

Bringing ONTAP On-Prem into NetApp Console – Managing a vSphere ONTAP System from the Cloud
NetApp Console is not limited to managing Cloud Volumes ONTAP in Azure, AWS, or GCP. It can also act as a centralized control plane for on-premises ONTAP systems.
In my lab, I’m running an ONTAP simulator on vSphere, I’ll walk through how to onboard that simulator into NetApp Console to build a true hybrid management setup.
About how to setup your own NetApp ONTAP 9 LAB in vSphere, you can also read my following post.
About Protecting On-Prem ONTAP with NetApp Console Backup and Recovery, you can read my following post.
About deploying NetApp Cloud Volumes ONTAP (CVO) in Azure, you can read my following multi-part guide.
Deploying the NetApp Console Agent (On-Premises)
The first step is to create a new Agent in the NetApp Console by navigating to Administration → Agents. From there, the console provides the option to deploy or register a Connector that will act as the local management bridge to discover and manage on-premises ONTAP systems.
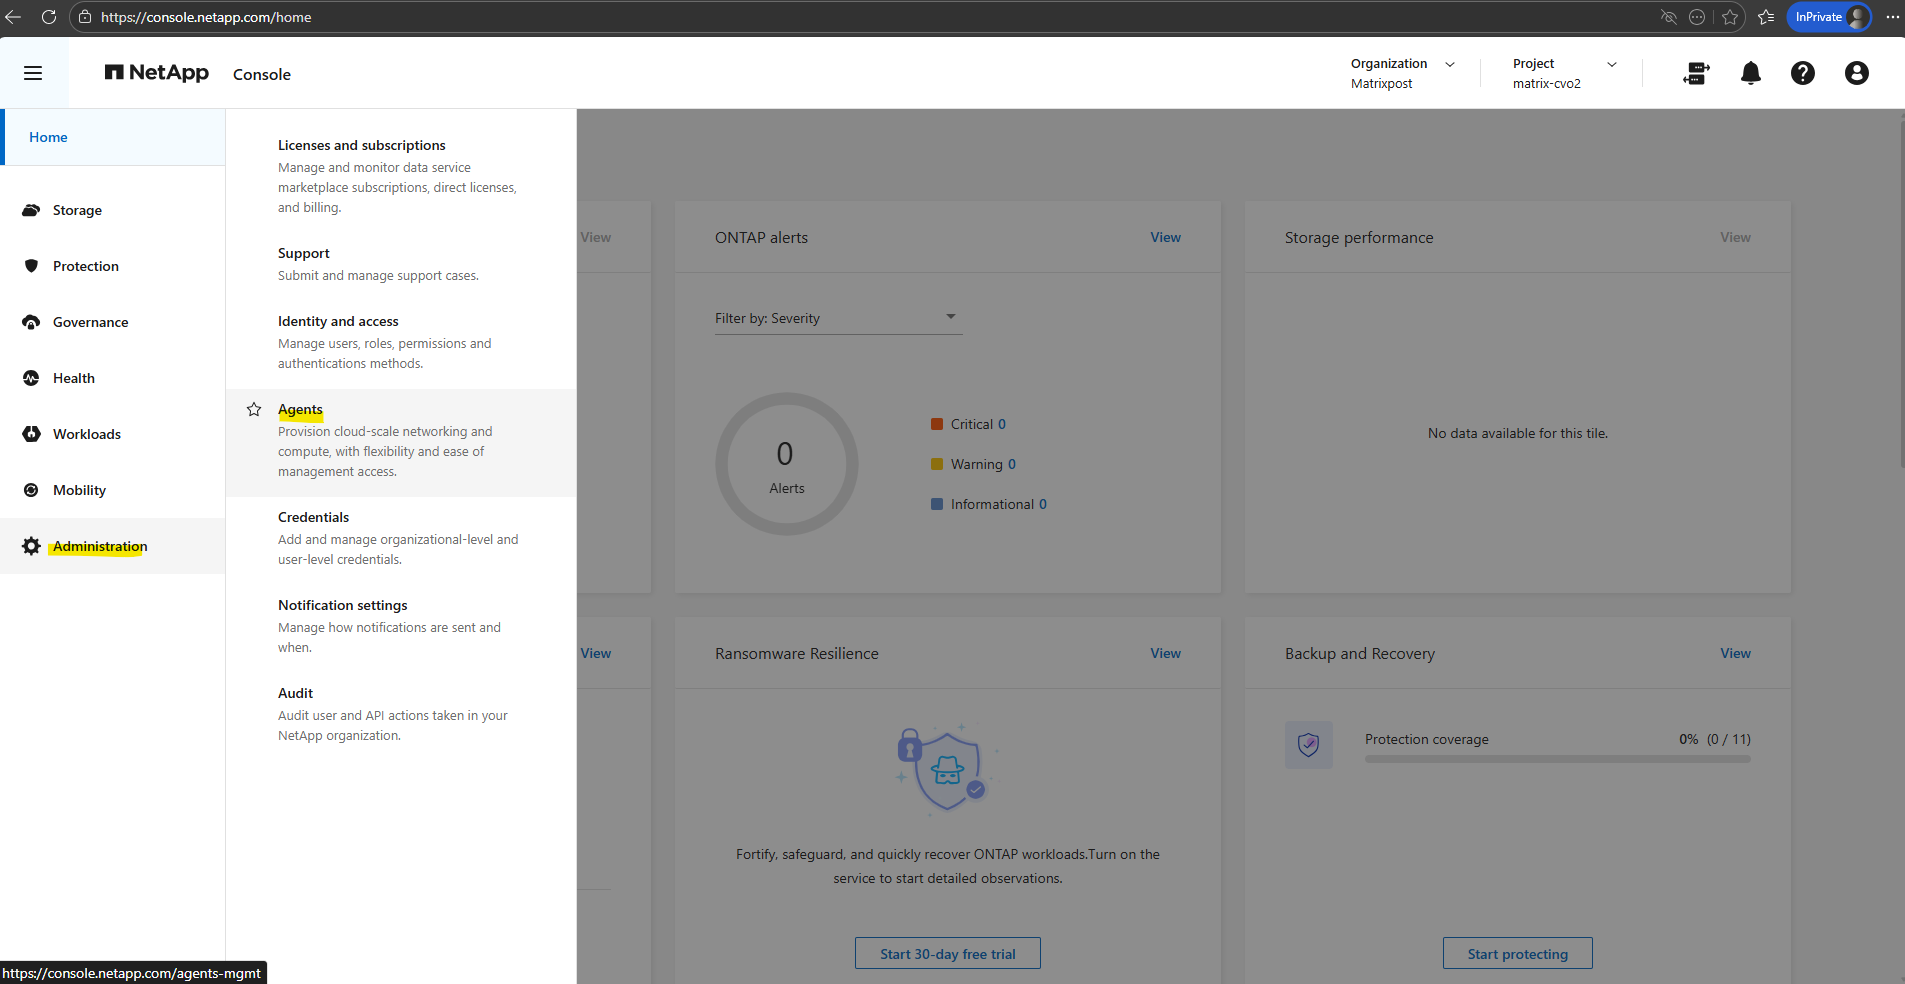
Click on Deploy agent -> On-premises.
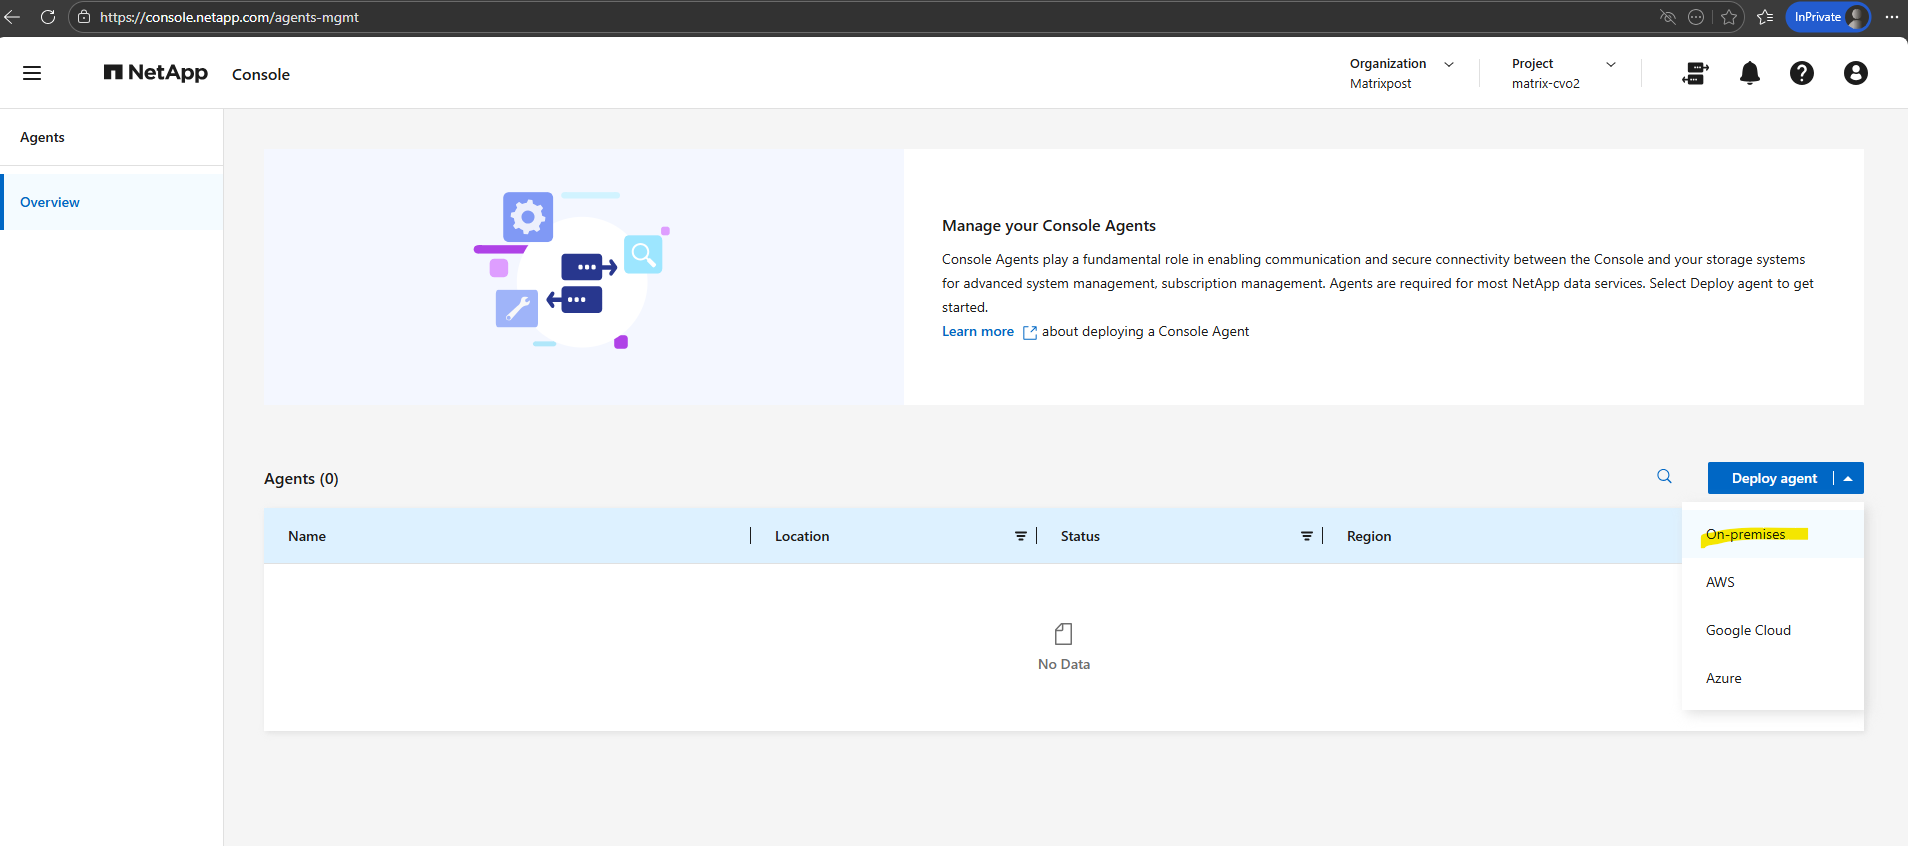
When clicking Deploy Agent → On-premises, the wizard provides two deployment options: With OVA or Manual Install. The OVA option allows you to deploy a ready-to-use virtual appliance in environments like vSphere, while the manual installation method installs the agent directly on an existing Linux host.
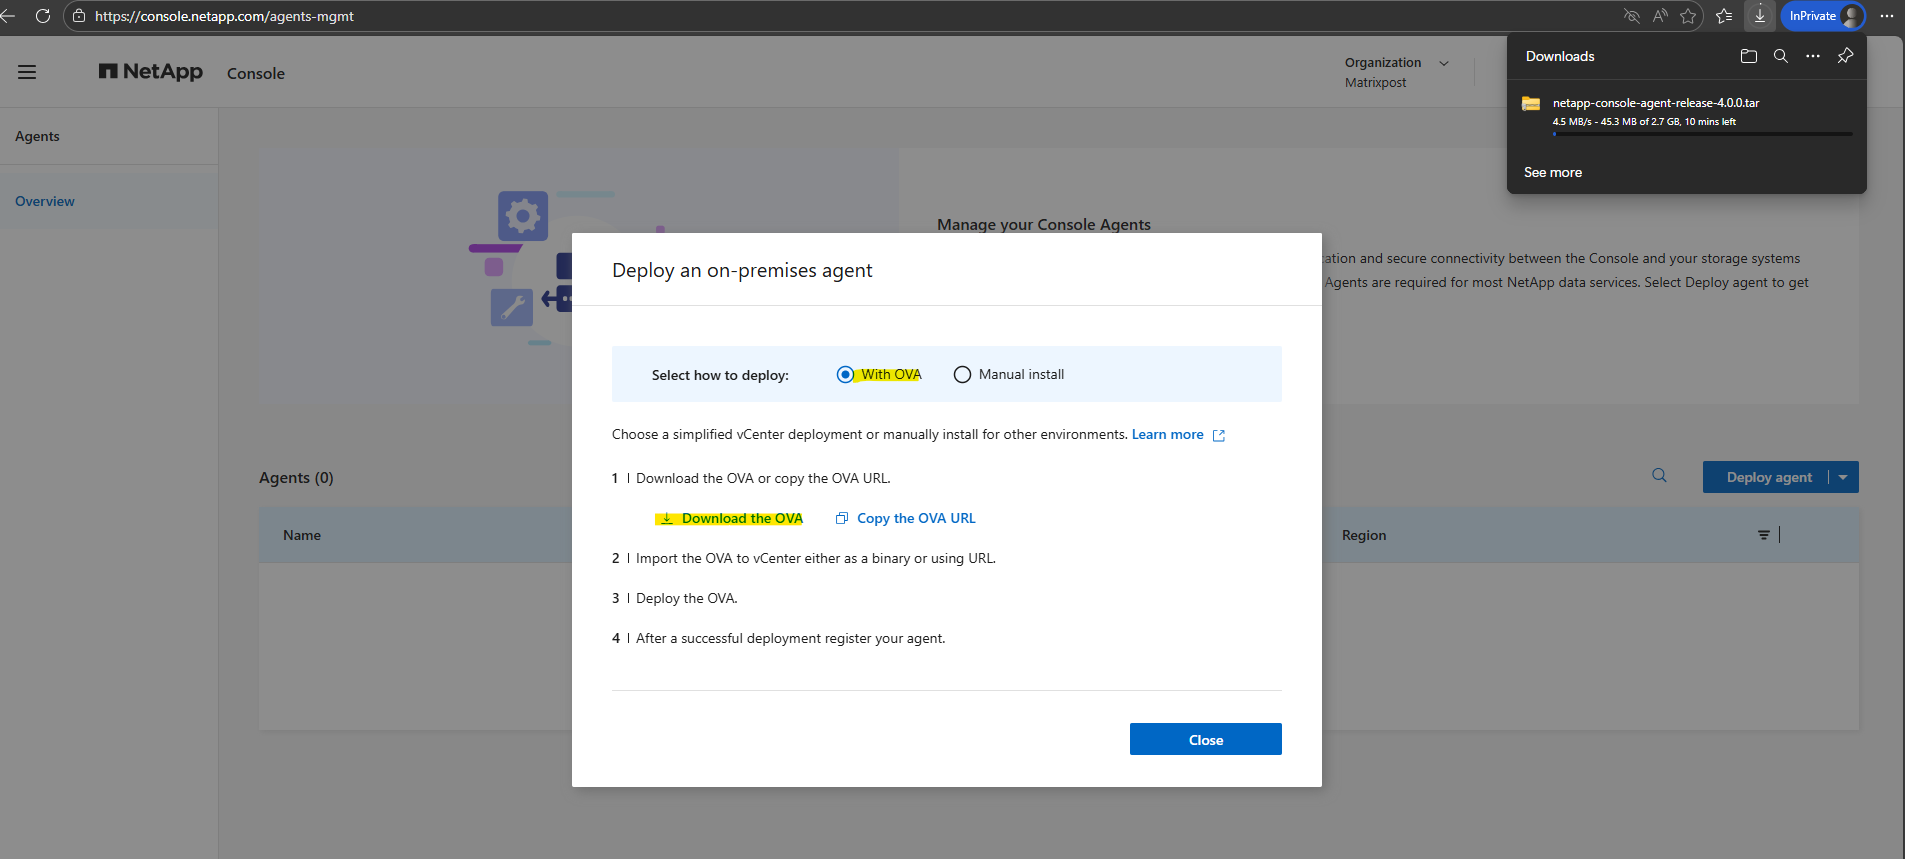
Deploying the OVA Appliance in vSphere
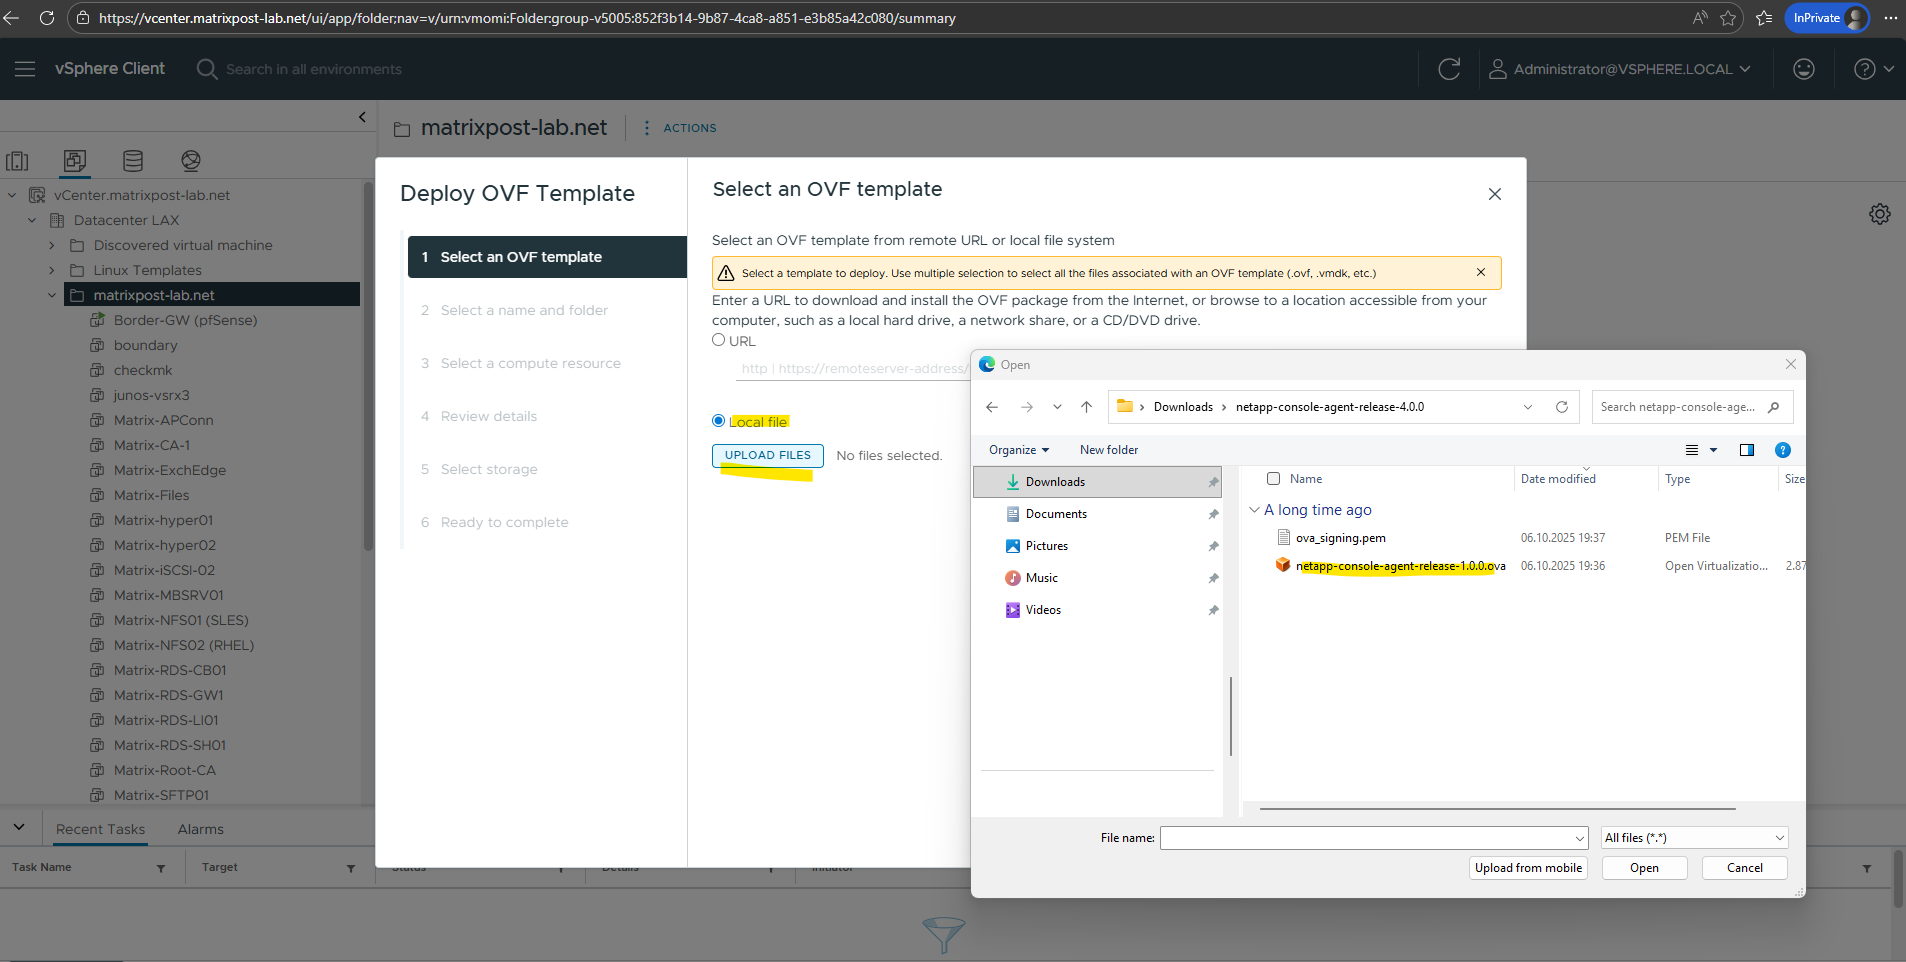
After downloading the OVA file, the appliance can be deployed in vSphere using the Deploy OVF Template wizard. This creates the Connector virtual machine in your environment, which will later be used to register the agent with the NetApp Console and discover on-premises ONTAP systems.
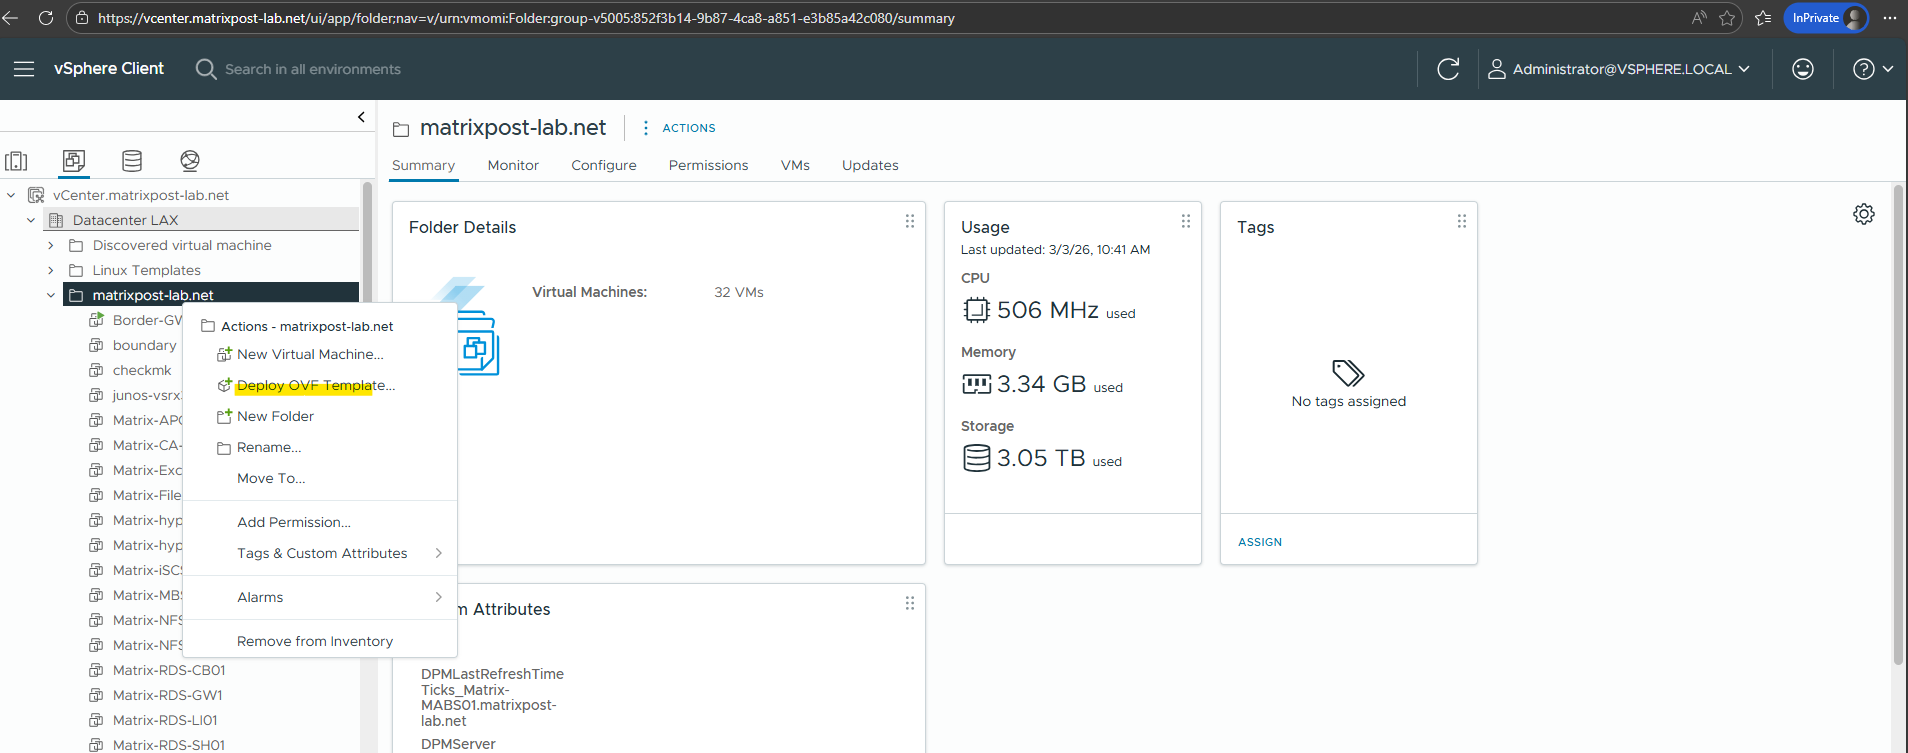
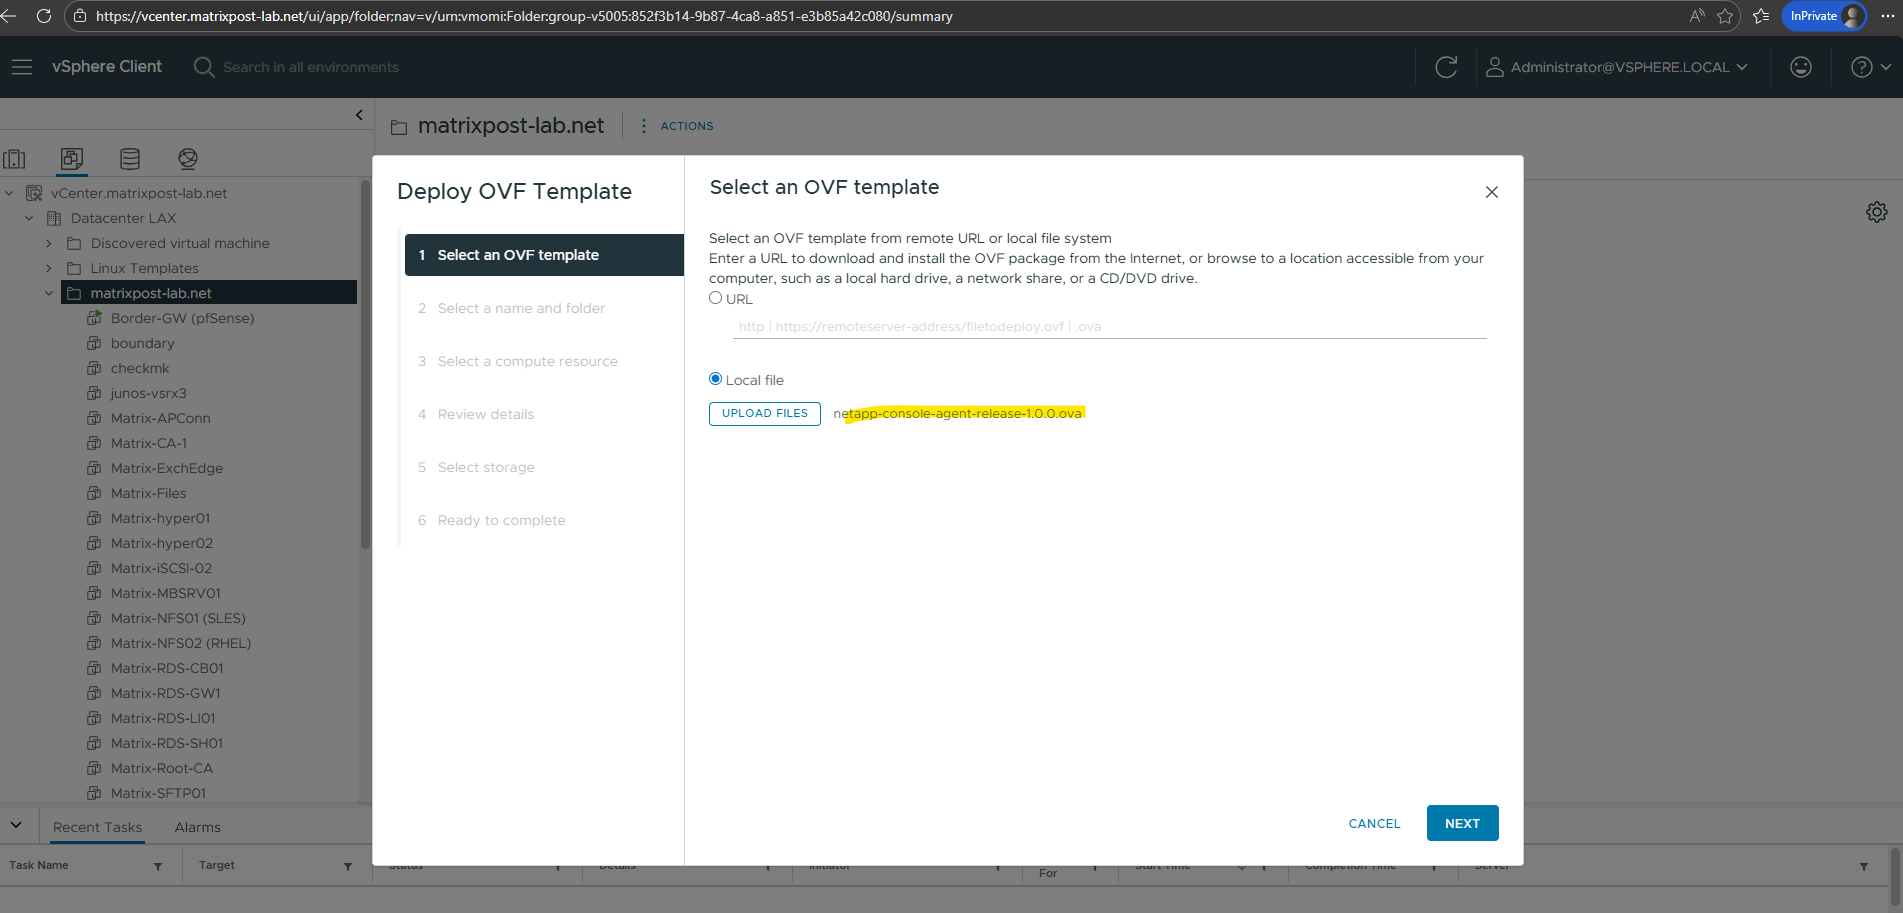
Select Local file and upload the OVA file to vSphere.
Click on NEXT.
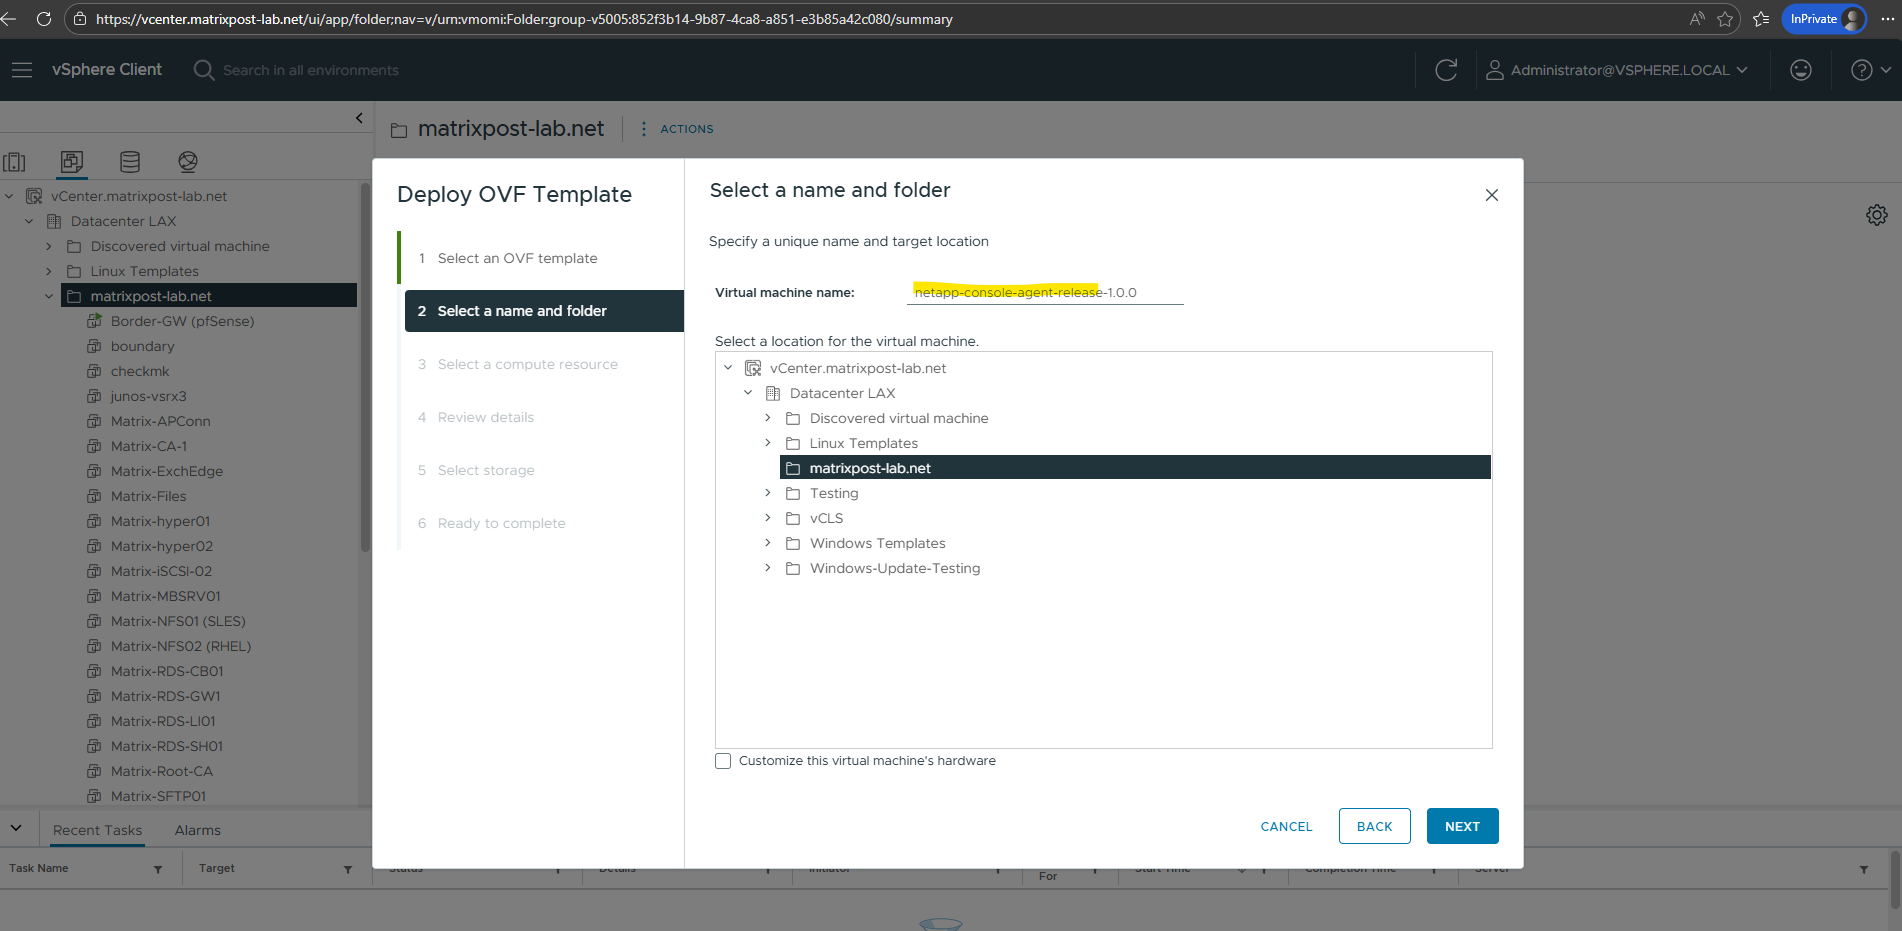
Enter a name for the virtual machine and select the folder to place to.
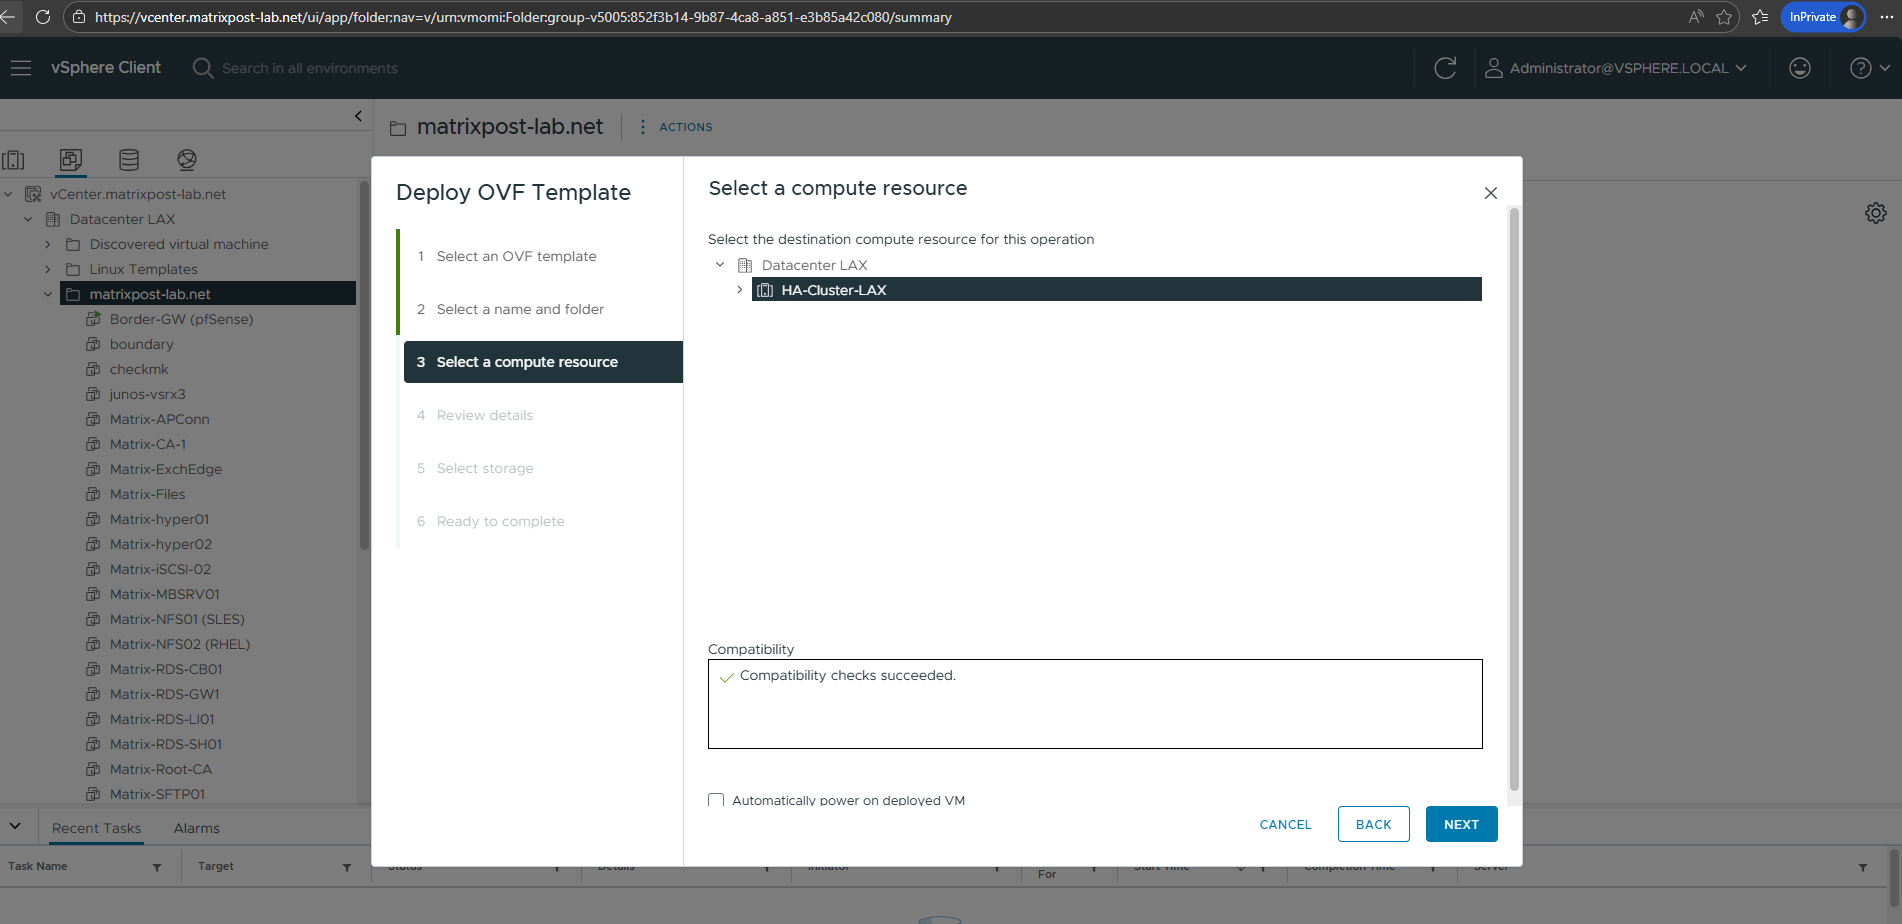
Select a computer resource where to deploy the appliance.
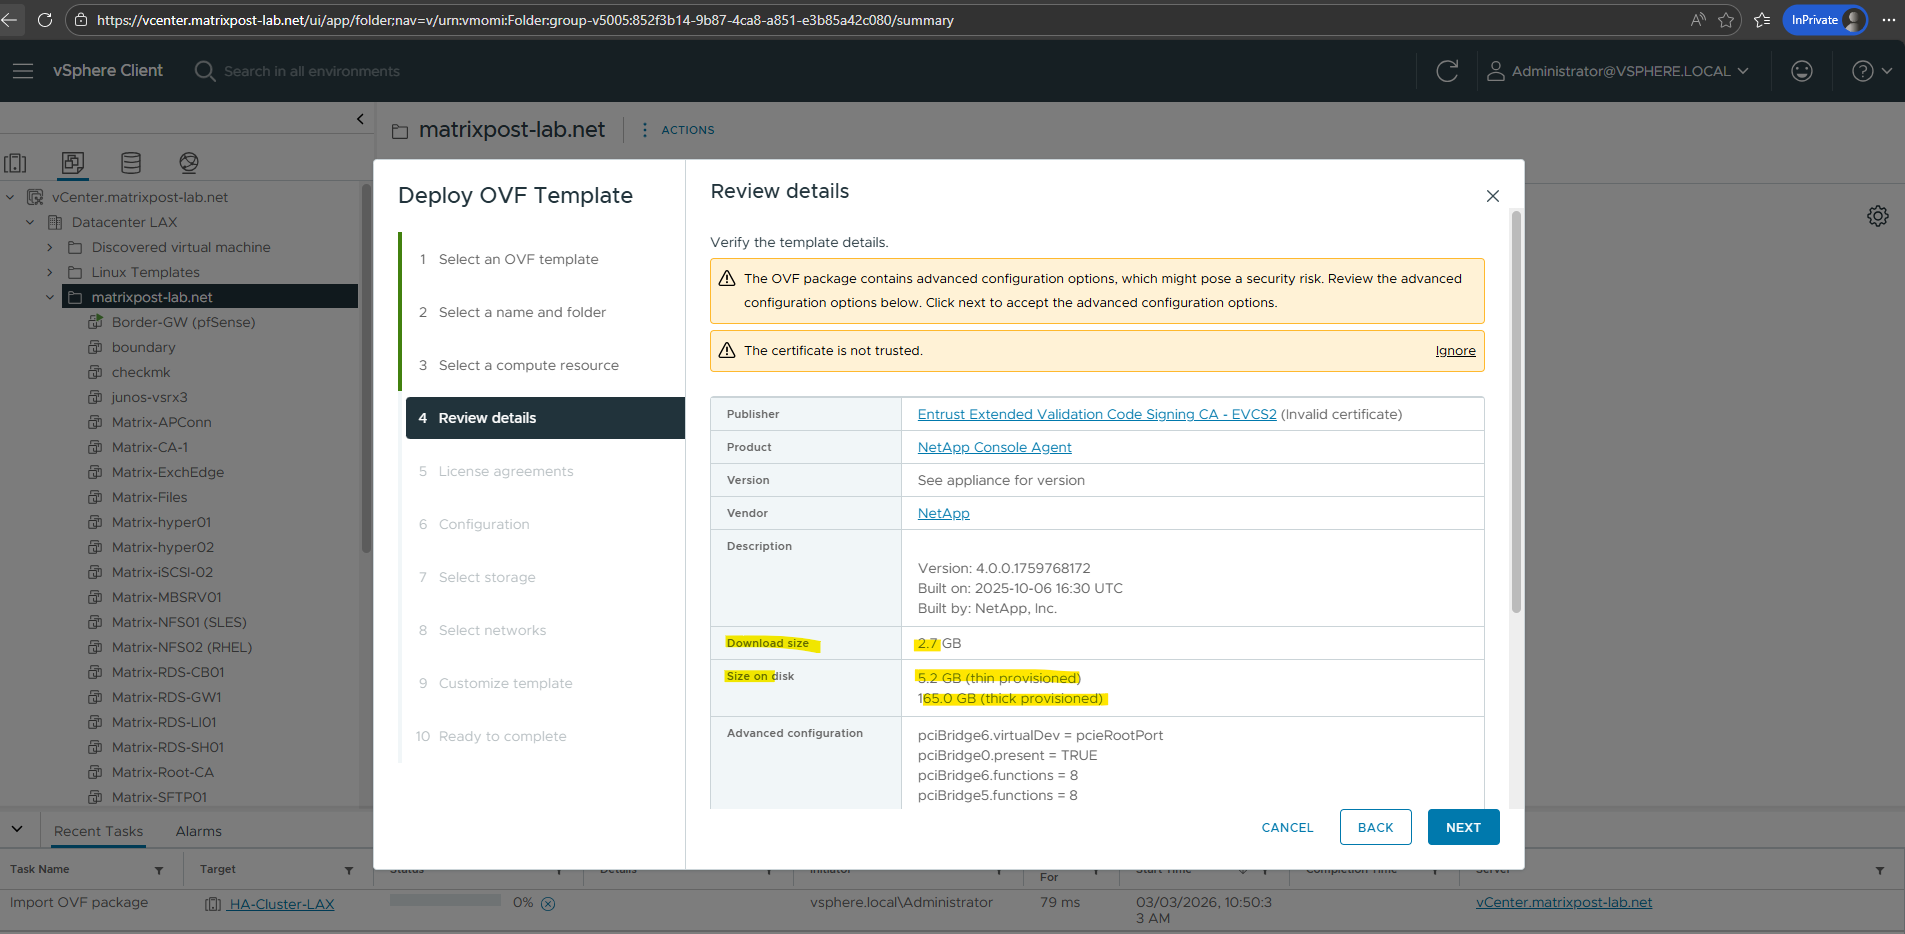
Review the details and click on NEXT.
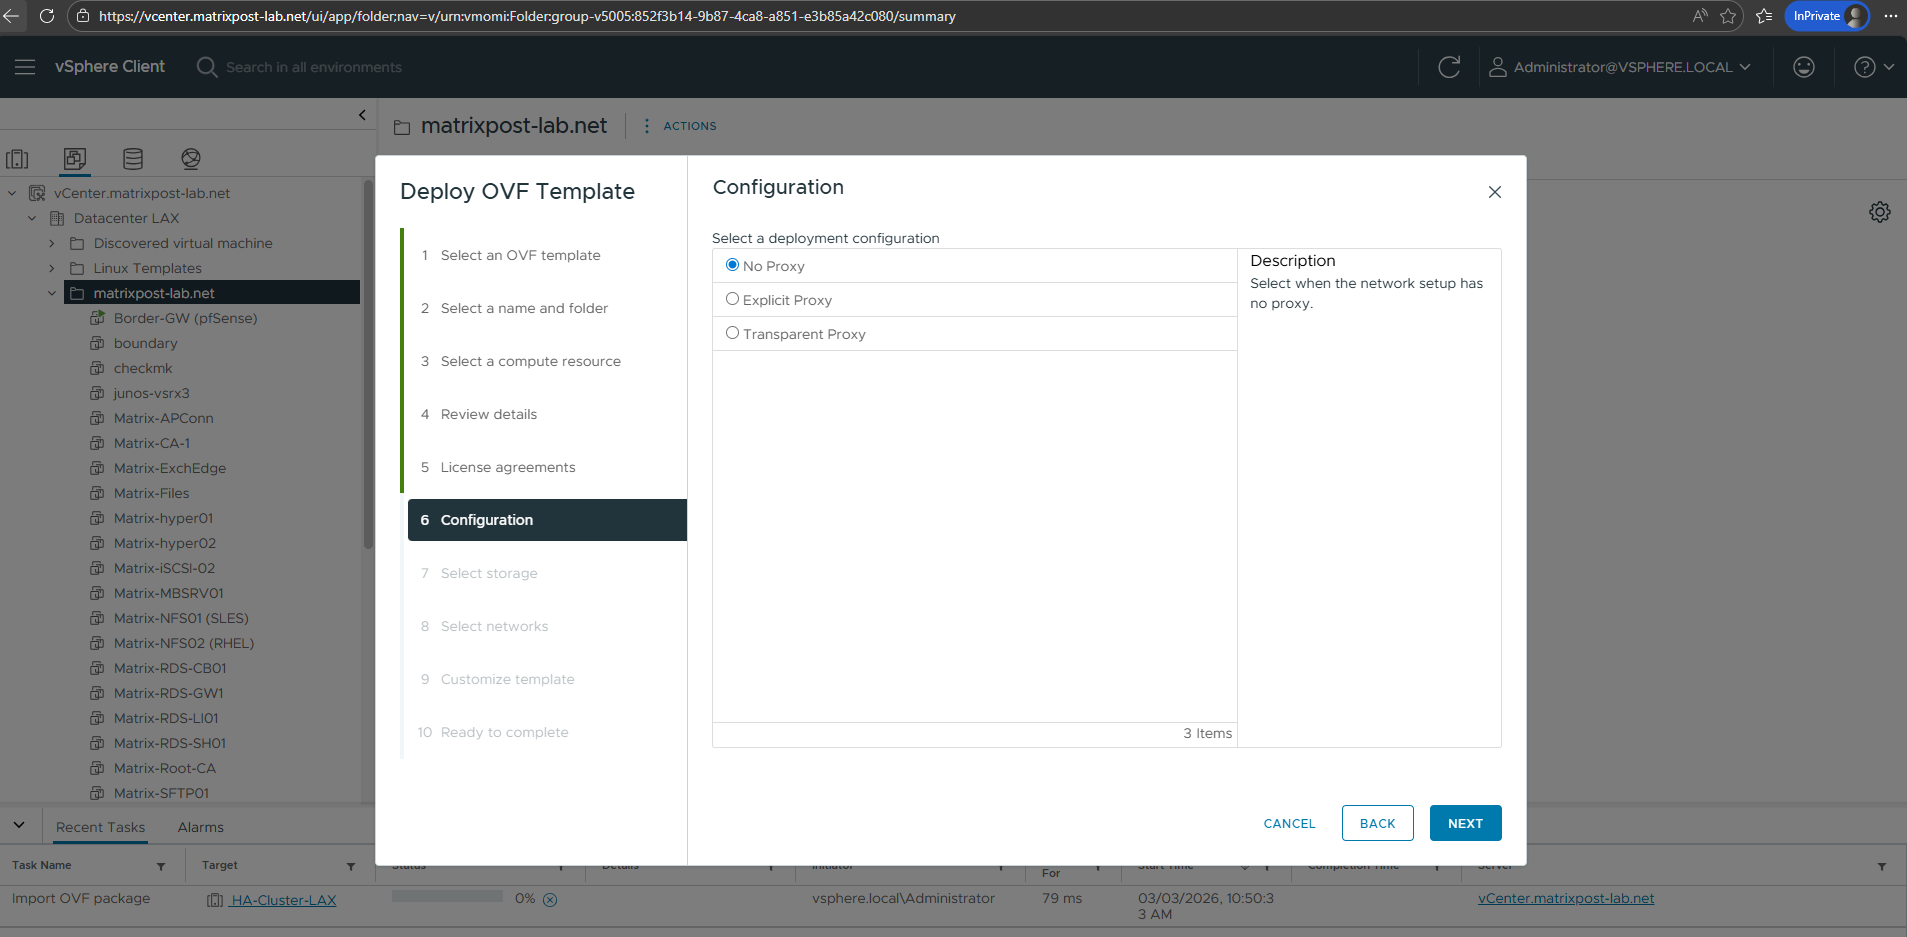
In my case I don’t need a proxy for outbound internet connection and a direct gateway is configured in my lab environment.
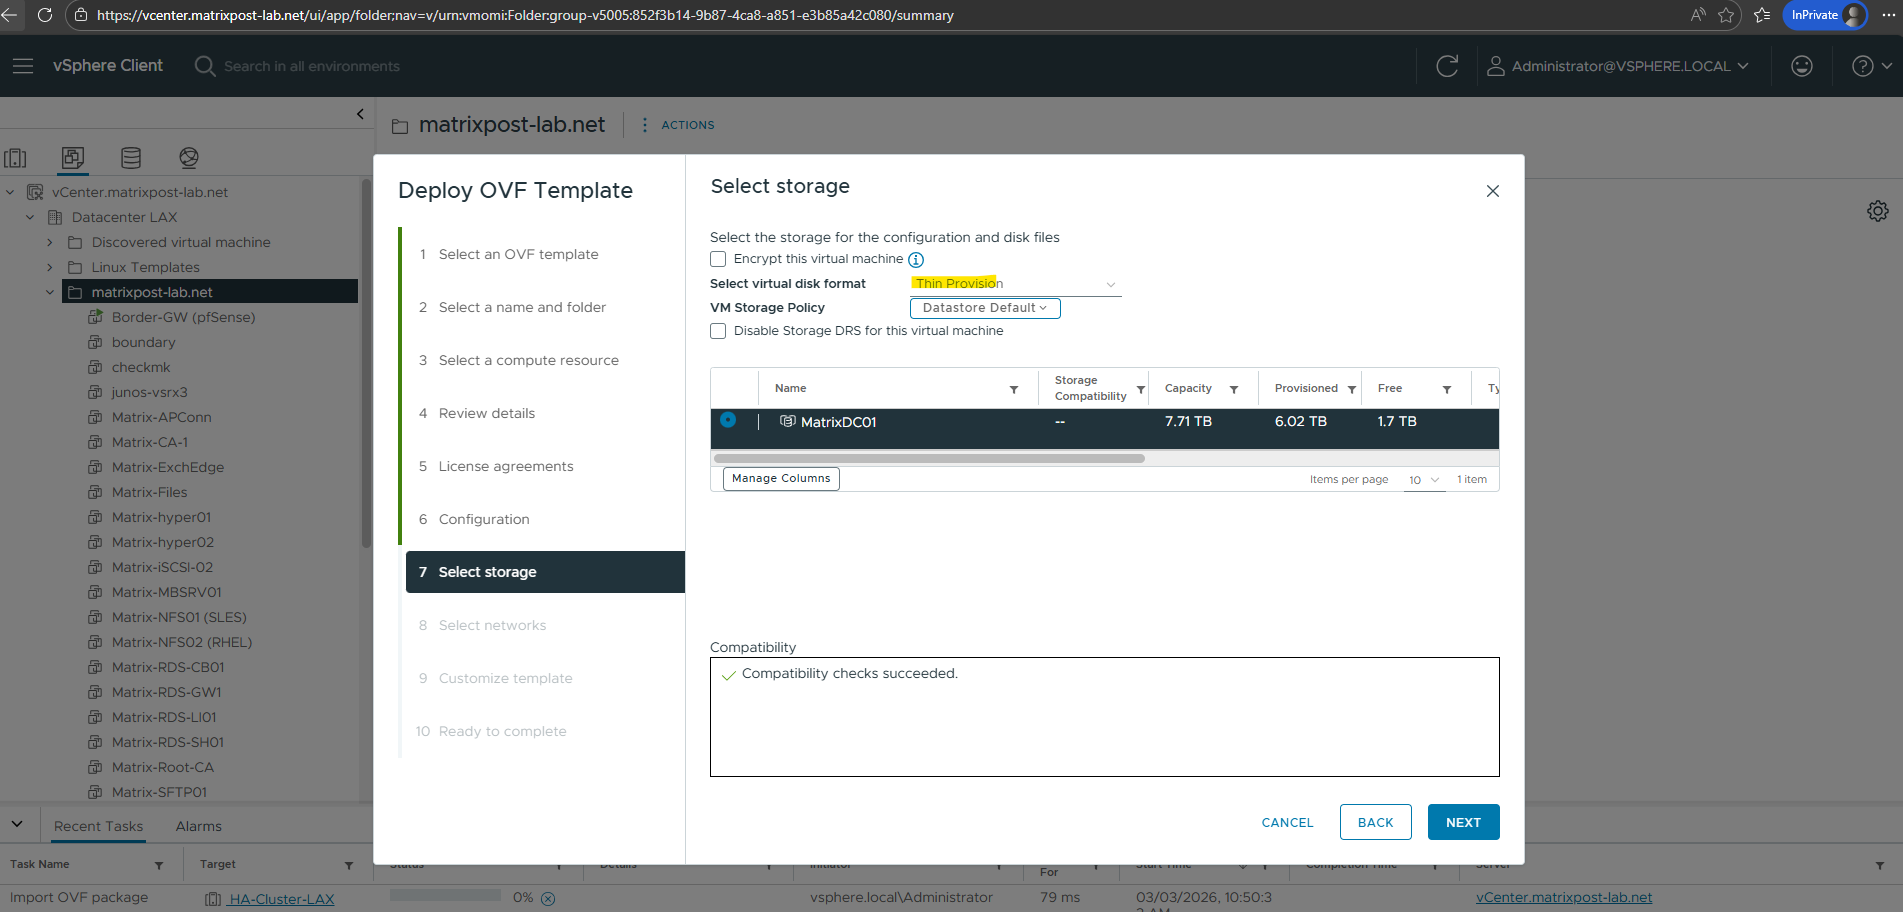
For my lab environment, I’ll use thin provisioning to keep the storage footprint small.
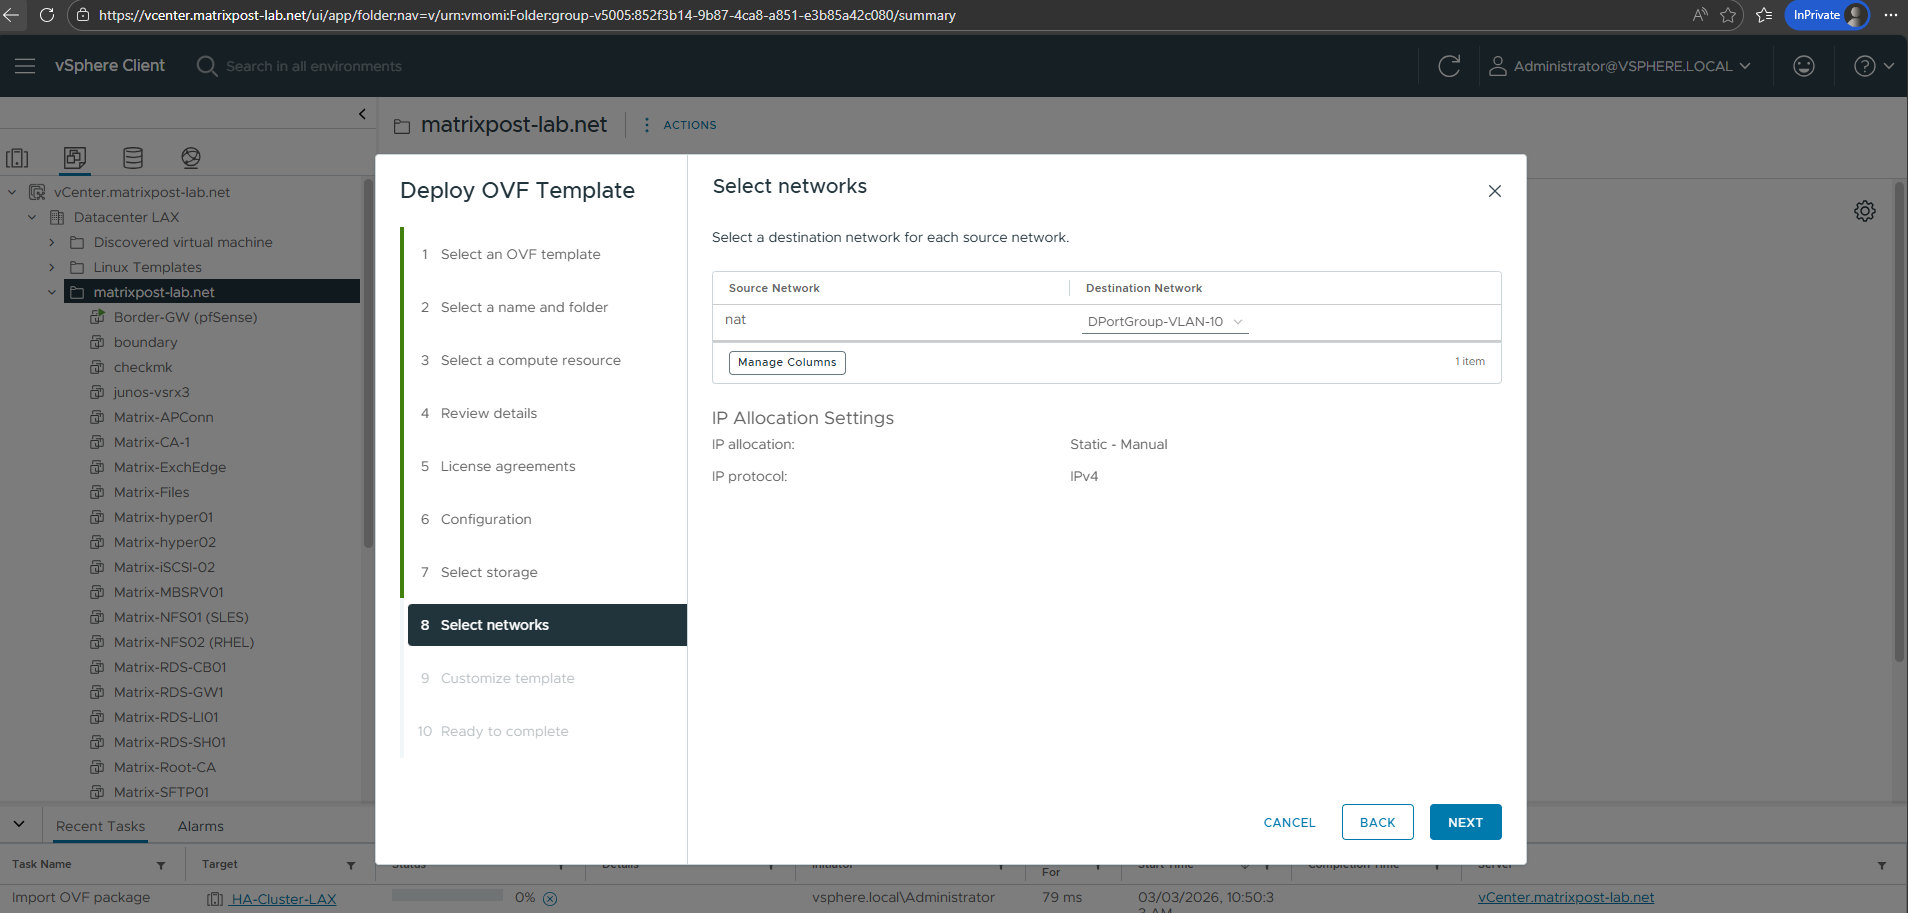
Select the desired network for the agent.
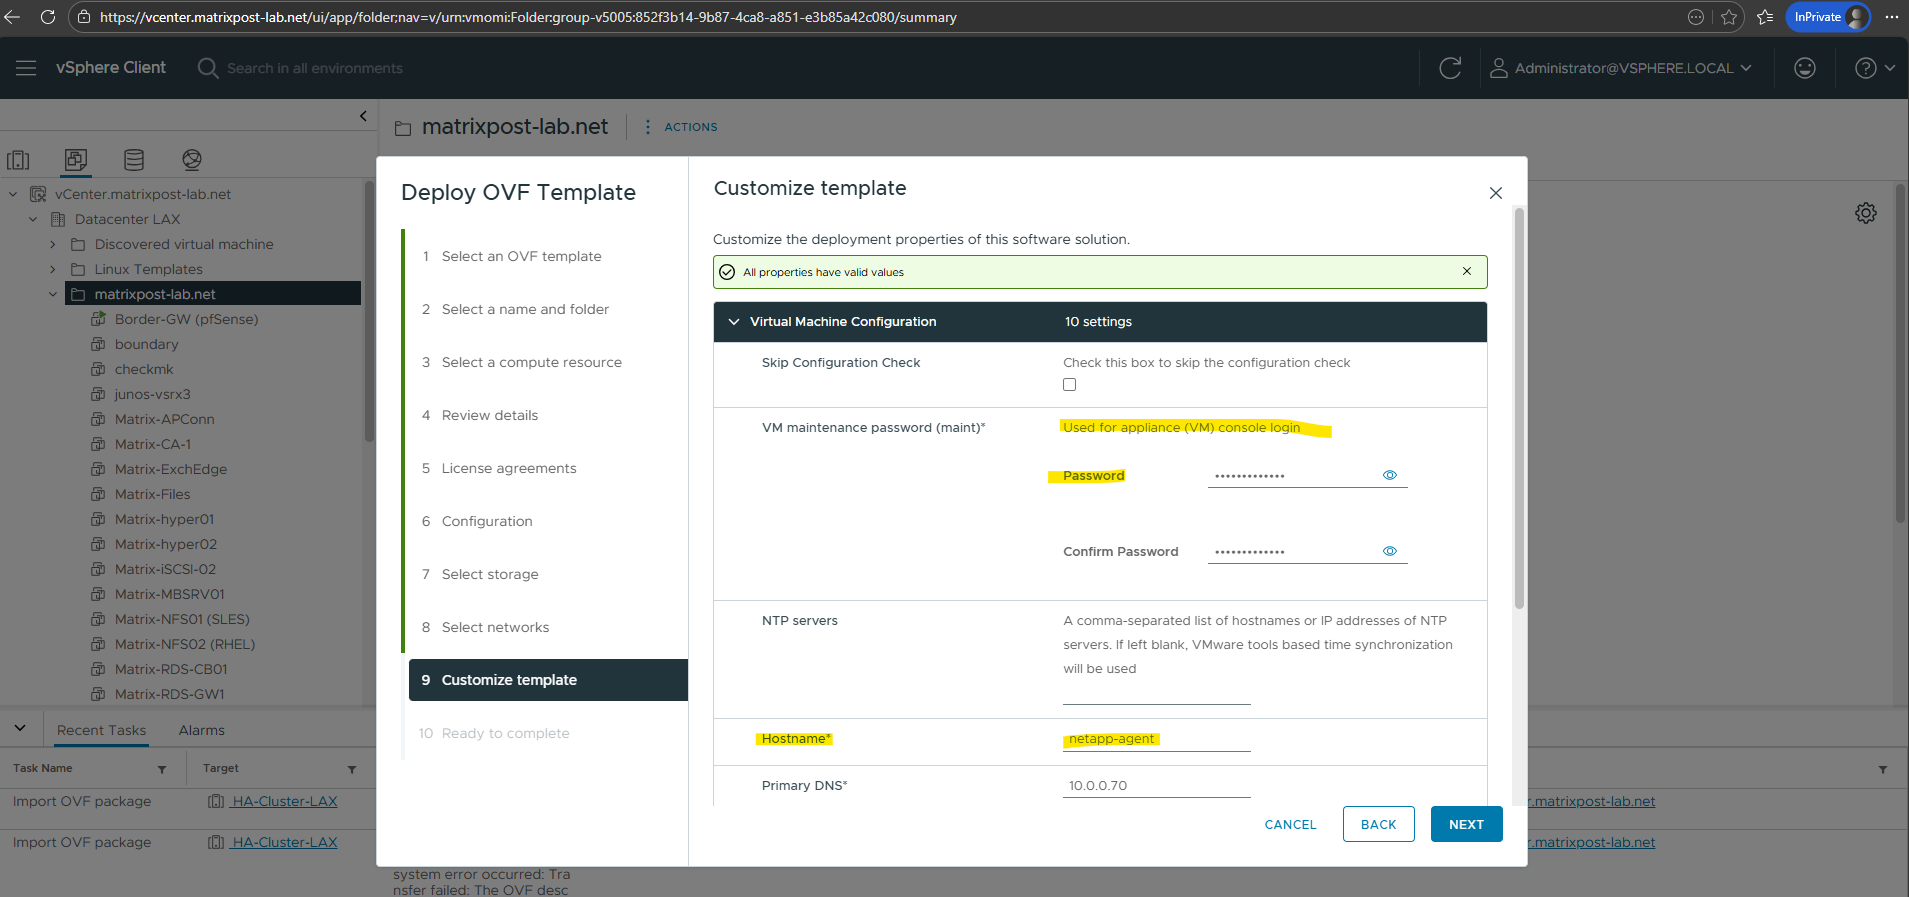
During the OVA deployment in vSphere, we are prompted to define a console password. This password is assigned to the
maintmaintenance account of the Connector appliance and is required to access the local maintenance console after the VM boots. It does not create a general Ubuntu user, but instead secures the restricted administrative interface used for system configuration and troubleshooting.
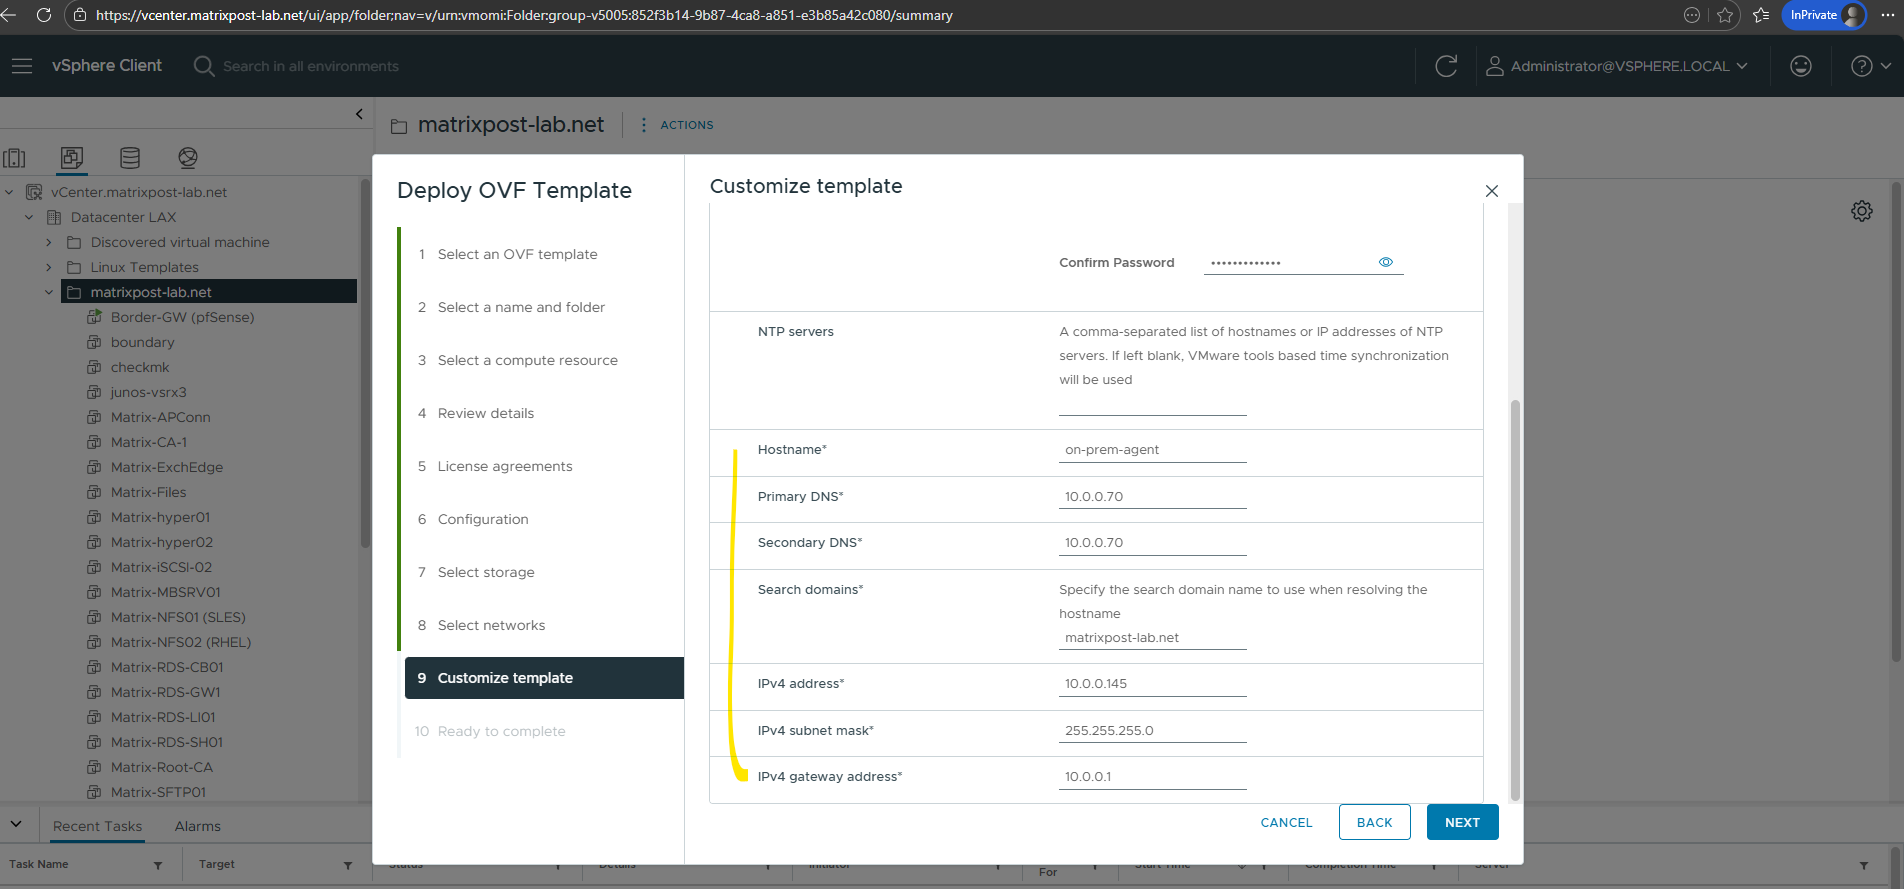
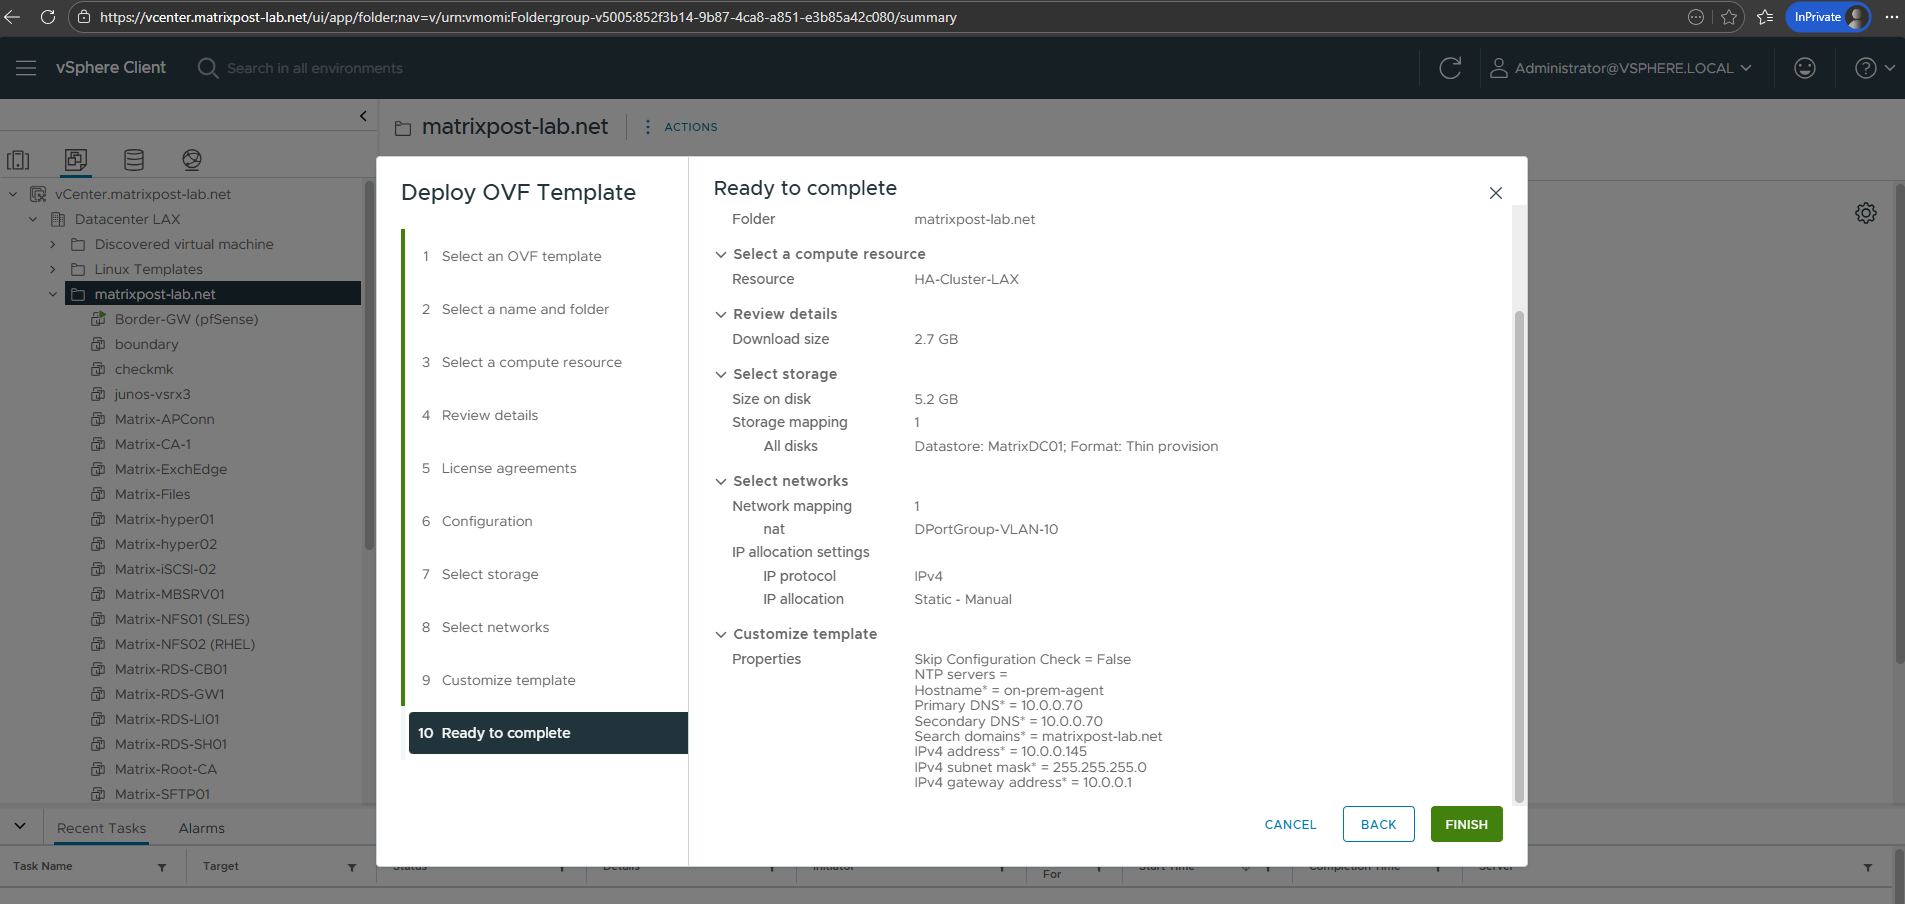
Finally click on FINISH to deploy the appliance (agent) in vSphere.
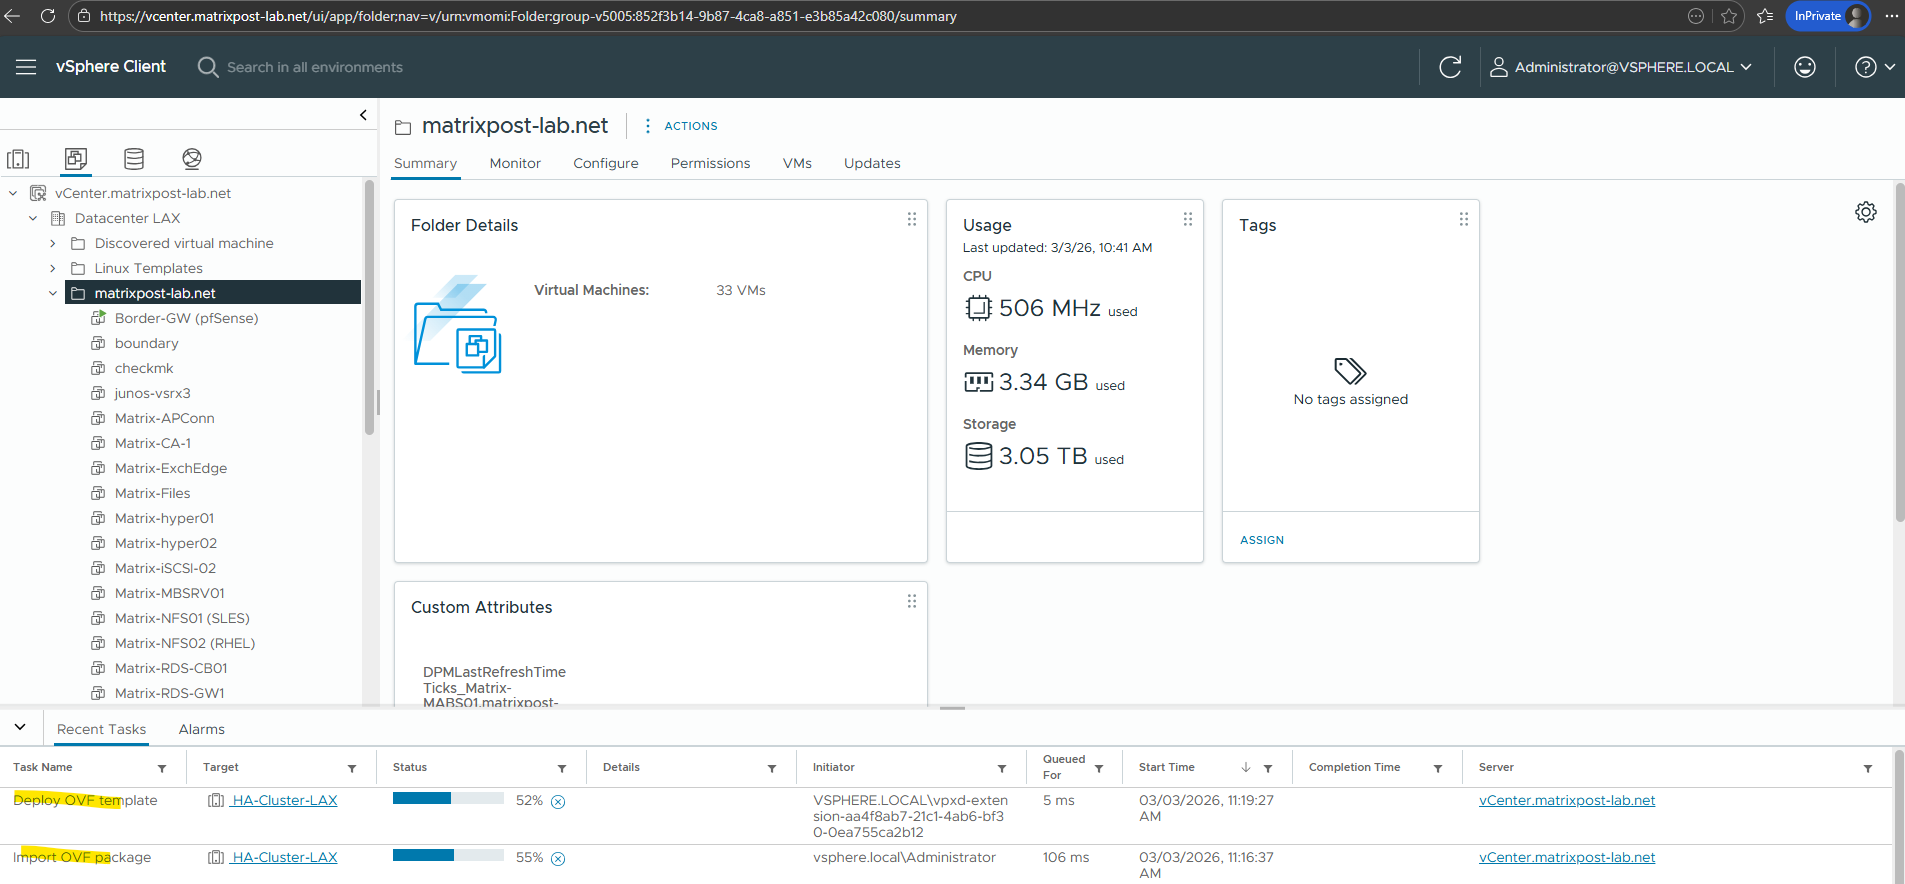
During the deployment, the task progress bar in the vSphere task panel shows the current status of the OVF import and VM creation process. This allows you to monitor the deployment progress until the appliance is fully deployed and ready to be powered on.
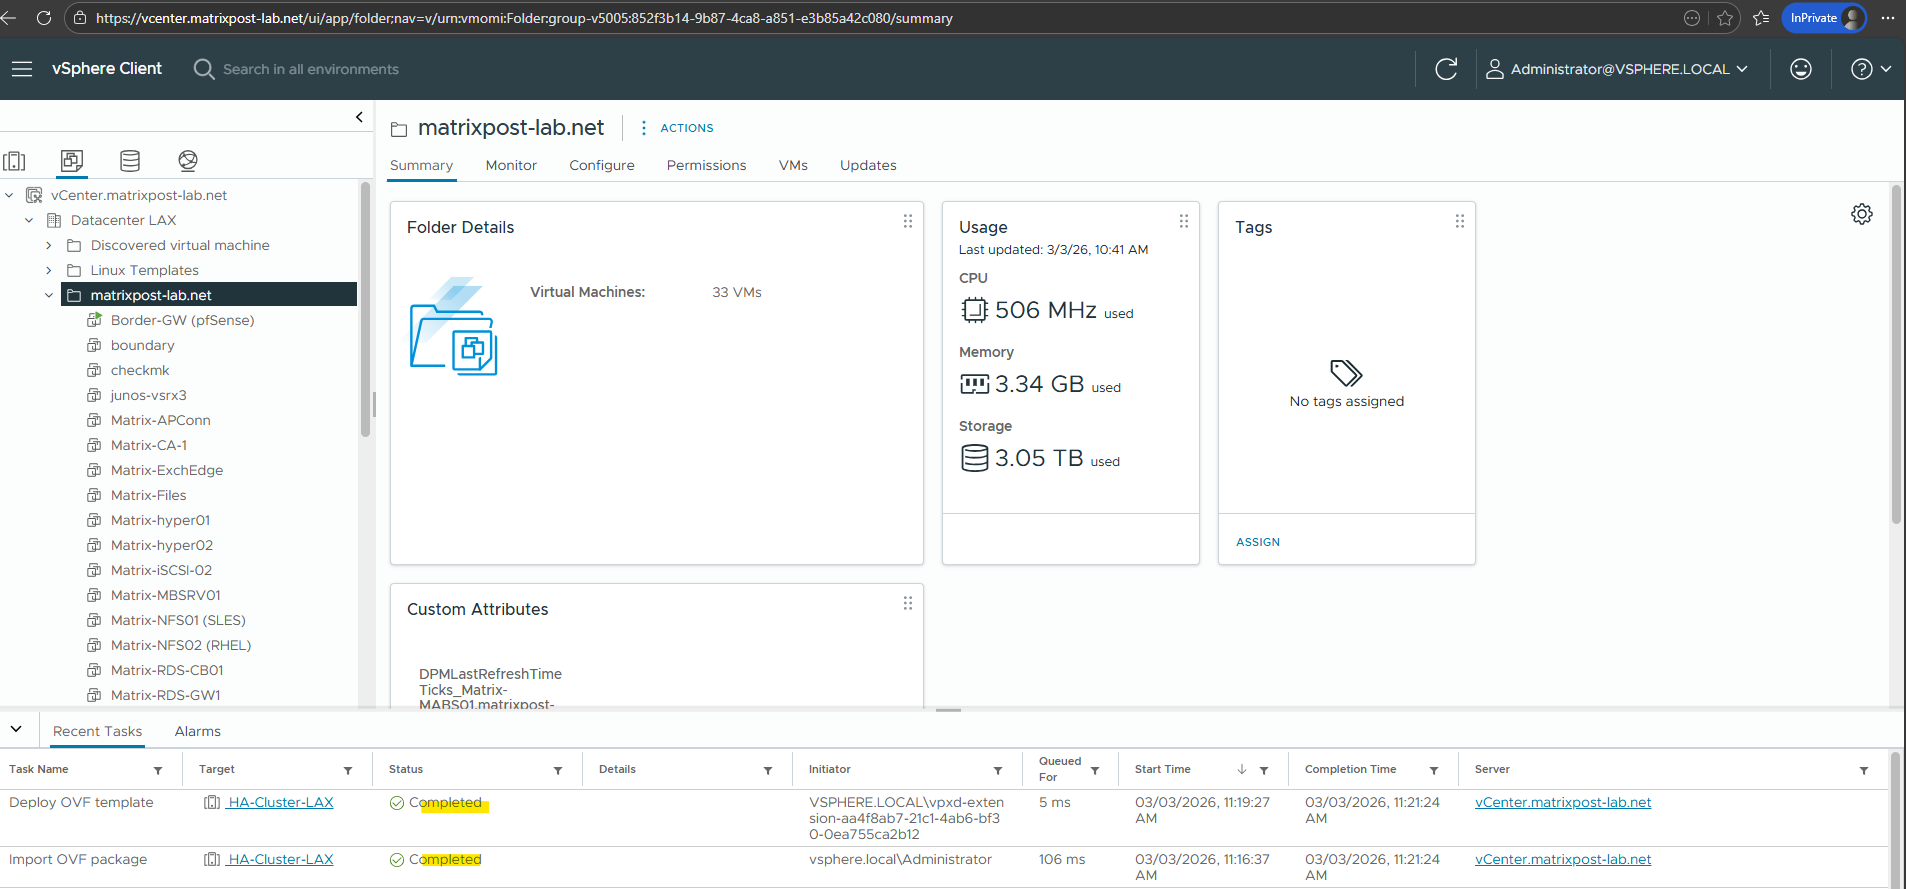
When using thin provisioning, the appliance initially consumes only about 5.22 GB of storage on the datastore. The virtual disks will grow dynamically as needed, instead of allocating the full disk size during deployment.
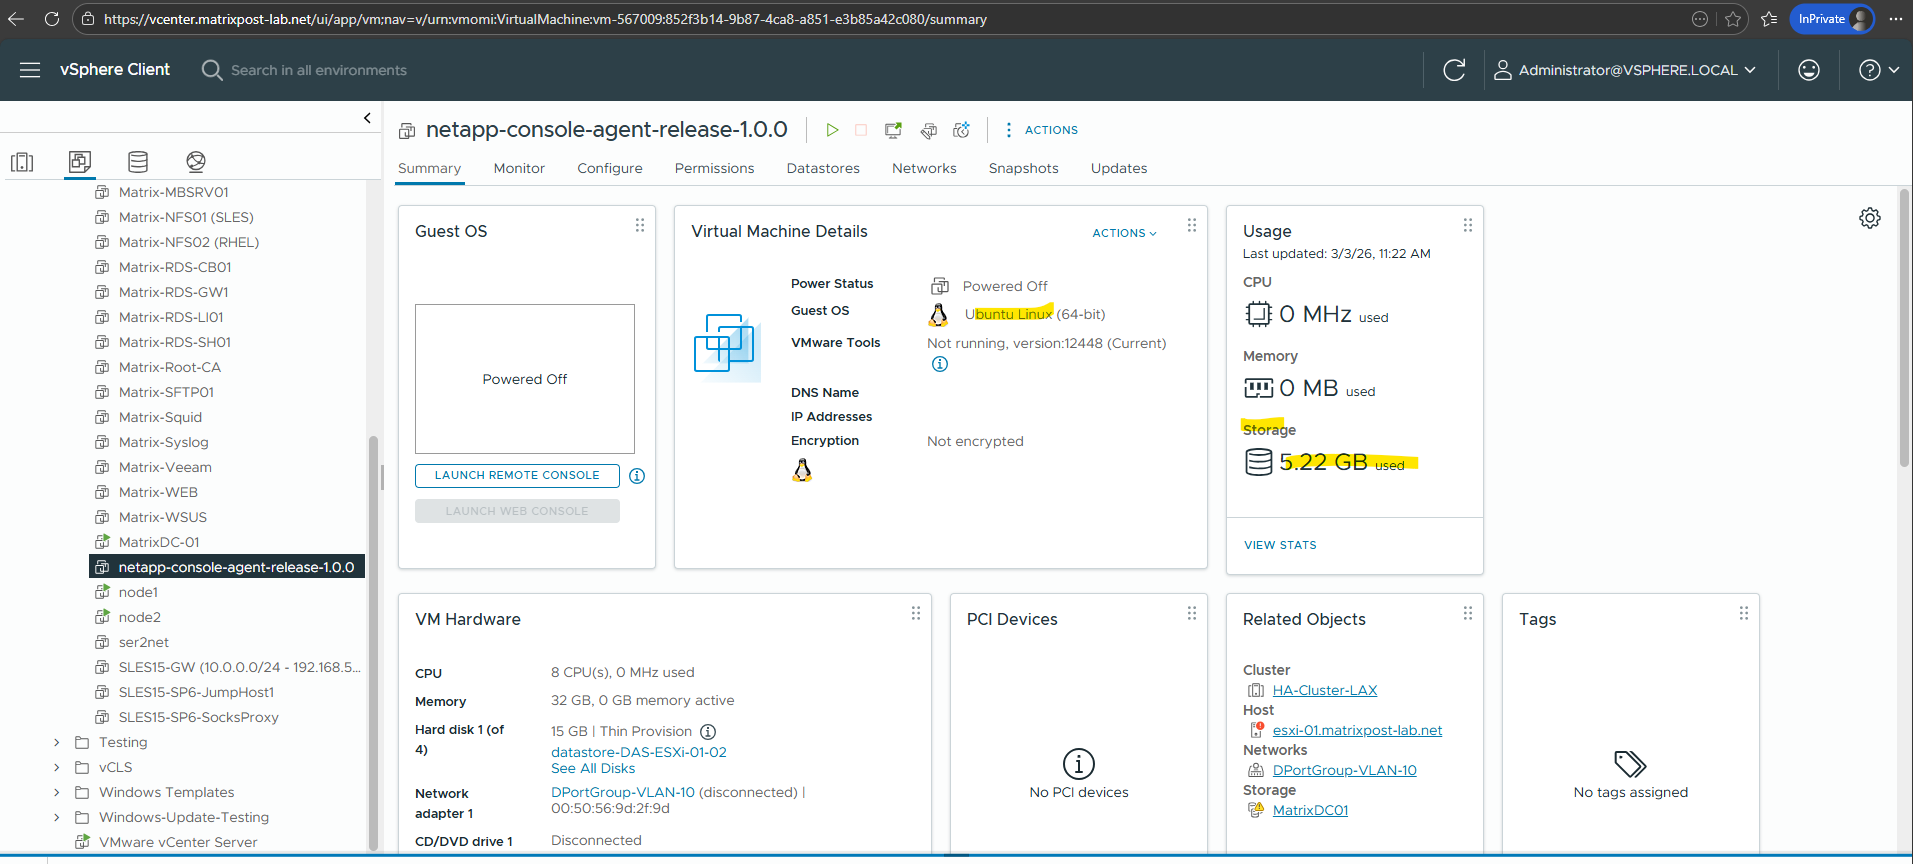
Initial Appliance Boot and Maintenance Console
After the deployment completes, the appliance virtual machine can be powered on from the vSphere inventory. Once started, the system boots the Connector appliance and presents the maintenance console for initial configuration.
The initial configuration was already defined during the Customize Template step of the vSphere deployment wizard, so the appliance will boot directly with the settings provided there.
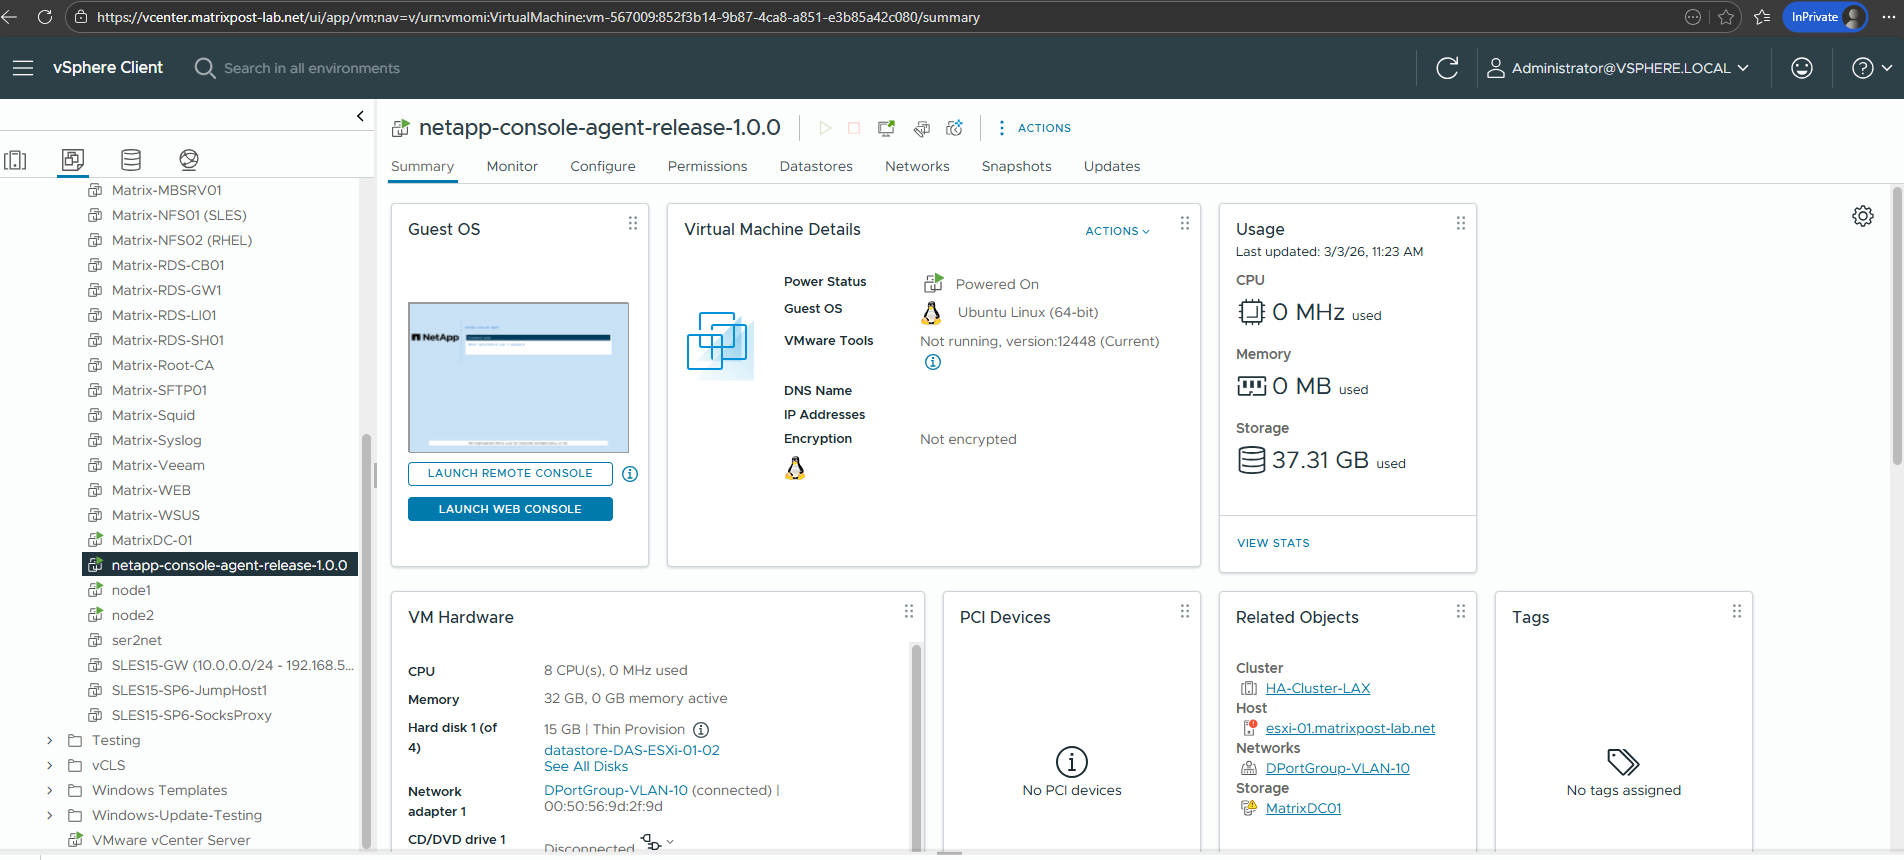
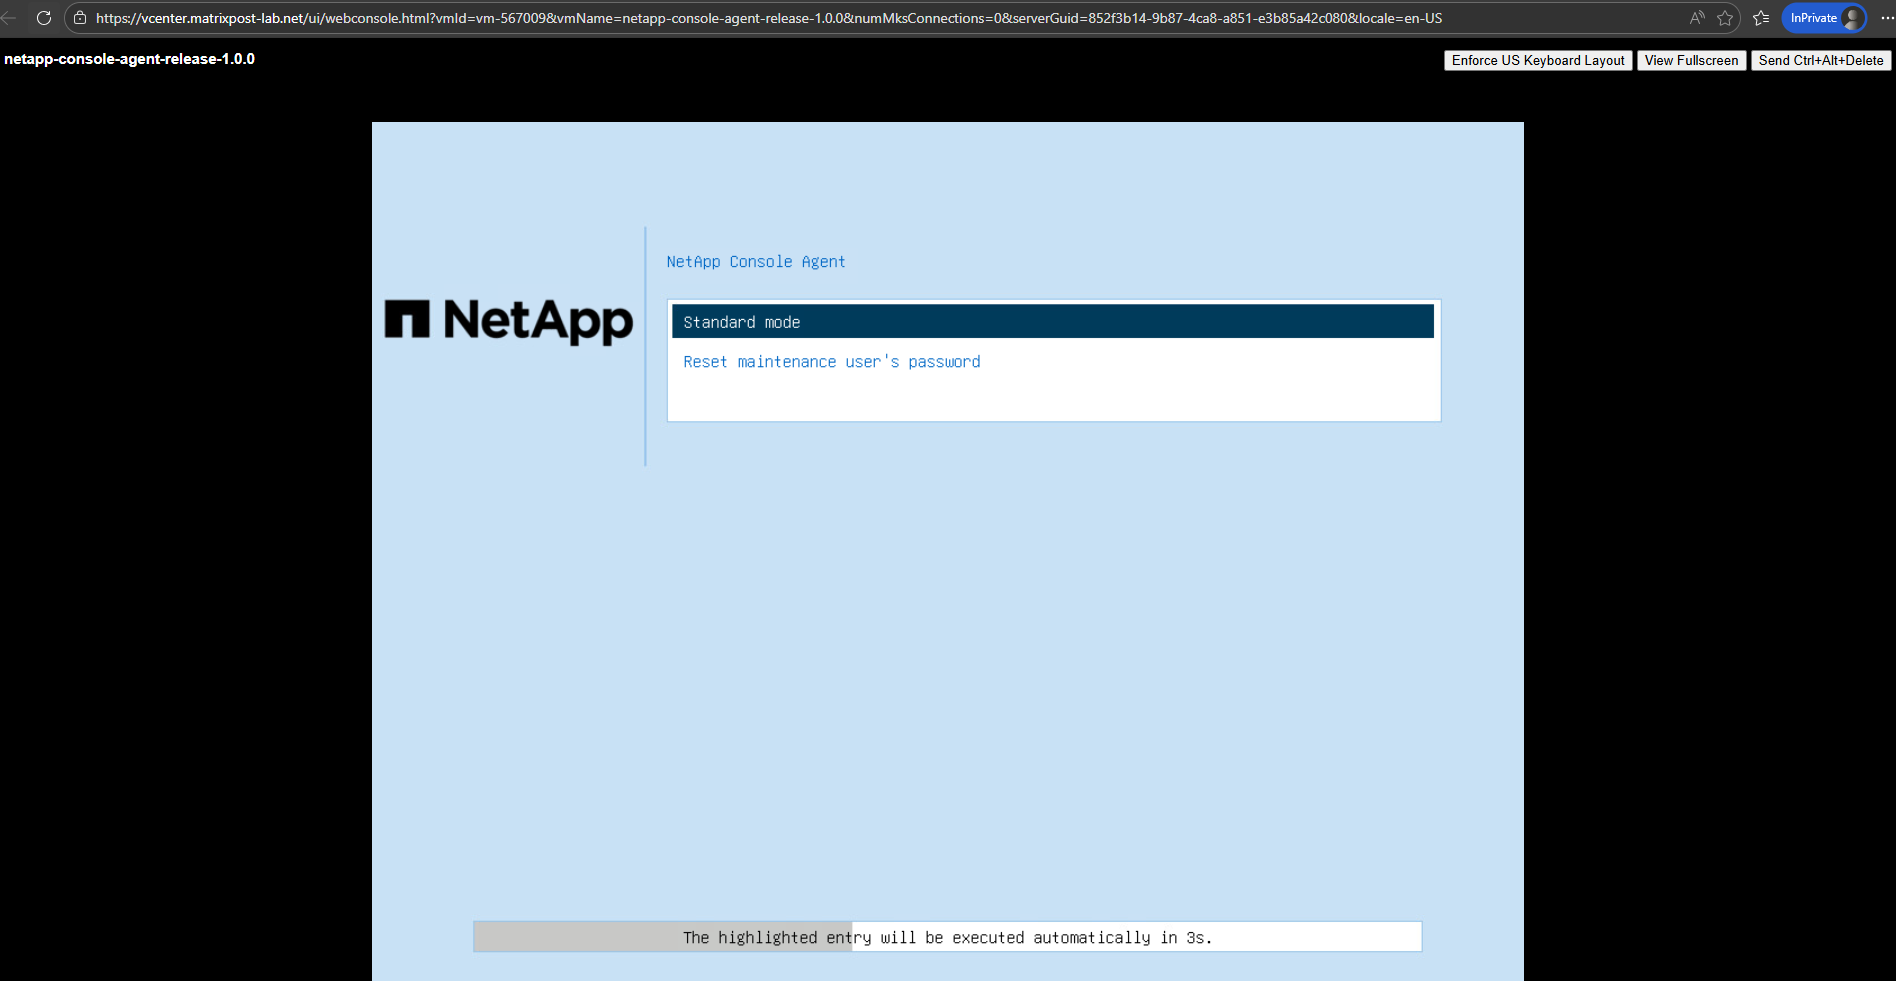
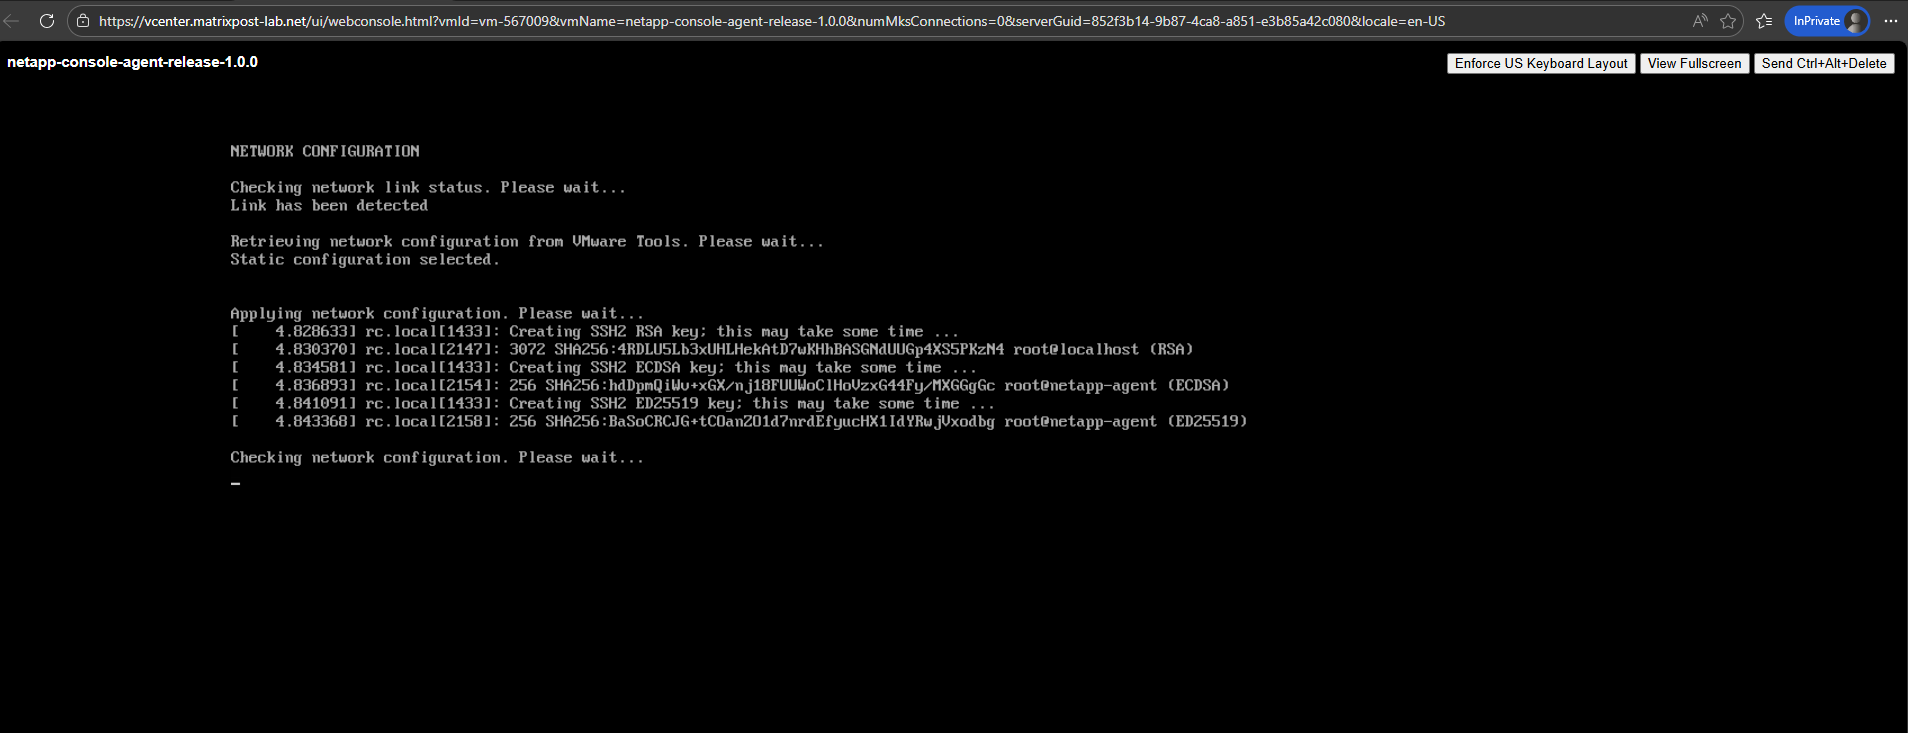
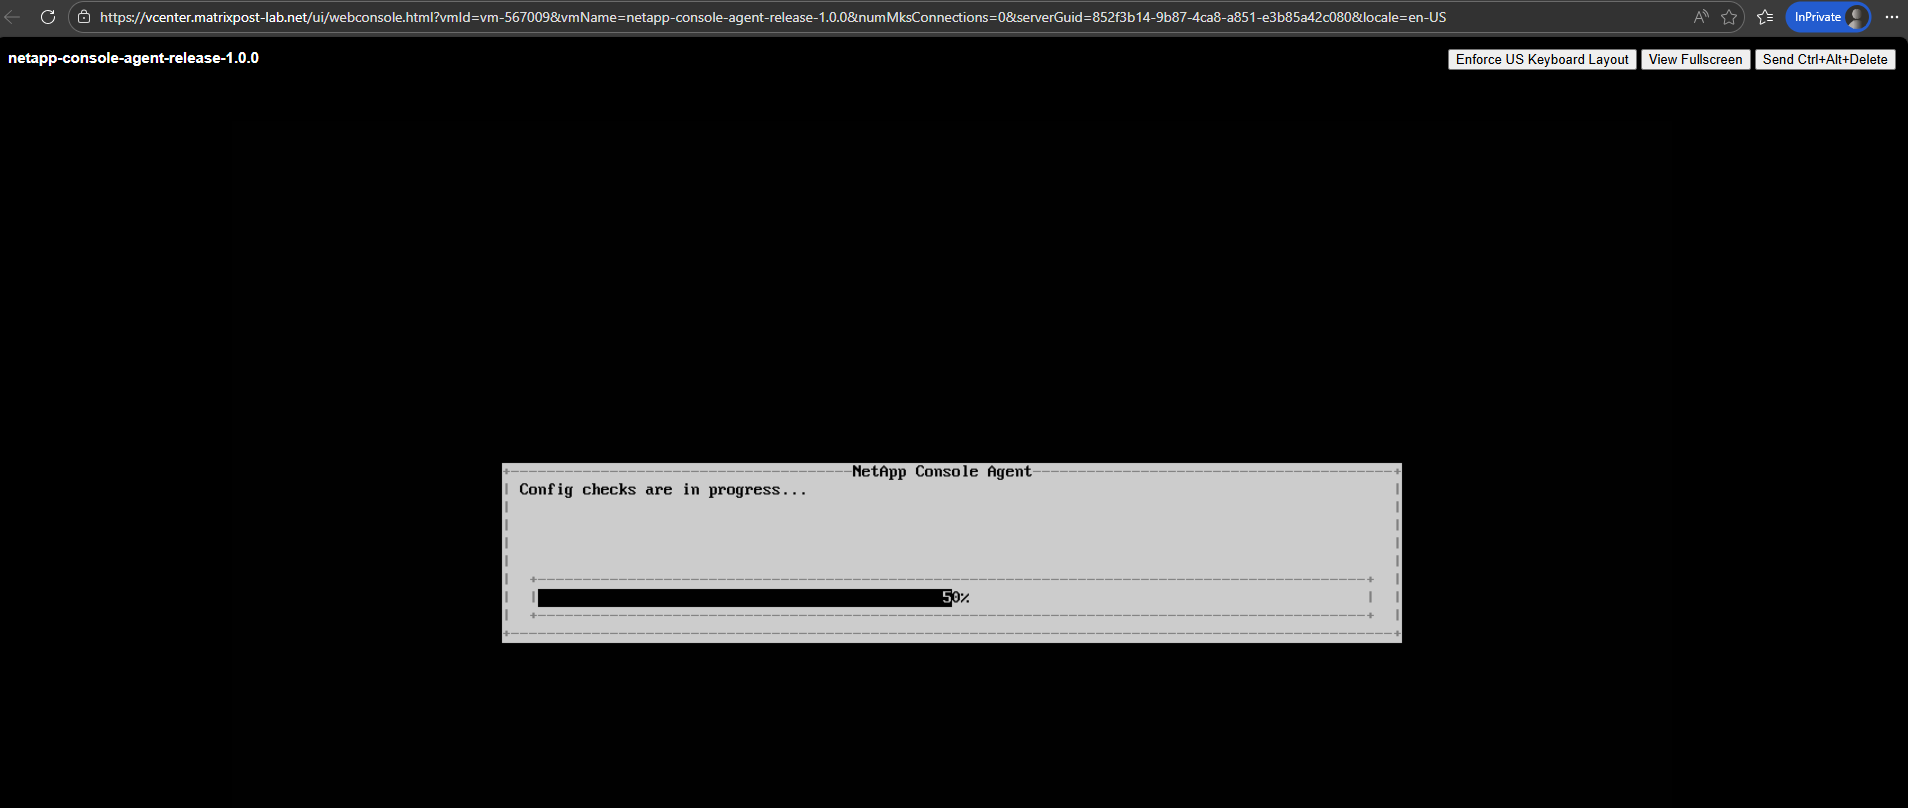
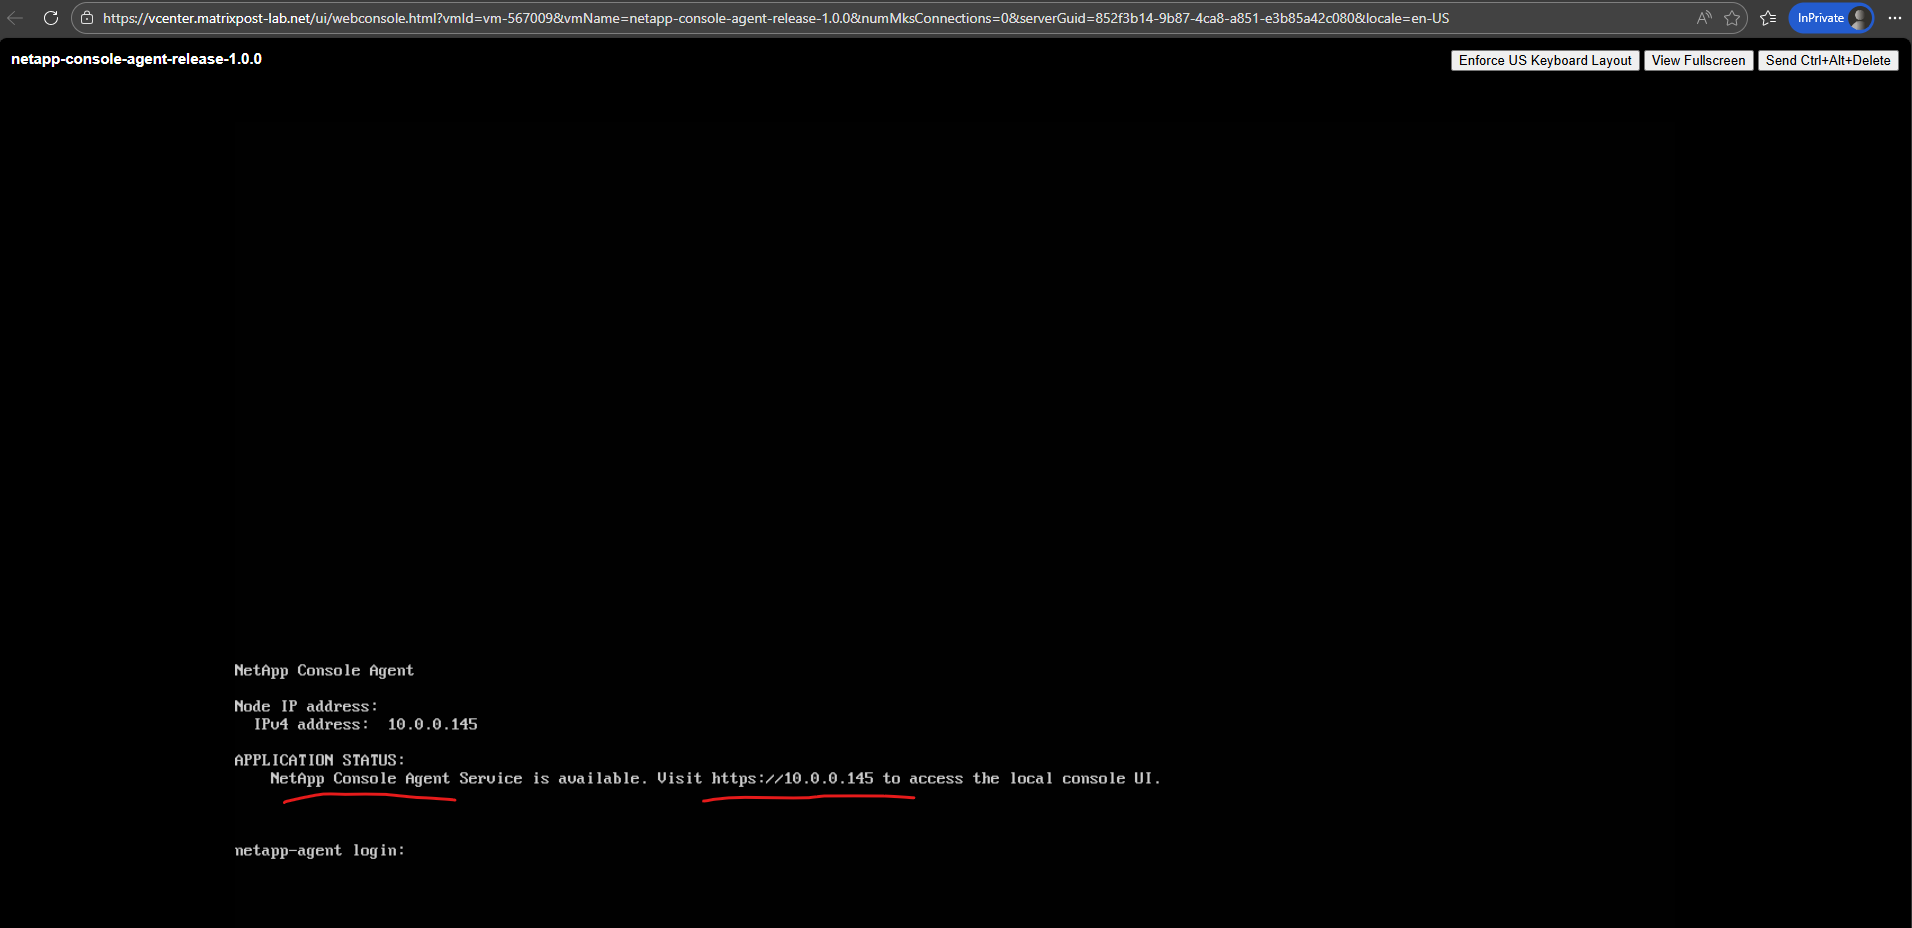
After the appliance has finished booting and reaches the login prompt, a message indicates that the NetApp Console Agent service is running. The screen also displays a link to https://<IP-address-of-the-appliance>, which can be used to access the local web console.
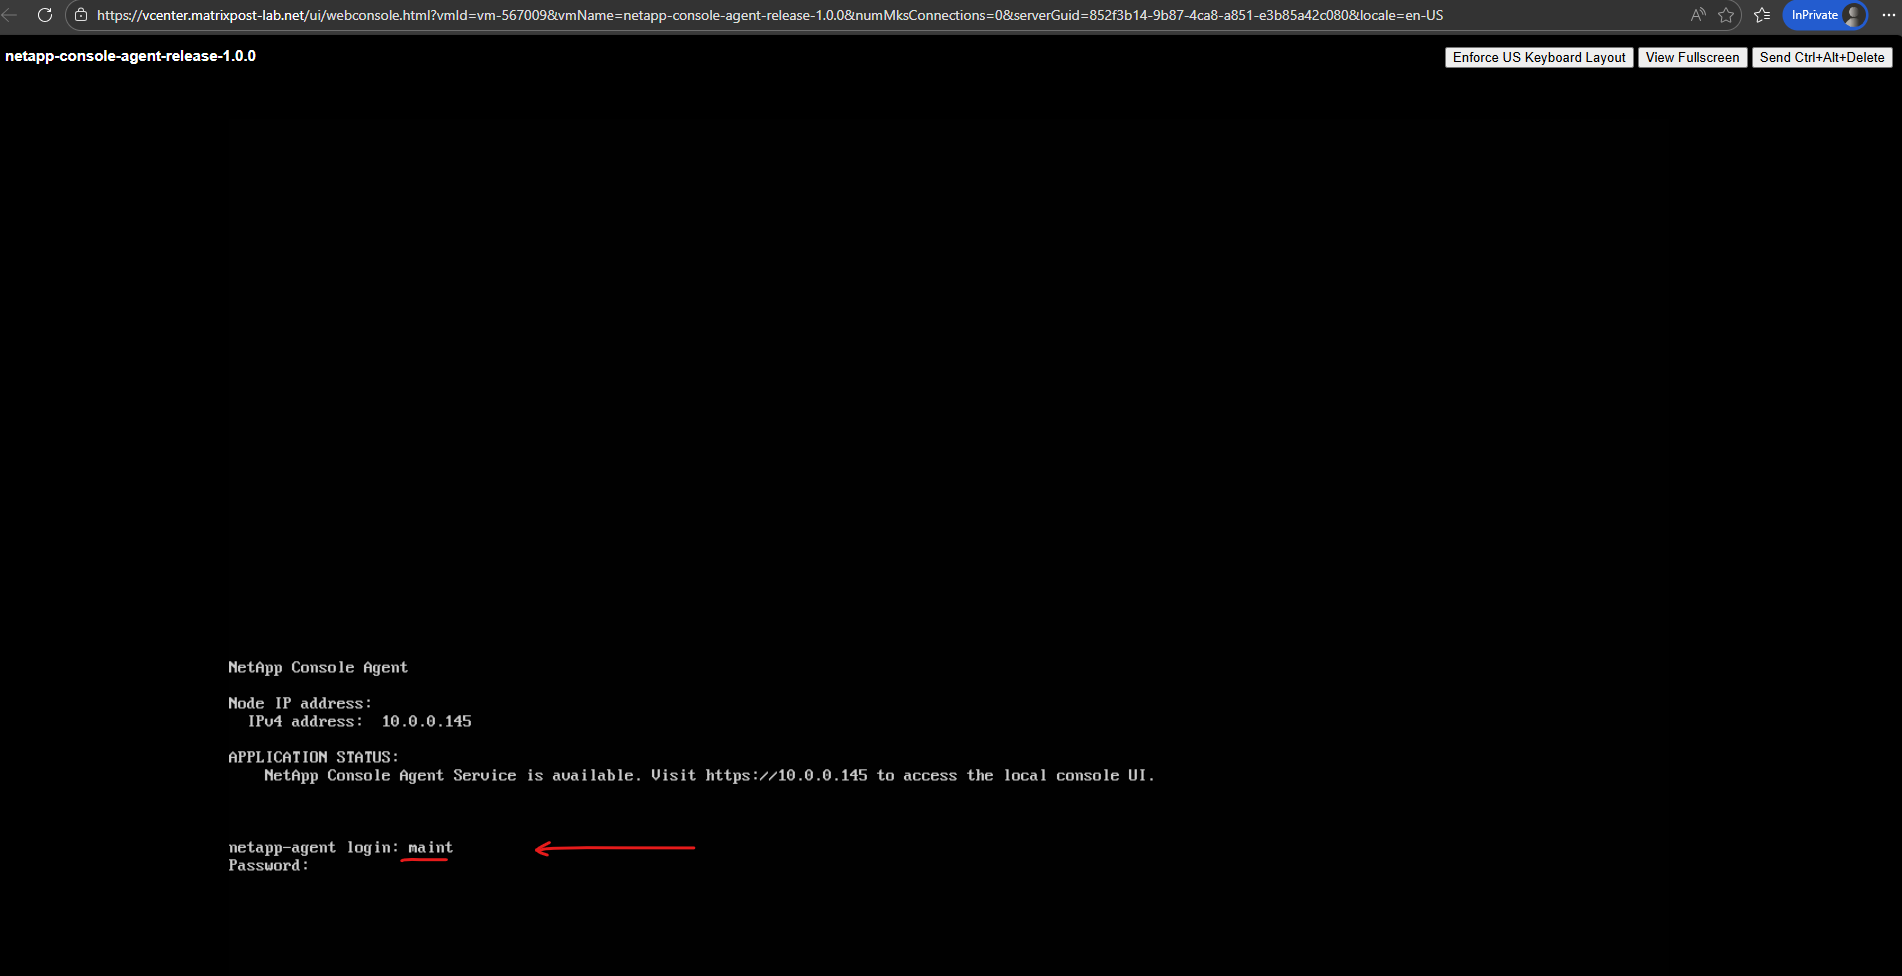
After deployment, login is performed using the maint user account. The password defined during the OVA deployment applies to this account.
Note: If login fails unexpectedly, verify your keyboard layout, the OVA console uses US keyboard mapping by default.
Login: maint
Password: <the one defined during OVA deployment>
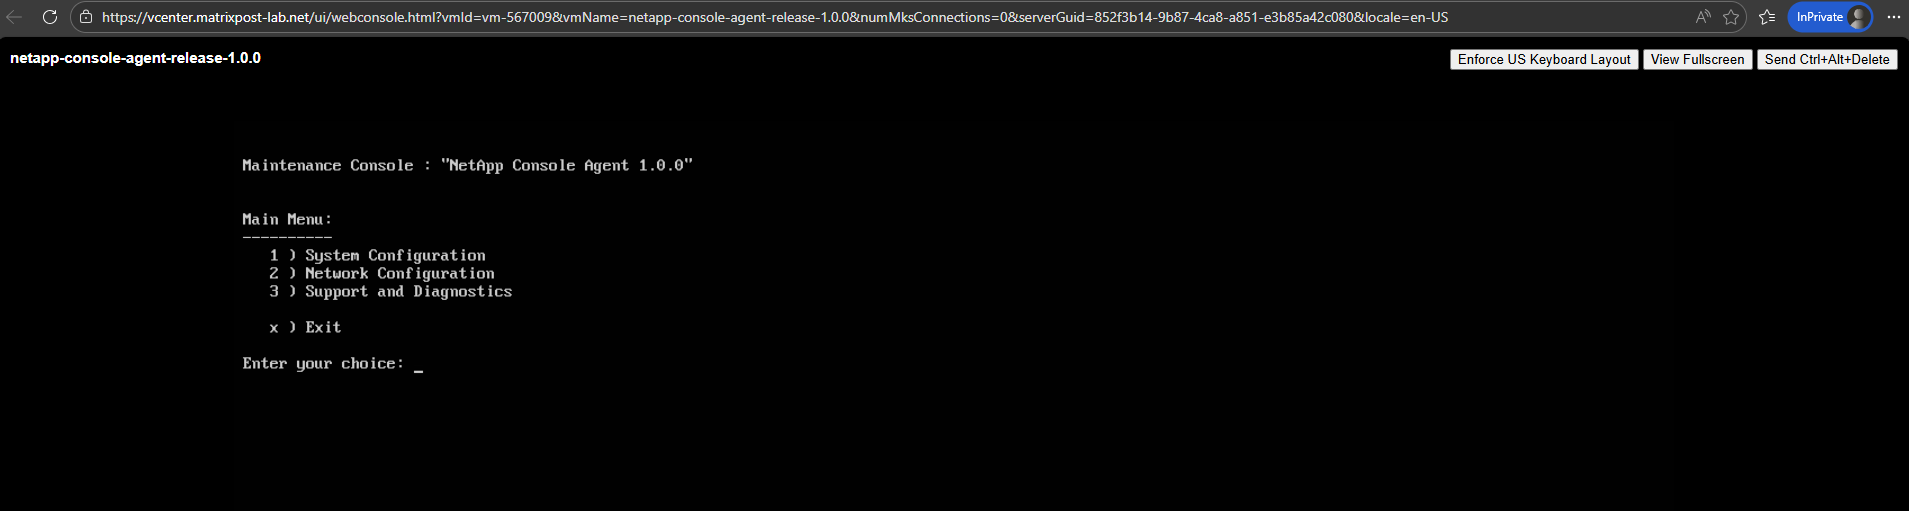
We will land in the Connector Maintenance Console, not a full Ubuntu shell.
The on-premises Connector OVA is delivered as a hardened appliance, so administrative access is intentionally limited to the
maintmaintenance interface to reduce the attack surface and prevent unsupported OS-level modifications.This ensures a consistent, controlled support and upgrade lifecycle, similar to other infrastructure appliances like vCenter Server. In contrast, cloud-based Connectors are deployed as standard IaaS VMs, where OS access is expected because the customer owns and manages the virtual machine directly.
Enabling Temporary SSH Access for Troubleshooting
Although the NetApp Console Agent OVA does not provide regular administrative SSH access by default, temporary diagnostic SSH access can be enabled from the Maintenance Console. This is useful for troubleshooting the appliance and its containerized Console Agent services without having to work through the vSphere VM console.
Log in to the Maintenance Console using the maint account and navigate to Support and Diagnostics → Remote Diagnostic Access. Enable remote diagnostic access and configure the temporary password for the diag account.
Press 3 for Support and Diagnostic.
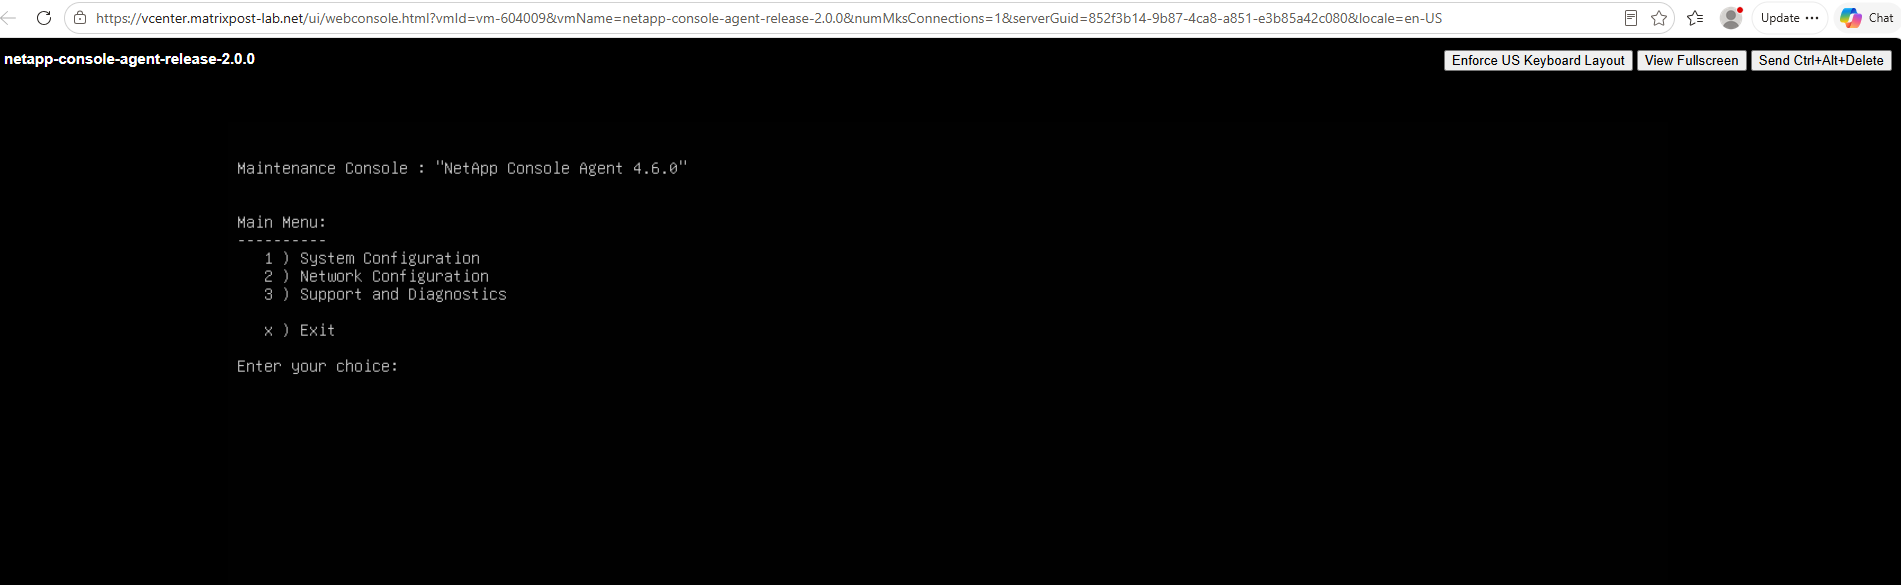
Press 2 Enable remote diagnostic access.
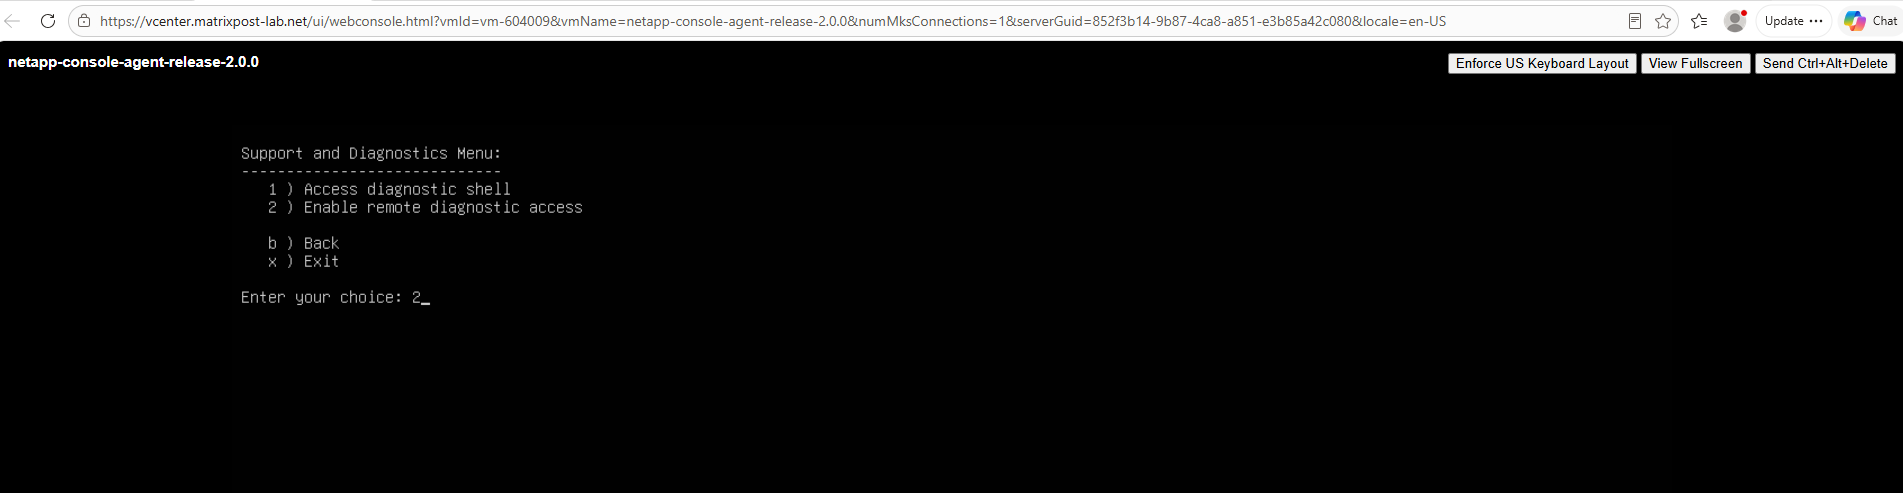
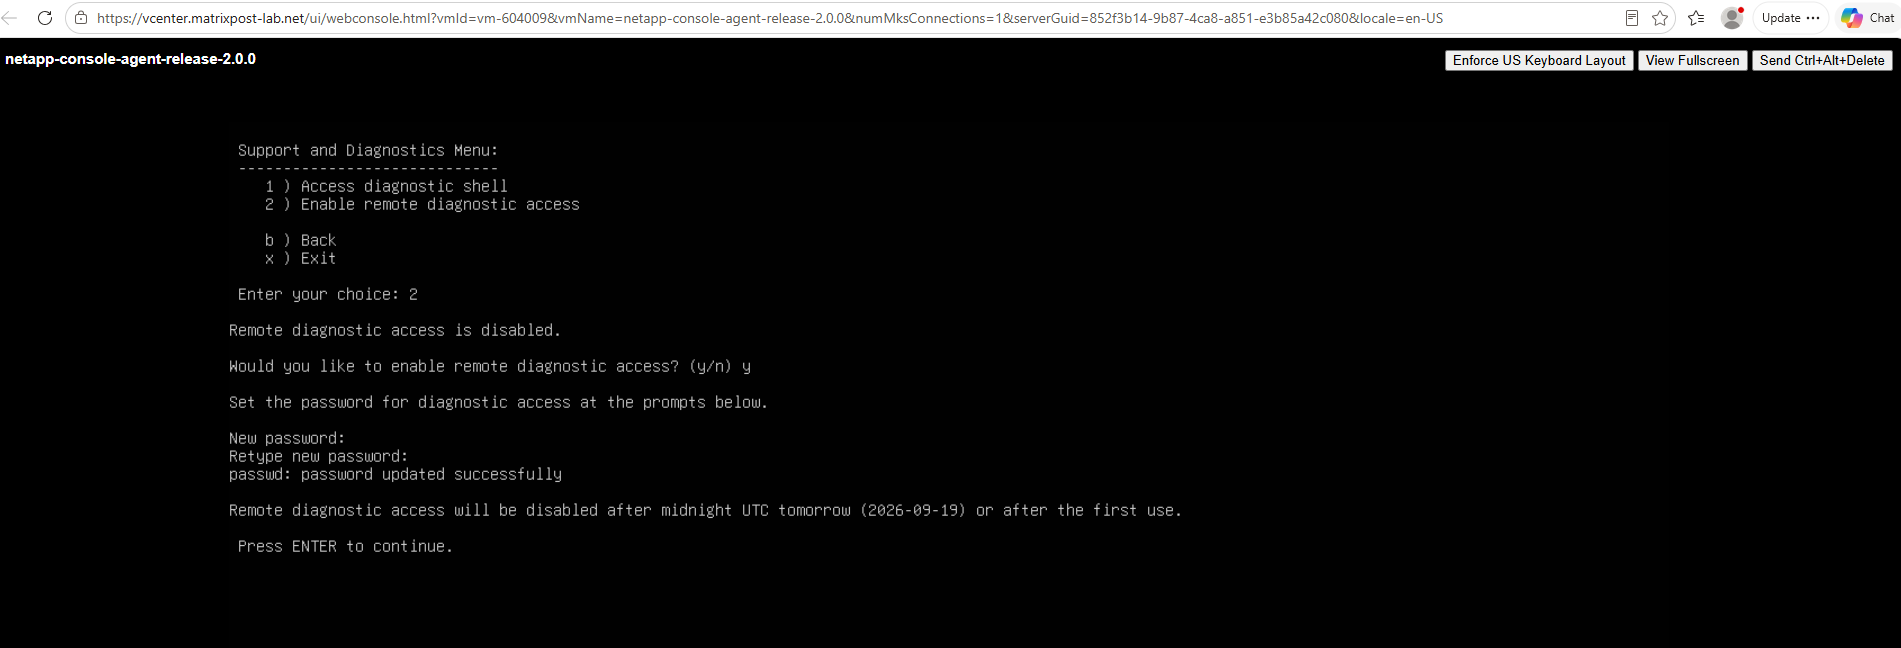
Enter a temporary password for the diag user.
Note that the password is valid for 24 hours, after which remote diagnostic access must be enabled again if required.
We can then connect to the appliance using SSH:
ssh diag@<IP console agent>
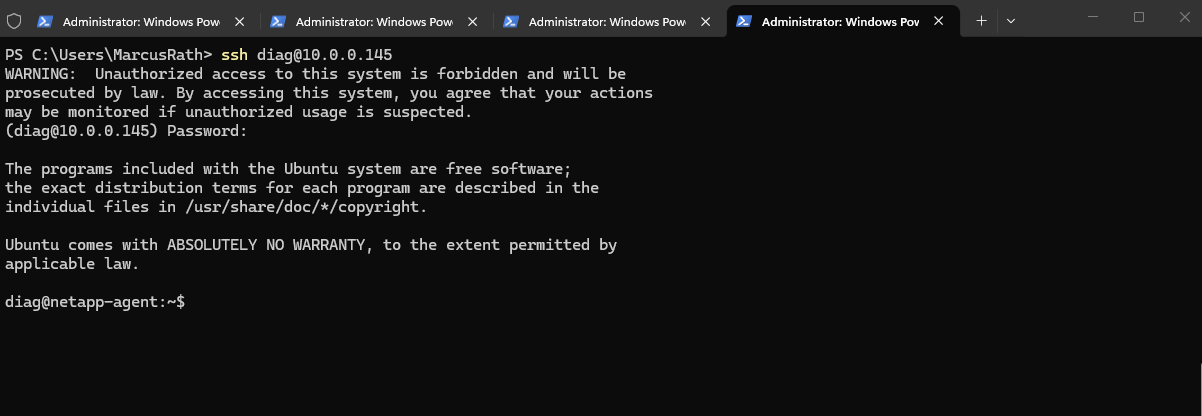
Registering the Agent with NetApp Console
The web console then presents a setup page where you need to define a name for the Agent. In addition, a drop-down list allows you to select the NetApp organization that the Agent should be associated with.
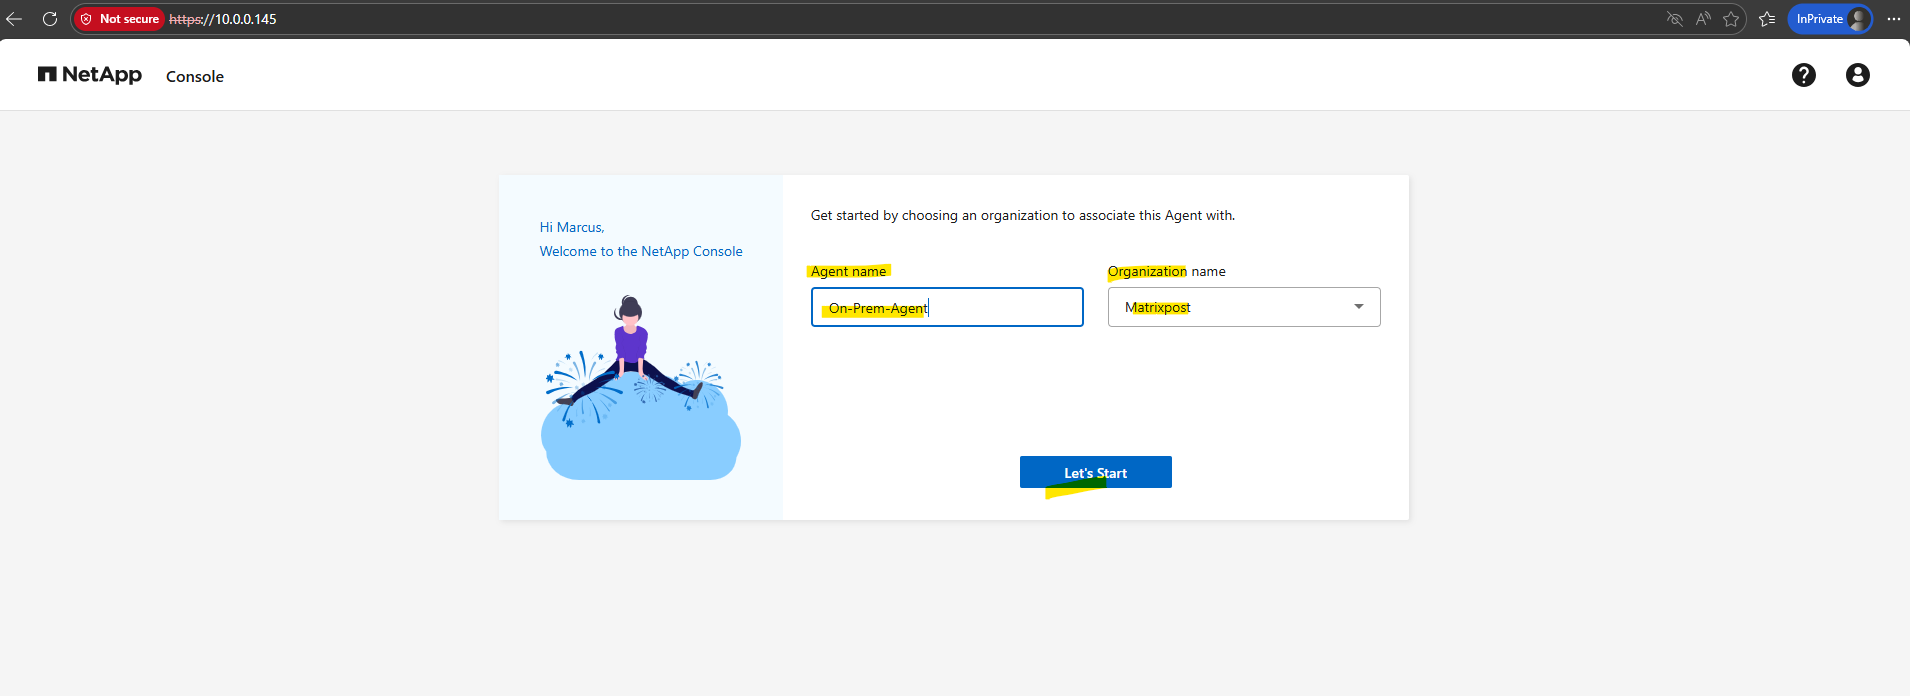
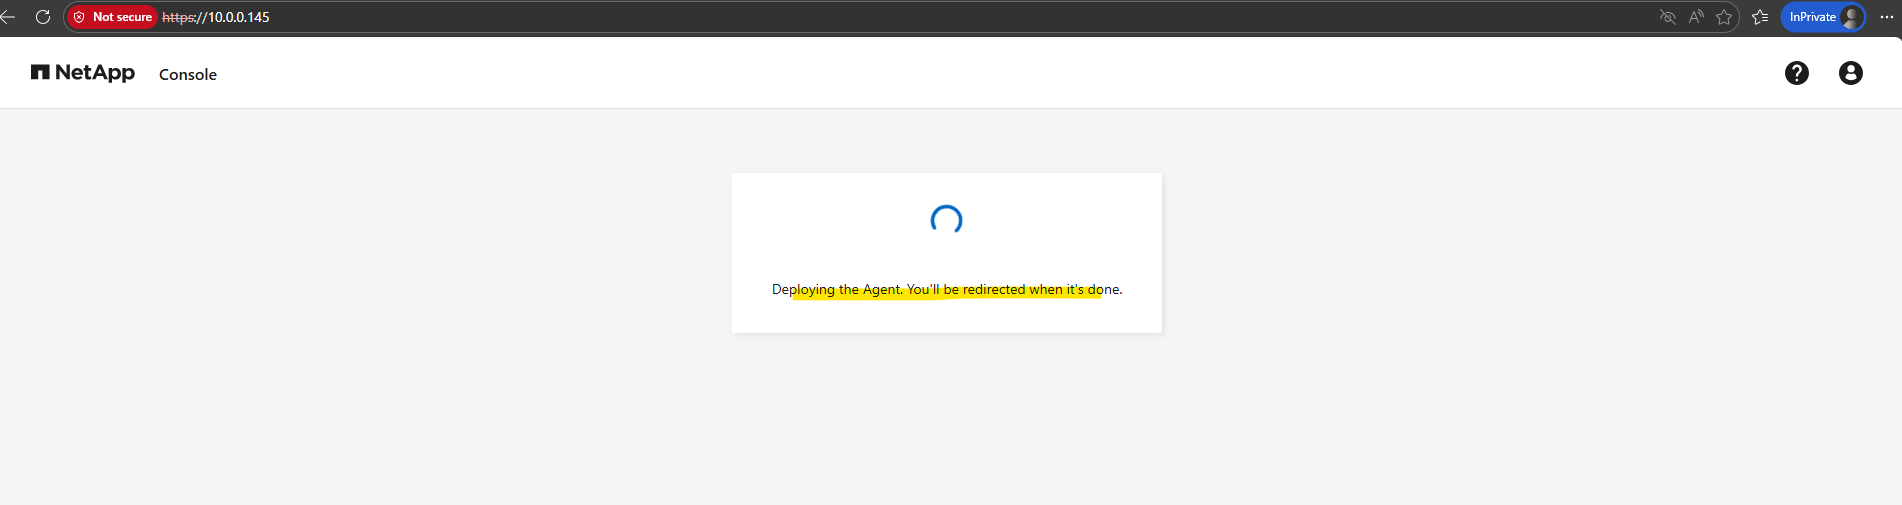
After clicking Let’s Start, the deployment process begins and a message appears indicating “Deploying the Agent. You’ll be redirected when it’s done.”
During this step, the appliance initializes the NetApp Console Agent services and registers the system with your selected organization.
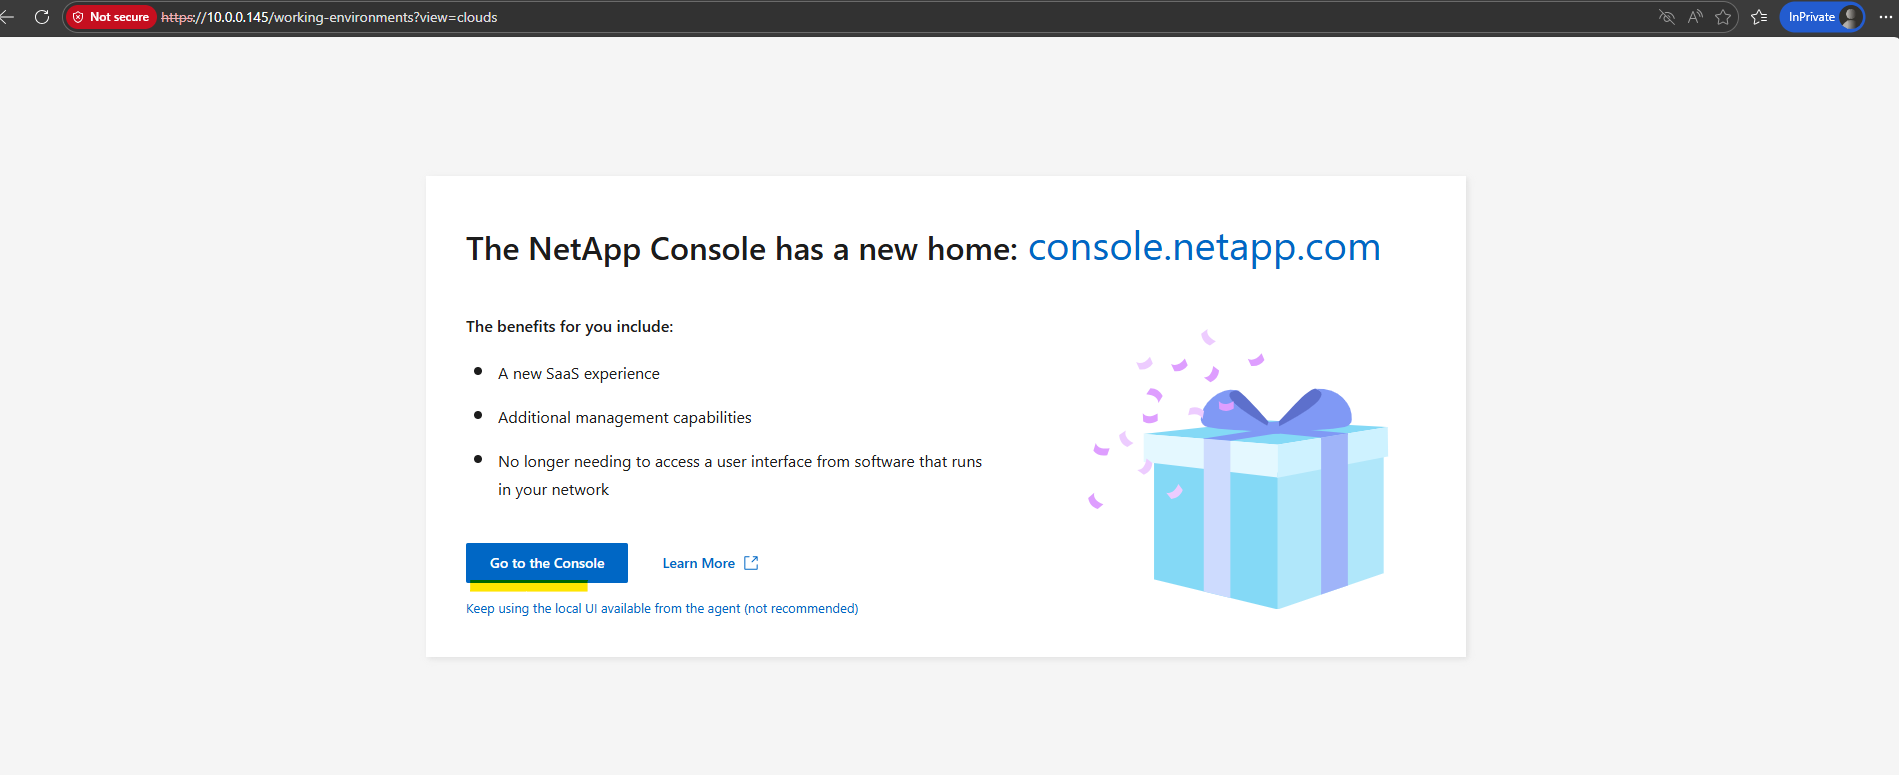
We can now click on Go to the Console.
Selecting Go to the Console redirects you to the centralized NetApp Console (SaaS interface), where all agents and storage systems can be managed from a single control plane.
The local UI on the agent only provides limited functionality and is mainly intended for initial setup or troubleshooting.
Discovering the On-Prem ONTAP System
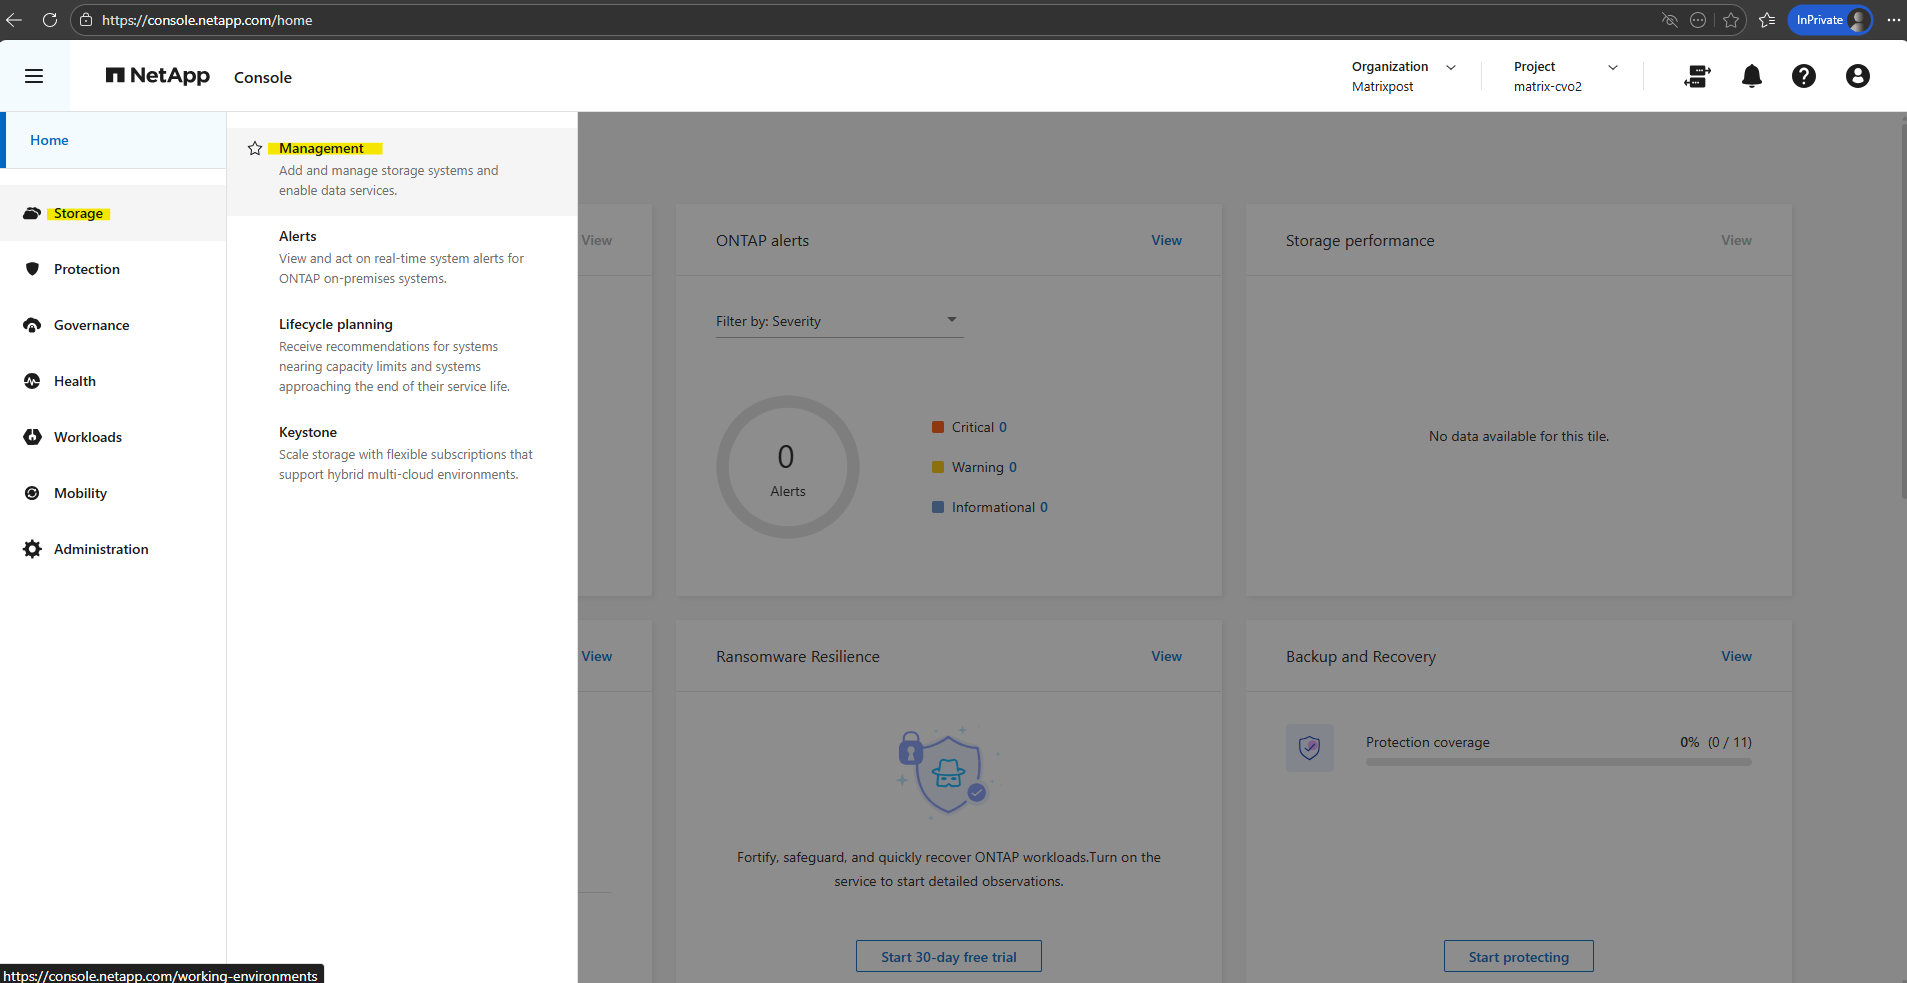
To discover the on-premises ONTAP simulator (or any other on-prem ONTAP system), navigate to Storage → Management in the NetApp Console. From there, you can start the discovery process to add and manage existing ONTAP systems through the connected Agent.
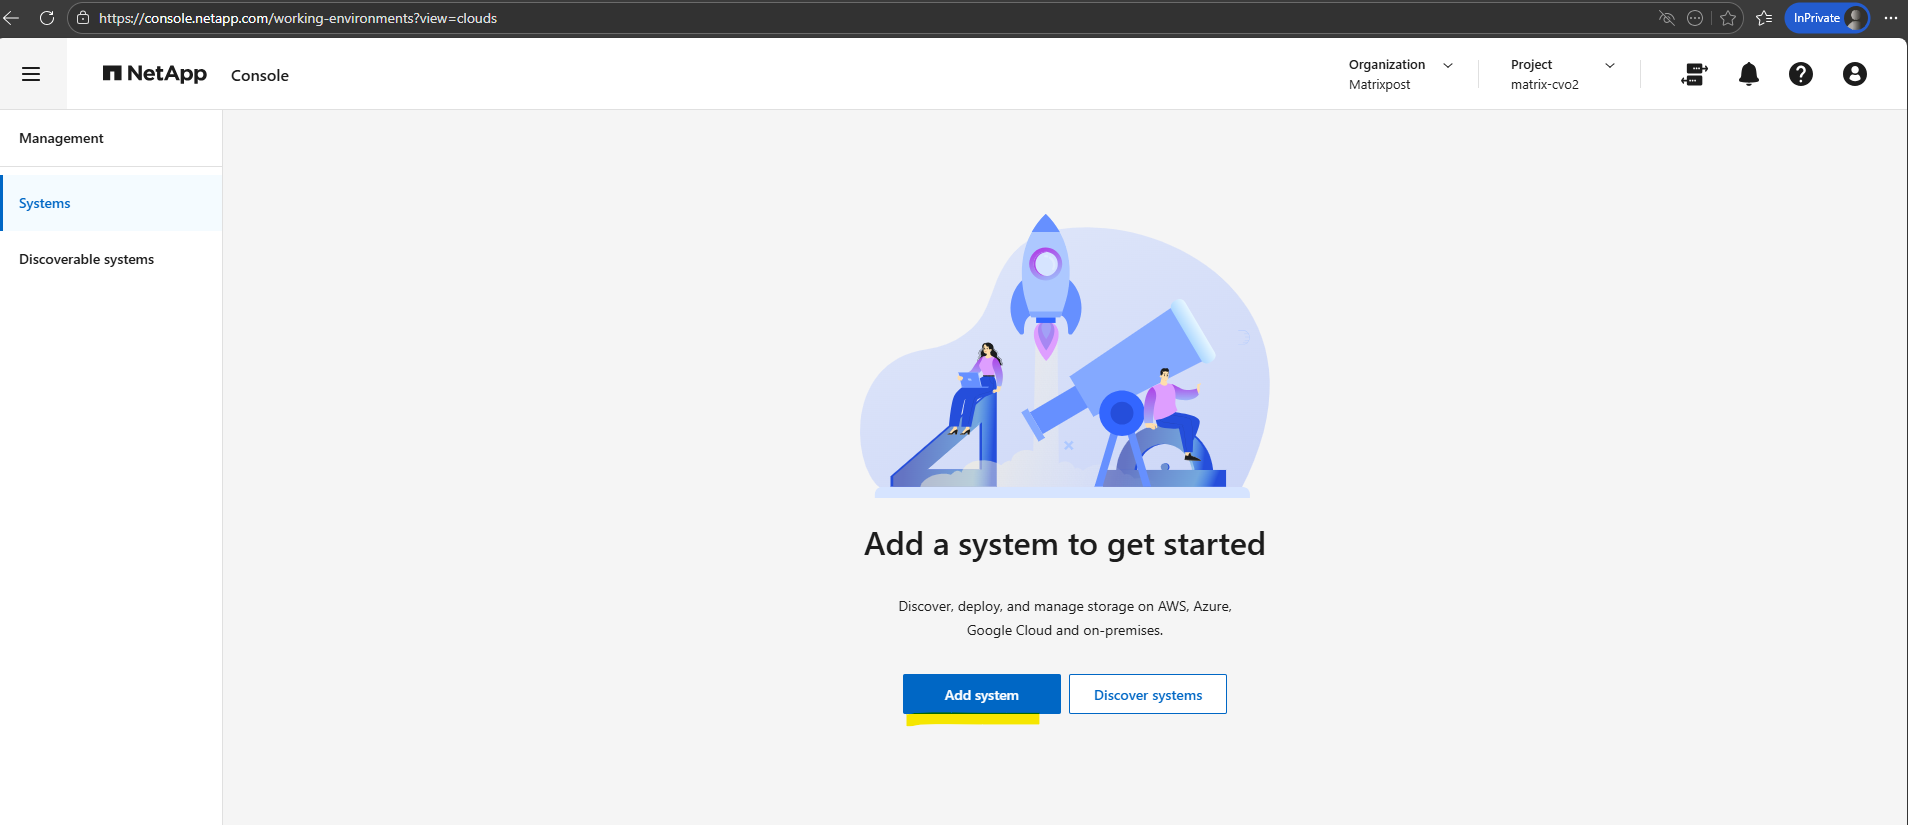
Click on Add system.
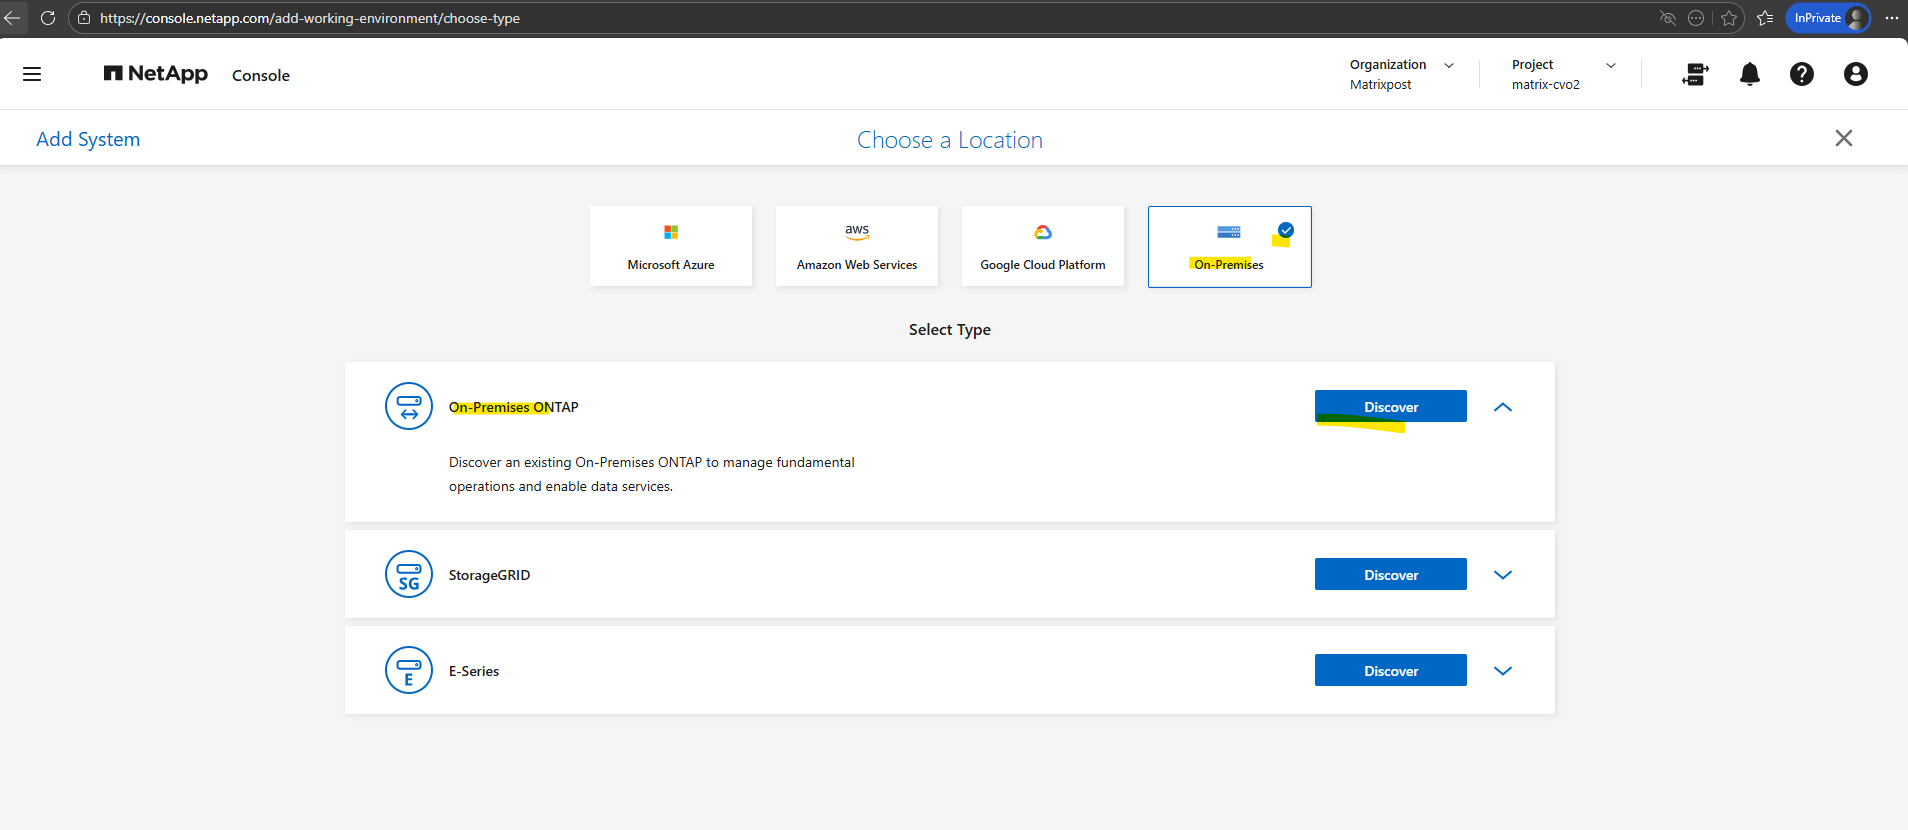
Click on Discover for the On-Premises ONTAP.
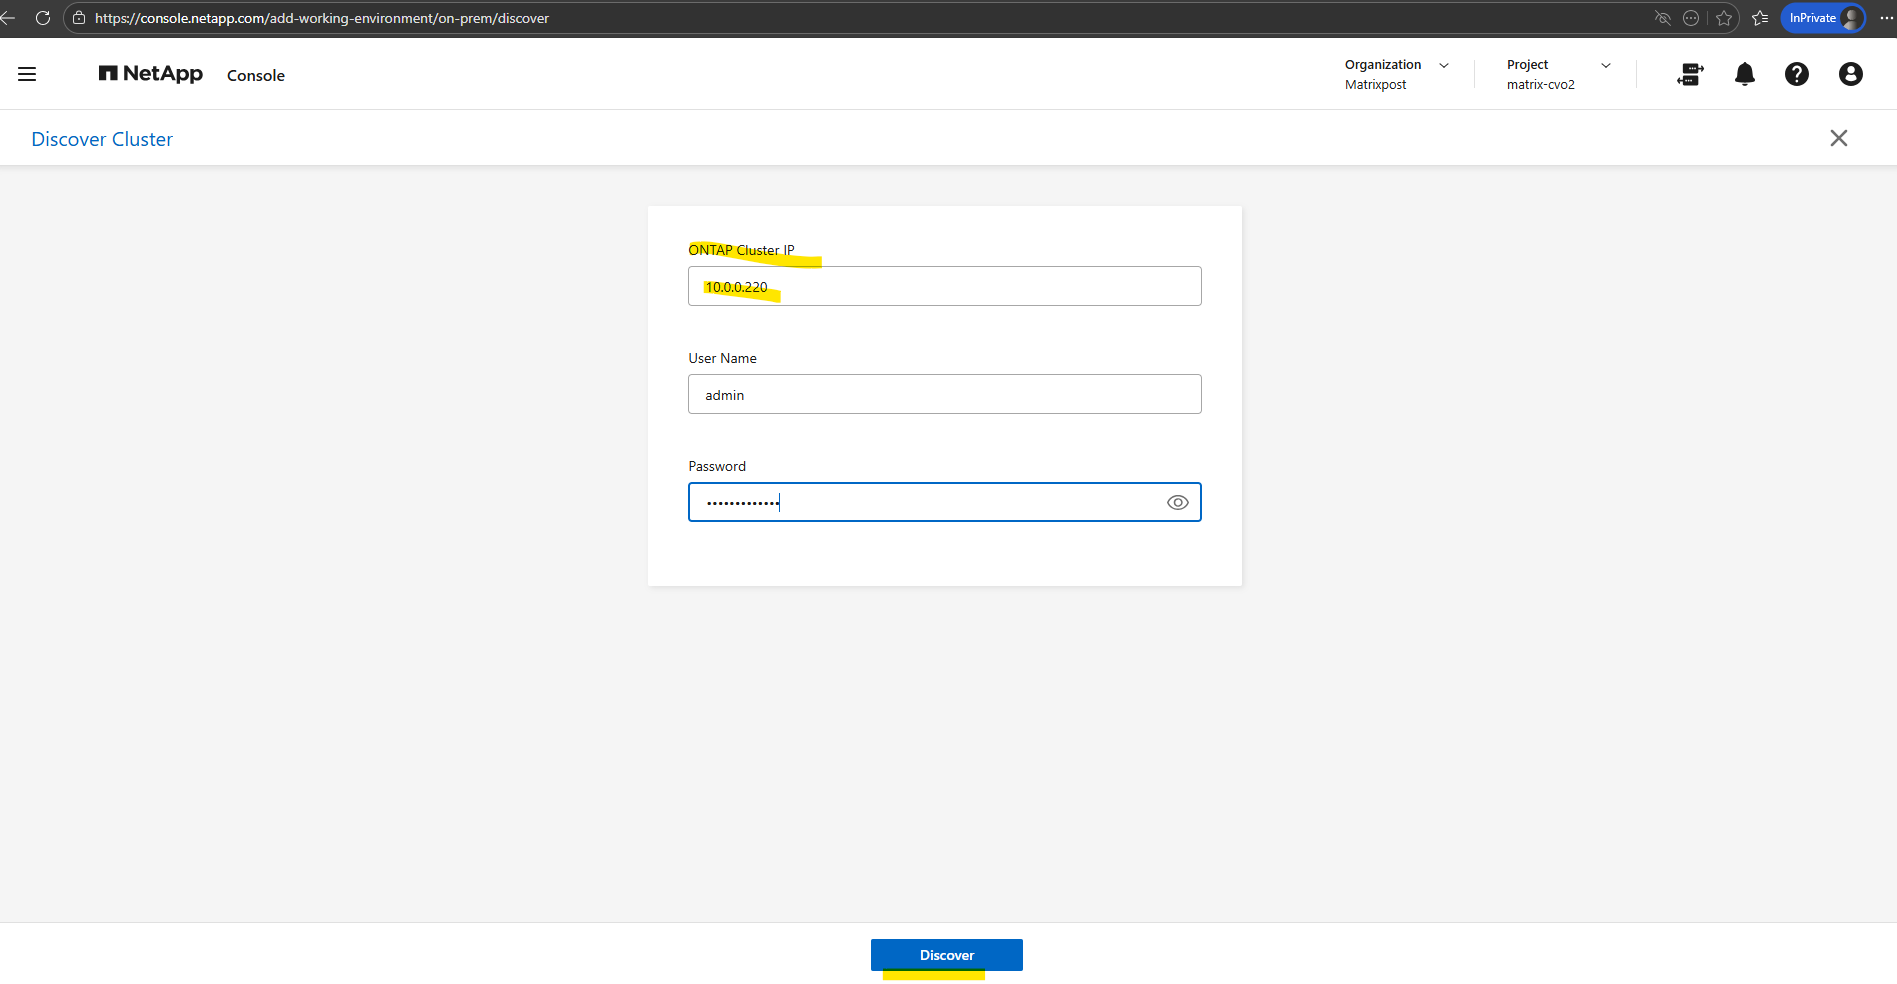
Enter the ONTAP cluster management IP address along with the administrator credentials of the cluster. The Agent will then use this information to connect to the system and initiate the discovery process.
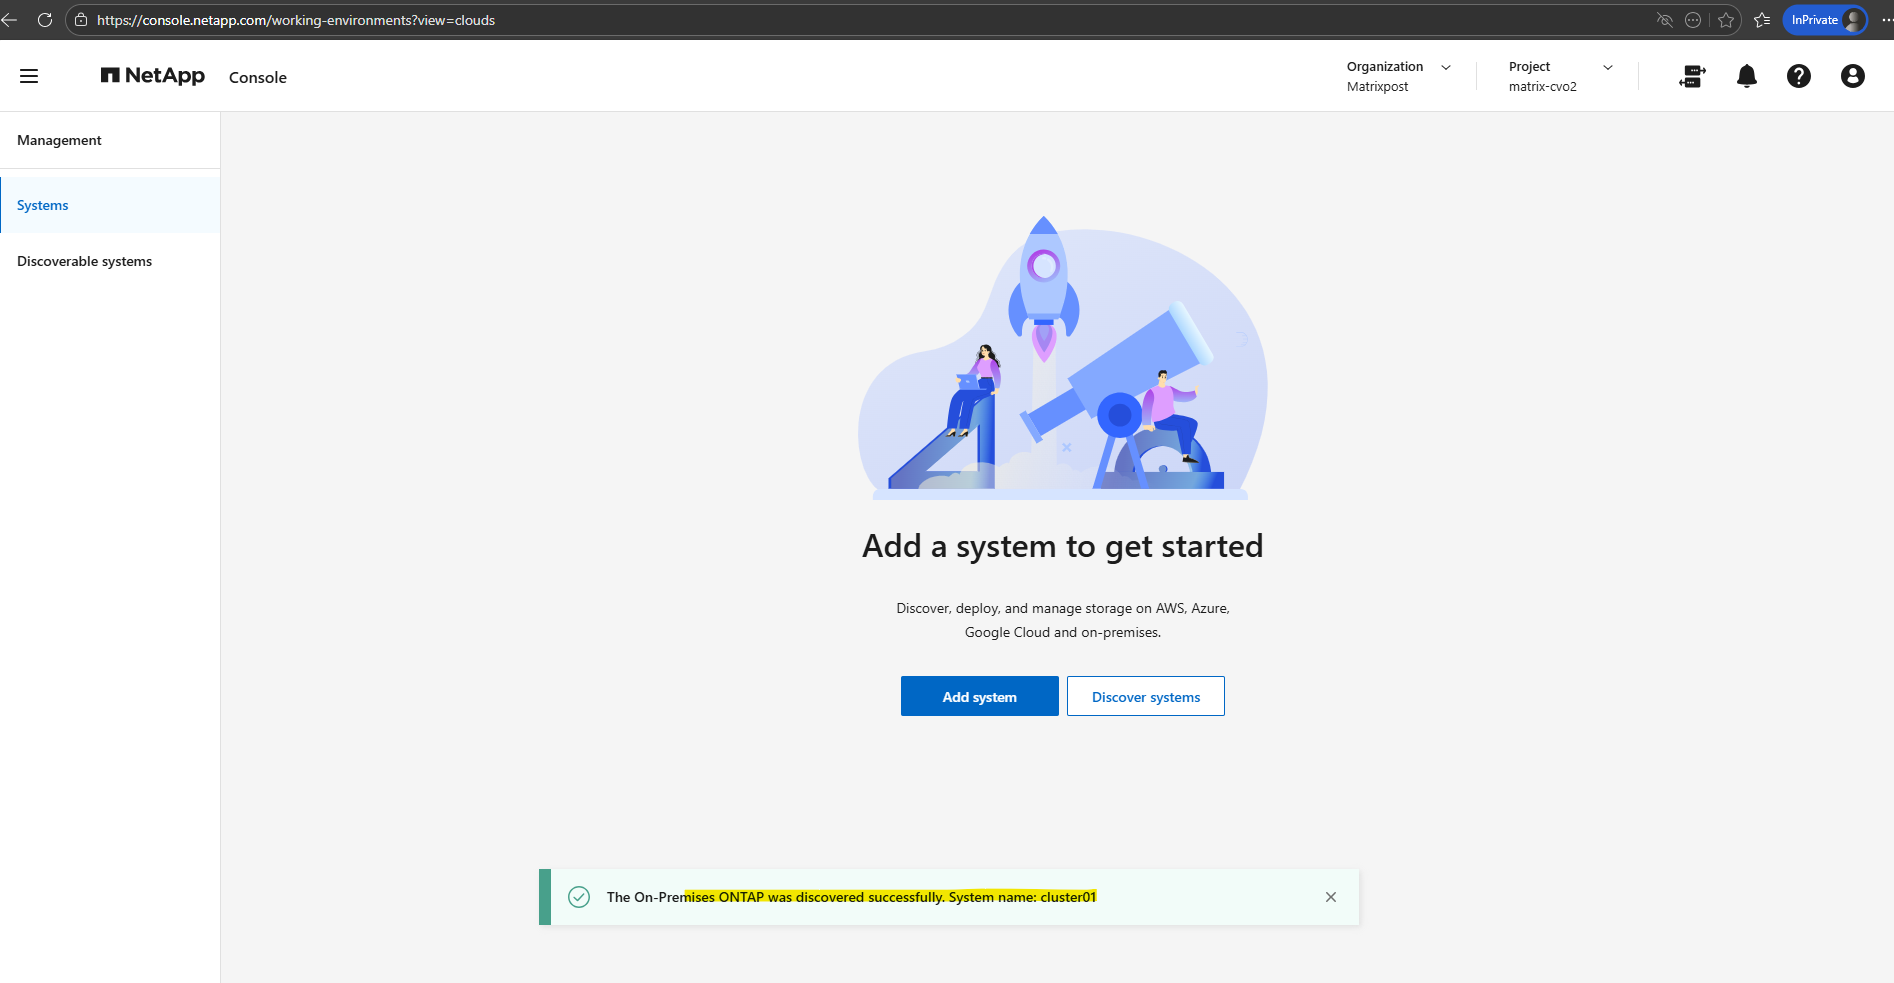
The page is confirming that our on-premises system now registered and manageable through the NetApp Console.
Managing the System in NetApp Console
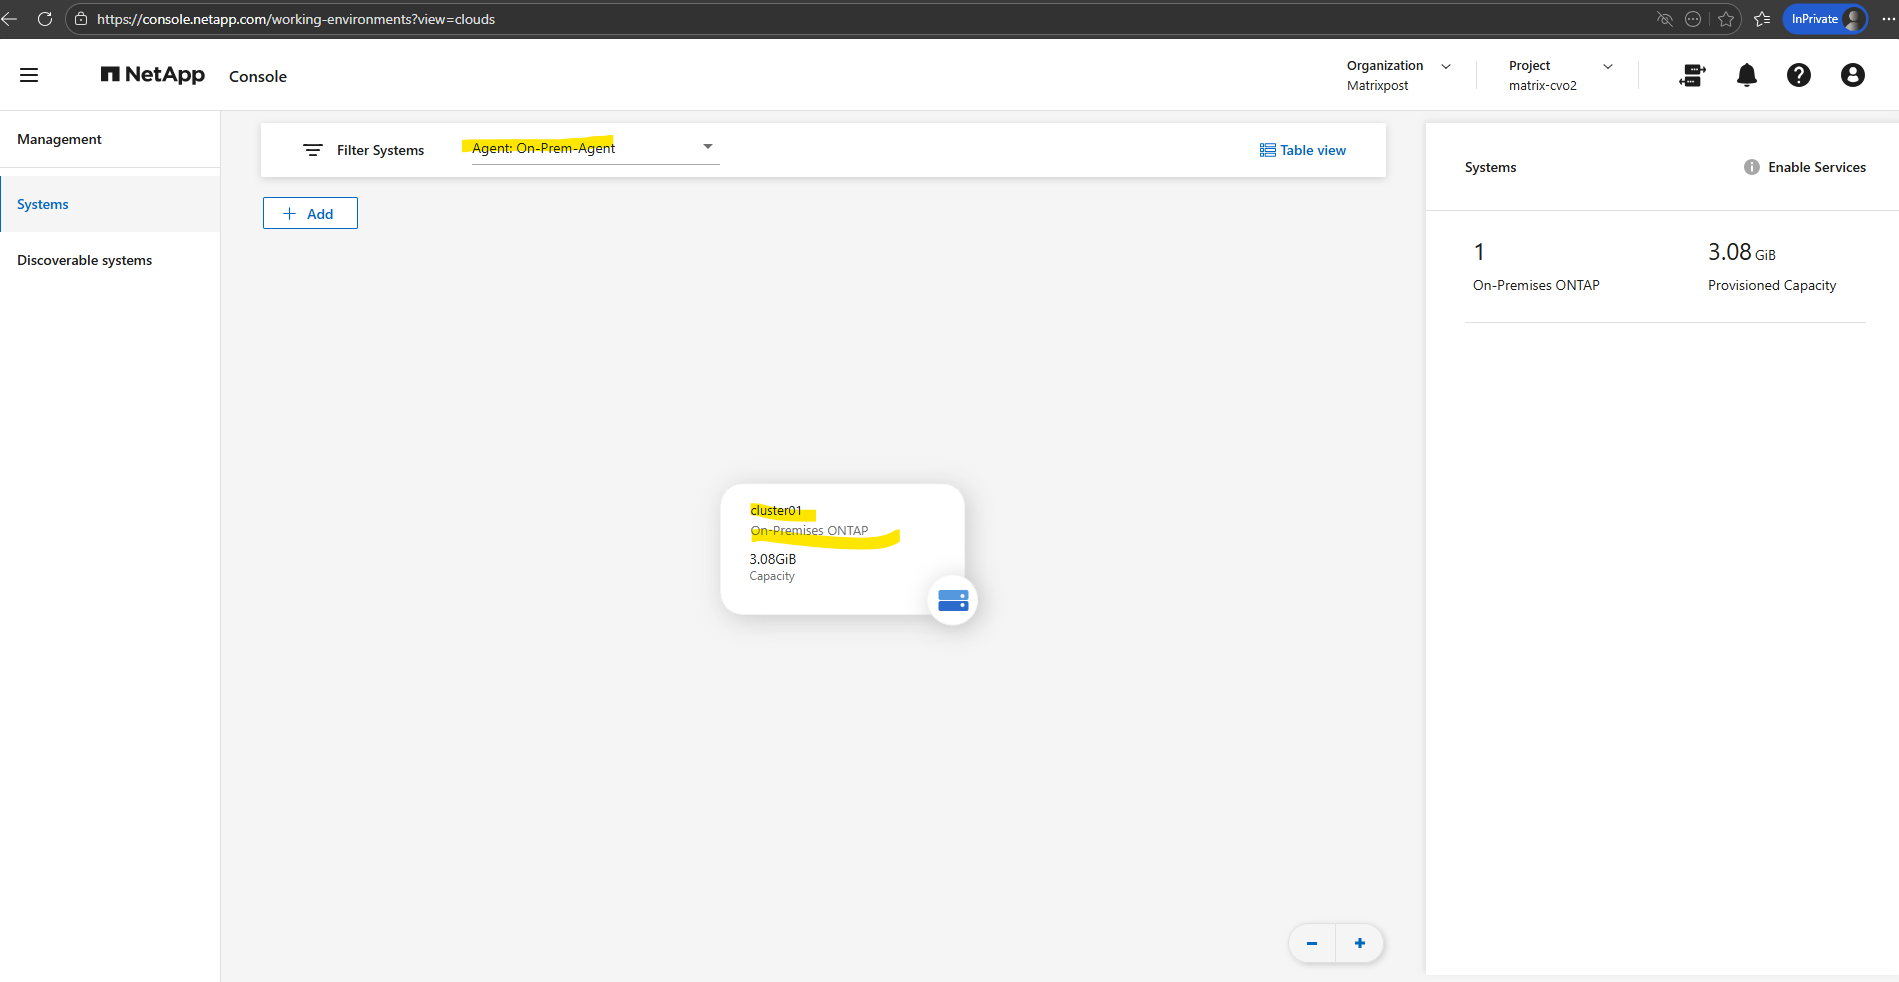
The on-premises ONTAP system is now listed under Storage → Management → Systems in the NetApp Console. From here, the cluster can be selected to view details and manage it through the connected Agent.
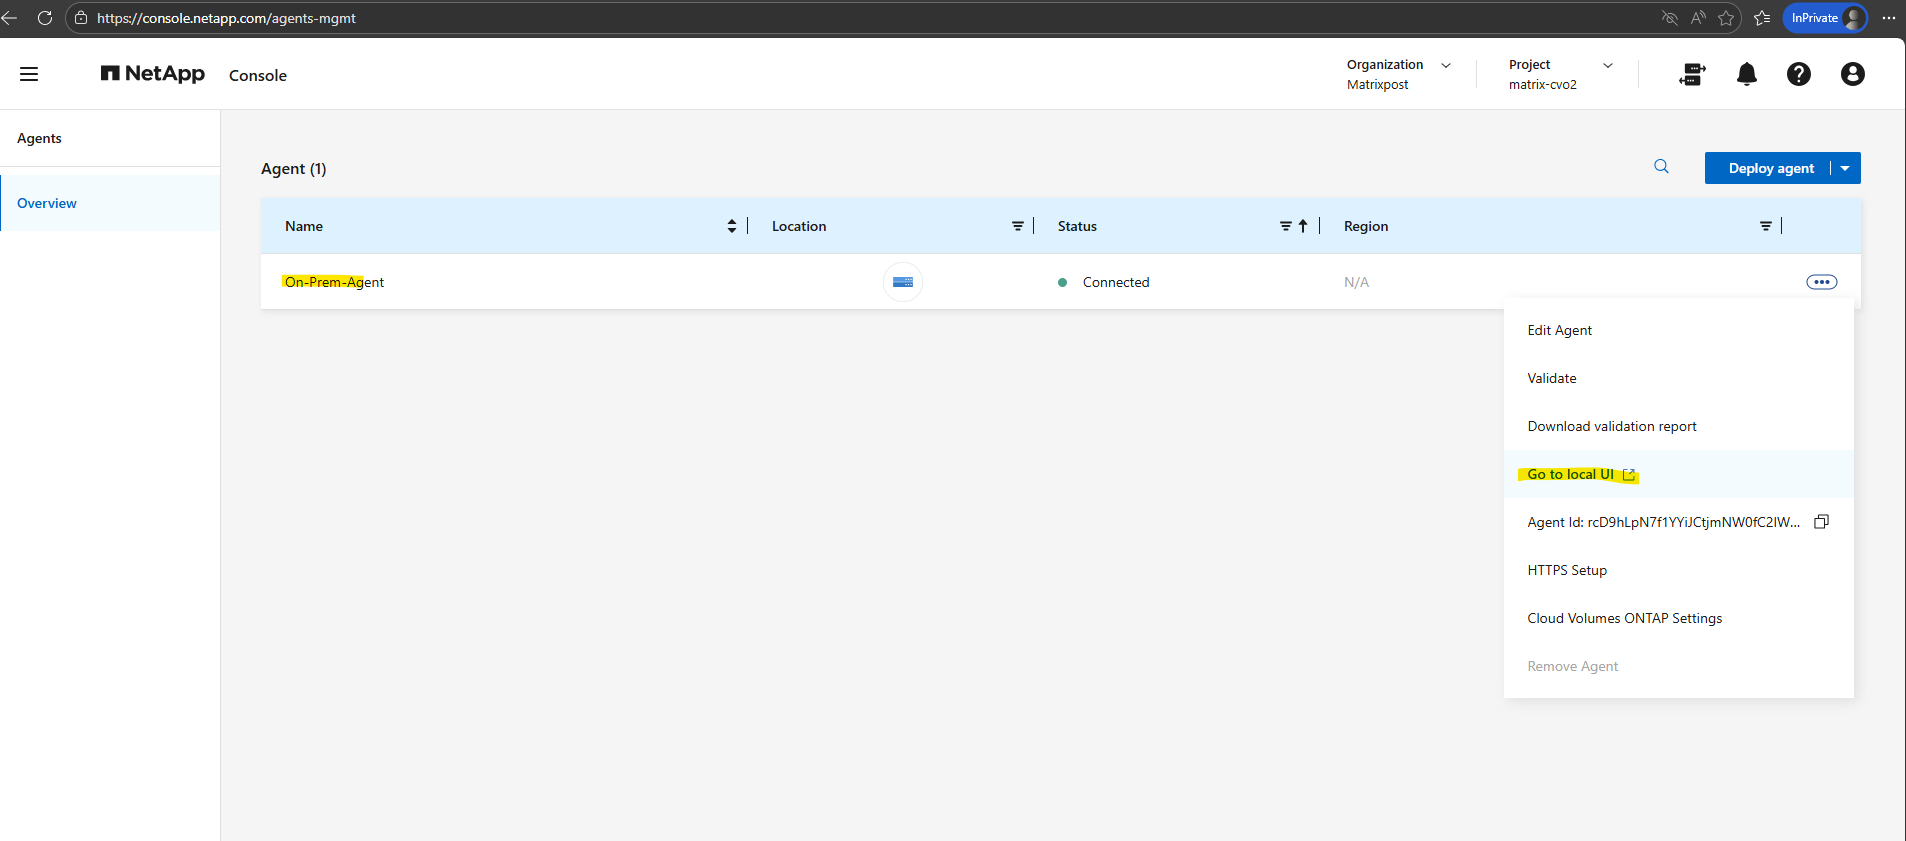
Under Administration → Agents, the Agent previously deployed in vSphere is now listed. From the context menu (three dots), you can perform actions such as Edit, Validate, and also open the local console URL of the Agent.
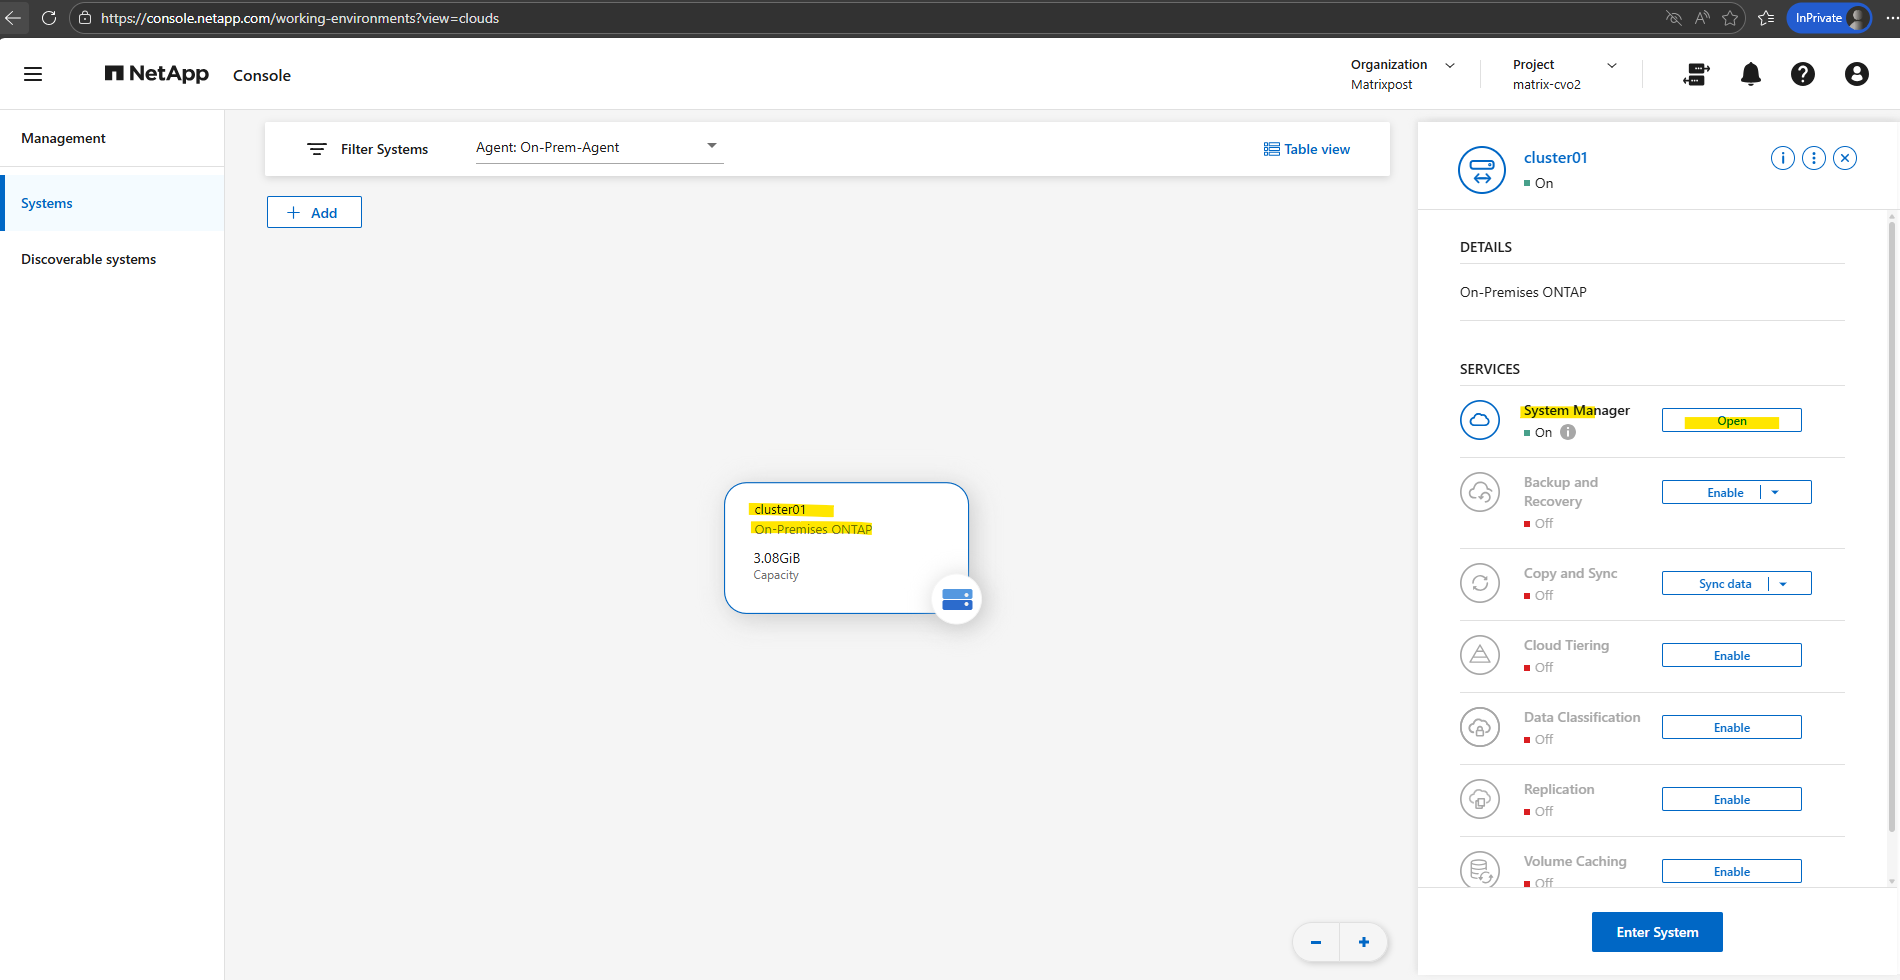
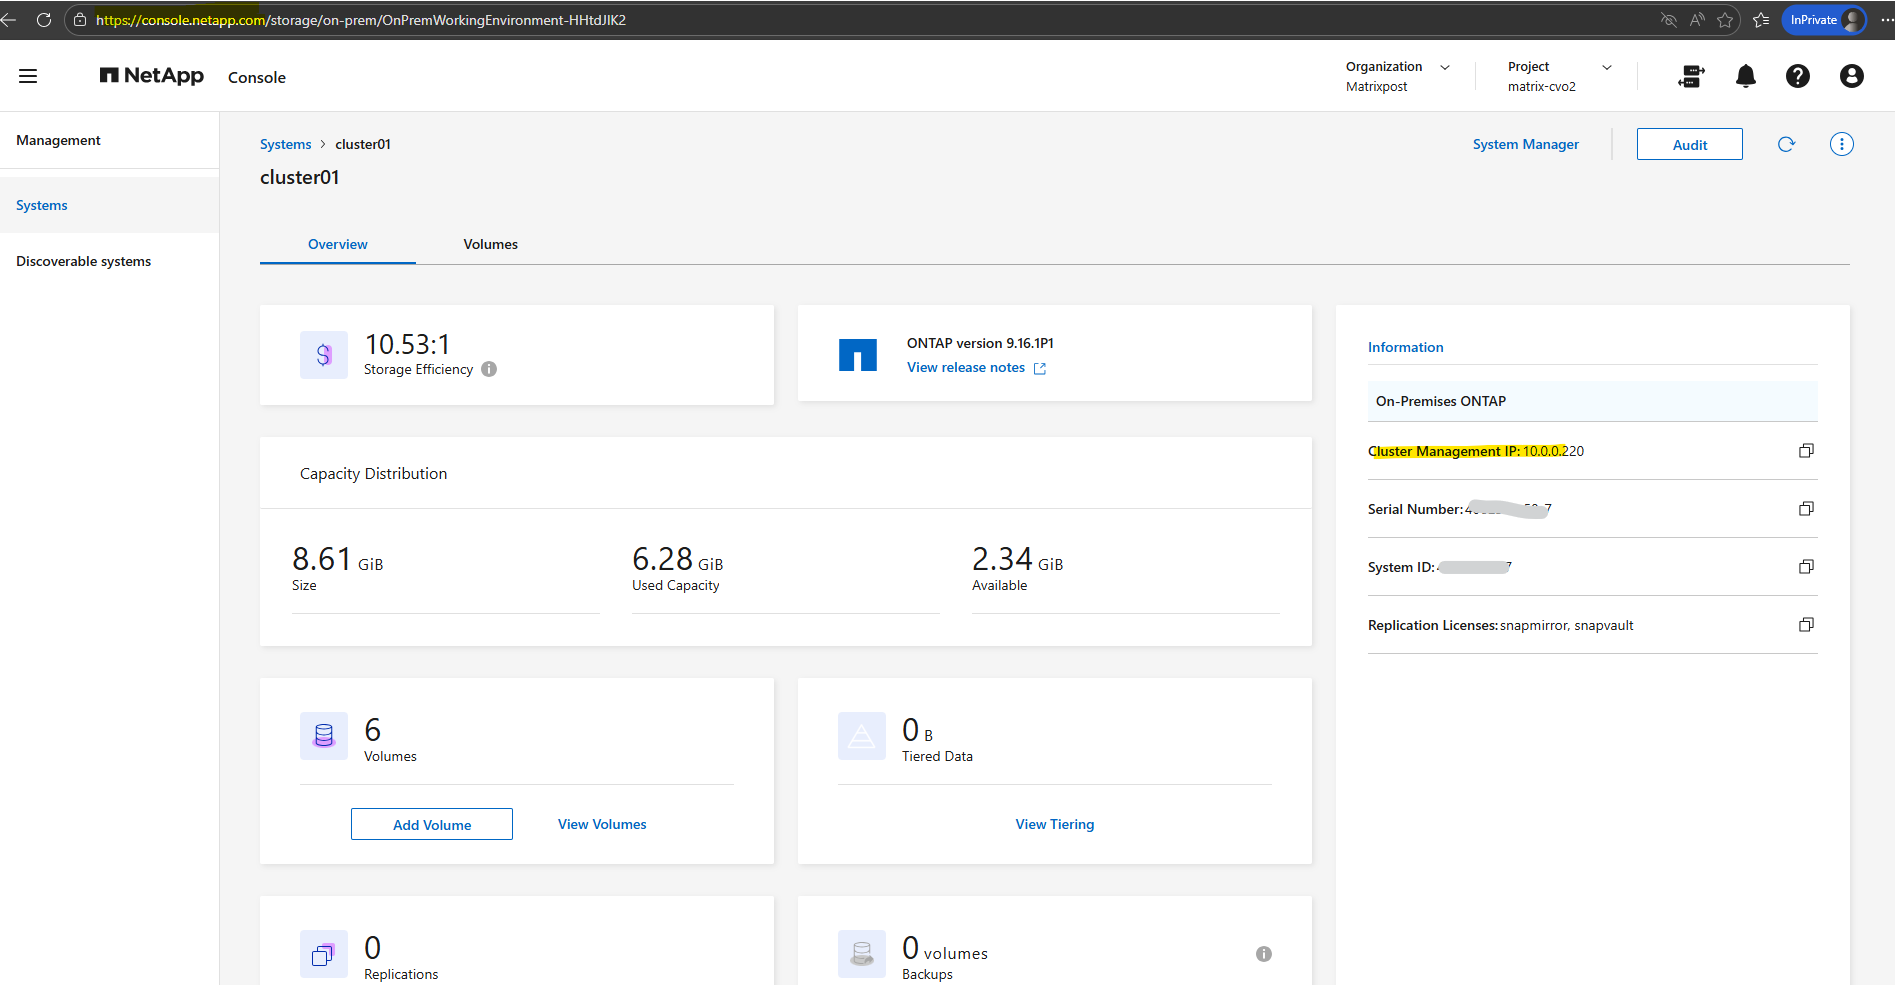
When selecting the system under Storage → Management → Systems and clicking on it, you are presented with options to either open System Manager or Enter the system.
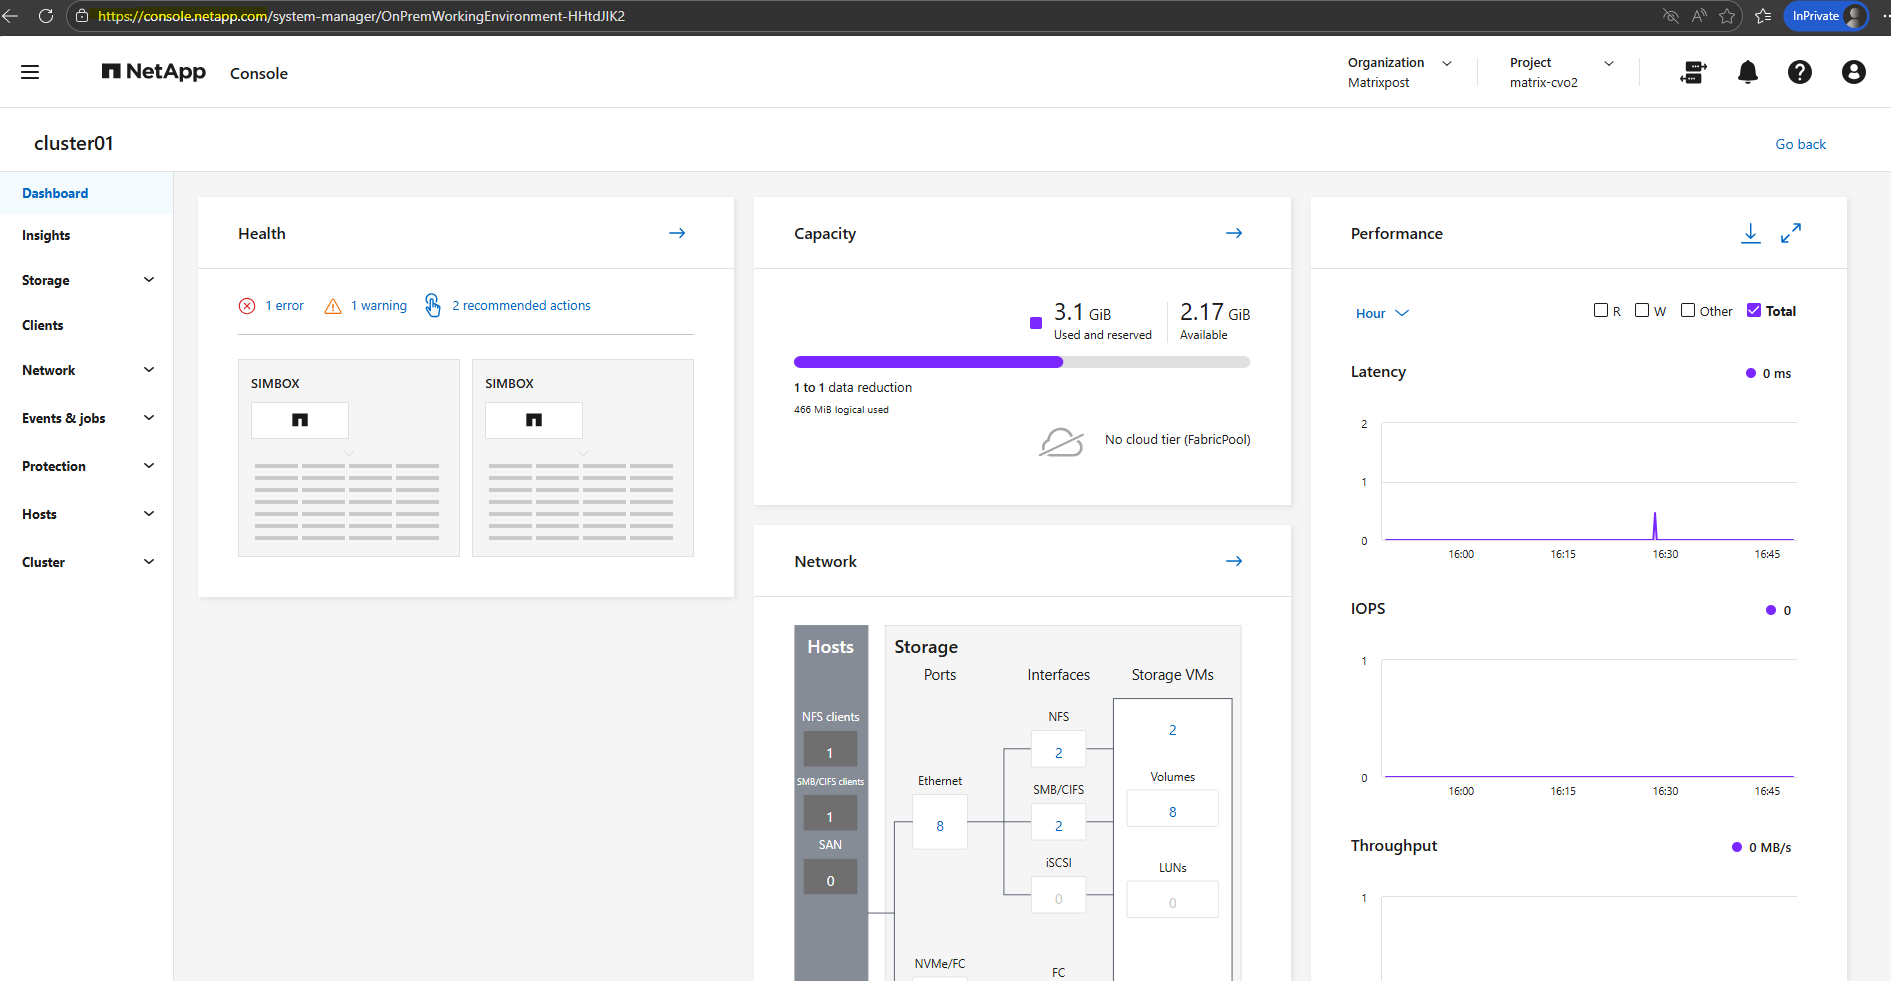
System Manager launches the familiar ONTAP management interface, while Enter the system opens the management view within the NetApp Console.
When clicking System Manager, the NetApp Console redirects you to the familiar ONTAP System Manager web interface of the selected cluster. From there, you can manage the system directly using the native ONTAP management GUI as shown below.
When clicking Enter System, the NetApp Console opens the system view within its own interface.
This allows you to monitor and manage the ONTAP system directly from the NetApp Console without leaving the platform.
Troubleshooting the NetApp Console Agent
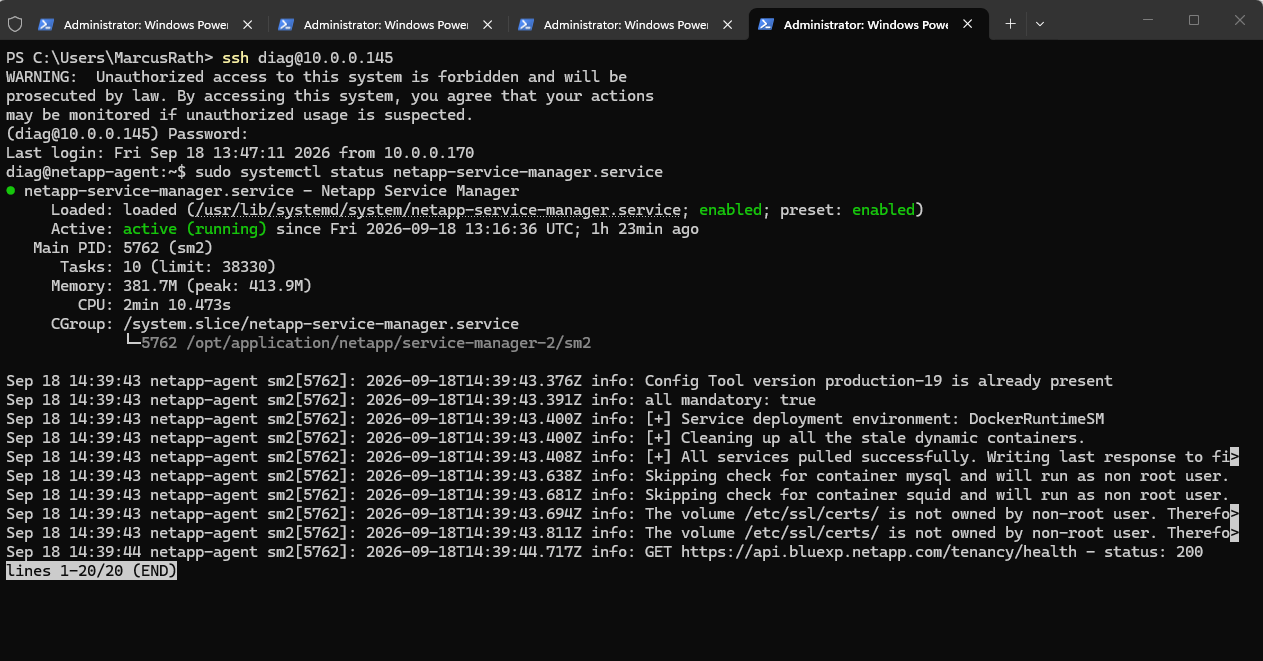
If NetApp Console cannot find the Console Agent, the Agent settings cannot be loaded, or an on-premises ONTAP system remains stuck at Loading Data, we can connect to the Console Agent using the temporary diag SSH account described above and perform some basic checks.
First, verify that the NetApp Service Manager is running:
sudo systemctl status netapp-service-manager.service
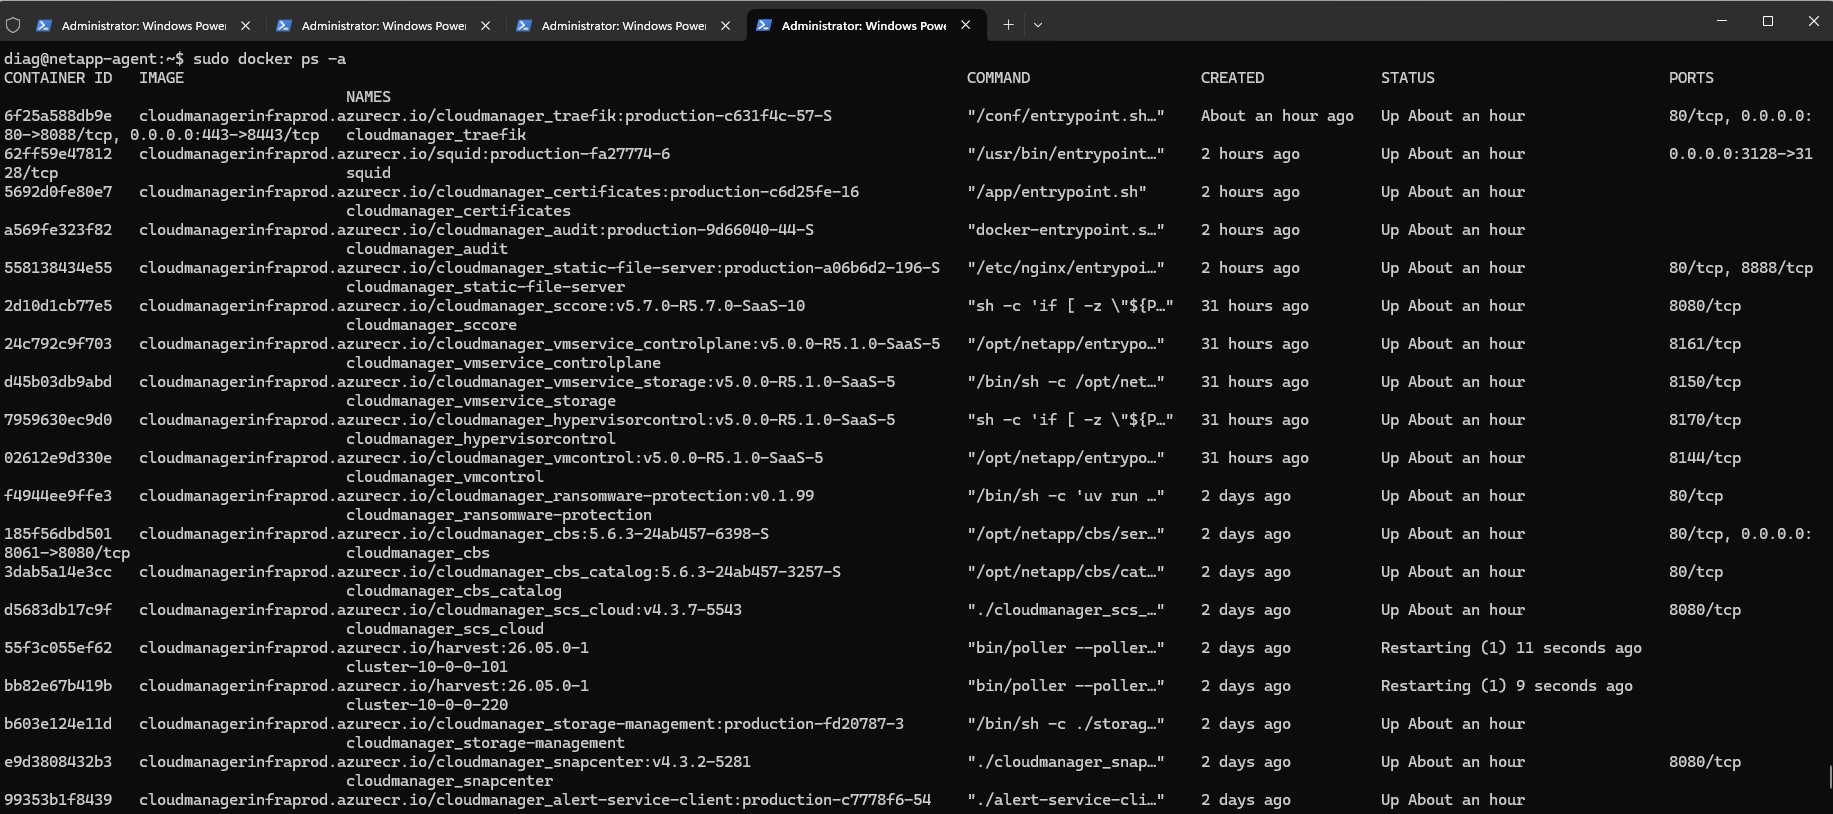
Next, check the state of all Docker containers:
NetApp recommends verifying that the Service Manager is active and that the required containers are running when the Console Agent cannot be reached or loaded.
sudo docker ps -a
A particularly important component is the occm container, which provides the core Console Agent service. Its status and recent log messages can be checked with:
occmis simply the internal name of the main NetApp Console Agent service/container.NetApp’s current documentation explicitly says: “The Console agent service is named
occm.”
sudo docker ps --format "table {{.Names}}\t{{.Status}}" | grep occm

# verify logs
sudo docker logs occm --tail 100
In our case, Docker reported the occm container as running, but the OCCM application inside it had failed during startup with a TimeoutException.
Restarting only this container restored access to our matrixselect ONTAP system:
sudo docker restart occm
Note: A Docker container showing the status
Updoes not necessarily mean that the application inside it is functioning correctly. Therefore, checking the OCCM logs can be useful when the Console reports No agent found, cannot load Agent information, or remains stuck while loading an ONTAP system.
Links
Discover on-premises ONTAP clusters in NetApp Console
https://docs.netapp.com/us-en/storage-management-ontap-onprem/task-discovering-ontap.htmlNetApp Console documentation
https://docs.netapp.com/us-en/console-familyManually install a Console agent on-premises
https://docs.netapp.com/us-en/console-setup-admin/task-install-agent-on-prem.htmlConsole agent default configuration in NetApp Console
https://docs.netapp.com/us-en/console-setup-admin/reference-agent-default-config.htmlConsole agent validation with the maintenance console in NetApp Console
https://docs.netapp.com/us-en/console-setup-admin/reference-agent-maint-console-config-checker.htmlTroubleshoot the NetApp Console agent
https://docs.netapp.com/us-en/console-setup-admin/task-troubleshoot-agent.html
