

How to Clone an Azure VM and Create a New VM from Its OS Disk
There are situations where you want to create a new Azure virtual machine based on the OS disk of an existing VM without modifying the original system.
In this article, I will show how to clone the OS disk of an existing Azure VM and use the cloned disk as the OS disk for a new virtual machine.
The source VM does not necessarily need to be stopped for this process, although shutting it down before creating the copy provides a clean and consistent disk state. I used this approach while deploying an additional pfSense firewall in Azure, but the same procedure can be used for other Azure virtual machines as well.
Note: While this approach works well for appliances such as pfSense, additional considerations apply when cloning Windows VMs. In particular, Windows systems that are already joined to an on-premises Active Directory domain or Microsoft Entra ID may retain machine-specific identity, domain/device registration, certificates, and other configuration from the source VM.
For Windows VMs intended to serve as reusable images, using a properly generalized image (for example with Sysprep) is usually the preferred approach.
Create a Snapshot of the Source VM OS Disk
In this article, we will use the Azure CLI to perform the cloning process. The commands can be executed from Azure Cloud Shell or from a local system with the Azure CLI installed and authenticated.
For installation, authentication, and general Azure CLI commands, see my cheat sheet below.
Before creating the snapshot, we first need to retrieve the resource ID of the managed OS disk attached to the source VM. We will use this disk as the source for the snapshot and subsequent cloned disk.
az vm show -g <Resource-Group-Name> -n <Source-VM-Name> --query "storageProfile.osDisk.managedDisk.id" -o tsv
az vm show -g VMs -n pfSense-Azure --query "storageProfile.osDisk.managedDisk.id" -o tsv
Stop it and create a snapshot:
az vm deallocate -g <Resource-Group-Name> -n <Source-VM-Name>
az vm deallocate -g VMs -n pfSense-Azure
Then
That’s the standard Azure mechanism for snapshotting a managed OS disk.
Source: https://learn.microsoft.com/en-us/azure/virtual-machines/snapshot-copy-managed-disk
$osDiskId = az vm show -g <Resource-Group-Name> -n <Source-VM-Name> --query "storageProfile.osDisk.managedDisk.id" -o tsv
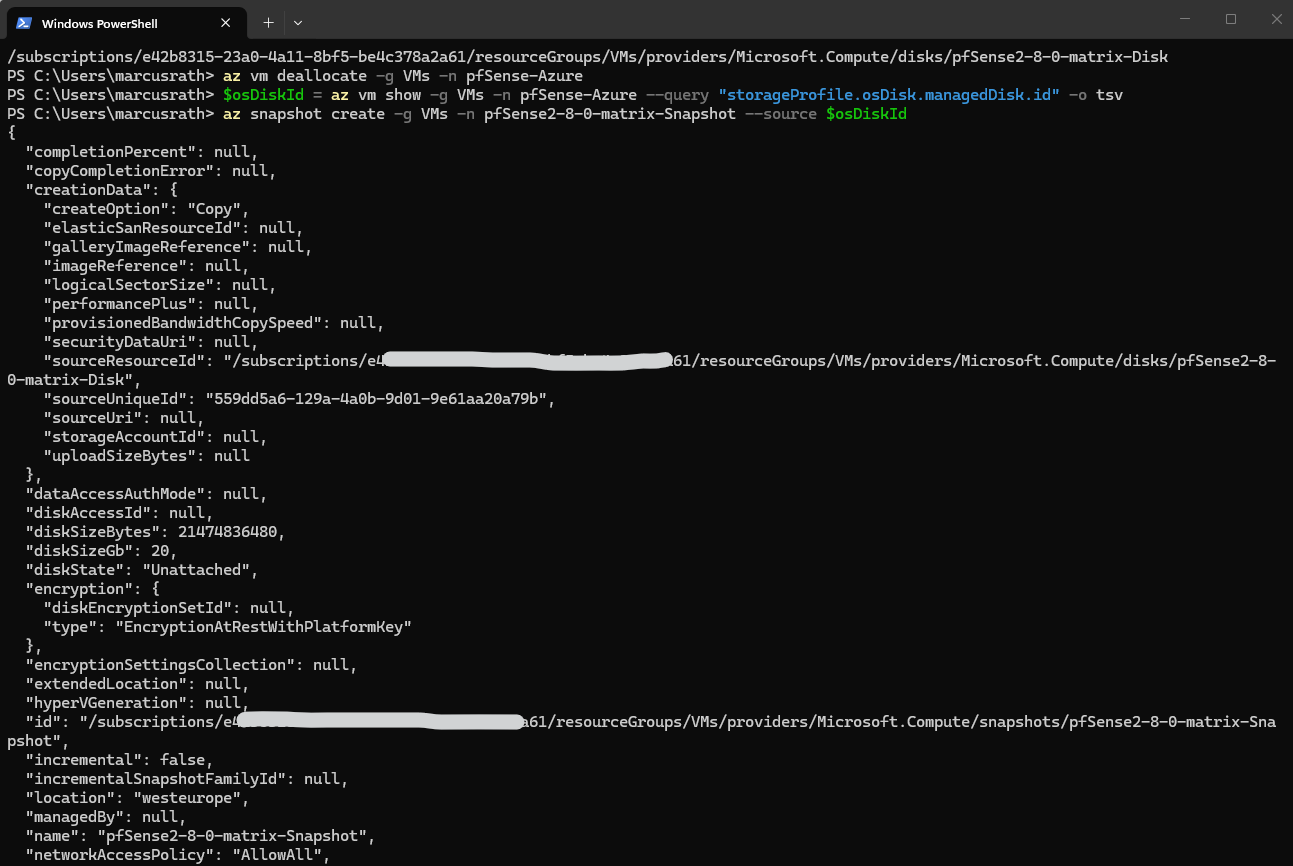
az snapshot create -g <Resource-Group-Name> -n <Snapshot-Name> --source $osDiskId

$osDiskId = az vm show -g VMs -n pfSense-Azure --query "storageProfile.osDisk.managedDisk.id" -o tsv
az snapshot create -g VMs -n pfSense2-8-0-matrix-Snapshot --source $osDiskId

Create an Independent Managed Disk from the Snapshot
The snapshot itself cannot be attached directly as an OS disk to a new VM, so we first create a new independent managed disk from it. This new disk will then be used as the OS disk for the cloned VM.
Create independent managed disk
$snapshotId = az snapshot show -g <Resource-Group-Name> -n <Snapshot-Name> --query id -o tsv
az disk create -g <Resource-Group-Name> -n <New-OS-Disk-Name> --source $snapshotId

$snapshotId = az snapshot show -g VMs -n pfSense2-8-0-matrix-Snapshot --query id -o tsv
az disk create -g Tenant-CustomerA -n pfSense-CustomerA-OSDisk --source $snapshotId

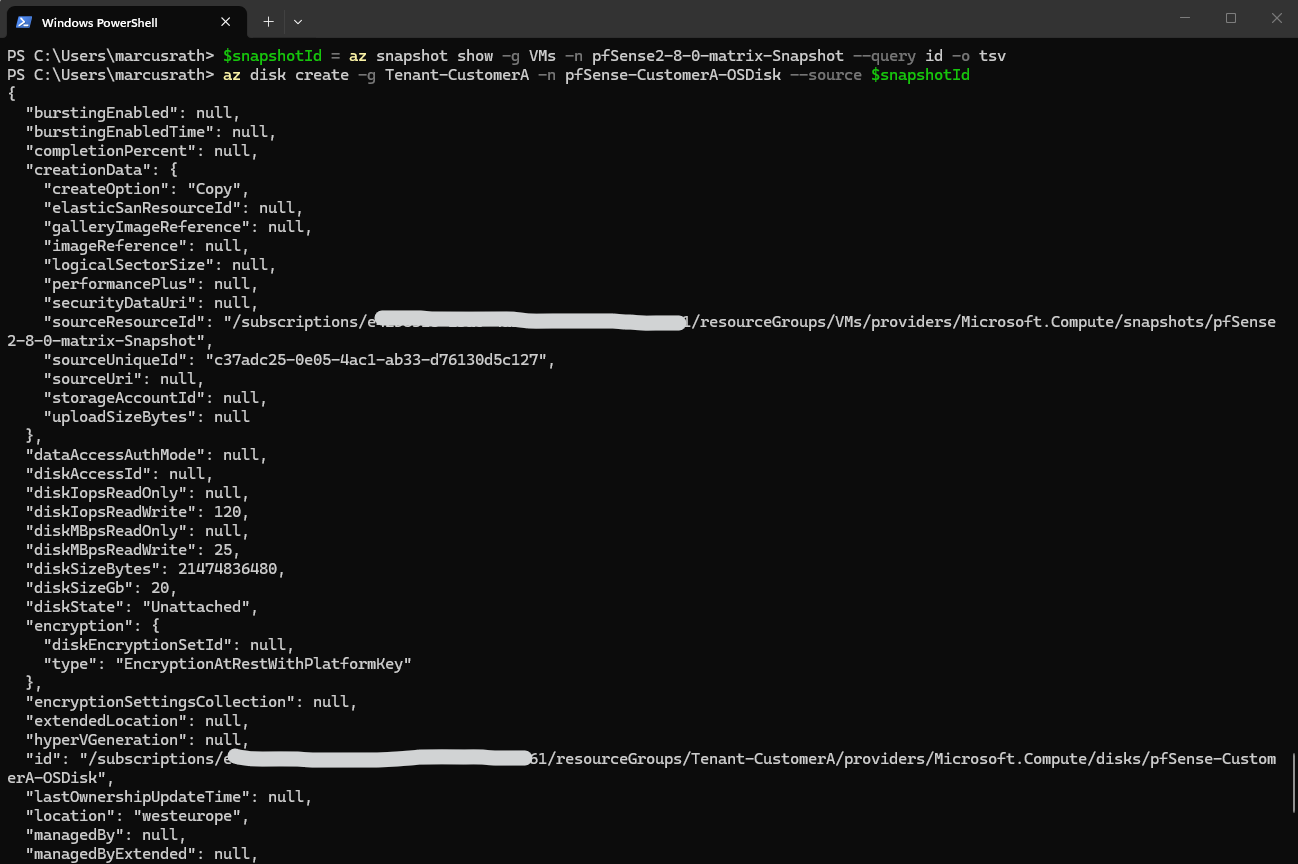
Now we effectively have a clone of our already-customized pfSense installation.
Azure supports precisely this snapshot → managed-disk workflow.
Source: https://learn.microsoft.com/en-us/azure/virtual-machines/scripts/create-managed-disk-from-snapshot
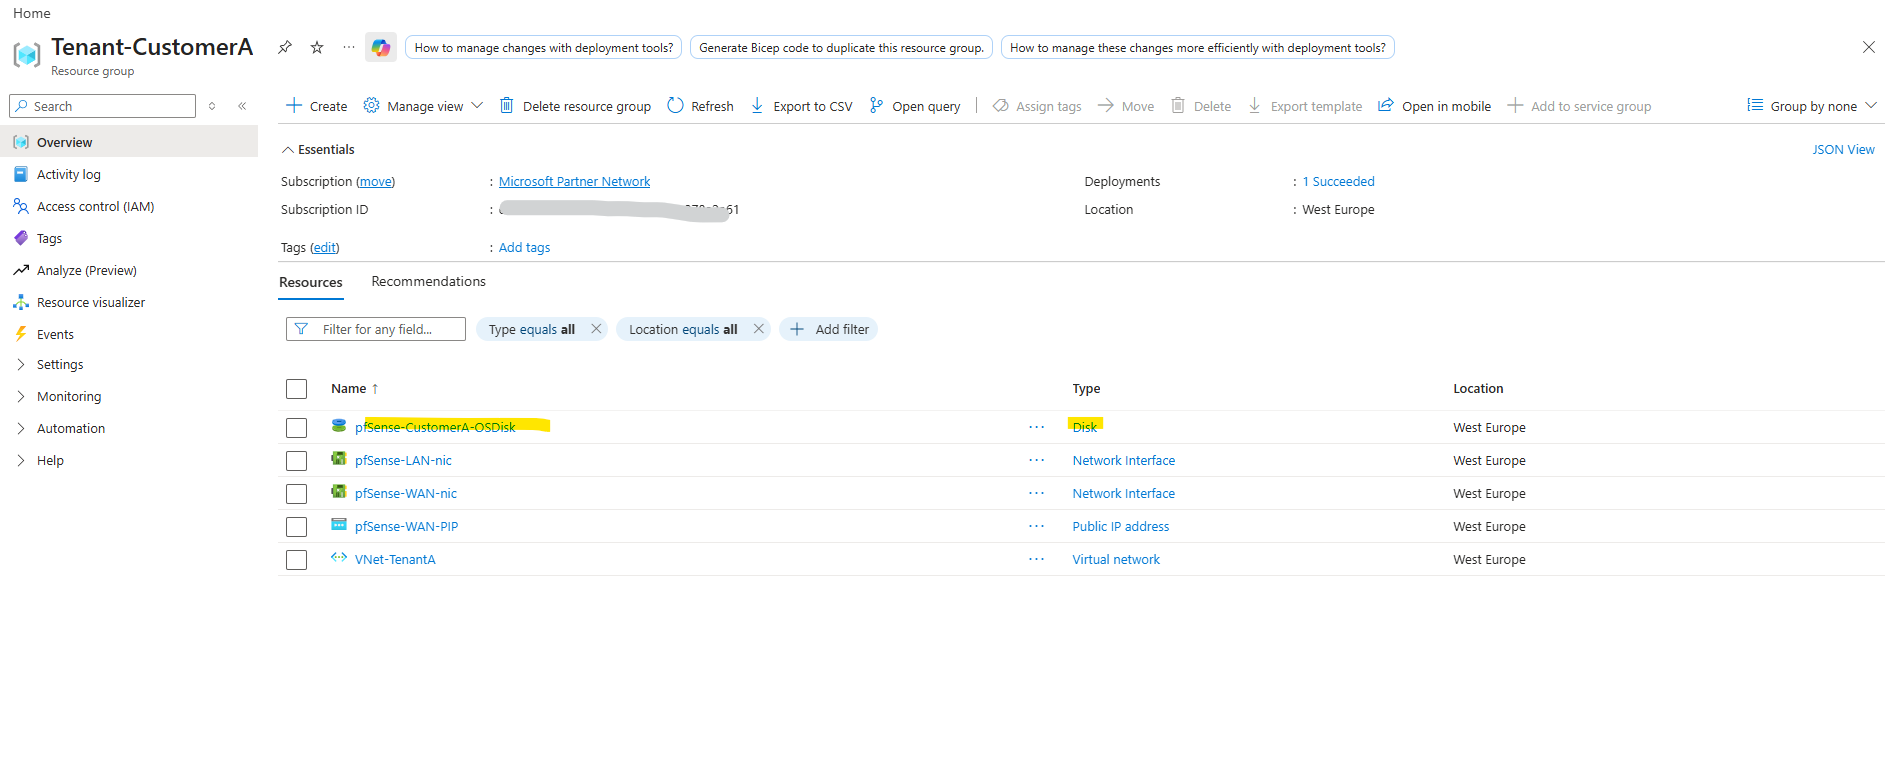
The disk is created in the resource group we set above.
Create the New VM from the Cloned OS Disk
Now that the cloned managed OS disk is available, we can use it to create the new virtual machine.
Before creating the VM, we first create the required network interfaces and then attach them together with the cloned OS disk during VM deployment.
# Create the VM and attach our previously created managed OS disk and NICs
az vm create `
  --resource-group VMs `
  --name pfSense-Azure `
  --location westeurope `
  --attach-os-disk <managed disk name> `
  --os-type Linux `
  --size Standard_B2s `
  --nics <WAN_nic_id> <LAN/Perimeter_nic_id>


# In my case
# Get NIC resource IDs dynamically

$nicWAN = az network nic show `
    --resource-group Tenant-CustomerA `
    --name pfSense-WAN-nic `
    --query id -o tsv

$nicLAN = az network nic show `
    --resource-group Tenant-CustomerA `
    --name pfSense-LAN-nic `
    --query id -o tsv

az vm create `
  --resource-group Tenant-CustomerA `
  --name pfSense-Azure `
  --location westeurope `
  --attach-os-disk pfSense-CustomerA-OSDisk `
  --os-type Linux `
  --size Standard_B2s `
  --nics $nicWAN $nicLAN
Links
Create a snapshot of an Azure managed disk
https://learn.microsoft.com/en-us/azure/virtual-machines/snapshot-copy-managed-diskCreate a managed disk from a snapshot with CLI (Linux)
https://learn.microsoft.com/en-us/azure/virtual-machines/scripts/create-managed-disk-from-snapshot
