Adjust a Date from Past or Future on Windows Server permanently
In case you need to adjust on your Windows Server a date different from the actual date and time, for whatever reason, like testing annual closure or genereal behaviour for some systems after a specific date, you need to configure the following steps in order to prevent automatic date and time synchronisation back to the actual date and time.
No need to say that a wrong date and time will have negative impact for the server to work smoothly and is only for testing purpose!
First we need to change the following registry entry into Nosync.
HKEY_LOCAL_MACHINESYSTEMCurrentControlSetServicesW32TimeParameters
Type = NoSync
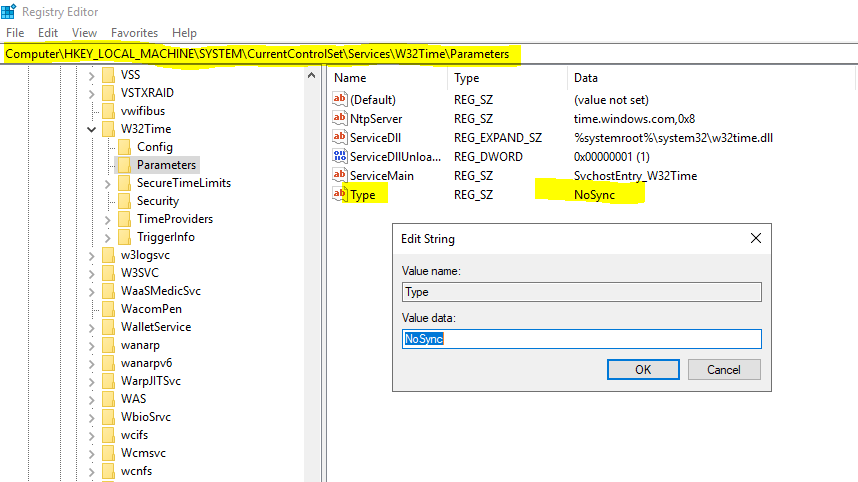
- NoSync = No sync of time.
- NT5DS = get actual time from domain controller.
- NTP = sync time form a internal or external time server.
- AllSync = Sync with domain servers or NTP servers.
Stop and disable the Windows Time Service
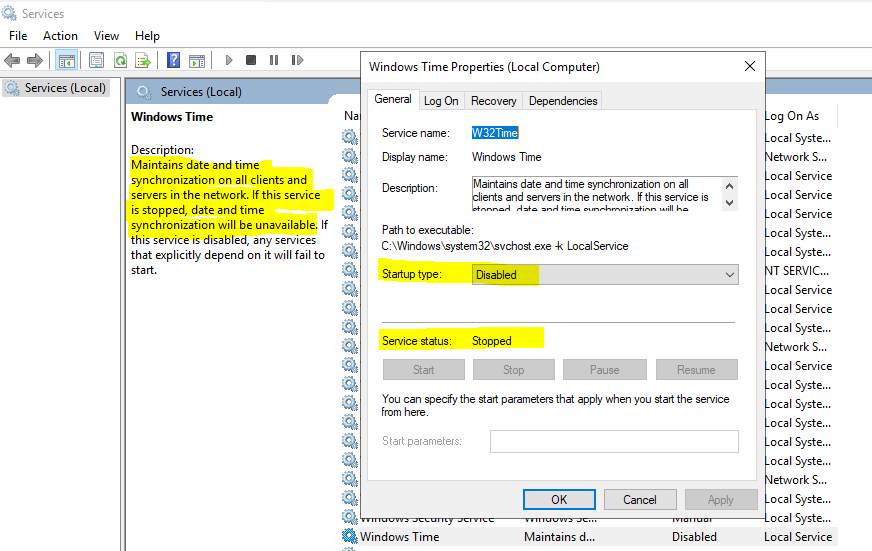
In order that the changes kick in, you have to restart the server.
Now after changing the date to a different from the actual you will encounter the following error for RDP connections.
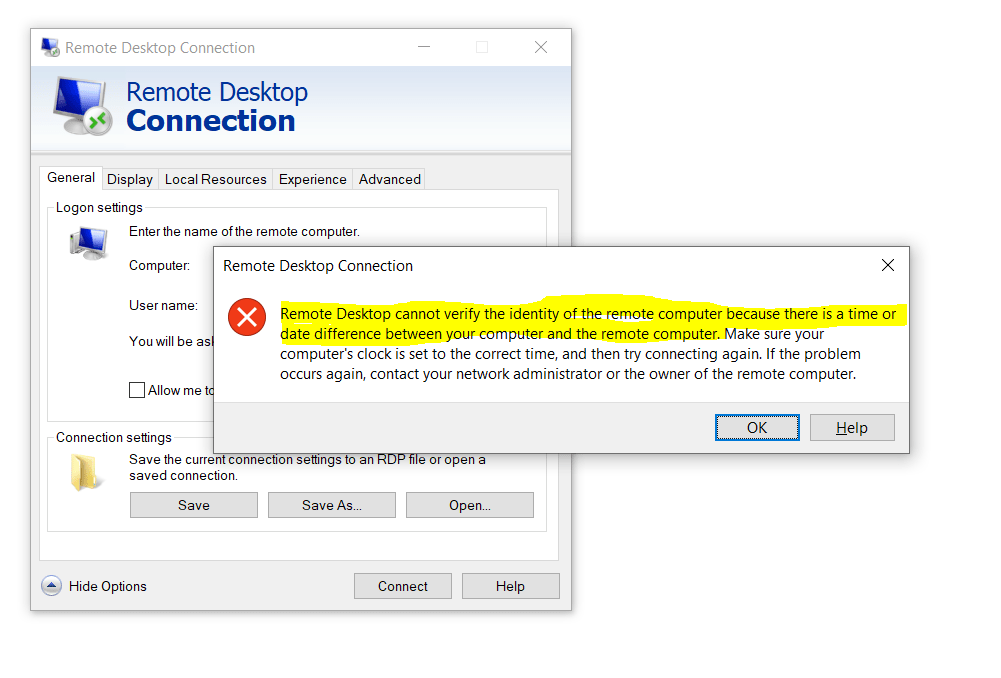
Remote Desktop cannot verify the identity of the remote computer because there is a time or date difference between your computer and the remote computer. Make sure your computer’s clock is set to the correct time, and then try connecting again. If the problem occurs again, contact your network administrator or the owner of the remote computer.
To circumvent the error we finally need to adjust the security layer setting for RDP-TCP into 0 as follows. The setting should kick in without restart.
HKLMSystemCurrentControlSetControlTerminal ServerWinStationsRDP-Tcp
SecurityLayer = 0
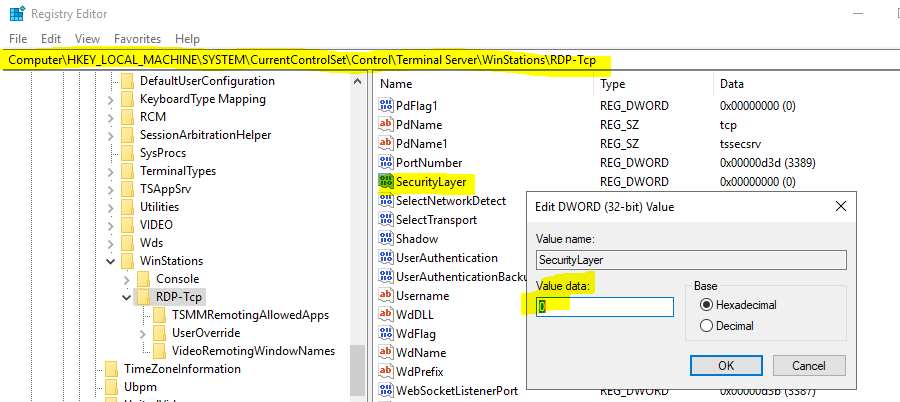
- 0 -> Specifies that the Microsoft Remote Desktop Protocol (RDP) is used by the server and the client for authentication before a remote desktop connection is established. RDP is a Microsoft protocol that supports terminal services across heterogeneous network environments.
- 1 -> Specifies that the server and the client negotiate the method for authentication before a remote desktop connection is established. This is the default value.
- 2 -> Specifies that the Transport Layer Security (TLS) protocol is used by the server and the client for authentication before a remote desktop connection is established.
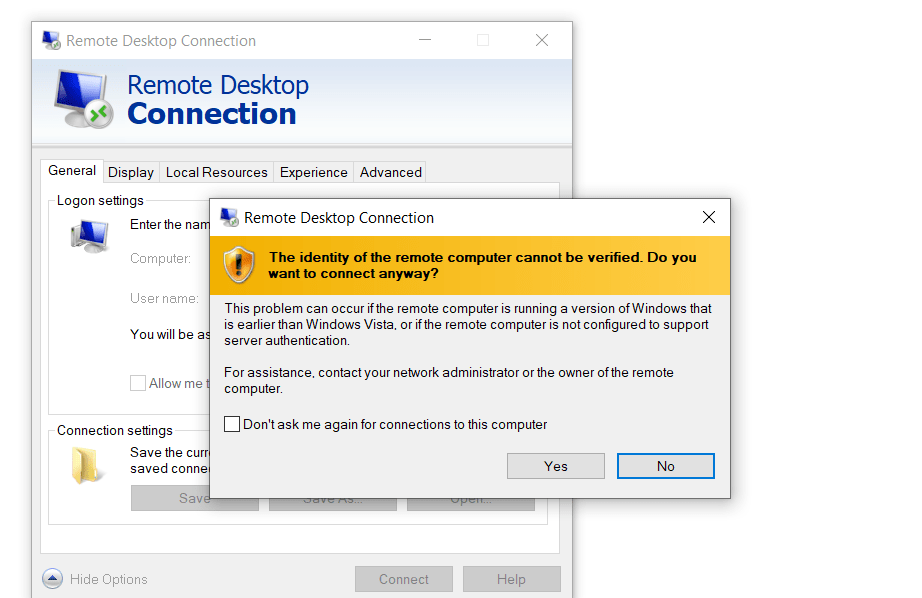
From now on you should be able to connect through RDP even though you will get warned that the identity of the remote computer cannot be verified as follows.
As we set the security layer to 0, you will also see that the connection is established to the remote computer but not passing the credentials through the RDP tool and instead you will see the logon screen from the remote computer.
SecurityLayer=0 -> Specifies that the Microsoft Remote Desktop Protocol (RDP) is used by the server and the client for authentication before a remote desktop connection is established. RDP is a Microsoft protocol that supports terminal services across heterogeneous network environments.
Links
SecurityLayer
https://docs.microsoft.com/en-us/windows-hardware/customize/desktop/unattend/microsoft-windows-terminalservices-rdp-winstationextensions-securitylayer
Remote Desktop – Allow access to your PC
https://docs.microsoft.com/en-us/windows-server/remote/remote-desktop-services/clients/remote-desktop-allow-access