Deploying and Operating Azure Kubernetes Service (AKS) – A Practical Guide – Part 3 – Deploying our First AKS Cluster
After covering the fundamentals and architecture in the previous parts, it’s now time to get hands-on and deploy our first Azure Kubernetes Service (AKS) cluster.
In this part, we will walk through the deployment of an AKS cluster using both the Azure Portal and the Azure CLI. The focus is on a practical, reproducible setup that can be used as a foundation for further exploration in the next parts of this series.
By the end of this section, we will have a fully functional AKS cluster, be connected to it using kubectl, and be ready to deploy your first workloads.
In Part 4 we will deploy our first application, manage it using deployments, and expose it externally using Kubernetes services.
Prerequisites
Before deploying an AKS cluster, a few basic requirements need to be in place.
You need:
- an active Azure subscription
- the Azure CLI installed and authenticated (
az login) - kubectl installed for interacting with the cluster
We can verify your Azure CLI installation with:
PS> az login
PS> az version
If kubectl is not yet installed, it can be installed via the Azure CLI:
PS> az login
PS> az aks install-cli
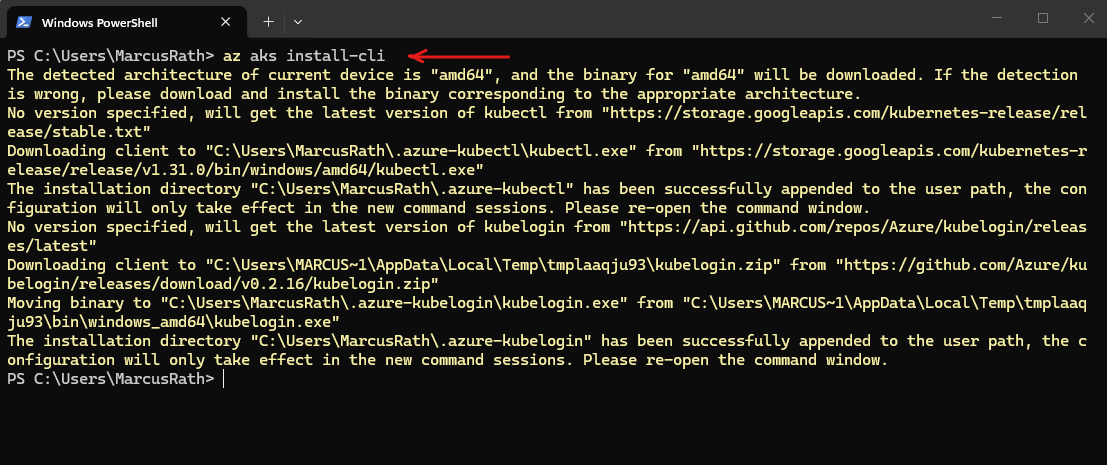
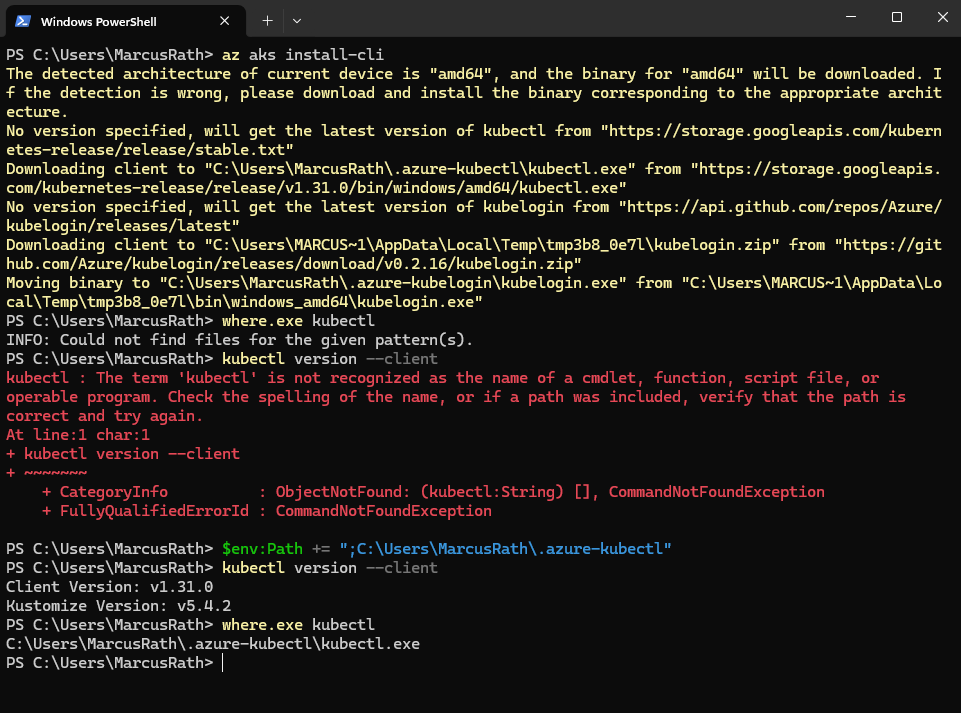
After installing kubectl using az aks install-cli, the binary was downloaded to a local directory but was not automatically added to the system PATH.
After manually updating the
PATHenvironment variable, thekubectlcommand was recognized and worked as expected.
PS> where.exe kubectl
PS> kubectl version --client

# updating the PATH environment variable
PS> $env:Path += ";C:\Users\MarcusRath\.azure-kubectl"
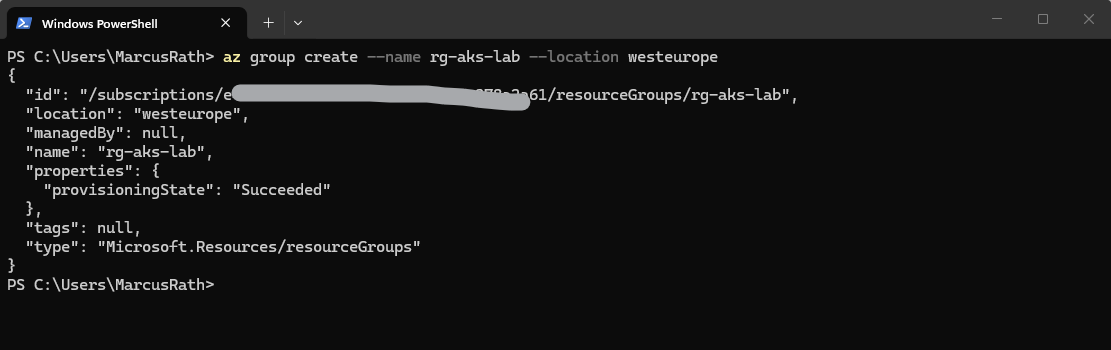
Create Resource Group
First, we create a dedicated resource group for our AKS cluster. The resource group acts as a logical container for all resources related to the AKS deployment.
PS> az group create --name rg-aks-lab --location westeurope
Create AKS Cluster (CLI)
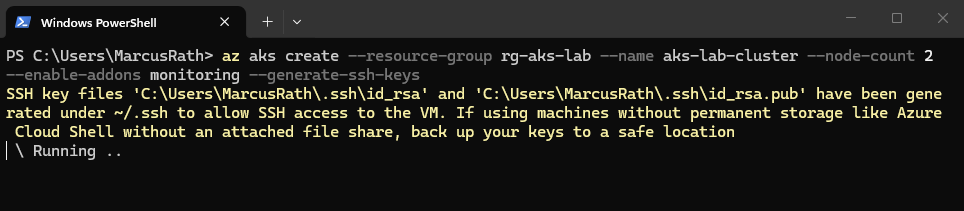
Now we deploy our first AKS cluster.
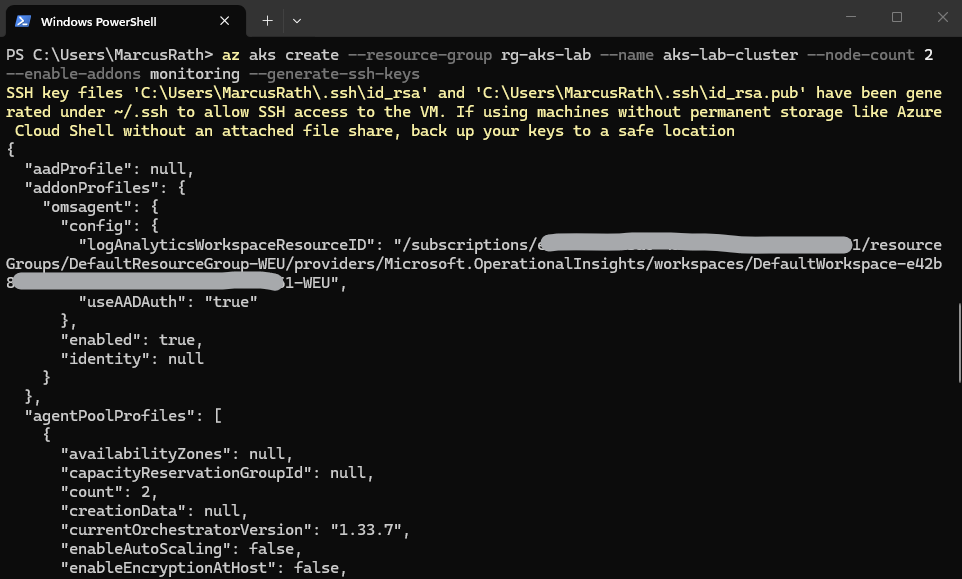
This command provisions a managed Azure Kubernetes Service (AKS) cluster with two worker nodes inside a specific resource group. It automatically integrates Azure Monitor for performance tracking and generates SSH keys to ensure secure remote access to the underlying virtual machines.
The deployment may take several minutes to complete.
If you do not explicitly define a node VM size, AKS uses a default size (currently
Standard_DS2_v2). However, it is recommended to always specify the node size explicitly to ensure consistent and predictable deployments.
# uses default settings
PS> az aks create --resource-group rg-aks-lab --name aks-lab-cluster --node-count 2 --enable-addons monitoring --generate-ssh-keys

# define node size
# --node-vm-size Standard_DS2_v2
PS>az aks create --resource-group rg-aks-lab --name aks-lab-cluster --node-count 2 --node-vm-size Standard_DS2_v2 --enable-addons monitoring --generate-ssh-keys
When deploying AKS with default settings like we did above, Azure automatically create a virtual network with multiple subnets to support additional features.
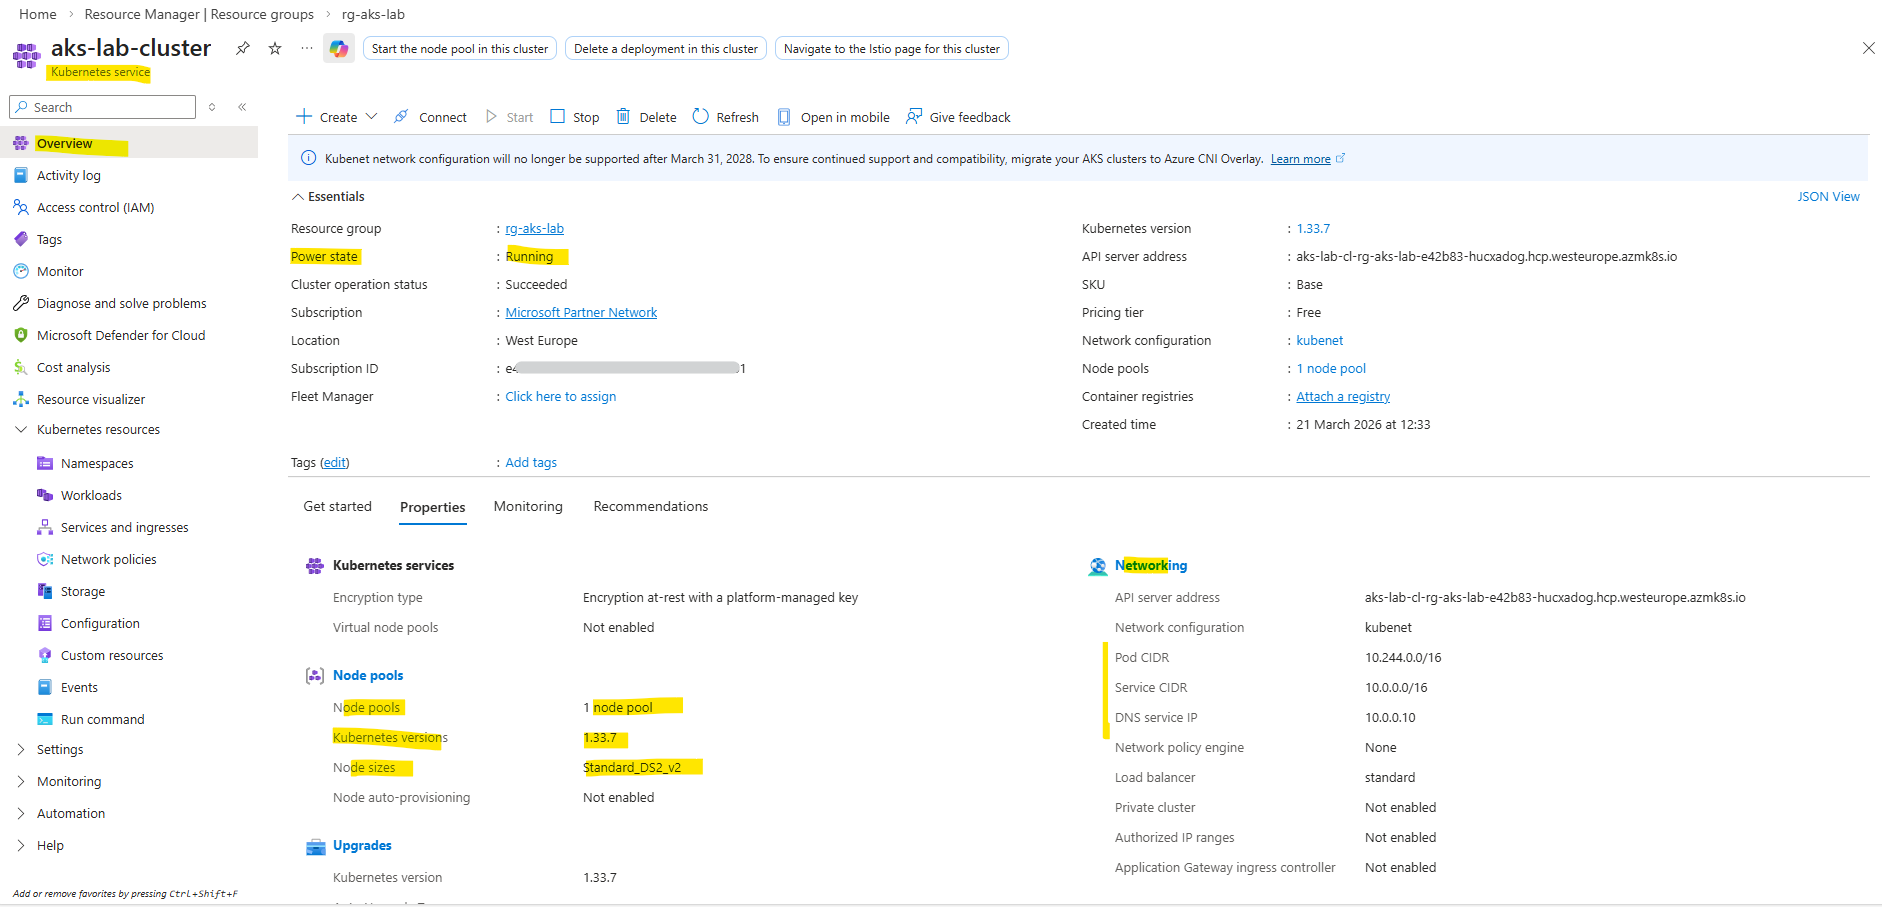
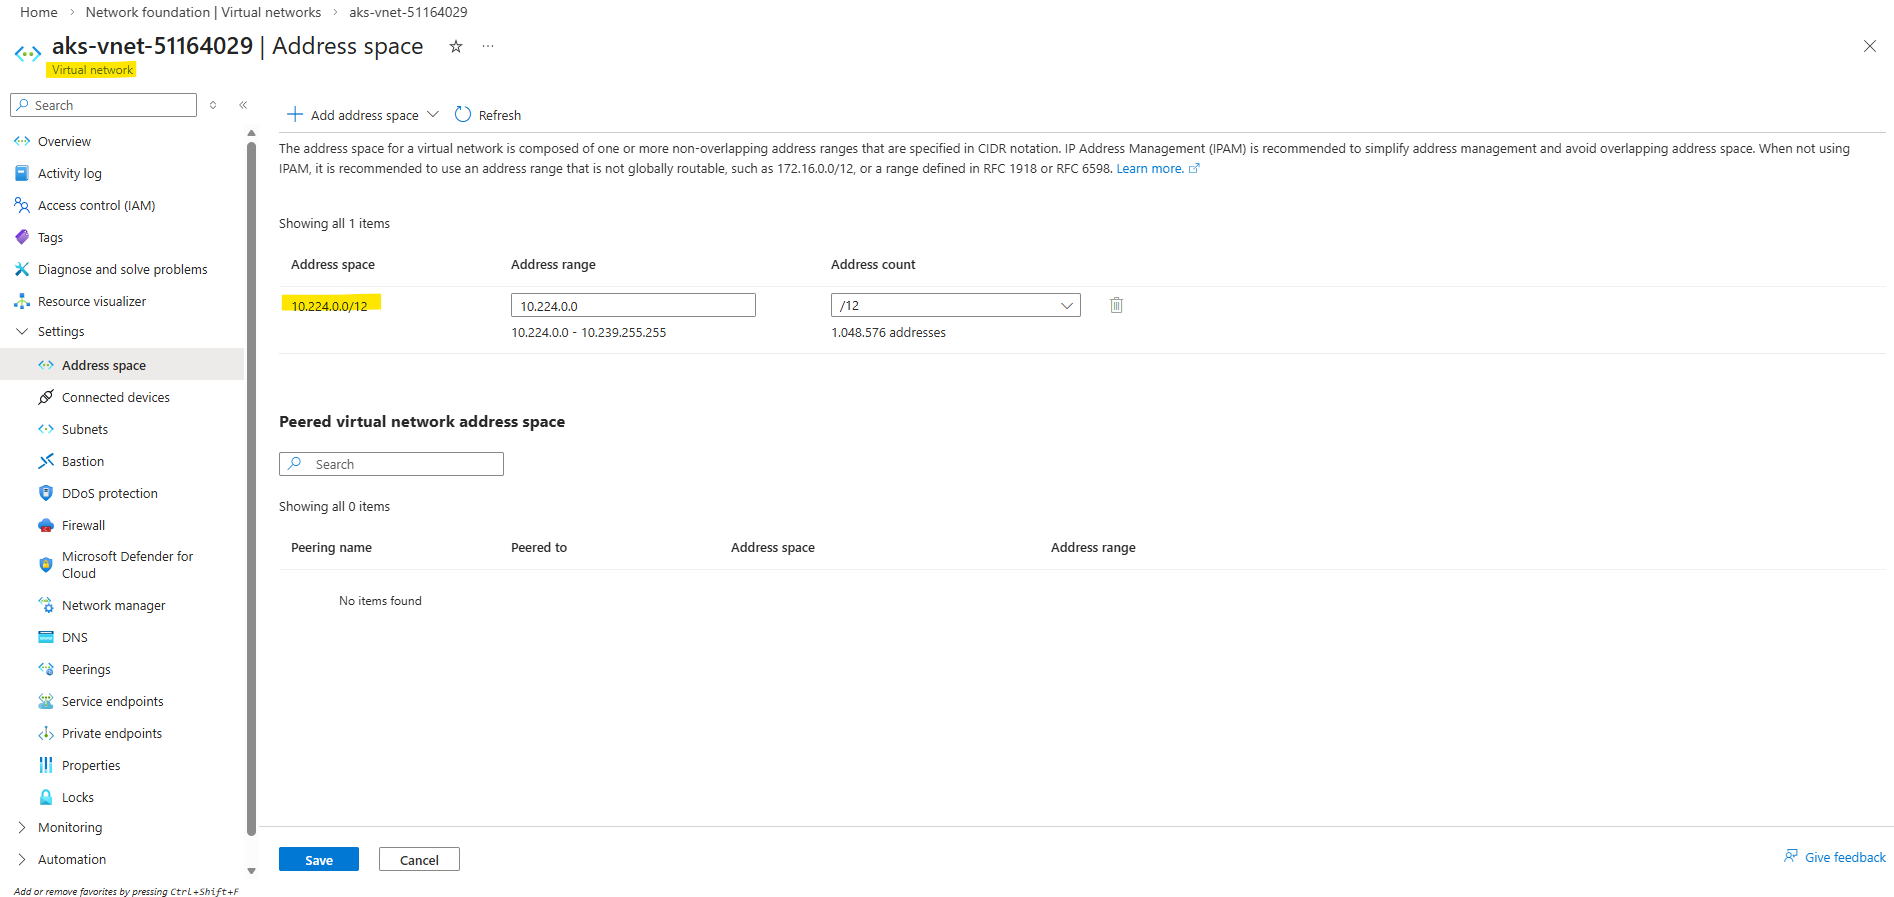
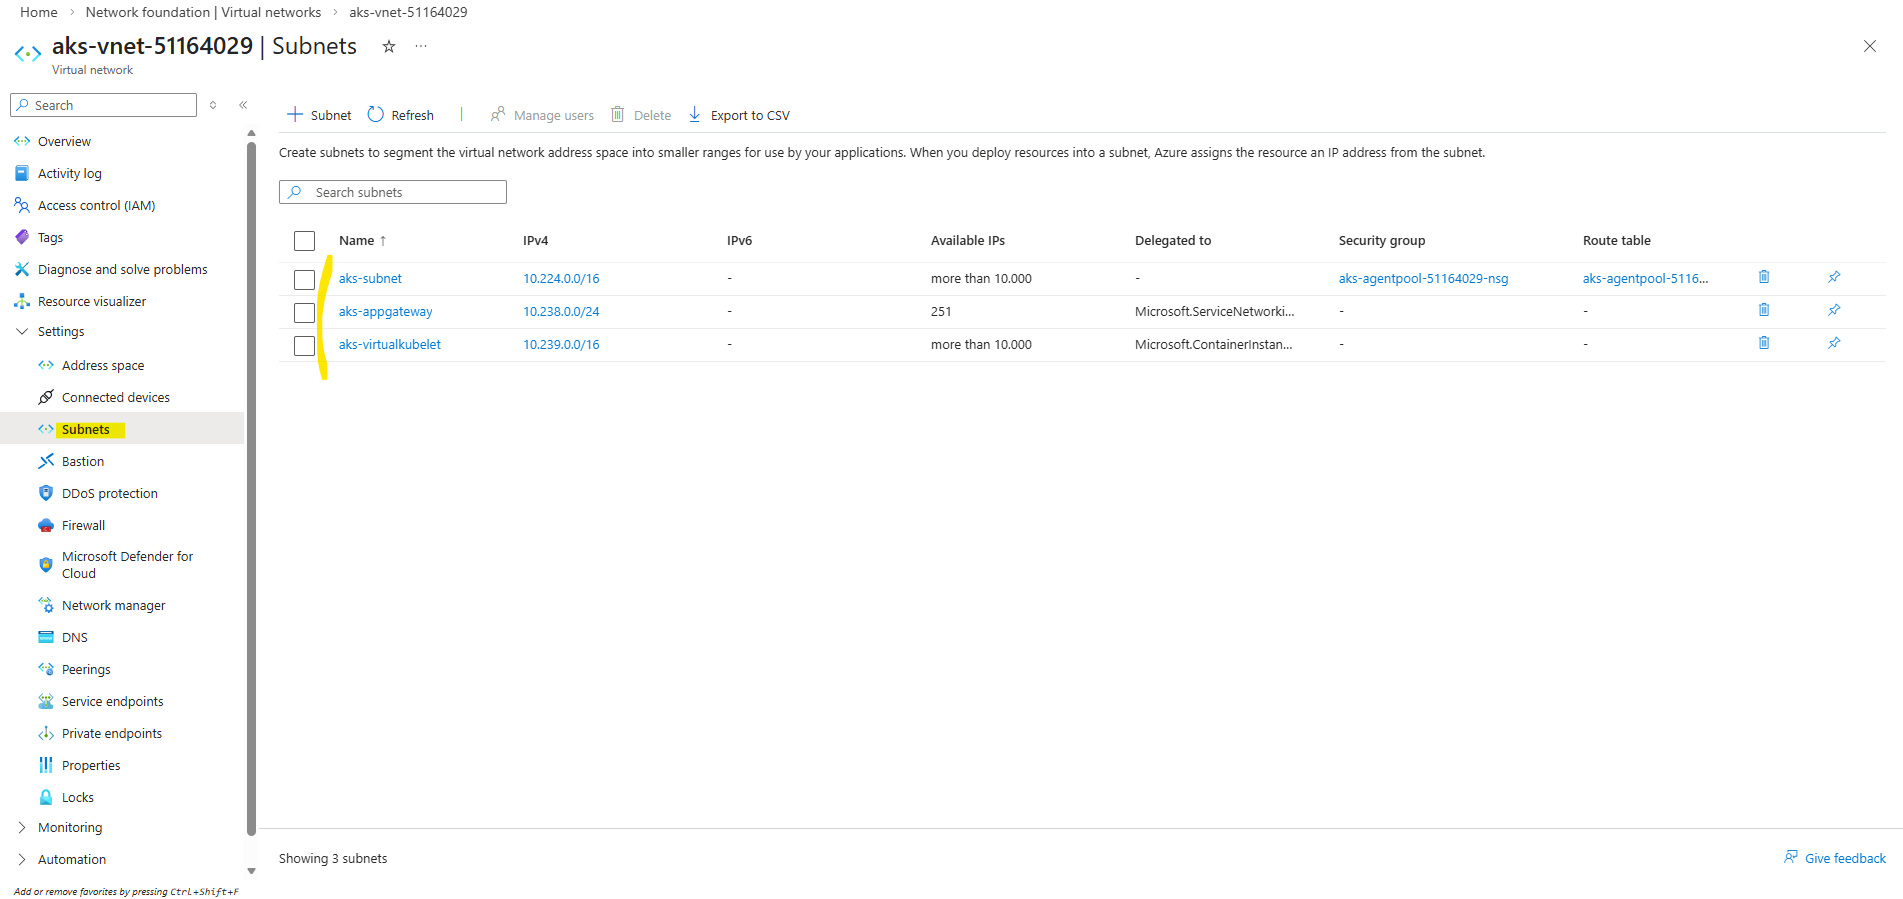
Here we can see the automatically created dedicated virtual network for our kubernetes service.
The aks-subnet is used for the AKS nodes and pods, the aks-appgateway subnet is reserved for integration with Azure Application Gateway (for ingress scenarios), and the aks-virtualkubelet subnet is used for Azure Container Instances via Virtual Nodes.
These additional subnets are provisioned to enable optional AKS capabilities out of the box, even if they are not actively used.
Further below, we will also deploy the AKS cluster using an existing virtual network and subnet instead of relying on the default AKS-managed networking.
AKS clusters use kubenet and create an Azure virtual network and subnet for you by default. With kubenet, nodes get an IP address from the Azure virtual network subnet. Pods receive an IP address from a logically different address space to the Azure virtual network subnet of the nodes. Network address translation (NAT) is then configured so the pods can reach resources on the Azure virtual network. The source IP address of the traffic is NAT’d to the node’s primary IP address. This approach greatly reduces the number of IP addresses you need to reserve in your network space for pods to use.
Source: https://learn.microsoft.com/en-us/azure/aks/configure-kubenet
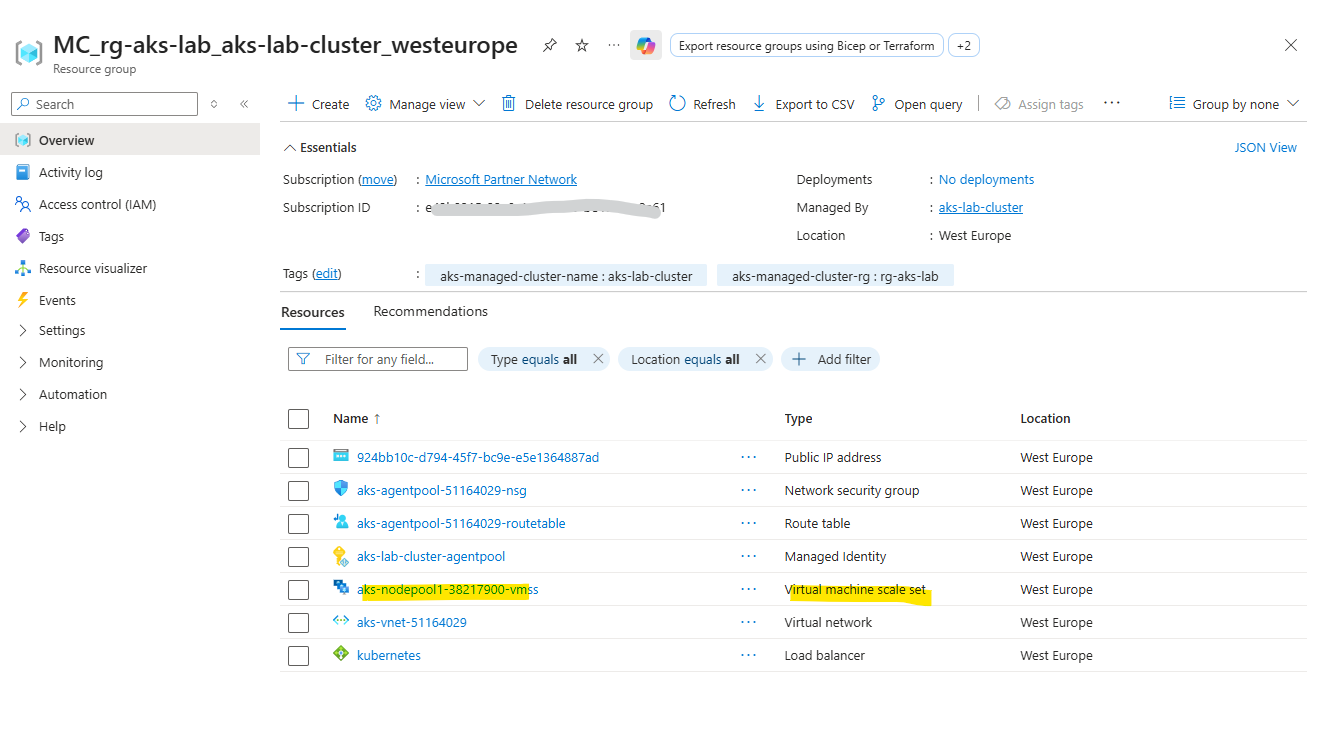
The worker nodes (VMs) are not located in our AKS resource group (rg-aks-lab). Instead, AKS automatically creates a separate resource group called:
👉 MC_<yourResourceGroup><clusterName><region>
In addition to the virtual machine scale set hosting the worker nodes, the automatically created MC_ resource group also contains the virtual network and related networking components used by the AKS cluster. These resources are fully managed by AKS and should not be modified manually.

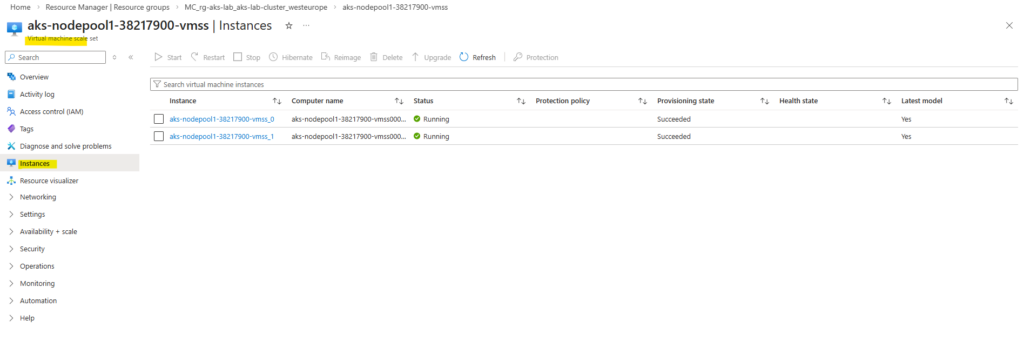
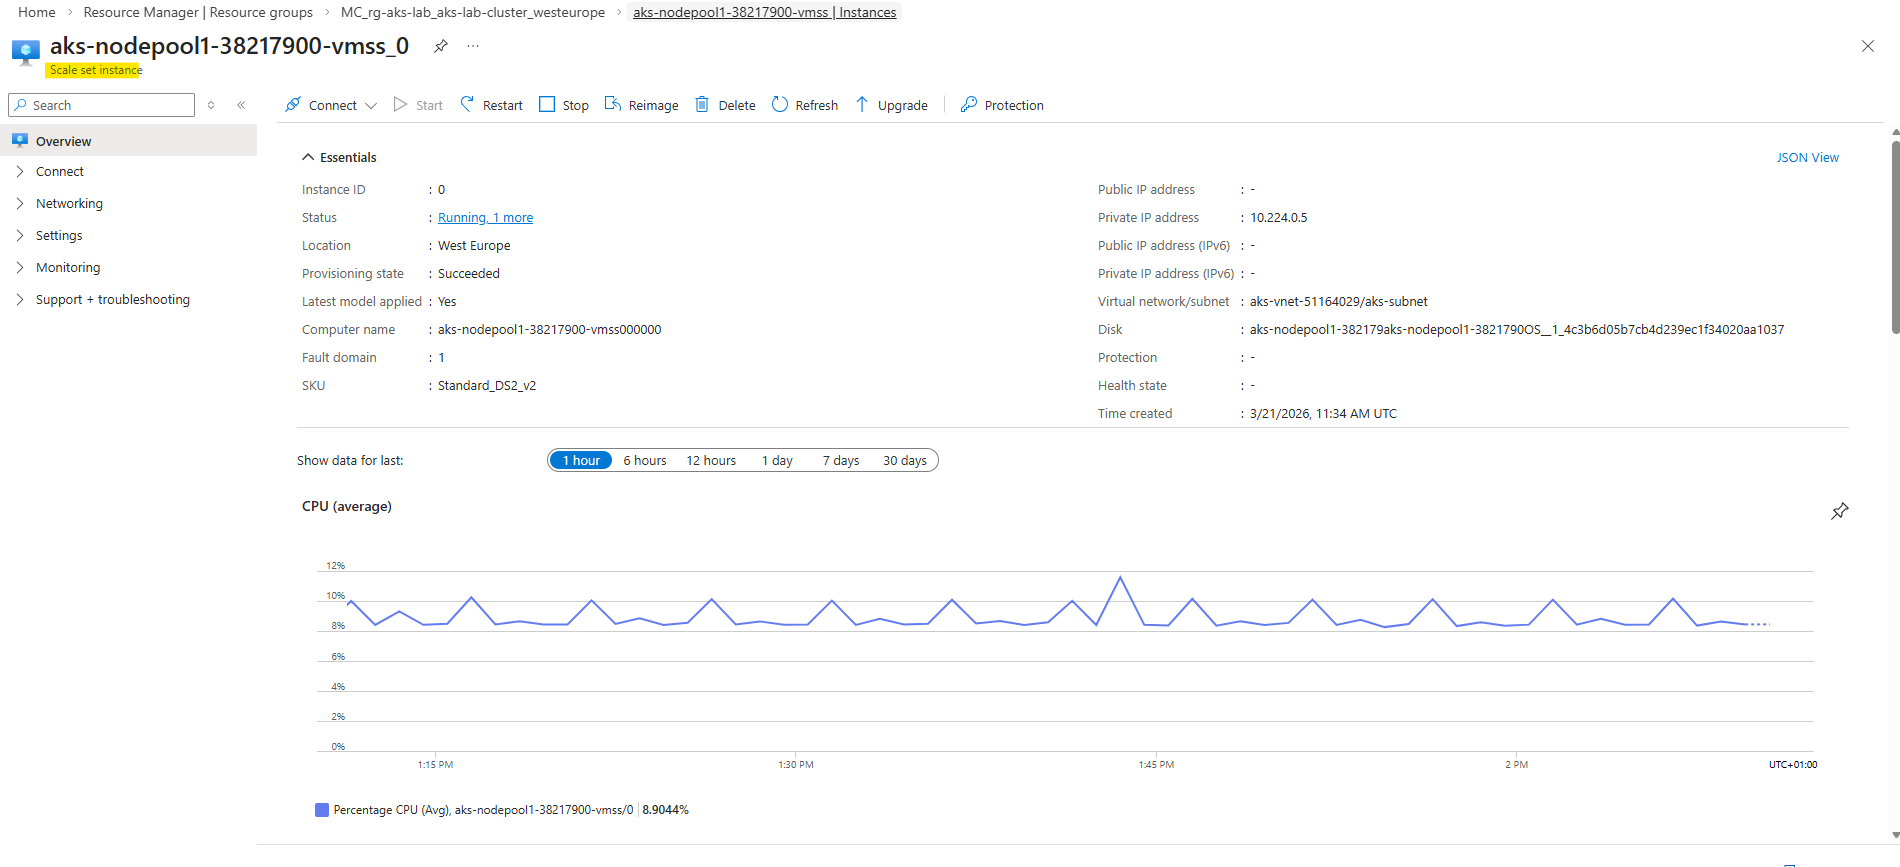
When opening the Virtual Machine Scale Set in the Azure Portal, the individual instances representing the worker nodes can be viewed. These instances correspond to the virtual machines that make up the AKS node pool.
AKS Free vs Standard Tier – Same Features, Different Guarantees
At first glance, the Free and Standard AKS tiers look identical, and technically they are. The only real difference is the SLA of the control plane, which determines whether your cluster is backed by an availability guarantee.
The Free tier provides the full AKS functionality without additional cost, but does not include a financially backed SLA for the Kubernetes control plane, making it suitable for lab and development environments.
The Standard tier includes the same features but adds a 99.95% SLA for the control plane, making it the preferred choice for production workloads that require guaranteed availability.
The AKS tier can be defined using the --tier parameter during cluster creation. If not explicitly specified, AKS defaults to the Free tier, while the Standard tier must be enabled manually to include an SLA for the control plane by running:
# uses default settings
PS> az aks create --resource-group rg-aks-lab --name aks-lab-cluster --node-count 2 --enable-addons monitoring --generate-ssh-keys

# define node size and AKS tier
# --node-vm-size Standard_DS2_v2
PS>az aks create --resource-group rg-aks-lab --name aks-lab-cluster --tier standard --node-count 2 --node-vm-size Standard_DS2_v2 --enable-addons monitoring --generate-ssh-keys
Connect to the Cluster
Once the cluster is deployed, we retrieve the credentials to interact with it:
This command updates your local kubeconfig file, allowing
kubectlto communicate with the cluster.
PS> az aks get-credentials --resource-group rg-aks-lab --name aks-lab-cluster

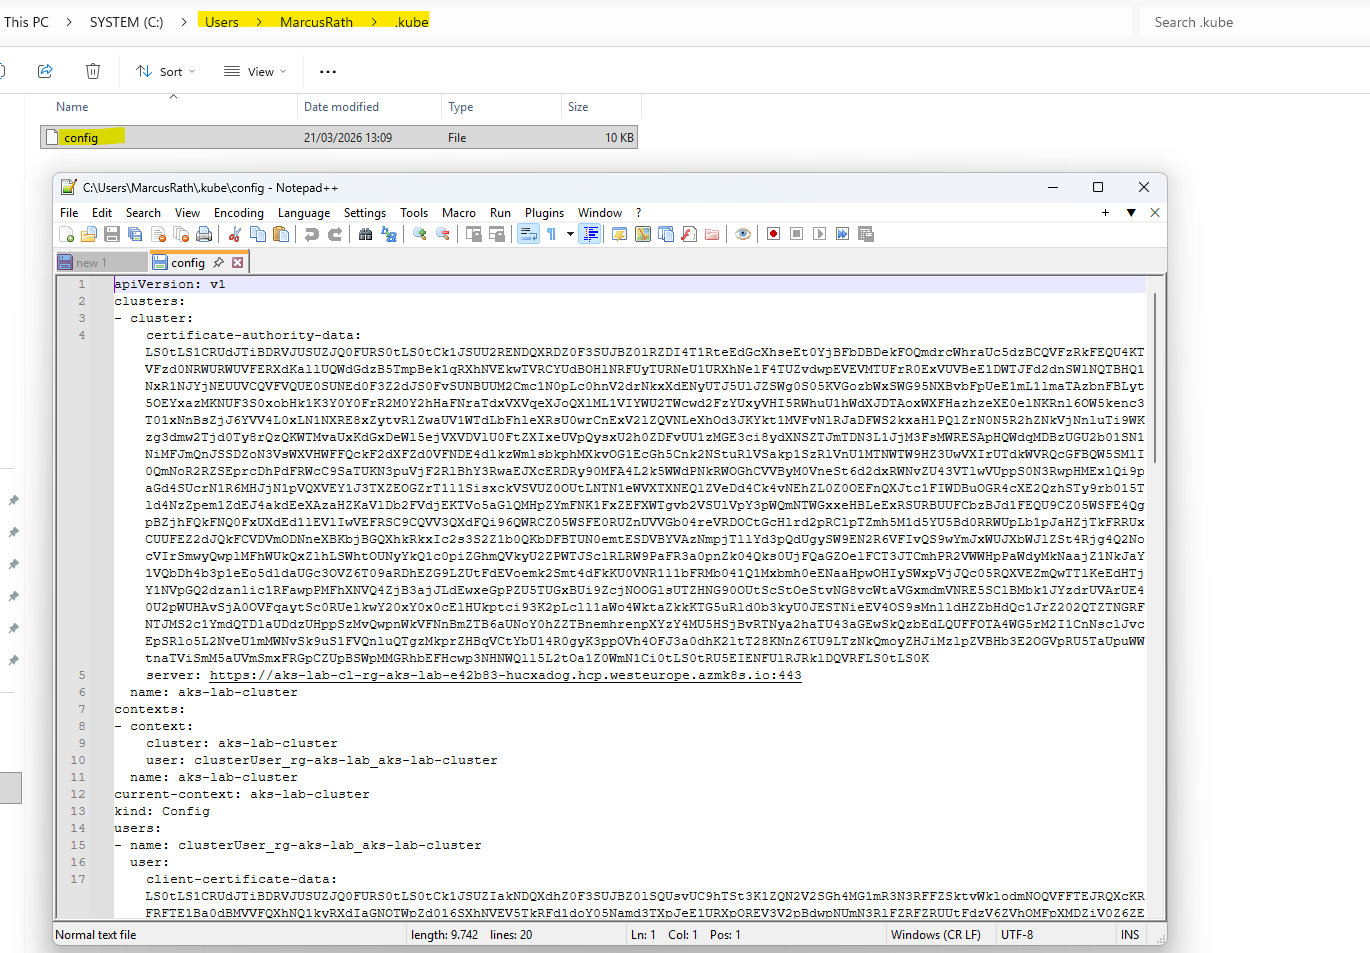
The kubeconfig file contains the connection details and credentials required for
kubectlto communicate with the AKS cluster. It defines the cluster endpoint, authentication method, and context used for managing the cluster.
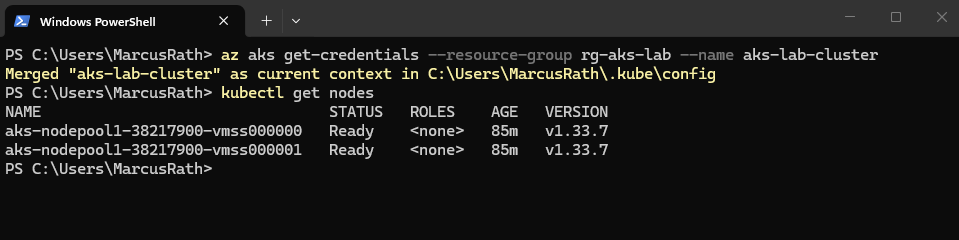
To verify that the cluster is up and running, we can check the available nodes:
We should see your worker nodes in a Ready state.
PS> kubectl get nodes
To list the node pools of our AKS cluster, we can use:
This provides an overview of all node pools, including their size, node count, and configuration.
PS> az aks nodepool list --resource-group rg-aks-lab --cluster-name aks-lab-cluster -o table

Using the command below, we can display detailed information about the cluster nodes, including their internal IP addresses and underlying infrastructure.
This also helps to correlate the Kubernetes nodes with the corresponding node pools and virtual machines in Azure.
The output also shows that AKS uses containerd as the container runtime on the worker nodes. Both AWS (EKS) and Google Cloud (GKE) also use containerd as the container runtime, following the deprecation of Docker (Dockershim) in Kubernetes.
PS> kubectl get nodes -o wide

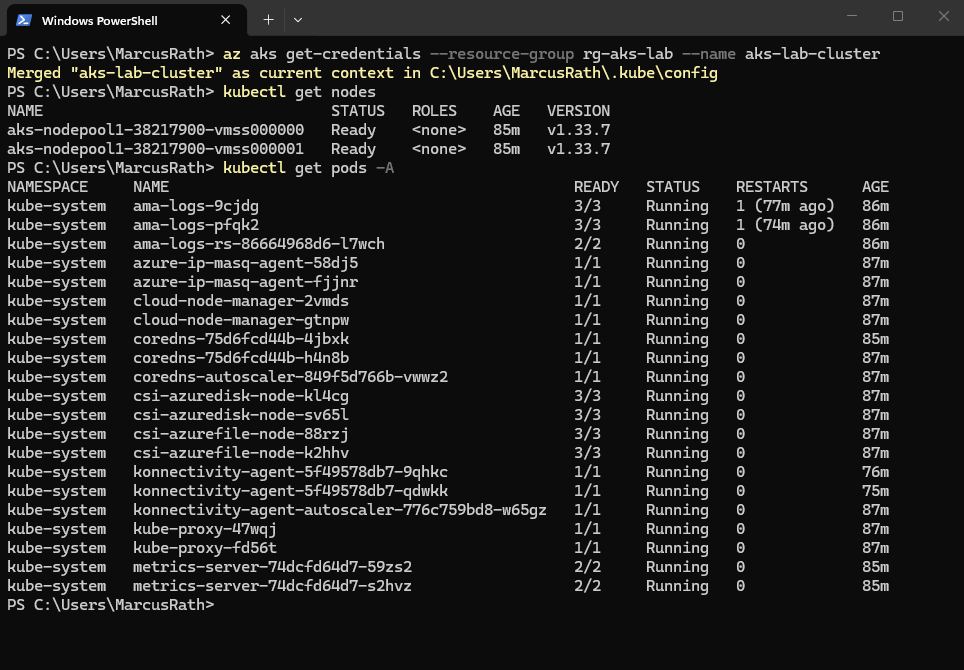
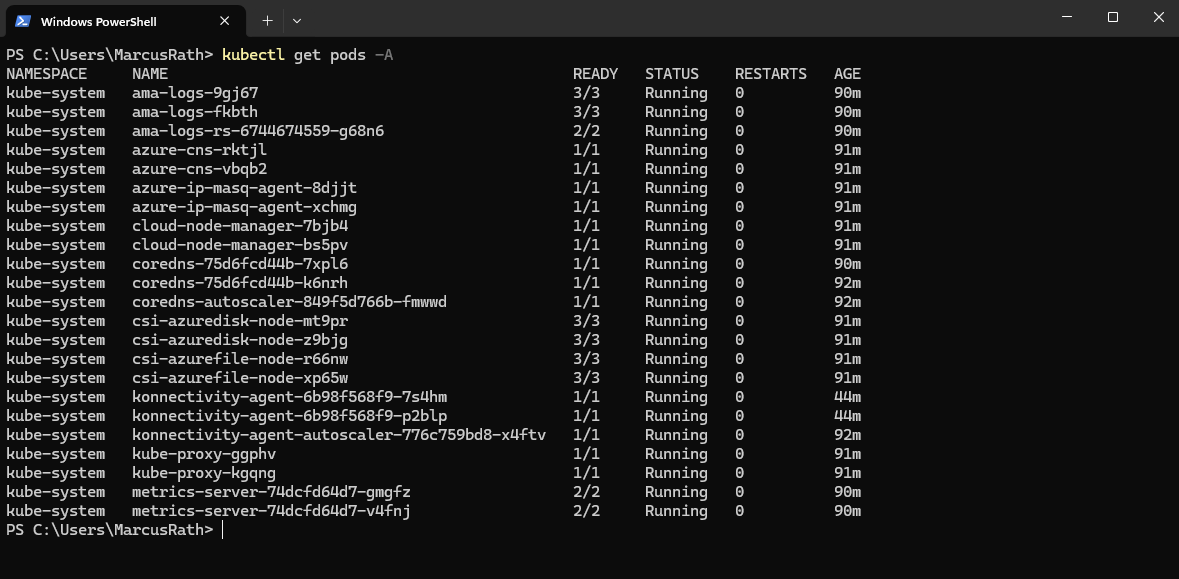
We can also check the system pods:
This shows all running pods across all namespaces, including Kubernetes system components.
The output shows various Kubernetes and Azure-related services, such as CoreDNS, kube-proxy, and storage drivers, all in a healthy Running state.
The storage drivers can be identified by the CSI (Container Storage Interface) components such as
csi-azuredisk-nodeandcsi-azurefile-node, which handle integration with Azure Disks and Azure Files. These drivers are responsible for dynamically provisioning and attaching persistent storage to workloads running in the cluster.
PS> kubectl get pods -A
At this point, the cluster is fully operational and ready to host workloads.
Deploying AKS into an Existing Virtual Network and Subnet
By default, AKS can automatically create and manage its own virtual network and subnets. While this is convenient for quick deployments, it is usually not suitable for real-world environments where integration with existing networking, security, and routing is required.
In this section, we deploy an AKS cluster into an existing Azure Virtual Network and subnet, giving us full control over IP addressing and allowing seamless integration with the surrounding infrastructure.
Creating the custom Virtual Network and Subnet
For this lab environment, I will create a dedicated Azure Virtual Network (VNet) for the AKS cluster to keep the setup simple and isolated.
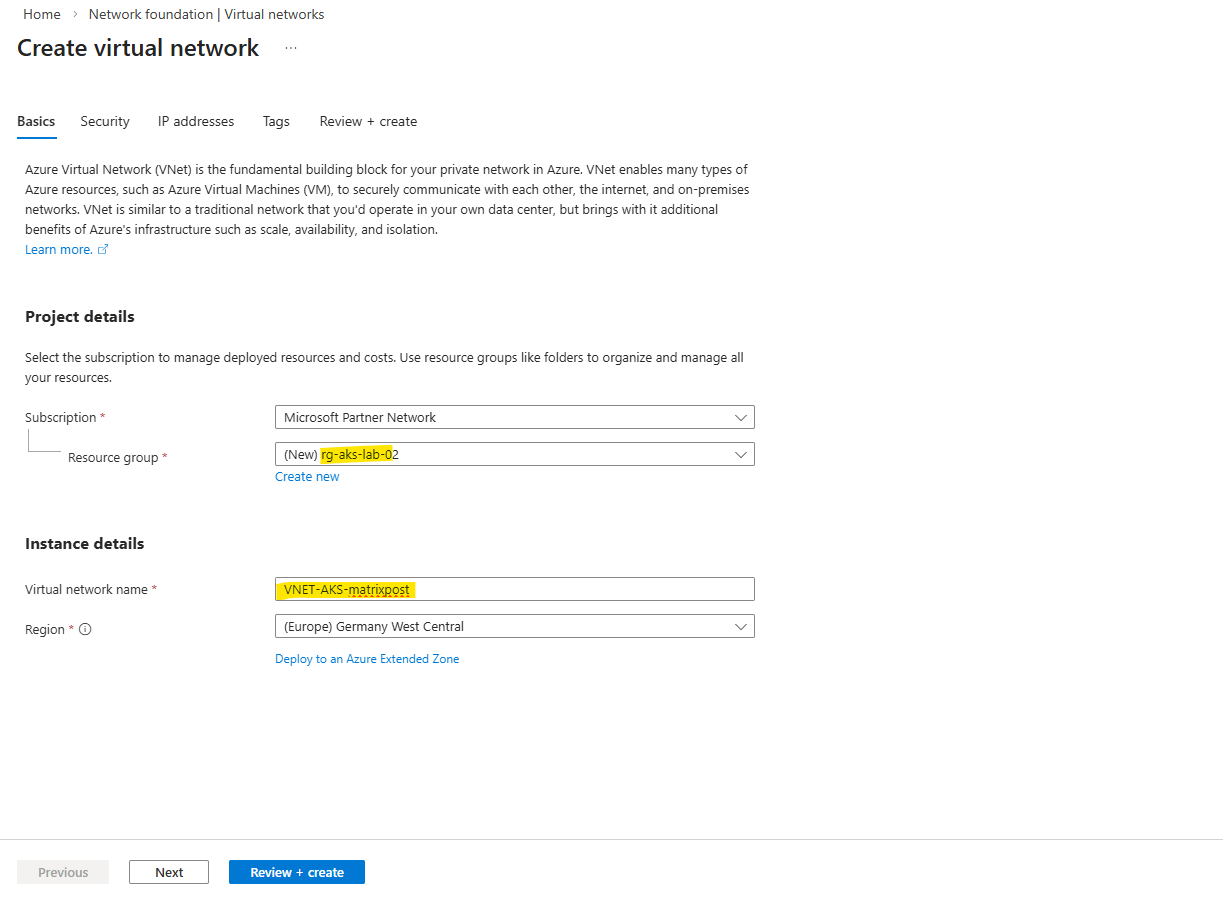
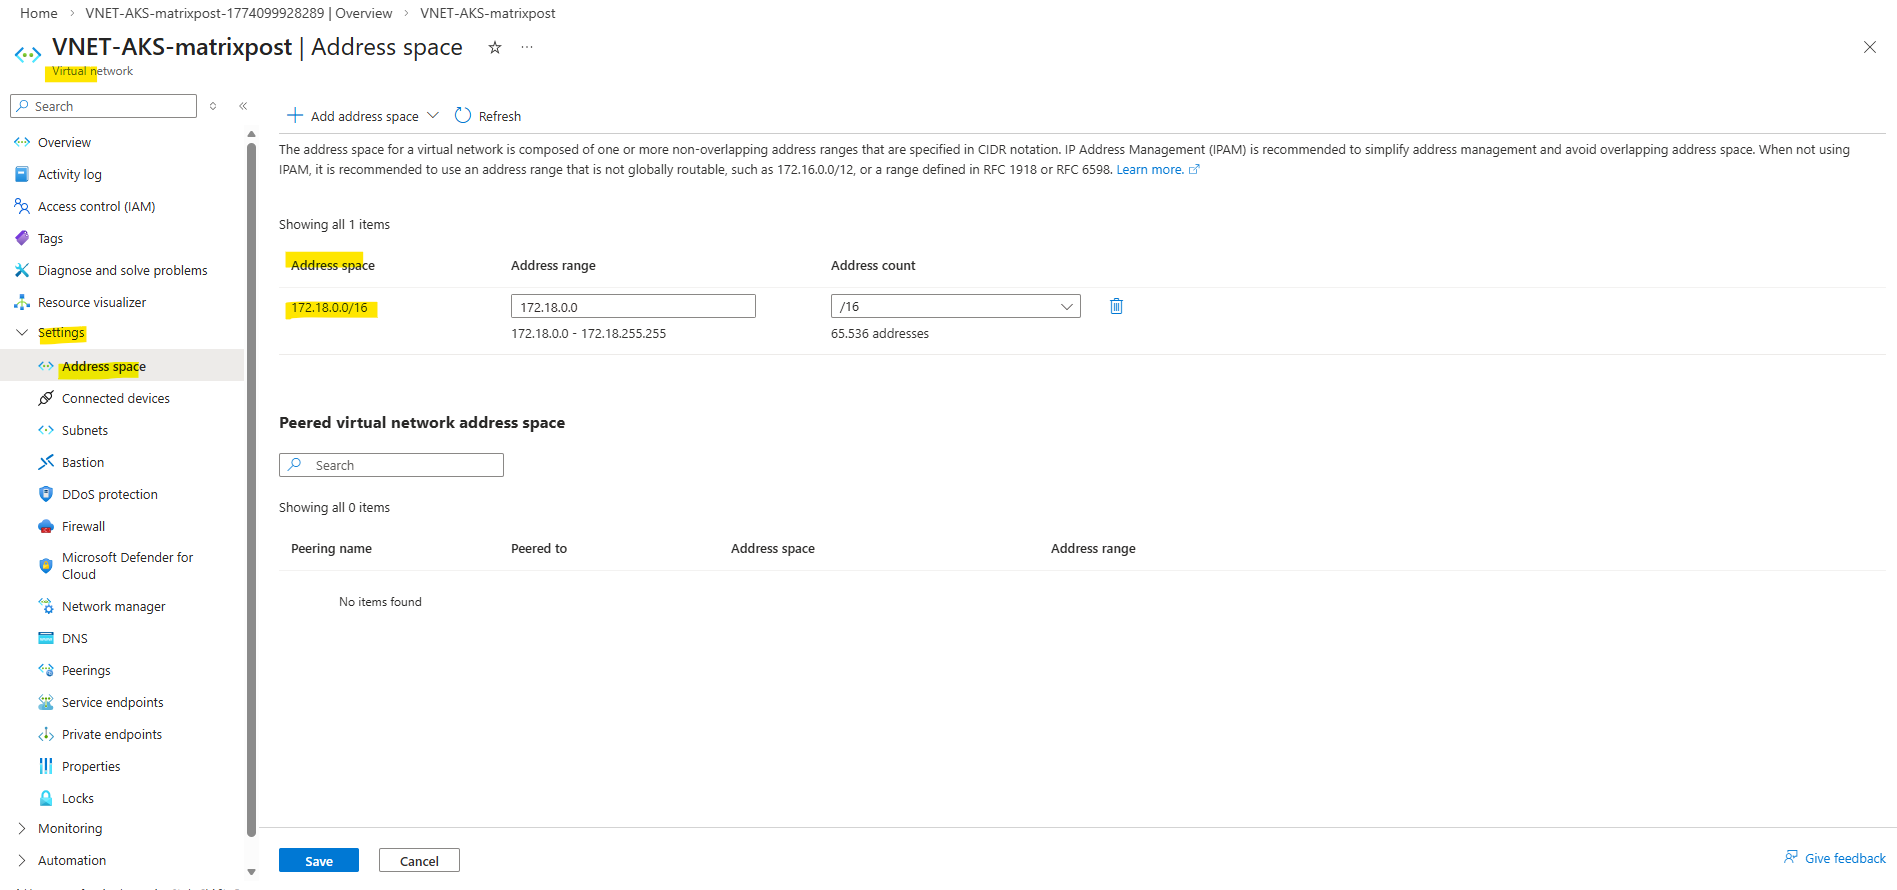
For this lab, I will create a dedicated VNet with the address space 172.18.0.0/16 and a subnet 172.18.10.0/24 for the AKS cluster. This subnet will host the worker nodes and, depending on the networking model, also the pod IP addresses.
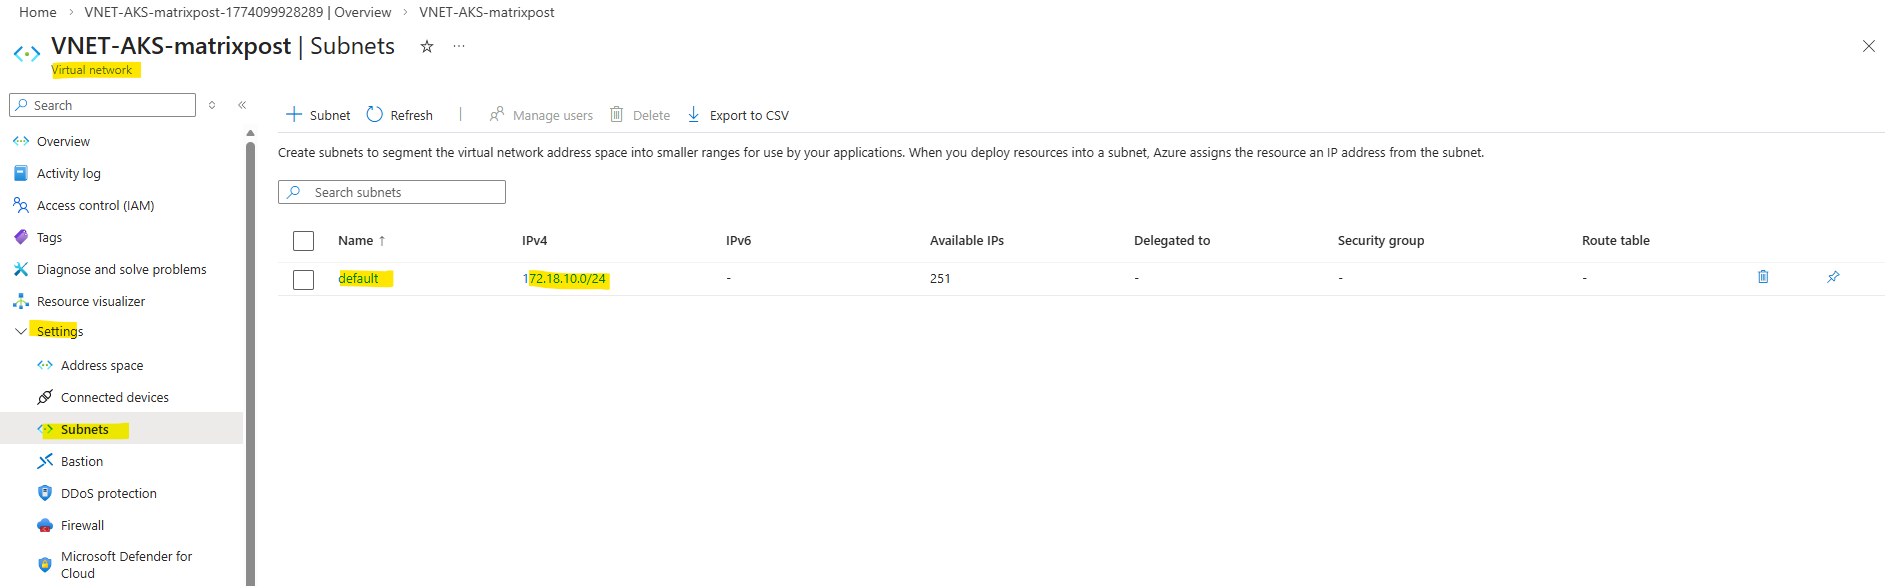
In this lab, the subnet
172.18.10.0/24is used exclusively for the worker nodes, while pod networking is implemented using the Azure CNI overlay model (most common networking model used in Kubernetes).The pods receive IP addresses from a separate, private CIDR that is not part of the VNet.
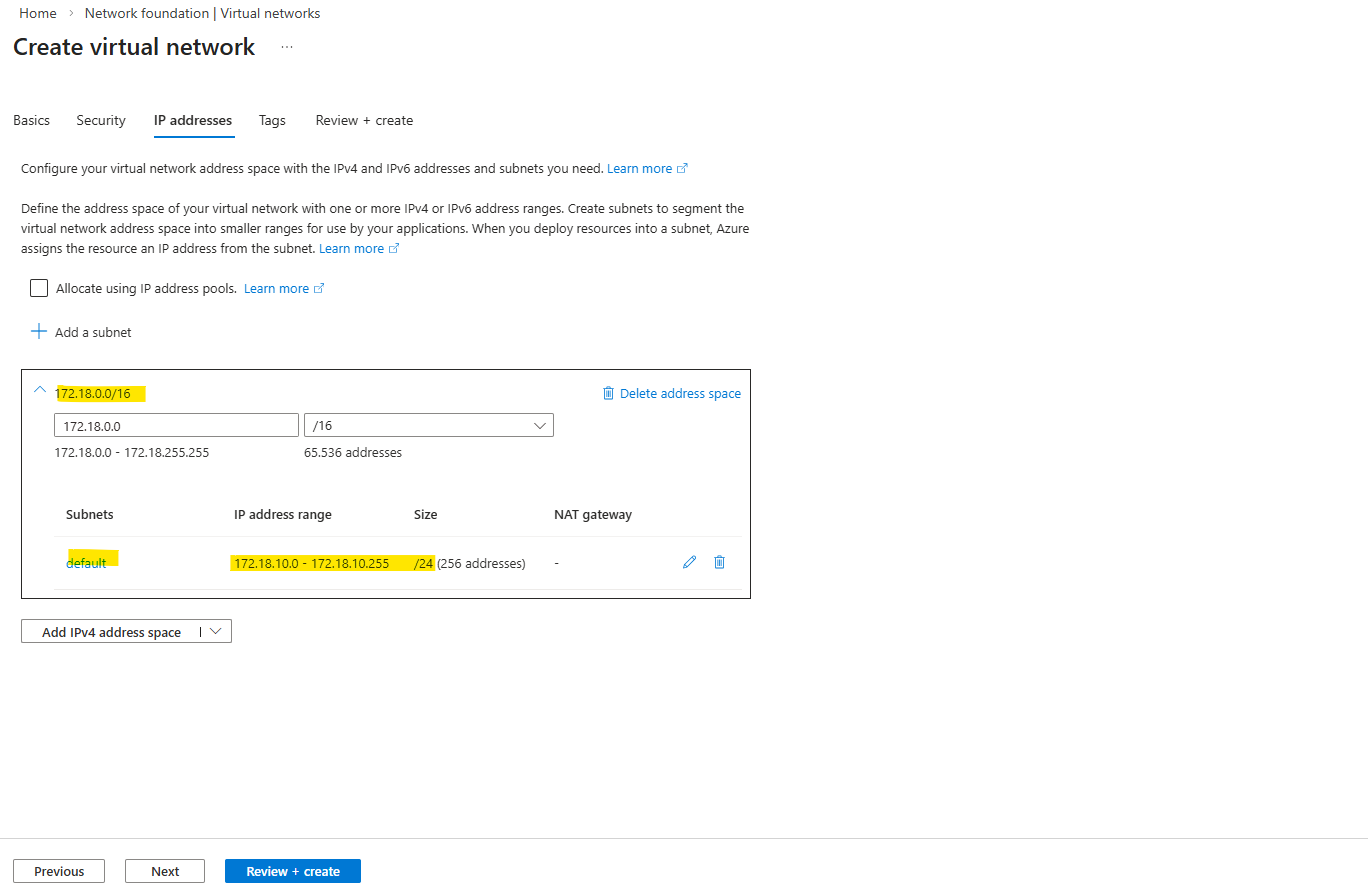
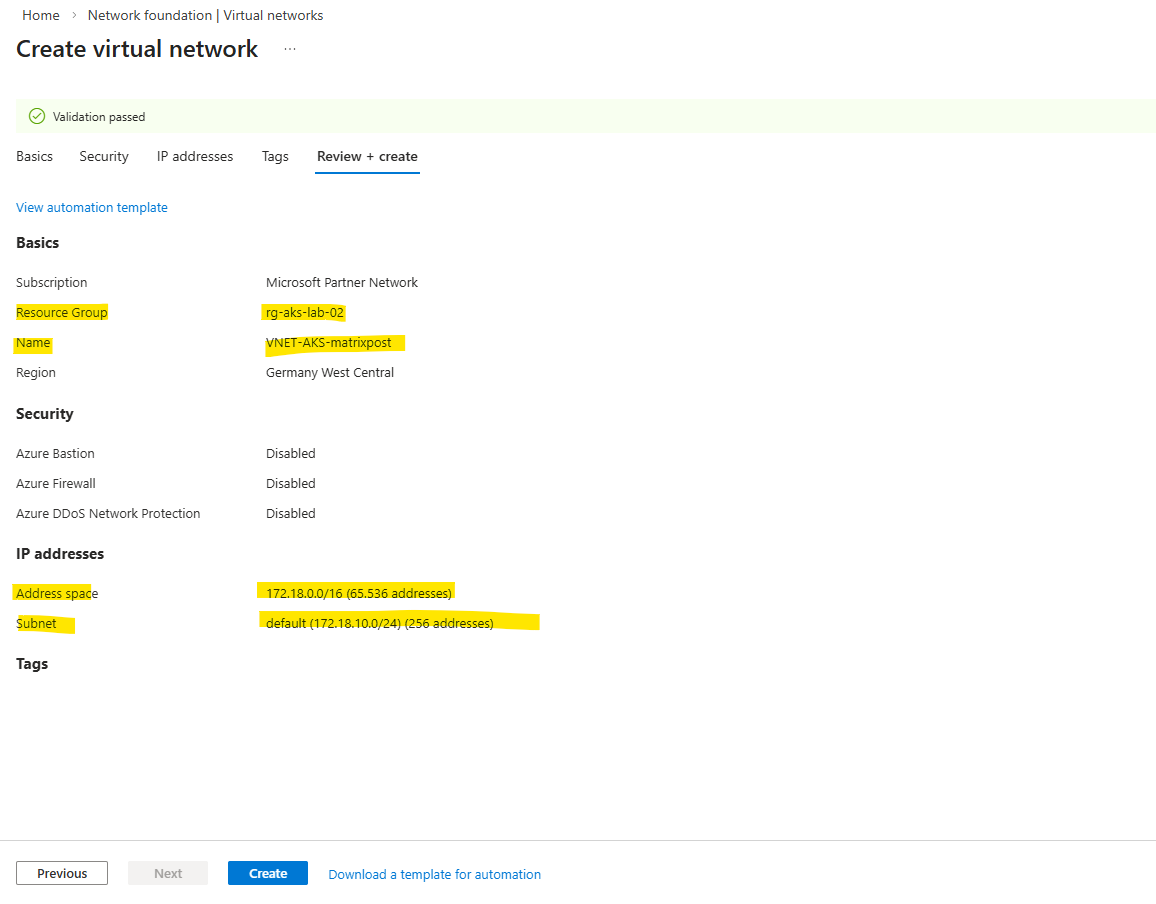
So this subnet 172.18.10.0/24 will be used for the worker nodes as mentioned.
Deploying AKS Using an Existing VNet and Subnet (Azure CNI Overlay)
After creating the custom virtual network and subnet, we can now deploy the AKS cluster using this existing network instead of relying on the default AKS-managed resources.
In this setup, the worker nodes are placed into the predefined subnet, while pod networking is handled using the Azure CNI overlay model.
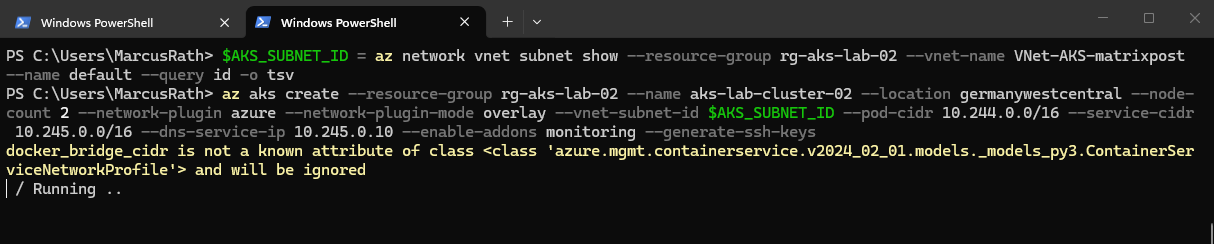
First we retrieve the subnet ID we want to use for the AKS cluster.
PS> $AKS_SUBNET_ID = az network vnet subnet show --resource-group rg-aks-lab-02 --vnet-name VNet-AKS-matrixpost --name default --query id -o tsv
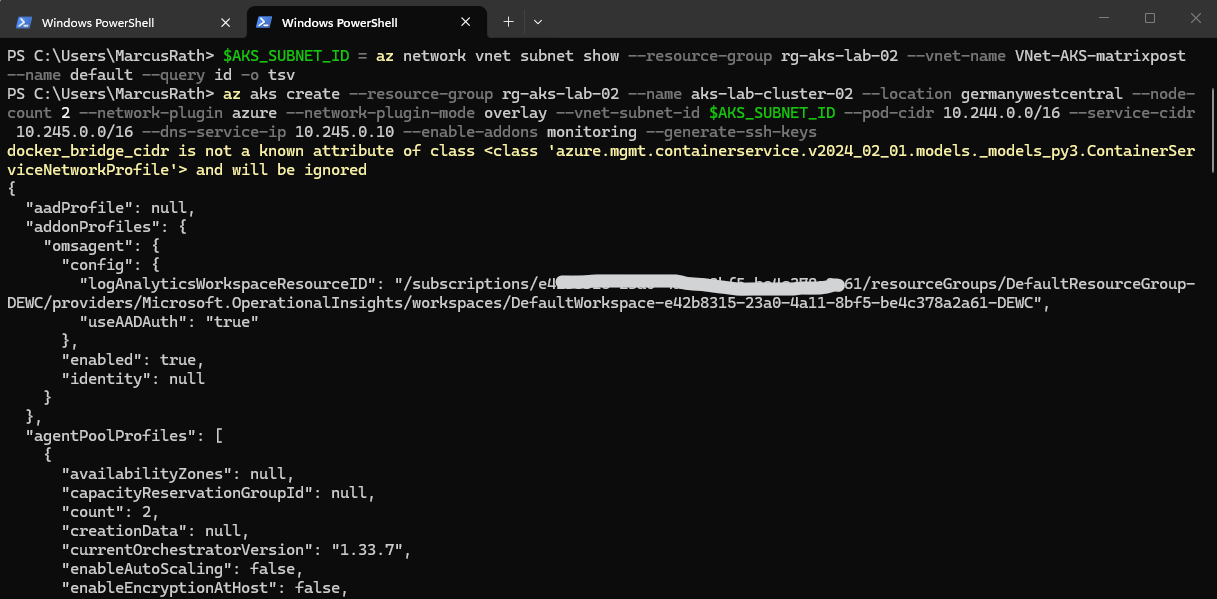
Next we can create the new AKS cluster by running.
Here, we deploy the AKS cluster into the existing subnet for the worker nodes, while using Azure CNI Overlay for pod networking. This separates node and pod IP addressing, with pods using a dedicated private CIDR instead of consuming VNet IPs.
To avoid overlapping address spaces, including with my connected on-premises network (
10.0.0.0/24), the pod and service CIDRs are configured using separate, non-conflicting ranges. In this setup,10.244.0.0/16is used for pods and10.245.0.0/16for services, ensuring clean network separation and compatibility with existing environments.If you do not explicitly define a node VM size, AKS uses a default size (currently
Standard_DS2_v2). However, it is recommended to always specify the node size explicitly to ensure consistent and predictable deployments.The AKS tier can be defined using the
--tierparameter during cluster creation. If not explicitly specified, AKS defaults to the Free tier, while the Standard tier must be enabled manually to include an SLA for the control plane by running:
PS>  az aks create --resource-group rg-aks-lab-02 --name aks-lab-cluster-02 --location germanywestcentral --node-count 2 --network-plugin azure --network-plugin-mode overlay --vnet-subnet-id $AKS_SUBNET_ID --pod-cidr 10.244.0.0/16 --service-cidr 10.245.0.0/16 --dns-service-ip 10.245.0.10 --generate-ssh-keys

# define node size
# --node-vm-size Standard_DS2_v2

# define AKS tiere
# --tier standard
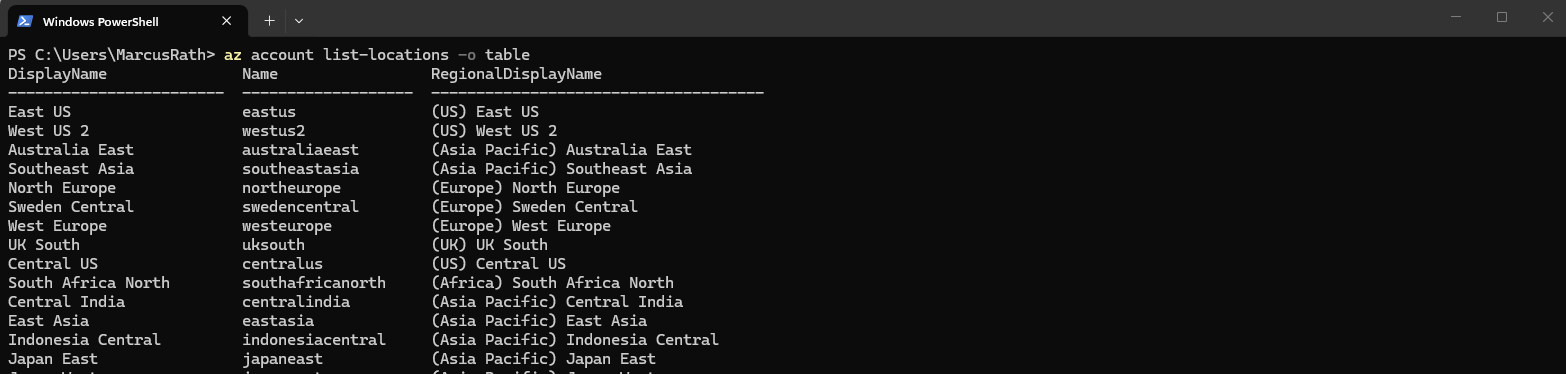
We can list all available locations and their corresponding name with the following command.
PS> az account list-locations -o table
The deployment may take several minutes to complete.
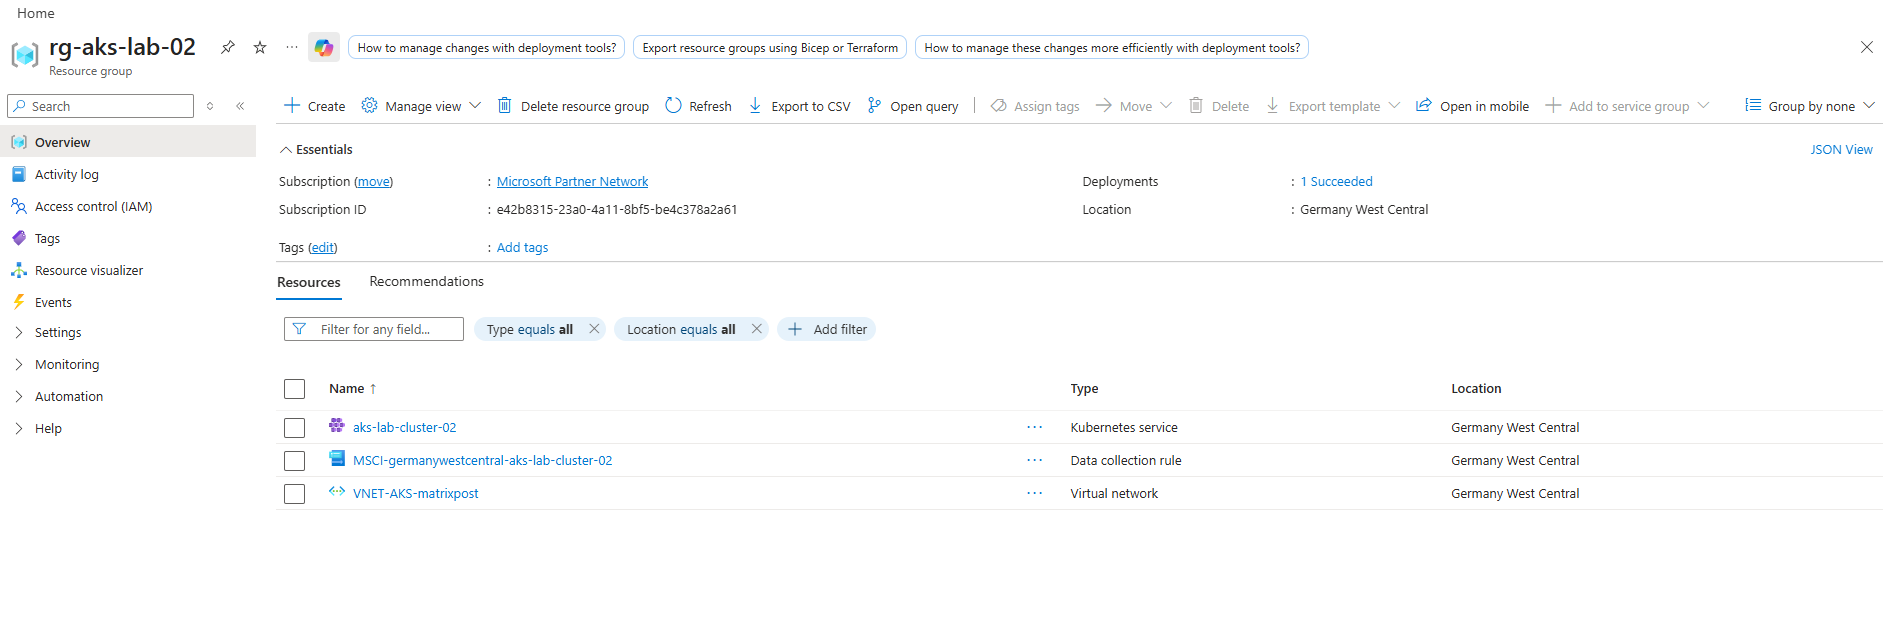
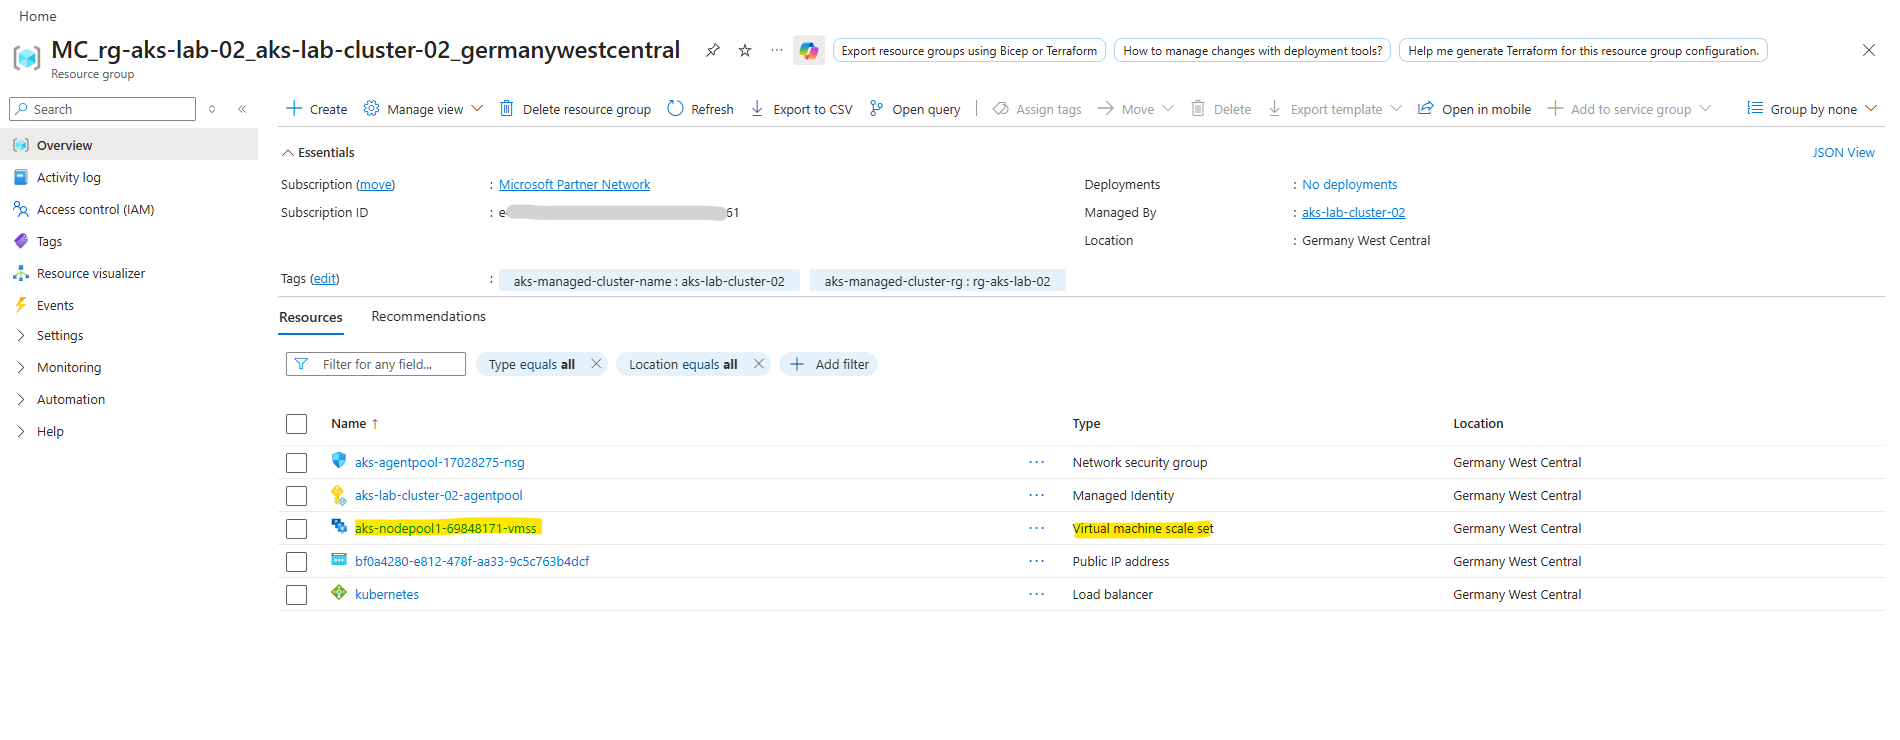
As previously the worker nodes (VMs) are not located in our AKS resource group (rg-aks-lab-02). Instead, AKS automatically creates a separate resource group called:
👉 MC_<yourResourceGroup><clusterName><region>
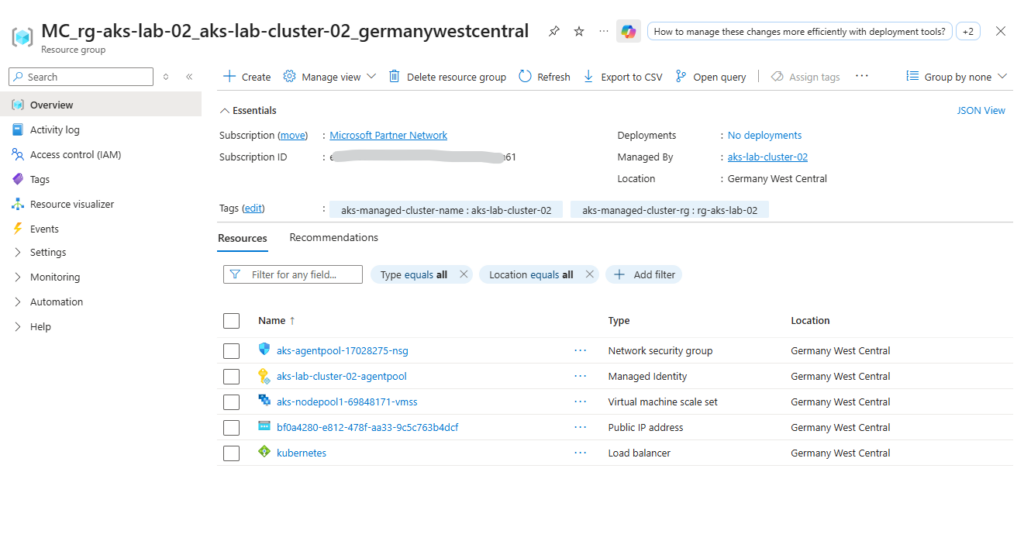
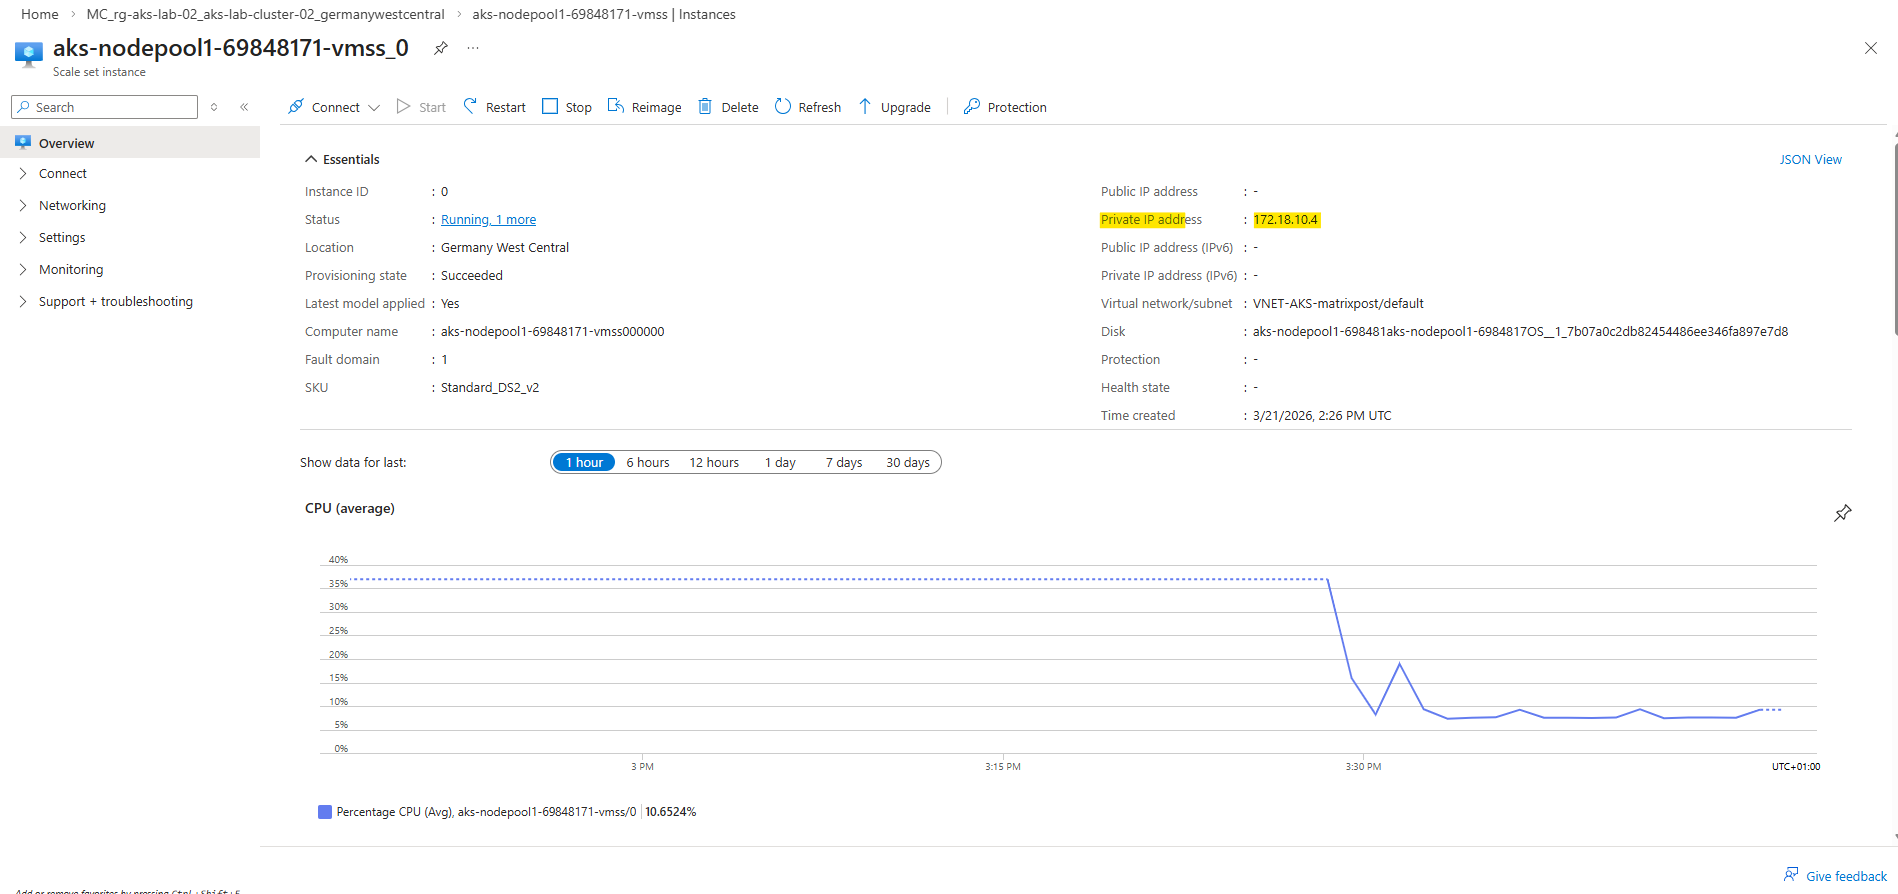
When opening the Virtual Machine Scale Set in the Azure Portal, the individual instances representing the worker nodes can be viewed. These instances correspond to the virtual machines that make up the AKS node pool.

In the Azure Portal, the first Virtual Machine Scale Set instance shows that the worker node has received the private IP 172.18.10.4 from the custom VNet and subnet. This verifies that the node is deployed into the intended network configuration.
In Azure, the first four IP addresses in a subnet are reserved by the platform, including the network address, default gateway, and additional internal Azure services. As a result, the first usable IP address for resources typically starts at
.4.
Connect to the Cluster
Once the cluster is deployed, we retrieve the credentials to interact with it:
This command updates your local kubeconfig file, allowing
kubectlto communicate with the cluster.
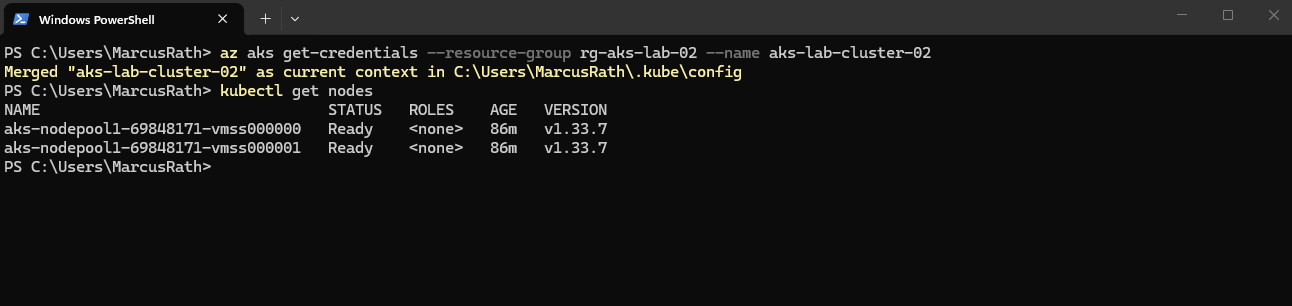
PS> az aks get-credentials --resource-group rg-aks-lab-02 --name aks-lab-cluster-02

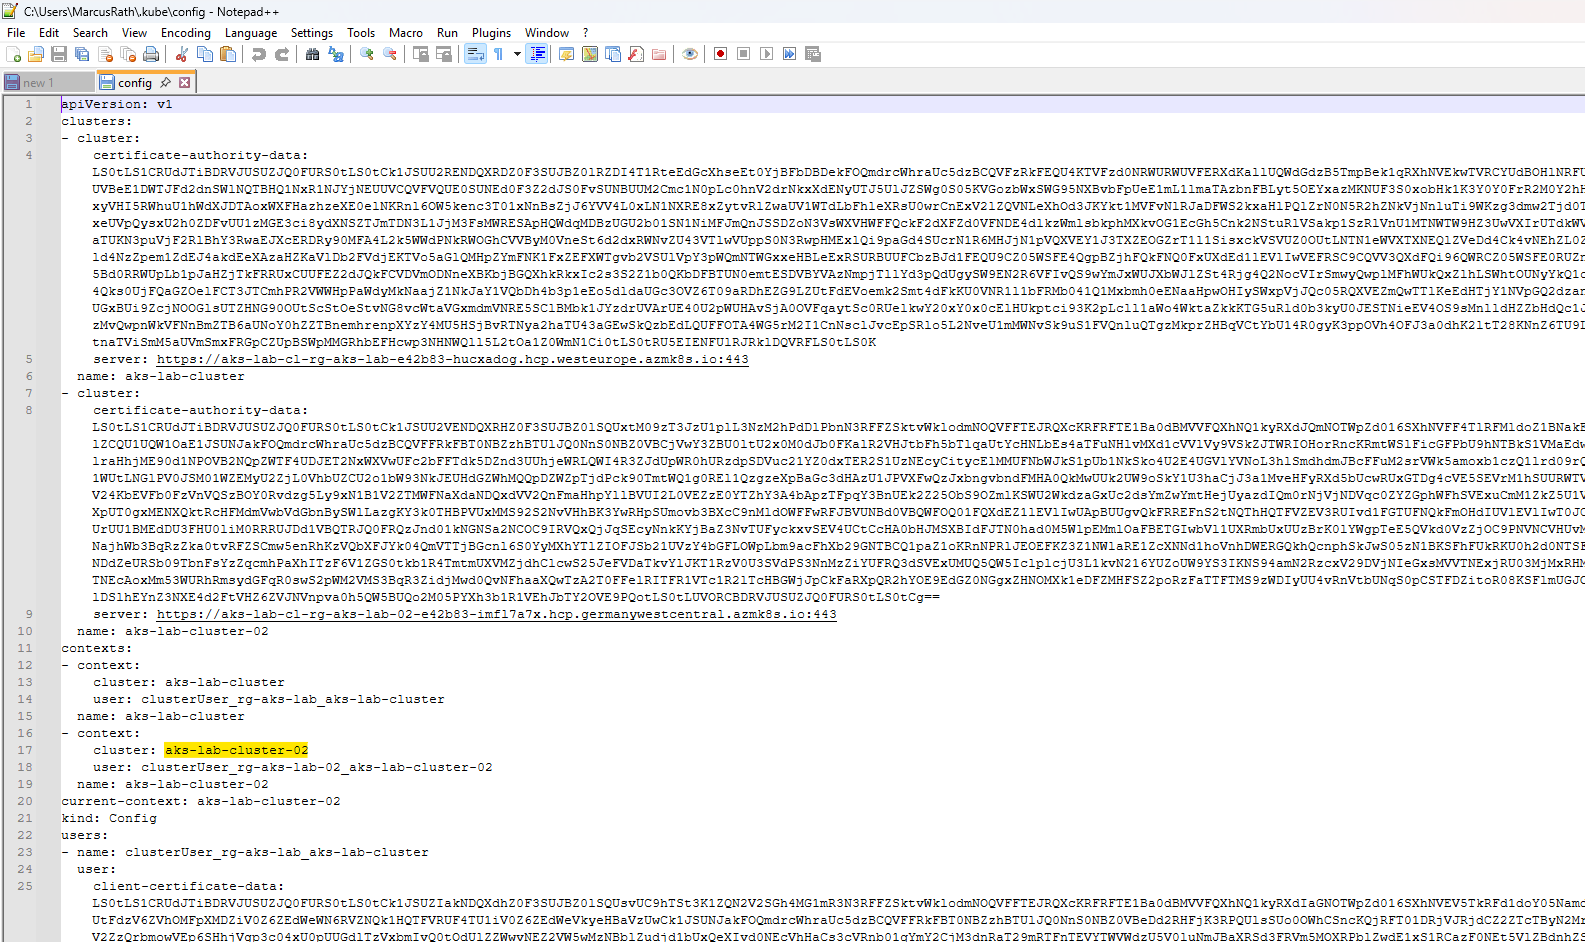
The kubeconfig file contains the connection details and credentials required for kubectl to communicate with the AKS cluster. It defines the cluster endpoint, authentication method, and context used for managing the cluster.
To verify that the cluster is up and running, we can check the available nodes:
We should see your worker nodes in a Ready state.
PS> kubectl get nodes
To list the node pools of our AKS cluster, we can use:
This provides an overview of all node pools, including their size, node count, and configuration.
PS> az aks nodepool list --resource-group rg-aks-lab-02 --cluster-name aks-lab-cluster-02 -o table

Using the command below, we can display detailed information about the cluster nodes, including their internal IP addresses (now assigned from our custom virtual network and subnet) and underlying infrastructure.
This also helps to correlate the Kubernetes nodes with the corresponding node pools and virtual machines in Azure.
The output also shows that AKS uses containerd as the container runtime on the worker nodes. Both AWS (EKS) and Google Cloud (GKE) also use containerd as the container runtime, following the deprecation of Docker (Dockershim) in Kubernetes.
PS> kubectl get nodes -o wide

We can also check the system pods:
This shows all running pods across all namespaces, including Kubernetes system components.
The output shows various Kubernetes and Azure-related services, such as CoreDNS, kube-proxy, and storage drivers, all in a healthy Running state.
The storage drivers can be identified by the CSI (Container Storage Interface) components such as
csi-azuredisk-nodeandcsi-azurefile-node, which handle integration with Azure Disks and Azure Files. These drivers are responsible for dynamically provisioning and attaching persistent storage to workloads running in the cluster.
PS> kubectl get pods -A
At this point, the cluster is fully operational and ready to host workloads.
Summary and What’s Next
In this part, we moved from theory to hands-on implementation by deploying our first Azure Kubernetes Service (AKS) cluster. We created a basic cluster using default settings, connected to it using kubectl, and verified that all core components are running as expected.
We then extended the setup by deploying an AKS cluster into an existing virtual network and subnet, using the Azure CNI overlay networking model. This approach provides better control over networking, improves scalability, and reflects how AKS is typically deployed in real-world environments.
In Part 4, we will start working with actual workloads by deploying our first application, managing it using deployments, and exposing it externally using Kubernetes services.
Links
Azure Command-Line Interface (CLI) documentation
https://learn.microsoft.com/en-us/cli/azure/?view=azure-cli-latestNetworking concepts for applications in Azure Kubernetes Service (AKS)
https://learn.microsoft.com/en-us/azure/aks/concepts-networkUse kubenet networking with your own IP address ranges in Azure Kubernetes Service (AKS)
https://learn.microsoft.com/en-us/azure/aks/configure-kubenetIP address planning for your Azure Kubernetes Service (AKS) clusters
https://learn.microsoft.com/en-us/azure/aks/concepts-network-ip-address-planning