Configure SAML SSO for Atlassian Confluence on-premises with ADFS
Today I want to show you, how you can configure your on-premises confluence site to support single sign-on (SSO) with Active Directory Federation Services (AD FS).
How to set up Active Directory Federation Services you can see in my following post.
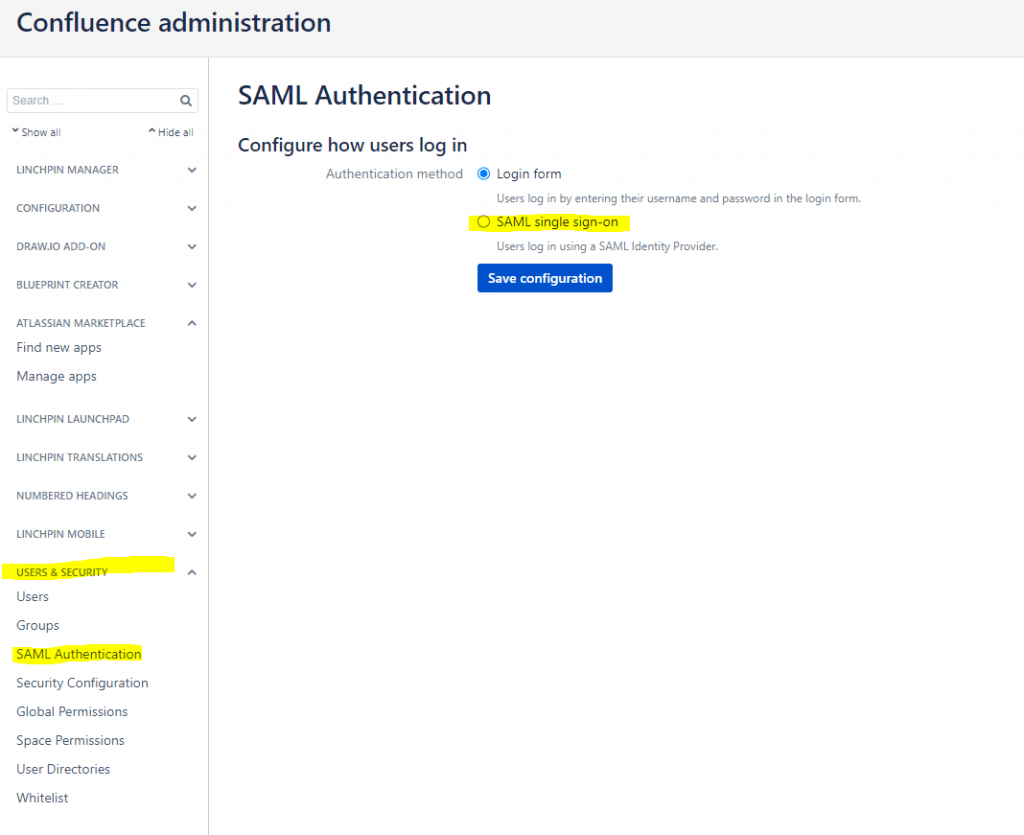
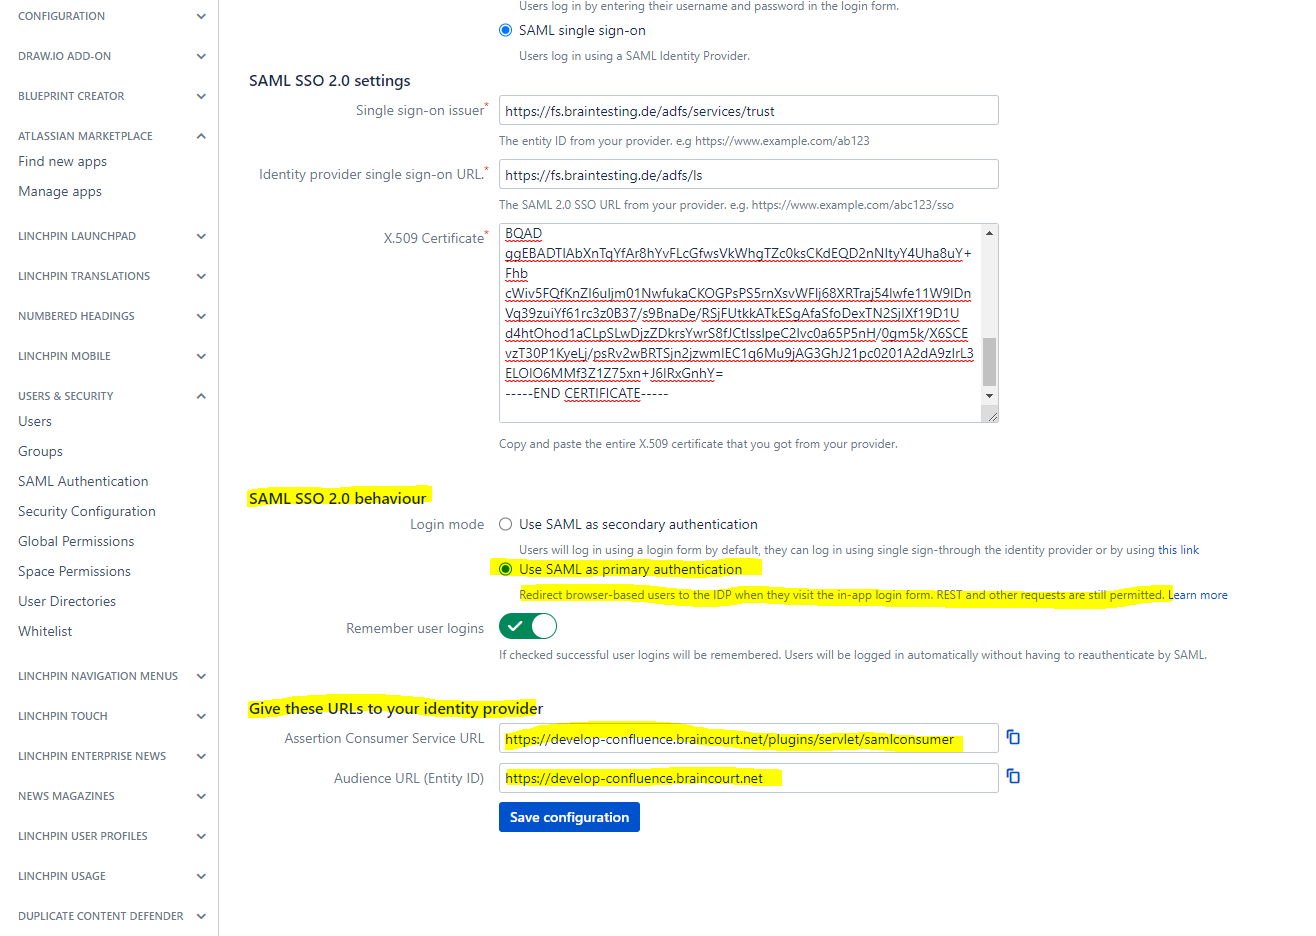
First we will configure confluence to use SAML SSO 2.0, therefore in confluence we will open Configuration -> USERS & SECURITY -> SAML Authentication
Switch from Login form to SAML single sign-on
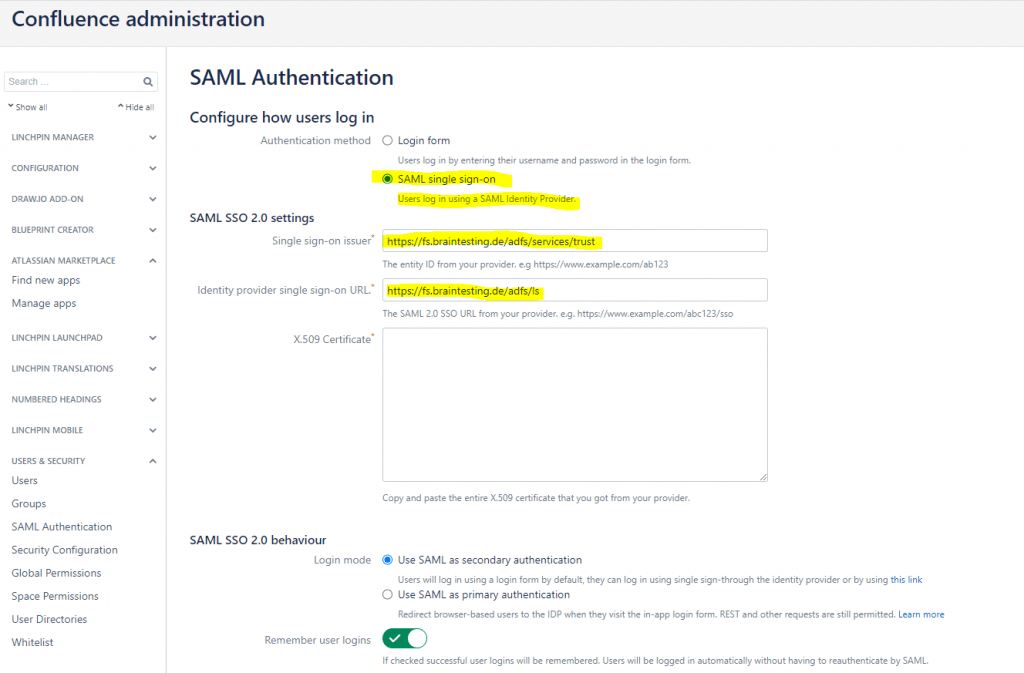
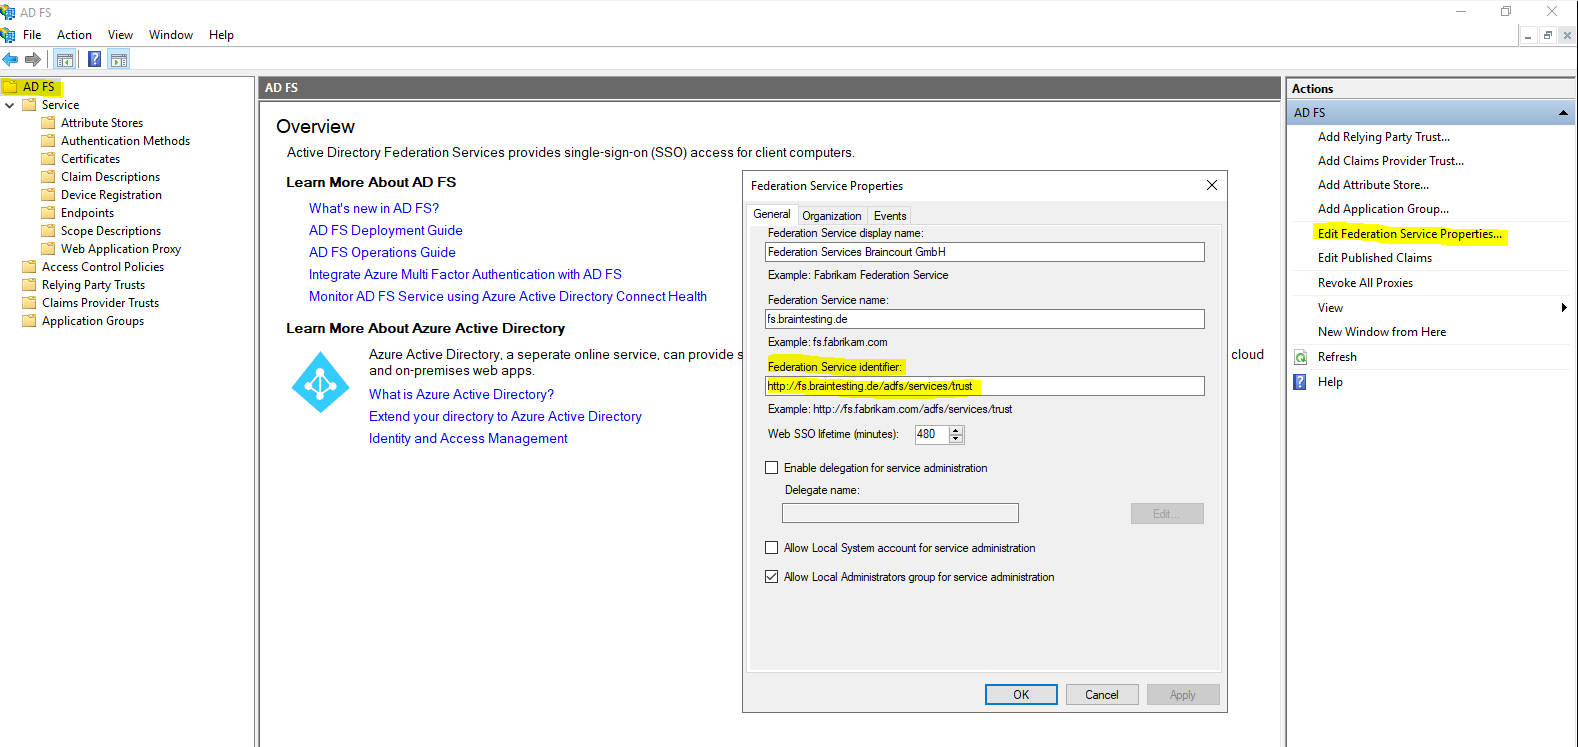
The above single sign-on issuer URL (entity ID) you can determine from your AD FS server and the Edit Federation Service Properties … as follows.
First the issur URL (entity ID) will be the Federation Service identifier URL.
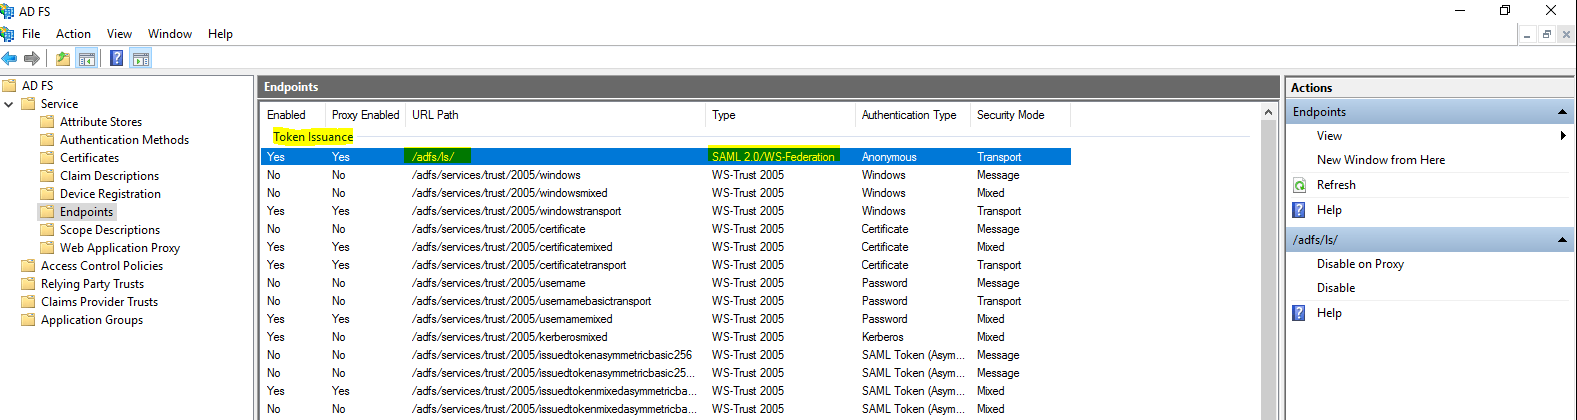
Second the identity provider (IDP) URL you can determine under AD FS -> Service -> Endpoints and here the Token Issuance URL path with a Type of SAML 2.0/WS-Federation.
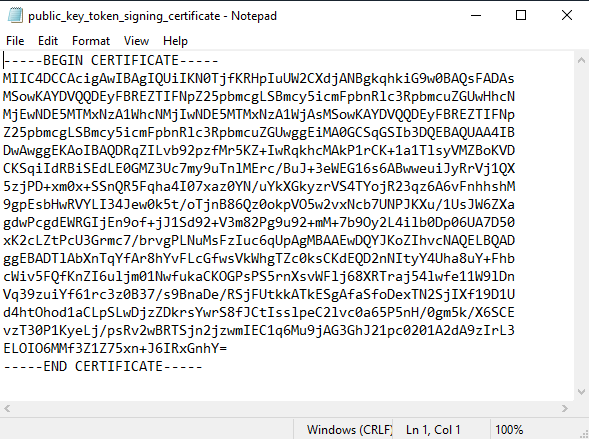
We also need the public key from the X.509 Certificate, which is assigned in AD FS for Token-signing.
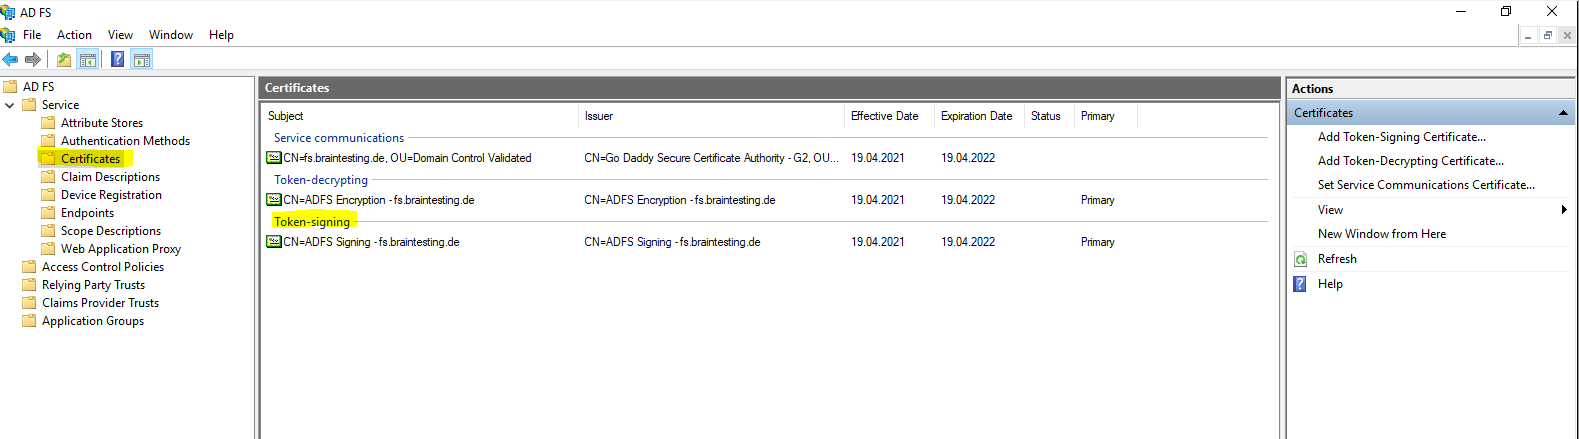
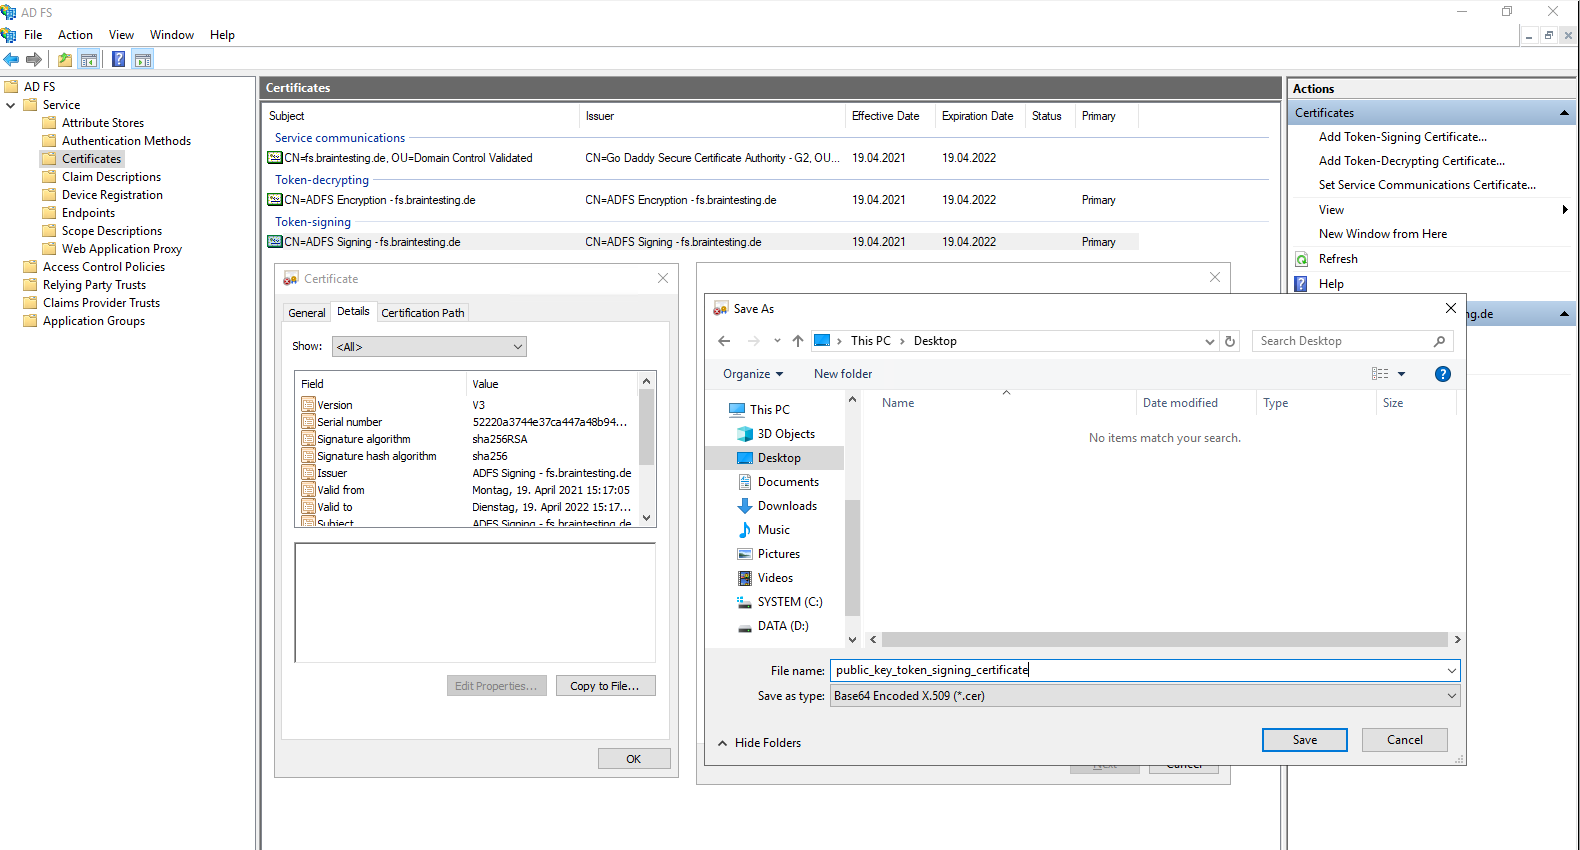
Therefore we double-click on the Token-signing certificate to export the public key as Base-64 encoded X.509 (.CER) format as follows.
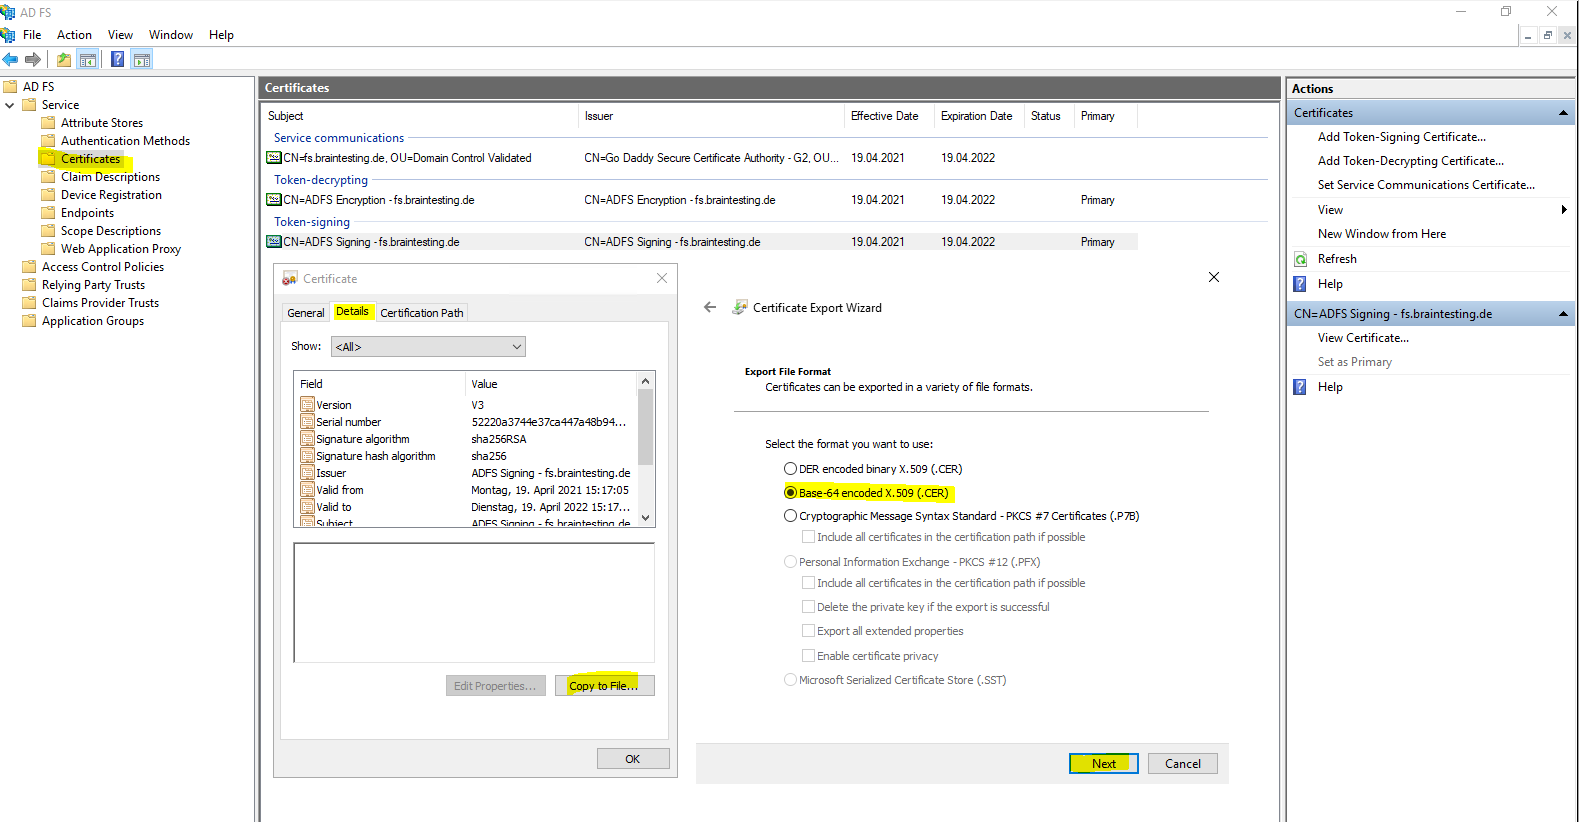
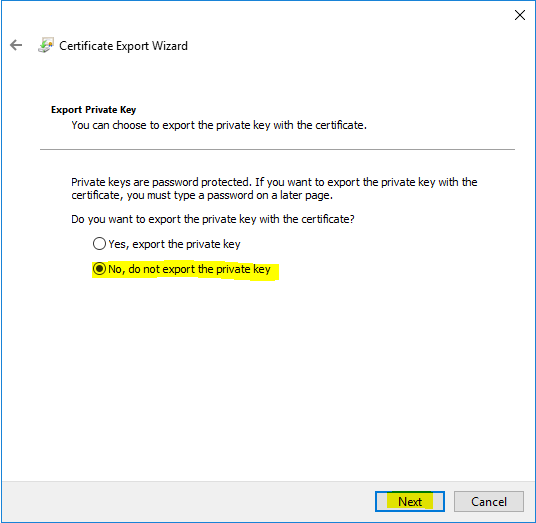
If you use instead the default self signed certificate from ADFS, certificates from your internal CA, keep in mind to only export the public key and not also the private key, or at least if you did, copy finally only the public key from the exported certificate which includes both keys.
When using the self signed certificates, you do not have here an option to export the private key for security reasons. The private key from the ADFS server self signed certificates for automatic rollover will be stored in a combination of an AD container and the ADFS DB, so you cannot export this key in a normal manner.
Now we have all informations to complete the SAML Authentication configuration in confluence.
SAML single sign-on for Atlassian Data Center applications
https://confluence.atlassian.com/enterprise/saml-single-sign-on-for-atlassian-data-center-applications-857050705.html
Copy the above URLs from the Give these URLs to your identity provider section, these URLs we need to configure the final step on the AD FS server to create a Relying Party Trust for the confluence site on it.
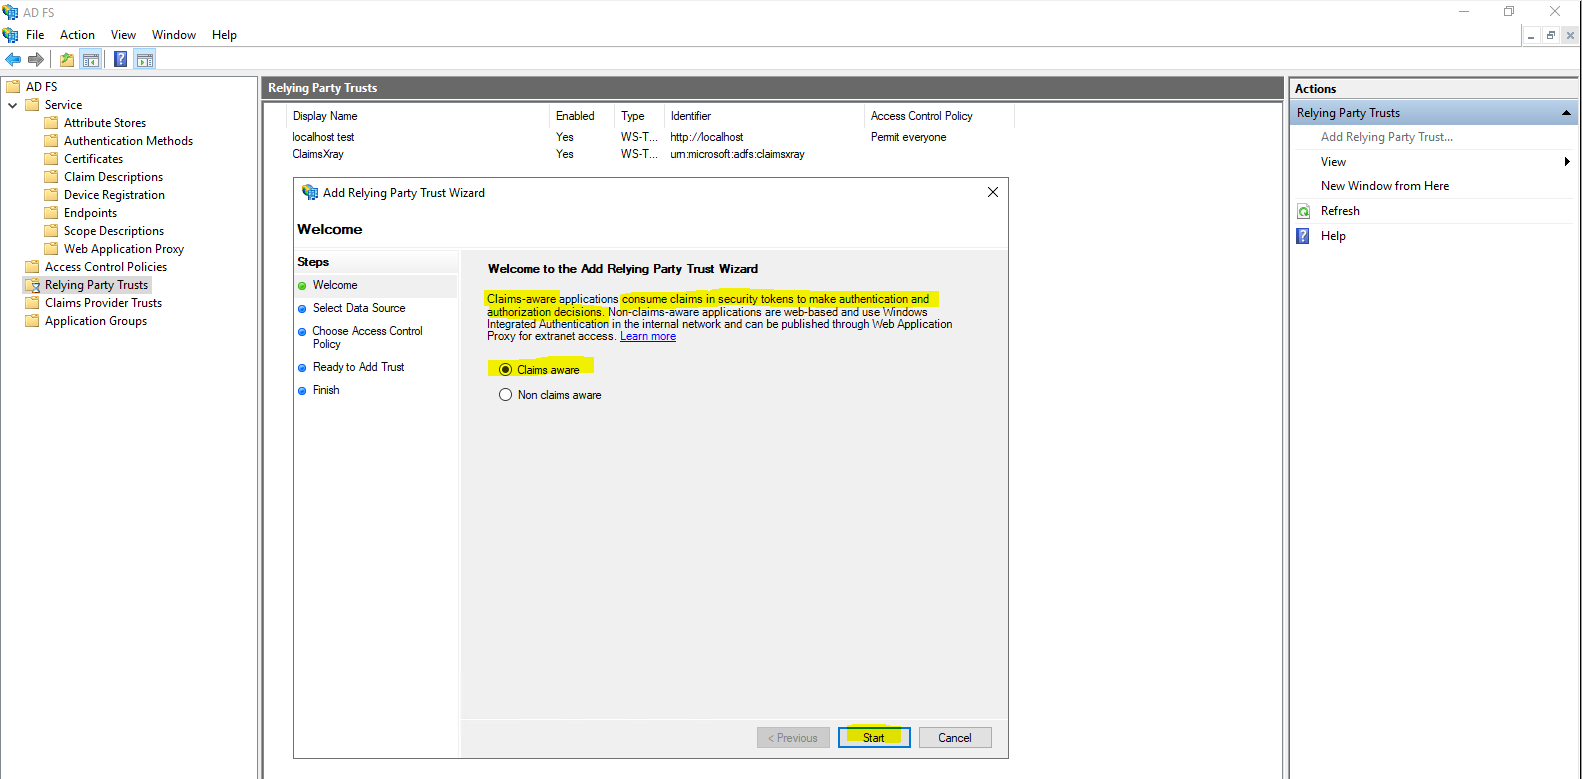
Click on Add Relying Party Trust …

Use Claims aware for our SAML Authentification and click on Start.
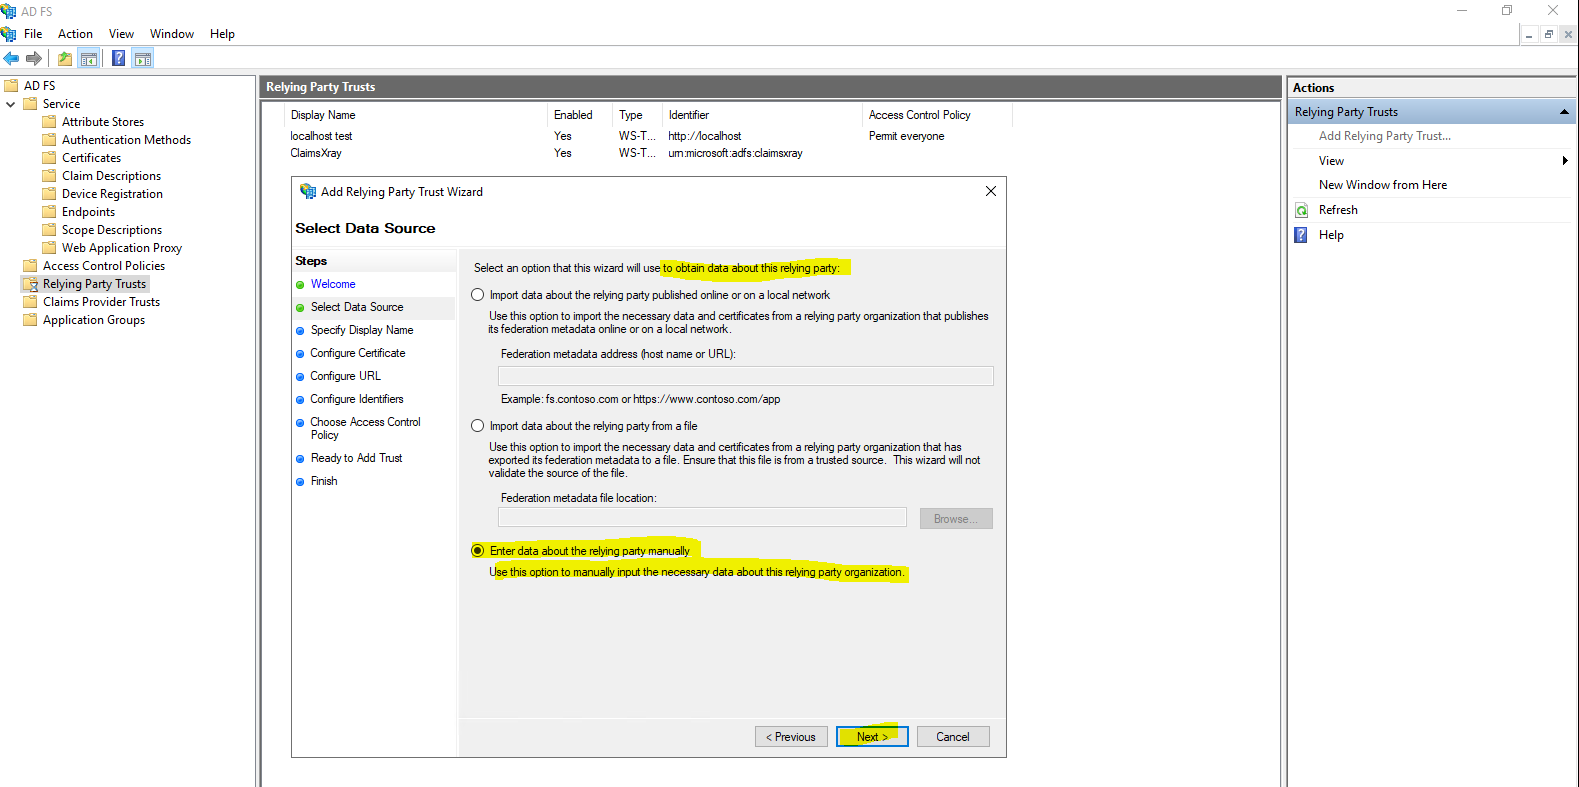
For the Data Source select Enter data about the relying party manually.
Enter the display name for this relying party.

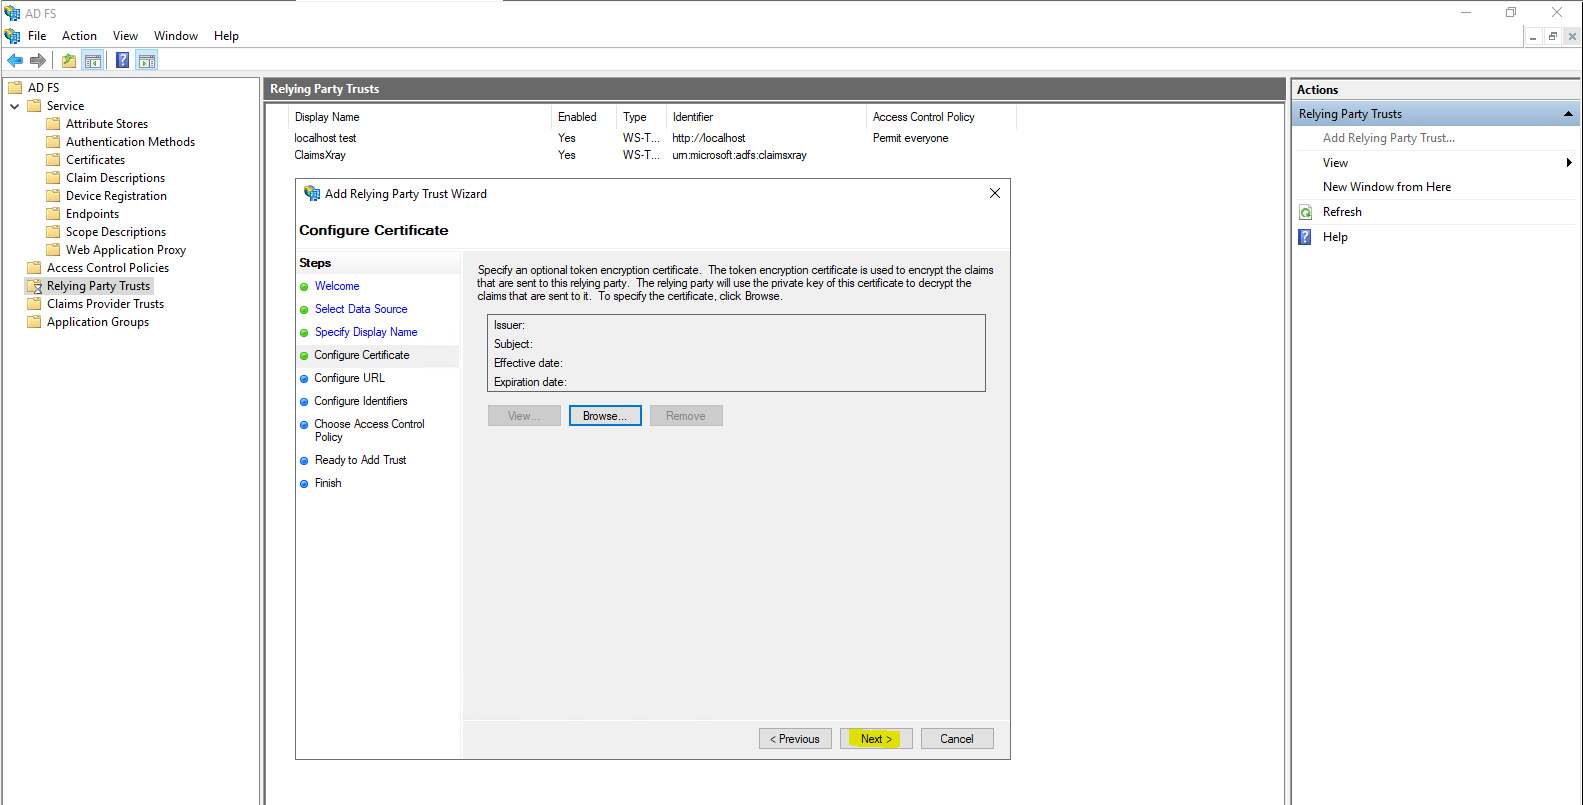
click Next we do not need to encrypt any of the tokens as part of the setup.
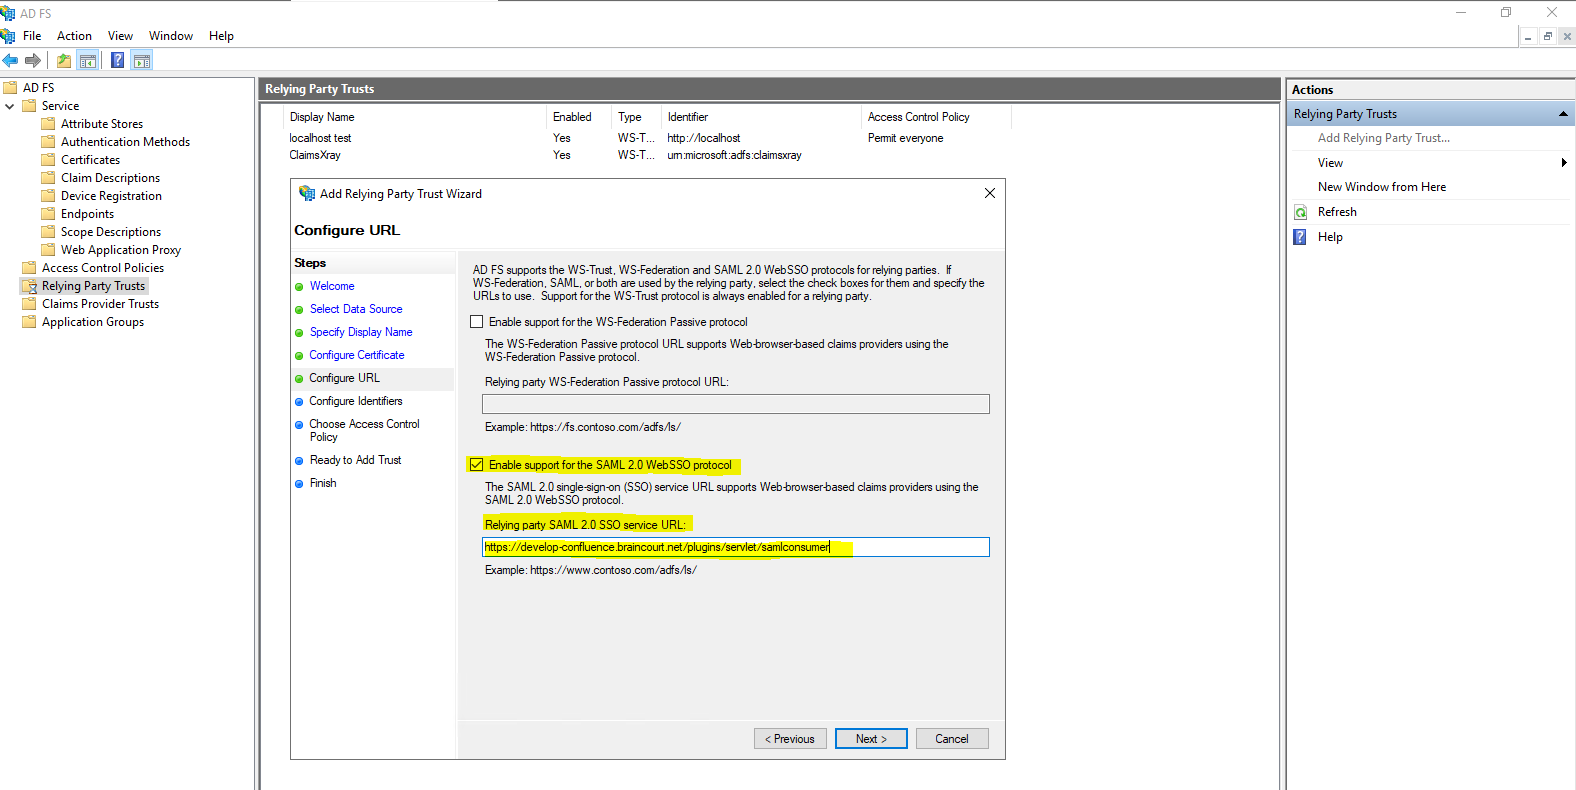
From the SAML single sign-on page copy the Assertion Consumer Service URL and paste the value into the Relying party SAML 2.0 SSO Service URL field as follows.
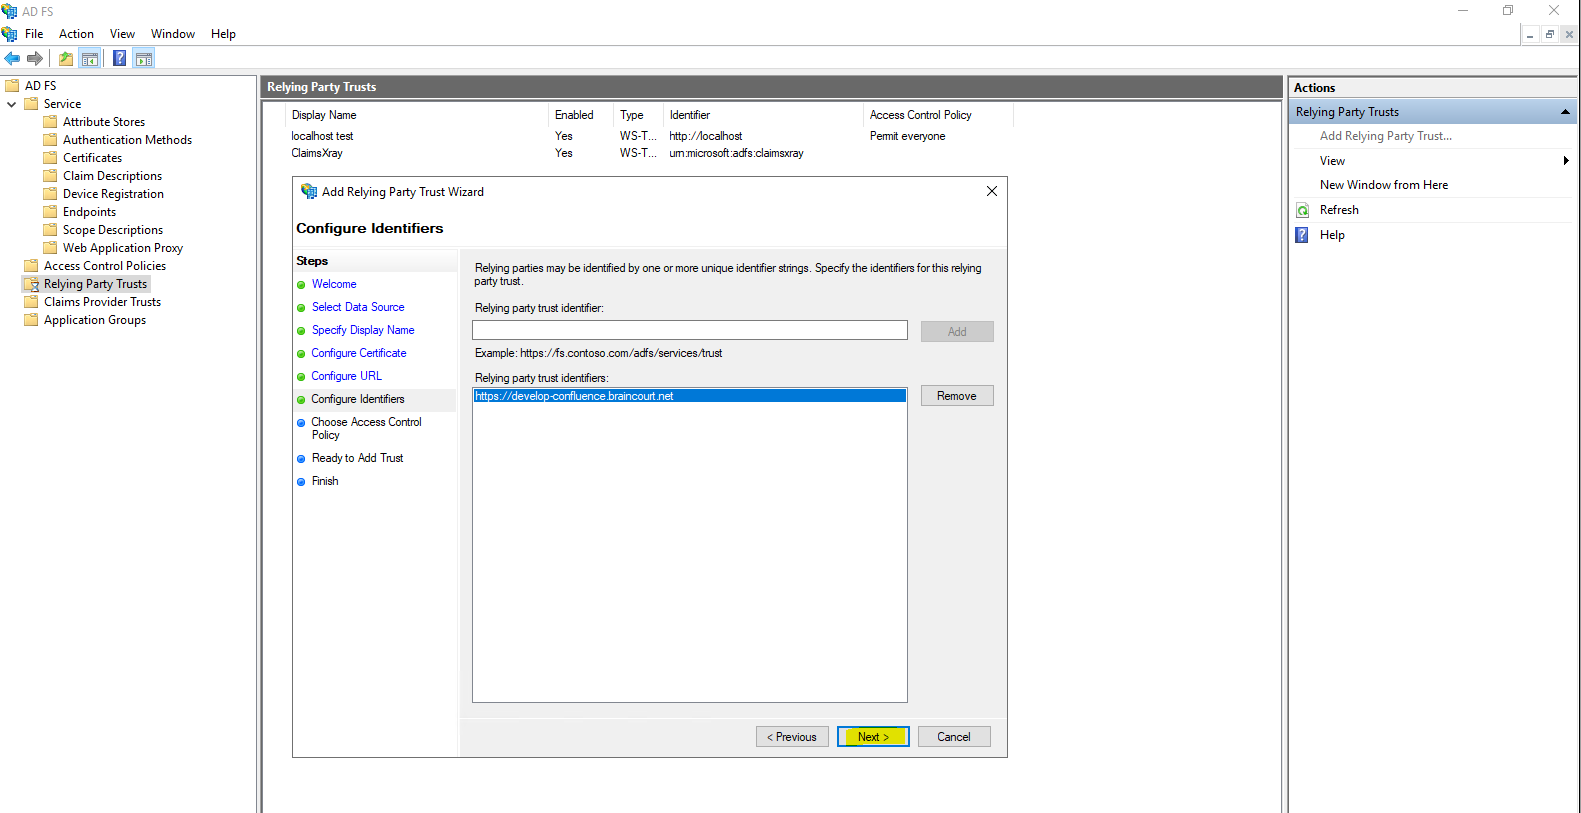
Also from the SAML single sign-on page copy the Audience URL (Entity ID) and paste the value into Relying party trust identifier field as follows.
For Choose Access Control Policy you can leave it as default on Permit everyone.

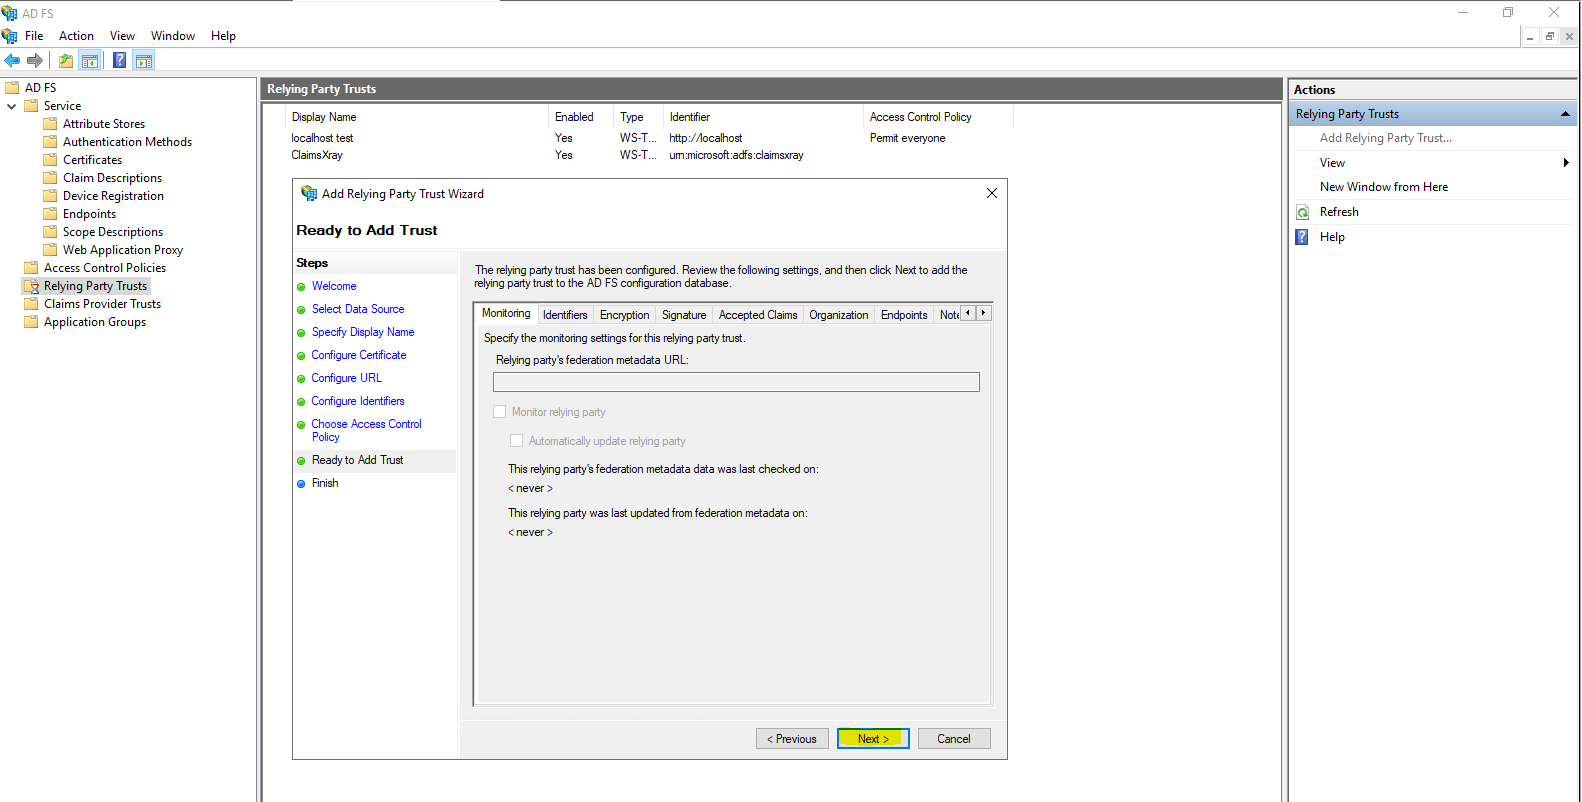
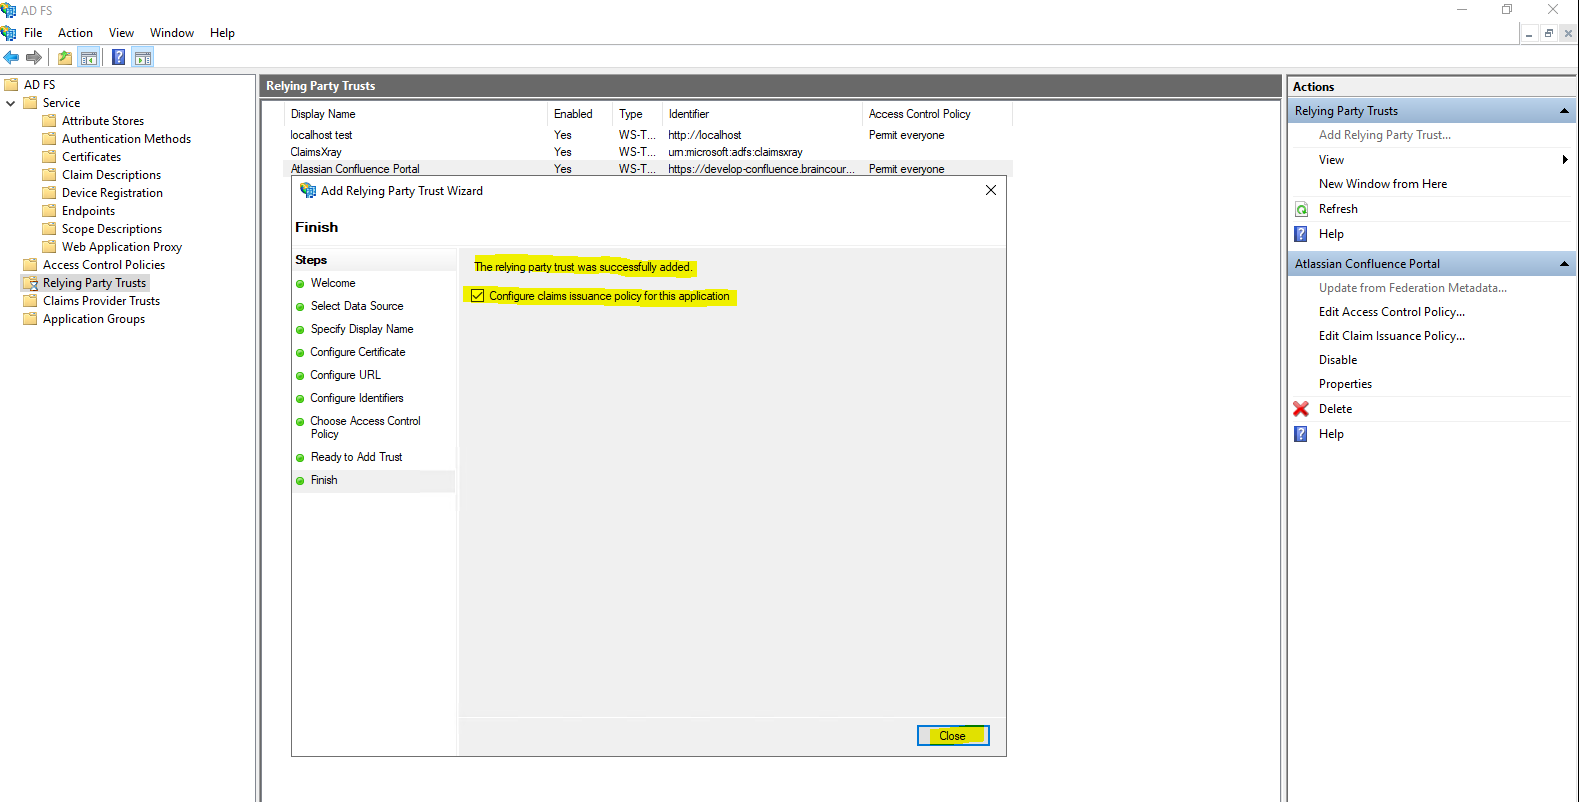
Under Ready to Add Trust you can click on Next.
The relying party trust was successfully added.
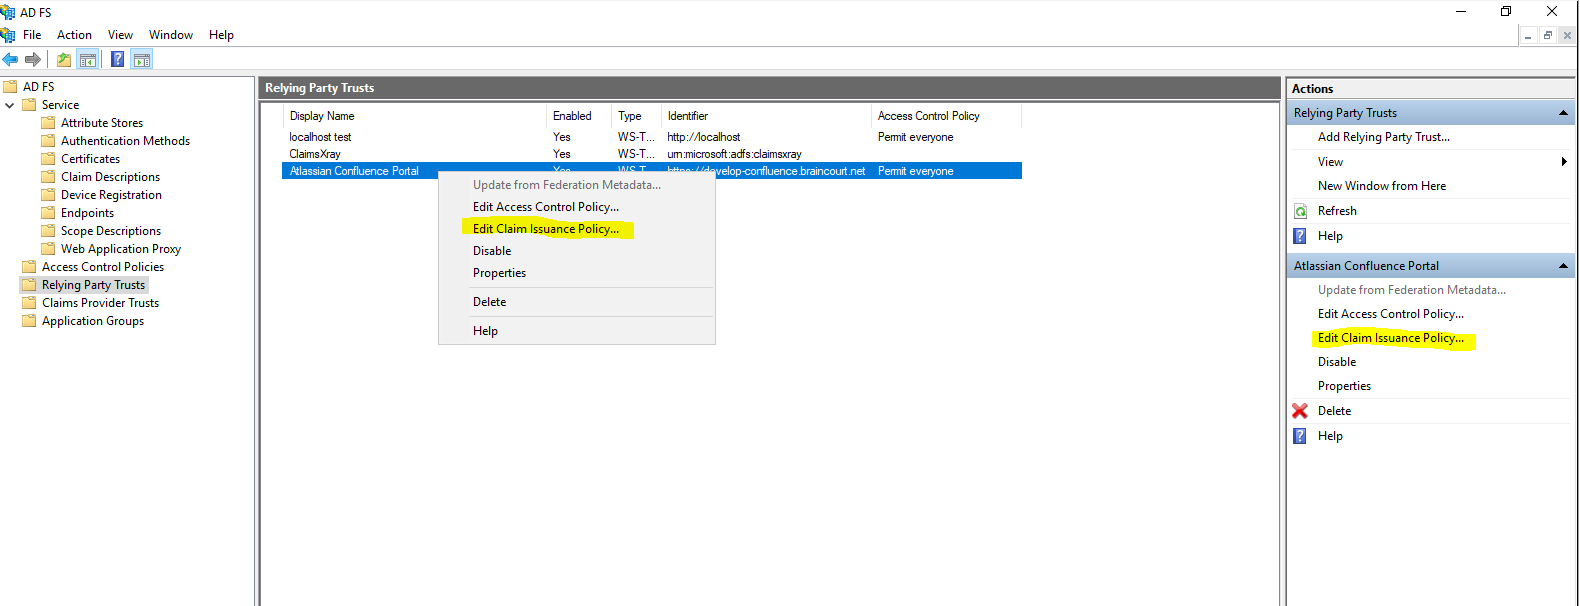
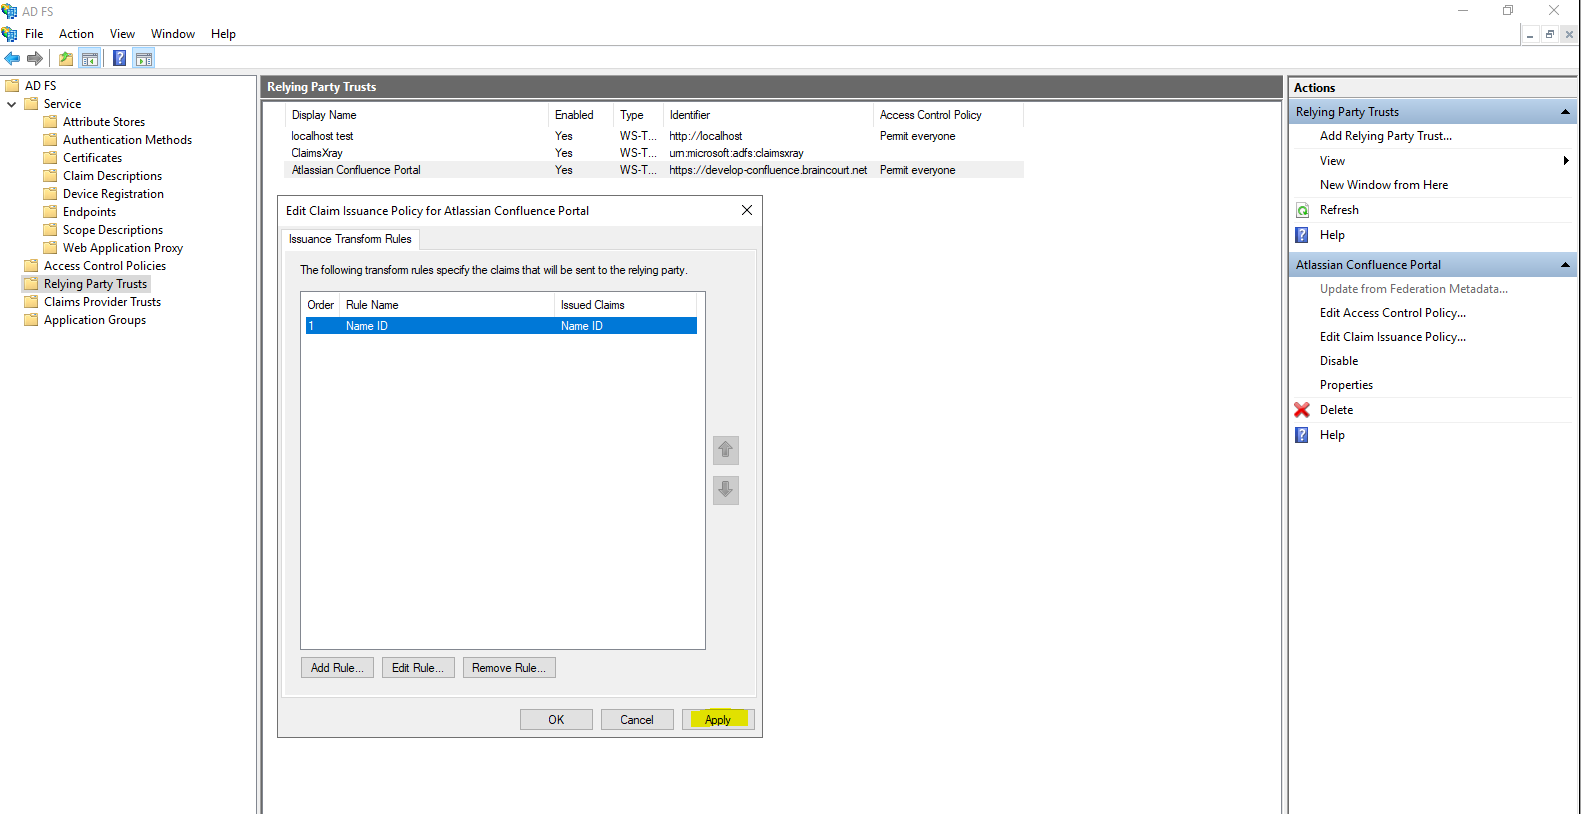
Now finally you have to configure a claims issuance policy for confluence.
The steps in this section map how AD FS sends claims to confluence.
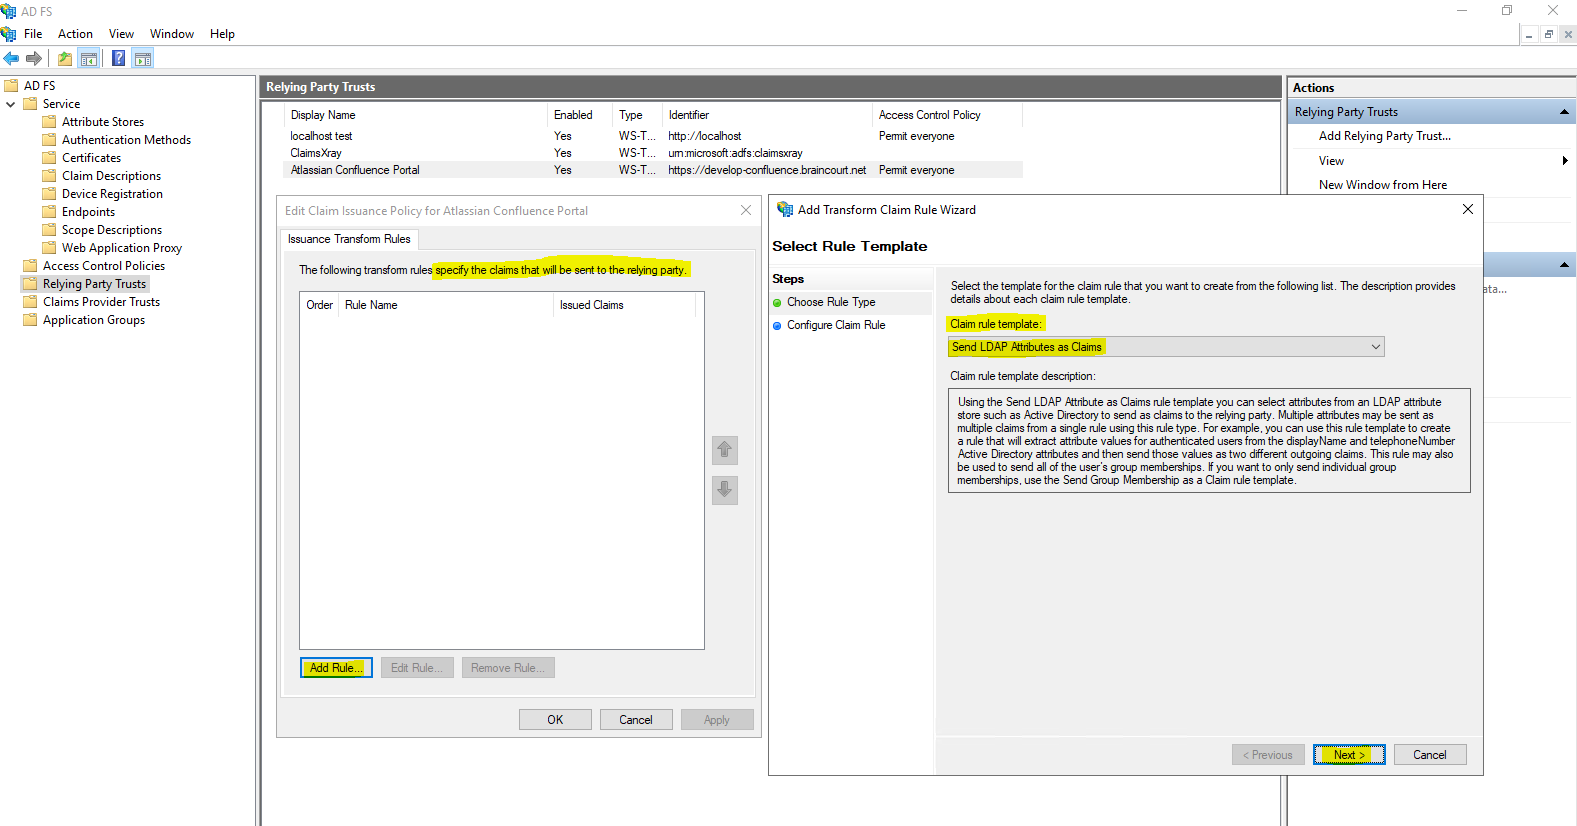
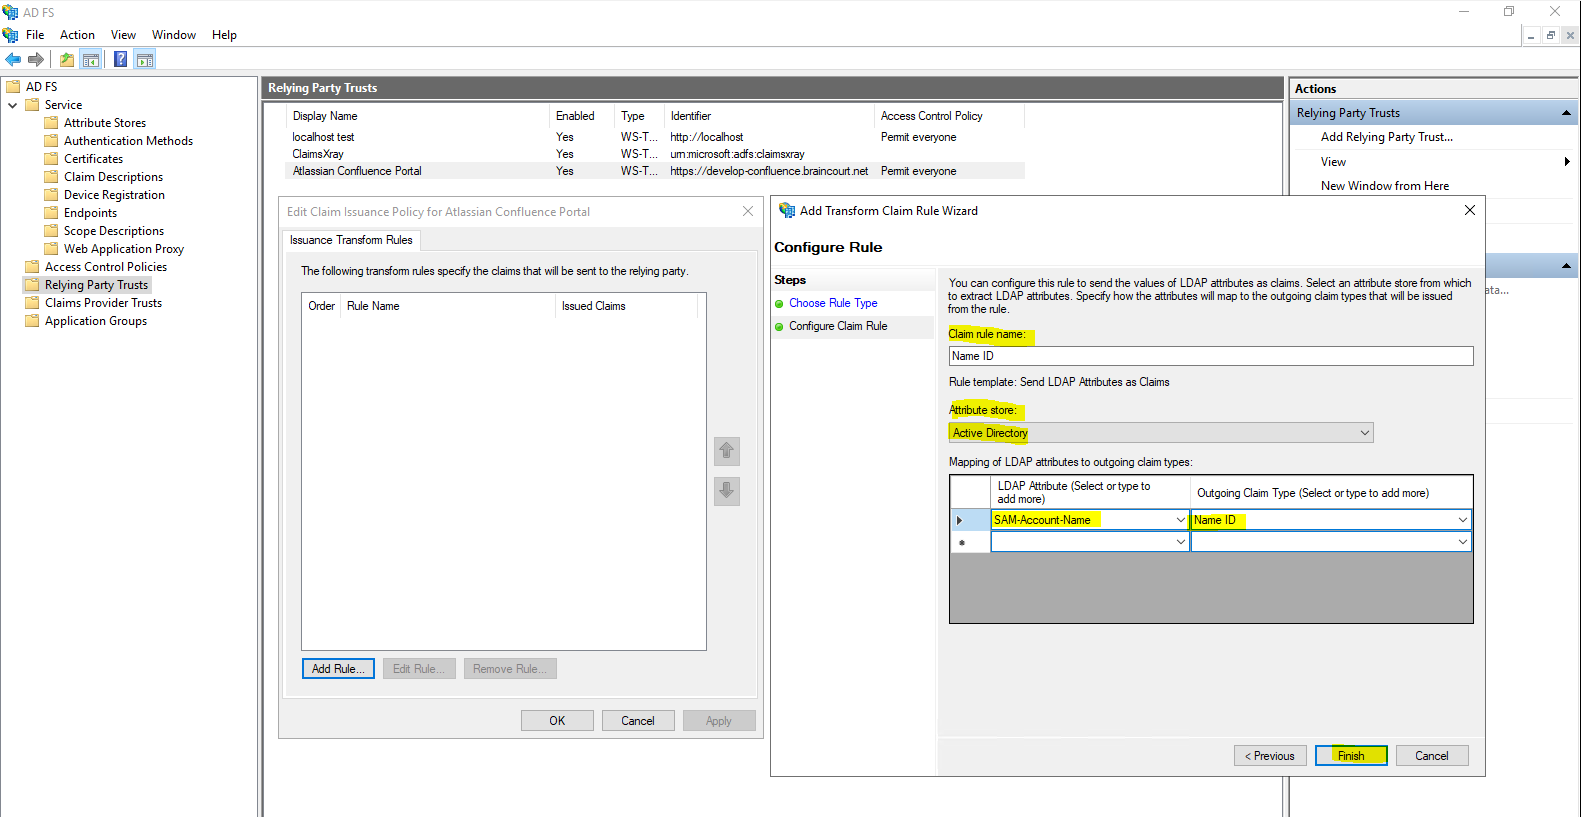
We need to add one Rule to map the Name Identifier AD field to the SAML field as follows.
Select here Send LDAP Attributes as Claims to send our Active Directory SAM-Account-Name attribute as an SAML field from the type Name ID.
As Attribute store we have to select Active Directory.

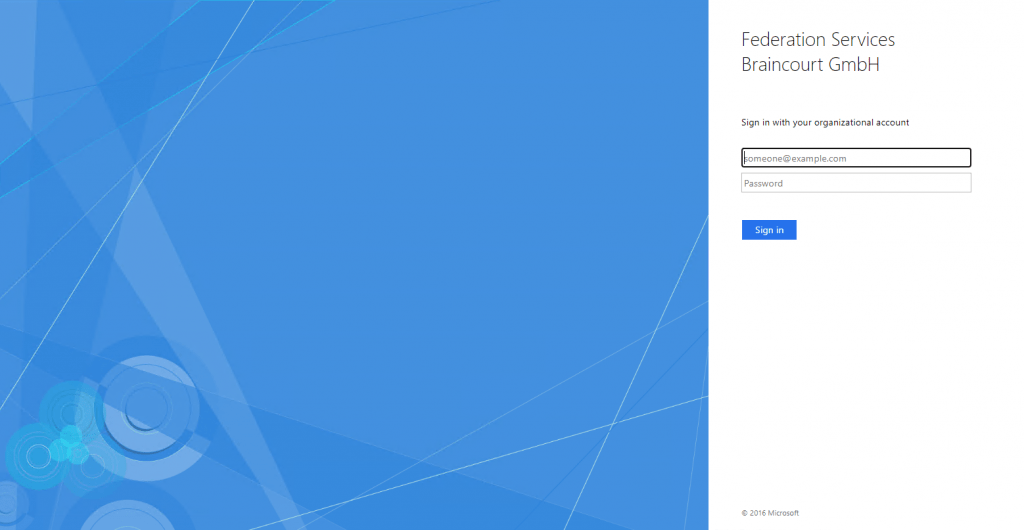
Now we can test if the SAML single sign-on integration works. Therefore I will open my confluence site.
In my case confluence successfully redirected me to the federation server but here wanted me to enter my credential to login.
The reason for was that on the AD FS server under Primary Authentication Methods, the Windows Authentication was missing.
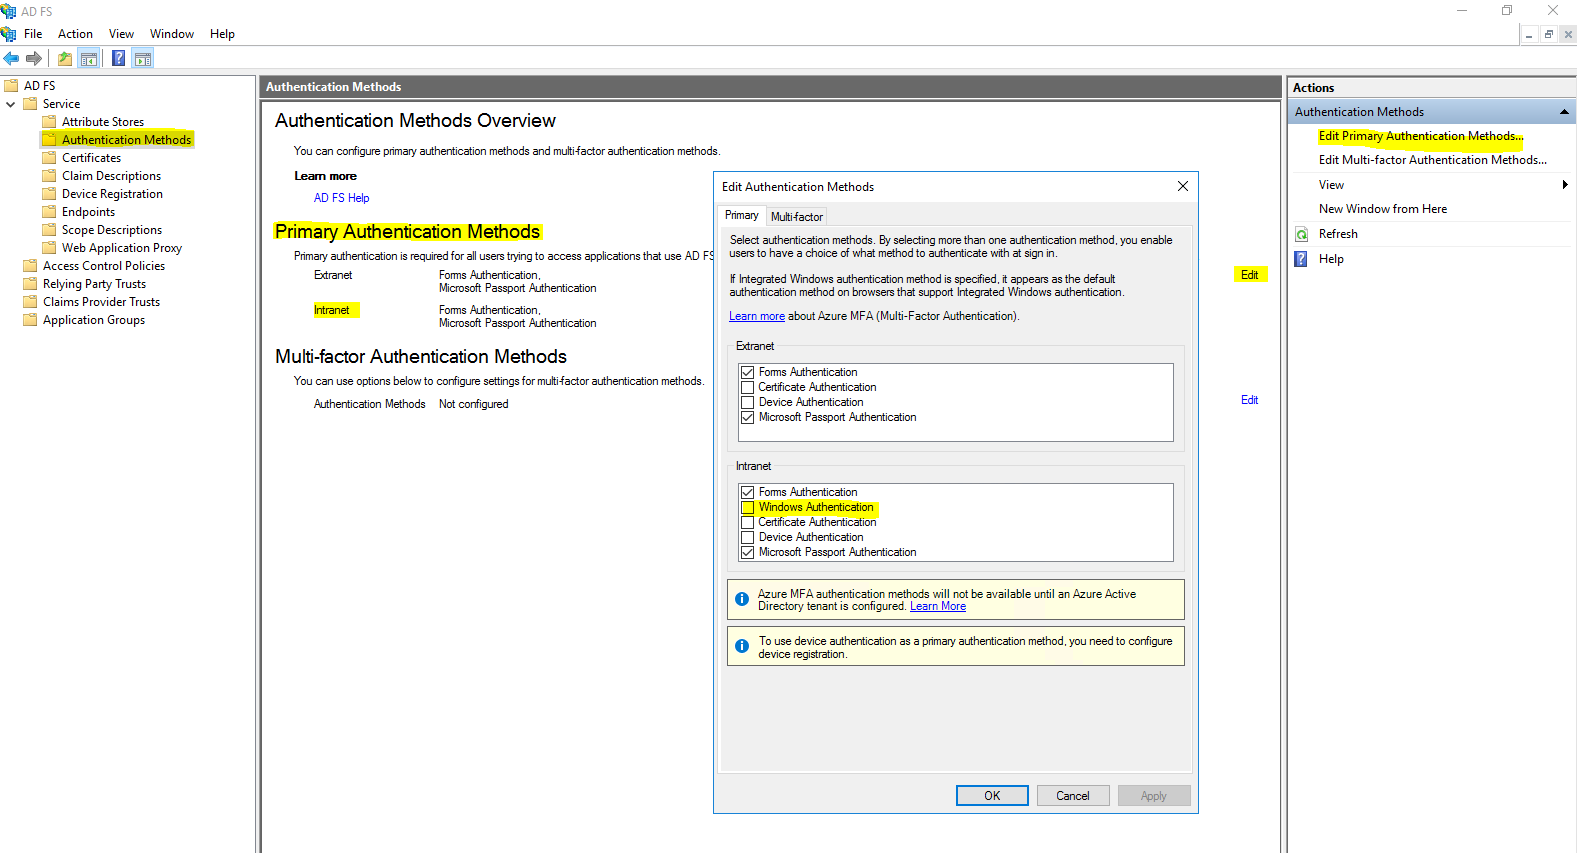
After adding Windows Authentication to the primary authentication methods for the intranet, I was logged successfully into confluence without the need to provide my credentials.
Configure Windows Integrated Authentication (WIA)
By default, Windows Integrated Authentication (WIA) is enabled in Active Directory Federation Services (AD FS) in Windows Server 2012 R2 and above for authentication requests that occur within the organization’s internal network (intranet) for any application that uses a browser for its authentication.
If not enabled by default, you can enable Windows Authentication to bypass the ADFS logon page for a real SSO experience as follows.

Configure browsers to use Windows Integrated Authentication (WIA) with AD FS
https://docs.microsoft.com/en-us/windows-server/identity/ad-fs/operations/configure-ad-fs-browser-wia
AD FS 2016 now has an improved default setting that enables the Edge browser to do WIA while not also (incorrectly) catching Windows Phone as well:
=~Windowss*NT.*Edg.*
The above means you no longer have to configure individual user agent strings to support common Edge scenarios, even though they are updated quite often.
For other browsers, configure the AD FS property WiaSupportedUserAgents to add the required values based on the browsers you are using. You can use the procedures below.
View WIASupportedUserAgent settings
The WIASupportedUserAgents defines the user agents which support WIA. AD FS analyzes the user agent string when performing logins in a browser or browser control.
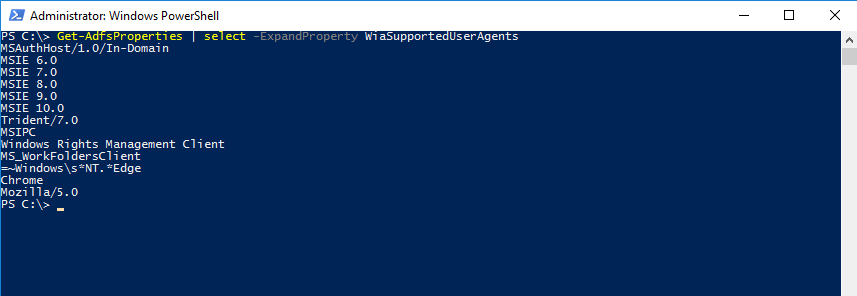
You can view the current settings using the following PowerShell example:
Get-AdfsProperties | select -ExpandProperty WiaSupportedUserAgents
Change WIASupportedUserAgent settings
By default, a new AD FS installation has a set of user agent string matches created. However, these may be out of date based on changes to browsers and devices. Particularly, Windows devices have similar user agent strings with minor variations in the tokens. The following Windows PowerShell example provides the best guidance for the current set of devices that are on the market today that support seamless WIA:
For AD FS on Windows Server 2016 or later:
Set-AdfsProperties -WIASupportedUserAgents @(“MSIE 6.0”, “MSIE 7.0; Windows NT”, “MSIE 8.0”, “MSIE 9.0”, “MSIE 10.0; Windows NT 6”, “Windows NT 6.3; Trident/7.0”, “Windows NT 6.3; Win64; x64; Trident/7.0”, “Windows NT 6.3; WOW64; Trident/7.0”, “Windows NT 6.2; Trident/7.0”, “Windows NT 6.2; Win64; x64; Trident/7.0”, “Windows NT 6.2; WOW64; Trident/7.0”, “Windows NT 6.1; Trident/7.0”, “Windows NT 6.1; Win64; x64; Trident/7.0”, “Windows NT 6.1; WOW64; Trident/7.0″,”Windows NT 10.0; WOW64; Trident/7.0”, “MSIPC”, “Windows Rights Management Client”, “=~WindowssNT.Edg.*”)
Add a user agent string for Chrome in ADFS configuration:
Set-AdfsProperties -WIASupportedUserAgents ((Get-ADFSProperties | Select -ExpandProperty WIASupportedUserAgents) + “Chrome”)
Add a user agent string for Firefox in ADFS configuration:
Set-AdfsProperties -WIASupportedUserAgents ((Get-ADFSProperties | Select -ExpandProperty WIASupportedUserAgents) + “Mozilla/5.0”)
Links
Configure browsers to use Windows Integrated Authentication (WIA) with AD FS
https://docs.microsoft.com/en-us/windows-server/identity/ad-fs/operations/configure-ad-fs-browser-wia
Configure SAML single sign-on with AD FS
https://support.atlassian.com/security-and-access-policies/docs/configure-saml-single-sign-on-with-ad-fs/
Tutorial: Azure Active Directory single sign-on (SSO) integration with Confluence SAML SSO by Microsoft (Azure AD)
https://docs.microsoft.com/en-us/azure/active-directory/saas-apps/confluencemicrosoft-tutorial