How to extend LVM Logical Volumes stored on extended Disk Partitions instead on whole initialized Disks by using Growpart
Introduction
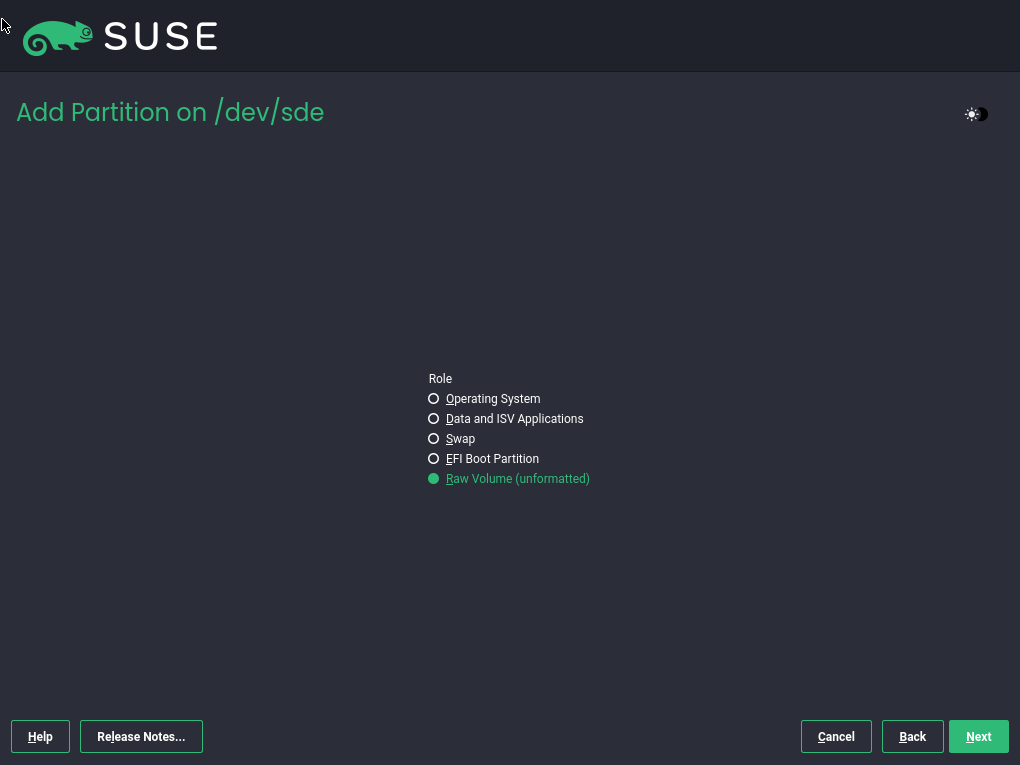
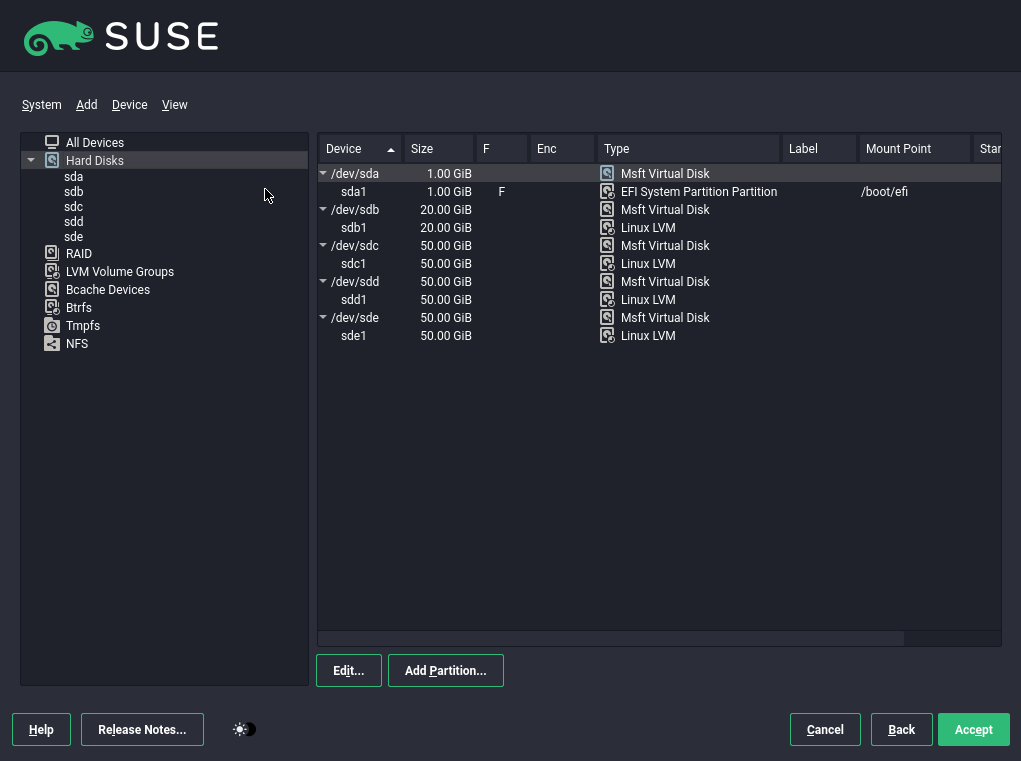
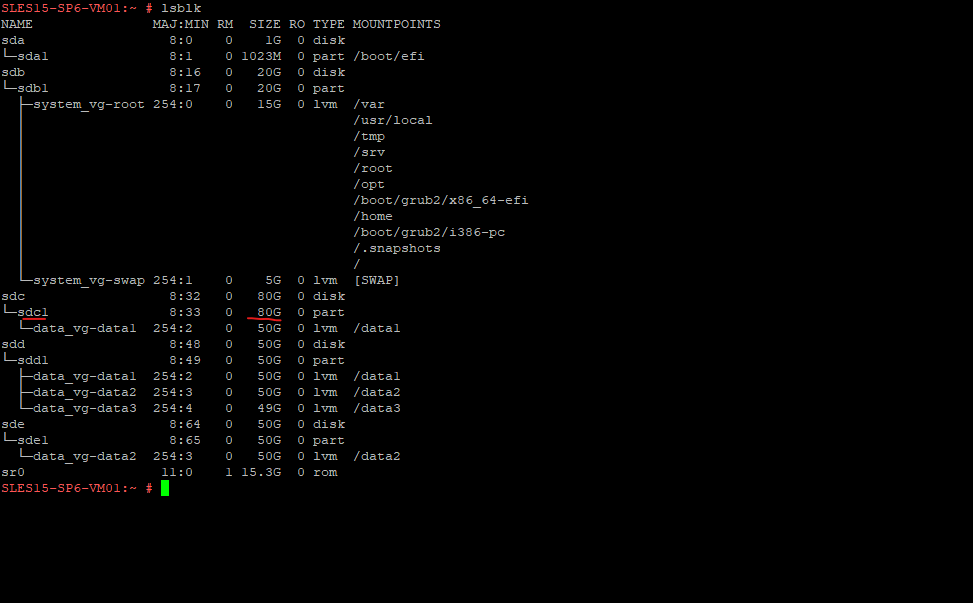
Set up the Disks
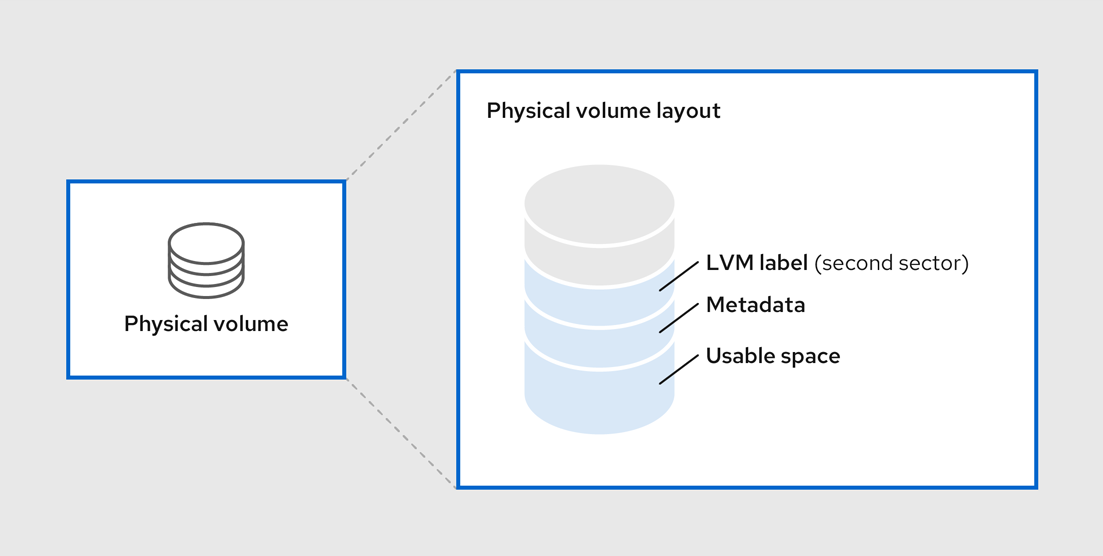
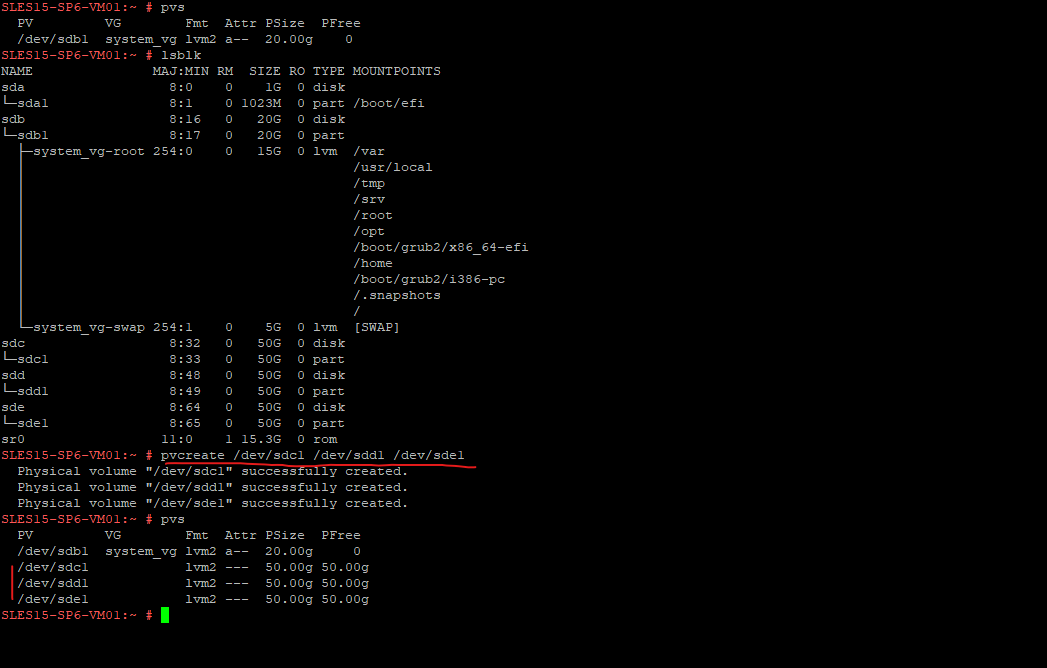
# pvcreate /dev/sdc1 /dev/sdd1 /dev/sde1
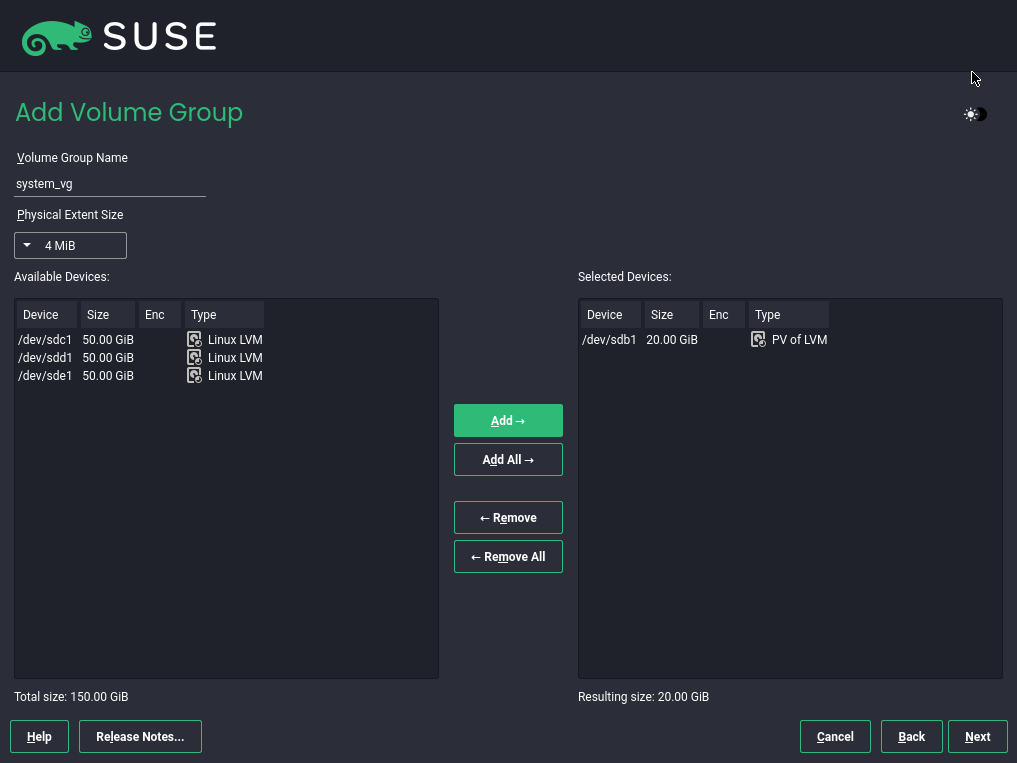
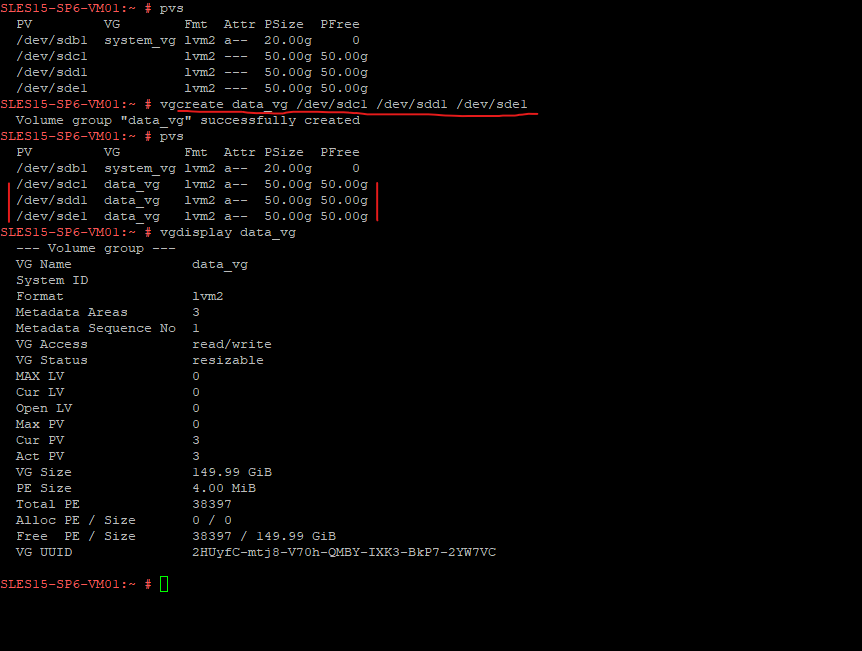
# vgcreate data_vg /dev/sdc1 /dev/sdd1 /dev/sde1
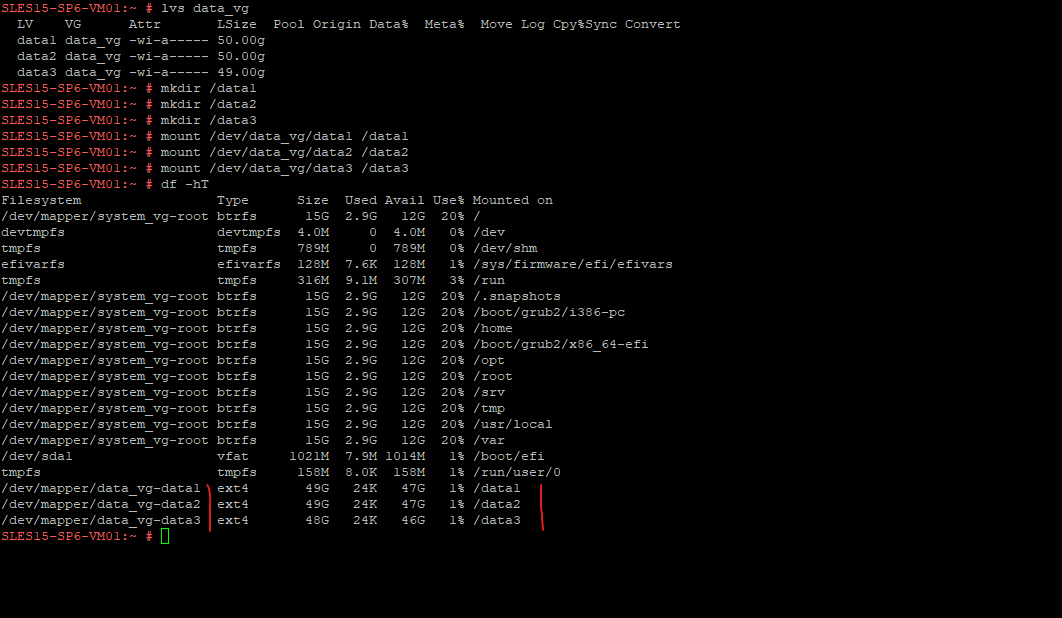
# lvcreate -L 50G -n data1 data_vg
# lvcreate -L 50G -n data2 data_vg
# lvcreate -L 50G -n data3 data_vg

To use all of the unallocated space we can use the following command:
# lvcreate -l 100%FREE -n data1 data_vg

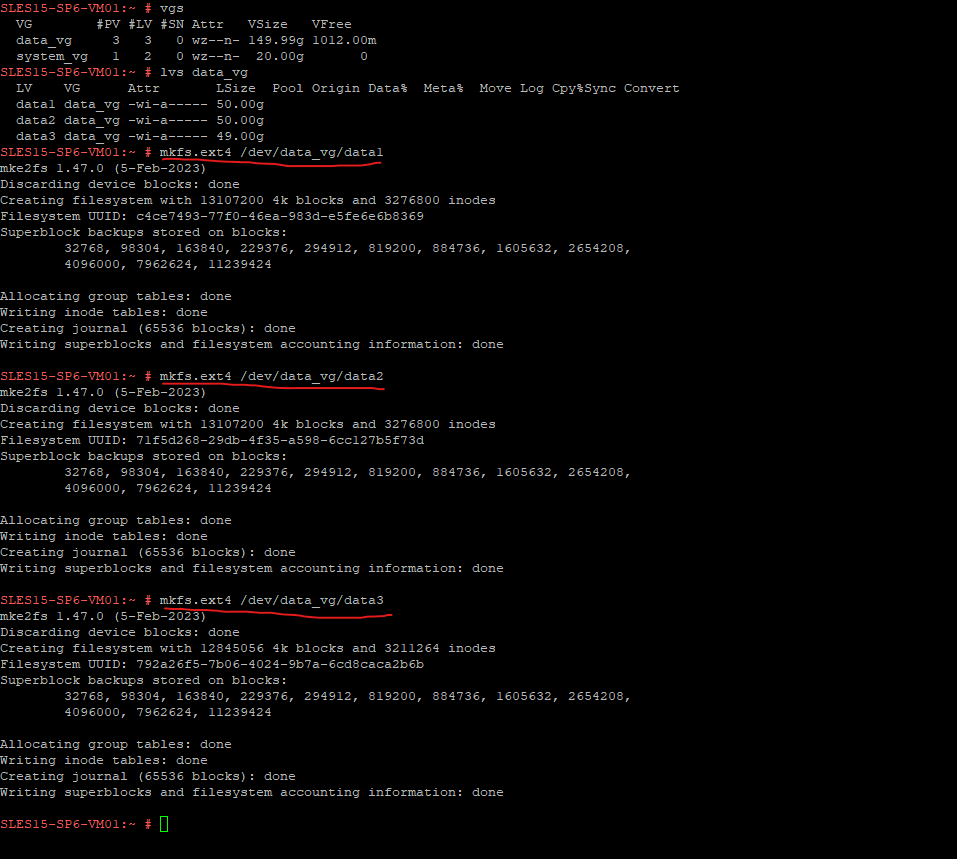
# mkfs.ext4 /dev/<volume group>/<logical volume>

# mkfs.ext4 /dev/data_vg/data1
# mkfs.ext4 /dev/data_vg/data2
# mkfs.ext4 /dev/data_vg/data3
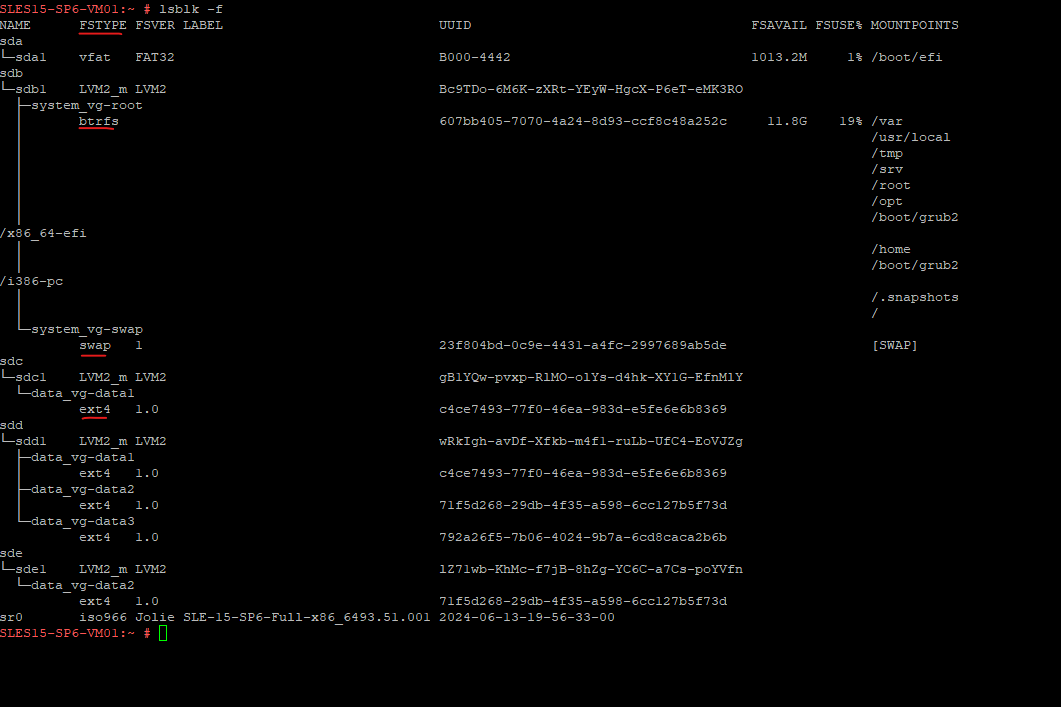
# mkdir /data1
# mkdir /data2
# mkdir /data3

# mount /dev/data_vg/data1 /data1
# mount /dev/data_vg/data2 /data2
# mount /dev/data_vg/data3 /data3
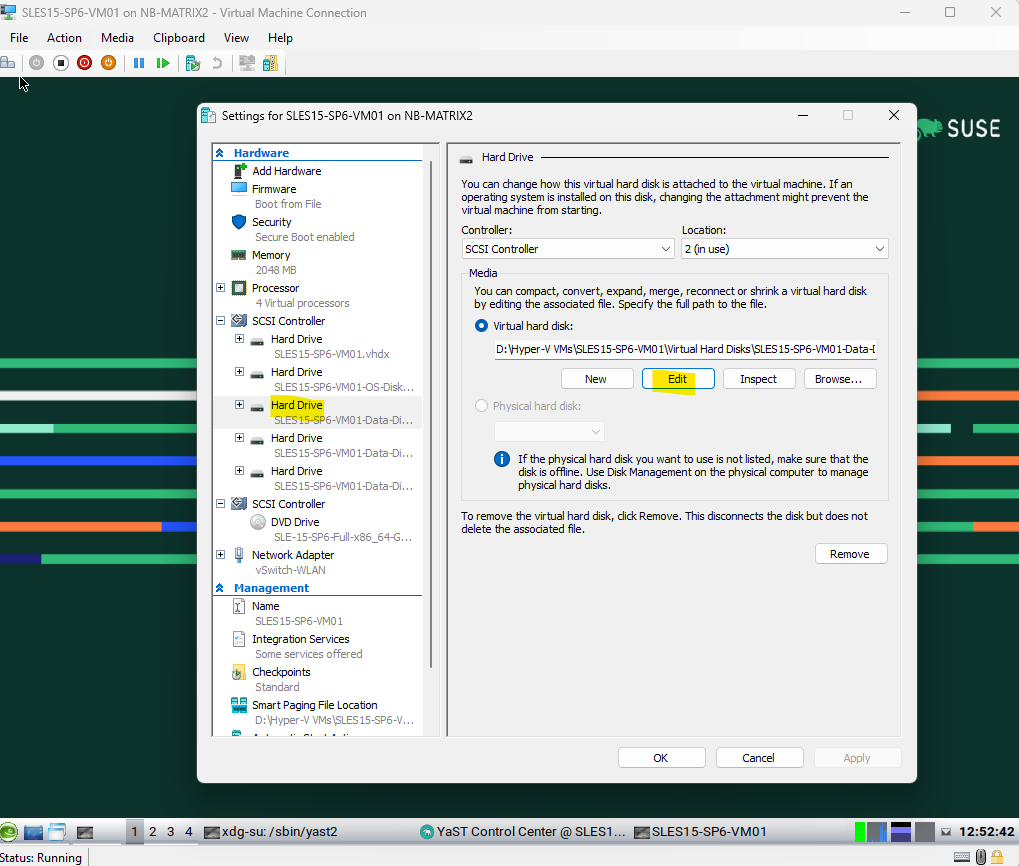
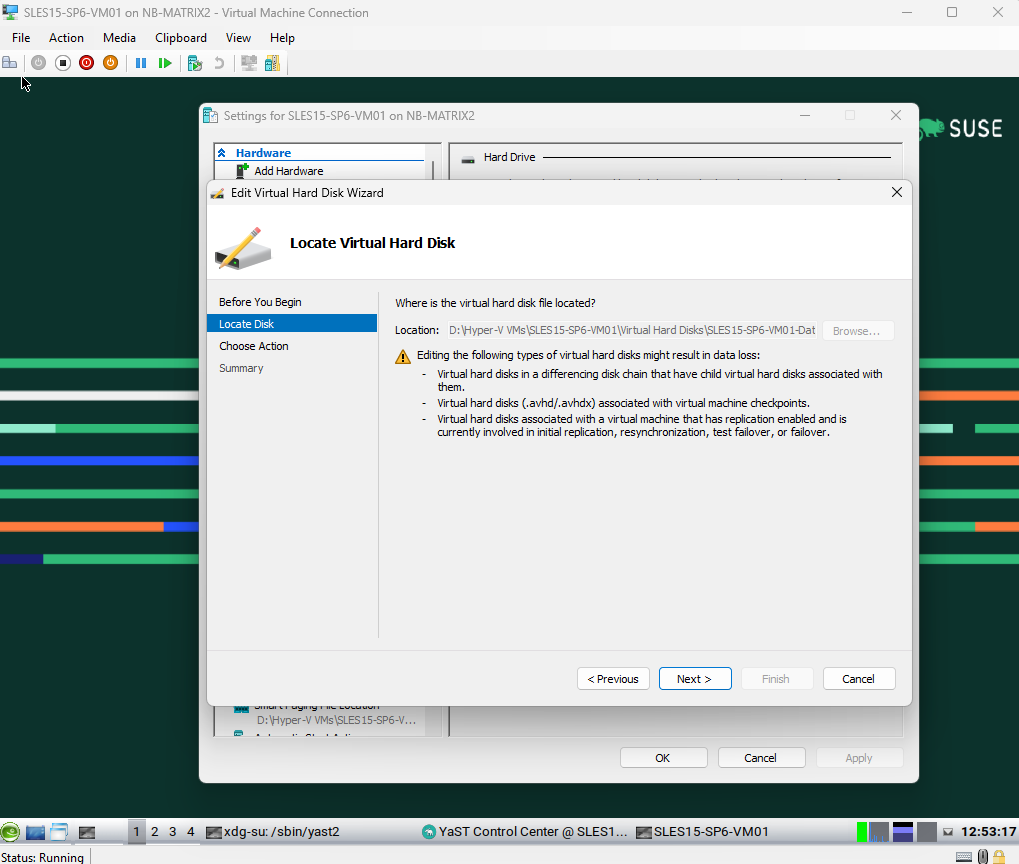
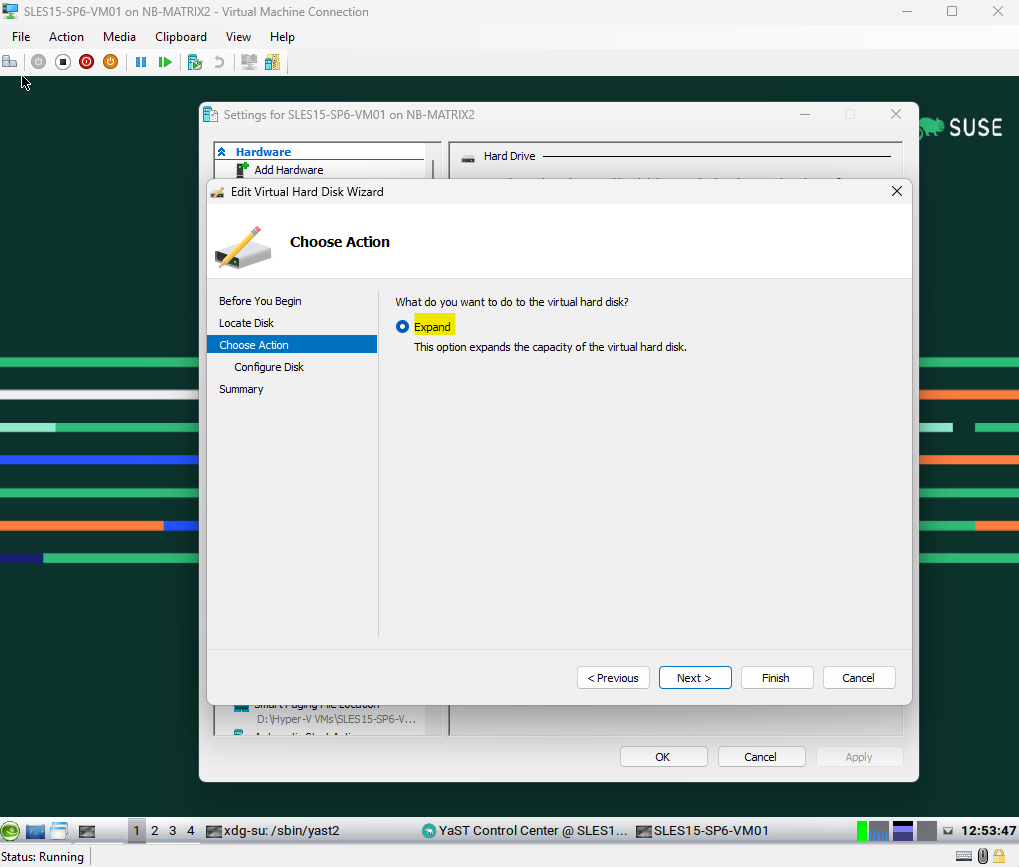
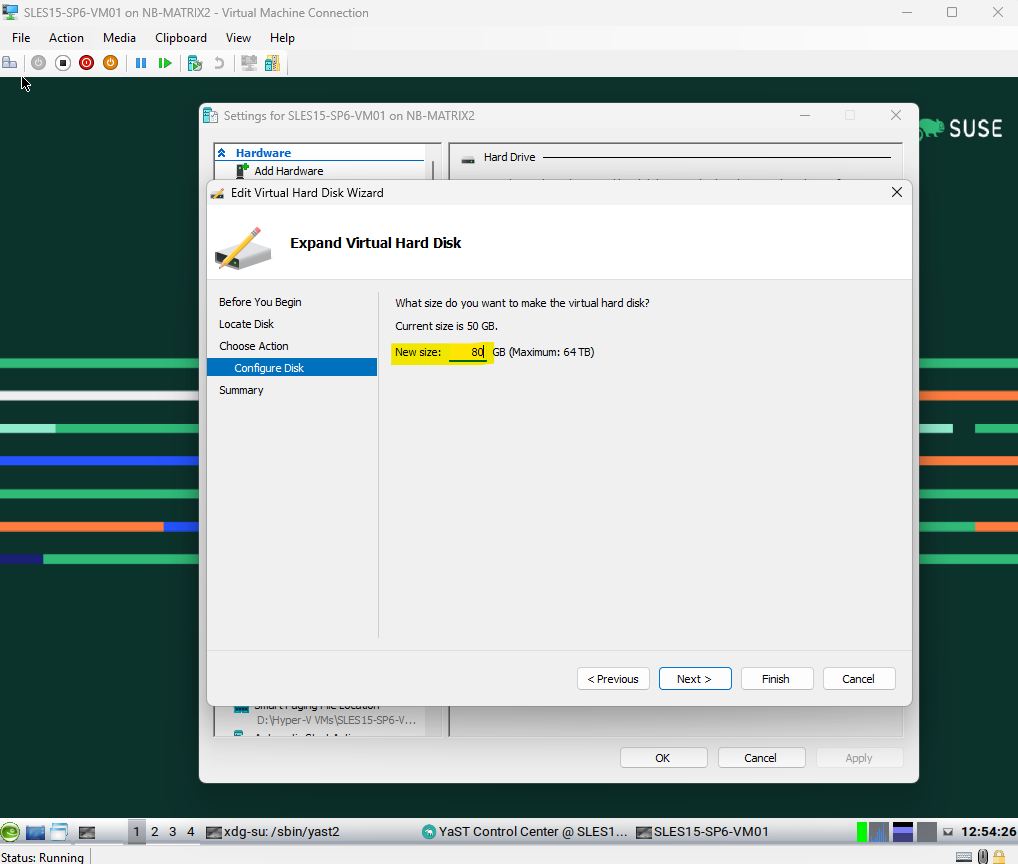
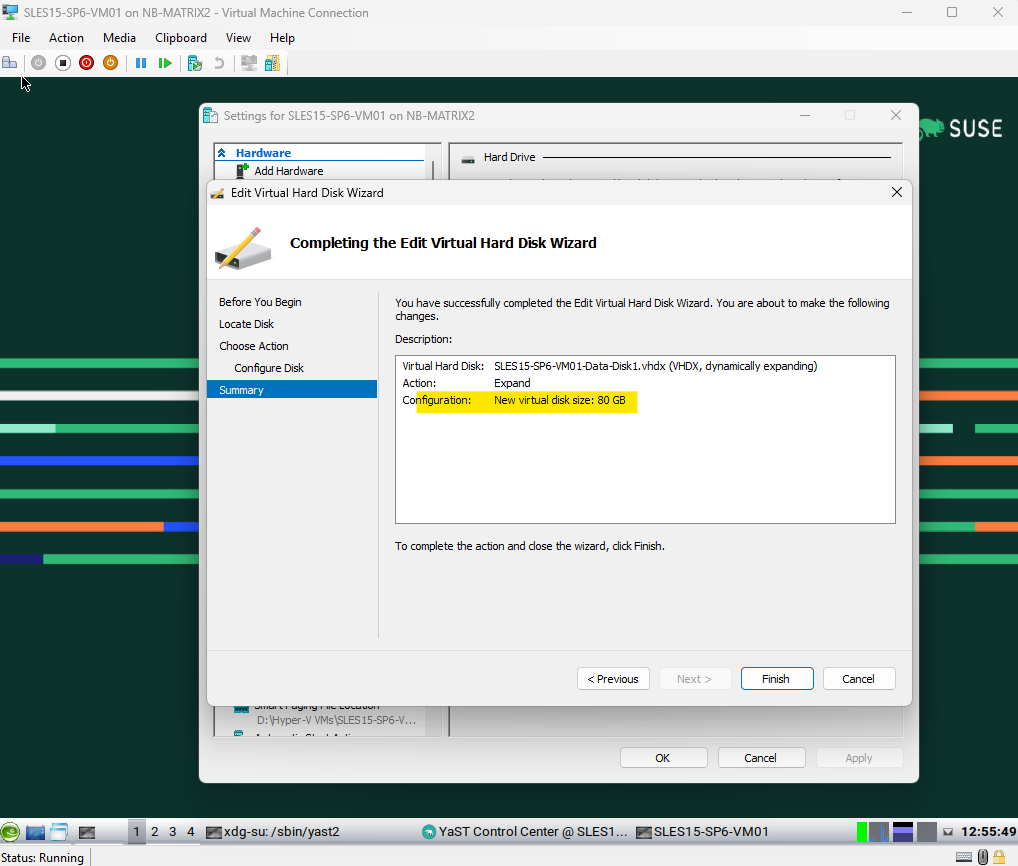
Expanding Virtual Hard Disk in Microsoft Hyper-V
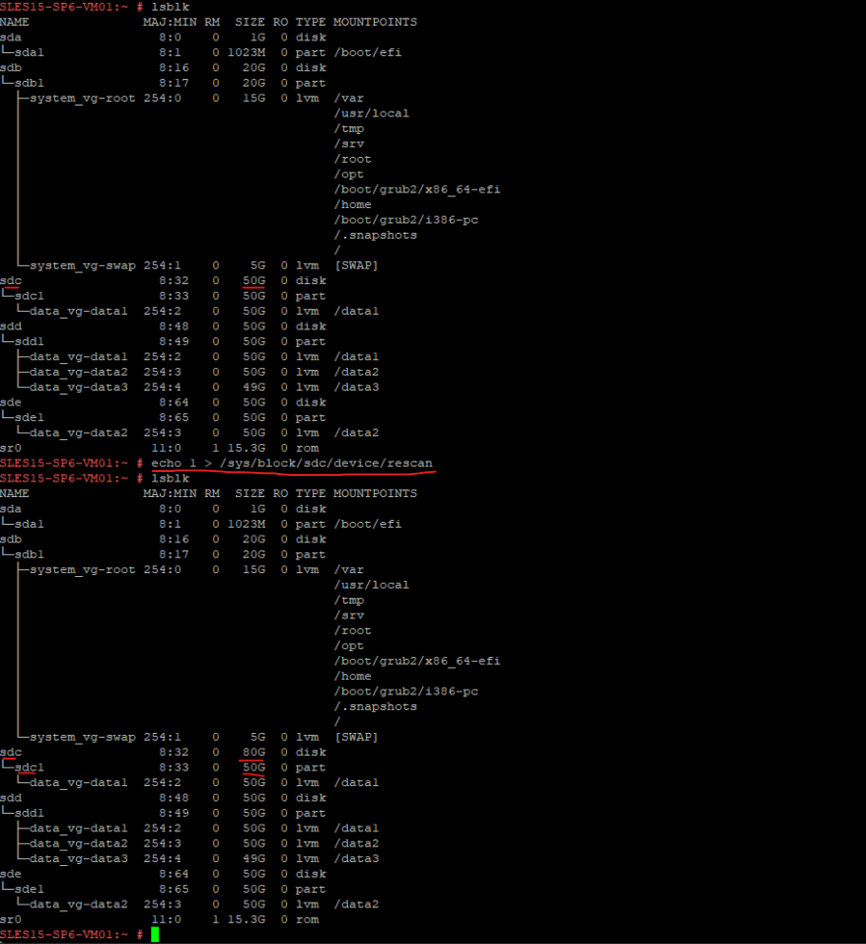
Rescan and Resize the Disks in Linux
# echo 1 > /sys/block/sdc/device/rescan
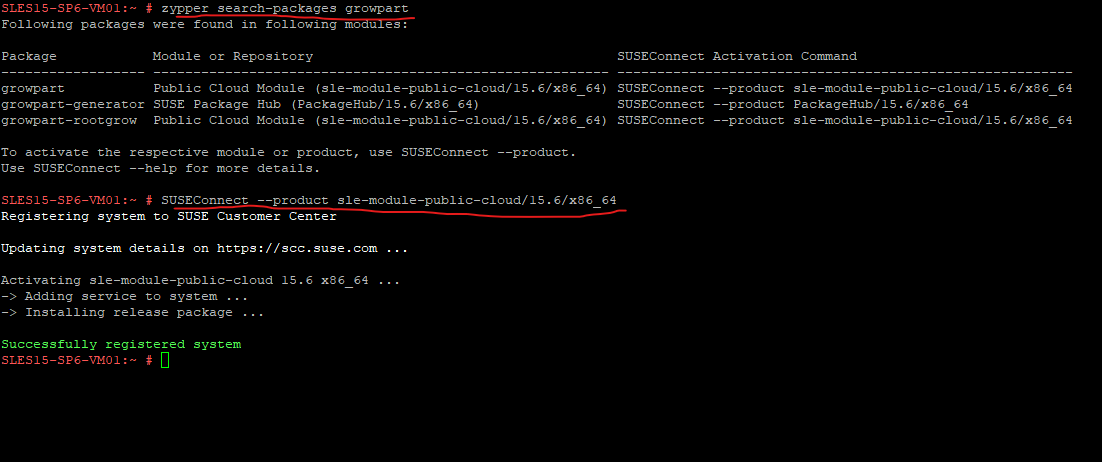
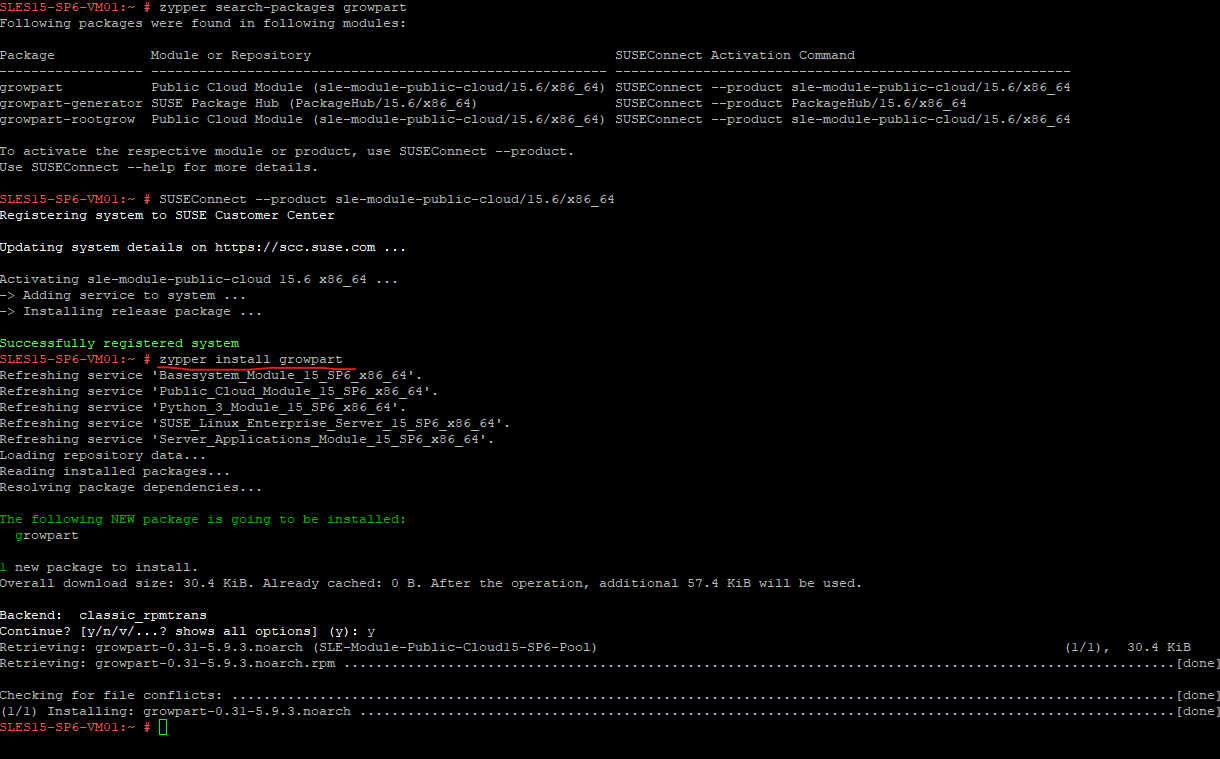
# zypper search-packages growpart
# SUSEConnect --product sle-module-public-cloud/15.6/x86_64
# zypper install growpart
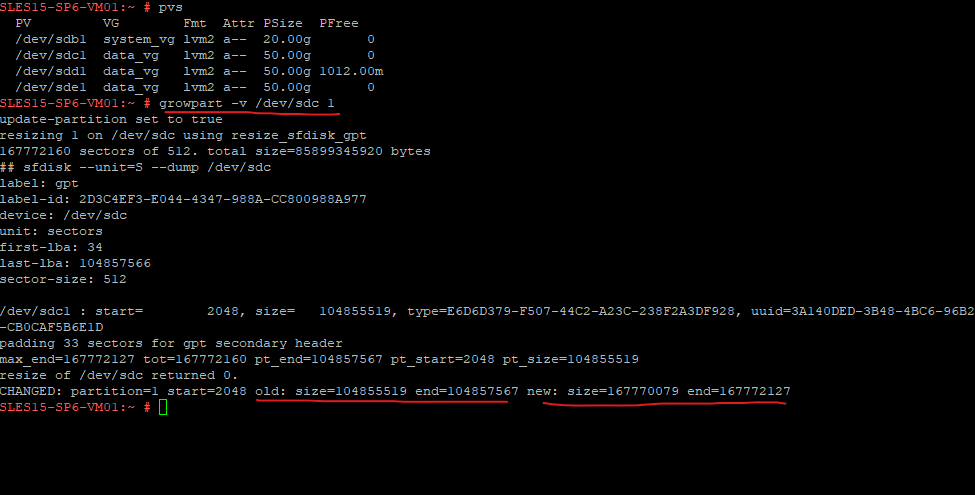
# growpart -v /dev/sdc 1

-v flag for verbose output

when you have a disk with two partitions, like sda1 and sda2 and you want to extend the last sda2 partition, we need to execute the following command, this will extend partition 2 on sda.
# growpart -v /dev/sda 2
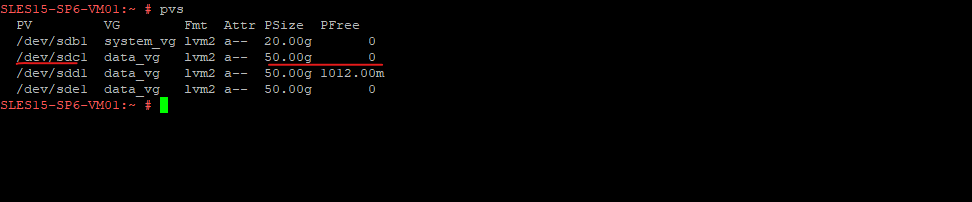
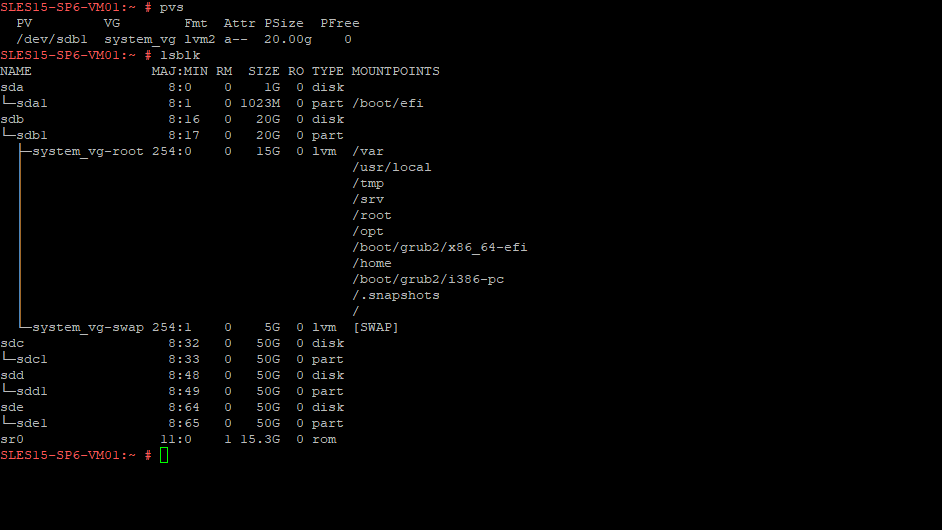
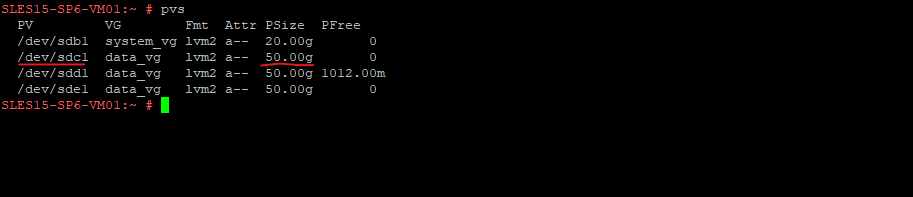
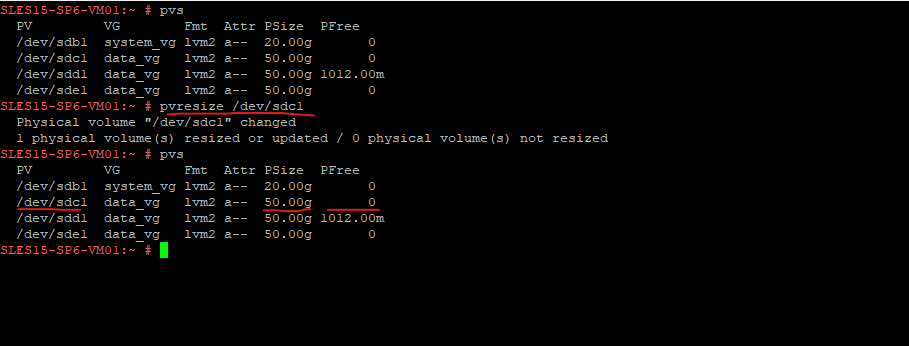
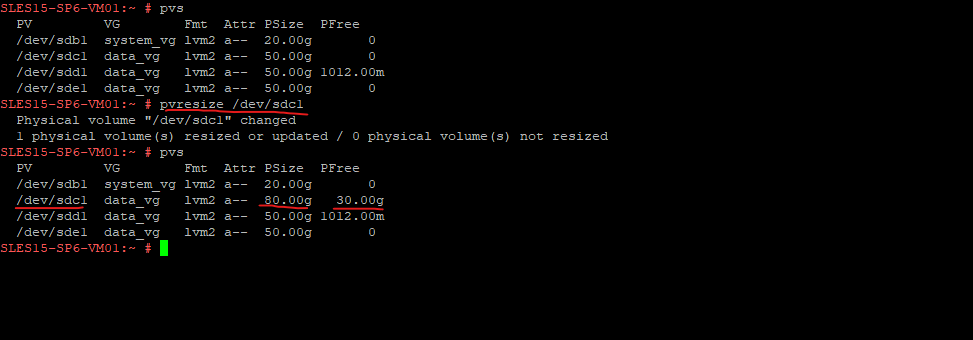
# pvresize /dev/sdc1
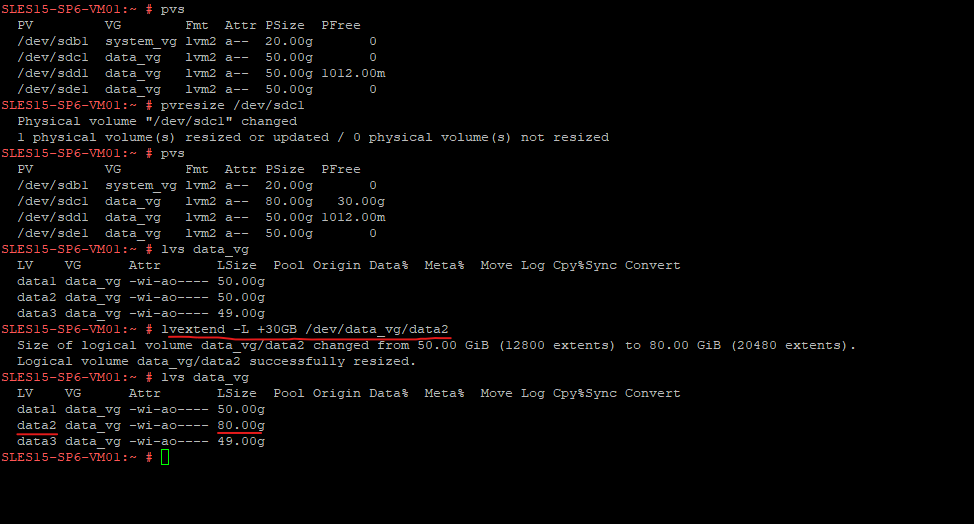
# lvextend -L+30G /dev/data_vg/data2

or by already adding the -r flag to also automatically resize the filesystem on the logical volume after the volume is extended (e.g., ext4, xfs).
-r | --resizefs
# lvextend -L+30G -r /dev/data_vg/data2


or
# lvextend -l +100%FREE /dev/data_vg/data2

or by already adding the -r flag to also automatically resize the filesystem on the logical volume after the volume is extended (e.g., ext4, xfs).
-r | --resizefs
# lvextend -l +100%FREE -r /dev/data_vg/data2
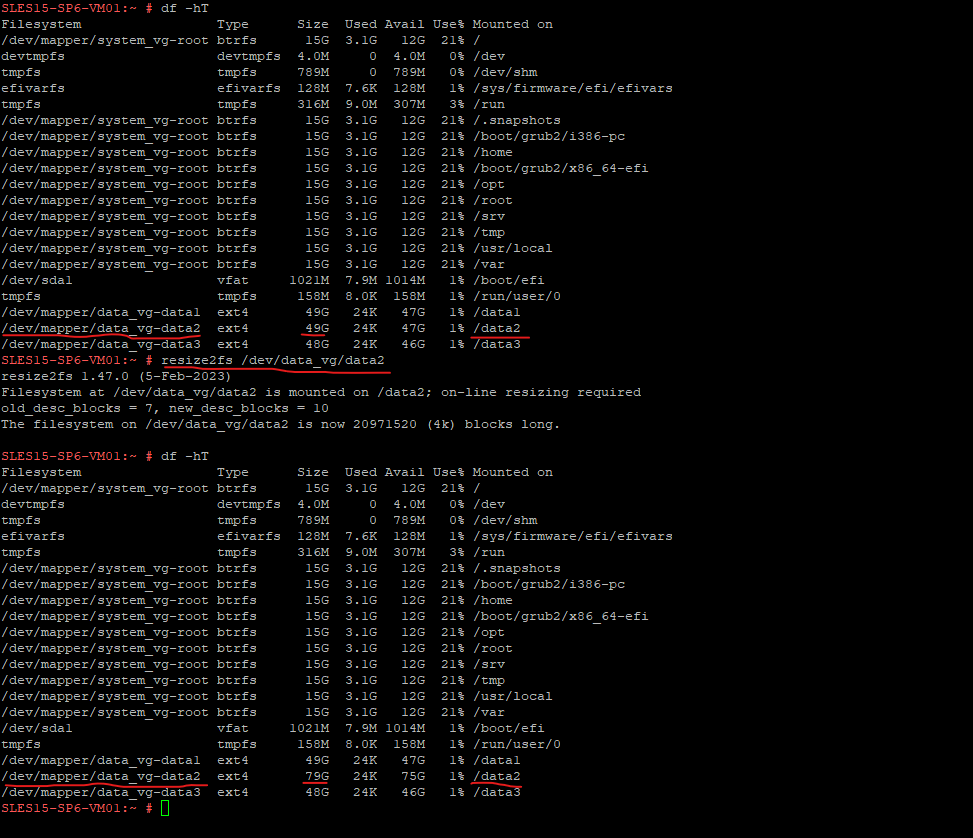
If not already done by using -r flag when running the lvextend commands above
# resize2fs /dev/<volume group>/<logical volume>

Grow the file system with all available space
# resize2fs /dev/data_vg/data2

Increase the file system to 20 GiB
# resize2fs /dev/data_vg/data2 20G

For the Btrfs File system

Increase the size by 40 GiB:
# btrfs filesystem resize +40G /

Decrease the size by 1 GiB: (also Online supported)
# btrfs filesystem resize -1G /

Set a specific fix size e.g. 30 GiB:
# btrfs filesystem resize 30G /

Resize to use all available space
# btrfs filesystem resize max /

Accepted size units for file system block sizes are:
S - 512 byte sectors
K - kilobytes
M - megabytes
G - gigabytes