How to replace the ESXi Certificate with a Custom Certificate
By default, ESXi hosts use certificates issued by the VMware Certificate Authority (VMCA), which are self-signed and trusted within the vSphere environment.
However, in many cases, organizations may need to replace these default certificates with custom certificates signed by a trusted external Certificate Authority (CA) or a trusted internal CA to meet compliance requirements, enhance security, or integrate with third-party tools.
In this post, we will see step-by-step how to replace the ESXi host certificate with a custom certificate issued by a trusted internal CA (Active Directory Certificate Services AD CS).
About how to renew/regenerate the vCenter Server Certificate, you can read my following post. I will also show here how to use a custom certificate for the vCenter.
Create the Certificate Signing Request (CSR)
Fist we need to generate the certificate signing request (CSR) and private key for the new custom certificate.
Connect to your ESXi Host by using SSH.
PS> ssh root@esxi-01.matrixpost-lab.net
In the /etc/vmware/ssl directory, create a file by running the following command.
[root@ESXi-01:/etc/vmware/ssl] vi ESXi.cfg
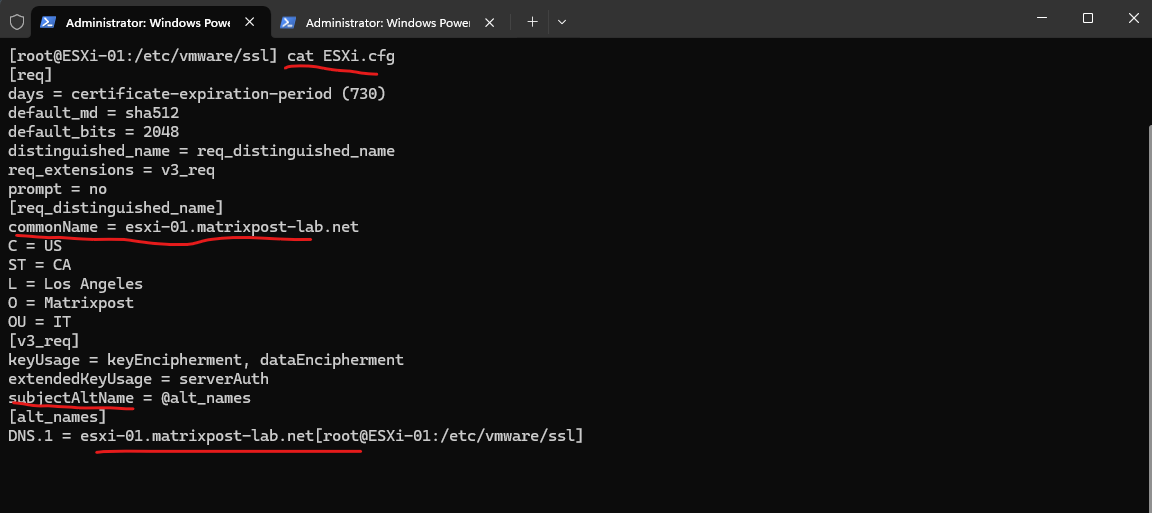
Place the following content in the ESXi.cfg file.
Adjust to your values for country, common name, dns, ….
[req]
days = certificate-expiration-period (730)
default_md = sha512
default_bits = 2048
distinguished_name = req_distinguished_name
req_extensions = v3_req
prompt = no
[req_distinguished_name]
commonName = esxi-01.matrixpost-lab.net
C = US
ST = CA
L = Los Angeles
O = Matrixpost
OU = IT
[v3_req]
keyUsage = keyEncipherment, dataEncipherment
extendedKeyUsage = serverAuth
subjectAltName = @alt_names
[alt_names]
DNS.1 = esxi-01.matrixpost-lab.net
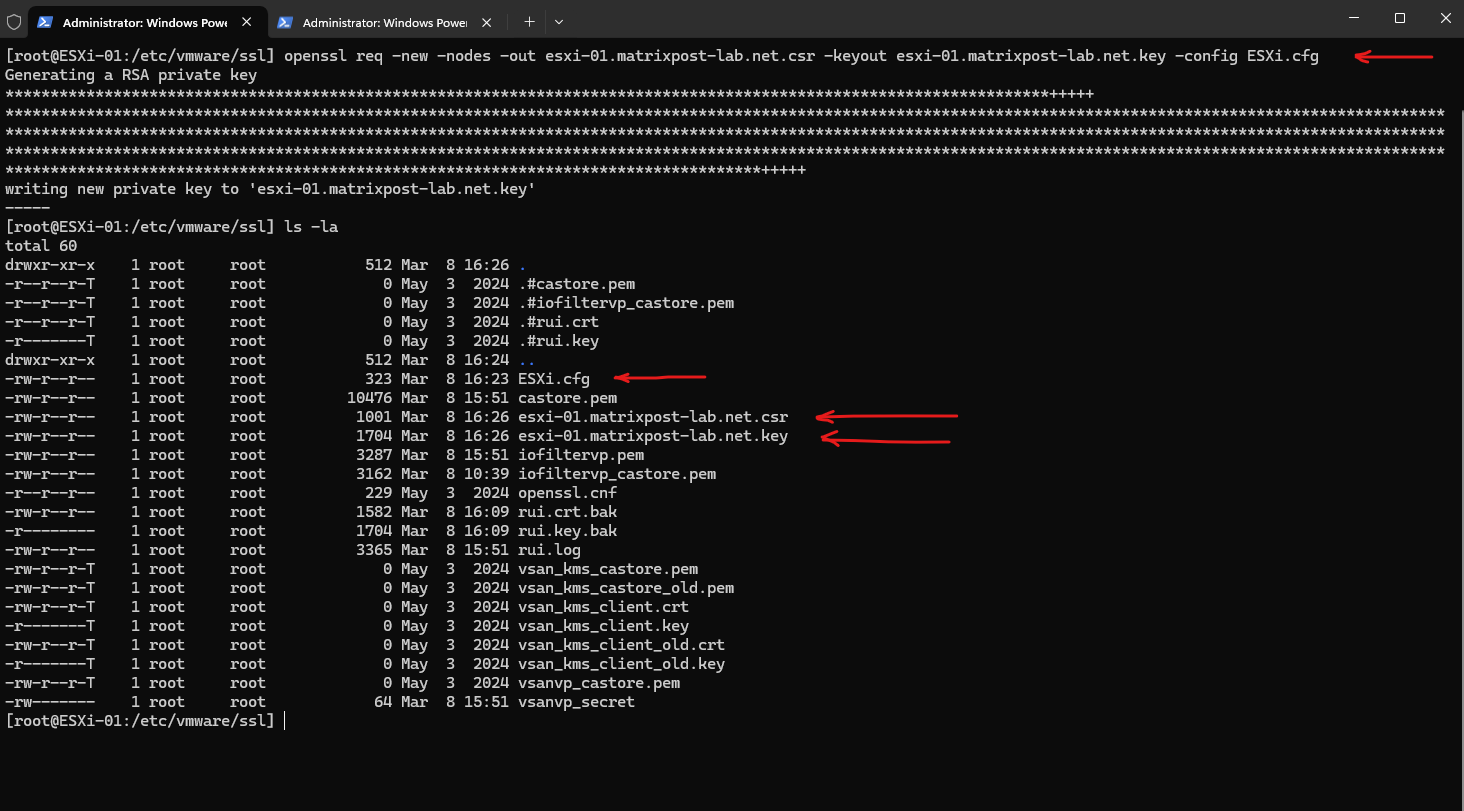
Run the following command to generate a private key and a CSR file, replacing the values in the example command.
[root@ESXi-01:/etc/vmware/ssl] openssl req -new -nodes -out esxi-01.matrixpost-lab.net.csr -keyout esxi-01.matrixpost-lab.net.key -config ESXi.cfg
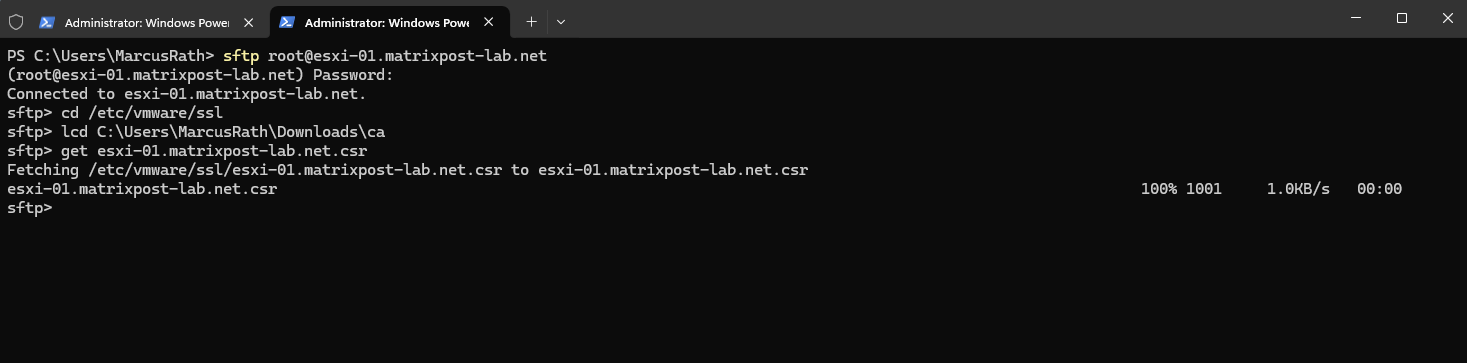
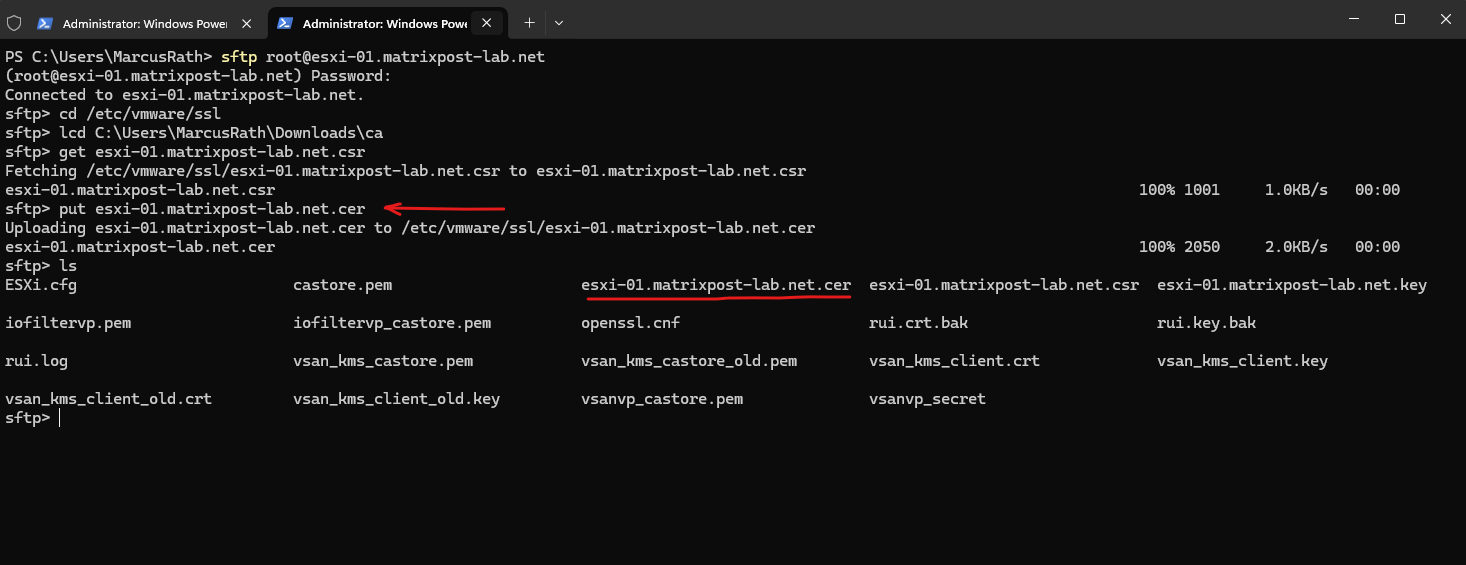
We can now download the CSR by using the SFTP protocol.
PS> sftp root@esxi-01.matrixpost-lab.net

sftp> cd /etc/vmware/ssl
sftp> lcd C:\Users\MarcusRath\Downloads\ca
sftp> get esxi-01.matrixpost-lab.net.csr
We can now go to our internal CA and request a new certificate signed by our CA. The steps how to you will find in the following link when I was replacing the vCenter Server certificate with a custom certificate issued by my internal CA https://blog.matrixpost.net/how-to-renew-regenerate-the-vcenter-server-certificate/#csr.
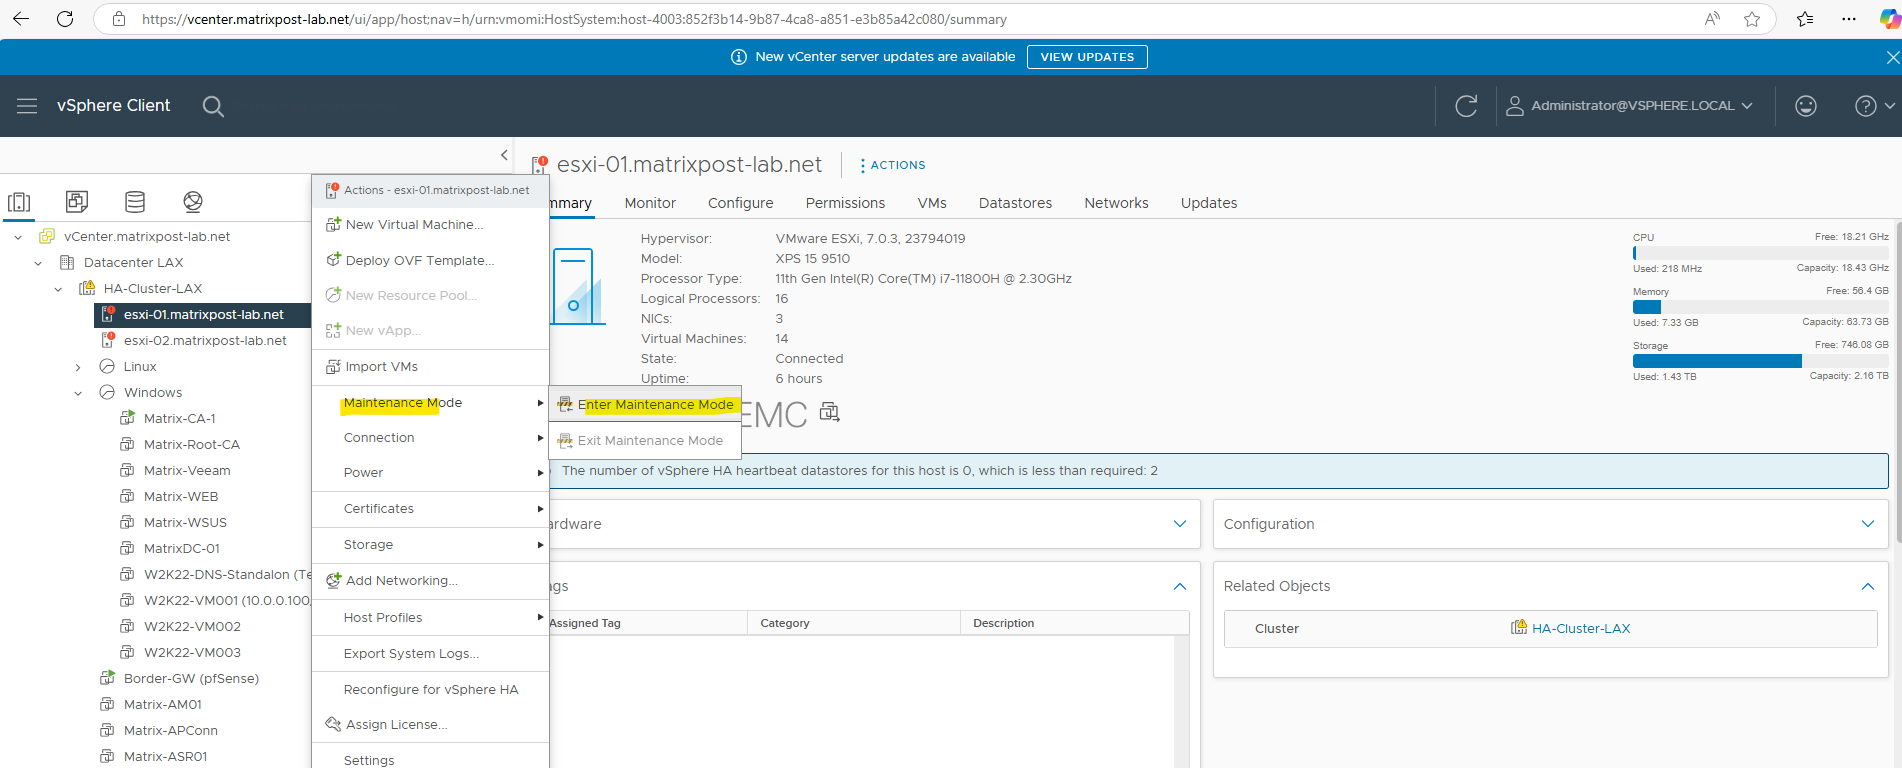
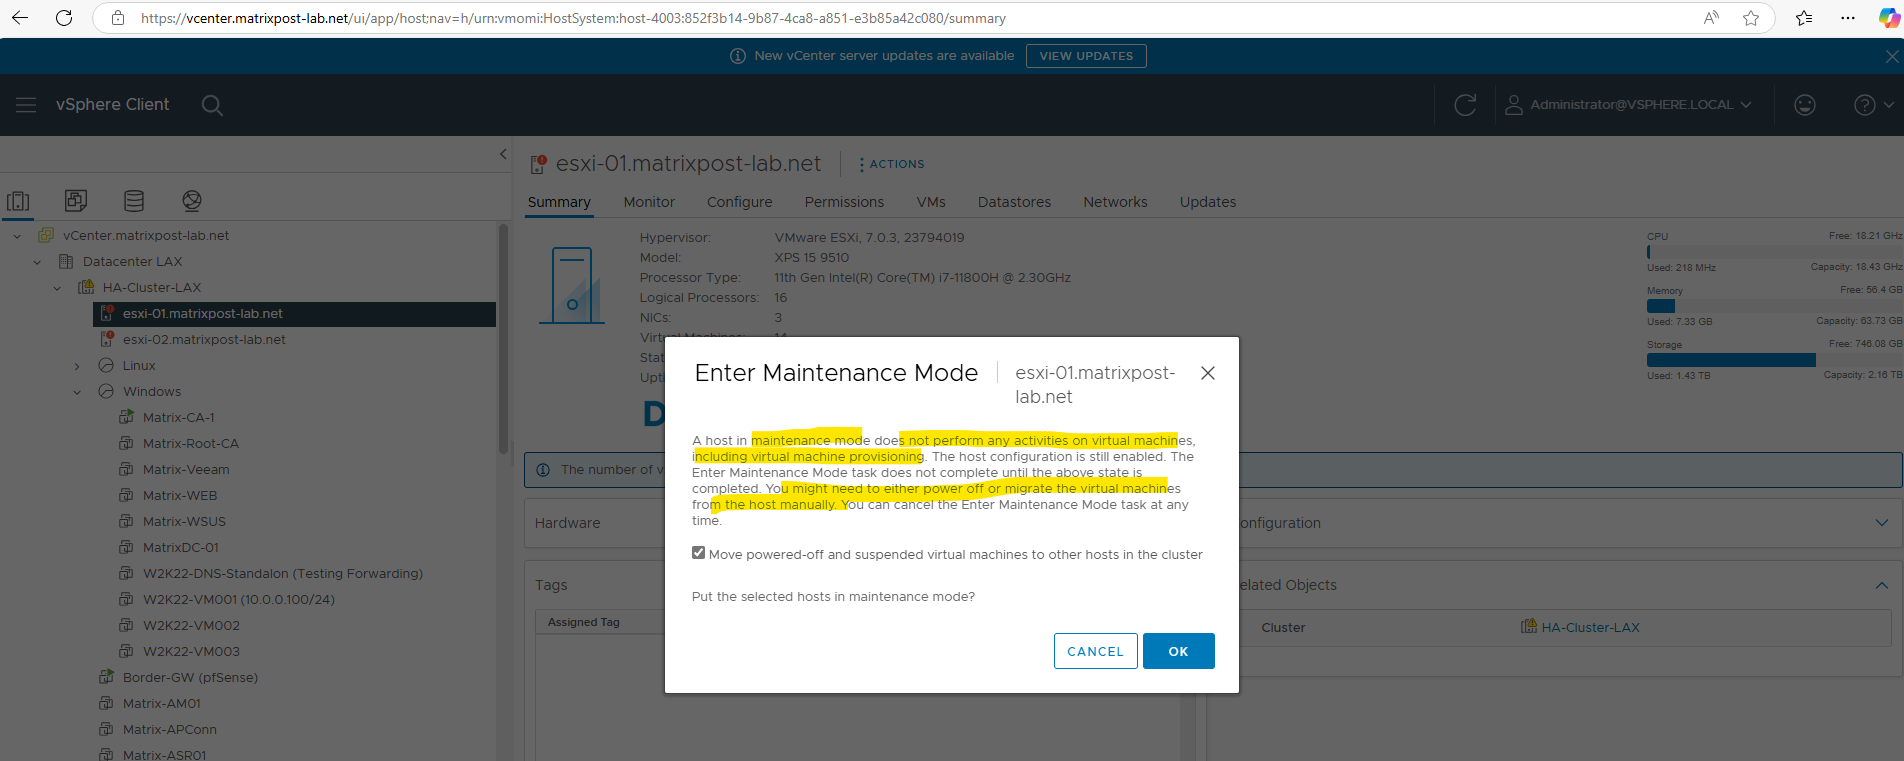
Prepare the ESXi Host (Maintenance Mode & Disconnect from vCenter)
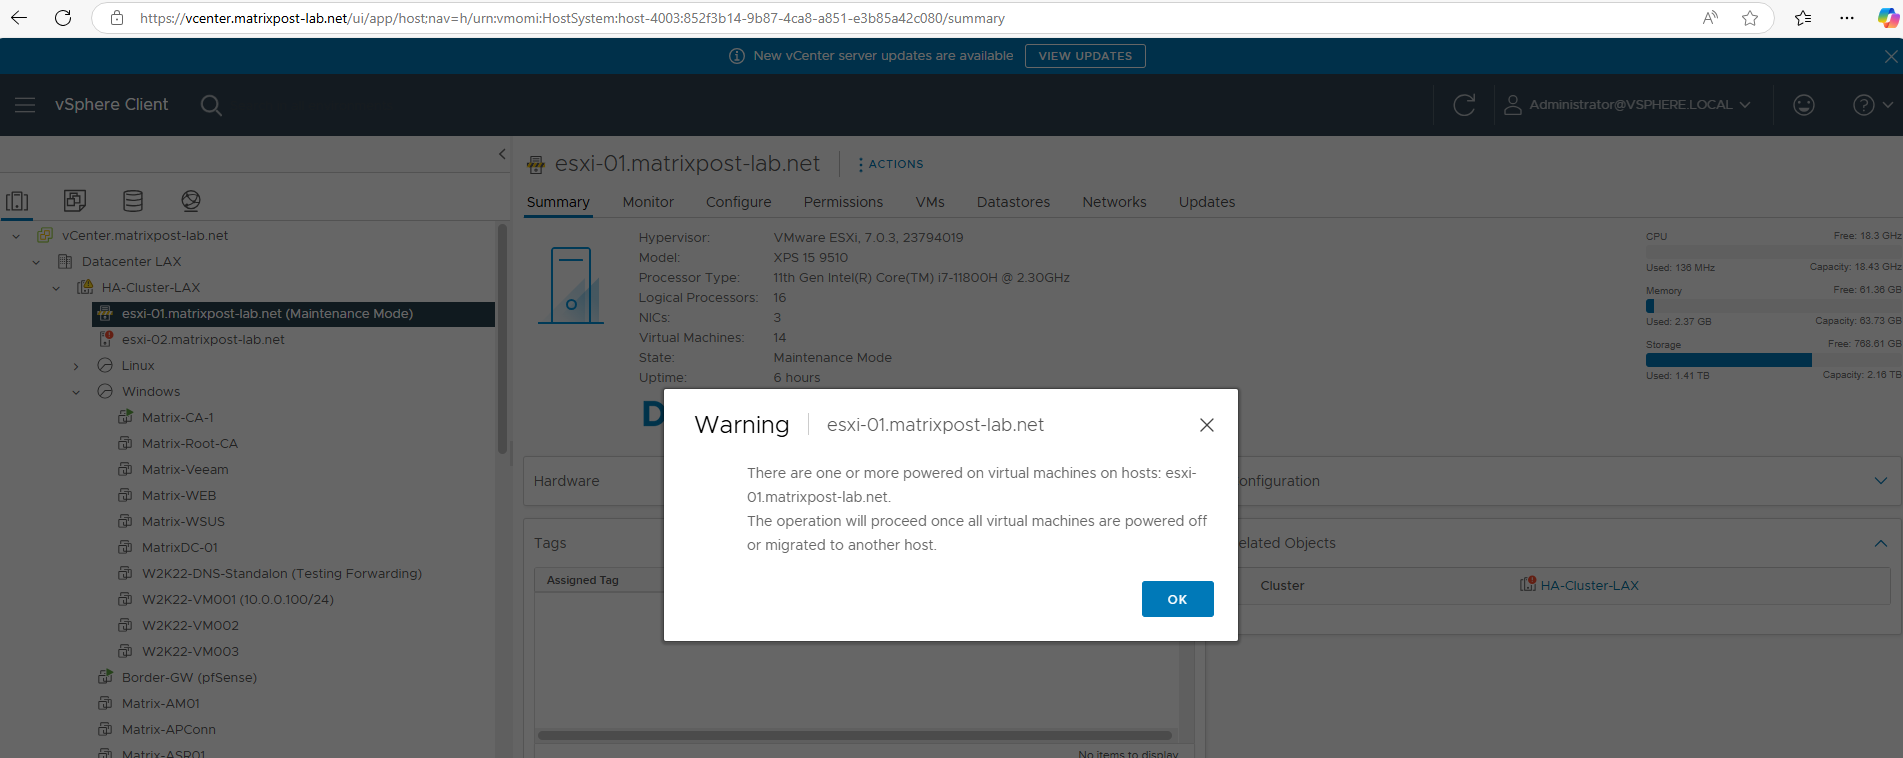
Before we can replace the certificates, we first need to place the ESXi host in maintenance mode.

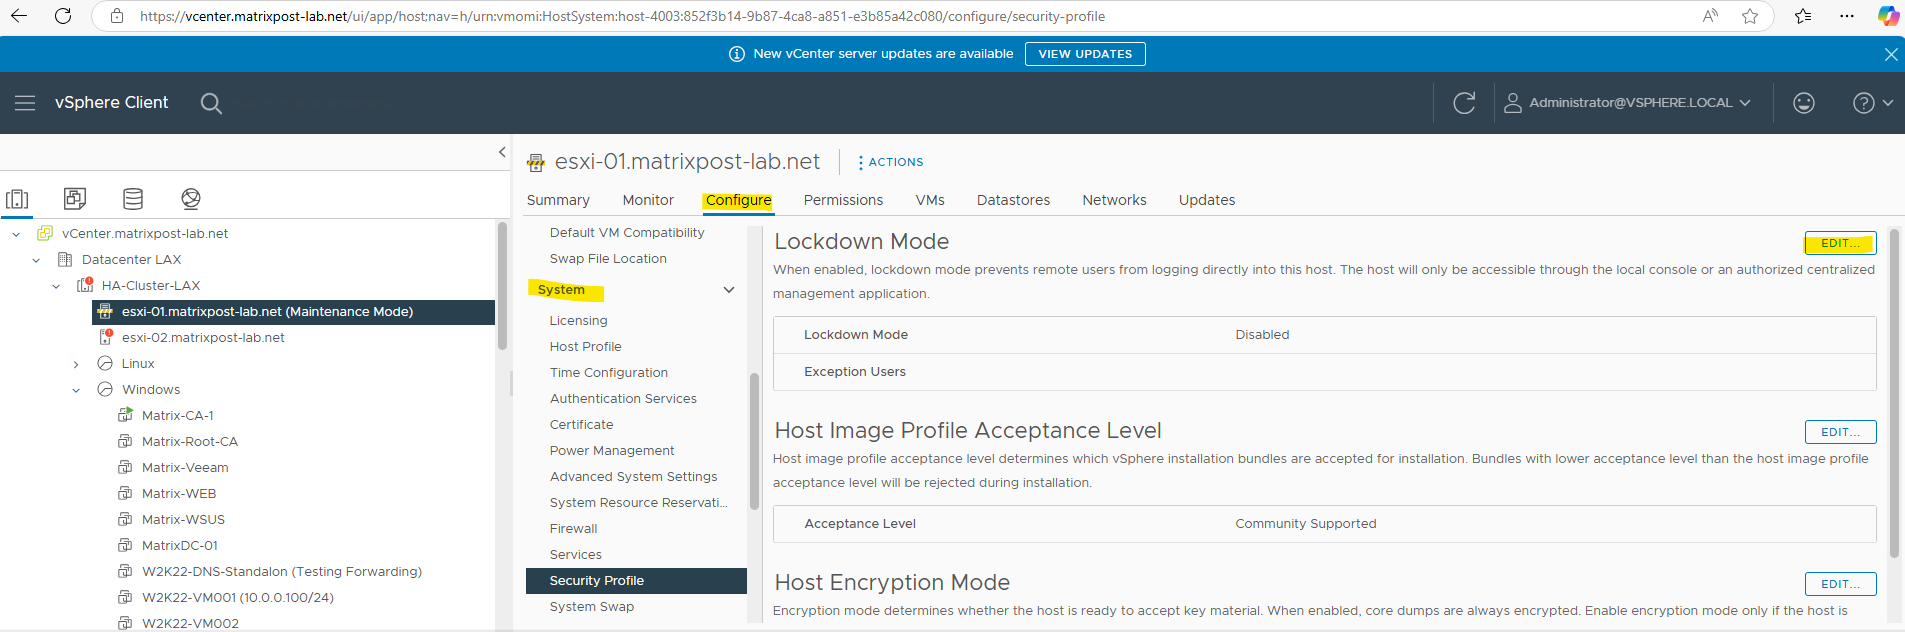
Next we need to deactivate ESXi lockdown mode in case this is enabled. In my case this already disabled and wouldn’t make sense for my lab environment just used by myself.
When ESXi lockdown mode is enabled, lockdown mode prevents remote users from logging directly into this host. The host will only be accessible through the local console or an authorized centralized management application.
To change this we need to click on Edit below.
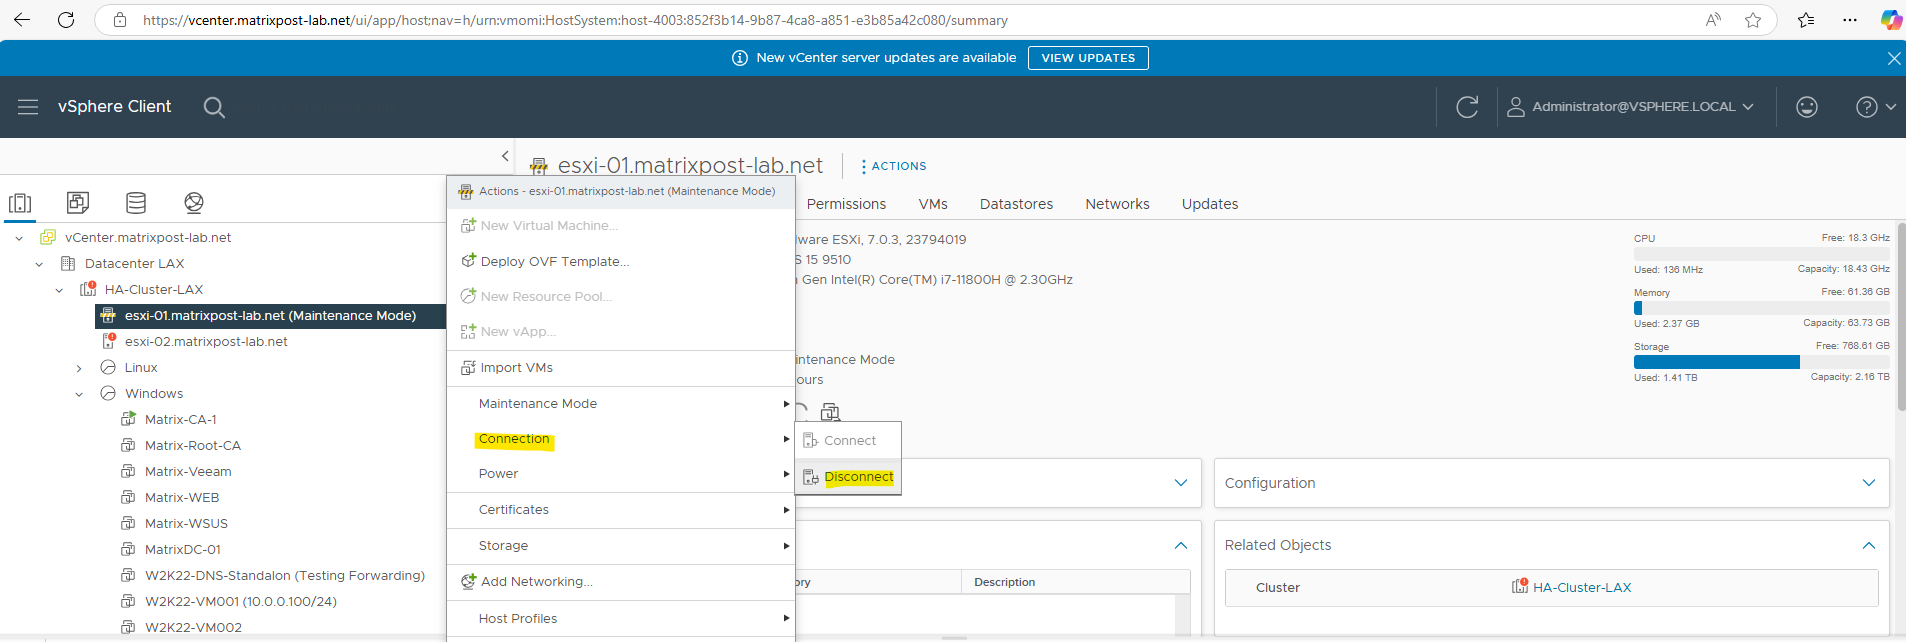
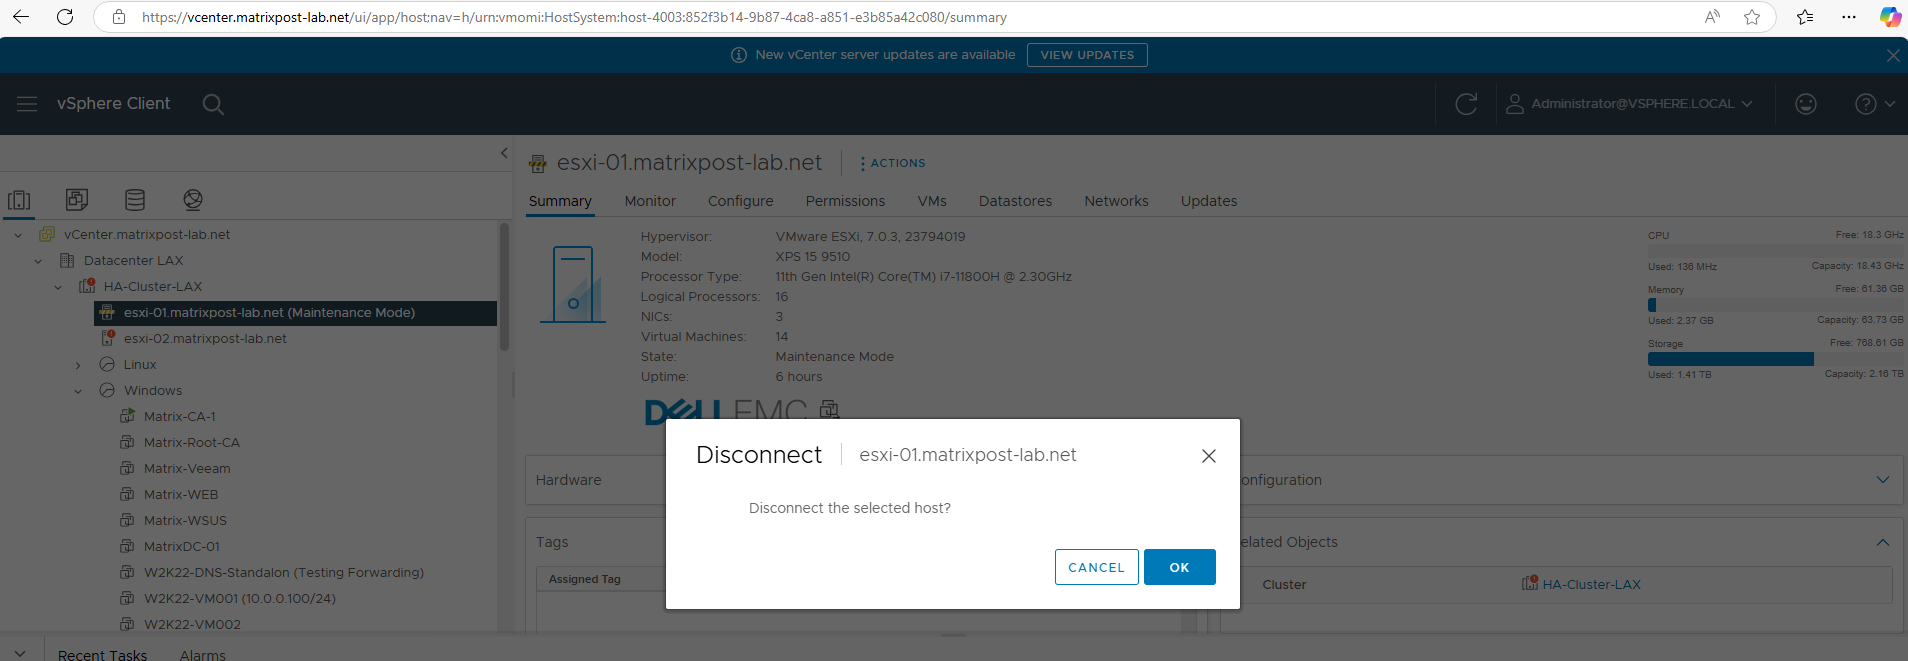
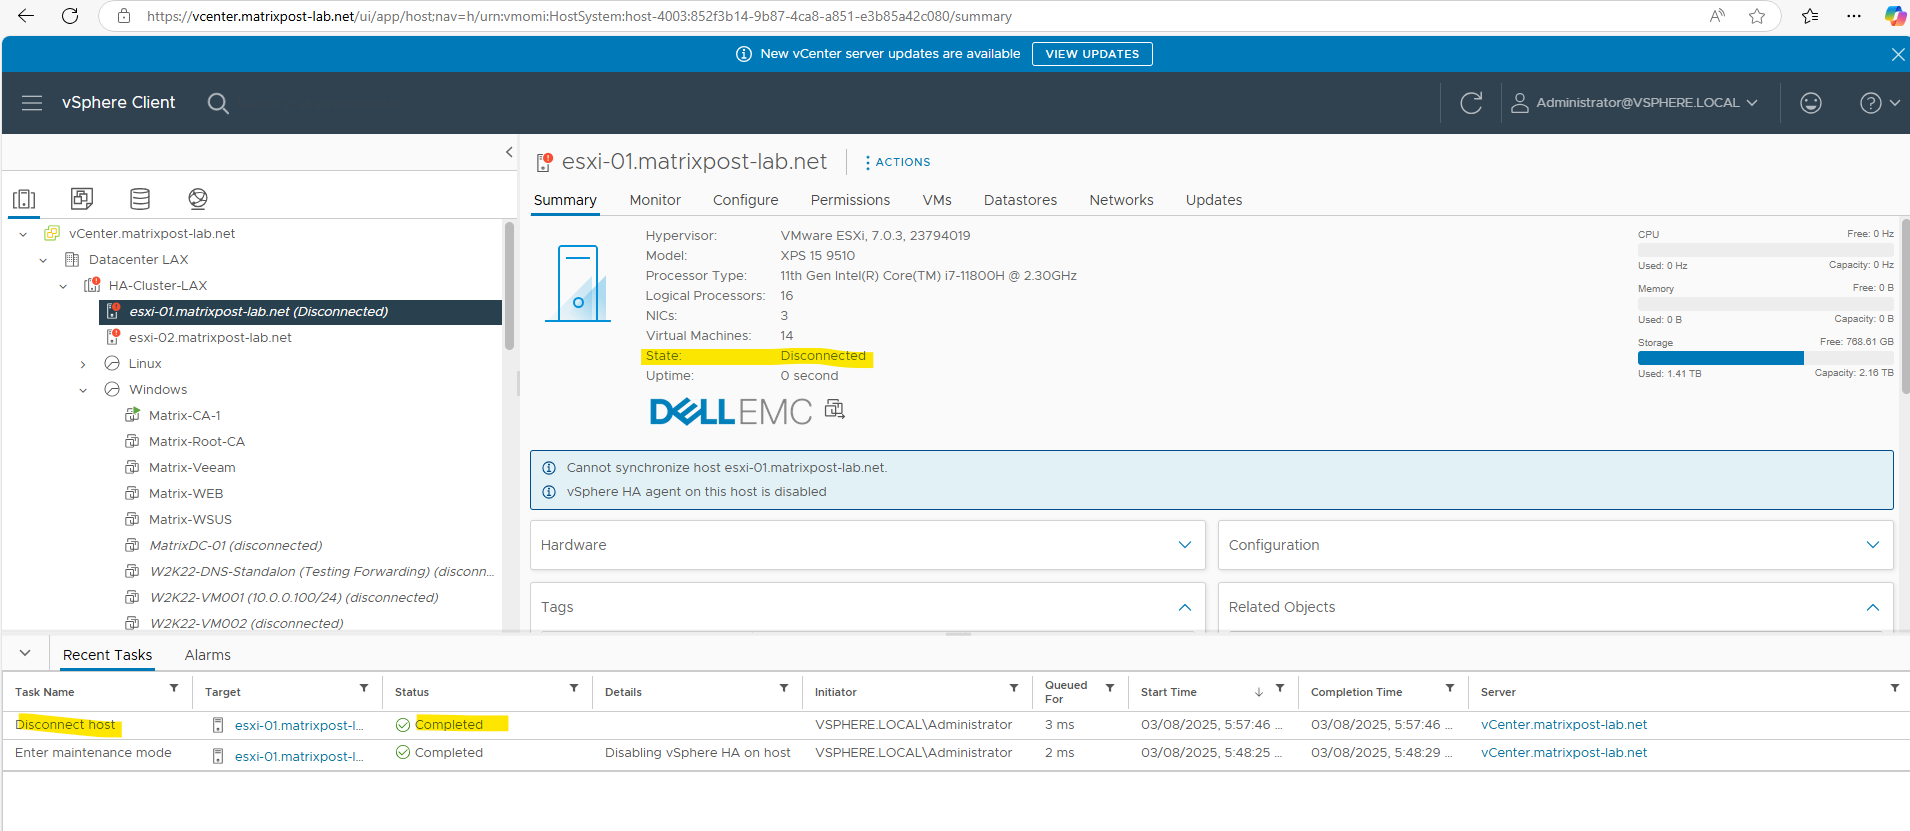
We also need to disconnect the ESXi host from vCenter Server.
Replace ESXi Host Certificate
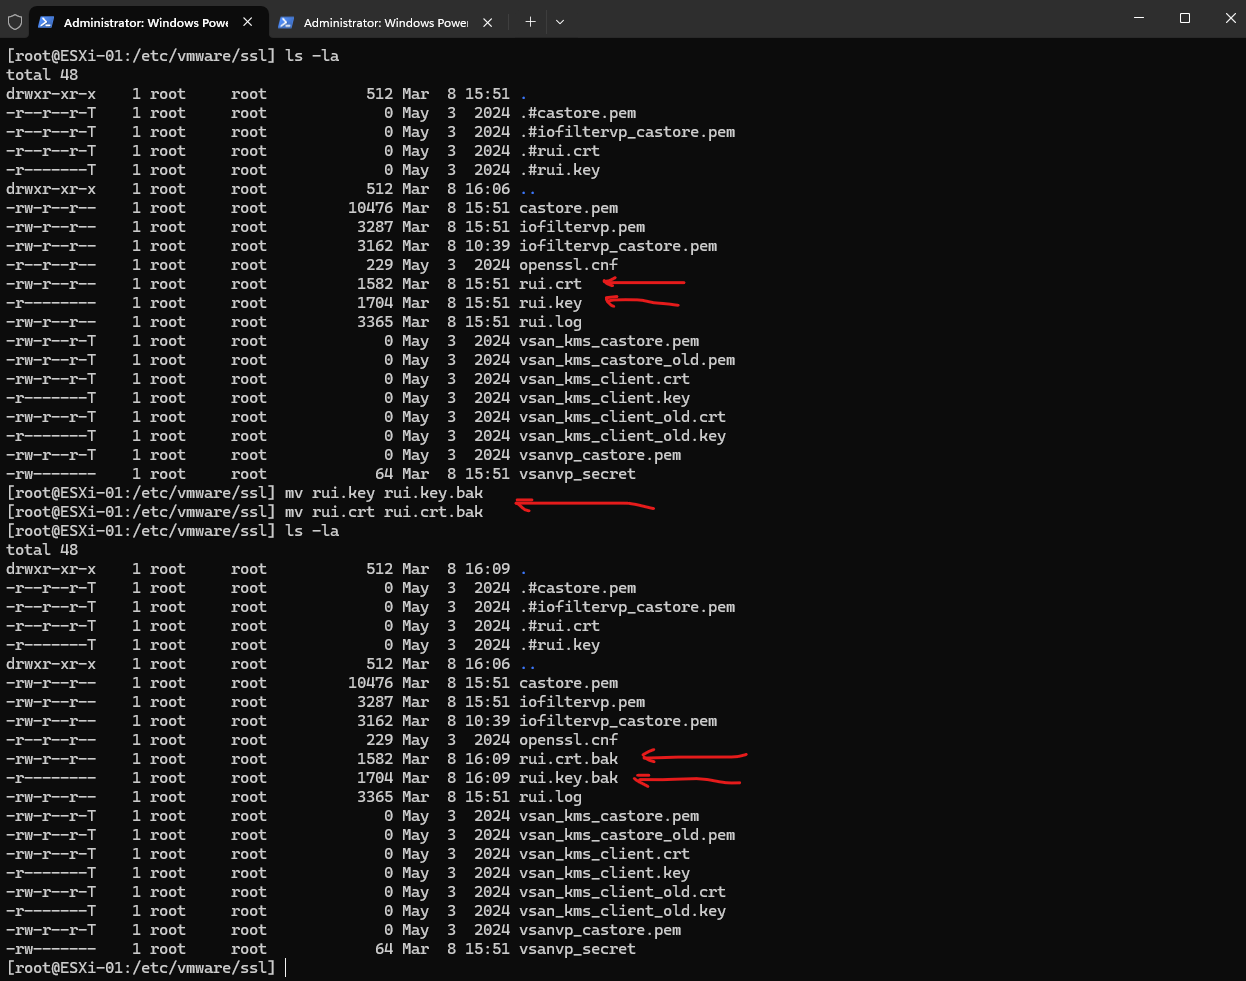
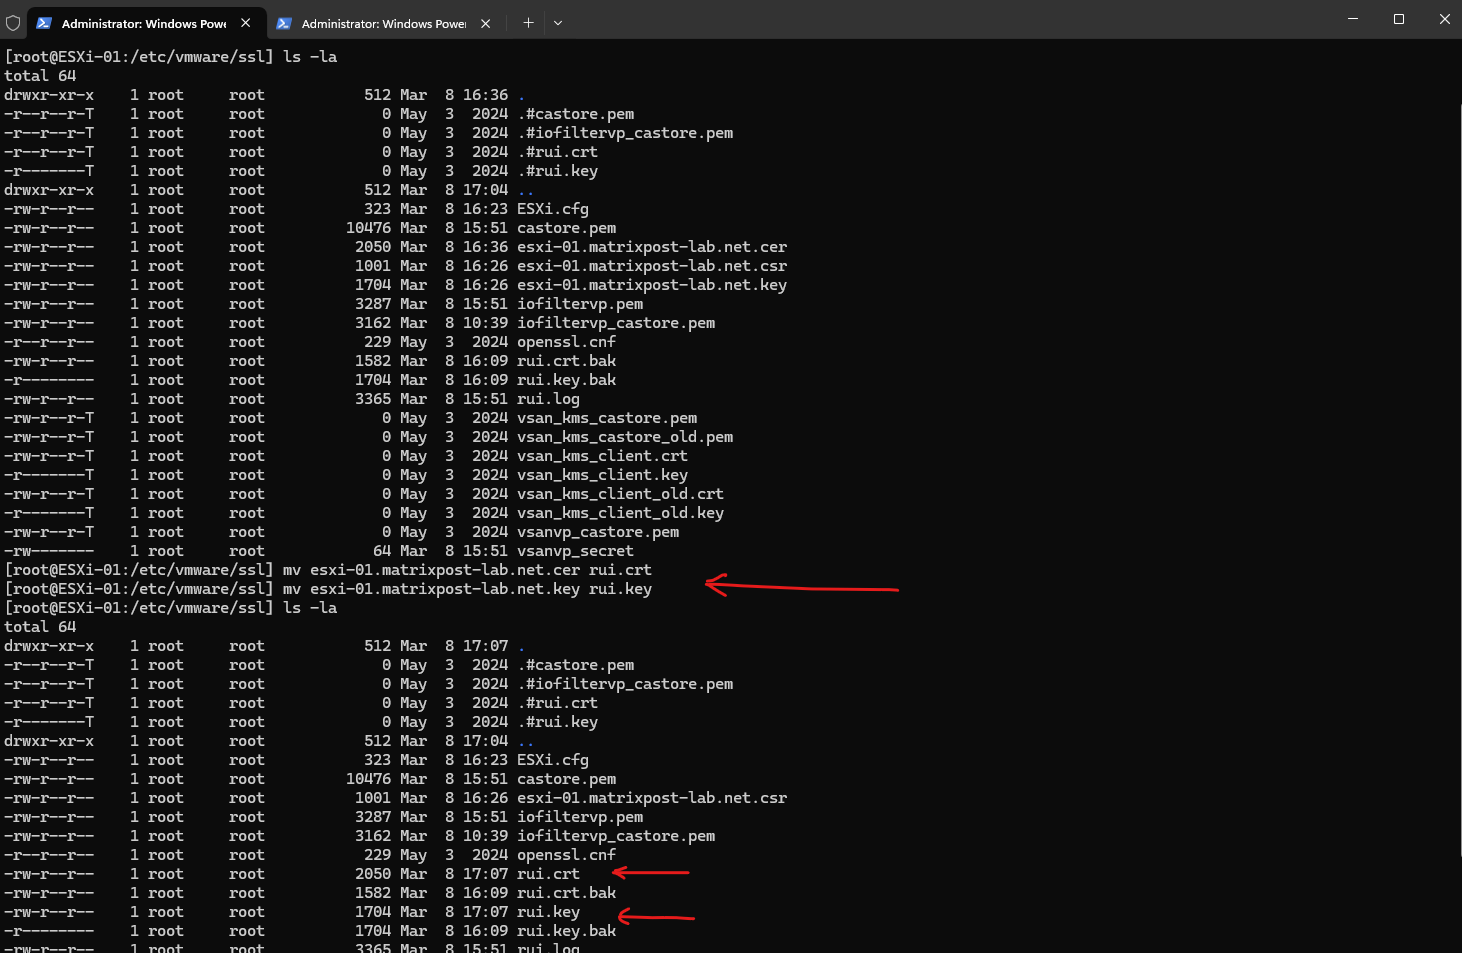
Before replacing the certificate we first need to back up the current ESXi host certificate named rui.crt and private key named rui.key.
In the /etc/vmware/ssl directory, rename the existing certificates by running the following commands.
After we requested the new custom certificate previously and shown further above, we need to upload it to our ESXi host to the following path /etc/vmware/ssl.
To replace the certificate, we just need to rename the uploaded custom certificate and rename it into rui.crt.
Further we need to rename the corresponding key file, in my case the esxi-01.matrixpost-lab.net.key into rui.key.
[root@ESXi-01:/etc/vmware/ssl] mv esxi-01.matrixpost-lab.net.cer rui.crt
[root@ESXi-01:/etc/vmware/ssl] mv esxi-01.matrixpost-lab.net.key rui.key
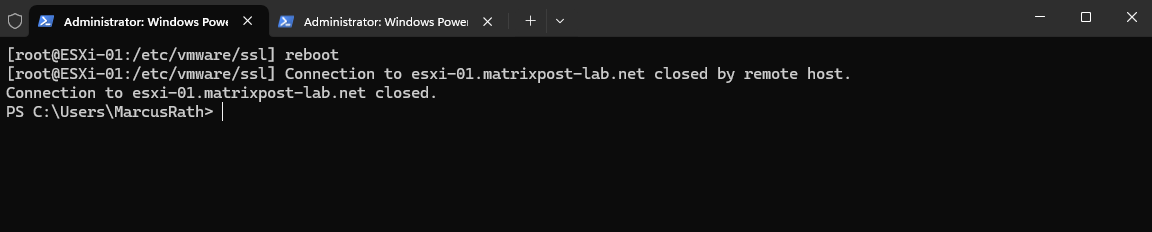
Restart the ESXi host by running the following command.
[root@ESXi-01:/etc/vmware/ssl] reboot
Reconnect the ESXi Host and exit the Maintenance mode
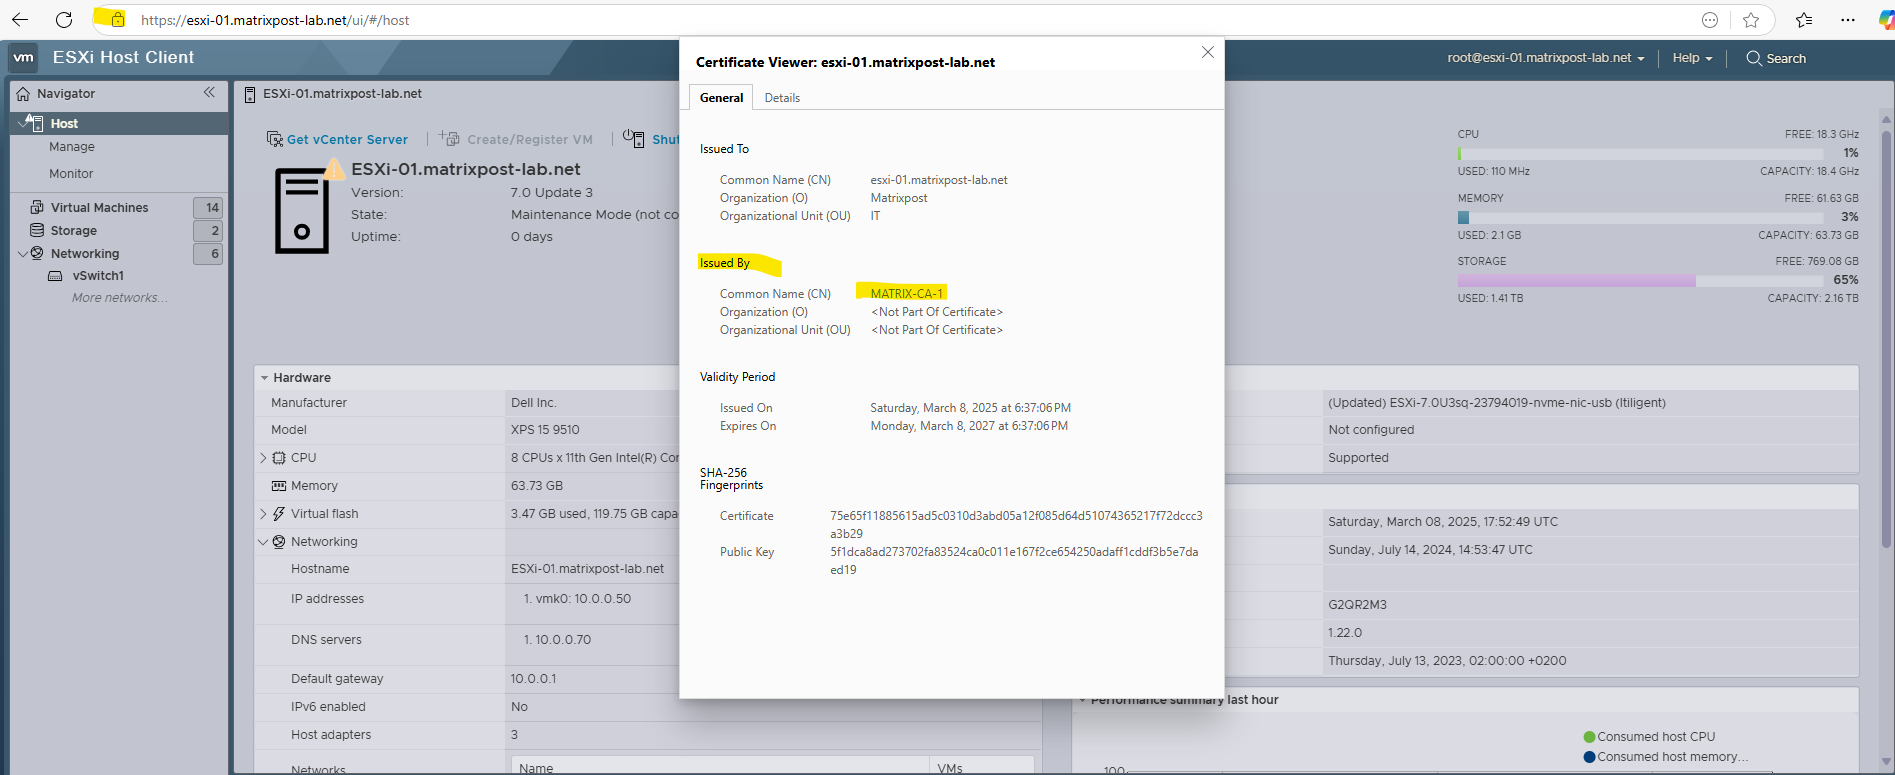
After a reboot, I will first check if the certificate is successfully replaced with the custom certificate by using the web browser’s SSL connection status.
Looks good!
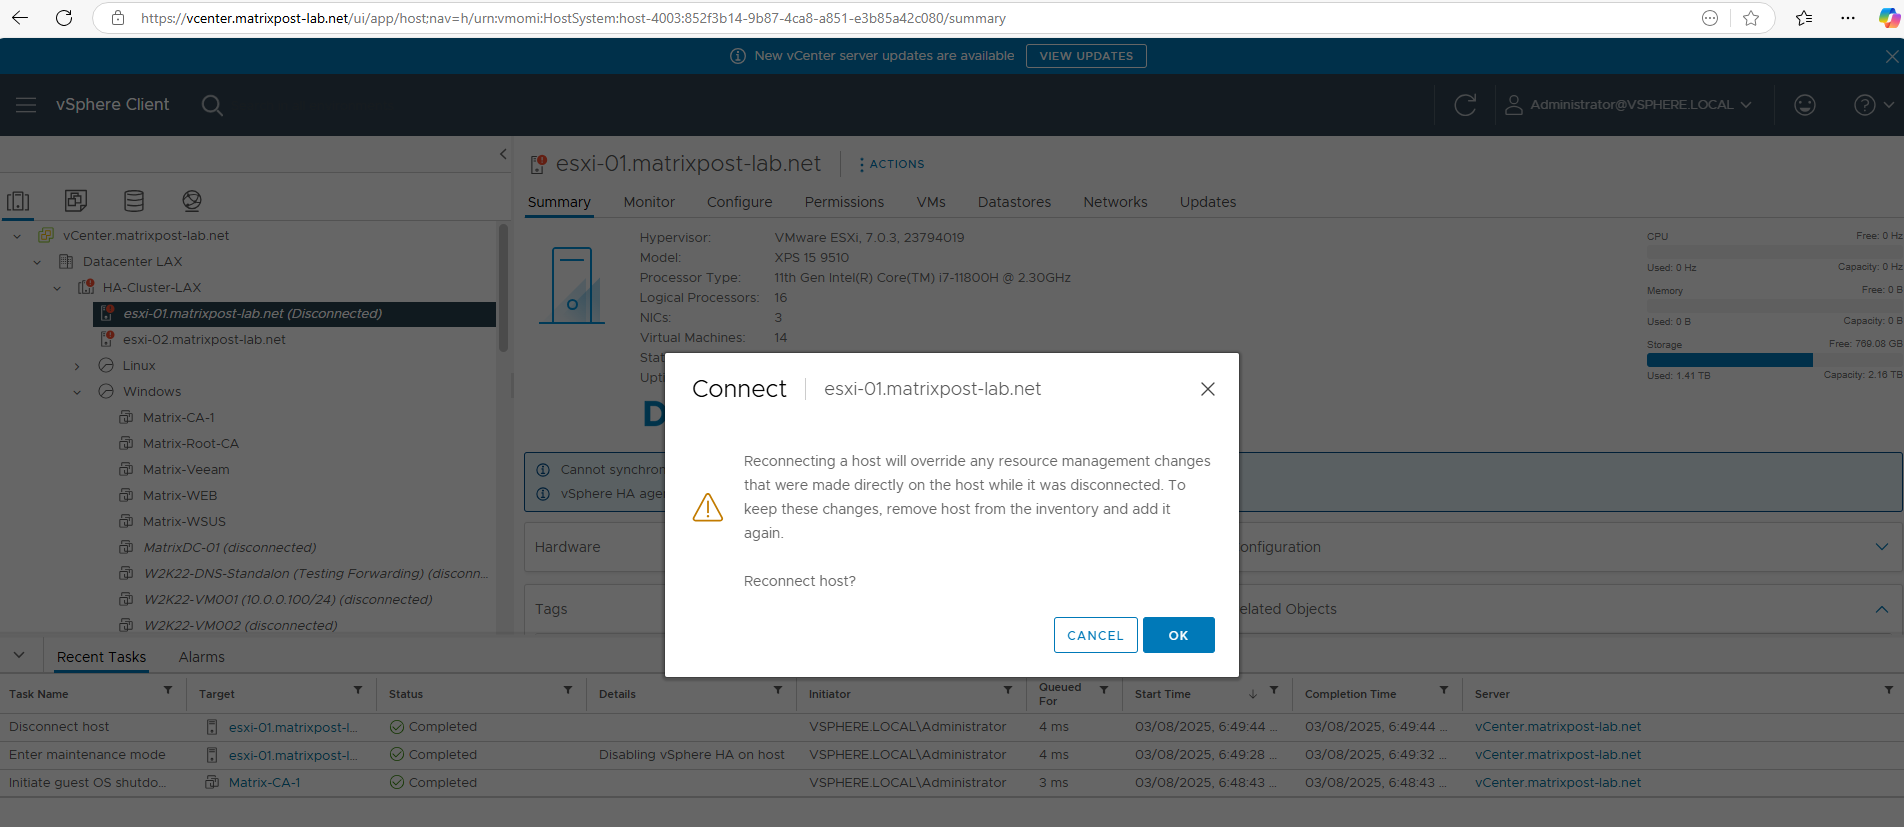
Now we can connect the ESXi Host back to vCenter and exit the Maintenance mode.
In the vSphere Client, in the Hosts and Clusters inventory, right-click the ESXi host and select ConnectionConnect.
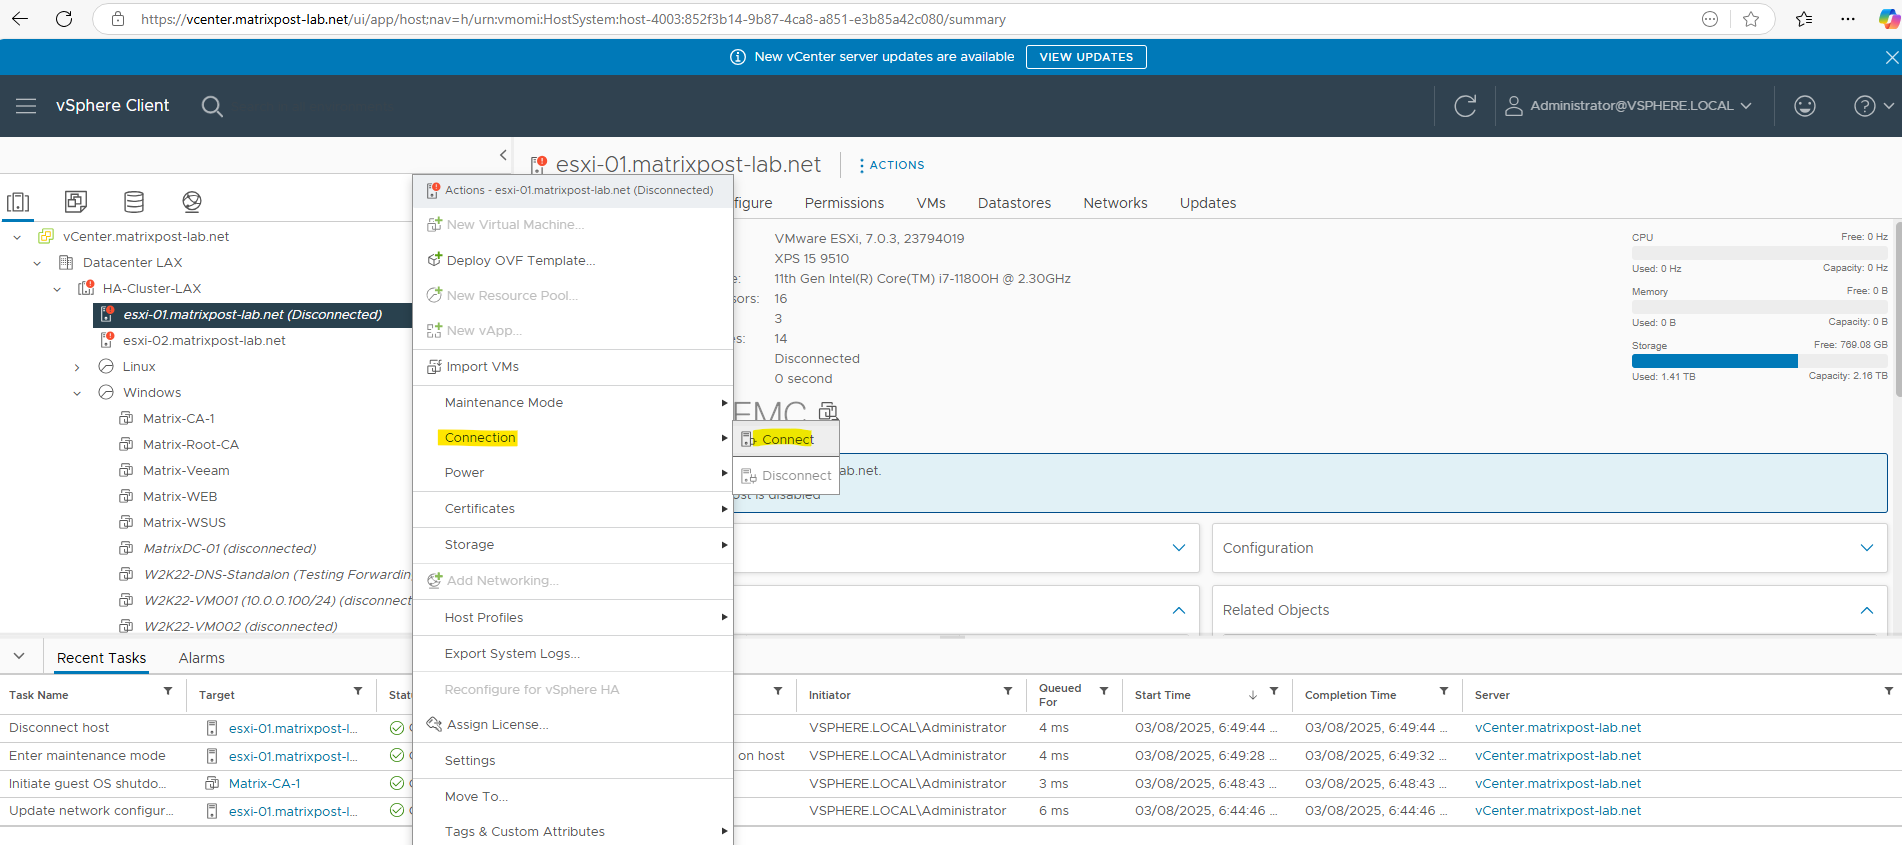
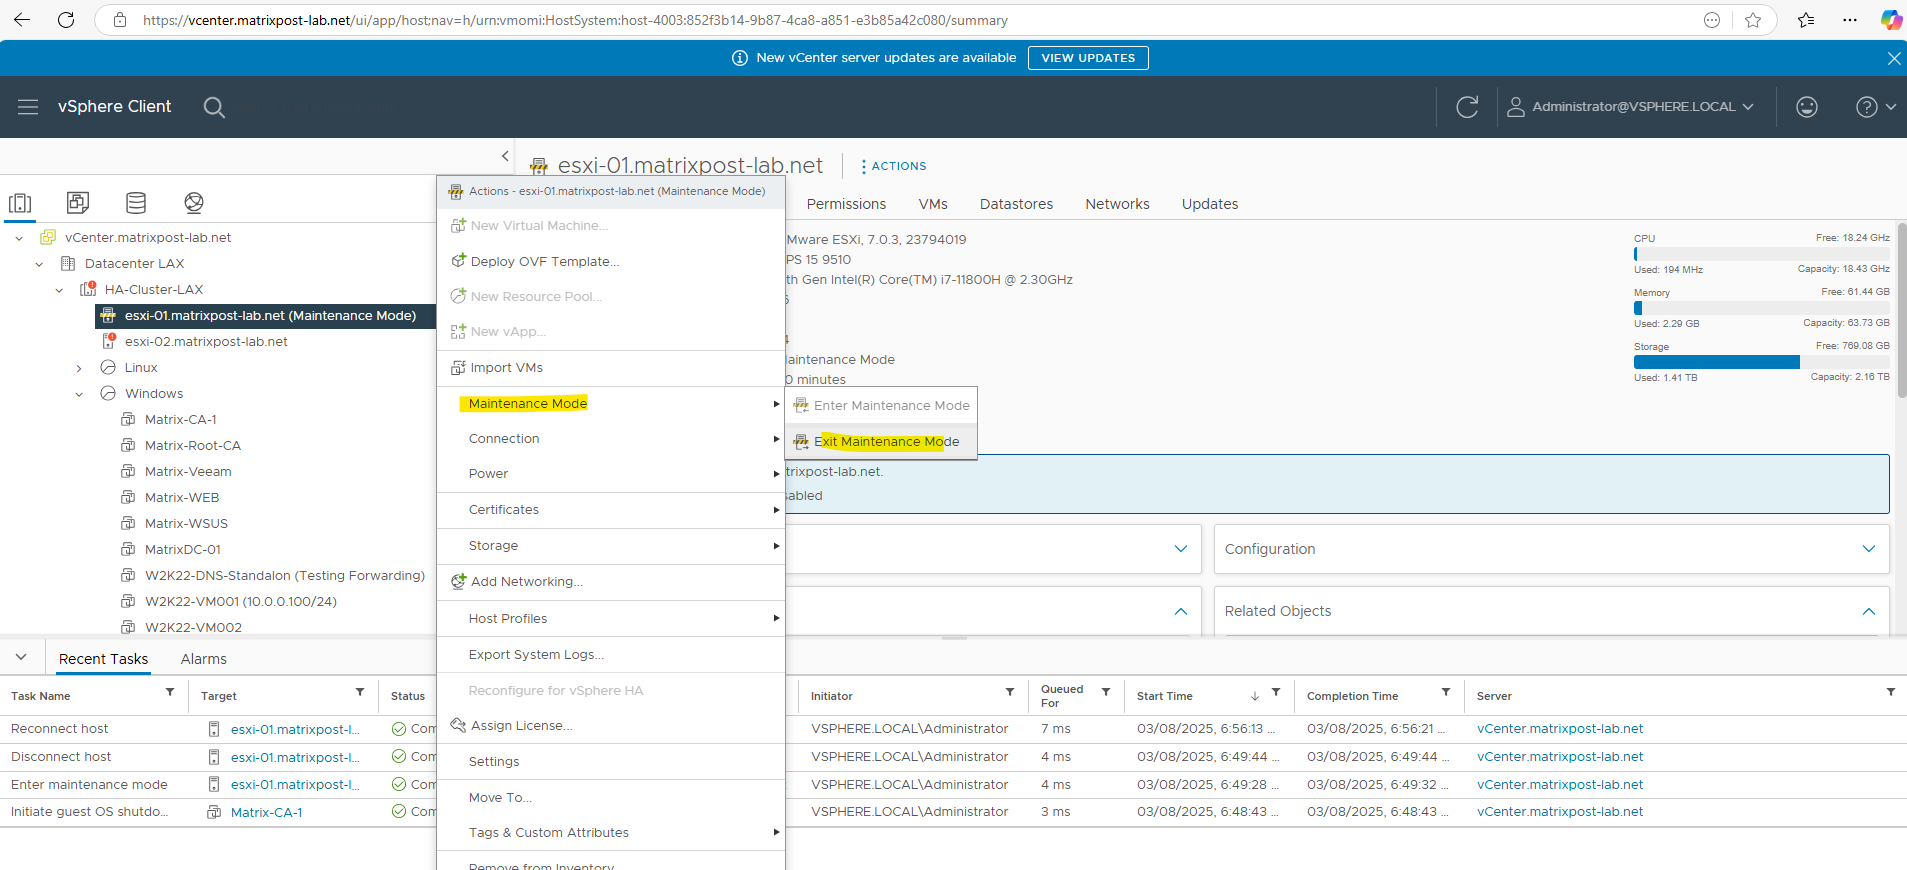
And finally we exit the Maintenance mode.
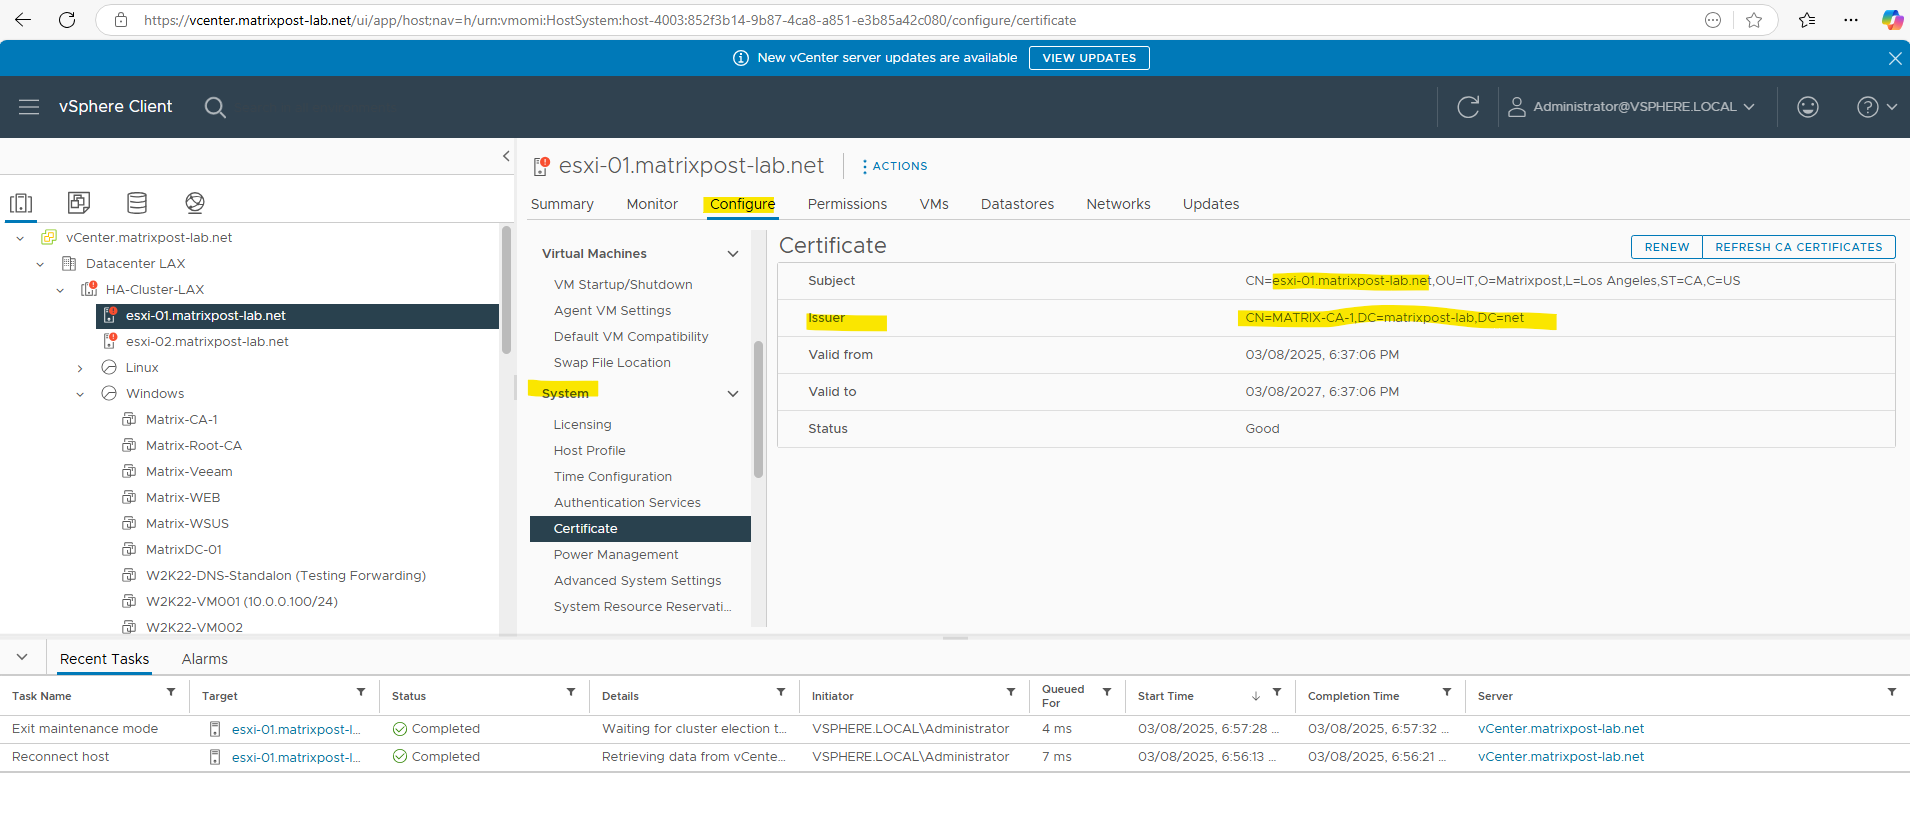
Finally we can also check our new custom certificate in the vSphere client.
Links
Replace the ESXi Host Certificates with CA-Signed Certificate in a Workload Domain
https://techdocs.broadcom.com/us/en/vmware-cis/vcf/vcf-5-2-and-earlier/5-1/vmware-cloud-foundation-operations-5-1/additional-certificate-management-for-vmware-cloud-foundation-operations/esxi-certificate-management-for-vmware-cloud-foundation-operations/vcf-replace-esxi-host-certificates-with-ca-signed-certificate-operations.html