How to use a SubCA Certificate issued by our internal AD CS PKI for the Squid Forward Proxy to generate dynamic Host Certificates
In this post we will see how to create and configure a subordinate CA certificate issued by our Active Directory Certificate Services (AD CS) PKI for the dynamic host certificate generation when running Squid as a forward proxy.
For Squid’s SSL interception (SSL Bump) which will generate dynamic host certificates for the requested destinations of the clients, we we need to configure a Certificate Authority (CA) certificate which will sign the issued dynamic host certificates.
In my following post we saw how to set up the Squid Proxy Server as a Transparent Proxy on SUSE Linux Enterprise. To issue dynamic host certificates, there we were using just a self-signed Certificate Authority (CA) certificate.
More about how to set up an internal PKI by using the Active Directory Certificate Services (AD CS) you can also read in my following post.
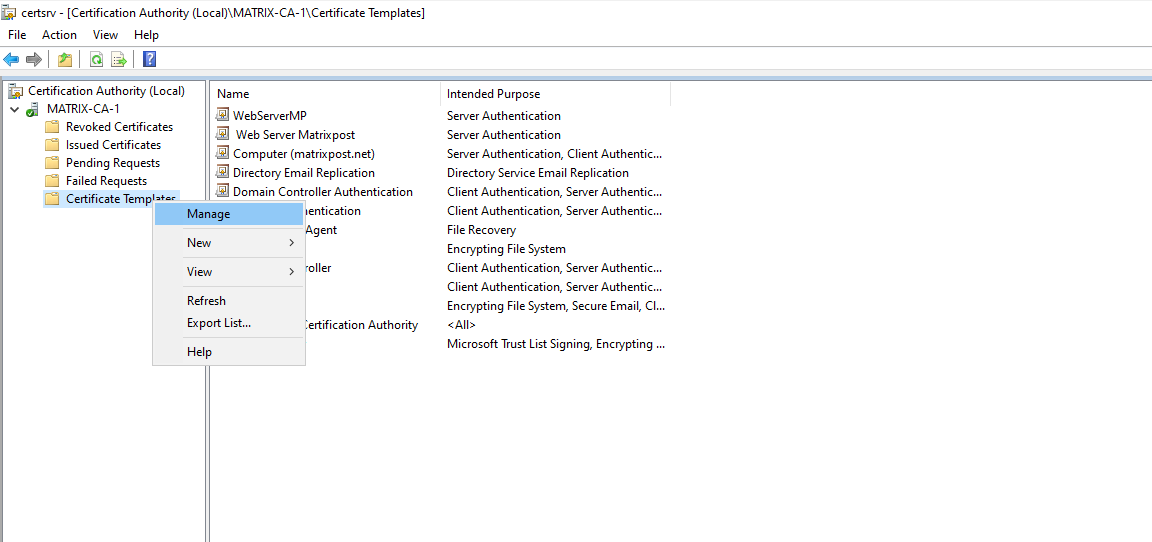
On the Active Directory Certificate Services (AD CS) PKI console I will first duplicate the Subordinate Certificate Authority template to adjust and using it as template for our new subordinate CA certificate.
Right-click on Certificate Template -> Manage.
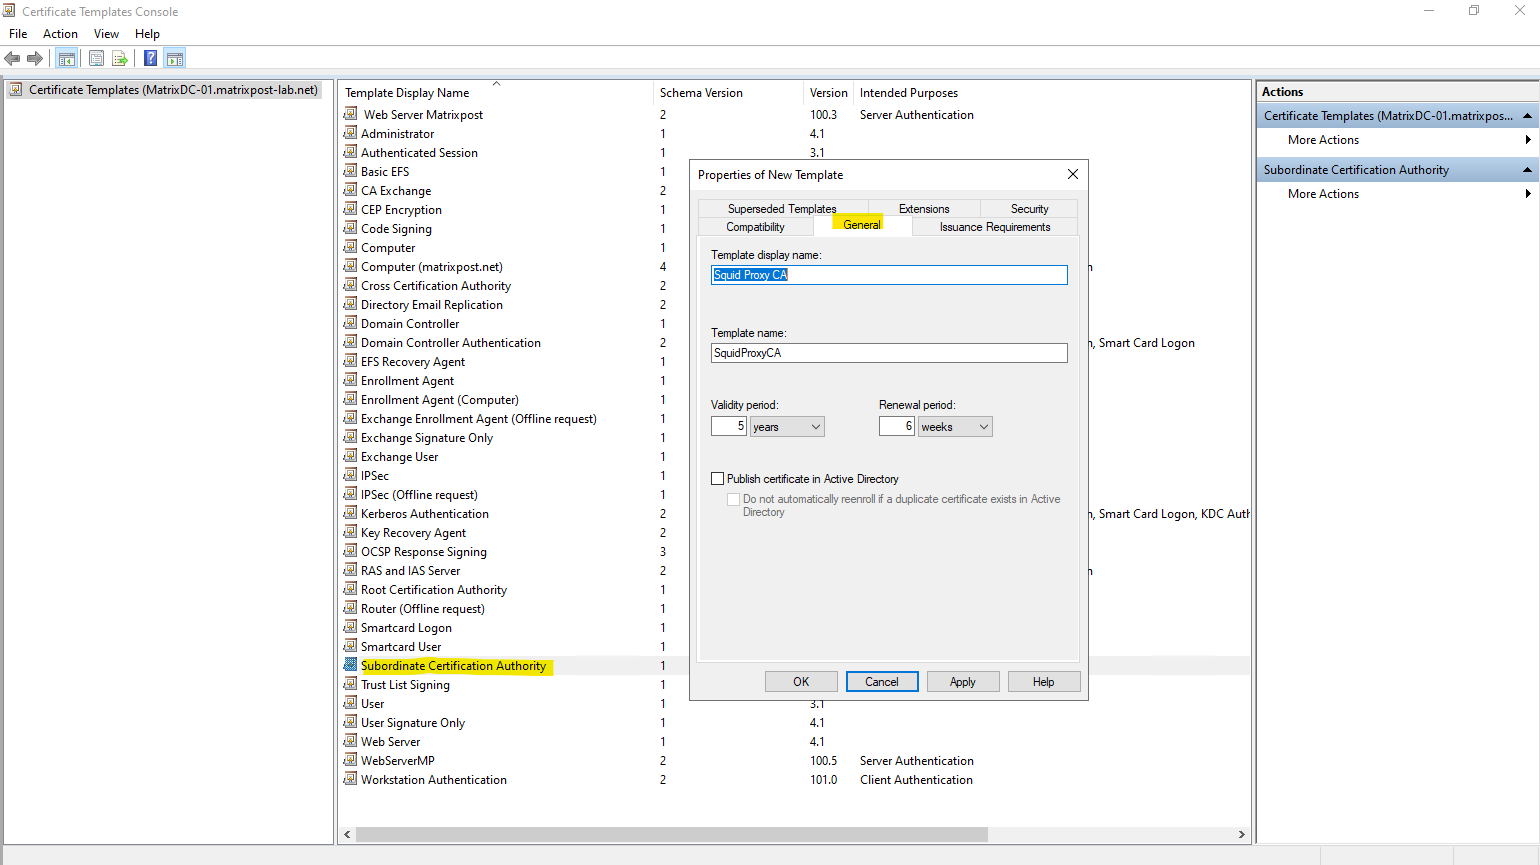
In the General tab enter a name for the template and optionally we can also adjust the validity period.
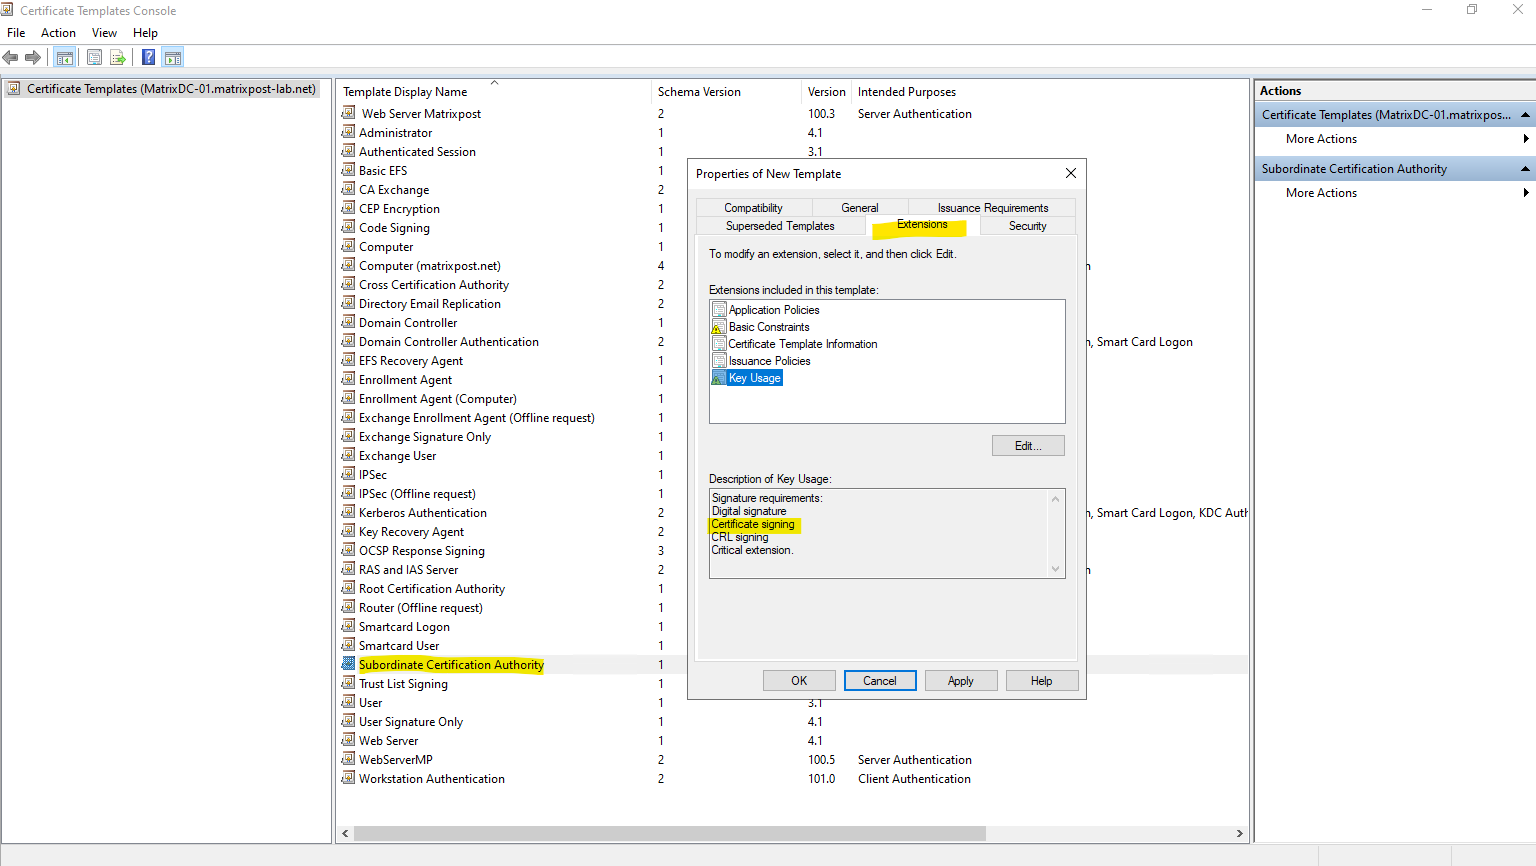
Here we can see the template we duplicated from has already the needed Certificate signing extension included.
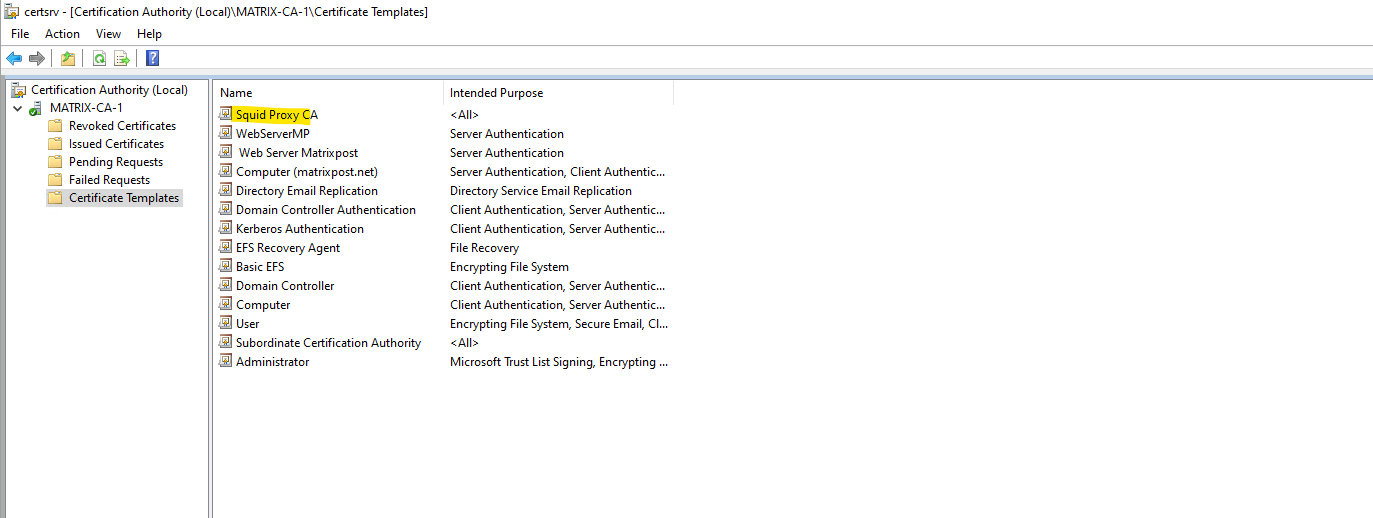
We can now close the above template console and finally issue the new certificate template for our PKI. Right-click -> New -> Certificate Template to Issue.
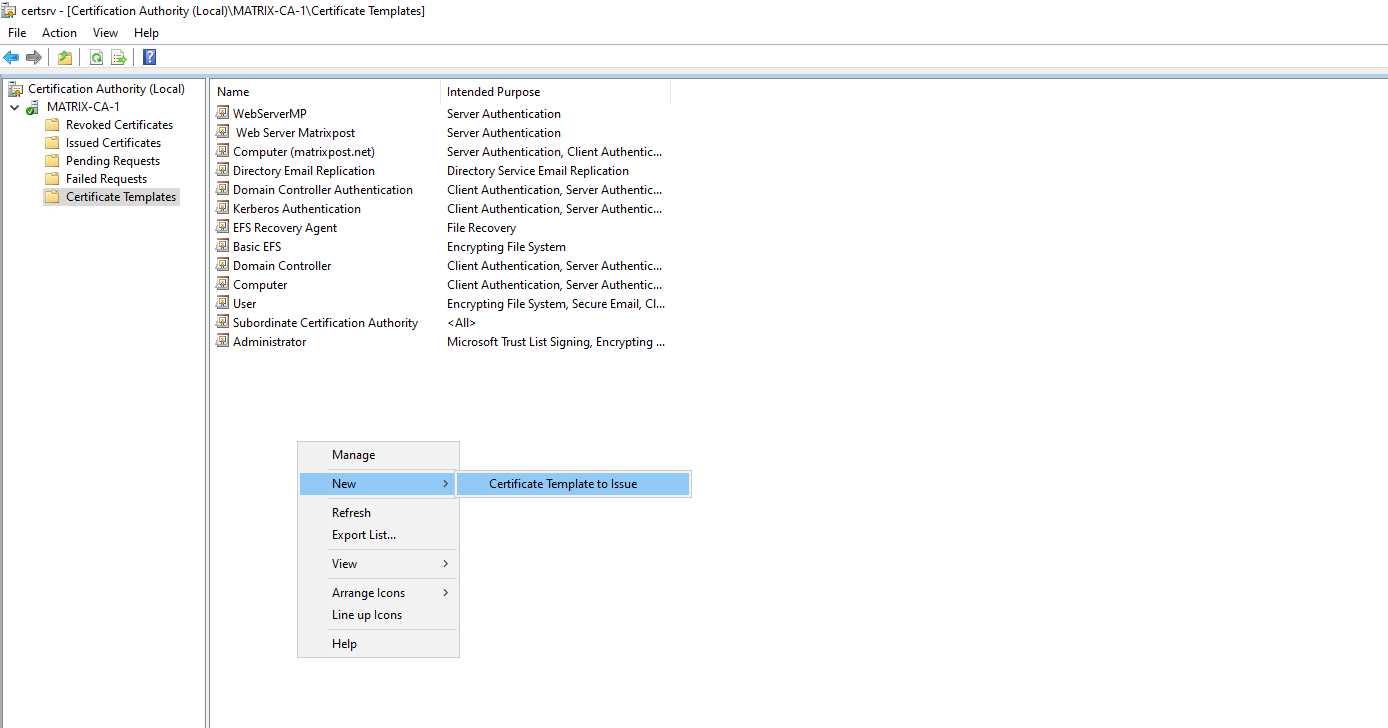
Select the duplicated template.
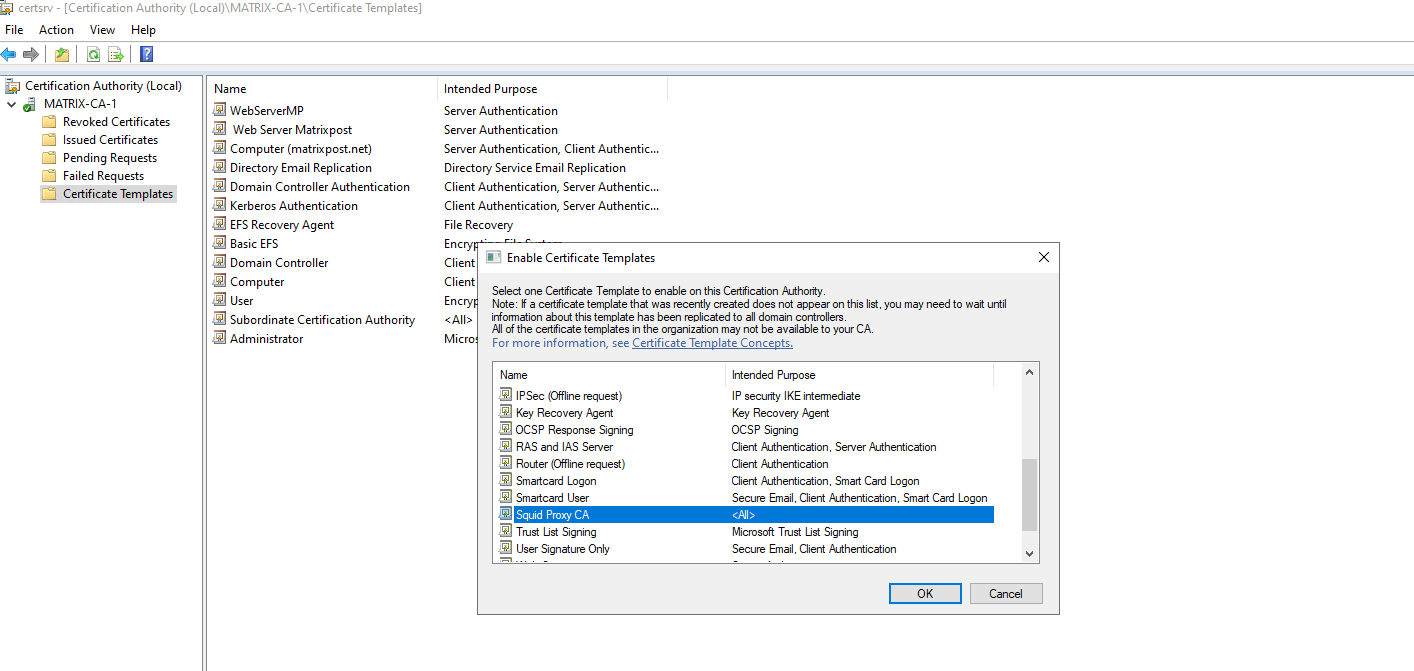
From now we can use this template to issue a new subordinate CA certificate for the Squid Forward proxy.
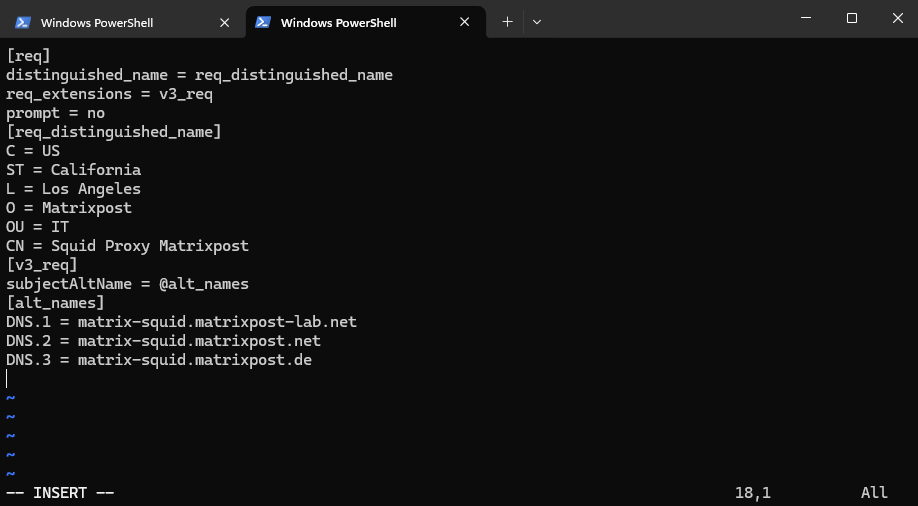
On Squid we can now create the Certificate Signing Request (CSR). I will create an configuration file named req.conf which includes details about the later issued certificate to create the CSR.
But first we also need to generate a new private key by using the following openssl command.
# openssl genrsa -out /etc/ssl/private/matrix-squid.matrixpost-lab.net.key 2048
[req]
distinguished_name = req_distinguished_name
req_extensions = v3_req
prompt = no
[req_distinguished_name]
C = US
ST = California
L = Los Angeles
O = Matrixpost
OU = IT
CN = Squid Proxy Matrixpost
[v3_req]
subjectAltName = @alt_names
[alt_names]
DNS.1 = matrix-squid.matrixpost-lab.net
DNS.2 = matrix-squid.matrixpost.net
DNS.3 = matrix-squid.matrixpost.de
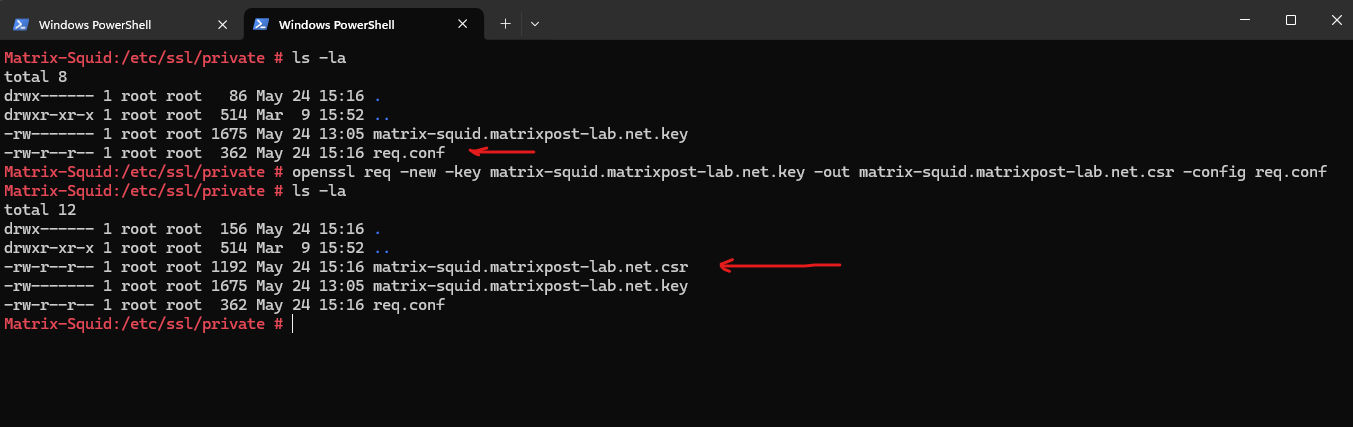
Now we can create the Certificate Signing Request (CSR) by using our extension file named req.conf and our newly created private key.
# openssl req -new -key /etc/ssl/private/matrix-squid.matrixpost-lab.net.key -out /etc/ssl/private/matrix-squid.matrixpost-lab.net.csr -config /etc/ssl/private/req.conf
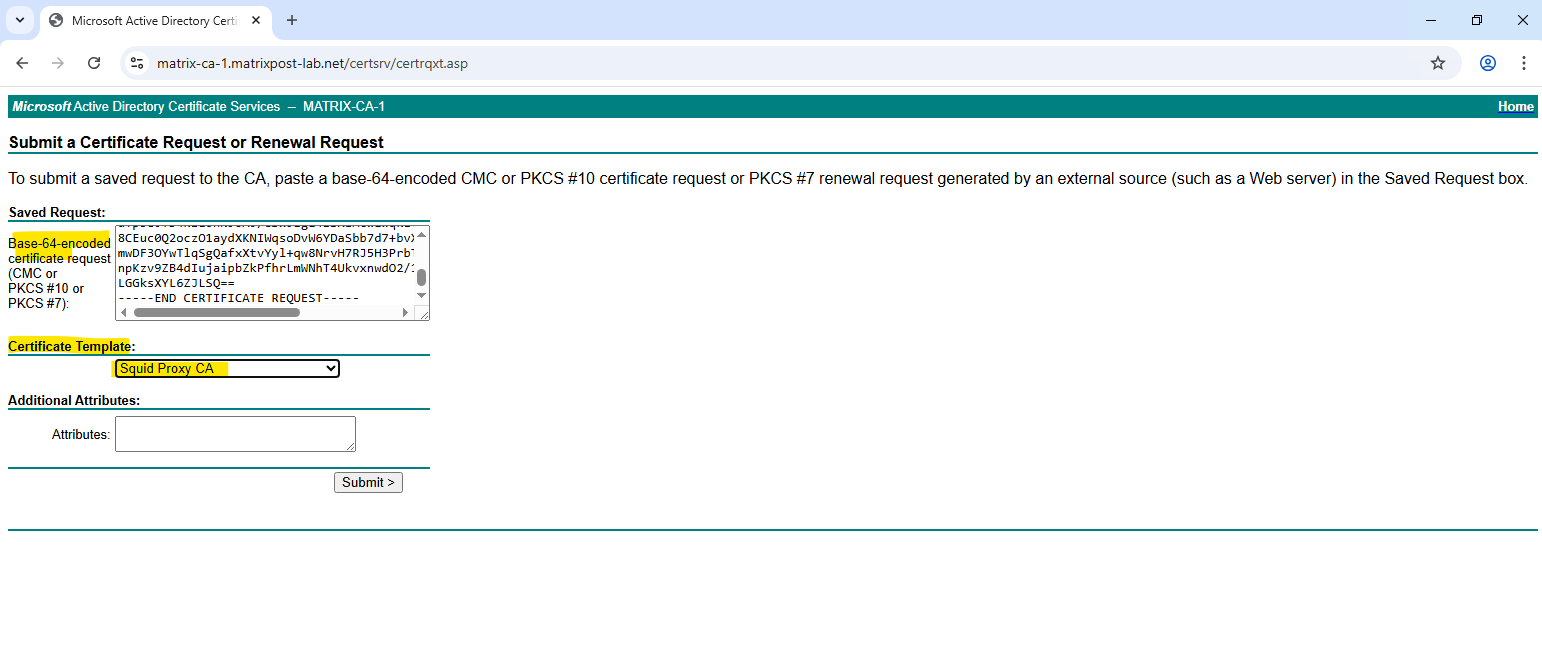
We can now copy the CSR to a domain joined Windows machine and using the CA Web Enrollment role service to issue our new subordinate CA certificate.
In case the CA Web Enrollment role is not installed in our environment we can also use the certreq command/utility as shown here.
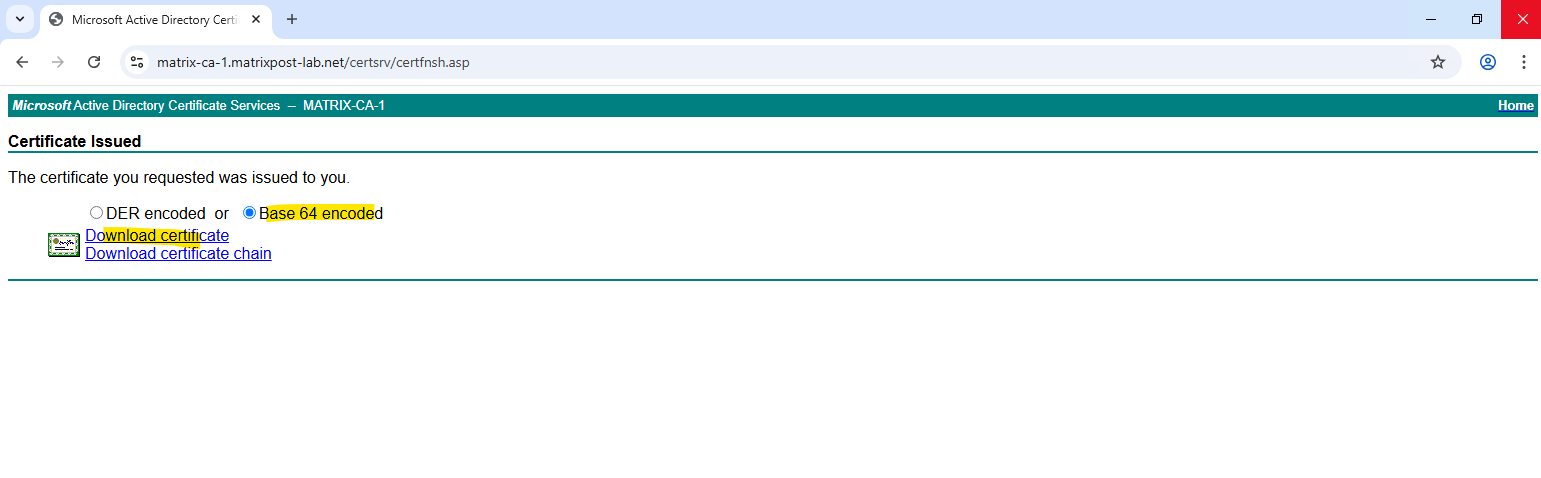
Download the certificate in Base 64 encoded mode.
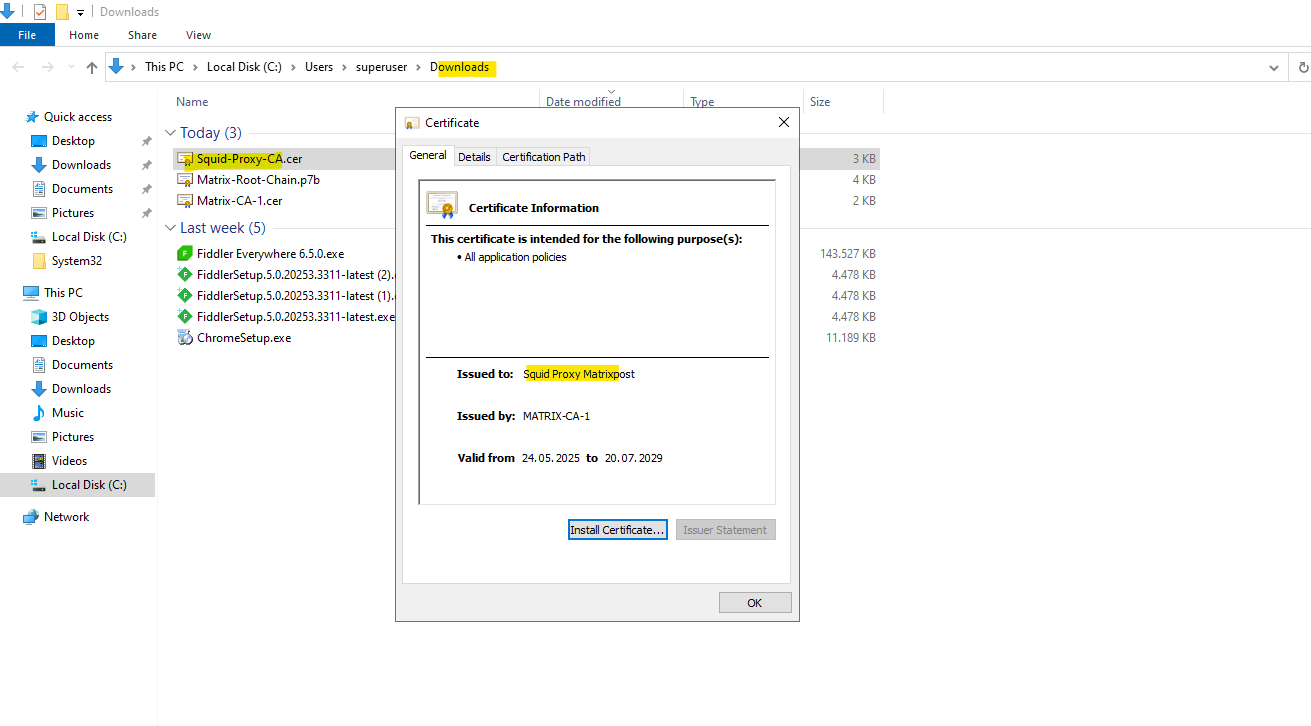
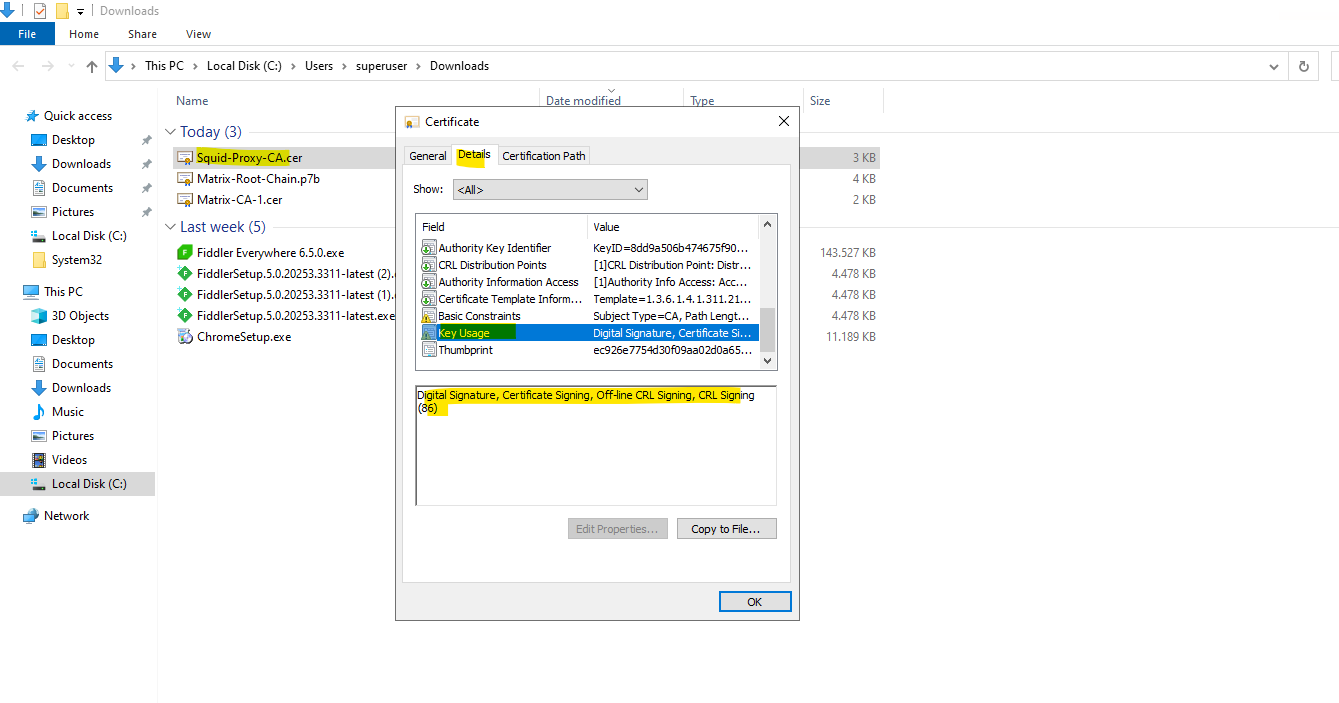
Here we can see that the certificate will include the Certificate Signing key usage we finally need here.
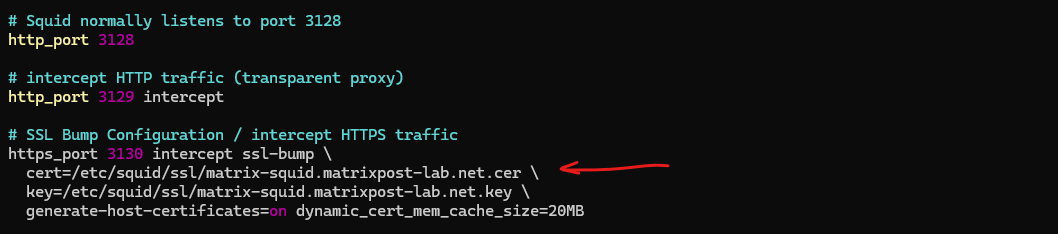
Copy the subordinate CA certificate to the Squid proxy server and make sure it is configured in /etc/squid/squid.conf and also the private key we created previously.
Because we change the CA certificate on Squid from the self-signed certificate to now use one signed by our internal PKI, we also need to delete the existing SSL Certificate Database under /var/cache/squid/ssl_db.
# rm -r /var/cache/squid/ssl_db
And re-create by running.
# /usr/lib/squid/security_file_certgen -c -s /var/cache/squid/ssl_db -M 20MB
Set the proper permissions to /var/cache/squid/ssl_db. We can first determine under which user Squid is running.
# ps aux | grep squid
# chown -R squid:squid /var/cache/squid/ssl_db
# chmod -R 700 /var/cache/squid/ssl_db
One last step, we also need to deploy the new subordinate CA certificate on the clients as trusted Intermediate Certification Authority.
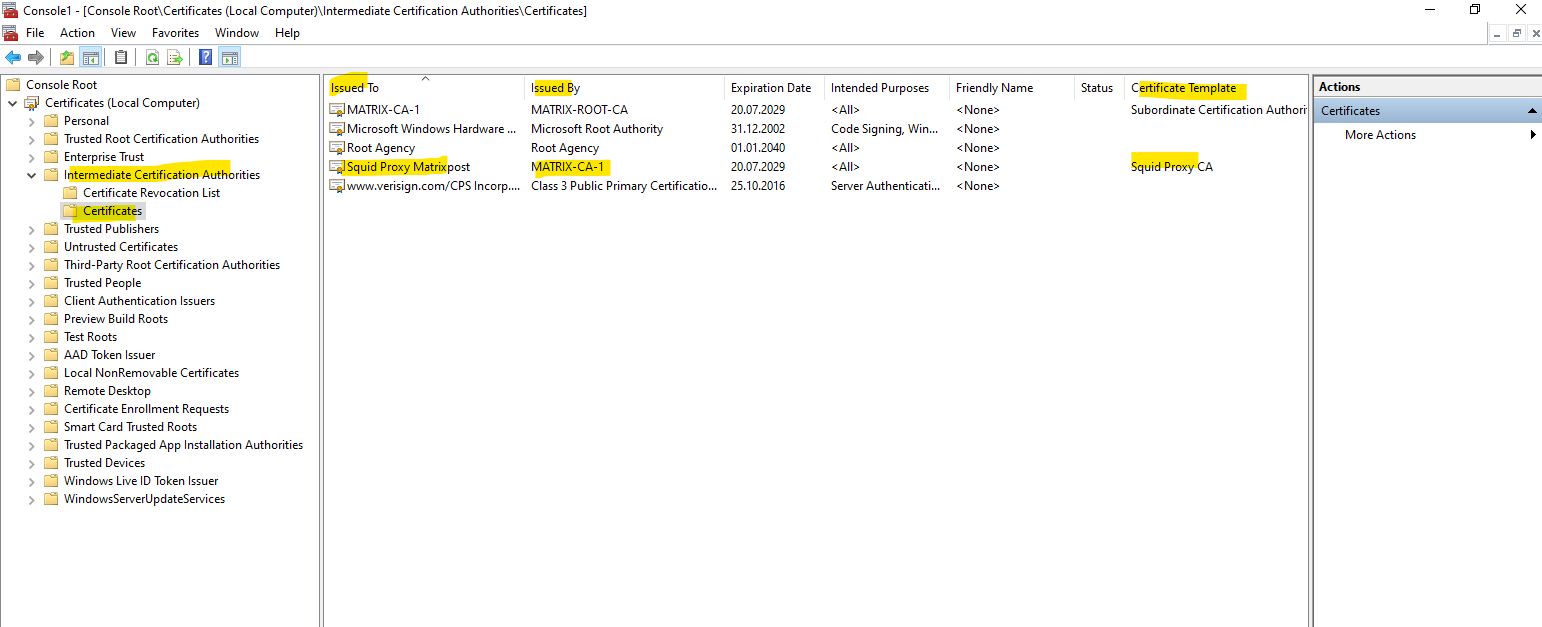
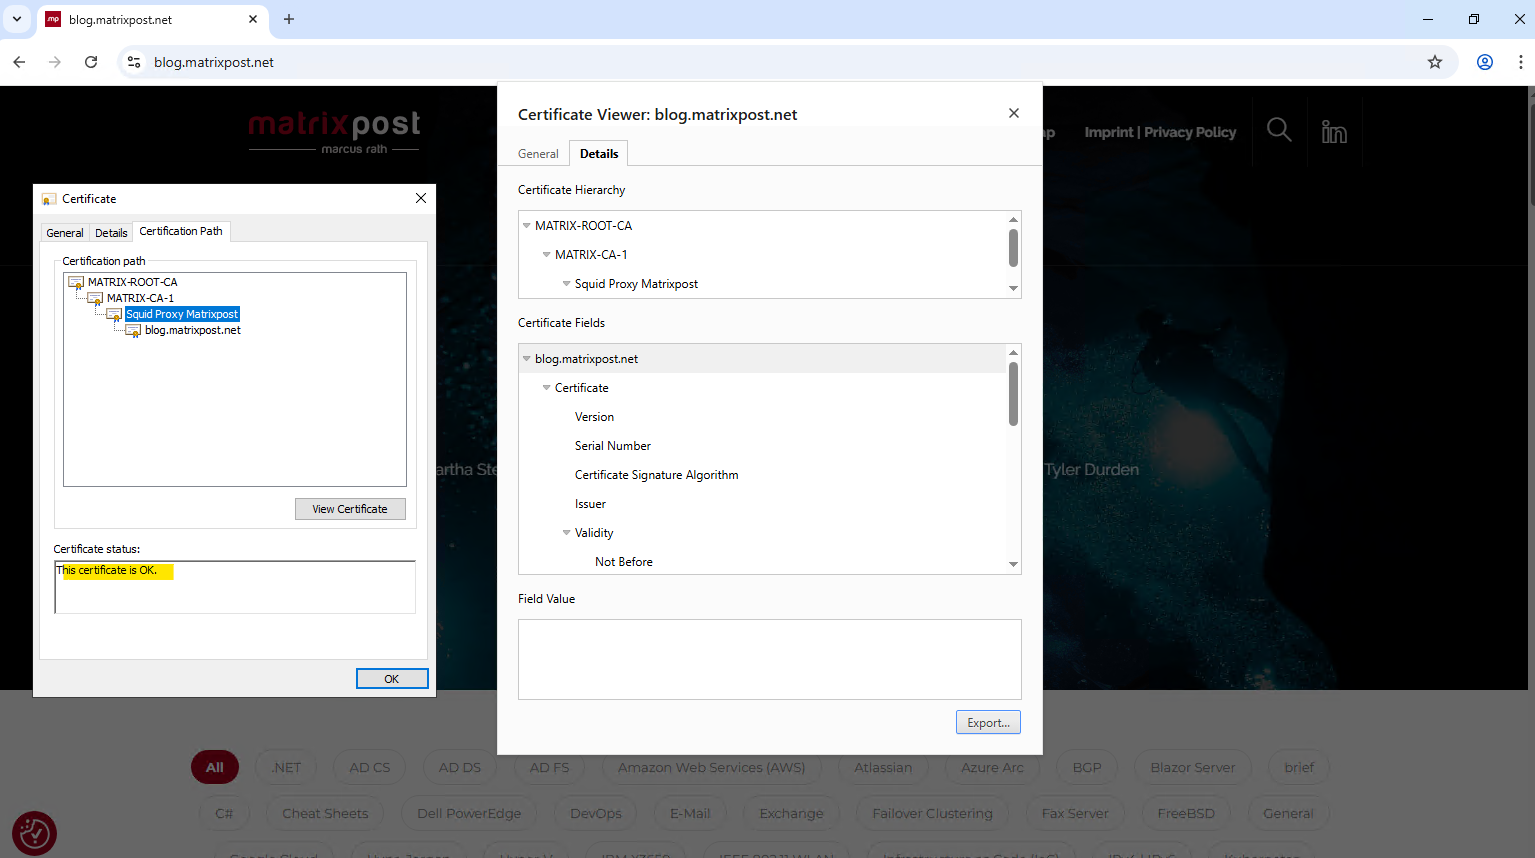
From now on Squid running as forward proxy will generate dynamic host certificates by using our new subordinate CA certificate issued by our internal PKI.

Troubleshooting
This certificate does not appear to be valid for the selected purpose | NET::ERR_CERT_INVALID
In this case the certificate supposedly not have the Certificate Signing key usage included.
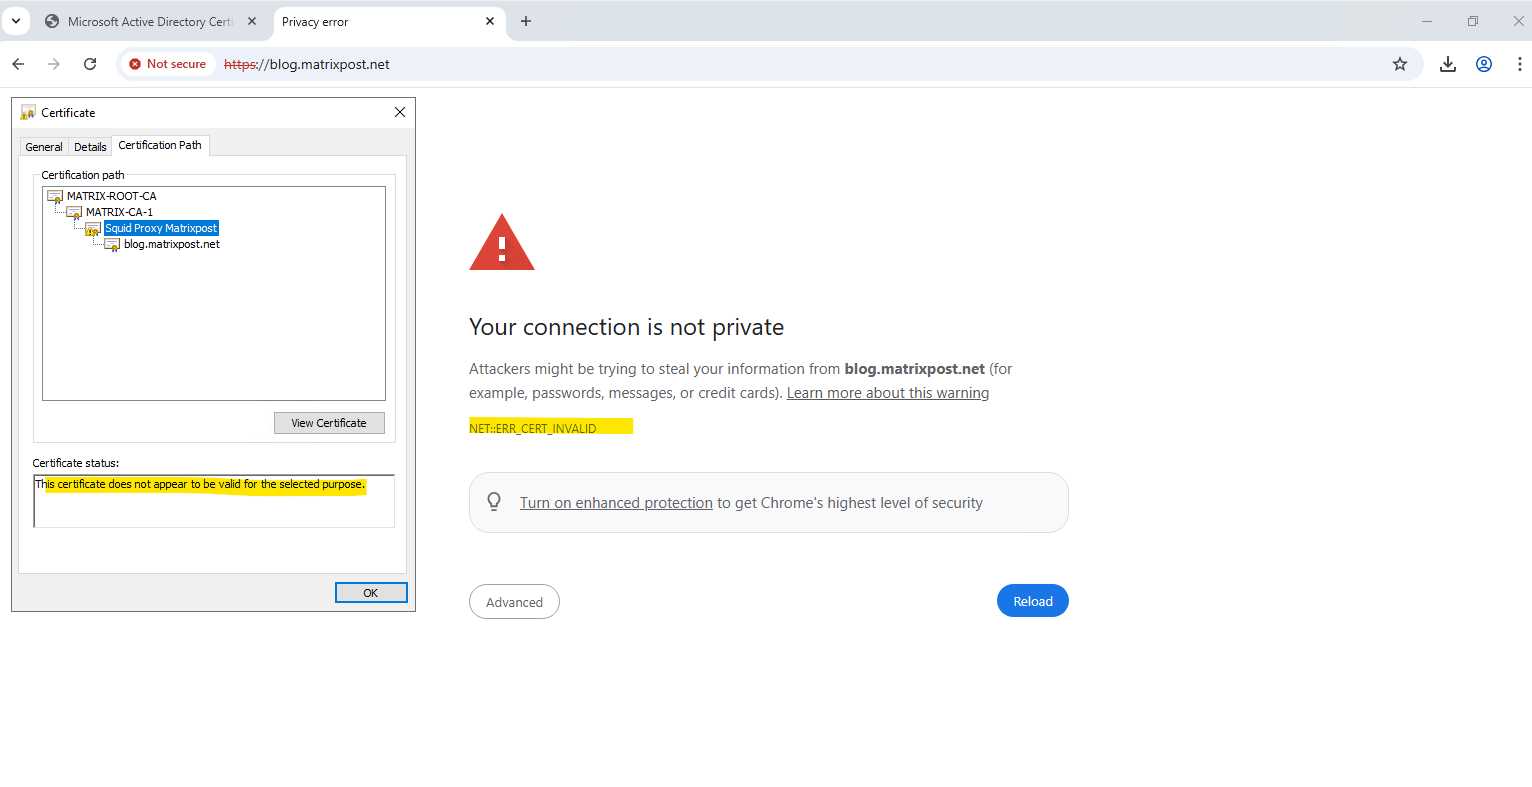
To resolve this issue use the Subordinate Certification Authority as template on the PKI for the new subordinate CA certificate which has included the Certificate Signing key usage.
Links
Set up the Squid Proxy Server as a Transparent Proxy on SUSE Linux Enterprise
https://blog.matrixpost.net/set-up-the-squid-proxy-server-as-transparent-proxy-on-suse-linux-enterpriseHow to request a Certificate from an internal PKI (AD CS) by using the Certreq Command without relying on the Web Enrollment service
https://blog.matrixpost.net/how-to-request-a-certificate-from-an-internal-pki-ad-cs-by-using-the-certreq-command-without-relying-on-the-web-enrollment-service/Set up a 2-tier PKI in Active Directory Certificate Services (AD CS) – Part 1
https://blog.matrixpost.net/set-up-a-2-tier-pki-in-active-directory-certificate-services-ad-cs-part-1/