Linux Cheat Sheet for essential Commands
Linux is a versatile operating system, packed with powerful tools and commands to streamline tasks, troubleshoot issues, and manage systems efficiently.
Whether you’re a seasoned sysadmin or a curious beginner, having a handy cheatsheet can save time and make your Linux experience more productive.
In this post, I will explore interesting and useful Linux commands and update this post regularly.
- which
- whereis
- history
- Grep multiple Patterns
- Clear Content of a File without deleting it
- Display System Shutdown and run-level Changes
- Analyze Log Files
- needs-restarting
- Determine the Public IP Address used for Internet Access directly on the Console
- Determine which IP Address is used to access a Remote Host in case multiple IPs assigned on the Network Interface
- netconfig update -f
- Determine on which Partition a specific Directory is located
- mount -a | reprocess your /etc/fstab file without Reboot
- List Files and Folders with their numeric (decimal/octal) Permissions using stat
- Looping a Command with Retry Logic (e.g. Testing an HTTPS Endpoint)
- Identify which Hypervisor a Linux VM Runs On
- Links
which
The which command in Linux is a simple utility that shows the location of an executable file for a given command in your system’s PATH. It helps users identify which version of a command or program will be executed when they run it in the shell.
which searches through the directories listed in the PATH environment variable and returns the full path of the first matching executable it finds.
# which zypper

Check the location of multiple commands:
# which zypper vi
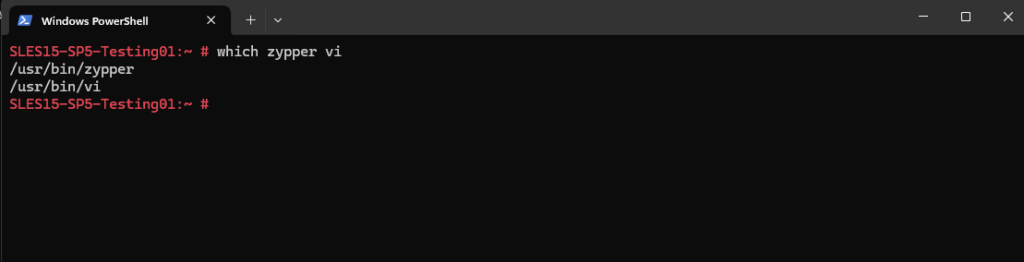
-a (all matches): Lists all matching executables in the PATH, not just the first one.

which only works for executables in the PATH. If a command is not in the PATH or is an alias, function, or shell built-in, which will not detect it.
whereis
The whereis command in Linux is a utility used to locate the binary, source code, and manual pages for a given command. Unlike the which command previously, which only looks for executables in your PATH, whereis performs a broader search in predefined directories to provide more comprehensive information.
# whereis zypper

Different output when using the which vs. whereis command for the zypper tool.
# whereis -a zypper

Search for a command’s binary only:
# whereis -b zypper

Find only the manual pages:
# whereis -m zypper

The whereis command searches predefined directories for:
- Binaries in directories like /bin, /usr/bin, and others.
- Source files in standard source directories.
- Manual pages in directories like /usr/share/man.
whereis does not search the entire file system (e.g., for custom installations) and is not aware of shell aliases or functions.
history
The history command in Linux is a powerful utility that allows users to view and manage the command history of their terminal sessions.
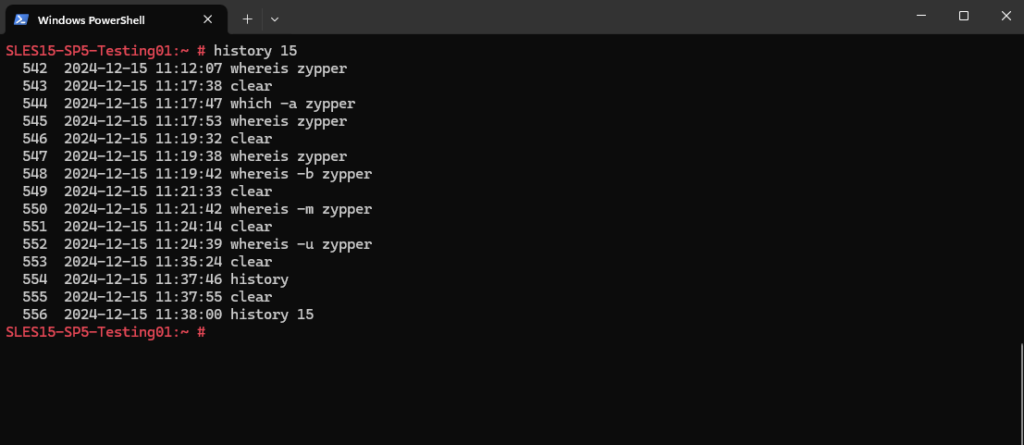
The following command lists the last 15 entries.
# history 15
Every command executed in the terminal is stored in a history file, and the history command provides a way to access this list. Users can recall previously used commands, re-execute them, or even search through past commands for efficiency. This command is especially useful for users who frequently work in the terminal, as it saves time and reduces the need to manually retype lengthy or complex commands.
More about the history command in my following post.
Grep multiple Patterns
You can use the -e option to specify multiple patterns. Here we will finally get all lines they either match for both patterns or just one of it.
command | grep -e "pattern1" -e "pattern2"
Or by using the \| operator within a single pattern to search for multiple patterns. Here we will finally also get all lines they either match for both patterns or just one of it.
# command | grep "pattern1\|pattern2"
The -E option enables extended regular expressions, which allows you to use | for OR operations without escaping it. Here we will finally also get all lines they either match for both patterns or just one of it.
# command | -E "pattern1|pattern2"
To display all lines they match two patterns we can use. Here we finally get all lines the match both patterns.
# command | grep "pattern1" | grep "pattern2"
You can search for multiple patterns across multiple files by specifying the filenames or using wildcards.
# grep -e "pattern1" -e "pattern2" file1.txt file2.txt

This will search for error or warning in all .log files in the current directory.
# grep -e "error" -e "warning" *.log
If your grep supports -P (Perl regex), you can use lookaheads to output only when two patterns exist.
command | grep -P '^(?=.*pattern1)(?=.*pattern2)'
Limit the output to a specific amount of lines. This will show the first 15 matching rows.
command | grep -e "pattern1" -e "pattern2" | head -n 15
Limit the output to a specific amount of lines. This will show the last 5 matching rows.
command | grep -e "pattern1" -e "pattern2" | tail -n 5
Clear Content of a File without deleting it
Therefore we can use the truncate command in Linux.
The truncate -s 0 command is used in Unix-like operating systems to shrink or extend the size of a file to a specified size. In this case, -s 0 sets the file size to 0 bytes, effectively emptying the file without deleting it.
# truncate -s 0 my-file.txt
Display System Shutdown and run-level Changes
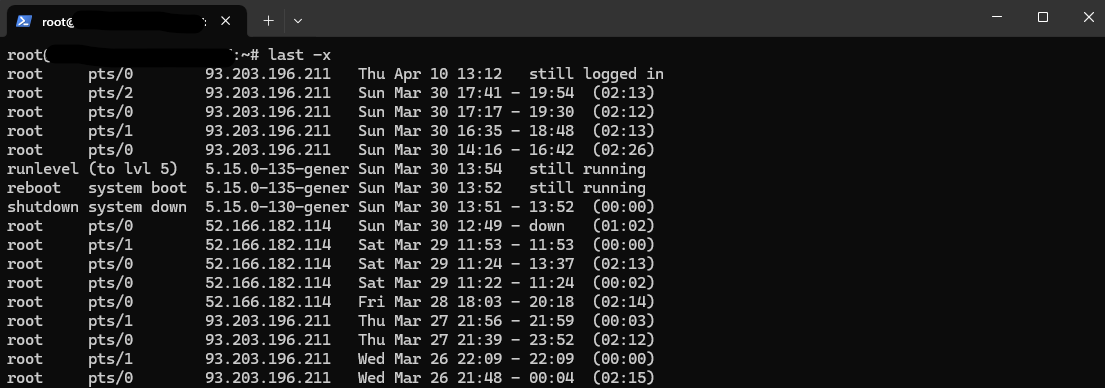
You can use the last -x command to display the system’s shutdown and run-level changes (in addition to regular user logins/logouts) from the /var/log/wtmp file.
# last -x
Analyze Log Files
Display first entries
While the cat command shows the entire file by default, you can combine it with other commands to show just the first entries.
# head -n 20 filename.txt  # Shows first 20 lines

# cat filename.txt | head -n 10  # Pipes cat output to head
Display last entries
While the cat command shows the entire file by default, you can combine it with other commands to show just the last entries.
# tail -n 20 filename.txt  # Shows last 20 lines

# cat filename.txt | tail -n 10  # Pipes cat output to tail

# tail -f filename.txt  # Shows last 10 lines and follows new additions in real time
-f, --follow  output appended data as the file grows
View Log Files in compressed .xz Format
If your system has log files compressed in .xz format (e.g., /var/log/messages.xz), you can view them using the xzcat tool like shown below.
sudo xzcat /var/log/messages.xz | head -n 10
needs-restarting
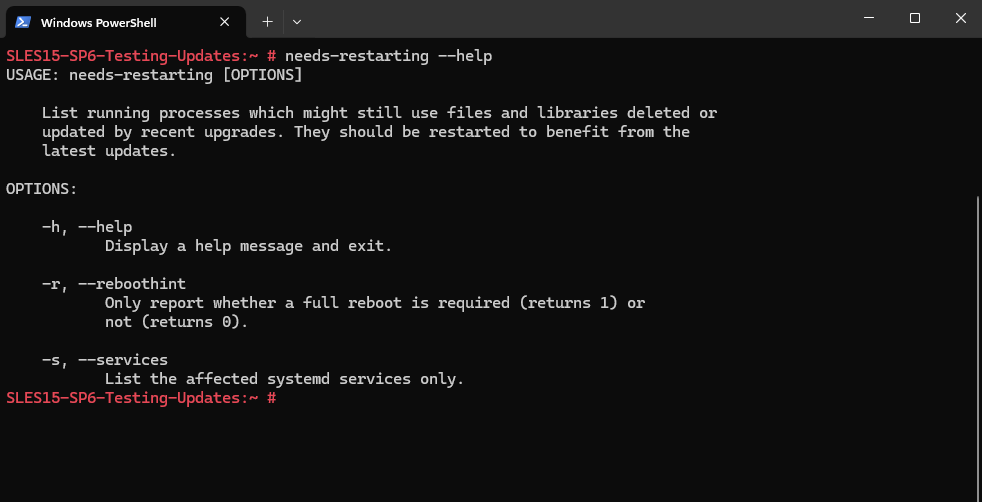
The needs-restarting command in Linux is used to determine whether a system reboot is required usually after updates or package changes.
It’s part of the yum-utils package (for RHEL-based systems like RHEL, CentOS, AlmaLinux, Rocky and SUSE).
# needs-restarting

# needs-restarting

-r, --reboothint    # Only report whether a full reboot is required (returns 1) or not (returns 0).
-s, --services         # List the affected systemd services only.
Determine the Public IP Address used for Internet Access directly on the Console
We can also check from the Linux command line which public IP address our virtual machine is using for outbound internet access by executing the following command.
# dig TXT +short o-o.myaddr.l.google.com @ns1.google.com
dig → The DNS lookup utility (stands for Domain Information Groper).
TXT → Specifies the DNS record type to query, in this case, a TXT record (often used for arbitrary human-readable or system info).
+short → Tells dig to return a simplified, short output (just the answer, no headers or additional sections).
o-o.myaddr.l.google.com → The domain you’re querying. Google provides a special hostname here that returns your public IP in a TXT record.
@ns1.google.com → Specifies the DNS server to query directly — here, Google’s authoritative name server (ns1.google.com).
Determine which IP Address is used to access a Remote Host in case multiple IPs assigned on the Network Interface
To determine which IP address a Linux system will use to access a remote host (when multiple IPs are assigned to one interface), you can use the following command. This is the simplest and most accurate method.
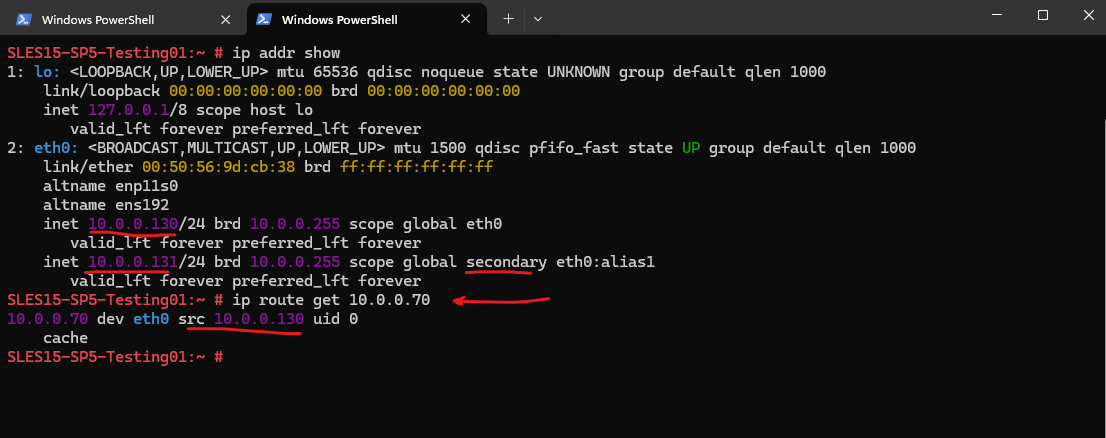
Below for example the Linux host have assigned two different IP addresses on the same network interface (eth0), first the primary IP address 10.0.0.130 and secondary the IP address 10.0.0.131.
By running the command below, I will use for the remote IP the IP address of my domain controller 10.0.0.70, the src field in the output tells us which IP will be used to reach 10.0.0.70, here the first (primary) assigned IP address on the eth0 interface 10.0.0.130.
# ip route get <remote-ip>
The primary vs. secondary distinction is mainly for configuration order, not routing priority.
Linux uses the IP that best matches the routing and subnet involved in the connection.If both IPs are in the same subnet, the first assigned (primary) IP is often used by default.
netconfig update -f
The following command
# sudo netconfig update -f
reprocess network settings and apply changes from configuration sources like:
- /etc/sysconfig/network/
- /etc/resolv.conf ==> should update the symlink to properly reflect the new setup. /etc/resolv.conf should be a symlink to /var/run/netconfig/resolv.conf
- Network interfaces
It Forces netconfig to re-apply all configured network settings.
Behind the scenes, it affects:
- /etc/resolv.conf (DNS)
- /etc/hosts (sometimes)
- Interface-specific scripts under /etc/sysconfig/network/
- Possibly triggers dispatcher scripts like if-up.d/, if-down.d/
Determine on which Partition a specific Directory is located
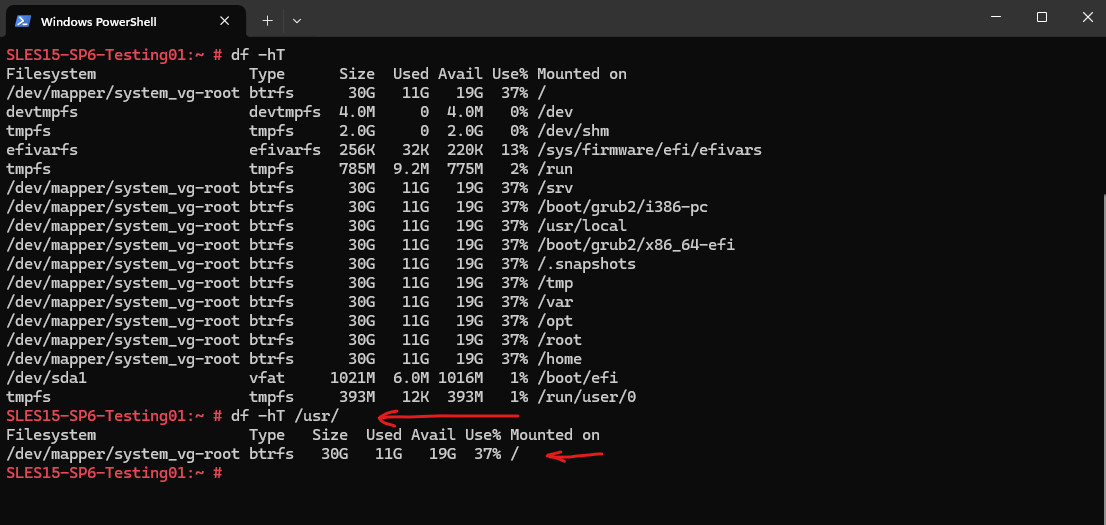
To determine on which partition for example the /usr directory is located in a Linux system, you can use one of the following commands:
# df -hT /<directory-name>
# df -hT /usr/
mount -a | reprocess your /etc/fstab file without Reboot
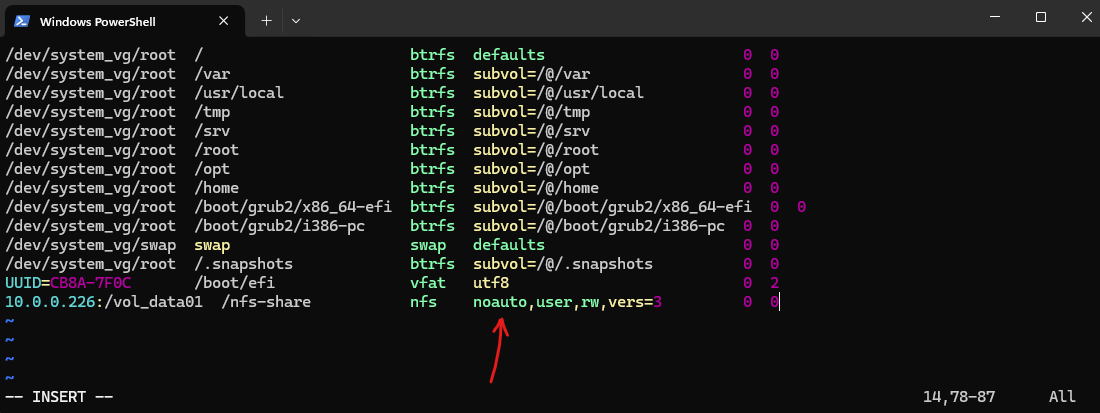
mount -a is a handy command to reprocess your /etc/fstab file and mount all filesystems listed there, except those marked with the noauto option.
# mount -a
The command reads the /etc/fstab file and attempts to mount all entries that:
- Are not already mounted
- Are not marked with noauto
- Have valid mount points and devices
So the following marked NFS Export wouldn’t be mounted because it is marked with noauto.
List Files and Folders with their numeric (decimal/octal) Permissions using stat
To list files and folders with their numeric (decimal/octal) permissions, use the stat command on Linux.
# find /<path> -maxdepth 1 -exec stat -c '%A %a %n' {} \;
# find /nfs-share -maxdepth 1 -exec stat -c '%A %a %n' {} \;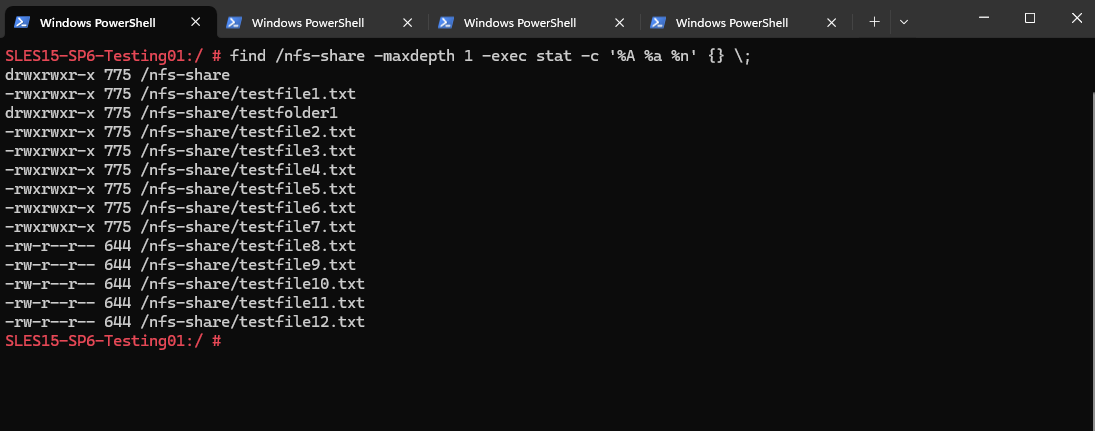
Looping a Command with Retry Logic (e.g. Testing an HTTPS Endpoint)
Sometimes you want to hammer an endpoint a few times to see if intermittent errors show up (TLS handshake issues, load balancer flakiness, backend restarts, …). A quick way in Linux is to loop a command, check the exit code, and add a short delay between attempts:
for i in {1..30}; do
    echo "Try $i"
    curl -sk https://blog.matrixpost.net  /dev/null
    if [ $? -ne 0 ]; then
        echo "FAILED at $i"
    fi
    sleep 1
done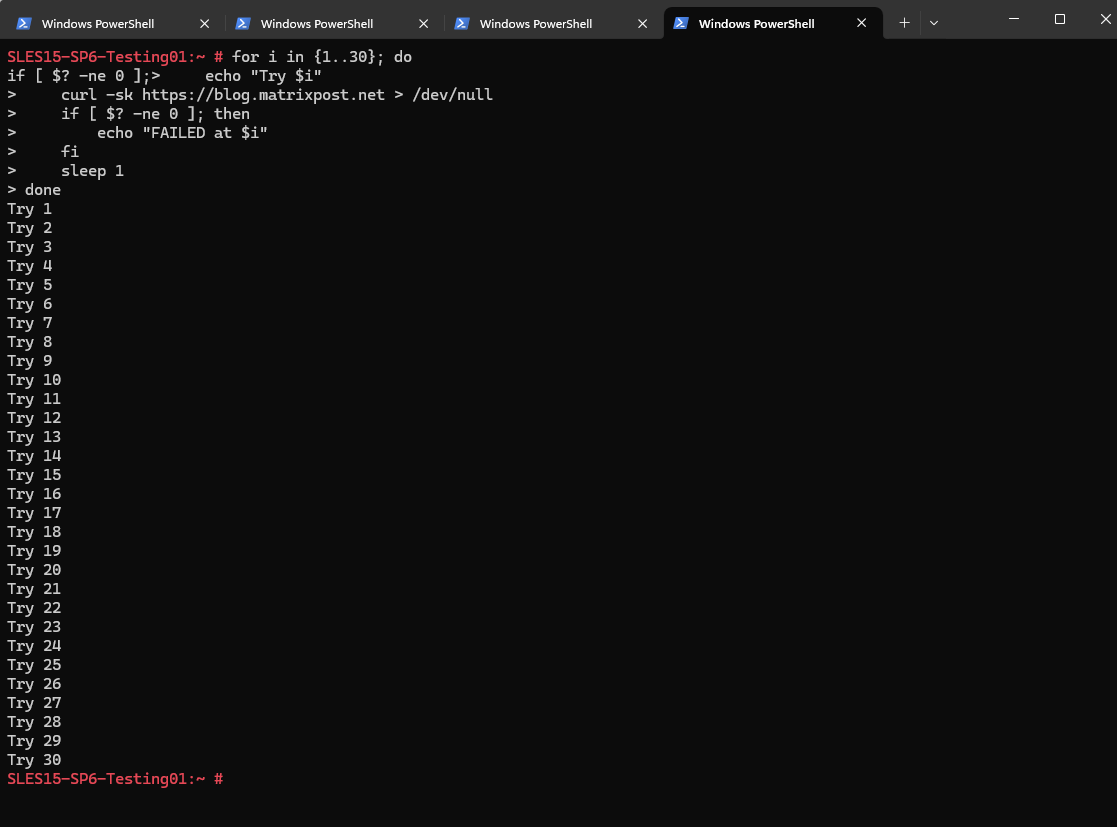
for i in {1..30}→ loop 30 timescurl -sk→ silent + ignore certificate errors> /dev/null→ throw away outputif [ $? -ne 0 ]→ check curl exit statusecho "FAILED at $i"→ show only failuressleep 1→ wait 1 second between tries
Identify which Hypervisor a Linux VM Runs On
Quickly identify the virtualization platform your Linux VM is running on using built-in tools. Commands like systemd-detect-virt and dmidecode can reveal whether the guest is running under KVM/QEMU, VMware, Hyper-V, Azure, or on bare metal, without needing access to the hypervisor itself.
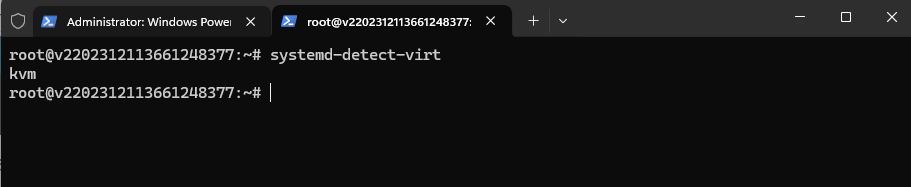
systemd-detect-virt
systemd-detect-virt is a simple utility that identifies whether a Linux system is running inside a virtual machine, container, or on bare metal. It quickly detects platforms like KVM, VMware, Hyper-V, Azure, Xen, or VirtualBox and is ideal for automation or cheat-sheet style diagnostics without requiring any extra tools or privileges.
# systemd-detect-virt

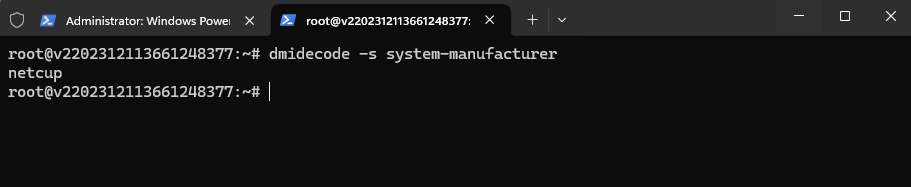
dmidecode -s system-manufacturer
dmidecode -s system-manufacturer reads hardware information directly from the VM’s virtual BIOS and reveals the vendor string of the underlying hypervisor (e.g., VMware, Microsoft, QEMU). It provides highly accurate hypervisor identification and works even when simplified tools like systemd-detect-virt return generic results.
# dmidecode -s system-manufacturer

dmidecode -s system-product-name
dmidecode -s system-product-name displays the virtual machine’s product identifier from its BIOS data, often showing more specific information about the hypervisor or virtualization stack (e.g., KVM/QEMU models, VMware product names, Hyper-V models). It’s useful for distinguishing similar platforms or confirming virtual hardware details inside a Linux guest.
# dmidecode -s system-product-name
dmidecode -s system-product-nameshows the VM’s virtual hardware compatibility, not the ESXi host version.
A VM may showVMware7,1even when it runs on e.g. ESXi 8.0 Update 3, because the guest only sees virtual BIOS data and not the real hypervisor software version.


Links
whereis(1) – Linux man page
https://linux.die.net/man/1/whereiswhich(1) – Linux man page
https://linux.die.net/man/1/whichhistory(3) — Linux manual page
https://www.man7.org/linux/man-pages/man3/history.3.html