Set up Redis Object Cache on Ubuntu for WordPress and the LiteSpeed Cache Plugin
In this post I want to show how to set up a persistent object cache on a virtual machine (Ubuntu) for WordPress by using the Redis Object Cache and the LiteSpeed Cache WordPress plugin.
A persistent object cache are server daemons like Redis or Memcached and they provide an in-memory data structure store to cache frequently requested resources (objects) in the system memory.
An object cache stores the results of expensive and/or frequent database queries in a way that makes them easy to retrieve, and eliminates the need for repeated access to the database. Object caching greatly reduces the time it takes to retrieve query results.
For example, your WordPress site’s options are stored in the database. Site options include things like the site’s name and URL. Every time a page is assembled for a visitor, it is necessary to access the database to read the site options. As you can imagine, these repeated queries for the same information represent wasted resources. With an object cache, you can query the database once, and save the results for a set period of time. During that time, whenever a page must be assembled, WordPress can get the site information from the cache. Accessing object cache is a much less resource-intensive prospect than accessing a database.
Some queries are time-consuming, and other queries are repeated frequently. Both of these scenarios can be improved by storing the query results in object cache.
Source: https://docs.litespeedtech.com/lscache/lscwp/admin/#what-is-an-object-cache
Redis is an open source (BSD licensed), in-memory data structure store used as a database, cache, message broker, and streaming engine.
Source: https://redis.io/docs/about/
Install the Redis Object Cache and Litespeed php Module on Ubuntu
$ sudo apt update
$ sudo apt upgrade
$ sudo apt install redis

# adjust your php version!
$ sudo apt install php8.2-redis

# add the litespeed repository
$ sudo wget -O - https://repo.litespeed.sh | sudo bash
$ sudo apt update

# Installing Redis PHP 8.2 Module for Litespeed Native on Ubuntu
# adjust your php version!
$ sudo apt install lsphp82-redis
Configure the Redis Object Cache
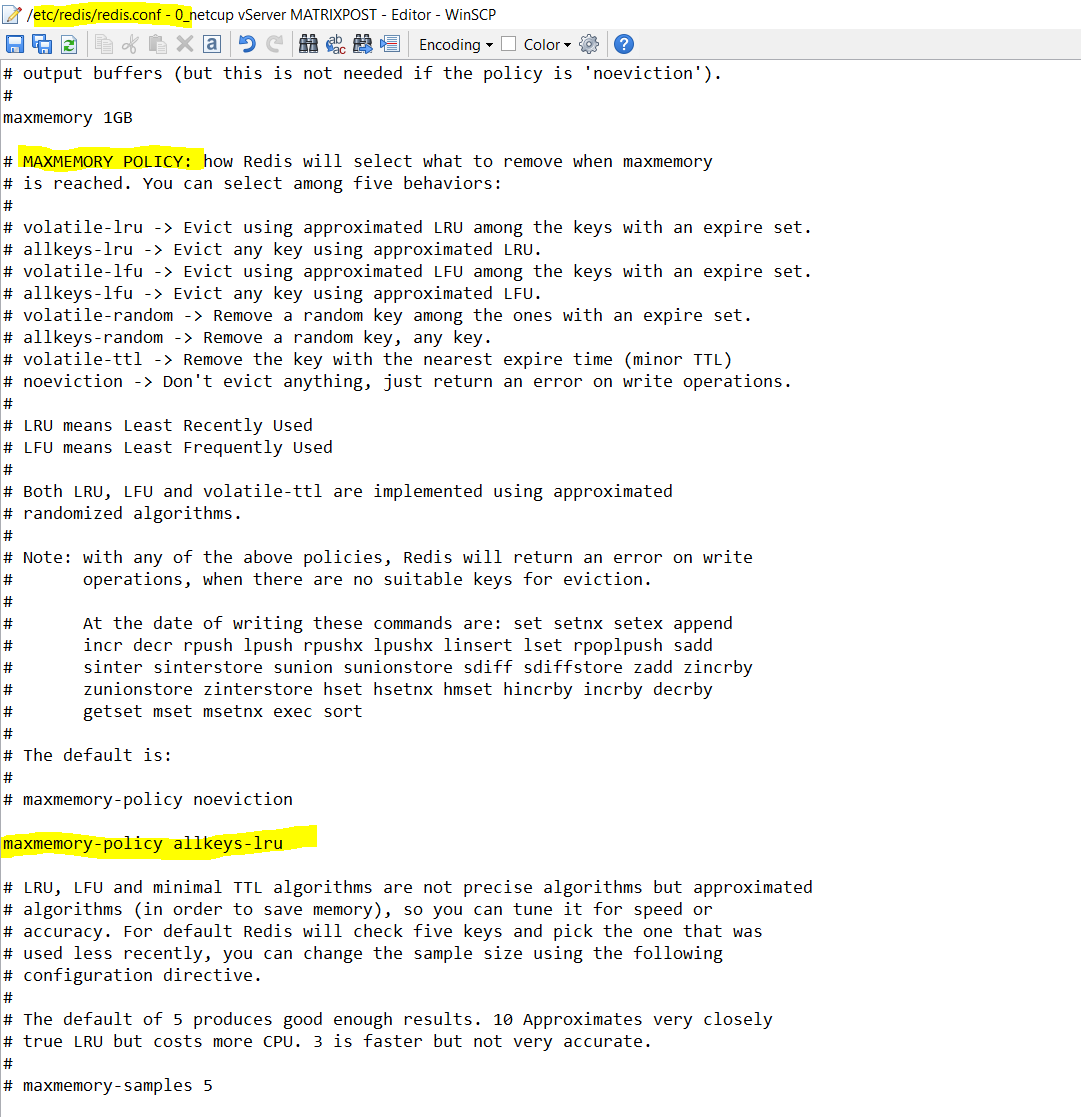
In the redis configuration file I will adjust the parameter maxmemory and maxmemory-policy as shown below. The maxmemory parameter adjust according to your systems available RAM.
/etc/redis/redis.conf

$sudo systemctl restart redis-server
# Enable Redis on boot if not already by default configured
$sudo systemctl enable redis-server
$sudo systemctl restart apache2
Install and Configure the LiteSpeed Cache WordPress Plugin

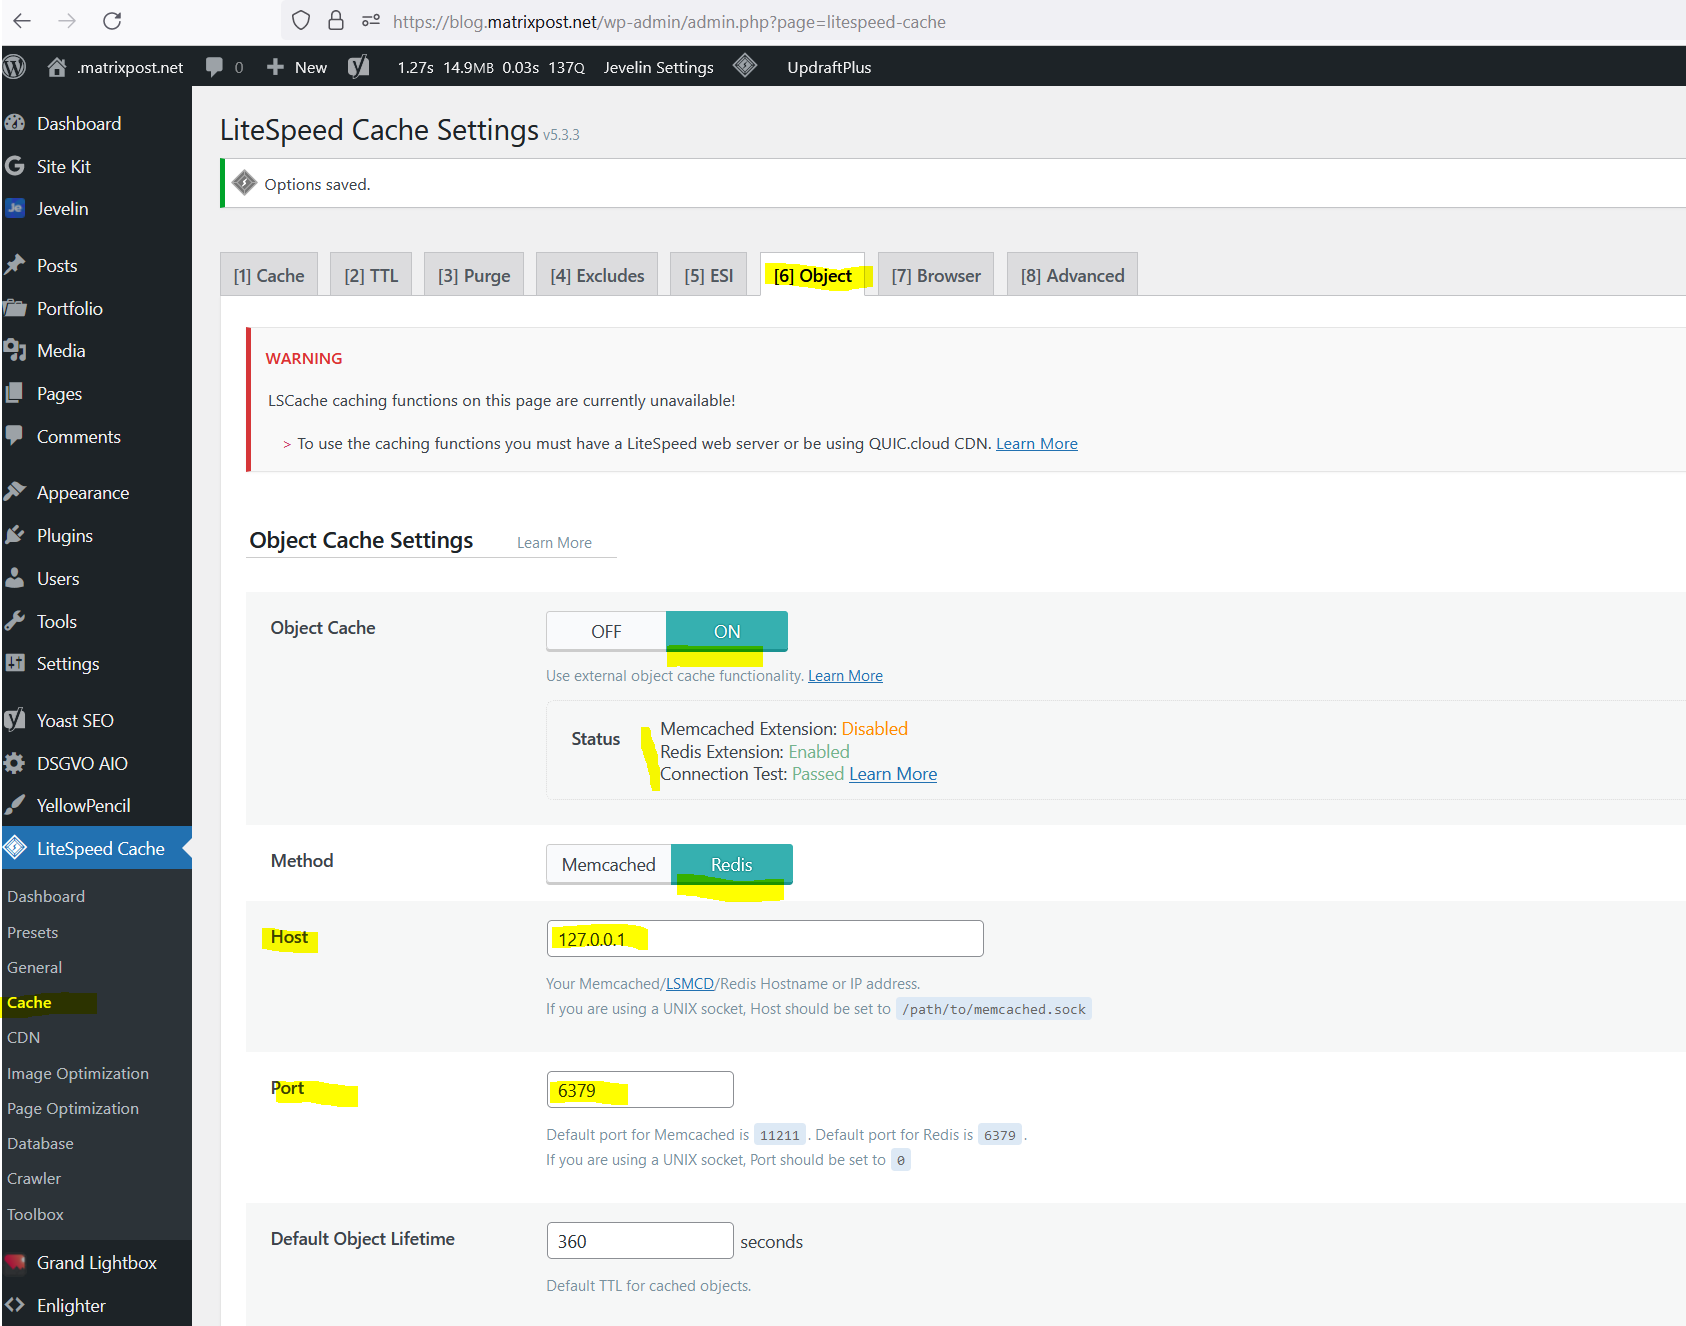
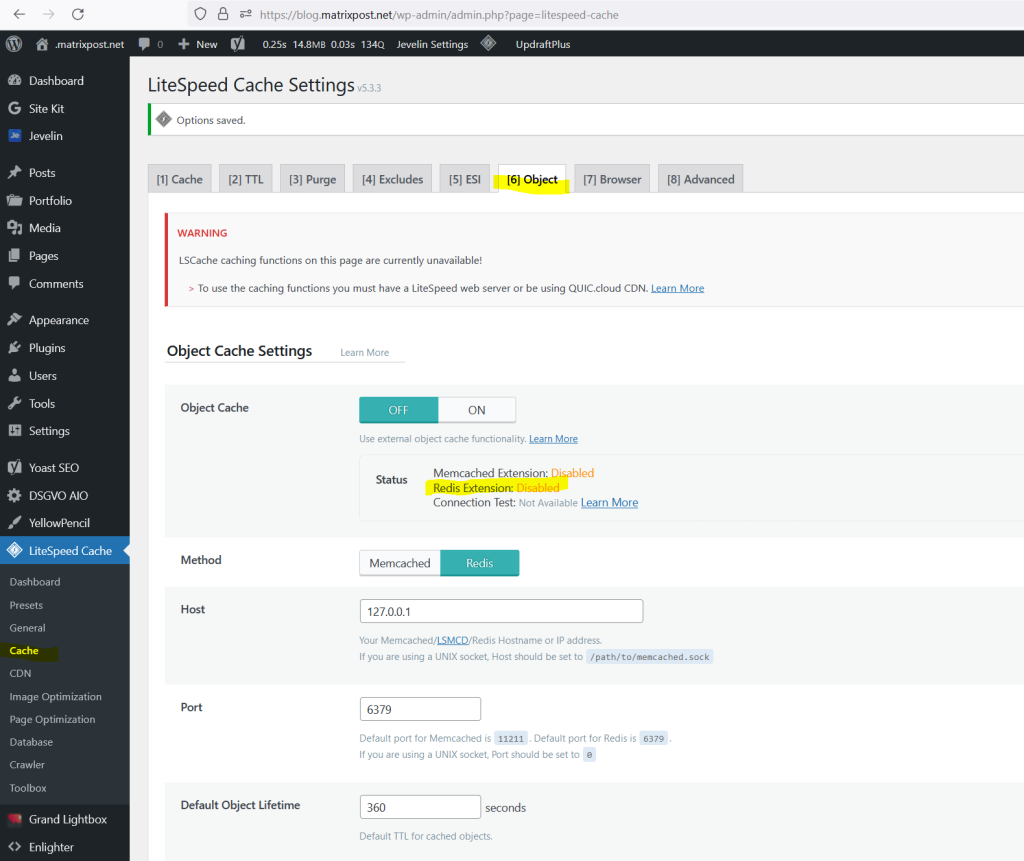
The warning message on the screenshot below you can ignore as we just use the plugin for the redis object cache we installed previously on our virtual machine.
LSCache caching functions on this page are currently unavailable!
Note: If you have a site that is fully-cached by LSCWP, object cache won’t be invoked very often. Object cache is only necessary when WordPress is building a page through PHP. If PHP is not being called (and minimizing PHP usage is the goal with LSCache, after all) then there are no queries to process and therefore nothing to look up in object cache.
LSCWP doesn’t provide object caching directly. Rather, it supports your use of an external object cache such as Redis, Memcached or LiteSpeed’s drop-in Memcached replacement, LSMCD.
Source: https://blog.litespeedtech.com/2018/02/07/object-cache-support-in-lscache/
Within the LiteSpeed Cache plugin select Cache and the Object tab. Here by default the object cache is disabled. I will enable it and for the Method we choose Redis.
Further we enter for Host either localhost or 127.0.0.1.
By default redis is listening on tcp port 6379.
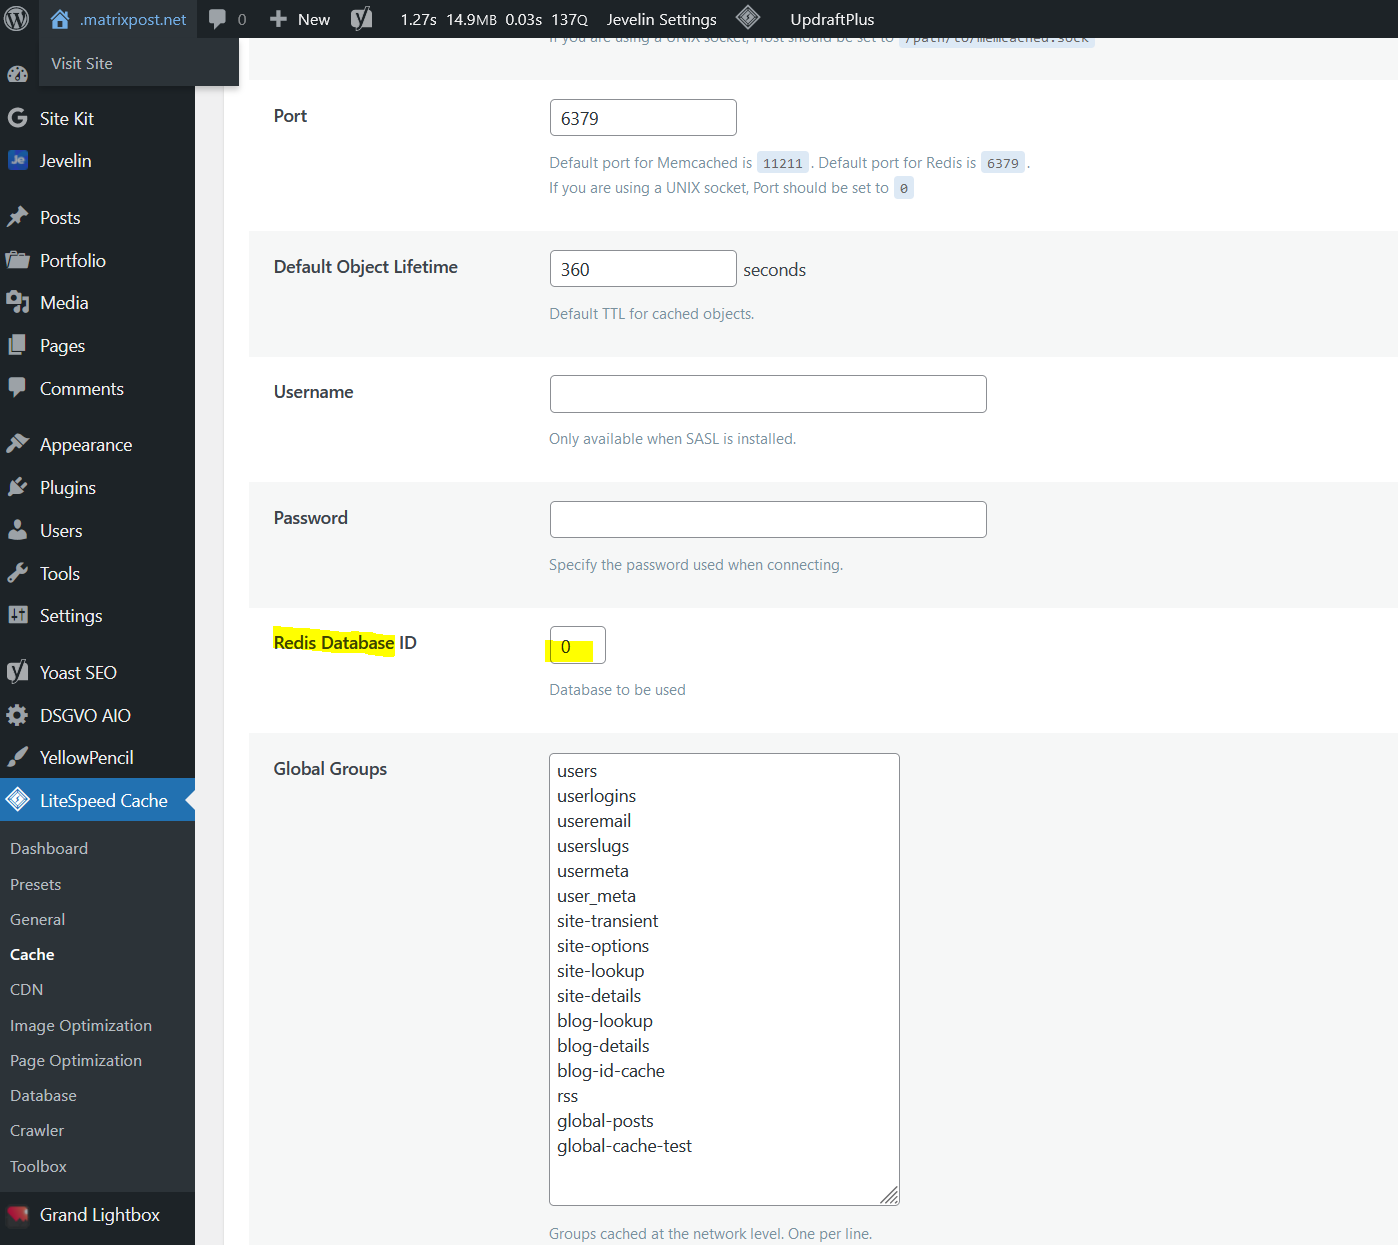
Default redis database id is 0.
Page Speed Test
https://developers.google.com/speed/pagespeed/insights/
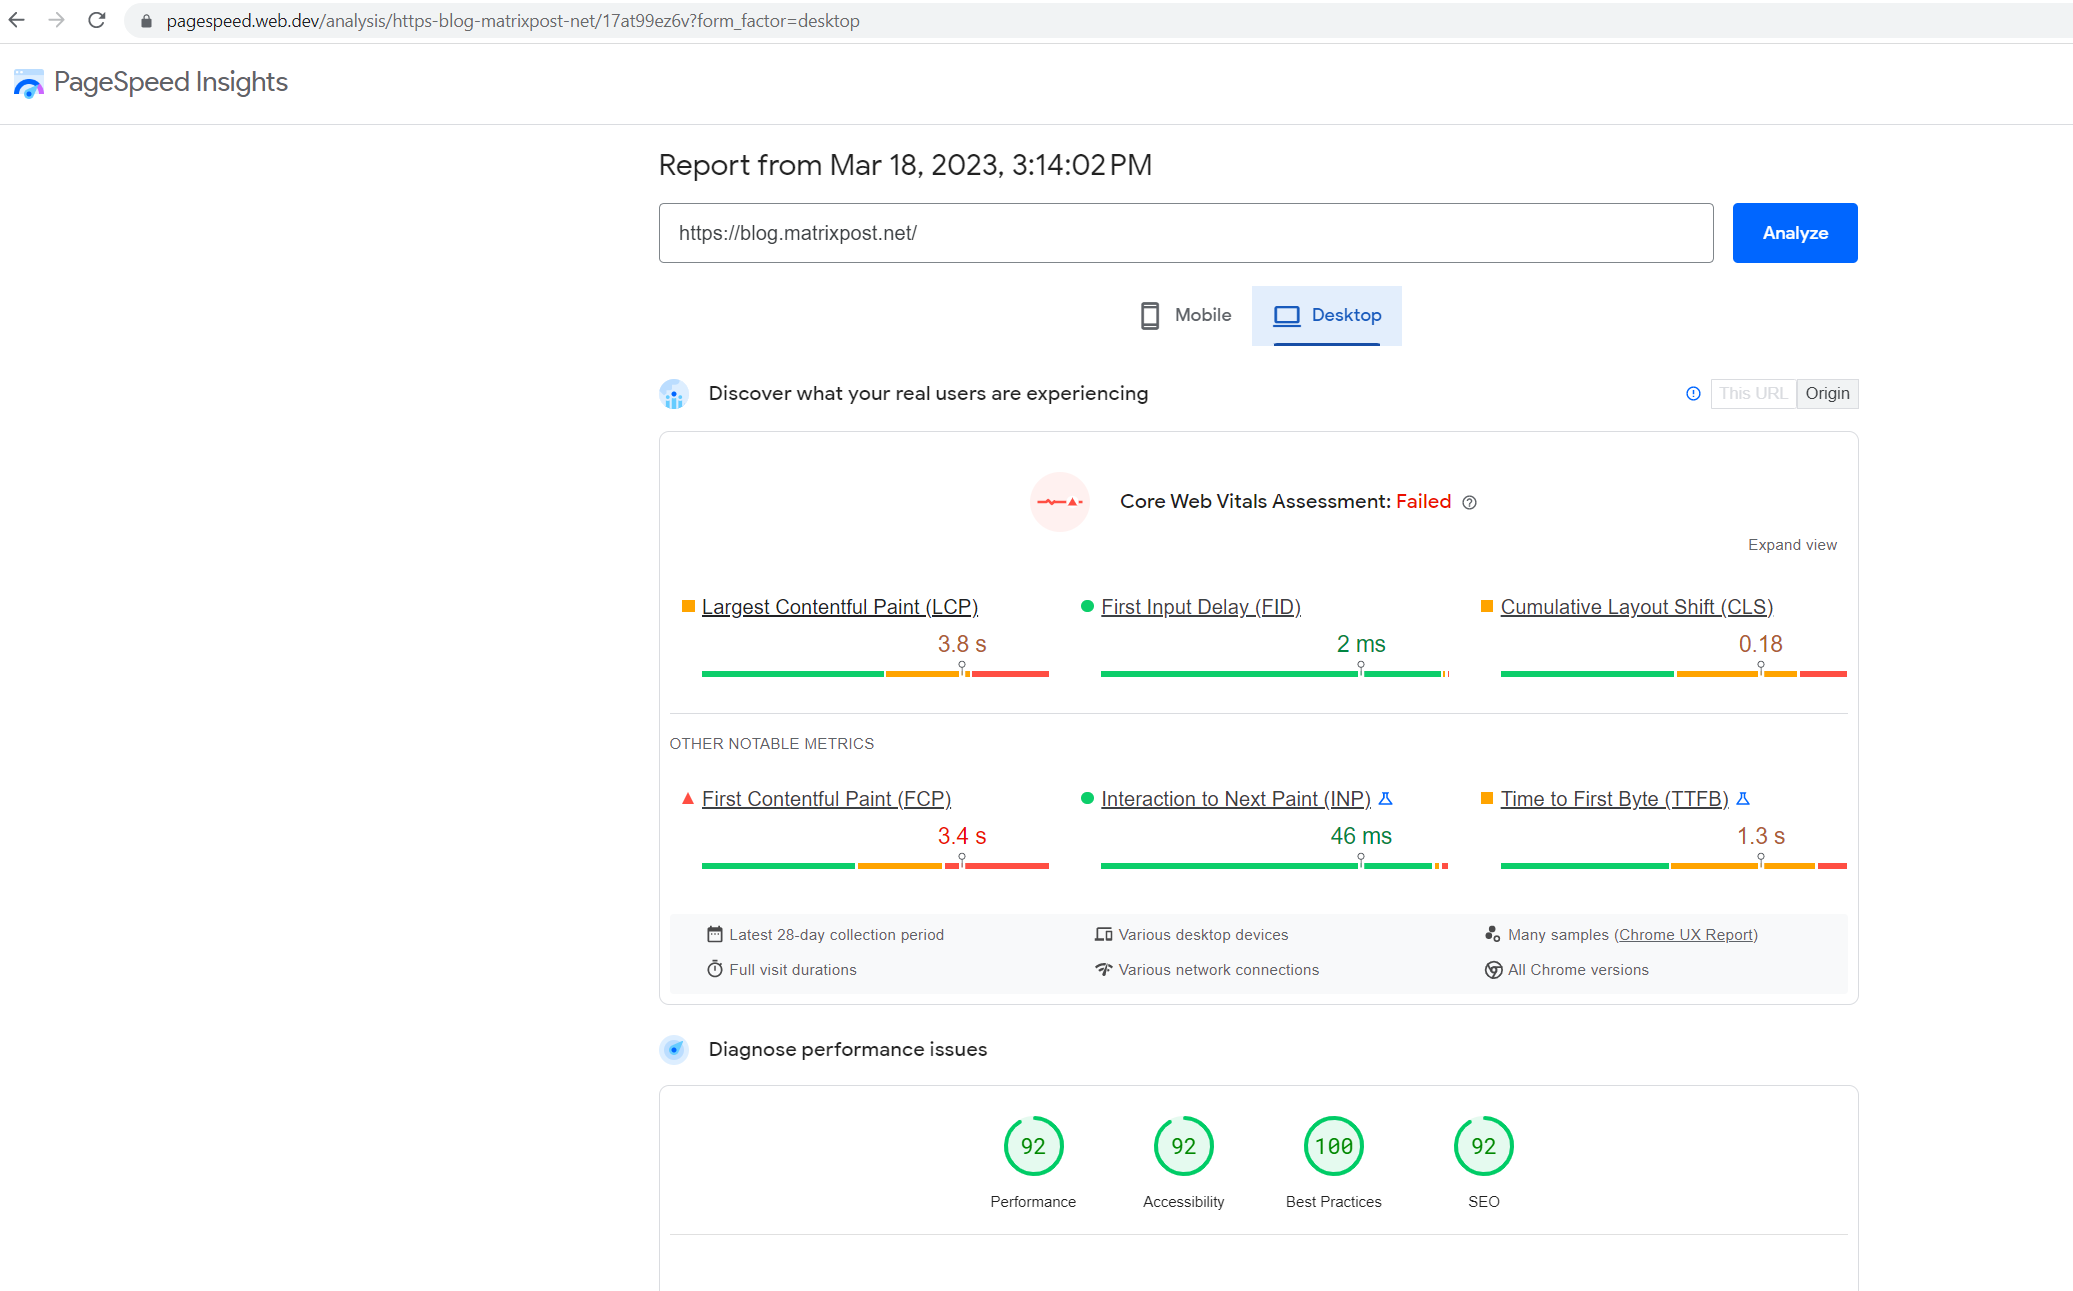
PageSpeed Insights (PSI) reports on the user experience of a page on both mobile and desktop devices, and provides suggestions on how that page may be improved.
Source: https://developers.google.com/speed/docs/insights/v5/about
Troubleshooting
Redis Extension: Disabled and Connection Test: Not Available
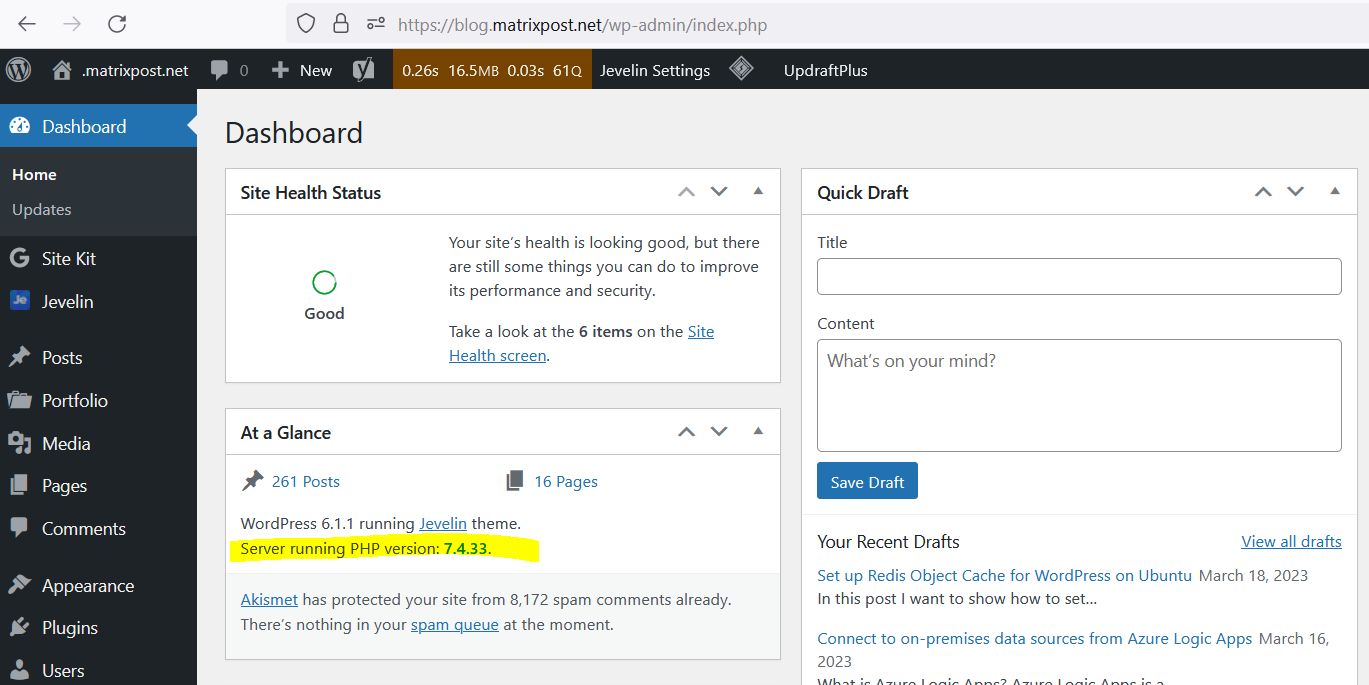
In my case the problem was, that I had installed different php versions on the server and by just installing the redis php module without explicit version using the following command:
$sudo apt install php-redis
php8.2-redis module was finally installed and because WordPress is running under PHP version 7.4 it won’t work.
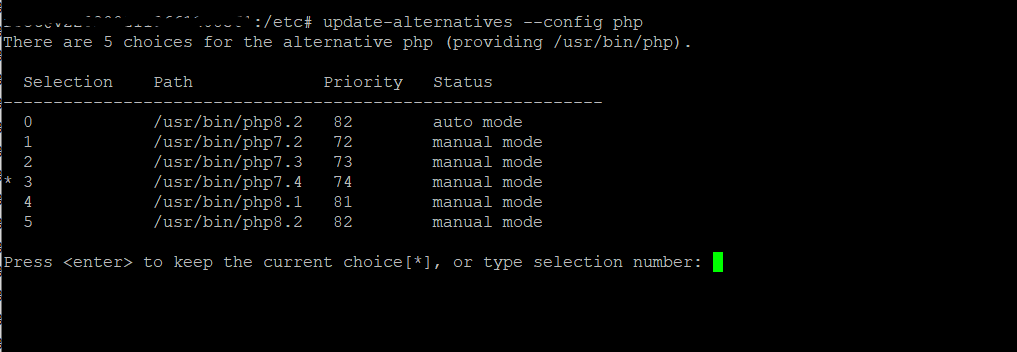
So first I have to remove the php-redis modul which was installed for php version 8.2 and then re-install it by using the explicit version 7.4.
$sudo apt remove php-redis
$sudo apt autoremove
$sudo apt install php7.4-redis
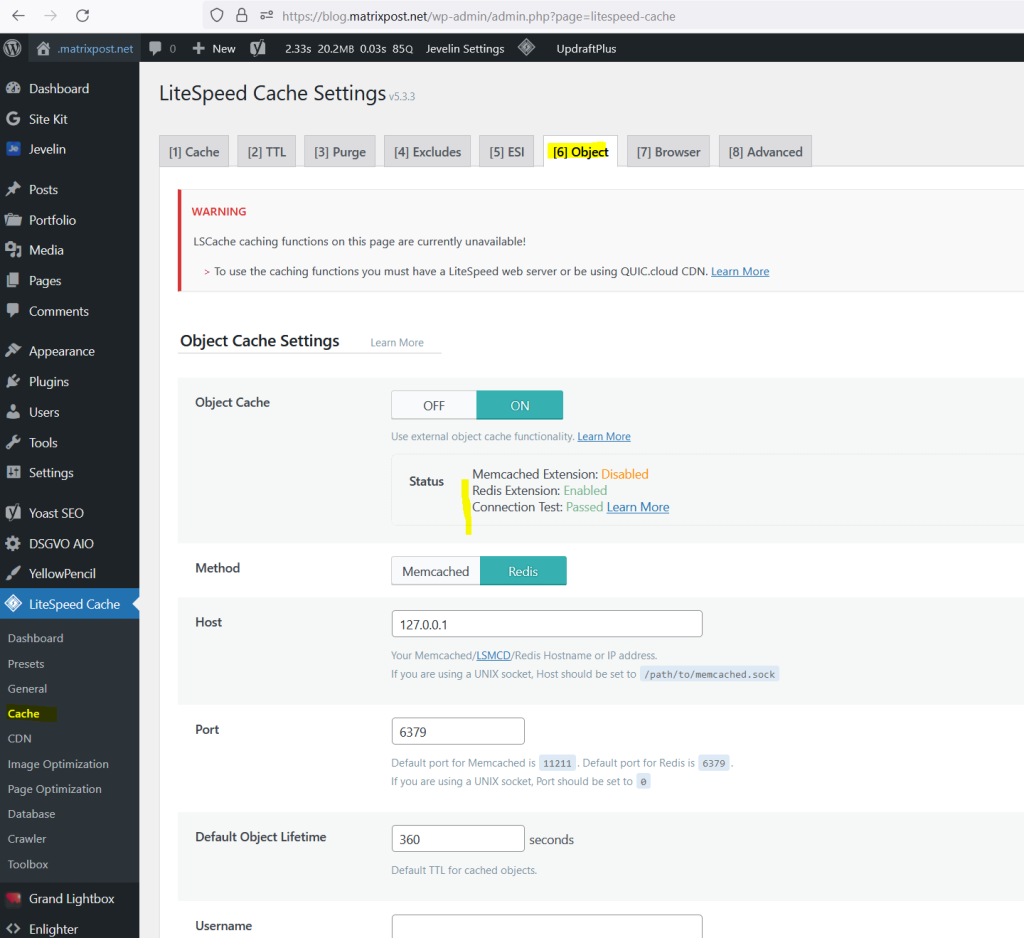
After that the LiteSpeed Cache plugin could determine and use the module and the connection test passed.
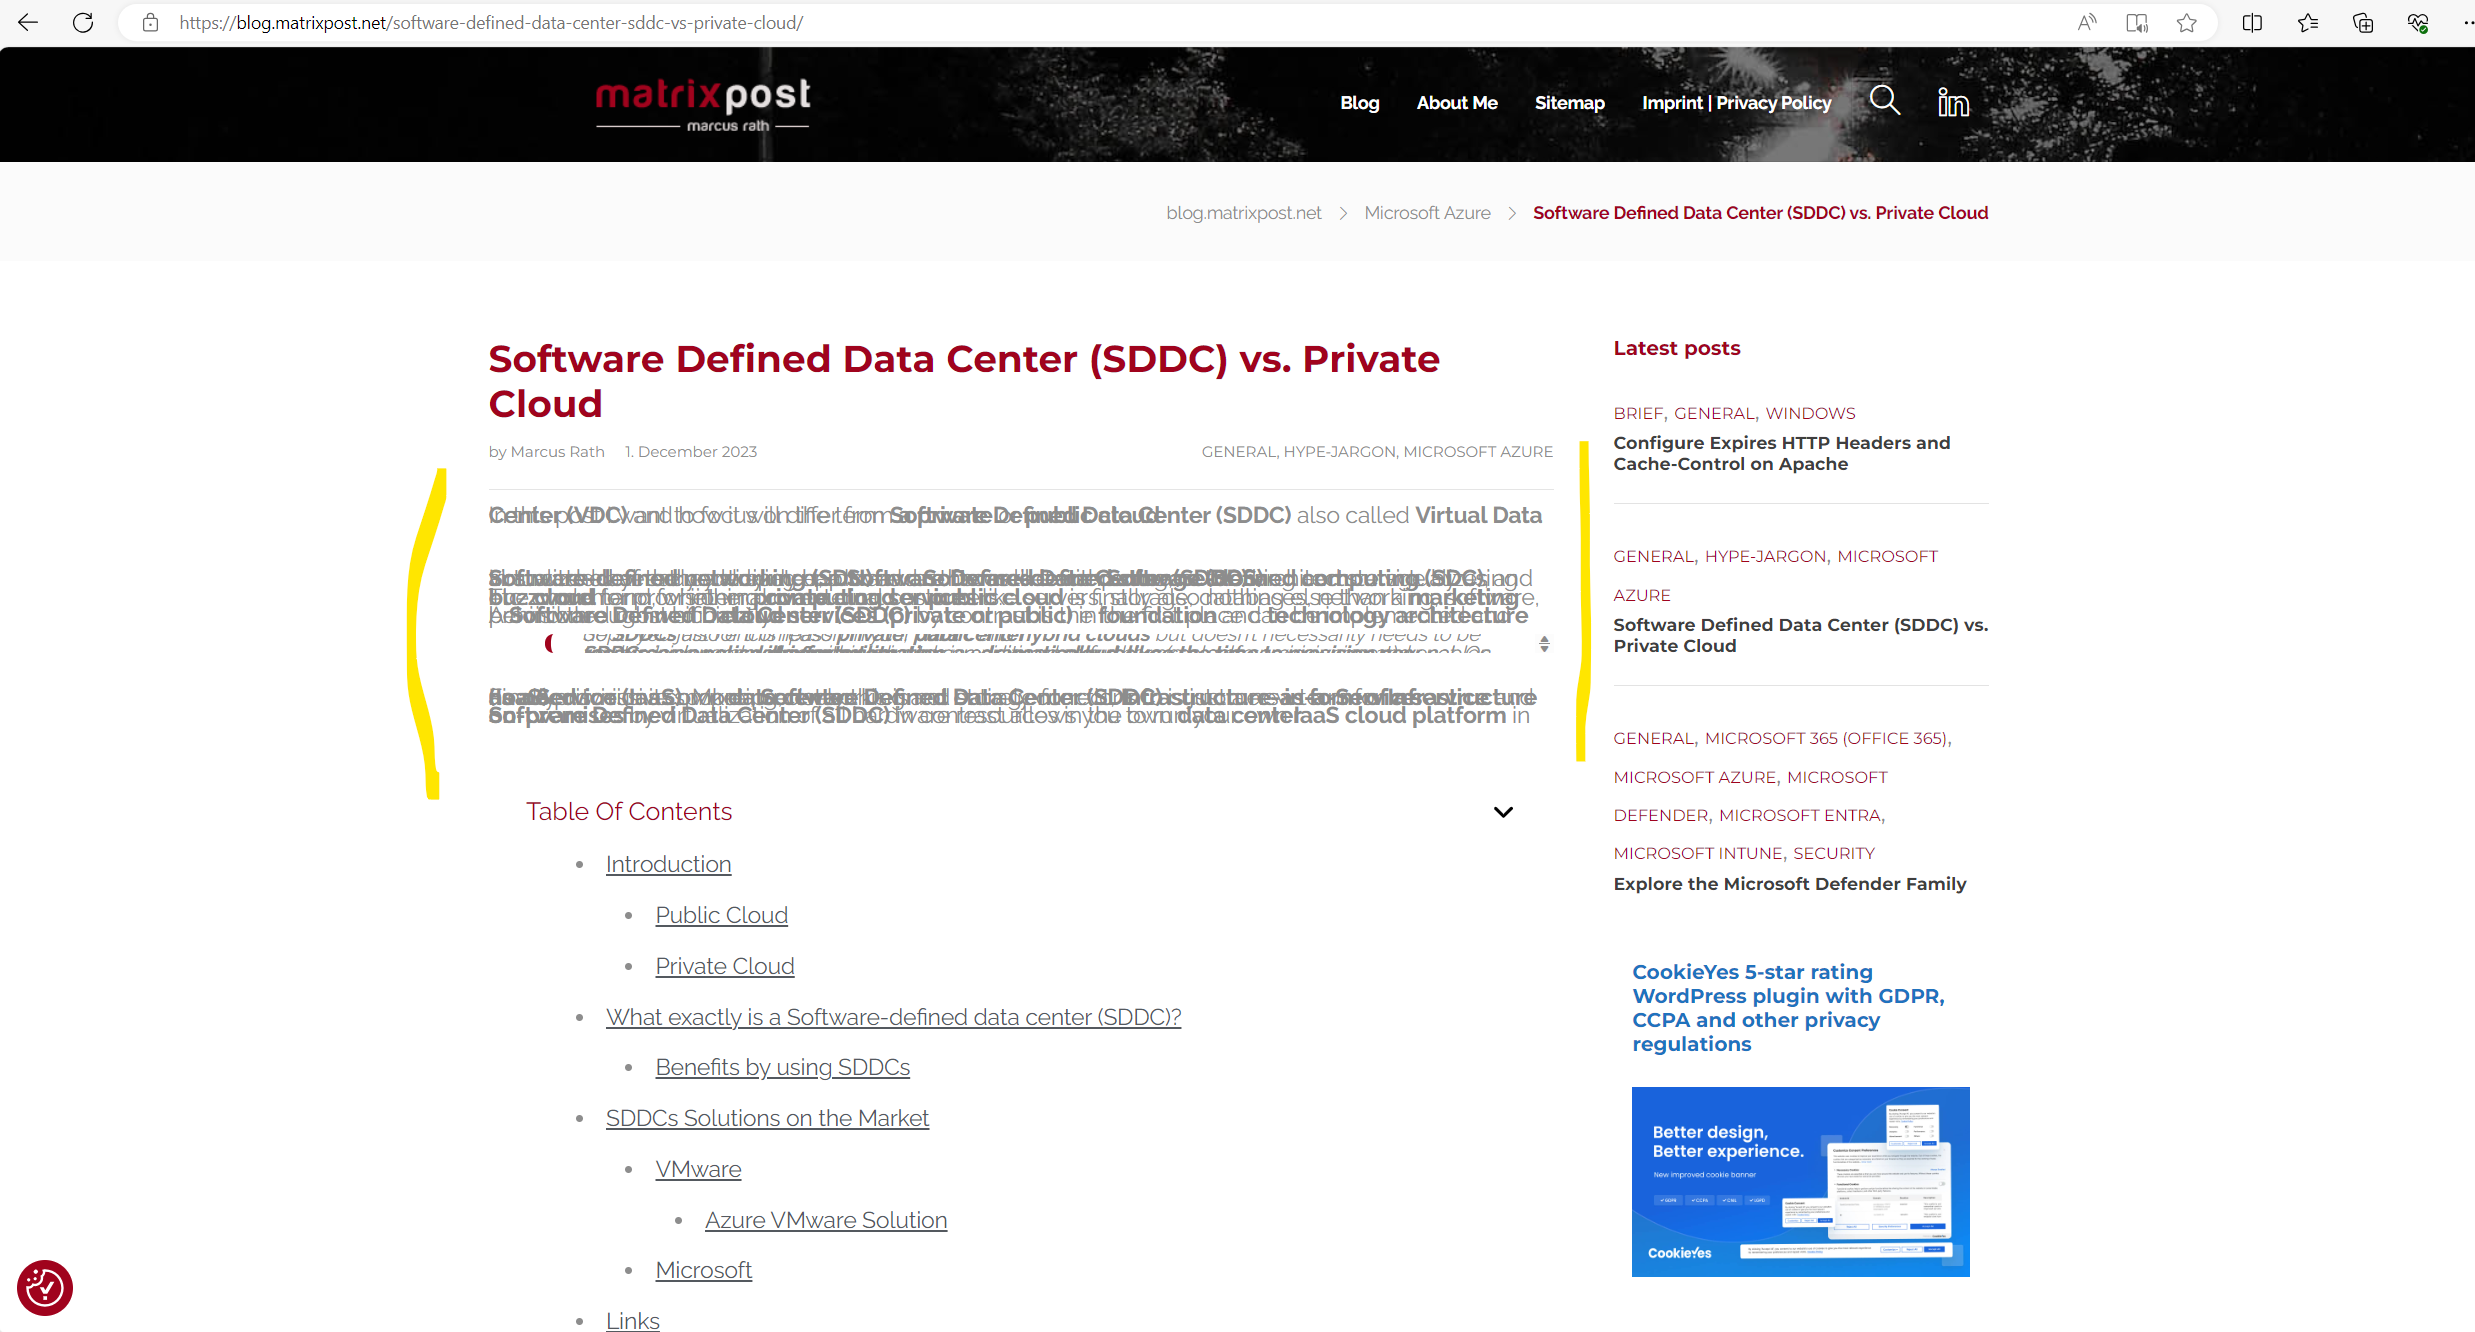
CSS styles are broken after activating the plugin
In case you will encounter some issues about the styling from your WordPress page like for example shown below, you can resolve it by using the Page Optimization tools.
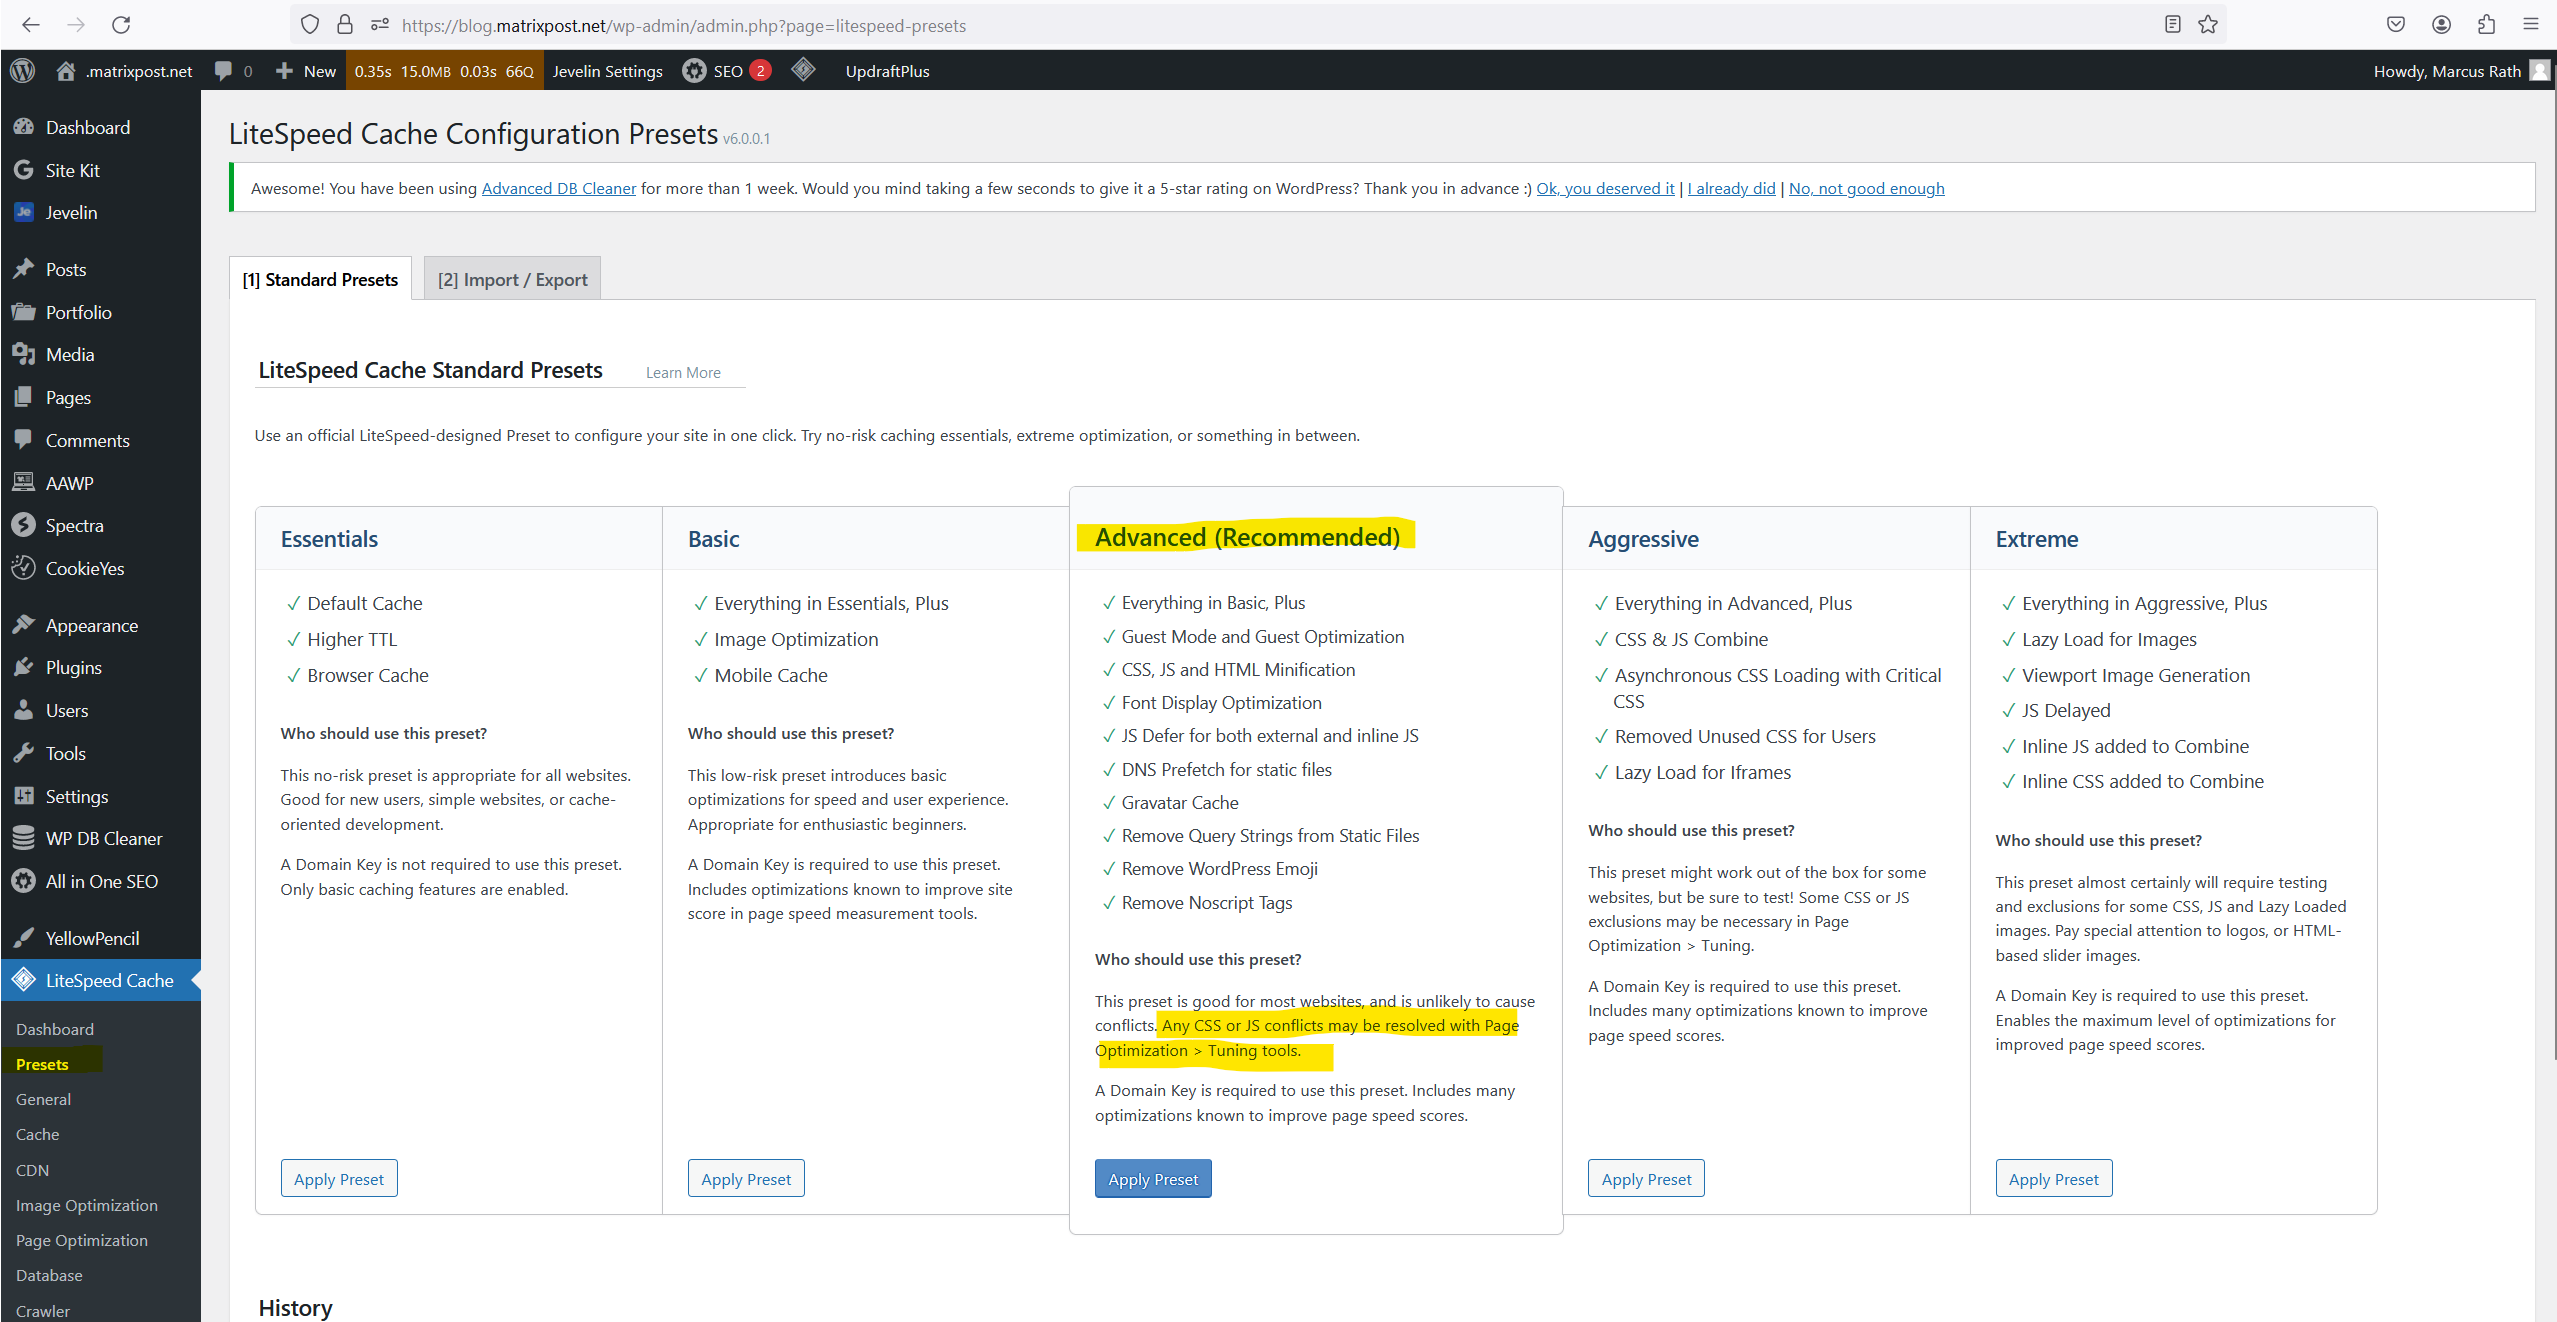
I will use the advanced presets which will also minify CSS files and inline CSS code.
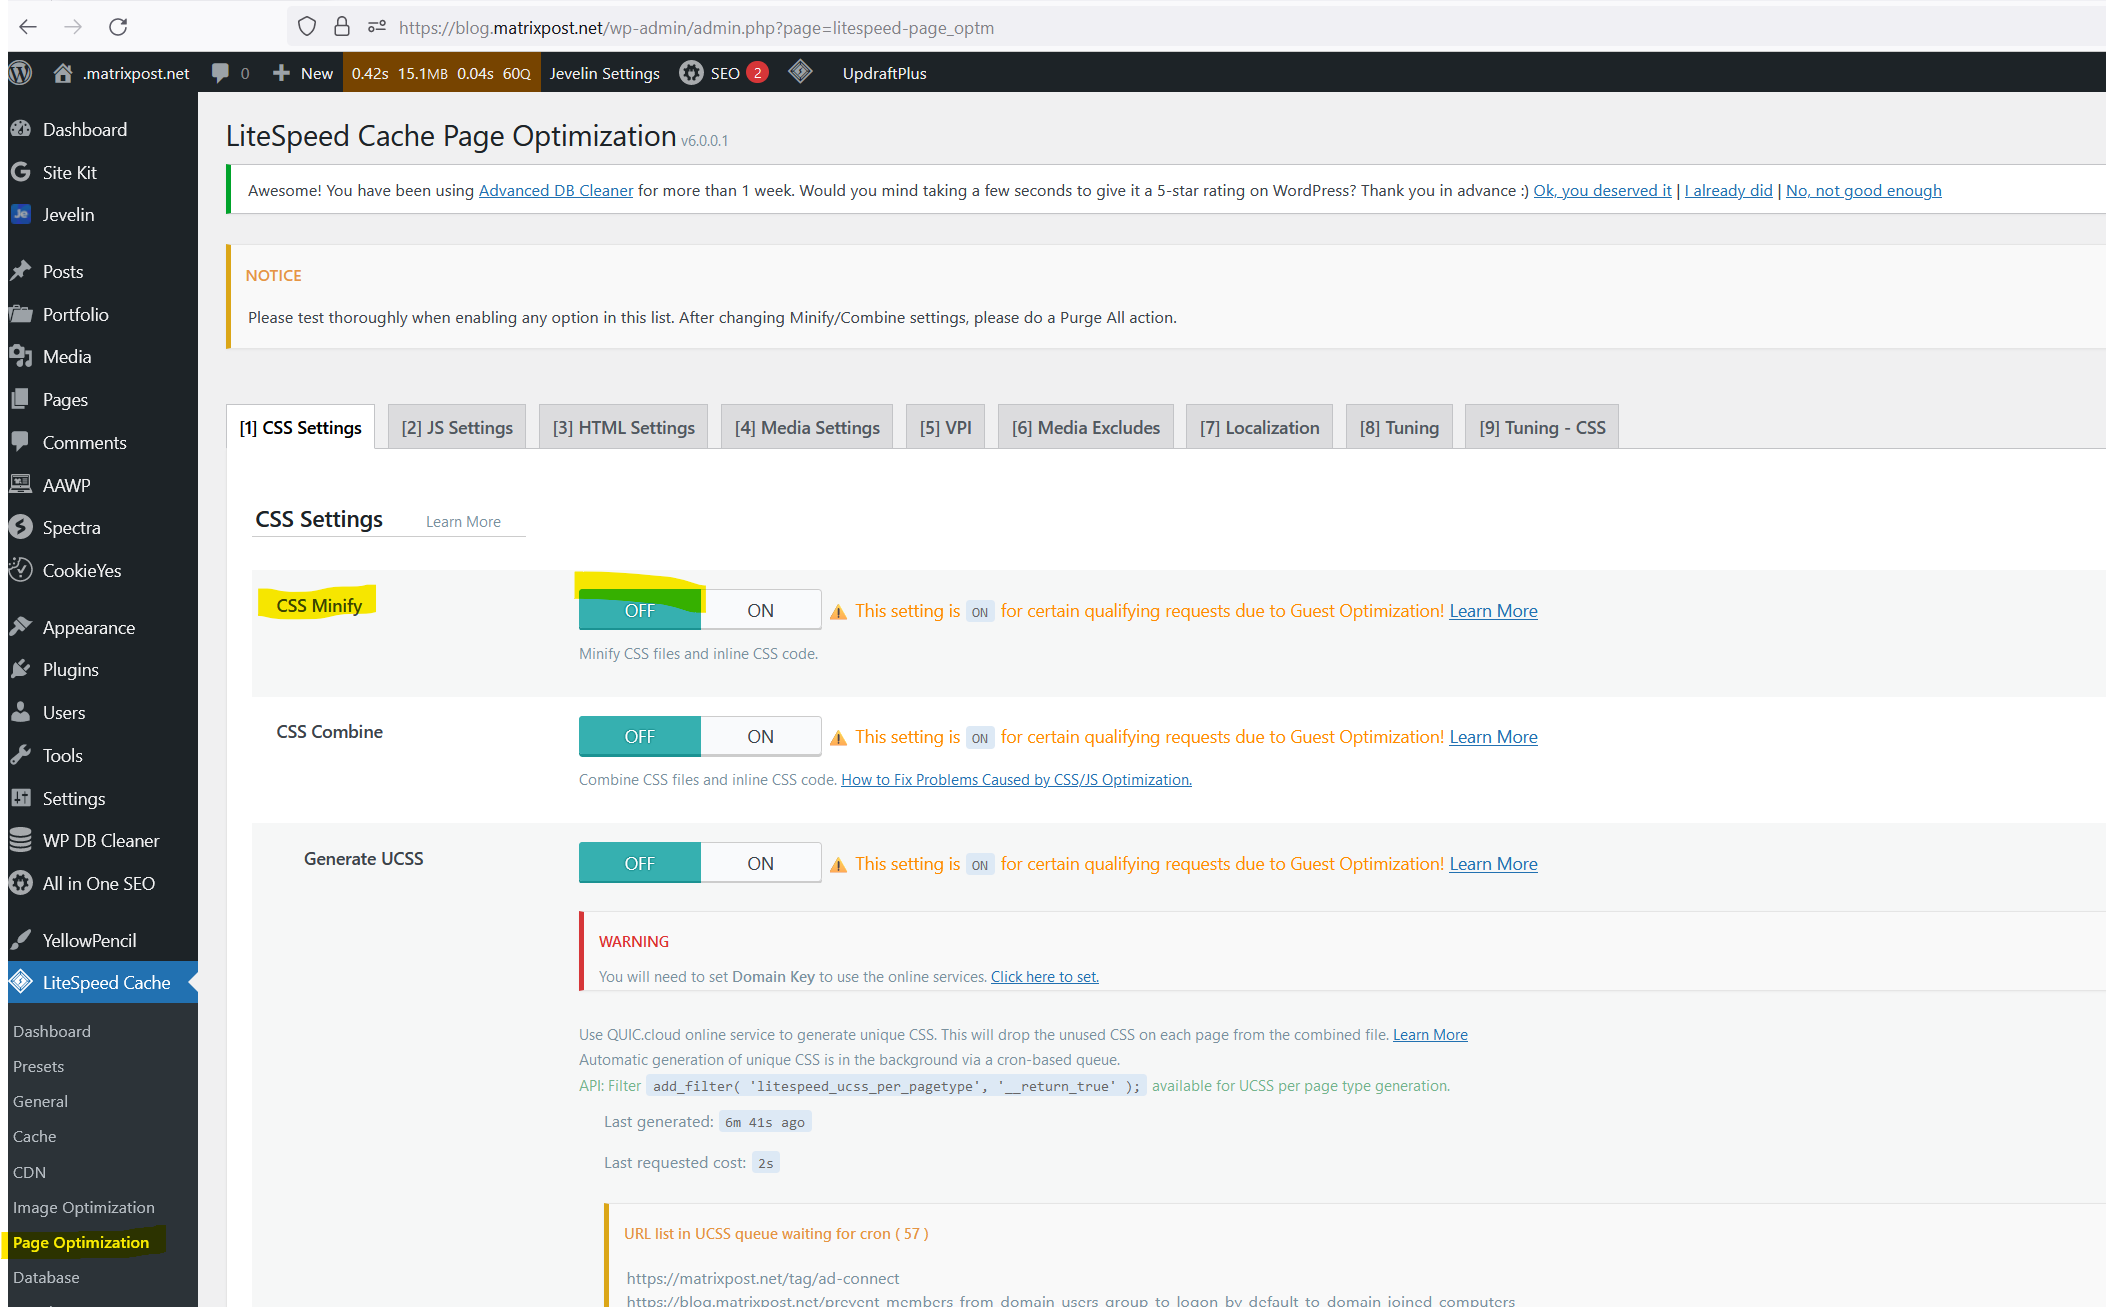
You can either disable CSS Minify or using the Tuning – CSS tab for more fine tuning your CSS styles and resolve the broken CSS styles issue.
Uninstall and Remove Redis
sudo systemctl stop redis
sudo systemctl disable redis

apt purge --auto-remove redis-server
Links
Redis
https://en.wikipedia.org/wiki/RedisRedis Documentation
https://redis.io/docs/Object Cache Support in LSCache
https://blog.litespeedtech.com/2018/02/07/object-cache-support-in-lscache/What is LSCache?
https://docs.litespeedtech.com/lscache/