How Azure AD Privileged Identity Management works?
To see Privileged Identity Management (PIM) in action, I want to show below how you can use it for example to restrict administrative access to Microsoft Teams.
Set up Azure AD Privileged Identity Management
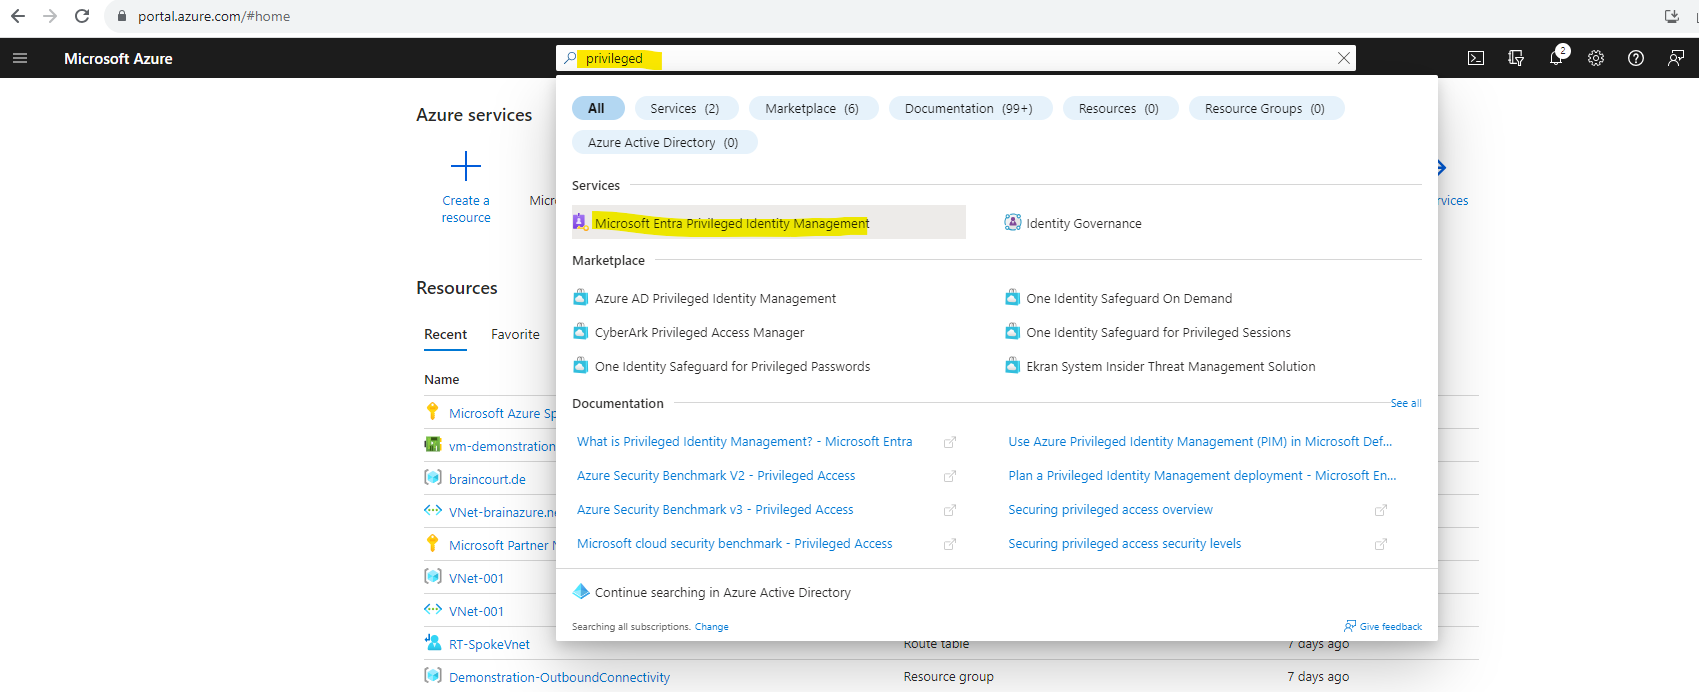
To open Azure AD Privileged Identity Management (since August 2023 called Microsoft Entra Privileged Identity Management) we can type the name into the search bar of the Azure portal as shown below and click on Microsoft Entra Privileged Identity Management.
I will first need to configure the Teams Administrator Role.
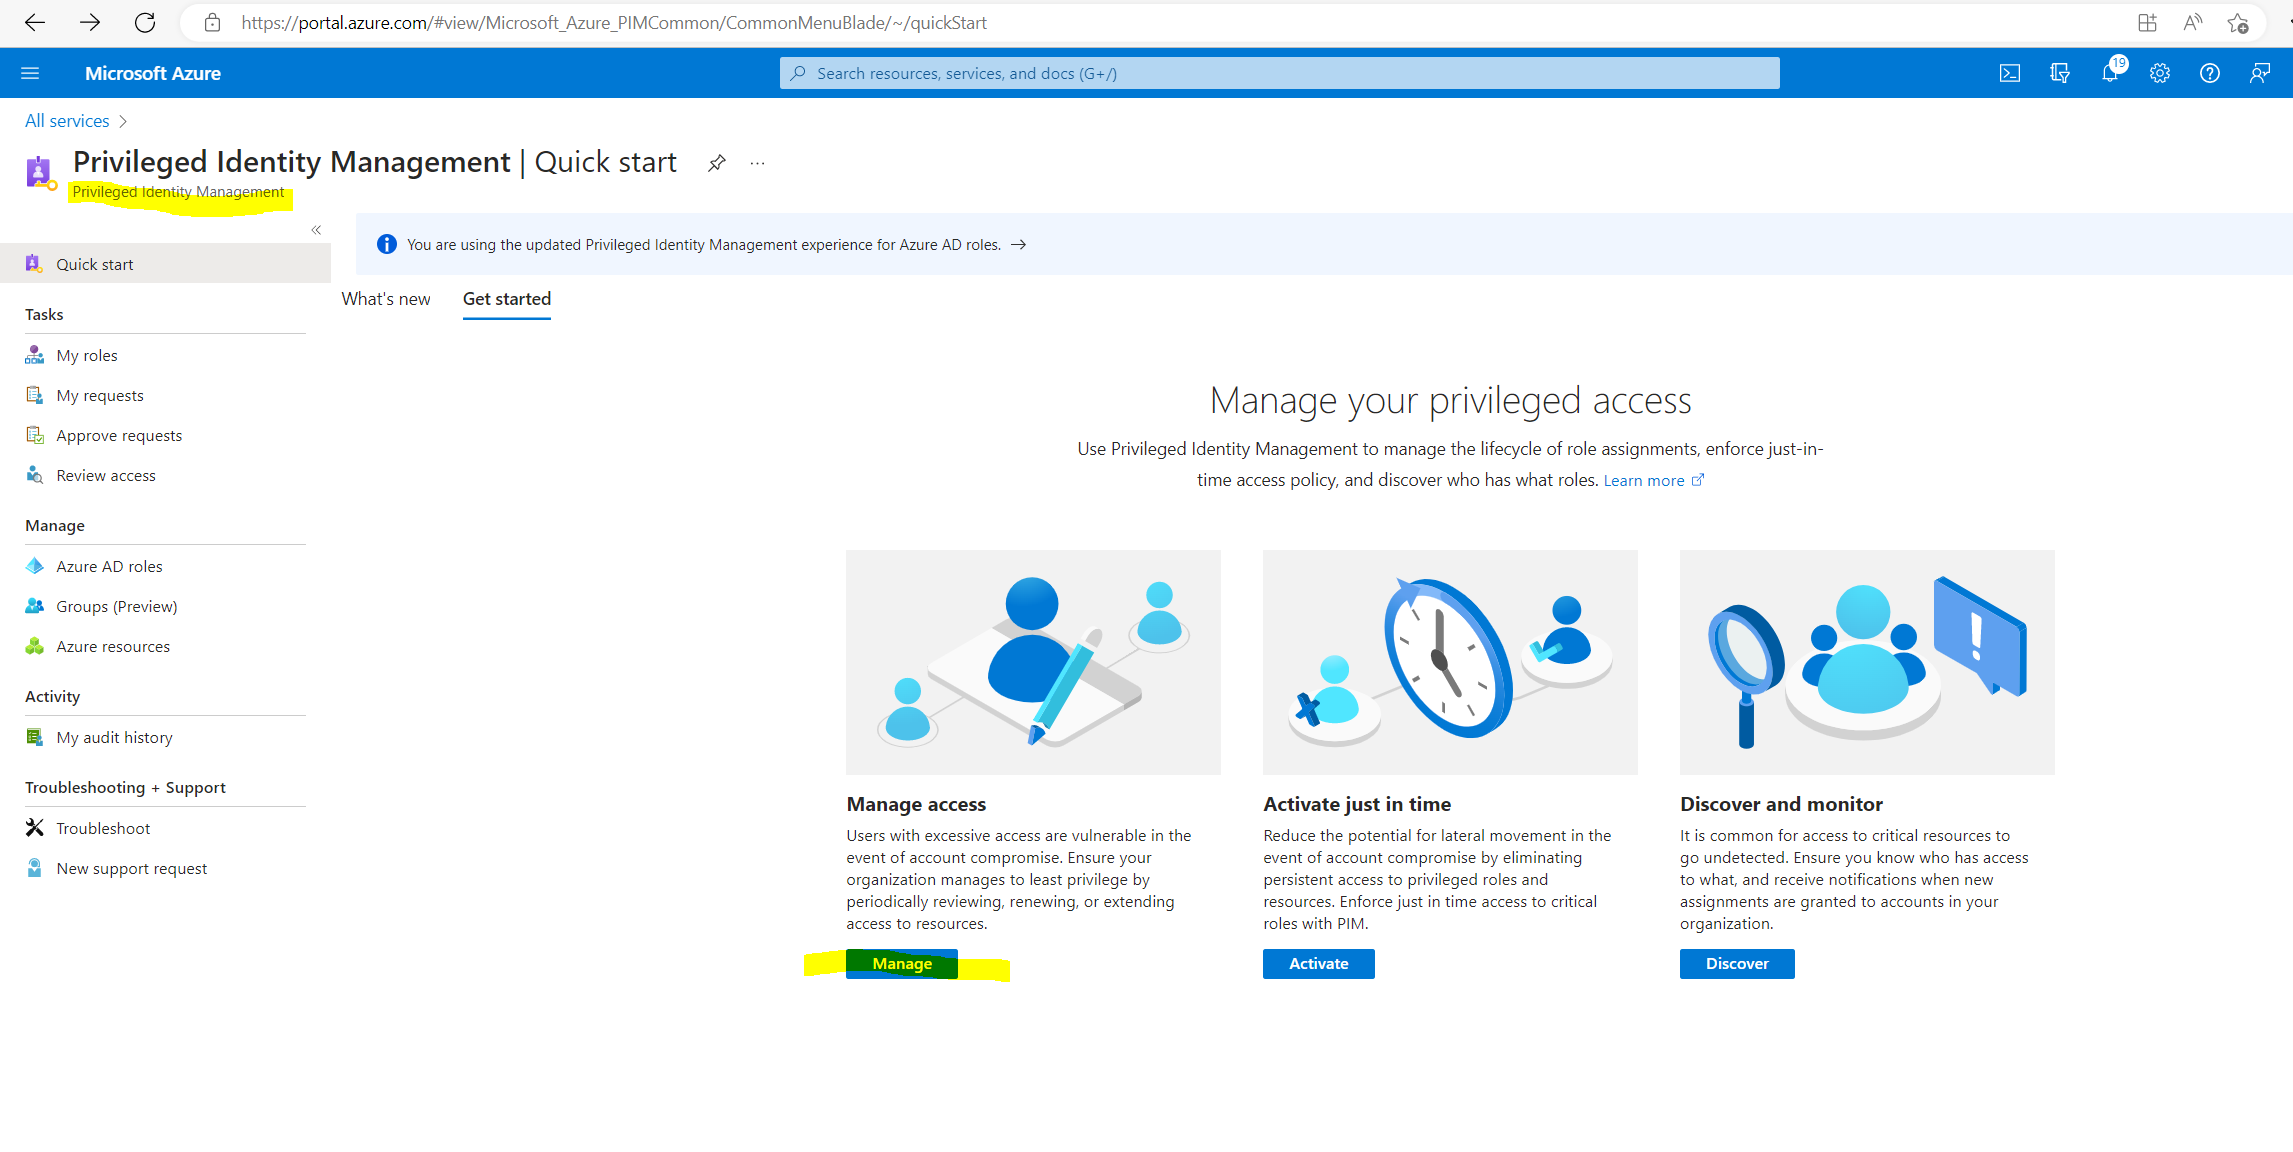
Therefore we can click on Manage in the Privileged Identity Management (PIM) blade or directly on Azure AD roles as shown below.
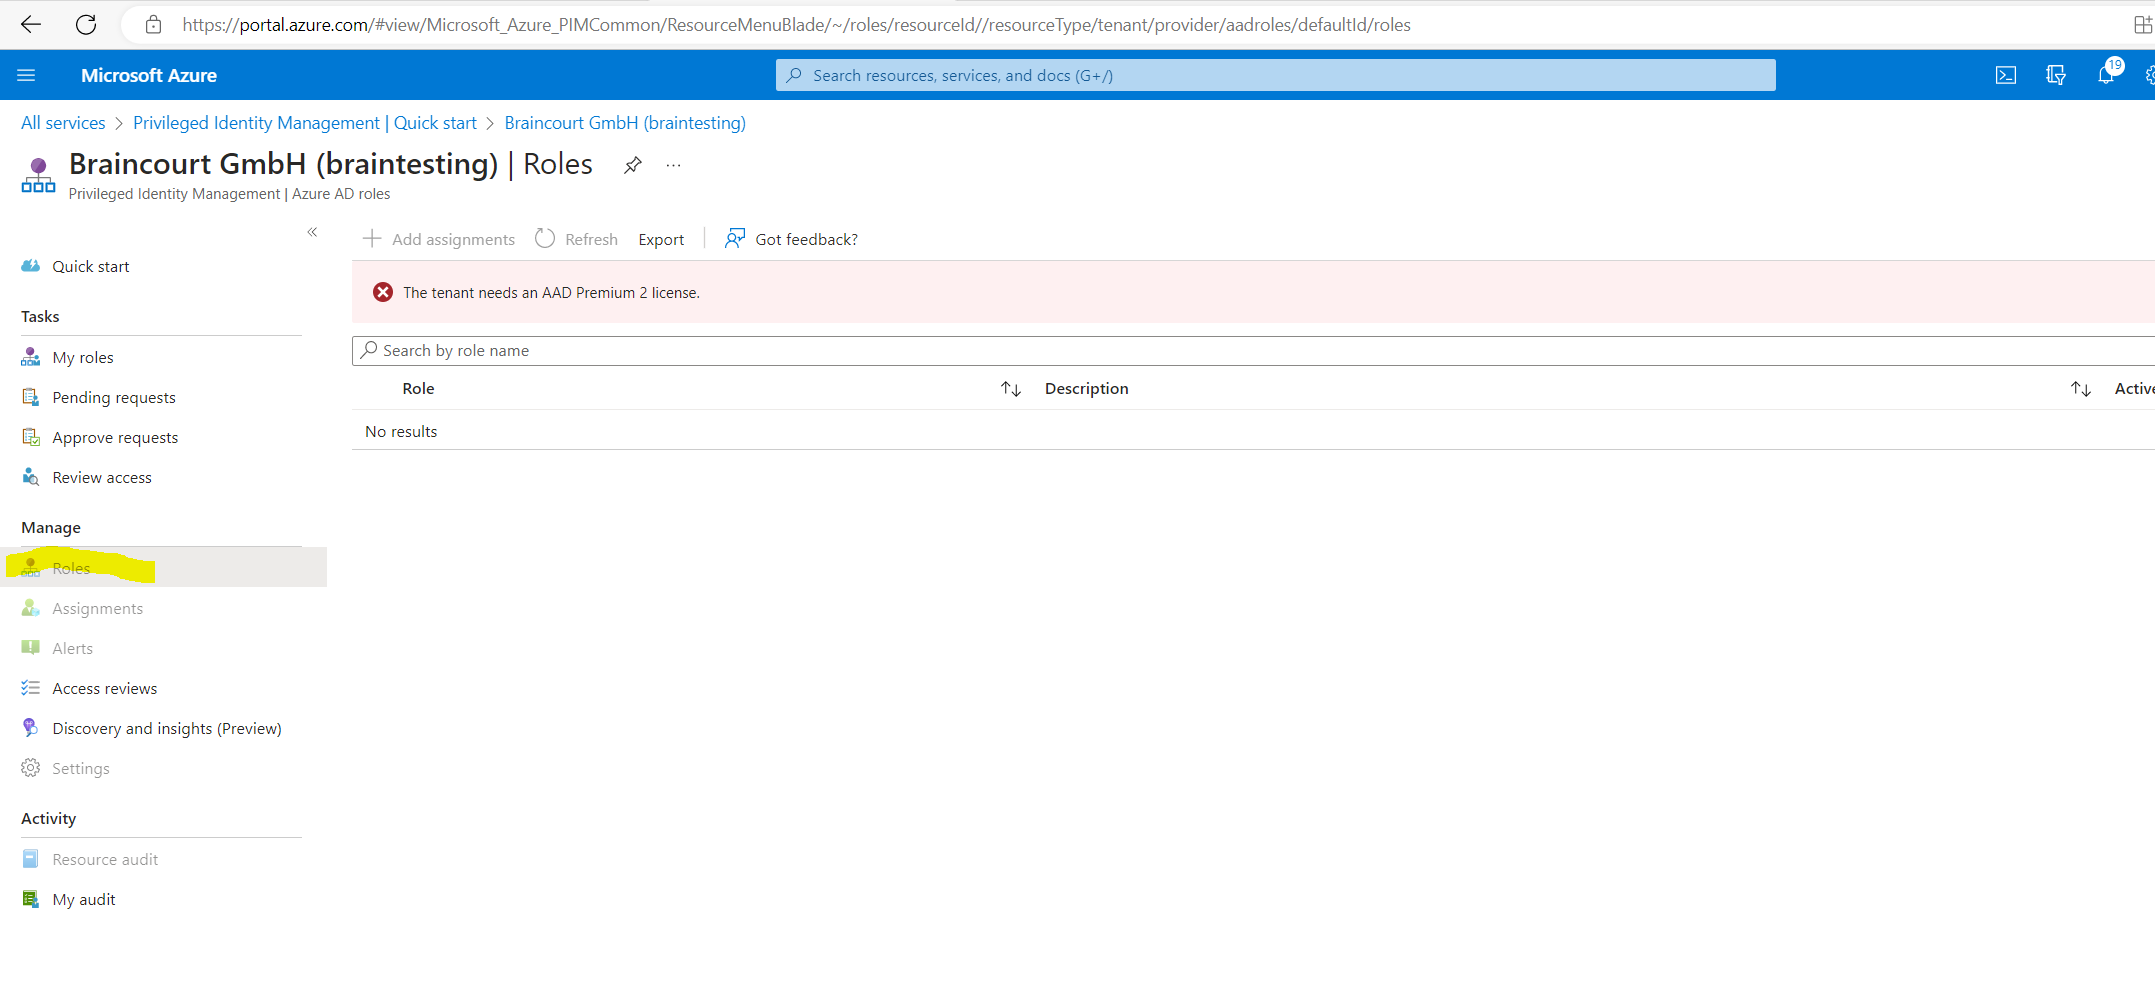
Using this feature requires Azure AD Premium P2 licenses
Ensure that your directory has Azure AD Premium P2 licenses for the following categories of users:
- Users with eligible and/or time-bound assignments to Azure AD or Azure roles managed using PIM
- Users with eligible and/or time-bound assignments as members or owners of PIM for Groups
- Users able to approve or reject activation requests in PIM
- Users assigned to an access review
- Users who perform access reviews
Azure AD Premium P2 licenses are not required for the following tasks:
- No licenses are required for users who set up PIM, configure policies, receive alerts, and set up access reviews.
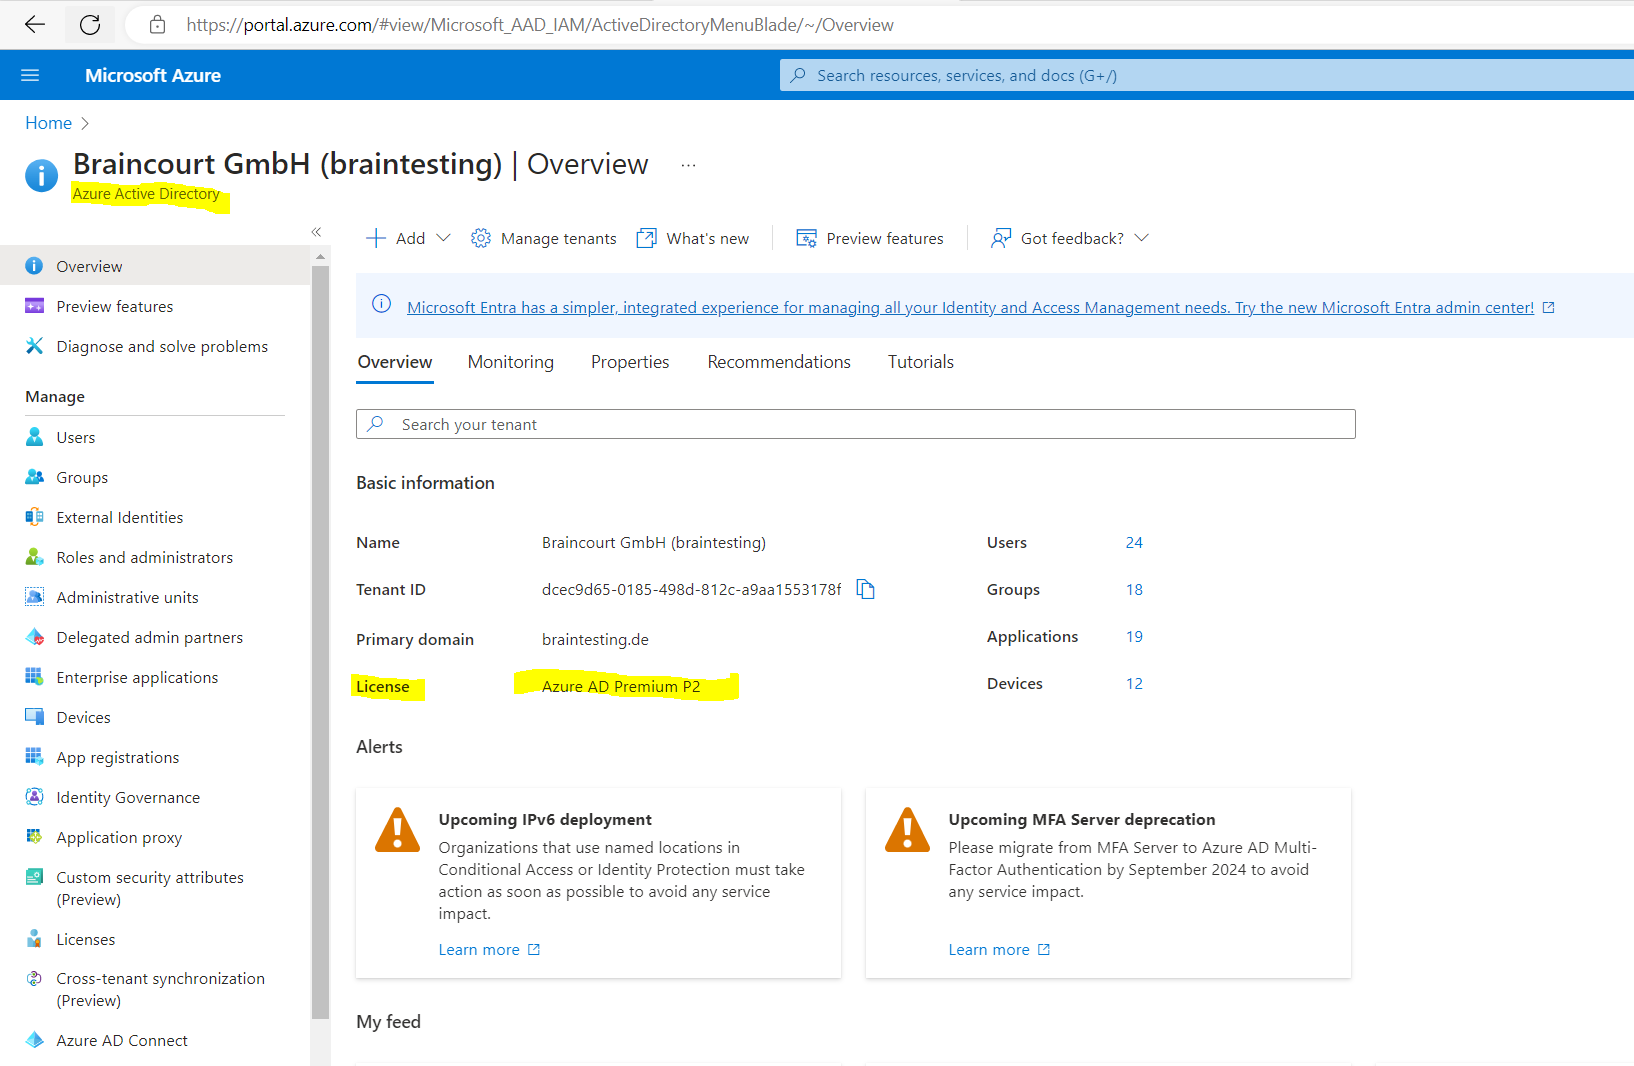
Now after purchasing at least one Azure AD Premium P2 licence for my user I can access the Azure AD Roles within Privileged Identity Management (PIM).
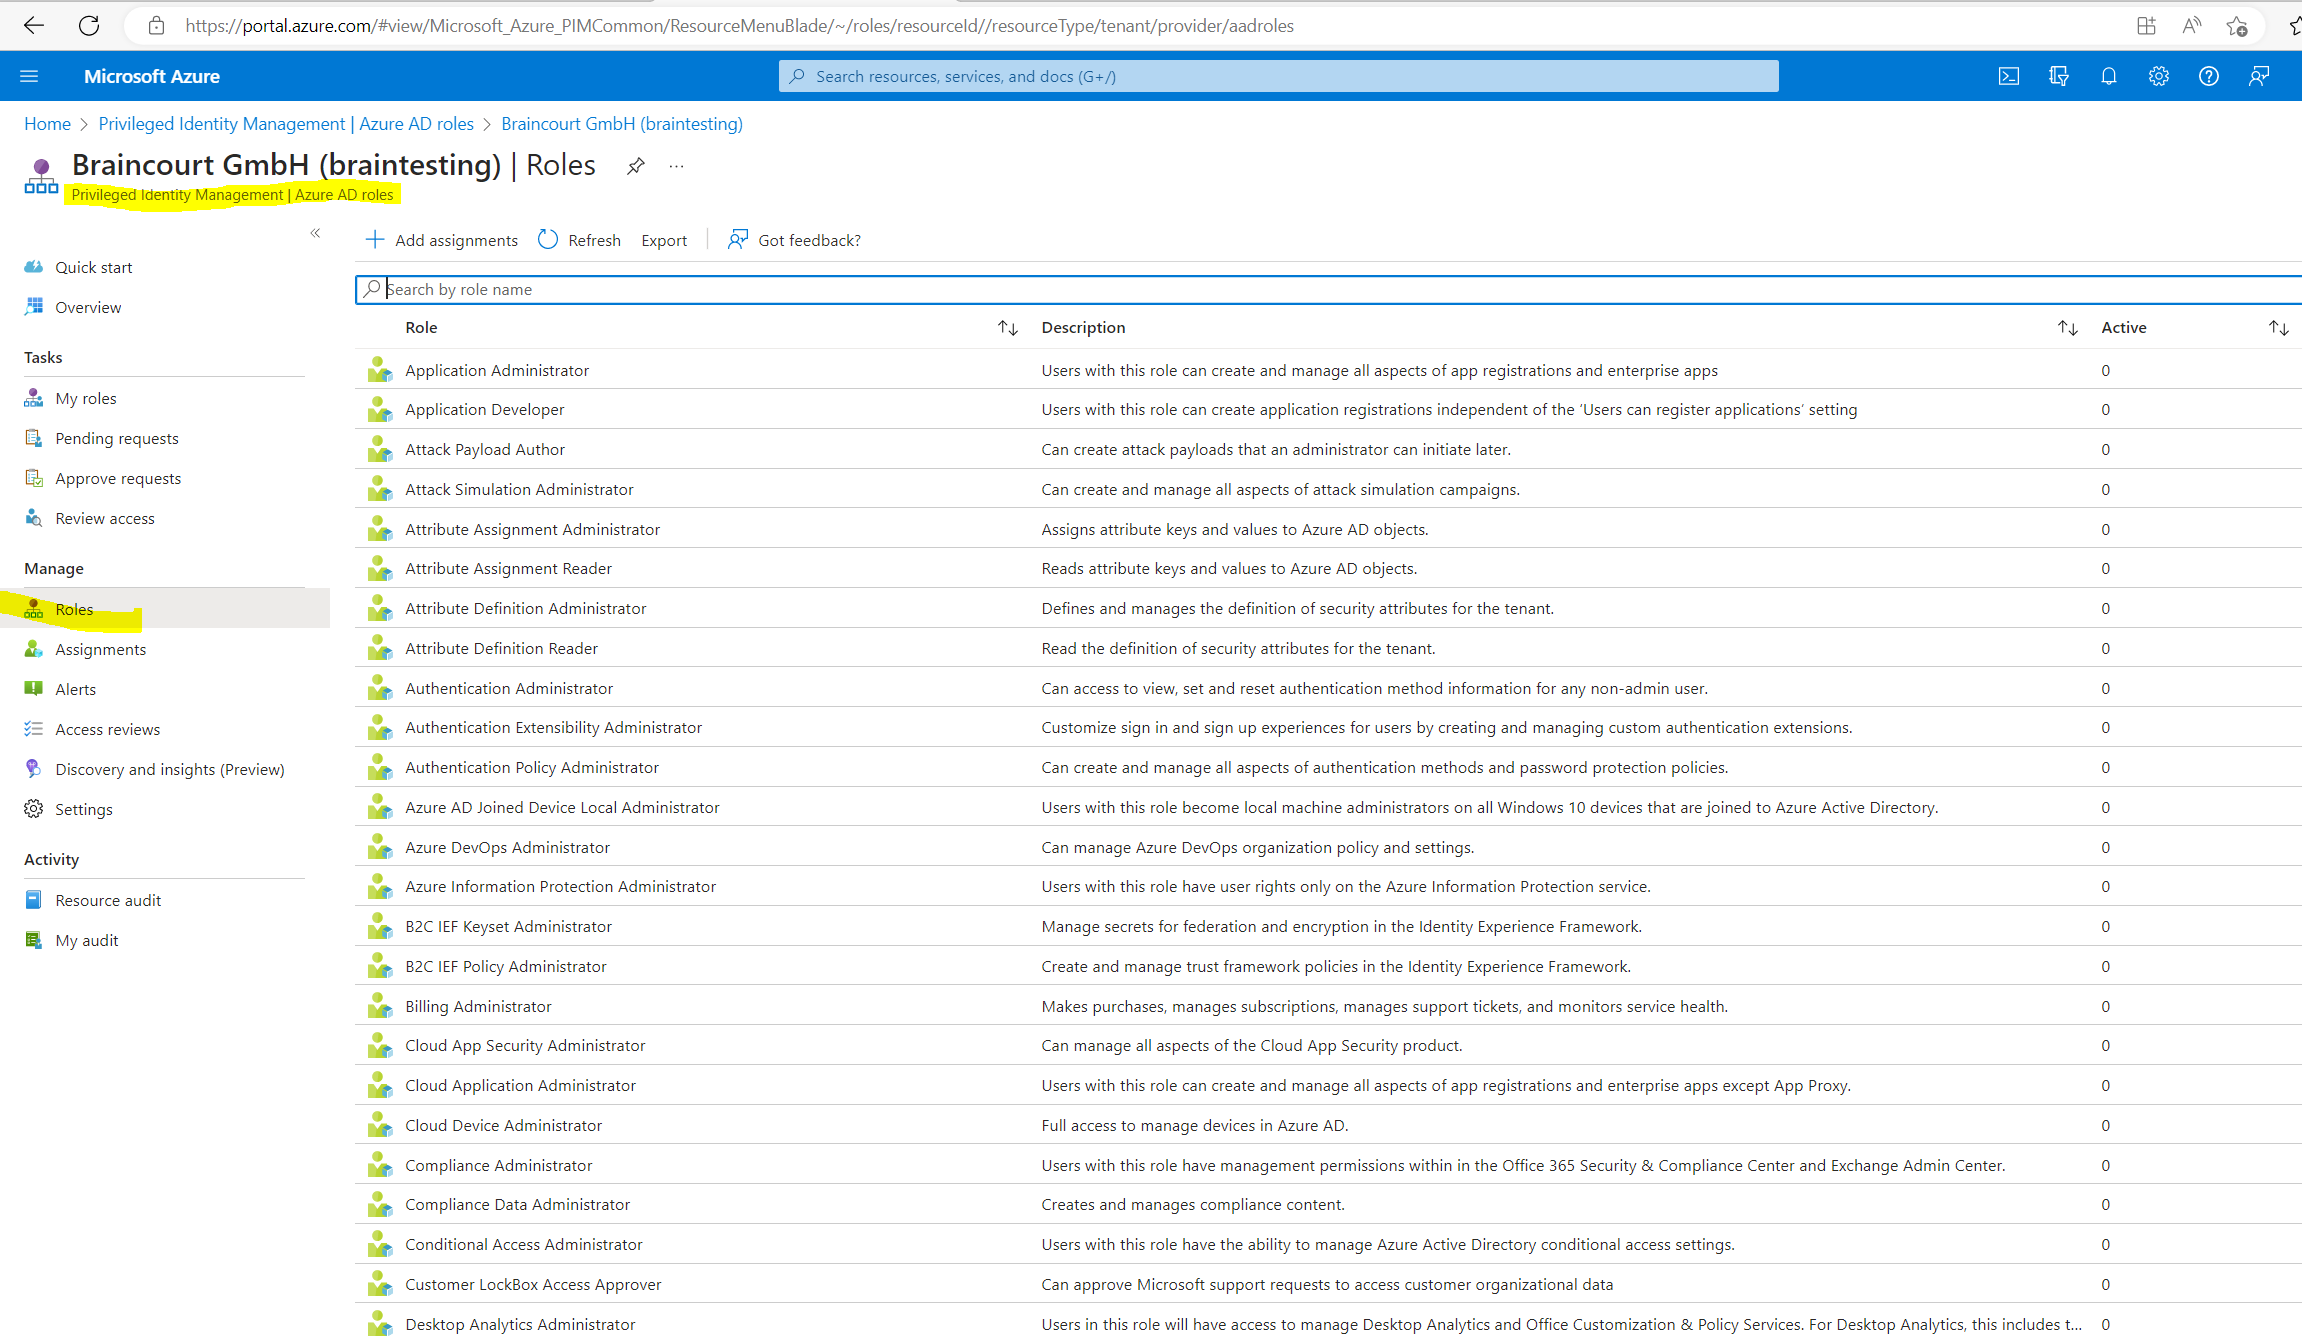
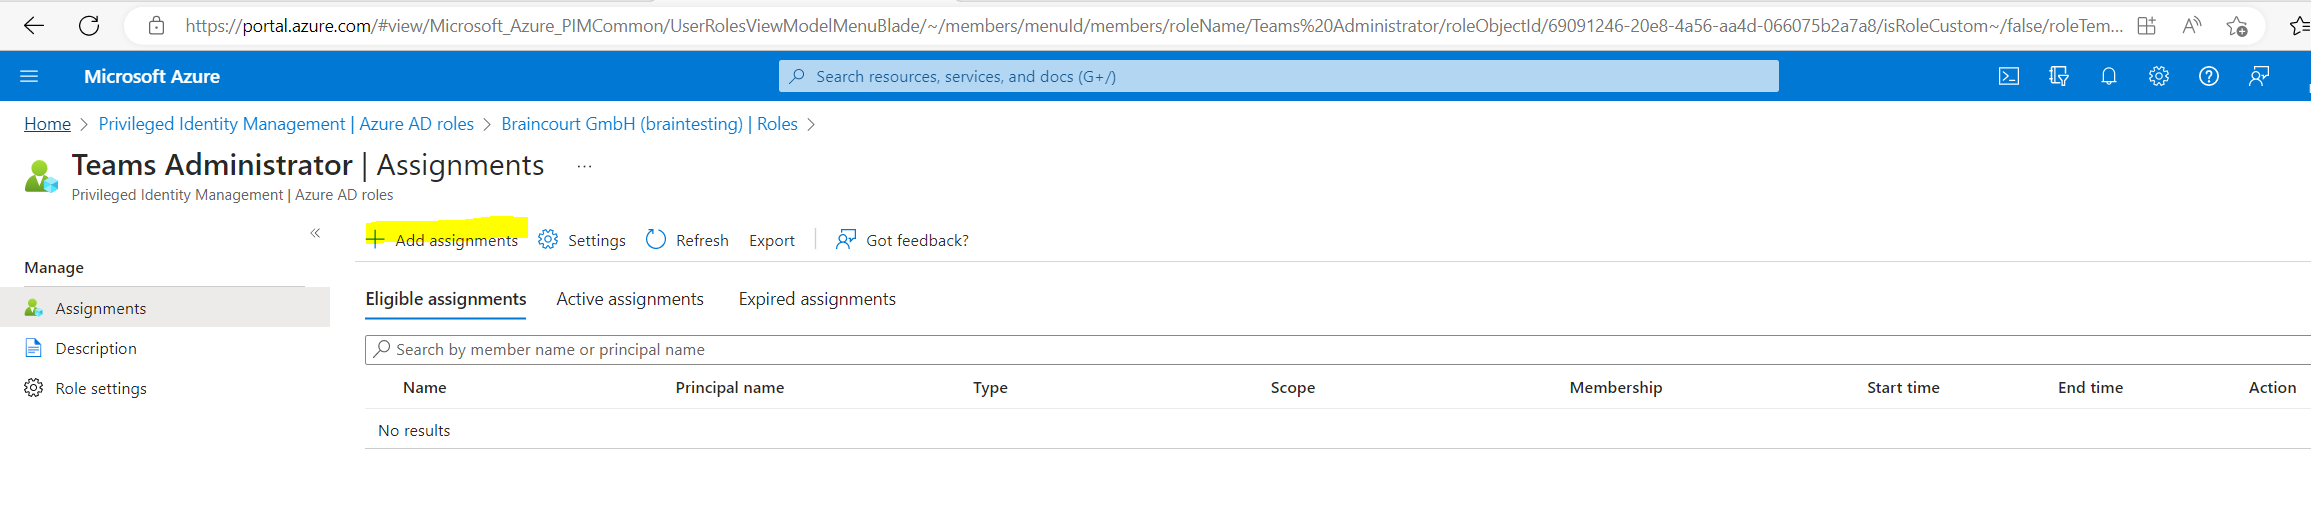
I will need to configure the Teams Administrator Role as mentioned, so I will first search for the role and click on it to configure which users should be able to request the role.

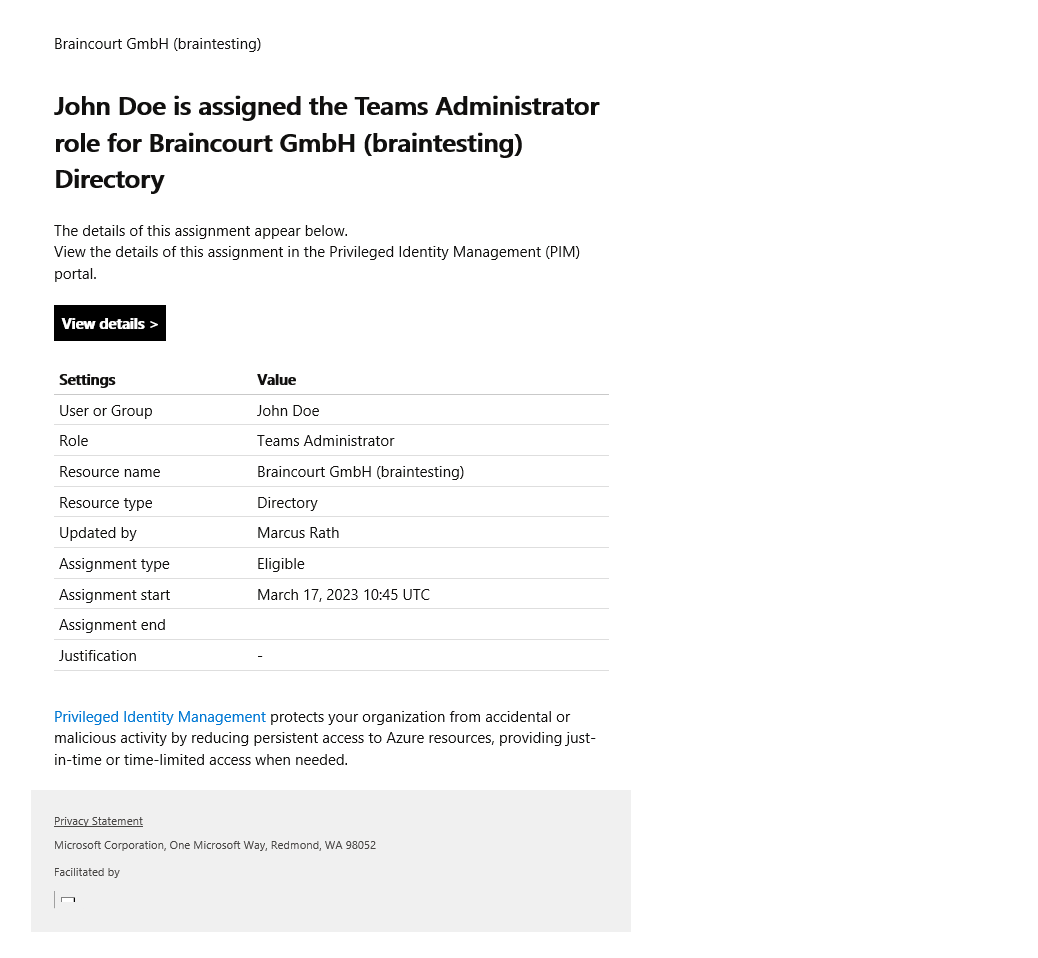
I will assign the Teams Administrator Role to my user John Doe and click on Add assignments.
Click on the No member selected link.
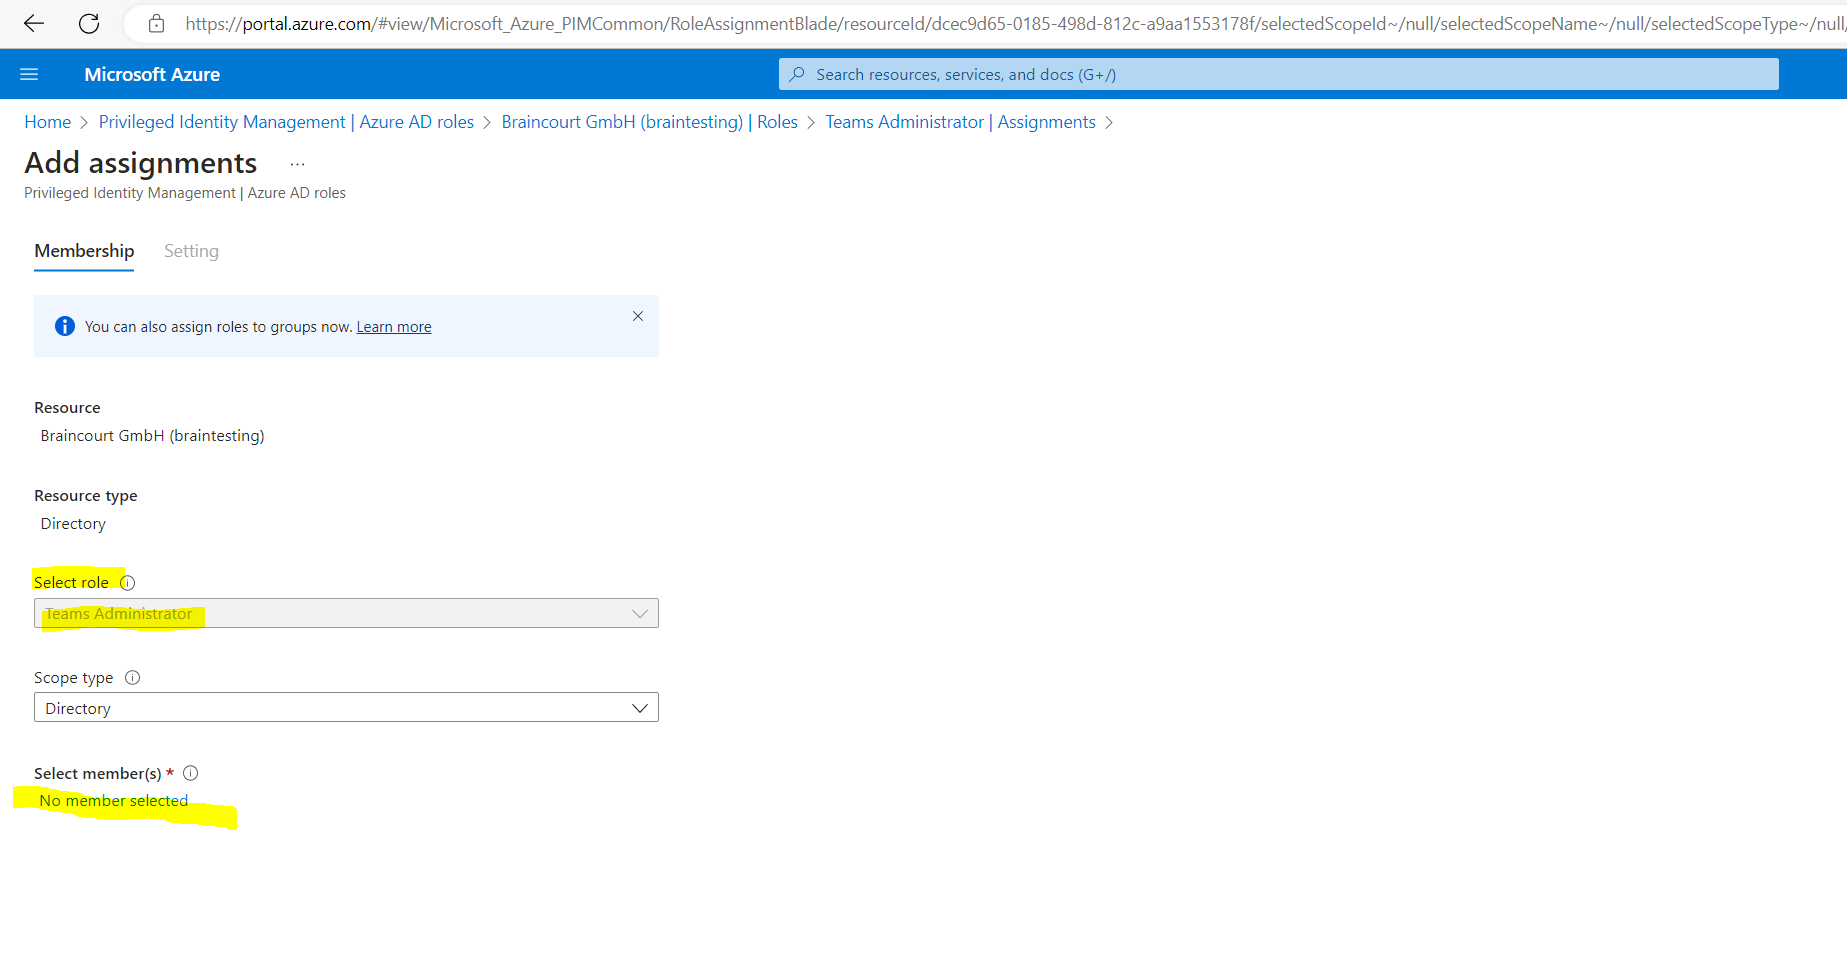
Here I will search for my user John Doe and select him.


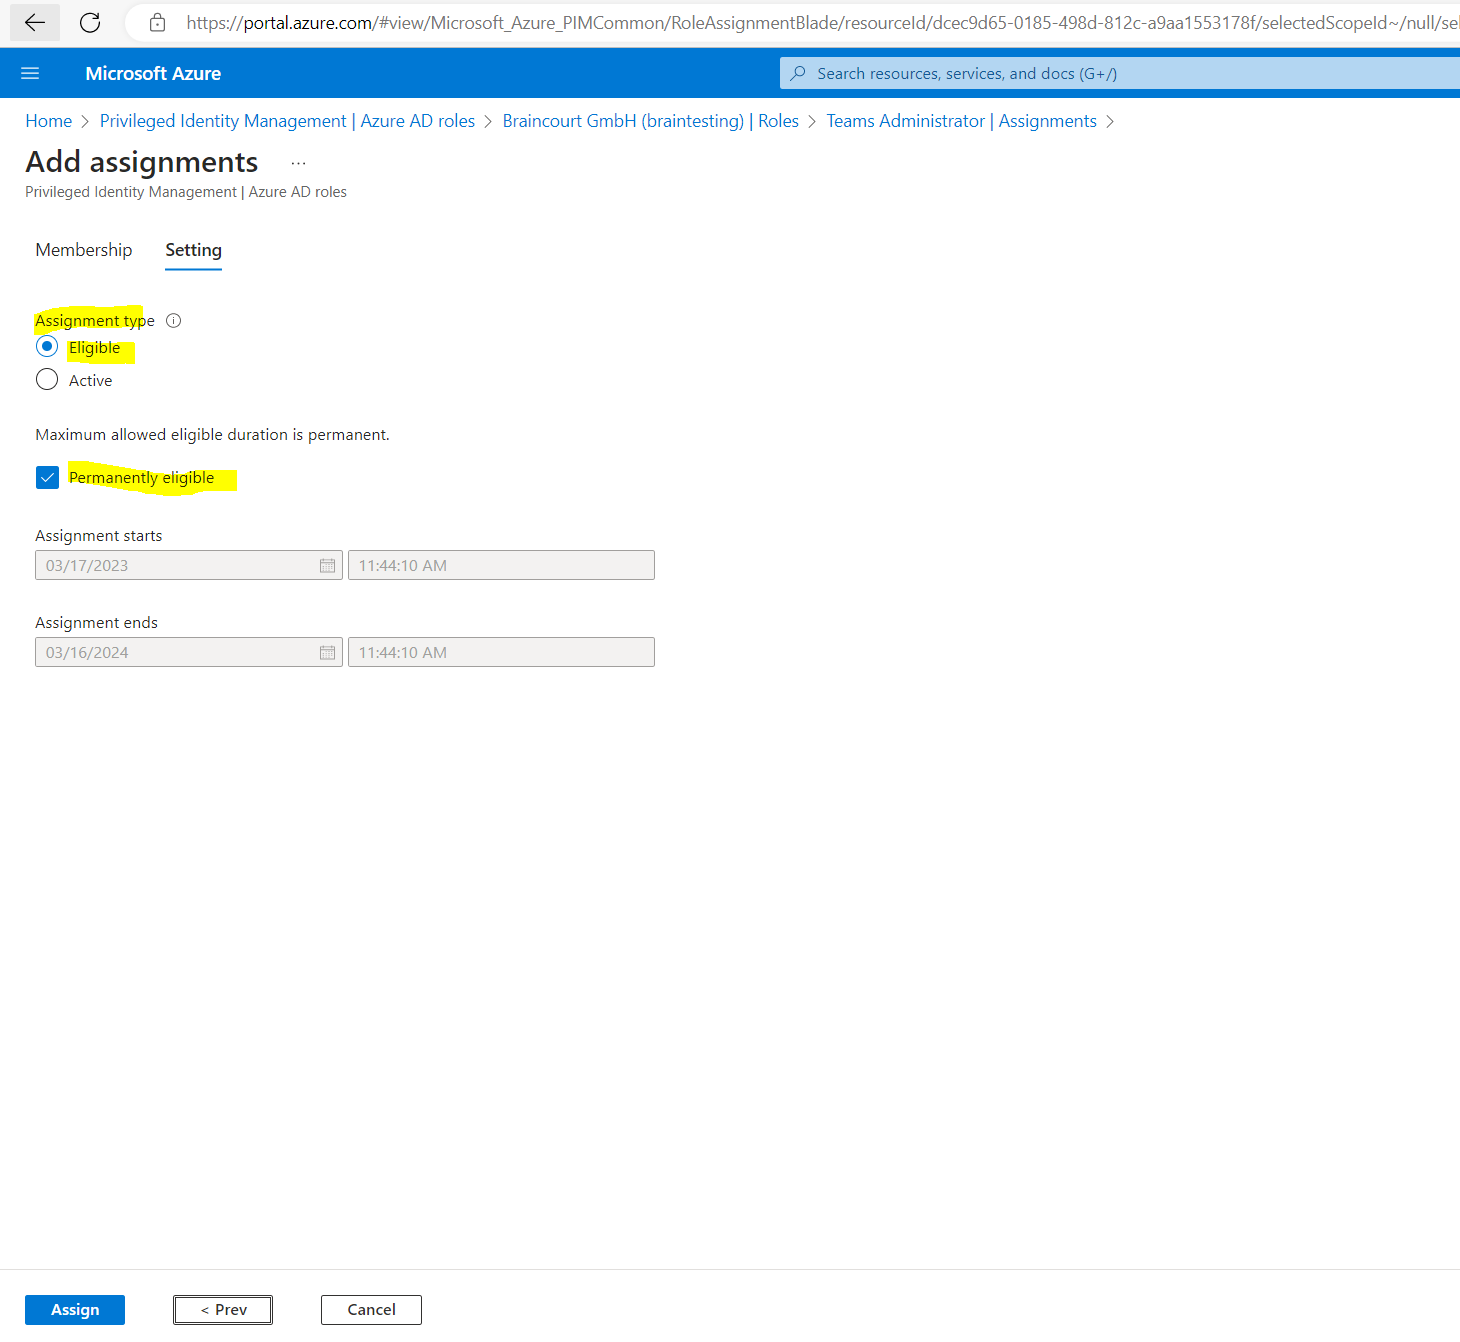
Below for the Assignment type by default is Eligible selected which I also want to use in order the user first have to activate the role before he can use it. The type Active is just like not using Azure AD PIM and assigning the permissions as usual.
Azure AD PIM for Azure resources provides two distinct assignment types:
- Eligible assignments require the member to activate the role before using it. Administrator may require role member to perform certain actions before role activation which might include performing a multi-factor authentication (MFA) check, providing a business justification, or requesting approval from designated approvers.
- Active assignments don’t require the member to activate the role before usage. Members assigned as active have the privileges assigned ready to use. This type of assignment is also available to customers that don’t use Azure AD PIM.
We can also specify an assignment duration, change the start and end dates and times. In my case the user should be able to request the role any time therefore I let Permanently eligible checked.
Finally I will click on Assign.

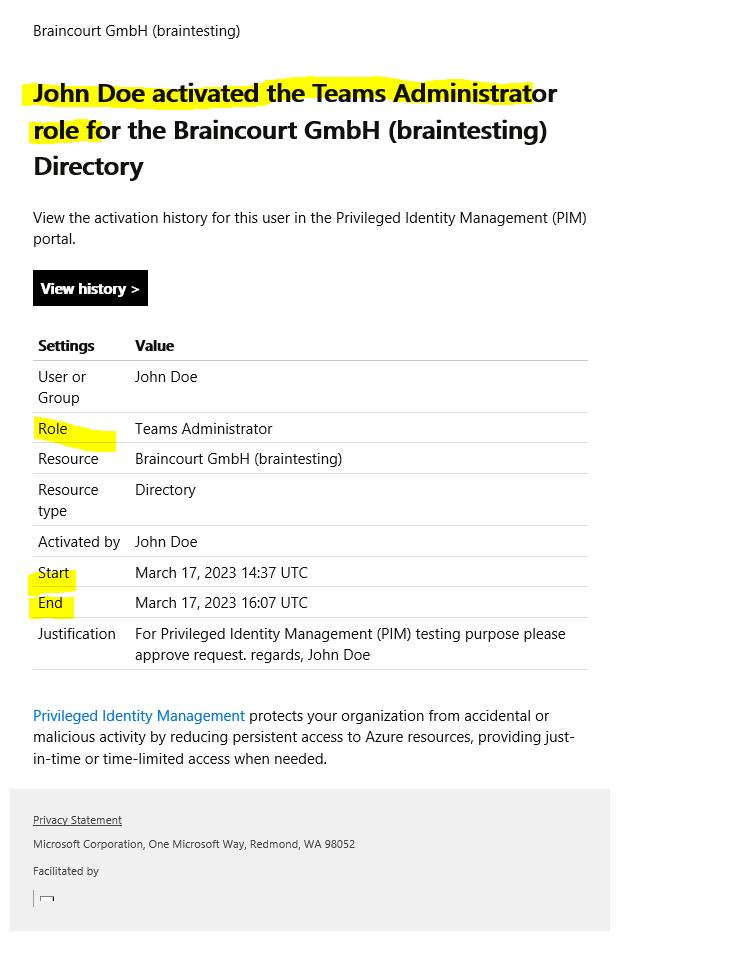
Global Administrators and Privileged Role Administrators receive an email for each assignment.
Email notifications in PIM
https://learn.microsoft.com/en-us/azure/active-directory/privileged-identity-management/pim-email-notifications
So far we just configured which users can request the role, now we need to configure the activation, assignment and notification settings. Therefore click on Settings below.
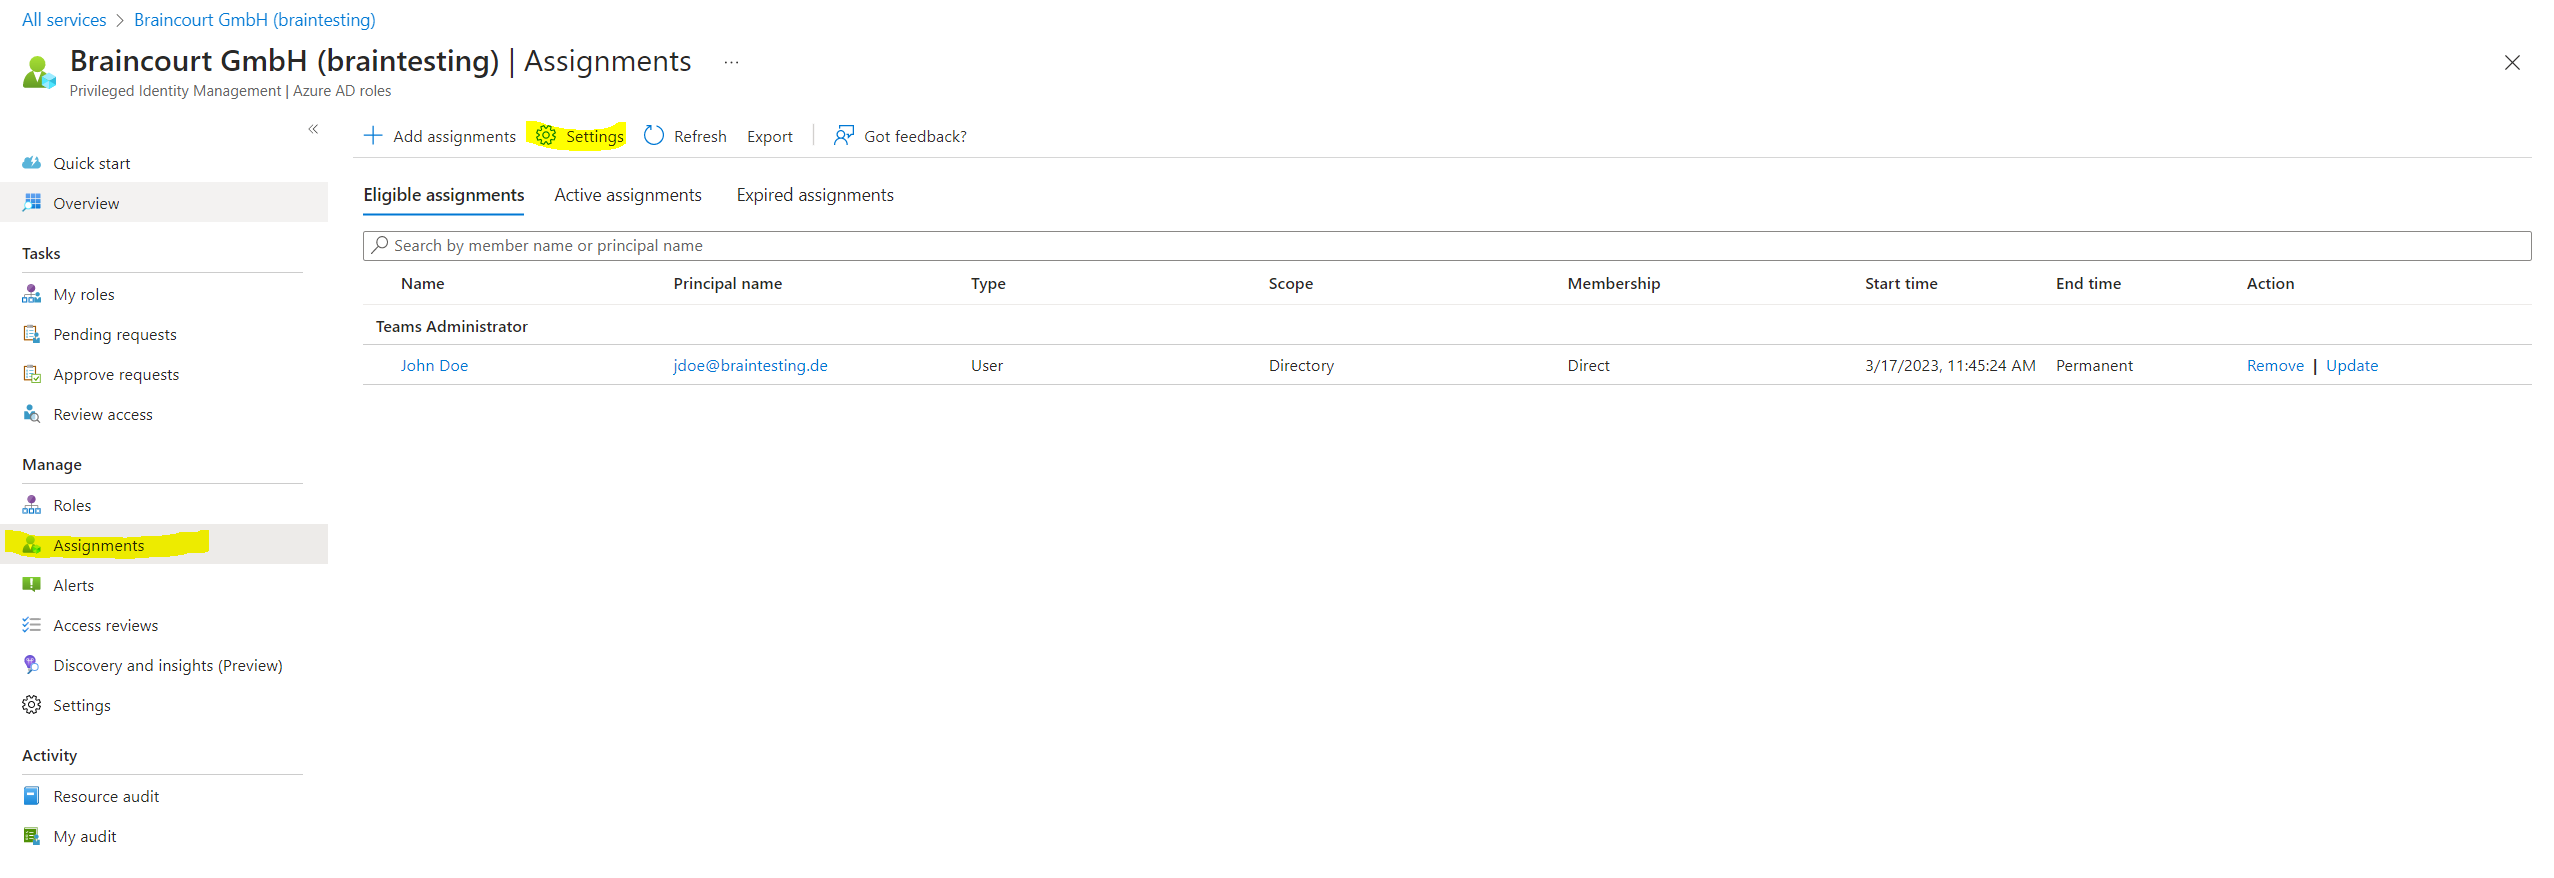
Search for the role we want to configure.

Click on Edit.
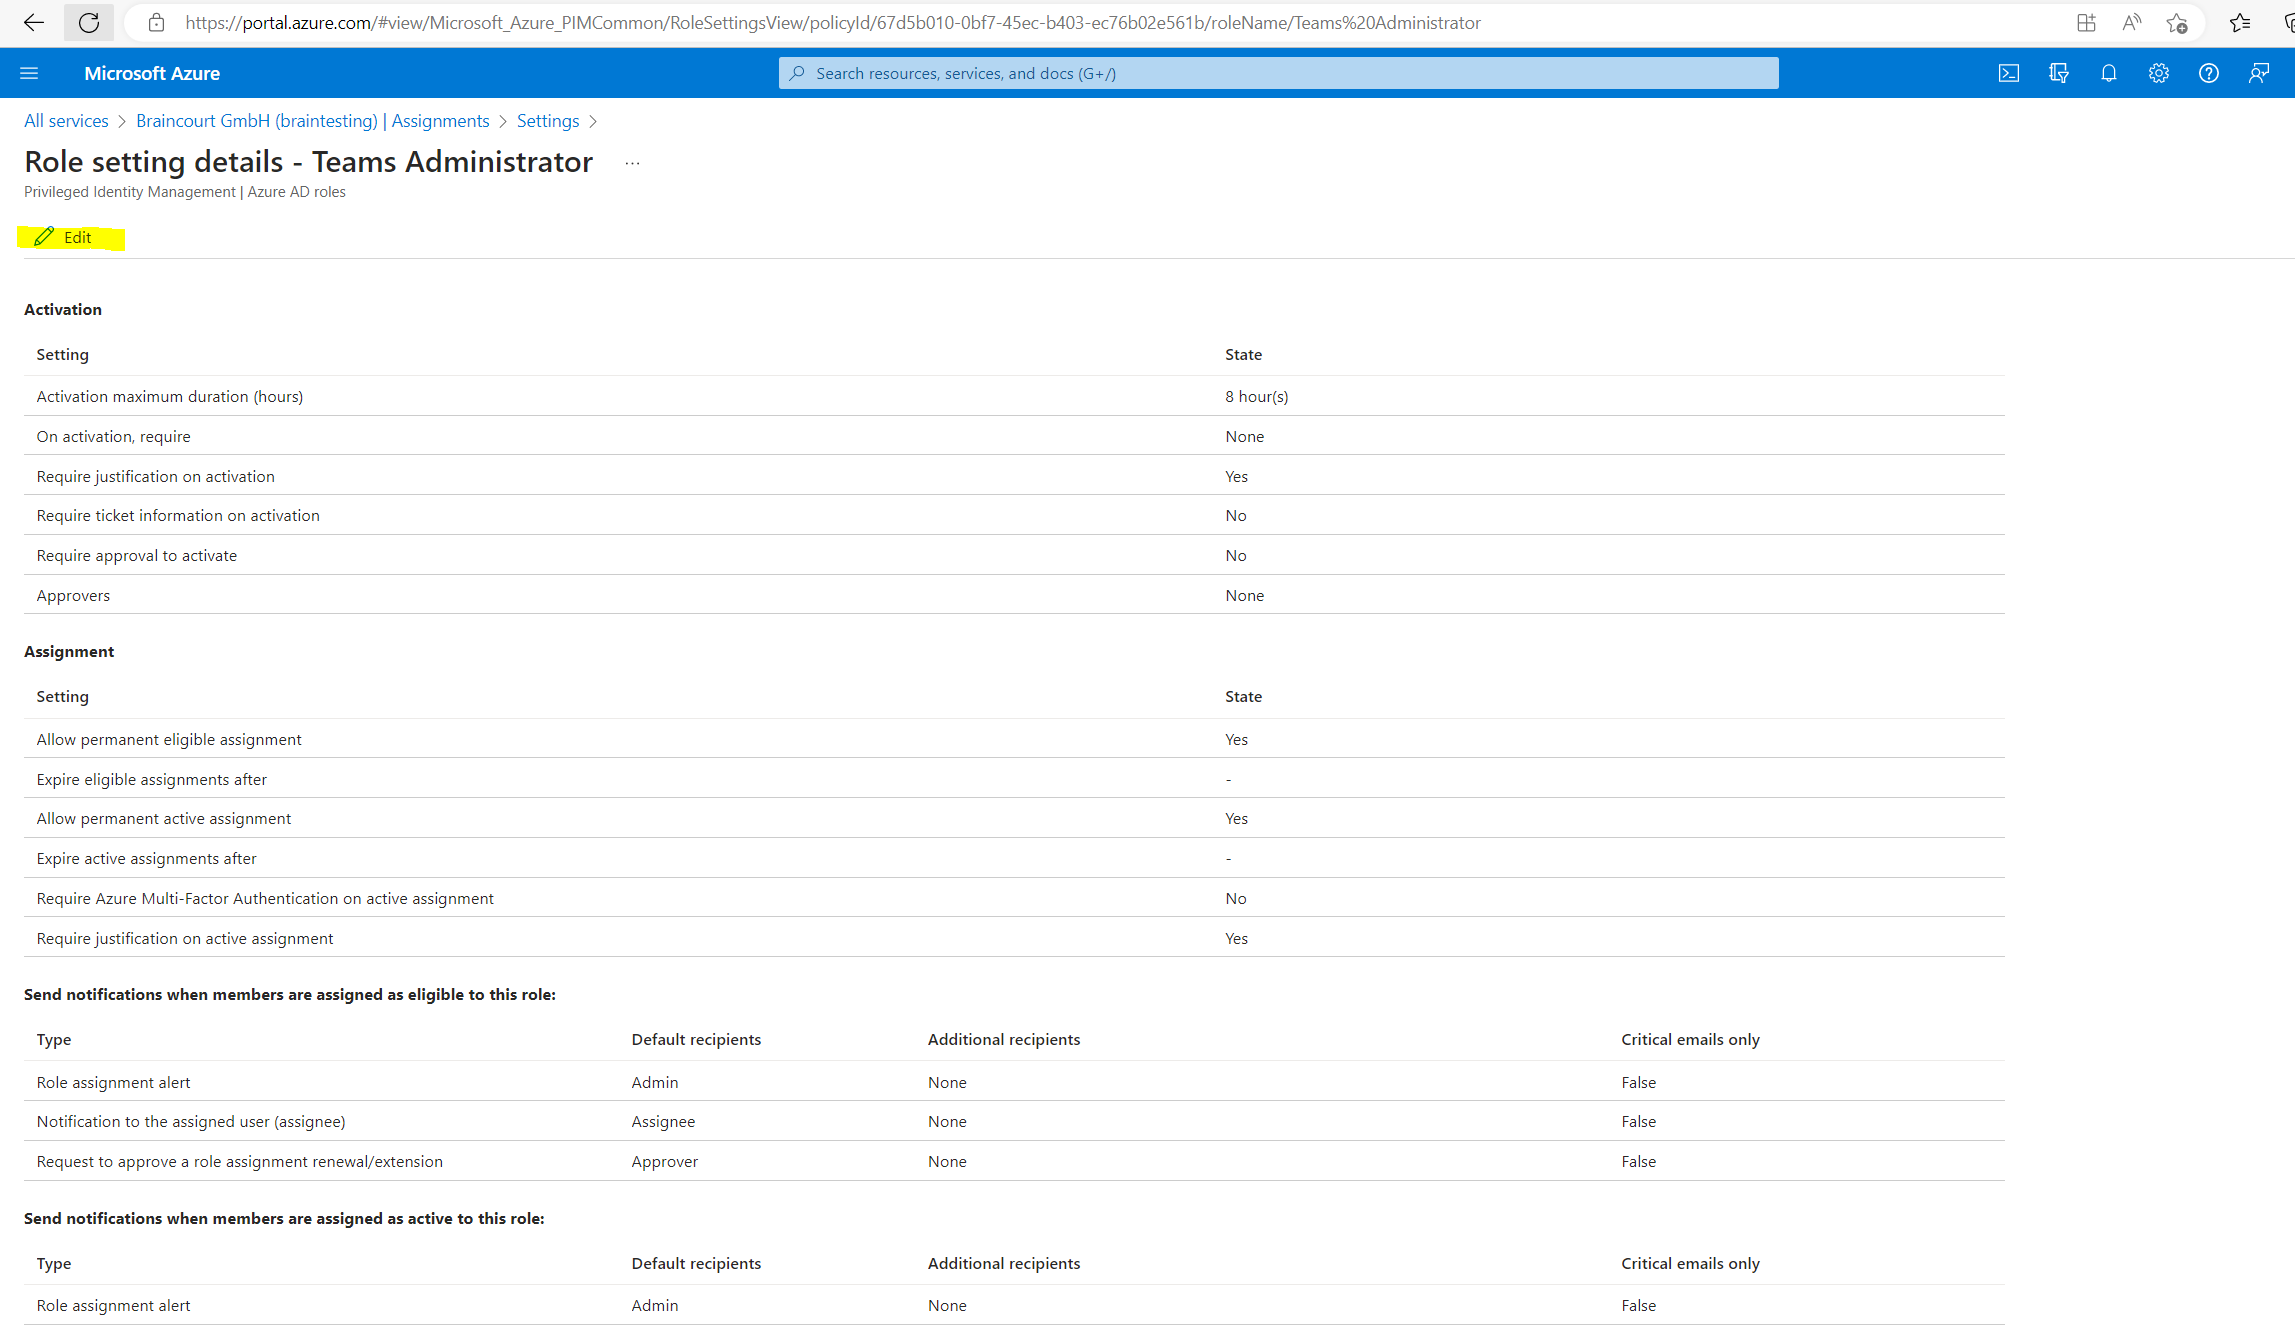
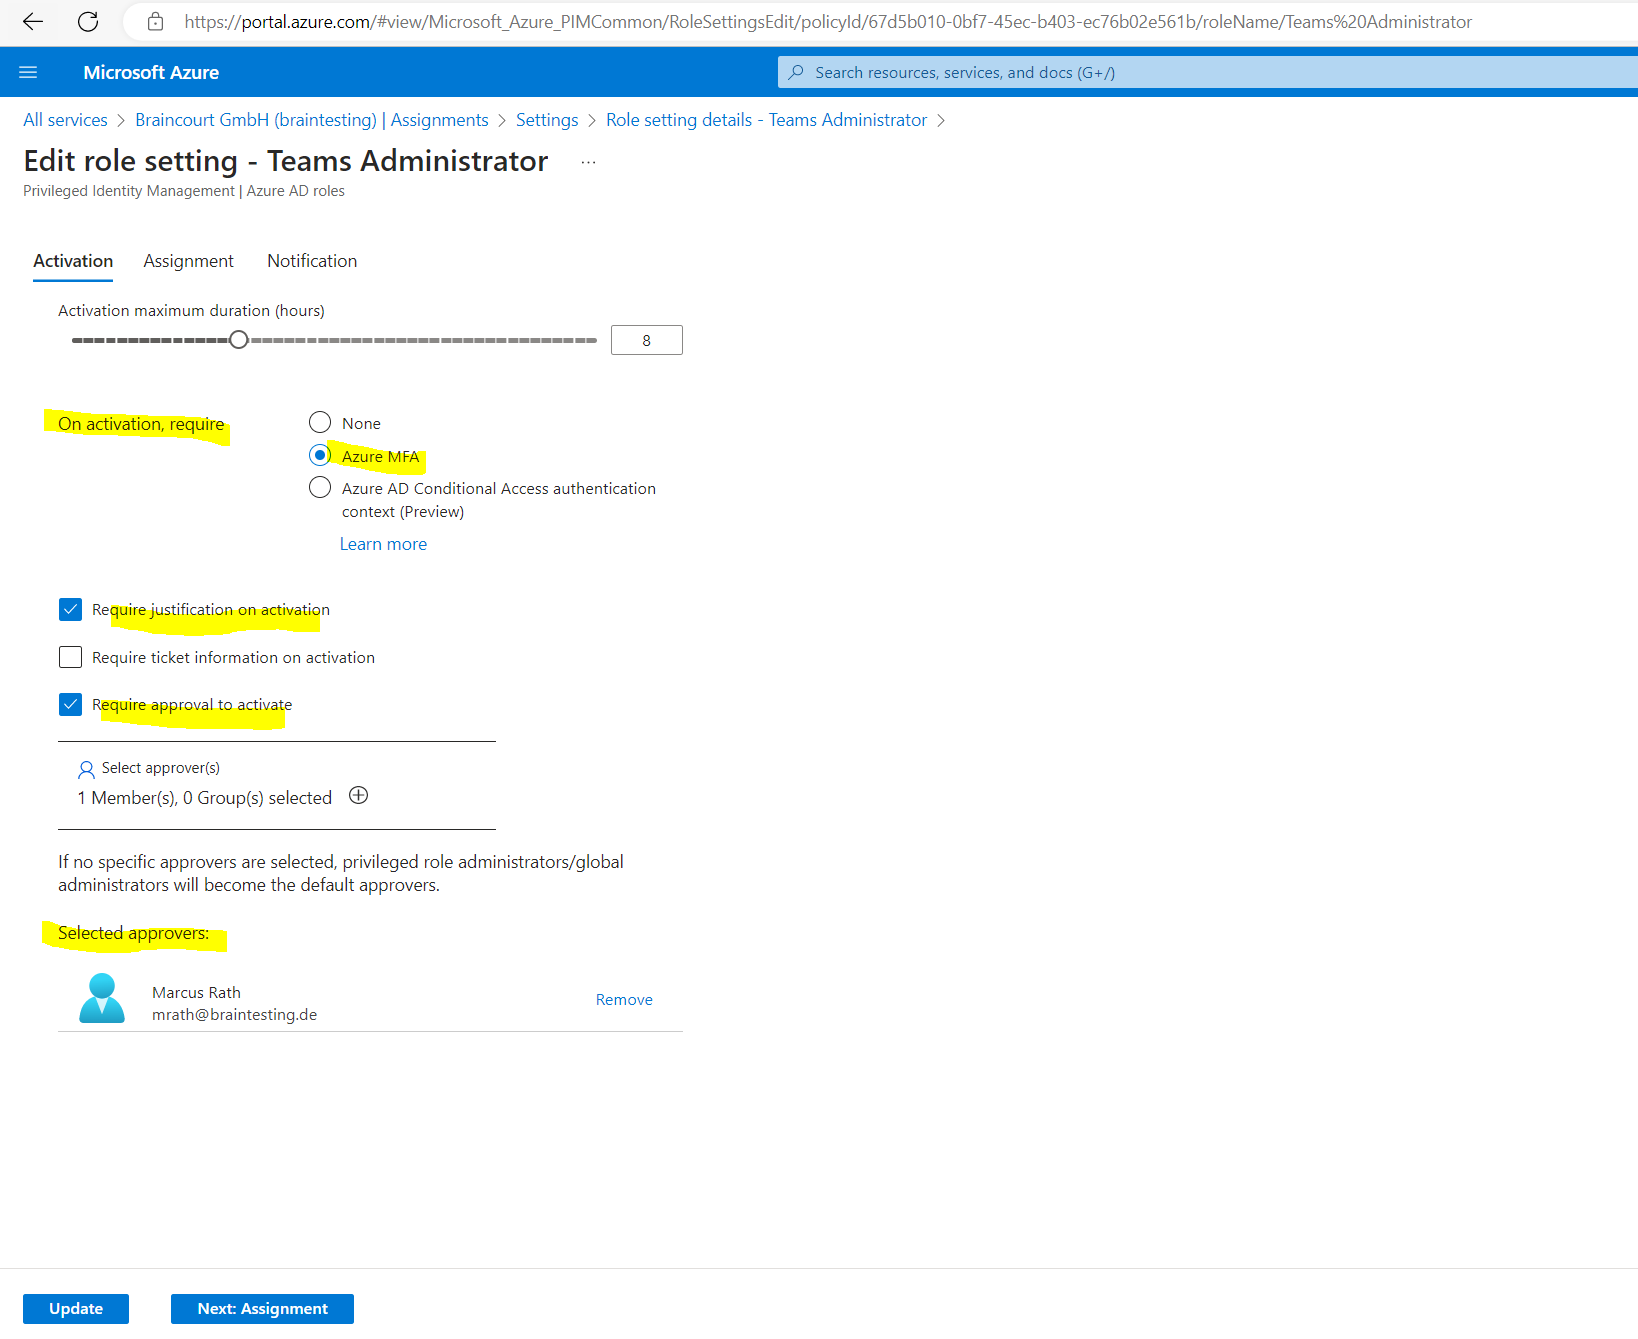
In the activation settings for the role we can configure the maximum duration the users will get assigned the role (elevated rights). By default 8 hours is preselected which I will also use here.

Further we can select what is required for the activation request, I will select that the user needs to authenticate by using Azure MFA.
I will also let checked by default Require justification on activation so the user needs to enter a reason why requested the role.
The last point I will check here is Require approval to activate so first a priviliged user needs to approve the request.
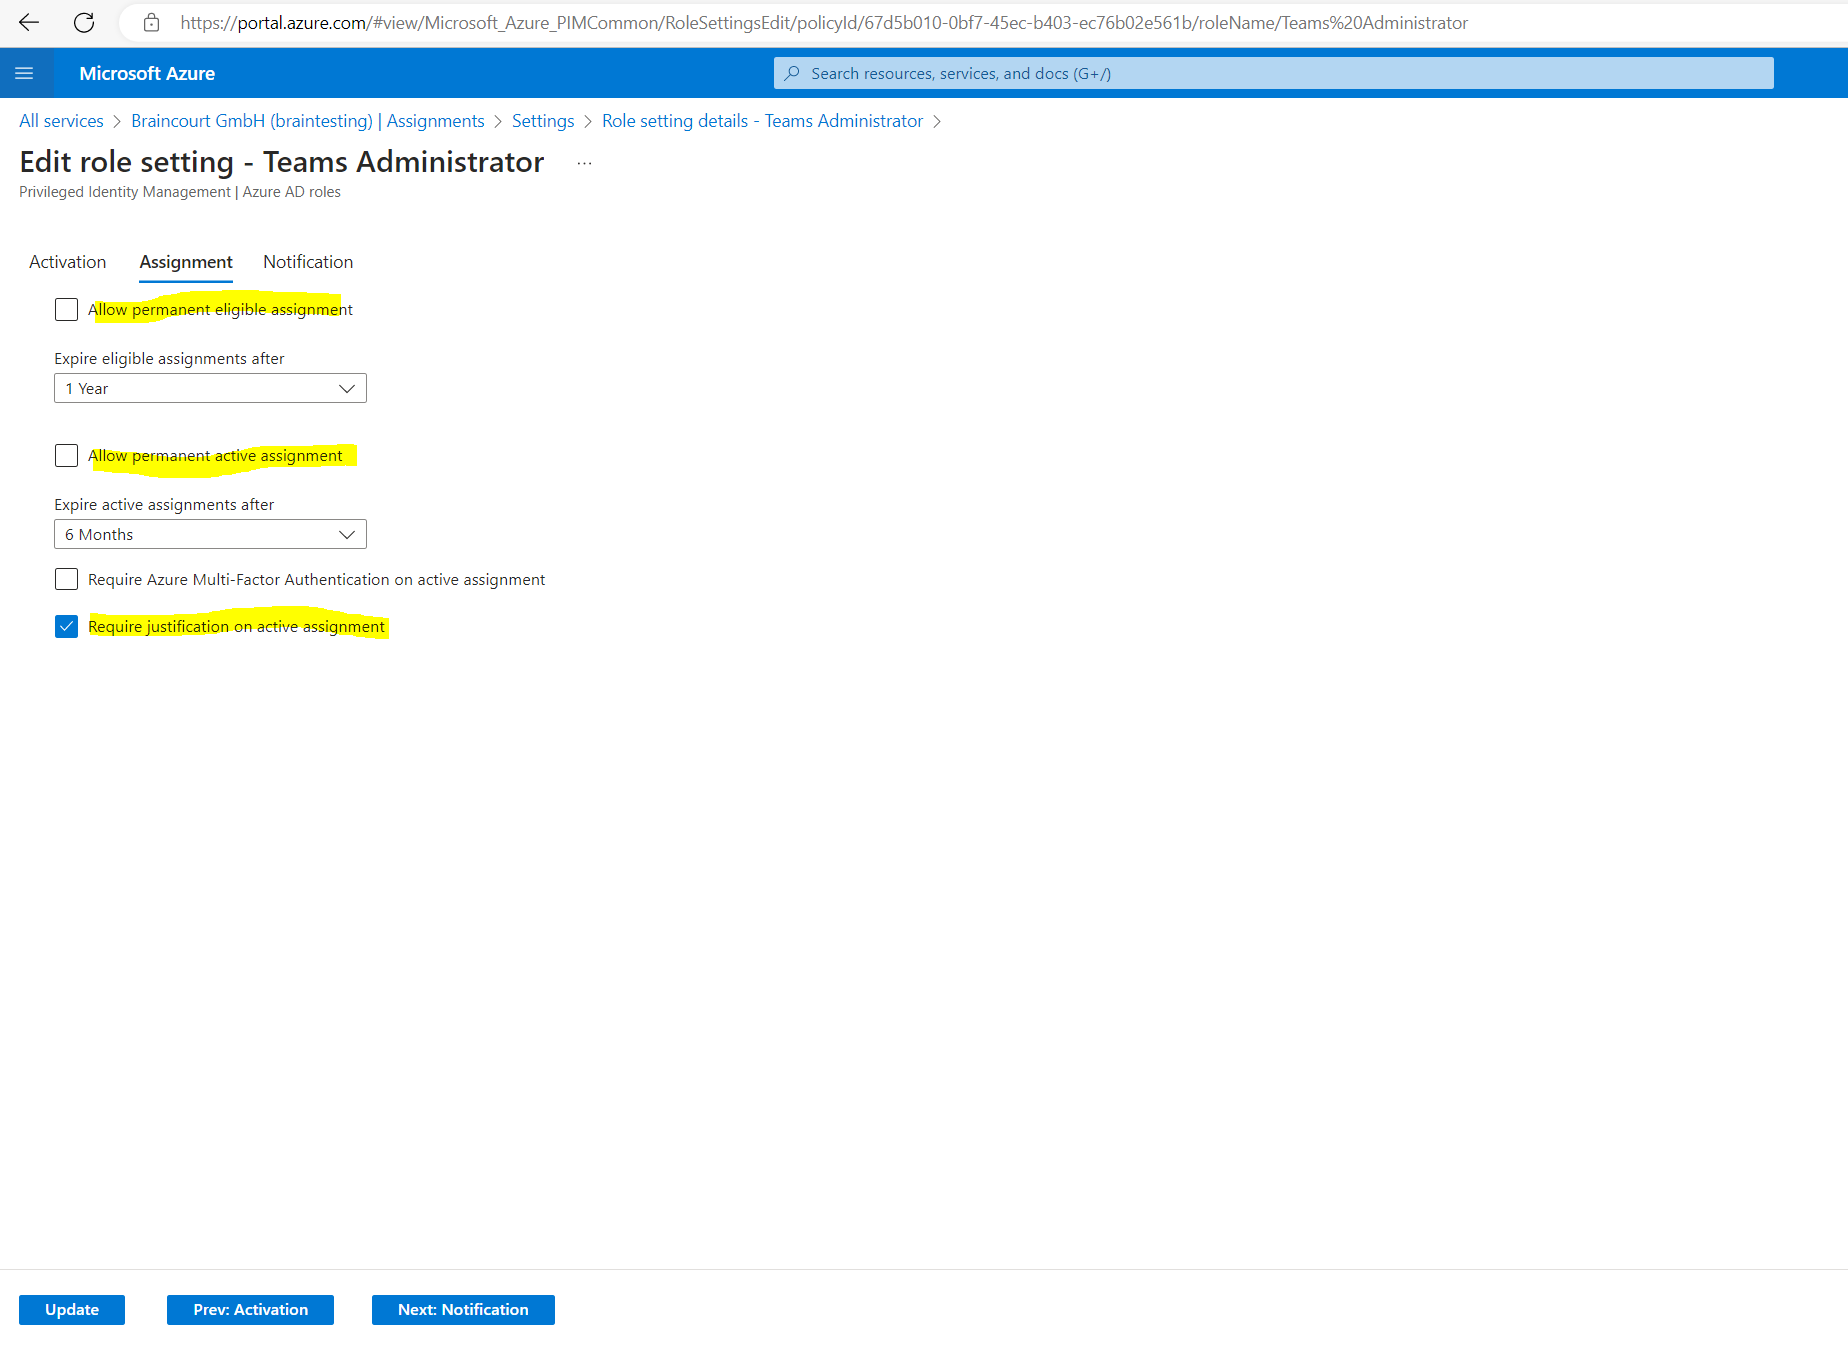
Click below on Next to configure the assignment settings.
The assignment settings lets you choose how long the user is able to elevate its permissions and activate the role.
I will check off Allow permanent eligible assignment, so after 1 year the user cannot anymore elevate its permissions and activiate the role.
I will also let unchecked Allow permanent active assignment as this is like already mentioned just like not using Azure AD PIM and assigning the permissions as usual.
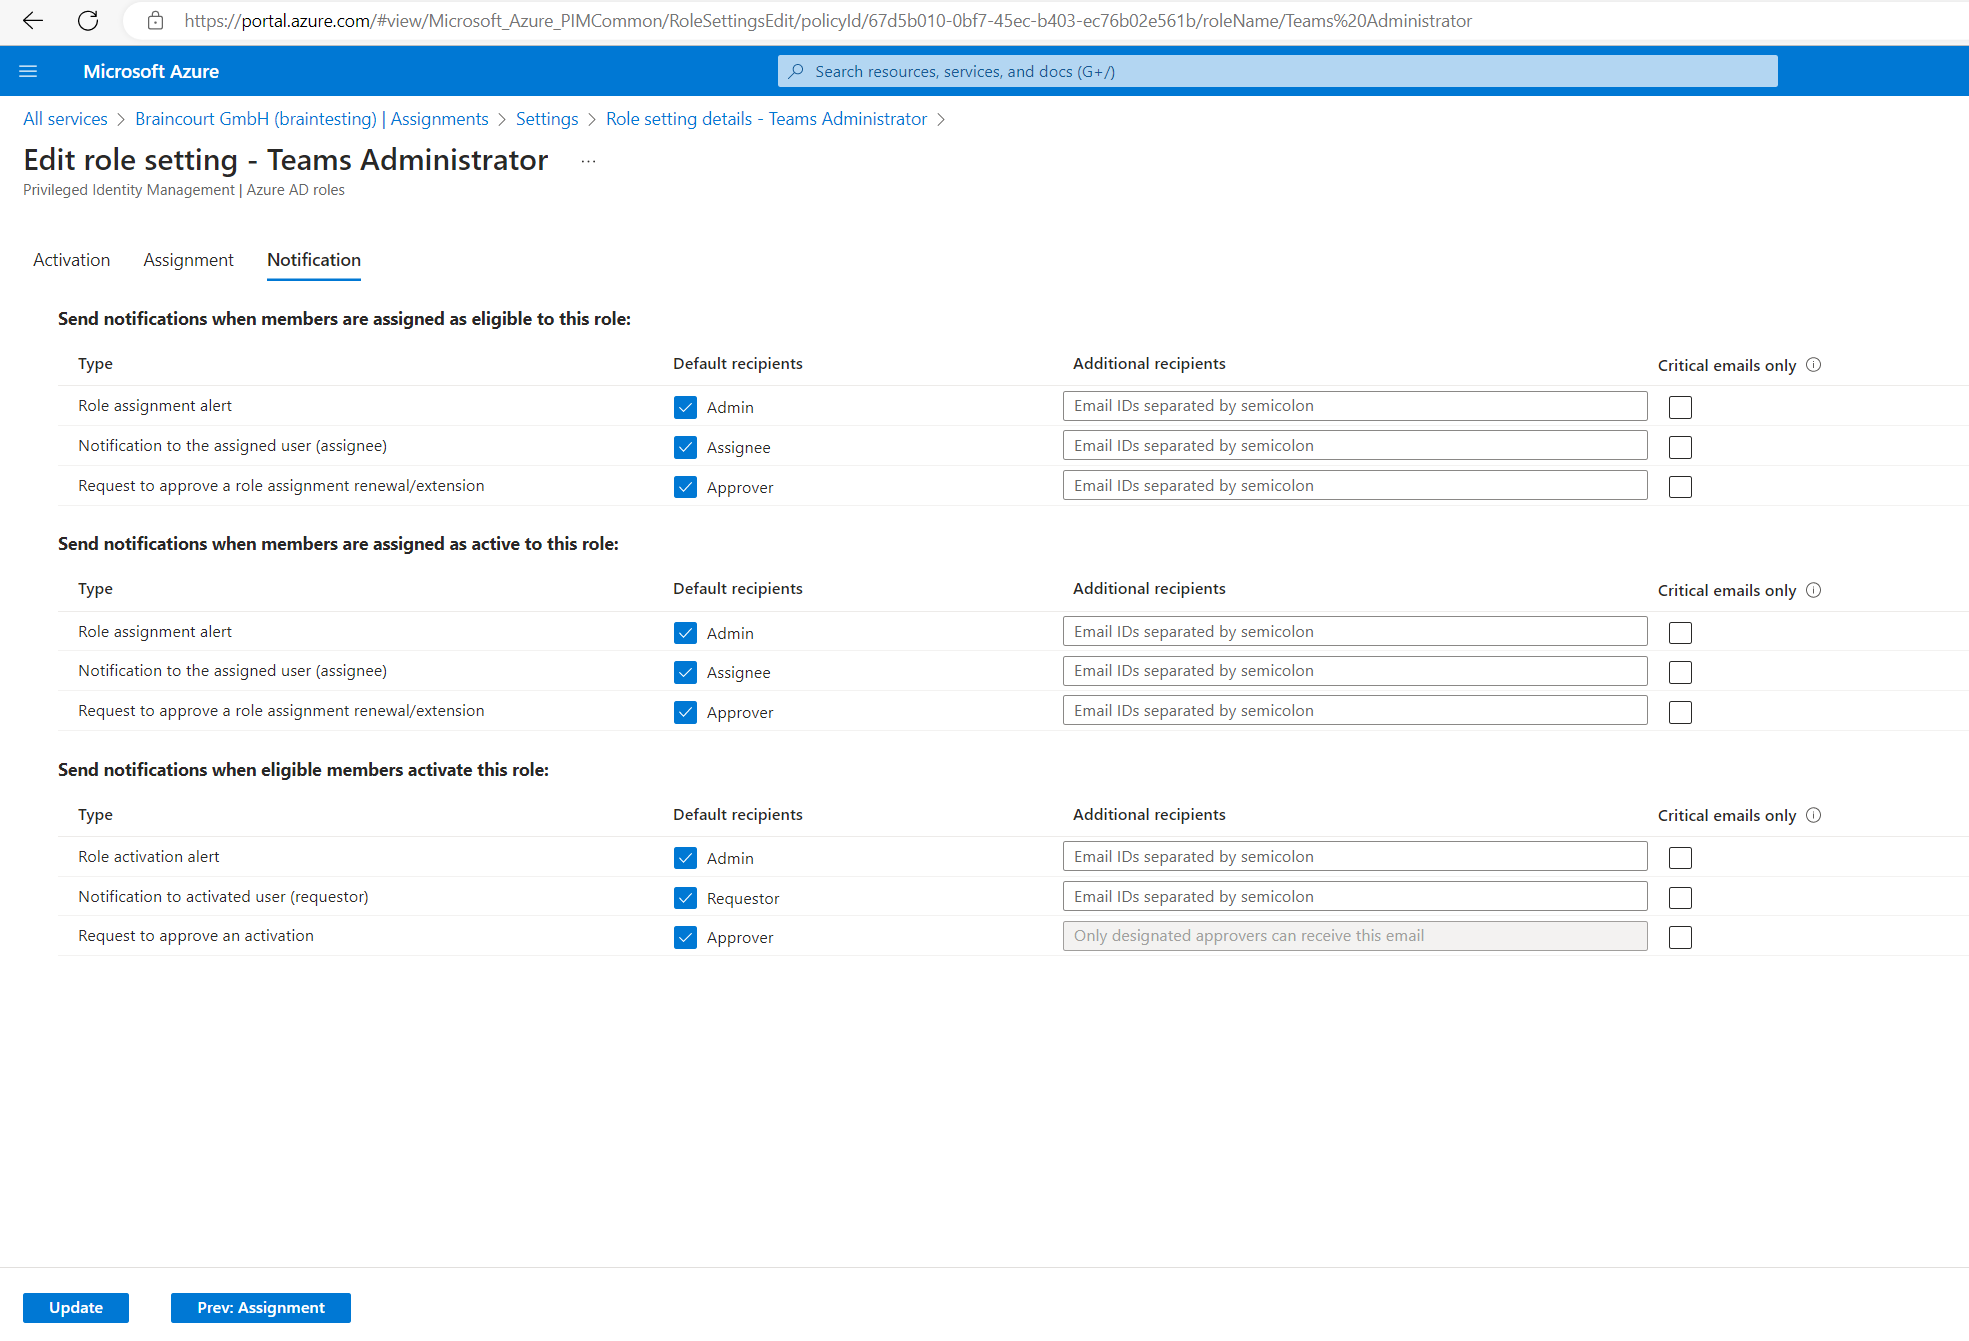
Click on Next to configure notification settings.
On the Notifications settings page you can configure what emails will be sent to which recipients for different assignment and activation events.
Finally I will click on Update.
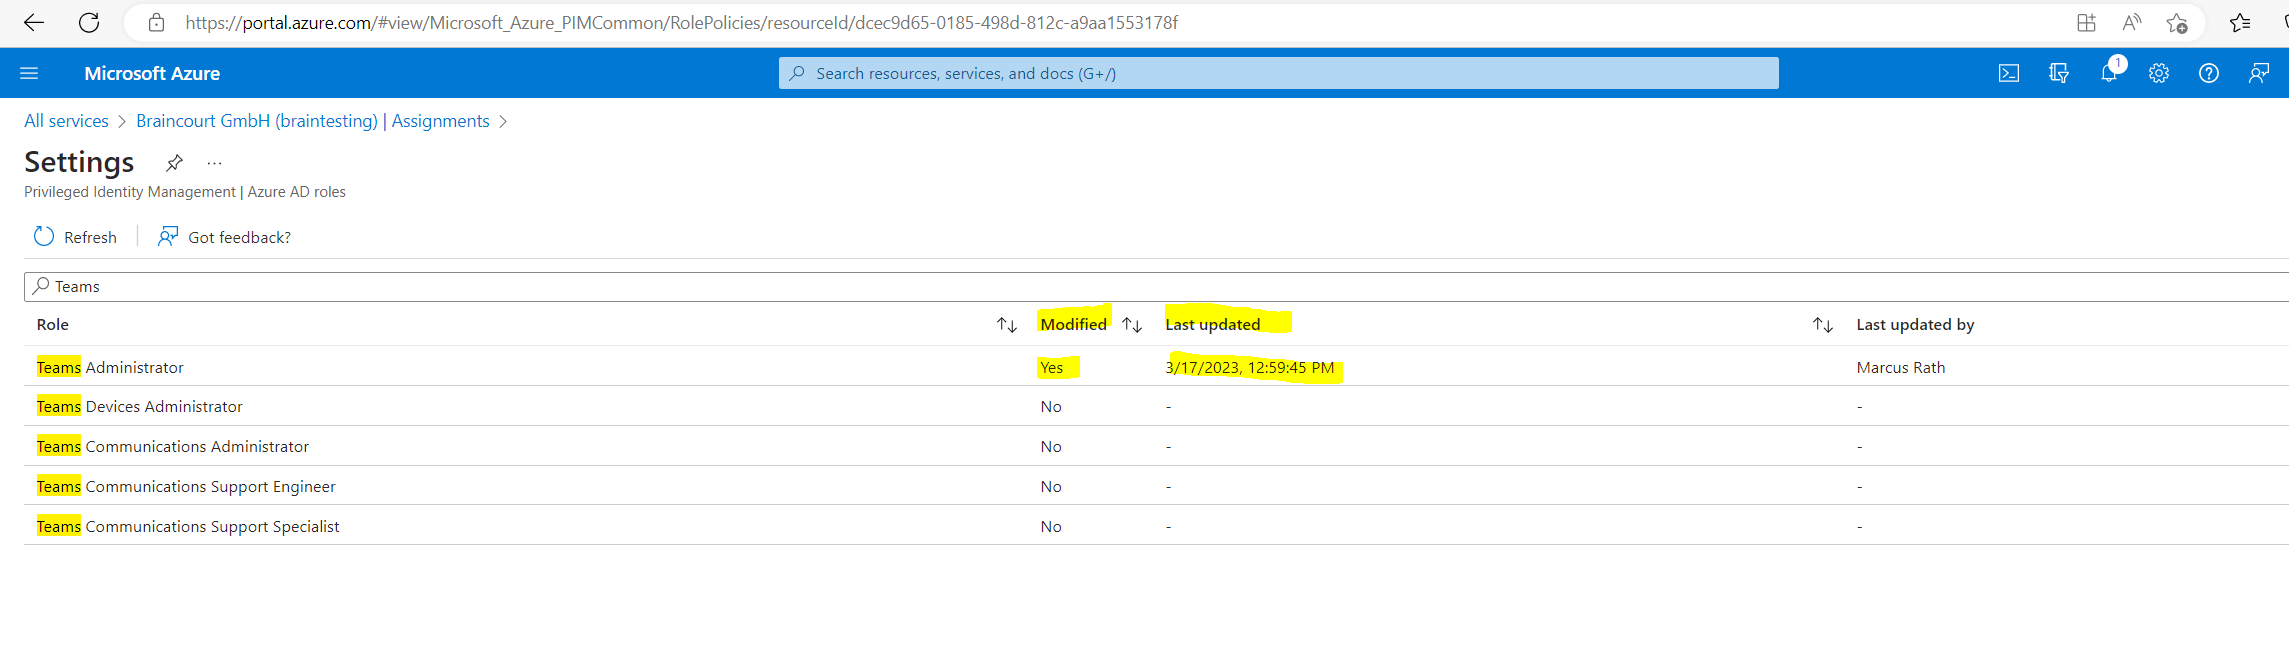
In the settings menu you will also see if the role was modified by a user.
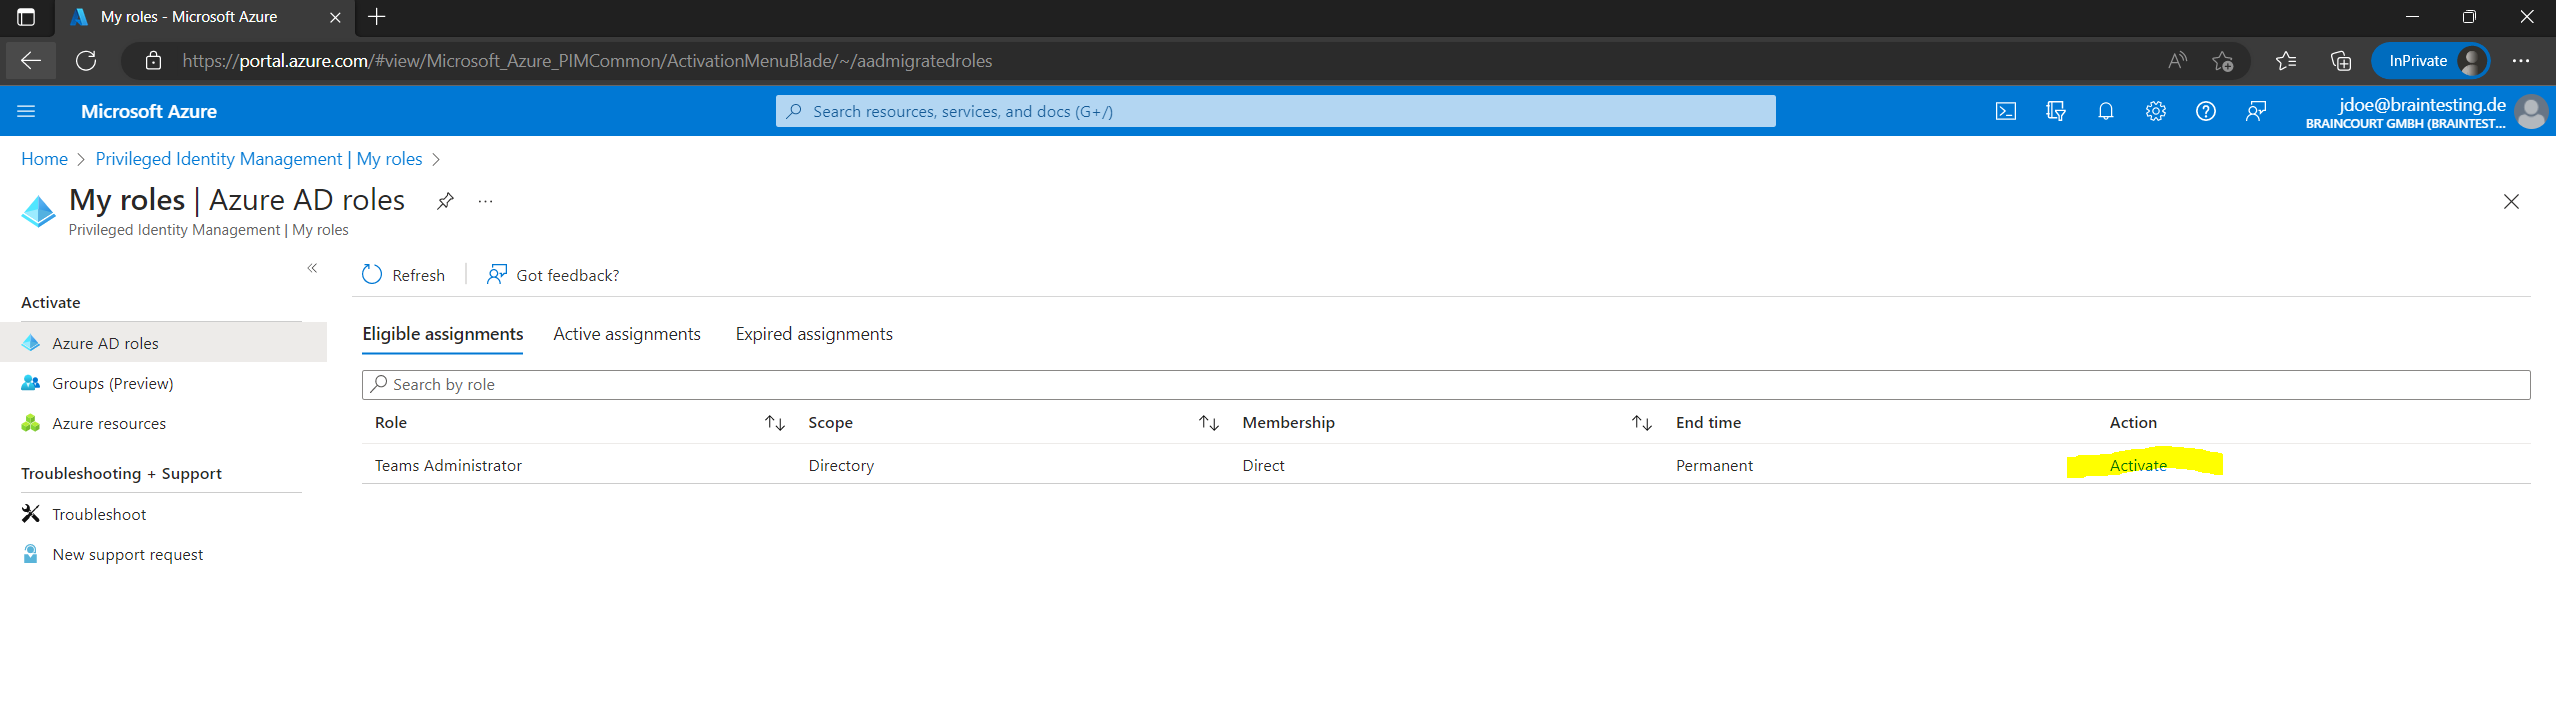
Activate an Azure AD Role just in Time

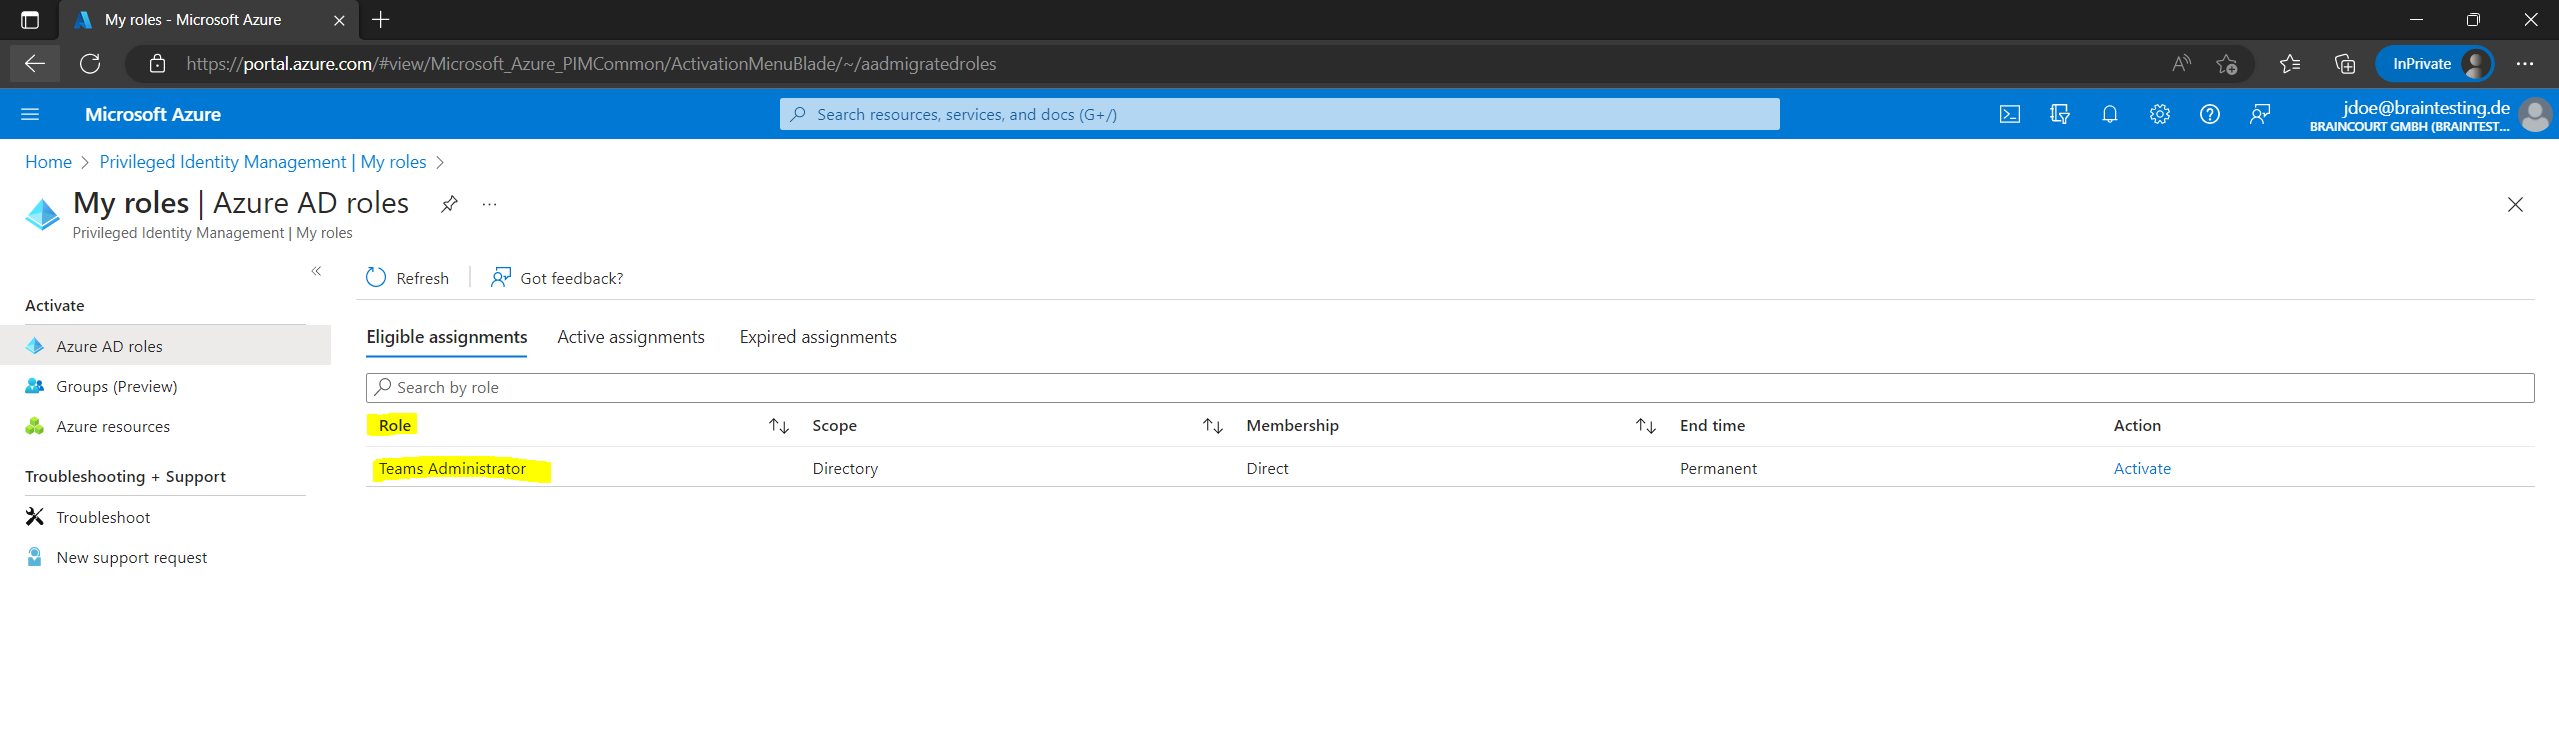
To activate the role the user have to click here on the Activate link below.
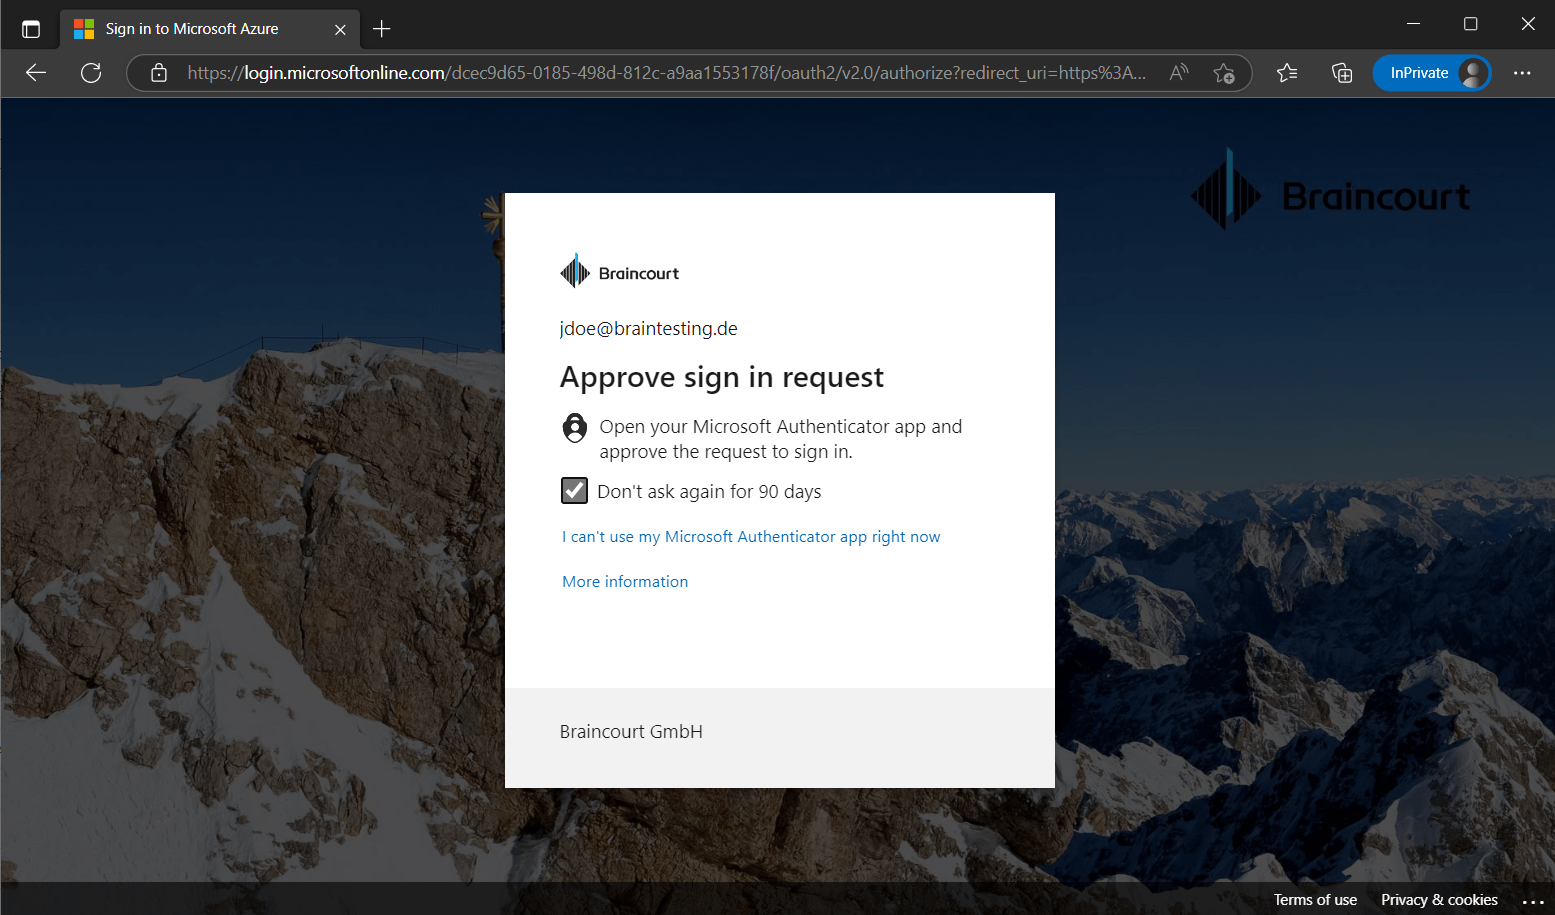
Because I have set previously that the user needs Azure MFA, the user first needs to click here on the link Additional verification required to authenticate with its second factor.
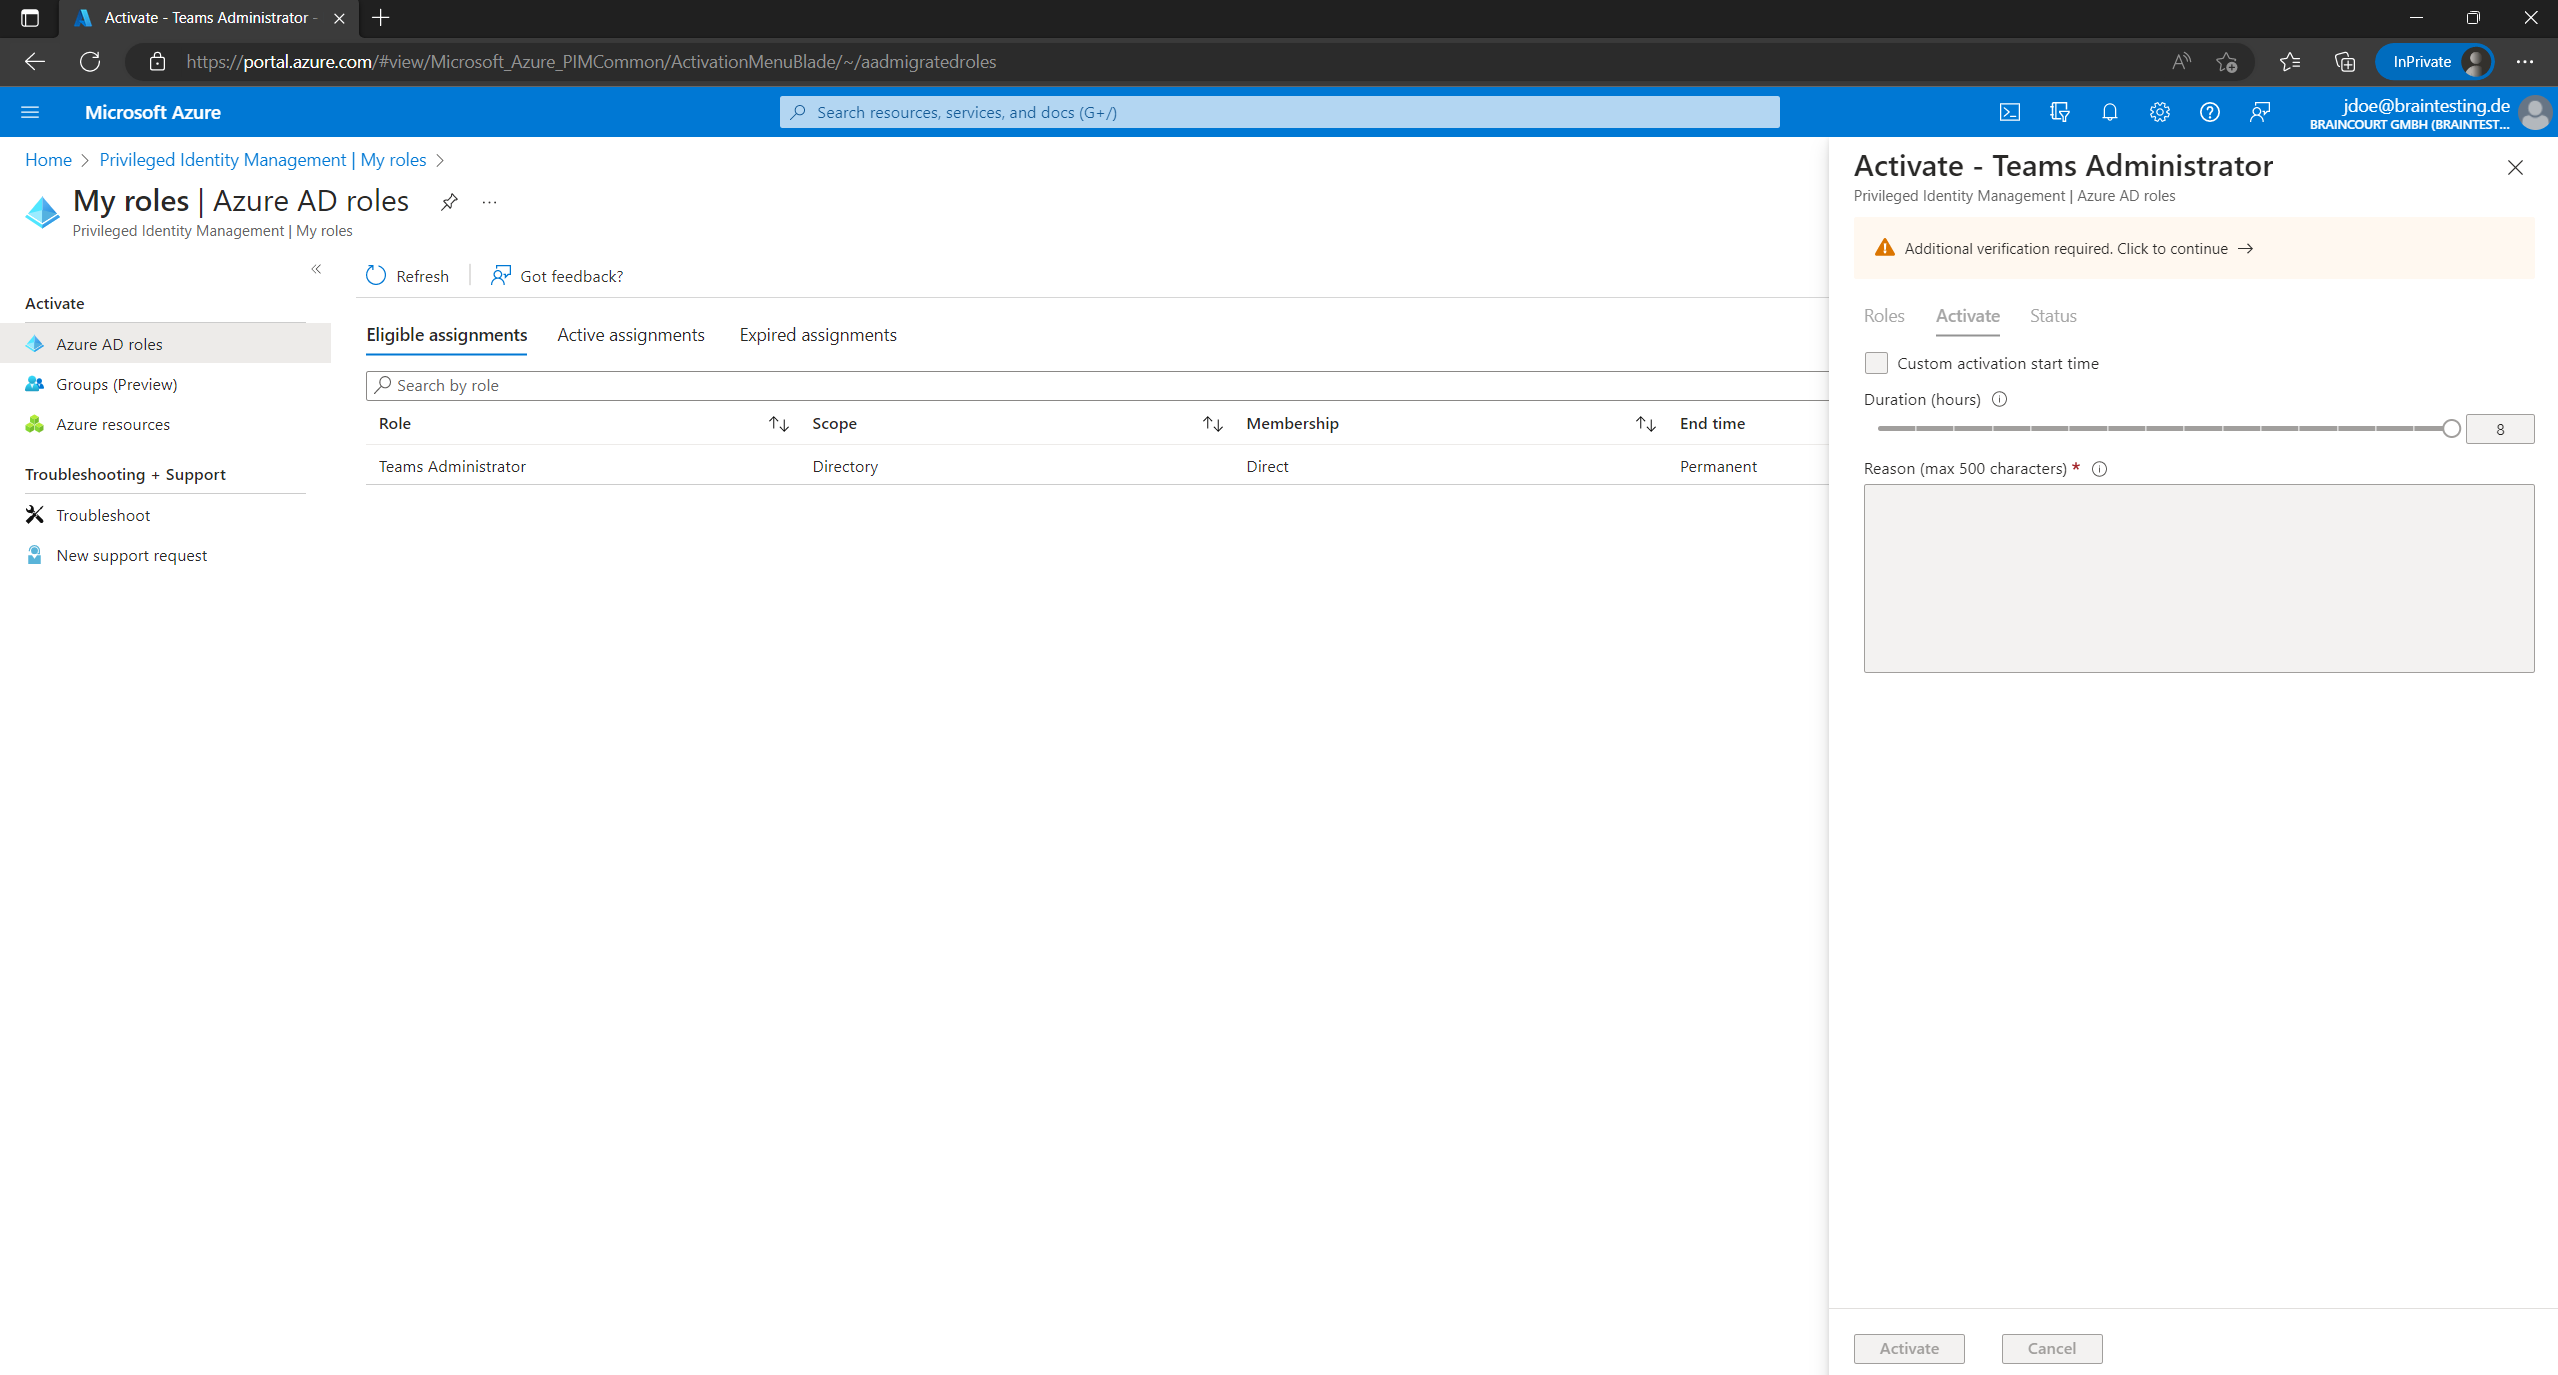
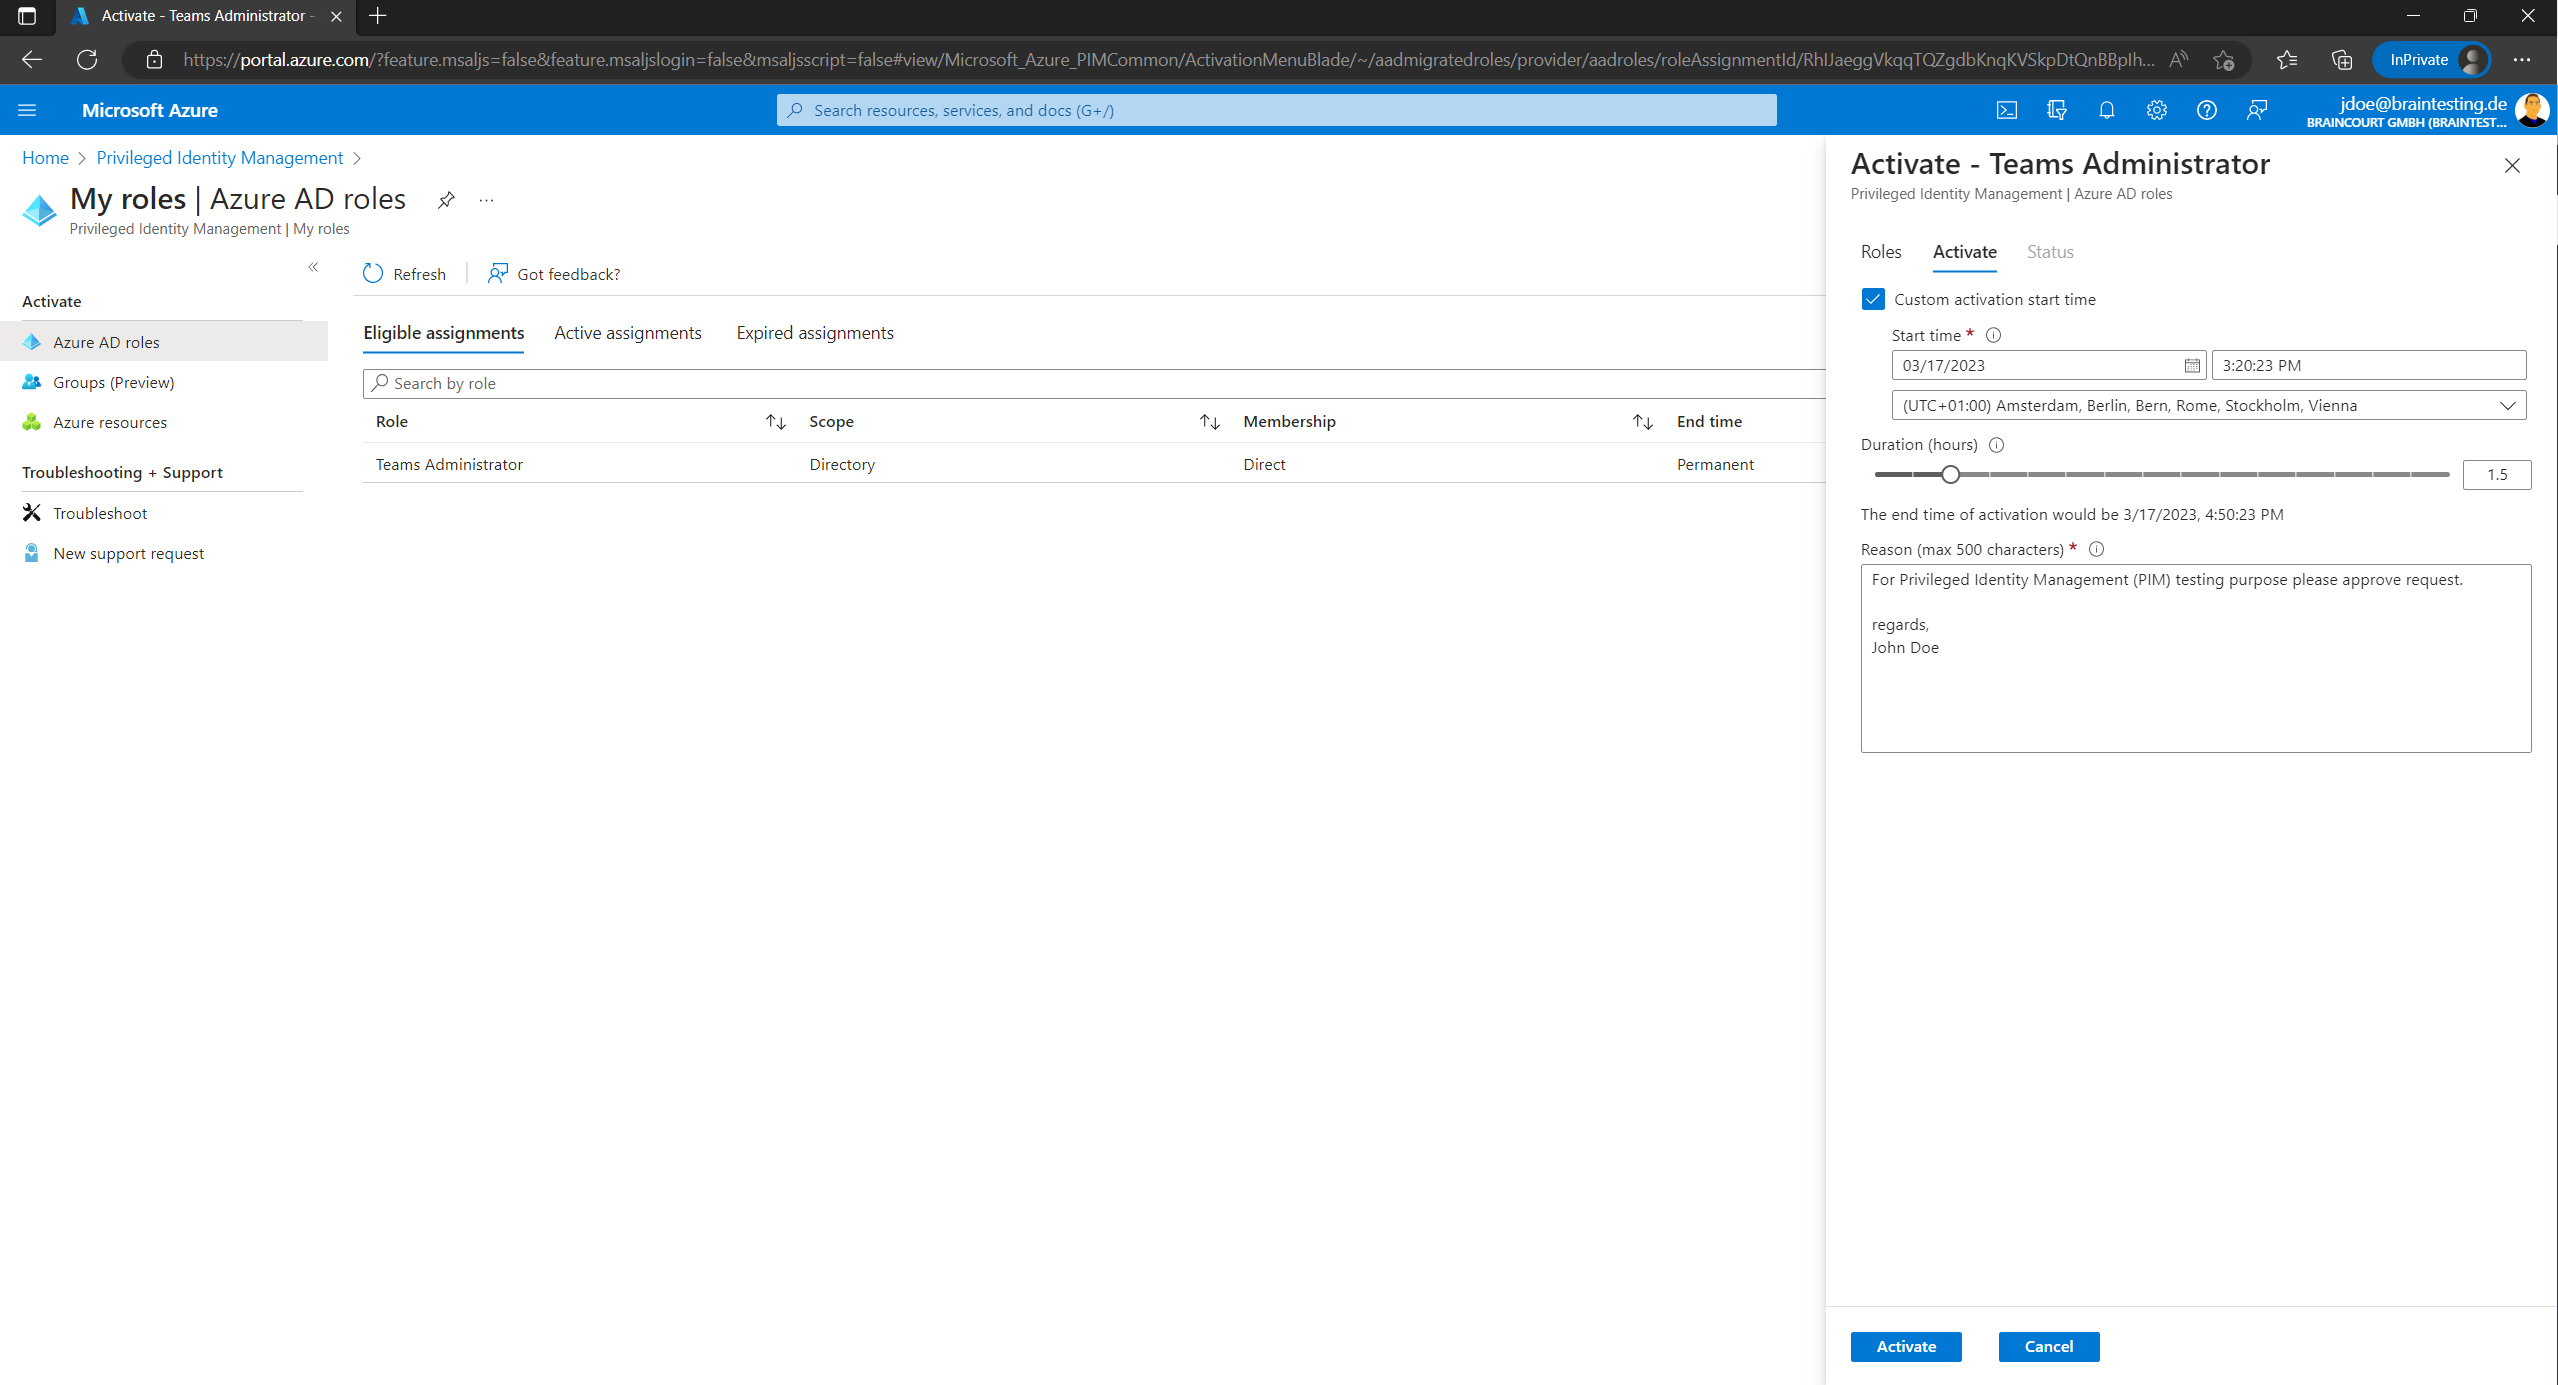
Now the user can activate the role and optionally set a custom start time. Further an activation reason is required.

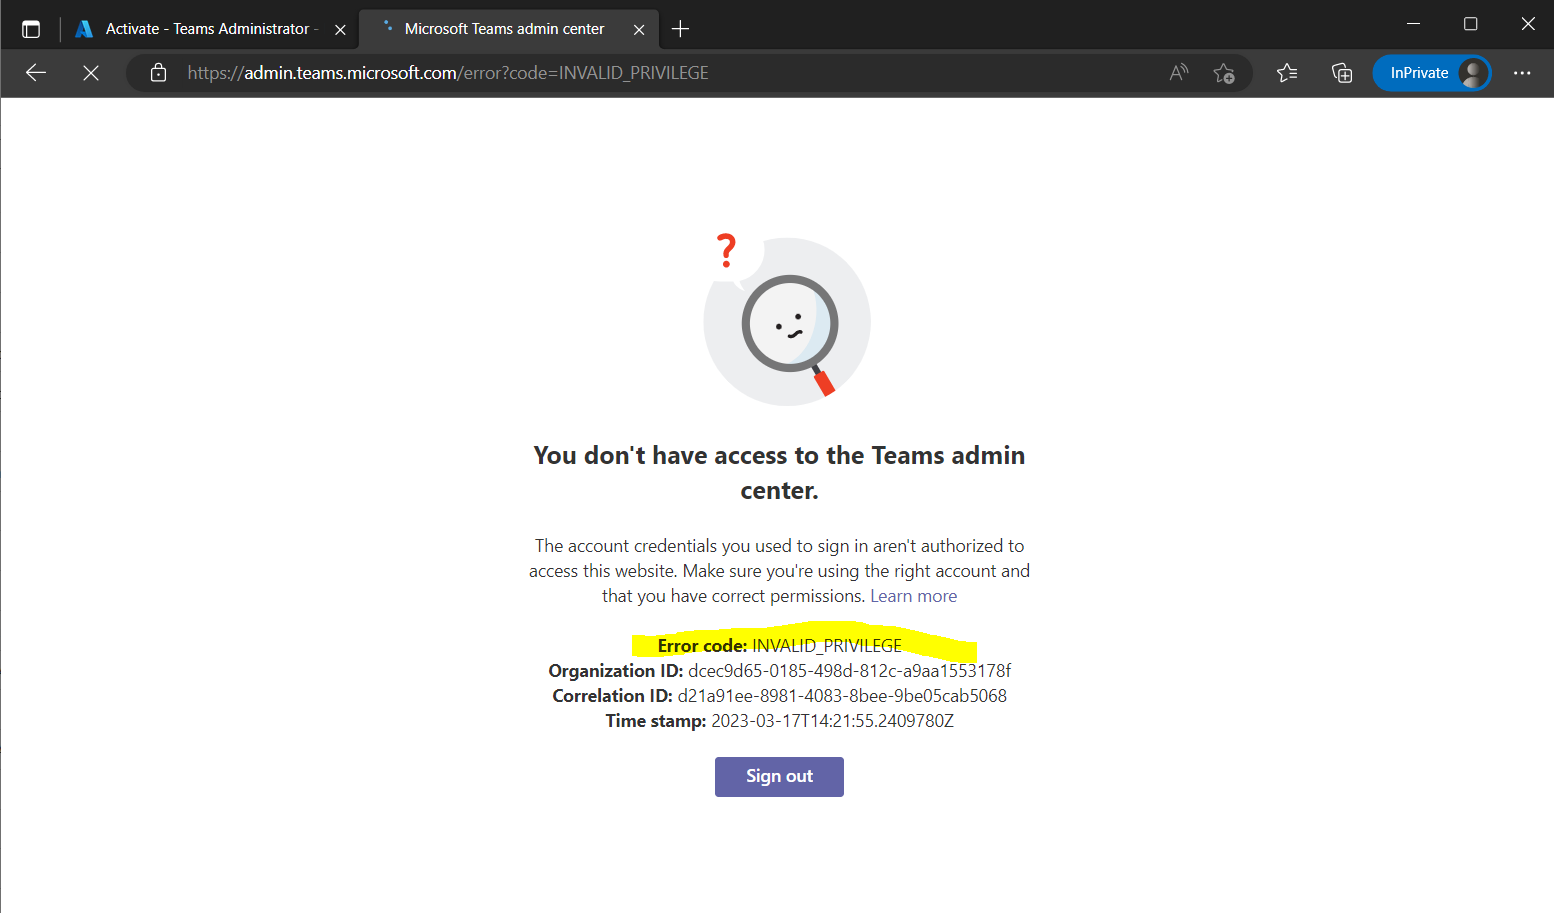
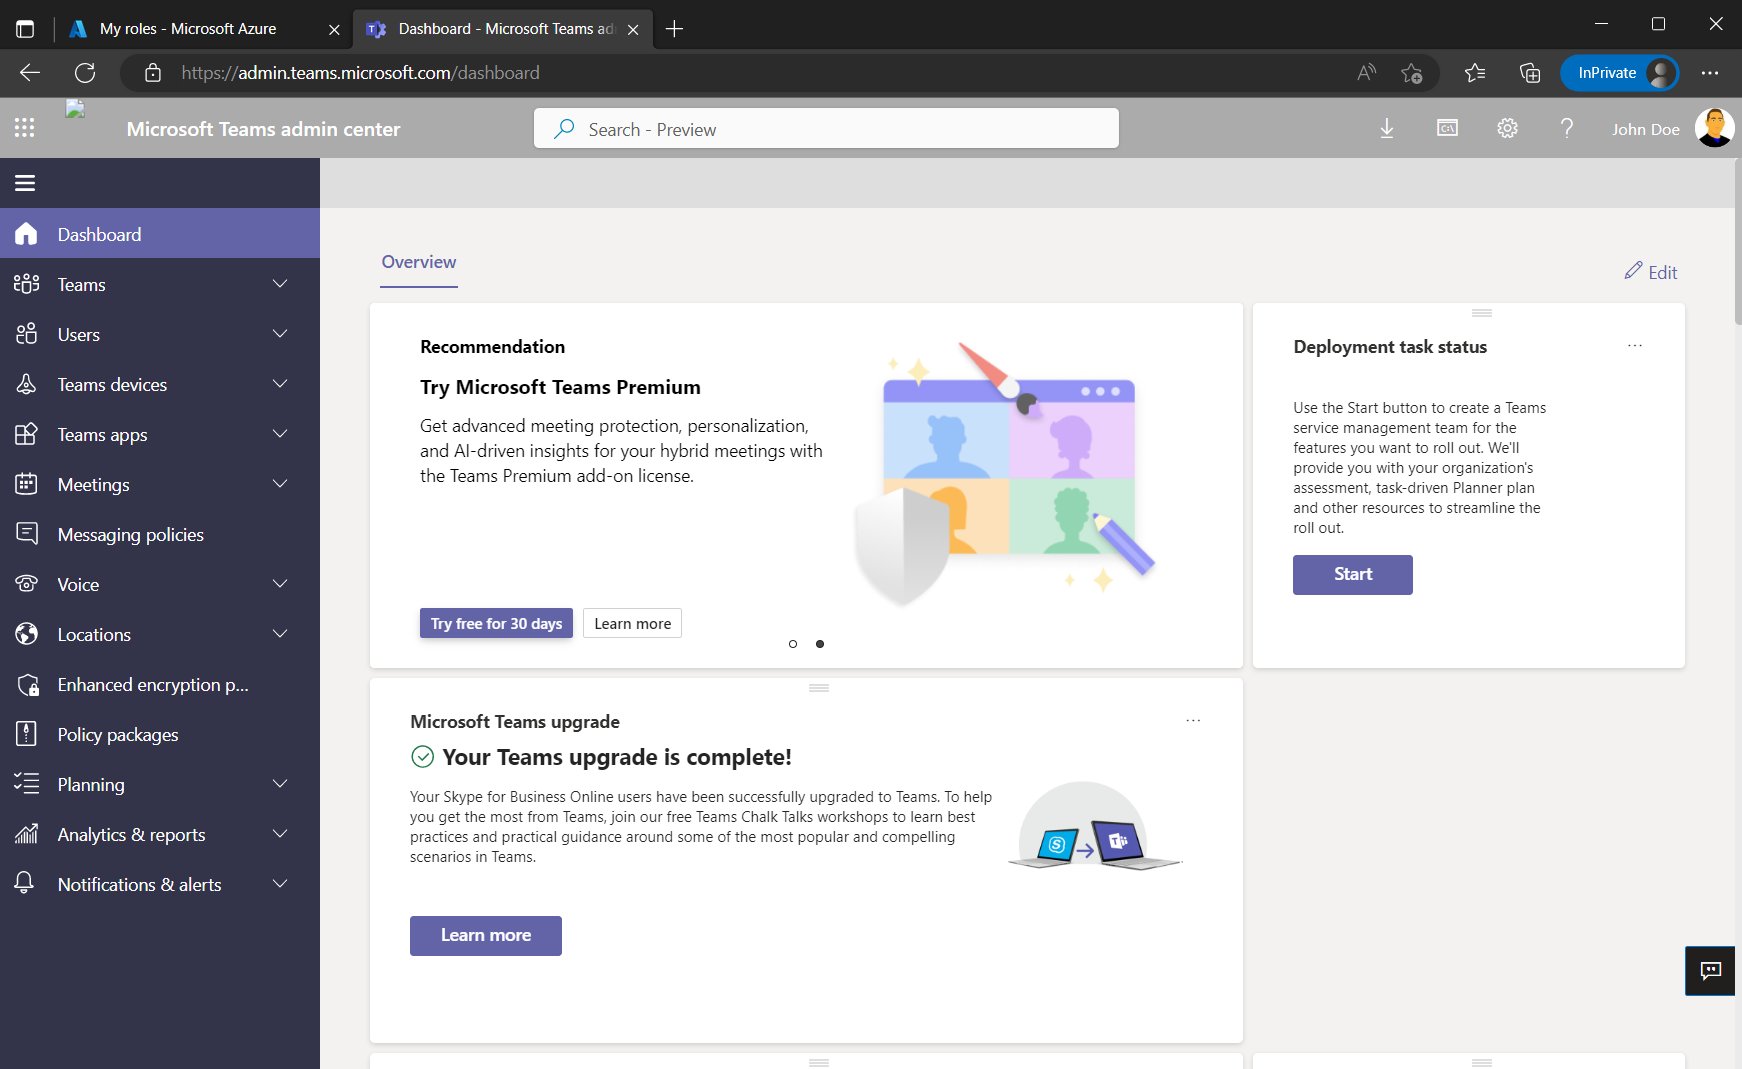
Just one test before activation to see the user John Doe so far have no priviliges to access the Microsoft Teams admin center under the URL https://admin.teams.microsoft.com.
Now John Doe will activate its Teams Administrator Role and also is setting a custom activation start time and reduces the duration from max 8 hours to 1.5 hours as this is just a test.
Further he also needs to provide an activation reason.

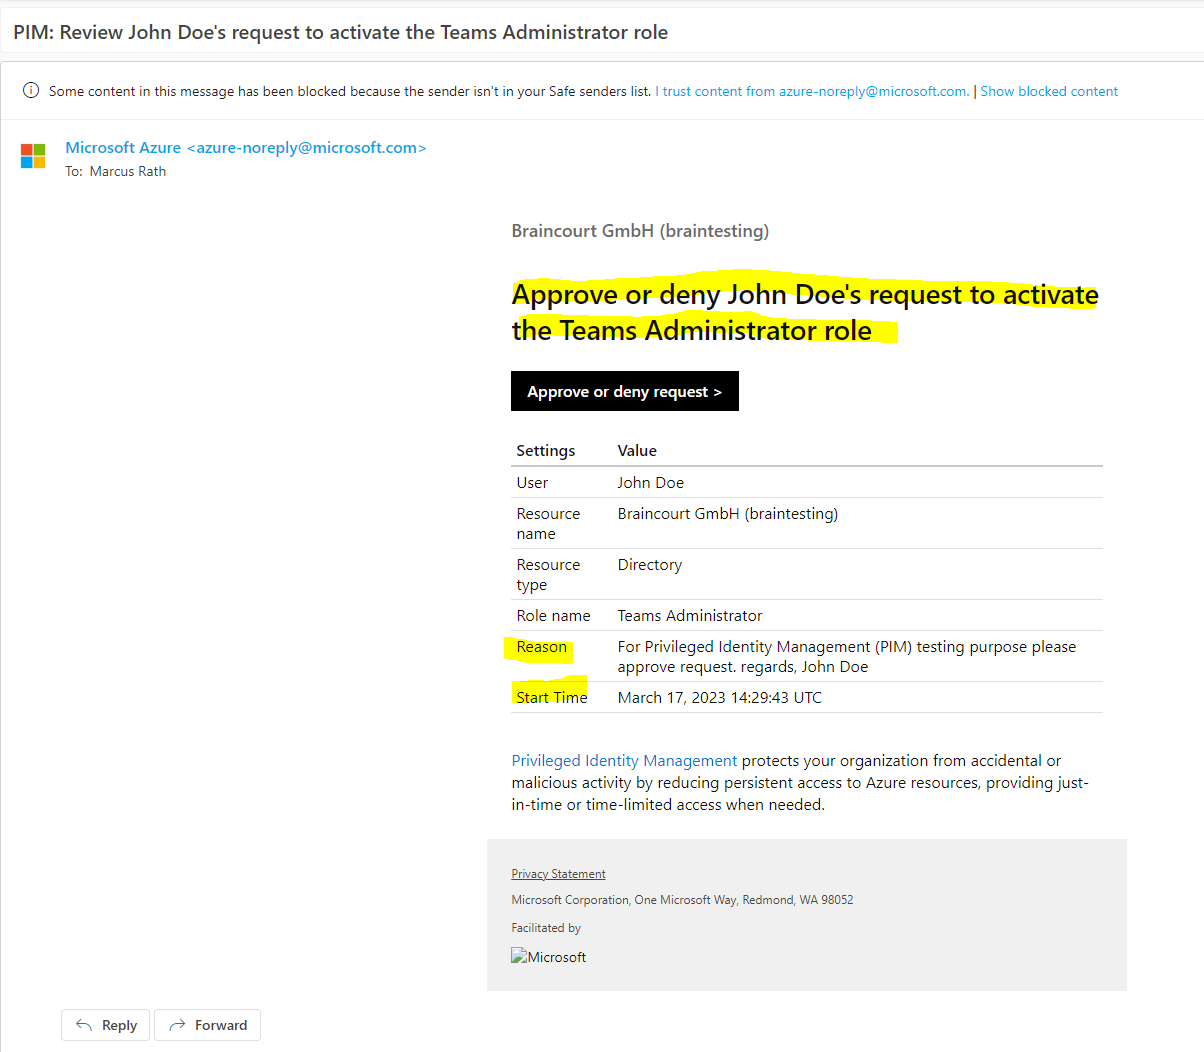
Global Administrators and Privileged Role Administrators receive an email to approve or deny the request. By clicking on the button Approve or deny request you will get forwarded to the Azure portal as shown below.
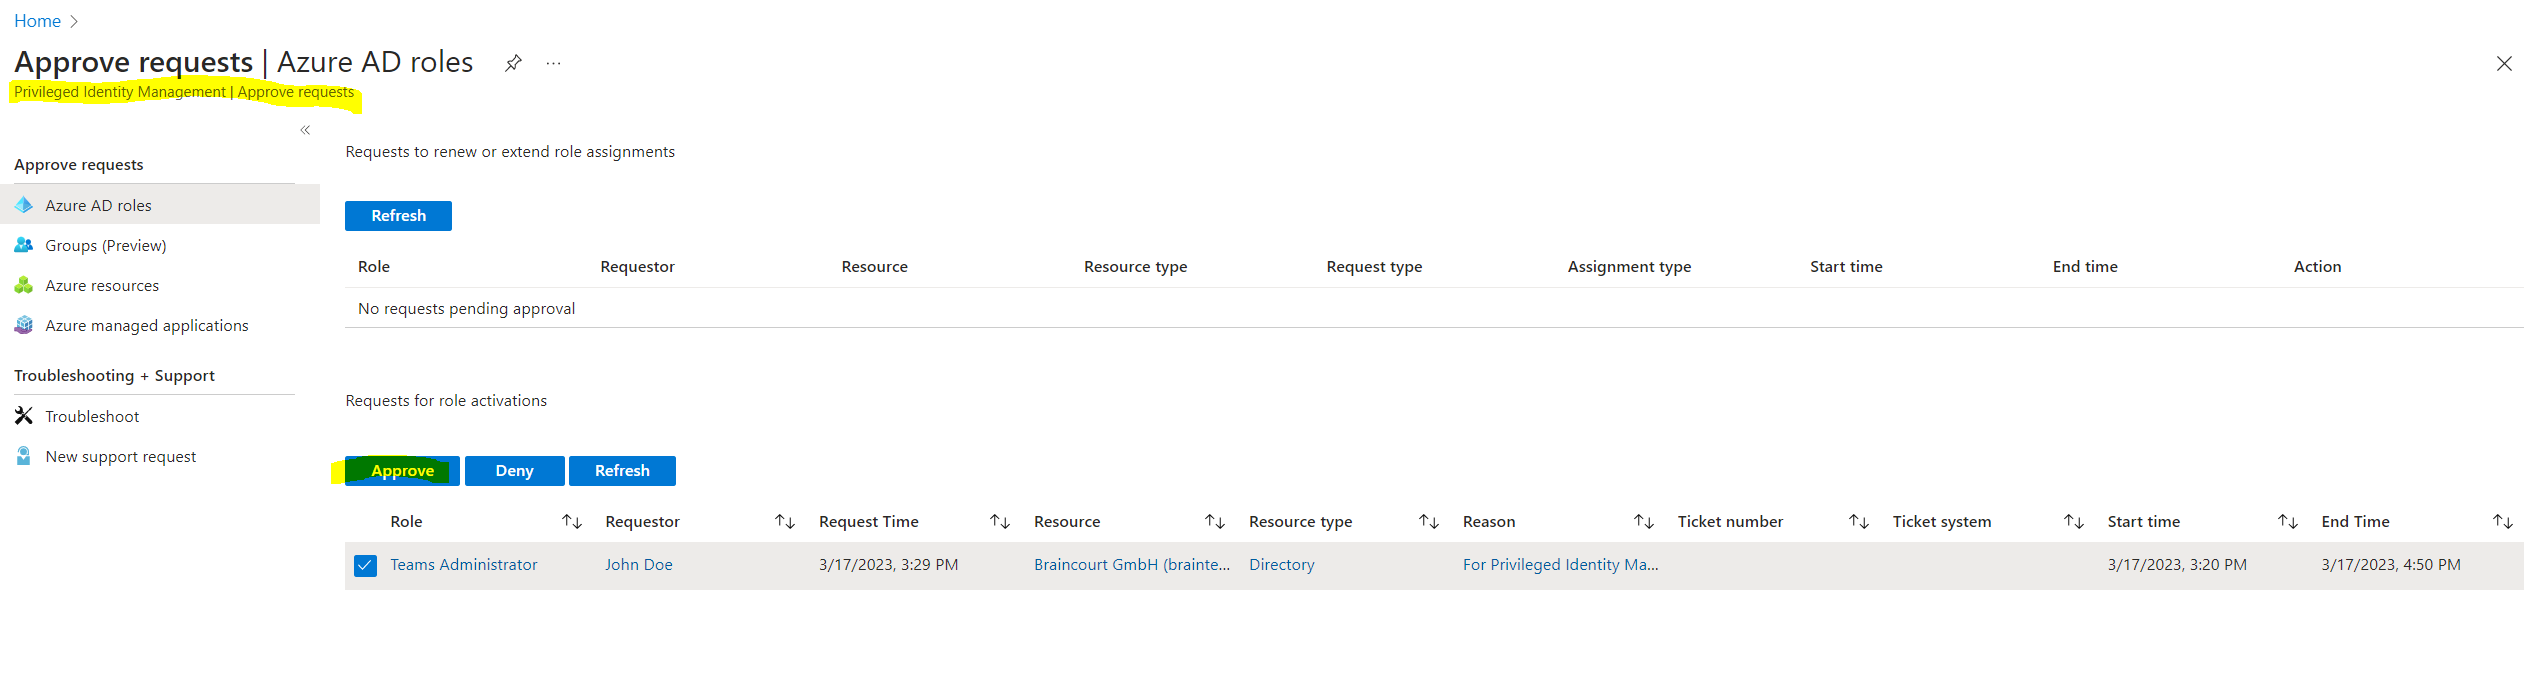
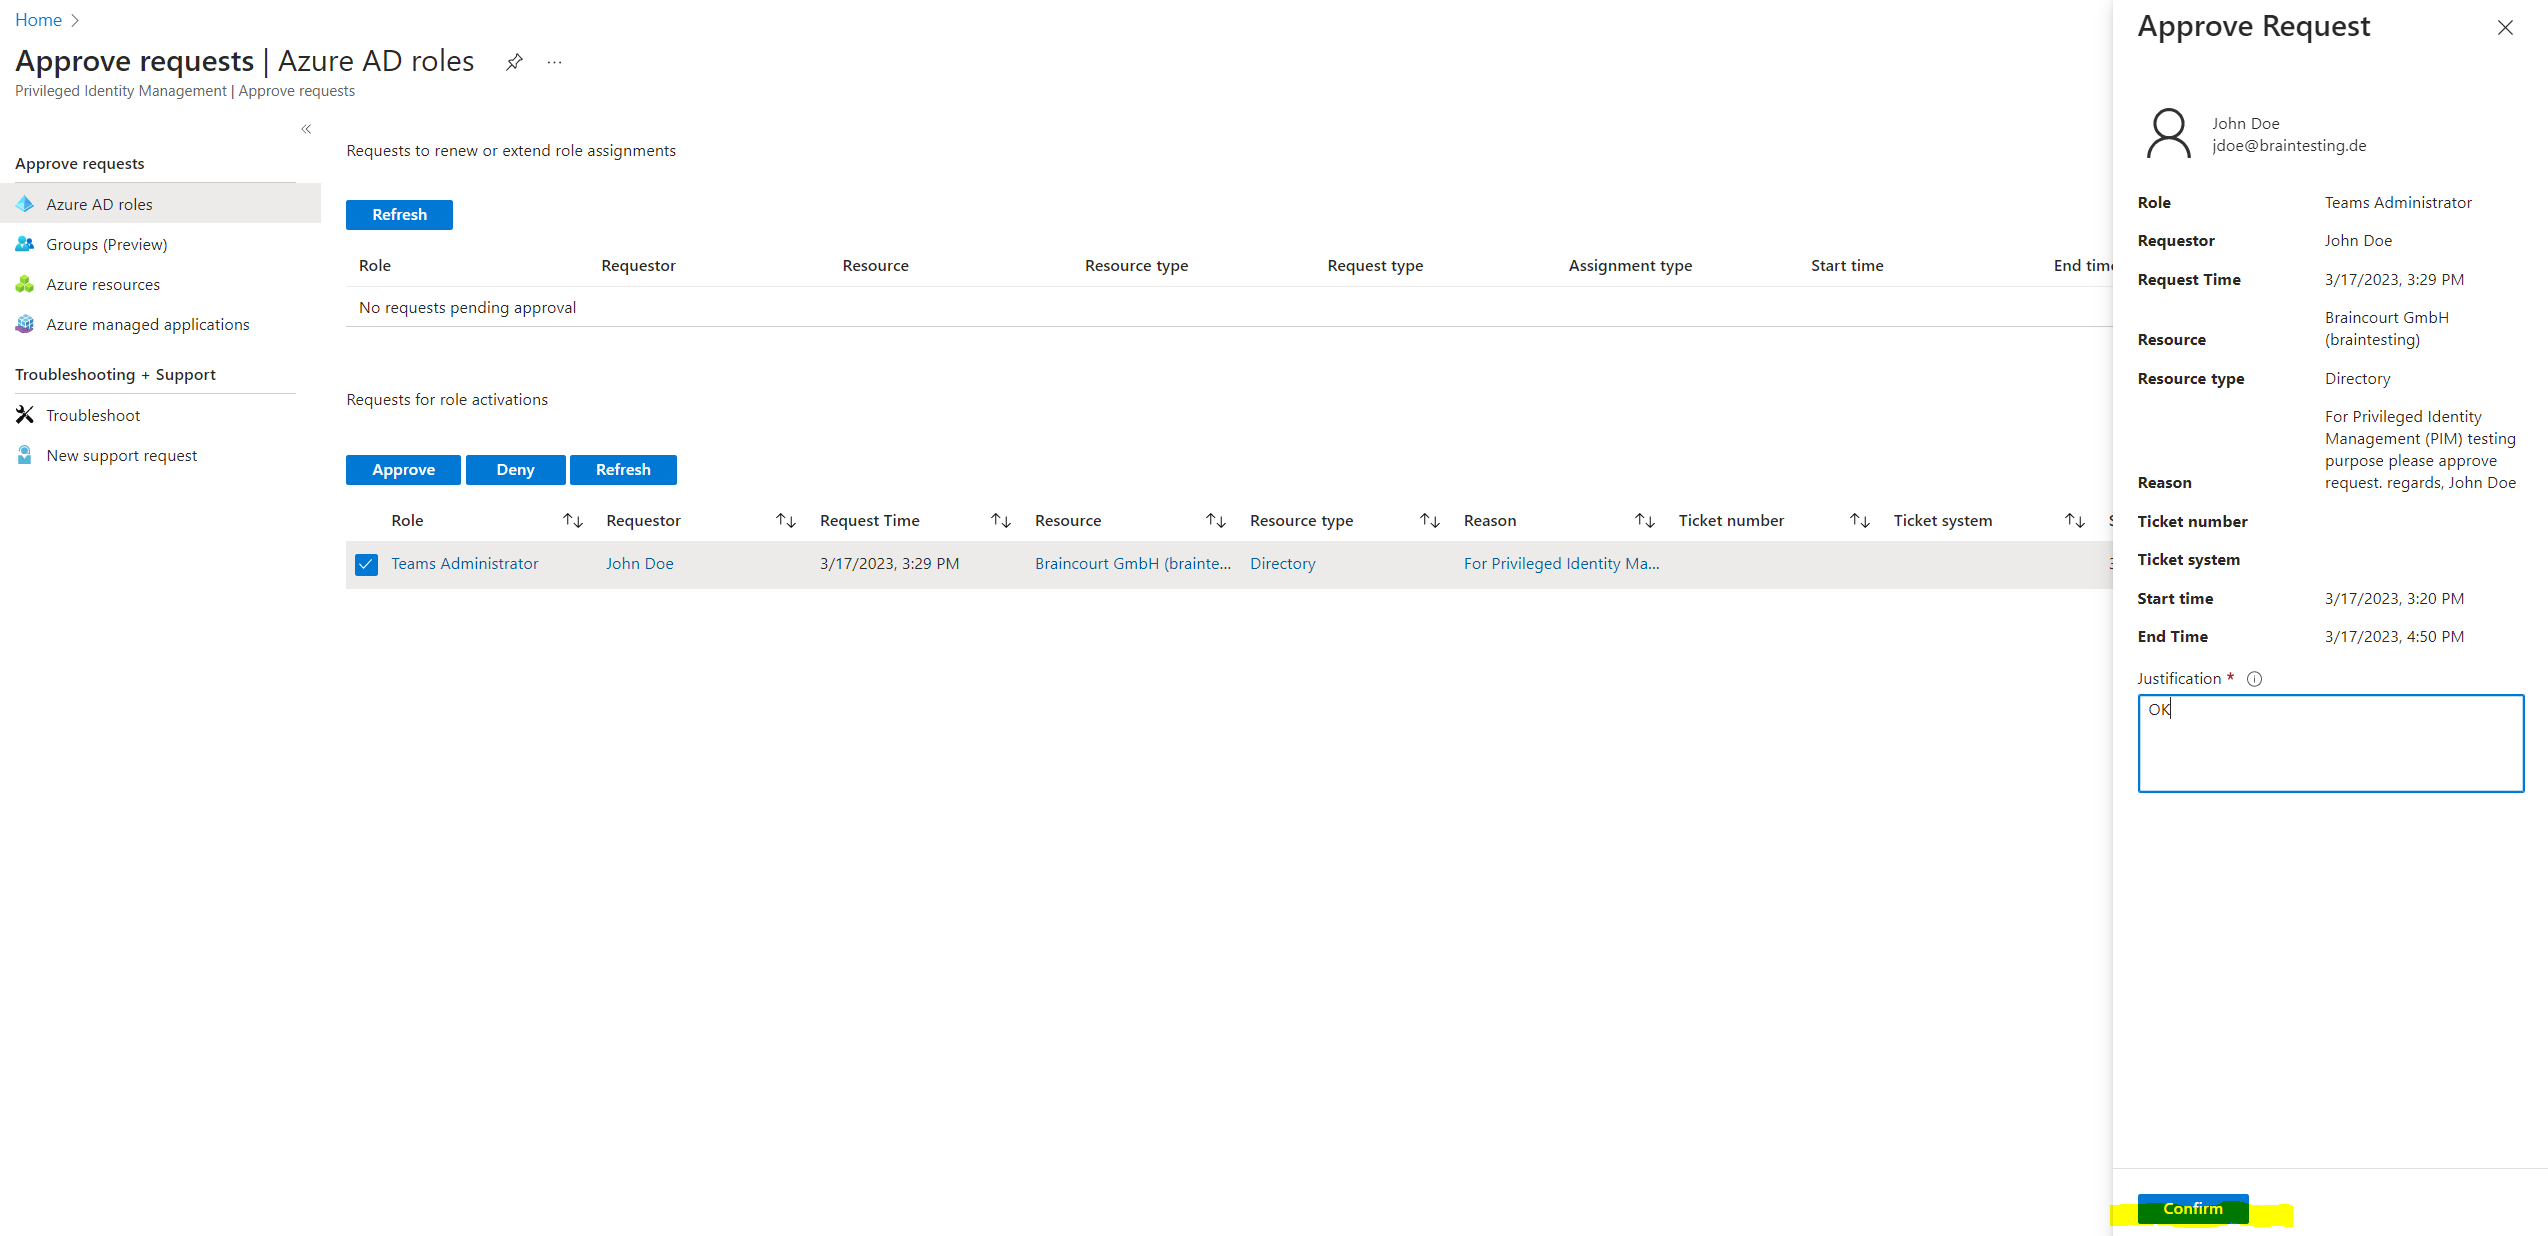
In the Azure portal I can now approve the request from John Doe.
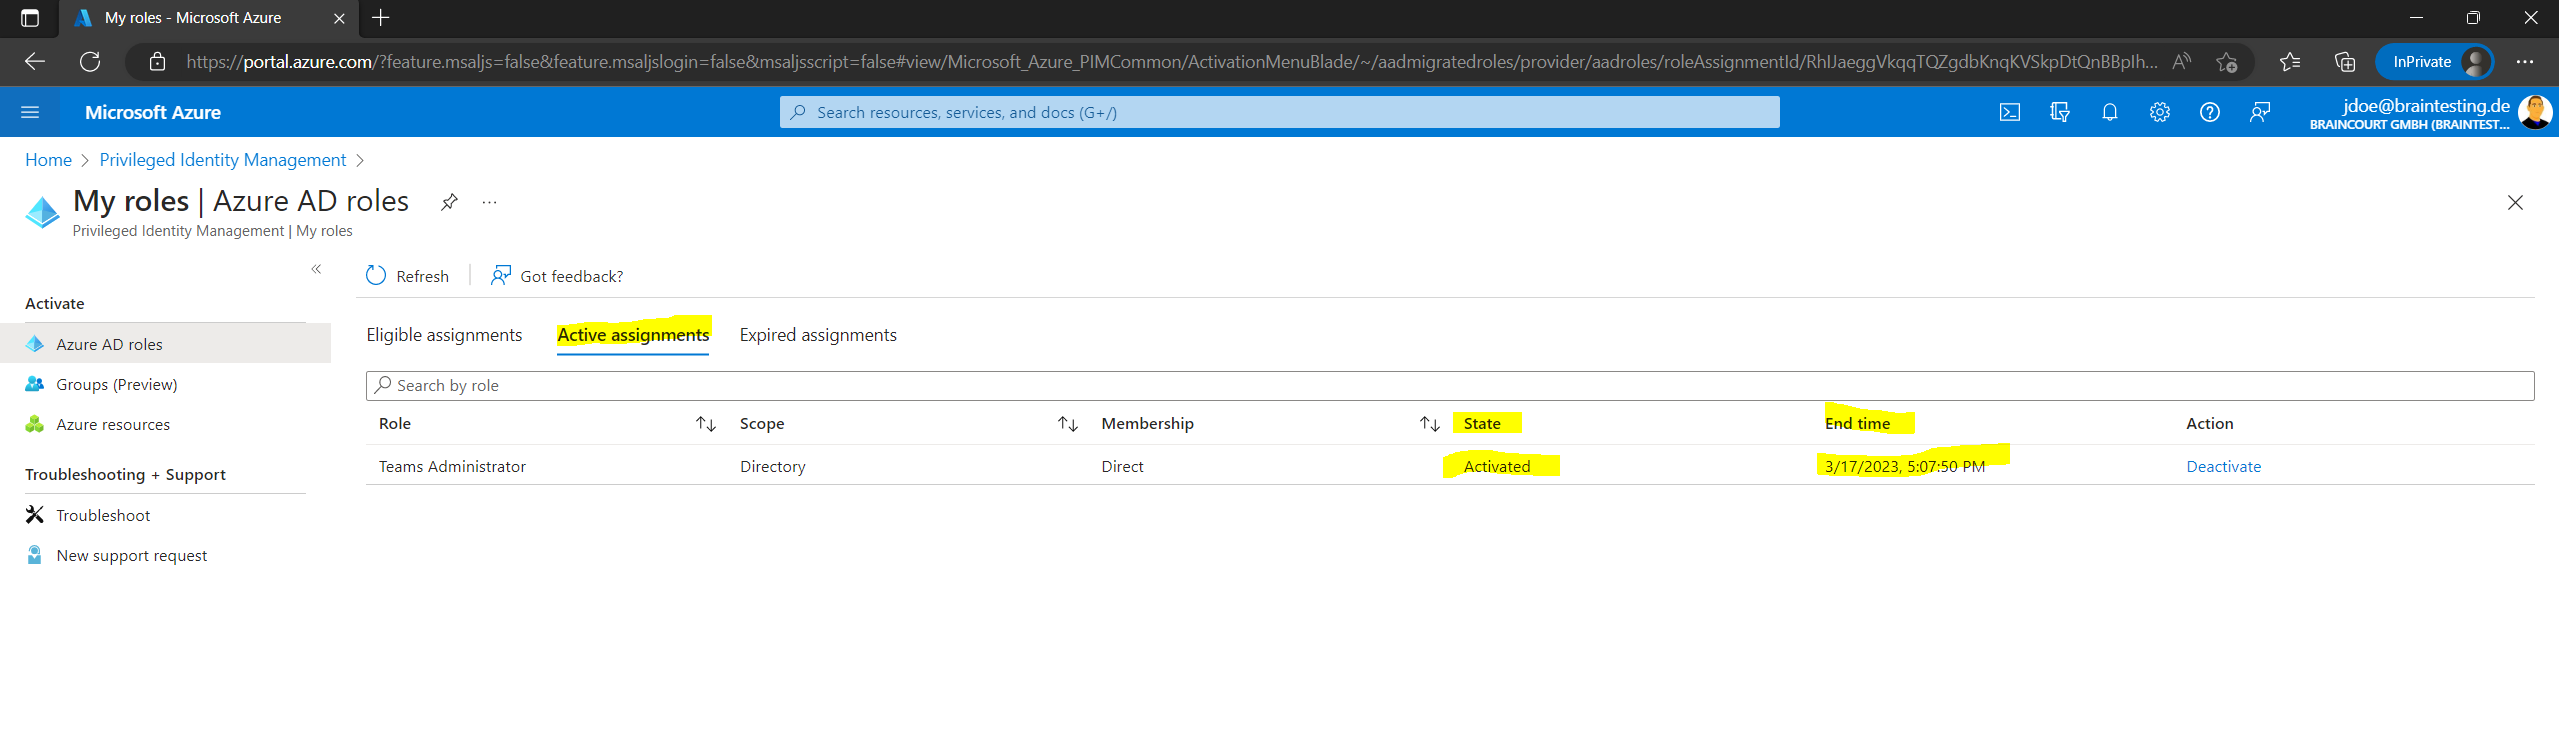
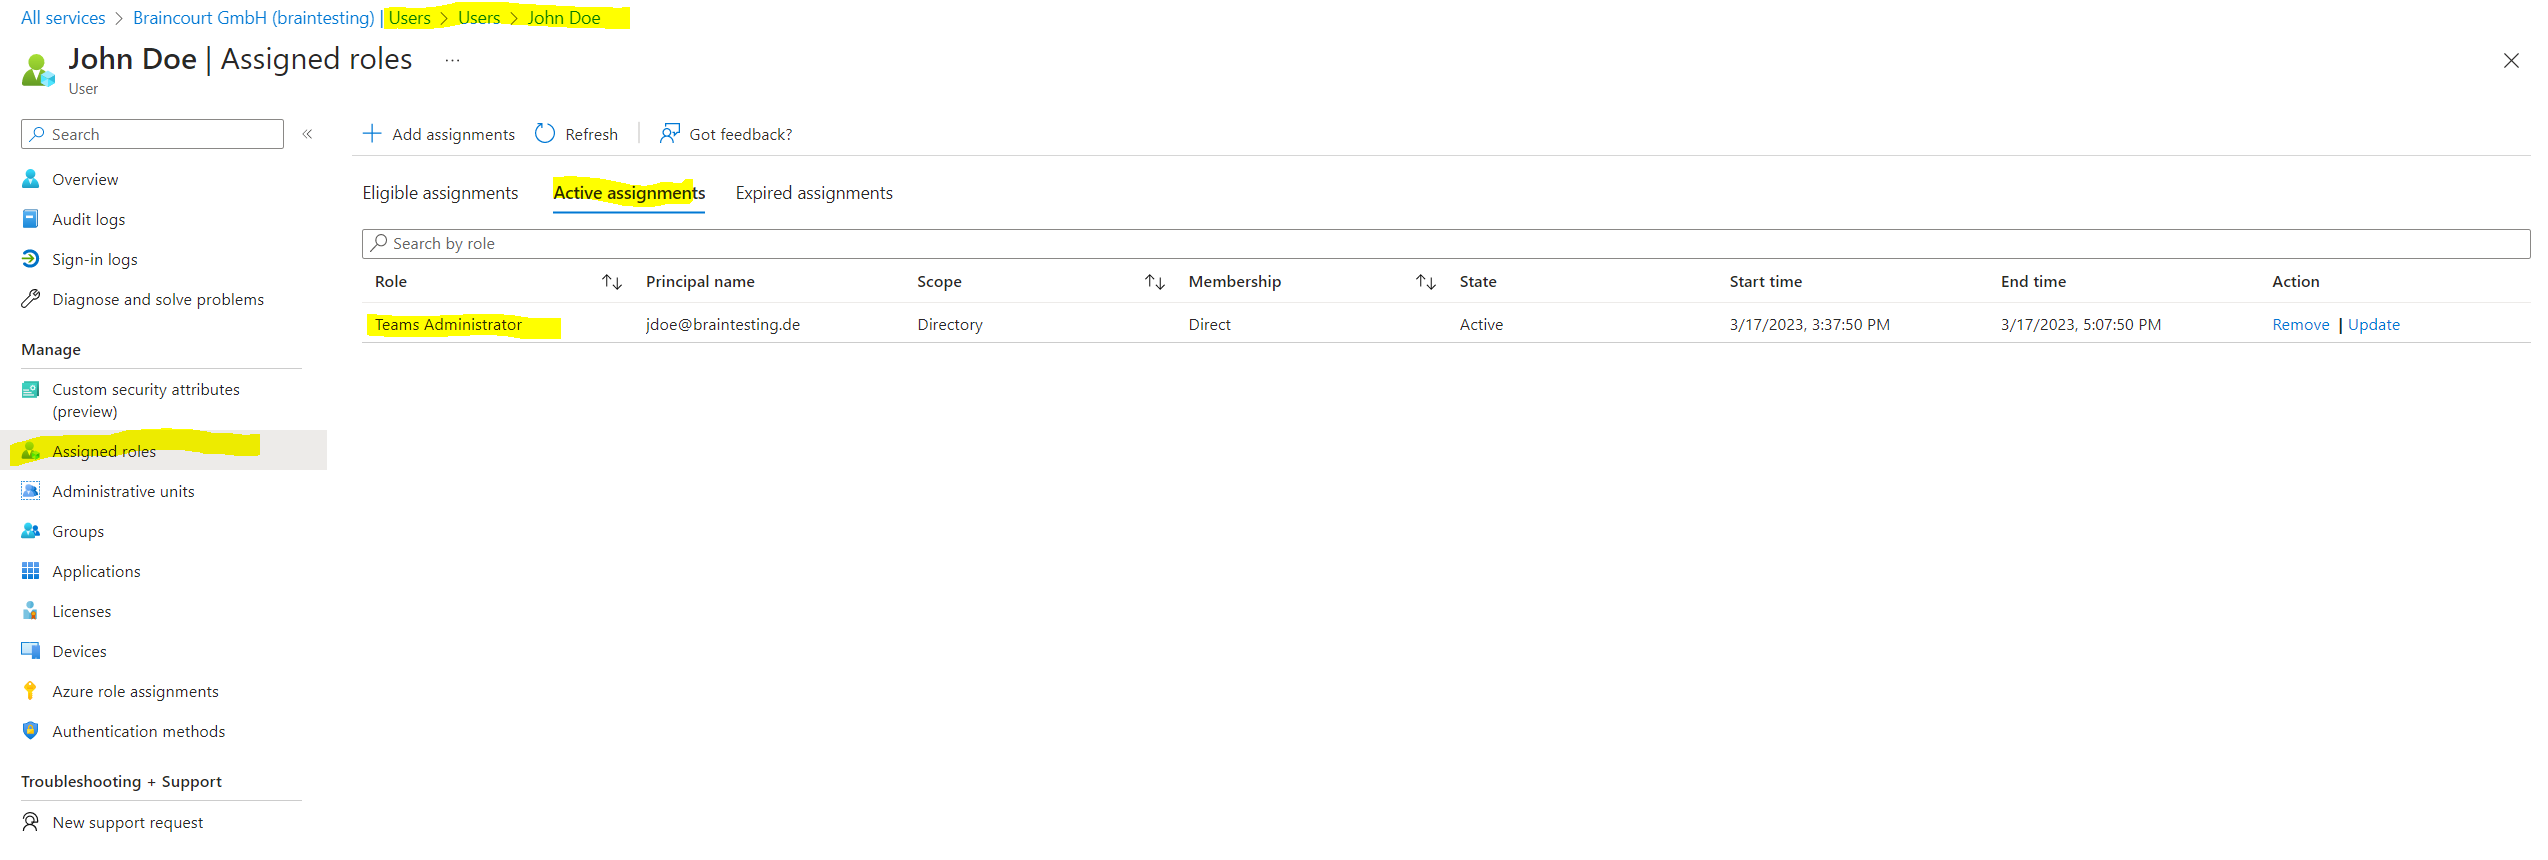
After approving the request John Doe will see the activation of the role under Active assignments.
So now John Doe should be able to access the Microsoft Teams admin center under the URL https://admin.teams.microsoft.com.
Looks fine!
Global Administrators and Privileged Role Administrators receive also an email about the activation.
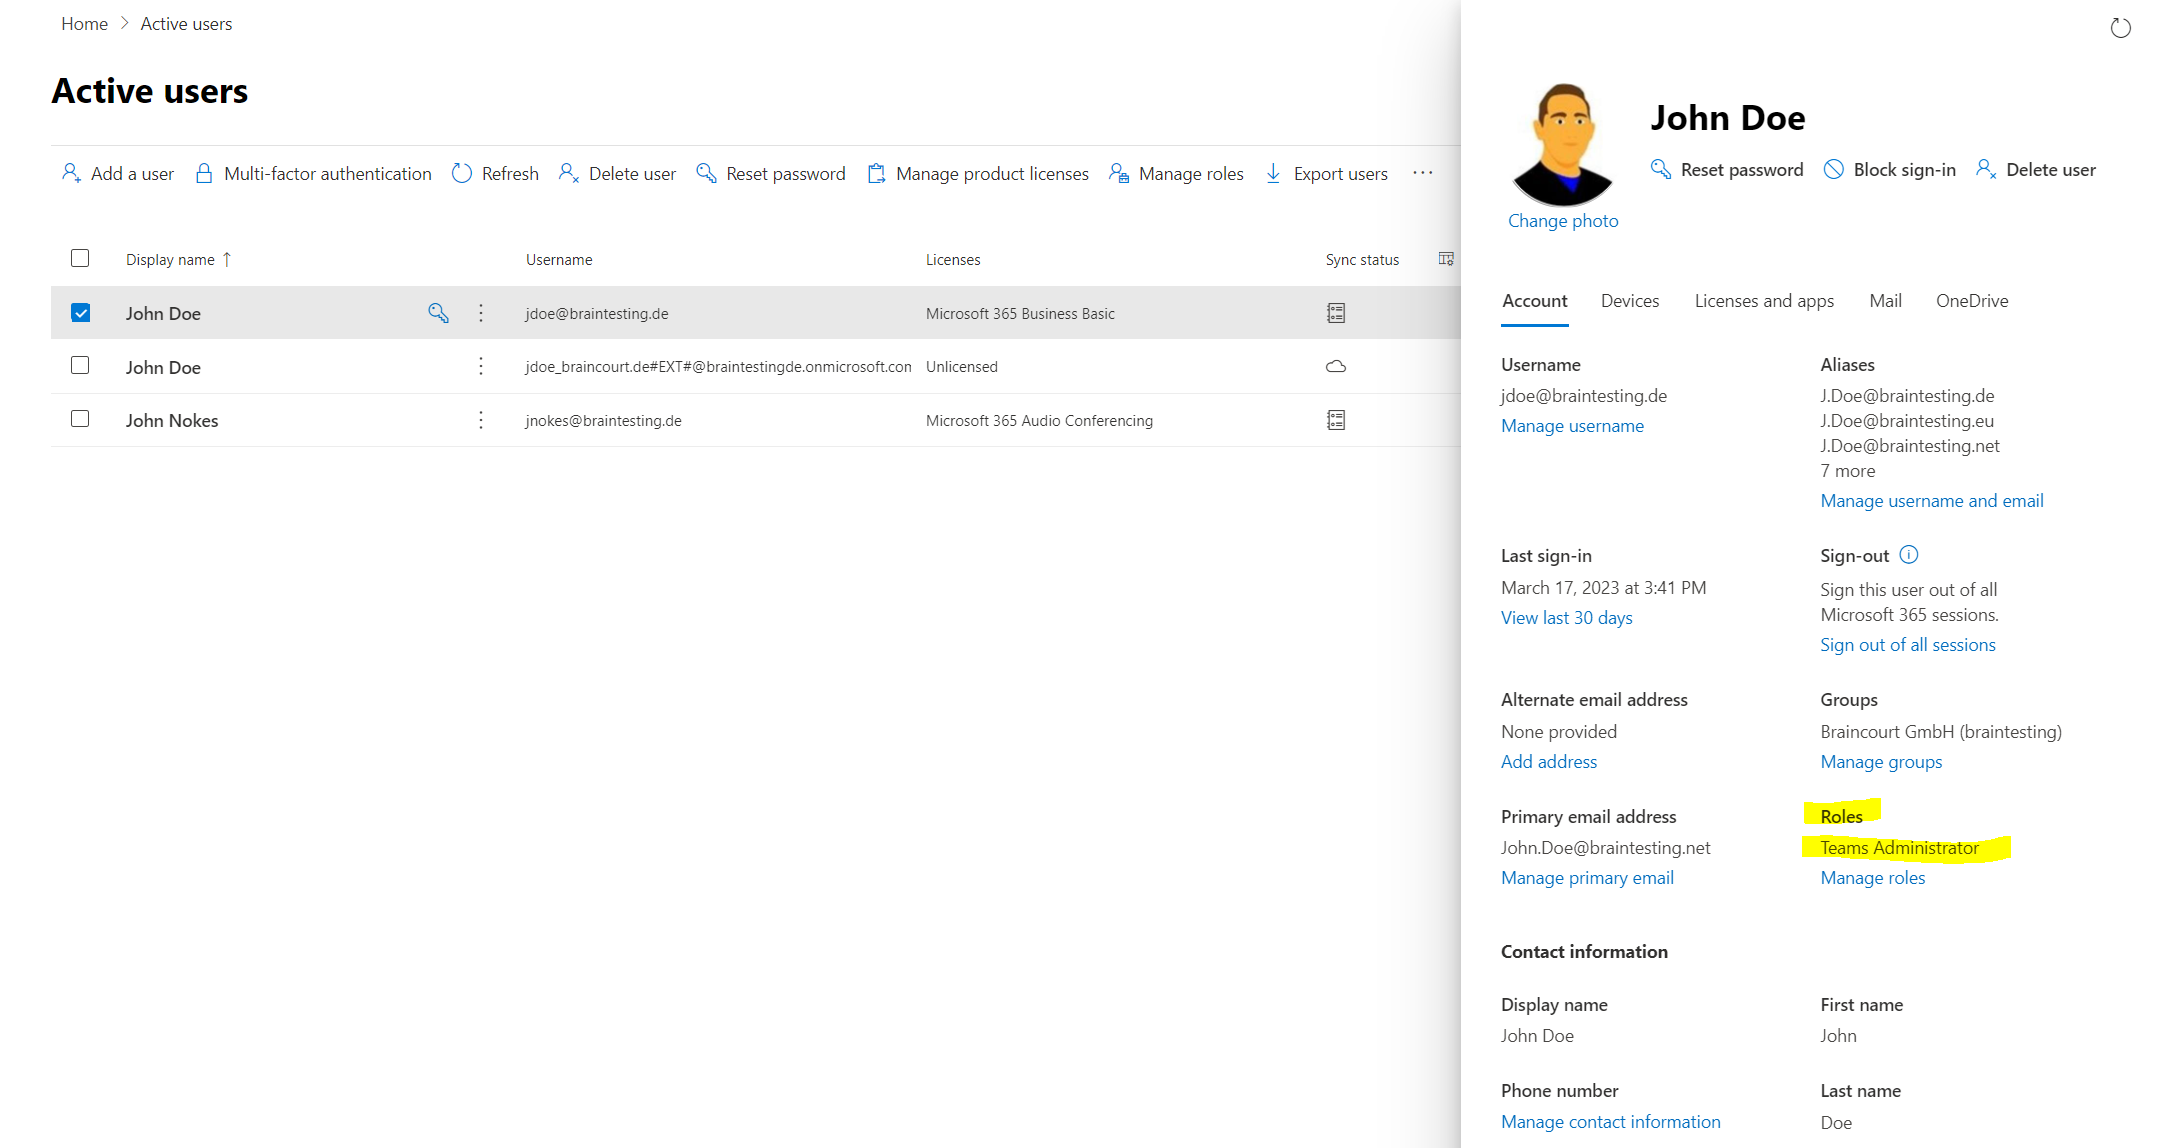
The assigned role you will also see in the Microsoft 365 admin center and Azure Portal under the users menu.
Check Role Assignments and Activations
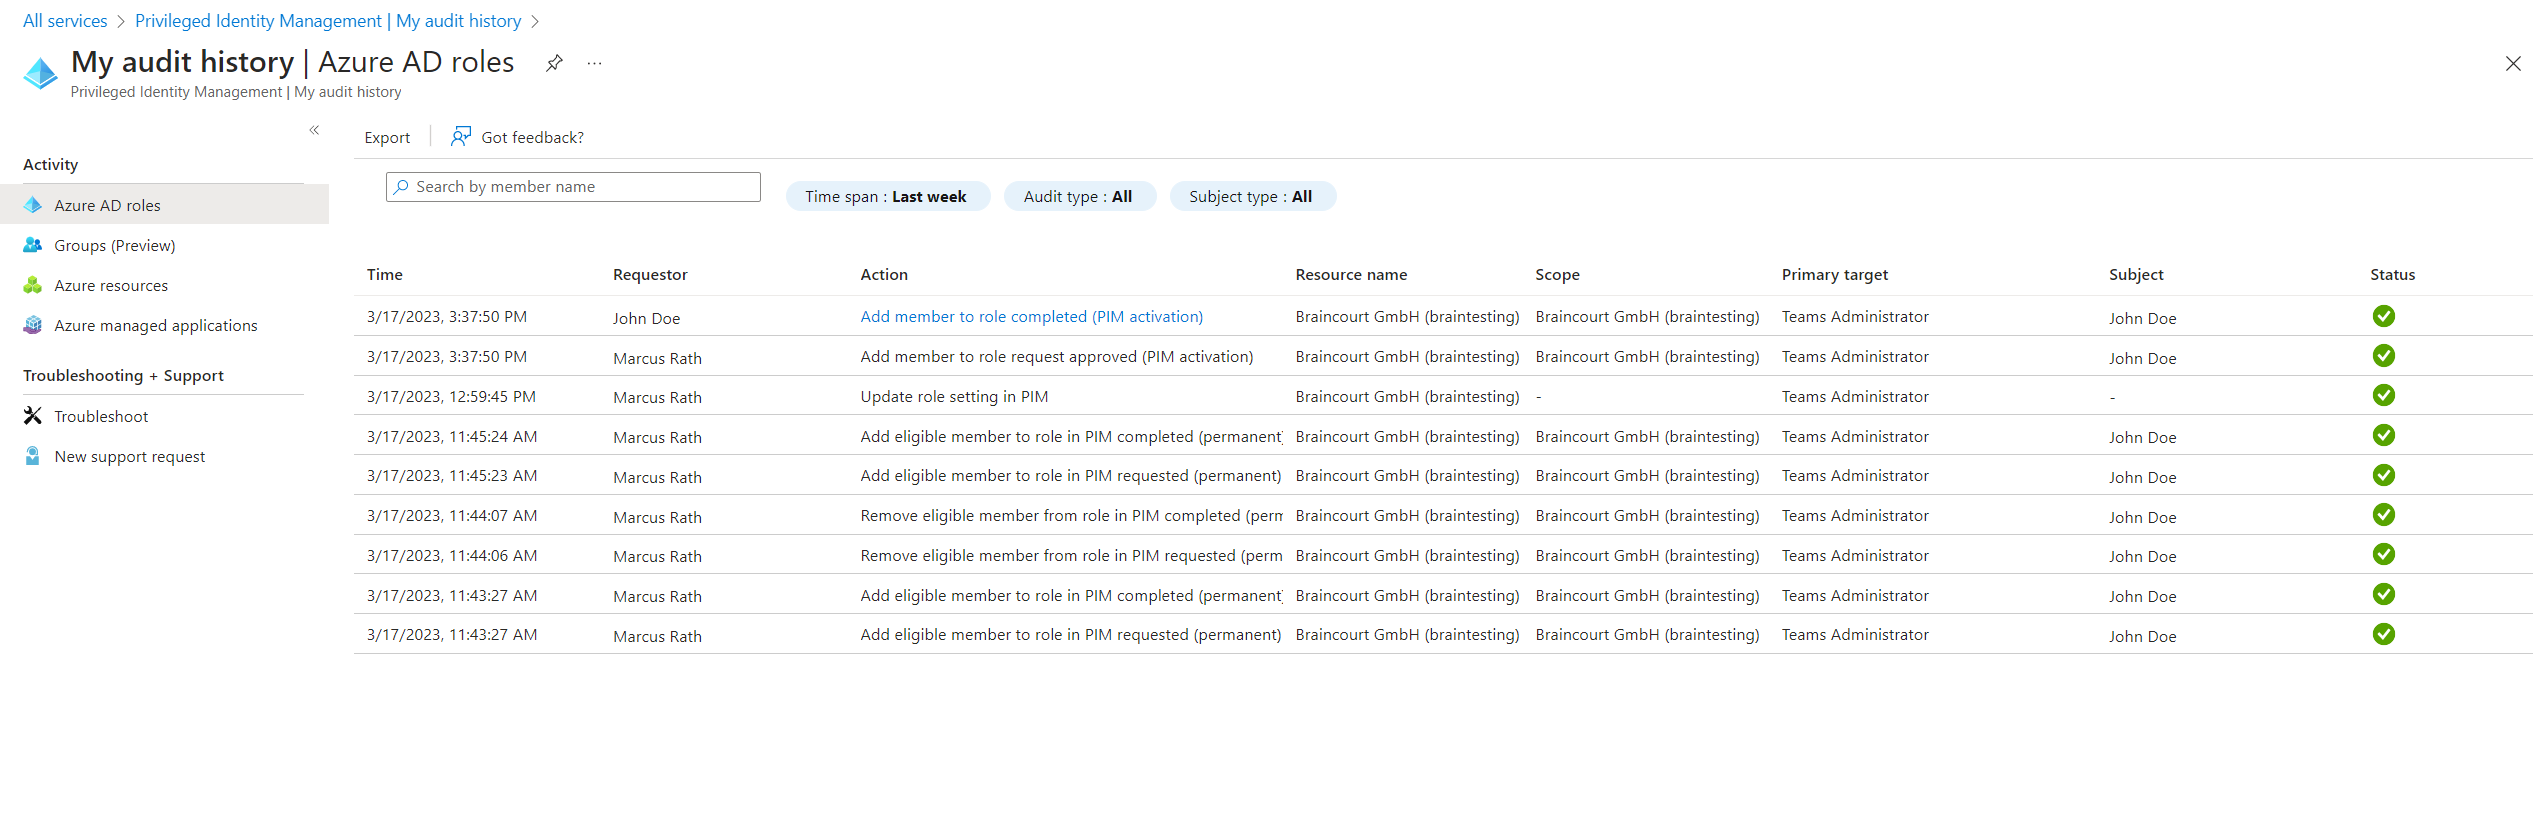
If you want to check which users activated its Azure AD roles and which userst approved the request you can use the My audtit history in Privileged Identity Management (PIM) as shown below.
You can use the Privileged Identity Management (PIM) audit history to see all role assignments and activations within the past 30 days for all privileged roles. If you want to retain audit data for longer than the default retention period, you can use Azure Monitor to route it to an Azure storage account.

Links
What is Azure AD Privileged Identity Management?
https://learn.microsoft.com/en-us/azure/active-directory/privileged-identity-management/pim-configureCreate an access review of Azure resource and Azure AD roles in PIM
https://learn.microsoft.com/en-us/azure/active-directory/privileged-identity-management/pim-create-azure-ad-roles-and-resource-roles-reviewAssign Azure resource roles in Privileged Identity Management
https://learn.microsoft.com/en-us/azure/active-directory/privileged-identity-management/pim-resource-roles-assign-rolesConfigure Azure resource role settings in Privileged Identity Management
https://learn.microsoft.com/en-us/azure/active-directory/privileged-identity-management/pim-resource-roles-configure-role-settingsView audit history for Azure AD roles in Privileged Identity Management
https://learn.microsoft.com/en-us/azure/active-directory/privileged-identity-management/pim-how-to-use-audit-log