Infrastructure as Code (IaC) – Part 6 – Terraform
In this post we will see the basics we need to know to provision resources in Azure by using Terraform. This is well documented by Terraform and Microsoft and I will refer to their articles in this post.
Terraform’s primary function is to create, modify, and destroy infrastructure resources to match the desired state described in a Terraform configuration.
When people refer to running Terraform, they generally mean performing these provisioning actions in order to affect real infrastructure objects. The Terraform binary has many other subcommands for a wide variety of administrative actions, but these basic provisioning tasks are the core of Terraform.
Terraform’s provisioning workflow relies on three commands: plan, apply, and destroy. All of these commands require an initialized working directory, and all of them act only upon the currently selected workspace.
- Prerequisites
- Write the Terraform Configuration (Tutorial by Terraform | Creating a Resource Group in Azure)
- Initialize your Terraform configuration
- Implement the Terraform code (Quickstart by Microsoft | Creating a Windows VM in Azure)
- Create multiple resource instances using Terraform
- Destroy Infrastructure
- Series Summary
- Links
Prerequisites
We first need to install and configure Terraform on a machine we use for the deployment later. I will use a windows machine and Azure PowerShell therefore.
Under the following link you will find all supported shells you can use for.
Quickstart: Install and Configure Terraform
https://learn.microsoft.com/en-us/azure/developer/terraform/quickstart-configure
Install Azure PowerShell
The latest PowerShell module that allows interaction with Azure resources is called the Azure PowerShell Az module. When using the Azure PowerShell Az module, PowerShell 7 (or later) is the recommended version on all platforms. If you have PowerShell installed, you can verify the version by entering the following command at a PowerShell prompt.
$PSVersionTable.PSVersion
Installing PowerShell on Windows
https://learn.microsoft.com/en-us/powershell/scripting/install/installing-powershell-on-windows
For Terraform to authenticate to Azure, you also need to install the Azure CLI.
After the installation you can run the Azure CLI with the az command from either Windows Command Prompt or PowerShell.
To determine the installed version you can just run
az version
# to update use
az upgrade
Install Terraform for Windows
Now we need to download and install Terraform. As mentioned I will use therefore a windows machine. Terraform is also supported on macOS, Linux, FreeBSD, OpenBSD and Solaris.
Install Terraform
https://developer.hashicorp.com/terraform/downloads
I will download here the Windows 386 binary. From the download, extract the executable to a directory of your choosing (for example, c:terraform).
Update your system’s global path to the executable.
Open a terminal window.
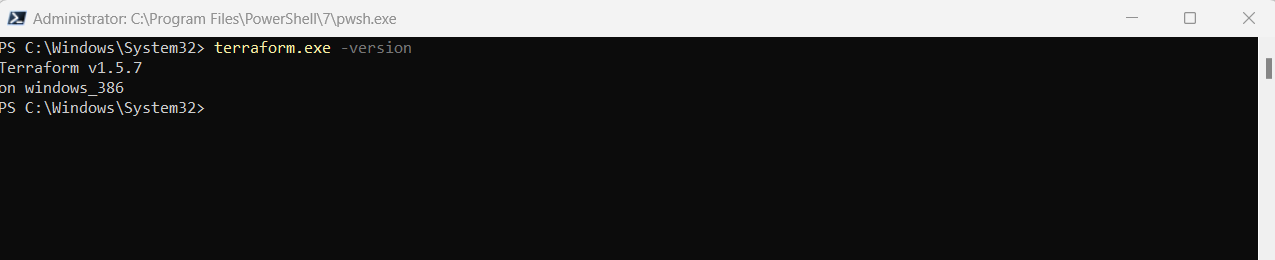
Verify the global path configuration with the terraform command.
terraform -version
Authenticate Terraform to Azure
Terraform only supports authenticating to Azure via the Azure CLI. Authenticating using Azure PowerShell isn’t supported. Therefore, while you can use the Azure PowerShell module when doing your Terraform work, you first need to authenticate to Azure using the Azure CLI.
So first we need to authenticate Terraform to Azure to create infrastructure.
Sign in with Azure CLI
https://learn.microsoft.com/en-us/cli/azure/authenticate-azure-cli
Sign in interactively using Azure CLI
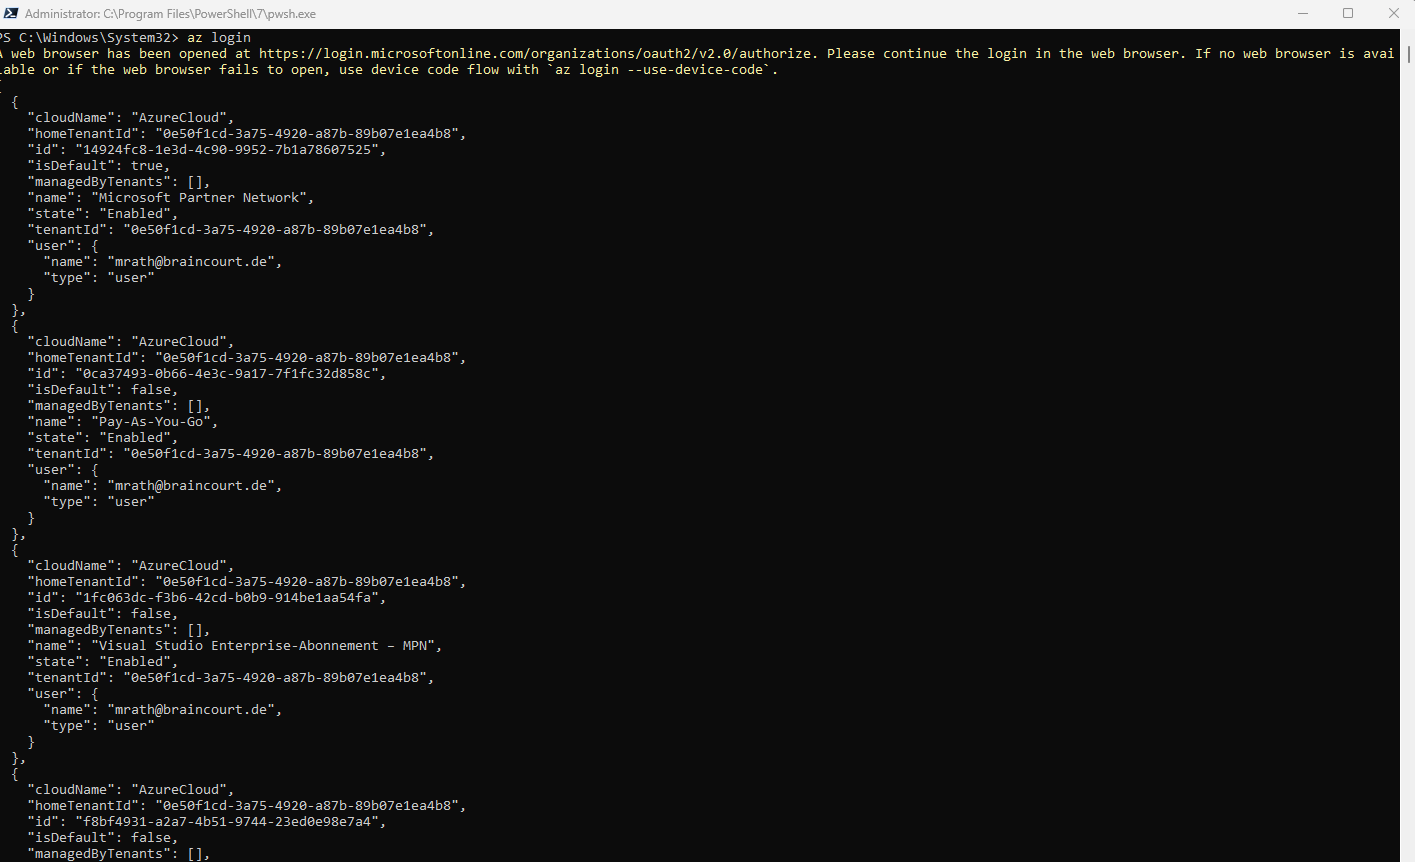
az login

# sign in with a different tenant
az login --tenant <myTenantID>

# sign in as a different user
az login --user <myAlias@myCompany.com> -password <myPassword>

# Azure subscriptions have both a name and an ID. You can switch to a different subscription using az account set specifying the desired subscription ID or name.

# If you change to a subscription that is in a different tenant, you will also be changing the active tenant.

# change the active subscription using the subscription ID
az account set --subscription "xxxxxxxx-xxxx-xxxx-xxxx-xxxxxxxxxxxx"


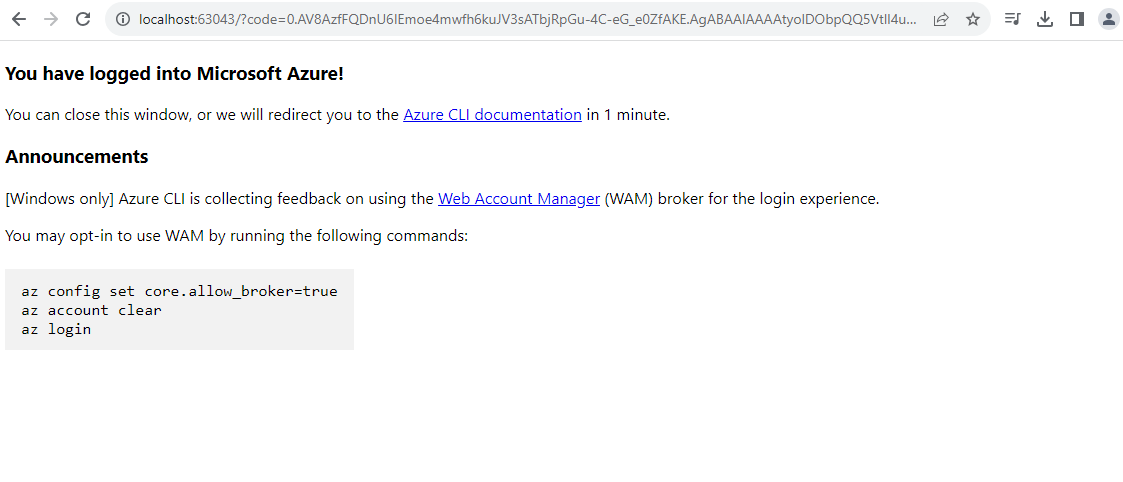
Your browser will open and prompt you to enter your Azure login credentials. After successful authentication, your terminal will display your subscription information.
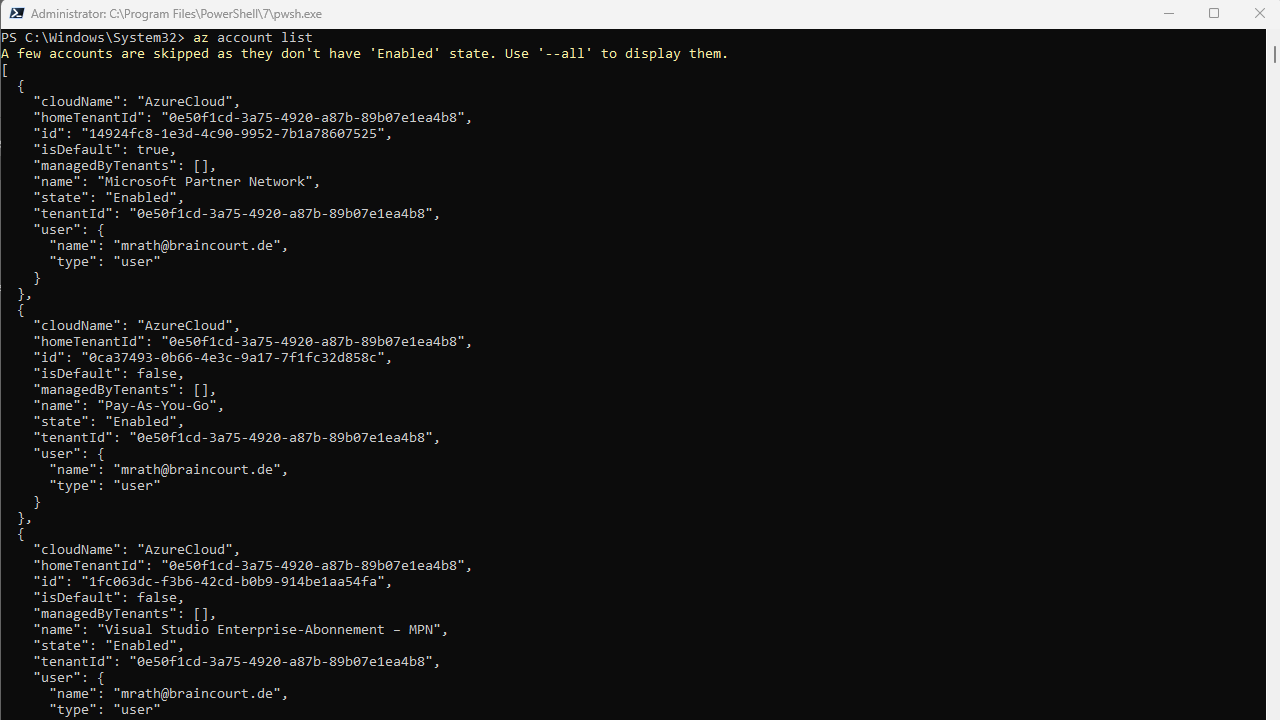
You can also list your subscription information later by using the command below.
az account list
To determine the active subscription and tenant for your session run the command below.
az account show
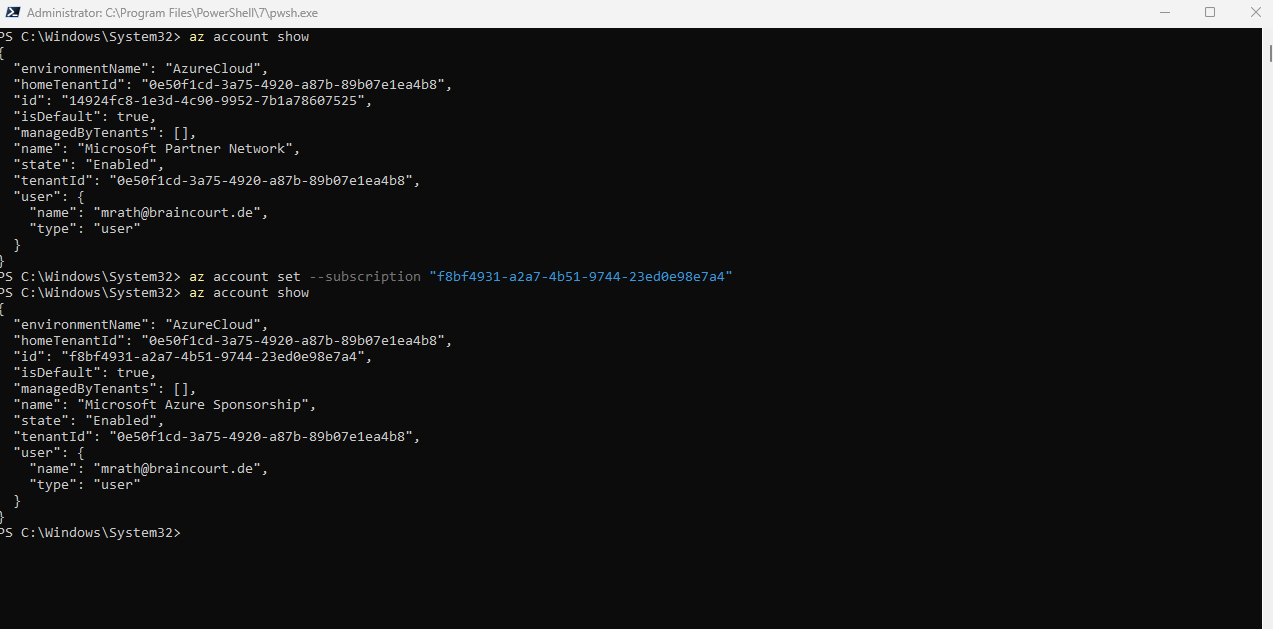
To change the active subscription and tenant for your session run the command below.
az account set --subscription "xxxxxxxx-xxxx-xxxx-xxxx-xxxxxxxxxxxx"
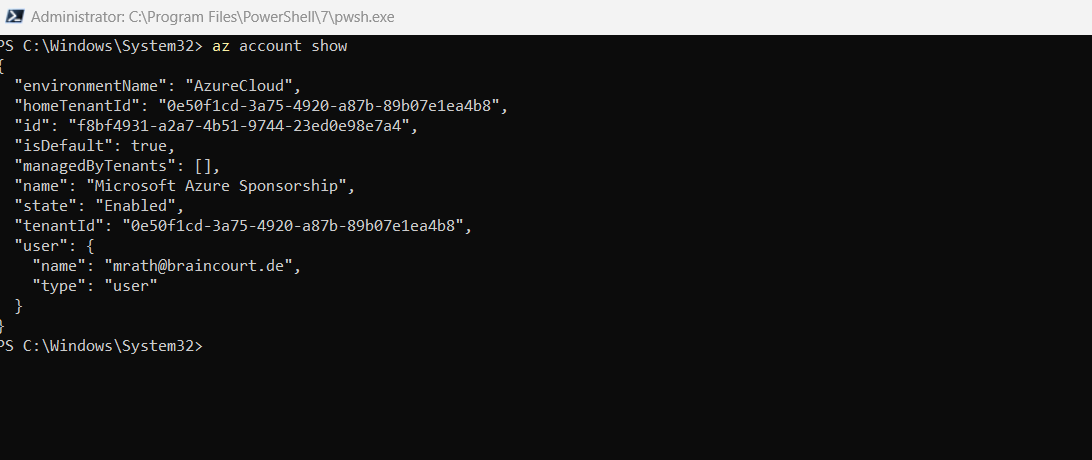
To check if you are still logged in to your Azure tenant you can also run the following command.
az account show
If you are still logged in to your account something like shown below should appear.
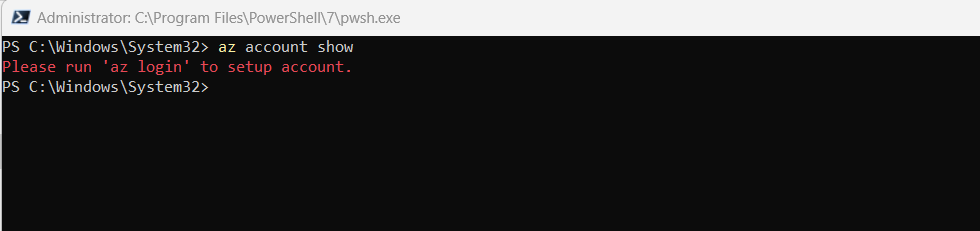
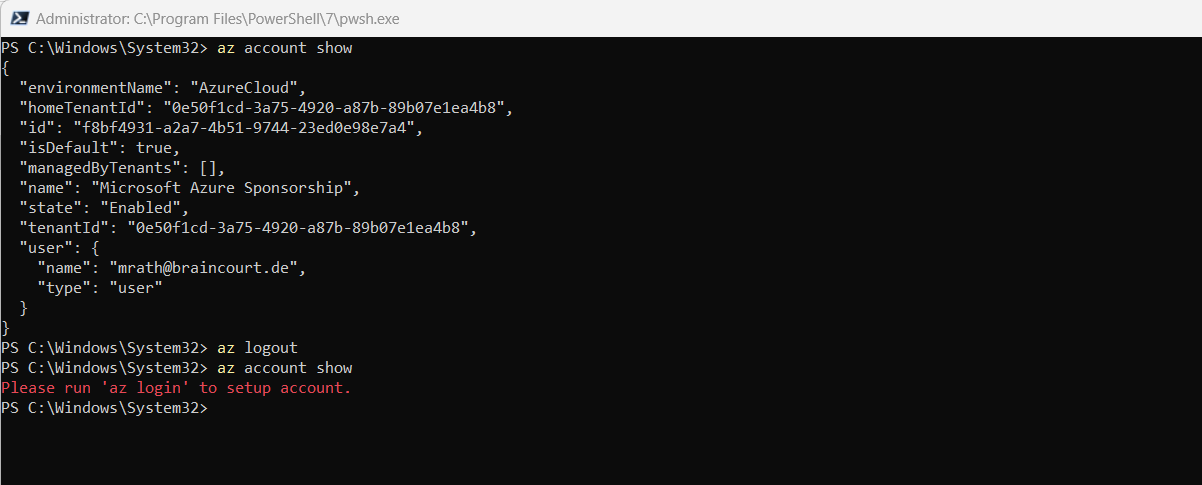
If not you will get the message Please run ‘az login’ to setup account.
To logout from your active account run
az logout
# to logout a specific account use
az logout –username <user@domain.ltd>
More about the Azure Command-Line Interface (CLI) you will find in the following article from Microsoft.
Azure Command-Line Interface (CLI) documentation
https://learn.microsoft.com/en-us/cli/azure/
Create a Service Principal
Service principals are accounts not tied to any particular user, which can have permissions on them assigned through predefined roles. Authenticating with a service principal is the best way to write secure scripts or programs, allowing you to apply both permissions restrictions and locally stored static credential information. To learn more about service principals, see Working with Azure service principals using the Azure CLI.
Source: https://learn.microsoft.com/en-us/cli/azure/authenticate-azure-cli#sign-in-with-a-service-principal
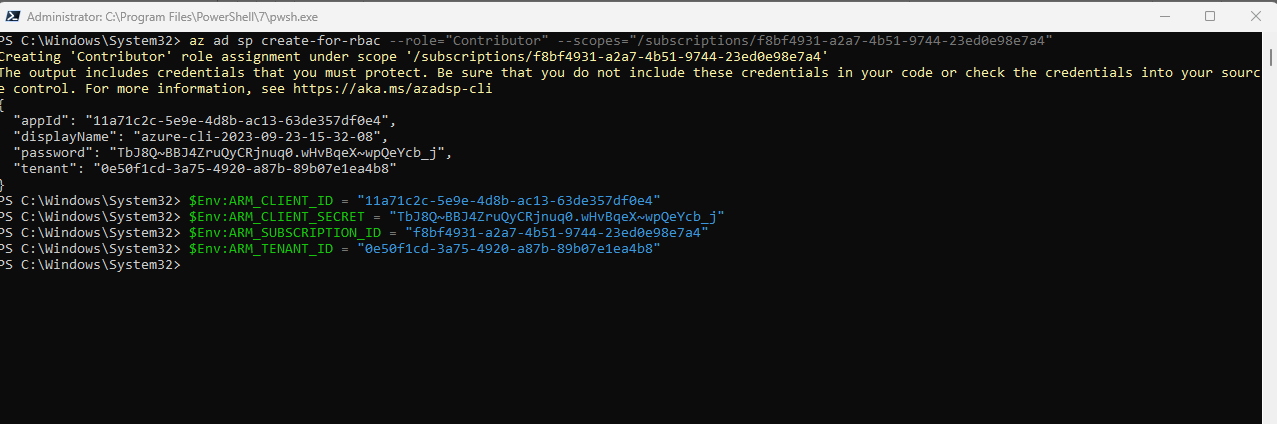
We can now create the Service Principal which will have permissions to manage resources in the specified Subscription using the following command:
az ad sp create-for-rbac --role="Contributor" --scopes="/subscriptions/<SUBSCRIPTION_ID>"

# --display-name --name -n
# Display name of the service principal. If not present, default to azure-cli-%Y-%m-%d-%H-%M-%S where the suffix is the time of creation.
az ad sp create-for-rbac
https://learn.microsoft.com/en-us/cli/azure/ad/sp?view=azure-cli-latest#az-ad-sp-create-for-rbac()
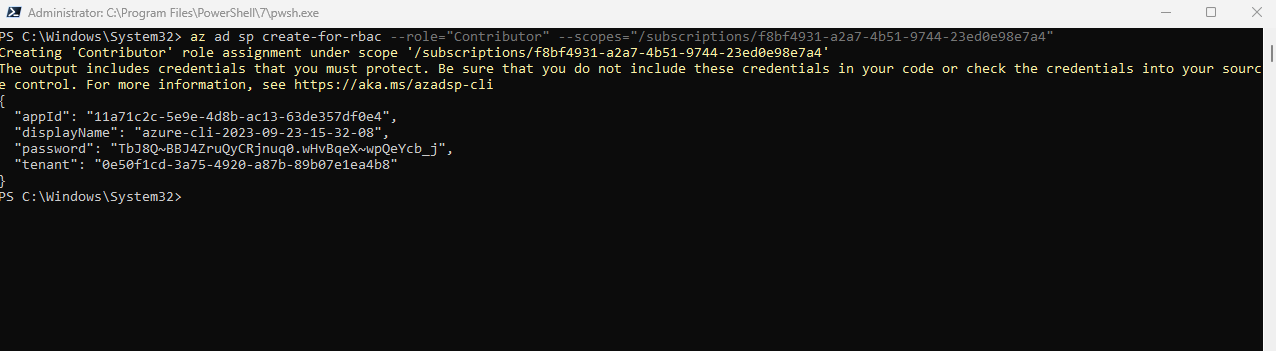
The output includes credentials that you must protect. Be sure that you do not include these credentials in your code or check the credentials into your source control. For more information, see https://aka.ms/azadsp-cli
When you use commond az ad sp create-for-rbac to create a service principal, output for a service principal with password authentication includes the password key. Make sure you copy this value – it can’t be retrieved. If you forget the password, reset the service principal credentials.
A Service Principal is an application within Azure Active Directory whose authentication tokens can be used as the client_id, client_secret, and tenant_id fields needed by Terraform (subscription_id can be independently recovered from your Azure account details).
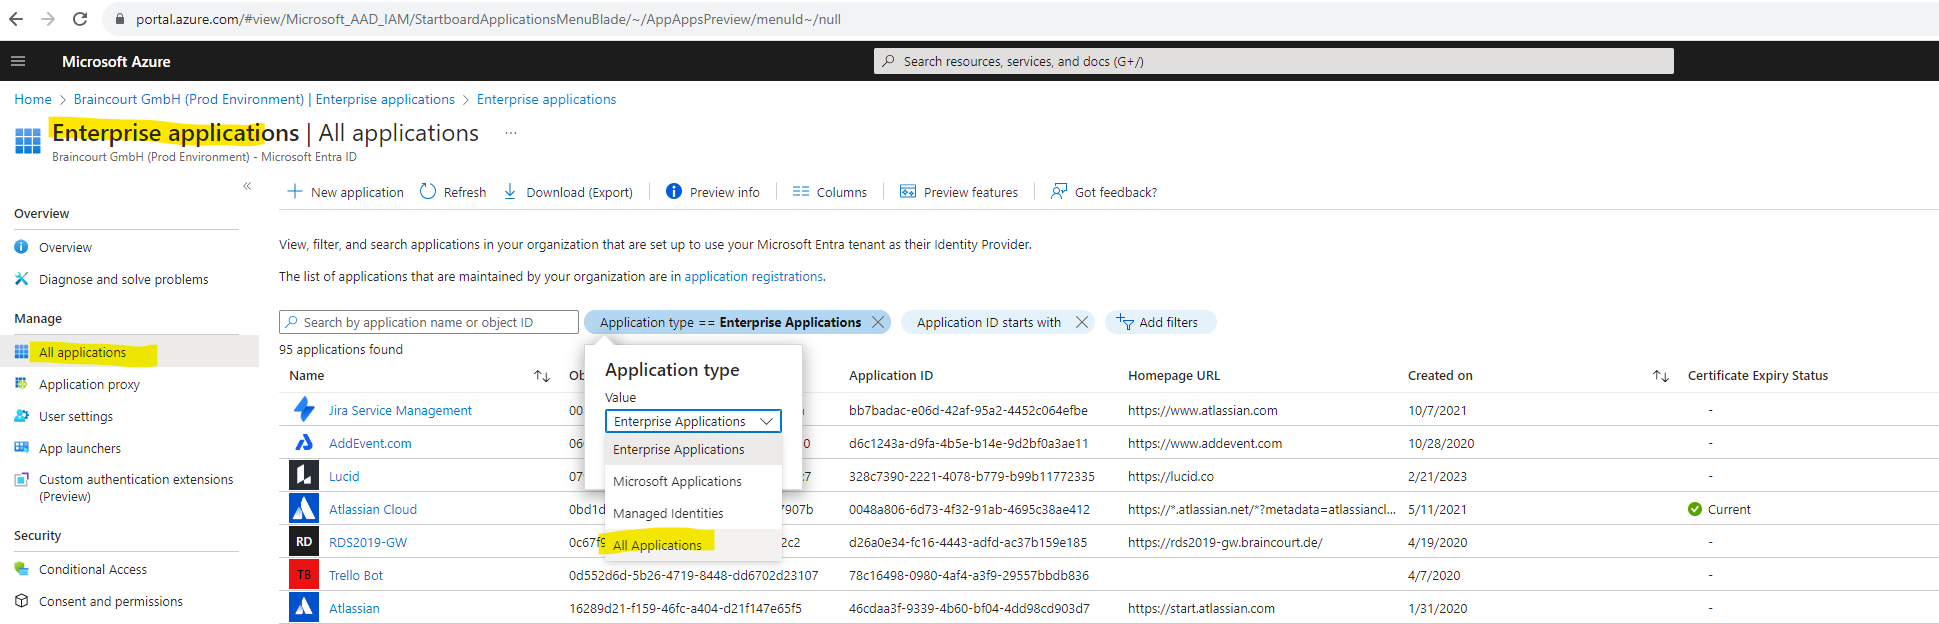
The Service Principal (Application in Azure Active Directory now called Microsoft Entra ID) can be listed within the Enterprise applications blade. Be sure to filter for All Aplications to list them.
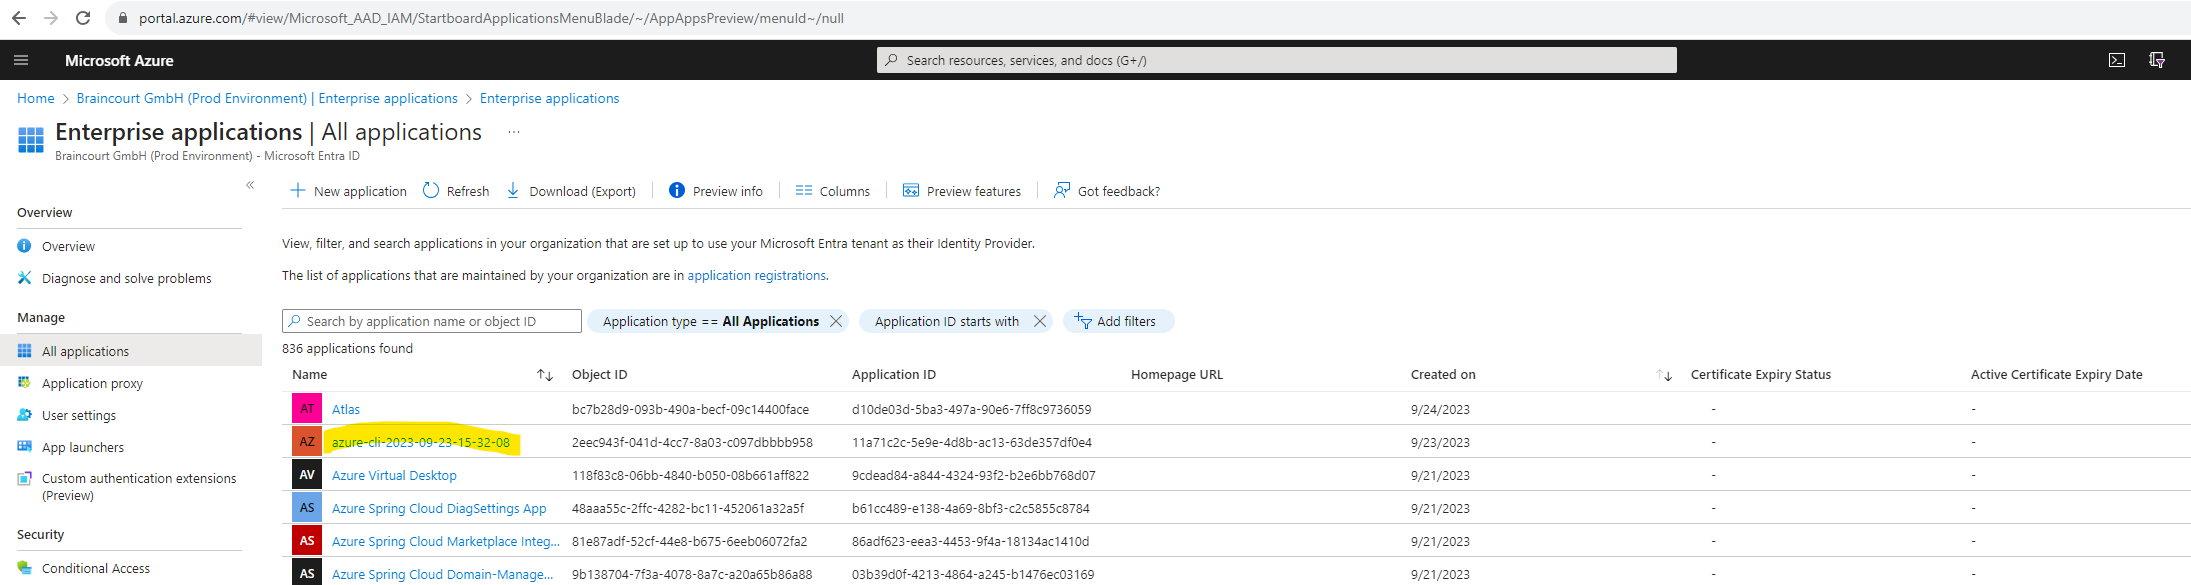
I will click on Created on to search for the latest created applications and to find my previously created service principal.
It is shown up here with the name azure-cli-2023-09-23-15-32-08.
If you not define a name during creation the default name is azure-cli-%Y-%m-%d-%H-%M-%S where the suffix is the time of creation.
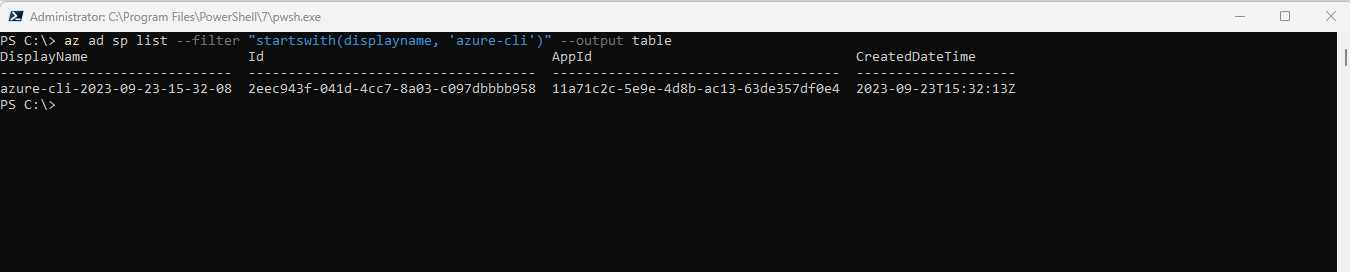
You can also list them by using the Azure Cli and the following commands.
# List service principals
az ad sp list
az ad sp list --display-name mydisplay
az ad sp list --display-name mydisplay --output table

# filter for displayname
az ad sp list --filter "startswith(displayname, 'azure-cli')"
az ad sp list --filter "startswith(displayname, 'azure-cli')" --output table

# Get the details of a service principal. id =>> Application ID
az ad sp show --id 00000000-0000-0000-0000-000000000000
Finally you can test if the service principal works as expected by logging in. First check if you are still logged in and if yes first logout with az logout before testing the service principal.
az logout
az login --service-principal -u CLIENT_ID -p CLIENT_SECRET --tenant TENANT_ID
Once you are logged in as the service principal you should be able to show your account information and other tasks in the tenant dependent on the role you assigned to the service principal.

These values map to the Terraform variables like so:
In case you didn’t noted the password after creation of your service principal, you can reset the credentials like shown below.
az ad sp credential reset --name <Application Name>
az ad sp credential reset --id <Application ID>

We already granted access to the specified subscription our service principal should have to create and manage resources. Here we added the Contributor role which
grants full access to manage all resources, but does not allow you to assign roles in Azure RBAC, manage assignments in Azure Blueprints, or share image galleries.
az ad sp create-for-rbac --role="Contributor" --scopes="/subscriptions/<SUBSCRIPTION_ID>"
You can also grant the service principal (Application) access to manage resources in your Azure Subscription by using the portal.
Once the Application exists in Azure Active Directory – we can grant it permissions to modify resources in the Subscription. To do this, navigate to the Subscriptions blade within the Azure Portal, then select the Subscription you wish to use, then click Access Control (IAM), and finally Add > Add role assignment.
Firstly, specify a Role which grants the appropriate permissions needed for the Service Principal (for example, Contributor will grant Read/Write on all resources in the Subscription). There’s more information about the built in roles available here.
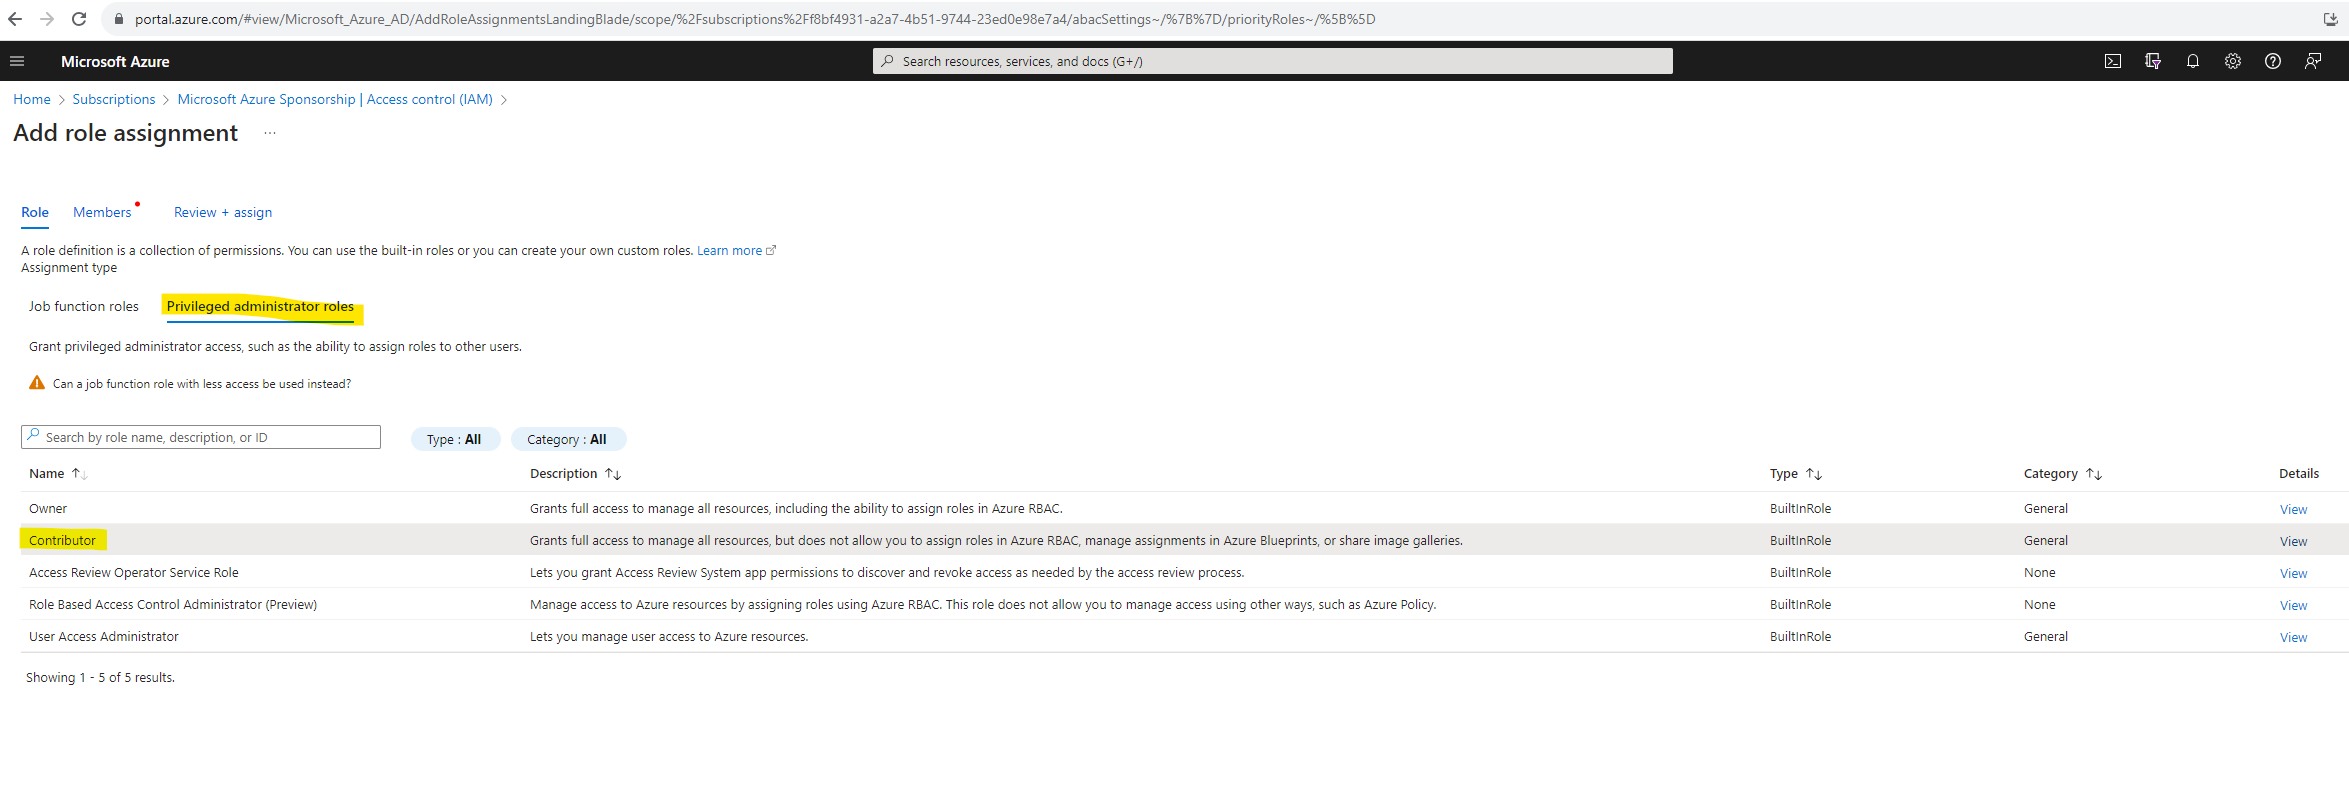
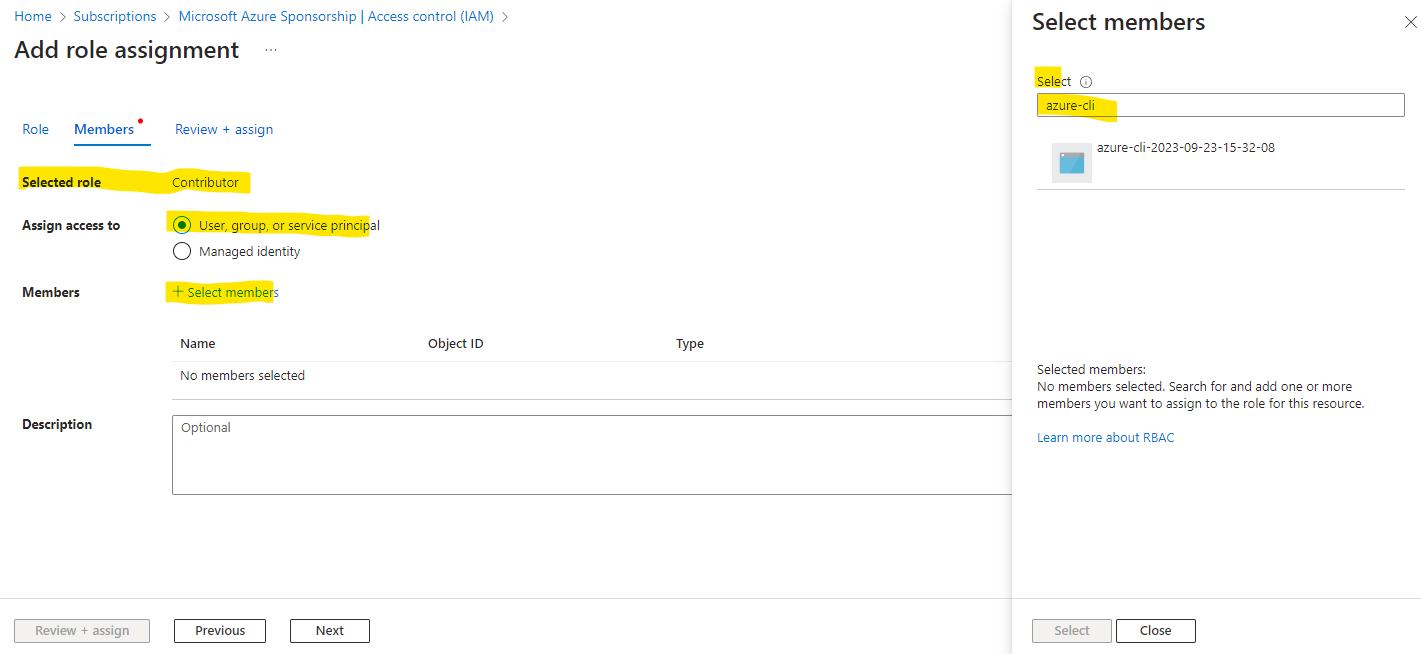
Secondly, search for and select the name of the Service Principal created in Azure Active Directory to assign it this role – then press Save.
More information about Azure Provider: Authenticating using a Service Principal with a Client Secret you will find here https://registry.terraform.io/providers/hashicorp/azurerm/latest/docs/guides/service_principal_client_secret#creating-a-service-principal
For more information on Service Principal authentication, visit the Azure provider documentation.
Set your environment variables
HashiCorp recommends to set the sensitive service principal values as environment variables rather than saving them in your Terraform configuration.
In your PowerShell terminal, set the following environment variables. Be sure to update the variables with the values Azure returned in the previous command when creating the service principal.
$Env:ARM_CLIENT_ID = "<APPID_VALUE>"
$Env:ARM_CLIENT_SECRET = "<PASSWORD_VALUE>"
$Env:ARM_SUBSCRIPTION_ID = "<SUBSCRIPTION_ID>"
$Env:ARM_TENANT_ID = "<TENANT_VALUE>"
At this point running either terraform plan or terraform apply (shown further down) should allow Terraform to run using the Service Principal to authenticate. Terraform will access and use the service principal values by default from the environment variables.
It’s also possible to configure these variables either in-line or from using variables in Terraform (as the client_secret is in this example), like so:
We recommend not defining these variables in-line since they could easily be checked into Source Control.
variable "client_secret" {
}

# We strongly recommend using the required_providers block to set the
# Azure Provider source and version being used
terraform {
  required_providers {
    azurerm = {
      source  = "hashicorp/azurerm"
      version = "=3.0.0"
    }
  }
}

# Configure the Microsoft Azure Provider
provider "azurerm" {
  features {}

  client_id       = "00000000-0000-0000-0000-000000000000"
  client_secret   = var.client_secret
  tenant_id       = "10000000-0000-0000-0000-000000000000"
  subscription_id = "20000000-0000-0000-0000-000000000000"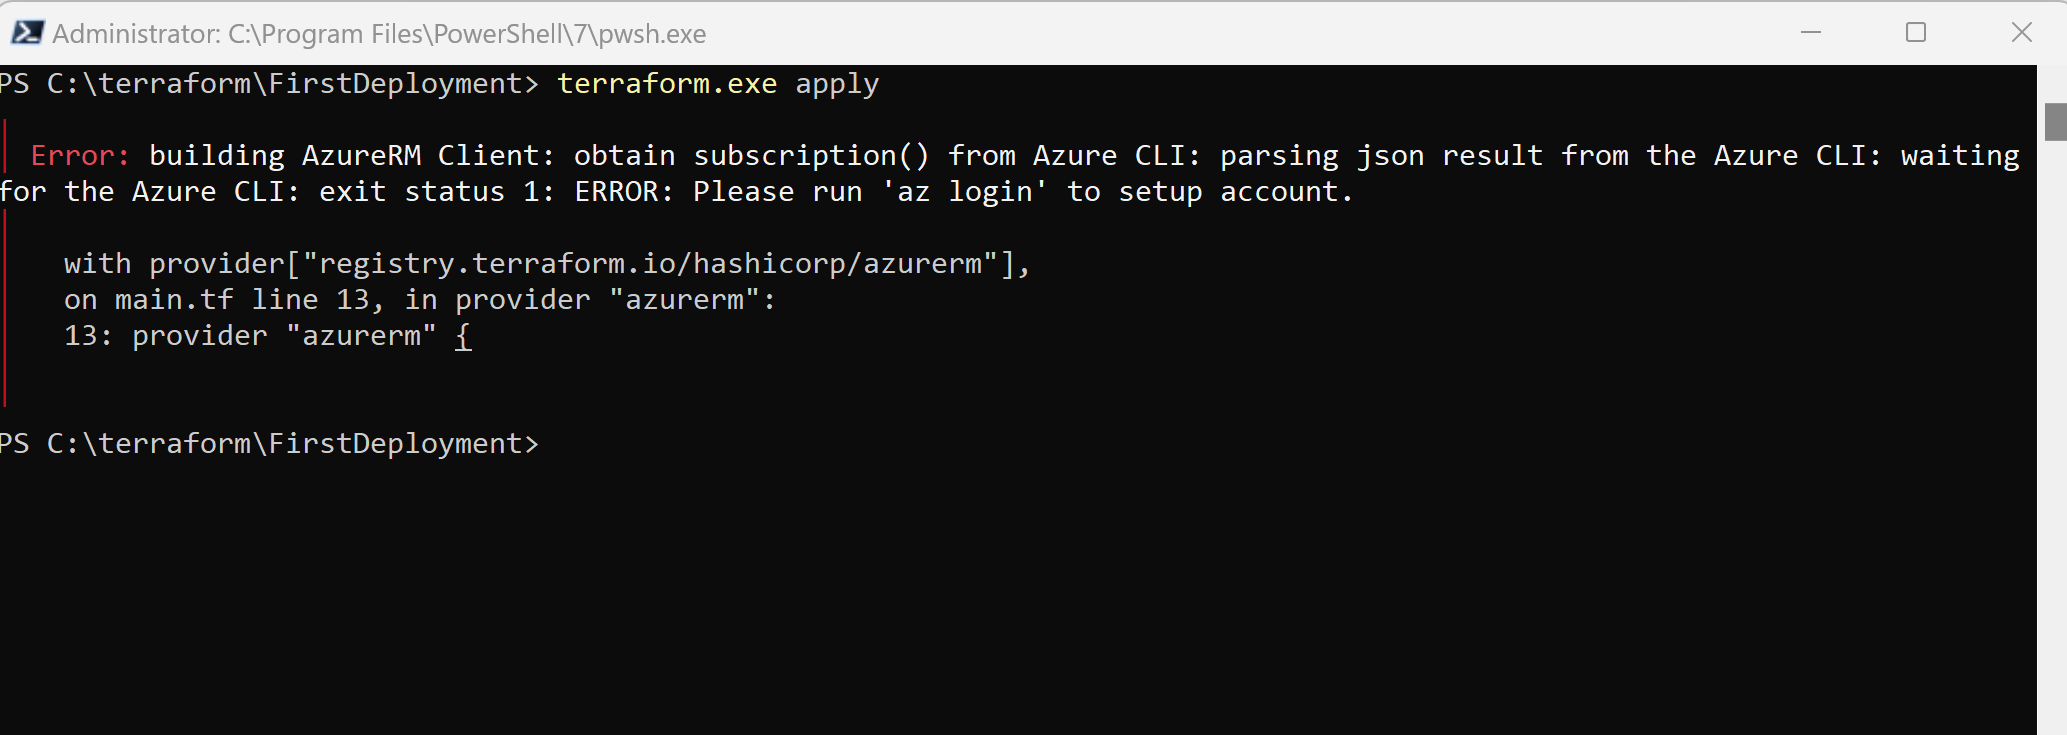
}In case you didn’t provide these variables the one way or other, Terraform of course couldn’t access your Azure tenant/subscription and provision the configuration to Azure.
You will run into the following error when executing the terraform apply command later.
Write the Terraform Configuration (Tutorial by Terraform | Creating a Resource Group in Azure)
First we need to create a dedicated folder on our machine where we want to store the Terraform configuration to create our Azure resources.
I will use therefore my previously created folder where I extracted the Terraform binary C:terraform and create here a subfolder named FirstDeployment.
Within this folder create a new file named main.tf and paste the configuration below.
# Configure the Azure provider
terraform {
  required_providers {
    azurerm = {
      source  = "hashicorp/azurerm"
      version = "~> 3.0.2"
    }
  }

  required_version = ">= 1.1.0"
}

provider "azurerm" {
  features {}
}

resource "azurerm_resource_group" "rg" {
  name     = "TFResourceGroupFirstDeployment"
  location = "westeurope"
}
In order to adjust the location you can use the following article.
List of Azure Regions
https://gist.github.com/ausfestivus/04e55c7d80229069bf3bc75870630ec8
The configuration above is a complete configuration that Terraform can apply and finally will create an Azure resource group.
The configuration includes three different sections, the terraform {} block, provider {} block and finally the resource {} block.
Terraform Block
The terraform {} block contains Terraform settings, including the required providers Terraform will use to provision your infrastructure. For each provider, the source attribute defines an optional hostname, a namespace, and the provider type. Terraform installs providers from the Terraform Registry by default. In this example configuration, the azurerm provider’s source is defined as hashicorp/azurerm, which is shorthand for registry.terraform.io/hashicorp/azurerm.
You can also define a version constraint for each provider in the required_providers block. The version attribute is optional, but we recommend using it to enforce the provider version. Without it, Terraform will always use the latest version of the provider, which may introduce breaking changes.
To learn more, reference the provider source documentation.
Source: https://developer.hashicorp.com/terraform/tutorials/azure-get-started/azure-build#terraform-block
Providers
The provider block configures the specified provider, in this case azurerm. A provider is a plugin that Terraform uses to create and manage your resources. You can define multiple provider blocks in a Terraform configuration to manage resources from different providers.
Source: https://developer.hashicorp.com/terraform/tutorials/azure-get-started/azure-build#providers
Resource
Use resource blocks to define components of your infrastructure. A resource might be a physical component such as a server, or it can be a logical resource such as a Heroku application.
Resource blocks have two strings before the block: the resource type and the resource name. In this example, the resource type is azurerm_resource_group and the name is rg. The prefix of the type maps to the name of the provider. In the example configuration, Terraform manages the azurerm_resource_group resource with the azurerm provider. Together, the resource type and resource name form a unique ID for the resource. For example, the ID for your network is azurerm_resource_group.rg.
Resource blocks contain arguments which you use to configure the resource. The Azure provider documentation documents supported resources and their configuration options, including azurerm_resource_group and its supported arguments.
Source: https://developer.hashicorp.com/terraform/tutorials/azure-get-started/azure-build#resource
Initialize your Terraform configuration
Run terraform init to initialize the Terraform deployment. This command downloads the Azure provider required to manage your Azure resources.
The terraform init command initializes a working directory containing Terraform configuration files. This is the first command that should be run after writing a new Terraform configuration or cloning an existing one from version control. It is safe to run this command multiple times.
Hands-on: Try the Terraform: Get Started tutorials. For more in-depth details on the
initcommand, check out the Initialize Terraform Configuration tutorial.Source: https://developer.hashicorp.com/terraform/cli/commands/init
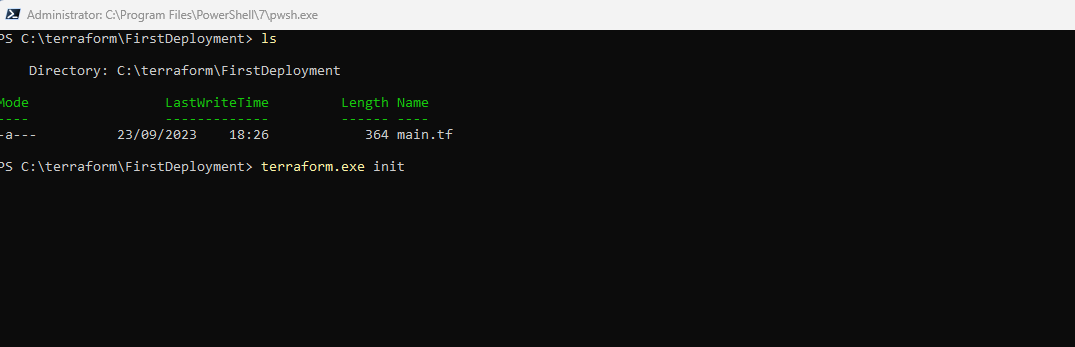
So I will change to my working directory which includes my Terraform configuration files, for this example just the main.tf file.
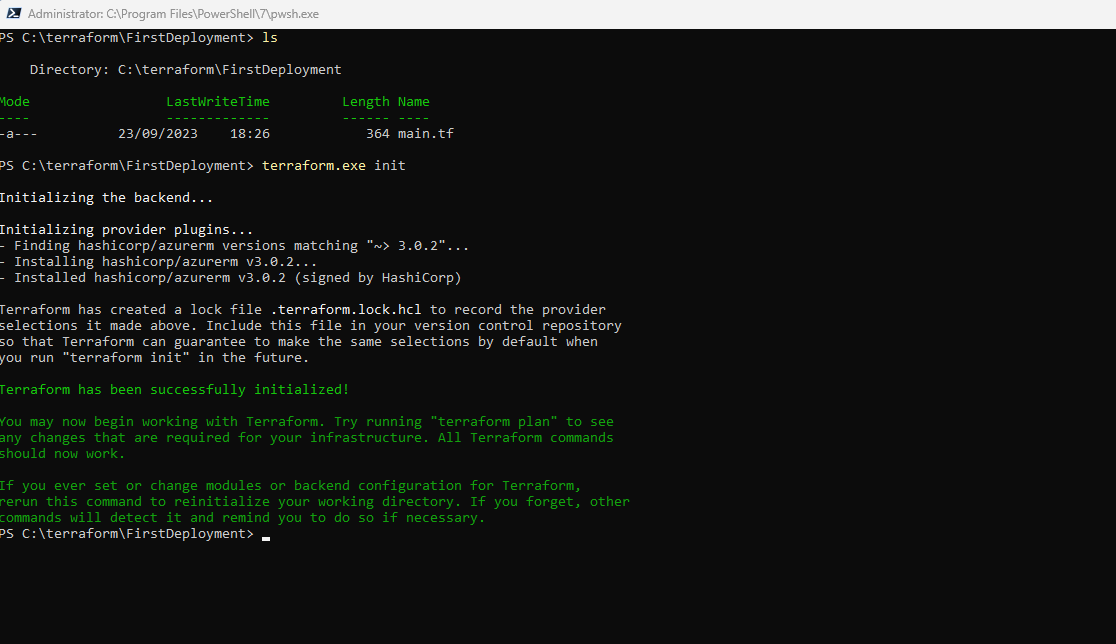
terraform init
This command downloads for our example here the Azure provider required to manage your Azure resources.
This command is always safe to run multiple times, to bring the working directory up to date with changes in the configuration. Though subsequent runs may give errors, this command will never delete your existing configuration or state.
Source: https://developer.hashicorp.com/terraform/cli/commands/init#usage
Format and validate the configuration
We recommend using consistent formatting in all of your configuration files. The terraform fmt command automatically updates configurations in the current directory for readability and consistency.
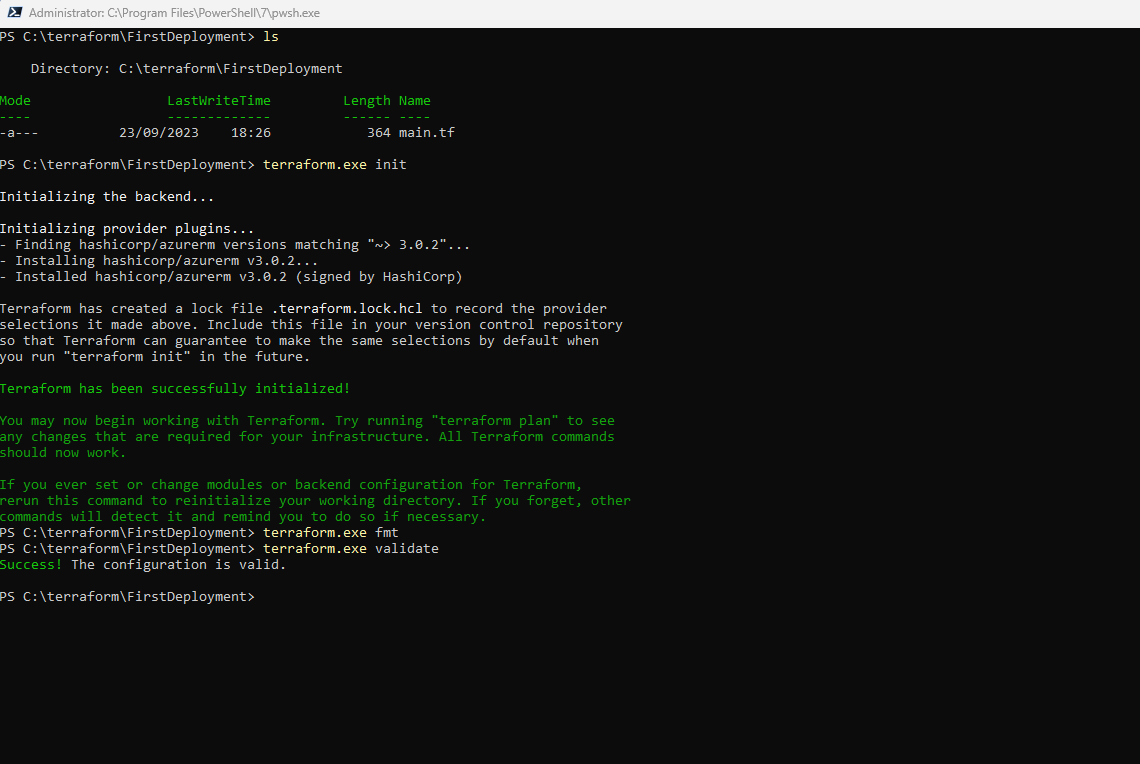
Format your configuration. Terraform will print out the names of the files it modified, if any. In this case, your configuration file was already formatted correctly, so Terraform won’t return any file names.
terraform fmt
You can also make sure your configuration is syntactically valid and internally consistent by using the terraform validate command.
Validate your configuration. The example configuration provided above is valid, so Terraform will return a success message.
terraform validate
Create a Terraform execution plan (optional)
To create an execution plan by using the terraform plan command is optional and not necessary to deploy resources. The terraform apply command will by default create an execution plan as output on the console and prompt you for approval before making the changes.
You will use and applying a saved execution plan normally in an automated Terraform pipeline to ensure the changes which will make to your infrastructure are the ones expected and scoped by the execution plan, even if your pipeline runs accross multiple machines.
In order to determine which changes it will make to your infrastructure, Terraform generates an execution plan. To do so, Terraform reconciles your Terraform configuration with the real-world infrastructure tracked in that workspace’s state file, and creates a list of resources to create, modify, or destroy. The plan command supports multiple flags that let you modify its behavior which allows you to be flexible in your operations. For example, you can target specific resources rather than your entire configuration, or run refresh-only plans that reconcile your state file with the actual configuration of the resources it tracks.
Source: https://developer.hashicorp.com/terraform/tutorials/cli/plan
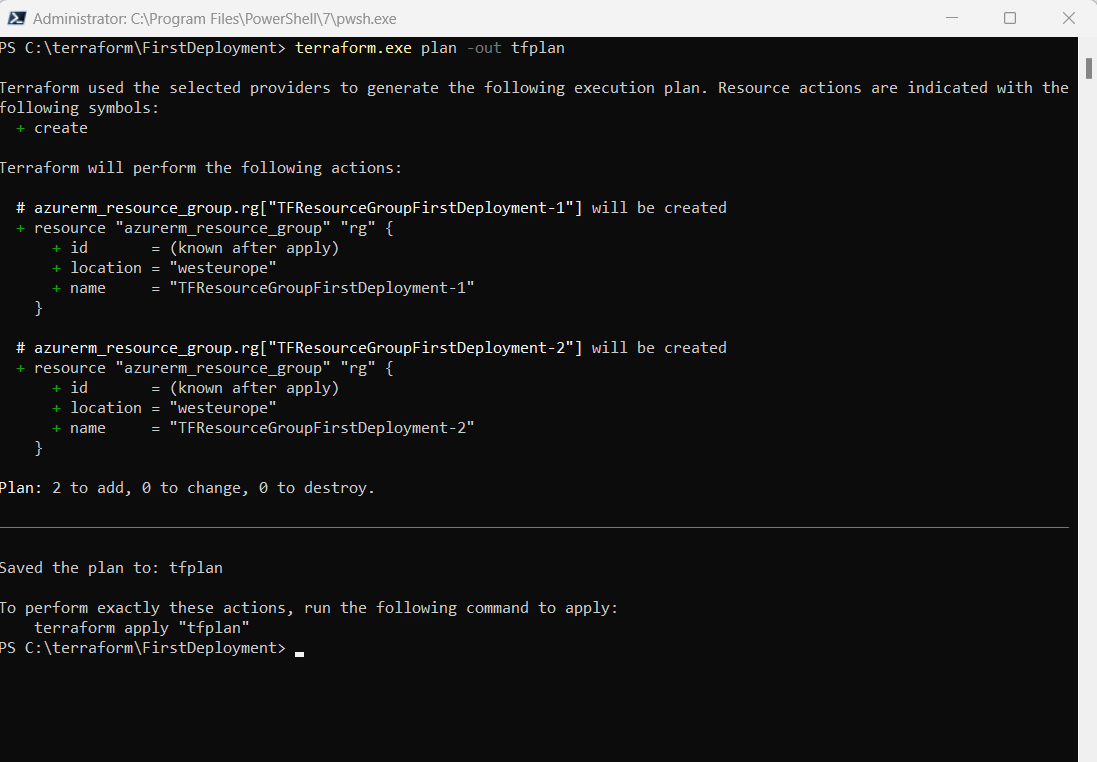
Generate a saved plan with the -out flag.
terraform.exe plan -out tfplan
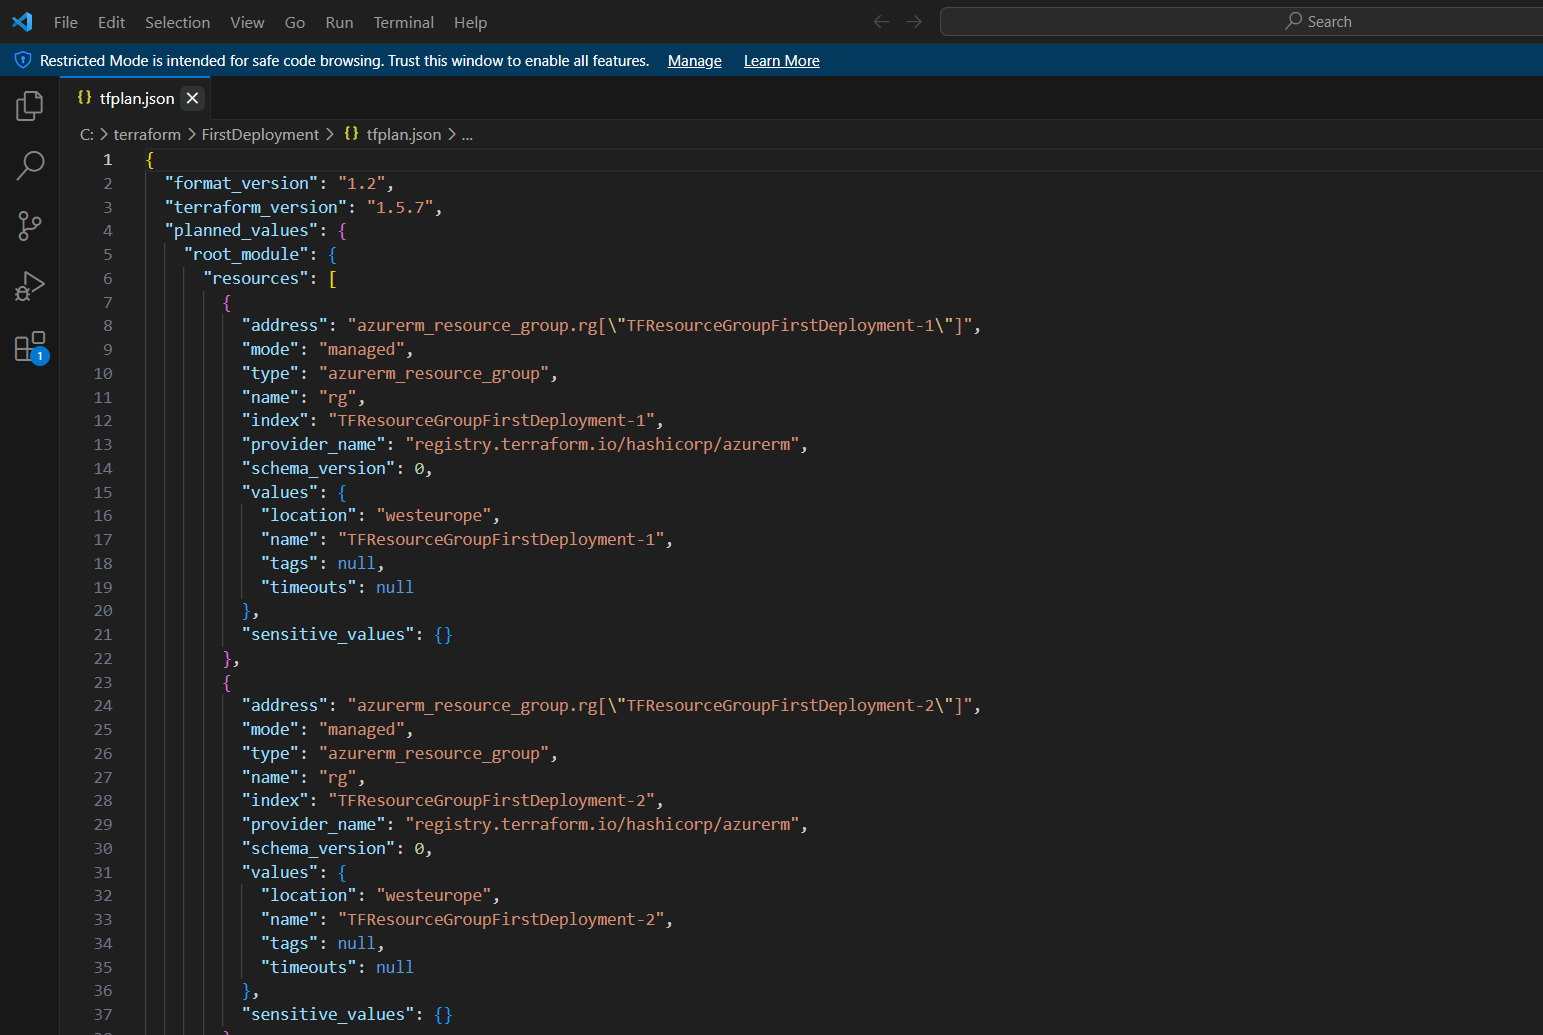
You can apply the saved plan file to execute these changes, but the contents are not in a human-readable format. Use the terraform show -json command to convert the plan contents into JSON, then pass it terraform show -json tfplan | jq > tfplan.json to jq to format it and save the output into a new file.
terraform show -json tfplan | jq > tfplan.json
!! Note !!
Terraform plan files can contain sensitive data. Never commit a plan file to version control, whether as a binary or in JSON format.
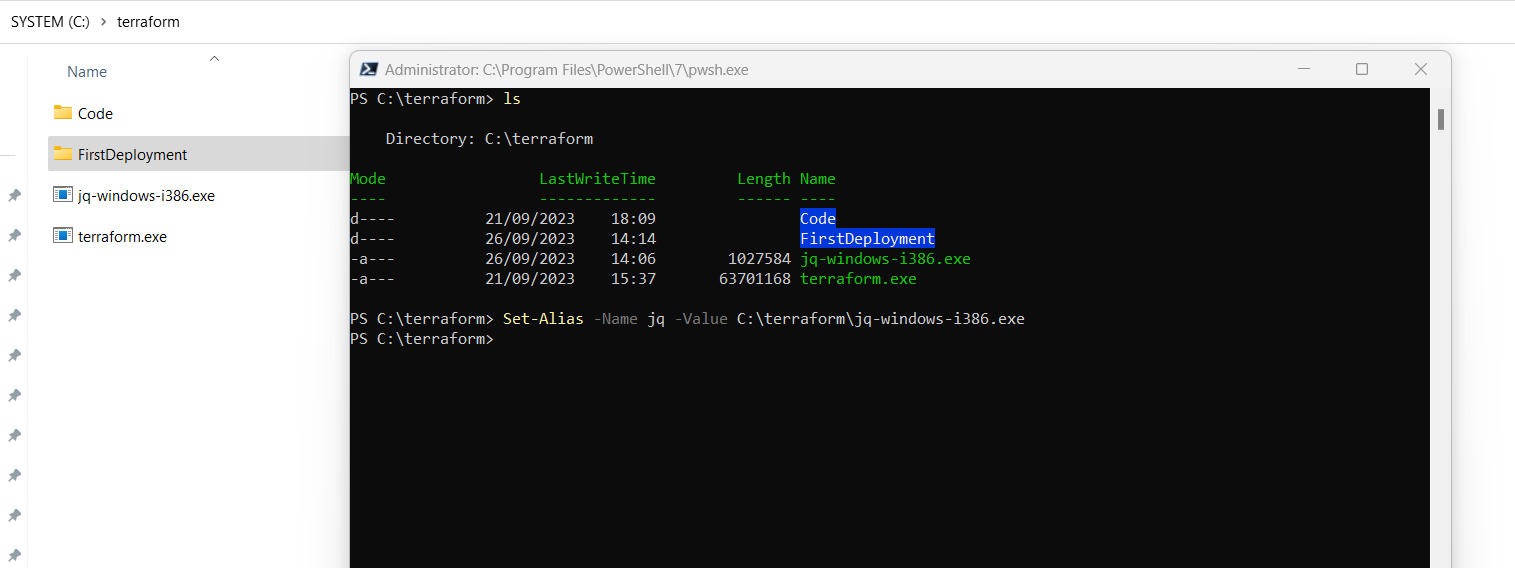
In order to use the jq binary on Windows we first need to download it and set an alias as shown below.
Download jq for Windows
https://jqlang.github.io/jq/download/# Set alias for the jq binary
Set-Alias -Name jq -Value C:terraformjq-windows-i386.exe
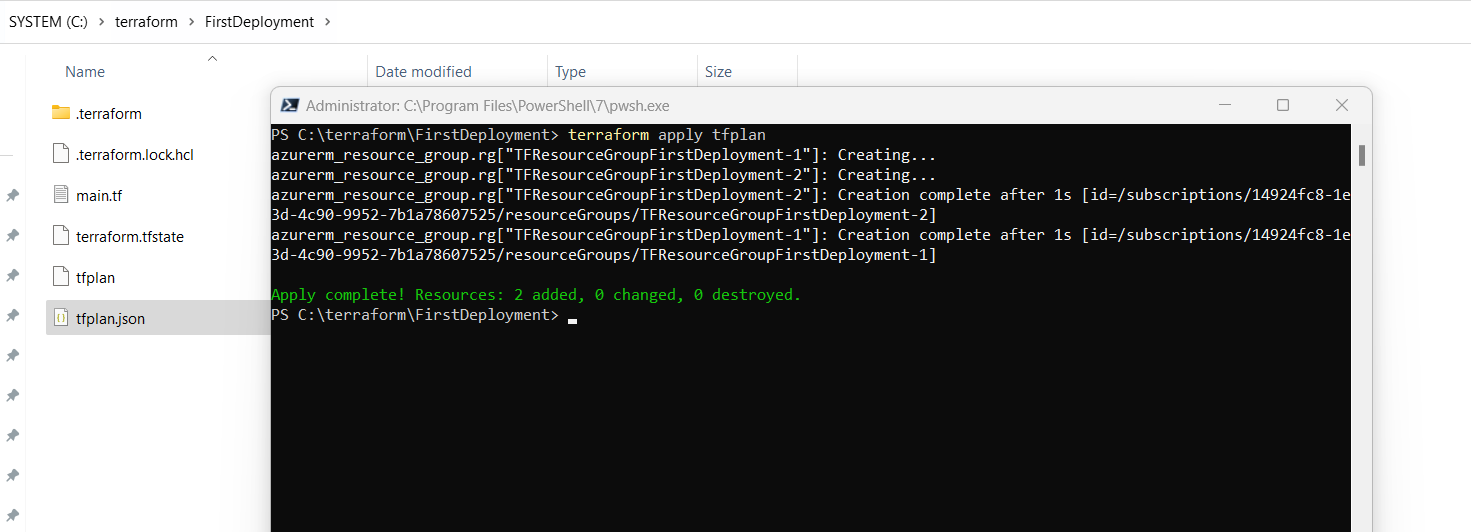
Finally to apply a saved plan you can execute
terraform apply tfplan
When you apply a saved plan file, Terraform will not prompt you for approval and instead immediately execute the changes, since this workflow is primarily used in automation.
More under the following link https://developer.hashicorp.com/terraform/tutorials/cli/plan
Apply your Terraform Configuration
Run the terraform apply command to apply your configuration.
This output shows the execution plan and will prompt you for approval before proceeding. If anything in the plan seems incorrect or dangerous, it is safe to abort here with no changes made to your infrastructure. Type yes at the confirmation prompt to proceed.
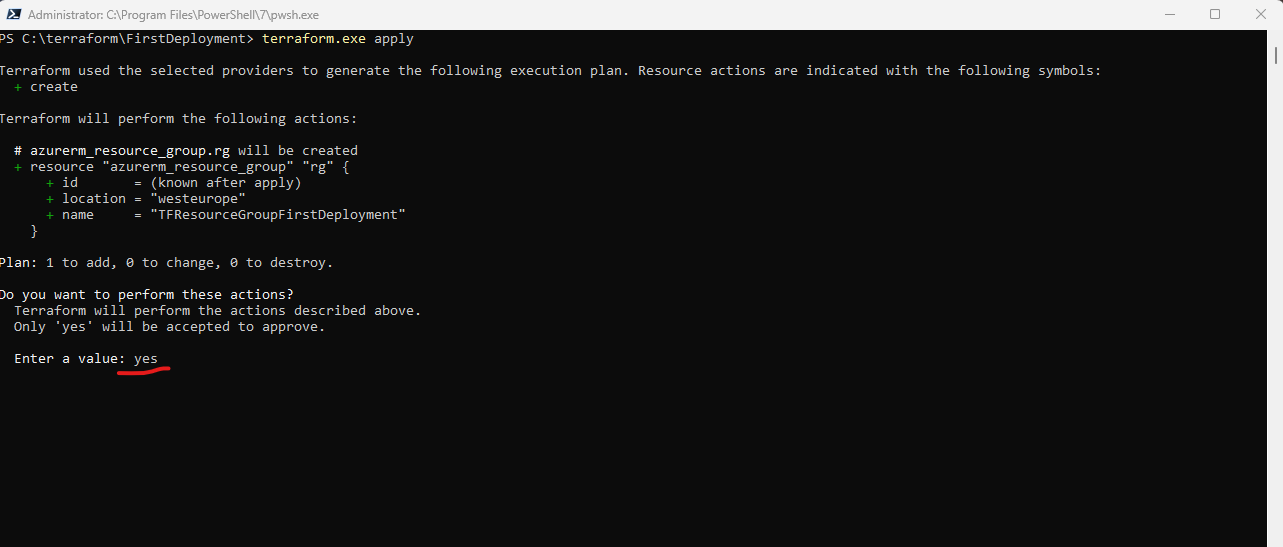
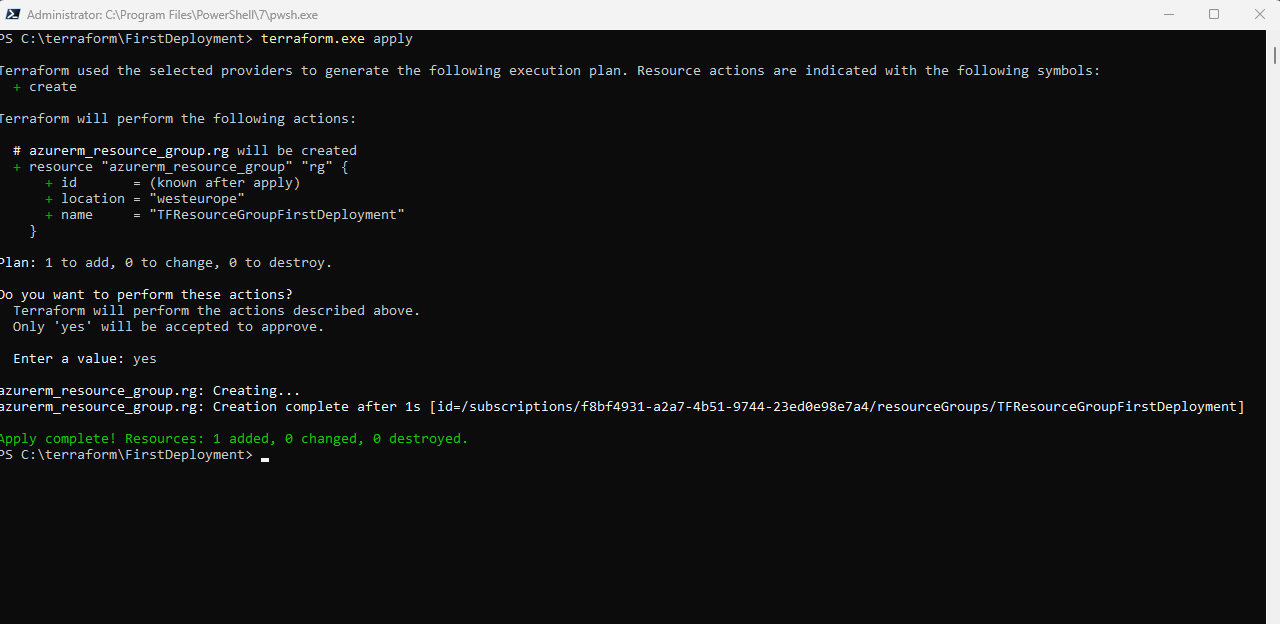
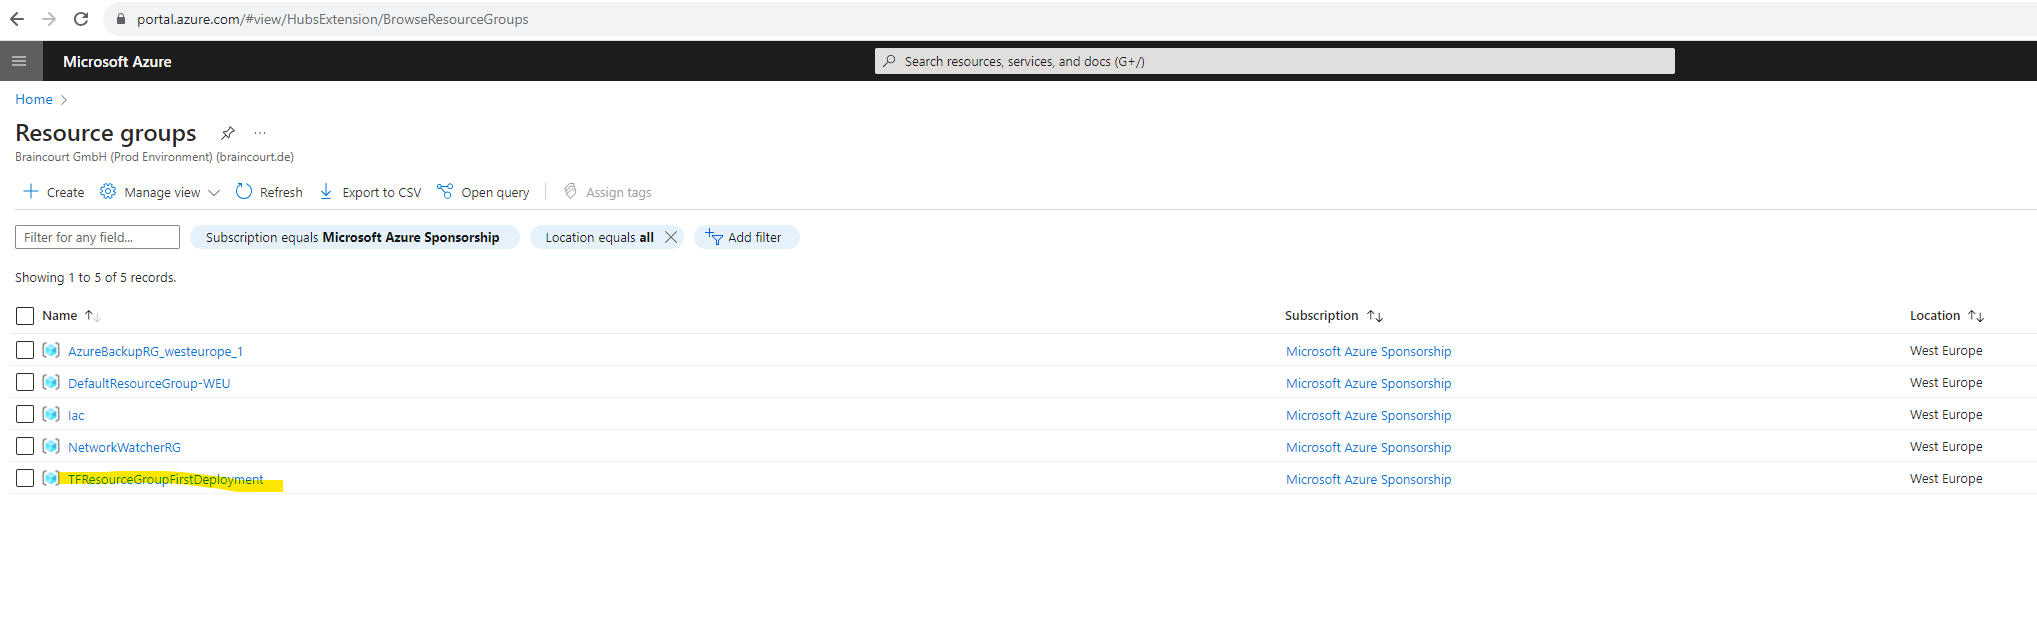
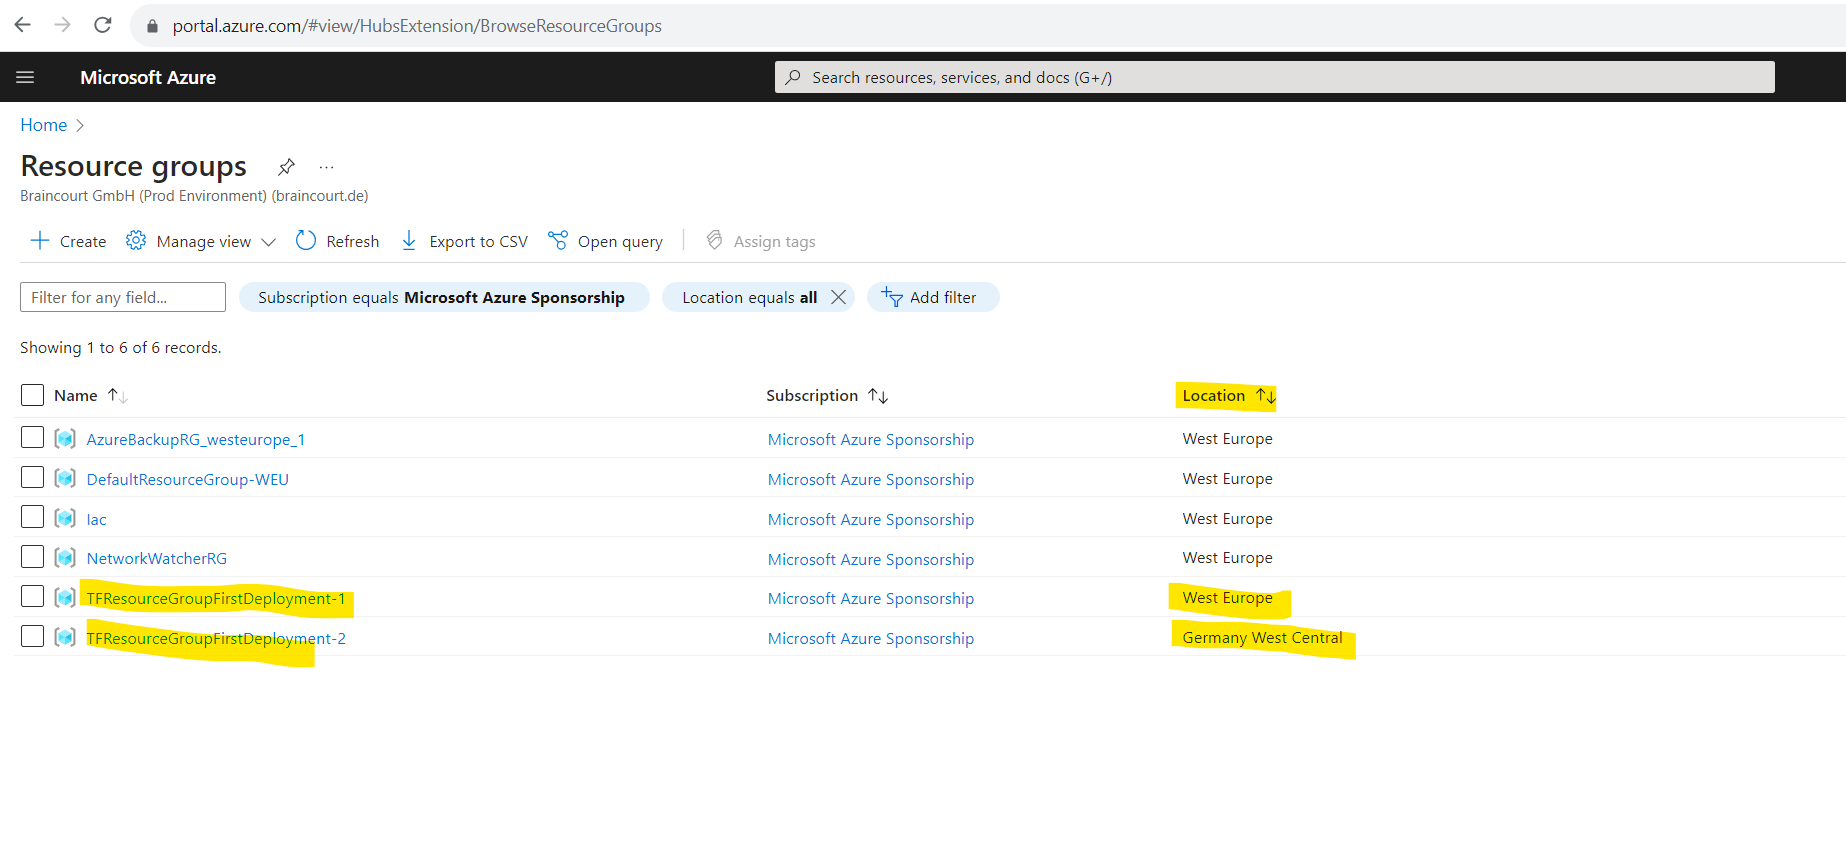
My new resource group was successfully created by Terraform.
Inspect your state
When you apply your configuration, Terraform writes data into a file called terraform.tfstate.
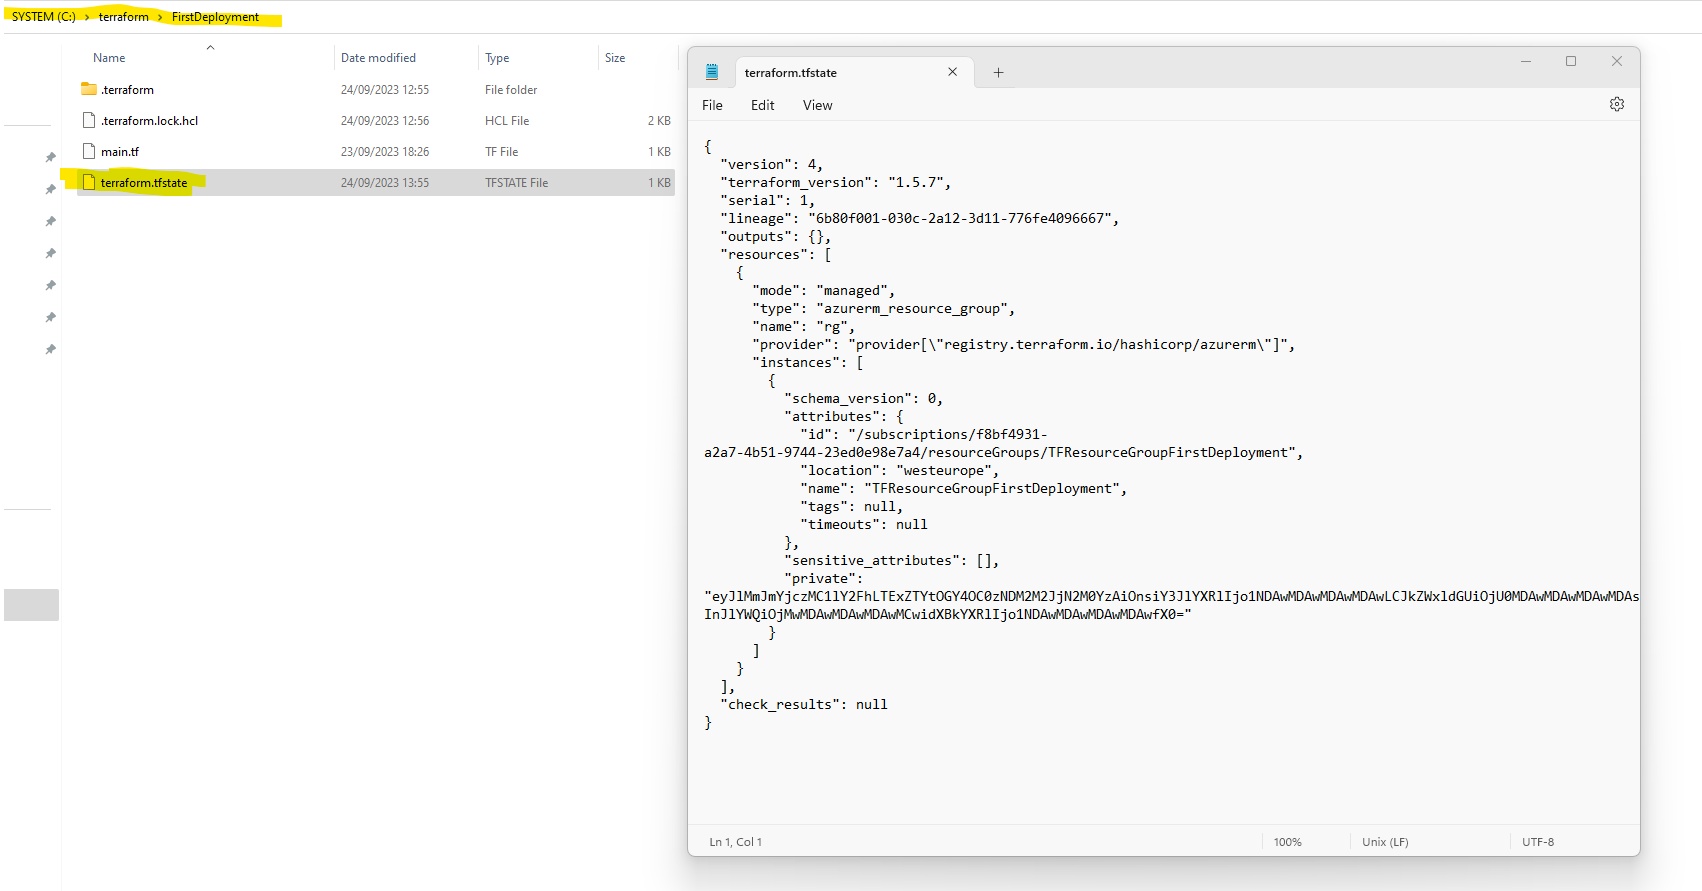
This file contains the IDs and properties of the resources Terraform created so that it can manage or destroy those resources going forward. Your state file contains all of the data in your configuration and could also contain sensitive values in plaintext, so do not share it or check it in to source control.
For teams or larger projects, consider storing your state remotely. Remote stage storage enables collaboration using Terraform but is beyond the scope of this tutorial.
Inspect the current state using terraform show.

When Terraform created this resource group, it also gathered the resource’s properties and meta-data. These values can be referenced to configure other resources or outputs, which you will encounter in later tutorials.
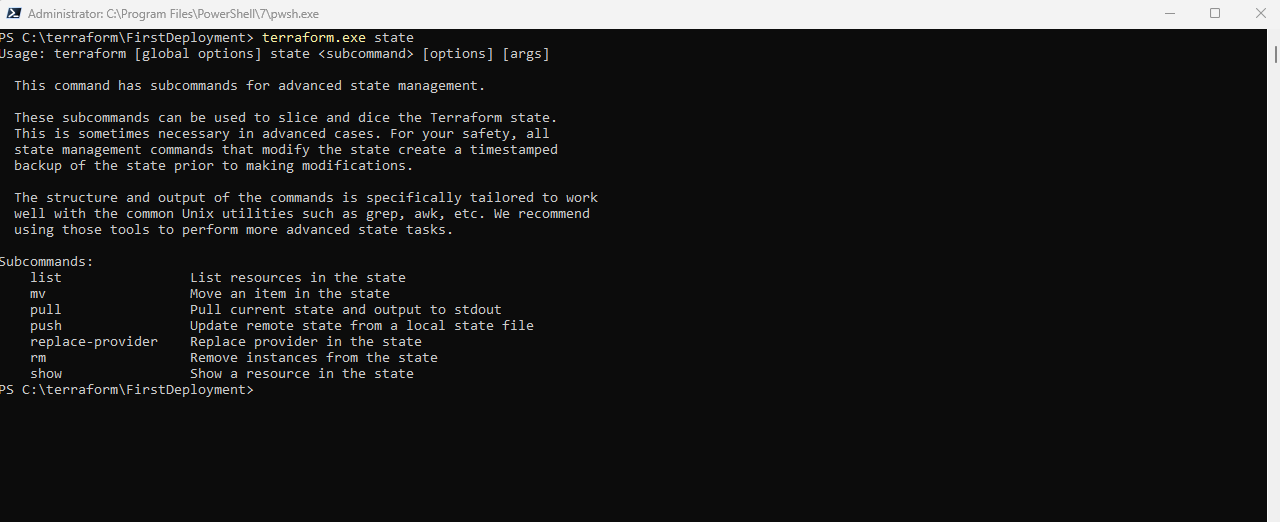
To review the information in your state file, use the state command. If you have a long state file, you can see a list of the resources you created with Terraform by using the list subcommand.
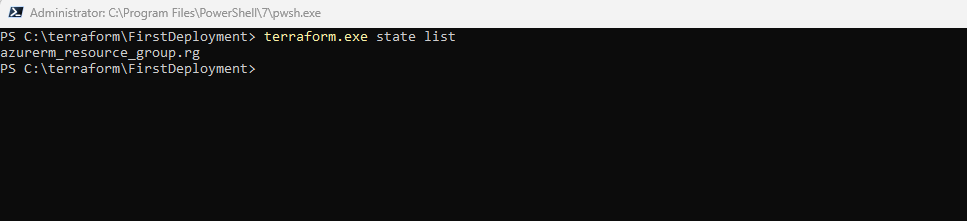
If you run terraform state, you will see a full list of available commands to view and manipulate the configuration’s state.
For more detail on the concepts used in this tutorial:
- Read about the Terraform configuration language in the Terraform documentation.
- Learn more about Terraform providers.
- Review usage examples of the Terraform Azure provider from Terraform provider engineers
Source: https://developer.hashicorp.com/terraform/tutorials/azure-get-started/azure-build
Implement the Terraform code (Quickstart by Microsoft | Creating a Windows VM in Azure)
Initialize Terraform
Run terraform init to initialize the Terraform deployment. This command downloads the Azure provider required to manage your Azure resources.
terraform init -upgrade
The -upgrade parameter upgrades the necessary provider plugins to the newest version that complies with the configuration’s version constraints.
This command must be executed within your directory where you placed the Terraform code.

Create a Terraform execution plan
First we need to authenticate to Azure via the Azure CLI before we can create the exection plan.
az login –tenant <tenant ID>
# change the active subscription using the subscription ID
az account set –subscription <subscription ID>
After authentication we can run
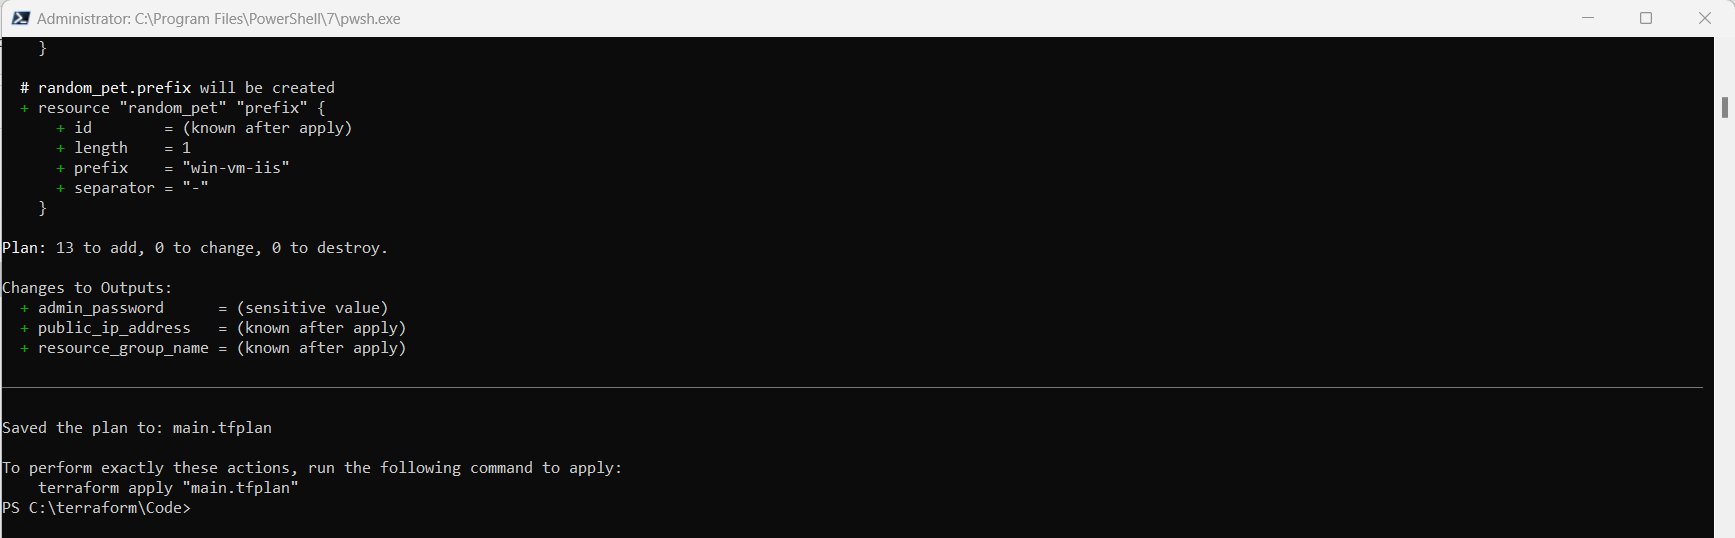
terraform plan -out main.tfplan
- The terraform plan command creates an execution plan, but doesn’t execute it. Instead, it determines what actions are necessary to create the configuration specified in your configuration files. This pattern allows you to verify whether the execution plan matches your expectations before making any changes to actual resources.
- The optional -out parameter allows you to specify an output file for the plan. Using the -out parameter ensures that the plan you reviewed is exactly what is applied.
- To read more about persisting execution plans and security, see the security warning section.

Apply a Terraform execution plan
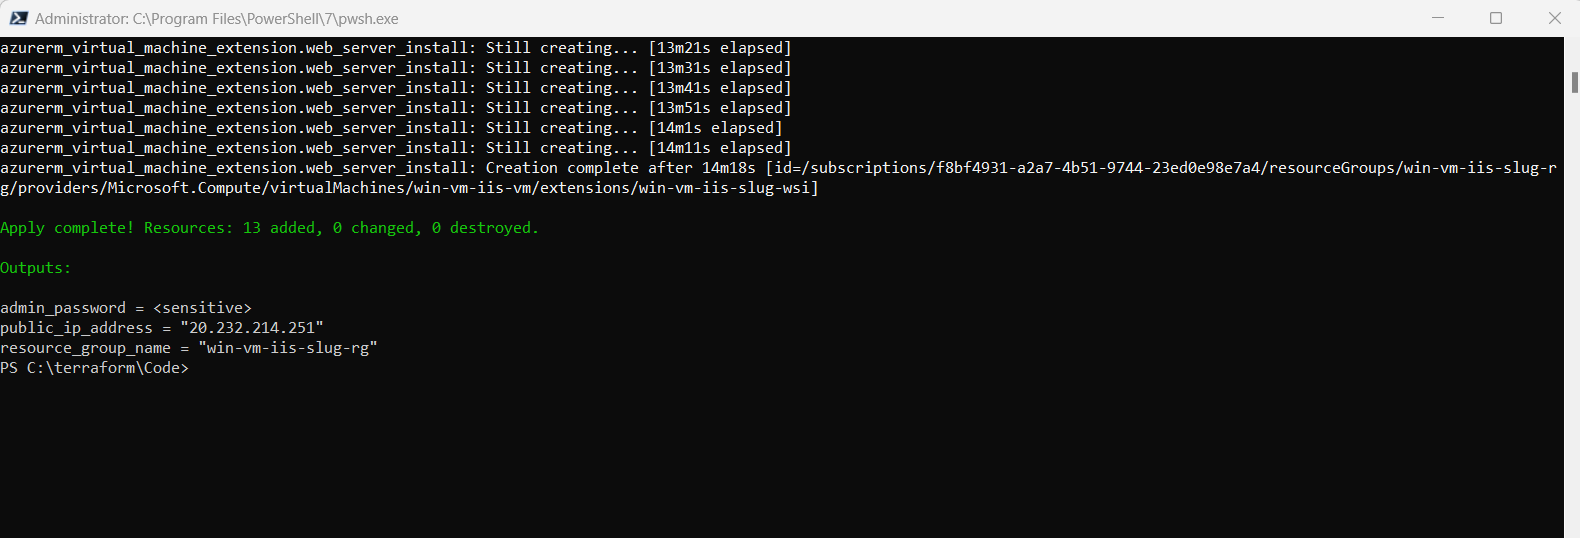
Run terraform apply to apply the execution plan to your cloud infrastructure.
terraform apply main.tfplan
- The example terraform apply command assumes you previously ran terraform plan -out main.tfplan.
- If you specified a different filename for the -out parameter, use that same filename in the call to terraform apply.
- If you didn’t use the -out parameter, call terraform apply without any parameters.

Verify the results
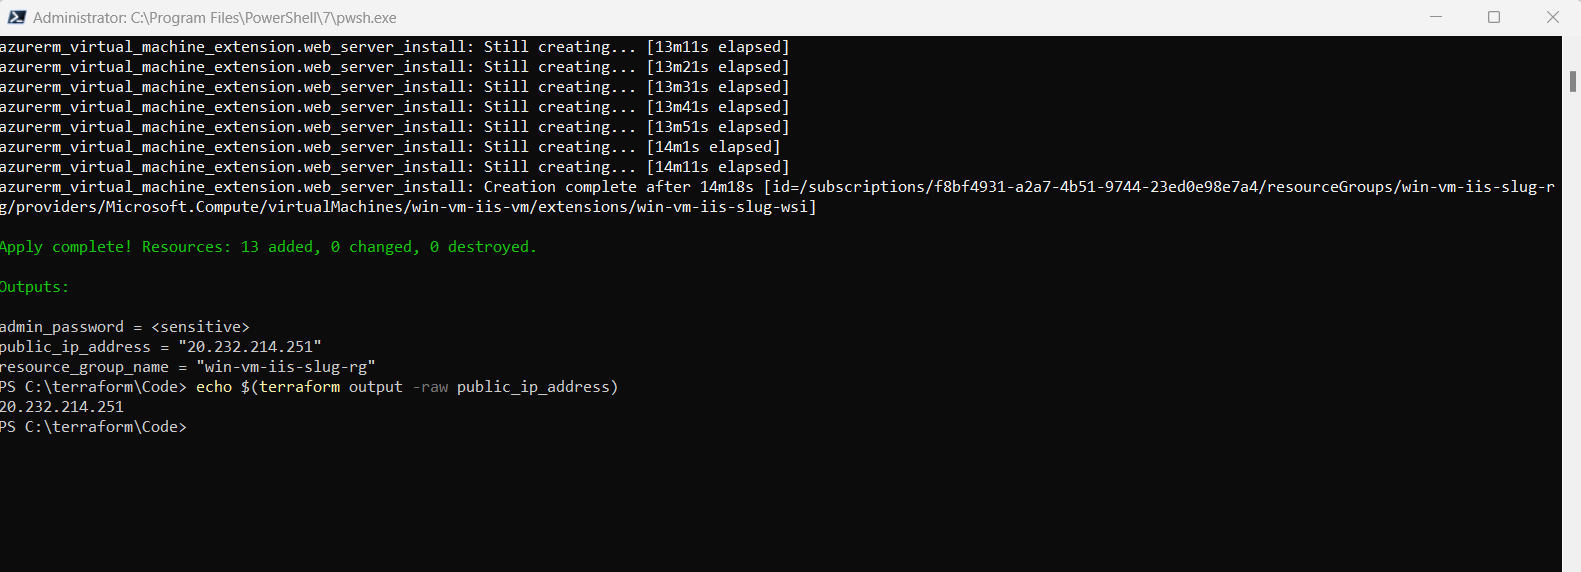
Run the following command to get the VM’s public IP address and make note of it: (you can also see it directly in the output message above)
echo $(terraform output -raw public_ip_address)
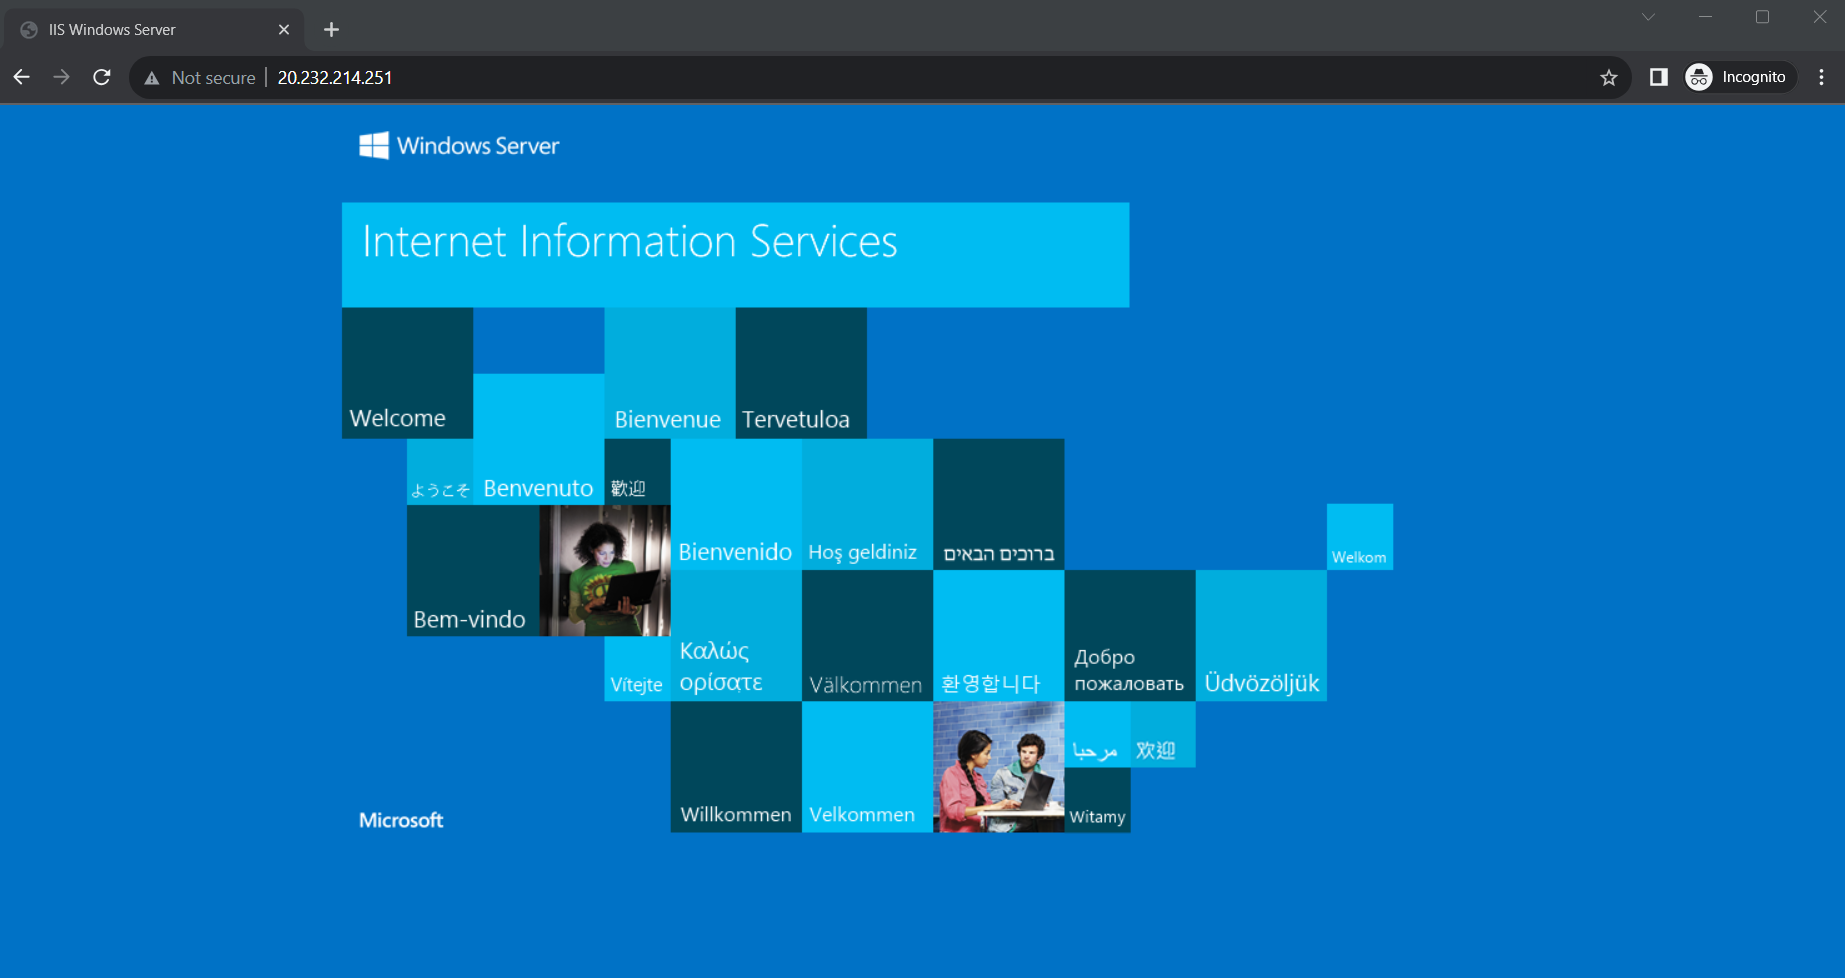
With IIS installed and port 80 now open on your VM from the Internet, use a web browser of your choice to view the default IIS welcome page. Use the public IP address of your VM obtained from the previous command. The following example shows the default IIS web site:
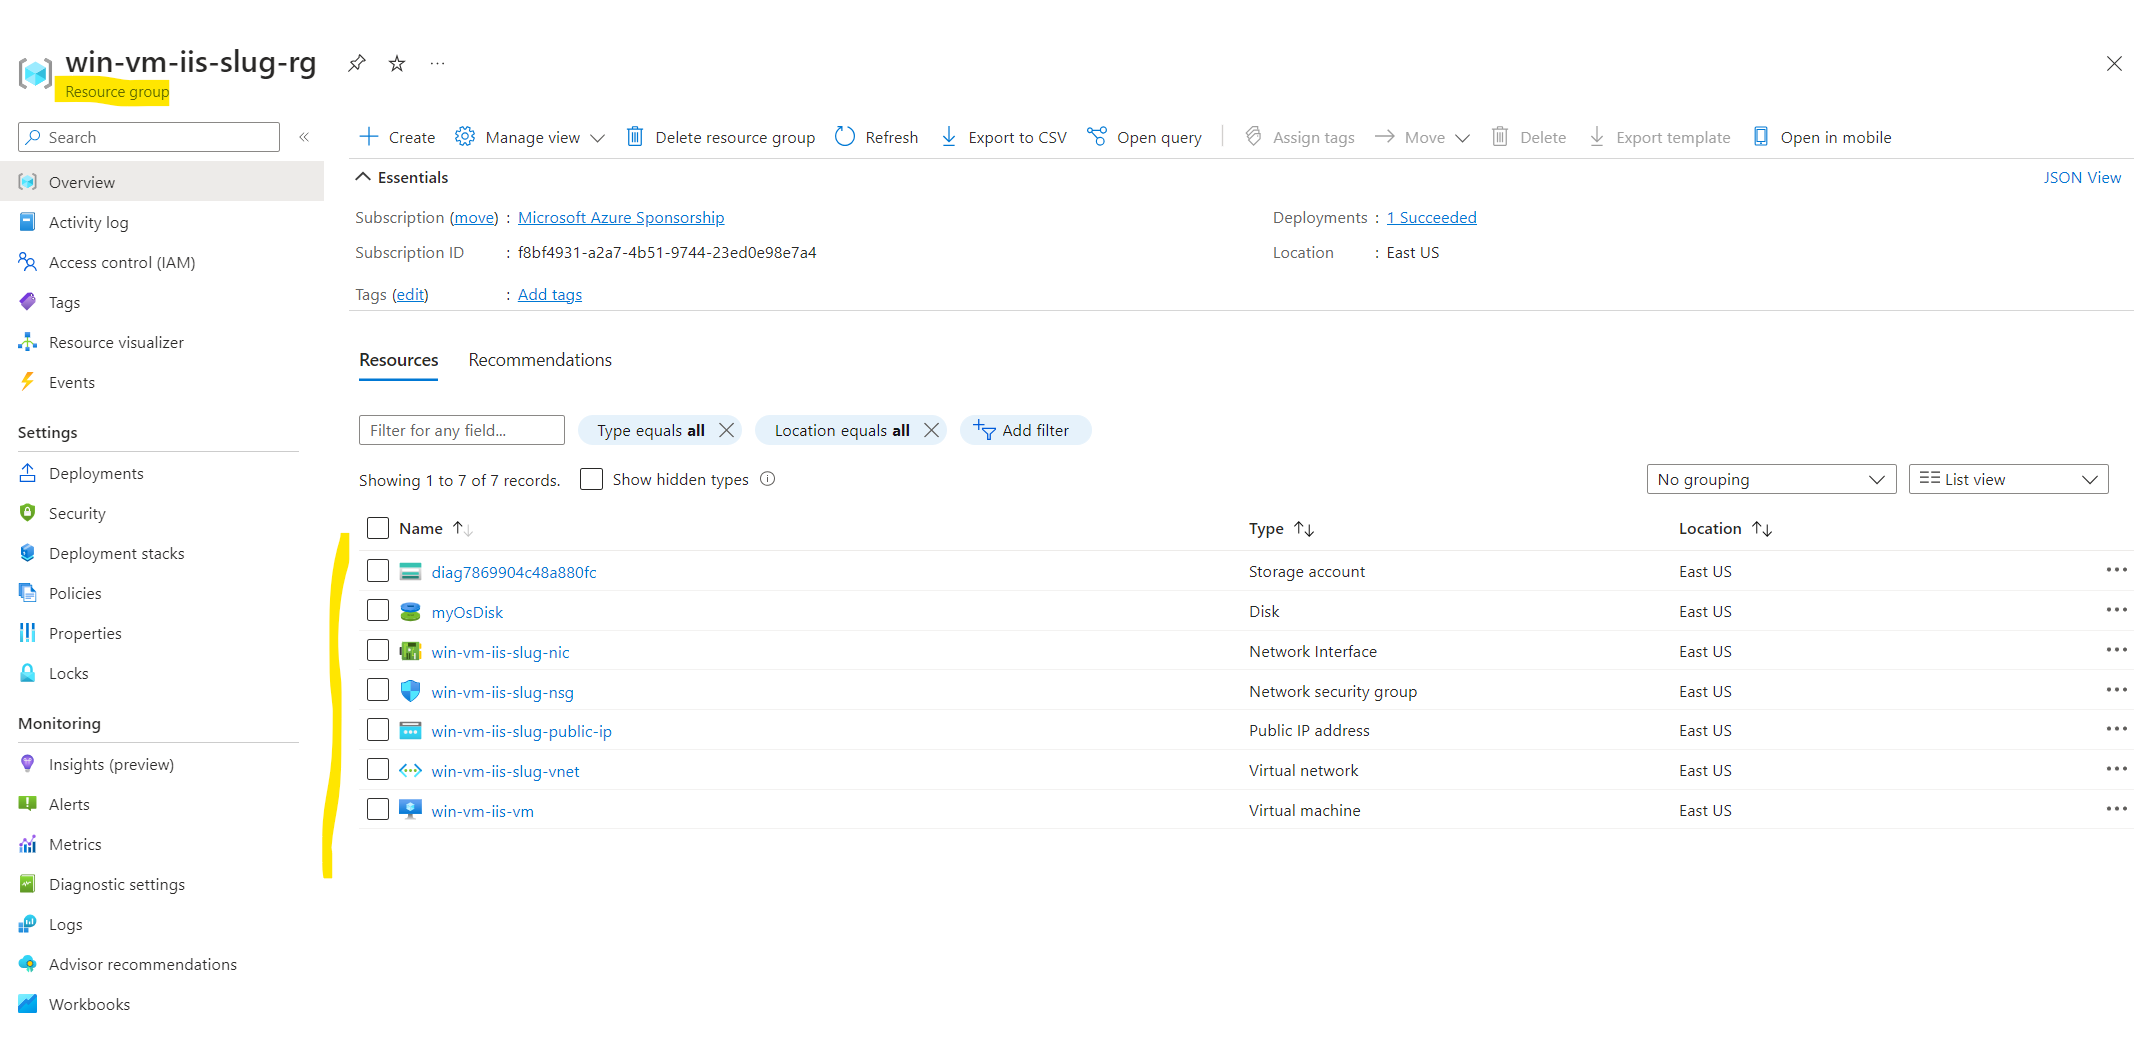
Finally you can check what Terraform deployed in our specific resource group.
Source: https://learn.microsoft.com/en-us/azure/virtual-machines/windows/quick-create-terraform
Create multiple resource instances using Terraform
By default, a resource block configures one real infrastructure object. (Similarly, a module block includes a child module’s contents into the configuration one time.) However, sometimes you want to manage several similar objects (like a fixed pool of compute instances) without writing a separate block for each one. Terraform has two ways to do this: count and for_each.
If your instances are almost identical, count is appropriate. If some of their arguments need distinct values that can’t be directly derived from an integer, it’s safer to use for_each.
Note: A given resource or module block cannot use both count and for_each.
The count Meta-Argument
If a resource or module block includes a count argument whose value is a whole number, Terraform will create that many instances.
The count meta-argument accepts a whole number, and creates that many instances of the resource or module. Each instance has a distinct infrastructure object associated with it, and each is separately created, updated, or destroyed when the configuration is applied.
In order to name the multiple instances different, use the ${count.index} function for the name property of the resource.
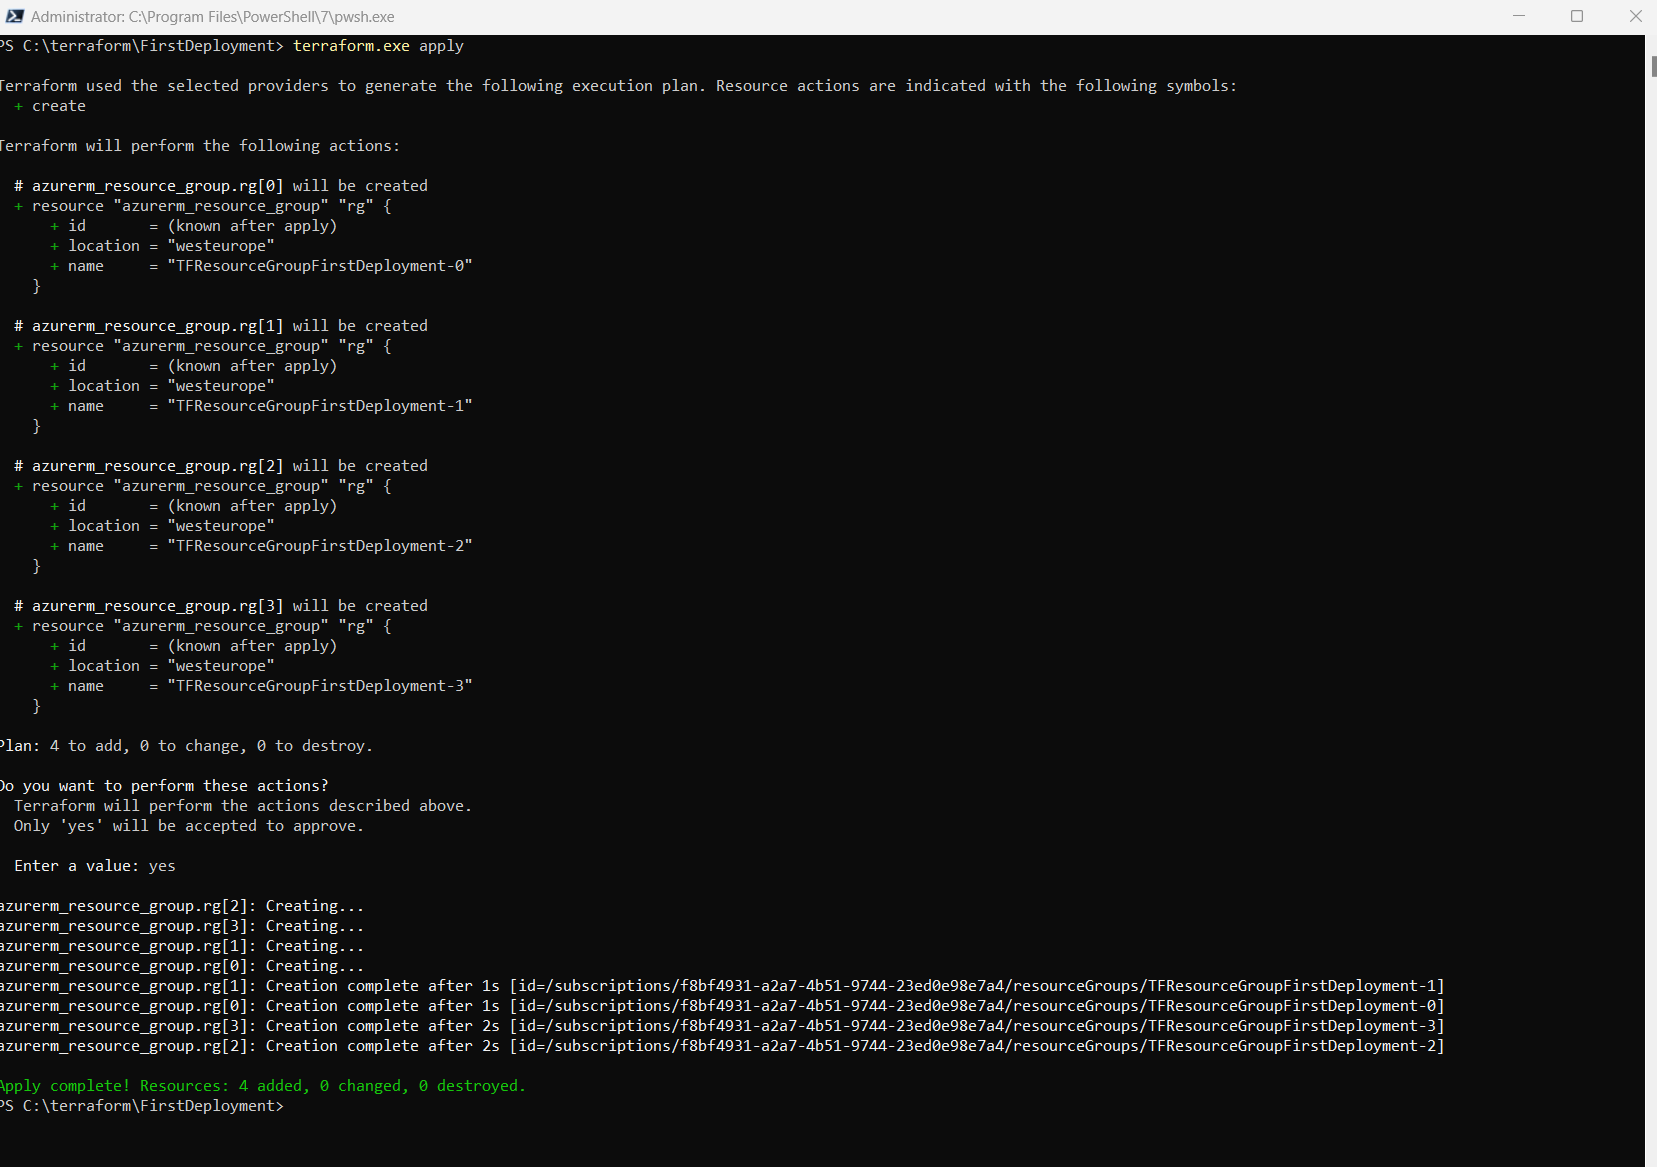
resource "azurerm_resource_group" "rg" {
count = 4 # create four similar Resource Group instances
name = "TFResourceGroupFirstDeployment-${count.index}"
location = "westeurope"
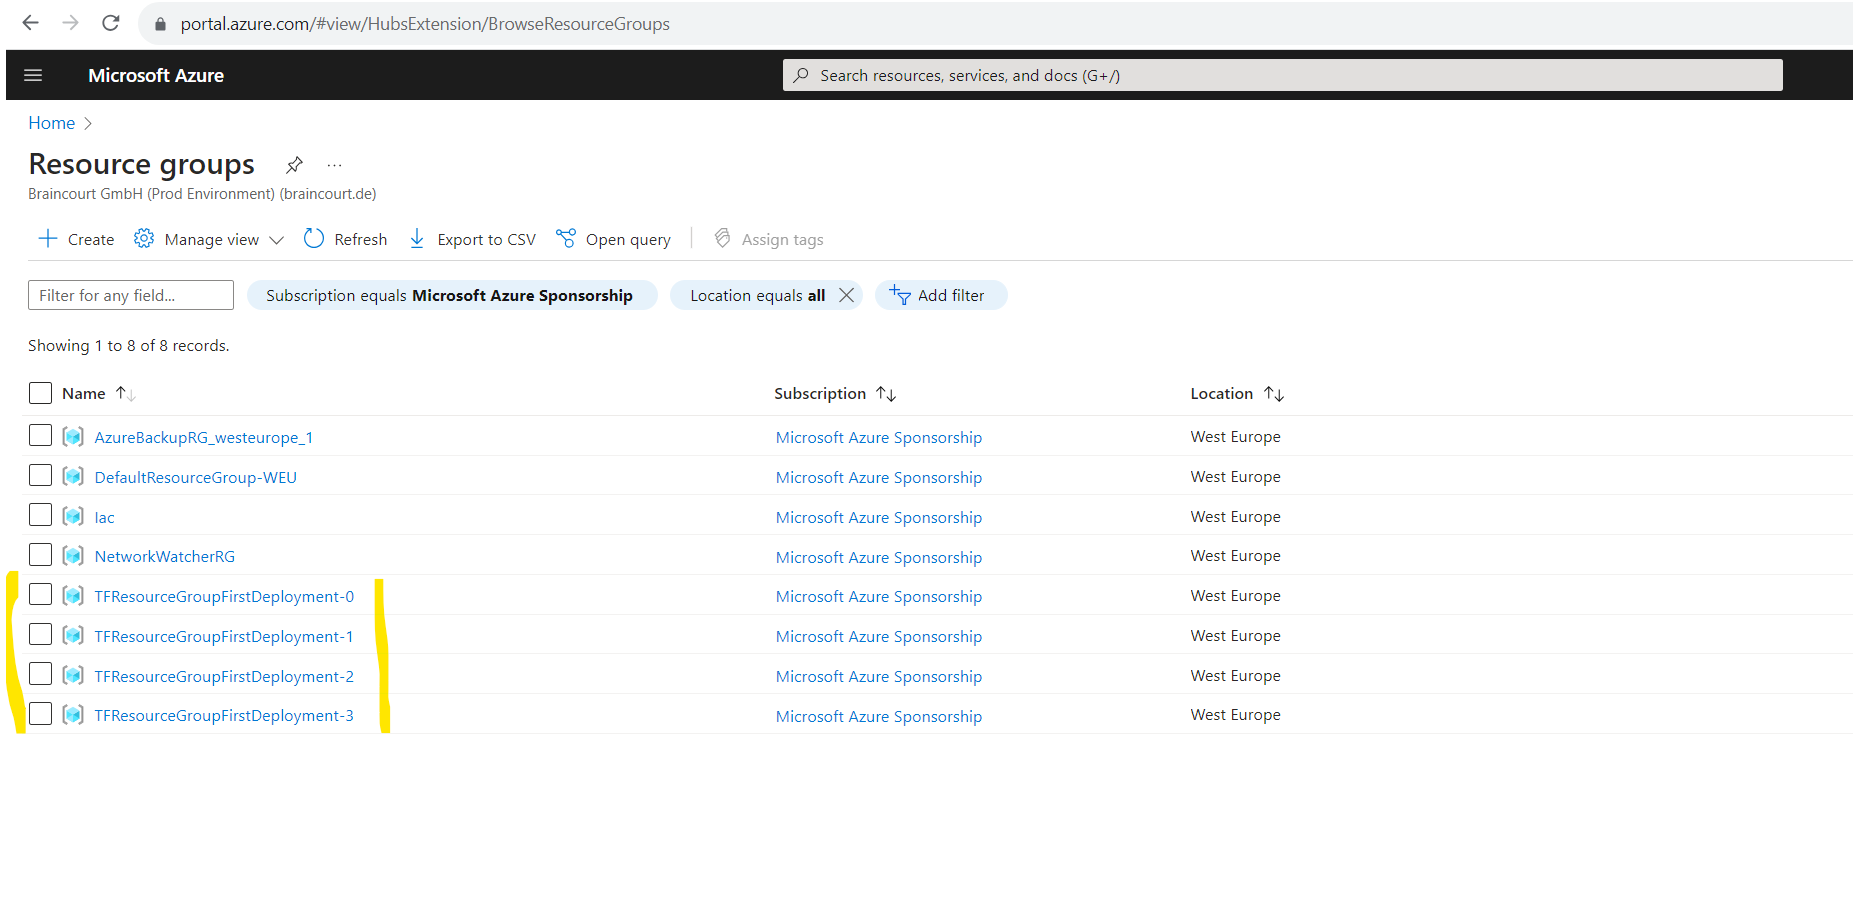
}This will finally create 4 identical resource groups but different names build with the ${count.index} function.
Source: https://developer.hashicorp.com/terraform/language/meta-arguments/count
The count meta-argument is similar to the copy element and count value in ARM templates as shown in Part 2.
The for_each Meta-Argument
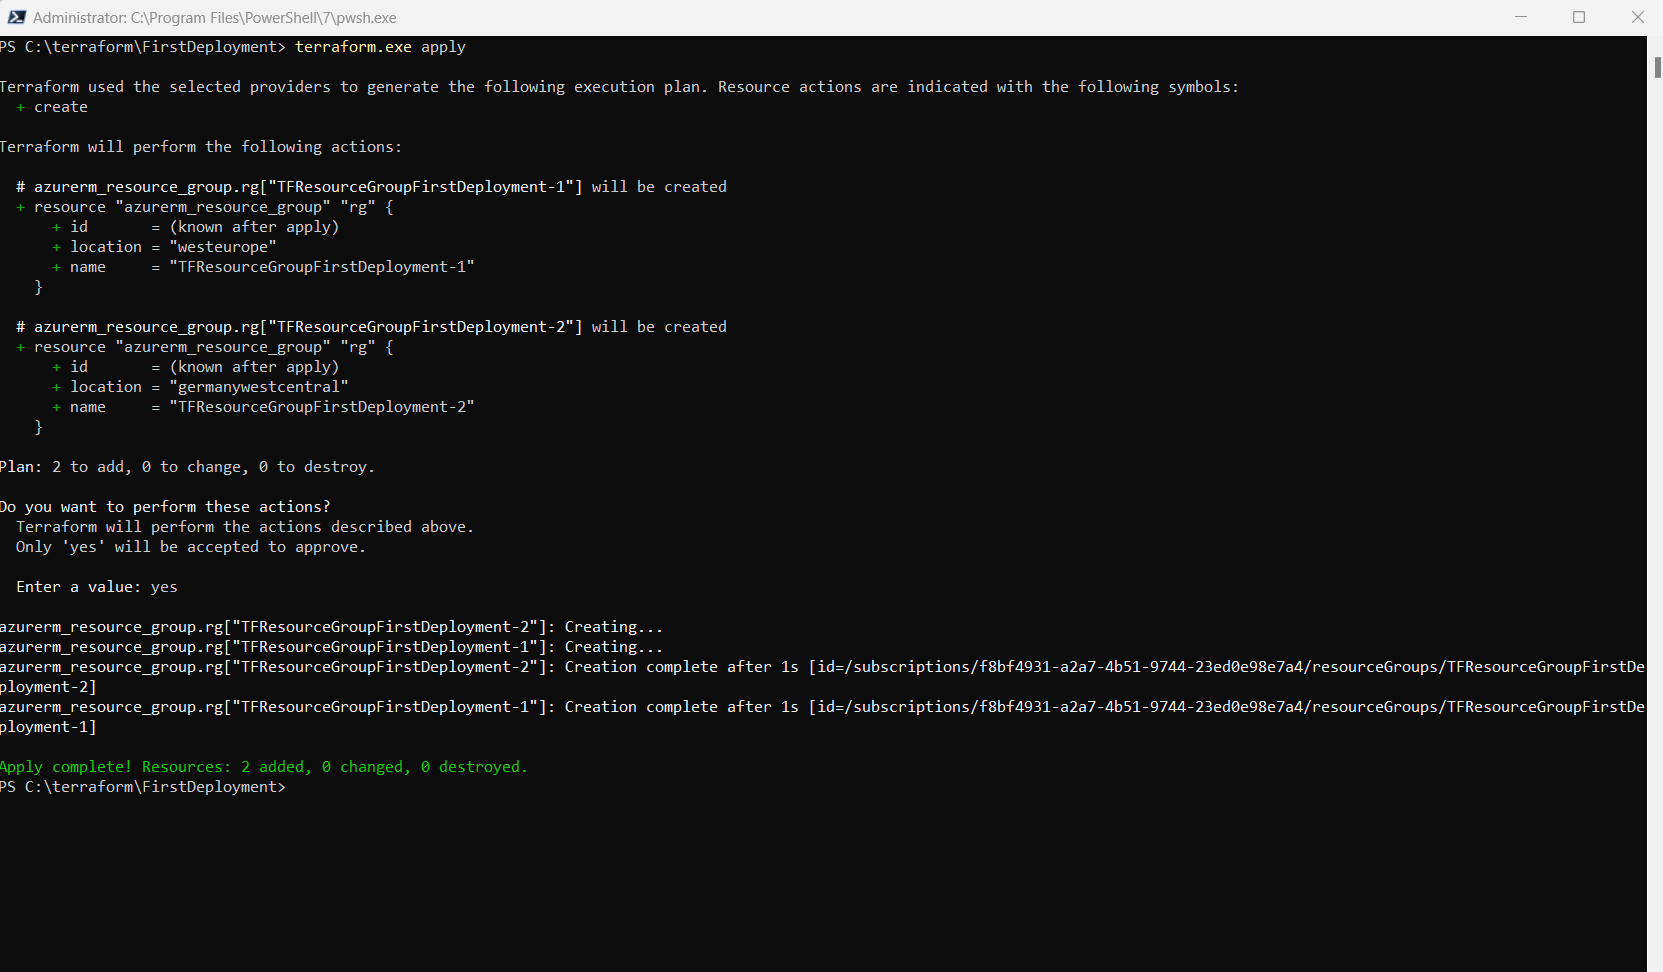
If a resource or module block includes a for_each argument whose value is a map or a set of strings, Terraform creates one instance for each member of that map or set.
Here I will map the values. For each item in the map (here TFResourceGroupFirstDeployment-1 and TFResourceGroupFirstDeployment-2) will be created an instance. The name and location of each resource group the key and value pair will be used.
resource "azurerm_resource_group" "rg" {
  for_each = {
    TFResourceGroupFirstDeployment-1 = "westeurope"
    TFResourceGroupFirstDeployment-2 = "germanywestcentral"
}

  name     = each.key
  location = each.value

}
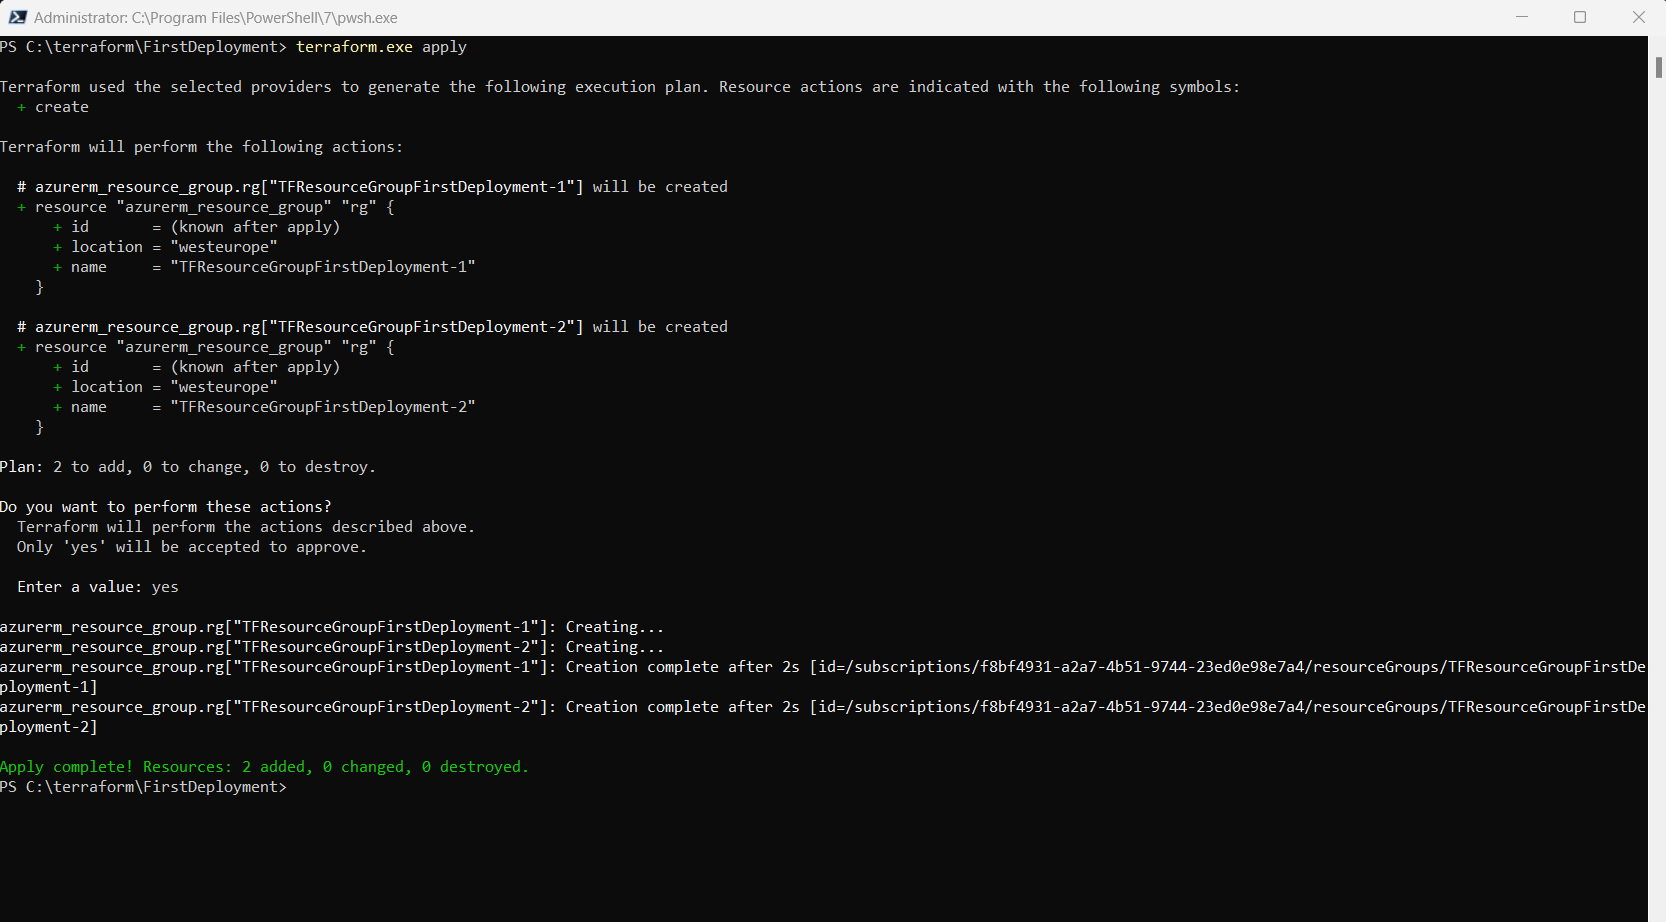
Here I will do the same by using a set of string.
resource "azurerm_resource_group" "rg" {
  for_each = toset( ["TFResourceGroupFirstDeployment-1", "TFResourceGroupFirstDeployment-2"] )
  name     = each.key
  location = "westeurope"
}
Source: https://developer.hashicorp.com/terraform/language/meta-arguments/for_each
Destroy Infrastructure
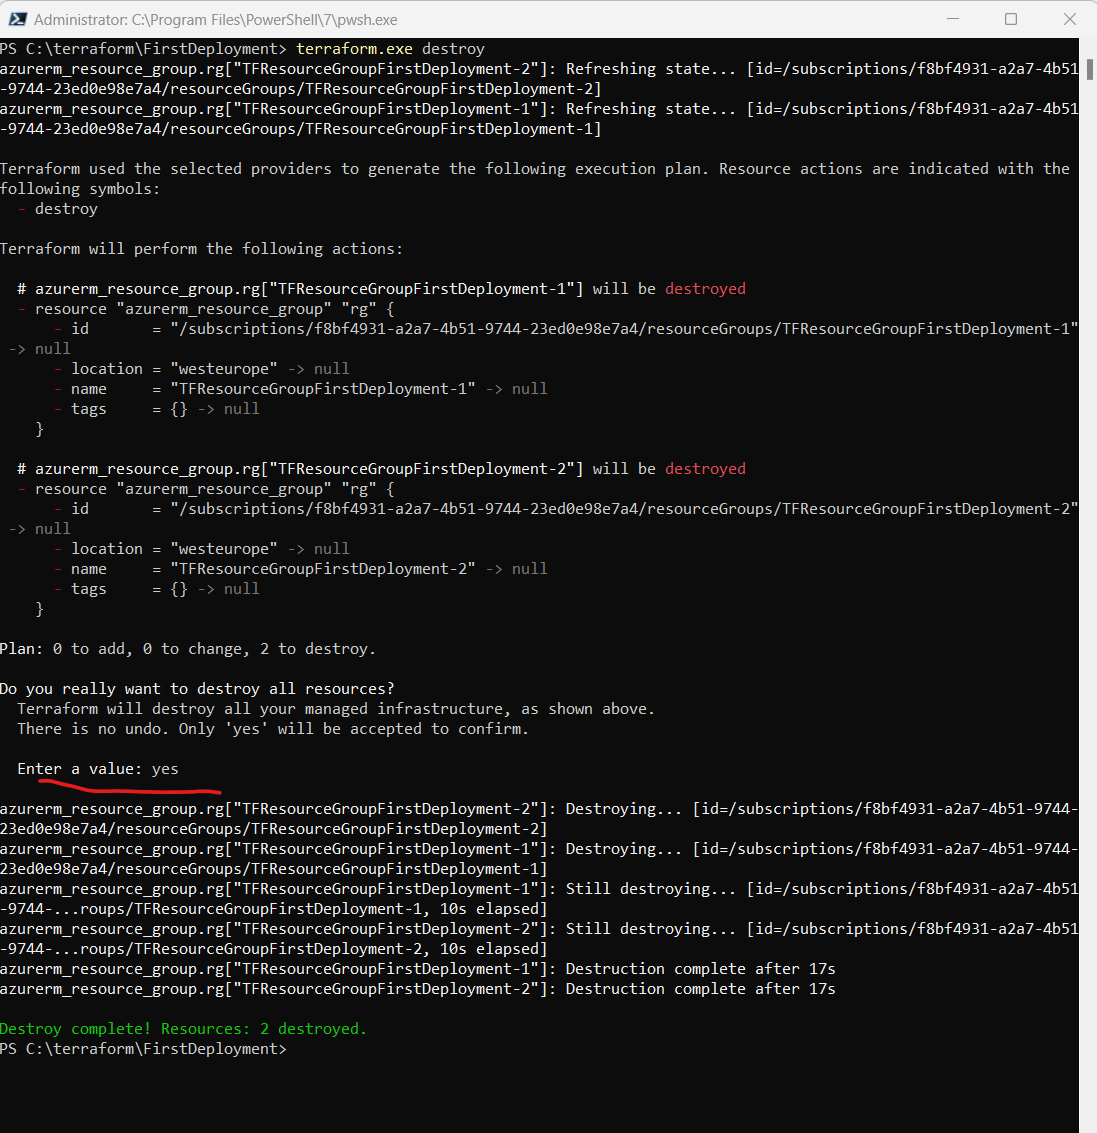
So far we used Terraform to create and update Azure resources. By using the terraform destroy command we can remove these resources.
The terraform destroy command terminates resources managed by your Terraform project. This command is the inverse of terraform apply in that it terminates all the resources specified in your Terraform state. It does not destroy resources running elsewhere that are not managed by the current Terraform project.
Source: https://developer.hashicorp.com/terraform/tutorials/azure-get-started/azure-destroy#destroy
Destroy the resources you created. When Terraform prompts you, type yes to execute this plan and destroy the infrastructure.
terraform destroy
Source: https://developer.hashicorp.com/terraform/tutorials/azure-get-started/azure-destroy
Series Summary
- Infrastructure as Code (IaC) – Part 1
- Infrastructure as Code (IaC) – Part 2 – Azure Resource Manager (ARM) templates
- Infrastructure as Code (IaC) – Part 3 – Desired State Configuration (DSC)
- Infrastructure as Code (IaC) – Part 4 – Azure Automation State
- Infrastructure as Code (IaC) – Part 5 – Azure Automanage Machine Configuration (formerly called Azure Policy Guest Configuration)
- Infrastructure as Code (IaC) – Part 6 – Terraform
Links
Quickstart: Use Terraform to create a Windows VM
https://learn.microsoft.com/en-us/azure/virtual-machines/windows/quick-create-terraformQuickstart: Install and Configure Terraform
https://learn.microsoft.com/en-us/azure/developer/terraform/quickstart-configureTerraform Tutorials
https://developer.hashicorp.com/terraform/tutorialsGet Started – Azure
https://developer.hashicorp.com/terraform/tutorials/azure-get-started