Mastering Expert Partitioning on SUSE Linux Enterprise Server 15
When installing SUSE Linux Enterprise Server (SLES), the installer usually suggests an automatic partitioning layout.
While this works for most standard deployments, advanced scenarios often require more control over how storage is organized.
That’s where Expert Partitioner comes in. With Expert Partitioner, you can set up custom partitioning schemes, whether it’s separating /home, /var, or /tmp, configuring LVM or Btrfs subvolumes, or fine-tuning mount options, ensuring your system is tailored to your performance, security, and scalability needs.
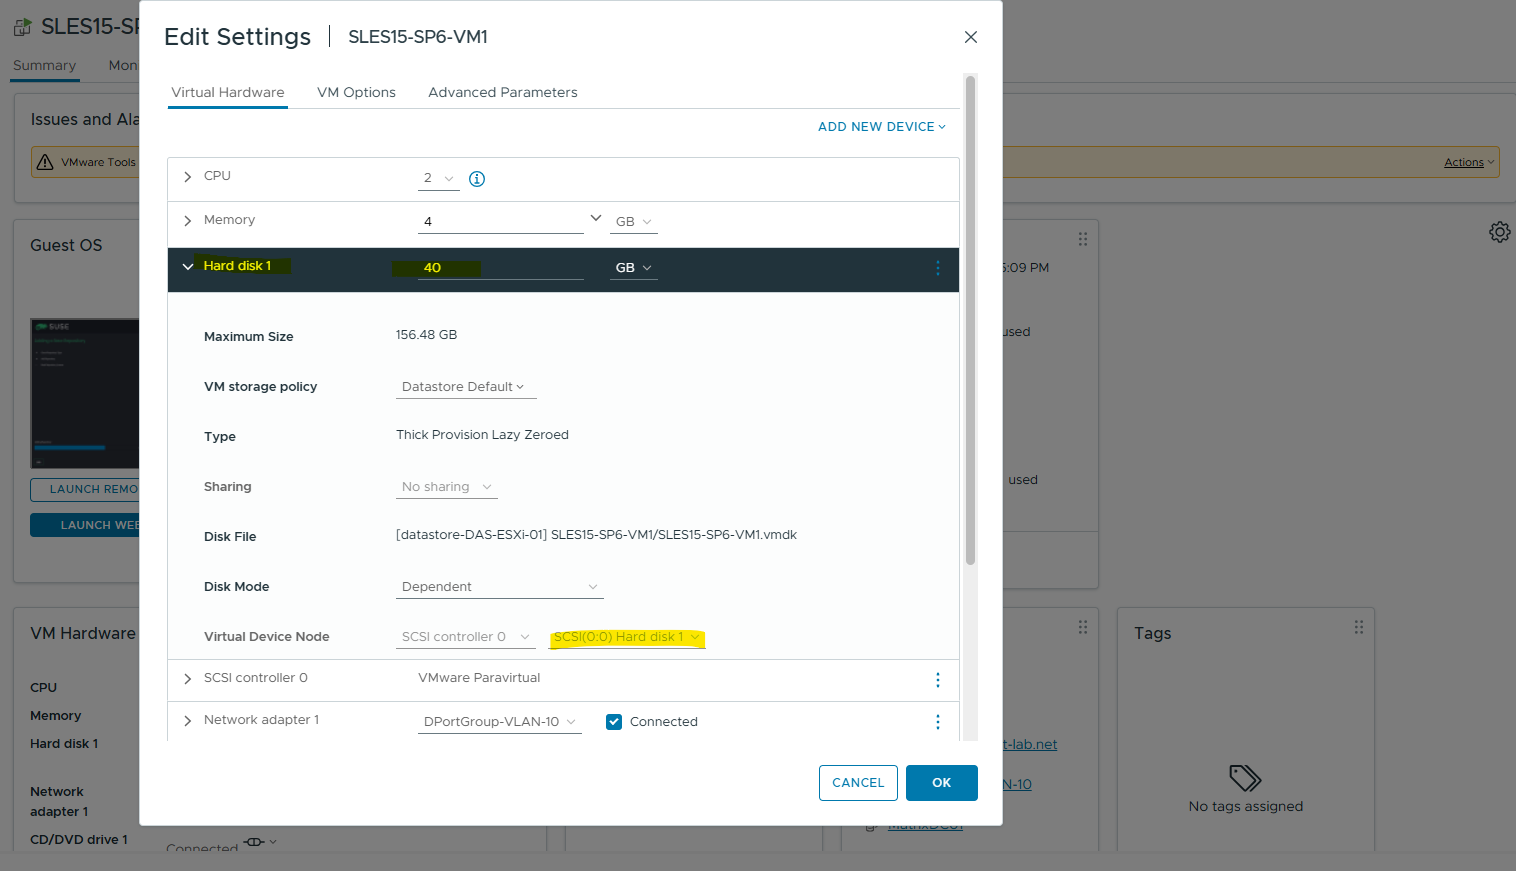
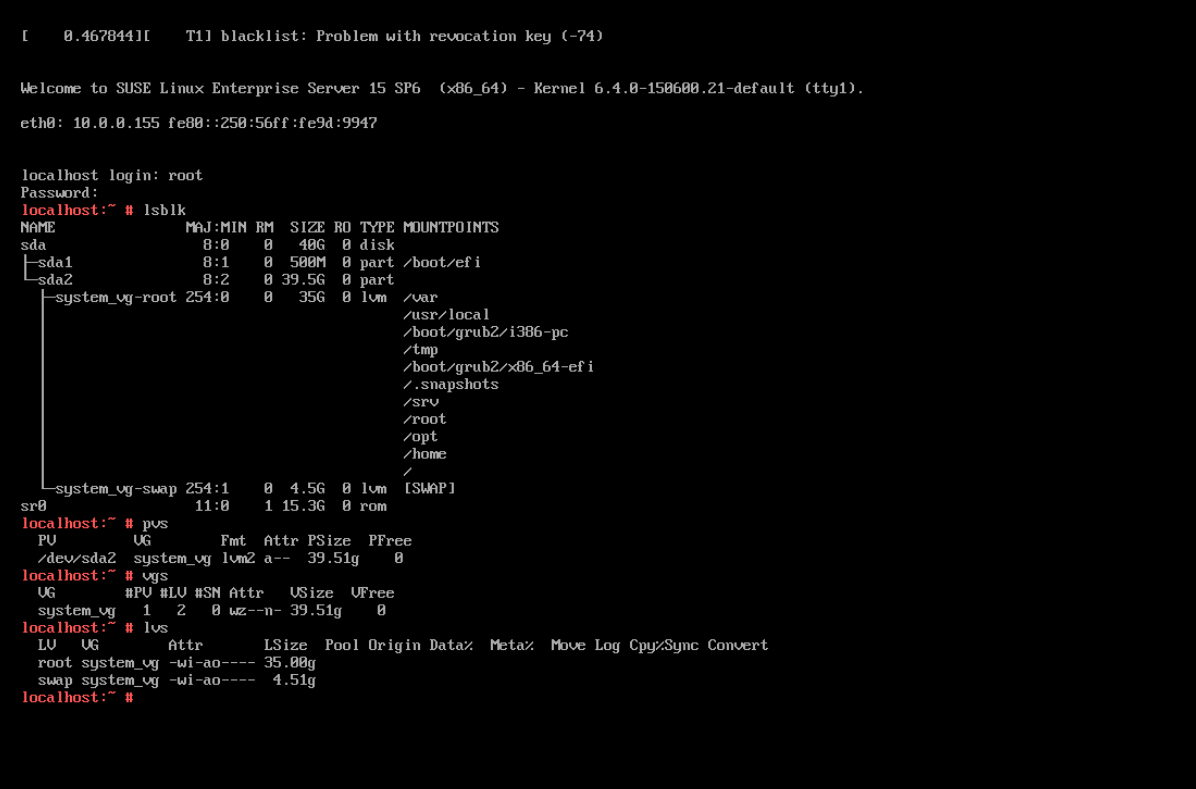
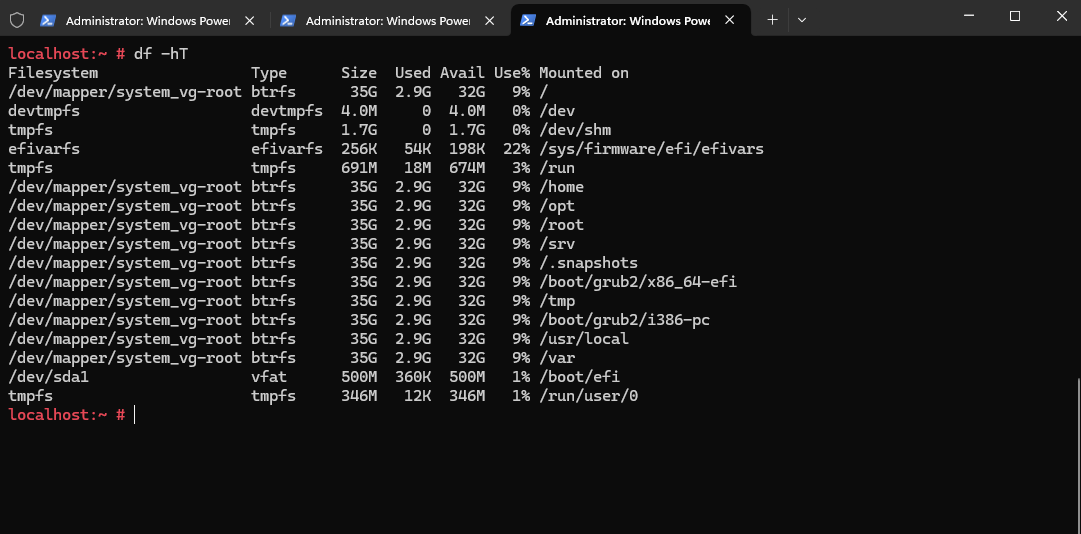
Below we will see a basic custom partitioning layout where I will attach one virtual disk to a virtual machine running in VMware vSphere and creating two partitions on, the first sda1 for the EFI Boot Partition and a second partition sda2 managed by the Logical Volume Manger (LVM) to create a volume group (VG) and two logical volumes (LVs), one for the root file system and one for the swap volume.
So as mentioned, the virtual machine will just have one virtual disk in vSphere.
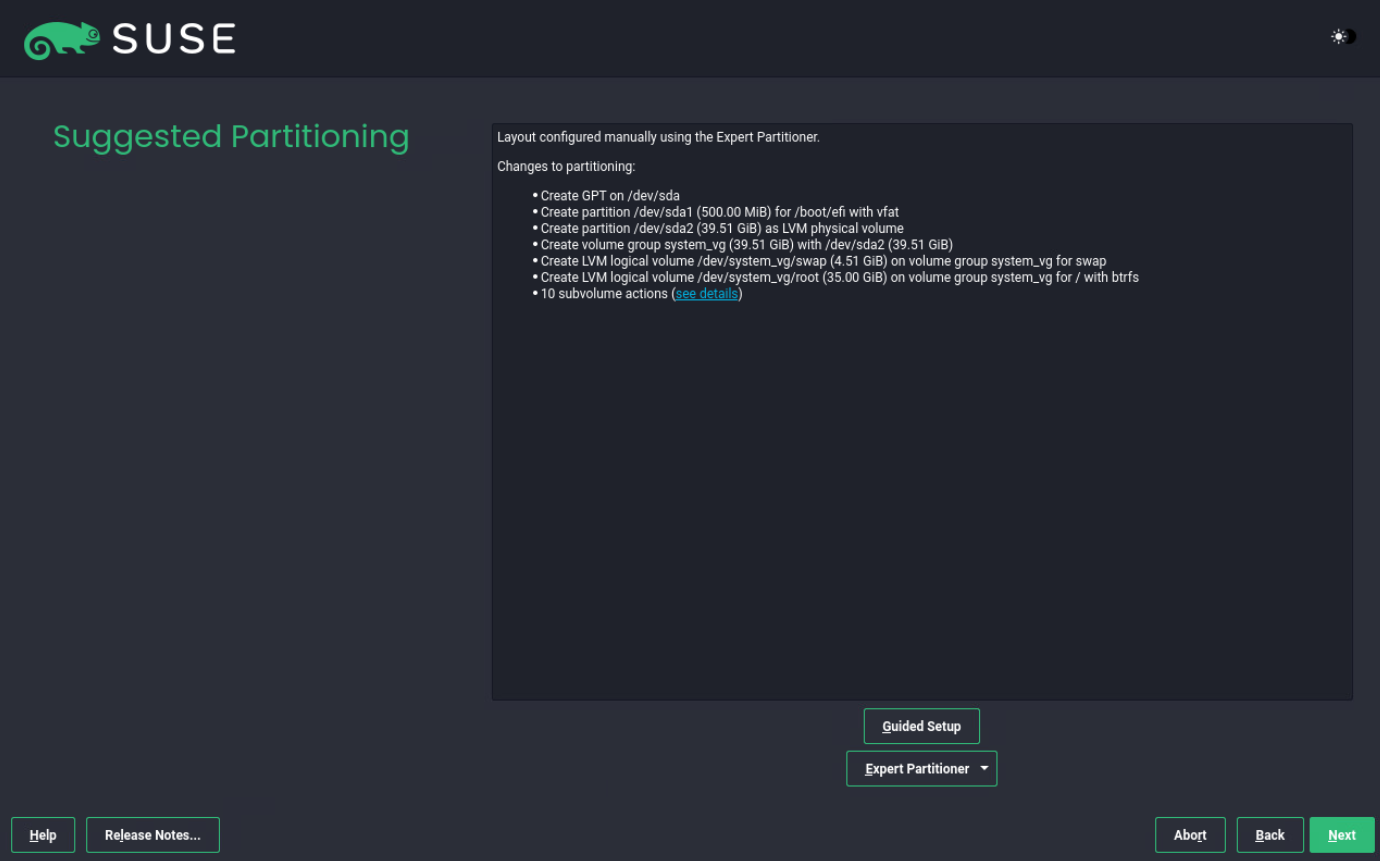
At the Suggested Partitioning dialog, we select Expert Partitioner -> Start with Current Proposal.

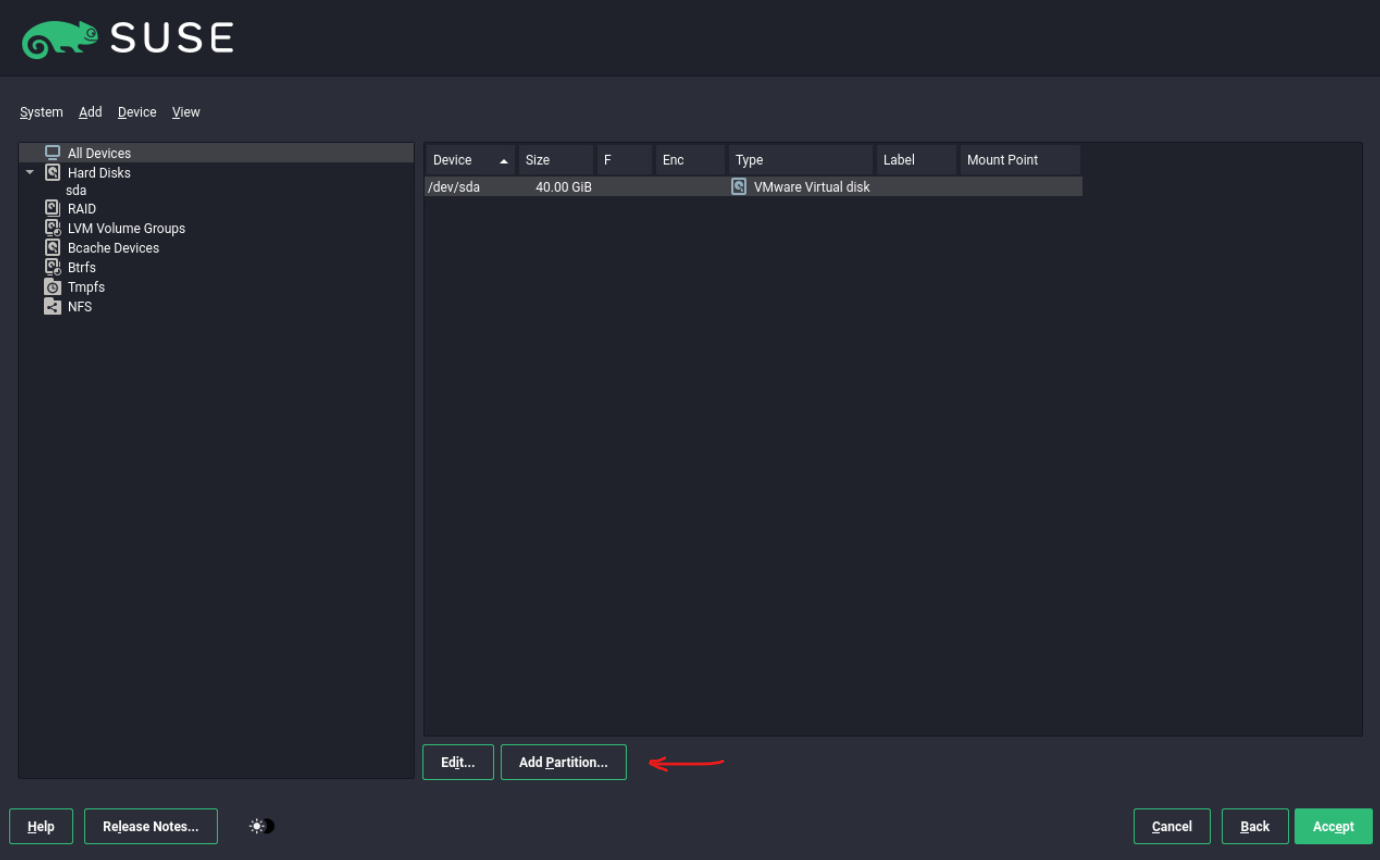
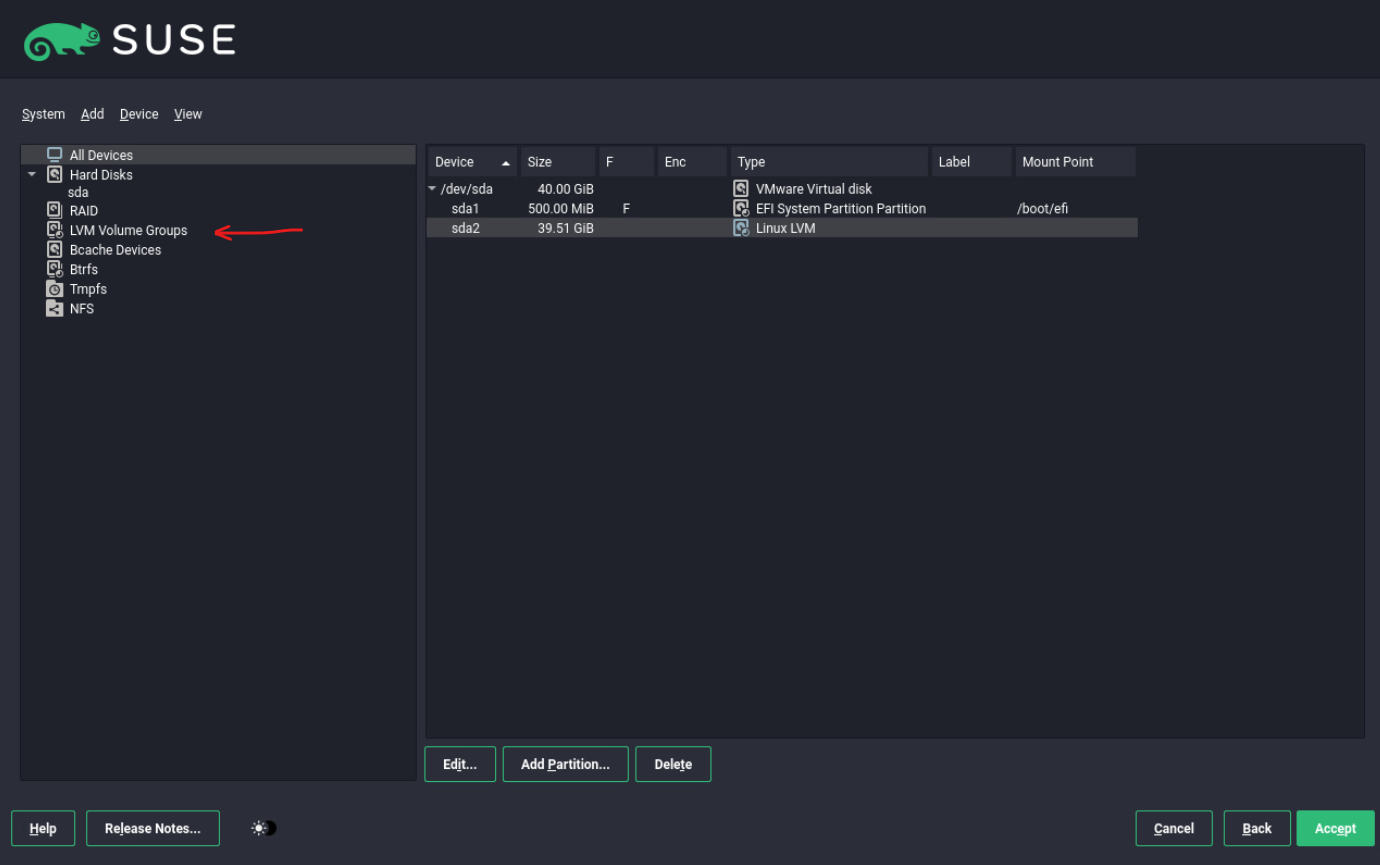
I will first delete all four partitions (sda4, sda3, sda2 and sda1) below so that finally just the raw disk is left.
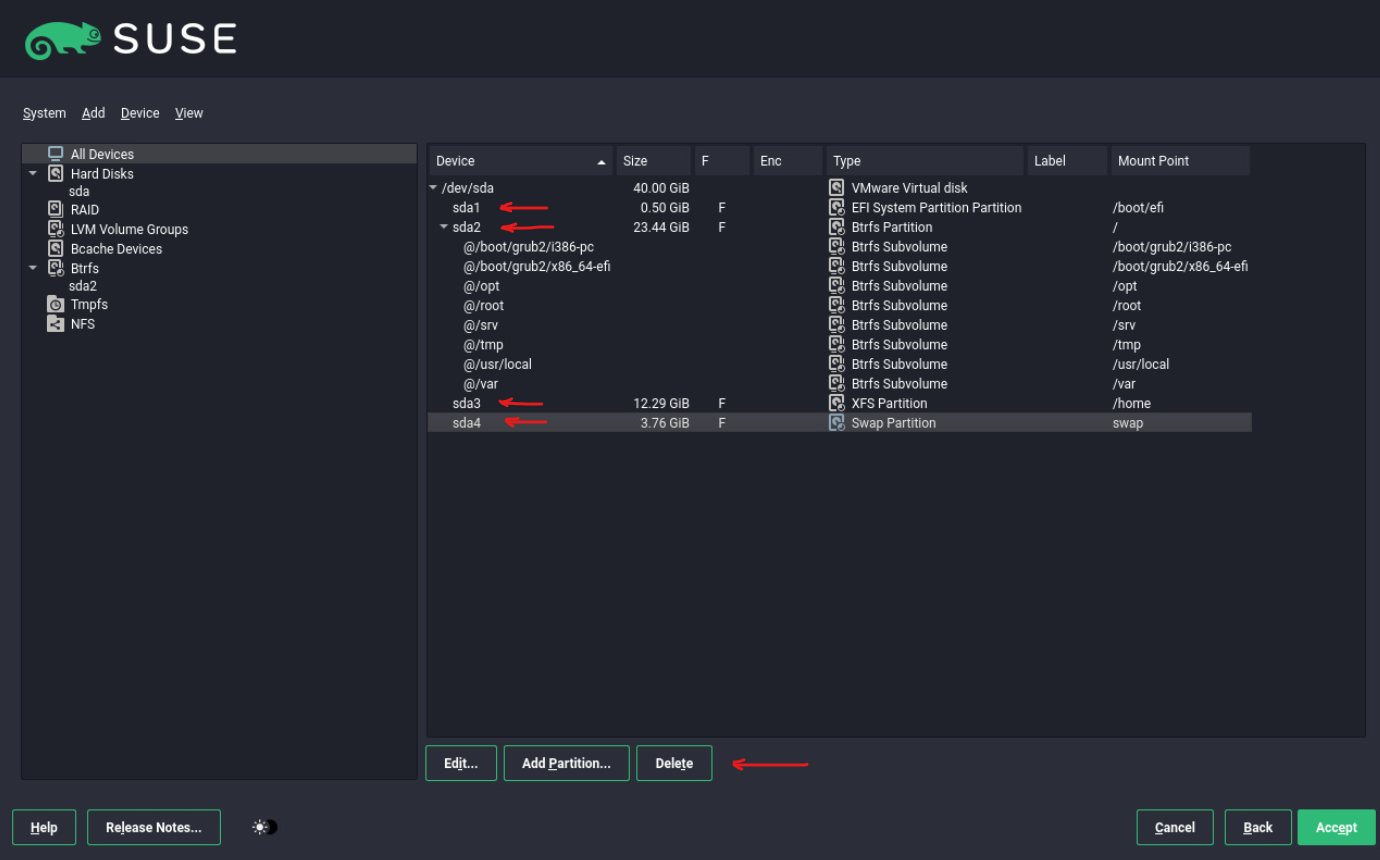
Just the raw disk (sda) is left as mentioned.
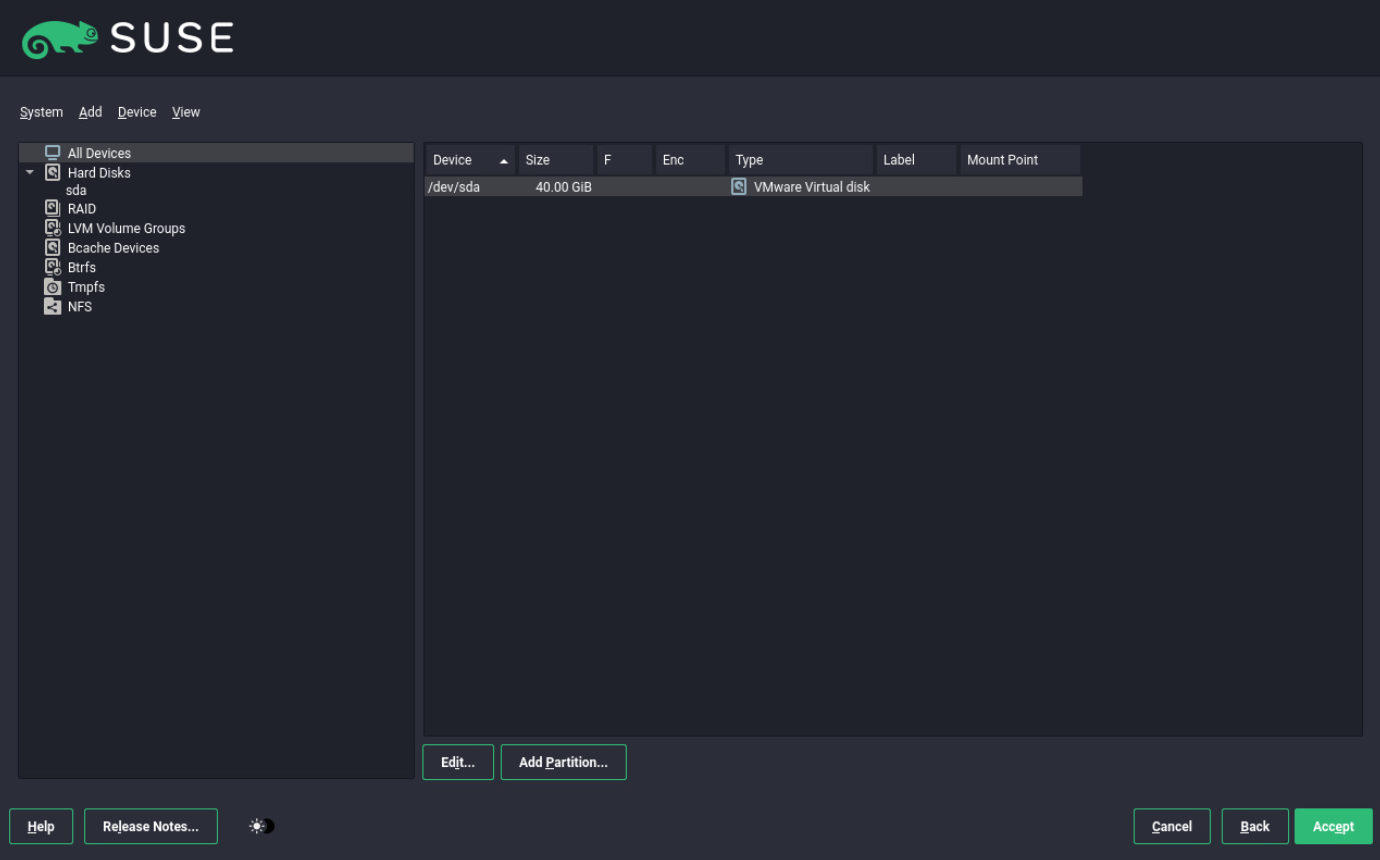
Next I will create a new partition (sda1) which will be used to place the EFI Boot Partition (GRUB2 bootloader) on.
Select the disk and click on Add Partition …
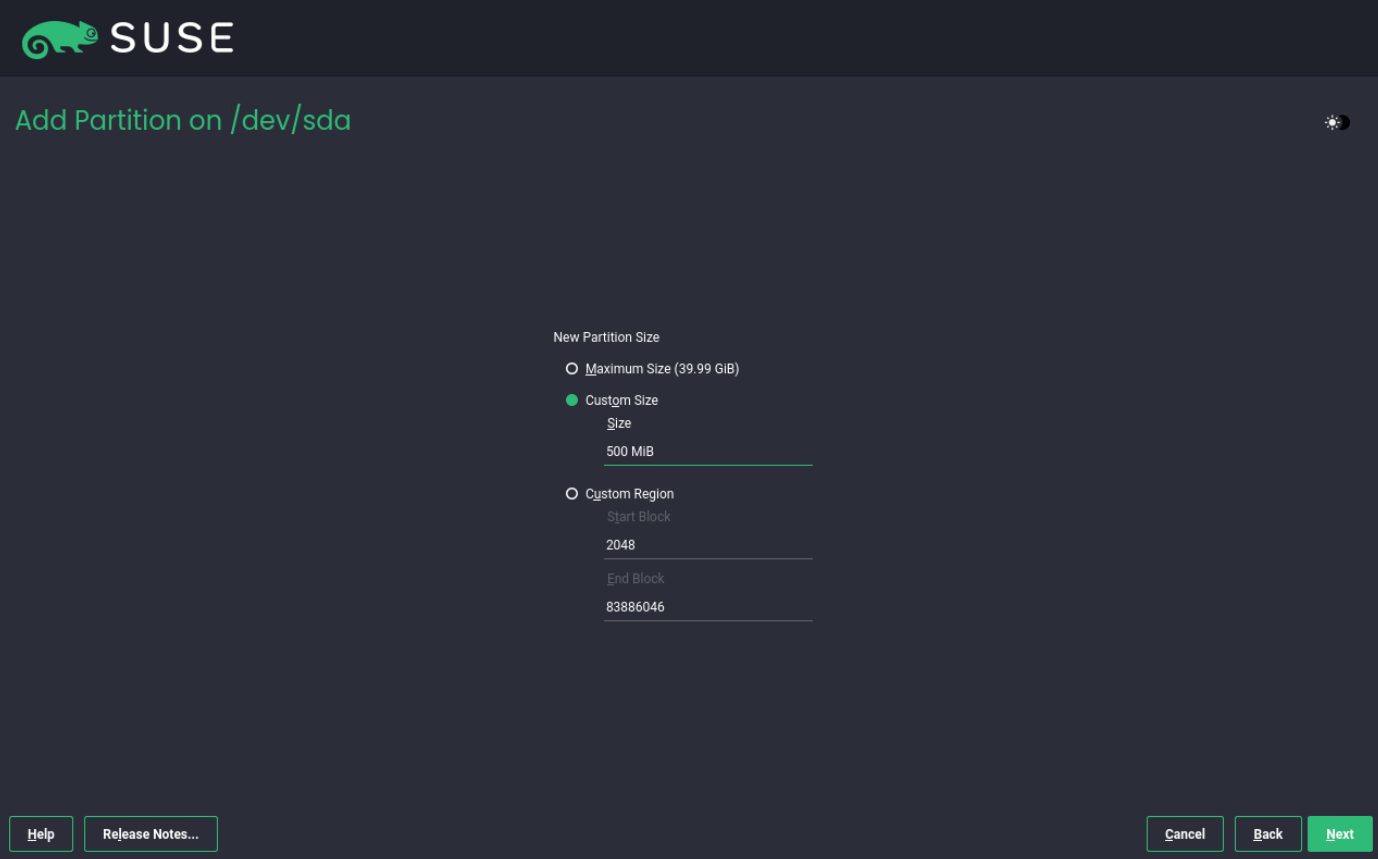
For the EFI Boot Partition (bootloader) we doesn’t need more than 500 MiB of free space on this partition.
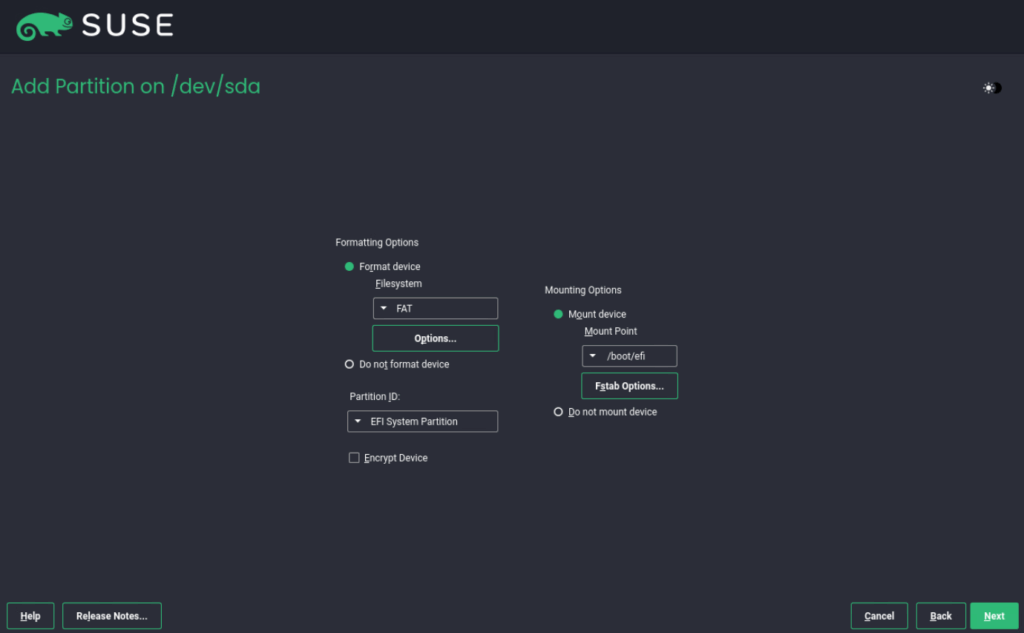
For the Role select EFI Boot Partition.

The settings below we can leave as they are. Click on Next.
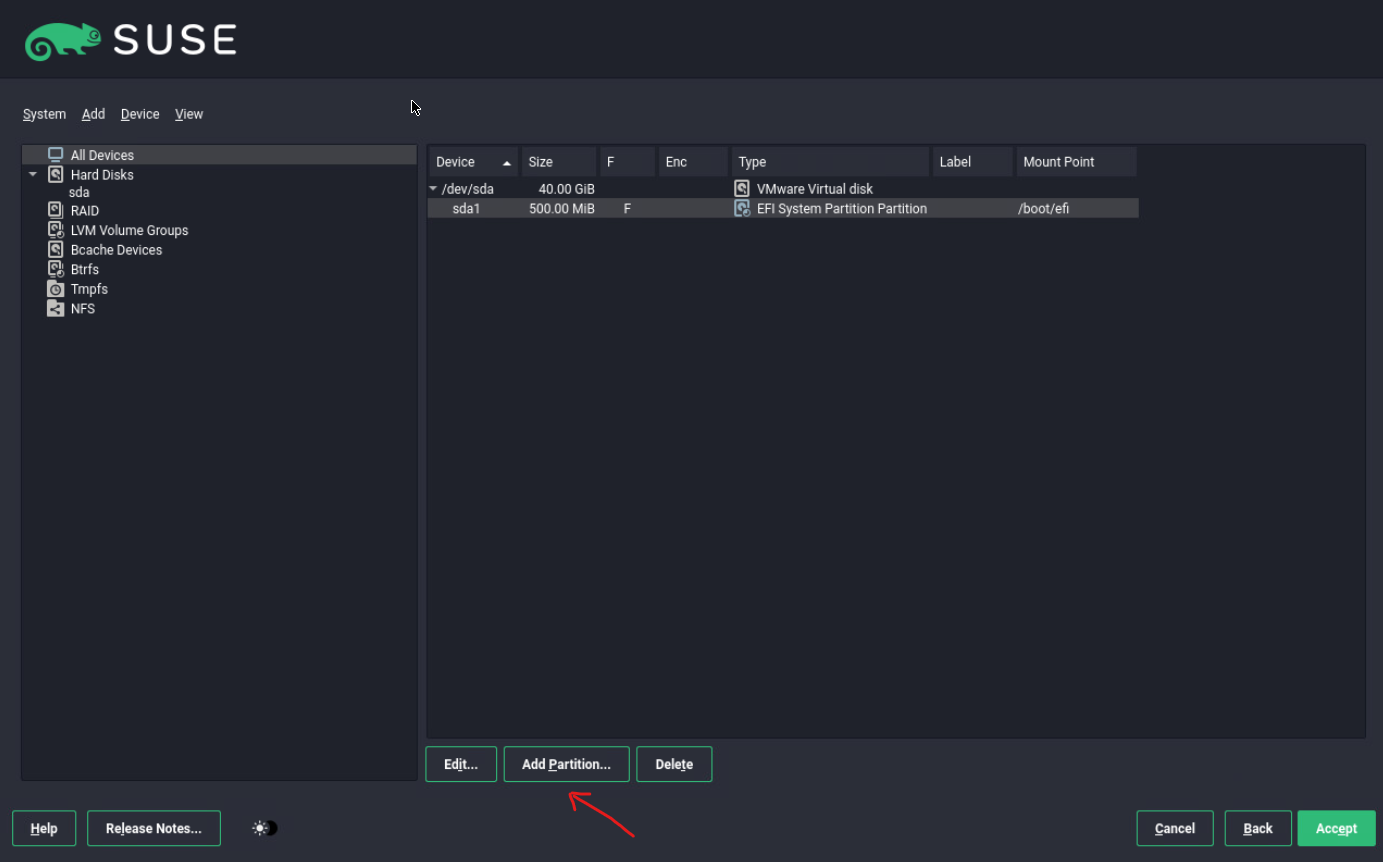
Looks good, click on Add Partition … to create a new raw volume which later will host the LVM with the logical root and swap volume.
The raw volume will get all of the available space.
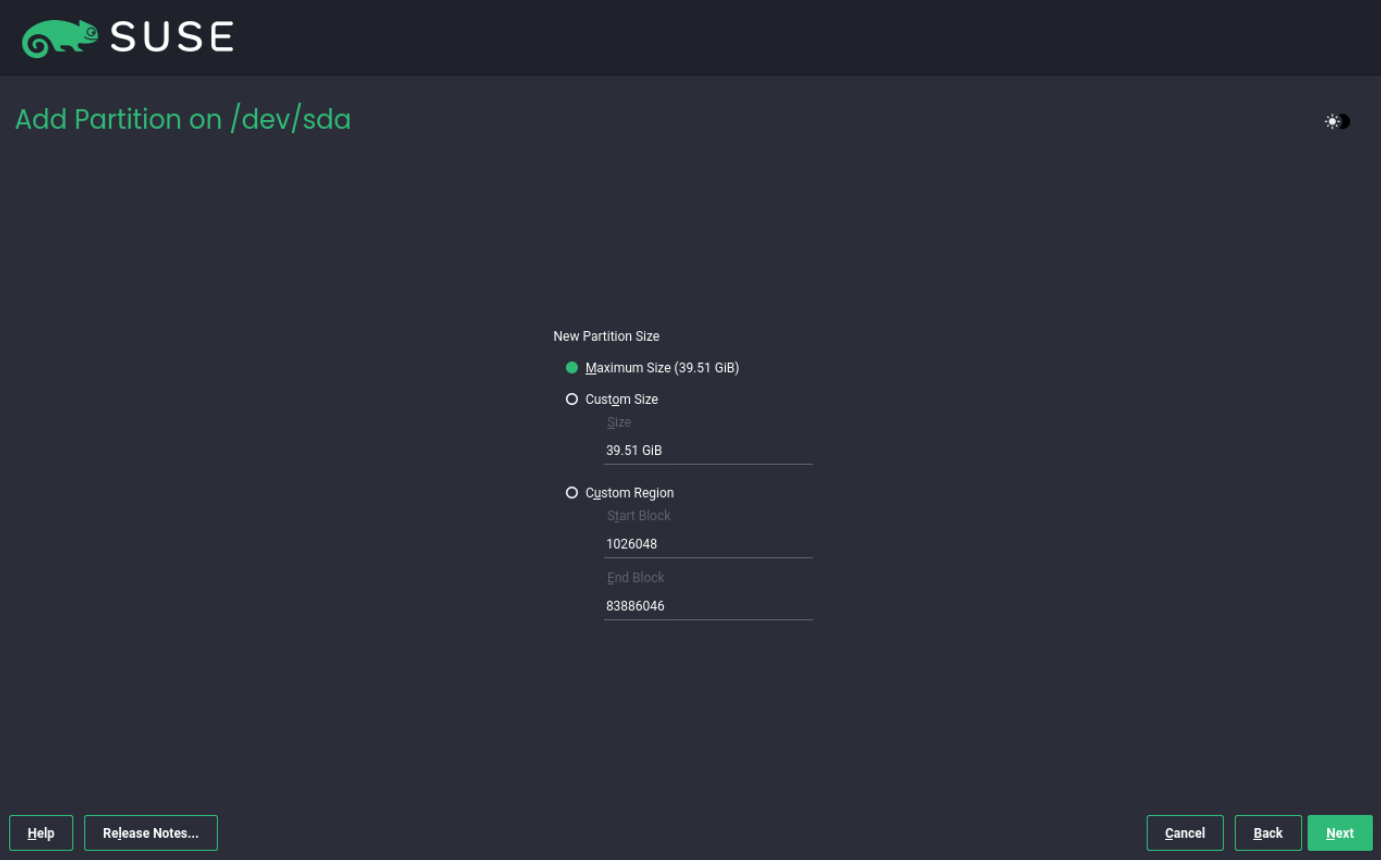
For the Role select Raw Volume (unformatted).

We can leave the settings below and click on Next.

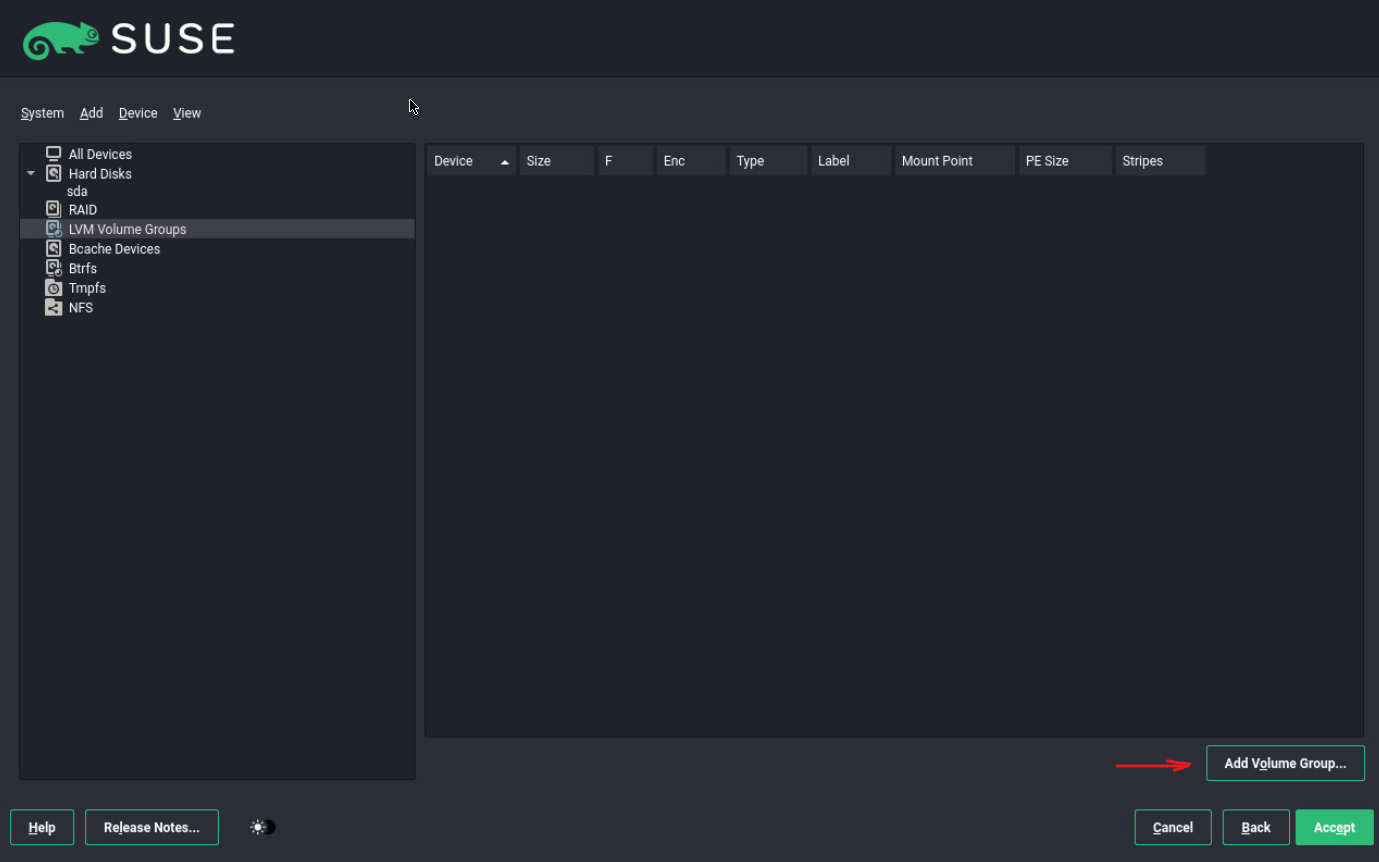
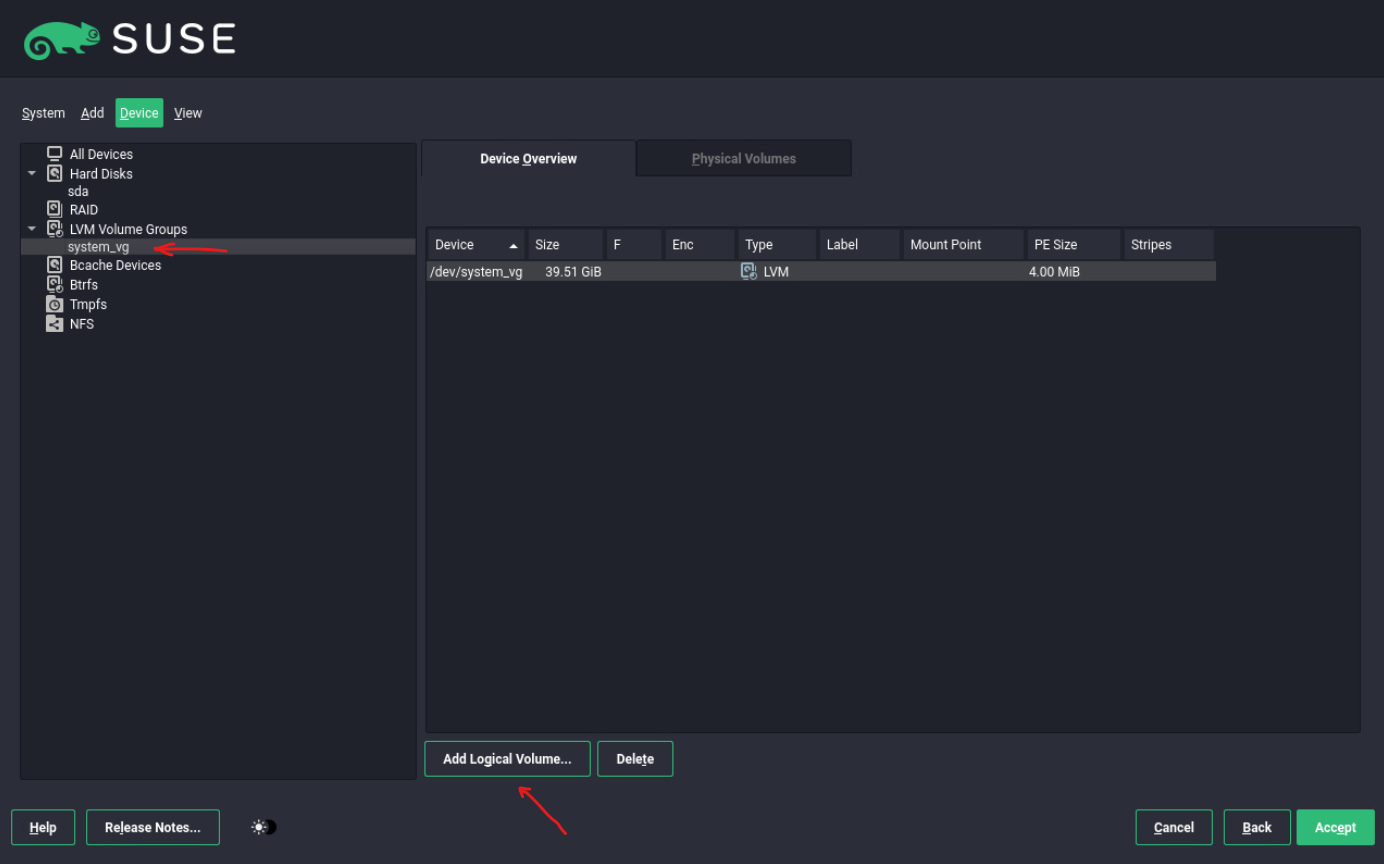
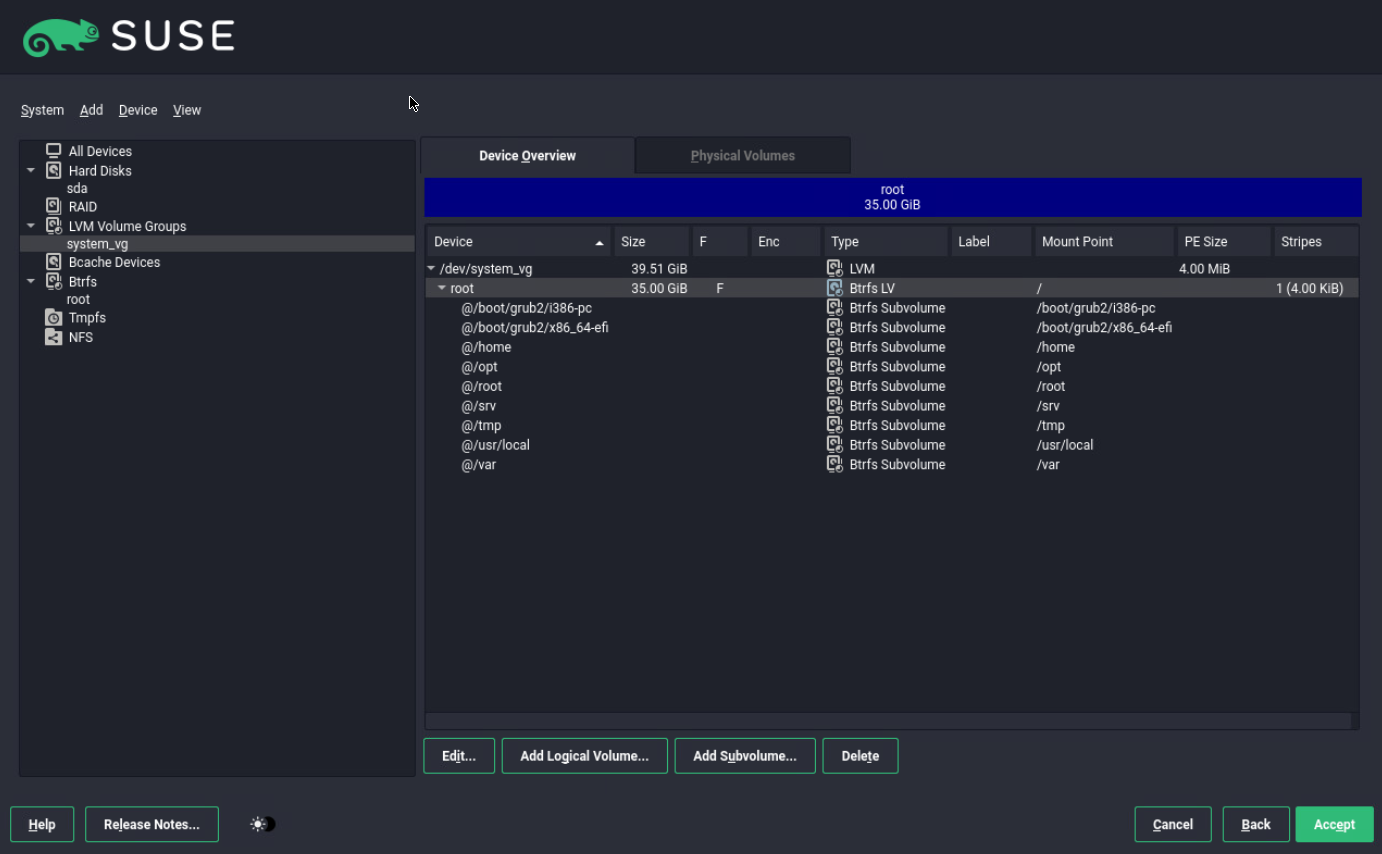
Looks good, now click on LVM Volume Groups. Next we create a new LVM physical volume (PV) and after that we can create two new logical volumes (LVs), one for the root file system and one for the swap volume.
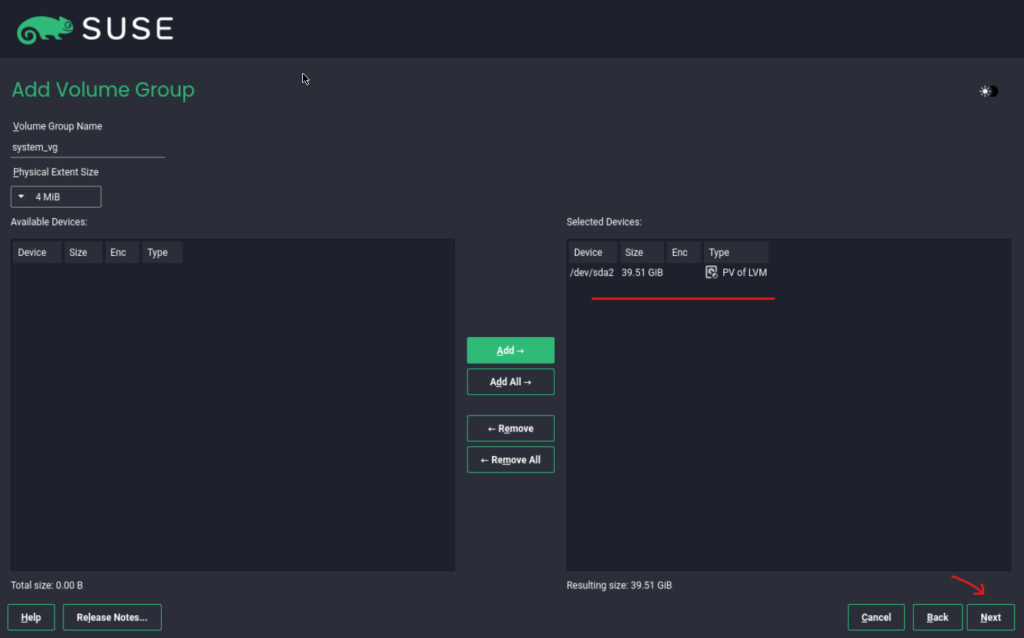
Click on Add Volume Group …
Enter a name for the new volume group, select the physical extent size, then select our previous created raw volume (unformatted), here /dev/sda2 and click on Add ->.
A physical extent (PE) is the smallest chunk of disk space LVM allocates inside a volume group. All logical volumes (LVs) are built from extents.
Use 4 MiB unless you have extremely large storage (multi-terabyte+ VGs).
For < 10 TB → 4 MiB is perfect.
For ~100 TB → consider 16 MiB or higher.
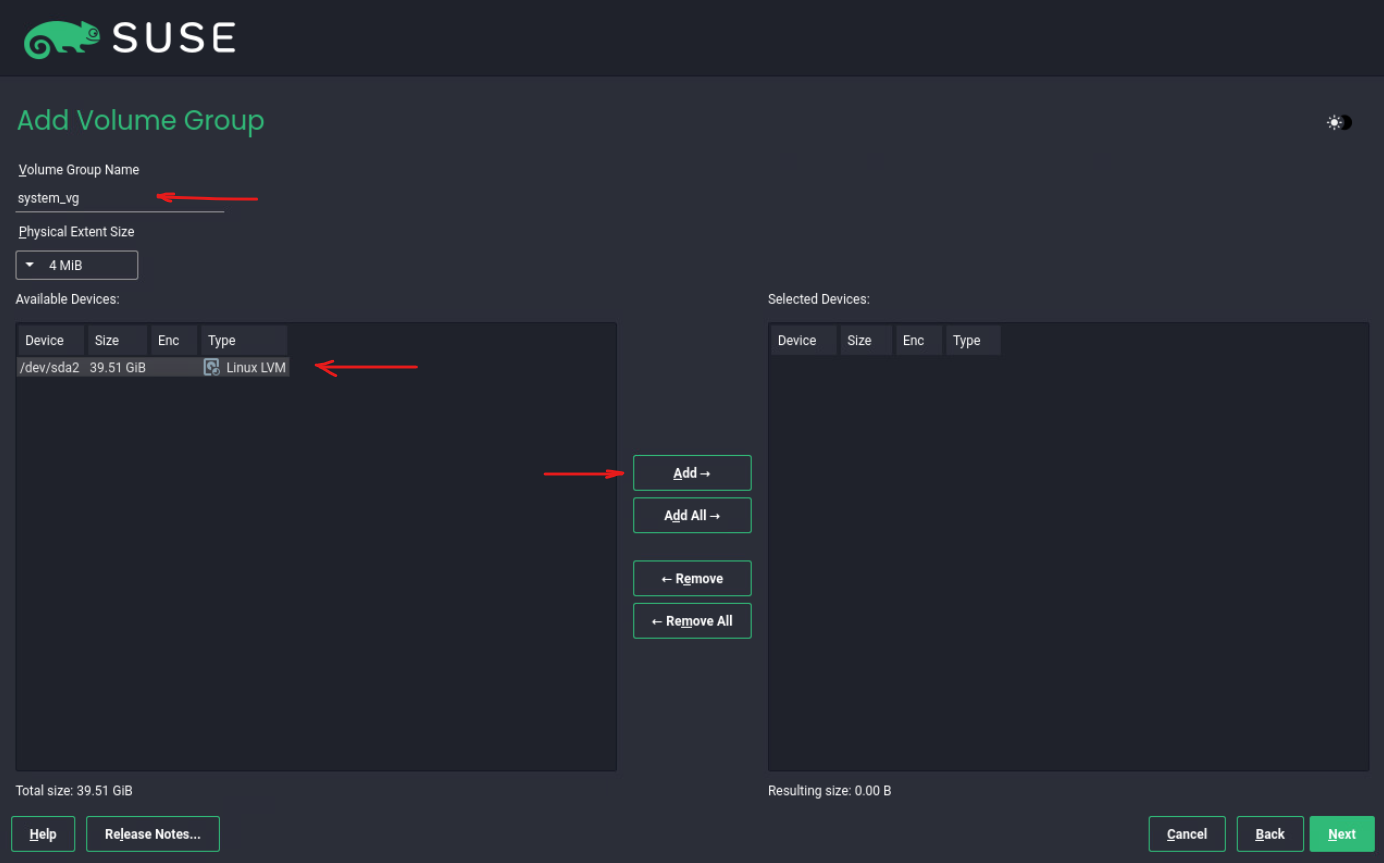
Click on Next.
Select the new volume group and click on Add Logical Volume …
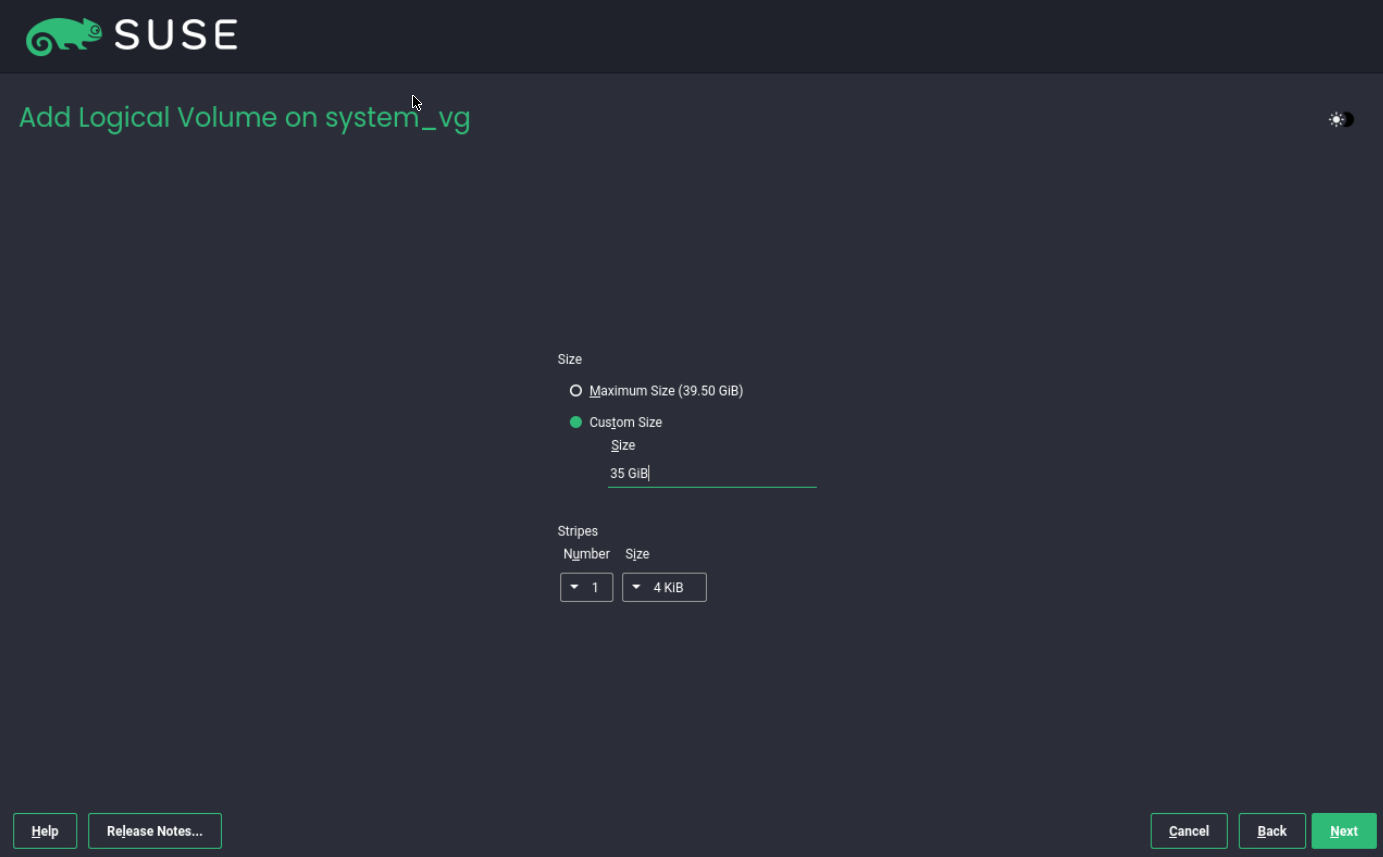
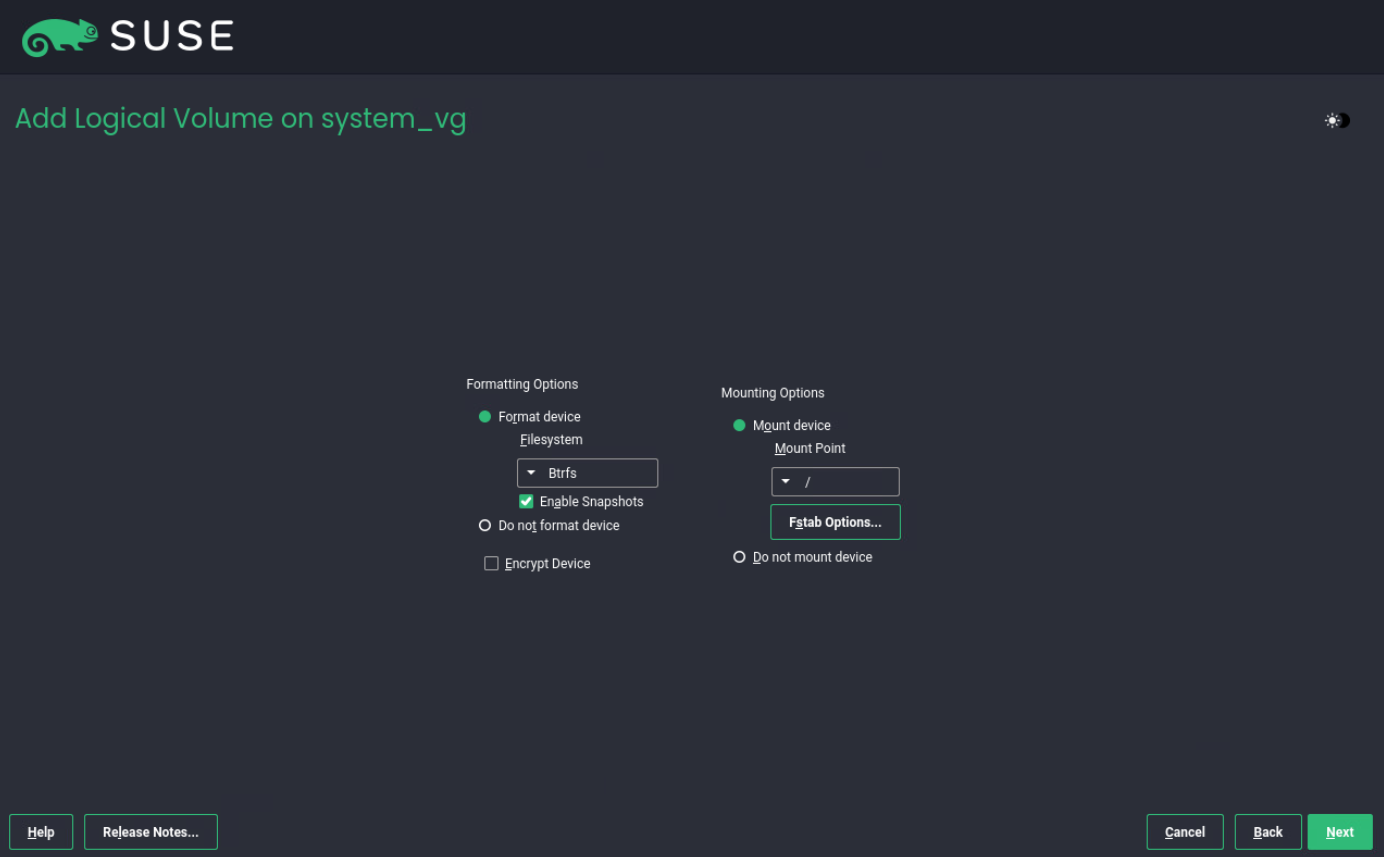
Enter a name for the new logical volume we use for the root file system.
In LVM you can choose between normal volumes and thin pools. Normal volumes are thick-provisioned, all space is allocated up front, giving simplicity and predictability.
Thin pools enable thin provisioning and efficient snapshots, only consuming space as data is written, but they require careful monitoring to avoid running out of space.

For the root file system volume I will set 35 GiB to leave 4,5 GiB for the swap volume.
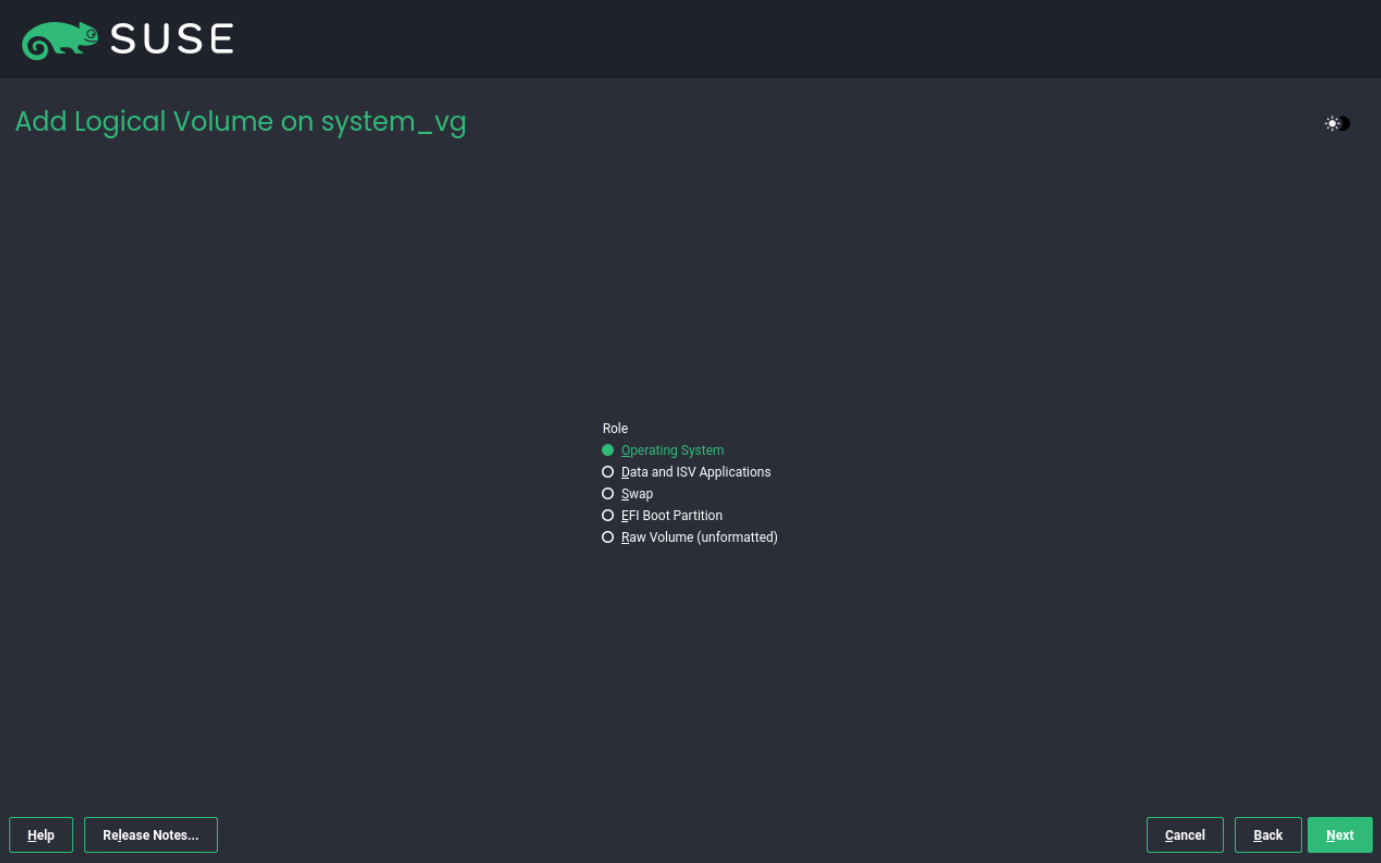
For the Role we need to select for the root file system below Operating System.
The setting below we can leave, so click on Next.
Looks good.
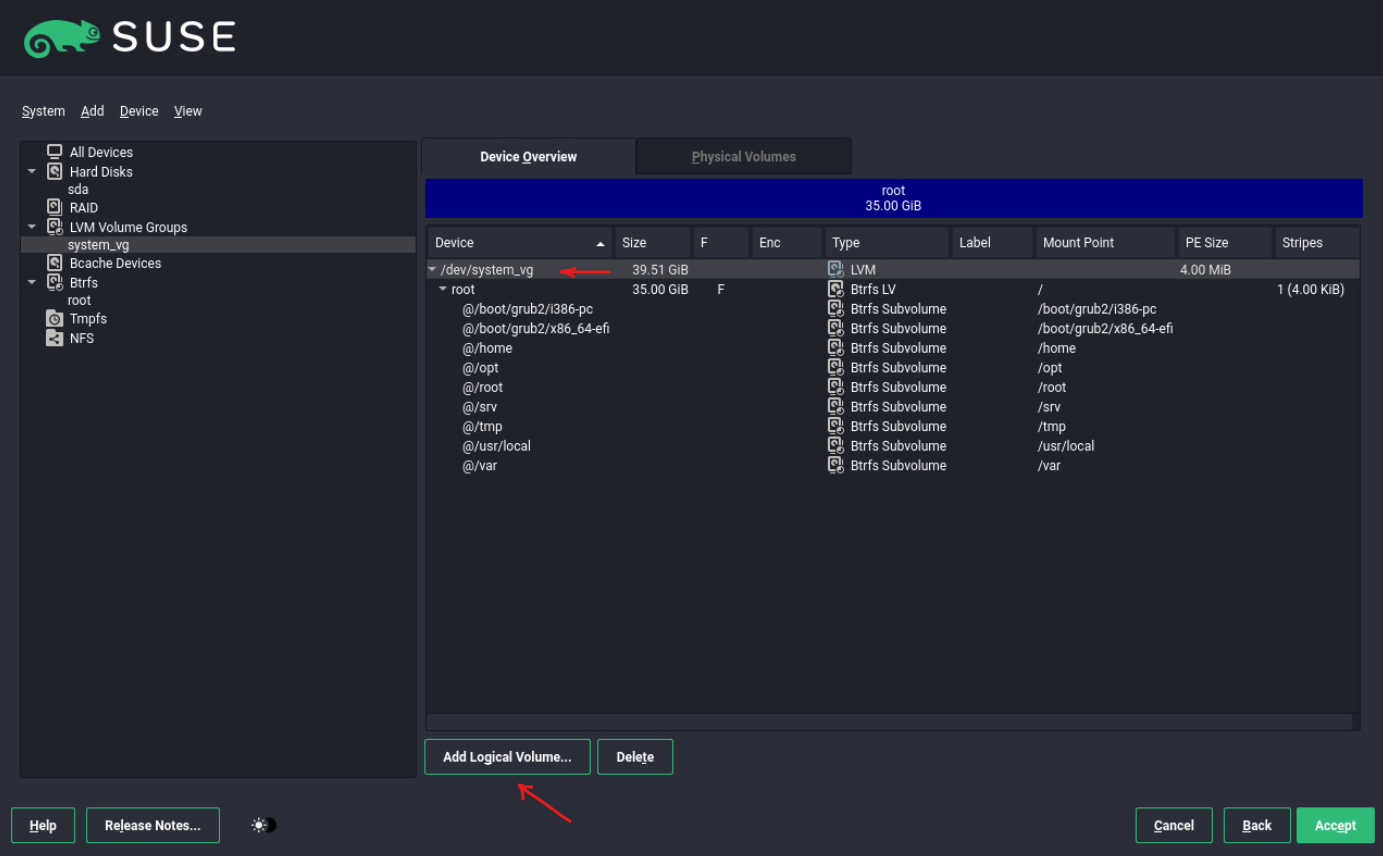
Select the volume group /dev/system_vg and click on Add Logical Volume … to finally add the swap volume we can use the left 4.5 GiB for.
Enter a name for our new swap volume.
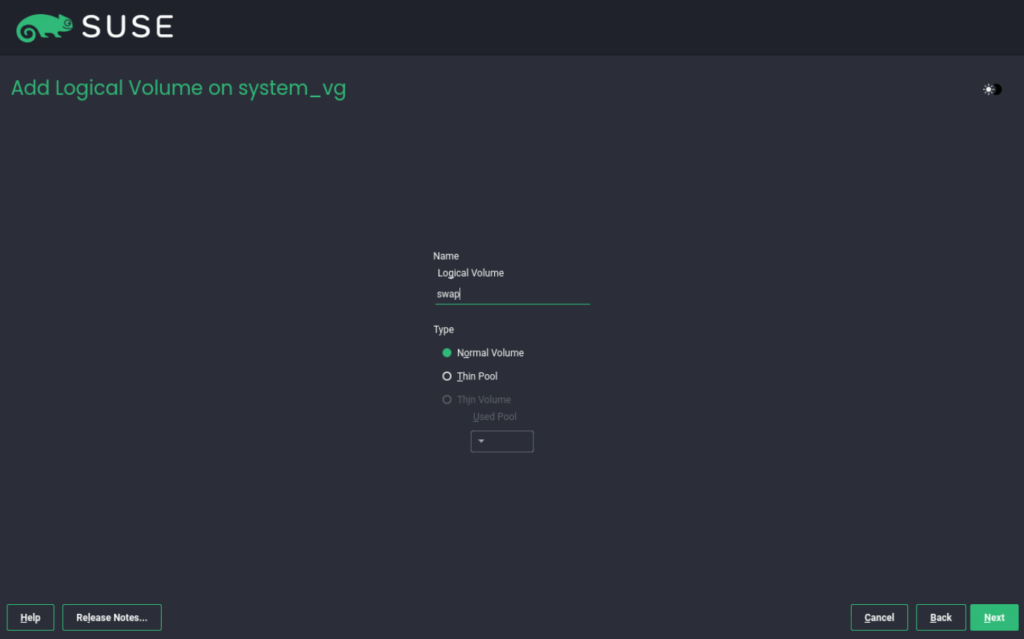
We will use all of the left space for the new swap volume.

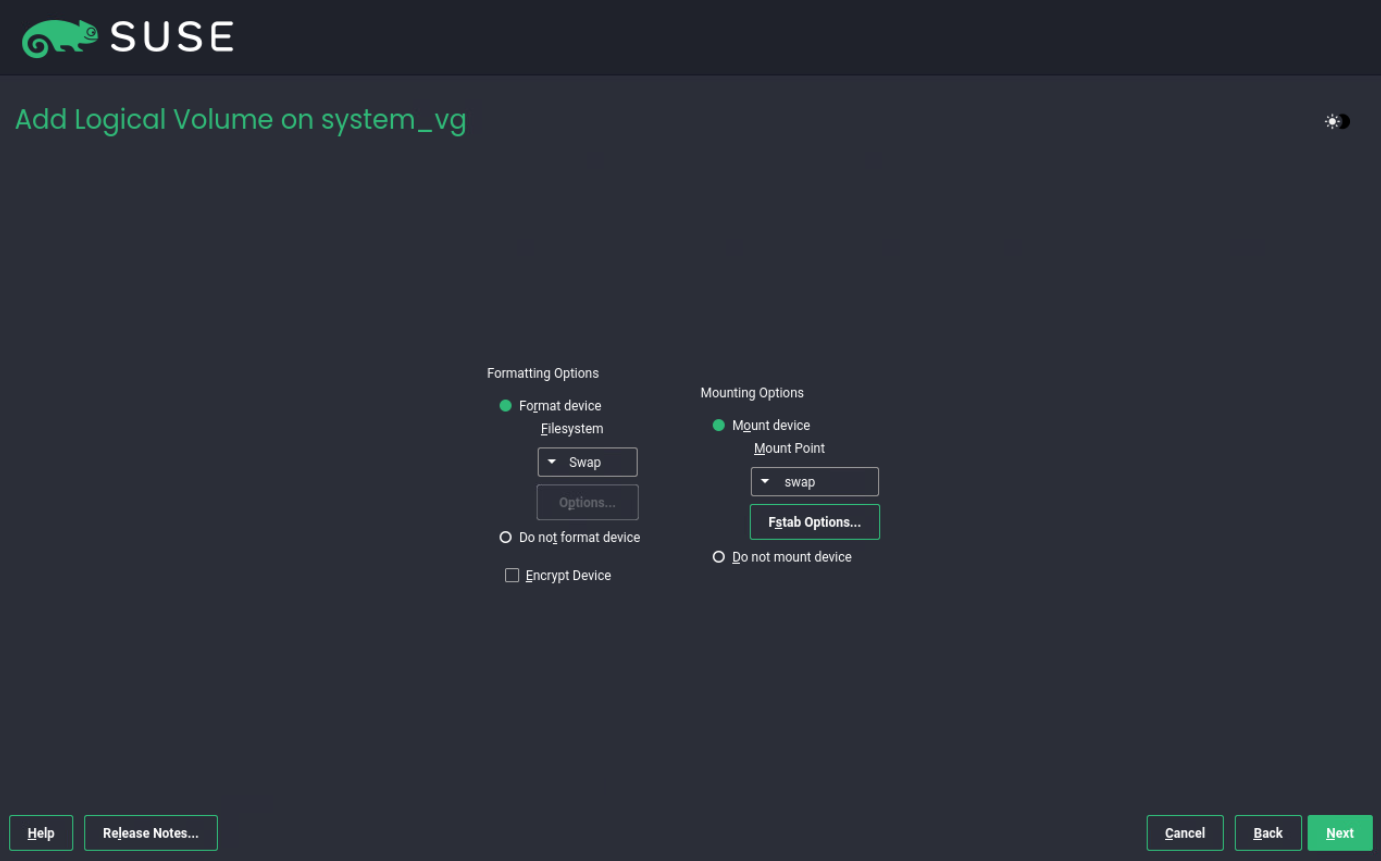
For the Role we need to select now Swap.
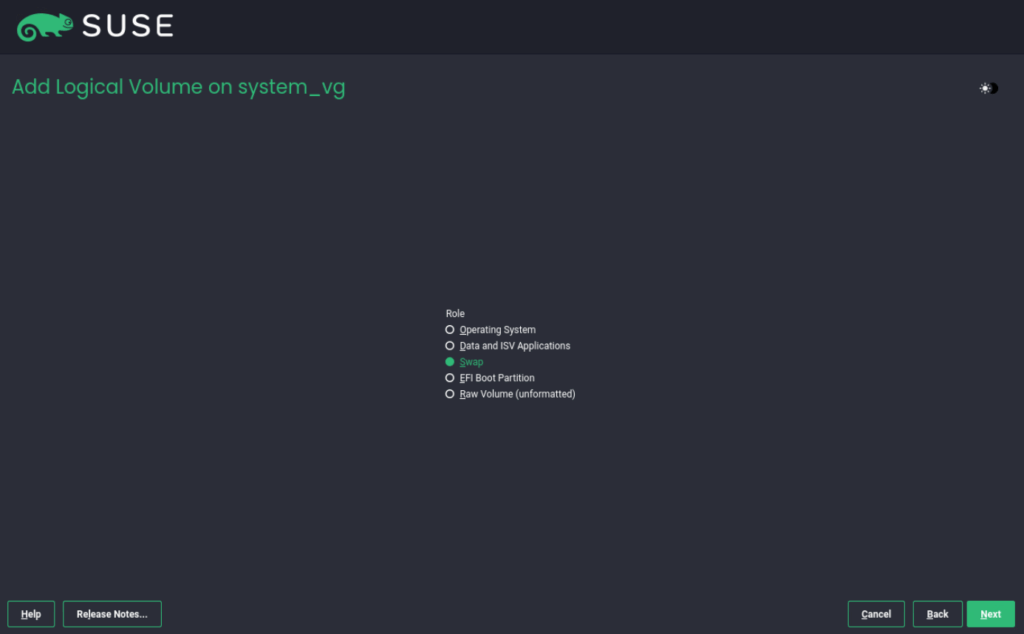
The settings below we can leave, click on Next.
Finally we can click on Accept to finish the file system layout.

Click on Next.
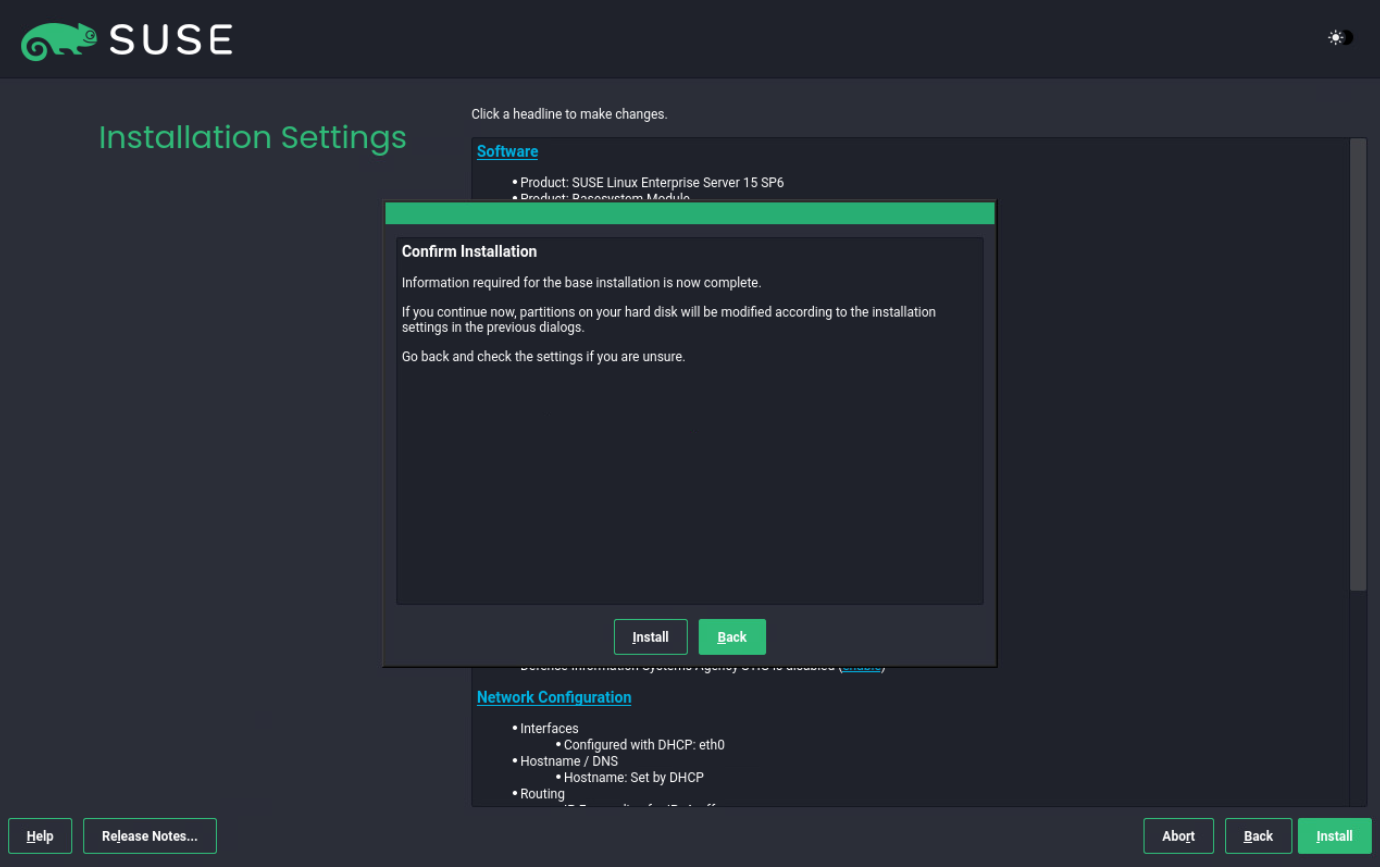
Finally we can click on Install.
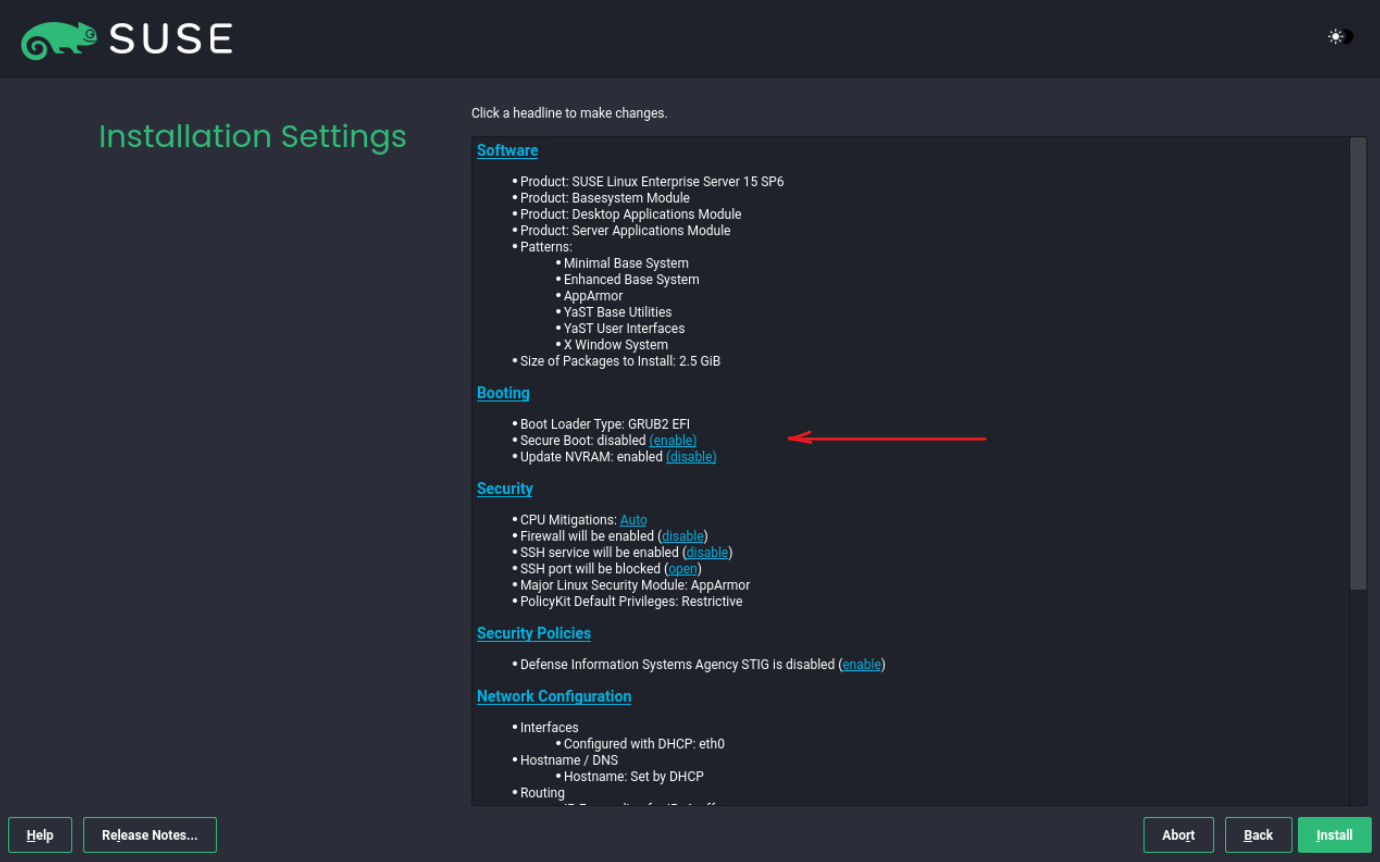
Below btw. I also disabled secure boot because not supported in case we want to migrate this machine to Azure later.
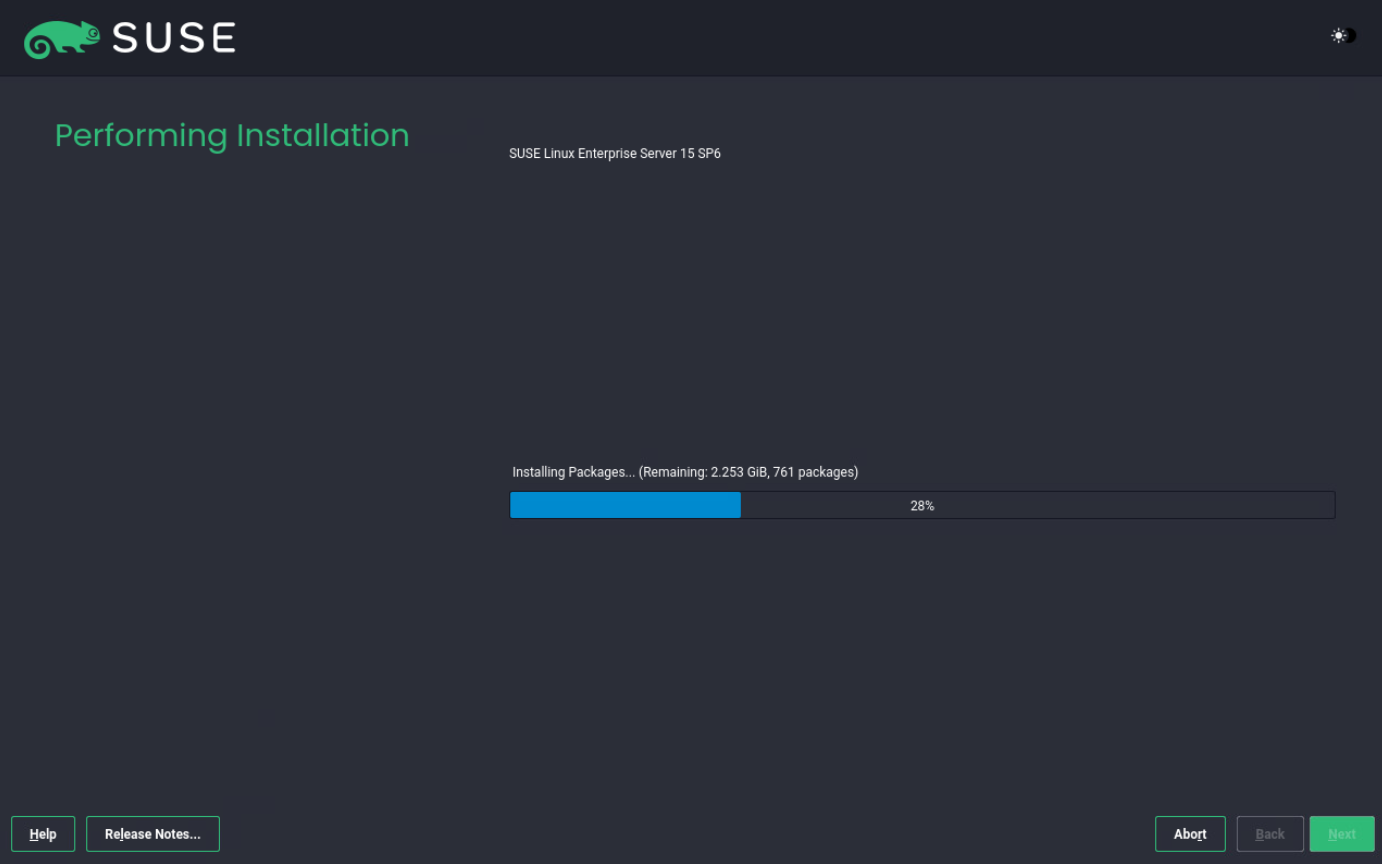
Click on Install.

Links
The Boot Loader GRUB 2
https://documentation.suse.com/sles/12-SP5/html/SLES-all/cha-grub2.html
Expert Partitioner
https://documentation.suse.com/sles/15-SP4/html/SLES-all/cha-expert-partitioner.html
Comparison of UEFI and BIOS – from an operating system perspective
https://www.suse.com/c/comparison-uefi-bios-operating-system-perspective/
EFI system partition
https://wiki.archlinux.org/title/EFI_system_partition