Mastering Linux DM Multipathing and iSCSI Block Storage on SUSE Linux Enterprise Server
Linux Device Mapper Multipath (DM Multipath) is a feature used in enterprise storage environments to provide redundancy and improved performance by allowing a system to access storage devices over multiple physical paths.
For this post I will use iSCSI block storage provided by a Microsoft iSCSI Target server to show how we can set up DM multipath on a SUSE Linux Enterprise Server.
Finally we connect an iSCSI target (virtuell disk) to a SUSE Linux Enterprise Server by using multiple NICs/IP addresses on the iSCSi Target server to provide at least two physical paths to connect the disk and showing how DM Multipathing works.
About how to set up DM multipath on Red Hat Enterprise Linux you can read my following post.
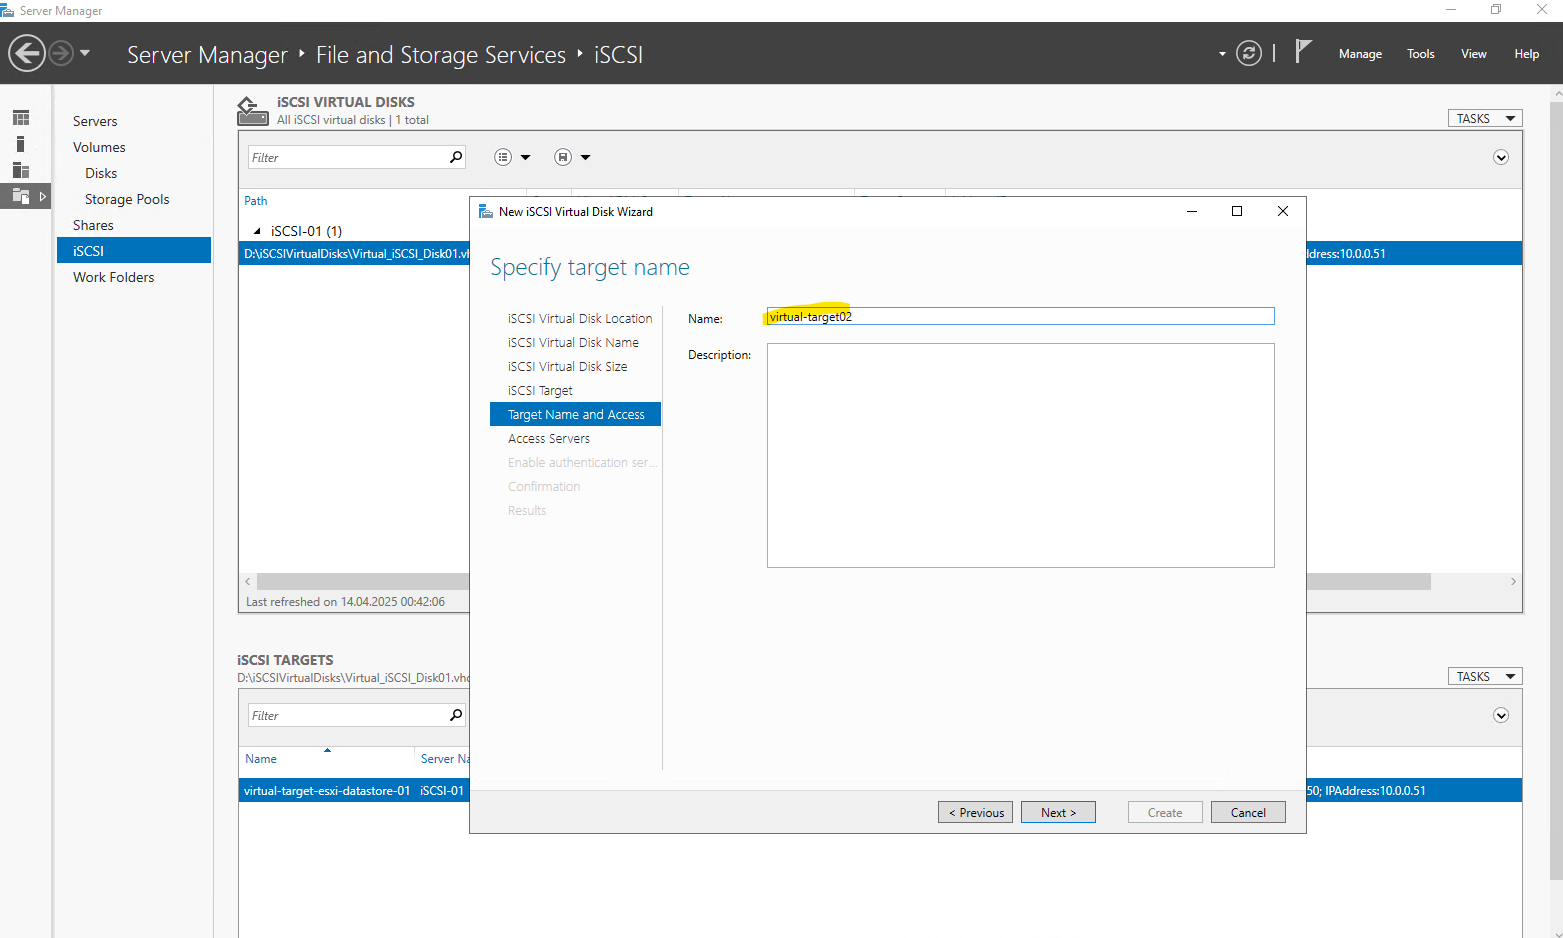
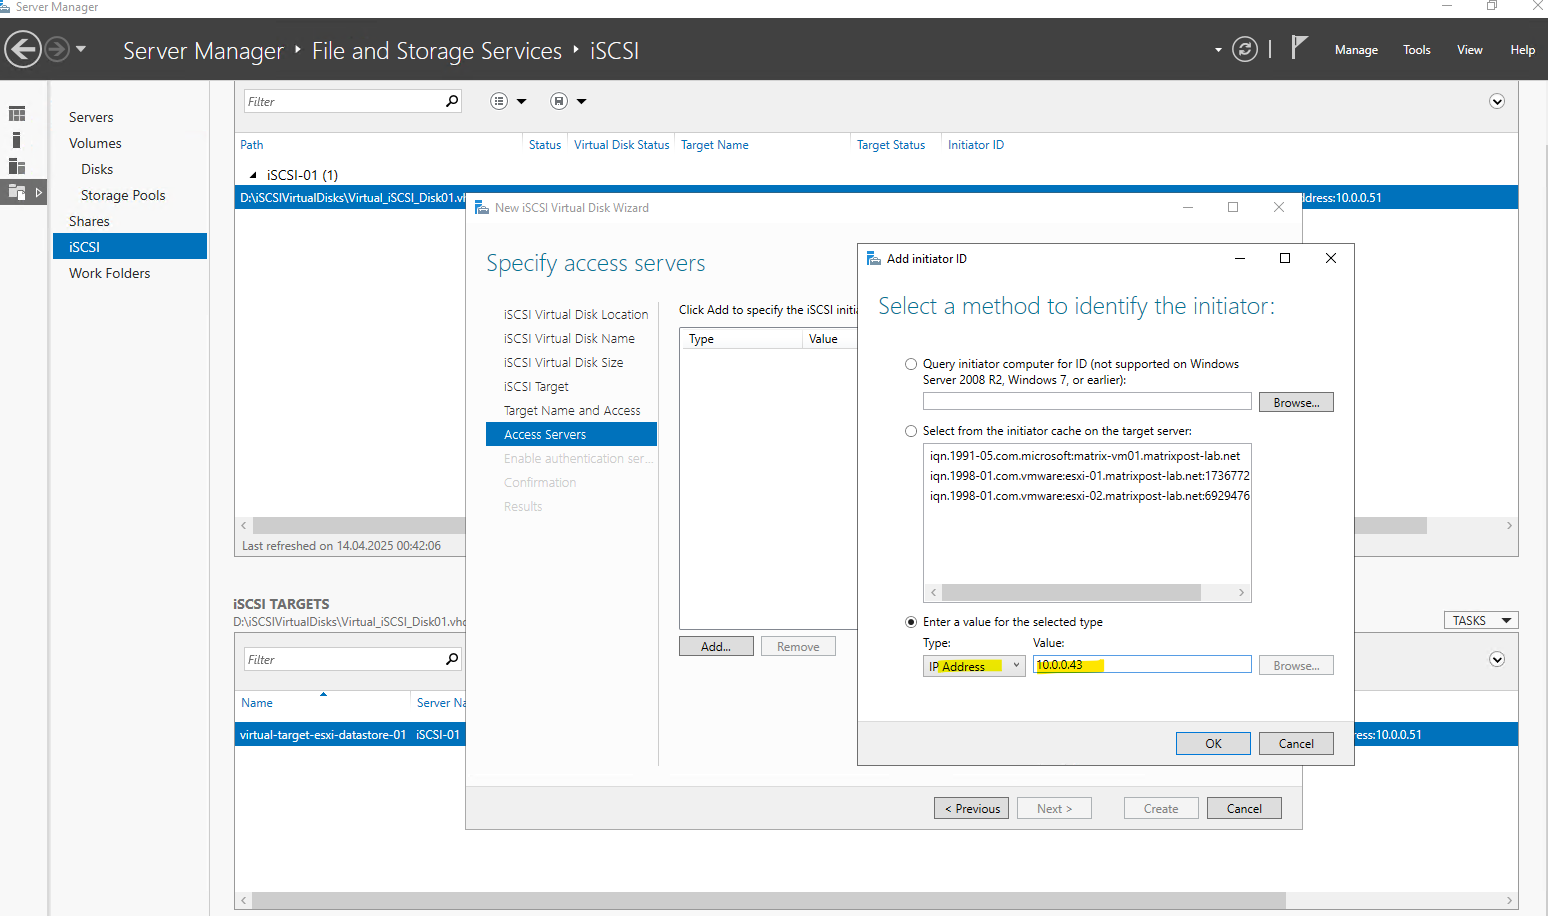
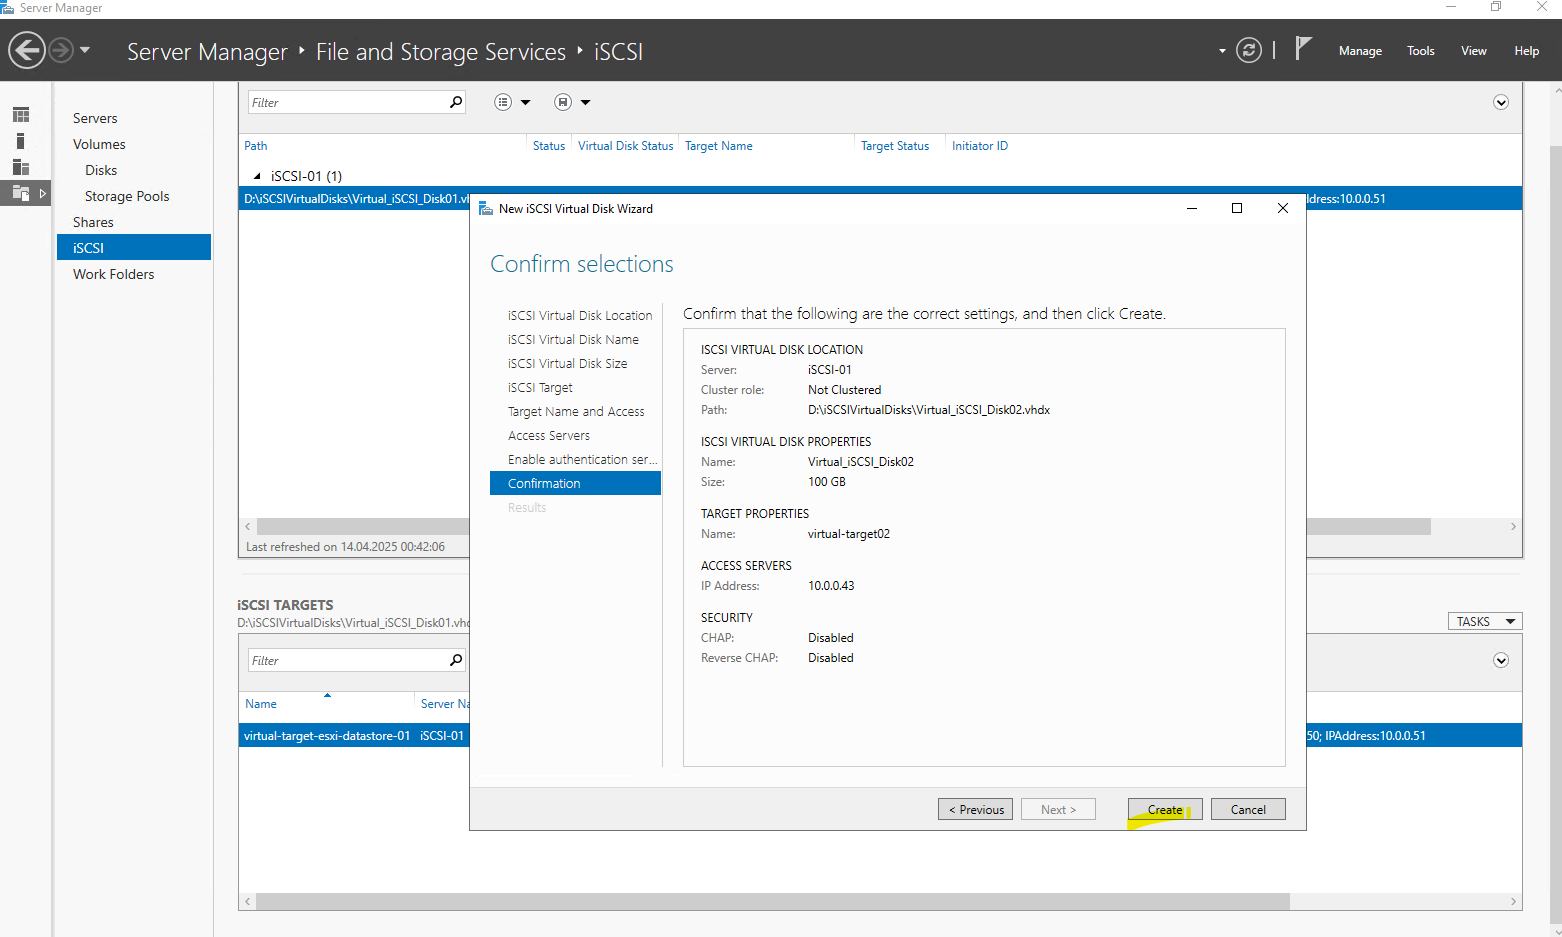
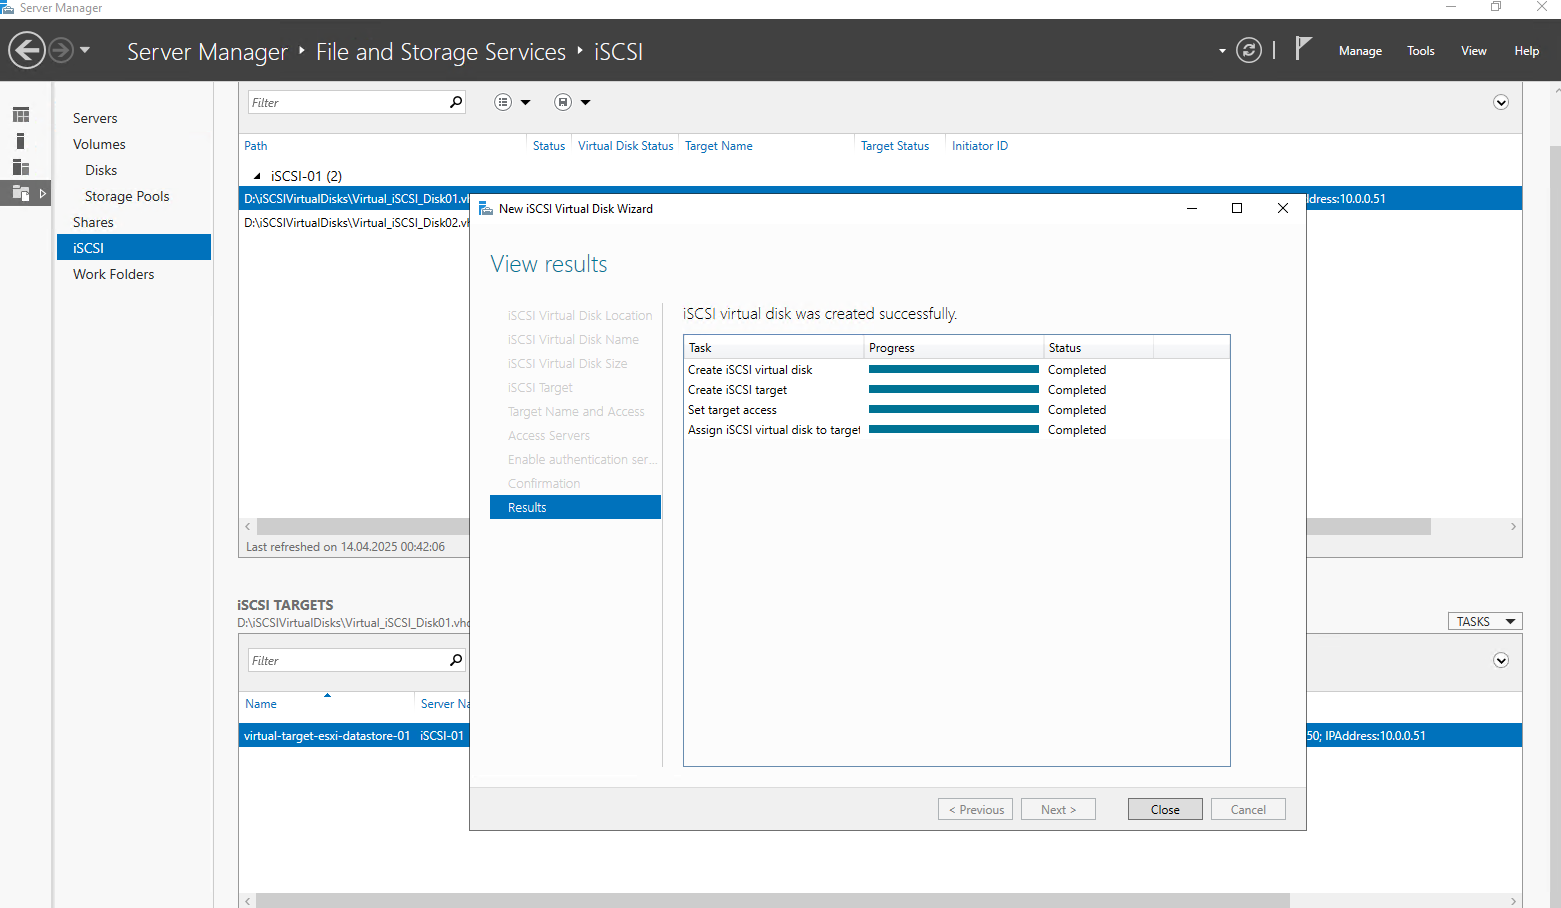
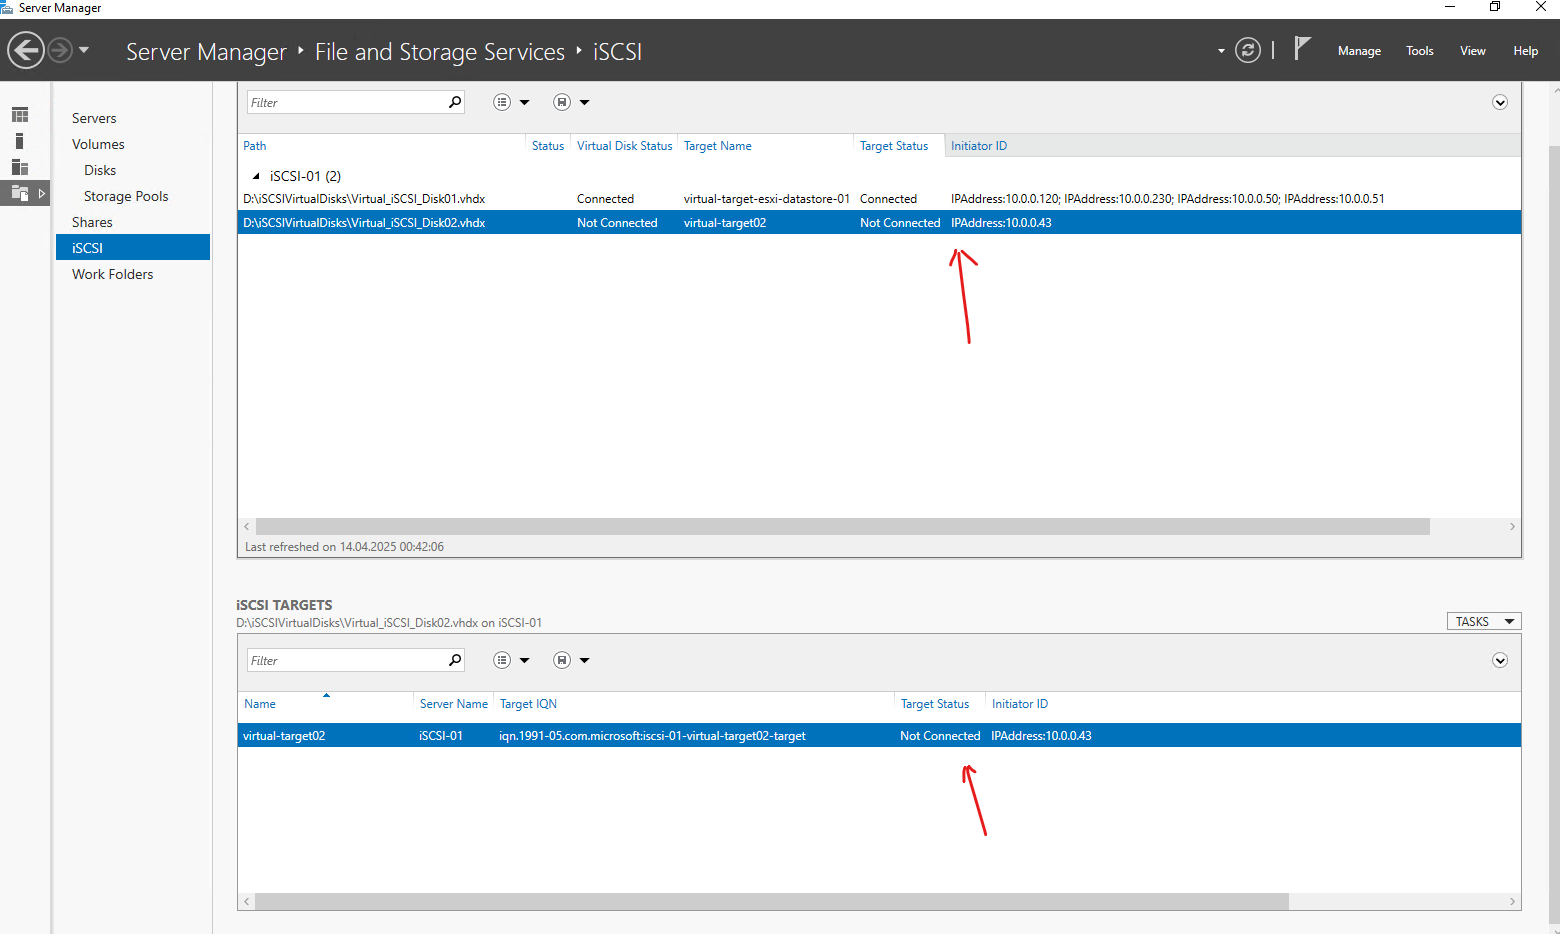
Set up the iSCSI Target Server
About how to set up a Microsoft iSCSI Target Server step by step you can also read my following post.
Set up the iSCSI Initiator on SUSE Linux Enterprise
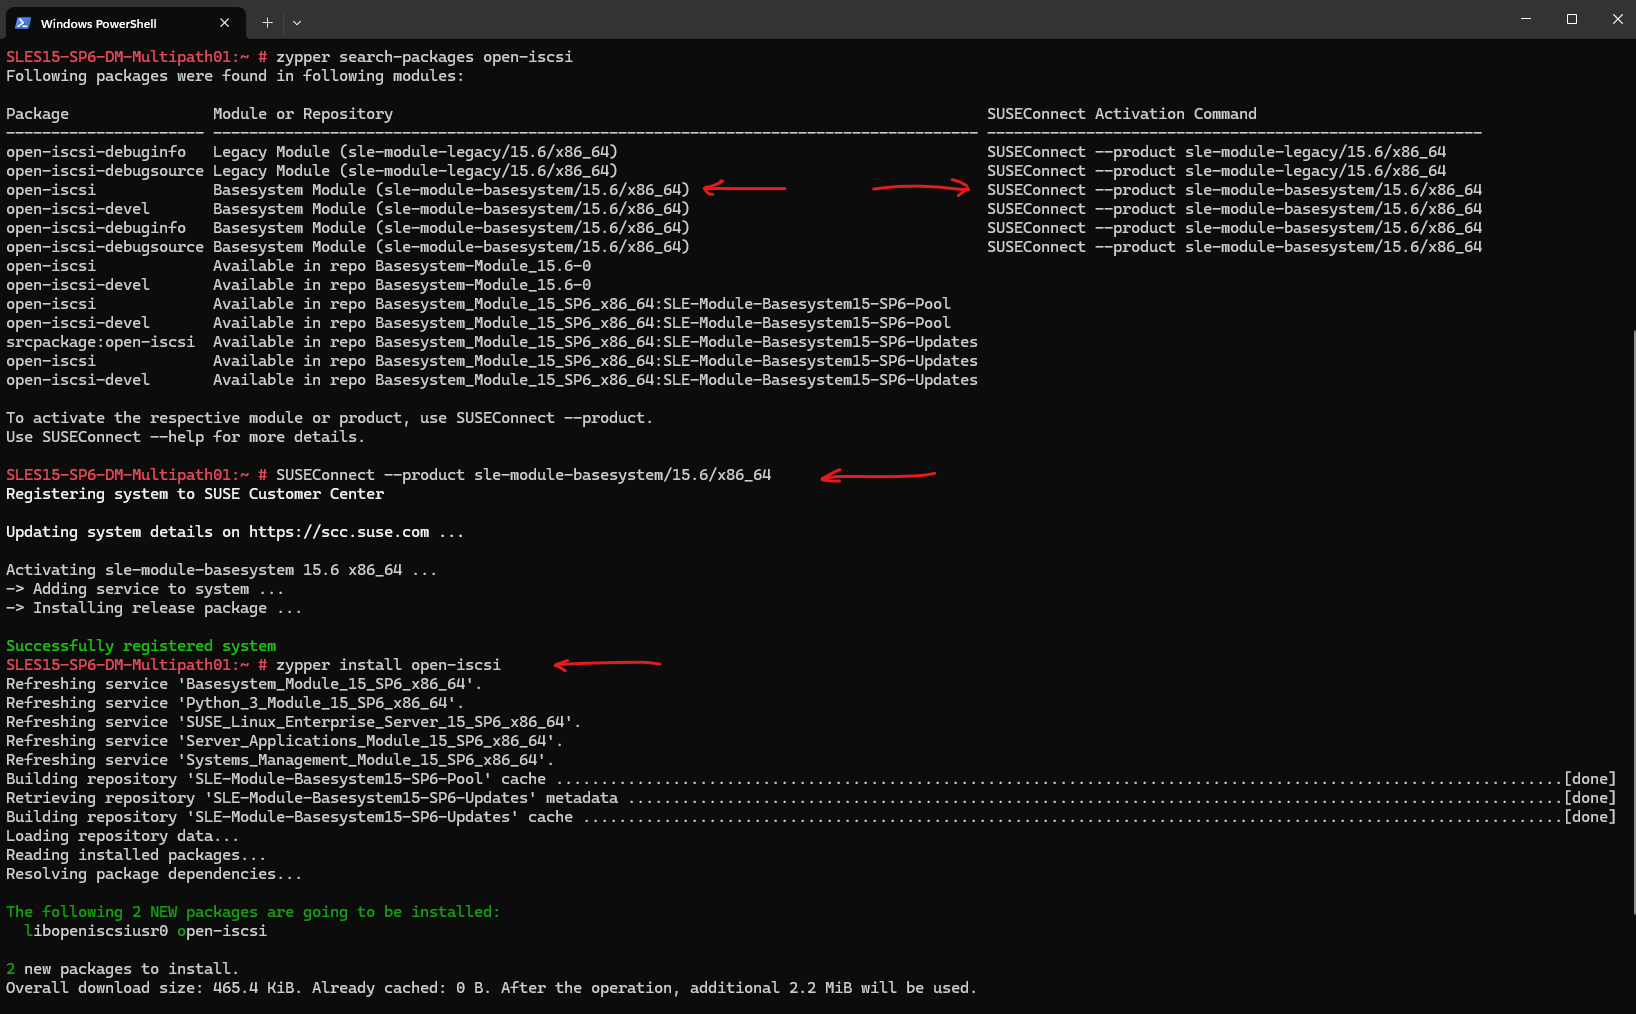
The iSCSI initiator on SUSE Linux Enterprise Server we can install by using the following packages:
- open-iscsi
- yast2-iscsi-client
The iSCSI initiator can be used to connect to any iSCSI target. The configuration of iSCSI initiator involves two major steps: the discovery of available iSCSI targets and the setup of an iSCSI session. Both can be done with YaST.
Install open-iscsi.
# zypper install open-iscsi
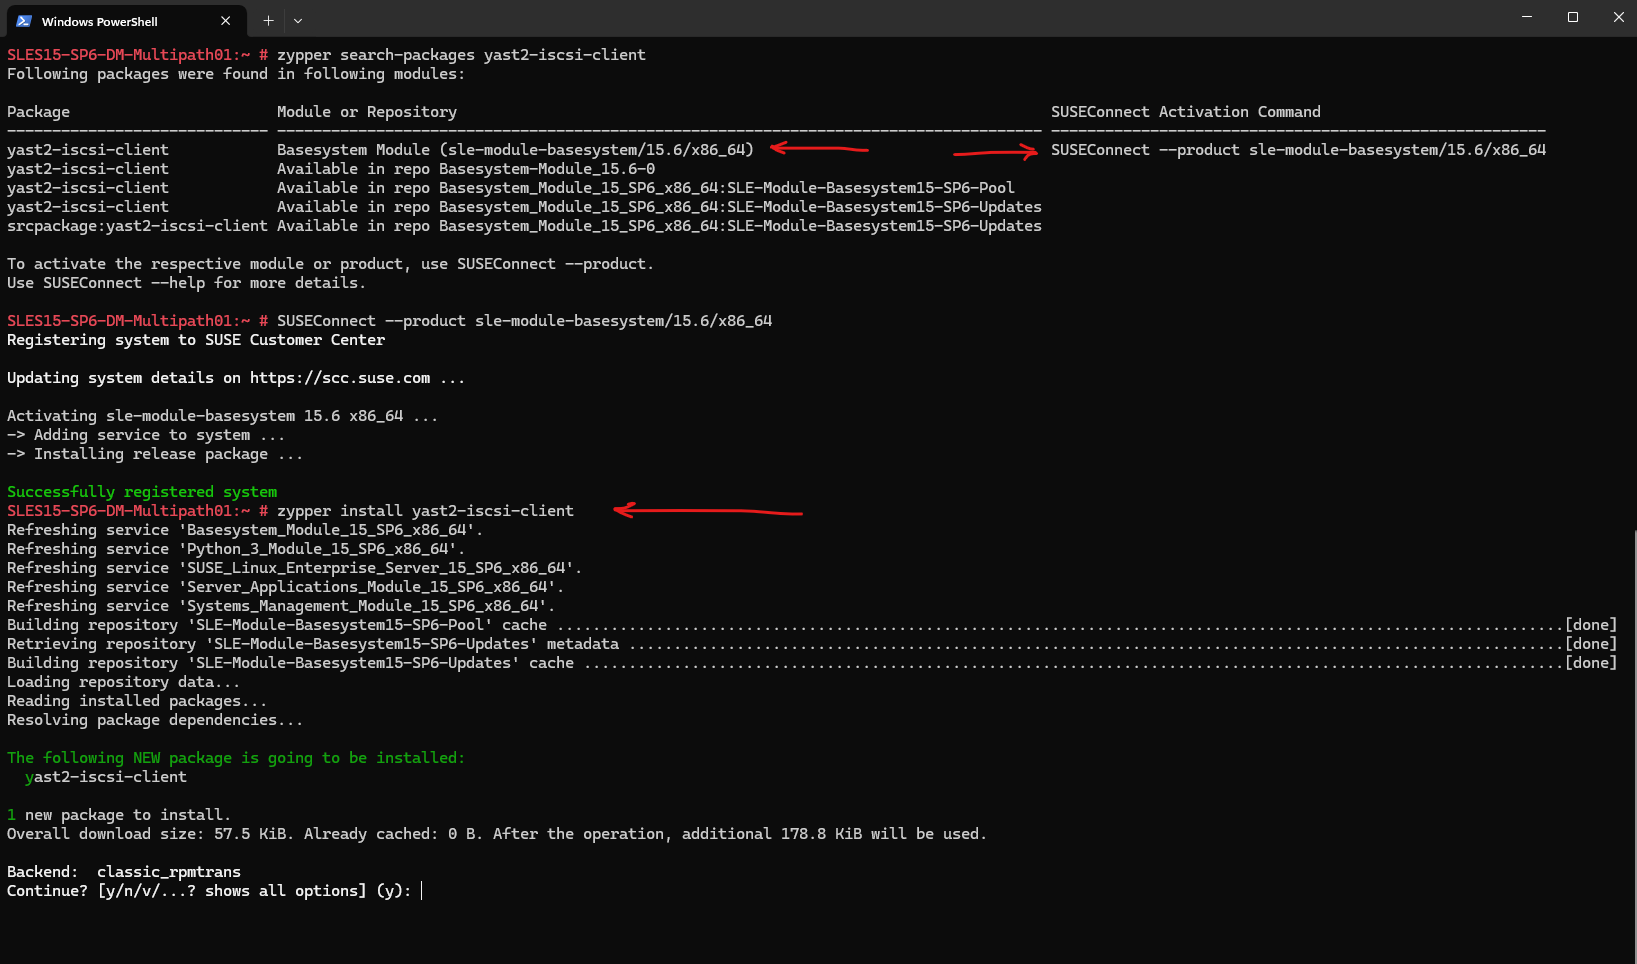
Install yast2-iscsi-client.
# zypper install yast2-iscsi-client
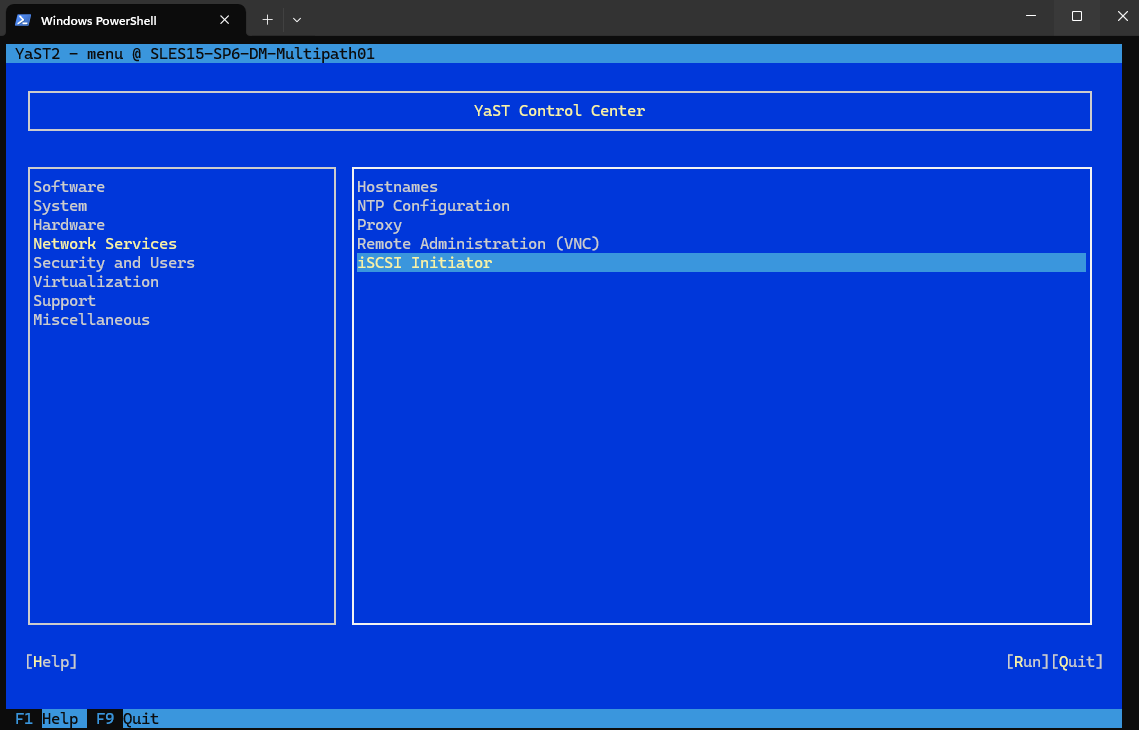
Open Yast and navigate to Network Services -> iSCSI Initiator.
Switch to the Service tab.
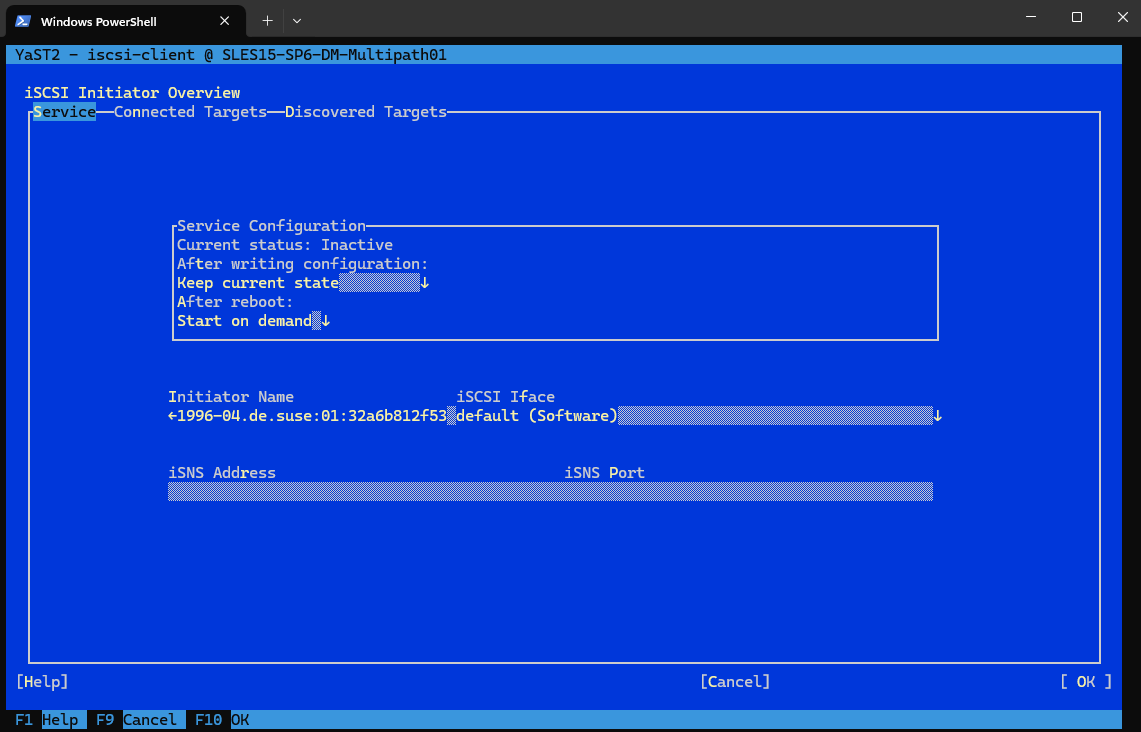
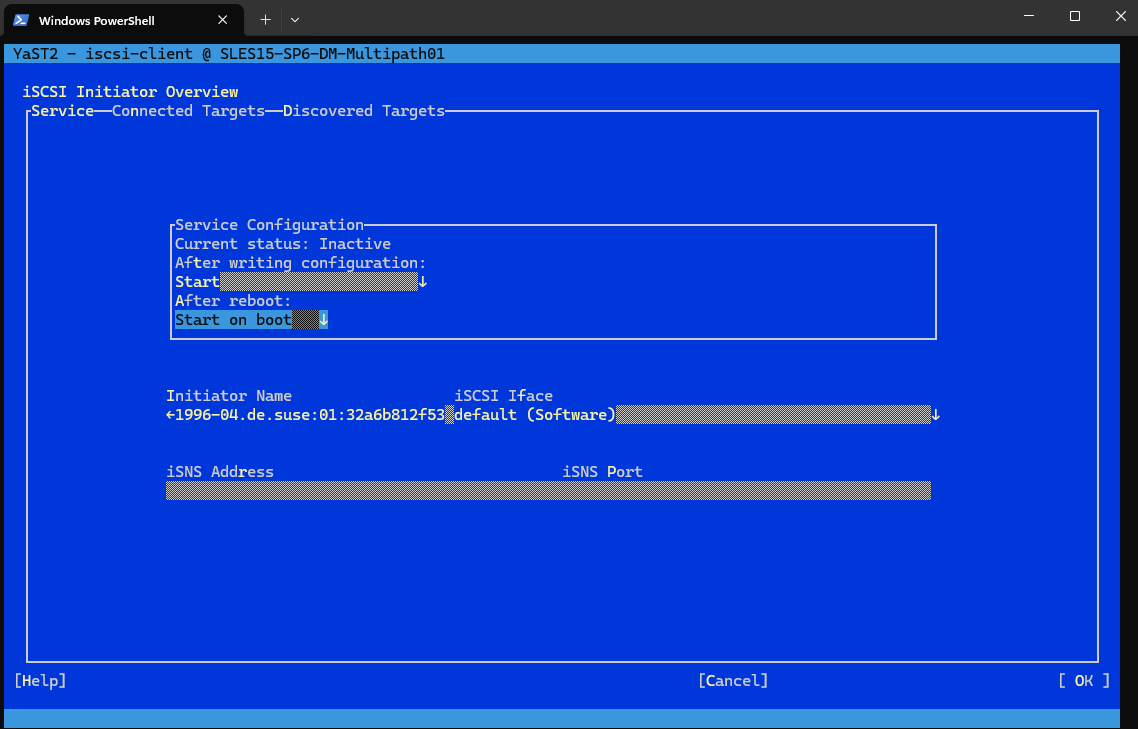
Under After writing configuration, define what to do if there is a configuration change. Bear in mind that available options depend on the service current status.
The Keep current state option keeps the service in the same status.
I will select Start.

In the After reboot menu specify action that will take place after reboot:
- Start on boot – to start the service automatically on boot.
- Start on demand – the associated socket will be running and if needed, the service will be started.
- Do not start – the service is not started automatically.
- Keep current settings – the service configuration is not changed.
I will select Start on boot.
Specify or verify the Initiator Name.
Specify a well-formed iSCSI qualified name (IQN) for the iSCSI initiator on this server. The initiator name must be globally unique on your network. The IQN uses the following general format:
iqn.yyyy-mm.com.mycompany:n1:n2
where n1 and n2 are alphanumeric characters. For example:
iqn.1996-04.de.suse:01:a5dfcea717a
The Initiator Name is automatically completed with the corresponding value from the /etc/iscsi/initiatorname.iscsi file on the server.
Connect to iSCSI Target by using Yast
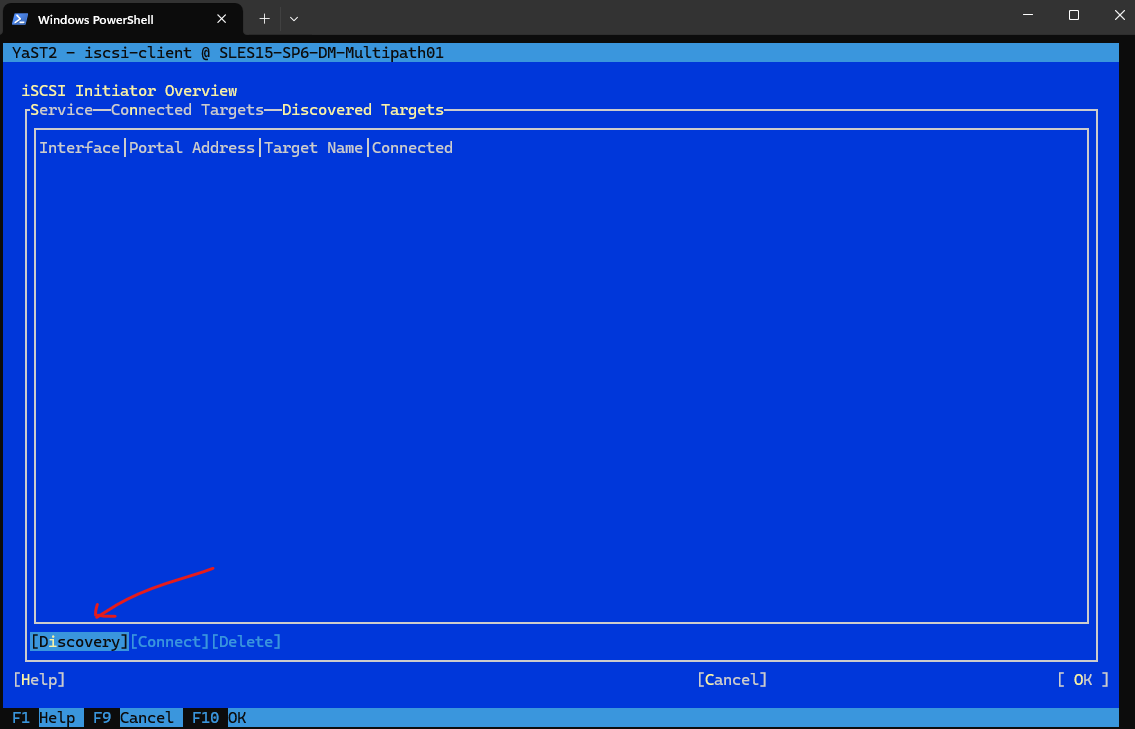
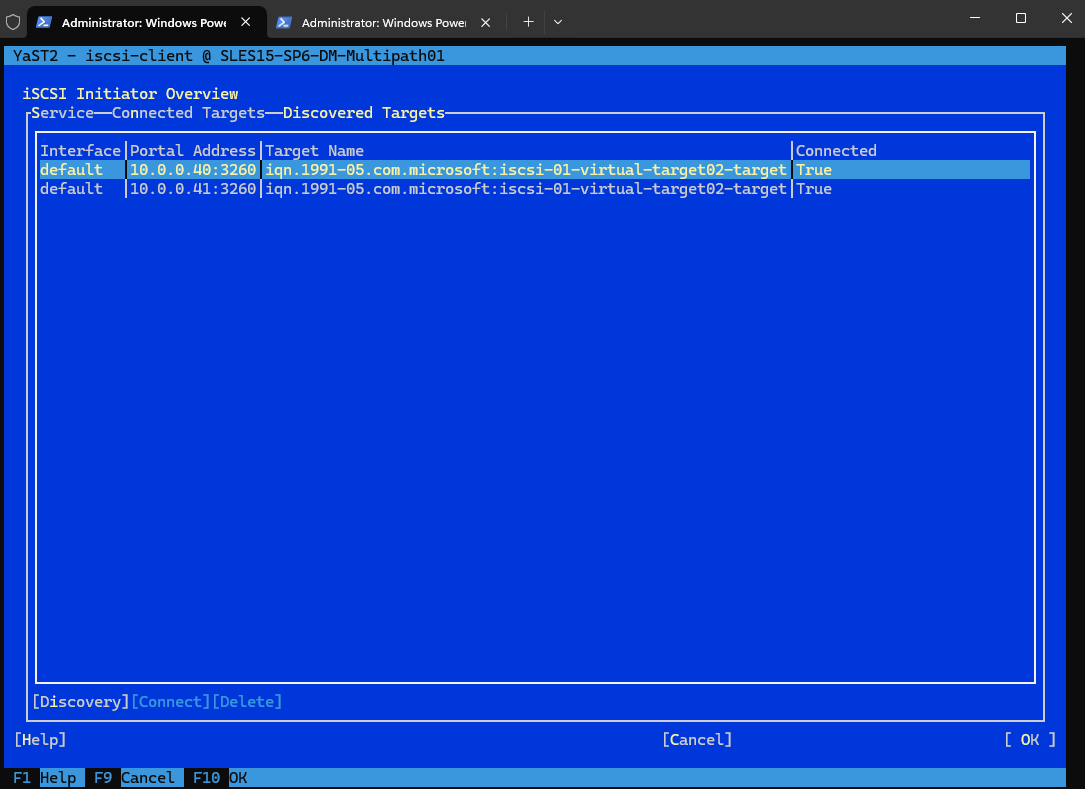
To connect to an iSCSI target, select iSCSI Initiator in YaST and then select the Discovered Targets tab.
Click Discovery to open the iSCSI Initiator Discovery dialog.
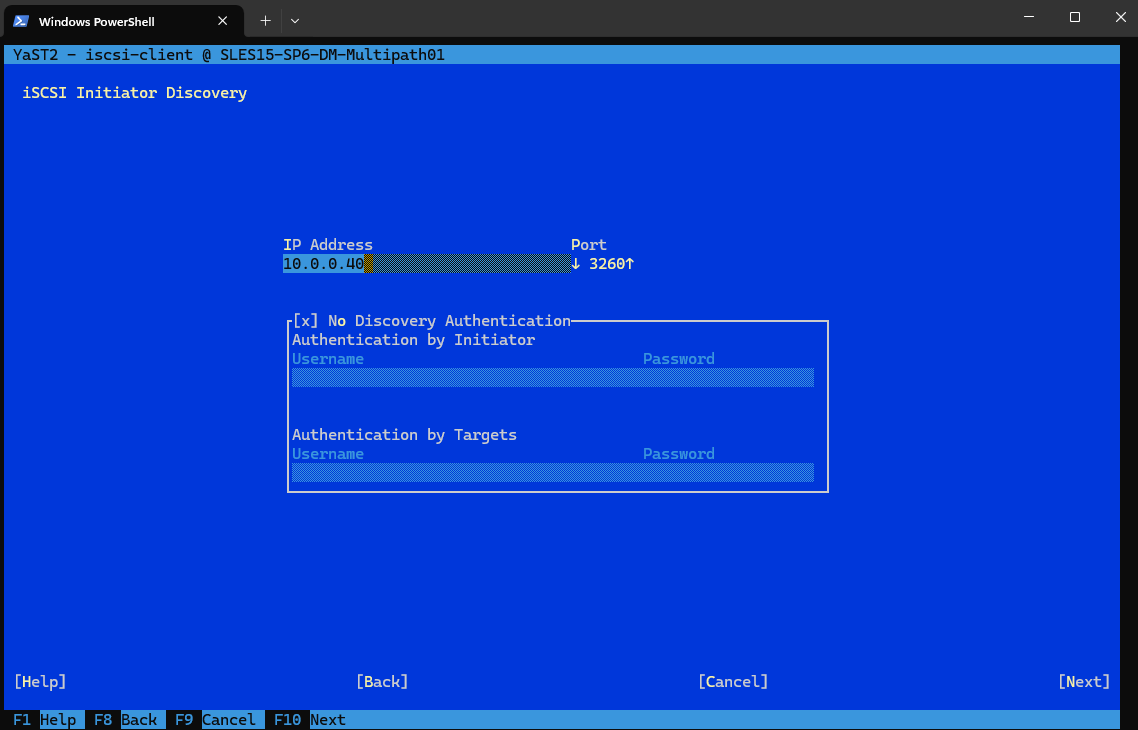
Enter the IP address and change the port if needed. The default port is 3260.
If authentication is required, deselect No Discovery Authentication, then specify the credentials for Authentication by Initiator or Authentication by Targets.
Because my iSCSI Target server is using two NICs to provide multipathing, we will see the target (same virtuell disk) for each of these NICs and its IPs.
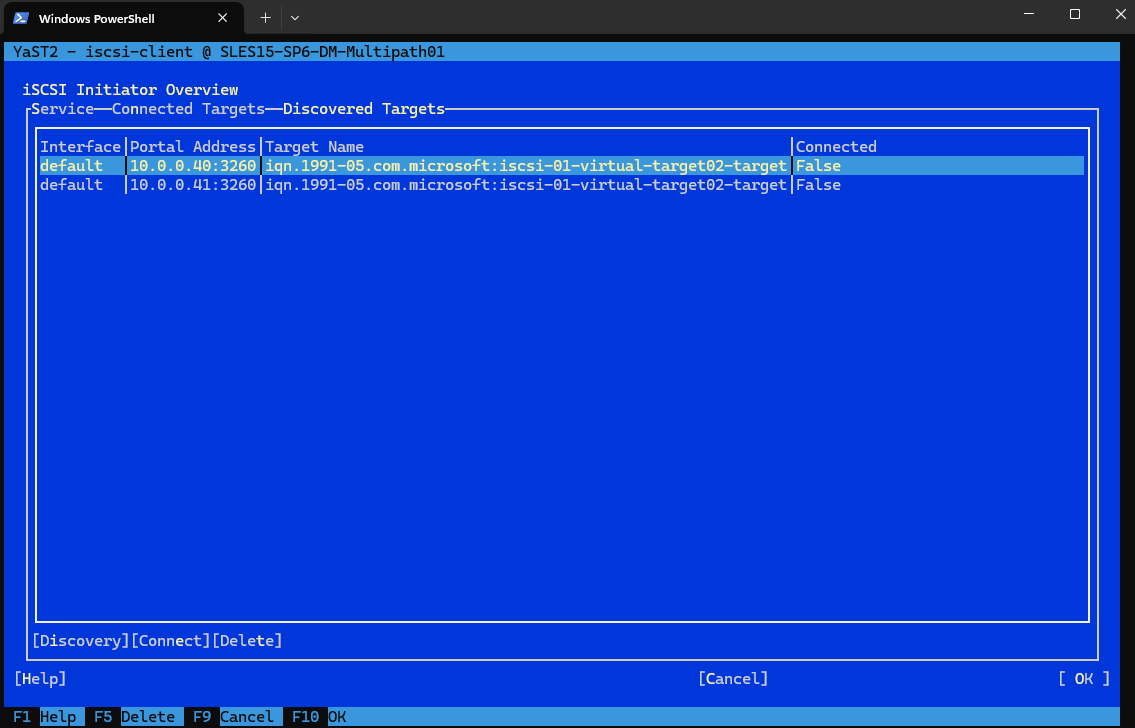
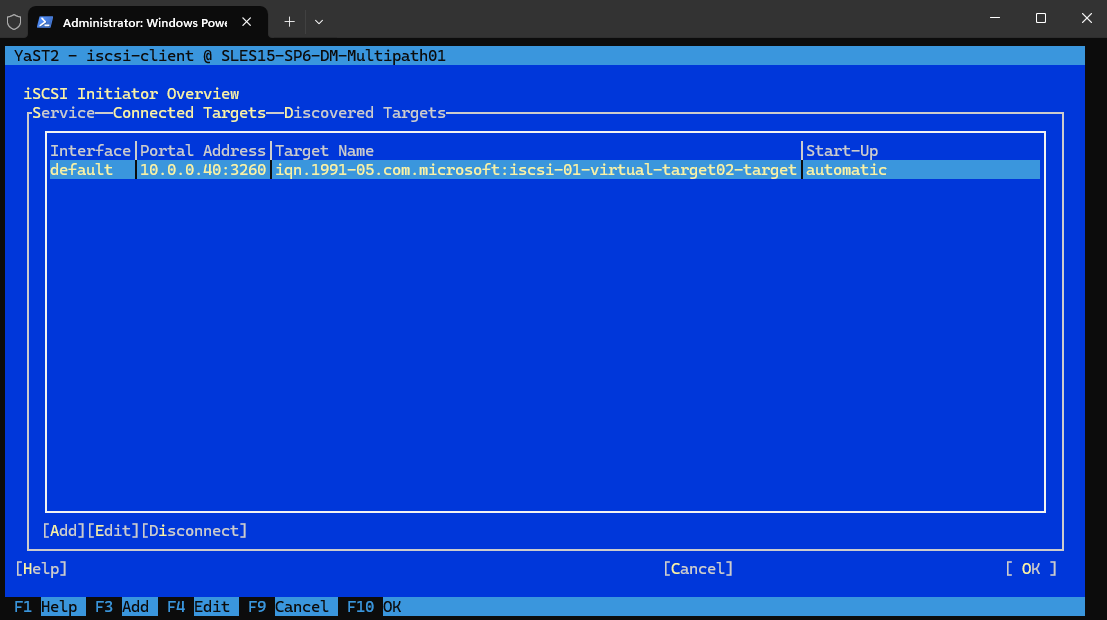
I will first just connect to the iSCSI Target by using its first IP address 10.0.0.40 selecting and clicking Connect. Afterwards the iSCSI Target is shown up under connected targets.
To connect also the disk by using the iSCSI Target servers second IP address 10.0.0.41, we first need to configure multipath on the client, otherwise we risk data corruption as the disk will shown up finally as two different disks on the client.
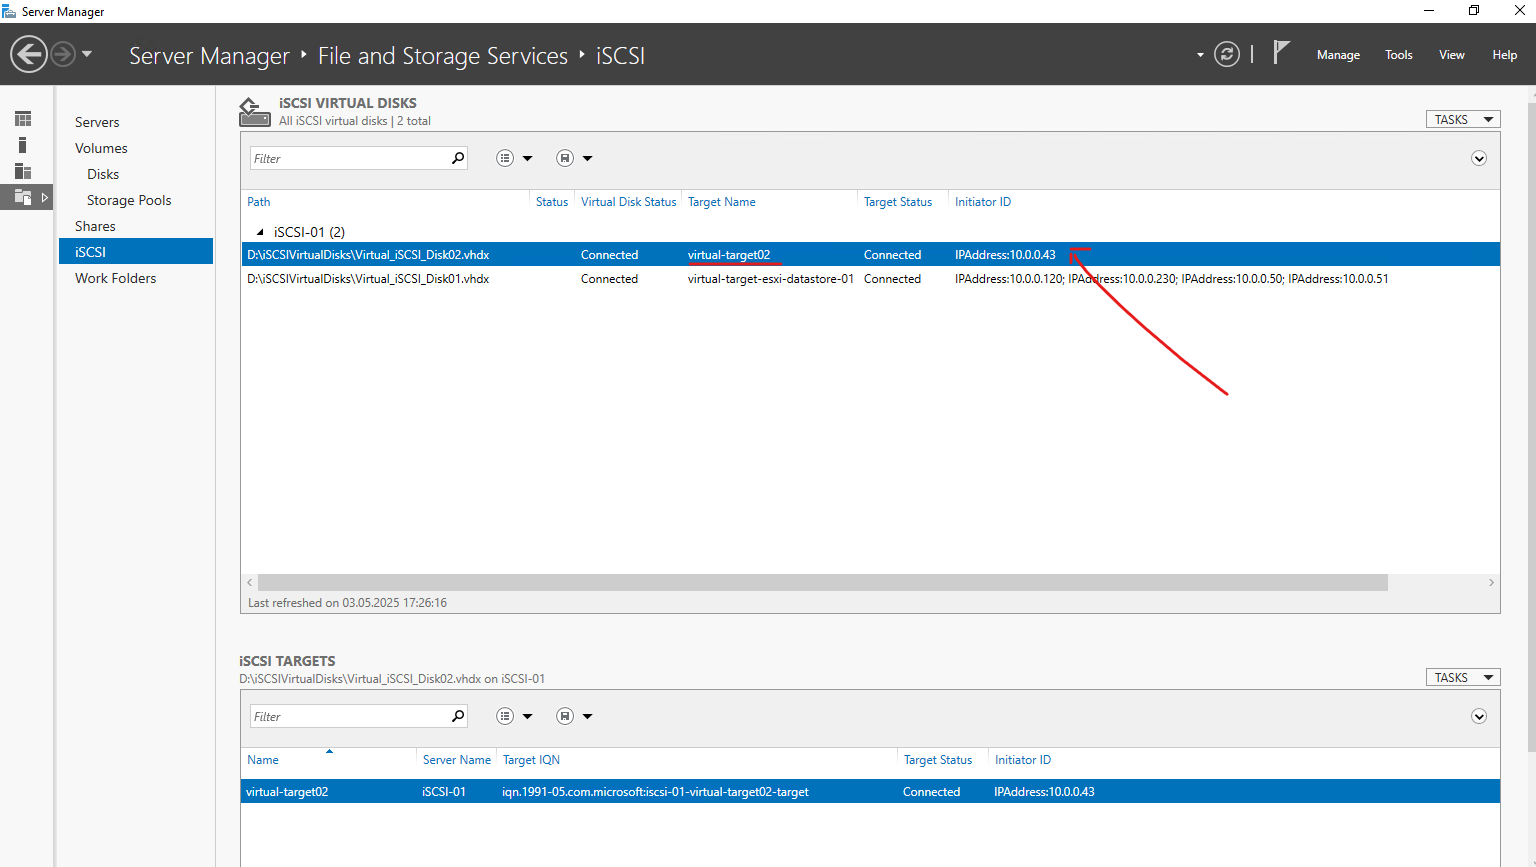
Further on the iSCSI Target server we can see our new SUSE Linux Enterprise client (iSCSI initiator) is connected to the iSCSI Target.
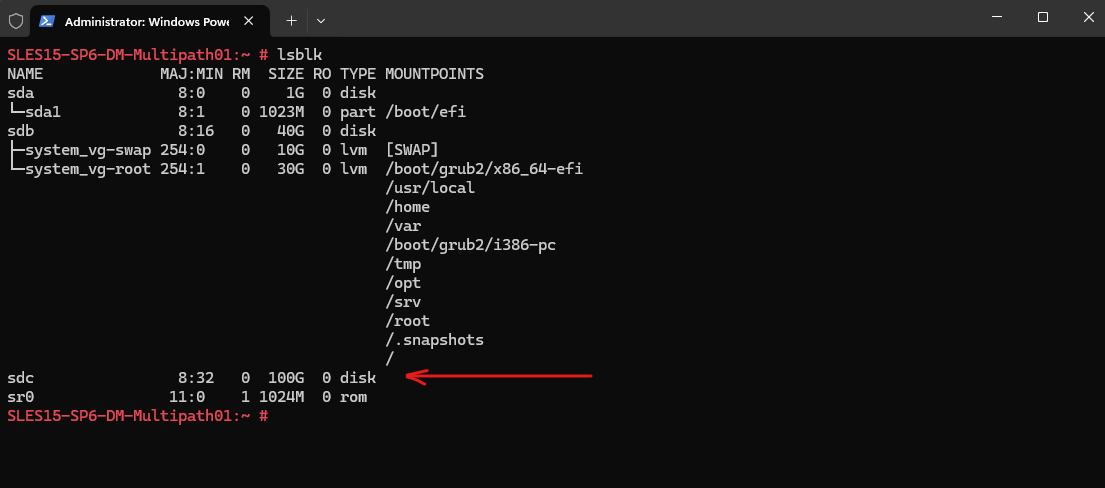
The disk is now shown up in Linux, we can therefore use the lsblk (list block devices) command.
# lsblk
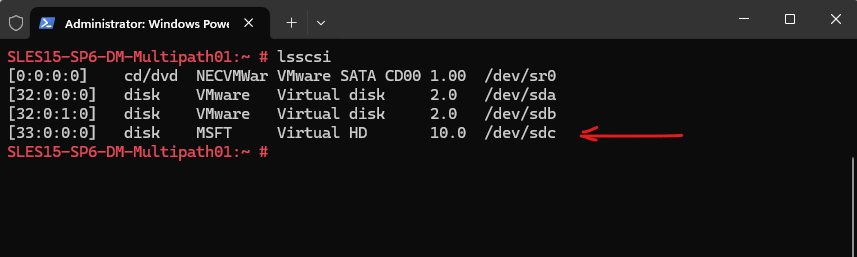
Or by using the lsscsi command.
# lsscsi
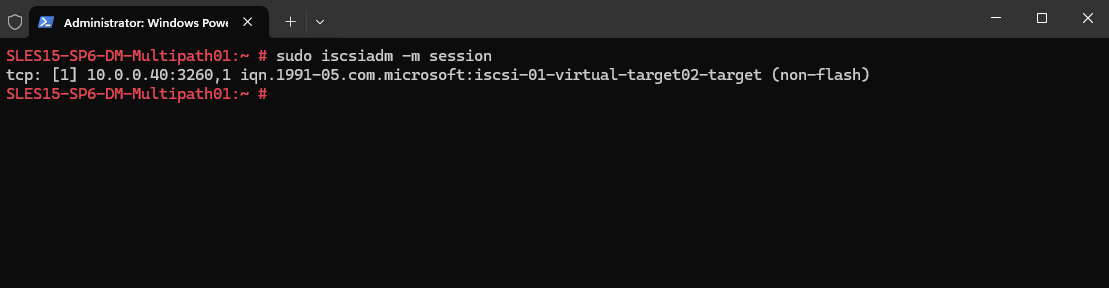
We can also use the iSCSI Administration Tool (iscsiadm) to list active iSCSI sessions on the system.
# iscsiadm -m session

or
# iscsiadm -m session -P 0
-P printlevel

or with more information
# sudo iscsiadm -m session -P 3
Source: https://documentation.suse.com/sles/15-SP6/html/SLES-all/cha-iscsi.html#sec-iscsi-initiator
Connect to iSCSI Target by using the Command Line
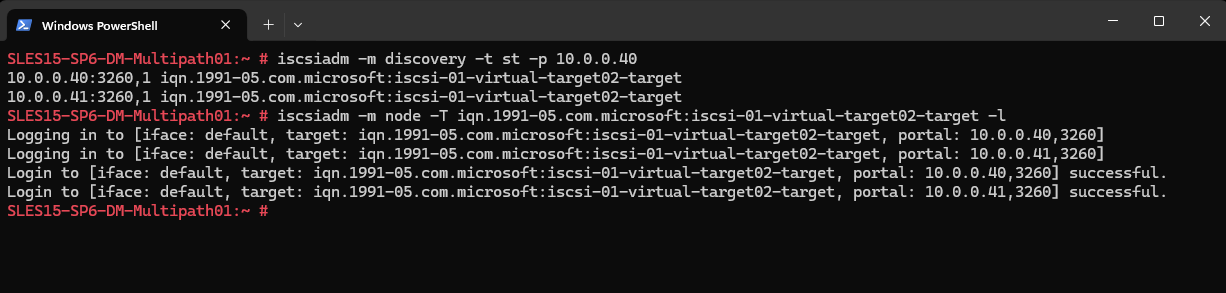
We first discover the target and log in to the target with the displayed target IQN.
# iscsiadm -m discovery -t st -p 10.0.0.40
# iscsiadm -m node -T iqn.1991-05.com.microsoft:iscsi-01-virtual-target02-target -l
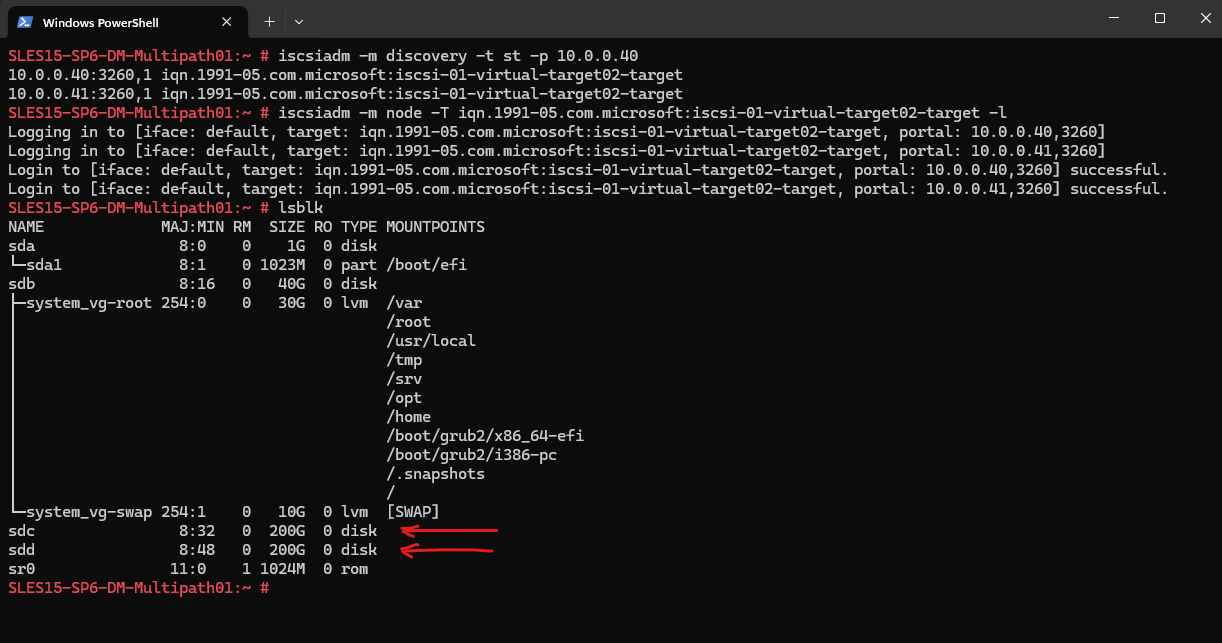
Because so far we not enabled DM multipathing and the iSCSI Target server target is available through multiple NICs/IP addresses, the disk is now shown up twice, sdc and sdd.
Therefore I will first logout the iSCSI target by using the following command.
# iscsiadm -m node -T iqn.1991-05.com.microsoft:iscsi-01-virtual-target02-target --logout
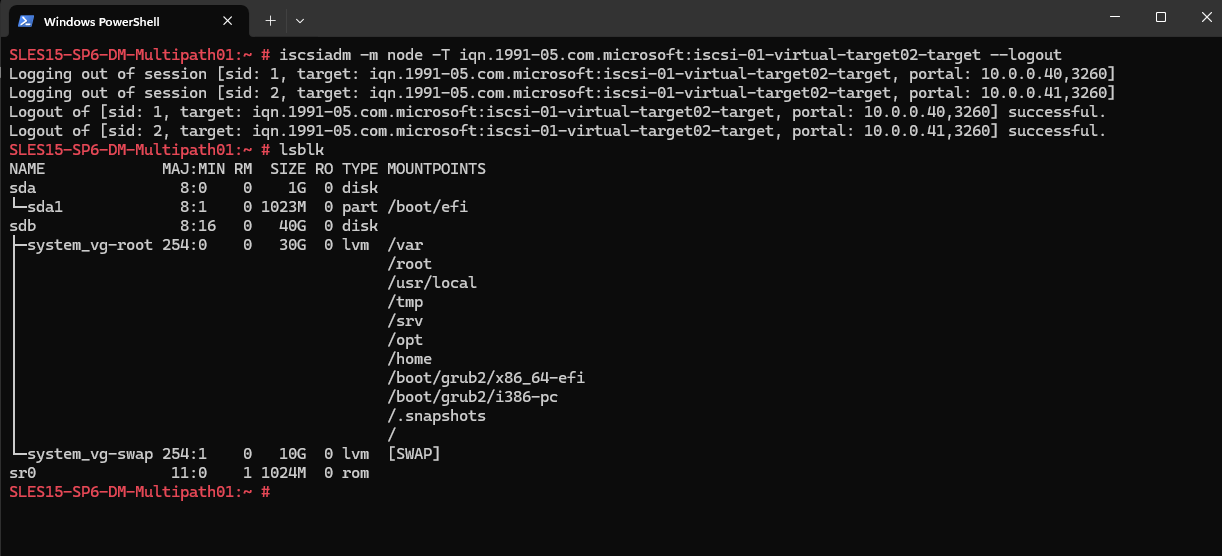
By using Yast to connect to the iSCSI target we set the startup mode to automatic previously. Because I was disabling it in Yast, now under /etc/iscsi/iscsid.conf the start up mode is on manual (default value on SLES) and therefore after a reboot the disk is not connected anymore.
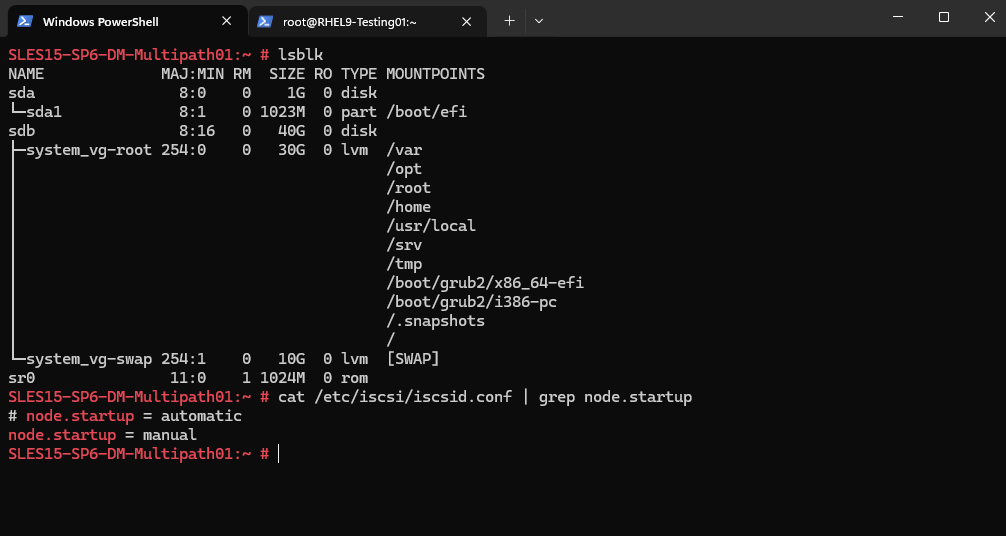
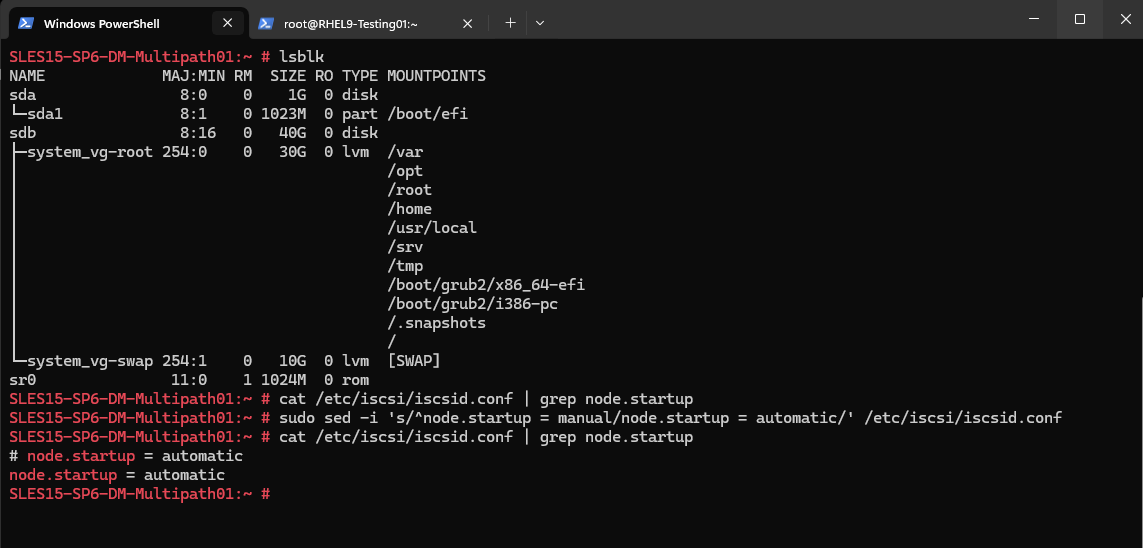
We first need to update the /etc/iscsi/iscsid.conf and the startup mode to automatic. Execute the following command therefore.
# sudo sed -i 's/^node.startup = manual/node.startup = automatic/' /etc/iscsi/iscsid.conf

check the update
# cat /etc/iscsi/iscsid.conf | grep node.startup
Then we need to login/connect the iSCSI target again by executing the following command.
# iscsiadm -m node -T iqn.1991-05.com.microsoft:iscsi-01-virtual-target02-target -l
Further we should enable the following services if not already done.
# sudo systemctl enable iscsi
# sudo systemctl enable iscsid
After a reboot the disk now should be re-connected during the boot.
Enable Multipathing
Below I want to show how to manage failover and path load balancing for multiple paths between the servers and block storage devices by using Multipath I/O (MPIO).
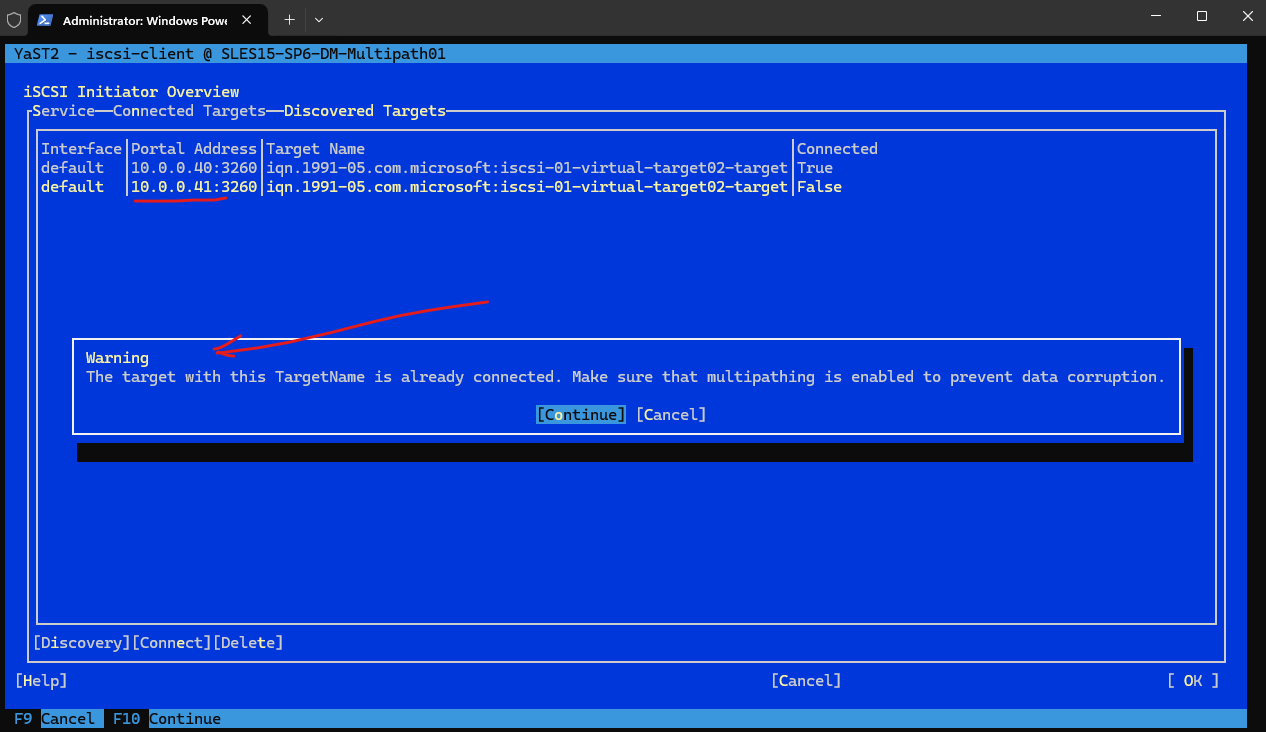
When trying to connect to the same iSCSI target on the iSCSI Target servers second IP address, I will get the following warning message.
So as mentioned earlier, we first need to configure DM multipathing on the client to connect to the same target by using the iSCSI Target servers both IP addresses.
Multipathing is the ability of a server to communicate with the same physical or logical block storage device across multiple physical paths between the host bus adapters in the server and the storage controllers for the device, typically in Fibre Channel (FC) or iSCSI SAN environments.
Linux multipathing provides connection fault tolerance and can provide load balancing across the active connections. When multipathing is configured and running, it automatically isolates and identifies device connection failures, and reroutes I/O to alternate connections.
Multipathing provides fault tolerance against connection failures, but not against failures of the storage device itself. The latter is achieved with complementary techniques like mirroring.
The traditional, generic implementation of multipathing under Linux uses the device mapper framework. For most device types like SCSI devices, device mapper multipathing is the only available implementation. Device mapper multipath is highly configurable and flexible.
Source: https://documentation.suse.com/sles/15-SP6/html/SLES-all/cha-multipath.html
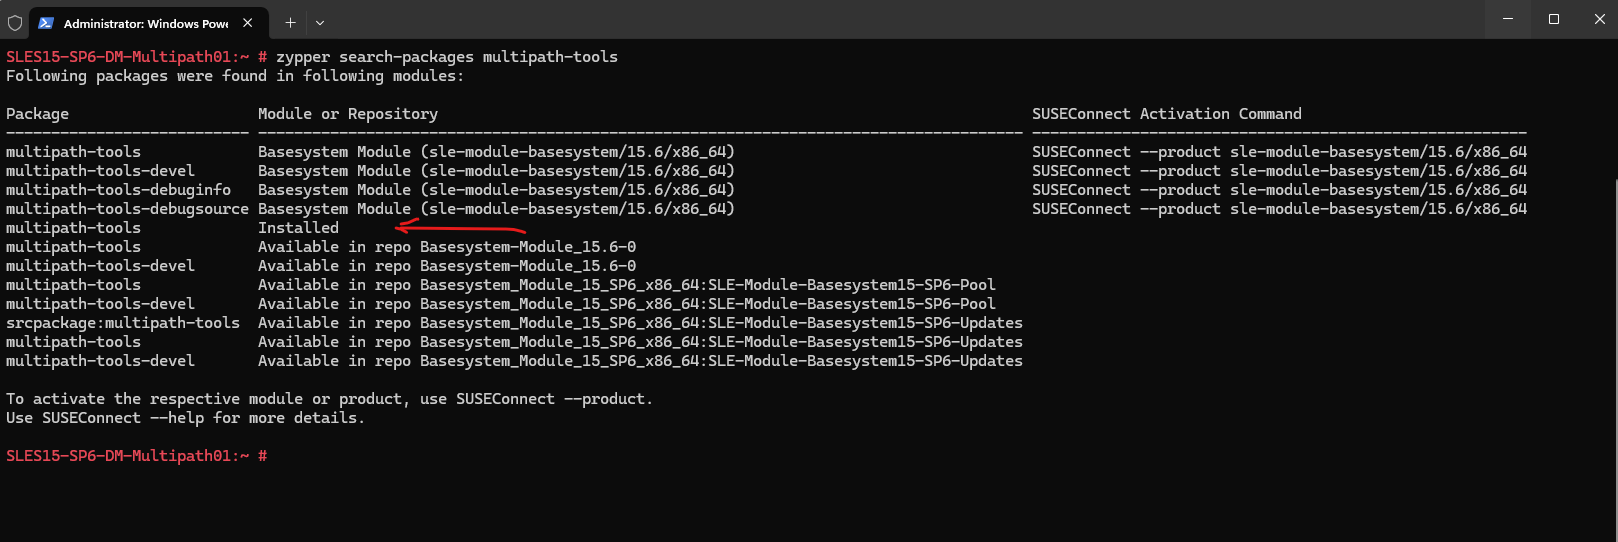
To configure and manage Device mapper multipath we can use the multipath-tools on Linux, on SUSE Linux Enterprise they are installed by default.
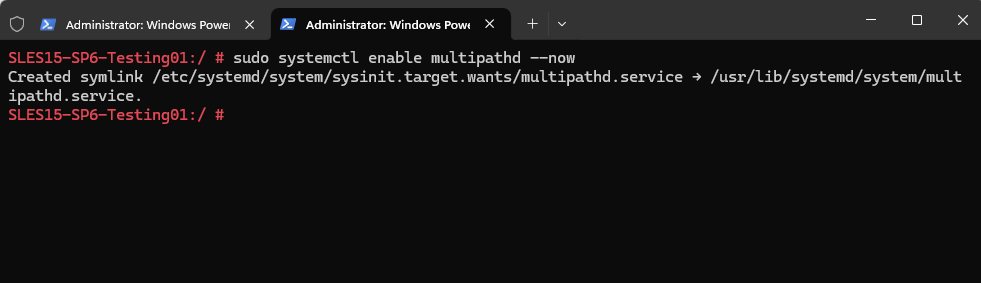
Next we need to enable the multipath daemon/service.
# sudo systemctl enable multipathd --now
Checking the status.
# sudo systemctl status multipathd
or
# sudo systemctl status multipath.service

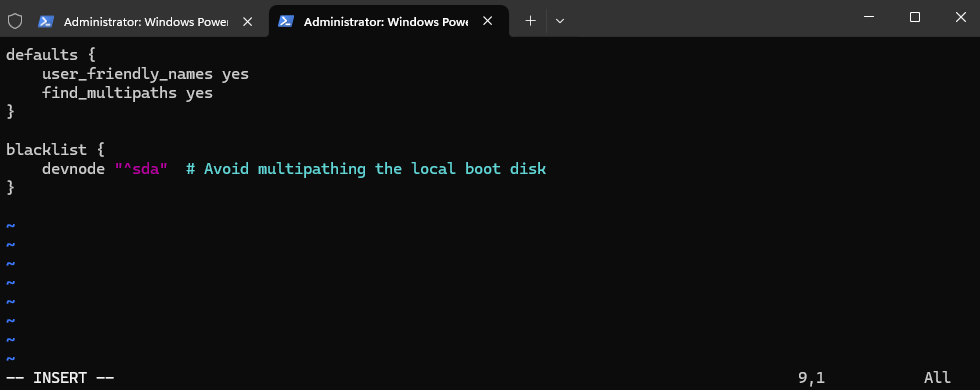
Create or edit the /etc/multipath.conf file.
A basic configuration will looks like:
defaults {
    user_friendly_names yes
    find_multipaths yes
}

blacklist {
    devnode "^sda"  # Avoid multipathing the local boot disk
}
# vi /etc/multipath.conf
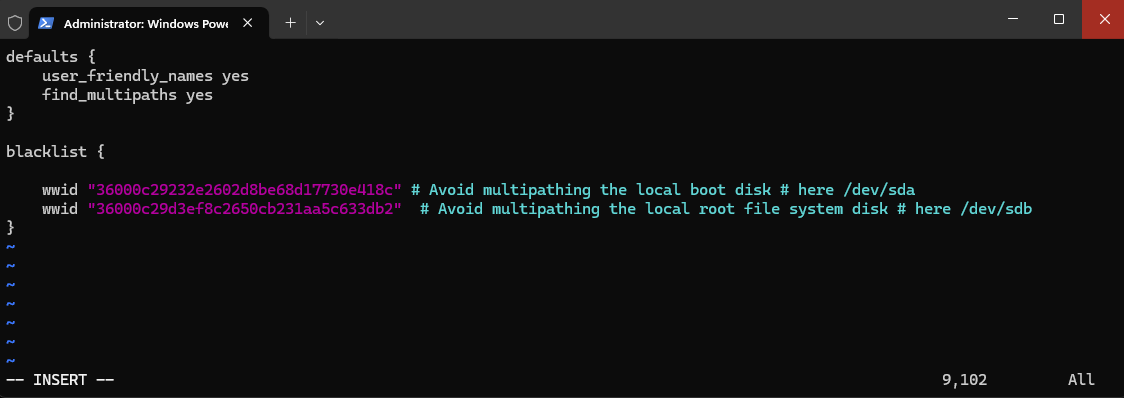
A better and more secure way to exclude disks from multipathing, is by using its World Wide Name (WWN) or World Wide Identifier (WWID).
To determine the WWID of the disk, we can use the lsscsi command.
# lsscsi -i -s

--scsi_id|-i      show udev derived /dev/disk/by-id/scsi* entry
 --size|-s         show disk size
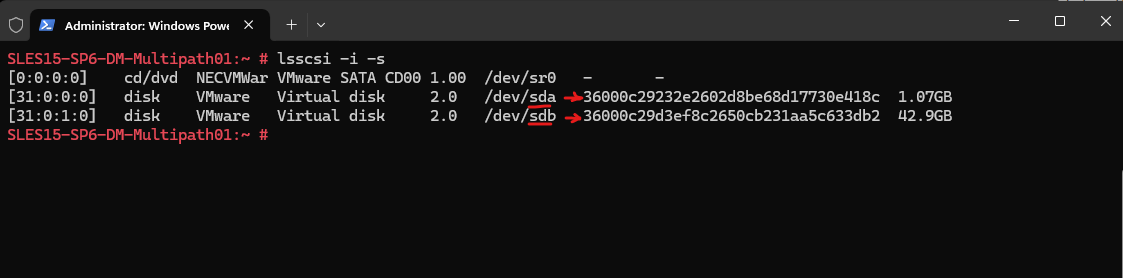
As we should avoid multipathing the root/boot device unless specifically required, I will add also the second /dev/sdb disk which contains the root file system to the blacklist. Both by using its WWID instead its device label.
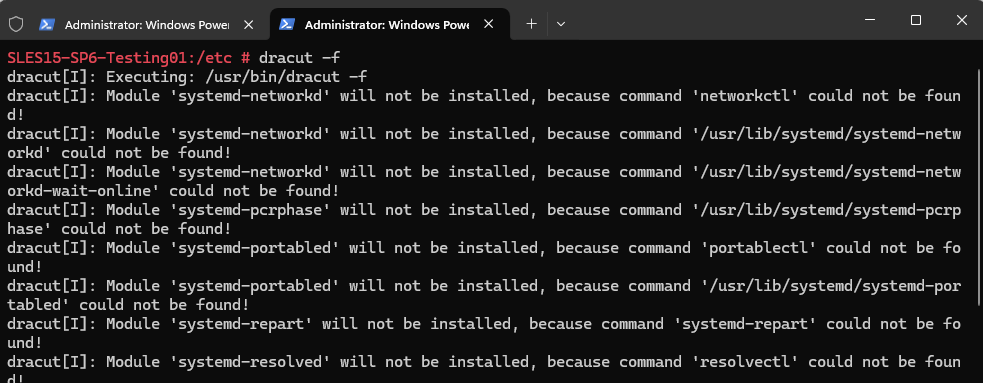
Rebuild initramfs (If Root is on Multipath or for Boot Support)
This setup guarantees that multipath devices are available early in the boot process, which is crucial for maintaining the integrity of the storage setup and preventing potential issues.
# dracut -f
# systemctl restart multipathd
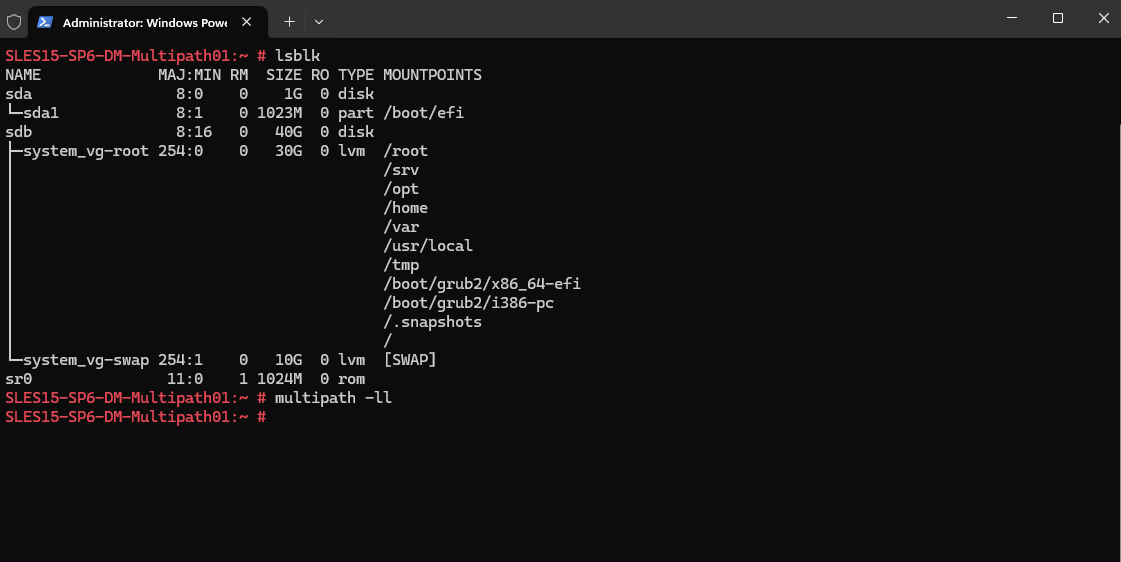
Check if both disk are not used by multipathing. Looks good, the multipath -ll command shouldn’t show our /dev/sda and /dev/sdb disks.
# lsblk
# multipath -ll
 -ll     show multipath topology (maximum info)
We can now connect the iSCSI target (disk) by using both iSCSI Target servers IP addresses for DM multipathing.
Connecting the targets like previously shown by using yast or the command line.
By using the command line.
# iscsiadm -m node -T iqn.1991-05.com.microsoft:iscsi-01-virtual-target02-target -l
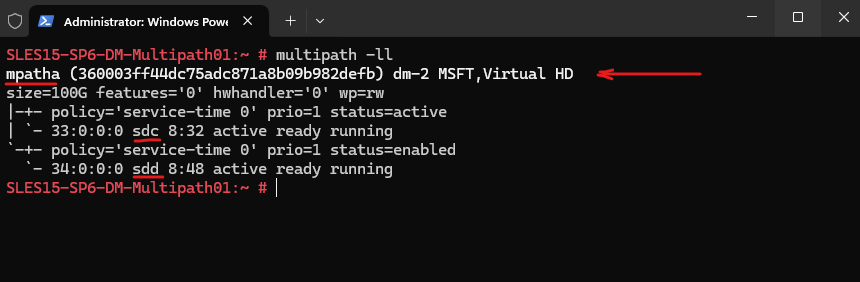
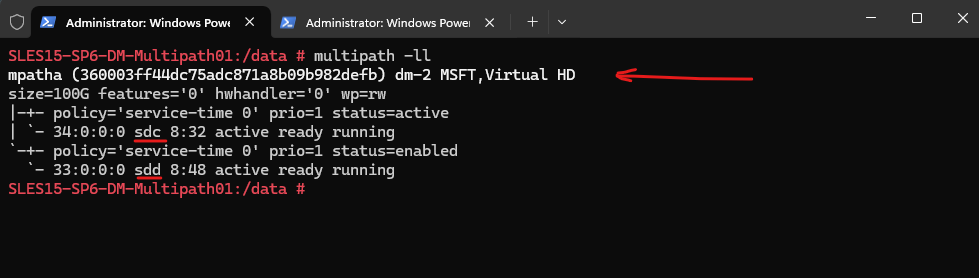
Because multipath is enabled, the disk connected through the iSCSI Target servers both IP addresses (iSCSI Targets), the disk is shown up just once and its device mappers name mpatha (mpathN).
We can check this by using the multipath and lsblk command.
# multipath -ll
 -ll     show multipath topology (maximum info)
In the output of multipath -ll, the status= field reflects the state of the path group, and values like active and enabled have distinct meanings related to how Device Mapper Multipath manages I/O paths.
status=active This path group is currently being used for I/O.
status=enabled This path group is available, but not currently in use. It’s a standby or failover group ready to take over if the active group fails.The policy= in multipath -ll output refers to the path selector policy, which defines how multipath decides which paths to use for I/O.
service-time Distributes I/O based on the response time of each path. Paths that return requests faster get more I/O. Designed to optimize throughput and latency in environments where path performance varies e.g., asymmetric storage, mixed-speed links, or overloaded paths.
Other policies available are: round-robin which sends I/O in a rotating fashion across all active paths. queue-length which chooses path with shortest I/O queue. failover which uses one path; switches only if it fails.
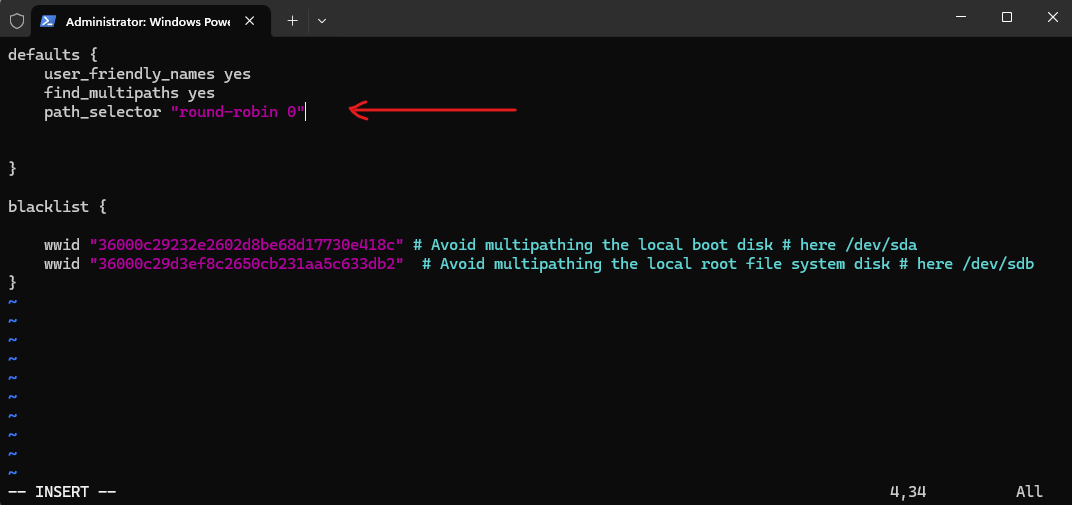
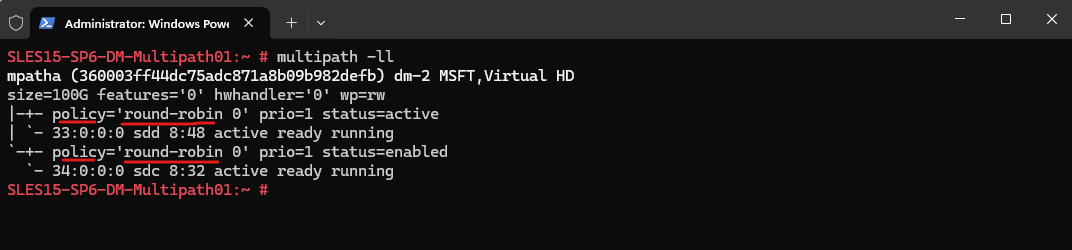
The policy mentioned above we can change within the /etc/multipath.conf file and its defaults section. Below for example I will change it from the default service time to round robin.
The 0 here is a placeholder, some implementations accept parameters, but it’s typically safe to leave as is.
defaults {
    user_friendly_names yes
    find_multipaths yes
    path_selector "round-robin 0"

}
Run the following commands after changing the /etc/multipath.conf file.
# dracut -f
# systemctl restart multipathd
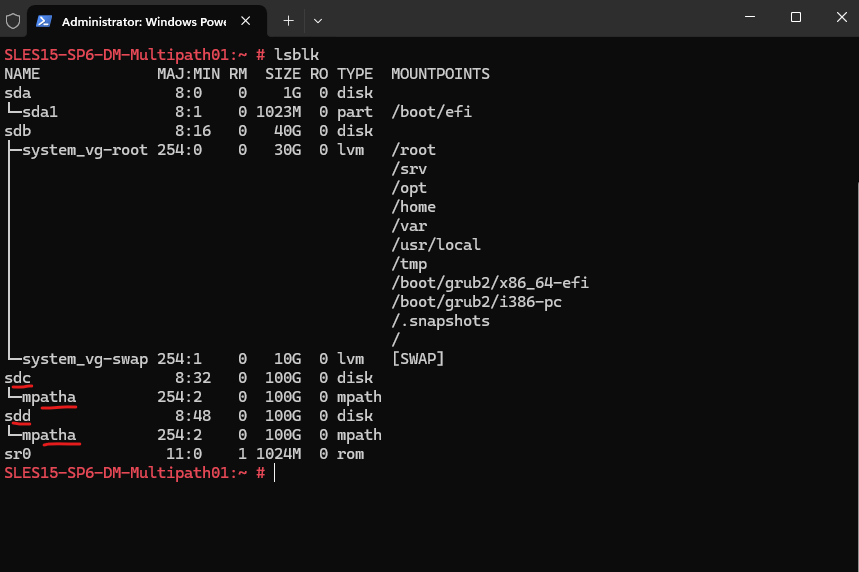
This means /dev/sdc and /dev/sdd are now managed as a single multipath device (/dev/mapper/mpatha).
When multiple paths (e.g., through different FC or iSCSI HBAs) connect your system to the same LUN on a storage array, each path shows up as a separate block device (like /dev/sdb, /dev/sdc, etc.).
The multipath subsystem consolidates these into a single virtual device, typically found at /dev/mapper/mpathX.
This logical abstraction of a single storage device that may be accessible via multiple physical paths is the so called Multipath Map.
# lsblk
# ls -la /dev/mapper
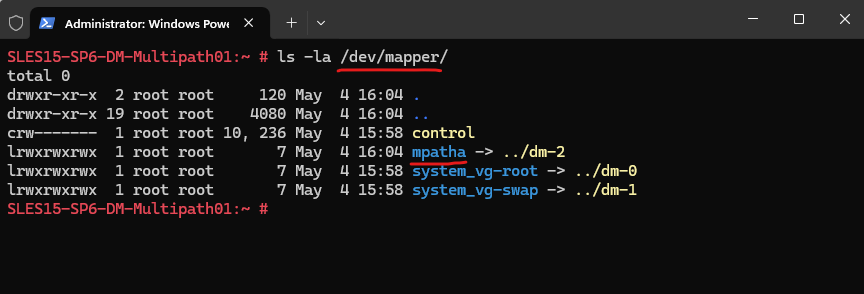
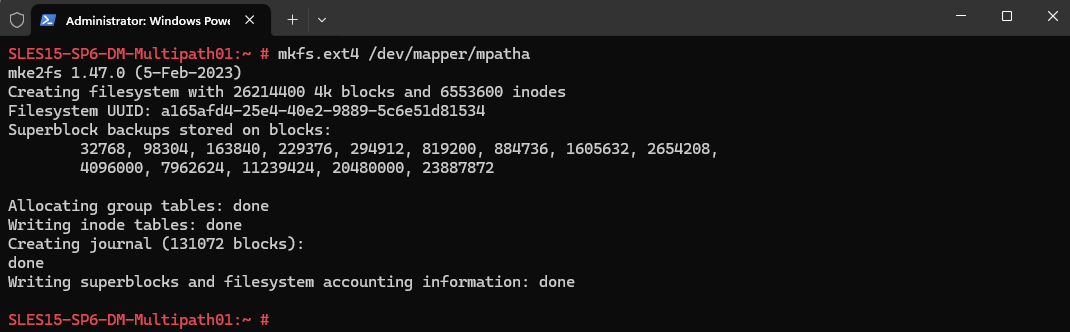
Finally we can now mount the disk and create the file system if not already done. I will first need to create a file system on the disk.
# # mkfs.ext4 /dev/mapper/mpatha
Now I can finally mount the new disk. Therefore I was first creating a new folder on the root file system named data to mount the disk to.
# mount /dev/mapper/mpatha /data/
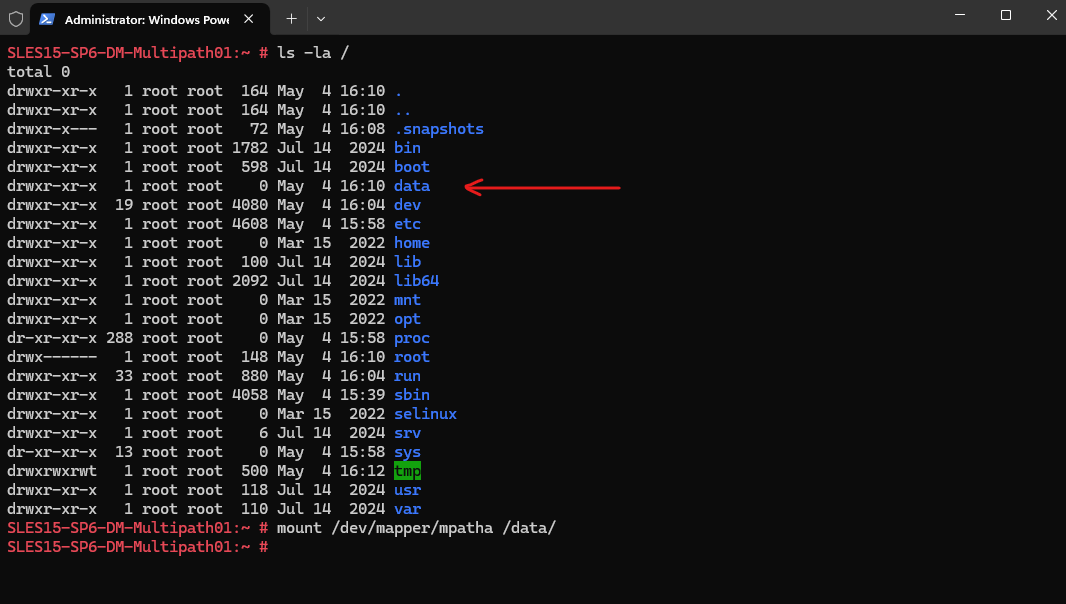
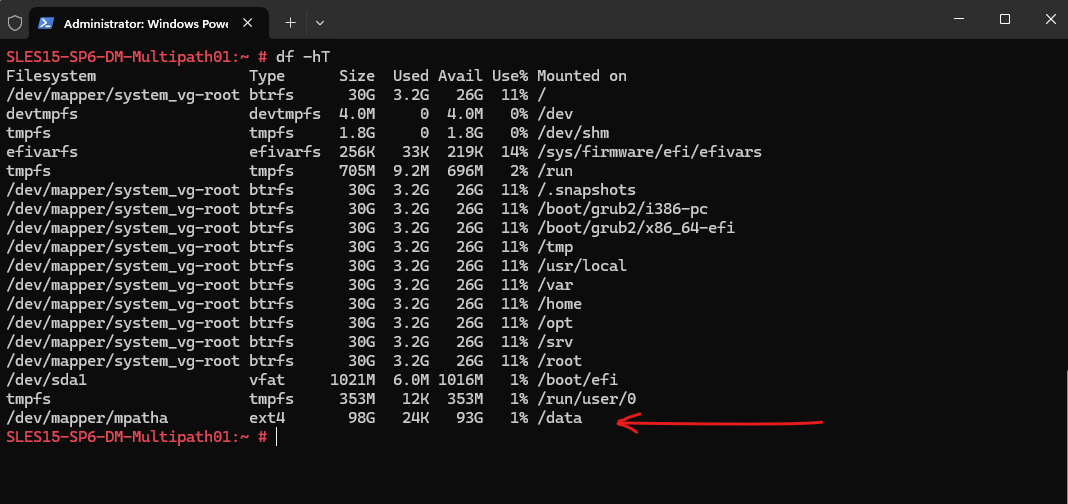
Looks good.
# df -hT
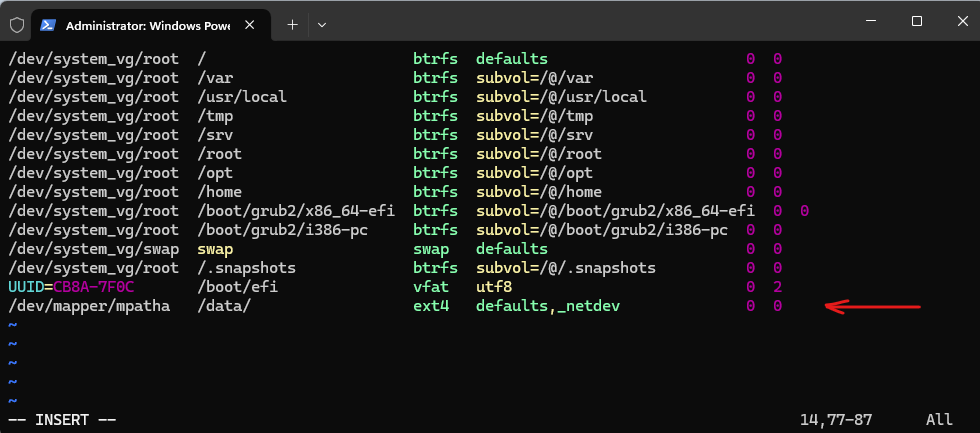
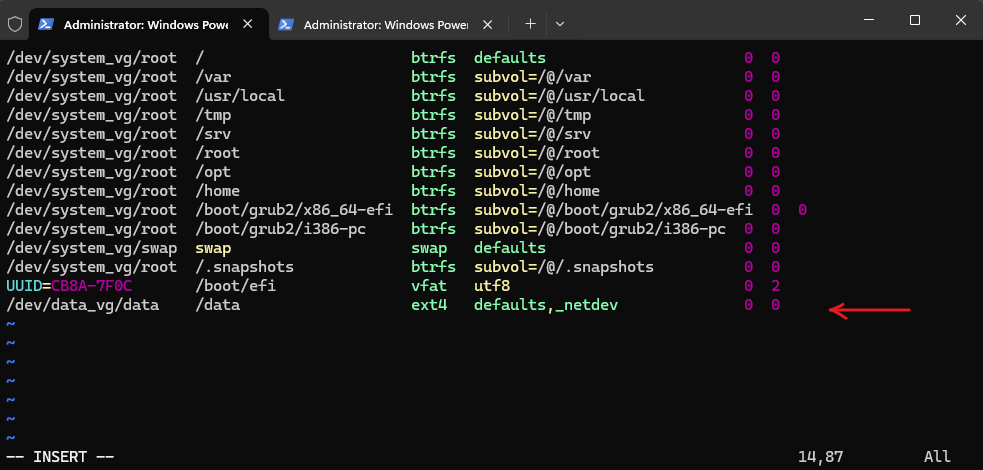
To make the mount persistent we also need to add an entry in the /etc/fstab file.
The _netdev option is useful if the multipath device is over iSCSI or FC and depends on network/storage being ready.
The mount is deferred until the network is up. Without _netdev, the system might attempt to mount the filesystem before the network (or multipath stack) is ready, leading to boot errors or dropped mounts.
/dev/mapper/mpatha /data/ ext4 defaults,_netdev 0 0
Keeping the initramfs synchronized
If multipathing is enabled in the system, it also needs to be enabled in the initramfs and vice versa.
The multipath configuration must be synchronized between the booted system and the initramfs. Therefore, if you change any of the files: /etc/multipath.conf, /etc/multipath/wwids, /etc/multipath/bindings, or other configuration files, or udev rules related to device identification, rebuild initramfs using the command:
sudo dracut -f
If the initramfs and the system are not synchronized, the system will not boot properly, and the start-up procedure may result in an emergency shell.
Using DM Multipath Disks for LVM
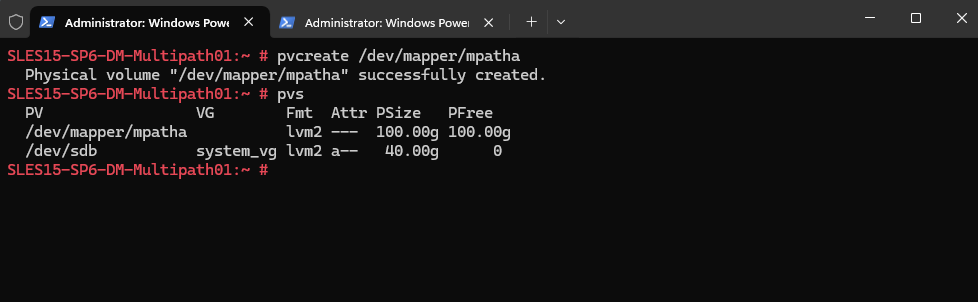
We can also use the DM multipath disk with the Logical Volume Manger (LVM). Therefore we must initialize the /dev/mapper/mpathN disk as a physical volume (PV).
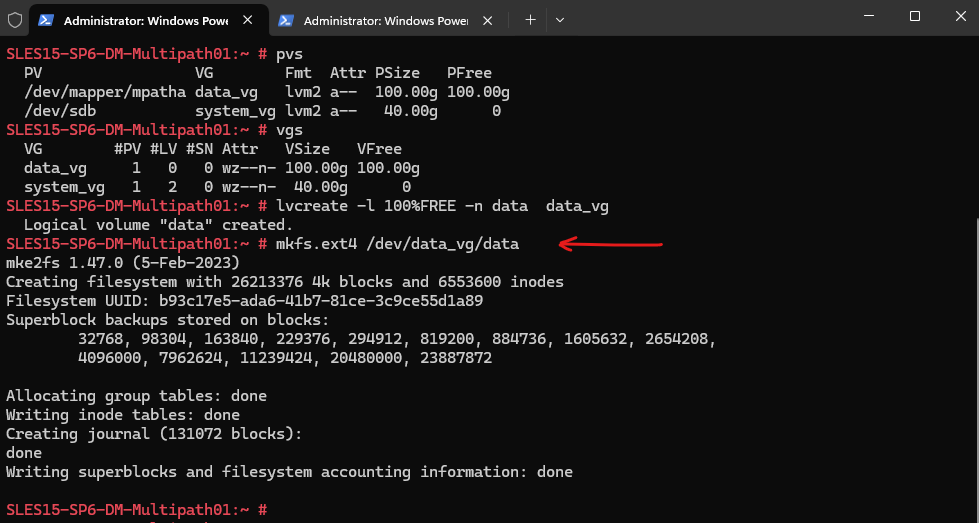
# pvcreate /dev/mapper/mpatha
# pvs
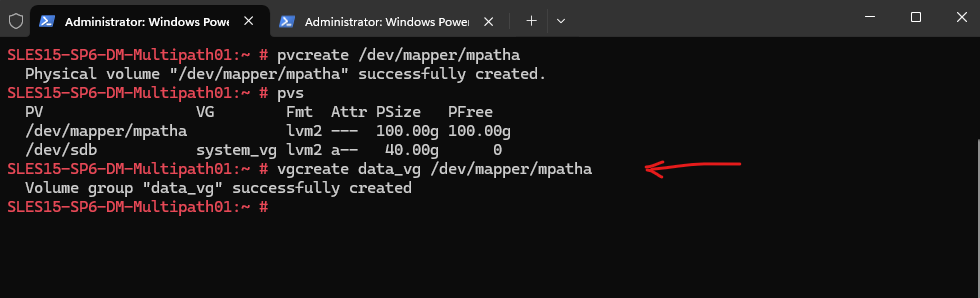
Creating the volume group (VG).
# vgcreate data_vg /dev/mapper/mpatha
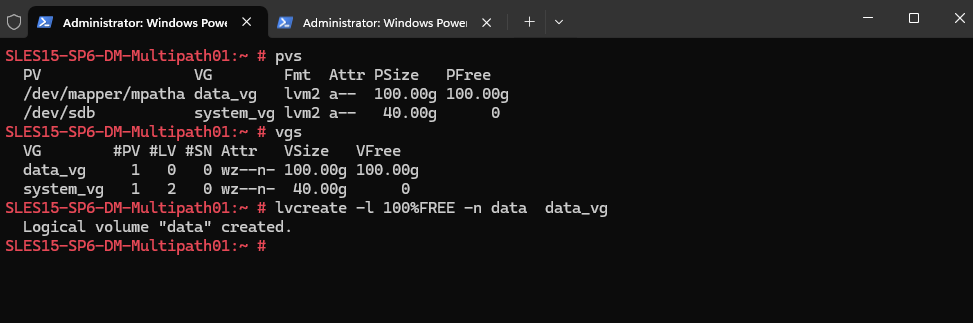
Creating a logical volume (LV).
# lvcreate -l 100%FREE -n data data_vg
Creating the file system.
# mkfs.ext4 /dev/data_vg/data
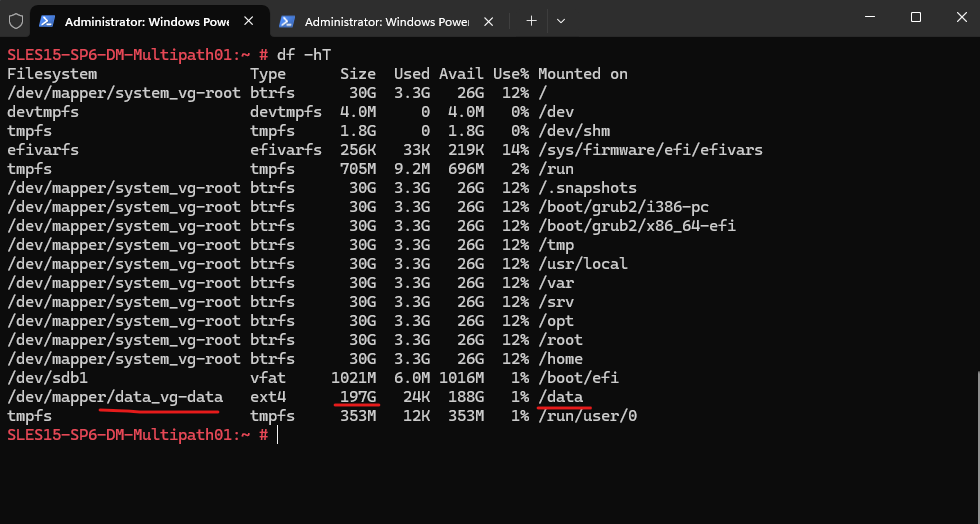
Finally we can mount our logical volumes.
# mount /dev/data_vg/data /data

To make the mount persistent we also need to add an entry in the /etc/fstab file.
The lsblk command output now looks like below.
# lsblk

The multipath -ll command will still display the disk labels with sdc and sdd.
More about creating LVM volume groups and logical volumes you will find in my following post.
How to resize/extend a Multipath Disk
Below I want to show how we can resize/extend a multipath disk.
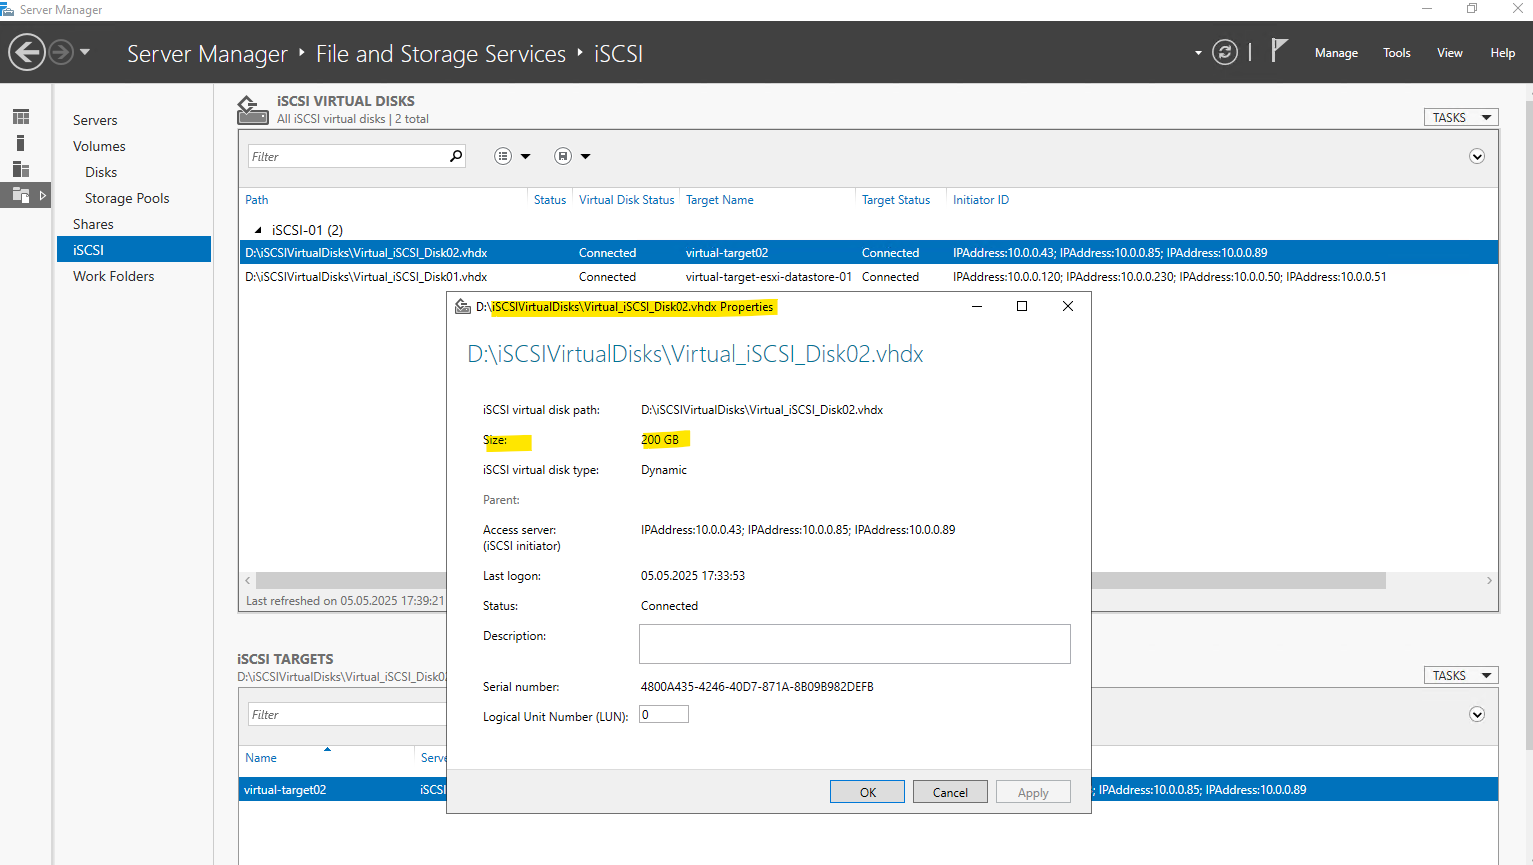
Therefore I will first extend the correspondig iSCSI virtual disk on the Microsoft iSCSI Target Server.
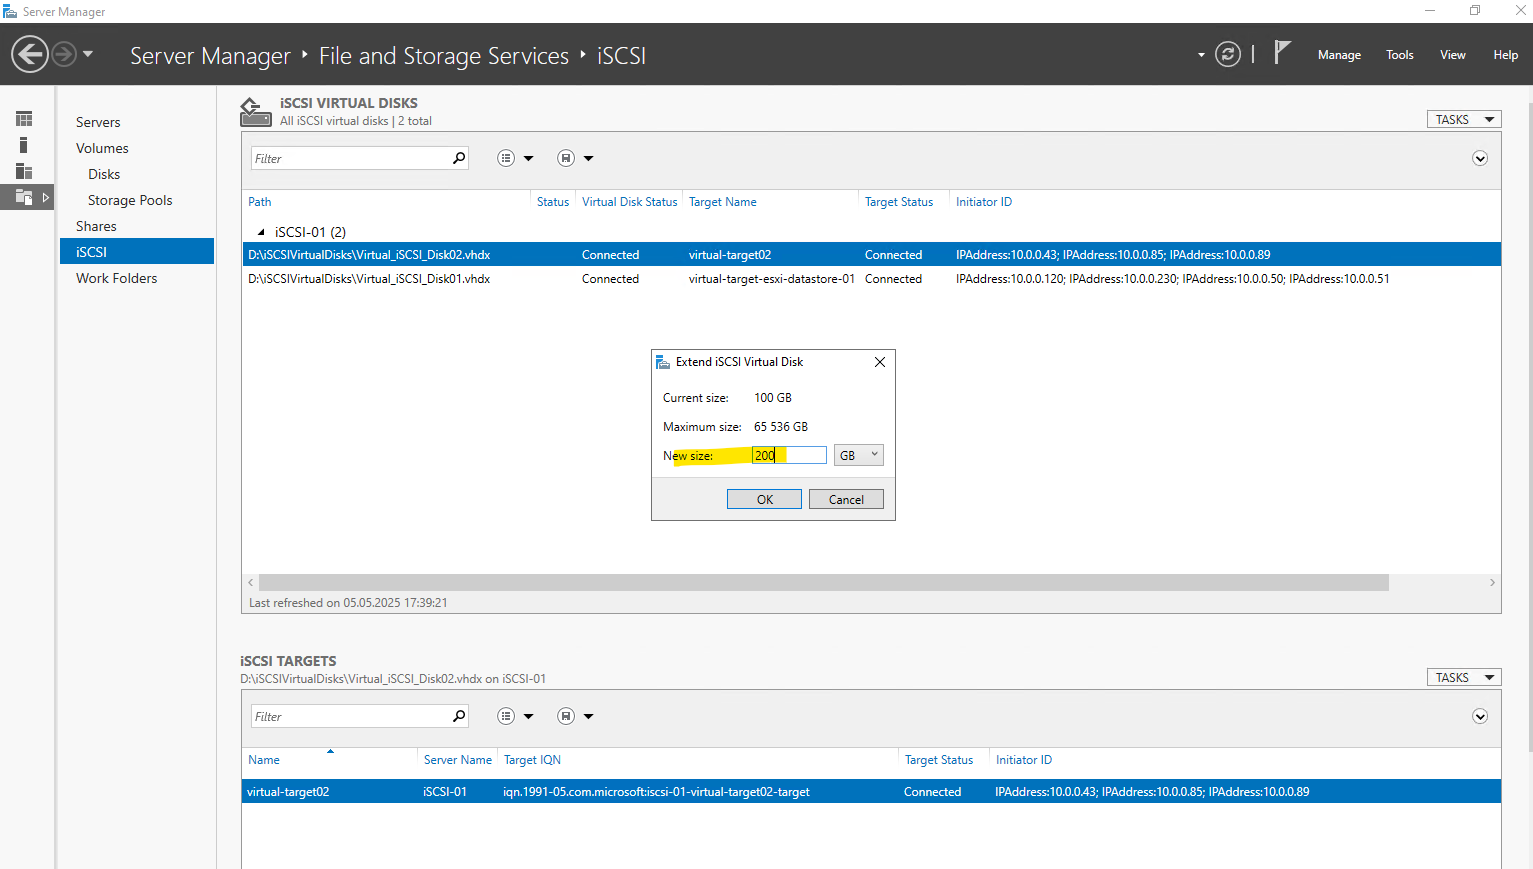
To reflect the new size also on the client, we first need to rescan the corresponding disks. So far they just show 100 GB. (sdc and sdd below)
When multiple paths (e.g., through different FC or iSCSI HBAs) connect your system to the same LUN on a storage array, each path shows up as a separate block device (like /dev/sdb, /dev/sdc, etc.).
The multipath subsystem consolidates these into a single virtual device, typically found at /dev/mapper/mpathX.
This logical abstraction of a single storage device that may be accessible via multiple physical paths is the so called Multipath Map.
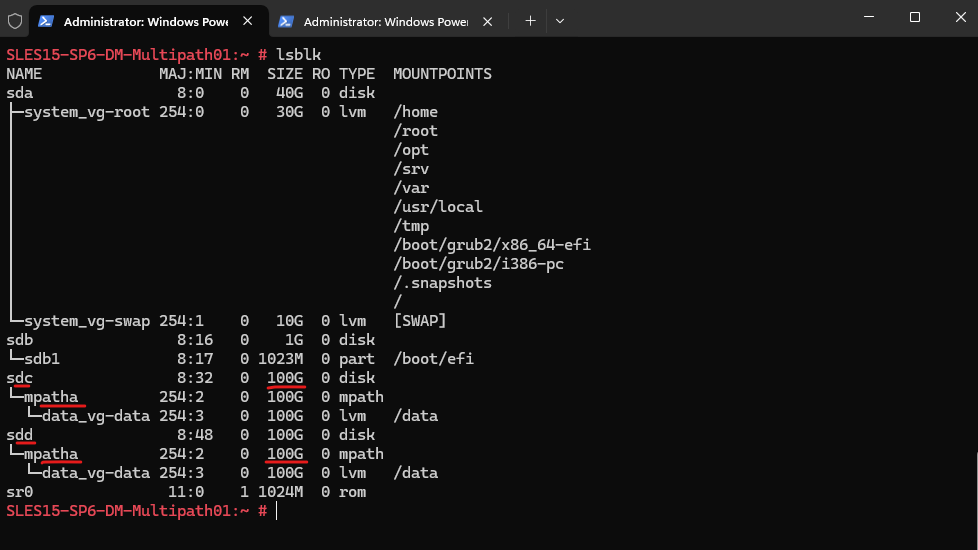
First we rescan the SCSI bus to show the new size of our block devices sdc and sdd which are used as multipath device named mpatha.
# echo 1 > /sys/block/sdc/device/rescan
# echo 1 > /sys/block/sdd/device/rescan
# lsblk

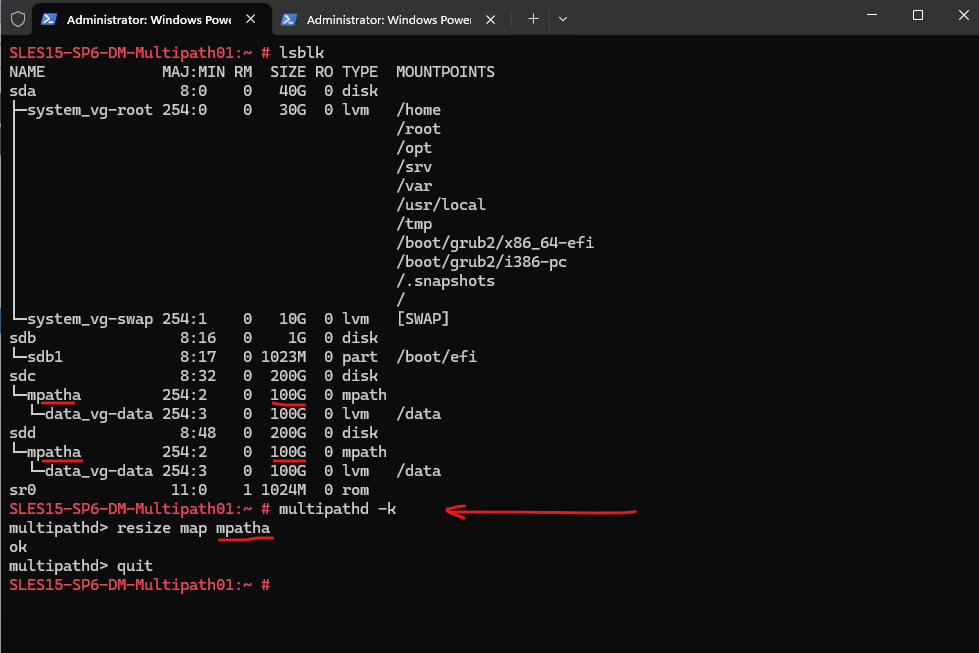
To also extend our multipath disk we need to start an interactive command shell to communicate with the multipathd daemon therfore. Enter the following command to start the interactive command shell.
# multipathd -k
Within the interactive command shell execute the following command to extend the disk.
multipathd> resize map mpath
ok
multipathd>
To exit the interactive command shell we need to enter the following command.
multipathd> quit
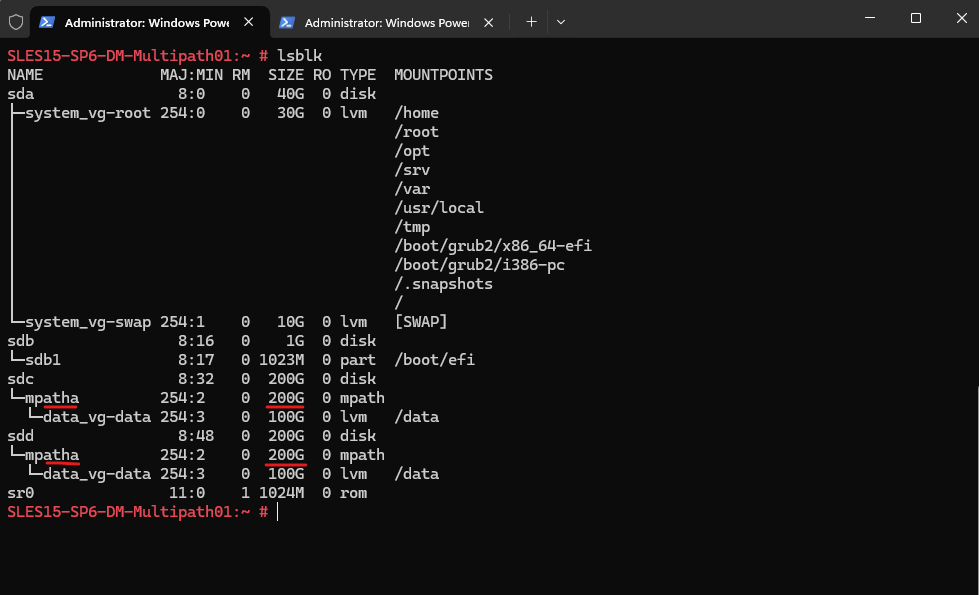
Looks good and our multipath disk was also successfully extended from 100 GB to 200 GB.
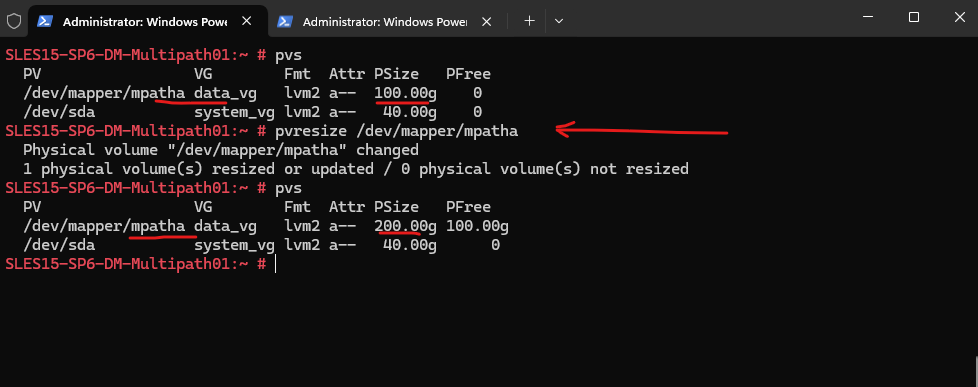
We can now resize the physical volume (PV) as usual which is using the multipath disk.
# pvs
# pvresize /dev/mapper/mpatha
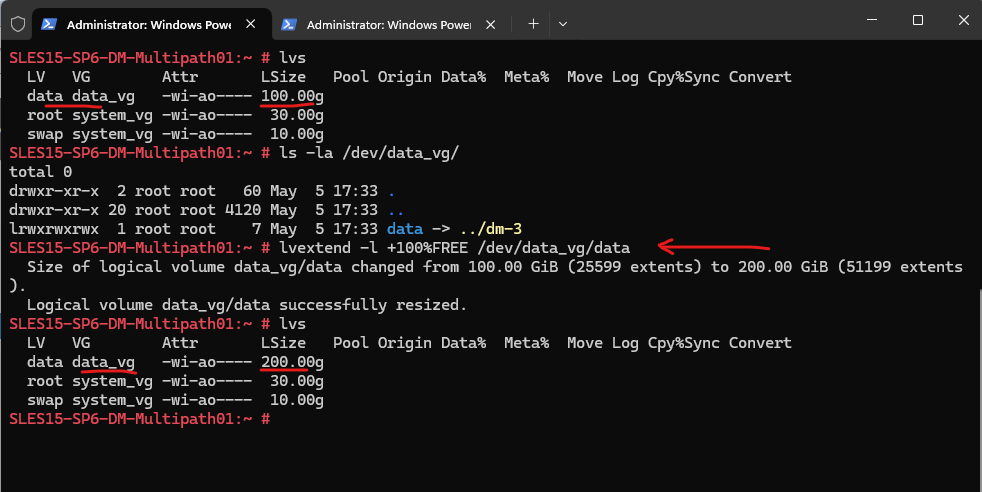
Next we can resize the logical volume (LV) as usual.
lvextend -l +100%FREE /dev/data_vg/data
So far the file system is not resized.
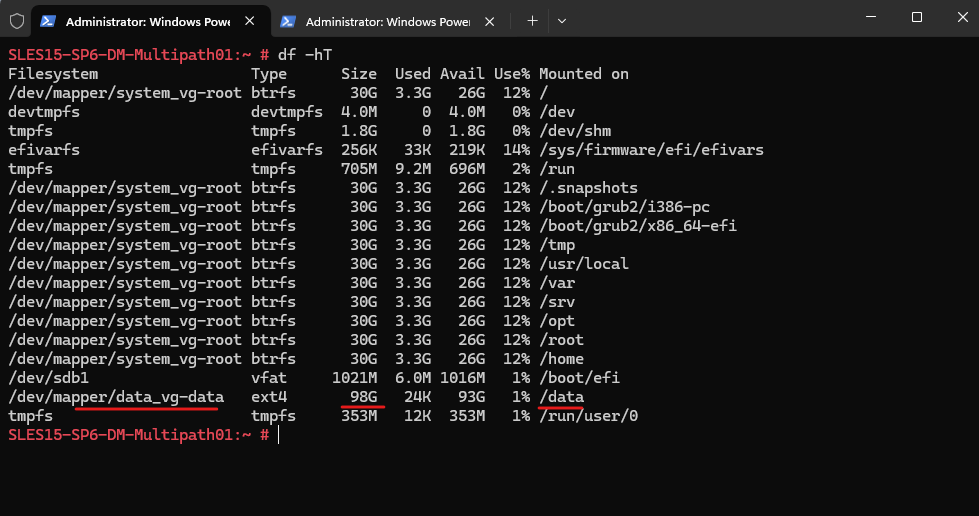
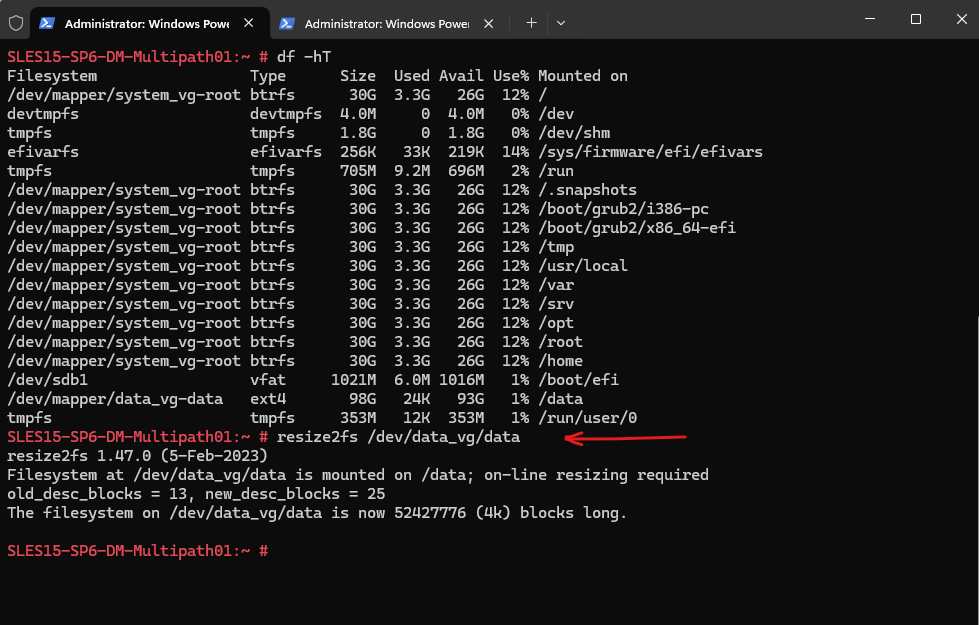
So finally we also need to resize the file system.
For the btrfs file system, which SLES is used by default for the root partition, we can use here in contrast the btrfs filesystem resize command.
# resize2fs /dev/<volume group>/<logical volume>

Grow the file system with all available space
# resize2fs /dev/data_vg/data

Resize to a specific size (increase or shrink) the file system to 50 GiB. To shrink we first need to unmount and check the file system as shown further down.
# resize2fs /dev/data_vg/data50G

Accepted size units for file system block sizes are:
S - 512 byte sectors
K - kilobytes
M - megabytes
G - gigabytes
Looks good!
More about extending disks, LVM logical volumes and the file system, you can read in my following post.
Links
ISCSI Multipath
https://pve.proxmox.com/wiki/ISCSI_MultipathDevice Mapper Multipathing
https://docs.redhat.com/de/documentation/red_hat_enterprise_linux/6/html/dm_multipath/mpio_overviewManaging multipath I/O for devices
https://documentation.suse.com/de-de/sles/15-SP6/html/SLES-all/cha-multipath.htmlMultipath commands
https://www.ibm.com/docs/en/svfpc/8.6.0?topic=hosts-multipath-commandsAppendix A. The Device Mapper
https://docs.redhat.com/en/documentation/red_hat_enterprise_linux/7/html/logical_volume_manager_administration/device_mapperUnderstanding Device Mapper and Filter Driver
https://www.msystechnologies.com/blog/understanding-device-mapper-and-filter-driver/Mass storage over IP networks: iSCSI
https://documentation.suse.com/sles/15-SP6/html/SLES-all/cha-iscsi.htmlInstalling the iSCSI LIO target server and iSCSI initiator
https://documentation.suse.com/sles/15-SP6/html/SLES-all/cha-iscsi.html#sec-iscsi-install