Move Azure AD Connect to another Server
In this post we will move an existing Azure AD Connect Installation to a new Windows Server 2019 which will be dedicated only for the synchronisation between our onPrem Active Directory and Azure Active Directory. Therefore we only install SQL Server 2019 and Azure AD Connect on it.
By default a SQL Server 2012 Express LocalDB will be installed with Azure AD Connect. So if you don’t have to manage more than 100.000 objects, you can use the default SQL Server Express Version.
Prerequisites for Azure AD Connect
https://docs.microsoft.com/en-us/azure/active-directory/hybrid/how-to-connect-install-prerequisites
By default a SQL Server 2012 Express LocalDB (a light version of SQL Server Express) is installed. SQL Server Express has a 10GB size limit that enables you to manage approximately 100,000 objects. If you need to manage a higher volume of directory objects, you need to point the installation wizard to a different installation of SQL Server. The type of SQL Server installation can impact the performance of Azure AD Connect.
It is recommended to install the same version of Azure AD Connect as the existing server from which you want to migrate to the new one. But it is not required!
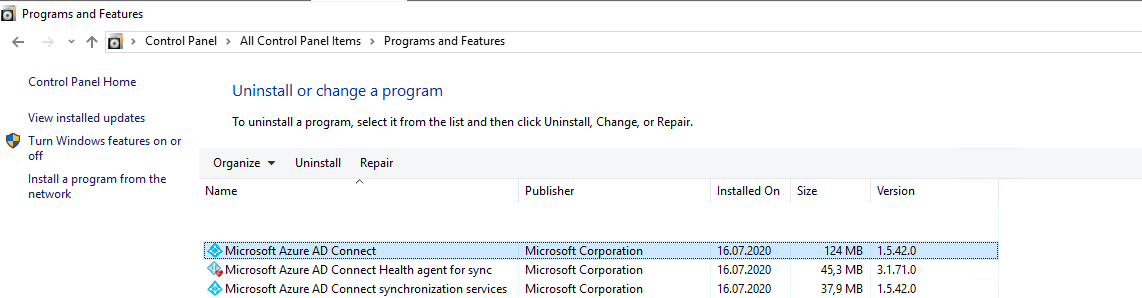
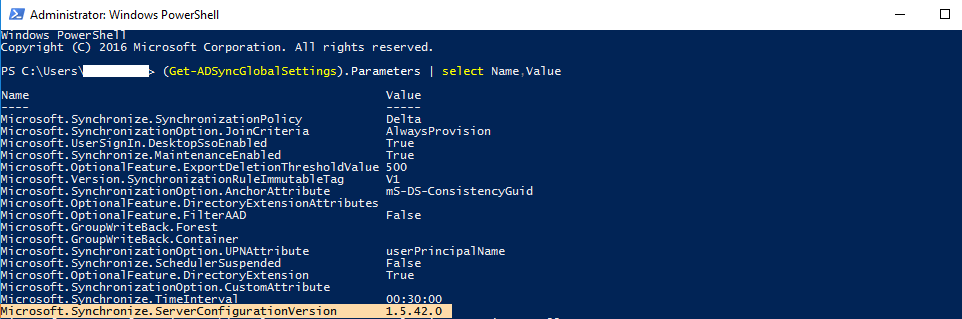
Determine the version of Azure AD Connect with the Control Panel under Programs and Features or with a PowerShell CMDlet.
(Get-ADSyncGlobalSettings).Parameters | select Name,Value
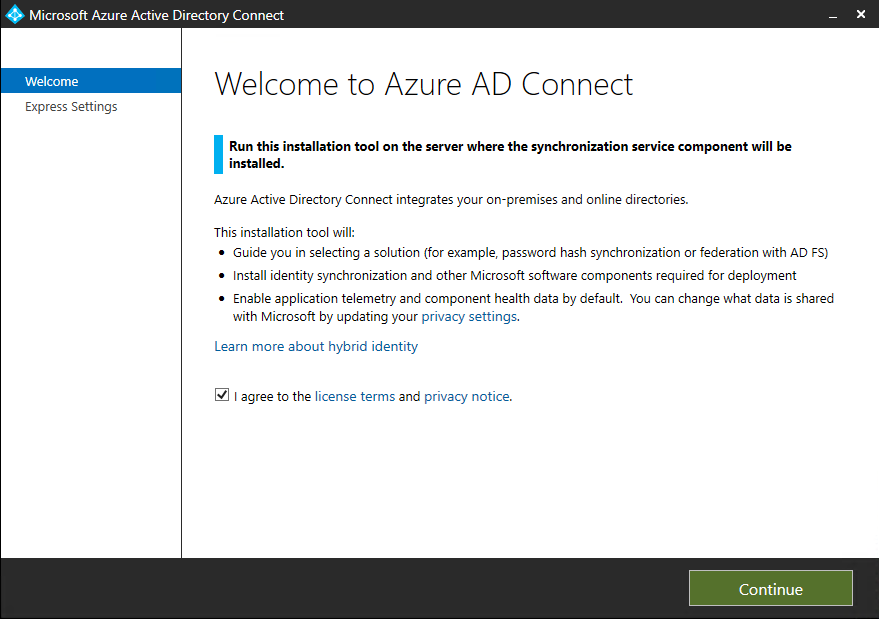
Install Azure AD Connect on the New Server
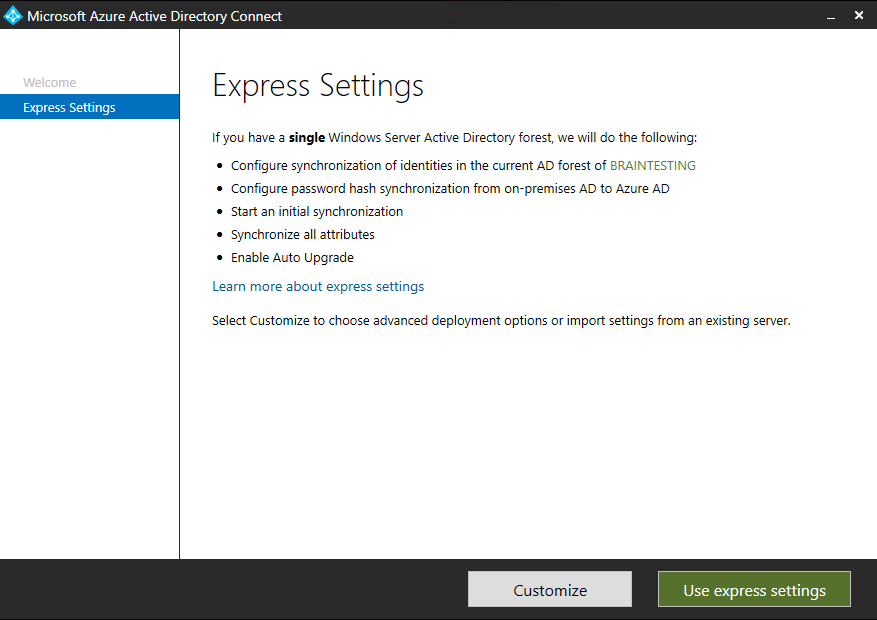
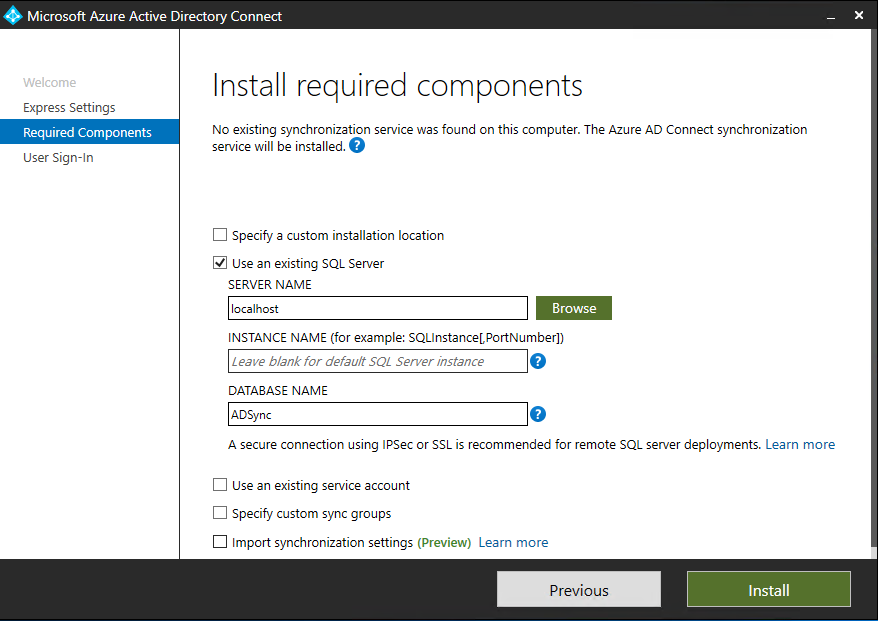
Click on Customize if you want change the default installation or want to use an existing SQL Server Instance instead a new SQL Express Installation. As mentioned above with the SQL Express Edition you are limited to manage 100.000 objects from your Active Directory which will be enough for the most installations.
I will use here an SQL Server 2019 for this Installation.
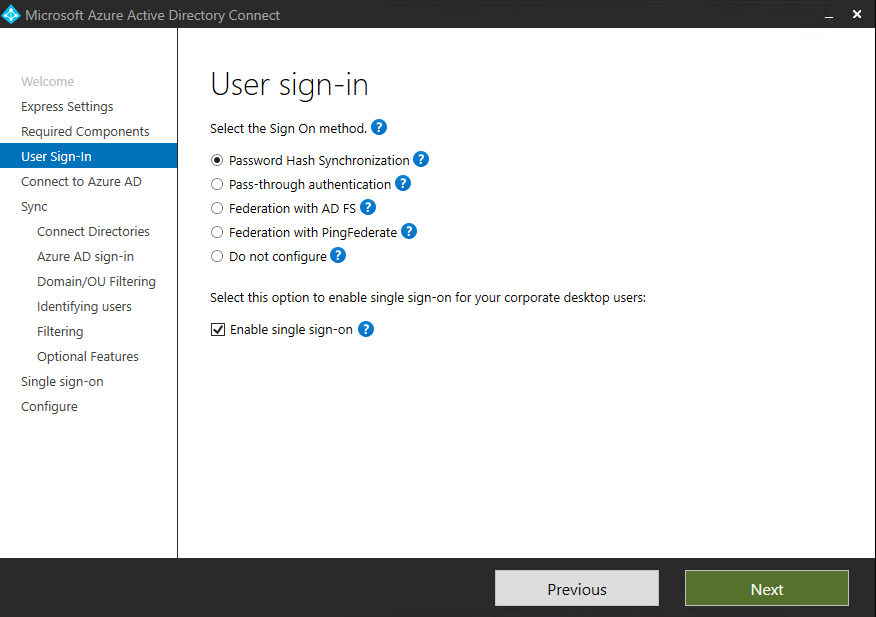
Check which User sign-in methods you want.
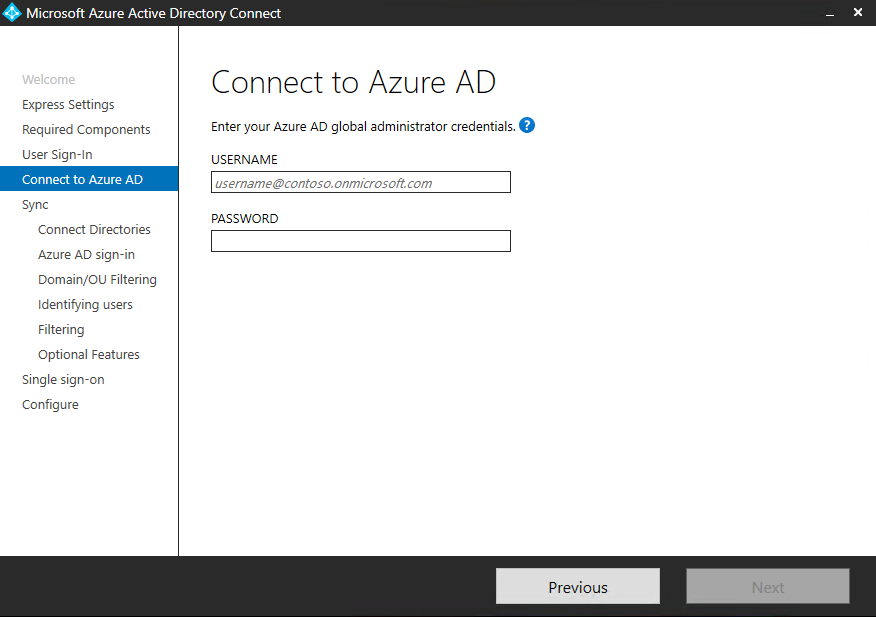
The Azure AD global administrator is your Office 365 Administrator user account which you must enter here.
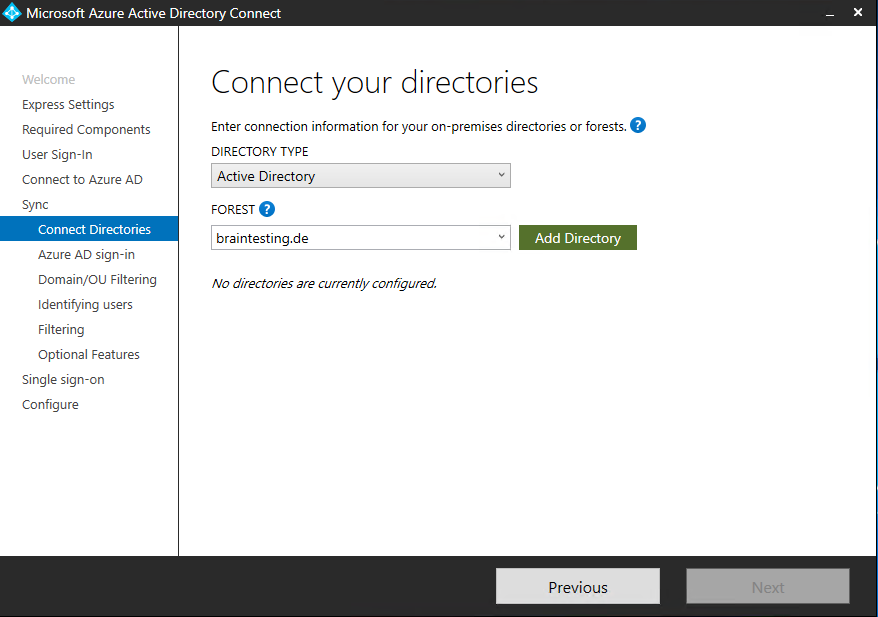
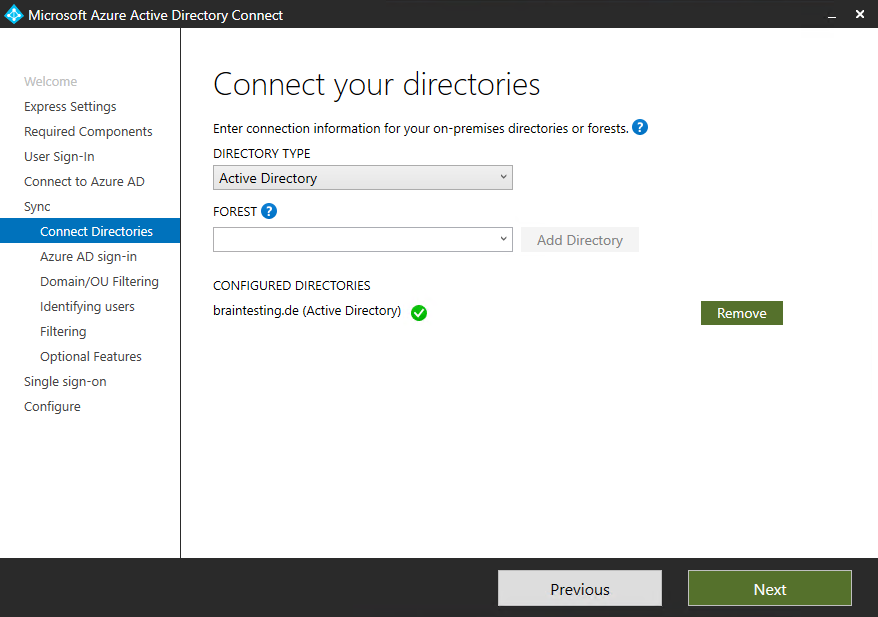
Click on Add Directory
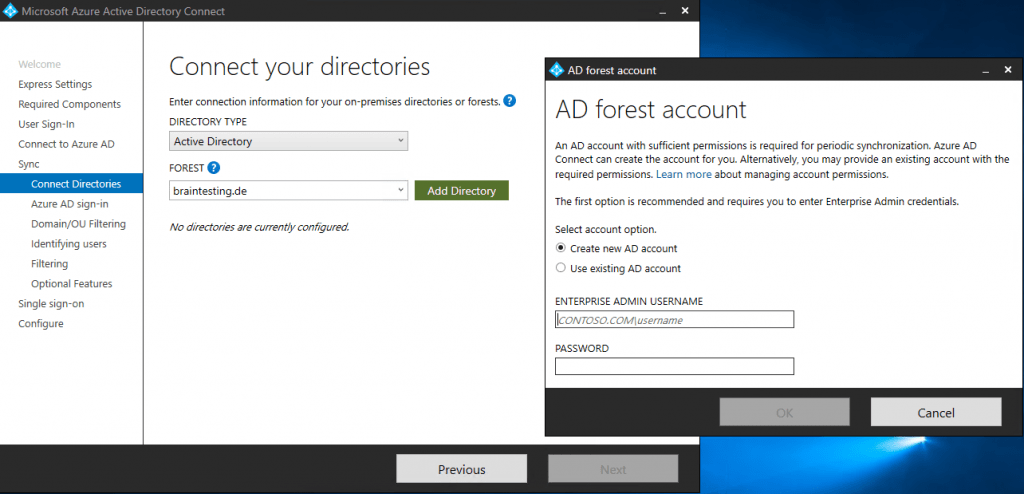
Enter your Enterprise Admin credentials, it is recommended to select the Create new AD account.
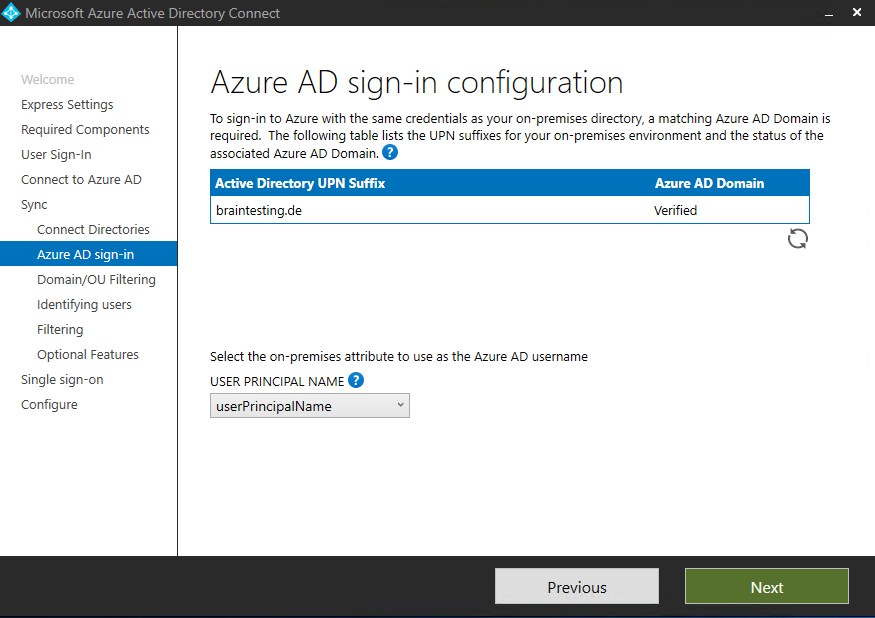
To be able to sign-in into Office 365 (Azure AD) with your existing onPremise credentials, you need a verified Azure AD Domain which is the same as your onPremise domain.
If you have here listed some Not Added domains, check Continue without matching all UPN suffixes to verified domains.
To specify OUs to synchronize, choose Sync selected domains and OUs option and specify required OUs.
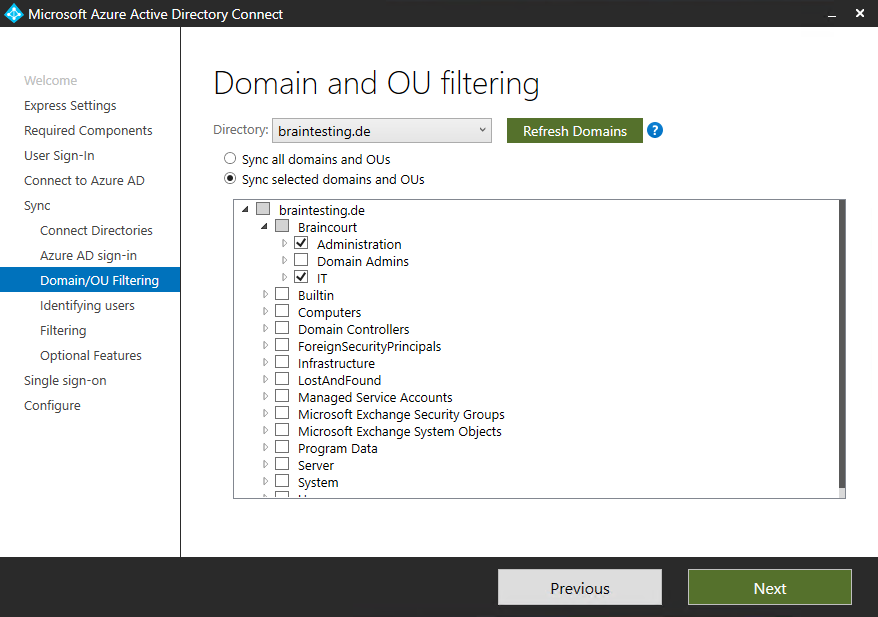
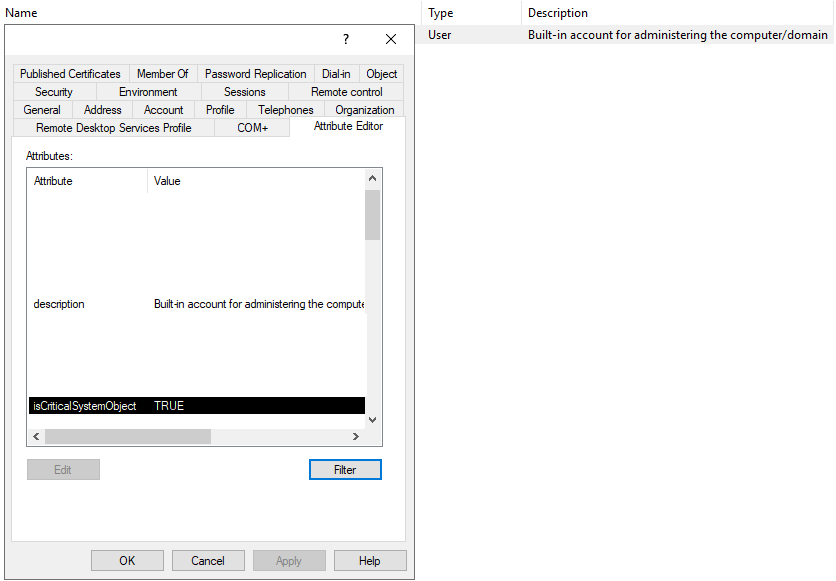
As you can see, I don’t check the Domain Admins OU. I don’t want to synchronize domain admins to Office 365, apart from that, this OU only contains the Built-in Administrator account which is a critical system object and won’t synchronize to Azure AD even if it is checked!
One or more objects don’t sync when using Azure Active Directory Sync tool
https://docs.microsoft.com/en-us/troubleshoot/azure/active-directory/objects-dont-sync-ad-sync-tool
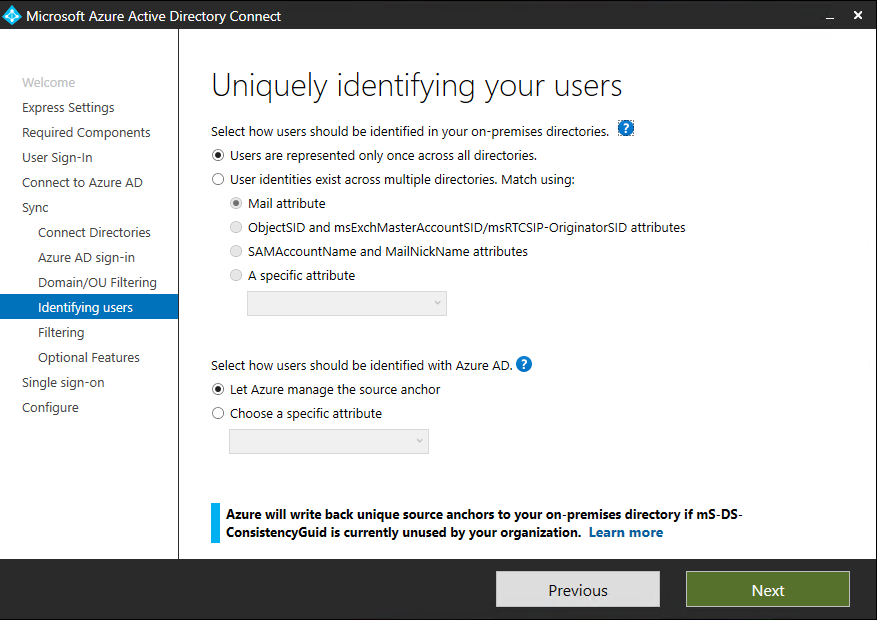
Specify how users should be identified in the on-premises directories then click Next.
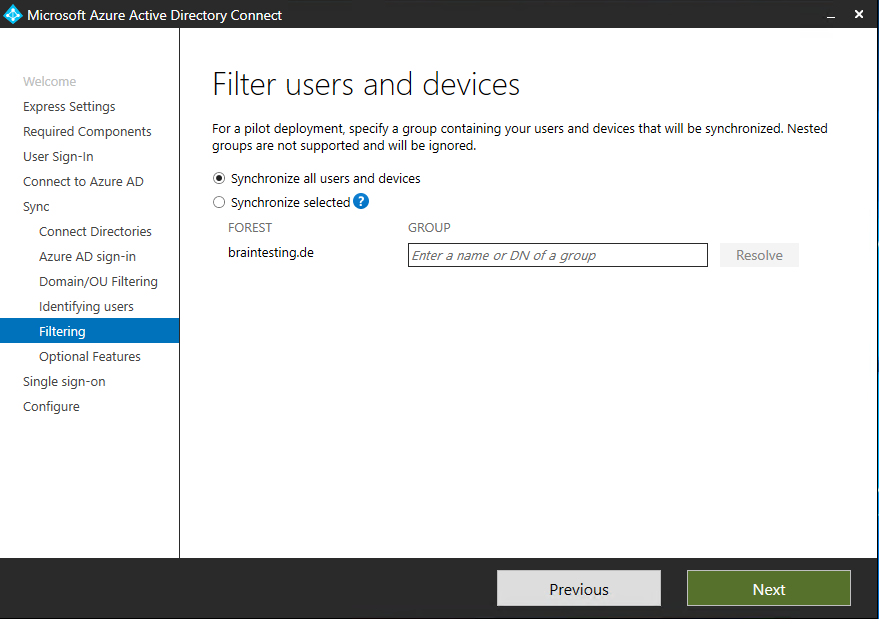
Select Synchronize all users and devices and click Next.
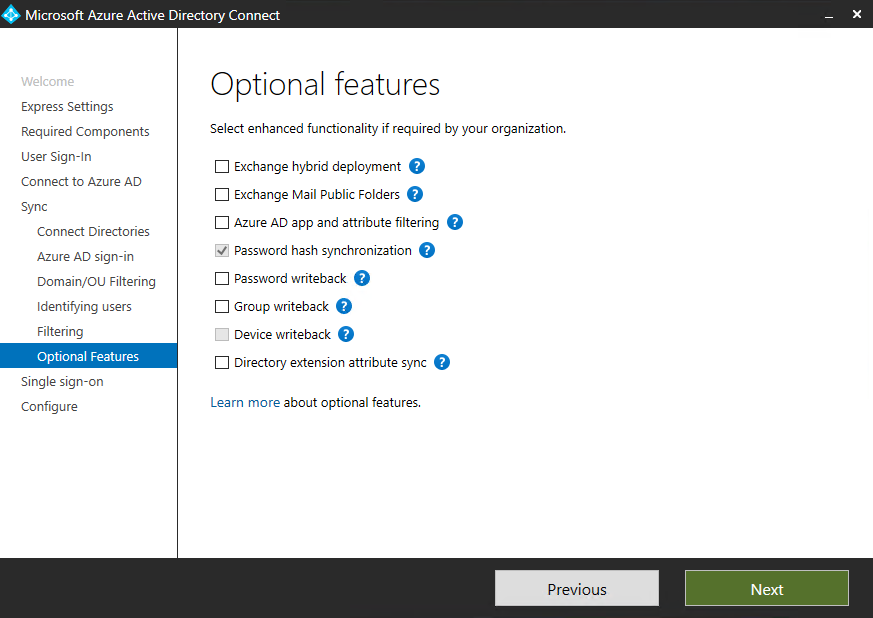
Check your optional features
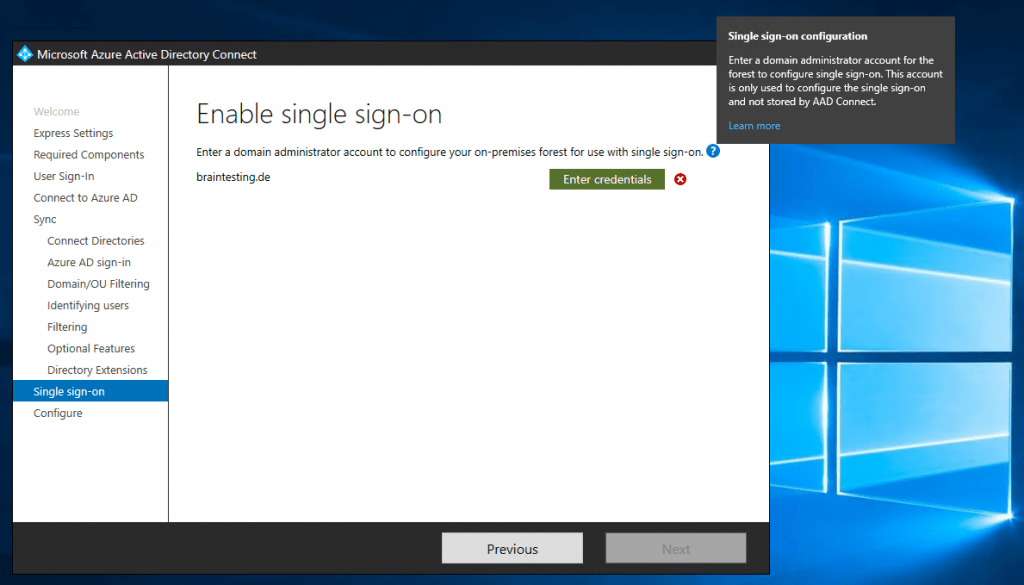
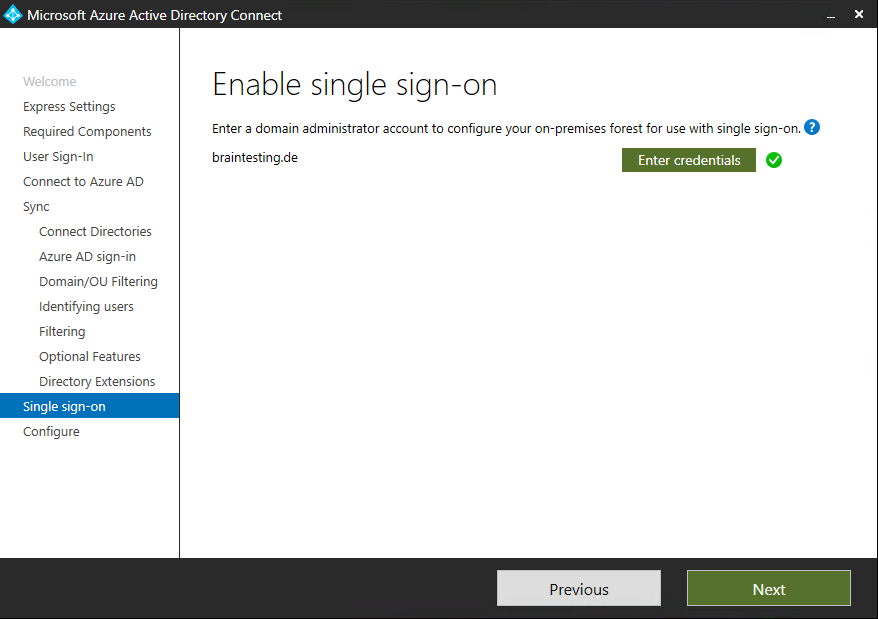
To enable single sign-on, click Enter credentials and specify the Domain Admin credentials.
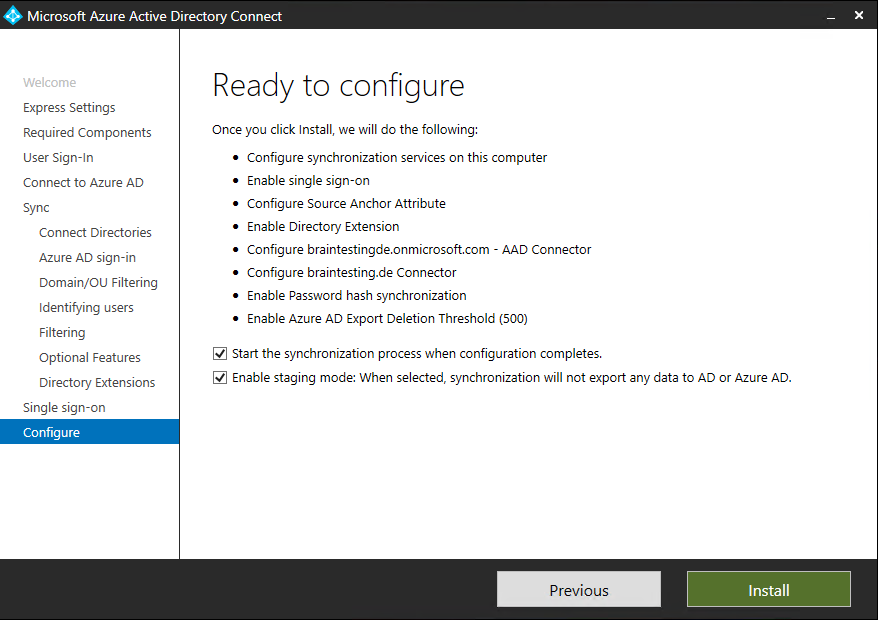
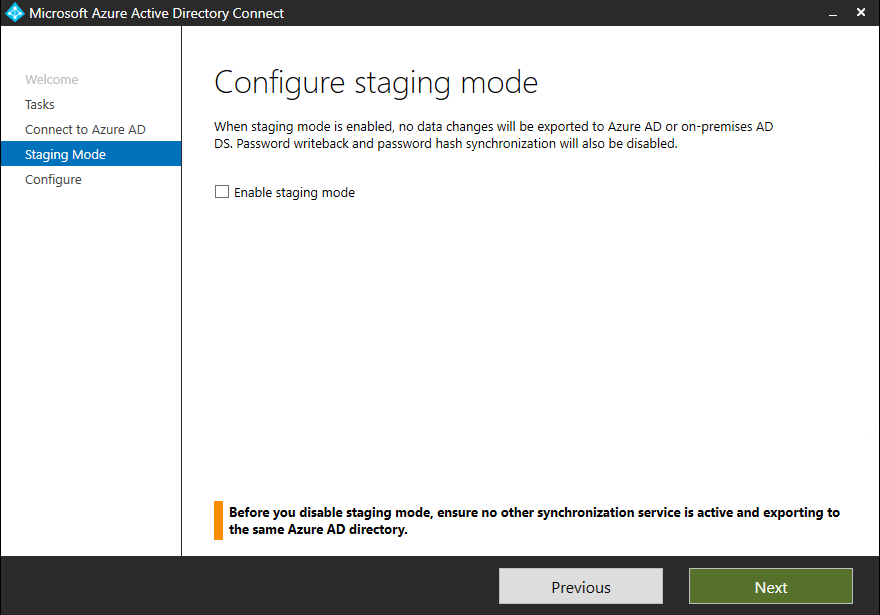
Check Enable the staging mode option to be sure to not exporting any data to AD or Azure AD! Then click on Install.
Azure AD Connect: Staging server and disaster recovery
https://docs.microsoft.com/en-us/azure/active-directory/hybrid/how-to-connect-sync-staging-server
Move / Migration to the New Server
This procedure is very easy and only contains of setting the old server in staging mode and deactivate synchronisation and on the new server disable staging mode and activate synchronisation.
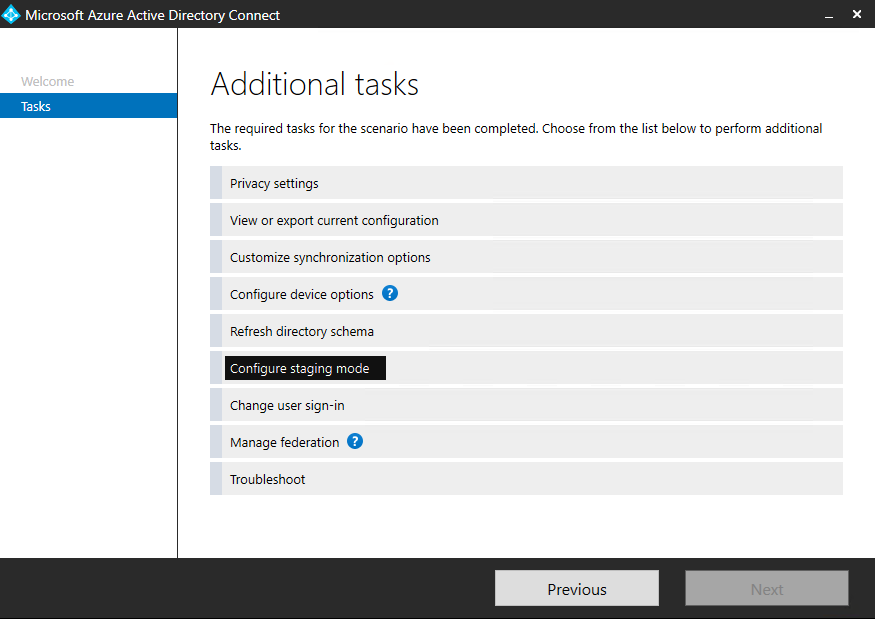
So open on the old server AAD Connect and select Configure
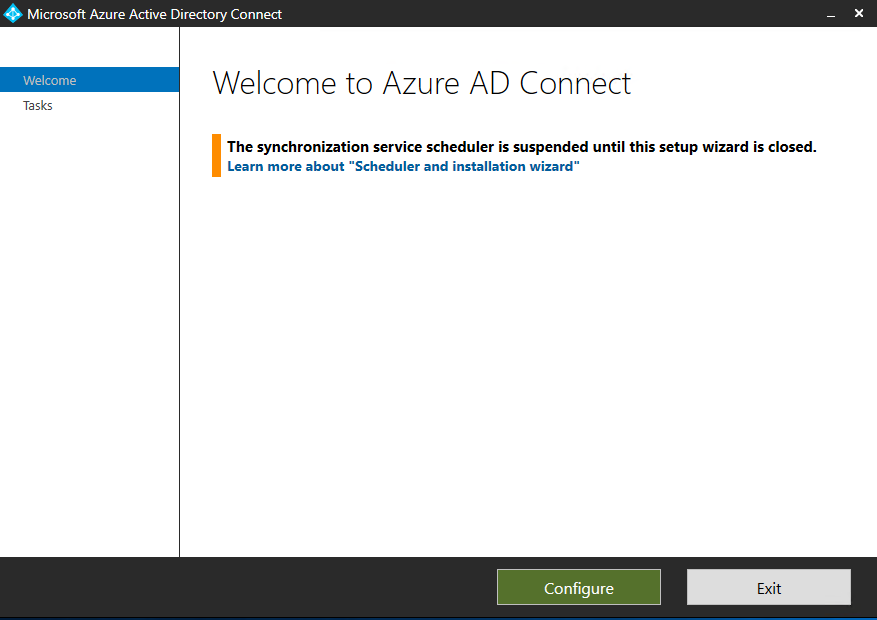
Select Configure staging mode
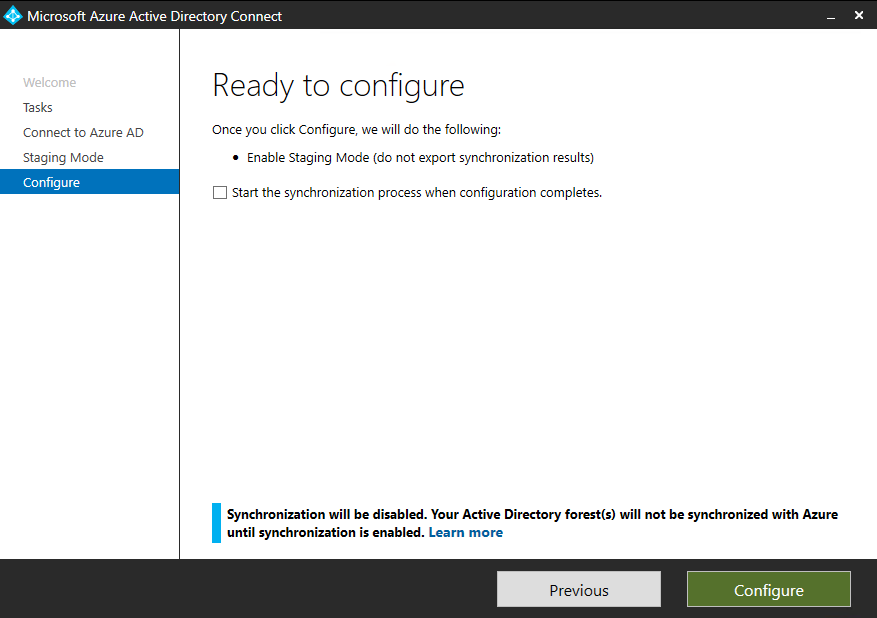
Enter your Office 365 (Azure AD) Admin credentials and check the Enable staging mode checkbox.

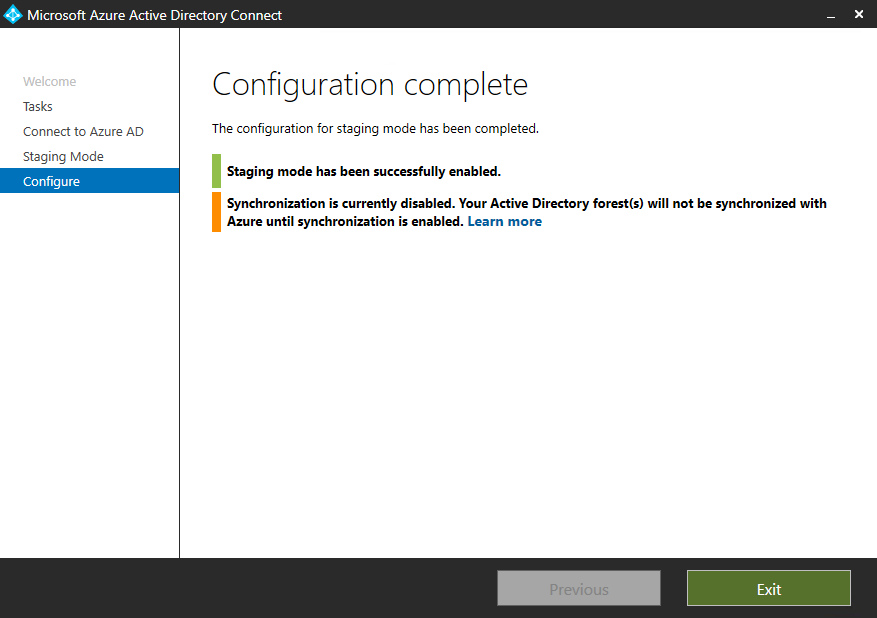
Disable Start the synchronization process when configuration completes and click on Configure.
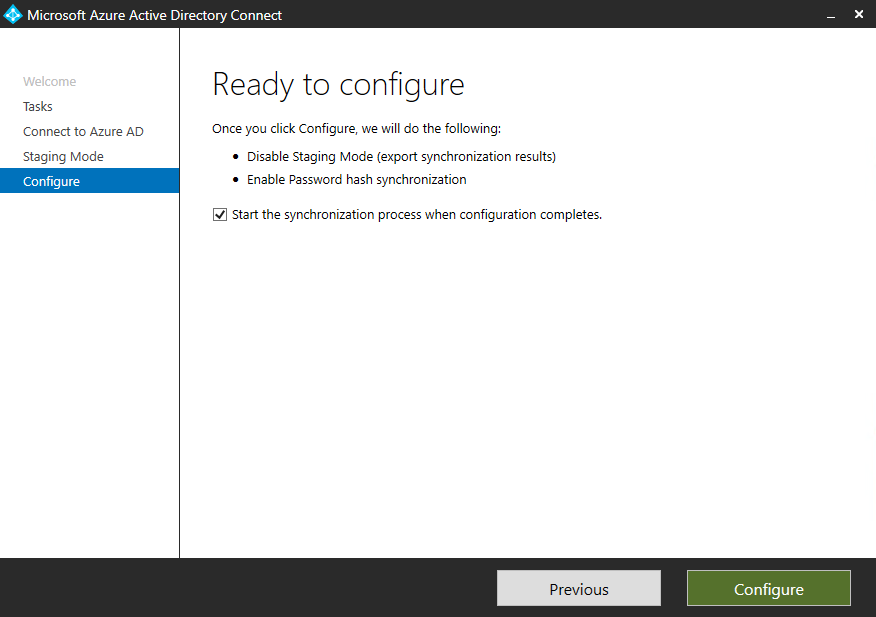
Now we can go to the New Server and disable the staging mode.
Open on the New Server AAD Connect and select Configure staging mode.
check Start the synchronization process when configuration completes
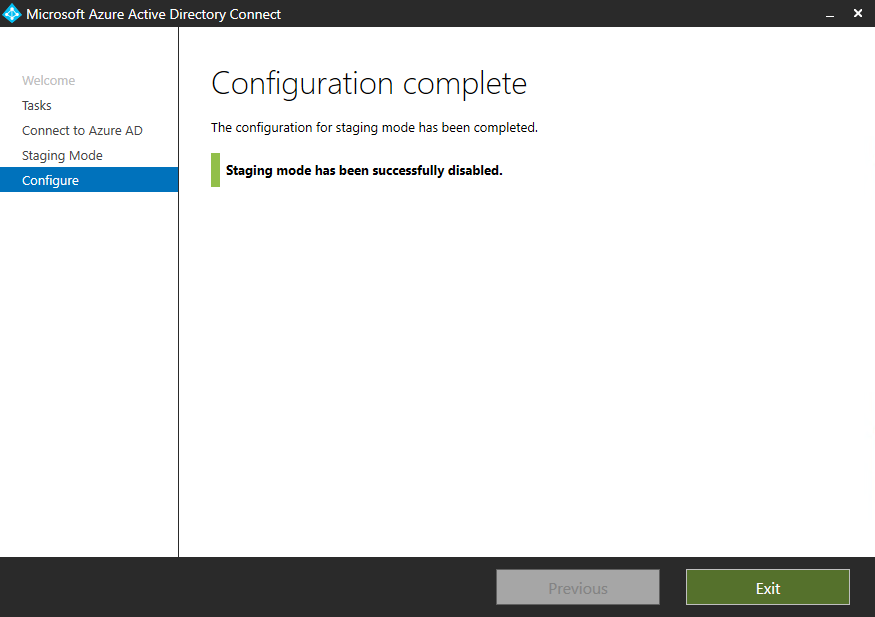
From now on only the New Server will be in charge for synchronisation between your onPrem environment and Office 365 (Azure AD)!
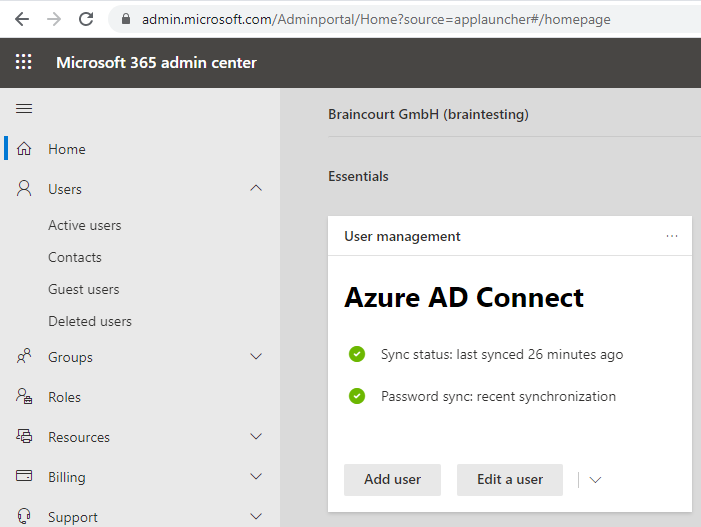
Check if the synchronisation works with the New Server
https://docs.microsoft.com/en-us/azure/active-directory/hybrid/how-to-connect-sync-feature-scheduler
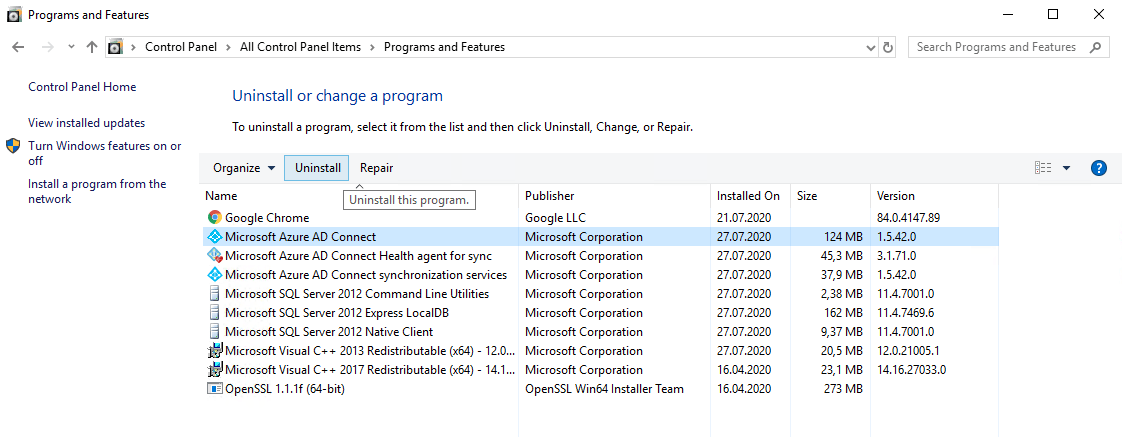
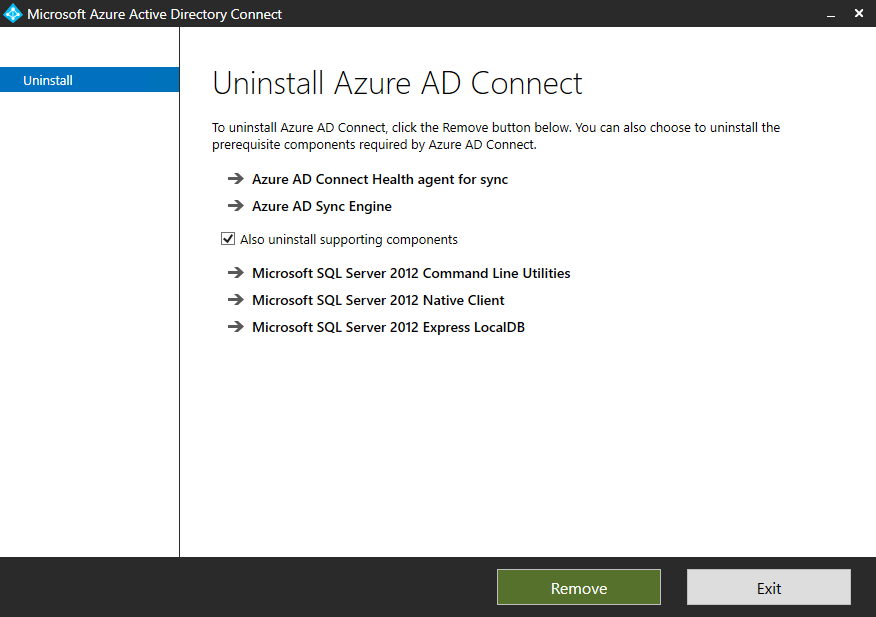
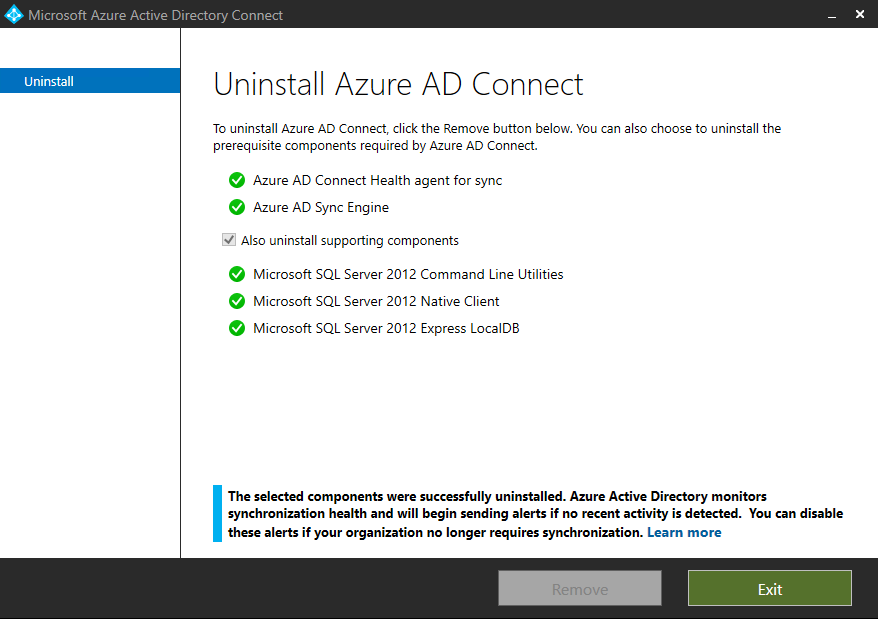
If you don’t need the old server as an Backup AAD Connect Server in staging mode, you can decommission it with the uninstall precedure as follows:
Go to Programs and Features in the Control Panel of the old server and uninstall Microsoft Azure AD Connect.
Finish!
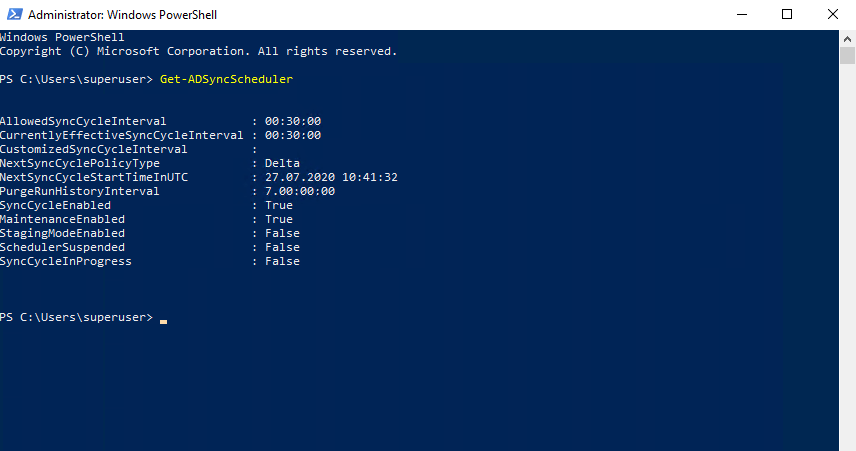
Trigger the synchronization with PowerShell
You can force the synchronization with the following two powershell cmdlets from your Azure AD Connect server:
To trigger a delta sync run
Start-ADSyncSyncCycle -PolicyType Deltaor to trigger a full (initial) sync run
Start-ADSyncSyncCycle -PolicyType Initial