Set up AudioCodes Fax Server and Mediant VE SBC with DTAG SIP Trunk
This post will show how to install and configure the AudioCodes Fax Server (Ver. 2.6.104.000) utilizing the AudioCodes Mediant VE SBC (Ver. 7.20A.258.119) with an DTAG SIP Trunk. (Deutsche Telekom AG)
Installation Guide
AudioCodes One Voice for Microsoft® Skype for Business
Fax Server & Auto Attendant IVR
https://www.audiocodes.com/media/14443/fax-server-and-auto-attendant-ivr-installation-guide-ver-26.pdf
Administrator’s Guide
https://www.audiocodes.com/media/13601/fax-server-and-auto-attendant-administrators-guide-ver-25x.pdf
Configuring Rerouting of Calls to Fax Destinations
Mediant Software SBC Virtual Edition (VE)
https://www.audiocodes.com/media/13248/mediant-software-sbc-users-manual-ver-72.pdf
page 550 26.2.1 Configuring Rerouting of Calls to Fax Destinations
- Installing the Fax Server on an Hyper-V VM with Windows Server 2019
- Configuration of the AudioCodes Mediant VE SBC for the Fax Server
- Configure the Fax Server
- Configuring Exchange SMTP Send Connector on-premise
- Configuring Exchange SMTP Send Connector Office 365
- Changing the AudioCodes Fax Server IP Address
- Links
Installing the Fax Server on an Hyper-V VM with Windows Server 2019
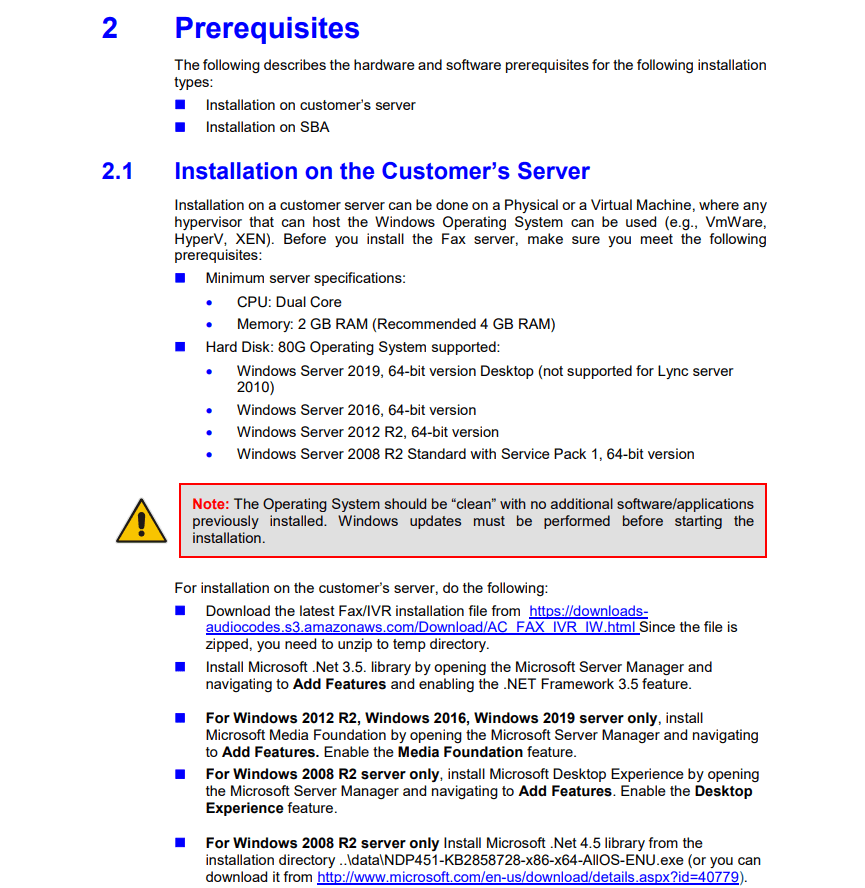
AudioCodes Fax Server is a pure software application which can be deployed on a standard server or on AudioCodes Mediant SBC or media gateways and Survivable Branch Appliances (SBA) in branch offices.
I will install the Fax Server software on an Hyper-V VM with Windows Server 2019.
First we need to install the .NET Framework 3.5 and the Microsoft Media Foundation.
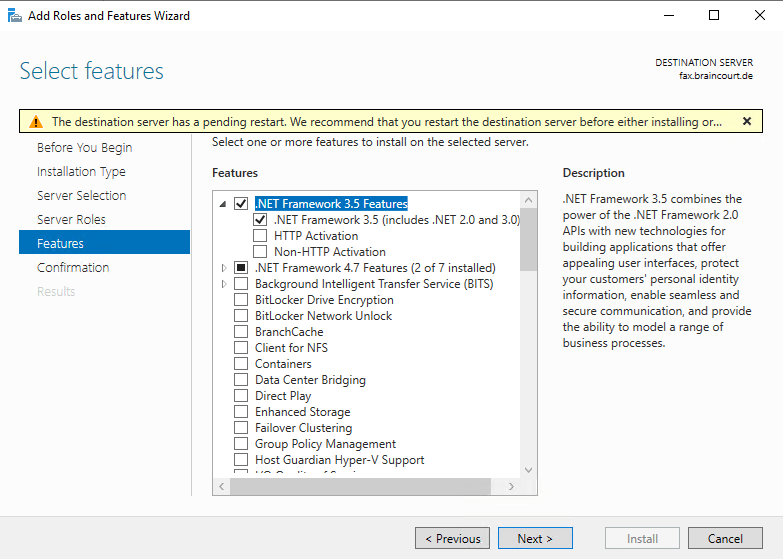
Install Microsoft Media Foundation
About Media Foundation
https://docs.microsoft.com/en-us/windows/win32/medfound/about-the-media-foundation-sdk

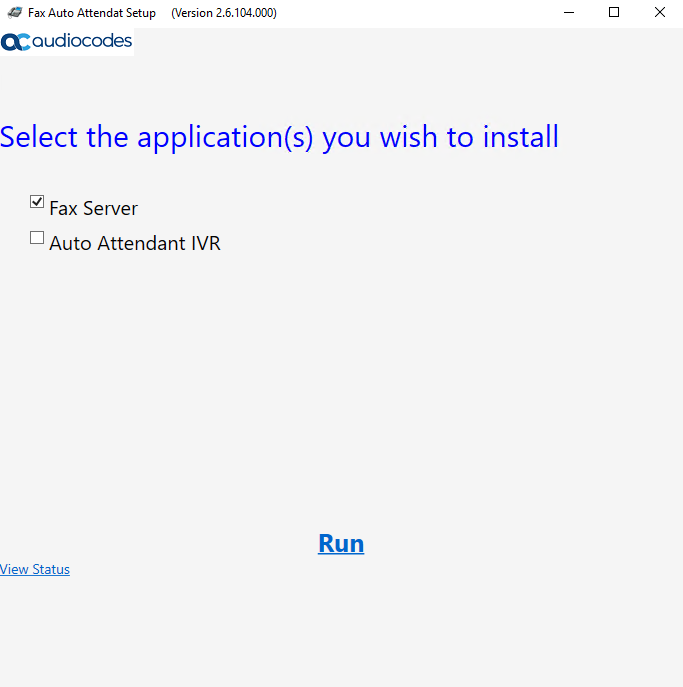
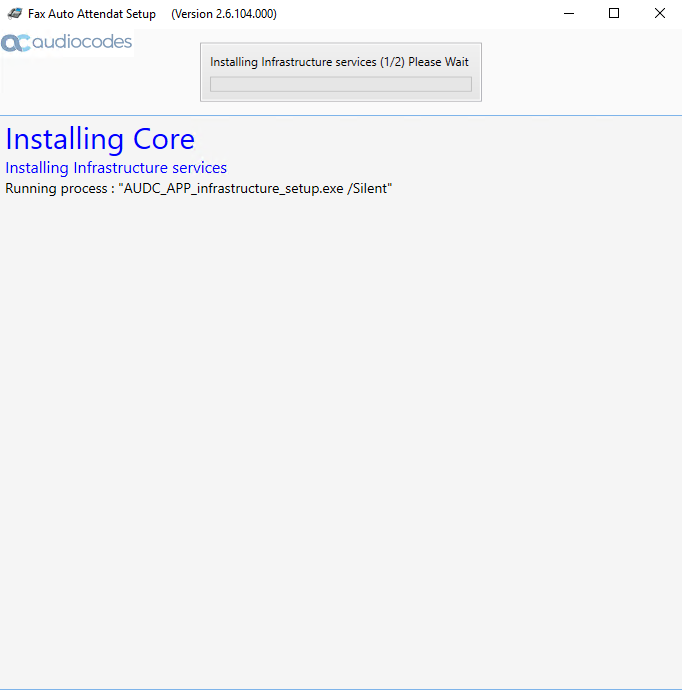
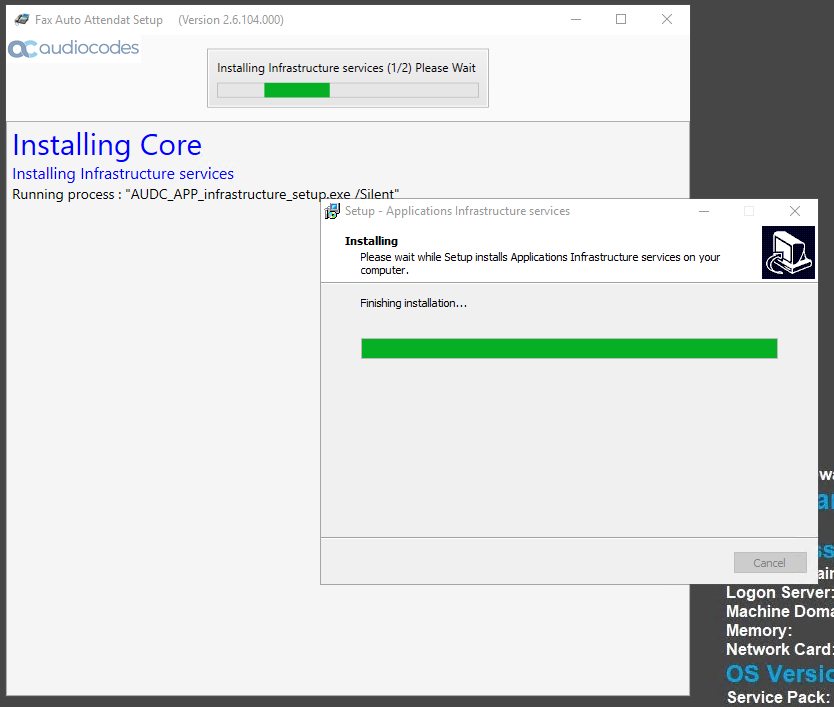
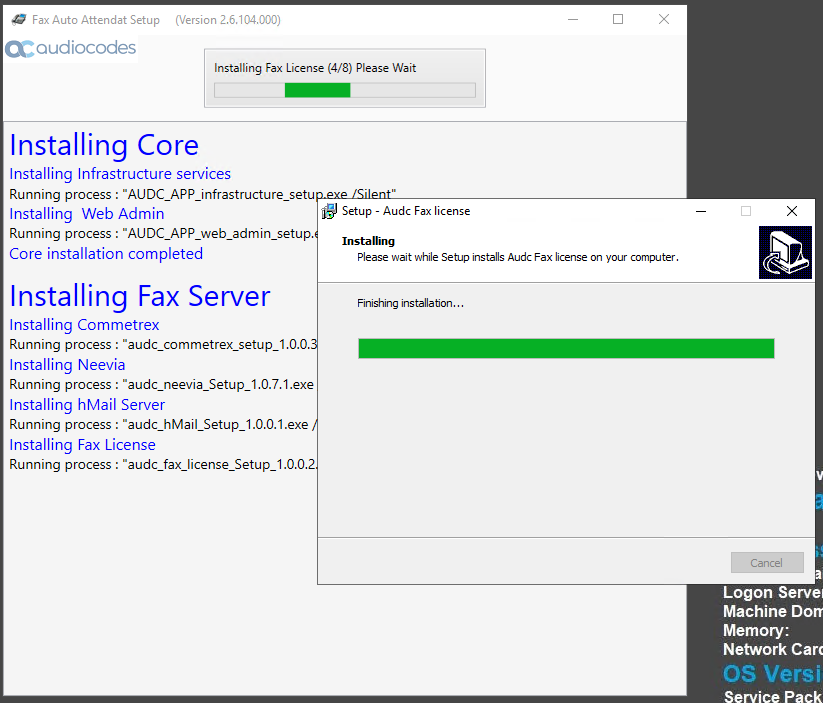
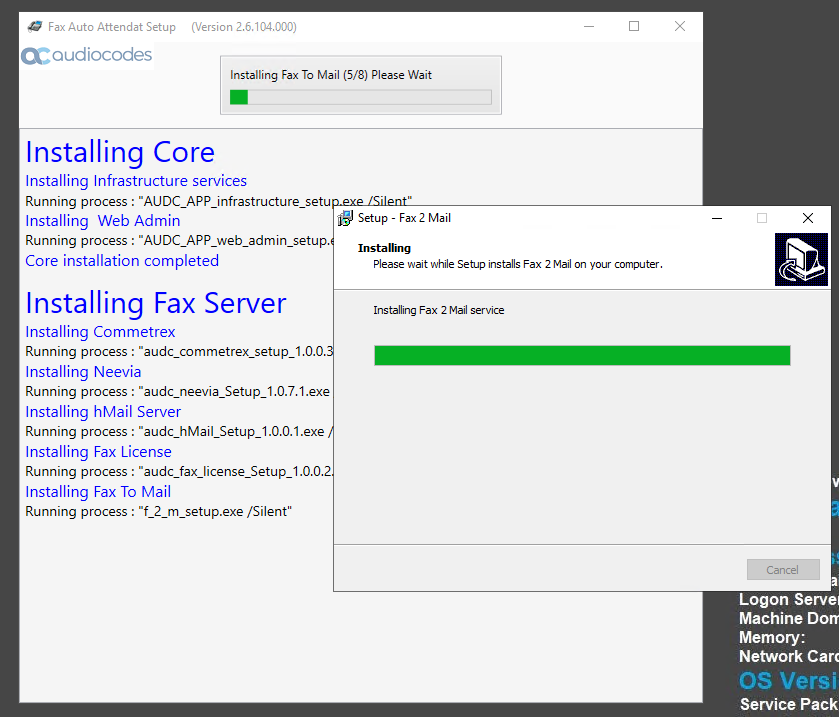
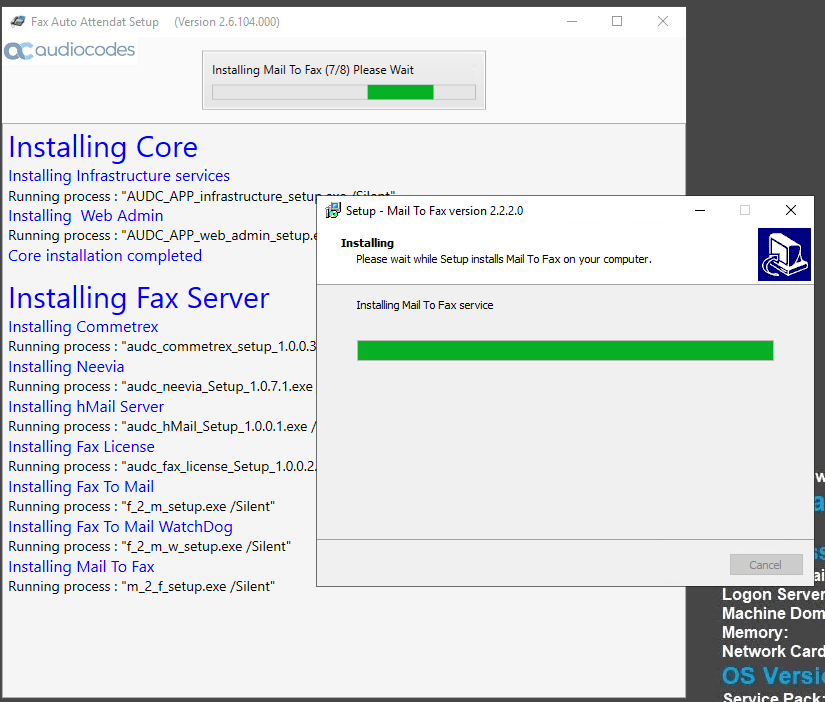
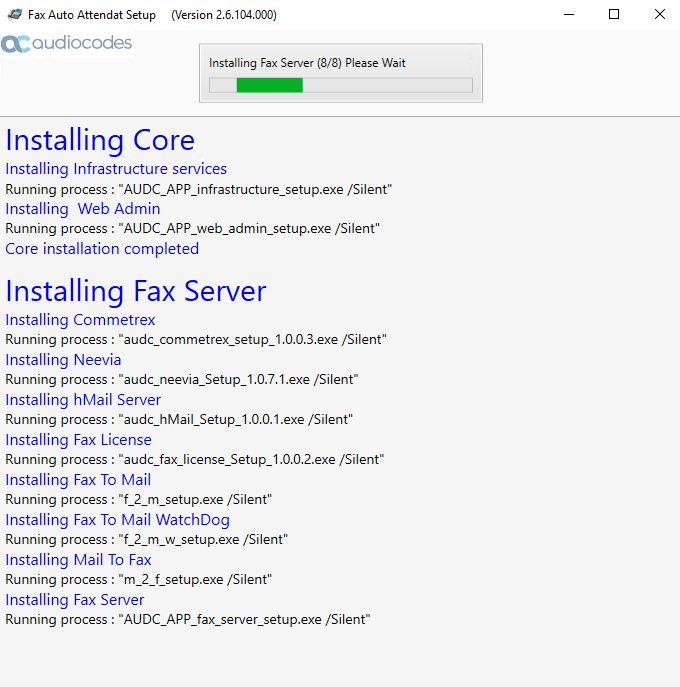
Now we can run the fax_att_setup.exe as Administrator.
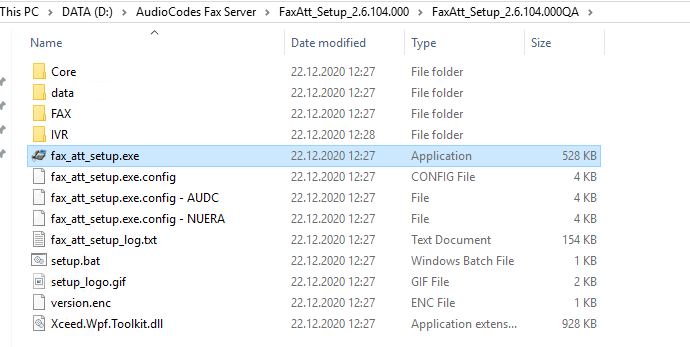

Select the Fax Server check box, and then click Run to continue.
Create a new local Windows user. The installation requires a username and password to create a new local Windows user that will be used to assign specific credentials for Fax server’s services (The created user will be a member of the local administrators group).
A domain user can be used as well – the domain user must have local administrators’ credentials. A Domain user is needed in case the Send the Fax to Printer option is used.
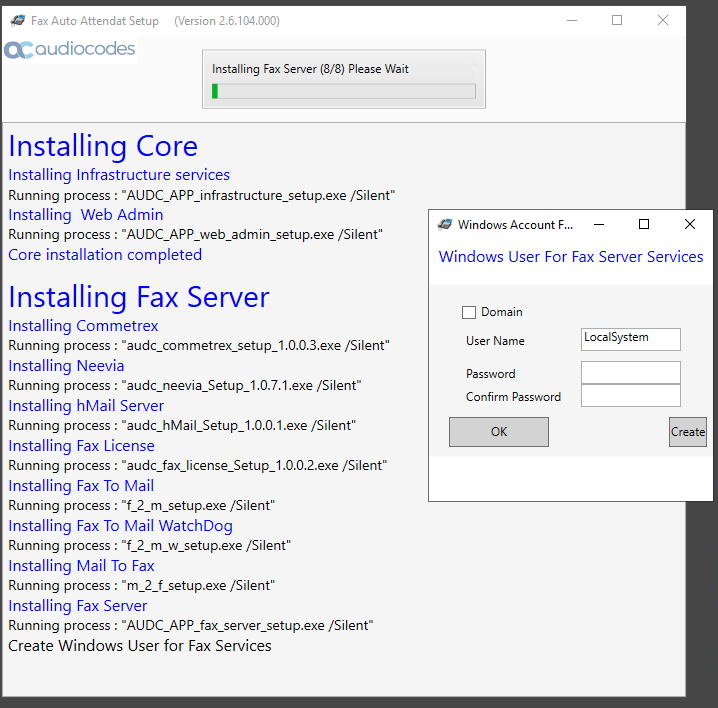
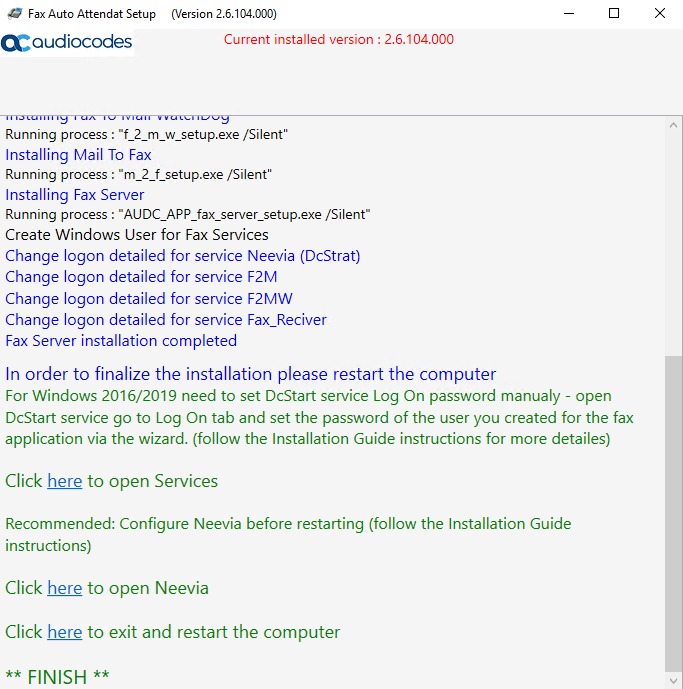
For Windows 2016/2019 need to set DcStart service Log On password manualy – open DcStart service go to Log On tab and set the password of the user you created for the fax application via the wizard. (follow the Installation Guide instructions for more details)

Recommended: Configure Neevia before restarting (follow the Installation Guide instructions)
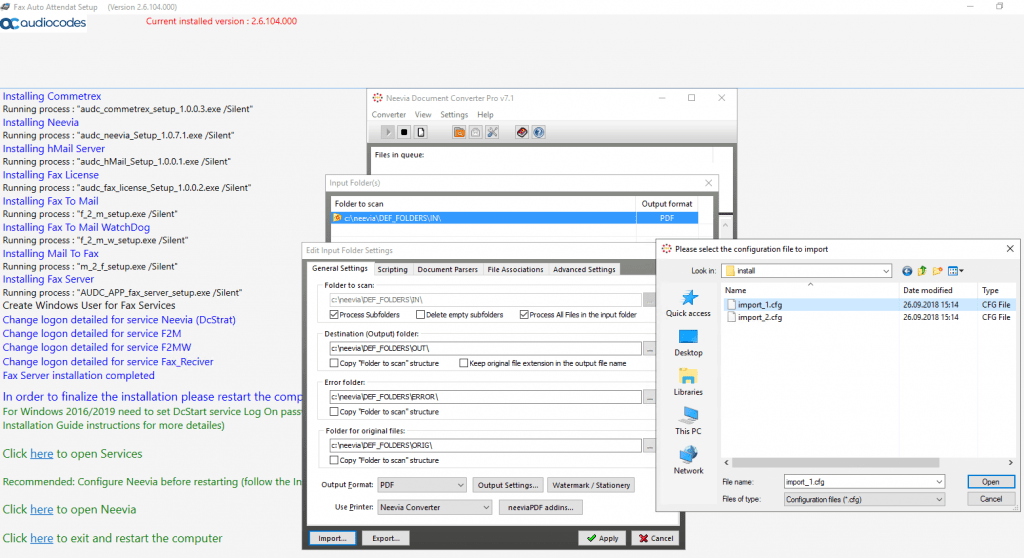
From the menu choose the Folders…option.

Double-click the folder displayed; the Edit Input Folder Settings screen is displayed.
Neevia Document Converter Pro – Import Configuration File
Navigate to the path of the configuration files directory – C:F2MAdmininstall.
Select the ‘Import_1.cfg’ check box, and then click Open
Click Apply.
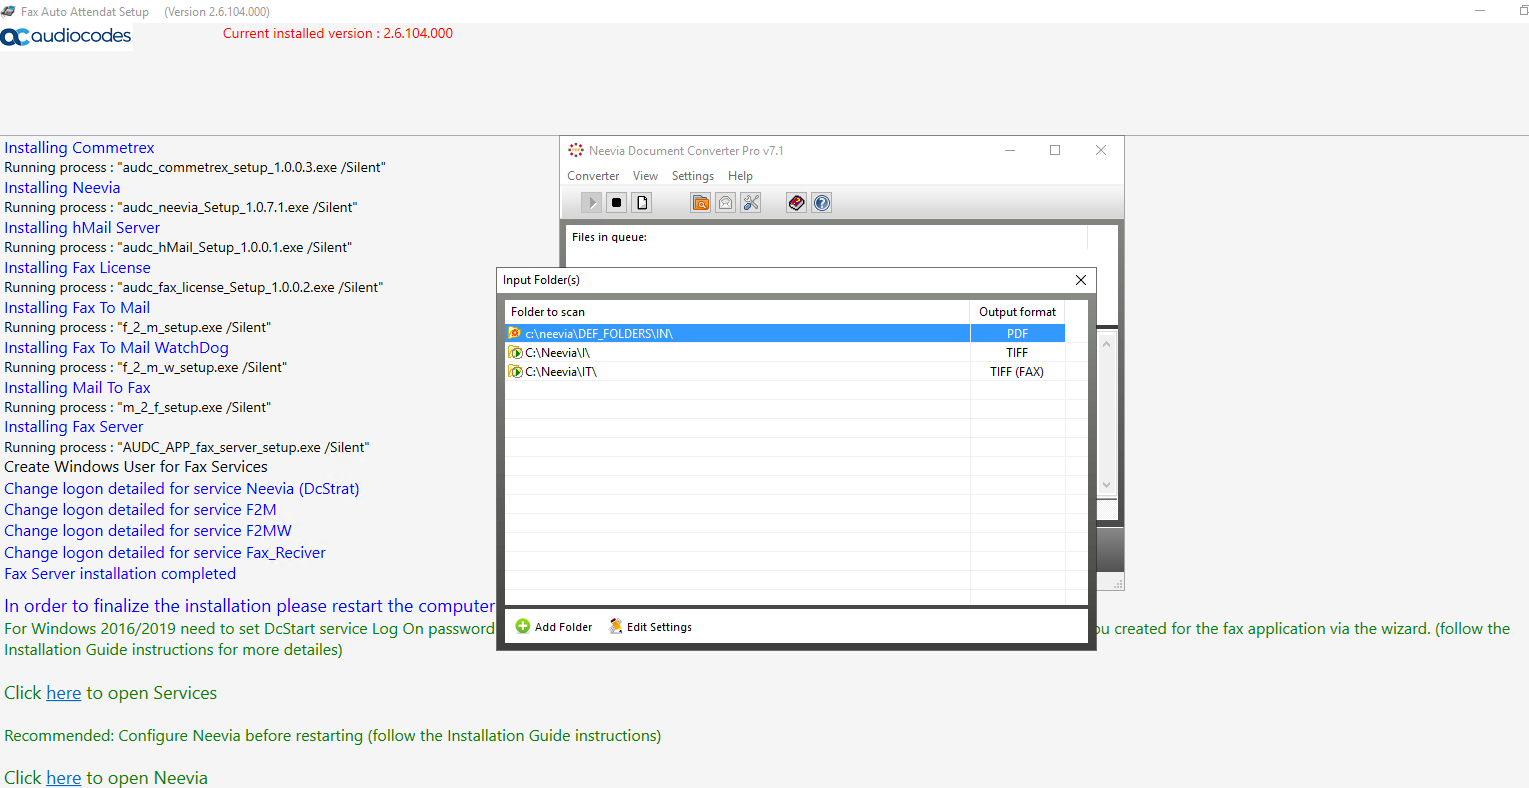
In the Input Folder(s) screen, click Add Folder.
Click Import.
Select the ‘Import_2.cfg’ check box, and then click Open.
Click Apply.
Click the here link to exit and restart the computer.

After the computer restarts, open Remote Desktop Connection, and then connect to the server. The server will run a short script to finalize the installation.
Note: Do not stop this script.

Log out and re-log in with the local user that was created for the fax service during the installation. If Microsoft Office is installed, you need to open all Microsoft Office applications once to verify that the fax user can open all the installed Office applications
Open the web browser http://Server_IP:8090. If you cannot connect, try to connect to Port 9431.
Enter Username ( Default = Admin | Admin_extra_ ) and Password (Default = Admin)
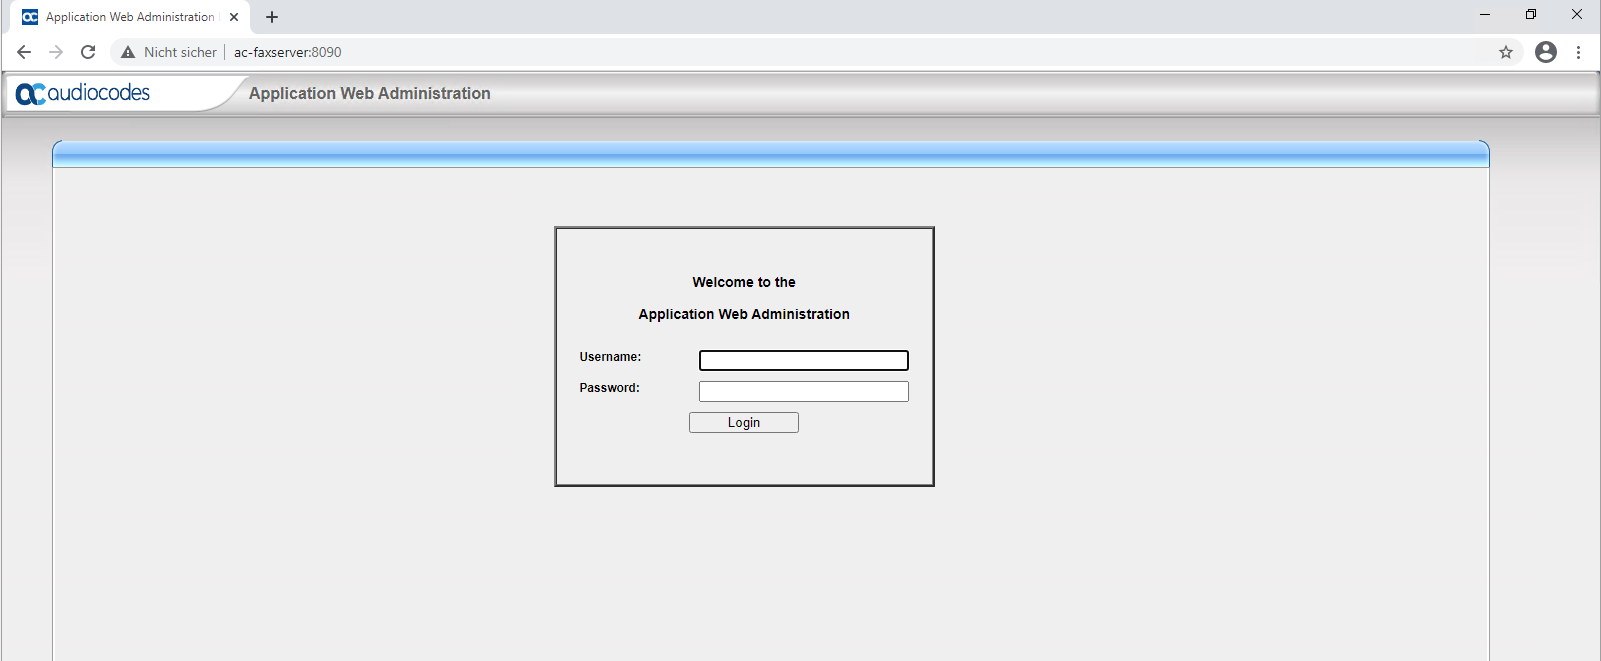
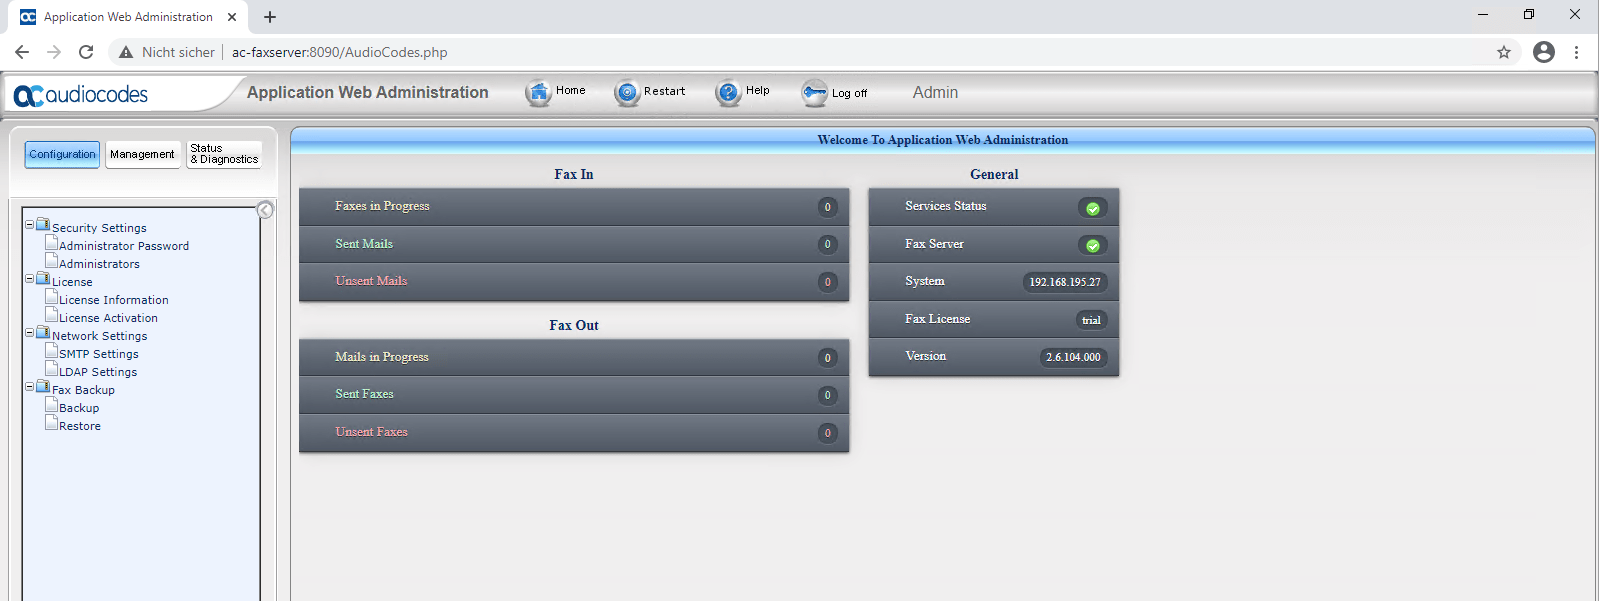
The installation is now complete. You’re directed to the Fax Server Web Admin, at port 8090.
The Fax server uses port 8090 while the standard port 80 is used by another application that is installed on the same server.
Enter Username ( Default = Admin | Admin_extra_ ) and Password (Default = Admin) and click Login; the Welcome screen is displayed:
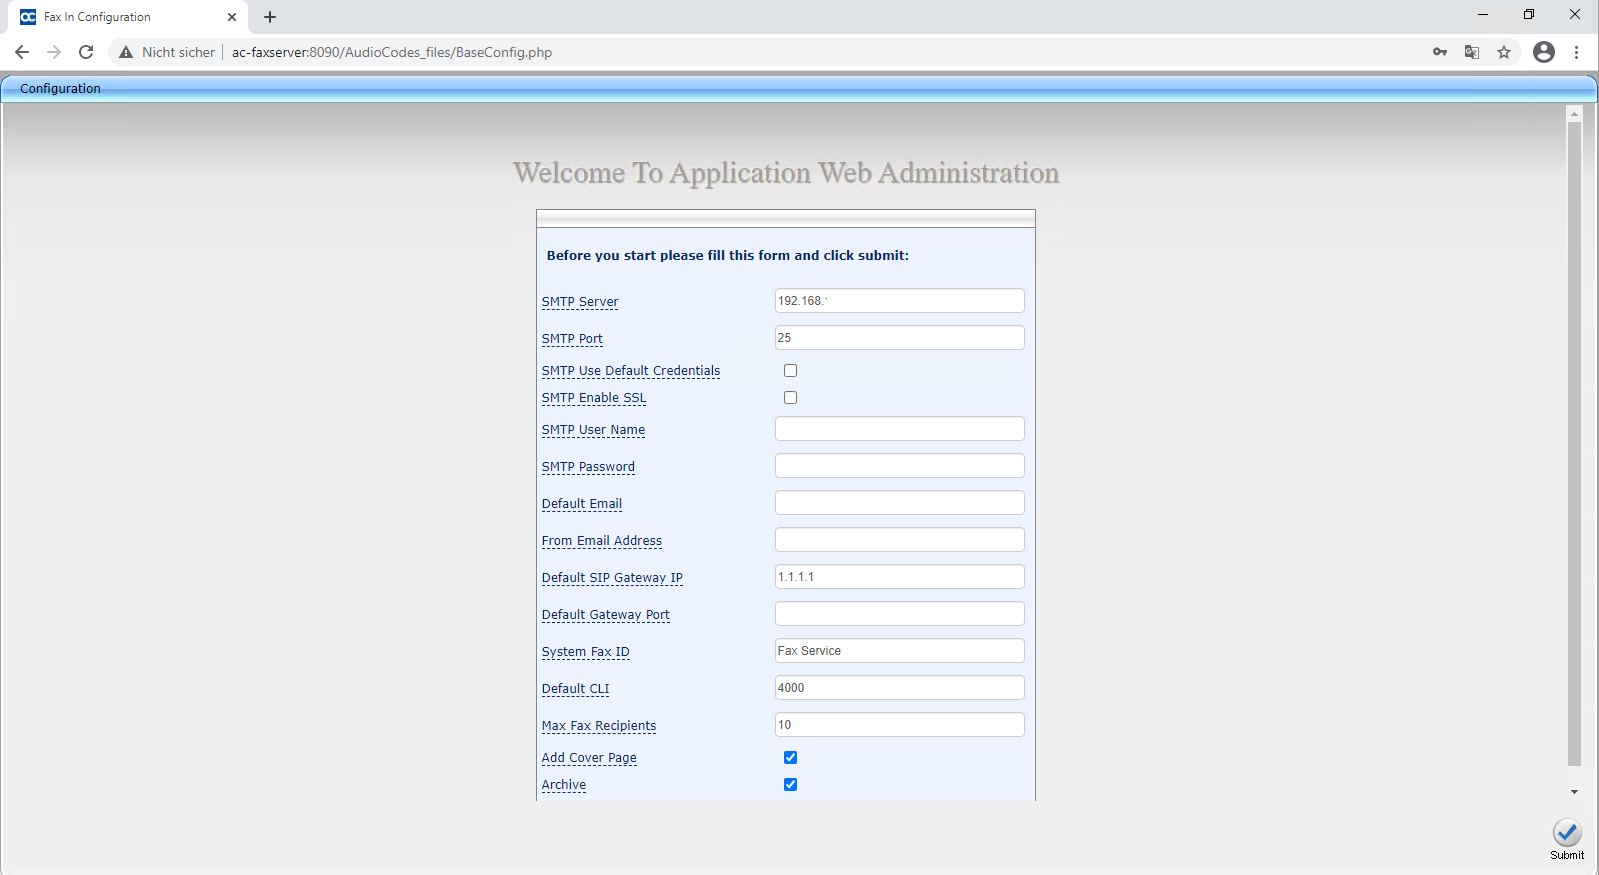
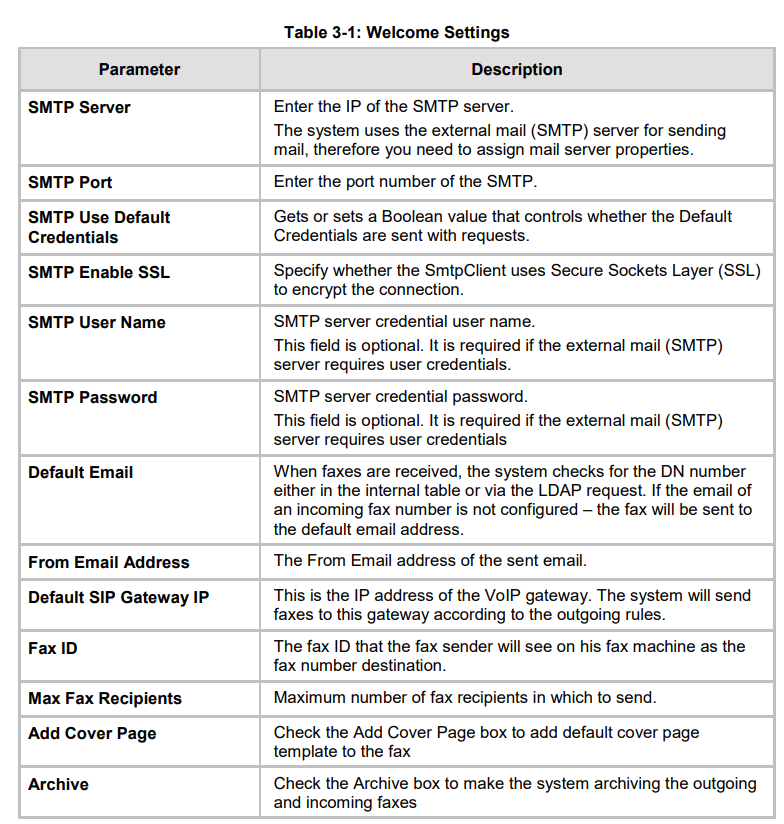
Configure the parameters using the descriptions in Table 3-1 as reference.
Here you have to enter besides the e-mail parameters the IP of the SIP Gateway which is in our case the AudioCodes Mediant VE SBC and the port it is listening. Therefore we create on the SBC a further set of SIP Interface, Media Realm, Proxy Set, IP Group and IP Profile which is dedicated to connect the Fax Server to the SBC. We will see this further down.
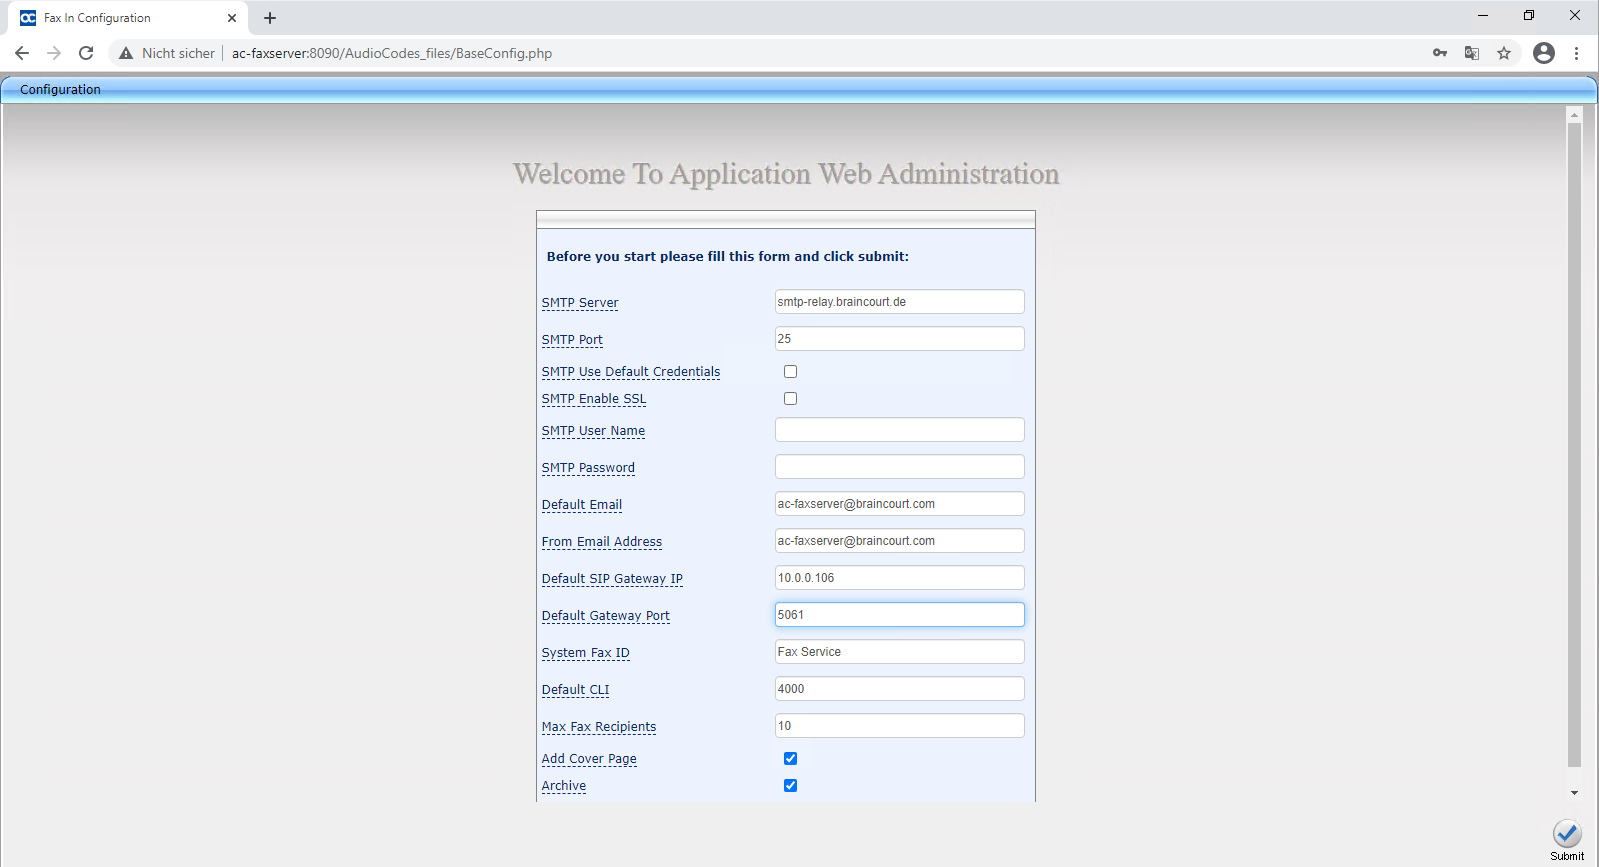
Click on Submit.

To activate the Fax server license, see Section 3.5
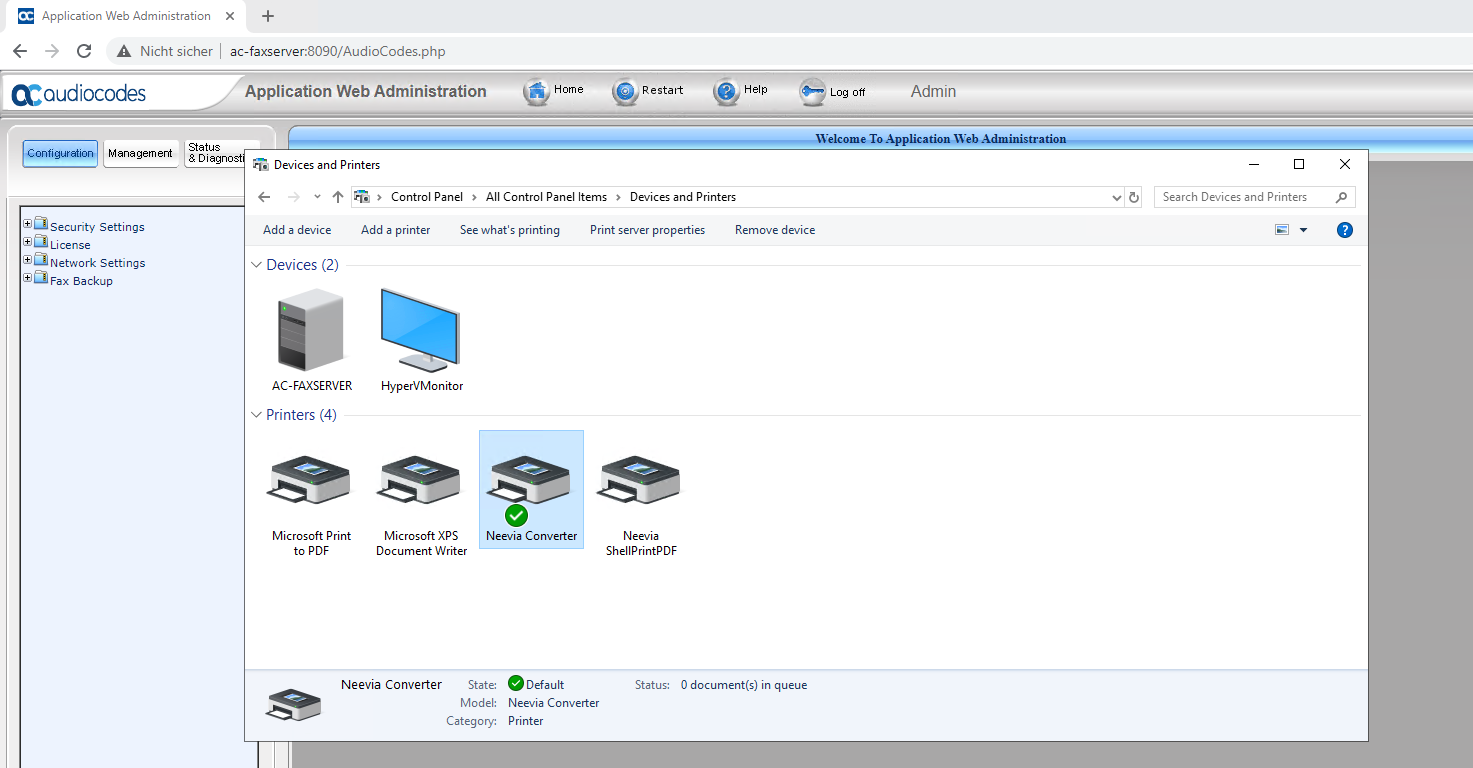
Configure your computer as follows:
a. Open Control Panel > Devices and Printers.
b. Right-click Neevia Converter and choose Printer Properties.
c. Click the Advanced tab and clear ‘Enable advanced printing features’ and
‘Neevia ShellPrintPDF’.
d. Set the Neevia printer as the default printer.
e. Restart the computer.
- The installation is now complete. You can now log in to the system. Refer to the Fax
Server and Auto Attendant IVR Administrator’s Guide for detailed information.
Configuration of the AudioCodes Mediant VE SBC for the Fax Server
I will use here the Hyper-V Image of the AudioCodes Mediant VE SBC, this image includes already two network adapters (Ethernet Devices).
At the moment the SBC is configured for Teams Direct Routing and using only one of the Ethernet Devices (IP Interfaces) as shown in the following post.
This existing IP Interface which is used for the connection to Teams and DTAG, is configured with NAT 1:1 translation, because the SBC is homed in my perimeter network with an internal IP address.
Therefore I need a further IP Interface for the internal connection between the fax server and the SBC without NAT.
So first I need to add the second Ethernet Device under SETUP – IP Network – CORE ENTITIES – Ethernet Devices
Click on New

Keep attention to switch Tagging to Untagged, by default Tagged is preselected, otherwise you won’t be able to connect to this interface!
For Underlying Interface select GROUP_2


Now I can add a further IP Interface using the second available Ethernet Device.
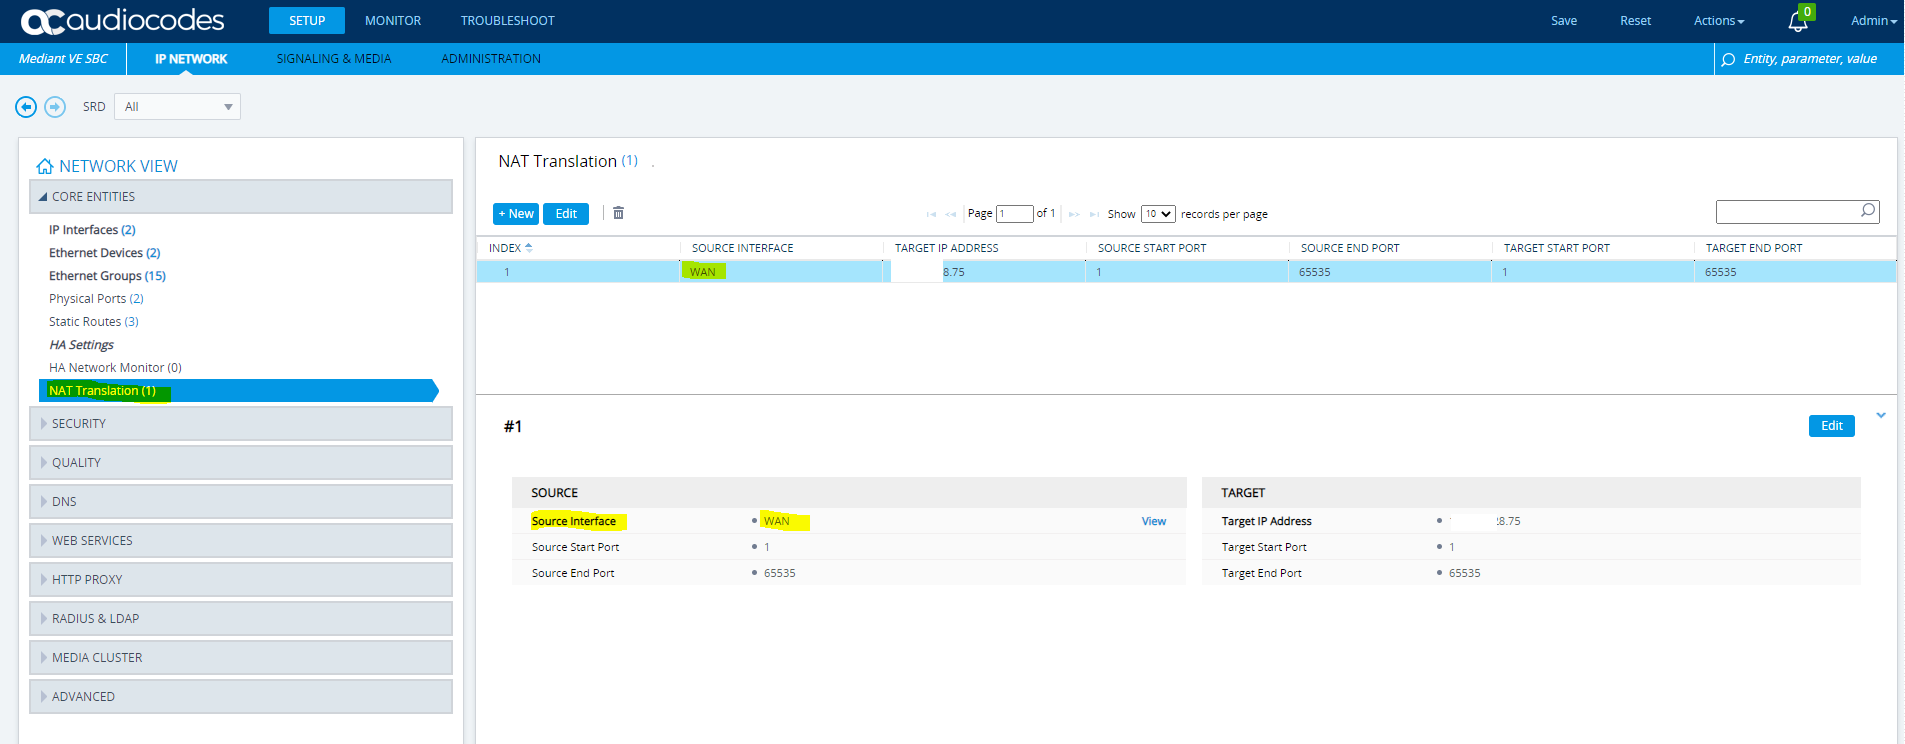
Both systems, the Fax Server and the SBC, are homed in my perimeter network and using an internal private ip from the perimeter network. Therefore the already configured IP Interface for the Teams and DTAG connection is using NAT 1:1.
As we now need two IP Interfaces, the existing for Teams and DTAG connection and a new one for the internal connection to the Fax Server, I renamed the existing in WAN and the new one for the Fax Server in LAN.
The WAN is already configured for NAT.
So go to SETUP – IP NETWORK – CORE ENTITIES – IP Interfaces and create a new IP Interface by selecting the second Ethernet Device.
As this interface is only used for the internal connection between the SBC and the Fax Server, I will name it LAN.
For Application Type use Media + Control, further you can set an internal DNS Server if available. For the connection between the SBC and Fax Server you can also use directly the IPs.
Btw. the first interface is using under Application Type OAMP + Media + Control which stands for:
Operations, Administration, Maintenance, and Provisioning (OAMP)

We will also need a new Media Realm for the Fax Server connection. Therefore go to SETUP – SIGNALING & MEDIA – CORE ENTITIES – Media Realms and click on new.
Regarding the documentation from AudioCodes I will configure the port range 49000 – 59000.
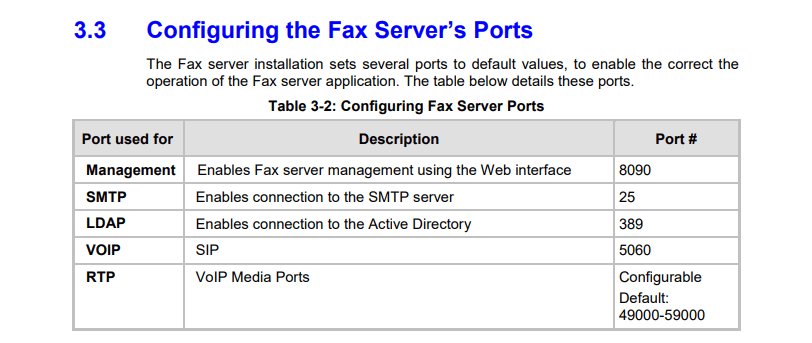
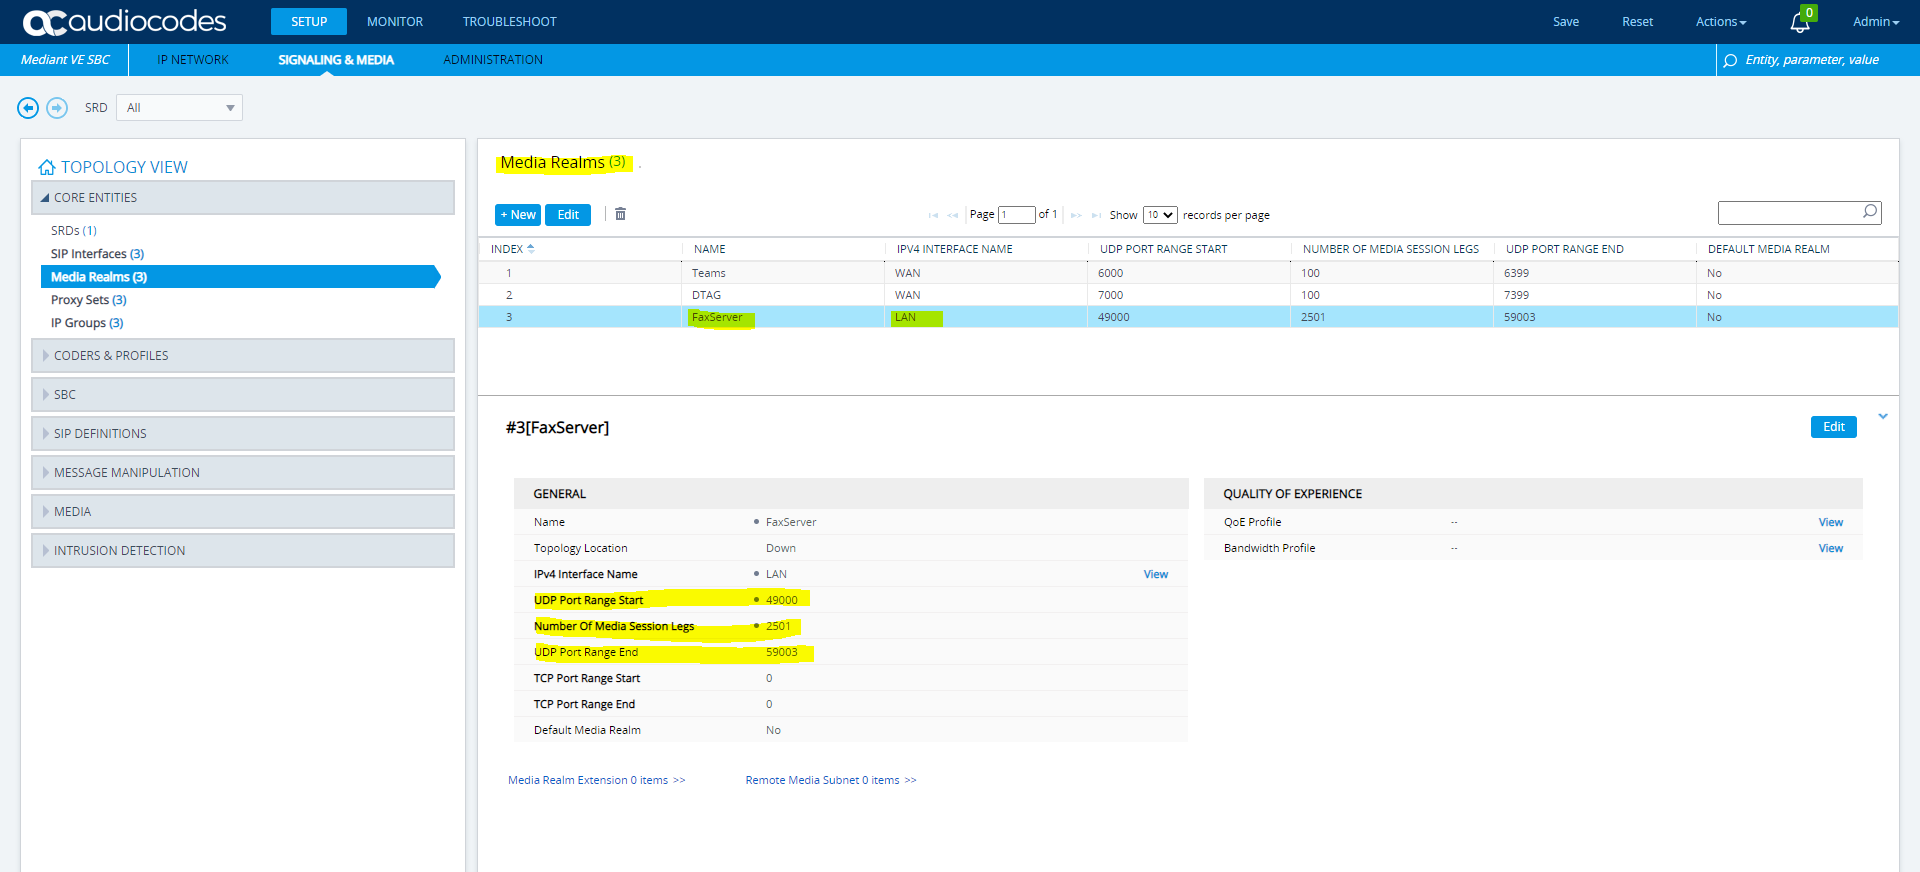
Also create a new SIP Interface for the connection with the fax server. The SBC should listen on UDP Port 5060 at this Interface.
For the network interface select the newly created LAN interface.

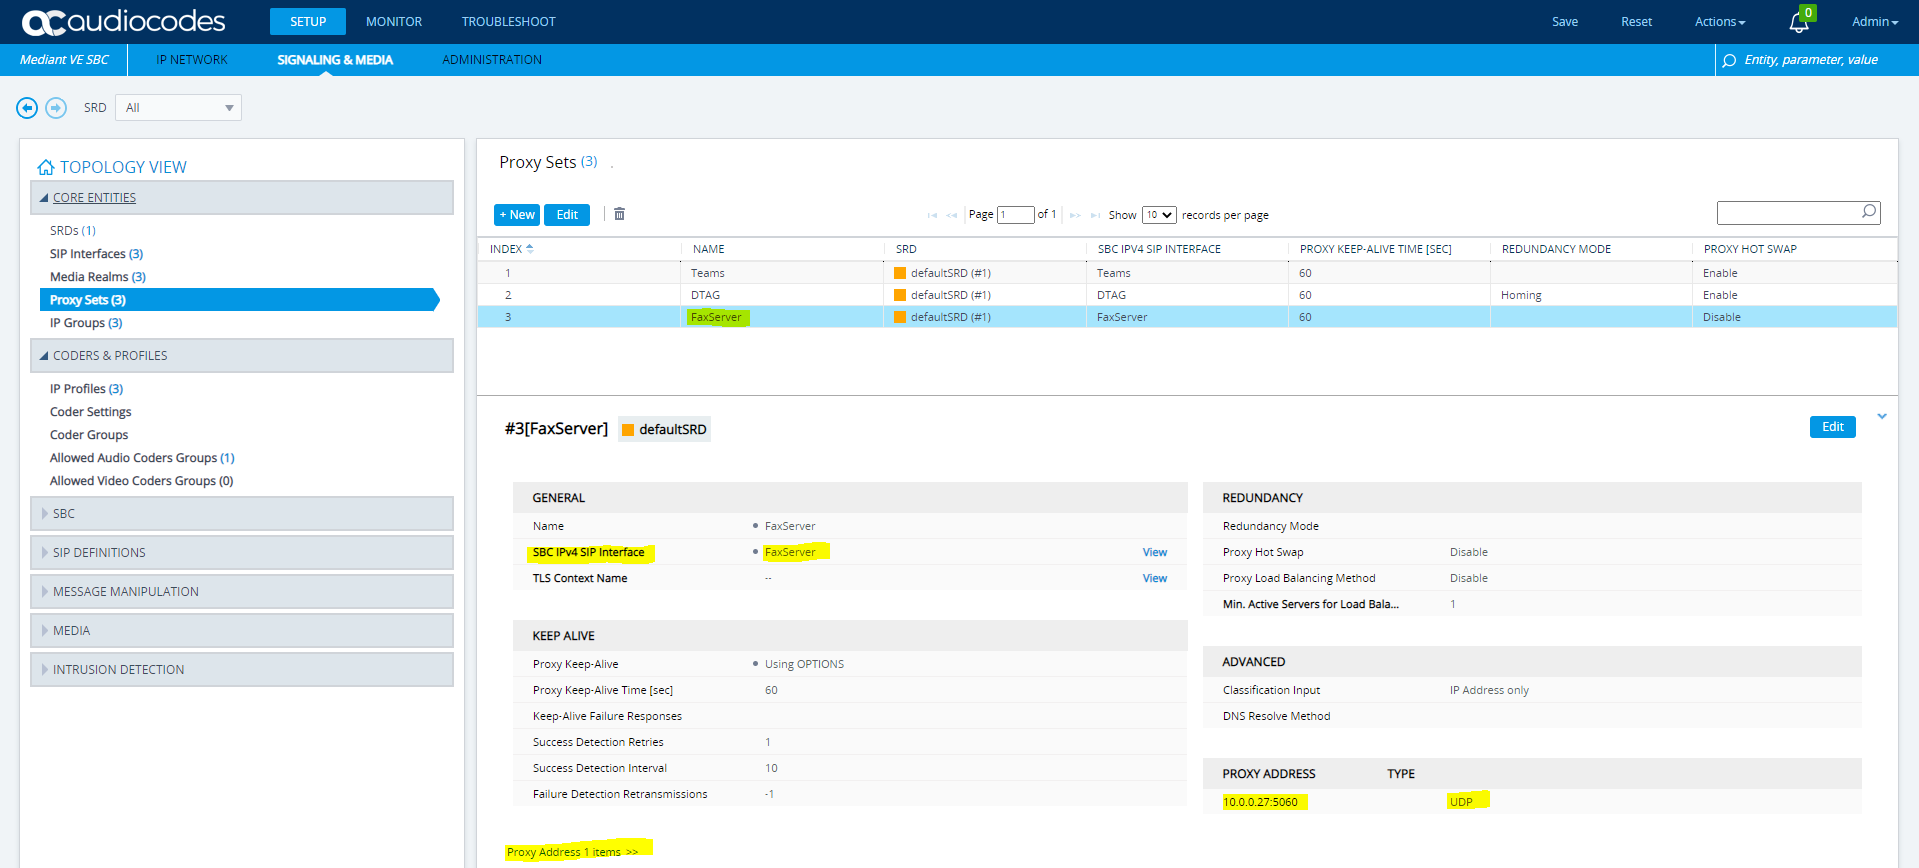
Next create a new Proxy Set for the Fax Server connection. So go to SETUP – SIGNALING & MEDIA – CORE ENTITIES – Proxy Sets and click on new.
Select the new SIP Interface for you Fax Server connection and click on the Proxy Address items link at the bottom to add the IP and Port number from the AudioCodes Fax Server. By default this is Port 5060 UDP as shown in the screenshot above 3.3.
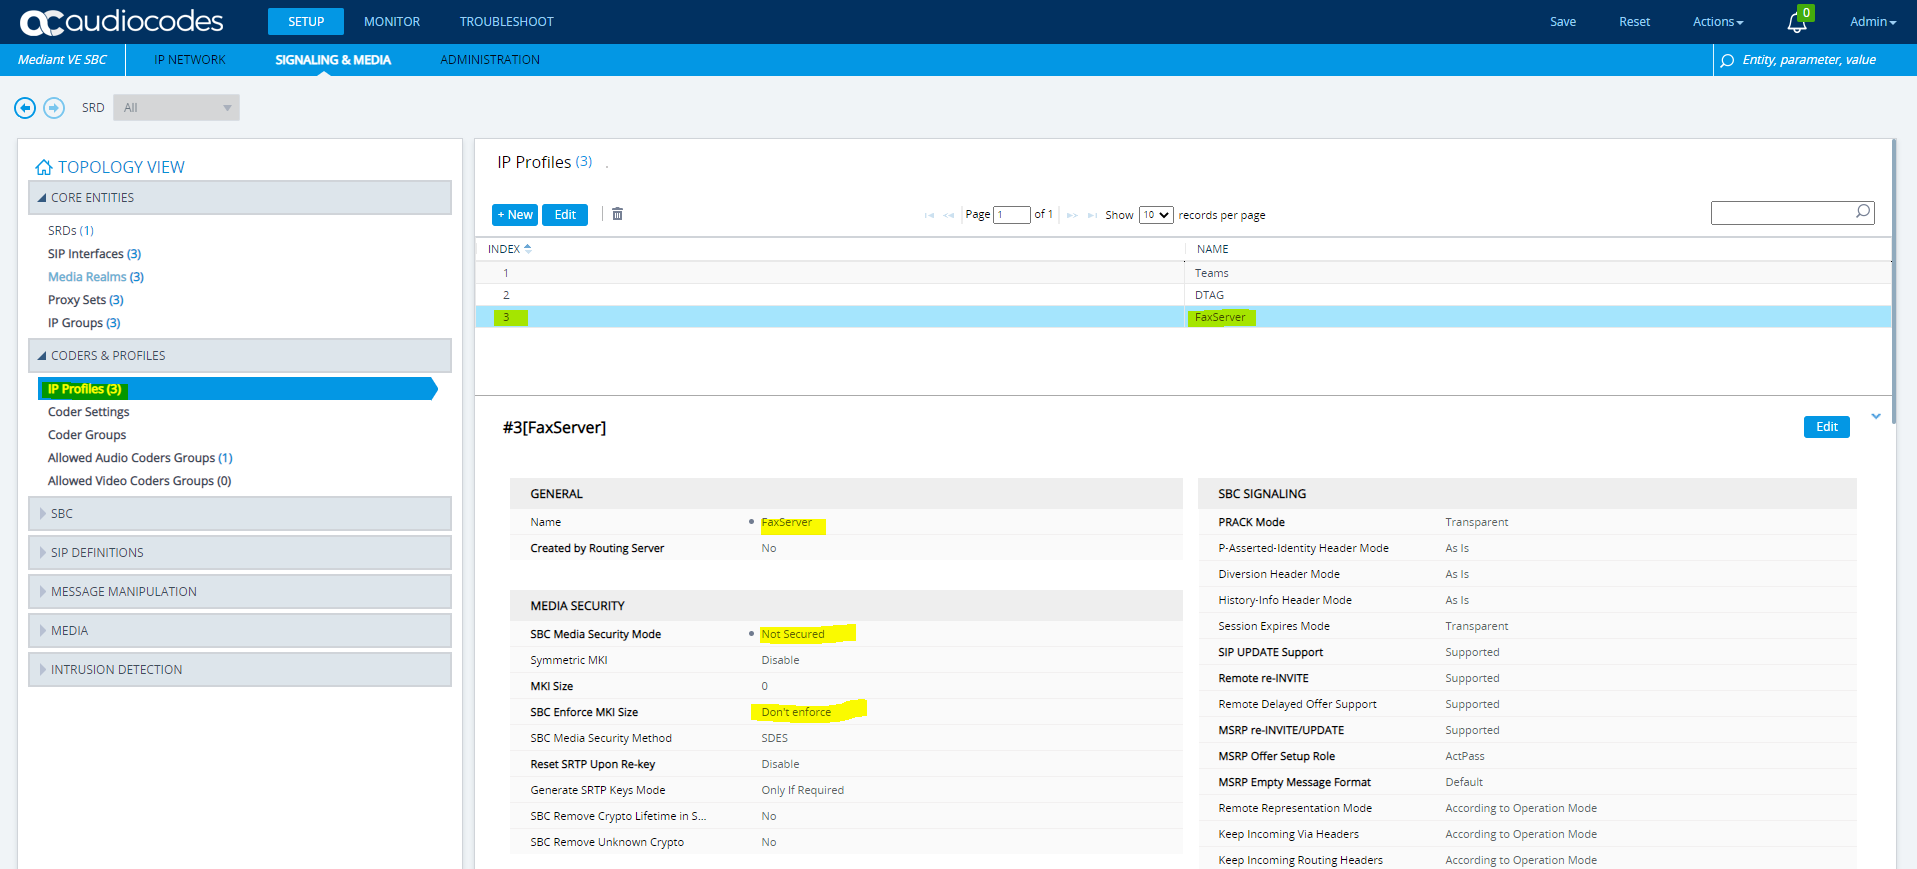
Further we have to create a new IP Profile for the Fax Server connection. So go to SETUP – SIGNALING & MEDIA- CODERS & PROFILES – IP Profiles and click on new with the following settings. The rest can be set on default.


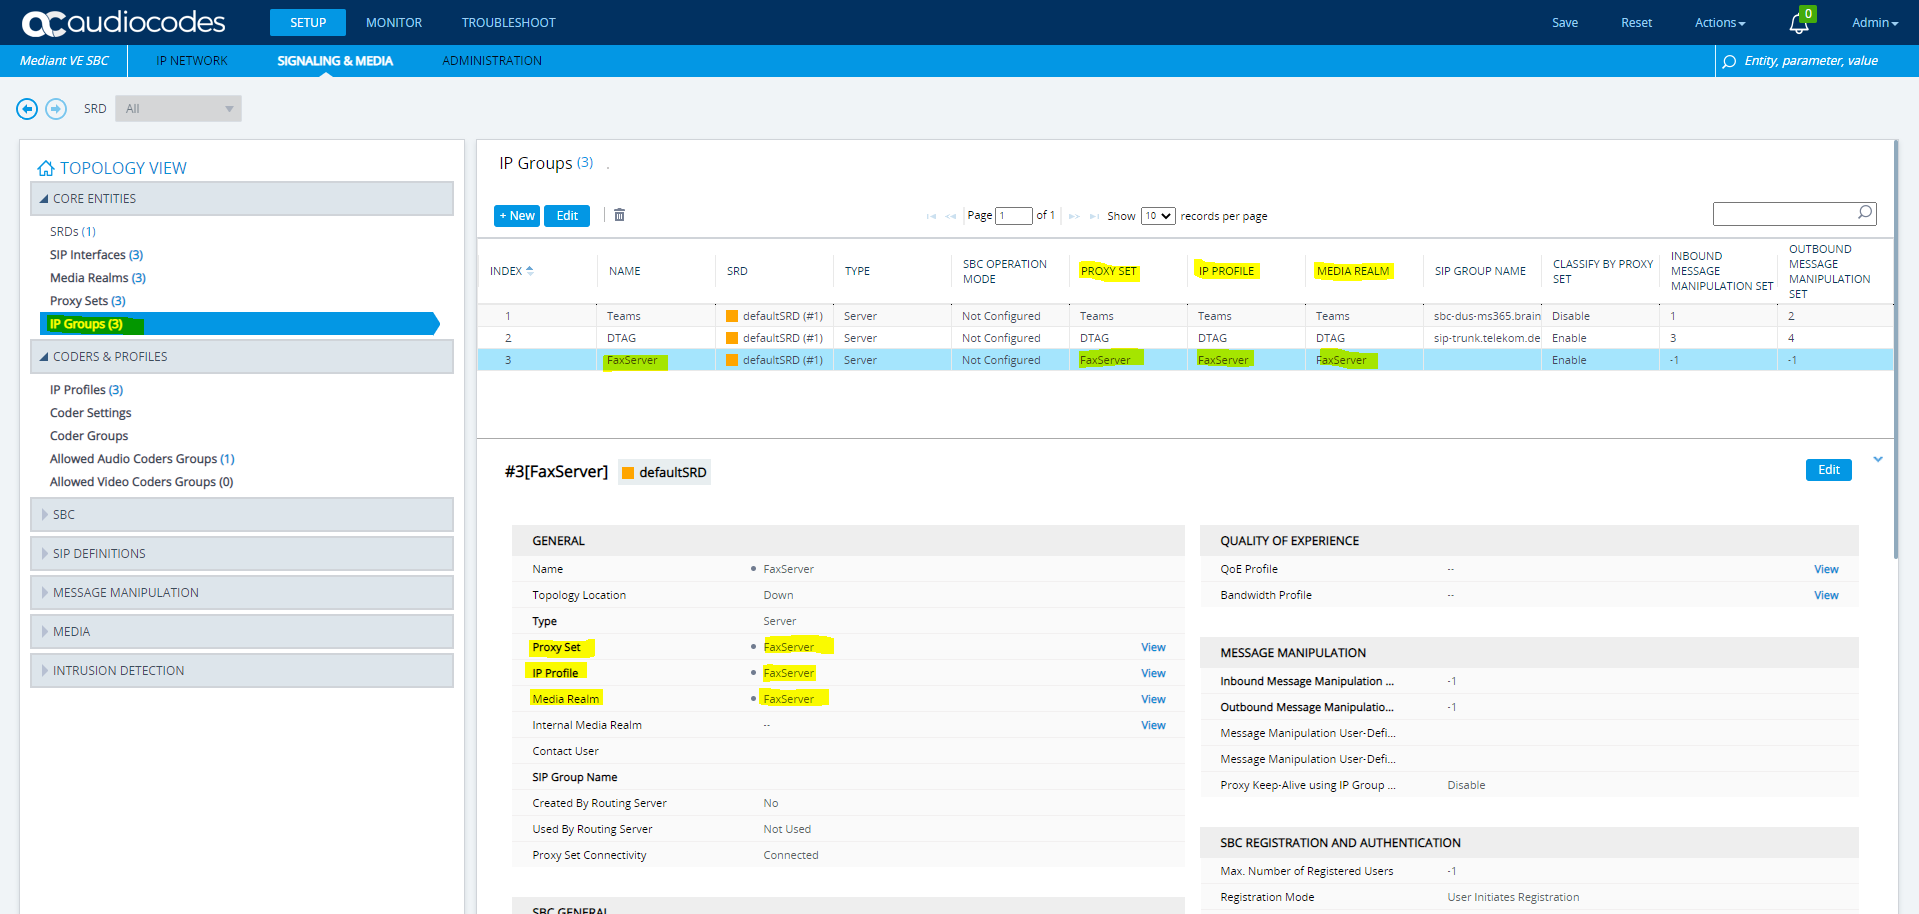
We also need to create a new IP Group which combines the previously configured entities for the Fax Server connection. So go to SETUP – SIGNALING & MEDIA – CORE ENTITIES – IP Groups and click on new with the following settings. The rest can be set on default.
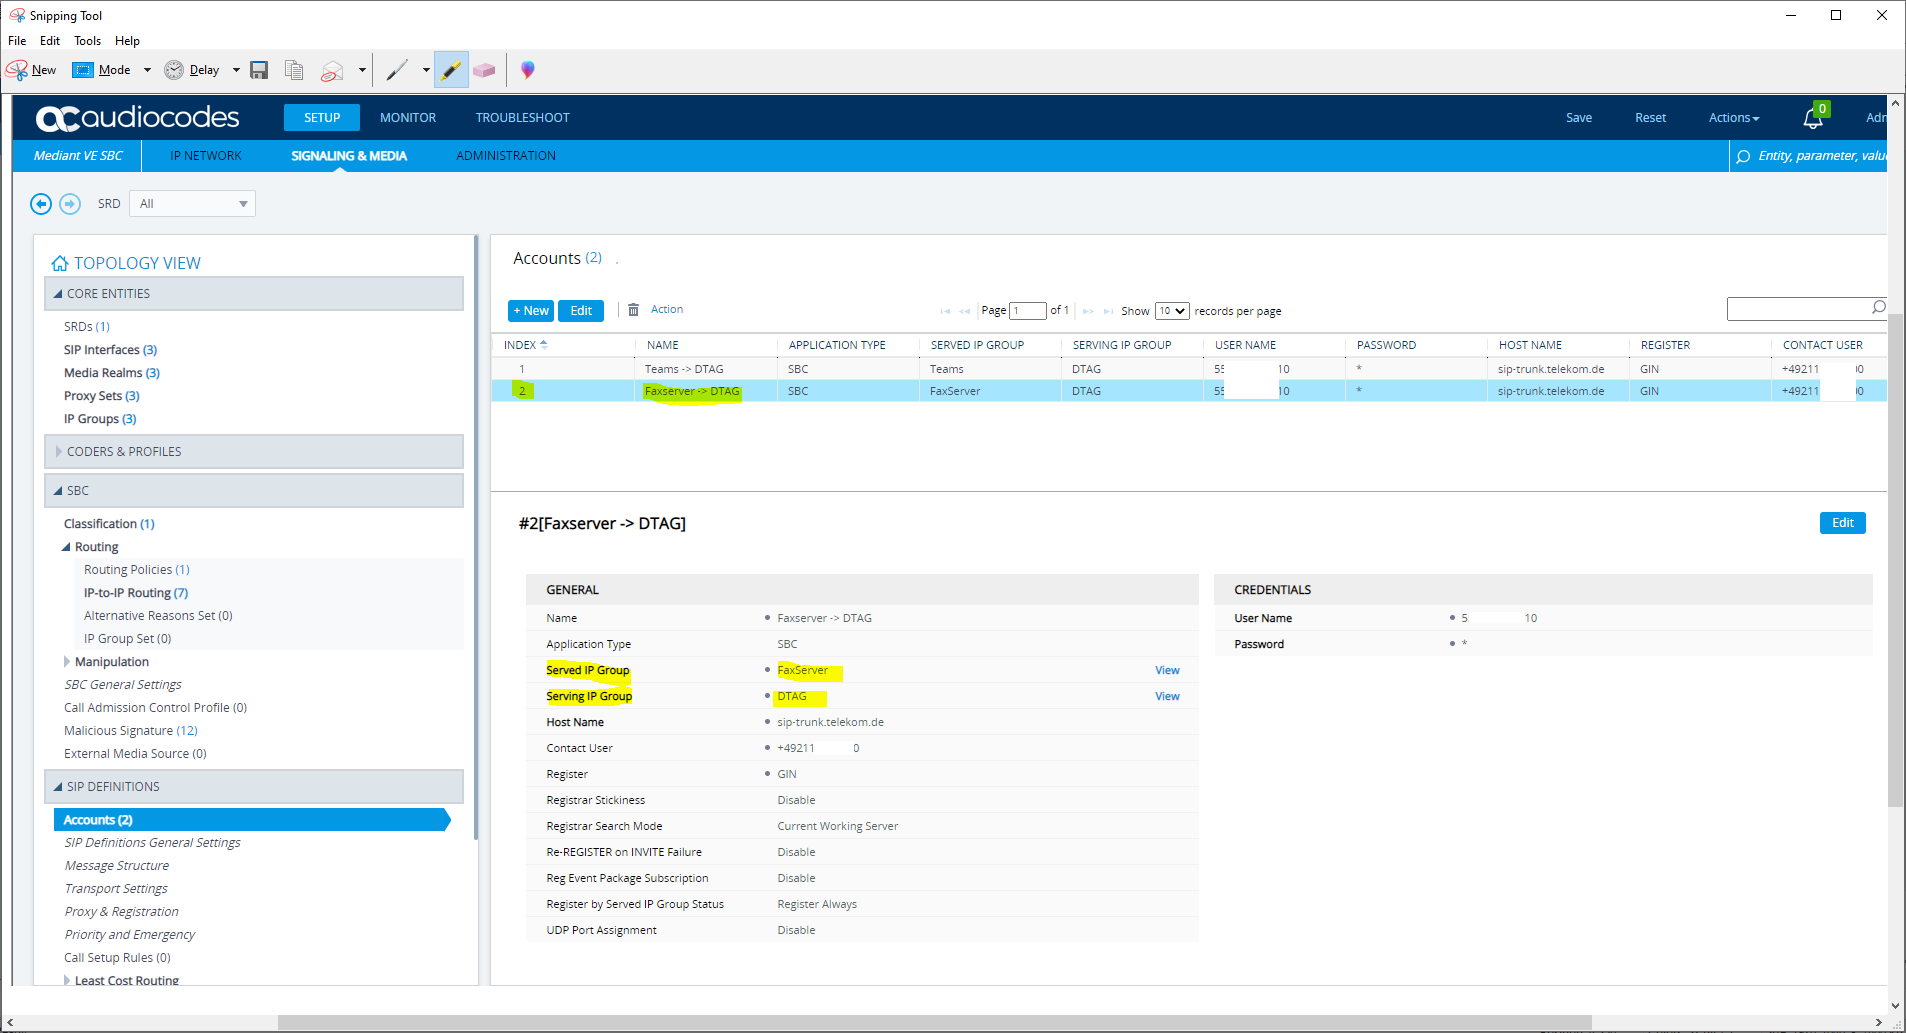
We also need a further account for the new created Fax Server IP Group, to authenticate against the DTAG SIP Trunk. This is needed to establish an outbound connection to the DTAG SIP Trunk from the Fax Server.
So far only an account for the traffic from the Teams to the DTAG IP Group is configured. We also have to authenticate traffic from the Fax Server to the DTAG IP Group.
So go to SETUP – SIGNALING & MEDIA – SIP DEFINITIONS – Accounts and click on new. For the Served IP Group select the Fax Server and for Serving IP Group the DTAG.
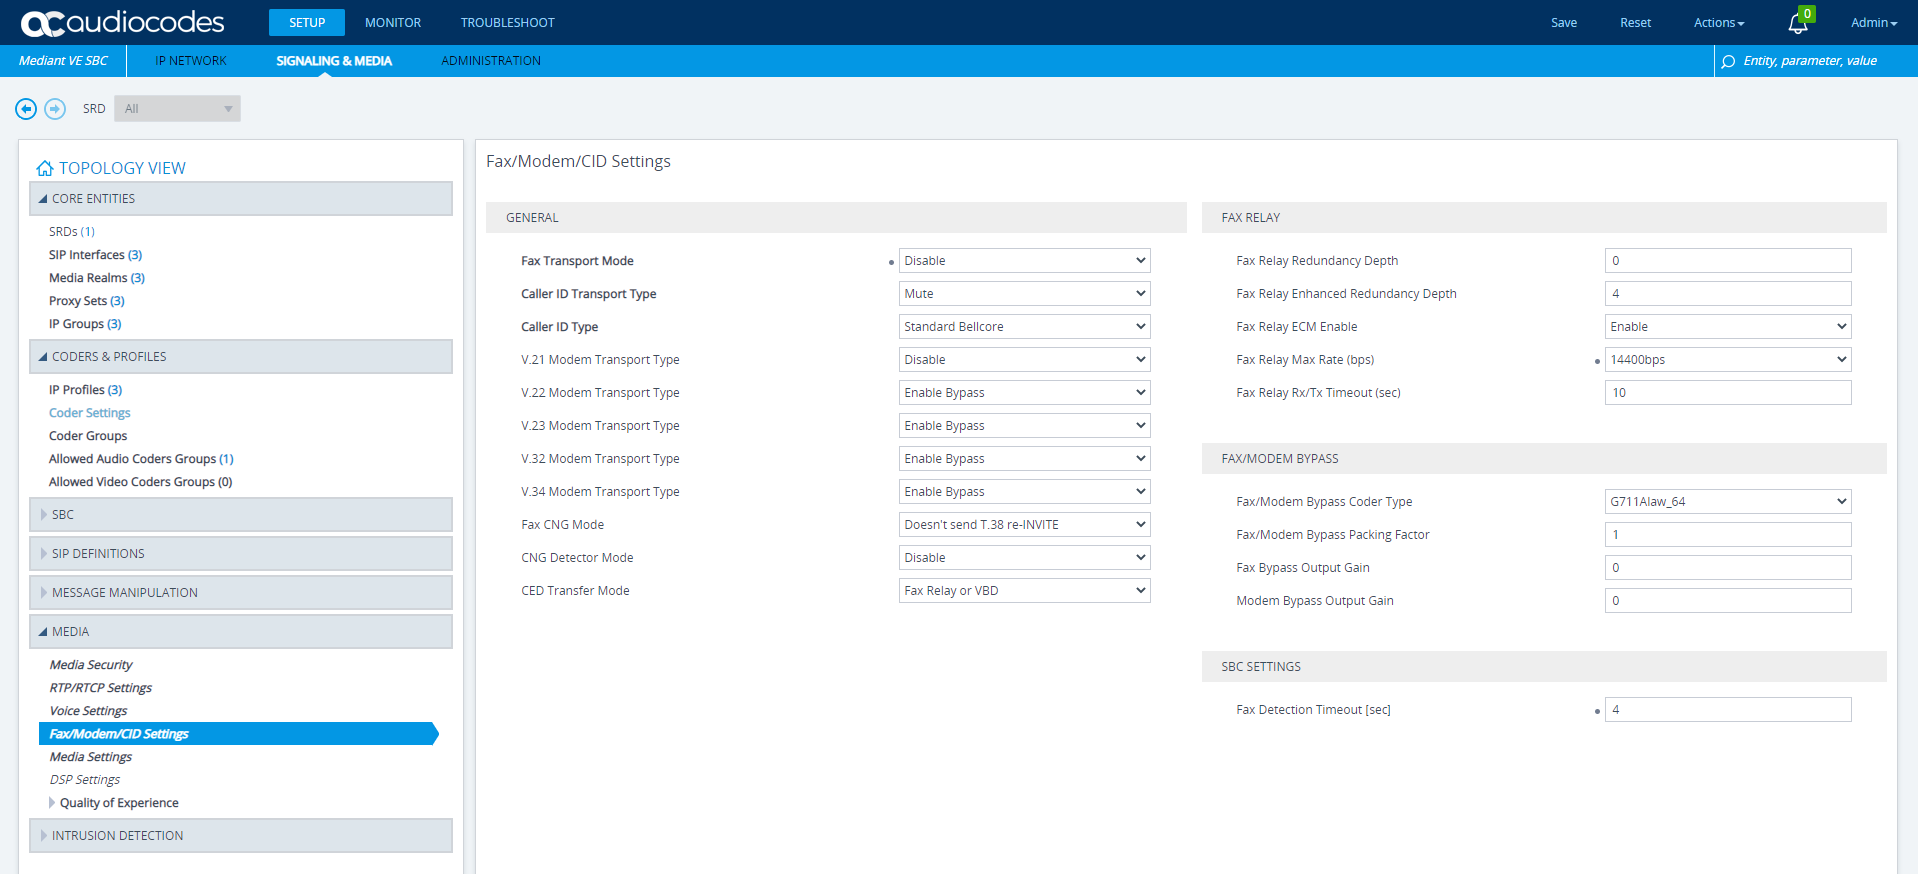
Finally we adjust the Fax/Modem/CID Settings under SETUP – SIGNALING & MEDIA – MEDIA as follows.
I don’t know if they even matter and will be used, I can also let them on default and it also works. As DTAG only supports T.38 within its own network and regarding my informations (Technical Specification below) not provides gateways to and from foreign networks for T.38, I will disable it but as mentioned it will also work if set on T.38 Relay.
1TR118
Technical Specification of the SIP – Trunking Interface between a SIP-PBX with DDI and the NGN Platform of Telekom Deutschland
https://www.telekom.de/hilfe/downloads/1tr118.pdf
2.6 Fax and Modem
SIP-PBXs used for SIP-trunk must support fax based on G.711a at least.
The NGN (Next Generation Network – replacement and successor of the PSTN/ISDN network of Telekom Deutschland) supports the transmission of T.38 fax, in a passive, transparent way, if both user entities (caller and callee) are attached to the NGN using SIP-Trunks and they agree to use T.38 fax (offer-answer).
Note: T.38 over UDPTL media encryption is not supported.
Also incoming faxes from several providers to my DTAG Sip Trunk never arrived as T.38. So I configured the AudioCodes Fax Server to use only G.711 A-Law. By default it will try and use first T.38 which is not working in my case with the DTAG Sip Trunk.
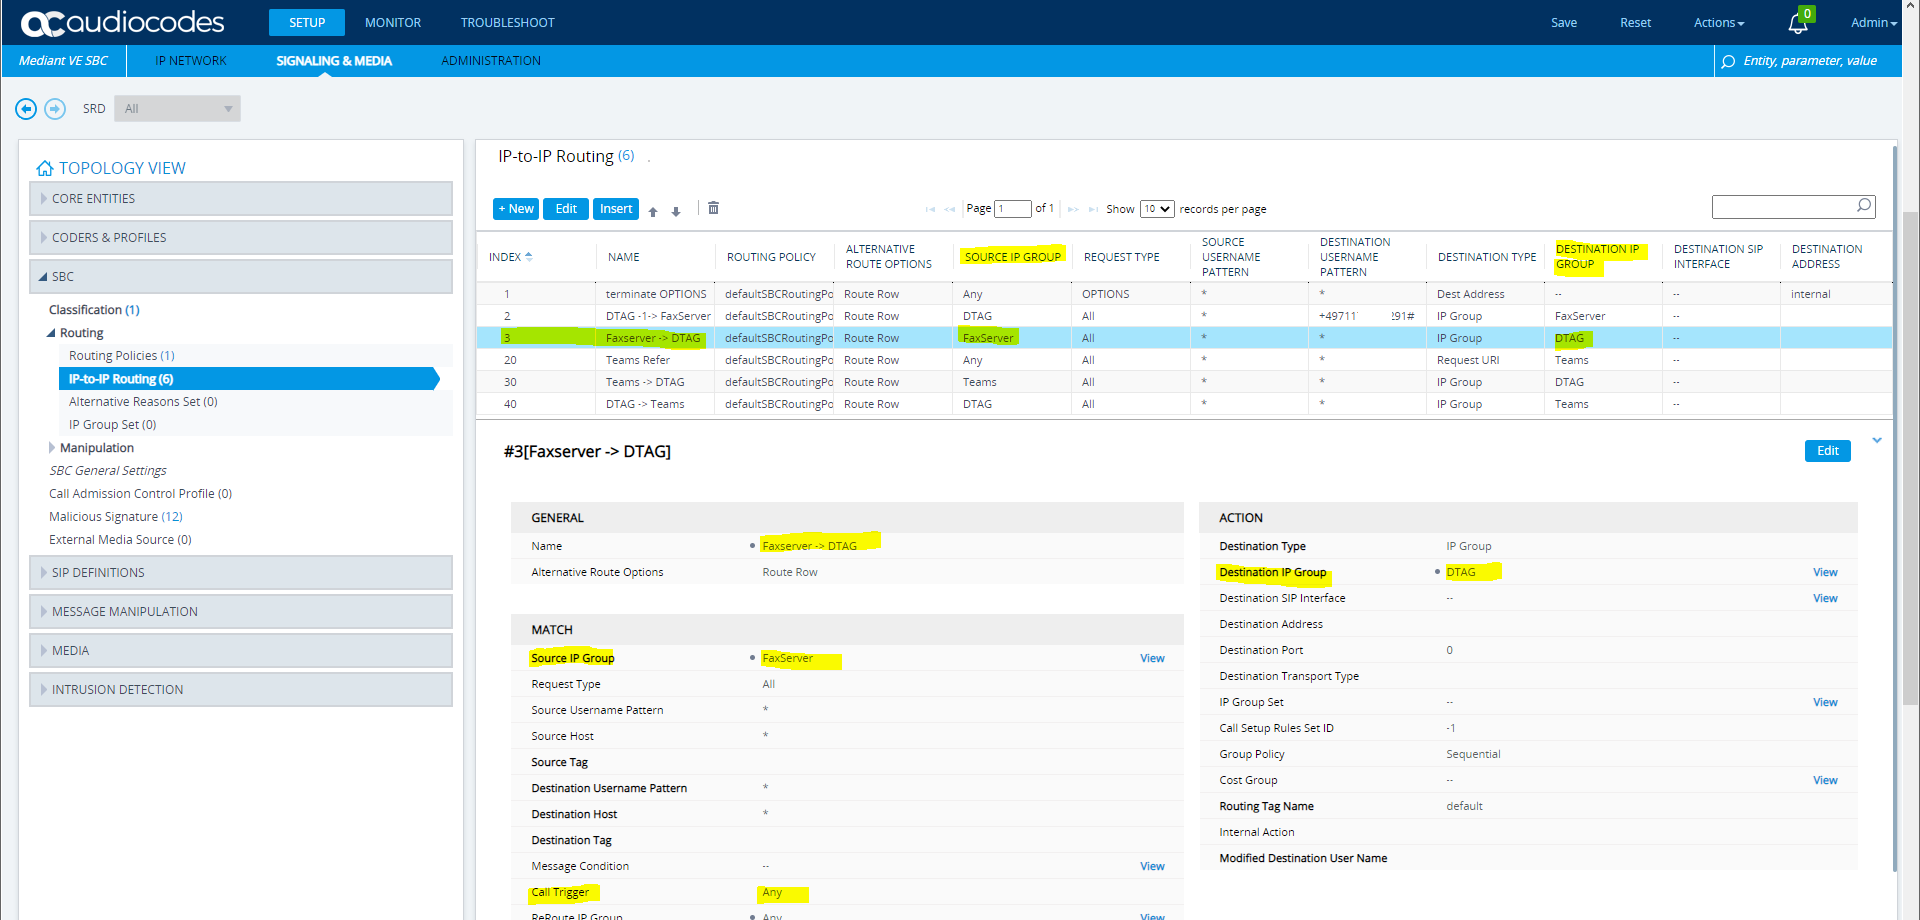
Finally configuration on the SBC is to configure the IP-to-IP Routing in order to route fax calls directly to the Fax Server and outbound fax calls from the Fax Server to DTAG.
The installation guide from AudioCodes only describes in short how to configure fax detection and fax rerouting which is not what I want. In this case all fax calls will be routed first to Teams and within a time span of seconds, which you can configure in the Fax/Modem/CID Settings, the SBC can detect if the call is a fax and if yes he will reroute the call to the Fax Server IP Group.
I will use dedicated fax numbers and want to route each call to them to the Fax Server directly.
Therefore I will create two new IP-to-IP Routing rules. So go to SETUP – SIGNALING & MEDIA – SBC – Routing – IP-to-IP Routing and click on new.
This rule (DTAG – 1 -> FaxServer) will route all calls with the specified destination number directly to the Fax Server.

This rule (Faxserver -> DTAG) will route all fax calls from the Fax Server to DTAG.
So here we finished the configuration on the SBC and will go to the Fax Server.
Configure the Fax Server
Open the web browser http://Server_IP:8090. If you cannot connect, try to connect to Port 9431.
Enter Username ( Default = Admin | Admin_extra_ ) and Password (Default = Admin)
First check if the SMTP Settings under the Network settings are correct, the Fax Server will send incomming faxes as Fax to Mail to this mail server.
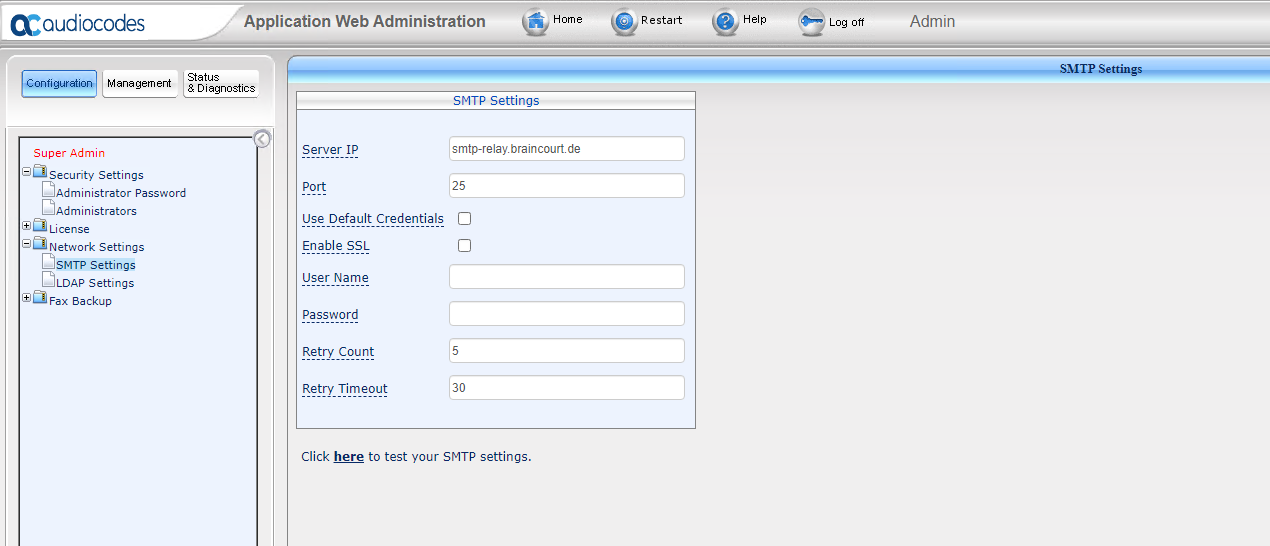
Further you can configure under the Network settings the LDAP Settings. In this case the Fax Server will determine the destination with an request to the LDAP Server (Domain Controller).
As I will use only a couple of dedicated fax numbers, I won’t use LDAP requests and therefore maintain the destination fax numbers and corresponding e-mail addresses directly under Management – Fax in – Numbers.

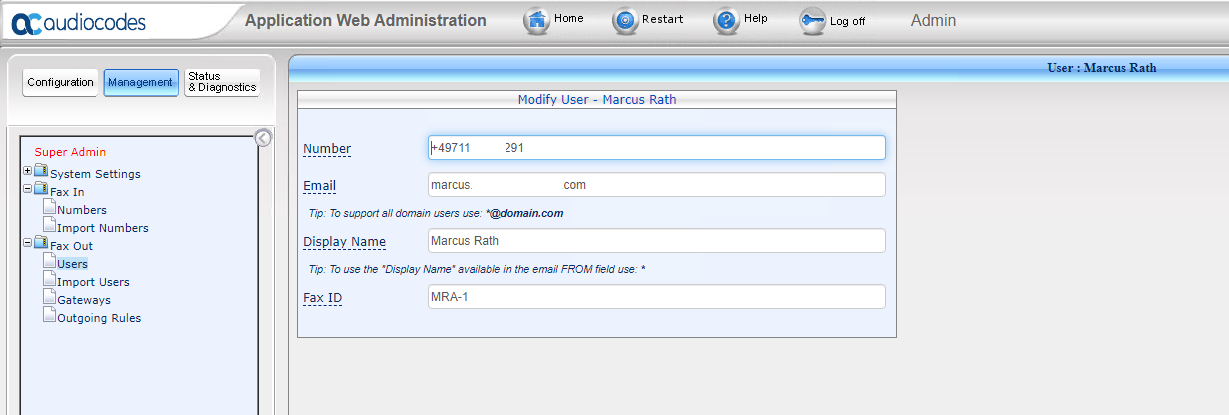
In order to be able to send faxes out and the Fax Server knows the outbound number, we also have to create the user under Management – Fax out – Numbers.
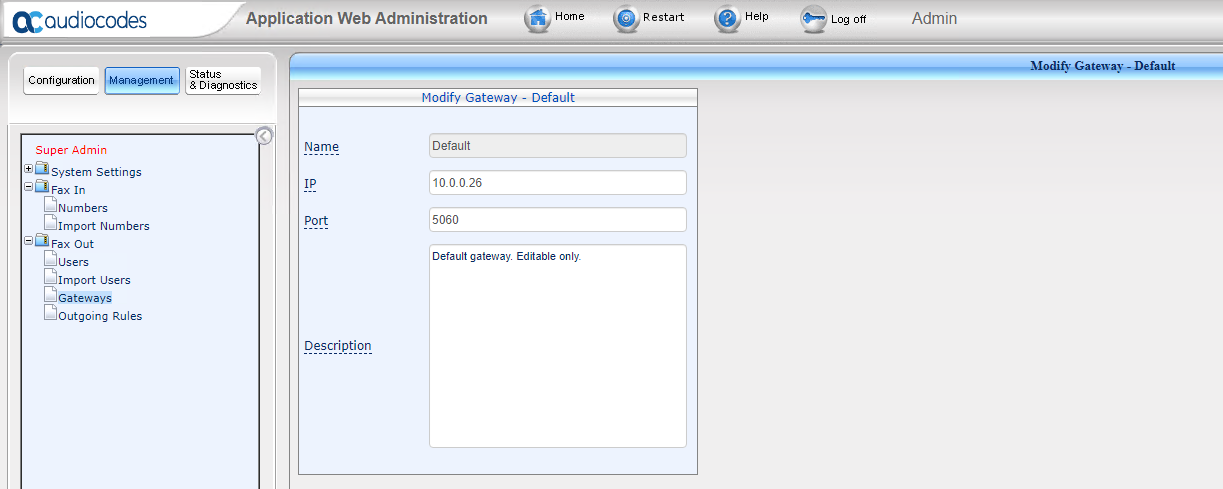
Under Management – Fax out – Gateways, we have to enter the ip and port number from our AudioCodes Mediant VE SBC and more precisely the ip and port from the proxy set we configured previously on the SBC for this connection.
As mentioned further up, the AudioCodes Fax Server by default first tries to use T.38 and after that G.711 U-Law and G.711 A-Law.
With DTAG only G.711 A-Law really works fine without any trouble.
Even the Fax Server will use by default G.711 A-Law and U-Law if T.38 is not supported from the other party, in the logs I saw that nevertheless he often first tries to send an Re-INVITE with T.38 in its SDP to INVITEs with G.711 A-Law.
And with this behaviour some parties have problems and the fax call will fail.Fortunately you can force the AudioCodes Fax Server to use only one of its supported codecs T.38, G.711 A-Law or G.711 U-Law.
Therefore you have to edit a registry key which is documented in the following PDF on page 34.https://www.audiocodes.com/media/14129/fax-server-and-auto-attendant-ivr-release-notes-ver-26x.pdf
Documented is only G.711 U-Law, but in Europe and for DTAG I will need to force the Fax Server to use G.711 A-Law, fortunately the help of the responsible binary file faxserver.exe under C:Program Files (x86)Commetrexotfbinfaxserver.exe will show us how force to use G.711 A-Law. You will see it below.
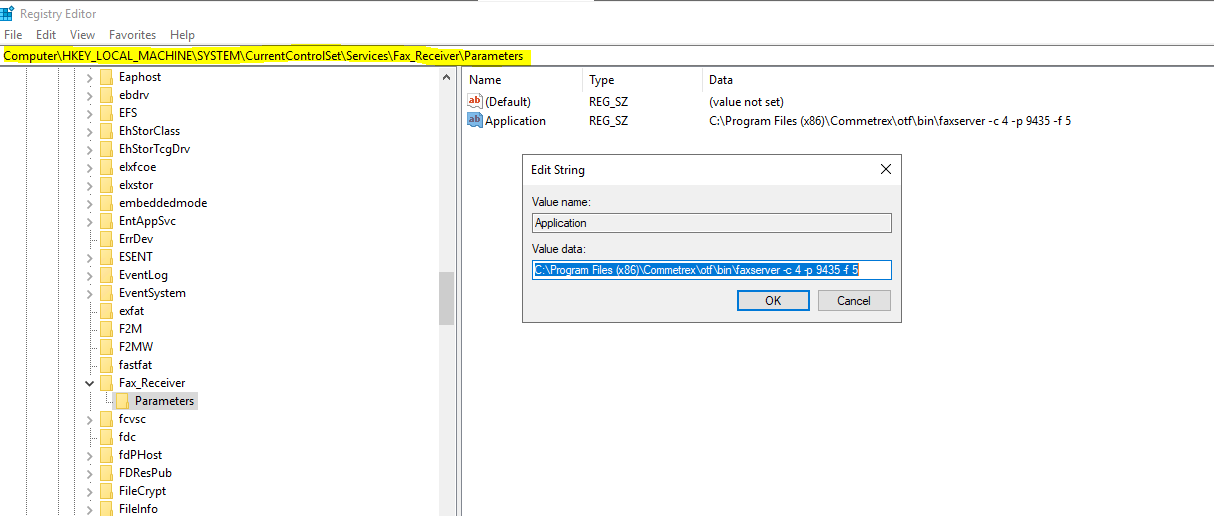
Edit the following key on the Fax Server to force to use G.711 A-Law:
ComputerHKEY_LOCAL_MACHINESYSTEMCurrentControlSetServicesFax_ReceiverParameters
Default value after the Installation
C:Program Files (x86)Commetrexotfbinfaxserver -c 4 -p 9435 -f 5
This default value force the Fax Server to try first T.38
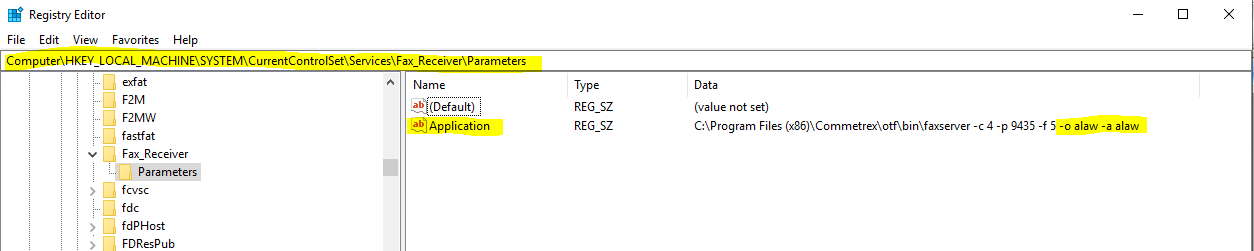
New value to support G.711 A-Law
faxserver -c 4 -p 9435 -f 5 -o alaw -a alaw
The help from the faxserver.exe
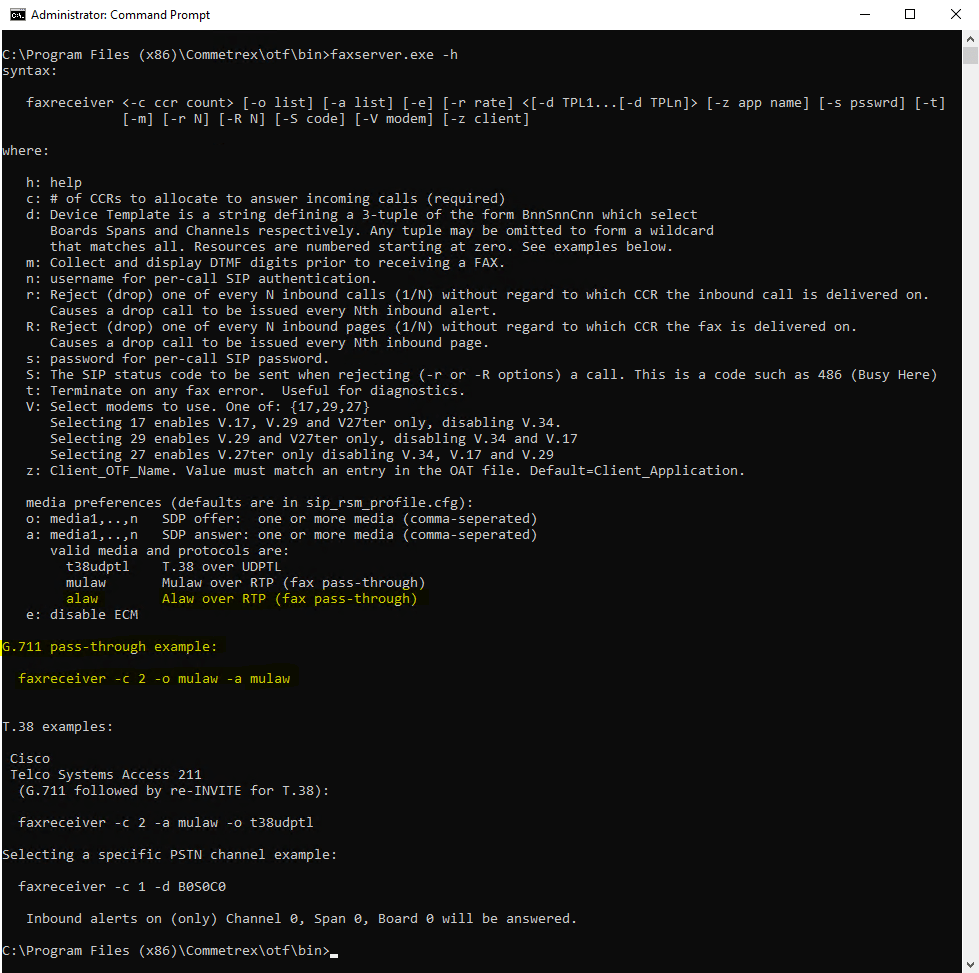
This example includes the following flags:
-e to disable ECM and -r 14400 (Fax Rate bps) and further you can use multiple codecs for the SDP offer and answer
faxserver-e -r 14400 -c 4 -p 9435 -f 5 -o alaw,mulaw -a alaw,mulaw
Codecs:
G.711 A-Law = alaw
G.711 U-Law = mulaw
T.38 = t38updtl
Call Completion Rate (CCR)
The ratio of the number of completed calls to the total number of attempted calls. This ratio is typically expressed as either a percentage or a decimal fraction. The call completion rate can be improved by increasing the number of calls made, increasing the percentage of calls completed, or both.
As you can see above, the AudioCodes Fax Server is using the Commetrex Bladware HMP telephony platform (framework) to support the fax functionality.
BLADEWARE HMP PORTAL
https://commetrex.com/products/bladeware-hmp-portal/
So far we finished the configuration from the Fax Server. In order to be able to receive and send faxes from Outlook and Exchange, we first have to create a new receive and send connector on Exchange.
In my case I only need to create a new send connector, I still have an receive connector which allows unauthenticated e-mails from specific internal servers.
As we use Exchange Hybrid with Office 365 and users are homed on-premise and online, I have to create a new send connector in on-premise and Office 365.
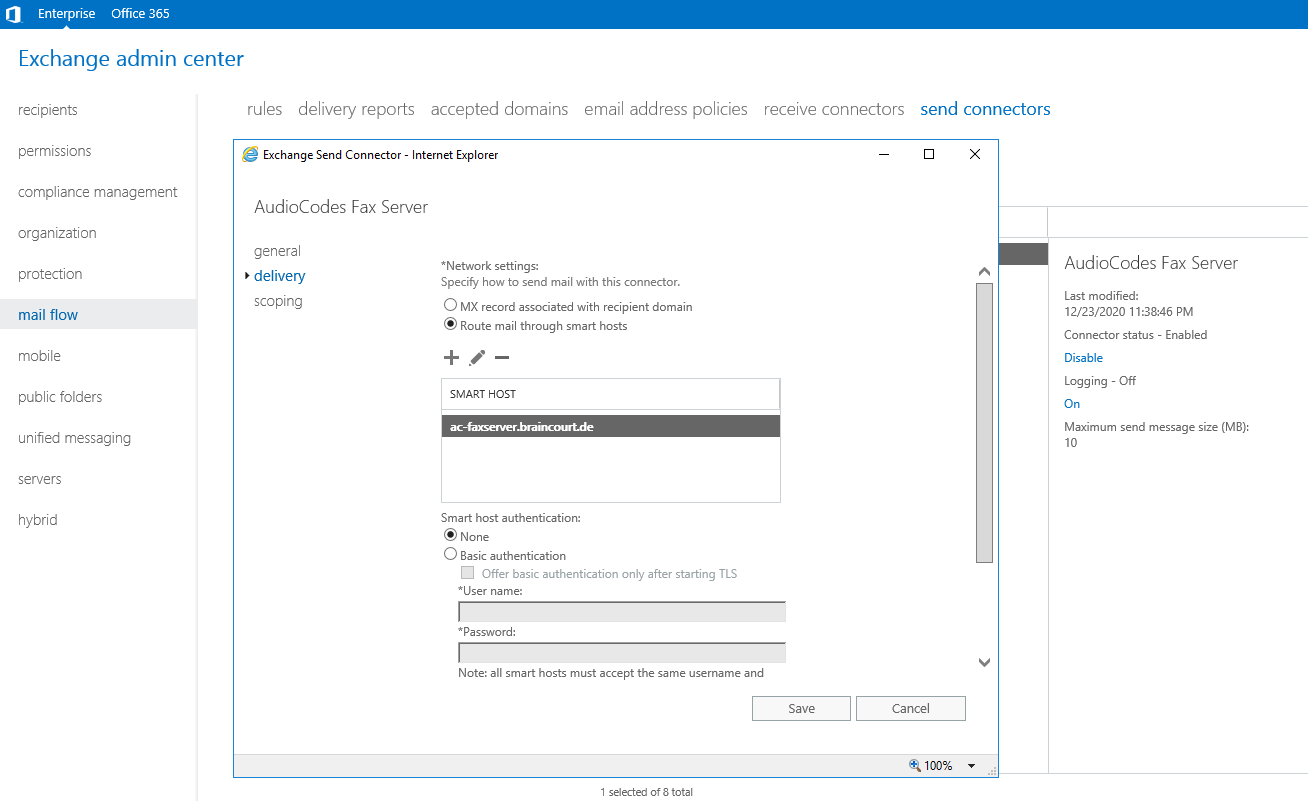
Configuring Exchange SMTP Send Connector on-premise
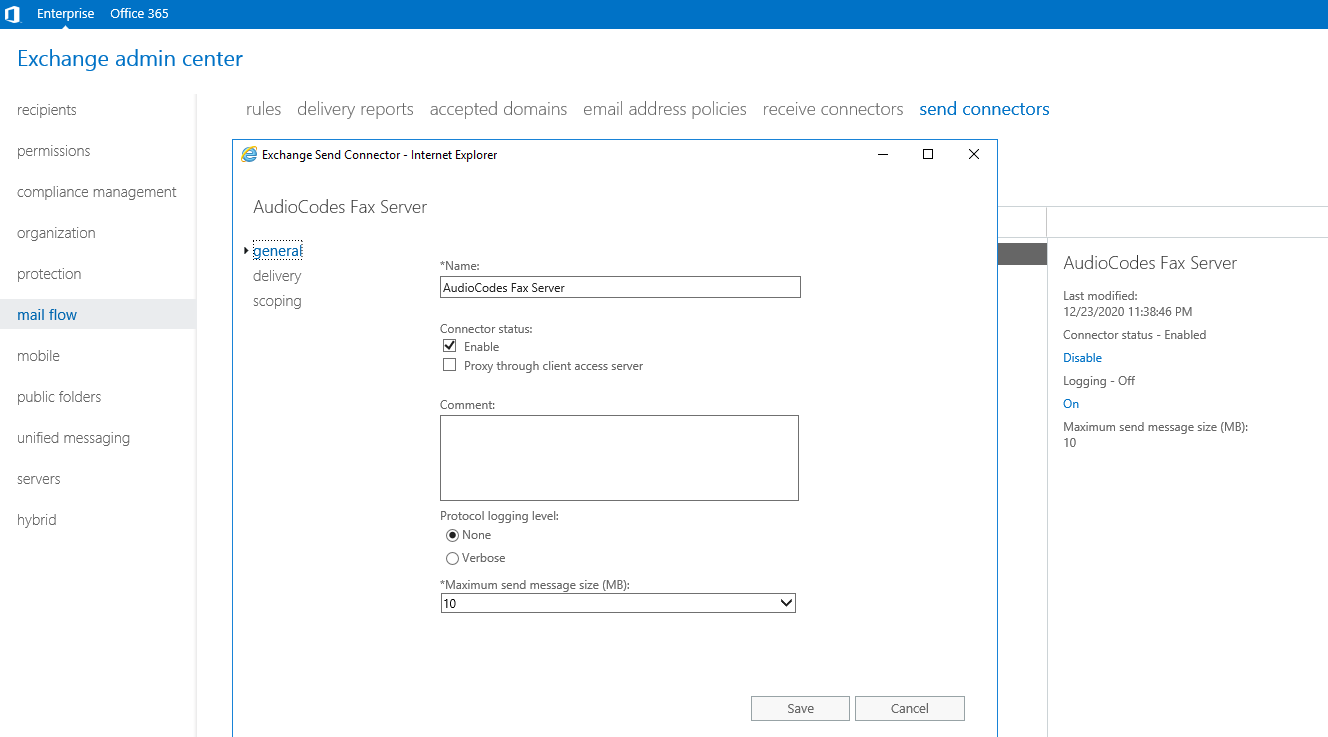
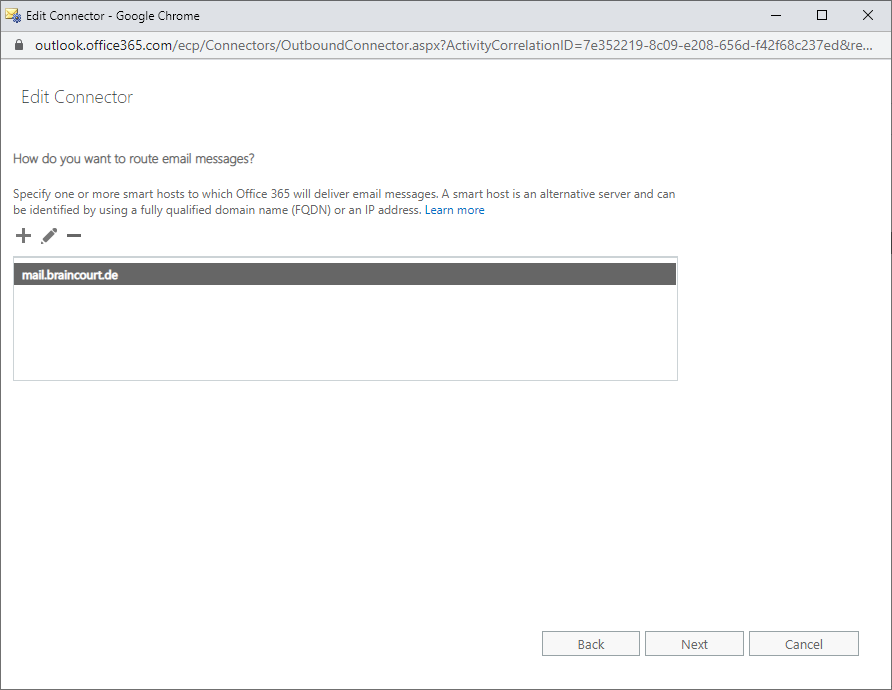
Add the FQDN of the AudioCodes Fax Server to the Smart Hosts
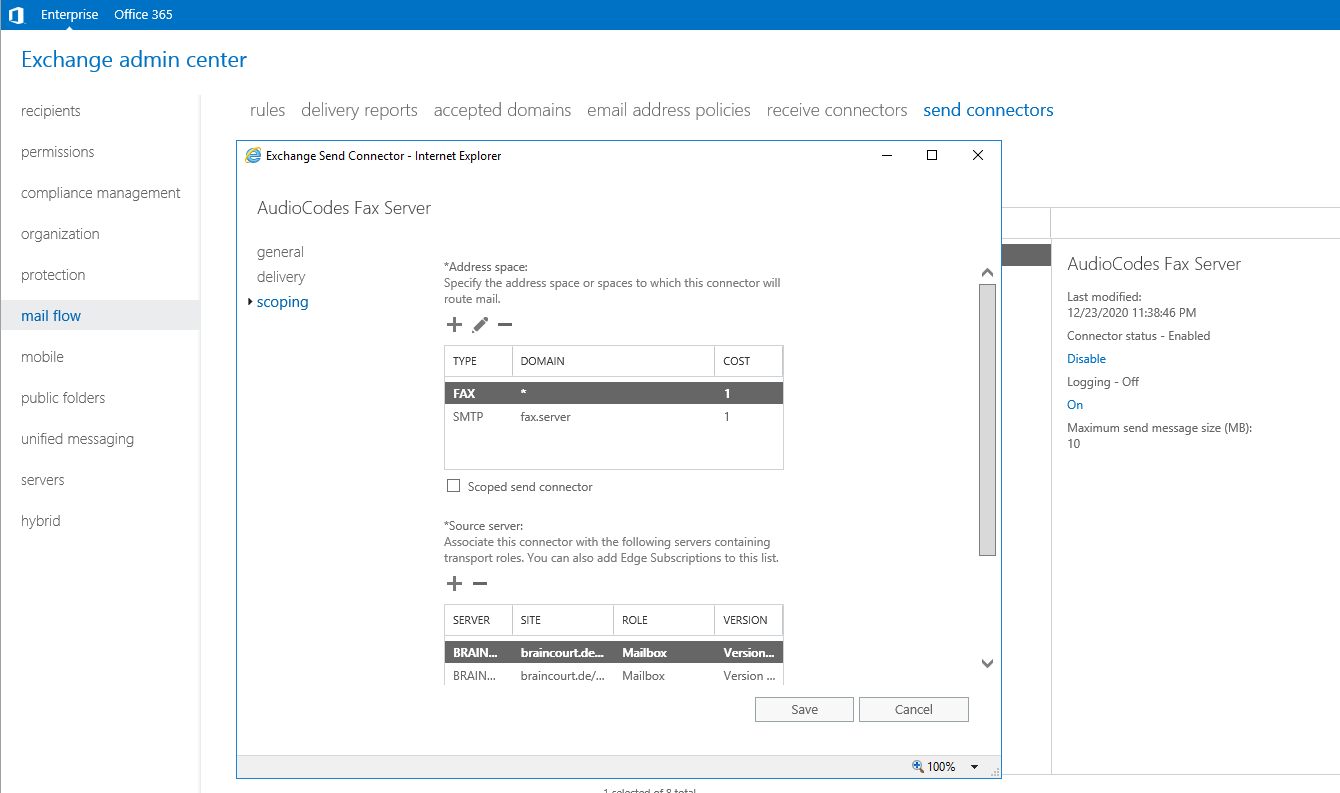
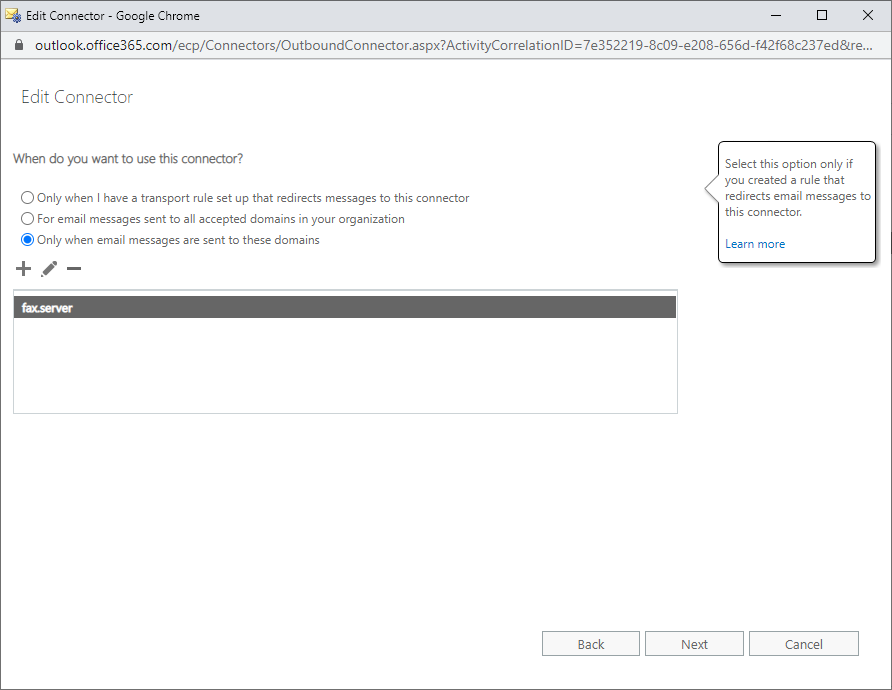
Under Scoping enter an address space for which Exchange should send the mail to the Fax Server.
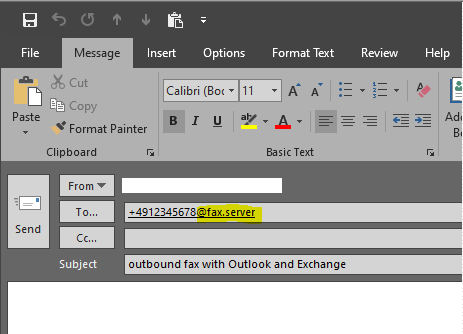
Here I will configure the domain fax.server for SMTP, this will force Exchange to route all mails with the destination domain fax.server to the Fax Server directly.
So for example mails to the recipient +49711…….@fax.server will route Exchange directly to the Fax Server we configured under the delivery tab above.
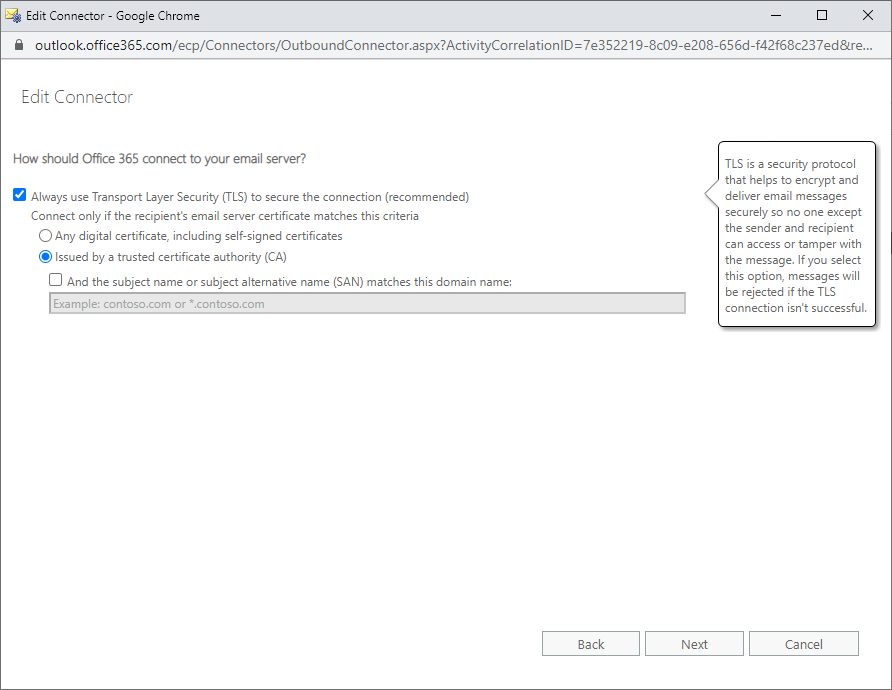
Configuring Exchange SMTP Send Connector Office 365
As mentioned I also need to configure an send connector in Office 365 so that users in Office 365 can also send faxes with the on-premise AudioCodes Fax Server.
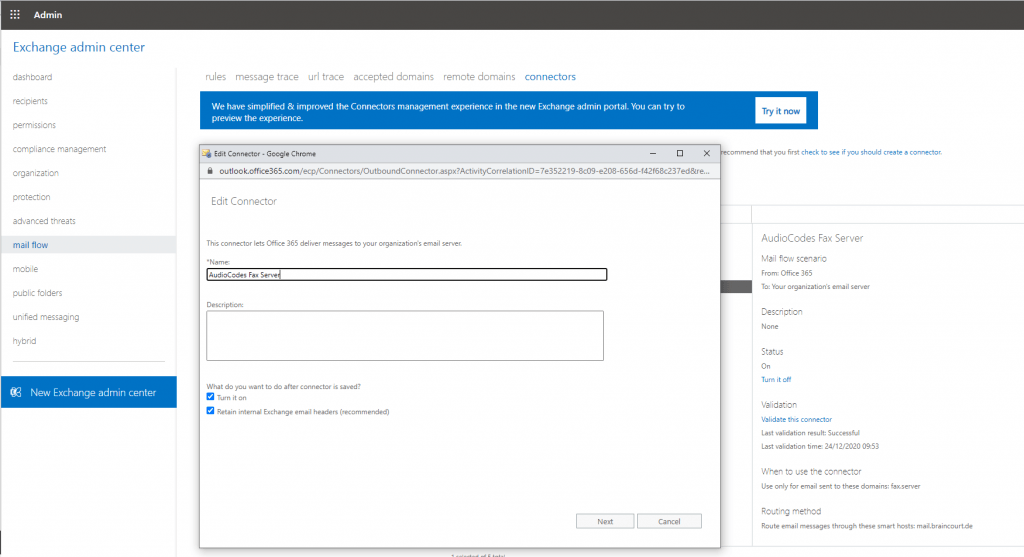
This is the Organization FQDN of your on-premise Exchange Hybrid environment.

From now on we can send outbound faxes from Office 365 and on-premise as follows from Outlook
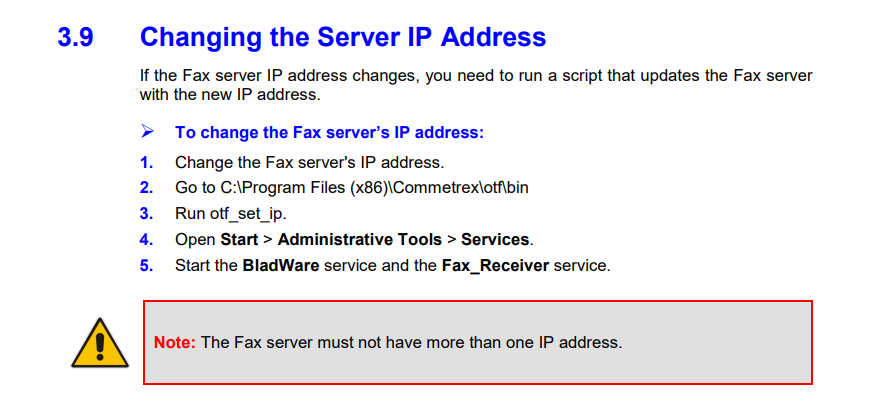
Changing the AudioCodes Fax Server IP Address
Links
Syslog ViewerUser Guide
https://www.audiocodes.com/media/14787/syslog-viewer-users-guide.pdf
Download
http://redirect.audiocodes.com/install/index.html
Commetrex BladeWare™
https://commetrex.com/enterprise-fax-oem-portal/
Commetrex – T.38 Fax Relay Software
https://commetrex.com/
Commetrex is the industry-leading developer of T.38 fax relay software, providing the highest-performing T.38 fax relay software for use in IP networks for the ATA or gateway OEM . T.38 fax relay software from Commetrex supports data and controls redundancy, meets the ITU-T recommendations, and supports proprietary protocols for secure-fax applications by converting data to an audio stream, which greatly reduces the effects of packet loss.
BLADEWARE HMP PORTAL
https://commetrex.com/products/bladeware-hmp-portal/
BladeWare is Commetrex’ portable HMP telephony platform used by OEMs as the framework for telephony gateways and servers. The platform supports fax today; voice is in development; video is on the roadmap. But BladeWare’s open architecture means the OEM user can add proprietary media and signaling technologies. Typically, however, OEMs add value to BladeWare by developing customer-facing applications that use BladeWare’s APIs to control SIP signaling and fax send-receive, as shown below.
WHITE PAPERS
https://commetrex.com/company/white-papers/
How to Make FoIP Work
https://commetrex.com/wp-content/uploads/How-to-Make-FoIP-Work-0515.pdf
Host Media Processing or HMP
https://en.wikipedia.org/wiki/Host_Media_Processing
Digital Signal Processor (DSP)
https://en.wikipedia.org/wiki/Digital_signal_processor
DTAG and T.38
https://telekomhilft.telekom.de/t5/All-IP-das-digitale-Netz/koennen-die-Telekom-Vermittlungstellen-das-Fax-Protokoll-T-38/td-p/4076609
https://www.teltarif.de/dienste/fax-dienste.html
ECM – T.38’s Dirty Little Secret (And Why It Matters)
http://blog.t38fax.com/blog/ecm-t38-dirty-little-secret
Fax transmission via SIP Connection
https://www.swyxdownload.com/download/kb4427_Faxtransmission_SIP.pdf
T.30
https://en.wikipedia.org/wiki/FaxThe T.30 fax protocol was designed for use over analog phone lines.
T.38
https://en.wikipedia.org/wiki/T.38
https://www.3cx.com/pbx/t38/T.38 is an ITU recommendation for allowing transmission of fax over IP networks (FoIP) in real time.
G.711 (A-law | μ-law)
https://en.wikipedia.org/wiki/G.711G.711 is a narrowband audio codec originally designed for use in telephony that provides toll-quality audio at 64 kbit/s.
It can also be used for fax communication over IP networks (as defined in T.38 specification).
G.722
https://en.wikipedia.org/wiki/G.722
G2, G3 & G4
https://de.wikipedia.org/wiki/Fax
Overview of Fax and Fax Relay
https://www.cisco.com/c/en/us/support/docs/voice/fax-modem-over-ip/20227-faxrelay-tsguide.html
Digital signal processing (DSP)
https://en.wikipedia.org/wiki/Digital_signal_processing
Next-generation VoIP and the role of DSP
https://www.eetimes.com/next-generation-voip-and-the-role-of-dsp
SDES (Session Description Protocol Security Descriptions)
https://en.wikipedia.org/wiki/SDES