Set up DomainKeys Identified Mail (DKIM) on Exchange on-premise
Out of the box on-premise Exchange Server doesn’t support DKIM signing. To deploy DKIM for your on-premises Exchange Servers you can now use the Exchange DKIM Signer which is a free open source tool you can download from GitHub.
The tool will install a further Transport Agent on your Exchange Server which will sign the outbound email messages.
For DMARC, DKIM or SPF verification you also need a 3rd party solution (Agent or Proxy service), out of the box this is unfortunately not supported by on-premise Exchange Server.
In case you had Exchange Hybrid configured in your environment, you can also create a new Send connector that uses smart host routing to send outbound messages for the Internet through Exchange Online Protection (EOP).
I will show how to add this connector in my post below.
Therefore outbound email messages from your on-premises mailboxes will be signed out of the box by Exchange Online Protection (EOP), in case you already had set up DKIM for the E-Mail domain in Office 365.
Exchange Online Protection overview
https://learn.microsoft.com/en-us/microsoft-365/security/office-365-security/exchange-online-protection-overview
EOP is included in all Microsoft 365 plans that come with Exchange Online and is enabled by default.
EOP configuration has moved from the EAC to the Microsoft 365 Defender portal under https://security.microsoft.com/
How EOP works
All inbound and outbound email messages will enter EOP and passes the following 4 connection filters.

Installation of Exchange DKIM Signer
https://github.com/Pro/dkim-exchange/wiki/Installation
If you have configured your server to only send in the TNEF message format, your mails will not be signed. To disable it, use the following powershell command (see also #170).
Set-RemoteDomain -Identity * -TNEFEnabled $false
The DKIM Signing Agent can be installed on all Exchange Hub-Transport/Mailbox and Edge-Transport server.
- Download the latest GUI package: https://github.com/Pro/dkim-exchange/releases/latest (Configuration.DkimSigner.zip)
- Move those two packages to your Exchange Server and extract the Configuration.DkimSigner.zip package to your Desktop
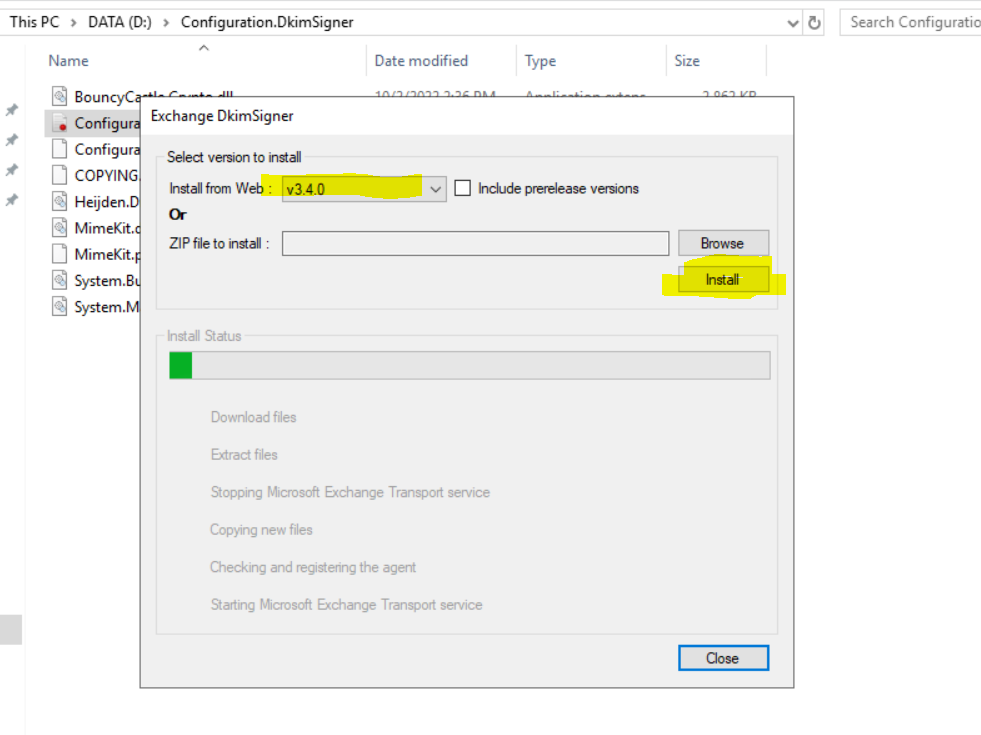
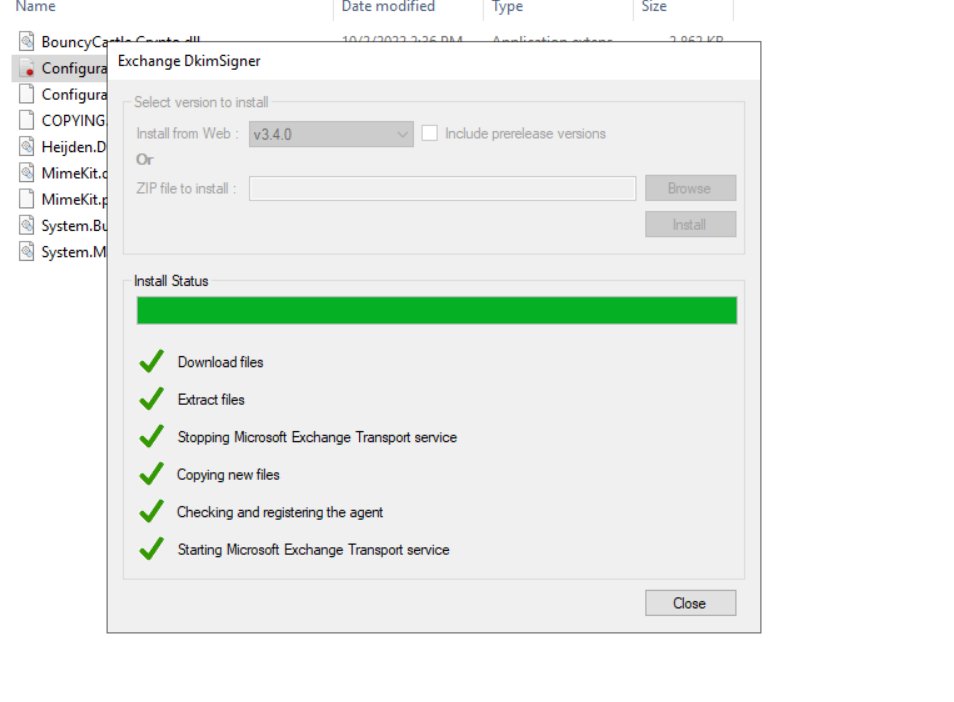
- Start Configuration.DkimSigner.exe
- Select the version you want to install and click on Install
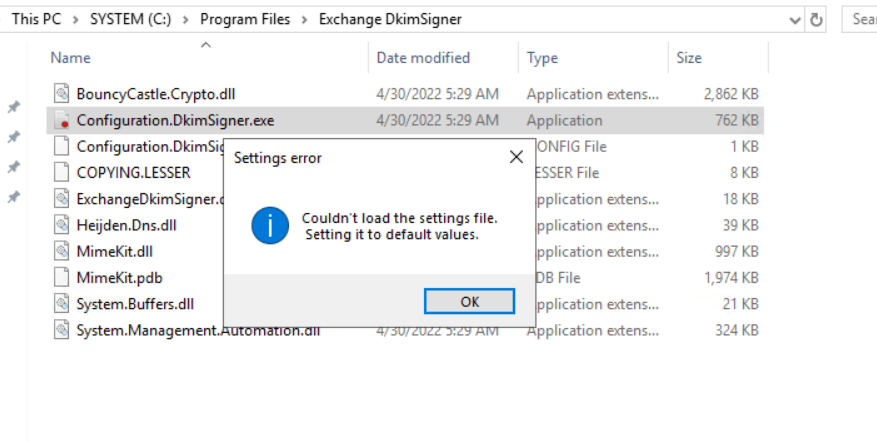
Now we can configure the DKIM Signer with the installed GUI (located under “C:Program FilesExchange DkimSignerConfiguration.DkimSigner.exe”
Once you save the config, the Signer Agent will automatically reload these changes
Configuration of Exchange DKIM Signer
If the GUI doesn’t work, you can also configure it manually (see Manual Configuration).
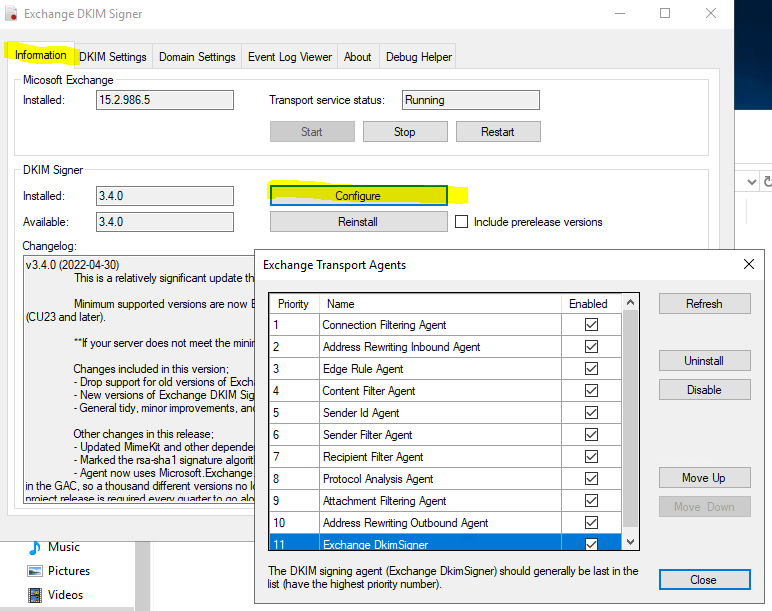
You can also change the priority of the Exchange DkimSigner transport agent by clicking on Configure in the Information tab, but it is not necessary. The default behavior is to append a new transport agent to the end of the priority list.
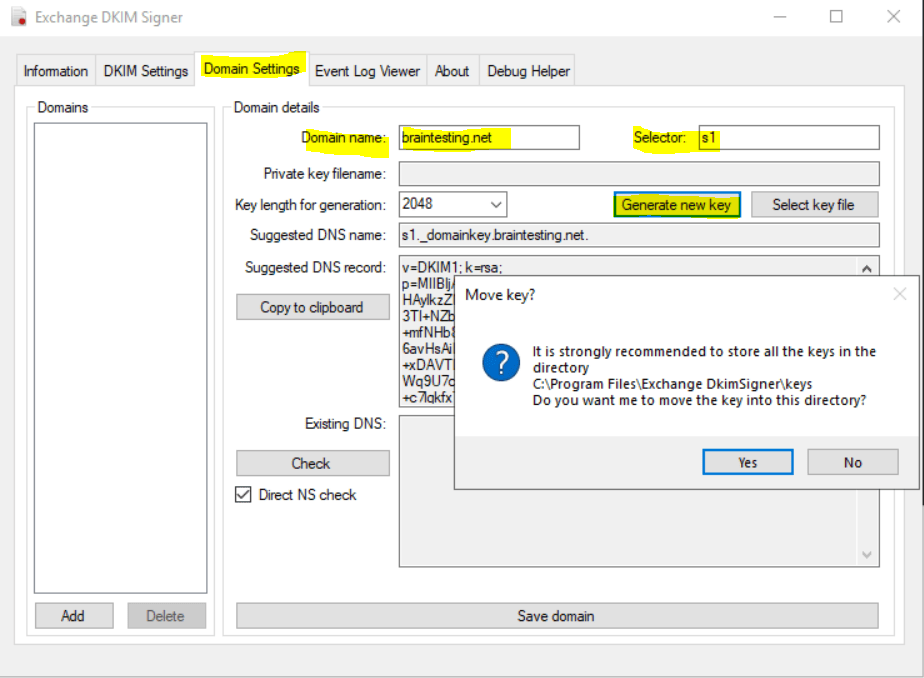
To configure DKIM we now go to the Domain Settings tab. Here we first click on Add to enter the domain we want to sign for outbound email.
In my case this is braintesting.net. Next we need to specify a Selector which is just string freely selectable used by the sending server to locate the private key to sign the email message and by the destination server to locate the public key in DNS to verify the integrity of the email message.
Each time a private/public key pair is generated, a tuple { selector, private key, public key } is created, where the selector is used to locate the private key and the public key.
Source: https://dmarcly.com/blog/what-is-dkim-selector-and-how-does-it-work-dkim-selector-explained
The key length for generation of the private/public key pair I will leave on default 2048 bit. In case your DNS provider doesn’t support TXT records with a length of 2048 bit, you may have to choose 1024.
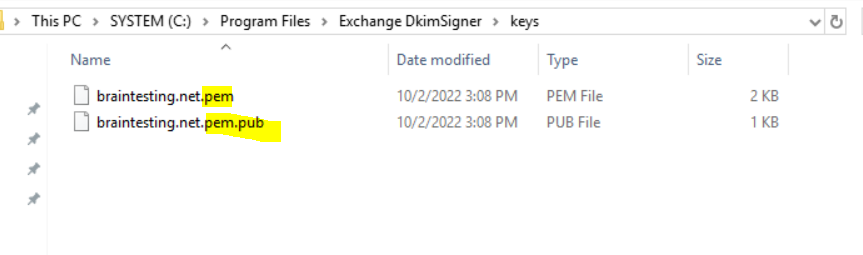
Now we can click on Generate new key to get our public DNS TXT record value. As you can see the Signer tool recommends me to save the private/public key pair directly into the program folder from DKIM Signer tool and here into the keys folder.
At this point we can publish the DNS TXT record at our DNS provider portal, in my case I have to add the following record.
Name
s1._domainkey.braintesting.net
TTL
3600
Type
TXT
Value
v=DKIM1; k=rsa; p=MIIBIjANBgkqhkiG9w0………………………………………………………………………
In case of an on-premise network and using DNS Split Brain we also have to add the DNS TXT record on our internal DNS servers.
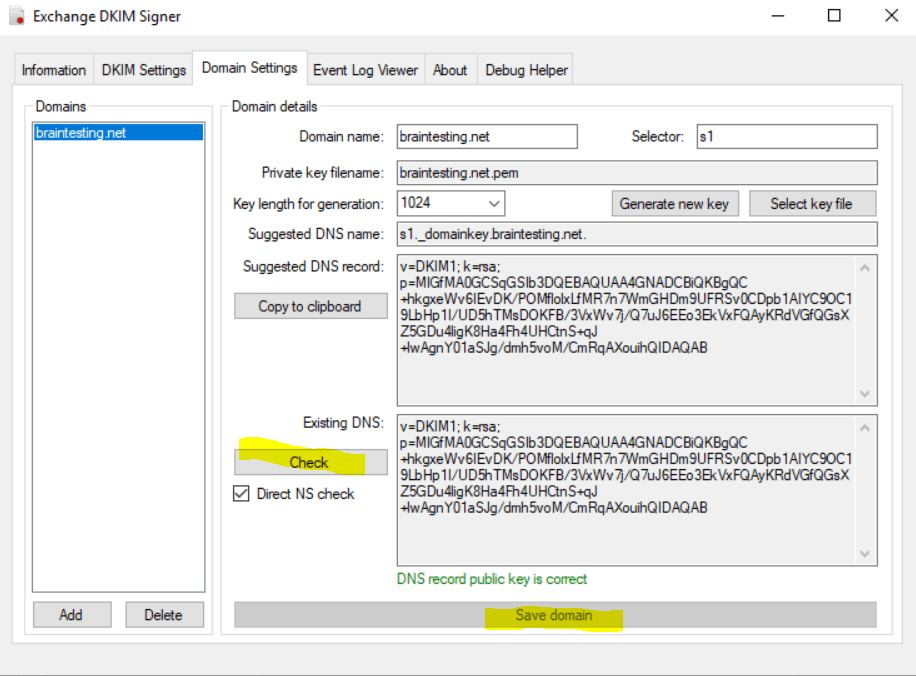
The Microsoft DNS Server will first accept the 2024 bit length public key but after clicking on OK it will truncated. There is a workaround described in the following article https://www.xeams.com/ms-dns.htm, but in my case I just changed the key length to 1024 bit.

You can also check if the DNS record with the public key is correct by clicking on the Check button below.
Finally we need to save the domain. In case you are using more domains to send email messages, you have to configure each of them here.
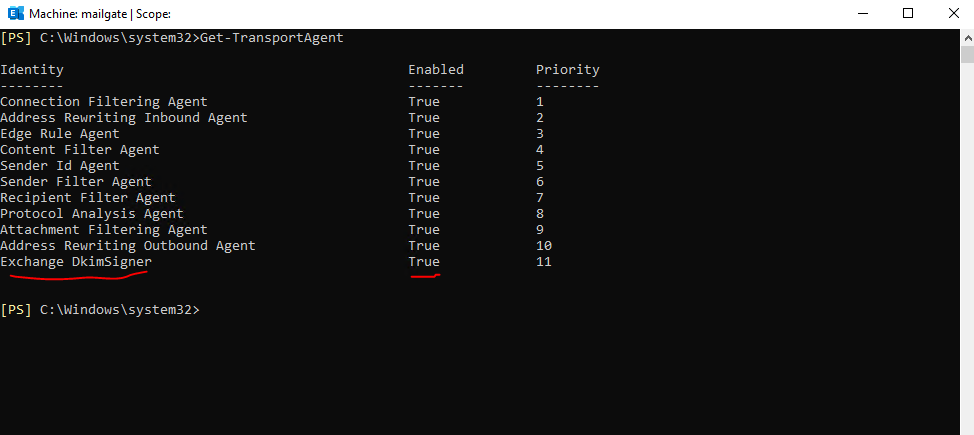
If you run Get-TransportAgent on your Exchange Server you should see the newly added Exchange DkimSigner transport agent.
Testing if DKIM signing works
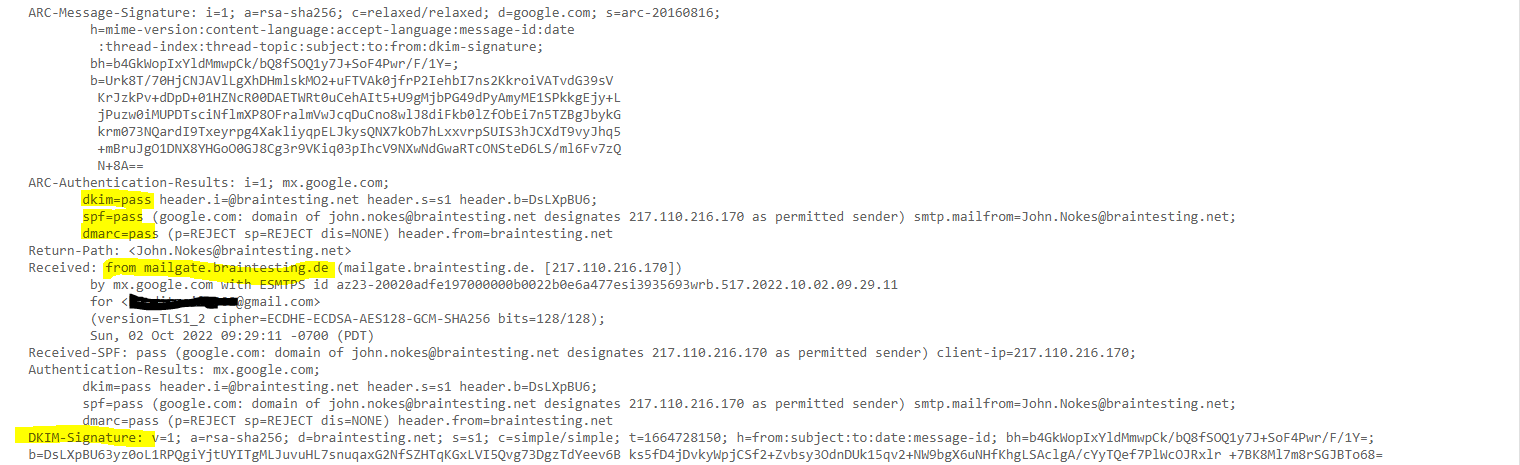
To check if from now on the outbound email messages from Exchange on-premise, in my case exactly from the Edge-Transport server will be signed for DKIM, we just had to inspect the email header on a destination mailbox which SMTP Server is capable to verify DKIM.
In this case you should see something like below in the email header, the listed IP is from the Edge Transport server from my lab environment we installed and configured the DKIM Signer tool resp. new transport agent.
Authentication-Results: spf=pass (sender IP is 217.110.216.170)
smtp.mailfrom=braintesting.net; dkim=pass (signature was verified)
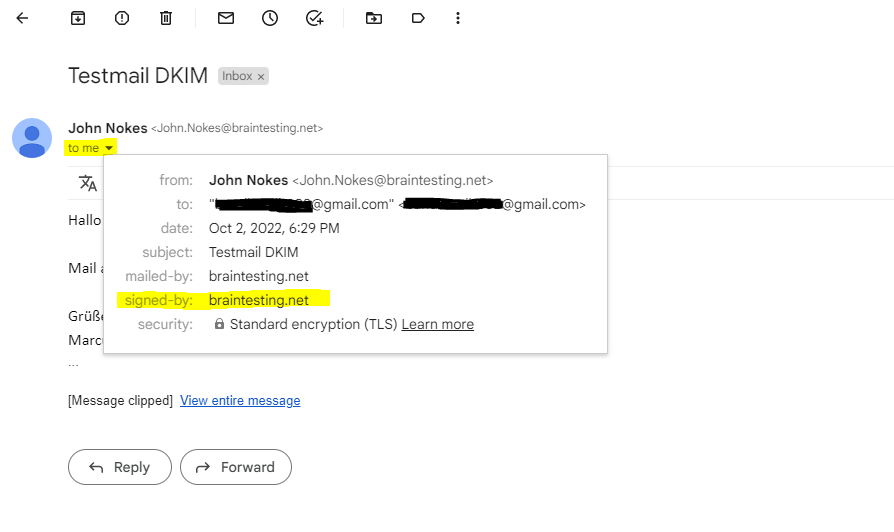
In case you had an Gmail account, you can also send an email message to your Gmail address.
In your inbox select the email and click on to me. If there is in the pop-up as below signed-by: <your domain> listed, your email message was correctly signed with DKIM.
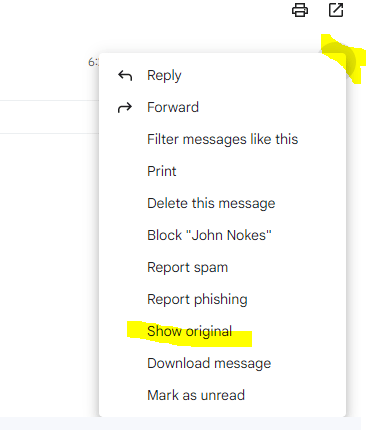
More details you will see when clicking on Show original on the right top three dots from your email like below.

So if you now assume that EOP will reject email messages they fail DMARC and your _dmarc DNS TXT Record action parameter is p=reject, unfortunately you will get disappointed.
Exchange Online Protection (EOP) marks the message as spoof instead of rejecting it. So for inbound email, Microsoft 365 treats p=reject and p=quarantine the same way.
Email messages they fail DMARC still landed in the users Junk Email folder instead get rejected by EOP.
All details and how you can change this default behavior you will see in my following post.
Links
Exchange DKIM Signer
https://github.com/Pro/dkim-exchange
Set up your email server to relay mail to the internet via Microsoft 365 or Office 365
https://learn.microsoft.com/en-us/exchange/mail-flow-best-practices/use-connectors-to-configure-mail-flow/set-up-connectors-to-route-mail?redirectedfrom=MSDN#2-set-up-your-email-server-to-relay-mail-to-the-internet-via-microsoft-365-or-office-365
What Is DKIM Selector and How Does It Work: DKIM Selector Explained
https://dmarcly.com/blog/what-is-dkim-selector-and-how-does-it-work-dkim-selector-explained
How to Set Up DMARC, DKIM, and SPF in Office 365 (O365) Exchange Server: the Complete Implementation Guide
https://dmarcly.com/blog/how-to-set-up-dmarc-dkim-and-spf-in-office-365-o365-the-complete-implementation-guide
Exchange Online Protection overview
https://learn.microsoft.com/en-us/microsoft-365/security/office-365-security/exchange-online-protection-overview
How Microsoft 365 handles inbound email that fails DMARC
https://learn.microsoft.com/en-us/microsoft-365/security/office-365-security/use-dmarc-to-validate-email?view=o365-worldwide#how-microsoft-365-handles-inbound-email-that-fails-dmarc
Anti-spam message headers in Microsoft 365
https://learn.microsoft.com/en-us/microsoft-365/security/office-365-security/anti-spam-message-headers?view=o365-worldwide