Set up WireGuard Site-to-Site VPN on pfSense
In my last post I was showing how to set up a Point-to-Site VPN (P2S) by using WireGuard on pfSense.
Now in this post I want to show how to set up a Site-to-Site VPN (S2S) by using WireGuard on pfSense.
Please note that the WireGuard pfSense add-on package is still under EXPERIMENTAL state as of today!
WireGuard is a communication protocol and free and open-source software that implements encrypted virtual private networks (VPNs), and was designed with the goals of ease of use, high speed performance, and low attack surface. It aims for better performance and more power than IPsec and OpenVPN, two common tunneling protocols. The WireGuard protocol passes traffic over UDP.
In March 2020, the Linux version of the software reached a stable production release and was incorporated into the Linux 5.6 kernel, and backported to earlier Linux kernels in some Linux distributions. The Linux kernel components are licensed under the GNU General Public License (GPL) version 2; other implementations are under GPLv2 or other free/open-source licenses.
Installation on pfSense
I will use two virtual machines on Hyper-V where pfSense 2.6.0 is installed on. One is in the datacenter in Frankfurt and one is in the datacenter in Duesseldorf.
WireGuard is available as an experimental add-on package on pfSense Plus 21.05, pfSense CE 2.5.2, and later versions. The settings for the WireGuard add-on package are not compatible with the older base system configuration.
The WireGuard package is still under active development. Follow the development progress on the developer’s YouTube channel
Source: https://docs.netgate.com/pfsense/en/latest/vpn/wireguard/index.html
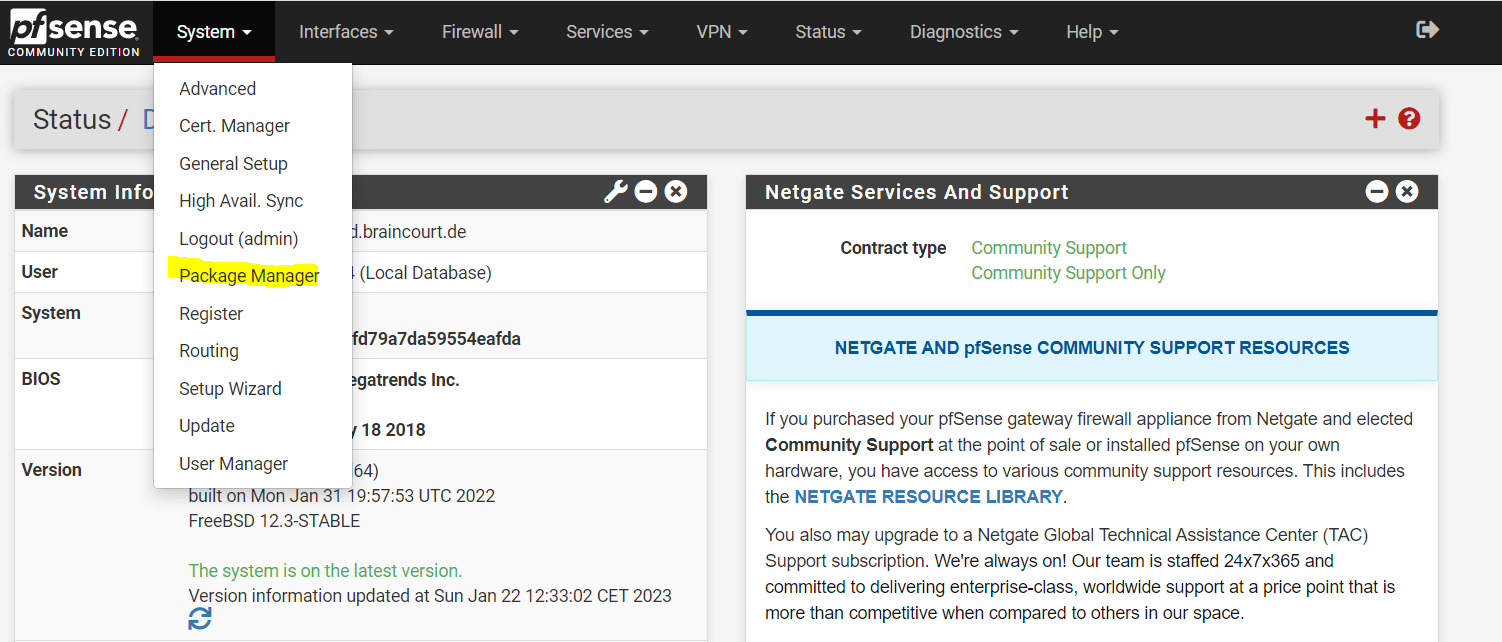
To install the WireGurad add-on package on pfSense we open as usual the Package Manger under System –> Package Manger
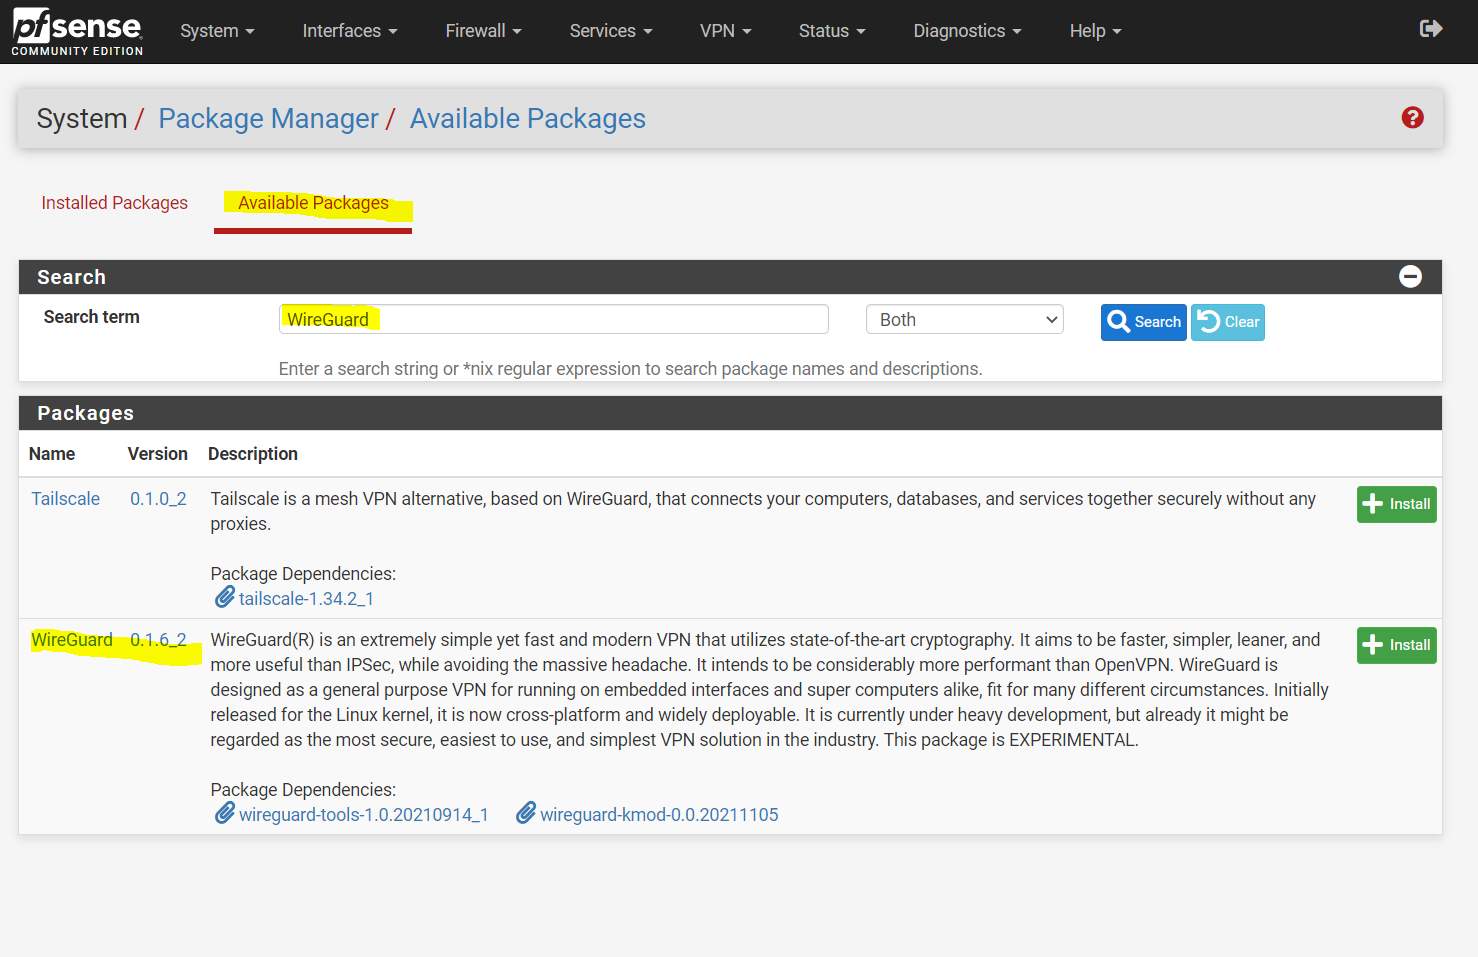
Here we search under Available Packages for WireGuard. As of today version 0.1.6_2 is the latest which I will install and therefore click on the install button.
The package is still EXPERIMENTAL!
WireGuard(R) is an extremely simple yet fast and modern VPN that utilizes state-of-the-art cryptography. It aims to be faster, simpler, leaner, and more useful than IPSec, while avoiding the massive headache. It intends to be considerably more performant than OpenVPN. WireGuard is designed as a general purpose VPN for running on embedded interfaces and super computers alike, fit for many different circumstances. Initially released for the Linux kernel, it is now cross-platform and widely deployable. It is currently under heavy development, but already it might be regarded as the most secure, easiest to use, and simplest VPN solution in the industry. This package is EXPERIMENTAL.
At this time this code is new, unvetted, possibly buggy, and should be
considered “experimental”. It might contain security issues. We gladly
welcome your testing and bug reports, but do keep in mind that this code
is new, so some caution should be exercised at the moment for using it
in mission critical environments.
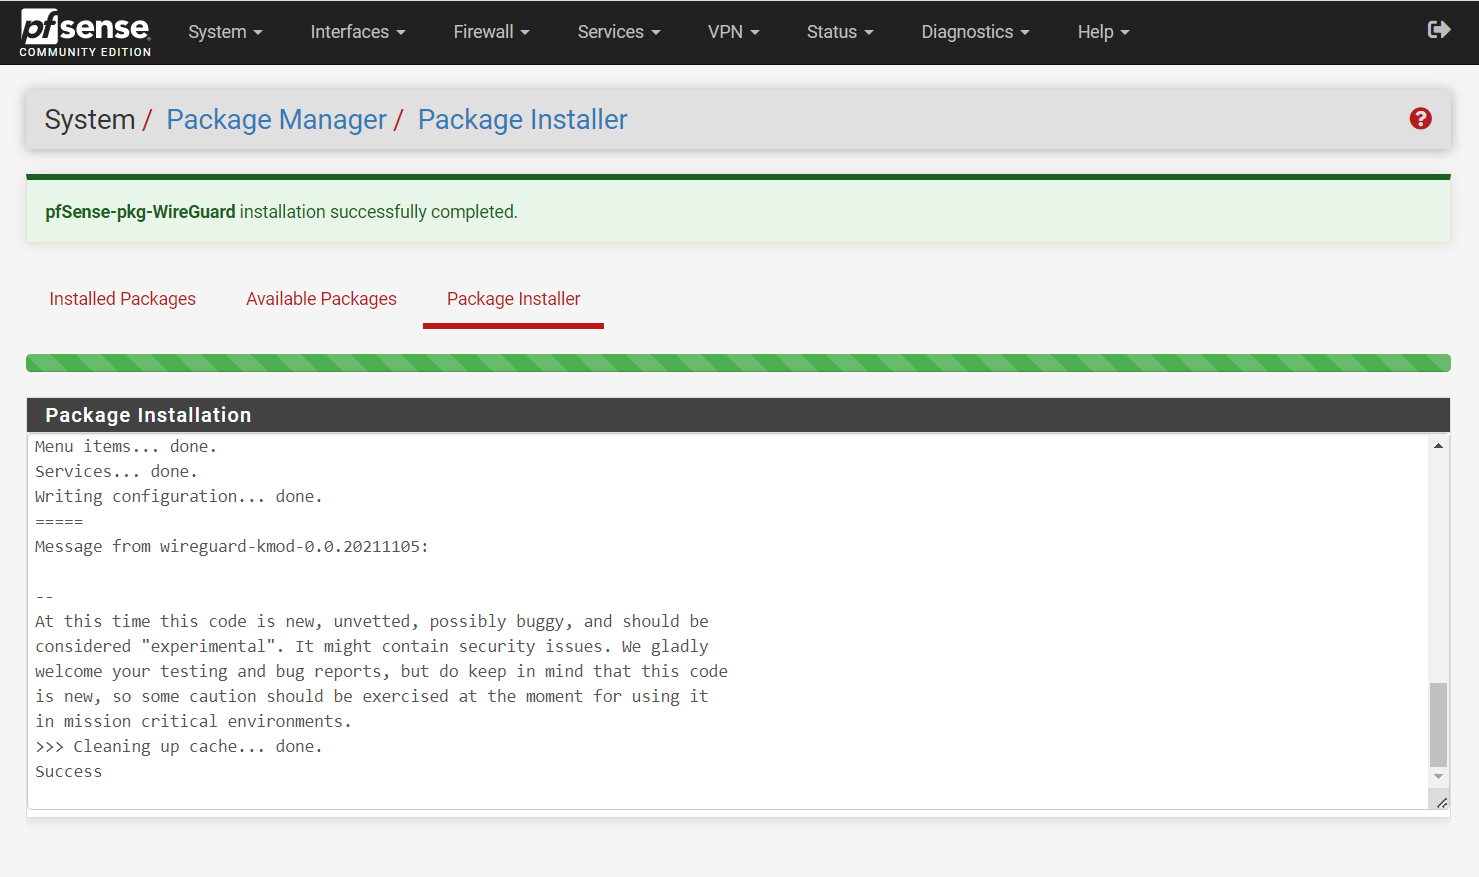
The same I will install on the second virtual machine.
Configure WireGuard on pfSense
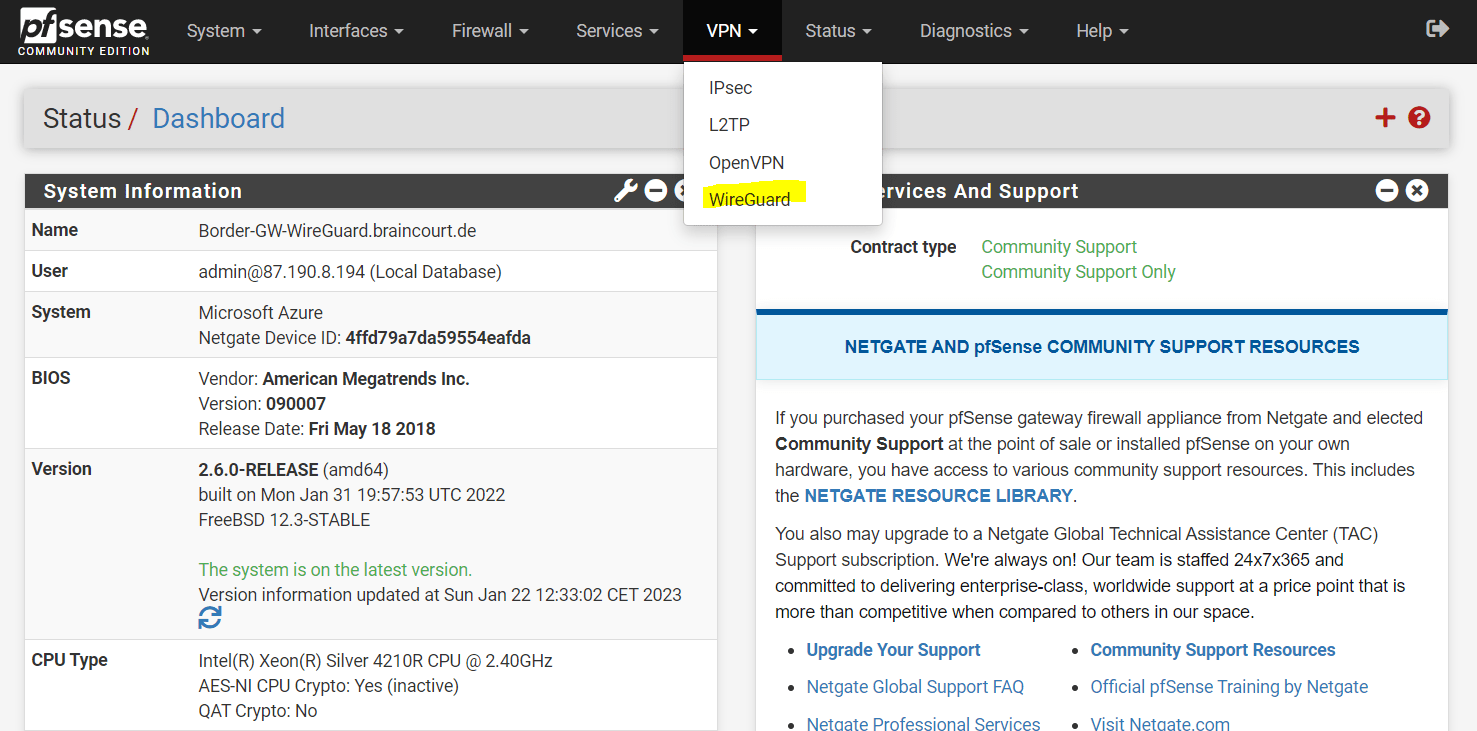
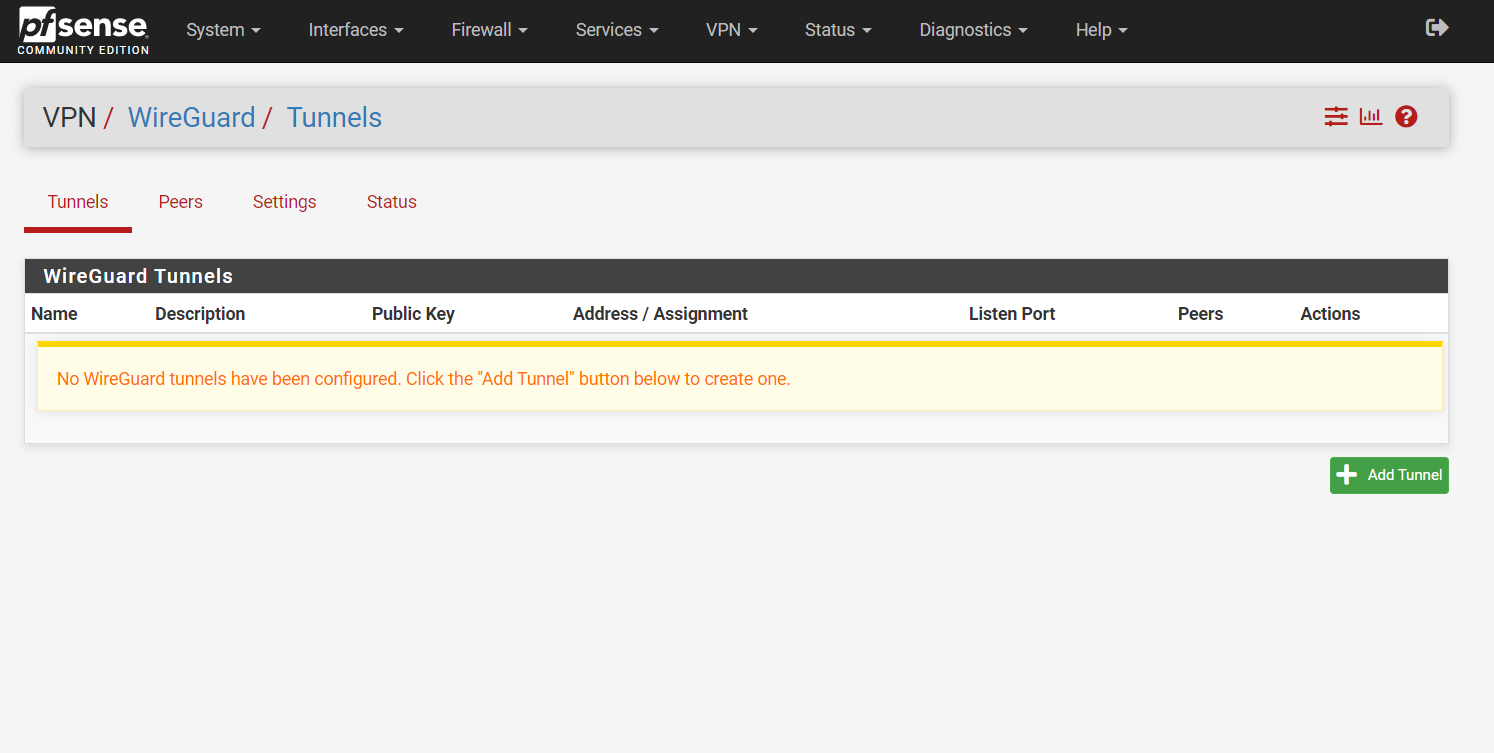
From now on we have under the VPN menu a new item with WireGuard where we can set up and configure WireGuard.
Configure the Tunnel
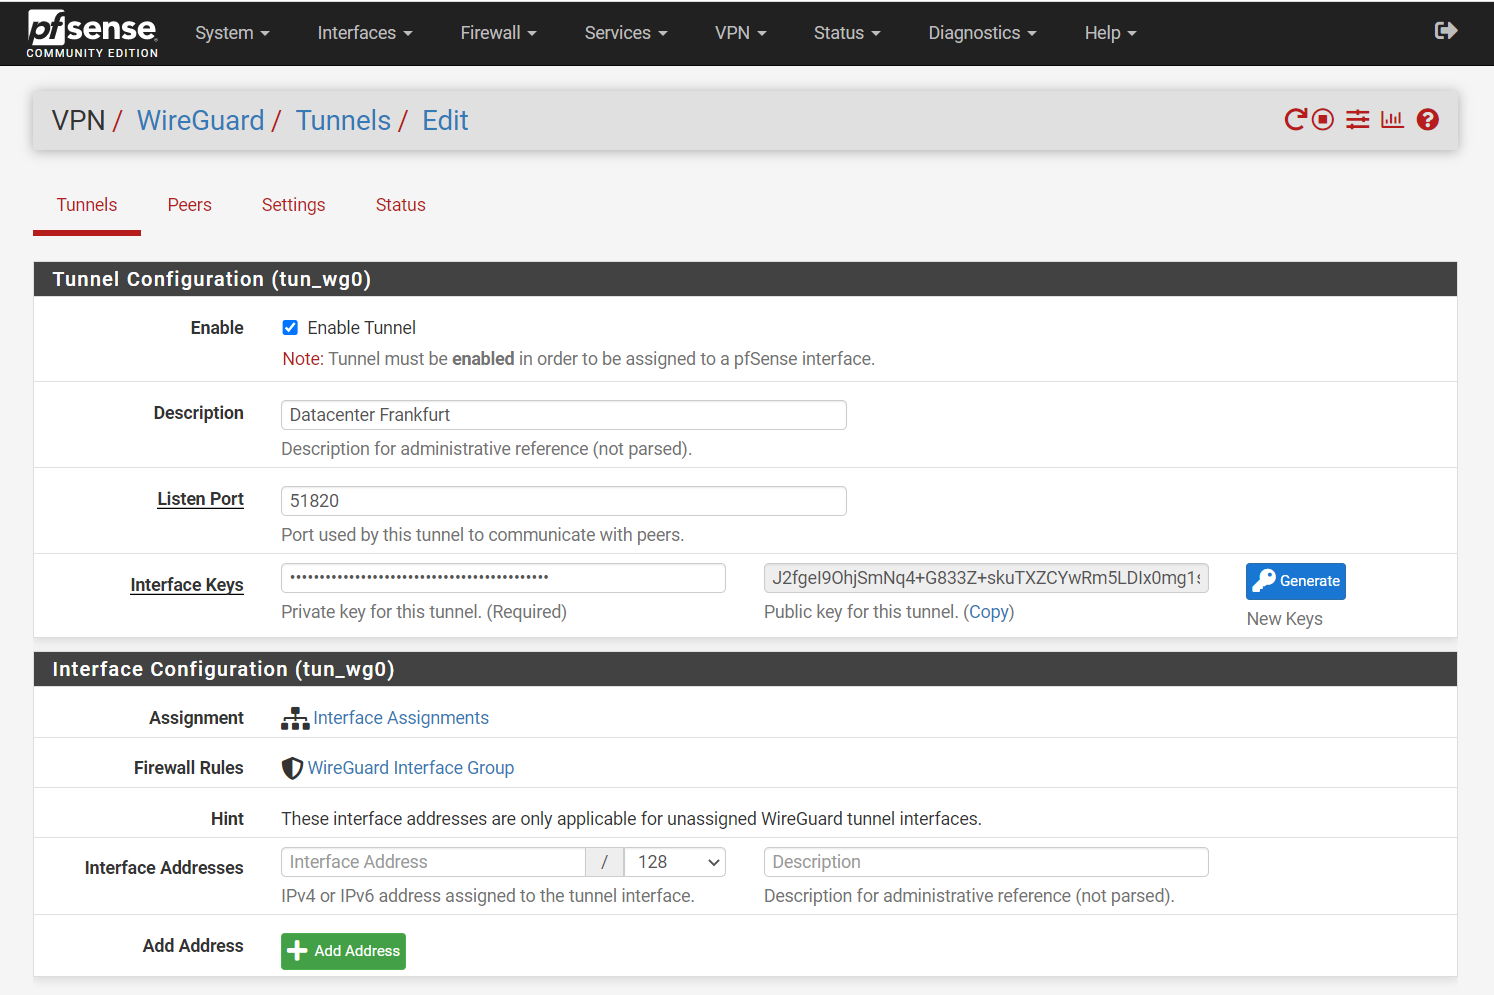
Below you will see the configuration for my virtual machine in the datacenter in Frankfurt where the network for the headquarter will be hosted.
First we need to add a tunnel by clicking on Add Tunnel.
Here we have to enter a description for the tunnel, the listening port we can be left empty in order to use the default UDP port 51820.
For the private and public interface keys we can generate a new key pair by clicking on the Generate button.
The interface we will configure later, so leave the interface addresses empty and click on Save Tunnel.
Assign a WireGuard Interface
Some functionality for WireGuard interfaces depends upon them being assigned as their own interfaces on the firewall. Benefits of assignment include:
- Adds a firewall tab under Firewall > Rules
- Allows the interface to be selected for use with NAT rules
- Allows the interface to be selected throughout the GUI and packages for various purposes
- Rules on assigned interface tabs get reply-to which ensures return routing will exit back the expected interface for inbound connections.
Source: https://docs.netgate.com/pfsense/en/latest/vpn/wireguard/assign.html#assign-a-wireguard-interface
Now I will also add and configure a tunnel for my second virtual machine in the datacenter in Duessldorf.
So I will also click here on Add Tunnel.
Here we also have to enter a description for the tunnel, the listening port we also left empty in order to use the default UDP port 51820.
For the private and public interface keys we also generate a new key pair by clicking on the Generate button.
Copy the public keys from each pfSense and note which is which.

Source: https://docs.netgate.com/pfsense/en/latest/vpn/wireguard/configure.html
That’s all for the tunnel configuaration for now and next we need to add a peer configuration on each pfSense which will represent the corresponding other site (pfSense).
The interface configuration for both tunnel we will do later as mentioned.
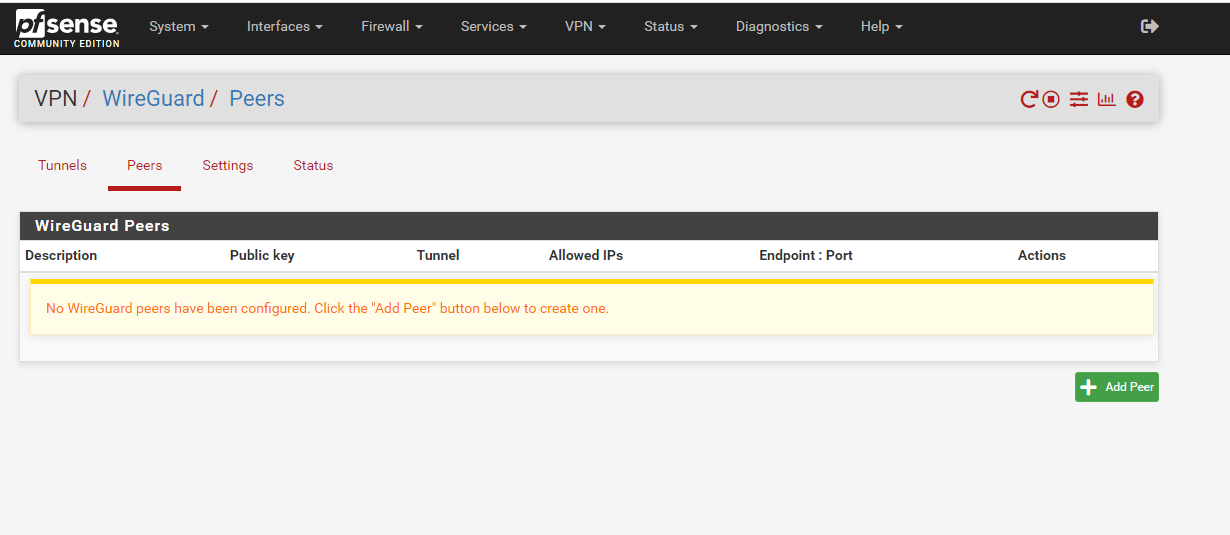
Configure the Peers
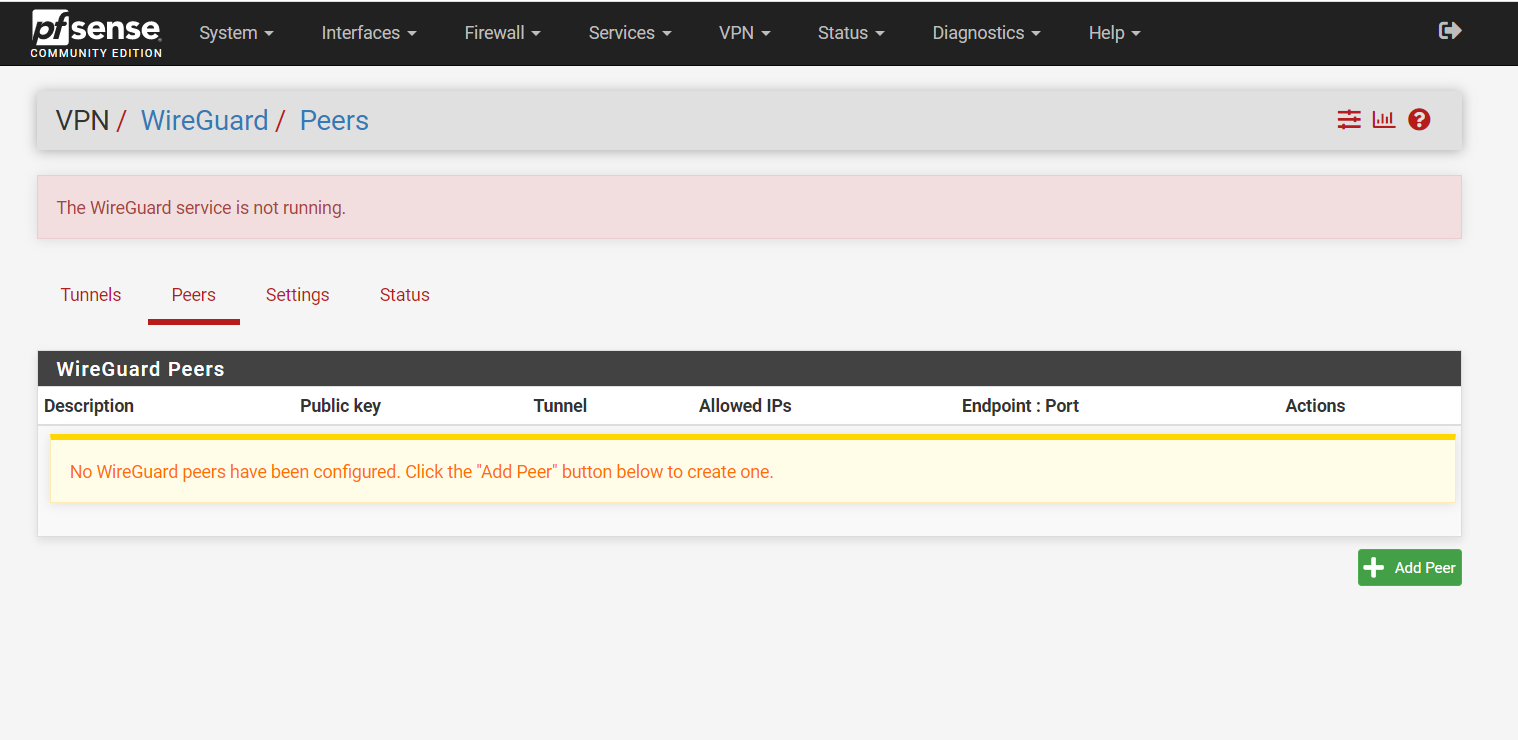
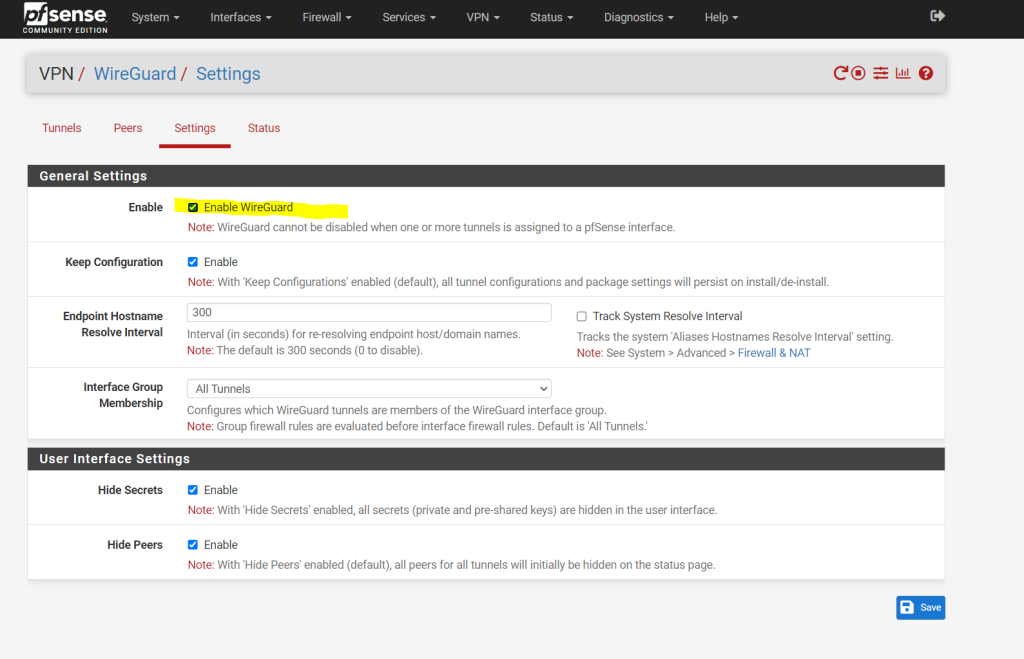
After saving the tunnel configuration on each pfSense, we get the red warning message that the WireGuard service so far is not running. To get rid of it you just need to enable WireGuard in the settings menu as shown in the next screenshot below.
As mentioned to start the WireGuard service you just need to check Enable Wireguard in the settings.
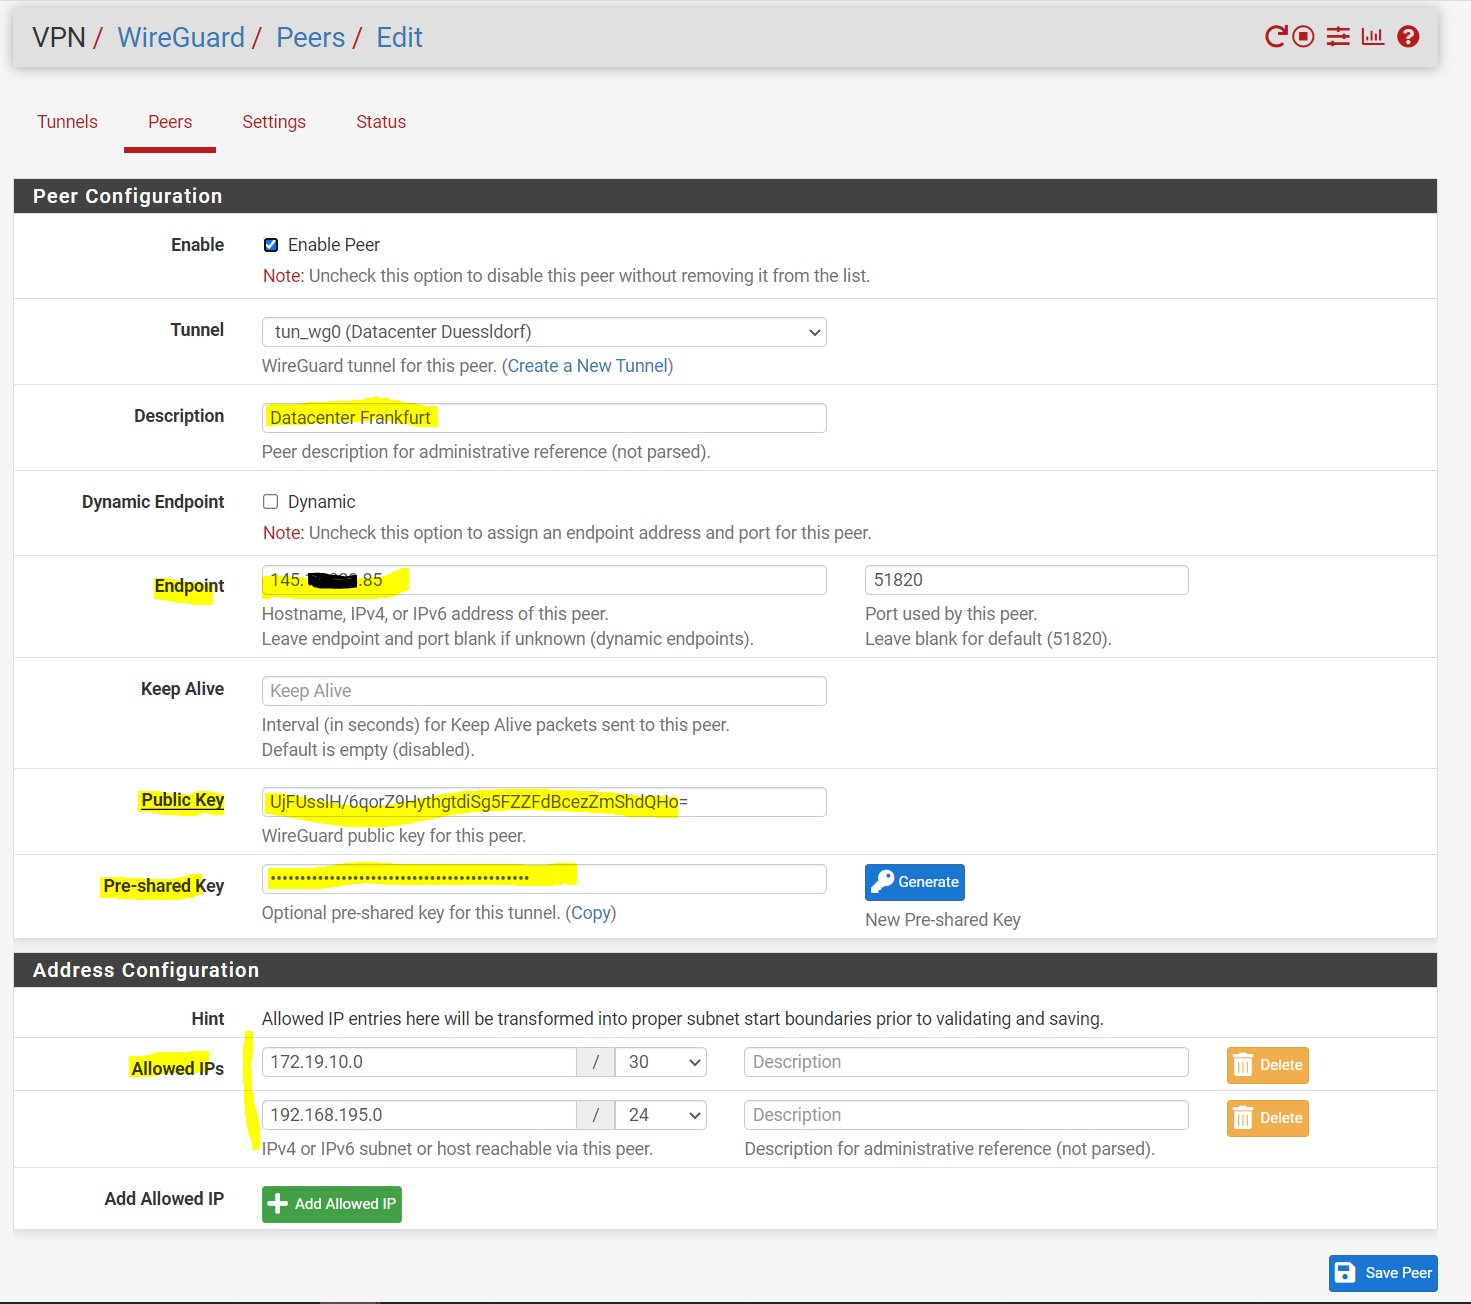
Now I will go back to the Peers menu on my first virtual machine (Datacenter Frankfurt) and click on Add Peer. As mentioned this peer will be our second pfSense appliance with WireGuard in the datacenter in Duesseldorf.
The new peer is by default enabled. So first we need to assign our previously created tunnel to this peer. Further we need to enter a description for the peer.
The Endpoint here is the public IP address and port number from the remote site (pfSense in Duesseldorf) where WireGuard is listening and sending/receiving traffic through the VPN tunnel.
I will uncheck dynamic endpoint as we have on both sites static public IP addresses. The port number I will left empty so the default UDP port 51820 will be used.
The public key will be the public key from the tunnel created on the pfSense in Duesseldorf which we noted previously.
Further to enhance security I will also generate a pre-shared key which we need to use on both sites.
Finally I added under address configuration the allowed IPs for this peer. On the one hand this must be our transit subnet and on the other hand all subnets from the remote site (pfSense Duesseldorf), we want to access through this peer. By adding them to the peer here, pfSense will also know, that all packets which destination IP range is the same as in the allowed IPs, it have to route through the tunnel which is assigned to this peer.
The transit subnet includes the interface configuration we will configure later. We need here two internal IP addresses, one for each site (pfSense) with a /30 subnet. You need to select here a subnet which not overlap with some other networks on both sites. In my case I will use the 172.19.10.0/30 subnet with the both IP addresses 172.19.10.1 for Frankfurt and 172.19.10.2 for Duesseldorf.
Therefore we need to add this transit subnet also for the allowed IPs.

Now we also need to add a peer on the pfSense in Duesseldorf which will represent the pfSense in Frankfurt.
The endpoint will be the static public IP from pfSense in Frankfurt. The port number I also will left empty so the default UDP port 51820 will be used.
Under public key I will paste the public key from the tunnel in Frankfurt and the pre-shared key needs to be the same as in Frankfurt.
Finally I added under address configuration the allowed IPs for this peer which will be also the transit subnet and one more subnet from Duesseldorf which the site in Frankfurt should be allowed to access.
Configure the Interfaces
Now as mentioned we need to configure the interfaces on each tunnel. I will start with the tunnel on my first virtual machine in Frankfurt.
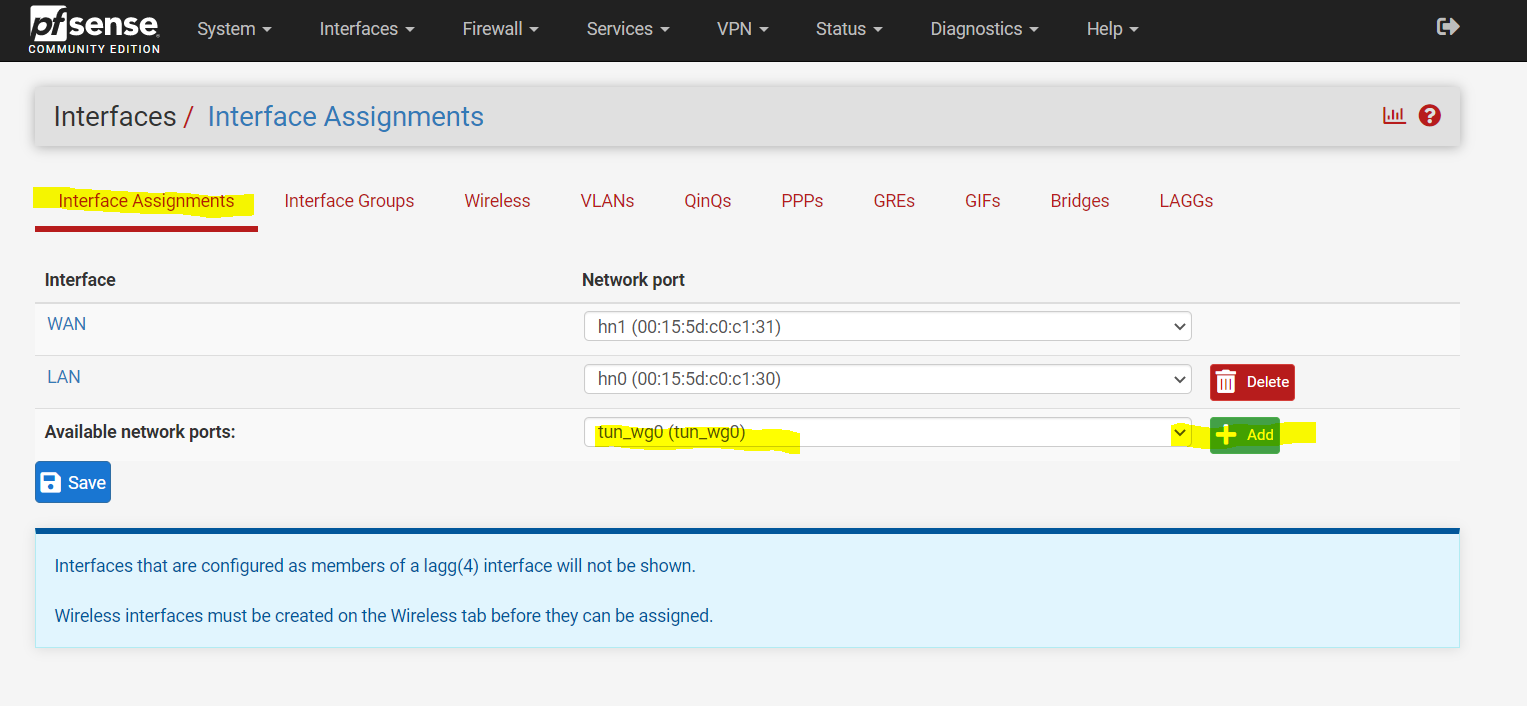
Therefore click on Interfaces –> Assignment
Click on Add for the tunnel interface and save it.
Then click on OPT1 to configure the new interface.
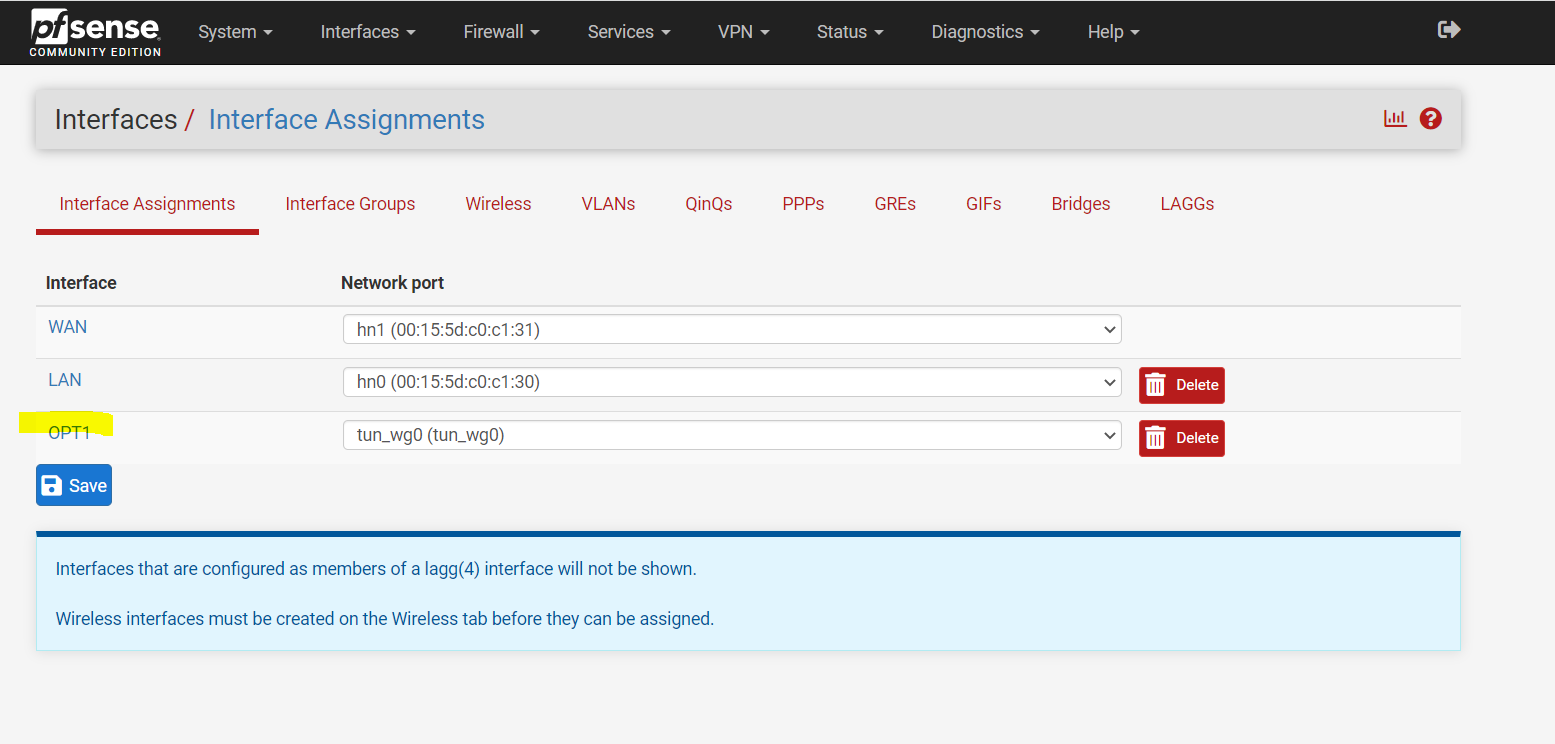
Here first enable the interface. Enter a description and under IPv4 Configuration Type select Static IPv4. Under IPv4 Address I will enter my first IP address from the transit subnet I choosed. You remember?
The transit subnet includes the interface configuration. We need here two internal IP addresses, one for each site (pfSense) with a /30 subnet. You need to select here a subnet which not overlap with some other networks on both sites. In my case I will use the 172.19.10.0/30 subnet with the both IP addresses 172.19.10.1 for Frankfurt and 172.19.10.2 for Duesseldorf.
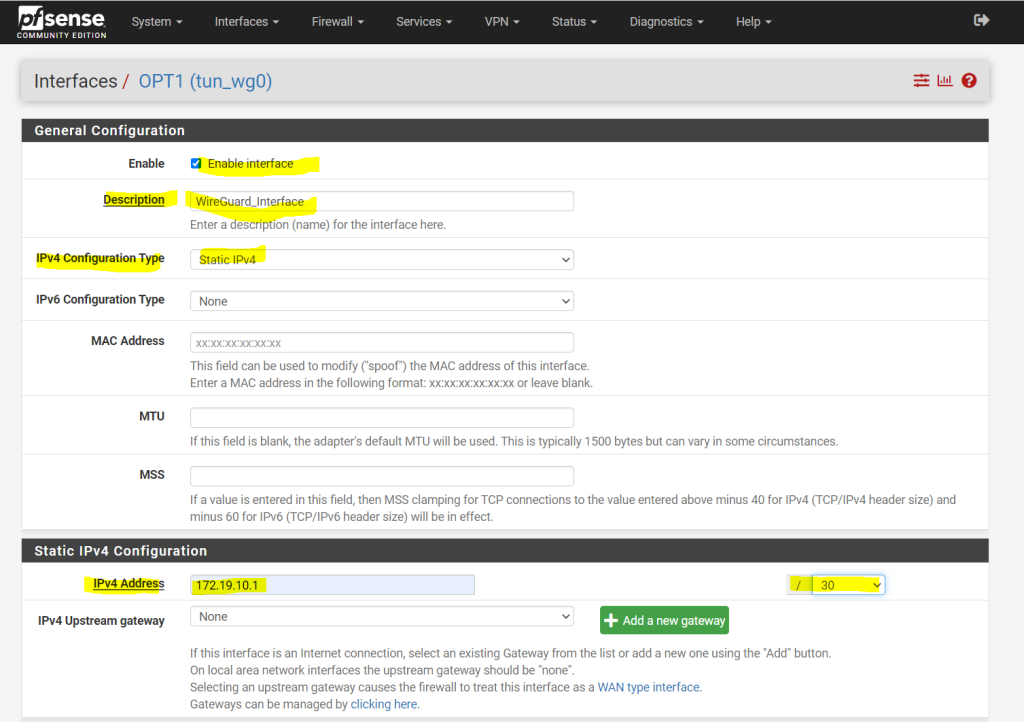
We do not add an upstream gateway here, later we we will create a normal gateway in the routing settings. Also we won’t enable to block private networks as the traffic through the tunnel will be private. Finally click on Save.
They same interface configuration I will need to do on the other site in Duesseldorf. For Duesseldorf the interface IP will be 172.19.10.2.
For the tunnel configuration you will see that now the interface we configured is assigned to.

Configure Firewall Settings
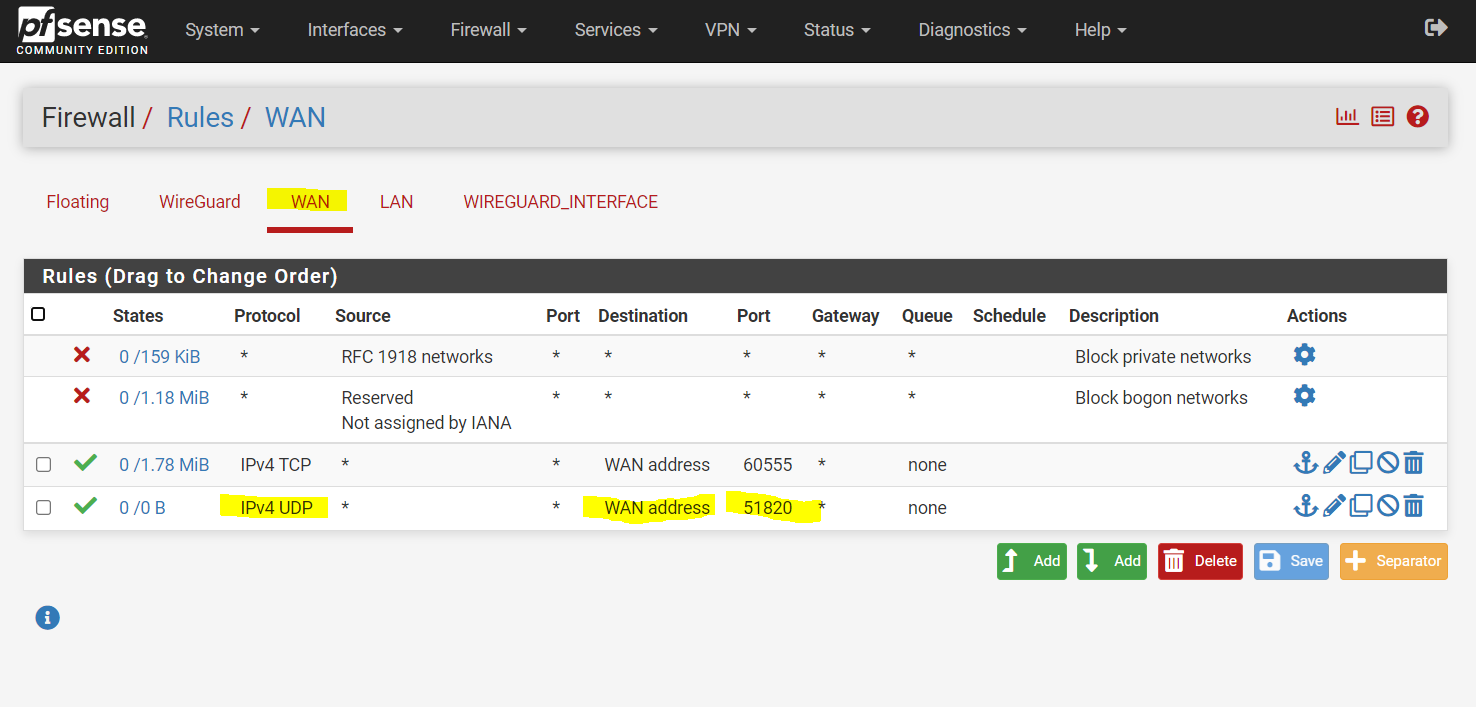
Unfortunately WireGuard doesn’t create an automatic rule like OpenVPN does to allow VPN connections to the listening UDP server port we configured for WireGuard.
So we need to add the firewall rules on Firewall > Rules, WAN tab to allow UDP traffic to the port for this WireGuard tunnel (WireGuard and Rules / NAT)
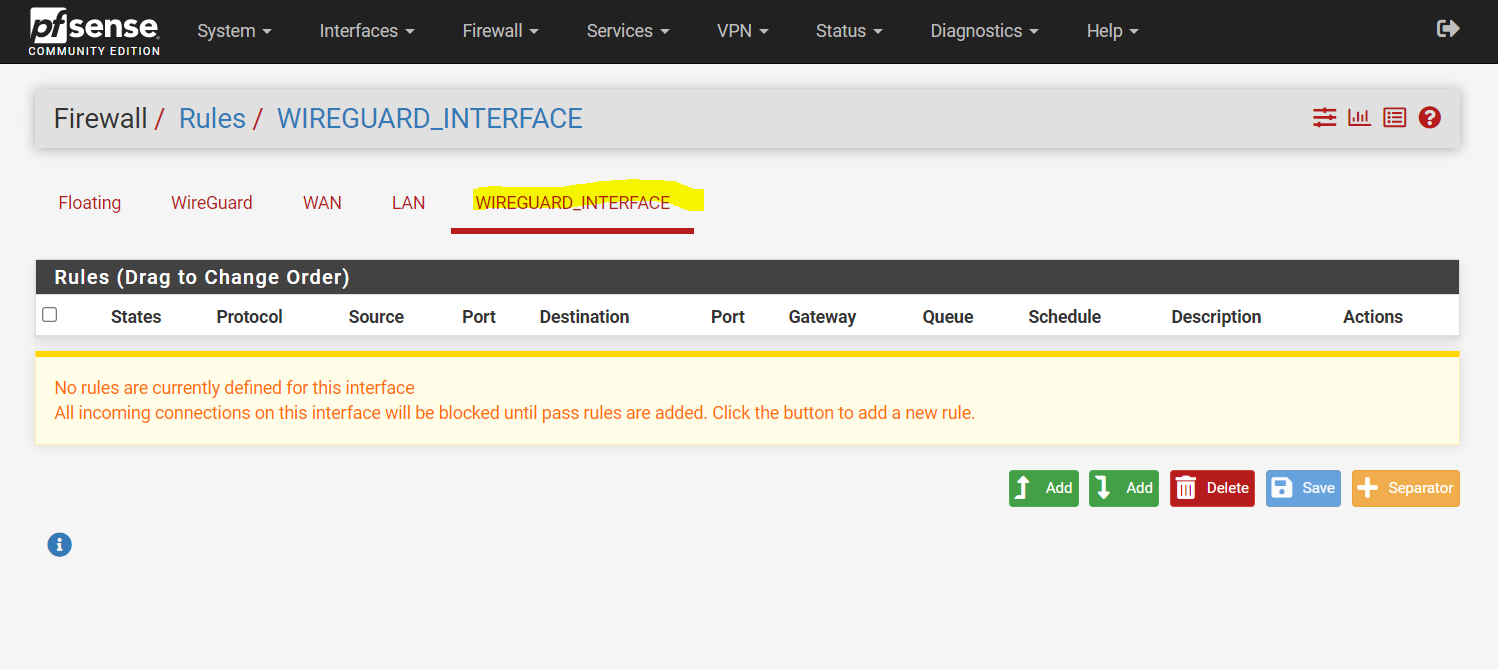
Next, add a rule to pass traffic inside the WireGuard tunnel on both firewalls:
As you can see below, within the pfSense firewall rules we have now two sections where we can set firewall rules for WireGuard.
The first entry with WireGuard is the WireGuard interface group and the second with WIREGUARD_INTERFACE is the interface we configured previously for the tunnel.
The group you can use if you want to set rules for more than just one tunnel. Also be aware that pfSense will first evaluate interface groups rules before individual interface rule sets.
As I will just set the rules directly for the interface (WIREGUARD_INTERFACE) above, I will change the following setting for WireGuard.
By default all tunnels are included in the WireGuard interface group, I will change this to Only Unassigned Tunnels. So because my tunnel is assigned, from now on the rules in the WireGuard interface group won’t applied to my tunnel and just the one I will set directly on the interface.

Now I will add directly on the interface a new rule and click on Add.
Rules on assigned WireGuard interface tabs get reply-to which ensures that traffic entering a specific assigned WireGuard interface exits back out the same interface. Without that, return traffic will follow the default gateway.
Source: https://docs.netgate.com/pfsense/en/latest/recipes/wireguard-s2s.html
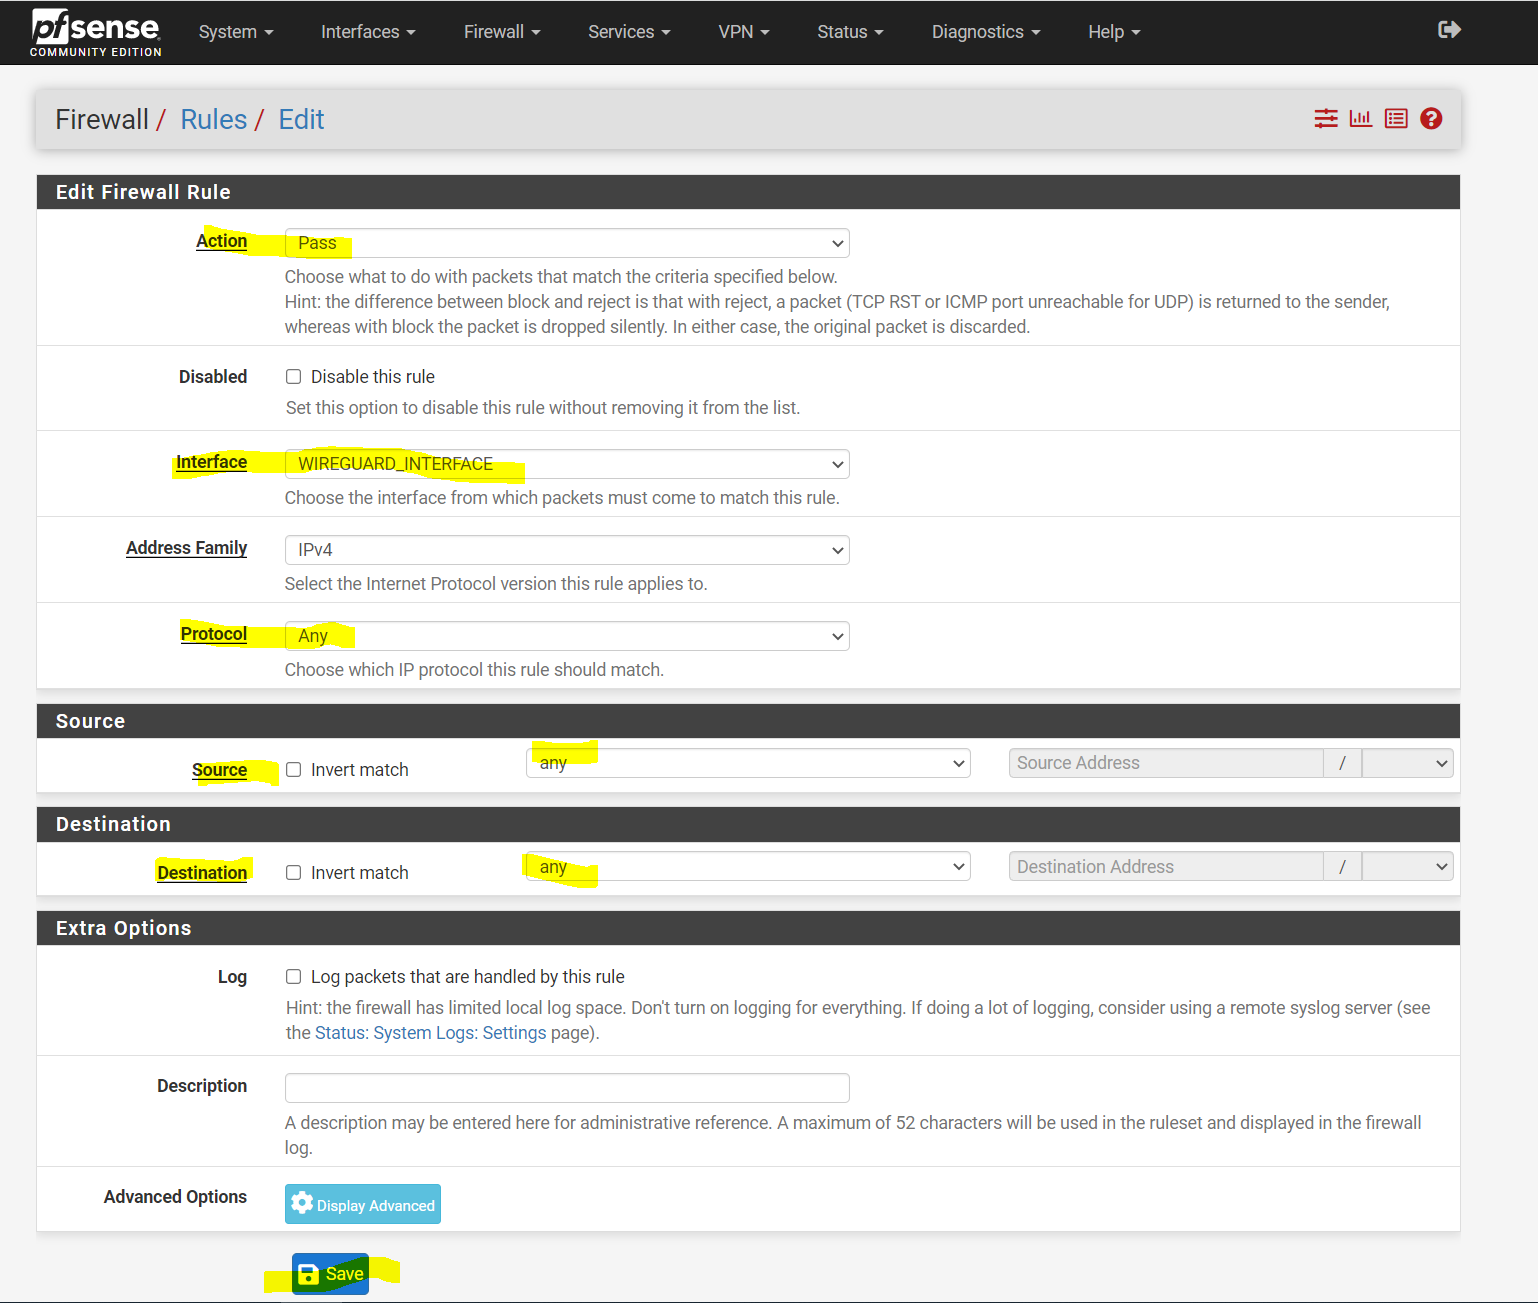
For testing purpose I will allow all traffic, in production use you will normally filter which traffic is allowed.

Configure Routing
You rember that when we assigned the WireGuard interface, we didn’t configured an IPv4 Upstream gateway as shown below.

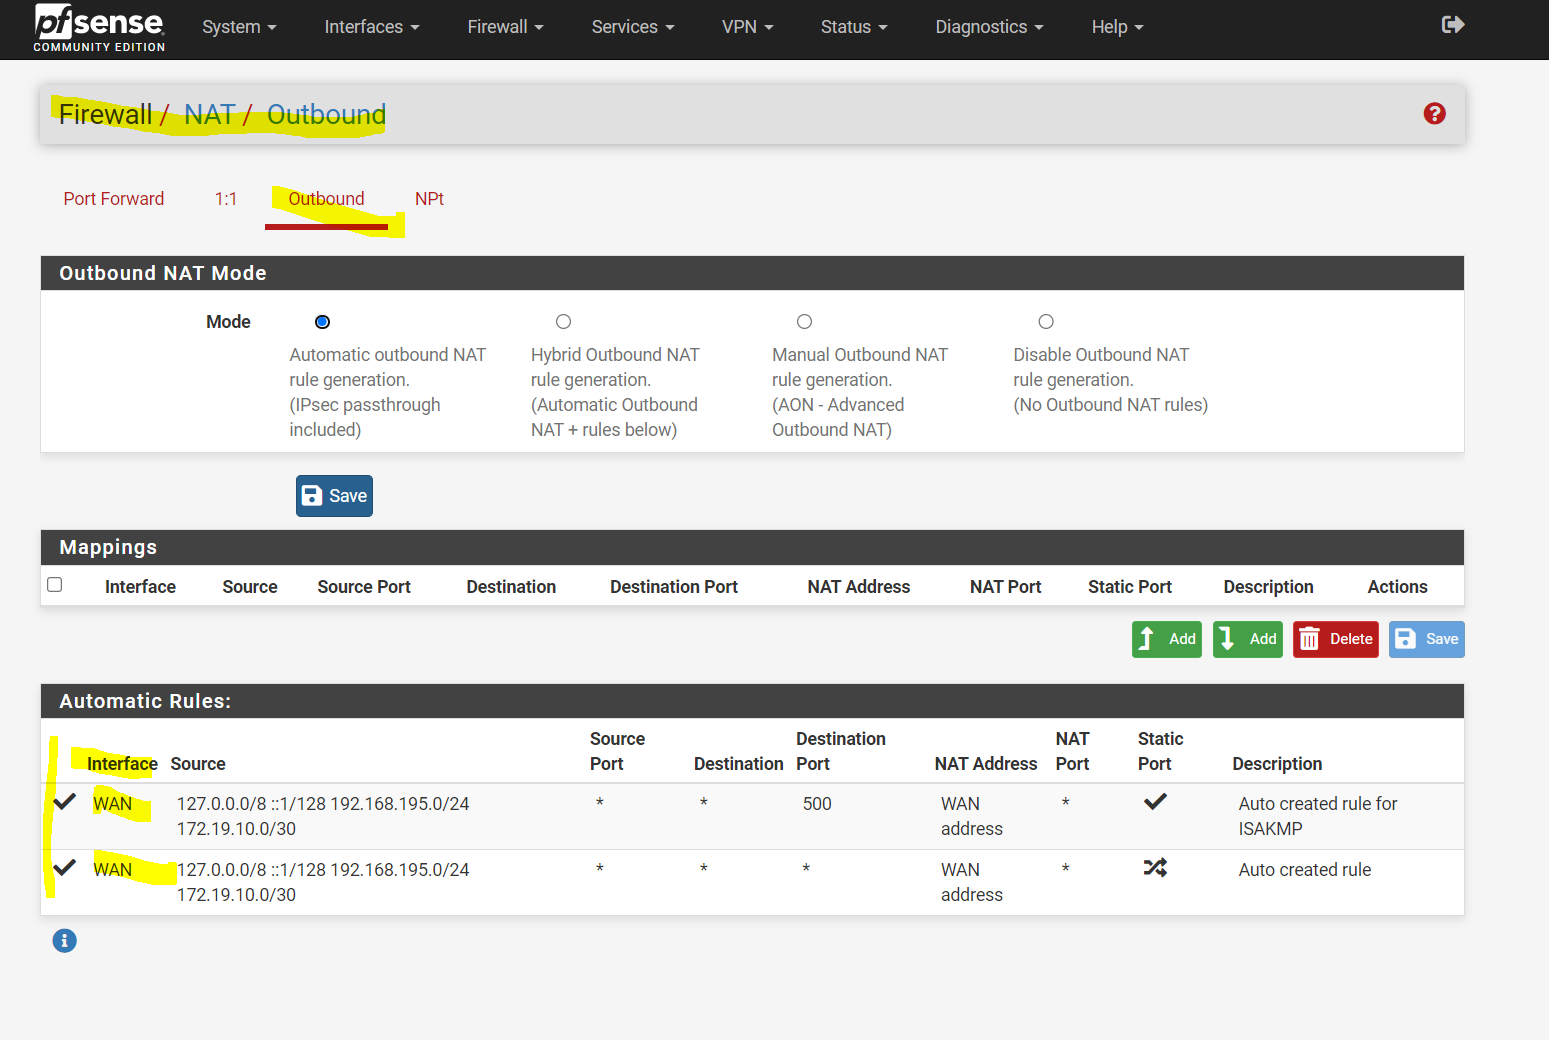
The reason for is that pfSense will set automatic outbound NAT rules for the upstream gateway which we usually doesn’t want.
In our case the gateway will be used to route traffic between both sites and internal subnets through the tunnel, therefore it should be treated as normal internal traffic and no need to use NAT.
Nevertheless the routing would technically also work when using here an upstream gateway and NAT, but in that case all original source IP addresses from one site and its subnets would be translated to the other site and systems into the tunnel interface IP from the other site which is mostly not desired internal. The destination systems in the other site couldn’t really determine the real IP address from the source system.
Below for example you will see the automatic created outbound NAT rules for the WAN interface which is desired and of course required to translate the internal IP addresses into the public IP address from the WAN interface from pfSense, in order to enable internal systems internet access.
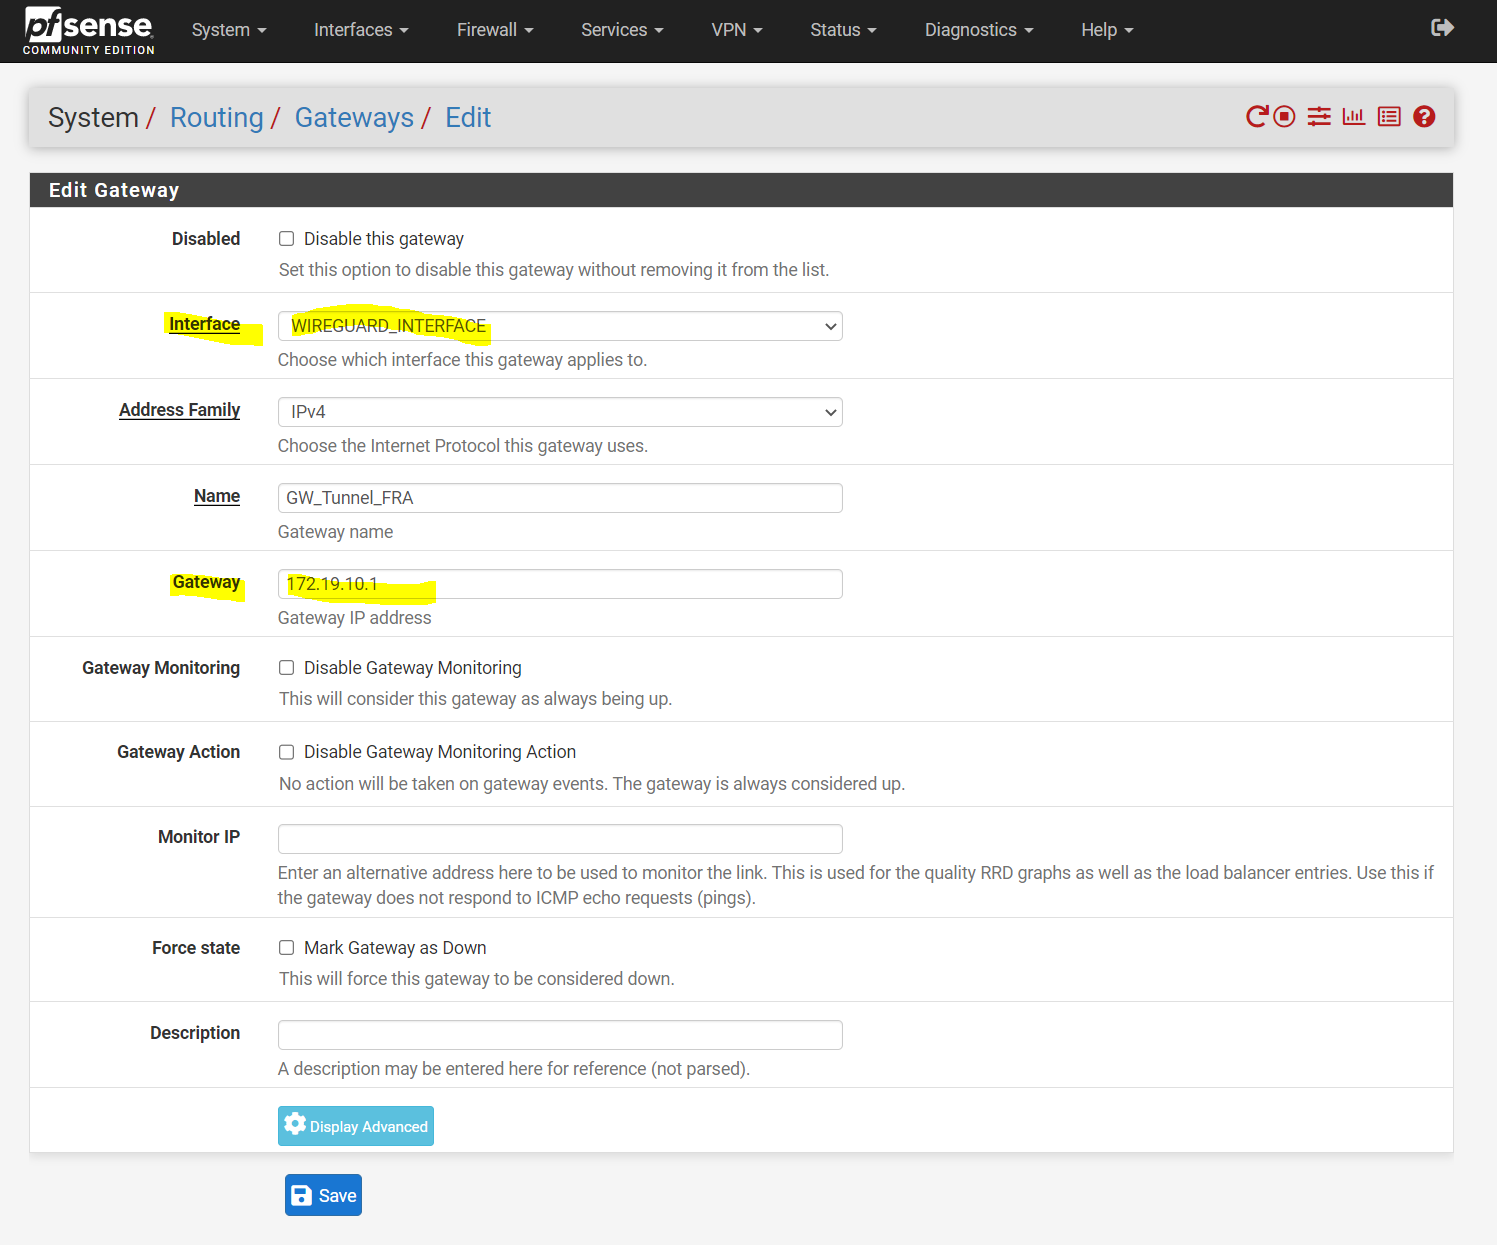
As mentioned we still need a gateway for the tunnel on each site but not assigned as an upstream gateway. Therefore we need to create a gateway under System –> Routing –> Gateway on each site. I will first create a gateway on pfSense in Frankfurt.
Therefore the gateway IP is 172.19.10.2 which is assigned on the WireGuard interface in Duesseldorf.

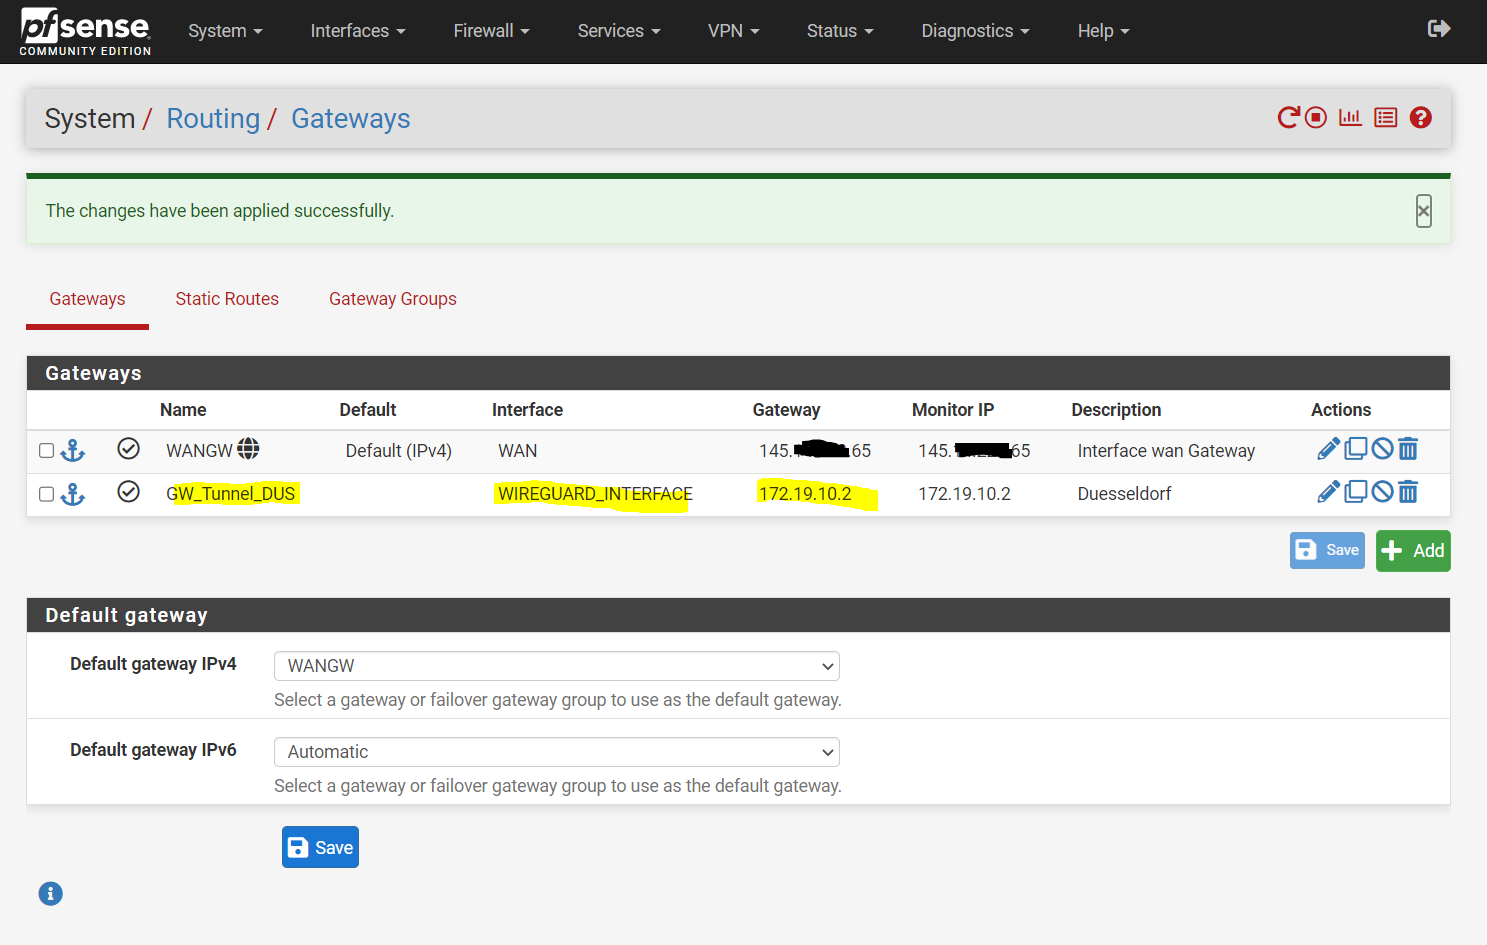
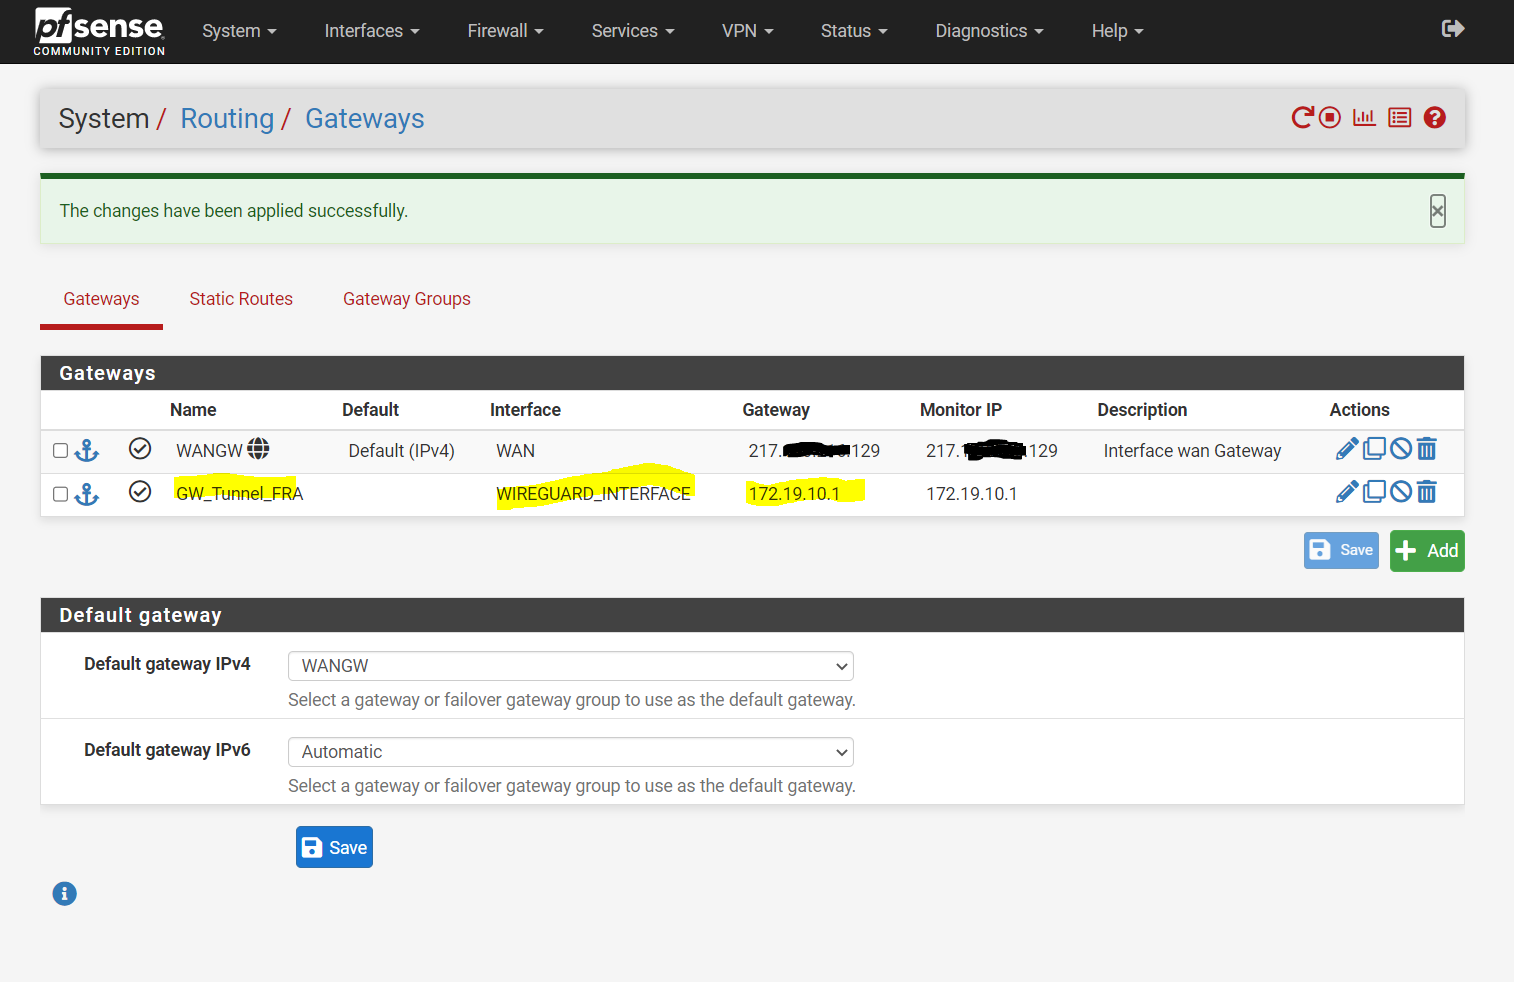
The same I will configure in Duesseldorf but with the gateway IP address 172.19.10.1 from Frankfurt.
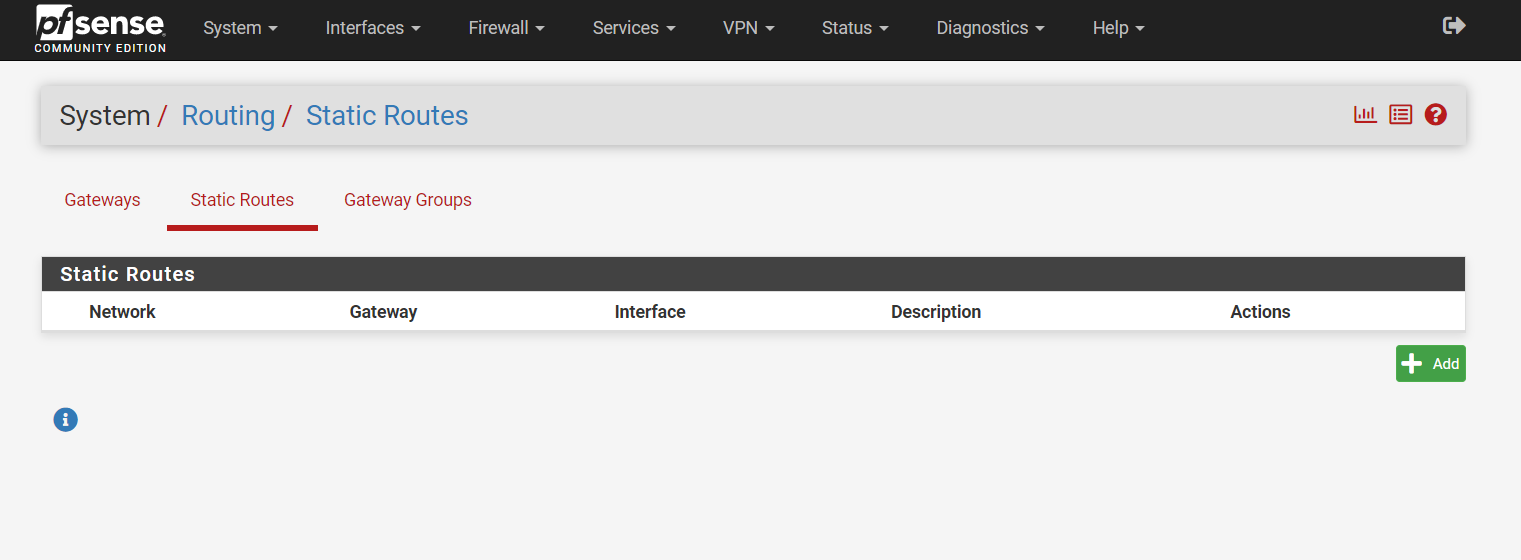
Now finally as we configured both gateways, we can configure the static routes for both sites.
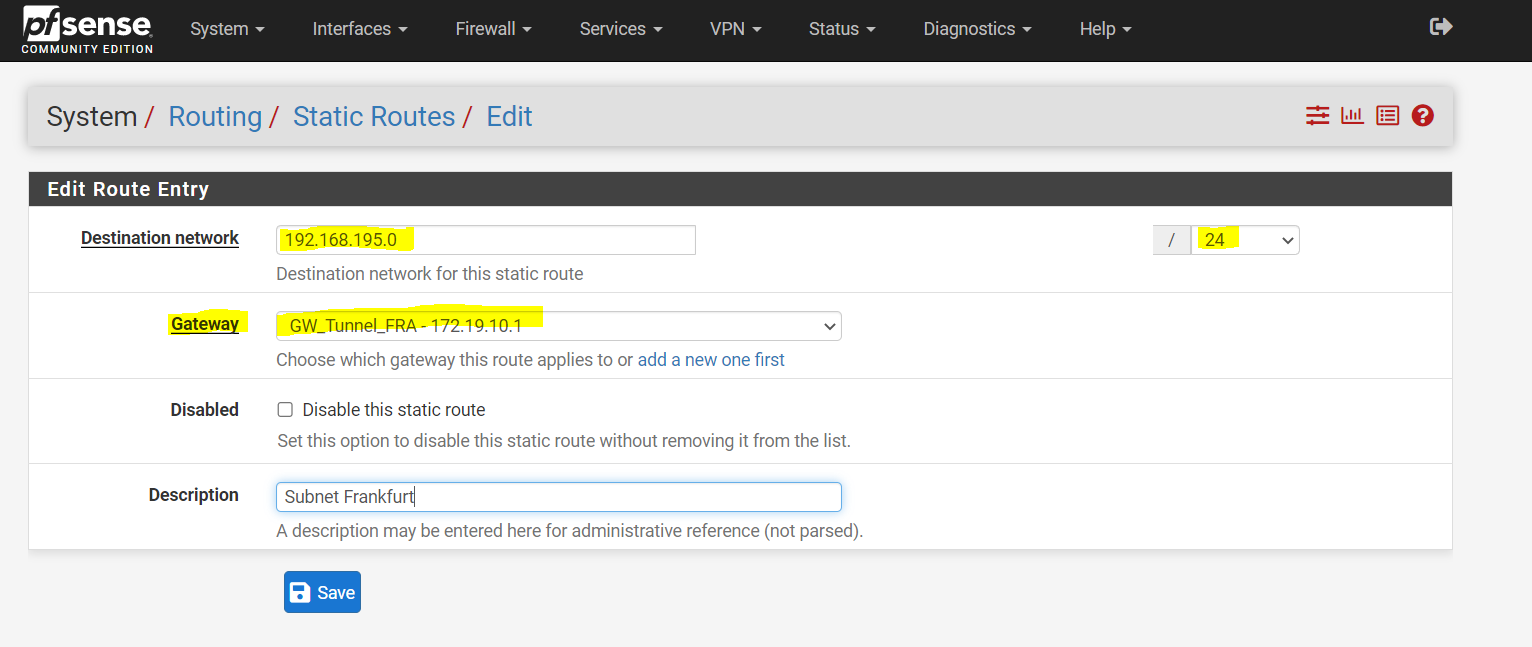
I will also start in Frankfurt. So I click on Add.
My subnet in Duesseldorf is 192.168.50.0/24 and the gateway is our previously created one.


The same I will configure in Duesseldorf with the Gateway and Subnet for Frankfurt.
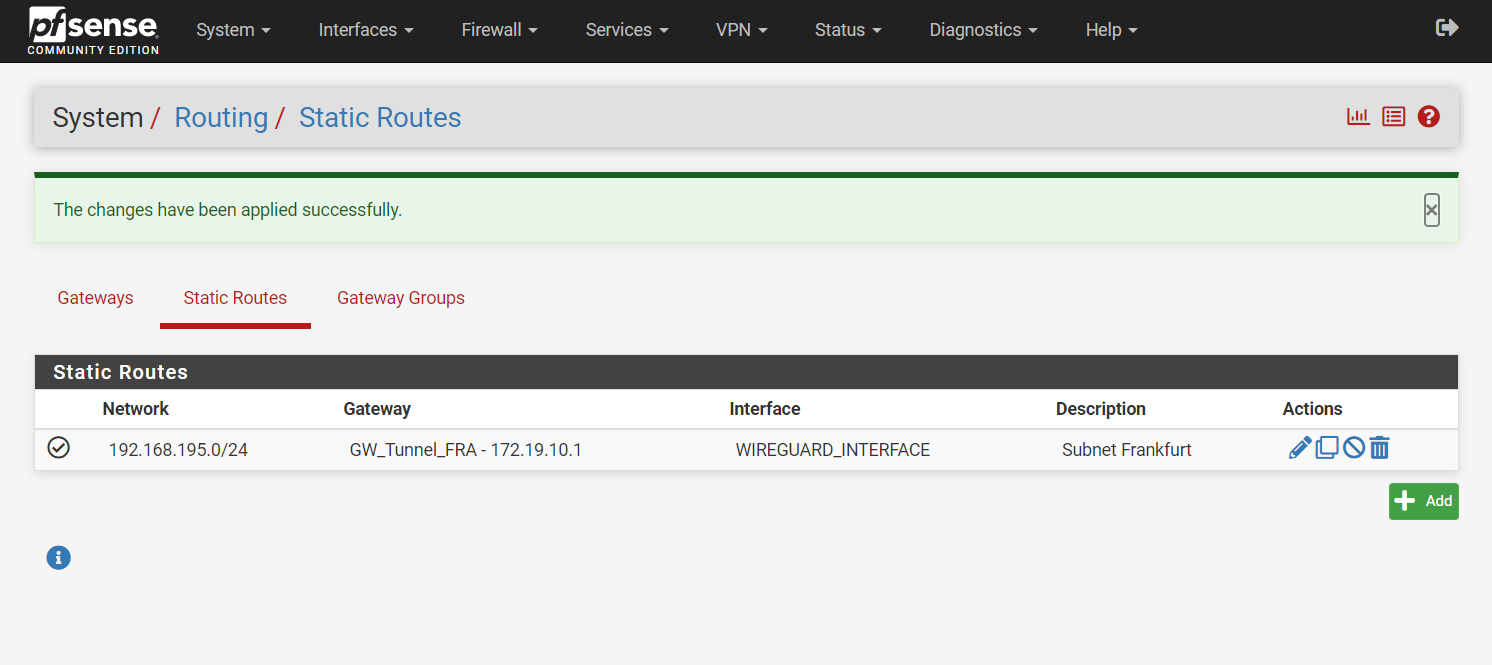
From now on routing traffic between both sites and our subnets should work.
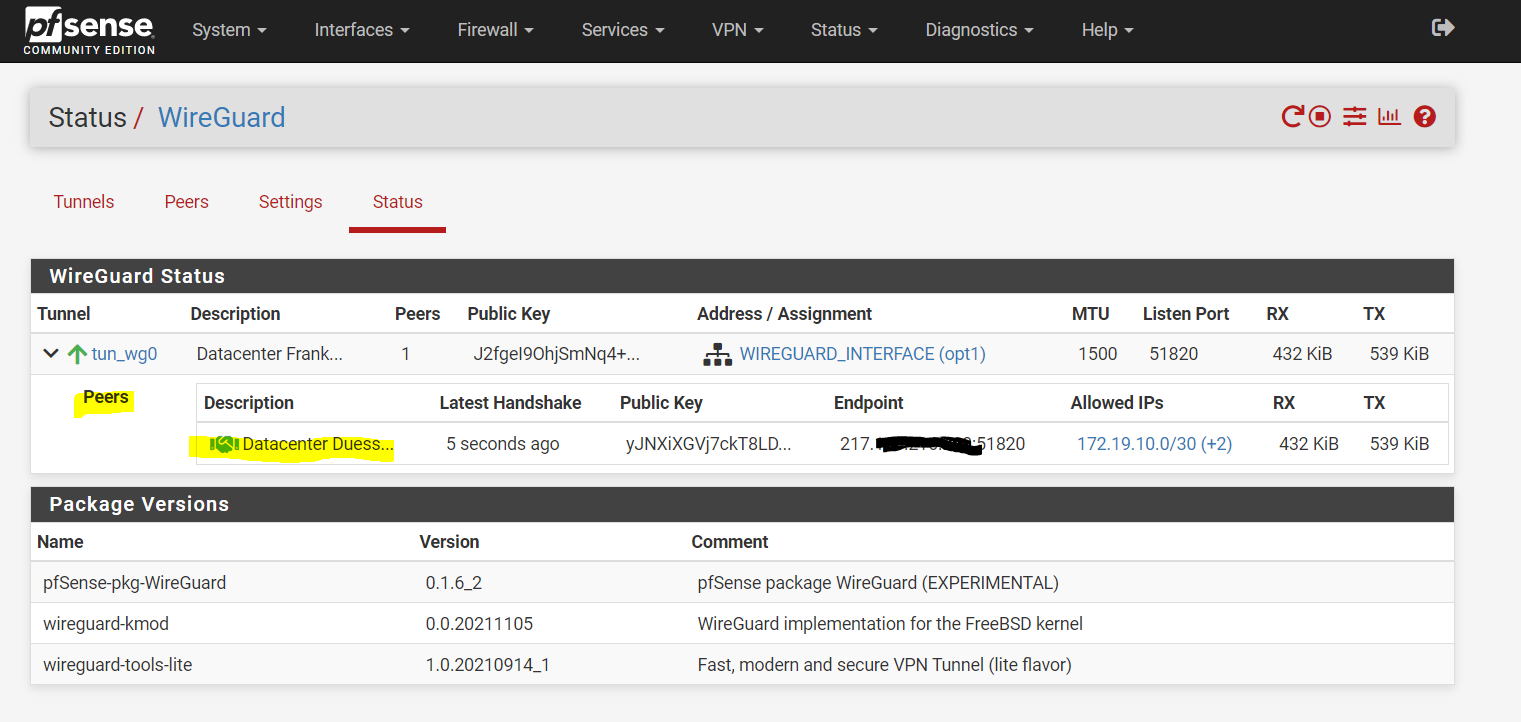
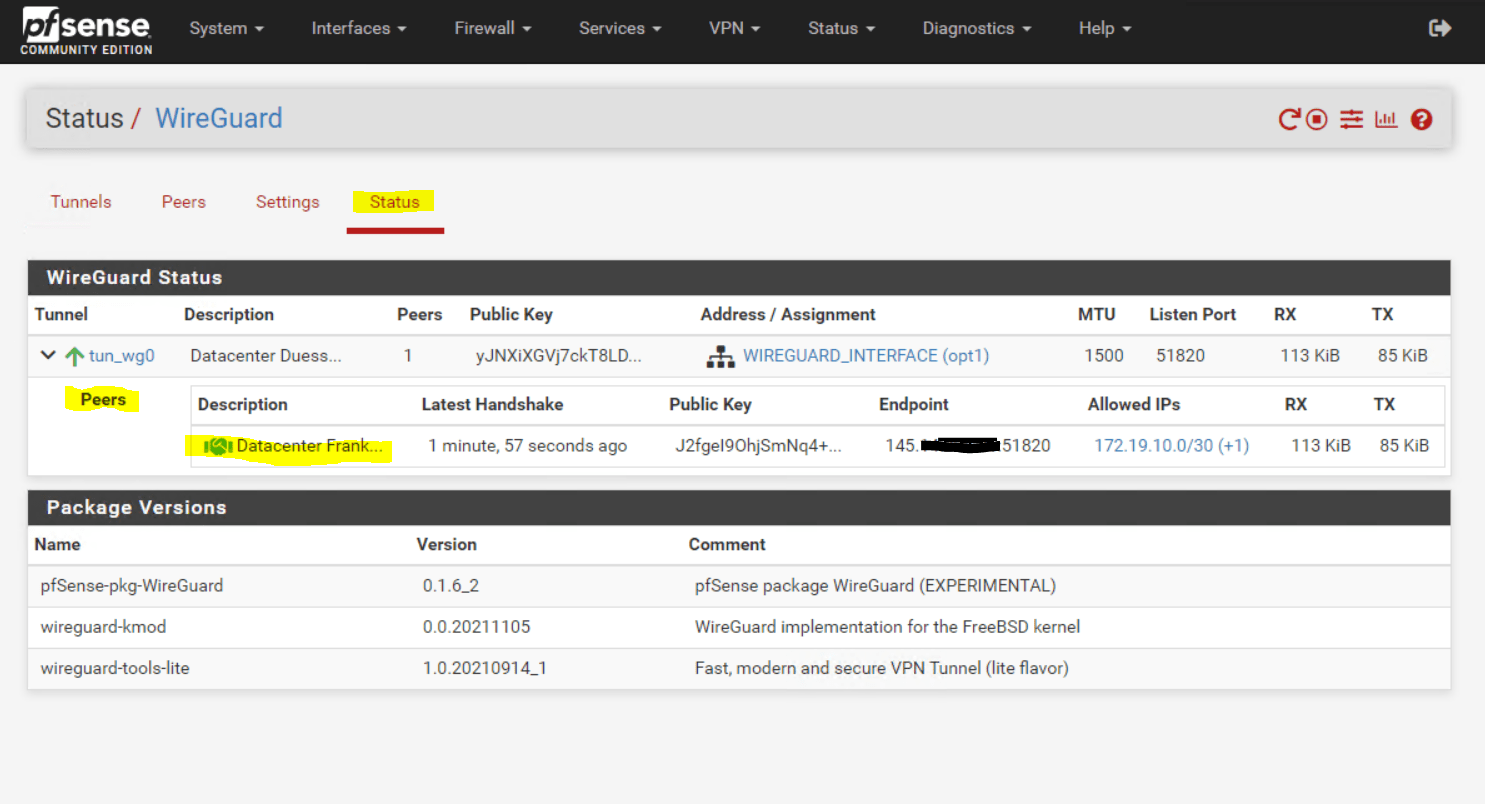
Check the Status
Finally you can check if the tunnel is up within the status tab from WireGuard. Actually you just can check the latest handshake between both peers because Wireguard is using UDP which is stateless.
pfSense in Frankfurt
pfSense in Duesseldorf
Links
WireGuard
https://docs.netgate.com/pfsense/en/latest/vpn/wireguard/index.htmlWireGuard Site-to-Site VPN Configuration Example
https://docs.netgate.com/pfsense/en/latest/recipes/wireguard-s2s.htmlBasic Site-to-Site VPN Using WireGuard and pfSense
https://www.youtube.com/watch?v=2oe7rTMFmqc