

Understanding Remote Procedure Calls (RPC) on Linux – Building an ONC RPC Client and Server and Analyzing the Network Traffic
In my previous article, we explored Microsoft’s implementation of Distributed Computing Environment / Remote Procedure Call (DCE/RPC) by building a simple C++ client and server application using the Microsoft Interface Definition Language (MIDL).
We then deployed the applications to separate Windows Server virtual machines and analyzed the complete communication flow with Wireshark, from the initial contact with the RPC Endpoint Mapper on TCP port 135 to the actual remote procedure calls on the dynamically assigned RPC endpoint.
Although Microsoft DCE/RPC is the dominant RPC implementation on Windows, the Unix and Linux world has its own RPC technology known as Open Network Computing Remote Procedure Call (ONC RPC), originally developed by Sun Microsystems and commonly referred to as Sun RPC.
While both technologies share the same fundamental goal, allowing applications to invoke procedures on remote systems as if they were local function calls, they differ significantly in their implementation, interface definition, endpoint discovery, data representation, and authentication mechanisms.
In this article, we will build the Linux equivalent of our previous Windows example by developing a simple C++ ONC RPC client and server running on two separate Ubuntu virtual machines.
Along the way, we will explore the Linux RPC toolchain based on rpcgen, rpcbind, and libtirpc, before once again capturing and analyzing the complete communication with Wireshark.
Finally, we will compare the Linux ONC RPC architecture with Microsoft’s DCE/RPC to highlight both their similarities and their architectural differences.
In my previous article, we covered the theoretical foundations of RPC, including the different RPC implementations, common terminology and core architectural components.
Therefore, this article assumes that you are already familiar with these concepts. If not, I highly recommend reading this article first before continuing, which demonstrates Microsoft’s native DCE/RPC implementation on Windows, before continuing.
- Building the C++ Client/Server Application
- Implementing the RPC Server
- Implementing the RPC Client
- Building the Client and Server Applications
- Running the Demo Locally from Visual Studio Code
- Deploying the RPC Client and Server on Separate Virtual Machines
- Analyzing the Network Traffic with Wireshark
- Links
Building the C++ Client/Server Application
While the overall development workflow remains very similar to the Windows example, the underlying technologies are quite different.
Instead of MIDL, rpcrt4.dll, and the RPC Endpoint Mapper, we will use rpcgen, libtirpc, and rpcbind to build the Linux equivalent of our C++ RPC client and server before analyzing the resulting network traffic with Wireshark.
Throughout the following sections, we’ll use this application in a dedicated vSphere lab environment to capture and analyze the complete network communication with Wireshark, correlating each packet with the individual stages of the RPC communication process explained earlier.
To demonstrate the Linux implementation of Open Network Computing Remote Procedure Call (ONC RPC) rather than Microsoft’s DCE/RPC, we create a new C++ Console Application in Visual Studio Code on Ubuntu.
Since our client and server applications will run on Ubuntu, we switch from Microsoft Visual Studio to Visual Studio Code, one of the most widely used cross-platform development environments for Linux.
Combined with the GNU C++ compiler (
g++) and the Linux ONC RPC toolchain, Visual Studio Code provides a lightweight yet powerful environment for developing, building, and debugging native C++ applications.
Creating the Project Workspace
Before we start writing any code, we first create a dedicated project directory on an Ubuntu virtual machine in our vSphere lab.
This virtual machine will serve as our development environment throughout the article. Later, we will deploy the compiled client and server applications to separate Ubuntu virtual machines to demonstrate the RPC communication across the network.
The
-poption ensures that all missing parent directories are created automatically. The project directory will contain our interface definition, the C++ client and server source files, as well as all client and server stubs generated later byrpcgen.
# mkdir -p ~/development/rpc/RpcDemoLinux
# cd ~/development/rpc/RpcDemoLinux
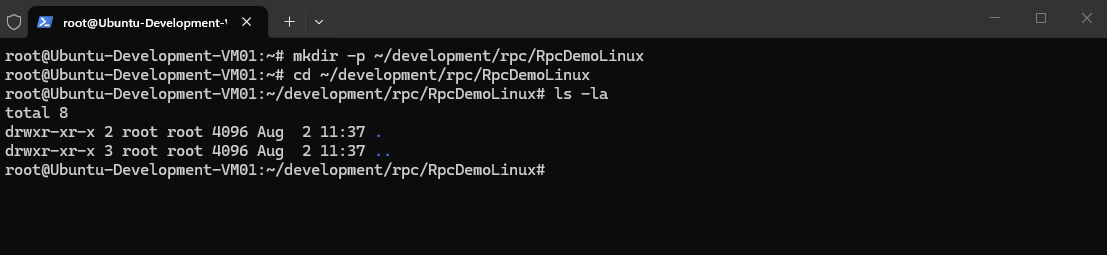
Connecting Visual Studio Code to the Ubuntu Development VM
Instead of storing the project locally on our Windows workstation, we use Visual Studio Code’s Remote – SSH extension to connect directly to the Ubuntu development virtual machine. This allows us to edit the source code, build the application with the native Linux toolchain, and debug it without leaving the familiar Visual Studio Code environment.
The project folder we created in the previous step will be opened directly from the remote Ubuntu system, ensuring that all source files, generated code, and compiled binaries remain on Linux throughout the development process.
Note: Although Visual Studio Code runs on the Windows workstation, the source files remain on the Ubuntu virtual machine.
The Remote – SSH extension installs a lightweight VS Code Server on the remote system, allowing us to edit, build, and debug the project as if Visual Studio Code were running locally on Ubuntu.
To install the Remote – SSH extension, click the Extensions icon in the Activity Bar, search for Remote – SSH, and click Install. The extension is published and maintained by Microsoft and provides seamless SSH connectivity to remote Linux systems directly from within Visual Studio Code.
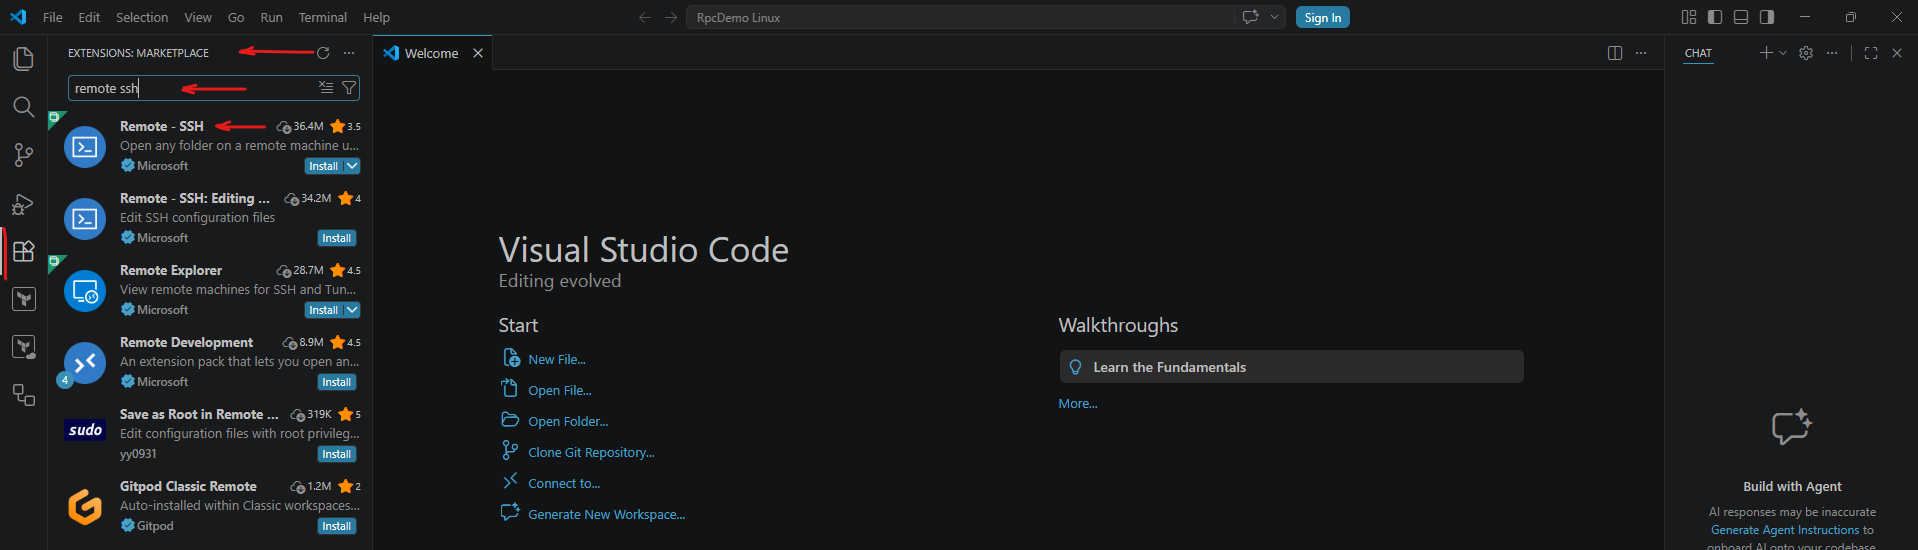
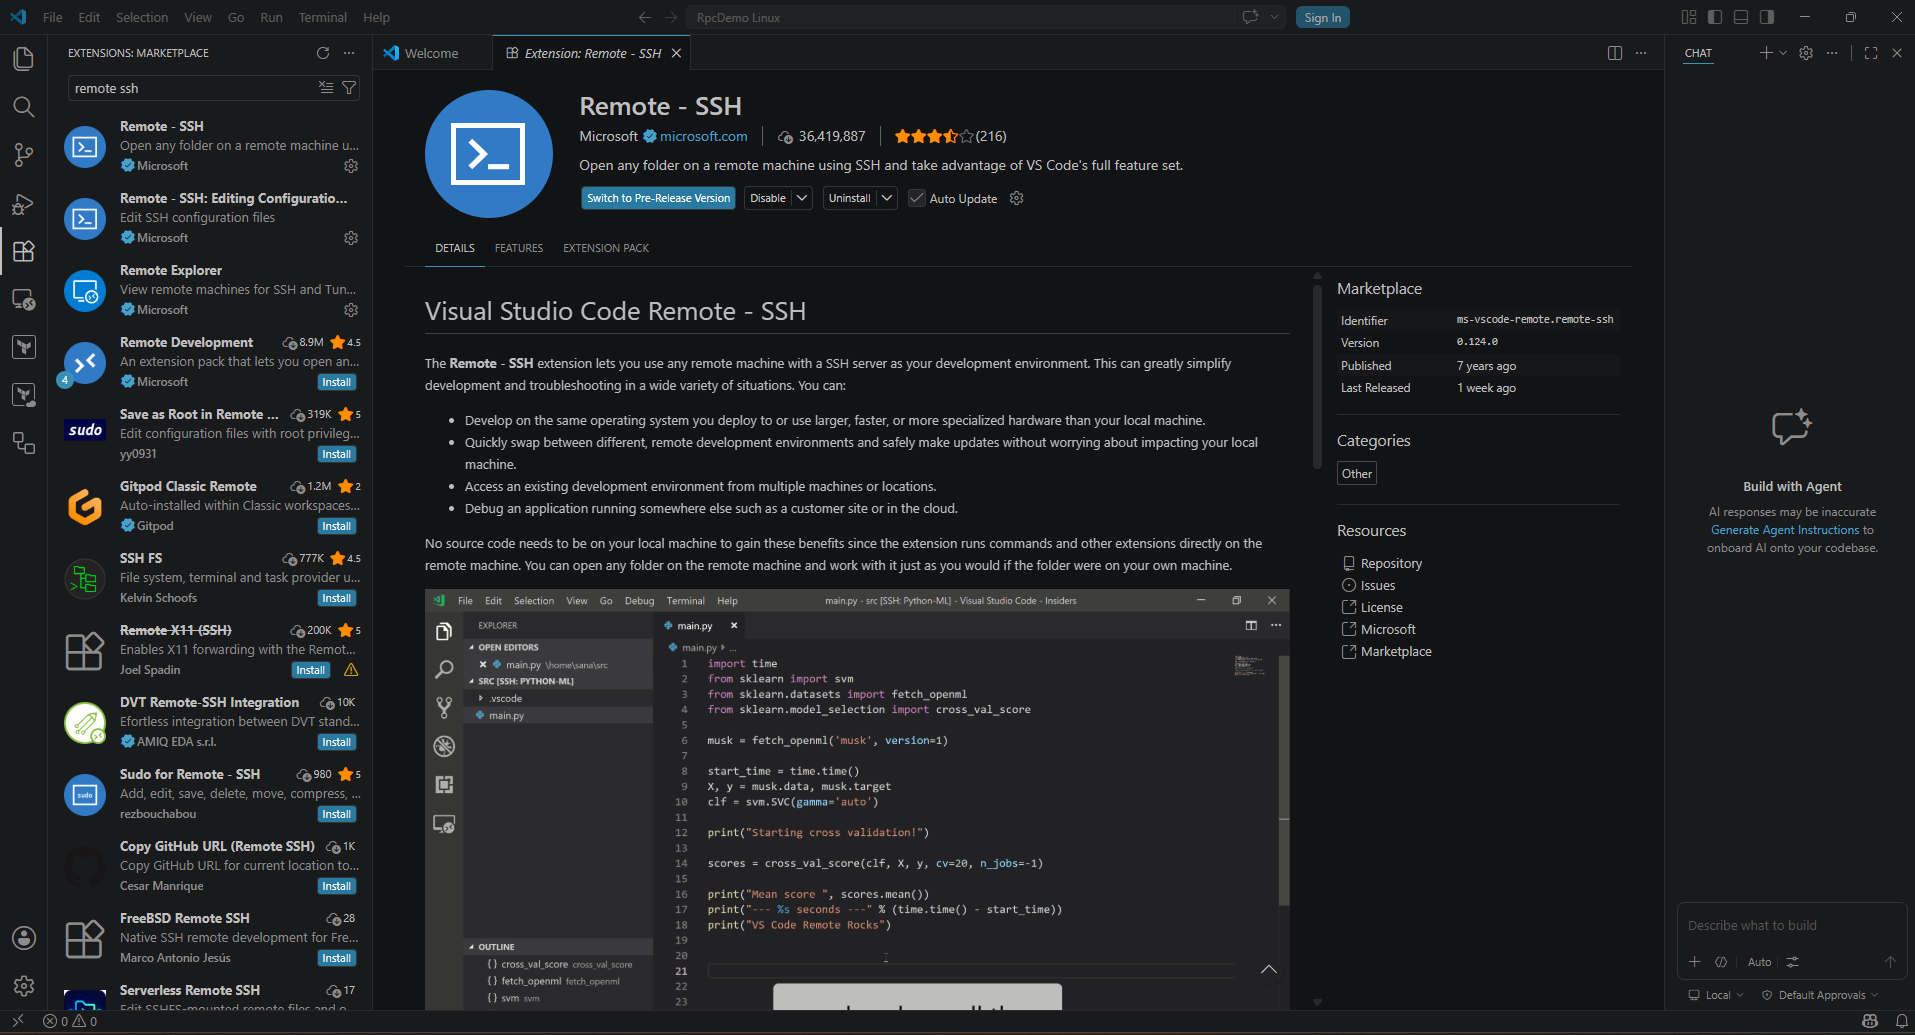
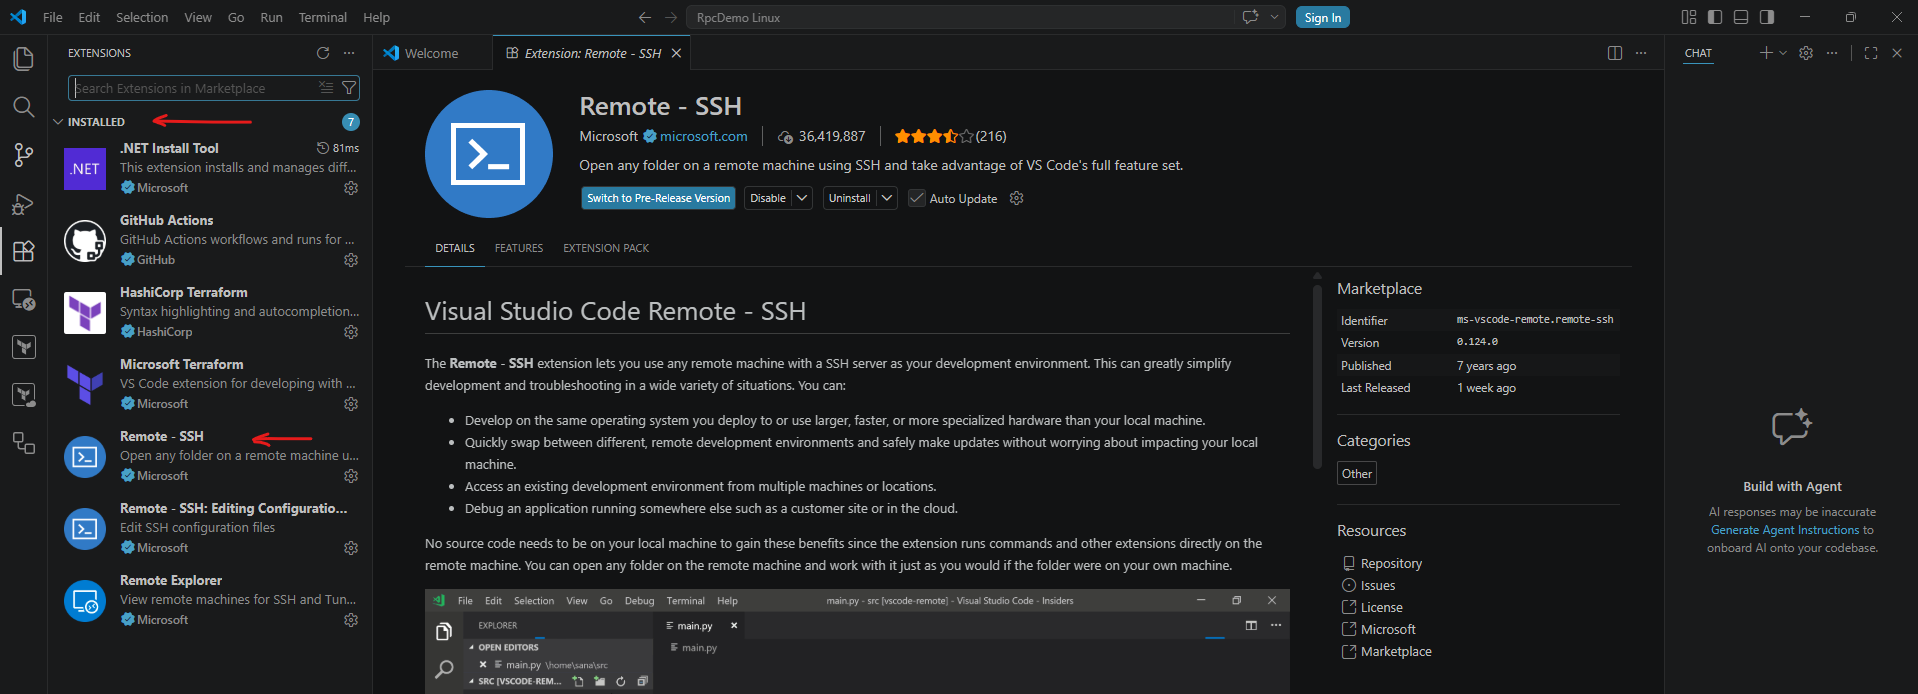
After the installation has completed, the Remote – SSH extension appears in the list of installed extensions. Selecting the extension displays additional information, including its version, documentation, and configuration options. Visual Studio Code is now ready to establish SSH connections to remote Linux systems.
We can now establish an SSH connection to our Ubuntu development virtual machine directly from within Visual Studio Code.
Once connected, Visual Studio Code automatically installs the required VS Code Server components on the remote system, allowing us to edit, build, and debug applications using the native Linux toolchain.
Press F1 (or Ctrl+Shift+P) to open the Command Palette.
Select Remote-SSH: Connect to Host….
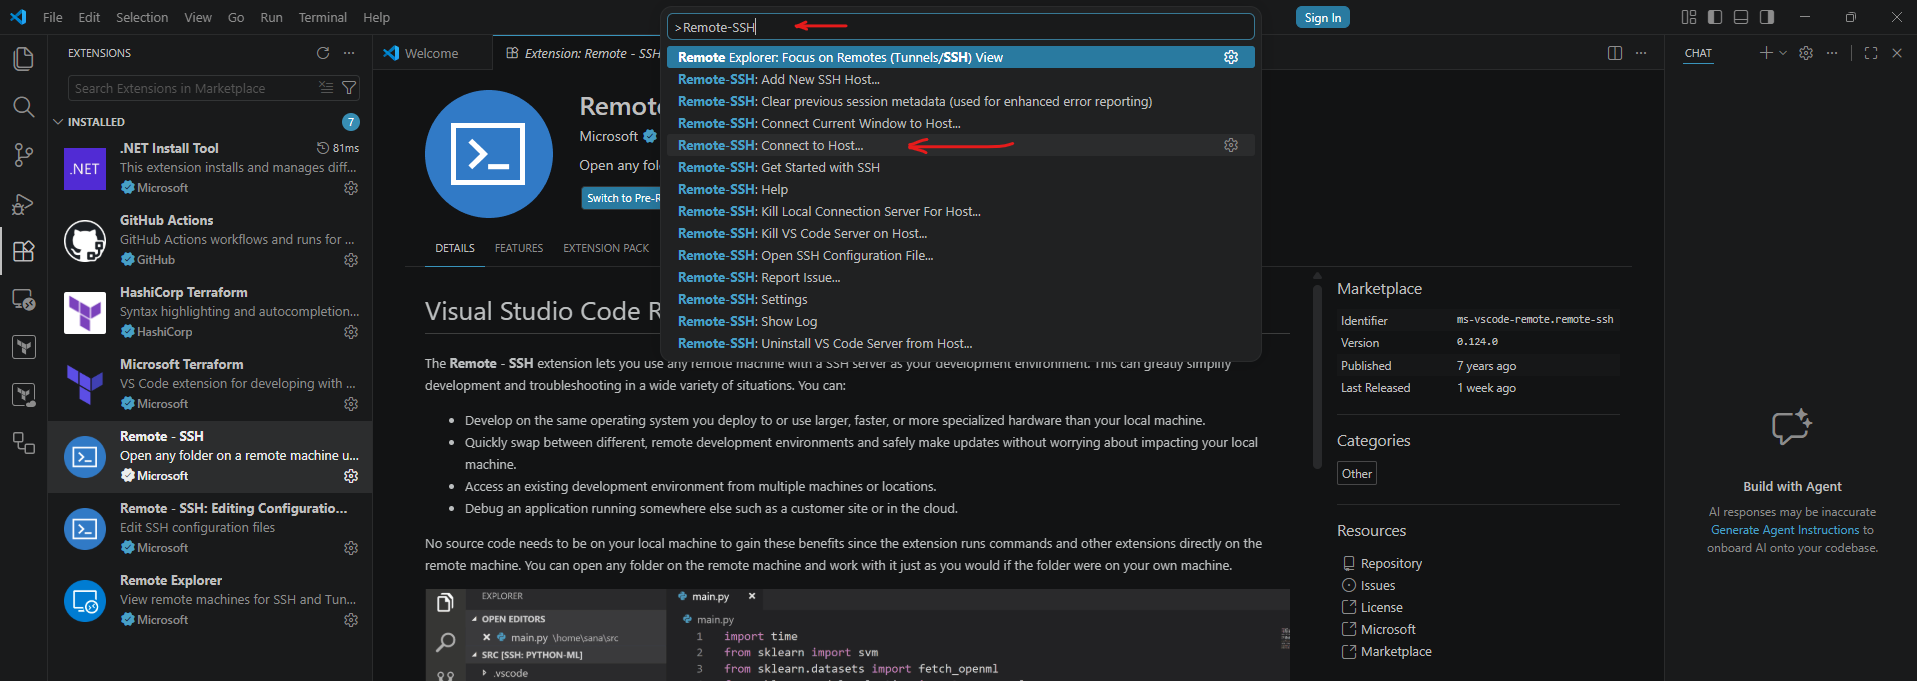
If this is the first connection, choose Add New SSH Host….

Enter the SSH connection string and press Enter, in my case:
ssh root@10.0.0.95
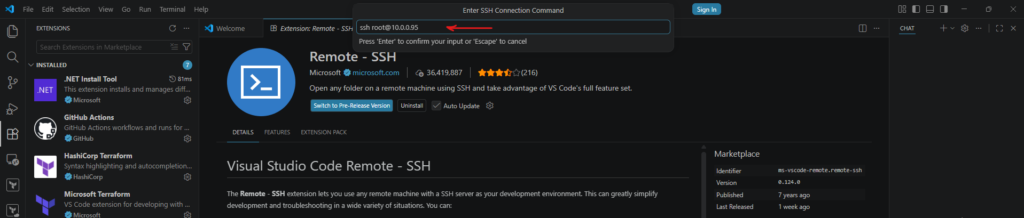
Select your SSH configuration file (usually C:\Users\<username>\.ssh\config).

After adding the SSH host, press F1 (or Ctrl+Shift+P) again and select Remote-SSH: Connect to Host….
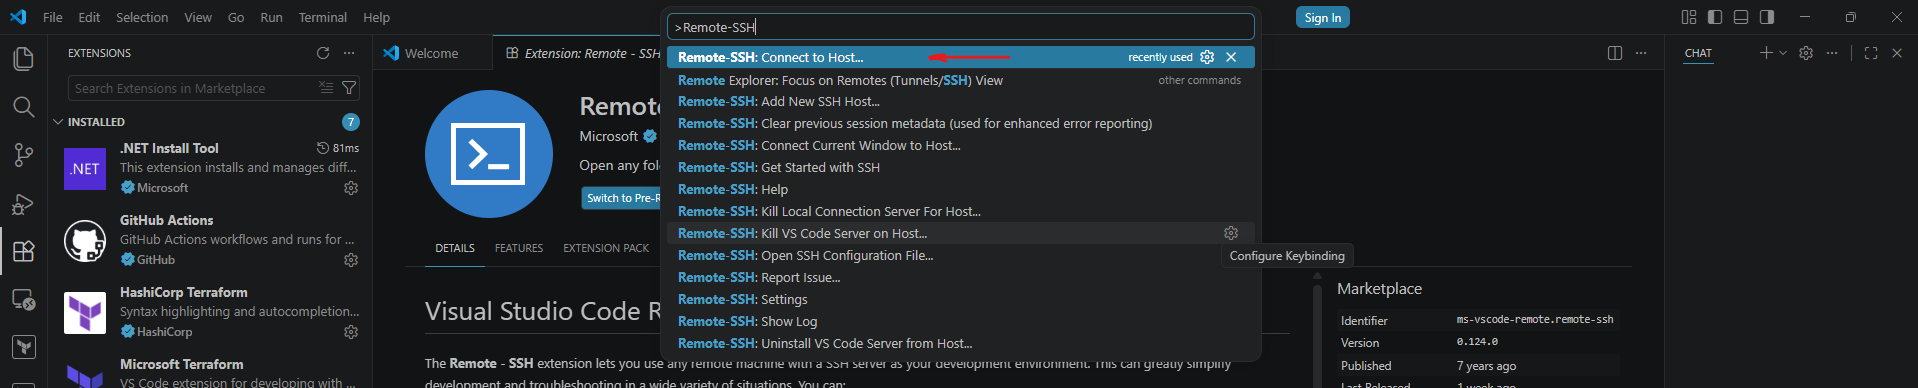
Visual Studio Code displays all configured SSH hosts. Select the newly added Ubuntu virtual machine.

Choose the target platform (Linux) if prompted, and authenticate using your SSH password or private key.
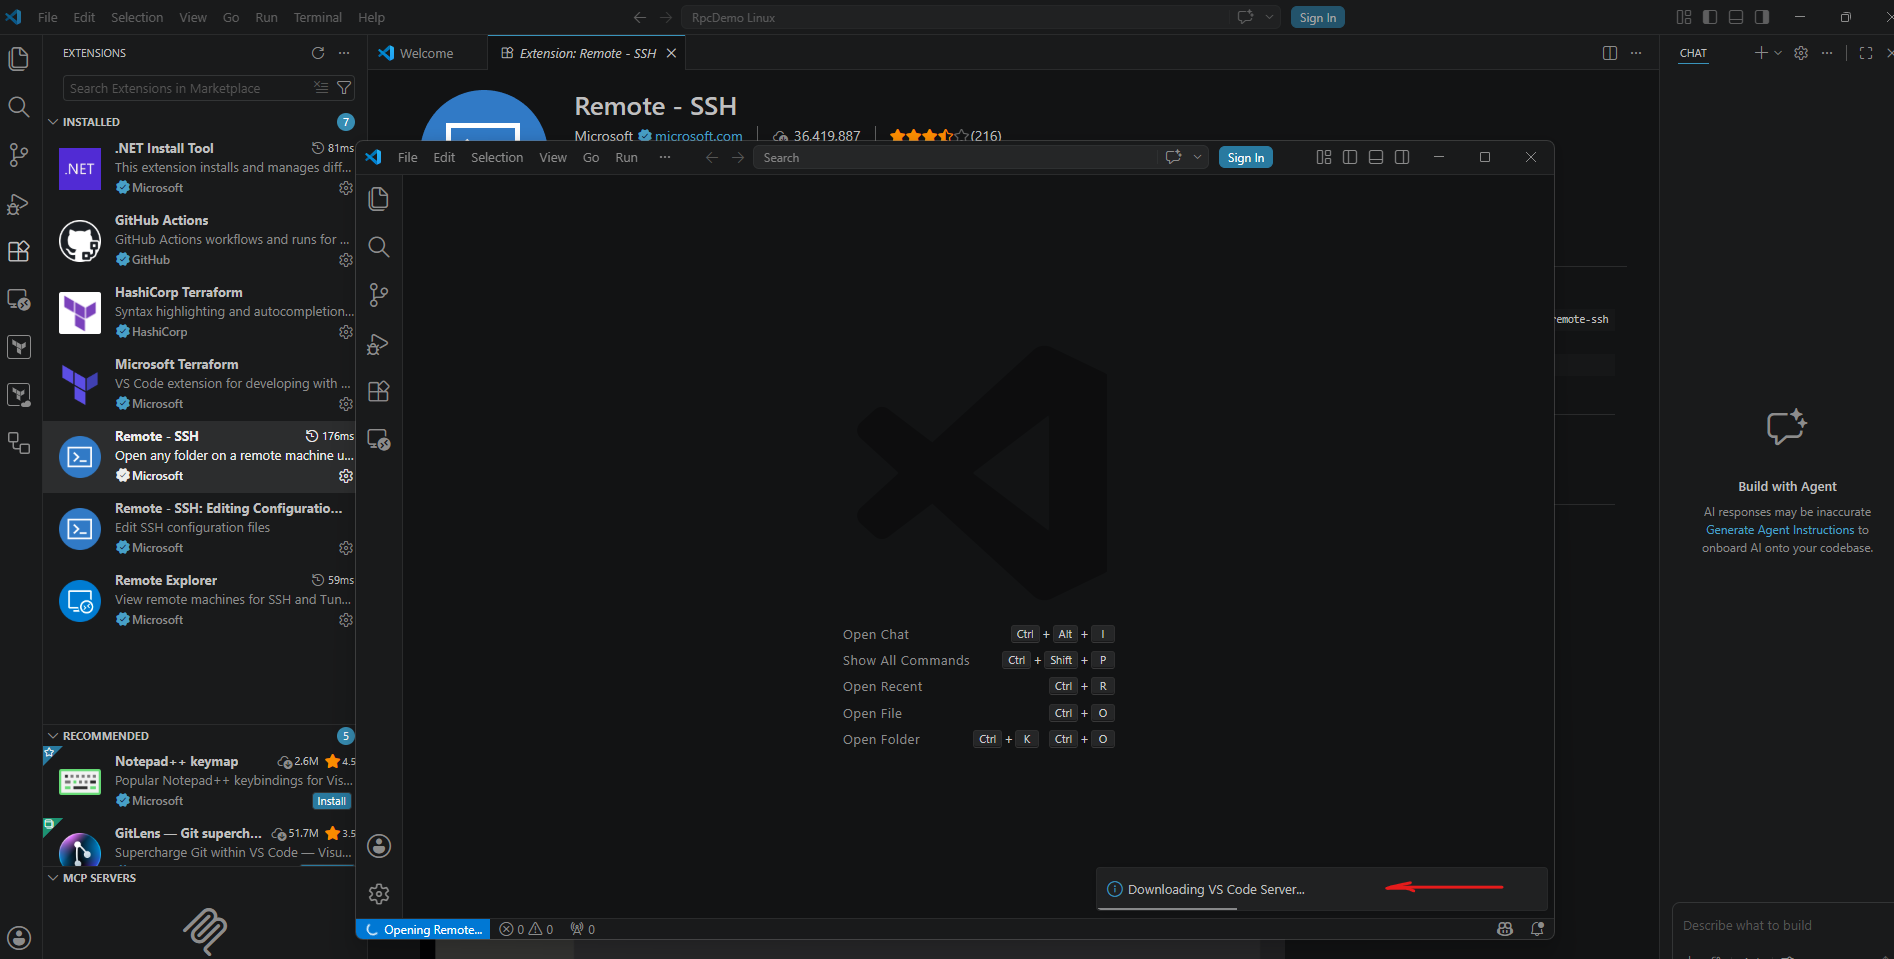
On the first connection, Visual Studio Code automatically installs the required VS Code Server components on the remote system.
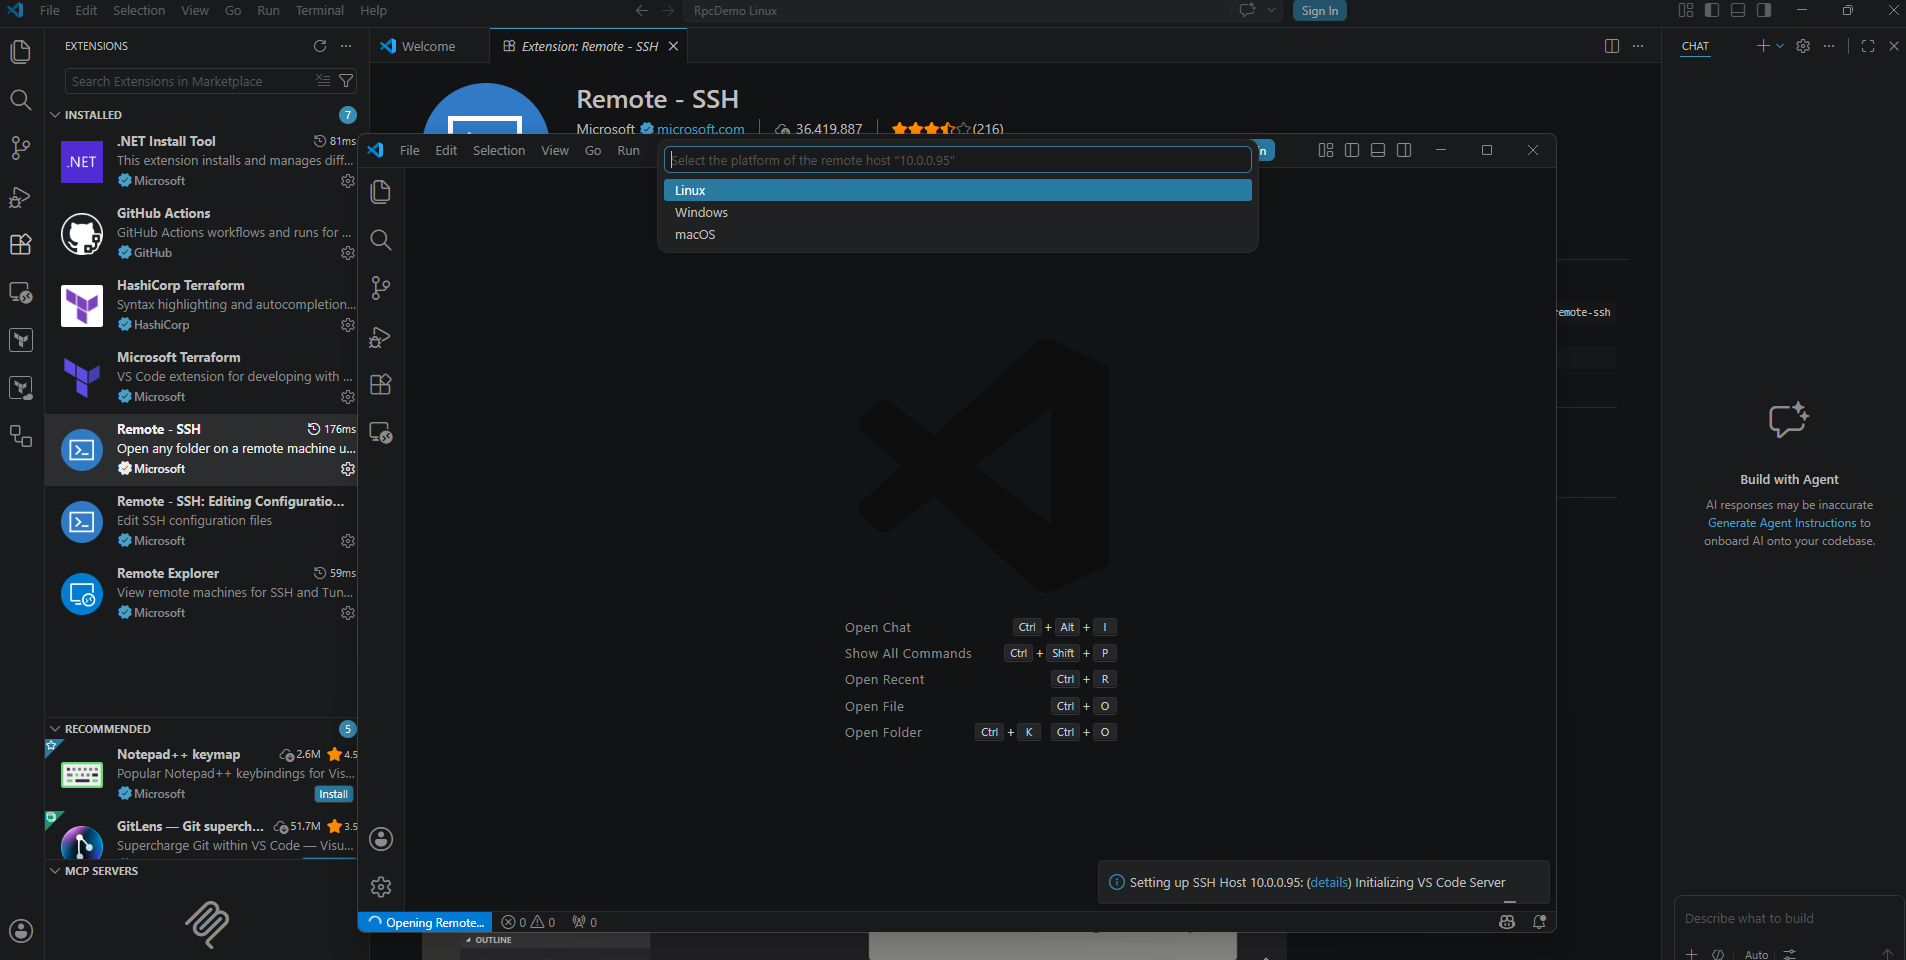
Enter password for root@10.0.0.95 and press Enter.
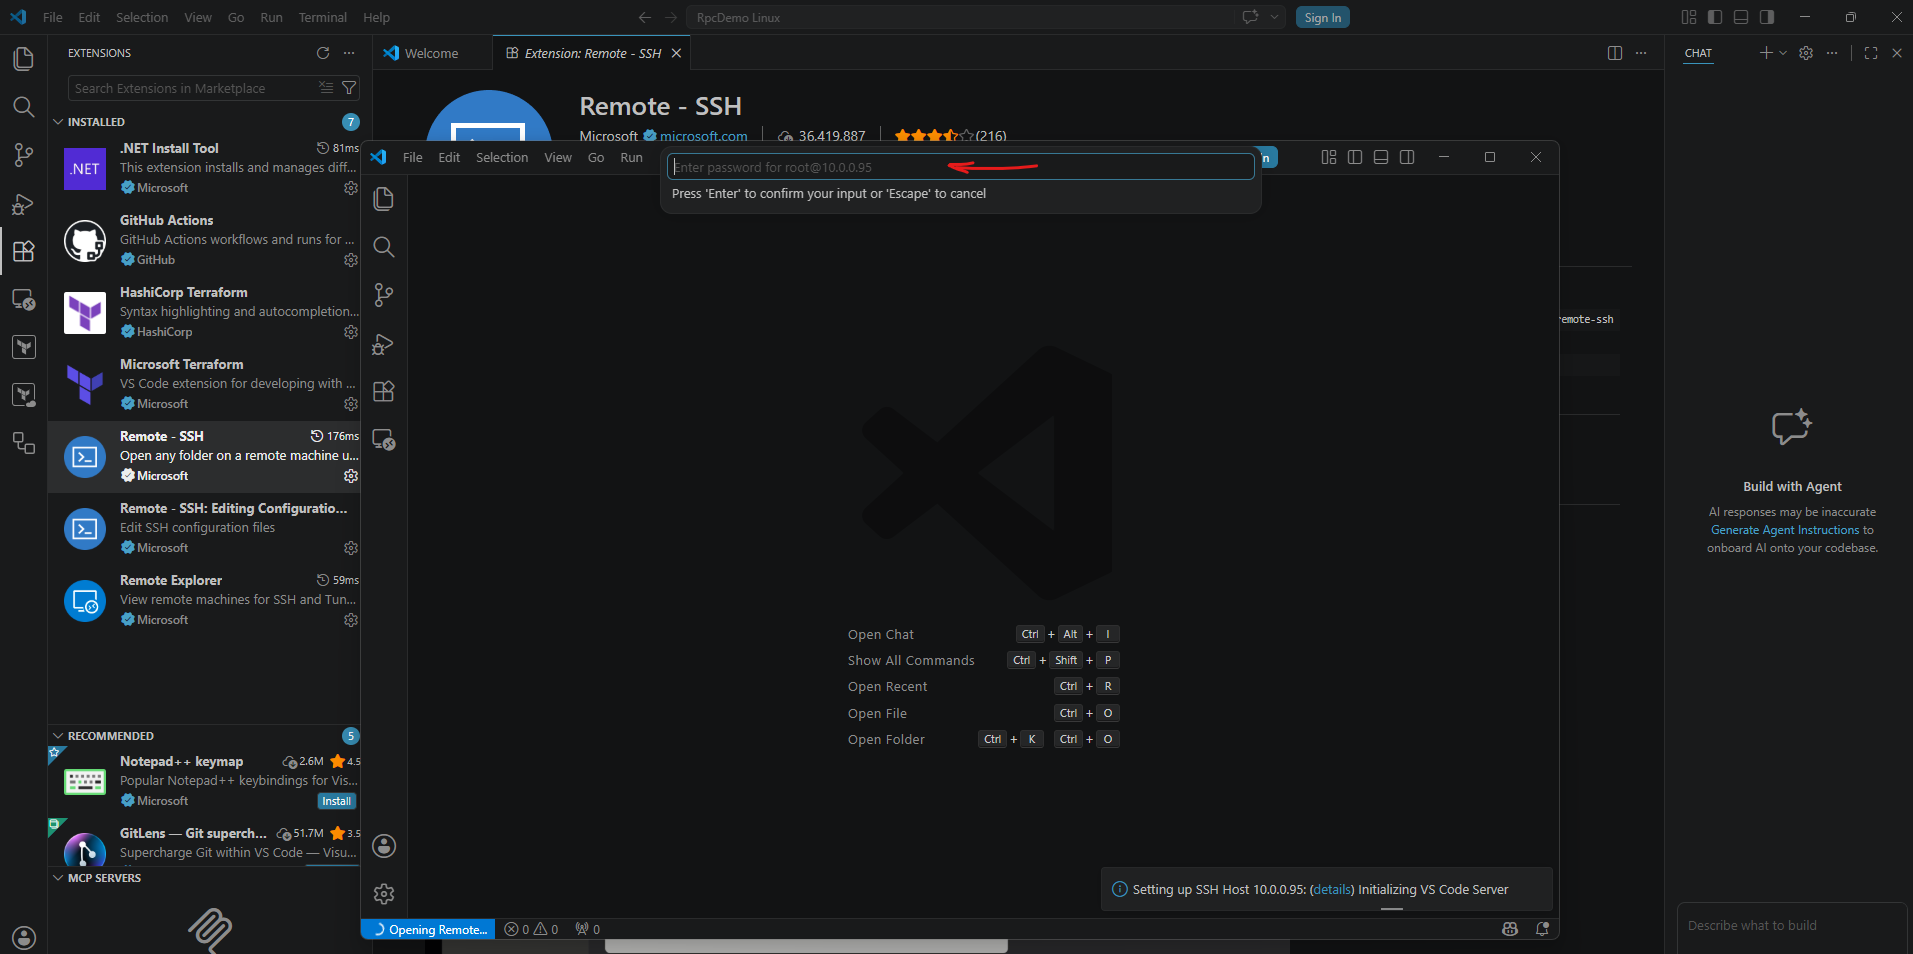
VS Code Server components on the remote system is downloaded and installed.
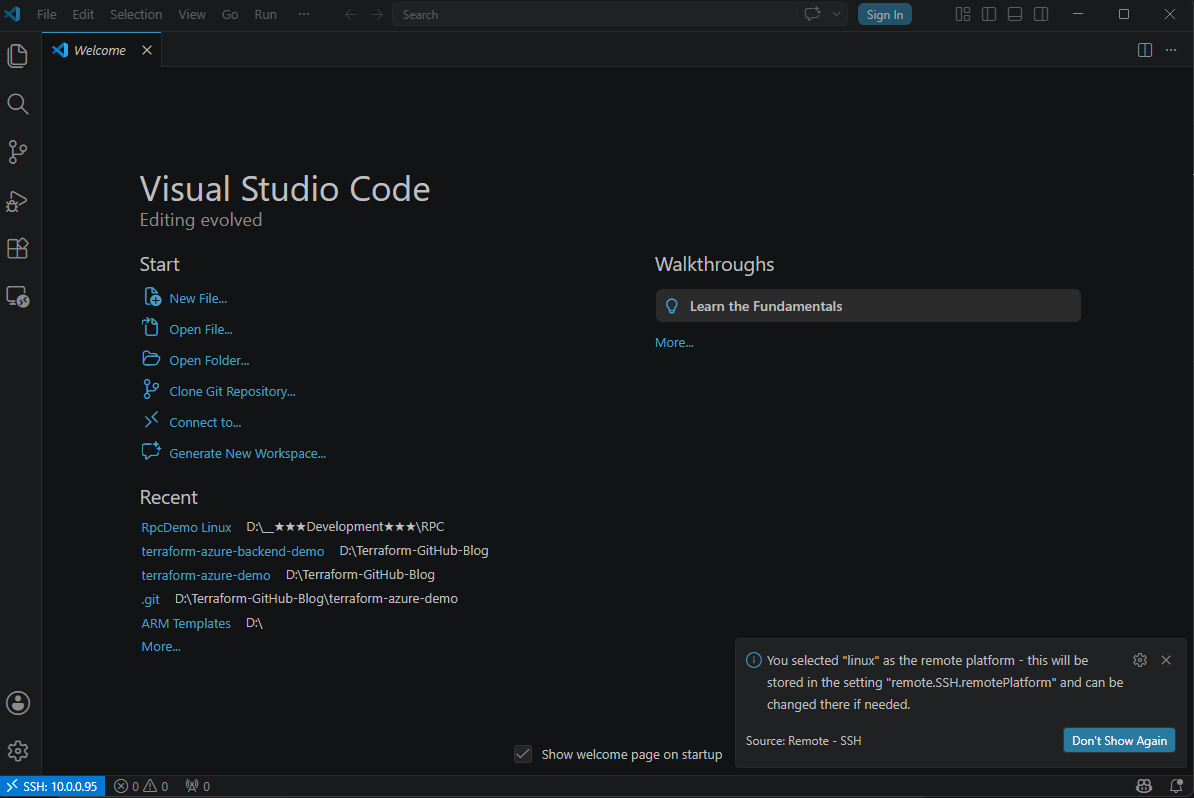
After selecting the Ubuntu virtual machine and completing the authentication, Visual Studio Code establishes the SSH connection and automatically opens a new remote session.
The status bar in the lower-left corner displays the connected SSH host, confirming that all subsequent operations are executed directly on the remote Ubuntu system rather than on the local Windows workstation.
n our example, the status bar shows SSH: 10.0.0.95, indicating that Visual Studio Code is now connected to our Ubuntu development virtual machine.
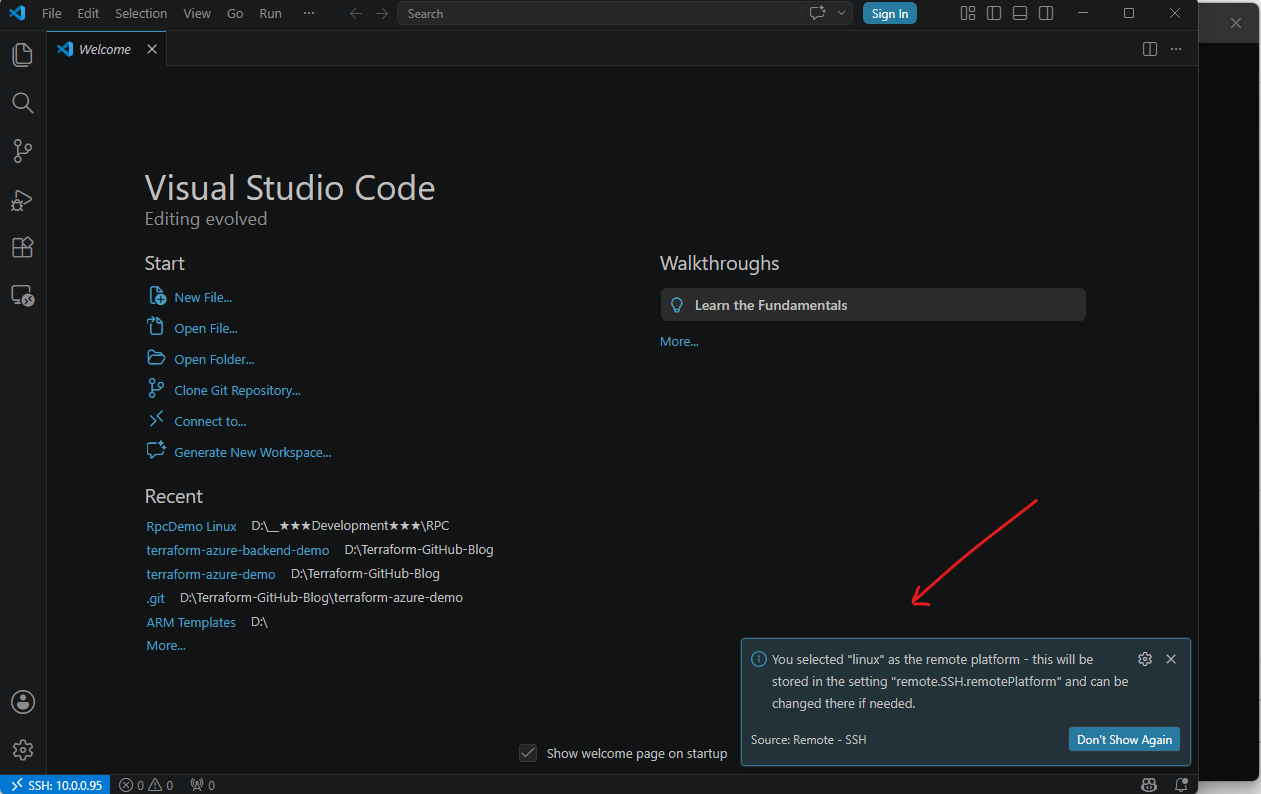
During the first connection, Visual Studio Code prompts us to confirm the remote platform. Selecting Linux stores this preference in the
remote.SSH.remotePlatformsetting, allowing Visual Studio Code to automatically recognize the operating system for future connections to the same host.
Opening the Project Directory
Once the SSH connection has been established, we open the project directory created earlier on the Ubuntu virtual machine.
From this point forward, all source files, generated code, and compiled binaries remain on the remote Linux system.
File → Open Folder…
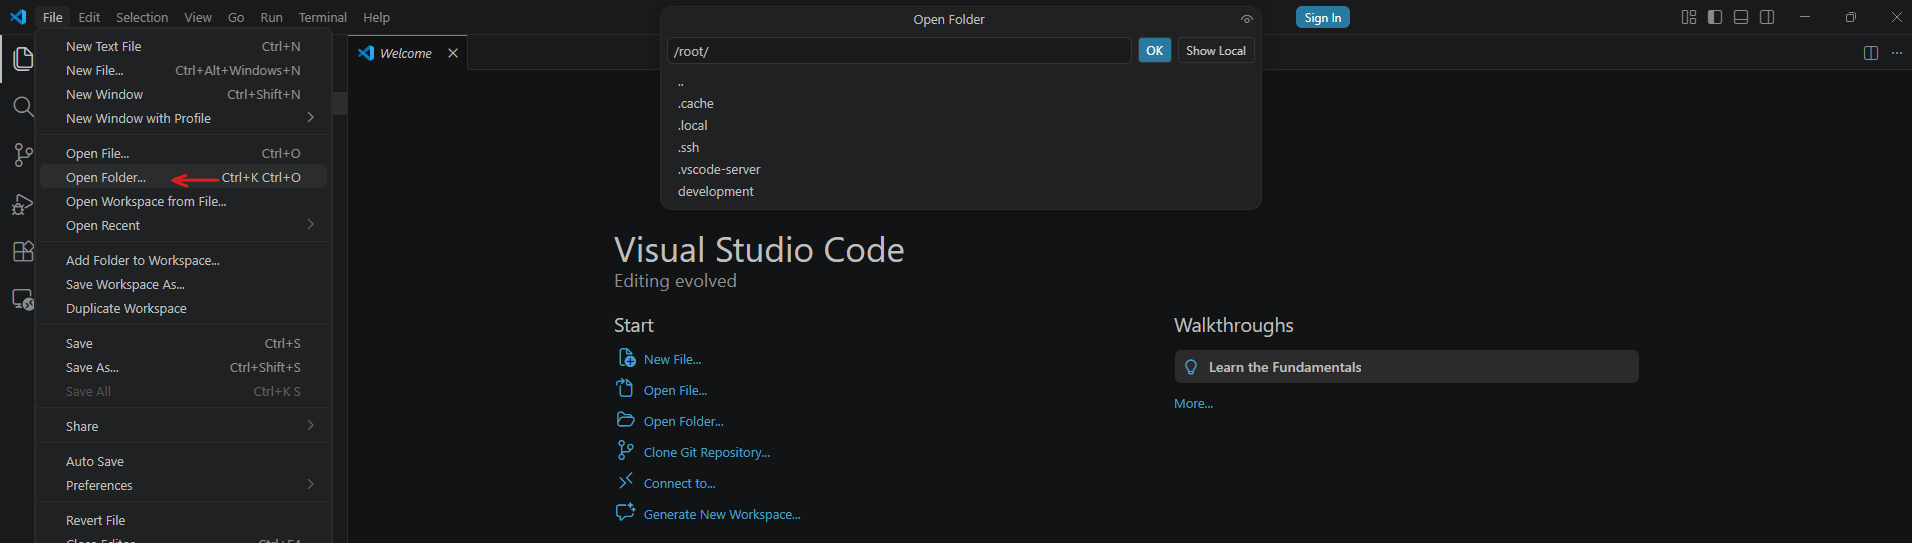
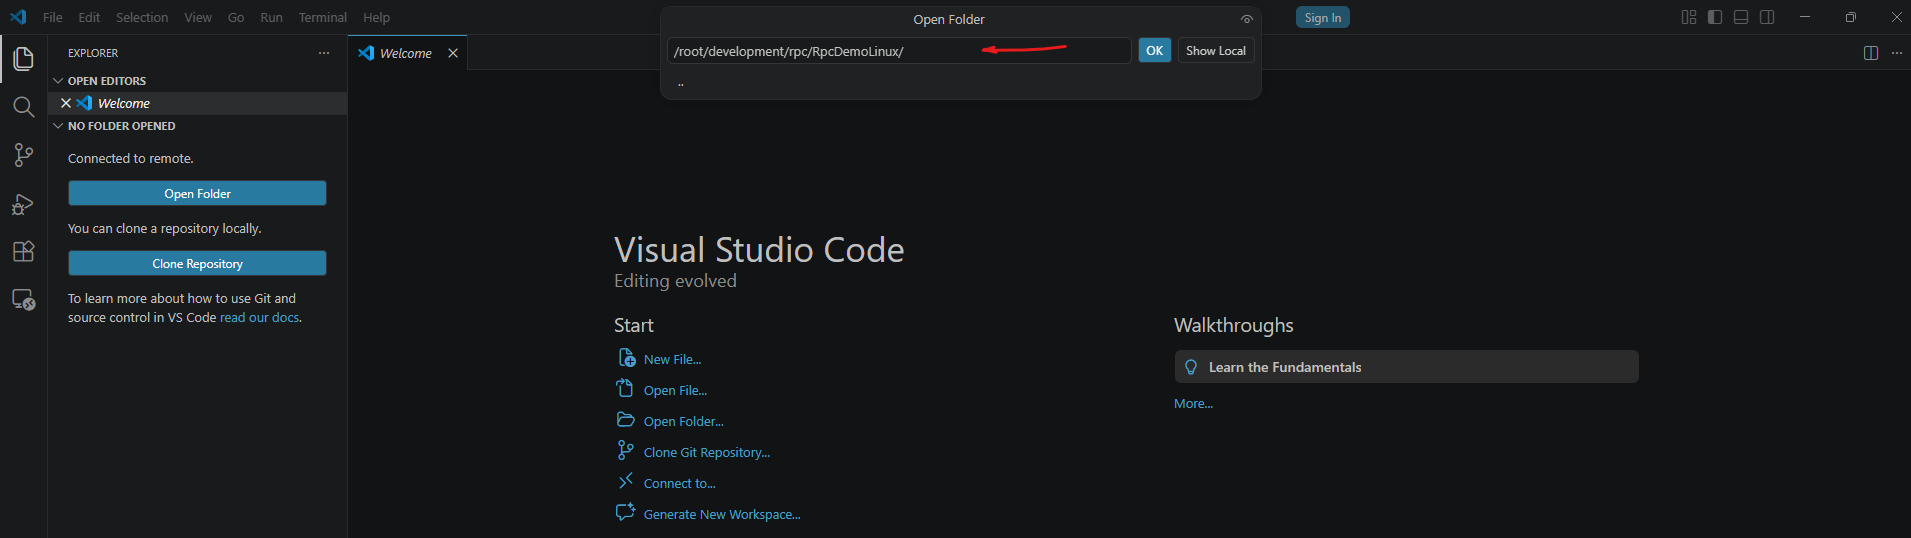
Browse to:
/root/development/rpc/RpcDemoLinux/
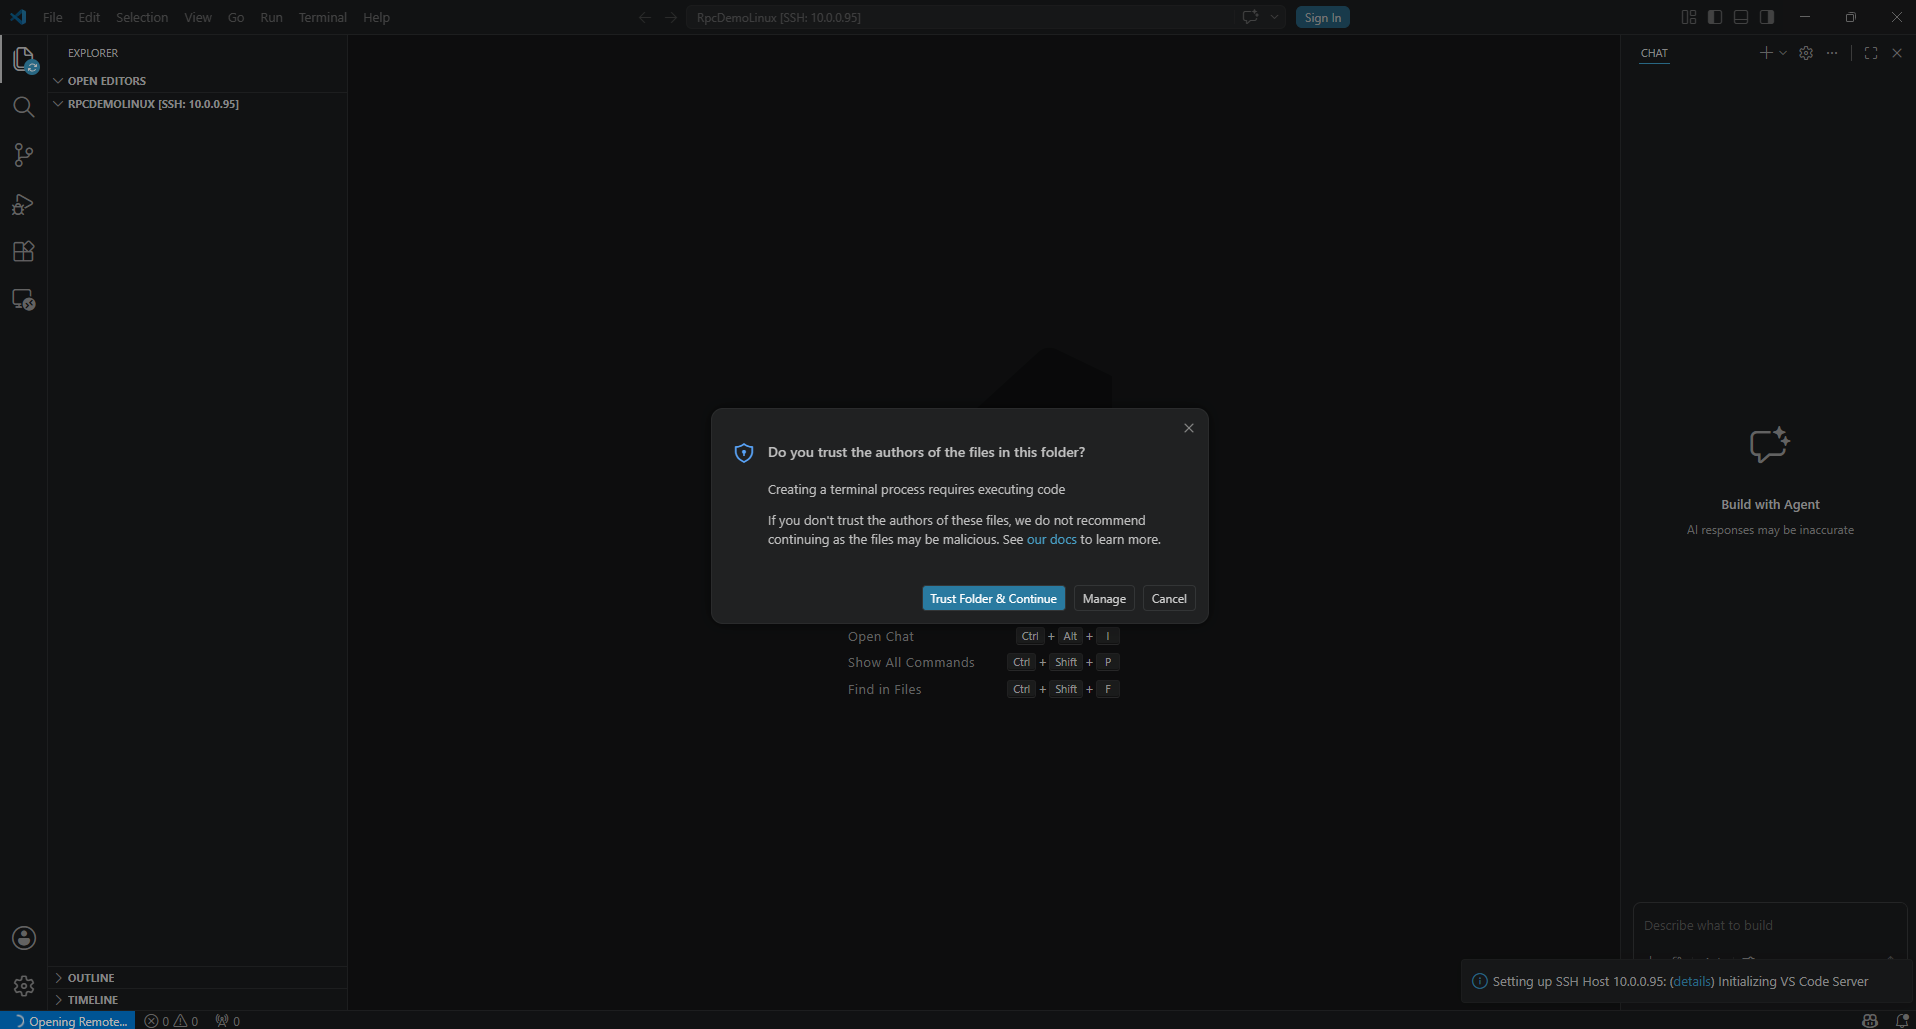
When opening the project directory for the first time, Visual Studio Code asks whether we trust the authors of the files contained in the folder.
Since we created the project directory ourselves, we can safely select Trust Folder & Continue. This enables all Visual Studio Code features, including the integrated terminal, code execution, extensions, and debugging capabilities within the trusted workspace.
During the initial connection, Visual Studio Code automatically installs the required VS Code Server components on the remote Ubuntu virtual machine. Depending on the system and network connection, this process may take a few moments. Once the installation has completed, the remote development environment is ready for use and subsequent connections are established much faster.
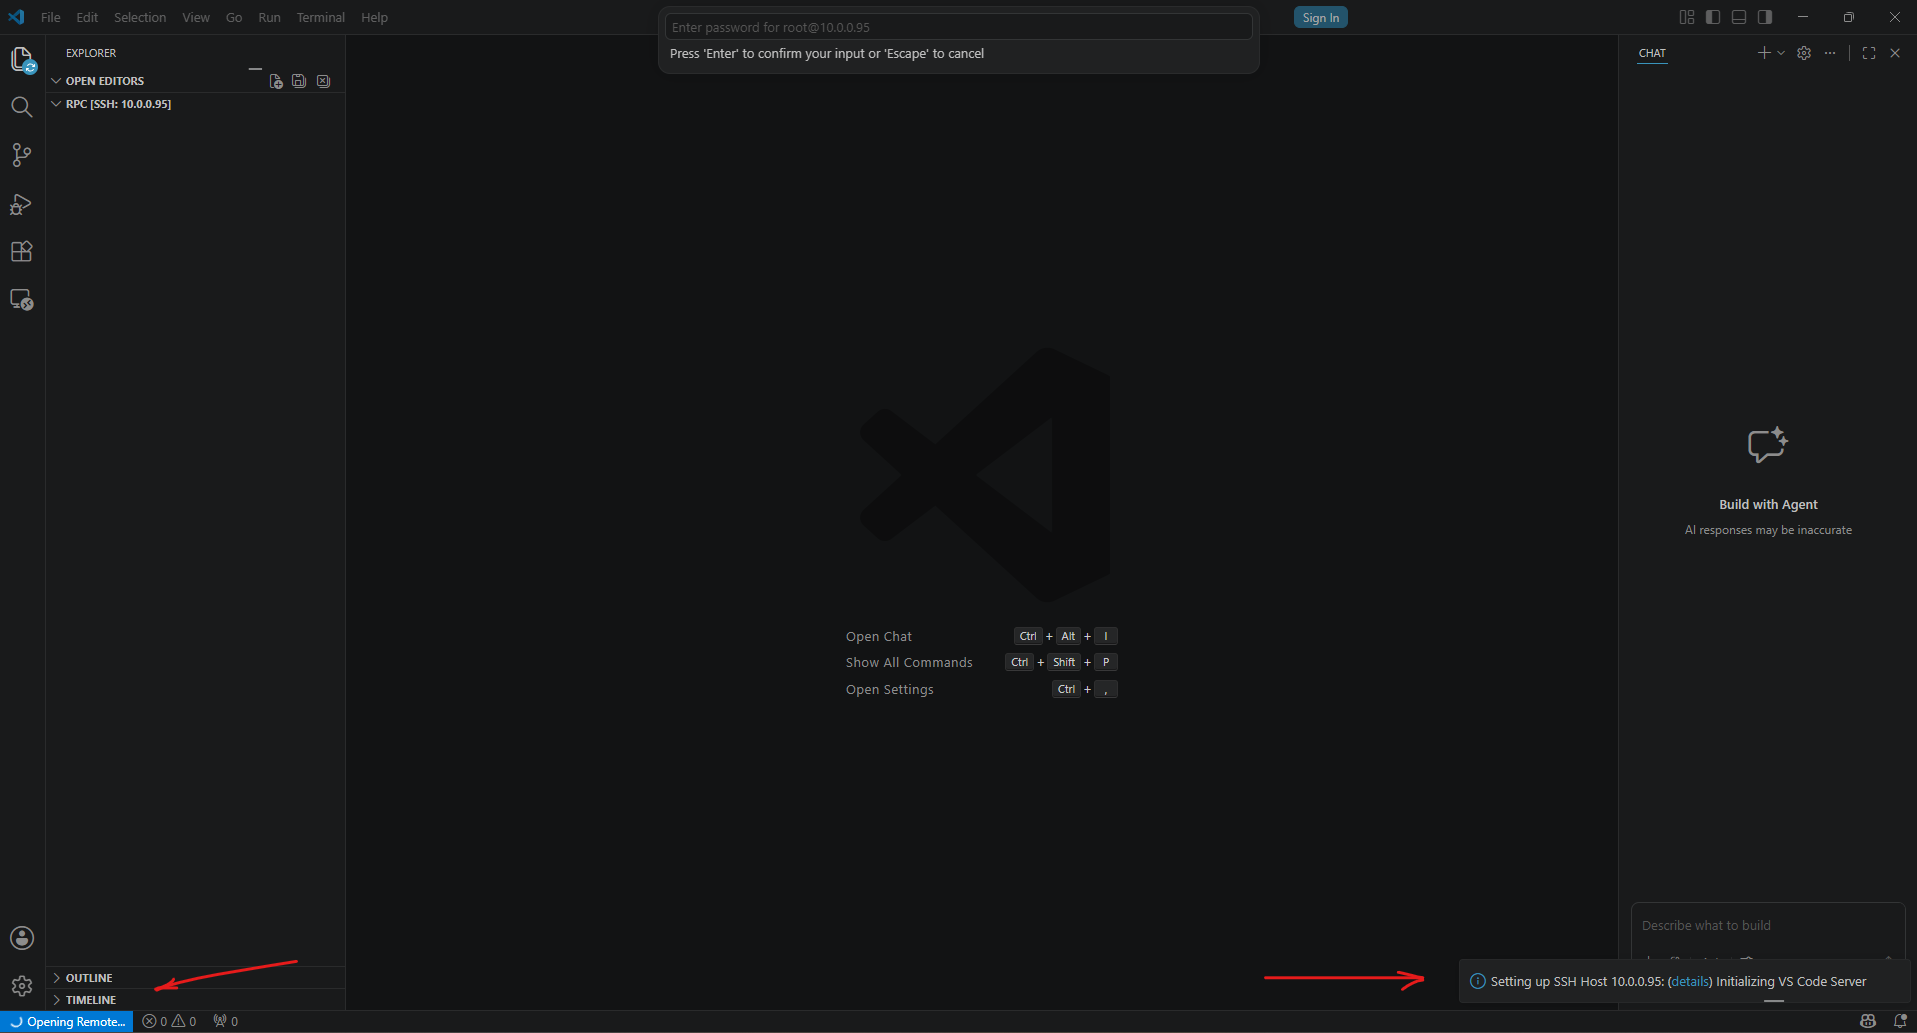
By clicking details in the notification, we can monitor the progress of the connection process in the integrated terminal. If password-based SSH authentication is used, Visual Studio Code prompts us to enter the SSH password once more before establishing the connection and starting the remote VS Code Server.
The terminal then displays the individual steps performed during the initialization process, making it easy to verify that the remote development environment has been set up successfully.
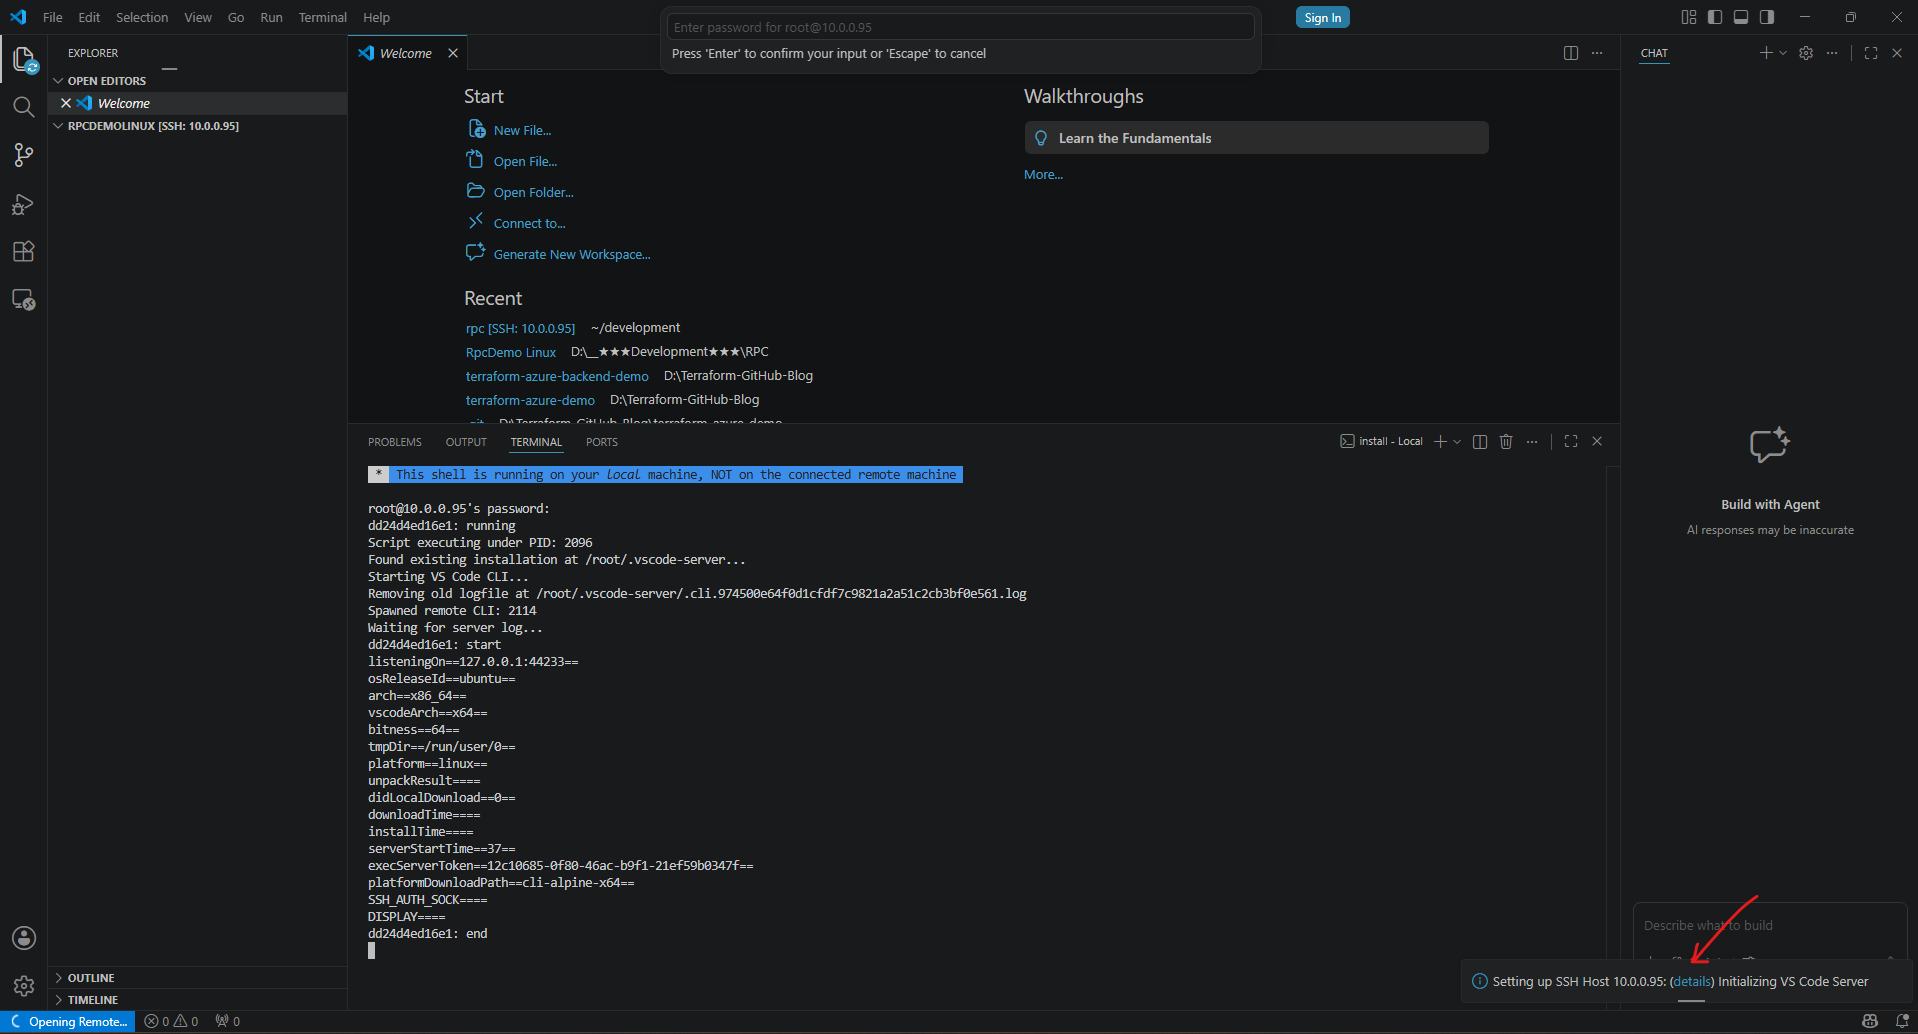
Note: During the initial connection, the SSH password prompt appears in the command input bar at the top of the Visual Studio Code window, rather than in a separate dialog or terminal. After entering the password and pressing Enter, Visual Studio Code completes the connection and opens the remote project folder.
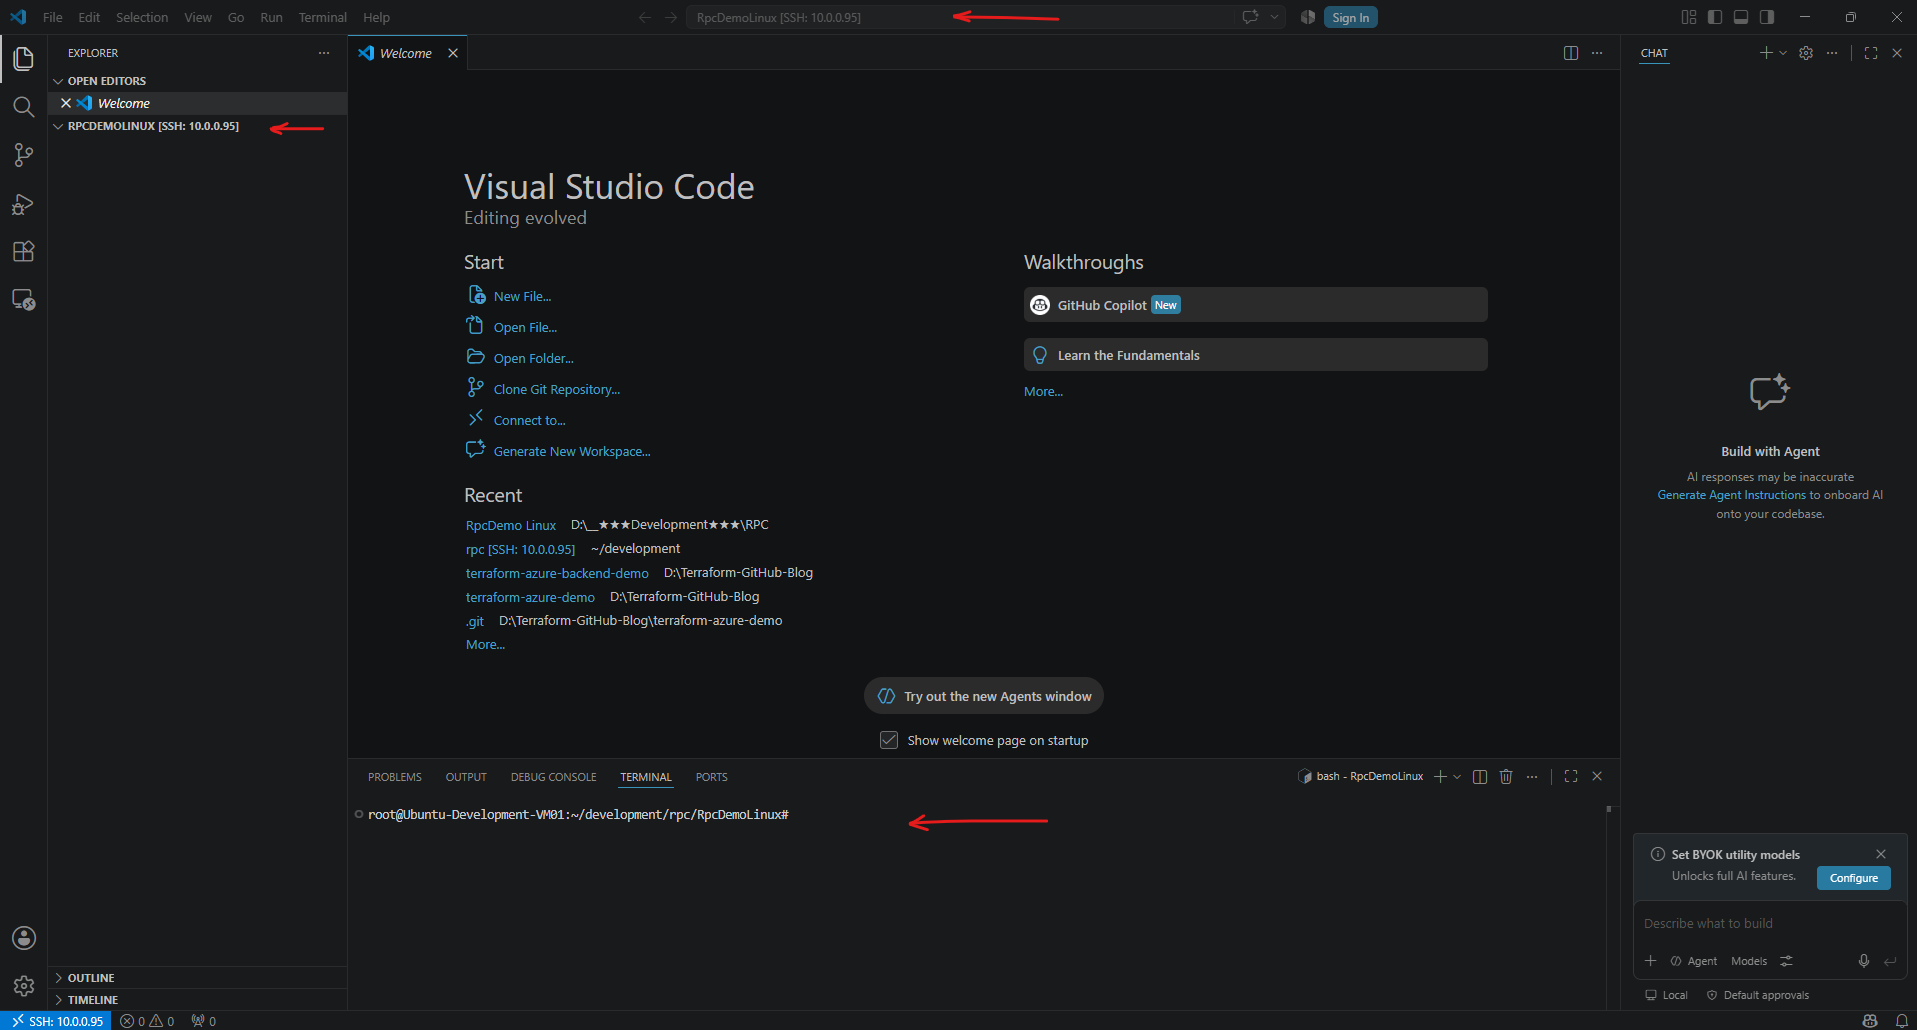
Installing the Required Development Tools
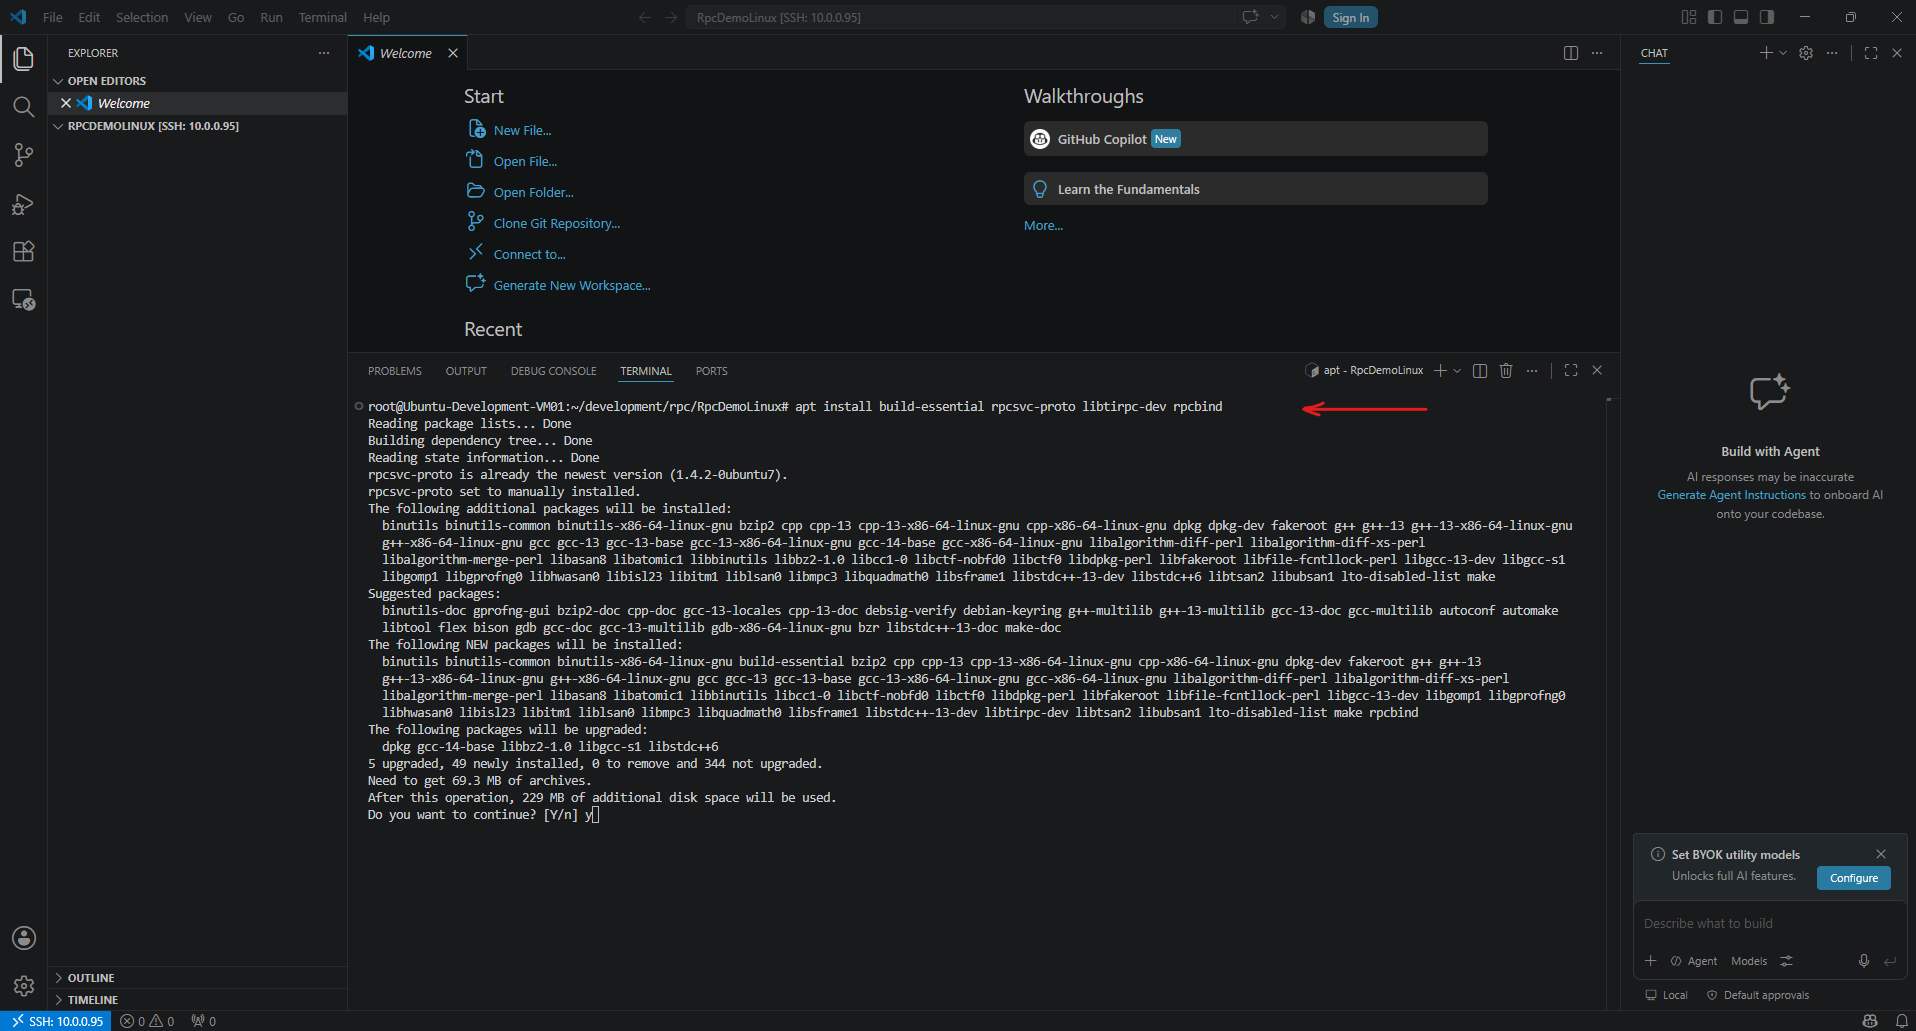
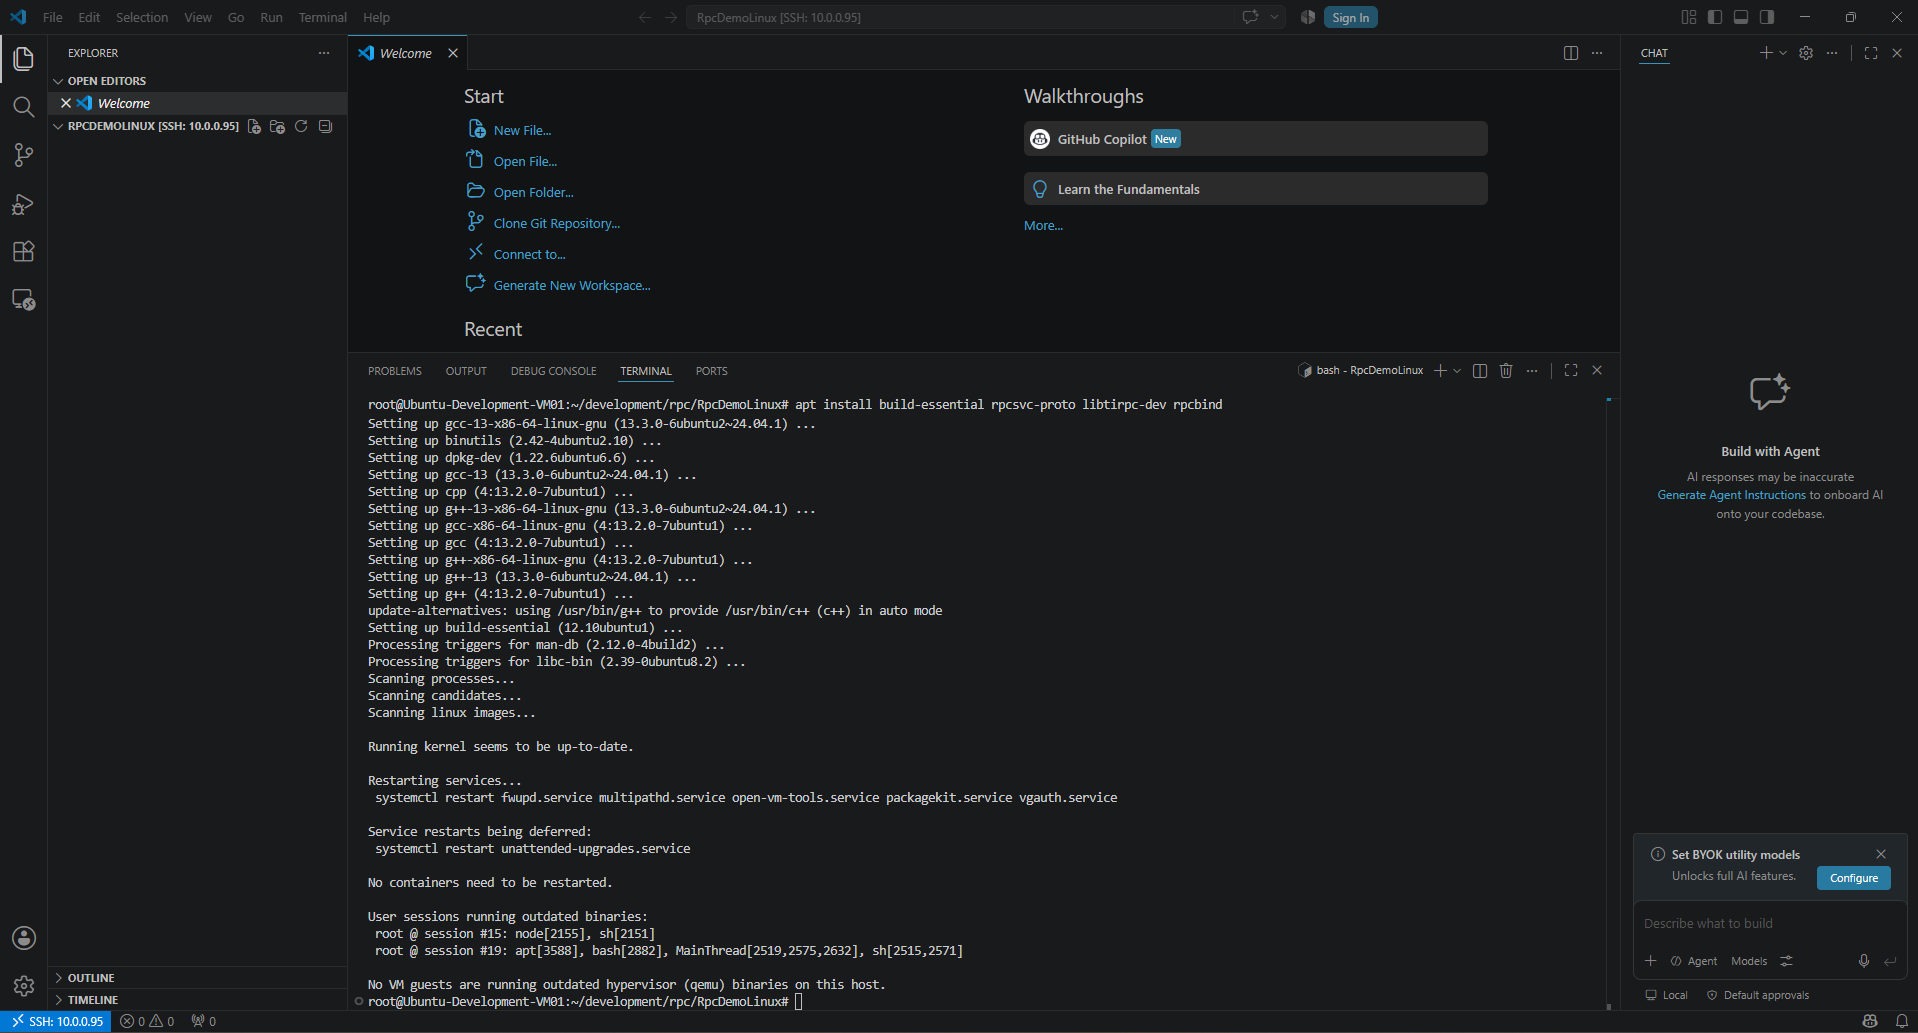
Before we can start implementing our ONC RPC client and server applications, we need to install the required development tools and libraries on the Ubuntu development virtual machine. Besides the GNU C++ compiler, ONC RPC relies on the rpcgen code generator and the libtirpc library, which provides the Transport Independent RPC implementation used by modern Linux distributions.
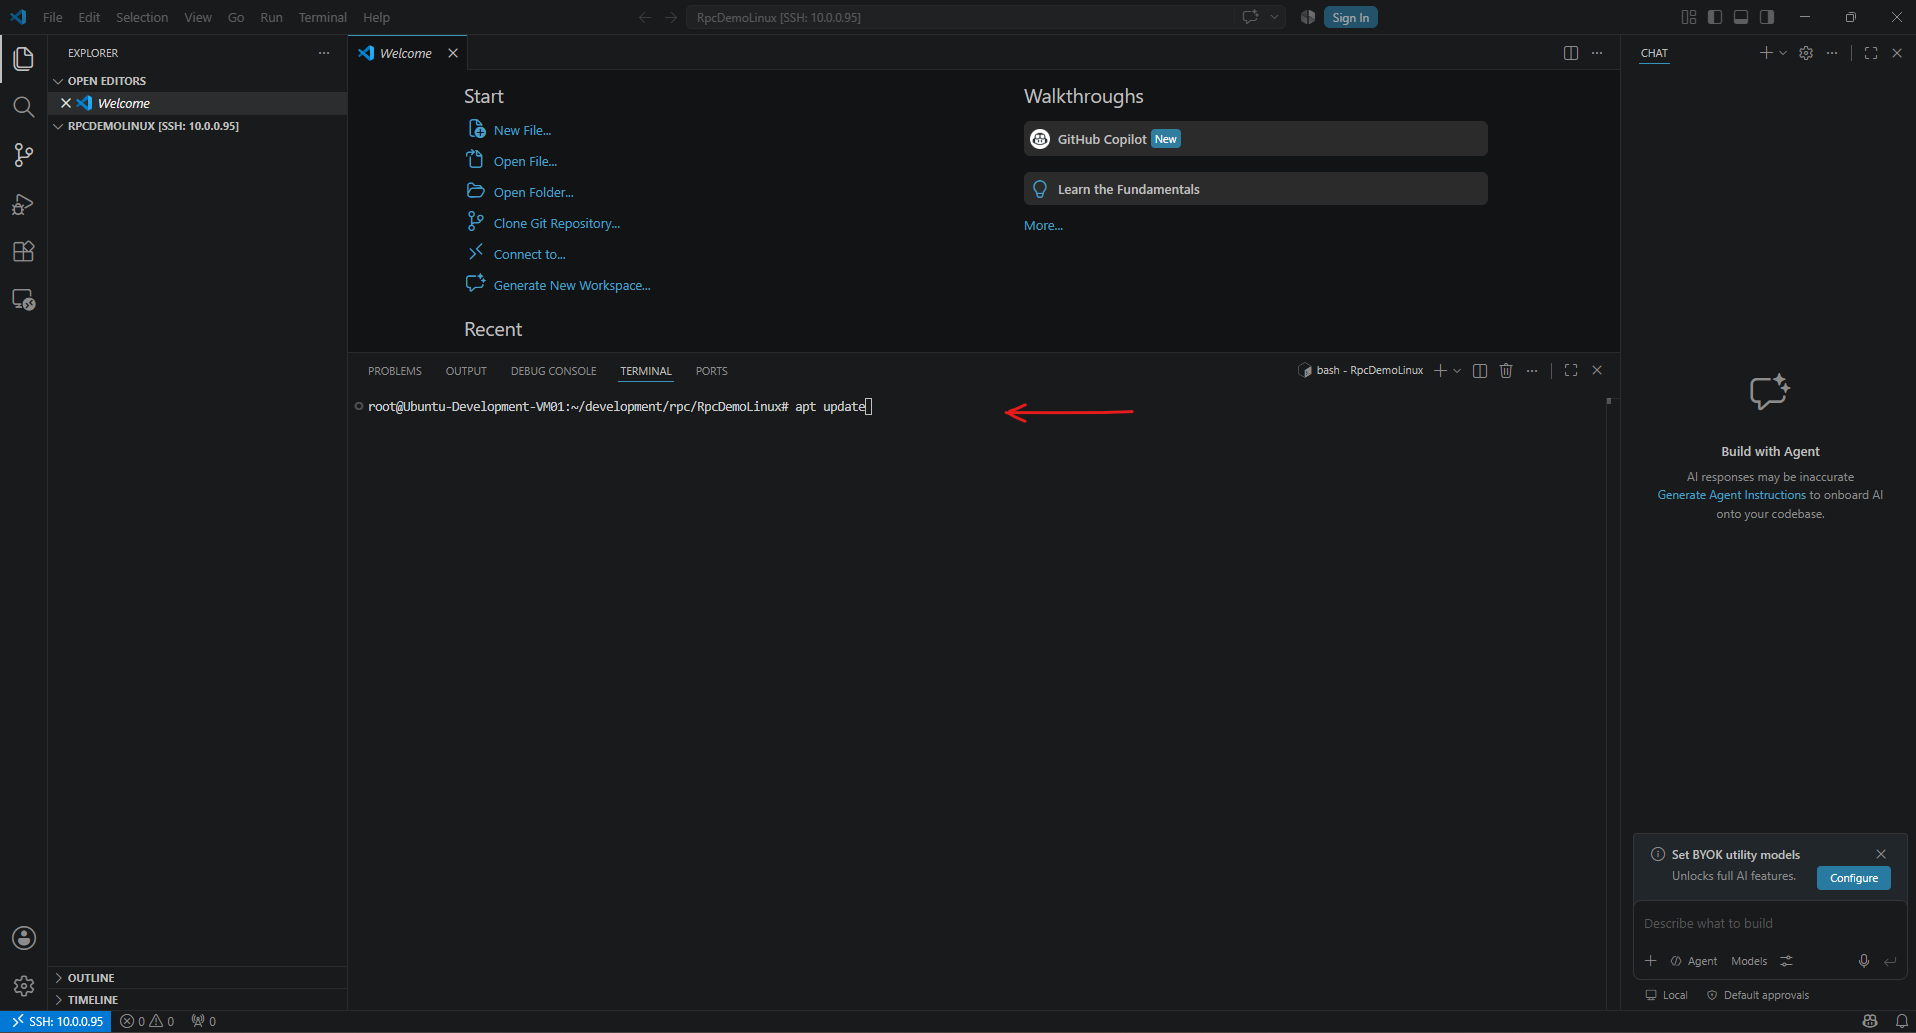
With the SSH connection established and the project directory opened, the integrated Visual Studio Code terminal now provides direct access to the remote Ubuntu virtual machine.
We can therefore perform all remaining tasks, including installing packages, editing source files, compiling the application, and debugging, directly from within Visual Studio Code without leaving the development environment.
# apt update
# apt install build-essential rpcsvc-proto libtirpc-dev rpcbind
Creating the ONC RPC Interface Definition
Similar to the Interface Definition Language (IDL) used by Microsoft’s DCE/RPC, ONC RPC uses an interface definition file with the .x extension. This file describes the remote procedures, their parameters, return values, and the program and version numbers.
The interface definition serves as the contract between the client and server and is later processed by the rpcgen utility to generate the required client and server stubs automatically.
Click the New File icon (the document with the +) next to RPCDEMOLINUX [SSH: 10.0.0.95] in the Explorer and create a rpcdemo.x file, our interface definition file.


Although both Microsoft DCE/RPC and Linux ONC RPC implement the same fundamental concept of invoking procedures on remote systems, they use different terminology and development toolchains.
The following table compares the most important components and highlights the corresponding equivalents in both implementations.
| Windows DCE/RPC | Linux ONC RPC |
|---|---|
.idl | .x |
| MIDL compiler | rpcgen |
| Client/Server stubs | Generated by rpcgen |
| UUID | Program Number |
| Endpoint Mapper | rpcbind |
Copy the following content into our new rpcdemo.x file and save it:
/*
 * rpcdemo.x
 * Simple ONC RPC demonstration
 */

struct AddNumbersArgs {
    int number1;
    int number2;
};

program RPCDEMO {
    version RPCDEMO_V1 {
        int ADD_NUMBERS(AddNumbersArgs) = 1;
    } = 1;
} = 0x31234567;program→ defines the RPC service (roughly comparable to an interface in DCE/RPC).version→ allows multiple interface versions.0x31234567→ unique program number registered withrpcbind.ADD_NUMBERS→ remote procedure number 1.AddNumbersArgs→ because ONC RPC procedures accept exactly one argument, we encapsulate multiple values in a structure.program→ defines the RPC service (roughly comparable to an interface in DCE/RPC).version→ allows multiple interface versions.0x31234567→ unique program number registered withrpcbind.ADD_NUMBERS→ remote procedure number 1.AddNumbersArgs→ because ONC RPC procedures accept exactly one argument, we encapsulate multiple values in a structure.
Unlike DCE/RPC, which identifies interfaces using globally unique UUIDs, ONC RPC uses a simple 32-bit program number.
For custom applications, developers typically choose an unused private value, whereas public services usually use officially assigned program numbers from the IANA registry.
At first glance, the interface definition looks very similar to the Microsoft IDL example from the previous article. However, there is one important architectural difference: ONC RPC remote procedures can accept only a single argument and return only a single value.
If multiple values need to be passed to a remote procedure, they must be encapsulated in a structure. In our example, the AddNumbersArgs structure groups the two integer values (number1 and number2) into a single argument that can be transmitted by the ONC RPC runtime.
Microsoft DCE/RPC
long AddNumbers(
    [in] long number1,
    [in] long number2
);
Linux ONC RPC
struct AddNumbersArgs {
    int number1;
    int number2;
};

int ADD_NUMBERS(AddNumbersArgs) = 1;
Although the syntax differs, both implementations ultimately achieve the same goal: invoking a remote procedure with two integer parameters and returning their sum.
The difference lies in how the interface definition language models the procedure parameters.
Generating the Client and Server Stubs with rpcgen
Just as we previously used the Microsoft Interface Definition Language (MIDL) compiler to generate the client and server stubs for our DCE/RPC application, ONC RPC uses the rpcgen utility to generate the required source files from the interface definition.
Execute the following command from the project directory:
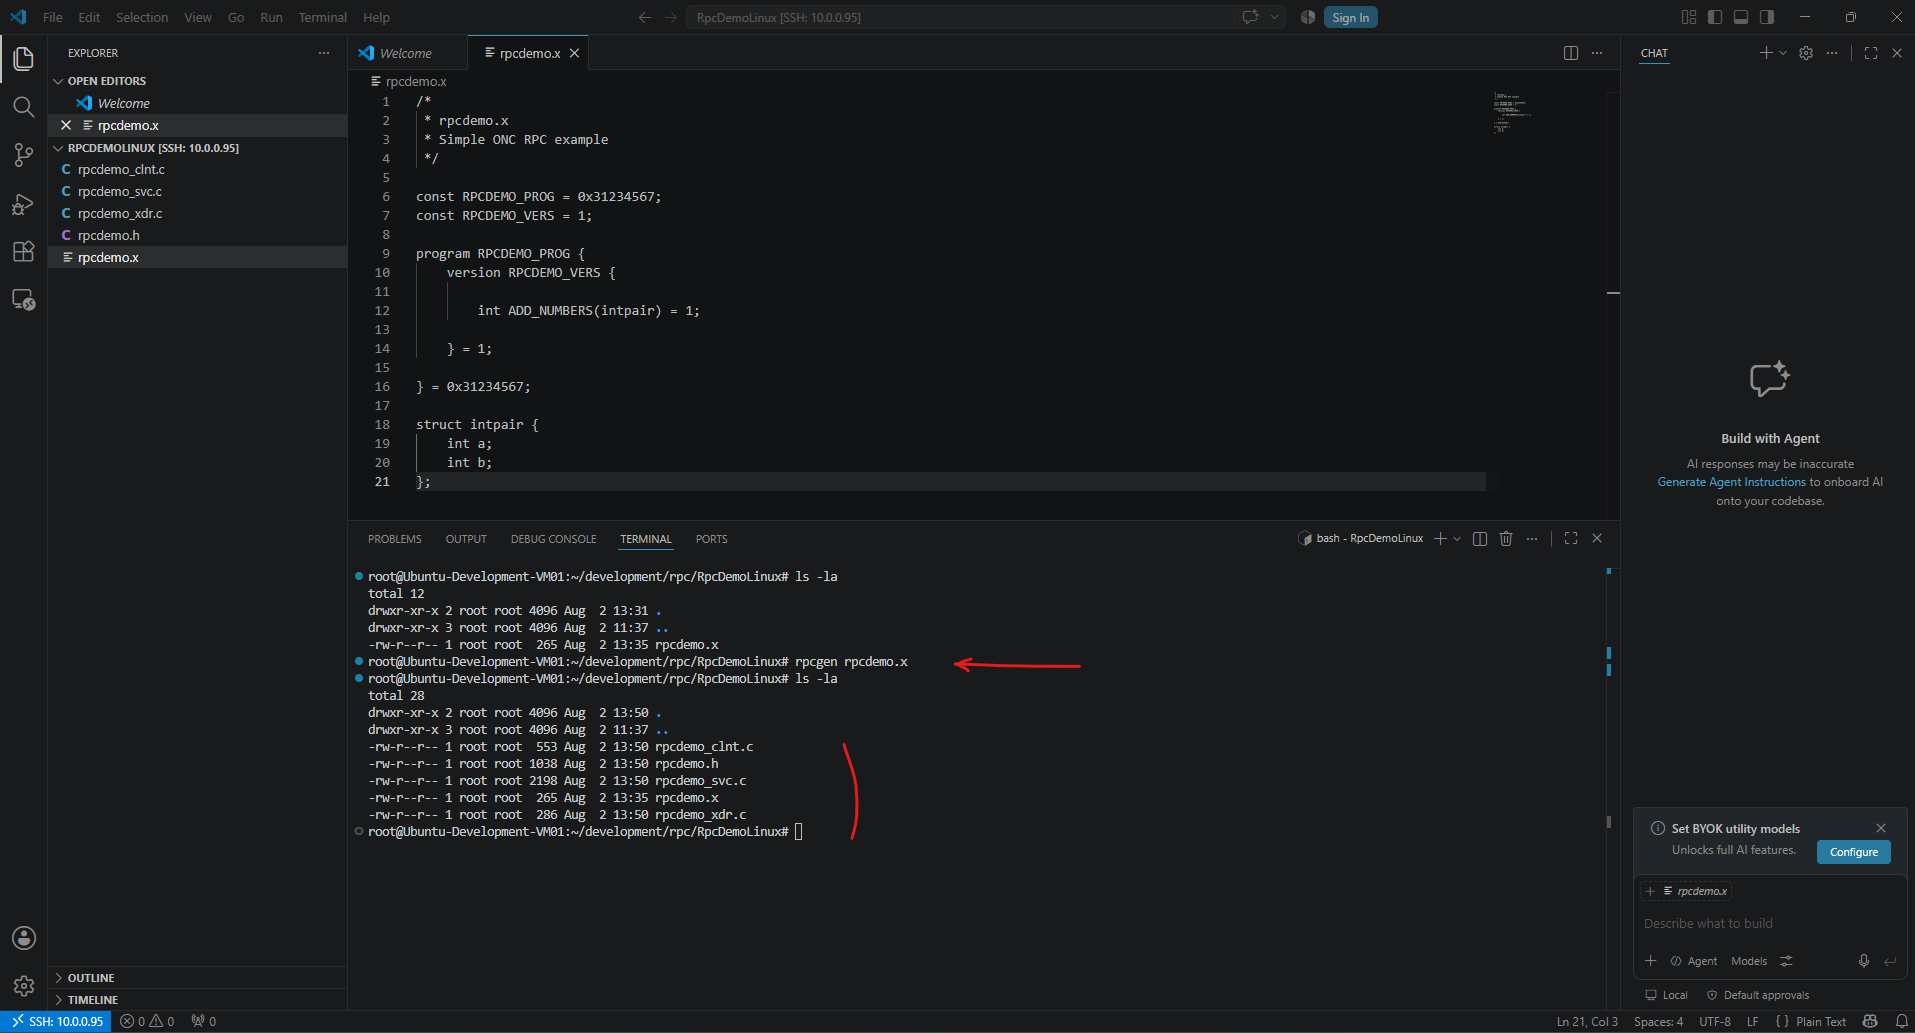
The
rpcgenutility automatically generates several source files that implement the RPC framework surrounding our application. Rather than manually implementing the client stub, server stub, and data serialization logic, we can now focus entirely on the actual application code while the generated files handle the underlying ONC RPC communication.
# rpcgen rpcdemo.x
| File | Description |
|---|---|
| rpcdemo.h | Shared header containing the generated data structures, function prototypes, and program definitions used by both the client and server. |
| rpcdemo_clnt.c | Client stub responsible for marshaling the procedure parameters, communicating with the RPC server, and unmarshaling the returned result. |
| rpcdemo_svc.c | Generated server framework responsible for creating the TCP and UDP transport endpoints, registering the RPC service with rpcbind, listening for incoming RPC requests, unmarshaling the transmitted parameters, dispatching the requests to our server implementation, and marshaling the returned result. Unlike Microsoft’s DCE/RPC, where the server setup is performed explicitly by the application using functions such as RpcServerUseProtseqEp(), RpcServerRegisterIf(), and RpcServerListen(), these tasks are generated automatically by rpcgen. |
| rpcdemo_xdr.c | Implements the External Data Representation (XDR) routines used to serialize and deserialize all transmitted data structures. XDR is the ONC RPC equivalent of Microsoft’s Network Data Representation (NDR), which we examined in the previous article. Both technologies provide a standardized binary representation of data, allowing different systems to exchange information reliably regardless of their native memory layout or processor architecture. |
If you compare this with the Windows implementation from the previous article, you’ll notice that
rpcgenserves essentially the same purpose as Microsoft’s MIDL compiler.The major difference is that ONC RPC generates an additional source file (
rpcdemo_xdr.c) containing the serialization routines based on External Data Representation (XDR), whereas Microsoft’s DCE/RPC uses Network Data Representation (NDR) internally through the Windows RPC runtime.
Implementing the RPC Server
With the interface definition in place and the required client and server stubs generated automatically by rpcgen, we can now focus on implementing the actual application logic.
Similar to the previous Microsoft DCE/RPC example, the generated source files take care of the underlying RPC communication, allowing us to concentrate solely on the functionality of the remote procedures.
Create server.cpp also in the project root.
*.cppis simply the standard file extension for C++ source code.
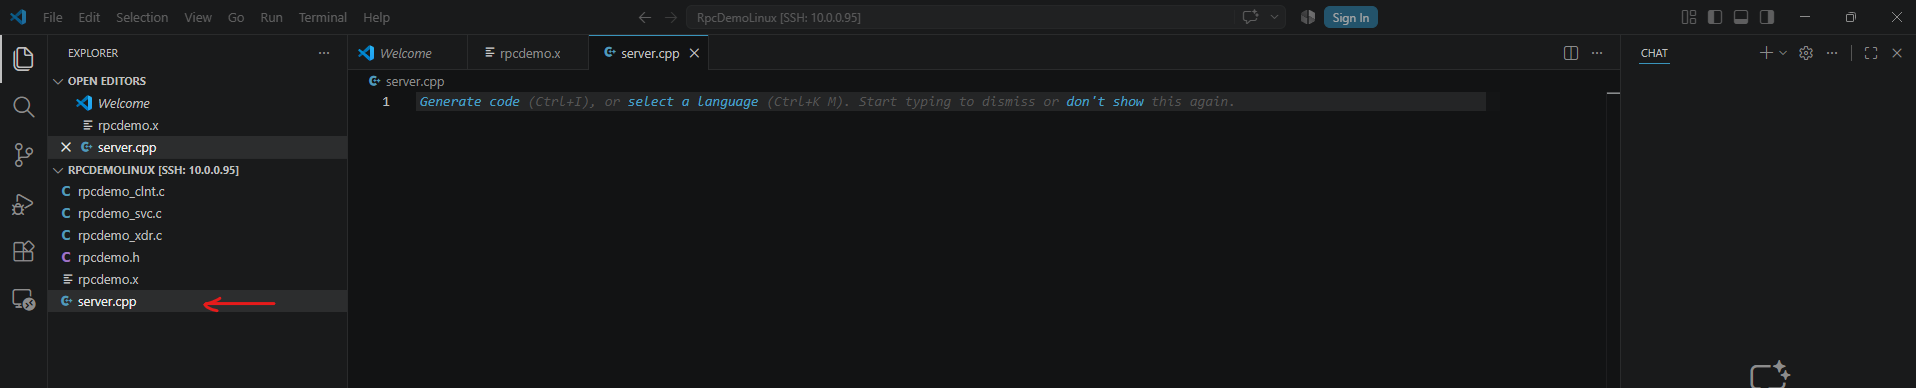
Enter the following content, the generated stub will call our function, and we only implement the business logic.
#include <iostream>
#include "rpcdemo.h"

extern "C" int *add_numbers_1_svc(intpair *argp, struct svc_req *rqstp)
{
    static int result;

    std::cout << "AddNumbers(" << argp->a << ", " << argp->b << ") requested." << std::endl;

    result = argp->a + argp->b;

    return &result;
}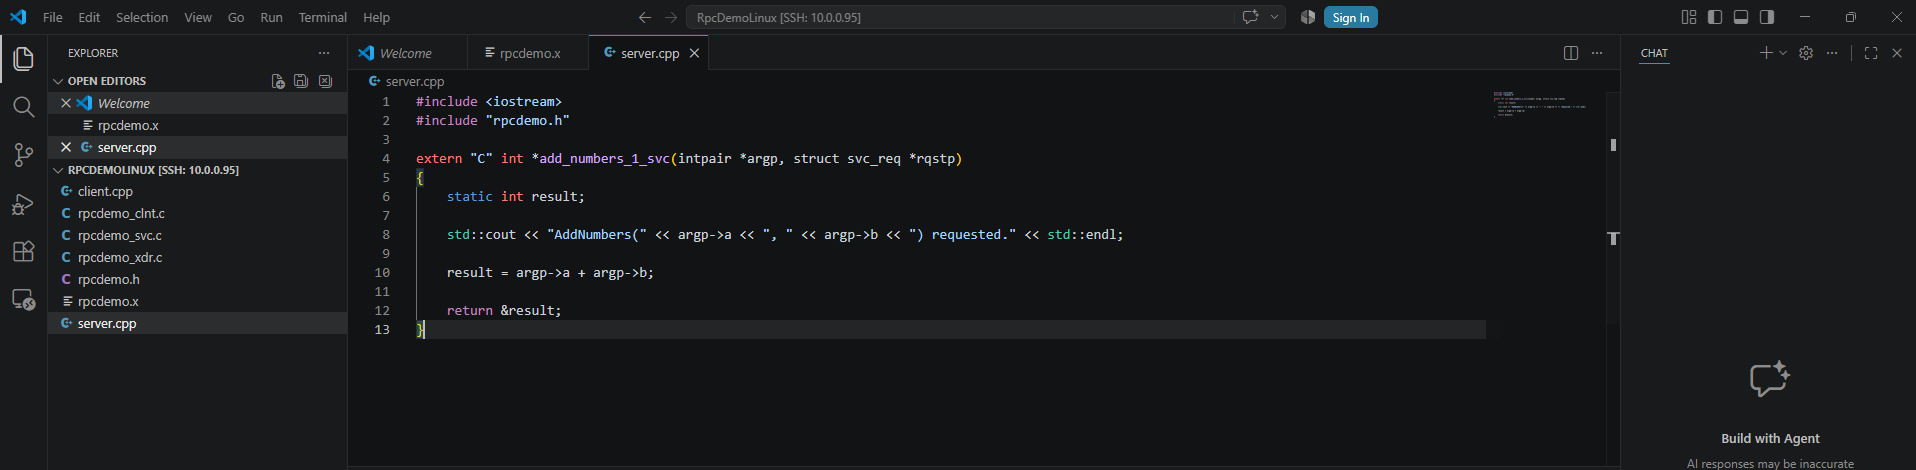
Unlike the Windows DCE/RPC example, we do not implement a complete RPC server application ourselves.
The generated rpcdemo_svc.c file already contains the server framework, listens for incoming RPC requests, and dispatches them to our implementation.
Our task is simply to provide the generated callback function (add_numbers_1_svc()), which contains the actual business logic executed when the remote procedure is invoked.
Implementing the RPC Client
Next, we create the client.cpp in the same project directory. The client accepts the RPC server address and two numbers as command-line arguments, creates an ONC RPC client handle, and invokes the generated add_numbers_1() client stub.
The
extern "C"block is required because the files generated byrpcgenuse C linkage, while our application is compiled as C++.This prevents the C++ compiler from changing the generated function names through name mangling.
#include <cerrno>
#include <cstdlib>
#include <iostream>
#include <limits>

extern "C"
{
#include "rpcdemo.h"
}

bool parseInteger(const char* value, int& result)
{
    if (value == nullptr || *value == '\0')
    {
        return false;
    }

    char* endPointer = nullptr;
    errno = 0;

    const long parsedValue = std::strtol(value, &endPointer, 10);

    if (errno == ERANGE ||
        endPointer == value ||
        *endPointer != '\0' ||
        parsedValue < std::numeric_limits<int>::min() ||
        parsedValue > std::numeric_limits<int>::max())
    {
        return false;
    }

    result = static_cast<int>(parsedValue);
    return true;
}

int main(int argc, char* argv[])
{
    if (argc != 4)
    {
        std::cerr
            << "Usage: "
            << argv[0]
            << " <server-name-or-ip> <number1> <number2>"
            << std::endl
            << "Example: "
            << argv[0]
            << " localhost 40 50"
            << std::endl;

        return EXIT_FAILURE;
    }

    const char* serverAddress = argv[1];

    int number1;
    int number2;

    if (!parseInteger(argv[2], number1) ||
        !parseInteger(argv[3], number2))
    {
        std::cerr
            << "Both number arguments must be valid integers."
            << std::endl;

        return EXIT_FAILURE;
    }

    std::cout
        << "Connecting to ONC RPC server "
        << serverAddress
        << "..."
        << std::endl;

    /*
     * Create an ONC RPC client handle.
     *
     * rpcbind resolves RPCDEMO_PROG and RPCDEMO_VERS to the
     * dynamically assigned TCP port of the server.
     */
    CLIENT* client = clnt_create(
        serverAddress,
        RPCDEMO_PROG,
        RPCDEMO_VERS,
        "tcp");

    if (client == nullptr)
    {
        clnt_pcreateerror(serverAddress);
        return EXIT_FAILURE;
    }

    intpair arguments{};
    arguments.a = number1;
    arguments.b = number2;

    std::cout
        << "Invoking AddNumbers("
        << number1
        << ", "
        << number2
        << ")..."
        << std::endl;

    /*
     * Invoke the rpcgen-generated client stub.
     *
     * The stub serializes the intpair structure using XDR,
     * sends the request to the server, and deserializes the
     * returned integer.
     */
    int* result = add_numbers_1(
        &arguments,
        client);

    if (result == nullptr)
    {
        clnt_perror(
            client,
            "Remote procedure call failed");

        clnt_destroy(client);
        return EXIT_FAILURE;
    }

    std::cout
        << "AddNumbers("
        << number1
        << ", "
        << number2
        << ") returned: "
        << *result
        << std::endl;

    clnt_destroy(client);

    return EXIT_SUCCESS;
}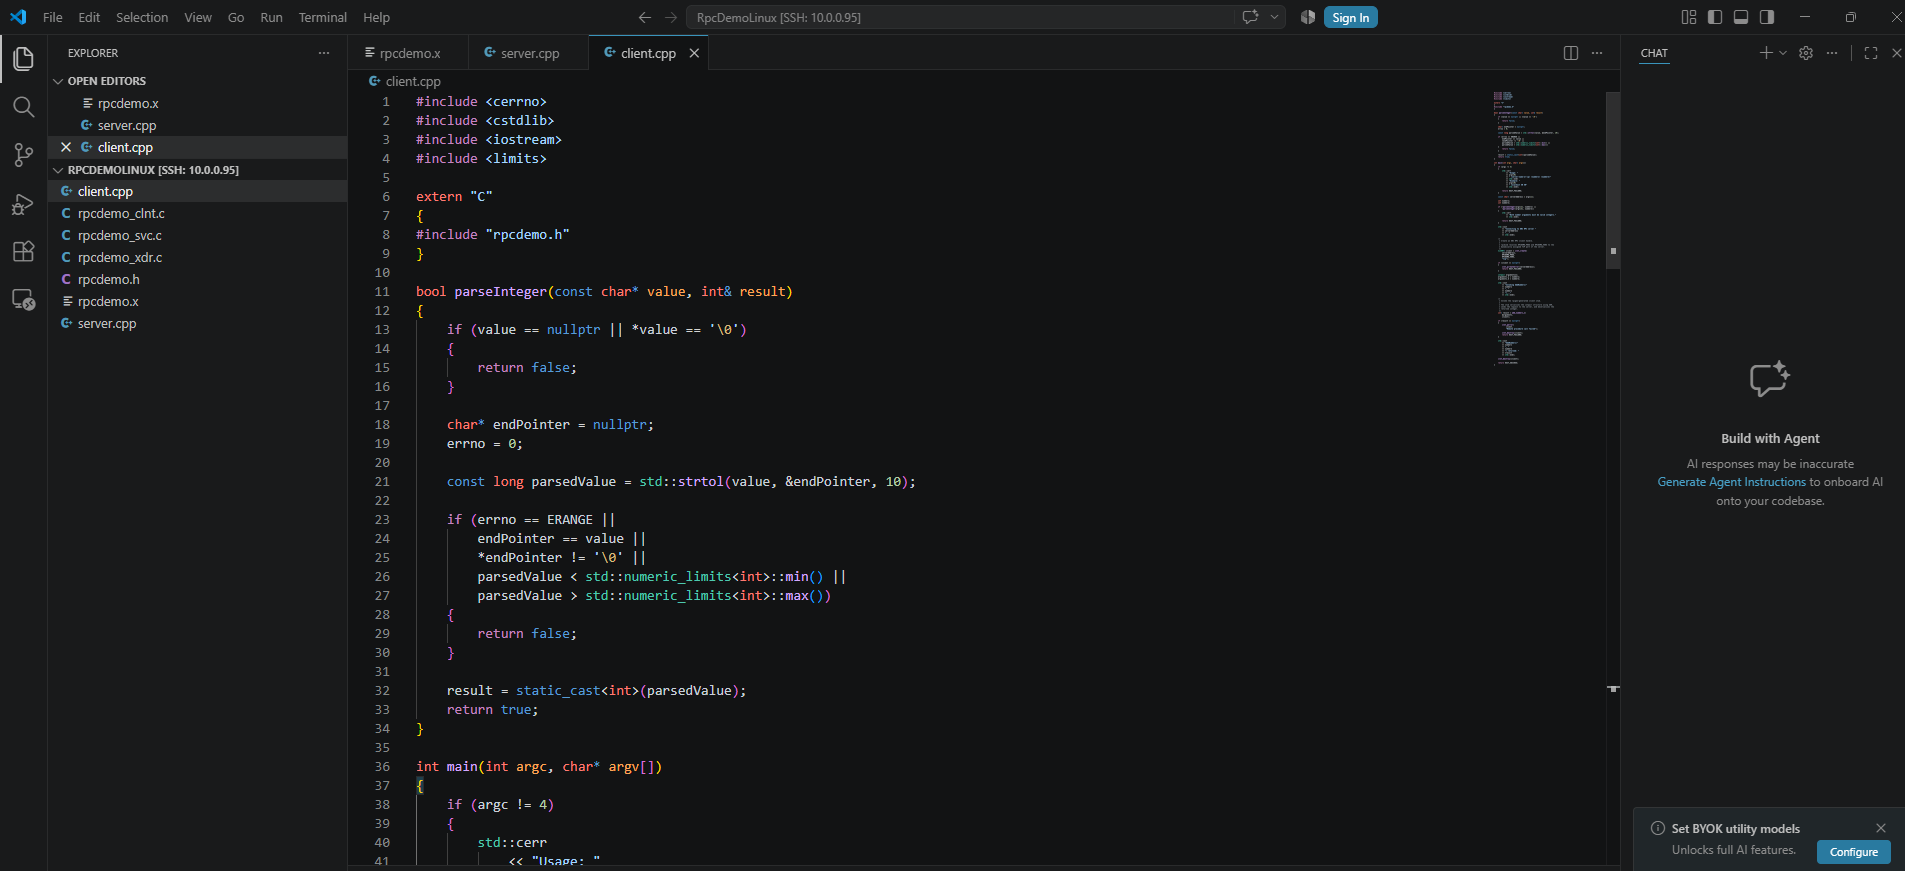
The call to clnt_create() creates the ONC RPC client handle and asks rpcbind to resolve the combination of program number and version to the TCP port used by our server.
The generated add_numbers_1() stub then serializes the intpair structure with XDR, invokes the remote procedure, and returns a pointer to the deserialized result.
Building the Client and Server Applications
Unlike Visual Studio, Linux does not automatically manage the compilation and linking process for our project.
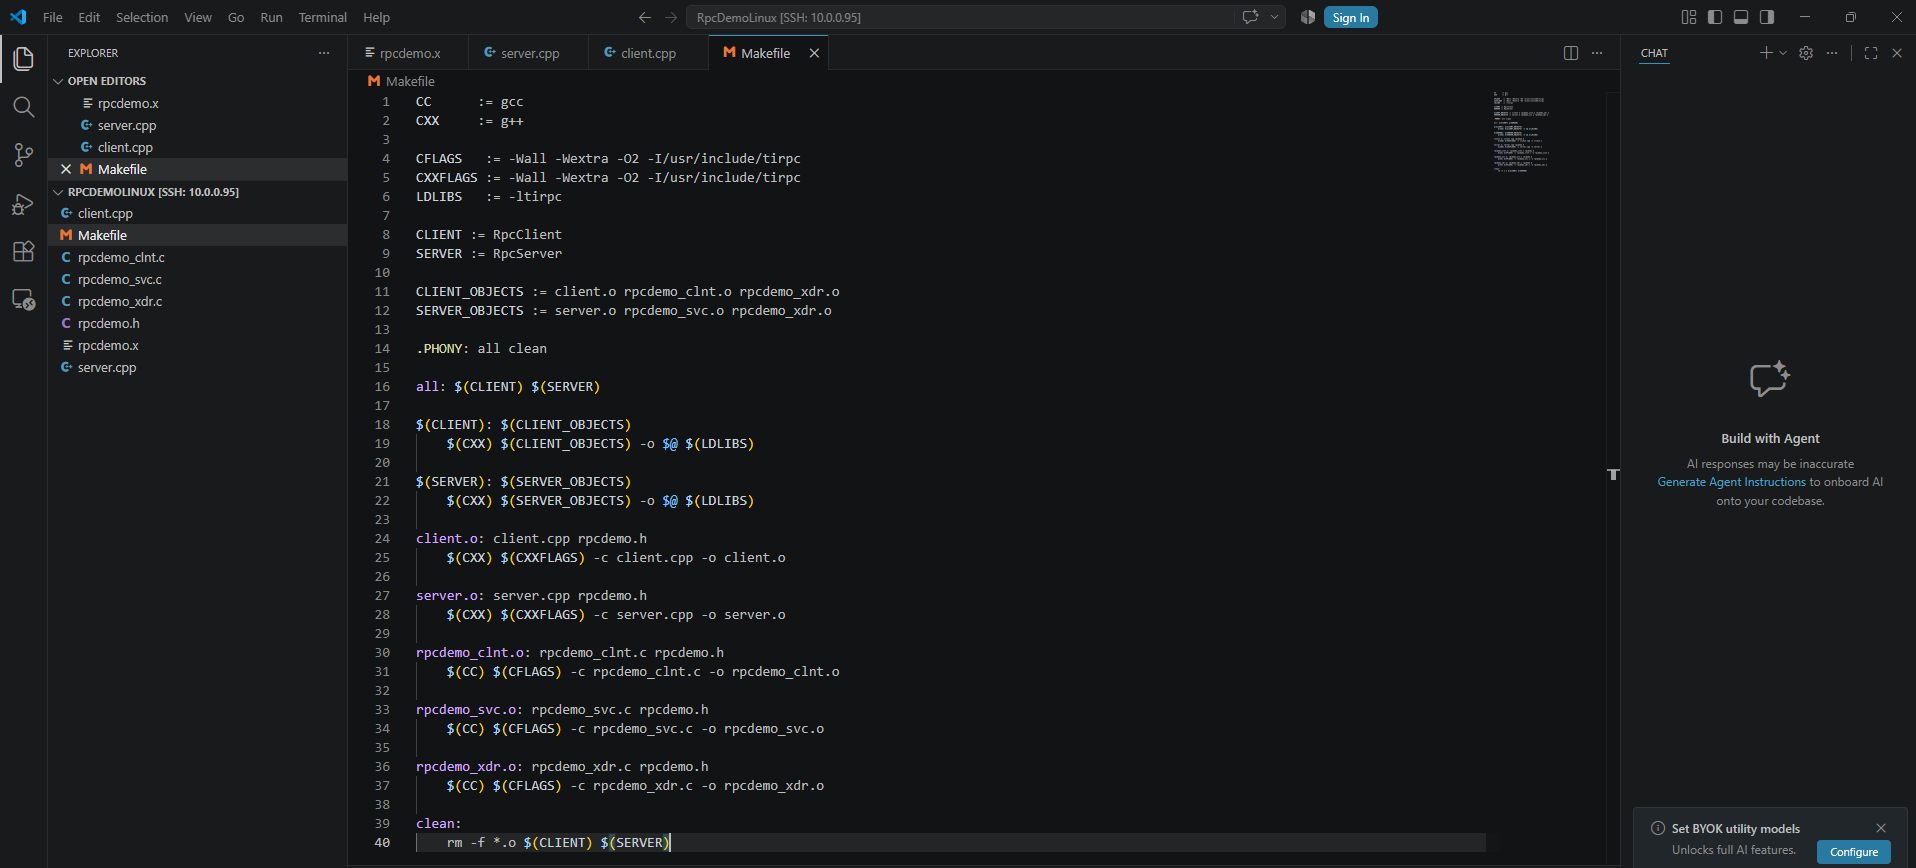
We therefore create a Makefile that defines how the generated RPC stubs, XDR routines, and our C++ implementations are compiled into the final client and server executables.
Create a new file named Makefile and add:
CC      := gcc
CXX     := g++

CFLAGS   := -Wall -Wextra -O2 -I/usr/include/tirpc
CXXFLAGS := -Wall -Wextra -O2 -I/usr/include/tirpc
LDLIBS   := -ltirpc

CLIENT := RpcClient
SERVER := RpcServer

CLIENT_OBJECTS := client.o rpcdemo_clnt.o rpcdemo_xdr.o
SERVER_OBJECTS := server.o rpcdemo_svc.o rpcdemo_xdr.o

.PHONY: all clean

all: $(CLIENT) $(SERVER)

$(CLIENT): $(CLIENT_OBJECTS)
	$(CXX) $(CLIENT_OBJECTS) -o $@ $(LDLIBS)

$(SERVER): $(SERVER_OBJECTS)
	$(CXX) $(SERVER_OBJECTS) -o $@ $(LDLIBS)

client.o: client.cpp rpcdemo.h
	$(CXX) $(CXXFLAGS) -c client.cpp -o client.o

server.o: server.cpp rpcdemo.h
	$(CXX) $(CXXFLAGS) -c server.cpp -o server.o

rpcdemo_clnt.o: rpcdemo_clnt.c rpcdemo.h
	$(CC) $(CFLAGS) -c rpcdemo_clnt.c -o rpcdemo_clnt.o

rpcdemo_svc.o: rpcdemo_svc.c rpcdemo.h
	$(CC) $(CFLAGS) -c rpcdemo_svc.c -o rpcdemo_svc.o

rpcdemo_xdr.o: rpcdemo_xdr.c rpcdemo.h
	$(CC) $(CFLAGS) -c rpcdemo_xdr.c -o rpcdemo_xdr.o

clean:
	rm -f *.o $(CLIENT) $(SERVER)
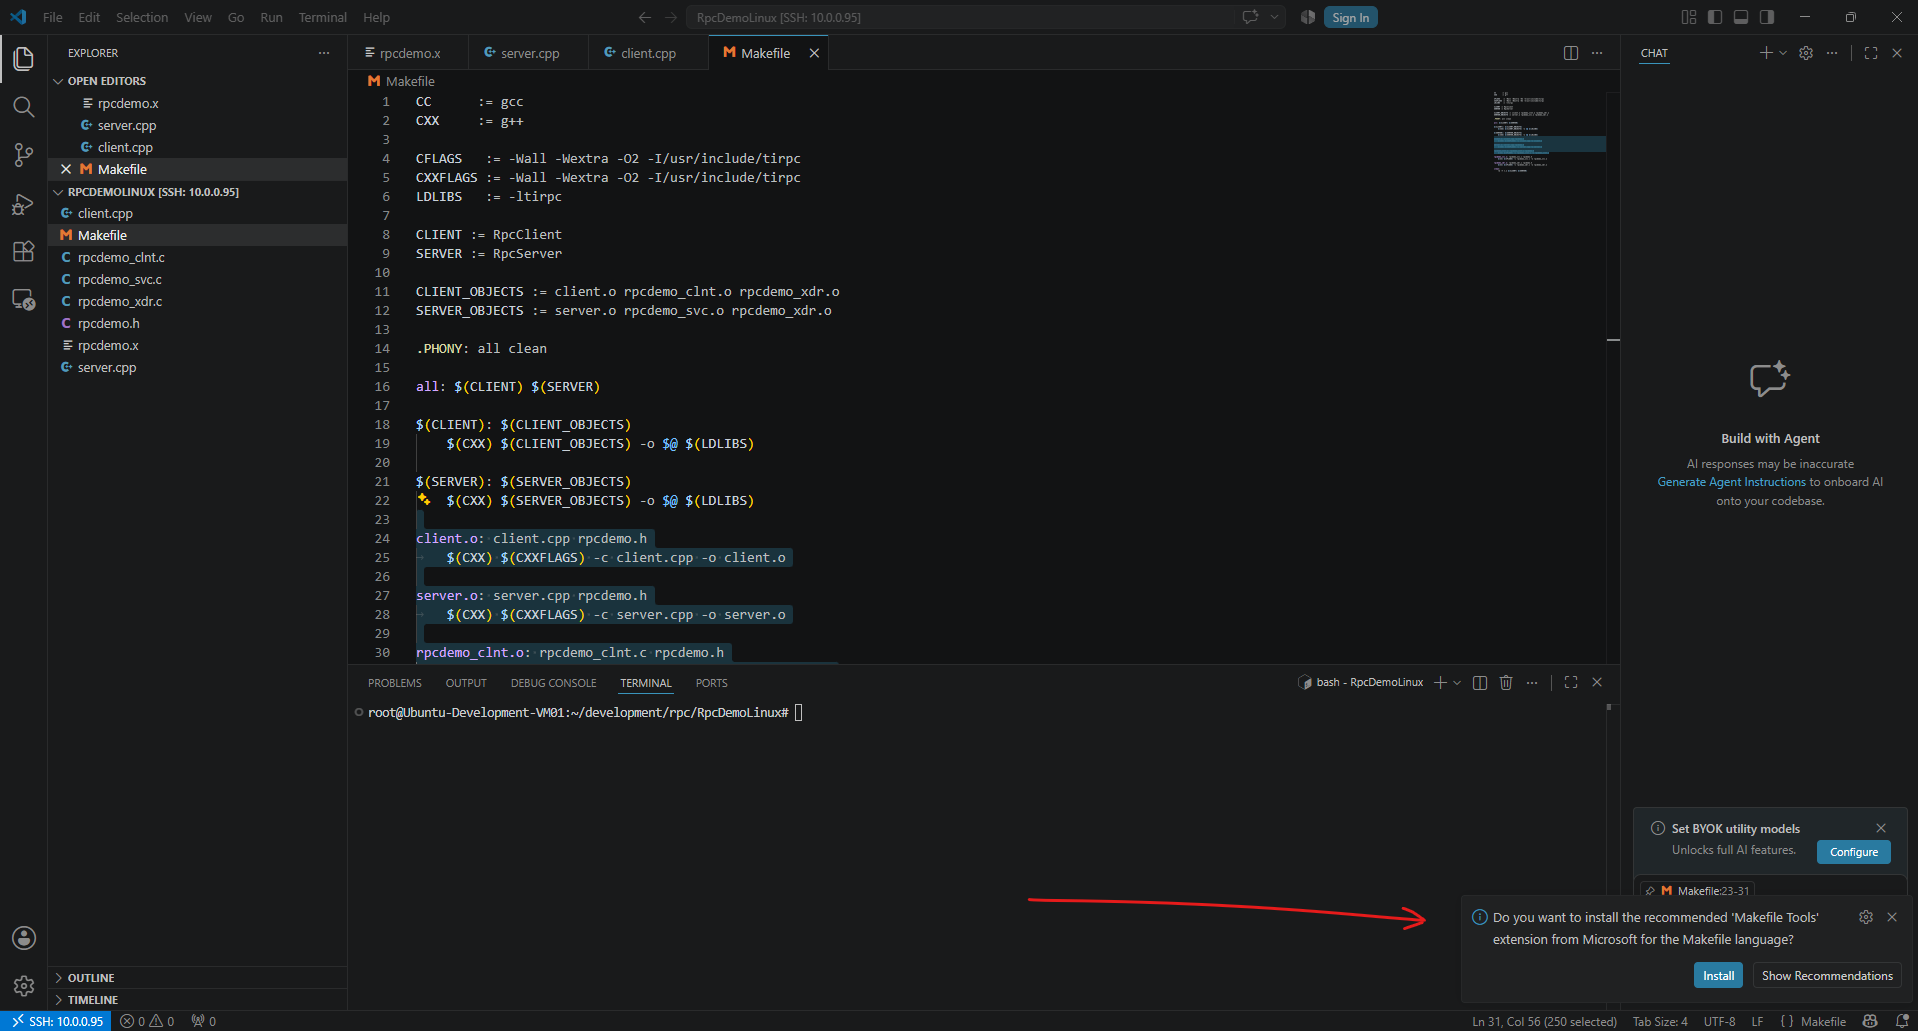
Visual Studio Code may recommend installing the Makefile Tools extension from Microsoft to provide syntax highlighting, IntelliSense, and additional language support for Makefiles.
Although the extension is not required to build our project, it improves the editing experience and is therefore recommended.
To build both applications run:
Executing
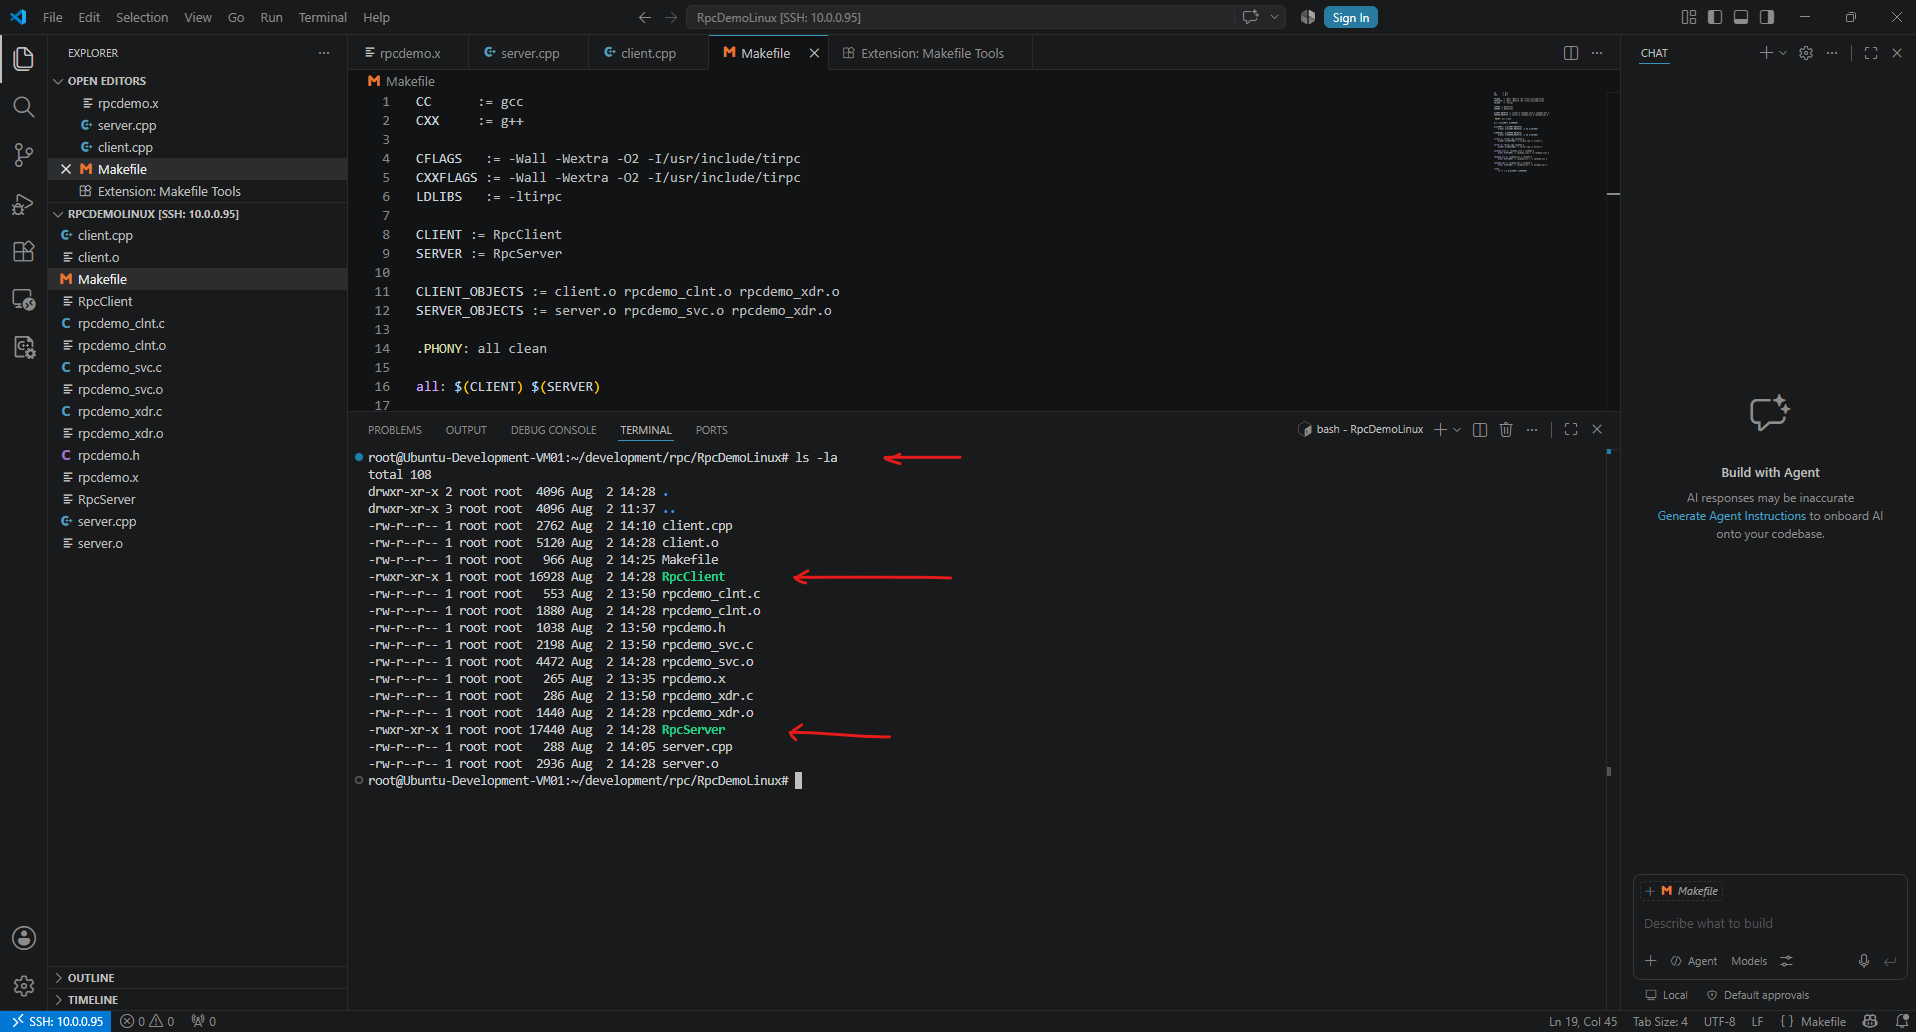
makecompiles both our C++ application code and the C source files generated byrpcgen.Although the compiler may emit a few warnings originating from the generated code or unused parameters, the build completes successfully and produces the two executable files RpcClient and RpcServer.
# make
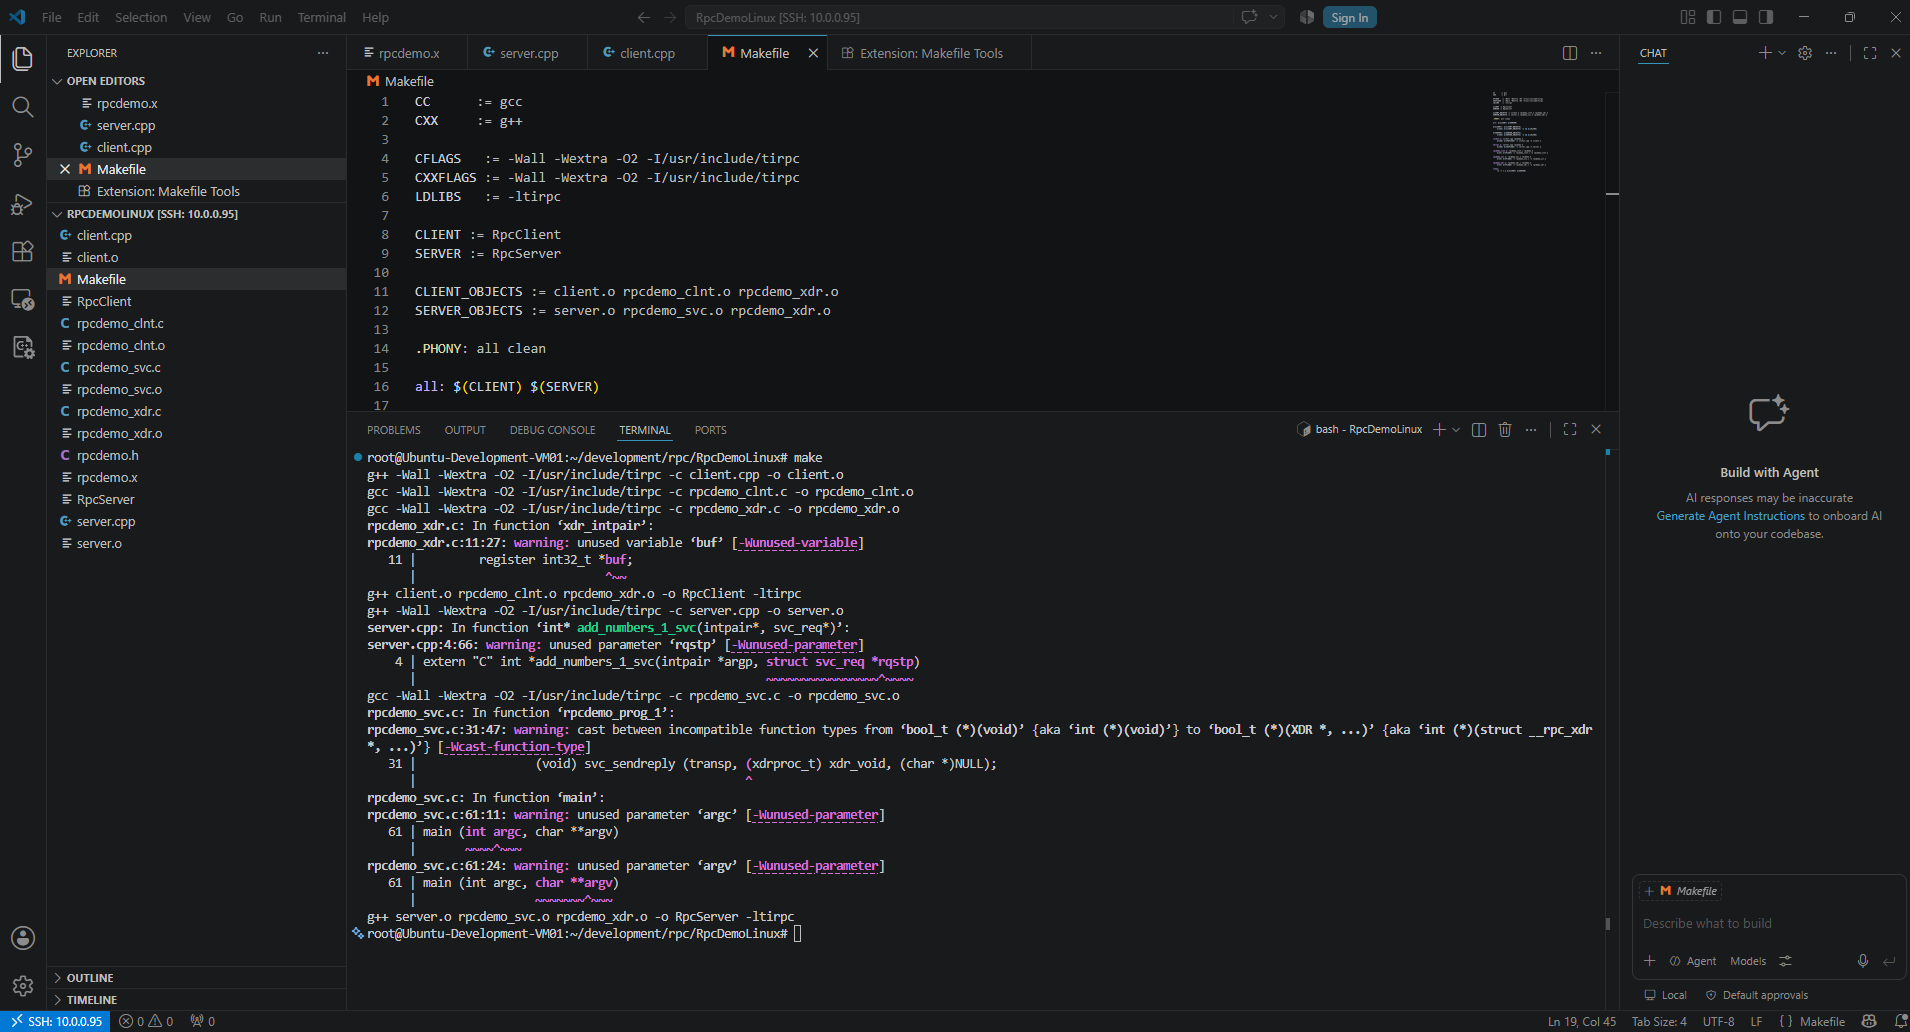
The build process produces the two executable files RpcServer and RpcClient, which are now ready for testing.
Running the Demo Locally from Visual Studio Code
Although this section is titled “Running the Demo Locally from Visual Studio Code”, the client and server are actually executed remotely on our Ubuntu development virtual machine.
Visual Studio Code merely provides the local user interface through the Remote – SSH extension, while all commands, compilation steps, and application execution take place natively on the remote Linux system.
Starting the RPC Server
Before invoking a remote procedure, we first start the RPC server. During startup, the server registers its program number and dynamically assigned TCP port with the local rpcbind service.
This allows clients to discover the service automatically without knowing the server’s TCP port in advance.
Execute:
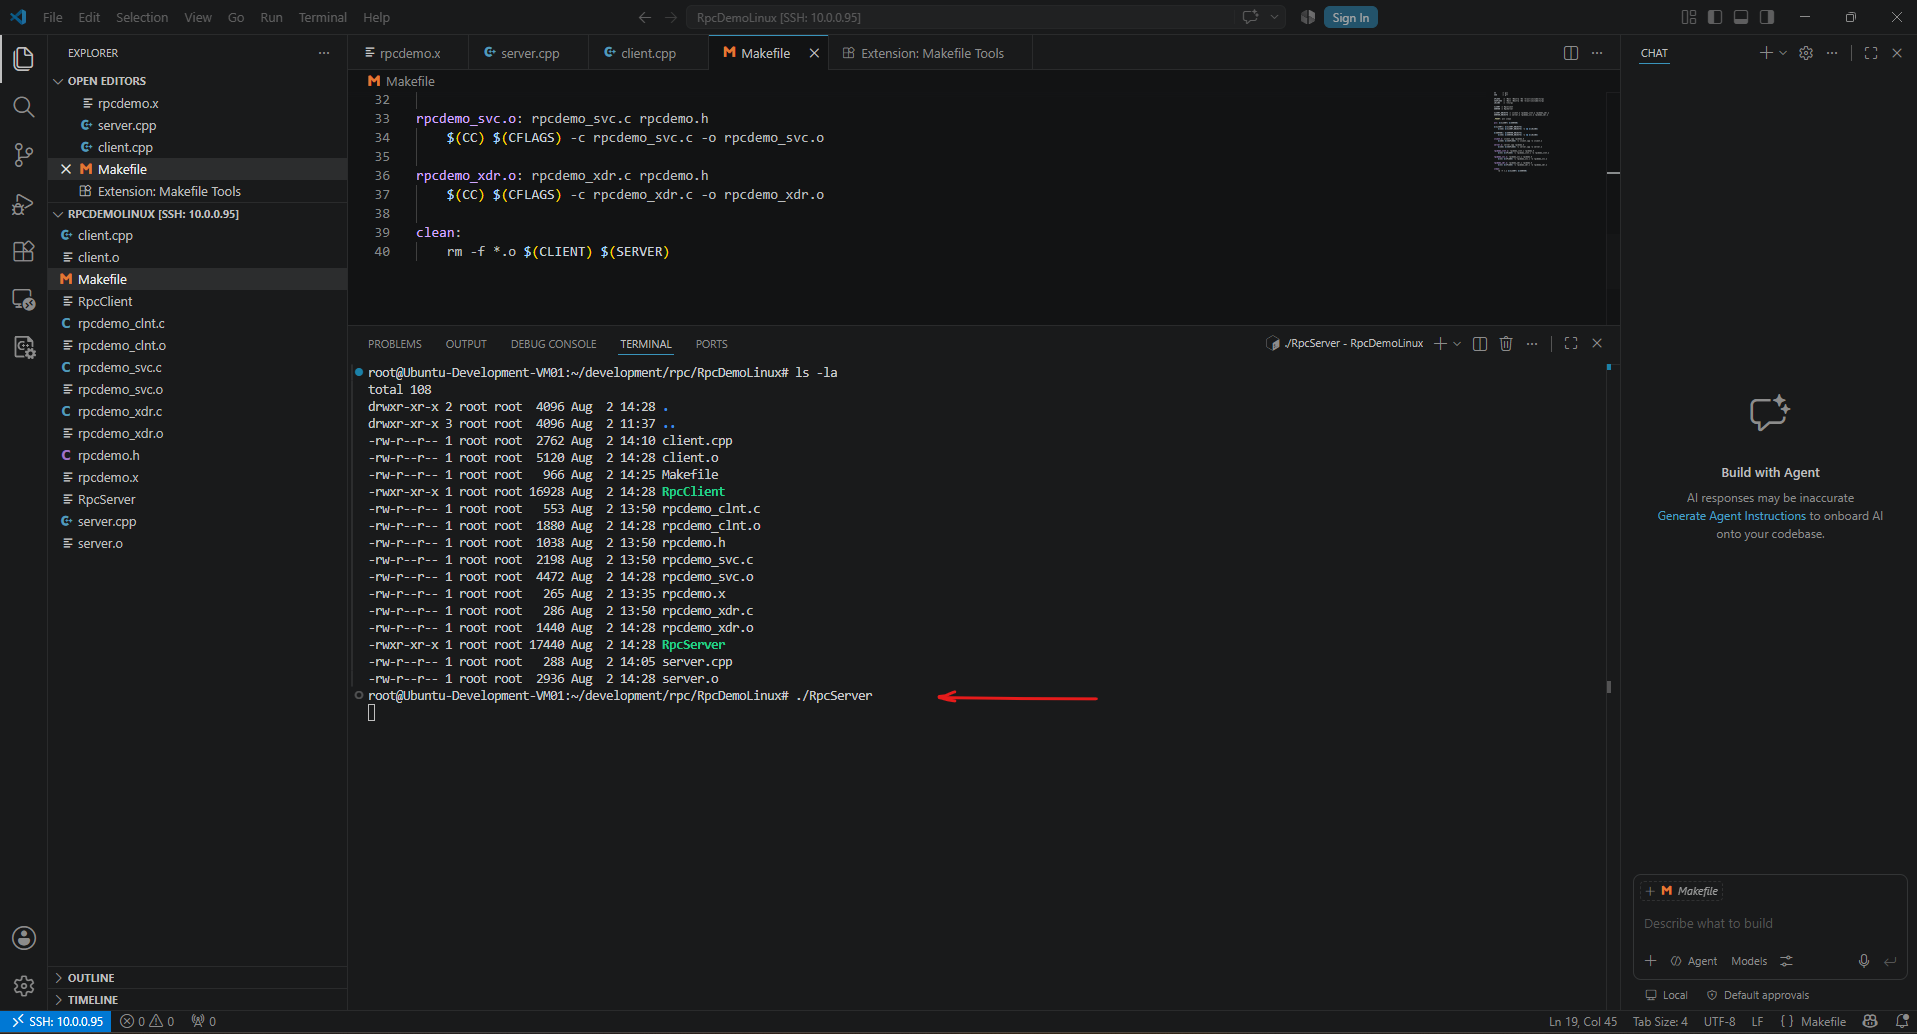
Since the shell prompt does not return after executing
./RpcServer, we can see that the server is running in the foreground and waiting for incoming RPC requests.
# ./RpcServer
The next step is to open a second terminal (or another SSH session in VS Code) and verify that the service has registered with rpcbind:
Unlike Microsoft Windows, where we developed our own RpcEndpointViewer utility to enumerate the registered DCE/RPC interfaces, Linux provides the
rpcinfoutility out of the box for querying the local or remoterpcbindservice.
# rpcinfo -p
or
# rpcinfo -p localhost
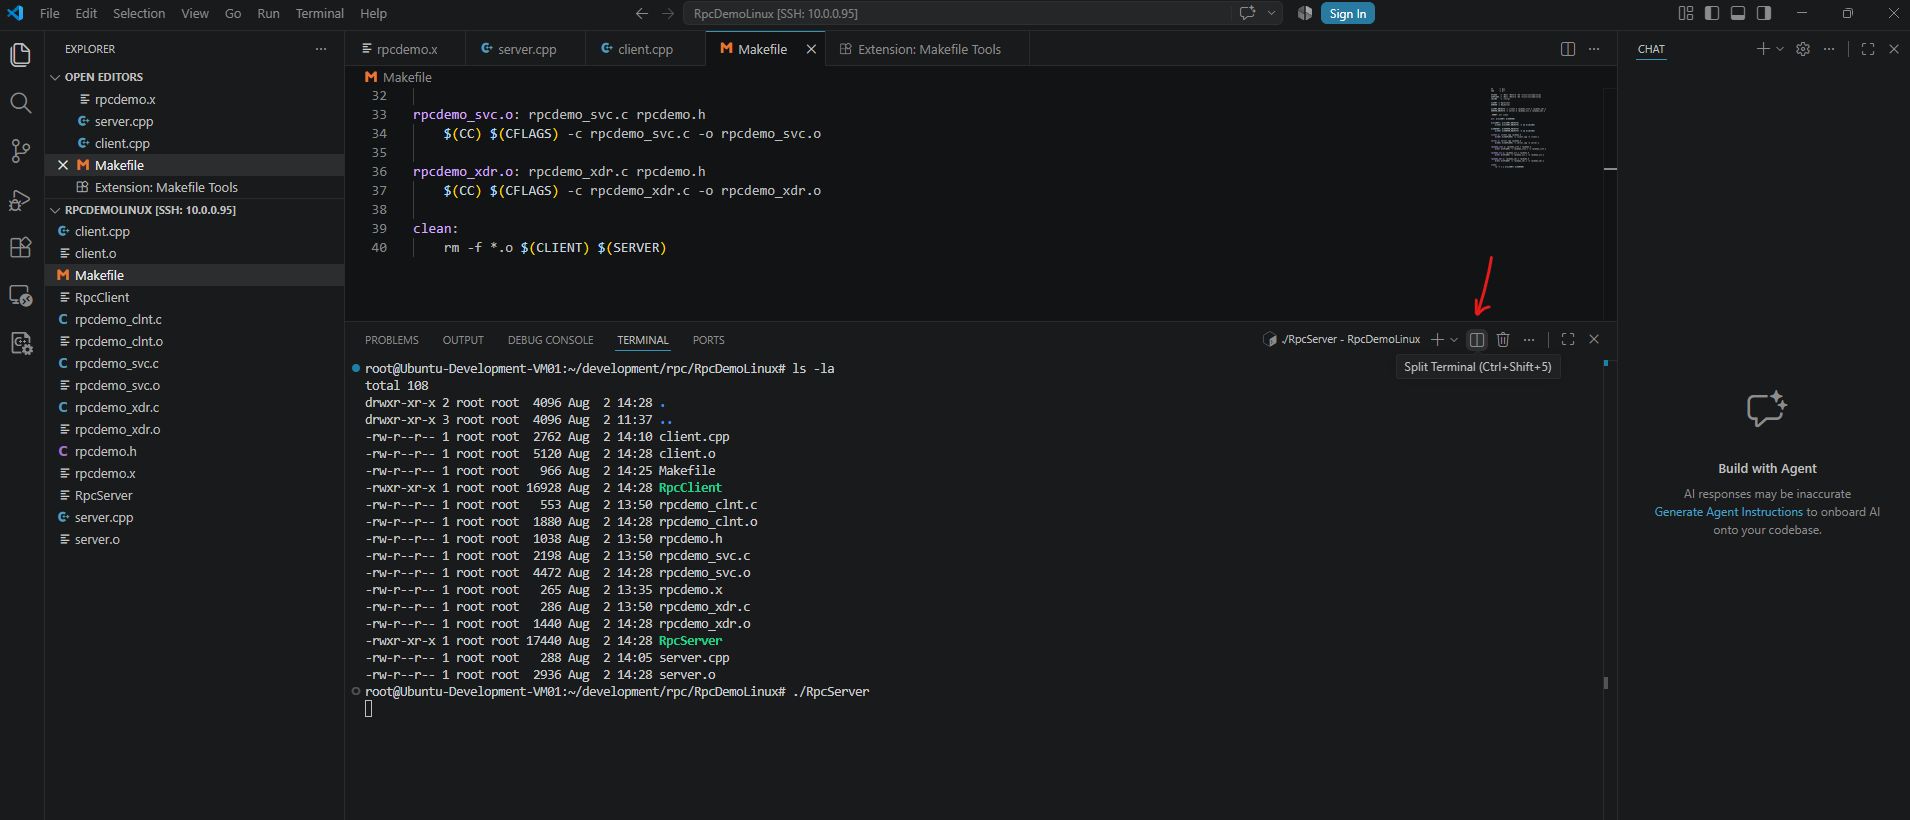
Click the Split Terminal button in the upper-right corner of the terminal pane to open a second SSH session.
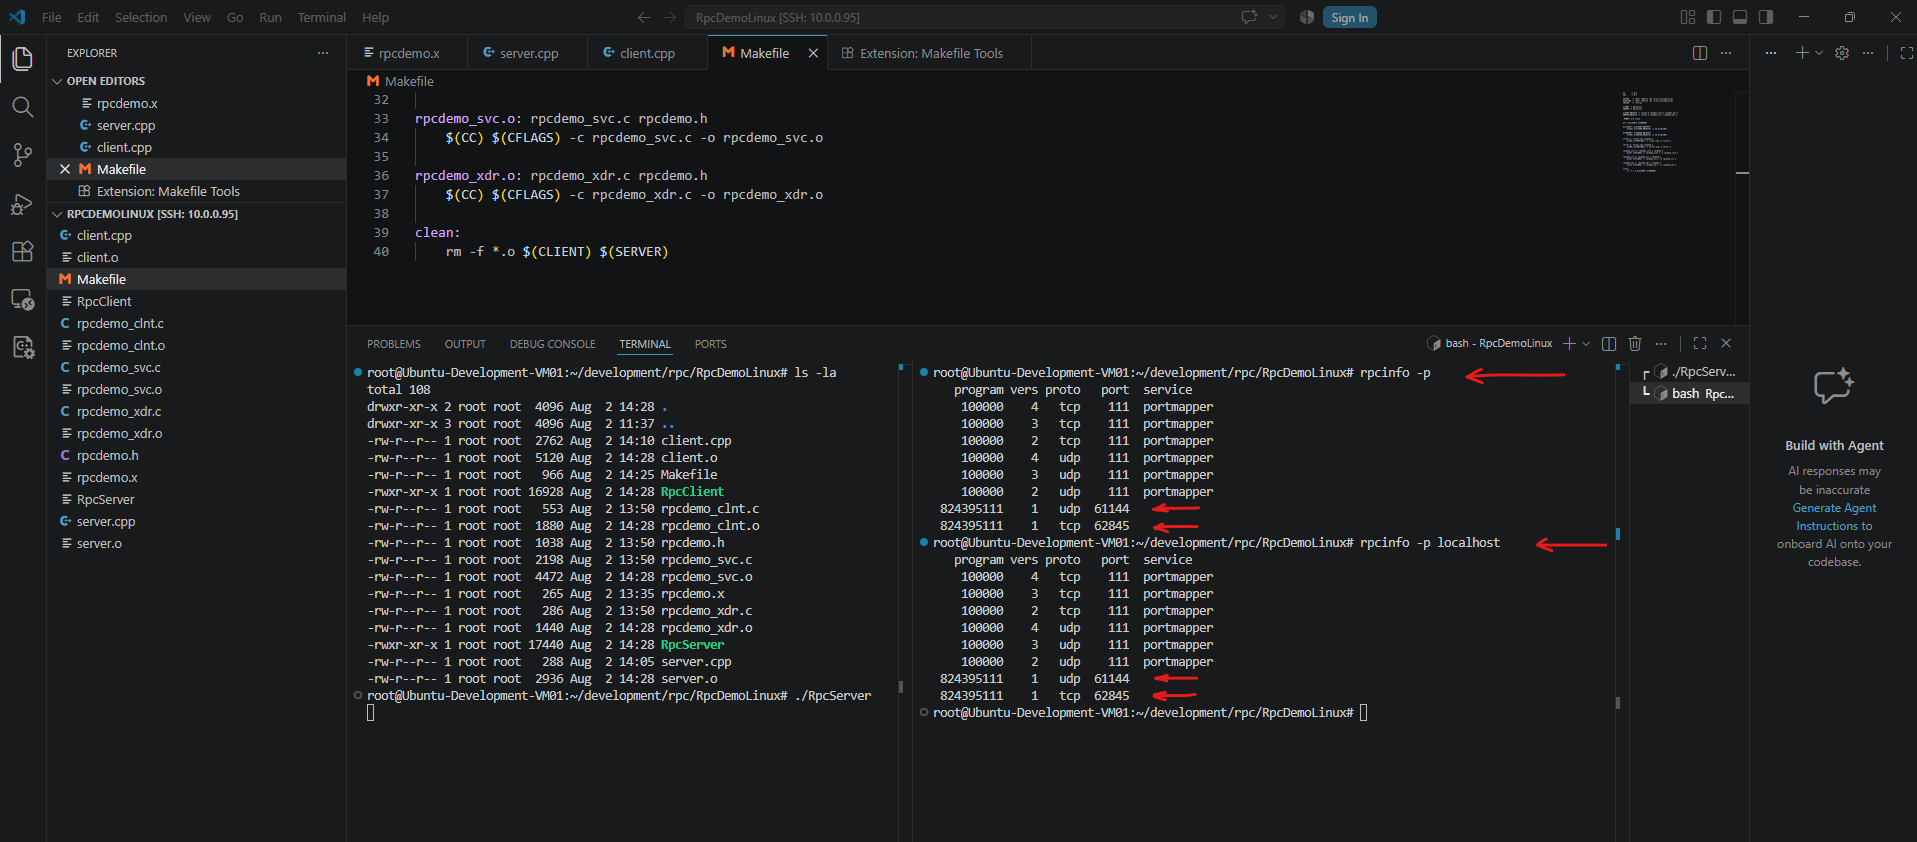
We can verify that the RPC server successfully registered its service with the local rpcbind daemon by using the rpcinfo -p command.
The program number, which serves the same purpose as the interface UUID in Microsoft’s DCE/RPC, was defined in
rpcdemo.xas0x31234567and is displayed byrpcinfoin its decimal representation as824395111, together with the dynamically assigned TCP and UDP ports.Both transport protocols appear because the
rpcgen-generatedrpcdemo_svc.cserver framework automatically creates and registers both TCP and UDP transport endpoints withrpcbind, allowing clients to communicate with the service over either protocol.This differs from Microsoft’s DCE/RPC implementation, where we explicitly configured the transport protocol, endpoint, interface registration, and server listener within our server application by calling
RpcServerUseProtseqEp(),RpcServerRegisterIf(), andRpcServerListen().
Starting the RPC Client
With the RPC server running and successfully registered with rpcbind, we can now start the RPC client.
Similar to Microsoft’s DCE/RPC implementation, the client first resolves the server endpoint before invoking the remote procedure.
However, instead of querying the Windows RPC Endpoint Mapper on TCP port 135, ONC RPC contacts the local rpcbind service to resolve the program number (0x31234567) to the dynamically assigned TCP port of the server.
- Windows: Endpoint Mapper → Interface UUID → TCP 135
- Linux:
rpcbind→ Program Number → TCP 111
Run:
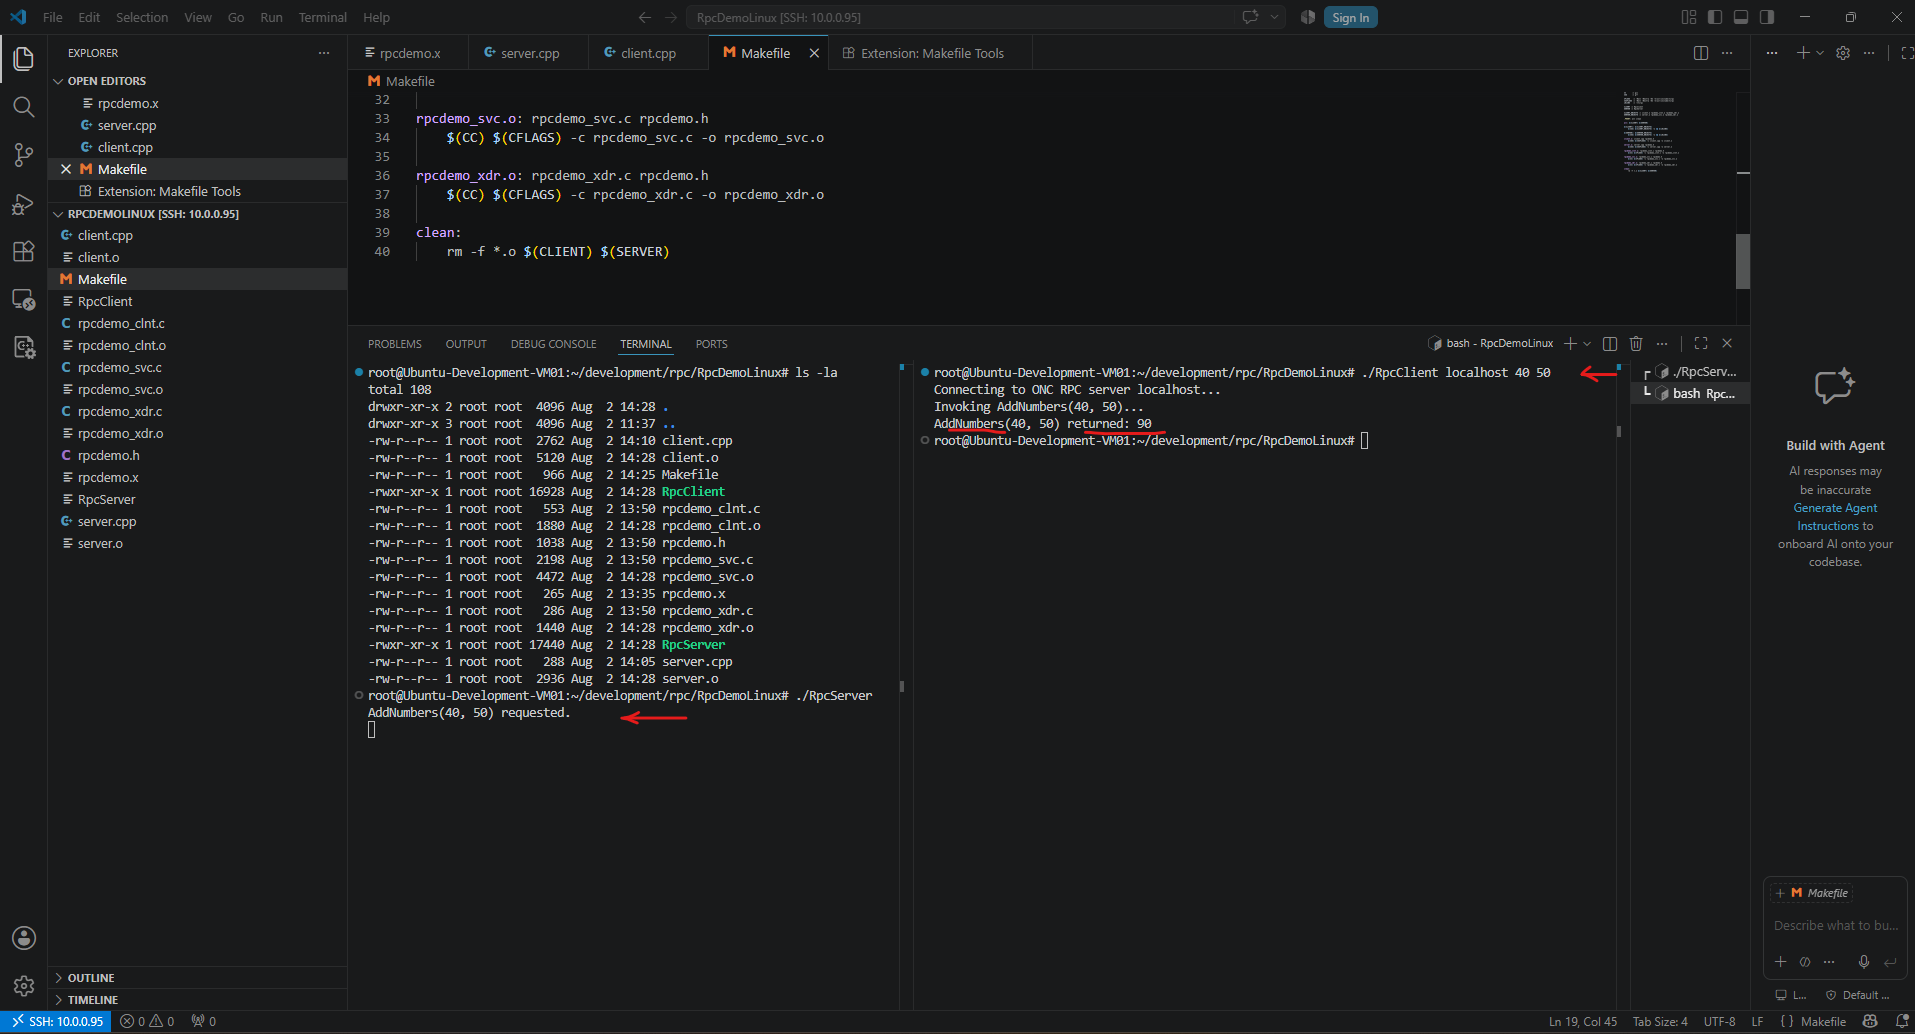
The client successfully resolved the server endpoint through
rpcbind, invoked the remoteAddNumbers()procedure, and received the calculated result (90) from the server.At the same time, the server received the request, executed our
add_numbers_1_svc()implementation, and printed the transmitted parameters to its console before returning the result to the client.
# ./RpcClient localhost 40 50
Deploying the RPC Client and Server on Separate Virtual Machines
So far, both the RPC server and client have been executed on the same Ubuntu development virtual machine through Visual Studio Code Remote – SSH to verify the implementation and simplify debugging.
To demonstrate ONC RPC communication under realistic conditions, we will now deploy the applications to two separate Ubuntu Server virtual machines in my vSphere lab, with one VM hosting the RPC server and the other acting as the RPC client.
Instead of capturing the network traffic directly with Wireshark on the virtual machines, we will use TShark, the command-line counterpart of Wireshark, to record the packet captures on both systems. The resulting capture files will then be transferred to my notebook and analyzed using the Wireshark graphical interface.
Verifying the Runtime Dependencies
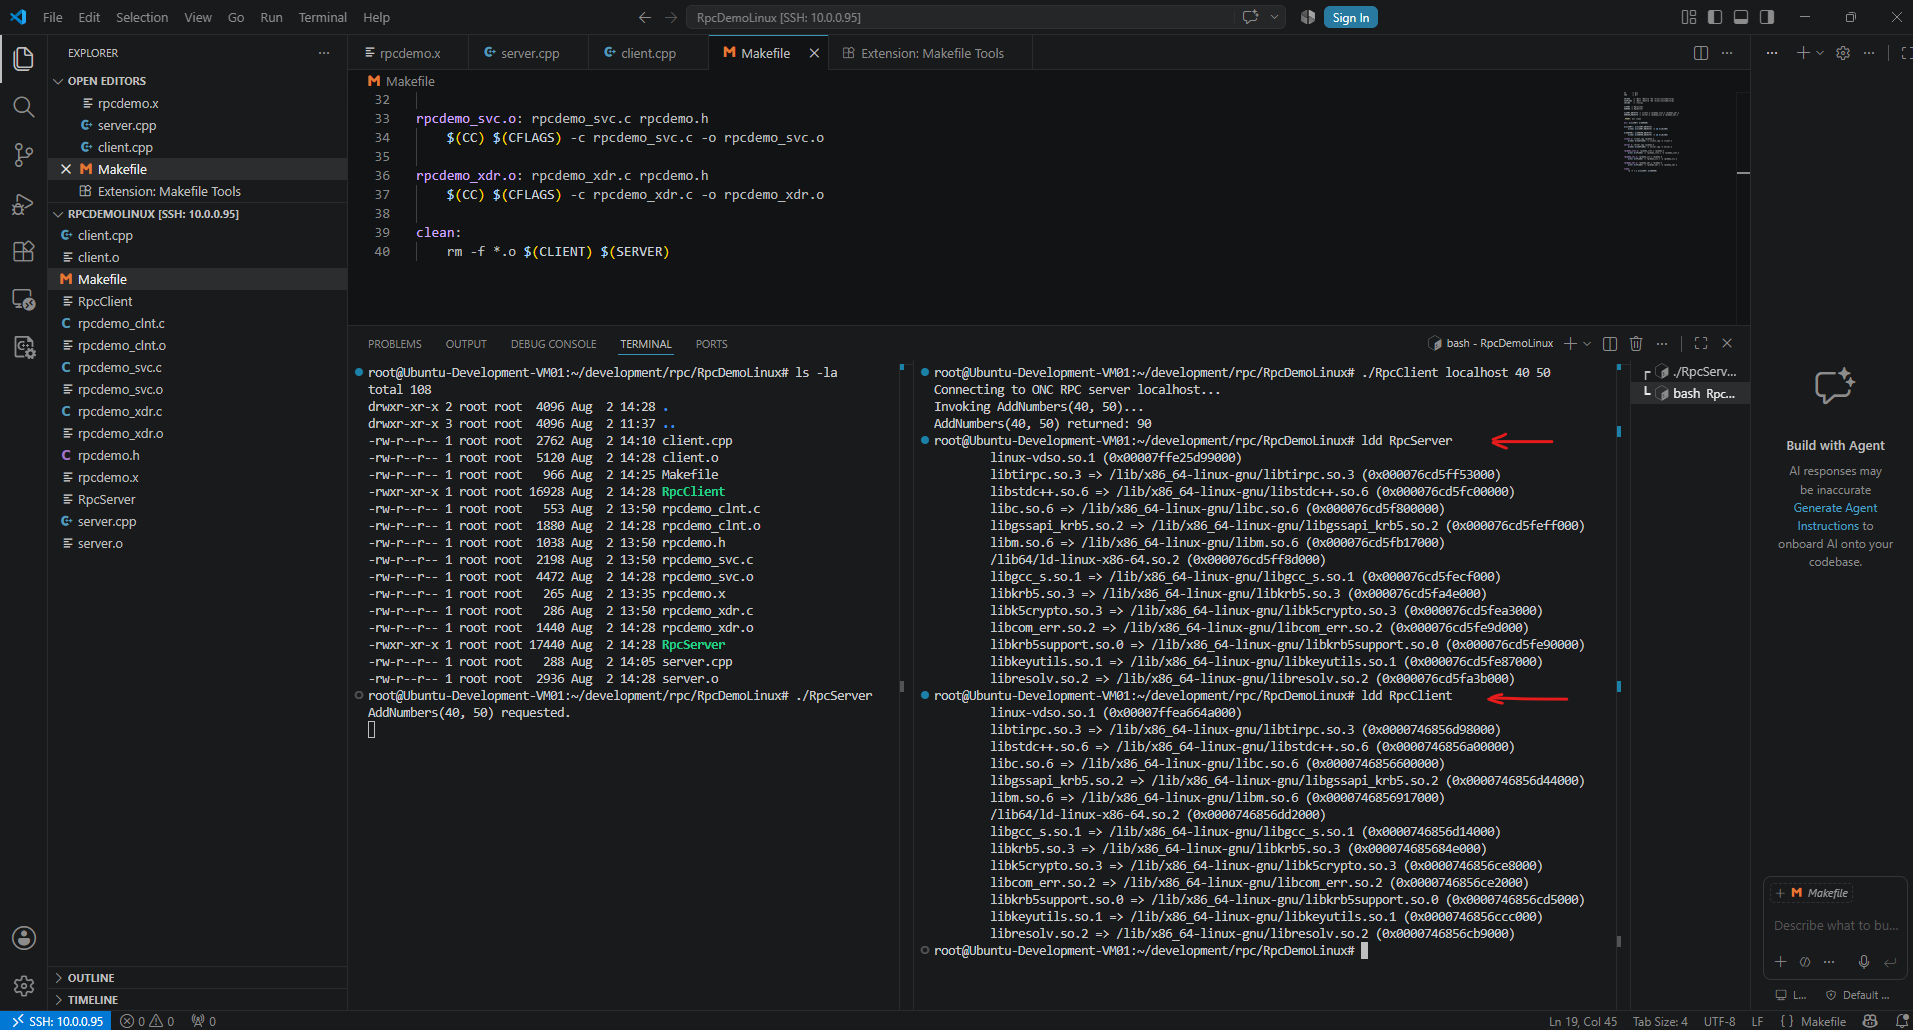
Before copying the applications, we verify which shared libraries they depend on.
The Ubuntu development VM as well as the dedicated RPC client and server VMs were all created from the same Ubuntu Server 24.04 vSphere template.
Since all systems share the same operating system version and software baseline, the compiled binaries can be copied directly to the target virtual machines without recompilation.
The
lddcommand lists all shared libraries an executable depends on at runtime. It is commonly used to verify that all required dependencies are available on the target system before deploying an application.
# ldd RpcServer
# ldd RpcClient
Deploying the RPC Demo in the vSphere Lab
After copying the RpcServer and RpcClient executables to two Ubuntu Server 24.04 virtual machines created from the same vSphere template as the development system, both applications started successfully without requiring recompilation or any additional application files.
This confirms that all application-specific code, including the rpcgen-generated client and server stubs as well as the XDR serialization routines, is compiled directly into the executables.
The required runtime functionality is provided by the standard Ubuntu runtime libraries together with the libtirpc ONC RPC runtime library already available on the target systems.
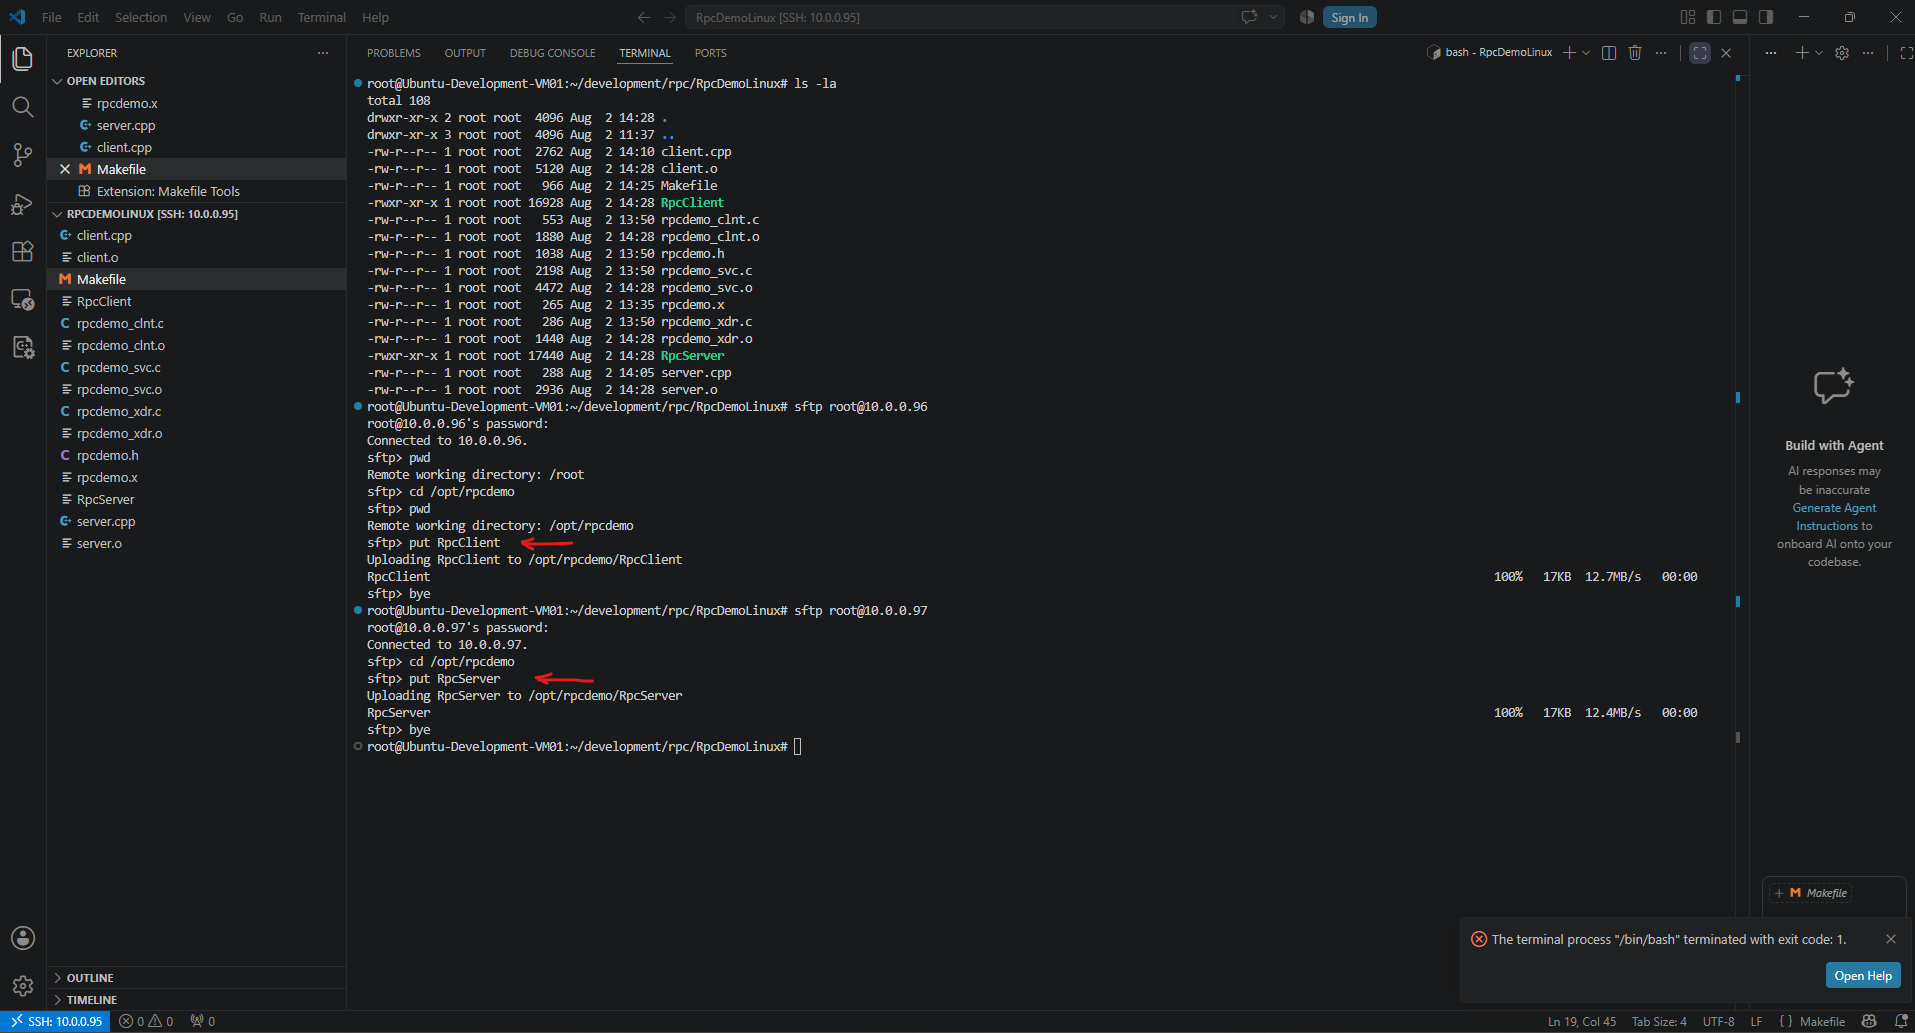
We first create a dedicated /opt/rpcdemo directory on both destination virtual machines to store the applications.
The compiled RpcServer and RpcClient executables are then securely copied from the development virtual machine to their respective target systems using SFTP over SSH.
Although the client and server applications are now deployed to separate Ubuntu virtual machines, we continue using Visual Studio Code as our central administration tool.
Instead of opening multiple SSH clients, VS Code provides convenient SSH terminals, split views, and session management, making it ideal for testing the RPC communication and later capturing the network traffic.
Open a new Visual Studio Code window (File → New Window) which we will use exclusively for connecting to the RPC client and server virtual machines over SSH.

Open a new terminal in Visual Studio Code (Terminal → New Terminal), which provides a local command-line session from which we can establish SSH connections to both the RPC client and server virtual machines.

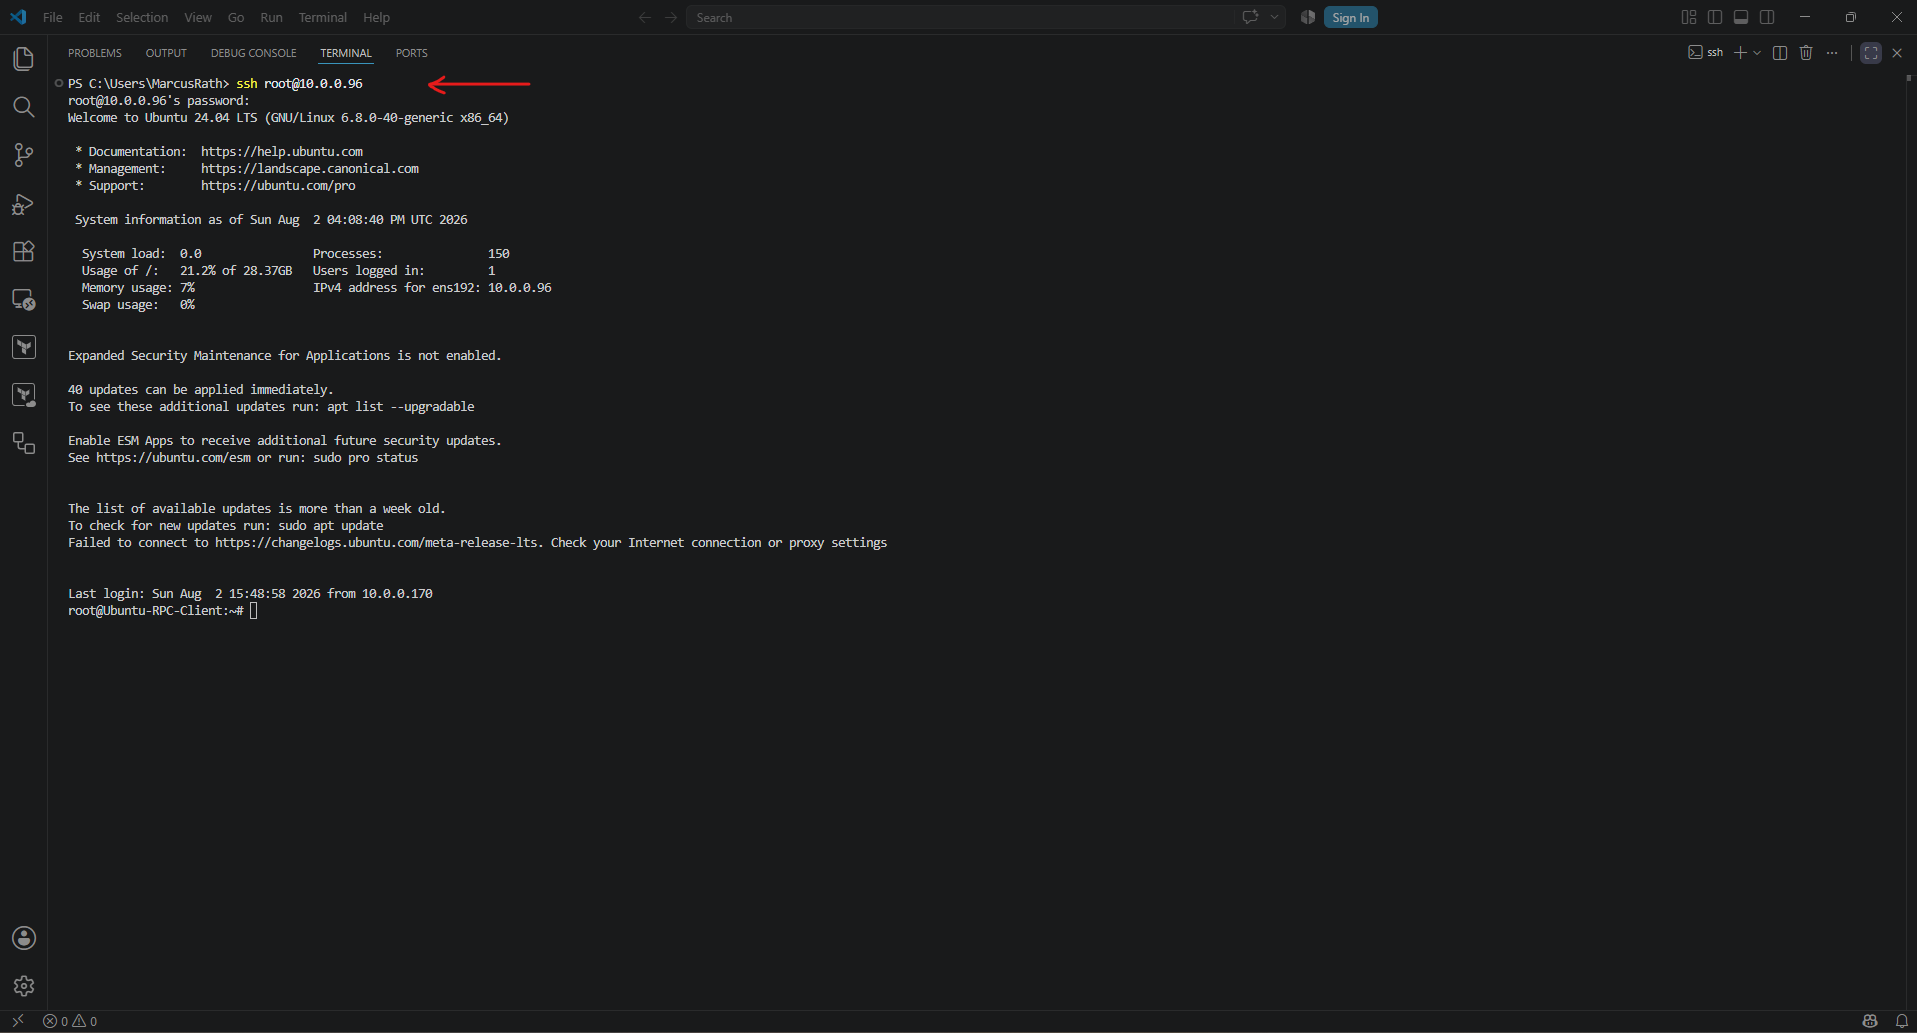
Using the local Visual Studio Code terminal, we establish a standard SSH connection to the RPC client virtual machine.
Visual Studio Code also allows us to split the integrated terminal into multiple panes. This makes it easy to keep simultaneous SSH sessions to both the RPC client and server virtual machines open within a single window while monitoring their output side by side.
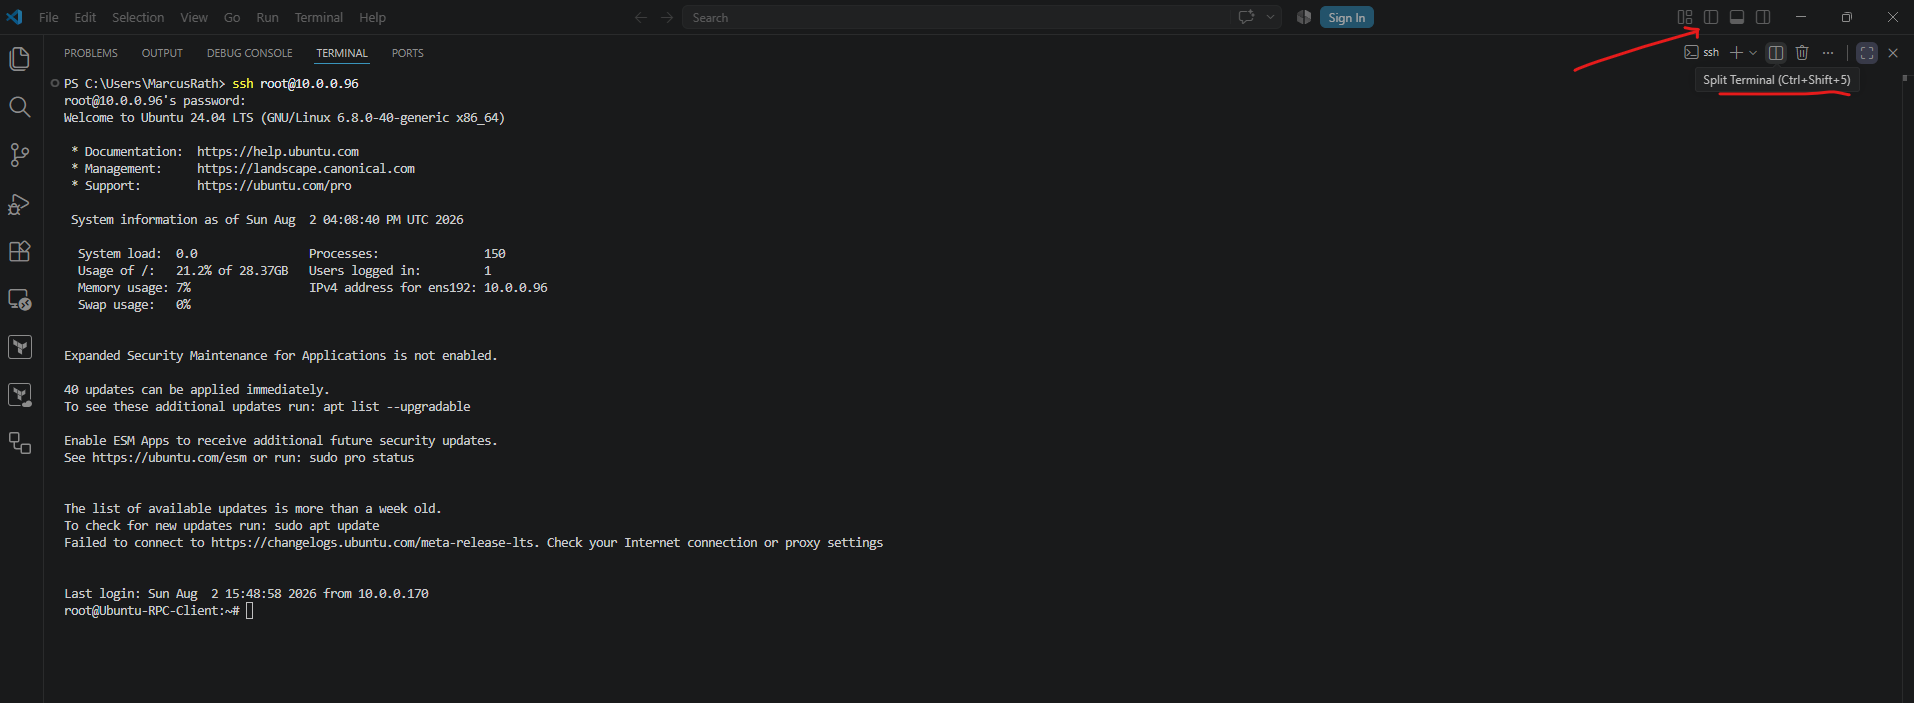
With both SSH sessions established, everything is now in place to start the ONC RPC server and client applications, capture the network traffic with TShark, and analyze the complete RPC communication between the two Ubuntu virtual machines.
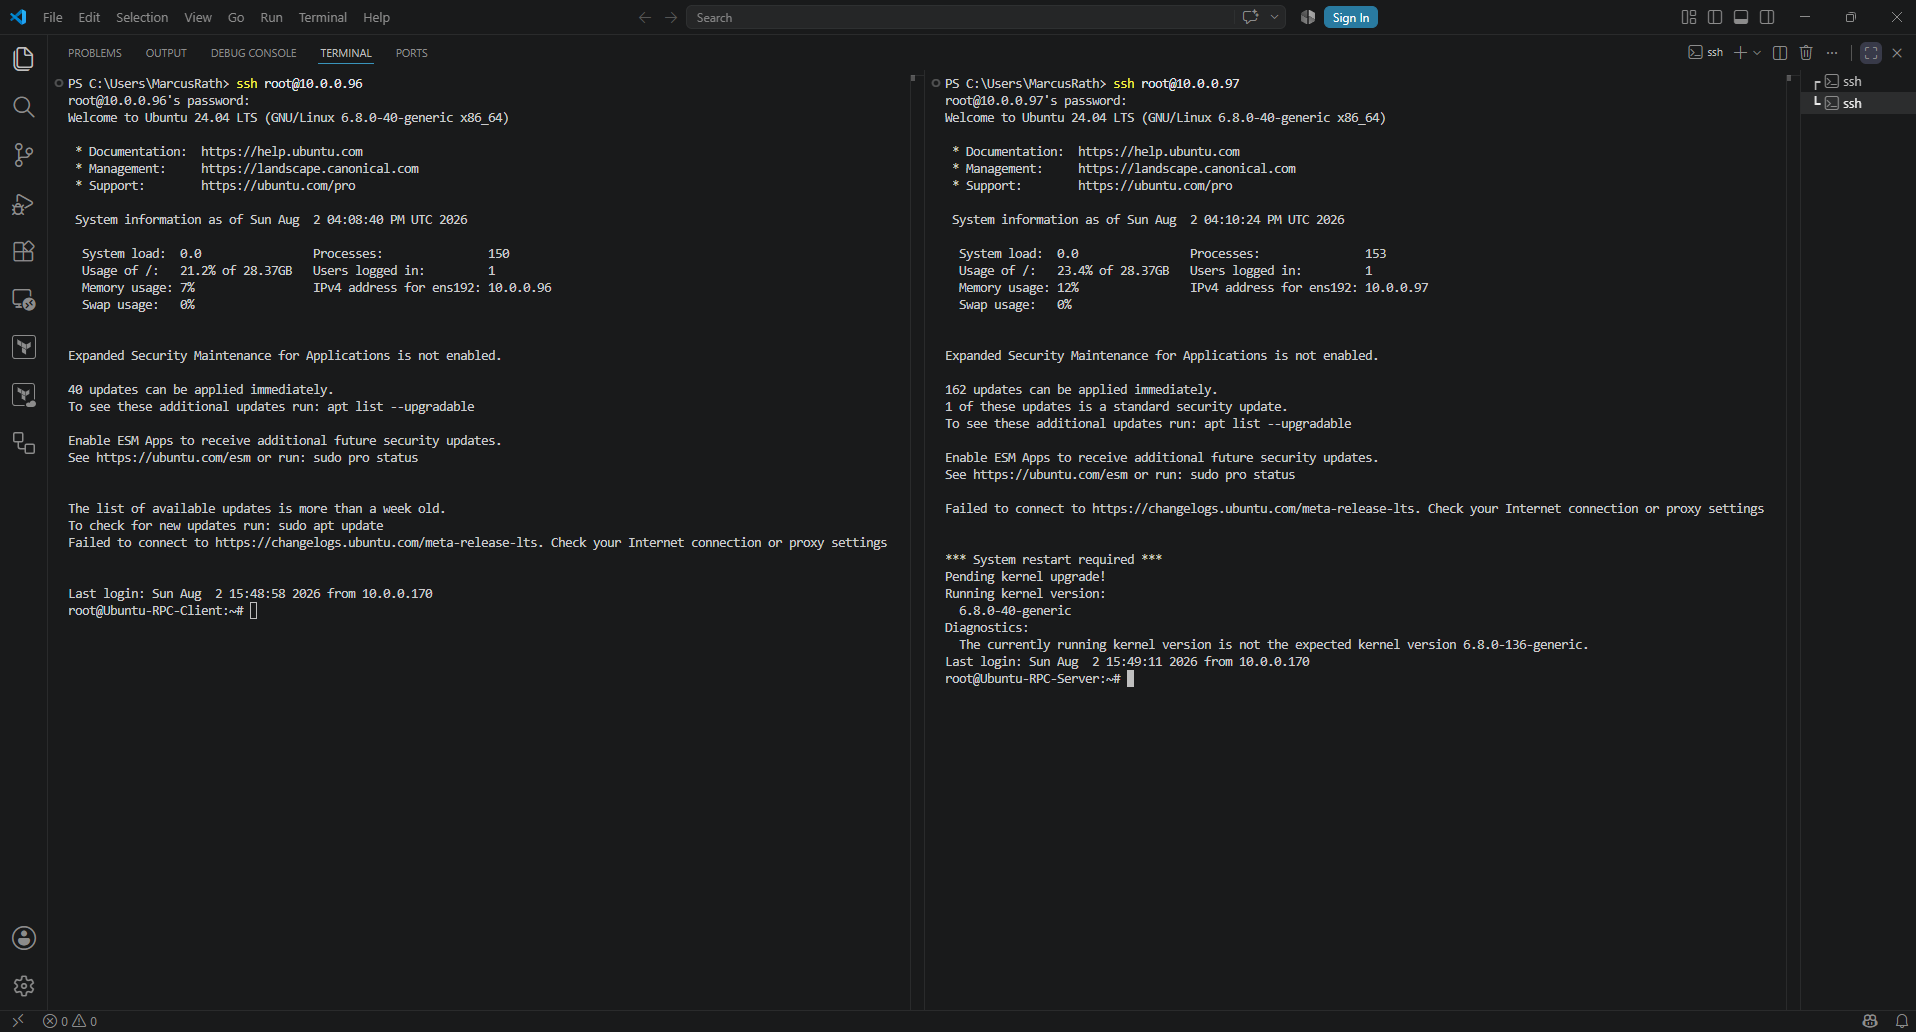
We begin by starting the RPC server on the designated Ubuntu virtual machine, where it registers its RPC program with rpcbind and waits for incoming client requests.
Although all three virtual machines were created from the same Ubuntu Server 24.04 template, the
rpcbindservice had only been installed manually on the development VM as part of the ONC RPC toolchain.Therefore,
rpcbindmust also be installed and running on the dedicated RPC server VM beforeRpcServercan register its program number and transport endpoints.
# ./RpcServer
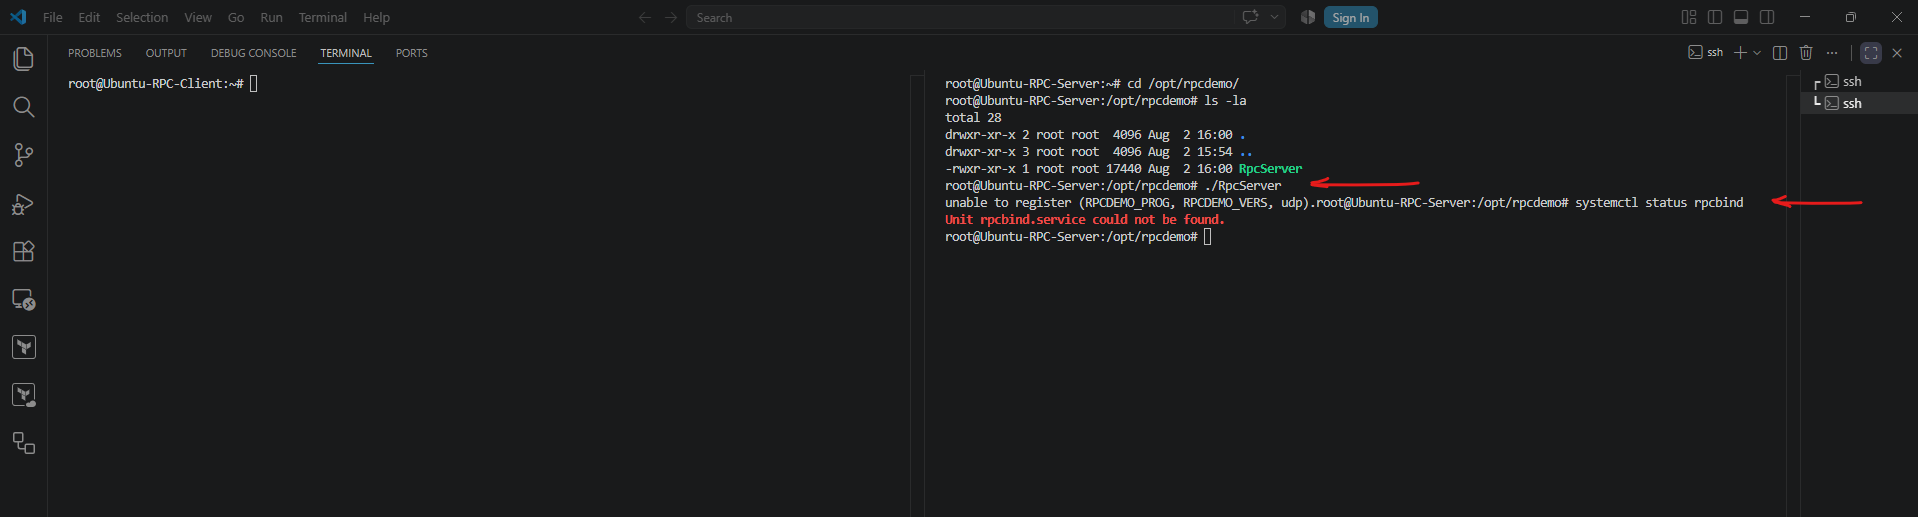
To install rpcbind on the RPC Server VM run:
Note: The
systemctl enable --nowcommand is a convenient shortcut that both enables the service to start automatically at boot and starts it immediately, eliminating the need to run theenableandstartcommands separately.
# apt update
# apt install rpcbind
# systemctl enable --now rpcbind
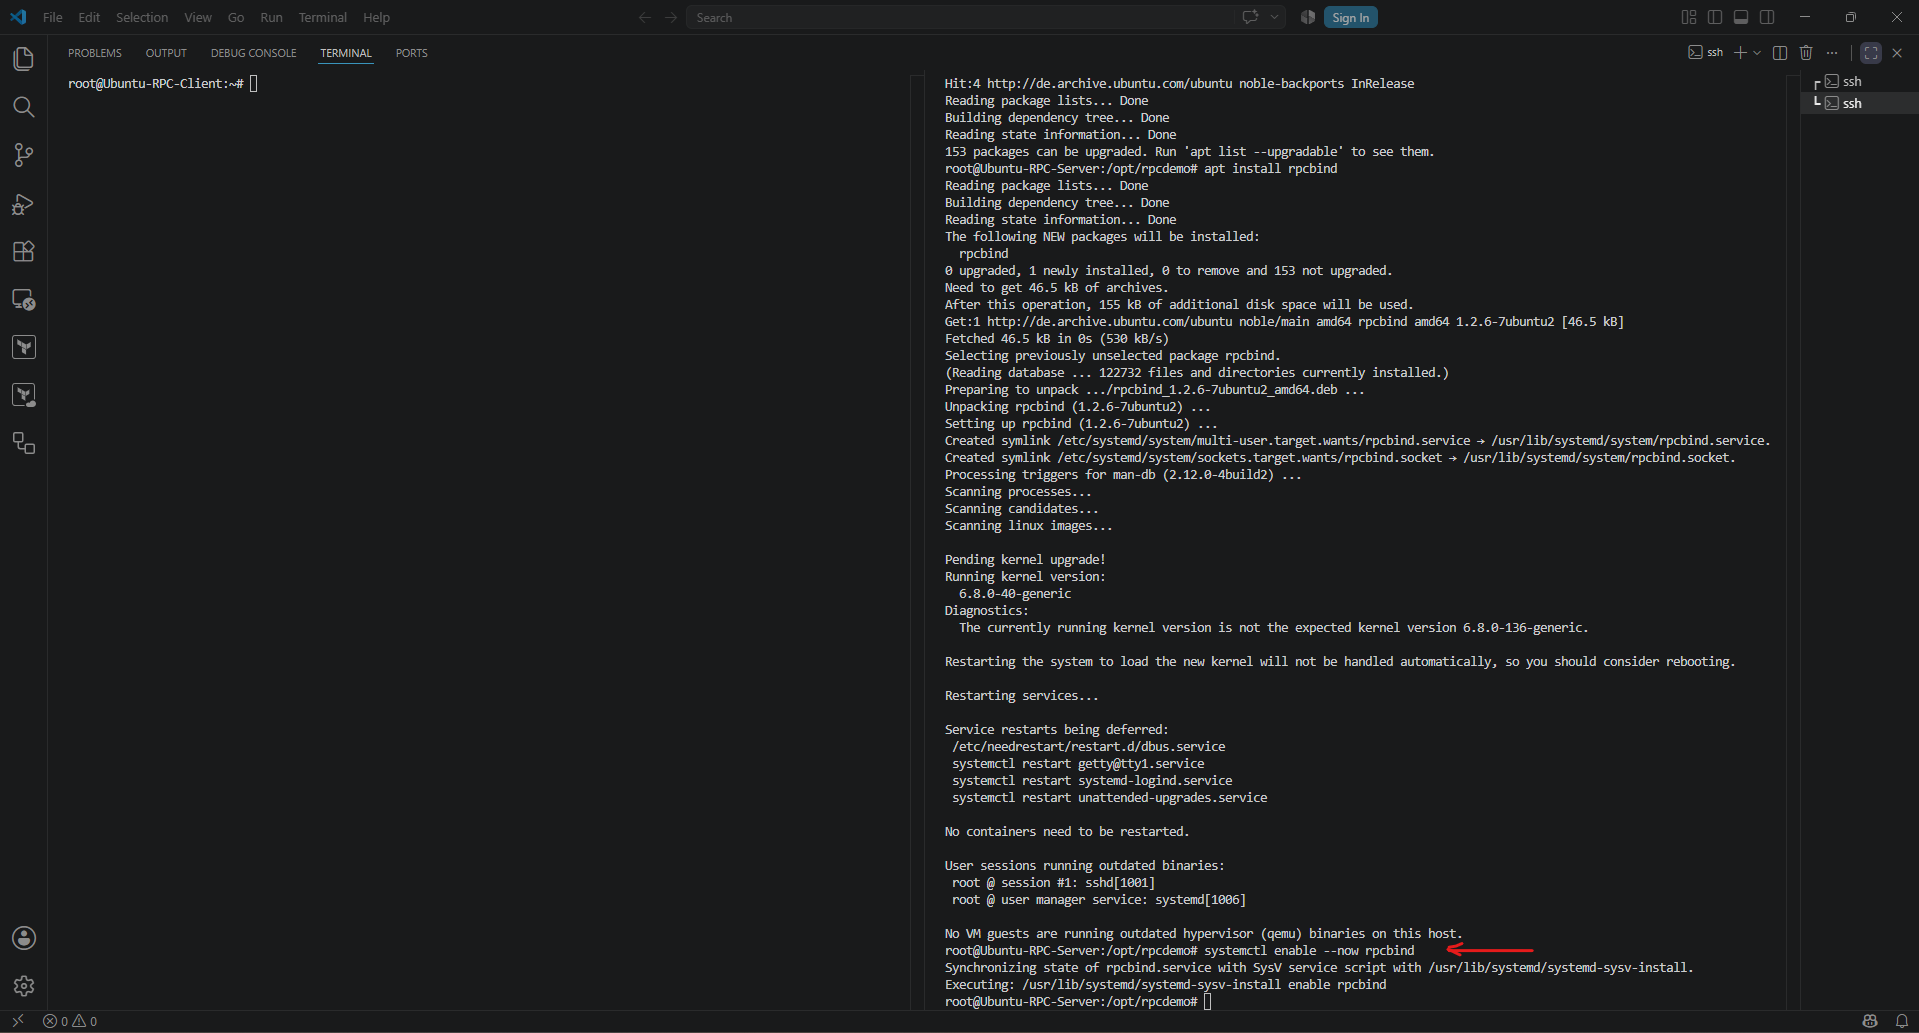
After installing and starting the rpcbind service on the RPC server virtual machine, we launch the server again. This time, the application starts successfully, registers its program number with rpcbind, and waits silently for incoming client requests.
# ./RpcServer
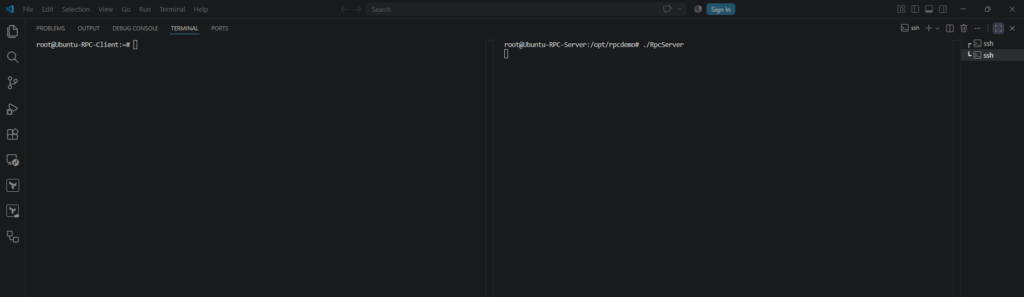
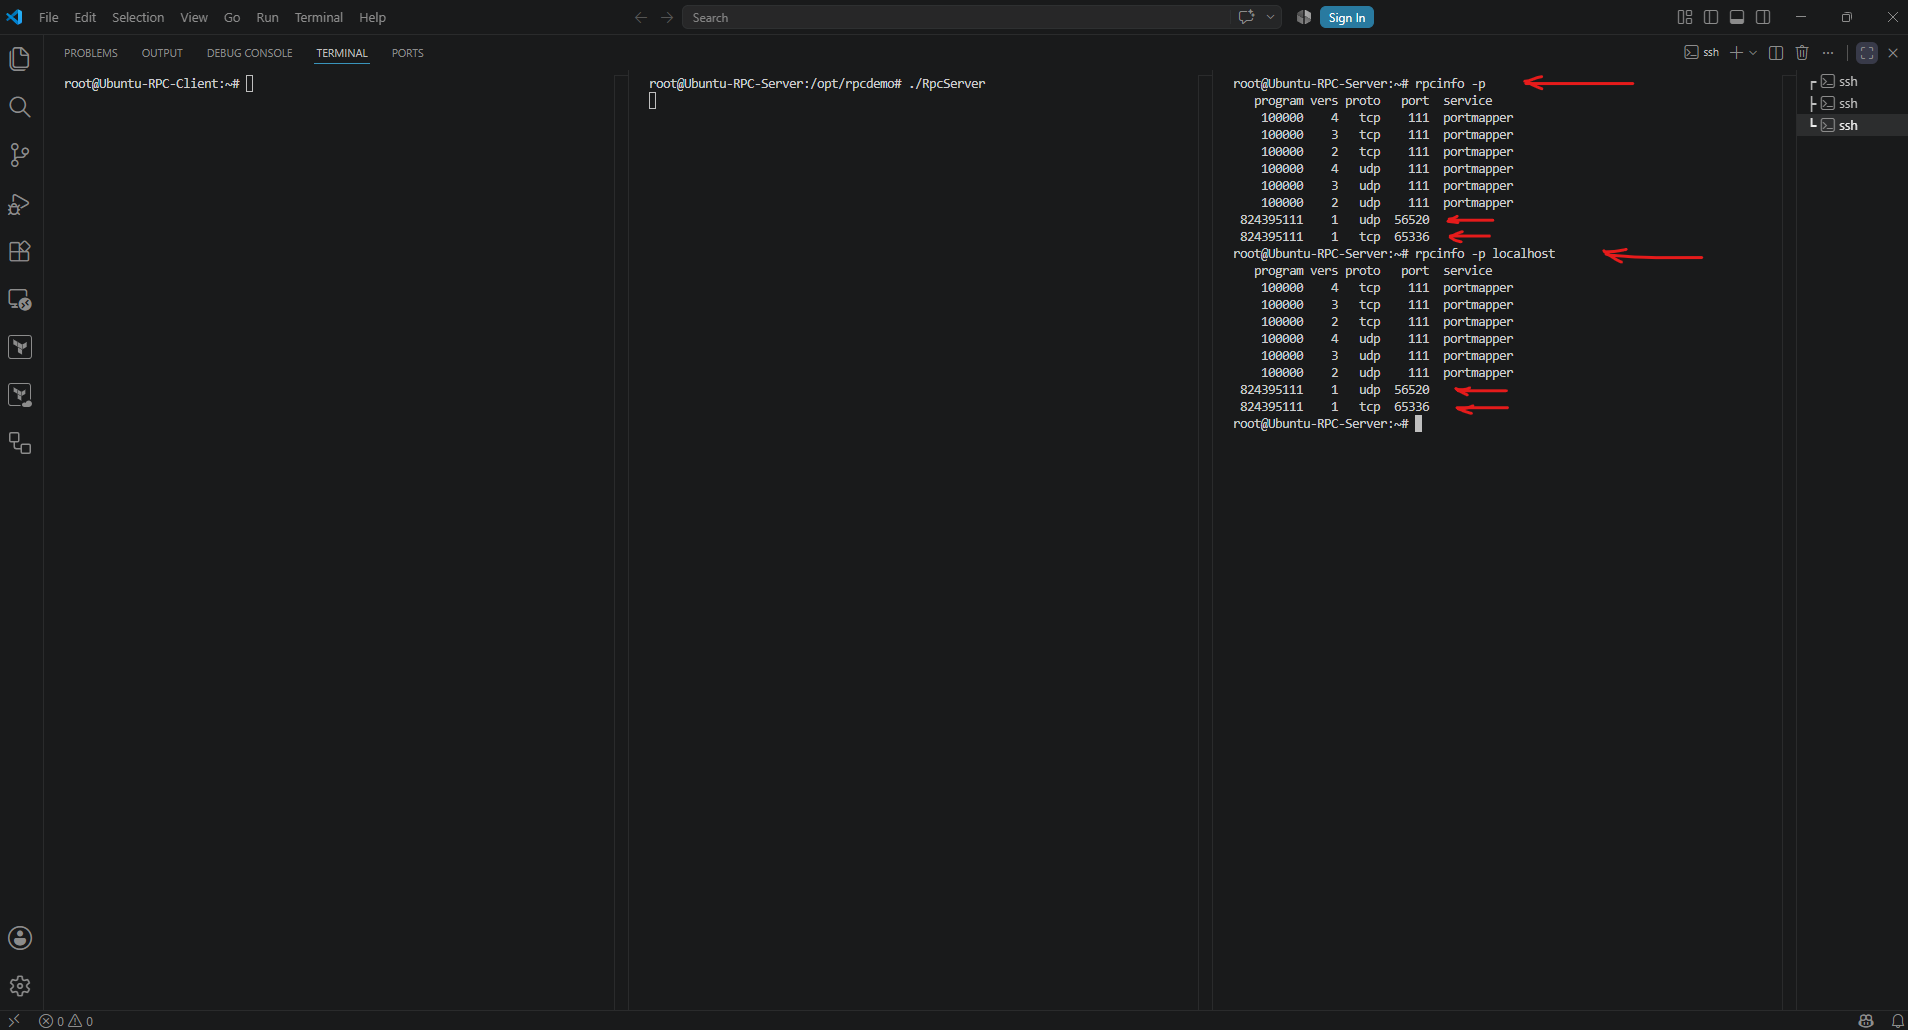
By clicking Split Terminal once more, Visual Studio Code opens a third terminal pane, allowing us to establish an additional SSH session to the RPC server.
We use this administrative session to execute the native Linux
rpcinfoutility, confirming that our RPC program (0x31234567, displayed as824395111in decimal representation) has been successfully registered withrpcbindtogether with its dynamically assigned UDP and TCP ports.
# rpcinfo -p
or
# rpcinfo -p localhost
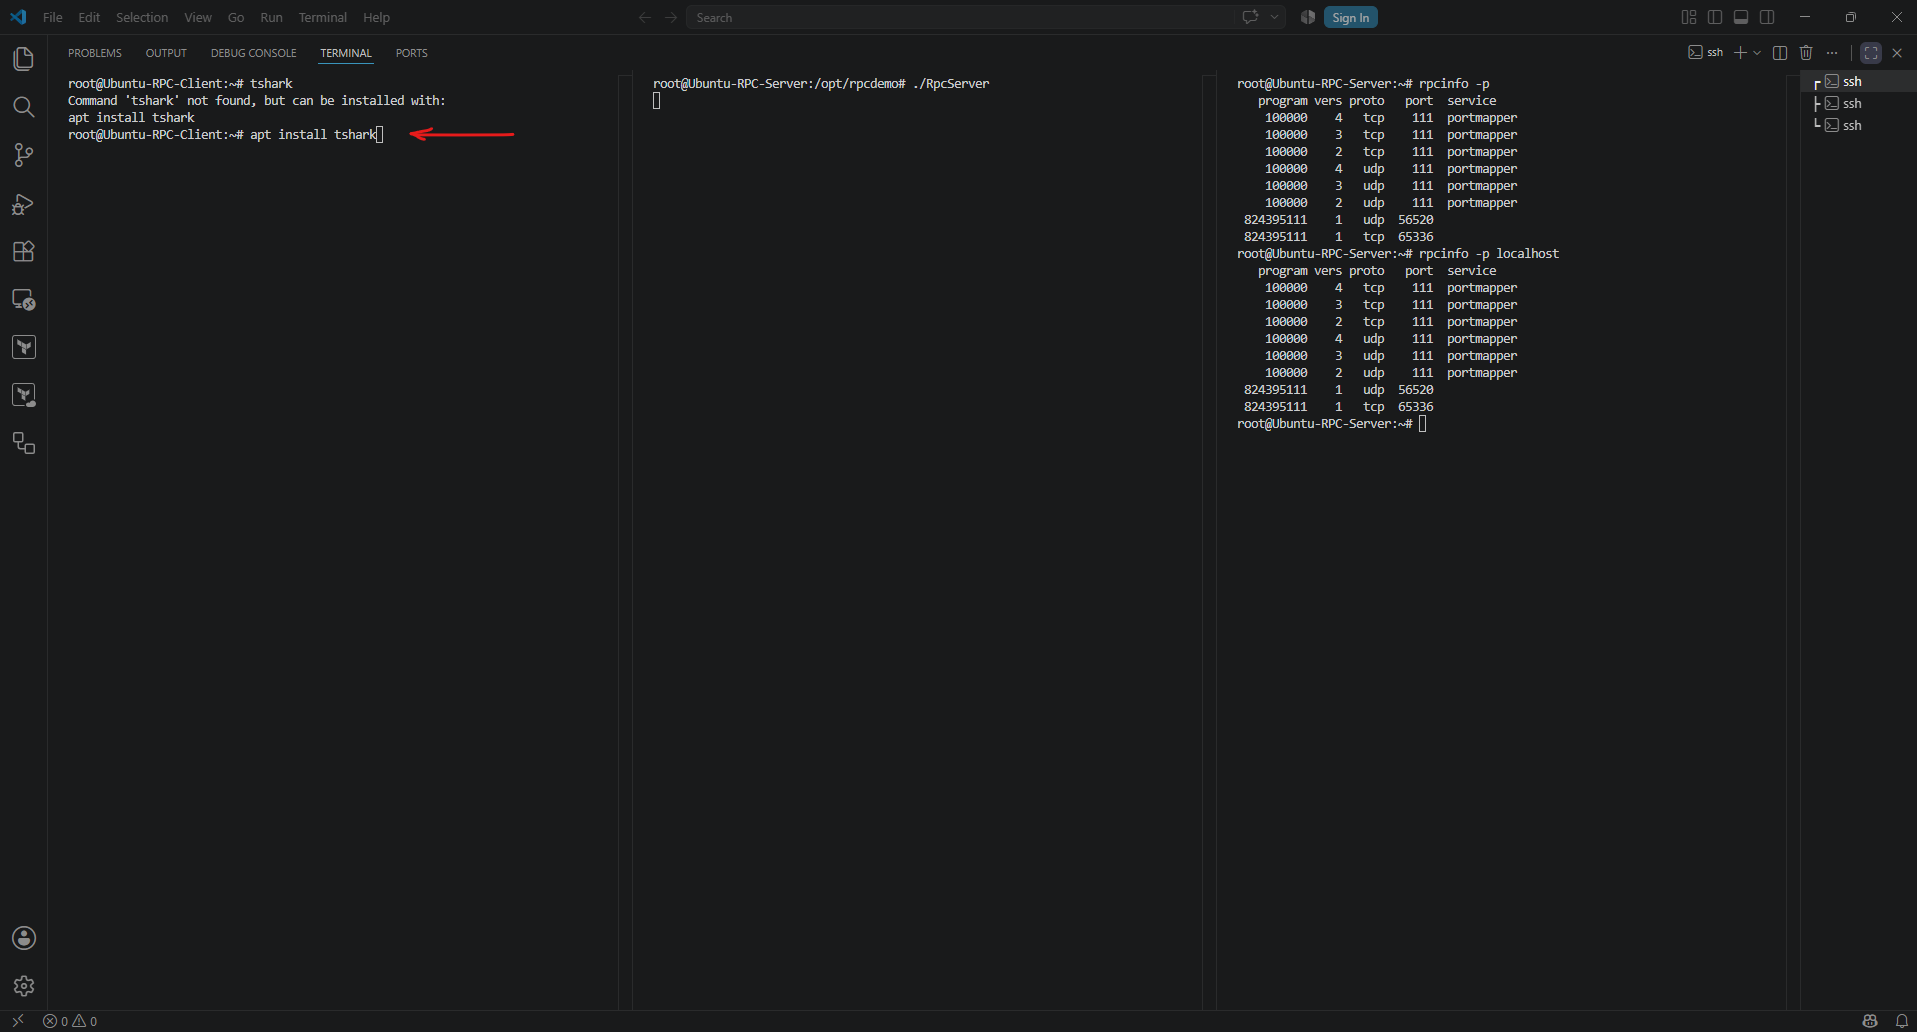
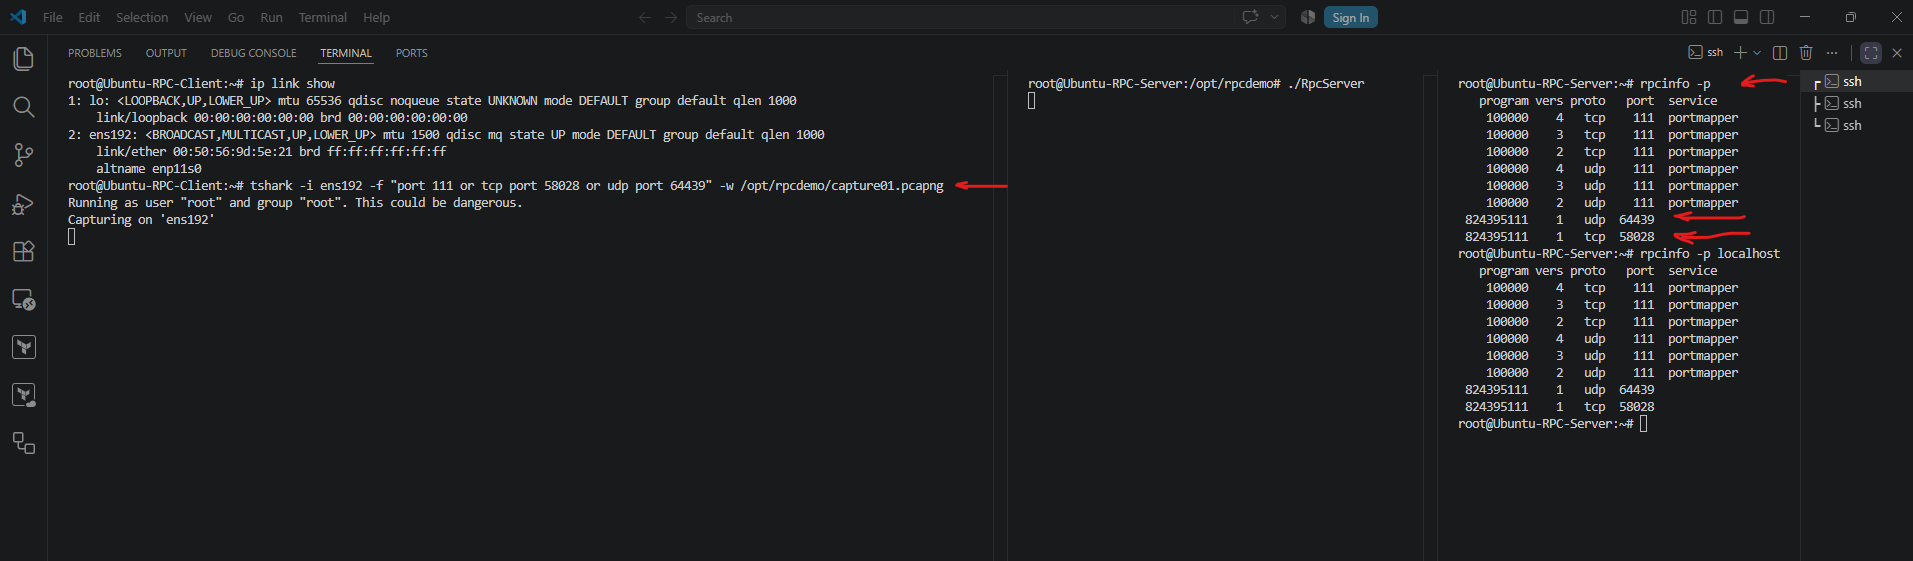
Before starting the RPC client, we first begin capturing the network traffic on the client virtual machine using TShark. If TShark is not yet installed, we can install it using the following command:
# apt install tshark
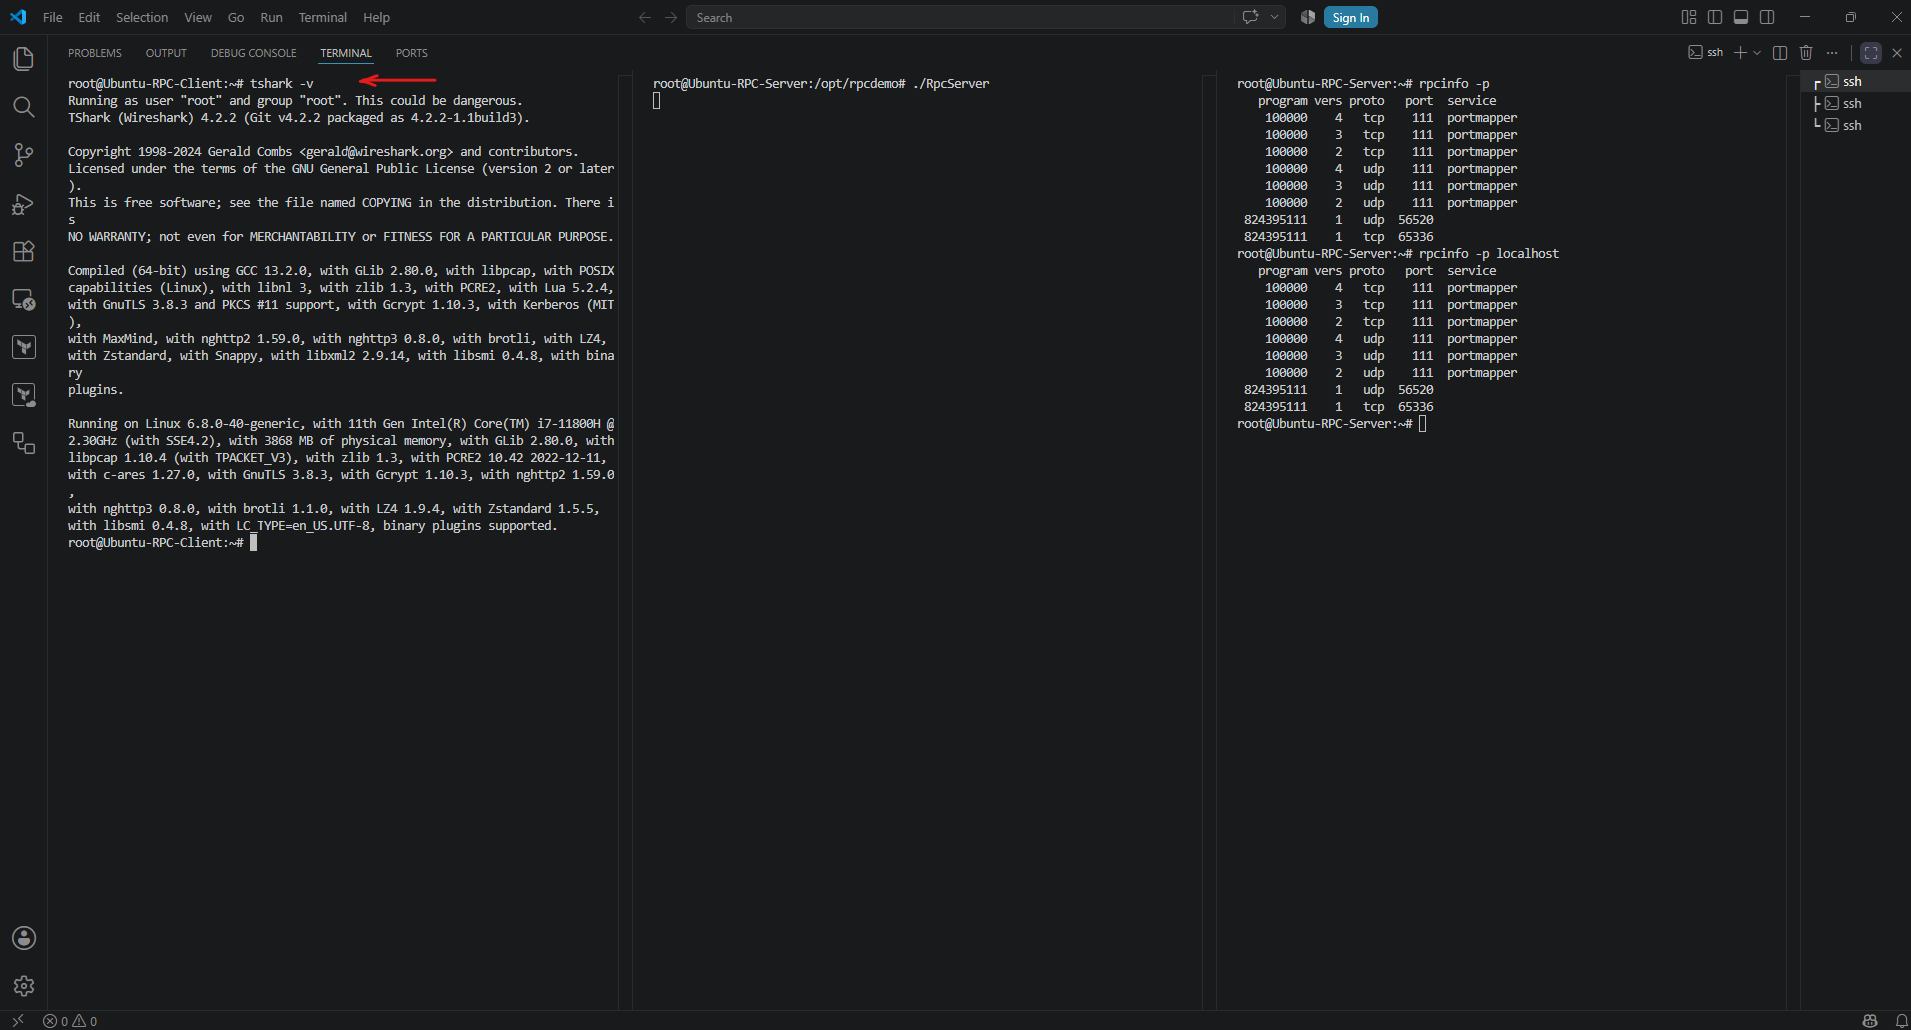
Before starting the packet capture, we verify that TShark is installed on the client virtual machine using the tshark -v command.
Before starting the RPC client, we begin capturing the network traffic with TShark. To keep the packet capture focused on the ONC RPC communication, we apply a capture filter that records only the traffic exchanged with rpcbind (port 111) and the dynamically assigned TCP and UDP ports used by our RPC service, while excluding all unrelated network traffic.
# ip link show
# tshark -i ens192 -f "port 111 or tcp port 58028 or udp port 64439" -w /opt/rpcdemo/capture01.pcapng
We can now start the RPC client and invoke the remote AddNumbers() procedure. As shown below, the client successfully connects to the RPC server, the server processes the request, and the calculated result is returned to the client while the complete communication is captured by TShark for later analysis in Wireshark.
# ./RpcClient 10.0.0.97 40 50
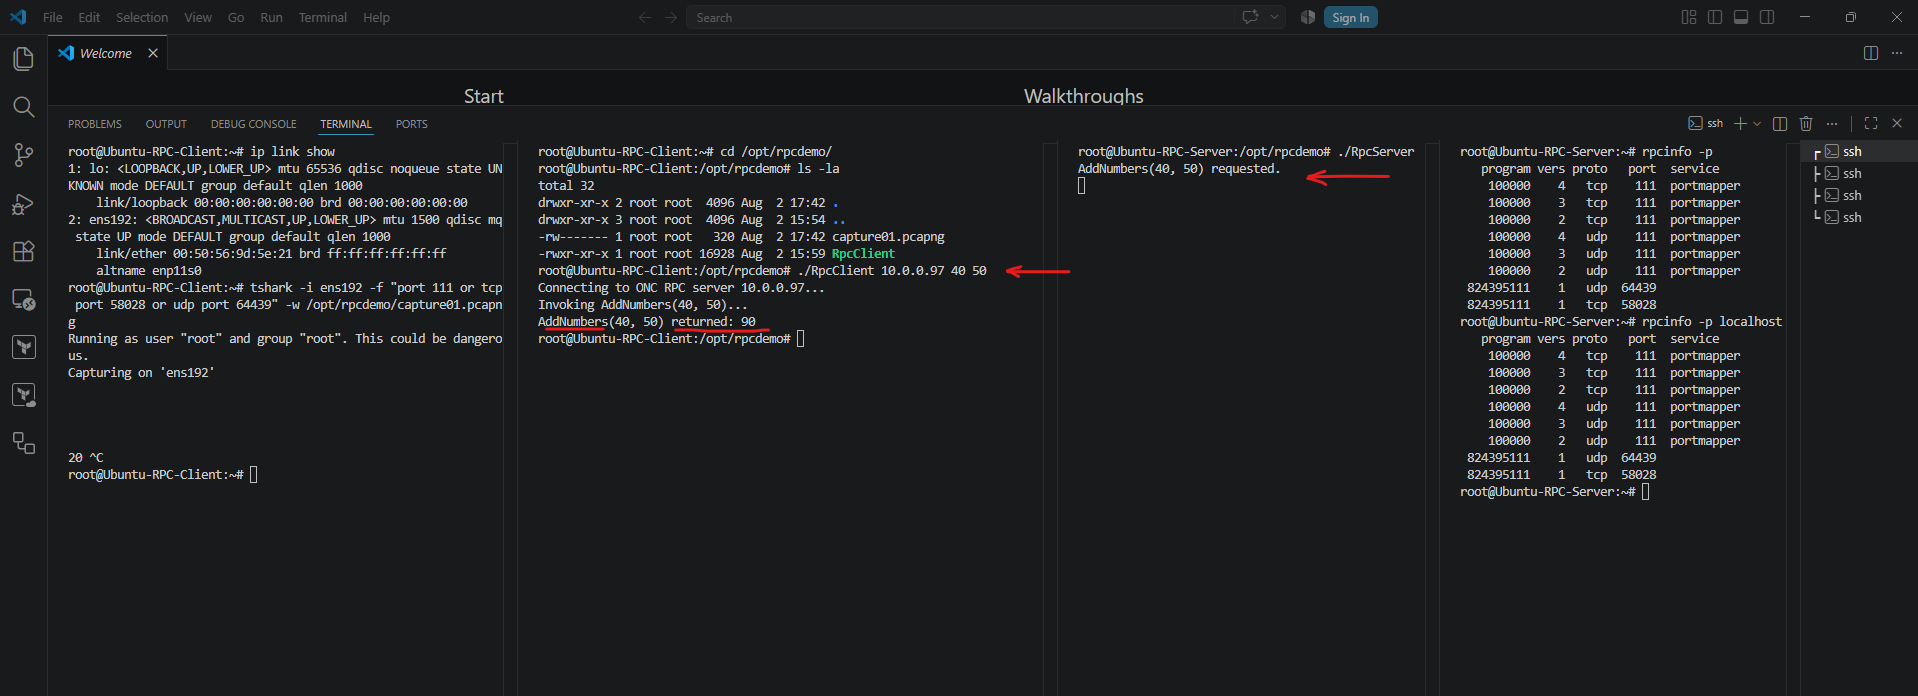
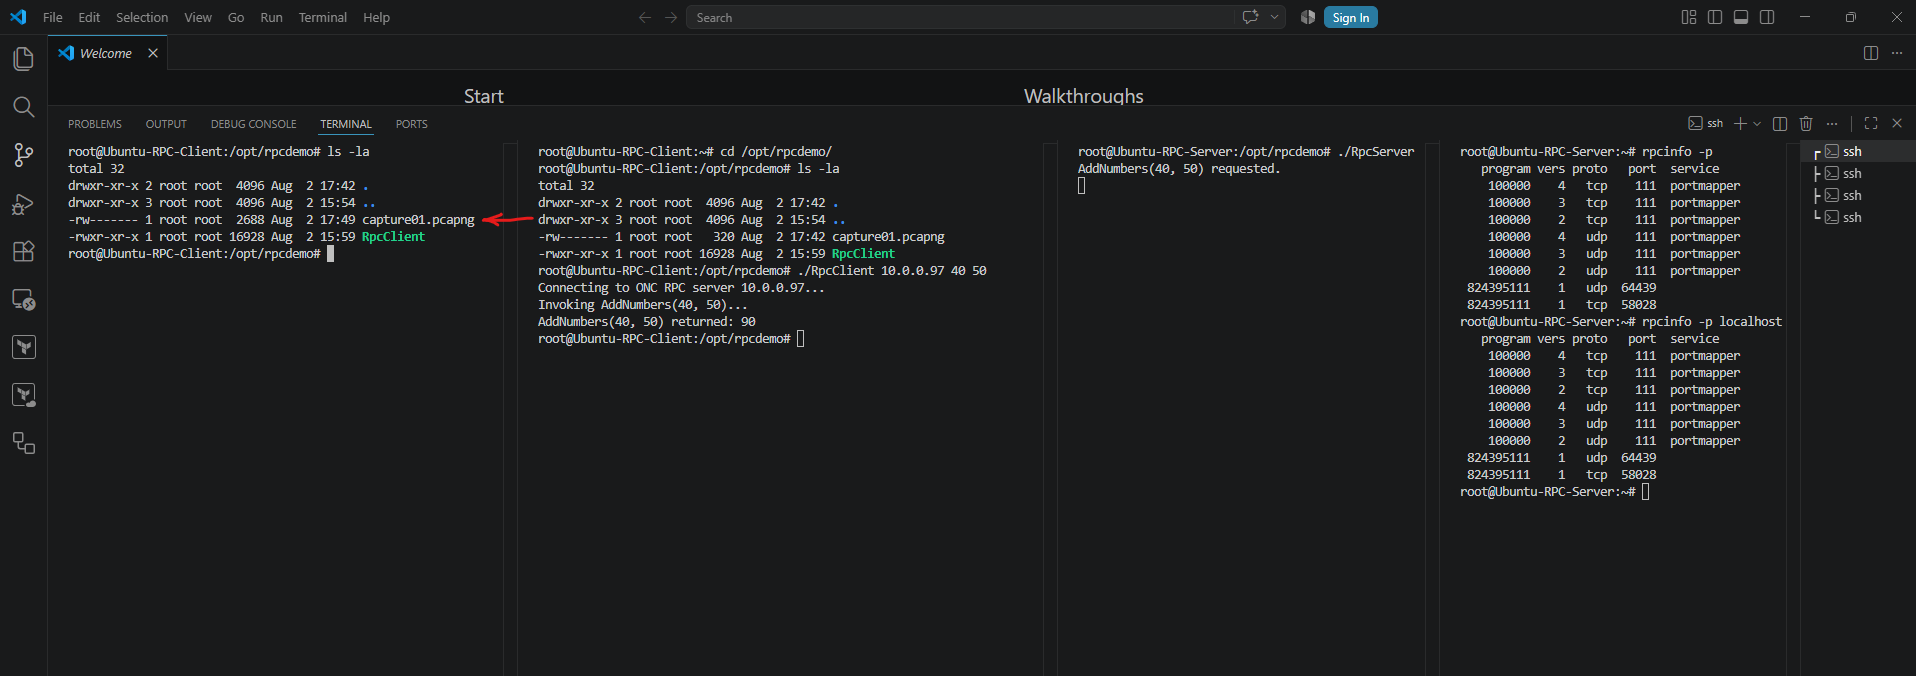
After stopping TShark with Ctrl+C, the packet capture is finalized and written to the specified .pcapng file.
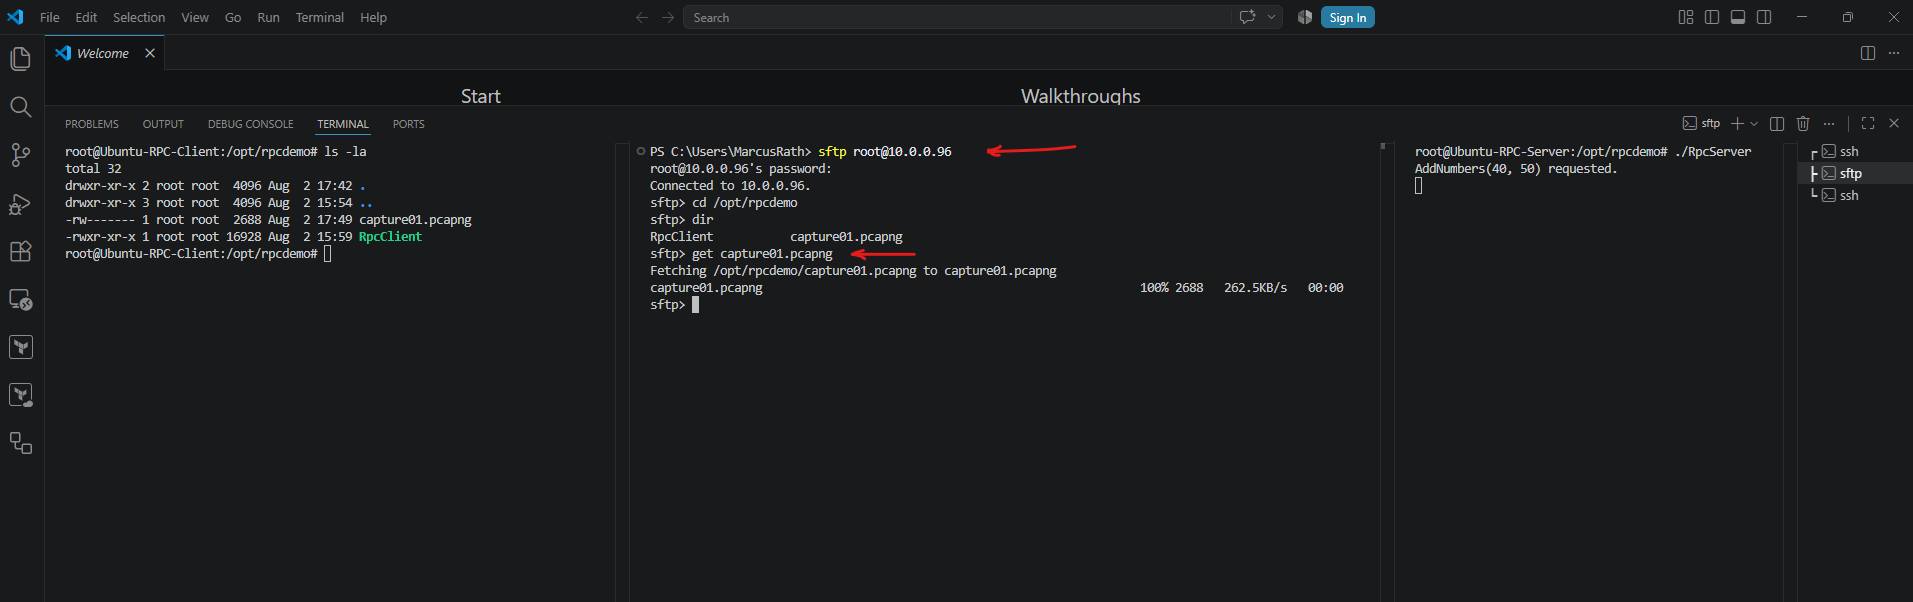
We can now download the capture from the client VM to our local workstation and analyze the recorded ONC RPC communication in Wireshark.
For a deeper dive into TShark, check out my following post
Analyzing the Network Traffic with Wireshark
With the packet capture successfully recorded, we can now examine the complete ONC RPC communication in Wireshark.
Below we will analyze each stage of the protocol, from the initial Portmapper lookup and dynamic port discovery to the actual RPC procedure call and server response exchanged between the client and server.
After the capture has been completed, we can use SFTP to download the generated .pcapng file from the client VM to our local workstation, where it can be opened and analyzed in Wireshark.
Packets 1–3 represent the standard TCP three-way handshake, establishing a reliable TCP connection between the RPC client (10.0.0.96) and the Portmapper service on the RPC server (10.0.0.97) listening on the well-known TCP port 111.
Once the TCP session has been established, packet 4 contains the first ONC RPC message. The client sends a Portmapper GETADDR request (Procedure 3) asking for the TCP endpoint of our RPC program 0x31234567 (decimal 824395111) version 1.
As shown in the packet details, the request already includes the target program number, version, transport protocol (
tcp), and the universal address (10.0.0.97.0.111) of the Portmapper service that is responsible for resolving the requested RPC program to its dynamically assigned listening port.
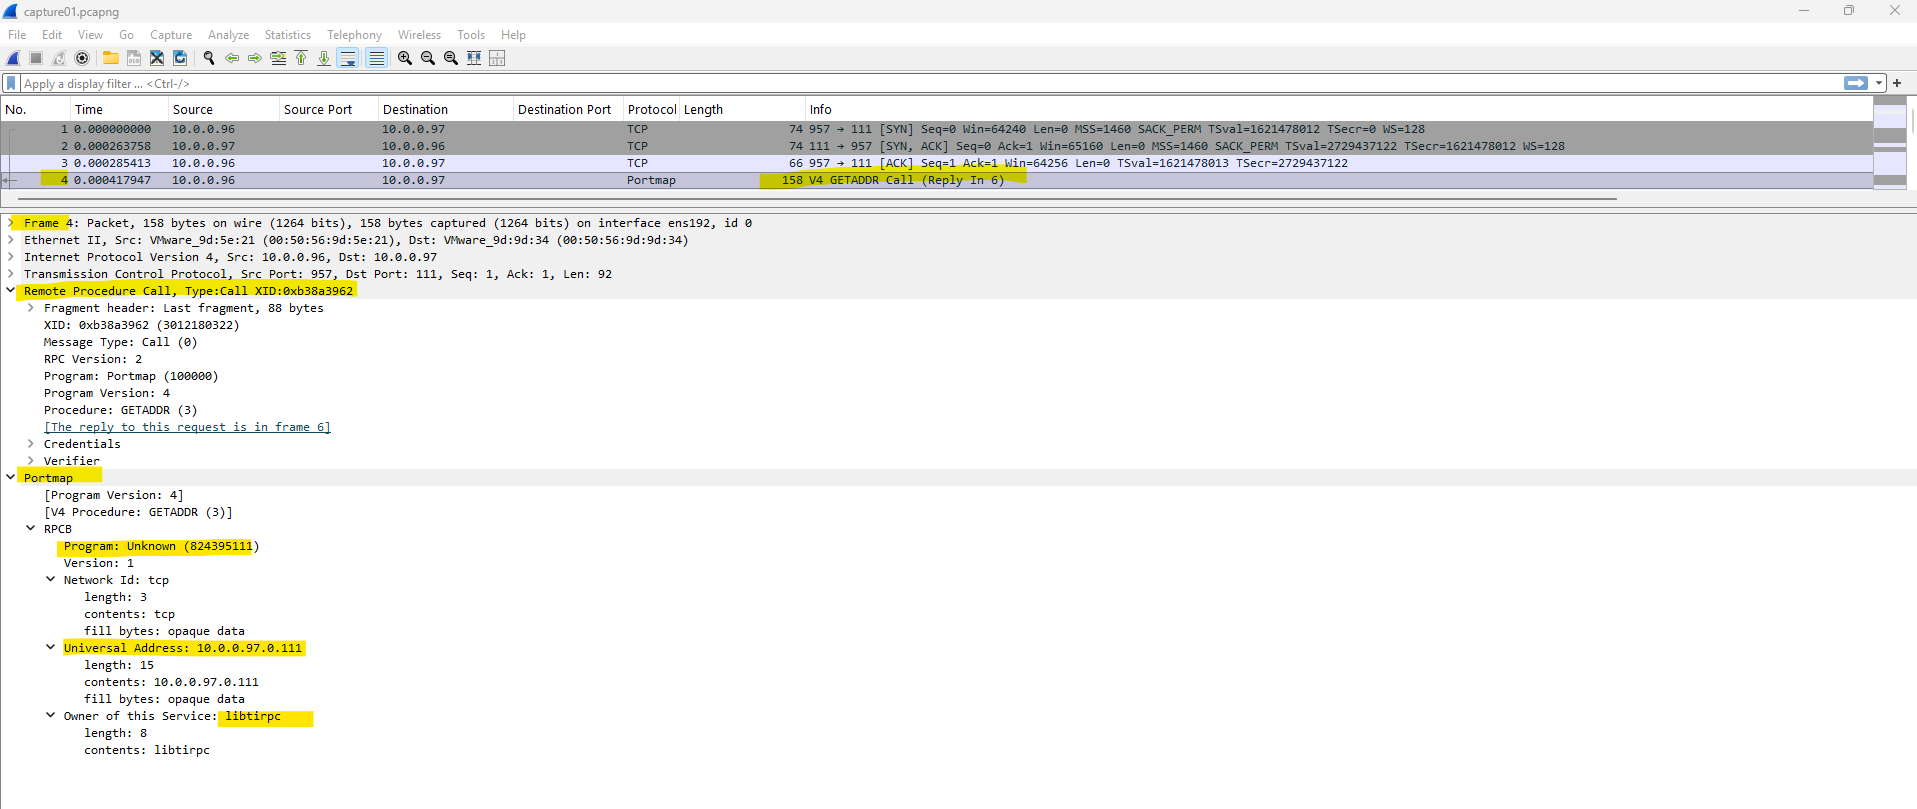
Packet 5 is a normal TCP acknowledgment (ACK) sent by the server, confirming that the Portmapper request has been received successfully.
Packet 6 contains the corresponding Portmapper GETADDR reply. The request is accepted (
Reply State: accepted), and the Portmapper returns the universal address10.0.0.97.226.172, which encodes the dynamically assigned TCP port of our RPC service.The last two numbers represent the port in decimal notation (
226 × 256 + 172 = 58028), informing the client that the RPC server is listening on TCP port 58028 for subsequent RPC procedure calls.
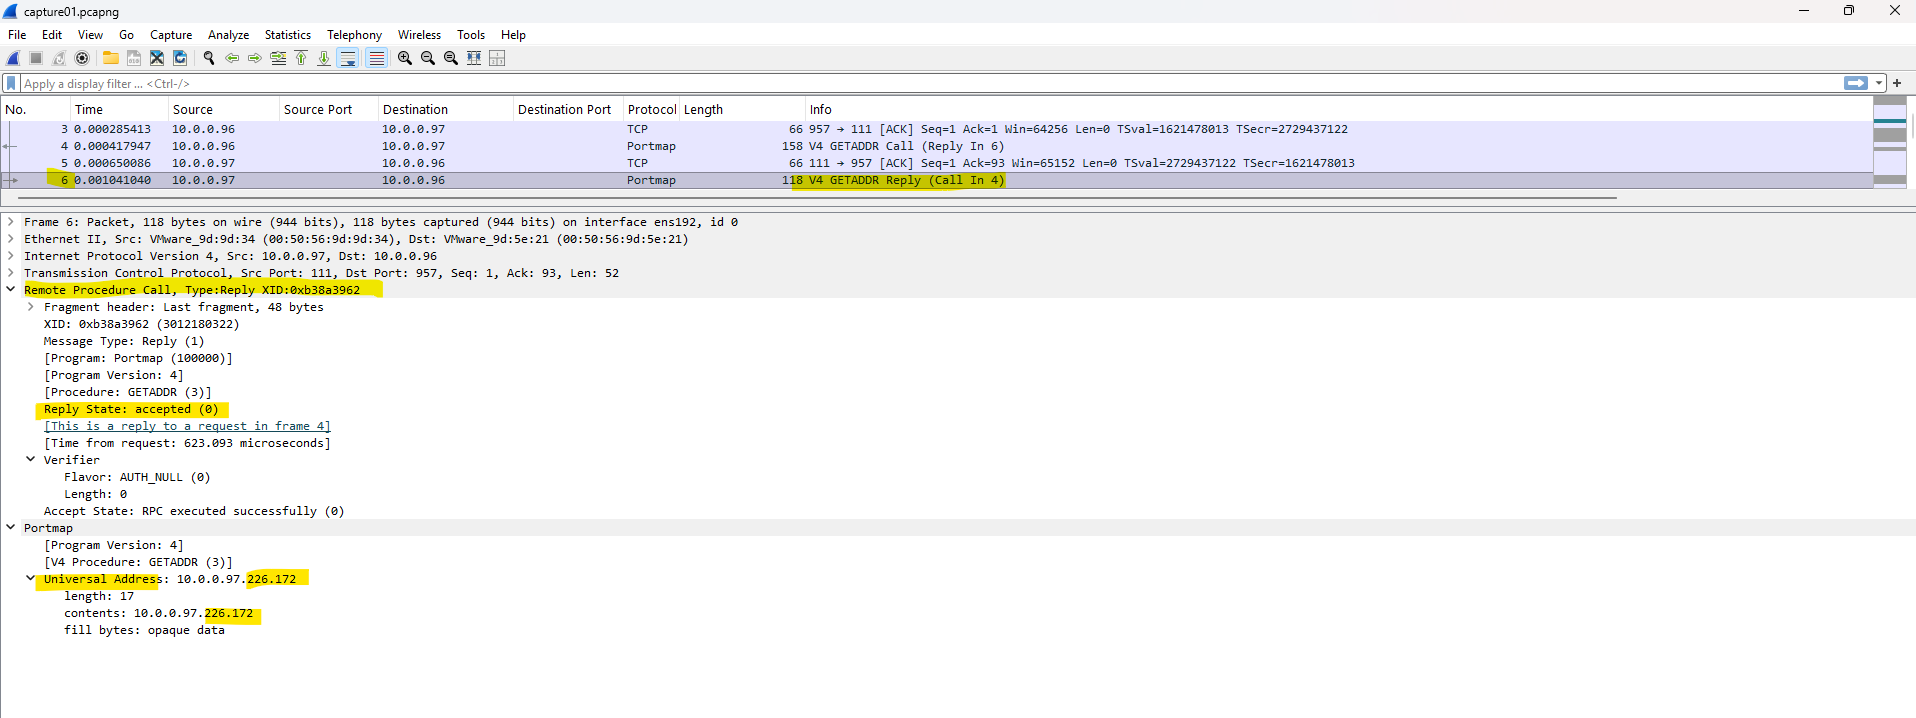
Unlike Microsoft DCE/RPC, which returns the TCP endpoint directly as part of a string binding (for example
ncacn_ip_tcp:49667), ONC RPC’s Portmapper returns a universal address in which the TCP port is encoded as the high and low byte appended to the IP address (for example10.0.0.97.226.172→226 × 256 + 172 = 58028).
Frame 9 shows the client initiating a new TCP connection to the dynamically assigned RPC service port (58028) returned by the Portmapper.
As with any TCP connection, the communication starts with a standard three-way handshake (SYN → SYN/ACK → ACK), but this time directly between the client and the RPC server process rather than the Portmapper on port 111.
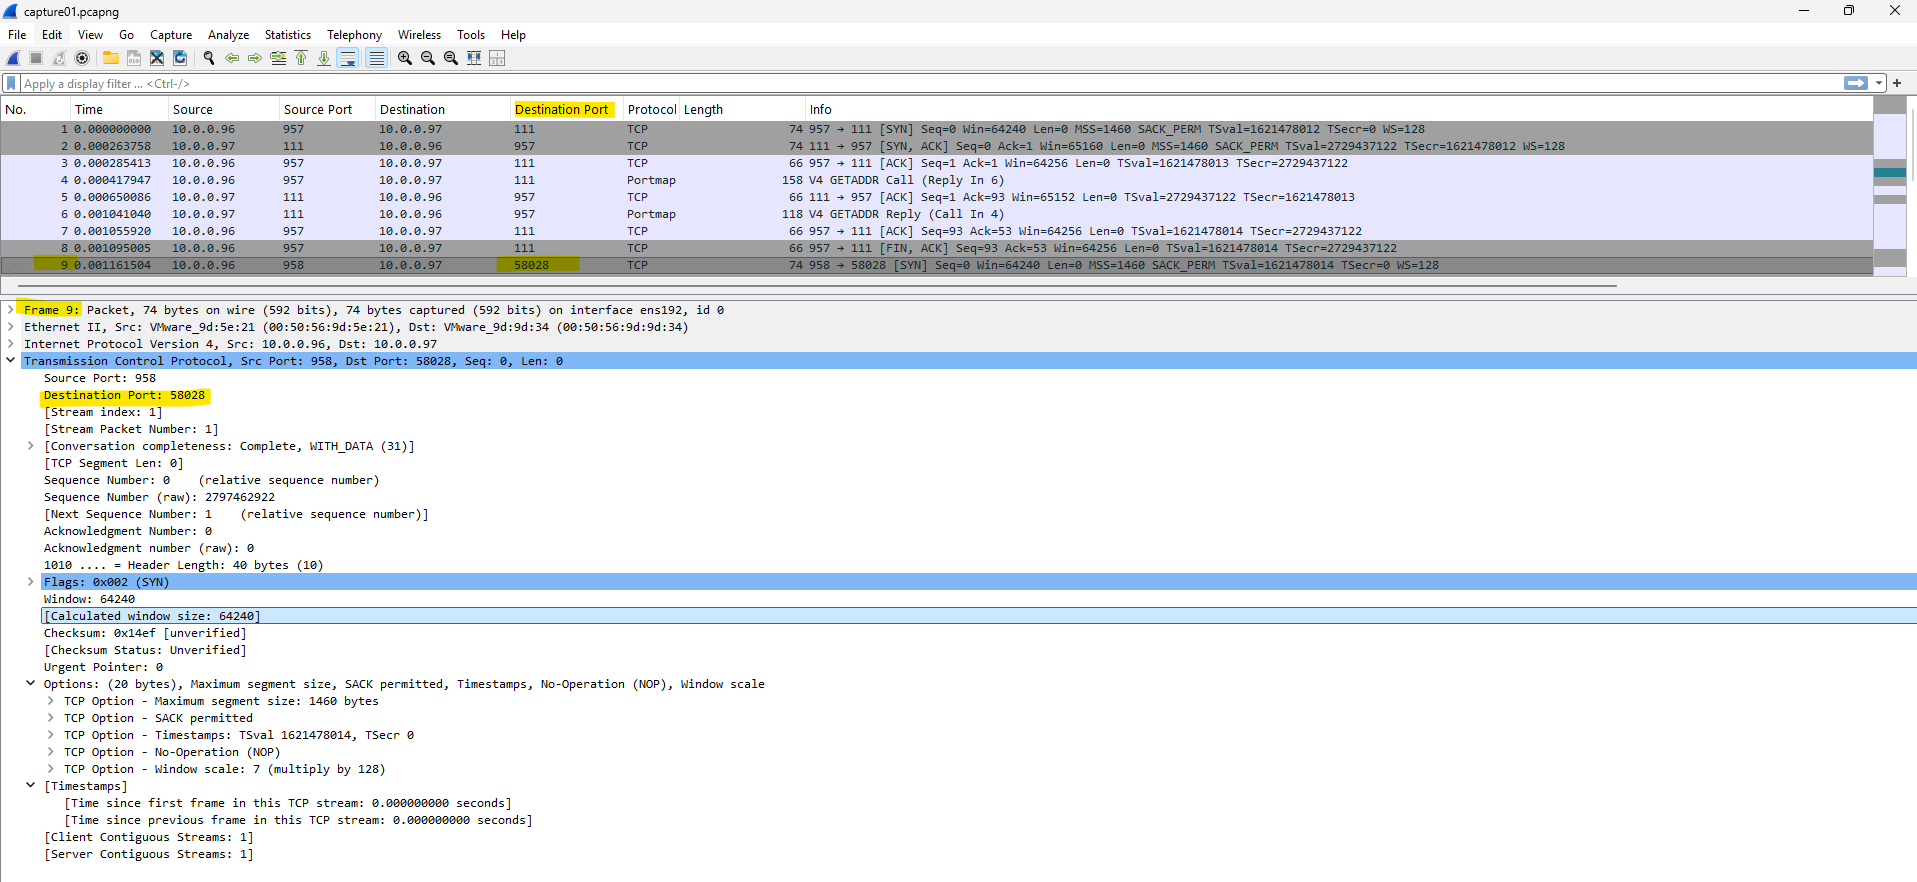
Packet 14 contains the first application data transmitted by the client after the TCP connection has been established and therefore represents the actual RPC request sent to the server.
Although Wireshark does not automatically decode the payload as an ONC RPC message on the dynamically assigned port, the raw TCP payload clearly contains the RPC request.
The final two 32-bit values (
0x00000028and0x00000032) correspond to the integers 40 and 50, which are passed to theAddNumbers()procedure.This confirms that the client has switched from the Portmapper on TCP port 111 to the dynamically assigned service port and is now invoking the actual RPC method.
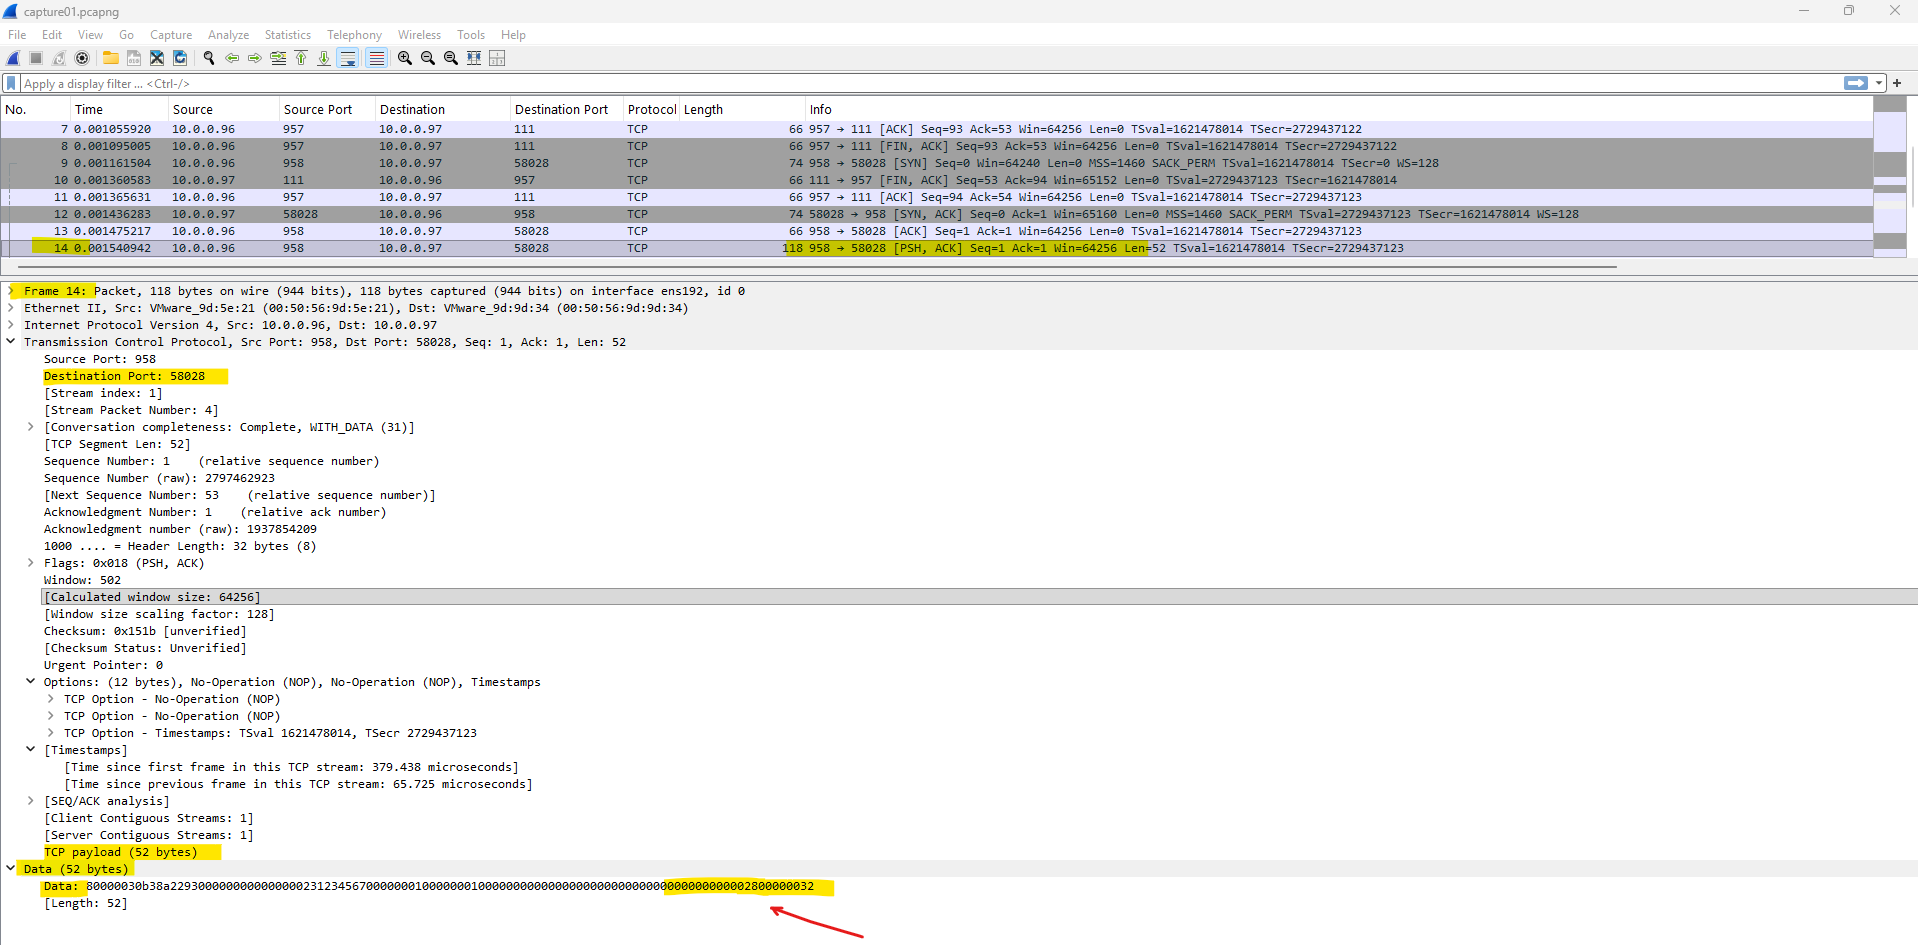
Since the previous packets only establish the TCP connection, the actual RPC communication begins with the first TCP segment carrying application data (PSH, ACK).
For this reason, the first PSH packet is typically the best starting point when analyzing an RPC conversation, as it usually contains the initial remote procedure call sent by the client.
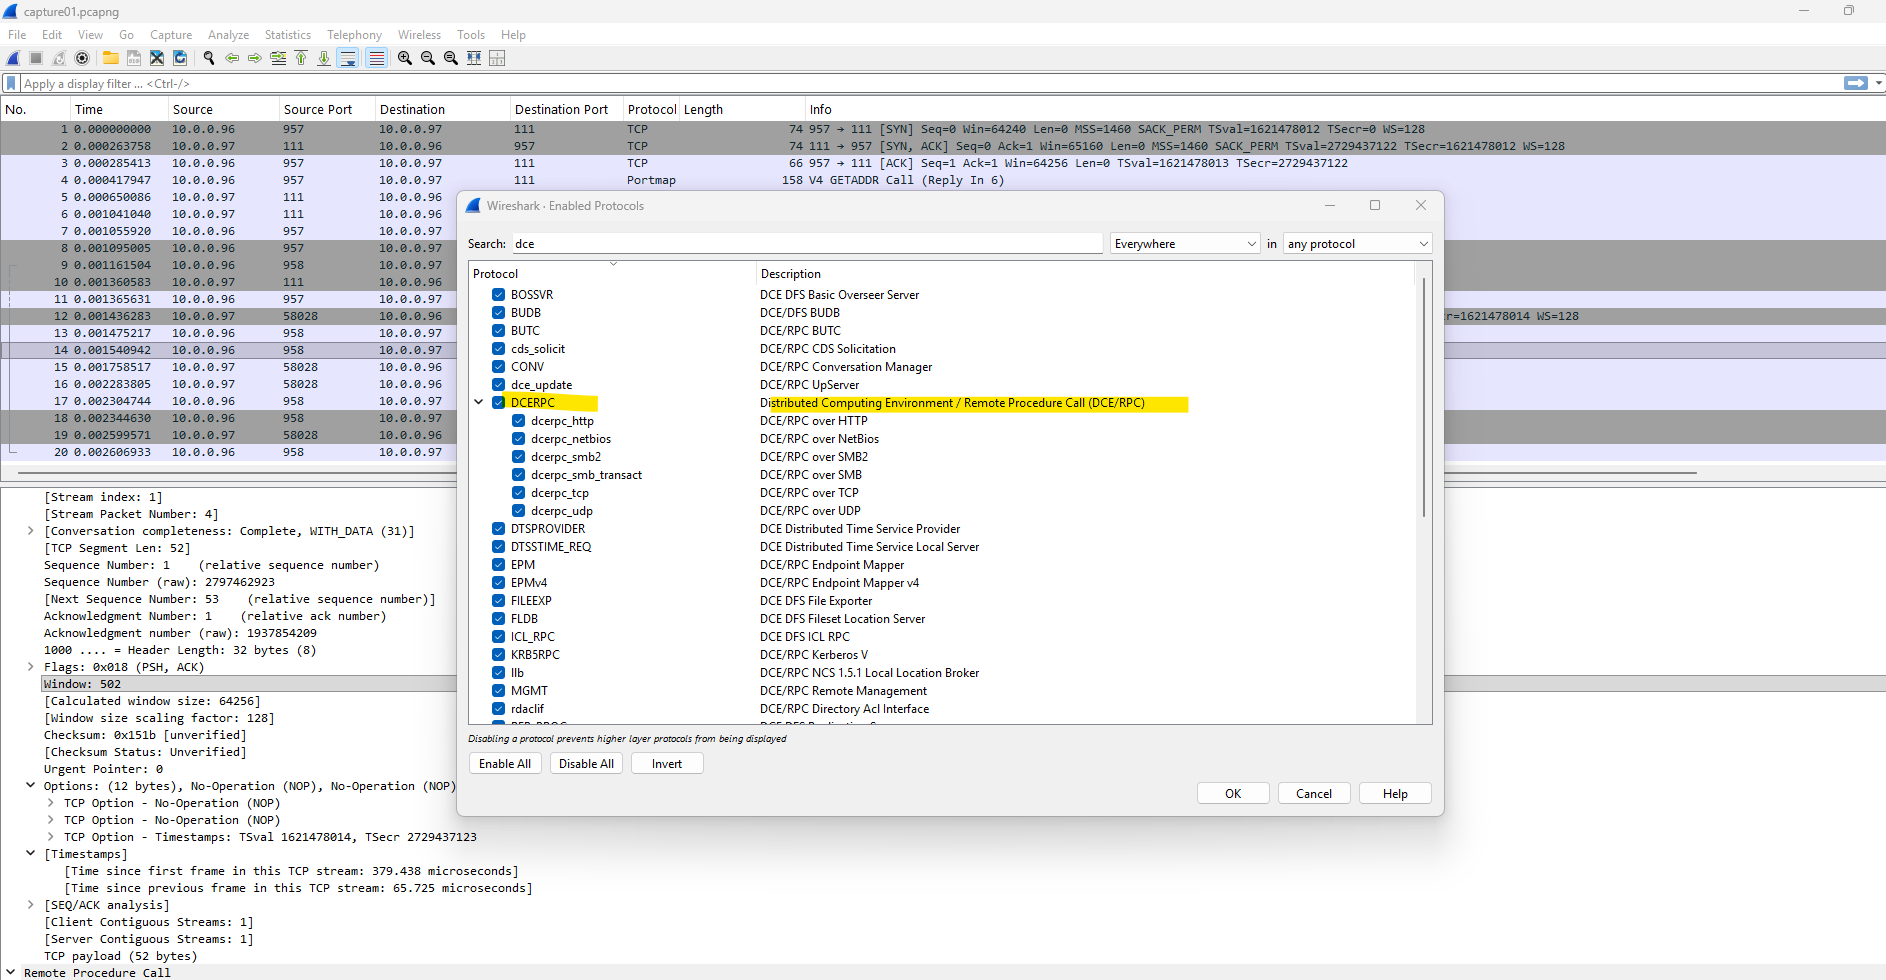
For comparison, Wireshark includes a dedicated dissector for Microsoft’s DCE/RPC protocol family like shown below with enabled protocols, exposing numerous protocol-specific sub-dissectors such as DCE/RPC over TCP, SMB, HTTP, and NetBIOS.
In contrast, ONC RPC support is much more generic, especially when analyzing custom RPC programs without a dedicated dissector.
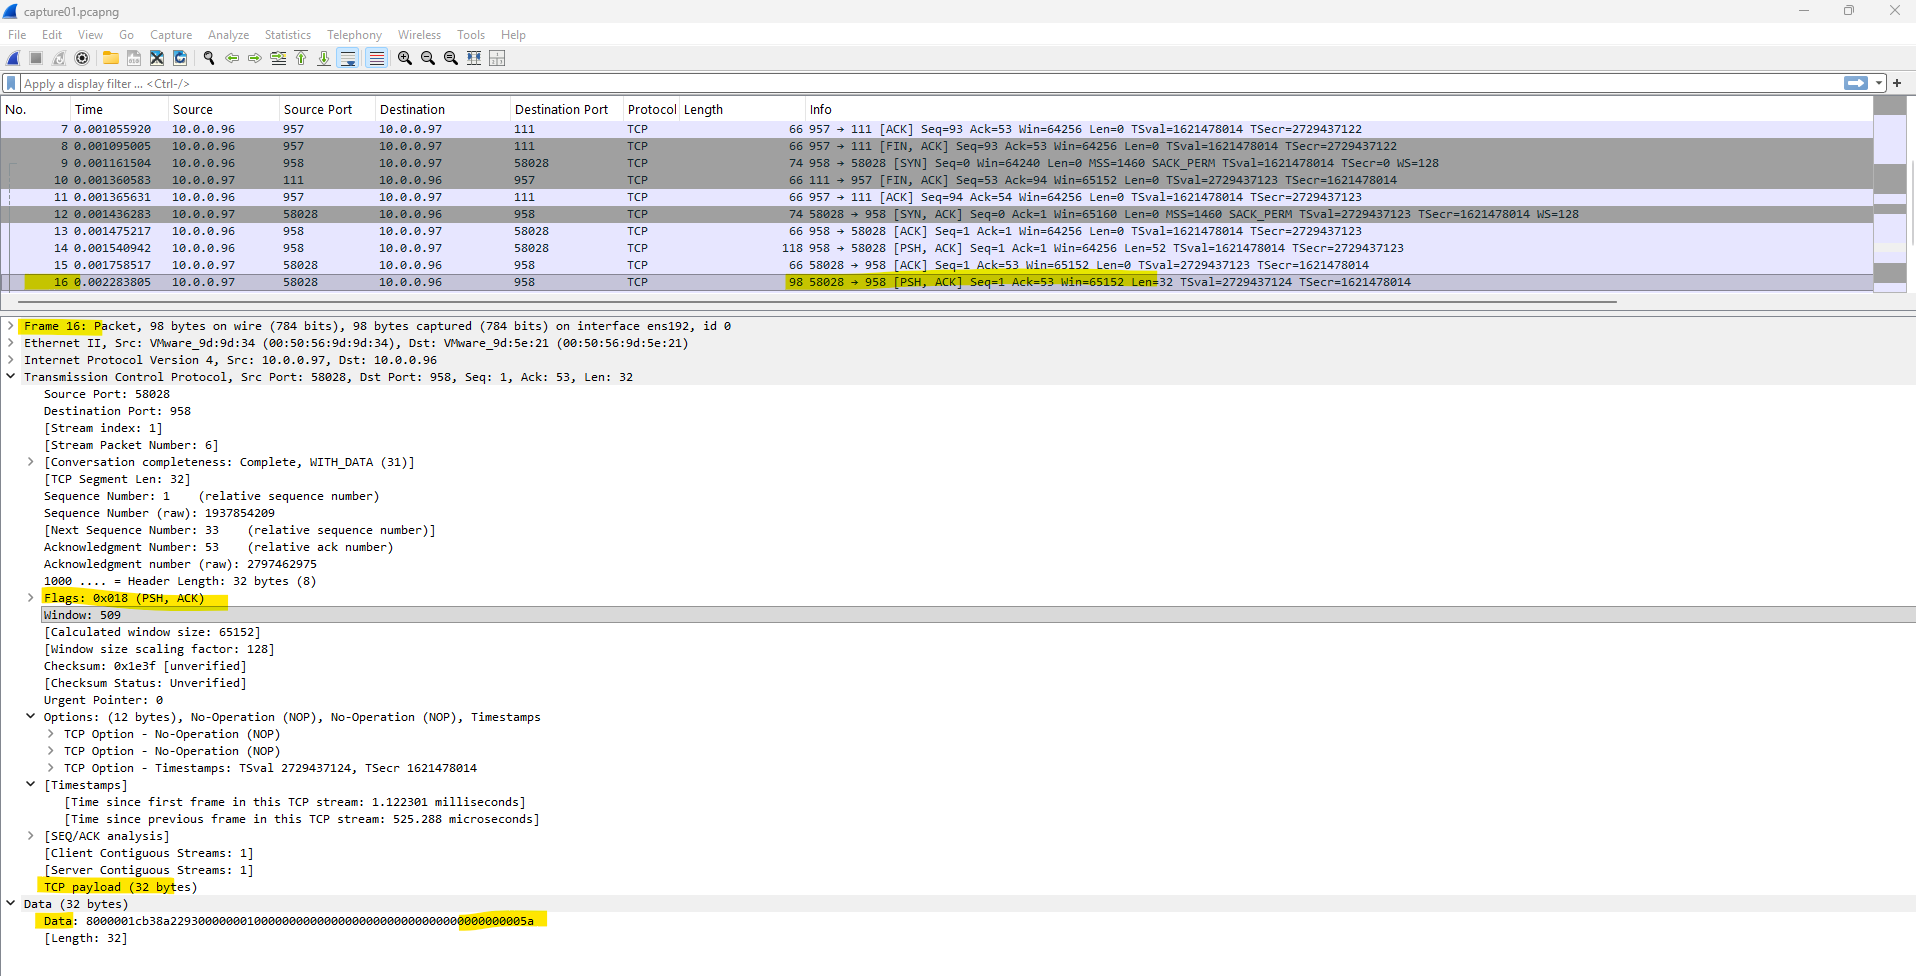
Packet 16 contains the server’s reply to the RPC request. Similar to the request packet, Wireshark does not automatically decode the ONC RPC payload on the dynamically assigned service port.
However, the final 32-bit value (
0x0000005A) corresponds to the decimal value 90, which is the expected result of theAddNumbers(40, 50)procedure.
Packet 17 acknowledges the server’s RPC reply, confirming that the response has been successfully received by the client. Since the RPC call has completed, no further application data needs to be exchanged.
Packets 18–20 show the graceful termination of the TCP connection. The client initiates the connection shutdown by sending a
FIN, ACK, the server acknowledges it and responds with its ownFIN, ACK, and finally the client sends the lastACK. At this point, the TCP session is cleanly closed.
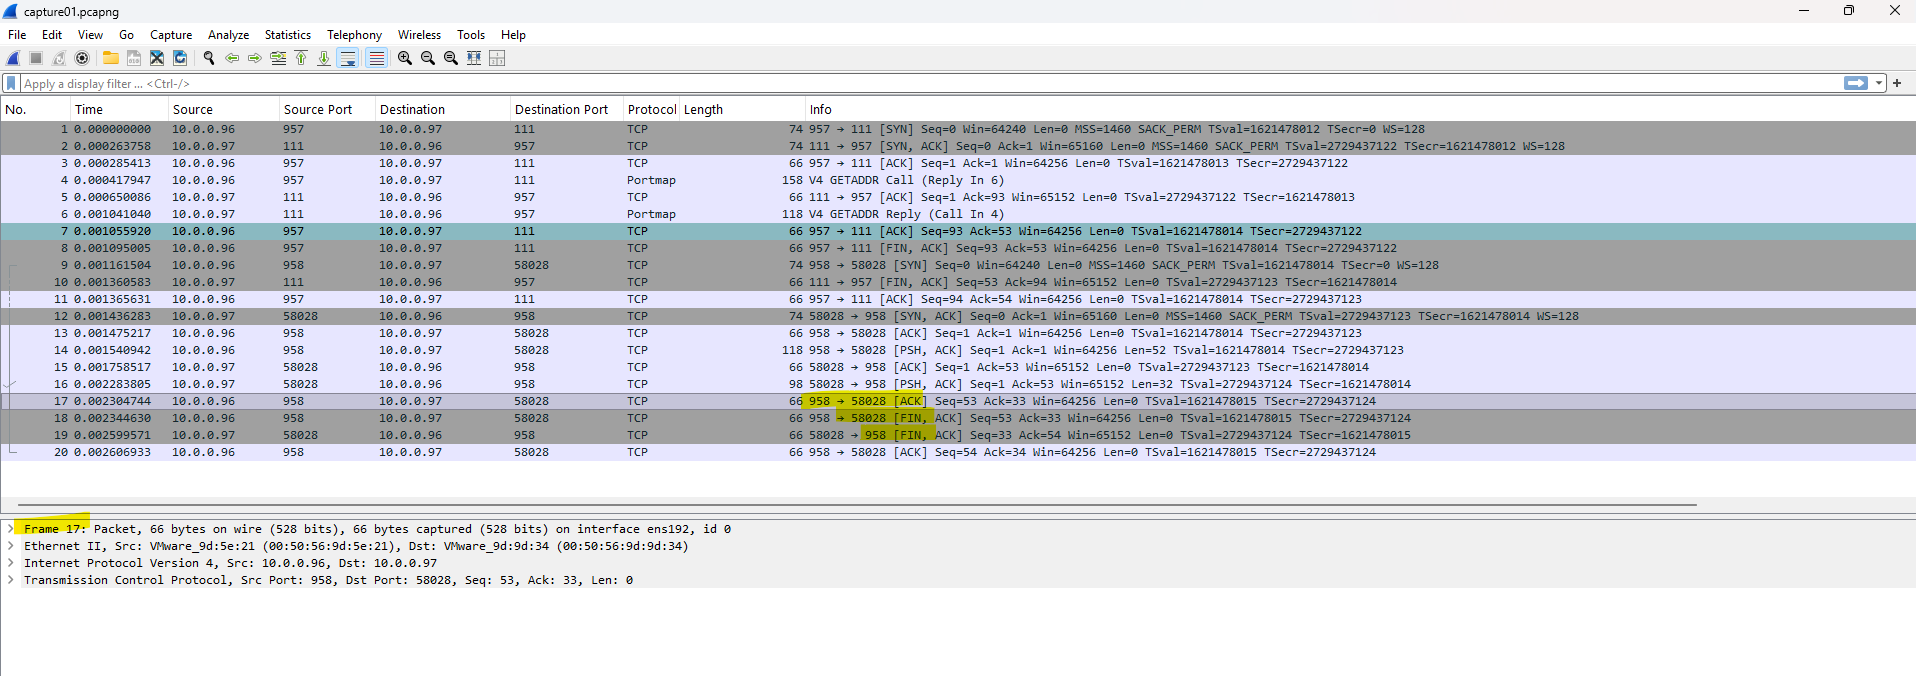
Although this example implements only a very simple remote procedure, it demonstrates the complete ONC RPC communication flow.
Understanding this sequence provides a solid foundation for analyzing more complex RPC-based protocols such as NFS, where the same fundamental principles are used on a much larger scale.
Links
Remote Procedure Call (RPC)
https://en.wikipedia.org/wiki/Remote_procedure_callRPC-Modell
https://www.ibm.com/docs/en/aix/7.2.0?topic=call-rpc-modelRemote procedure call (RPC) – efficient communication in client-server architectures
https://www.ionos.com/digitalguide/server/know-how/what-is-a-remote-procedure-call/ONC RPC concepts
https://www.ibm.com/docs/en/cics-ts/5.5.0?topic=rpc-onc-conceptsSun RPC
https://en.wikipedia.org/wiki/Sun_RPCONC and DCE
https://www.ibm.com/docs/en/cics-ts/6.x?topic=interfaces-onc-dce
