Using Google Service Accounts in C#: Secure API Access Explained
When building applications that interact with Google Cloud services, authentication is the first challenge to solve. The most secure and flexible way to access Google Cloud APIs programmatically is by using Service Accounts, special identities designed for applications, automation, and backend workloads.
In this post, we’ll walk through how to authenticate our C# application with a Google Cloud Service Account and use it to call APIs such as Cloud Storage, Compute Engine, or Pub/Sub.
Google Cloud Pub/Sub is a fully managed messaging service that enables asynchronous communication between applications using a publish/subscribe model.
More about here https://cloud.google.com/pubsub/docs/overview.
We will see how to create and configure the Service Account in the Google Cloud Console, generate credentials, and use the Google.Apis.Auth and Google.Cloud.* client libraries to securely connect and perform API operations, without hardcoding credentials or user interaction.
If you’re familiar with Azure, the concept is similar to using Managed Identities when your workload runs entirely inside Azure or Service Principals when authenticating from outside.
More about you will find in my following both posts.
Authentication Options for Applications in Google Cloud
In Google Cloud, the service accounts are the primary way for applications and workloads to authenticate to Google APIs.
However, depending on the environment, alternatives like Workload Identity Federation (for external apps without storing keys) and Workload Identity (for GKE pods) can be used to provide secure, keyless authentication.
For user-facing applications, OAuth 2.0 user credentials remain the preferred choice.
Create Service Accounts
By default, each project can have up to 100 service accounts that control access to our resources. We can request a quota increase if necessary. Learn more about quotas and limits.
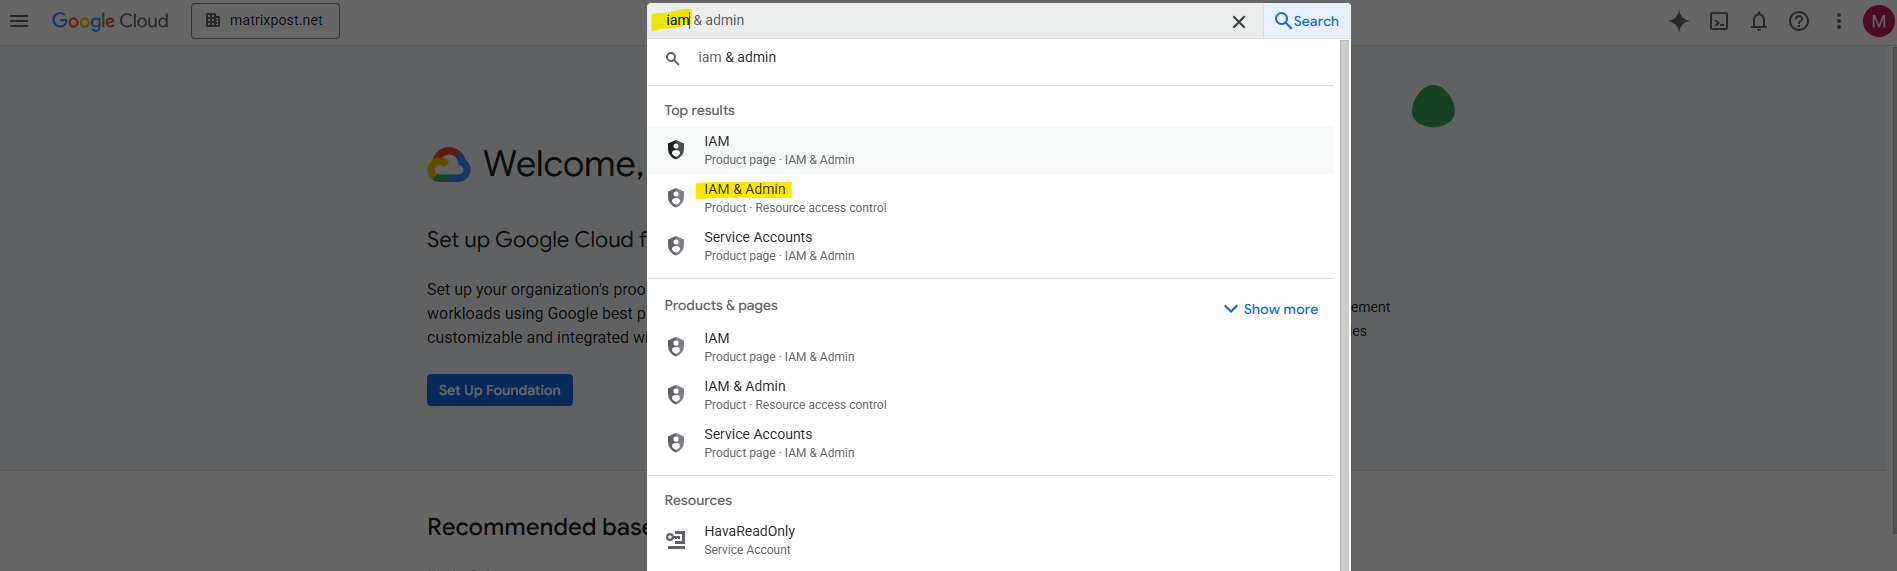
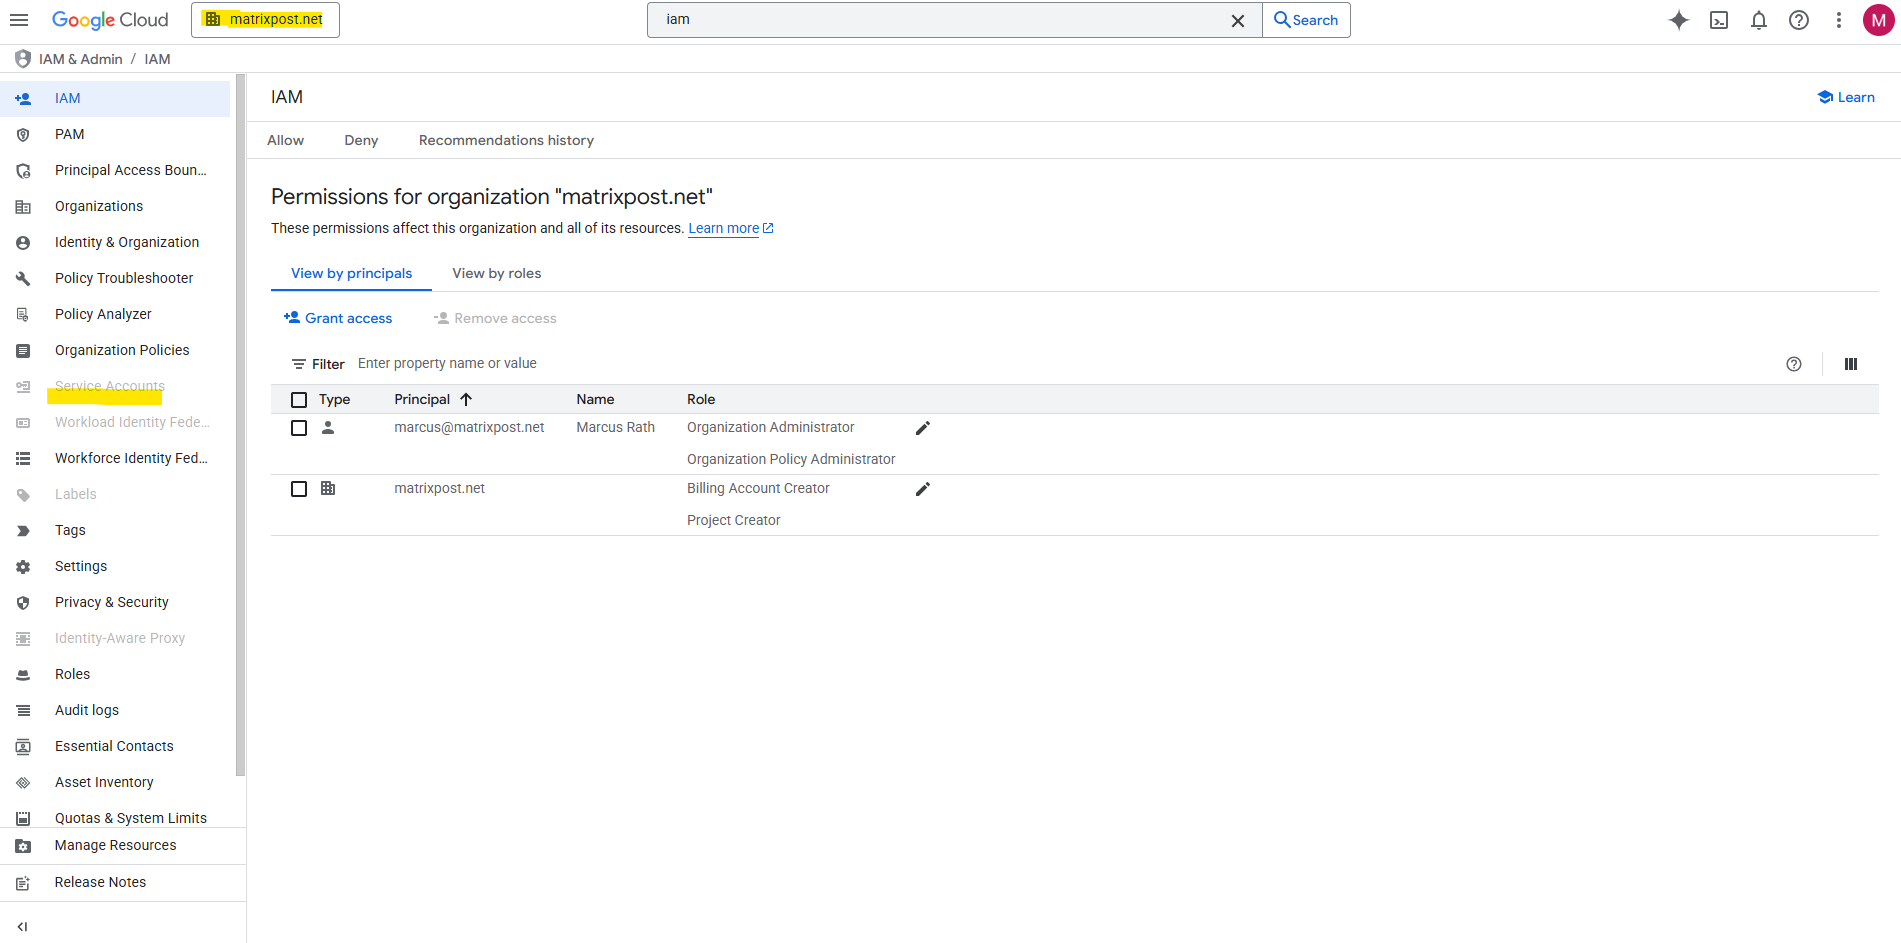
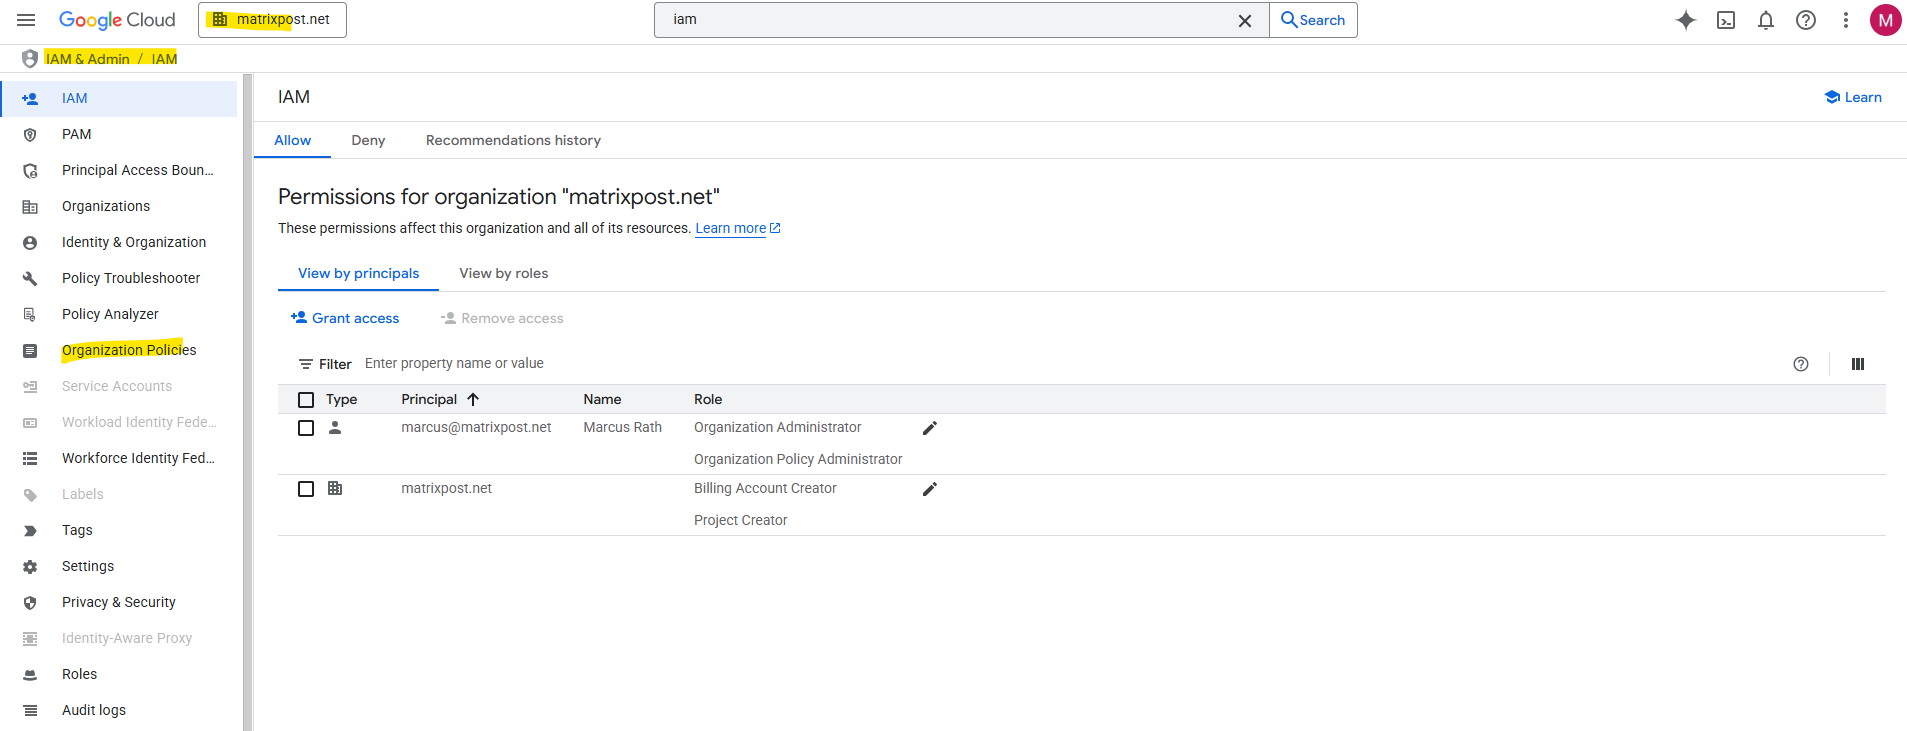
In the GCP console navigate to IAM & Admin, either on your Google account (billing account) or GCP organization.
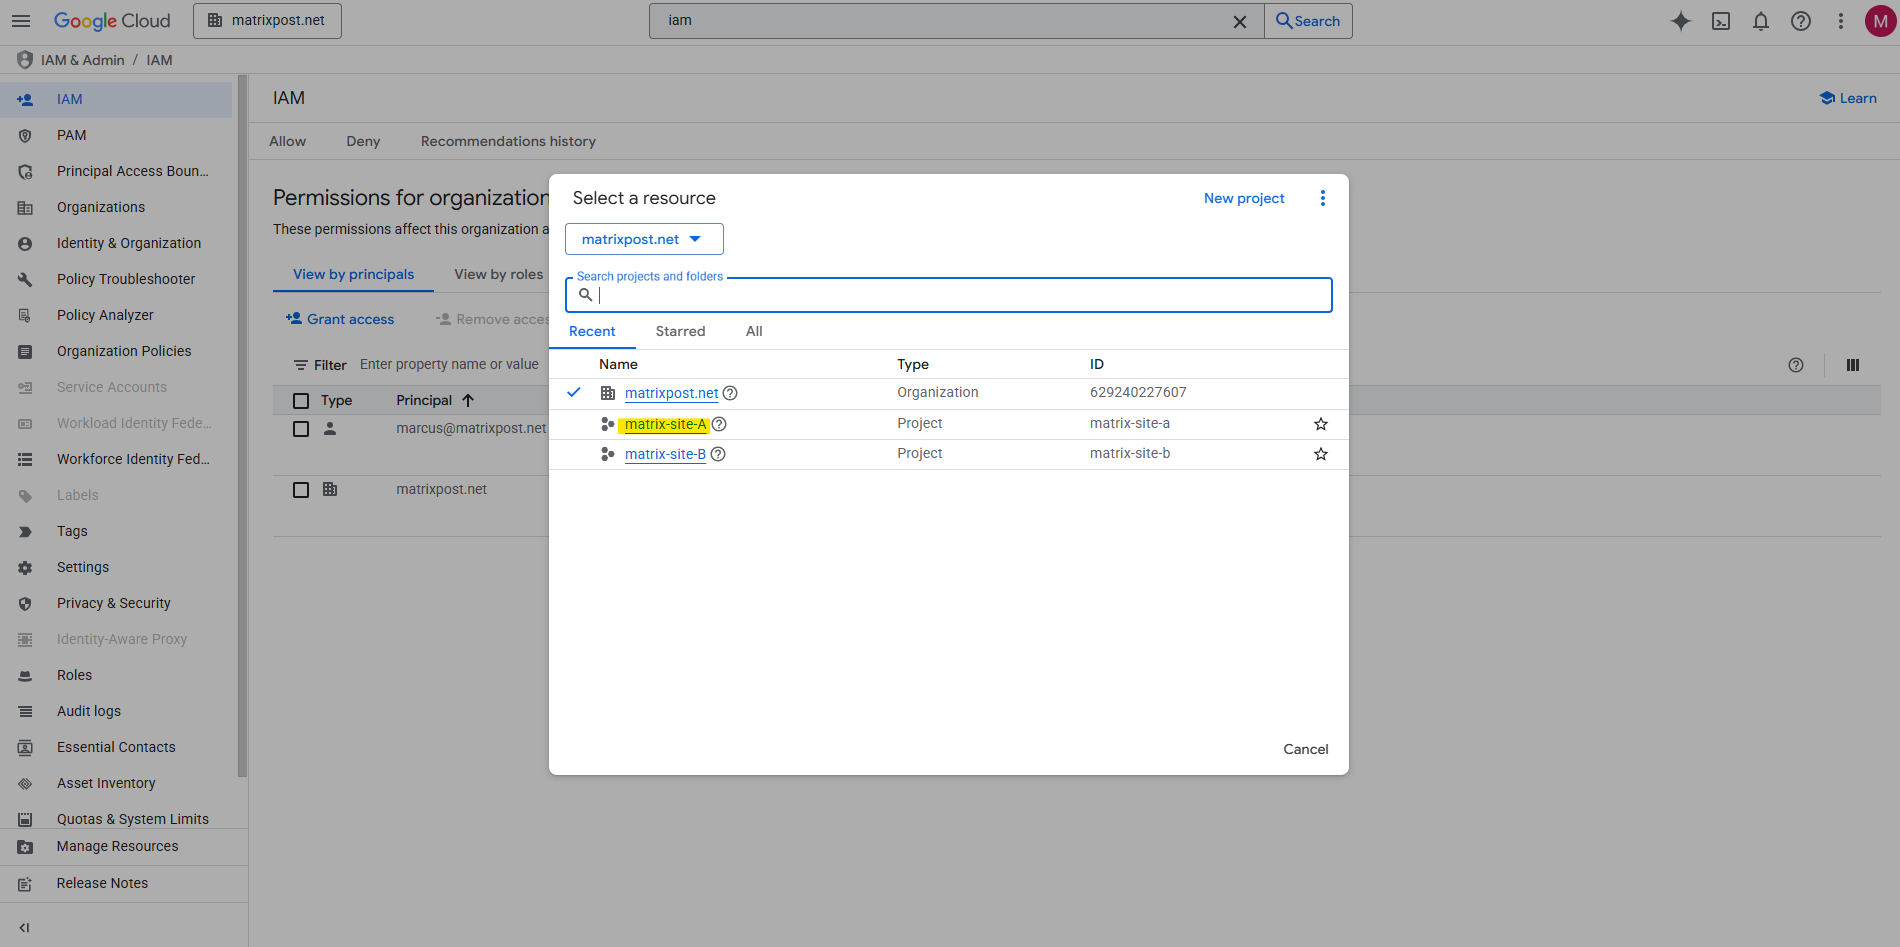
To create a new service account, we first need to select the project for which we want to add this account.
In Google Cloud, the service accounts are always created within a specific project, since their permissions and roles are scoped at the project level.
I will use here my existing project matrix-site-a which I was using in my post about cross-hub connectivity in Google Cloud.
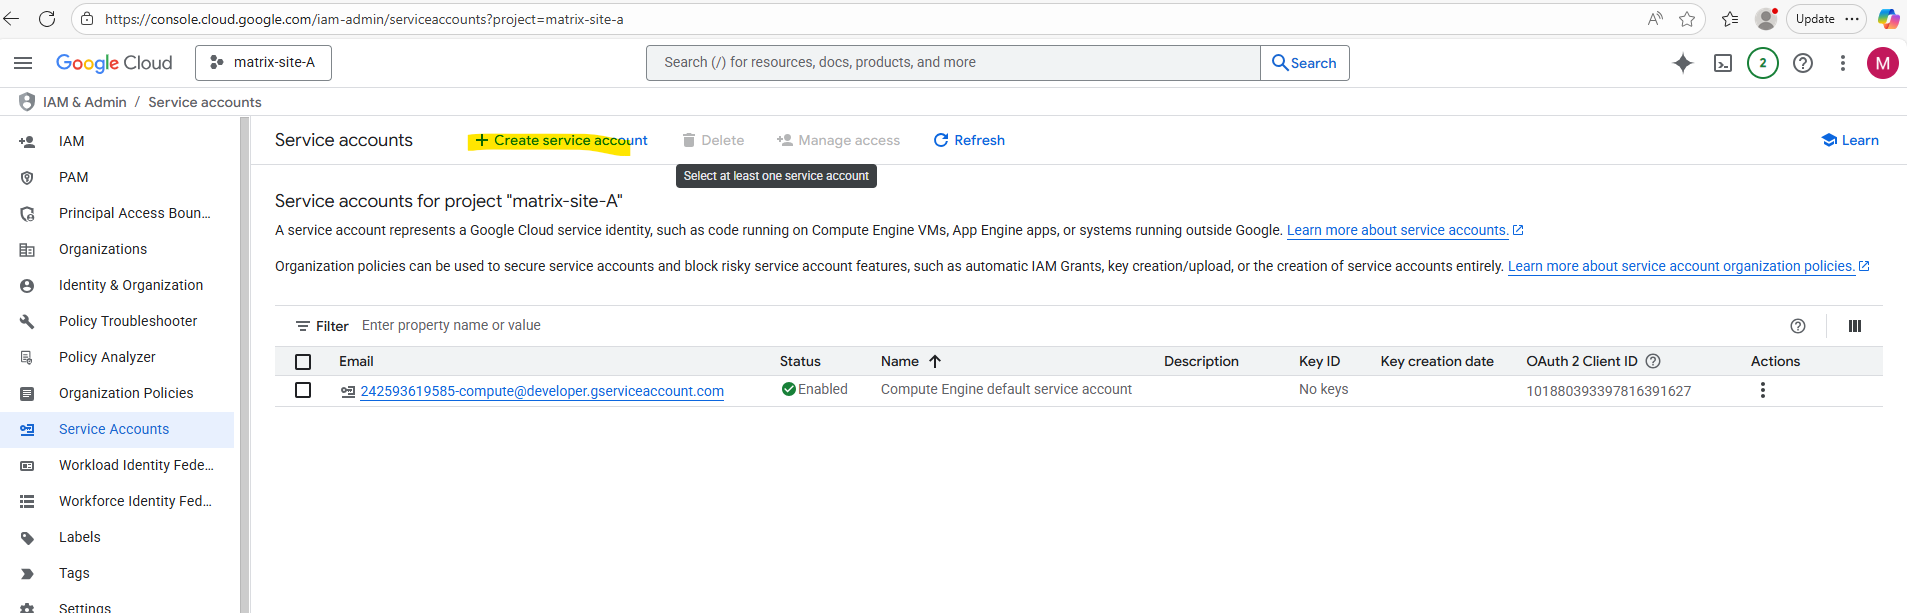
Within the selected project, navigate to IAM & Admin -> Service Accounts.
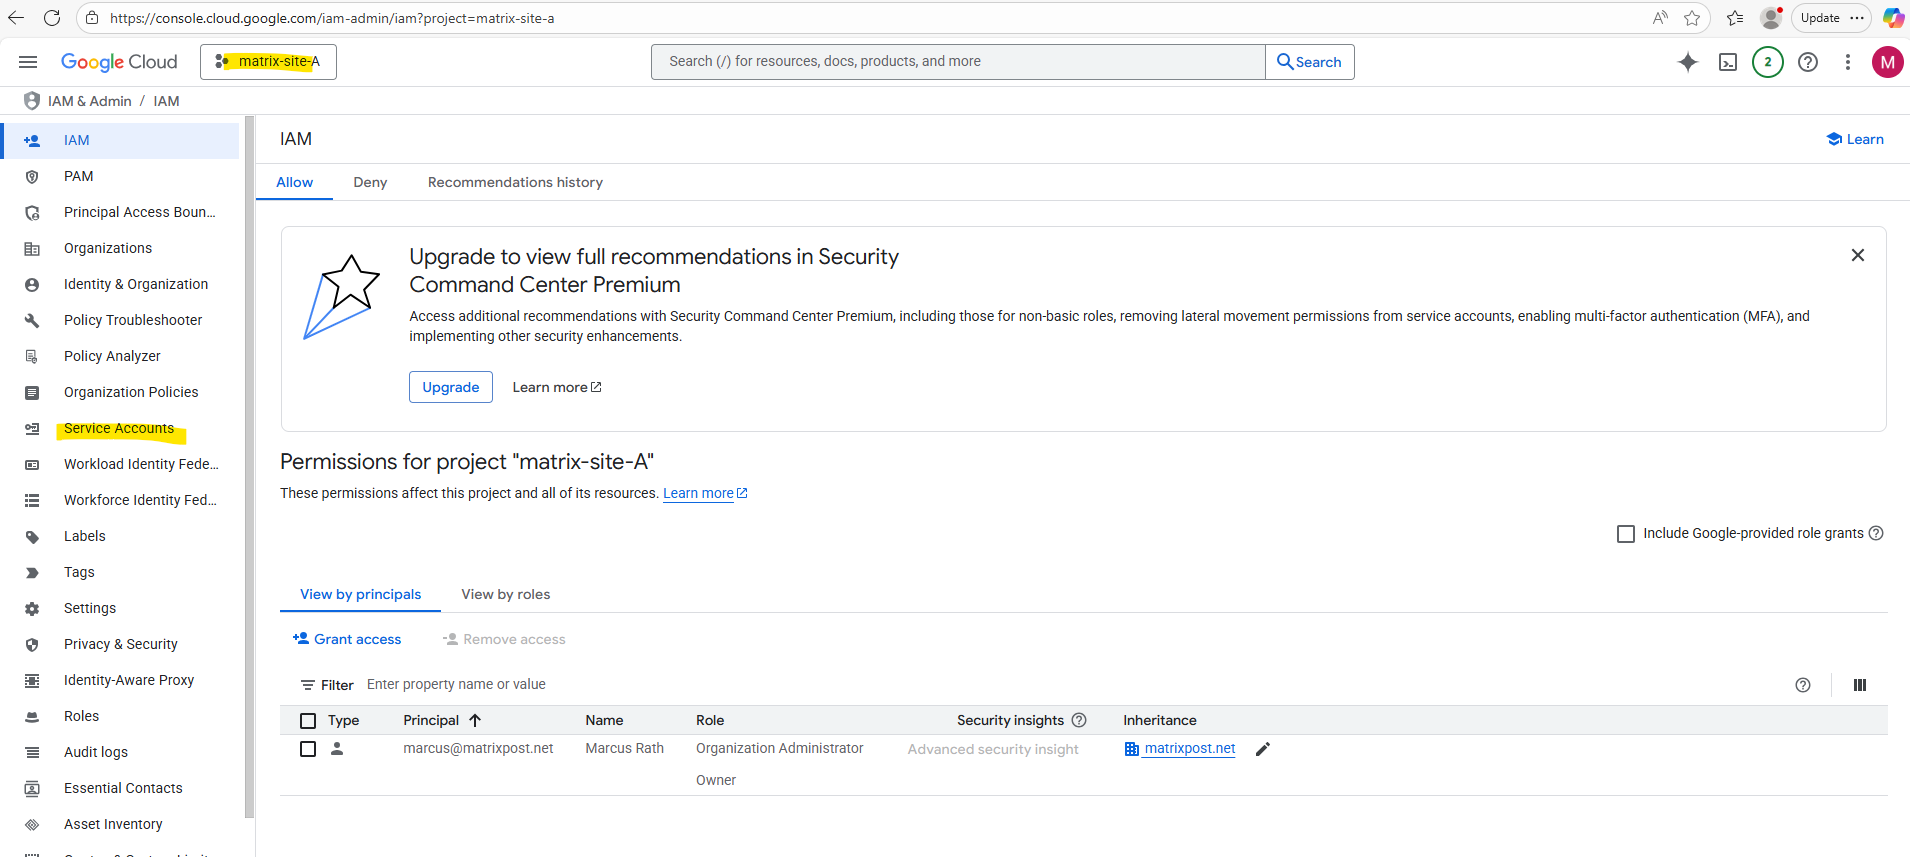
Click on + Create service account.
To create new service accounts we need the “roles/iam.serviceAccountCreator” IAM role on the project.
Enter a name for the new service account.
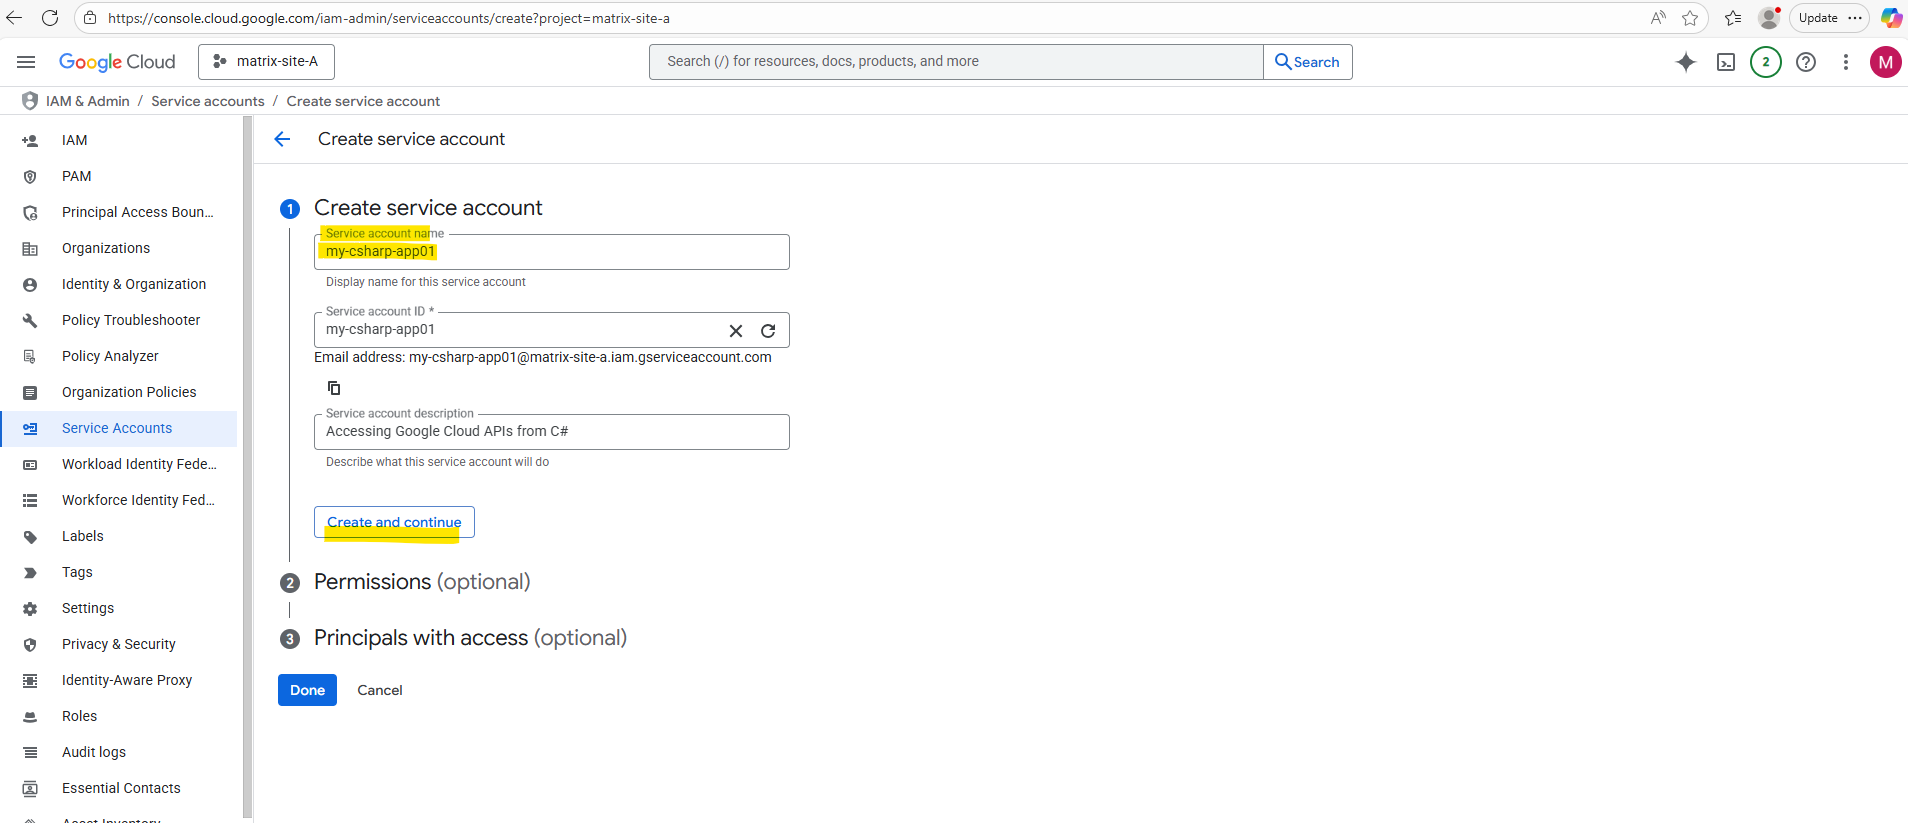
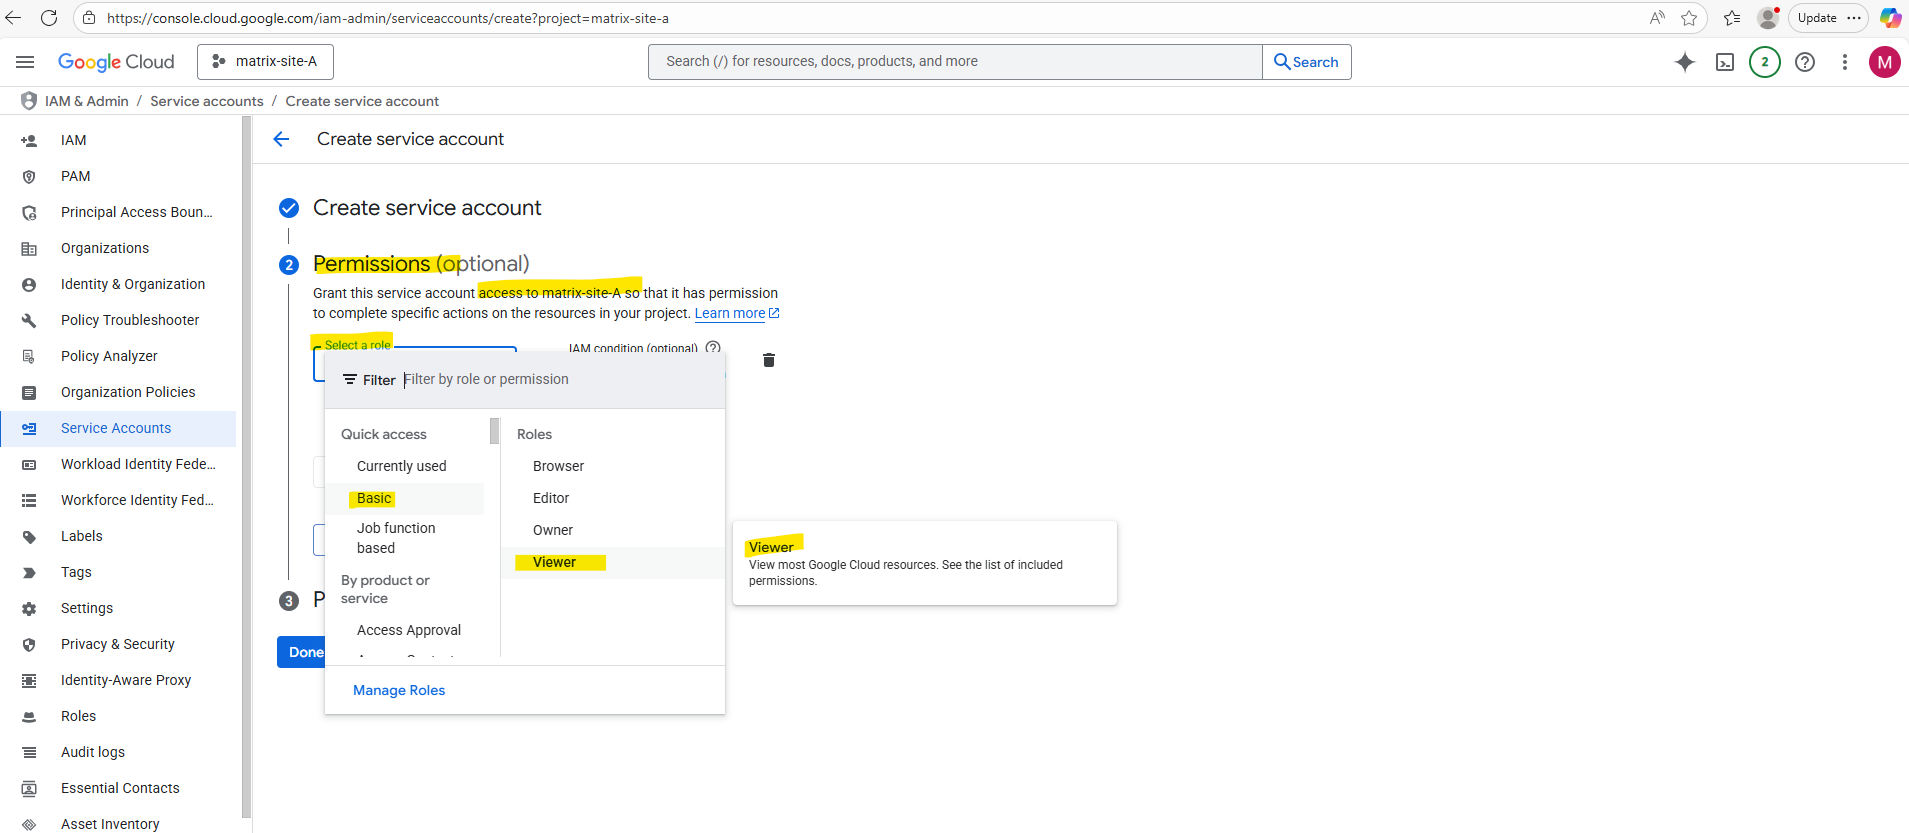
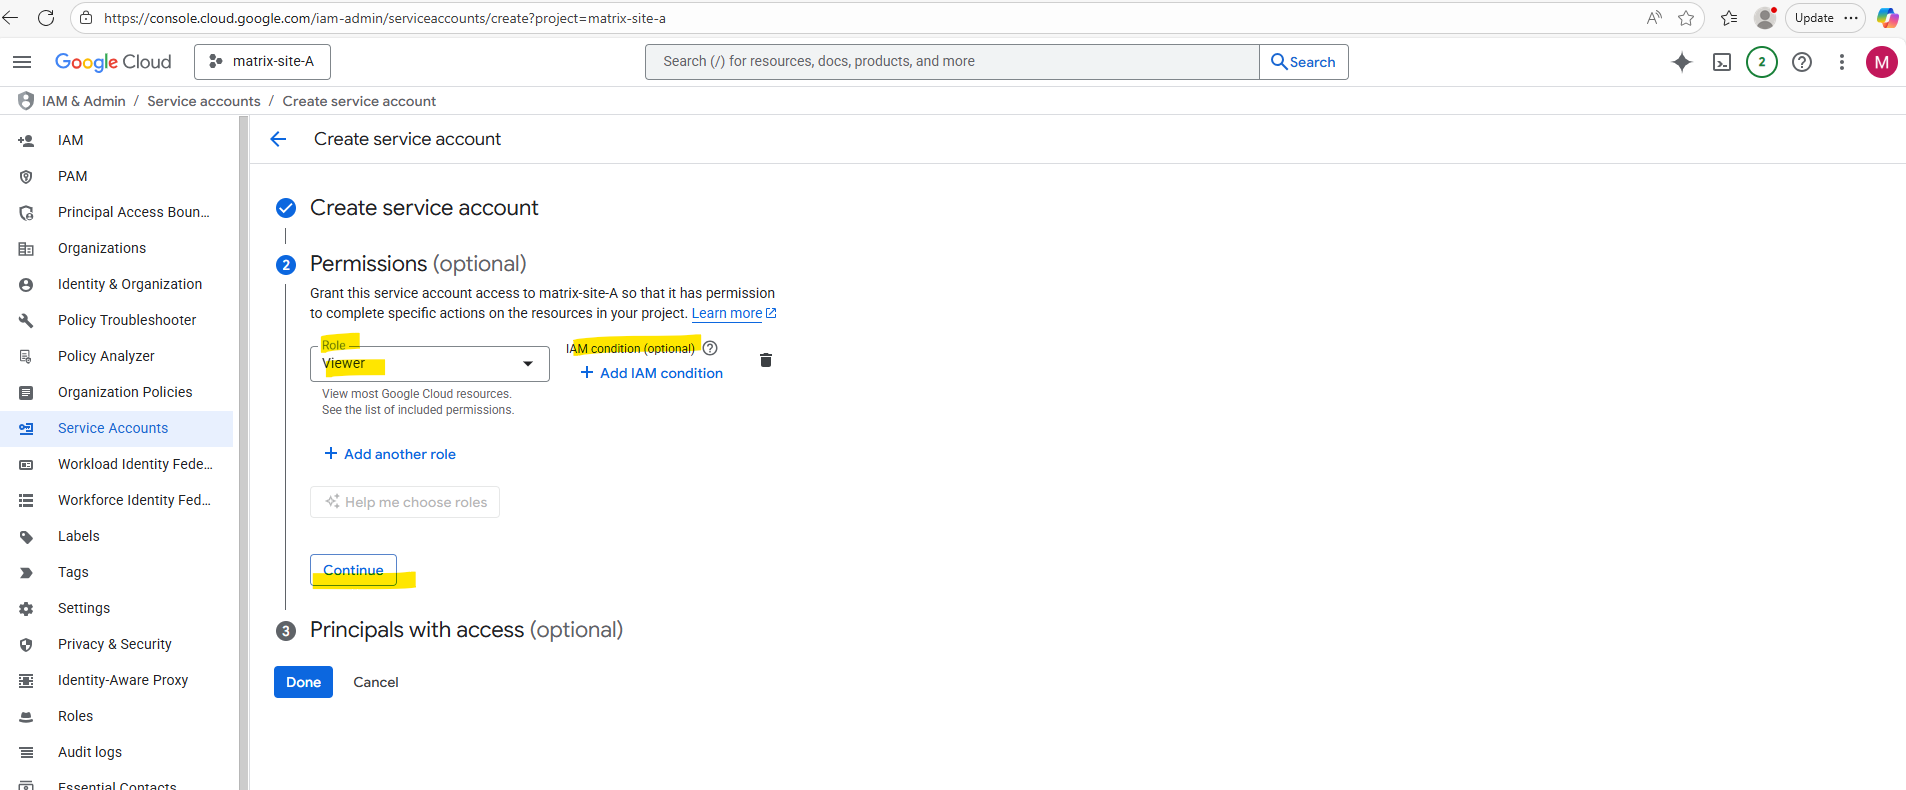
I will assign the basic Viewer role to this account.
Click on Continue.
Below besides the assigned role under IAM condition (optional) we can also use IAM Conditions to define and enforce conditional, attribute-based access control for Google Cloud resources.
More about here https://cloud.google.com/iam/docs/conditions-overview.
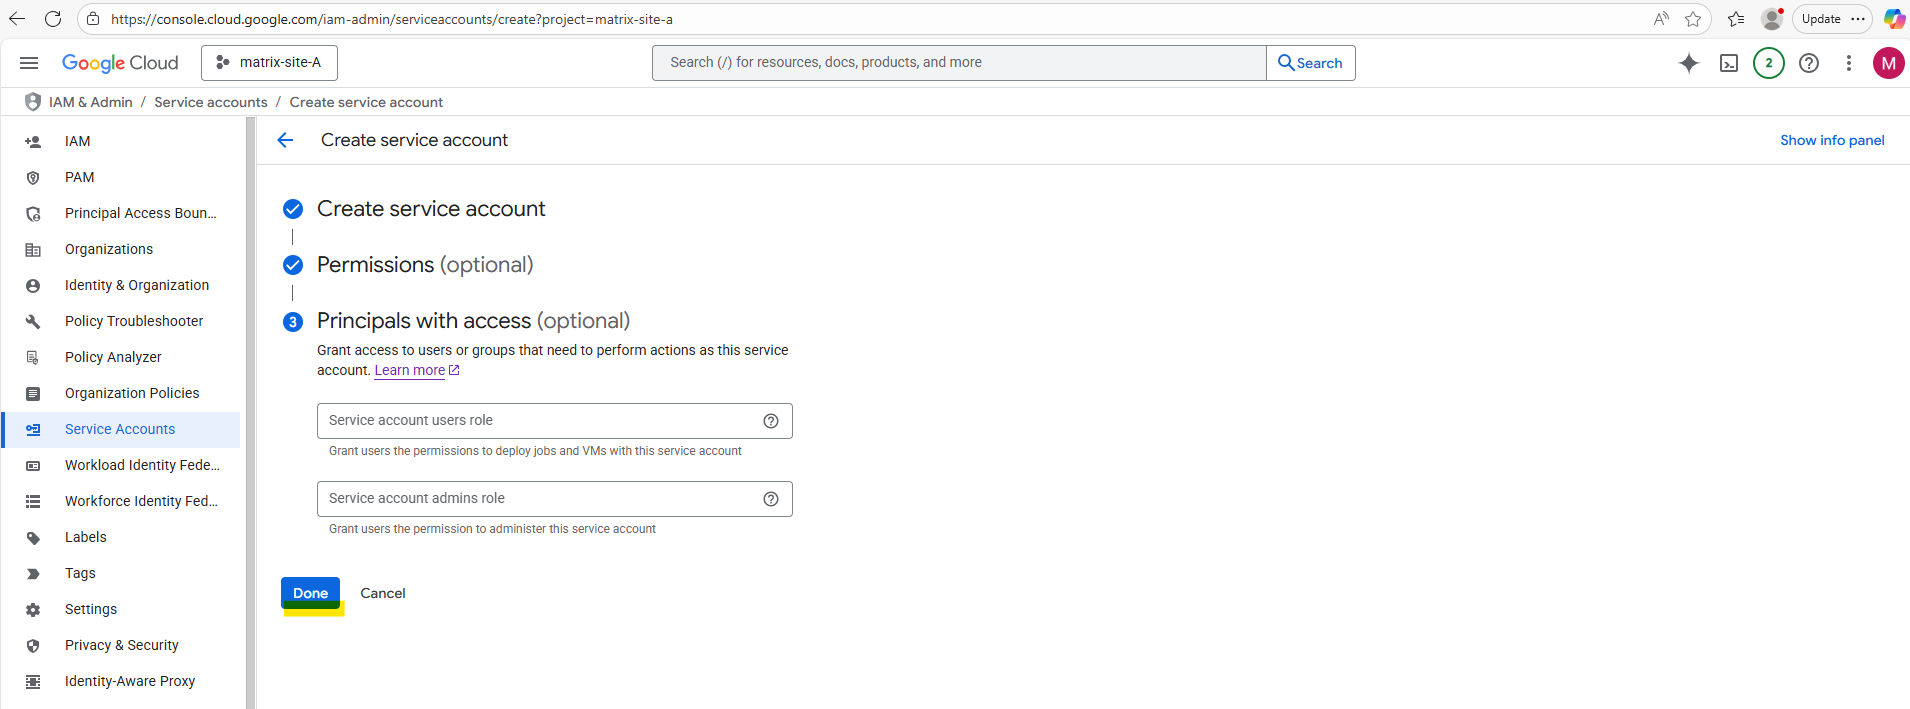
Finally click on Done.
Below under Principals with access (optional) we can also grant, change, and revoke a principal’s access to a single service account.
Grant users the permission to deploy jobs and VMs with this service account → gives selected principals the Service Account User role (roles/iam.serviceAccountUser). This allows them to attach and use the service account when running VMs, Cloud Run services, or batch jobs, but not to modify the account itself.
Grant users the permission to administer this service account → gives selected principals the Service Account Admin role (roles/iam.serviceAccountAdmin). This allows them to manage the service account, including editing metadata, managing keys, and assigning roles, but not necessarily to use it for workloads.
Finally the new service account is created successfully.
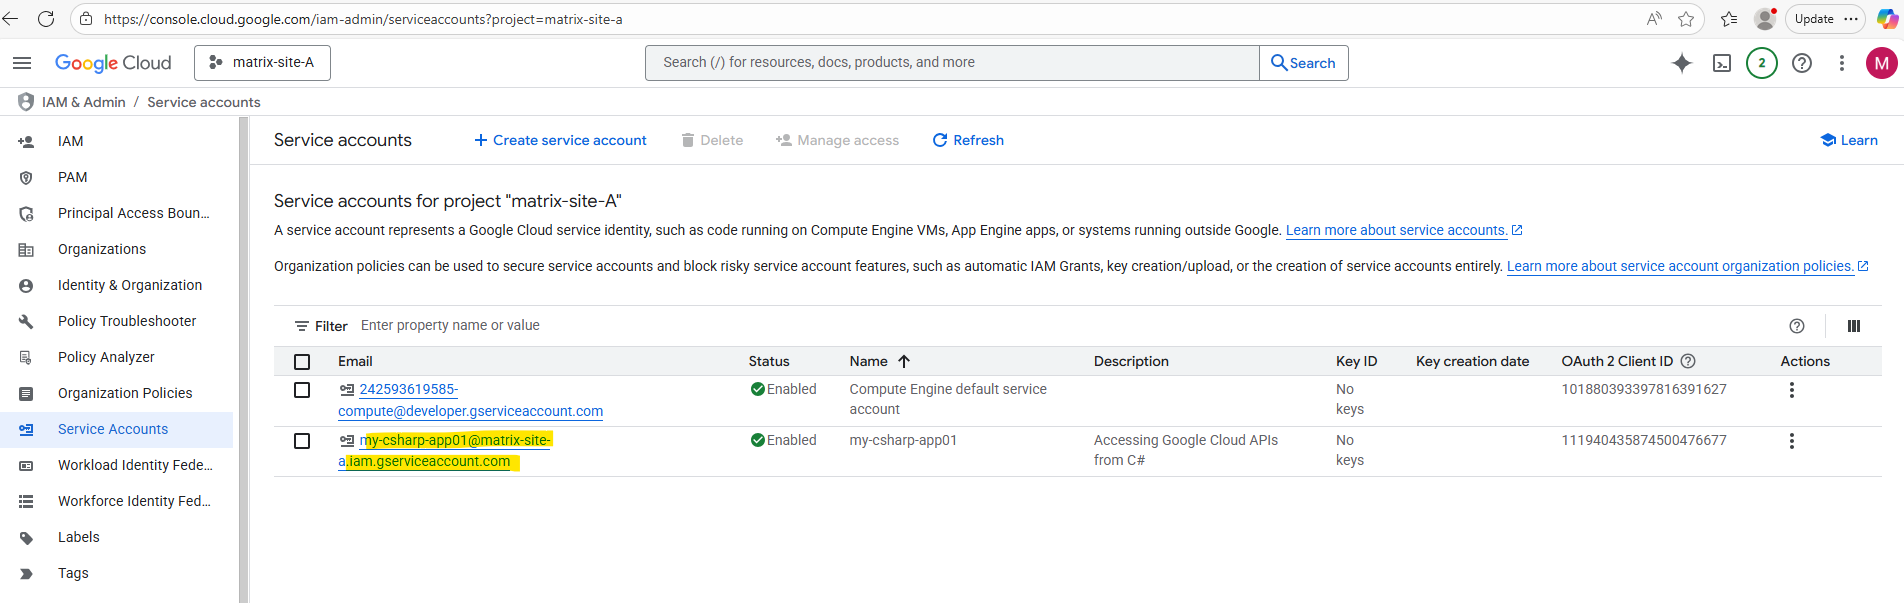
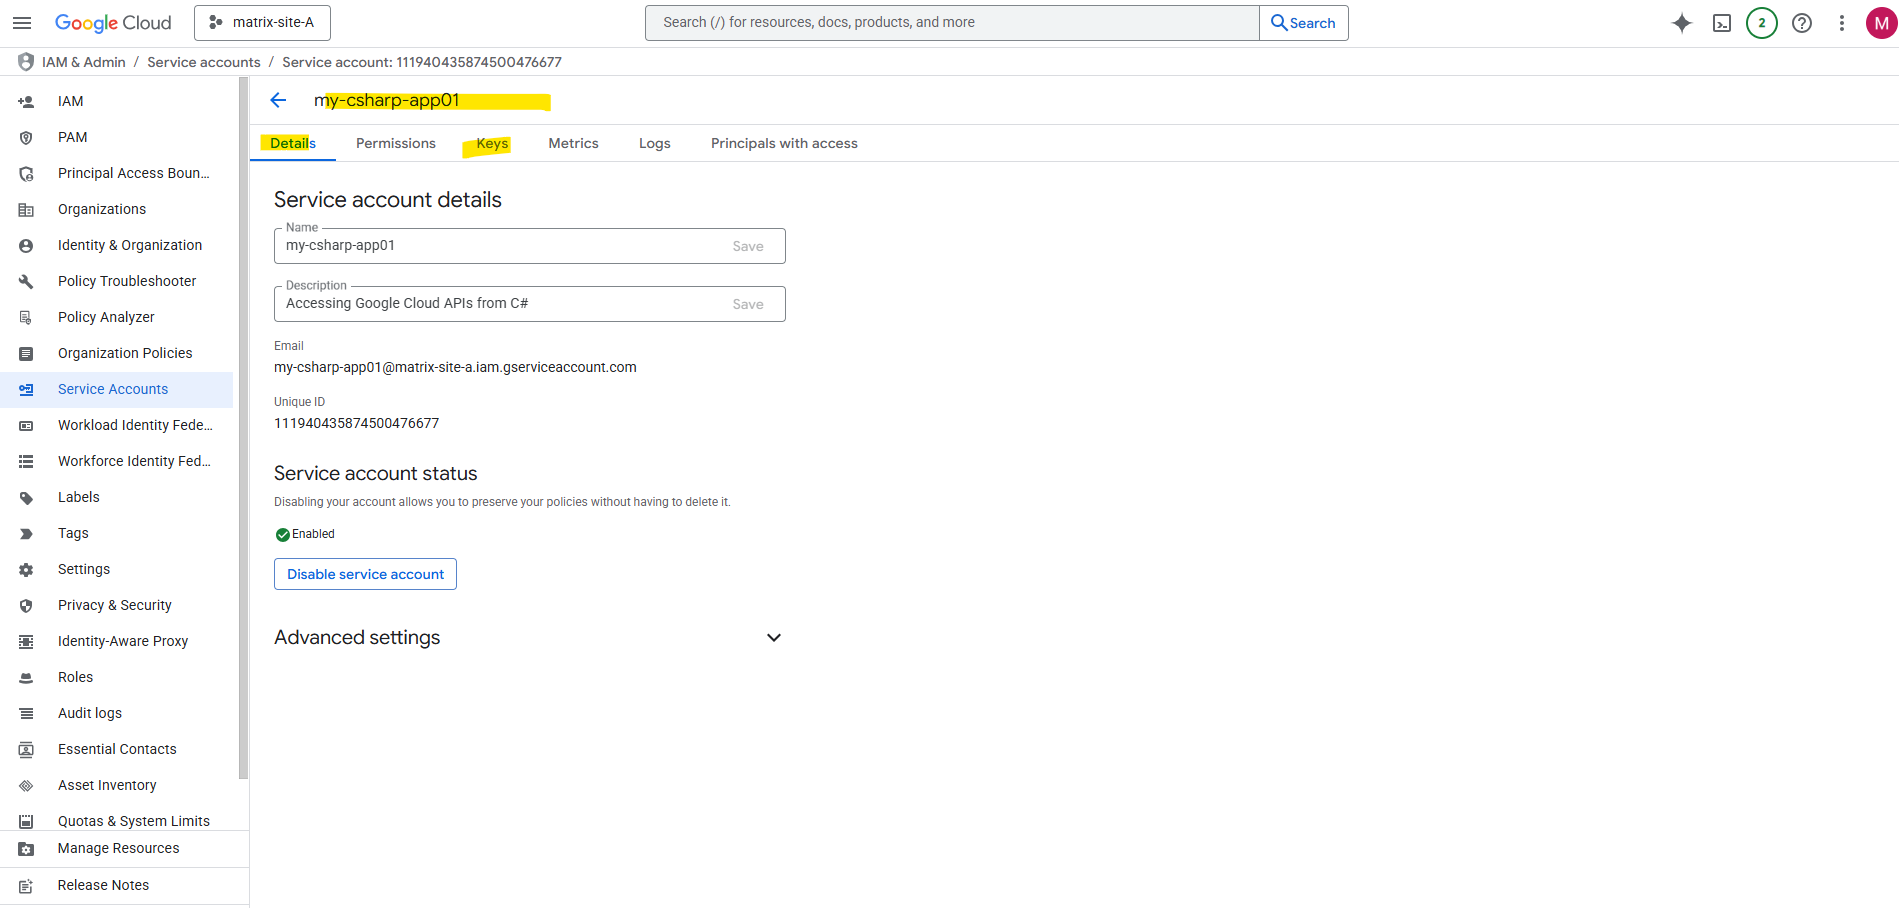
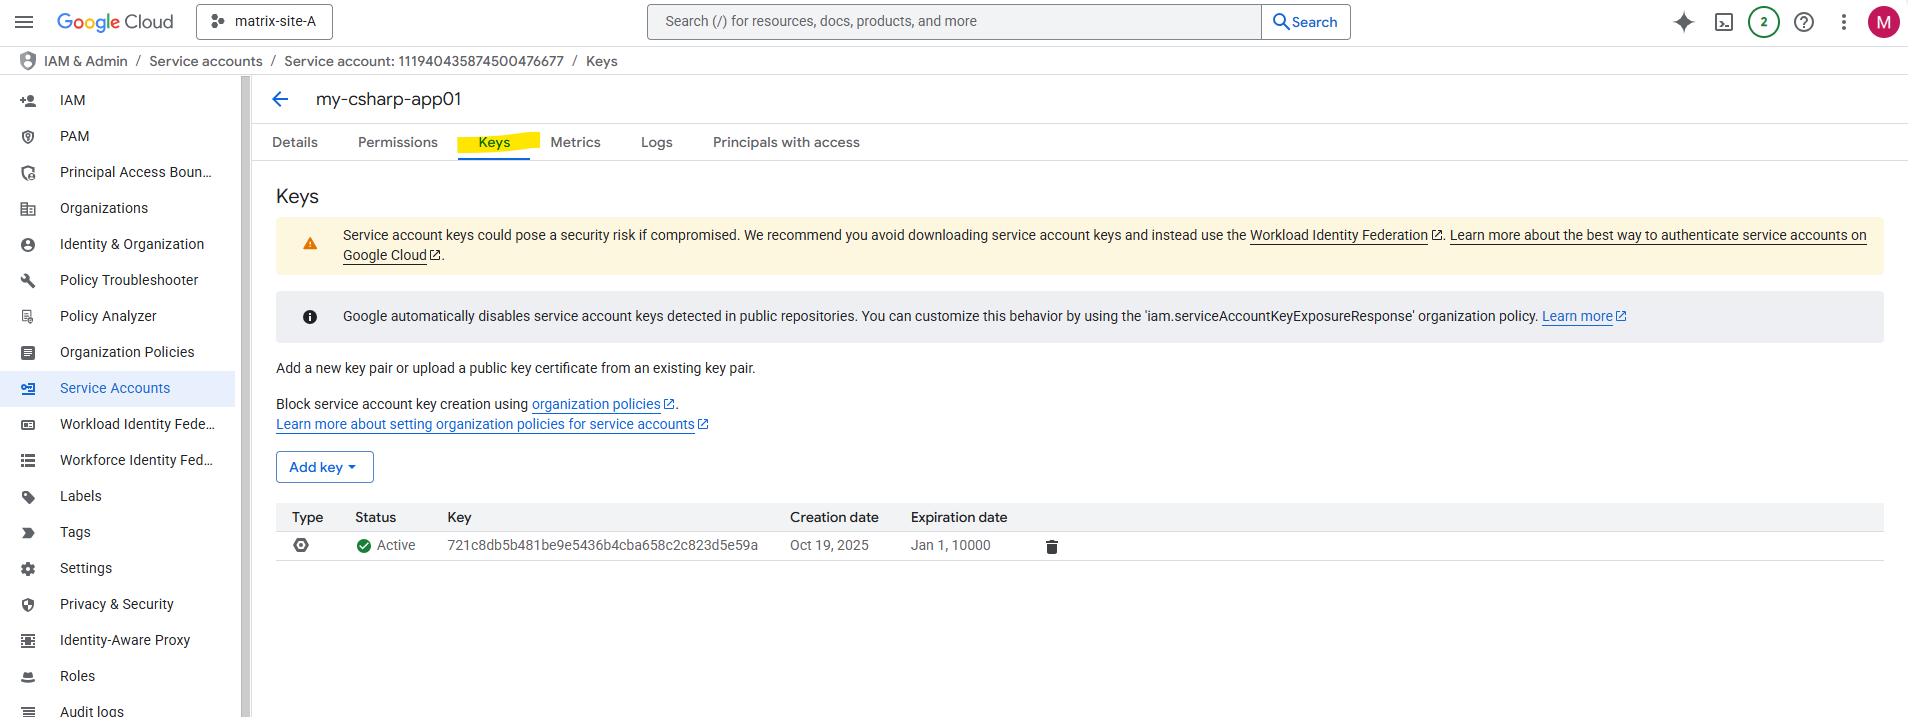
Click on the service account to browse to its details page. Here switch to the Keys tab.
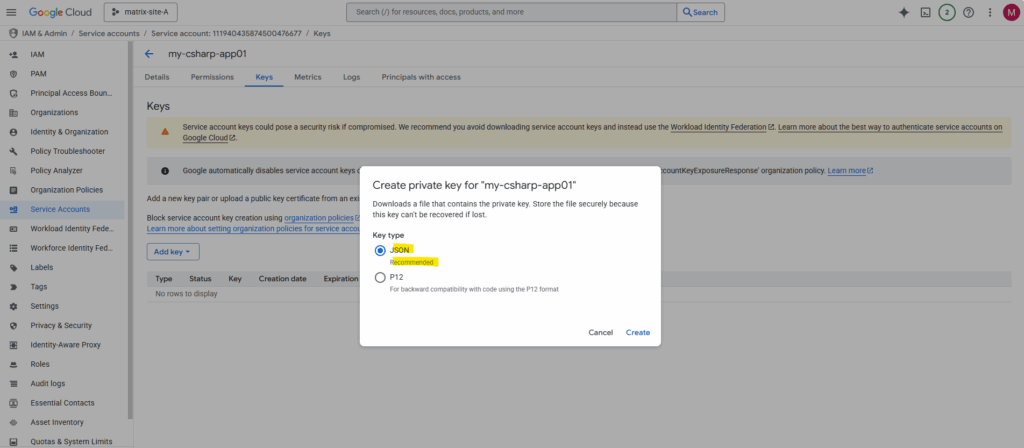
Click on Add key -> Create new key.
We recommend you avoid downloading service account keys and instead use the Workload Identity Federation .
Learn more about the best way to authenticate service accounts on Google Cloud .
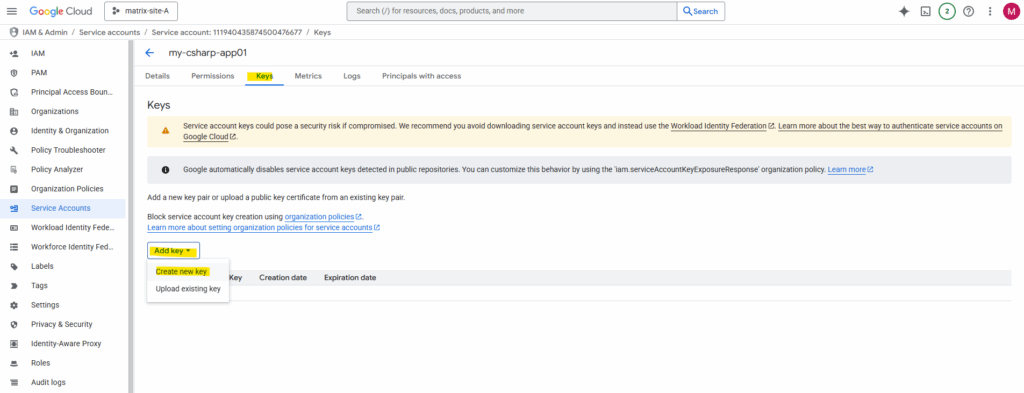
Leave the recommended JSON key type and click on Create.
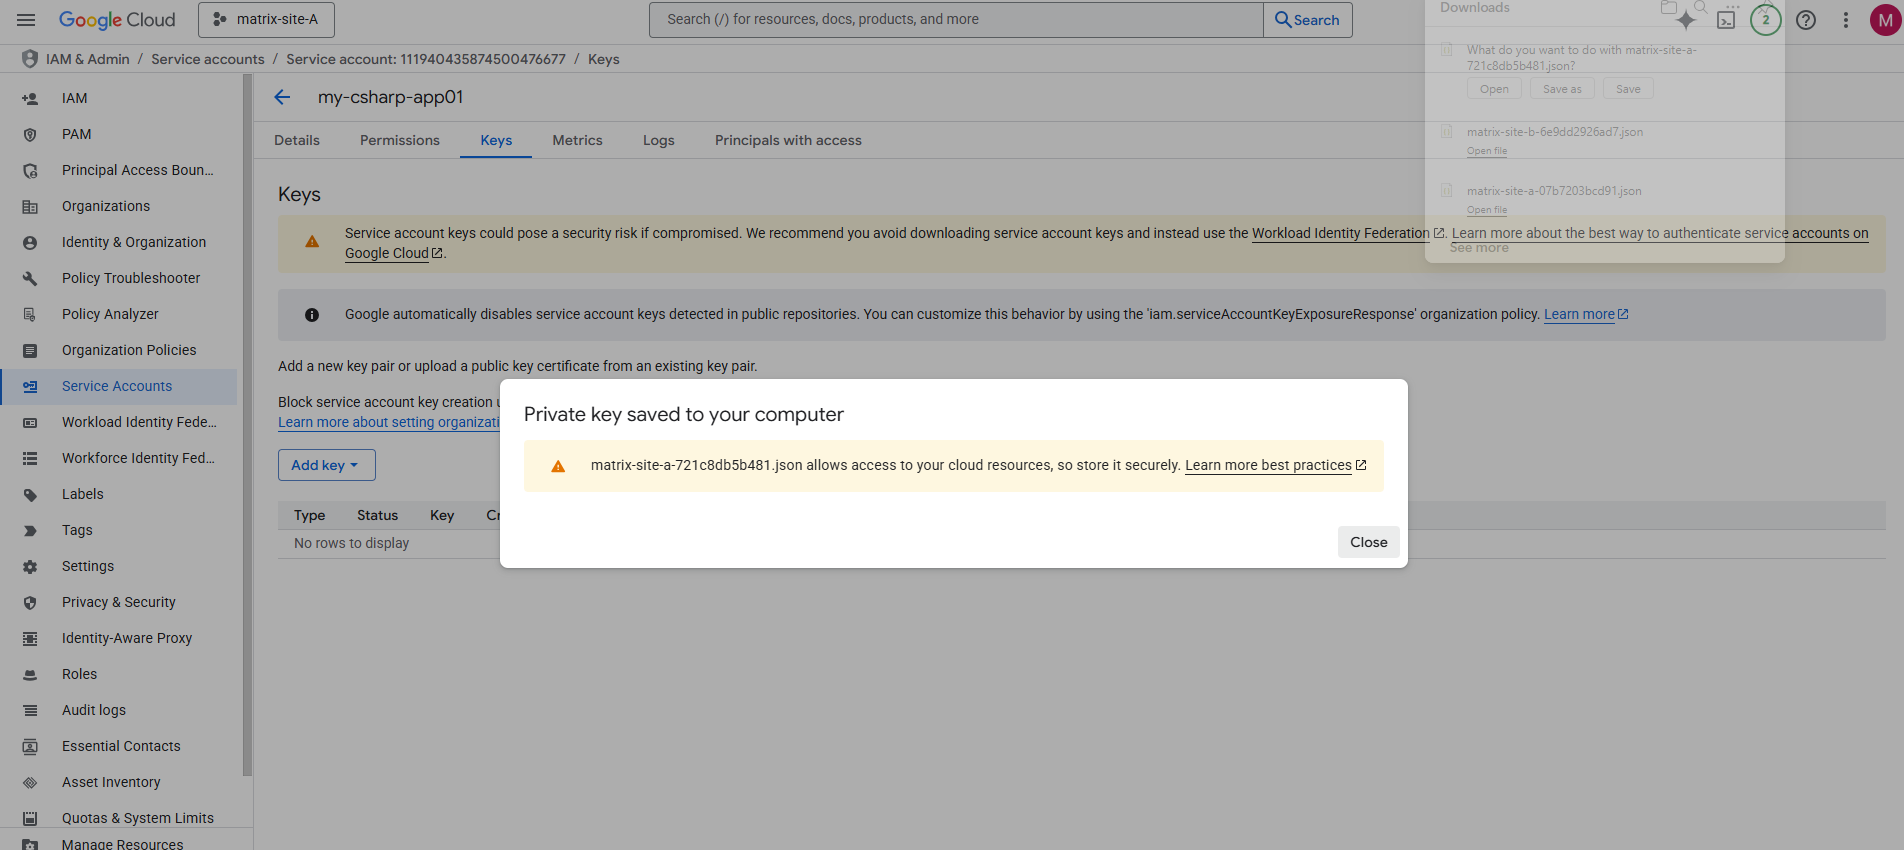
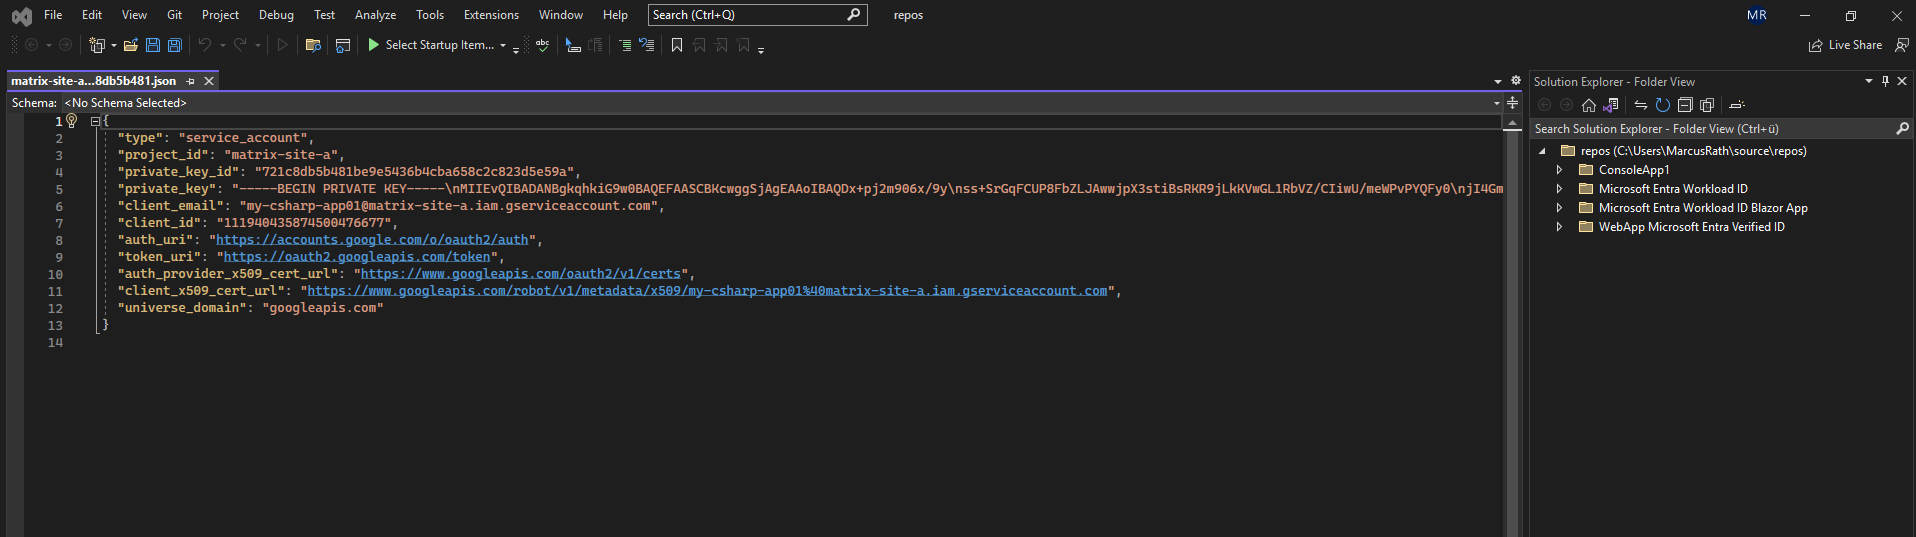
The new JSON key is downloaded immediately to your computer.
Creating a C# .NET (Core) Console App
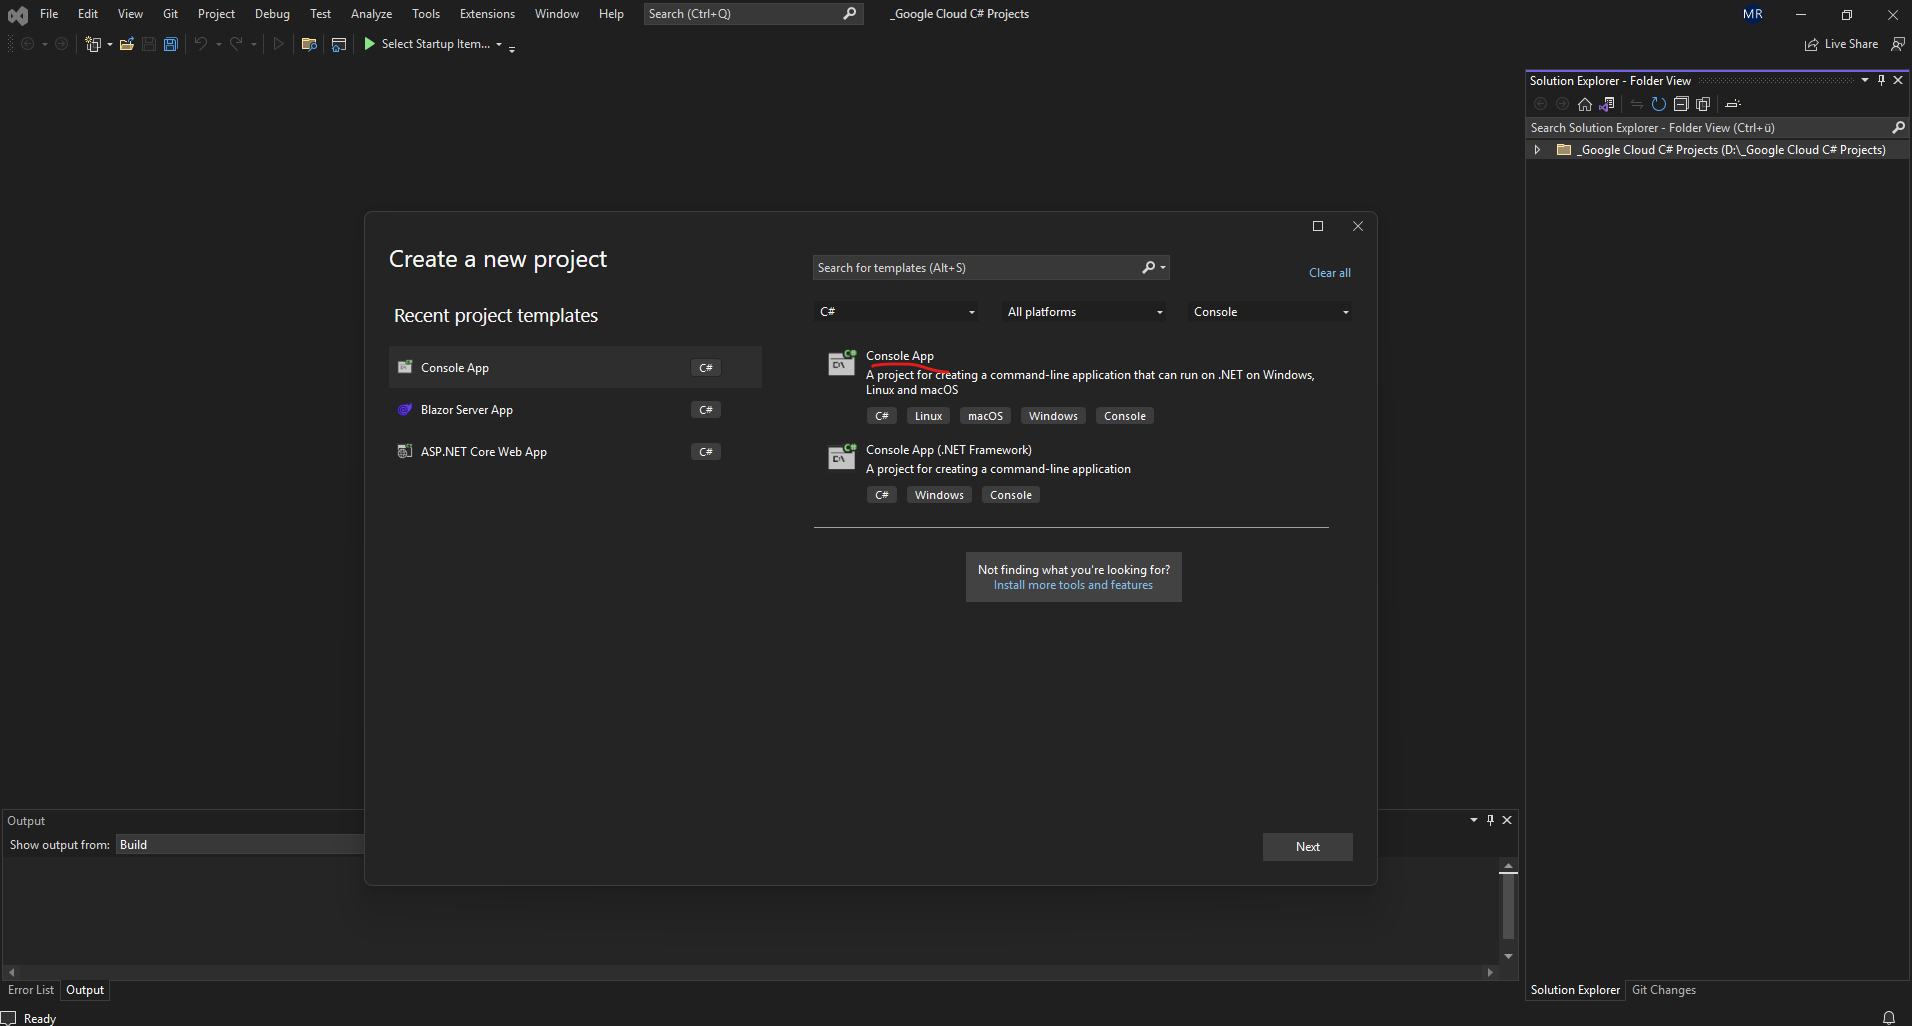
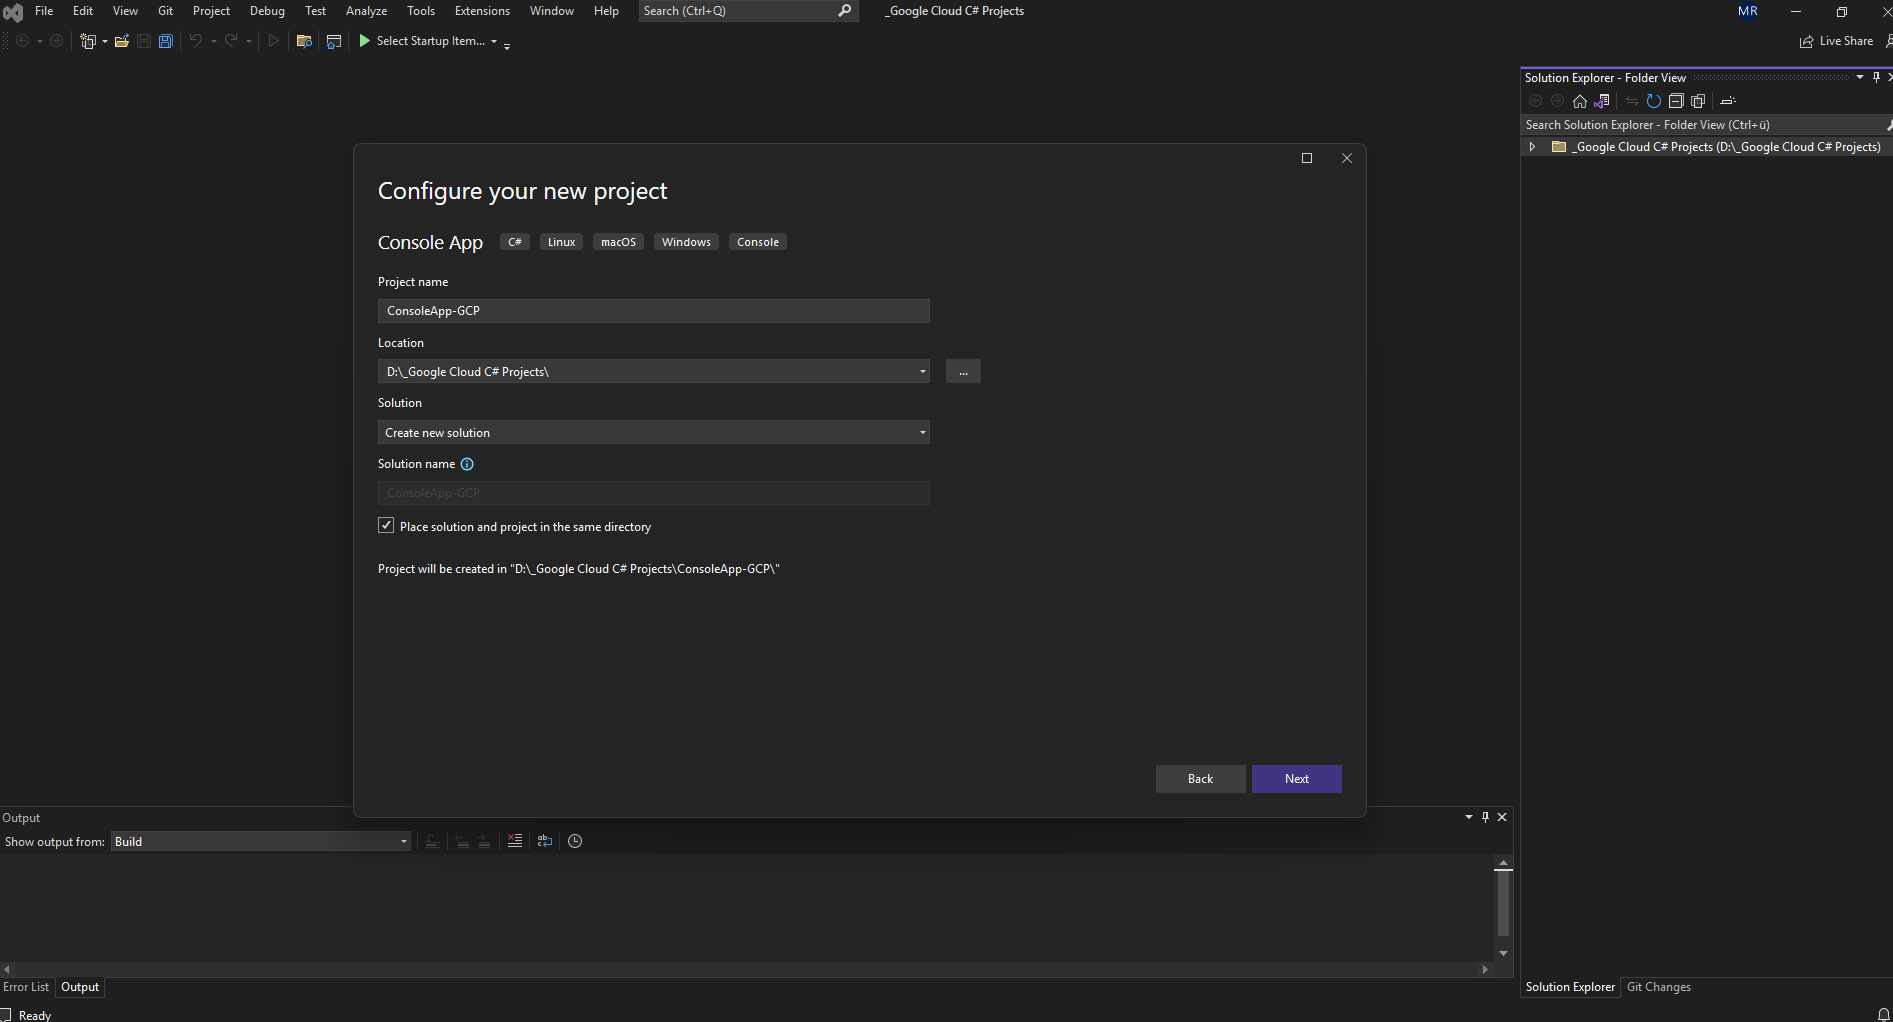
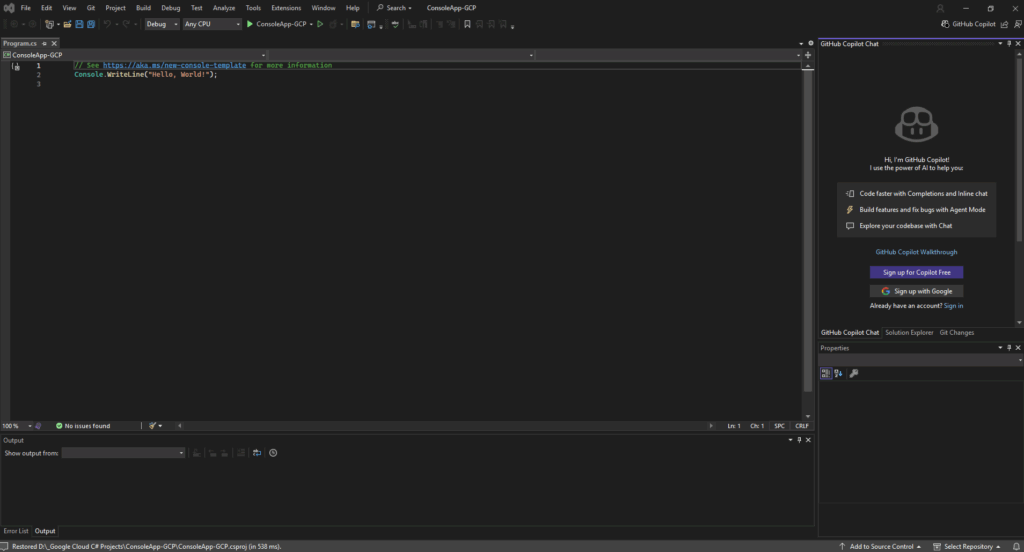
Below I want to create a new C# .NET (Core) Console Appto to interact with the Google Cloud API.
To build a modern, cross-platform application using .NET Core / .NET 5+, which runs on any OS.
Select “Console App (.NET Framework)” only if you specifically need to target the Windows-only .NET Framework, for example to integrate with older libraries or legacy systems.
Microsoft has rebranded .NET Core simply as .NET starting with .NET 5.
.NET 5, 6, 7, 8 … are the successors to .NET Core, they combines .NET Core, .NET Framework, Xamarin, and more.
So, when you see templates like “Console App (C# Linux, macOS, Windows)”, they actually refer to the modern, cross-platform .NET, the successor of .NET Core.
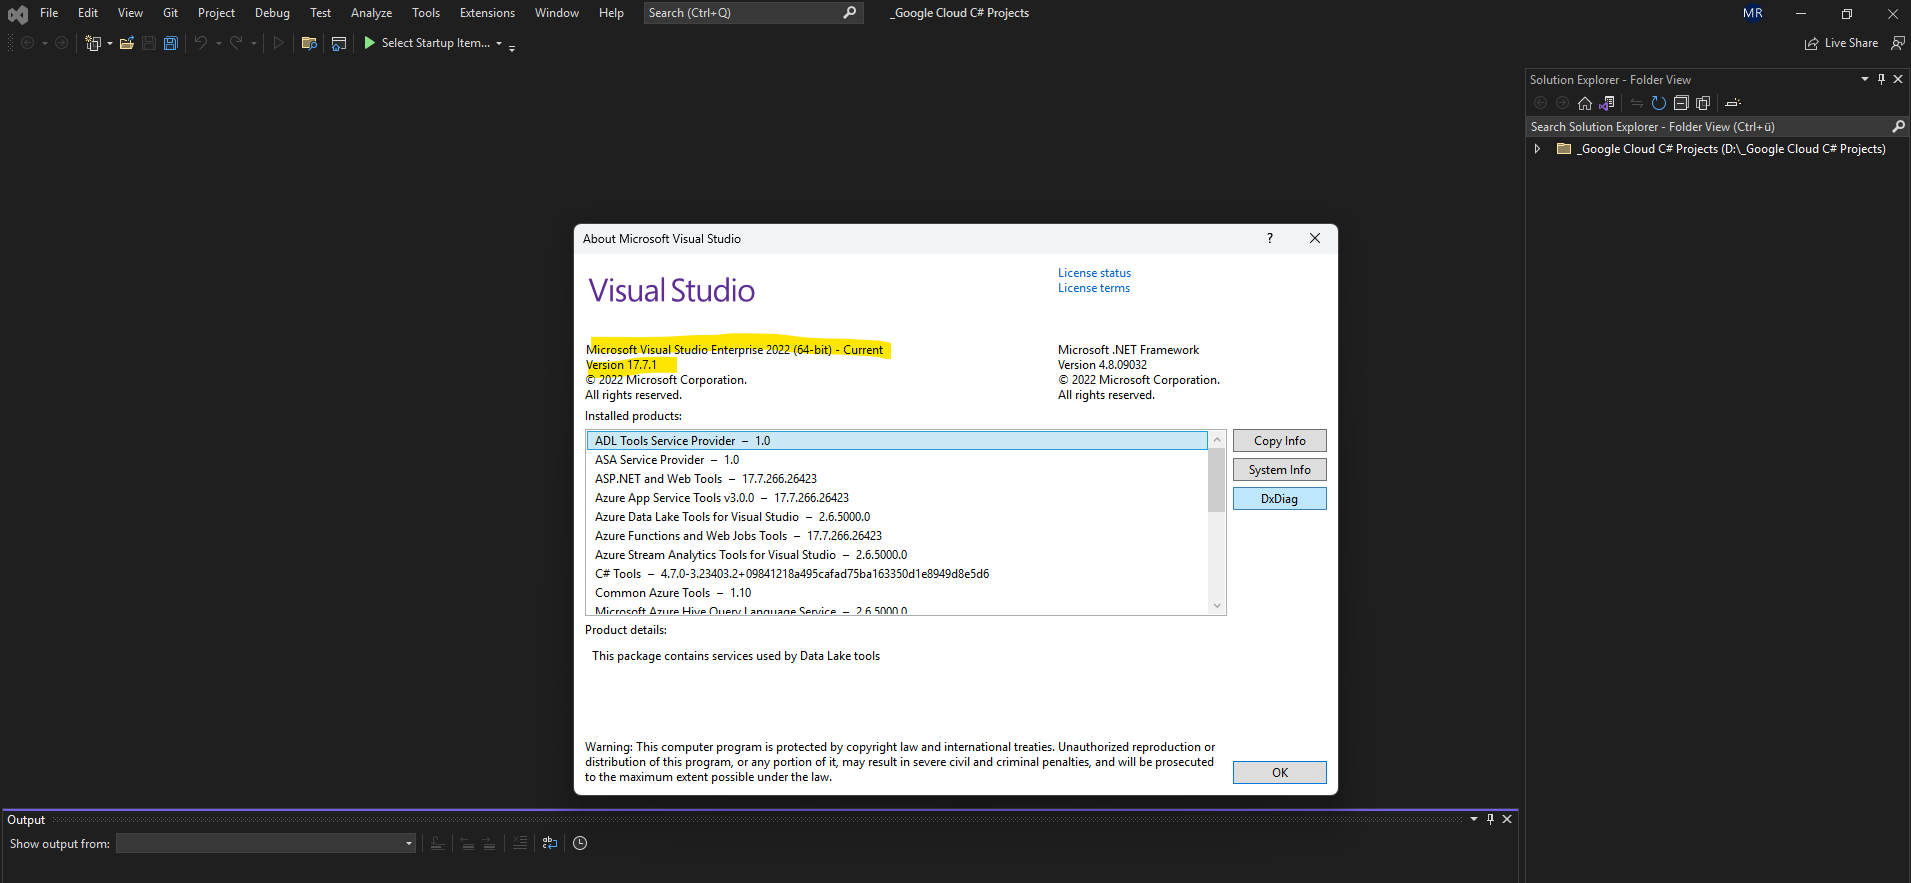
On my computer the latest .NET version which is currently installed is .NET 7.0. The currently latest version as of October 2025 is .NET 9 and preview .NET 10.
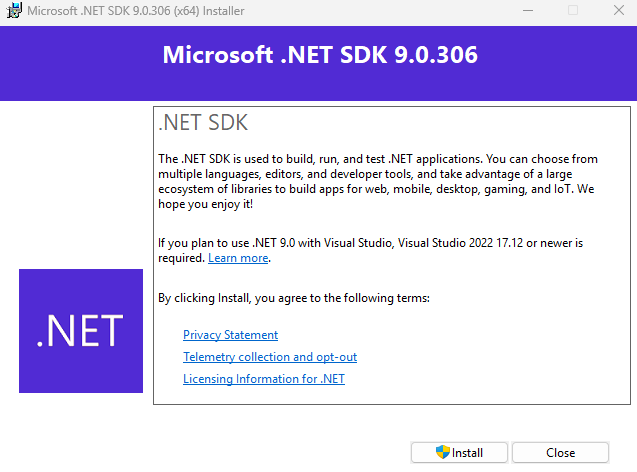
So to use the latest .NET version we can first download and install it, go to the following link to download the latest version https://dotnet.microsoft.com/en-us/download/dotnet.
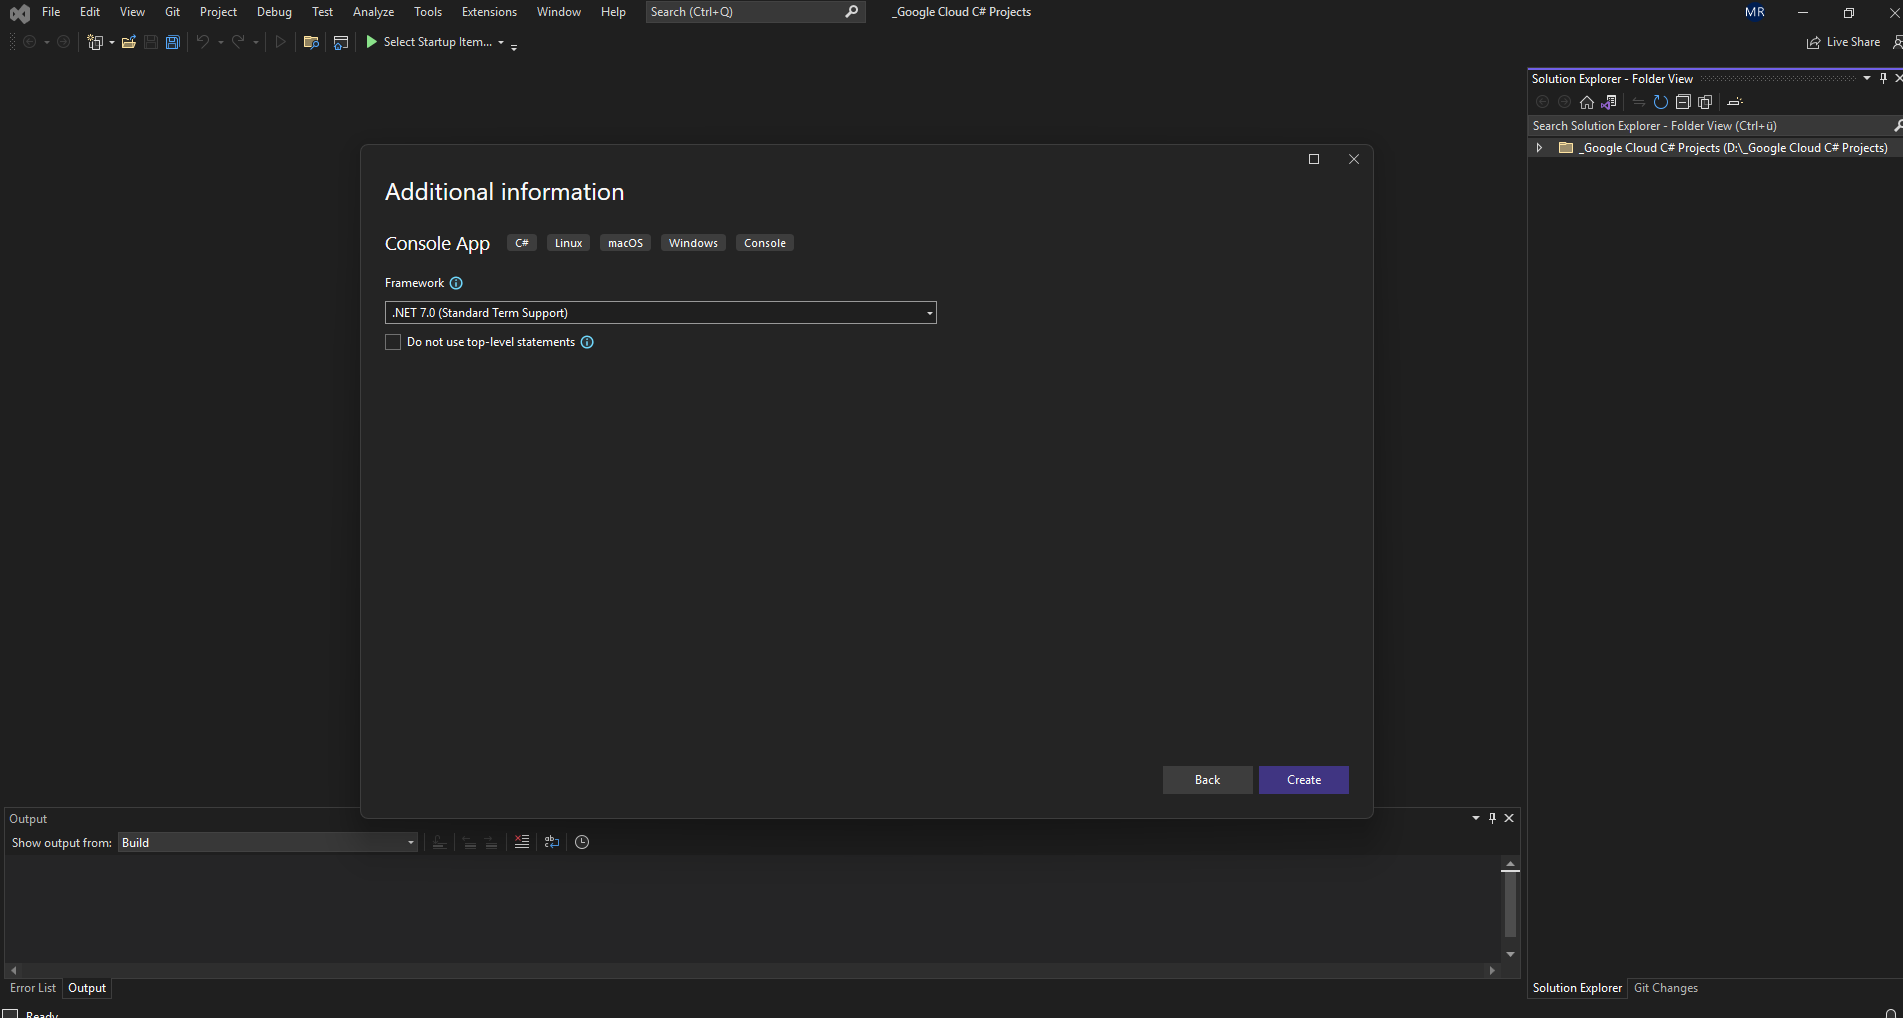

Nevertheless so far I can’t see and select .NET 9 in Visual Studio.
Even though we’ve installed the .NET 8 or .NET 9/10 SDKs, Visual Studio won’t automatically show those targets unless the IDE itself supports them. Each Visual Studio release is tied to specific .NET SDK generations.
We need Visual Studio 2022 v17.8+ for .NET 8 and v17.10+ for .NET 9.
.NET 10 requires the latest Visual Studio 2025 Preview.
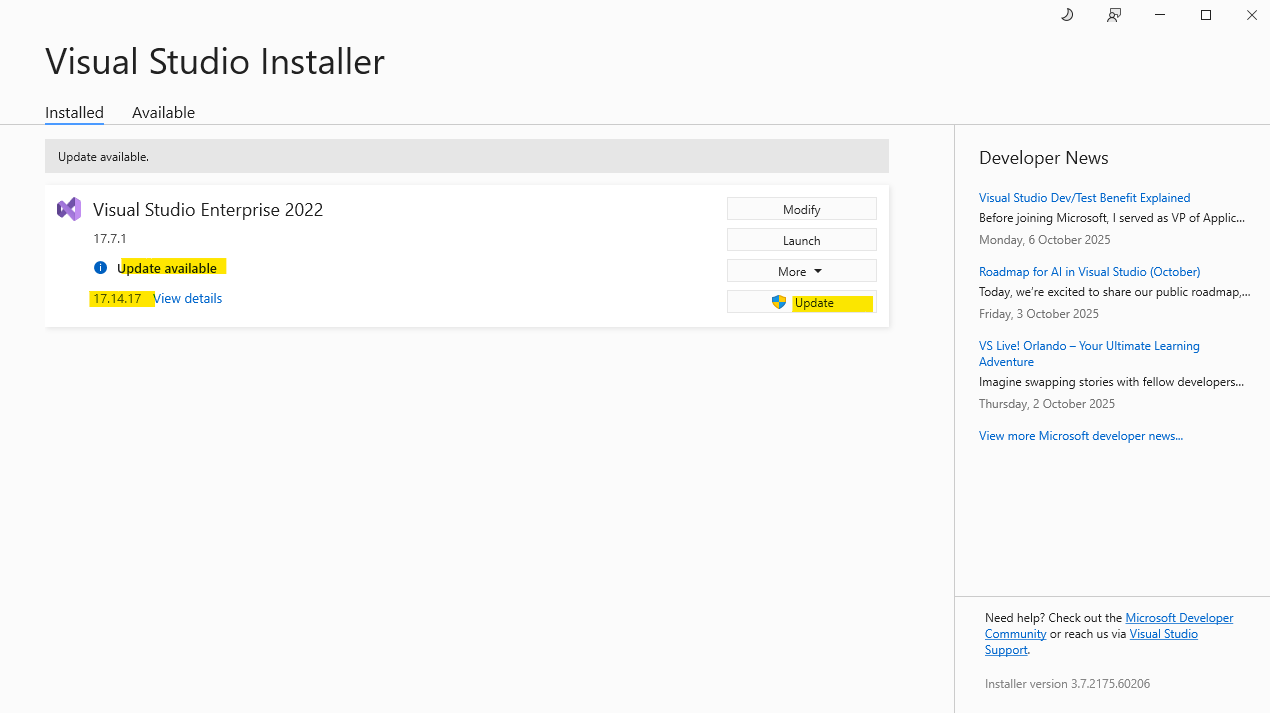
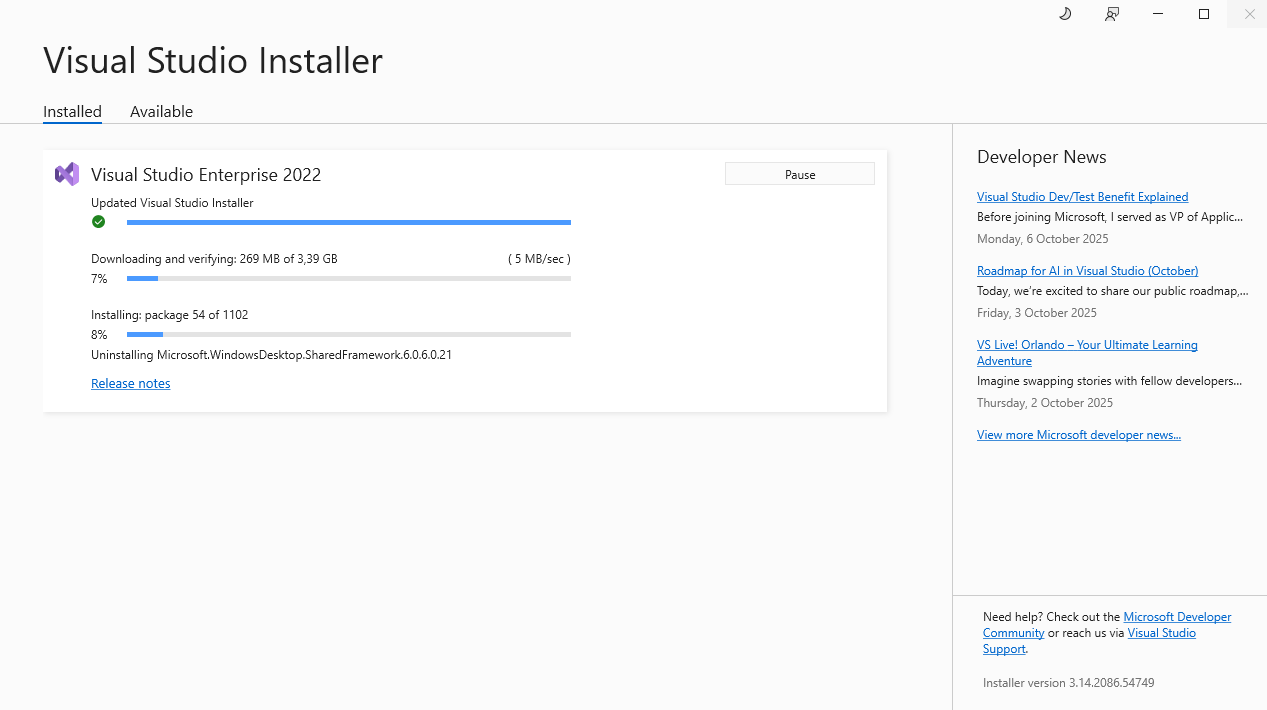
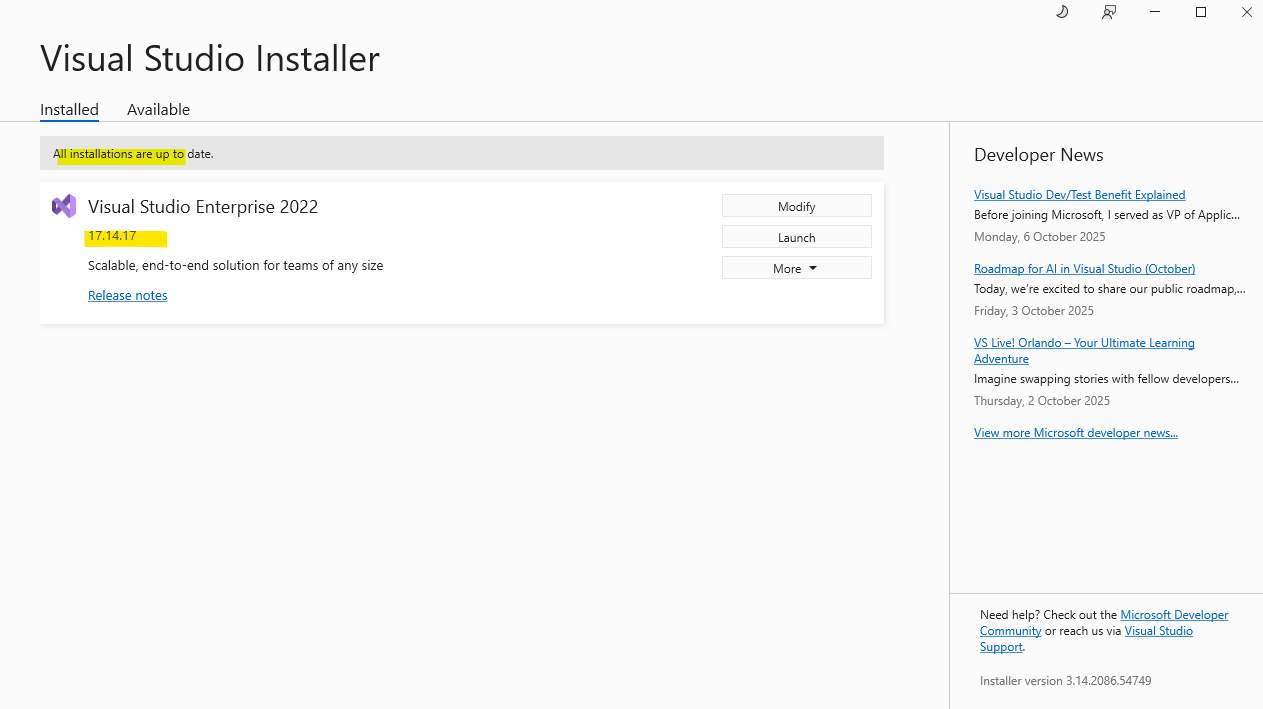
So I will first have to also update Visual Studio. Therefore open the Visual Studio Installer to see if there are new update available. Looks good and in my case I can update to version 17.14.17.
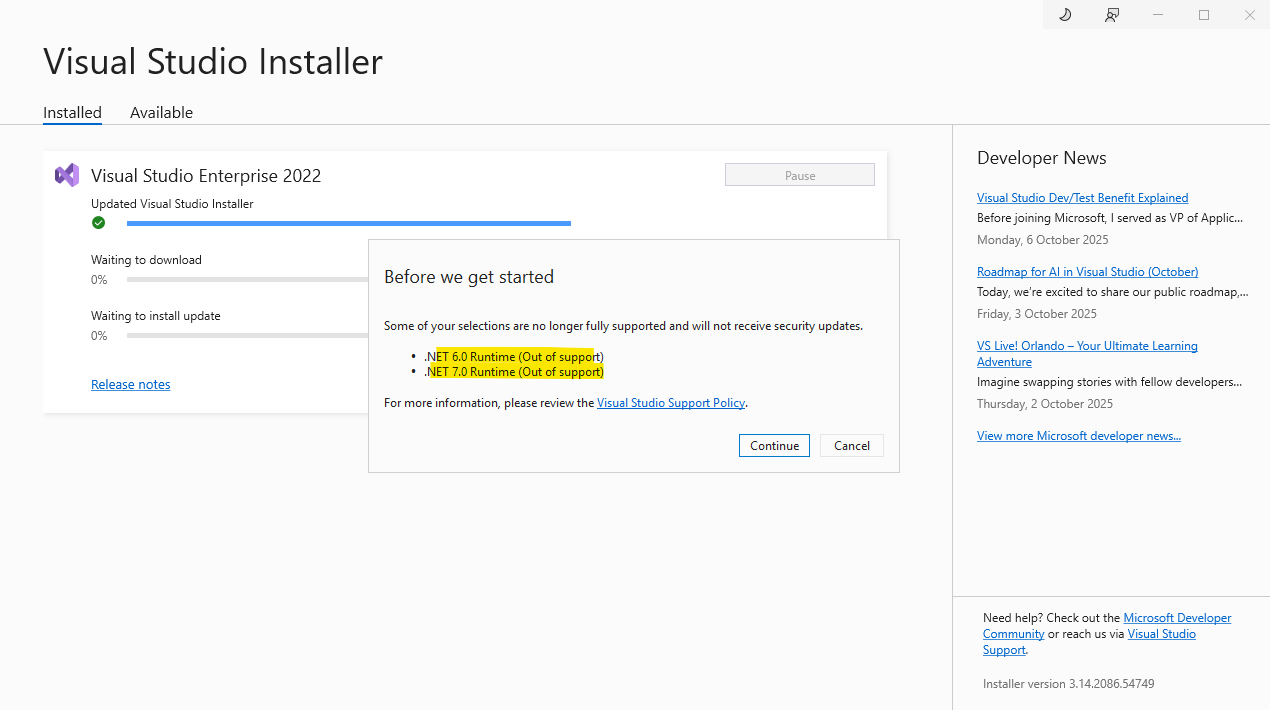
.NET 7.0 is also out of support meanwhile.
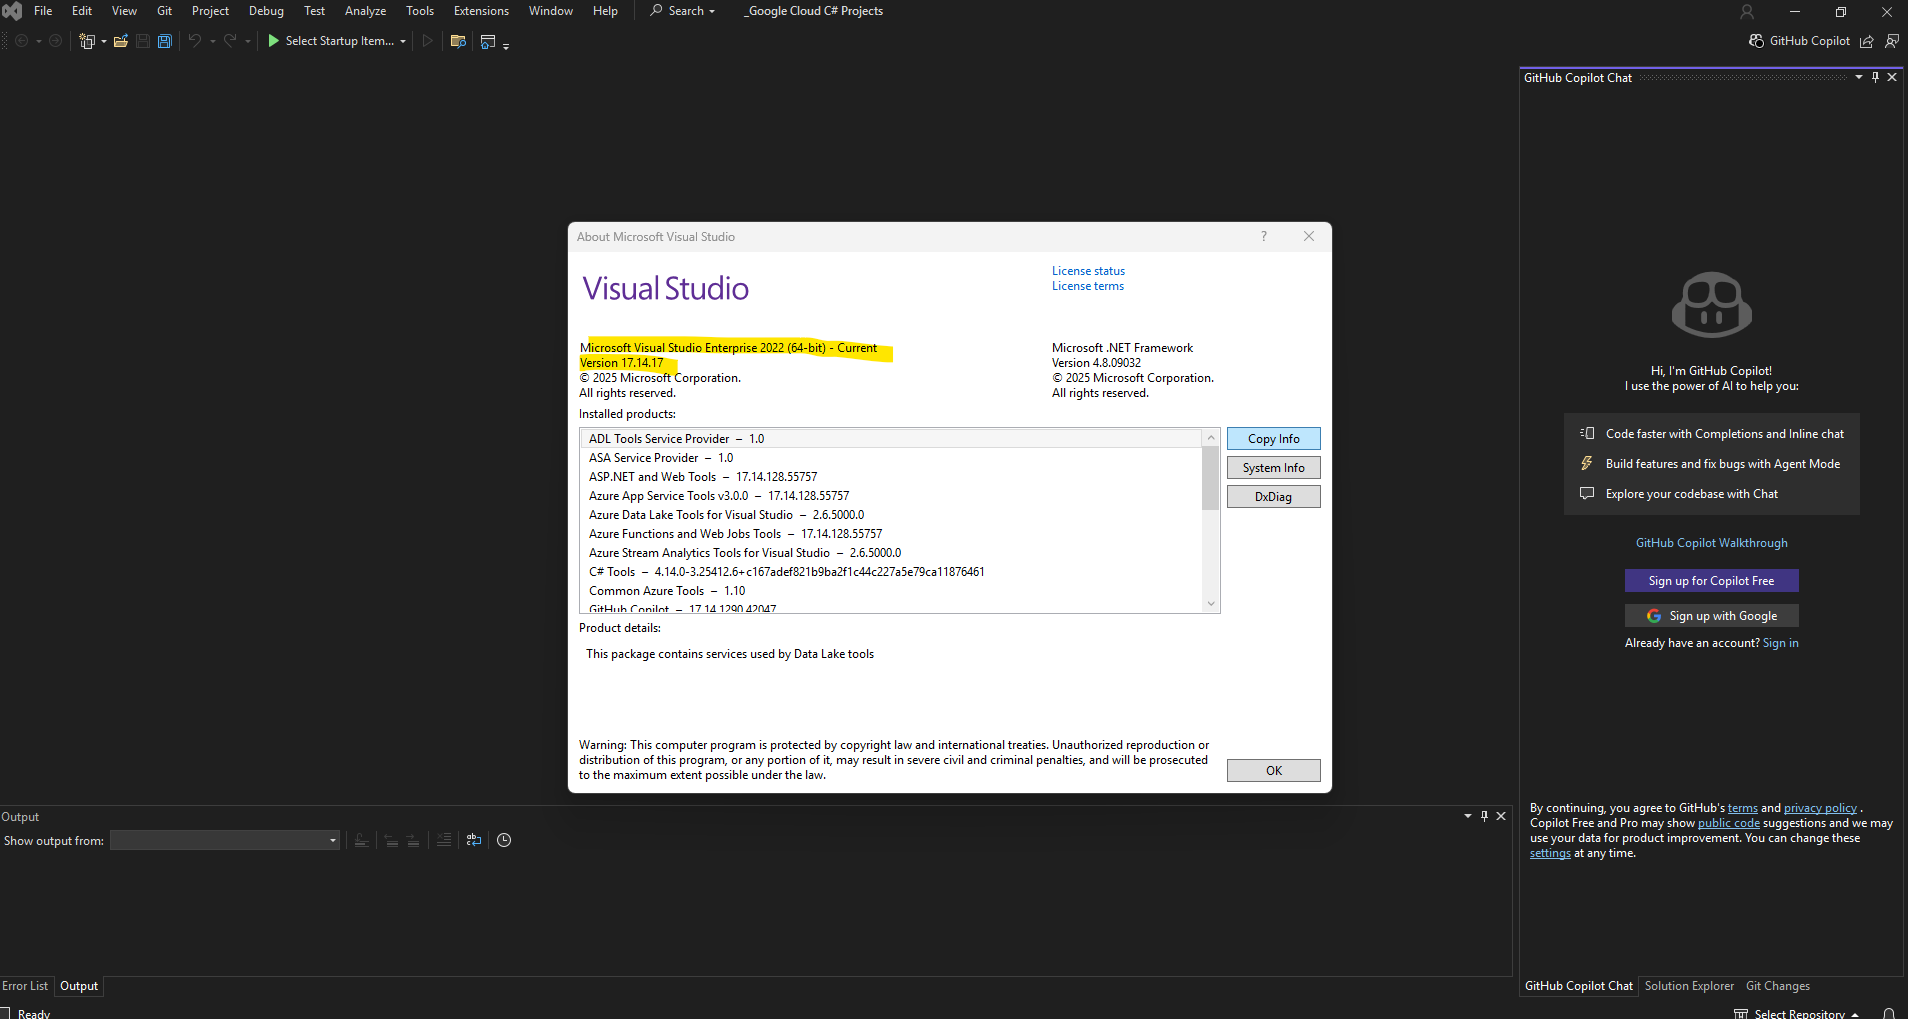
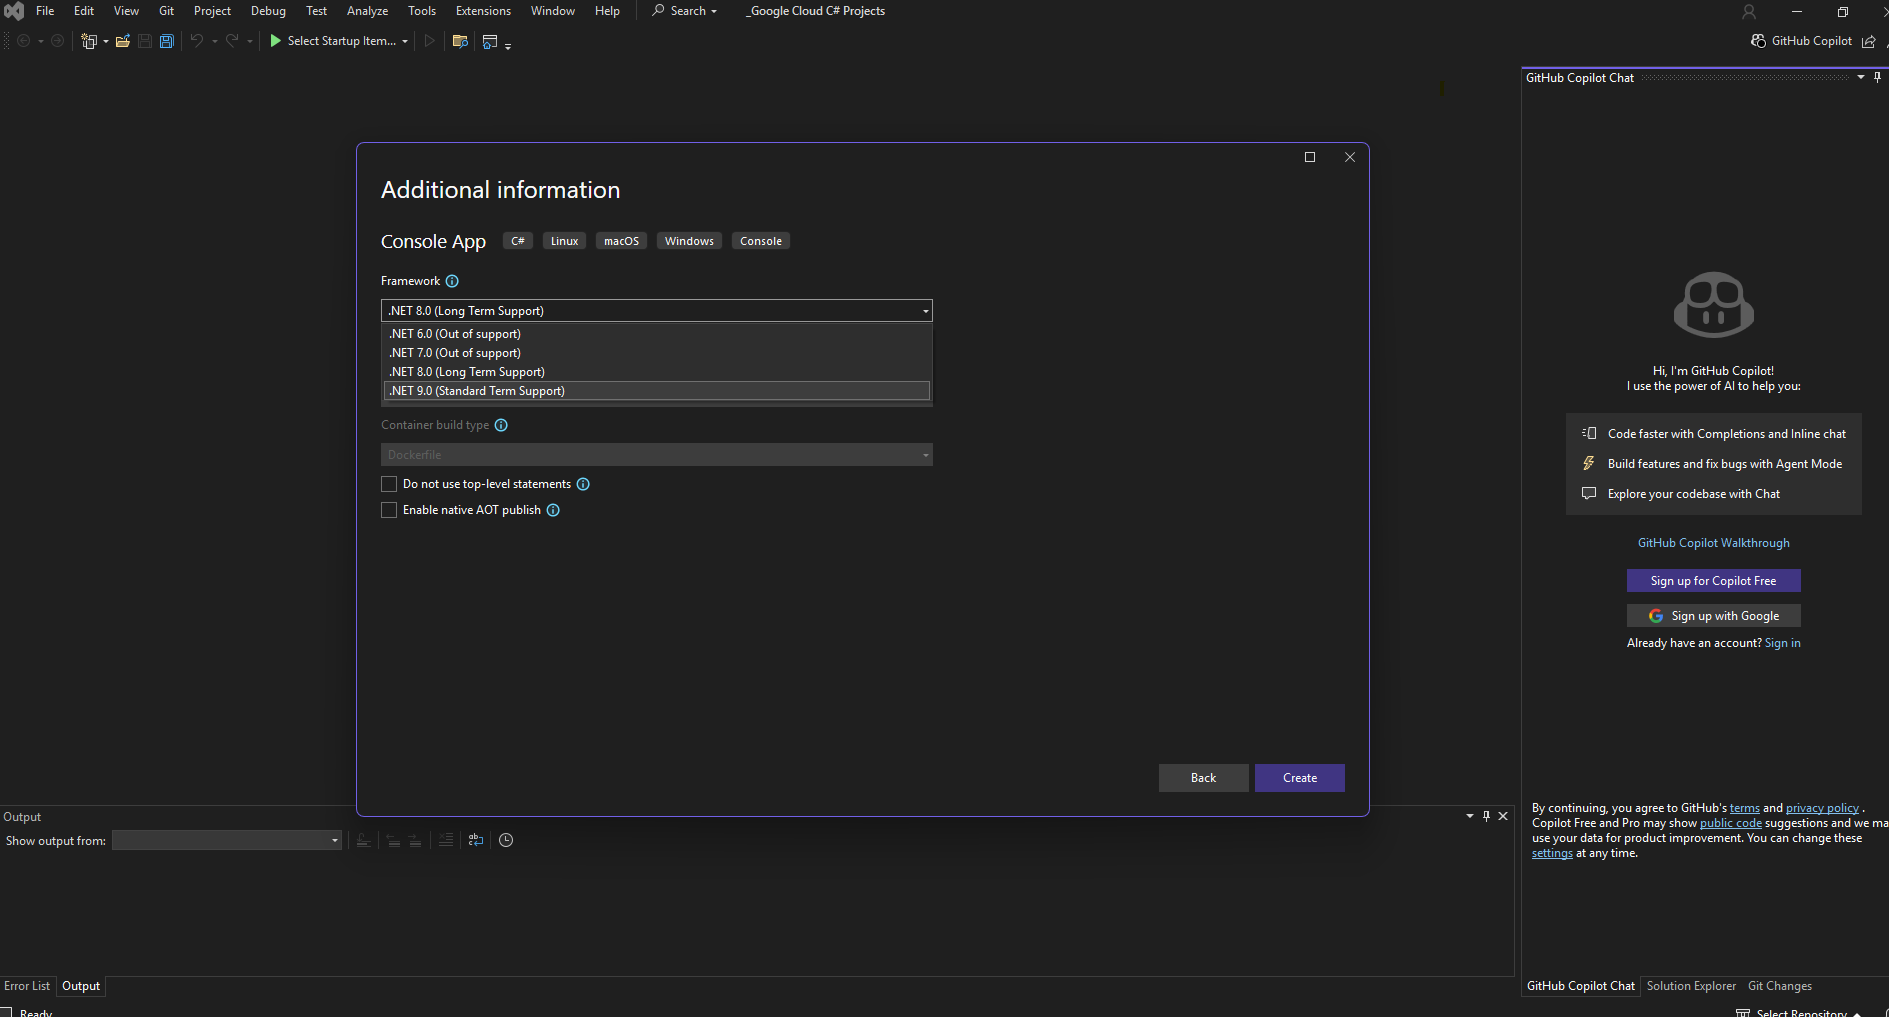
I am now be able to select .NET 9.0 which I was previously installing on my computer.
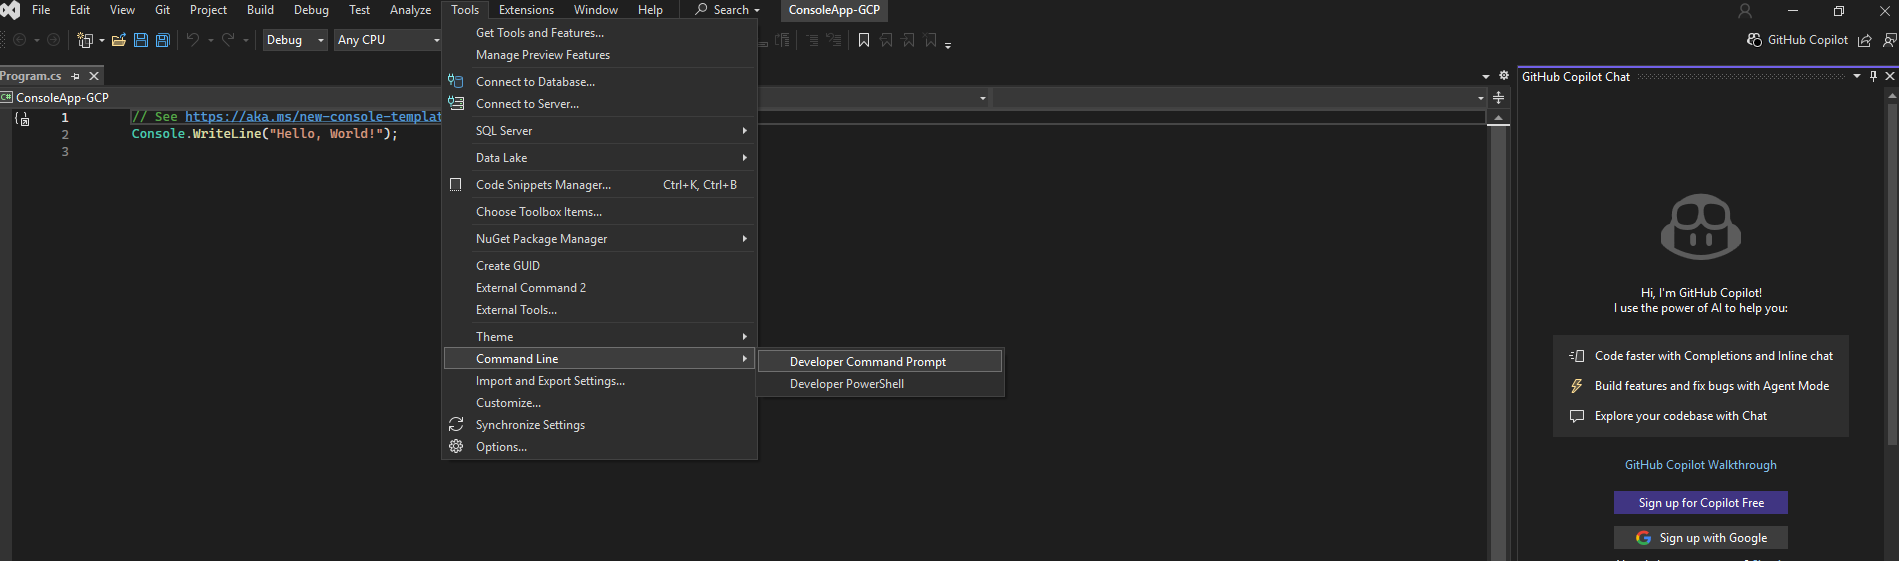
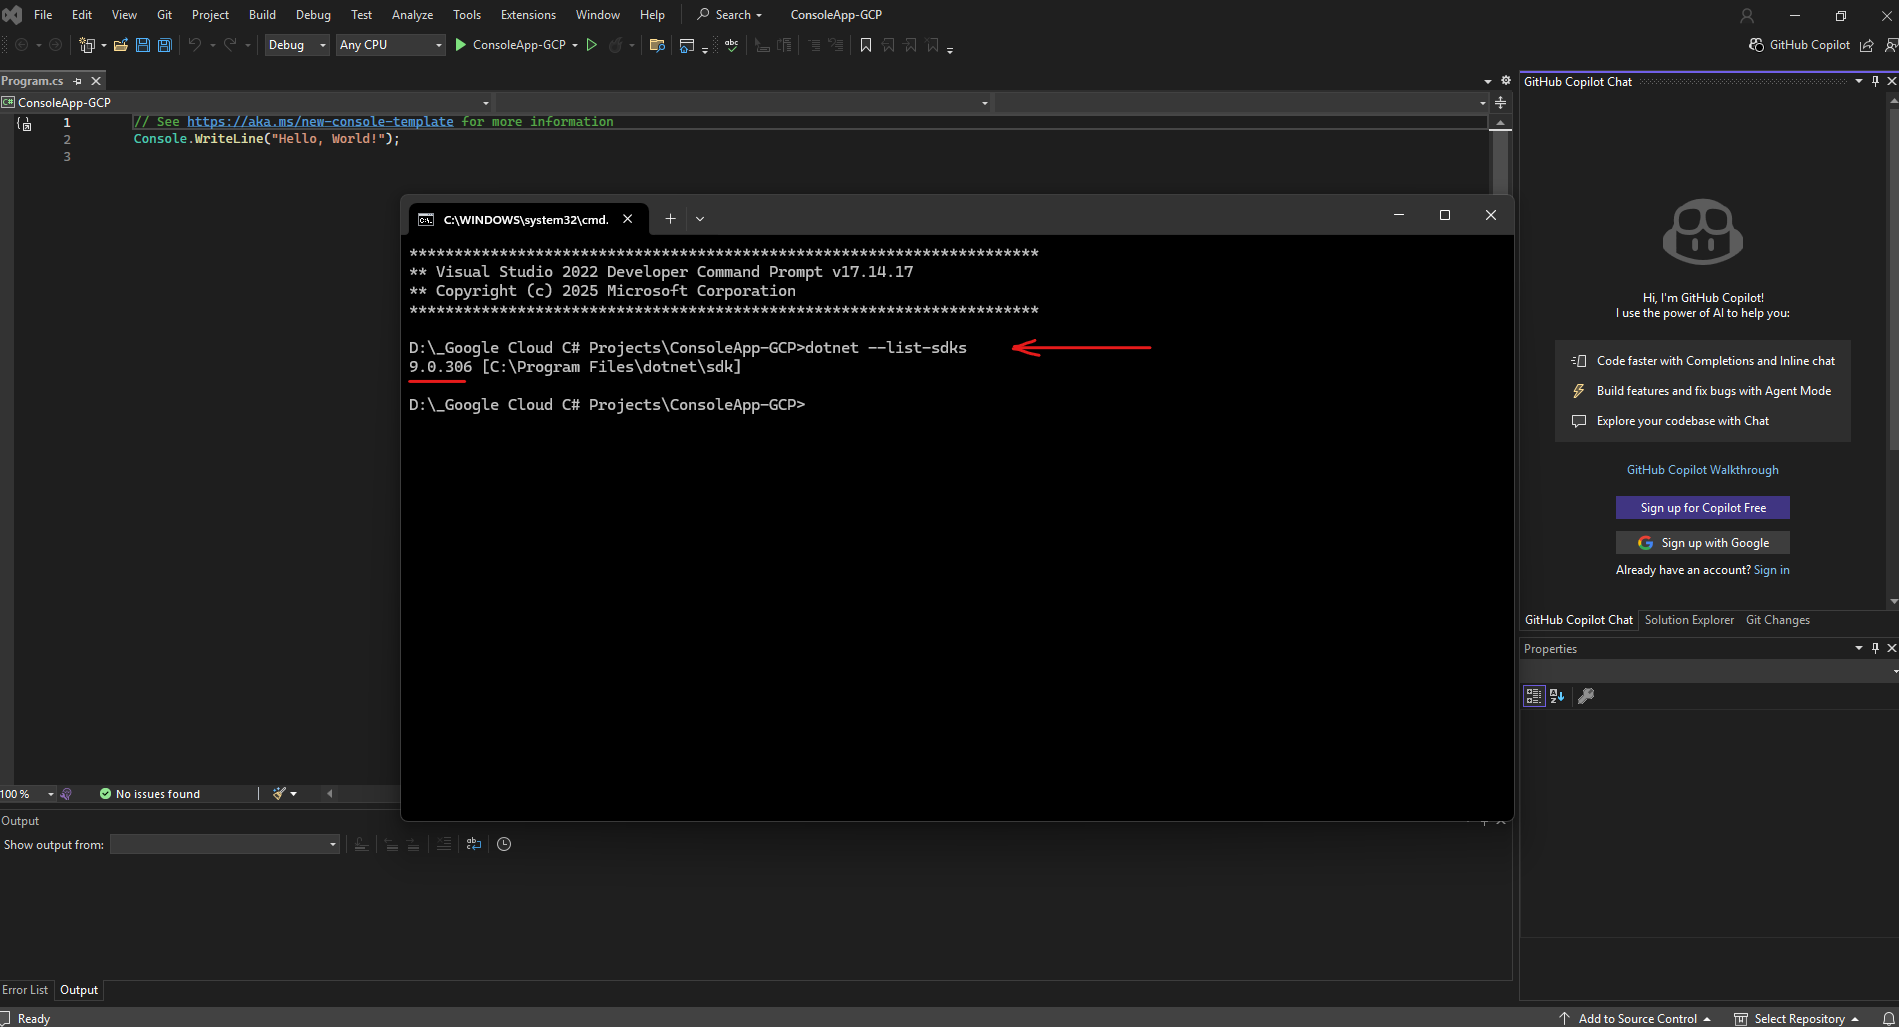
We can also verify the installed SDK version by running.
dotnet --list-sdks
We first need to import the following namespaces to finally use the corresponding .NET libraries (assemblies).
.NET libraries are collections of prebuilt code that provide reusable functionality for your applications, such as working with files, networks, data, or user interfaces.
They’re organized into namespaces (like System or System.Linq) that group related classes and methods.
By referencing these libraries, you can use powerful features without writing everything from scratch.
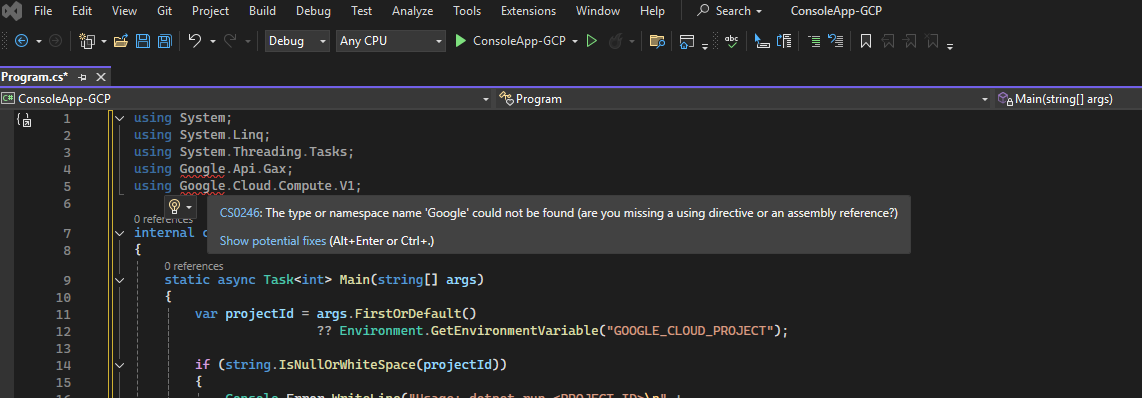
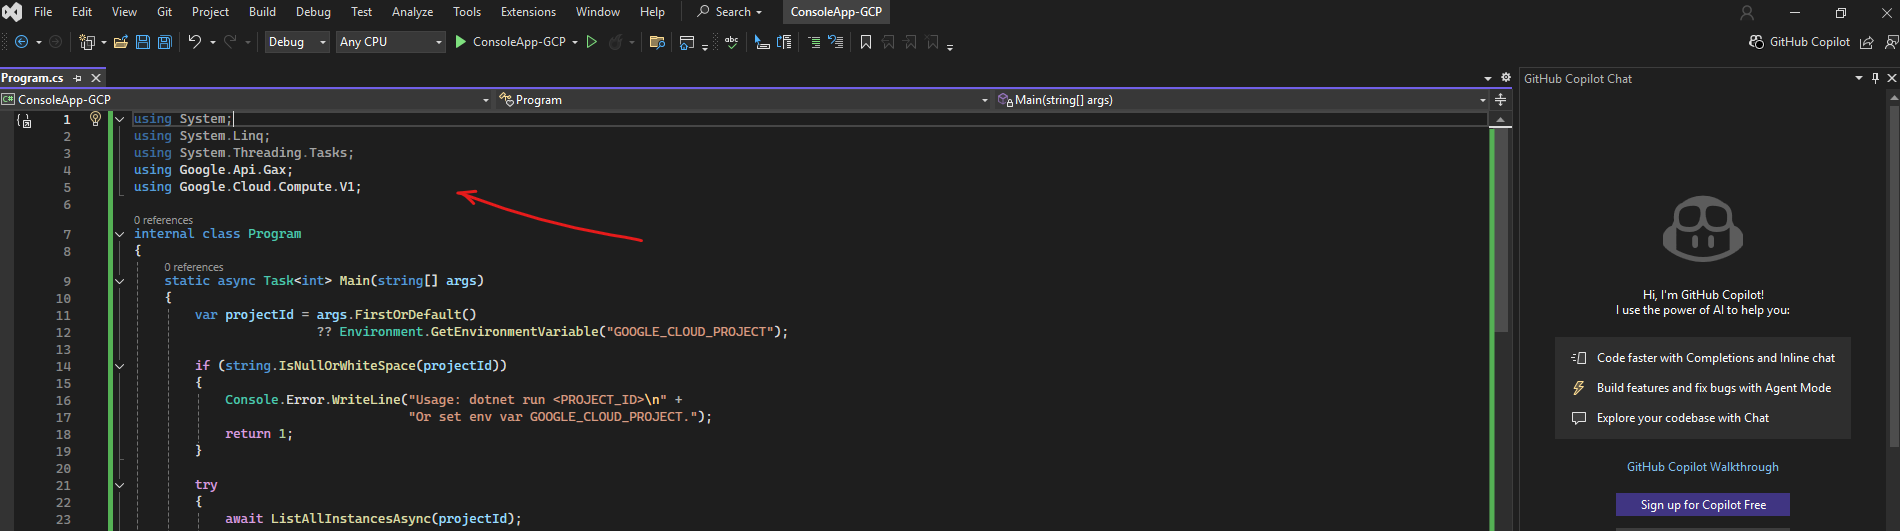
using System;
using System.Linq;
using System.Threading.Tasks;
using Google.Api.Gax;
using Google.Cloud.Compute.V1;
Many core .NET libraries like System or System.Linq come preinstalled with the .NET SDK, so you can use them right away.
In contrast, third-party libraries such as Google.Api.Gax or Google.Cloud.Compute.V1 shown below as red underlined errors, aren’t included by default.
These must first be added manually to our project, typically through the NuGet Package Manager in Visual Studio or via the dotnet add package command.
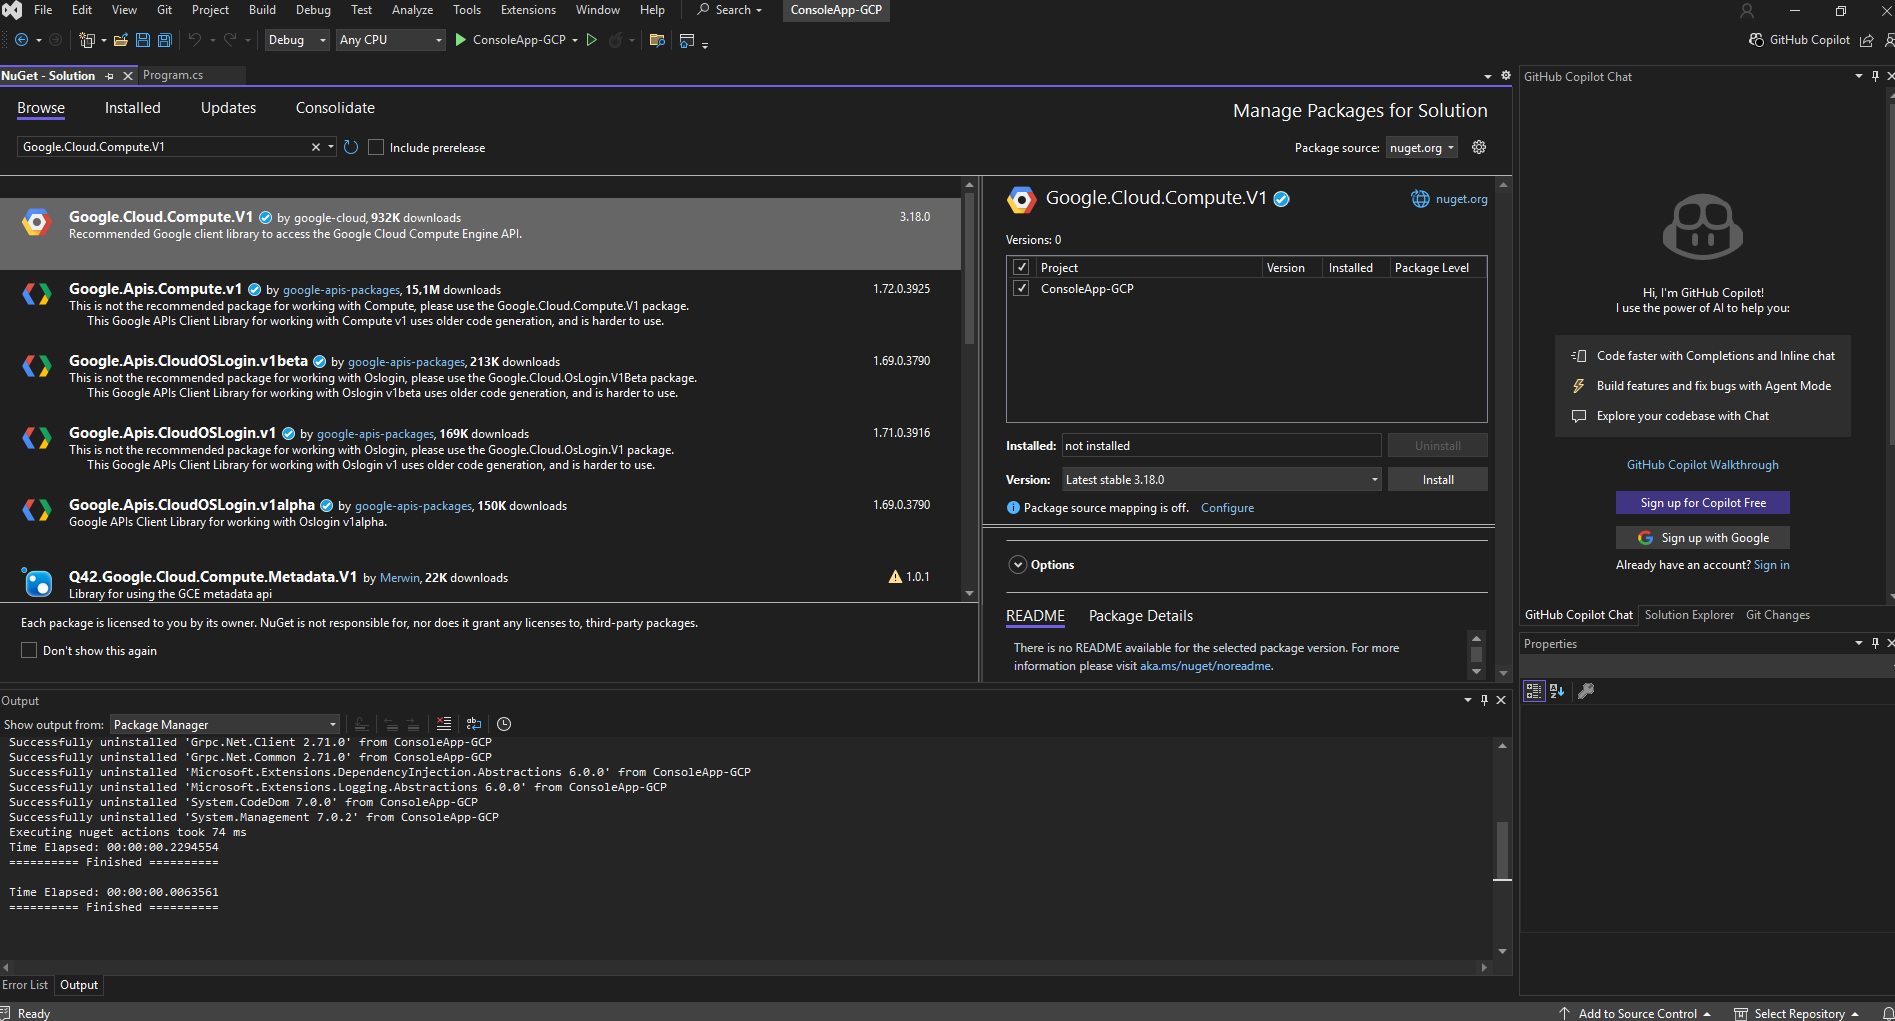
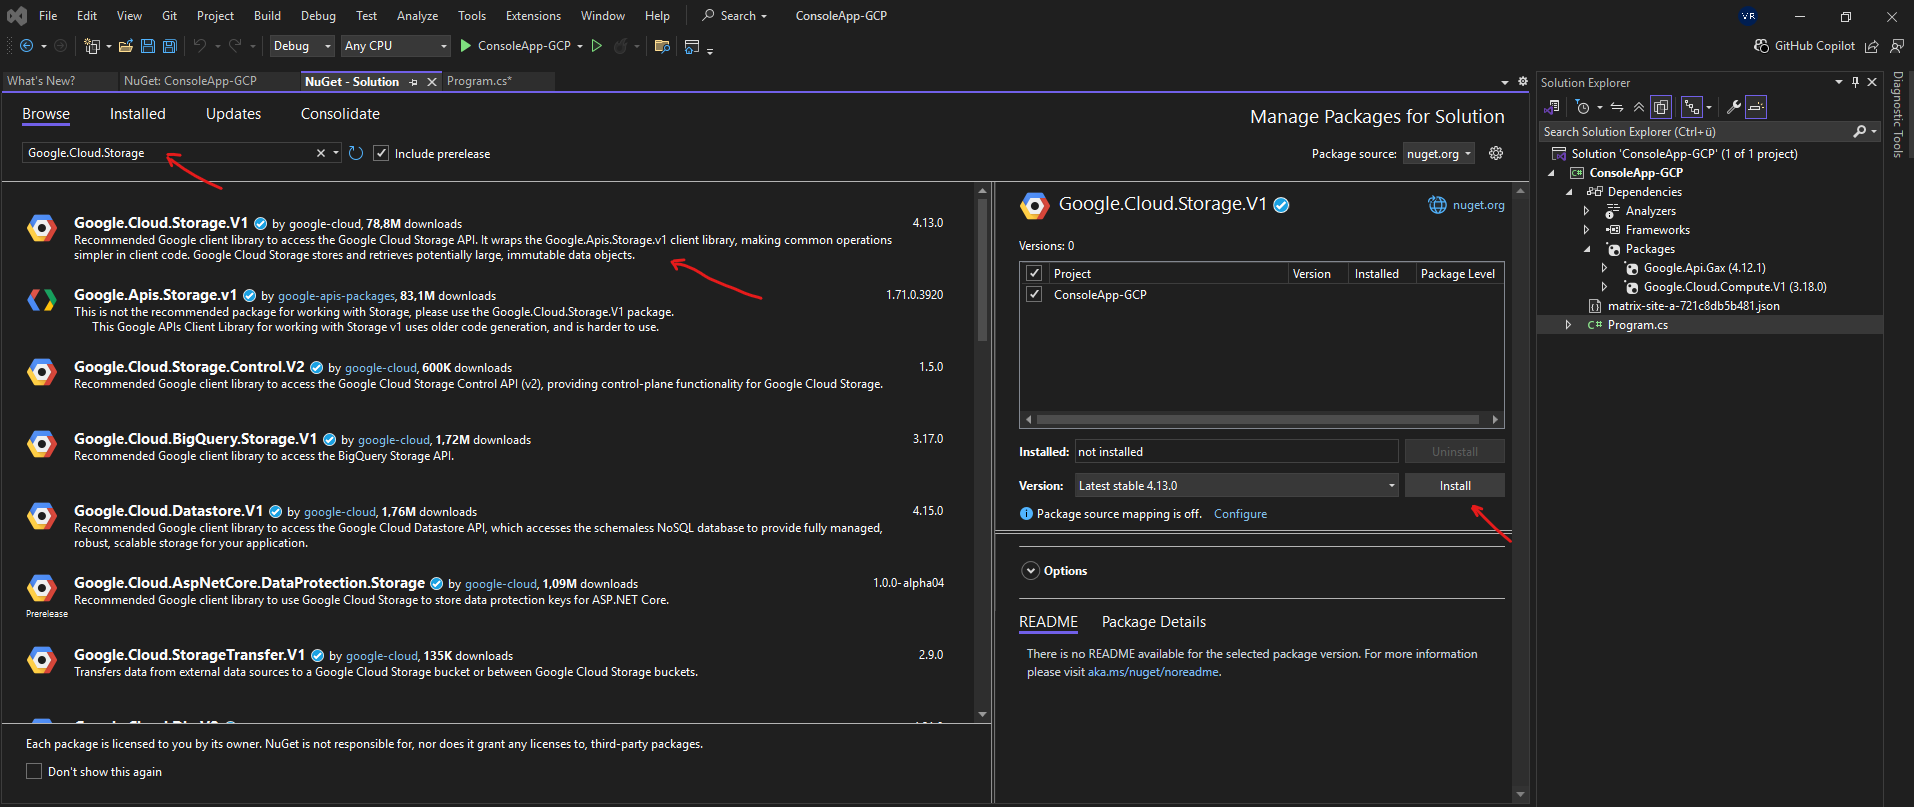
I will use below the NuGet Package Manager to first search for our required .NET libraries and then to install them.
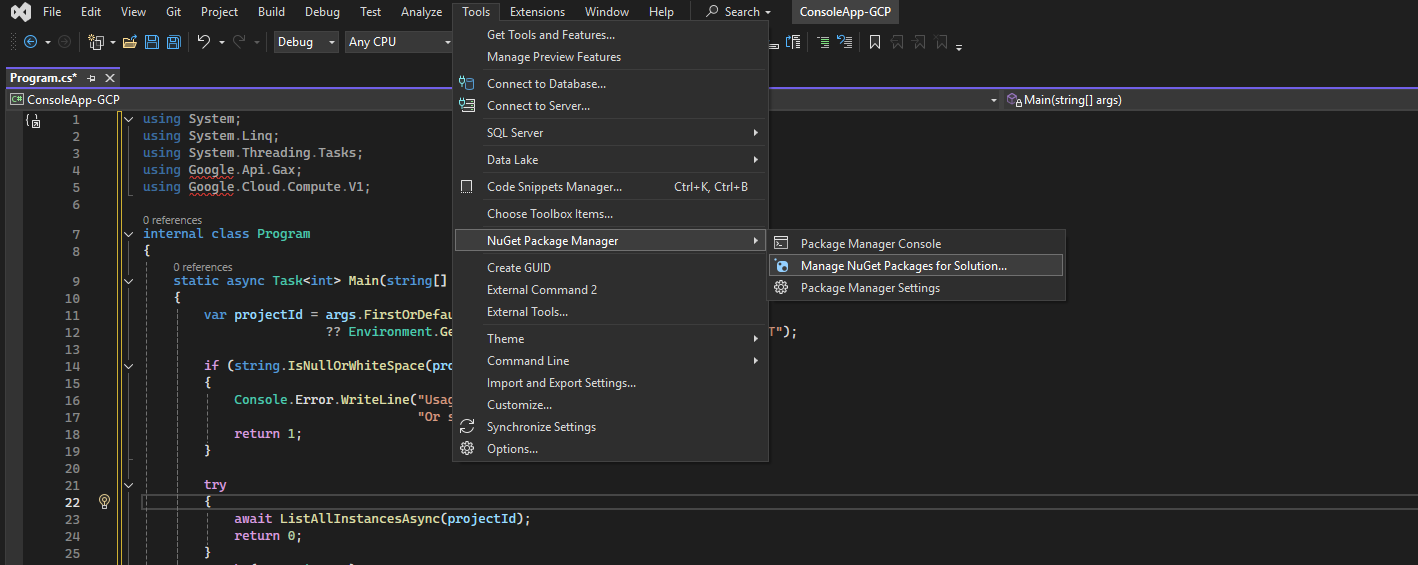
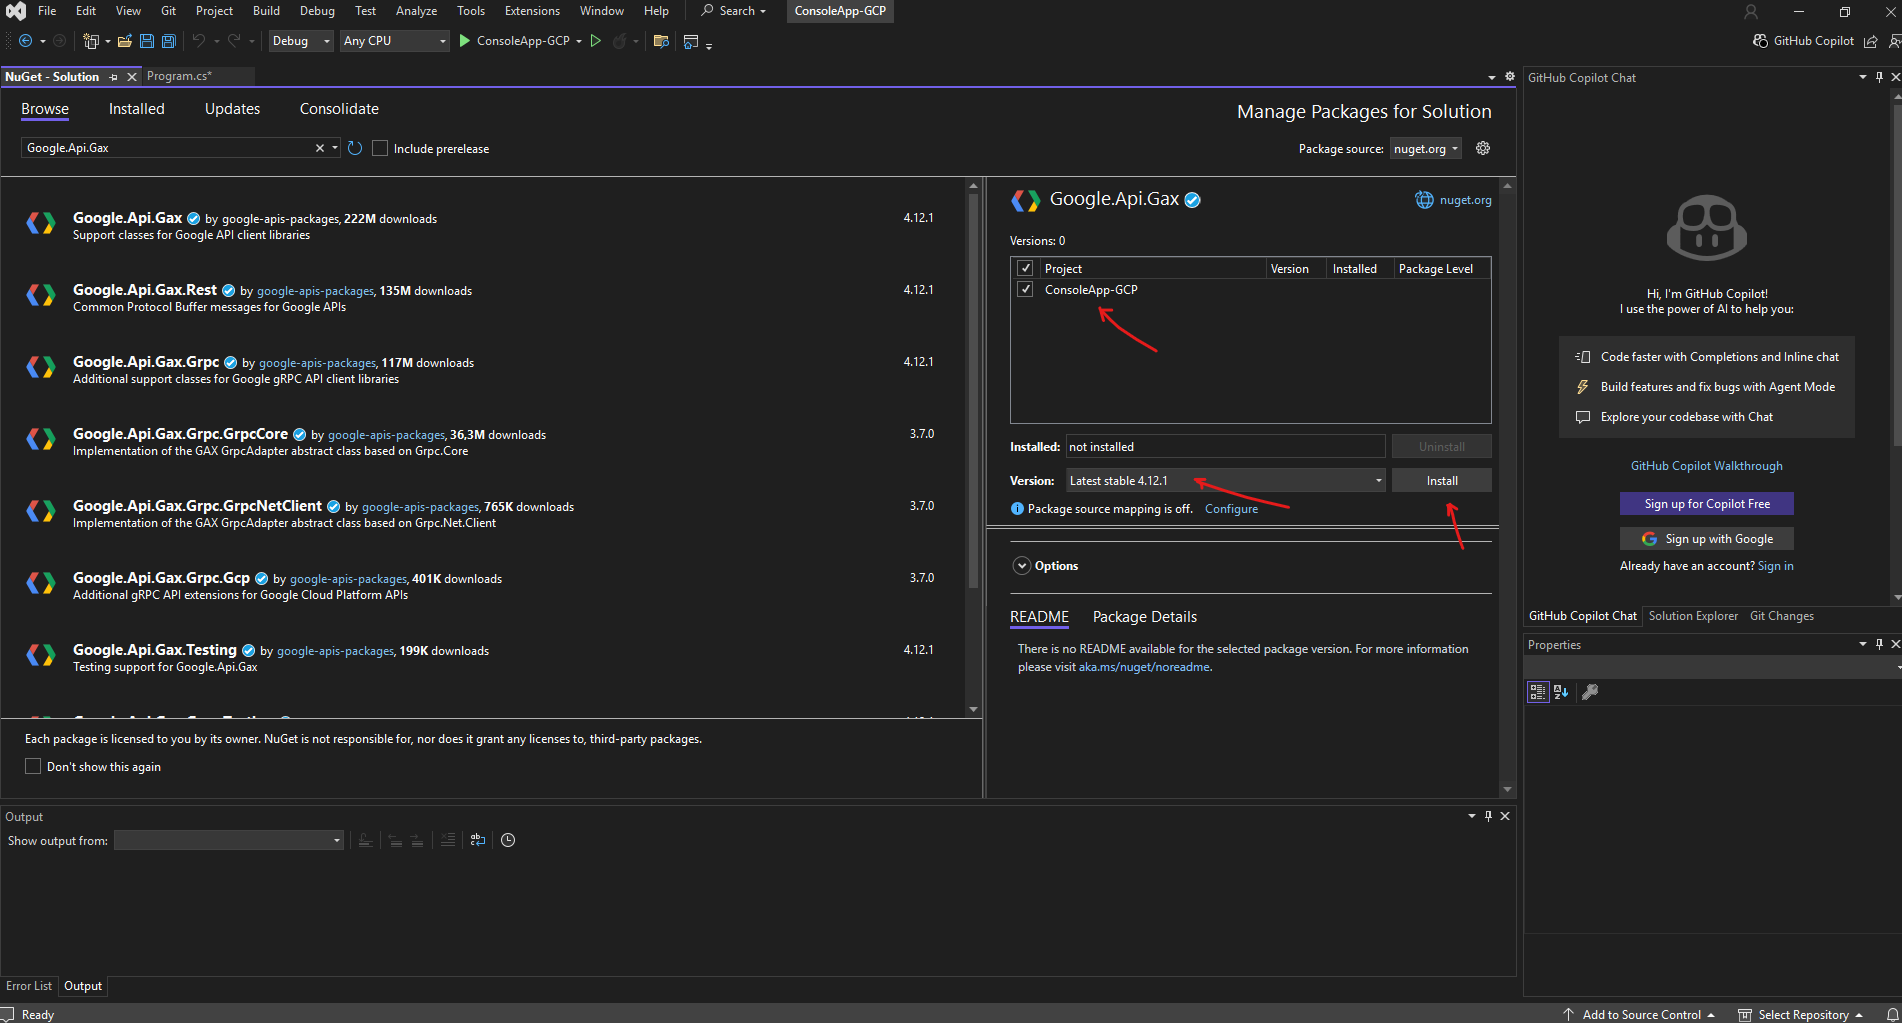
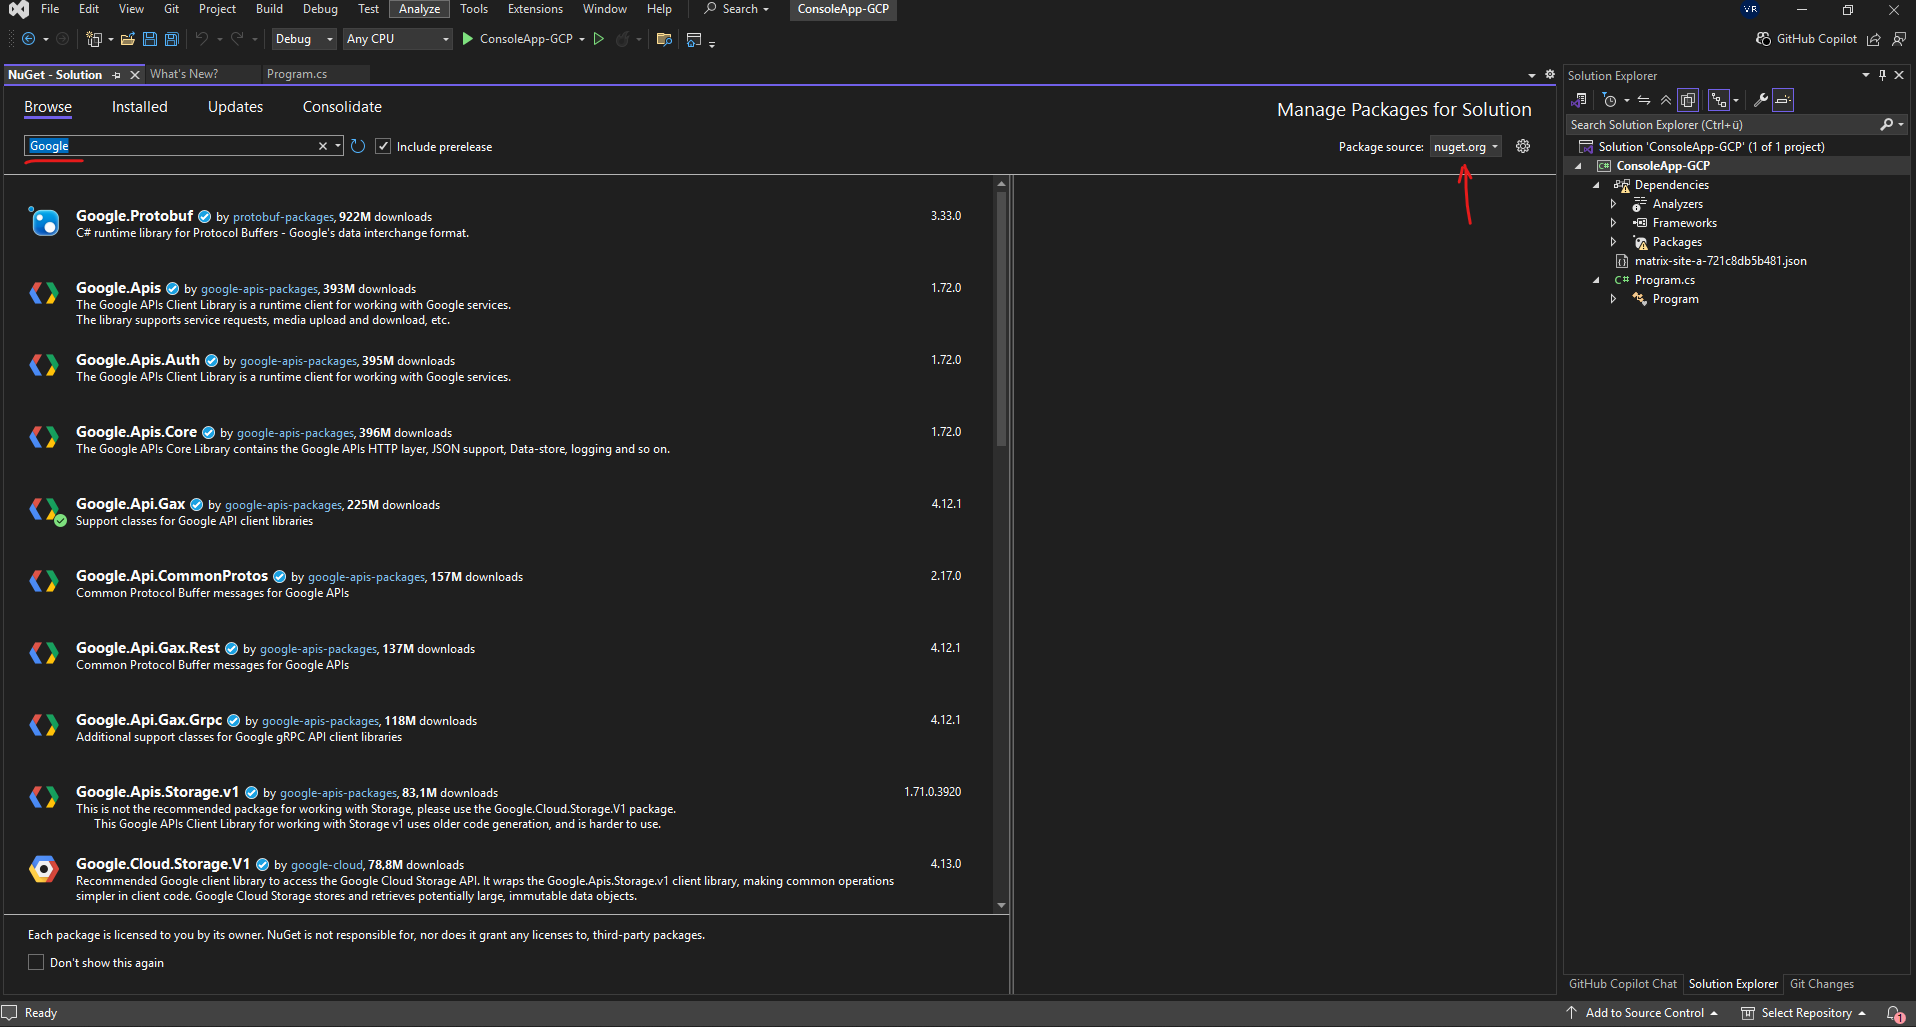
Within the NuGet Package Manager we need to switch to the Browse tab and search for our required .NET libraries like shown below.
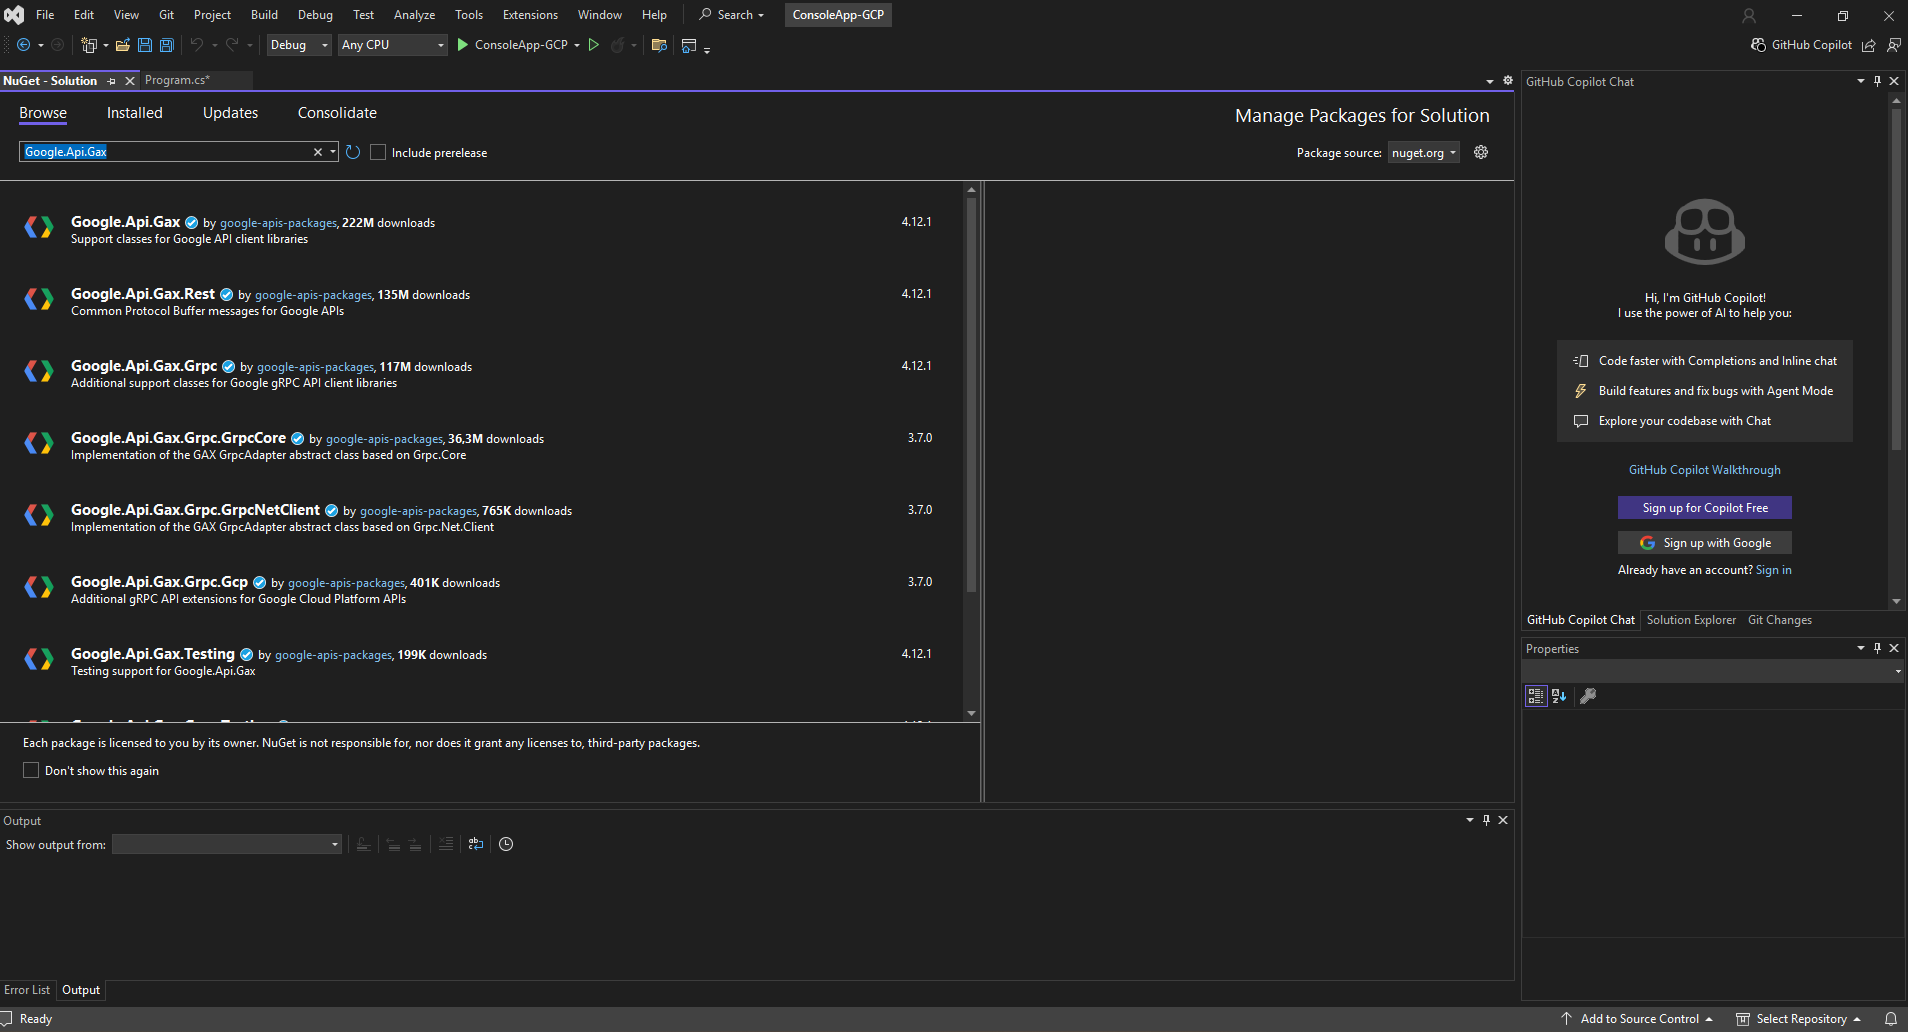
To install the NET library check the project you want to install it for and select the desired version, finally click on Install.
Click on Apply.
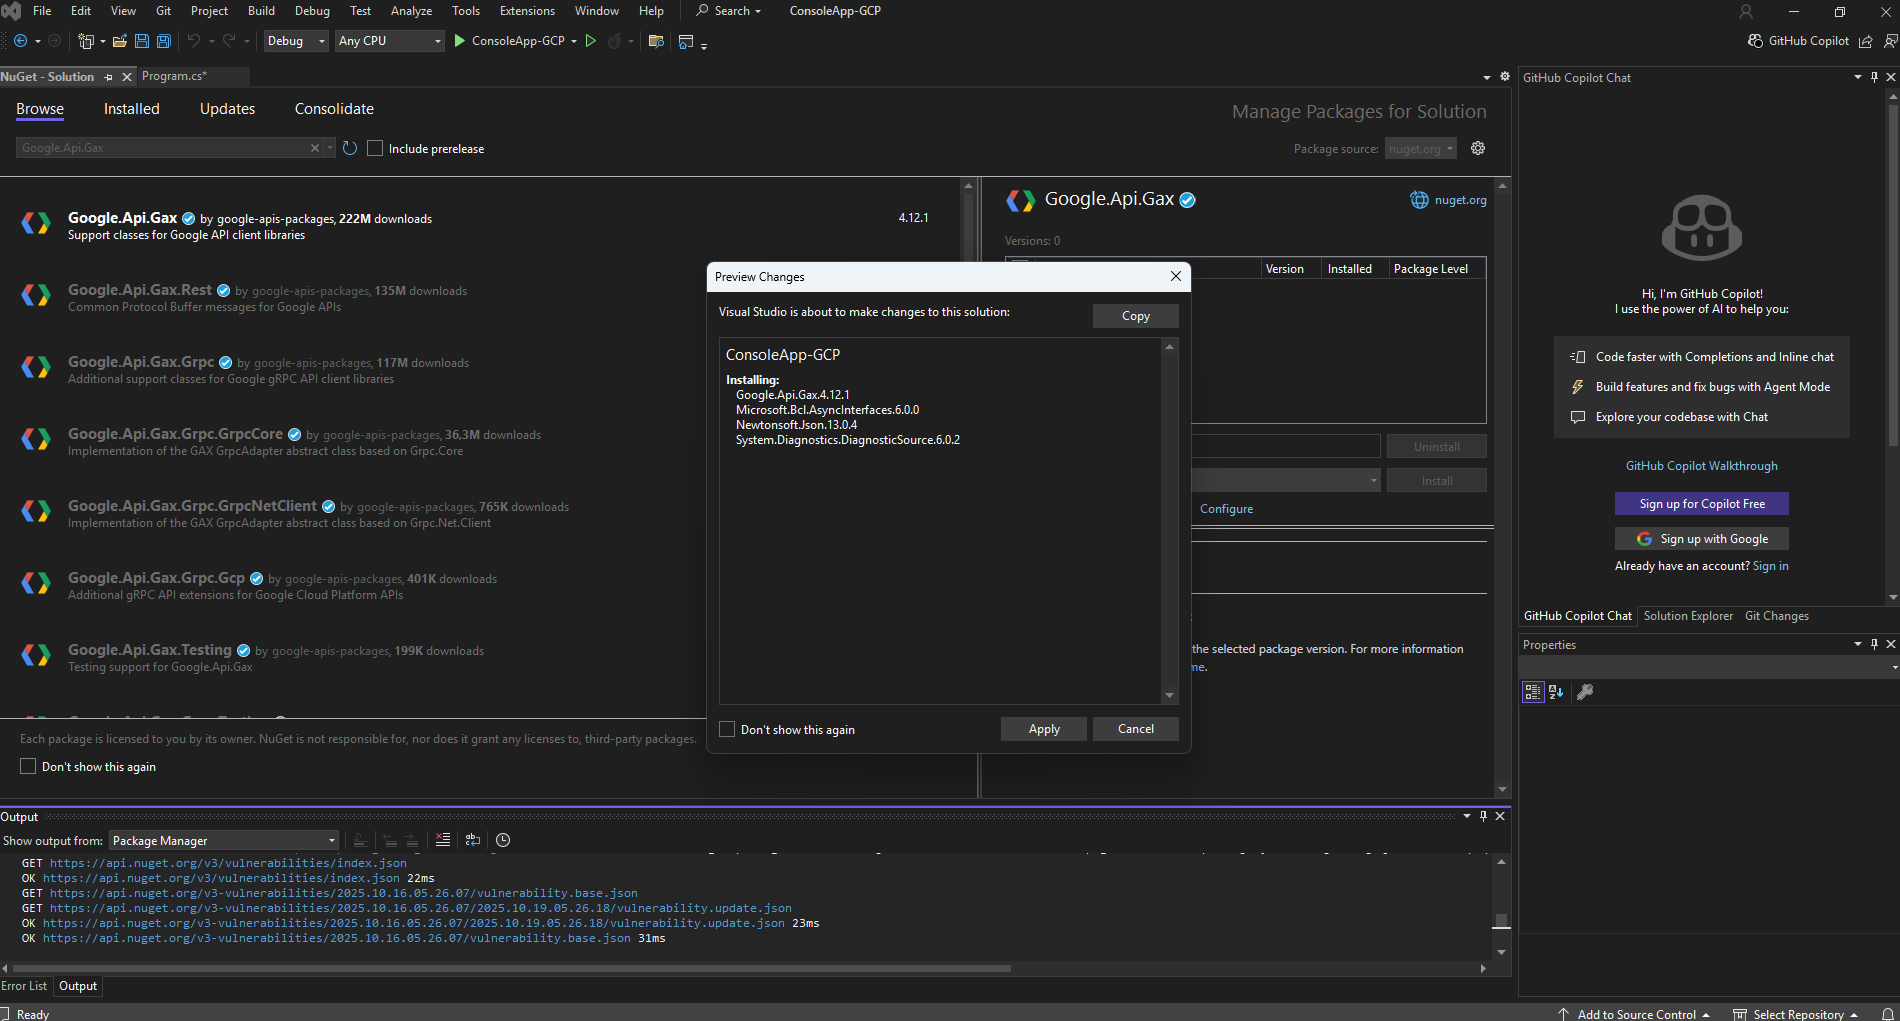
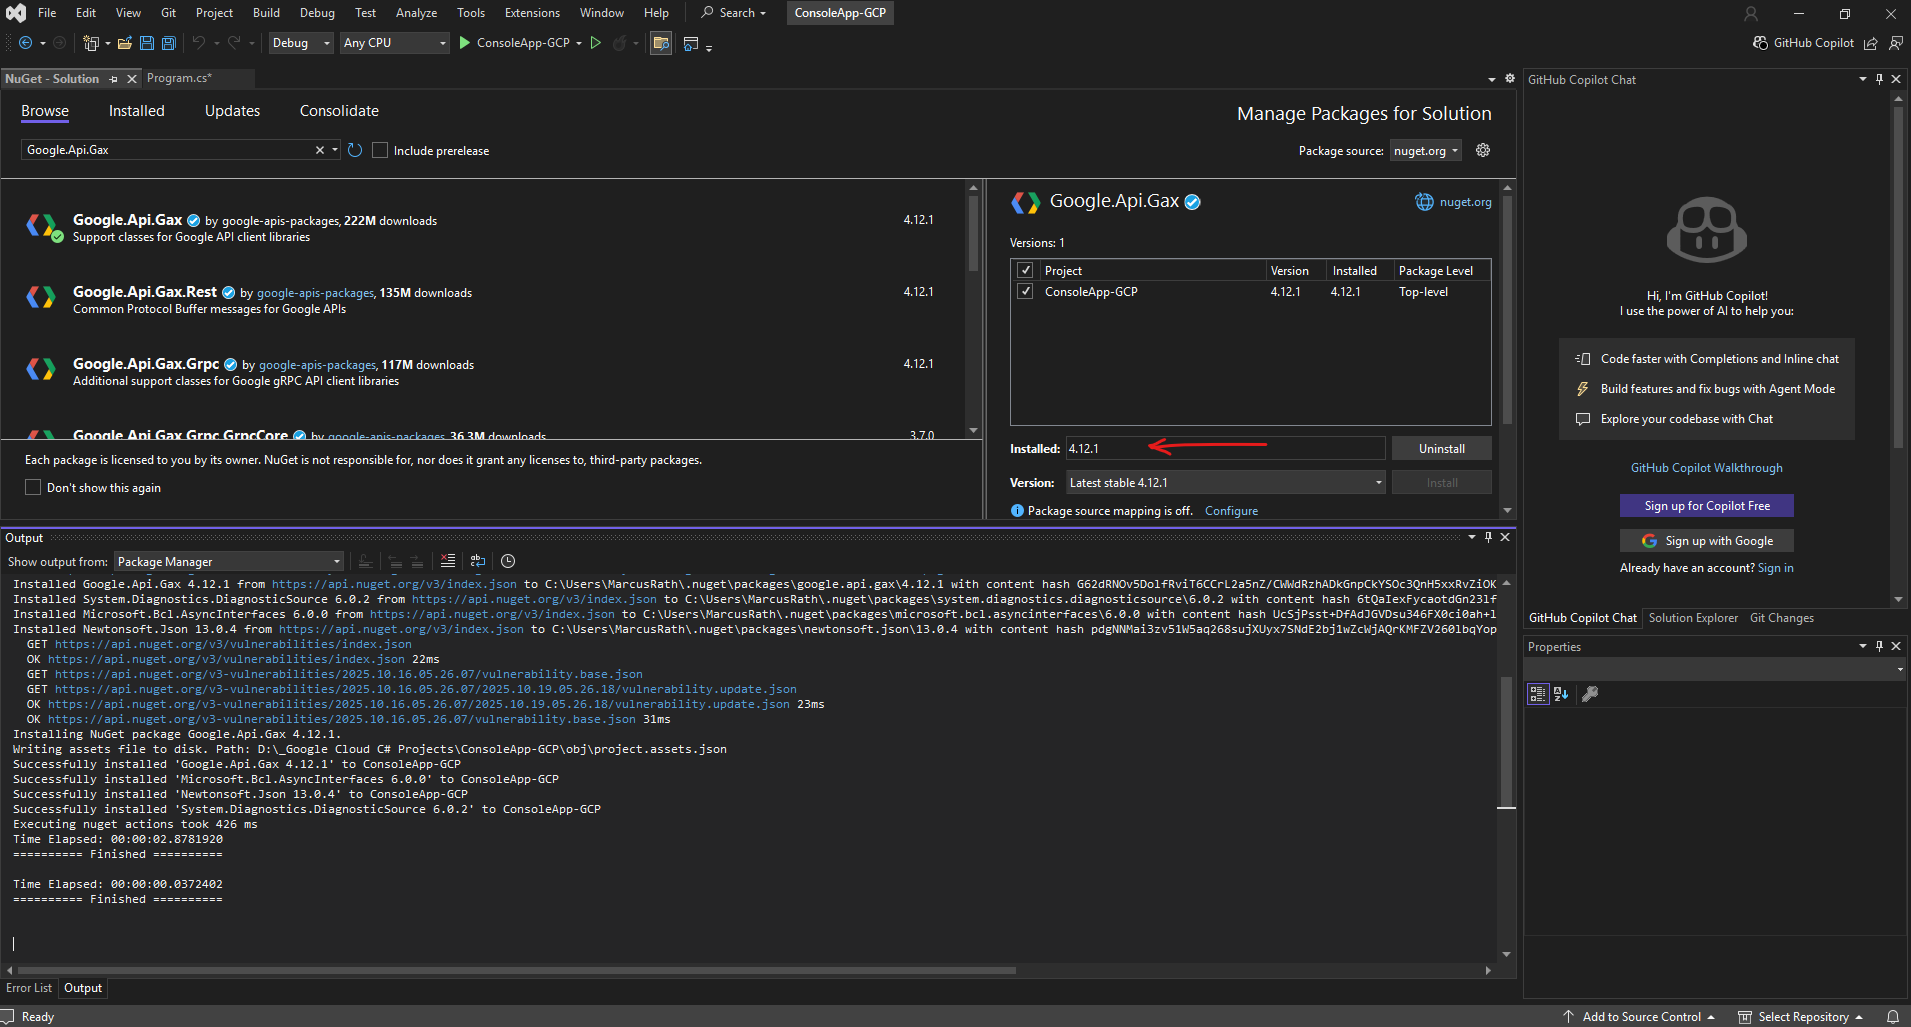
In Visual Studios Output window we will see the detailed progress of installing our libraries.
In the project window we will also see the new state with installed for our package/library.
Next we also need to install the Google.Cloud.Compute.V1 package.
The previous red underlined errors about missing namespace are gone.
Accessing Google Cloud Compute Engine via Service Account
We’ll now create a short C# example that connects to the Google Cloud Compute Engine API using a service account.
The sample code will list all virtual machine instances within a specified project, demonstrating how to programmatically access Compute Engine resources.
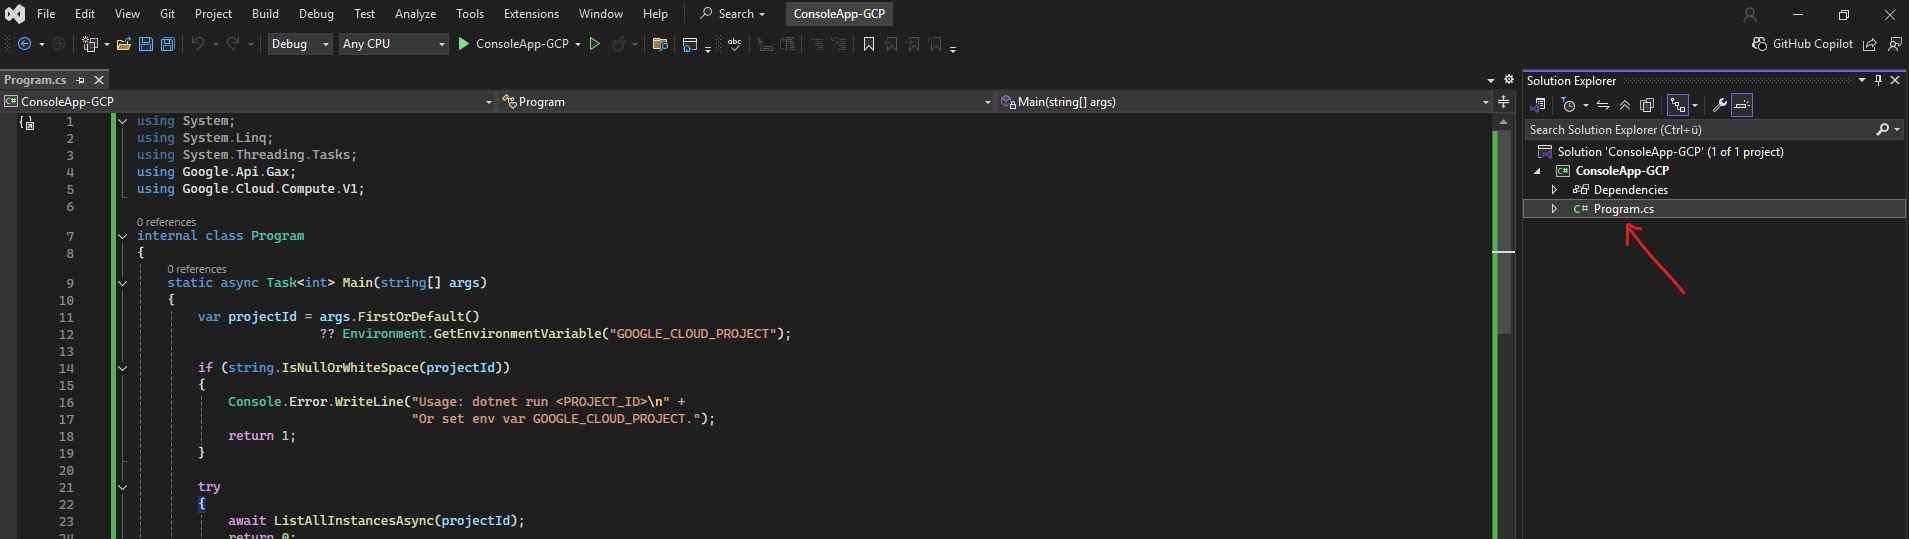
Insert the complete code into your Program.cs file.
The Program.cs file is the main entry point of a C# console application.
It contains the Main() method, which is where the program starts running when you launch it.
From here, you can initialize resources, call other methods, and control the overall flow of your application.In newer .NET versions (starting with .NET 6), the Main() method is hidden by default through a feature called top-level statements.
This lets you write cleaner, simpler code without boilerplate, the compiler still generates a Main() method behind the scenes.
We just need to adjust our project ID and JSON file below.
internal class Program
{
static async Task<int> Main(string[] args)
{
// 🔧 Set your GCP project ID and path to the service account key JSON file
string projectId = "242593619585"; // <-- replace with your project ID
string jsonKeyPath = "matrix-site-a-721c8db5b481.json"; // <-- replace with your key path
if (!File.Exists(jsonKeyPath))
{
Console.Error.WriteLine($"Service account key file not found: {jsonKeyPath}");
return 1;
}
try
{
// Authenticate using the JSON key file
GoogleCredential credential = GoogleCredential.FromFile(jsonKeyPath)
.CreateScoped("https://www.googleapis.com/auth/cloud-platform");
// Create the client using the credentials
InstancesClientBuilder builder = new InstancesClientBuilder
{
Credential = credential
};
InstancesClient client = await builder.BuildAsync();
await ListAllInstancesAsync(client, projectId);
return 0;
}
catch (Exception ex)
{
Console.Error.WriteLine($"Error: {ex.Message}");
return 2;
}
}
private static async Task ListAllInstancesAsync(InstancesClient client, string projectId)
{
var request = new AggregatedListInstancesRequest
{
Project = projectId
};
PagedAsyncEnumerable<InstanceAggregatedList, System.Collections.Generic.KeyValuePair<string, InstancesScopedList>> response =
client.AggregatedListAsync(request);
Console.WriteLine($"Project: {projectId}");
Console.WriteLine("--------------------------------------------------------------------------------");
Console.WriteLine($"{"ZONE",-20} {"NAME",-30} {"STATUS",-12} {"MACHINE",-18} {"INTERNAL_IP",-16} {"EXTERNAL_IP",-16}");
Console.WriteLine("--------------------------------------------------------------------------------");
await foreach (var pair in response)
{
var zone = pair.Key;
var list = pair.Value;
if (list?.Instances == null)
continue;
foreach (var instance in list.Instances)
{
string zoneName = LastSegment(instance.Zone);
string name = instance.Name ?? "";
string status = instance.Status ?? "";
string machineType = LastSegment(instance.MachineType);
string internalIp = instance.NetworkInterfaces?.FirstOrDefault()?.NetworkIP ?? "";
string externalIp = instance.NetworkInterfaces?.FirstOrDefault()?.AccessConfigs?.FirstOrDefault()?.NatIP ?? "";
Console.WriteLine($"{zoneName,-20} {name,-30} {status,-12} {machineType,-18} {internalIp,-16} {externalIp,-16}");
}
}
Console.WriteLine("--------------------------------------------------------------------------------");
}
private static string LastSegment(string? urlOrName)
{
if (string.IsNullOrWhiteSpace(urlOrName)) return "";
var parts = urlOrName.Split('/', StringSplitOptions.RemoveEmptyEntries);
return parts.Length > 0 ? parts[^1] : urlOrName;
}
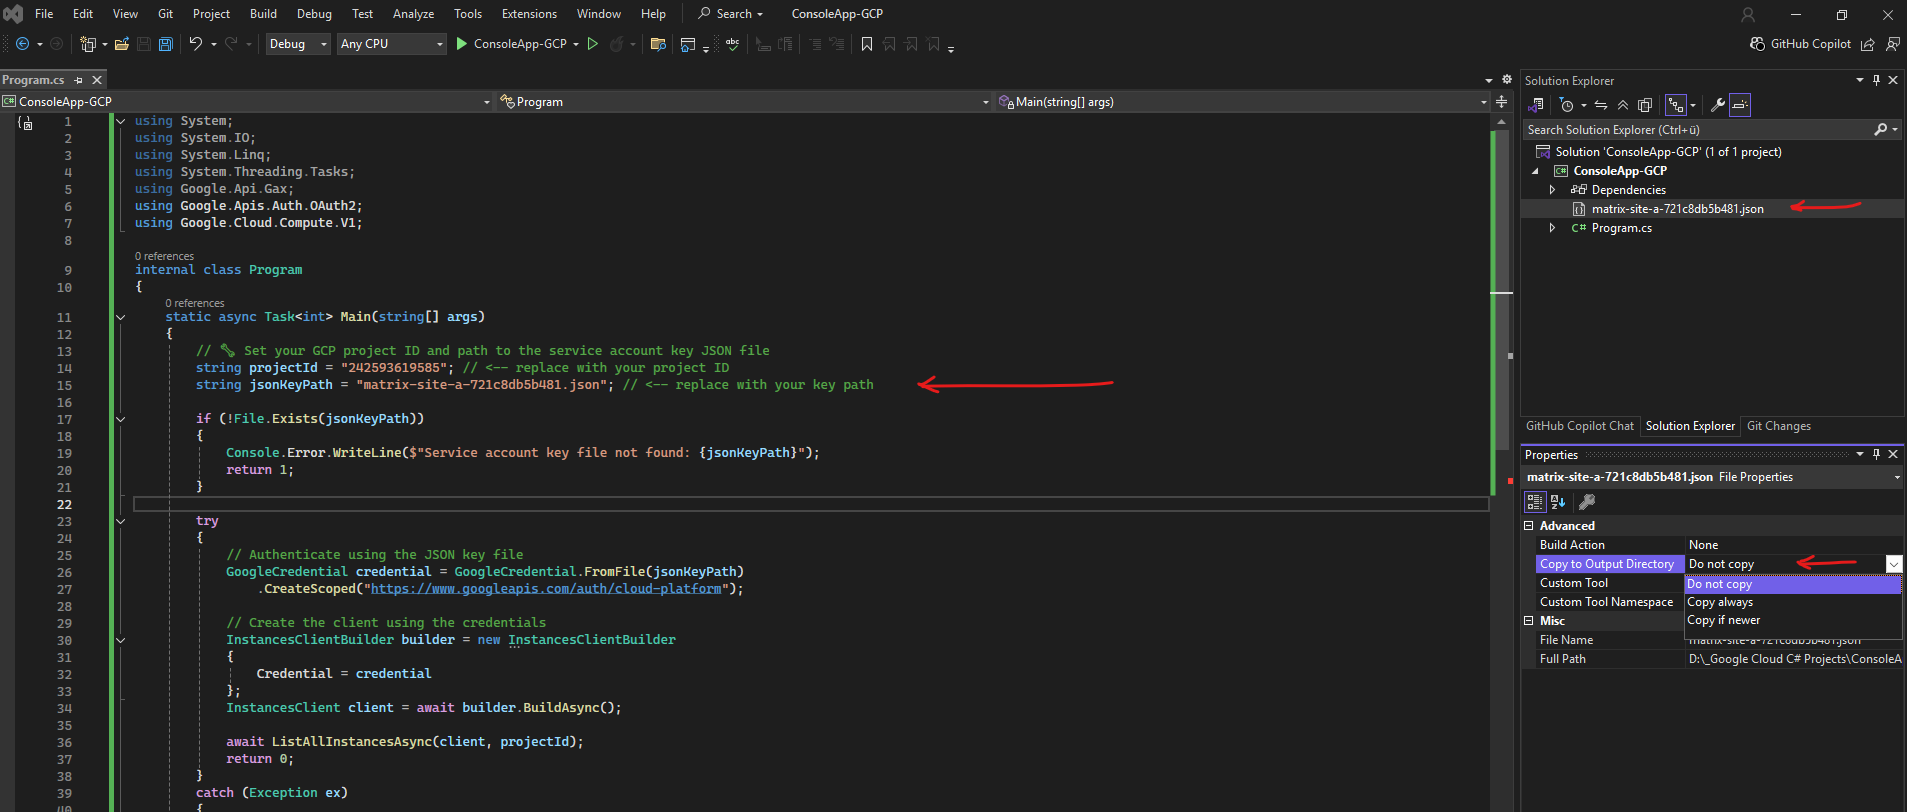
}I will place the service account JSON file directly into the same path as our program.cs file, so we can just reference the JSON file with a relative path instead of the full absolute one.
When you build and run the project, Visual Studio compiles everything into the bin/Debug/net9.0 (or net8.0, etc.) directory.
So we should copy the JSON key file into that same output folder, or tell Visual Studio to copy it automatically on build. Right-click the JSON file → Properties, set “Copy to Output Directory” → Copy always or Copy if newer.
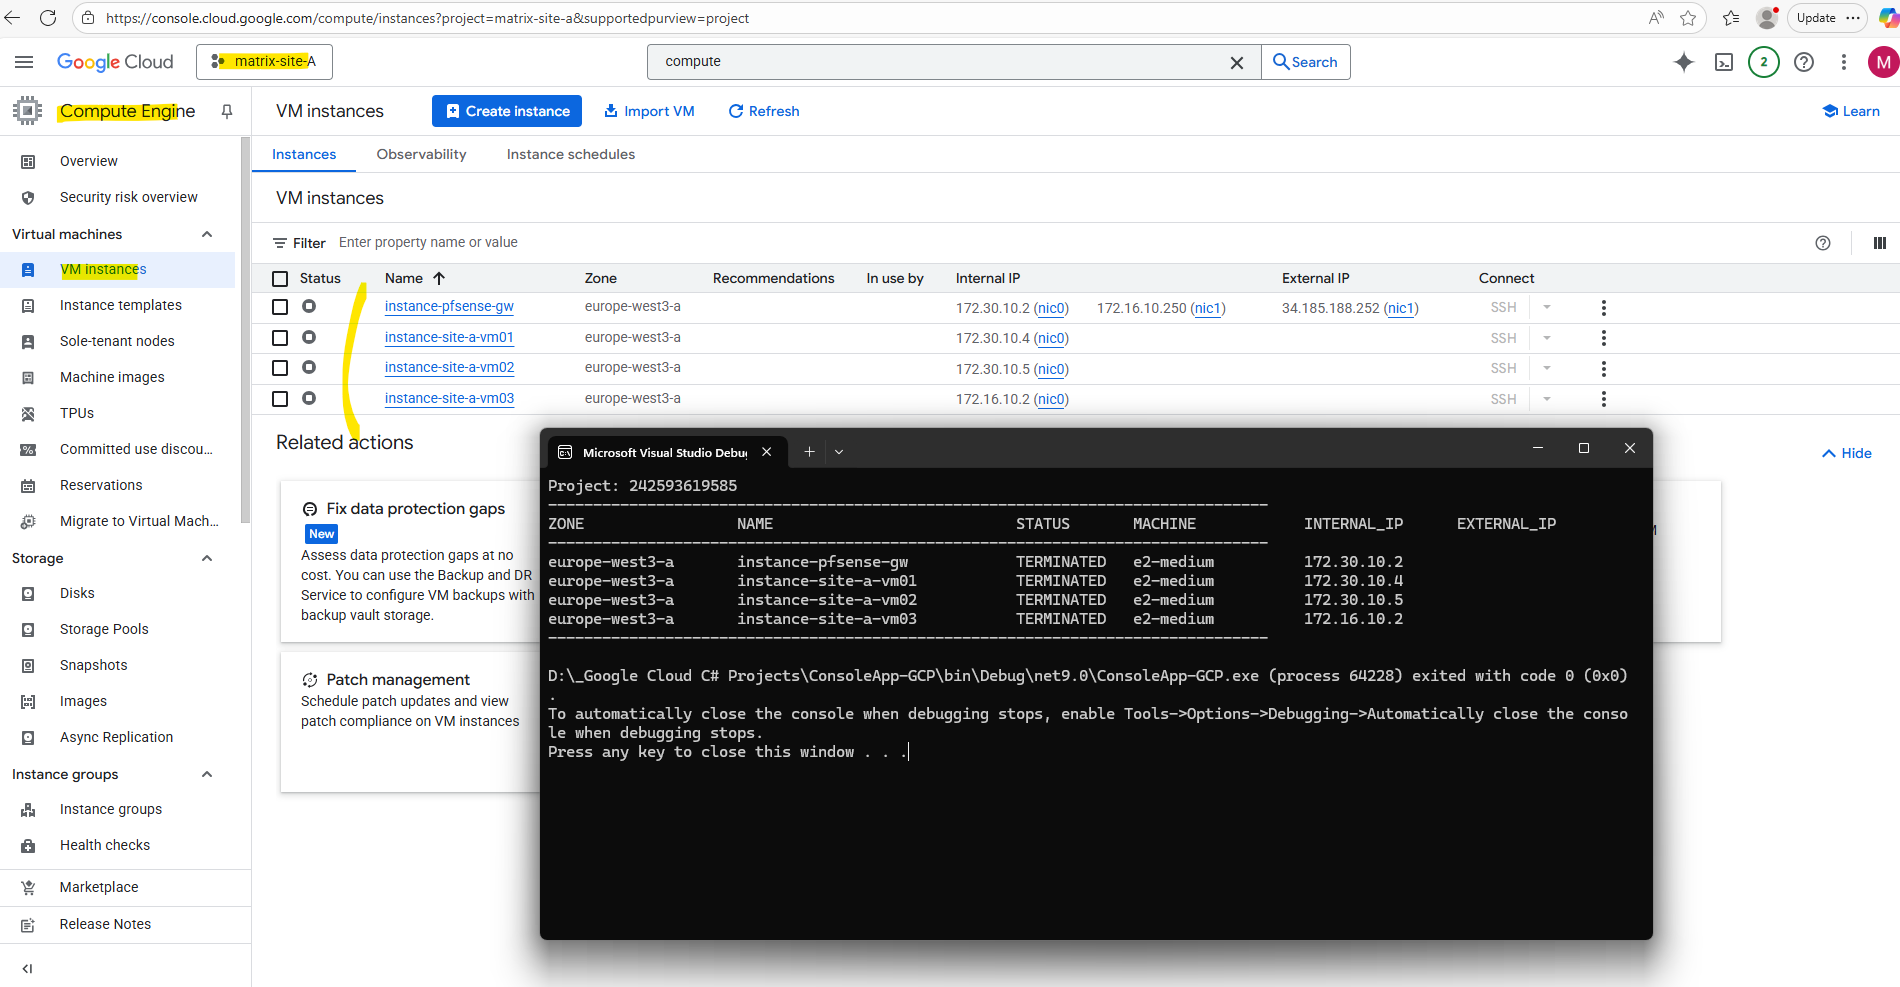
Finally run it.
This C# code authenticates to Google Cloud using a service account JSON key and creates a Compute Engine client with those credentials.
It then queries the Compute Engine API and lists all VM instances across the specified project.
This is a simple foundational example showing how to securely connect to GCP and interact programmatically with Compute Engine resources.
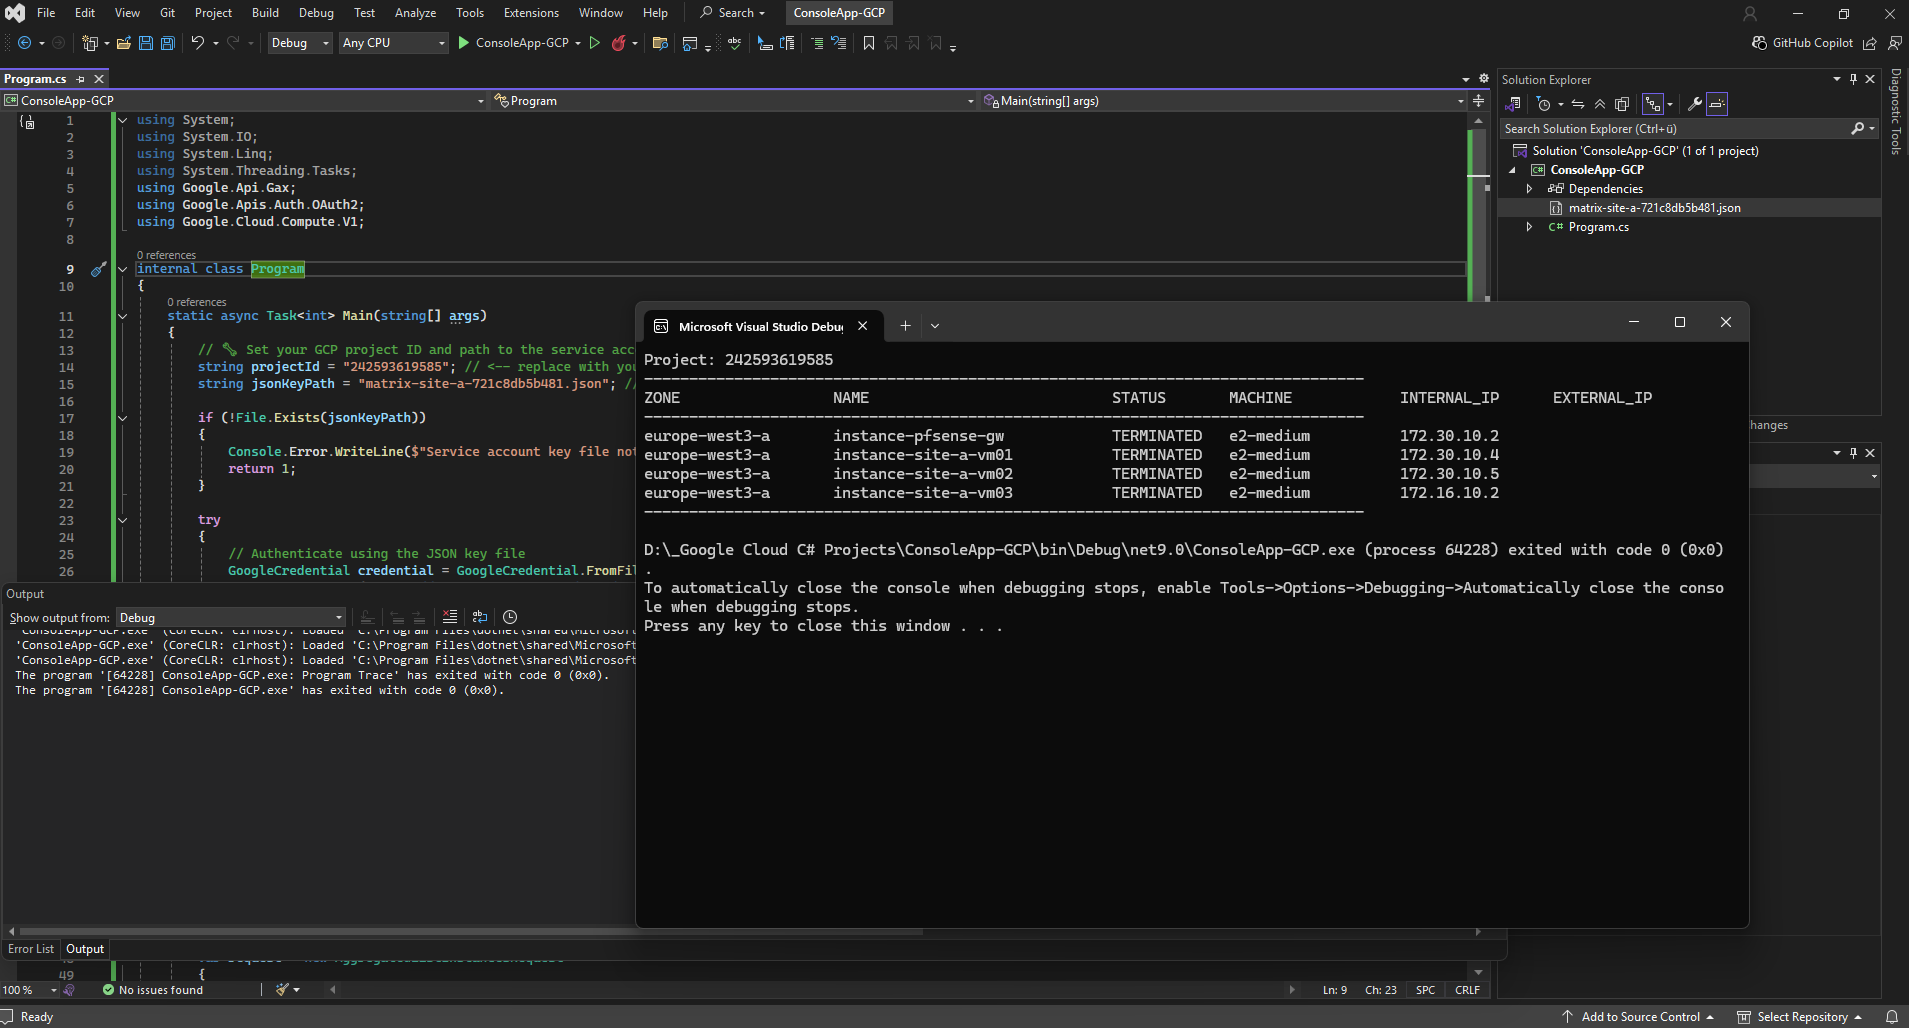
Looks good.
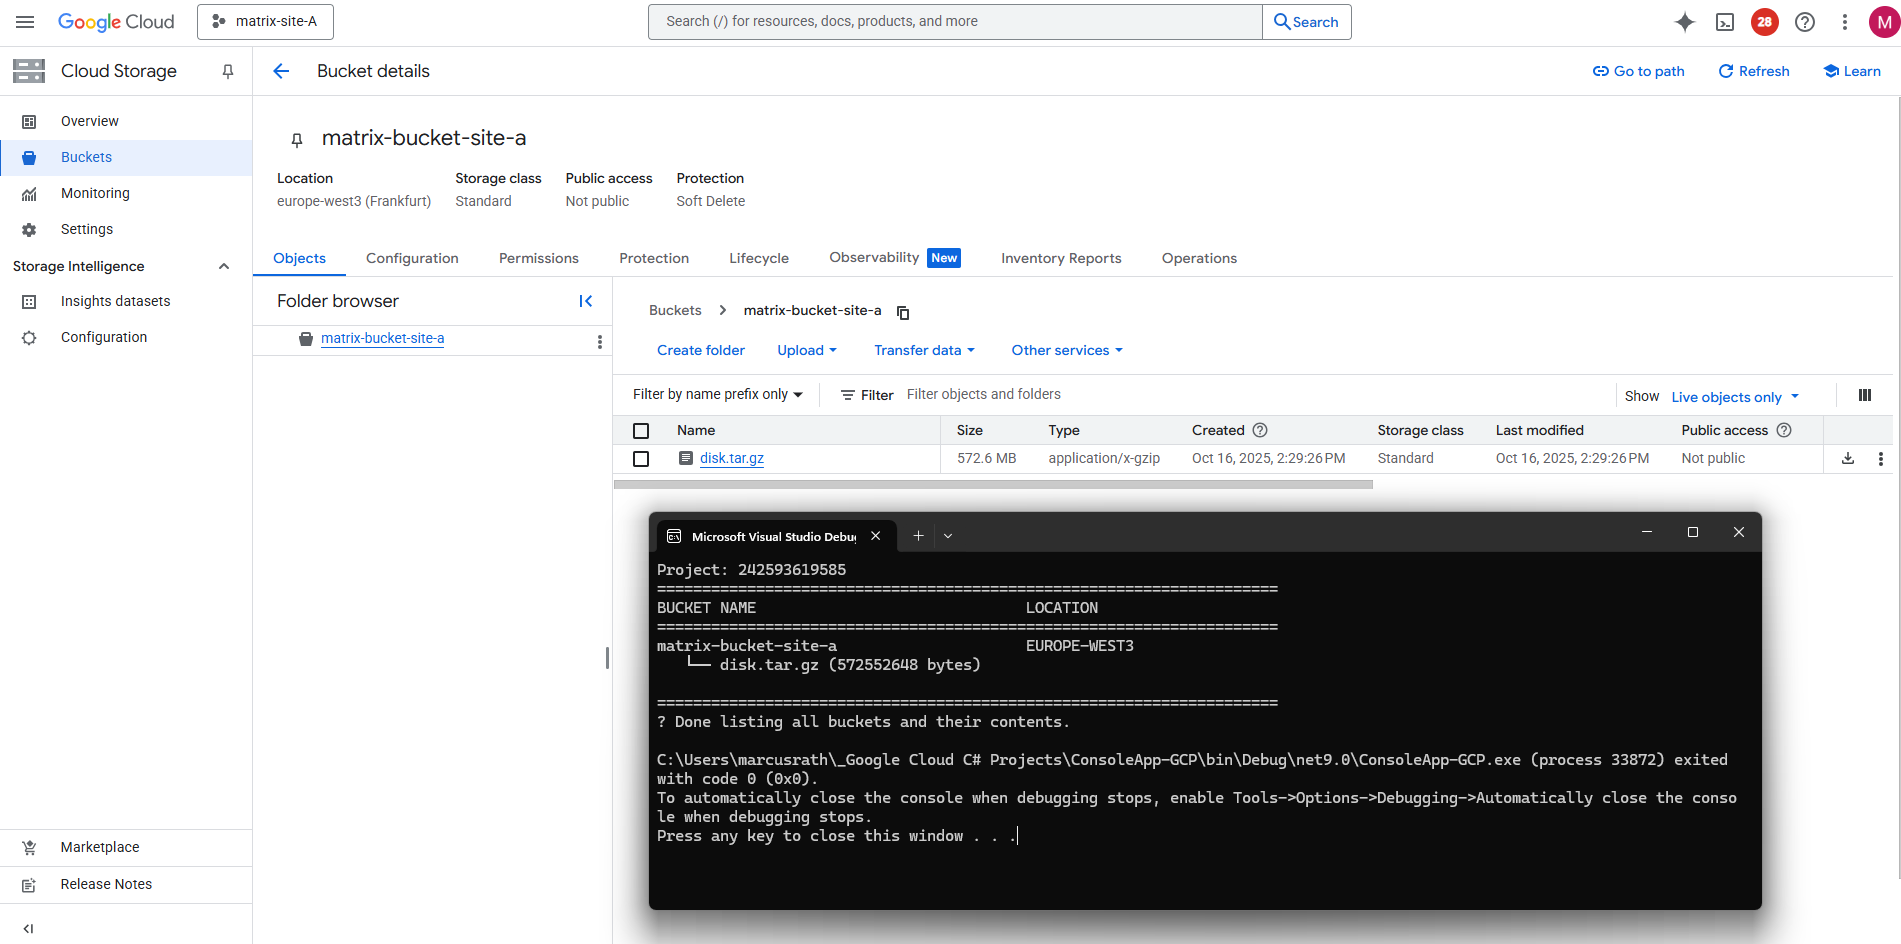
Accessing Google Cloud Storage via Service Account
The following C# .NET sample authenticates you with your GCP service account JSON key and lists all Cloud Storage buckets in a project, along with their contents (objects).
We just need to adjust our project ID and JSON file below.
using System;
using System.IO;
using System.Linq;
using System.Threading.Tasks;
using Google.Apis.Auth.OAuth2;
using Google.Cloud.Storage.V1;

internal class Program
{
    static async Task<int> Main(string[] args)
    {
        // 🔧 Set your GCP project ID and path to the service account key JSON file
        string projectId = "your-gcp-project-id"; // <-- replace with your project ID
        string jsonKeyPath = "your-service-account-key.json"; // <-- replace with your key path

        if (!File.Exists(jsonKeyPath))
        {
            Console.Error.WriteLine($"Service account key file not found: {jsonKeyPath}");
            return 1;
        }

        try
        {
            // Authenticate using the JSON key file
            GoogleCredential credential = GoogleCredential.FromFile(jsonKeyPath)
                .CreateScoped(StorageClient.Scopes.DevstorageReadOnly);

            // Create a Storage client using the credentials
            StorageClient storageClient = await StorageClient.CreateAsync(credential);

            Console.WriteLine($"Project: {projectId}");
            Console.WriteLine("=====================================================================");
            Console.WriteLine($"{"BUCKET NAME",-40} {"LOCATION",-15}");
            Console.WriteLine("=====================================================================");

            // List all buckets in the project
            var buckets = storageClient.ListBuckets(projectId);
            foreach (var bucket in buckets)
            {
                Console.WriteLine($"{bucket.Name,-40} {bucket.Location,-15}");

                // List all objects in the bucket
                var objects = storageClient.ListObjects(bucket.Name);
                foreach (var obj in objects)
                {
                    Console.WriteLine($"   └── {obj.Name} ({obj.Size ?? 0} bytes)");
                }

                Console.WriteLine();
            }

            Console.WriteLine("=====================================================================");
            Console.WriteLine("Done listing all buckets and their contents.");
            return 0;
        }
        catch (Exception ex)
        {
            Console.Error.WriteLine($"Error: {ex.Message}");
            return 2;
        }
    }
}
For this example, we need to add the Google.Cloud.Storage.V1 NuGet package to our project, which provides the client library for interacting with Cloud Storage.
Looks good.
Troubleshooting
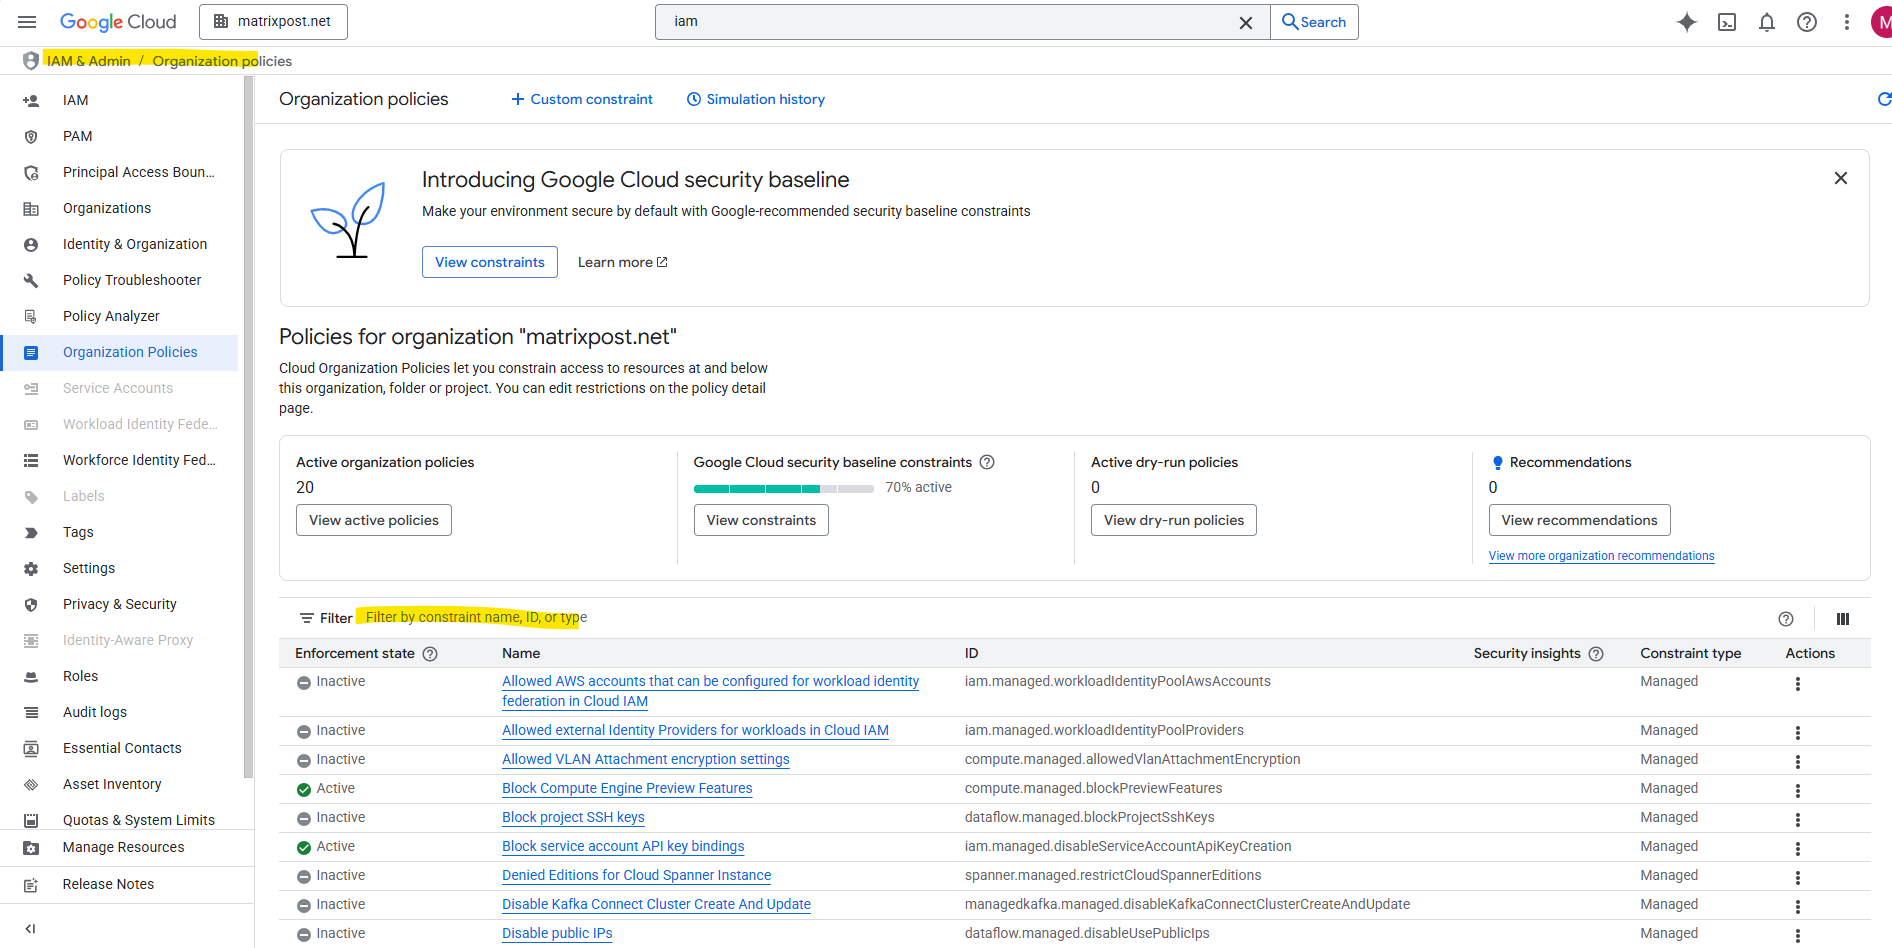
Organization Policies
When your Google Cloud setup is tied to a Cloud Identity organization, Google applies a set of default organization policies for security and governance, even if you didn’t manually configure them.
One of these defaults is often constraints/iam.disableServiceAccountCreation, which is enforced by default in new Cloud Identity–backed organizations.
The intention is to prevent uncontrolled service account sprawl and enforce keyless authentication patterns like Workload Identity Federation or Workload Identity for GKE.
To override the
constraints/iam.disableServiceAccountCreationpolicy in Google Cloud IAM, we’ll need at minimum the following IAM role: roles/orgpolicy.policyAdminSource: https://cloud.google.com/iam/docs/troubleshoot-org-policies
We also need to be operating at the organization or folder level (not just a project) since the constraint is typically set at the org level.
Source: https://cloud.google.com/resource-manager/docs/organization-policy/restricting-service-accounts
We must explicitly override the default constraint and allow service account creation for our organization or project.
Otherwise, every attempt to create a service account, even with the correct IAM permissions, will be denied by this organization-level policy.
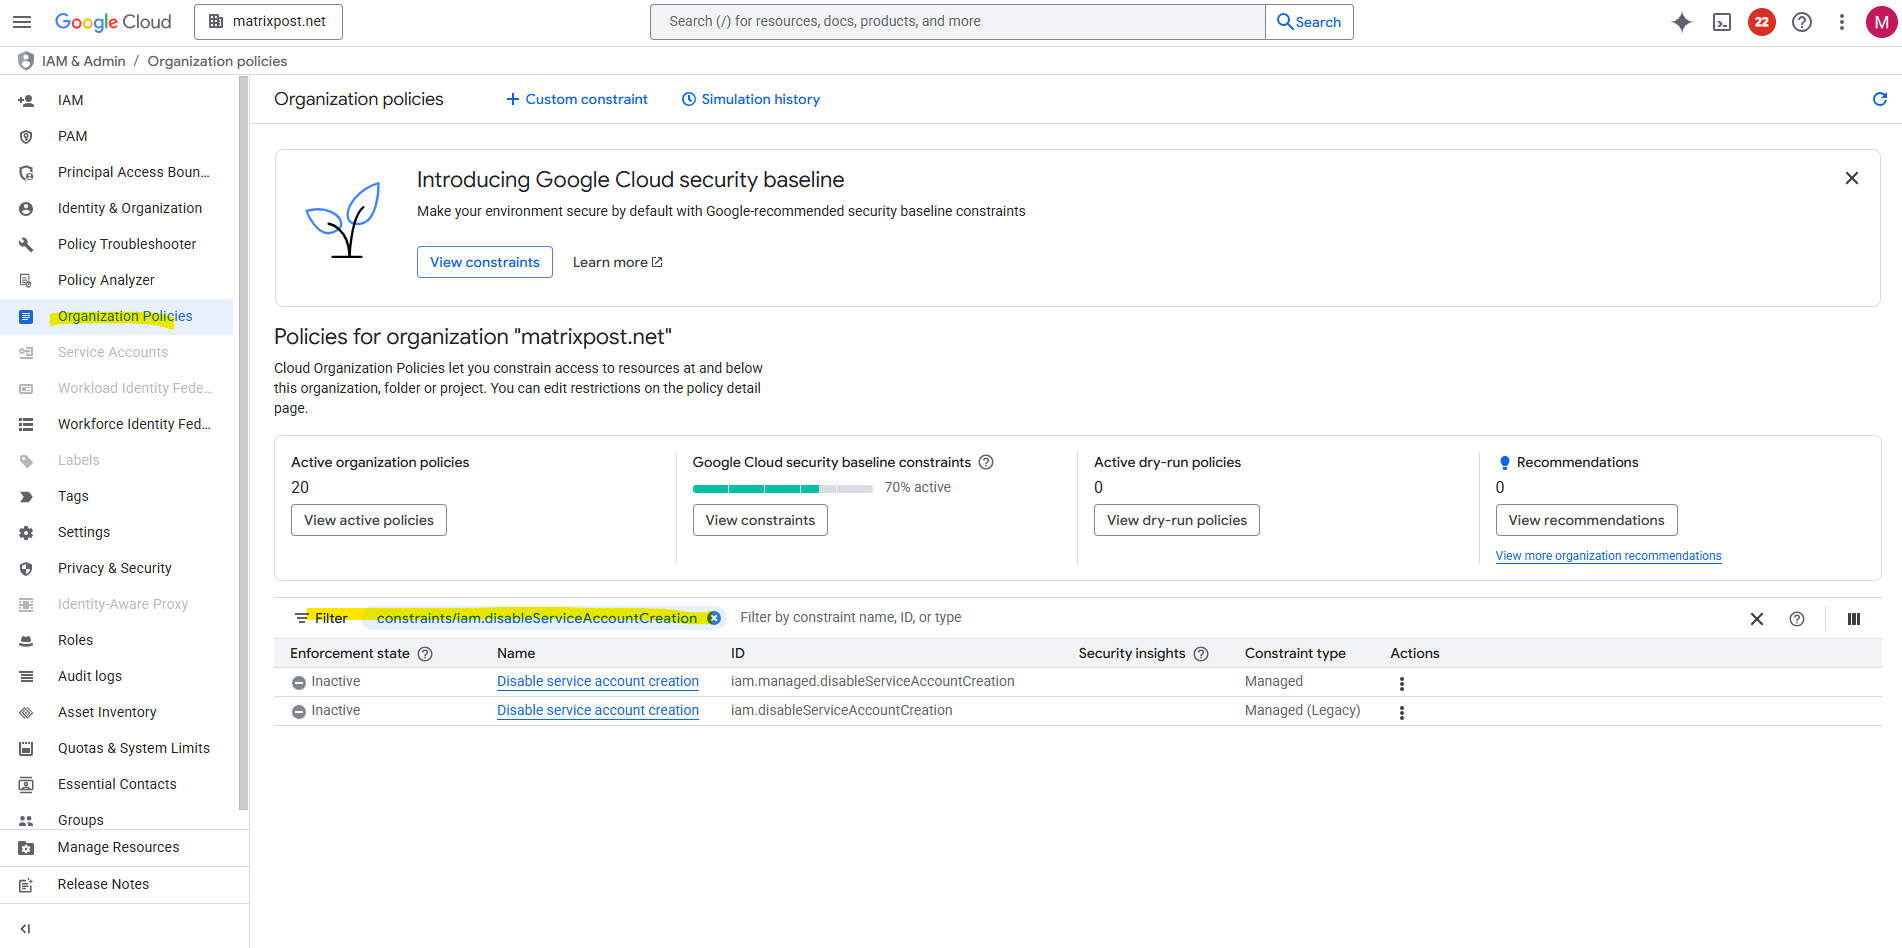
Filtering for constraints/iam.disableServiceAccountCreation
Below we are seeing two variants of the same organization policy constraint, and both are currently not enforced (“Inactive”).
iam.managed.disableServiceAccountCreation → The new, actively developed constraint that controls whether service accounts can be created
iam.disableServiceAccountCreation → The older / legacy version of the same control
Service account creation is currently enabled, because both constraints are Inactive. If either one was set to Enforced, service account creation attempts would be blocked unless overridden.
NuGet package sources missing
If NuGet packages can’t be found in Visual Studio, it’s often due to a missing or misconfigured package source.

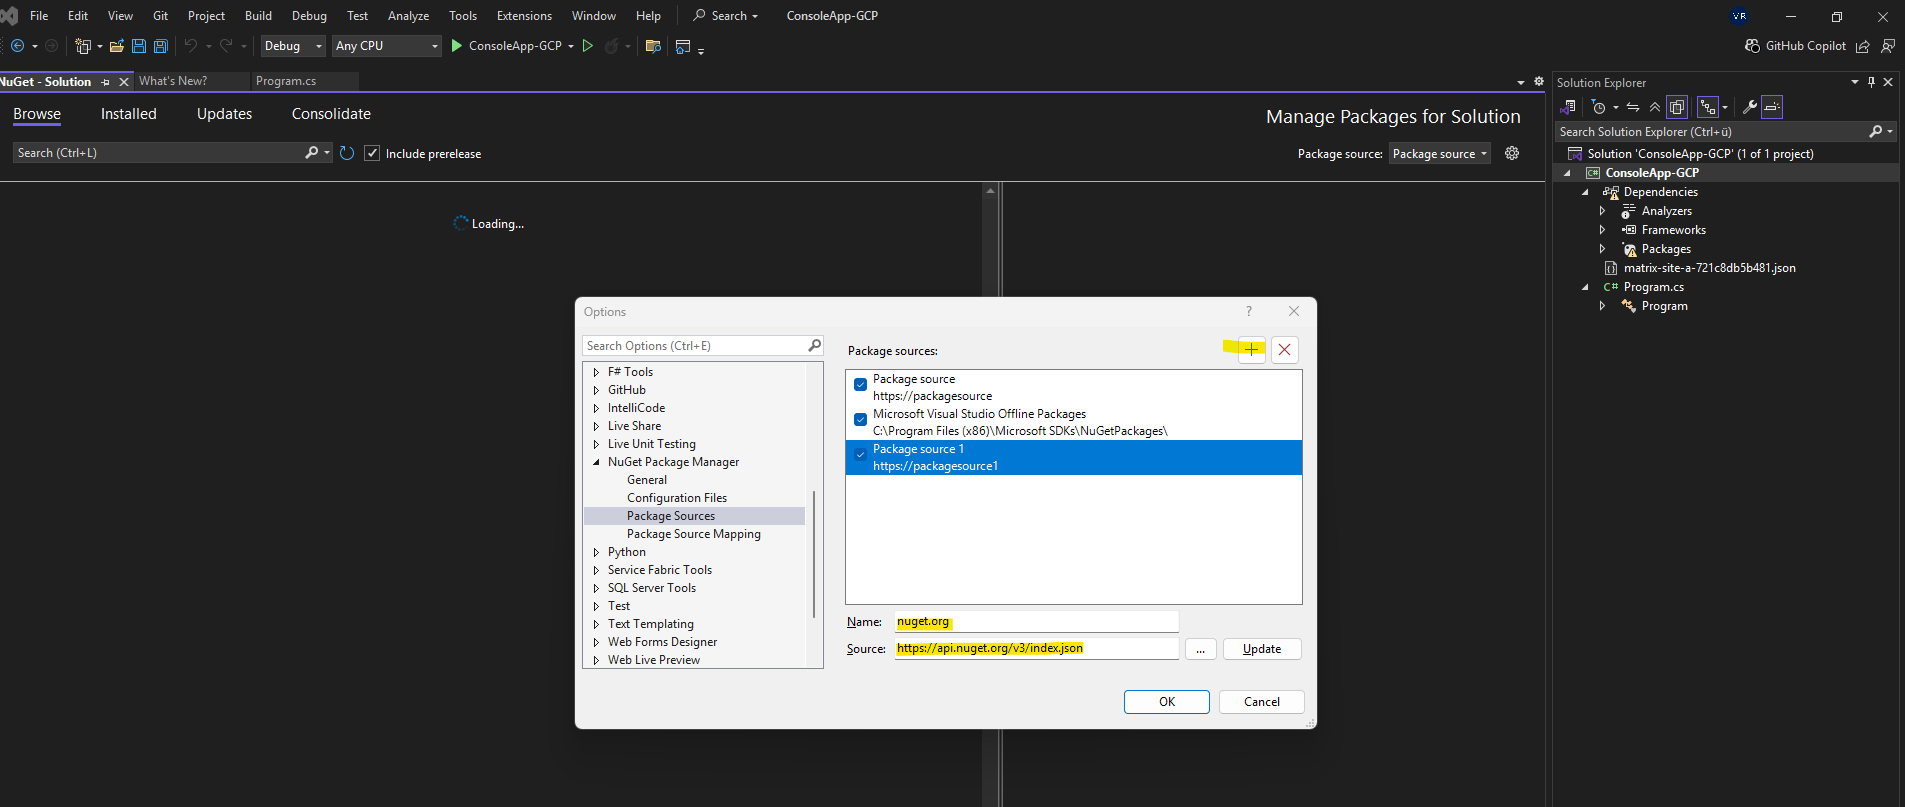
Check the settings under Tools > NuGet Package Manager > Package Sources and ensure the official NuGet feed (https://api.nuget.org/v3/index.json) is added and enabled.
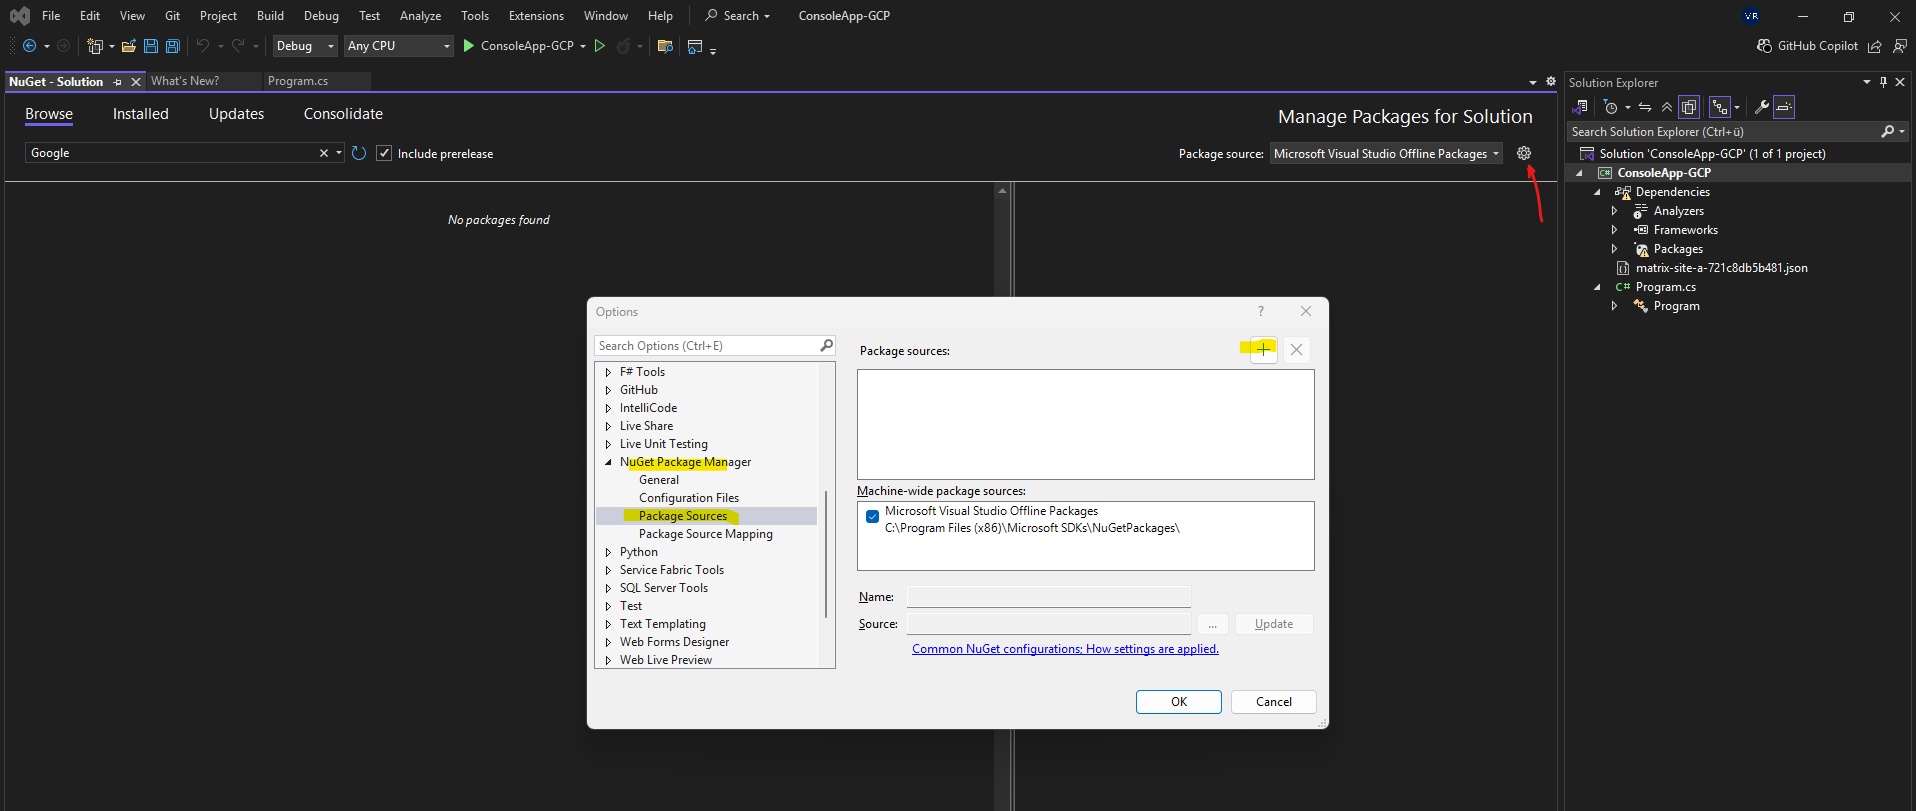
If it is not shown here, we can add it by clicking on the plus icon.
For the name enter e.g. nuget.org (finally doesn’t matter) and for the source enter the following URL https://api.nuget.org/v3/index.json.
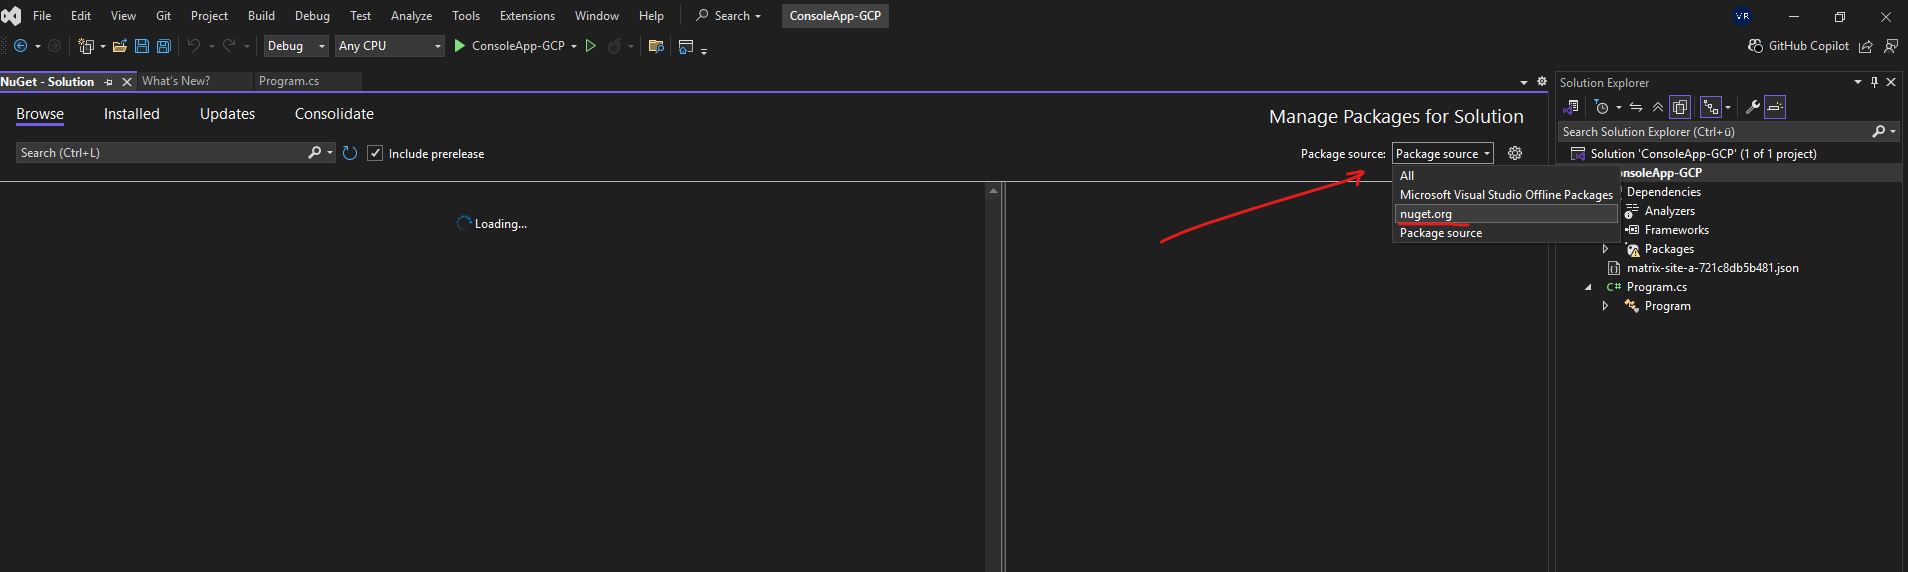
For the package source settings switch to nuget.org (or the name you previously used for).
Finally the NuGet packages will shown up in the Browse tab below.
More about C# you will find in my blog here.
Links
Create service accounts
https://cloud.google.com/iam/docs/service-accounts-createTroubleshoot organization policy errors for service accounts
https://cloud.google.com/iam/docs/troubleshoot-org-policiesRestricting service account usage
https://cloud.google.com/resource-manager/docs/organization-policy/restricting-service-accountsWhat is Pub/Sub?
https://cloud.google.com/pubsub/docs/overview