Deploying NetApp Cloud Volumes ONTAP (CVO) in Azure using NetApp Console (formerly BlueXP) – Part 1 – NetApp Onboarding
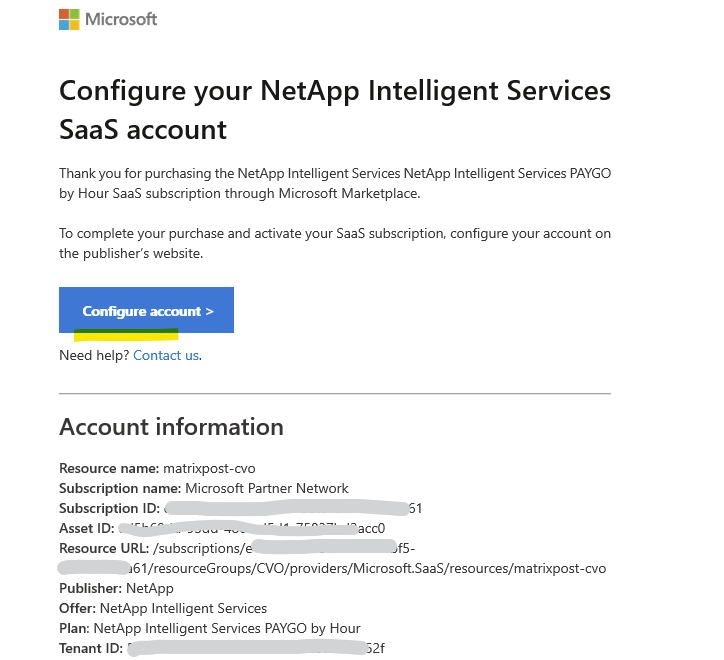
In this multi-part guide, we walk through the complete setup of NetApp Cloud Volumes ONTAP (CVO) in Microsoft Azure, from initial deployment to secure management using the NetApp® Console (formerly BlueXP).In the email you will get click on Configure account.
The NetApp® Console provides unified management for your data across cloud, on-premises, and hybrid environments.
NetApp Cloud Volumes ONTAP is an ideal bridge for organizations moving from traditional on-premises storage to the cloud because it delivers the same proven ONTAP data management features they already know with snapshots, SnapMirror, FlexClone, tiering, and replication, without redesigning their workloads.
This consistency dramatically reduces migration complexity and risk, enabling a controlled, step-by-step transition to Azure while preserving operational processes, data protection strategies, and administrative skills.
This multi-part series covers the complete lifecycle of deploying and operating Cloud Volumes ONTAP in Azure, guiding you step by step through architecture, configuration, and day-to-day management with a practical, hands-on approach.
In this first part we will see the initial preparation steps we need to perform in Azure and the initial setup and onboarding in the NetApp Cloud console.
In Part 2 we will see how to deploy a Cloud Volumes ONTAP HA pair in Azure directly from the NetApp console.
In Part 3 of this series, the focus shifts to configuring the actual data services on the Cloud Volumes ONTAP system. Further, we also covers how the Azure networking side fits into the picture, including VNet peering with an existing hub network (which is connected to my on-prem lab), as well as the Internal Load Balancer (ILB) setup.
In Part 4 of the series, we shift the focus to security and take a closer look at how antivirus protection is implemented in Cloud Volumes ONTAP using ONTAP VSCAN.
In Part 5 we will configure snapshot and backup policies, validate protection workflows, and perform real restore operations to ensure data can be recovered quickly and reliably.
In Part 6 we walk through the process of performing a Non-Disruptive Upgrade (NDU) of a NetApp Cloud Volumes ONTAP (CVO) HA pair in Microsoft Azure.
In Part 7 we dive into NetApp AutoSupport, the critical telemetry system that acts as the heartbeat of our CVO instance.
In Part 8 we focus on Disaster Recovery and explore how to protect Cloud Volumes ONTAP in Azure against outages and unexpected failures.
About how to build your own NetApp ONTAP Lab in on-premise and vSphere, you can also read my following post.
Introduction
NetApp Cloud Volumes ONTAP (CVO) is a software-defined storage solution that brings the full power of ONTAP data management into the cloud.
It provides enterprise-grade features such as high availability, data tiering, snapshots, replication, and data protection while running natively on public cloud infrastructure.
Cloud Volumes ONTAP is available across major hyperscalers including Microsoft Azure, AWS, and Google Cloud, making it a flexible and consistent storage platform for hybrid and multi-cloud environments.
Compared to other enterprise storage solutions, NetApp ONTAP stands out due to its unified architecture and consistent feature set across on-premises and cloud environments.
While many vendors require different platforms or tools for block, file, and object storage, ONTAP combines these services into a single, mature data management layer.
This consistency, together with features like Snapshots, replication, tiering, and automation, makes ONTAP especially attractive for hybrid and multi-cloud scenarios.
NetApp originally named the console BlueXP because it was intended to represent a unified cloud experience (“XP” = experience) across all NetApp cloud services. The idea was to move beyond just storage management and position BlueXP as a central control plane for data services such as Cloud Volumes ONTAP, backup, classification, replication, and Kubernetes integrations, all under one cloud-native UI.
Over time, however, many users associated the name more with marketing than function, so NetApp gradually shifted back to referring to it more clearly as the NetApp Cloud Console, while BlueXP remains the platform name behind it.
In short: BlueXP was the branding for the experience, while the console is the practical interface administrators actually use.
06 October 2025
BlueXP is now NetApp ConsoleThe NetApp Console, built on the enhanced and restructured BlueXP foundation, provides centralized management of NetApp storage and NetApp Data Services across on-premises and cloud environments at enterprise grade, delivering real-time insights, faster workflows, and simplified administration that is highly secure and compliant.
Source: https://docs.netapp.com/us-en/console-setup-admin/whats-new.html#netapp-console-administration-3
What is the NetApp Connector (aka Agent)?
The NetApp Connector (Agent) is a lightweight virtual machine that acts as the central control component between the NetApp Cloud Console and Cloud Volumes ONTAP.
It is responsible for orchestrating deployments, managing resources, and enabling communication between NetApp’s cloud services and the ONTAP systems.
The Connector establishes secure outbound connections only, allowing management operations, monitoring, and access to ONTAP System Manager without exposing the storage system directly to the internet.
More about you will find here https://docs.netapp.com/us-en/console-setup-admin/concept-agents.html.
Best Practices
Azure Resource Group
Use a new, dedicated resource group for each Cloud Volumes ONTAP system.
Deploying Cloud Volumes ONTAP in an existing, shared resource group is not recommended due to the risk of data loss. While the Console can remove Cloud Volumes ONTAP resources from a shared resource group in case of deployment failure or deletion, an Azure user might accidentally delete Cloud Volumes ONTAP resources from a shared resource group.
Source: https://docs.netapp.com/us-en/storage-management-cloud-volumes-ontap/task-deploying-otc-azure.html
Azure Virtual Network and Subnet
For networking, it is recommended to deploy Cloud Volumes ONTAP into a dedicated virtual network (VNet) and subnet to ensure clear separation from application workloads and better control over routing and security.
This approach simplifies network management, avoids IP address conflicts, and allows more granular control over network security groups and routing. Using a dedicated subnet also aligns with NetApp and Azure best practices for performance, stability, and future scalability.
Prepare your Azure Subscription first to deploy Cloud Volumes ONTAP (CVO)
Before deploying Cloud Volumes ONTAP in Azure, the subscription must meet specific prerequisites required by the underlying HA architecture.
In particular, the Azure features EnableHighAvailabilityMode and VMOrchestratorZonalMultiFD must be registered in the target subscription to allow proper deployment of the CVO high-availability components.
Without these features enabled, the marketplace deployment will fail or block the creation of required resources.
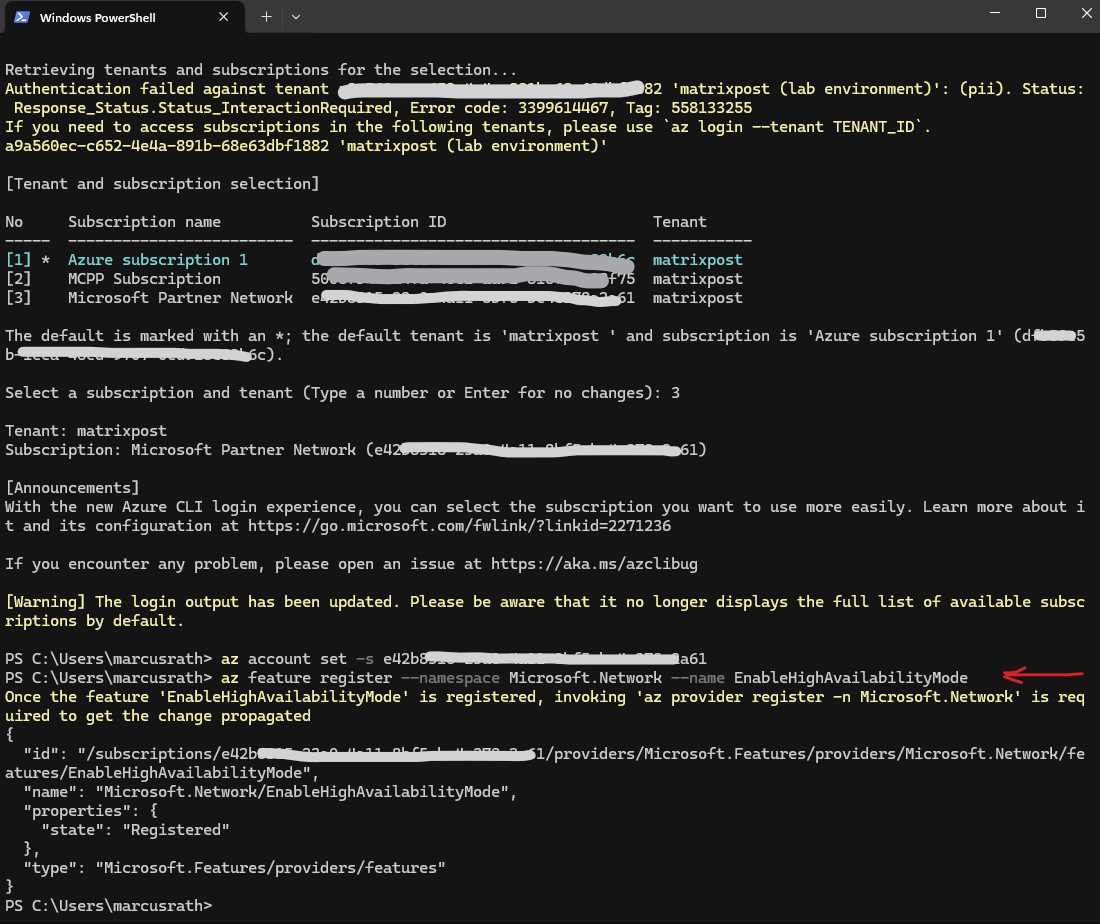
Register the EnableHighAvailabilityMode Feature for your subscription
The EnableHighAvailabilityMode feature enables Azure-specific functionality required for deploying high-availability virtual machine architectures.
For Cloud Volumes ONTAP, this feature allows Azure to correctly provision and manage the HA pair, including coordinated failover behavior and infrastructure dependencies required for resilient storage operation.
Both features can be enabled directly via the Azure CLI by registering them for the target subscription.
Re-registering
Microsoft.Networkforces Azure to refresh its feature state so that newly enabled capabilities are recognized during resource deployment.
# login to your tenant and subscription
PS> az login
PS> az account set -s <your subscription ID>

# Register the feature
PS> az feature register --namespace Microsoft.Network --name EnableHighAvailabilityMode

# Re-register the provider (important after feature flips)
PS> az provider register --namespace Microsoft.Network
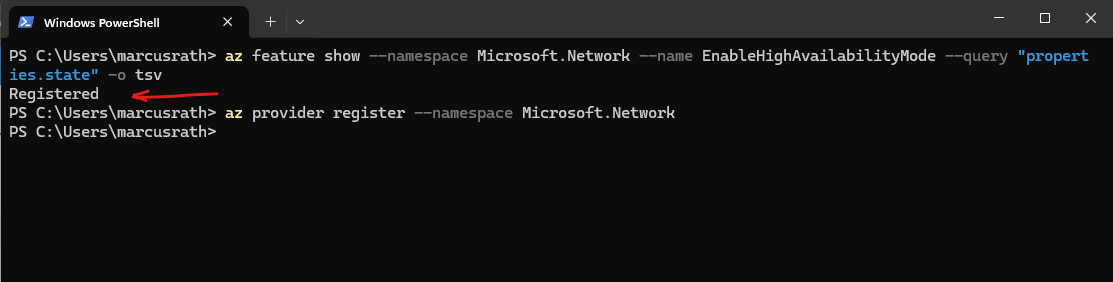
# Check status
PS> az feature show --namespace Microsoft.Network --name EnableHighAvailabilityMode --query "properties.state" -o tsv

# Re-register the provider (important after feature flips)
PS> az provider register --namespace Microsoft.Network
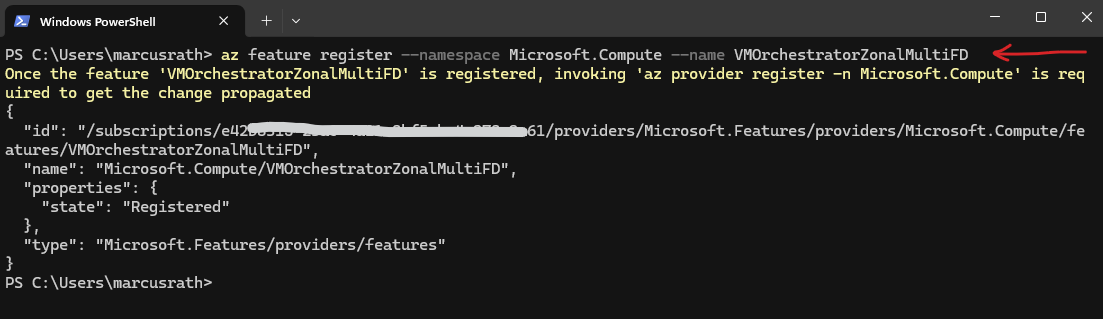
Register the VMOrchestratorZonalMultiFD Feature for your subscription
The VMOrchestratorZonalMultiFD feature allows Azure to deploy virtual machines across multiple fault domains within an availability zone.
Cloud Volumes ONTAP relies on this capability to ensure that HA nodes are placed on separate fault domains, improving resiliency against host or infrastructure failures.
PS> az feature register --namespace Microsoft.Compute --name VMOrchestratorZonalMultiFD
Initial Setup and Onboarding in the NetApp Cloud Console
Before deploying Cloud Volumes ONTAP, several initial setup steps must be completed in the NetApp Console (formerly BlueXP)
This includes signing in with a NetApp Support Site (NSS) account, creating or selecting an organization, and completing the onboarding workflow such as associating the support account, connecting the storage environment, and linking the marketplace subscription.
These steps ensure that the environment is properly prepared before any Cloud Volumes ONTAP systems are deployed or managed.
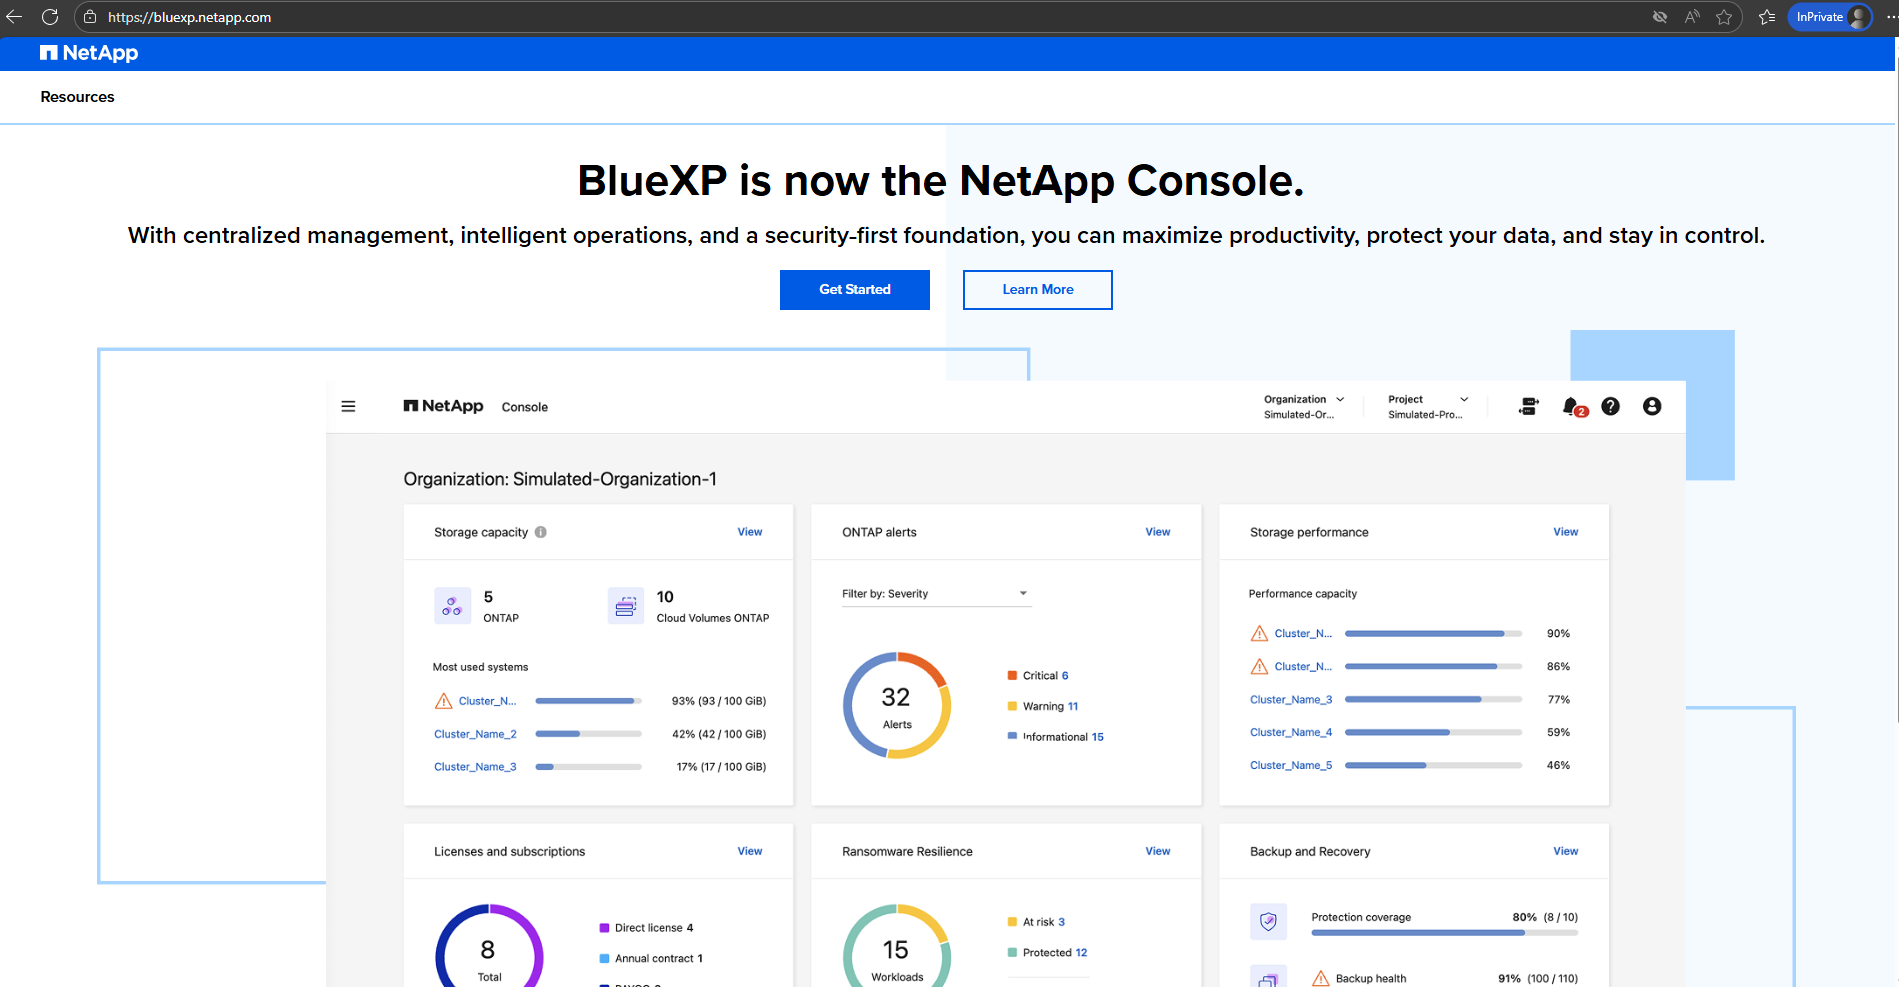
The NetApp Console (formerly BlueXP) you can open with the following link https://bluexp.netapp.com.
From there, Cloud Volumes ONTAP system can be discovered (for already existing systems) or newly deployed and managed through the web-based interface.
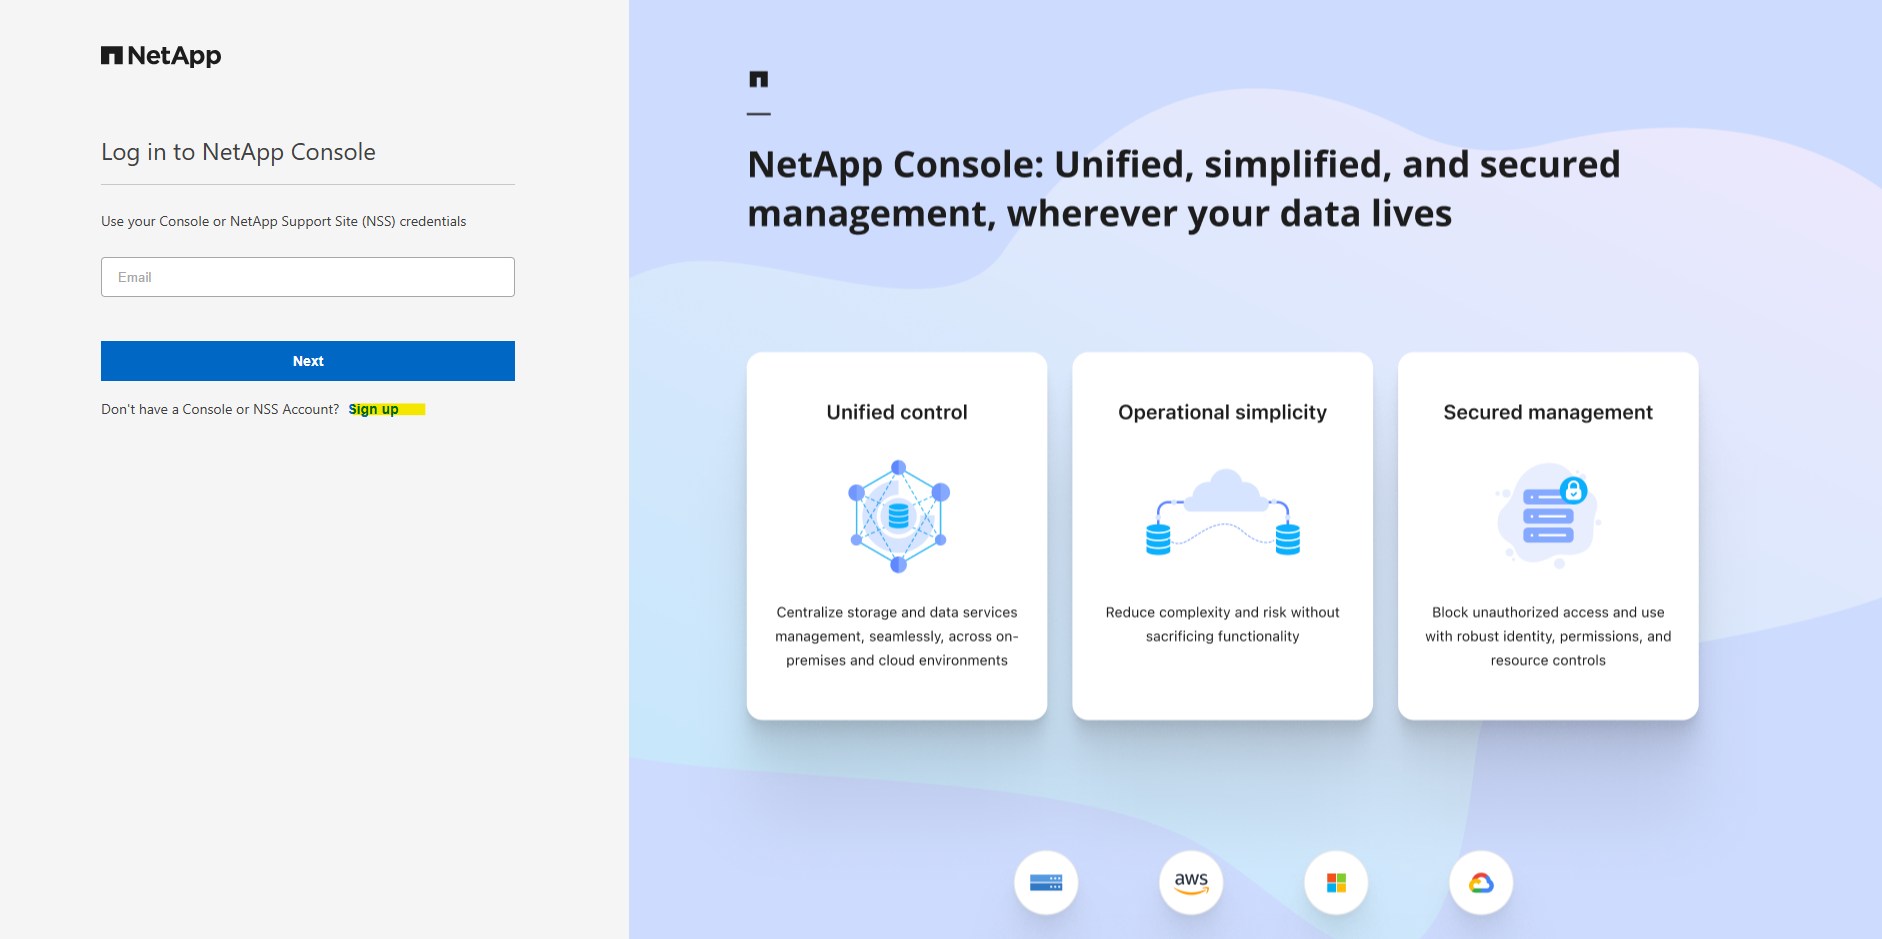
On the NetApp Console landing page, click Get started to begin the onboarding process.
You can either sign up for a new NetApp Support Site (NSS) account or use an existing one to continue with the configuration.
I will sign up to create a new NSS account.
The NetApp Support Site (NSS) account is used to authenticate access to NetApp services and manage product entitlements.
It is required to register Cloud Volumes ONTAP with the NetApp Console and to enable support, updates, and licensing features.
Enter an email address and password for the new account.
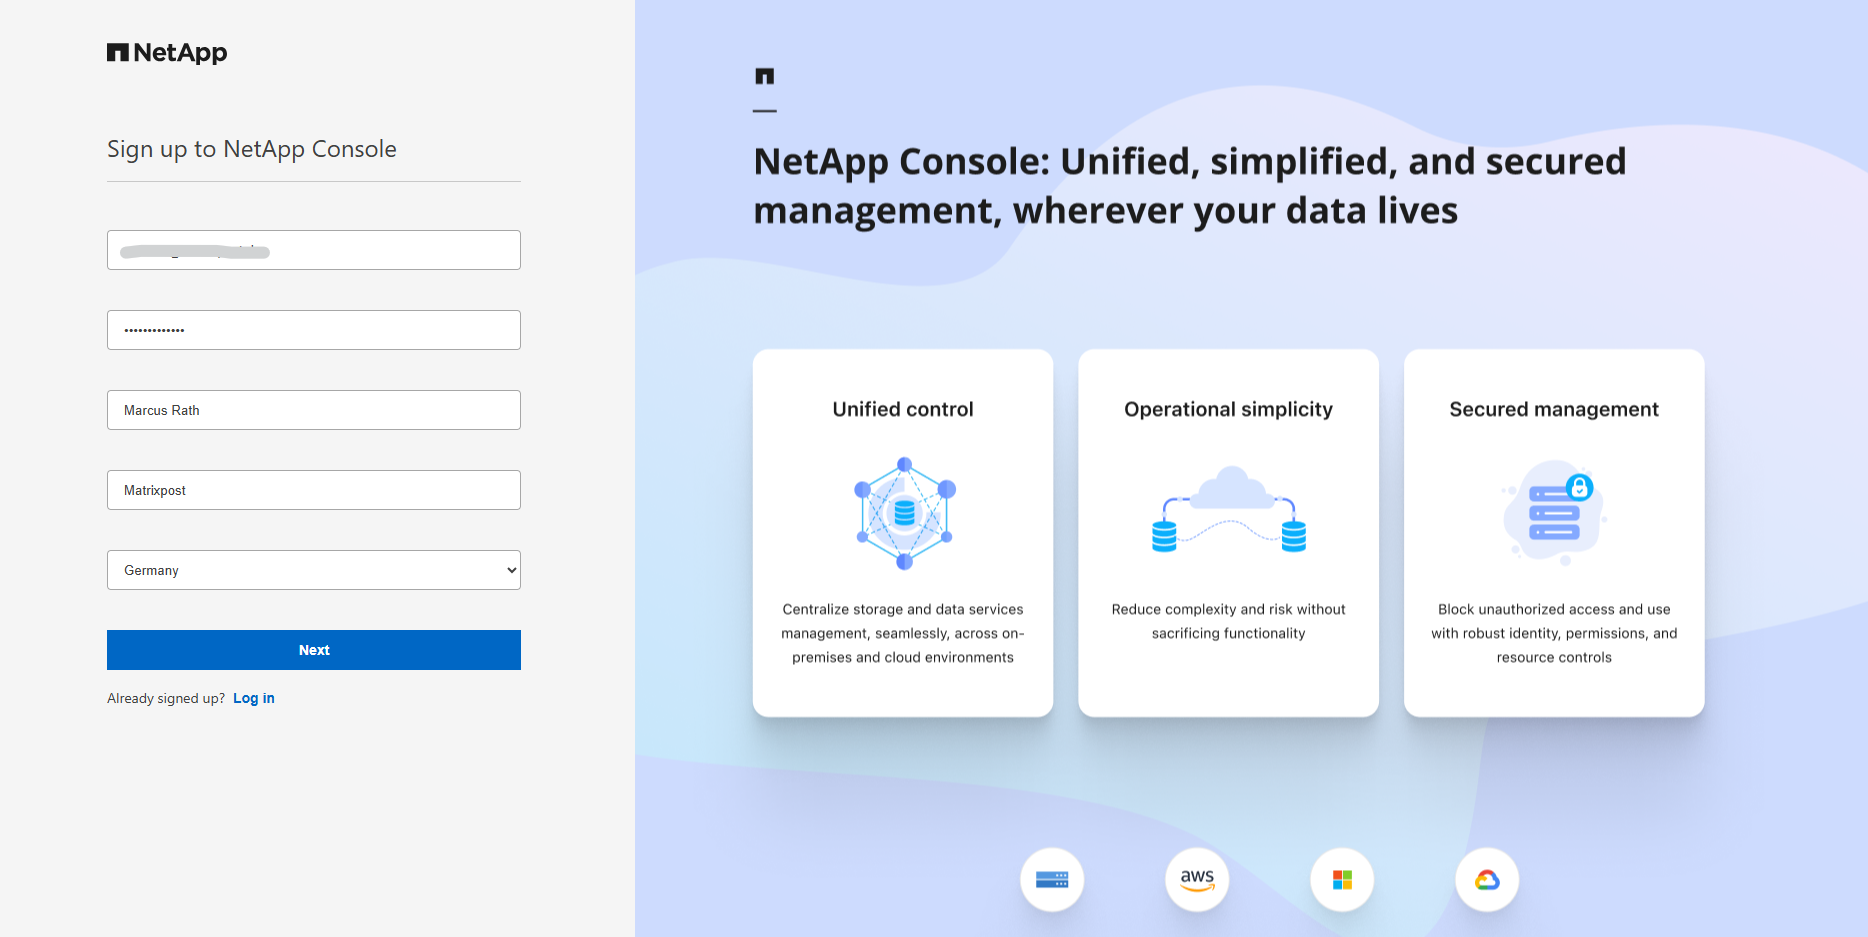
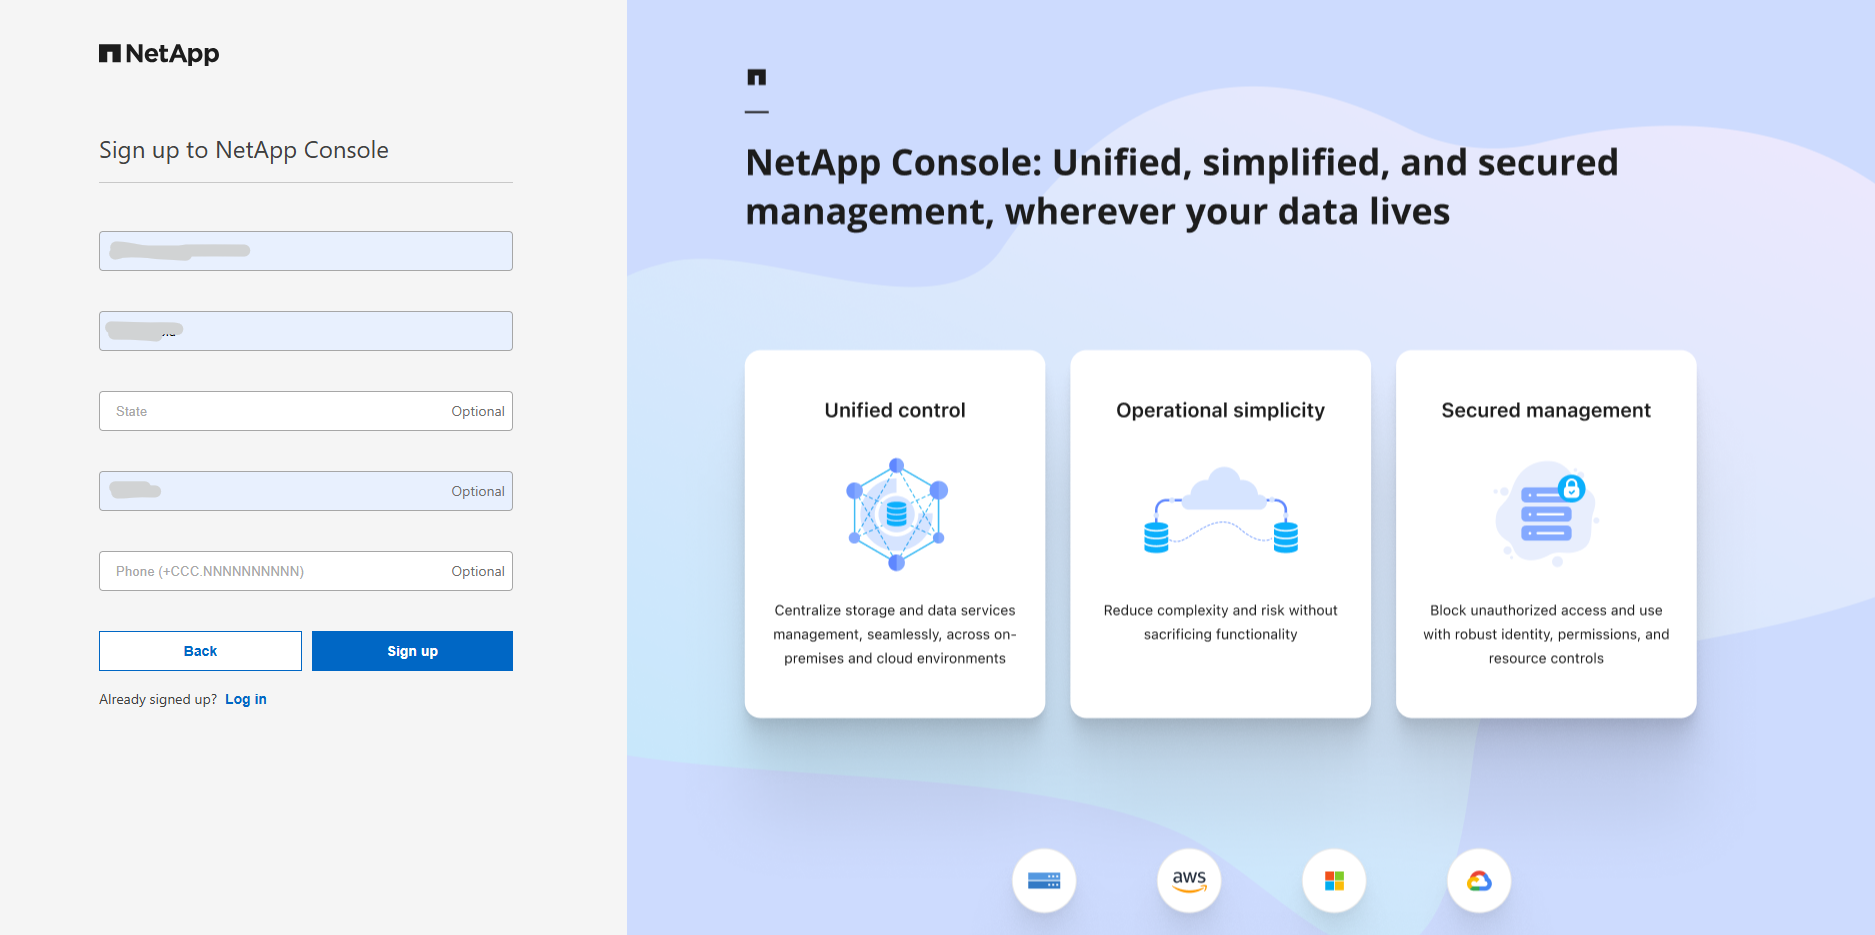
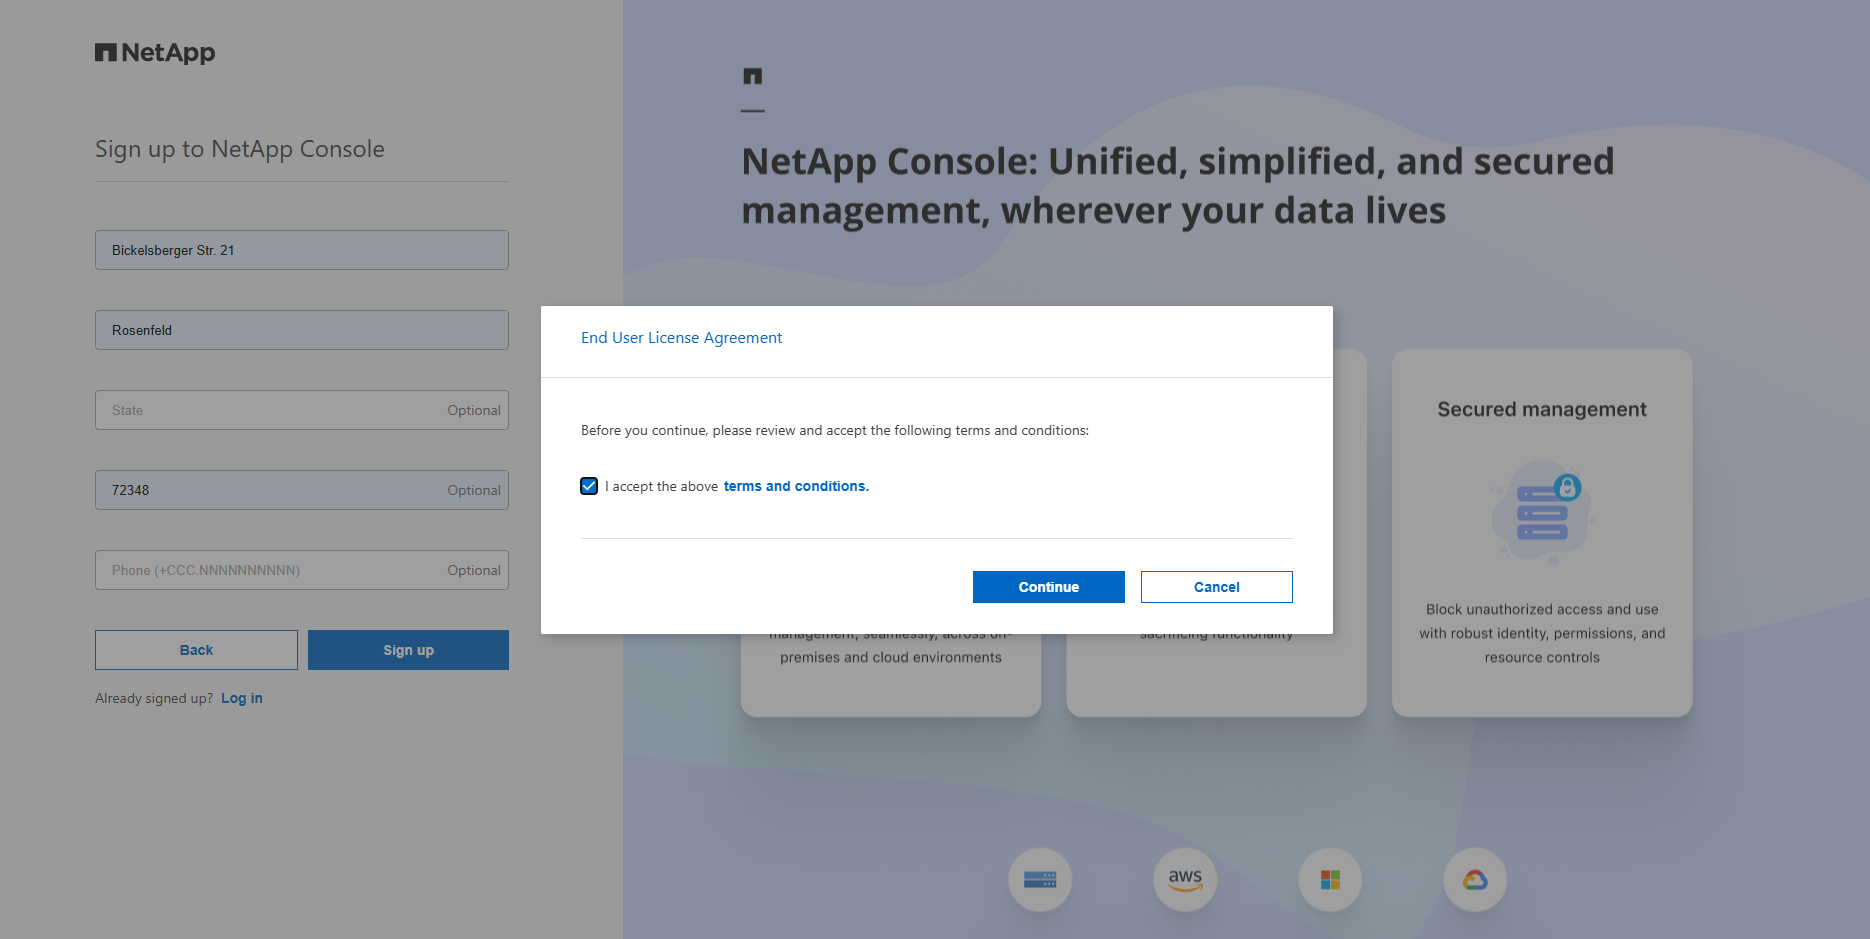
Enter your company address and click on Sign up.
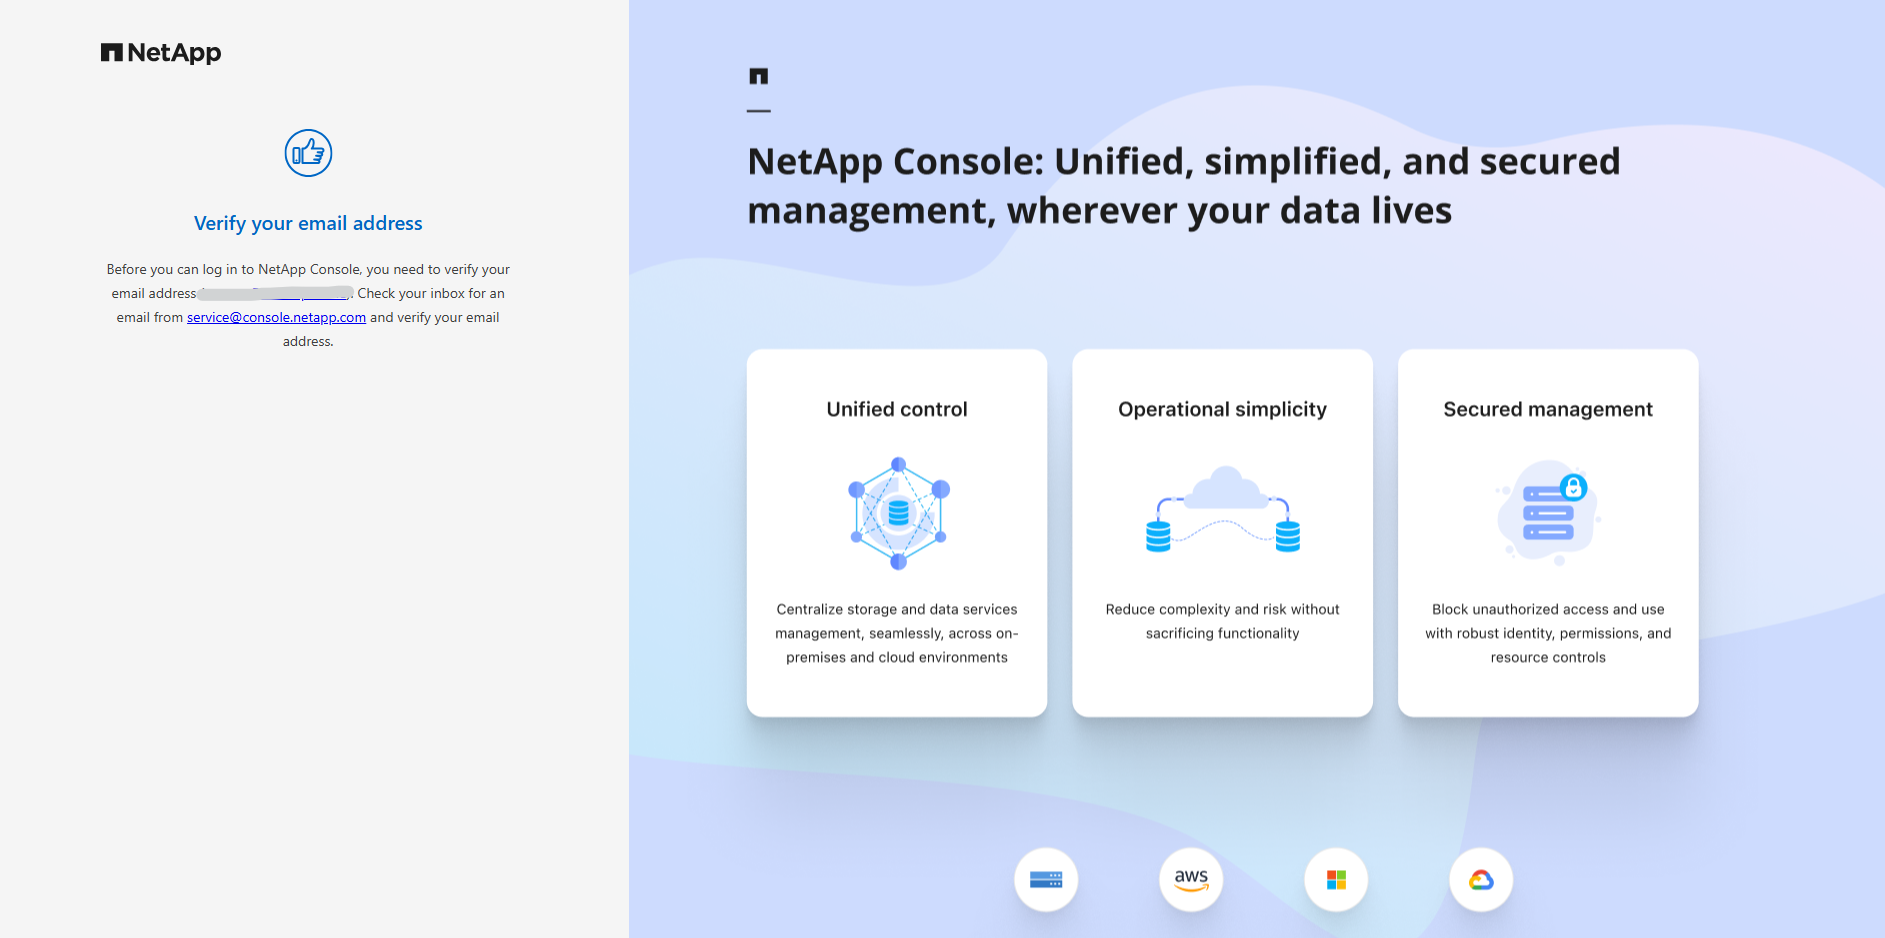
Verify your email address.
After registering, you’ll receive a confirmation email. Since no password exists yet, simply click “Forgot password” to create your initial login credentials.
After signing in at https://bluexp.netapp.com, you’re redirected to https://services.cloud.netapp.com/fabric-view, which serves as NetApp’s service landing page (Products, Tools, API, Service Status, etc.).
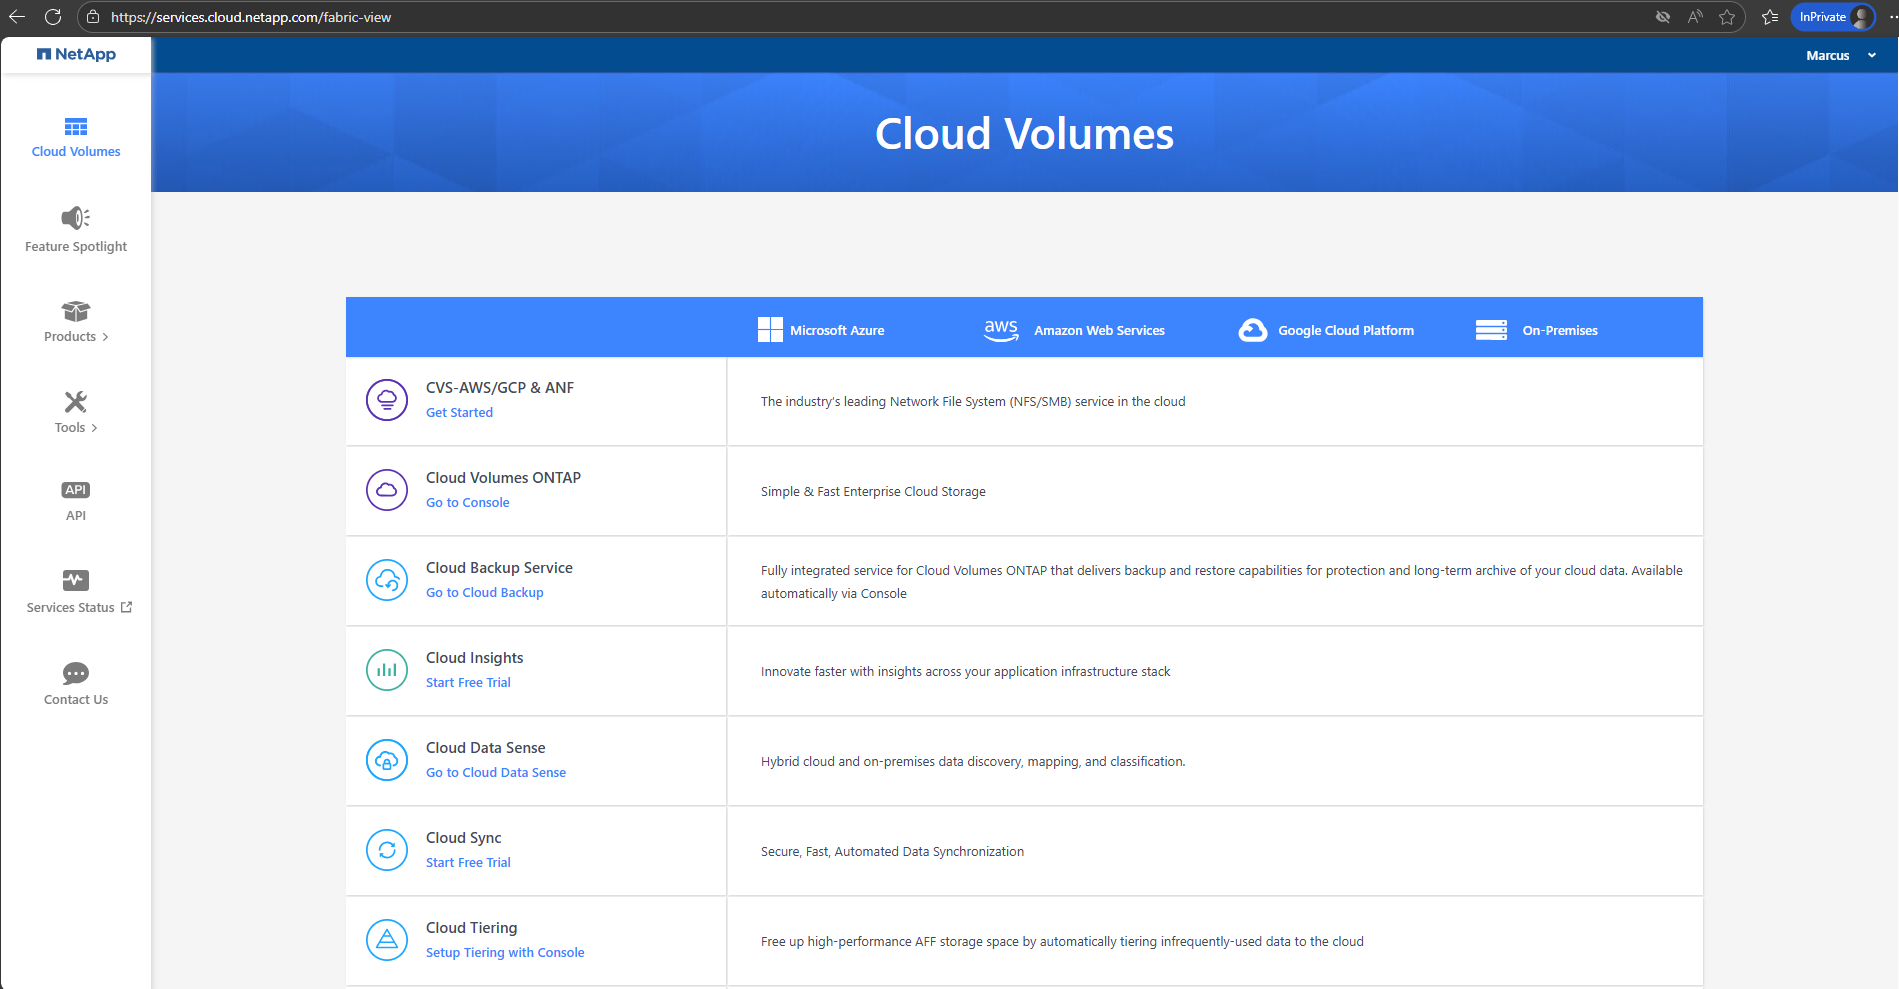
From there, selecting Cloud Volumes ONTAP takes you into the management workflow where you complete onboarding steps as mentioned such as associating your support account, connecting your storage estate, managing/discovering a system, associating the Marketplace subscription, and enabling NetApp data services.
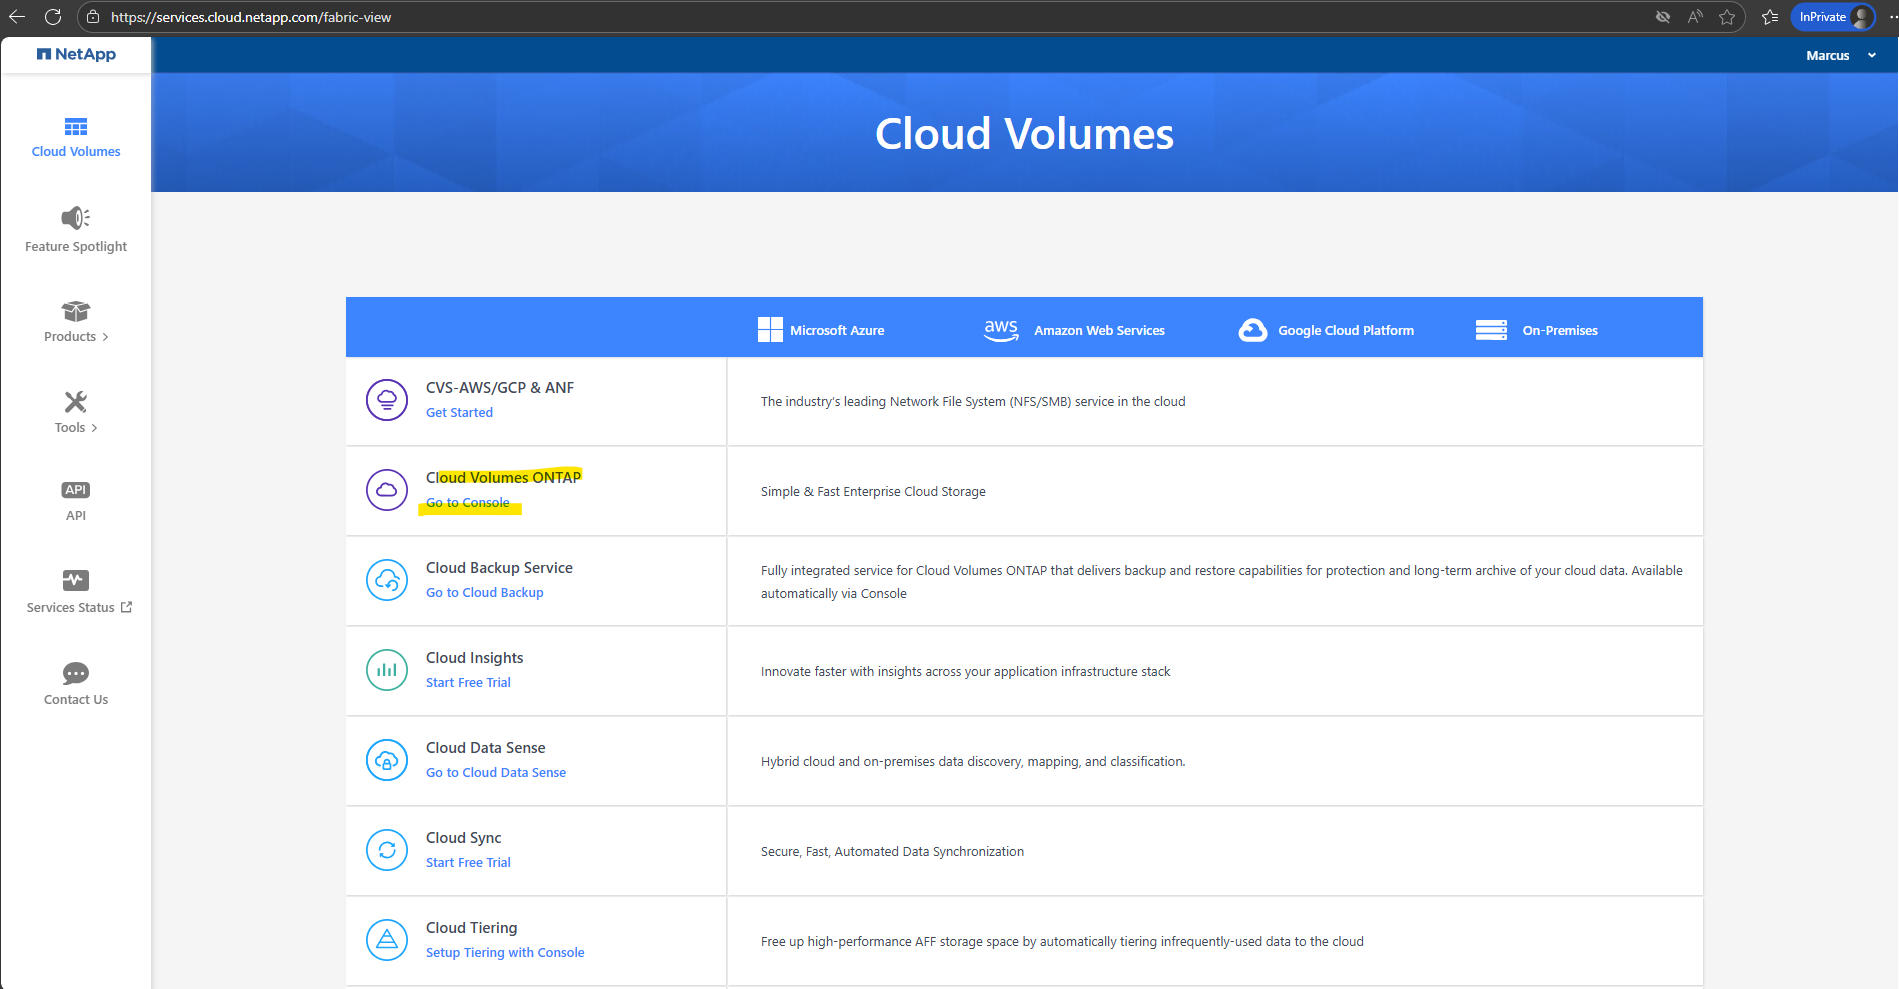
Click on Cloud Volume ONTAP – Go to Console as shown below.
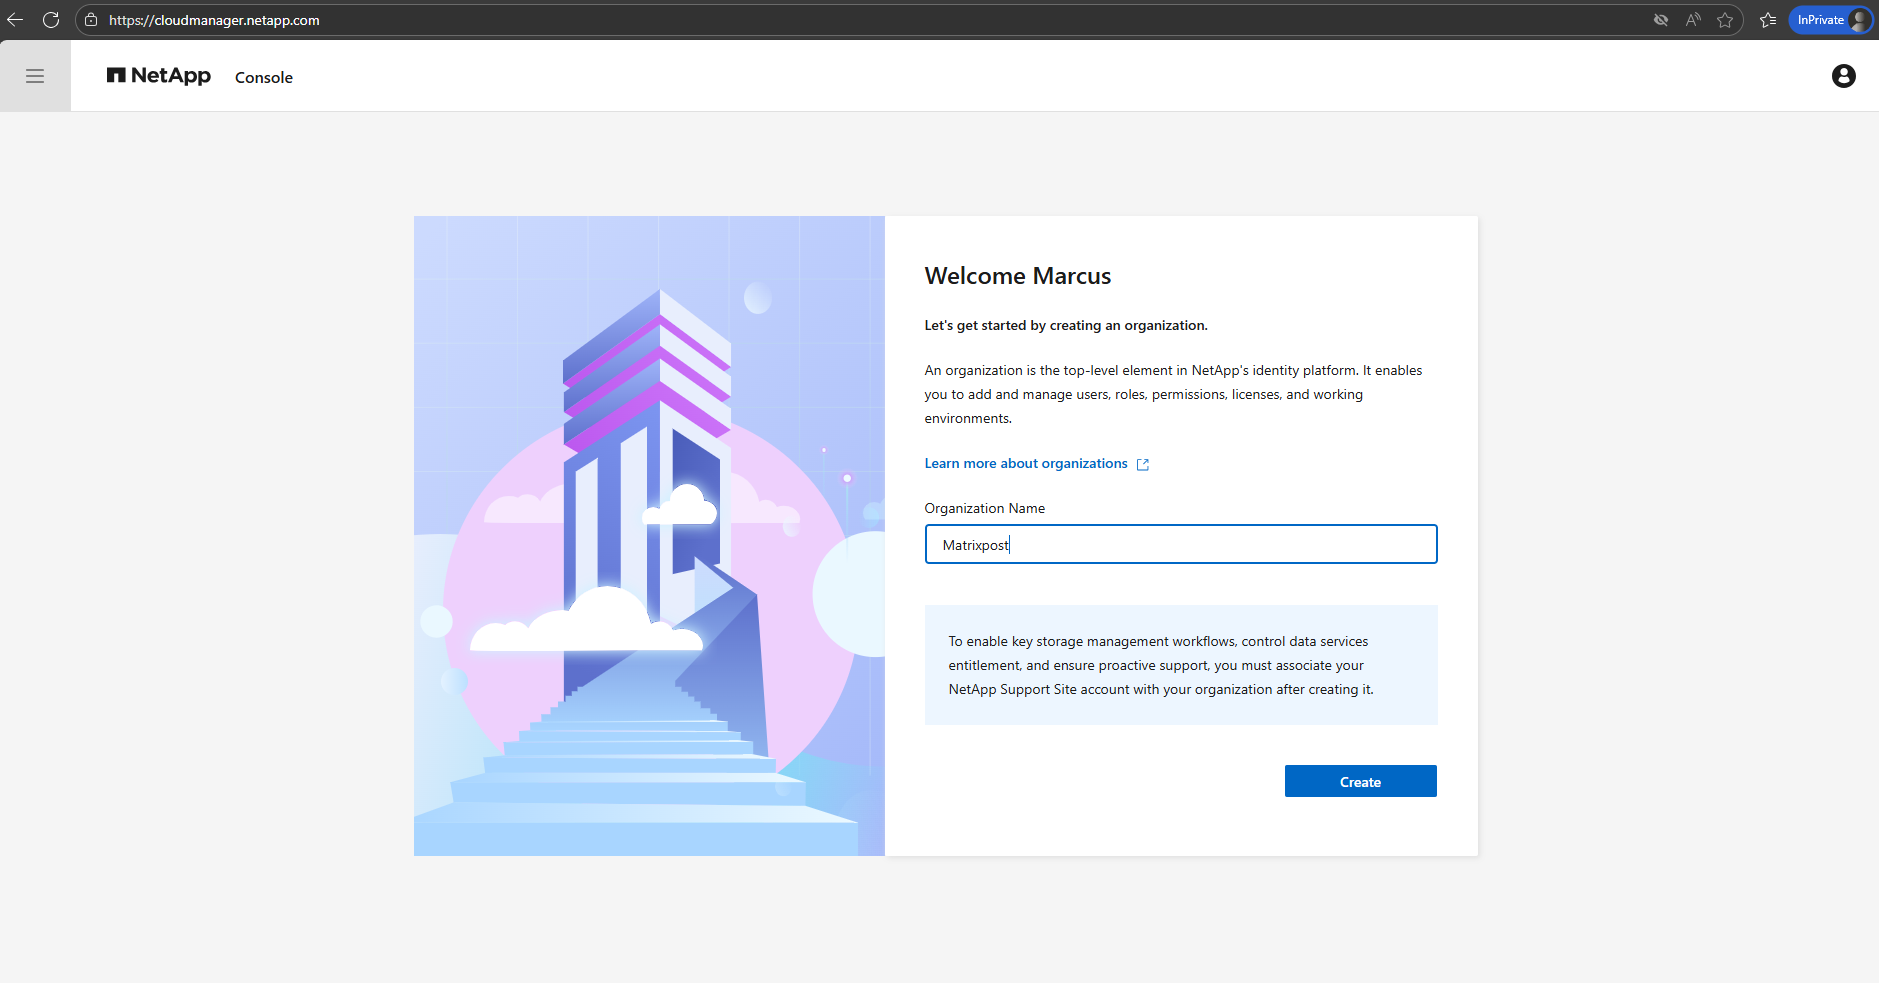
First we need to create an organization.
When you sign up for the NetApp Console, you’re prompted to create a new organization. The organization includes one member (an Organization admin) and one default project.
To set up identity and access management (IAM) to meet your business needs, you’ll need to customize your organization’s hierarchy, add additional members, add or discover resources, and associate those resources across your hierarchy.
Source: https://docs.netapp.com/us-en/console-setup-admin/task-iam-get-started.html
Click on Get started.
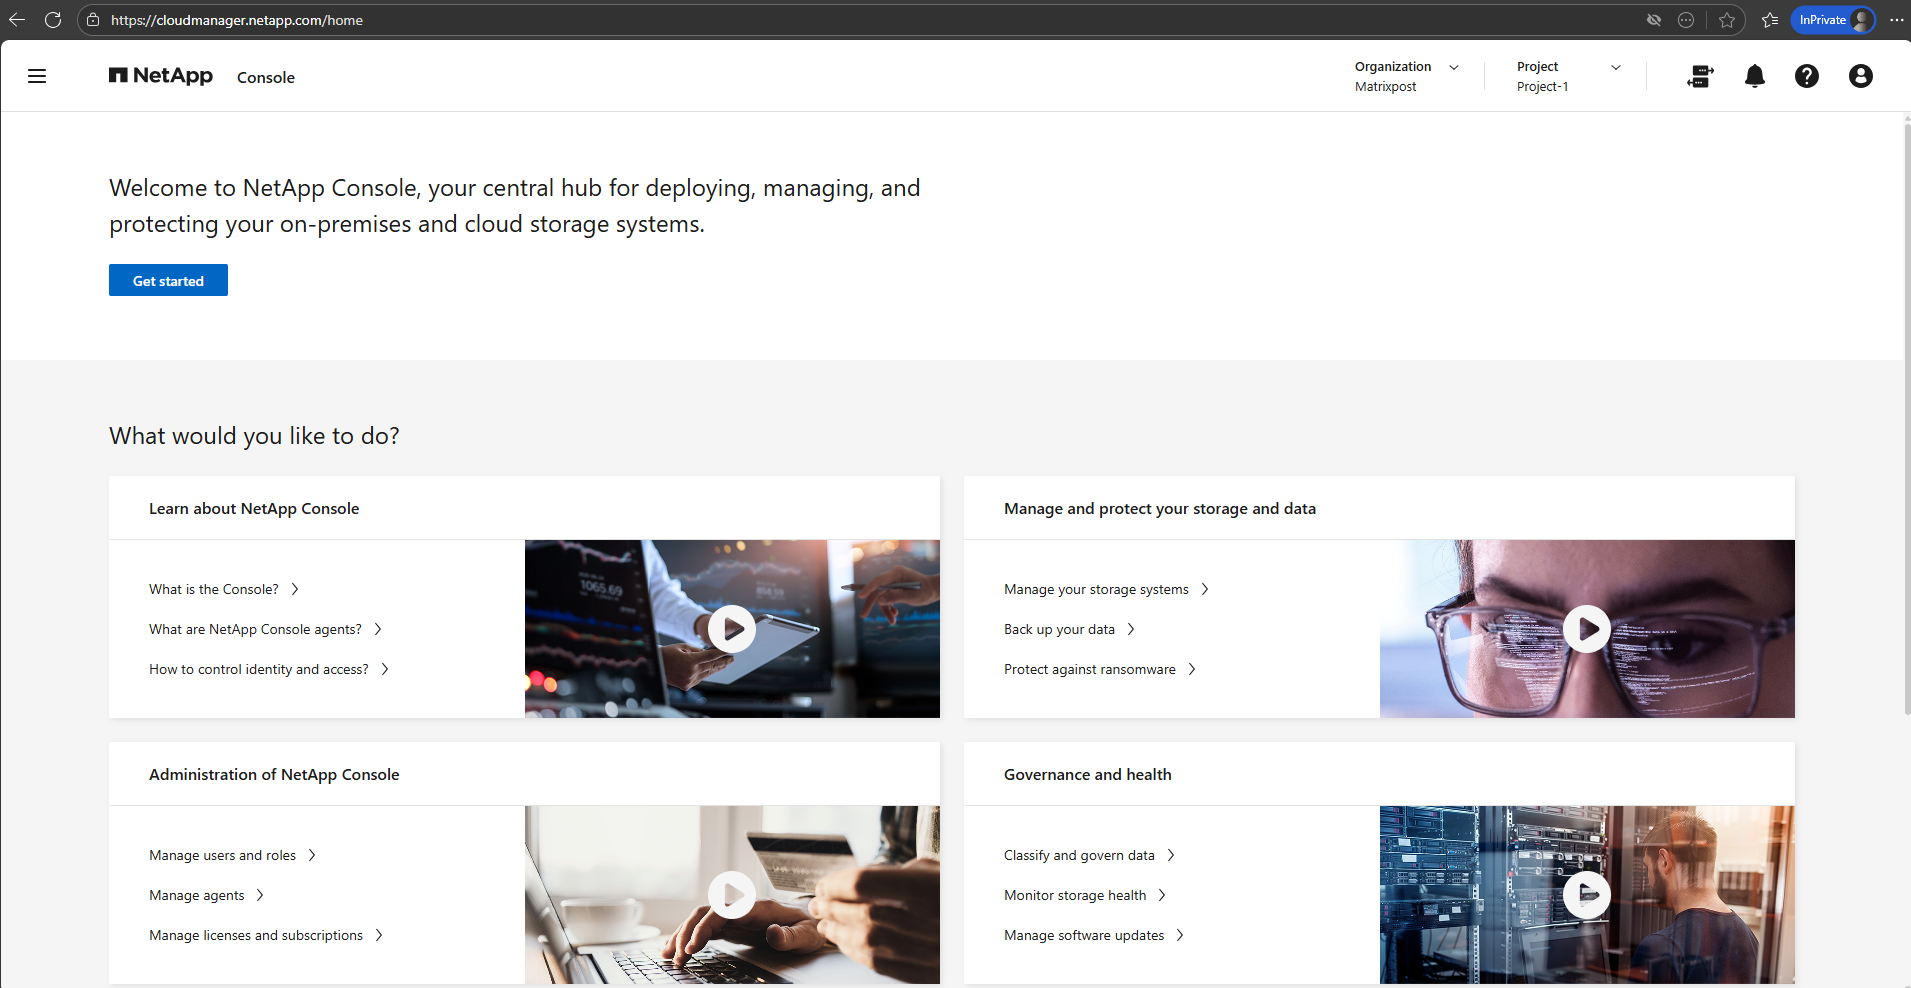
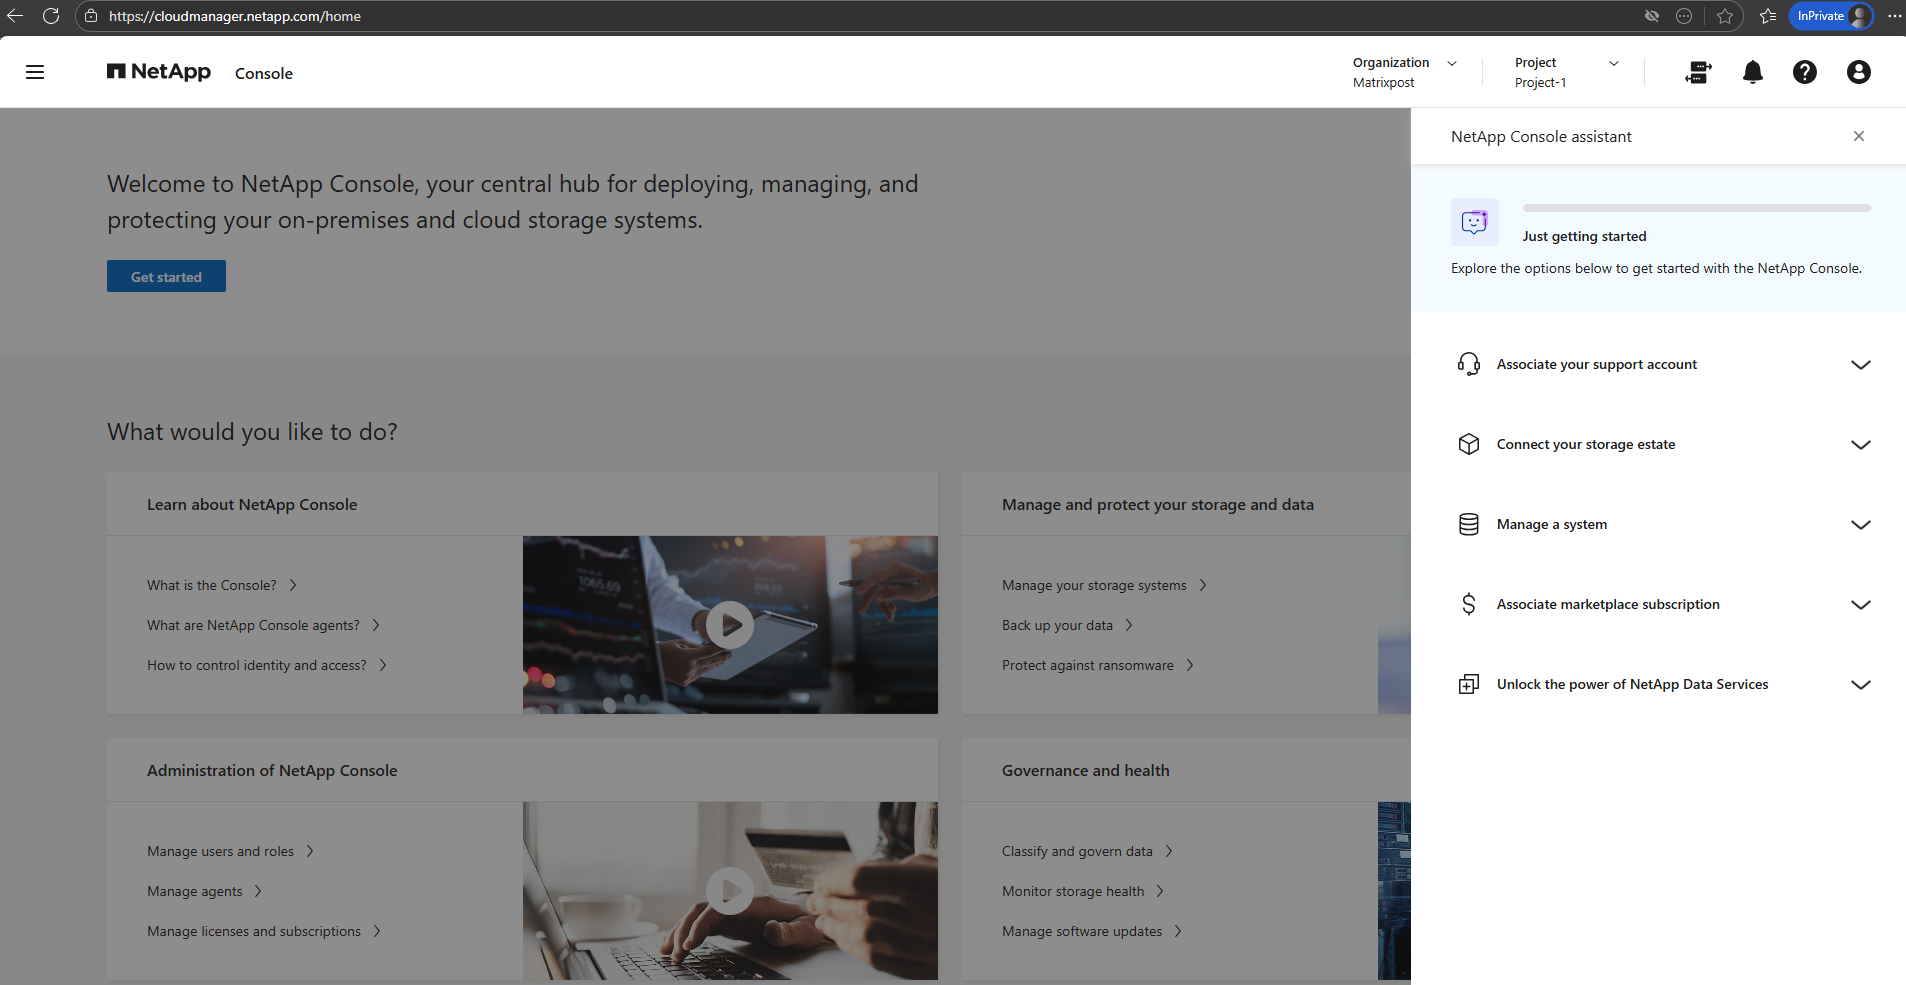
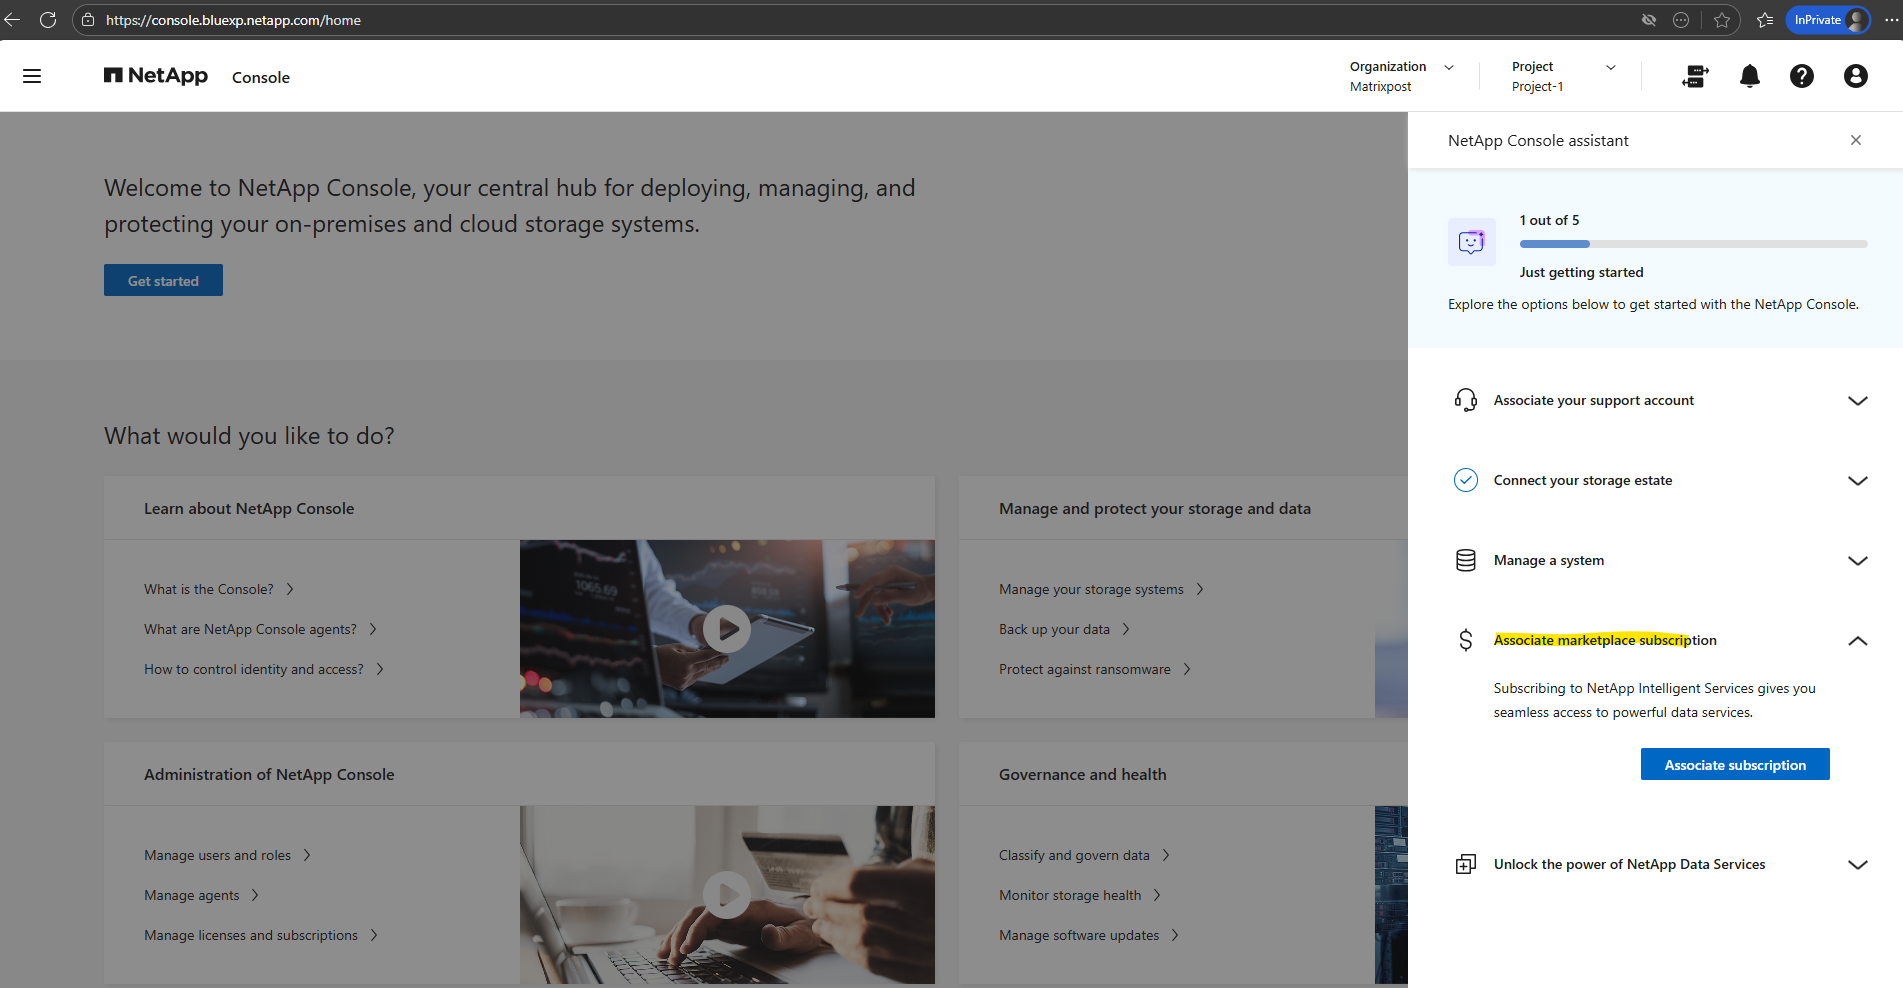
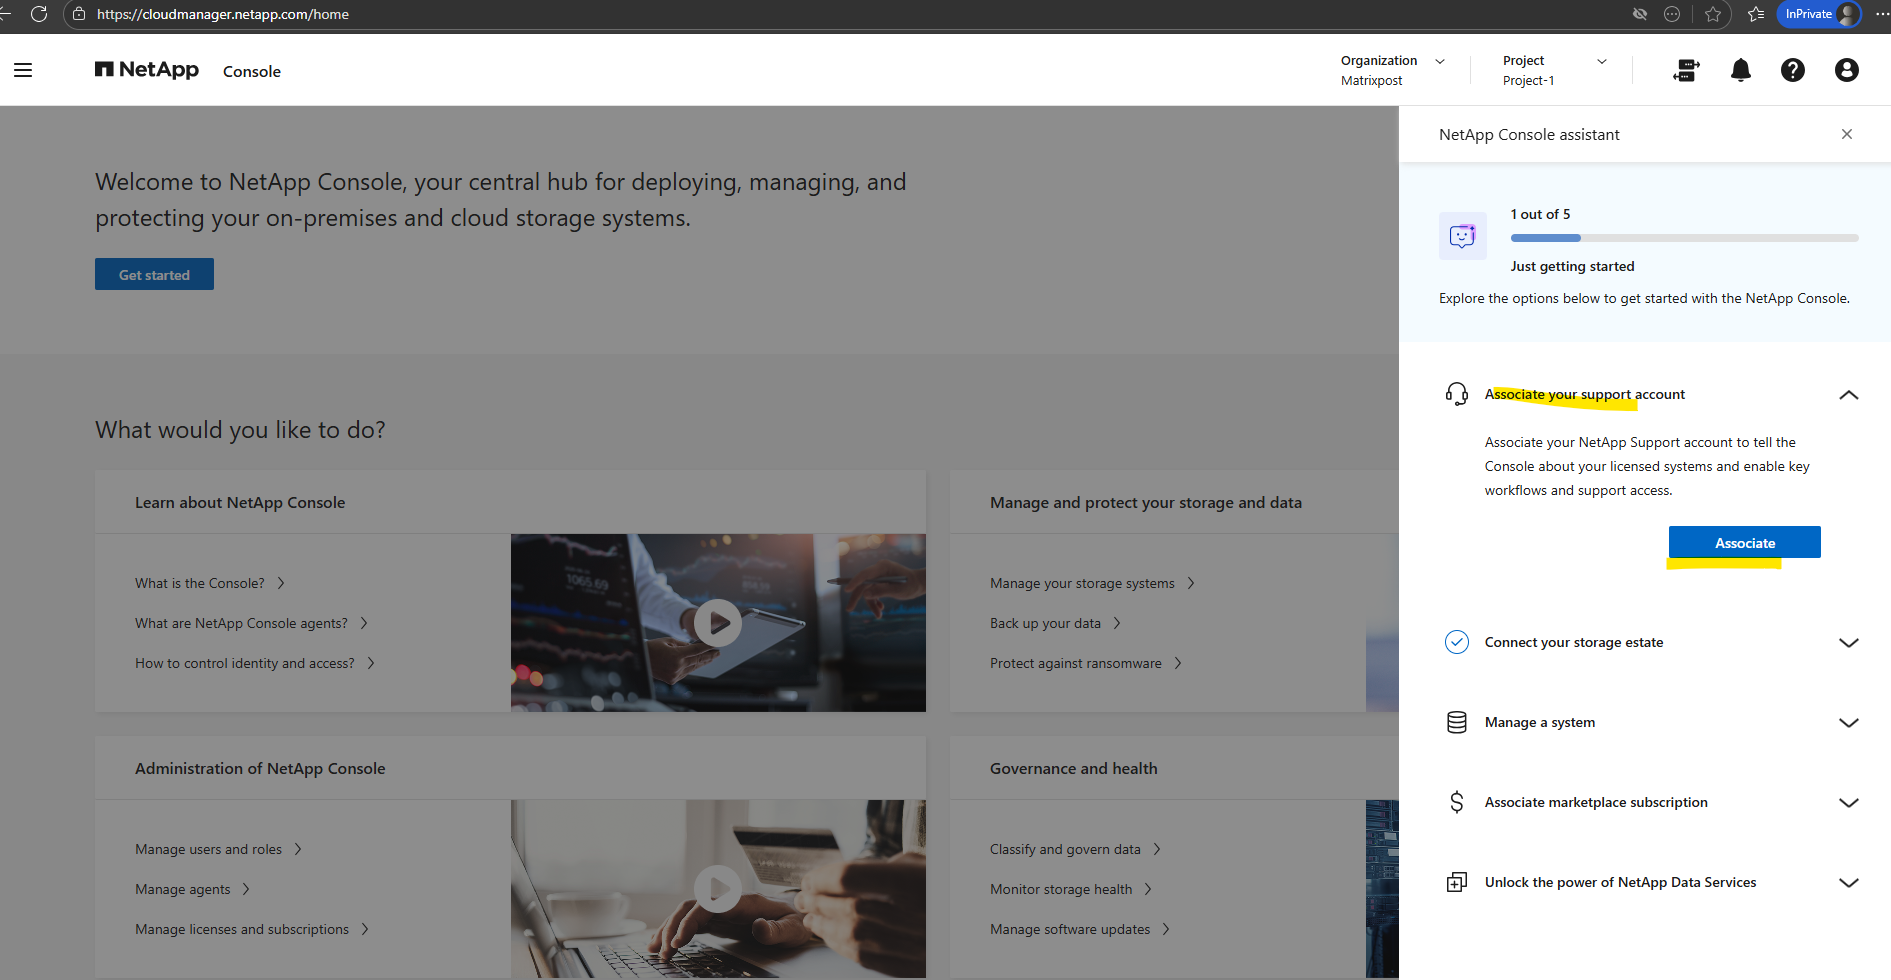
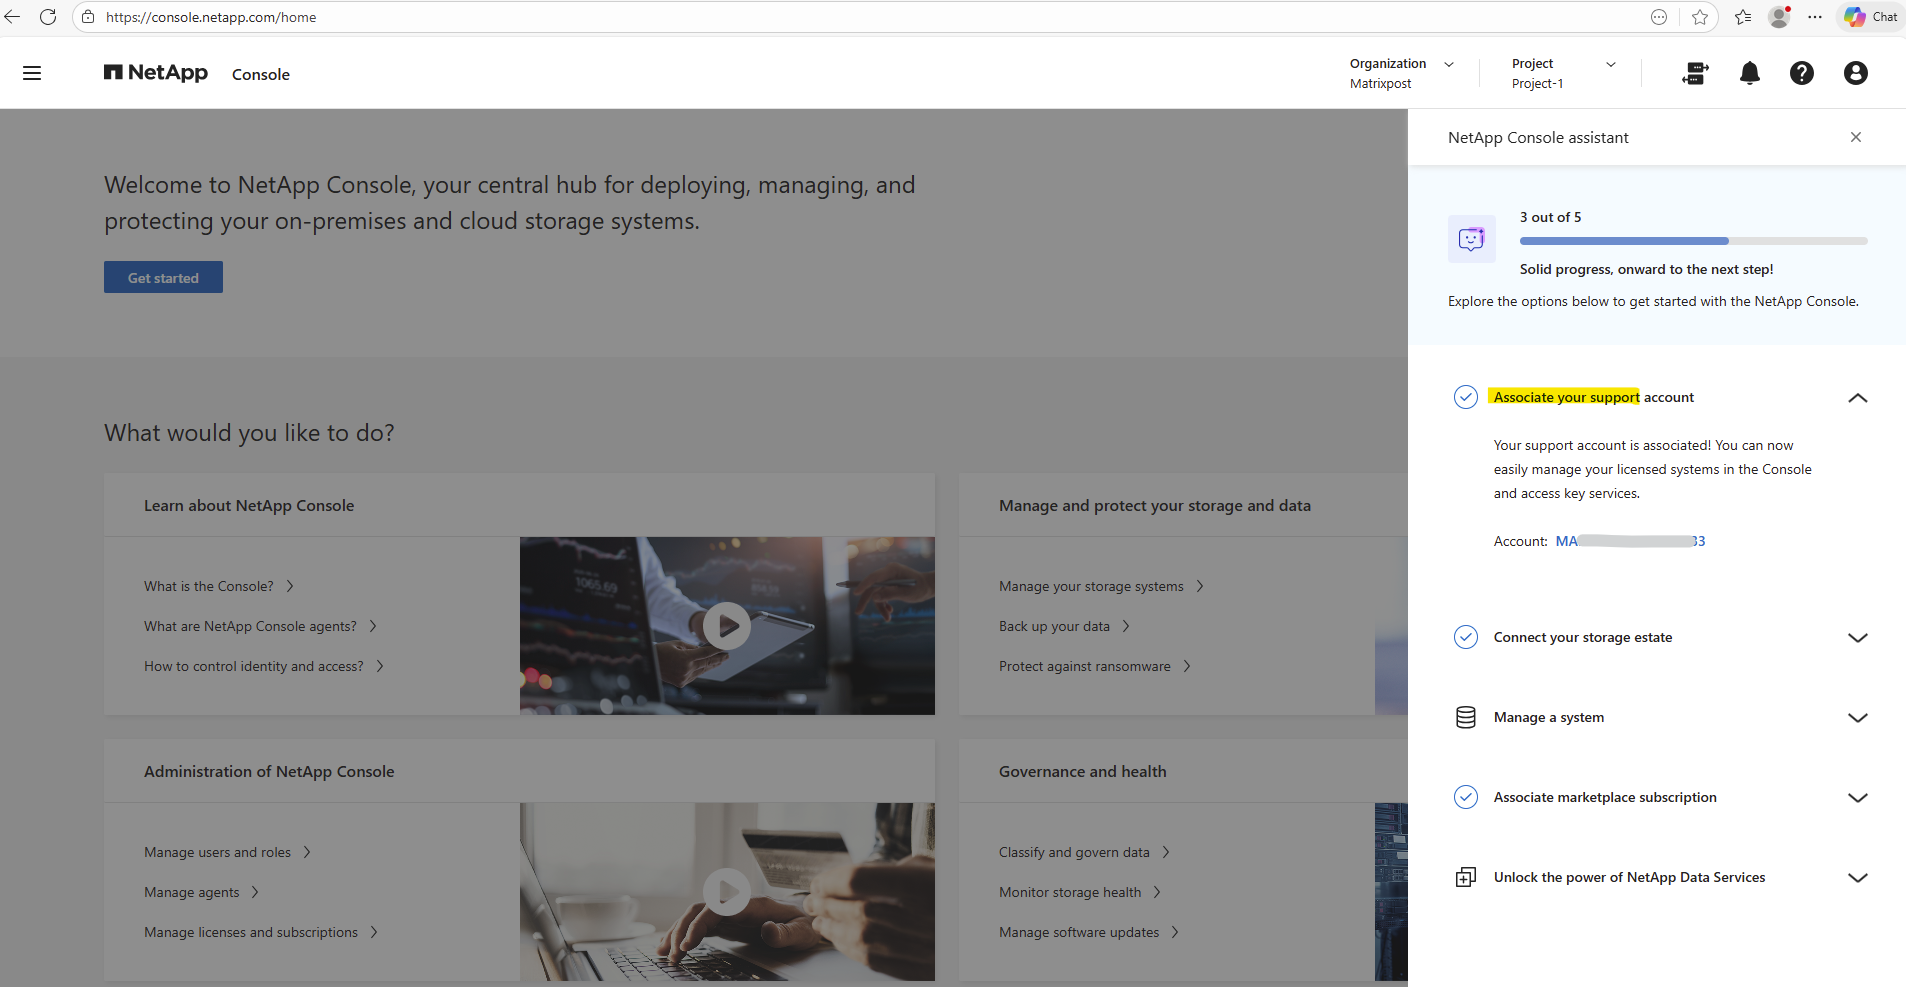
Here as mentioned we need to complete the onboarding steps shown below.
The top navigation bar shows Organization and Project, which are used to logically separate environments and access scopes.
The Organization represents the top-level account, while Projects are used to group and manage related resources such as Cloud Volumes ONTAP systems within that organization.
By default Project-1 was already created.

Create a Console Agent (aka Connector VM) in Azure from NetApp Console (Connect your storage estate)
First we need to deploy an Agent (aka Connector VM) in Azure to securely manage and monitor our storage systems and activate NetApp Data Services. We also need this Agent to be able to deploy Cloud Volume ONTAP in Azure directly from the NetApp console which I will show in this post.
NetApp provides two options for deploying Cloud Volumes ONTAP on Azure.
Cloud Volumes ONTAP traditionally relies on the NetApp Console for deployment and orchestration. Beginning with Cloud Volumes ONTAP 9.16.1, you can take advantage of Azure marketplace direct deployment, a streamlined process that provides access to a limited, but still powerful set of Cloud Volumes ONTAP features and options.
Choose where to deploy your Agent (aka Connector VM), either on-premises or in the cloud. In my case I need to select Azure below.
Create a Console agent in Azure from NetApp Console
https://docs.netapp.com/us-en/console-setup-admin/task-install-agent-azure-console.html
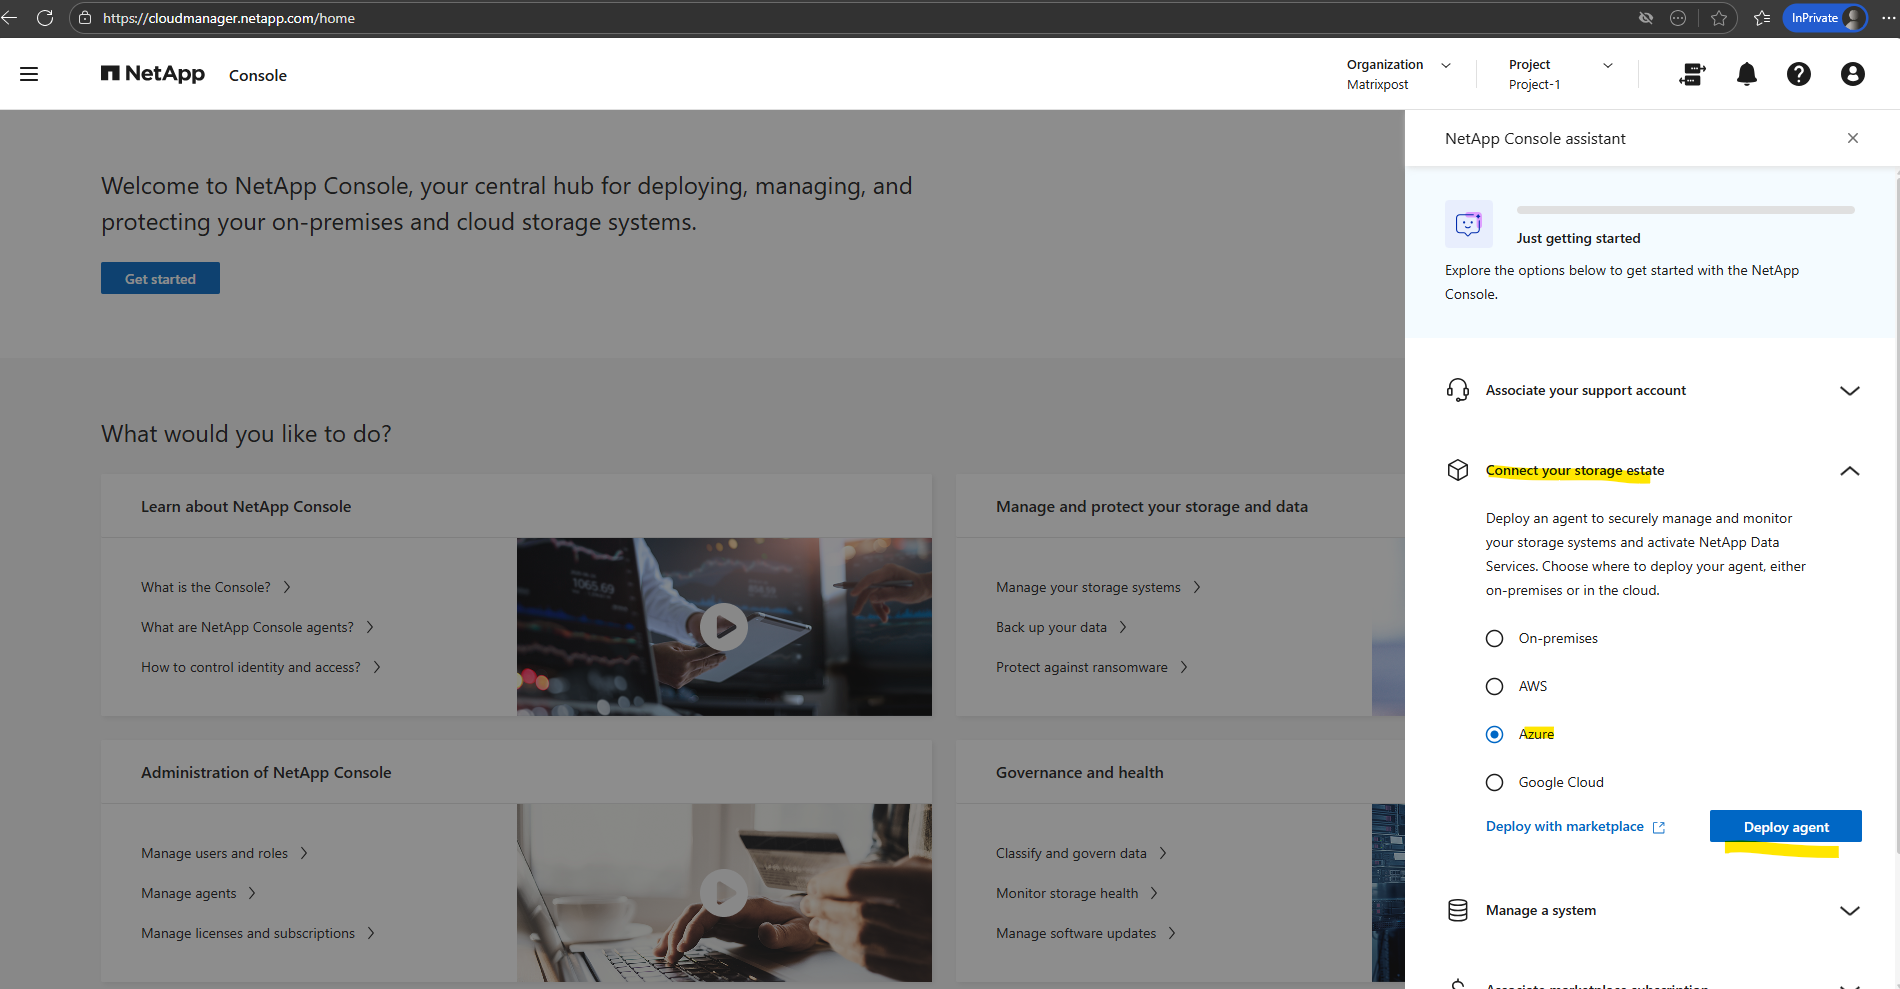
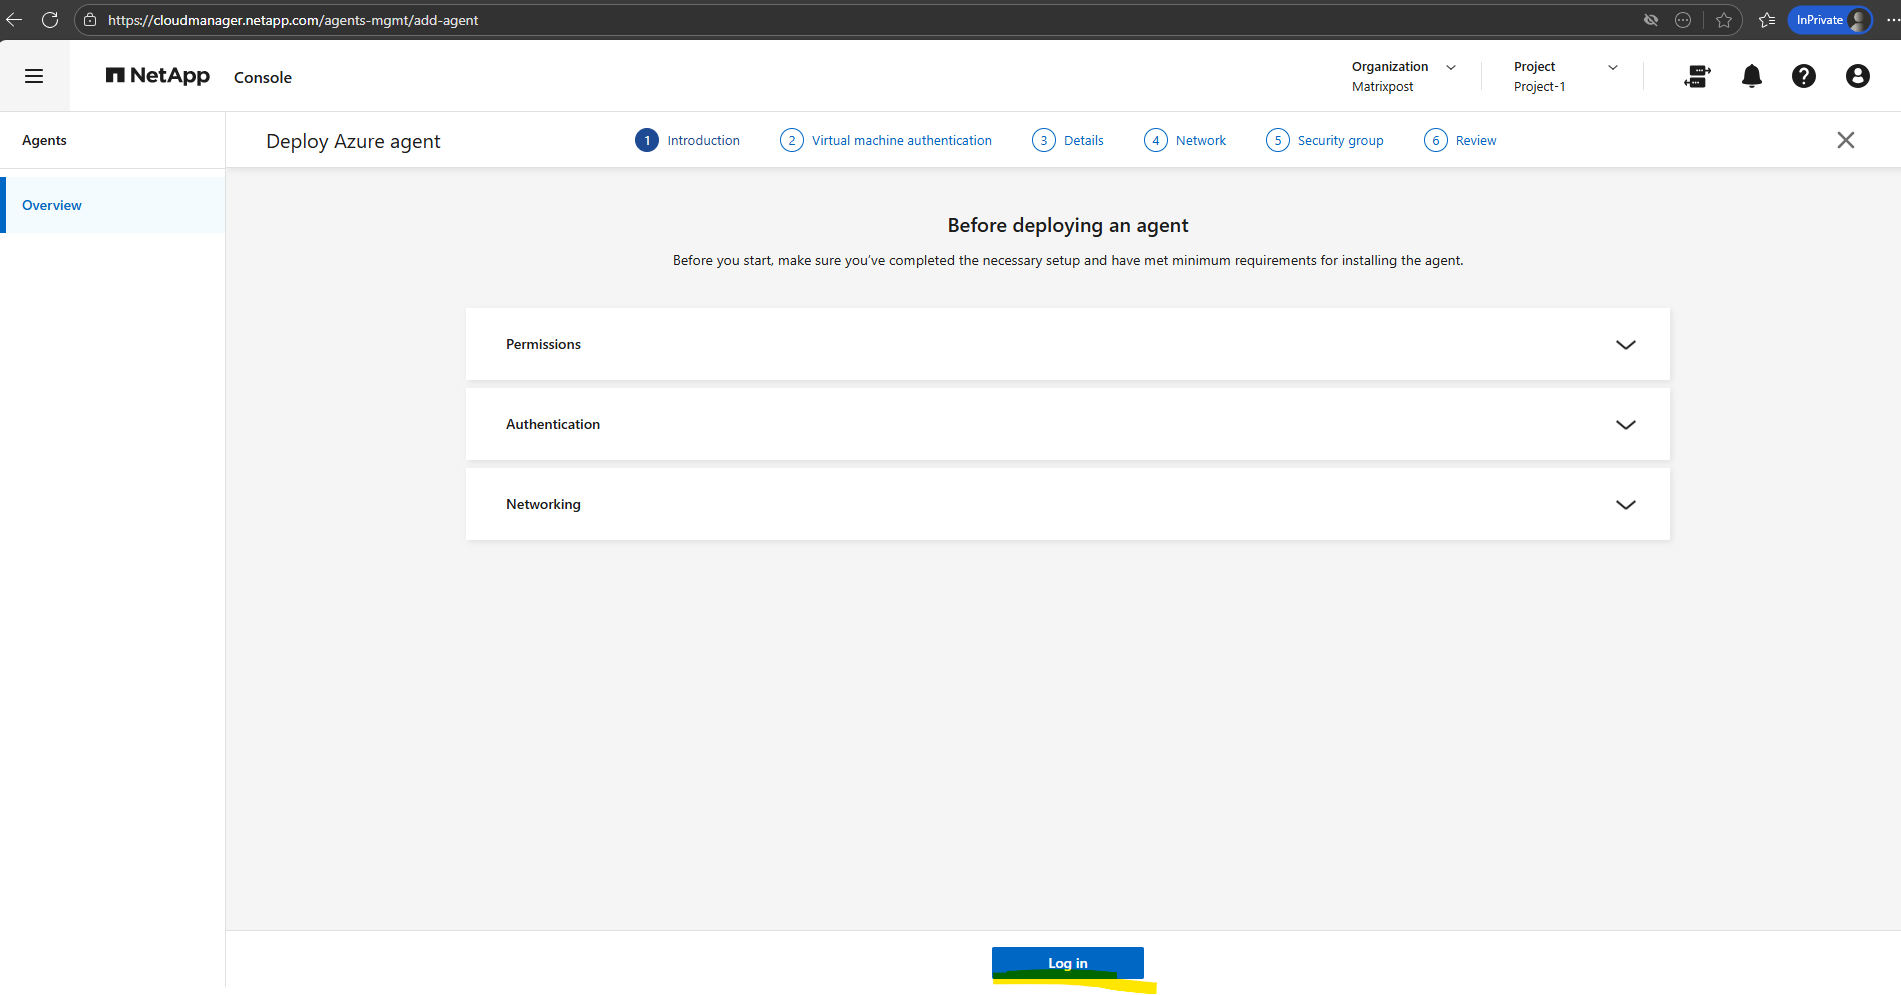
Before we can click on Log in below, we first need to create a console agent deployment policy (custom role) as shown below.
Create an Azure custom role that you can assign to your Azure account or to a Microsoft Entra service principal. The Console authenticates with Azure and uses these permissions to create the Console agent on your behalf.
The Console deploys the Console agent VM (aka Connector VM) in Azure, enables a system-assigned managed identity, creates the required role, and assigns it to the VM.
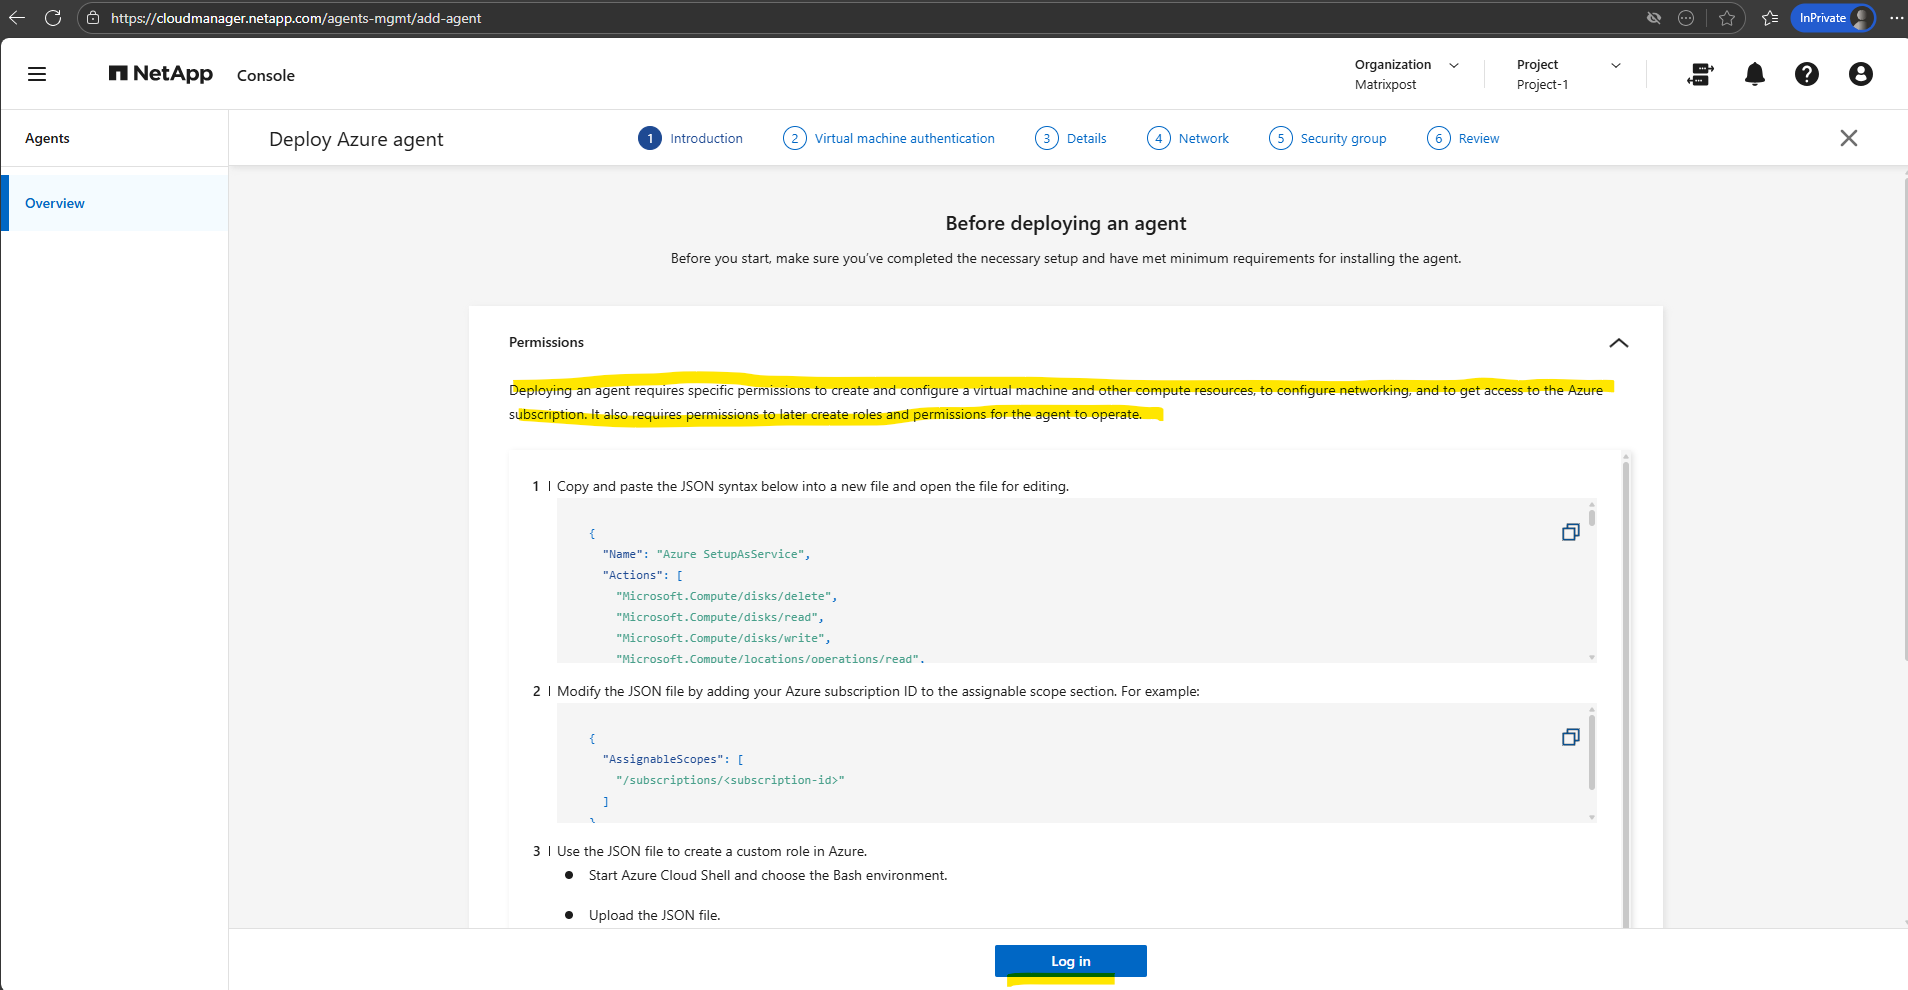
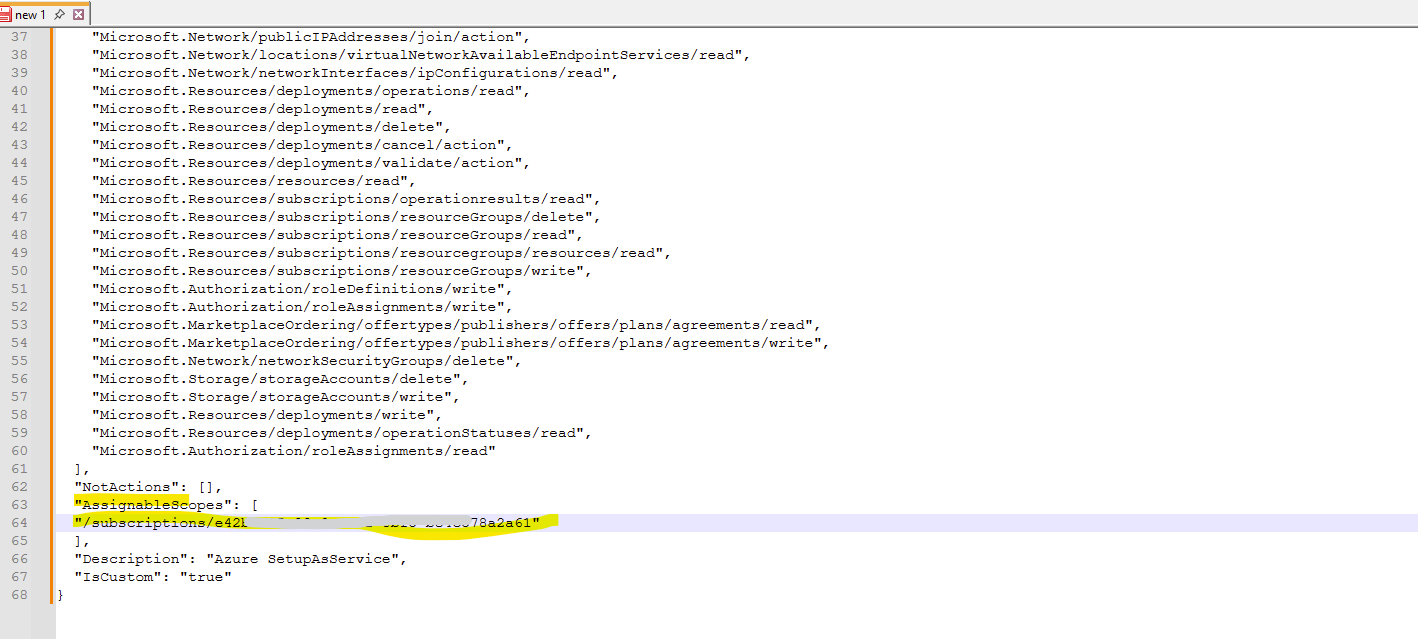
Copy and paste the JSON syntax below into a new file and open the file for editing.
Modify the JSON file by adding your Azure subscription ID to the assignable scope section.
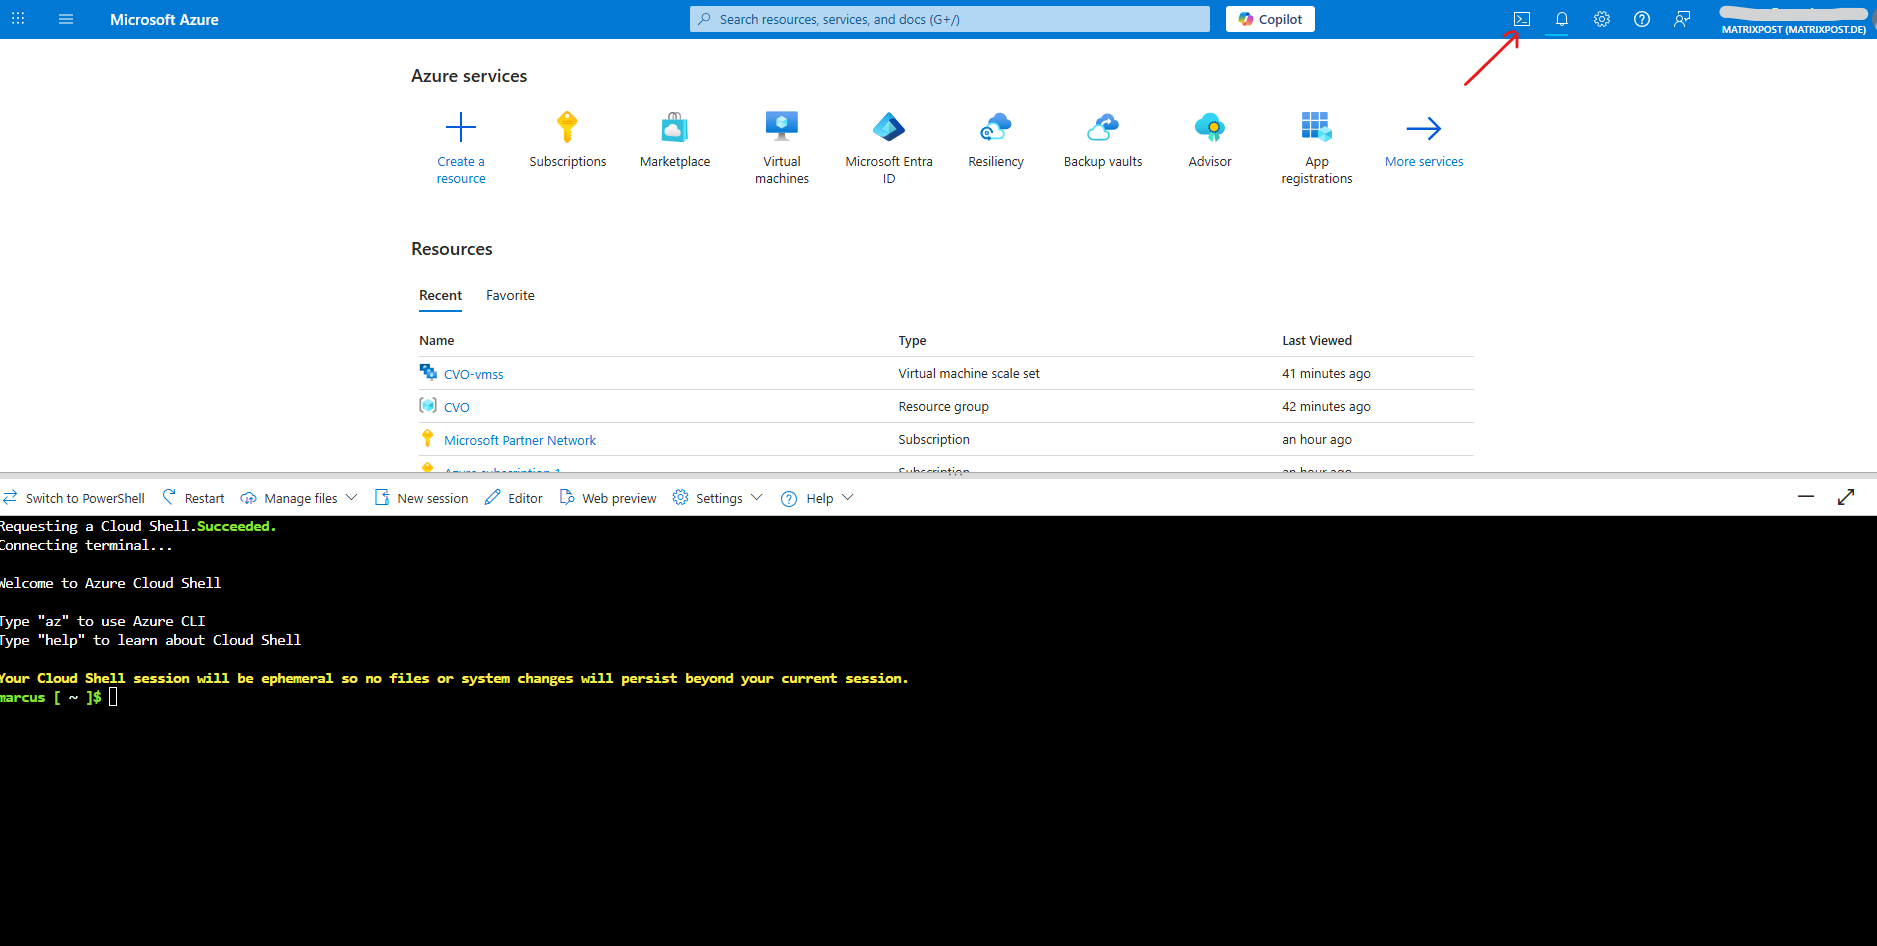
Open the Azure Cloud Shell and select the Bash.
Choose or create a storage account if prompted for.
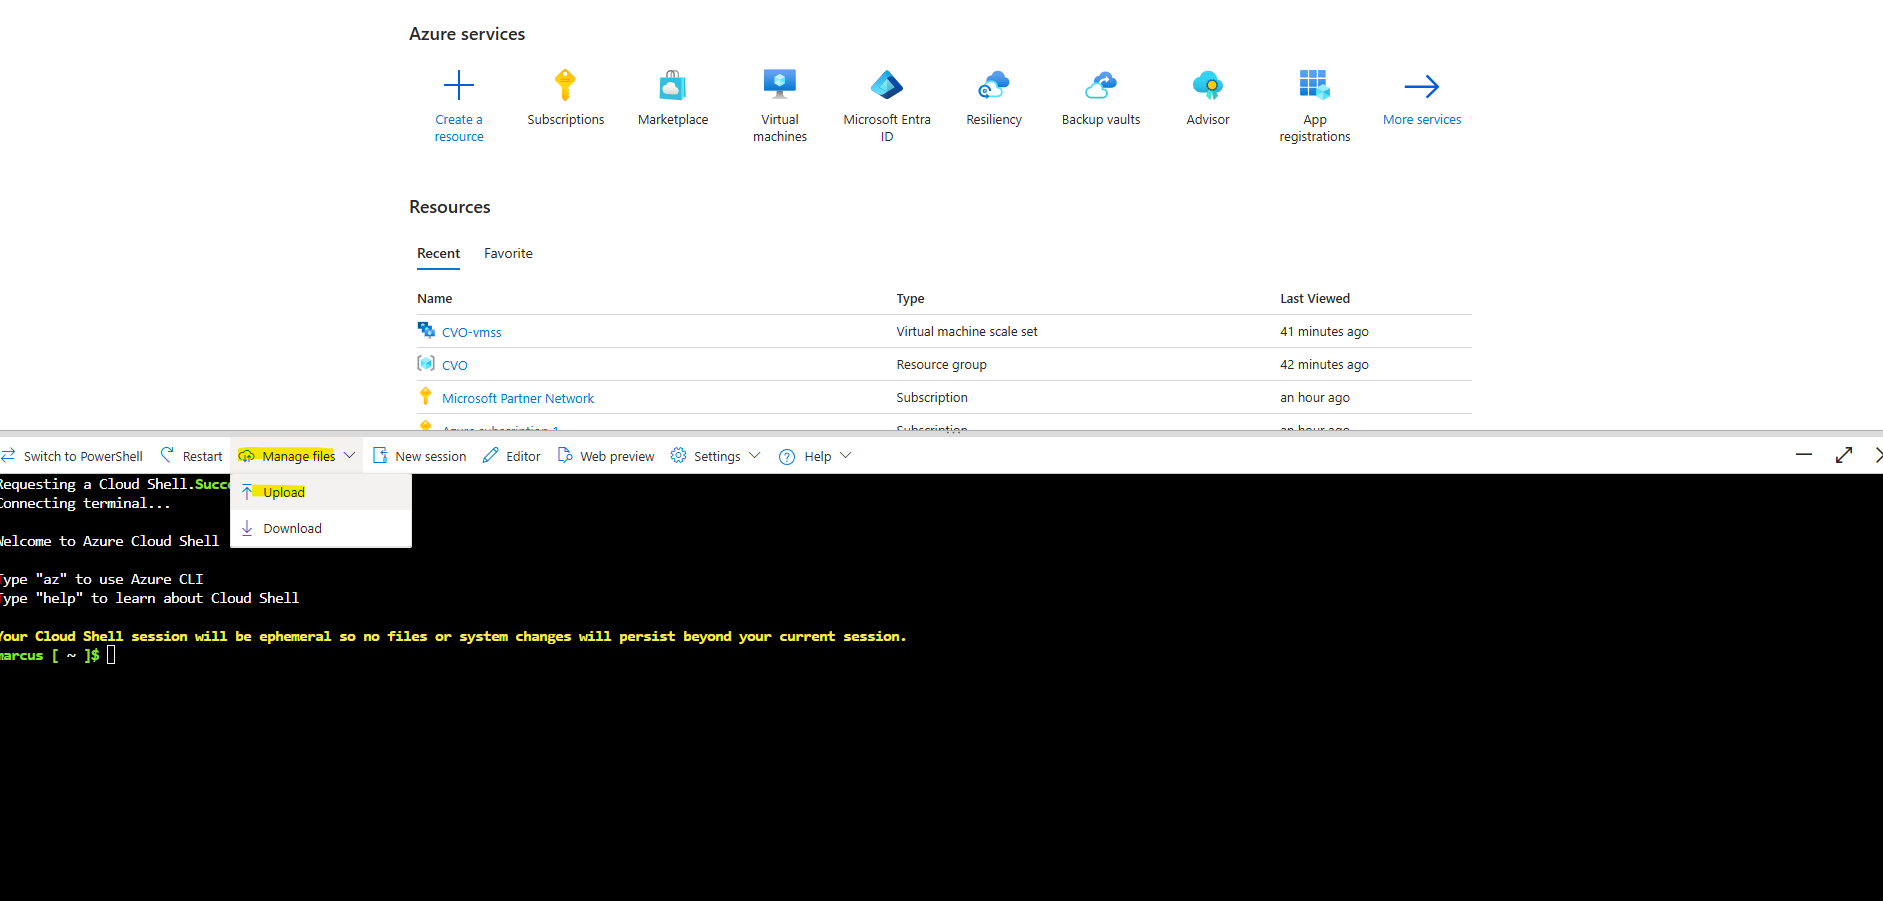
Click on Manage files -> Upload and select the adjusted JSON file.
The JSON file was successfully uploaded.
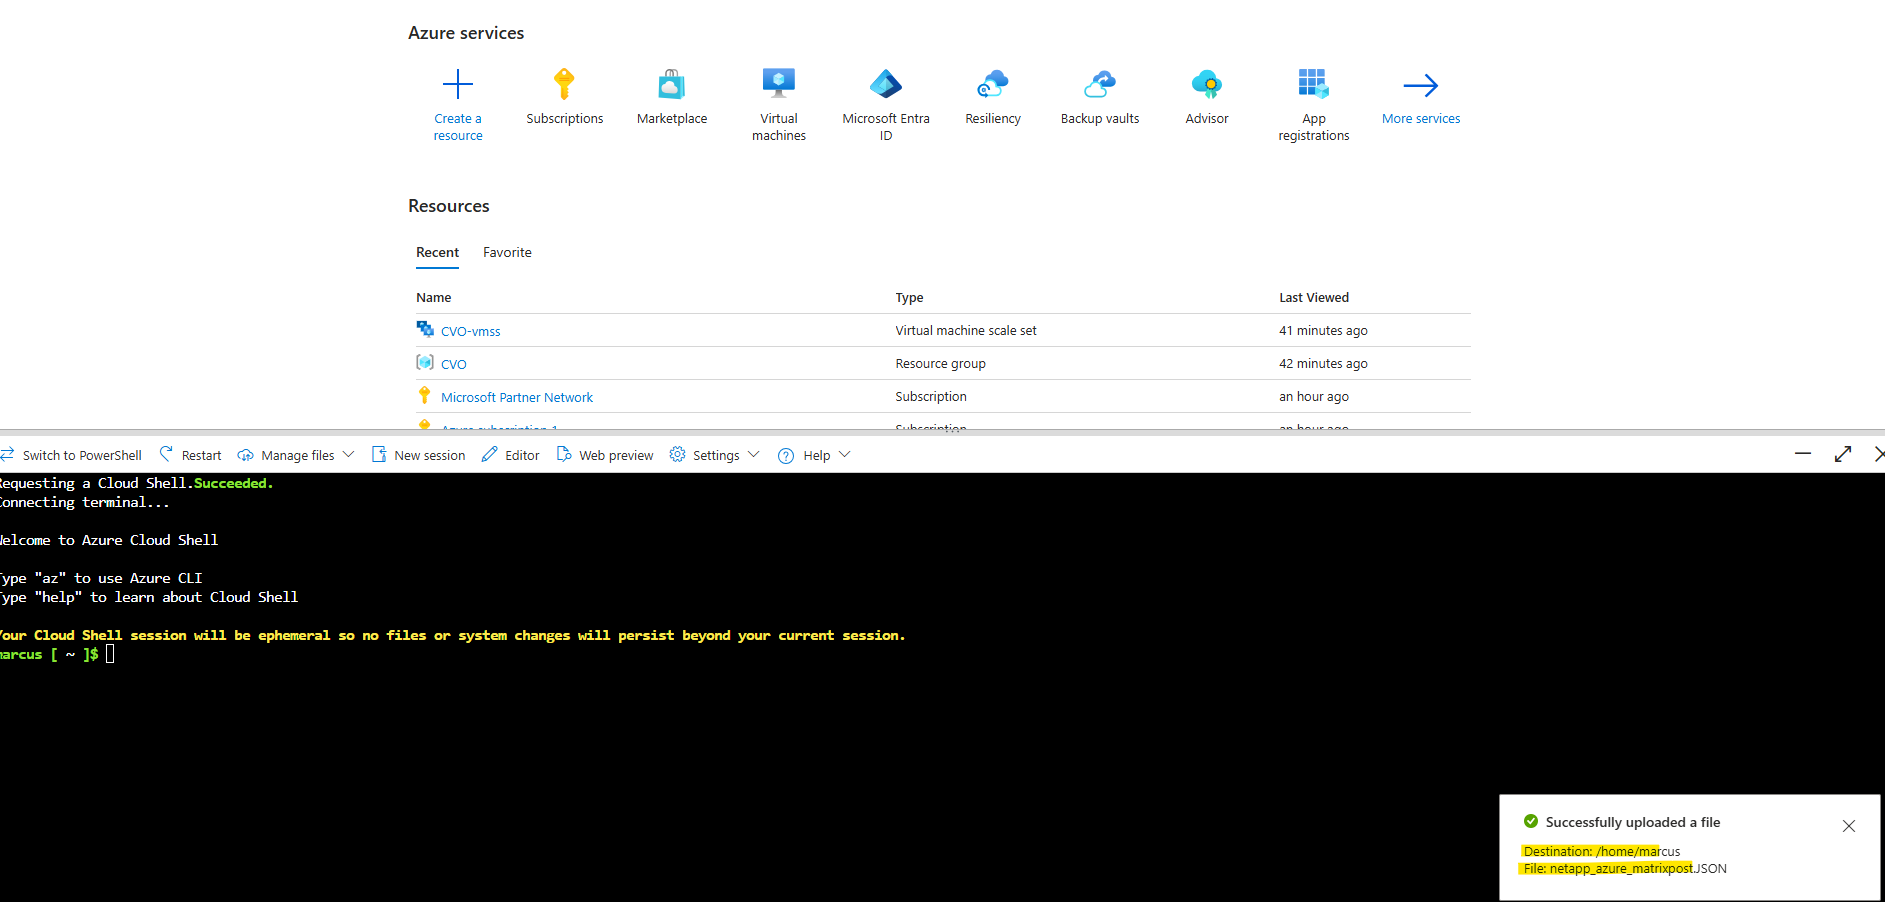
Now run this command:
Adjust the path and JSON file name to your environment.
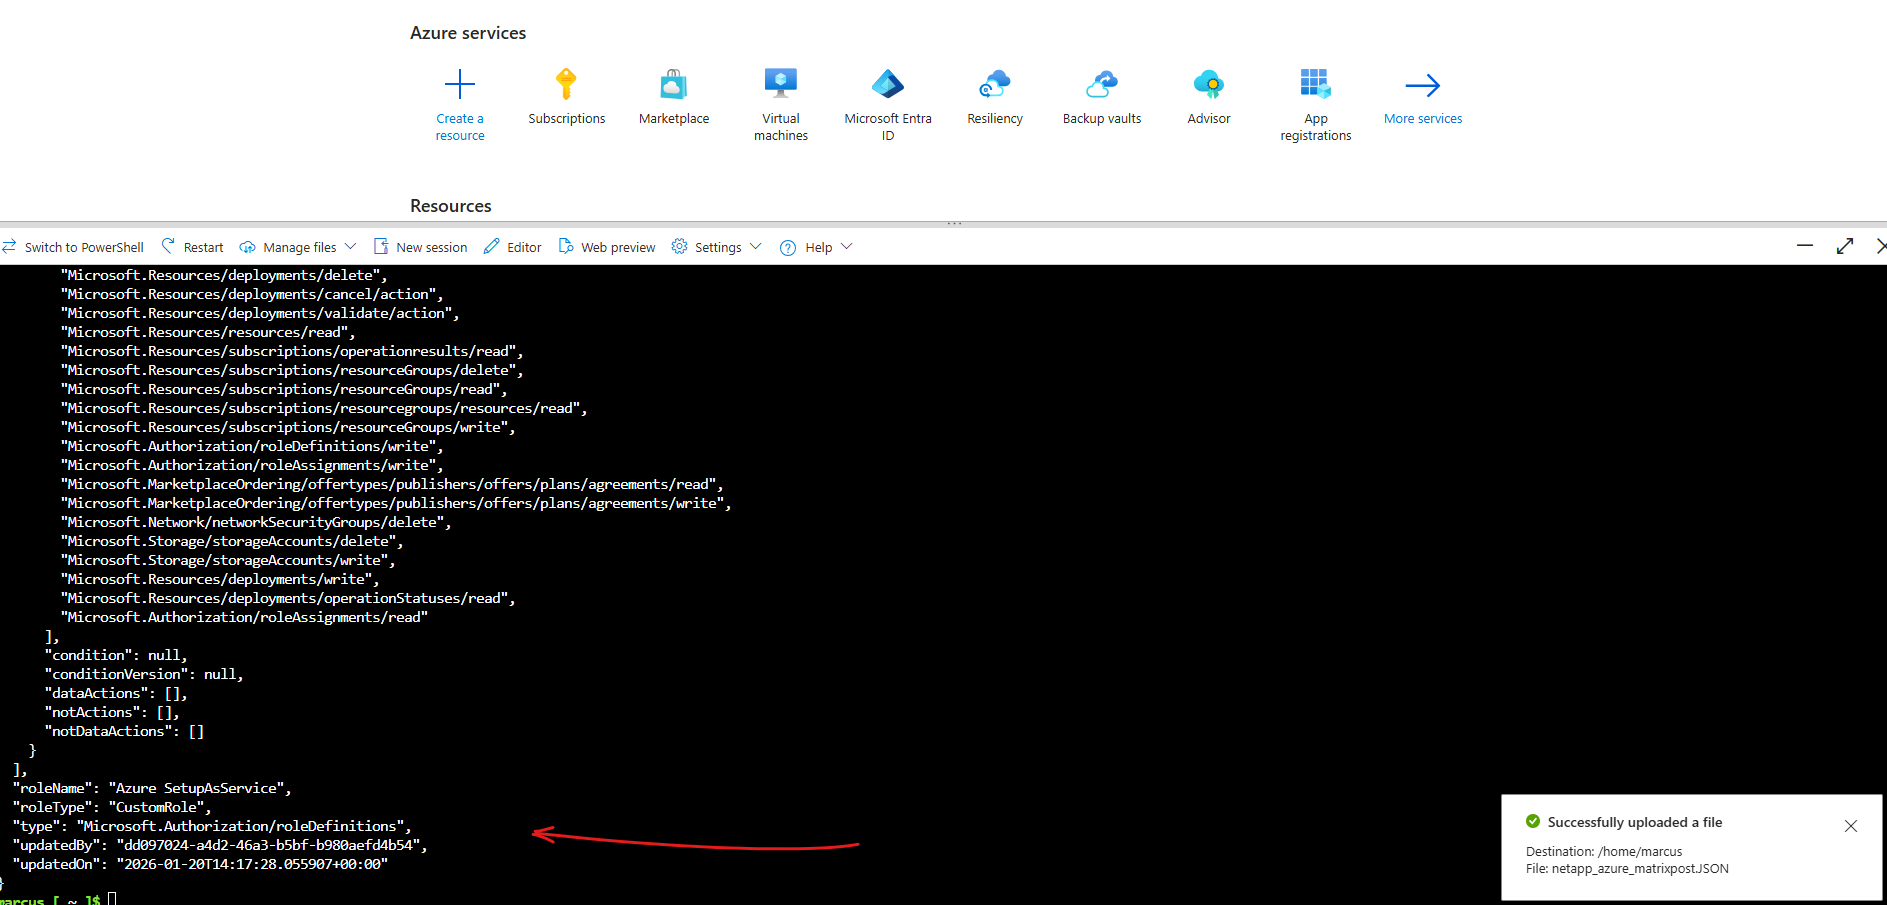
$ az role definition create --role-definition /home/marcus/netapp_azure_matrixpost.JSON
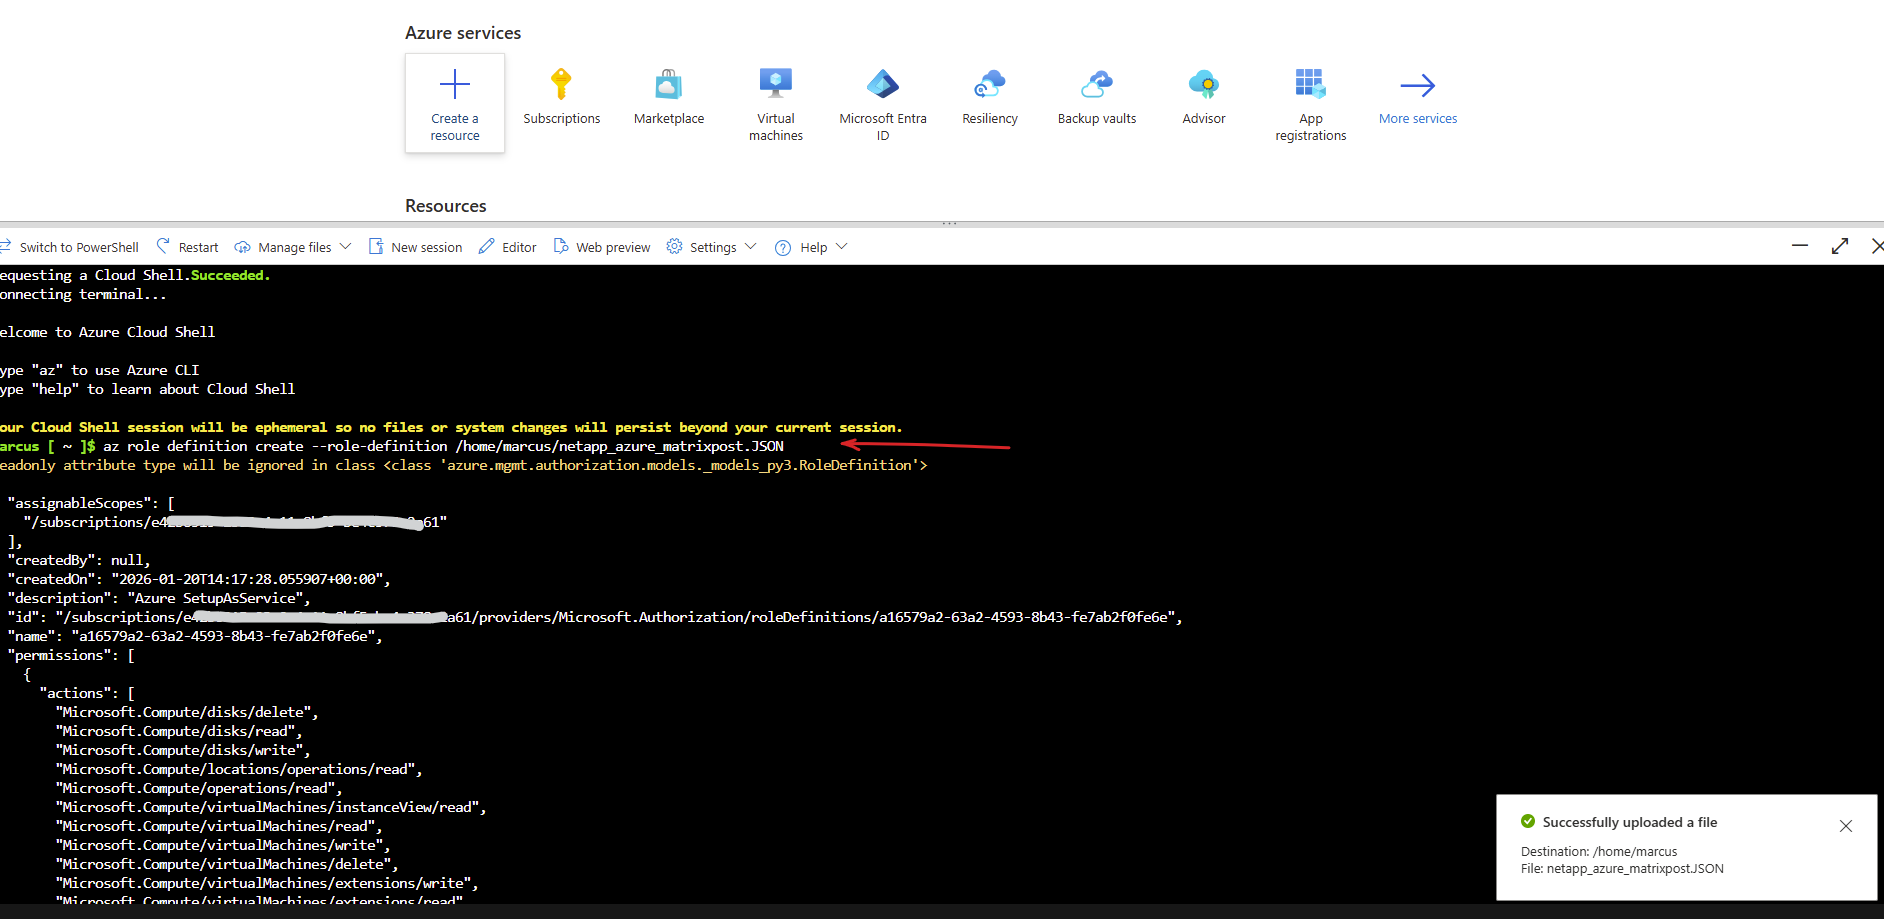
The custom role is created successfully.
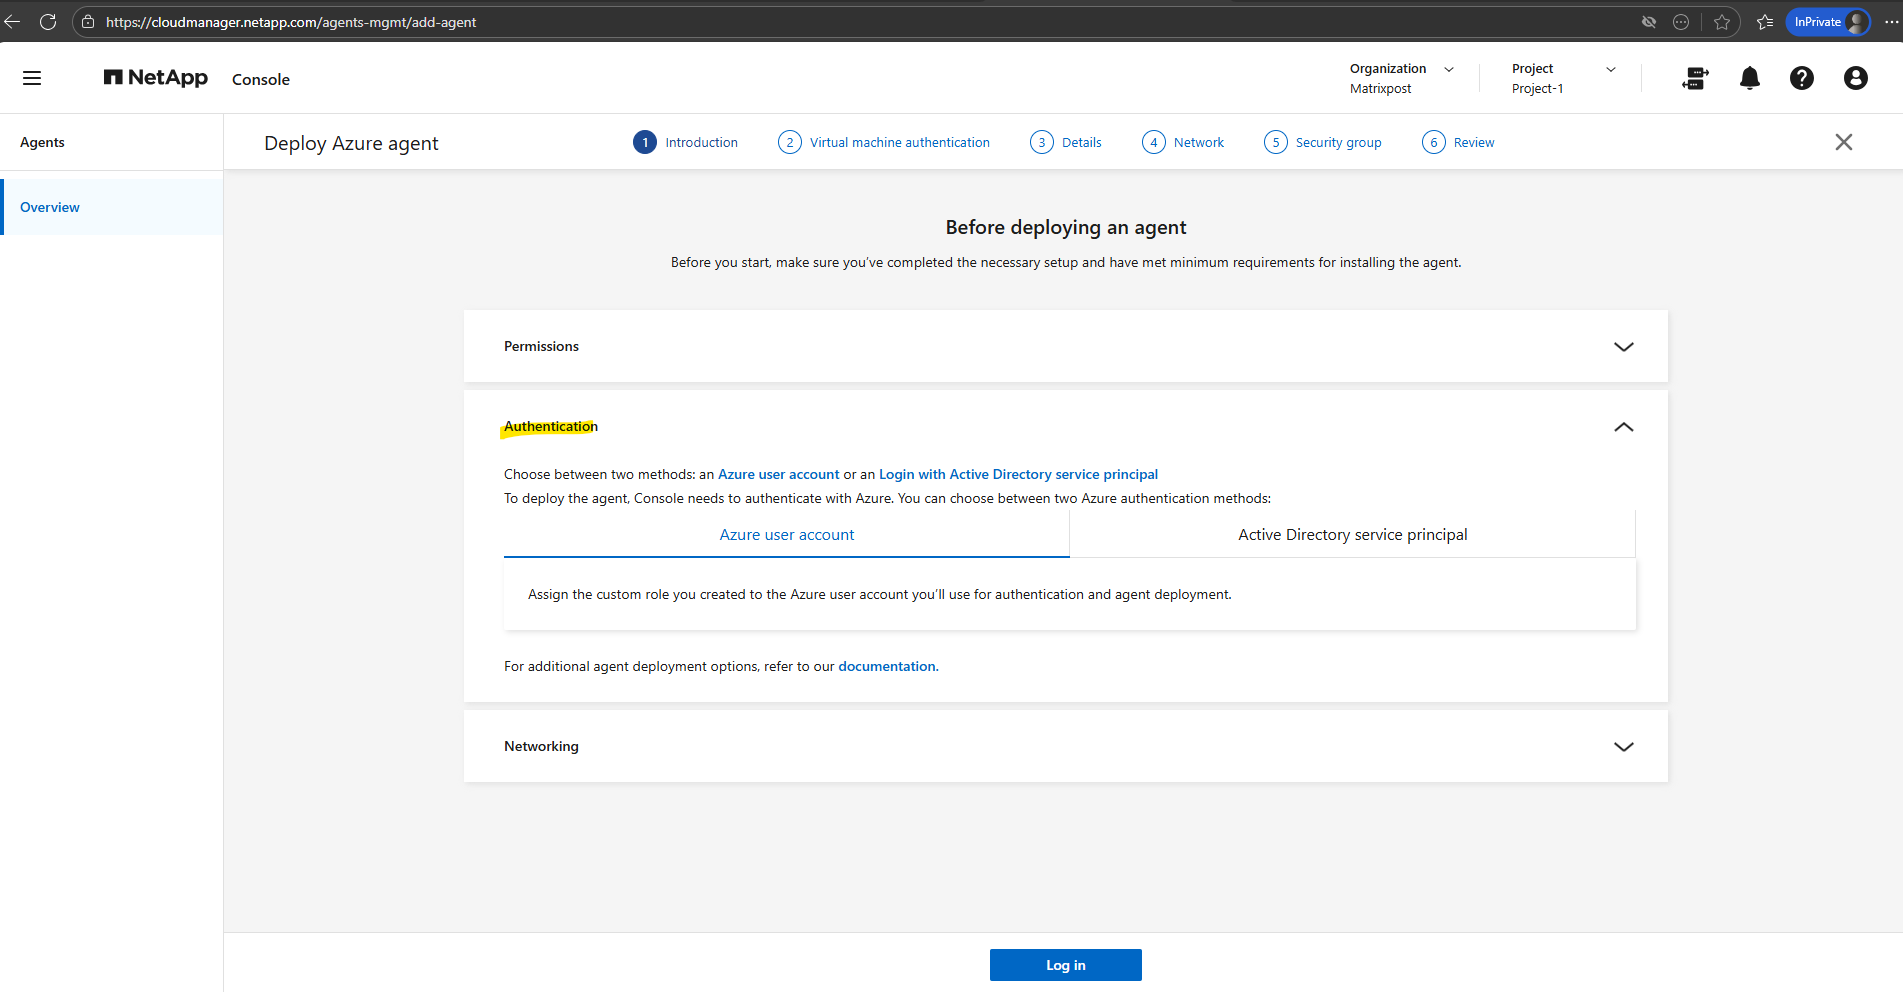
Back on the NetApp console.
The NetApp Console allows authentication either via an Azure user account or an Azure AD service principal.
For lab and PoC environments, using an Azure user account is the simplest and recommended option, while service principals are typically reserved for production automation scenarios.
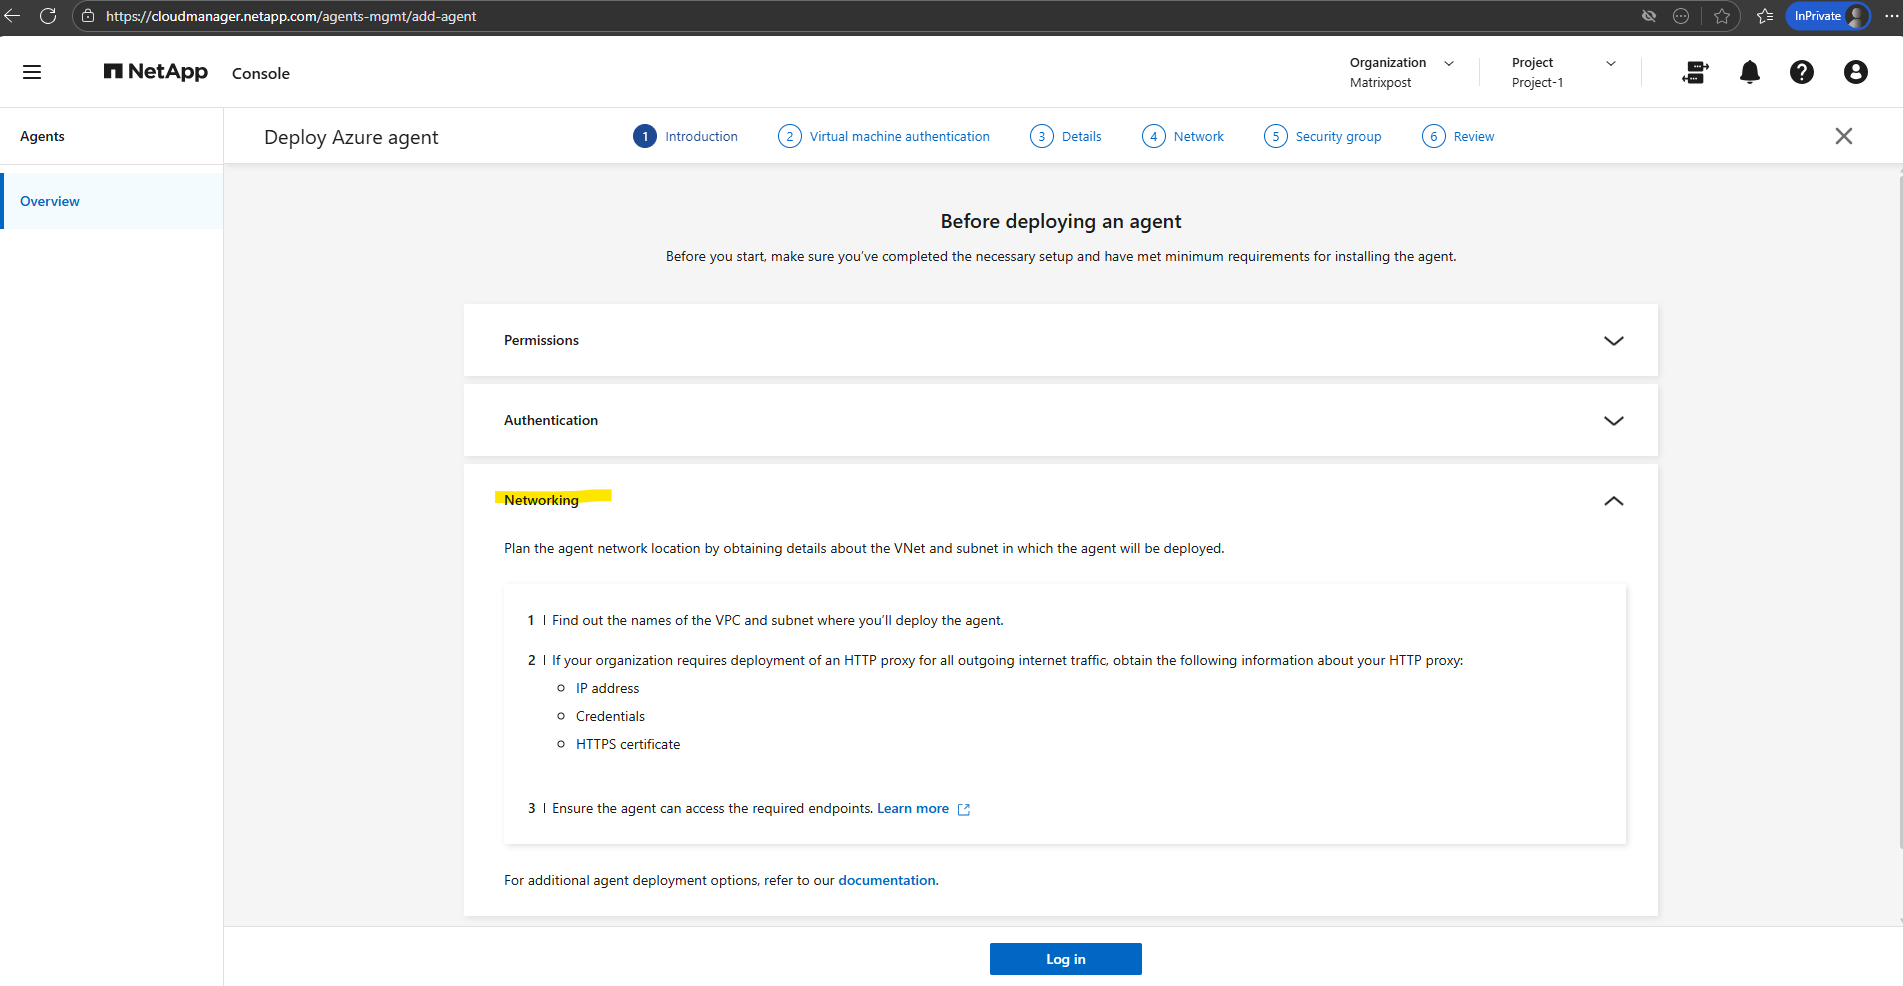
During Connector deployment, the NetApp console requires a VNet and subnet with outbound internet access.
No inbound connectivity or proxy configuration is required unless the environment enforces restricted egress.
We can now click on Log in, that’s the step where the NetApp console connects to your Azure tenant and gets permission to deploy the Connector (agent VM).
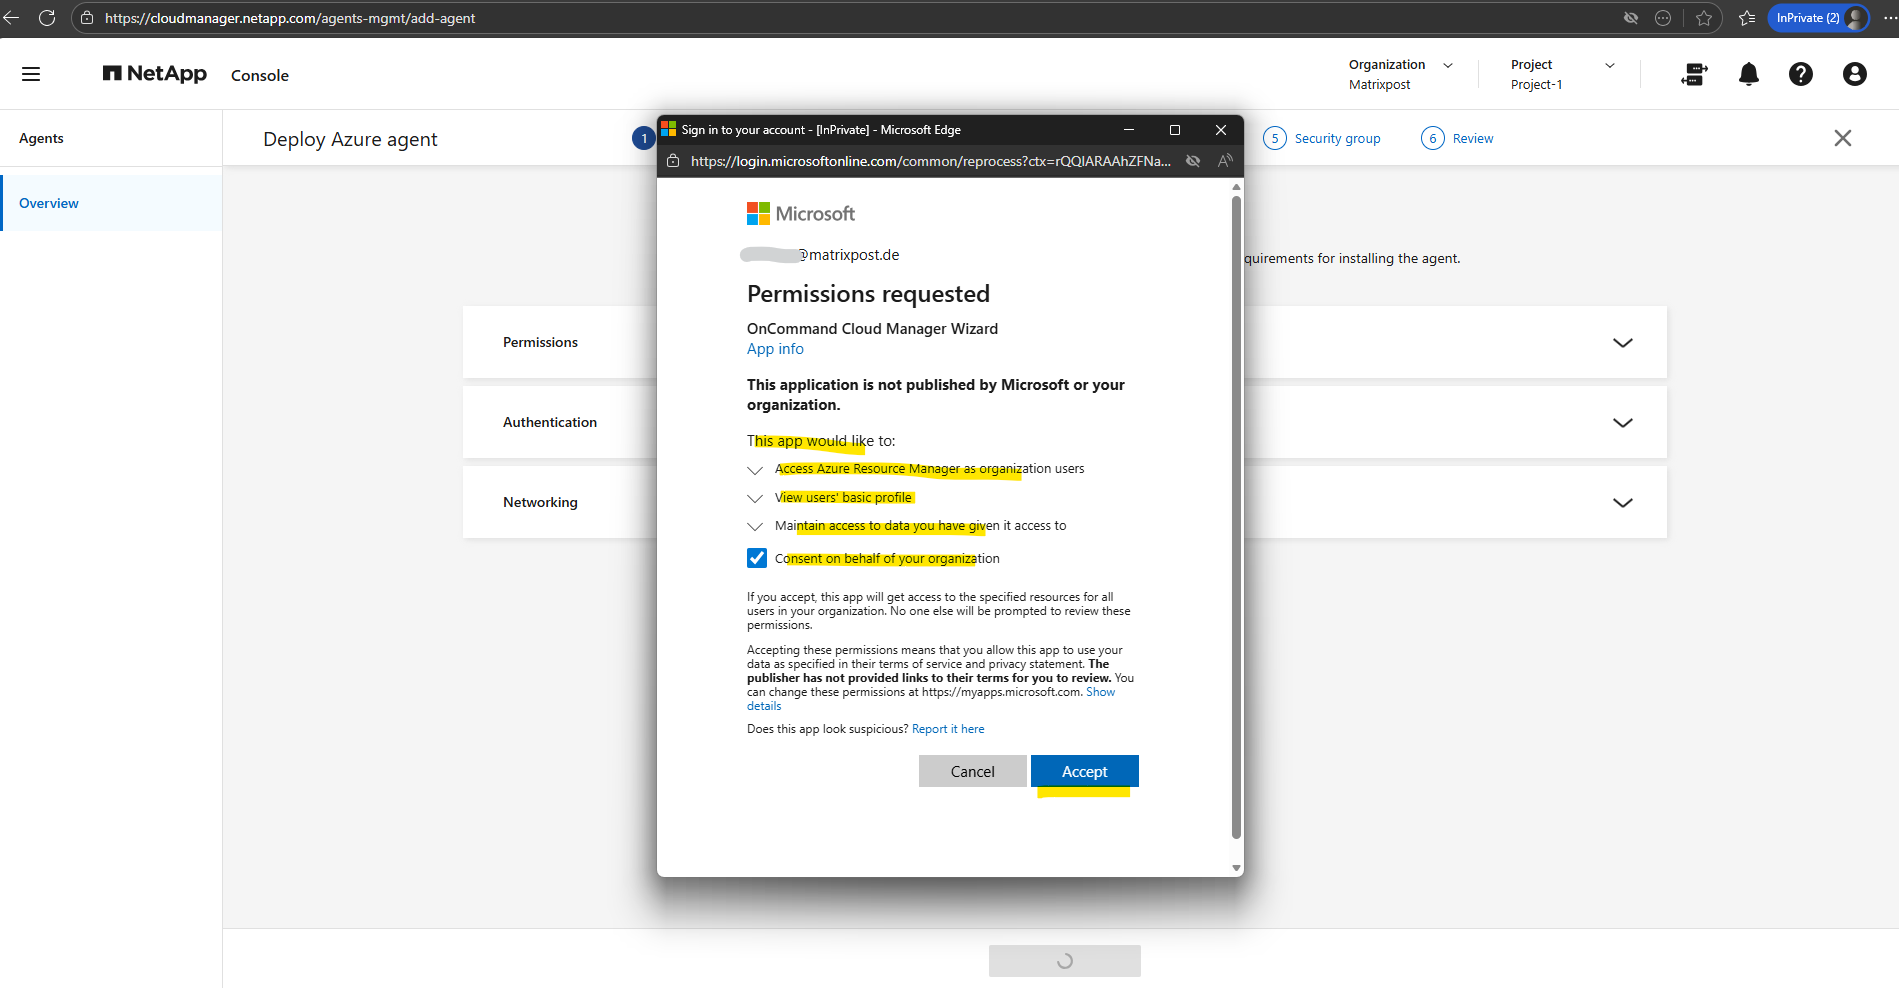
During the NetApp console setup, Azure prompts for consent to allow the NetApp Connector to access the subscription and deploy required resources.
This consent grants permissions to create and manage virtual machines, networking components, and role assignments needed to operate Cloud Volumes ONTAP.
Without this approval, the Agent (Connector) cannot be deployed or manage the CVO environment.
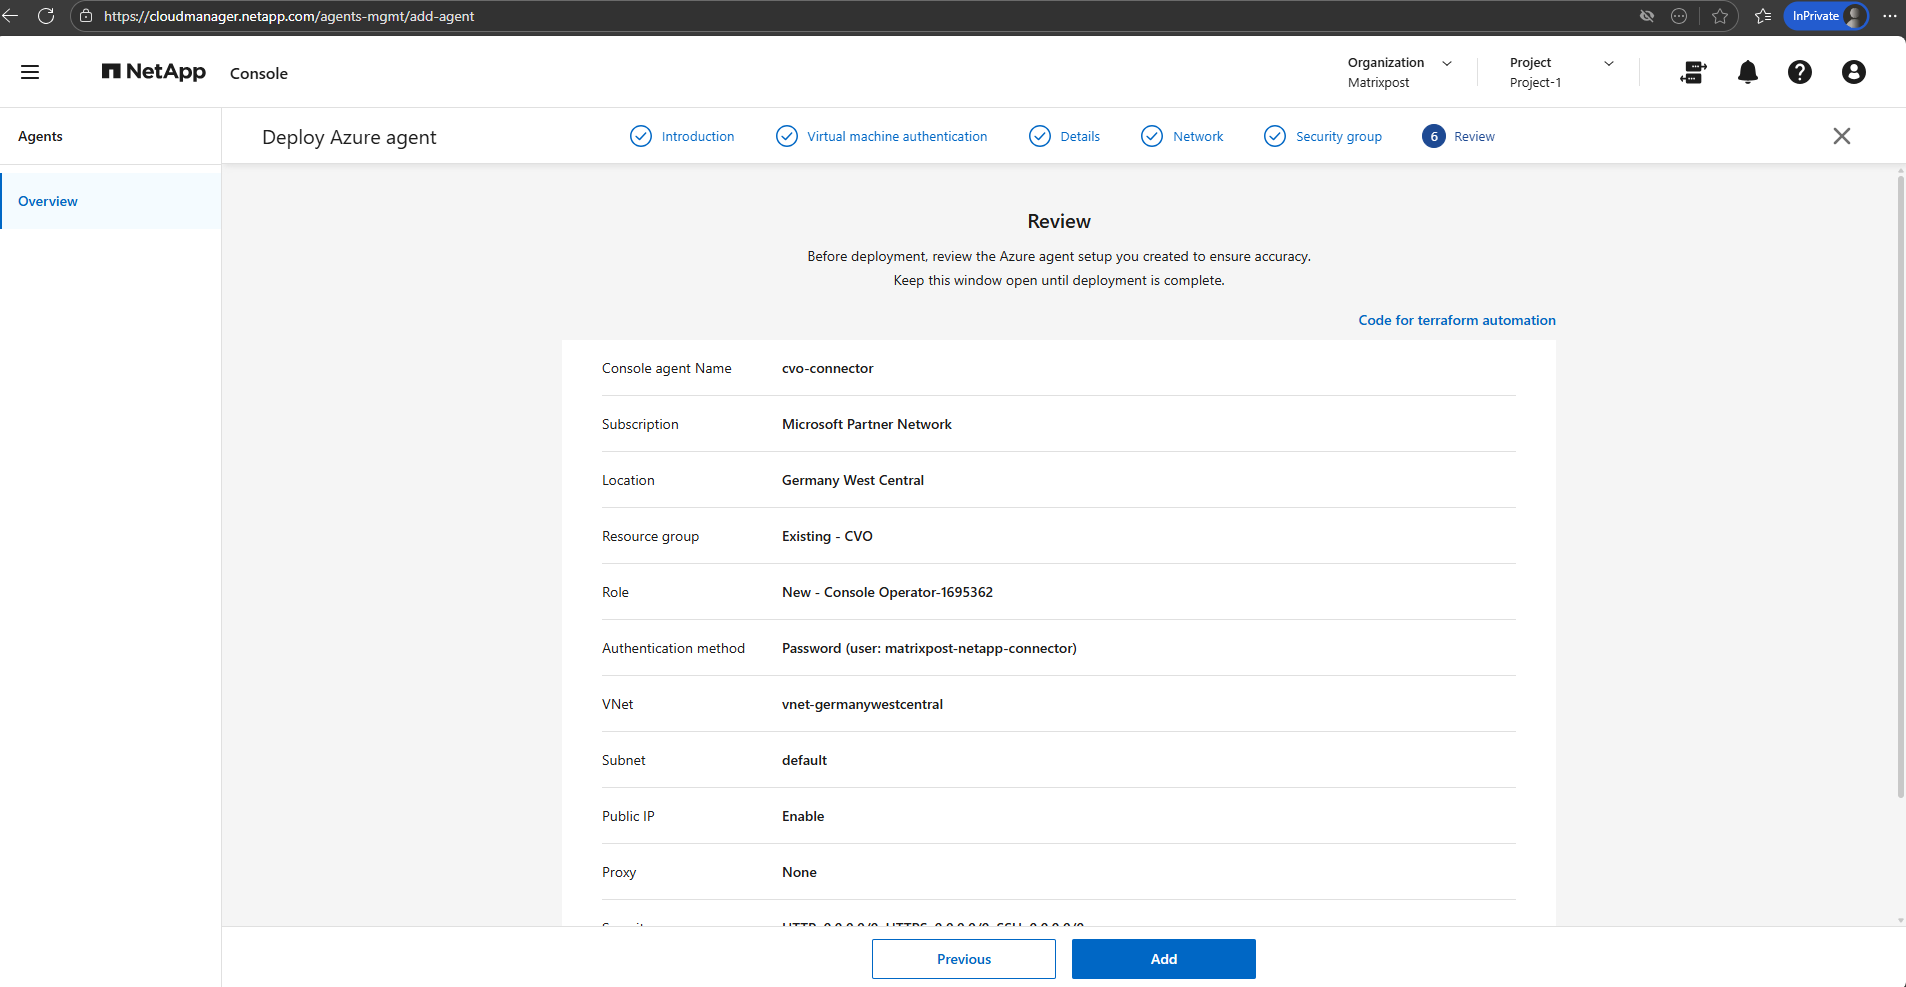
Enter and select the required information below to match your existing Azure deployment.
The username and password defined here are only for the Agent (Connector VM), not for Cloud Volumes ONTAP. For Cloud Volumes ONTAP (the ONTAP OS running on the Azure VMs/nodes) we set the password for the admin account when deploying the Cloud Volumes ONTAP solution in Azure, on the Basics tab.
These credentials are used solely to access the Connector’s operating system (for troubleshooting if needed or to use as Jumphost to ssh into ONTAP as shown further down) and have no relation to ONTAP user accounts or SSH access to the storage system.
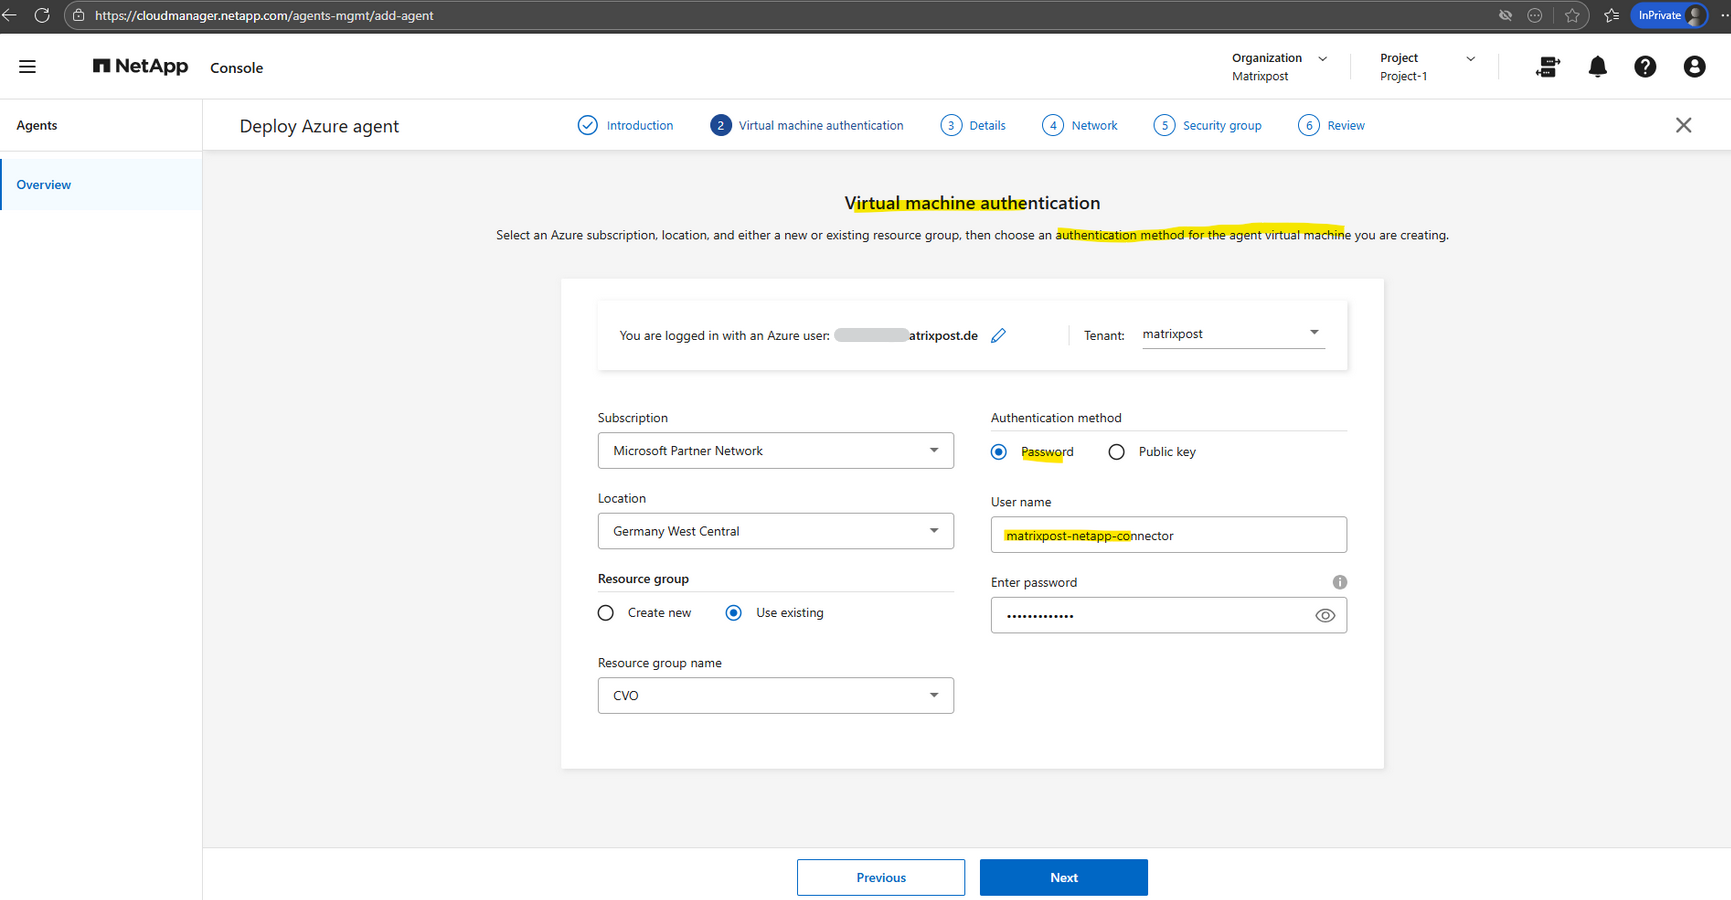
In the step below, you define the Agent (Connector VM) instance name and how Azure permissions are assigned.
Selecting “Create” lets the NetApp console automatically create and assign the required custom role to the Connector using the selected subscription.
This is the recommended option for new deployments, as it ensures all required permissions are applied correctly without manual role assignment.

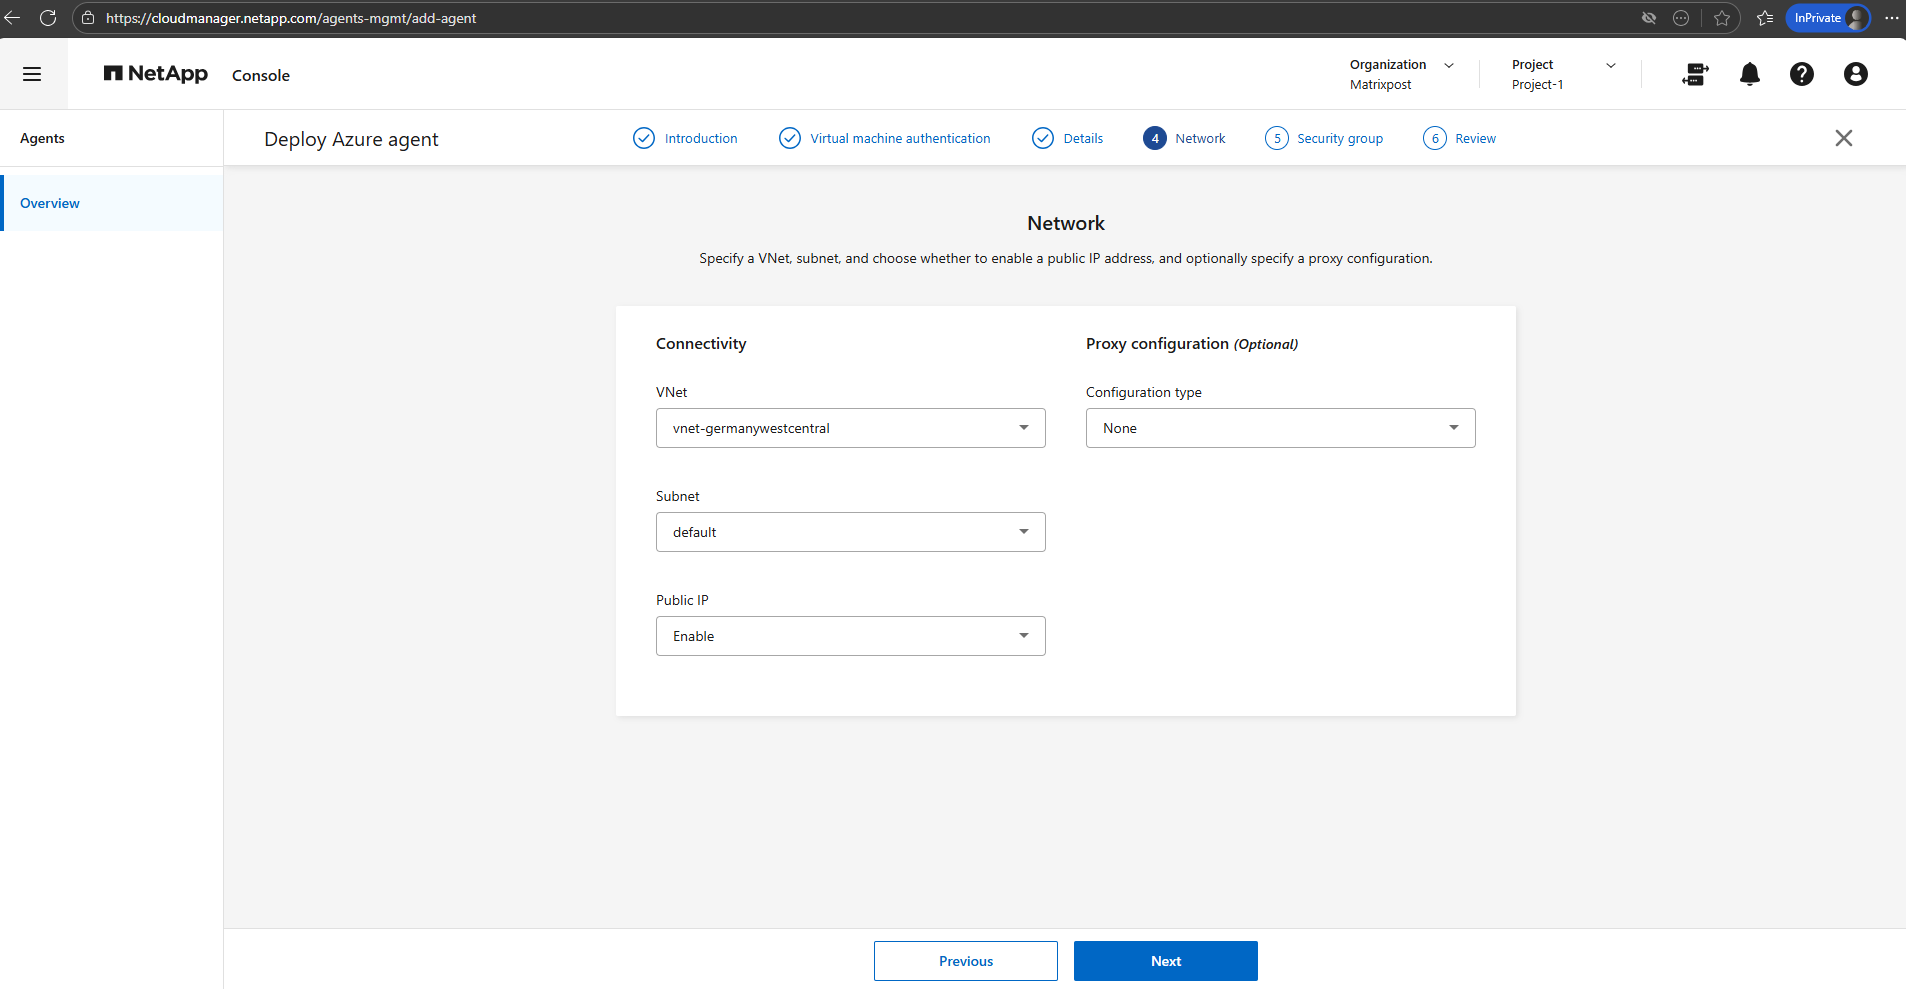
Before deploying the NetApp console Connector in Azure, first create a virtual network and subnet in Azure you want to use for.
The NetApp console Connector should be deployed in the same VNet as the Cloud Volumes ONTAP nodes to ensure direct connectivity.
For lab environments, placing it in the same subnet and enabling a public IP is the simplest approach.
Proxy settings are only required in restricted enterprise networks and can otherwise be left disabled.
The security group assigned to the NetApp console Connector controls access to the management VM itself, not to Cloud Volumes ONTAP.
For lab environments, allowing inbound access from
0.0.0.0/0is acceptable, especially when public IP addresses change frequently.In production environments, access should be restricted to trusted IP ranges.
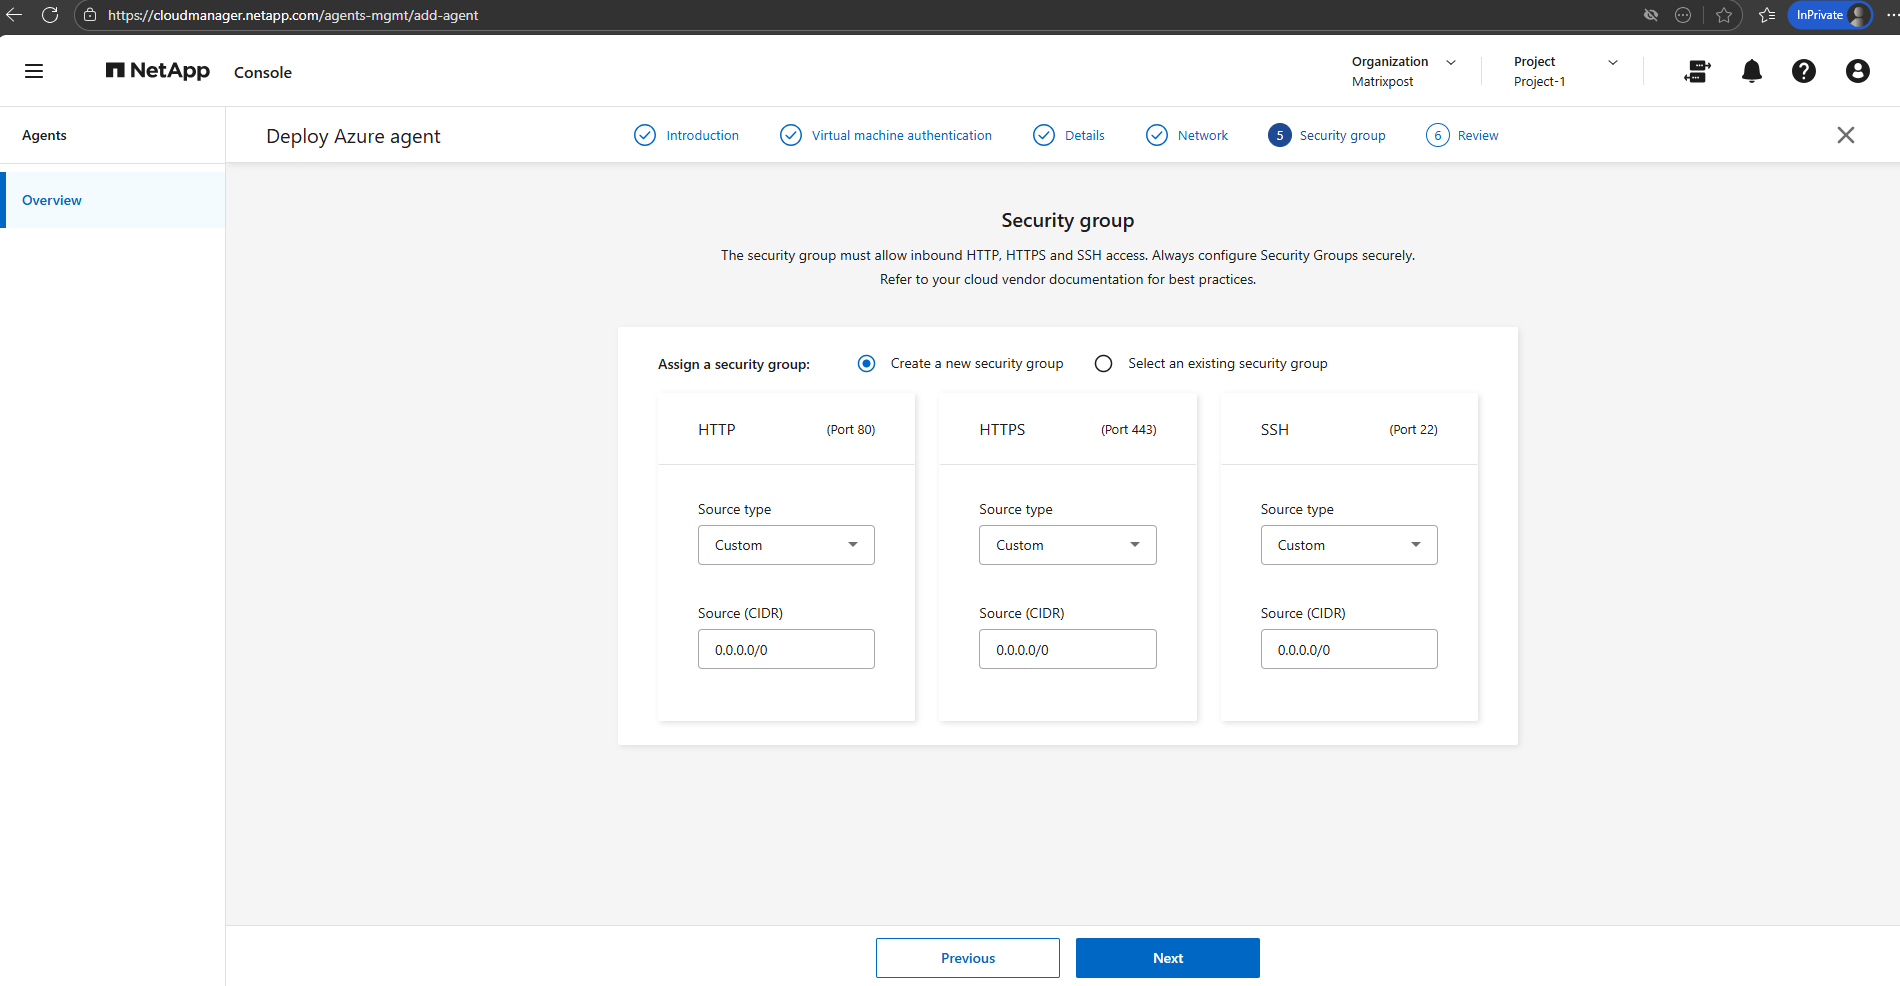
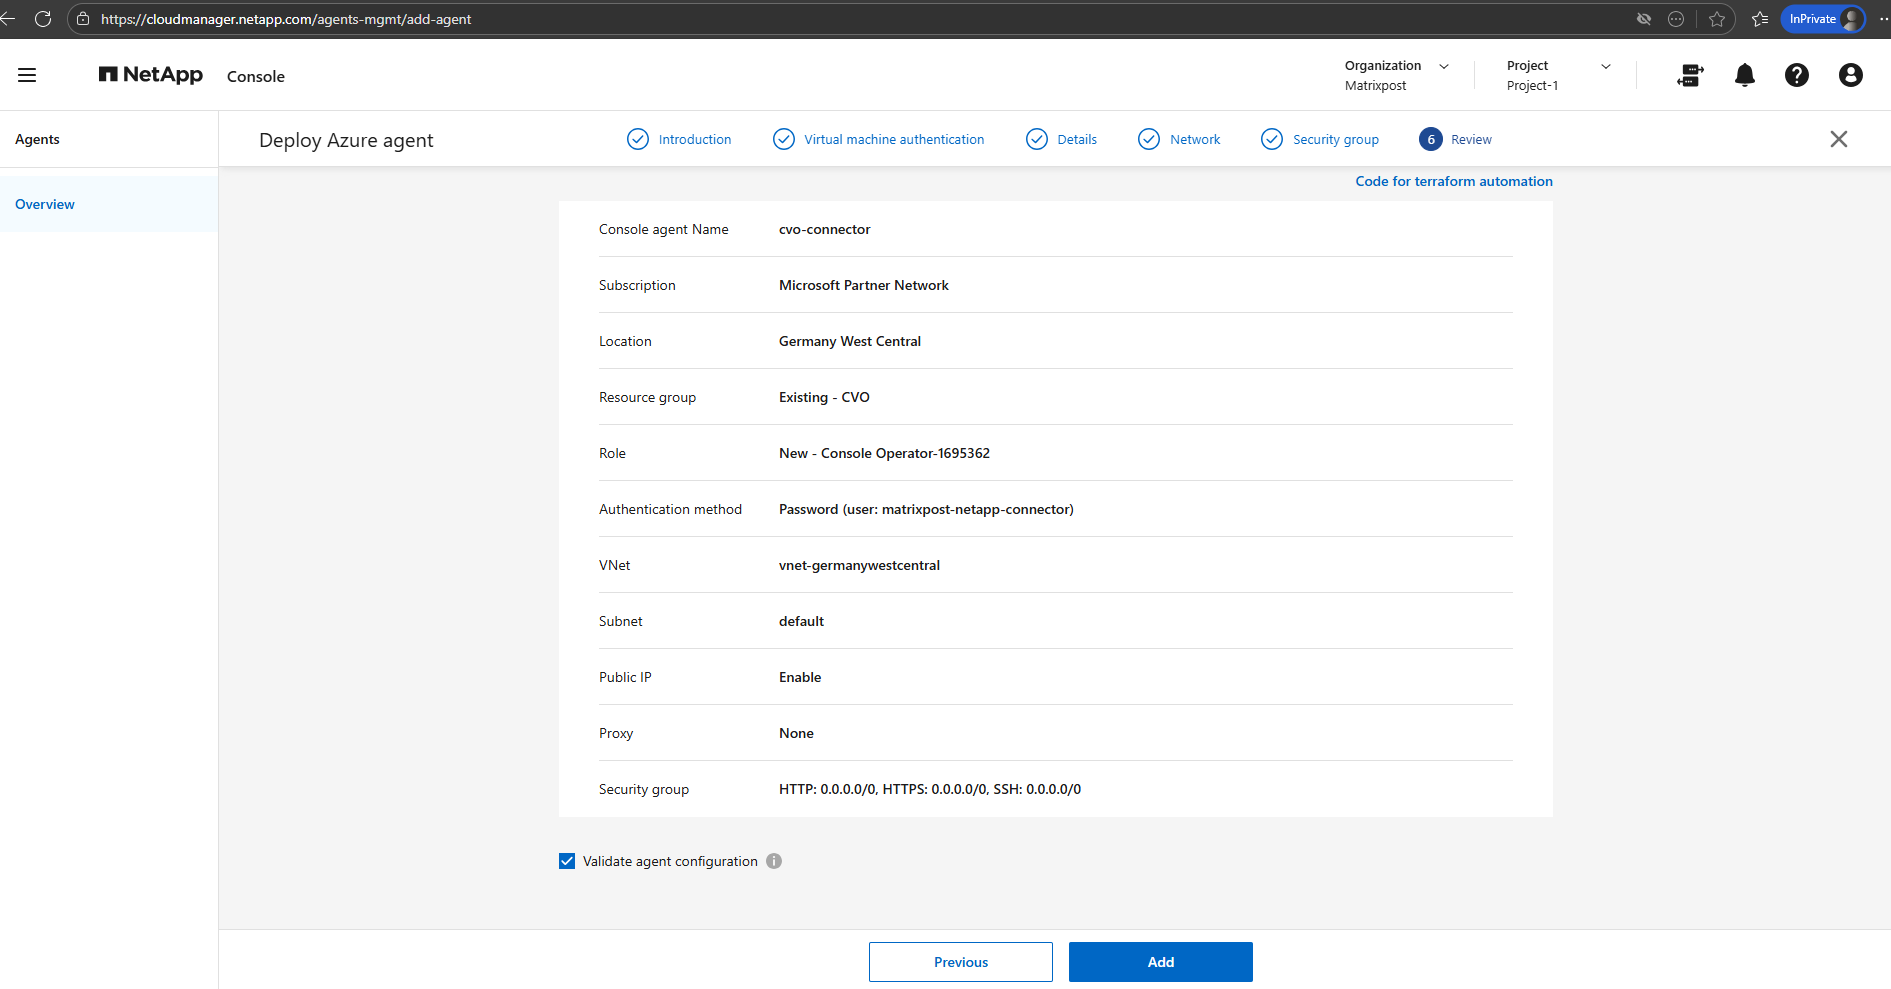
Finally click on Add.
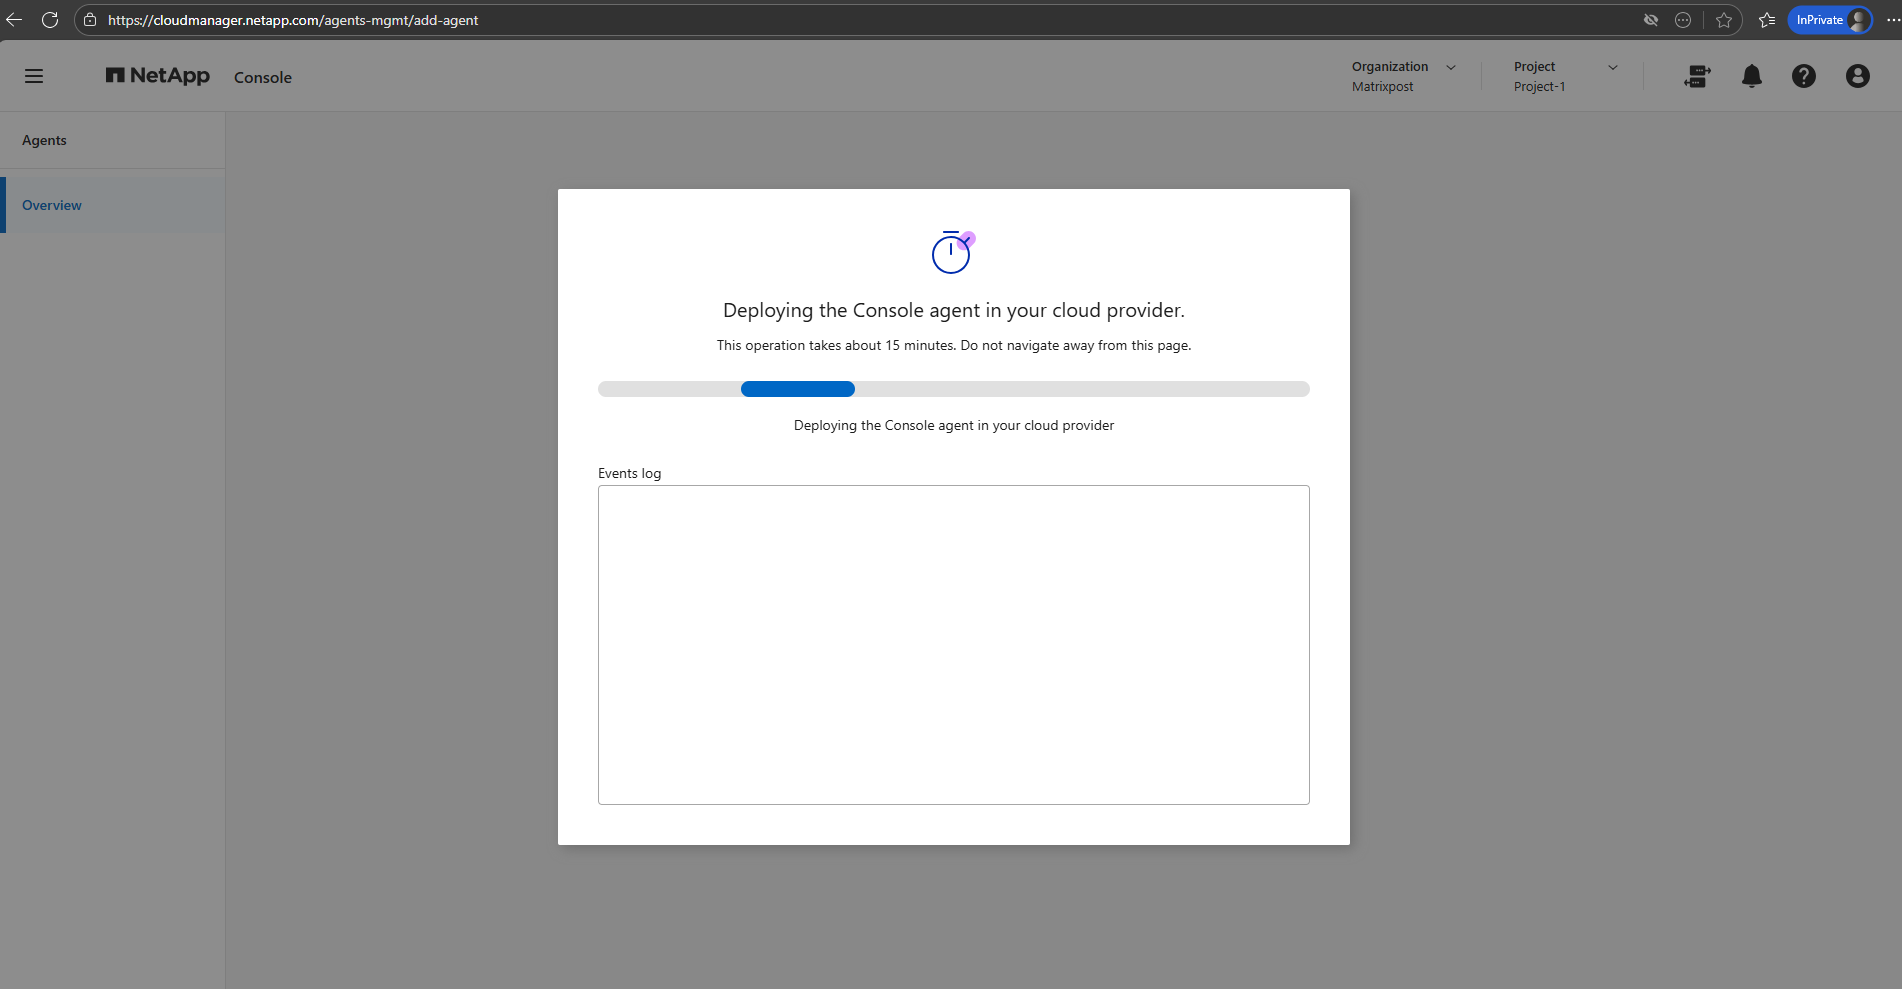
Once all parameters are defined, the NetApp console deploys the Connector VM in Azure and configures it automatically. This process takes a few minutes and requires no further manual interaction.
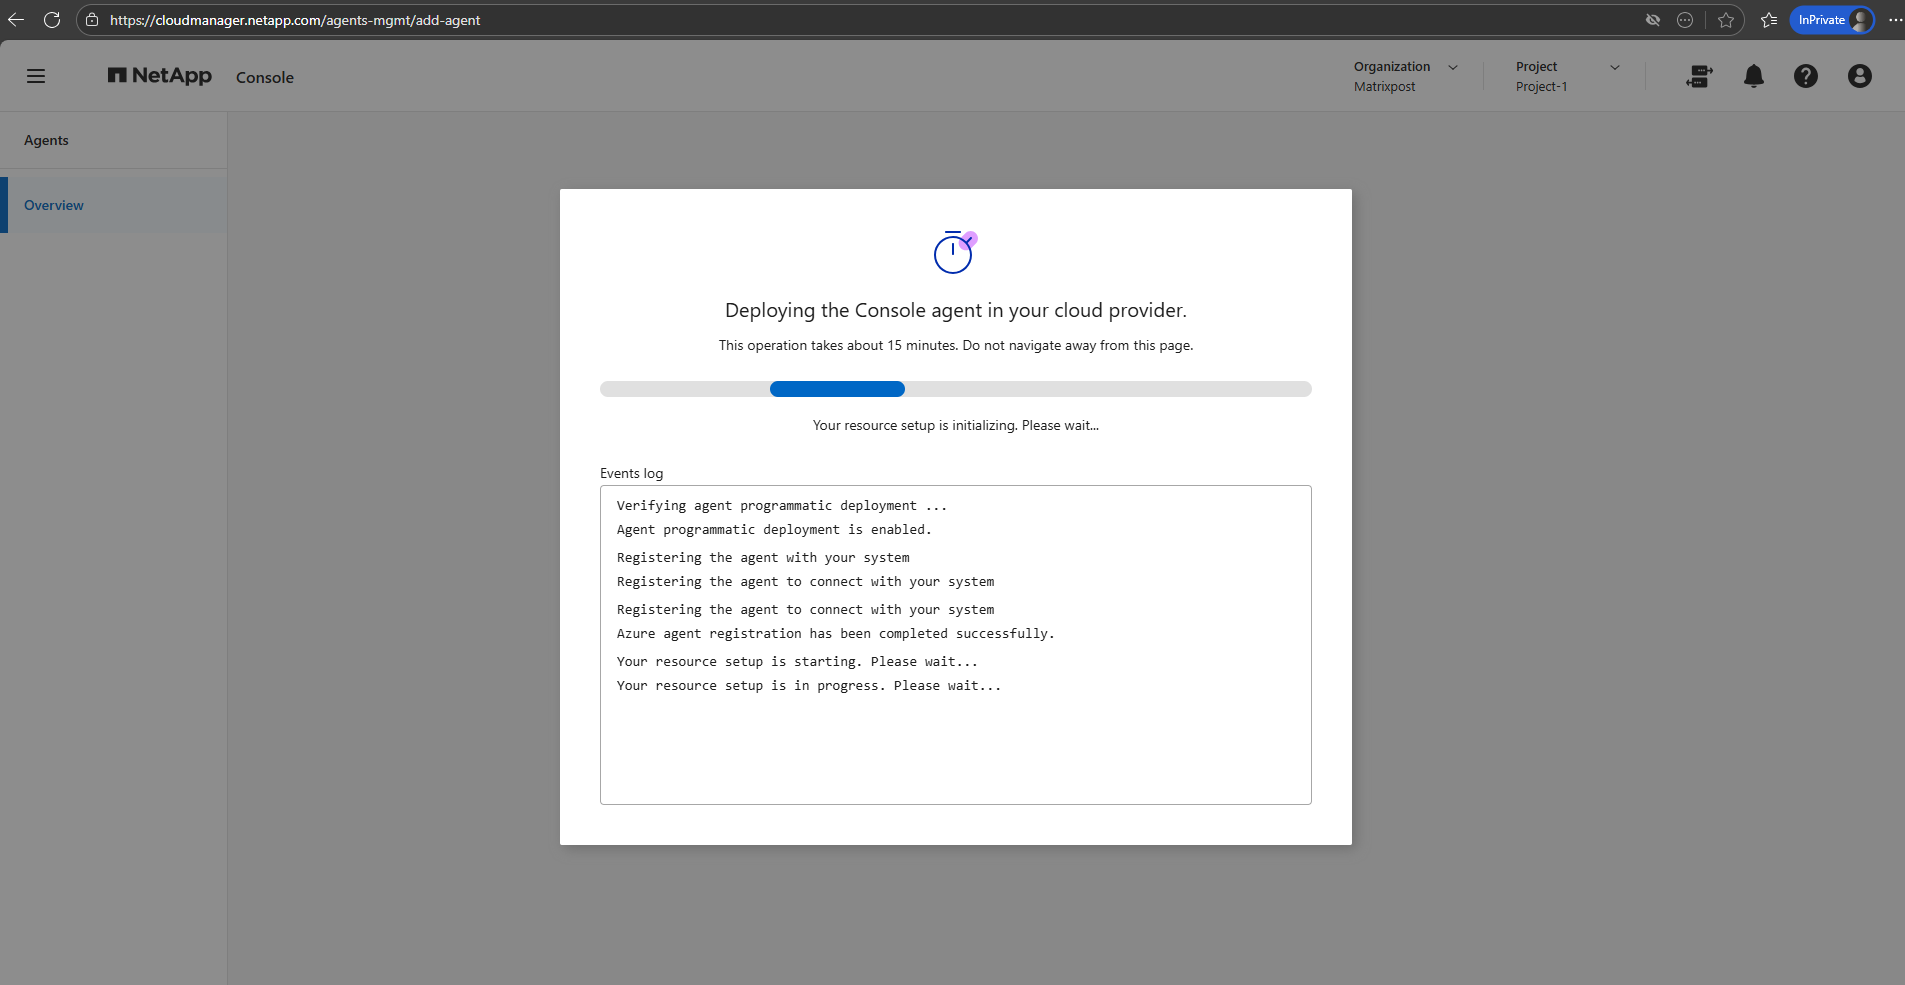

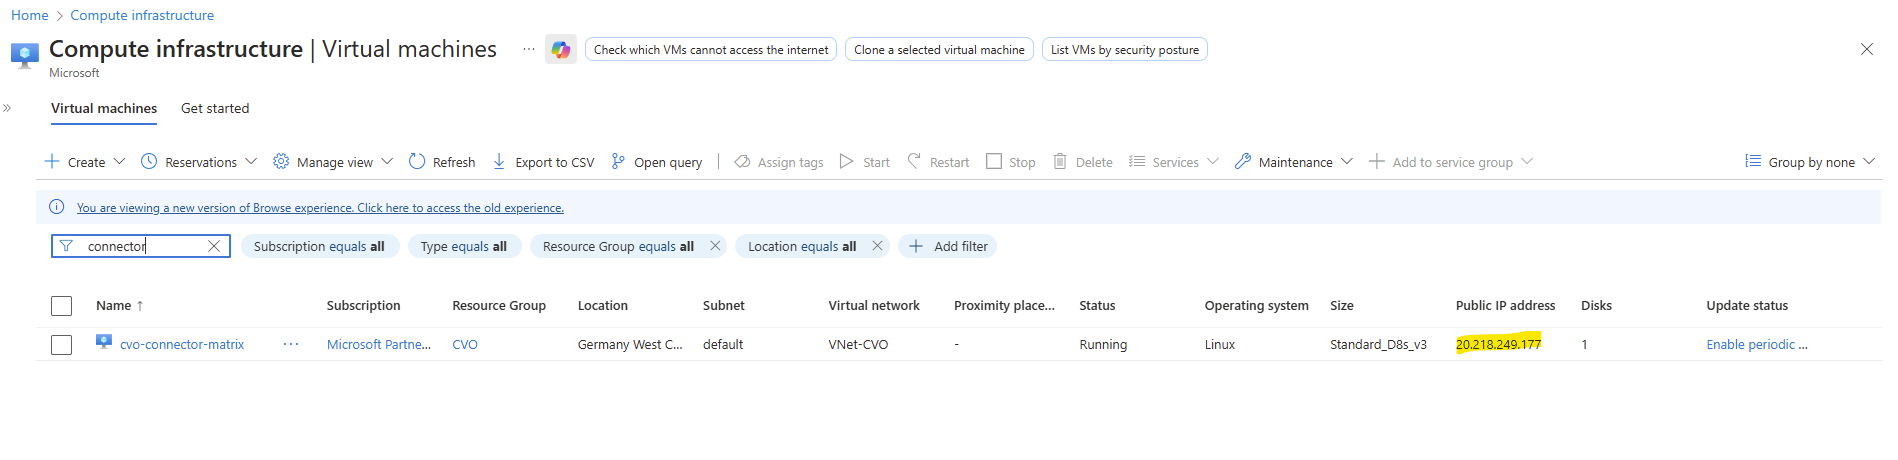
The Agent (connector VM) I can see already in Azure and its public IP address to access through the internet.
The public IP assigned to the Agent (Connector VM) is only used for direct access to the VM itself, for example via SSH.
It is not used for communication between the NetApp Console and the Connector. Instead, the Connector establishes an outbound HTTPS connection to NetApp’s services, which is how management and orchestration are performed.
No inbound connection from the NetApp Console into your Connector is required for normal operation, only optional inbound access (for SSH) is needed if you choose to administer the VM directly.
More about you will find here https://docs.netapp.com/us-en/storage-management-cloud-volumes-ontap/reference-networking-azure.html.
After successfully deployed the Agent (connector) VM, the page switches back to the NetApp Console assistant as shown below.
We have deployed and registered an agent” confirms that the BlueXP Connector VM was successfully created, authenticated, and linked to our NetApp account. At this point: the Connector is running in Azure, It is registered with the NetApp Console, It is ready to discover and manage Cloud Volumes ONTAP

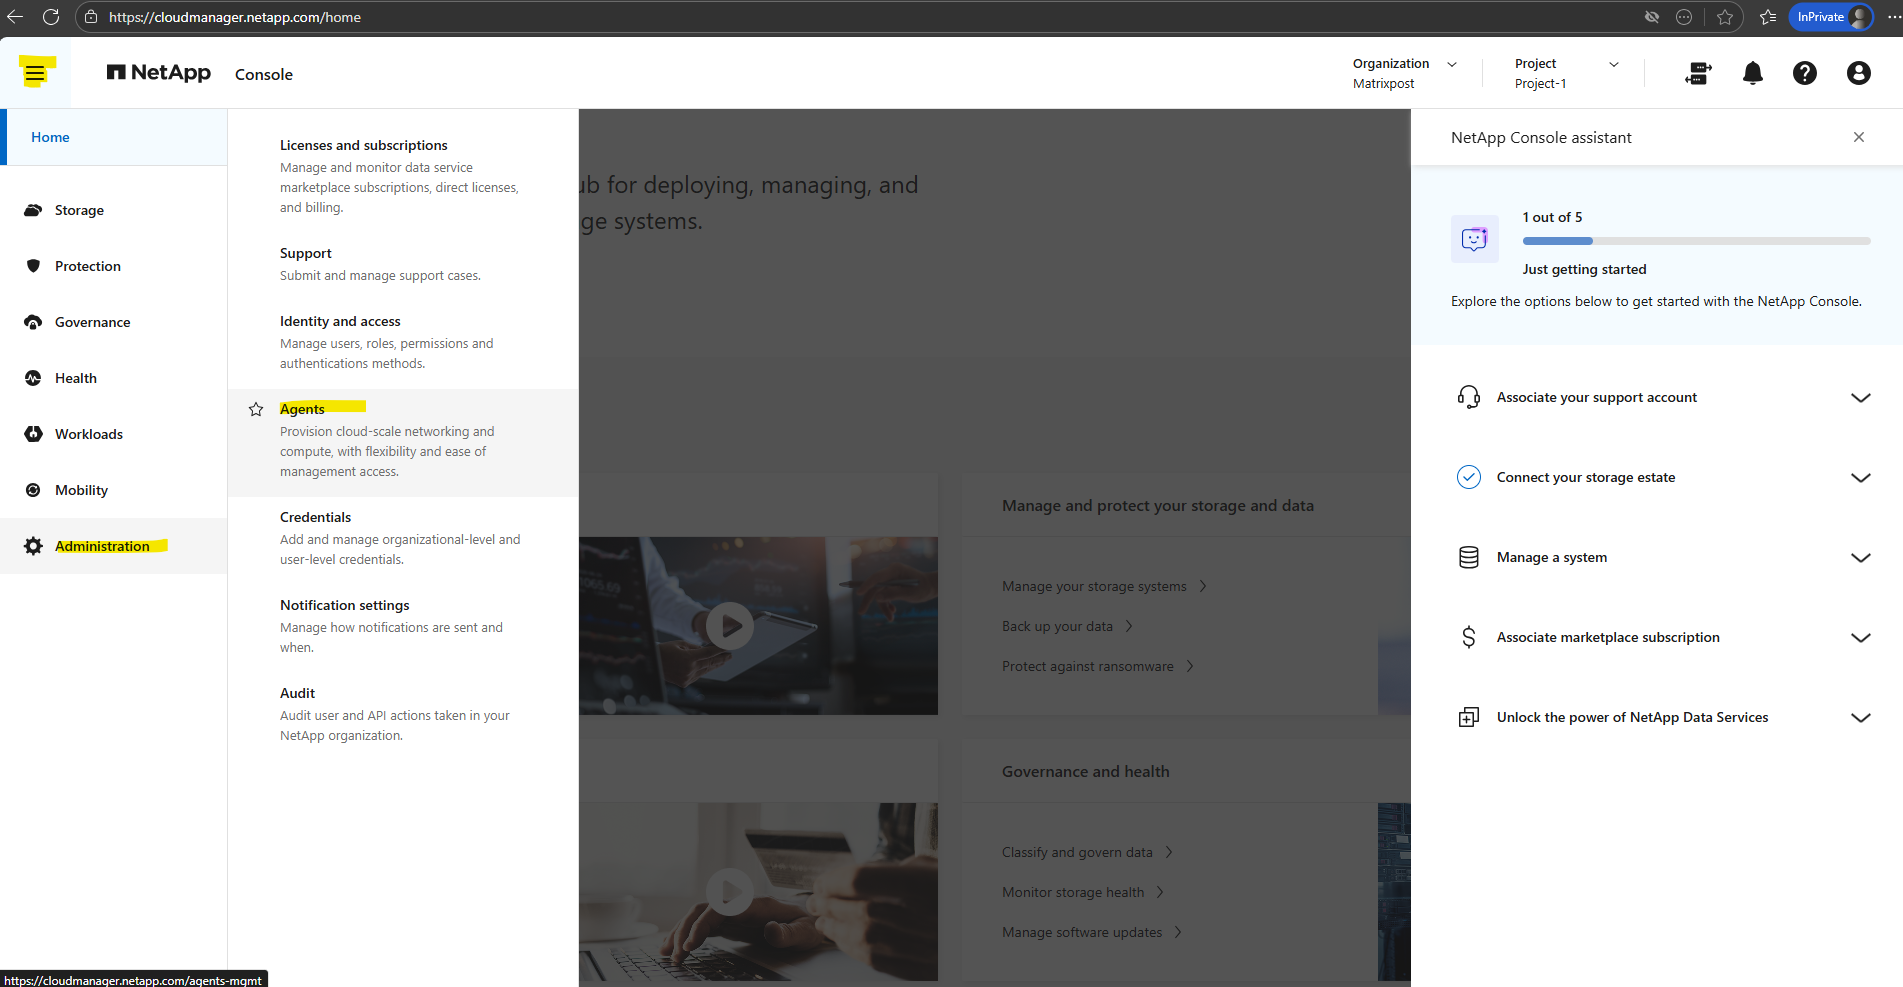
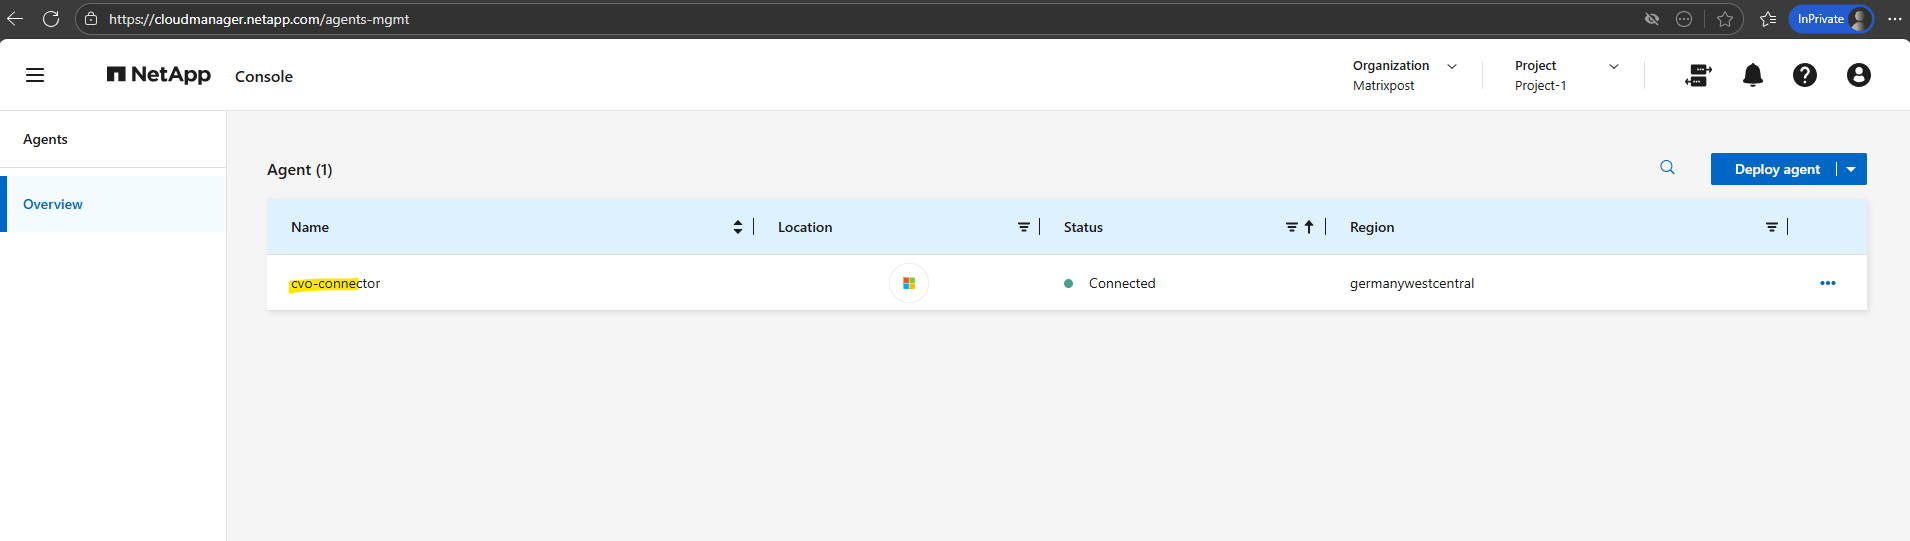
The deployed Agent (Connector VM in Azure) we can now see under Administration → Agents.
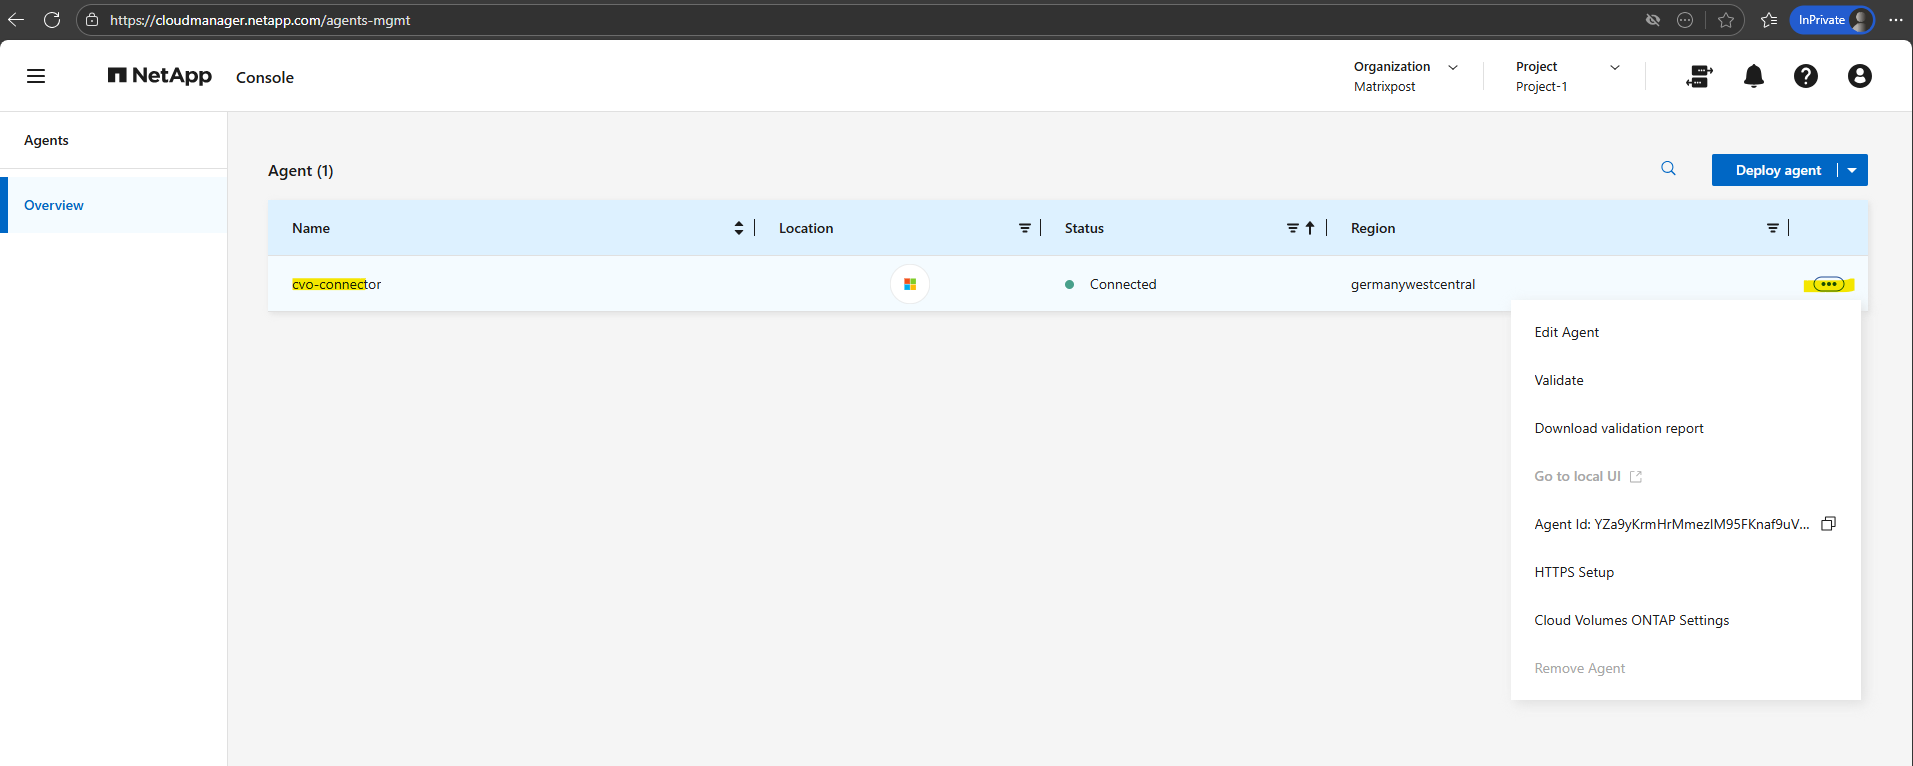
Please note that OS updates for the Agent (Connector VM) will be not automatically orchestrated by the Netapp console (formely BlueXP).
Maintaining the operating system on the Console agent host is your (the customer’s) responsibility. For example, you (the customer) should apply security updates to the operating system on the agent host by following your company’s standard procedures for operating system distribution.
Source: https://docs.netapp.com/us-en/console-setup-admin/task-maintain-agents.html
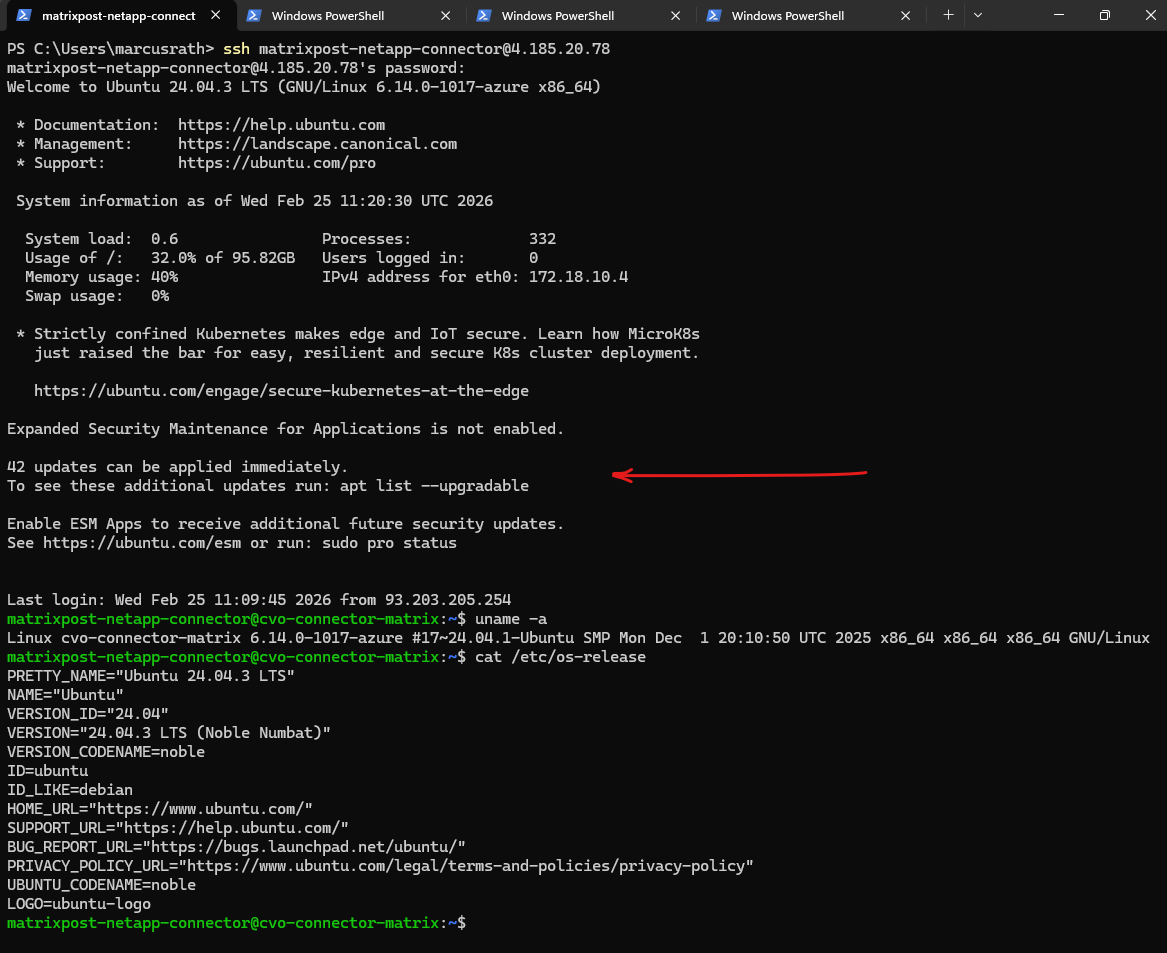
While the NetApp BlueXP Connector software is automatically updated by NetApp to ensure you always have the latest orchestration features, it is important to remember that the underlying Ubuntu OS is not managed by the Netapp console.
You remain responsible for applying standard Linux security patches and kernel updates (e.g., via
apt upgrade) to ensure the VM remains secure and compliant within your Azure environment.You may notice the public IP address changes between my screenshots; since this is a lab environment, I frequently shut down the Connector and CVO nodes to save costs and do not reserve the public IPs, as the specific address is irrelevant for my SSH management.
Rebooting the Connector VM is non-disruptive to data traffic; your users and applications won’t lose access to their shares.
However, the Netapp console (formely BlueXP) management plane will be temporarily ‘blind,’ meaning you cannot perform administrative tasks like creating volumes or triggering manual backups until the occm service has fully restarted.
A key architectural benefit of NetApp BlueXP is the separation of control and data. While the Connector VM orchestrates the SnapMirror and Backup relationships, the actual data traffic flows directly from the CVO instance to the destination (like Azure Blob).
This means you can perform maintenance or reboots on your Connector without interrupting active data transfers or client access.
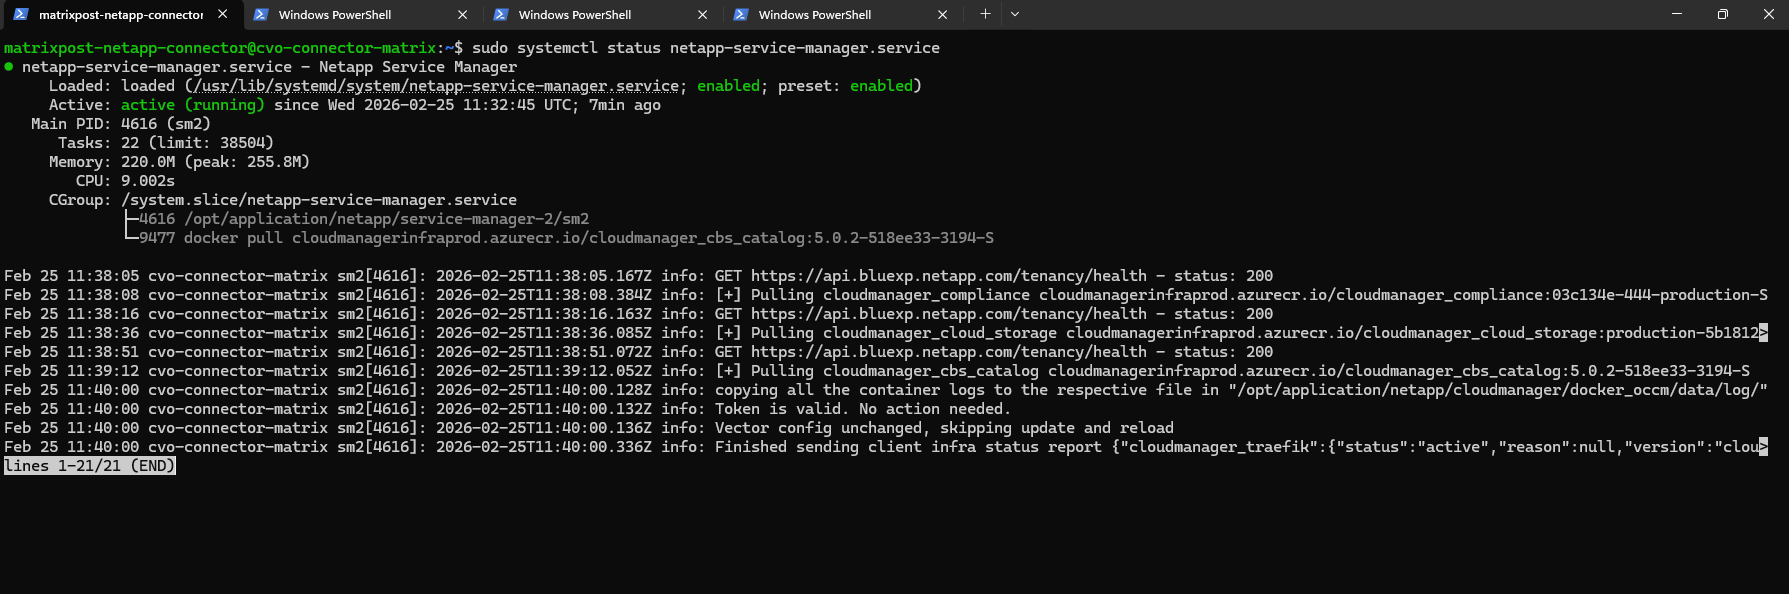
After performing the OS upgrade and rebooting the VM, you can verify that the BlueXP orchestration layer is healthy by running the command below.
This command confirms that the primary watchdog service is active and managing the underlying containerized microservices. If the output shows the service is active (running), you can be confident that the Connector is ready to re-establish its heartbeat with the BlueXP SaaS console.
$ sudo systemctl status netapp-service-manager.service
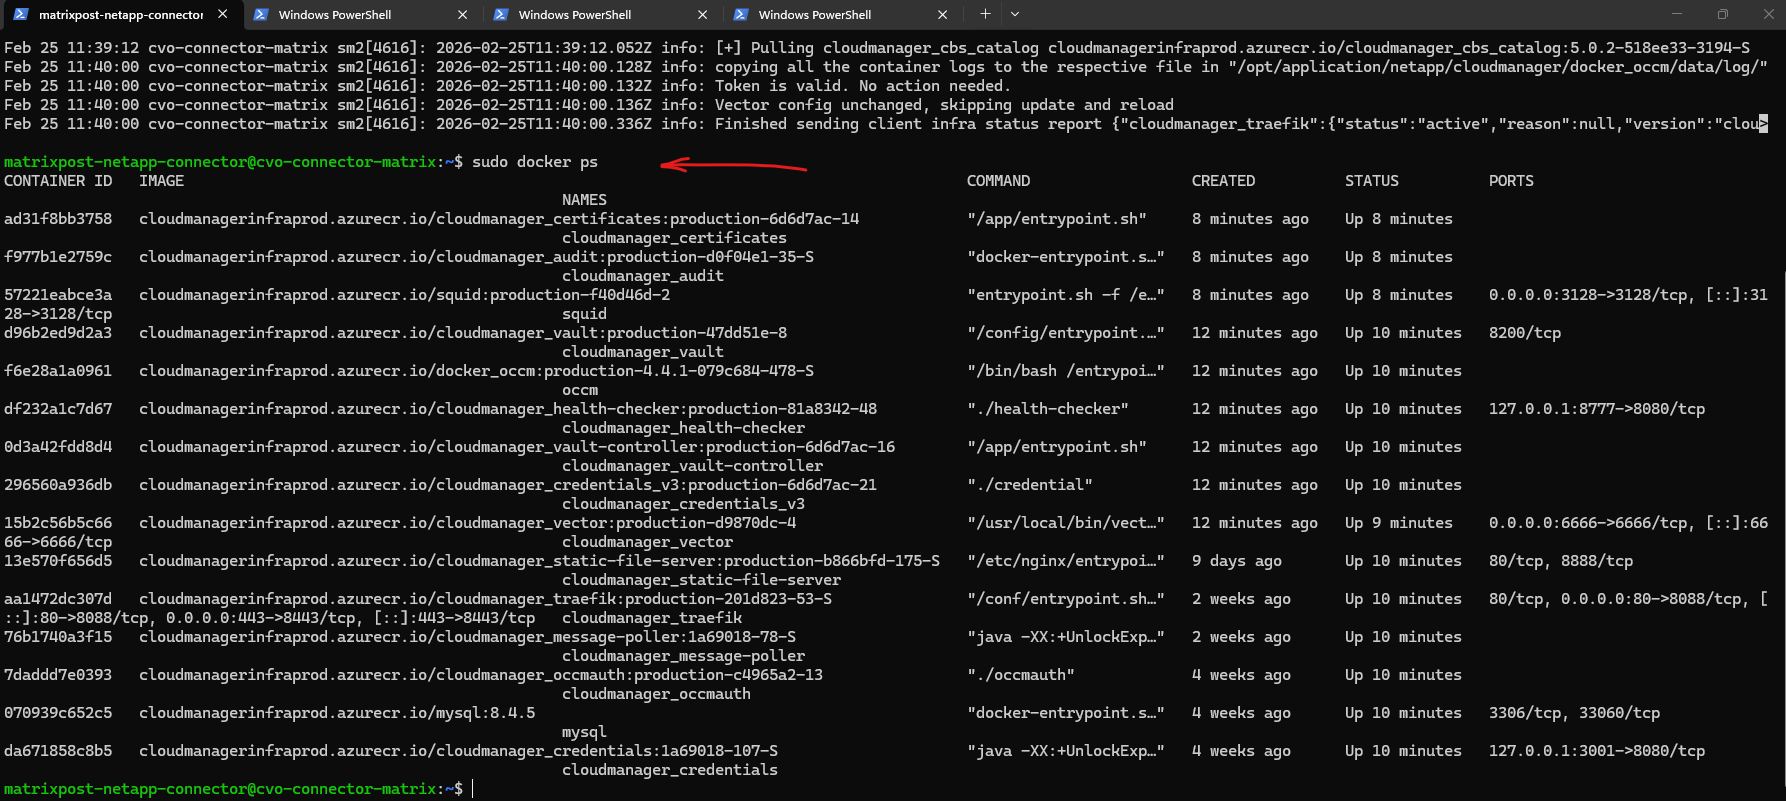
Additionally, you can use the
sudo docker pscommand to inspect the individual microservices that make up the Connector.Since the BlueXP Connector is a containerized application, this command allows you to verify that all critical components, such as the occm (orchestrator), mysql (database), and traefik (reverse proxy), are up and running with a status of “Up.”
Seeing a list of approximately 20-30 active containers confirms that the Connector’s internal architecture has successfully initialized and is ready to manage your Cloud Volumes ONTAP environment.
$ sudo docker ps
Associate the Azure Marketplace Subscription
Next I will associate my marketplace subscription.
This step links the Cloud Volumes ONTAP deployment to the Azure billing model and is required to enable management and licensing of the service.
Click on Add subscription.
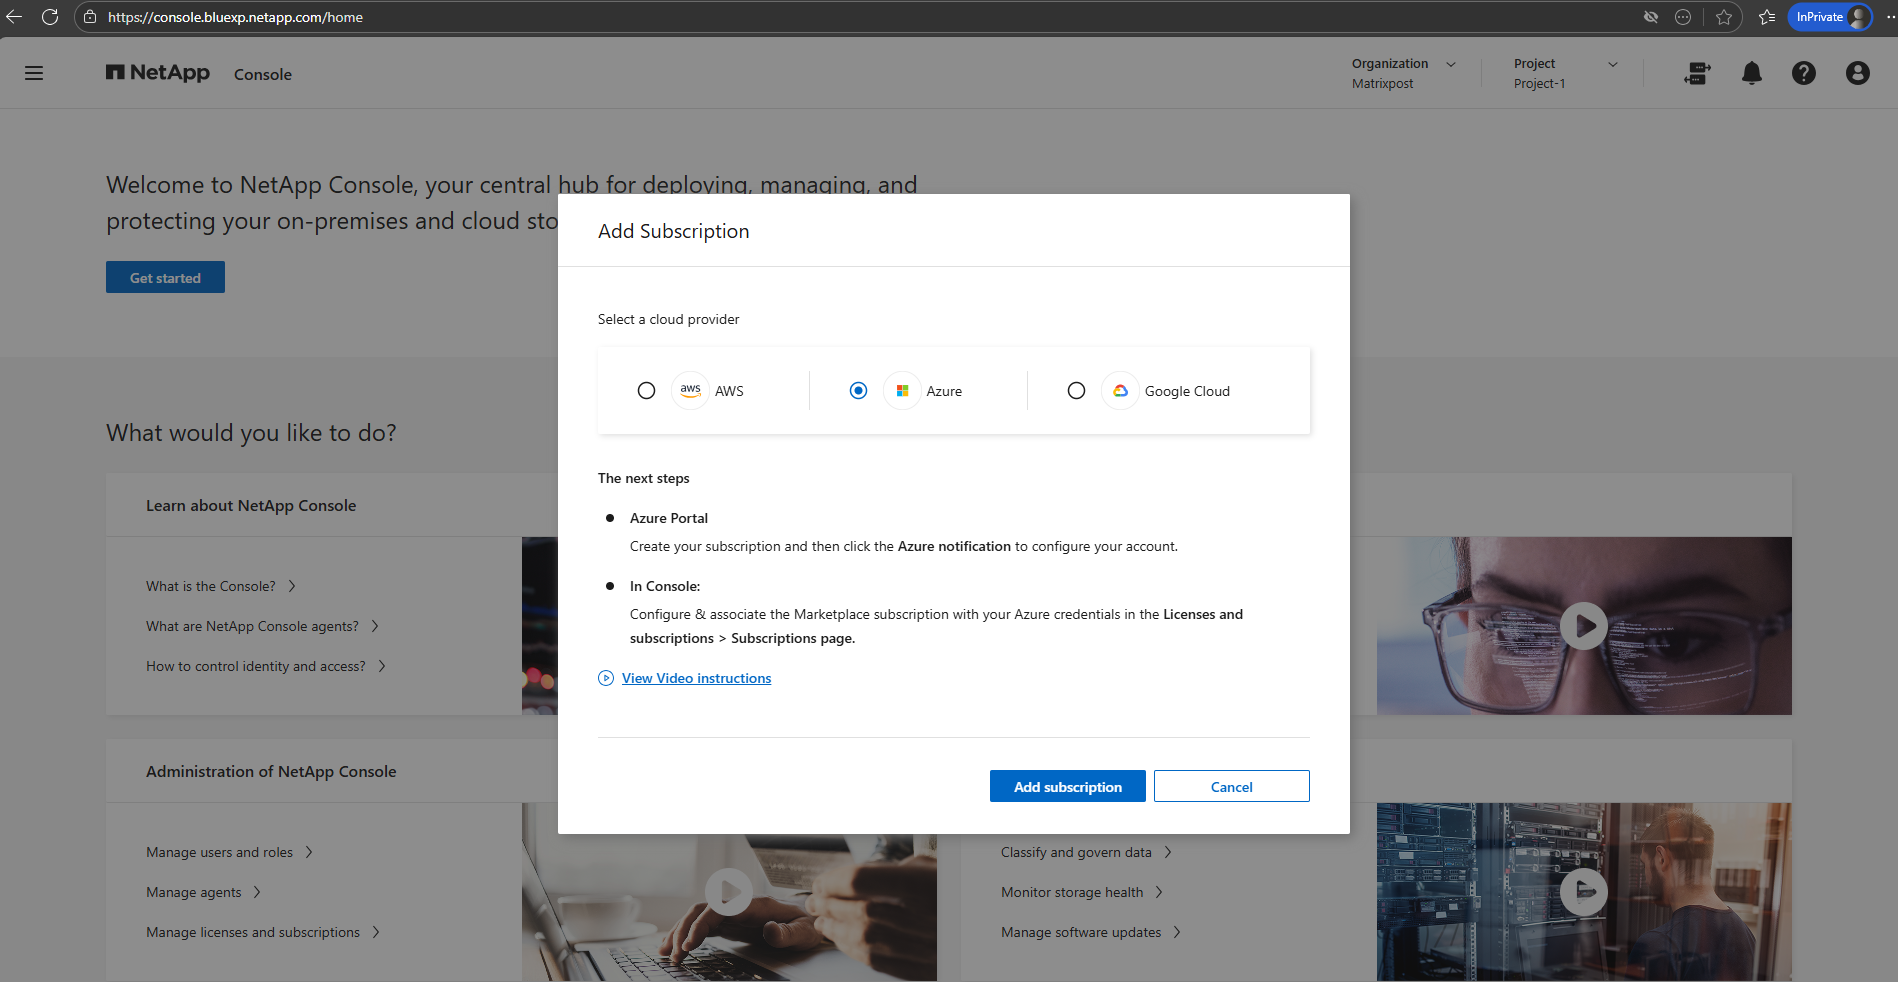
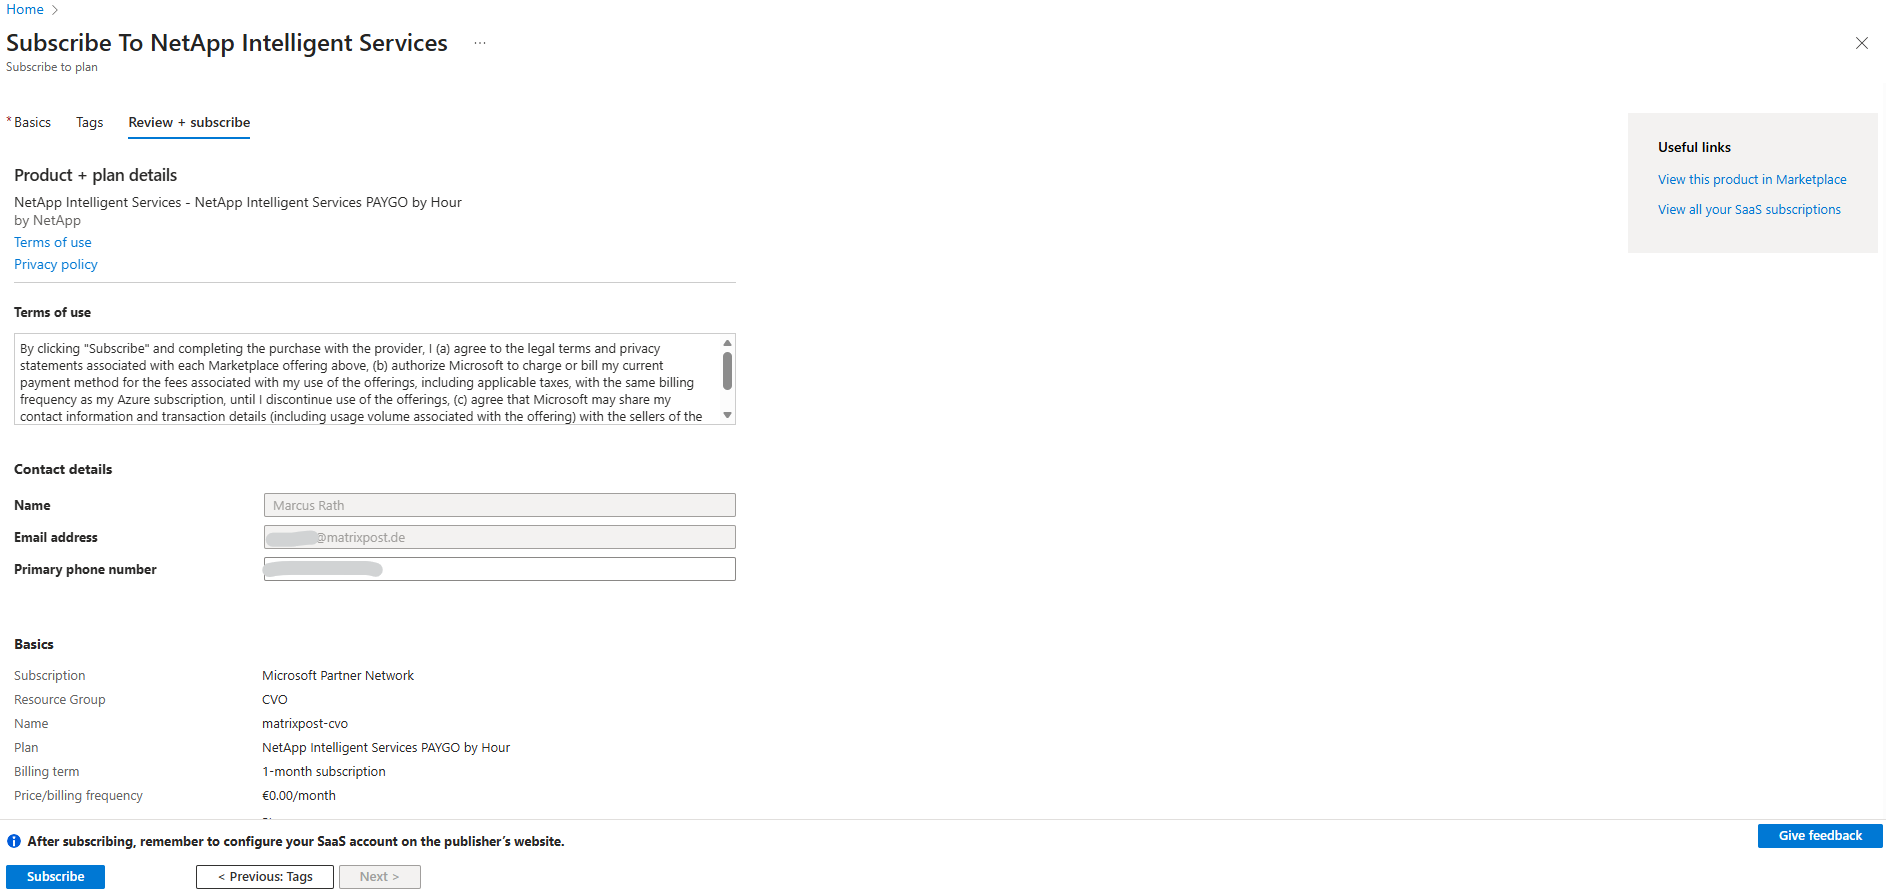
Click on Review + subscribe.
This step only registers your subscription for possible PAYGO usage, it does not start billing by itself.
It does three things only: Links your Azure subscription to NetApp, Allows the NetApp console to enable services if you choose to, enables billing only when usage occurs.
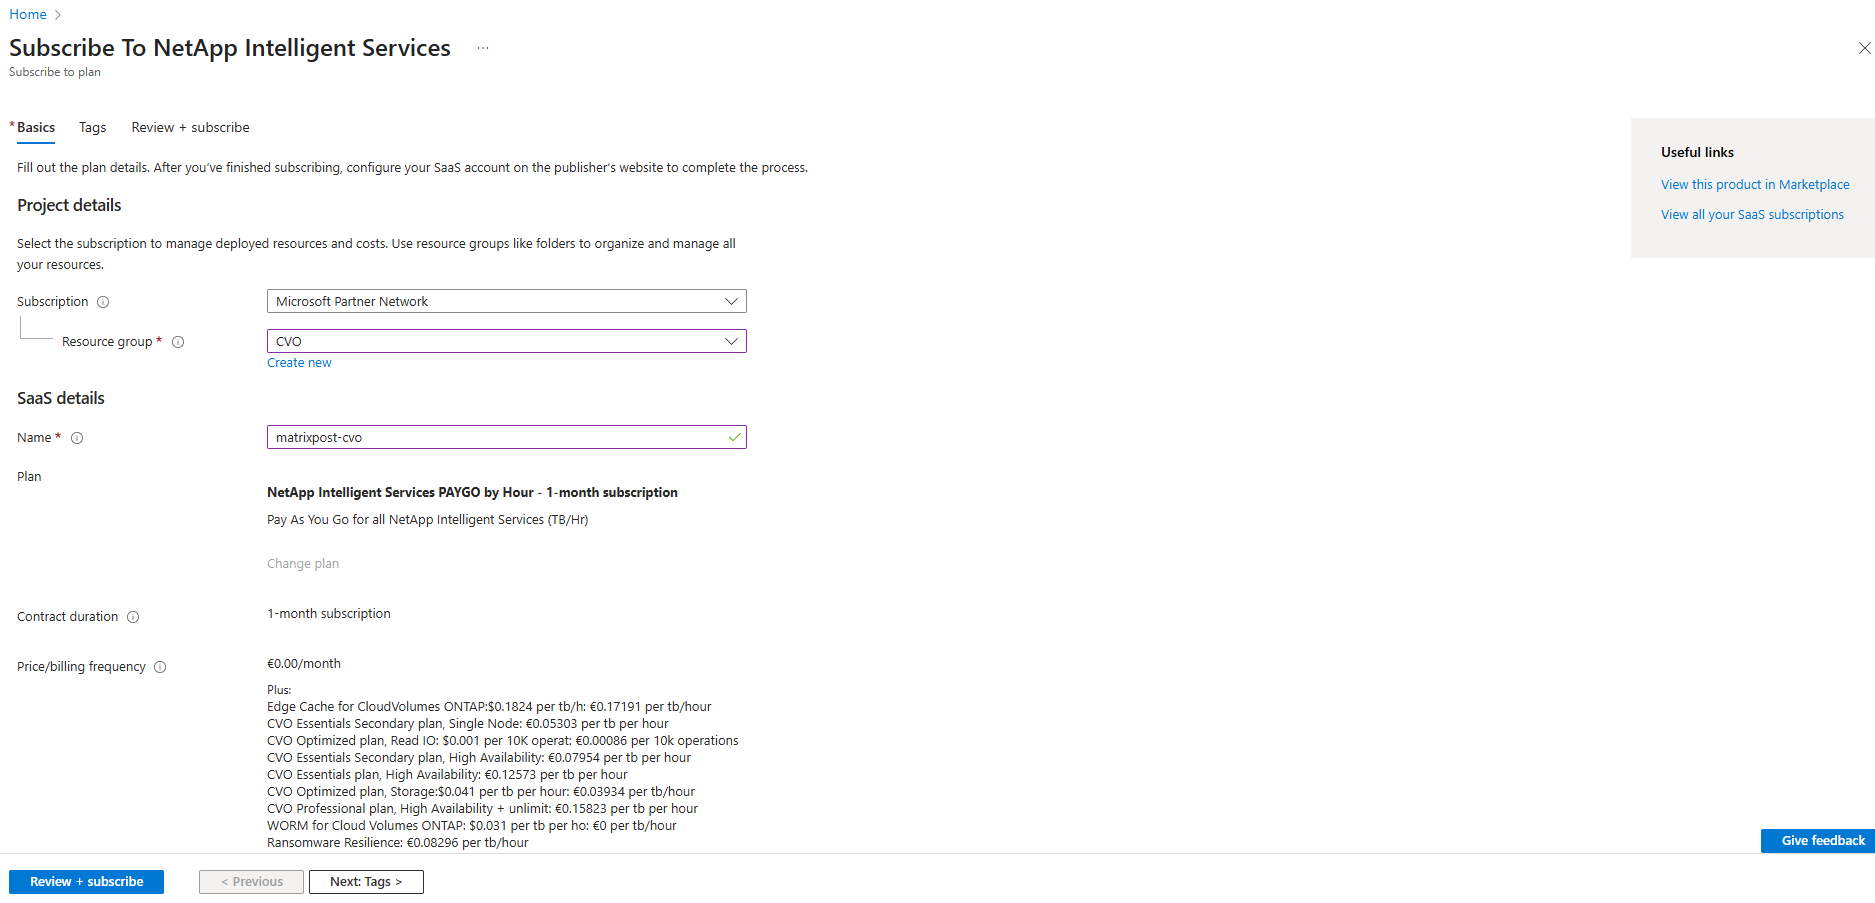
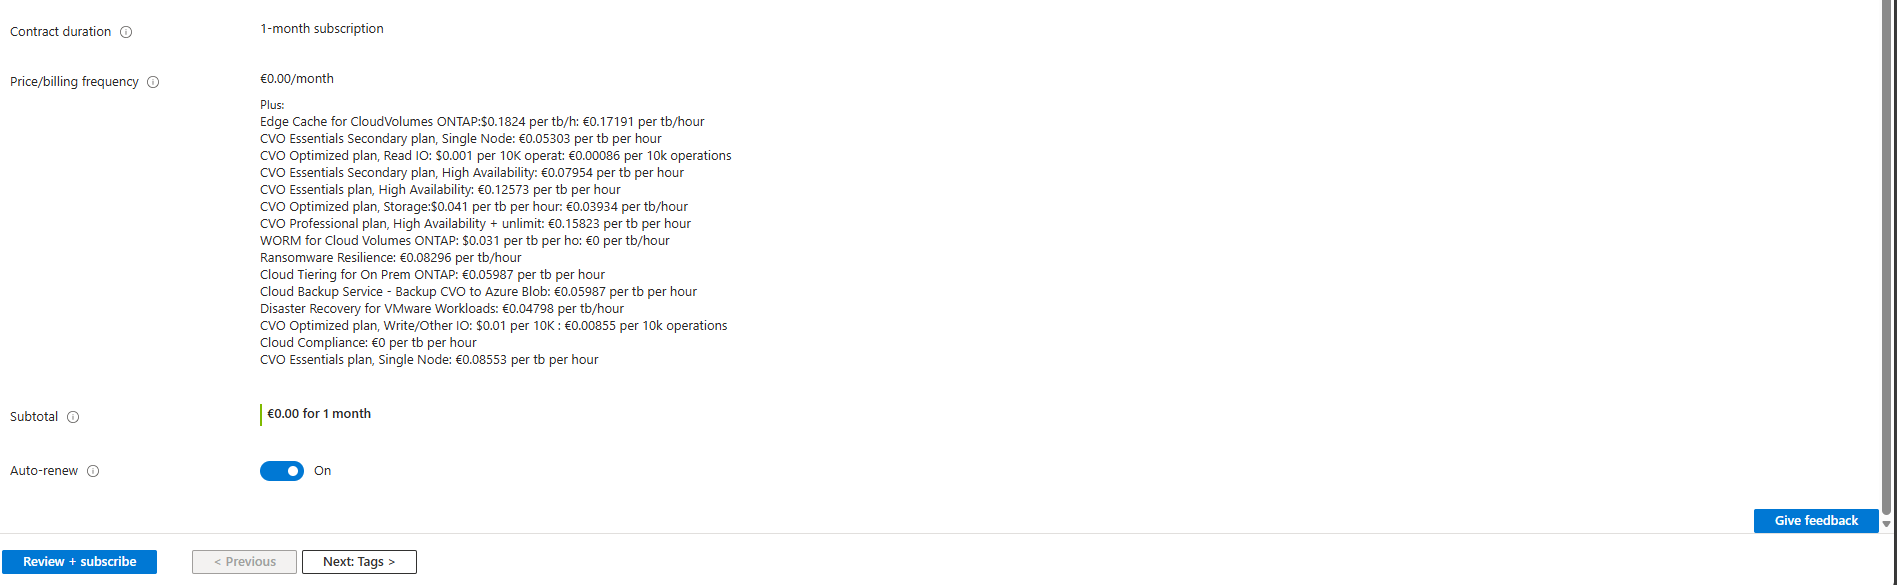
Finally click on Subscribe.
Although the NetApp console requires accepting the NetApp PAYGO marketplace offer, this does not incur any charges when using Cloud Volumes ONTAP in Freemium mode. Billing only starts if paid services or capacity beyond the free tier are enabled.
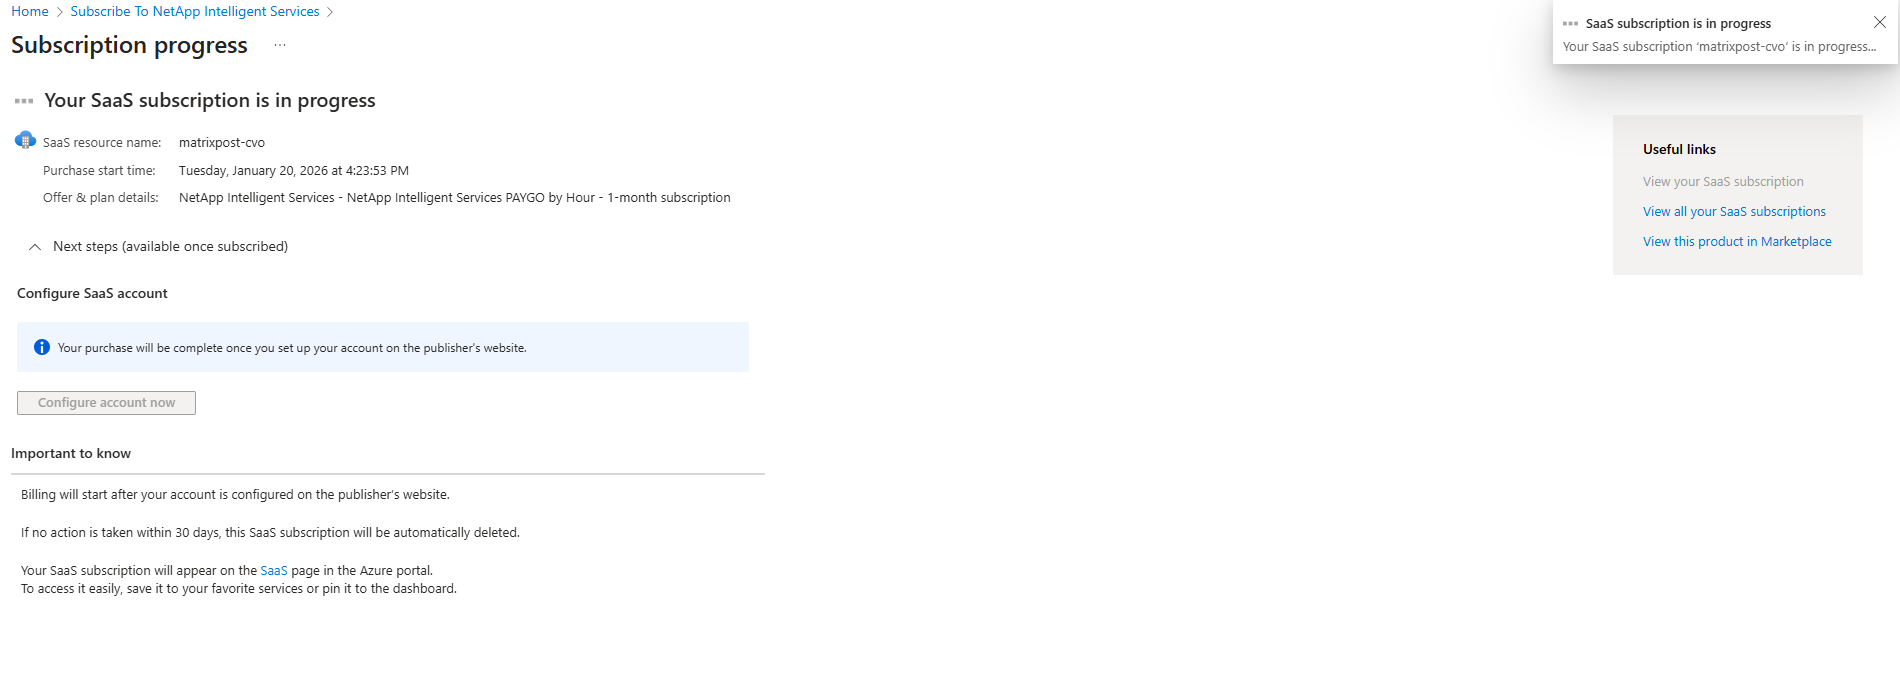
Your purchase will be complete once you set up your account on the publisher’s website.
Check your email for instructions on setting up your SaaS account.
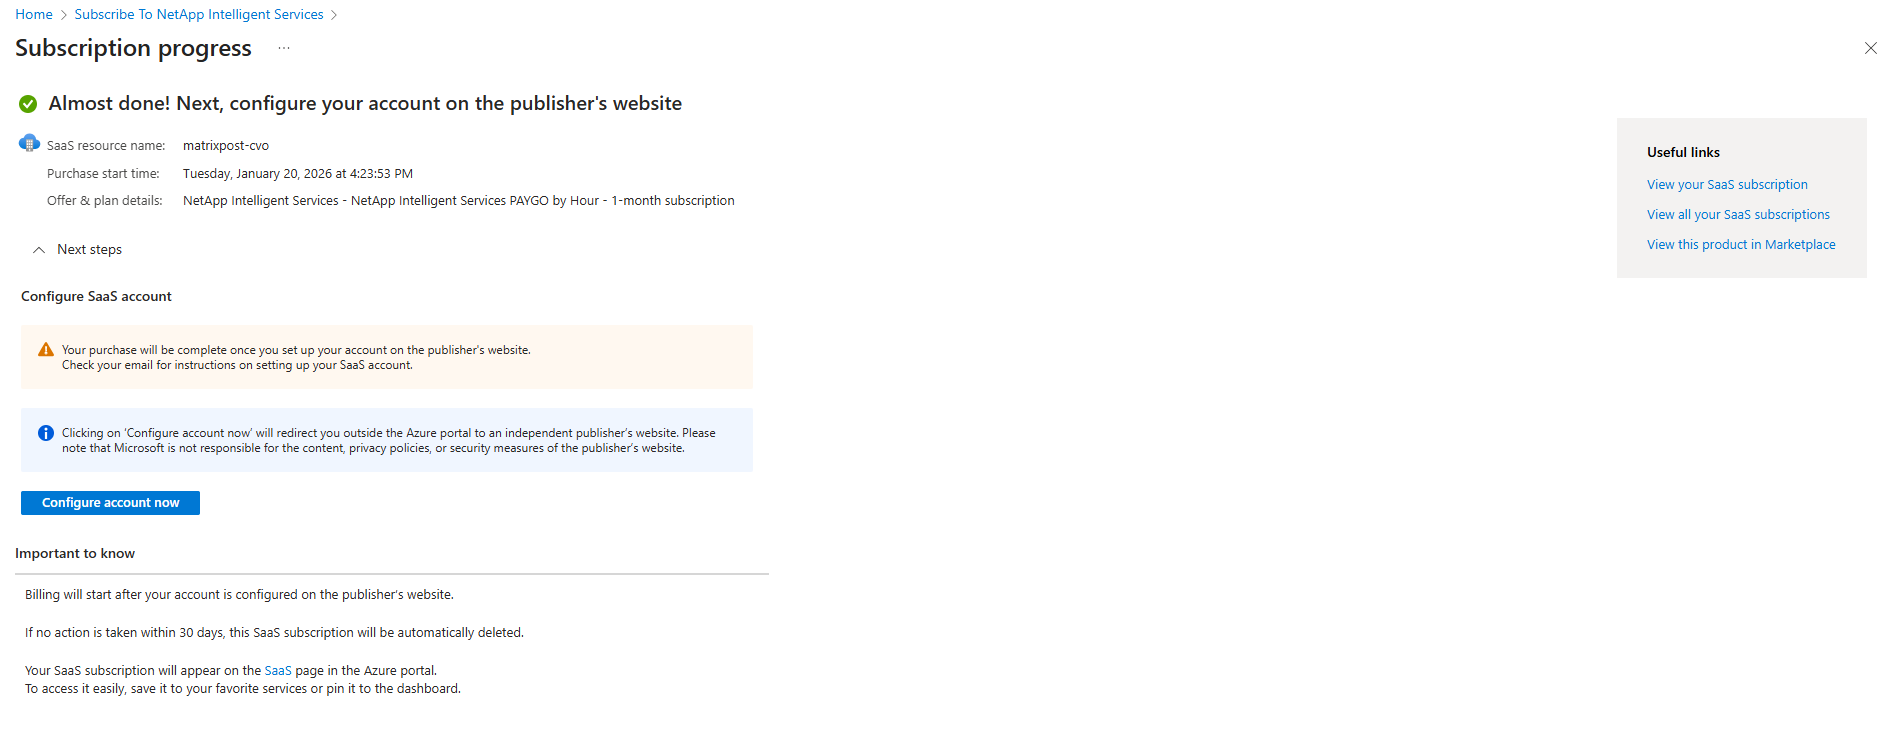
In the email we need to click on Configure account.
We will get forwarded to the NetApp console and following page. Click on Next.
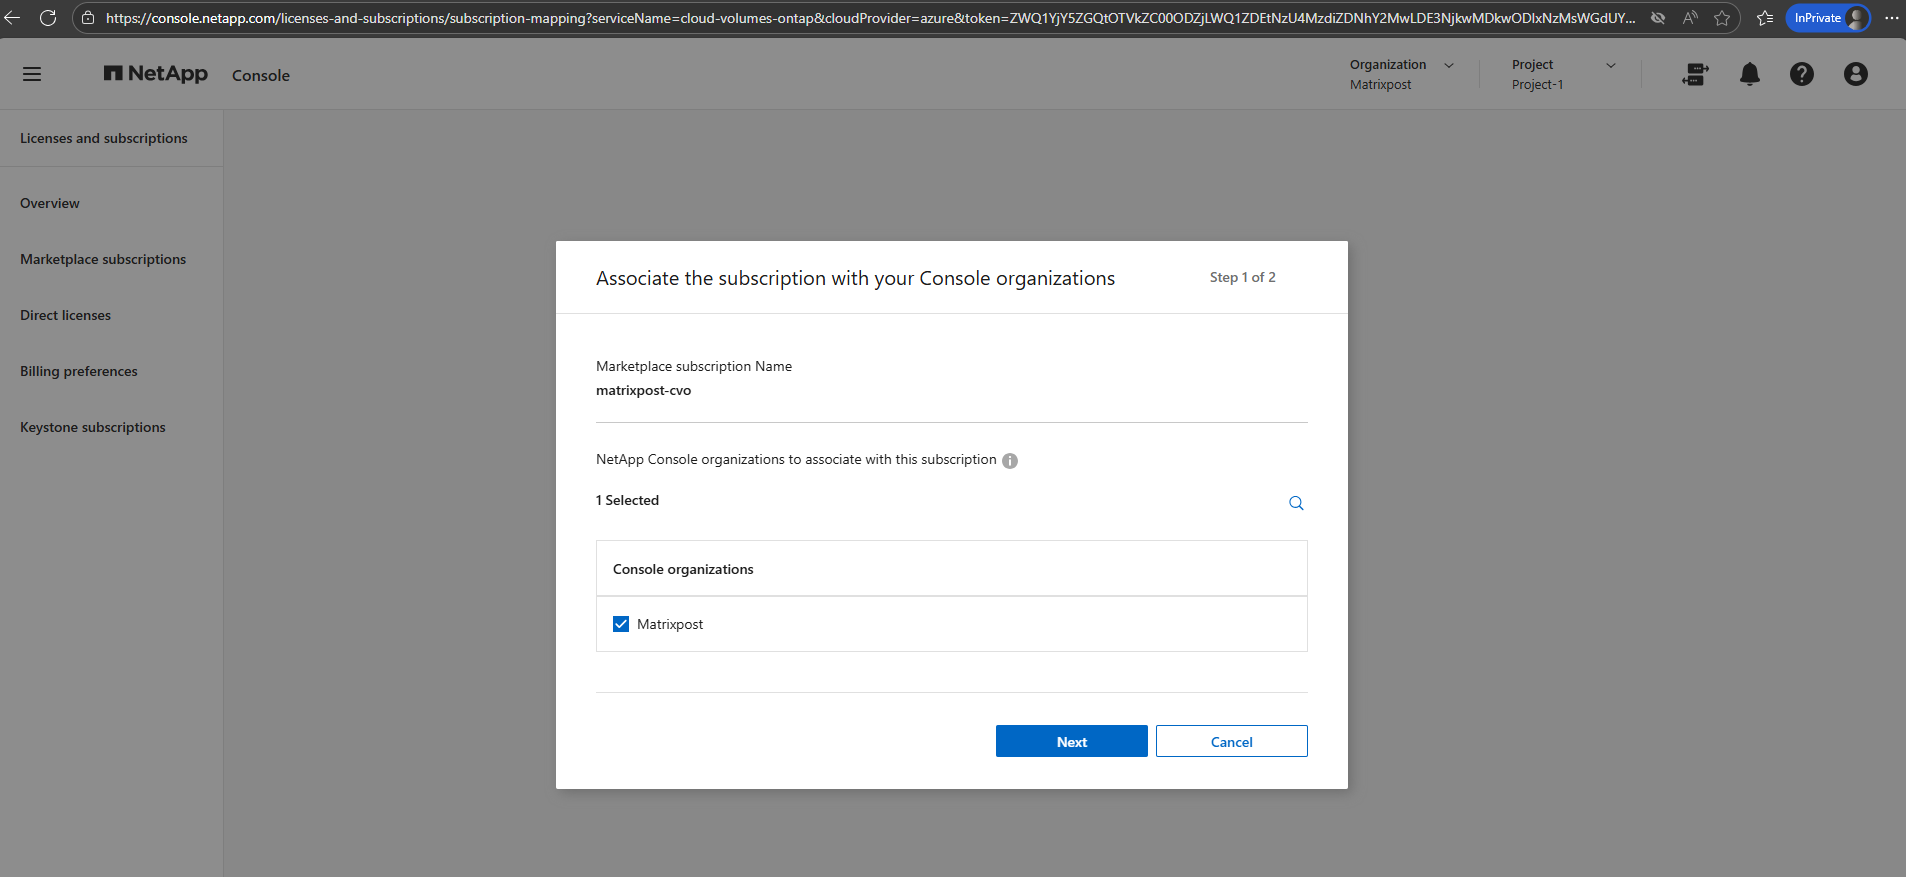
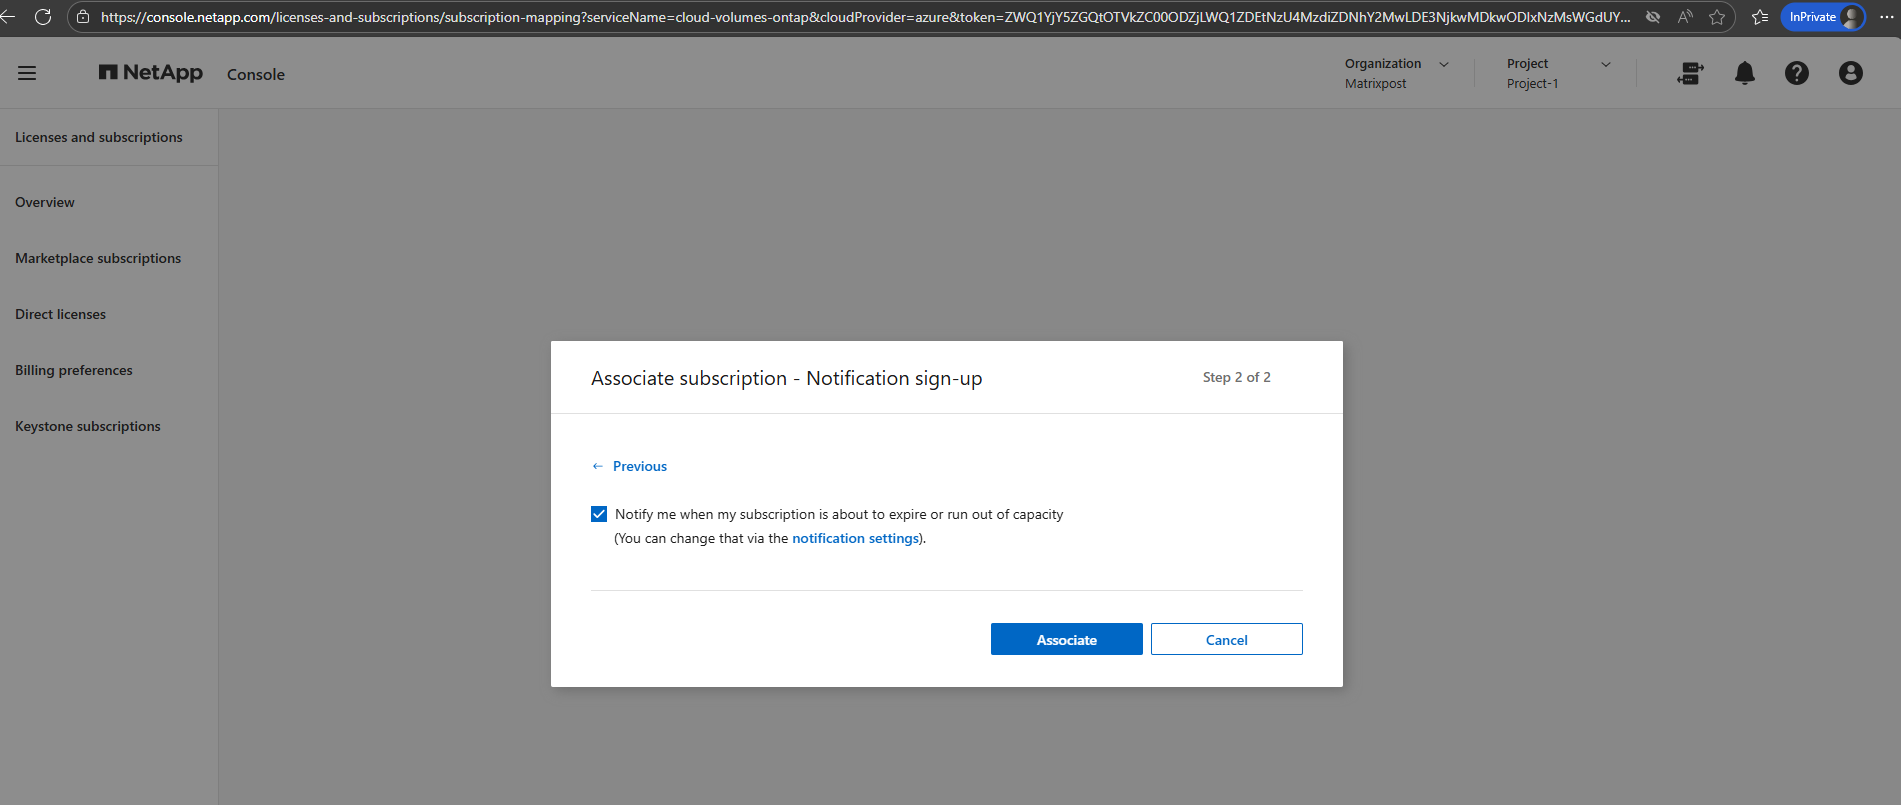
Click on Associate.
Finally my Azure subscription is associated with my NetApp Support Site (NSS) account.
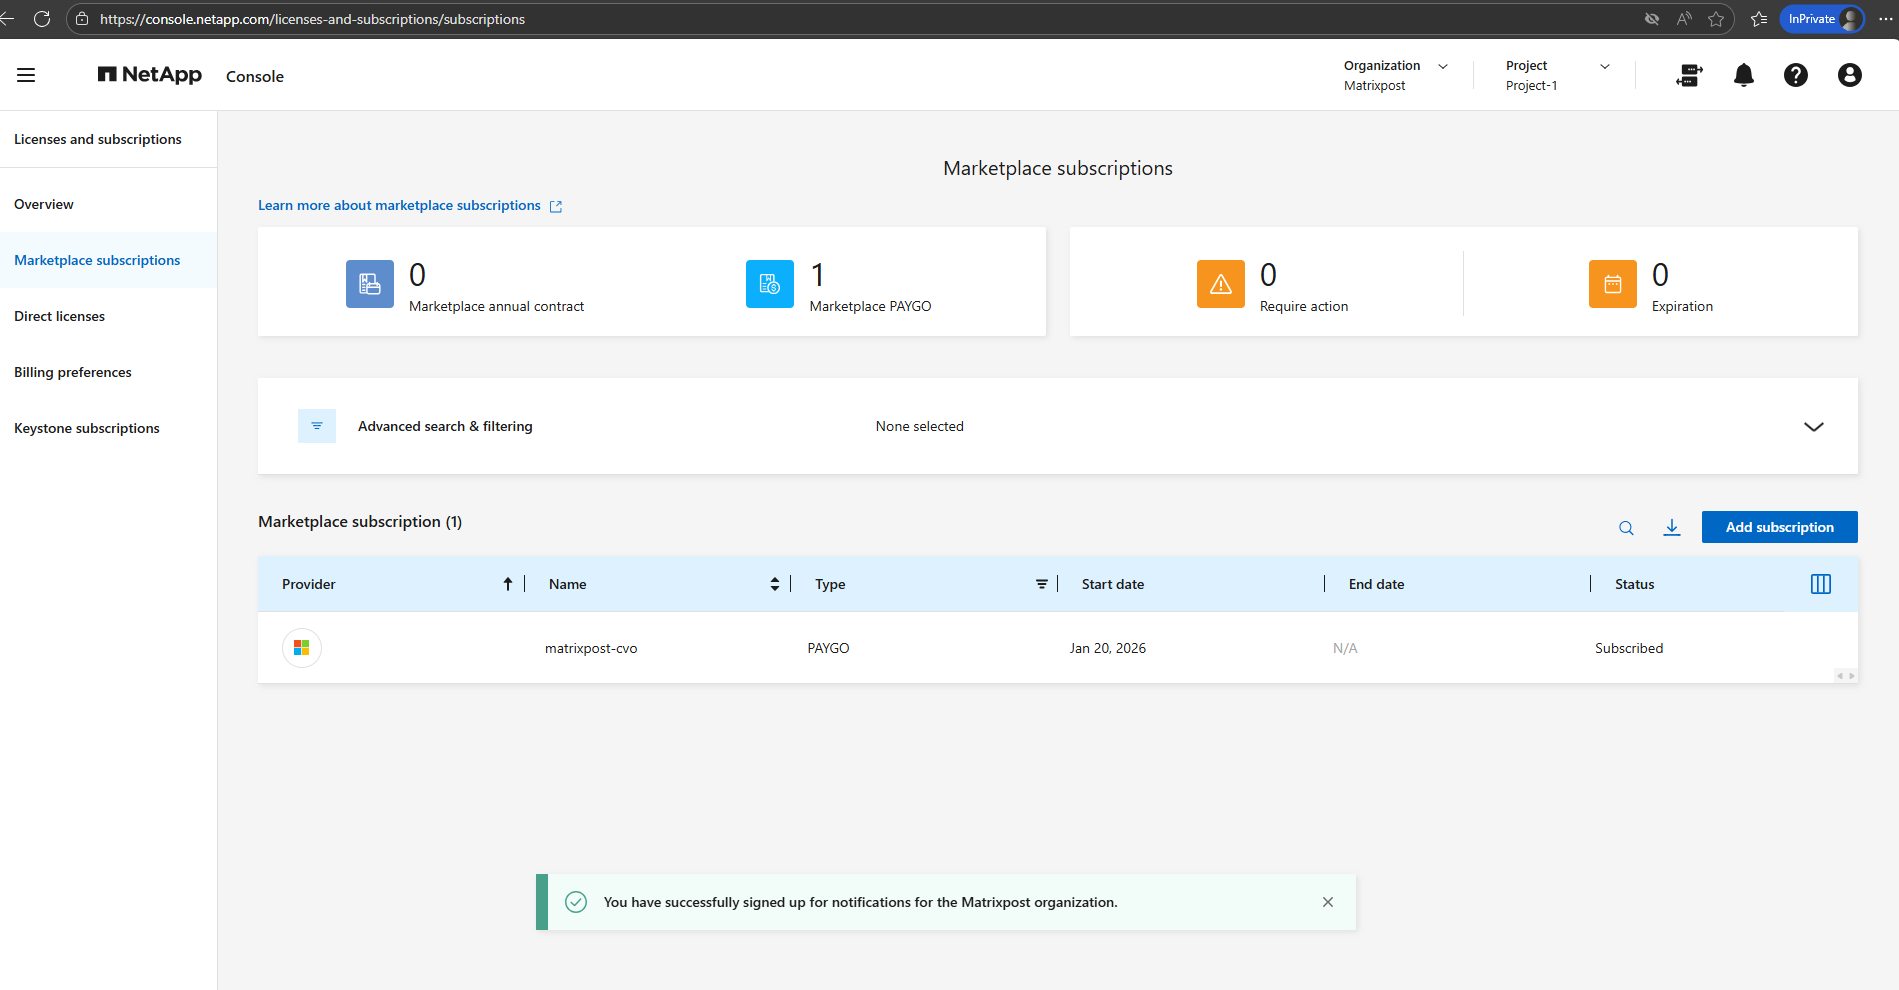
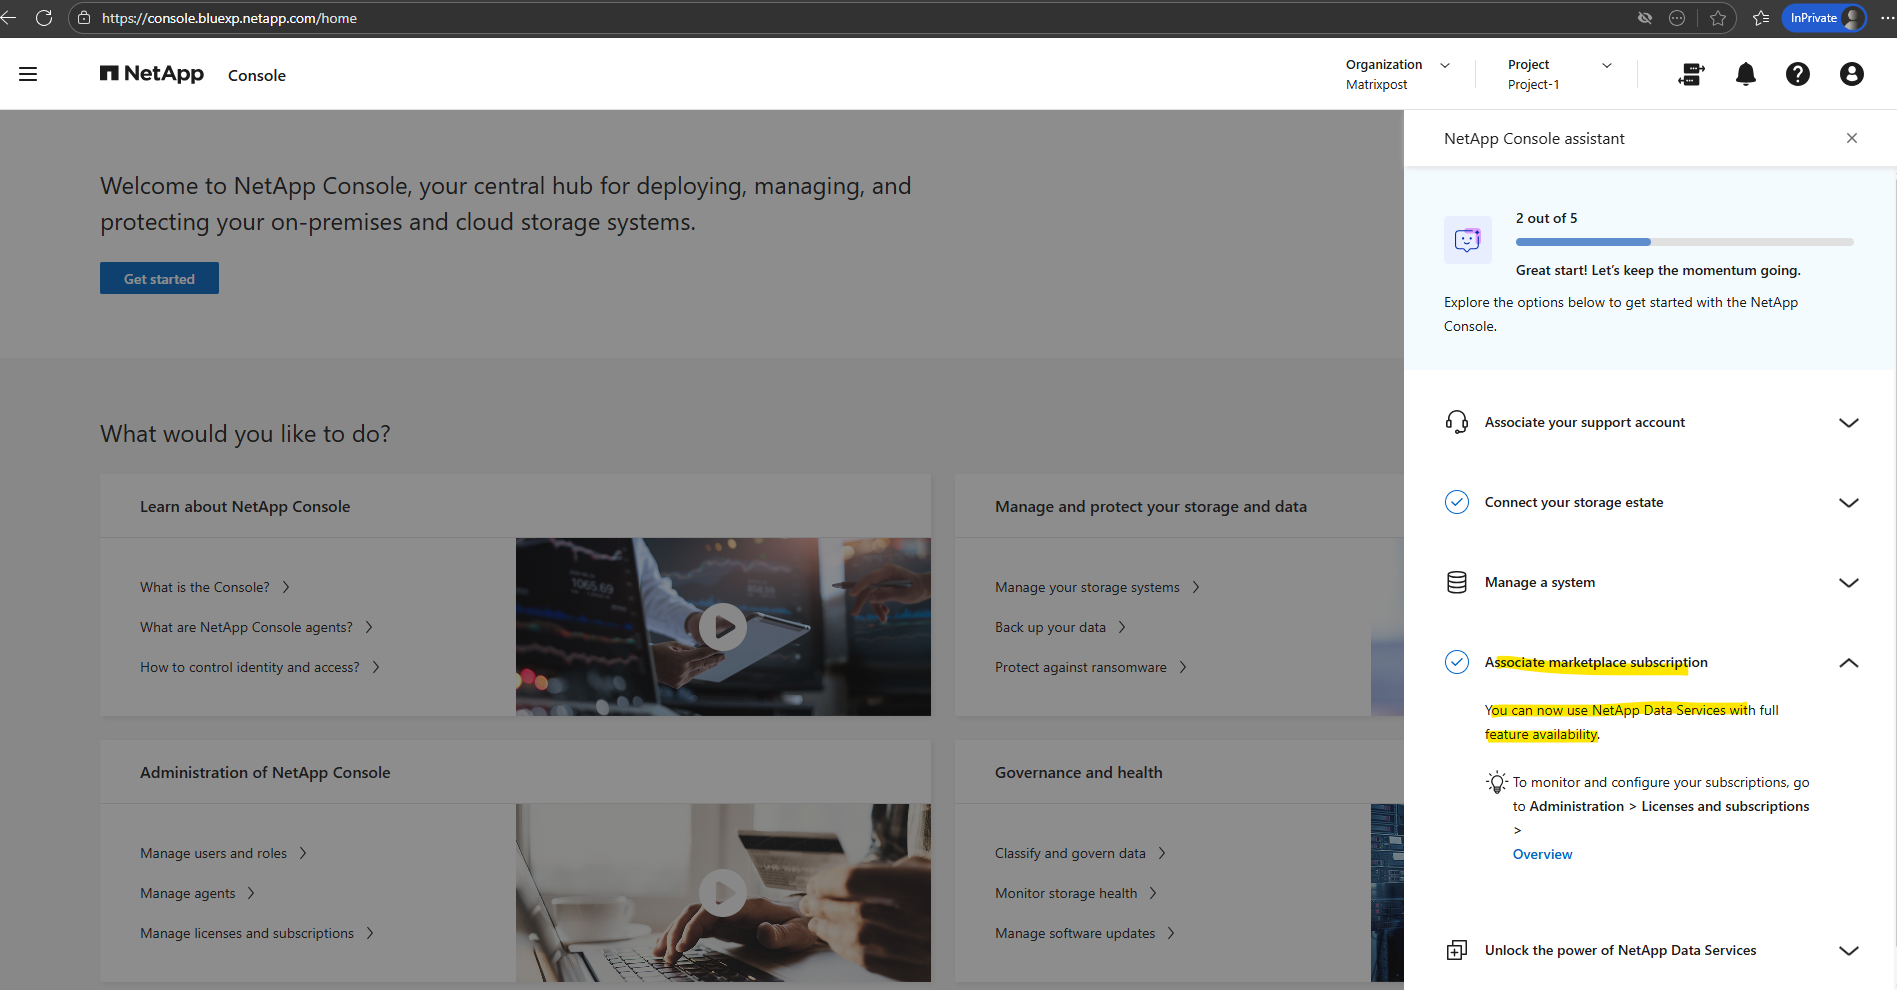
On the NetApp Console this step is now also marked as done.
Associate the NetApp Support Account
I will now also associate my support account.
By associating your NetApp Support Site (NSS) account, the NetApp Console can verify entitlements, enable support services, and manage licensing for Cloud Volumes ONTAP.
Without this step, certain management and support features would not be available.
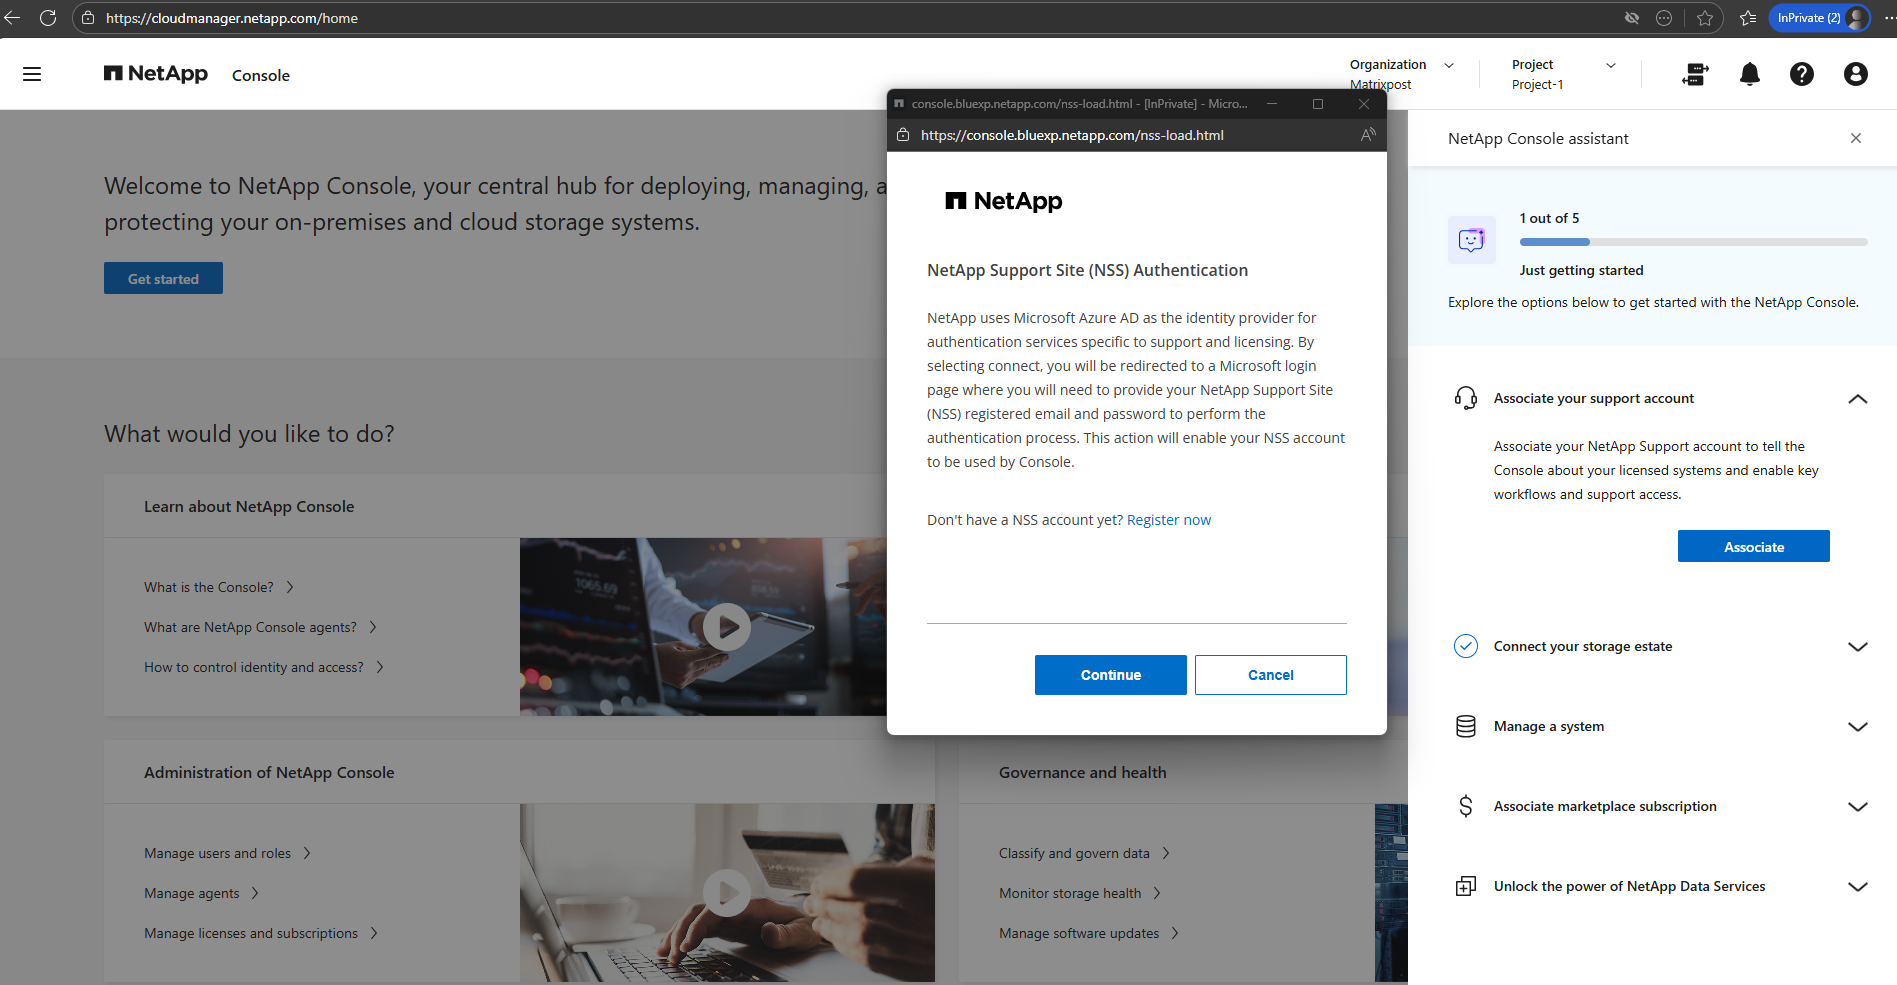
Click on Continue.
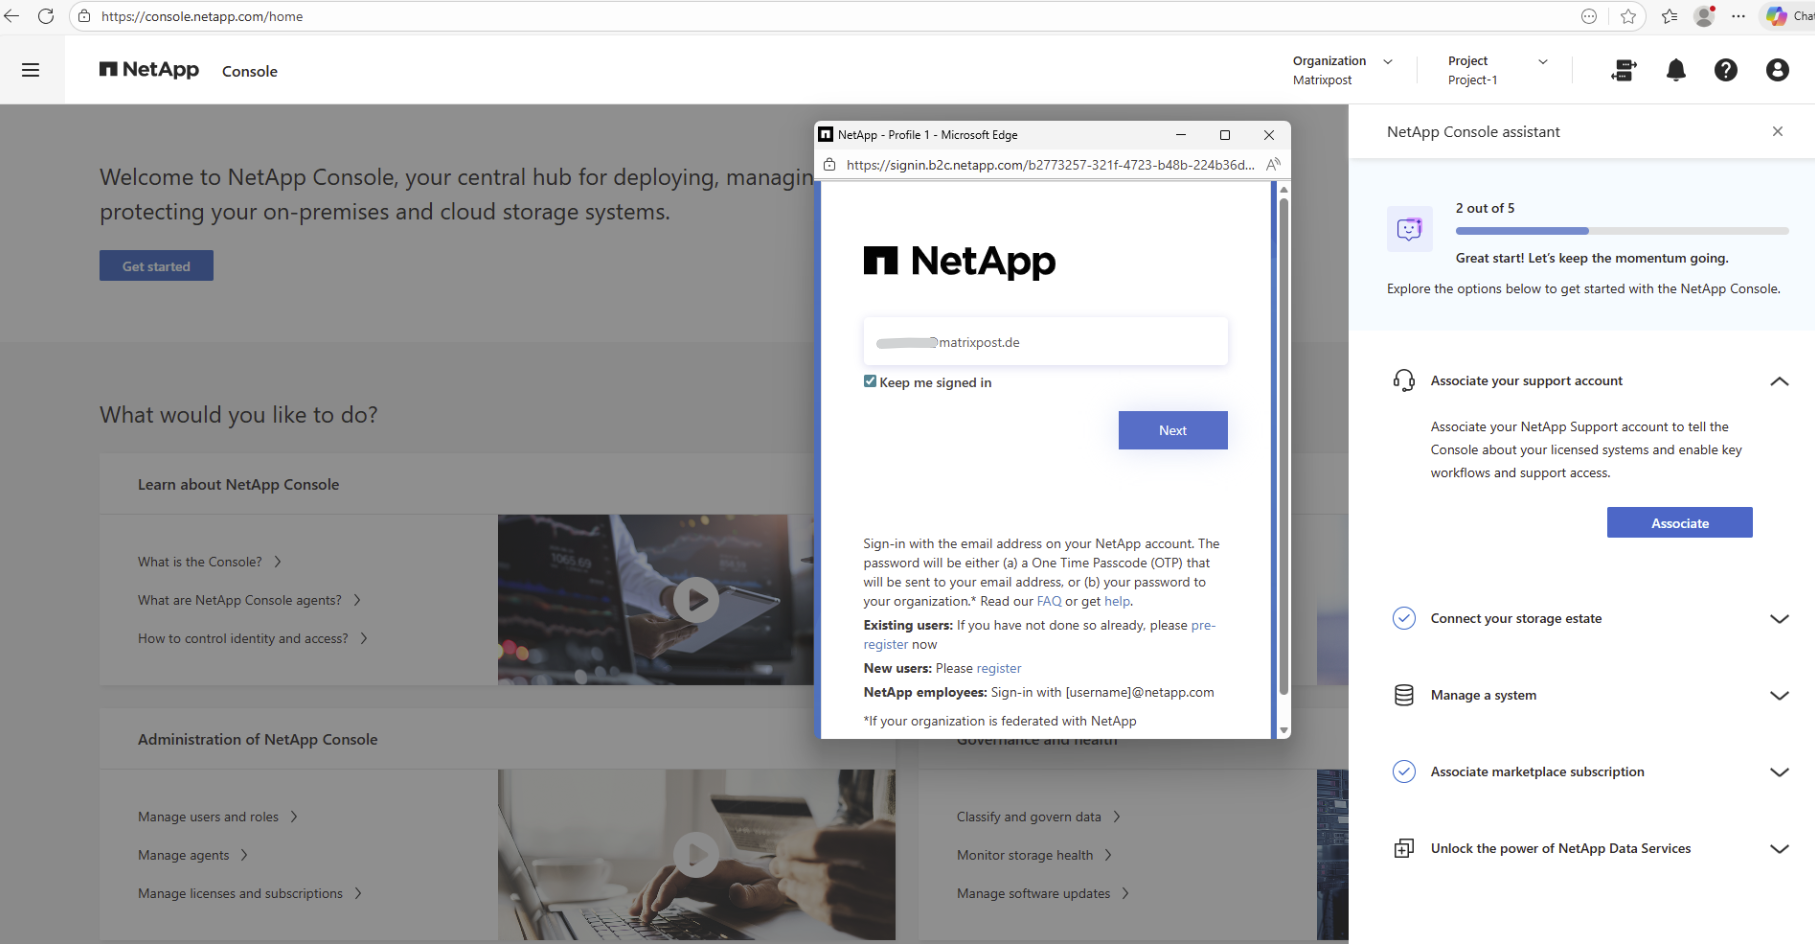
Enter your NetApp Support Site (NSS) credentials.
We will receive an OTP per mail to authenticate.
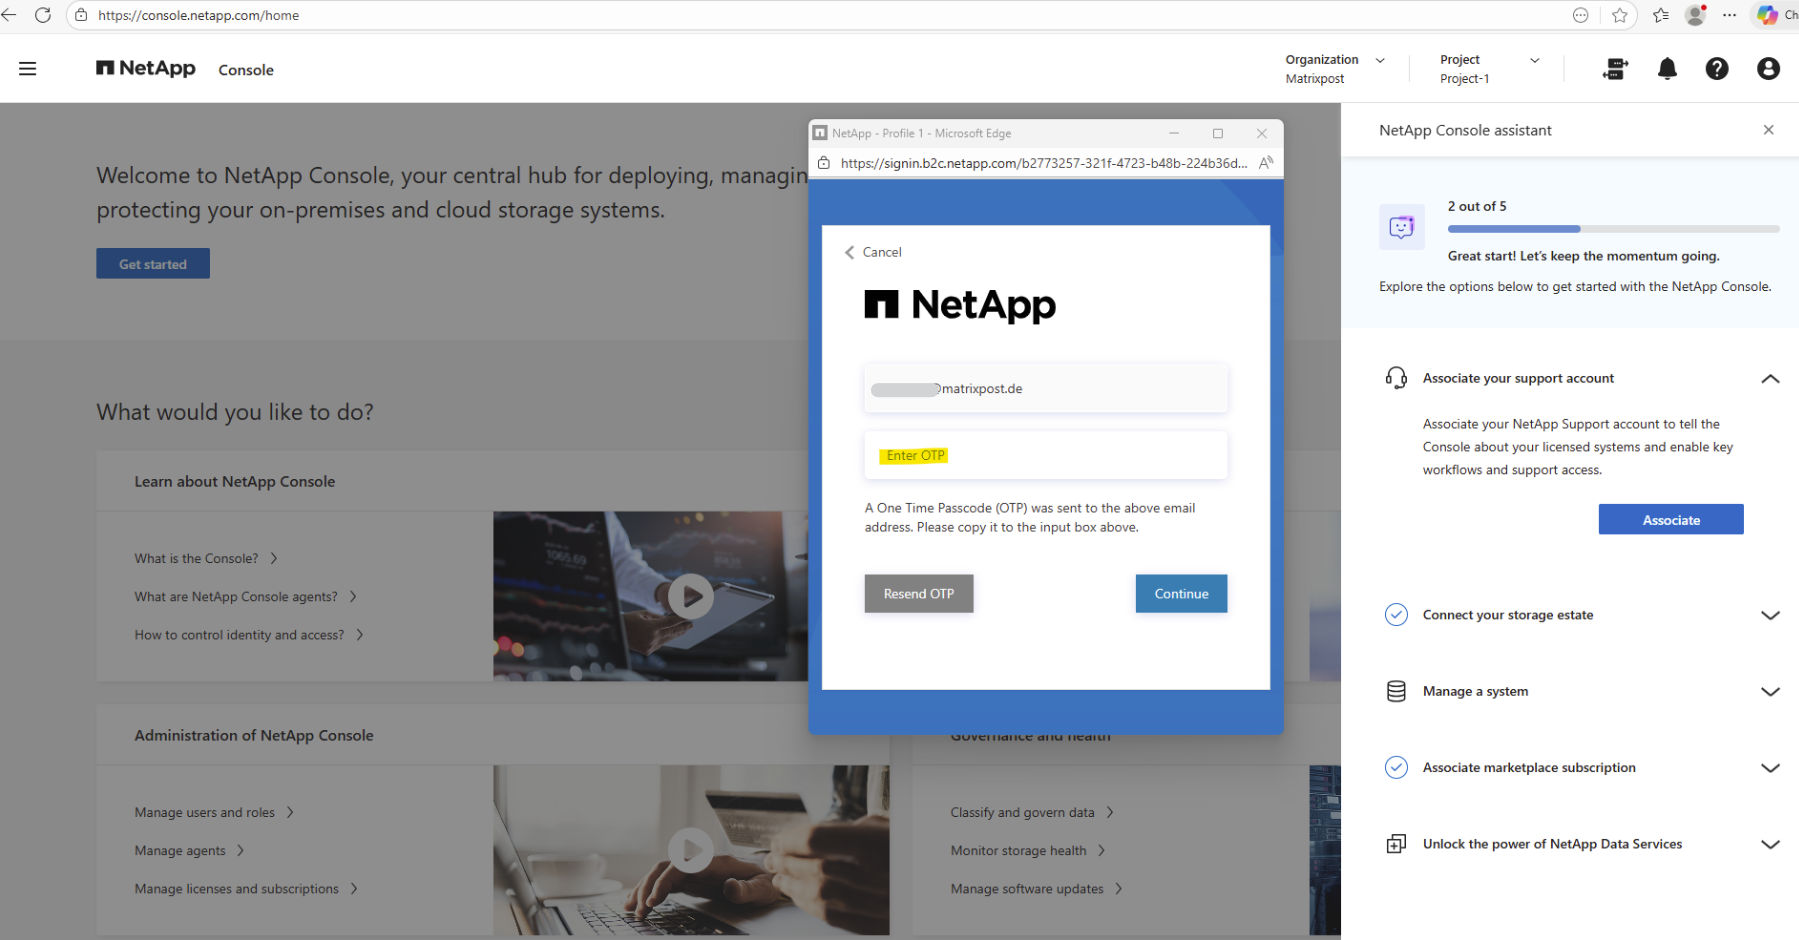
My NetApp Support Site (NSS) account is now associated with the NetApp console.
With the onboarding steps completed, we’re now ready to deploy a Cloud Volumes ONTAP HA pair in Azure directly from the NetApp Console, which we’ll cover in detail in Part 2.
Links
Plan your Cloud Volumes ONTAP configuration in Azure
https://docs.netapp.com/us-en/storage-management-cloud-volumes-ontap/task-planning-your-config-azure.htmlLaunch Cloud Volumes ONTAP in Azure
https://docs.netapp.com/us-en/storage-management-cloud-volumes-ontap/task-deploying-otc-azure.htmlLaunch a Cloud Volumes ONTAP HA pair in Azure
https://docs.netapp.com/us-en/storage-management-cloud-volumes-ontap/task-deploying-otc-azure.html#launch-a-cloud-volumes-ontap-ha-pair-in-azureSupported configurations for Cloud Volumes ONTAP in Azure
https://docs.netapp.com/us-en/cloud-volumes-ontap-relnotes/reference-configs-azure.htmlLicensing for Cloud Volumes ONTAP
https://docs.netapp.com/us-en/storage-management-cloud-volumes-ontap/concept-licensing.htmlAzure region support
https://bluexp.netapp.com/cloud-volumes-global-regionsLearn about NetApp Console agents
https://docs.netapp.com/us-en/console-setup-admin/concept-agents.htmlMaintain the Console agent VM and operating system
https://docs.netapp.com/us-en/console-setup-admin/task-maintain-agents.html