Understanding Identity Mapping in NetApp ONTAP – Windows, UNIX, and Kerberos Users
In environments where both SMB/CIFS and NFS are used, NetApp ONTAP must translate user identities between different authentication systems. Windows clients typically authenticate using Active Directory accounts, while UNIX or Linux systems rely on UID/GID based identities.
To allow consistent file access across these environments, ONTAP provides a name mapping mechanism that translates identities between Windows, UNIX, and Kerberos principals.
In this post, we take a closer look at how host user and group name mapping works in ONTAP, including common scenarios such as Windows-to-UNIX, UNIX-to-Windows, and Kerberos-to-UNIX mappings.
More about NFS authentication with AUTH_SYS (formerly known as AUTH_UNIX and aka sec=sys) which uses UID/GID based identities, you will find in my following post which shows the difference for AUTH_SYS depending on using NFSv3 of NFSv4.
Introduction
In multiprotocol NAS environments, the same dataset can be accessed simultaneously by Windows clients using SMB/CIFS and by Linux or UNIX systems using NFS.
Because these operating systems use different identity models, Windows accounts identified by SIDs and UNIX users identified by numeric UIDs and GIDs, NetApp ONTAP must translate these identities to evaluate file permissions correctly.
This translation is handled through name mapping, where ONTAP maps Windows users to UNIX users or vice versa so that access decisions remain consistent across protocols.
In contrast, when an SVM serves only SMB/CIFS, ONTAP works exclusively with Windows identities from Active Directory, and when it serves only NFS, it evaluates permissions solely based on the numeric UID and GID values provided by the client.
Name mapping therefore becomes relevant primarily in multiprotocol environments where the same data is accessed via both SMB and NFS.
So for example if a SVM purely serves NFS:
- My Linux client sends UID 1001 / GID 100 for user
marcus. - ONTAP stores and evaluates those numeric IDs on the filesystem.
- Access decisions are based purely on whether those numbers match the file owner or group.
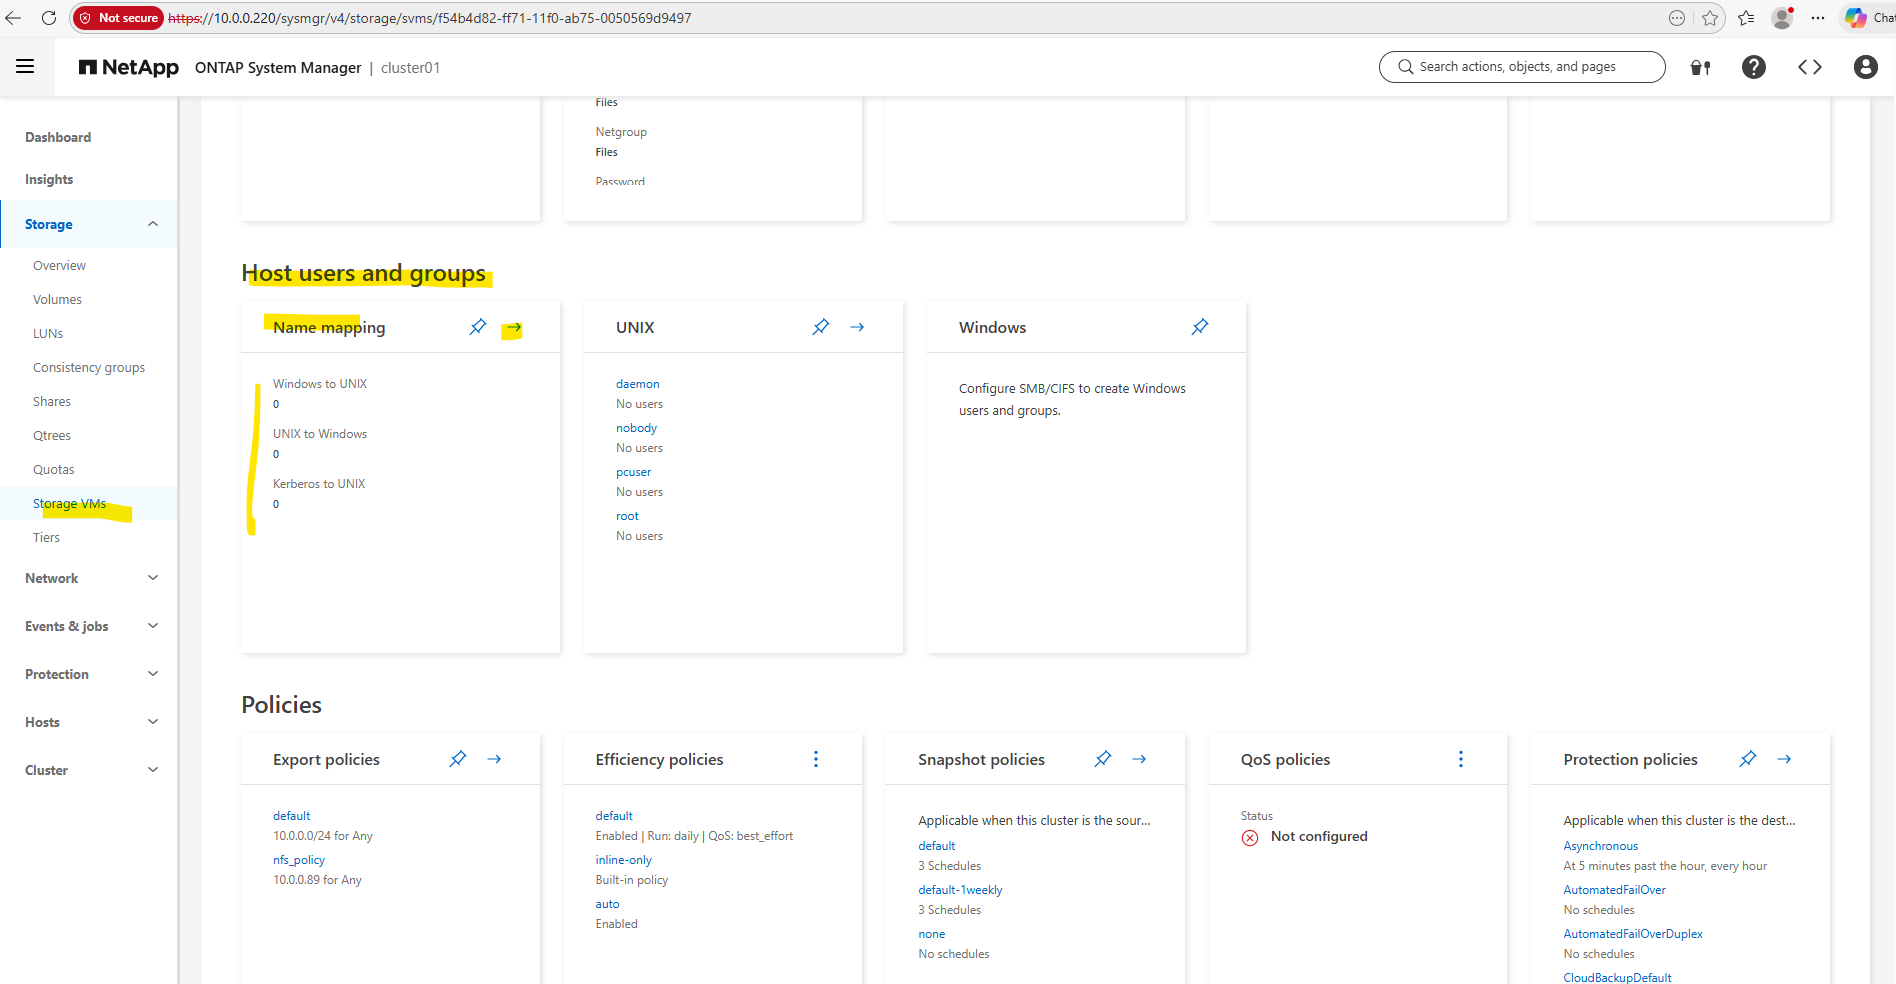
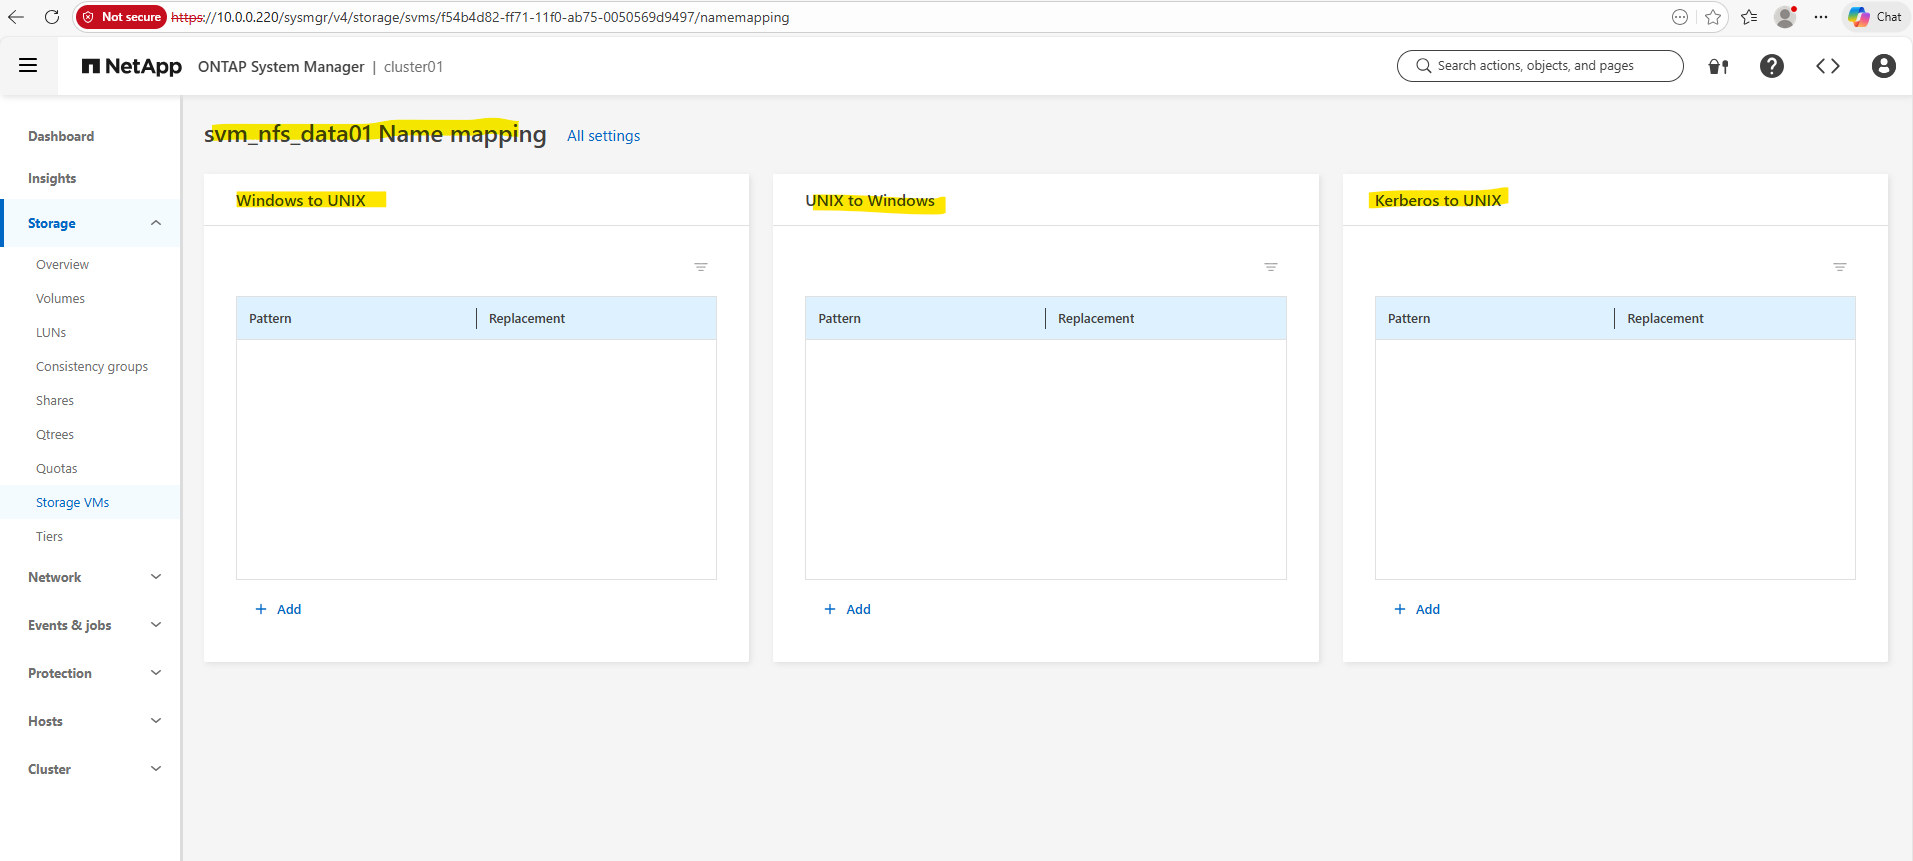
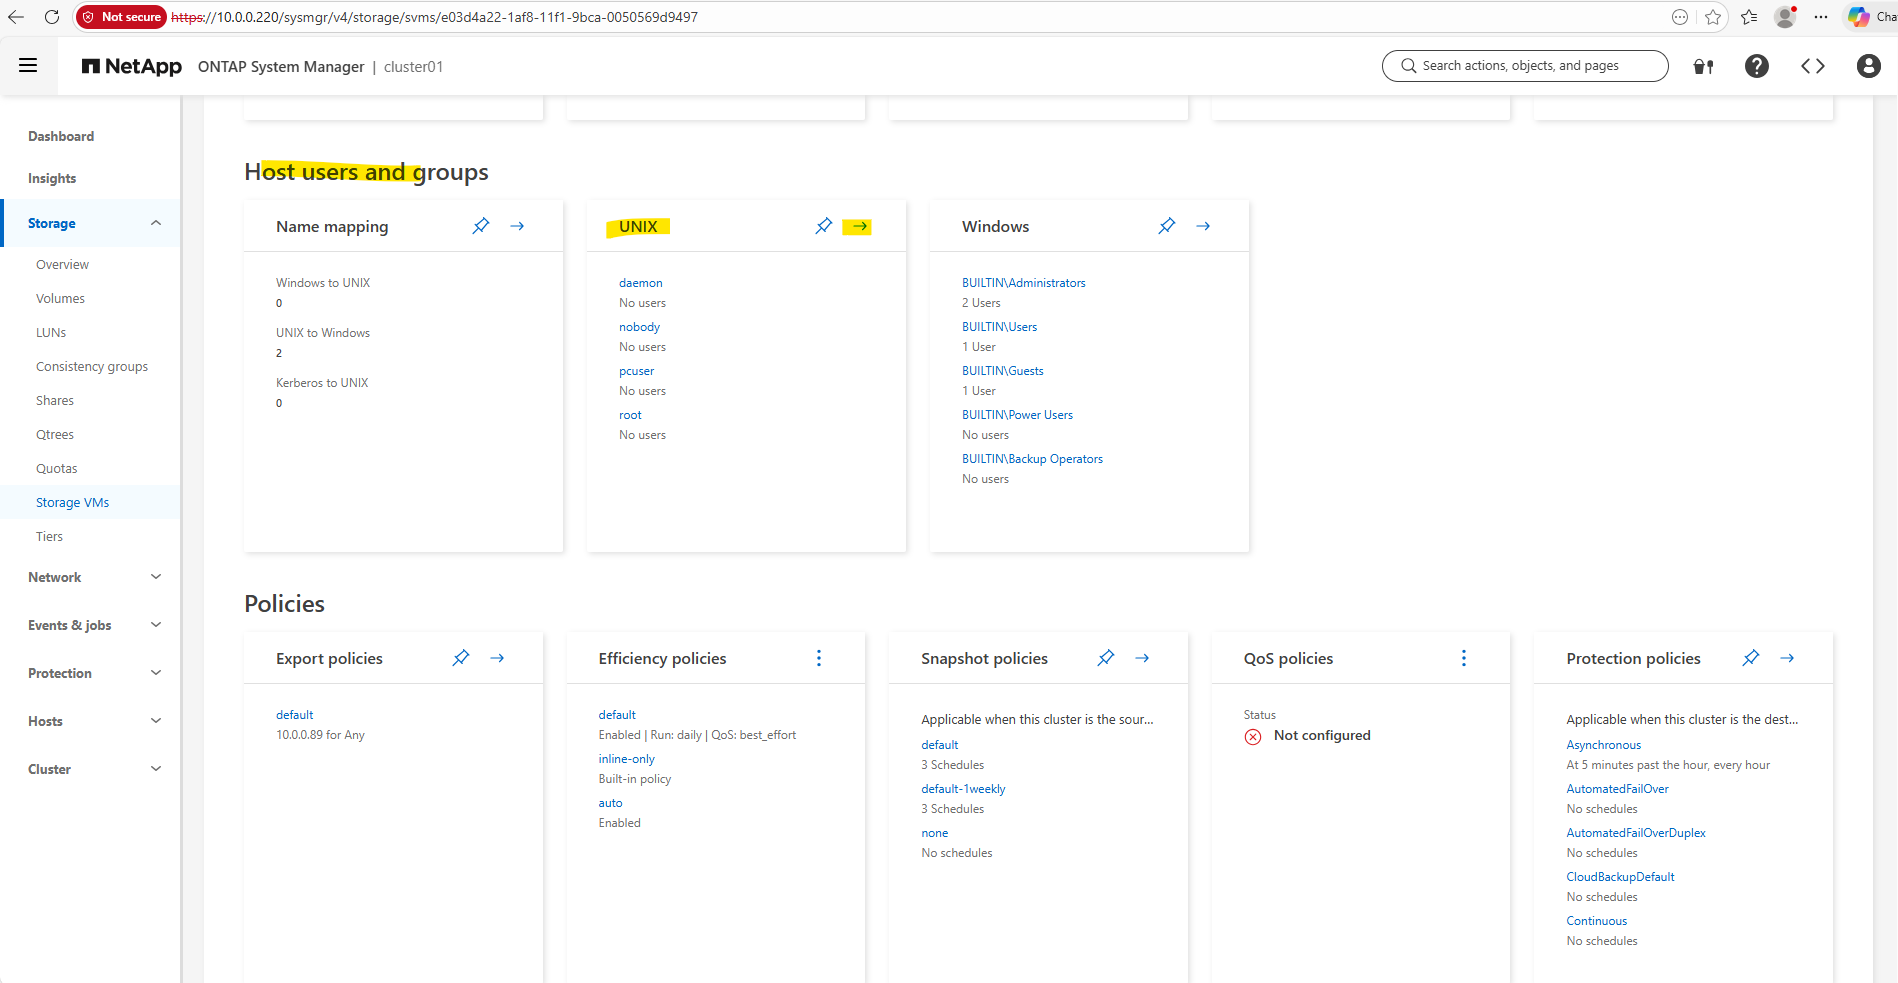
The Name Mapping options we see in System Manager below serve a different purpose:
- Windows → UNIX mapping (for SMB users accessing UNIX security style data)
- UNIX → Windows mapping (for NFS users accessing NTFS security style data)
- Kerberos → UNIX mapping (for Kerberos-authenticated identities)
Choosing the Right Security Style for Multiprotocol NAS (SMB and NFS)
NetApp generally recommends avoiding the mixed security style when possible, because it can make permission behavior harder to predict and troubleshoot. In most multiprotocol environments, it is usually better to choose a primary security model (often NTFS) and rely on name mapping so that both SMB and NFS clients are evaluated consistently against the same permission model.
In environments where SMB and NFS clients access the same data in roughly equal proportions, NetApp typically recommends using the NTFS security style and configuring UNIX → Windows name mapping.
In this model, Windows ACLs remain the authoritative permission model, and when NFS users access the data, ONTAP maps the UNIX identity to a corresponding Windows user so that the NTFS permissions can be evaluated consistently.
Testing UNIX to Windows Name Mapping in ONTAP
To demonstrate UNIX → Windows name mapping, I will create below a dedicated SVM configured with both NFS and CIFS protocols and set the security style to NTFS.
The SVM I will also join to the Active Directory domain so that Windows ACLs can be used as the authoritative permission model.
This setup reflects the recommended best practice for multiprotocol environments, where Windows ACLs remain the authoritative permission model and NFS users are mapped to corresponding Windows accounts using name mappings.
To create our new dedicated SVM I will run the following command.
cluster01::> vserver create -vserver svm_data_cifs_nfs -aggregate aggr_data01 -rootvolume root_vol_svm_data_cifs_nfs -rootvolume-security-style ntfs

Creating an SVM alone is not sufficient to provide data access. Each SVM requires at least one data LIF, which represents the network endpoint used by clients to access storage services such as NFS or SMB. The LIF defines the IP address, subnet, and network path used by the SVM.
By using
-service-policy default-data-files, we explicitly define the LIF’s allowed traffic (NFS/SMB) using the modern ONTAP networking stack rather than a legacy role. Combined with-failover-policy system-defined, the system automatically calculates the most resilient failover path within the broadcast domain, ensuring the LIF stays reachable during an Azure HA event.Since the ONTAP Simulator does not support HA, failover mechanisms are not relevant in this lab environment. Therefore, a single data LIF is sufficient, and the failover policy can effectively be ignored for demonstration purposes.
cluster01::> network interface create -vserver svm_data_cifs_nfs -lif cifs_nfs_data_1 -service-policy default-data-files -home-node cluster01-01 -home-port e0c -address 10.0.0.228 -netmask 255.255.255.0 -failover-policy system-defined -auto-revert true

So far neither the CIFS/SMB protocol nor NFS is enabled on the the newly created SVM.
To enable NFS we just need to run the following command.
cluster01::> vserver nfs create -vserver svm_data_cifs_nfs
To enable CIFS we need to join the SVM to our on-premises Active Directory domain
Before we can join the SVM to our on-premises Active Directory domain, we will also first need to set a DNS server first on the Vserver’s DNS configuration.
cluster01::> vserver services dns create -vserver svm_data_cifs_nfs -domains matrixpost-lab.net -name-servers 10.0.0.70
For my lab environment just one DNS server is fine.

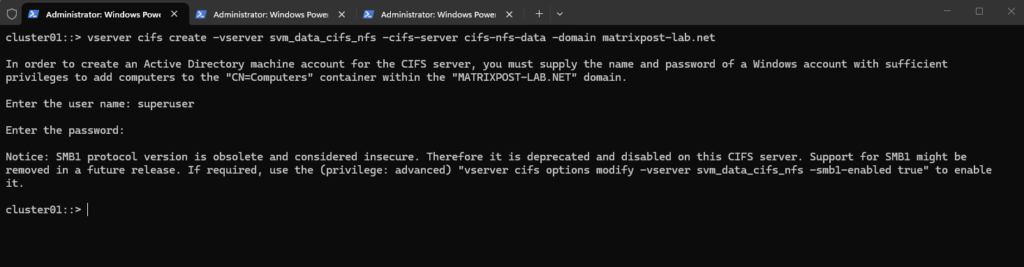
We can now join the SVM to our on-prem AD domain by running.
For the domain join and to create a AD machine account for this CIFS server we need to supply the name and password of a Windows account with sufficient privileges to add computers to the AD.
The NetBIOS name, in my case
cifs-nfs-datacannot be longer than 15 characters as usual.
cluster01::> vserver cifs create -vserver svm_data_cifs_nfs -cifs-server cifs-nfs-data -domain matrixpost-lab.net
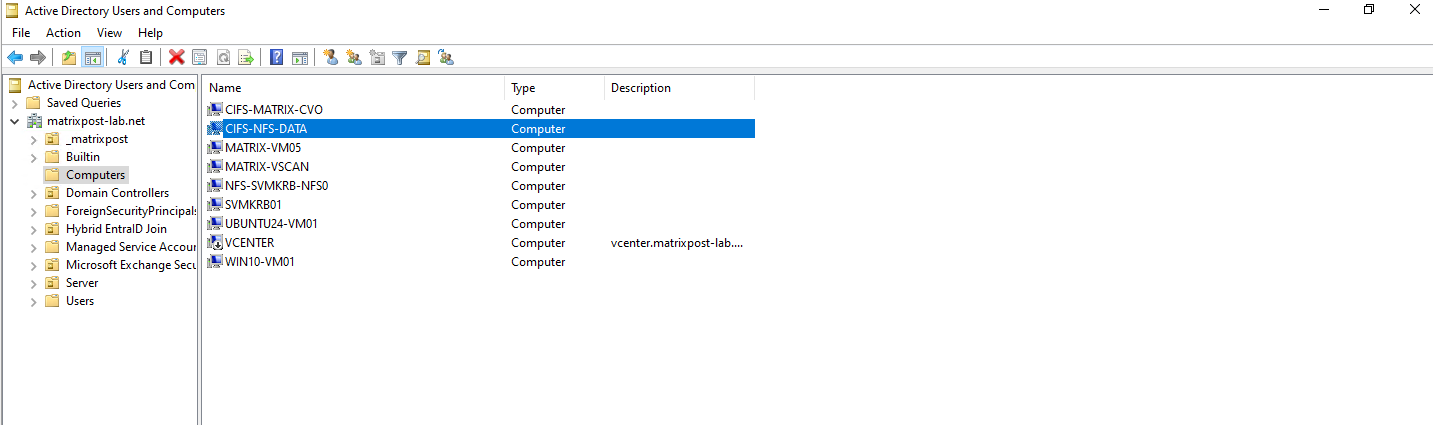
Our new CIFS server is joined to our AD and the default Computers container.
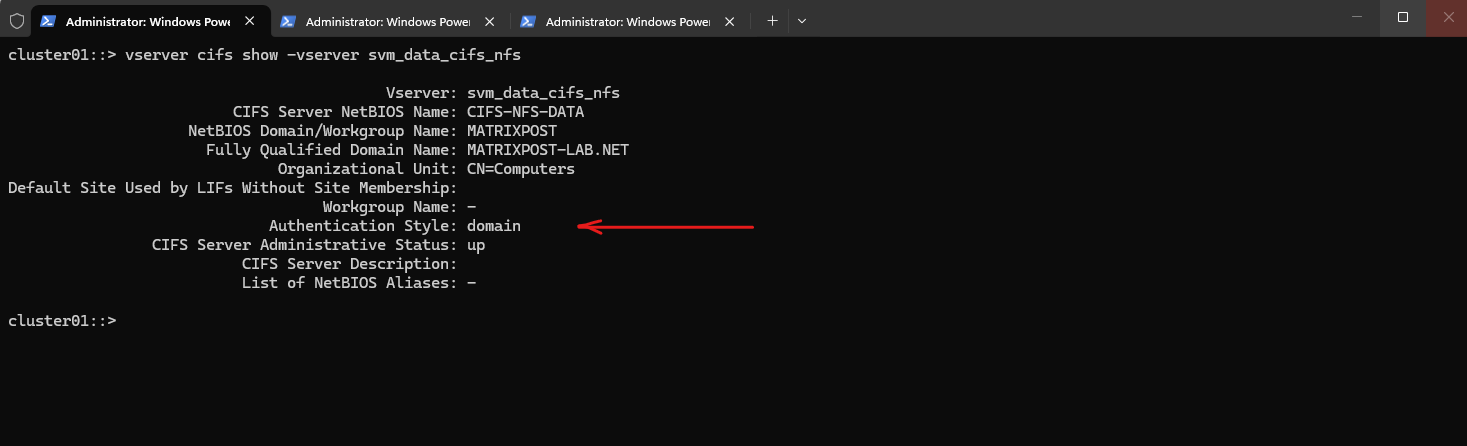
The following command displays the configuration and current status of the CIFS server for the SVM, including the NetBIOS name, Active Directory domain membership, and authentication settings.
cluster01::> vserver cifs show -vserver svm_data_cifs_nfs
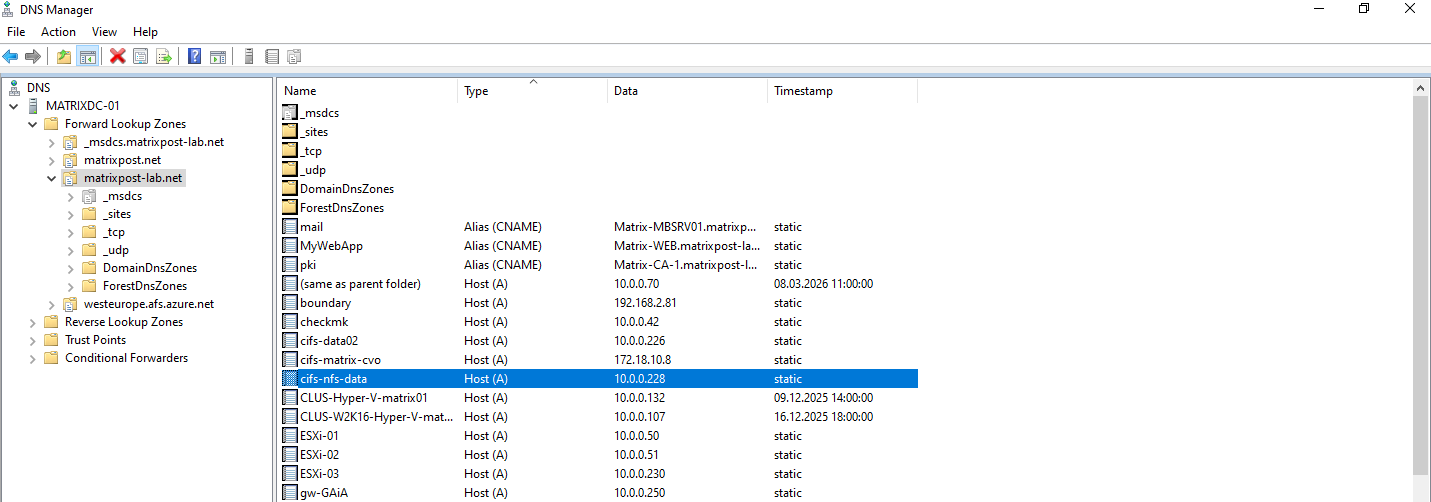
For the CIFS/SMB share (NetBIOS/hostname) I will create a DNS record in my lab environment which points to the IP address of the SVM we enabled CIFS on.
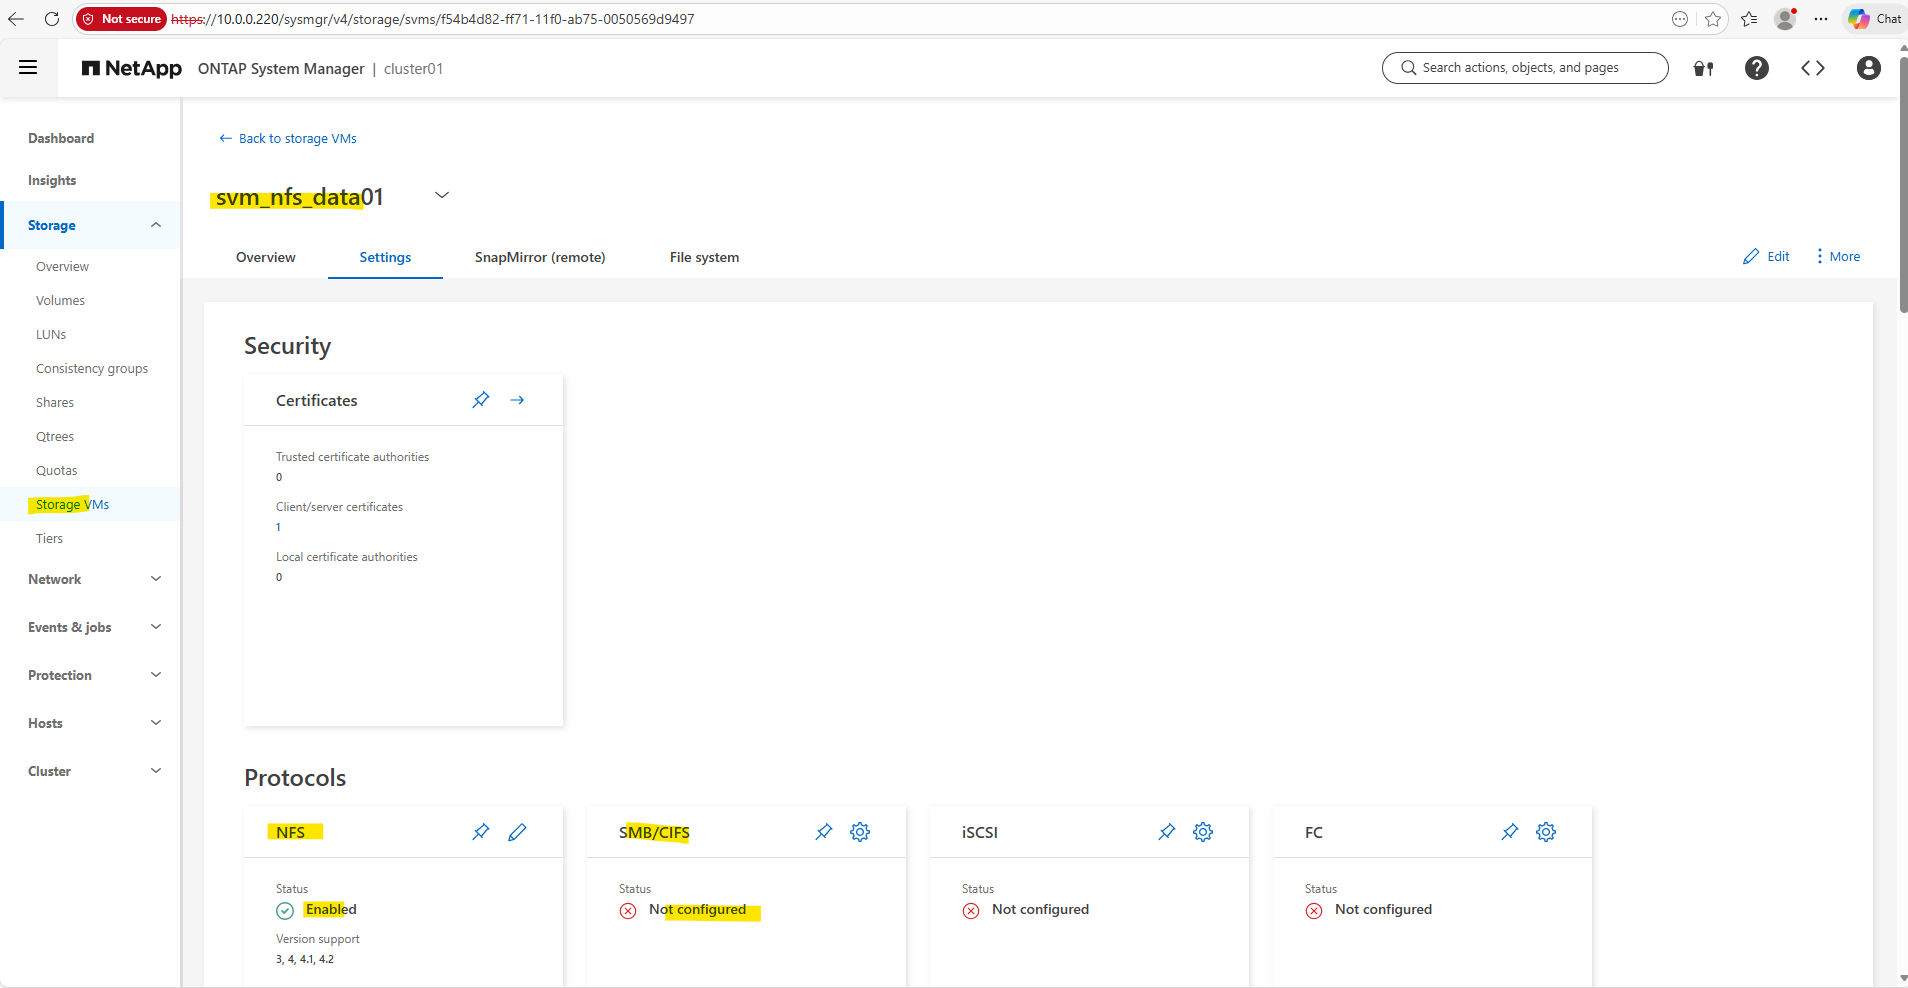
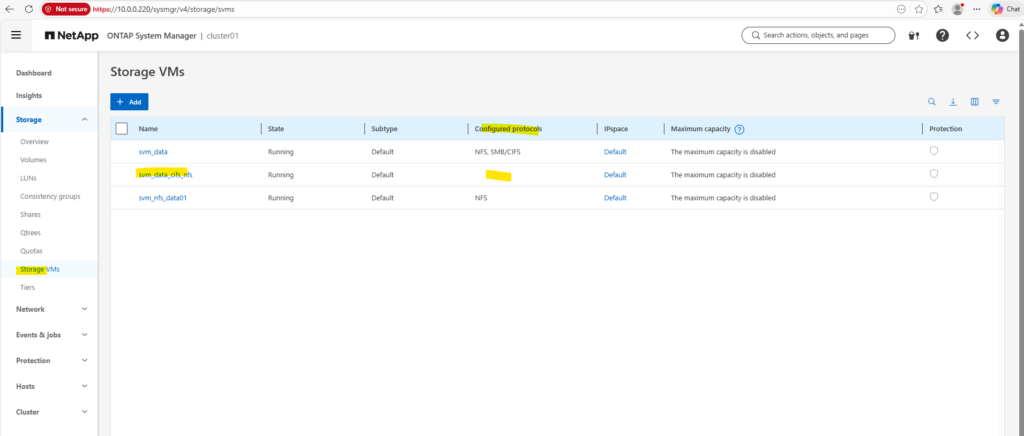
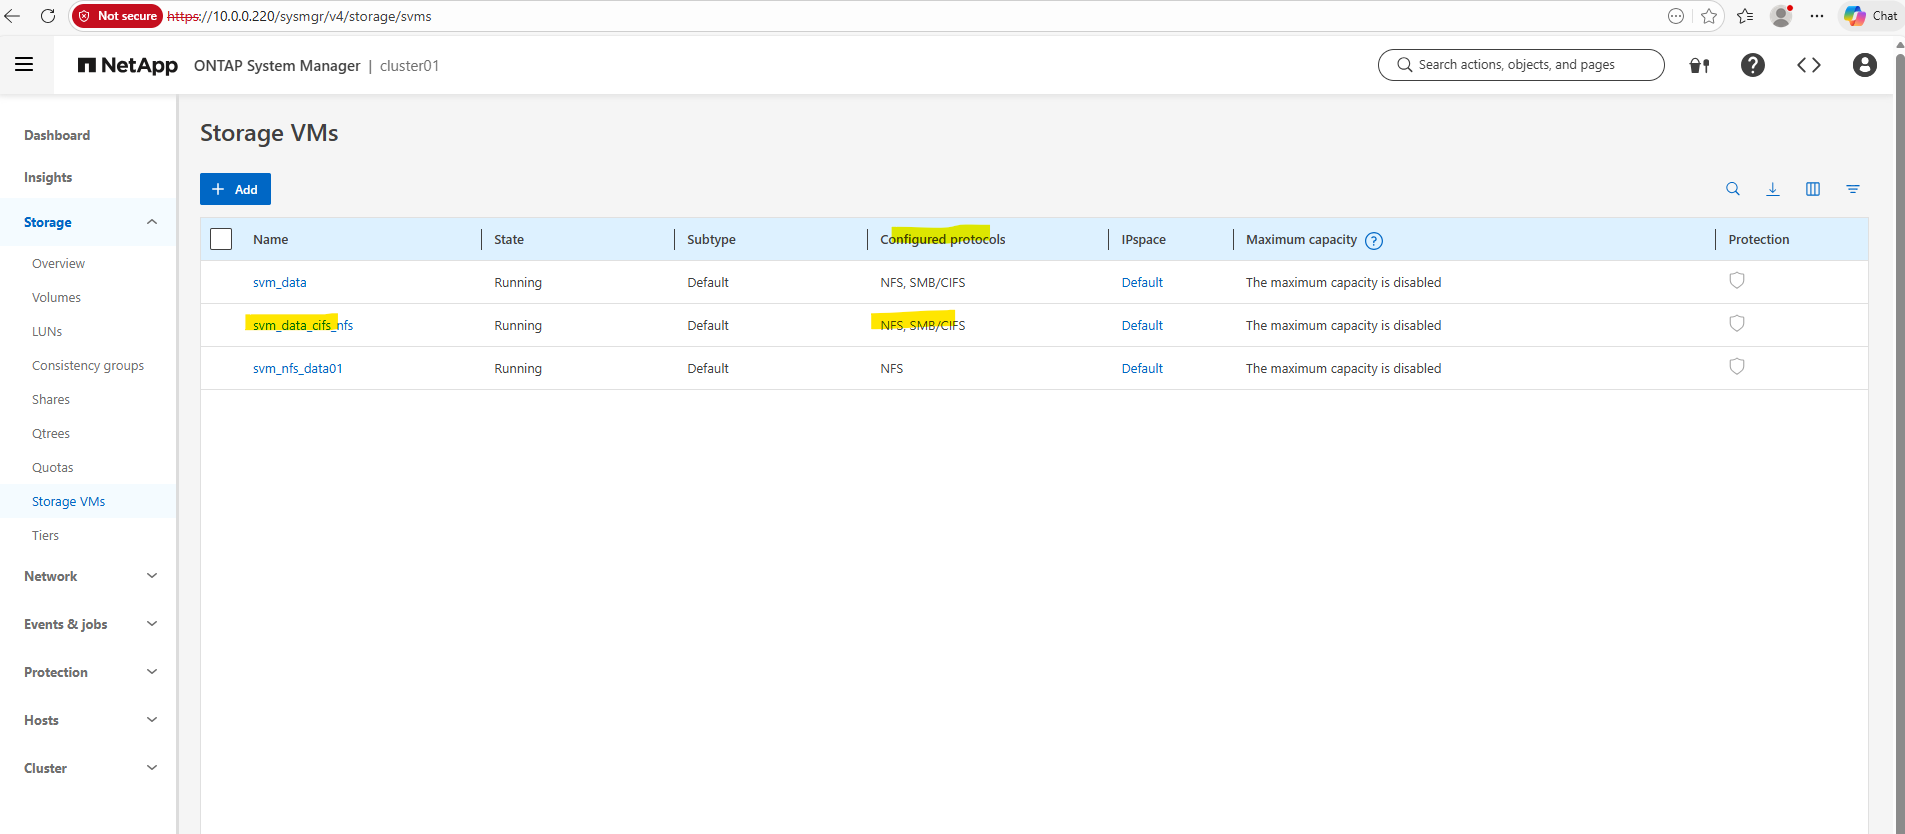
In the System Manager we can now also see that both protocols, CIFS/SMB and NFS are enabled on our newly created SVM.
Next, I will create a dedicated volume that will be accessed by both Windows and Linux clients. By default, the volume inherits the security style from the SVM root volume, which in this case is NTFS, but the security style could also be explicitly defined during volume creation if required.
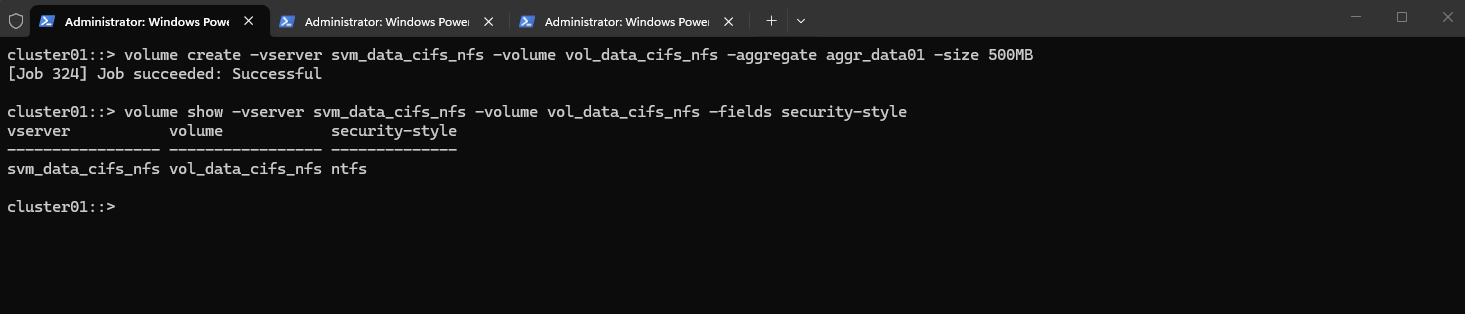
cluster01::> volume create -vserver svm_data_cifs_nfs -volume vol_data_cifs_nfs -aggregate aggr_data01 -size 500MB

# the security style could also be explicitly defined during volume creation
cluster01::> volume create -vserver svm_data_cifs_nfs -volume vol_data_cifs_nfs -aggregate aggr_data01 -size 500MB -security-style ntfs

The following command can be used to verify the security style configured for a specific volume. It displays the security model (for example NTFS, UNIX, or mixed) currently applied to the volume.
cluster01::> volume show -vserver svm_data_cifs_nfs -volume vol_data_cifs_nfs -fields security-style
We can now finally mount the volume in the namespace.
When mounting the volume, ONTAP warns that the default export policy contains no rules, which means that NFS clients are not allowed to access the volume. Even when a volume uses the NTFS security style, an export policy rule is still required for NFS access, because export policies control which clients are allowed to mount the export before any permission checks or name mapping occur.
About enabling or disabling ONTAP export policies for SMB access you can read my following post https://blog.matrixpost.net/deploying-netapp-cloud-volumes-ontap-part-3/#enable_disable_export_policies_smb_access.
cluster01::> volume mount -vserver svm_data_cifs_nfs -volume vol_data_cifs_nfs -junction-path /cifs-nfs-data

To allow the NFS client 10.0.0.89 to access the volume, we need to add an export policy rule to the policy used by the volume (in my case default).
The export policy allows the NFS client IP to mount the export, but it does not determine the final access permissions. Once the client is allowed, ONTAP evaluates the request using AUTH_SYS credentials (UID/GID), which in a multiprotocol setup are translated through UNIX → Windows name mapping so that the NTFS permissions can ultimately decide whether access is permitted.
cluster01::> export-policy rule create -vserver svm_data_cifs_nfs -policyname default -ruleindex 1 -clientmatch 10.0.0.89 -rorule sys -rwrule sys

At this point, Linux clients could already access the volume once it is mounted via NFS, although the name mapping configuration still needs to be adjusted for proper permission handling.
For Windows clients, however, the volume is not yet accessible until an SMB share is created for the junction path.
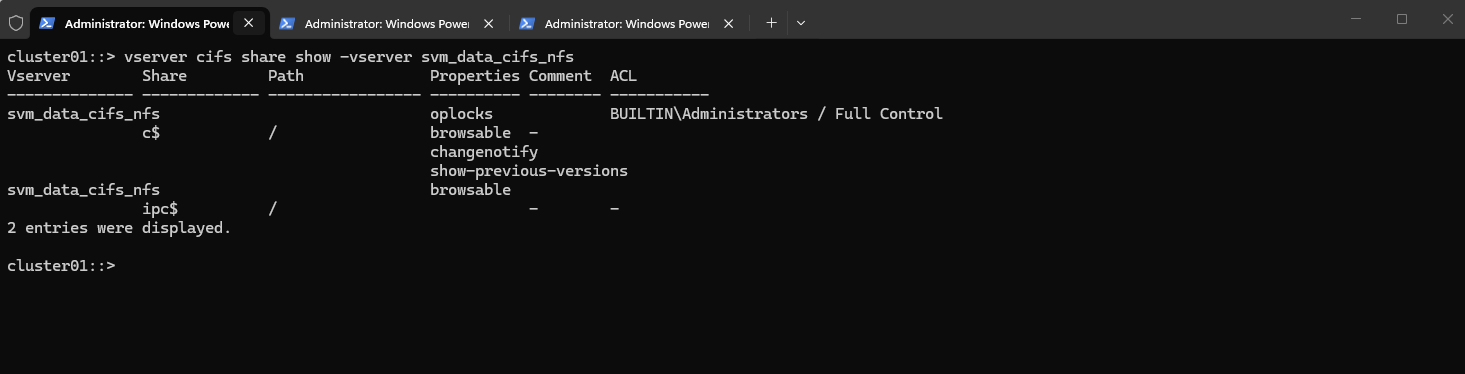
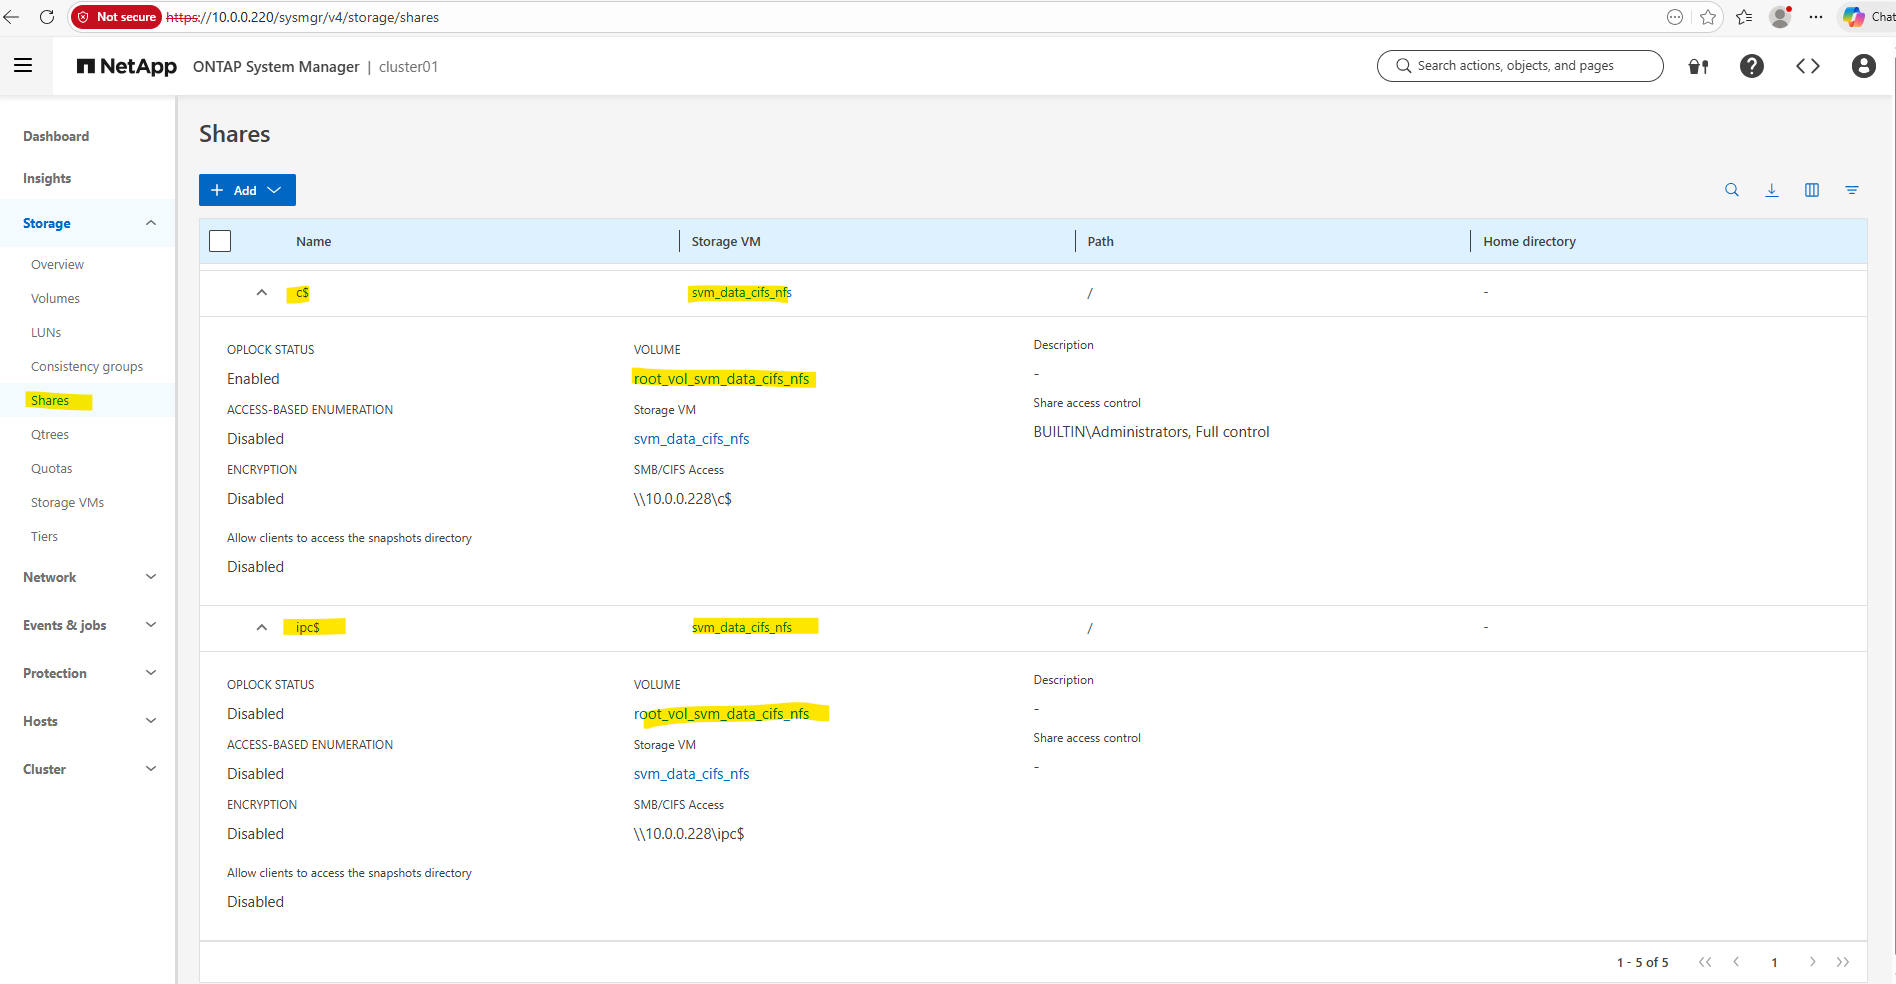
We can run the following command to show the currently existing CIFS shares on our SVM.
c$ and ipc$ shares here are default administrative shares, very similar to those found on a Windows server.
They are pointing to the root of the SVM namespace, which is the root_vol_svm_data_cifs_nfs, not our newly mounted volume vol_data_cifs_nfs.
cluster01::> vserver cifs share show -vserver svm_data_cifs_nfs
Every SVM in ONTAP requires a root volume, often named something like root_vol_svm_data_cifs_nfs. This root volume is mounted at / in the SVM’s namespace.
Our new volume vol_data_cifs_nfs is mounted at /cifs-nfs-data, but unless it’s explicitly shared, it’s not exposed via SMB.
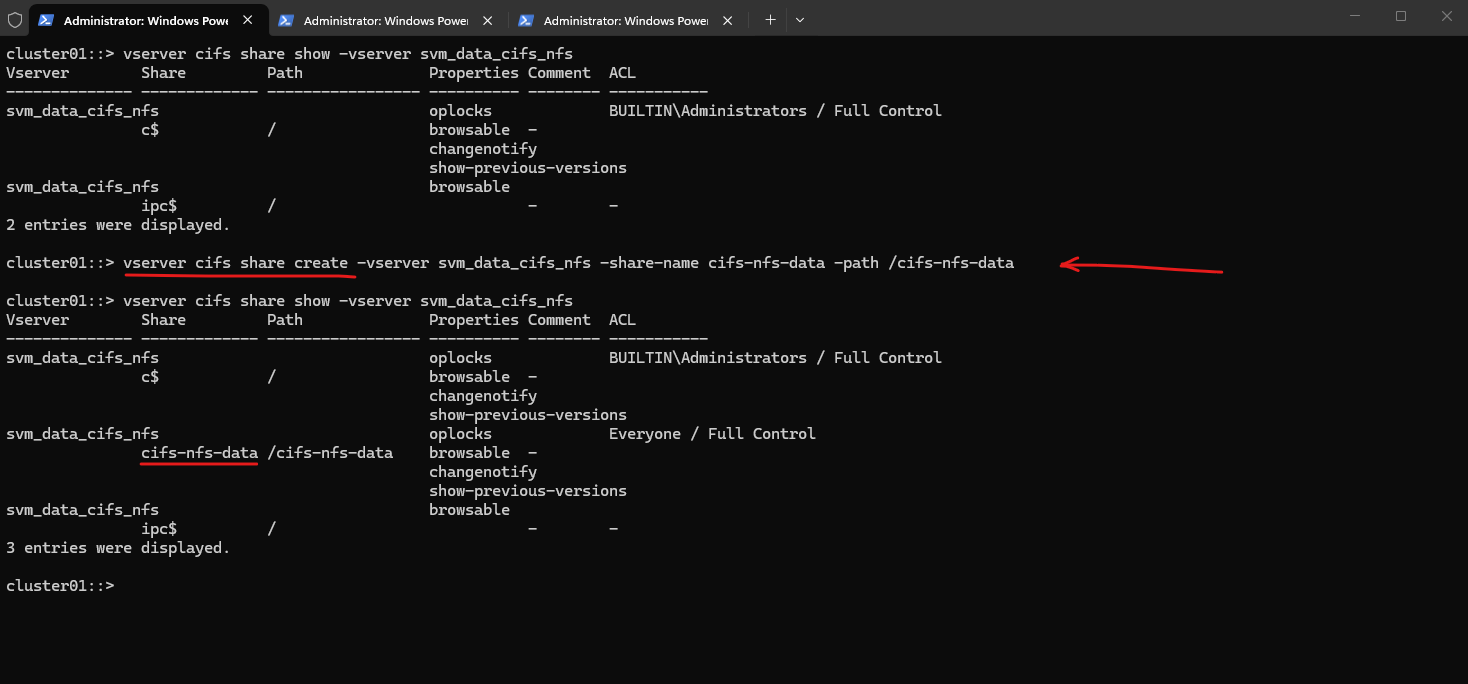
We now need to create a SMB share for our newly created vol_data_cifs_nfs volume.
cluster01::> vserver cifs share create -vserver svm_data_cifs_nfs -share-name cifs-nfs-data -path /cifs-nfs-data

# verify
cluster01::> vserver cifs share show -vserver svm_data_cifs_nfs
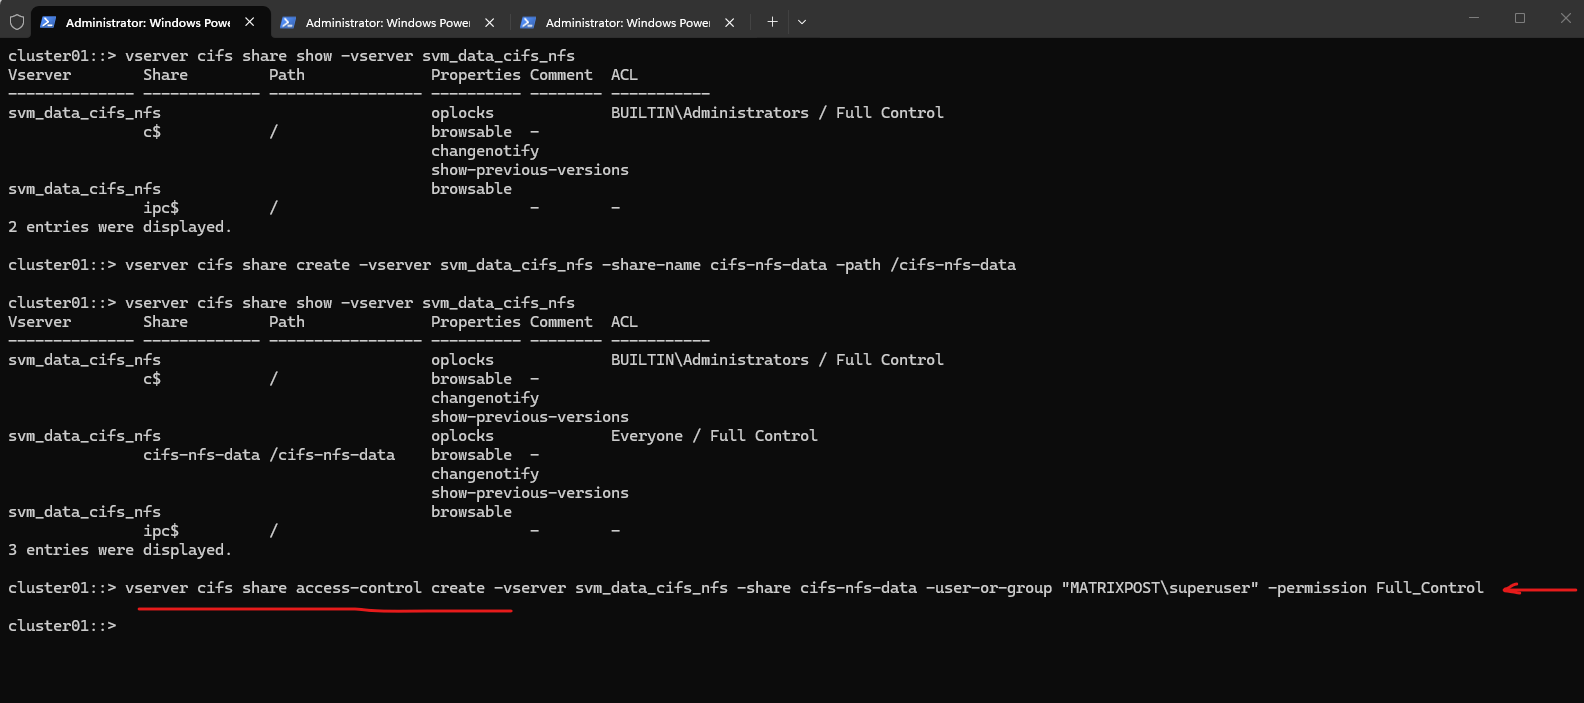
When creating the SMB share, we can either leave the default Everyone / Full Control permission and later restrict access using NTFS permissions on the filesystem, or we can already limit access at the share level by assigning specific users or groups. In many environments, share permissions remain permissive while access control is primarily enforced through NTFS ACLs.
cluster01::> vserver cifs share access-control create -vserver svm_data_cifs_nfs -share cifs-nfs-data -user-or-group "MATRIXPOST\superuser" -permission Full_Control
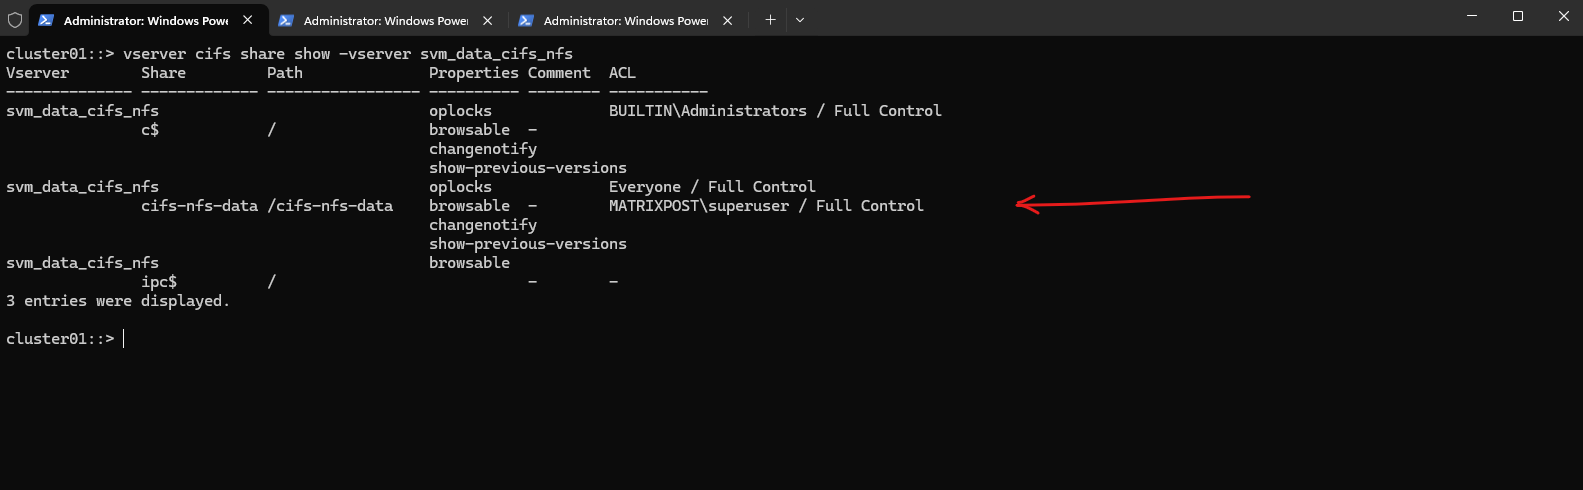
cluster01::> vserver cifs share show -vserver svm_data_cifs_nfs
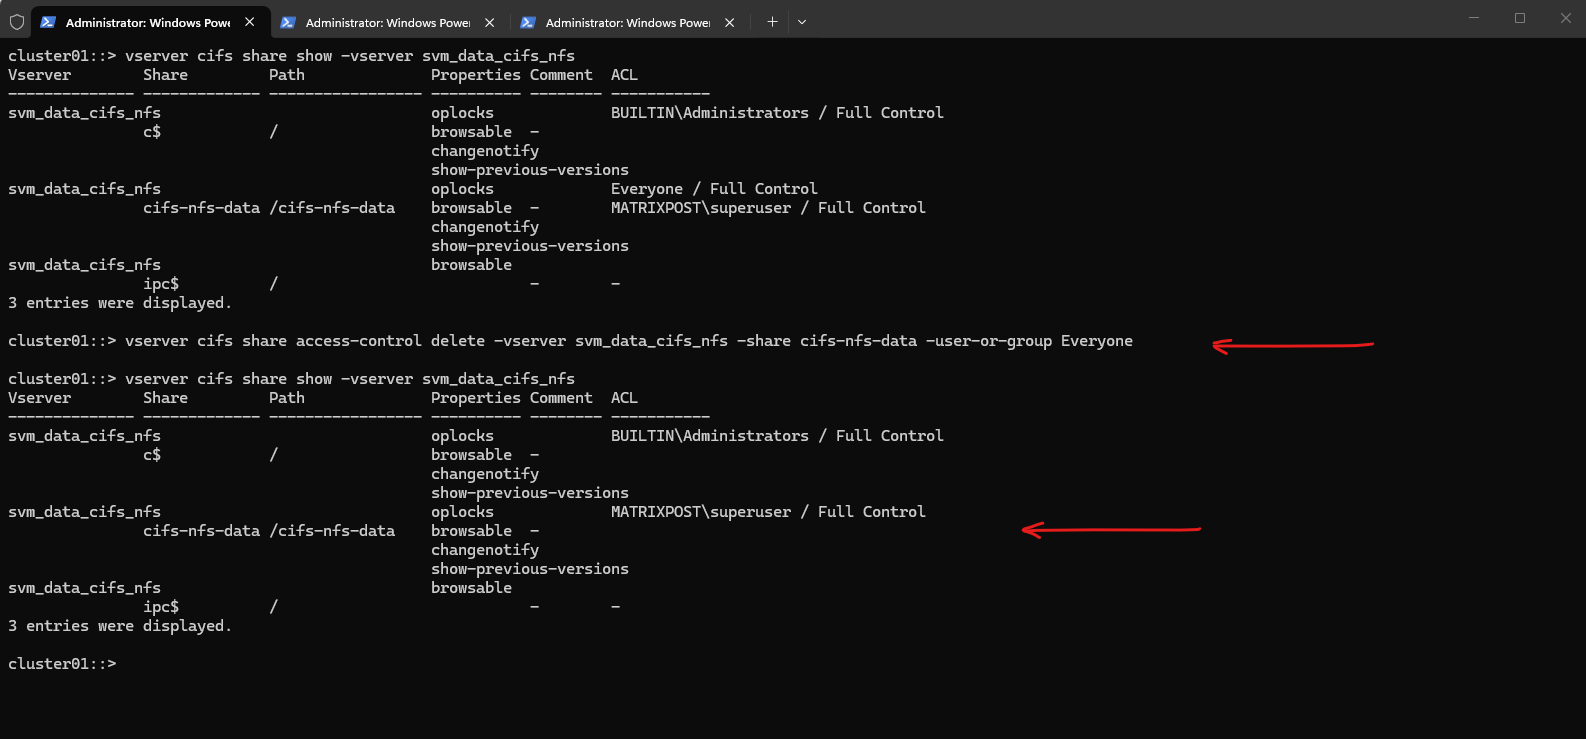
To remove Everyone / Full Control from the SMB share in ONTAP, you remove the share ACL entry with the following command.
cluster01::> vserver cifs share access-control delete -vserver svm_data_cifs_nfs -share cifs-nfs-data -user-or-group Everyone
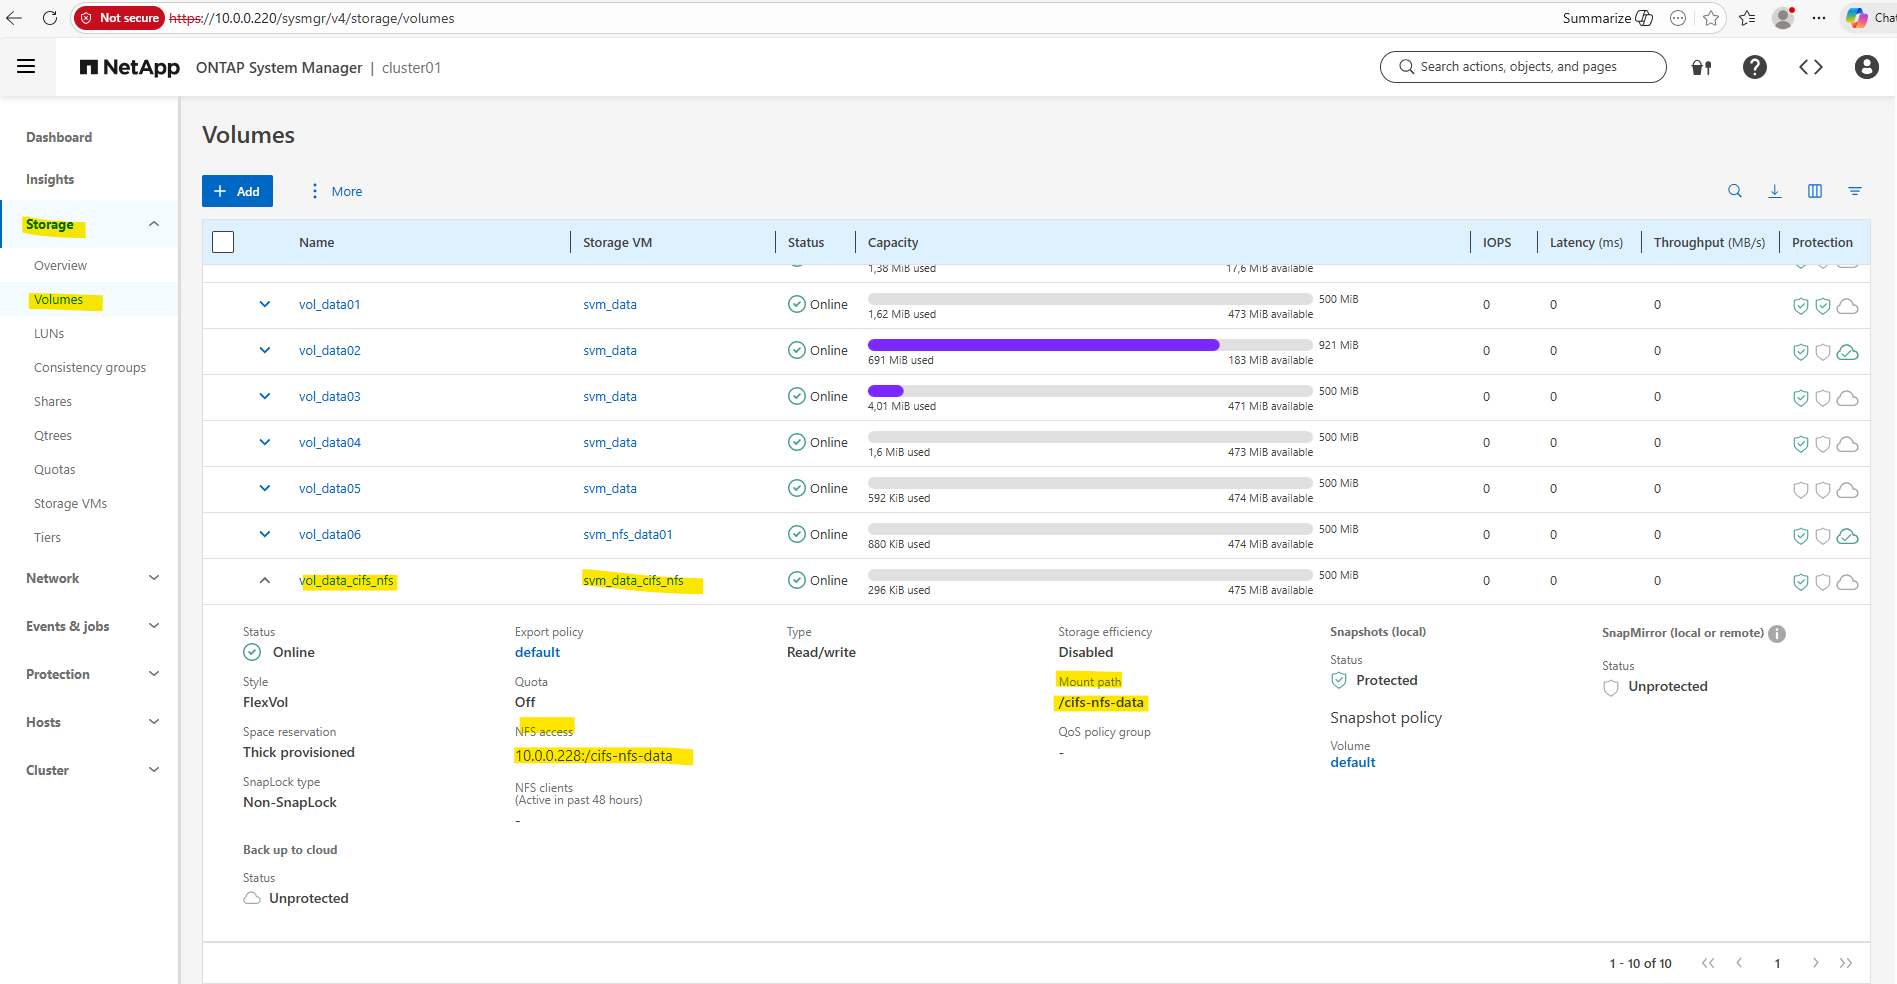
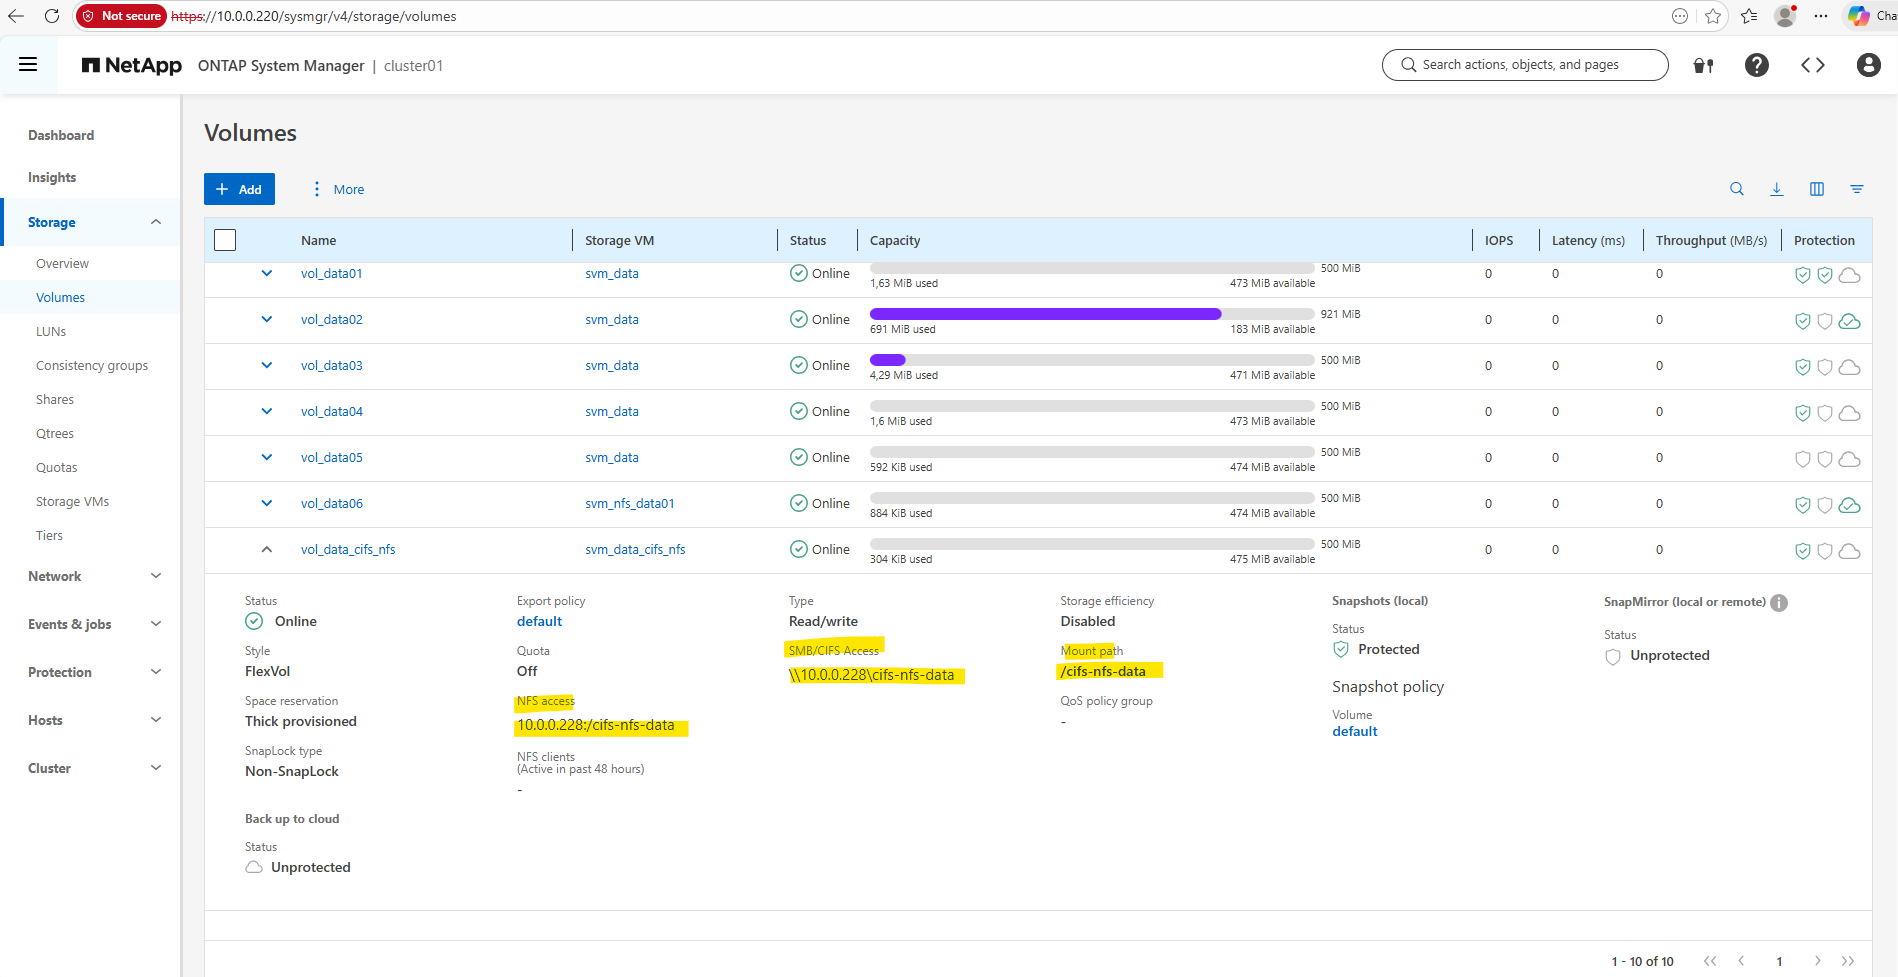
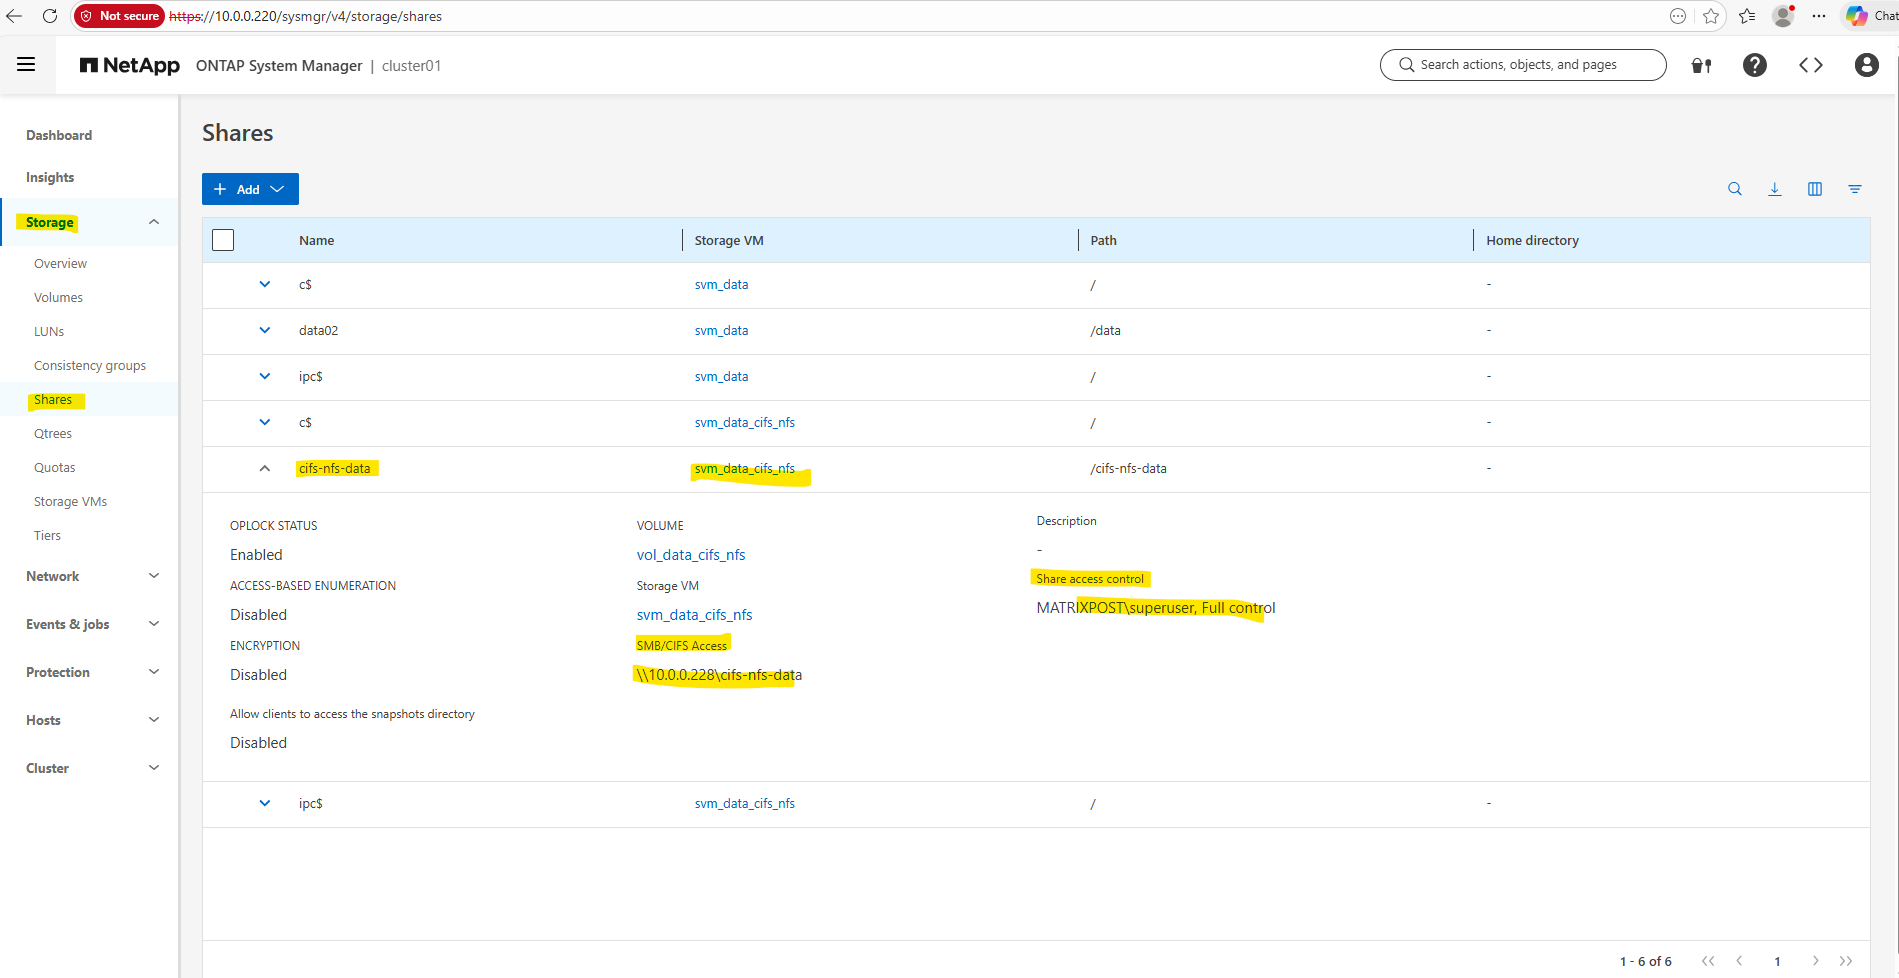
In System Manager, we can now also see the SMB/CIFS access path, which shows the UNC path that Windows clients can use to connect to the share. This path can be used directly from Windows systems to access the volume over SMB.
Accessing the Share (Volume) from Windows and Linux
From Windows
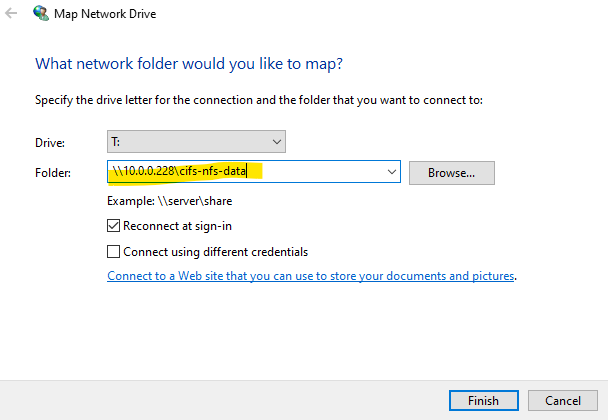
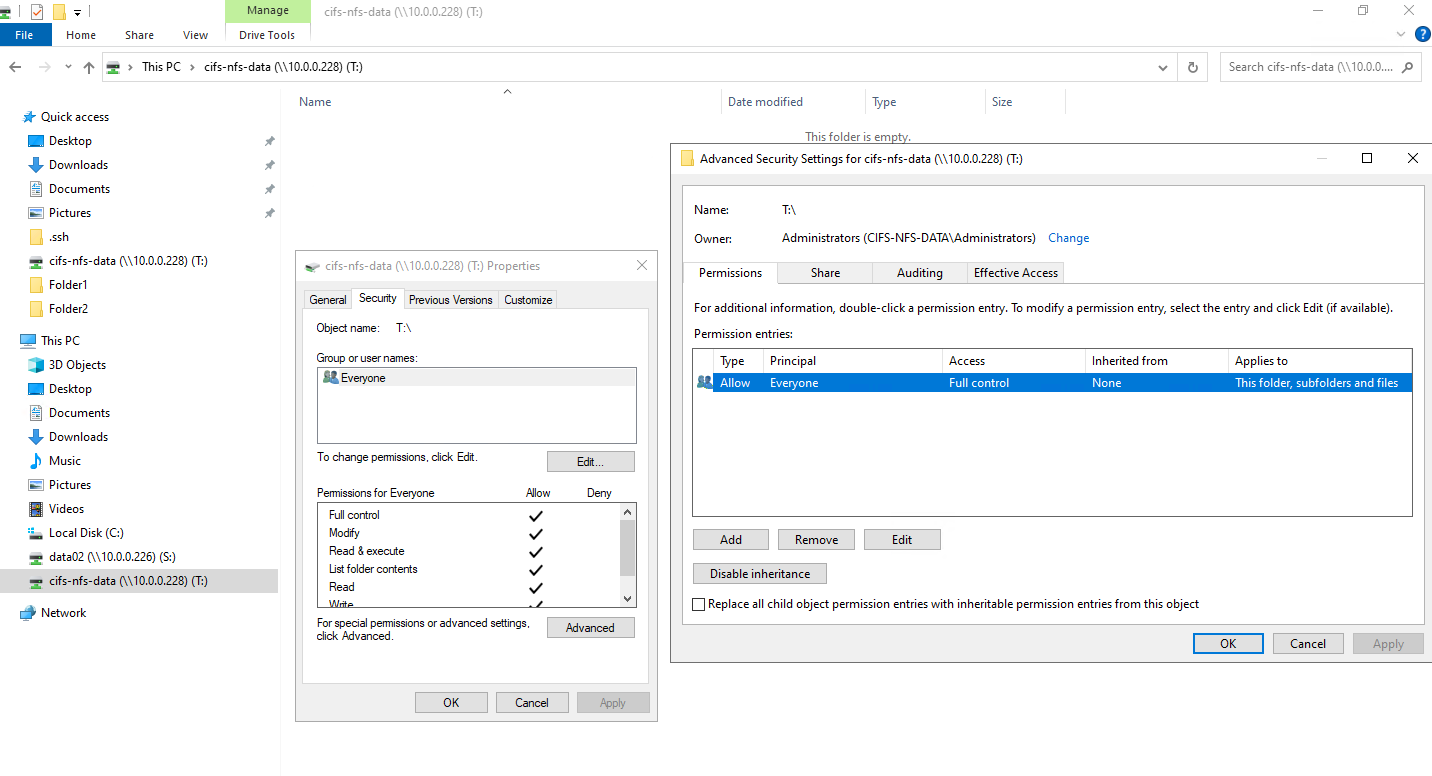
To verify the access permissions of the newly created SMB share, I connect to it from a Windows client using the UNC path displayed in System Manager, as shown below.
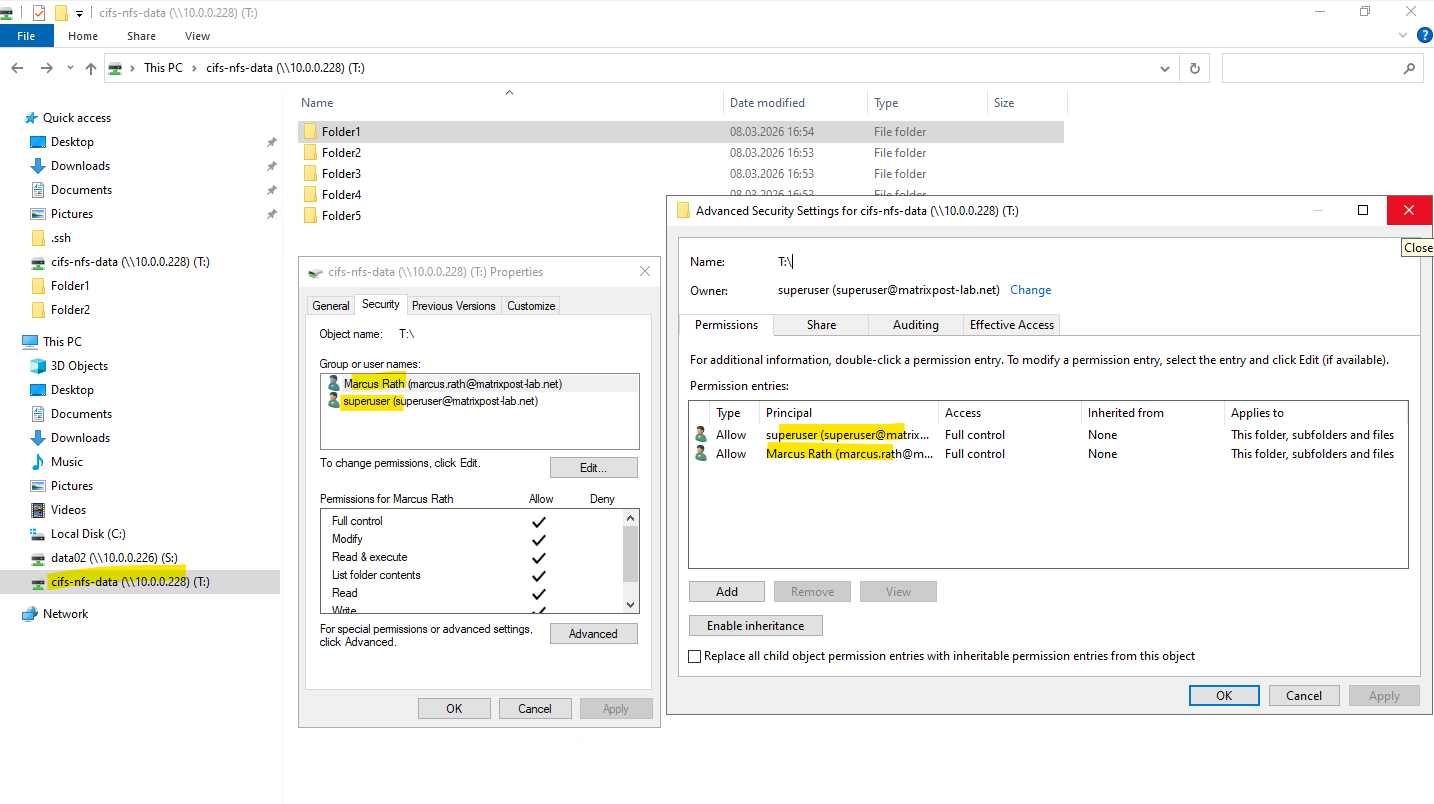
SMB access is controlled by two independent permission layers: the share permissions configured on the CIFS share and the NTFS filesystem permissions stored on the volume. When viewing permissions in Windows, the Security tab shows the NTFS ACL, not the share permissions.
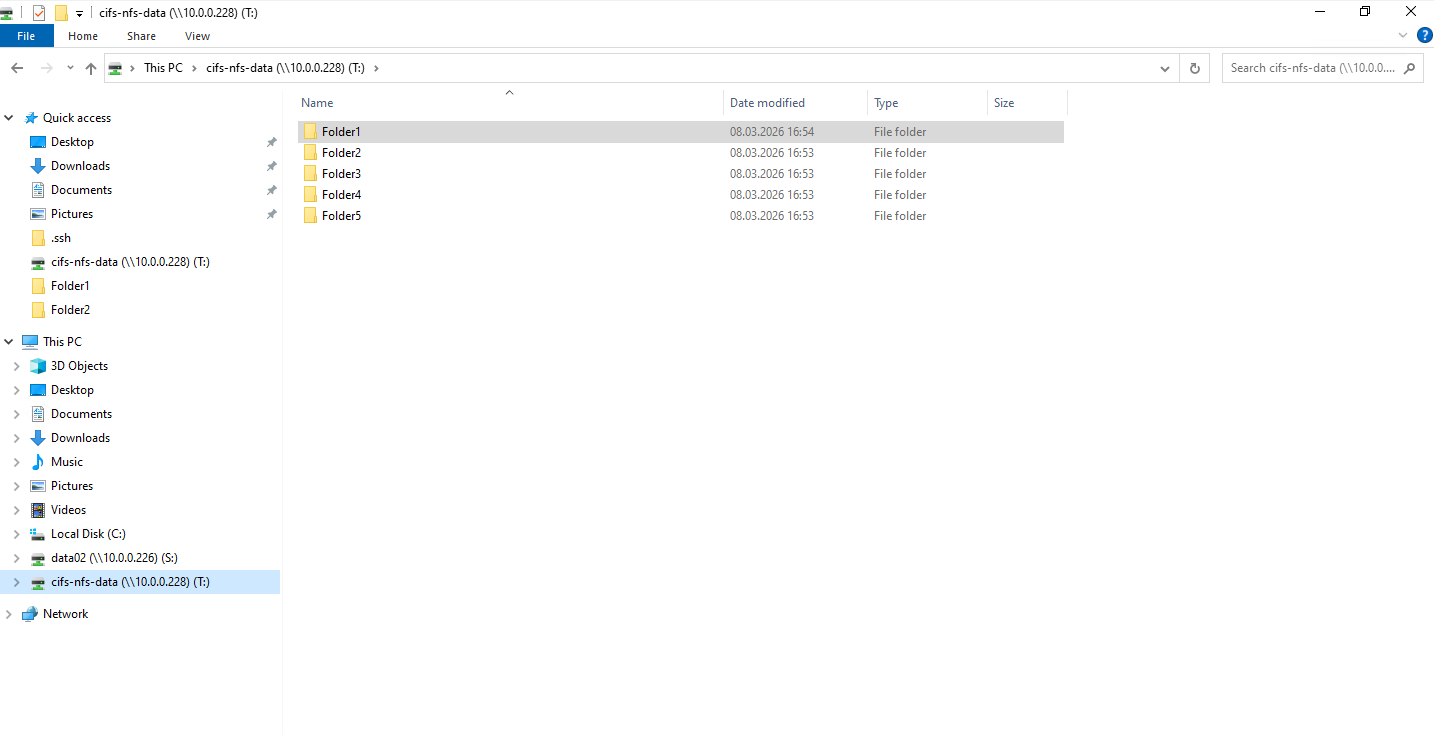
For testing purposes, I created five folders on the share (volume), as shown below.
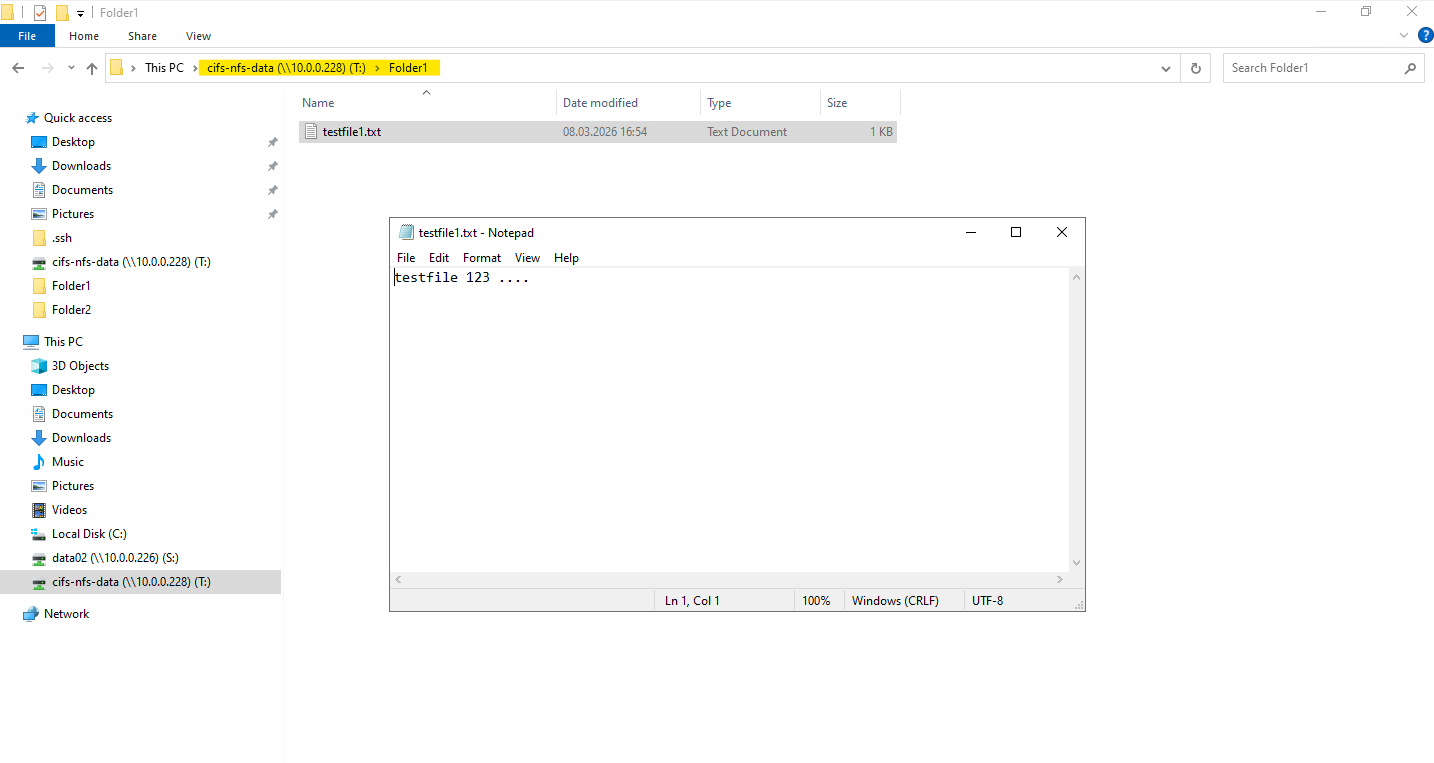
Also a testfile in Folder1 as shown below.
From Linux
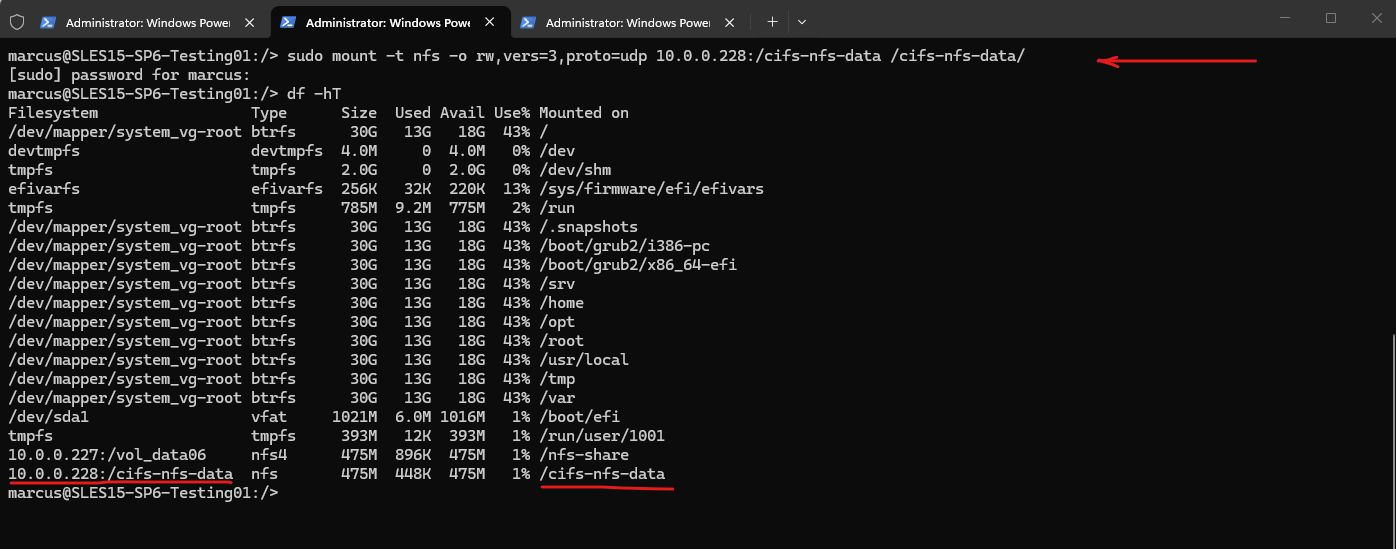
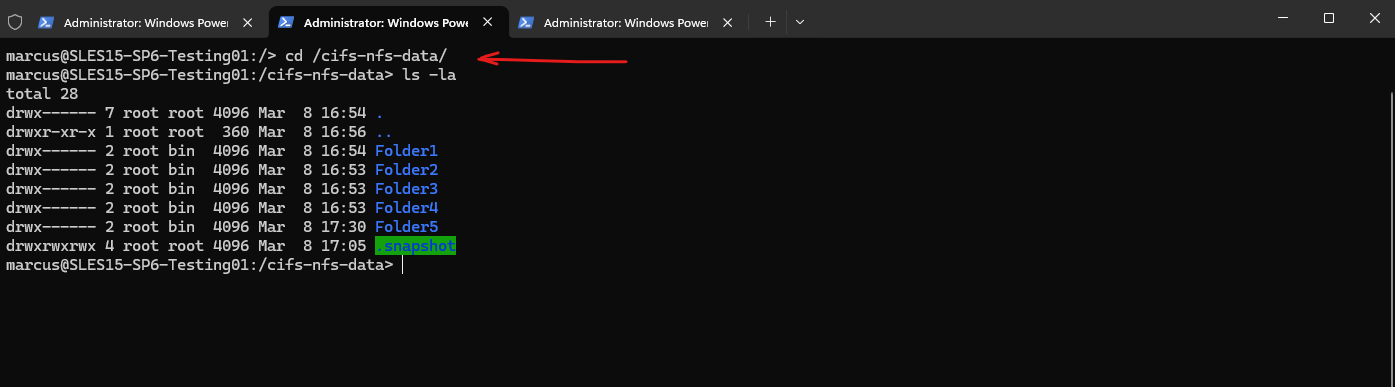
Next, I attempt to access the share (volume) from a Linux client using the NFSv3 protocol. This is the key test to verify whether the UNIX → Windows name mapping works correctly, so I first mount the volume as shown below.
marcus@SLES15-SP6-Testing01:/> sudo mount -t nfs -o rw,vers=3,proto=udp 10.0.0.228:/cifs-nfs-data /cifs-nfs-data/
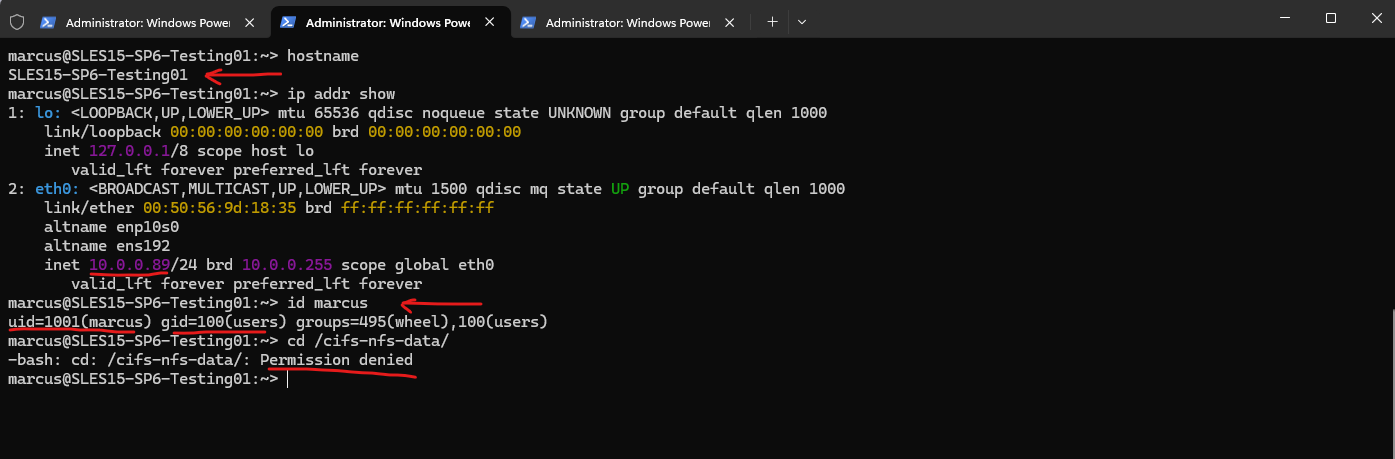
After mounting the volume, I verify the client identity and test access to the volume. Therefore, I check the hostname, IP address, and user identity before attempting to access the mounted directory.
At this stage the change directory command results in a “Permission denied” error because the required name mapping and UNIX user configuration are not yet in place.
:~> hostname
:~> ip addr show
:~> id marcus

:~> cd /cifs-nfs-data/
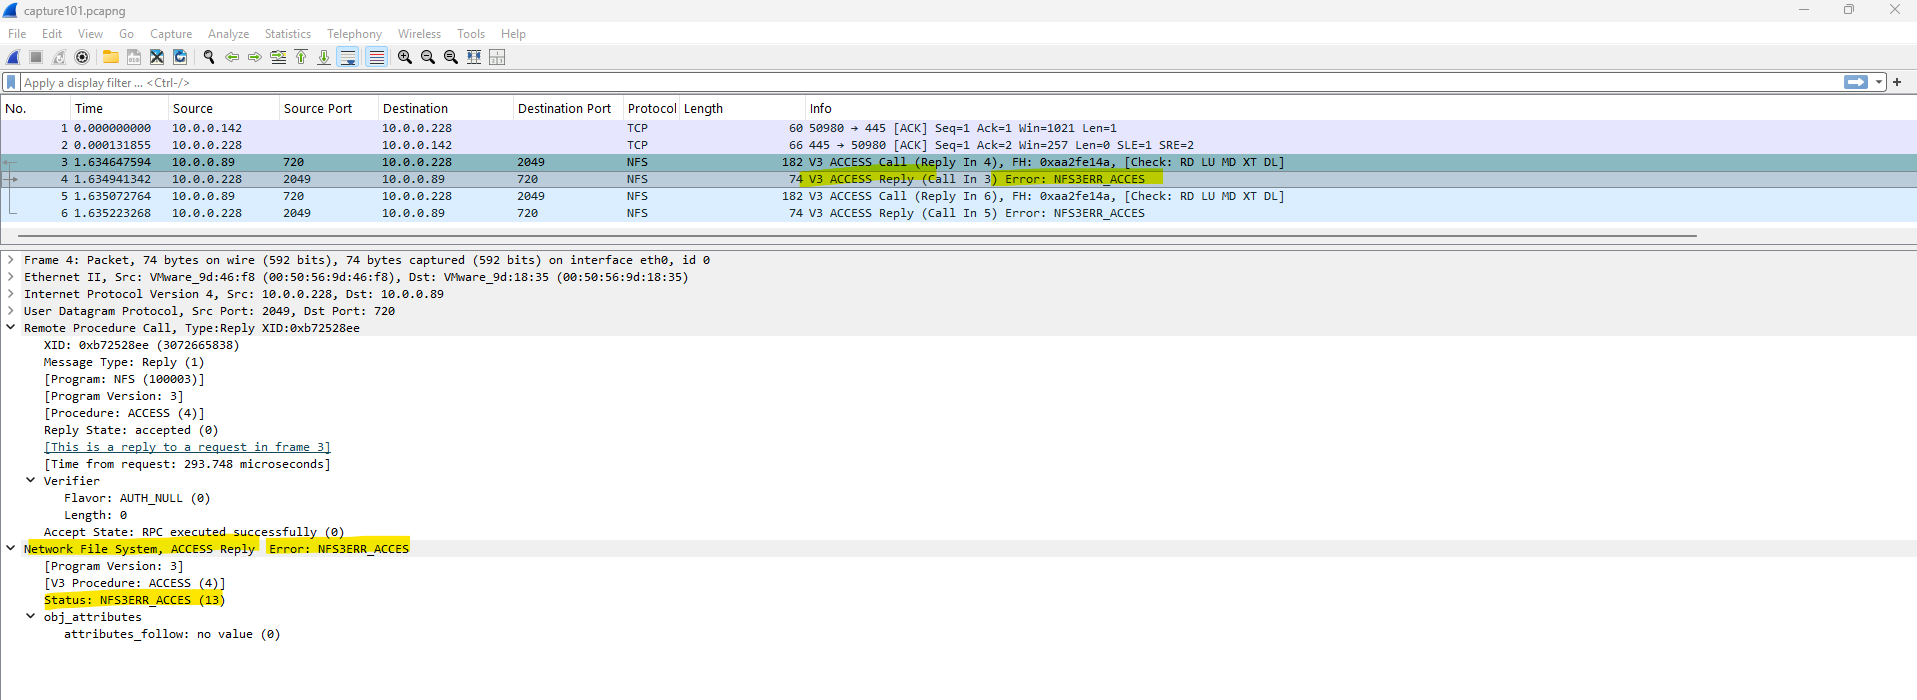
In the packet capture below, we can see the RPC call sent by the NFS client, including the transmitted UID and GID values as well as the authentication flavor AUTH_UNIX (1) used by NFSv3.
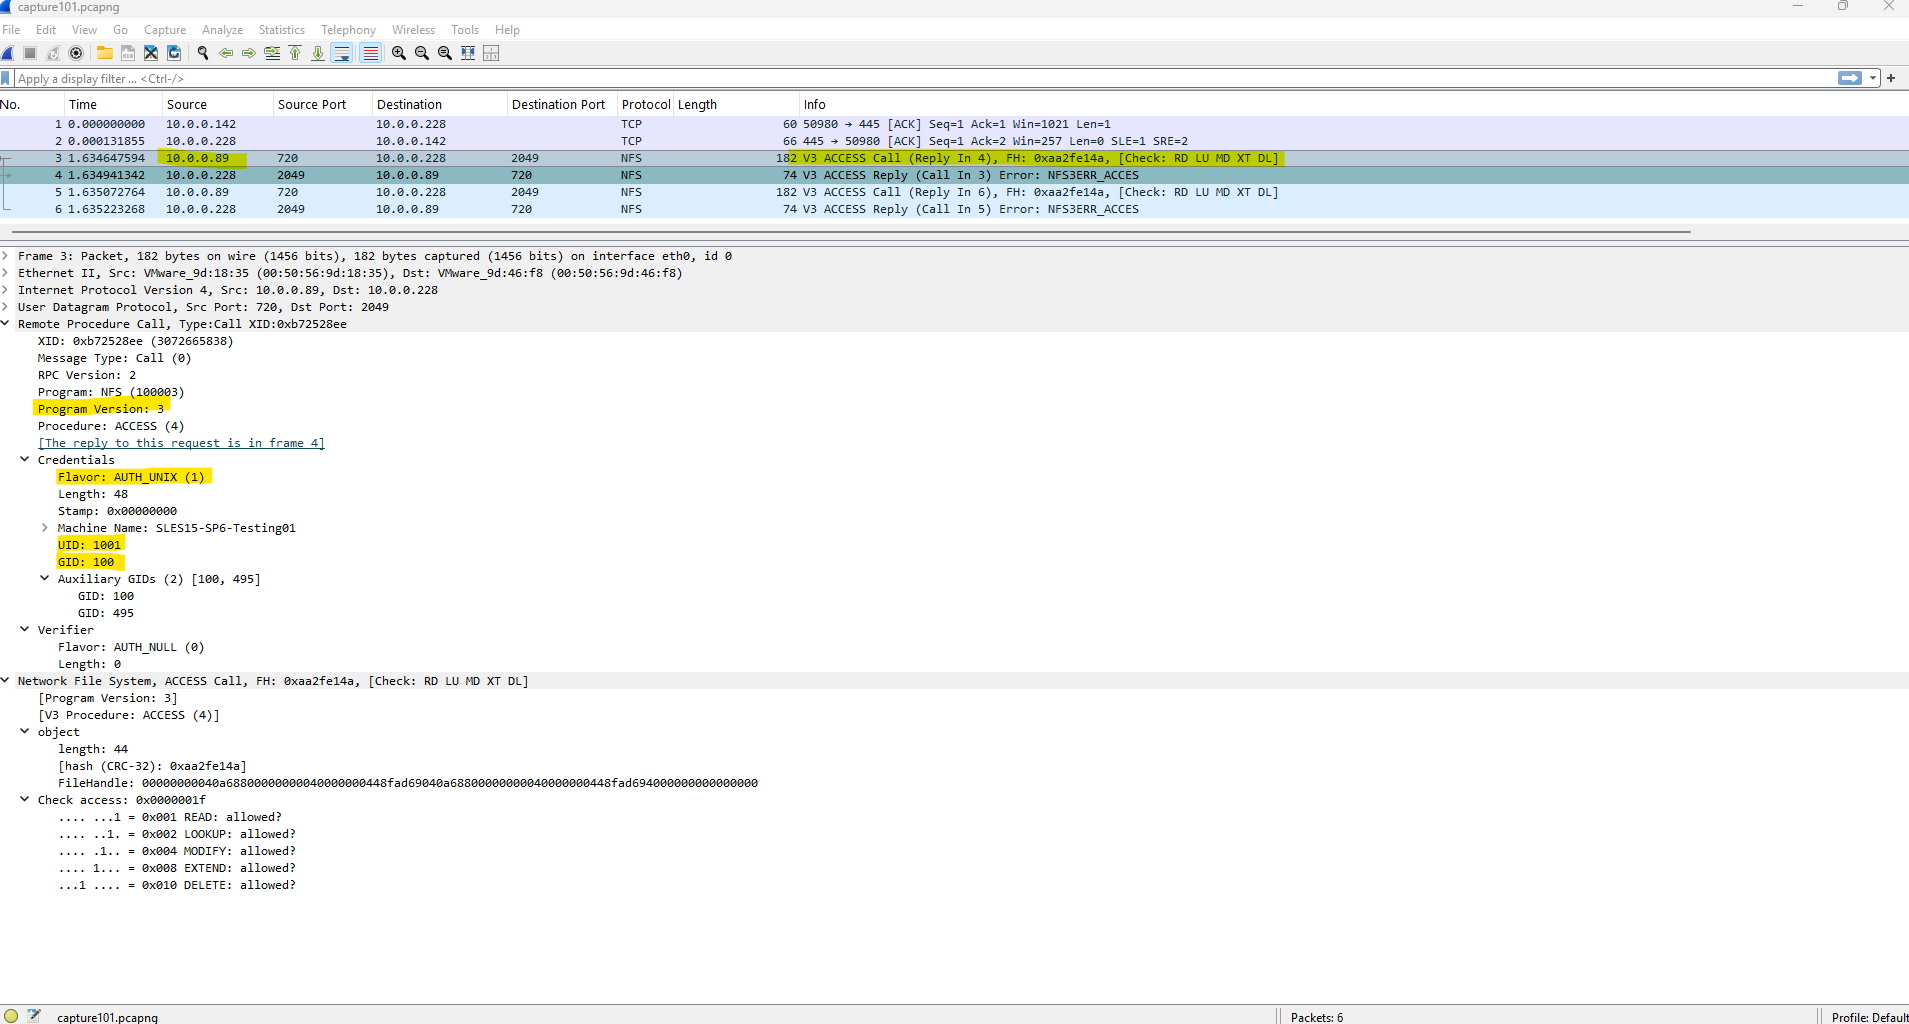
Although the NFS client is allowed to mount the export through the export policy, access to the data is still denied because the volume uses the NTFS security style. Without a proper UNIX → Windows name mapping, ONTAP cannot translate the UNIX identity to a Windows user, and the NTFS permission check therefore fails.
More about analyzing NFS traffic by using TSharek and WireShark you will find here.
Next, I will first remove the default NTFS Everyone / Full Control permission from the volume and instead grant Full Control explicitly to the Enterprise Admin account (superuser) and my own user account marcus.rath.
This ensures that access is restricted to the intended identities.
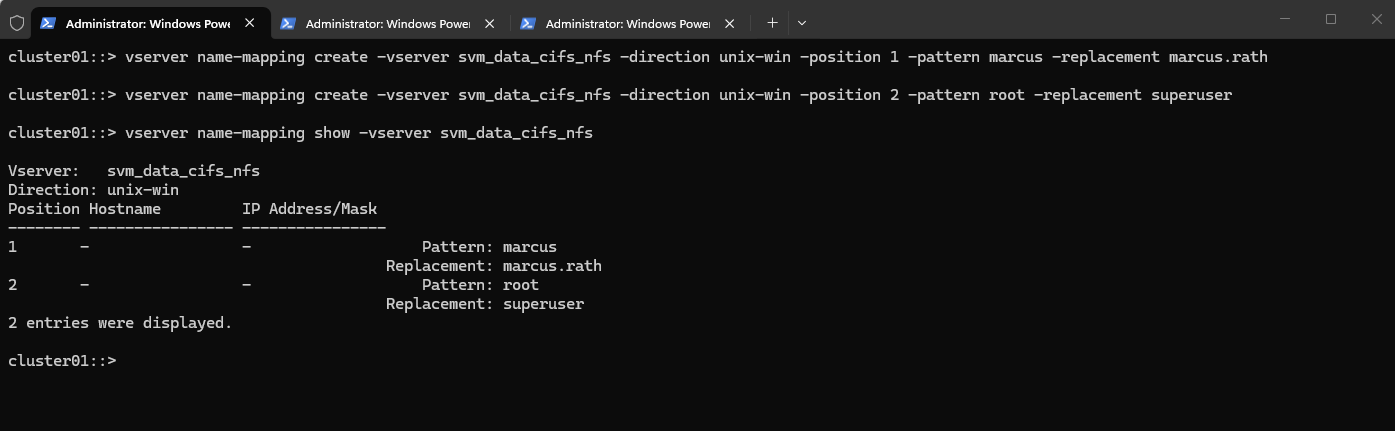
Next, I create UNIX → Windows name mapping rules so that the UNIX users marcus and root are translated to their corresponding Windows accounts marcus.rath and superuser. This allows ONTAP to evaluate NTFS permissions correctly when the volume is accessed via NFS.
cluster01::> vserver name-mapping create -vserver svm_data_cifs_nfs -direction unix-win -position 1 -pattern marcus -replacement marcus.rath

cluster01::> vserver name-mapping create -vserver svm_data_cifs_nfs -direction unix-win -position 2 -pattern root -replacement superuser

Verify mappings.
cluster01::> vserver name-mapping show -vserver svm_data_cifs_nfs
Since our SVM is domain joined, ONTAP automatically resolves the users against the domain:
marcus.rath  -> MATRIXPOST\marcus.rath
superuser    -> MATRIXPOST\superuser
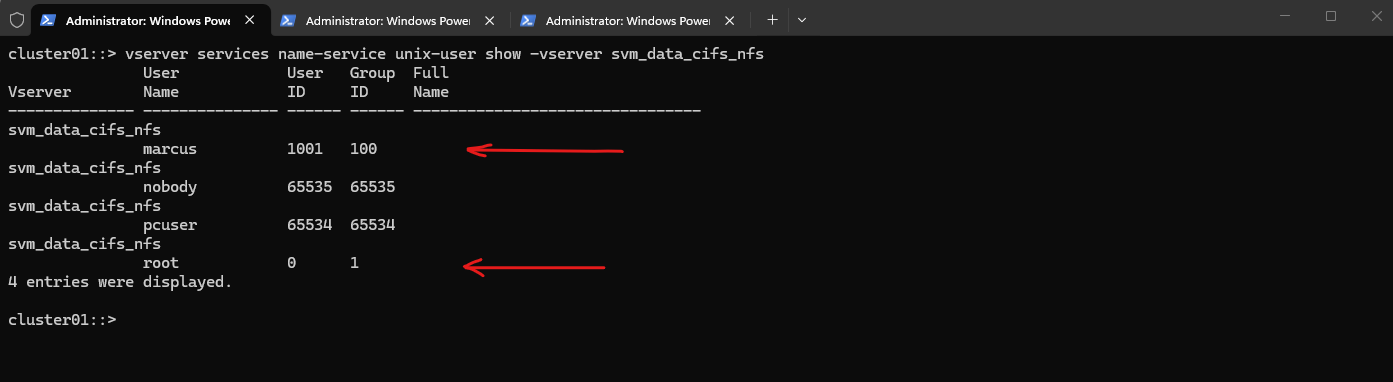
To allow ONTAP to resolve the NFS identity, I created also a local UNIX user entry on the SVM that maps UID 1001 to the username marcus. This enables ONTAP to translate the UID received in the NFS request to a UNIX username, which can then be used for the UNIX → Windows name mapping as configured previously.
Because NFS AUTH_SYS transmits only the numeric UID/GID, ONTAP must first resolve the UID to a UNIX username before applying name mapping rules.
Unlike regular users, the UNIX root user (UID 0) is already known to ONTAP and usually does not need to be created as a local UNIX user. However, in multiprotocol environments it is common to configure a root → Windows administrative account name mapping so NTFS permissions can be evaluated correctly.
By using the ONTAP CLI:
cluster01::> vserver services name-service unix-user create -vserver svm_data_cifs_nfs -user marcus -id 1001 -primary-gid 100
Verify it with:
cluster01::> vserver services name-service unix-user show -vserver svm_data_cifs_nfs
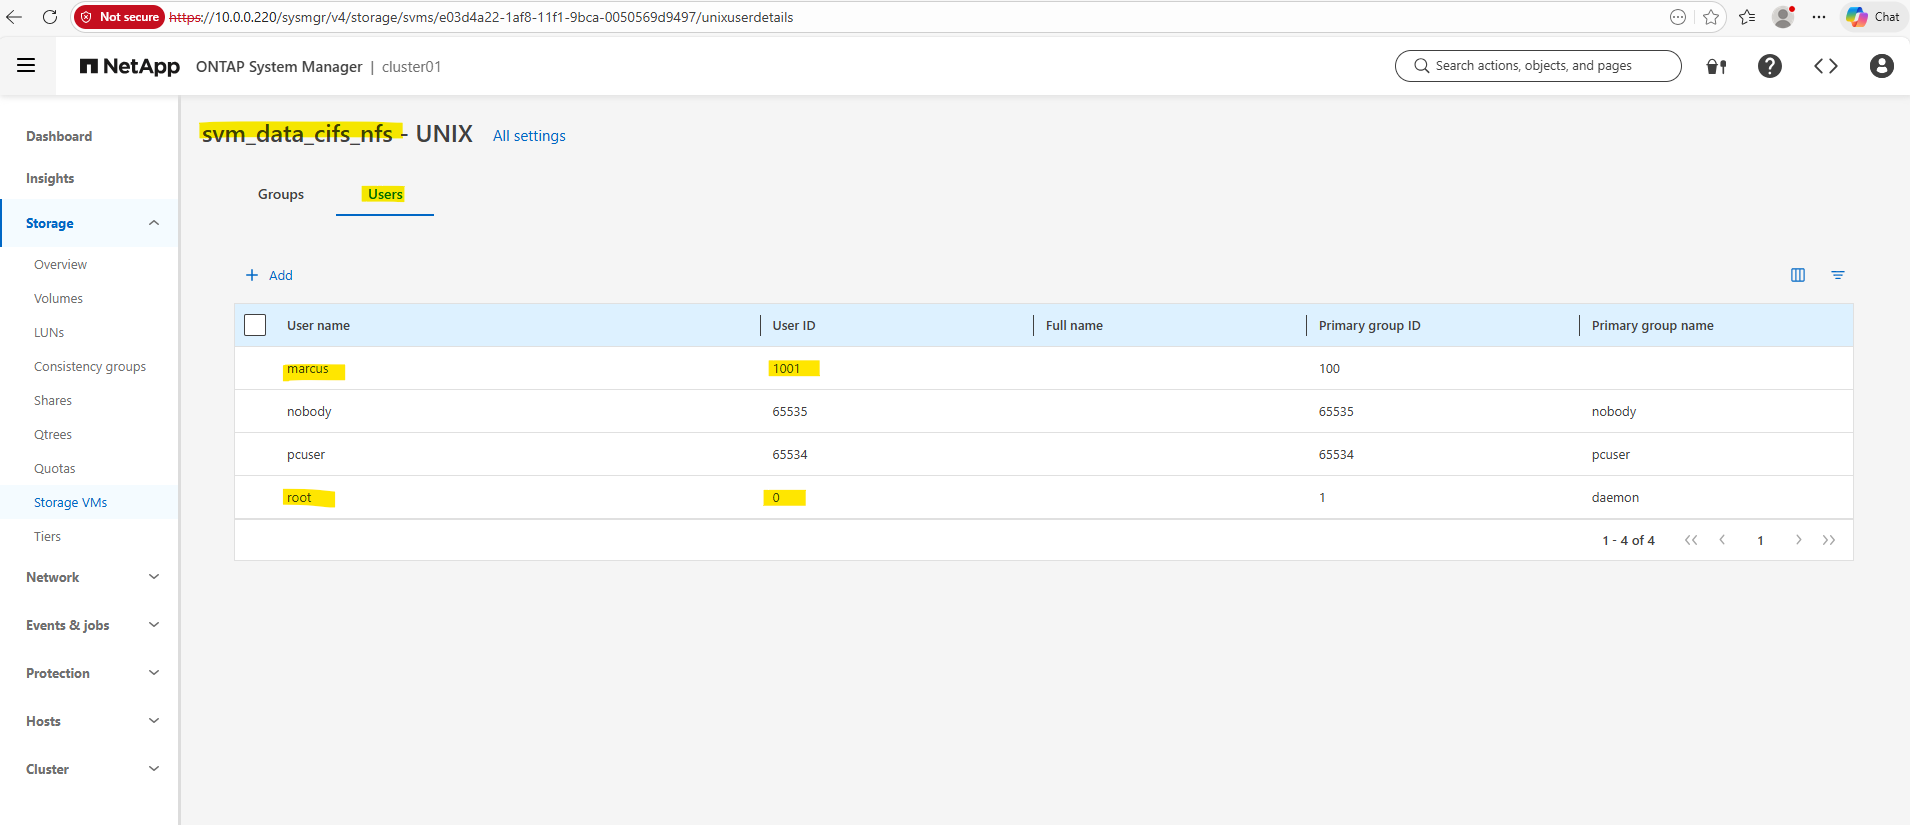
Therefore we can also use the System Manager as shown below, here on the SVM under Host Users and Groups → UNIX so that UID 1001 can be resolved to the username marcus.
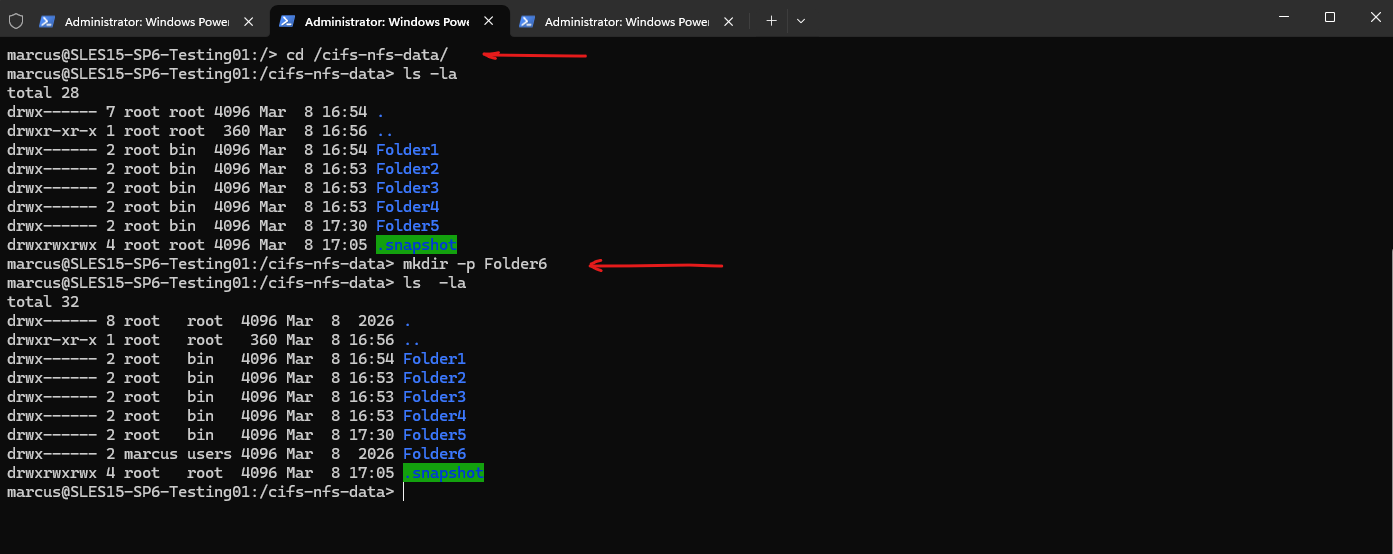
After configuring the UNIX → Windows name mapping and creating a corresponding UNIX user entry on the SVM, the NFS client can successfully access the volume.
ONTAP resolves the incoming UID/GID from the NFS request, maps the UNIX user to the corresponding Windows identity, and evaluates the NTFS permissions, allowing the directory to be created successfully.
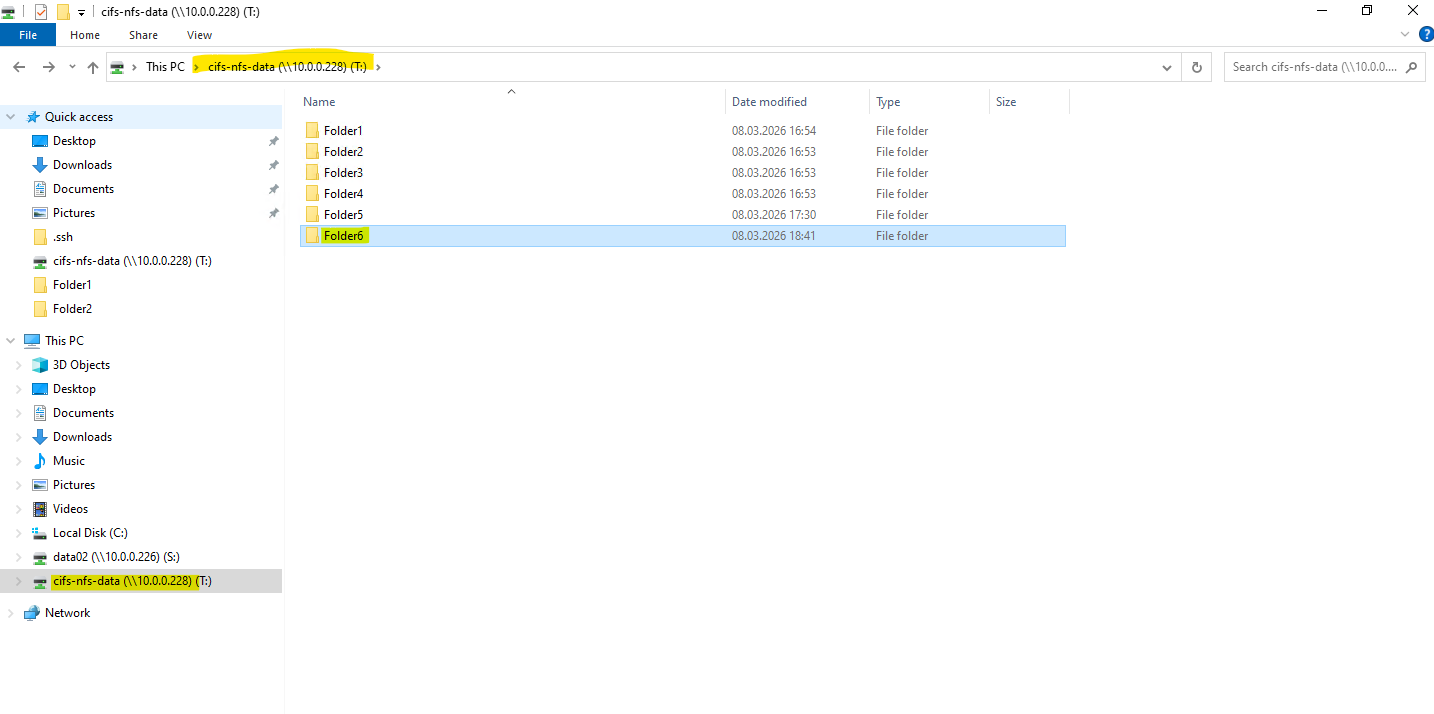
Below I was creating a new folder named Folder6 on this share (volume).
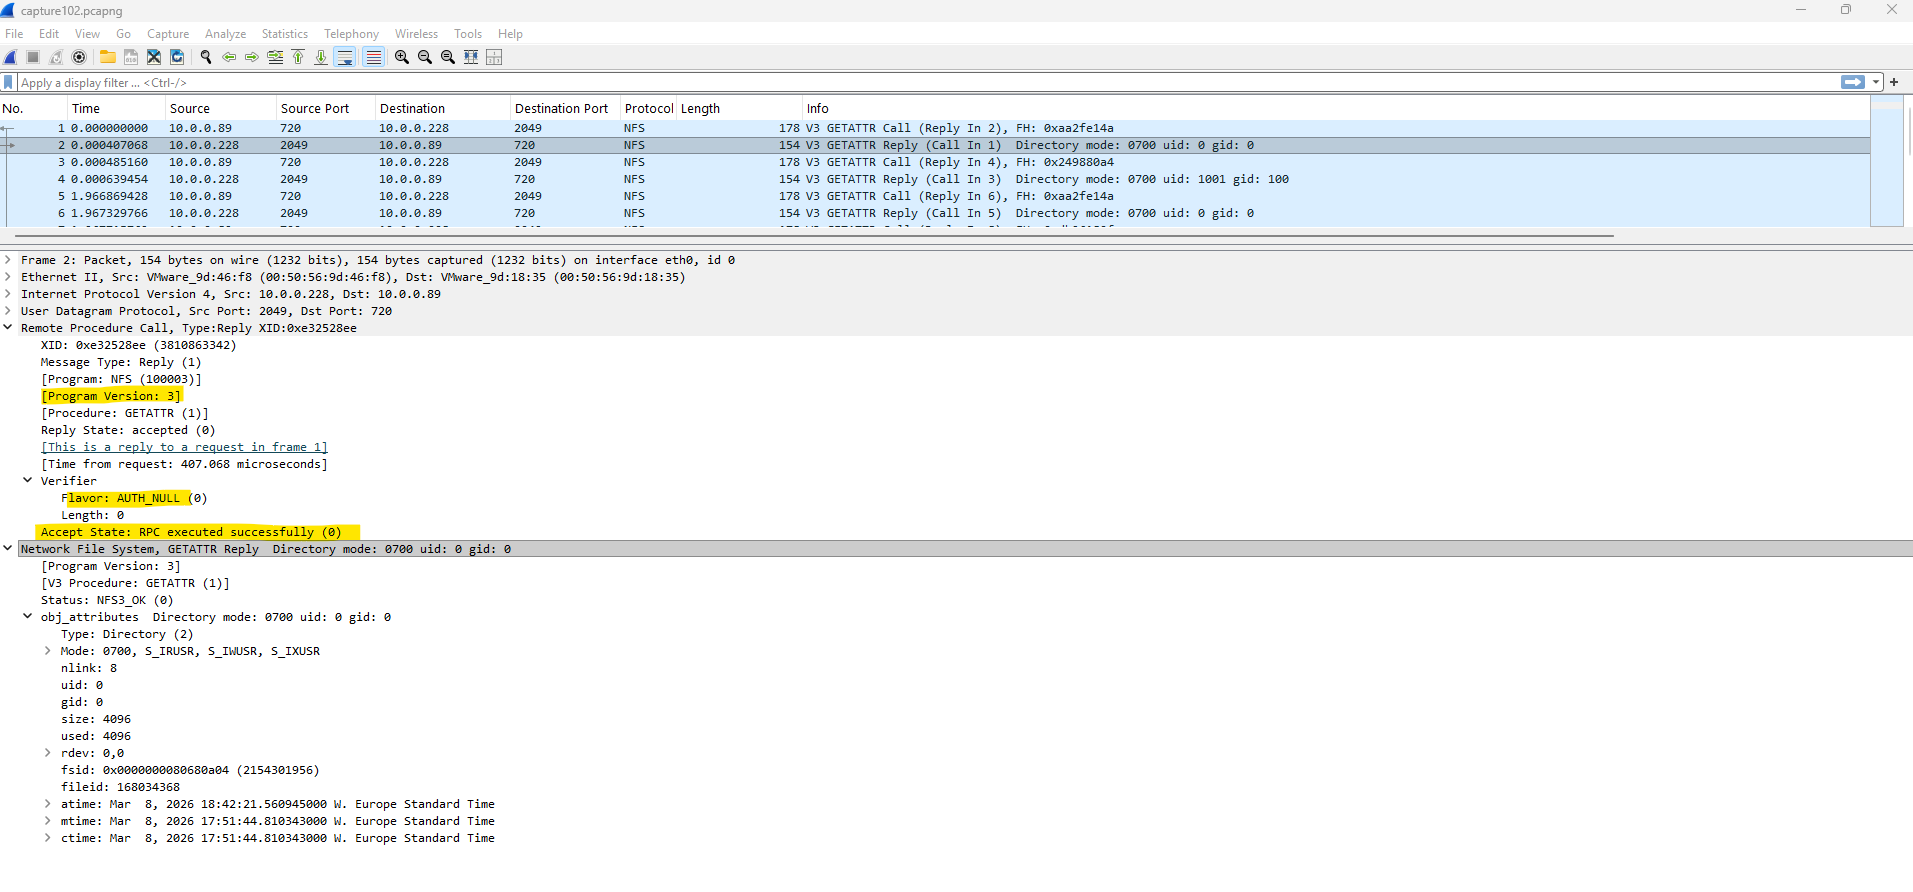
When capturing the traffic with tshark and later analyzing it in Wireshark, successful NFS operations can be identified by the field “Accept State: RPC executed successfully (0)”. This indicates that the RPC request was processed successfully by the NFS server.
Troubleshooting
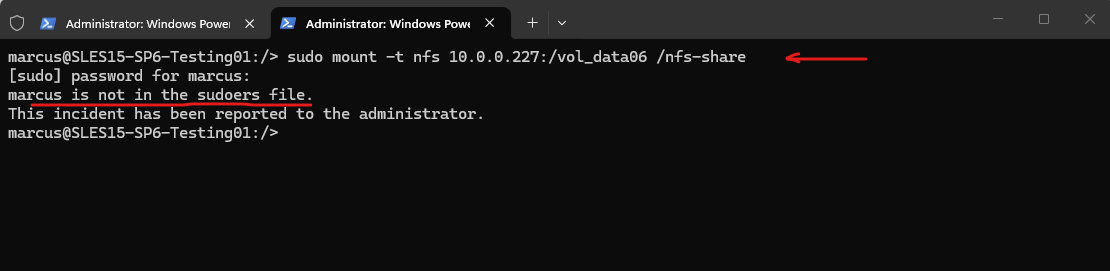
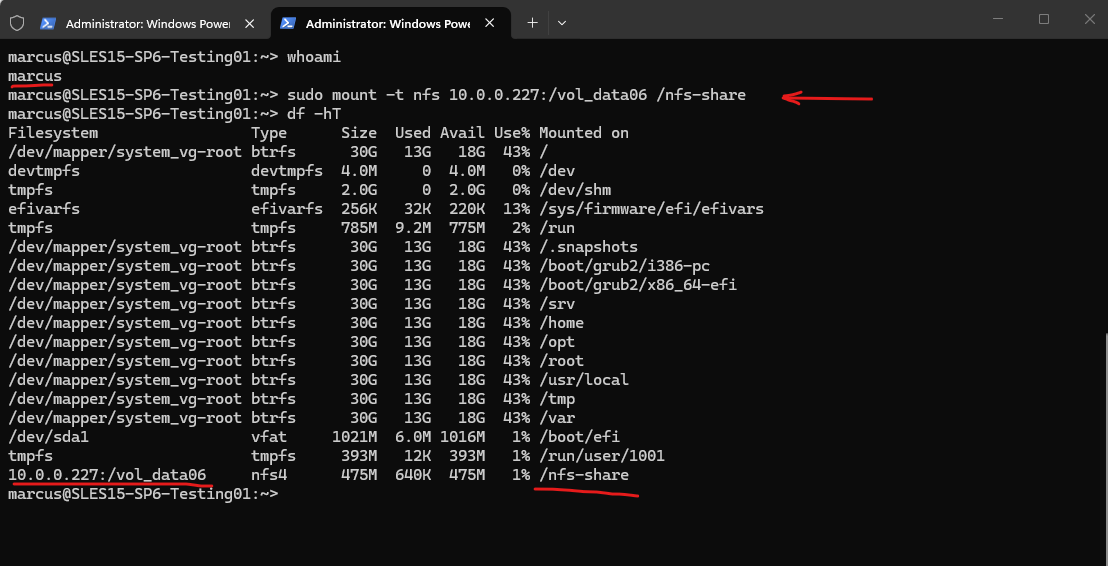
User is not in the sudoers file when running Mount Command
marcus@SLES15-SP6-Testing01:/> sudo mount -t nfs 10.0.0.227:/vol_data06 /nfs-share
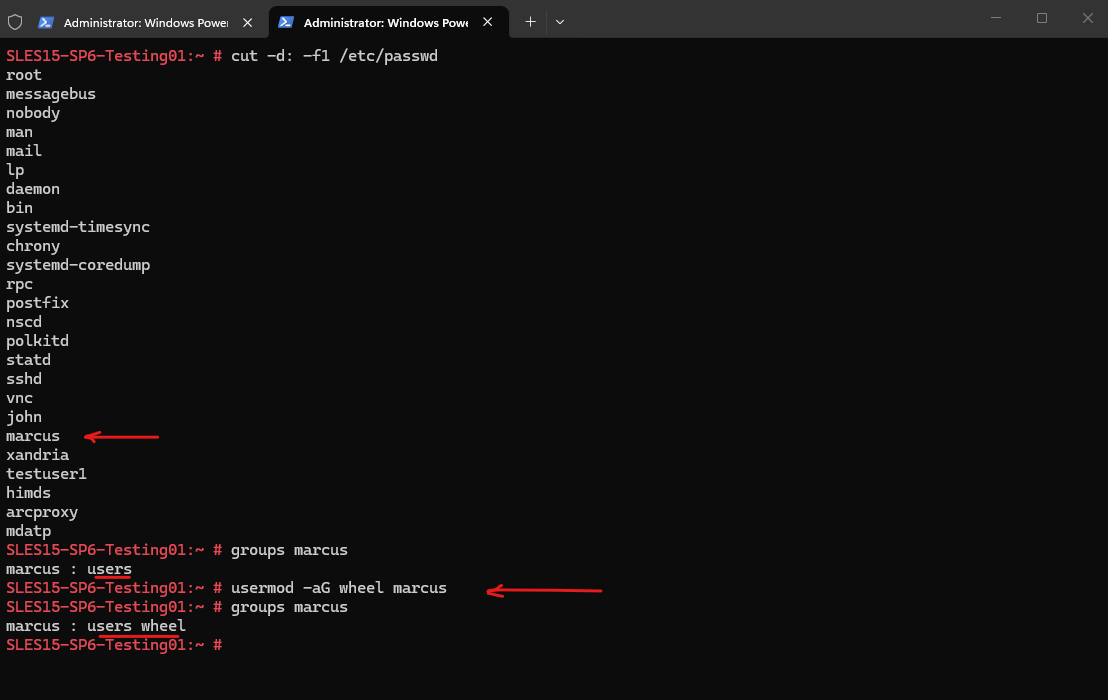
The /etc/passwd file contains user account information. This command displays all usernames. To list all local users:
# cut -d: -f1 /etc/passwd

Determine in which groups a user is we can use the following command:
# groups marcus

We can use the usermod command to add users to an existing group on Linux. The wheel group which exists on SUSE Linux Enterprise and can be used to grant the members elevated privileges to execute administrative commands via sudo.
# usermod -aG wheel marcus
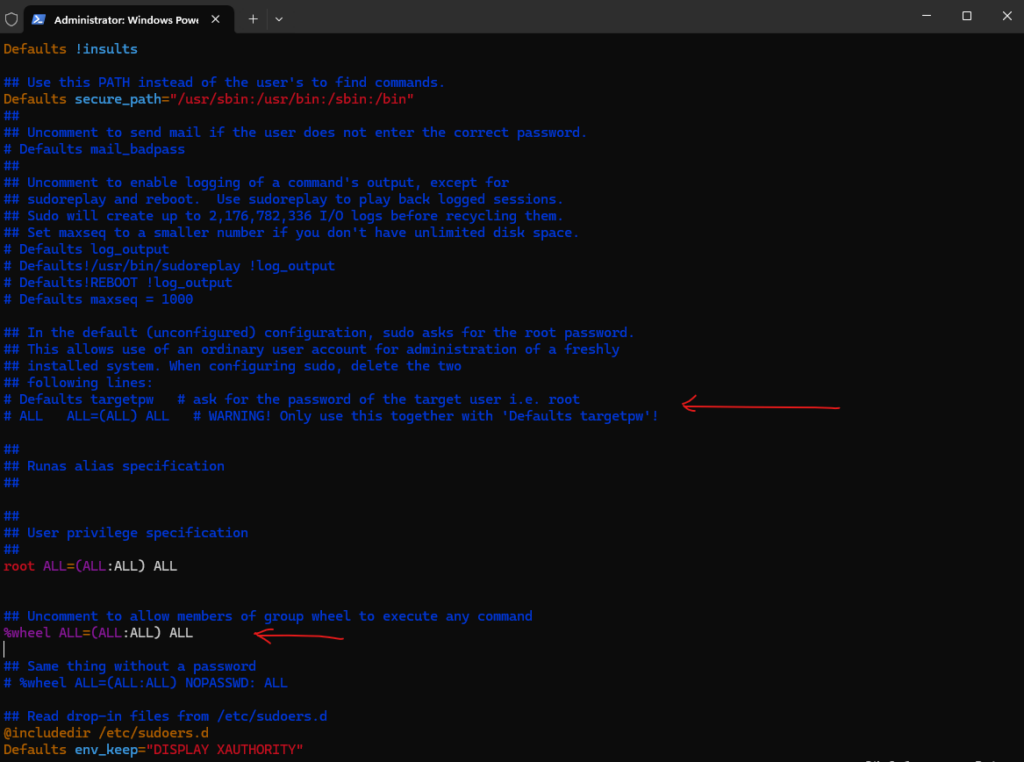
But first we need enable the wheel group in the /etc/sudoers file. To open the file just enter the visudo command.

Please note: making changes directly to the /etc/sudoers file is discouraged, and the visudo utility should be used instead. Also see Additional Information below regarding /etc/sudoers.d.

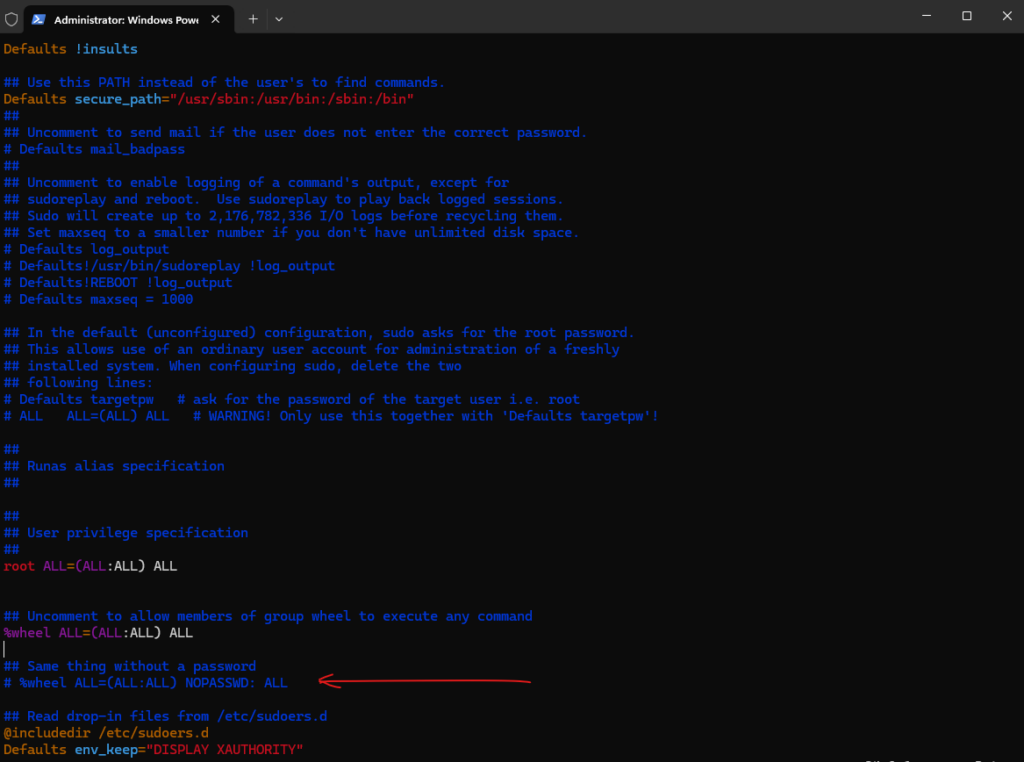
Comment the following two lines if not already commented (default):
# Defaults targetpw   # ask for the password of the target user i.e. root
# ALL   ALL=(ALL) ALL   # WARNING! Only use this together with 'Defaults targetpw'!
And uncomment the following line:
%wheel ALL=(ALL:ALL) ALL
From now on the new user can execute sudo commands by providing its own password.
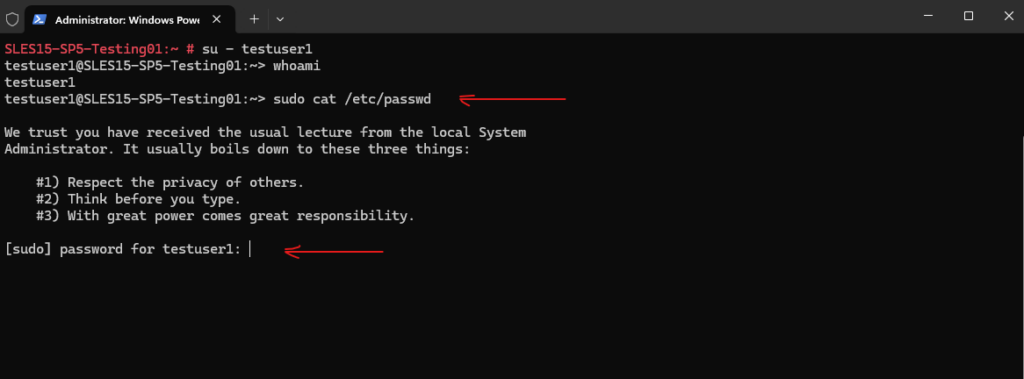
Or the following line so that users in the wheel group didn’t even need to provide its own password.
# %wheel ALL=(ALL:ALL) NOPASSWD: ALL
More about you will find in my following post.
Links
Understanding name-mapping in a multiprotocol environment
https://kb.netapp.com/on-prem/ontap/da/NAS/NAS-KBs/Understanding_name-mapping_in_a_multiprotocol_environmentCreate ONTAP SMB name mapping
https://docs.netapp.com/us-en/ontap/smb-admin/create-name-mapping-task.htmlLearn about name mappings for ONTAP NAS SVMs
https://docs.netapp.com/us-en/ontap/nfs-admin/name-mapping-concept.htmlvserver name-mapping create
https://docs.netapp.com/us-en/ontap-cli/vserver-name-mapping-create.htmlvserver name-mapping modify
https://docs.netapp.com/us-en/ontap-cli/vserver-name-mapping-modify.htmlHow does name-mapping work for NFS clients accessing UNIX security style resources?
https://kb.netapp.com/on-prem/ontap/da/NAS/NAS-KBs/How_does_name-mapping_work_for_NFS_clients_accessing_UNIX_security_style_resources