How to onboard on-premise Server (Azure Arc) and native Azure Server (VMs) to Microsoft Defender for Servers
Introduction
Prerequisites
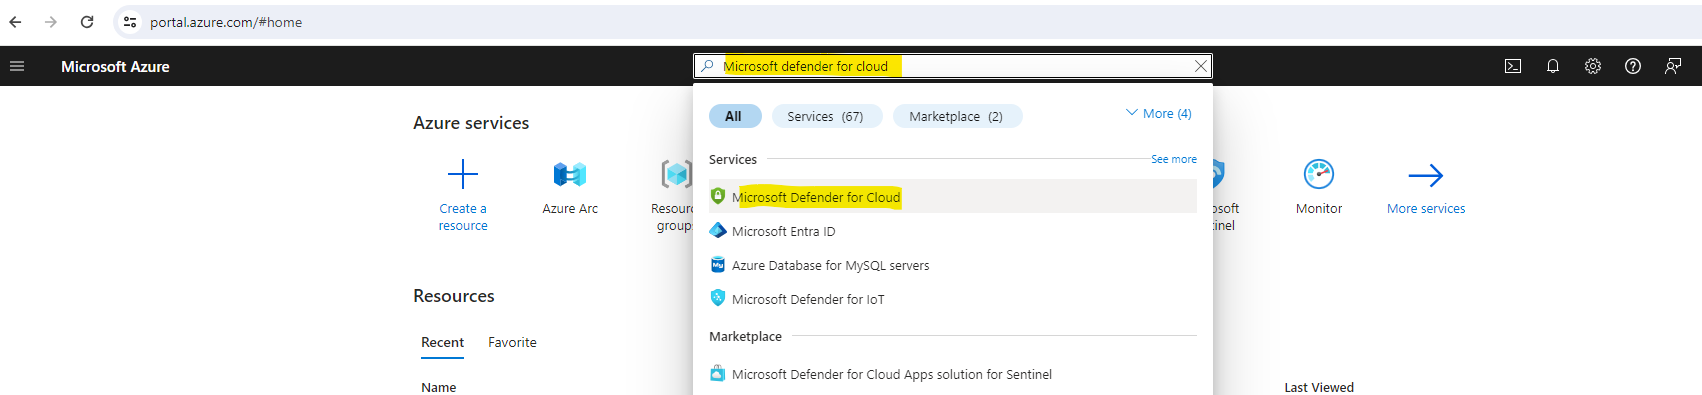
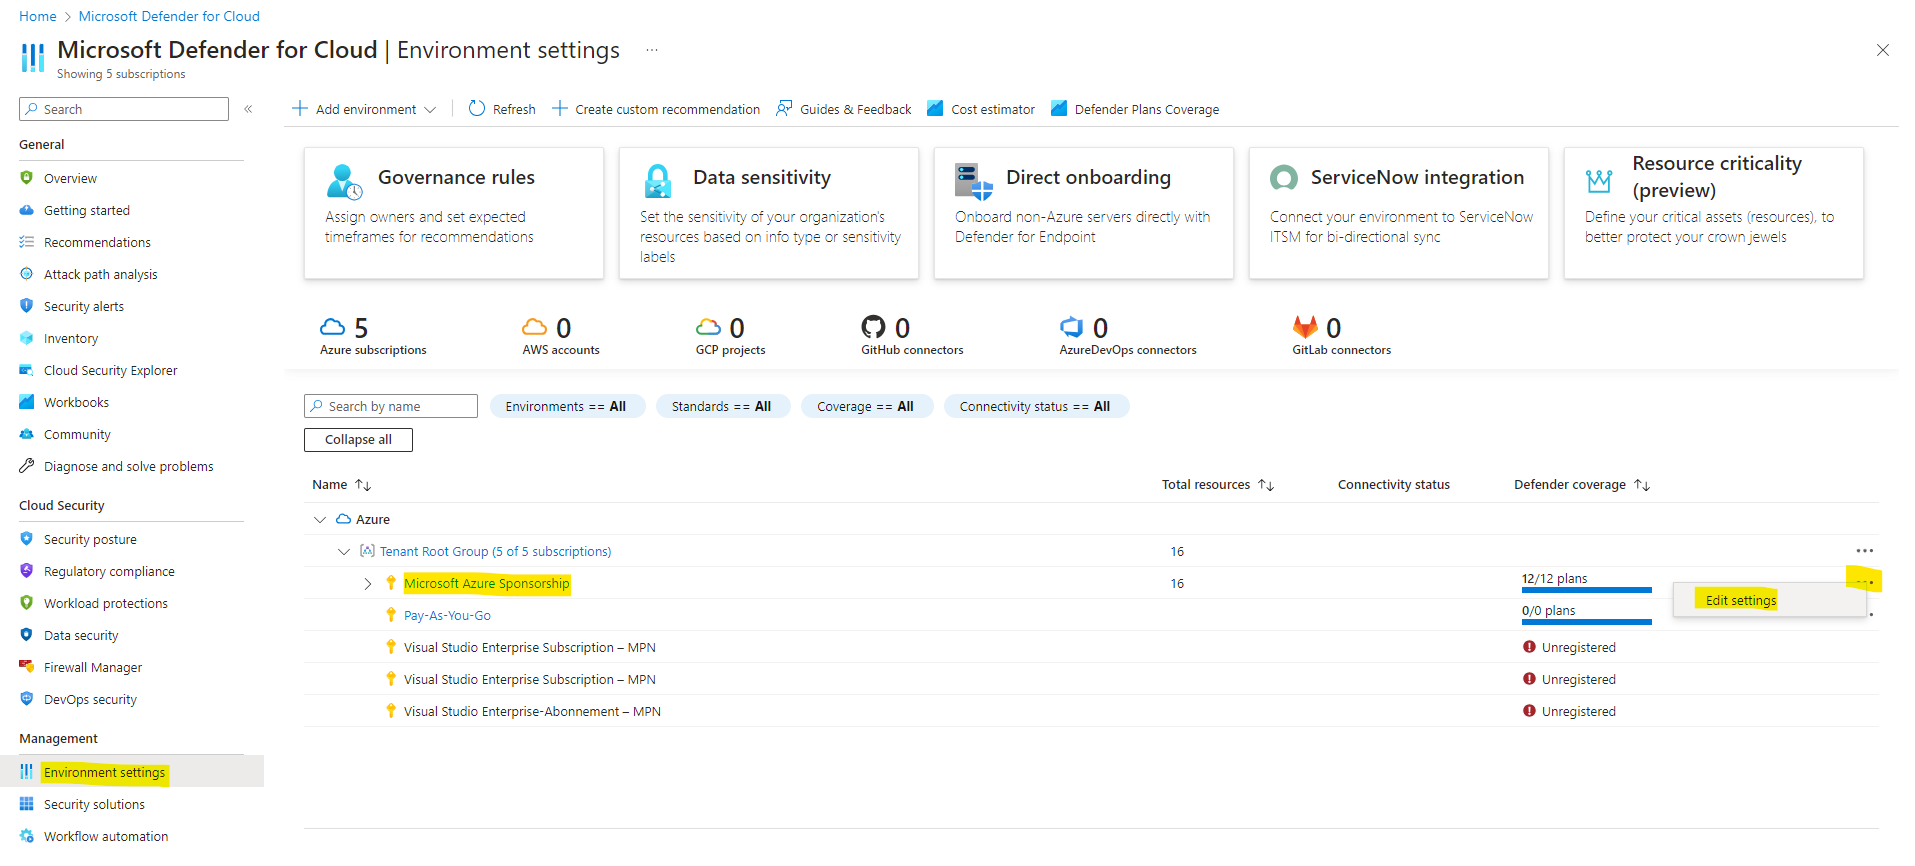
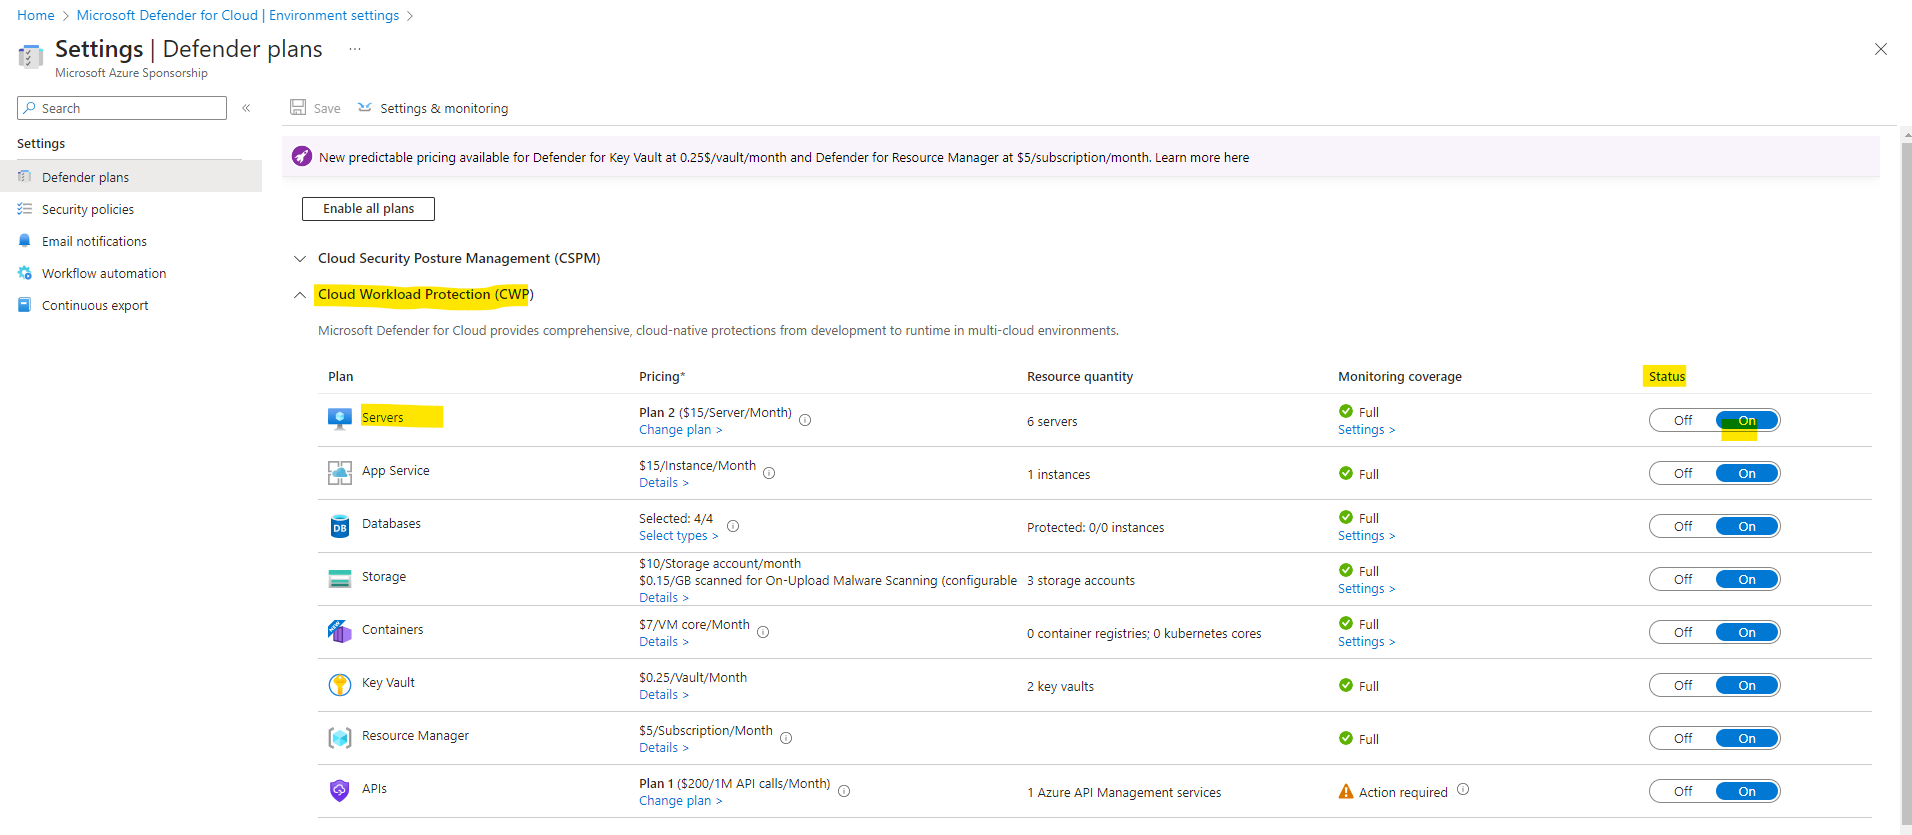
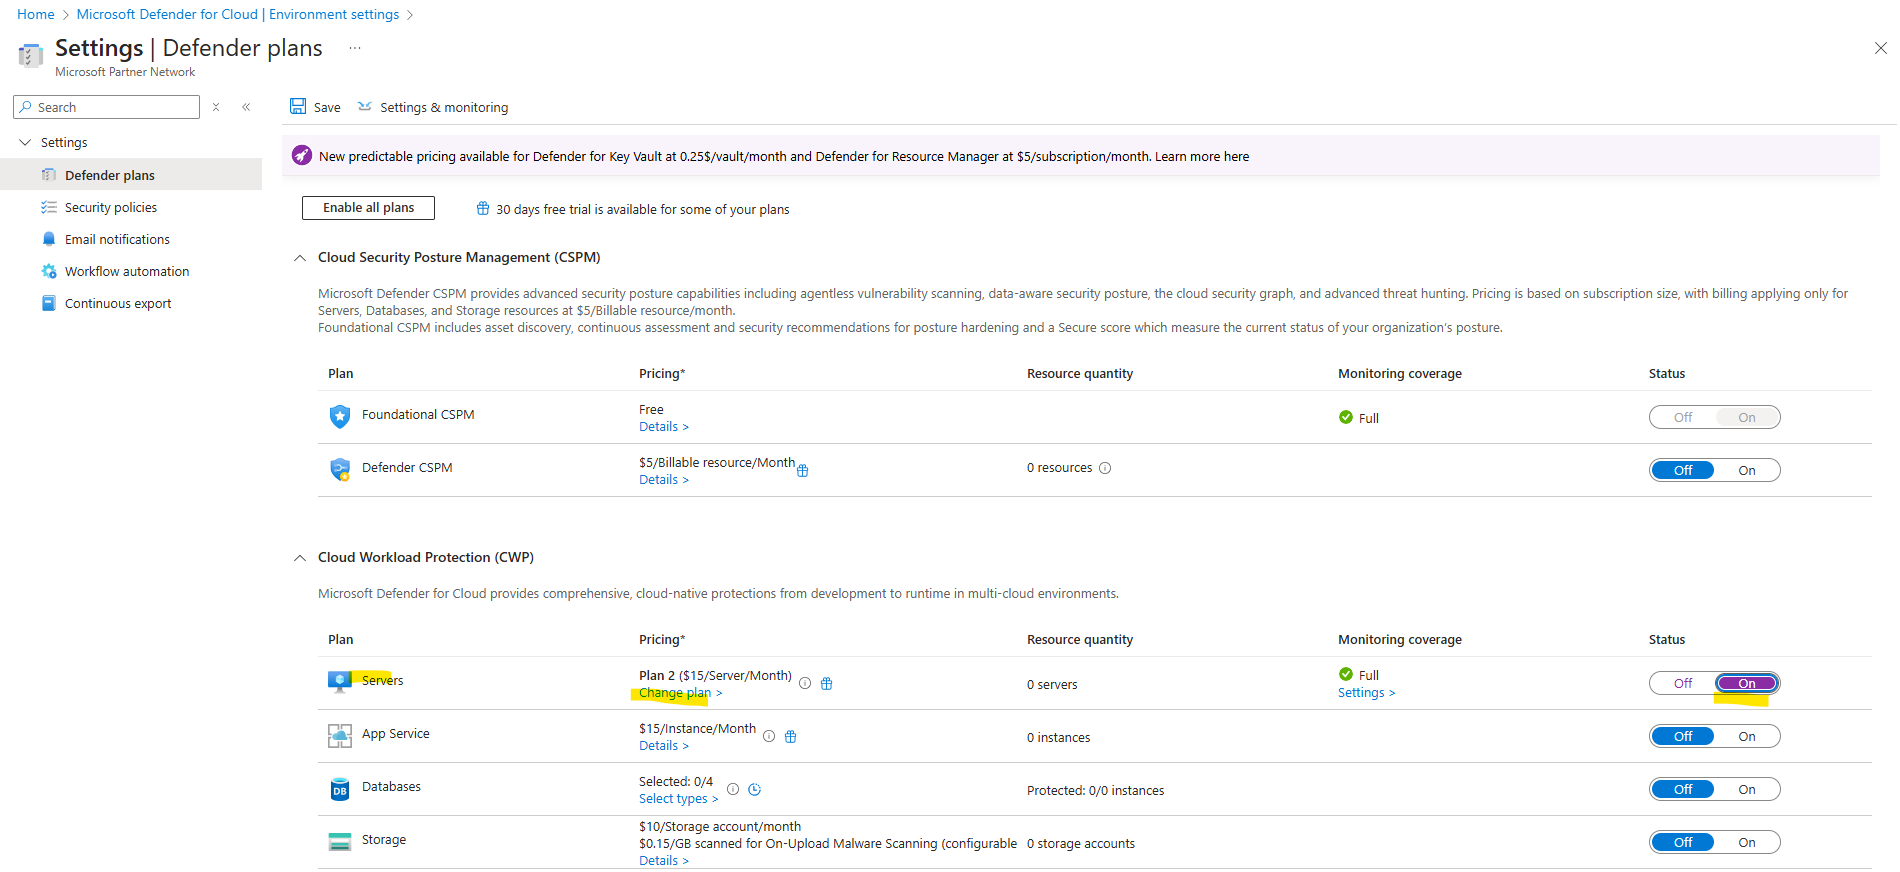
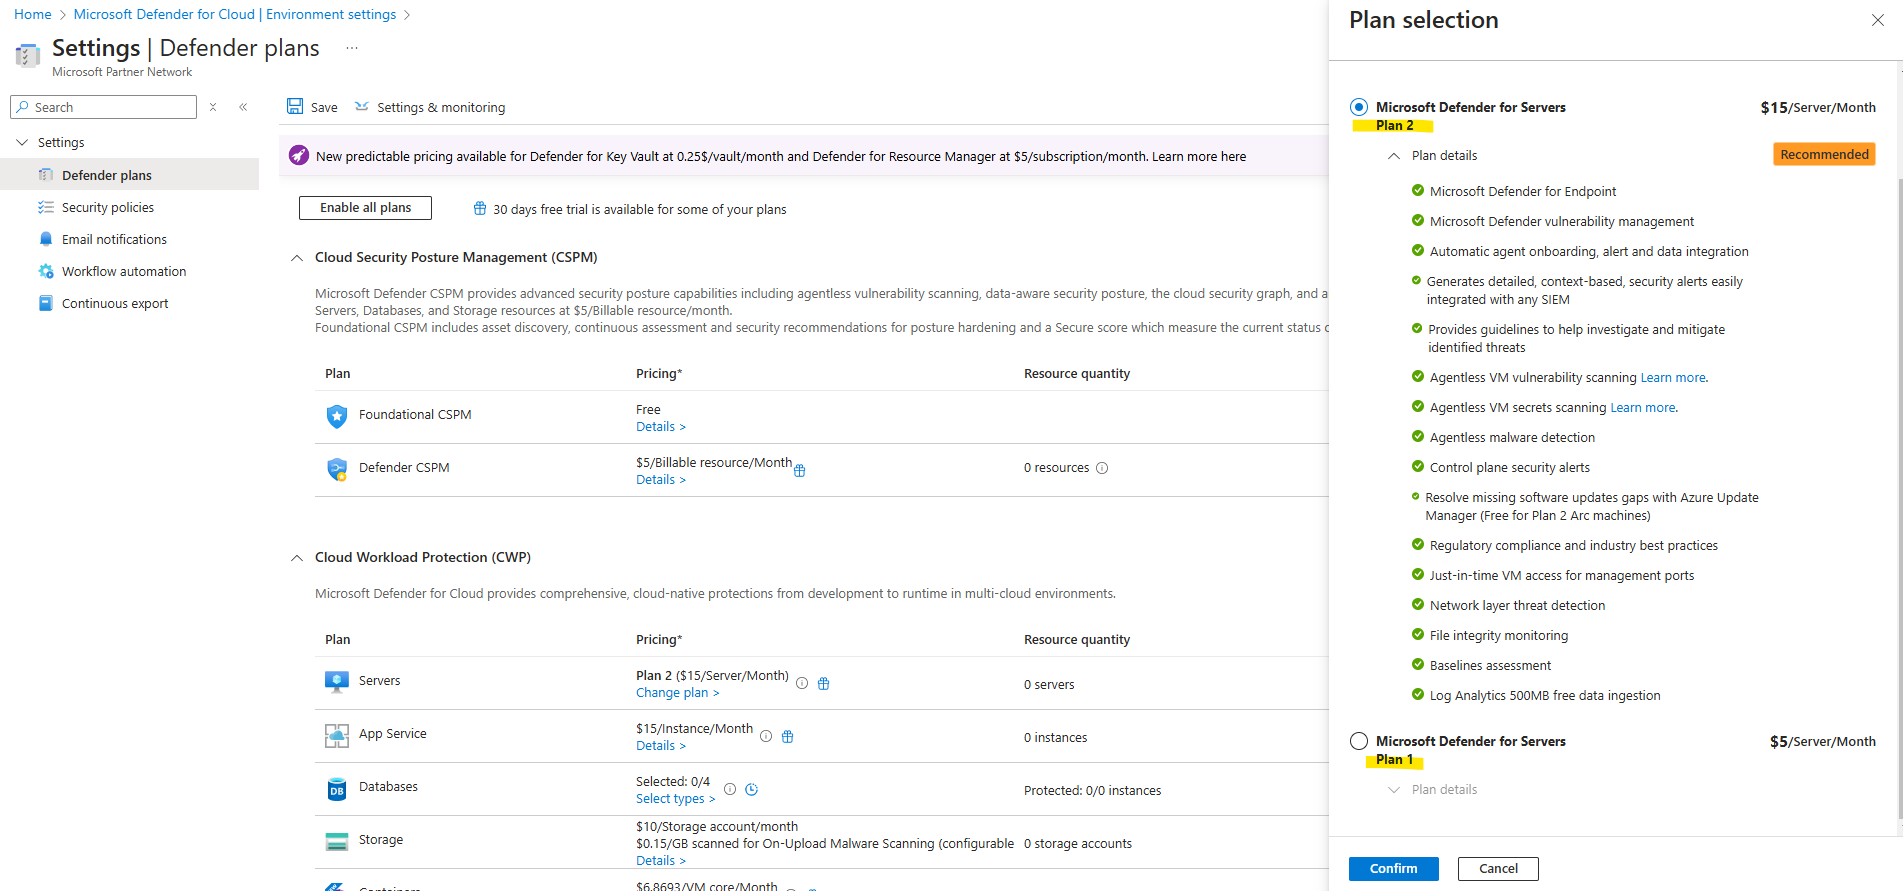
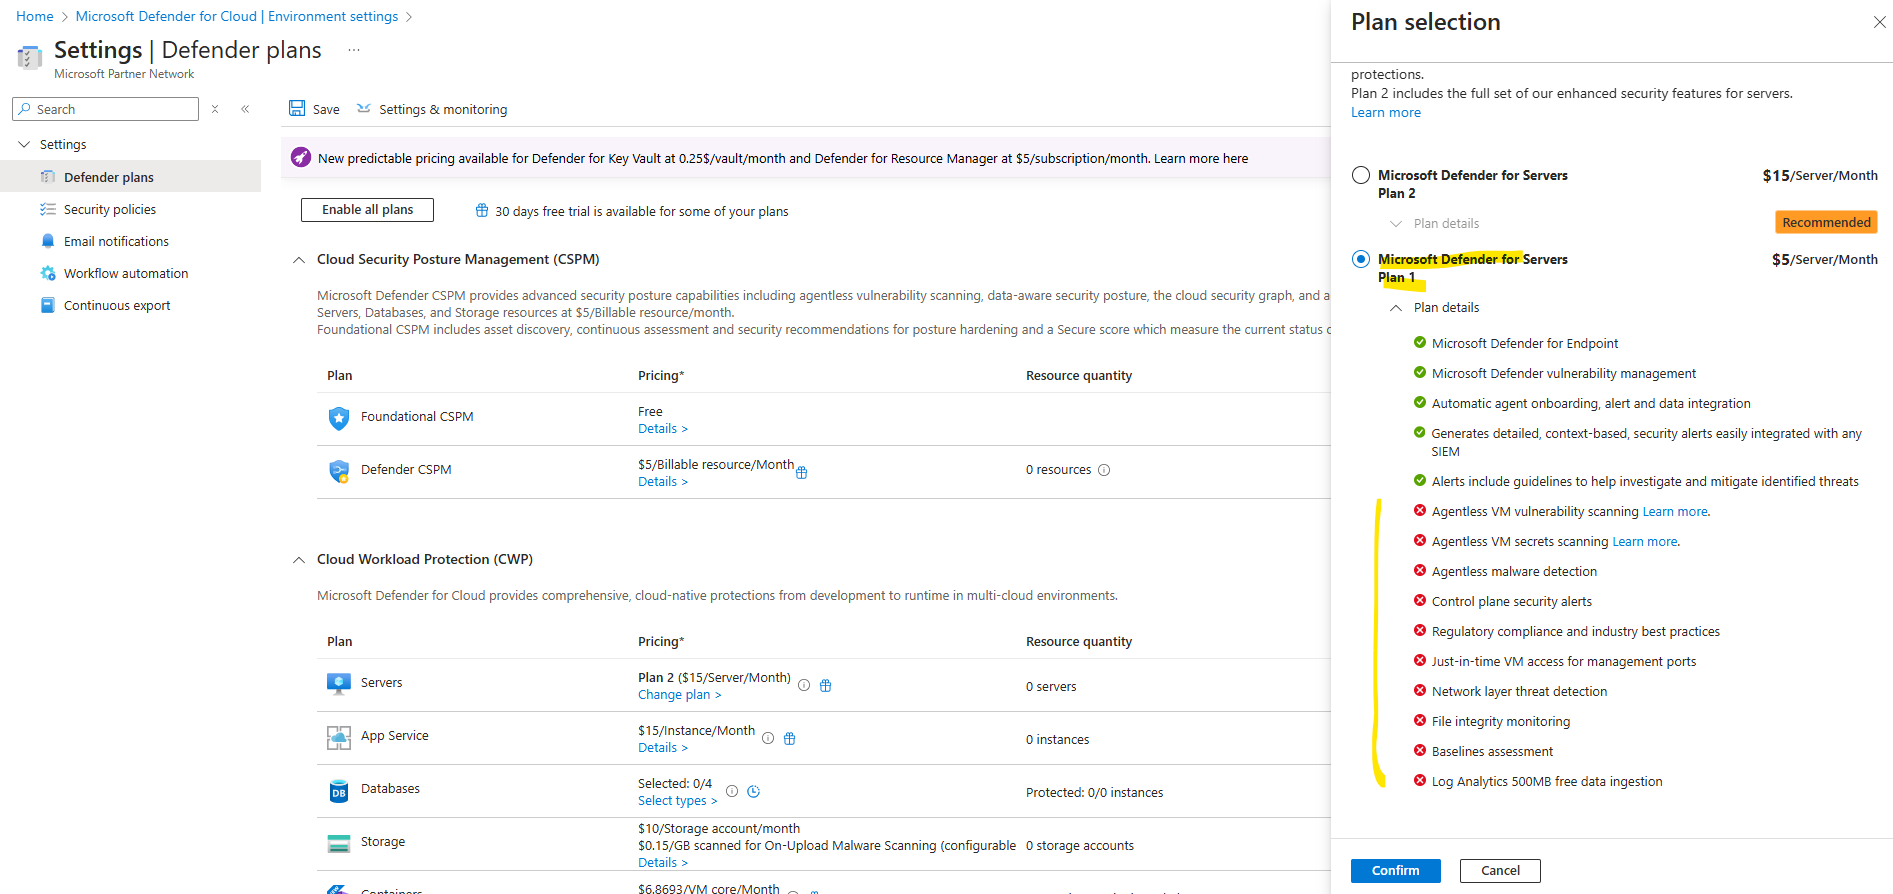
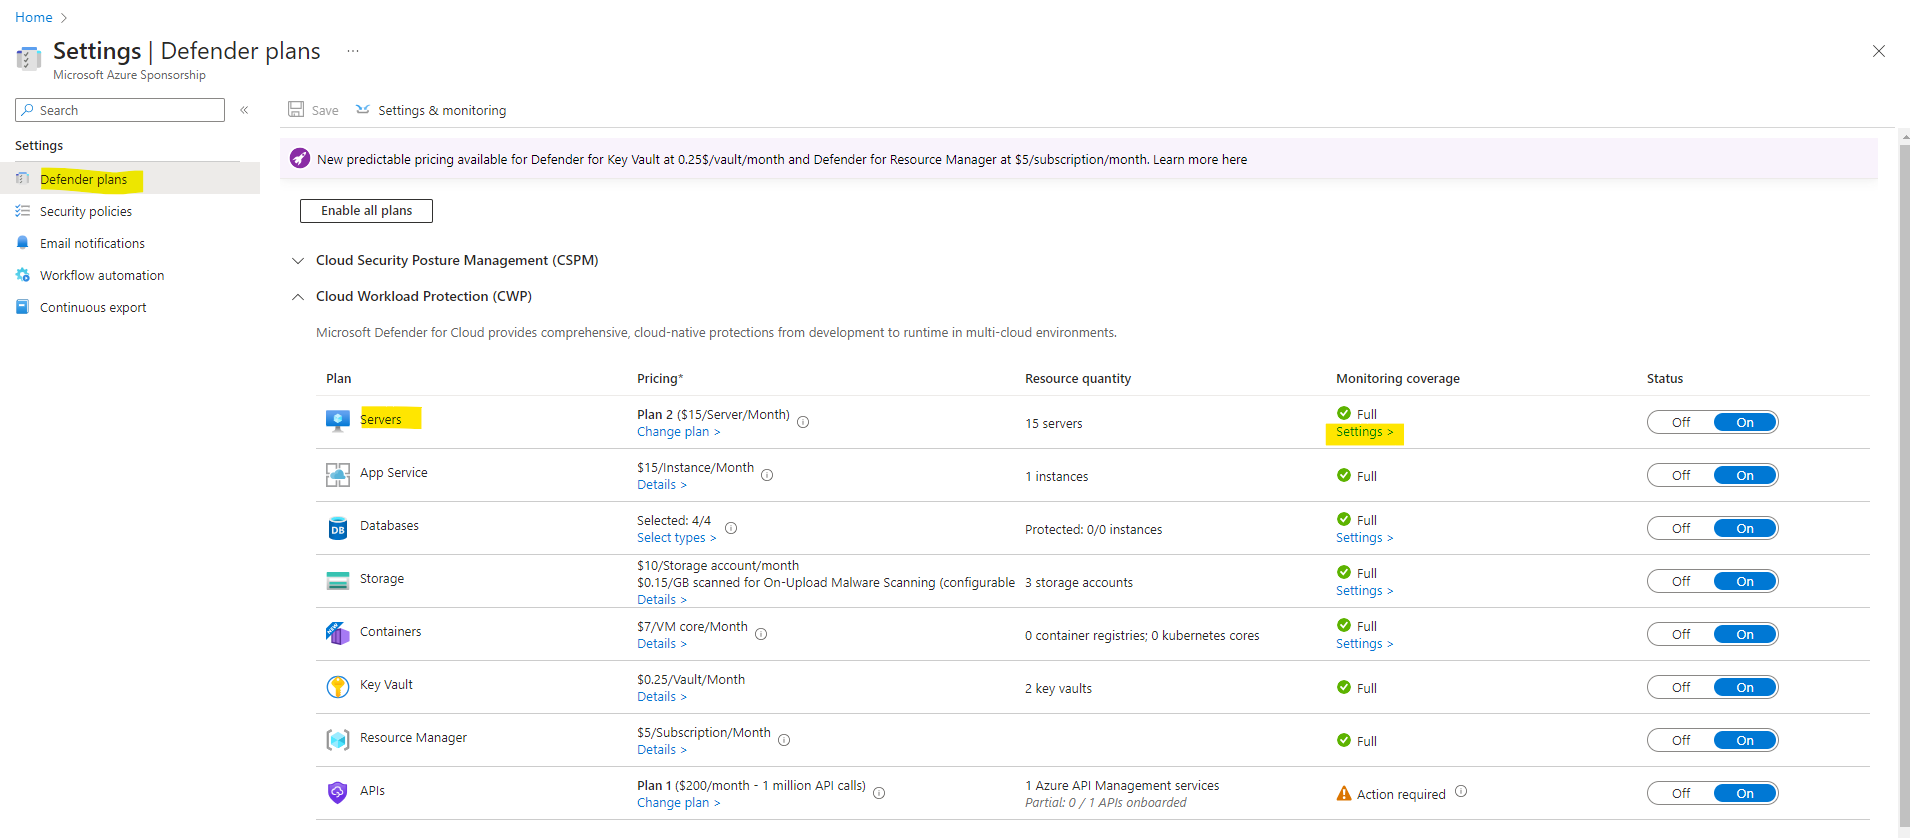
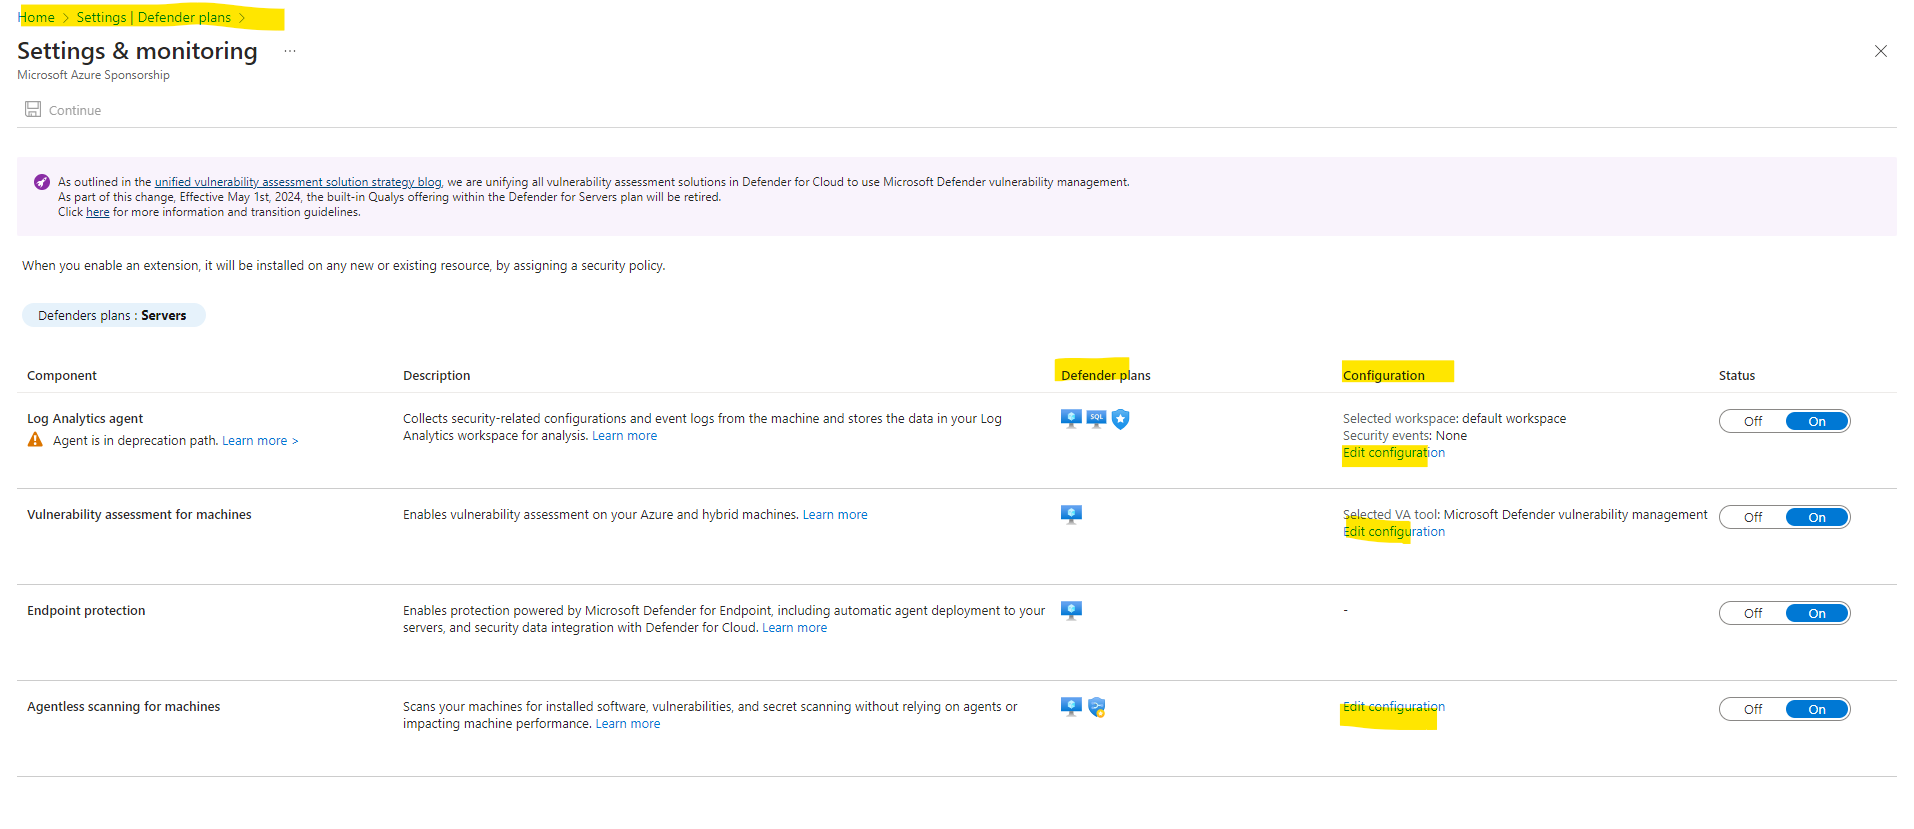
Enable Microsoft Defender for Cloud on an Azure Subscription

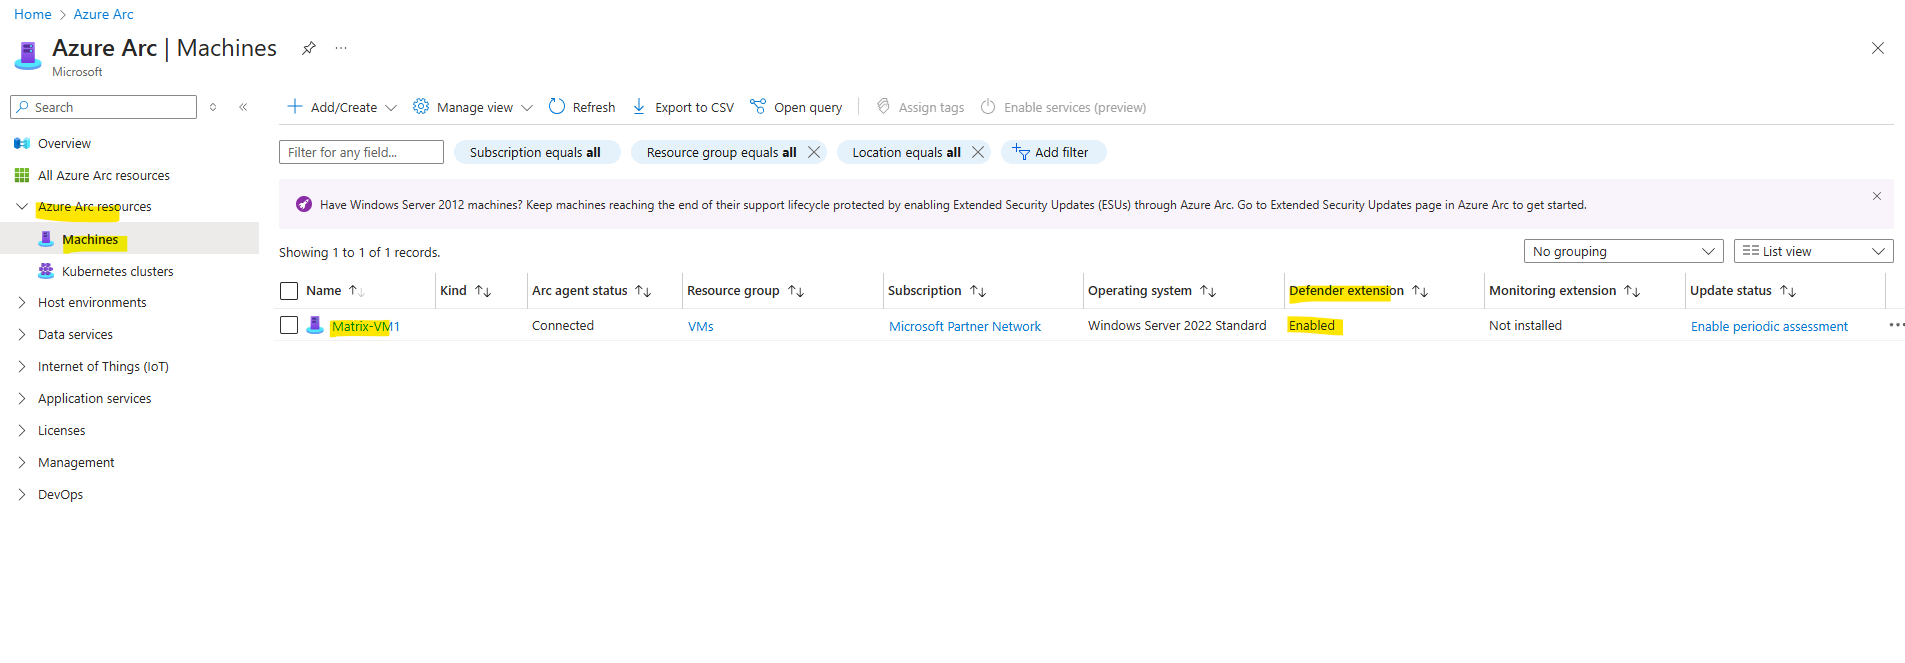
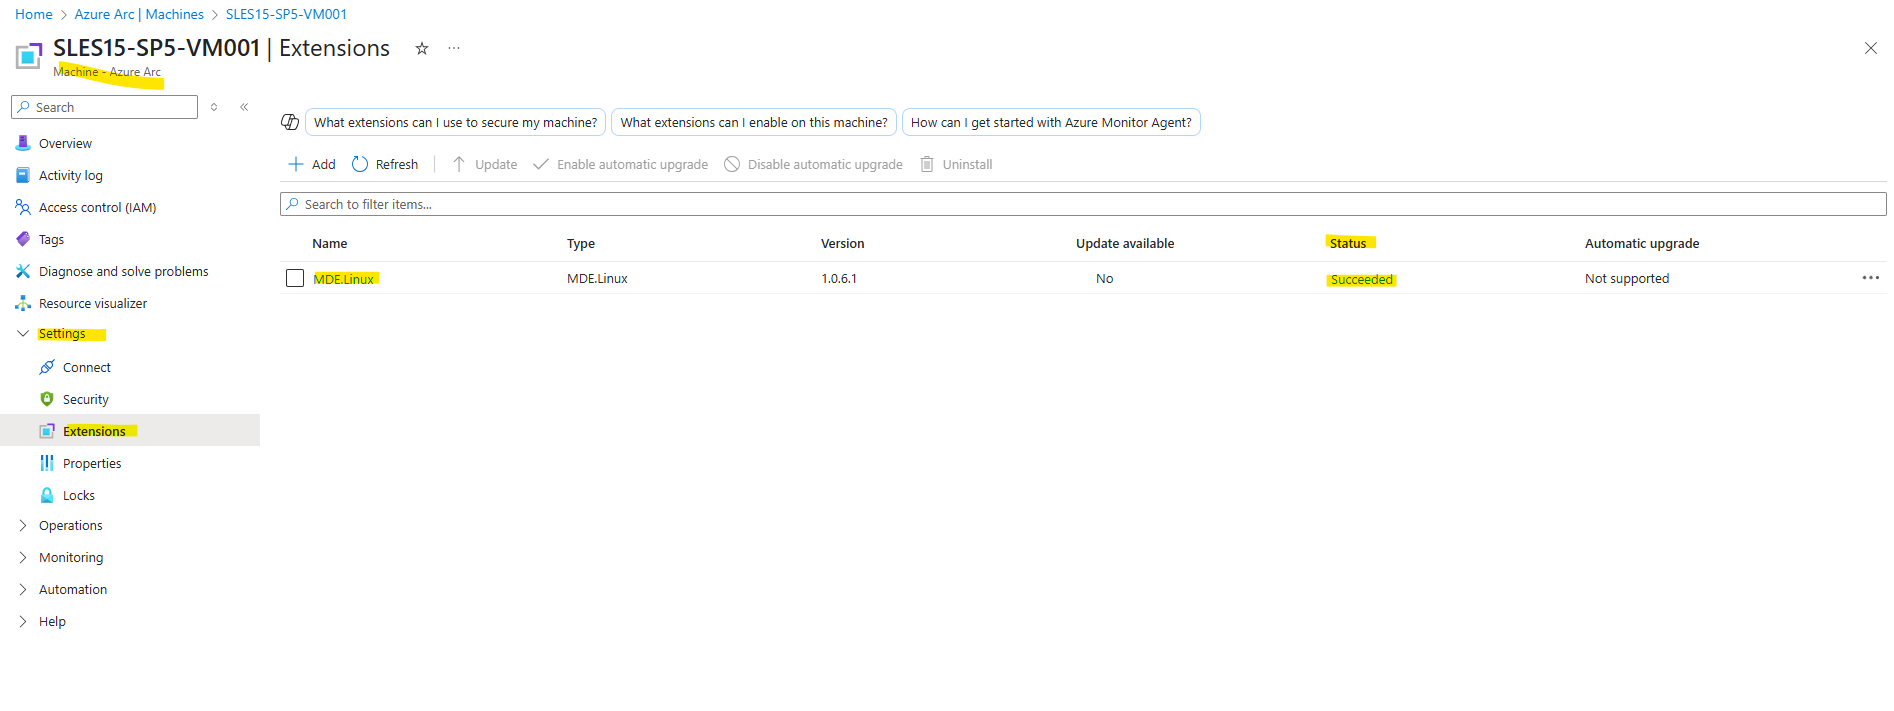
You will see this also in the Settings -> Extensions blade of the machine.
On a Windows machine.
The MDE.Windows (Azure Guest Extension) is responsible for onboarding Defender for Servers

On a Linux machine.
The MDE.Linux (Azure Guest Extension) is responsible for onboarding Defender for Servers
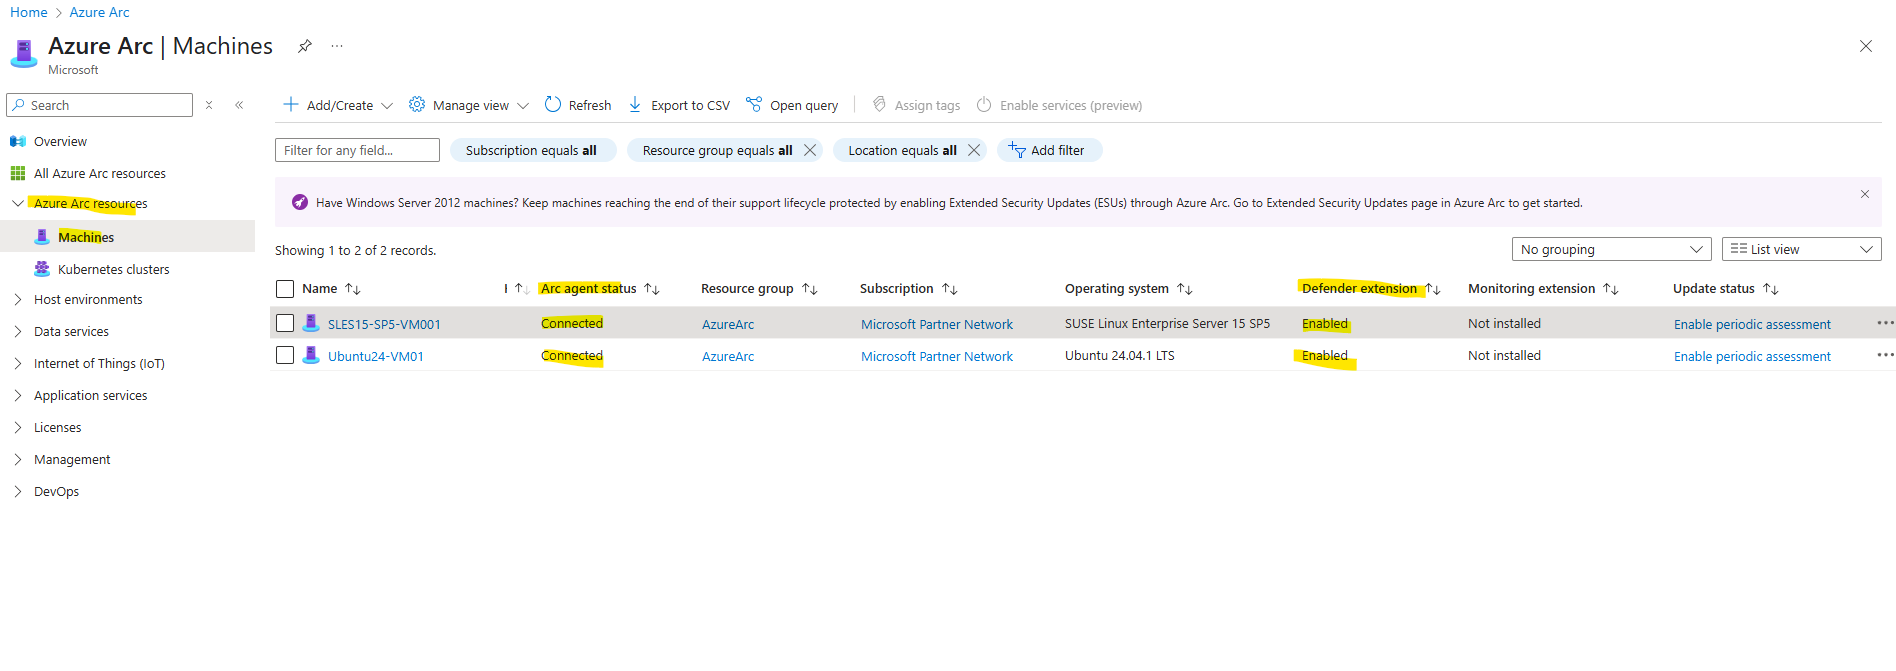
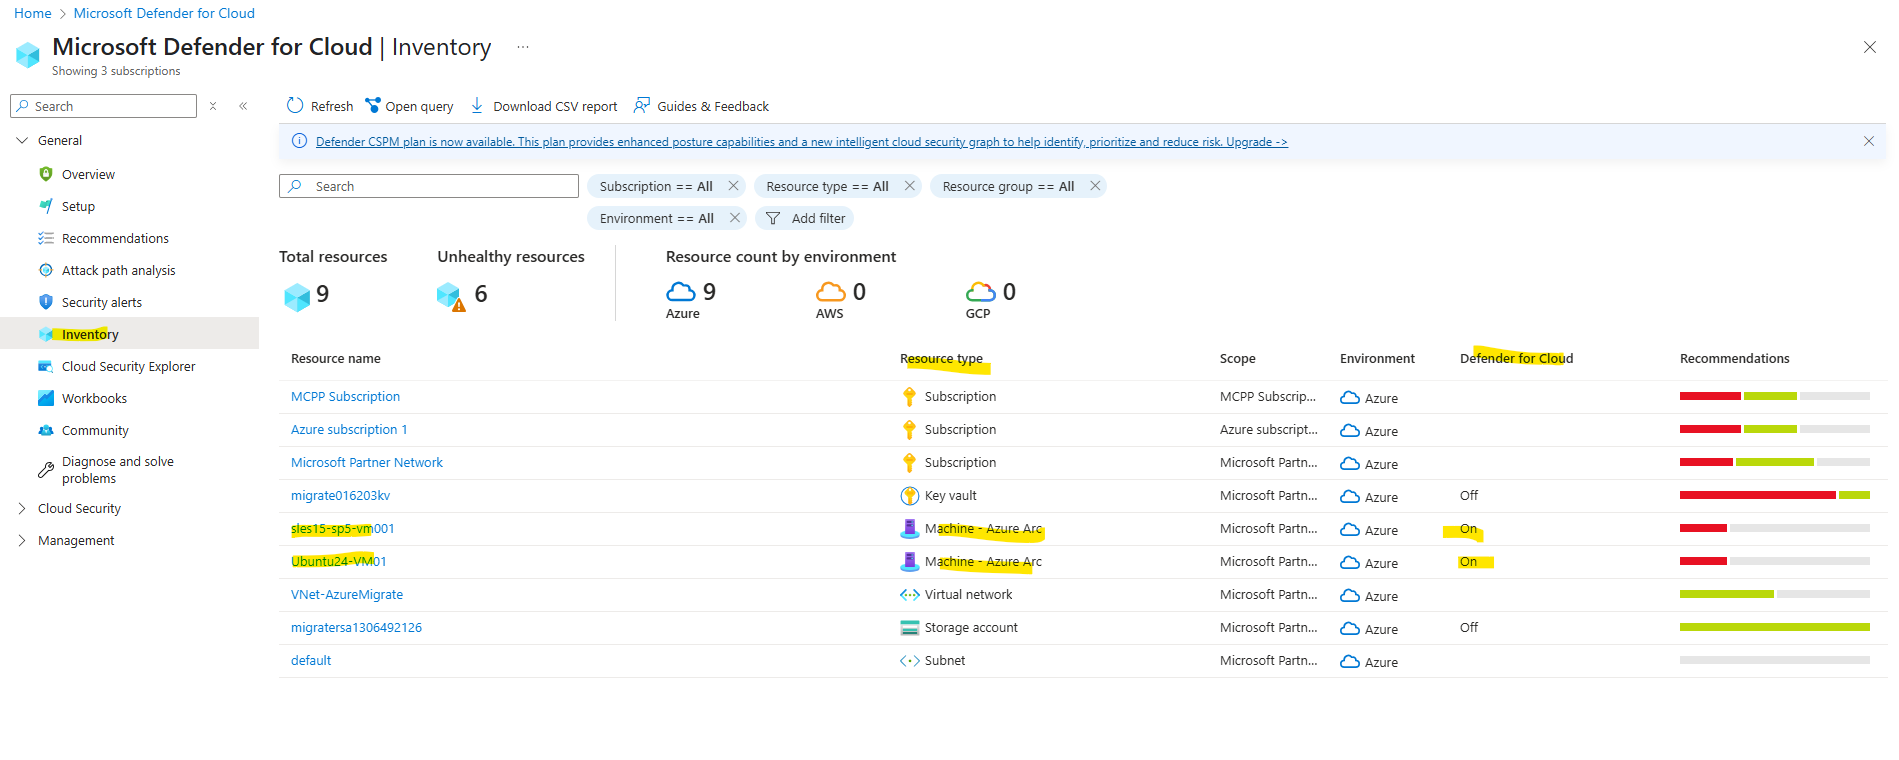
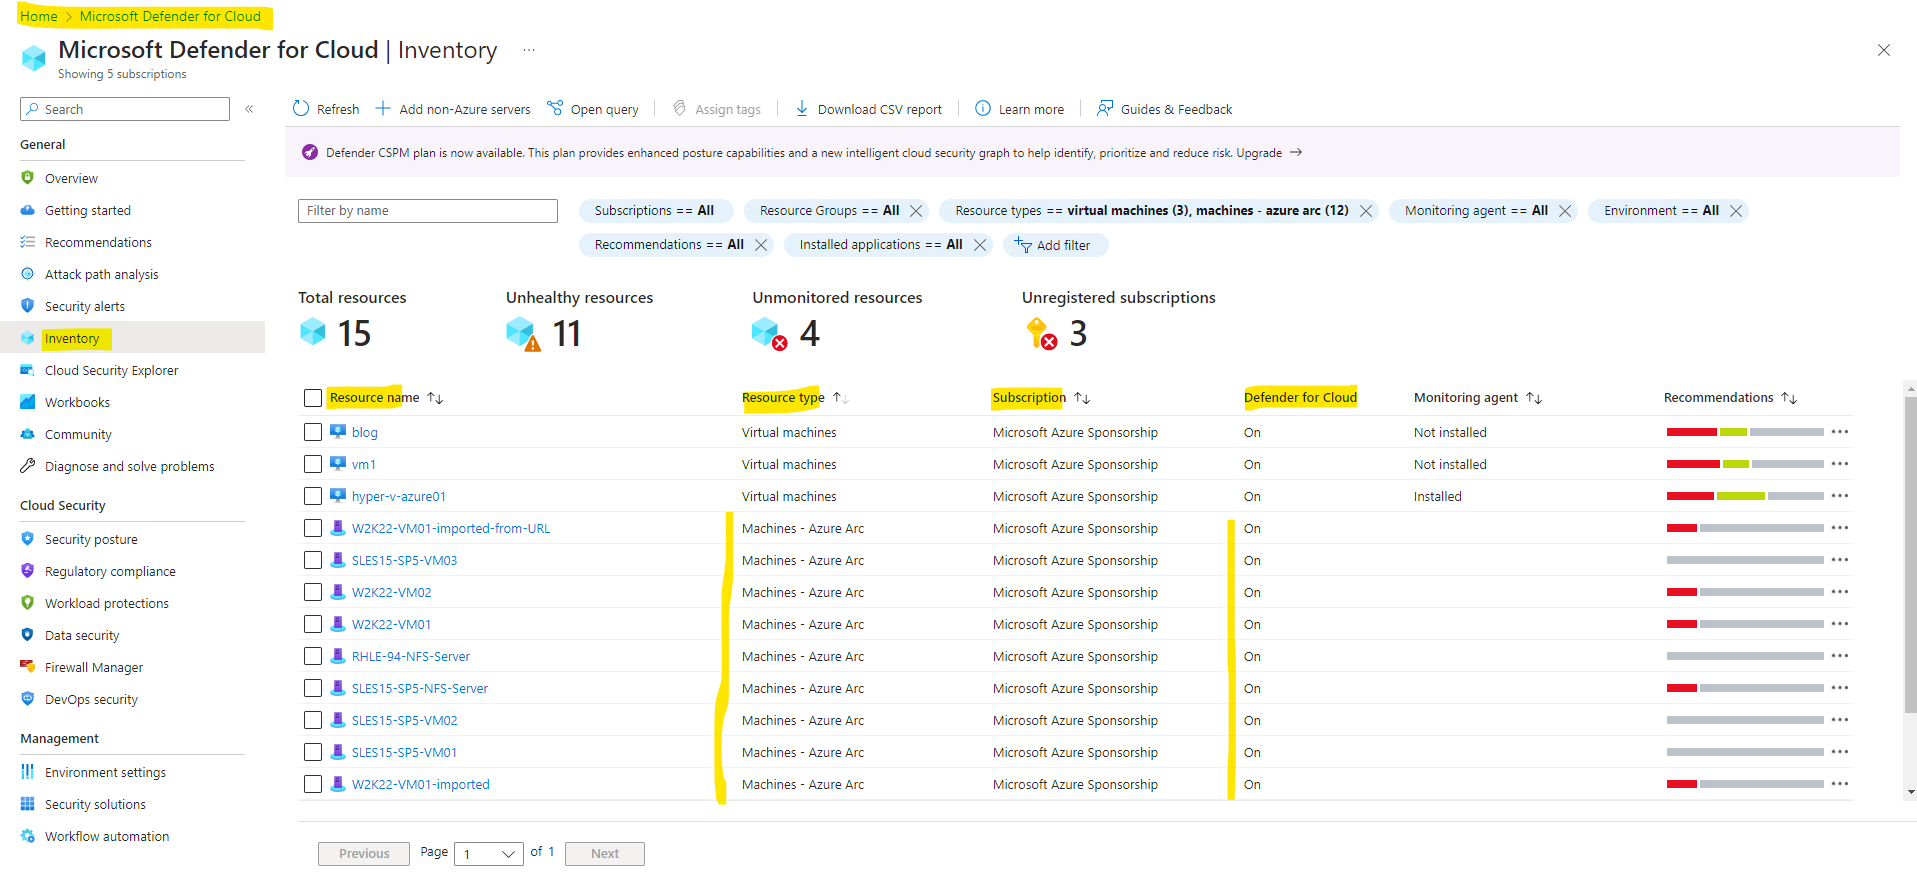
And as mentioned a few minutes later in Defender for Cloud.
Disable Defender for Servers plan
Microsoft Defender XDR Portal Integration
Verify client connectivity to Microsoft Defender for Endpoint service URLs
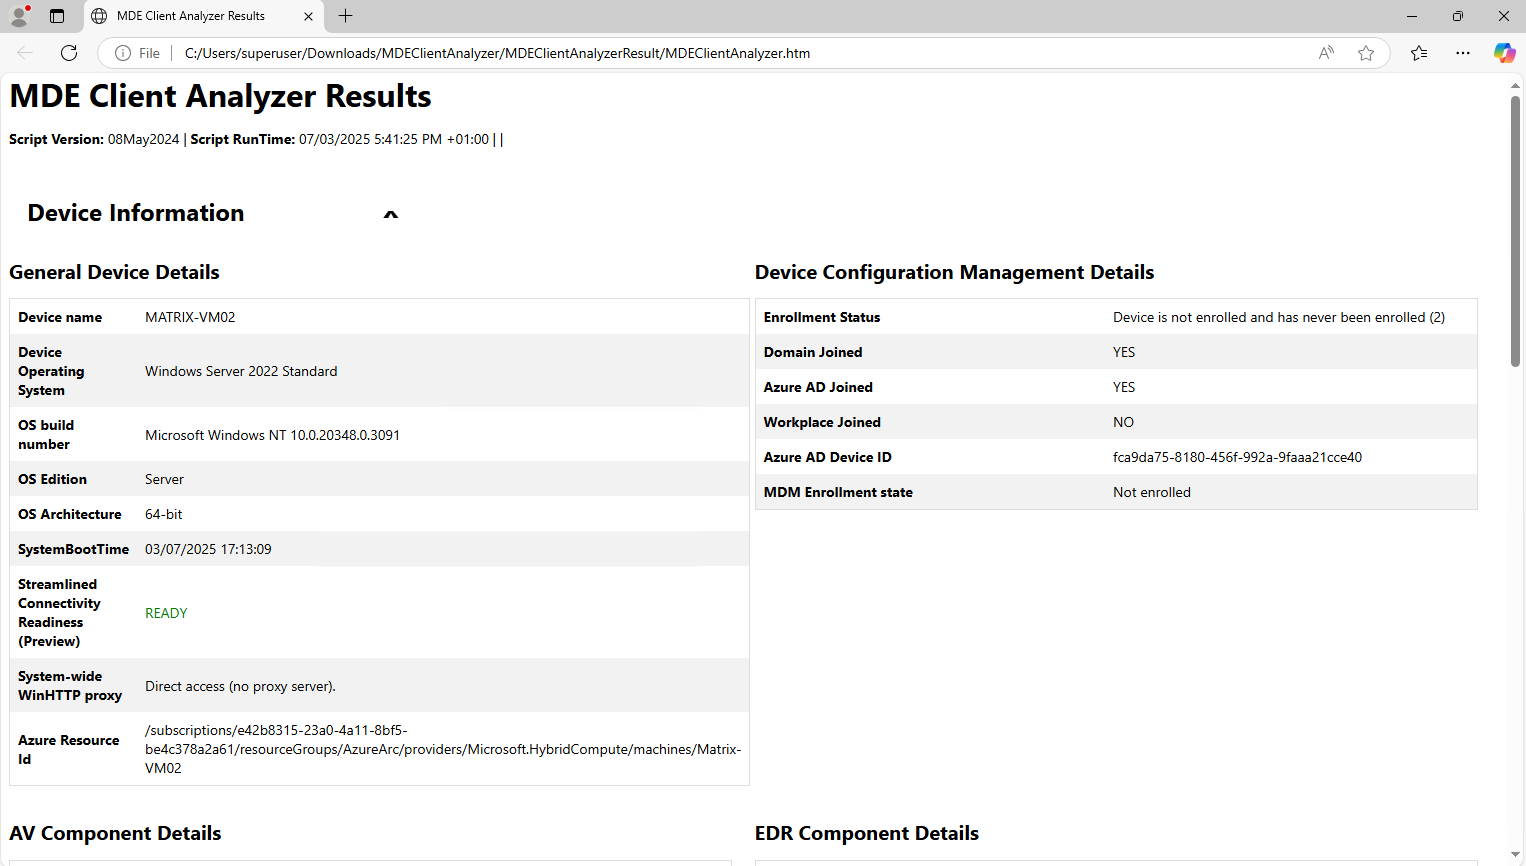
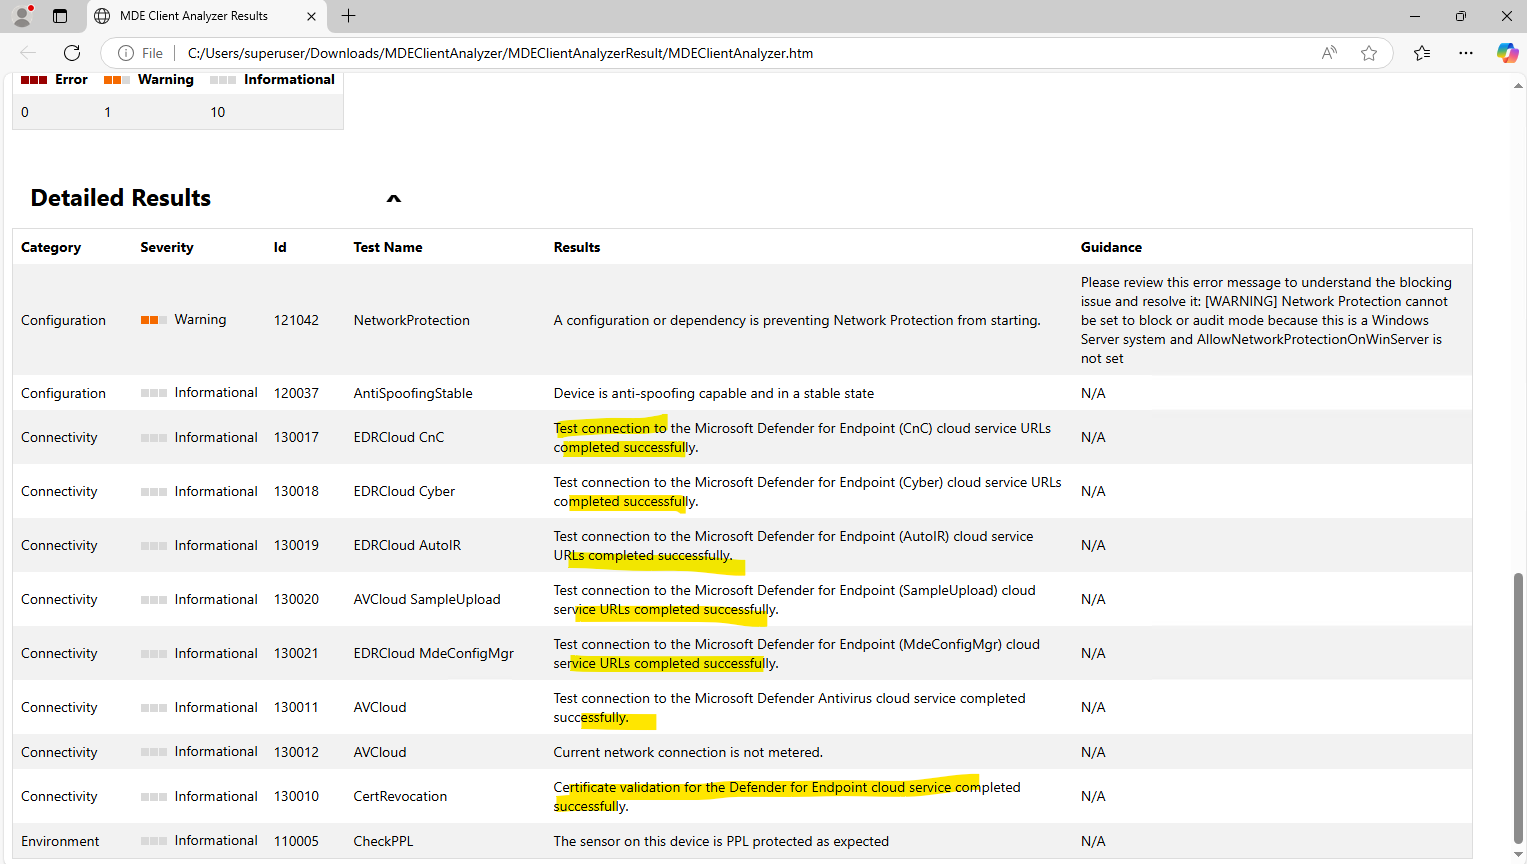
We can check that clients are able to connect to the Defender for Endpoint service URLs using the Defender for Endpoint Client Analyzer to ensure that endpoints are able to communicate telemetry to the service.
For more information on the Defender for Endpoint Client Analyzer, see Troubleshoot sensor health using Microsoft Defender for Endpoint Client Analyzer.
Download the Microsoft Defender for Endpoint Client Analyzer tool where Defender for Endpoint sensor is running on.
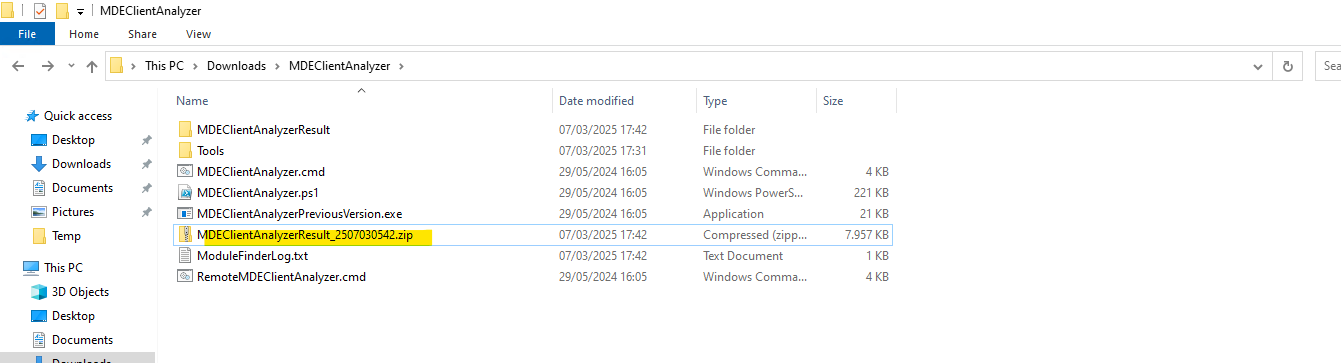
Extract the contents of MDEClientAnalyzer.zip on the device and start the MDEClientAnalyzer.cmd script.

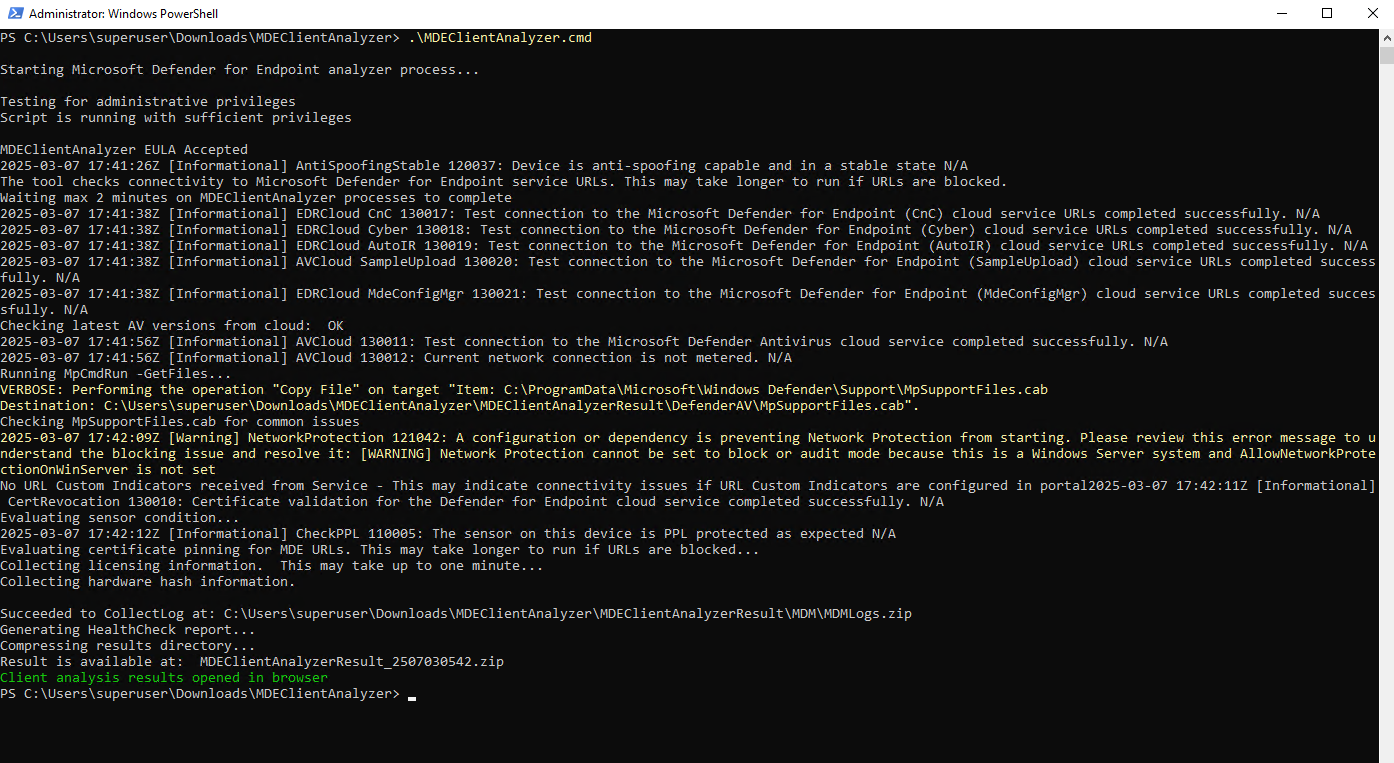
The tool creates and extracts the MDEClientAnalyzerResult.zip file in the folder to use in the HardDrivePath.
Source: https://learn.microsoft.com/en-us/defender-endpoint/verify-connectivity
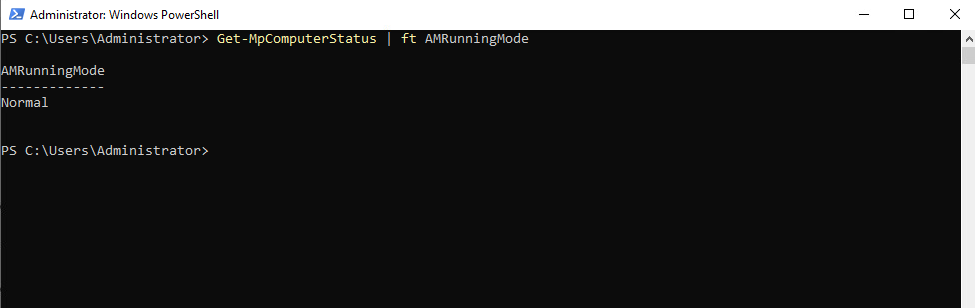
Determine the Antimalware status directly on the Computer
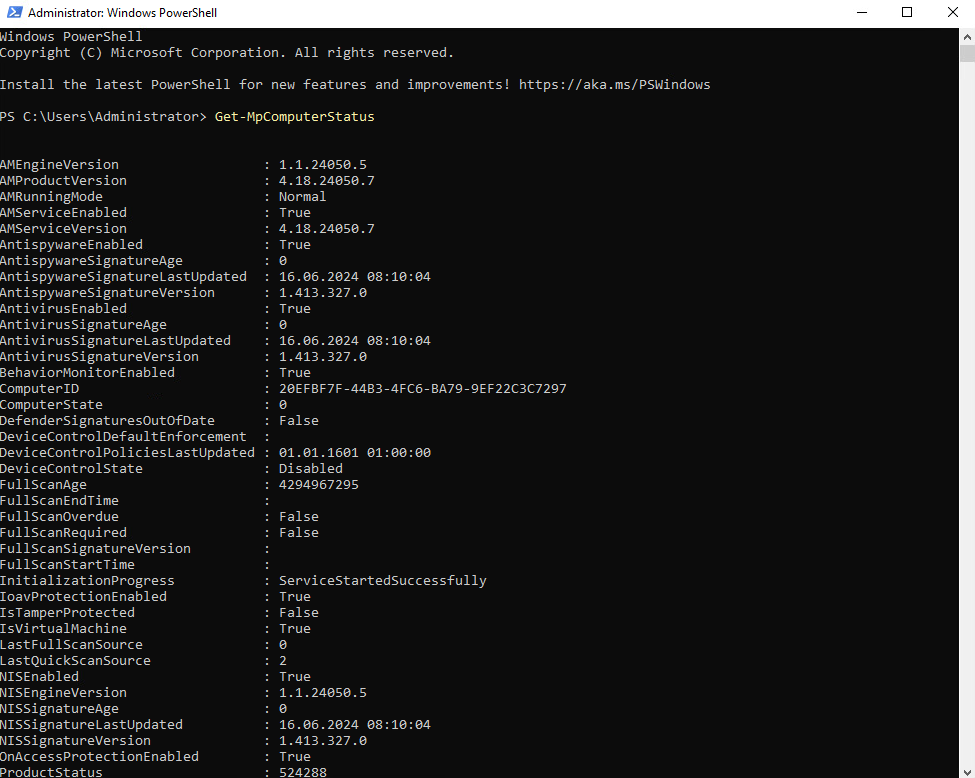
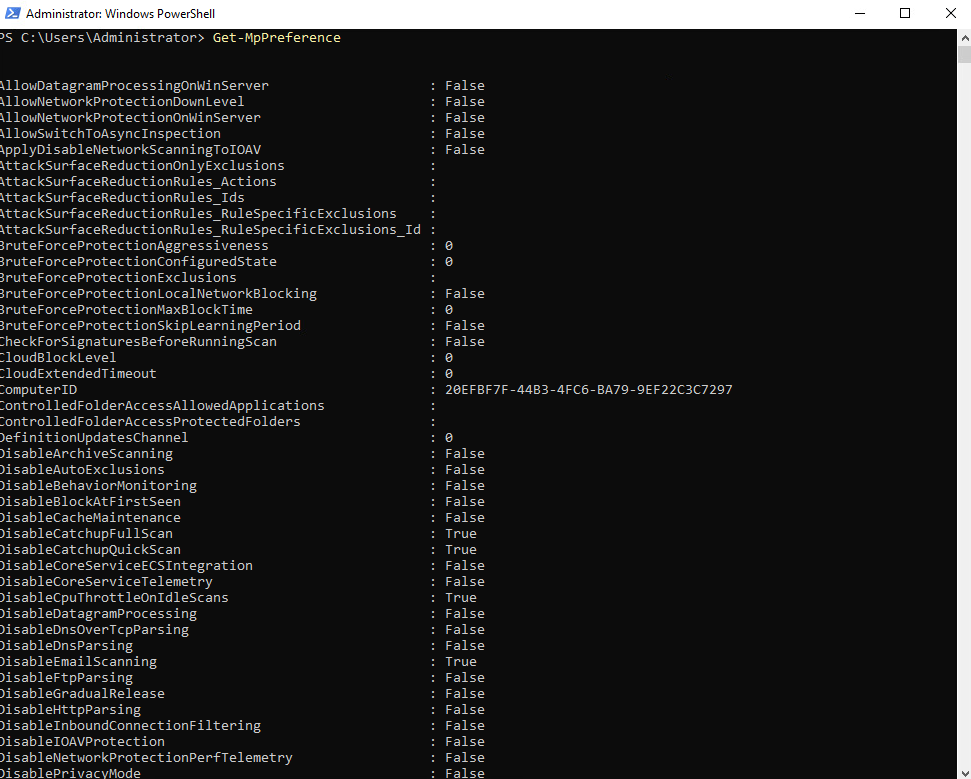
Use PowerShell to check the status of Microsoft Defender Antivirus
Get-MpComputerStatus | ft AMRunningMode
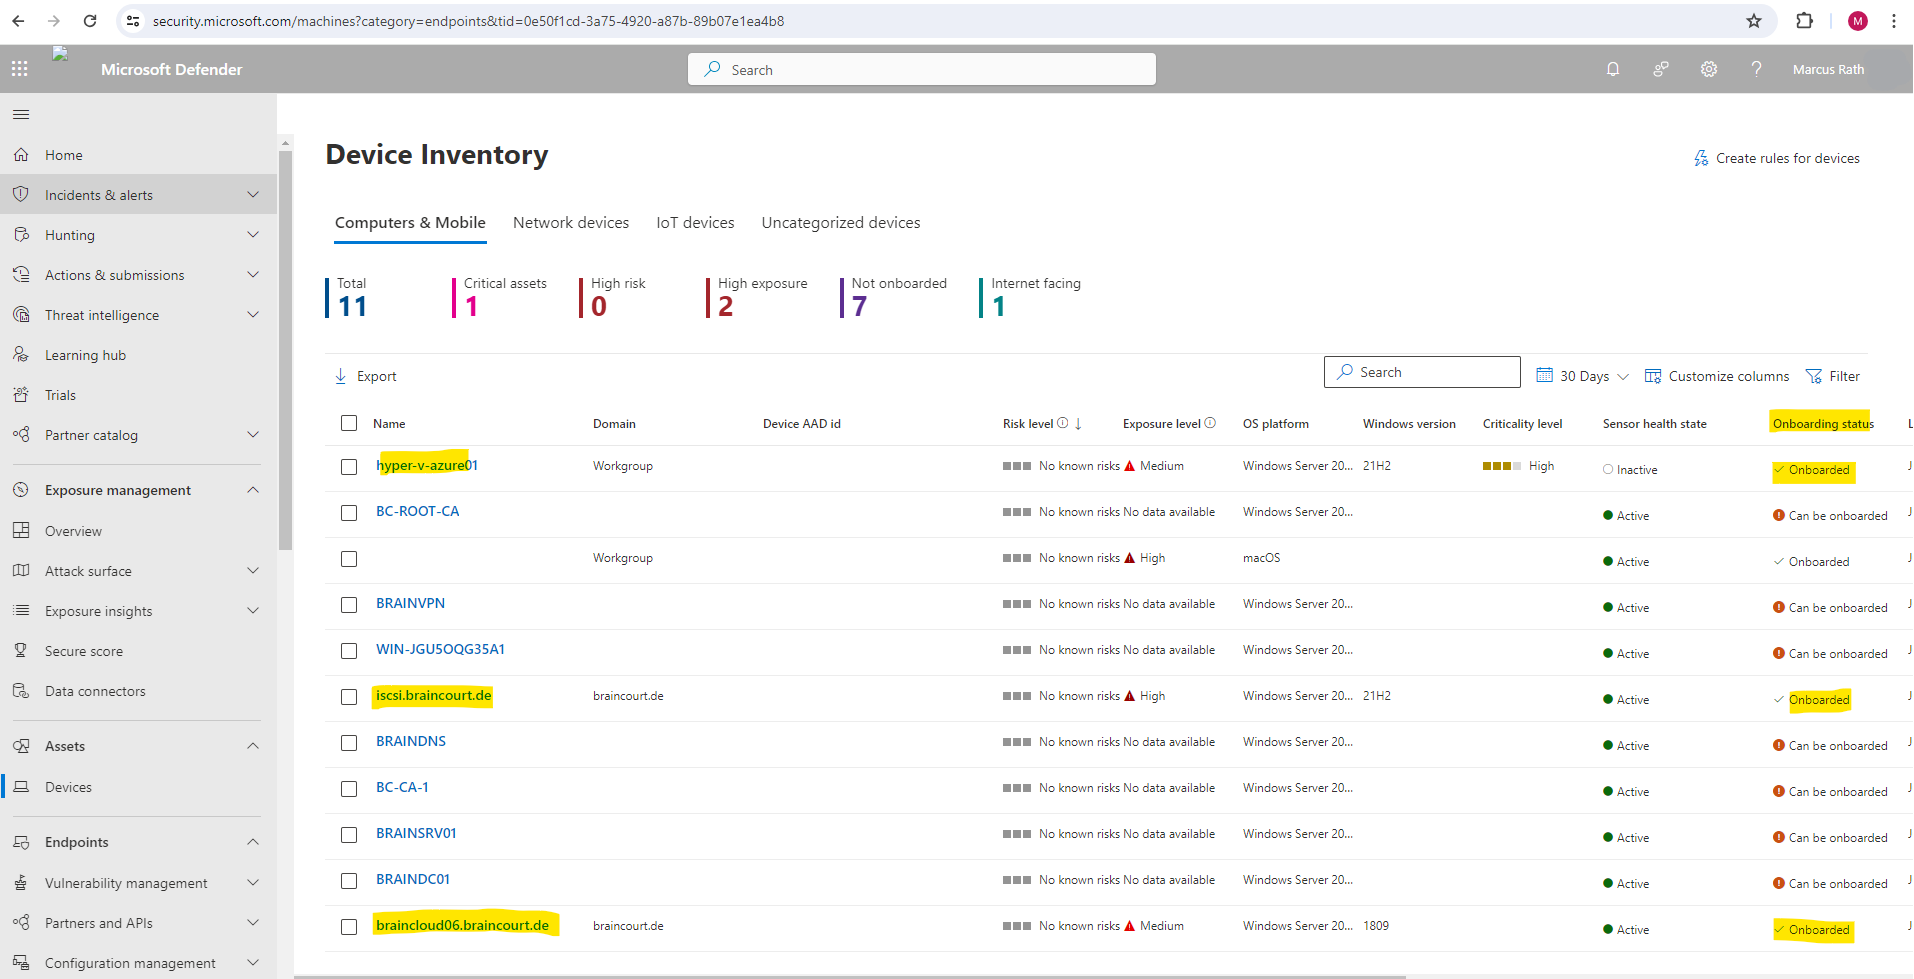
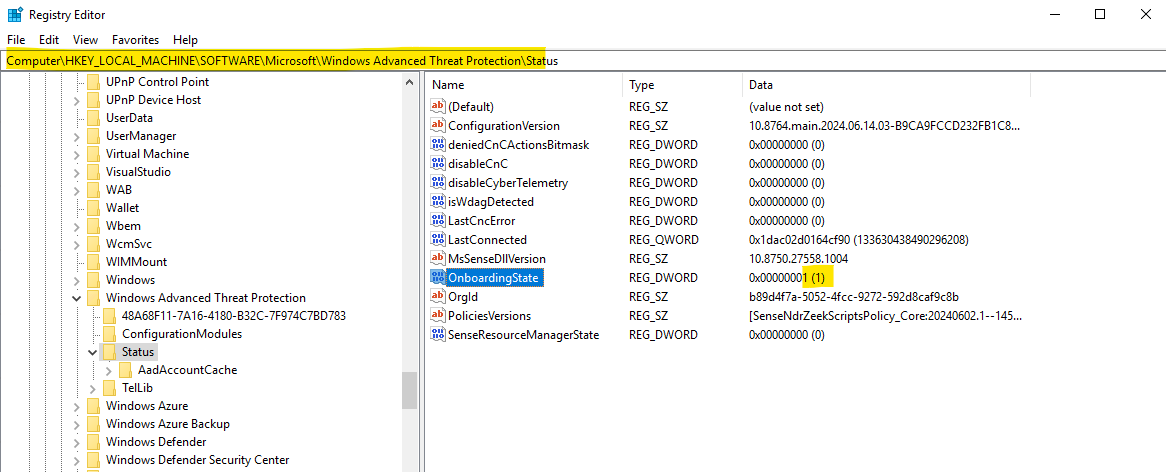
Determine if the Server is onboarded to Defender for Endpoint directly on the Server
On Windows
Computer\HKEY_LOCAL_MACHINE\SOFTWARE\Microsoft\Windows Advanced Threat Protection\Status
OnboardingState
Windows Defender Advanced Threat Protection (ATP), now known as Microsoft Defender for Endpoint
On Linux
Check the output of the mdatp tool.
org-id ==> Present means it’s onboarded.
The command mdatp health -details shows the status of Microsoft Defender for Endpoint (formerly known as Microsoft Defender Advanced Threat Protection or MDATP).

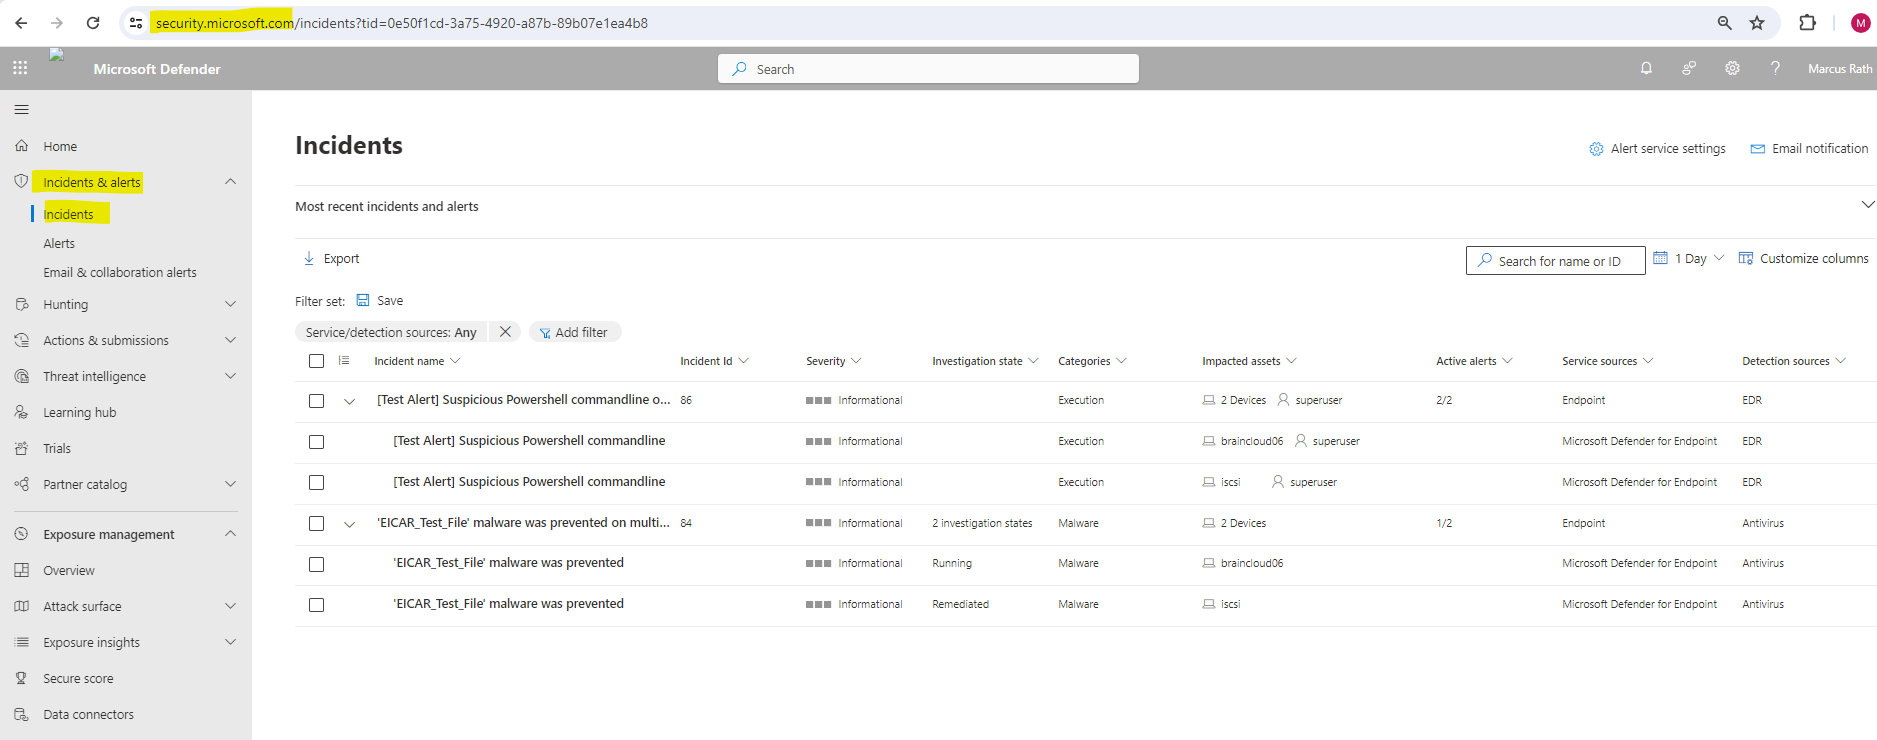
By using a PowerShell script or the EICAR anti-virus test file
We can also determine if the server are onboarded successfully to Microsoft Defender for Endpoint by executing a PowerShell script within an elevated command-line prompt or the EICAR anti-virus test file as shown here https://blog.matrixpost.net/set-up-microsoft-defender-for-endpoint/#verify_onboarding.
In both cases if our server is onboarded successfully to Microsoft Defender for Endpoint, an alert should show up in Microsoft Defender for Endpoint under Incidents & alerts -> Incidents or Alerts as shown below.
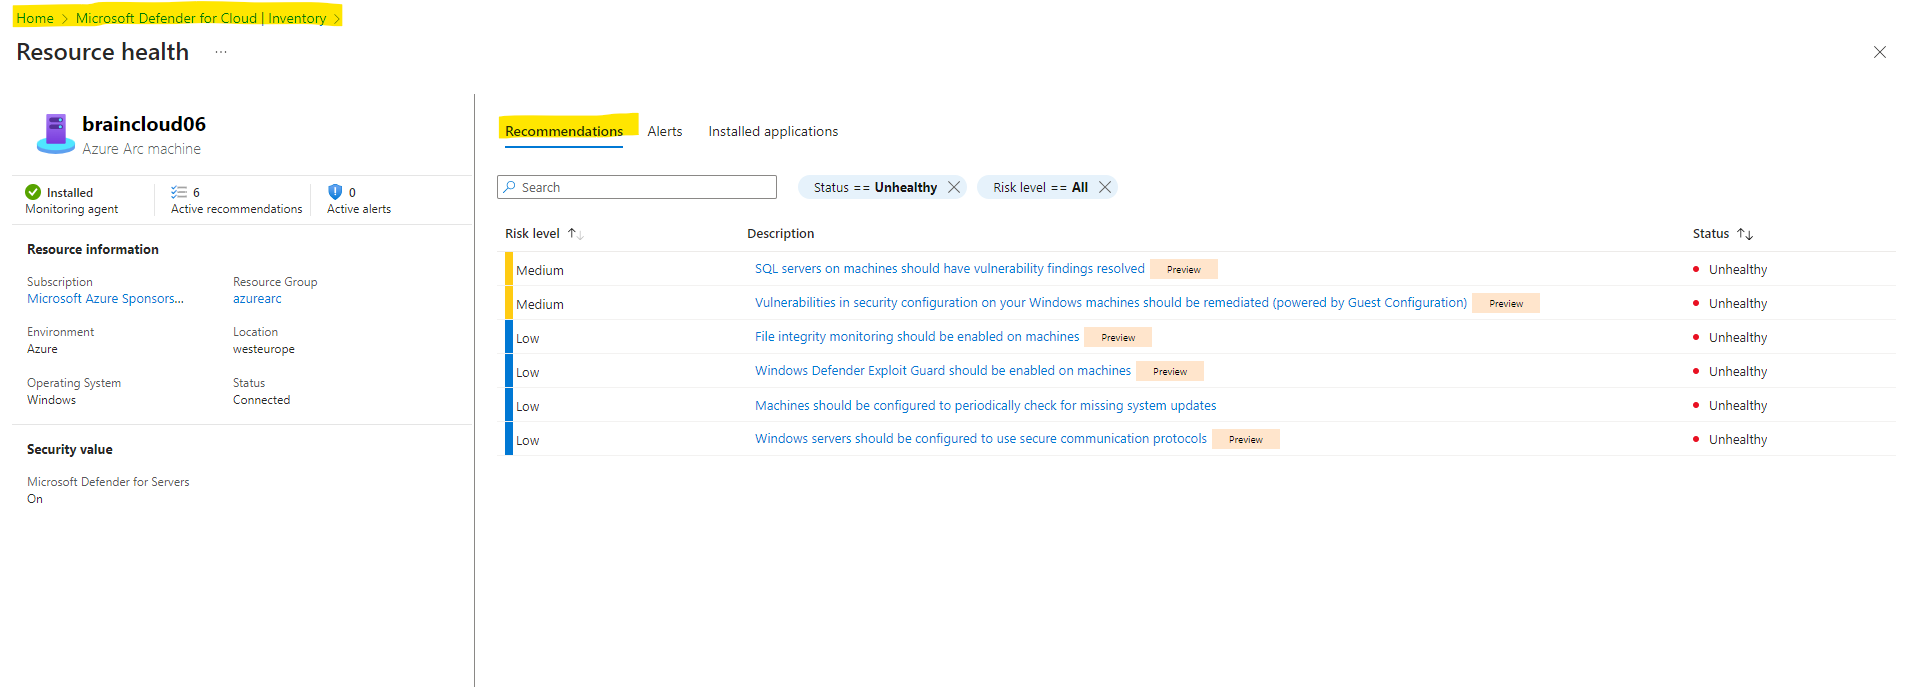
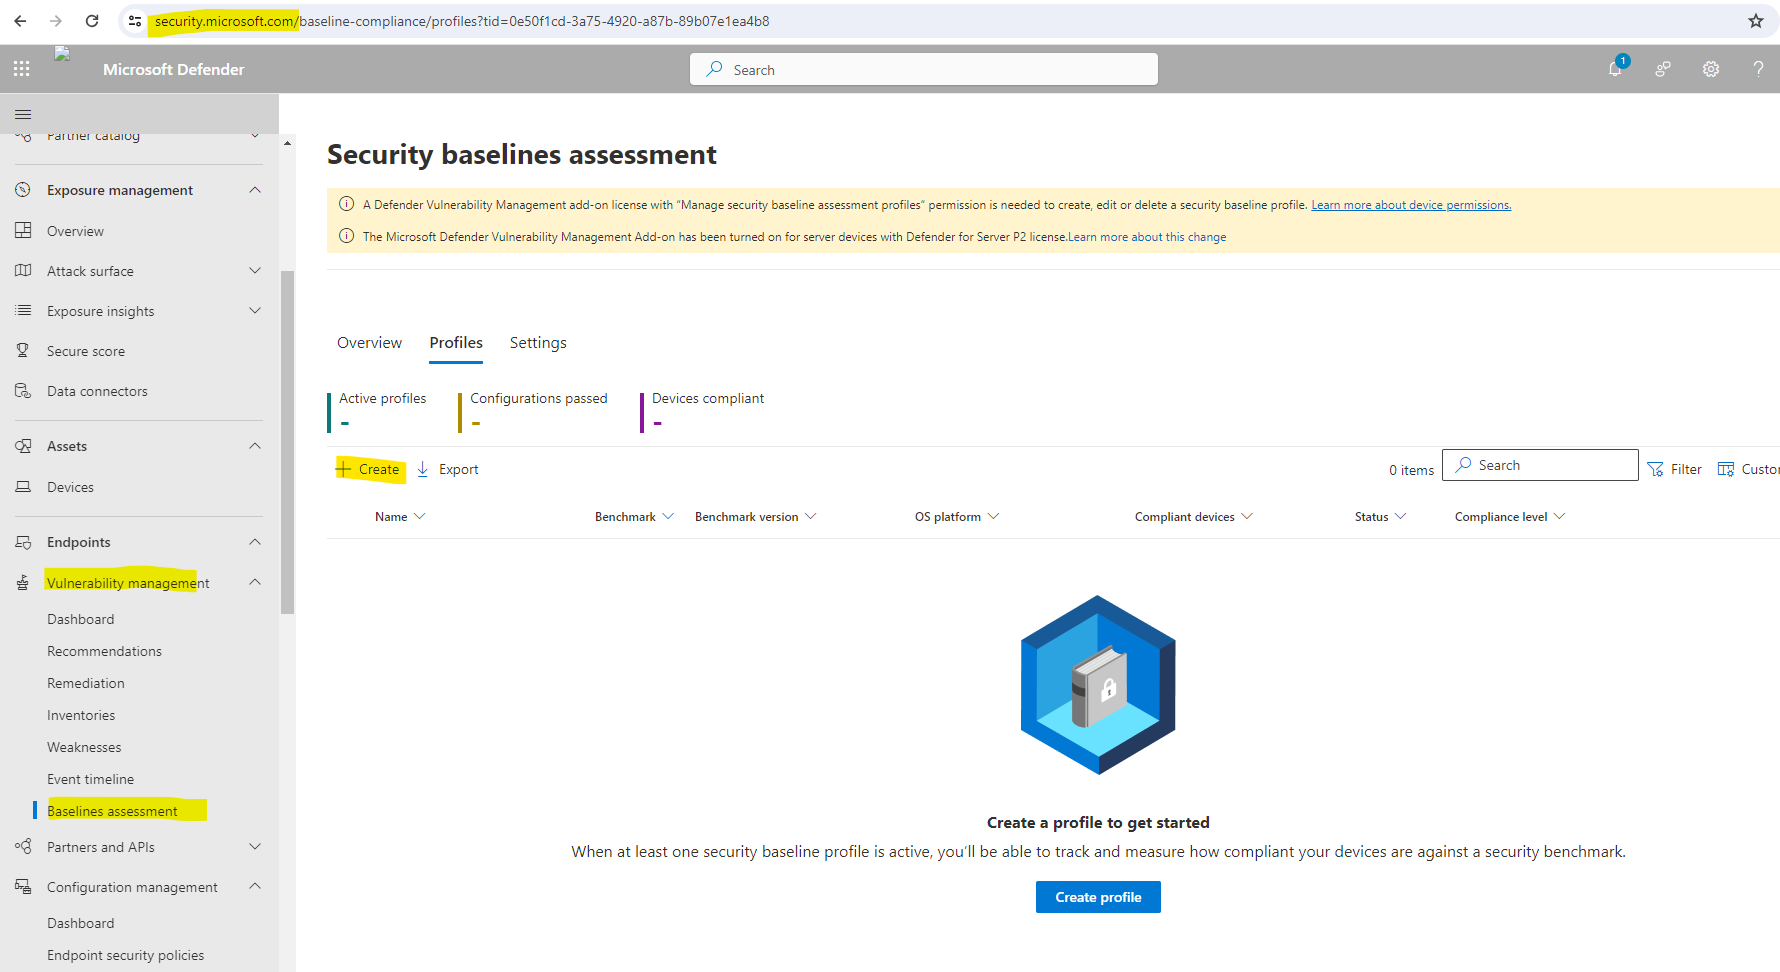
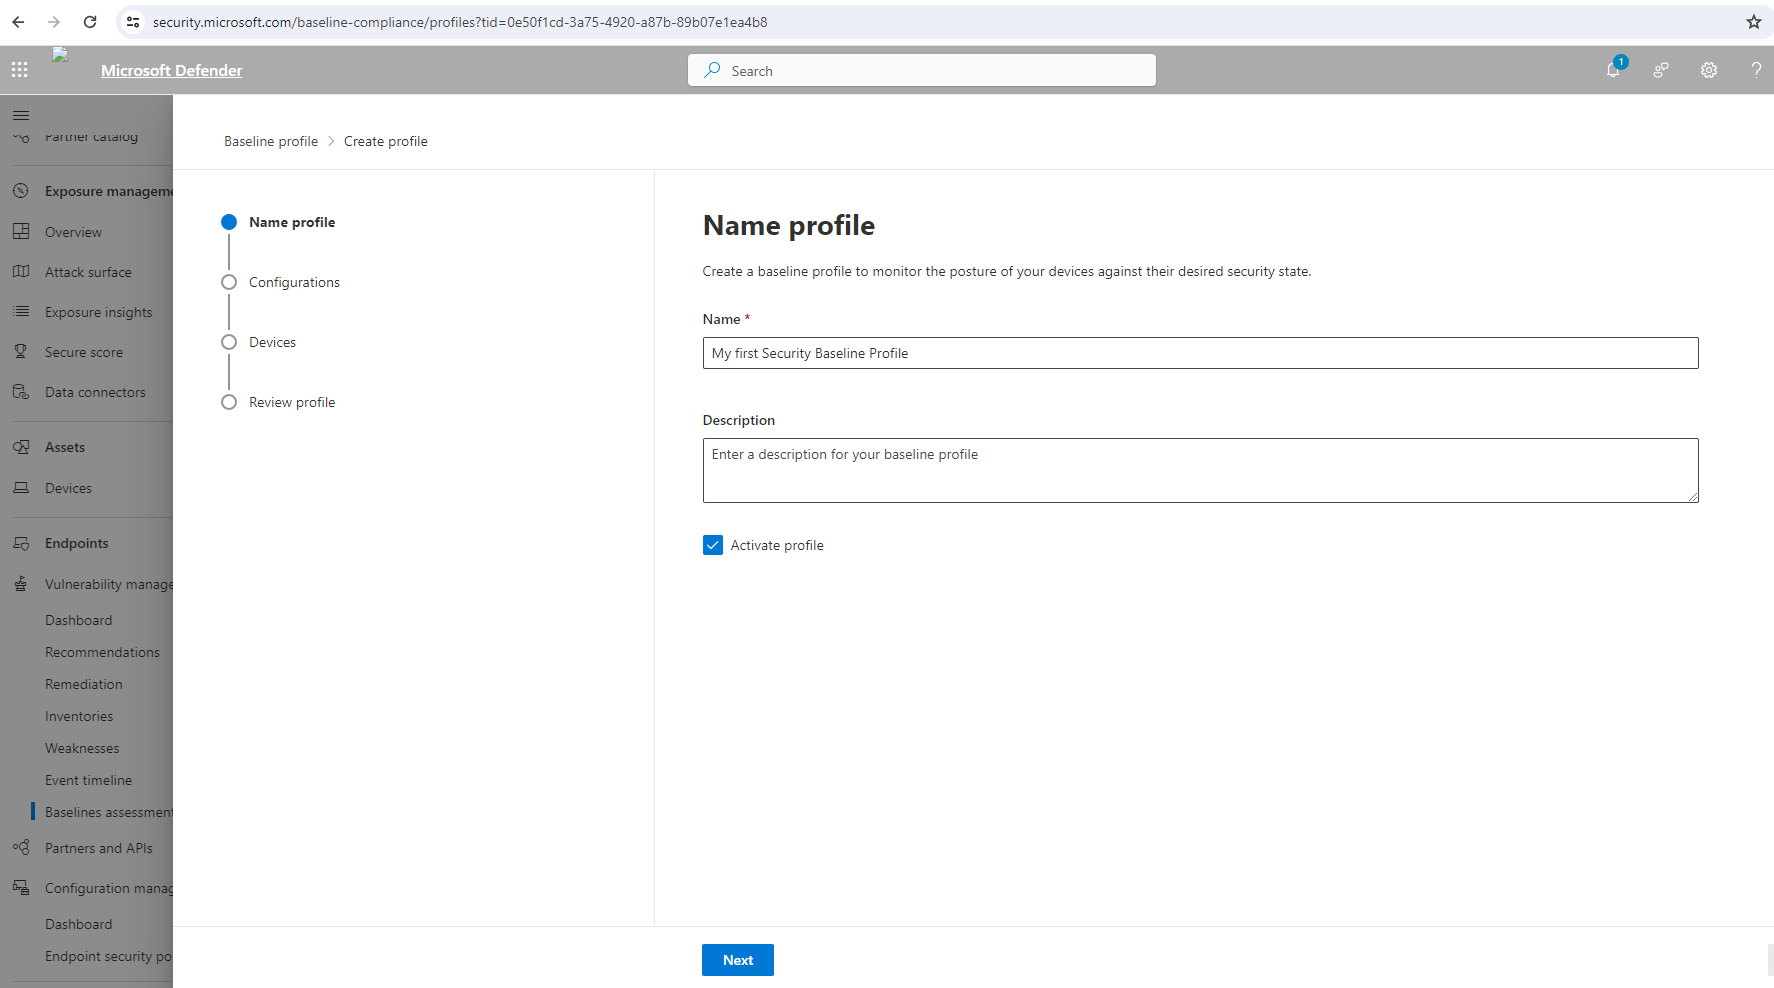
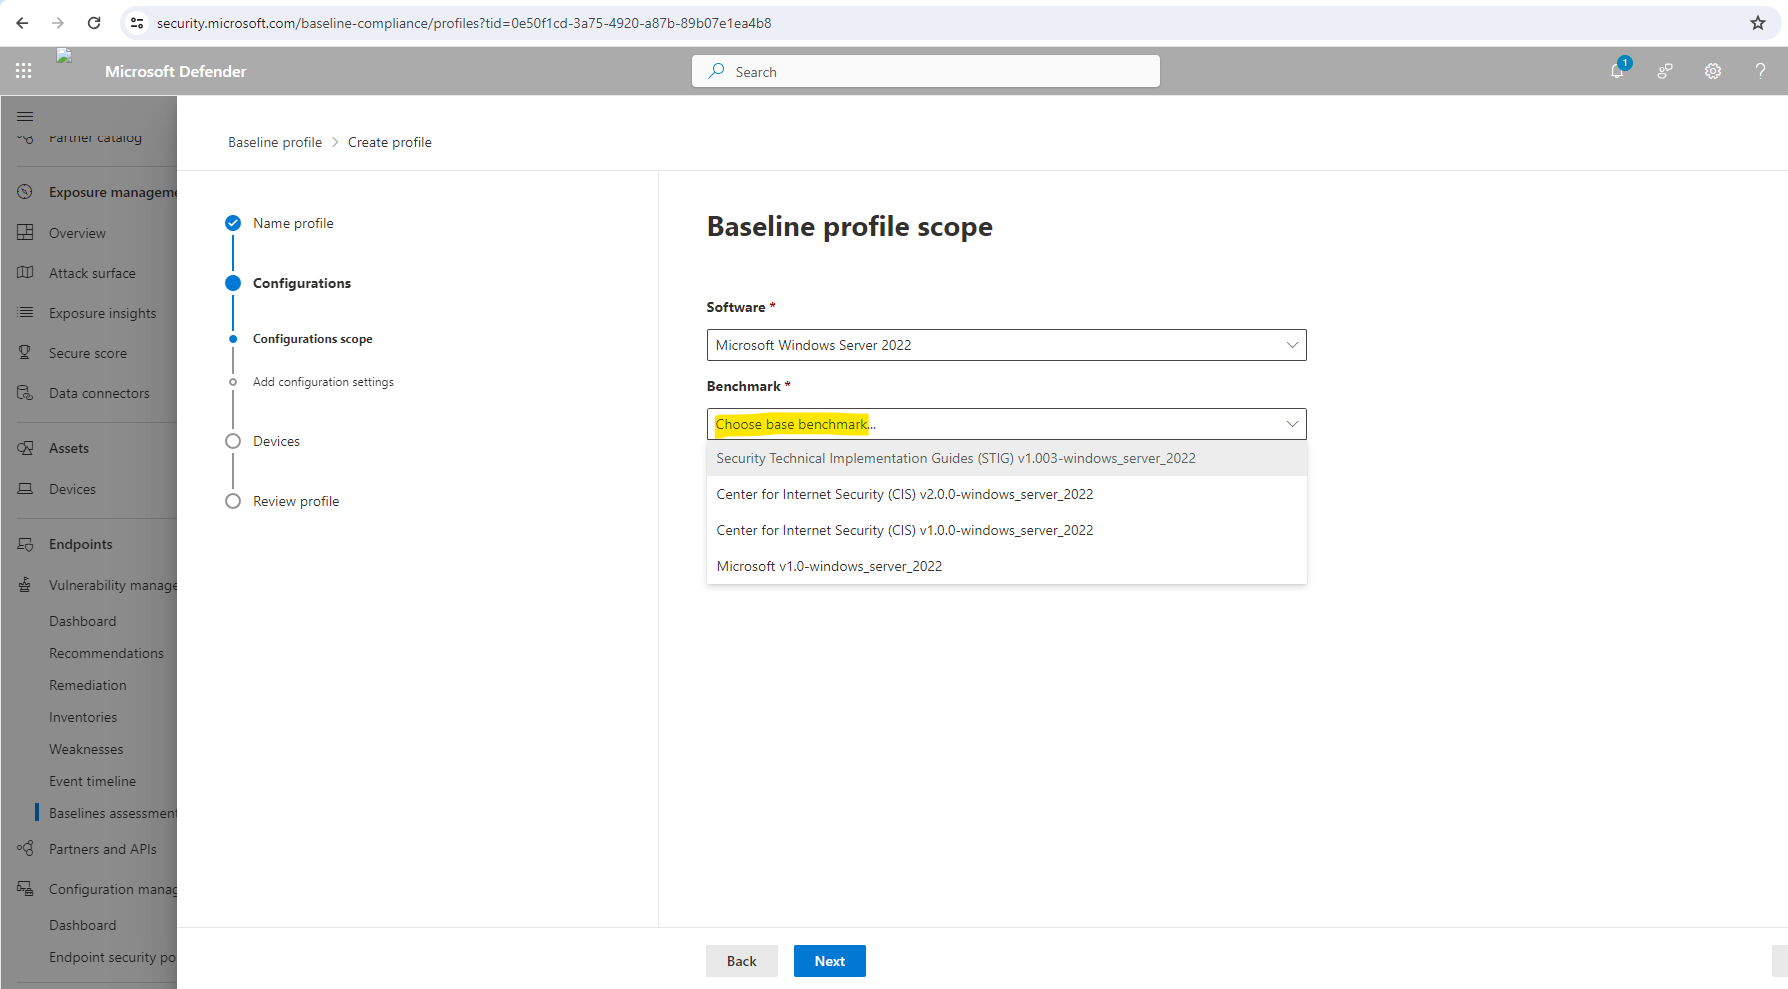
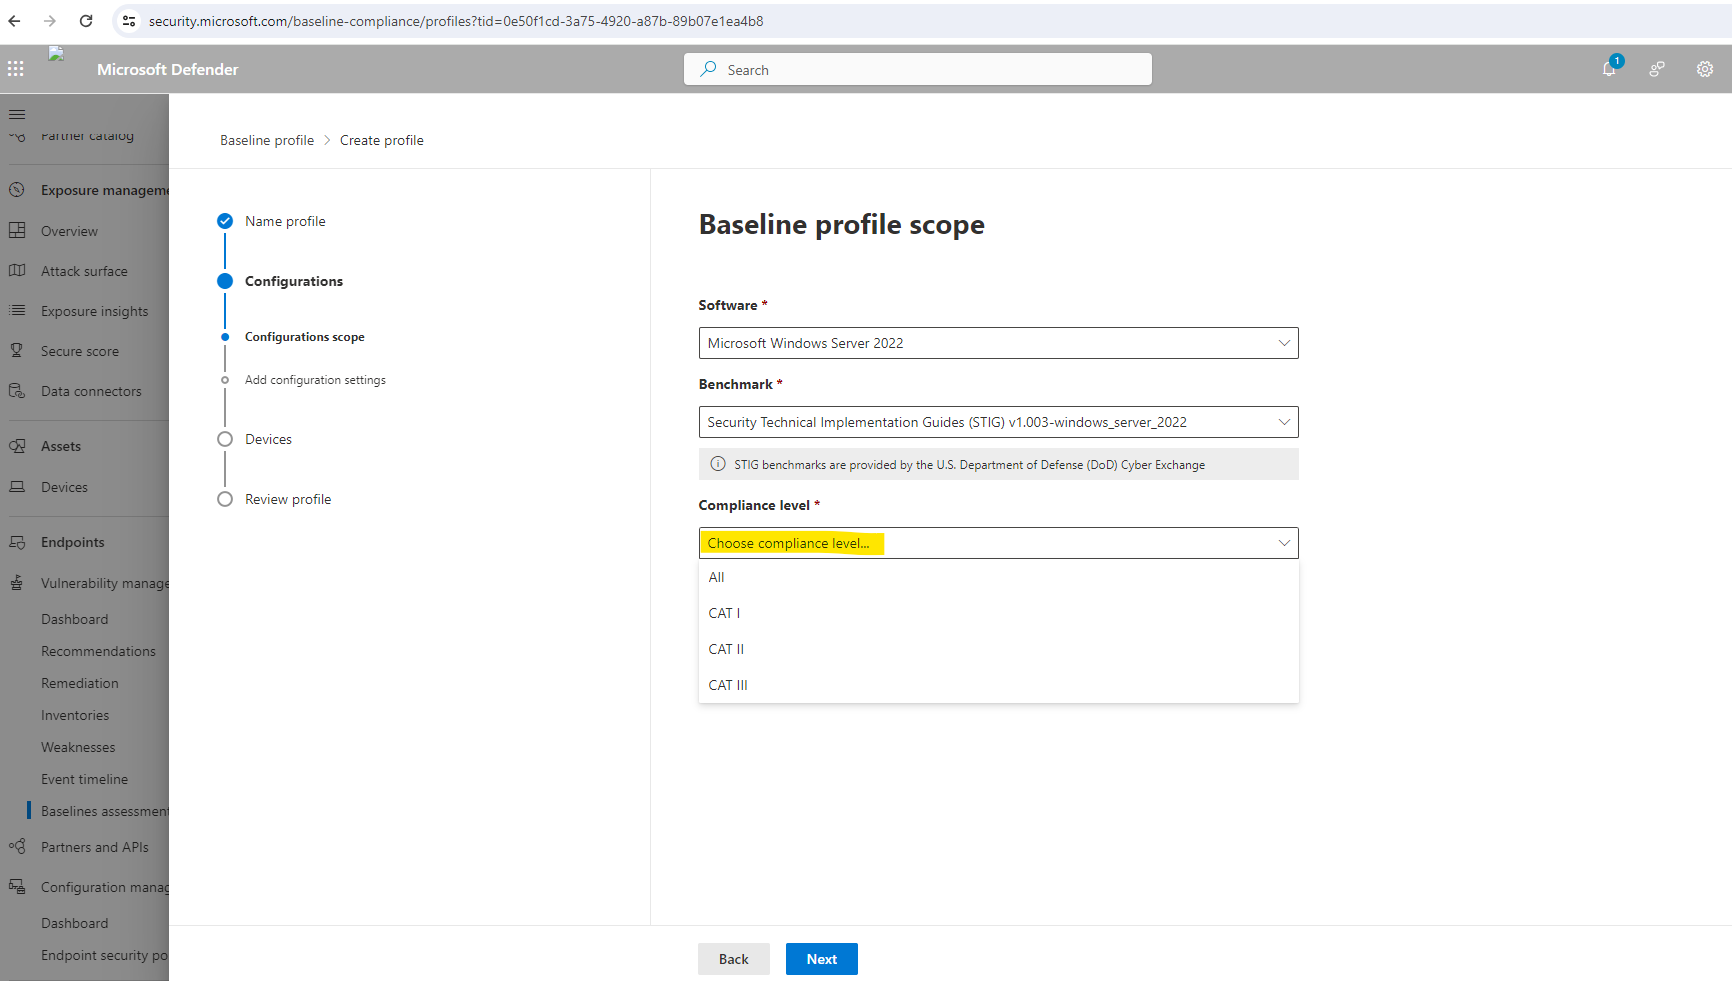
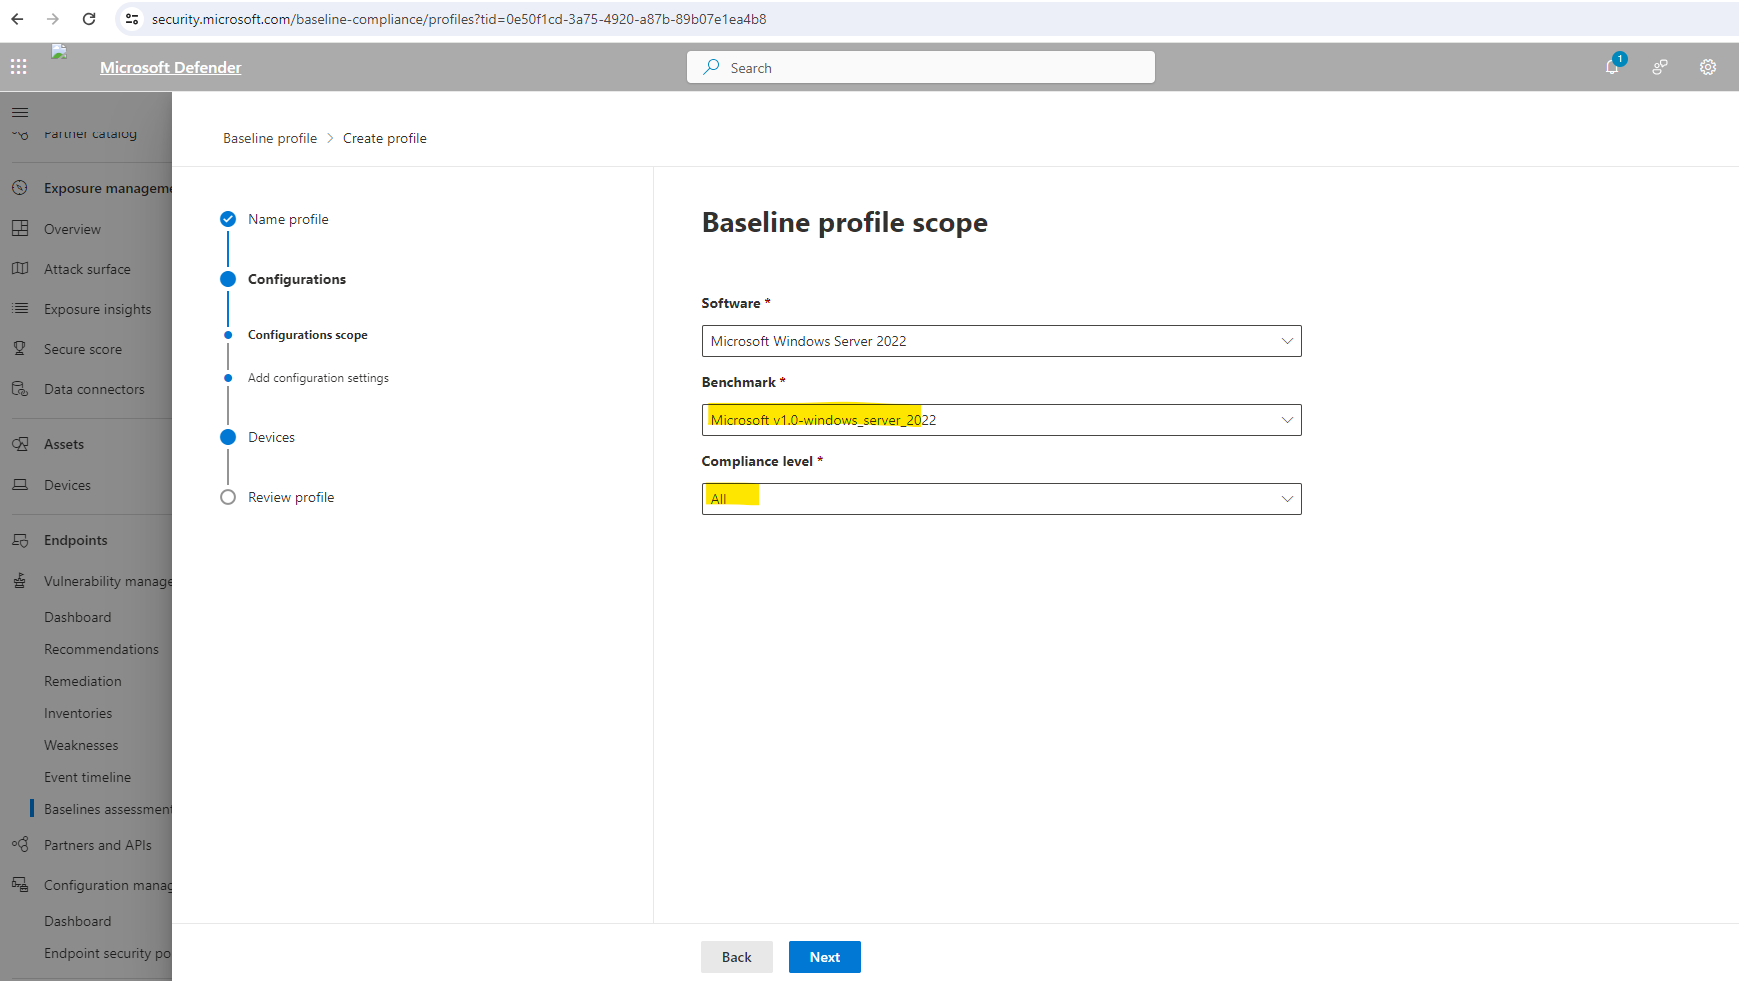
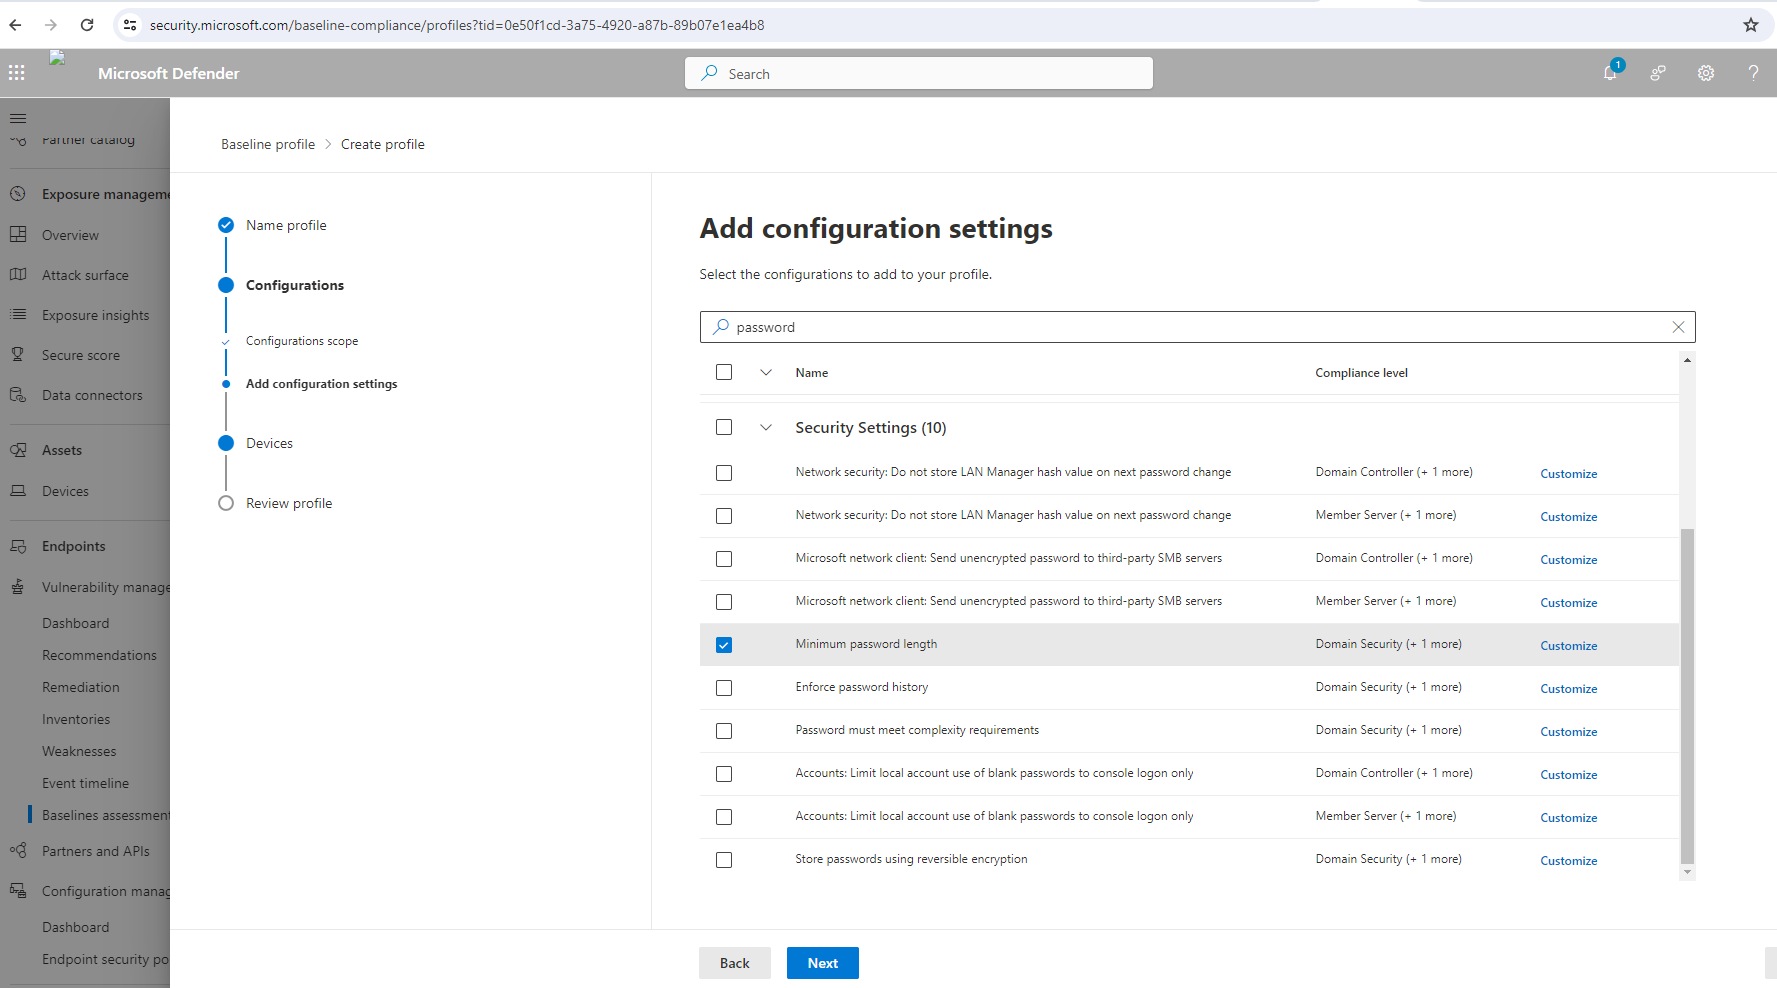
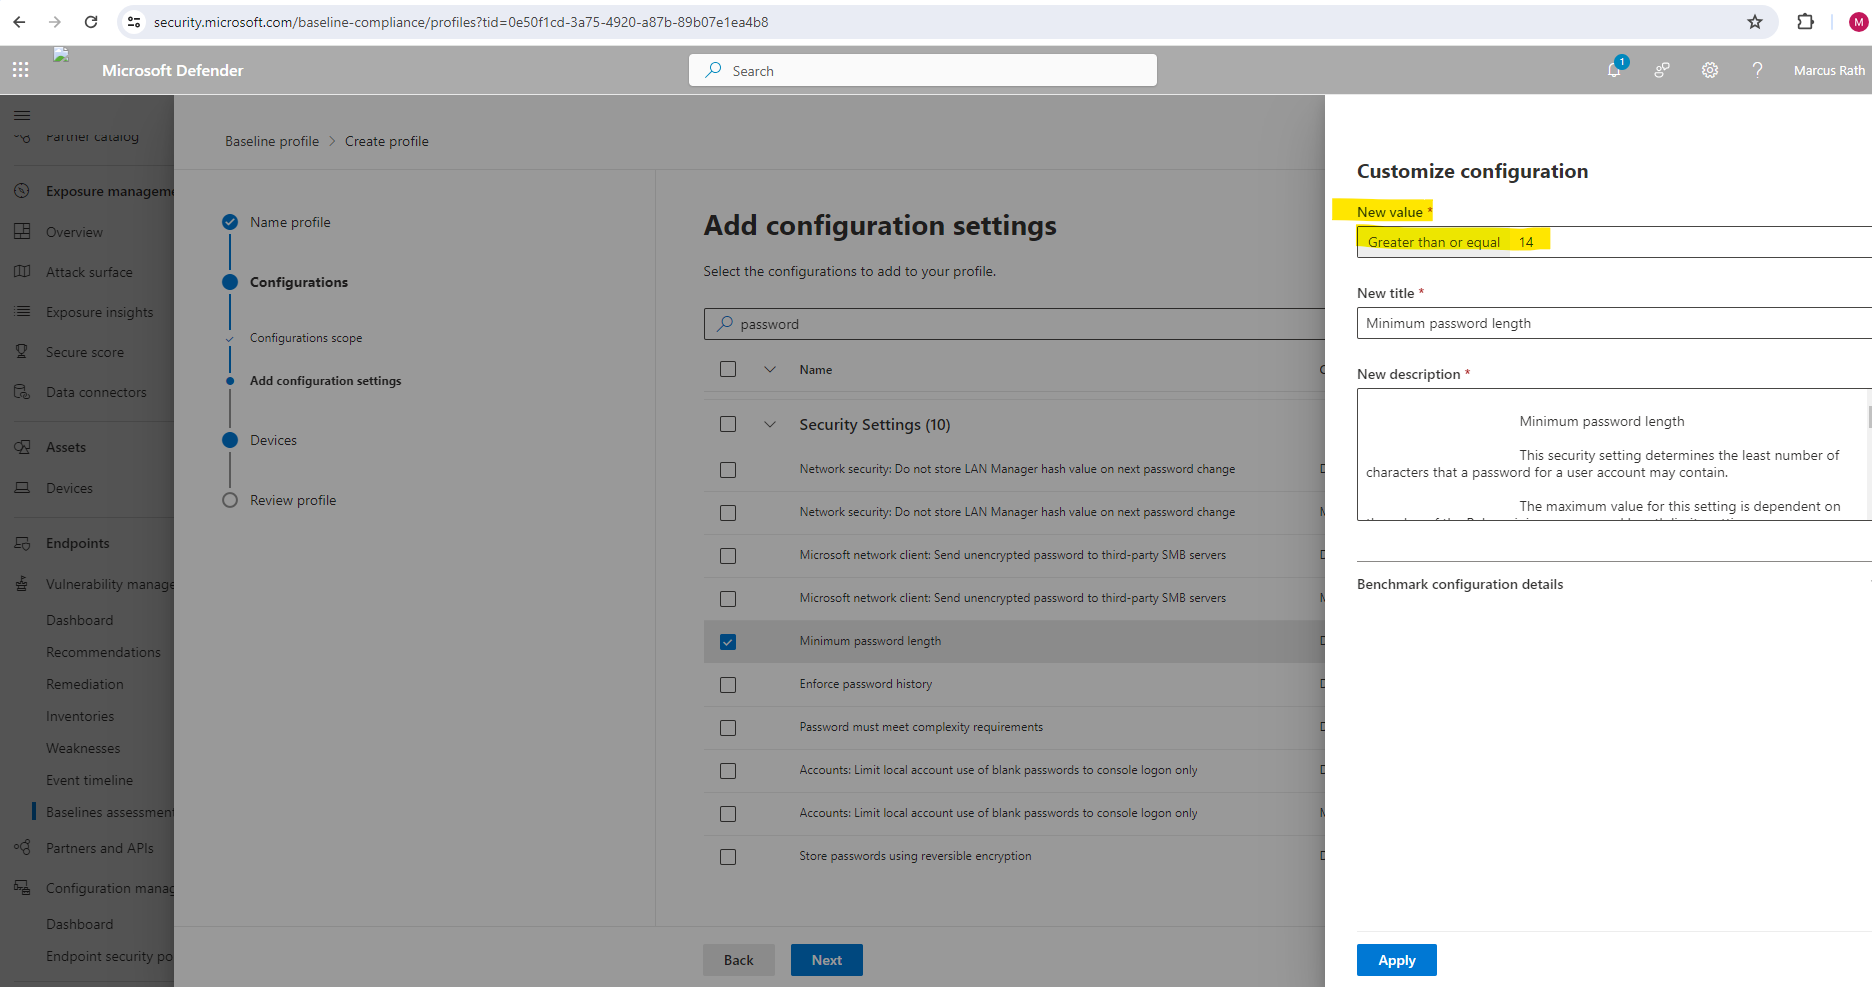
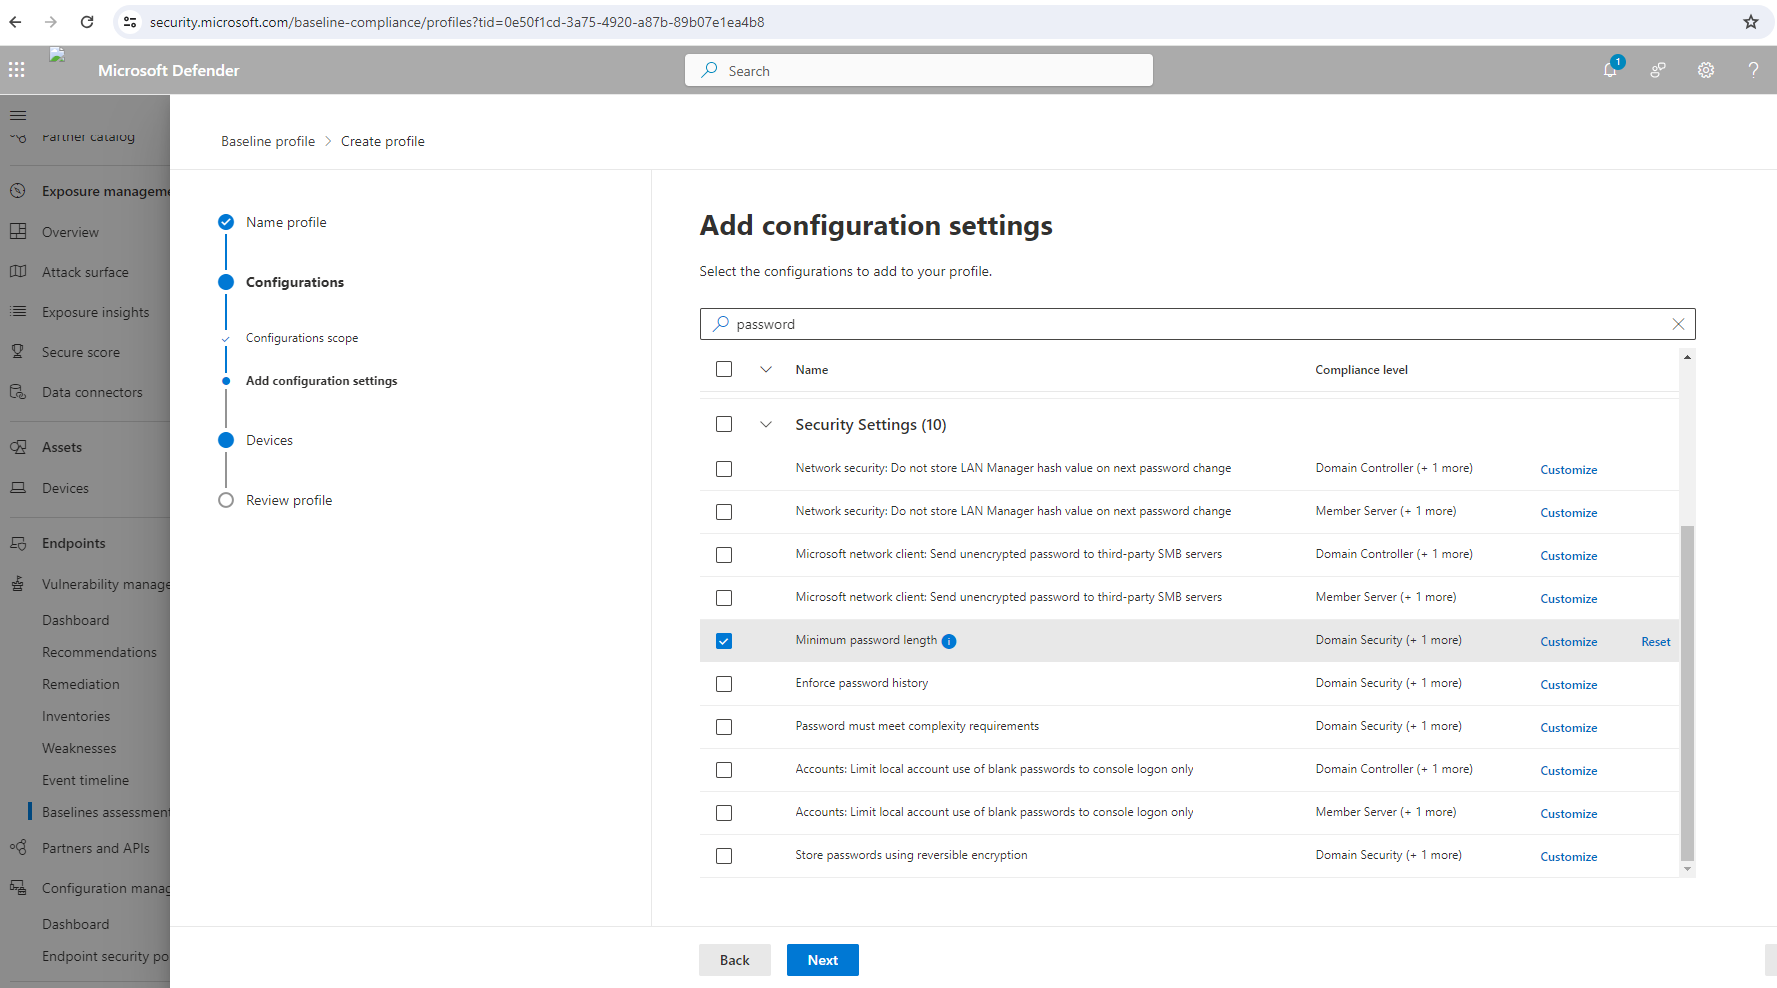
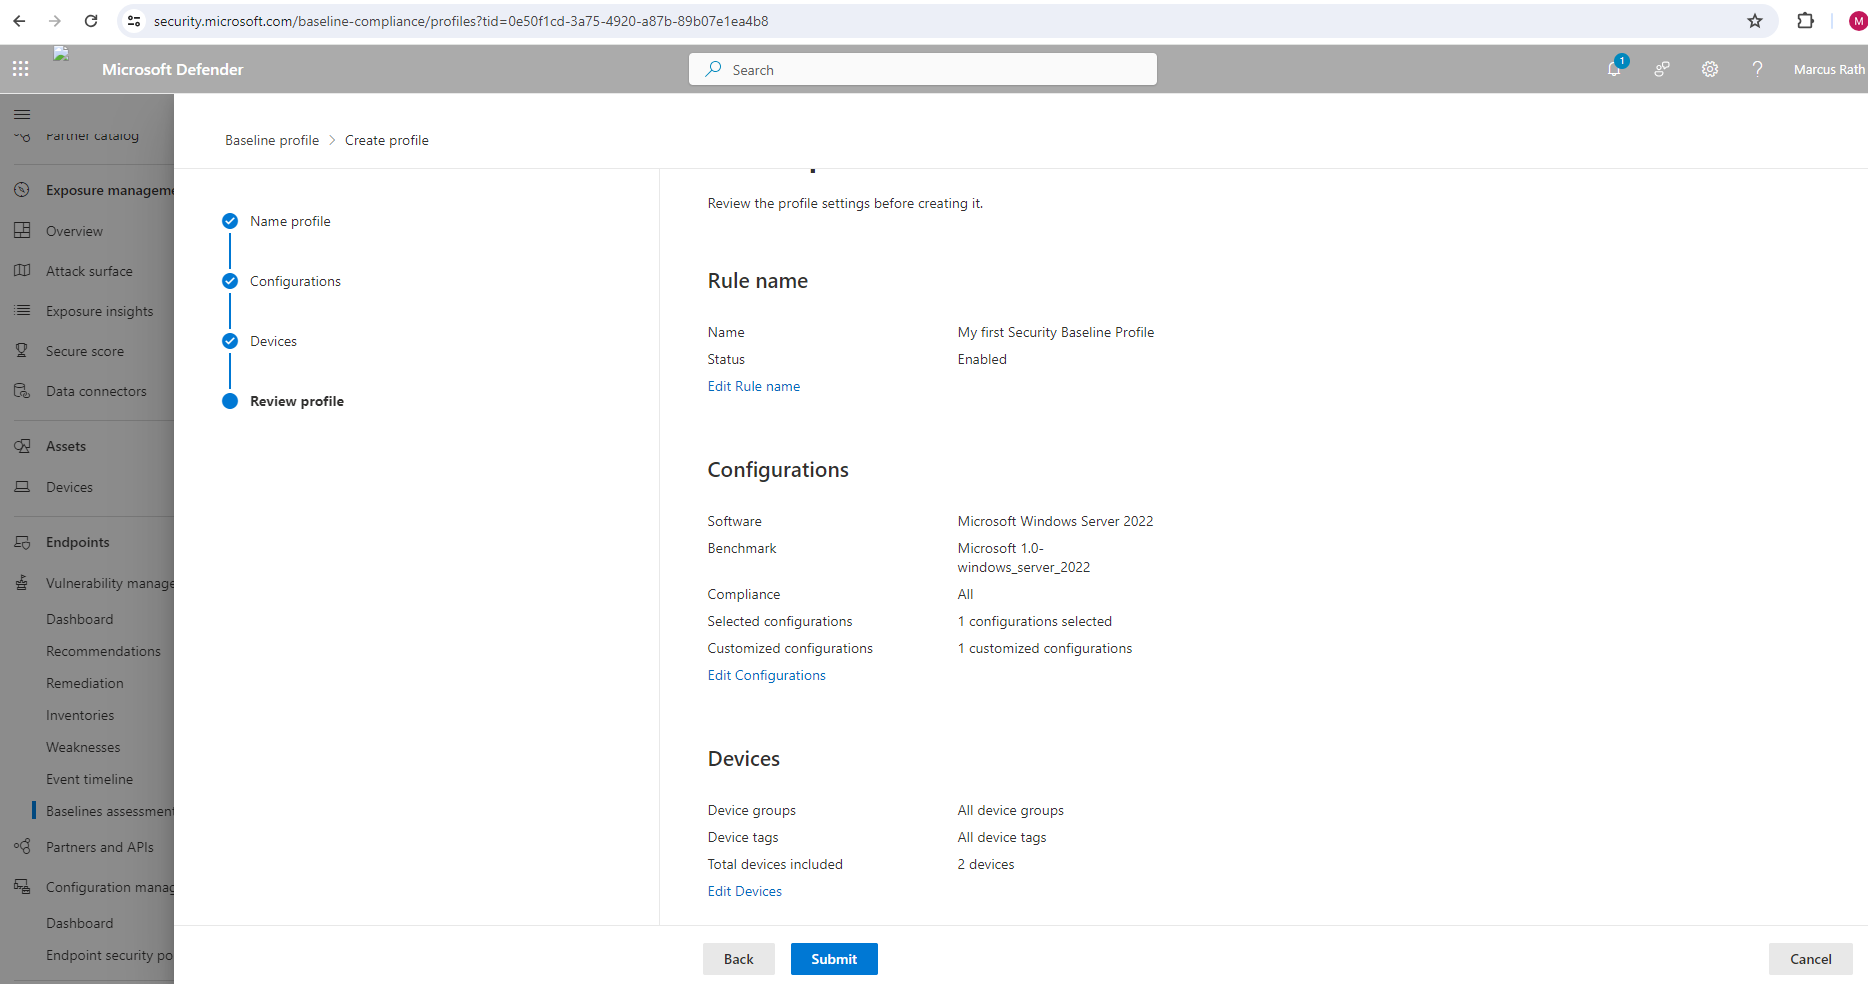
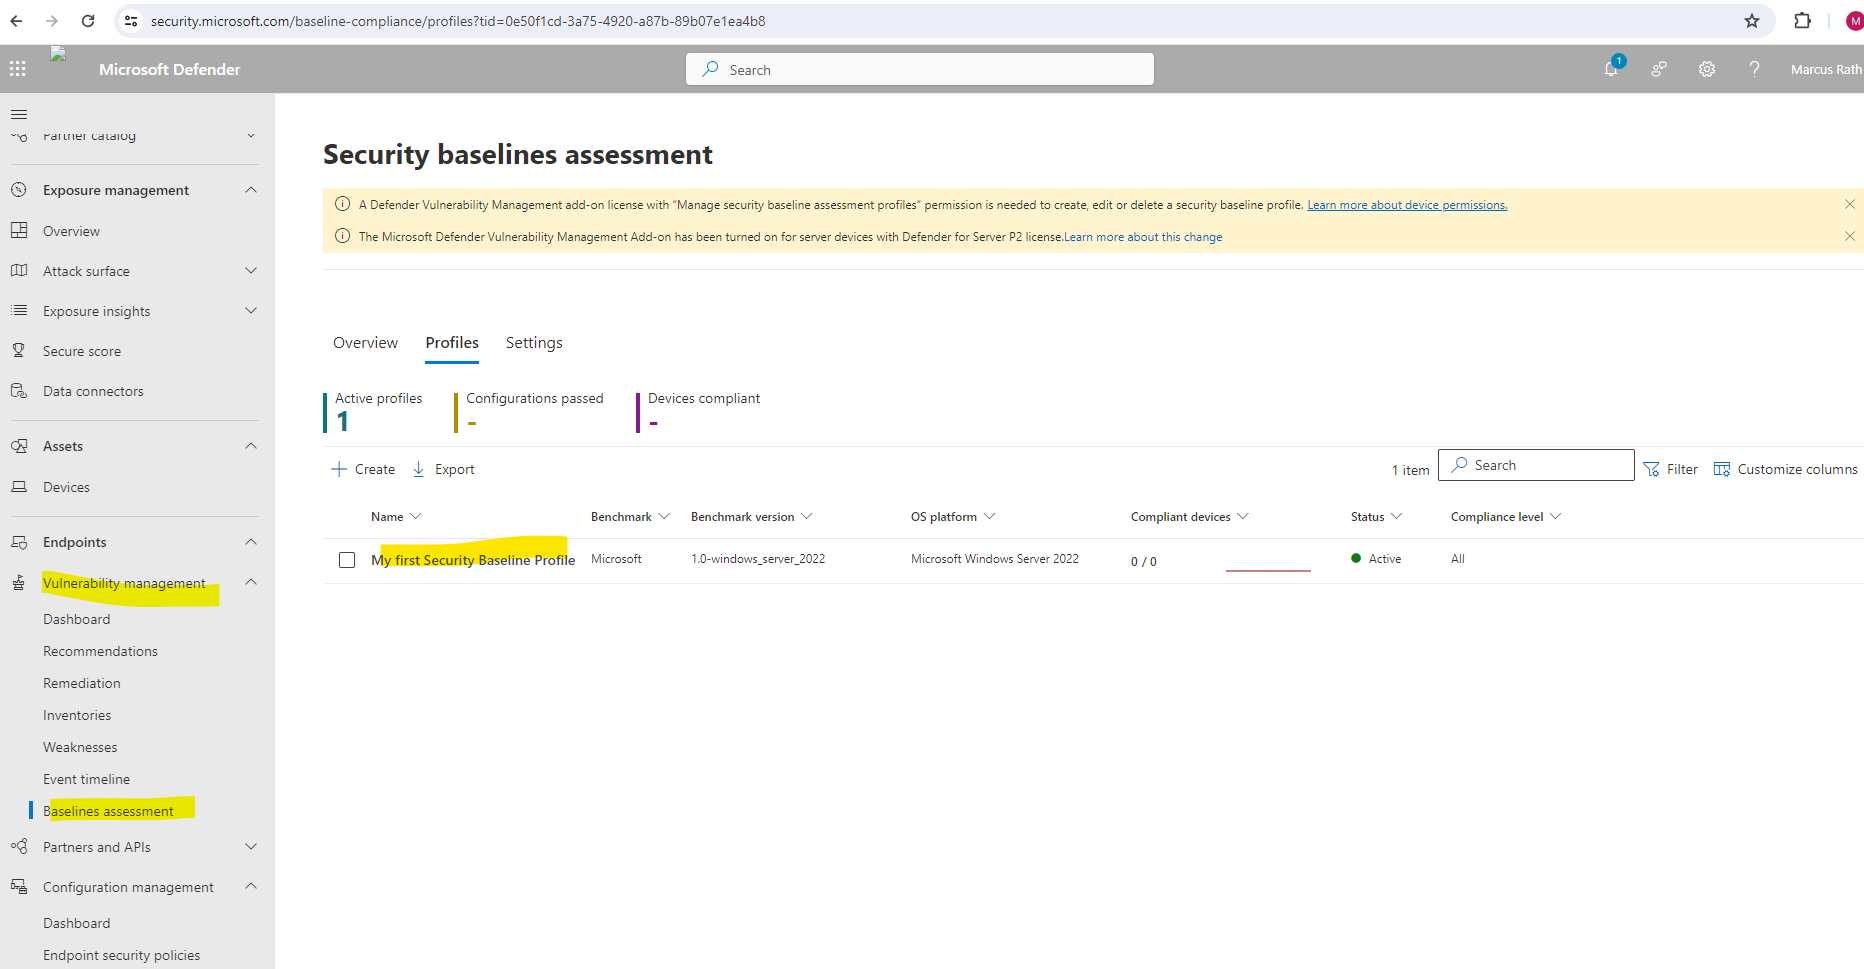
Security baselines assessment
Troubleshooting
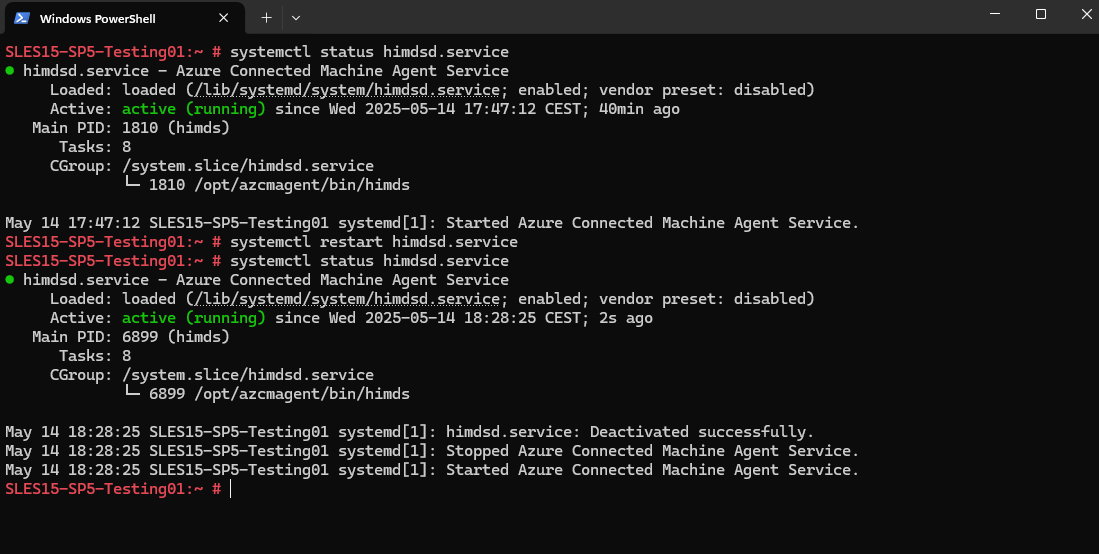
Restart the Azure Connected Machine Agent Service
# systemctl status himdsd.service
The himdsd.service is the Hybrid Instance Metadata Service (HIMDS), which is a critical component used by Azure Arc for Servers. It works together with the Azure Connected Machine Agent to securely fetch metadata, configuration, and policies from Azure.
# azcmagent show
The azcmagent show command displays the current status of the Azure Connected Machine Agent on a machine that is registered with Azure Arc.

Install MDE.Linux Extension manually by using the Azure CLI
PS> az login
PS> az connectedmachine list --resource-group <resource group>

PS> az connectedmachine extension create --machine-name "<MachineName>" --name "MDE.Linux" --resource-group "<YourResourceGroup>" --location "<AzureRegion>" --publisher "Microsoft.Azure.AzureDefenderForServers" --type "MDE.Linux" --settings '{}'

<AzureRegion>: Must match the Arc server's region (e.g., eastus).
--settings '{}': Optional configuration (usually left empty for defaults).
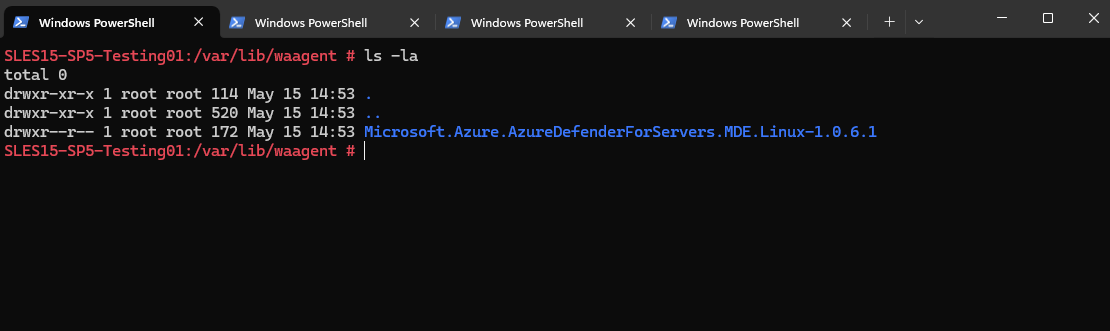
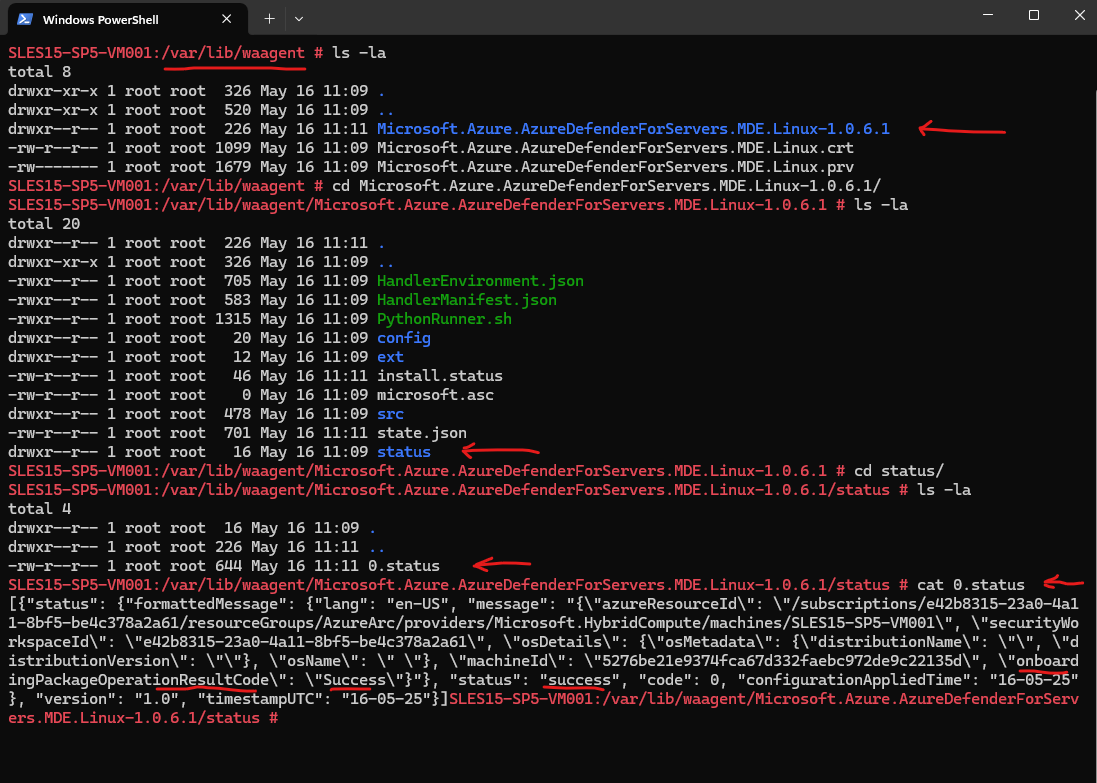
The extension packages will be installed under /var/lib/waagent/.
The Microsoft Azure Linux VM Agent (waagent) manages Linux and FreeBSD provisioning, along with virtual machine (VM) interaction with the Azure fabric controller. In addition to the Linux agent providing provisioning functionality, Azure provides the option of using cloud-init for some Linux operating systems.
The Linux agent provides the following functionality for Linux and FreeBSD Azure Virtual Machines deployments. For more information, see the Azure Linux VM Agent readme on GitHub.
Source: https://learn.microsoft.com/en-us/azure/virtual-machines/extensions/agent-linux
wa stands for Windows Azure (Microsoft’s former cloud branding before it was renamed to Microsoft Azure in 2014). Hence Windows Azure Agent (waagent).
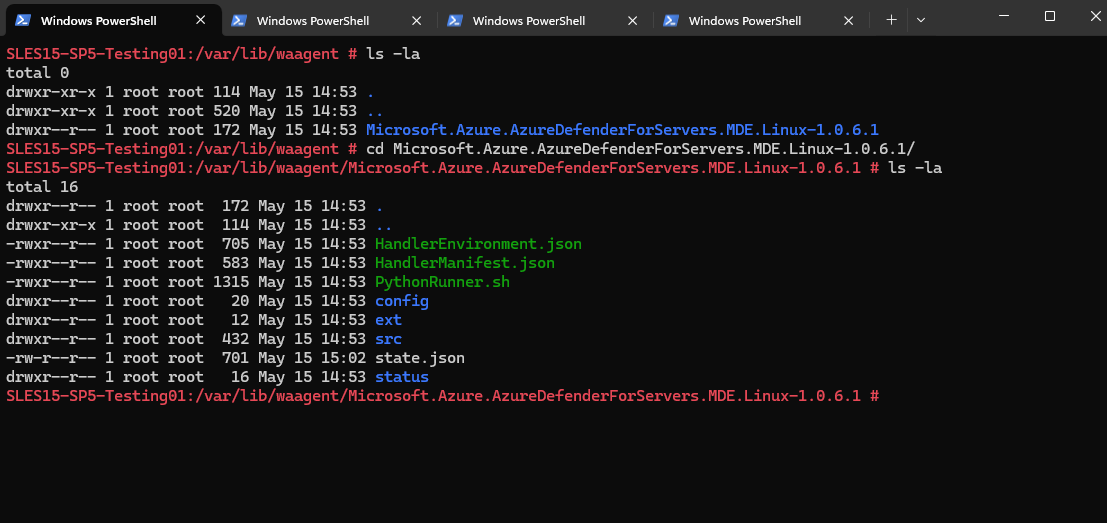
Check the status of the extension installation under /var/lib/waagent/Microsoft.Azure.AzureDefenderForServers.MDE.Linux-1.0.6.1/status
Azure Extensions on Azure Arc enabled Servers
The Azure Connected Machine agent lets you manage Windows and Linux machines hosted outside of Azure, on your corporate network or other cloud providers.
The Azure Connected Machine agent package contains several logical components bundled together:
- The Hybrid Instance Metadata service (HIMDS) manages the connection to Azure and the connected machine’s Azure identity.
- The machine configuration agent provides functionality such as assessing whether the machine complies with required policies and enforcing compliance.Note the following behavior with Azure Policy machine configuration for a disconnected machine:
- An Azure Policy assignment that targets disconnected machines is unaffected.
- Guest assignment is stored locally for 14 days. Within the 14-day period, if the Connected Machine agent reconnects to the service, policy assignments are reapplied.
- Assignments are deleted after 14 days, and aren’t reassigned to the machine after the 14-day period.
- The Extension agent manages VM extensions, including install, uninstall, and upgrade. Azure downloads extensions and copies them to the %SystemDrive%\%ProgramFiles%\AzureConnectedMachineAgent\ExtensionService\downloads folder on Windows, and to /opt/GC_Ext/downloads on Linux. On Windows, the extension installs to the following path %SystemDrive%\Packages\Plugins\<extension>, and on Linux the extension installs to /var/lib/waagent/<extension>.
Source: https://learn.microsoft.com/en-us/azure/azure-arc/servers/agent-overview