

How to update/upgrade vCenter Server (VCSA) by using the vCenter Server Appliance Management Interface (VAMI)
vCenter Server is the backbone of VMware’s virtualization management, providing centralized control over your vSphere environment.
Keeping it updated is crucial for security, stability, and access to new features. Regular updates patch vulnerabilities, improve performance, and ensure compatibility with the latest hardware and software.
In this post we will see step by step how we can update and upgrade our vCenter Server (VCSA) by using the vCenter Server Appliance Management Interface (VAMI).
The vCenter Server Appliance Management Interface (VAMI) is a web-based management portal for administering and maintaining the vCenter Server Appliance (VCSA). It provides an easy-to-use interface for performing essential system tasks without requiring direct CLI access.
Log in with the root credentials set during vCenter deployment.
http://<vCenter-IP-or-Hostname>:5480
Also if not already aware of, as of April 23, 2025, VMware’s public patch and update repository URLs have been officially deprecated following the transition to Broadcom’s entitlement-based distribution model.
To continue receiving updates in connected environments, administrators must manually update their repository configurations in Lifecycle Manager and VAMI or via CLI to point to the new authenticated URLs.
More about you will find in my following post.
About patching the vCenter Server offline via CLI you can read the following article https://knowledge.broadcom.com/external/article/370115/patching-vcenter-server-appliance-via-cl.html.
About how to upgrade vCenter Server from version 7 to 8, you can also read my following post.
About upgrading and patching the ESXi hosts by using the vSphere Lifecycle Management (vLCM) you can read my following post.
Update vCenter Server by using the VAMI
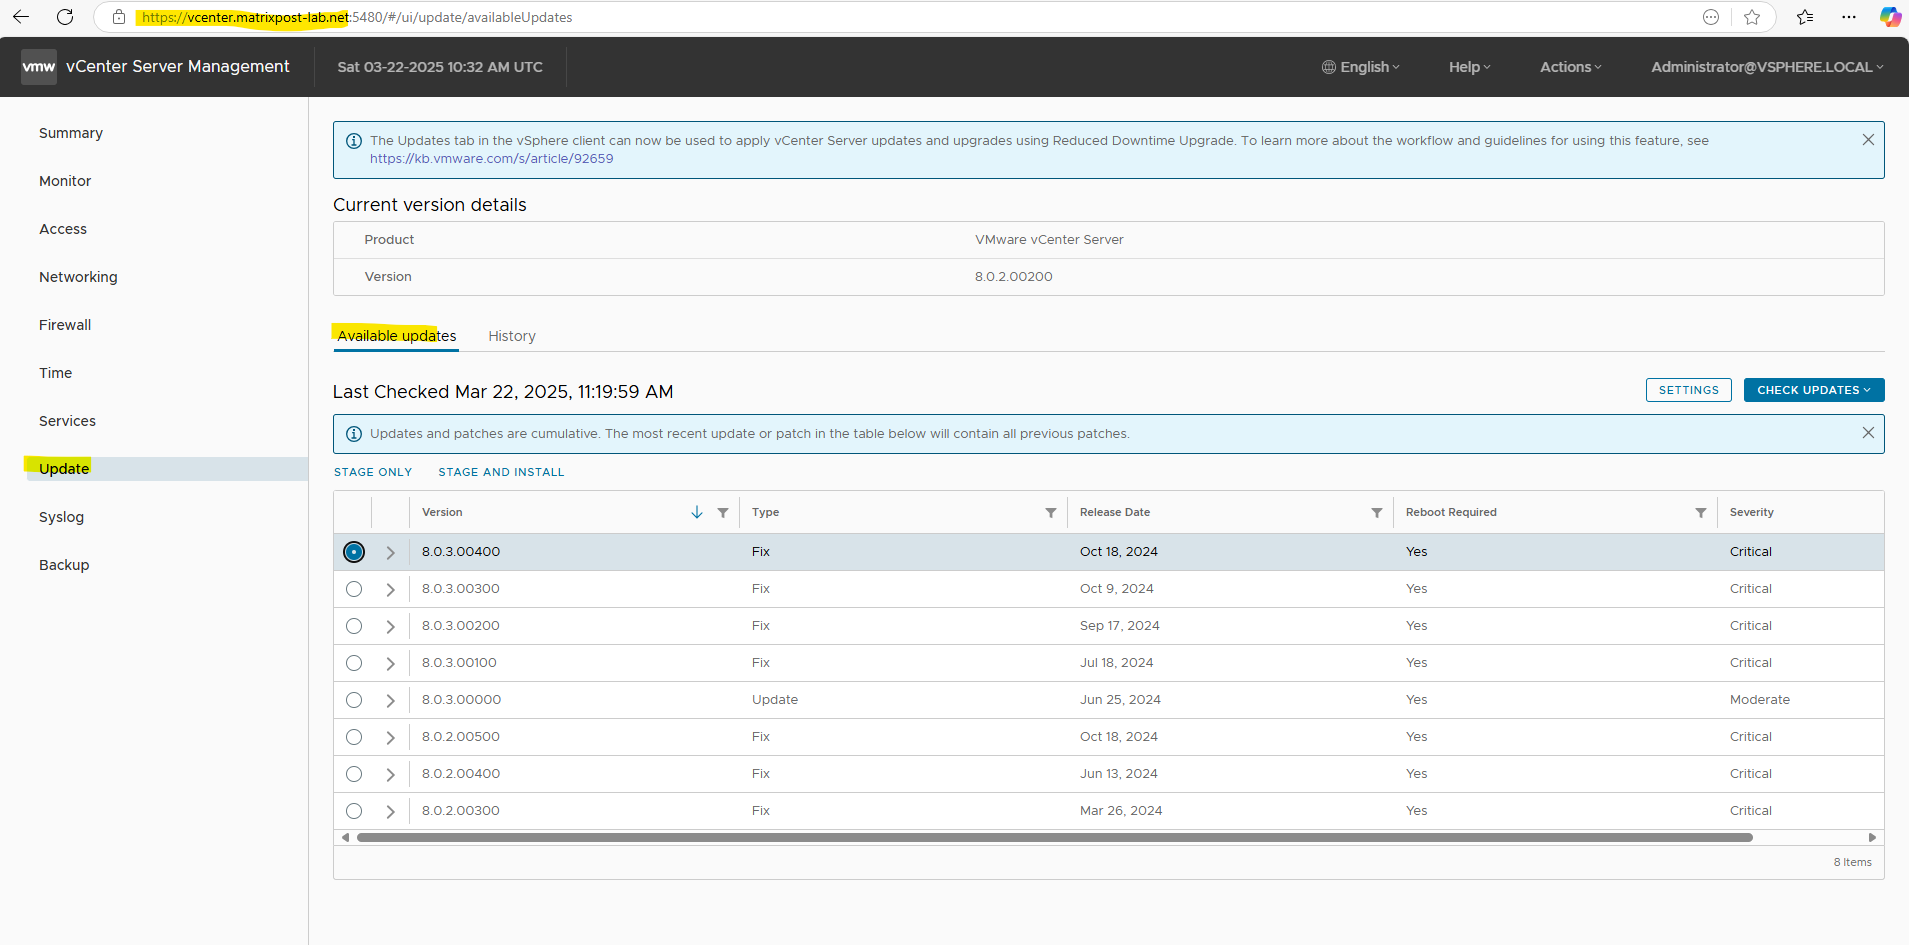
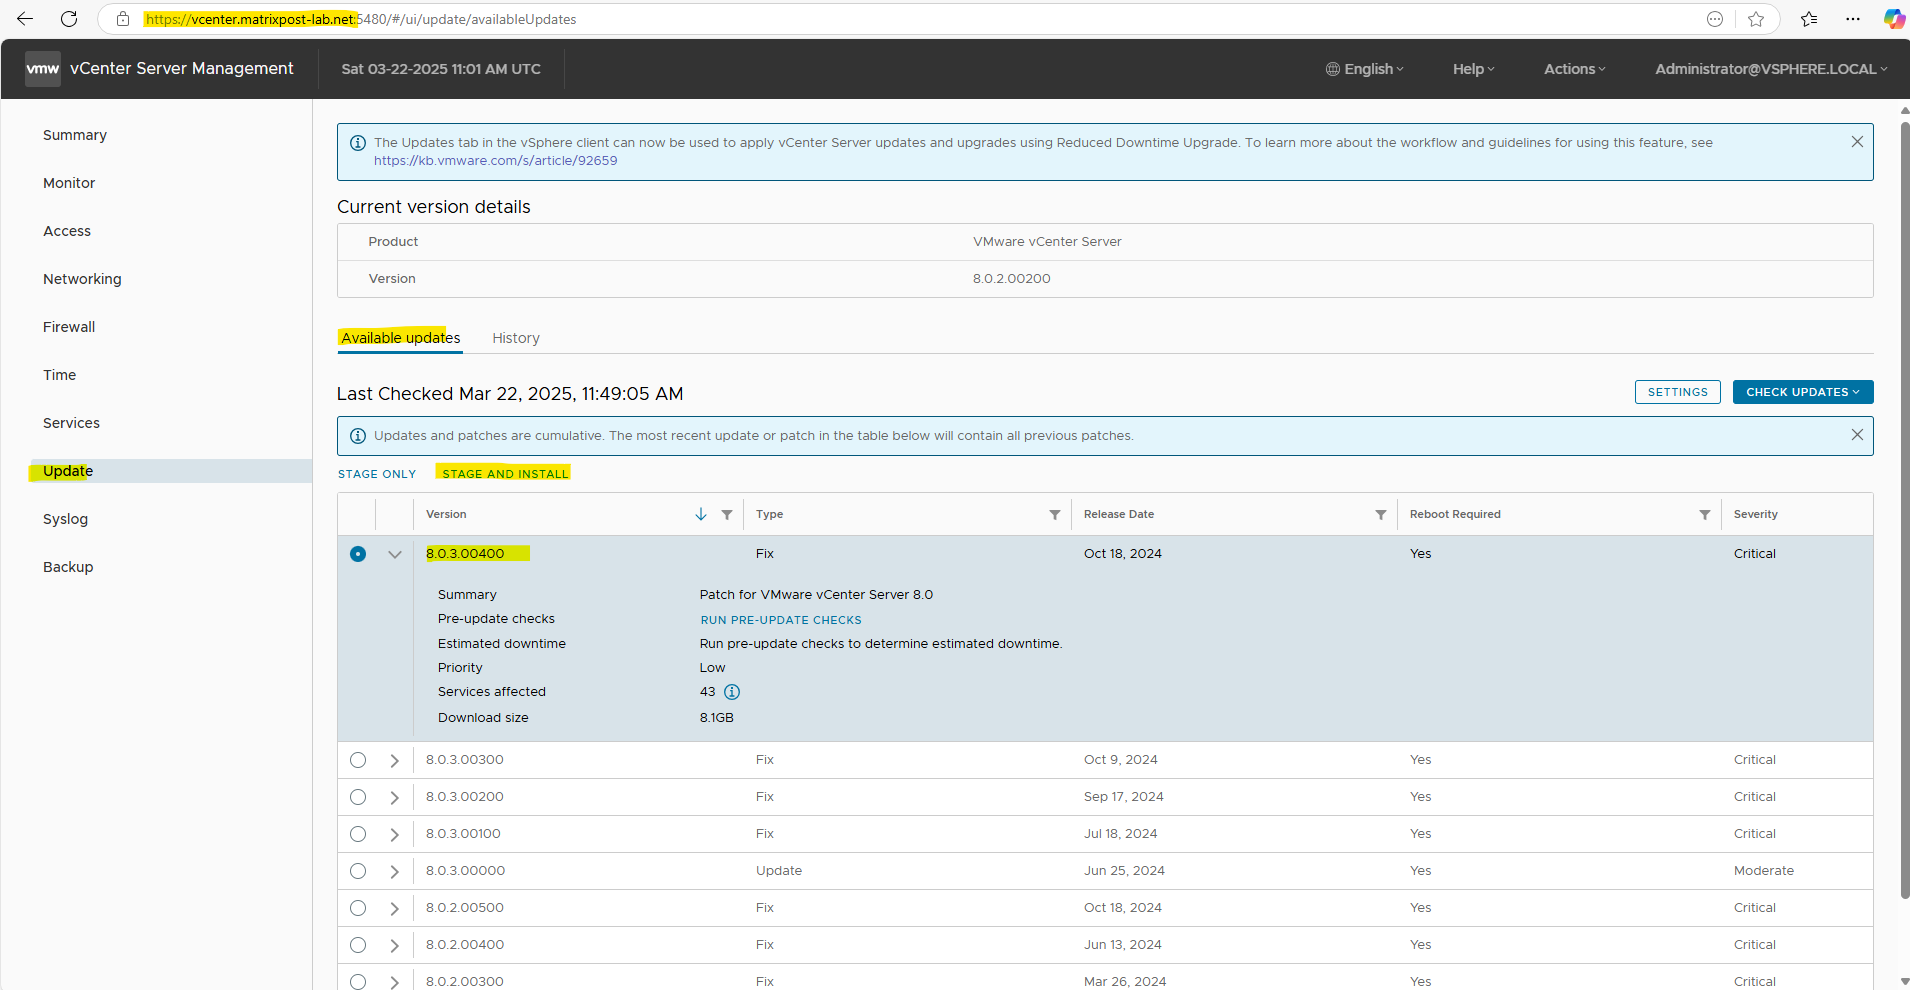
Browse to the vCenter Server Appliance Management Interface (VAMI) under http://<vCenter-IP-or-Hostname>:5480 and click on Update.
The Updates tab in the vSphere client can now be used to apply vCenter Server updates and upgrades using Reduced Downtime Upgrade (RDU).
Reduced Downtime Upgrade (RDU) is a new mechanism introduced for upgrading the self-managed vCenter Servers with decreased downtime.
Self-managed vCenter Server is one that manages its own ESXi host and its own virtual machine. This does not require a jump host to mount the ISO but the vCenter ISO needs to be mounted on the CD-ROM device of the vCenter Server Virtual Machine. The Workflow is integrated inside the vCenter Server itself.
Source: https://knowledge.broadcom.com/external/article?legacyId=92659
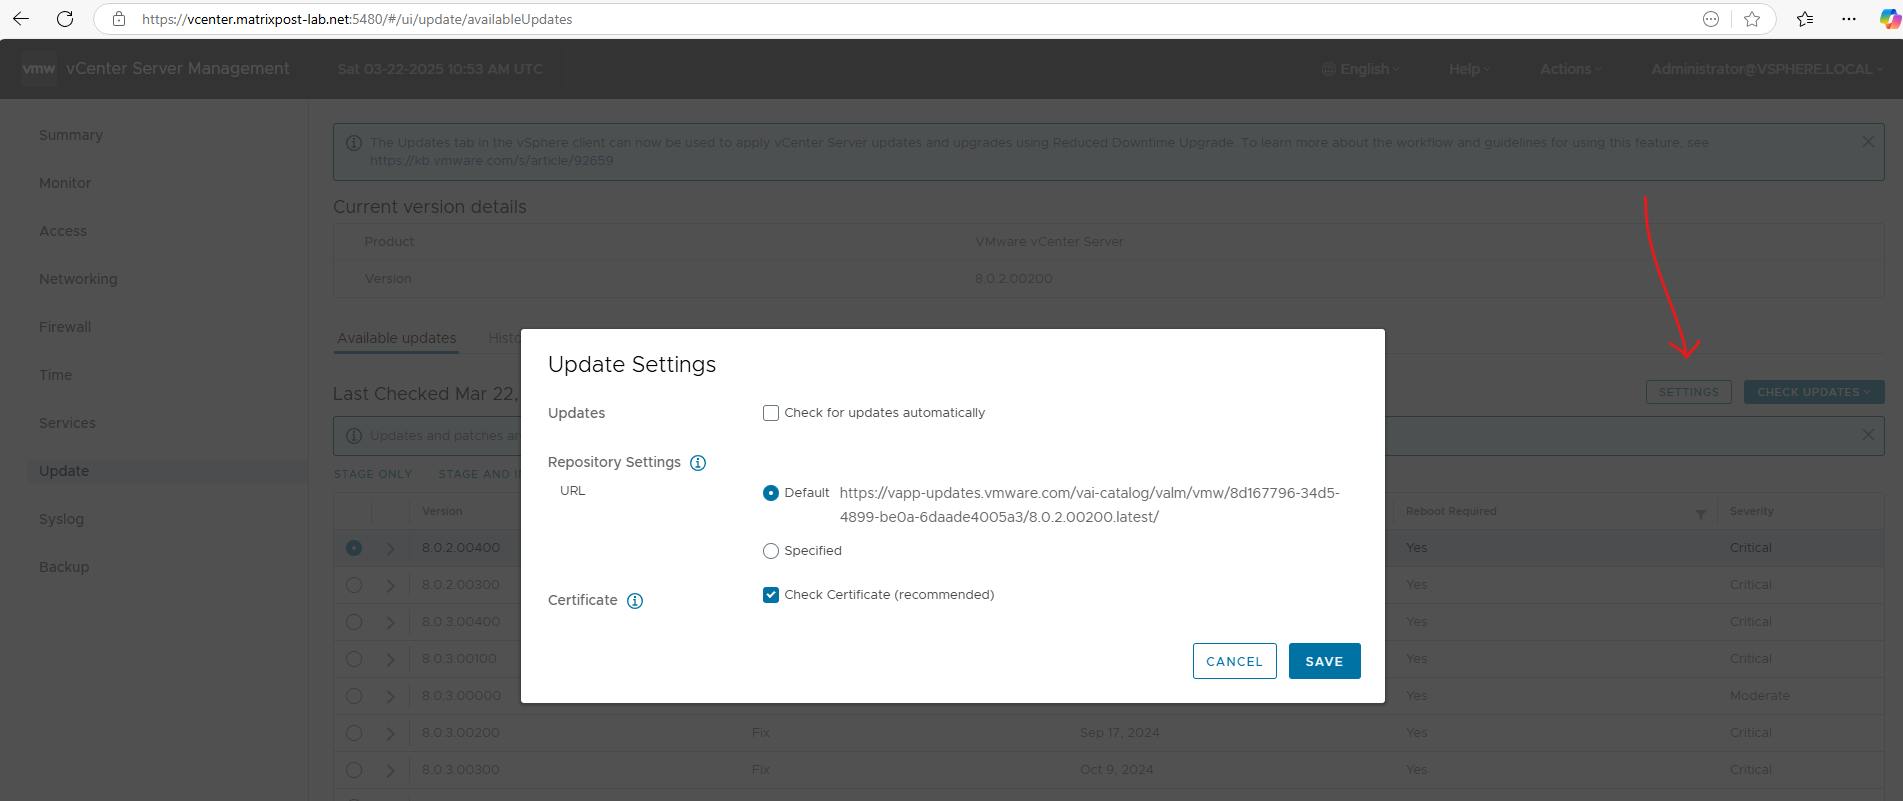
By clicking on Settings below we can adjust if updates will be checked automatically and we can choose between the default repository and a custom.
As mentioned to the beginning, as of April 23, 2025 we need to adjust all public patch and update repository URLs by using a specified custom repository as shown in my following post https://blog.matrixpost.net/vmware-public-patch-repository-urls-were-deprecated-as-of-april-23-2025/.
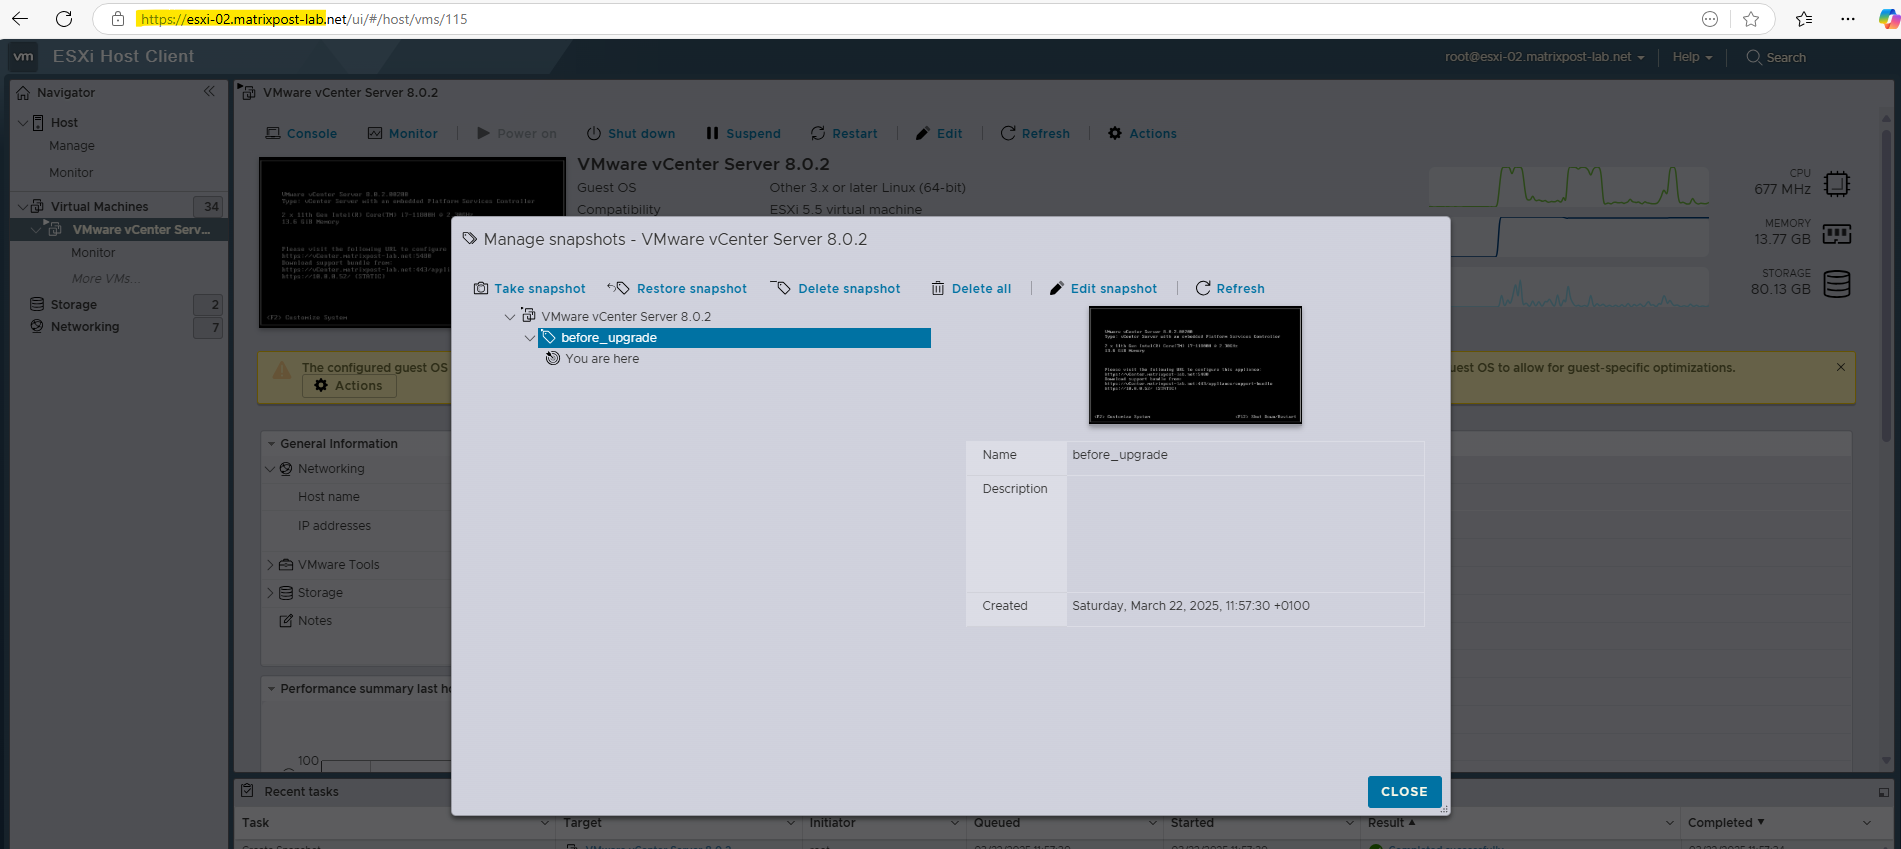
Before performing any updates or upgrades we should first create a snapshot for the vCenter Server in case something goes wrong.
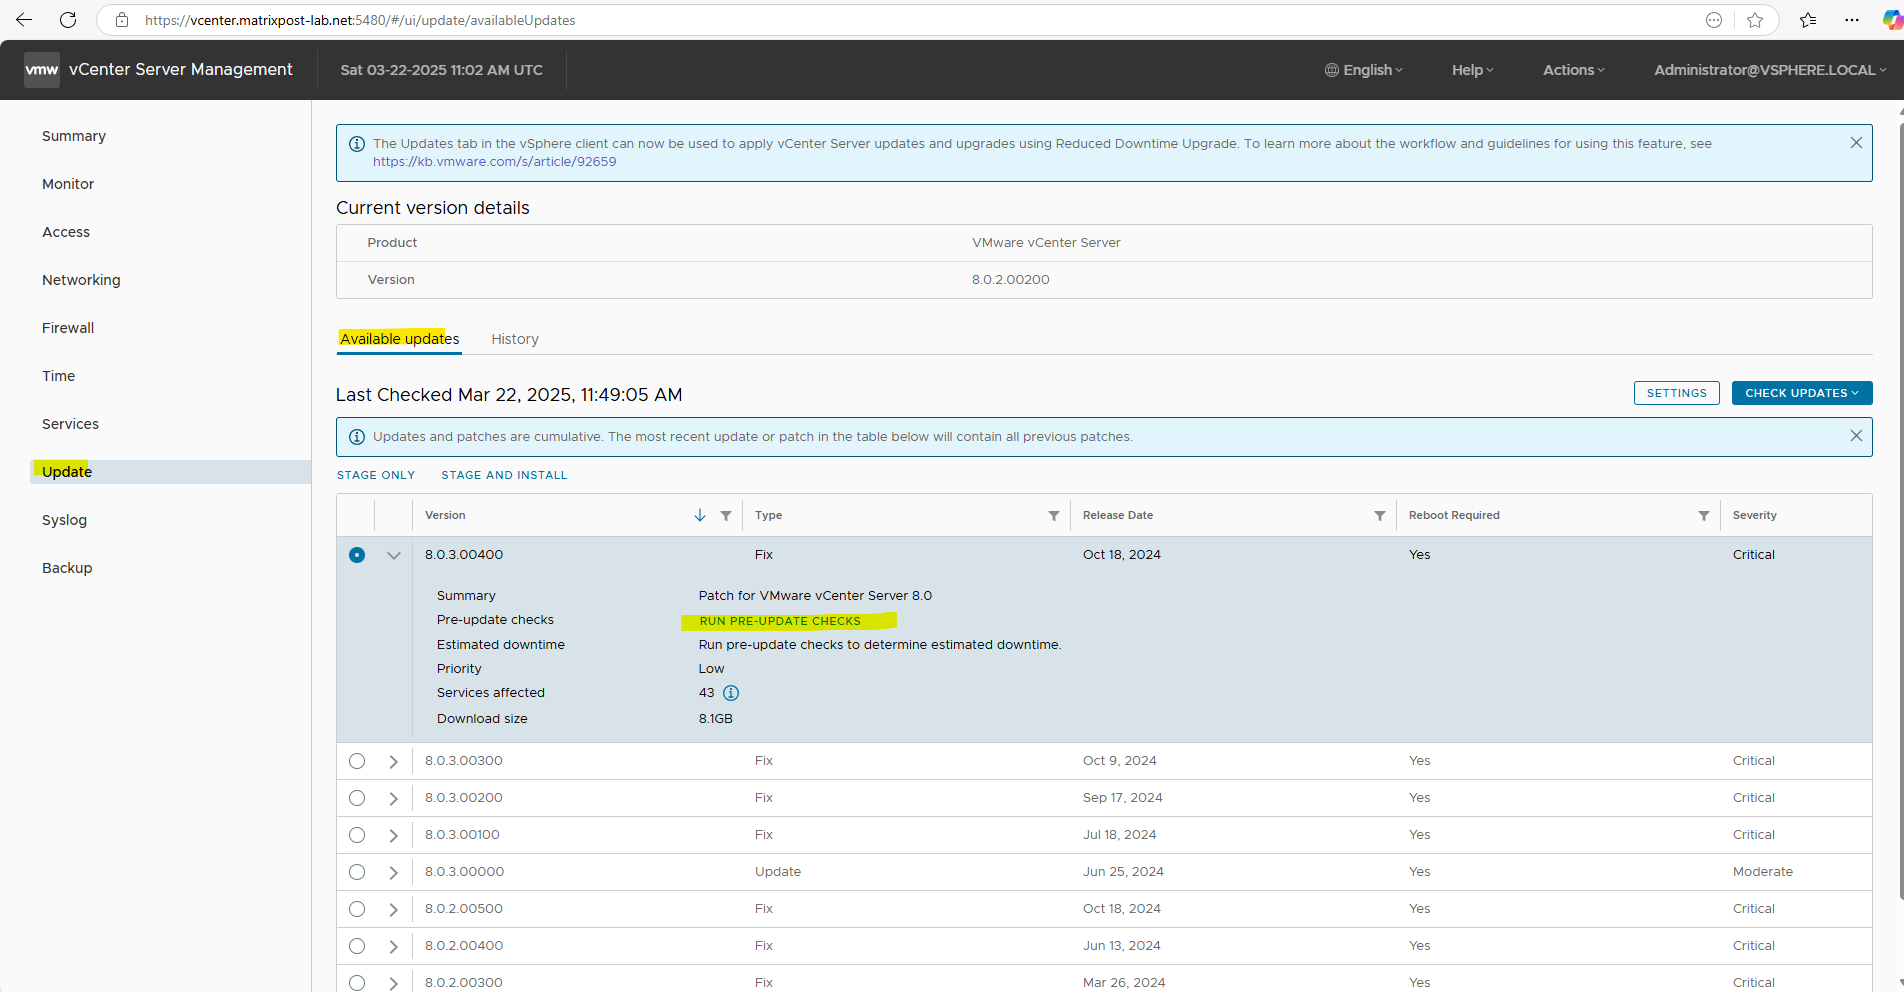
We can also first run the pre-updates checks, but finally they will also run when clicking directly on Stage and Install.
Now we can click on Stage and Install.
In vCenter Server, staging refers to the process of pre-downloading the update files to the vCenter Server Appliance (VCSA) before actually applying the update. This helps to reduce downtime by ensuring all necessary files are ready when you initiate the update
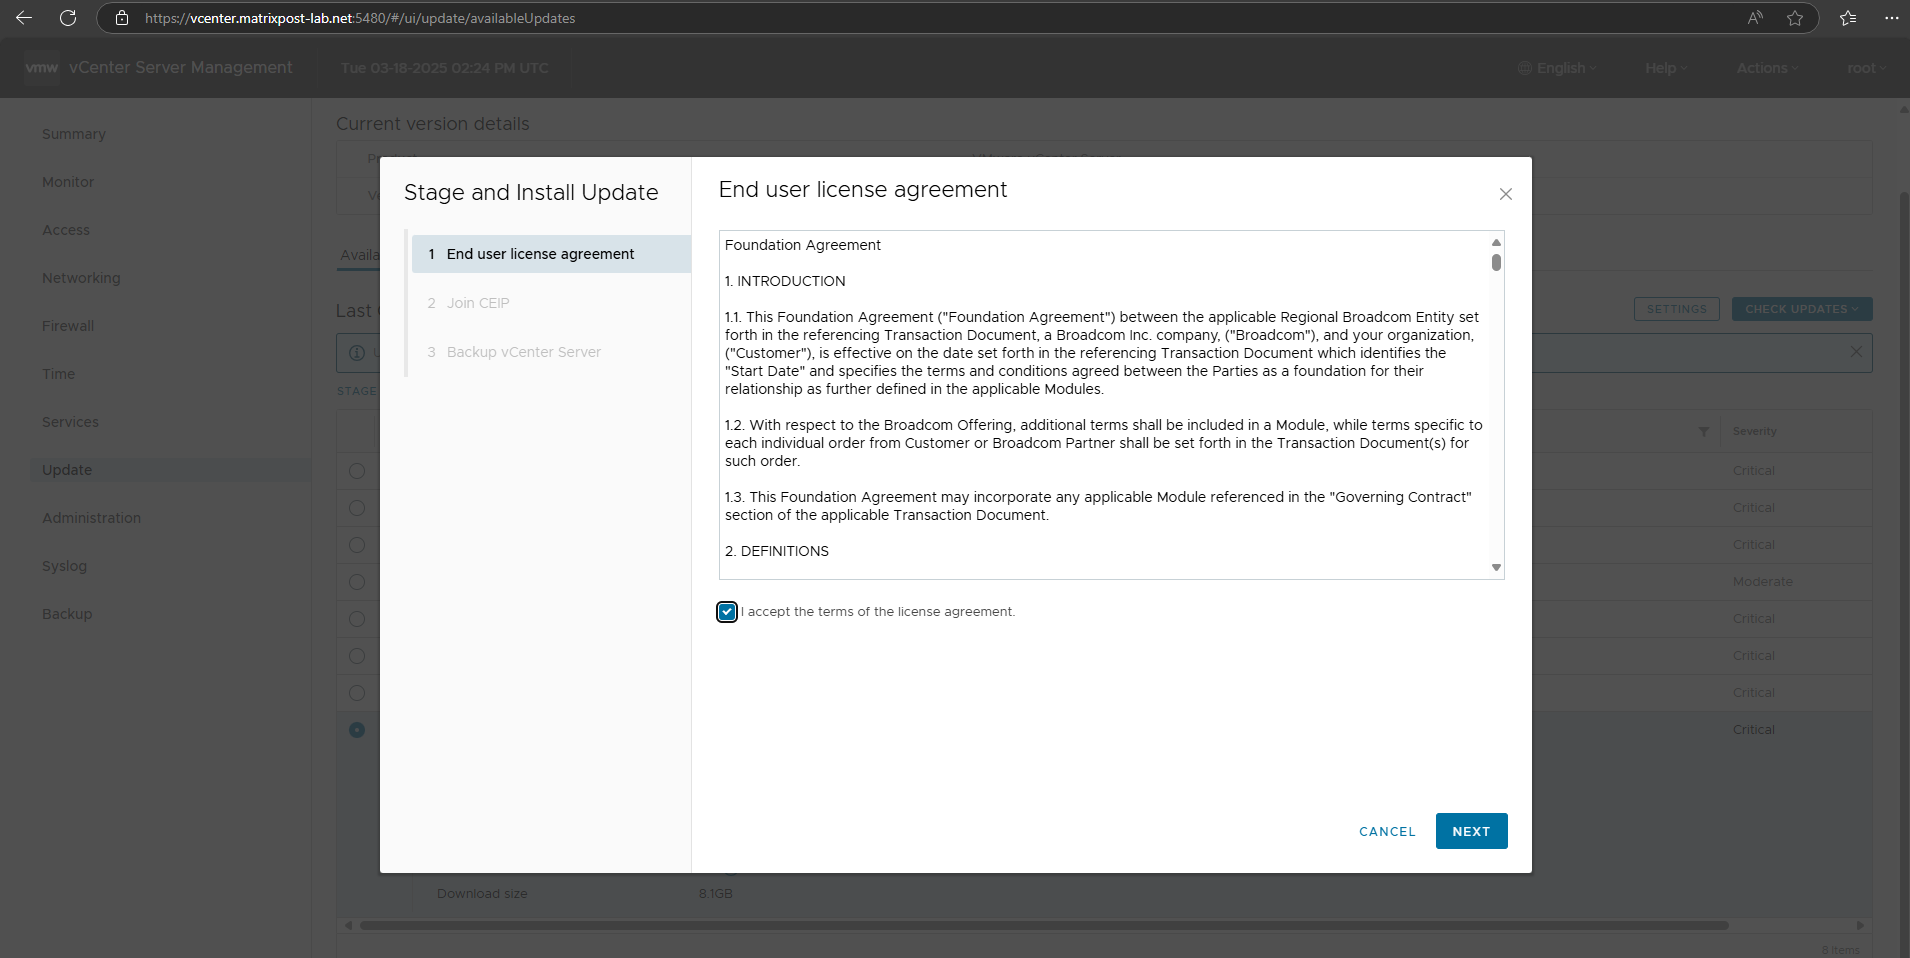
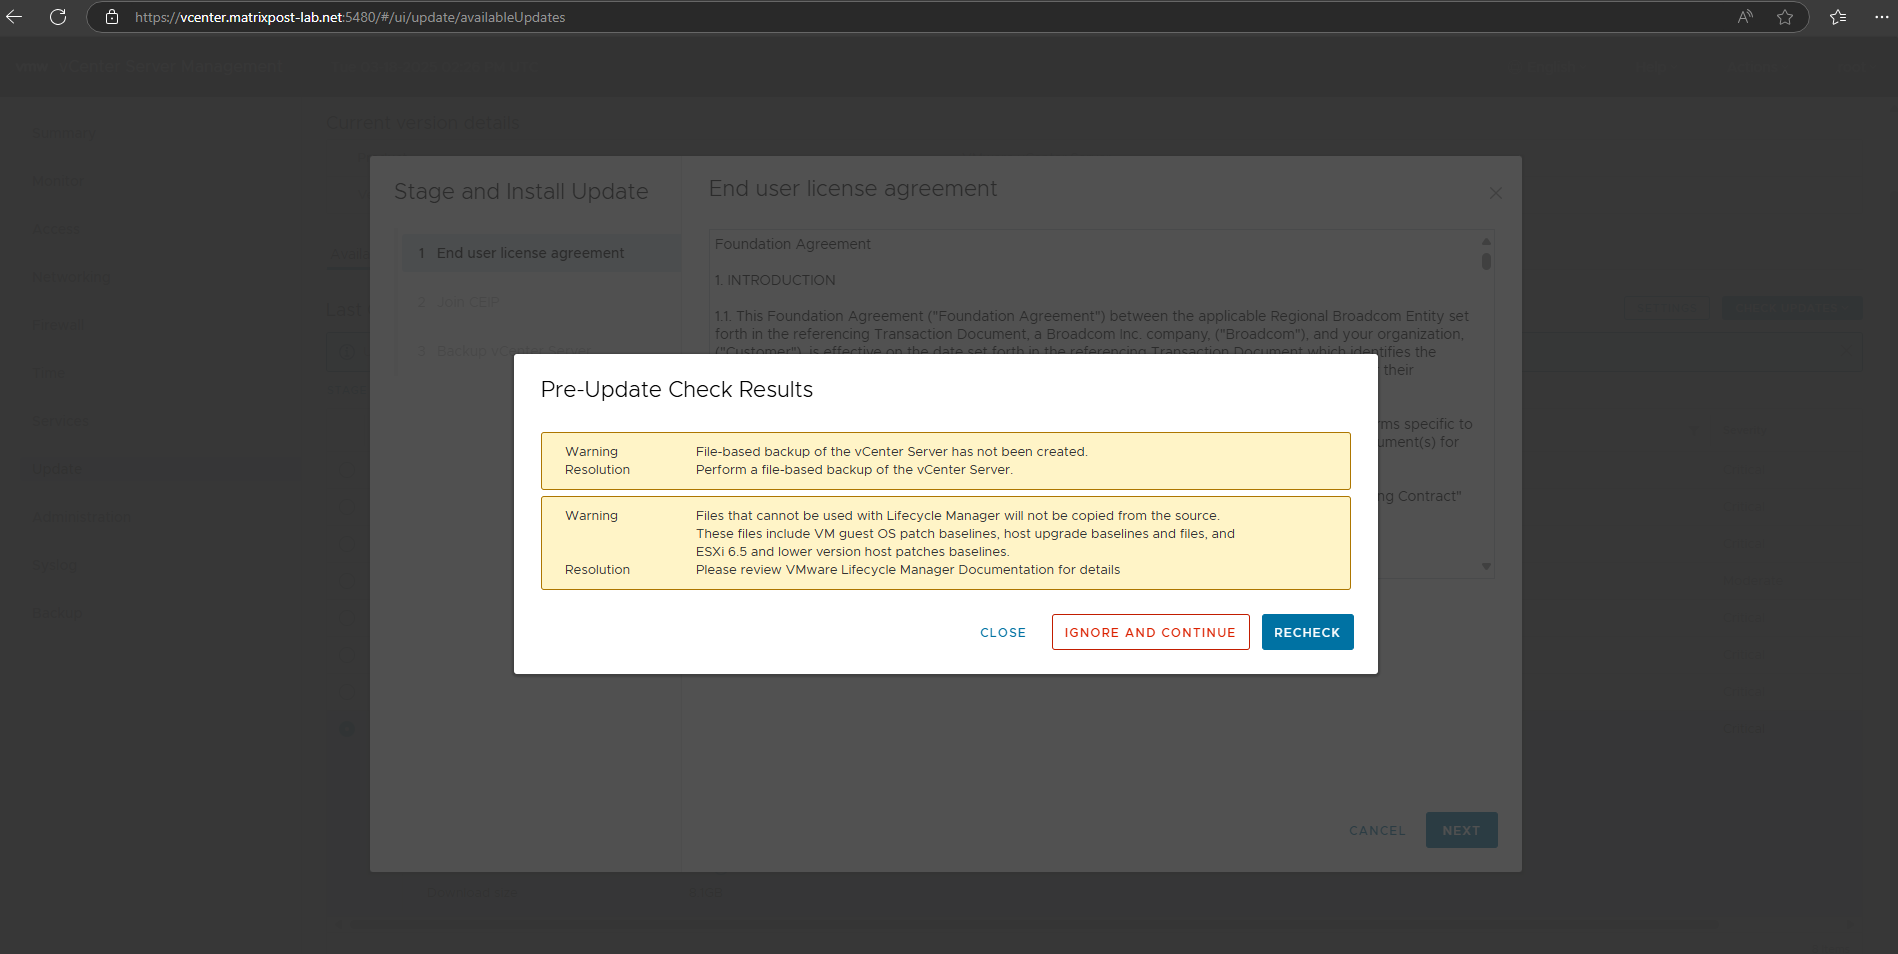
These are just warnings about not been created file-based backup of my vCenter Server and that files which cannot be used with Lifecycle Manager will not be copied from the repository. Finally I can ignore these messages.
So I will click on Ignore and Continue.
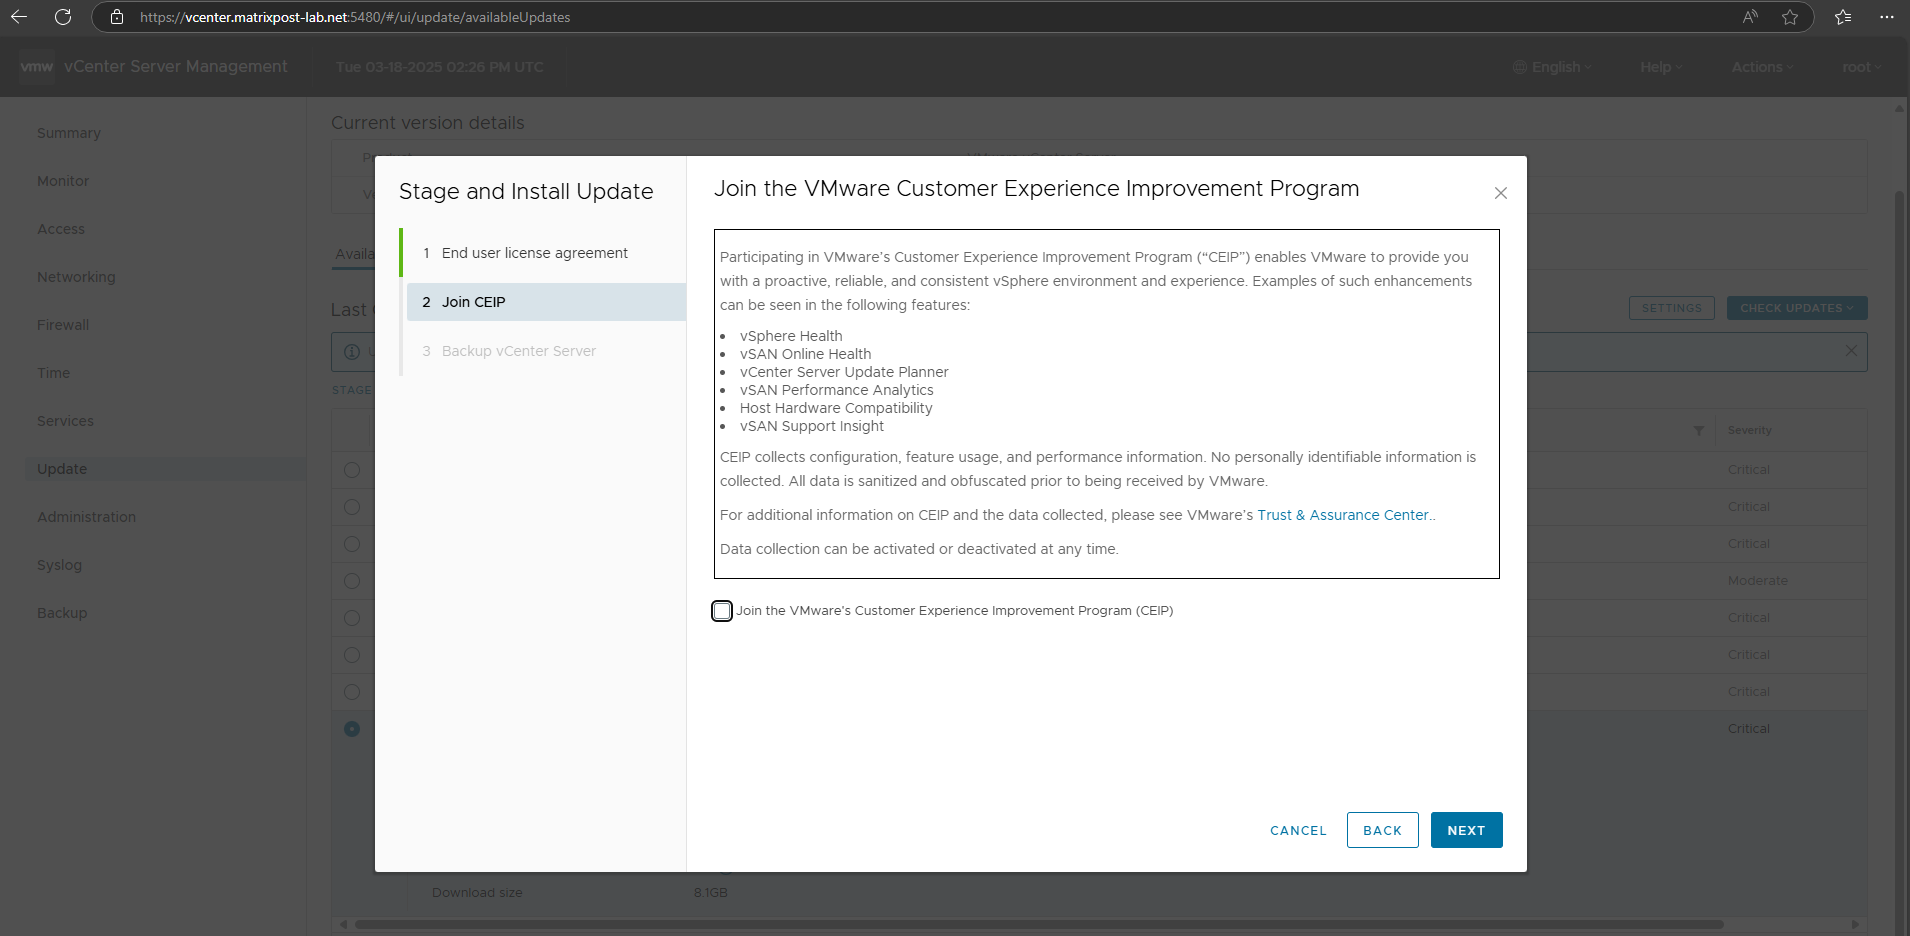
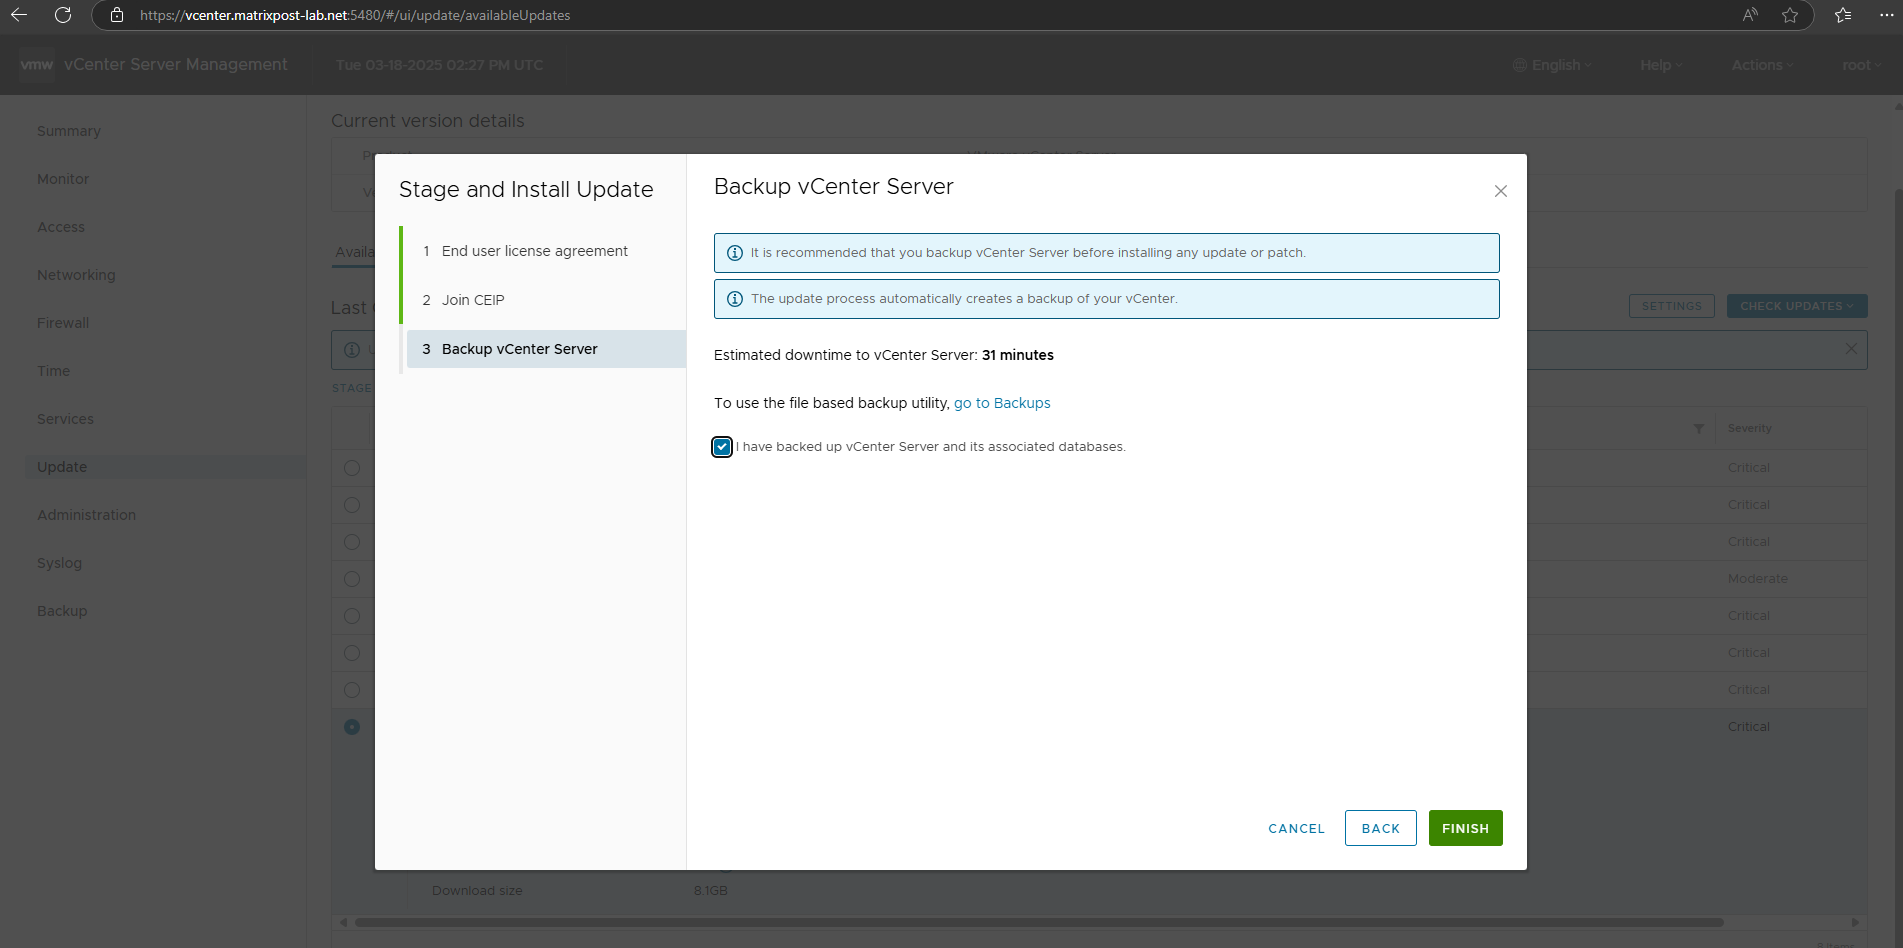
Finally click on Finish.
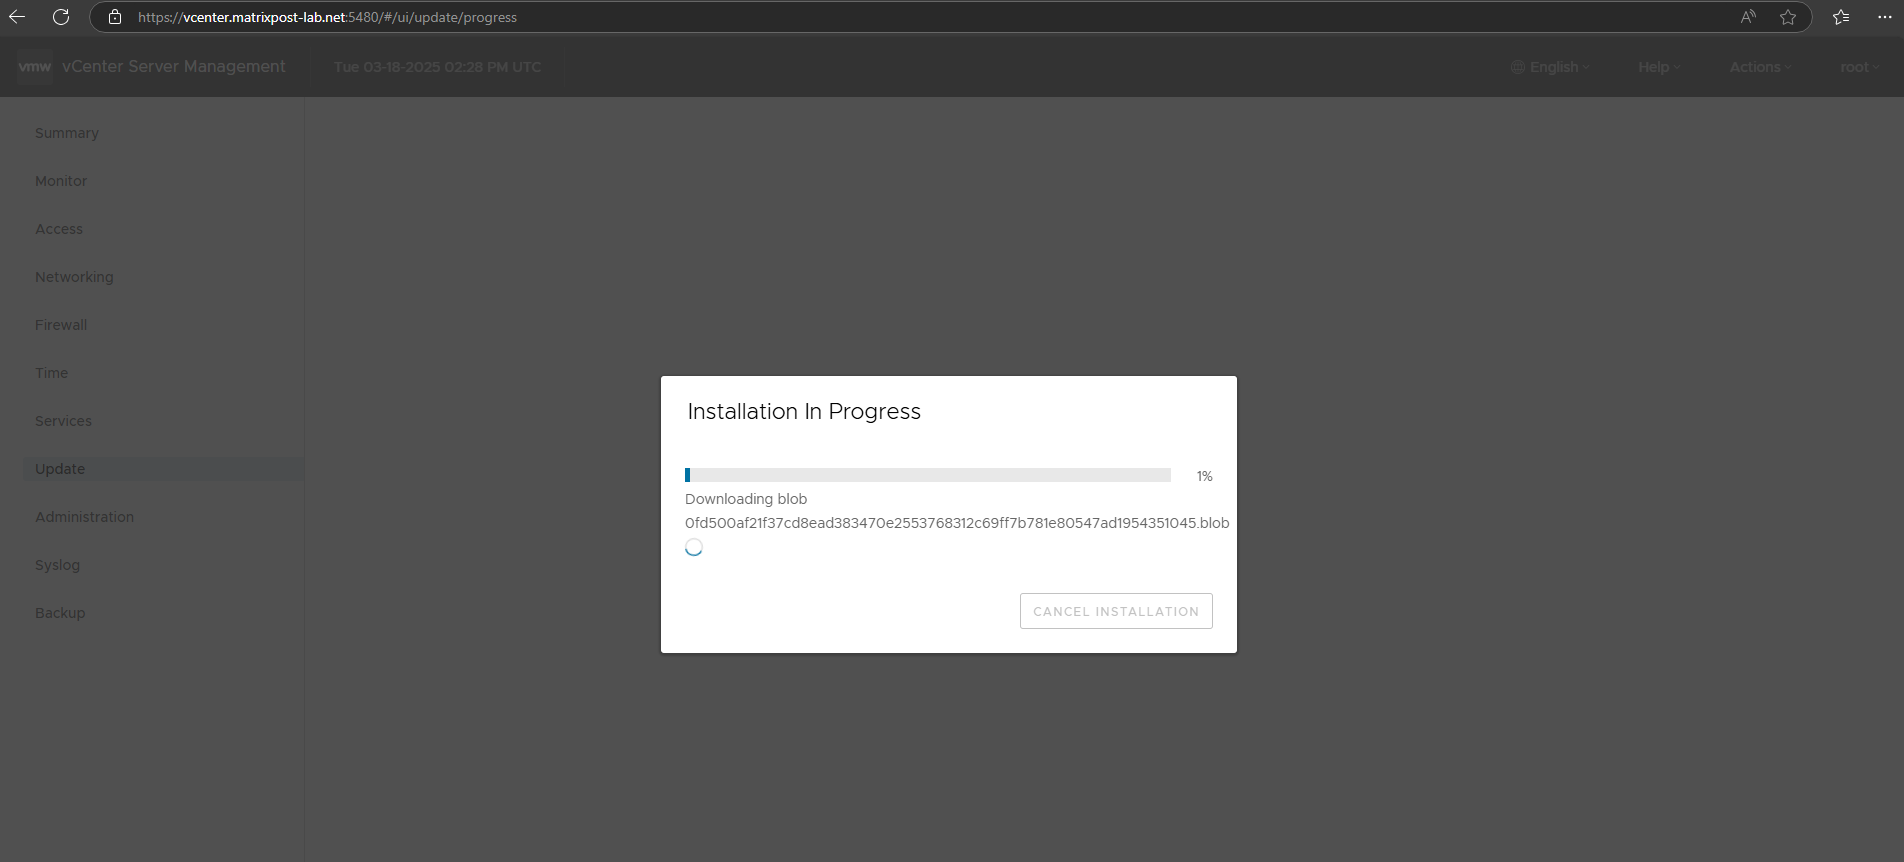
The installation of the updates are now in progress. First the required files will be downloaded.
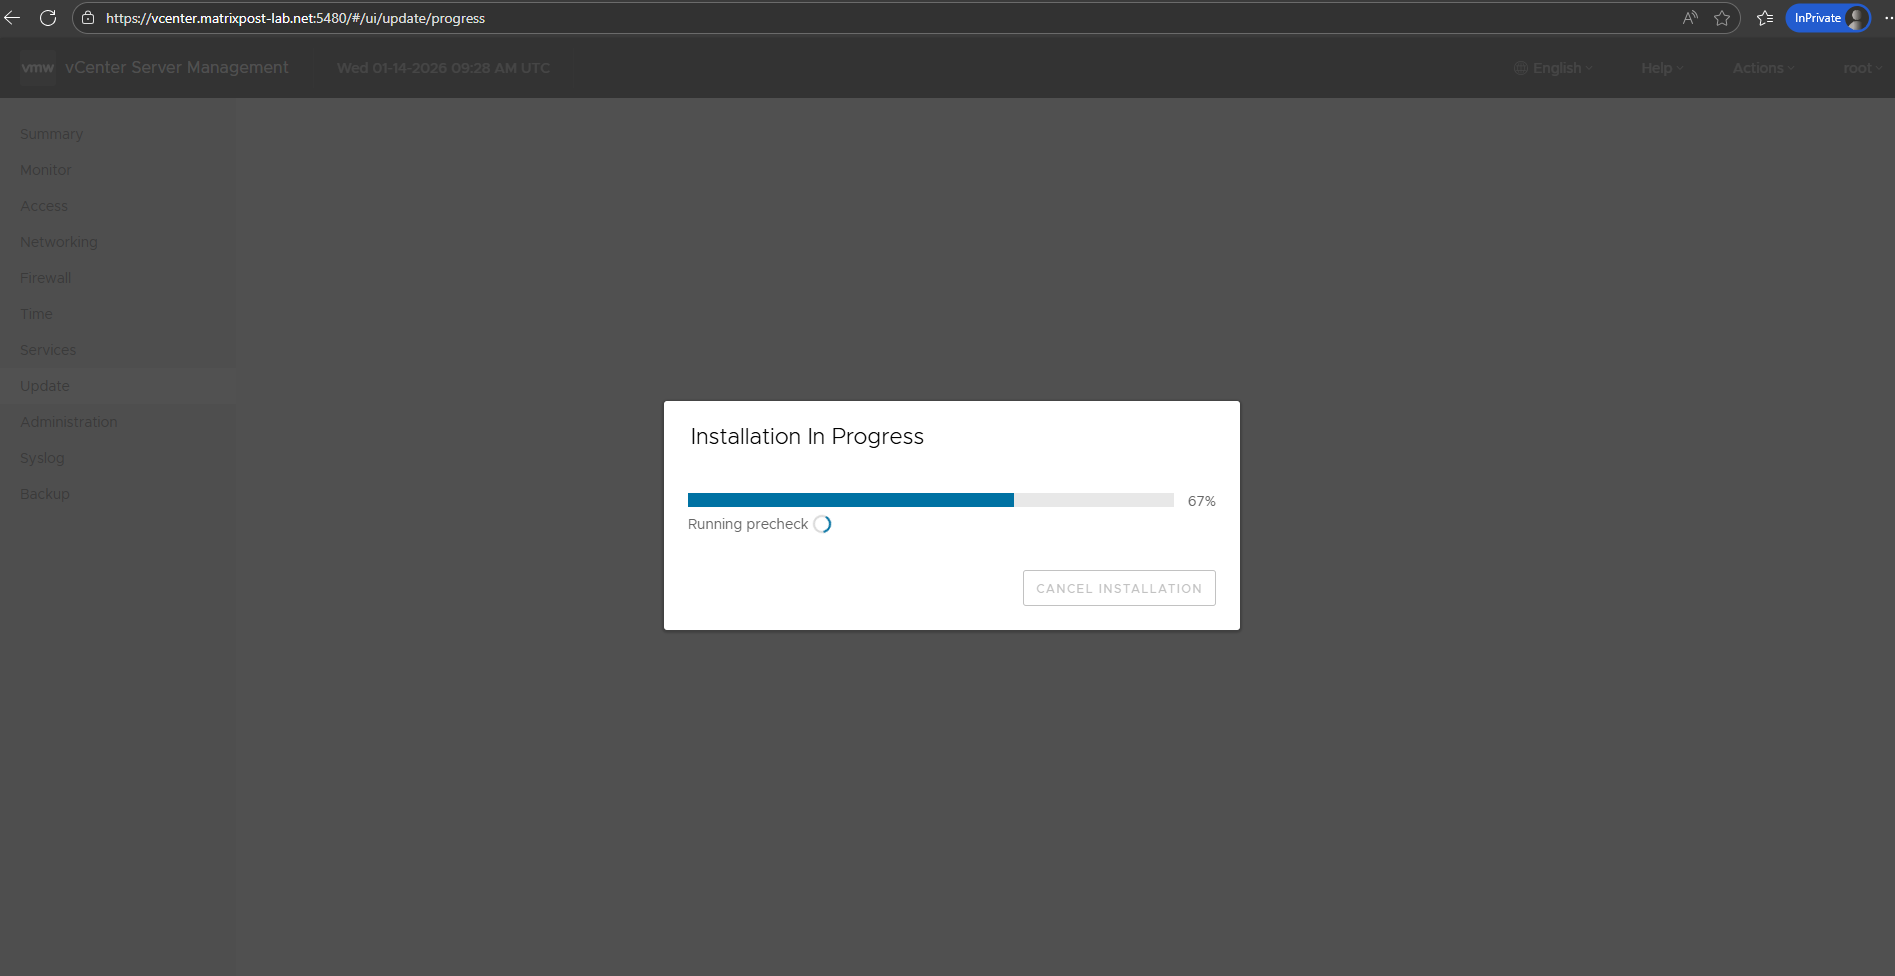
At around 67 % progress the precheck will be performed before the installation and upgrade finally starts.
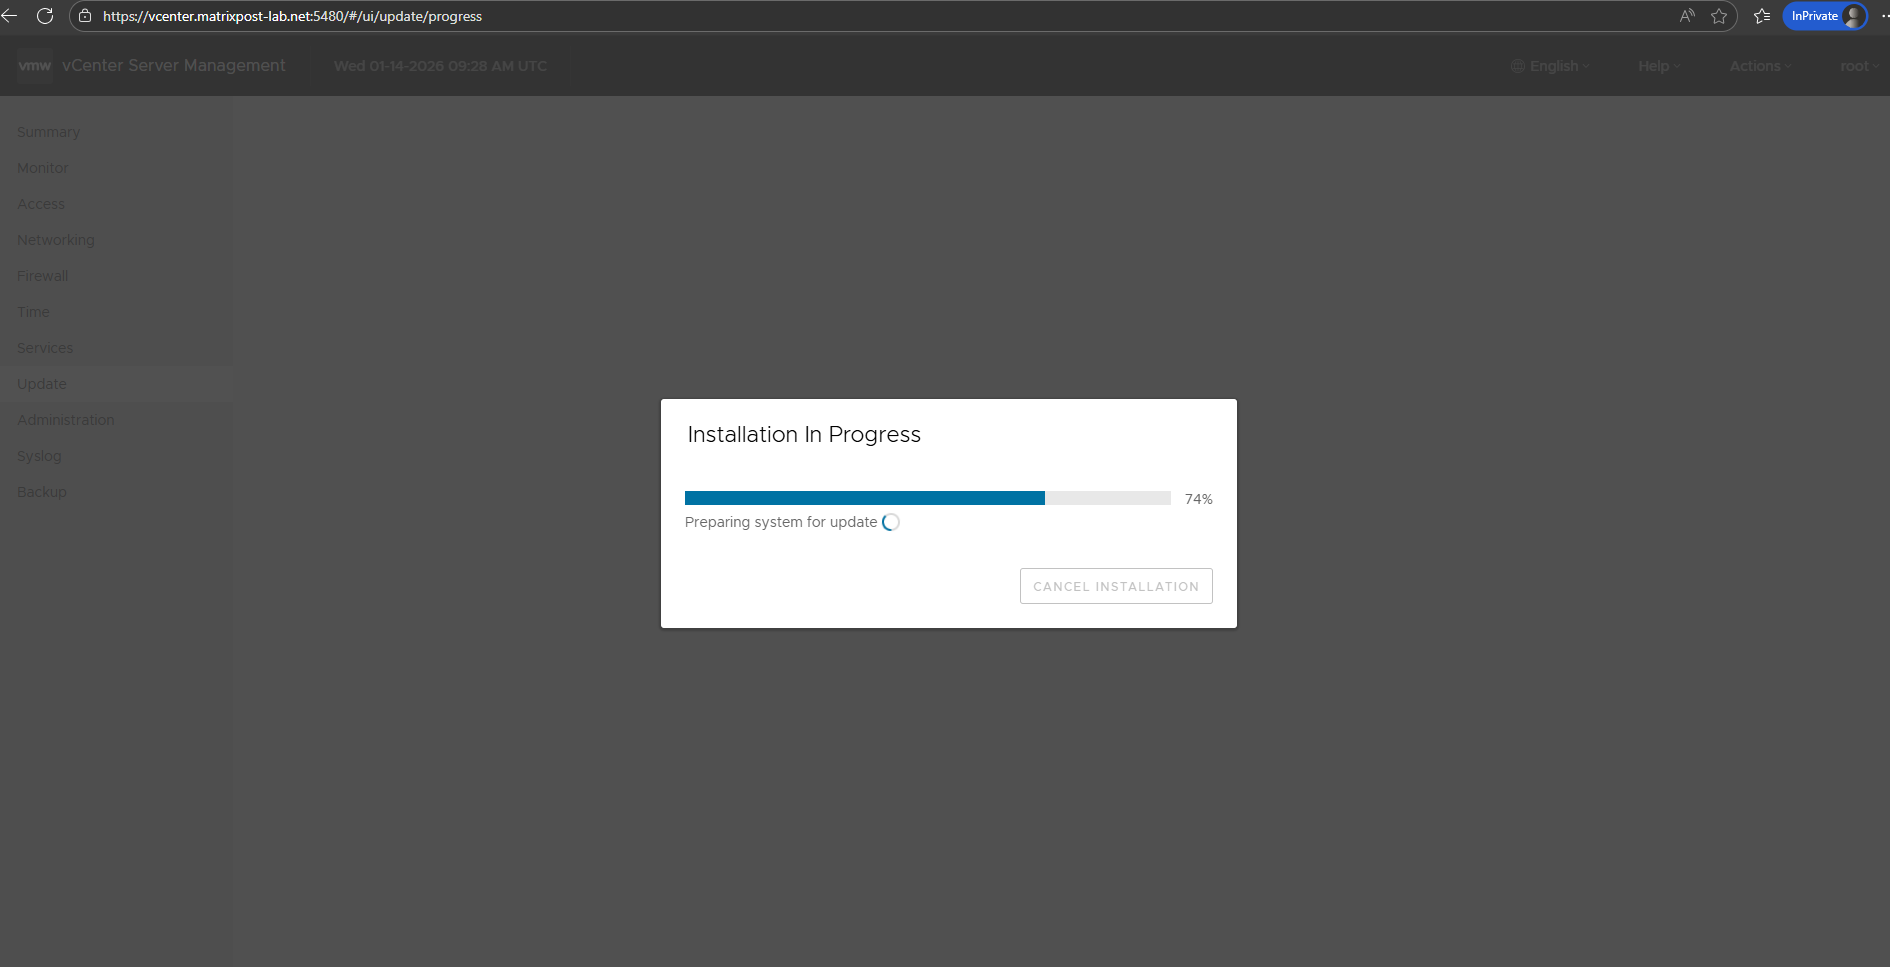
At around 82 % progress the vCenter services will be stopped.
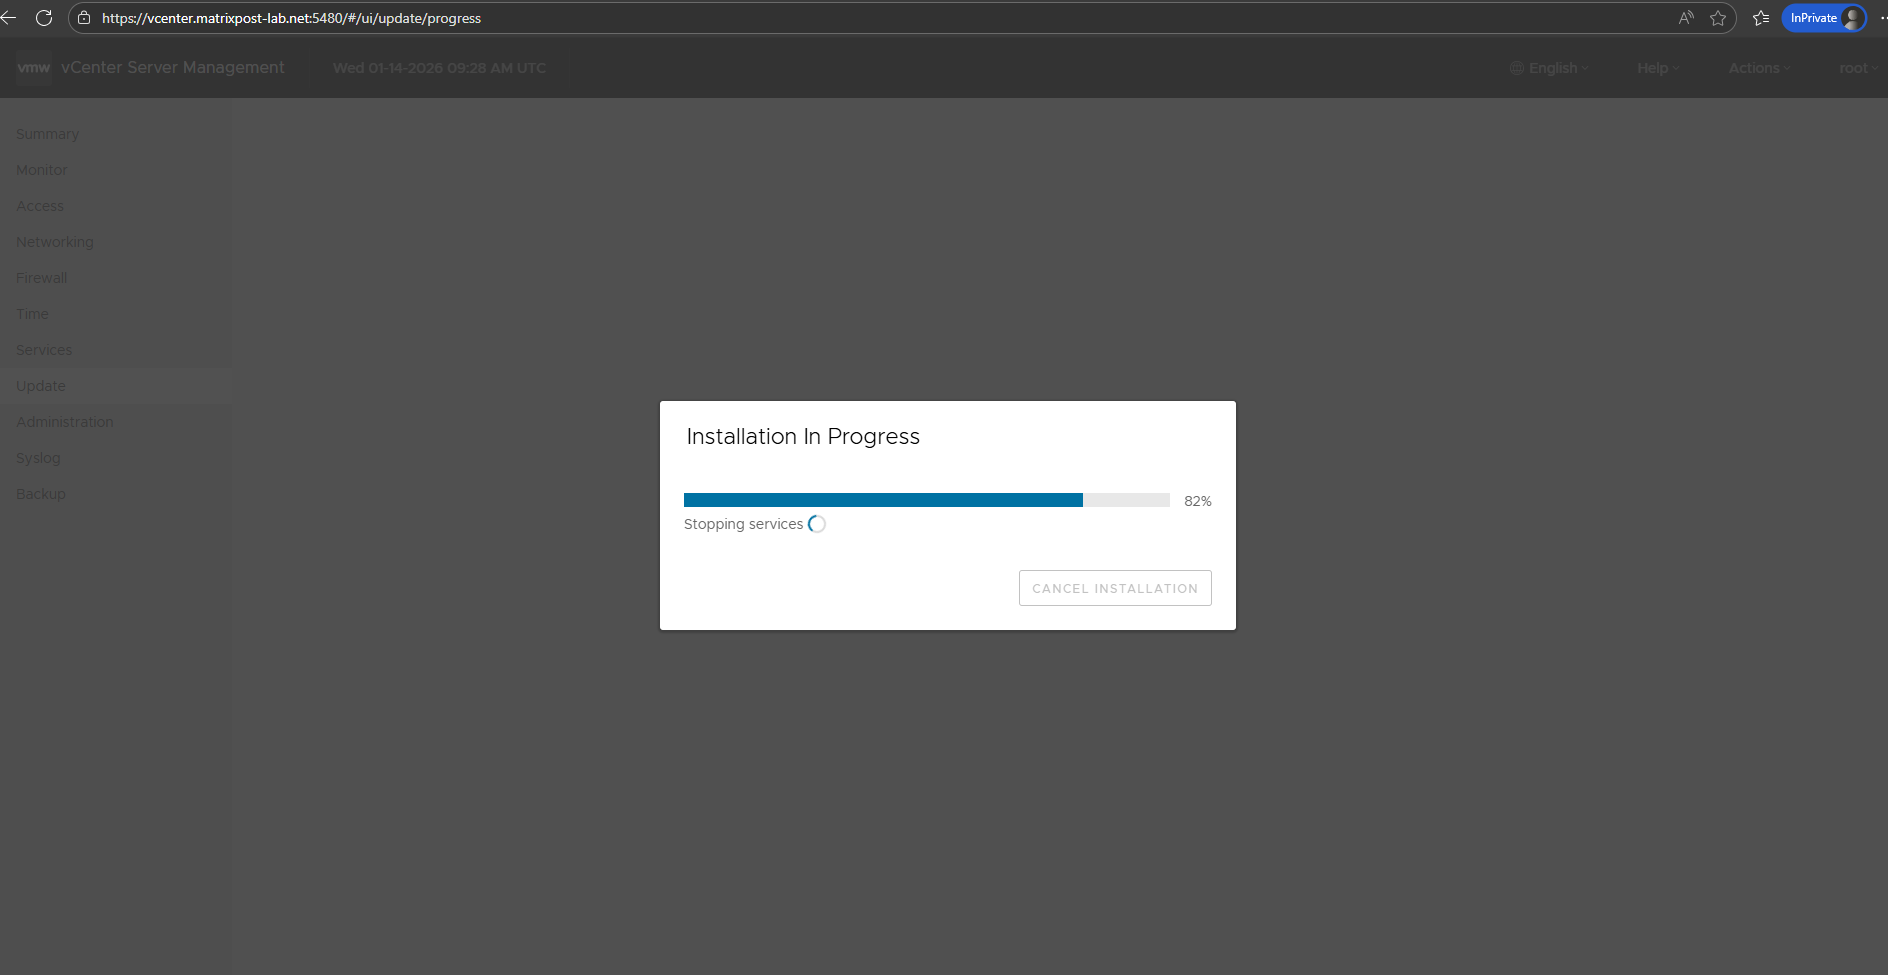
Afterwards the installation and upgrade starts.
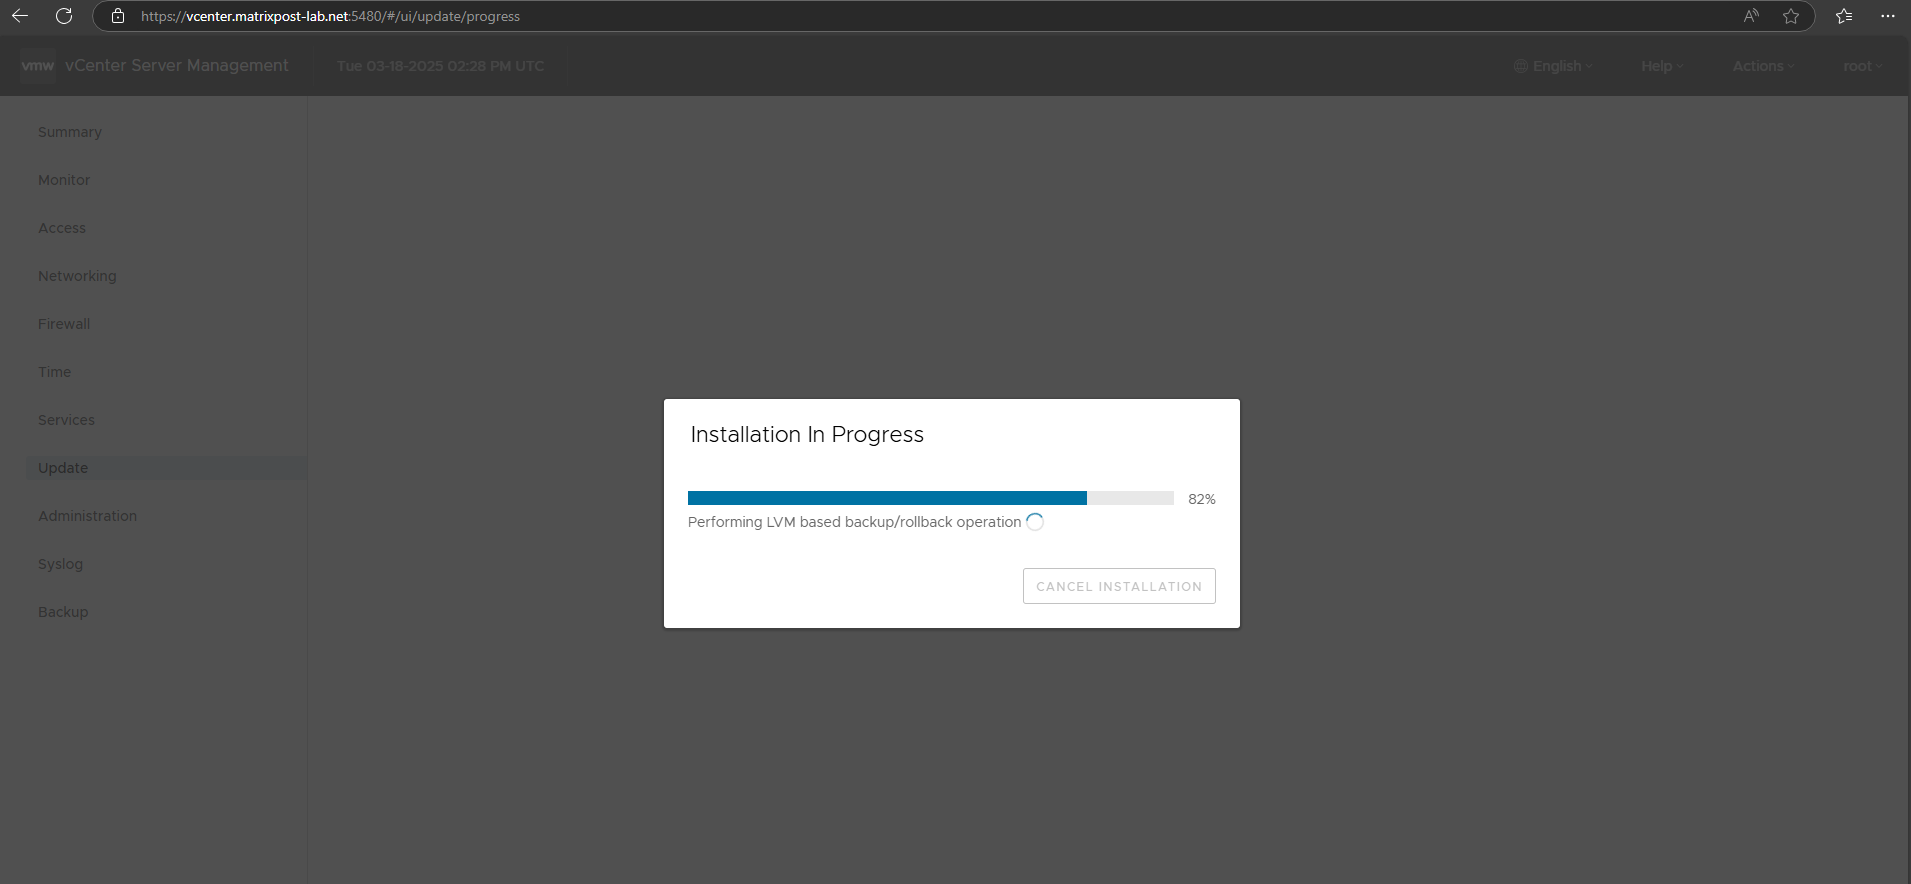
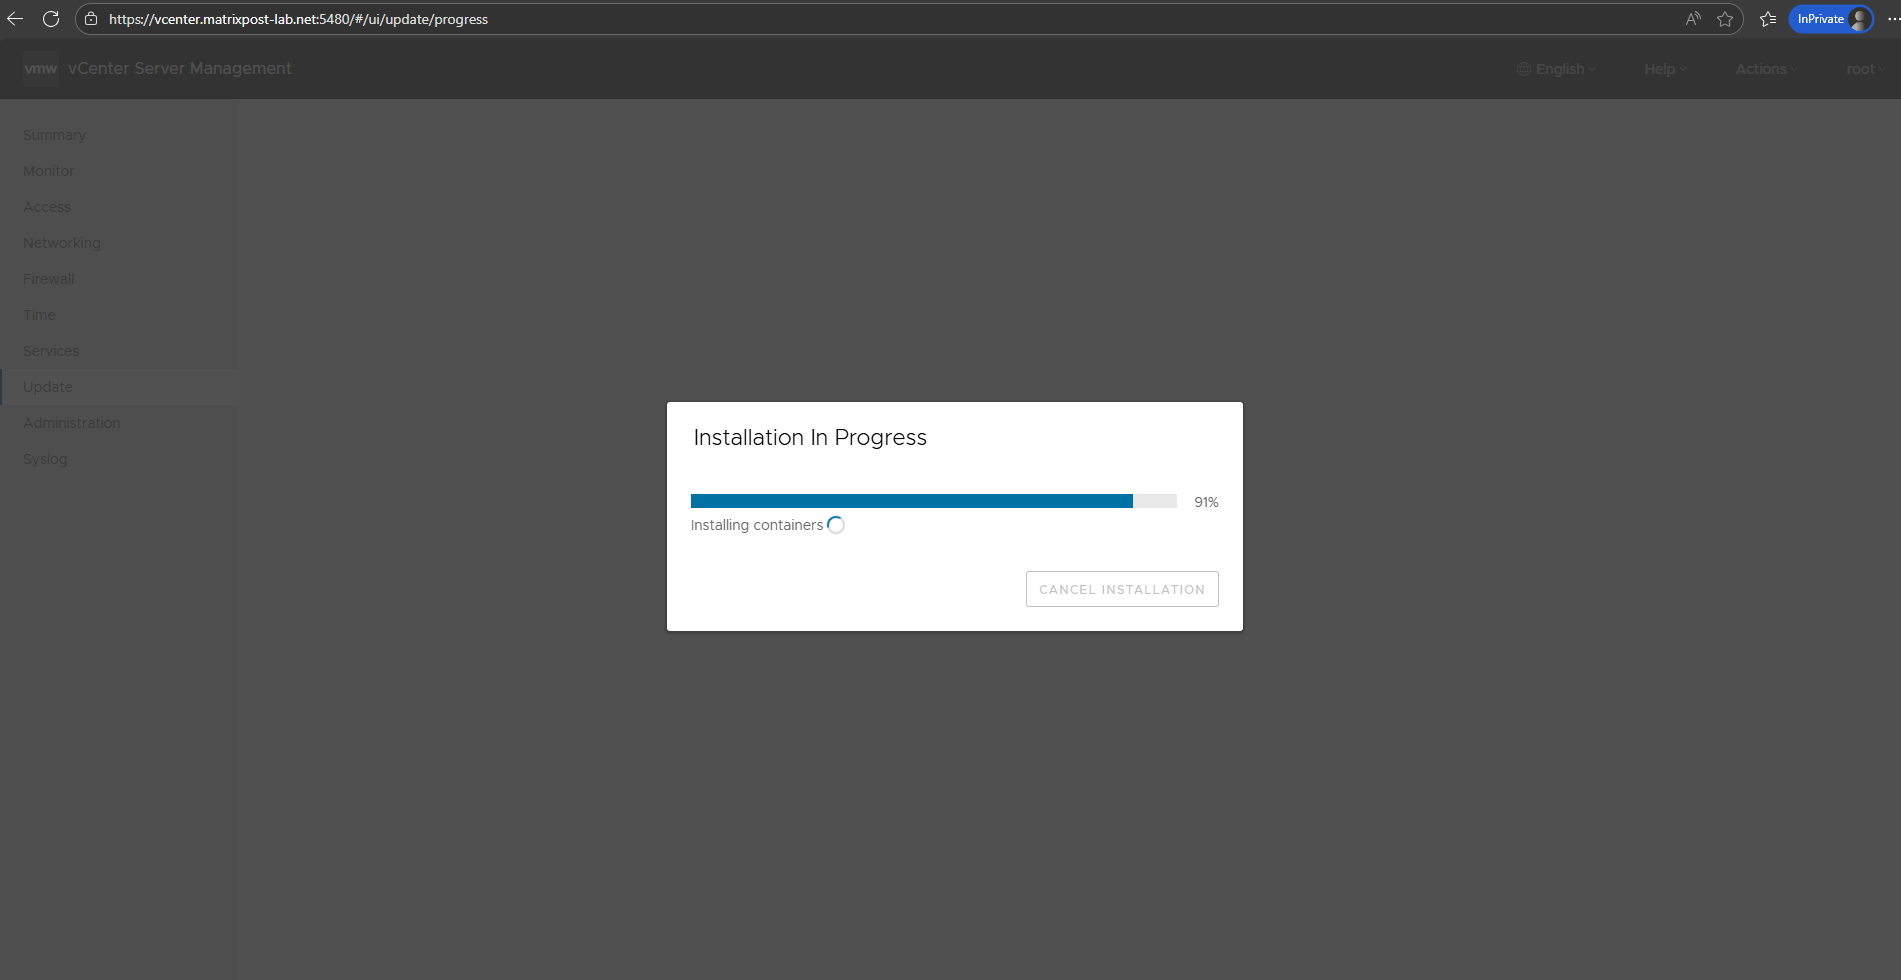
During the update/upgrade process the vCenter Server Appliance Management Interface (VAMI) will be sometimes unavailable.

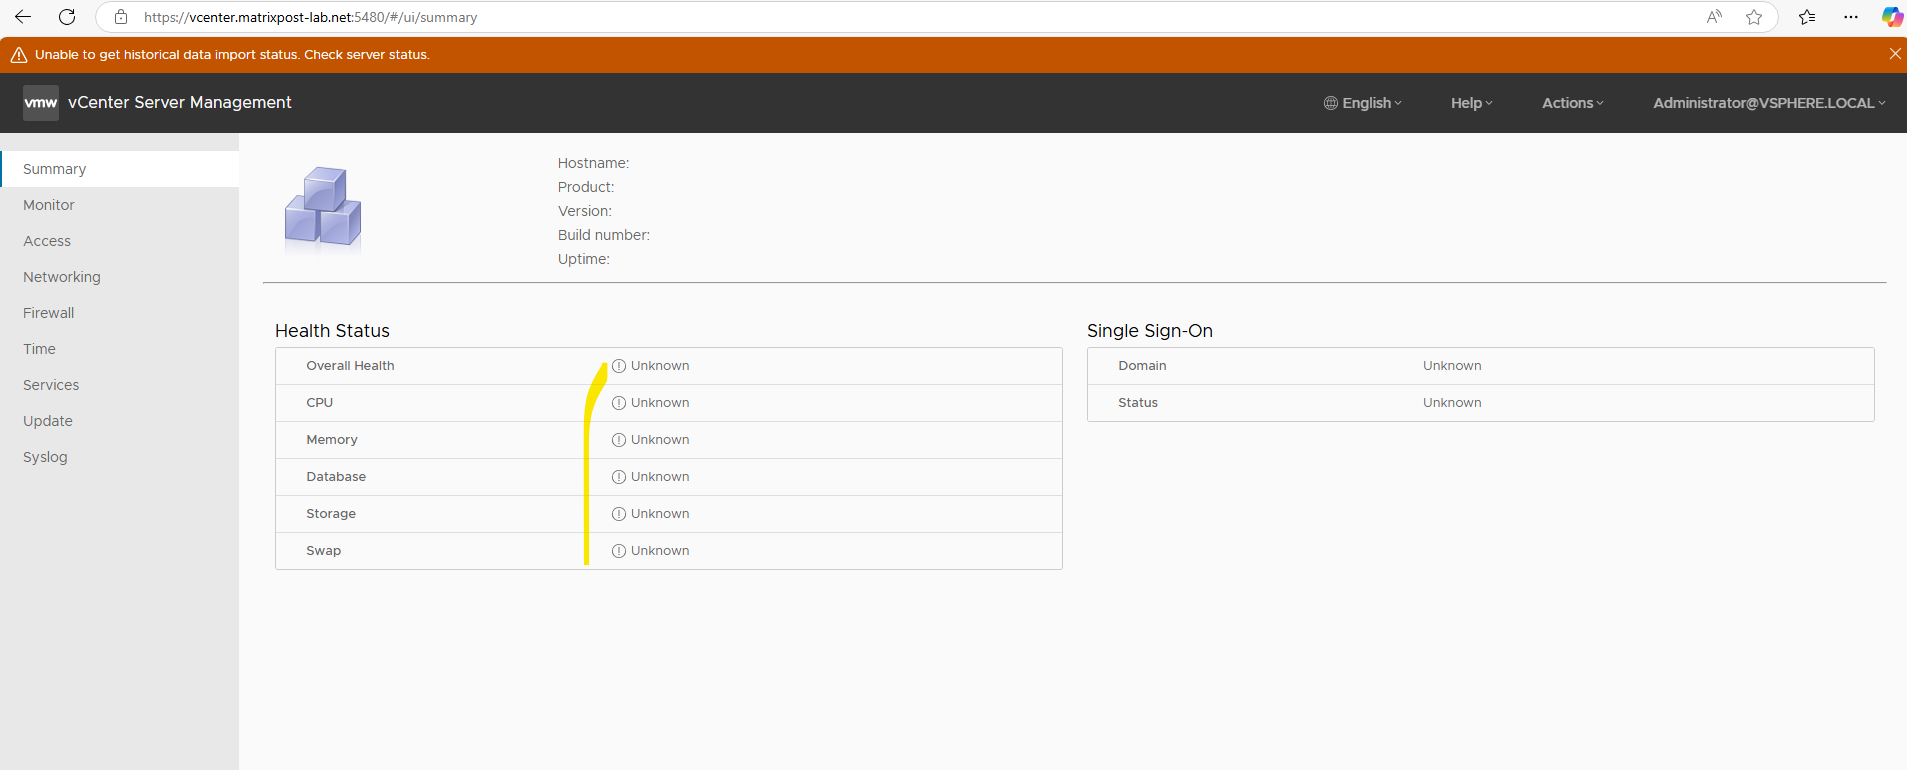
Just wait and try it later, the vCenter Server Appliance Management Interface (VAMI) will get responsible again.
The step below with “Converting data as part of post install” is one of the longest phases of a VCSA update. During this step, vCenter performs internal database schema updates, data migrations, and final service reconciliations.
It is common for this phase to remain at ~90–95% for an extended period of time without visible progress.
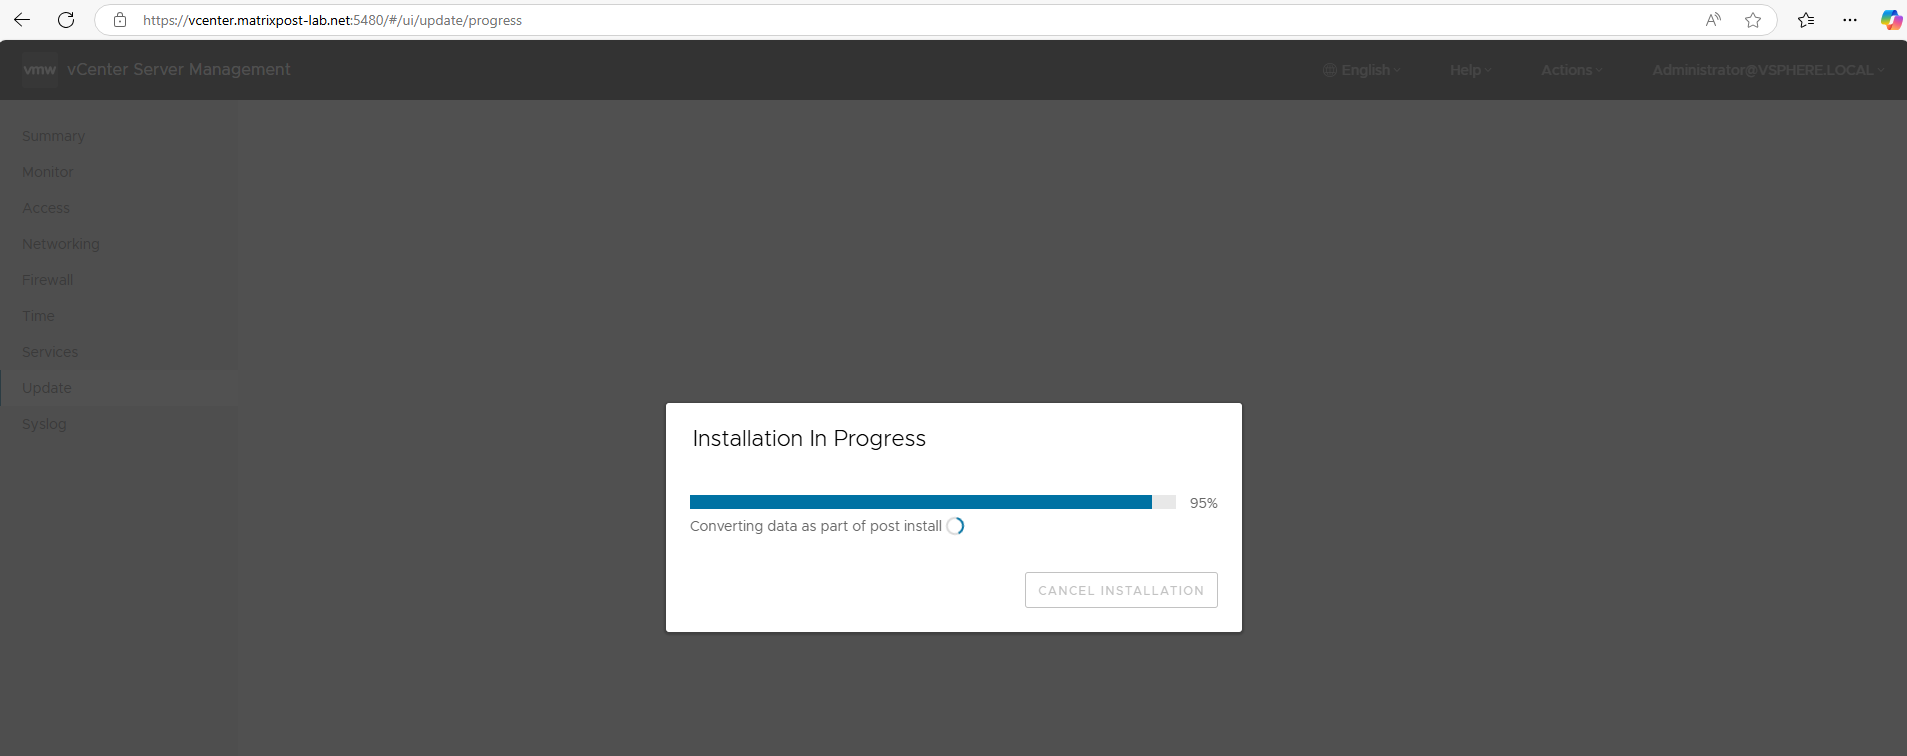
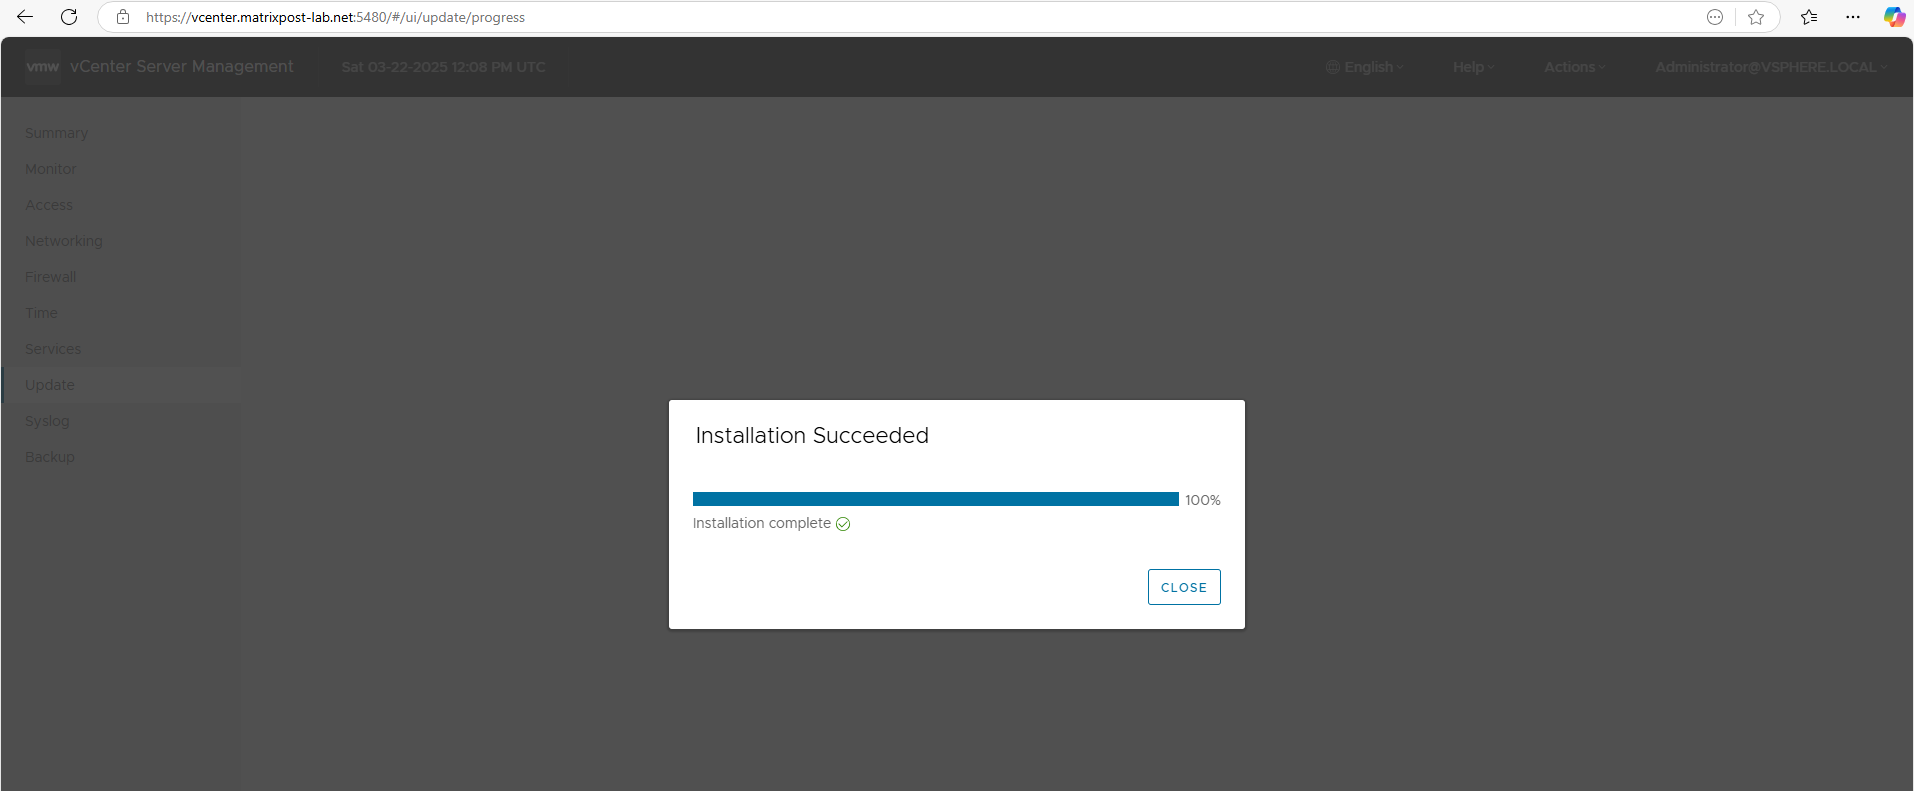
Finally the updates were successfully installed.
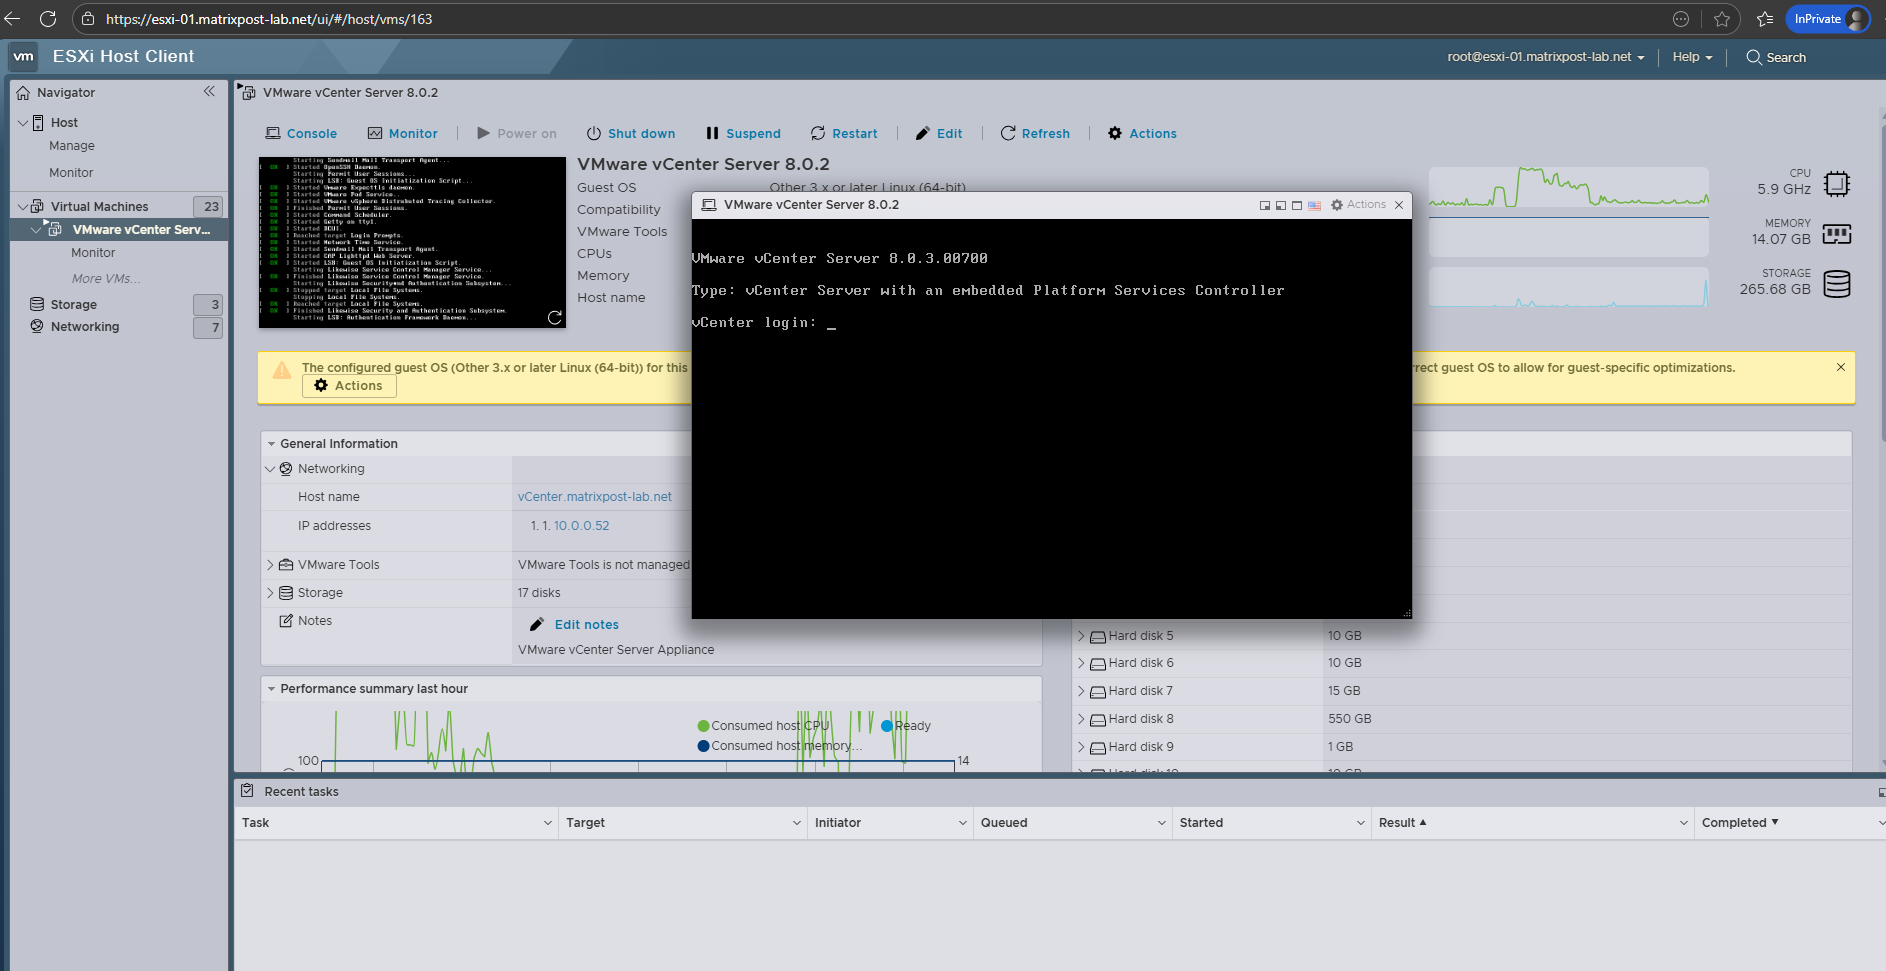
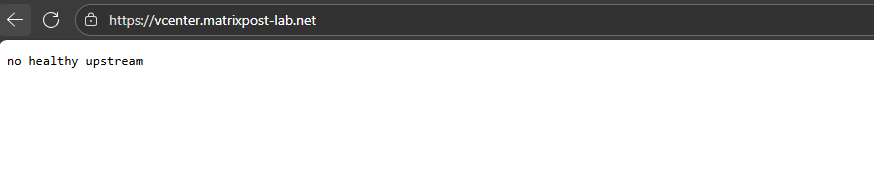
The vCenter server reboots after the upgrade and it takes some time before we can finally access the vCenter Web GUI.
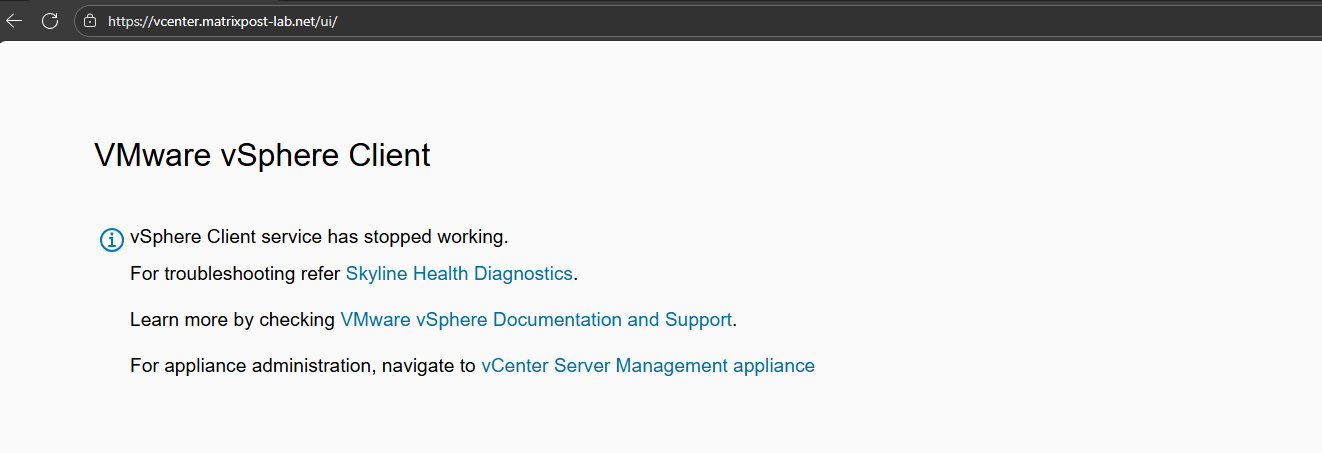
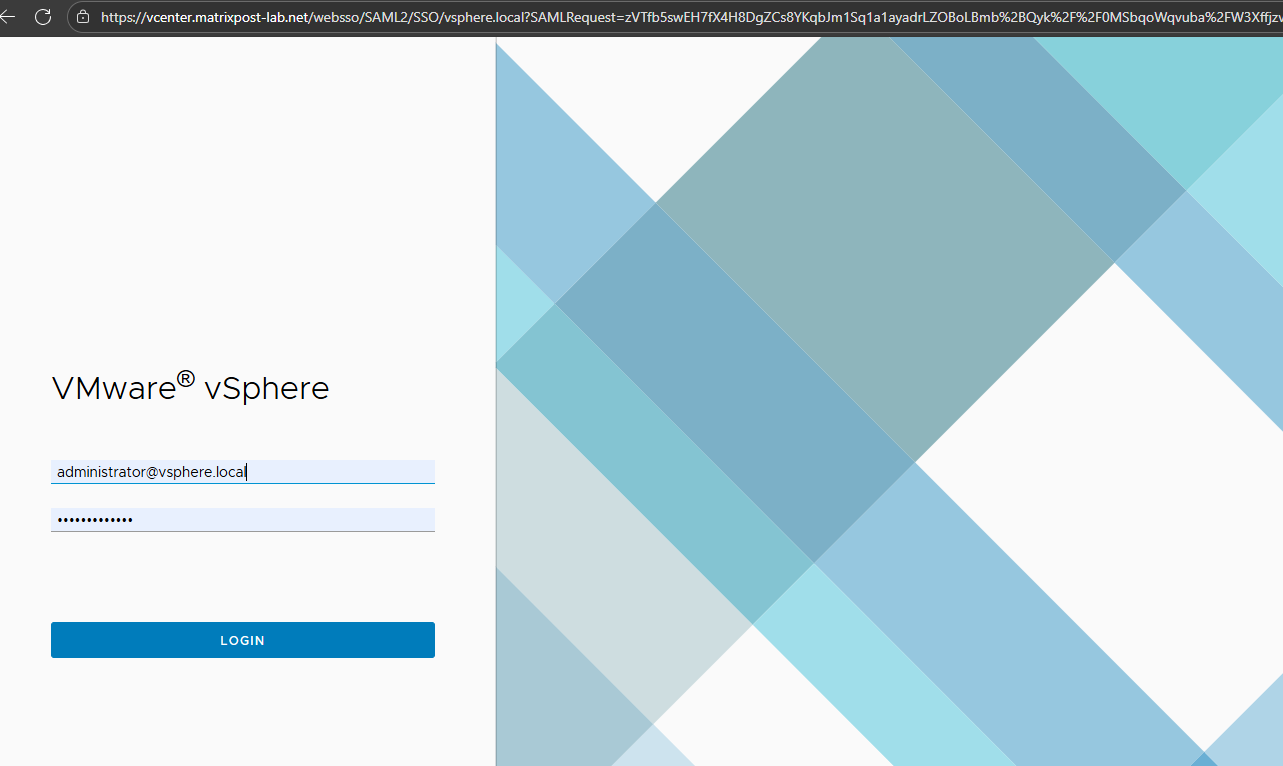
Finally all vCenter services are up and running and we can sign-in again to the vCenter Web GUI.
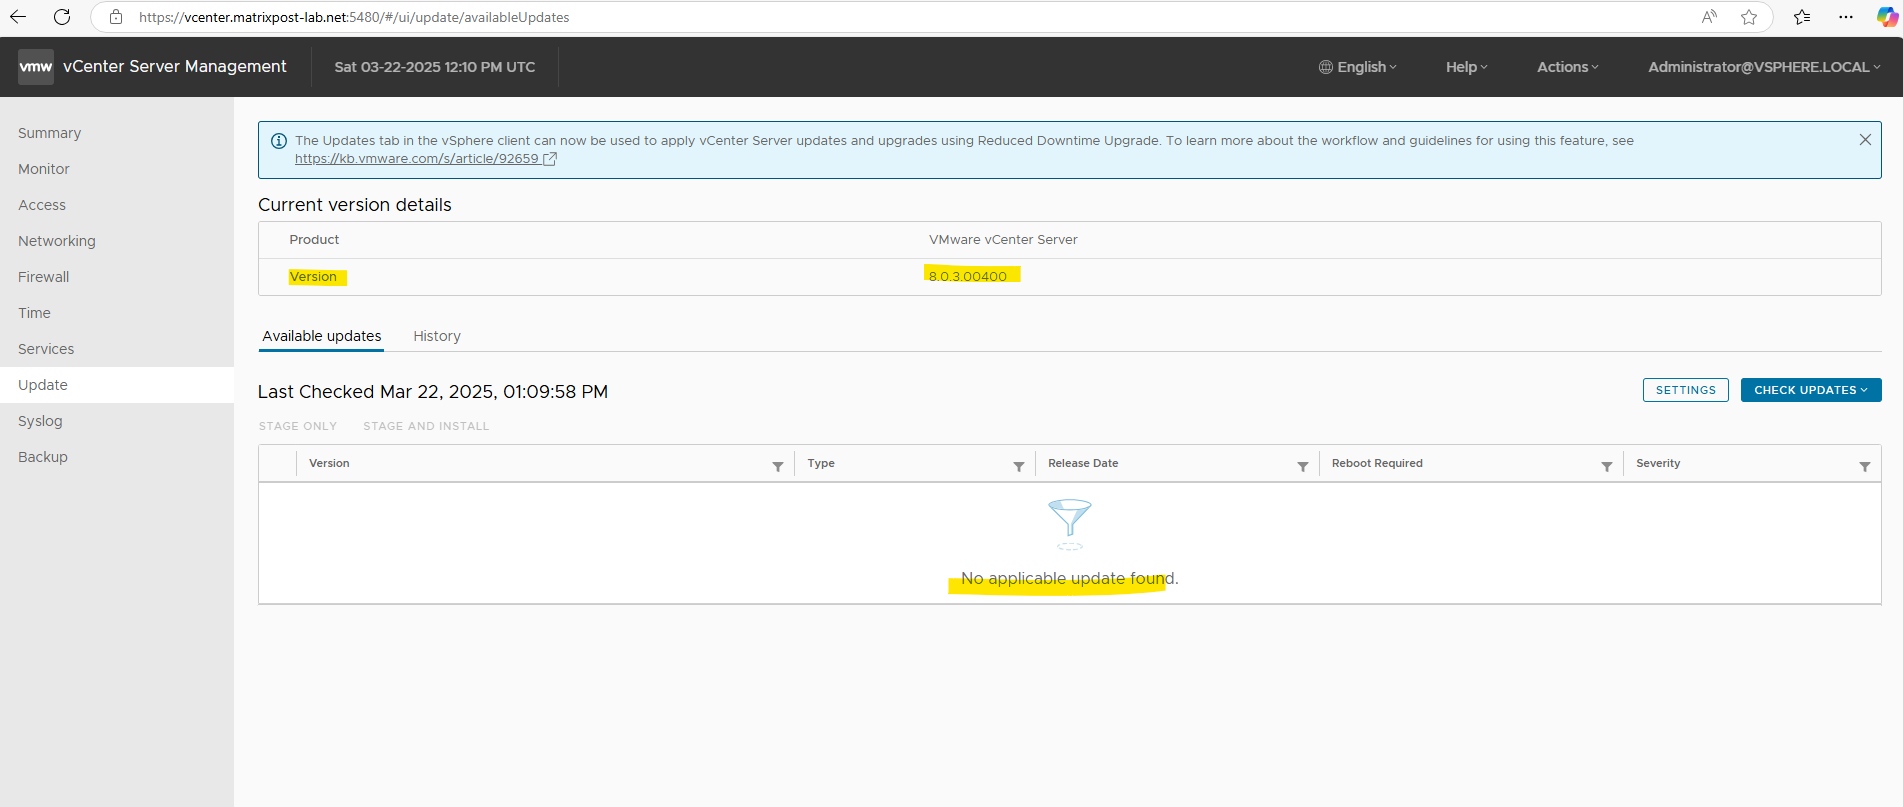
When checking updates again by using the vCenter Server Appliance Management Interface (VAMI), now no new updates are available and vCenter Server is up to date.
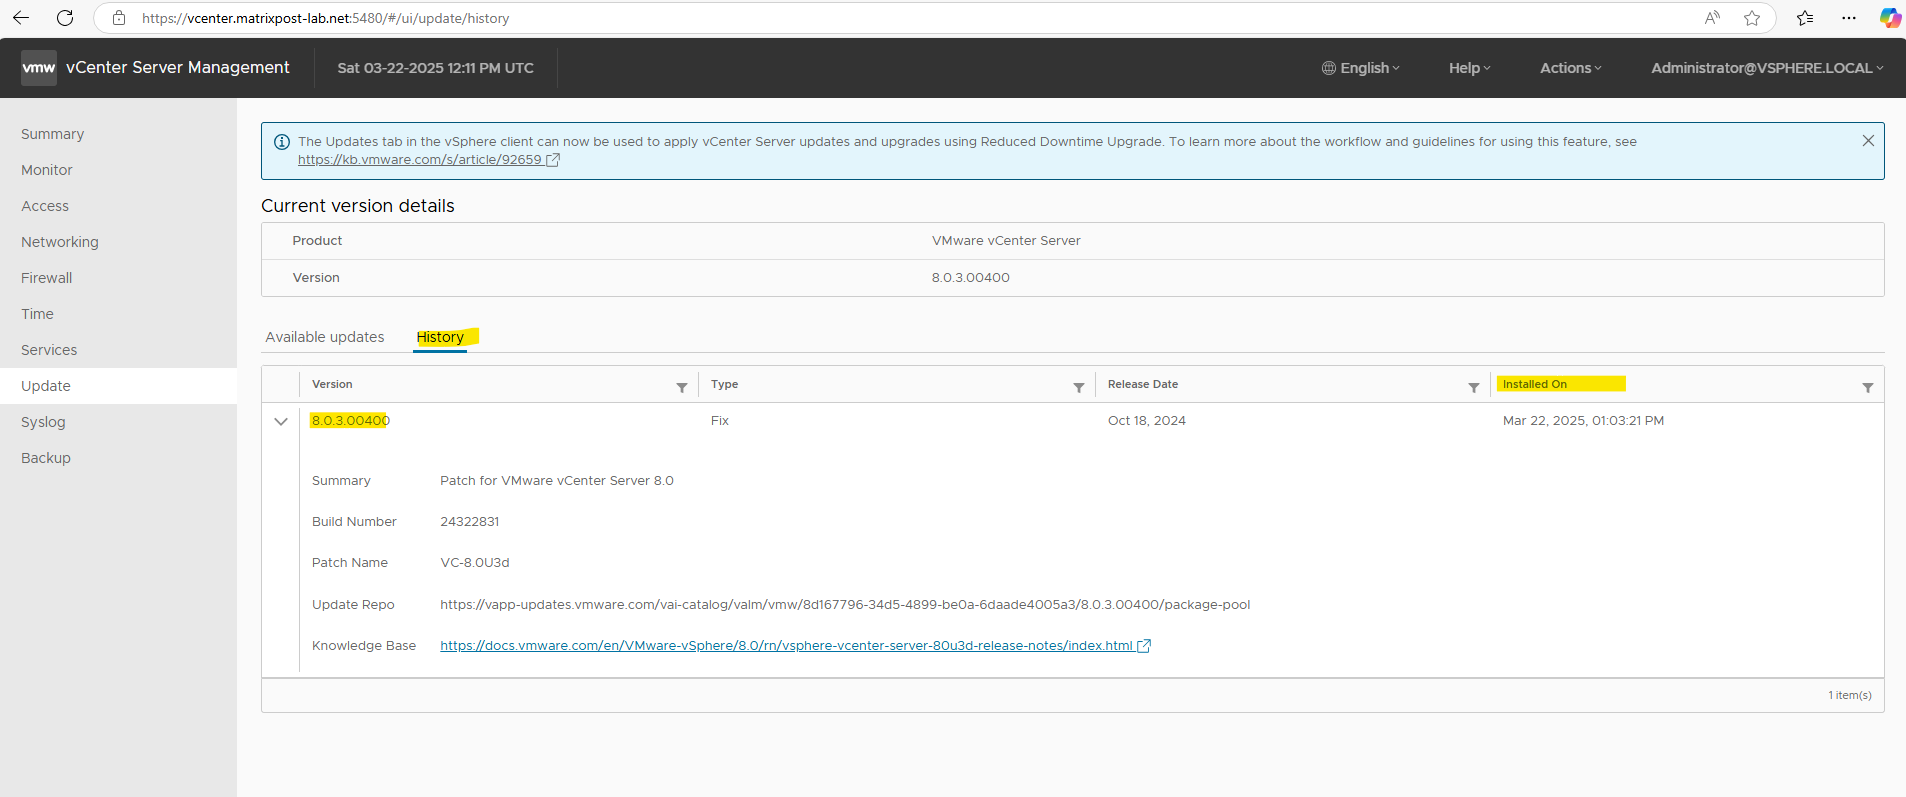
On the History tab we can see all installed updates in past.
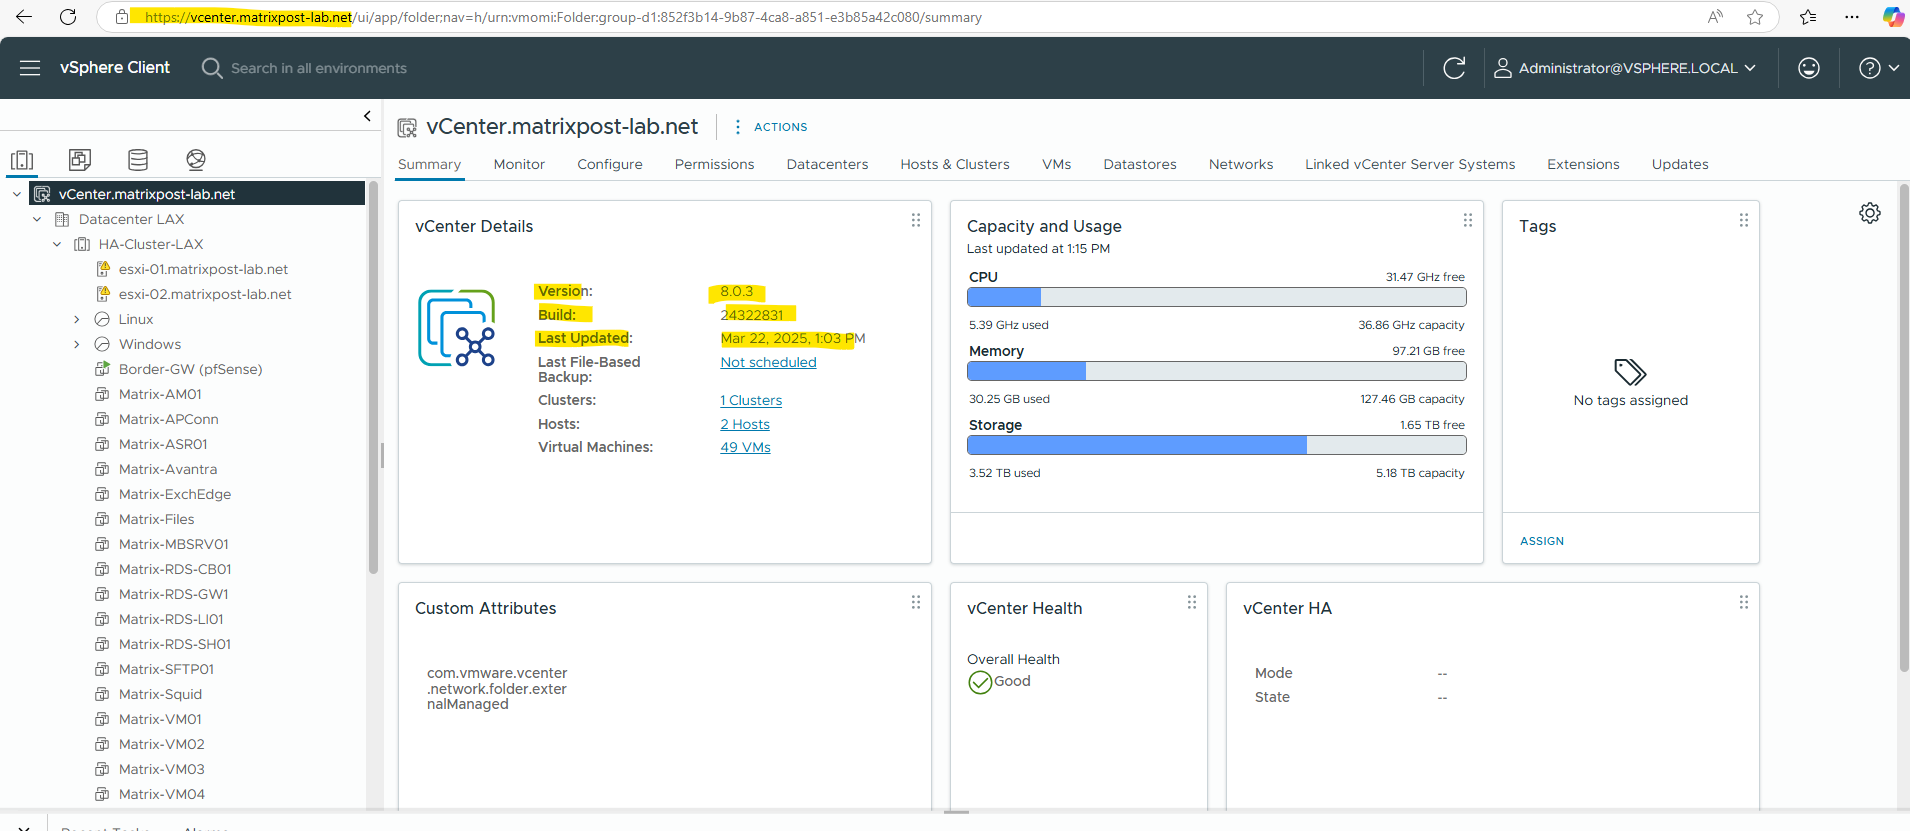
vSphere HA Warning after VAMI Upgrade
After upgrading vCenter Server via VAMI and logging in to the vSphere Client for the first time, several background tasks are automatically started. During this initialization phase, temporary warnings and failed tasks may appear.
In most cases, these are expected and disappear automatically once the cluster initialization has completed successfully.
The vSphere Client may temporarily display the warning “Cannot find vSphere HA master agent.” as shown in the screenshot below.
This behavior is expected and occurs because the HA agents and cluster state are re-initialized after the vCenter services restart.

During this phase, Lifecycle Manager automatically reconfigures the cluster, performs HA remediation, and triggers a new HA master election.
The process may take several minutes and includes tasks such as “Configure vSphere HA” and “Remediate HA”.
HA remediation is the process where vCenter reconfigures and repairs the vSphere High Availability setup on the ESXi hosts to ensure the cluster is in a consistent and supported state.
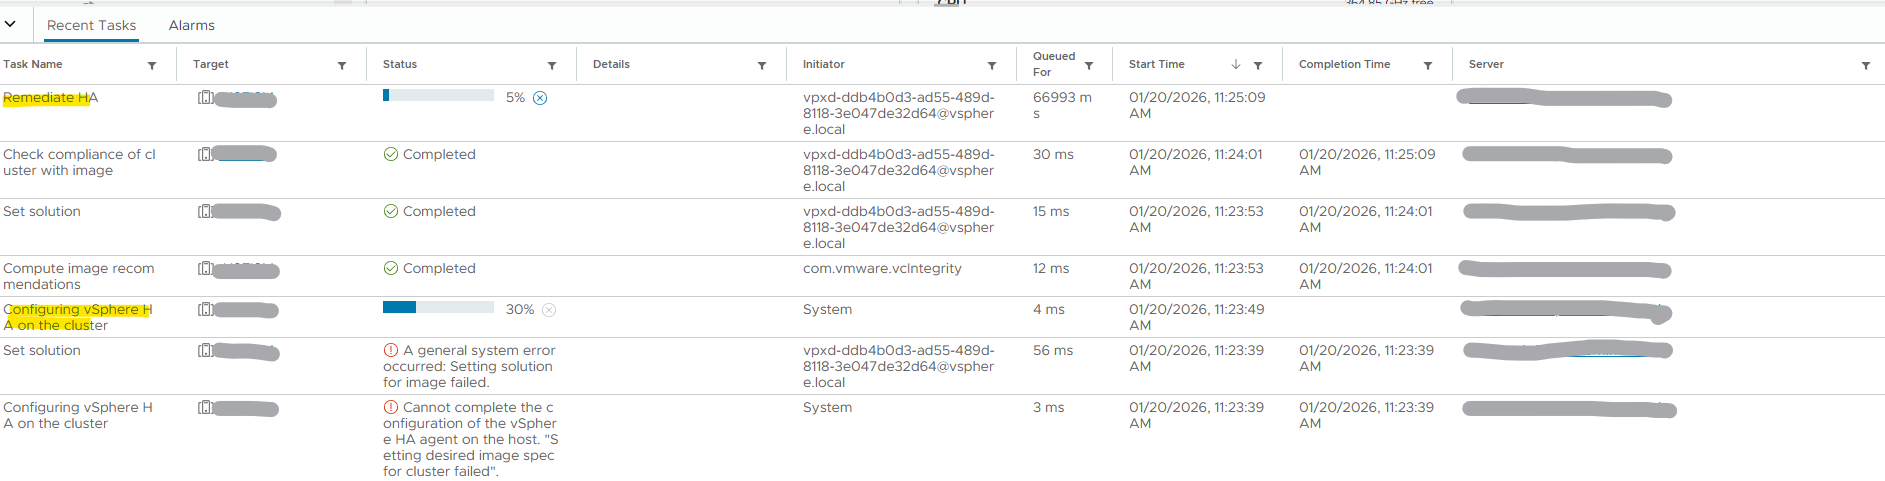
During the post-upgrade phase, the task “Configure vSphere HA” appears for each ESXi host while the cluster performs a new HA master election.
The status “Waiting for cluster election to complete” indicates that HA agents are being reconfigured and the master role is being reassigned. This is expected behavior after a vCenter upgrade and resolves automatically once the HA configuration is finalized.

Once completed, the warning disappears automatically and the cluster returns to a healthy state.

Troubleshooting
Insufficient Disk Space Warning – disk /storage/archive
In the vCenter Server Appliance, the disk /storage/archive has a total size of 52 GB, of which 2 GB is free.
Insufficient disk space is available on the vCenter Server Appliance. Increase the disk space and attempt the operation again.
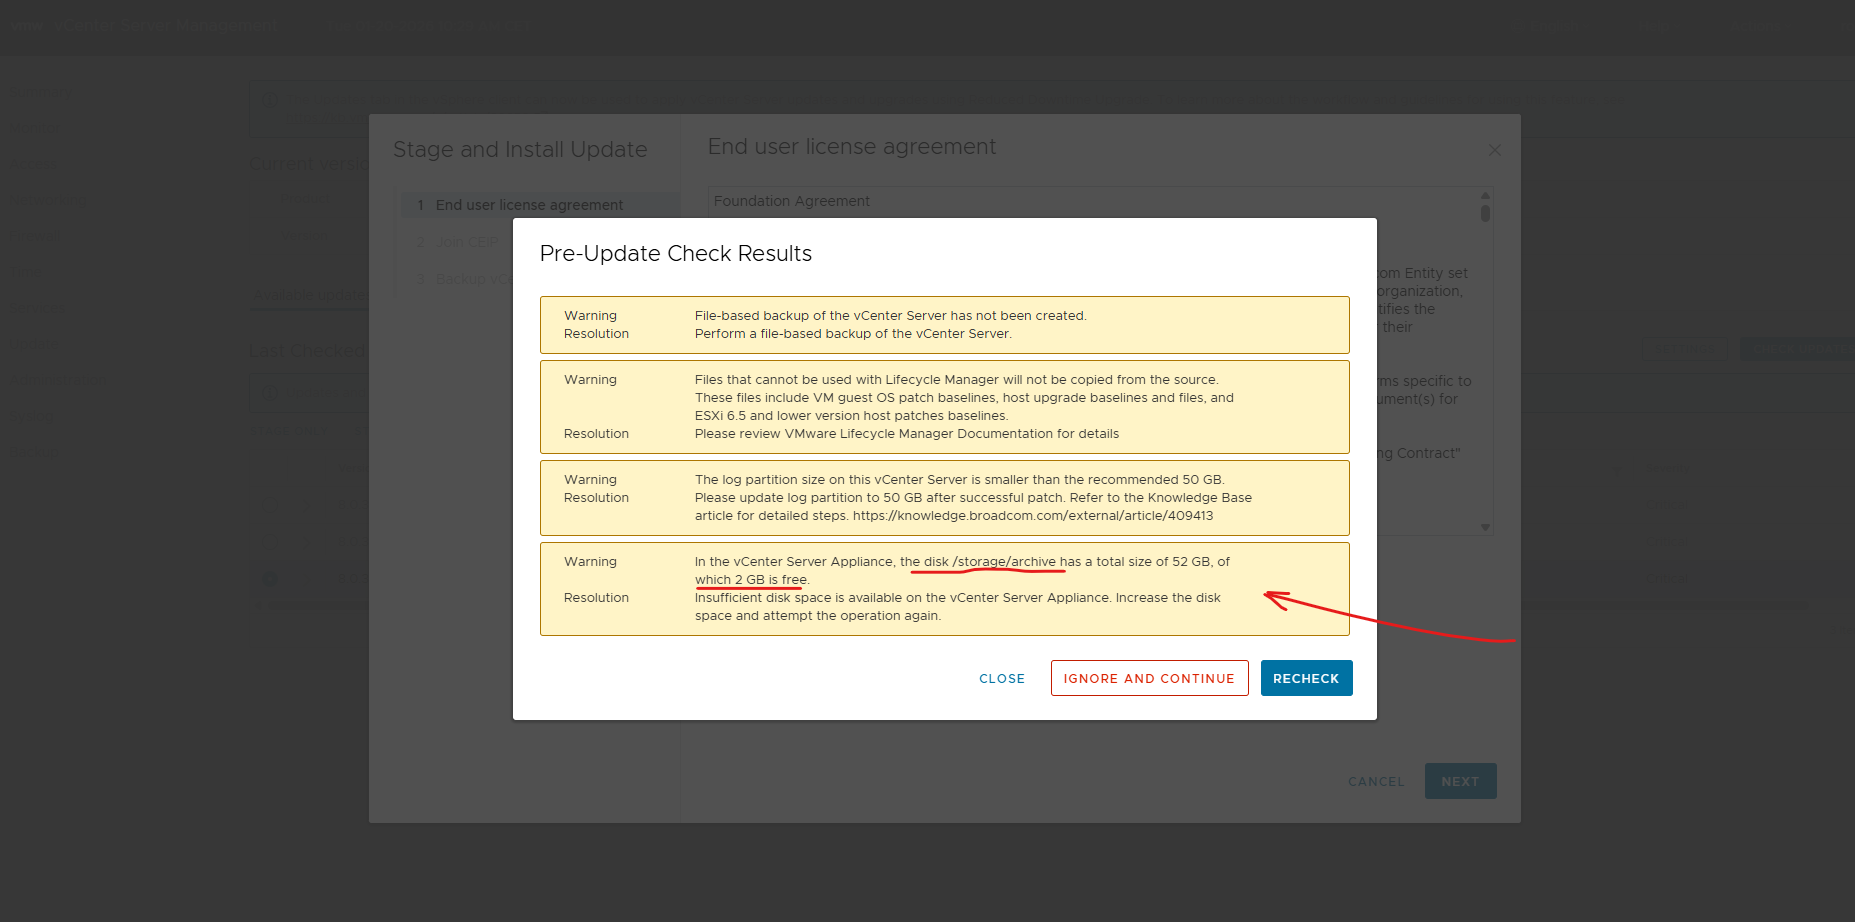
The upgrade will fail if /storage/archive doesn’t have enough free space.
What /storage/archive is used for?
/storage/archive stores:
- Old support bundles
- Archived logs
- Upgrade / patch remnants
- Old core dumps
During an upgrade, vCenter needs several GB of free space there to stage files safely.
Clean up /storage/archive.
45G /storage/archive/vpostgres ==> That directory contains old PostgreSQL WAL / archive logs which are safe to clean up in almost all cases.
What this directory is?
/storage/archive/vpostgres is used for:
- PostgreSQL WAL archive files
- DB recovery / crash recovery
- Upgrade safety buffers
These files are NOT required for normal operation once written.
# df -h
# du -sh /storage/archive/*
# service-control --stop --all
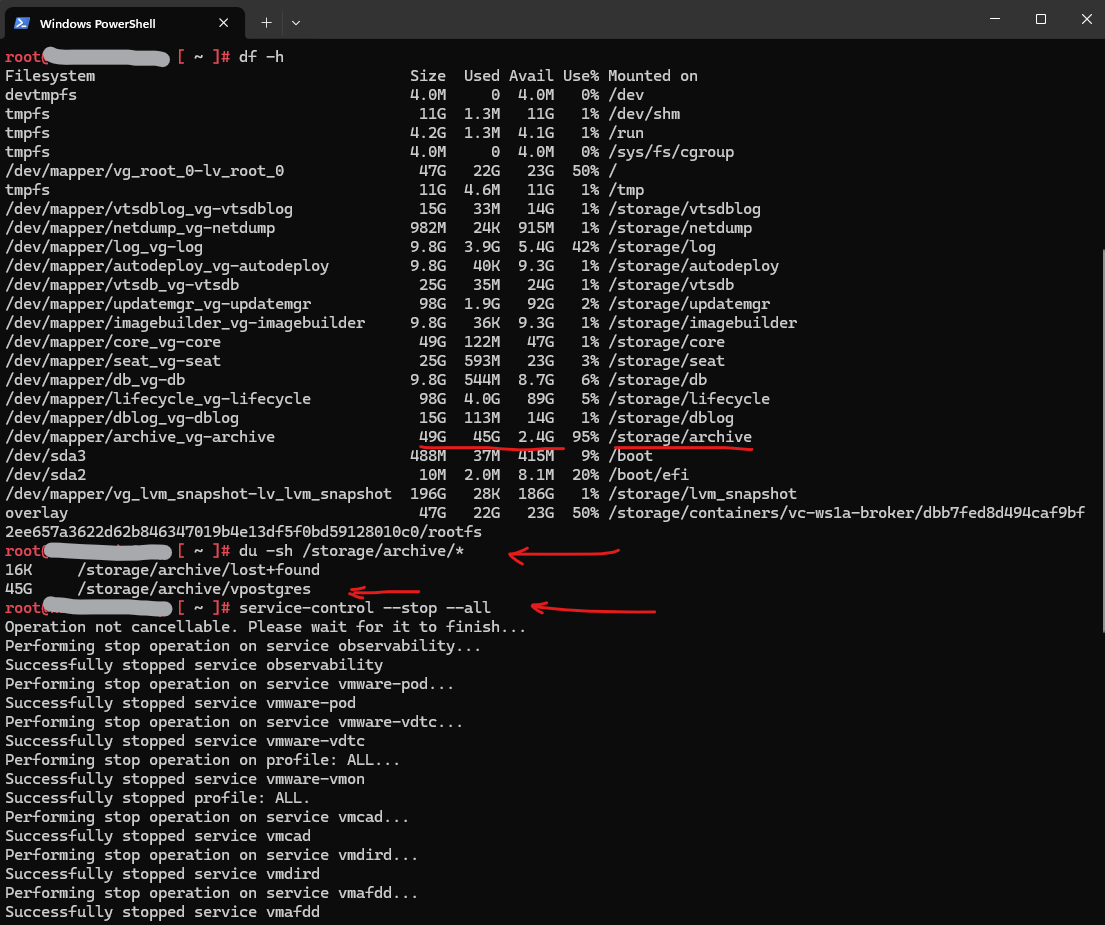
Safe cleanup procedure (recommended)
Stop vCenter services (important), this avoids DB file locks. Delete the archive content.
Do NOT delete the directory itself, only its contents.
Finally start the services again.
# service-control --stop --all
# rm -rf /storage/archive/vpostgres/*
# df -h /storage/archive
# service-control --start --all
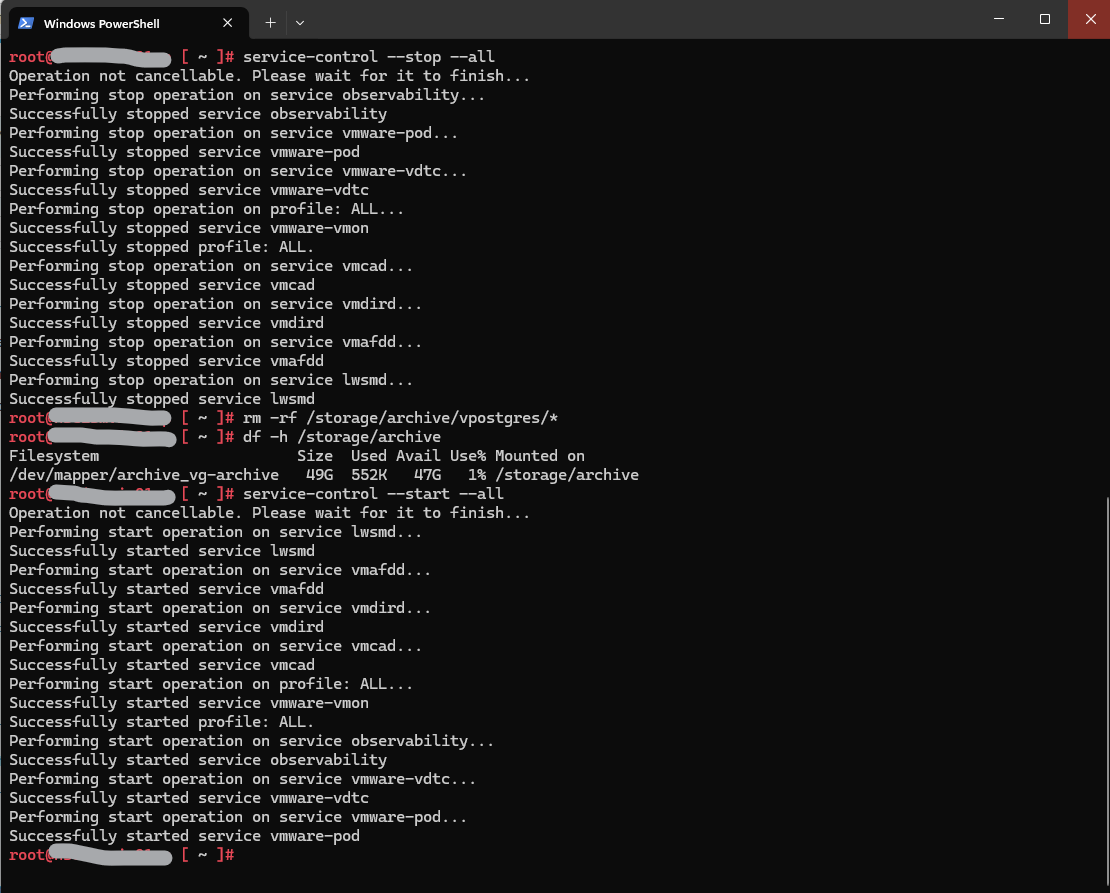
After restarting all vCenter services, the Lifecycle Manager initiated a “Sync Updates” task to re-synchronize update metadata and validate the internal patch and image repositories. This behavior is expected after service restarts or maintenance activities affecting the database. The synchronization finally completed successfully without errors after a few minutes.

Upgrade Fails or Times Out at “Converting data as part of post install” (CLI Fallback)
While the “Converting data as part of post install” step normally just requires patience while historical metrics process in the background as already mentioned further above, it can occasionally hit a service startup timeout (such as observability-vapi, hvc, or topologysvc) and throw an “Installation Failed” error in the VAMI UI.
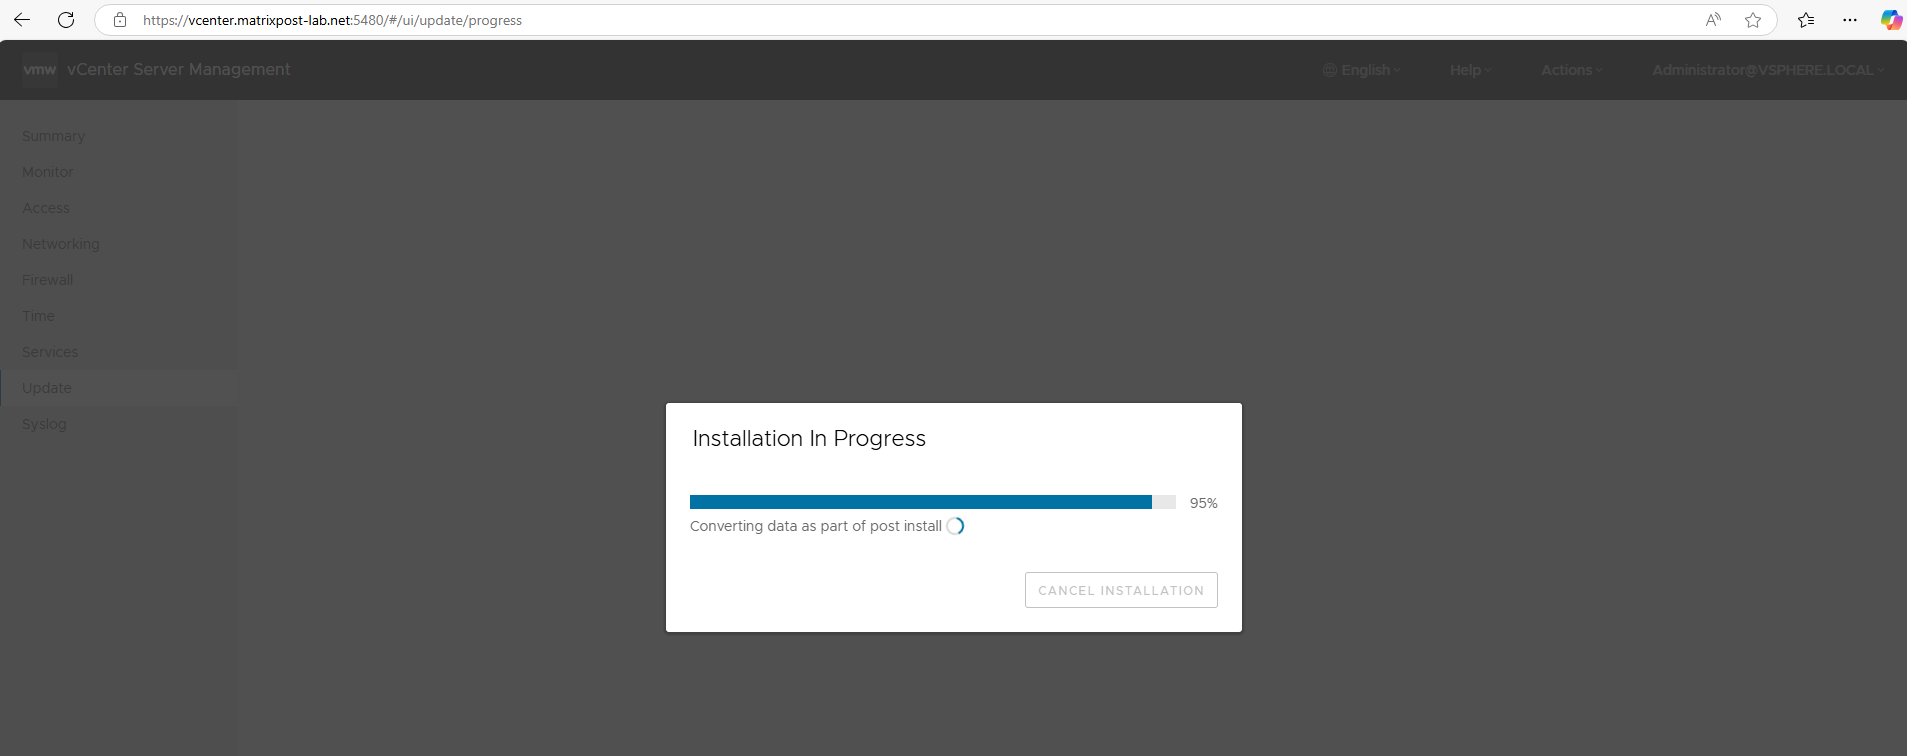
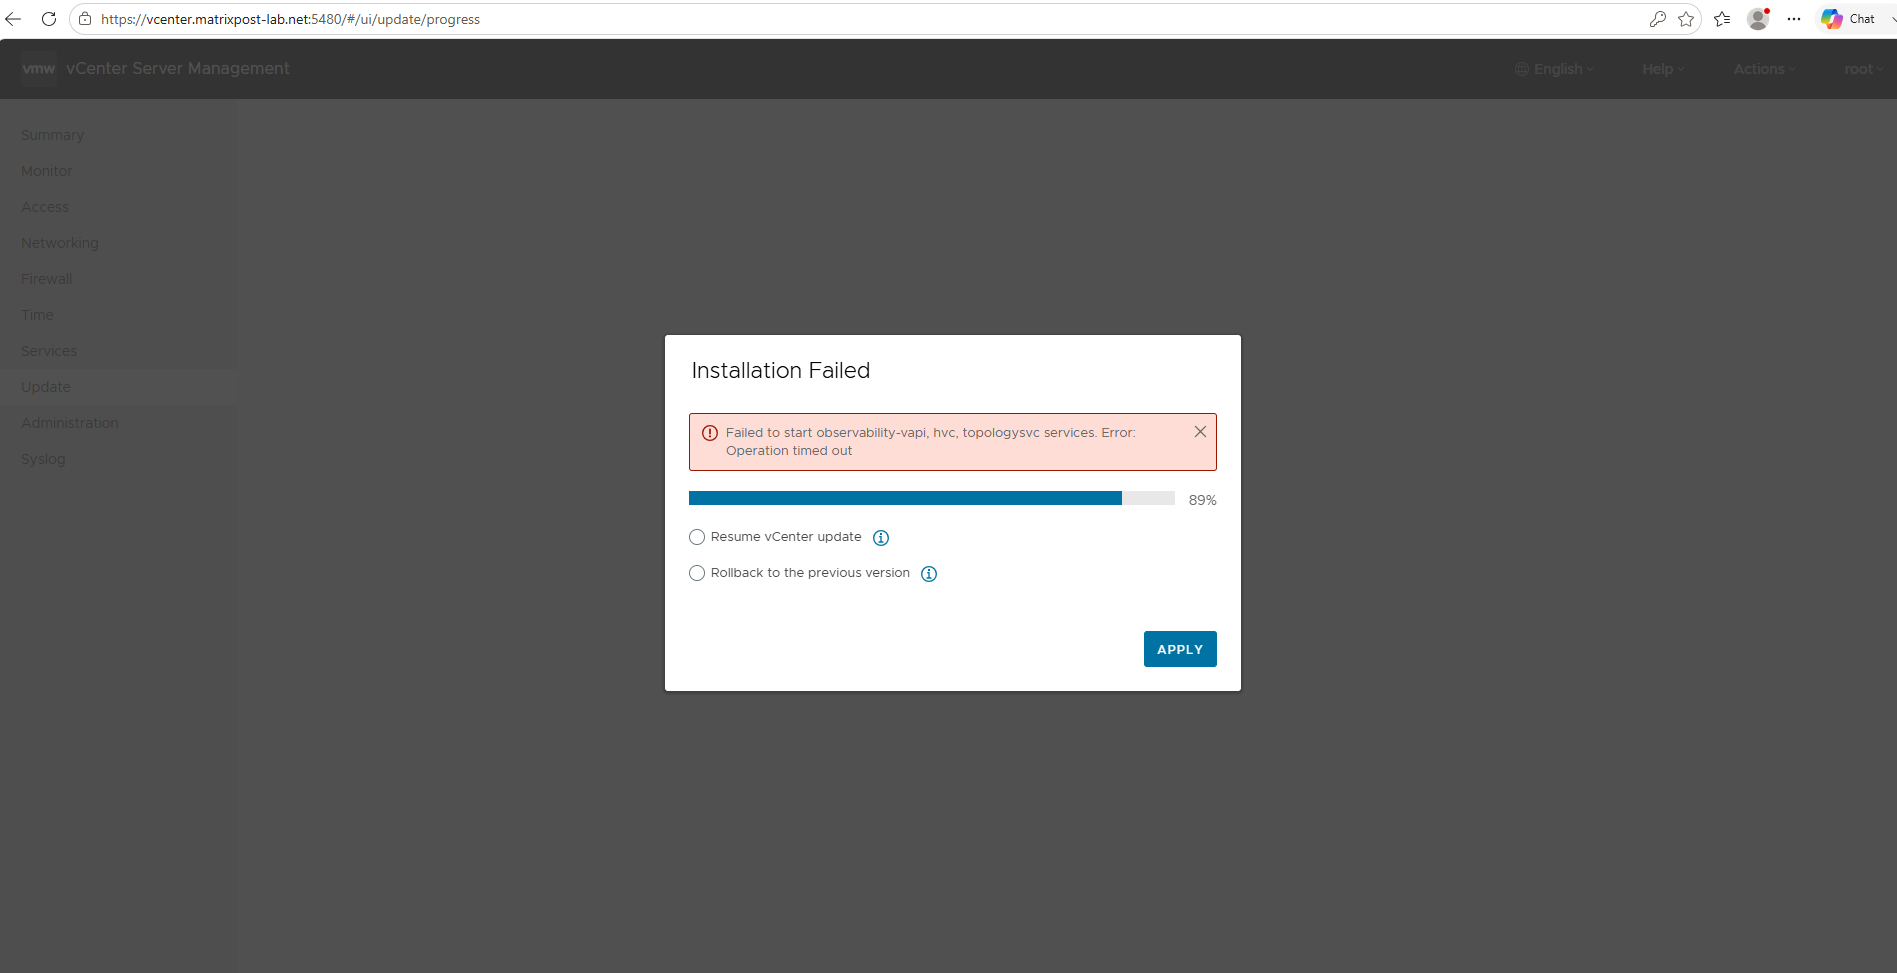
If your update stalls indefinitely or rolls back after hitting this error, you can bypass the VAMI interface entirely and complete or re-apply the update using the vCenter Appliance shell (CLI).
Using the command-line interface in the Appliance Shell prevents web UI session timeouts and protects your patch process from browser disconnects.
First we log into the VAMI (https://<vcenter-fqdn>:5480), navigate to Update, select the patch version and click on STAGE ONLY.
This downloads all the update binaries locally so you don’t have to pull them over the network during the CLI installation.
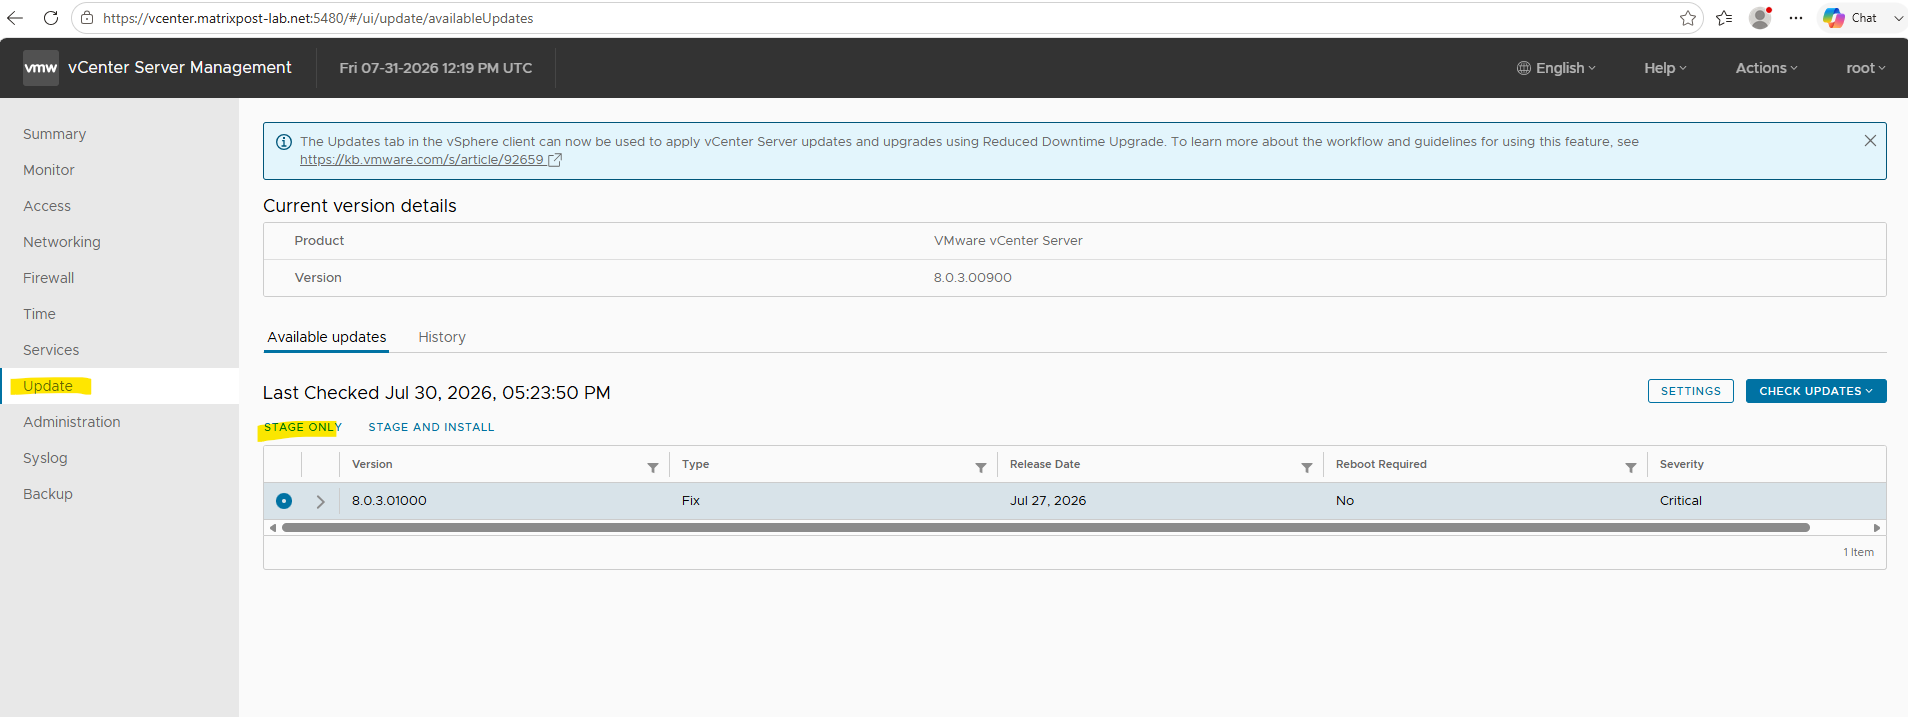
We see the progress of the download below.
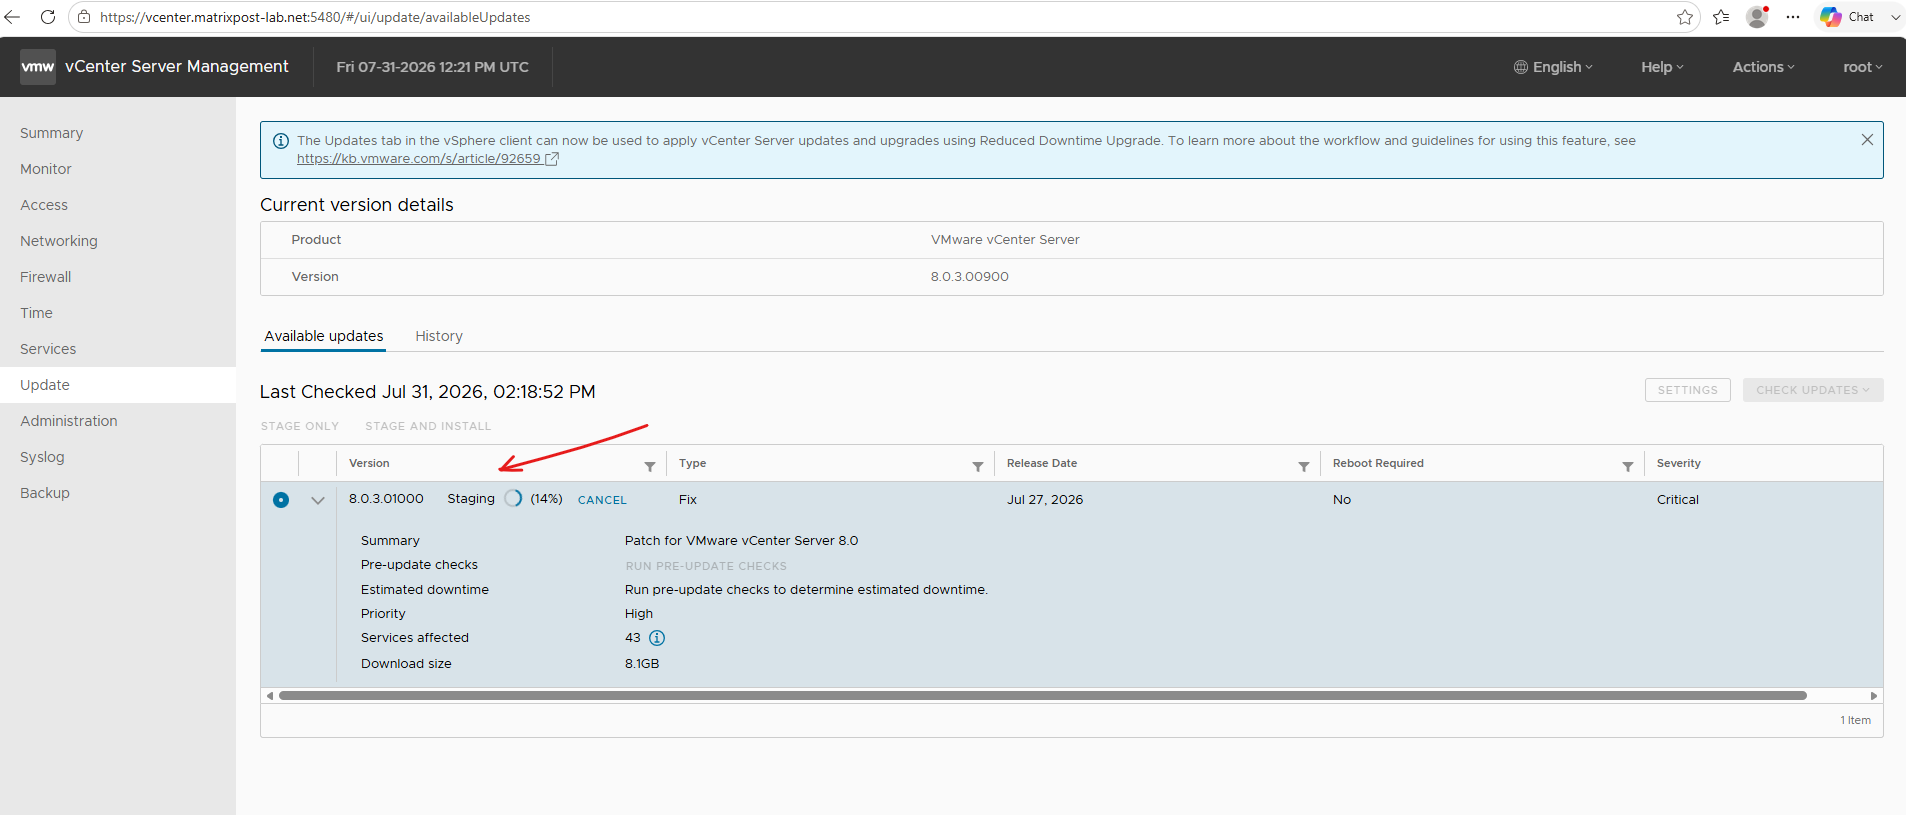
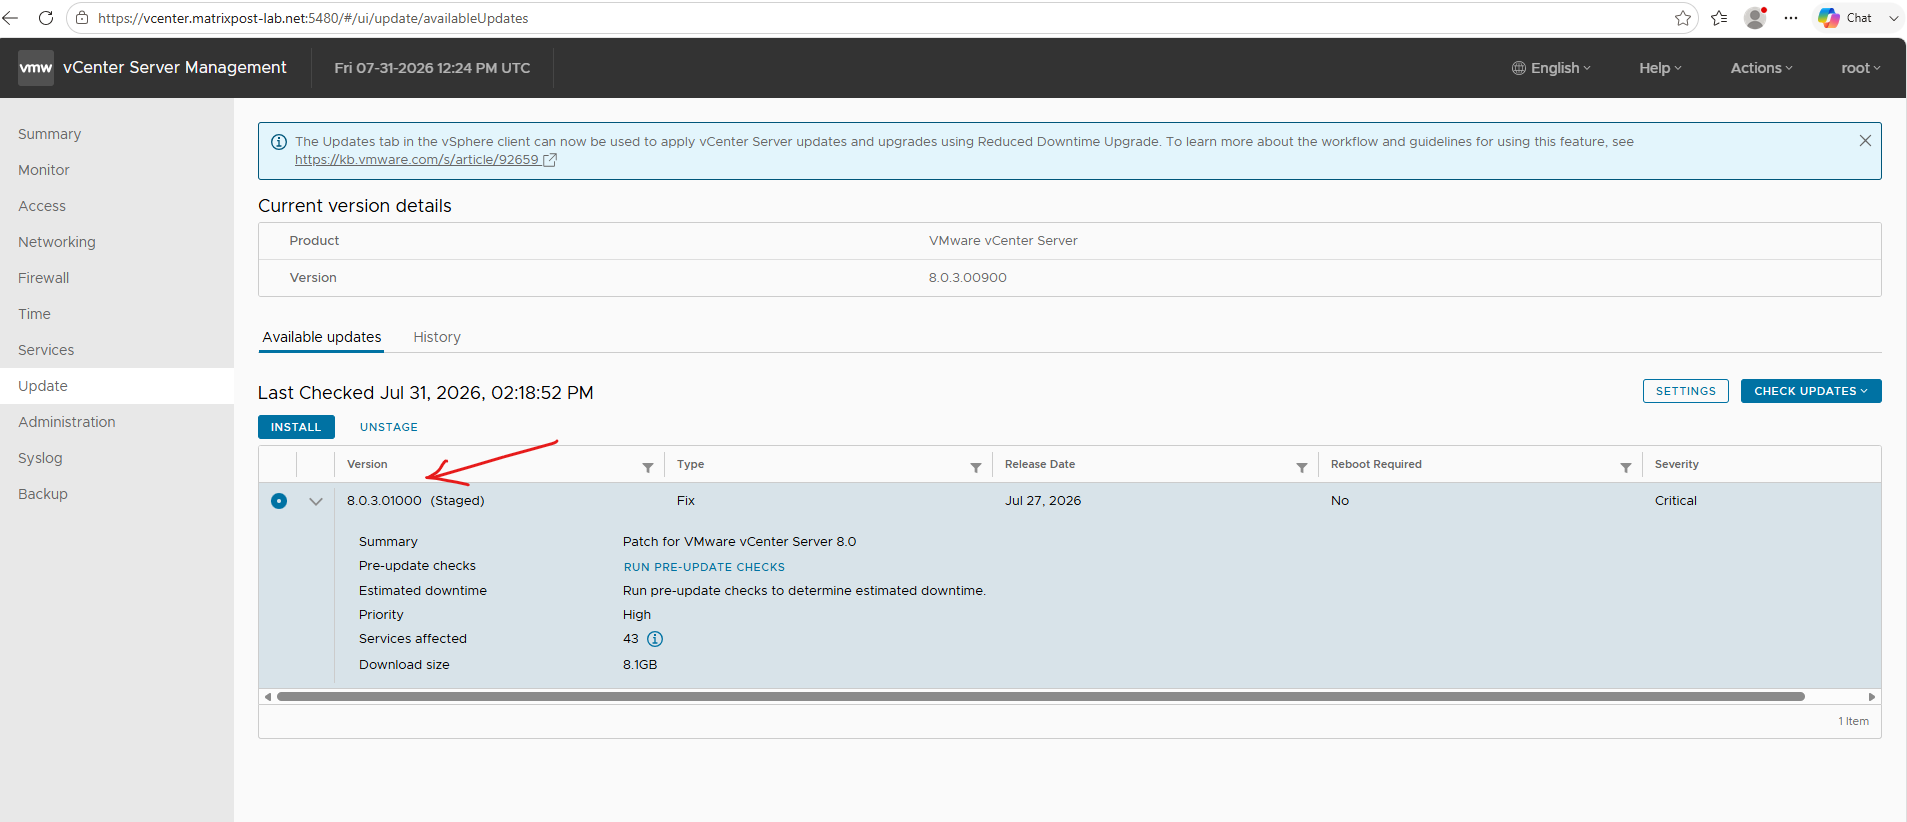
Once the update package shows as (Staged) in the VAMI interface, all required installation files are fully downloaded to the local appliance storage. You can now leave the web UI behind and switch to an SSH command-line session to safely run software-packages install --staged directly within the Appliance Shell.
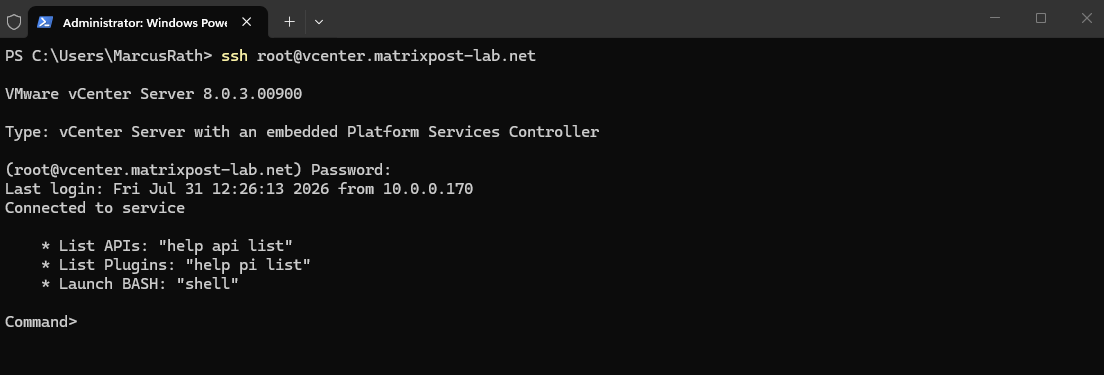
Open an SSH connection to your vCenter Server Appliance and log in as root.
Run the installation command directly in the default vCSA Appliance Shell (Command>). You do not need to switch to the Bash shell:
PS> ssh root@vcenter.matrixpost-lab.net
Once inside the default vCSA Appliance Shell (Command>), run the following command to update vCenter without switching to the Bash shell:
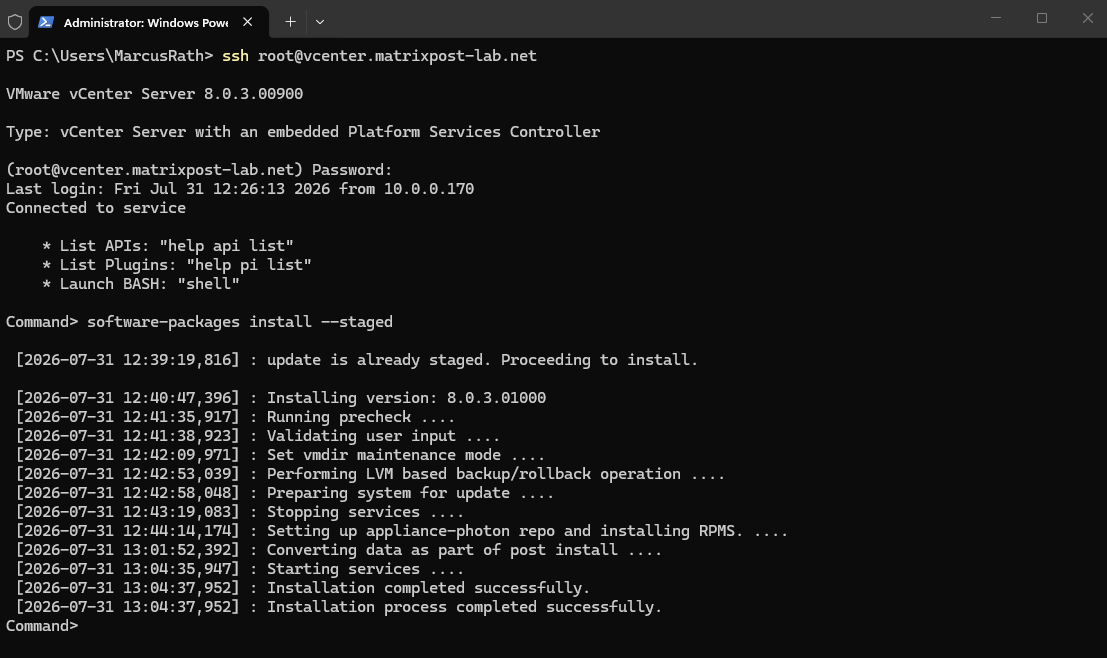
The appliance will confirm that the update package is staged and automatically proceed with the installation.
Command> software-packages install --staged
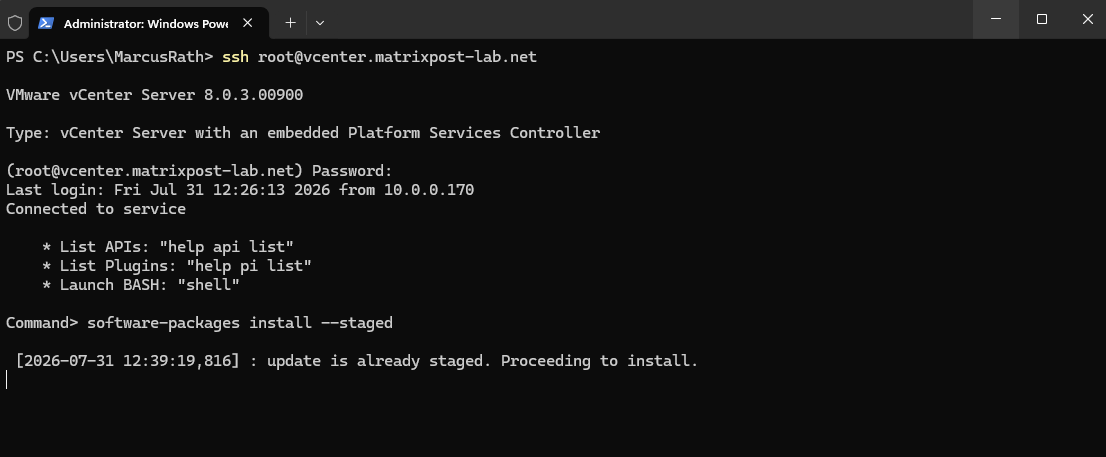
When you run software-packages install --staged, the Appliance Shell guides you through the full lifecycle with real-time feedback.
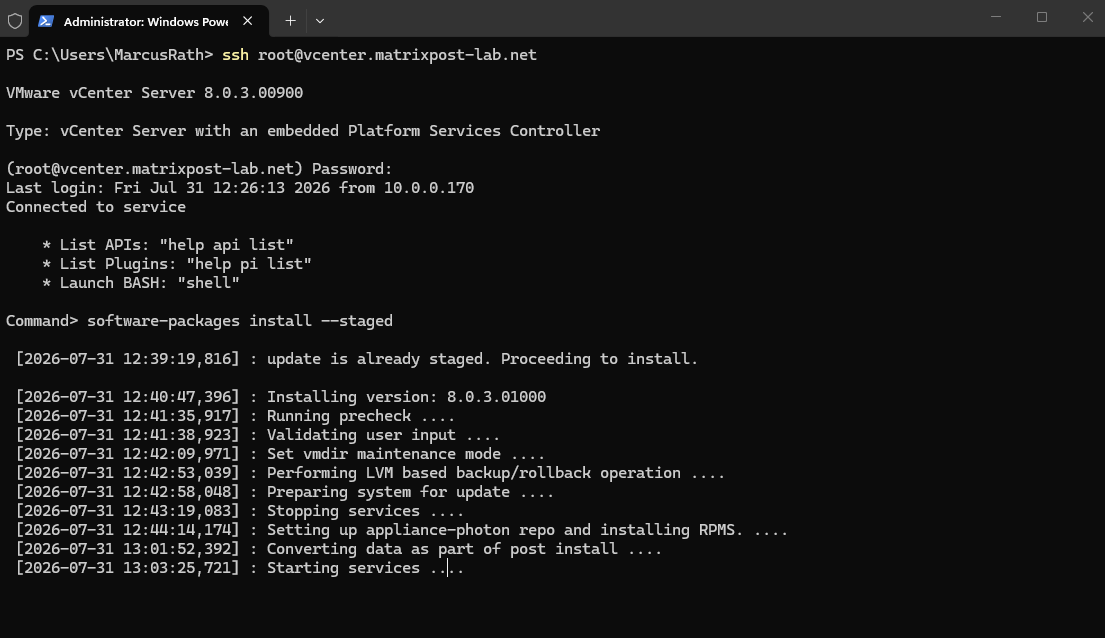
Finally the entire update process finished without losing the SSH session. Because the base Photon OS network stack and SSH daemon (sshd) remain active while higher-level vCenter services restart, the CLI method avoids the session drops common in the VAMI UI.
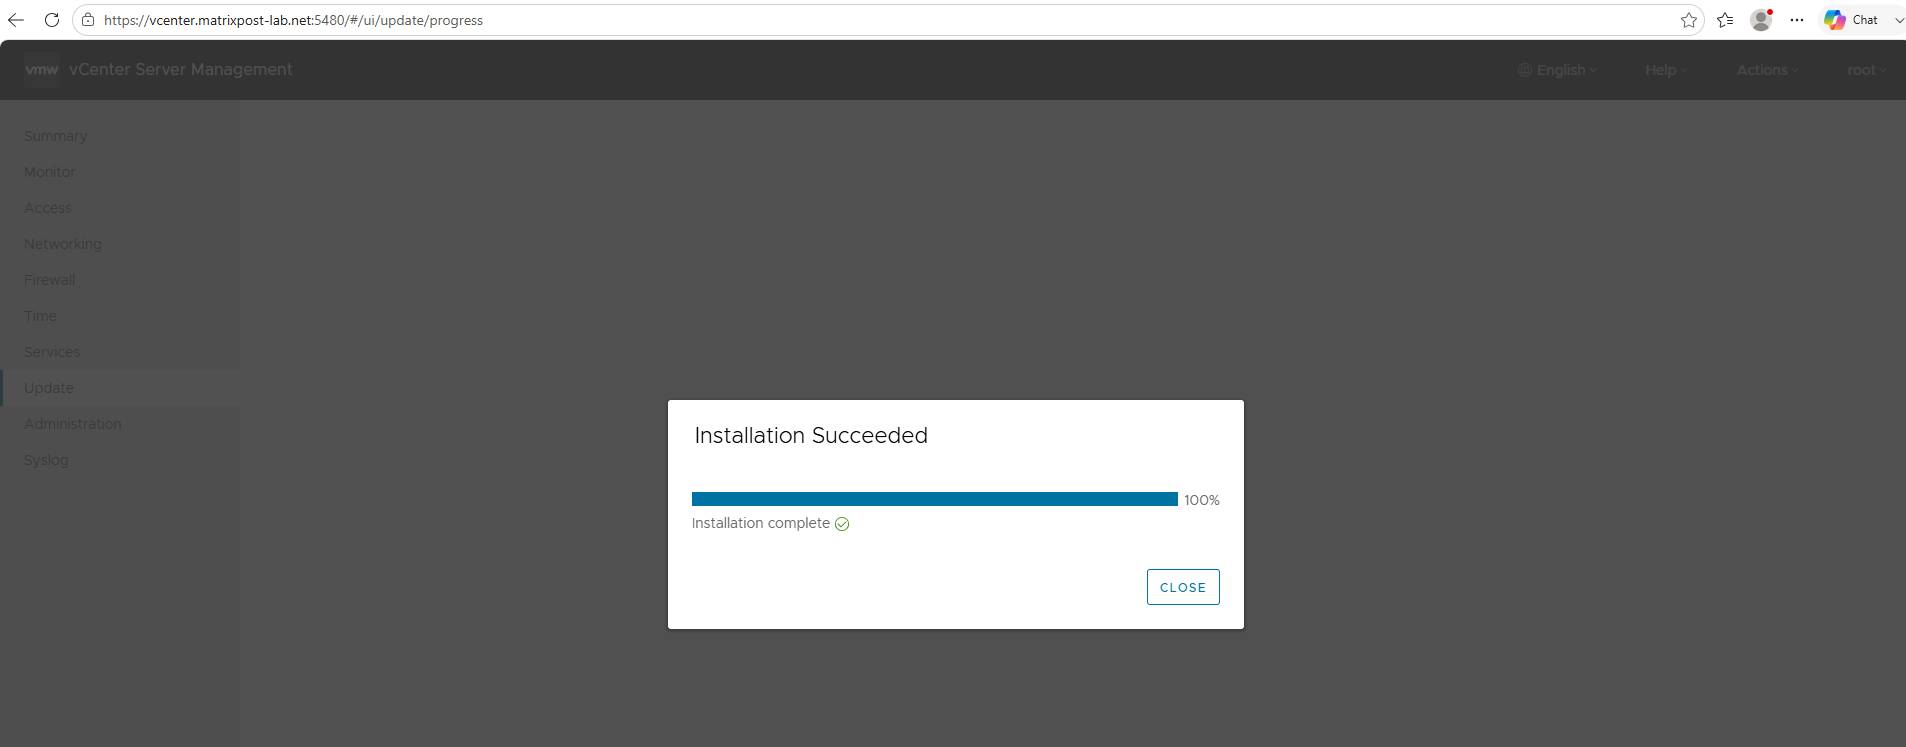
You can also open the VAMI UI in your browser at any point during the update to track live progress and confirm the final Installation Succeeded state side-by-side with your terminal.
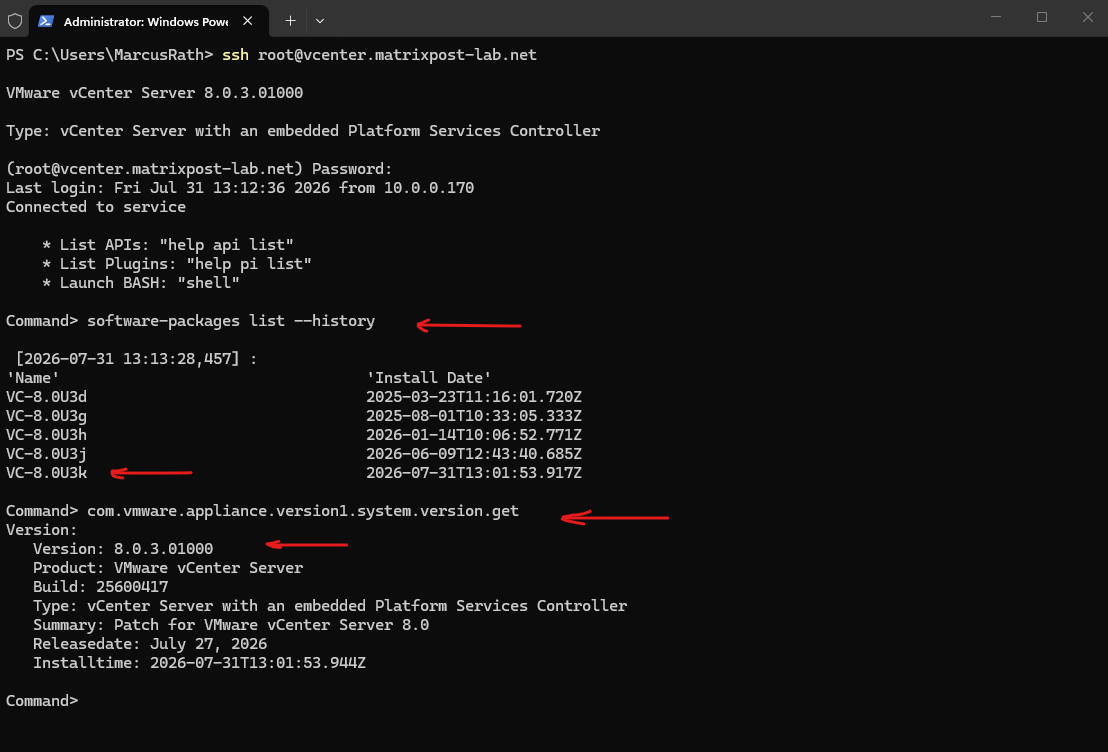
To confirm the update succeeded, run software-packages list --history to view the newly applied patch (e.g., VC-8.0U3k) in your history log.
You can also execute com.vmware.appliance.version1.system.version.get in the Appliance Shell to display the active build number (8.0.3.01000) and release details.
Command> software-packages list --history
Command> com.vmware.appliance.version1.system.version.get
Links
VMware vCenter Server Versions and Build Numbers
https://knowledge.broadcom.com/external/article/326316/build-numbers-and-versions-of-vmware-vce.htmlPatching/Updating VMware vCenter Server Appliance VCSA and Platform Service Controller PSC through Appliance Management Interface VAMI
https://knowledge.broadcom.com/external/article/316584/patchingupdating-vmware-vcenter-server-a.htmlPatching vCenter Server Appliance via CLI
https://knowledge.broadcom.com/external/article/370115/patching-vcenter-server-appliance-via-cl.html
