Back up VMware VMs with Azure Backup Server
Microsoft Azure Backup Server (MABS) provides enterprise-level data protection for VMware environments, ensuring reliable backup and recovery of virtual machines in hybrid and cloud scenarios.
As VMware workloads grow in complexity, businesses need a secure, scalable, and cost-efficient backup solution. MABS delivers just that with deep integration into Azure Backup and support for VMware vSphere.
With MABS, organizations can:
- Back up VMware VMs at the host or cluster level without requiring agents inside each VM.
- Leverage Azure’s cloud storage for long-term retention and disaster recovery.
- Restore entire VMs or individual files quickly, minimizing downtime.
- Protect against ransomware and data loss with encryption and application-consistent backups.
Agentless backup: MABS doesn’t require an agent to be installed on the vCenter or ESXi server, to back up the virtual machine. Instead, just provide the IP address or fully qualified domain name (FQDN), and sign-in credentials used to authenticate the VMware server with MABS.
This post explores how MABS enhances VMware backup strategies, its key features, and best practices for deployment in virtualized environments.
Unfortunately by using MABS we can’t recover/restore these virtual machines directly to Azure and just to VMware on-premises (ESXi Hosts).
To migrate these on-premises VMware machines to Azure, we can use either Azure Migrate or Azure Site Recovery as shown in my following posts.
Prerequisites
Before you back up VMware VMs using Azure Backup Server, ensure that the following prerequisites are met:
- Verify that you’re running a version of vCenter/ESXi that’s supported for backup. Refer to the support matrix here.
- Make sure you’ve set up Azure Backup Server. If you haven’t, do that before you start. You should be running Azure Backup Server with the latest updates.
- Ensure the following network ports are open:
- TCP 443 between MABS and vCenter
- TCP 443 and TCP 902 between MABS and ESXi host
Source: https://docs.azure.cn/en-us/backup/backup-azure-backup-server-vmware#prerequisites
Install and upgrade Azure Backup Server
The first step towards getting the Azure Backup Server up and running is to set up a Windows Server. Your server can be in Azure or on-premises.
- To protect on-premises workloads, the MABS server must be located on-premises, and connected to a domain.
- To protect workloads running on Azure VMs, the MABS server must be located in Azure, running as an Azure VM, and connected to a domain.
For this post I will run the Windows Server 2022 in on-premise and my vSphere lab environment.
Always join Azure Backup Server to a domain. Moving an existing Azure Backup Server machine to a new domain after deployment is not supported.
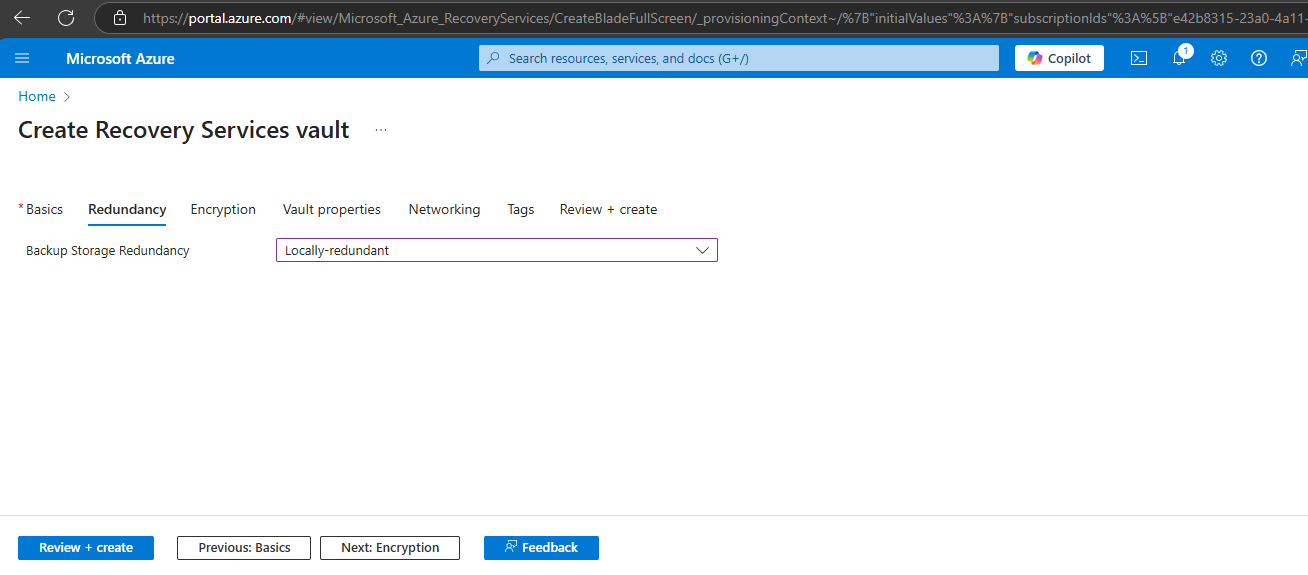
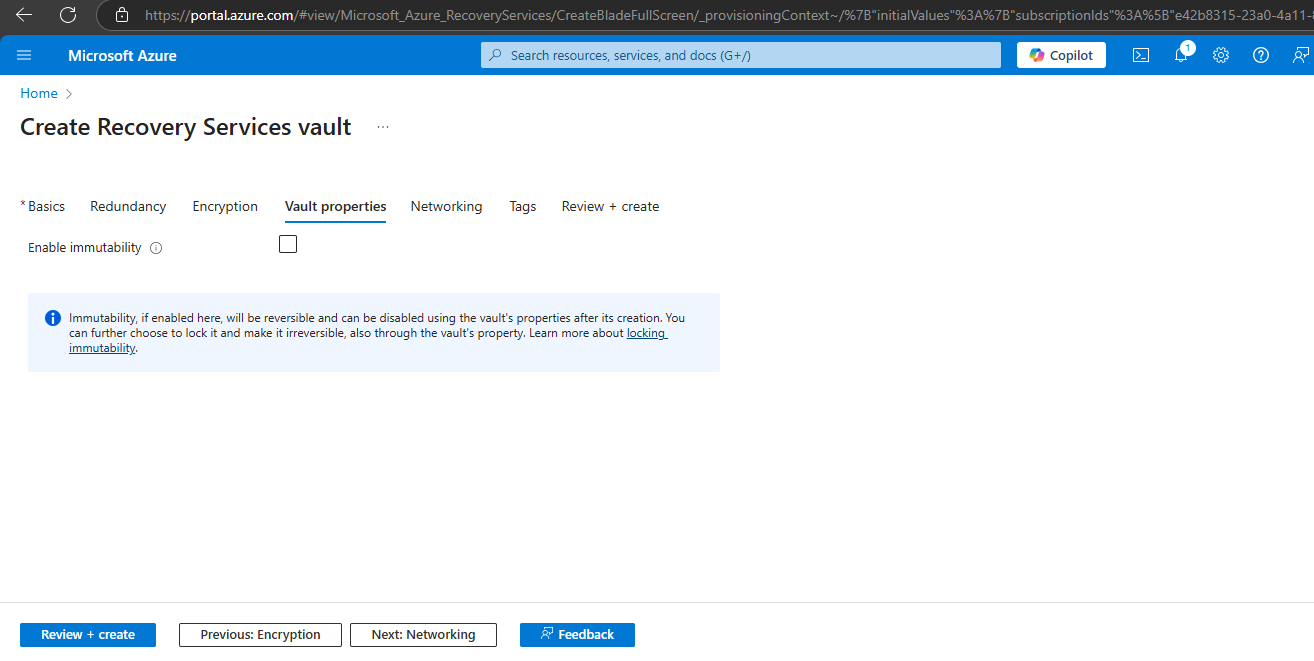
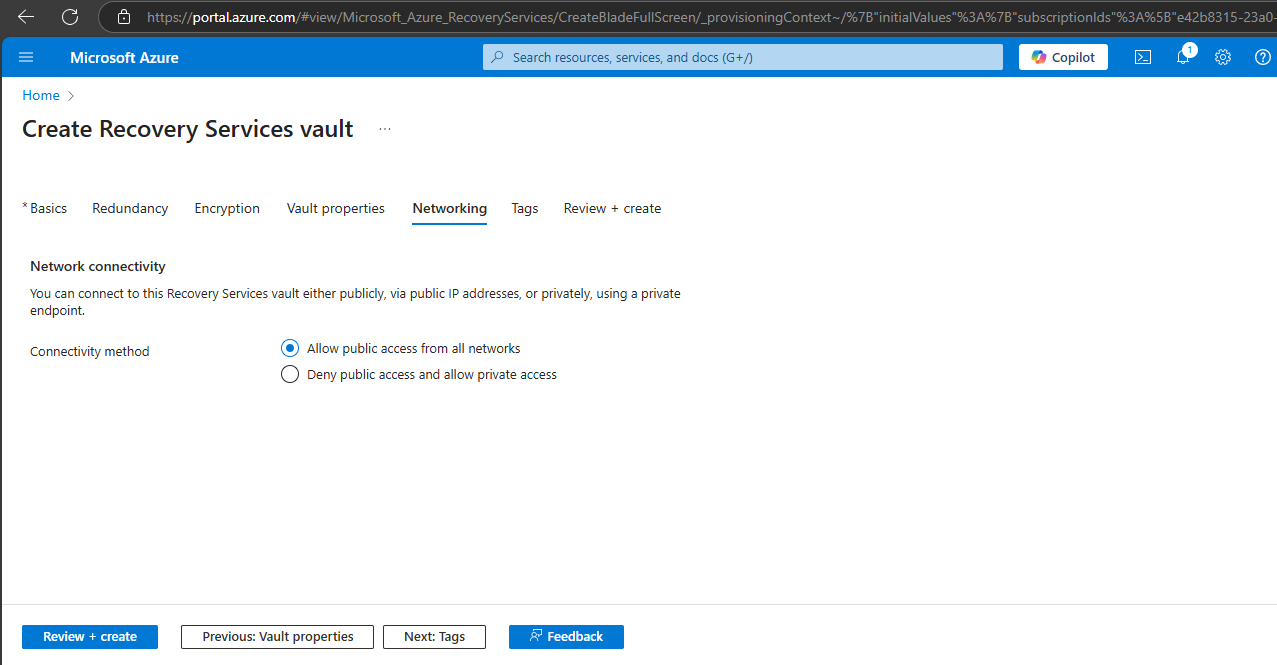
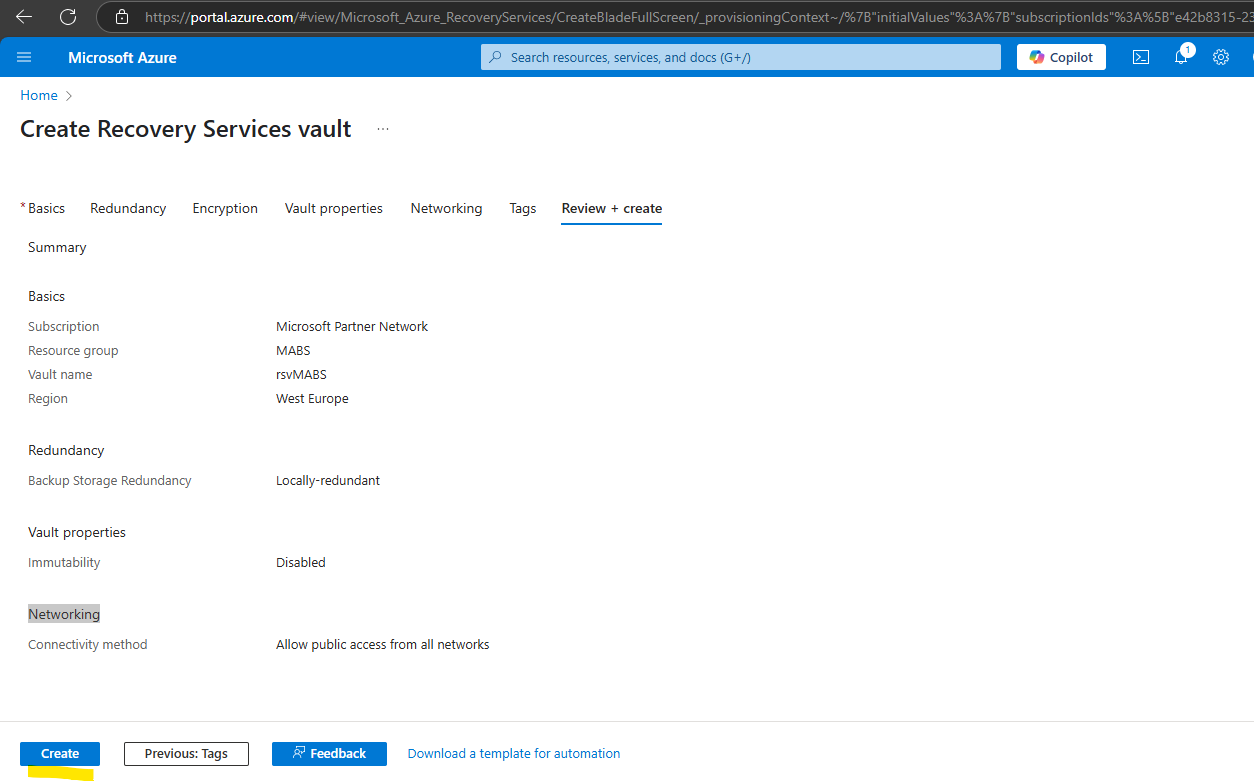
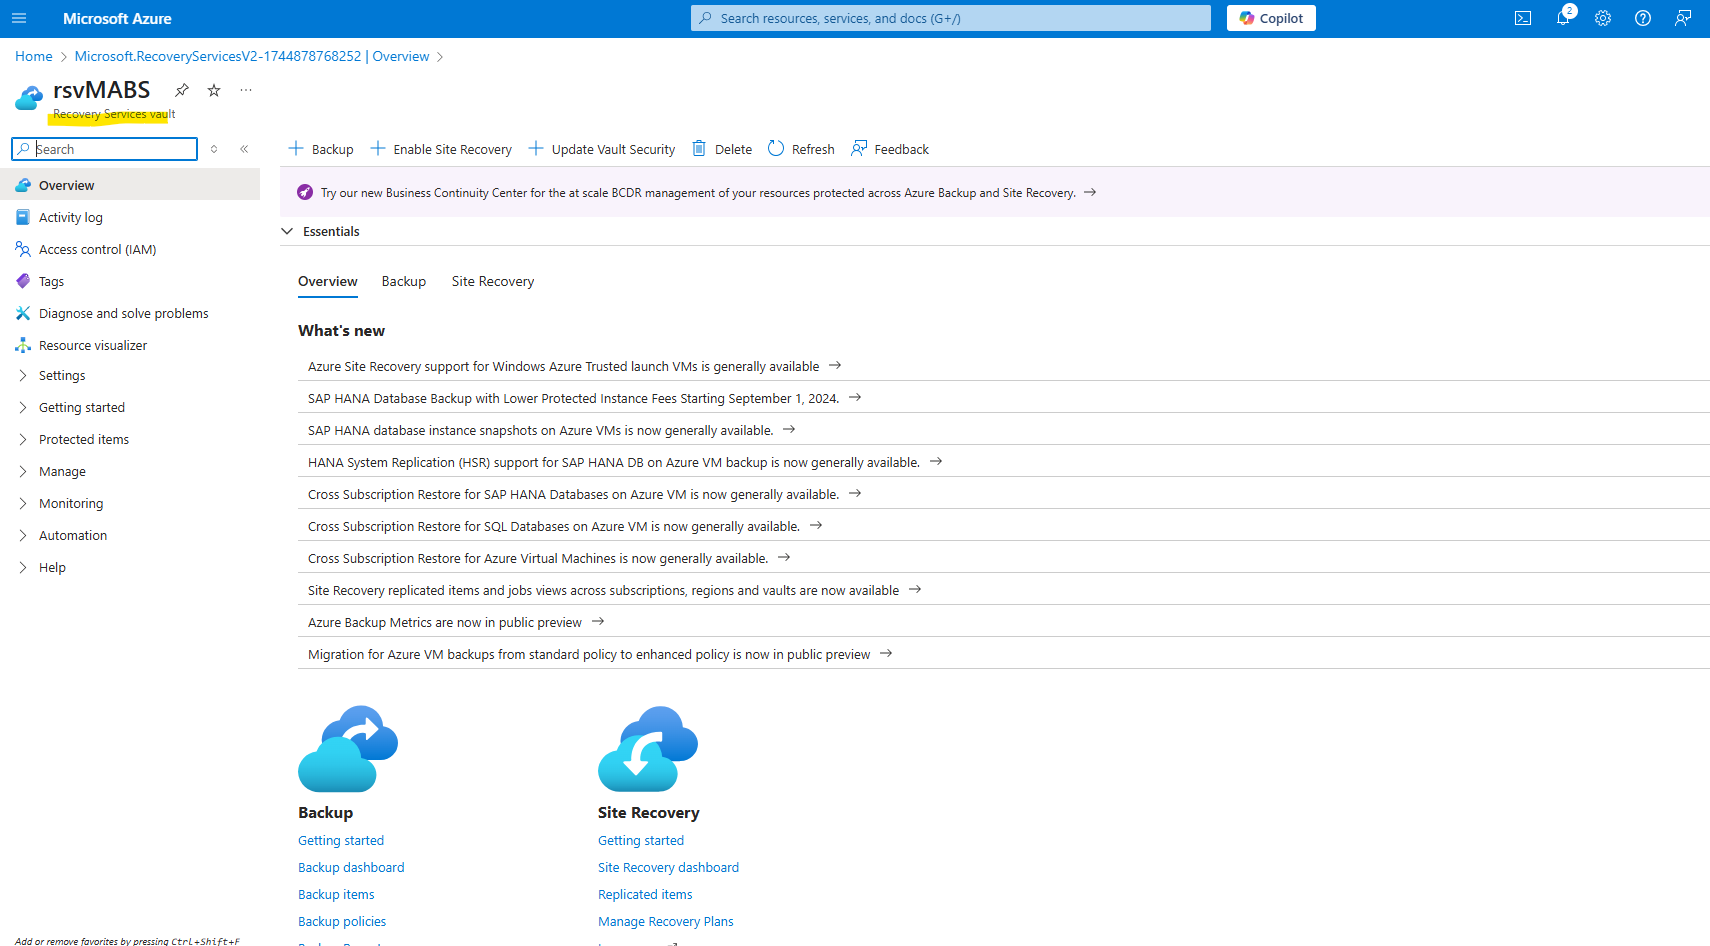
Create a Recovery Services vault
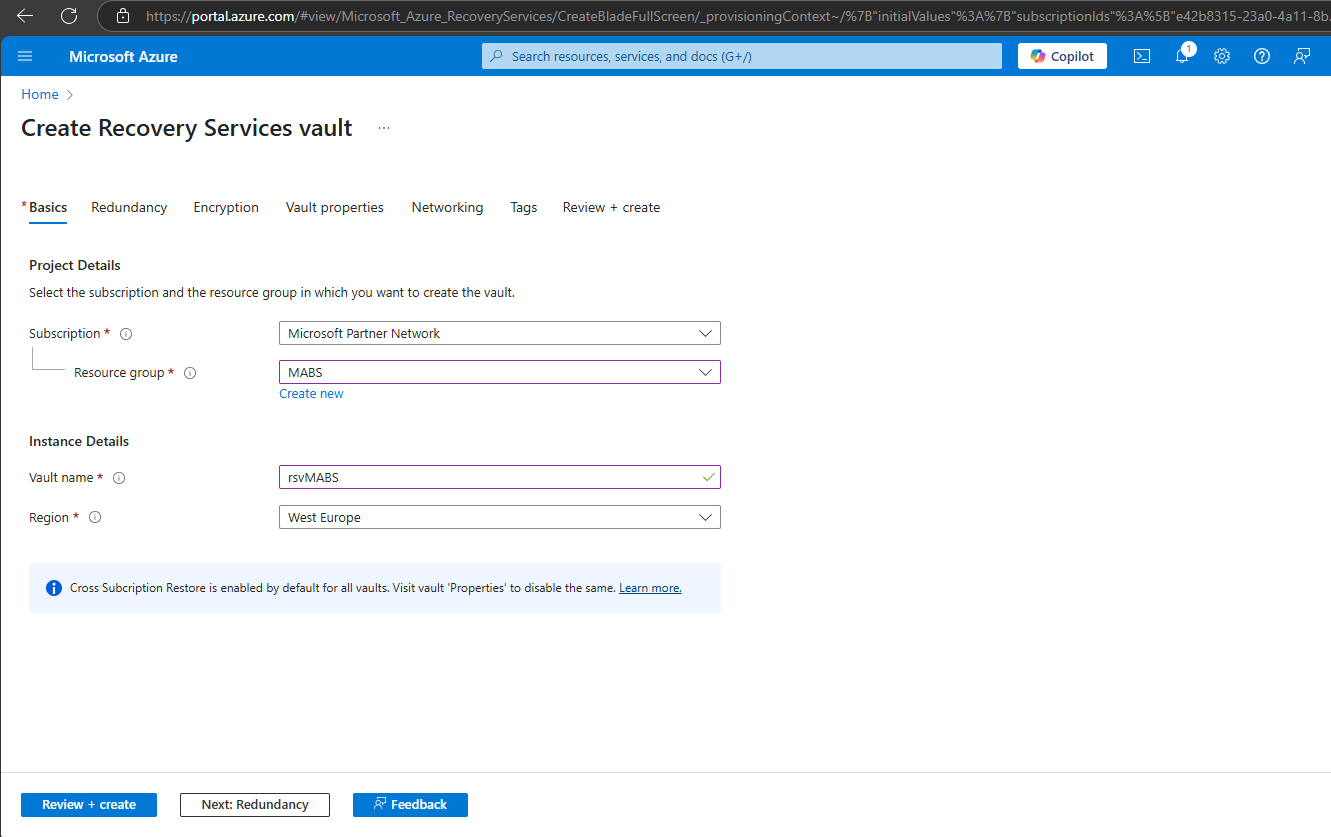
A Recovery Services vault is a management entity that stores recovery points that are created over time, and it provides an interface to perform backup-related operations. These operations include taking on-demand backups, performing restores, and creating backup policies.
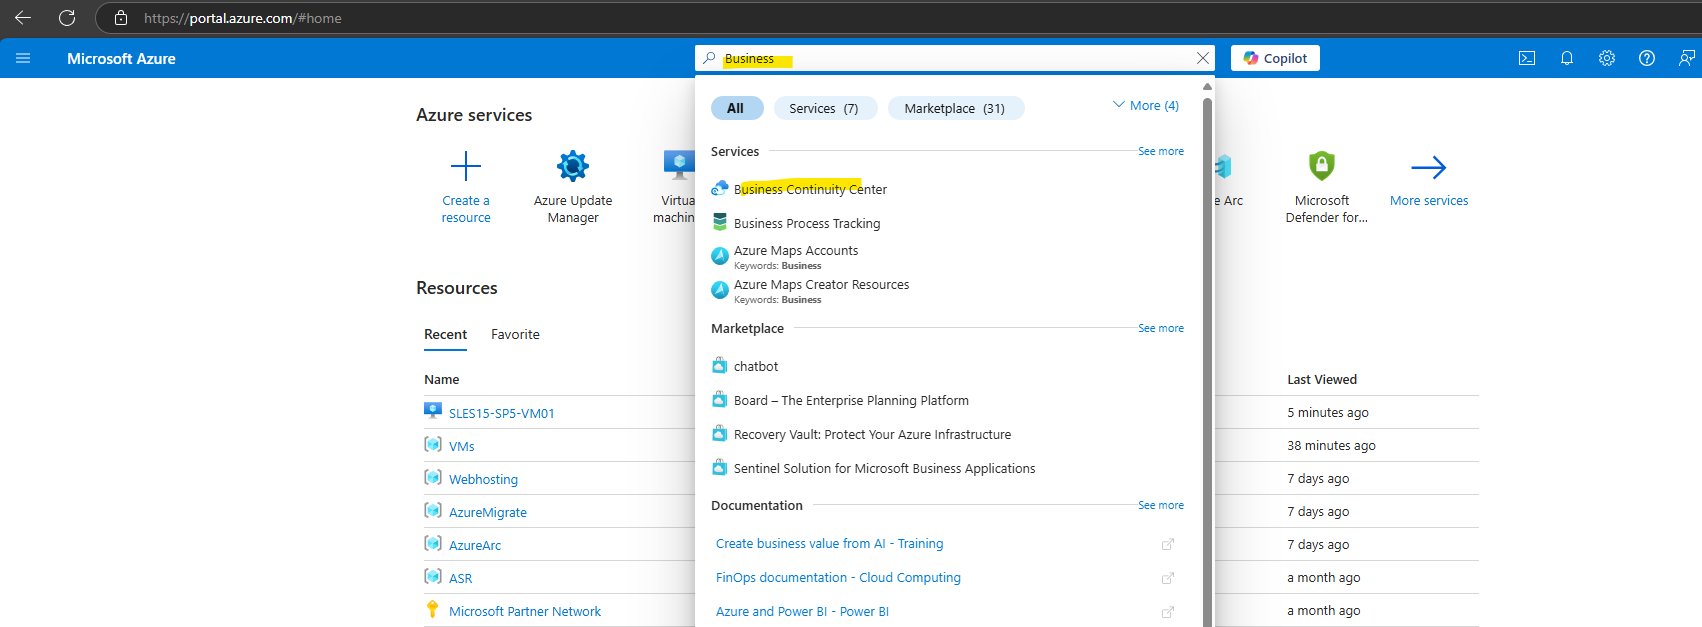
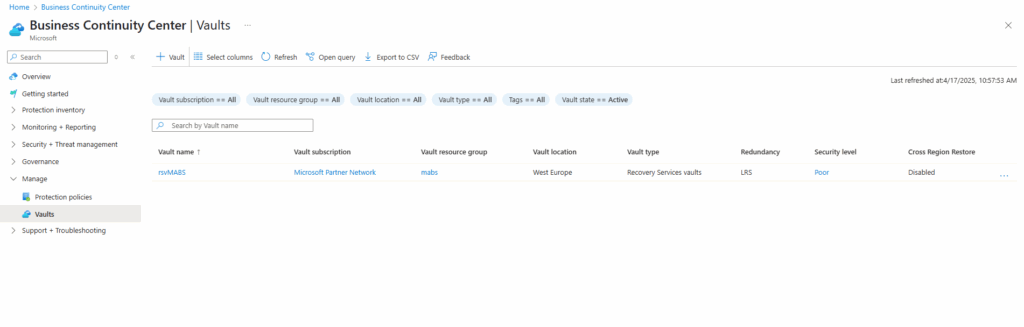
To create a Recovery Services vault sign in to the Azure Portal and search for the Business Continuity Center.
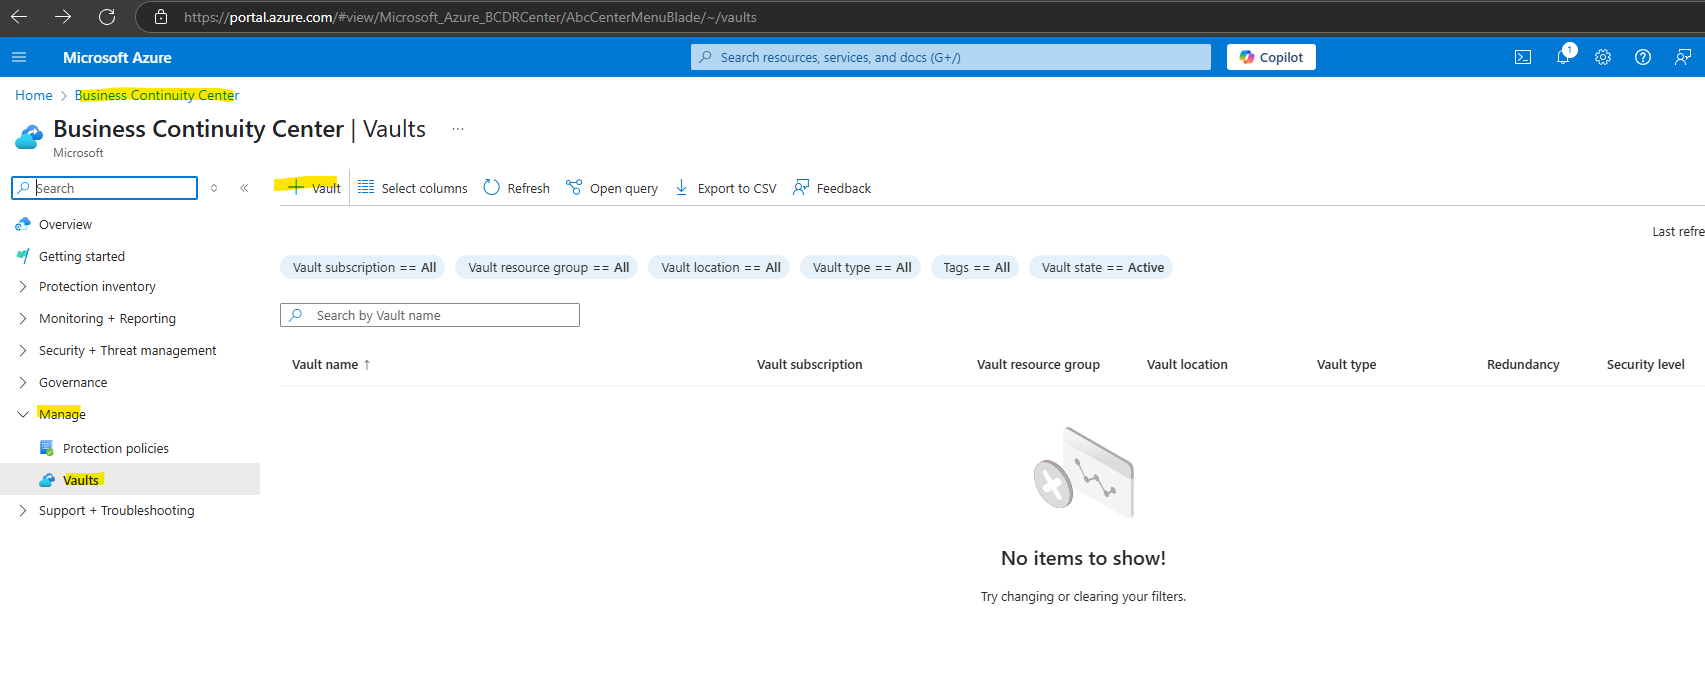
On the Manage -> Vault pane, select +Vault.
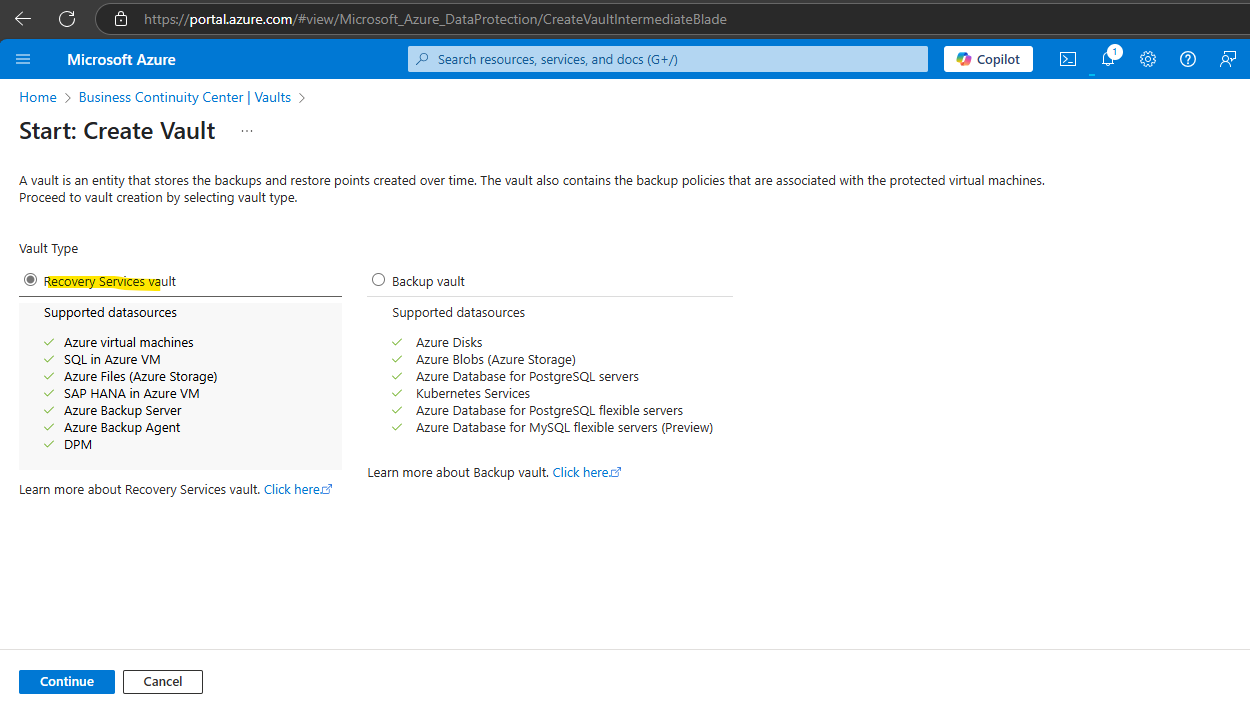
Select Recovery Services vault > Continue.

Software package
On the Recovery Services vault navigate to Getting started -> Backup.
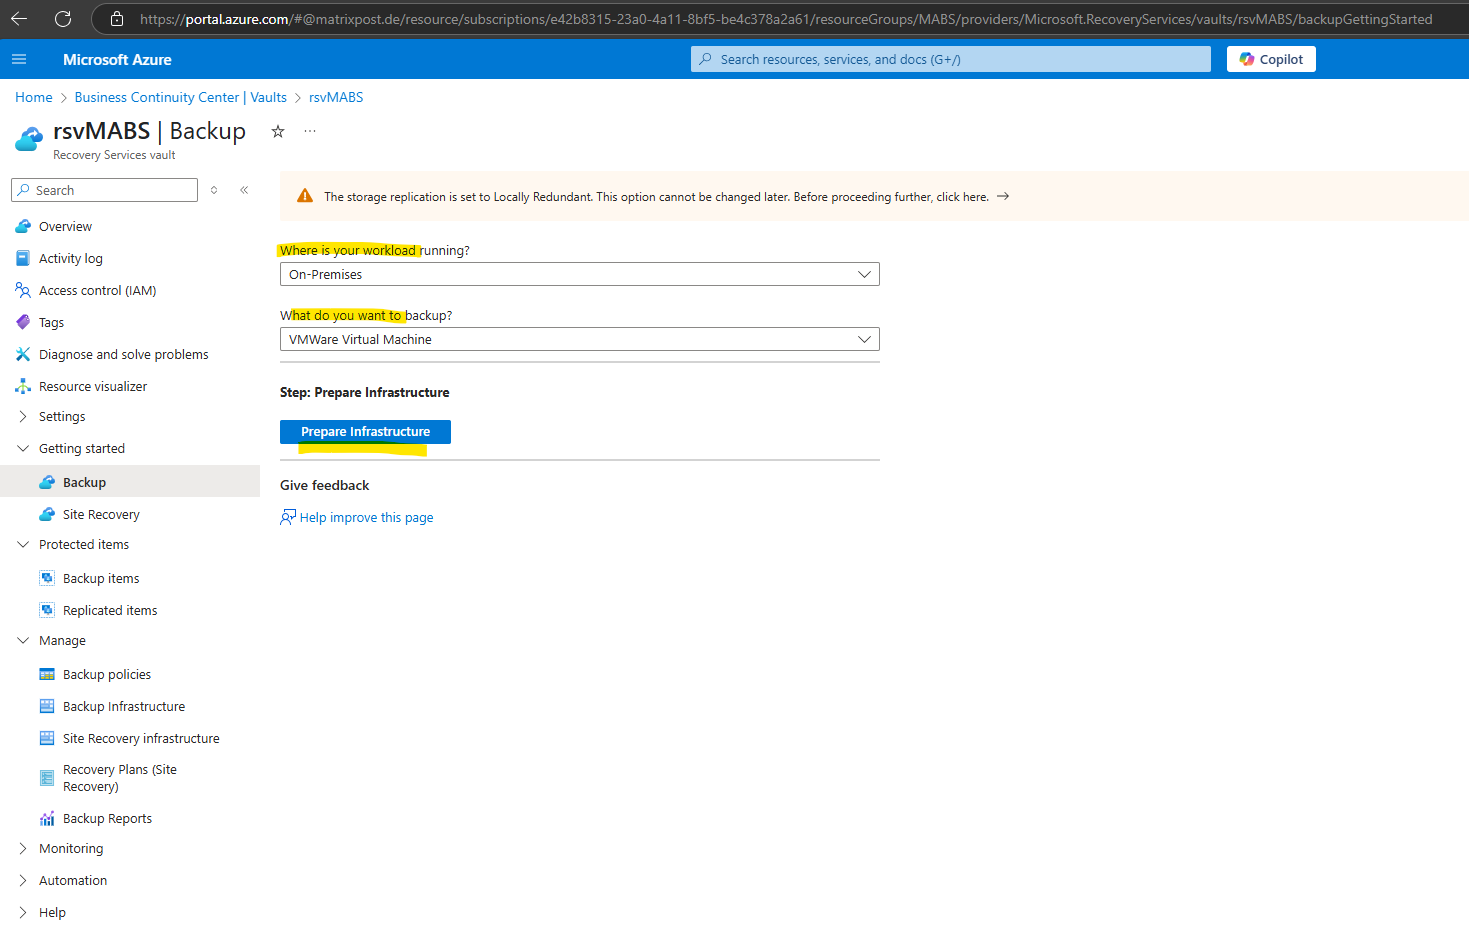
The links take you to the Download Center where the software package can be downloaded.
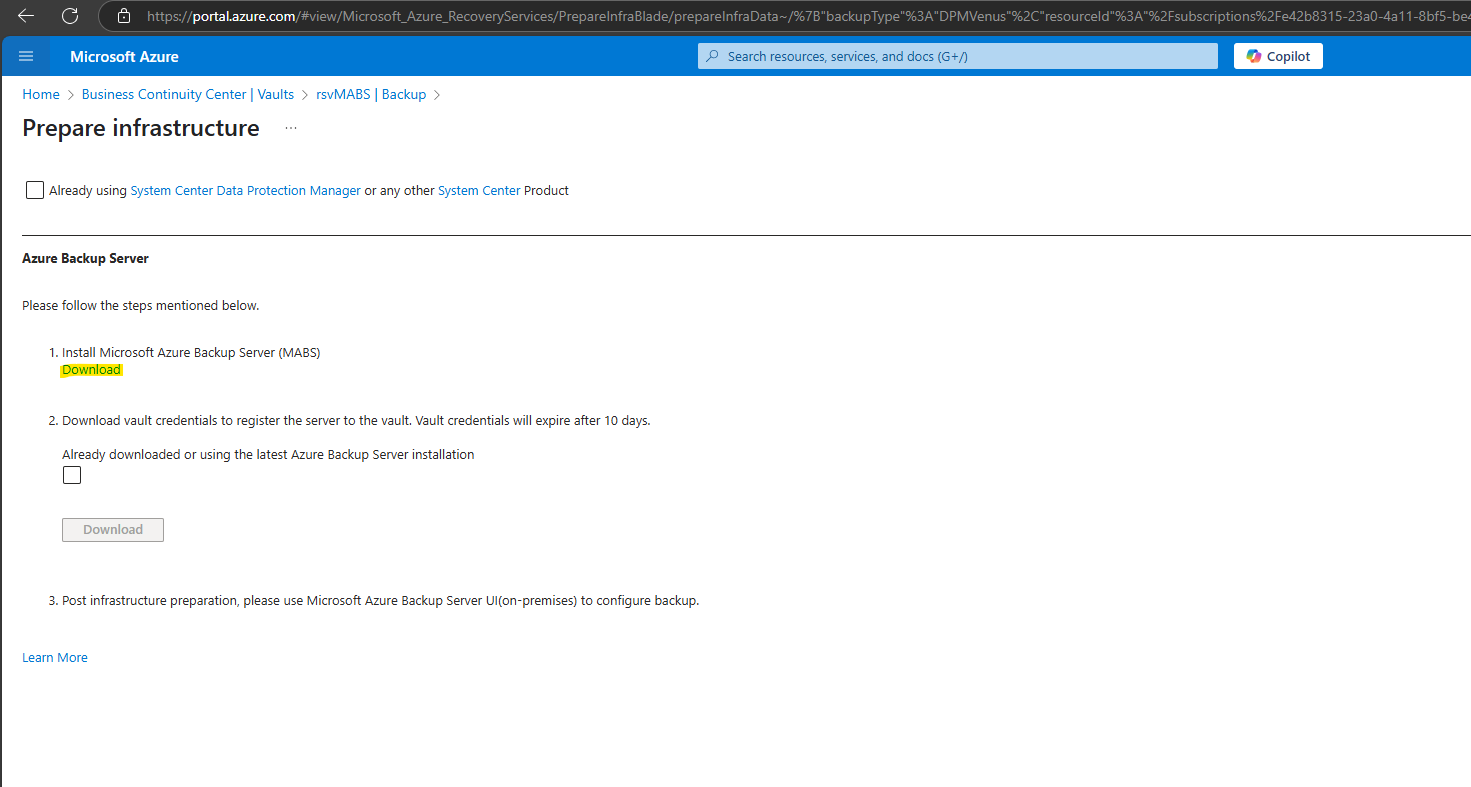

Select all the files and select Next. Download all the files coming in from the Microsoft Azure Backup download page, and place all the files in the same folder.
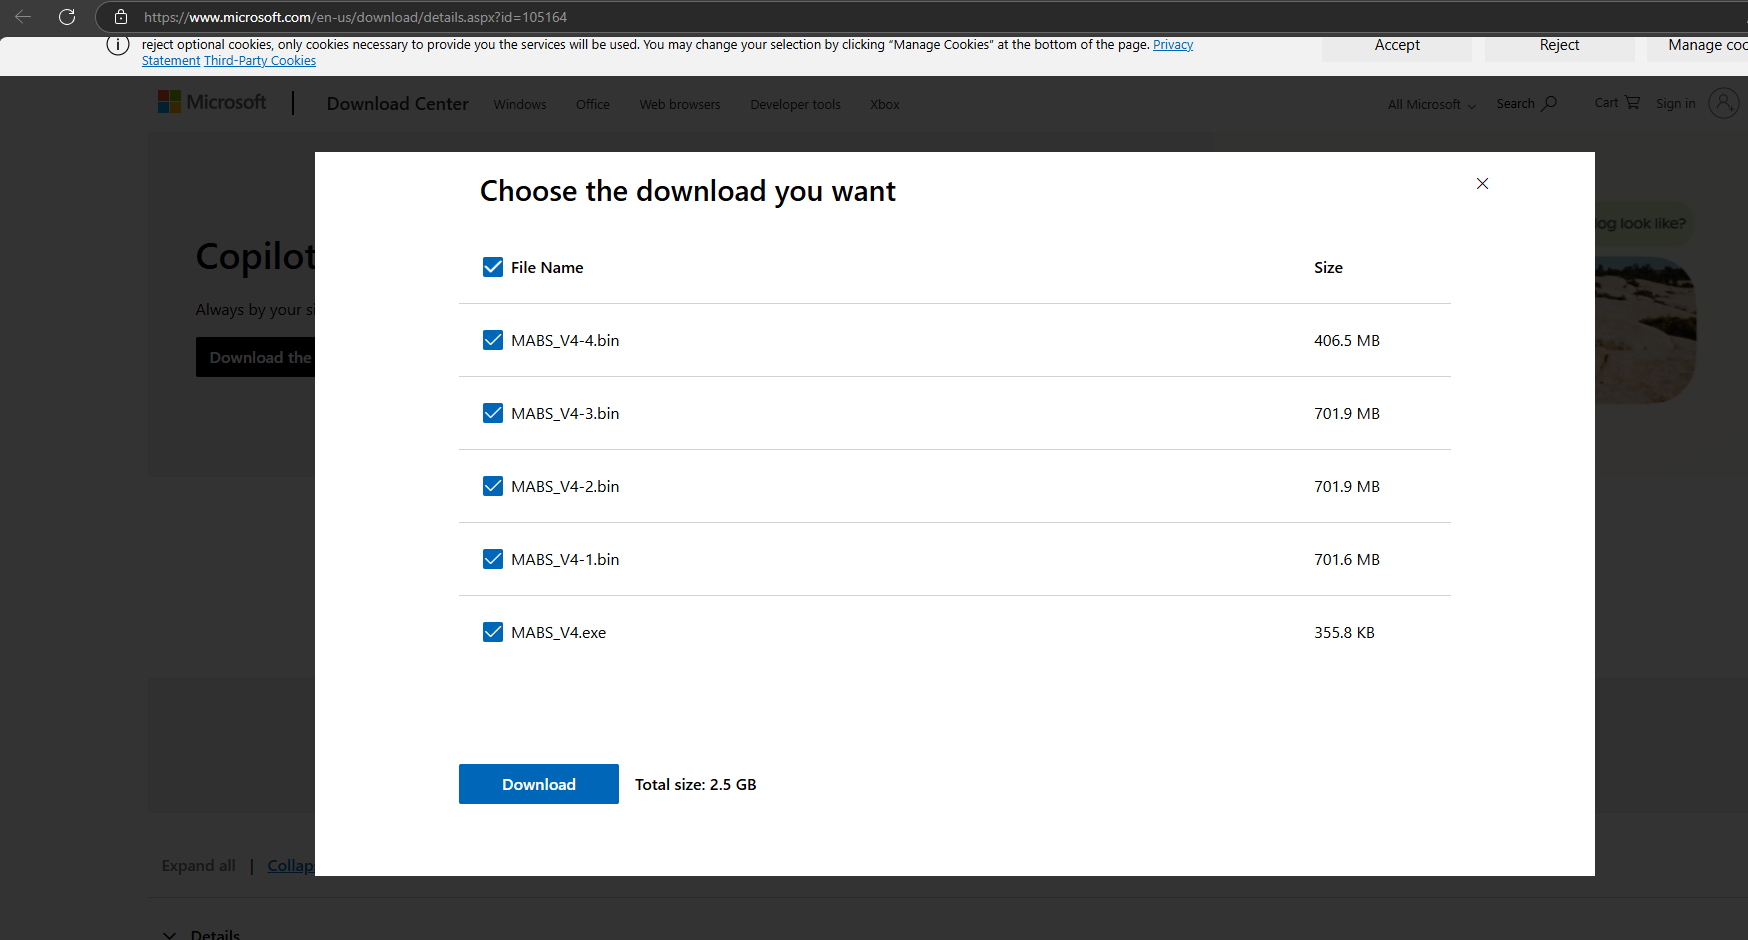
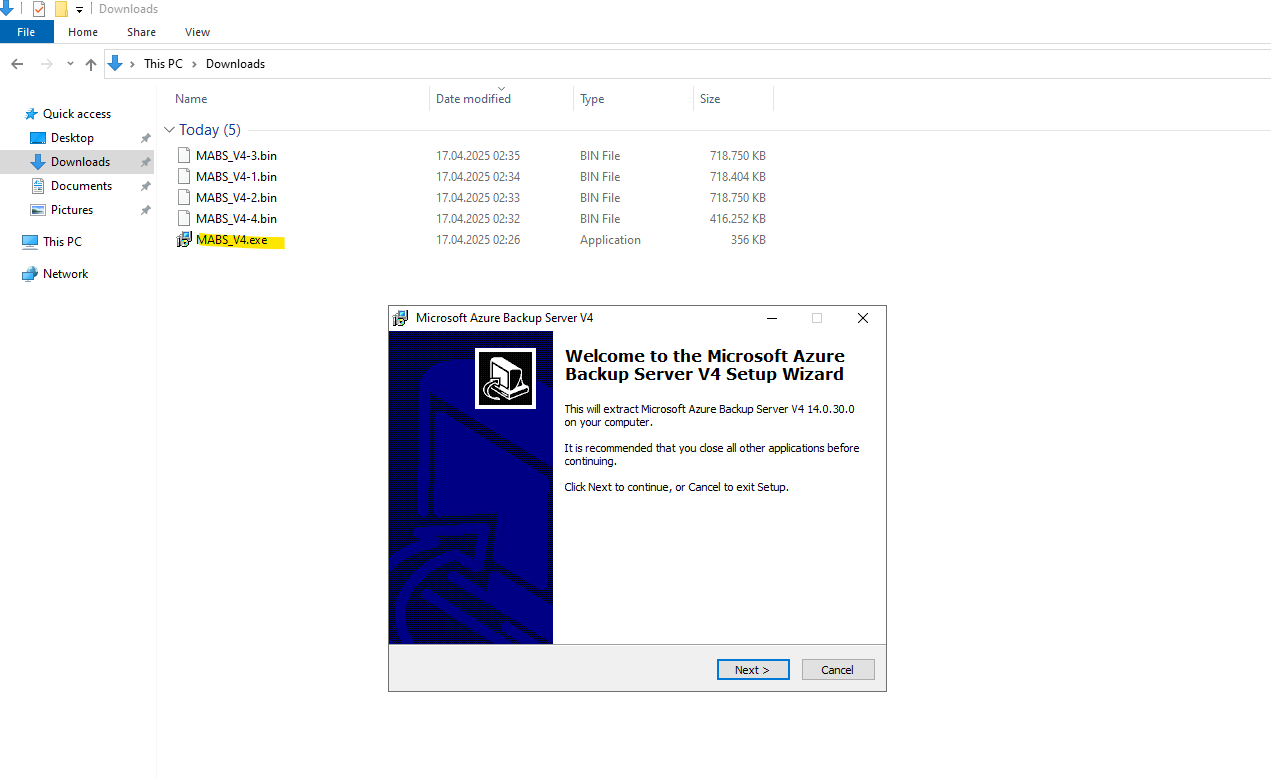
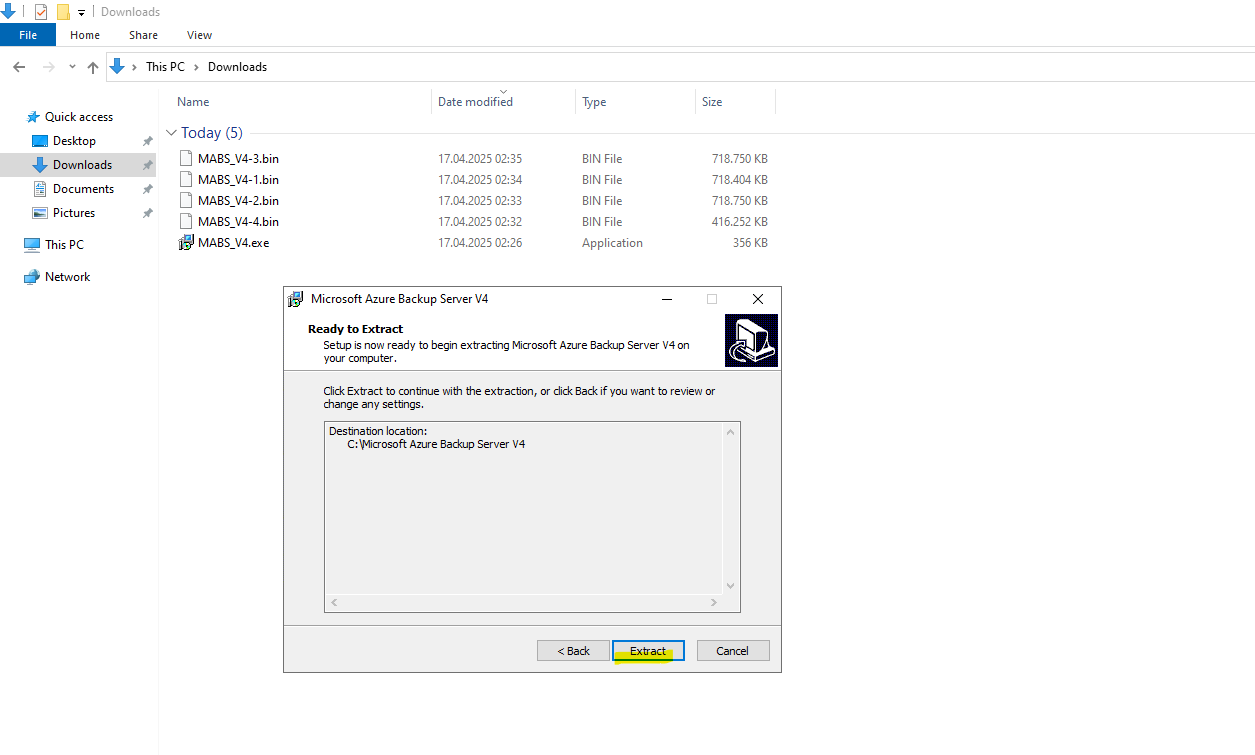
After you’ve downloaded all the files, select MicrosoftAzureBackupInstaller.exe (MABS_V4.exe). This will start the Microsoft Azure Backup Setup Wizard to extract the setup files to a location specified by you. Continue through the wizard and select the Extract button to begin the extraction process.
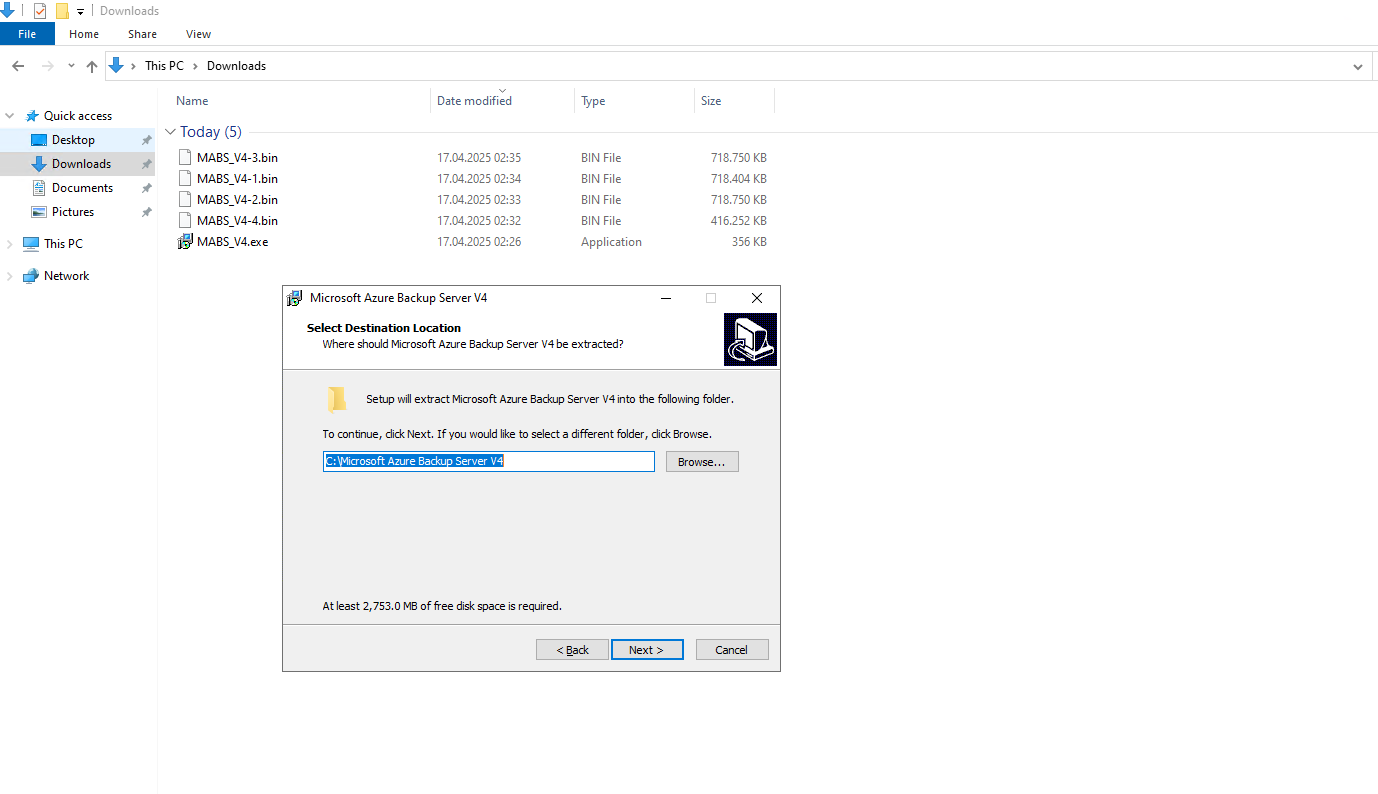
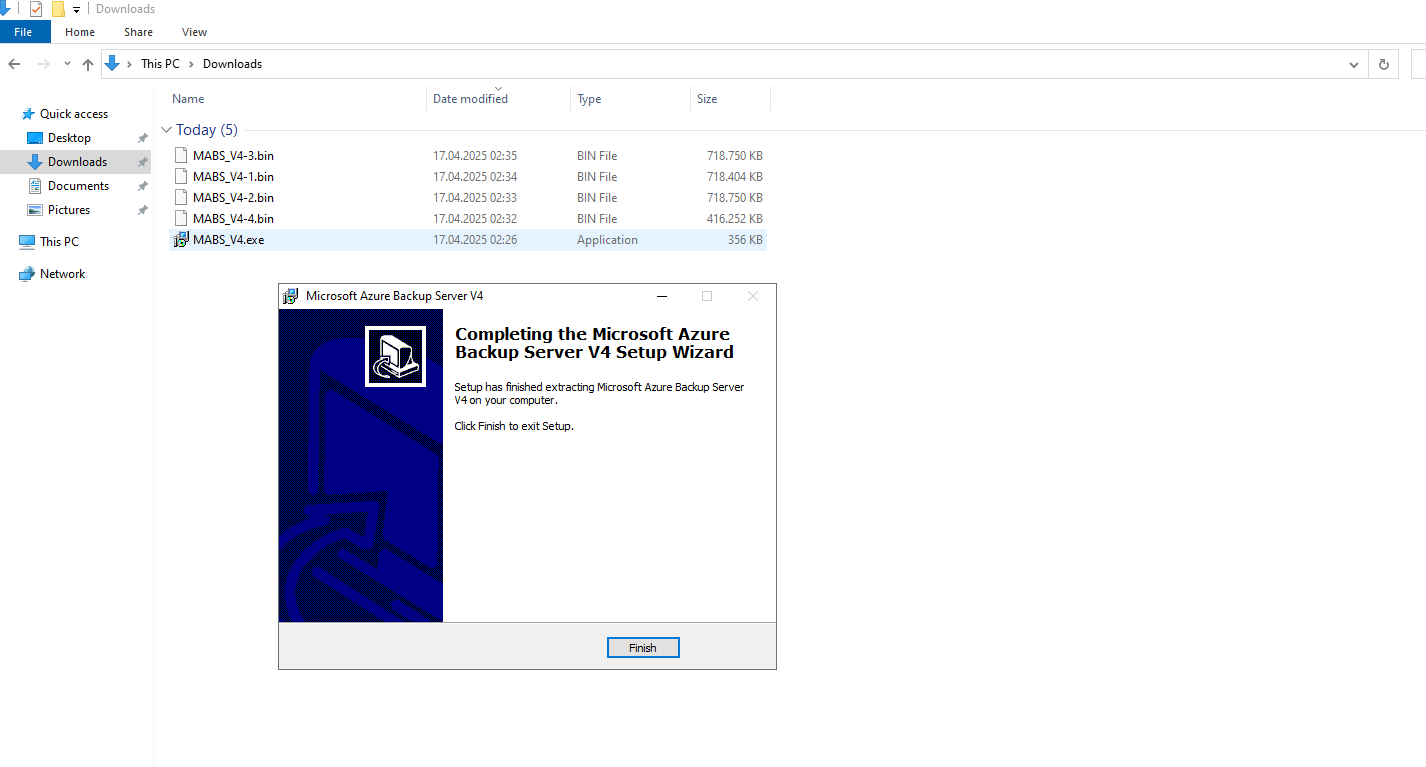
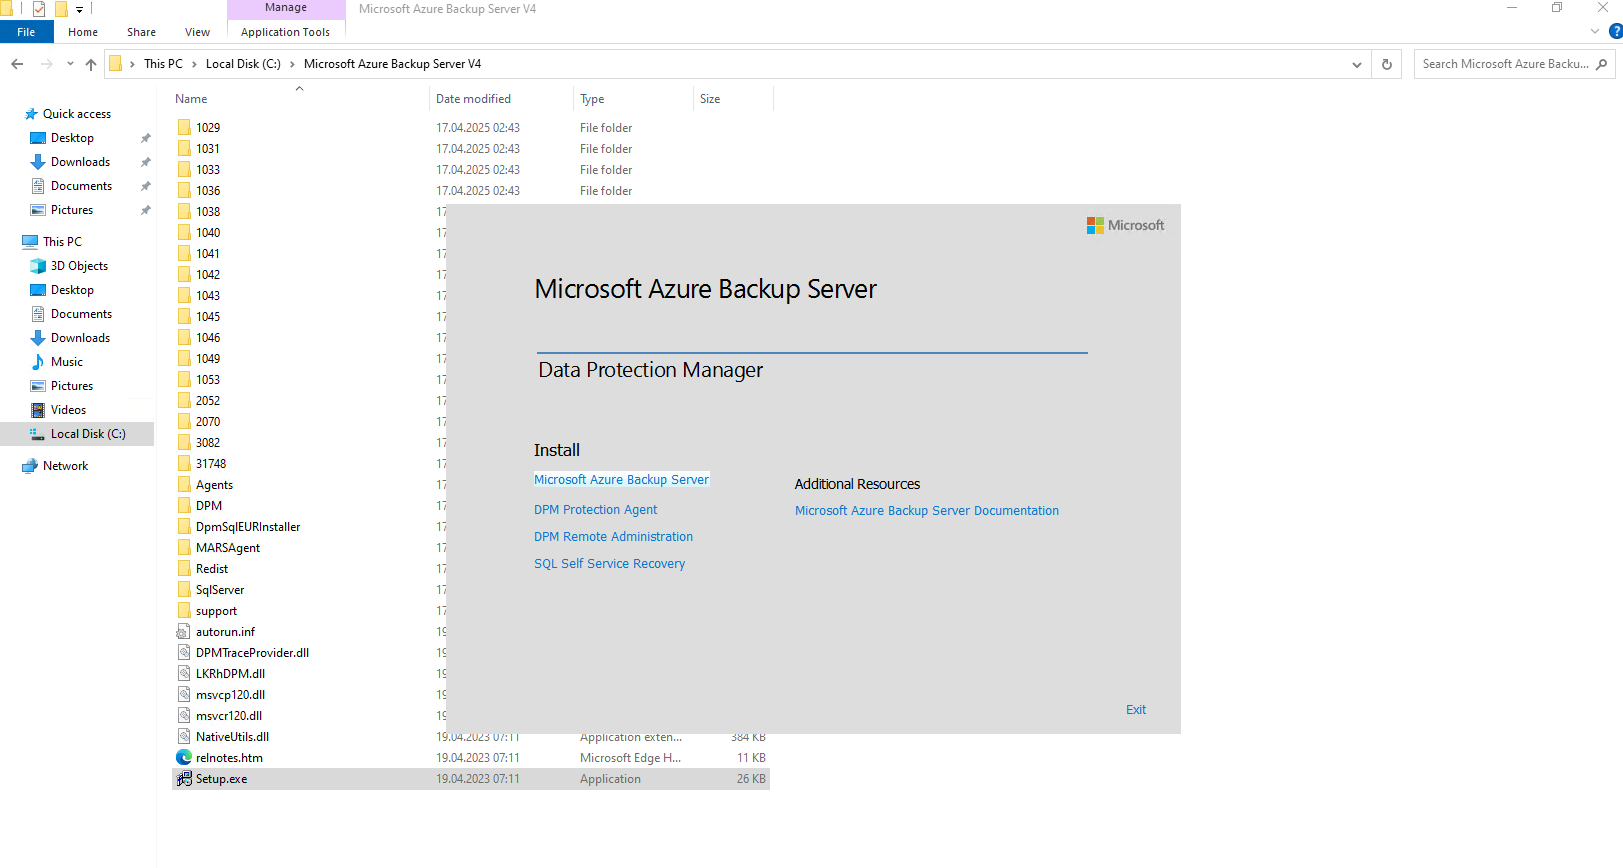
Once the extraction process completes, to begin installing Microsoft Azure Backup Server navigate to the path C:\Microsoft Azure Backup Server V4 and click on Setup.exe.
Select Install -> Microsoft Azure Backup Server.
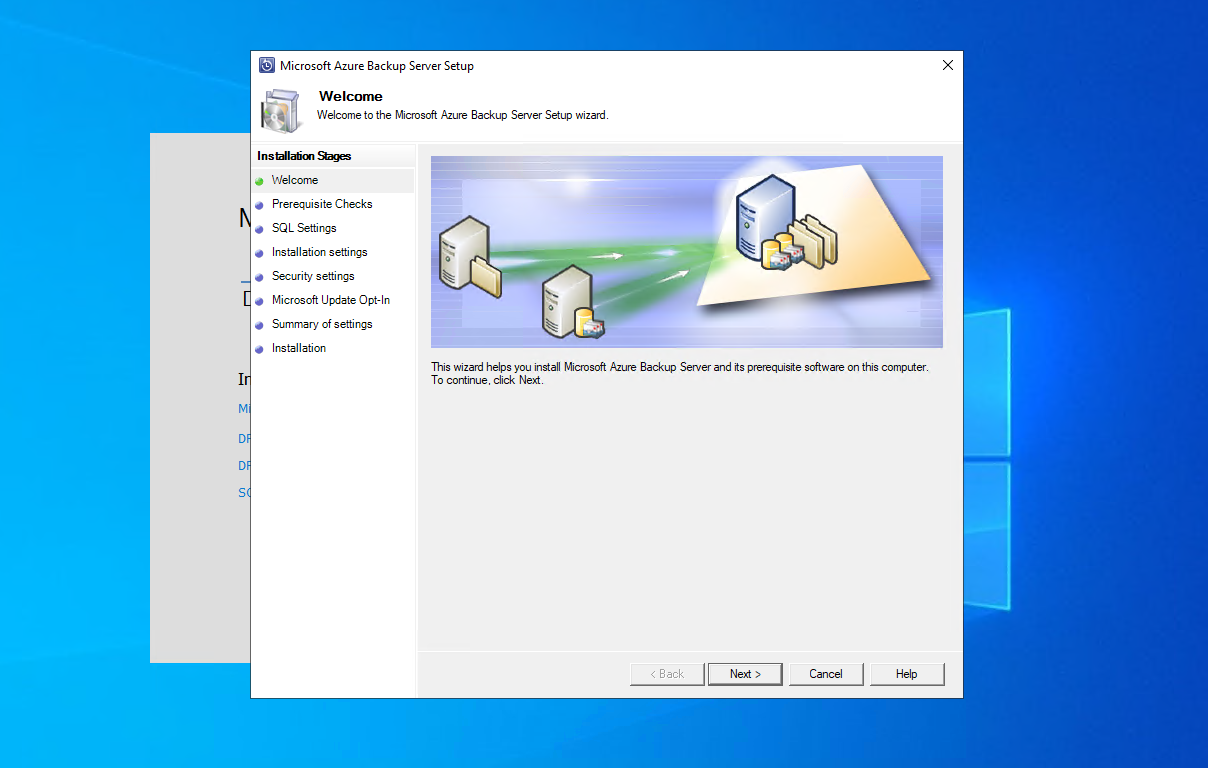
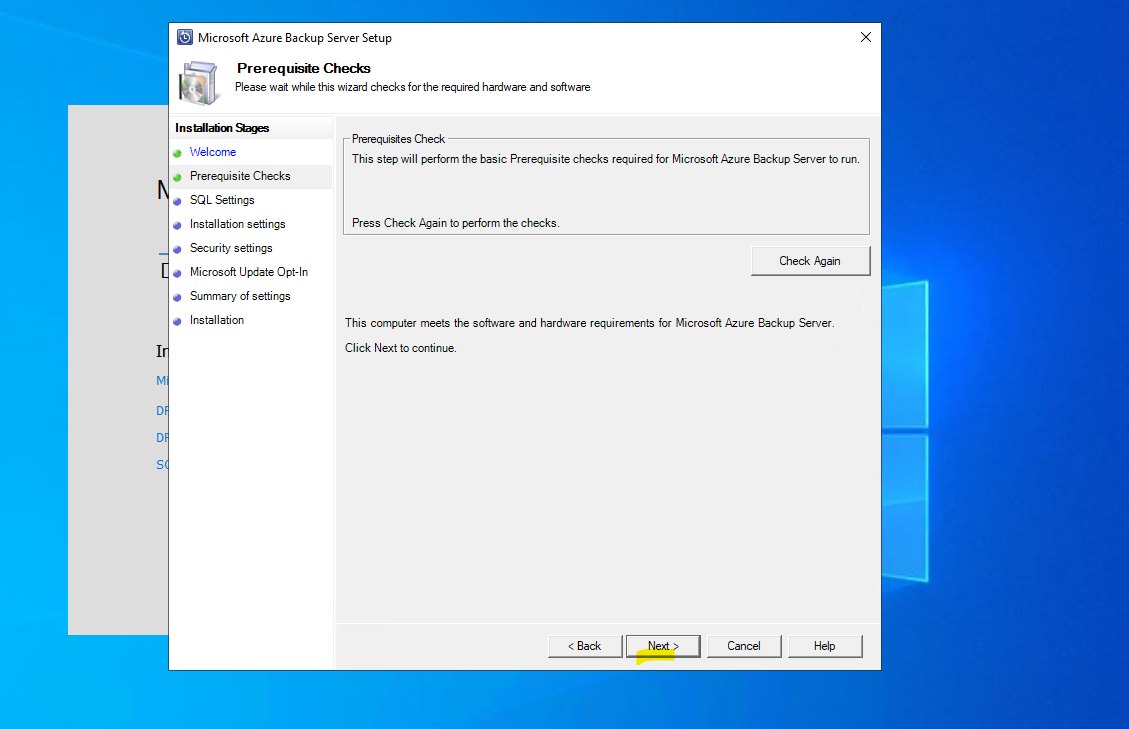
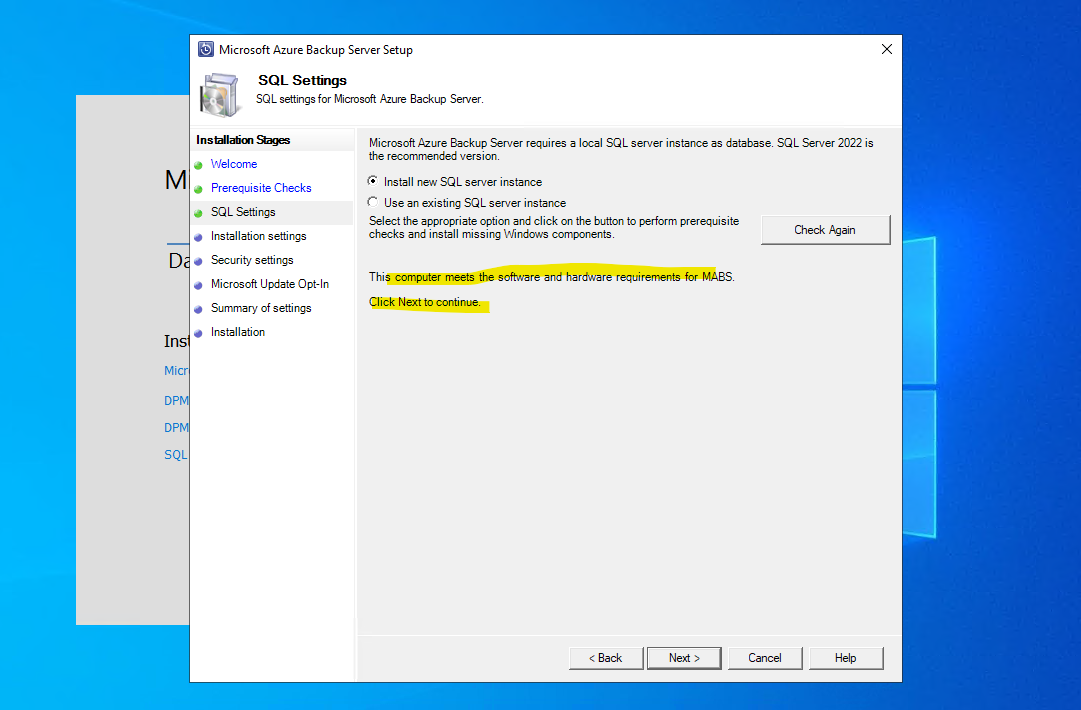
This takes you to the Prerequisite Checks section. On this screen, select Check to determine if the hardware and software prerequisites for Azure Backup Server have been met. If all prerequisites are met successfully, you’ll see a message indicating that the machine meets the requirements. Select the Next button.
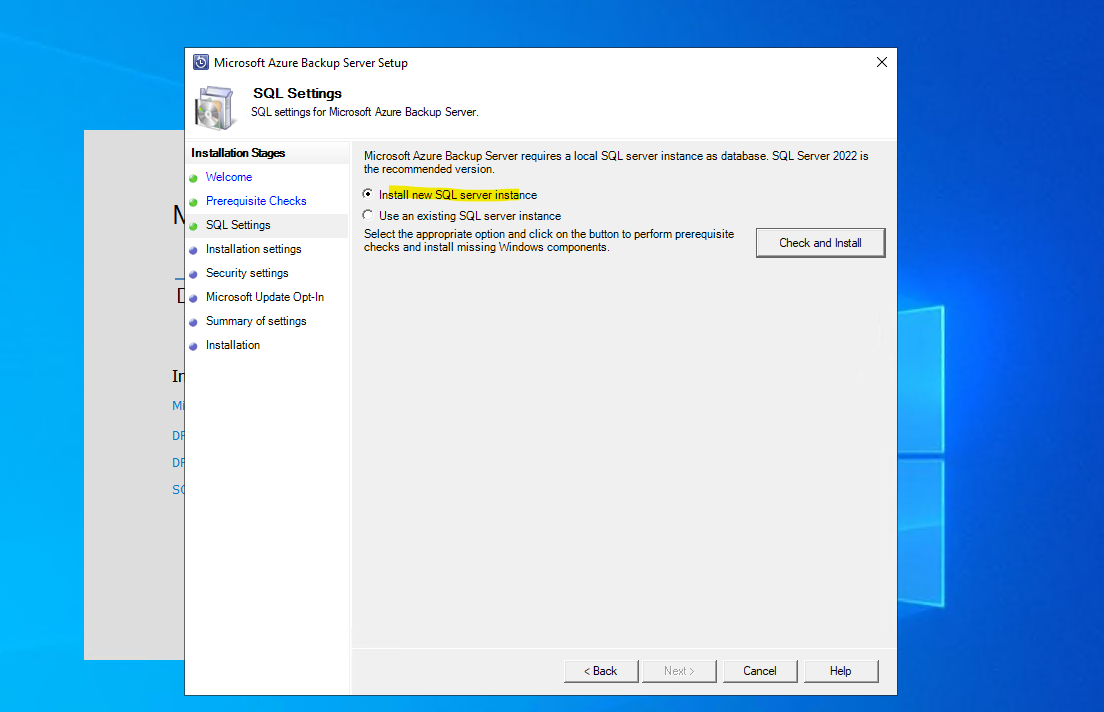
The Azure Backup Server installation package comes bundled with the appropriate SQL Server binaries needed. When starting a new Azure Backup Server installation, pick the option Install new Instance of SQL Server with this Setup and select the Check and Install button. Once the prerequisites are successfully installed, select Next.
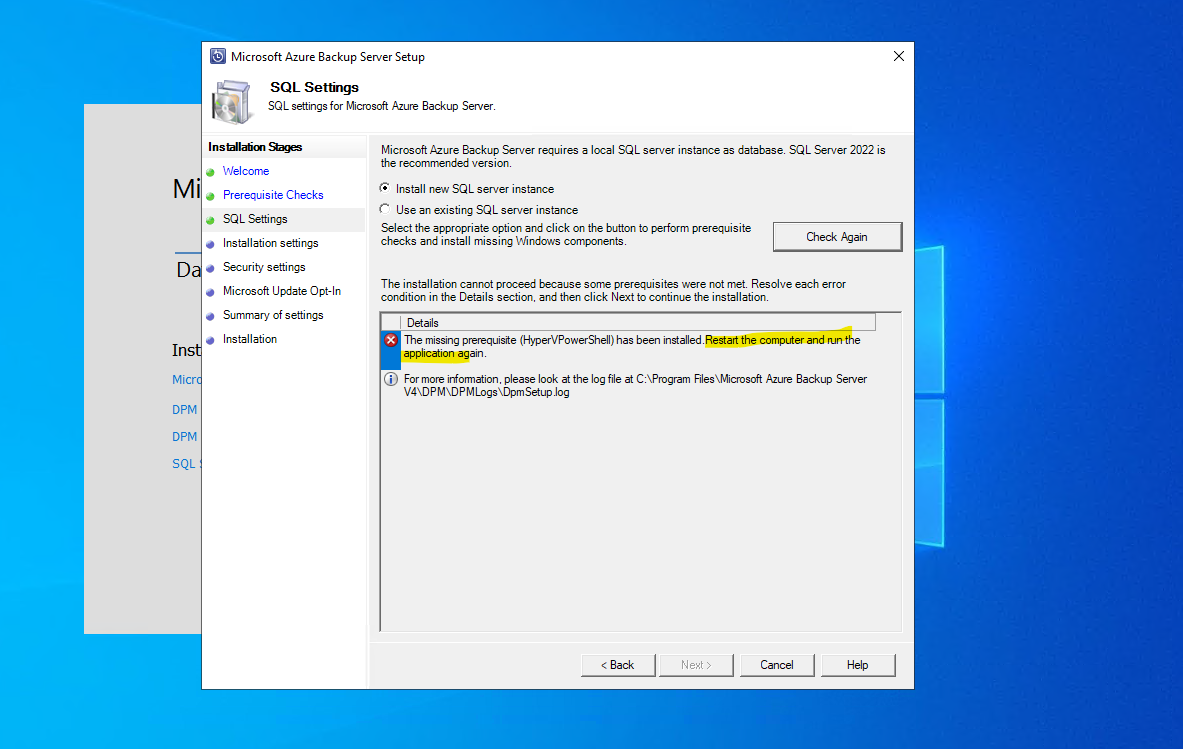
As shown below, next we first need to restart the computer to finish the installation of the Hyper-V PowerShell. Then we need to run the installer again.
After a reboot we can now install the new SQL server instance, so click on Next.
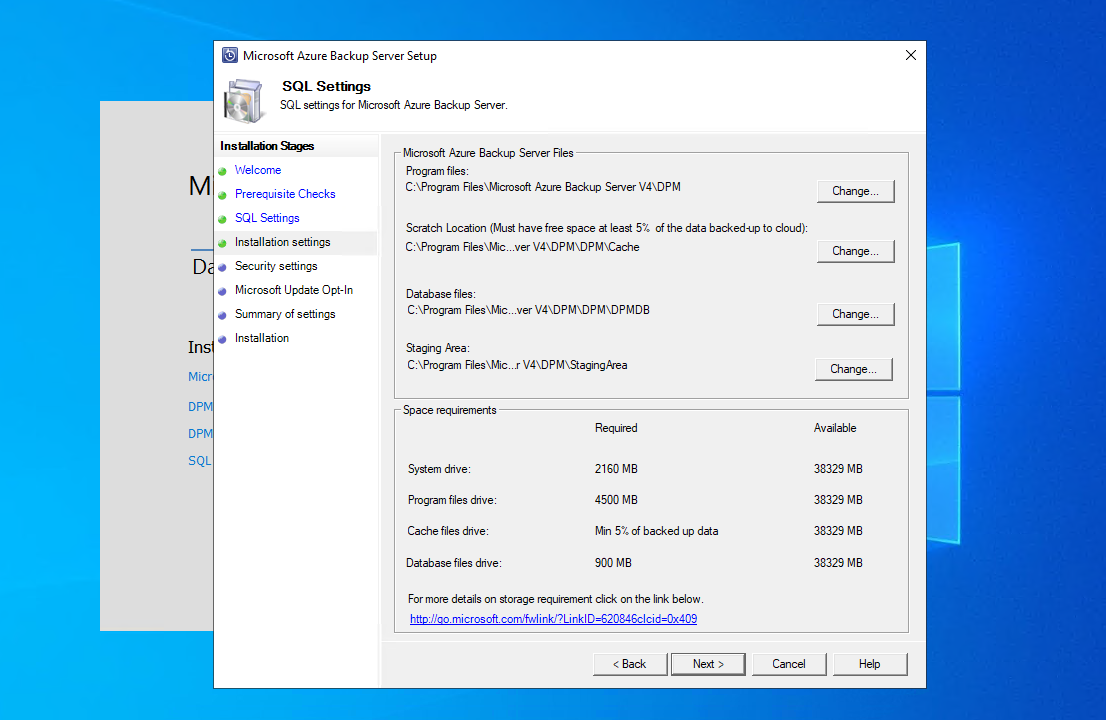
Provide a location for the installation of Microsoft Azure Backup server files and select Next.
The scratch location is a requirement for back up to Azure. Ensure the scratch location is at least 5% of the data planned to be backed up to the cloud. For disk protection, separate disks need to be configured once the installation completes. For more information about storage pools, see Prepare data storage.
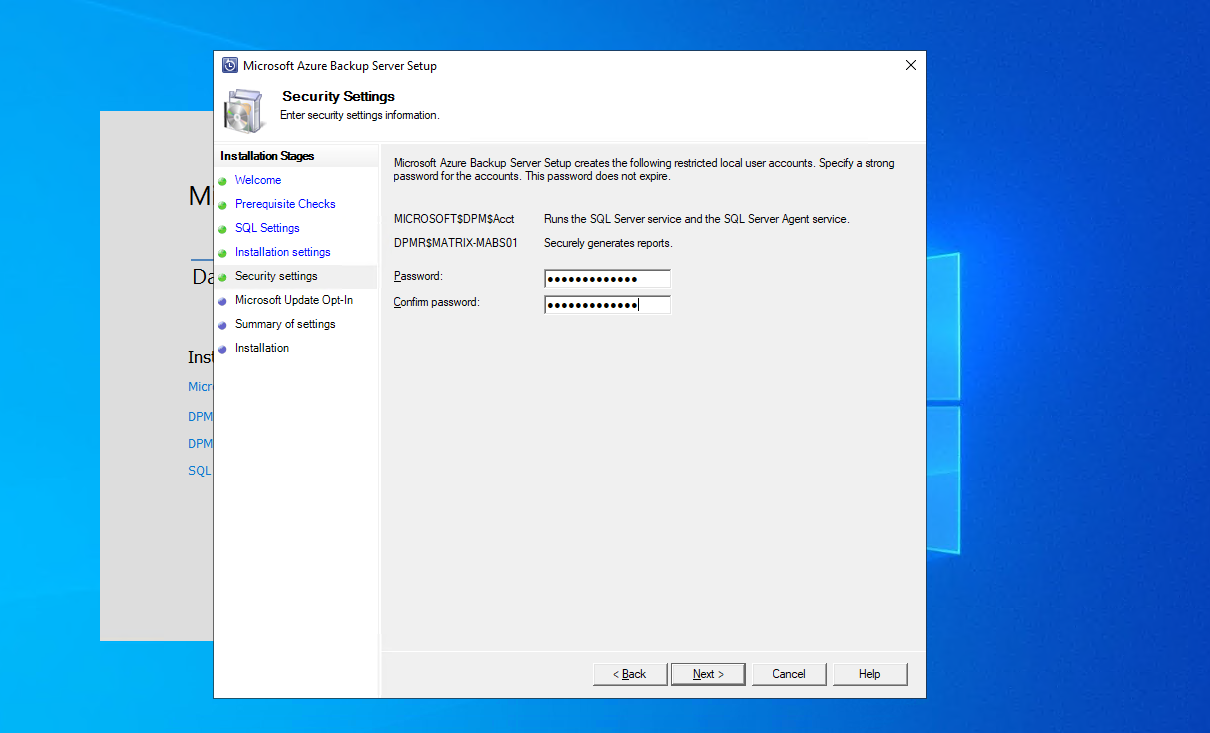
Provide a strong password for restricted local user accounts and select Next.
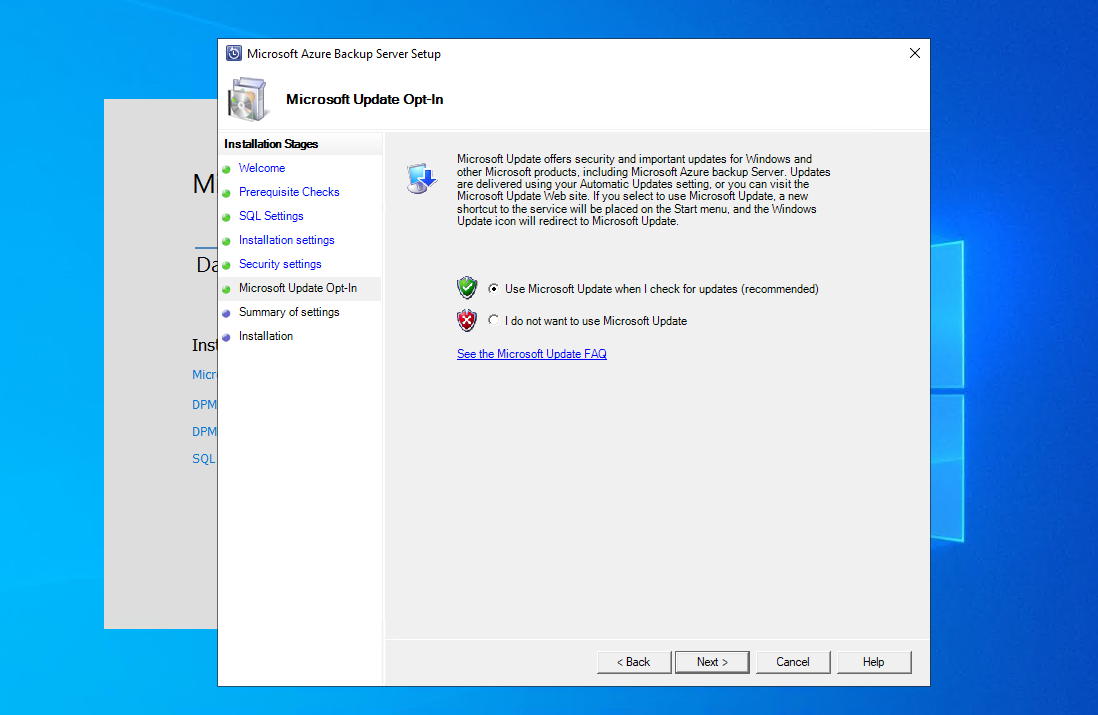
Select whether you want to use Microsoft Update to check for updates and select Next.
Microsoft recommends having Windows Update redirect to Microsoft Update, which offers security and important updates for Windows and other products like Microsoft Azure Backup Server.
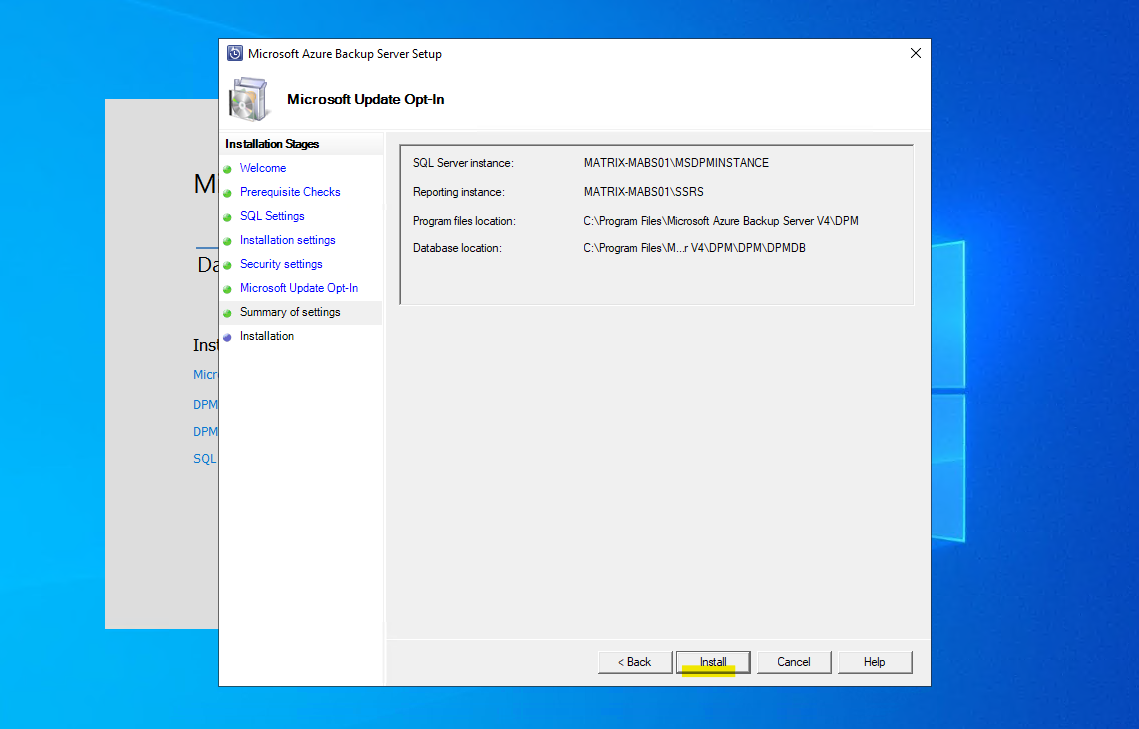
Review the Summary of Settings and select Install.
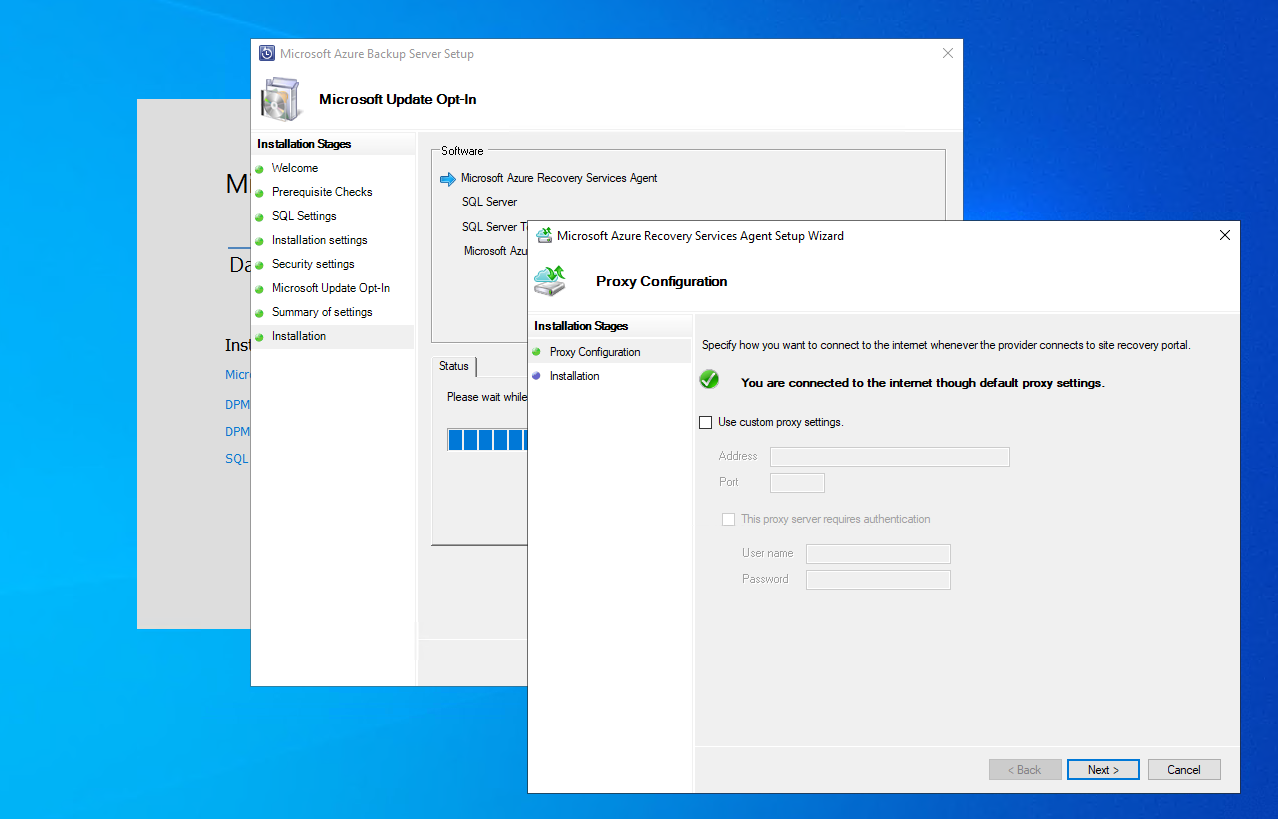
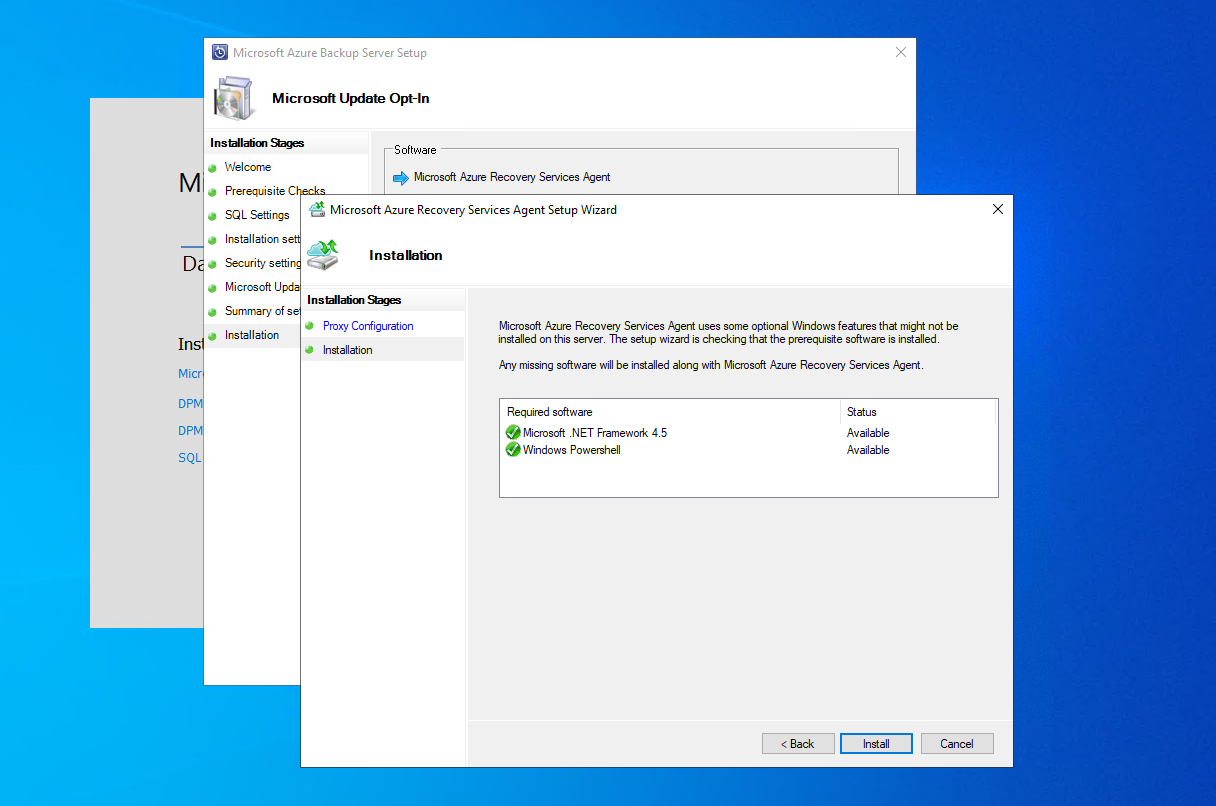
The installation happens in phases. In the first phase, the Microsoft Azure Recovery Services Agent is installed on the server. The wizard also checks for Internet connectivity. If Internet connectivity is available, you can continue with the installation. If not, you need to provide proxy details to connect to the Internet.
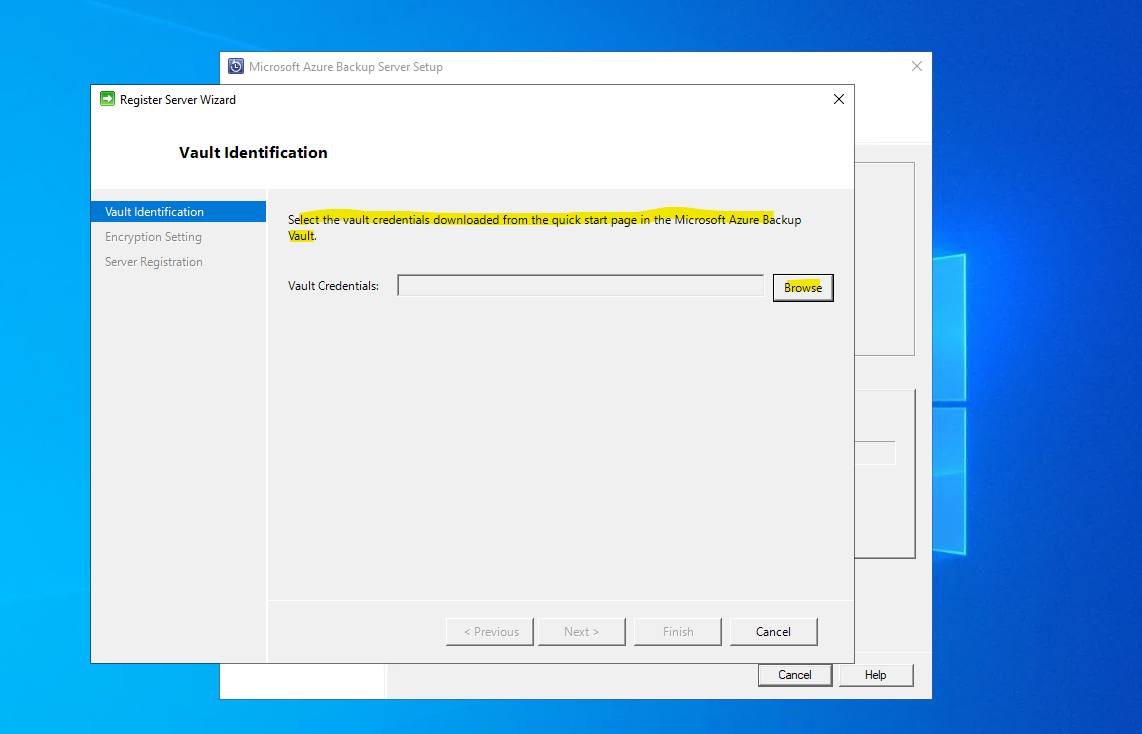
The next step is to configure the Microsoft Azure Recovery Services Agent. As a part of the configuration, you’ll have to provide your vault credentials to register the machine to the Recovery Services vault.
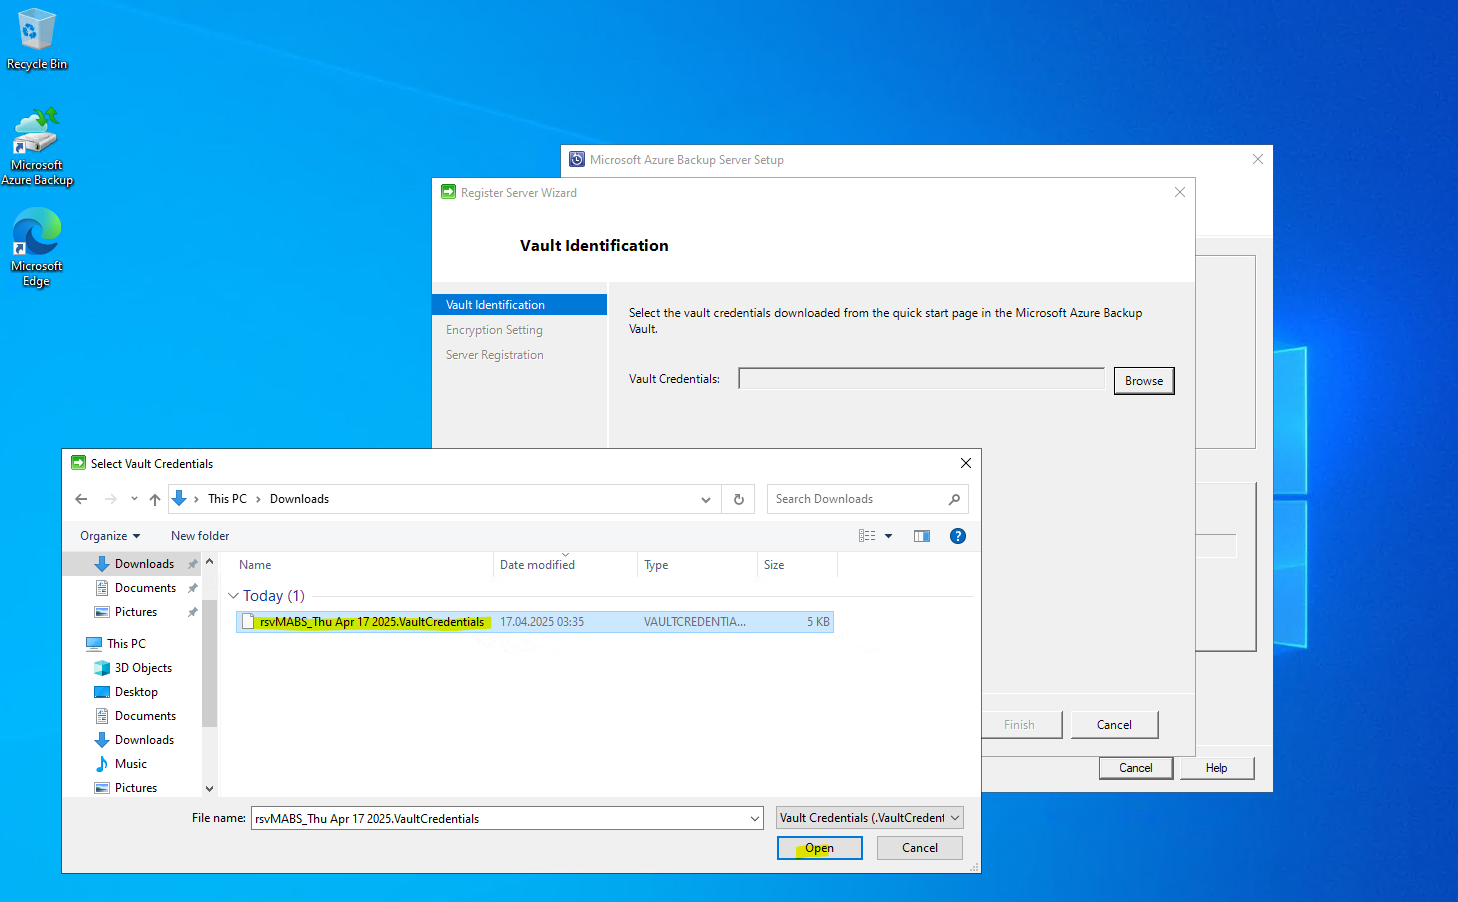
So now we need to go back to the Azure portal where we previously downloaded the Microsoft Azure Backup Server installation files.
Click on Download.

Open the downloaded credentials file and click on Next.
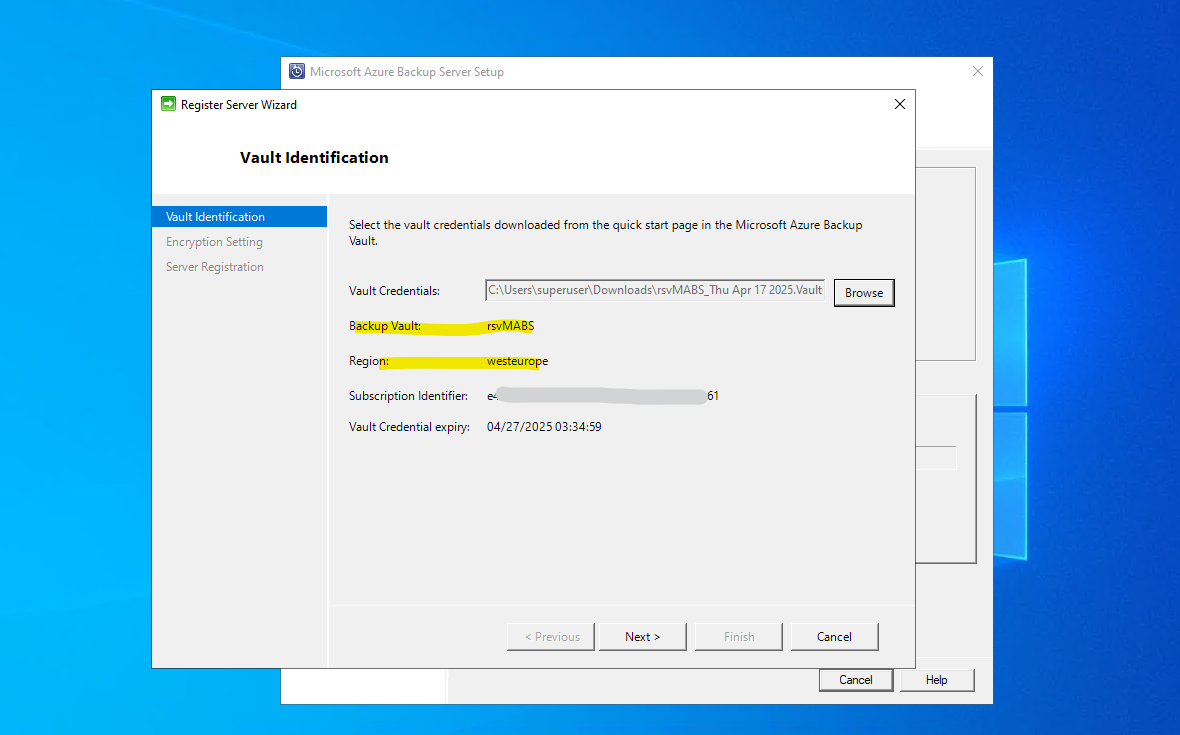
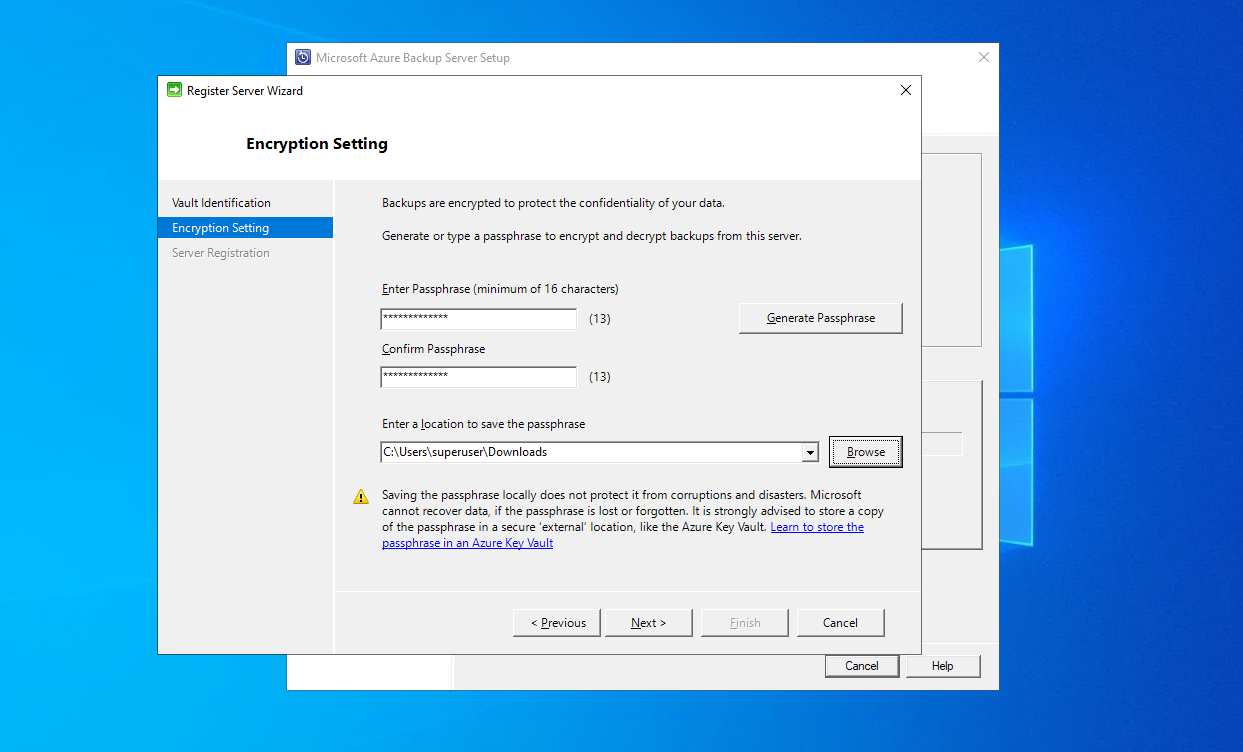
You’ll also provide a passphrase to encrypt/decrypt the data sent between Azure and your premises. You can automatically generate a passphrase or provide your own minimum 16-character passphrase. Continue with the wizard until the agent has been configured.
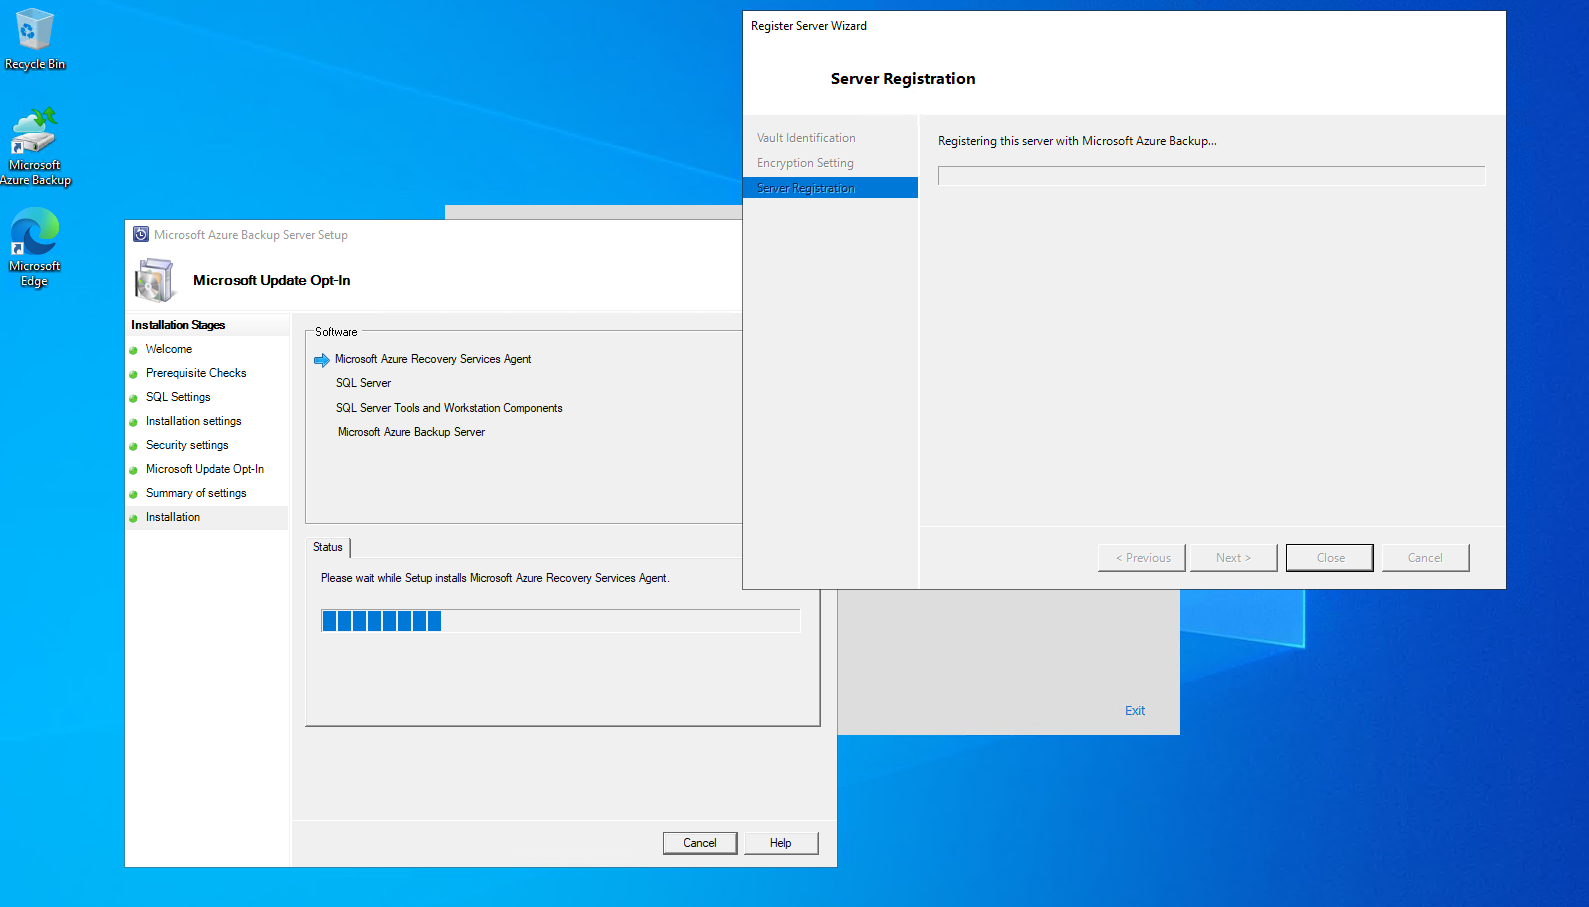
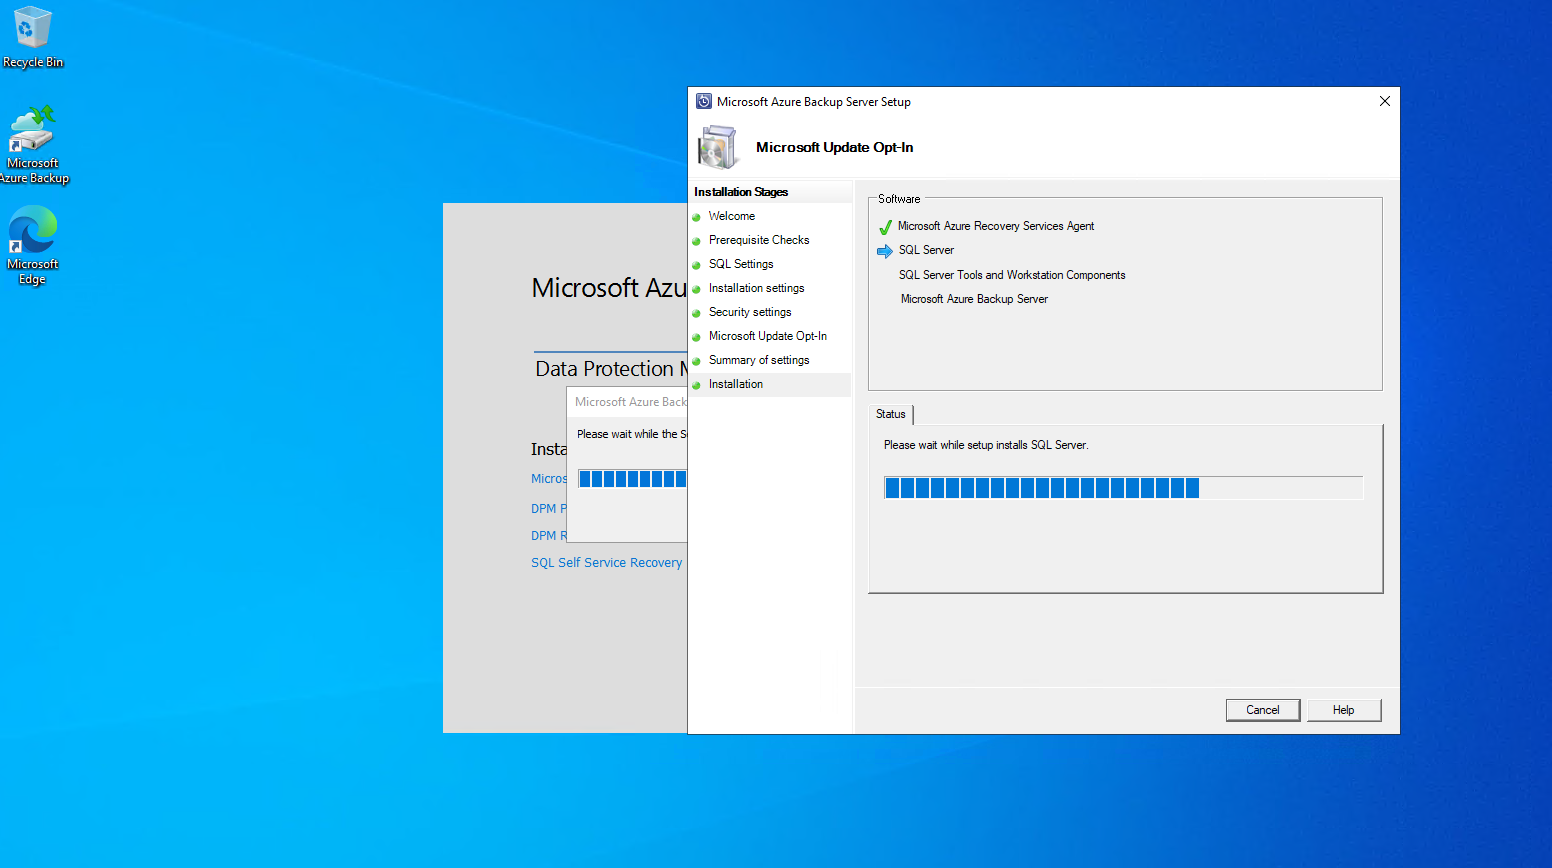
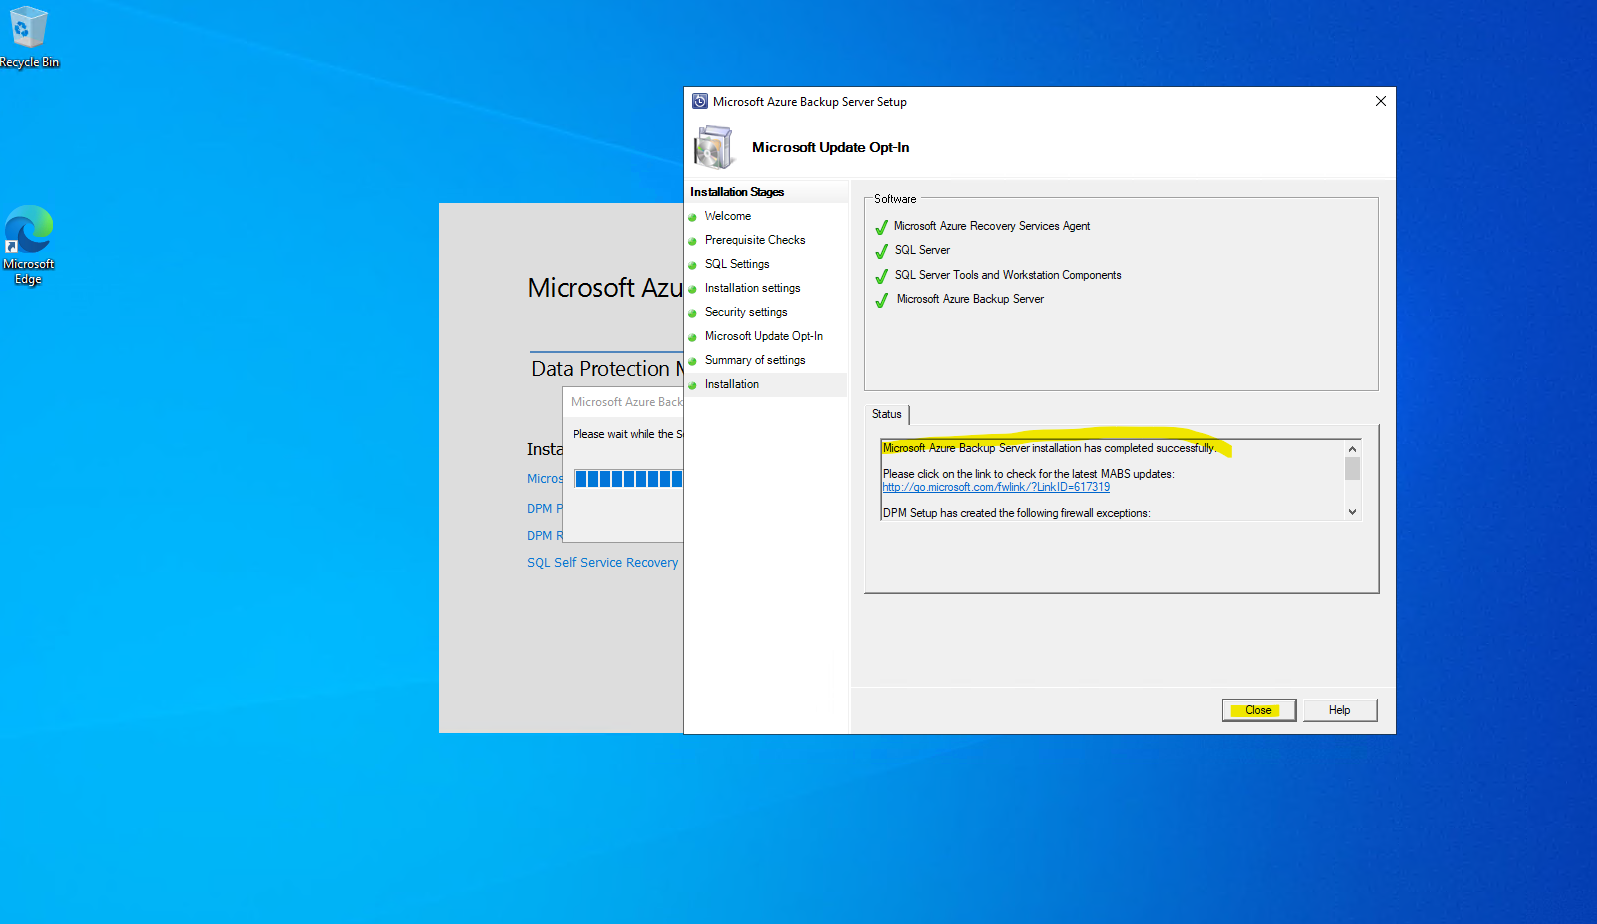
Once registration of the Microsoft Azure Backup server successfully completes, the overall setup wizard proceeds to the installation and configuration of SQL Server and the Azure Backup Server components. Once the SQL Server component installation completes, the Azure Backup Server components are installed.
When the installation step has completed, the product’s desktop icons will have been created as well. Double-click the icon to launch the product.
Source: https://learn.microsoft.com/en-us/azure/backup/backup-azure-microsoft-azure-backup
Add backup storage
The first backup copy is kept on storage attached to the Azure Backup Server machine. For more information about adding disks, see Configure storage pools and disk storage.
As a first step Azure Backup Server backs up data to local disk storage. Azure Backup Server uses a storage pool, a set of disks and volumes on which Azure Backup Server stores disk recovery points for its protected data. The storage pool can be directly attached storage (DAS), a fiber channel SAN, or iSCSI storage device or SAN. It’s important to ensure that you have sufficient storage for local backup of your VMware VM data.
Source: https://learn.microsoft.com/en-us/azure/backup/backup-azure-backup-server-vmware#before-you-begin
You need to add backup storage even if you plan to send data to Azure. In the current architecture of Azure Backup Server, the Azure Backup vault holds the second copy of the data while the local storage holds the first (and mandatory) backup copy.
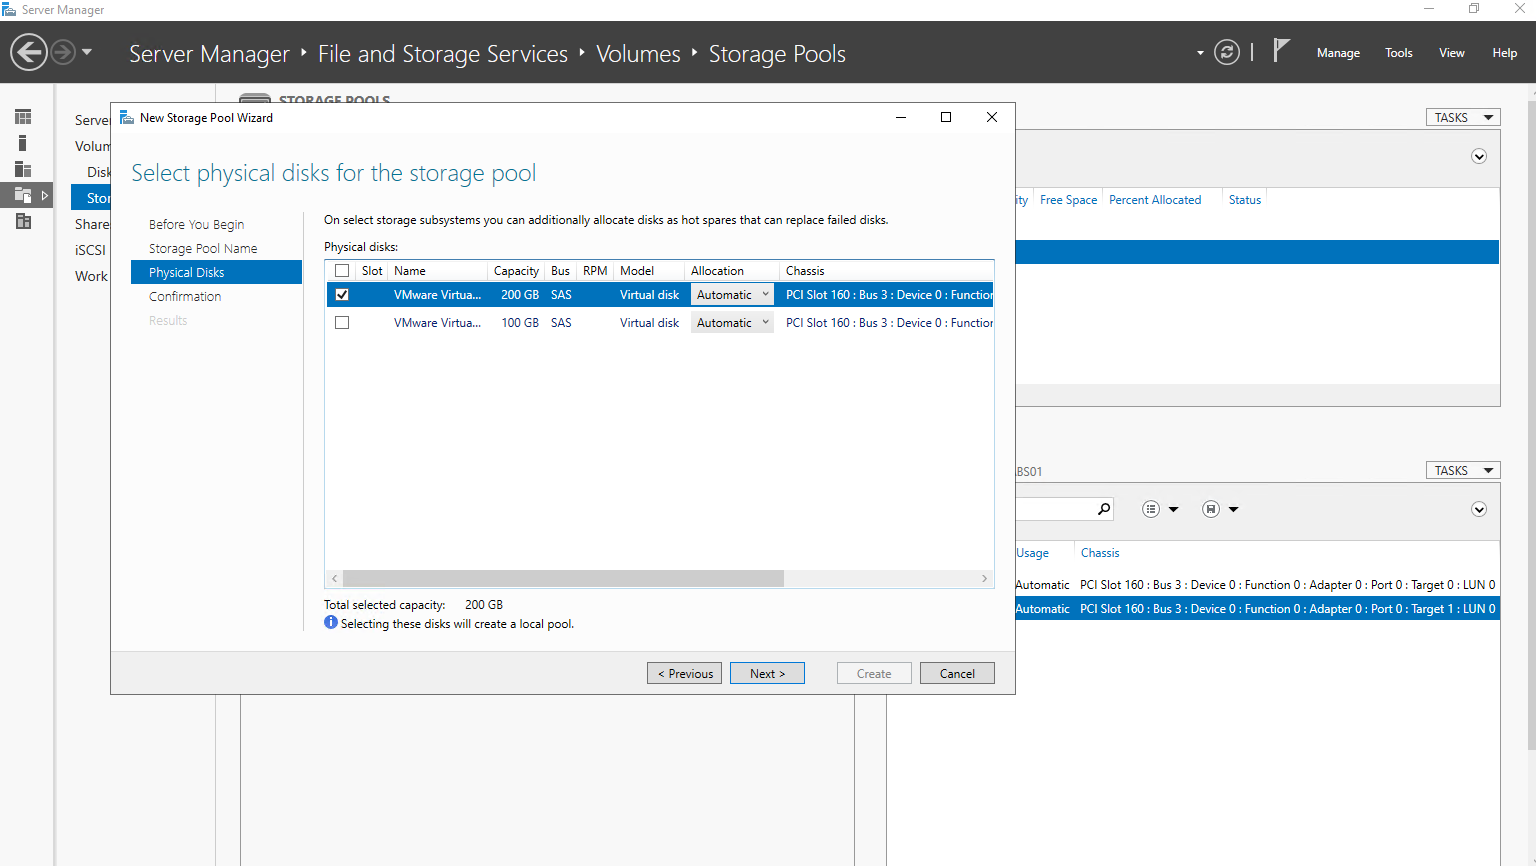
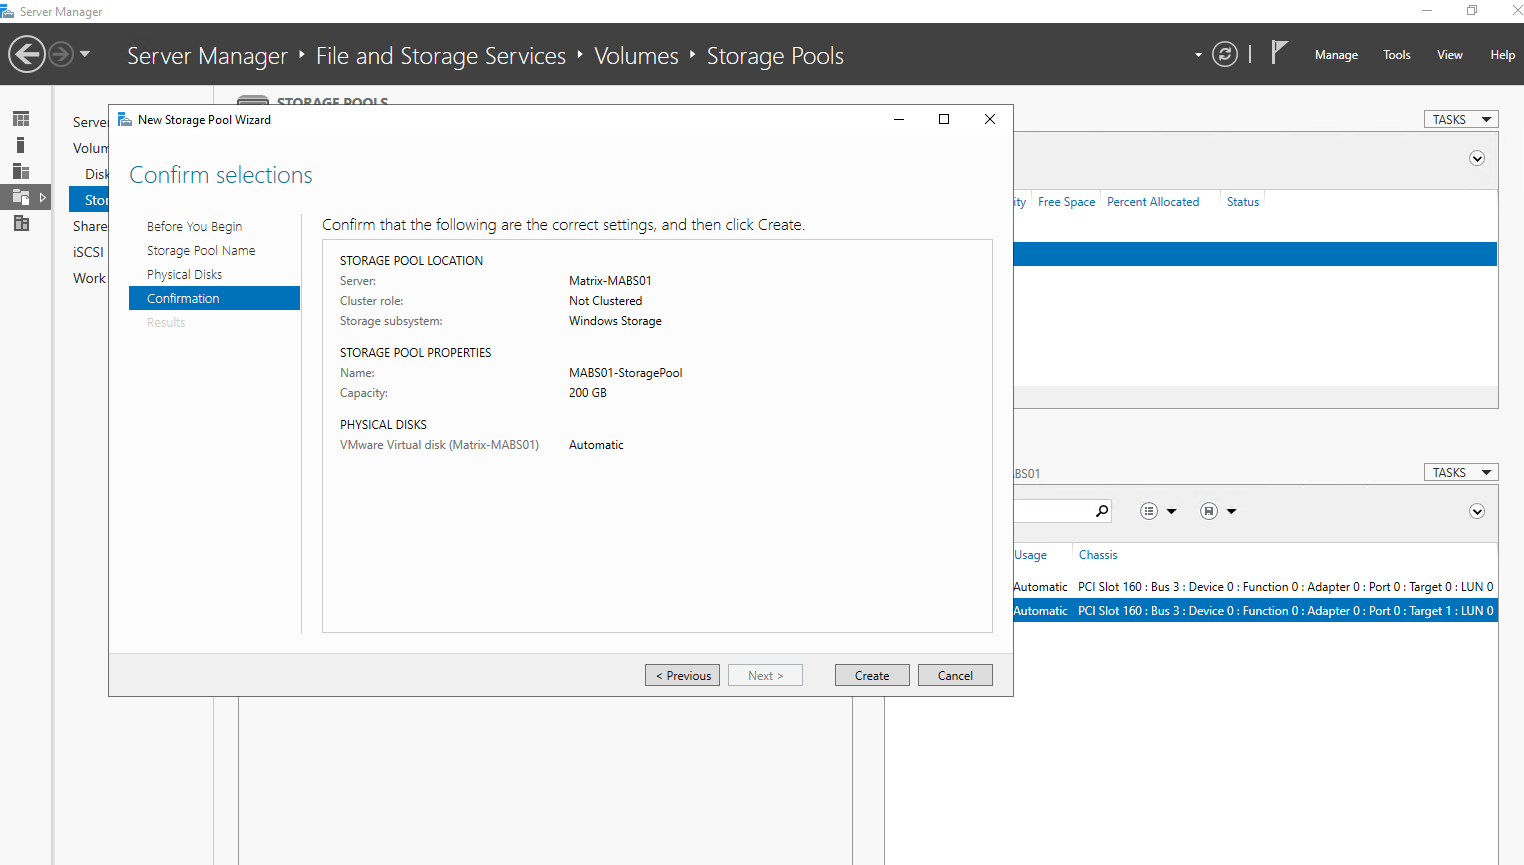
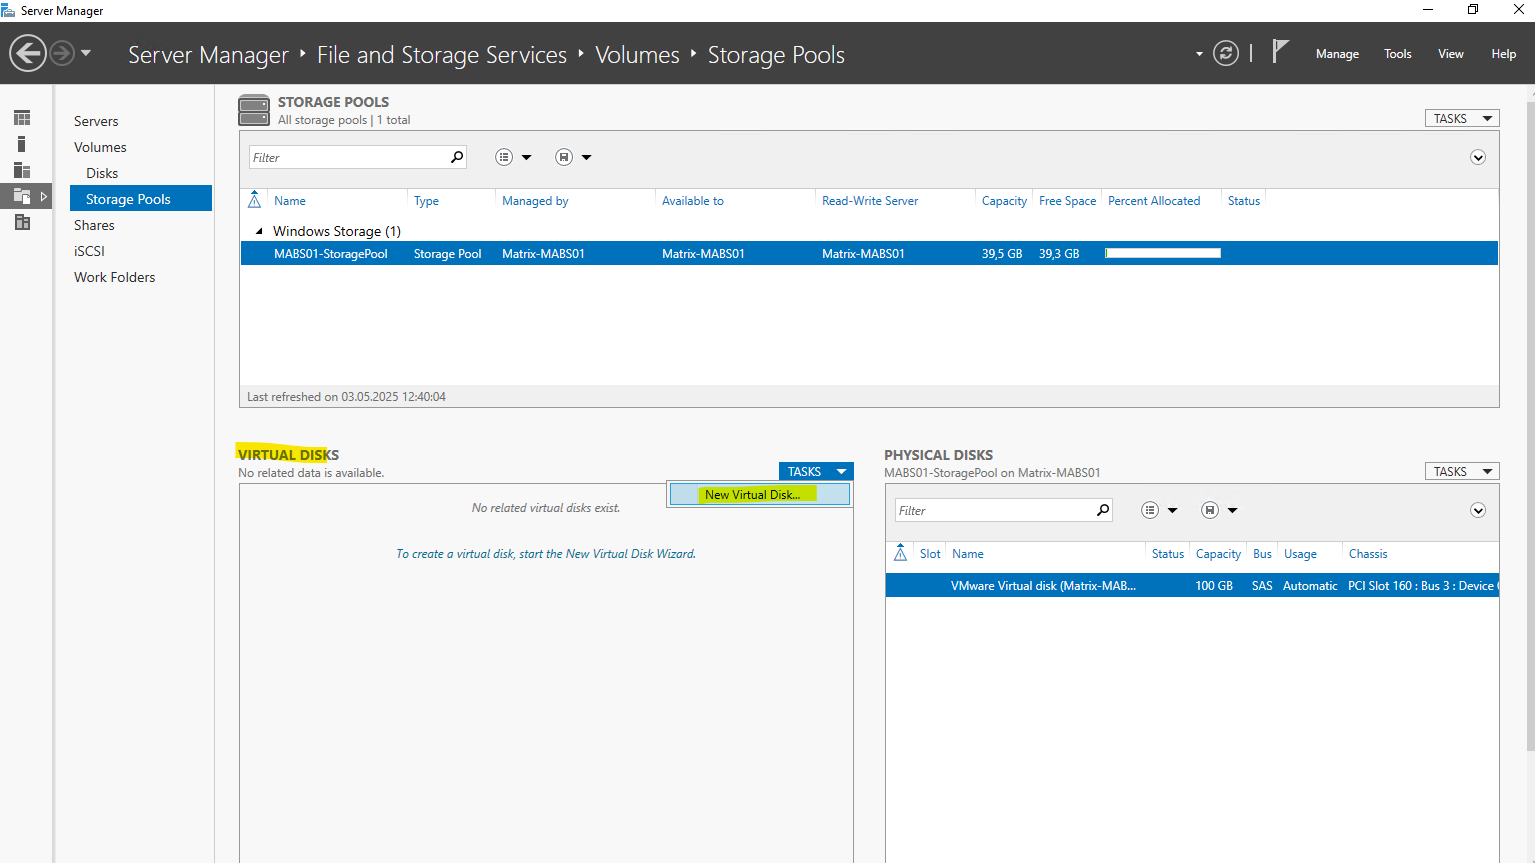
In Server Manager, select File and Storage Services > Volumes > Storage Pools. Under PHYSICAL DISKS, select New Storage Pool.

Enter a name for the new storage pool.
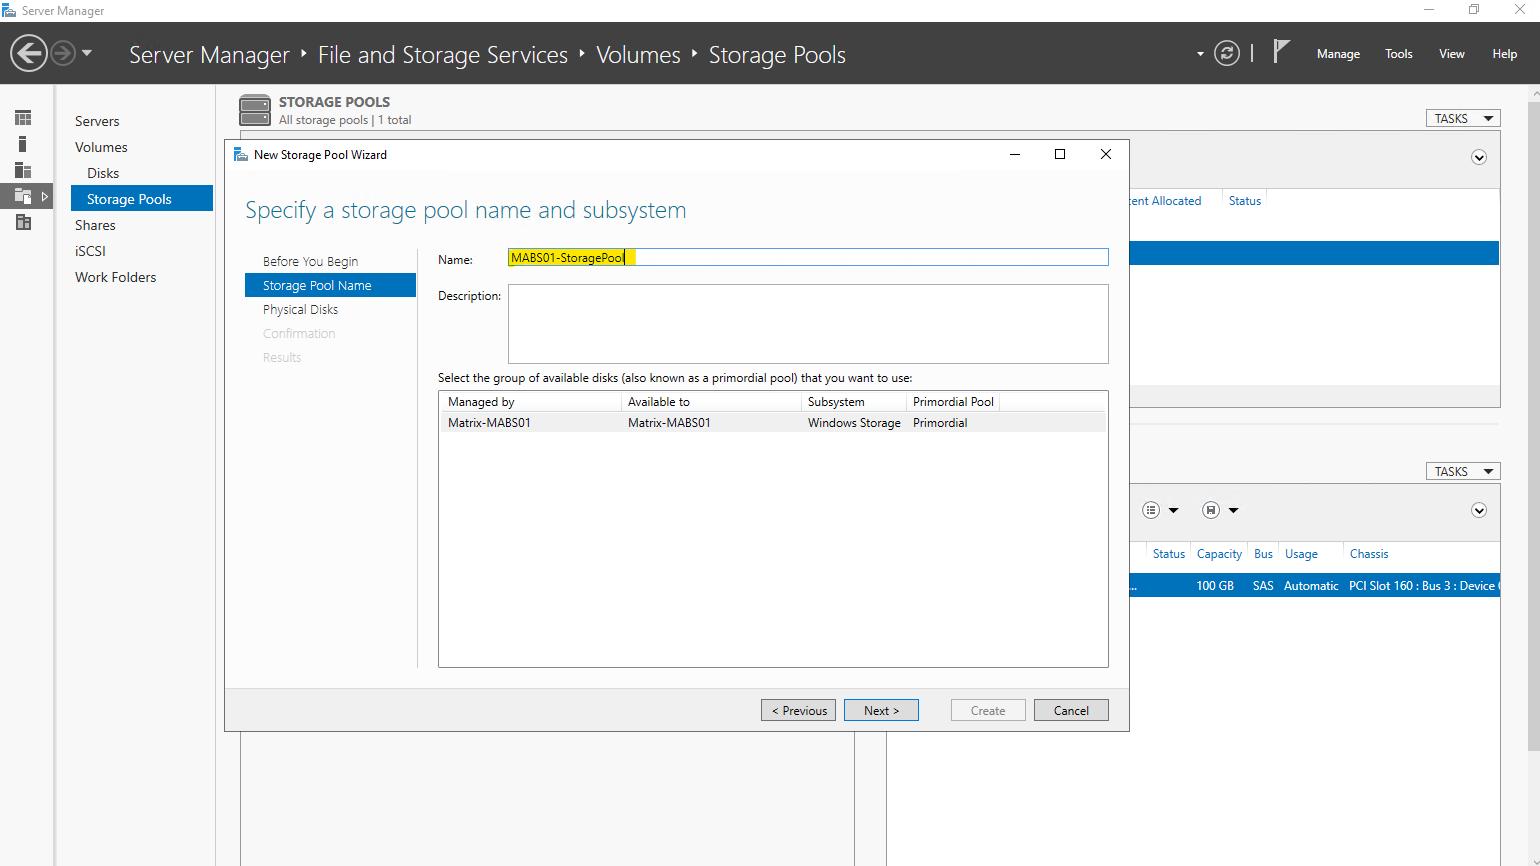
I will select below a dedicated added virtual disk in VMware to be used for this storage pool. The other 100 GB disk is the OS disk.
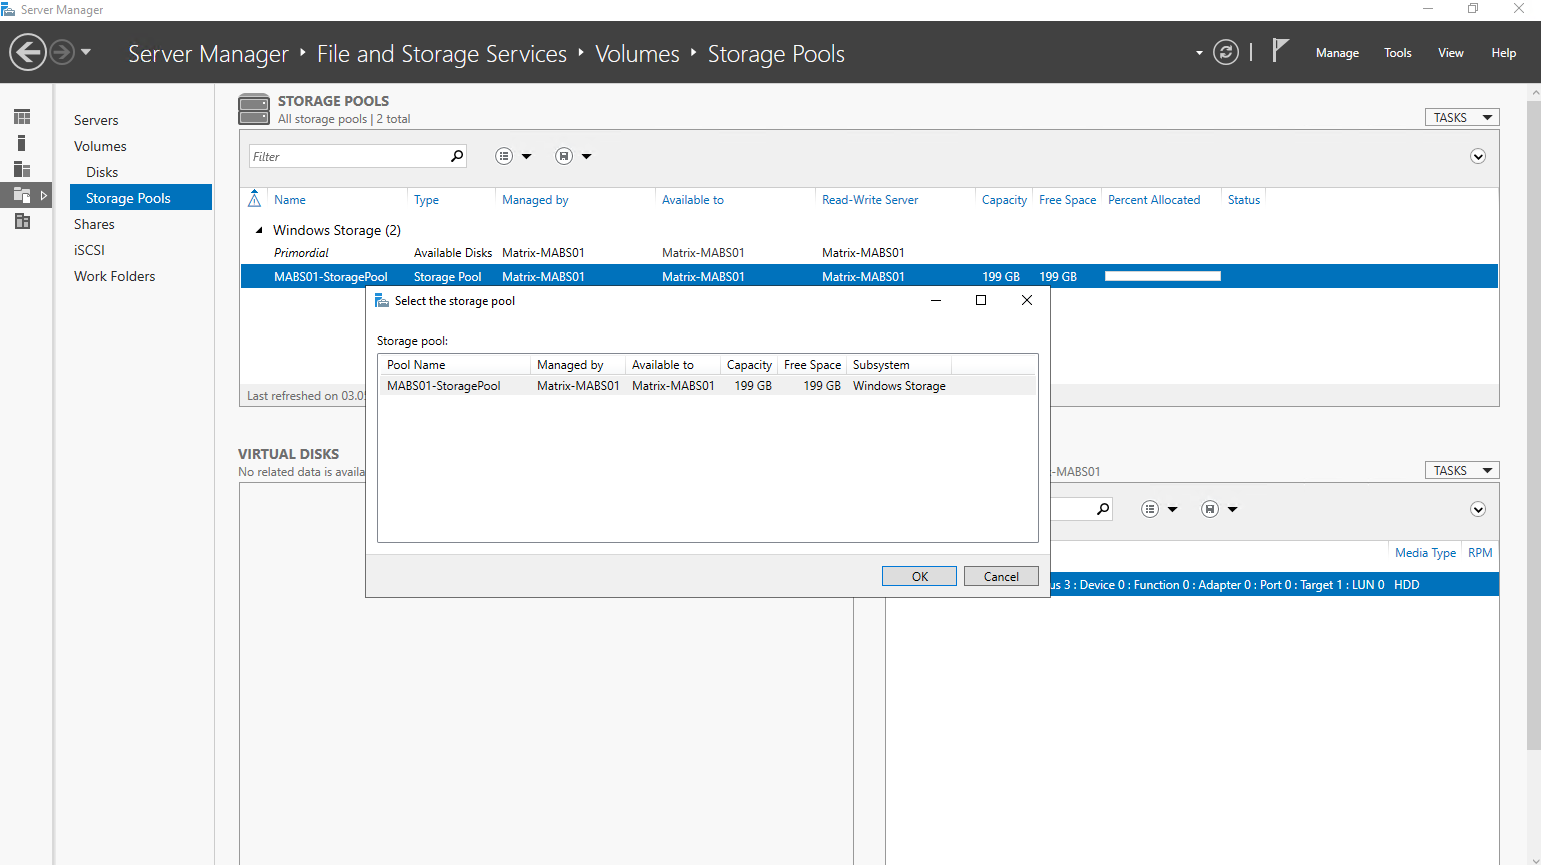
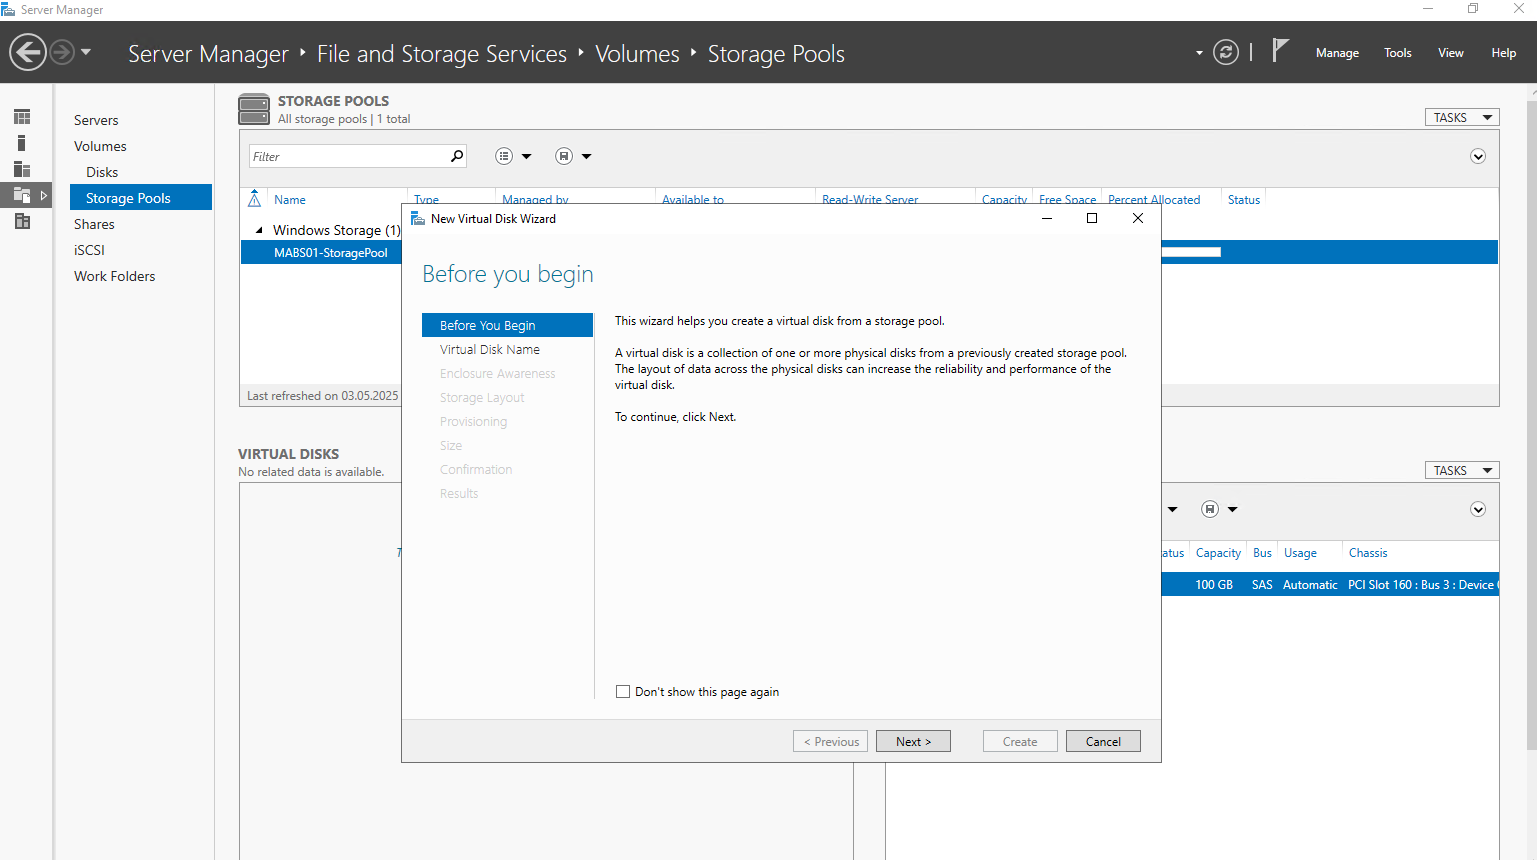
Select the new storage pool and under virtual disks select New Virtual Disk.
Select the storage pool, and then select Add Physical Disk
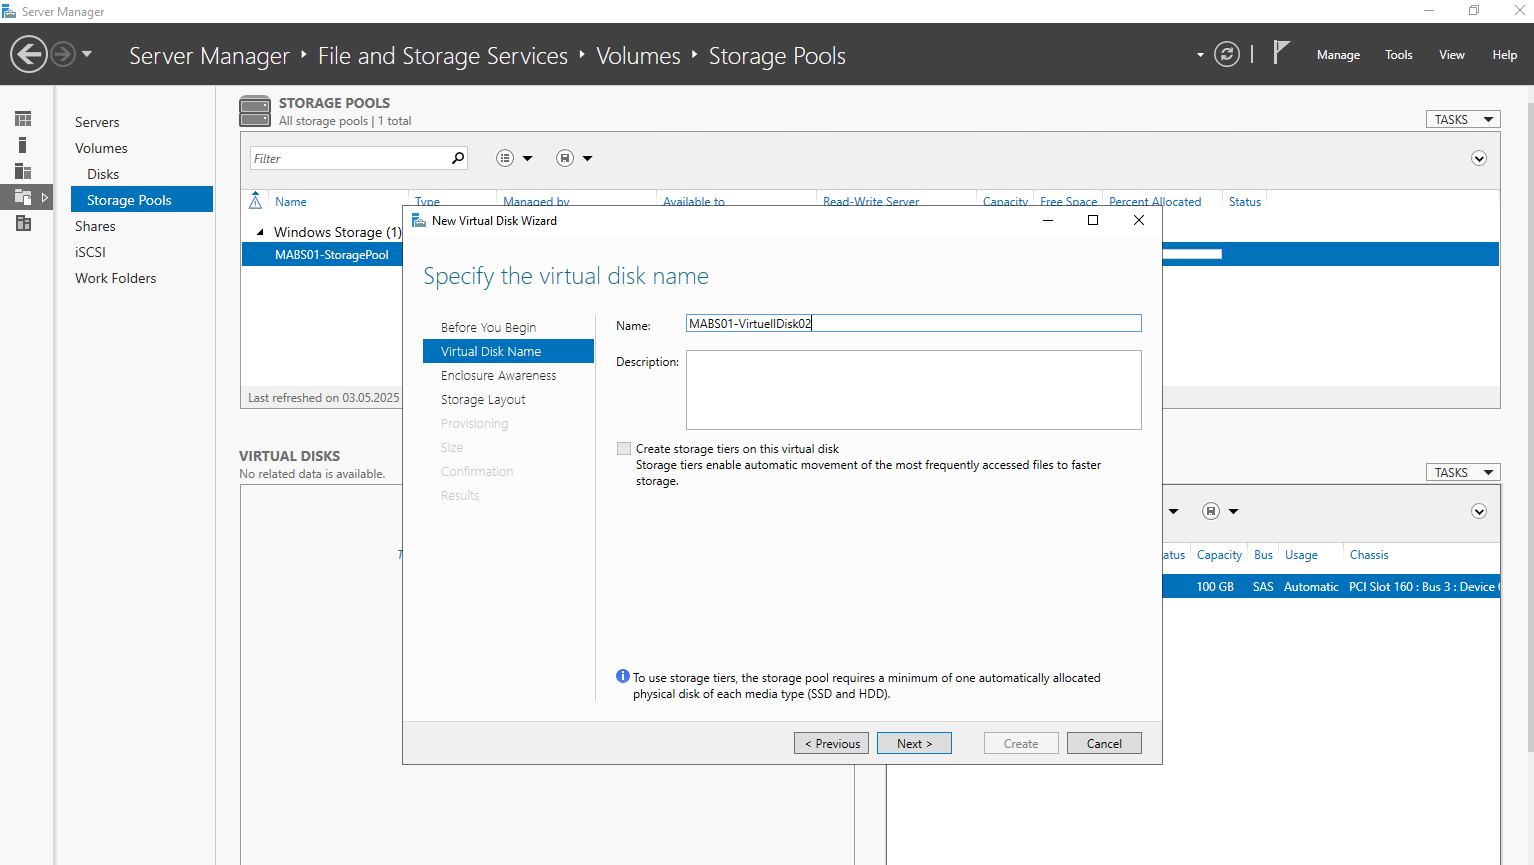
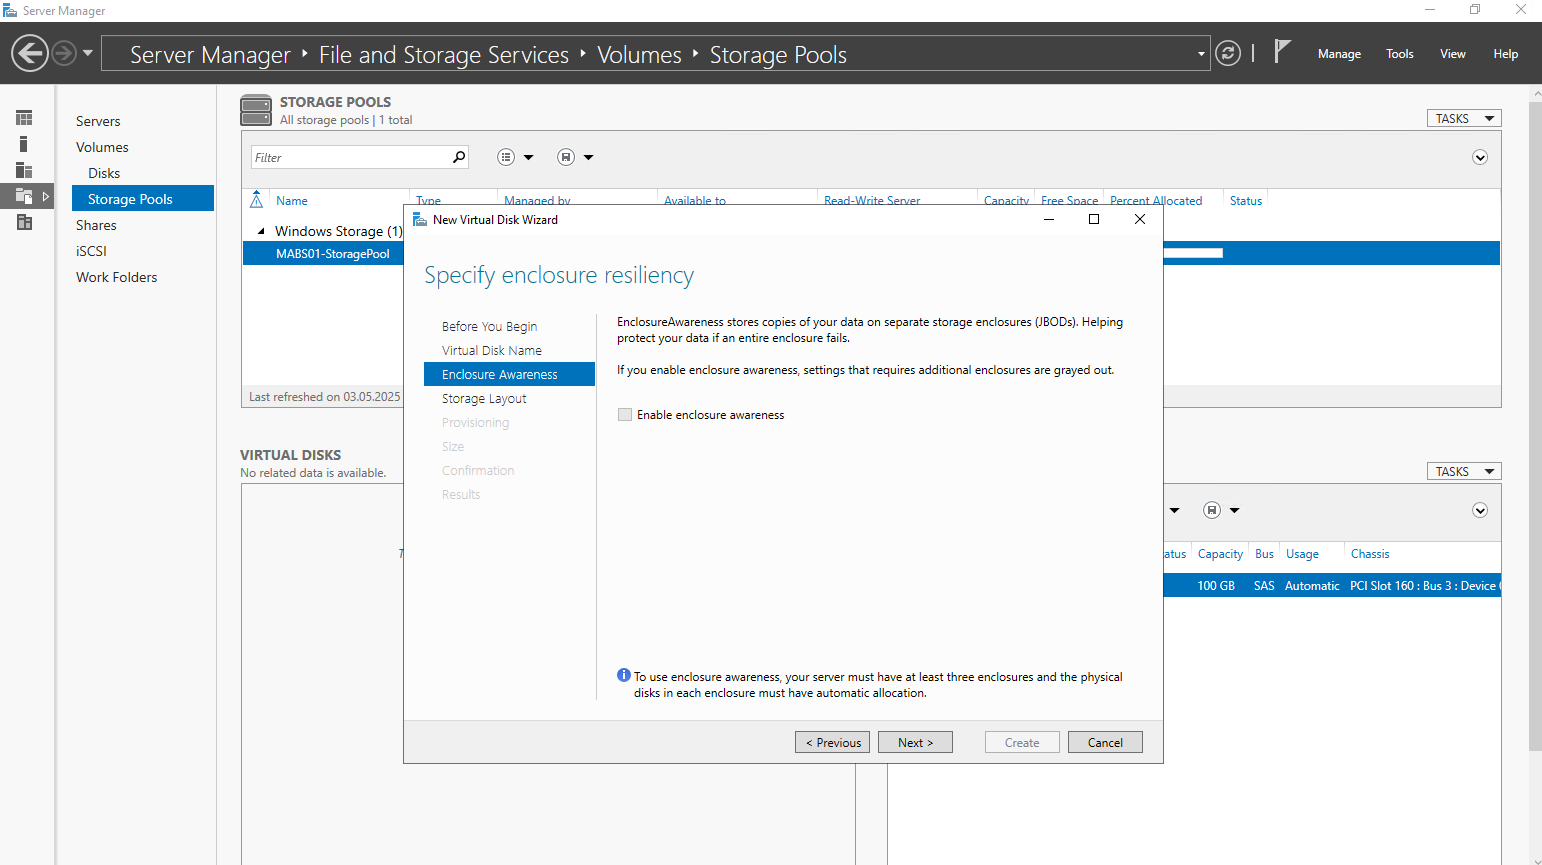
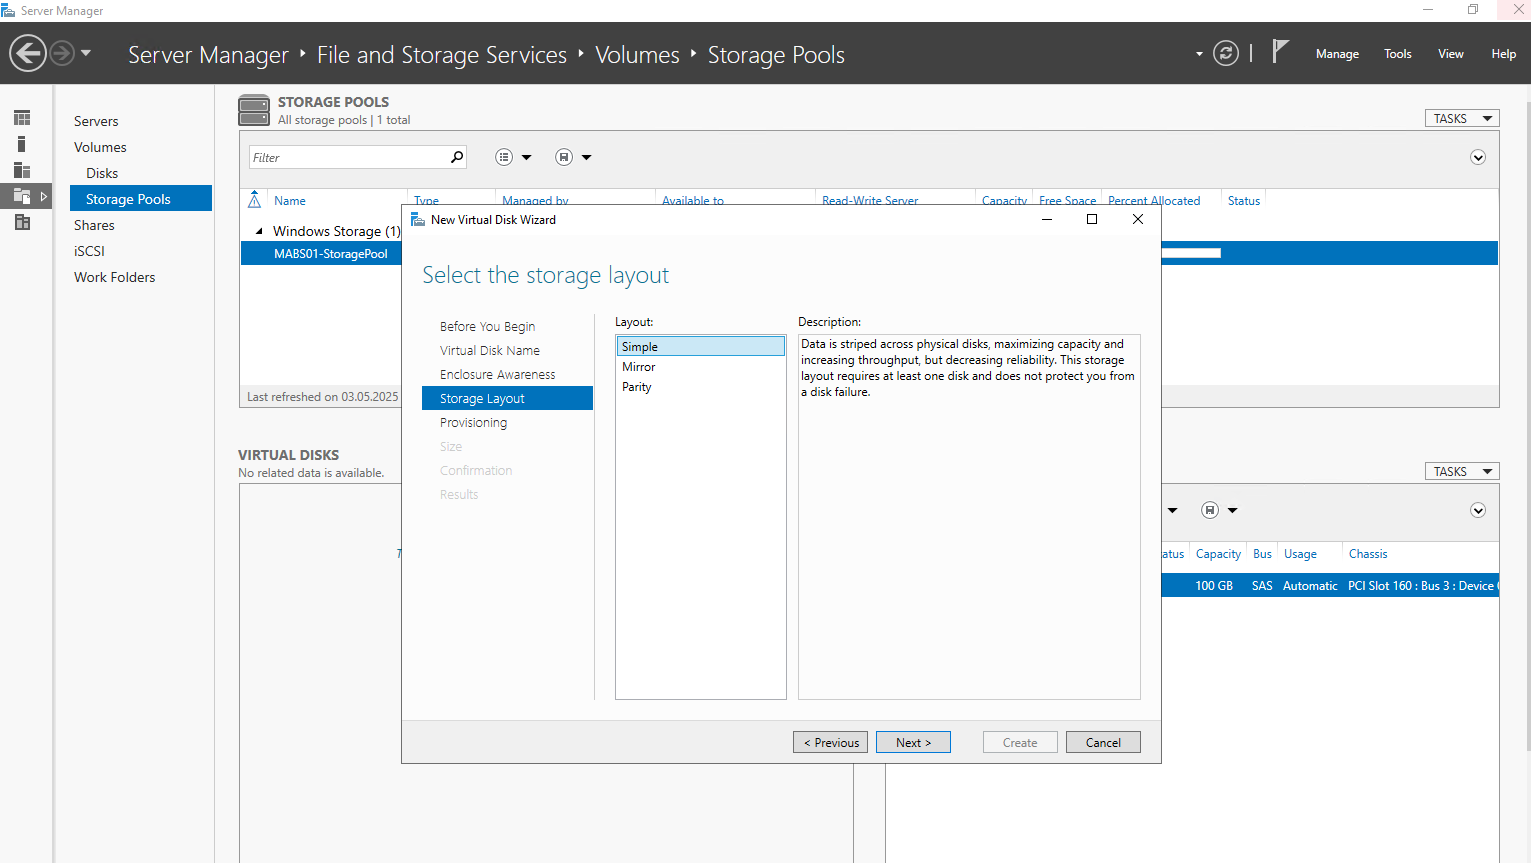
Just for this post and testing purpose I will use for the storage layout simple to have the maximum capacity.
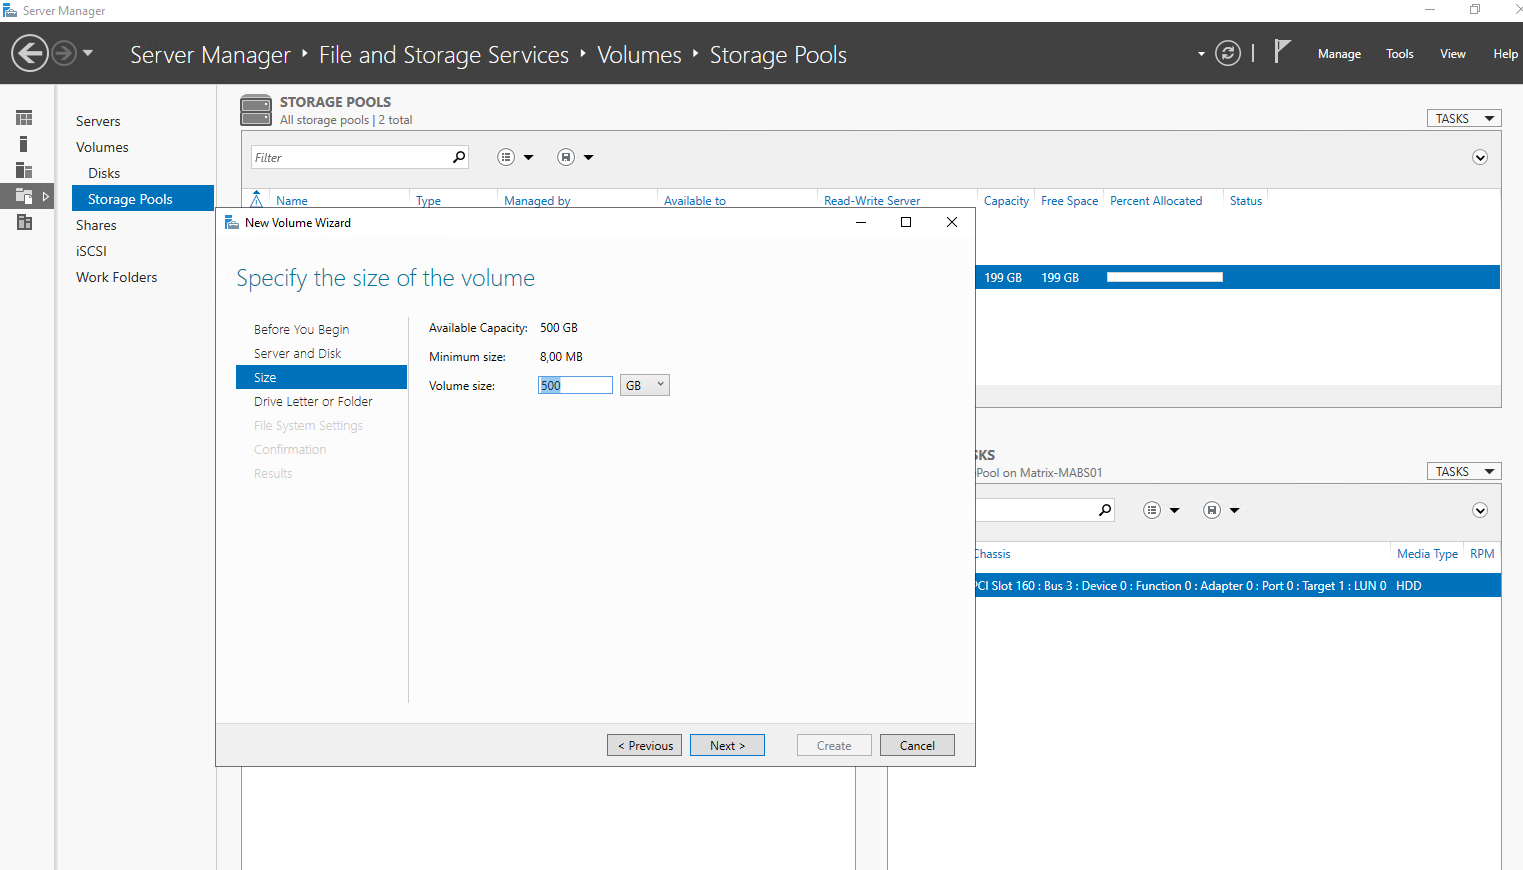
For the provision type I will use thin.
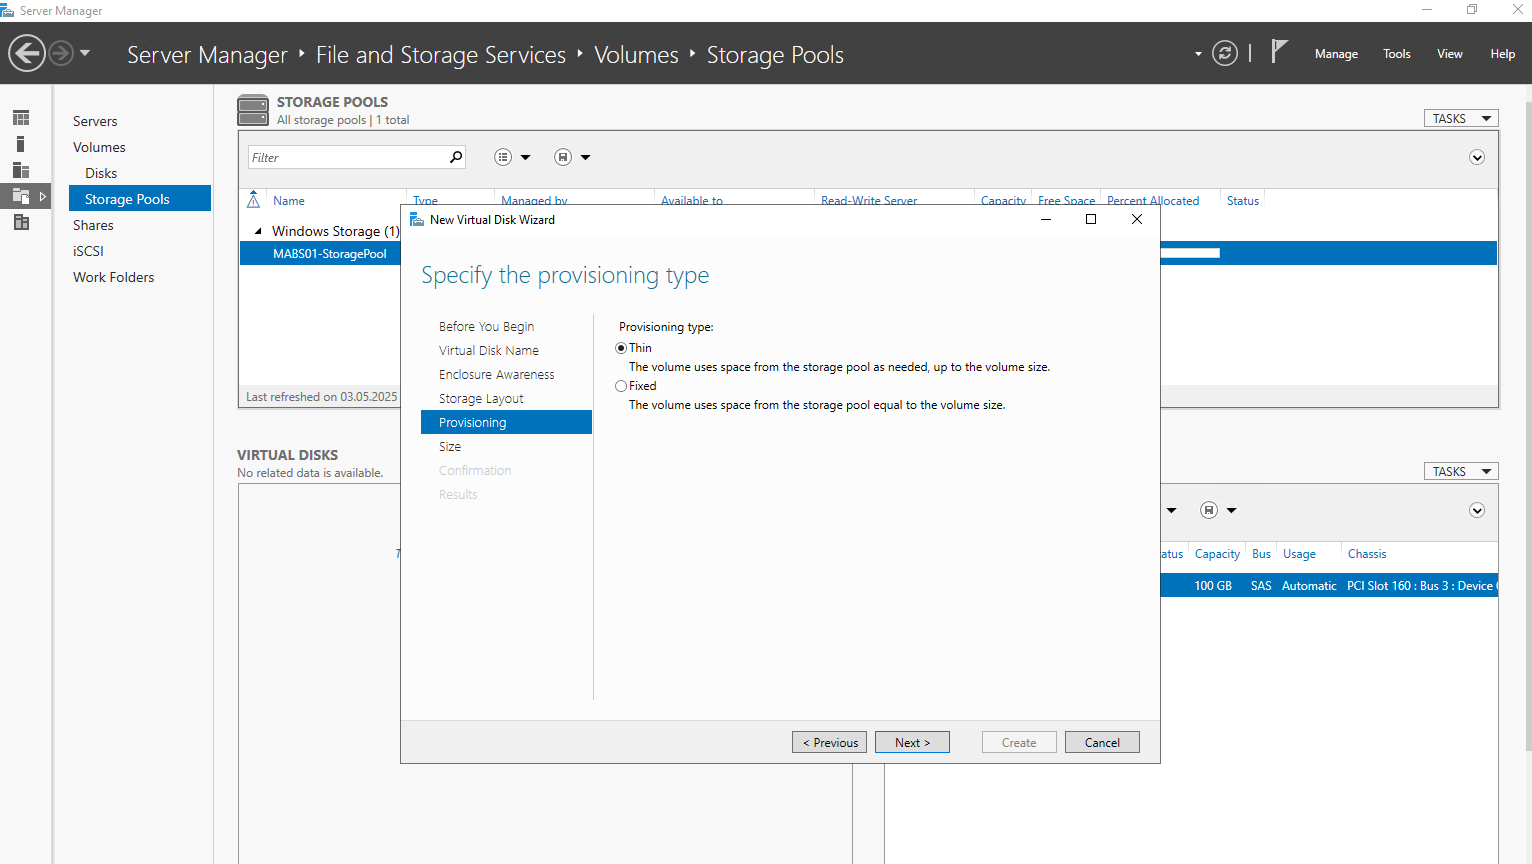
As I will use thin for the provision type, I can finally specify more space and overcommit the real disk size here to e.g. 500 GB.
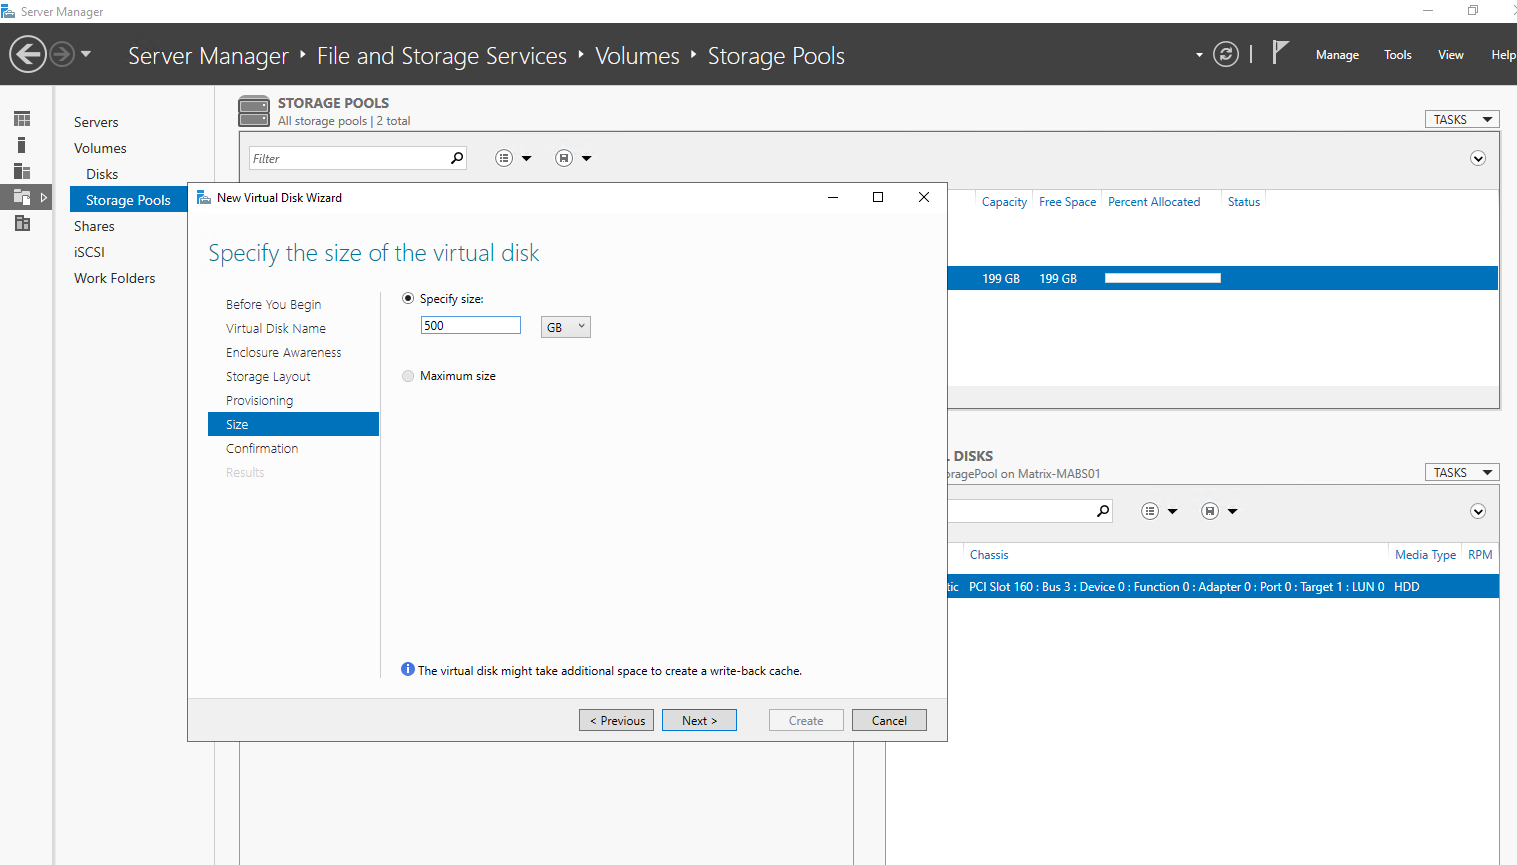
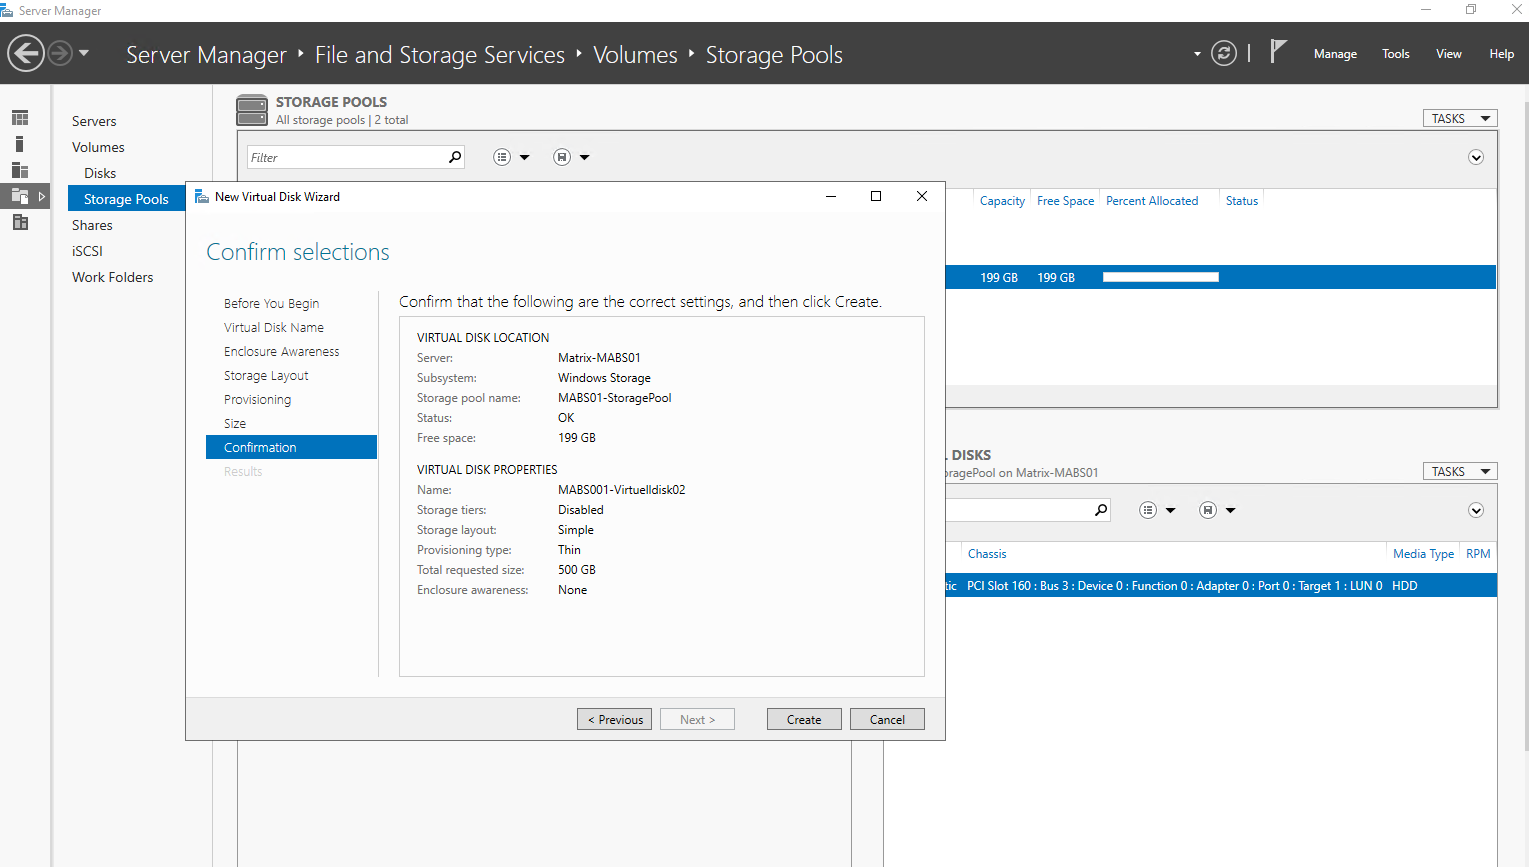
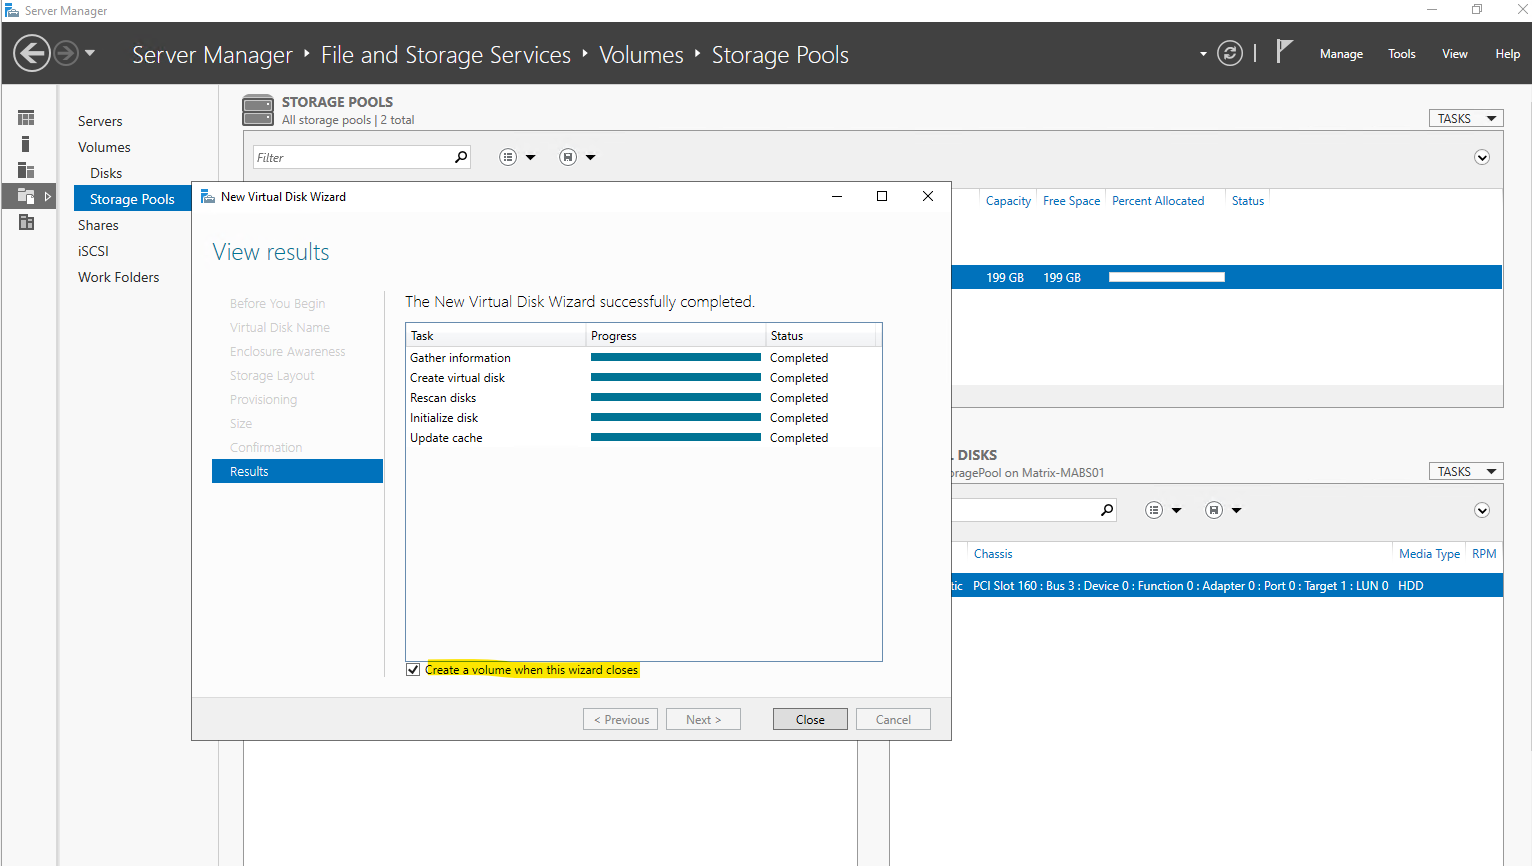
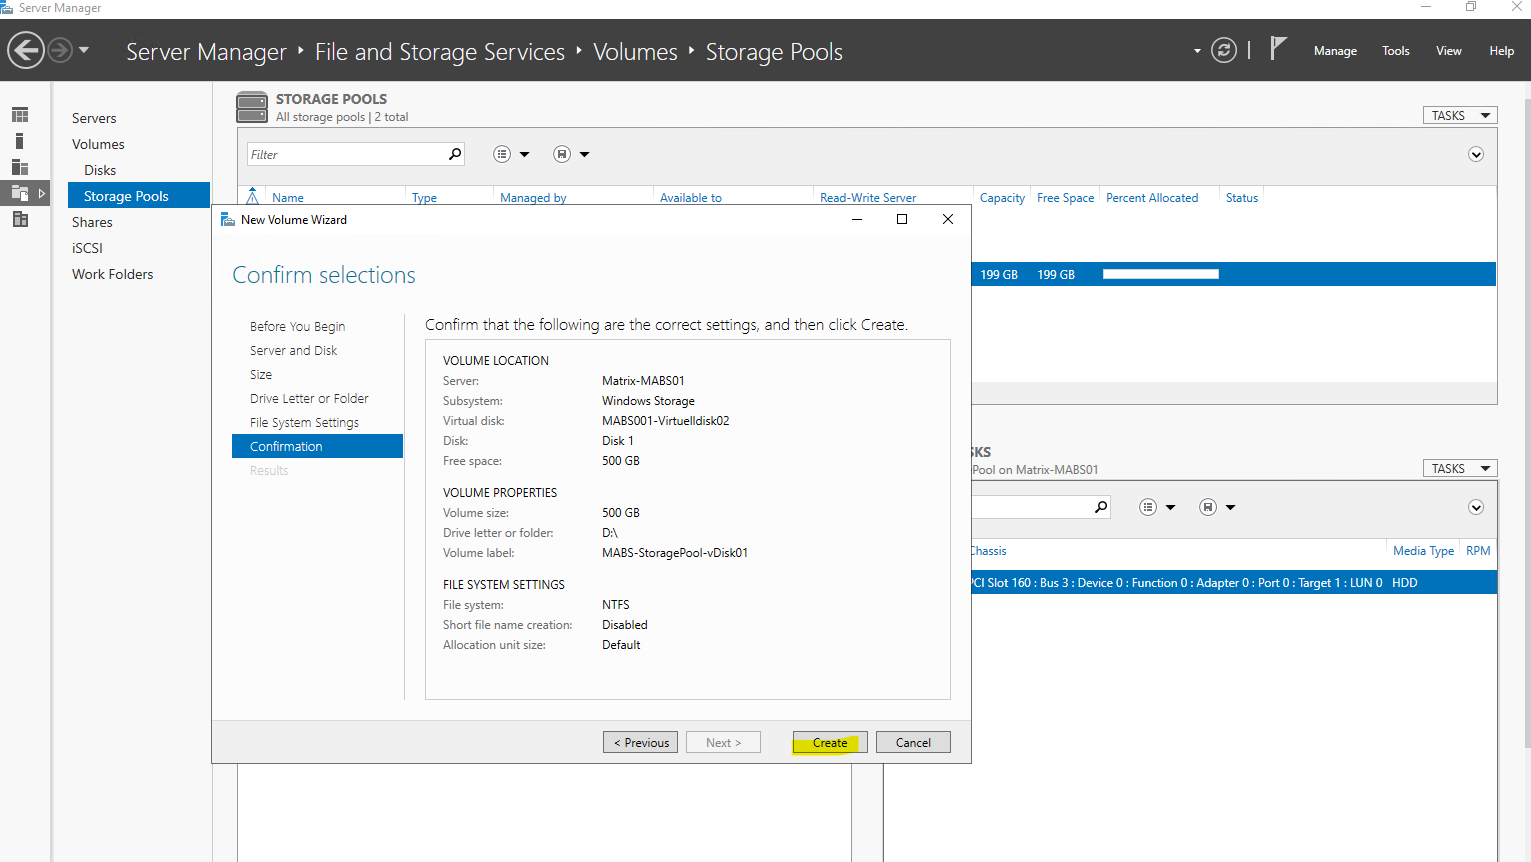
After the virtual disk is created, the wizard to create a new volume on the disk is opened.
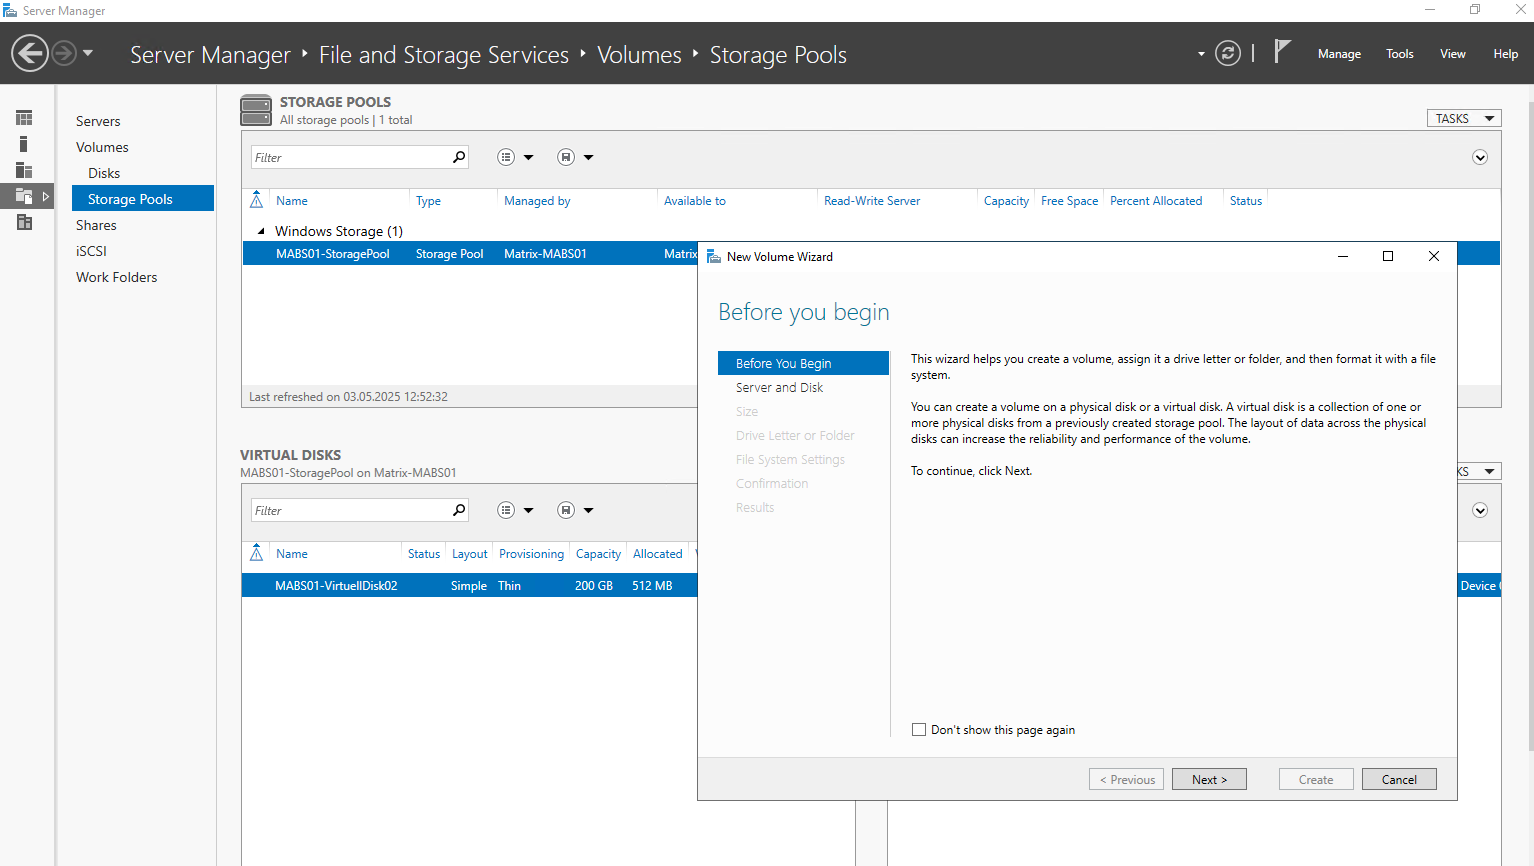
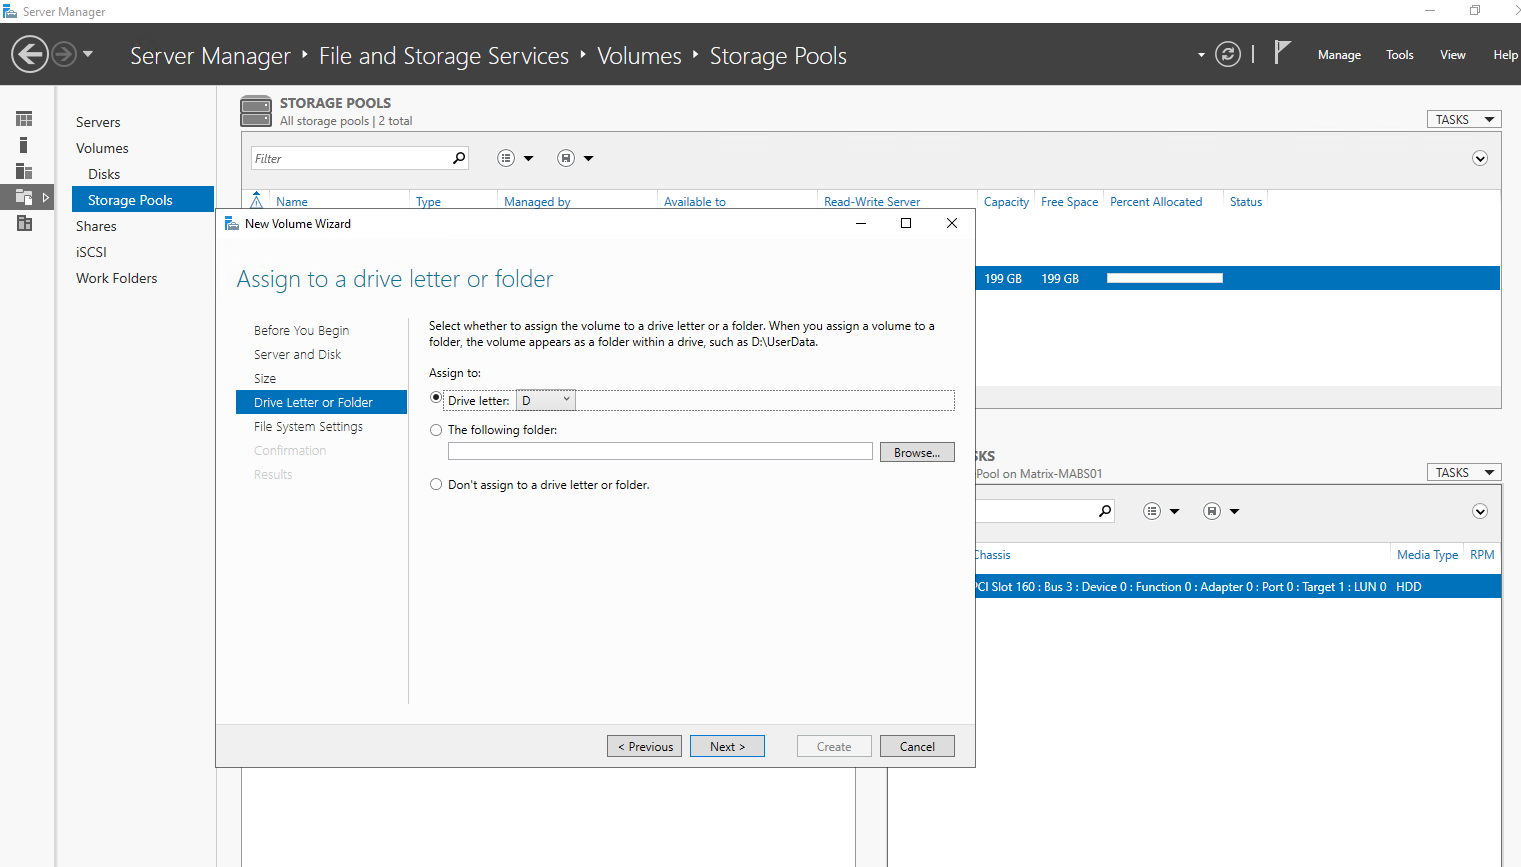
Add volumes to Backup Server disk storage
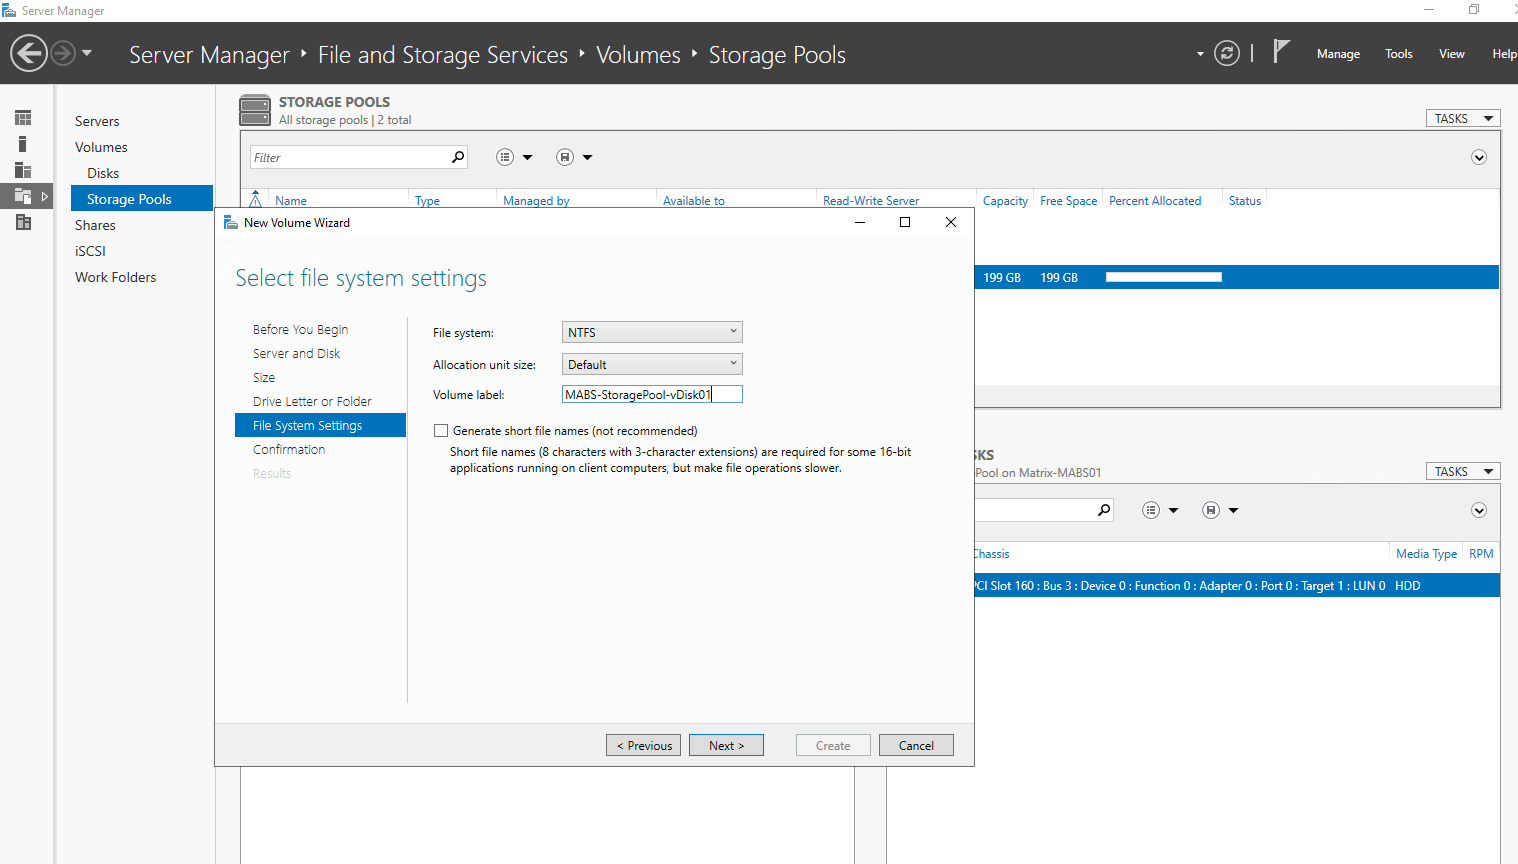
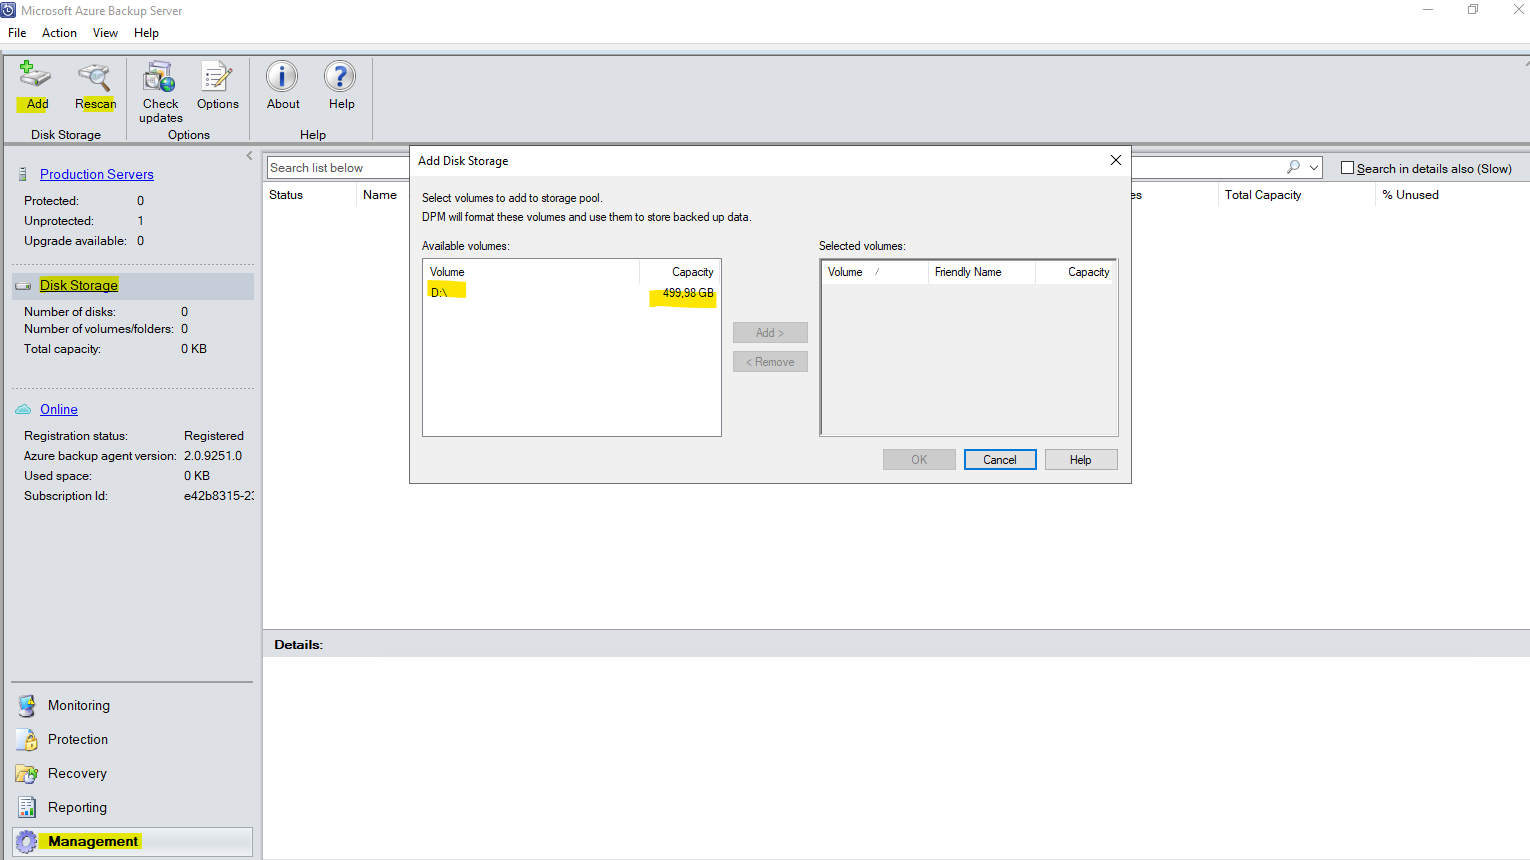
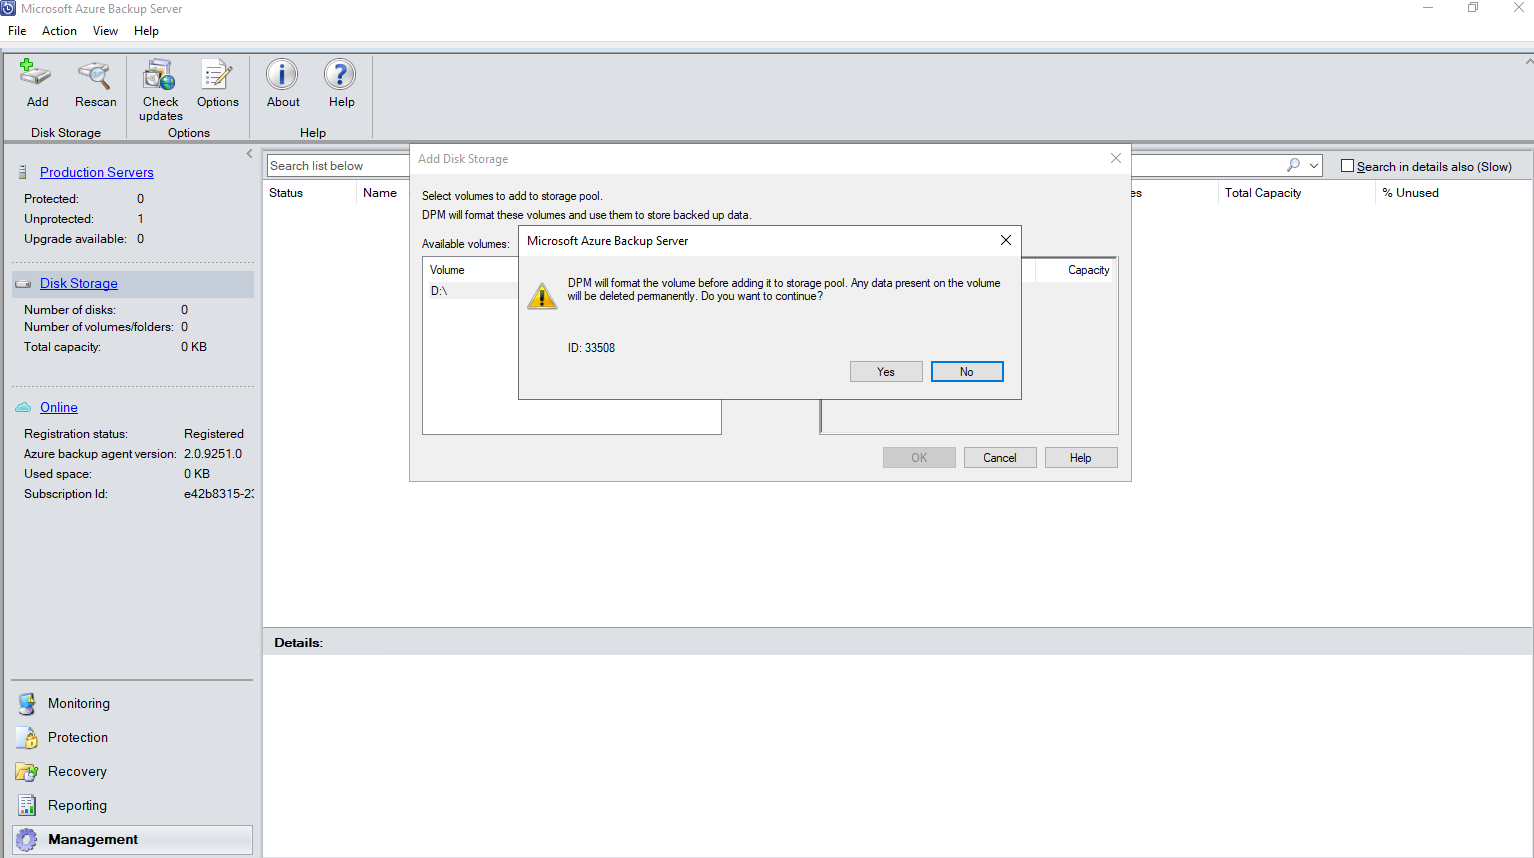
To add a volume to Backup Server, in the Management pane, rescan the storage, and then select Add. A list of all the volumes available to be added for Backup Server Storage appears. After available volumes are added to the list of selected volumes, you can give them a friendly name to help you manage them. To format these volumes to ReFS so Backup Server can use the benefits of Modern Backup Storage, select OK.
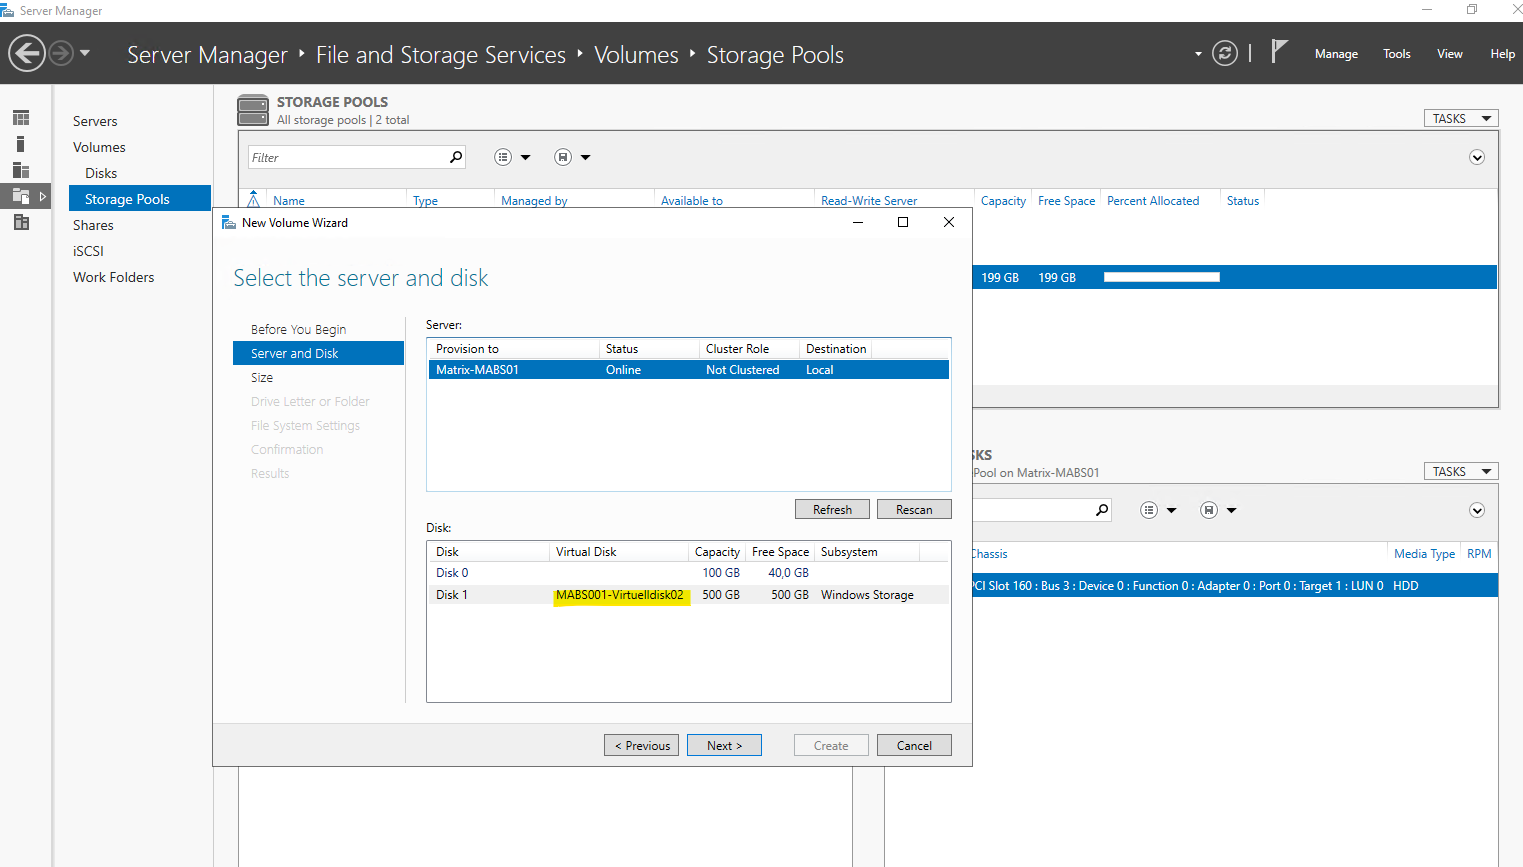
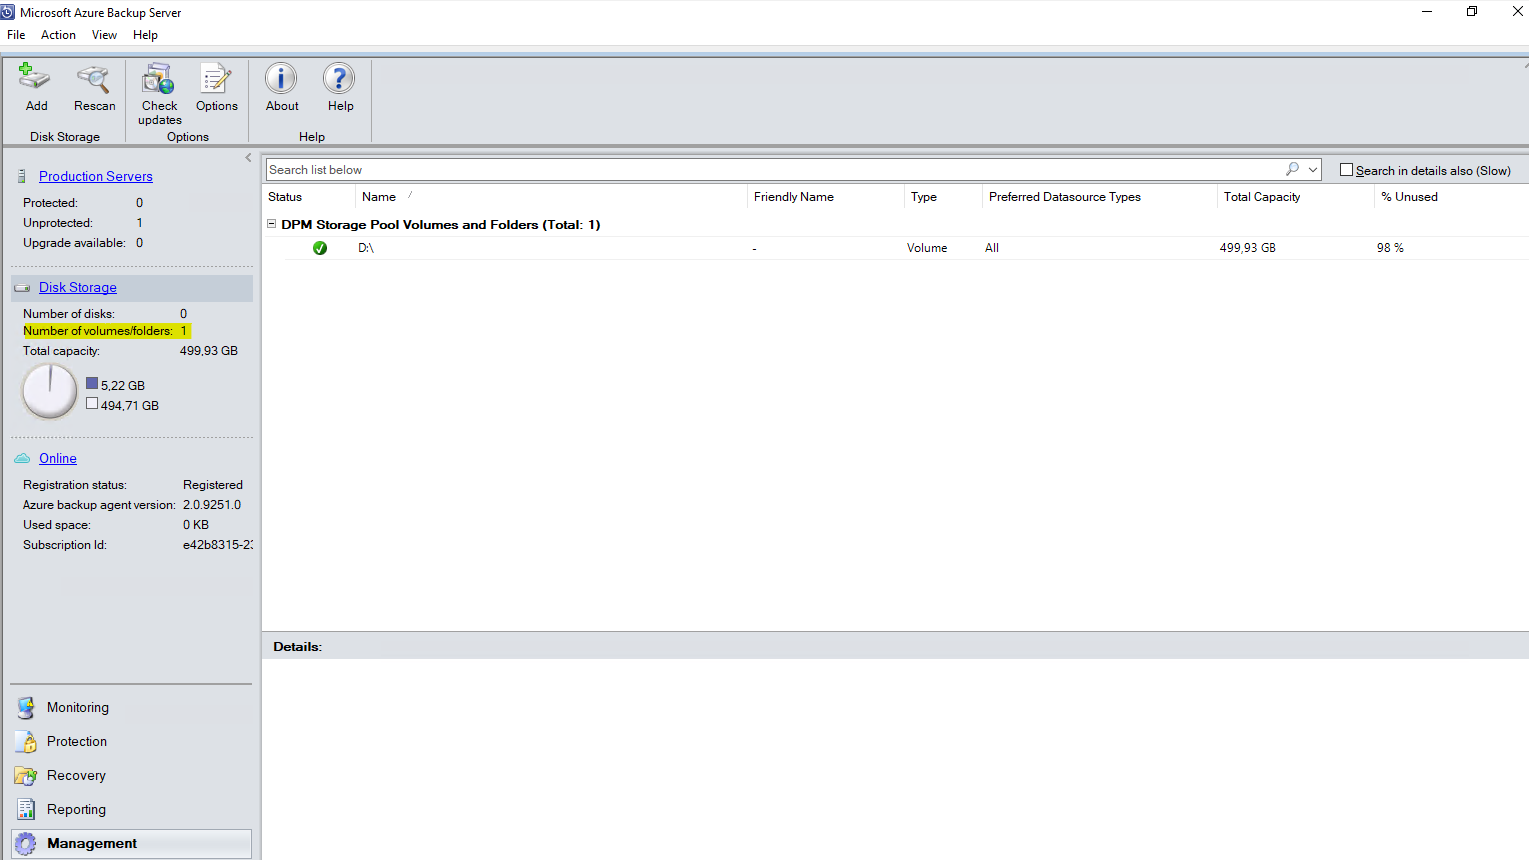
In my case the previously added new storage pool and virtual disk will be shown up after clicking on Add.
Set up a secure channel between the MABS and vCenter
Finally we just need to make sure, that our MABS will trust the vCenter server certificate. Please read the following article by Microsoft about how to import the vCenter server certificate as trusted root CA on the MABS.
Create a VMware role and User Account
The Azure Backup Server needs a user account with permissions to access v-Center Server/ESXi host. Create a VMware role with specific privileges, and then associate a user account with the role.
To add the account on the Azure Backup Server, follow these steps:
On the Azure Backup Server console, select Management > Production Servers > Manage VMware.
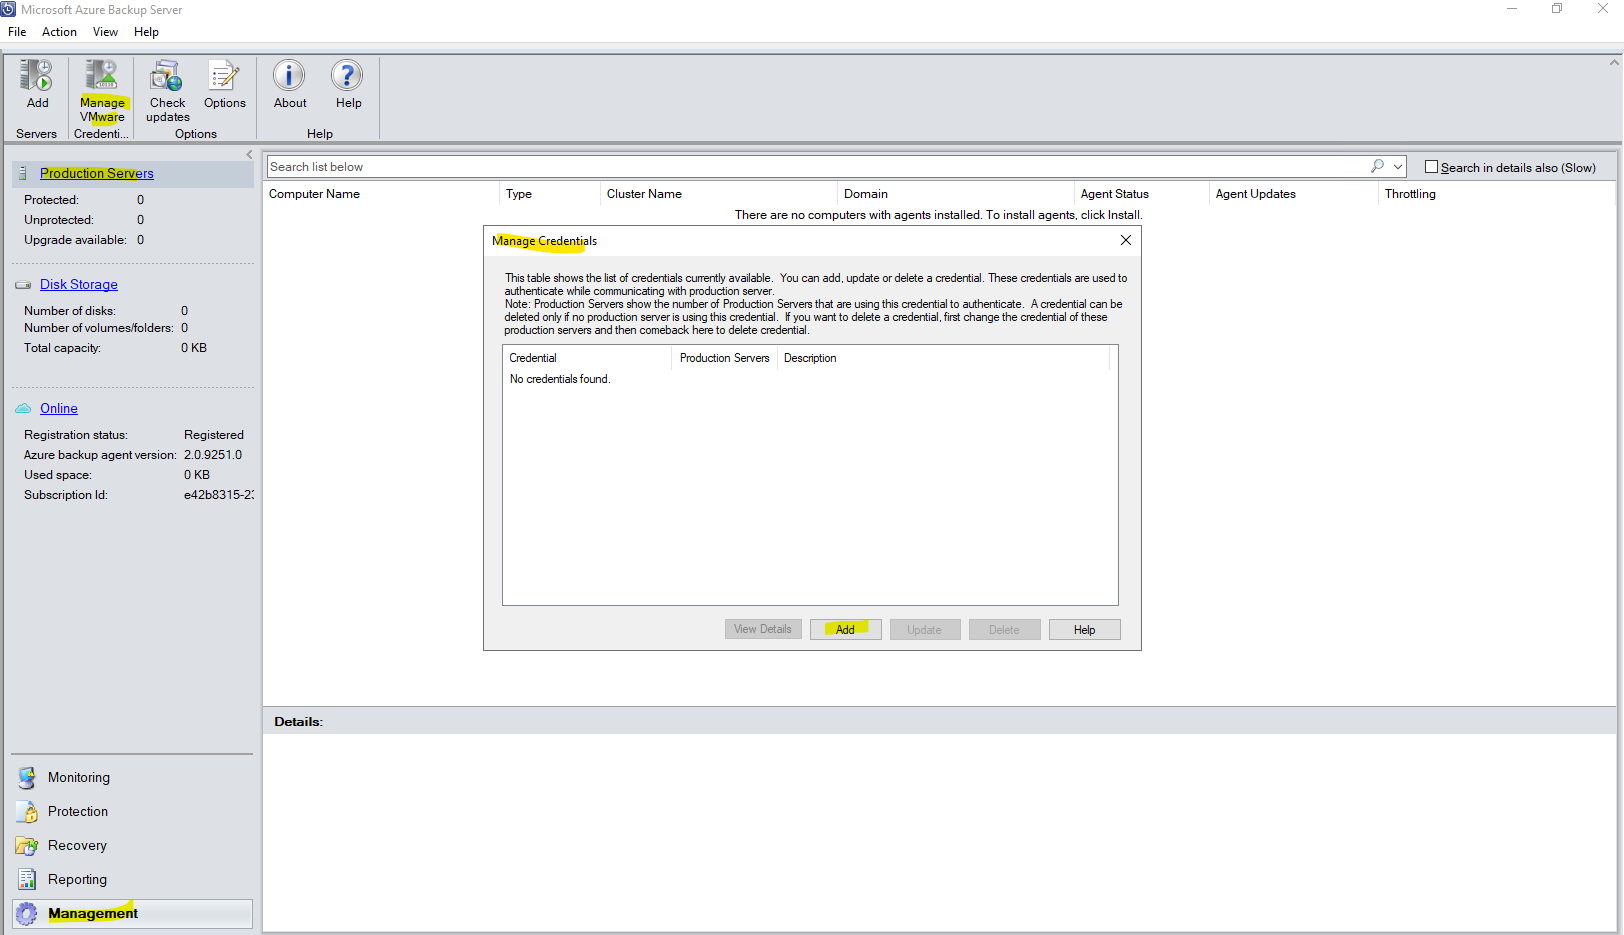
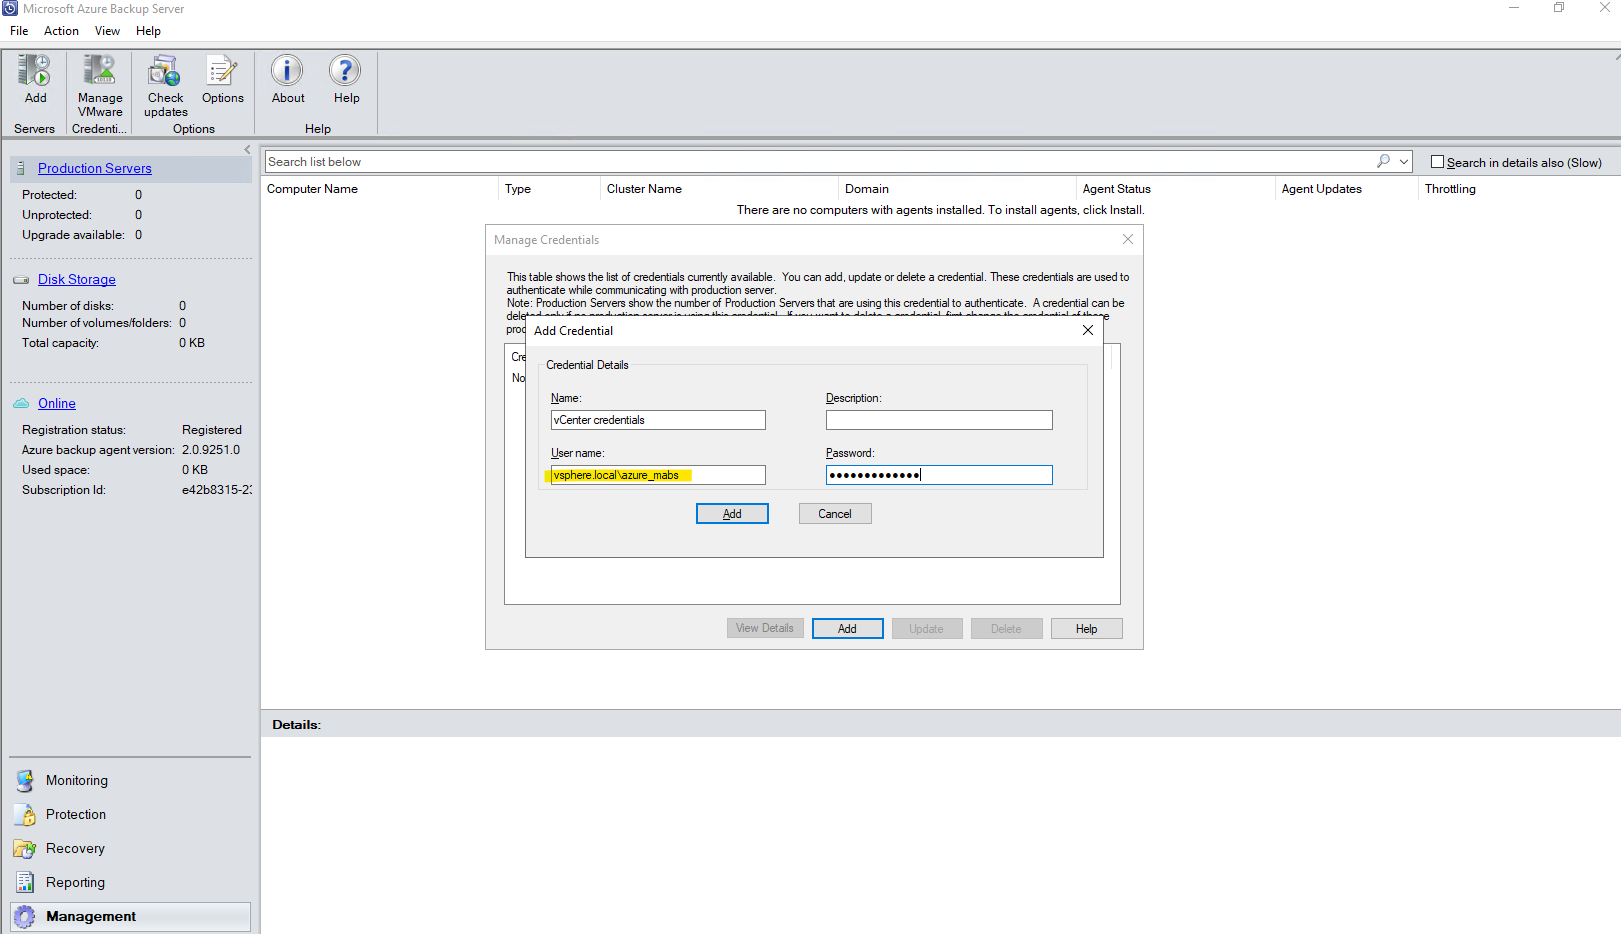
On Add Credential, enter a name and a description for the new credential, and specify the username and password you defined on the VMware server. The name, Contoso Vcenter credential is used to identify the credential in this procedure. If the VMware server and Azure Backup Server aren’t in the same domain, specify the domain in the user name.
To add the vCenter Server to Azure Backup Server, follow these steps:
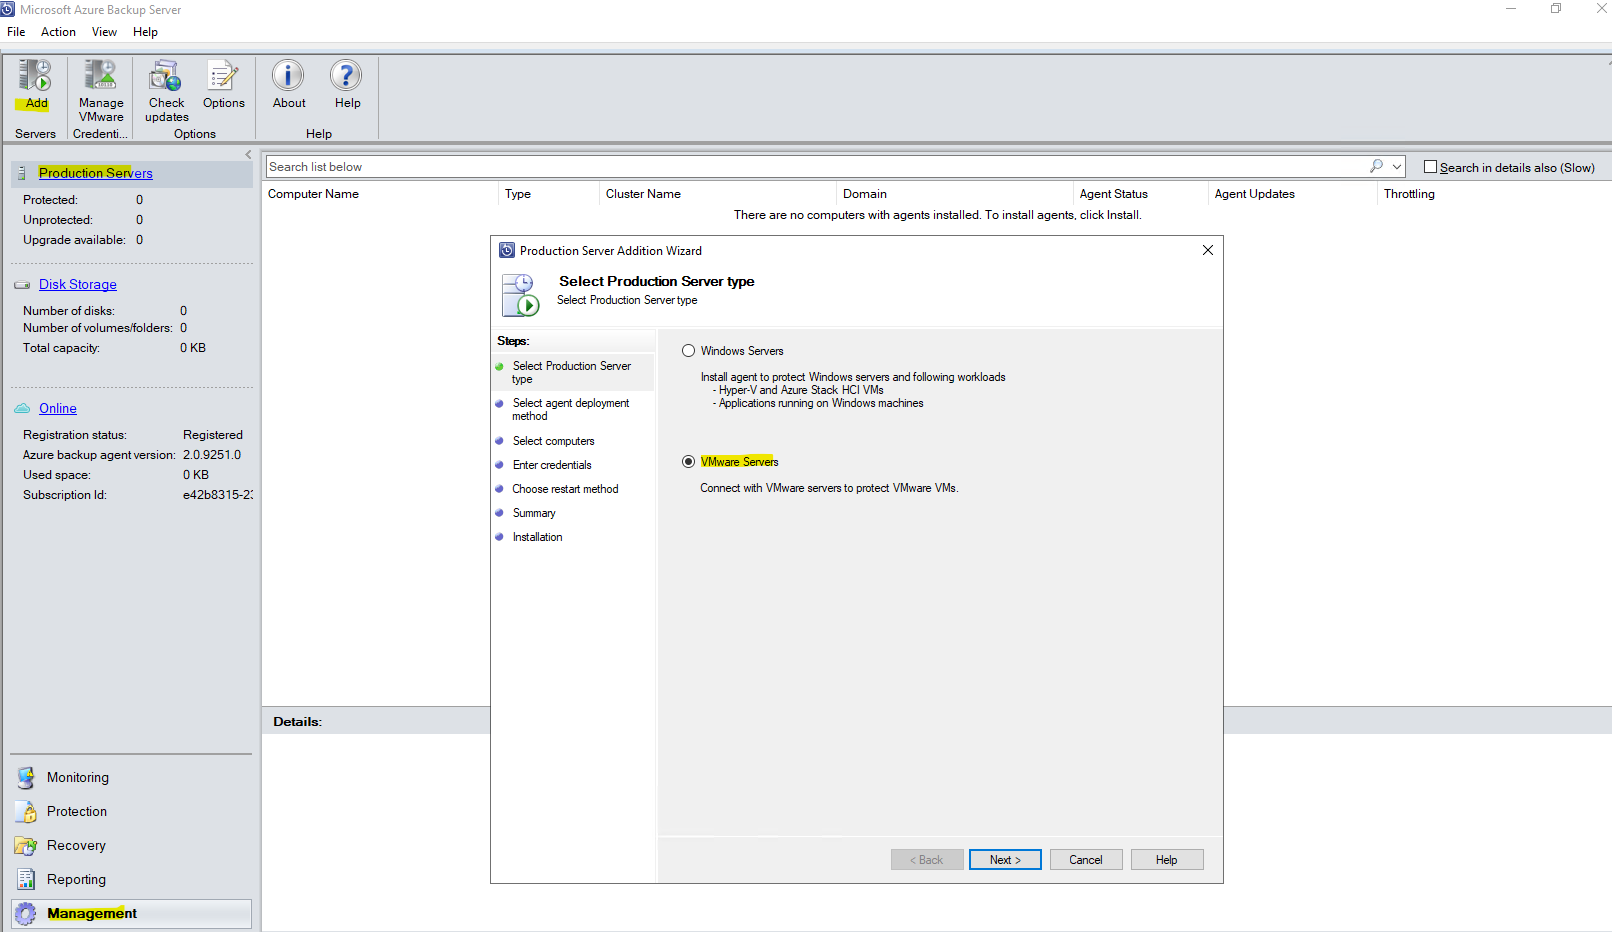
On the Azure Backup Server console, select Management > Production Servers > Add.
On Production Server Addition Wizard > Select Production Server type page, select VMware Servers, and then select Next.
On Select Computers, under Server Name/IP Address, specify the FQDN or IP address of the VMware server. If all the ESXi servers are managed by the same vCenter, specify the vCenter name. Otherwise, add the ESXi host.
On SSL Port, enter the port that’s used to communicate with the VMware server. 443 is the default port, but you can change it if your VMware server listens on a different port.
On Specify Credential, select the credential that you created earlier.
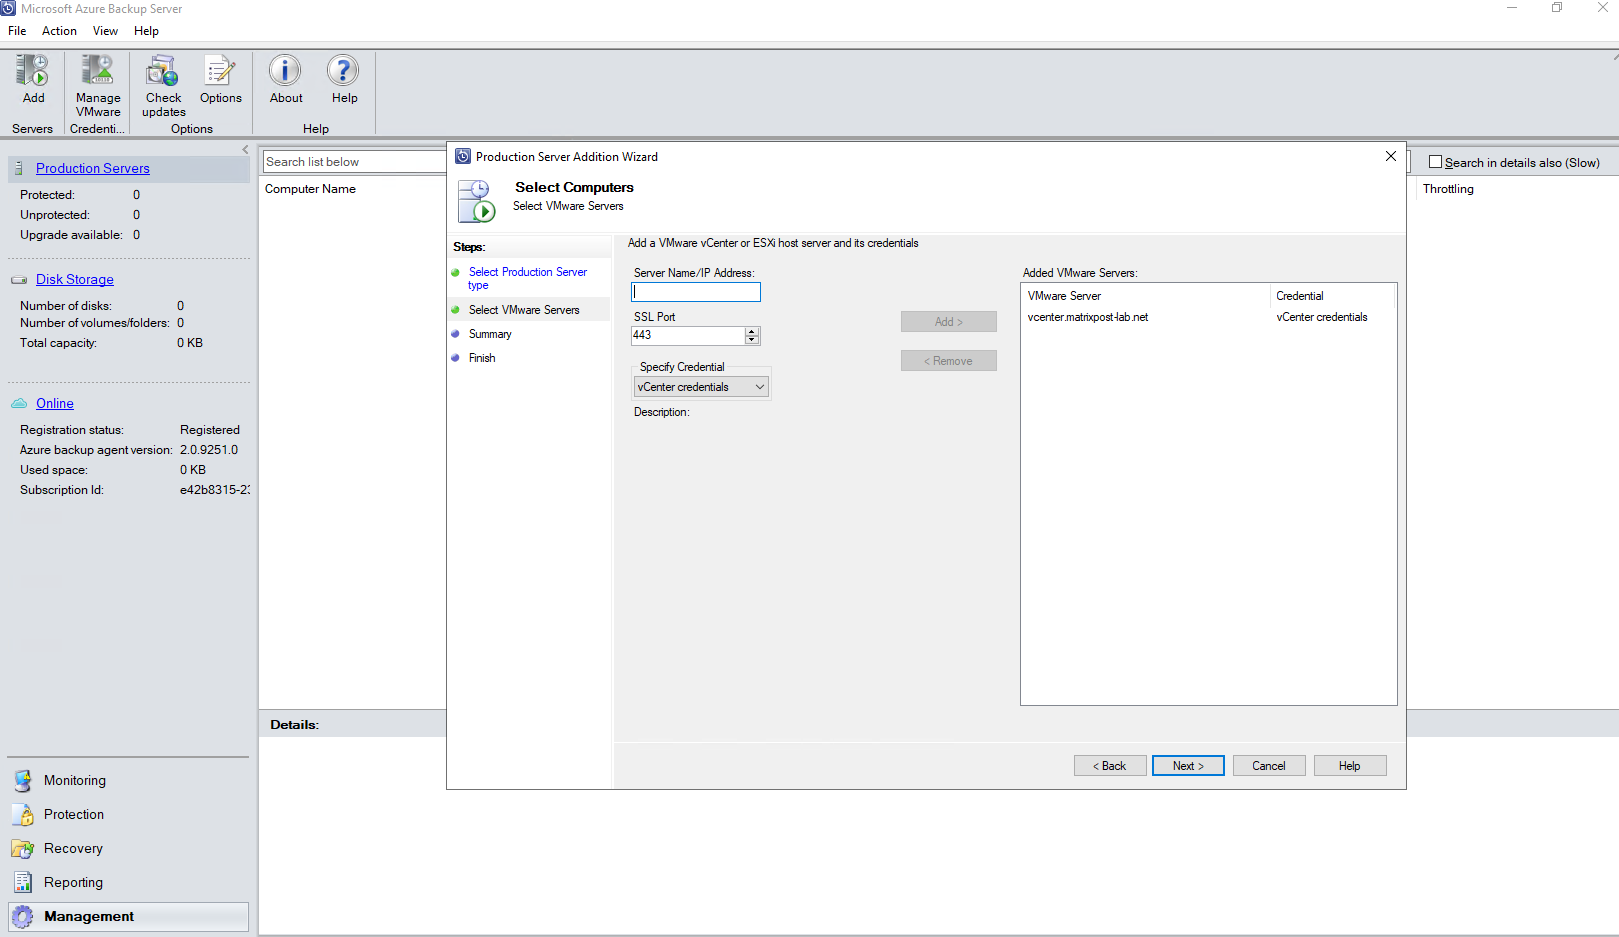
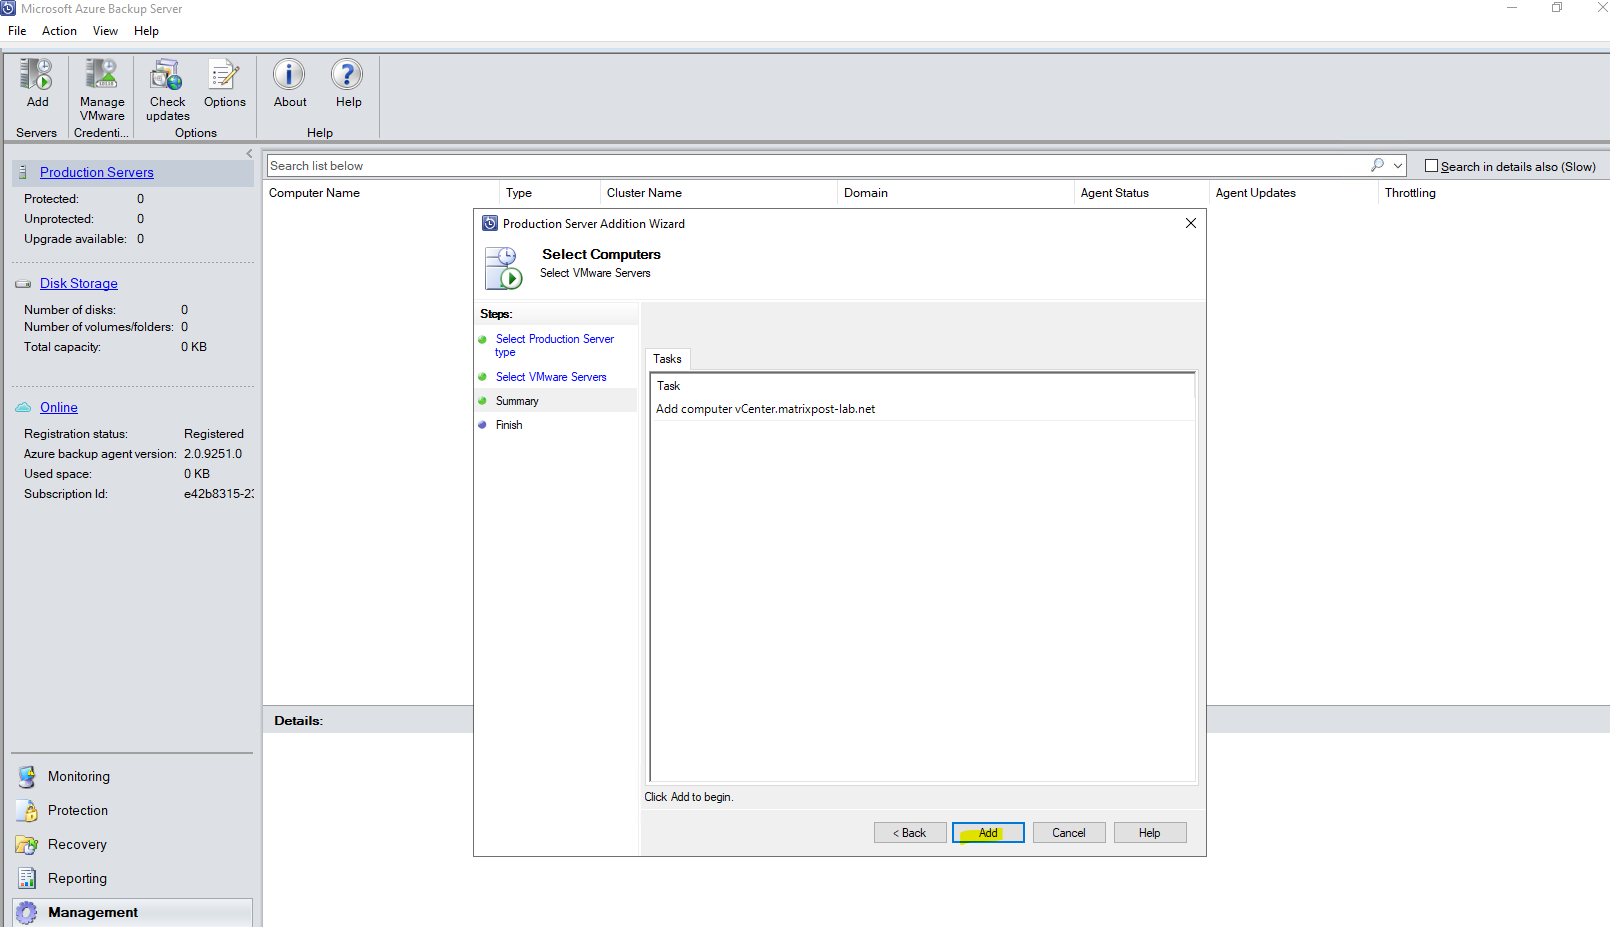
On the Summary page, select Add to add the VMware server to Azure Backup Server. The new server is added immediately, no agent is needed on the VMware server.
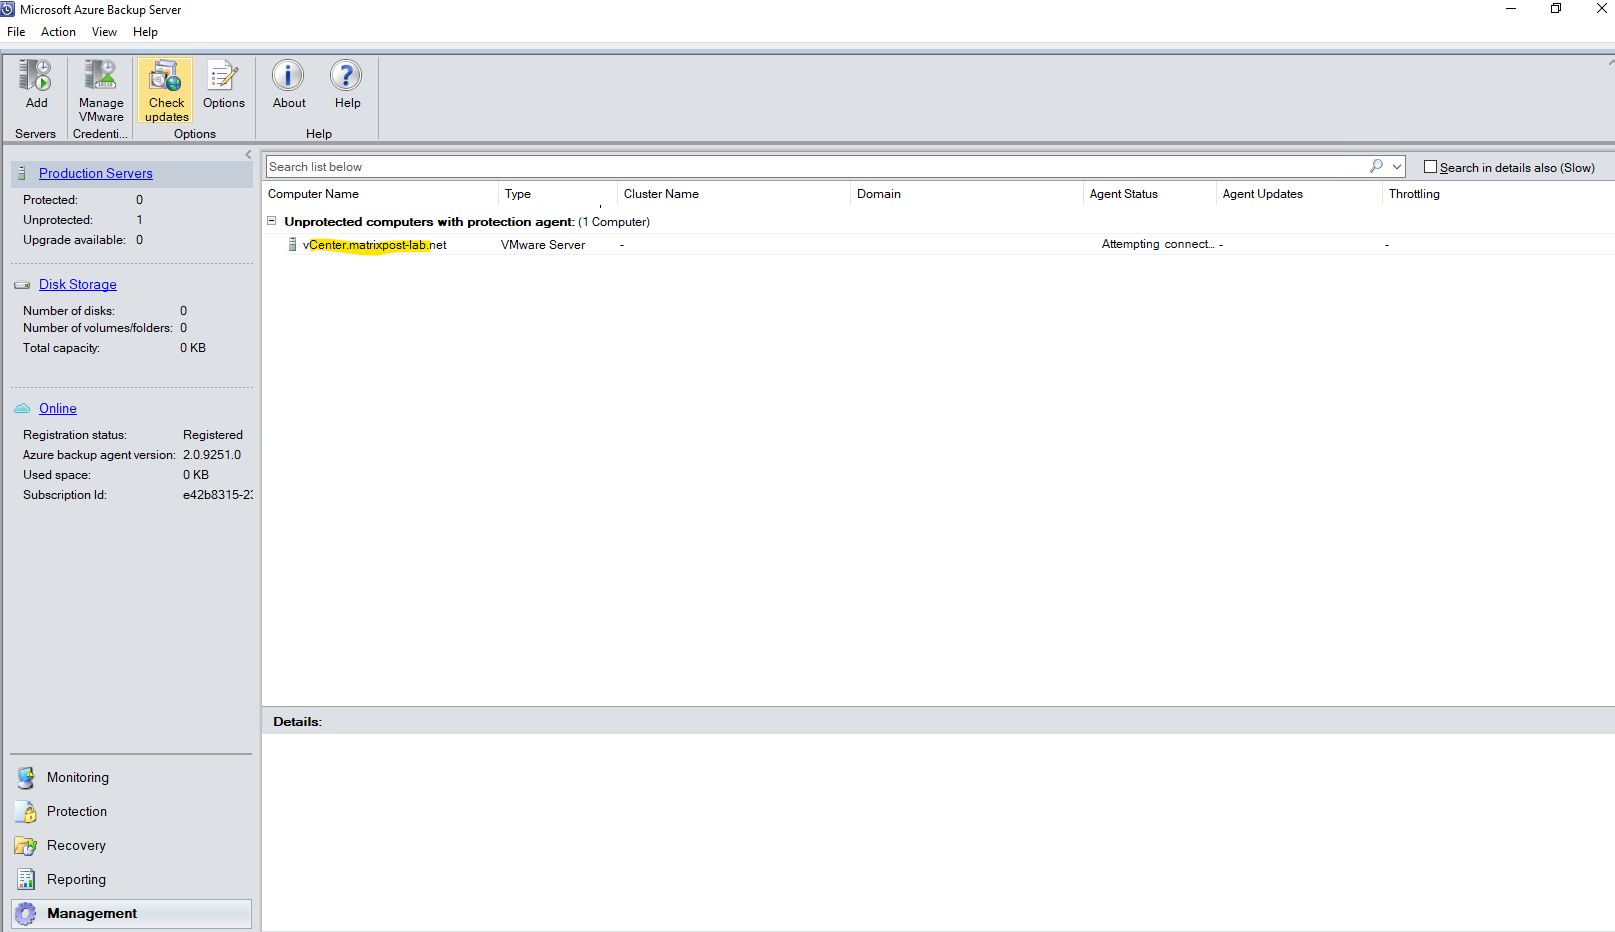
If you have multiple ESXi hosts that aren’t managed by vCenter server, or you have multiple instances of vCenter Server, you need to rerun the wizard to add the servers.
Configure a protection group
To add VMware VMs for backup, Protection groups gather multiple VMs and apply the same data retention and backup settings to all VMs in the group, follow these steps:
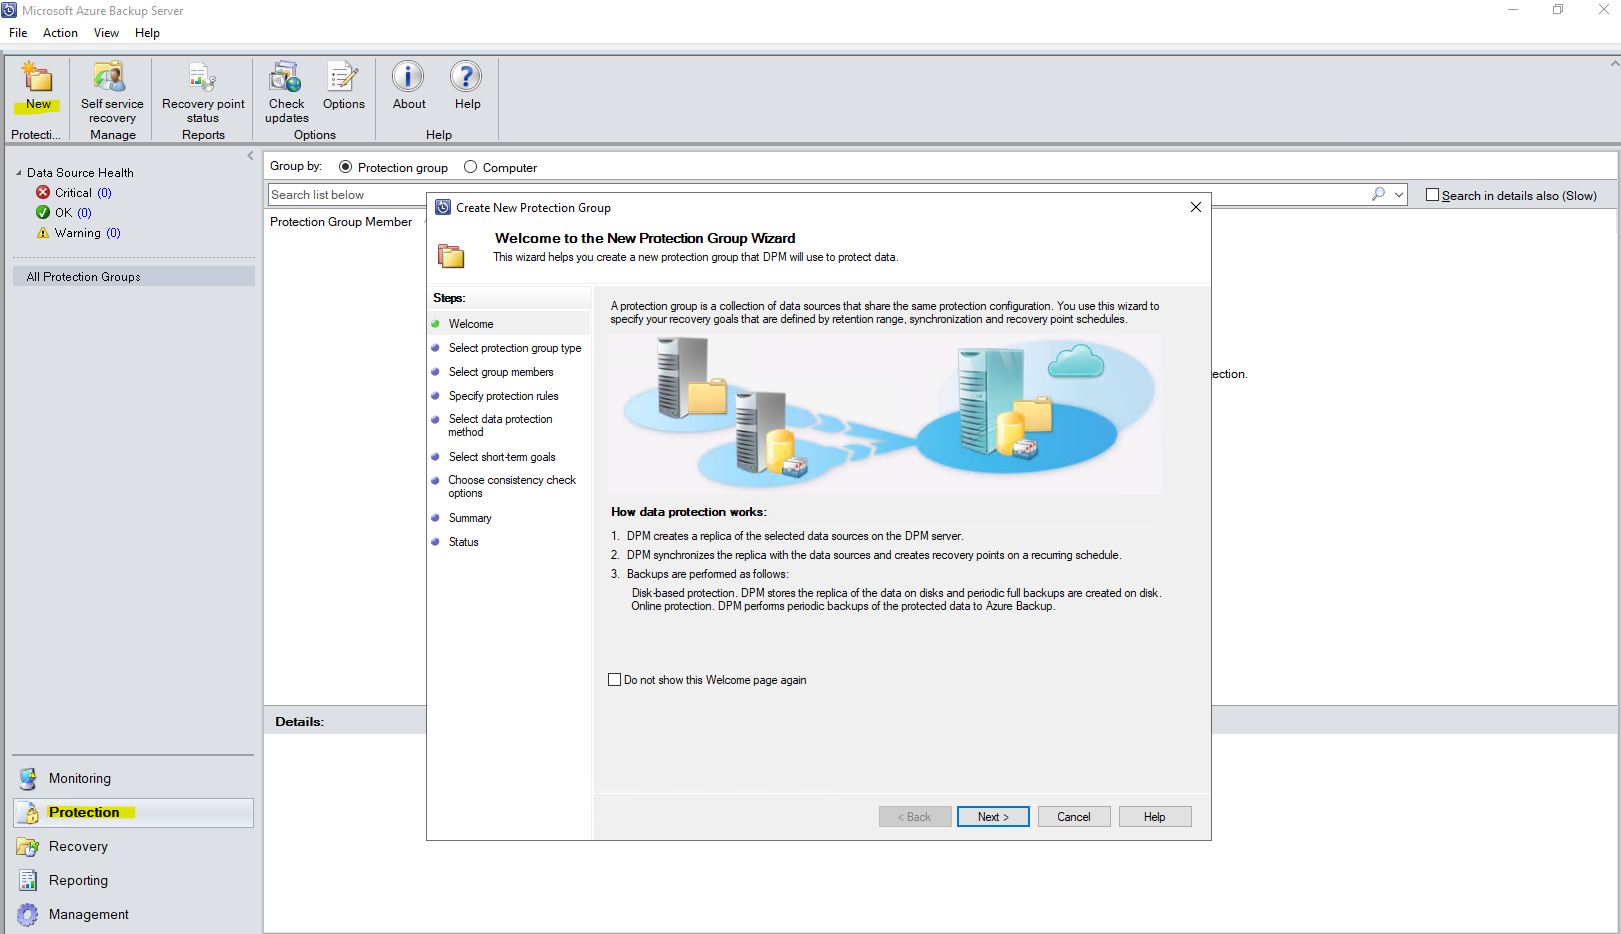
On the Azure Backup Server console, select Protection > New.
On the Create New Protection Group wizard welcome page, select Next.
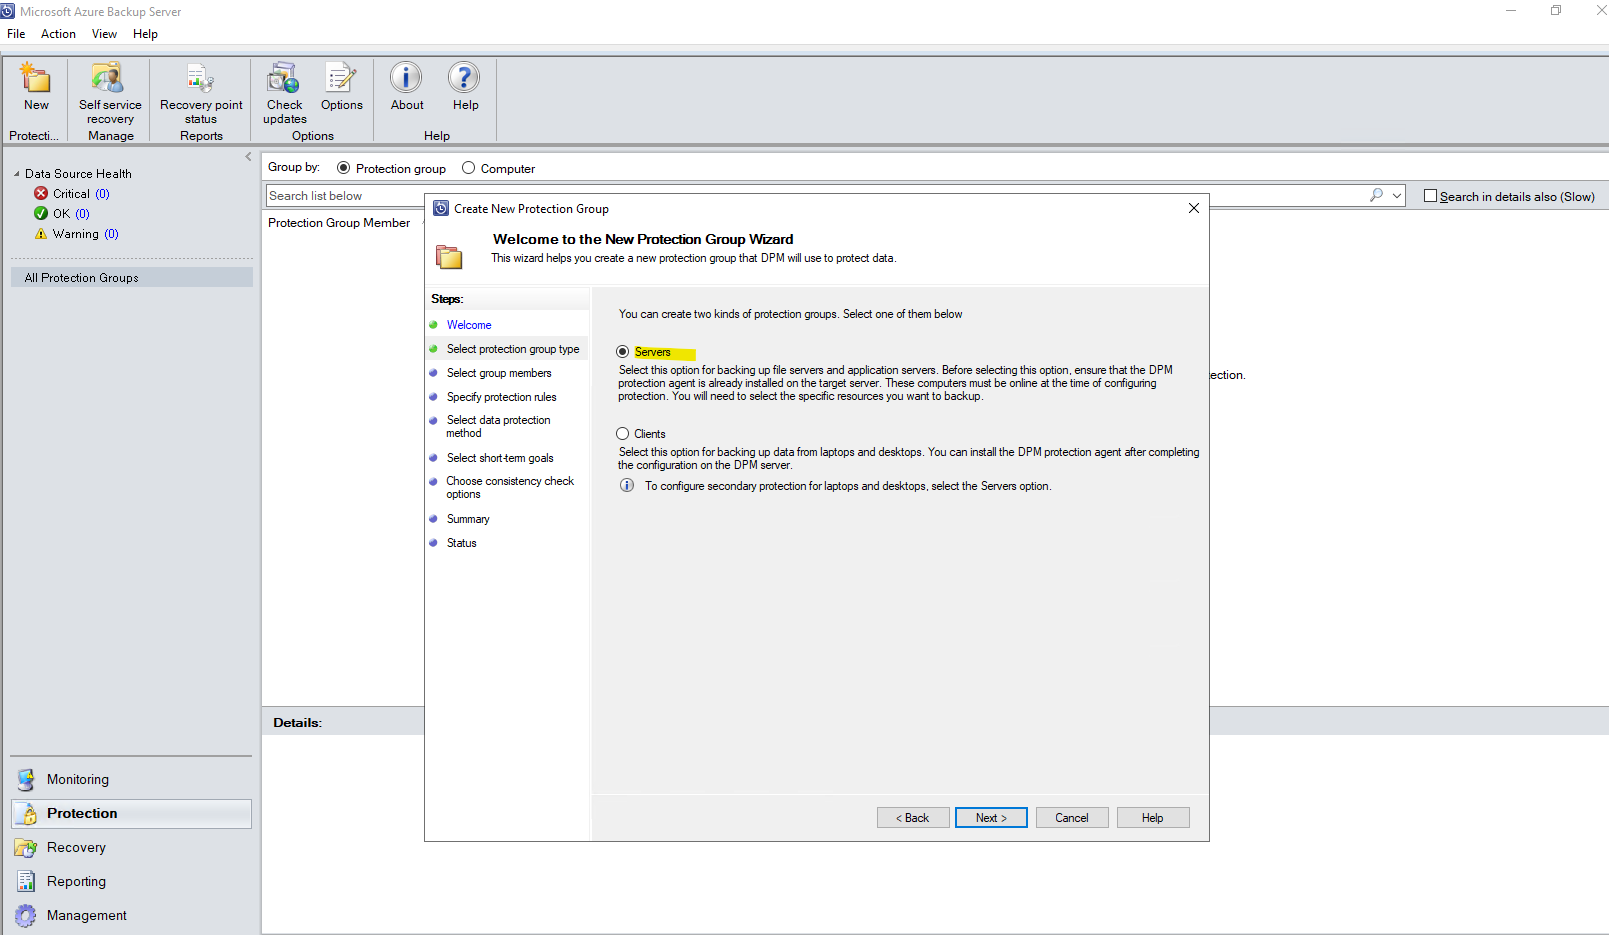
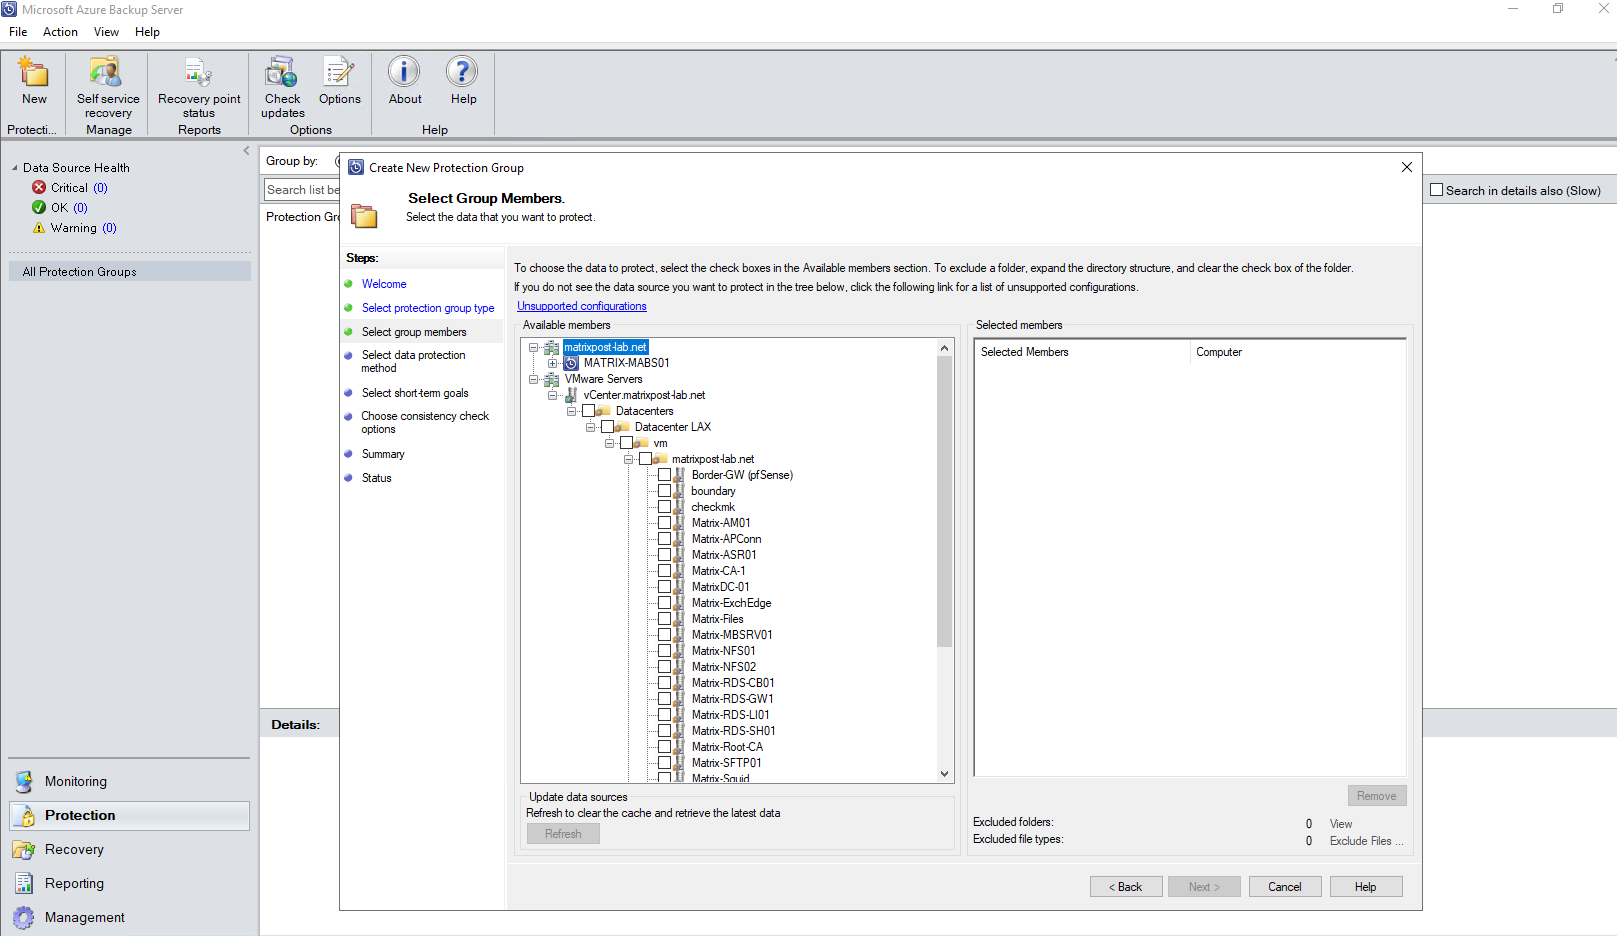
On the Select Protection group type page, select Servers and then select Next. The Select group members page appears.
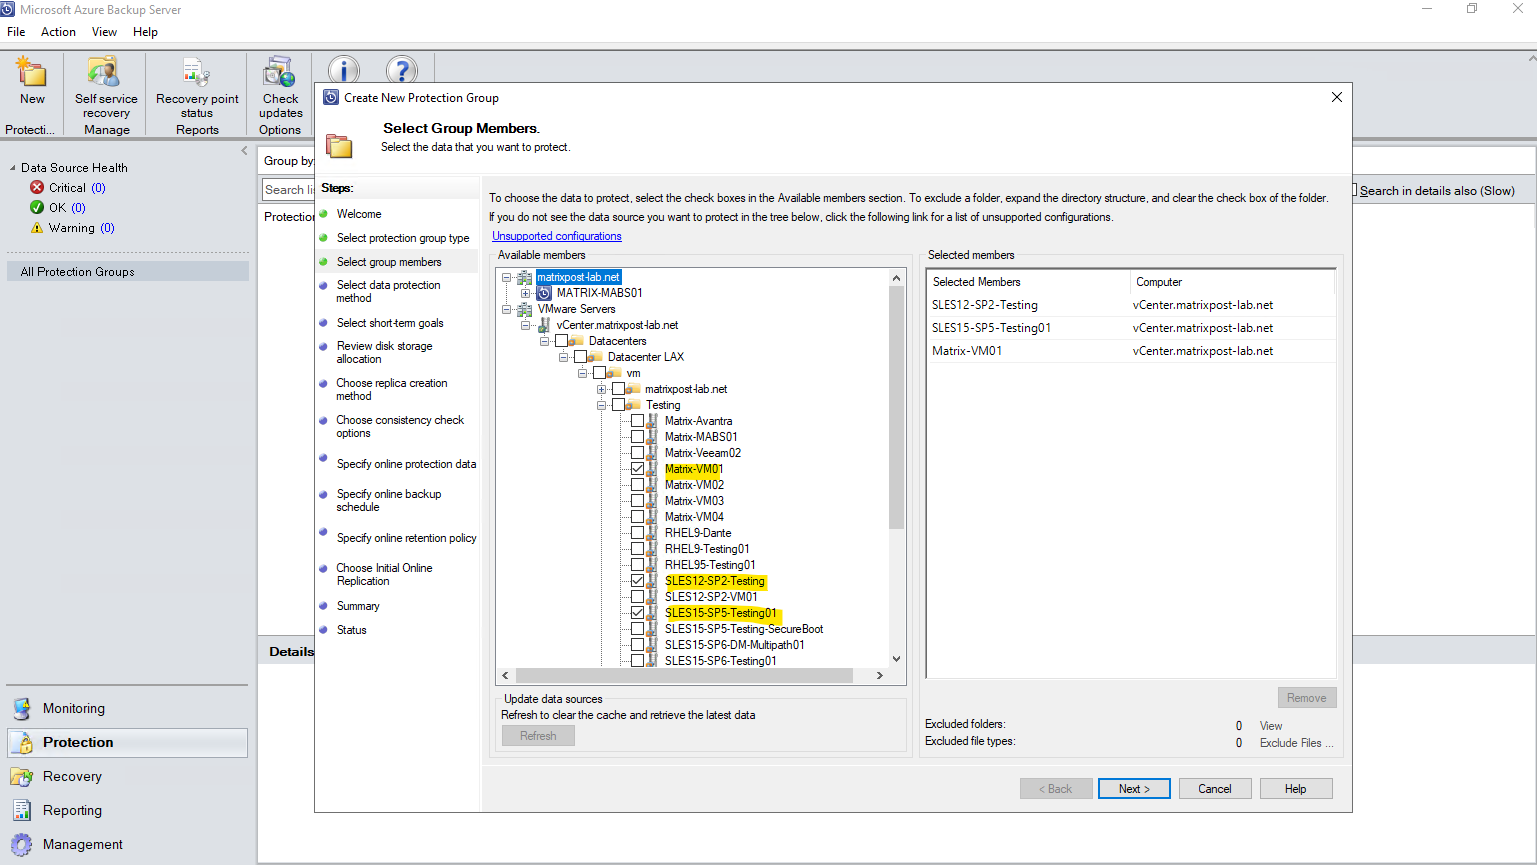
On Select group members, select the VMs (or VM folders) that you want to back up. Then select Next.
If a VM or folder is already being backed up, you can’t select it. This ensures that duplicate recovery points aren’t created for a VM.
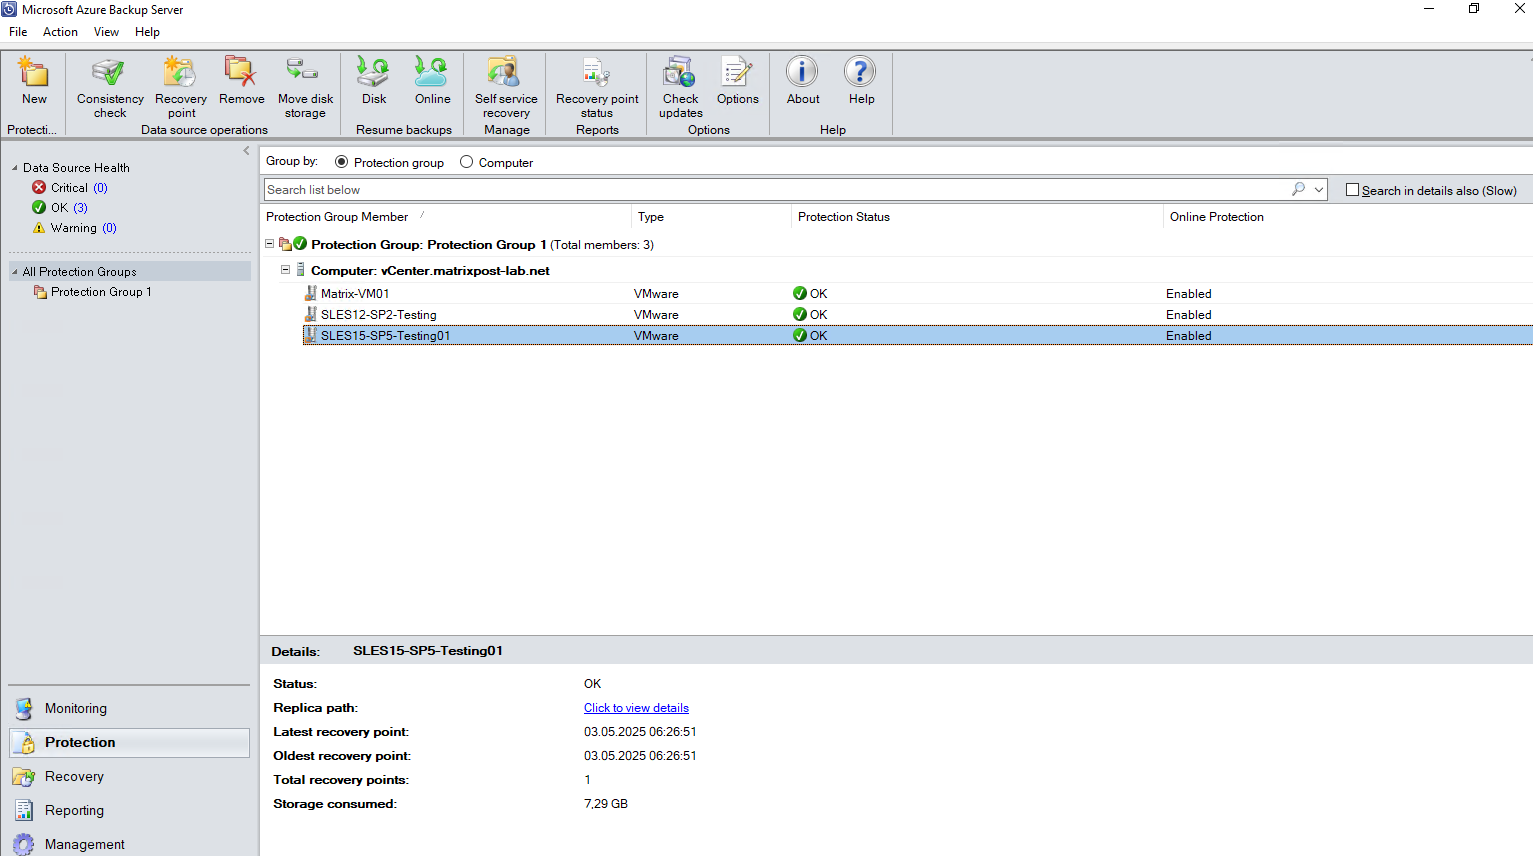
Below I will select one Windows machine (Matrix-VM01) and two SUSE Linux Enterprise machines which should be added to my new protection group.
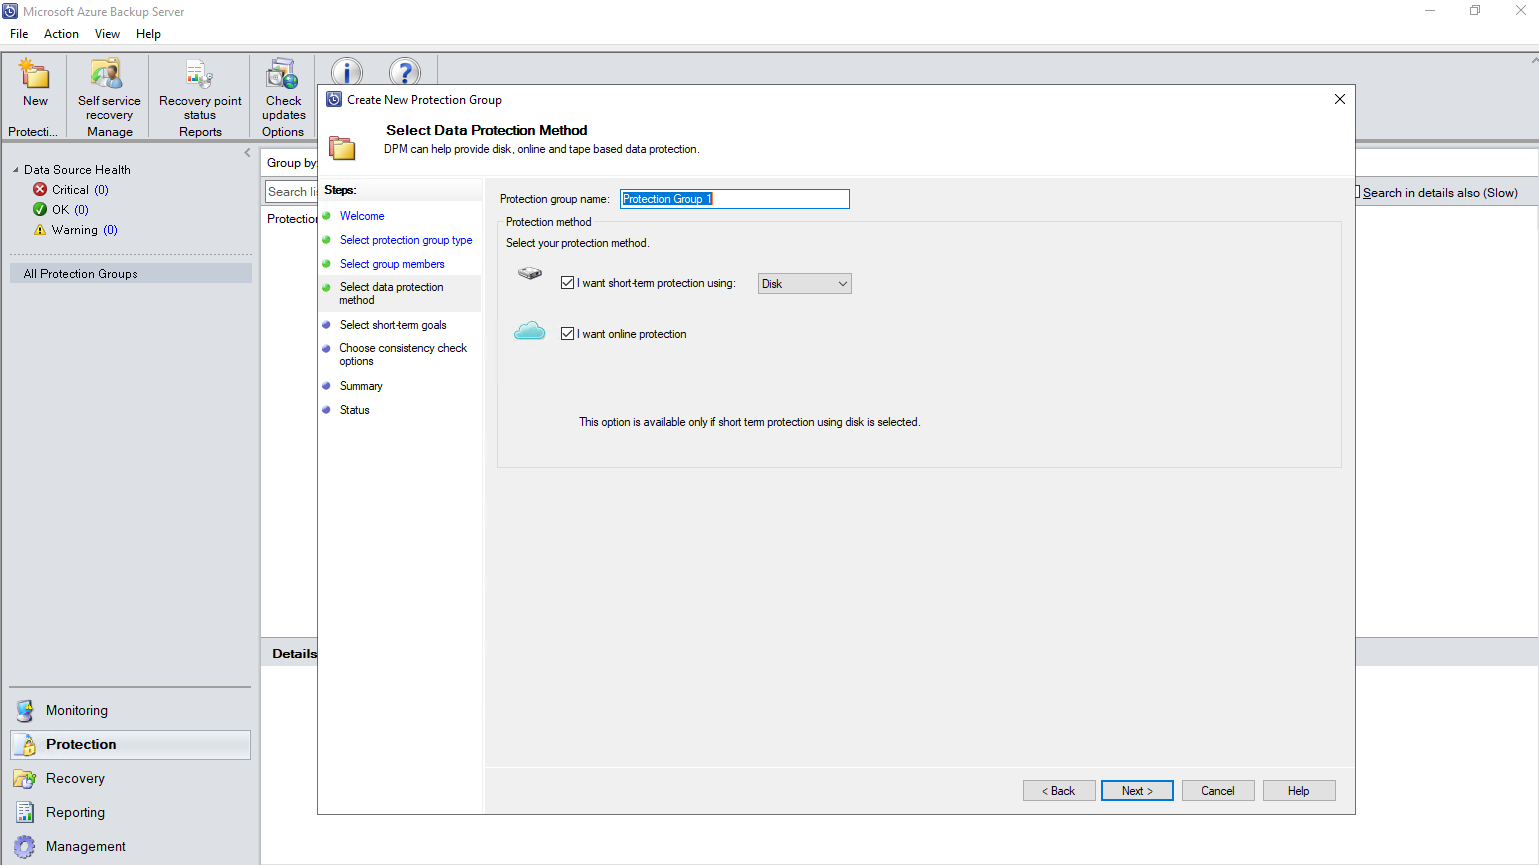
On Select Data Protection Method page, enter a name for the protection group, and protection settings. To back up to Azure, set short-term protection to Disk and enable online protection. Then select Next.
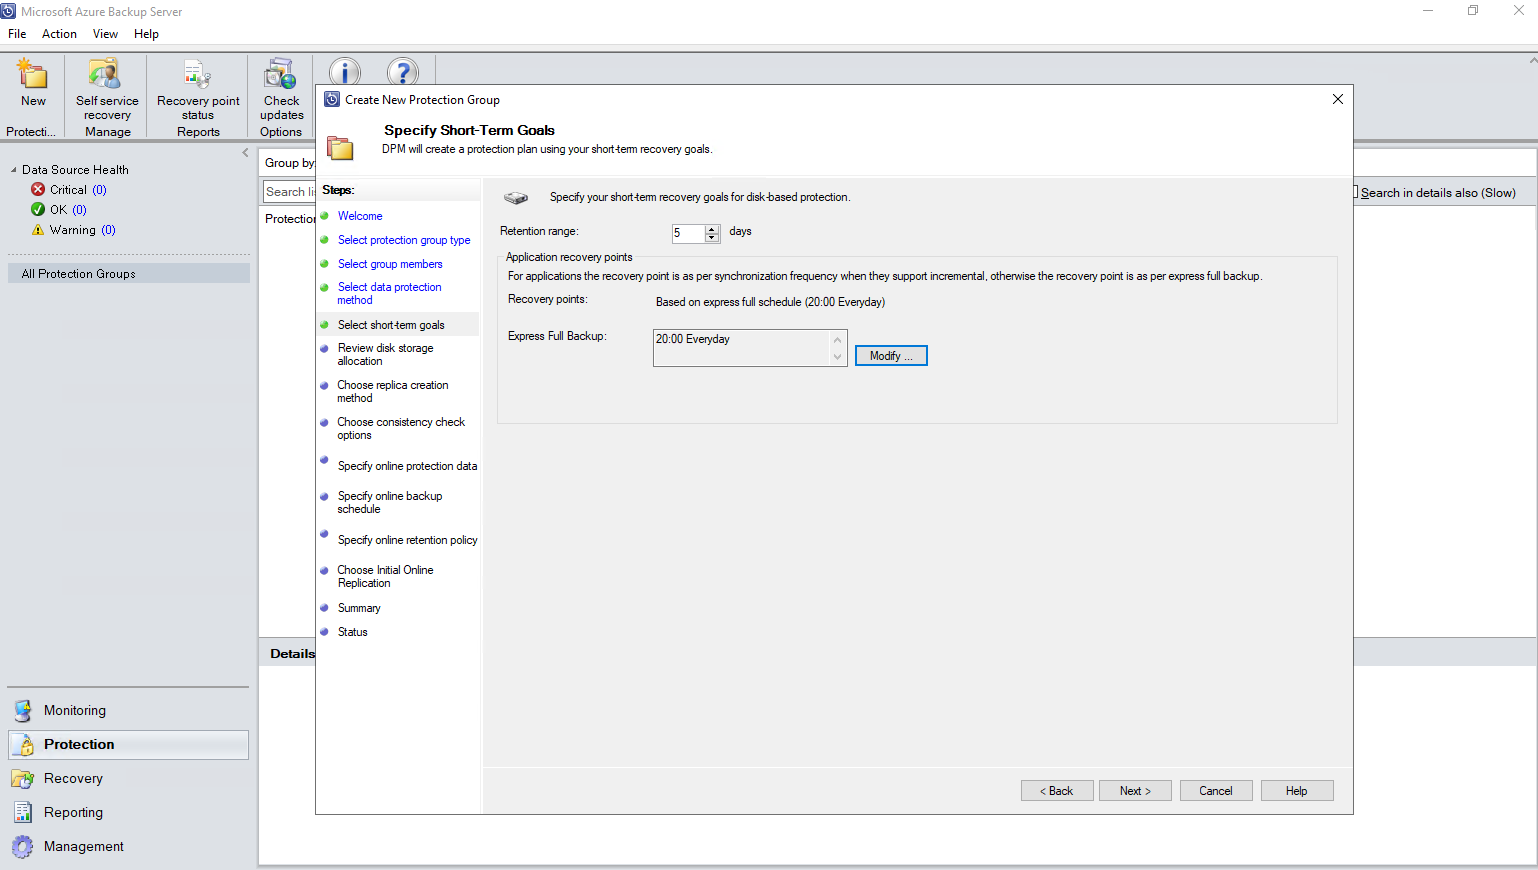
On Specify Short-Term Goals, specify how long you want to keep data backed up to disk. On Retention Range, specify how many days disk recovery points should be kept.
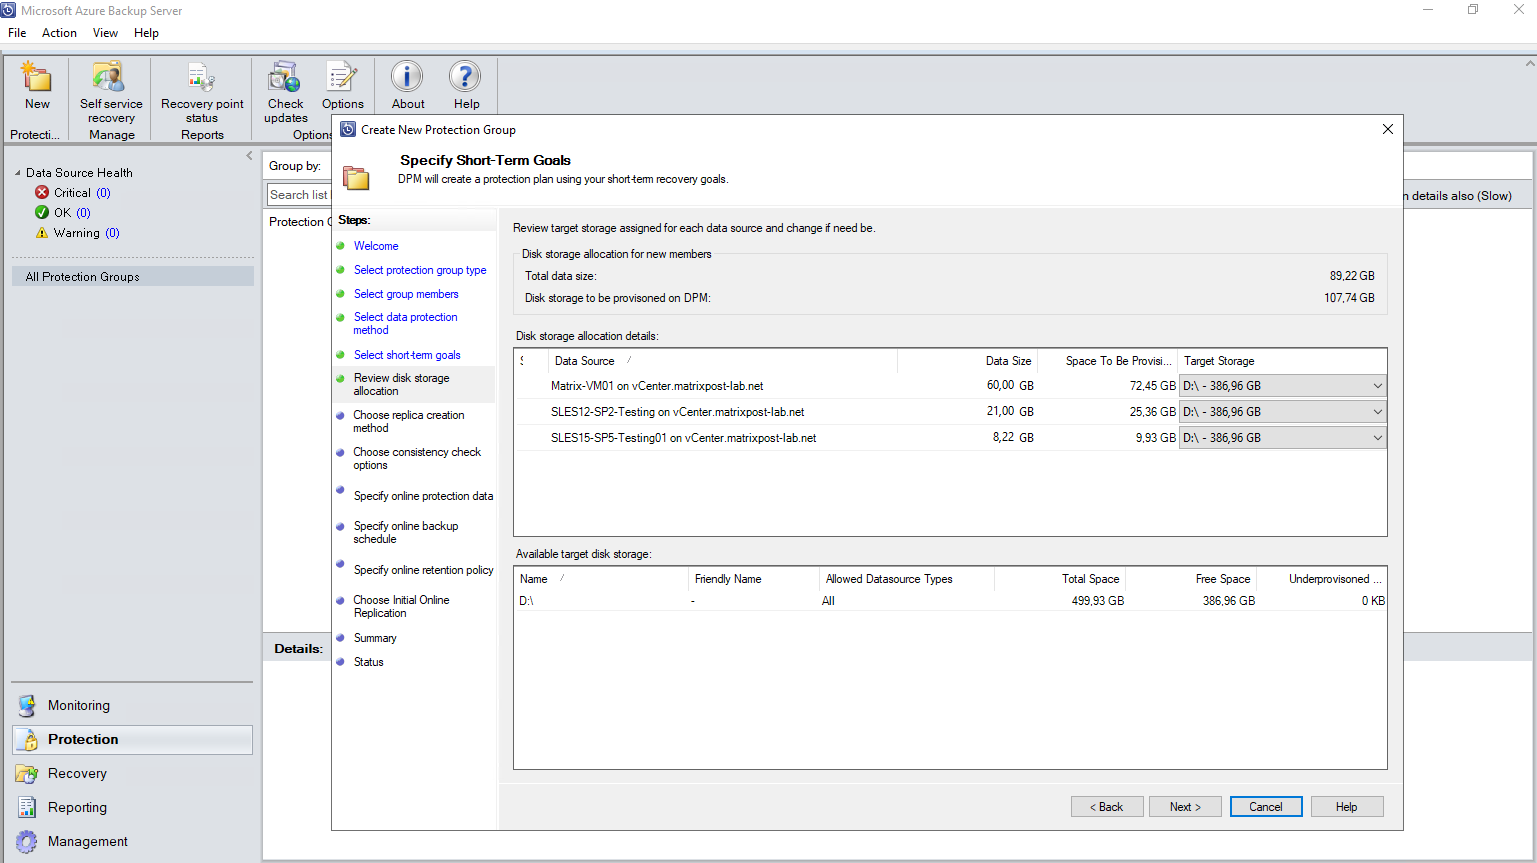
On Review Disk Allocation, review the disk space provided for the VM backups. for the VMs.
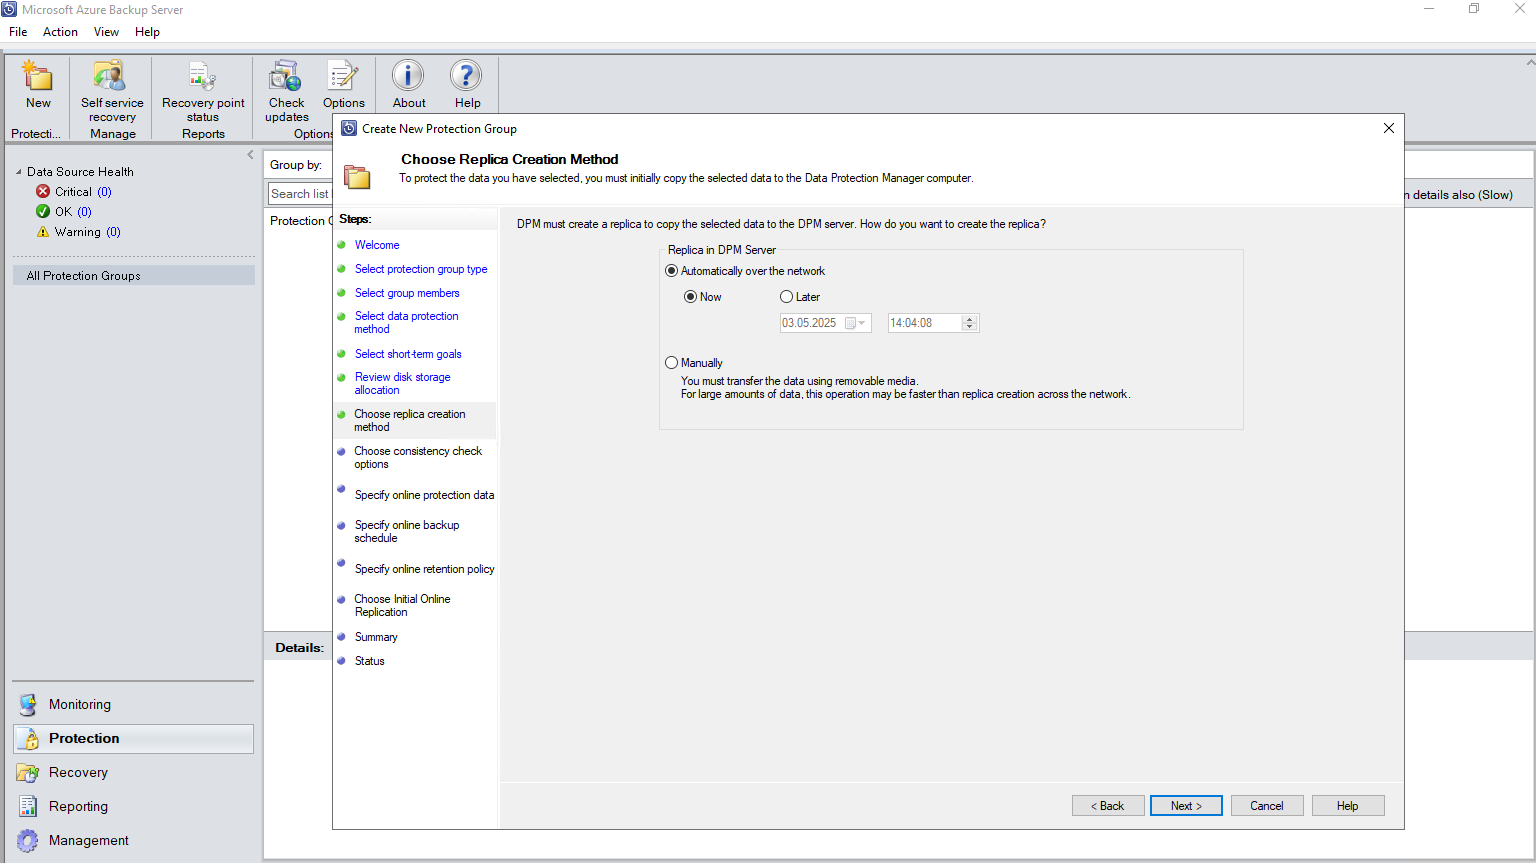
On Choose Replica Creation Method page, specify how you want to take the initial backup, and then select Next
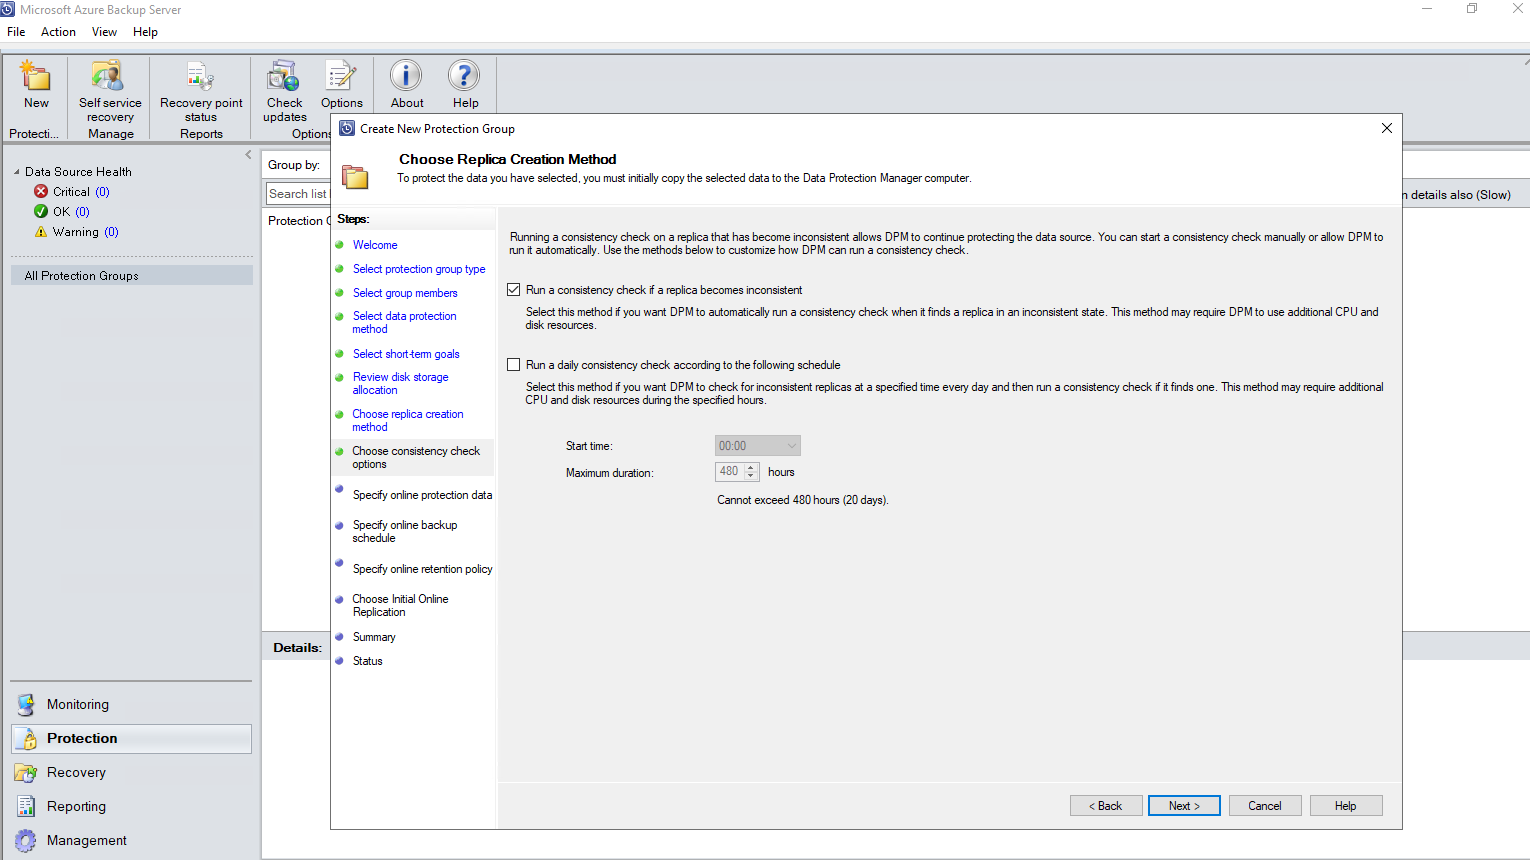
On Consistency Check Options, select how and when to automate the consistency checks. Then select Next.
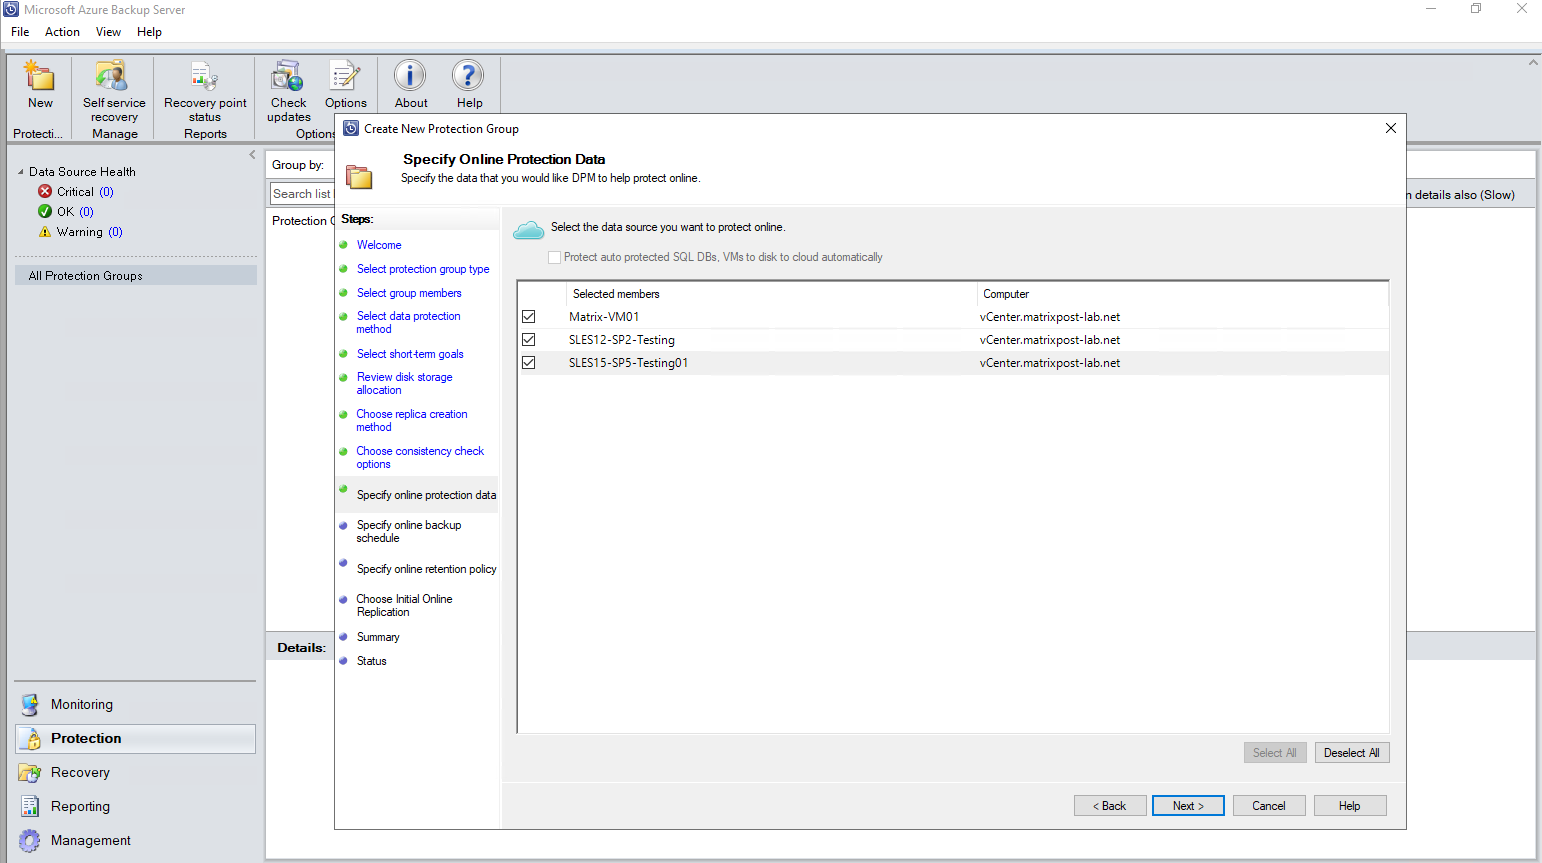
On Specify Online Protection Data page, select the VMs or VM folders that you want to back up. You can select the members individually, or select Select All to choose all members. Then select Next.
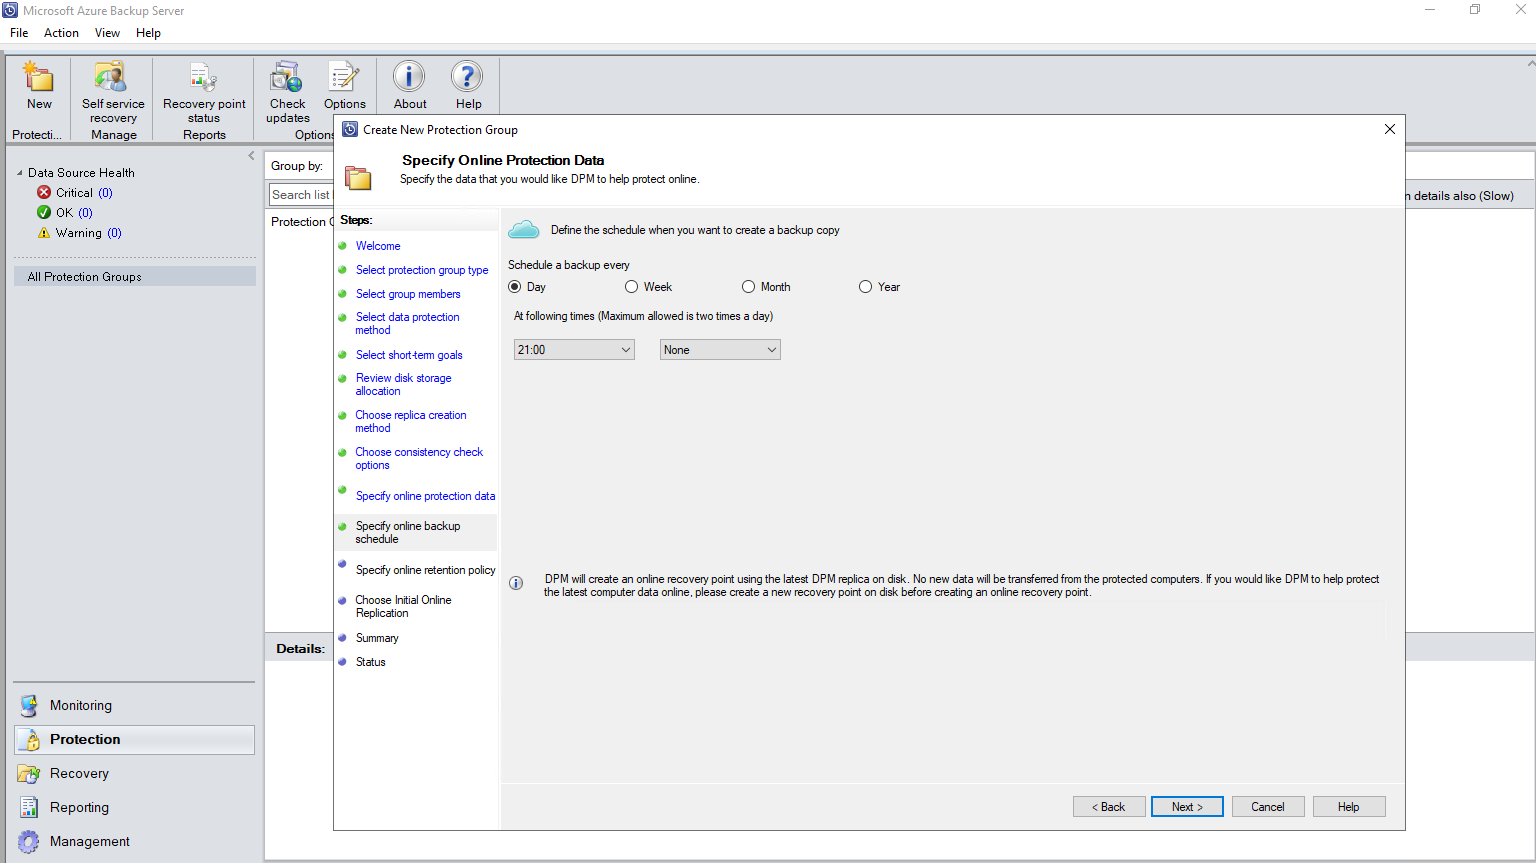
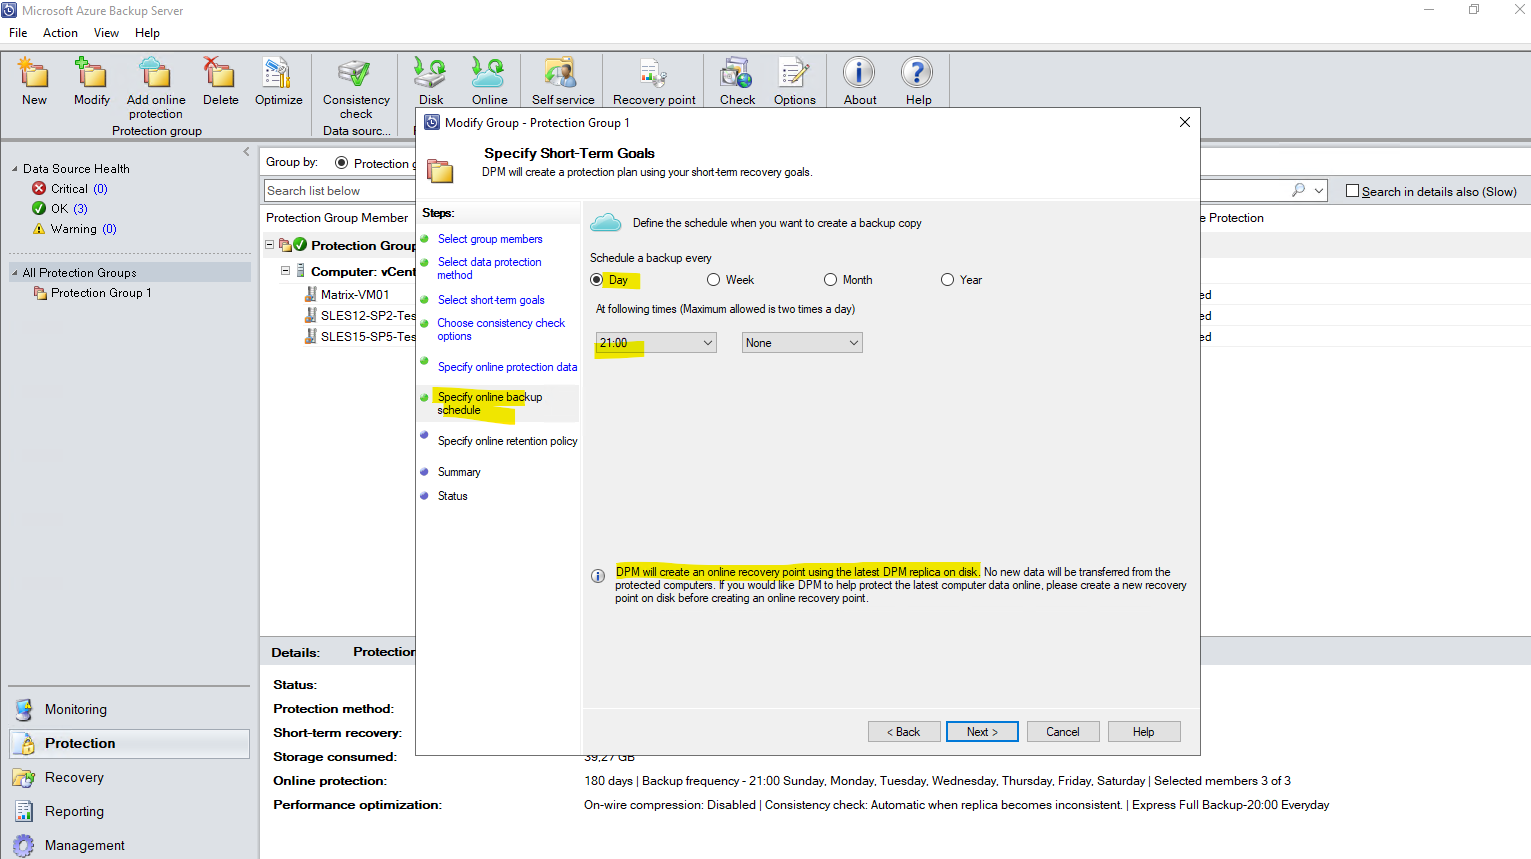
On the Specify Online Backup Schedule page, specify how often you want to back up data from local storage to Azure.
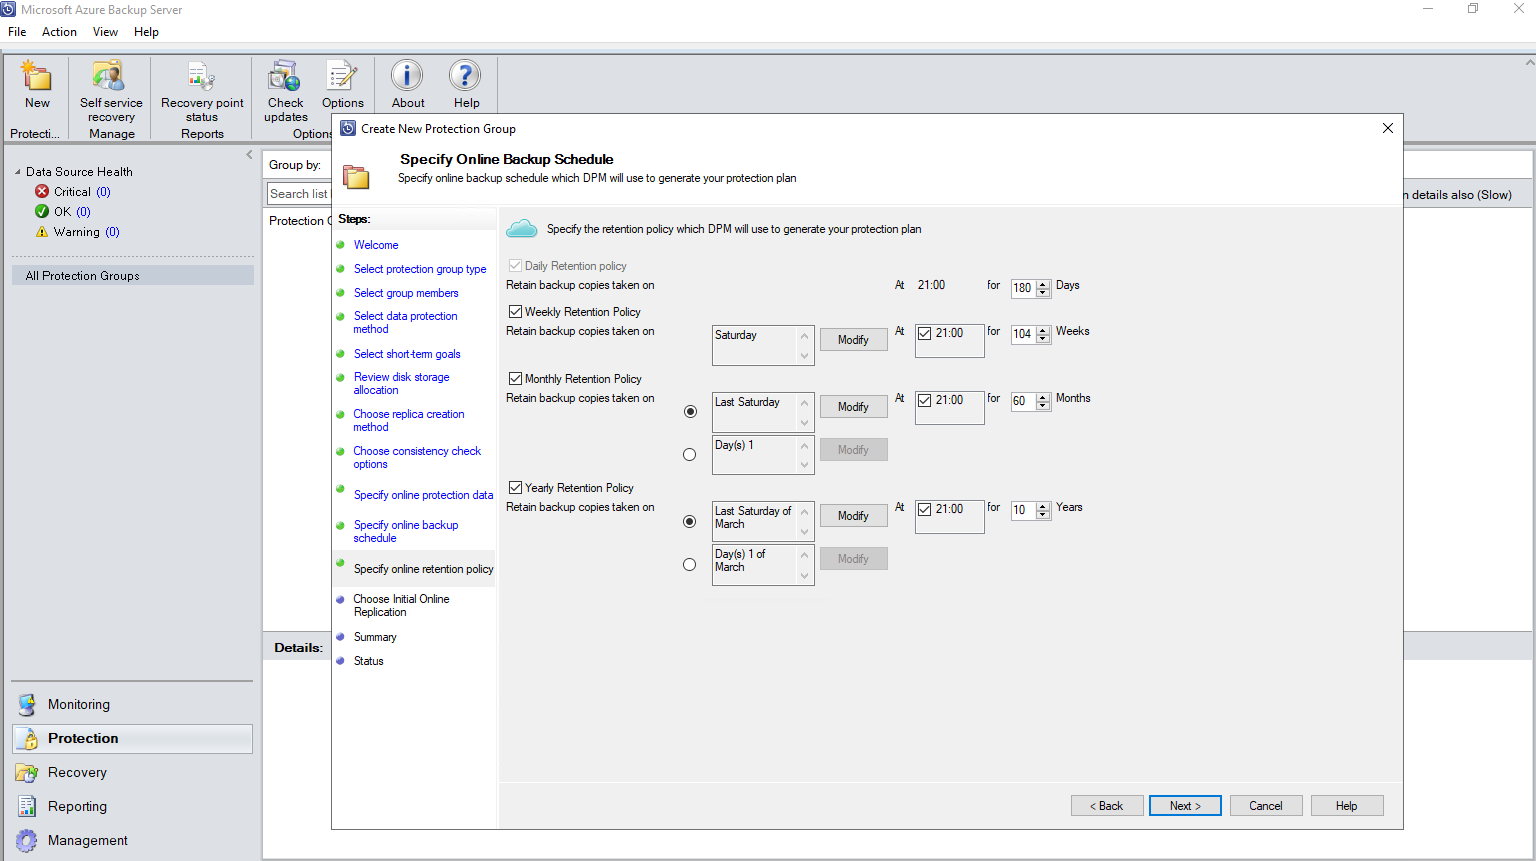
On the Specify Online Retention Policy page, indicate how long you want to keep the recovery points that are created from the daily/weekly/monthly/yearly backups to Azure. then select Next.
- There’s no time limit for how long you can keep data in Azure.
- The only limit is that you can’t have more than 9999 recovery points per protected instance. In this example, the protected instance is the VMware server.
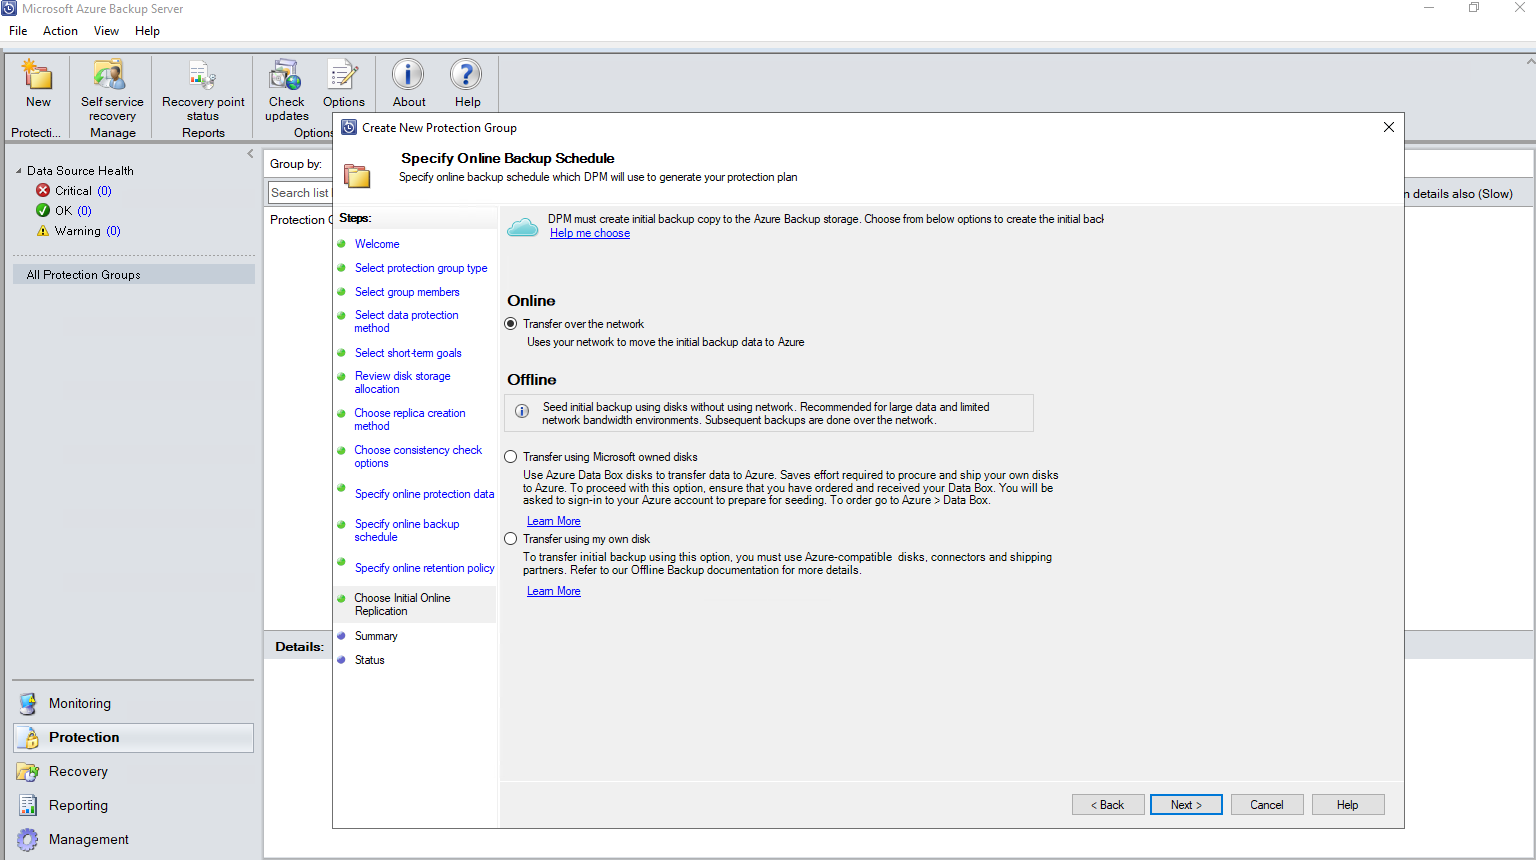
On the Choose Initial Online Replication we can select how to replicate the initial date to Azure. I will use the default Online method.
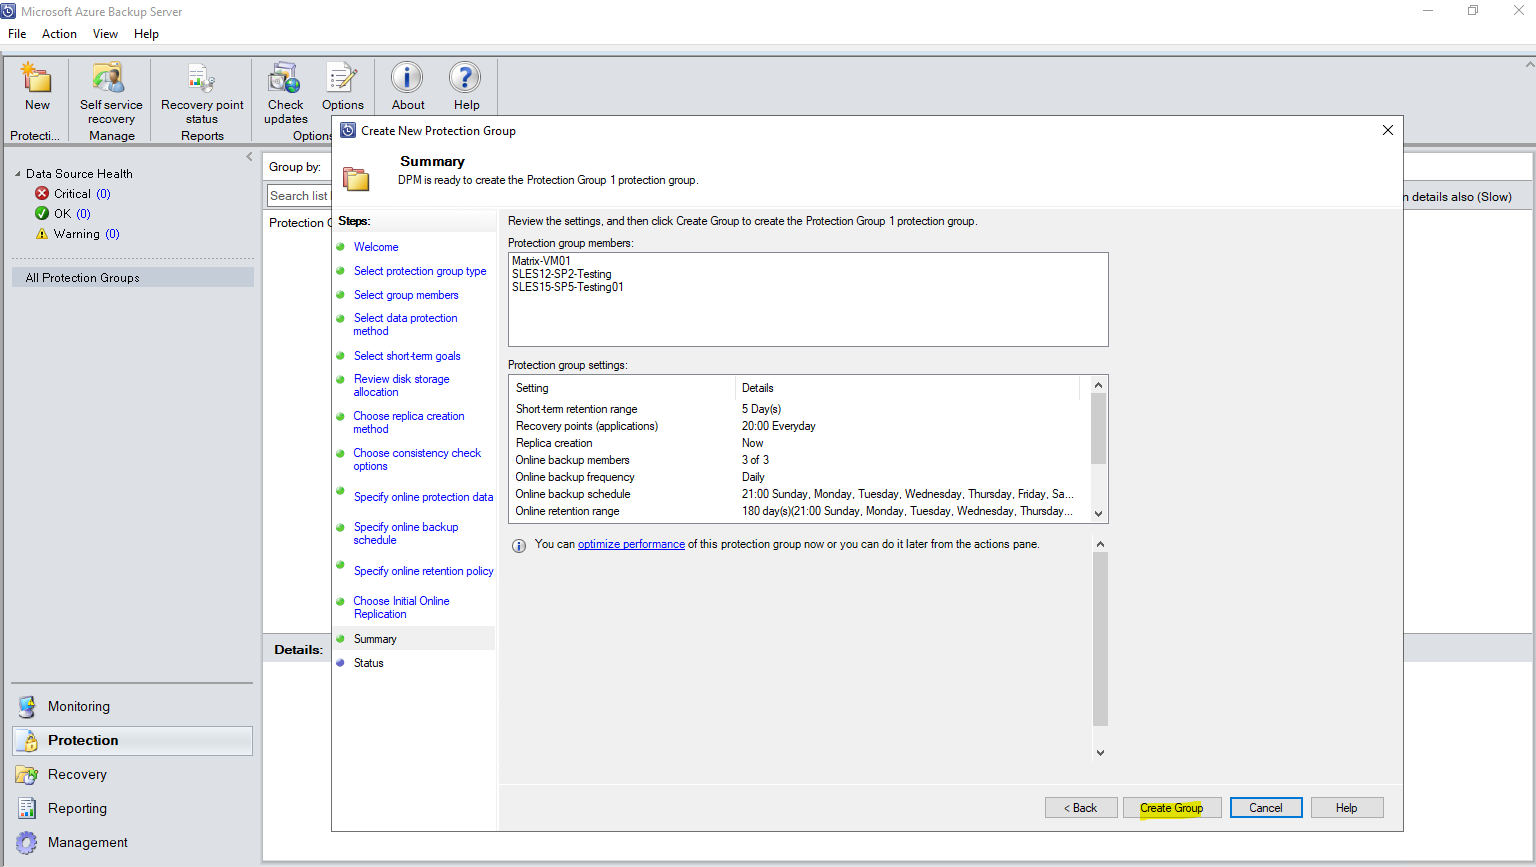
On the Summary page, review the settings, and then select Create Group.
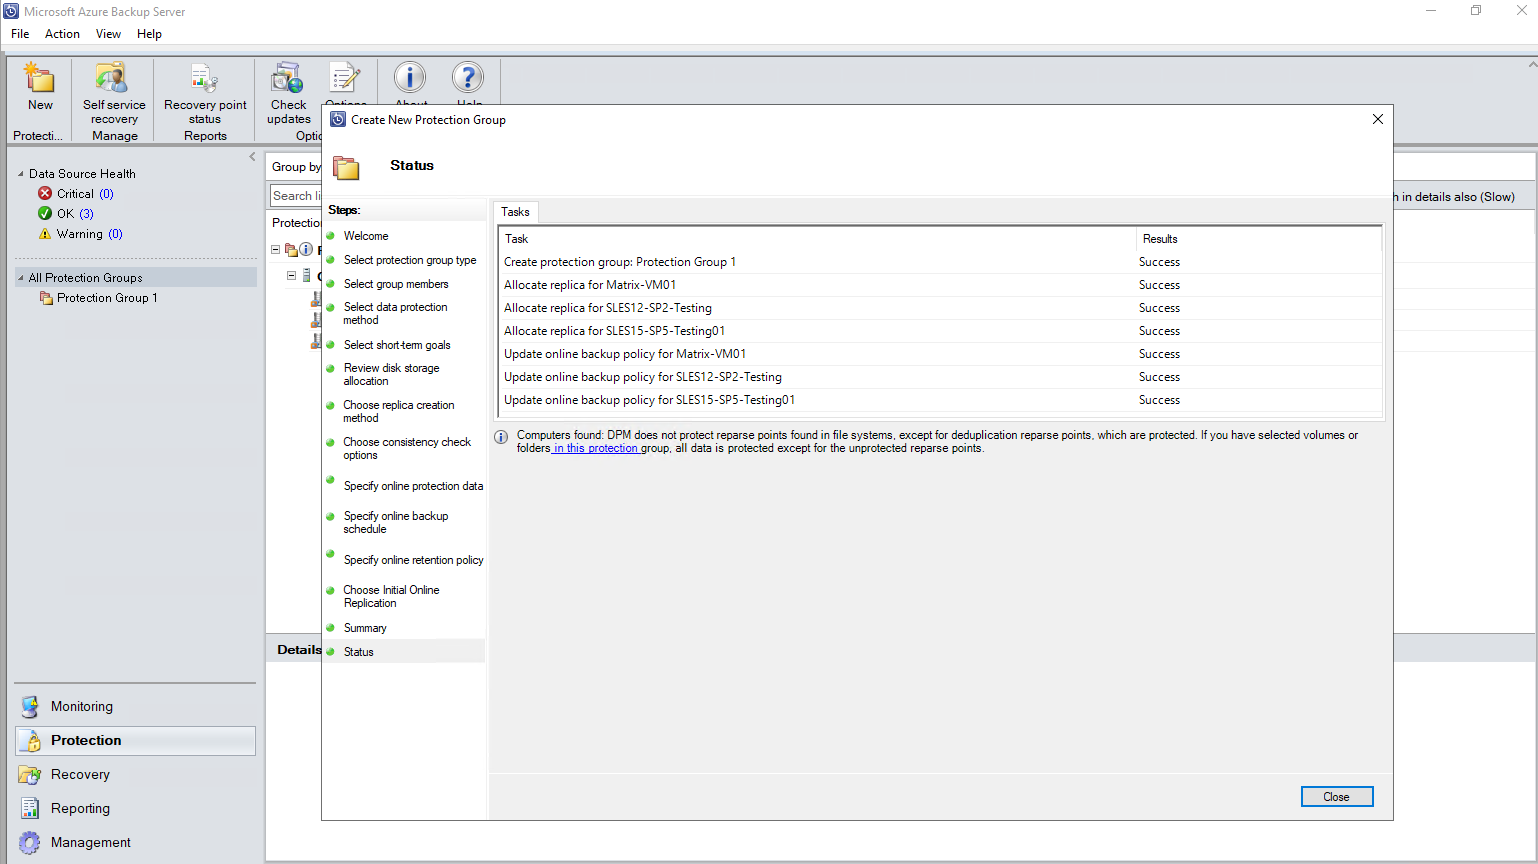
The initial replication will start immediately
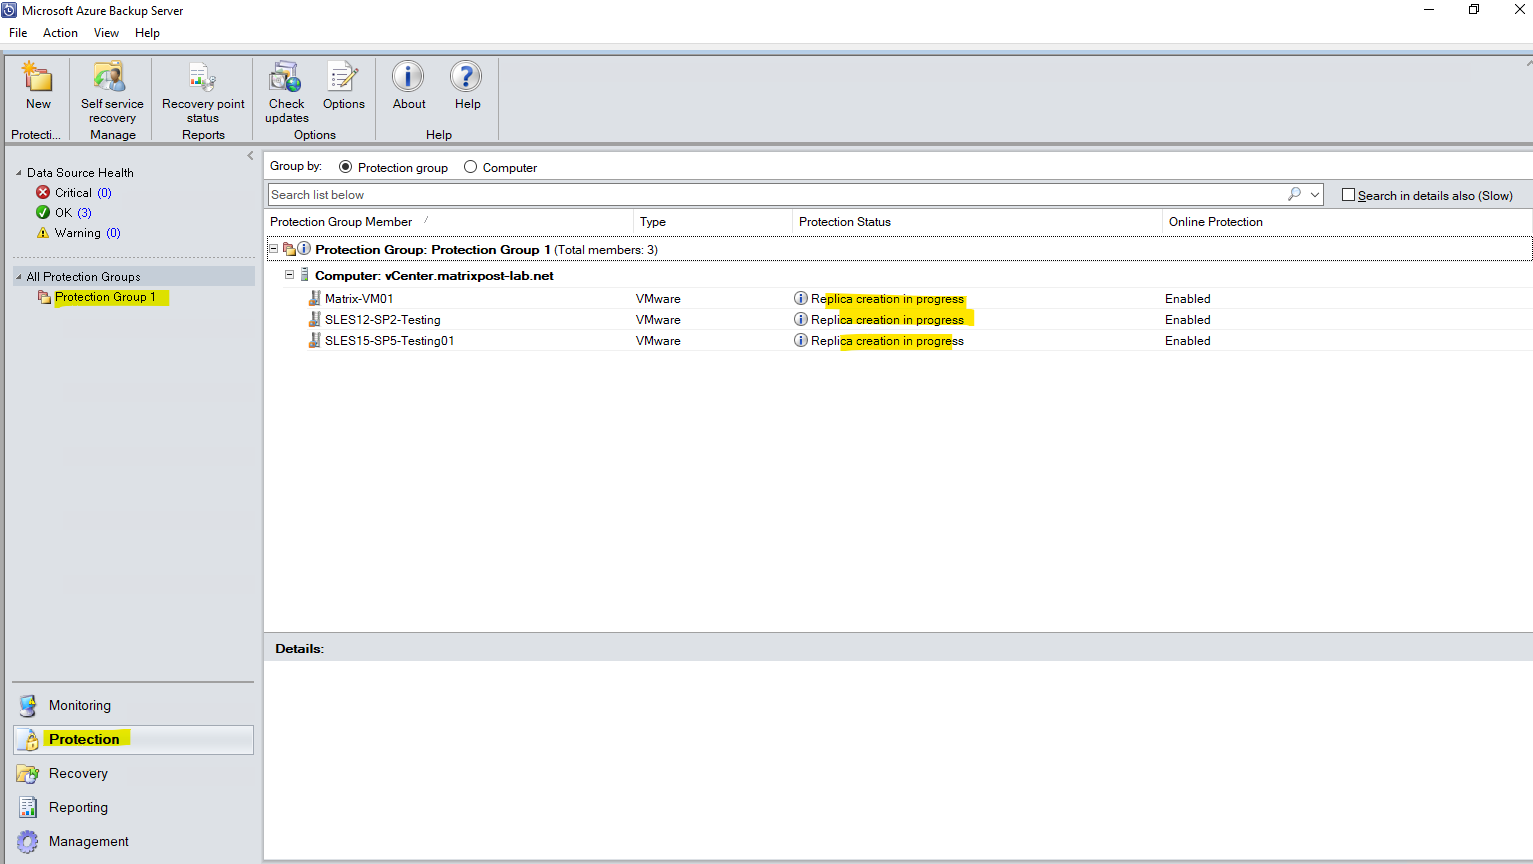
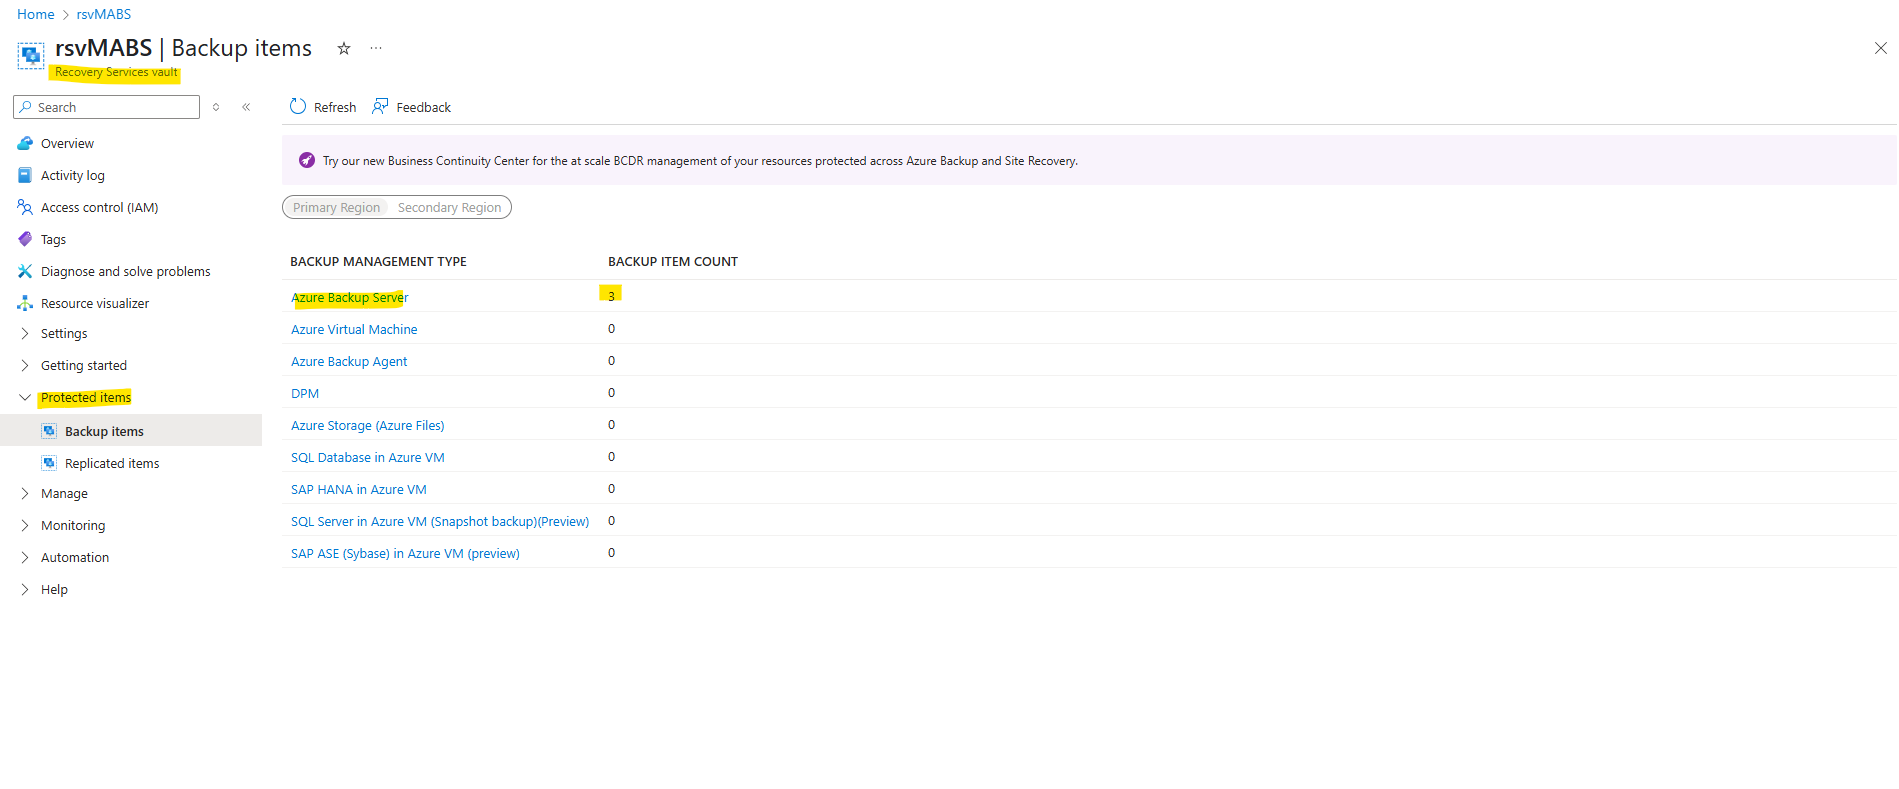
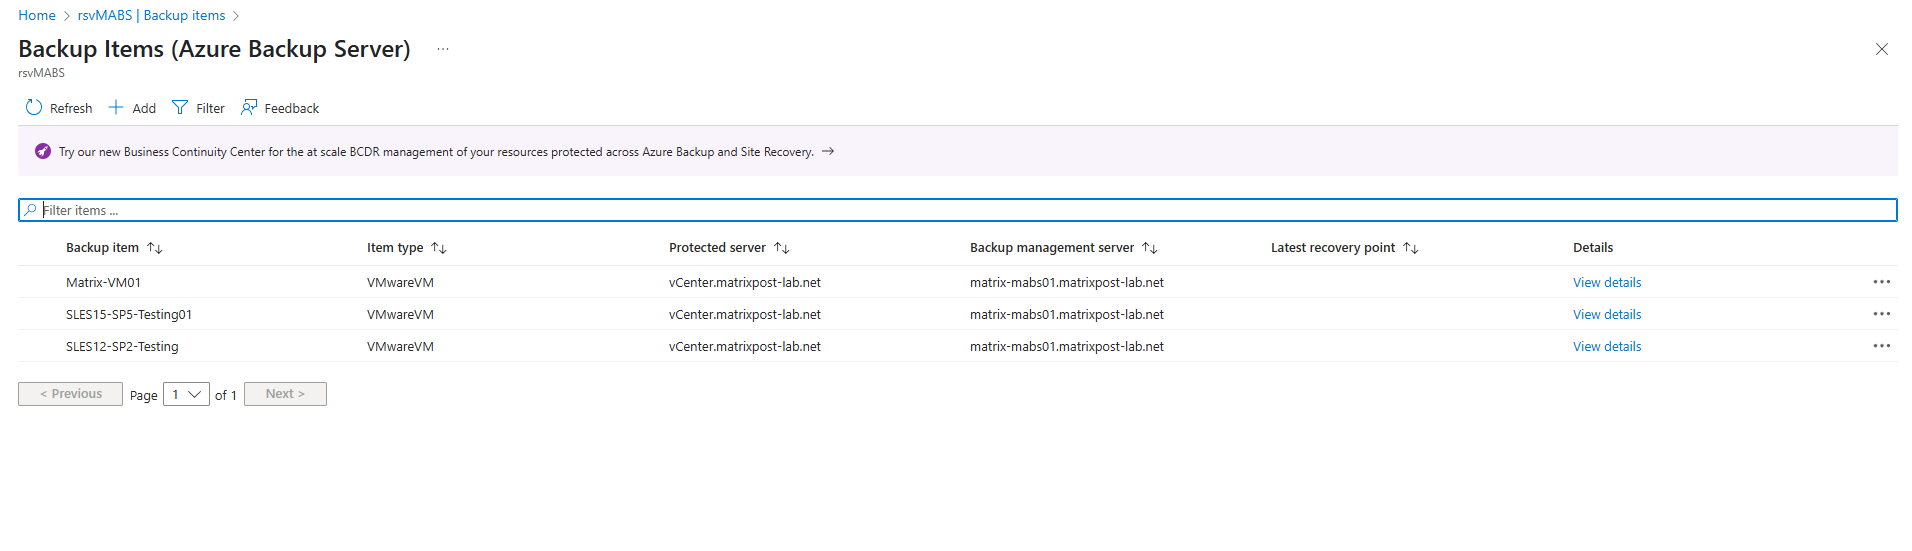
A few minutes later we can already see our protected three virtual machines in Azure and the recovery services vault we created.
So far no recovery points are created, this will take a while.
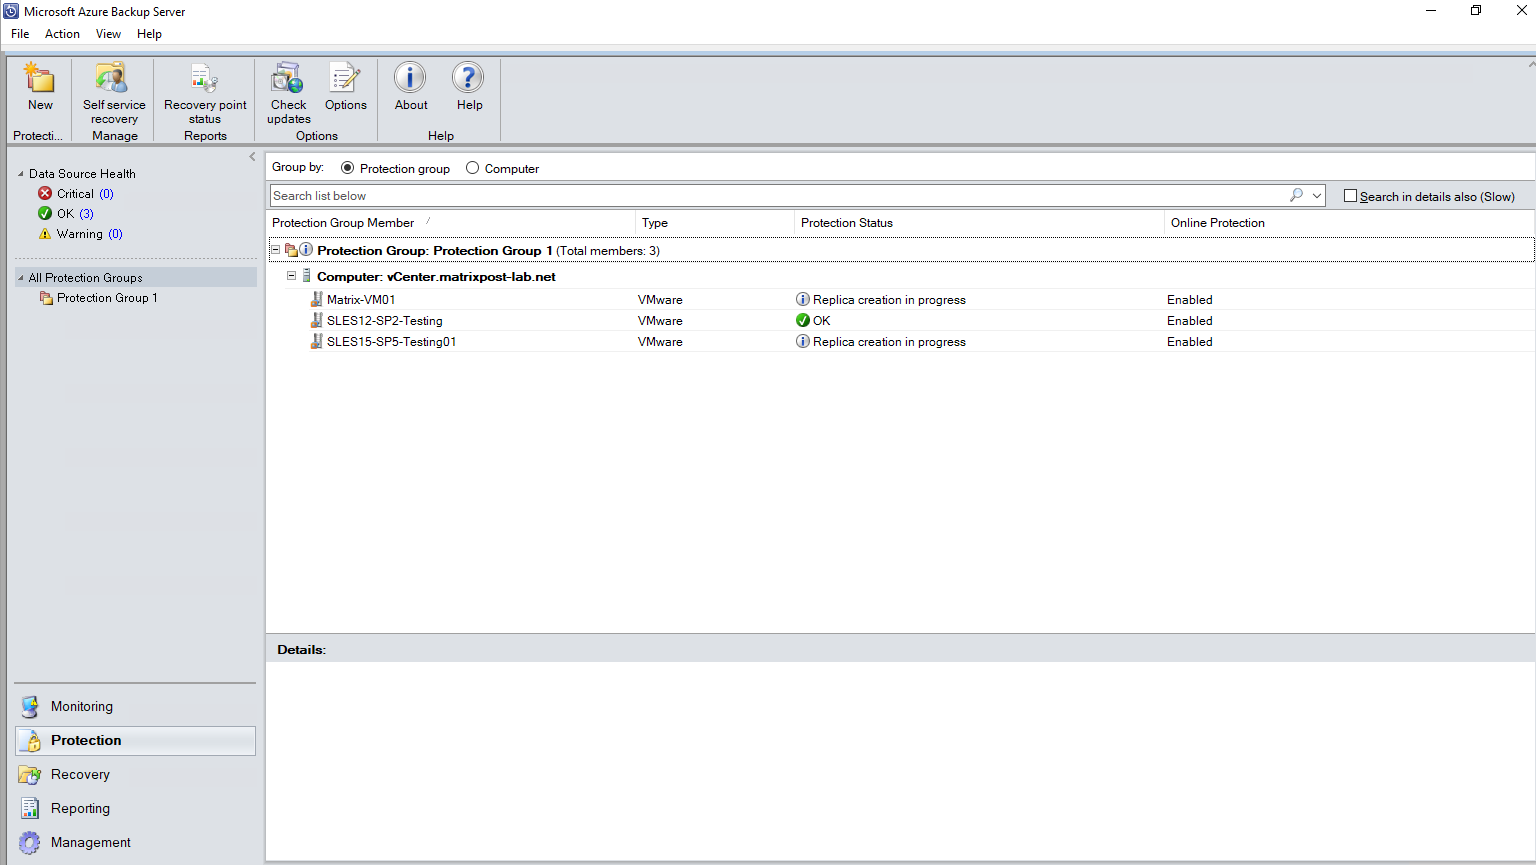
A few minutes later also the recovery points were created.
So far they are are just on the MABS server’s local on-premise storage and not in Azure.
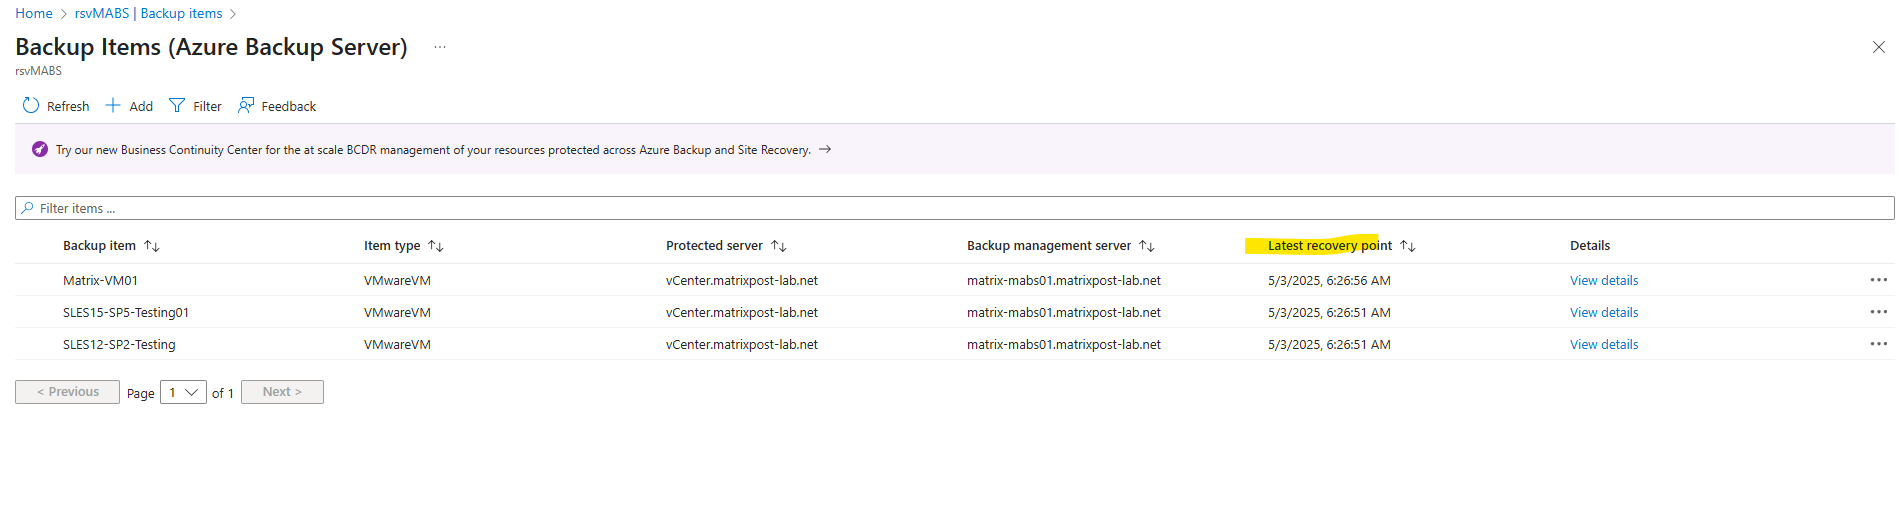
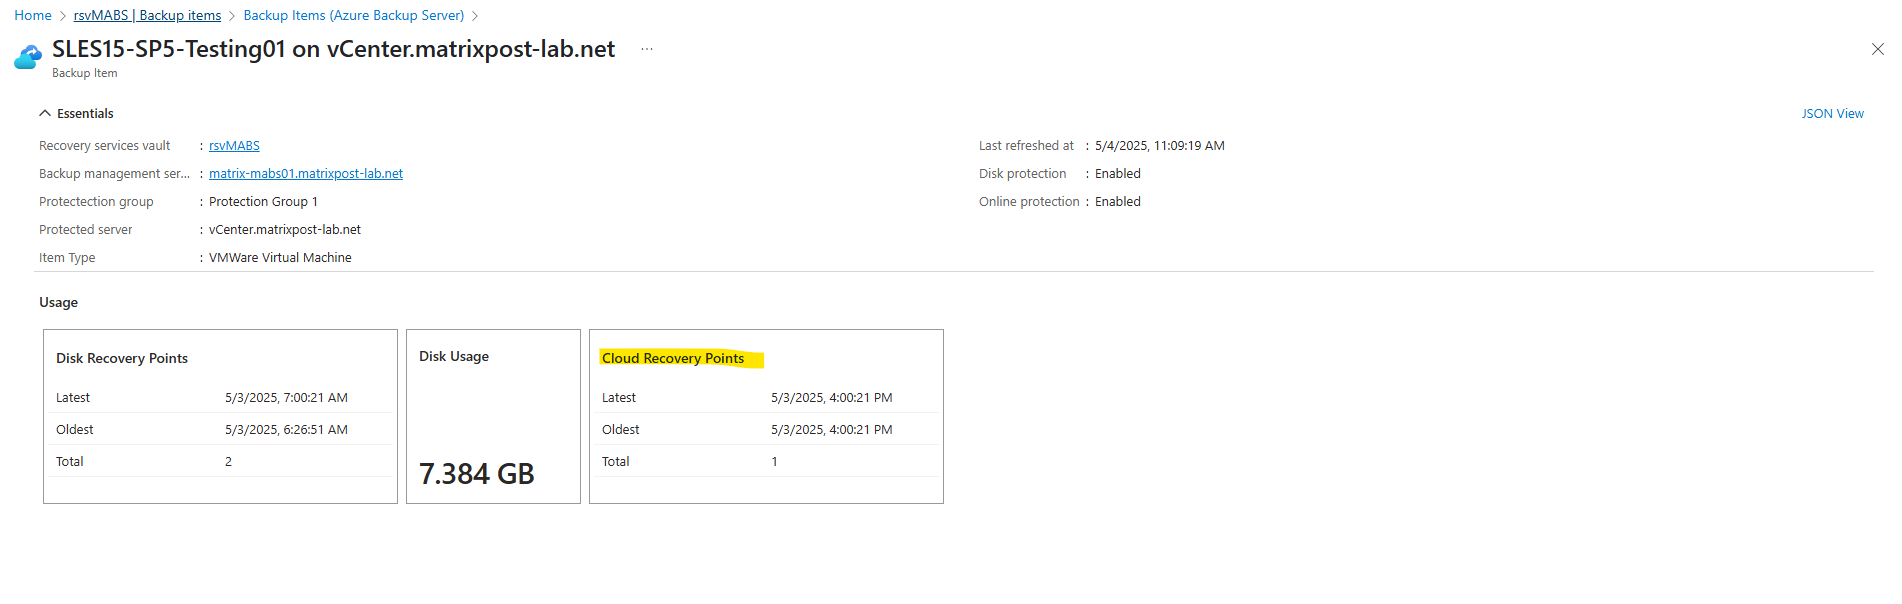
When clicking on View details above we can check also the cloud recovery points of the machine.

In my case I was setting the online backup schedule daily at 8pm, therefore so far no cloud recovery points are available.
To force this I will add above a second time to trigger the replication to the cloud. The progress we can see under Monitoring -> All jobs as shown below.
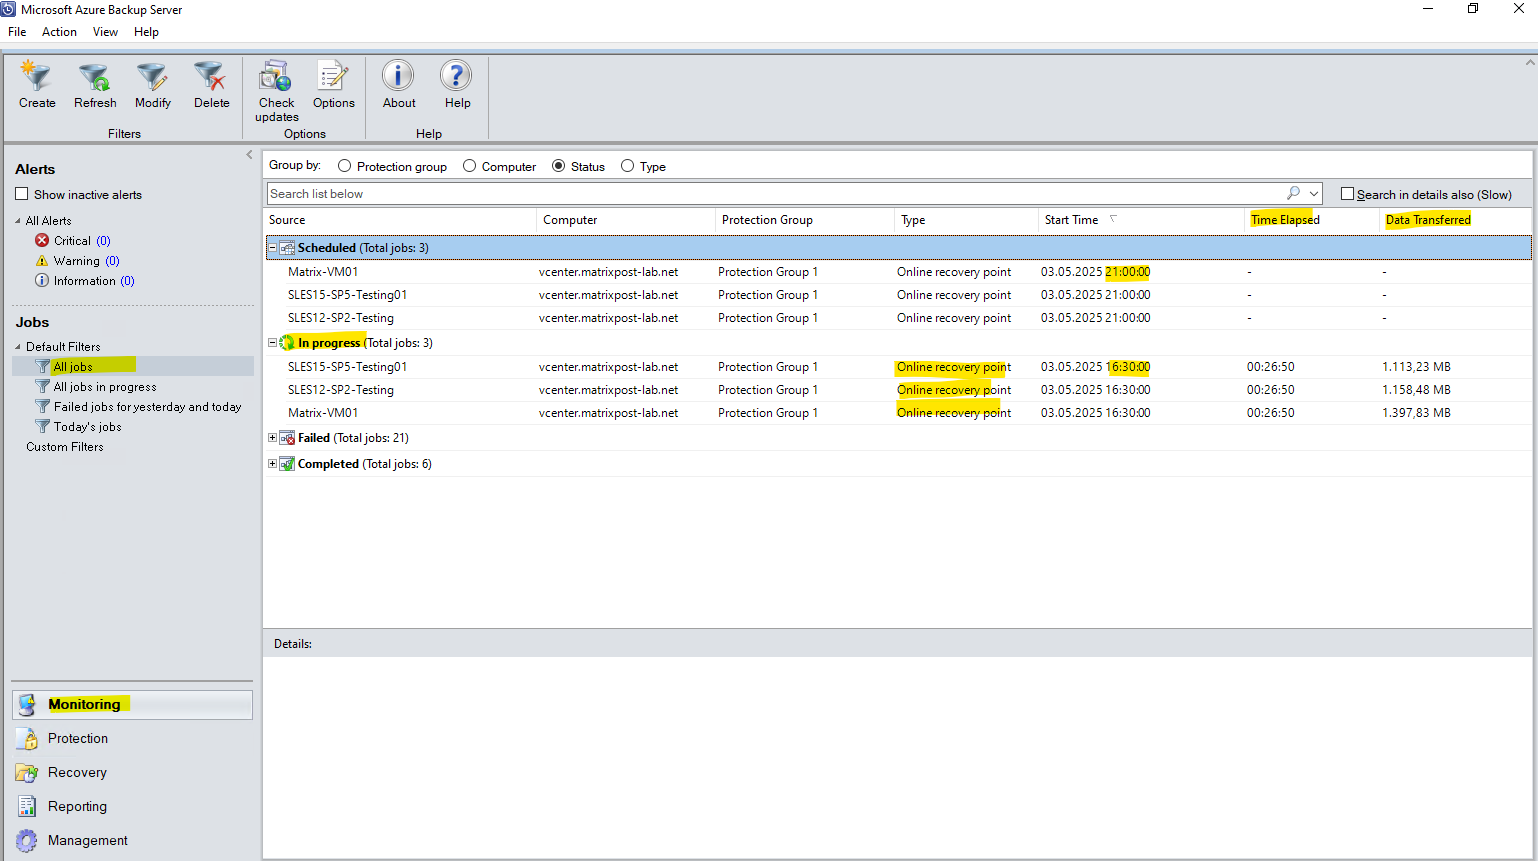
Finally all my three virtual machines are also replicated successful to Azure and I can see the cloud recovery points.
Restore VMware Virtual Machines using Azure Backup Server
To restore a recovery point of a VMware VM, follow these steps:
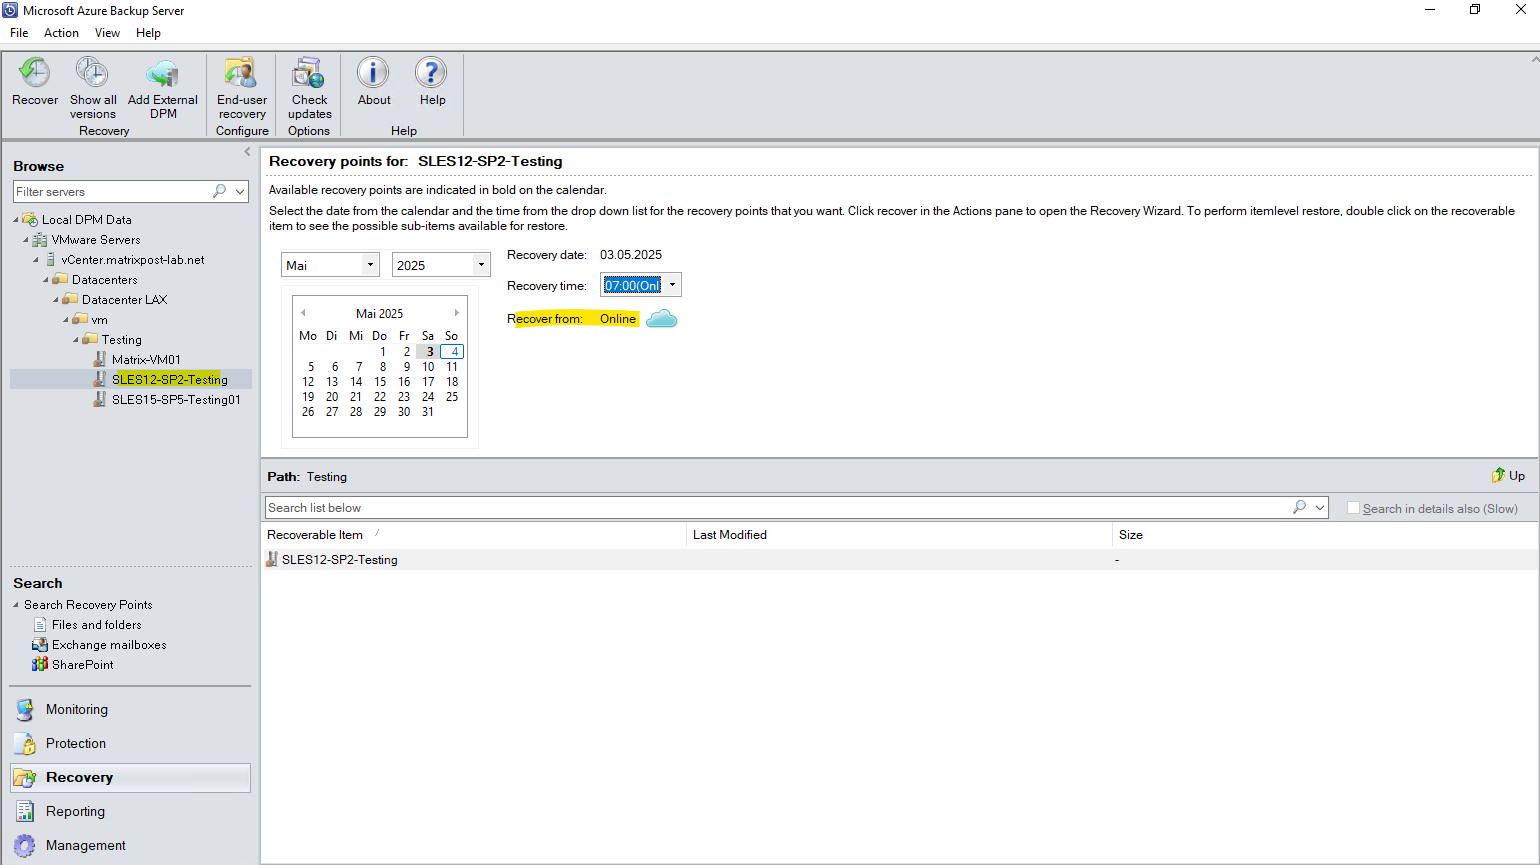
- In the MABS Administrator Console, select Recovery view.
- On the Browse pane, browse or filter to find the VM you want to recover. Once you select a VM or folder, the Recovery points for pane displays the available recovery points.
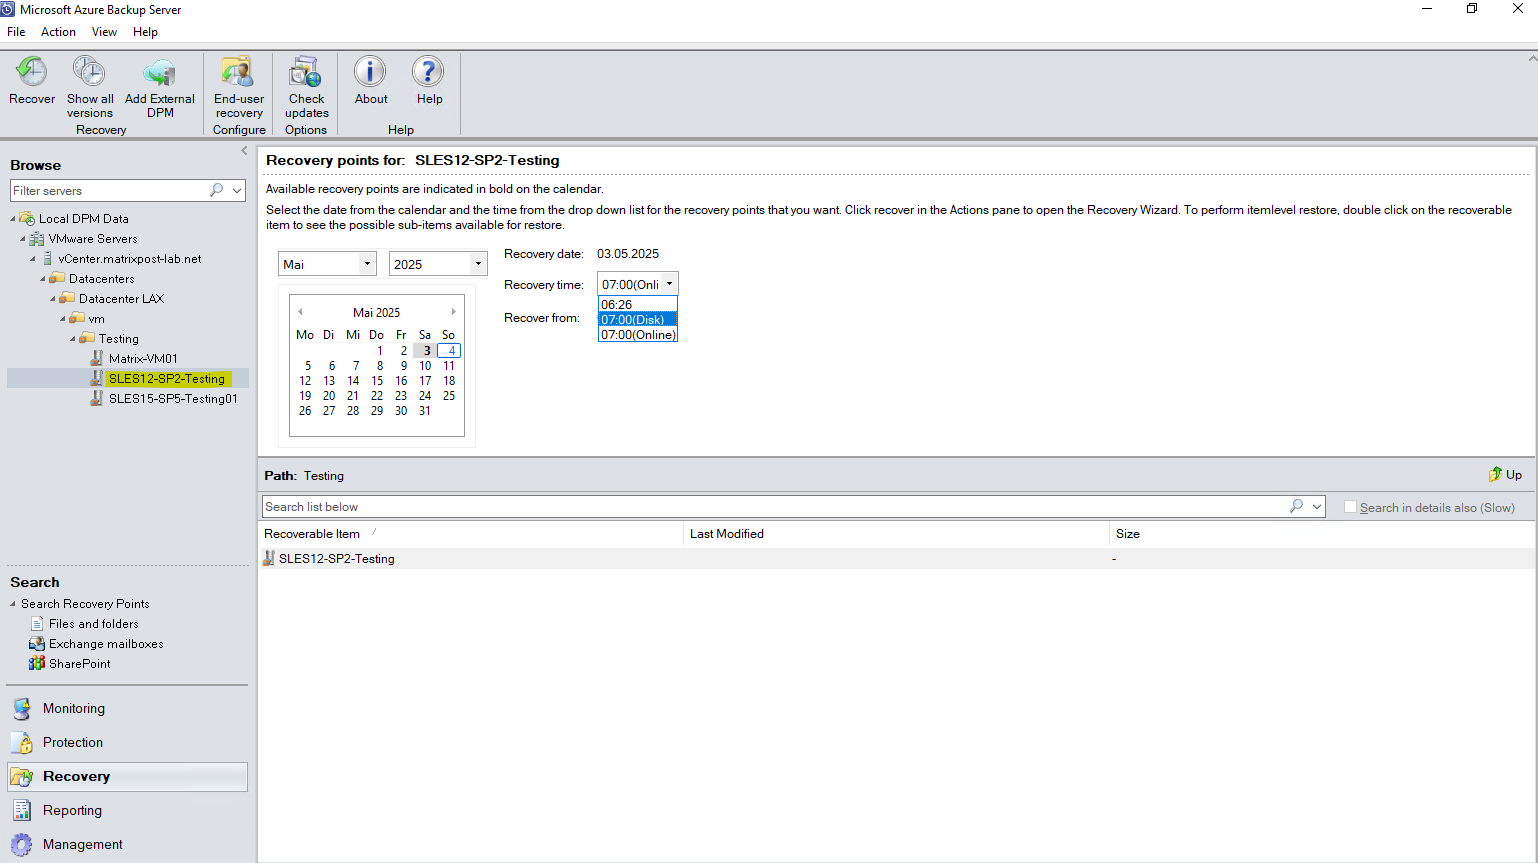
We can recover the virtual machine from either online (Azure) or disk (local storage MABS server). In the Recovery points for field, use the calendar and drop-down menus to select a date when a recovery point was taken. Calendar dates in bold have available recovery points.
Here online from Azure.
Or we can select below the disk recovery time to restore from the local storage of the MABS server.
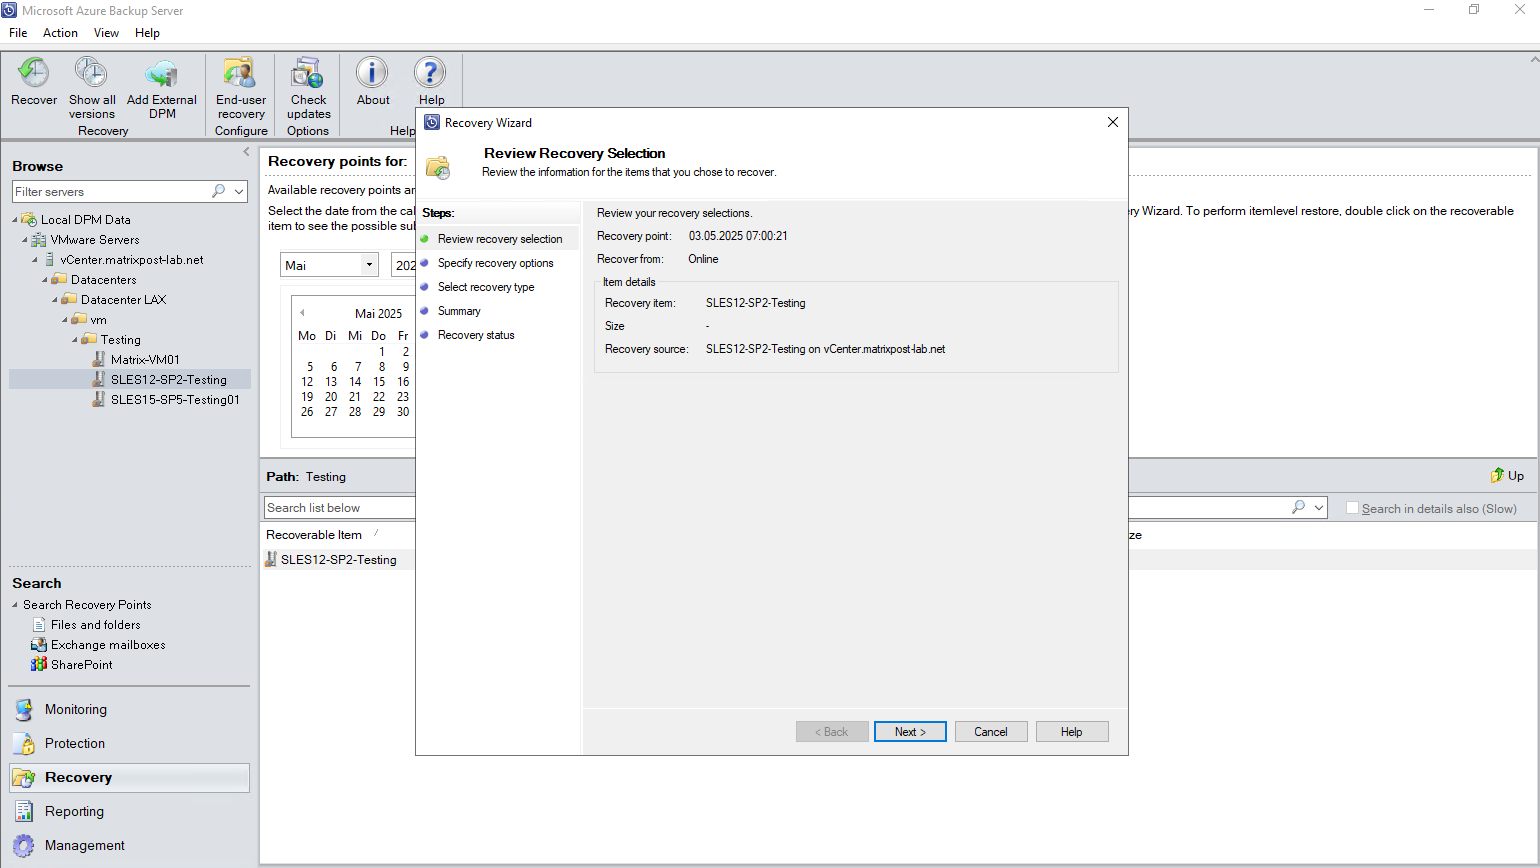
On the tool ribbon, select Recover to open the Recovery Wizard.
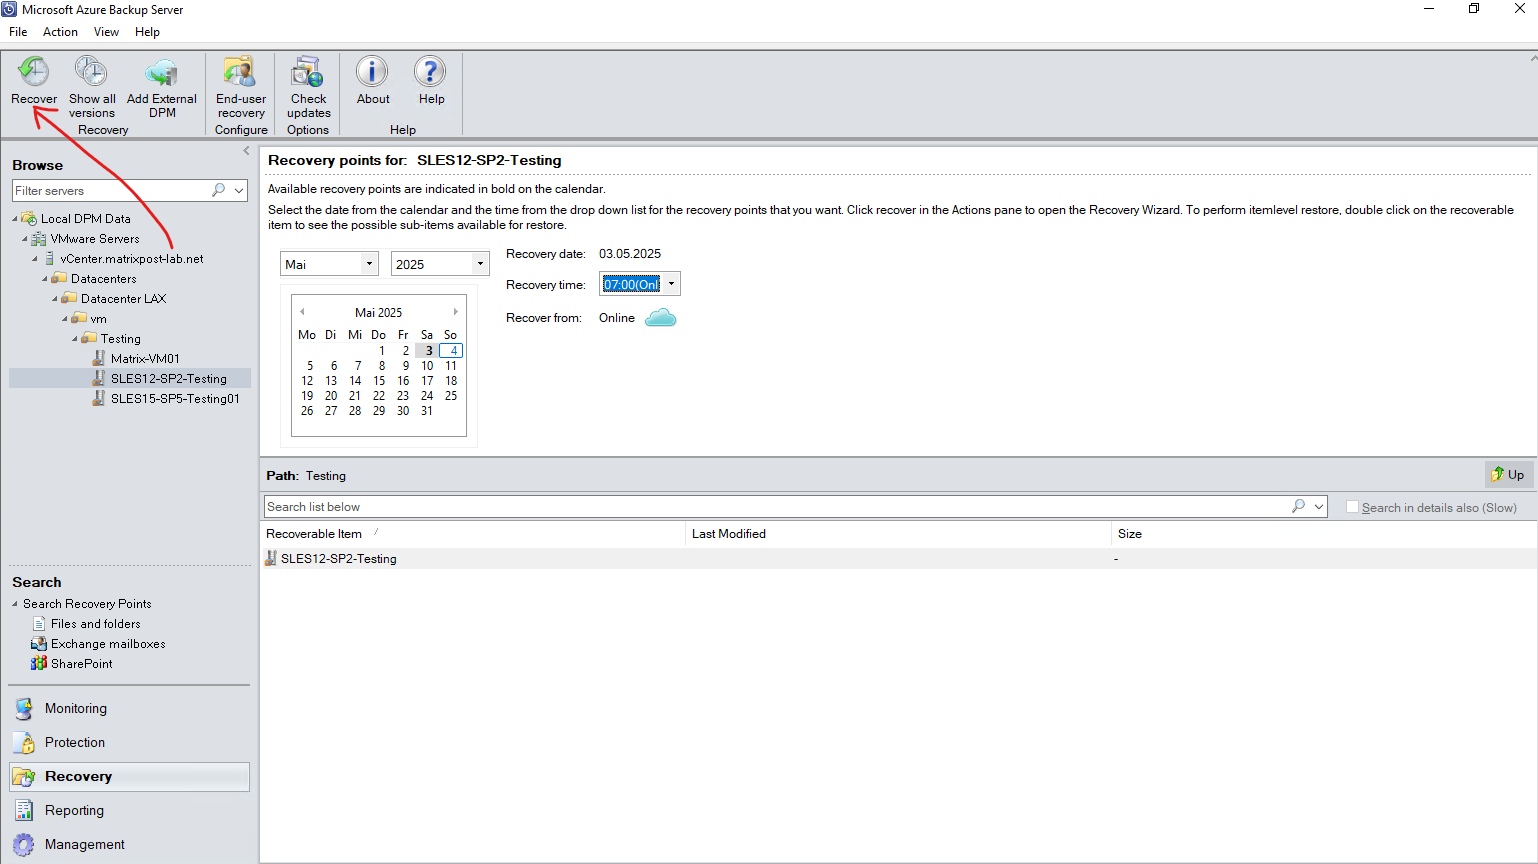
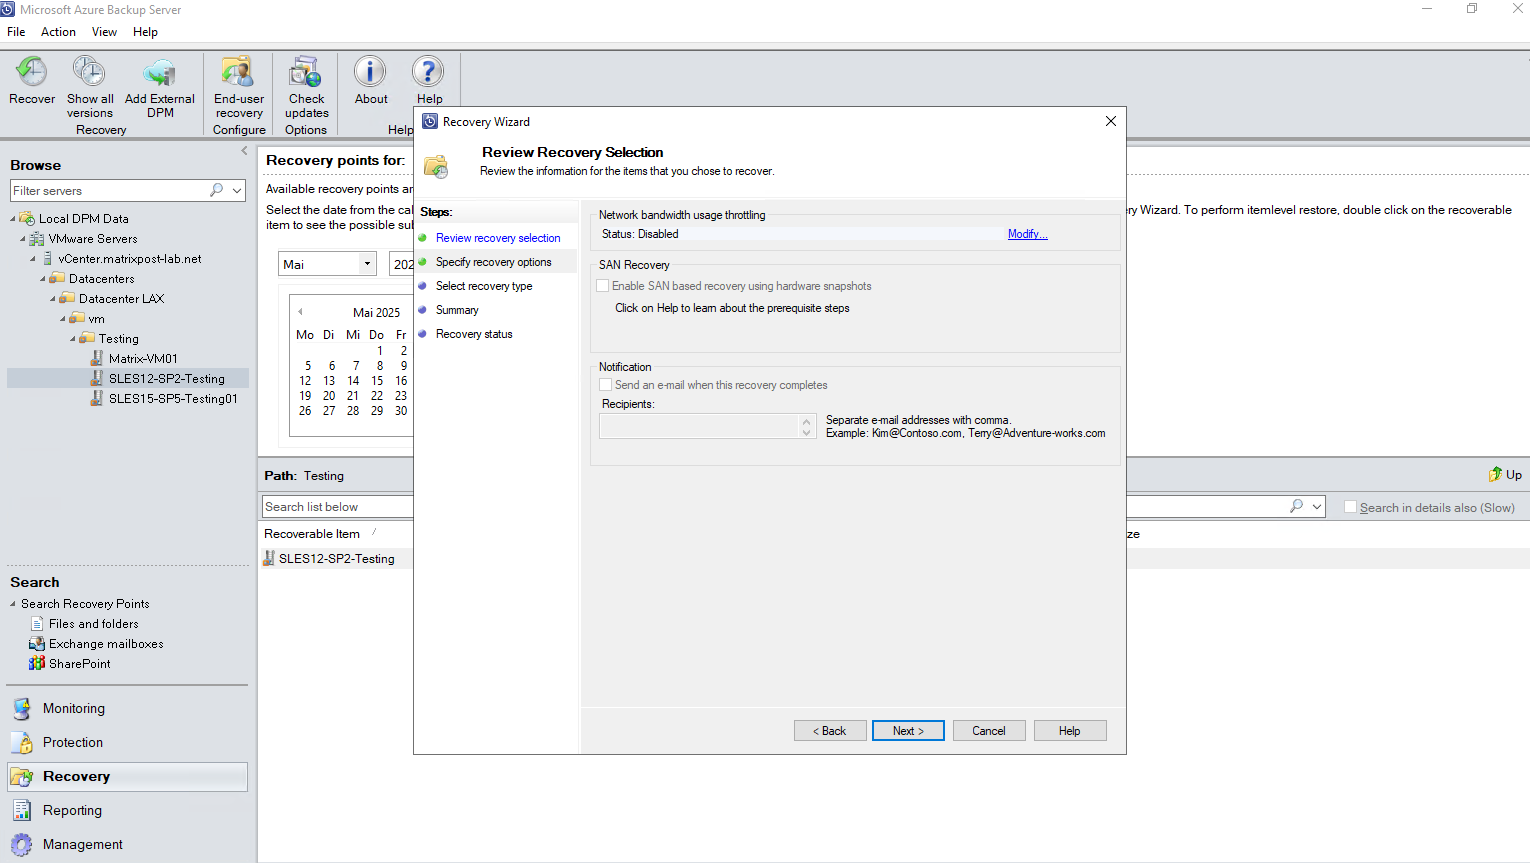
Select Next to advance to the Specify Recovery Options screen.
On the Specify Recovery Options screen, if you want to enable network bandwidth throttling, select Modify. To leave network throttling disabled, select Next. No other options on this wizard screen are available for VMware VMs. If you choose to modify the network bandwidth throttle, in the Throttle dialog, select Enable network bandwidth usage throttling to turn it on. Once enabled, configure the Settings and Work Schedule.
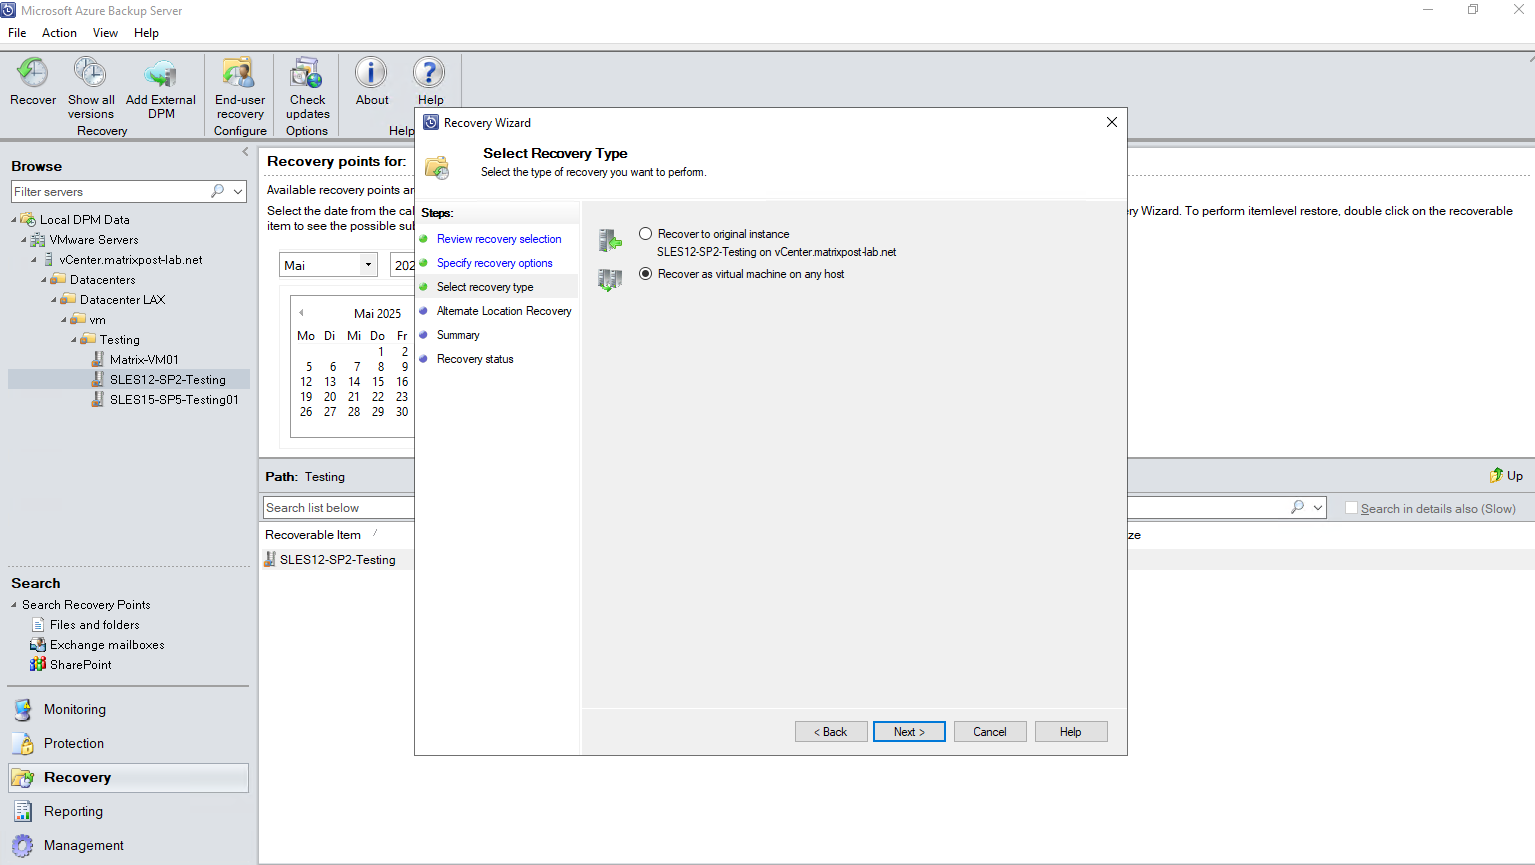
On the Select Recovery Type screen, choose whether to recover to the original instance, or to a new location. Then select Next.
- If you choose Recover to original instance, you don’t need to make any more choices in the wizard. The data for the original instance is used.
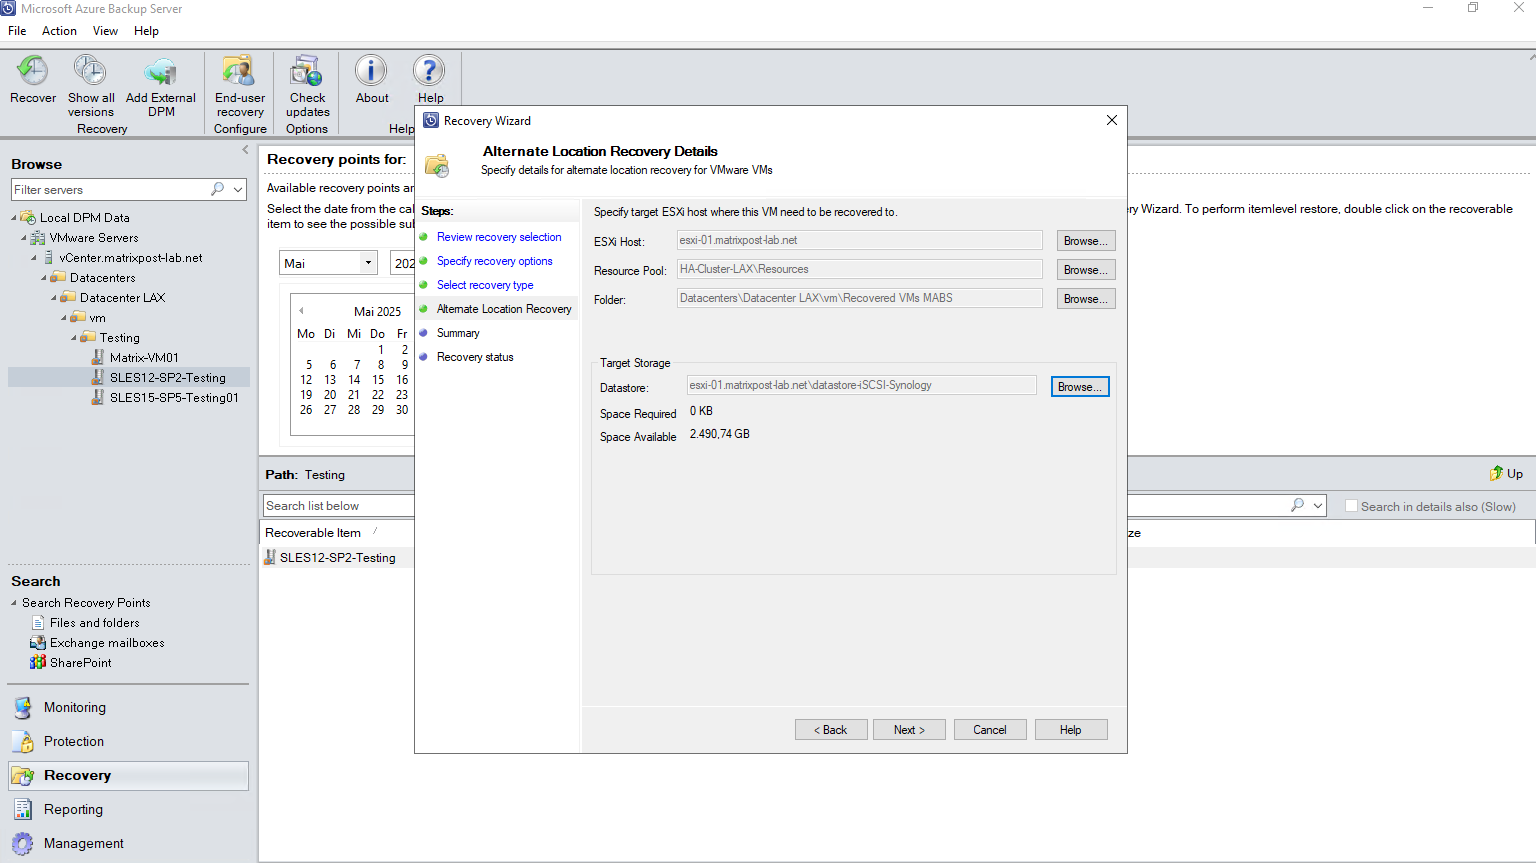
- If you choose Recover as virtual machine on any host, then on the Specify Destination screen, provide the information for ESXi Host, Resource Pool, Folder, and Path.
For thist post I don’t want to restore the original instance and therefore select Recover as virtual machine on any host.
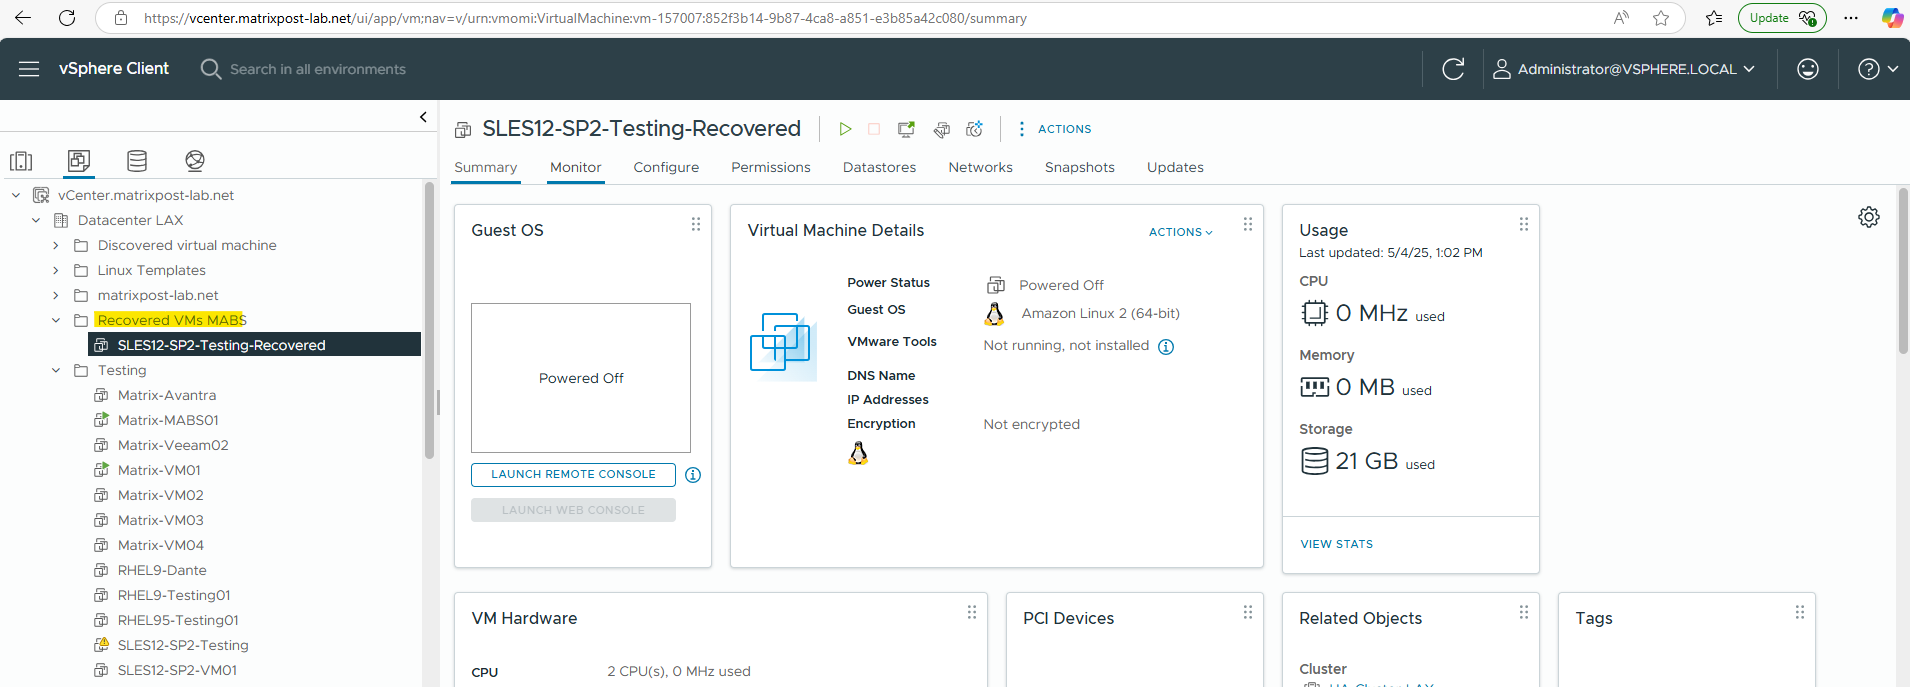
The original instance is running on my ESXi host named esxi-02.matrixpost-lab.net, therefore I will choose below now to restore the machnine on esxi-01.matrixpost-lab.net.
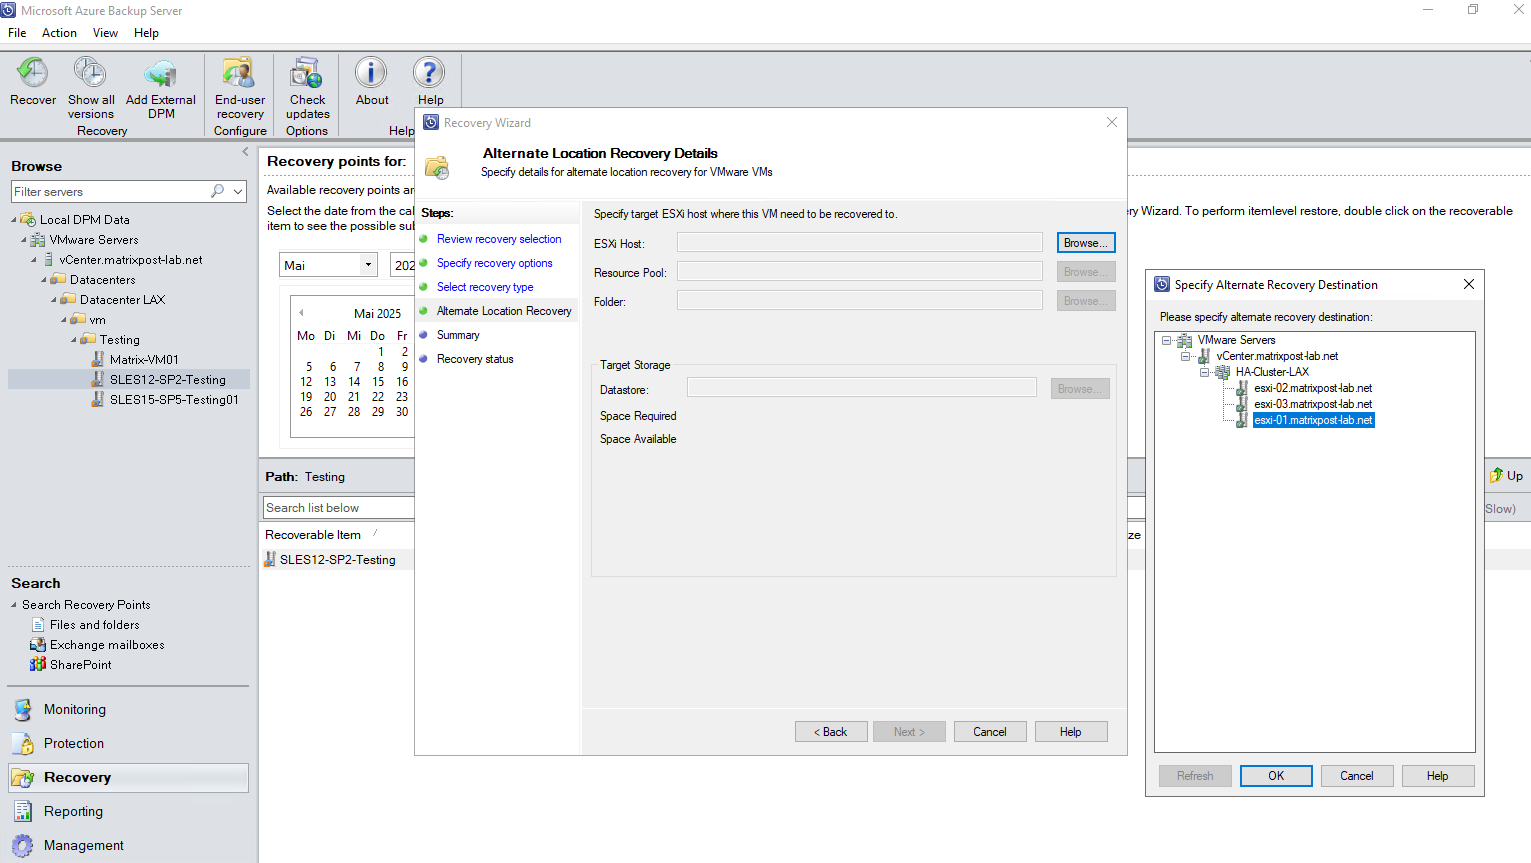
Also select the resource pool, folder and target datastore the virtual machine will be recovered.
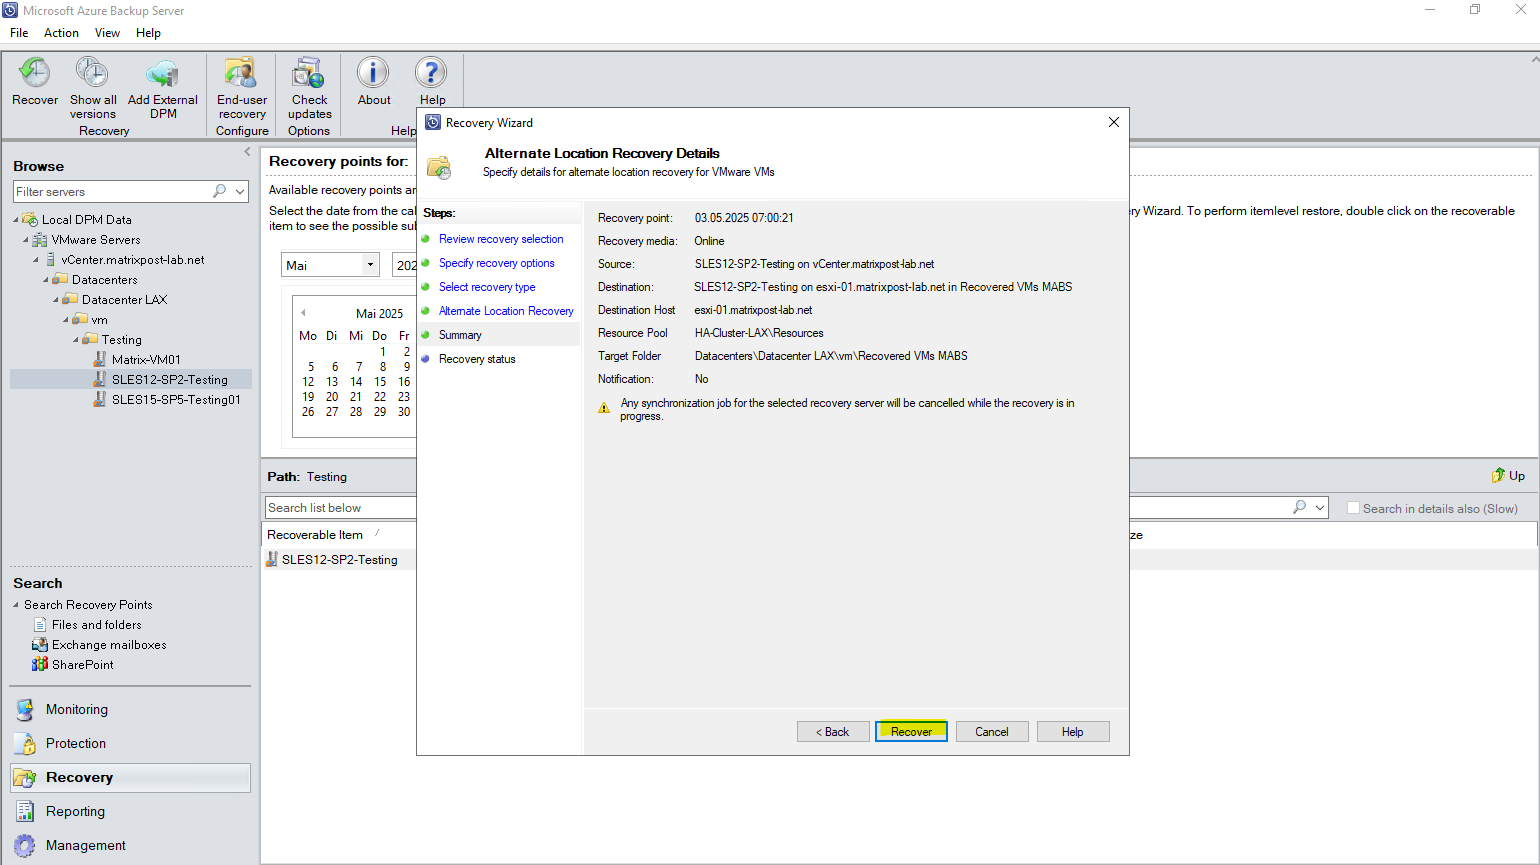
Finally click on Recover.
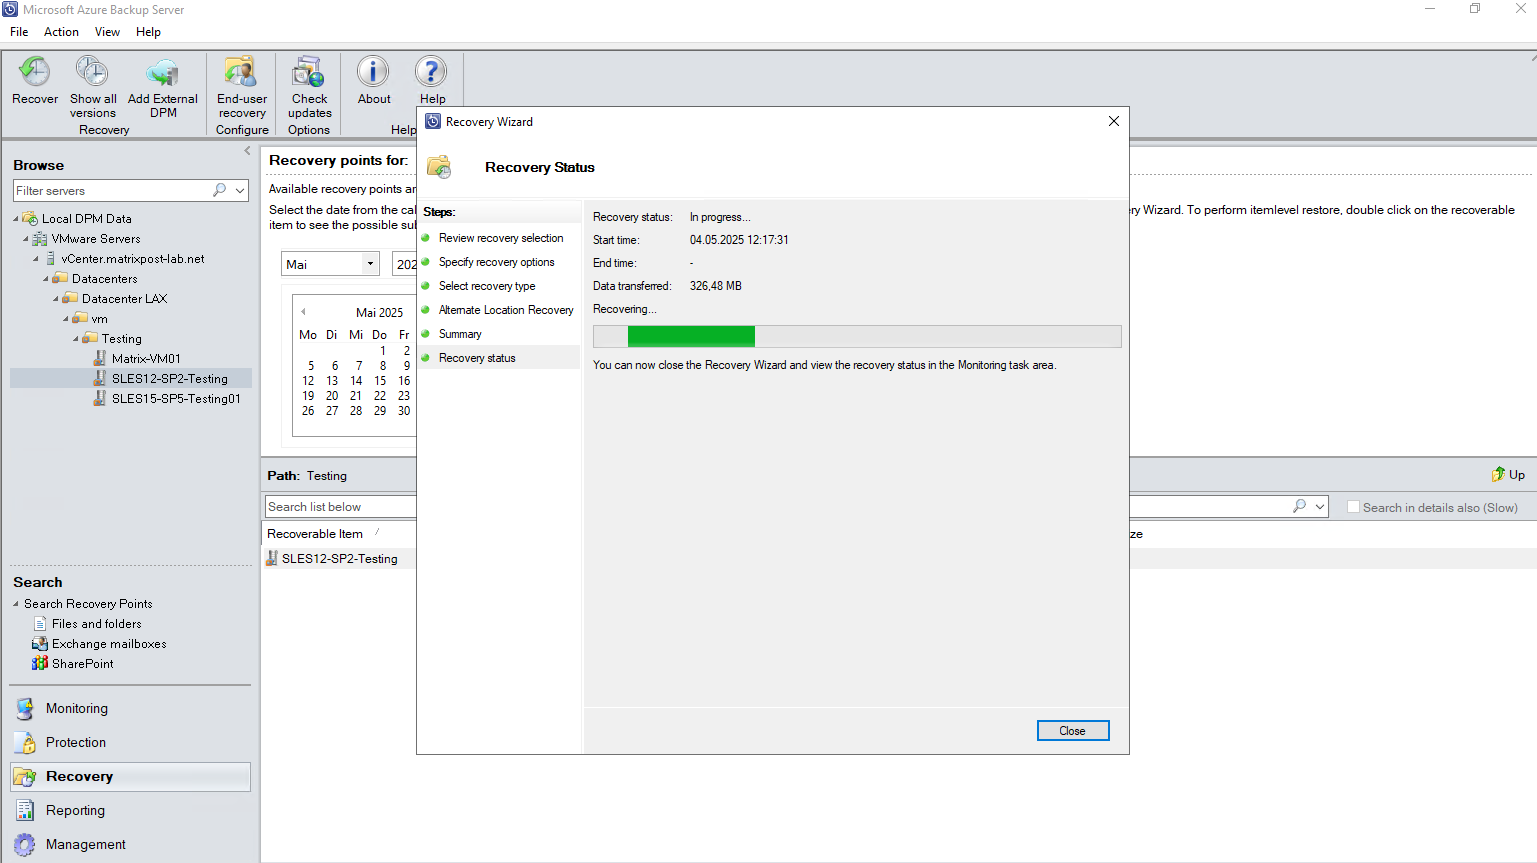
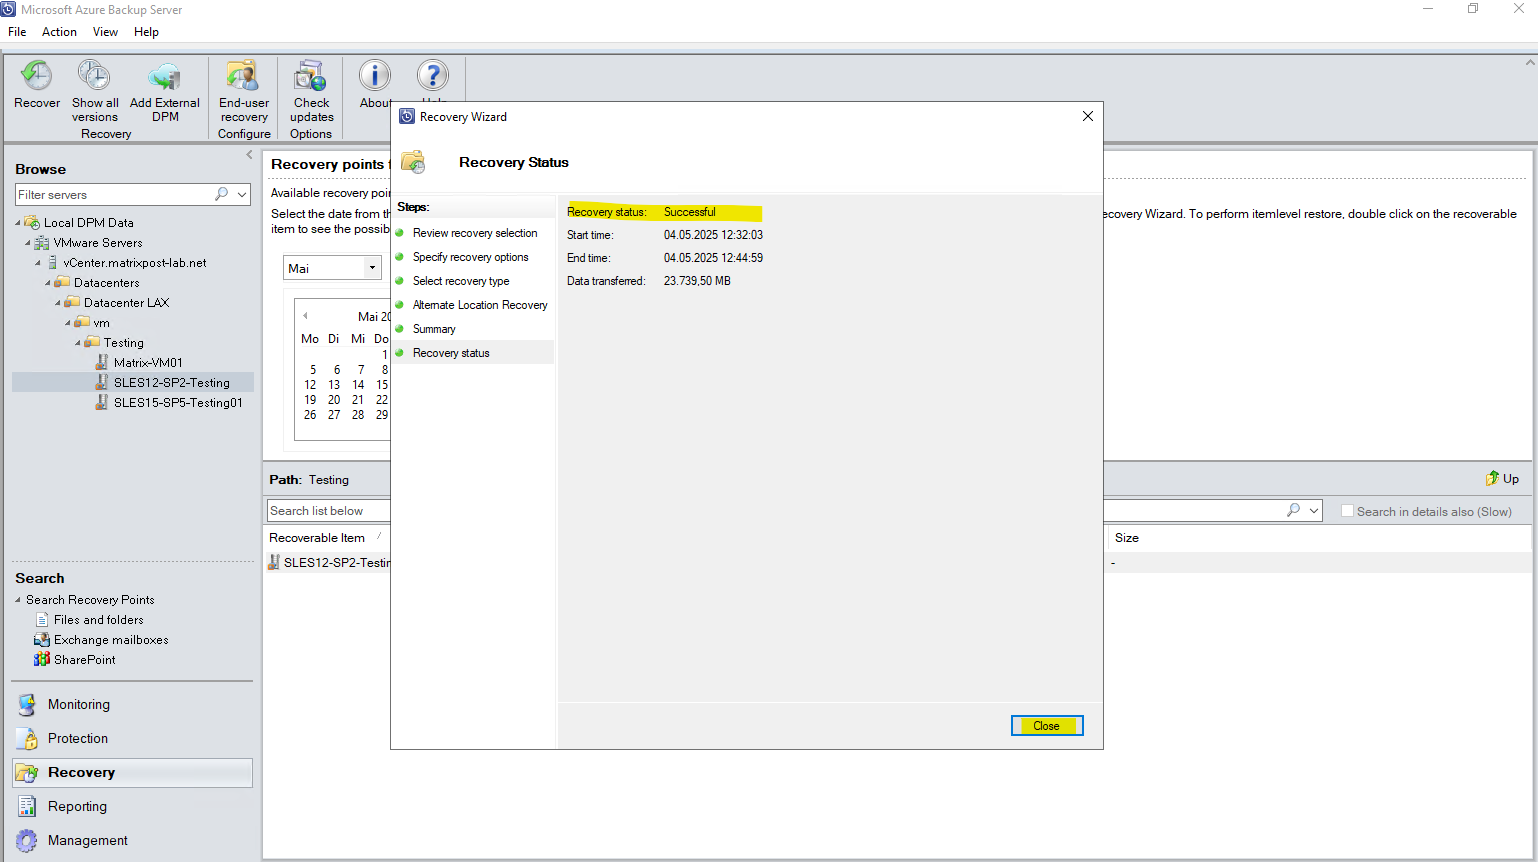
Finally the virtual machine was recovered and restored successfully.
Source: https://learn.microsoft.com/en-us/azure/backup/restore-azure-backup-server-vmware
Troubleshooting
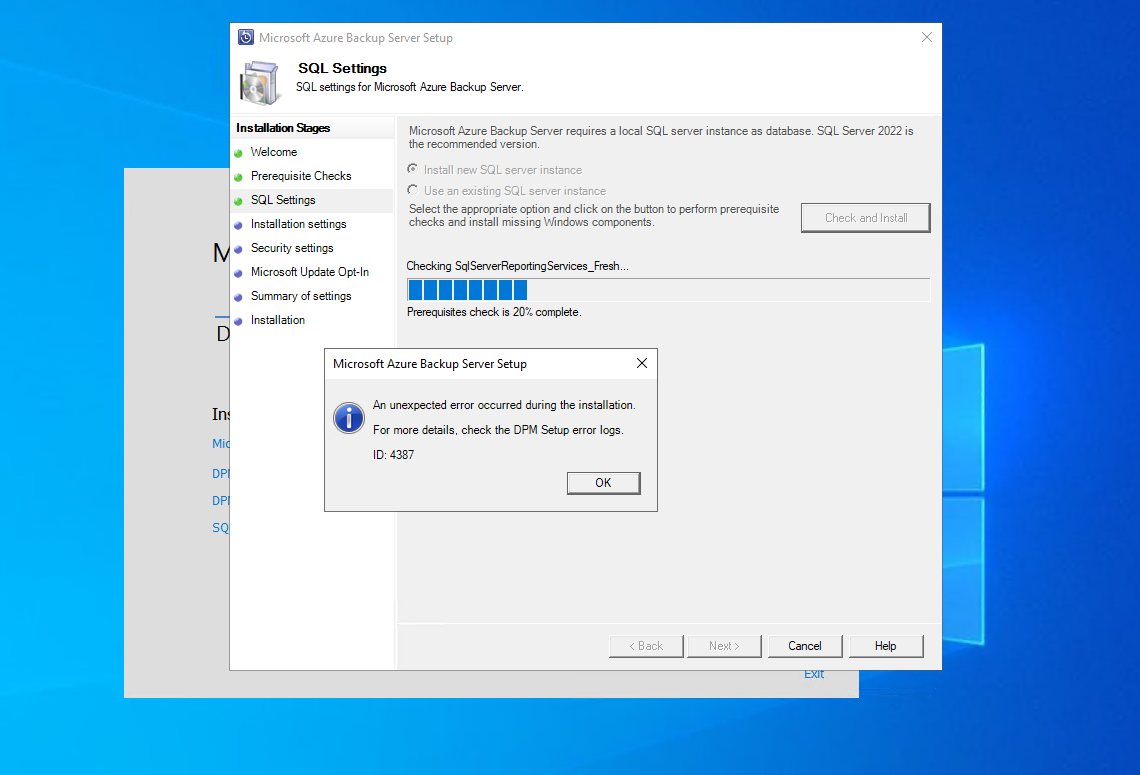
An unexpected error occured during the installation. For more details, check the DPM Setup error logs. ID: 4378
The Windows Server 2022 must be joined to your on-premise domain.
Data Protection Manager Error ID 33623 – Unable to communicate with VMware vCenter – Internal error code 0x80990EF2
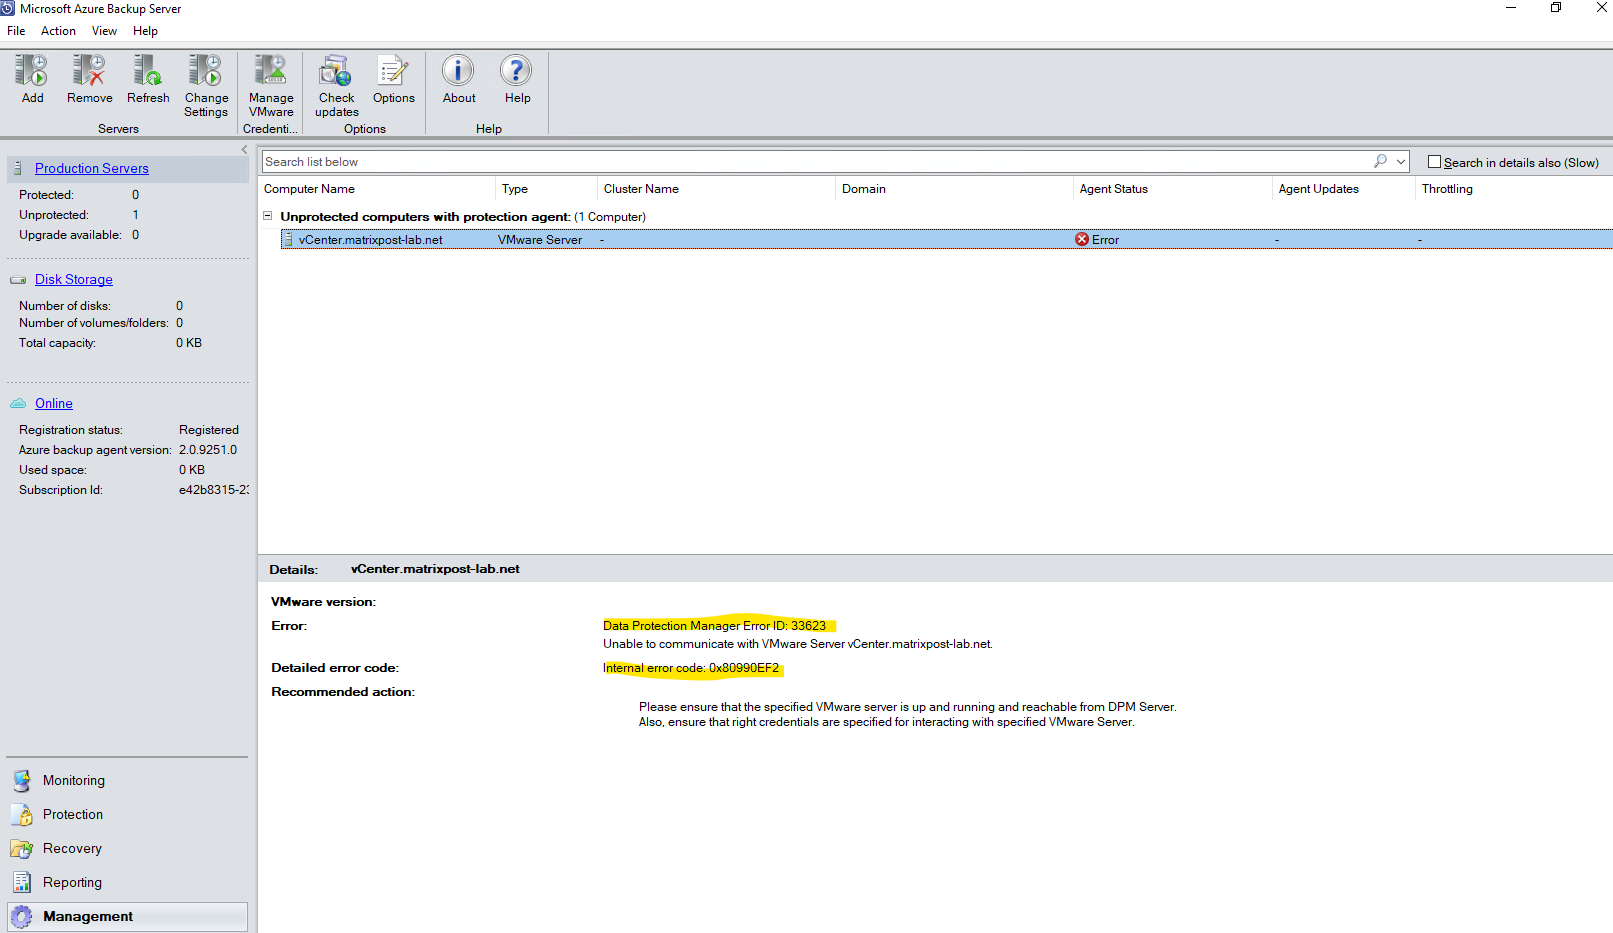
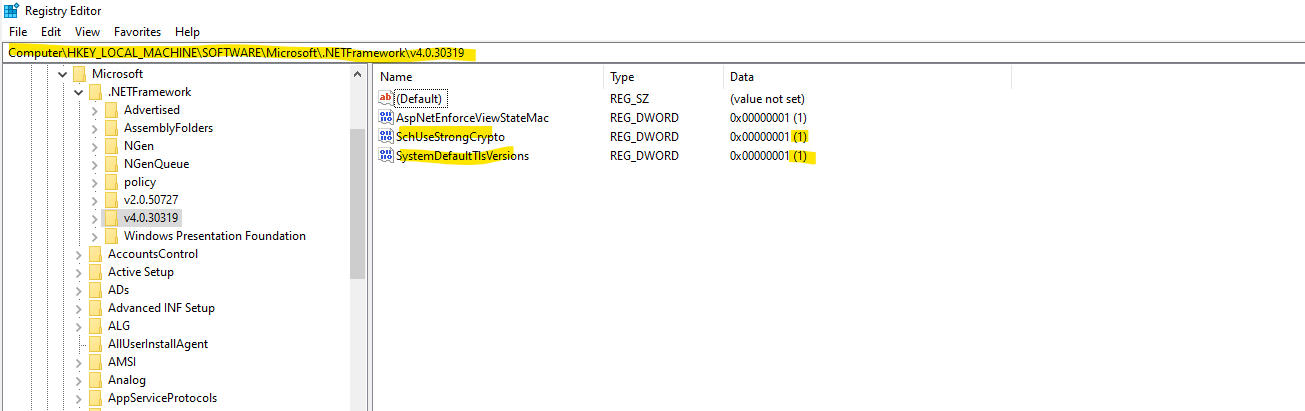
Enforce the MABS to use TLS 1.2.
Computer\HKEY_LOCAL_MACHINE\SOFTWARE\Microsoft.NETFramework\v4.0.30319
DPM encountered error from VMware server – ConnectionFail ID 33614
Enforce the MABS to use TLS 1.2.
Computer\HKEY_LOCAL_MACHINE\SOFTWARE\Microsoft.NETFramework\v4.0.30319
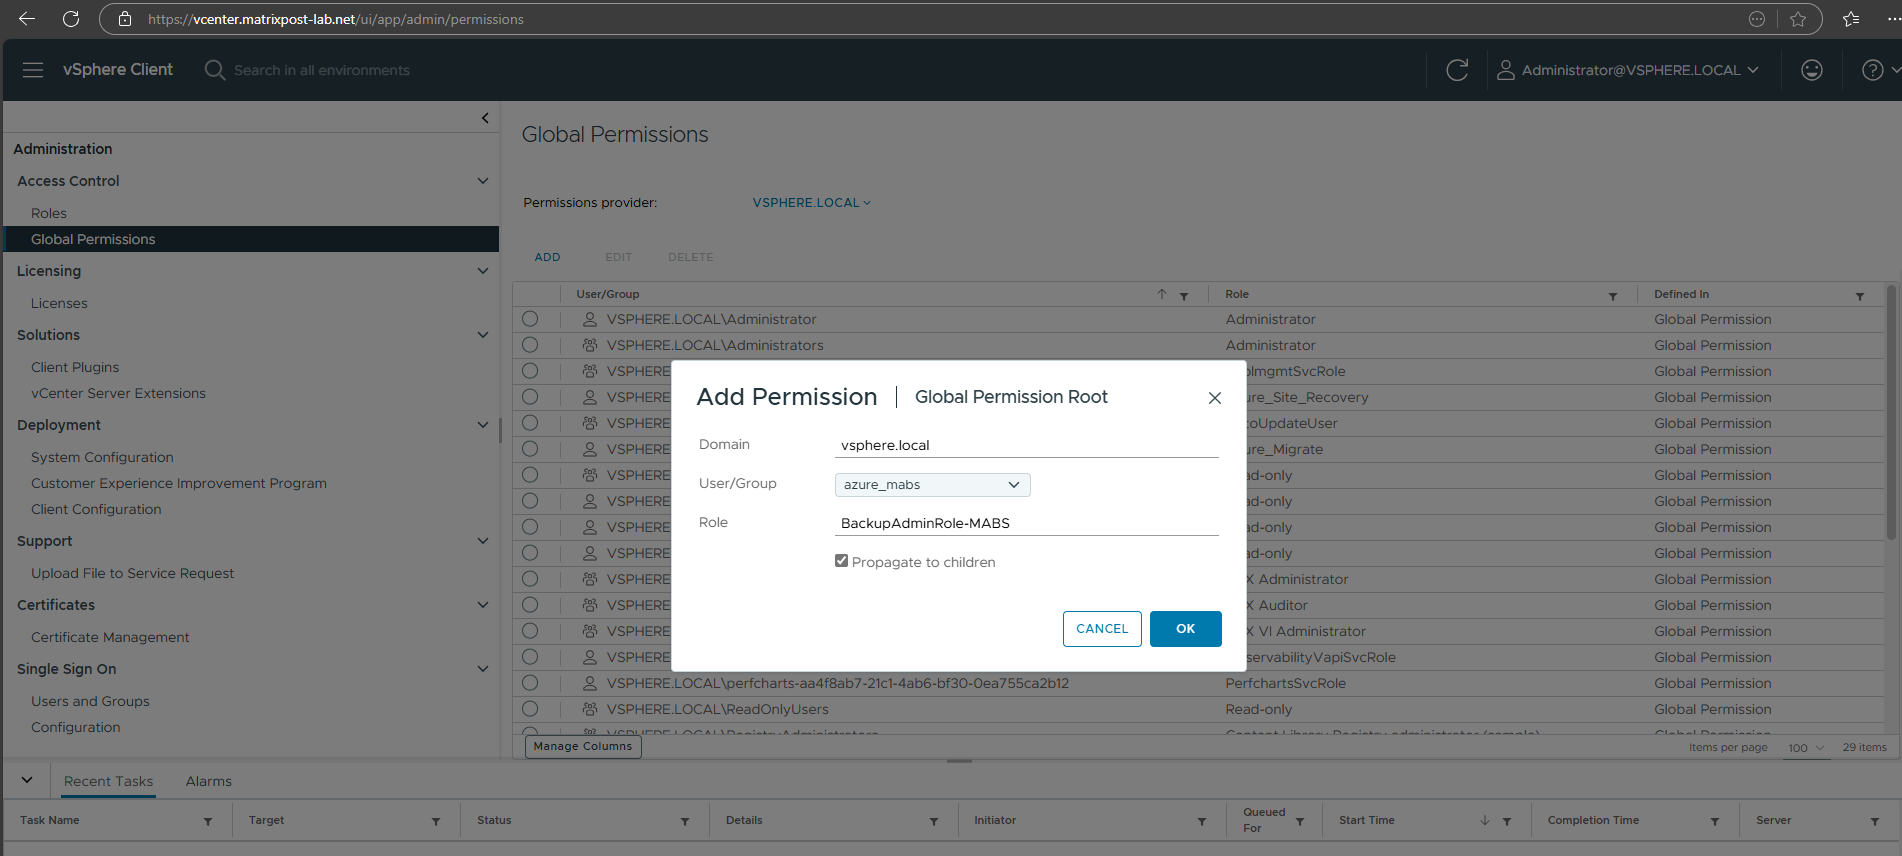
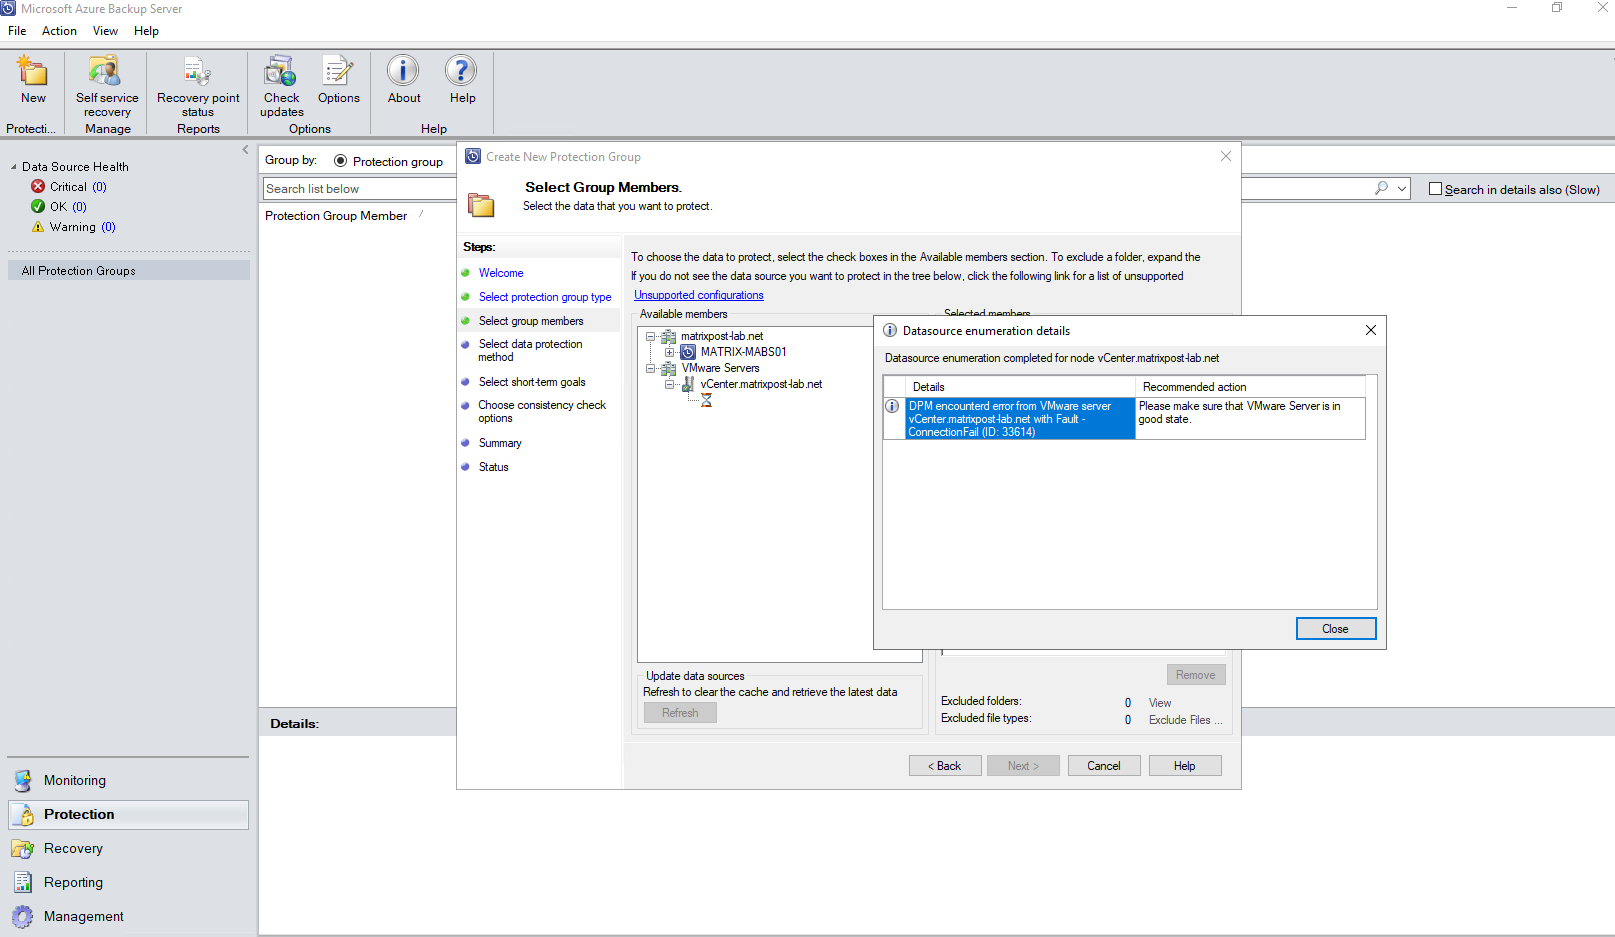
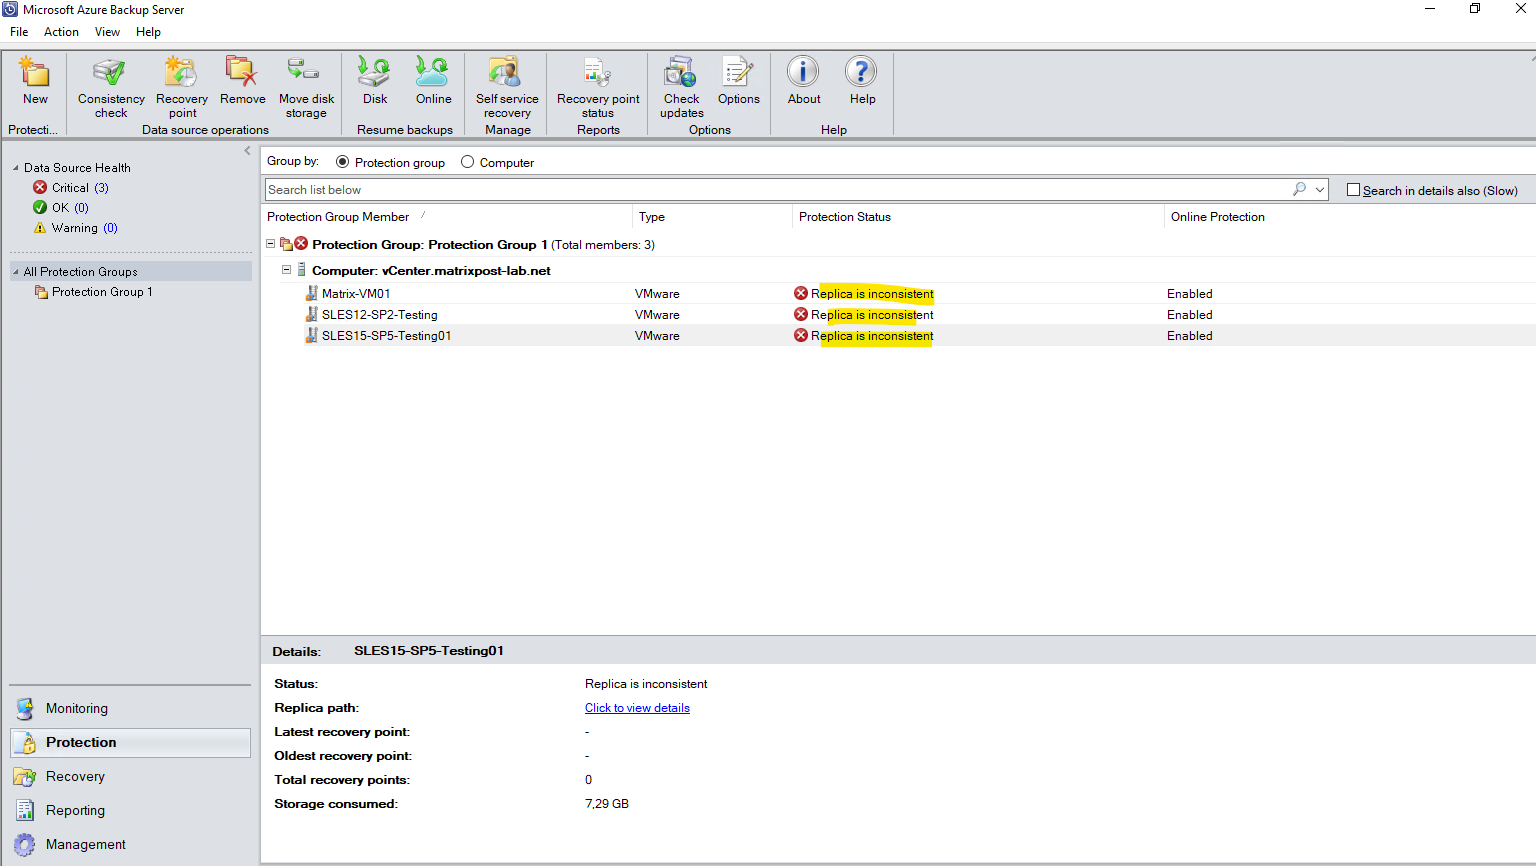
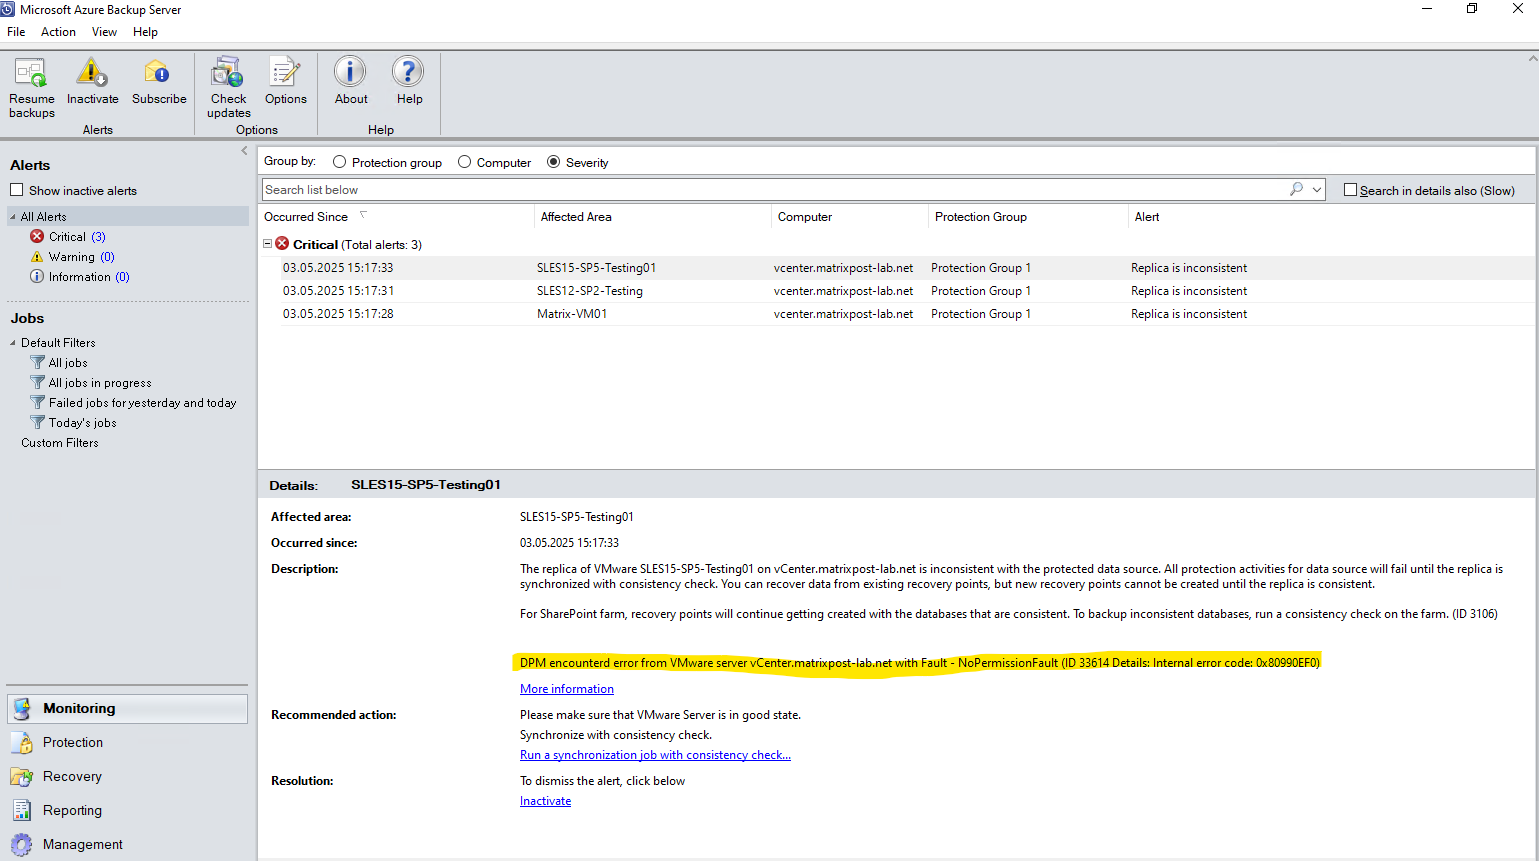
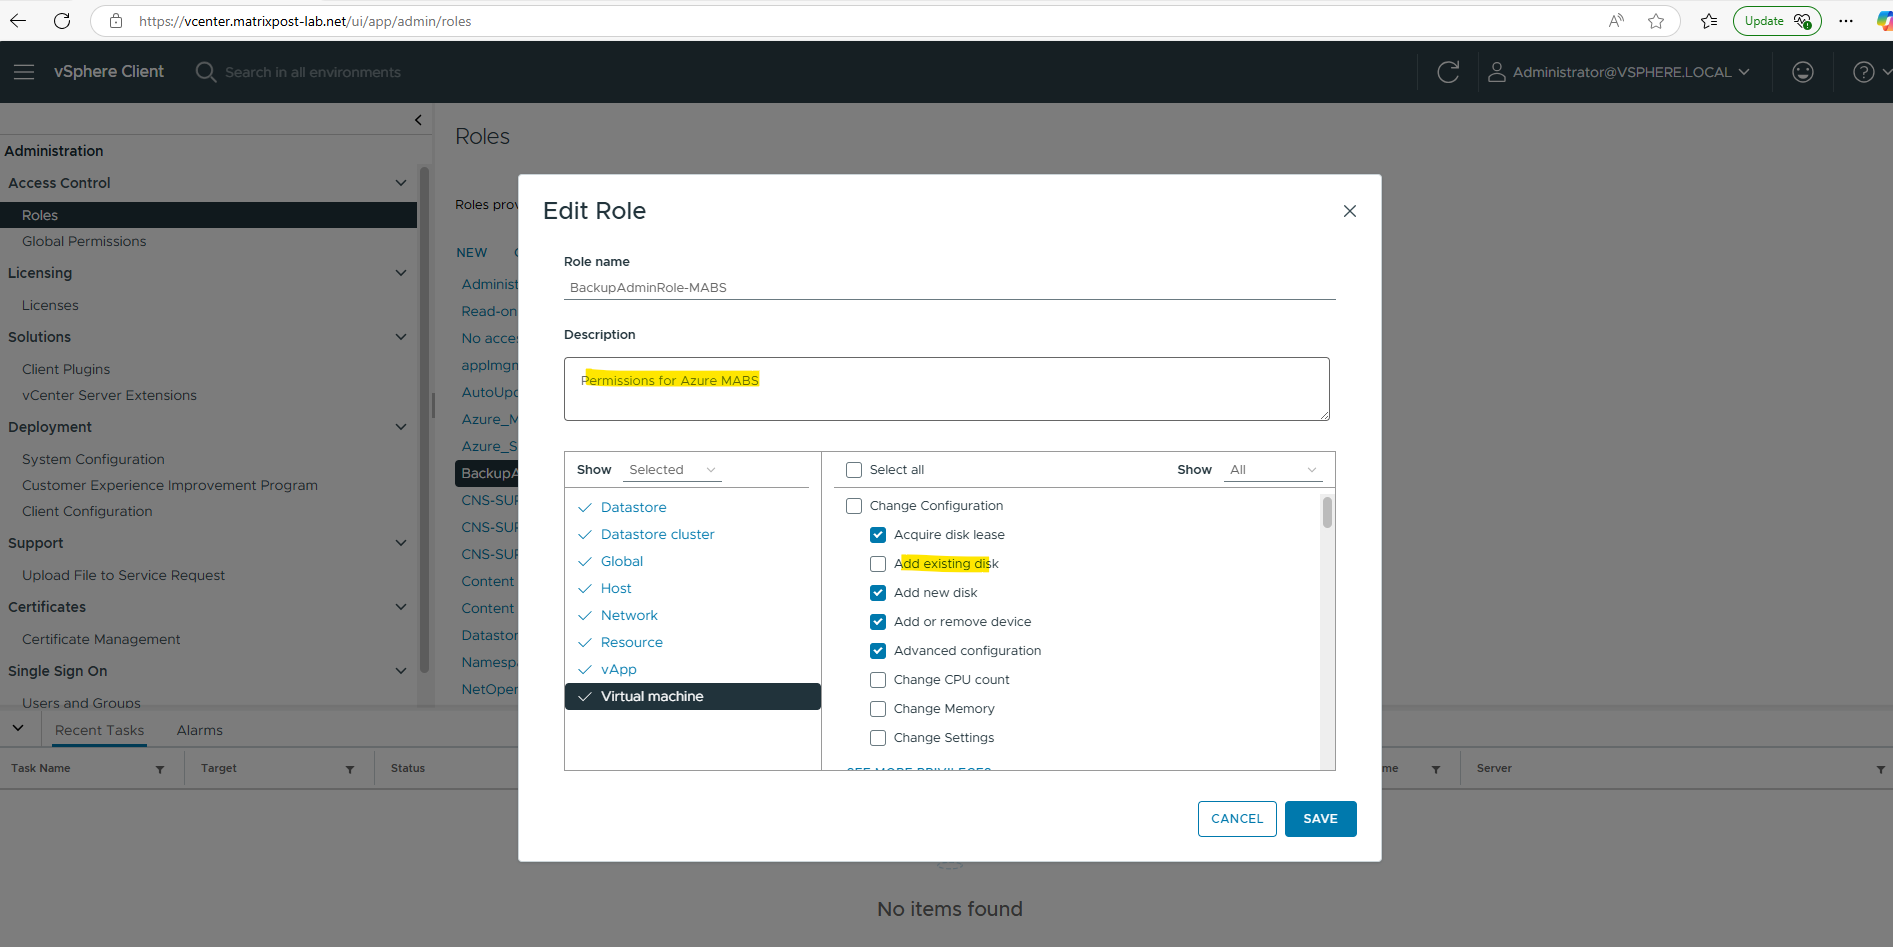
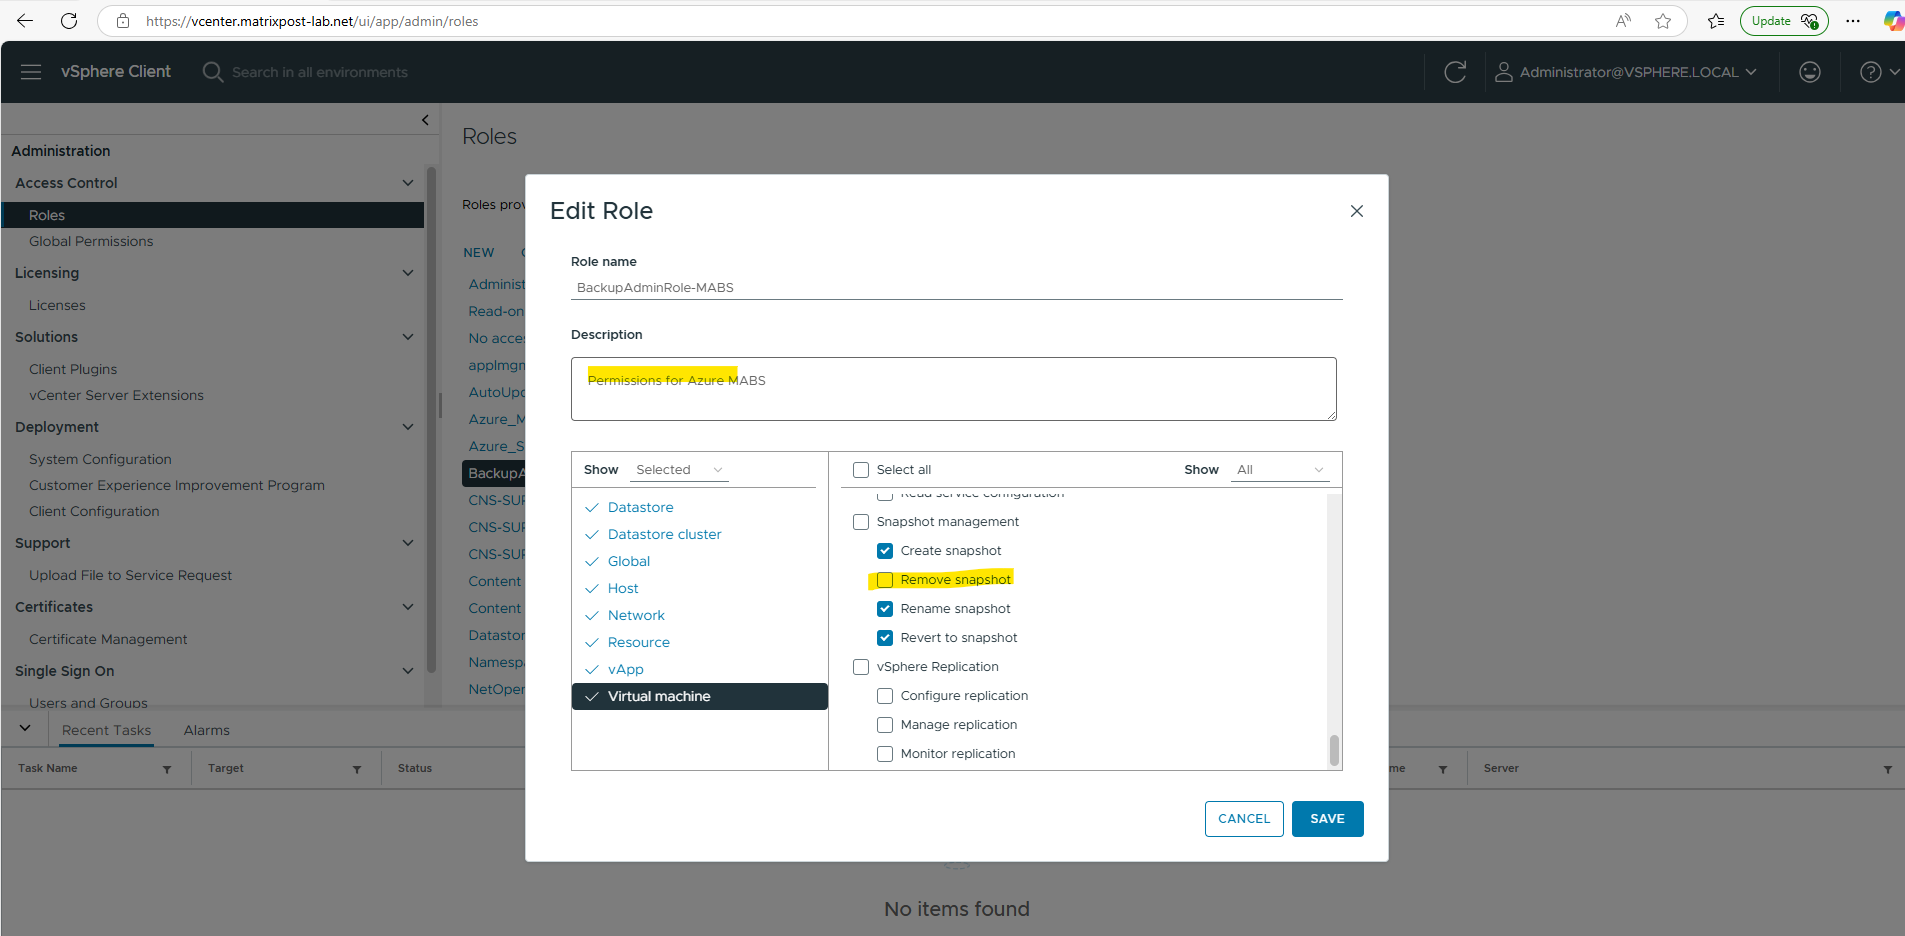
DPM encountered error from VMware server with Fault – NoPermissionFault (ID: 33614)
This error will occur in case your account you will use to access the vCenter server does not have the sufficient permissions on the vCenter server.
vSphere Client -> Administration -> Events
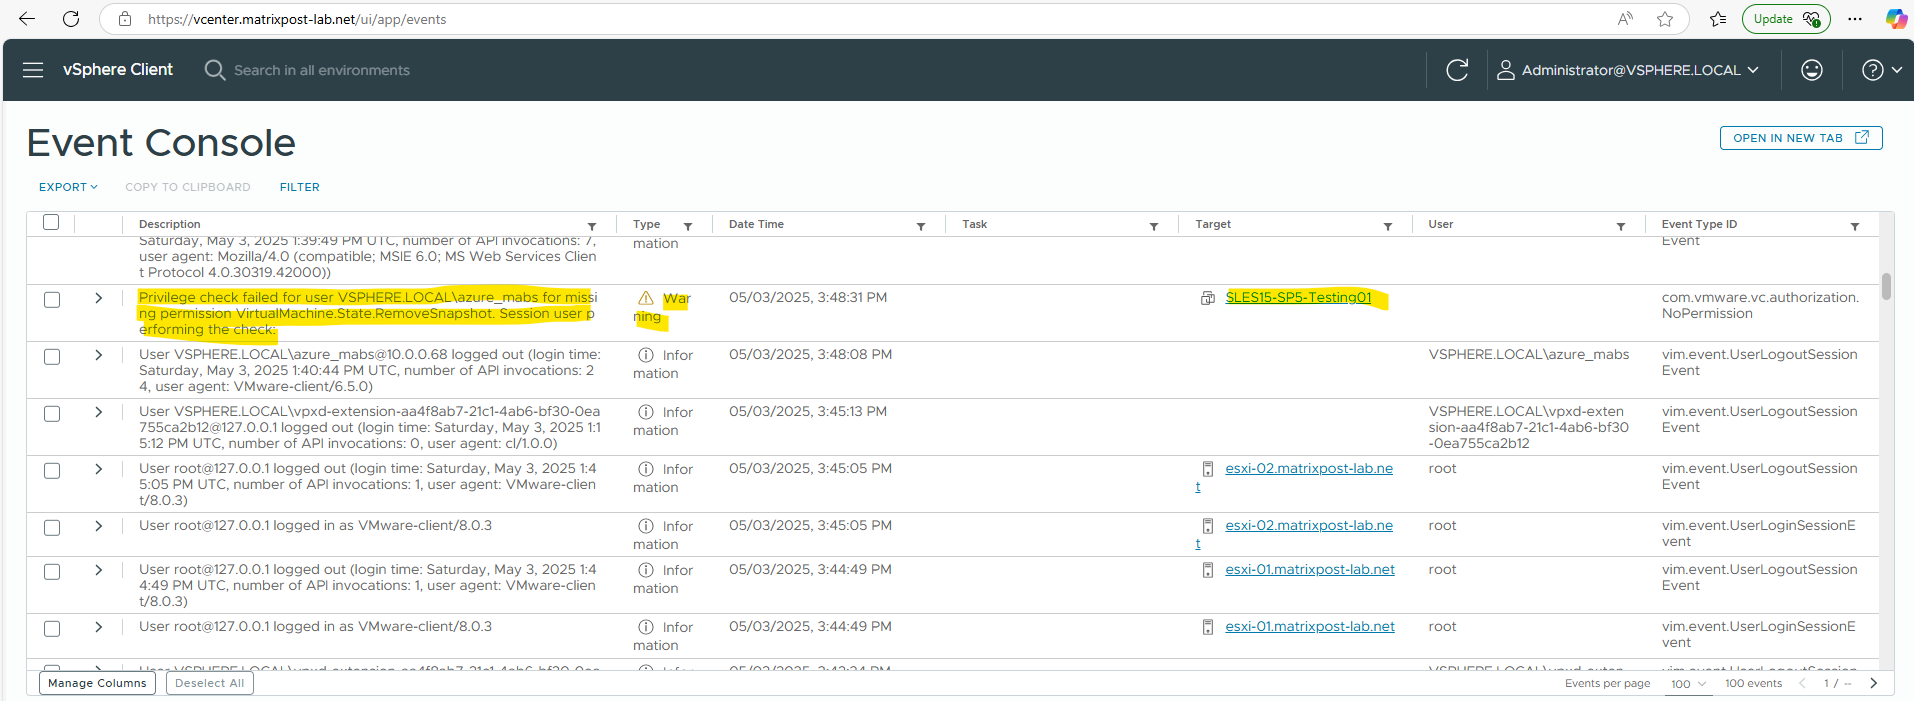

So I need to add the following role permissions to my account I will use to access vCenter from MABS.
- VirtualMachine.State.RemoveSnapshot
- VirtualMachine.Config.AddExistingDisk
Role permissions
https://learn.microsoft.com/en-us/azure/backup/backup-azure-backup-server-vmware#role-permissions
After adding both missing roles I was able to run a replica consistency check successful.
Links
What is the Azure Backup service?
https://learn.microsoft.com/en-us/azure/backup/backup-overviewBack up VMware VMs with Azure Backup Server
https://learn.microsoft.com/en-us/azure/backup/backup-azure-backup-server-vmwareInstall and upgrade Azure Backup Server
https://learn.microsoft.com/en-us/azure/backup/backup-azure-microsoft-azure-backupTroubleshoot Azure Backup Server
https://learn.microsoft.com/en-us/azure/backup/backup-azure-mabs-troubleshootRestore VMware virtual machines using Azure Backup Server
https://learn.microsoft.com/en-us/azure/backup/restore-azure-backup-server-vmware