How to Set up a Microsoft Hyper-V Cluster
Today I want to go through the separate steps to set up a two-node Hyper-V cluster.
A failover cluster is a group of independent computers that work together to increase the availability and scalability of clustered roles (formerly called clustered applications and services). The clustered servers (called nodes) are connected by physical cables and by software. If one or more of the cluster nodes fail, other nodes begin to provide service (a process known as failover). In addition, the clustered roles are proactively monitored to verify that they are working properly. If they are not working, they are restarted or moved to another node.
Failover clusters also provide Cluster Shared Volume (CSV) functionality that provides a consistent, distributed namespace that clustered roles can use to access shared storage from all nodes. With the Failover Clustering feature, users experience a minimum of disruptions in service.
Failover Clustering has many practical applications, including:
- Highly available or continuously available file share storage for applications such as Microsoft SQL Server and Hyper-V virtual machines
- Highly available clustered roles that run on physical servers or on virtual machines that are installed on servers running Hyper-V
Source: https://learn.microsoft.com/en-us/windows-server/failover-clustering/failover-clustering-overview
- Prerequisites
- Install Failover Clustering
- Create the Cluster
- Configure Cluster Shared Volumes for the Cluster
- Configure and manage quorum
- Testing Failover
- Modify Settings for a clustered Virtual Machine
- Using Windows Admin Center to managing Clusters
- Using PowerShell to managing Clusters
- Troubleshooting
- Links
Prerequisites
- Shared Storage: Direct Attached Storage, iSCSI Storage, Storage Area Networking (SAN) and SMB 3.0 protocol (for Windows Server 2012 and later).
- CPU: native virtualization support.
- Network: Cluster nodes should be share same network settings.
- OS: Should be places within the same domain and have installed Hyper-V and failover cluster roles.
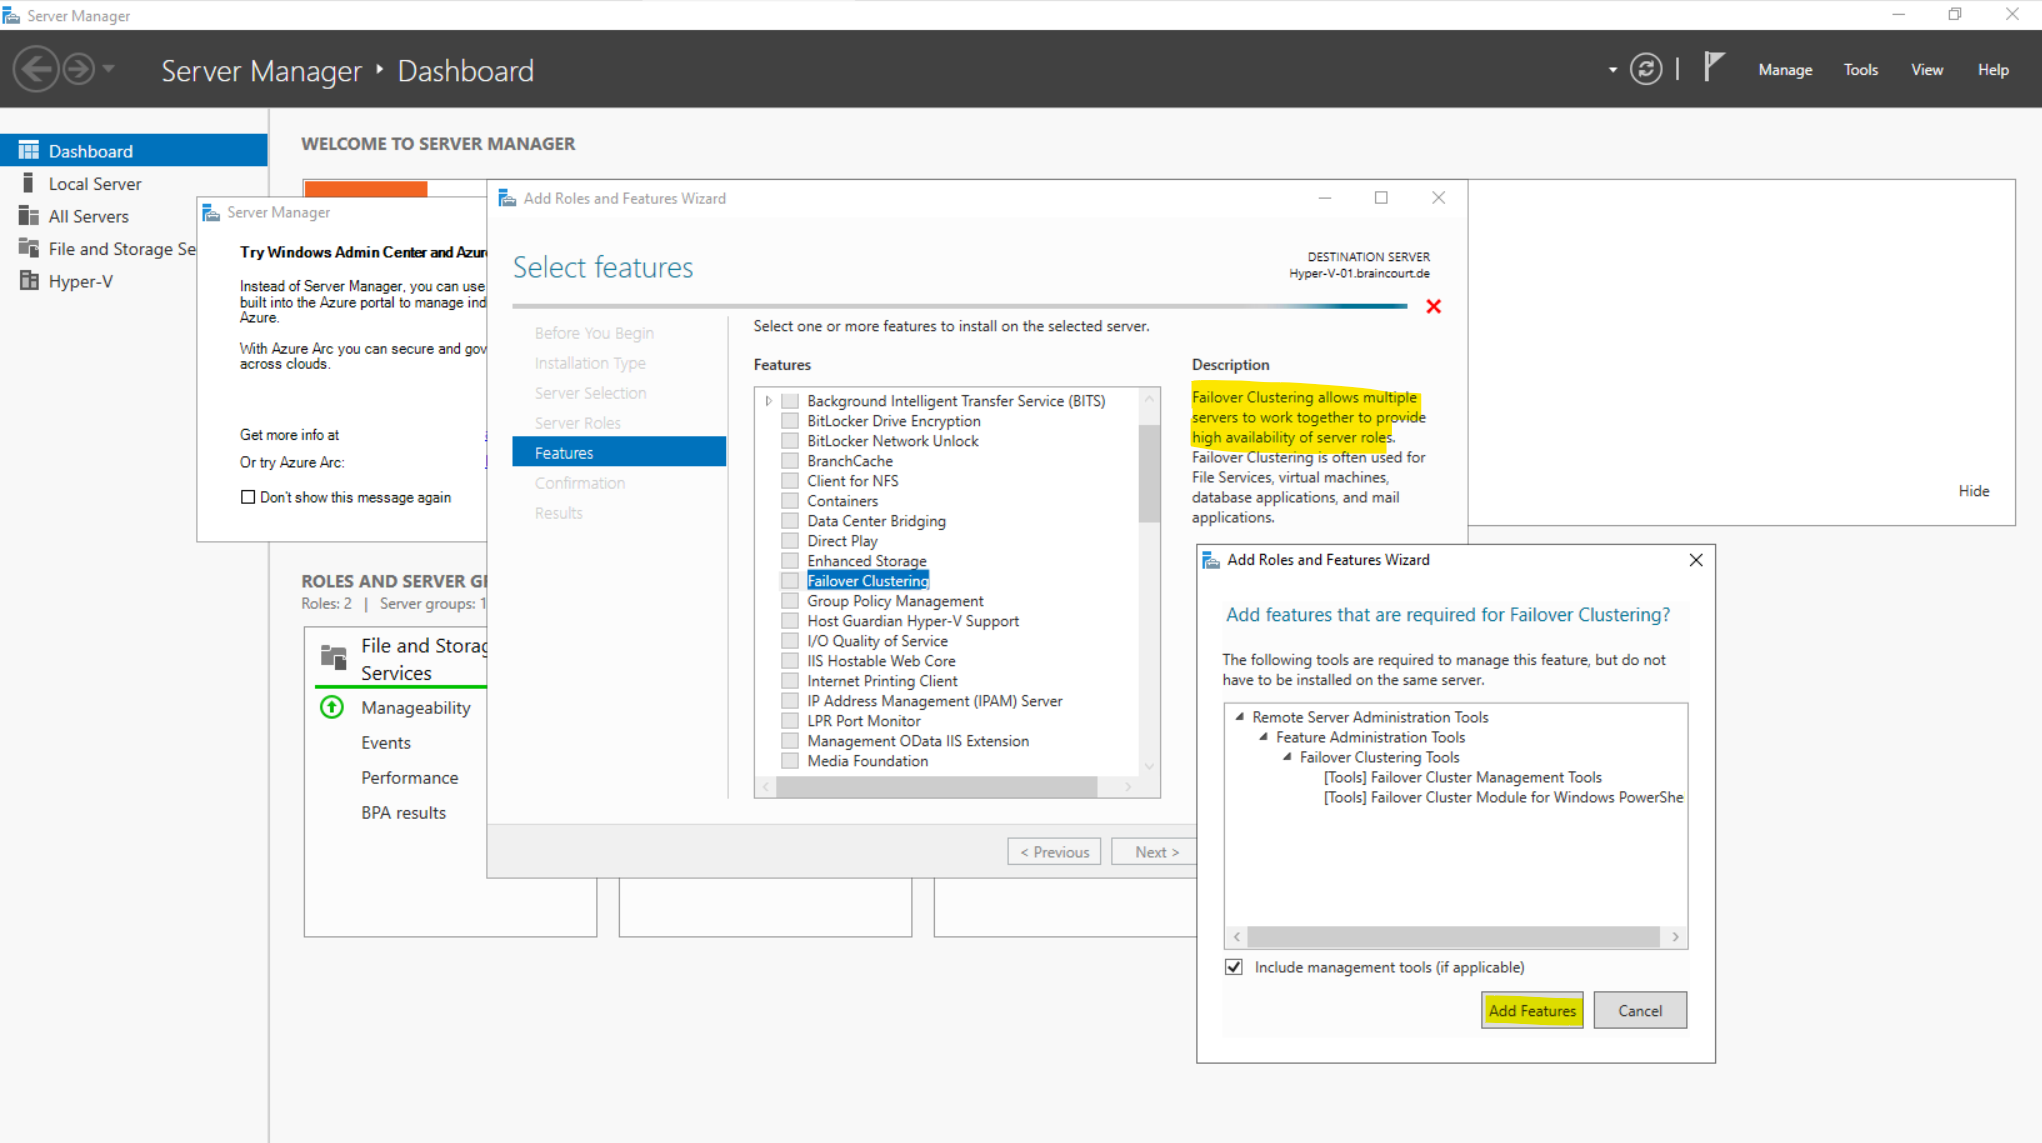
Install Failover Clustering
Install the Failover Clustering feature on both Hyper-V servers.
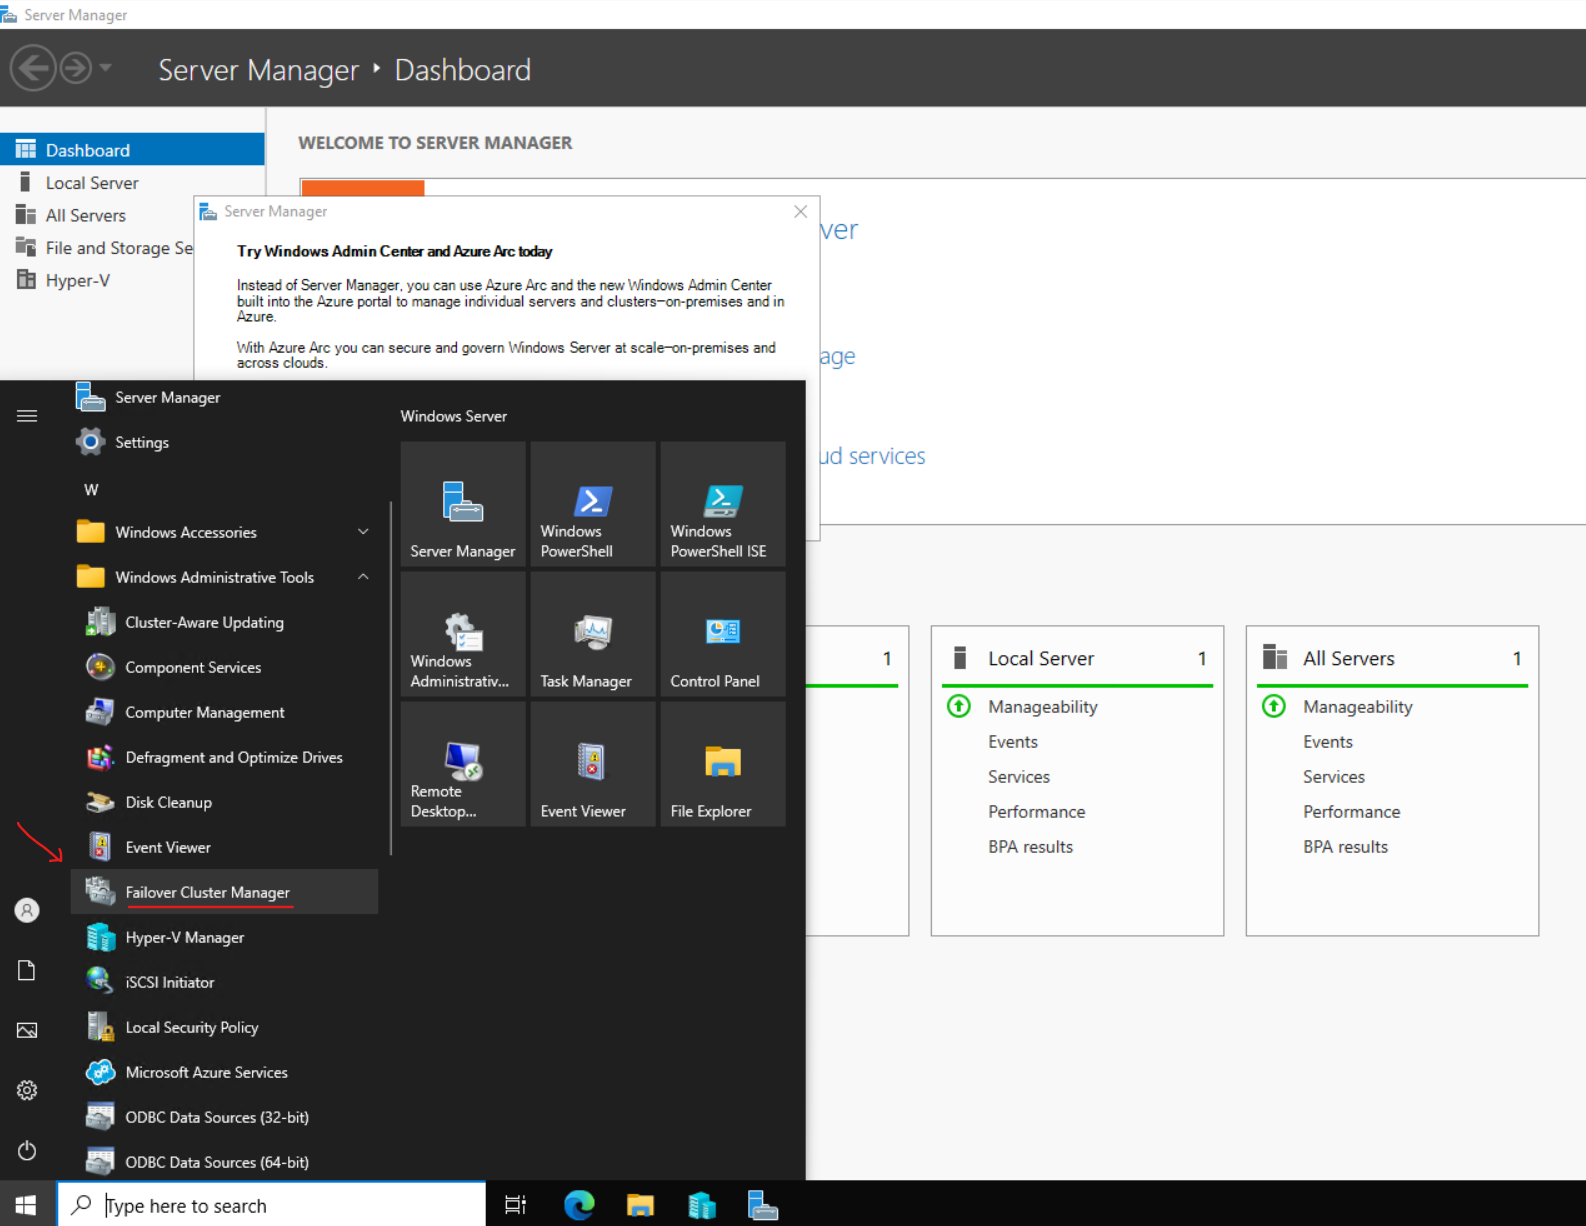
Validate the Cluster Configuration of Member Nodes
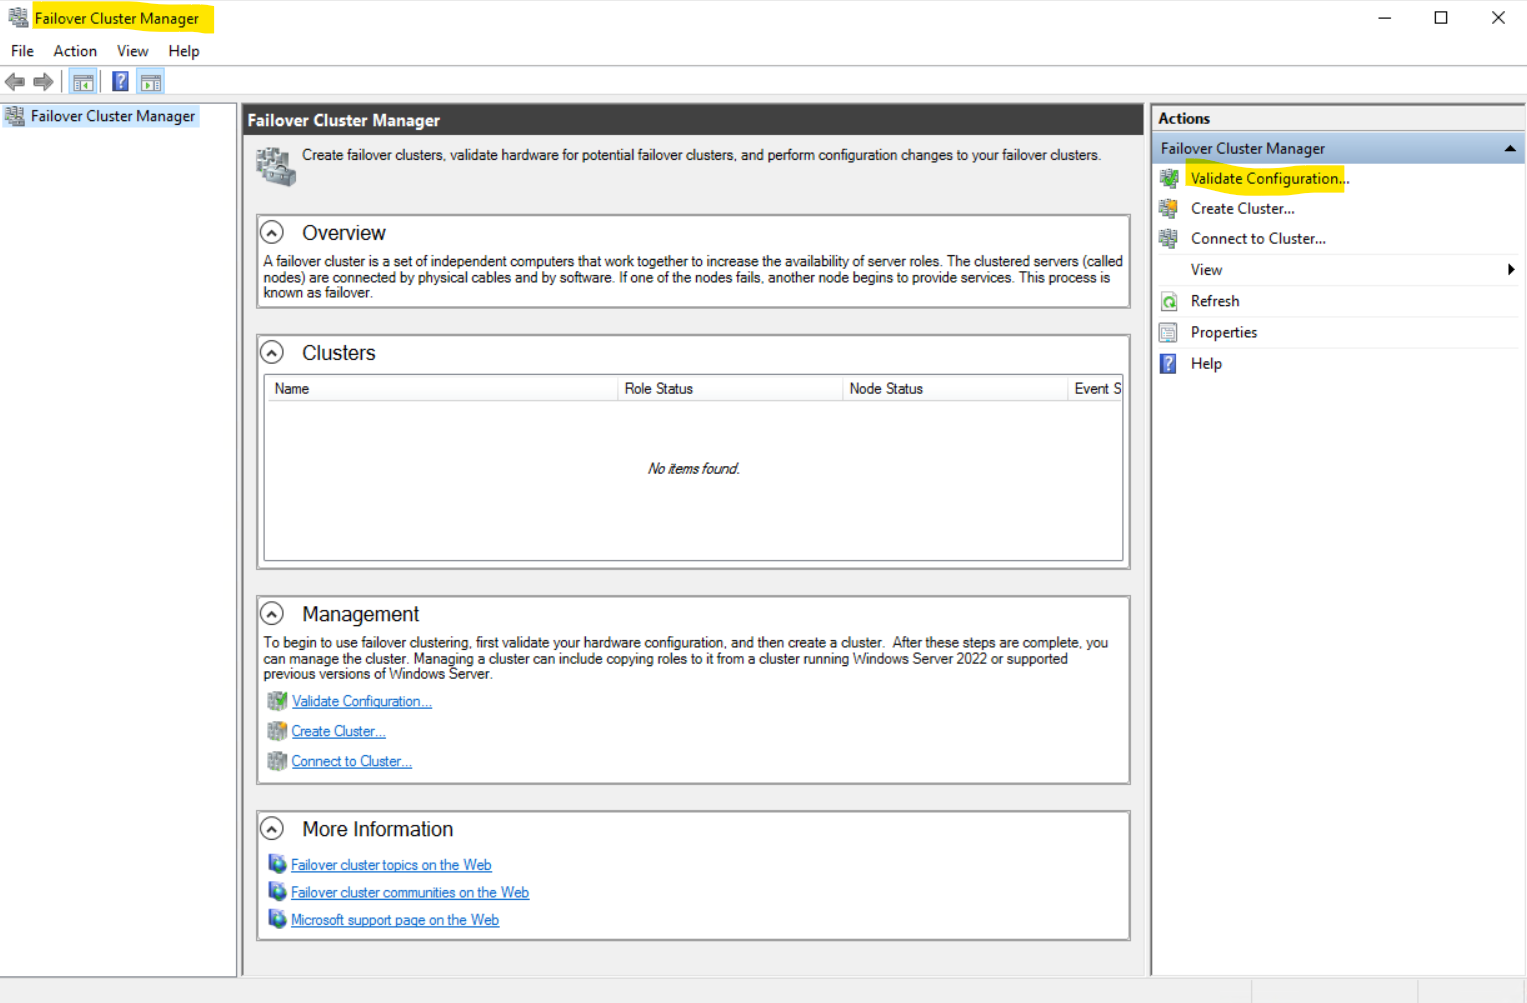
After adding the Failover Cluster feature we first run a validation test of the cluster configuration by using the Failover Cluster Manager as shown below.
Click on Validate Configuration …

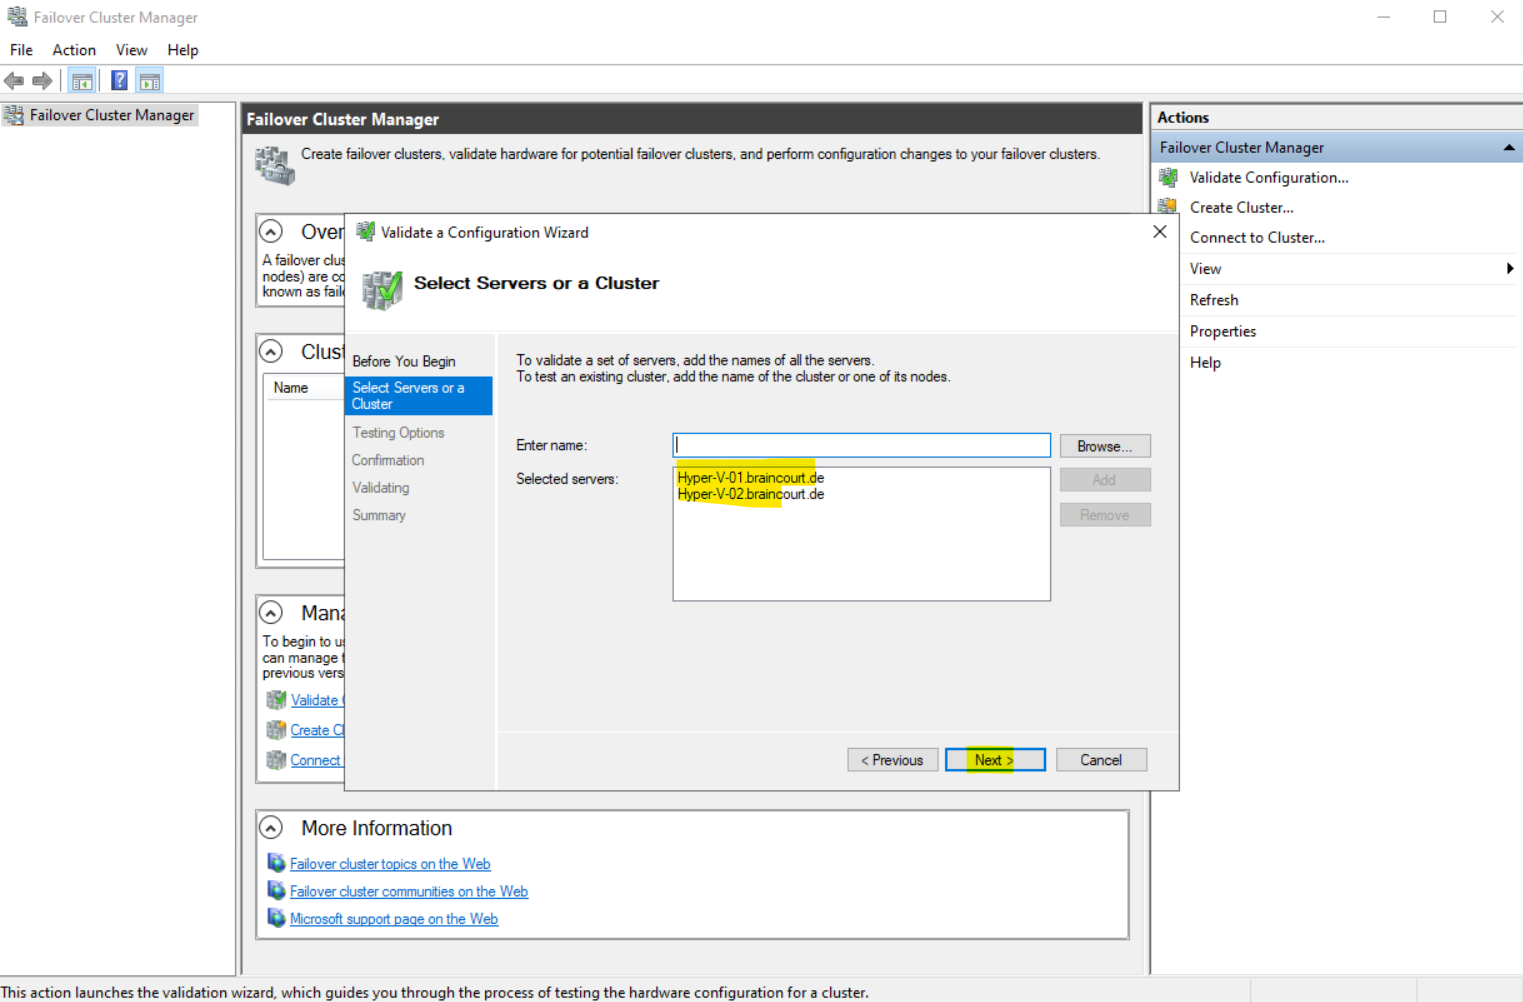
Click on Browse to specify all servers you want to be a member node in the new cluster. I will add here both of my Hyper-V servers which should be a member of the cluster.
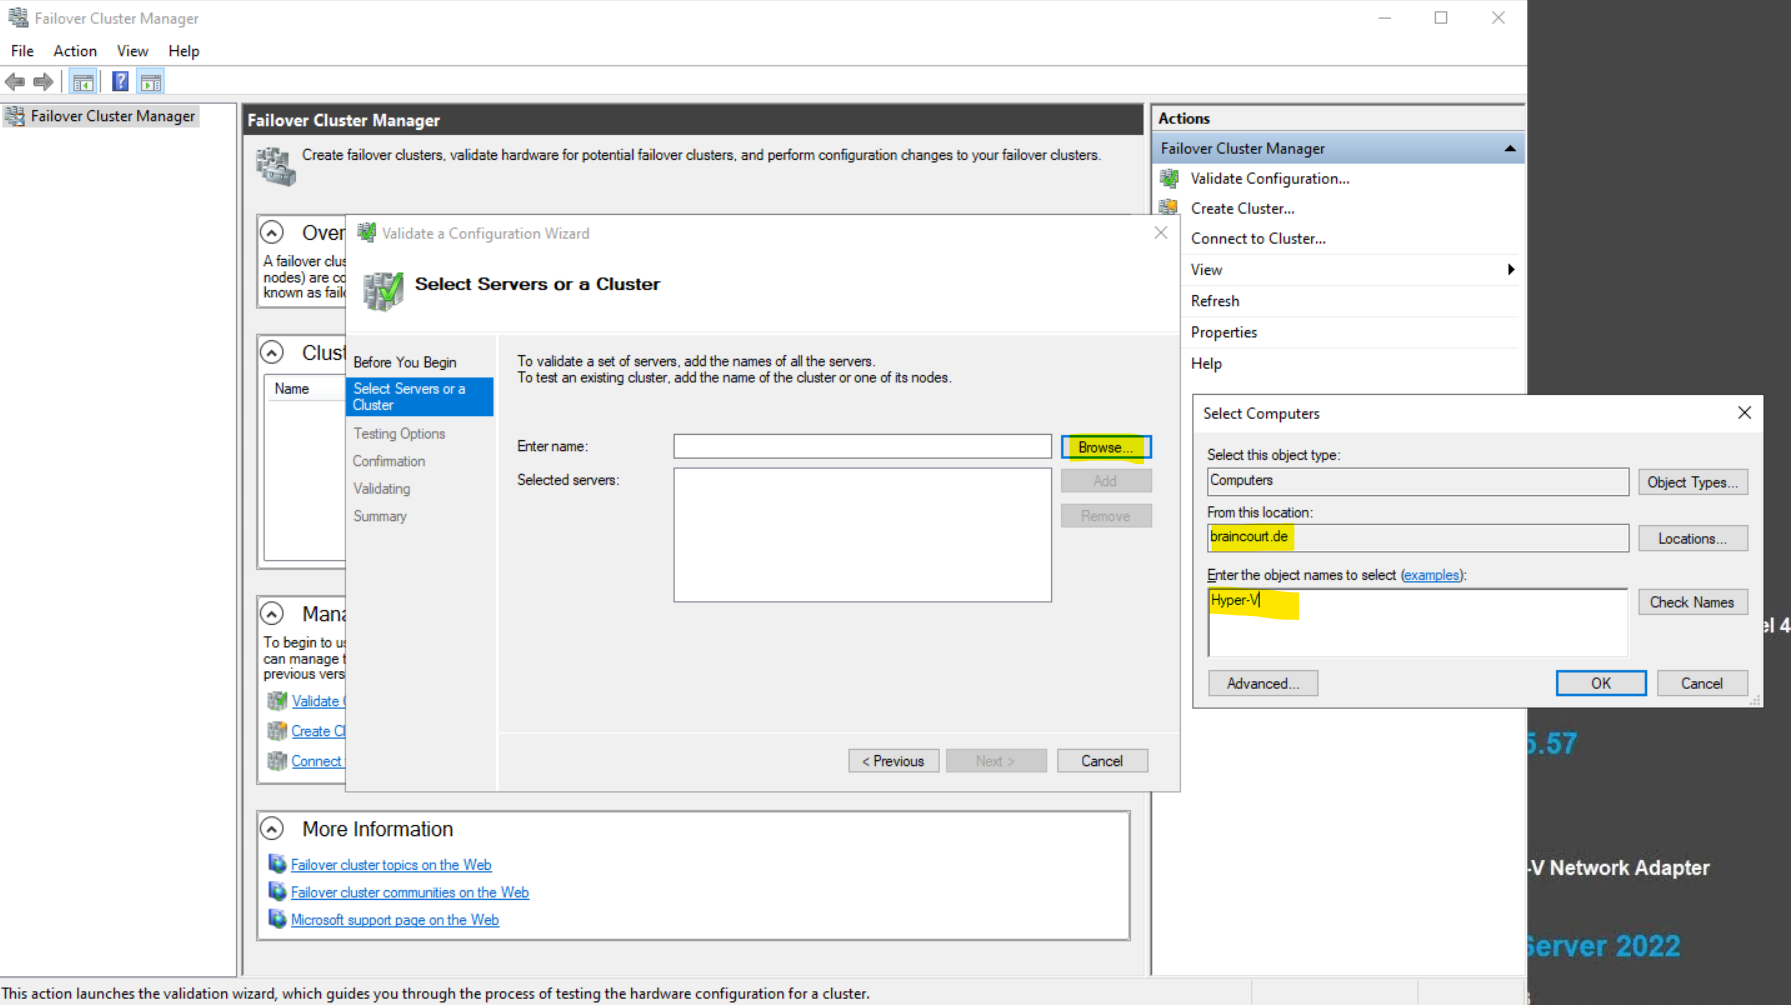
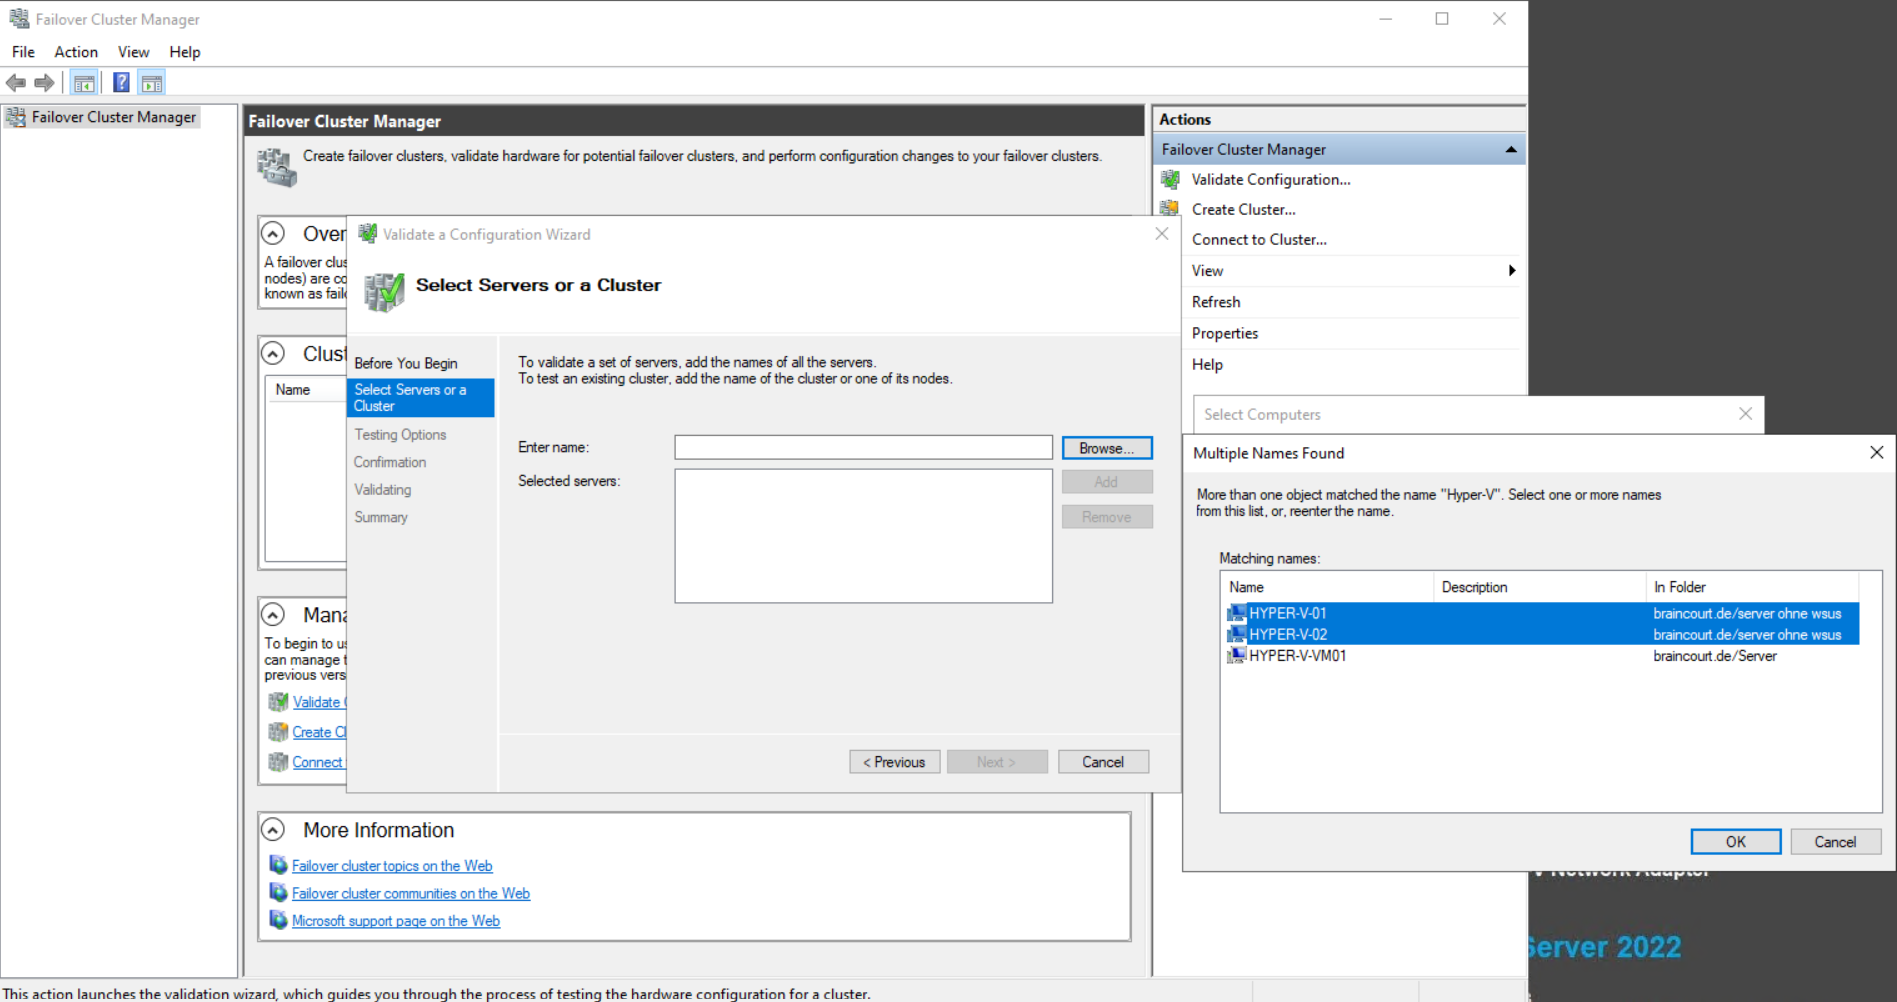
Click Next.
I will run all tests.

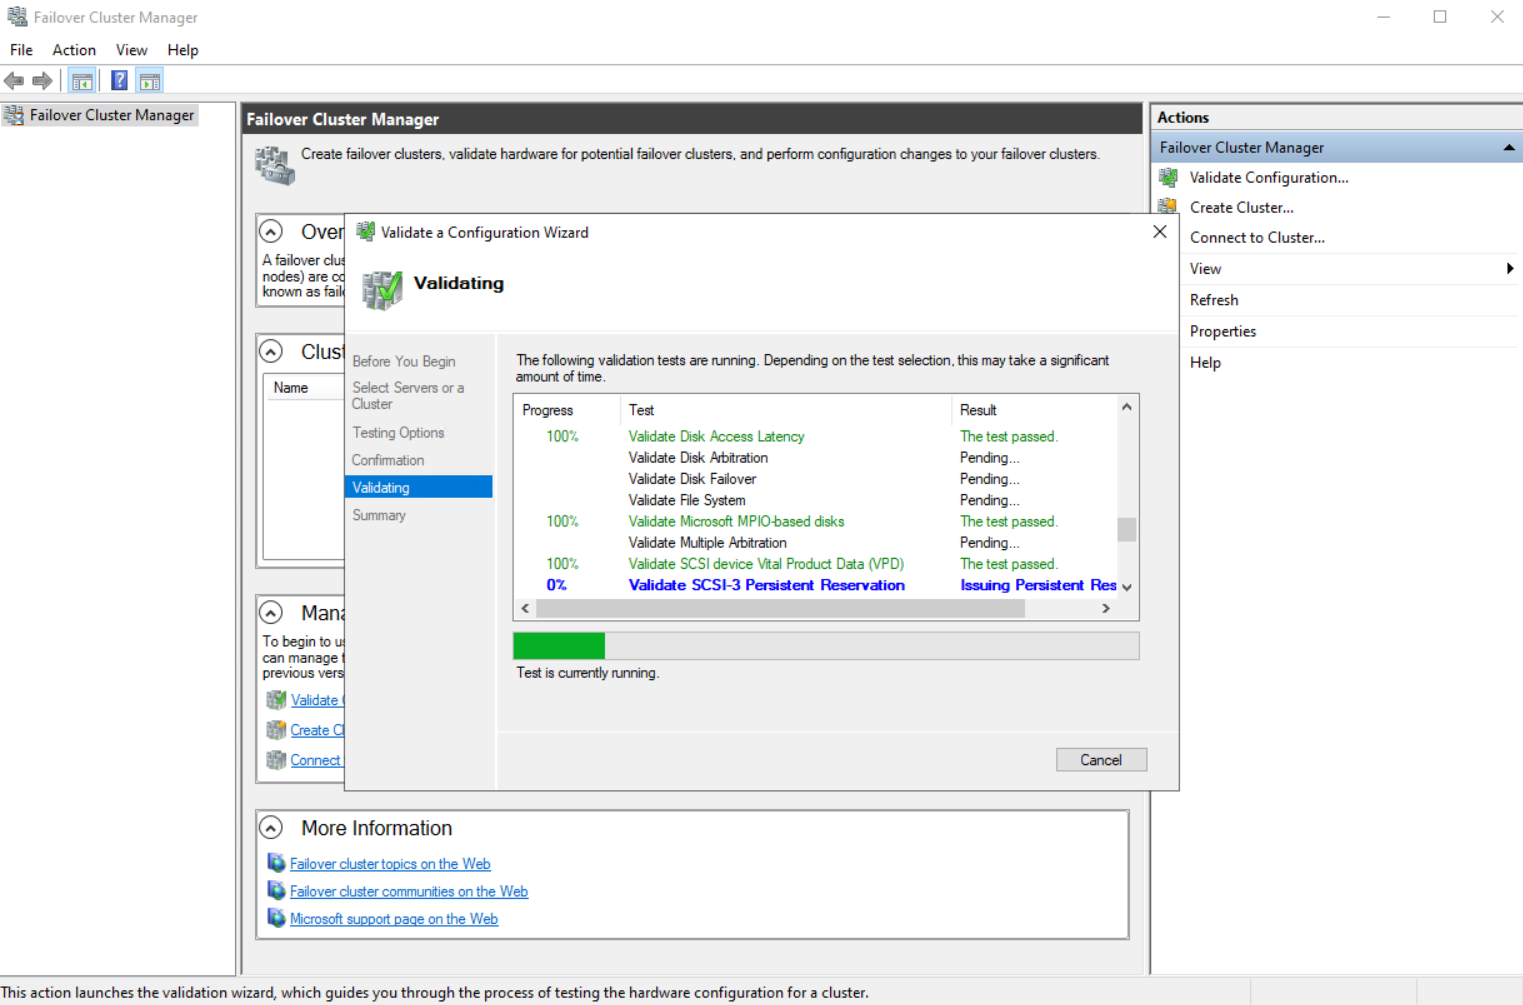
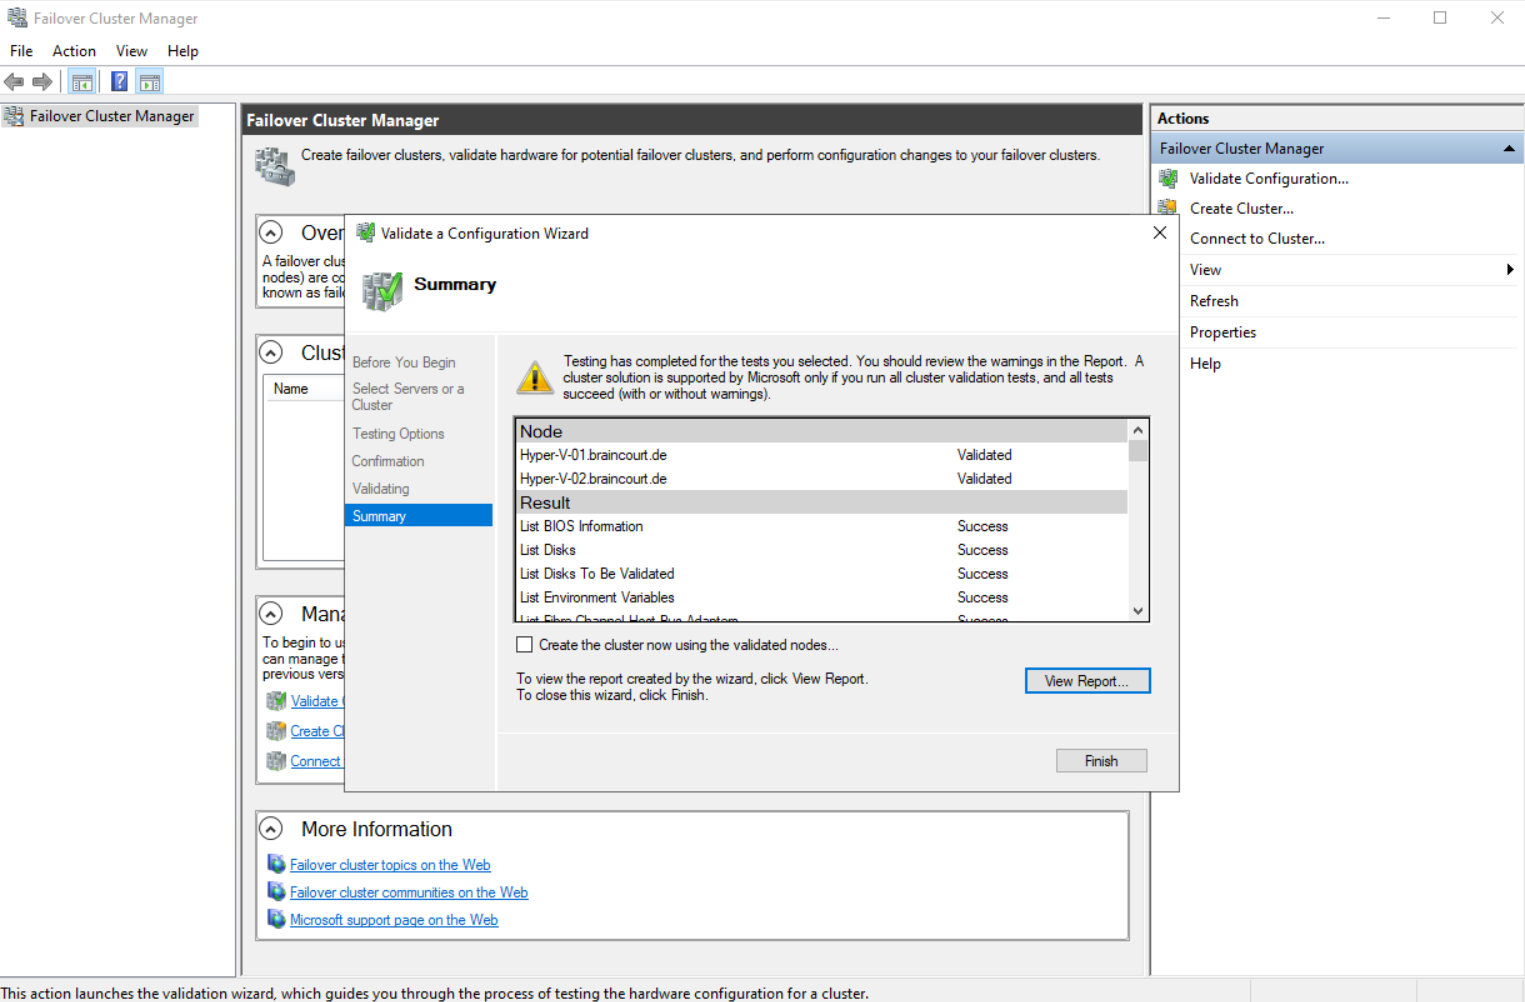
All tests passed successfully.
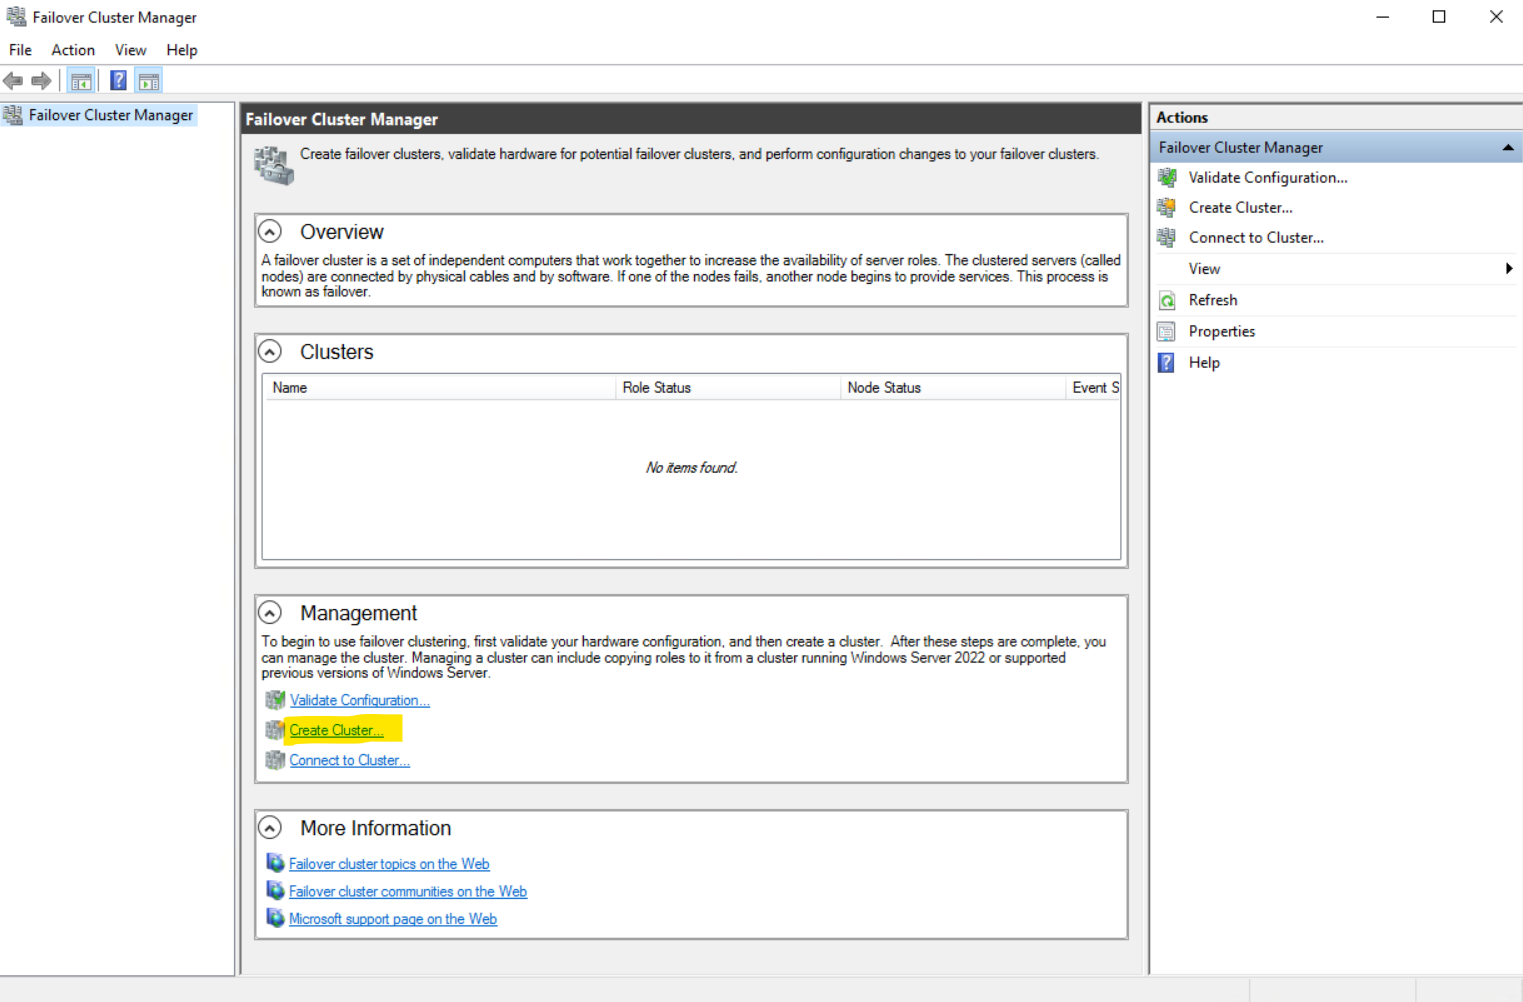
Create the Cluster
To create a new cluster we can click on Create Cluster within the Failover Cluster Manager as shown below.
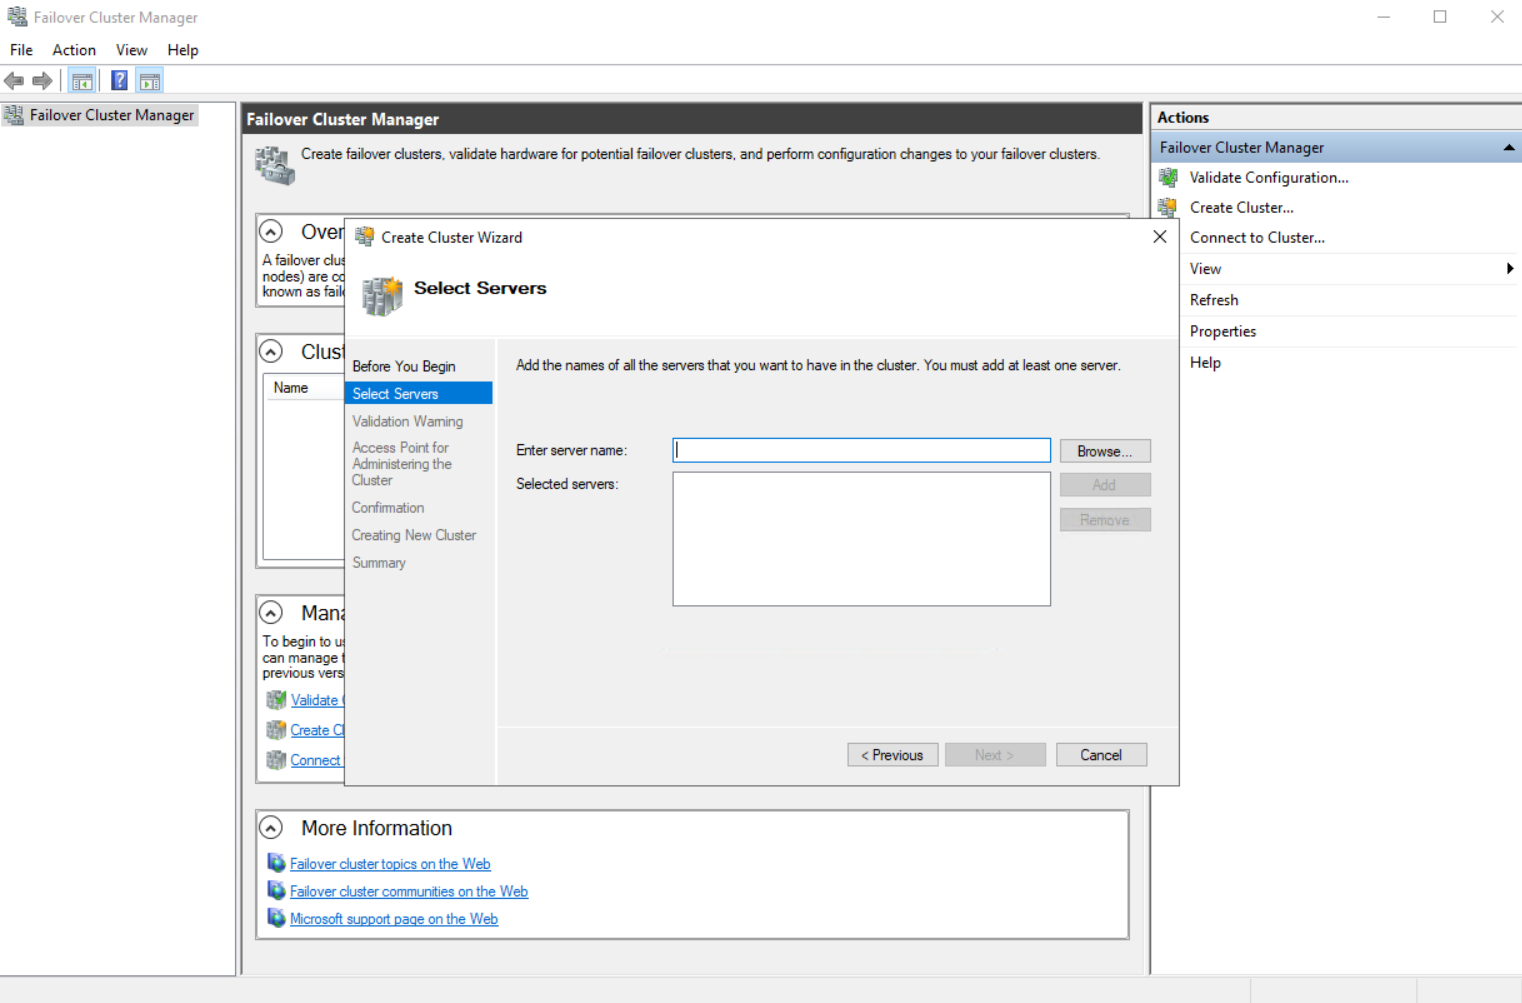
As previously for testing the configuration we now also need to add all servers which should be a member node in this new cluster.
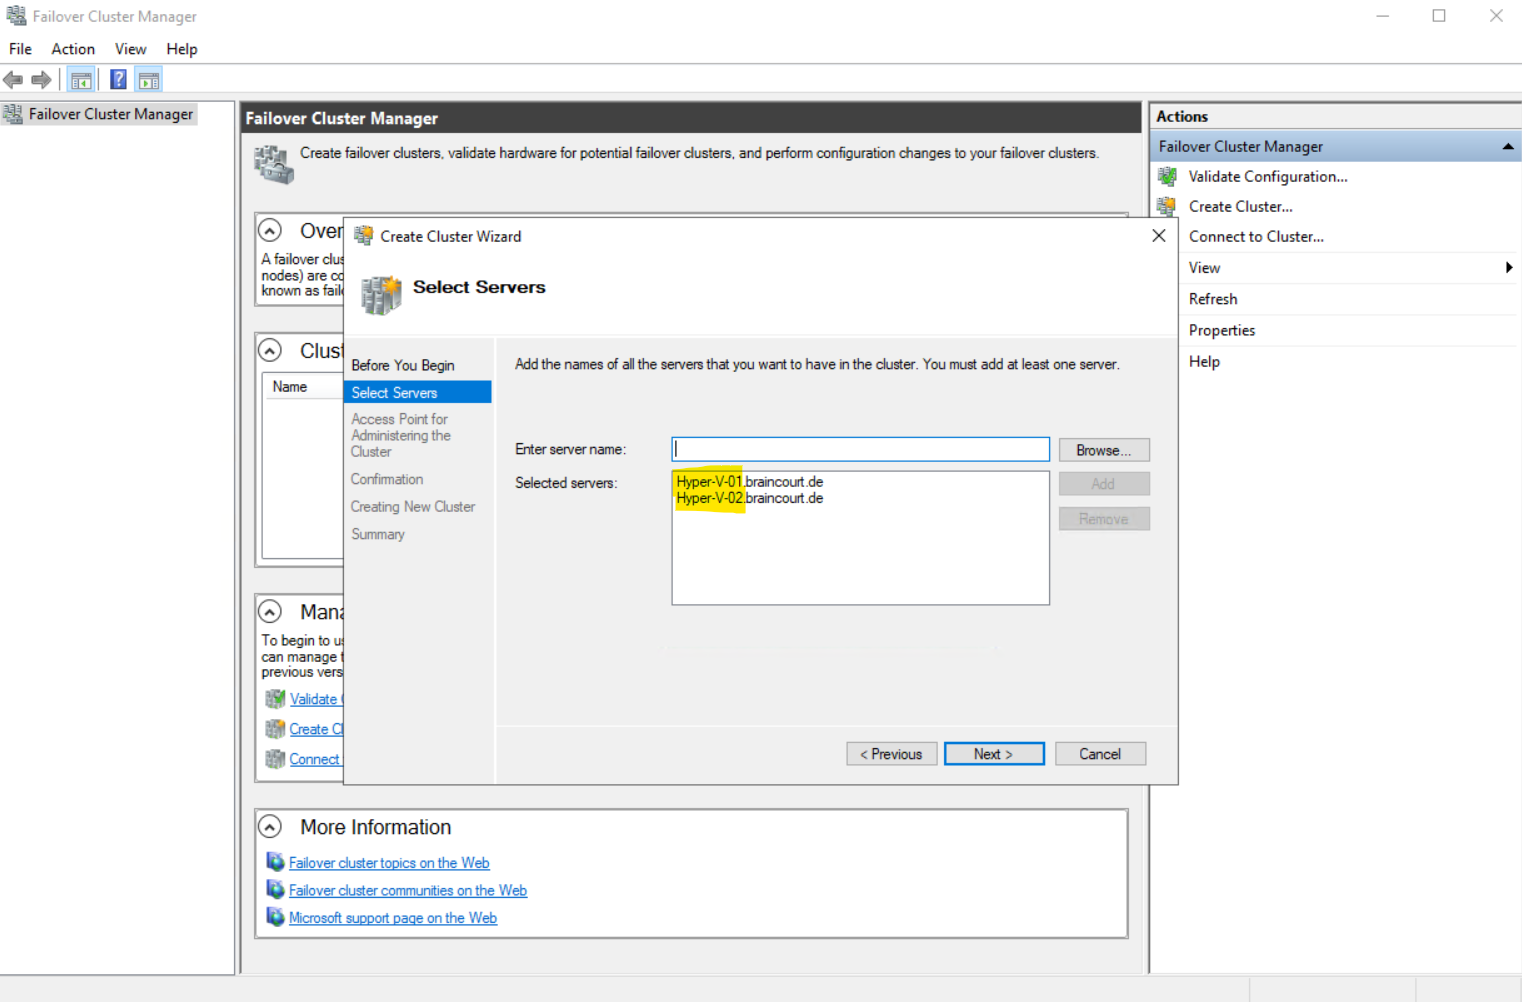
I will create a two-node cluster and therefore adding two Hyper-V hosts as shown below.
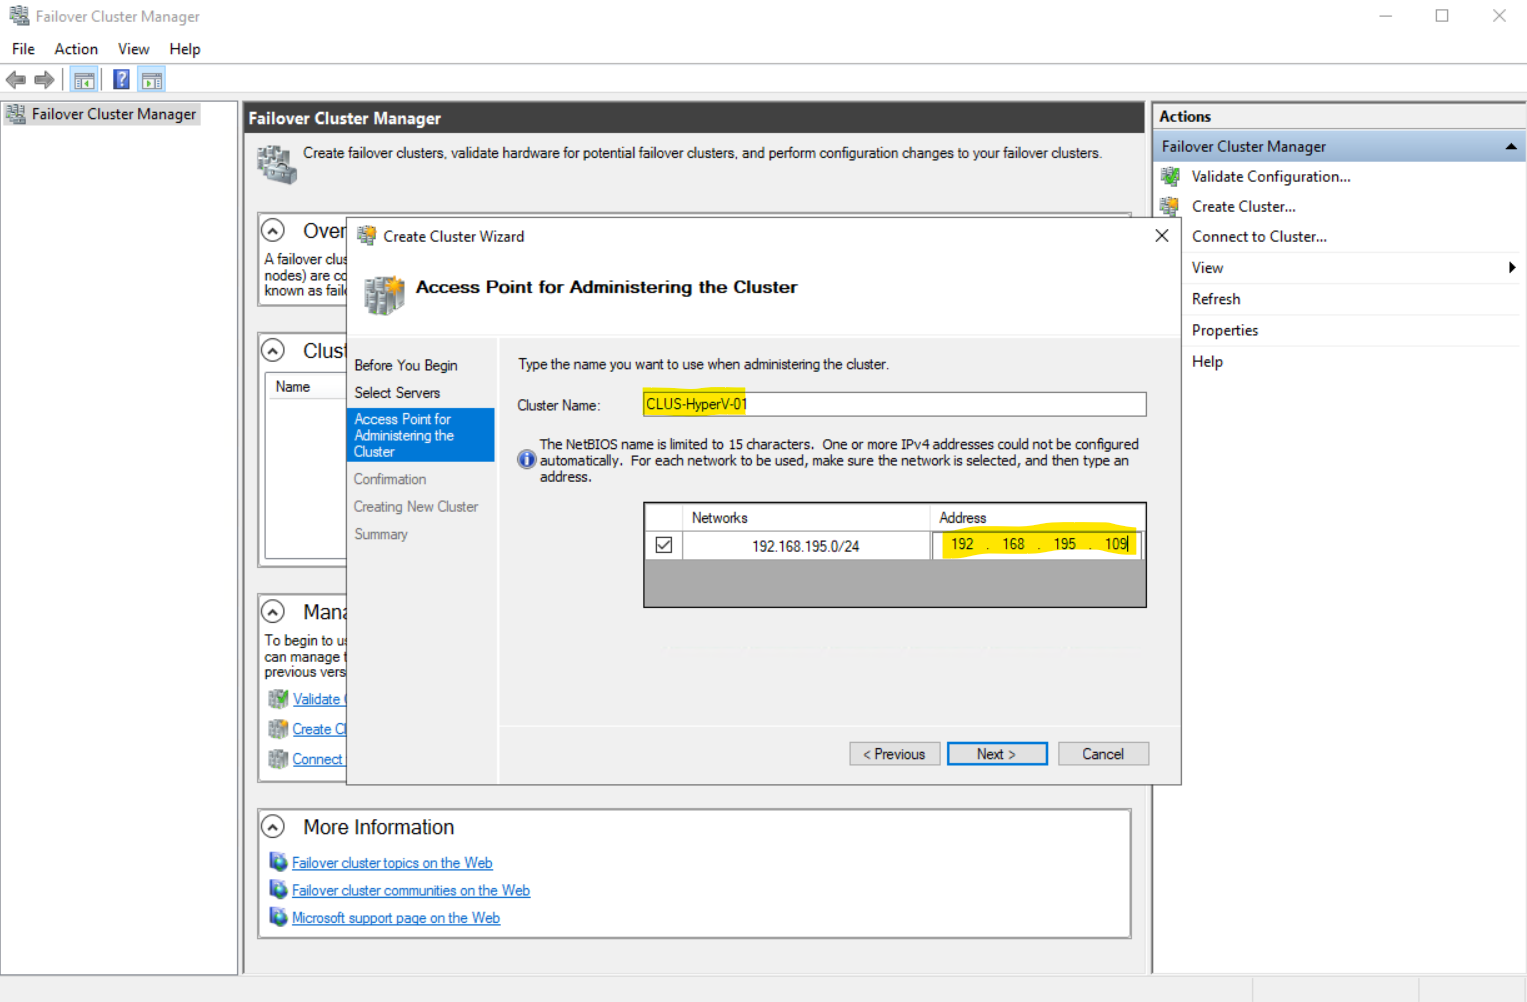
Under Access Point for Administering the Cluster provide a name and free available IP address for the new cluster.
During cluster creation, this name is registered as the cluster computer object (also known as the cluster name object or CNO) in AD DS. If you specify a NetBIOS name for the cluster, the CNO is created in the same location where the computer objects for the cluster nodes reside. This can be either the default Computers container or an OU.
To specify a different location for the CNO, you can enter the distinguished name of an OU in the Cluster Name box. For example: CN=ClusterName, OU=Clusters, DC=Contoso, DC=com.
If a domain administrator has prestaged the CNO in a different OU than where the cluster nodes reside, specify the distinguished name that the domain administrator provides.
If the server does not have a network adapter that is configured to use DHCP, you must configure one or more static IP addresses for the failover cluster. Select the check box next to each network that you want to use for cluster management. Select the Address field next to a selected network and then enter the IP address that you want to assign to the cluster. This IP address (or addresses) will be associated with the cluster name in Domain Name System (DNS).
If you’re using Windows Server 2019, you have the option to use a distributed network name for the cluster. A distributed network name uses the IP addresses of the member servers instead of requiring a dedicated IP address for the cluster. By default, Windows uses a distributed network name if it detects that you’re creating the cluster in Azure (so you don’t have to create an internal load balancer for the cluster) or a normal static or IP address if you’re running on-premises. For more info, see Distributed Network Name.
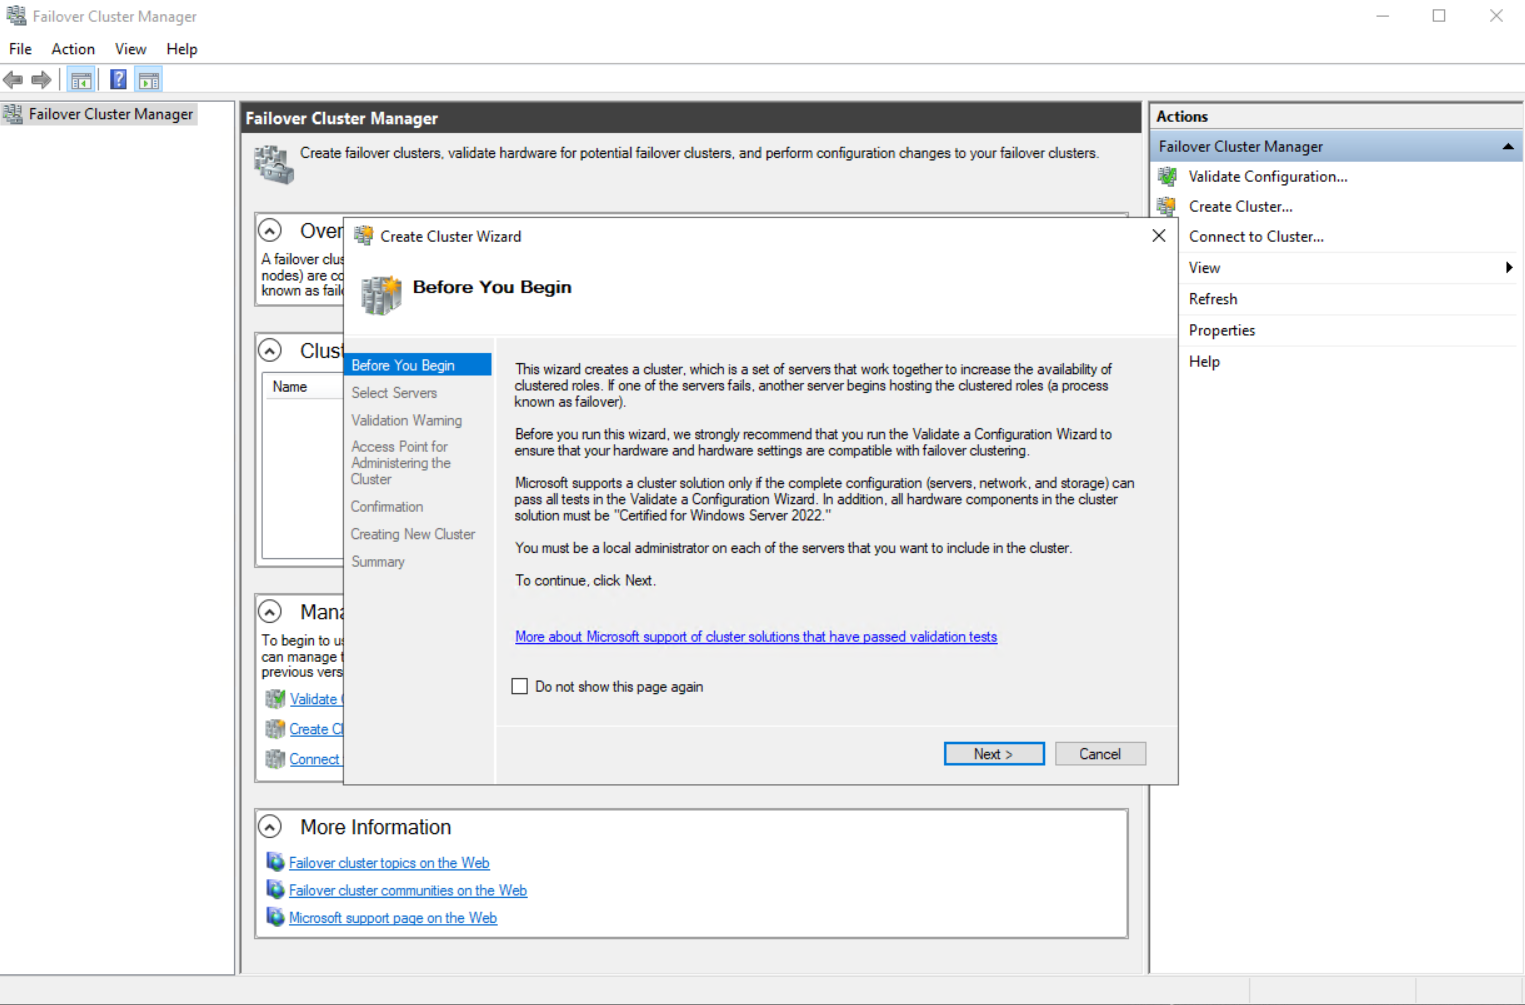
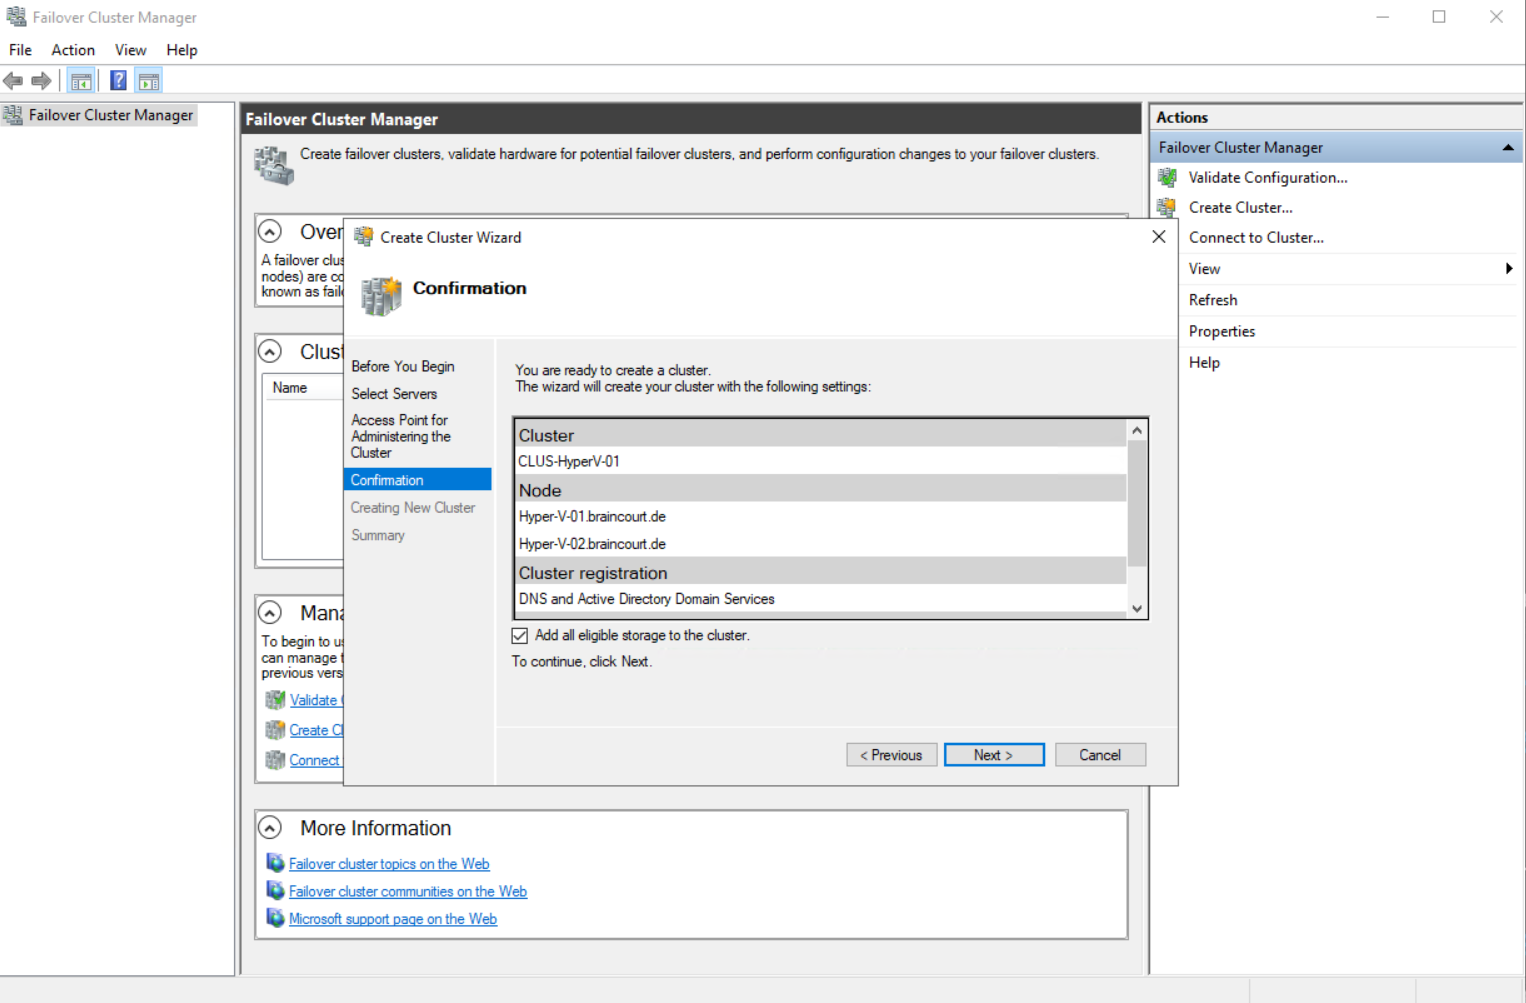
Before finally creating the new cluster you will see a confirmation page including all settings for the cluster. Click on Next to create the cluster.
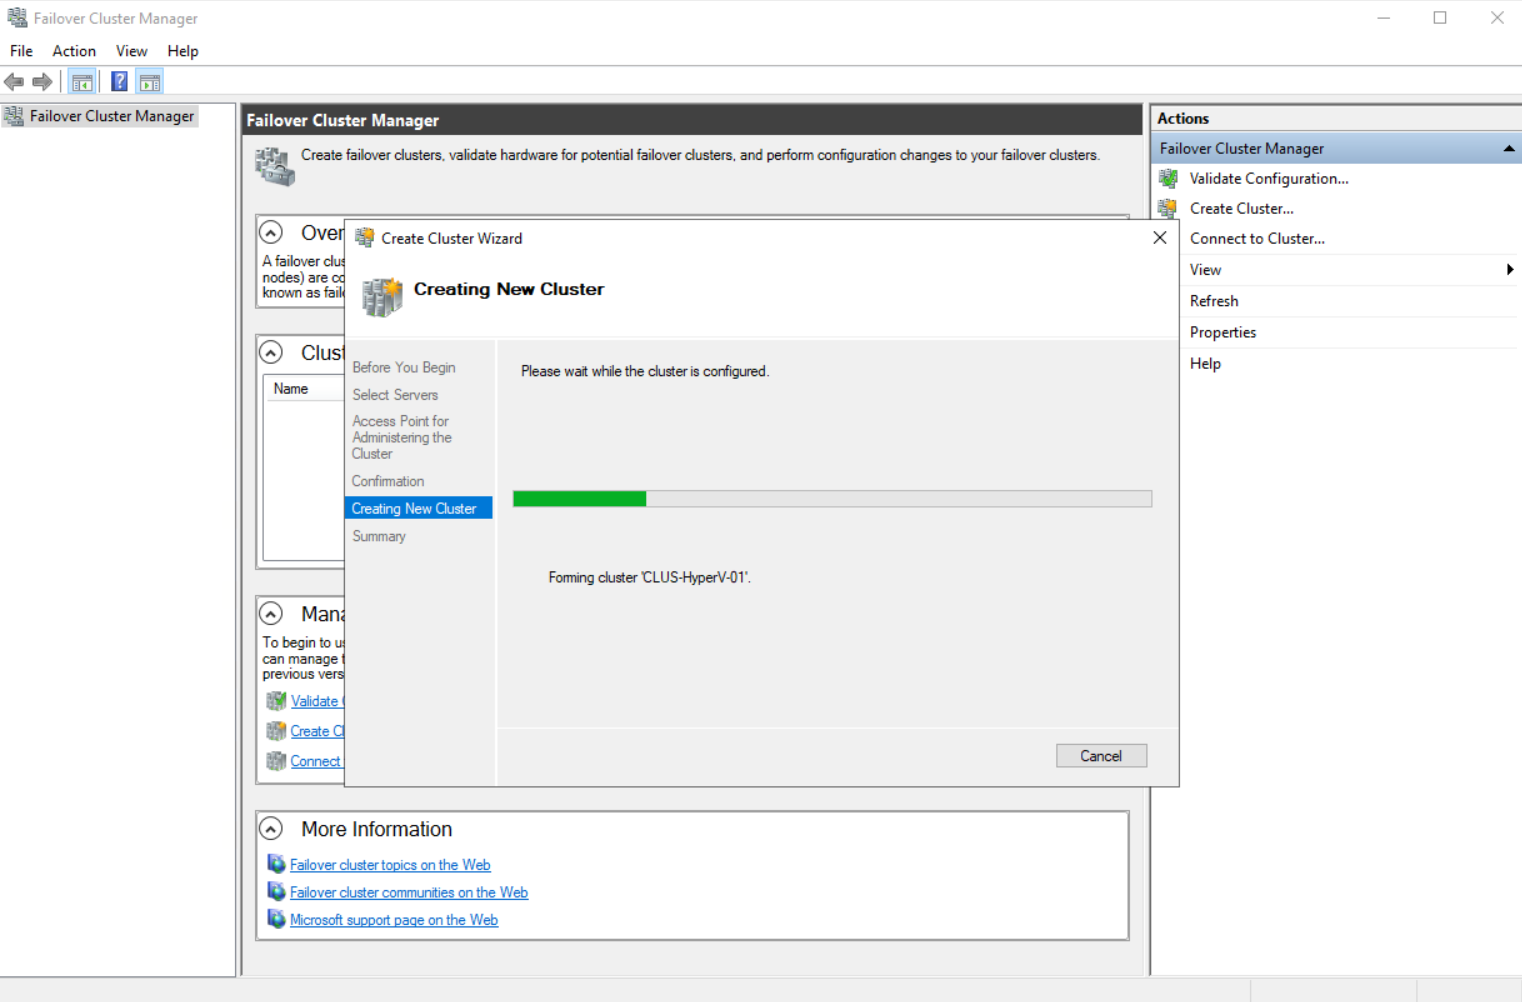
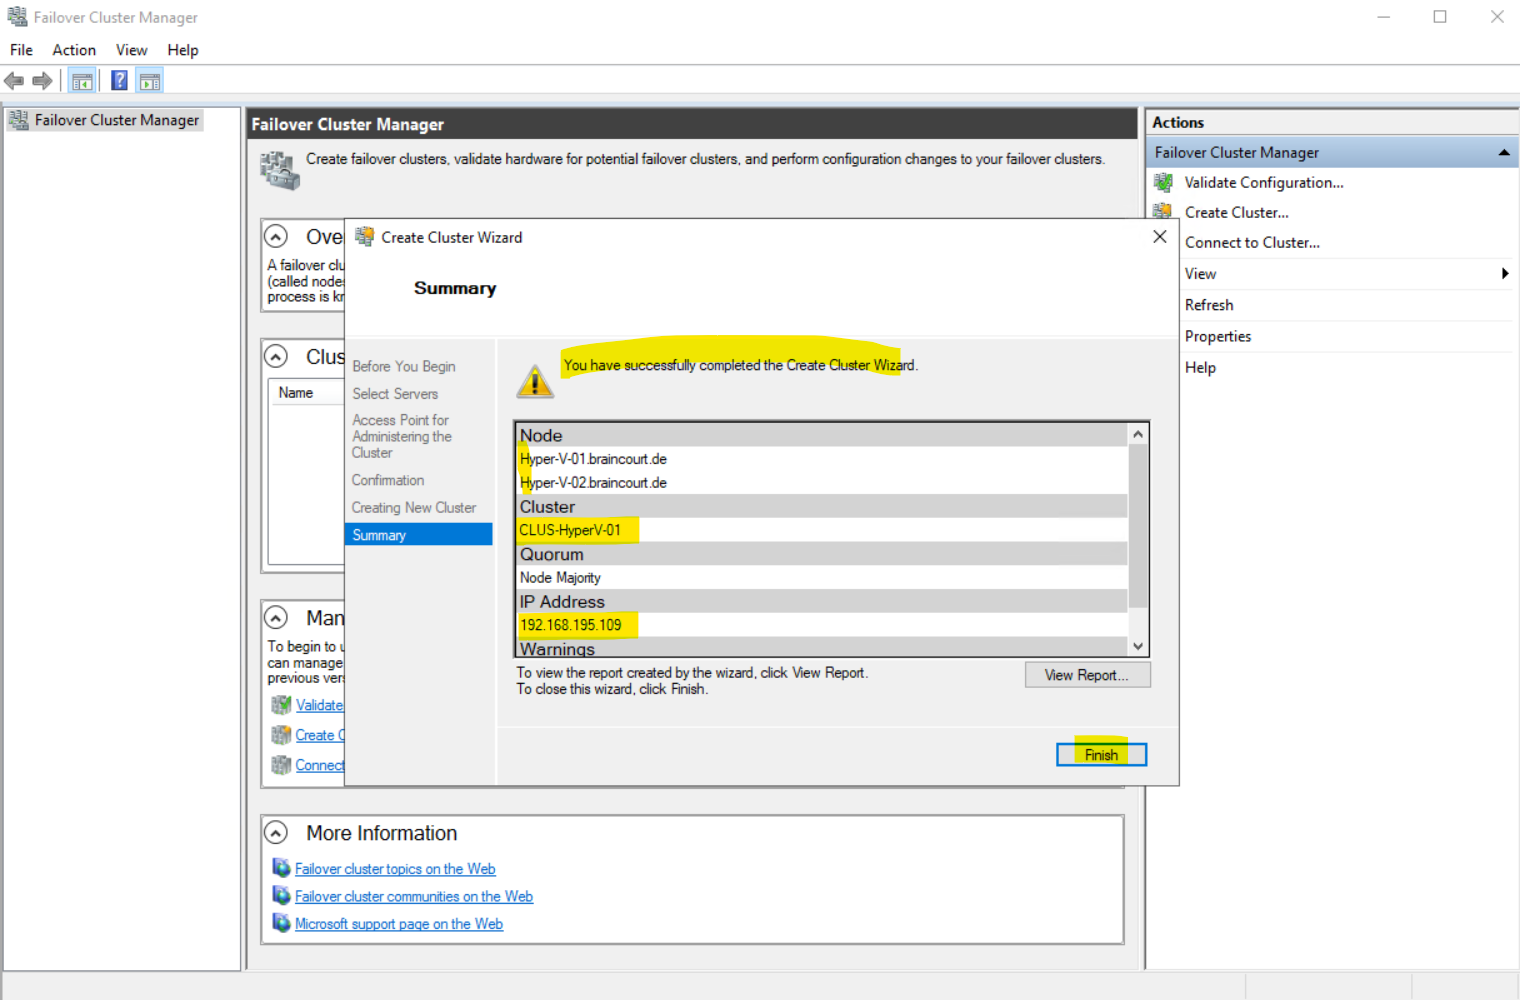
Finally we have set up the Hyper-V cluster.
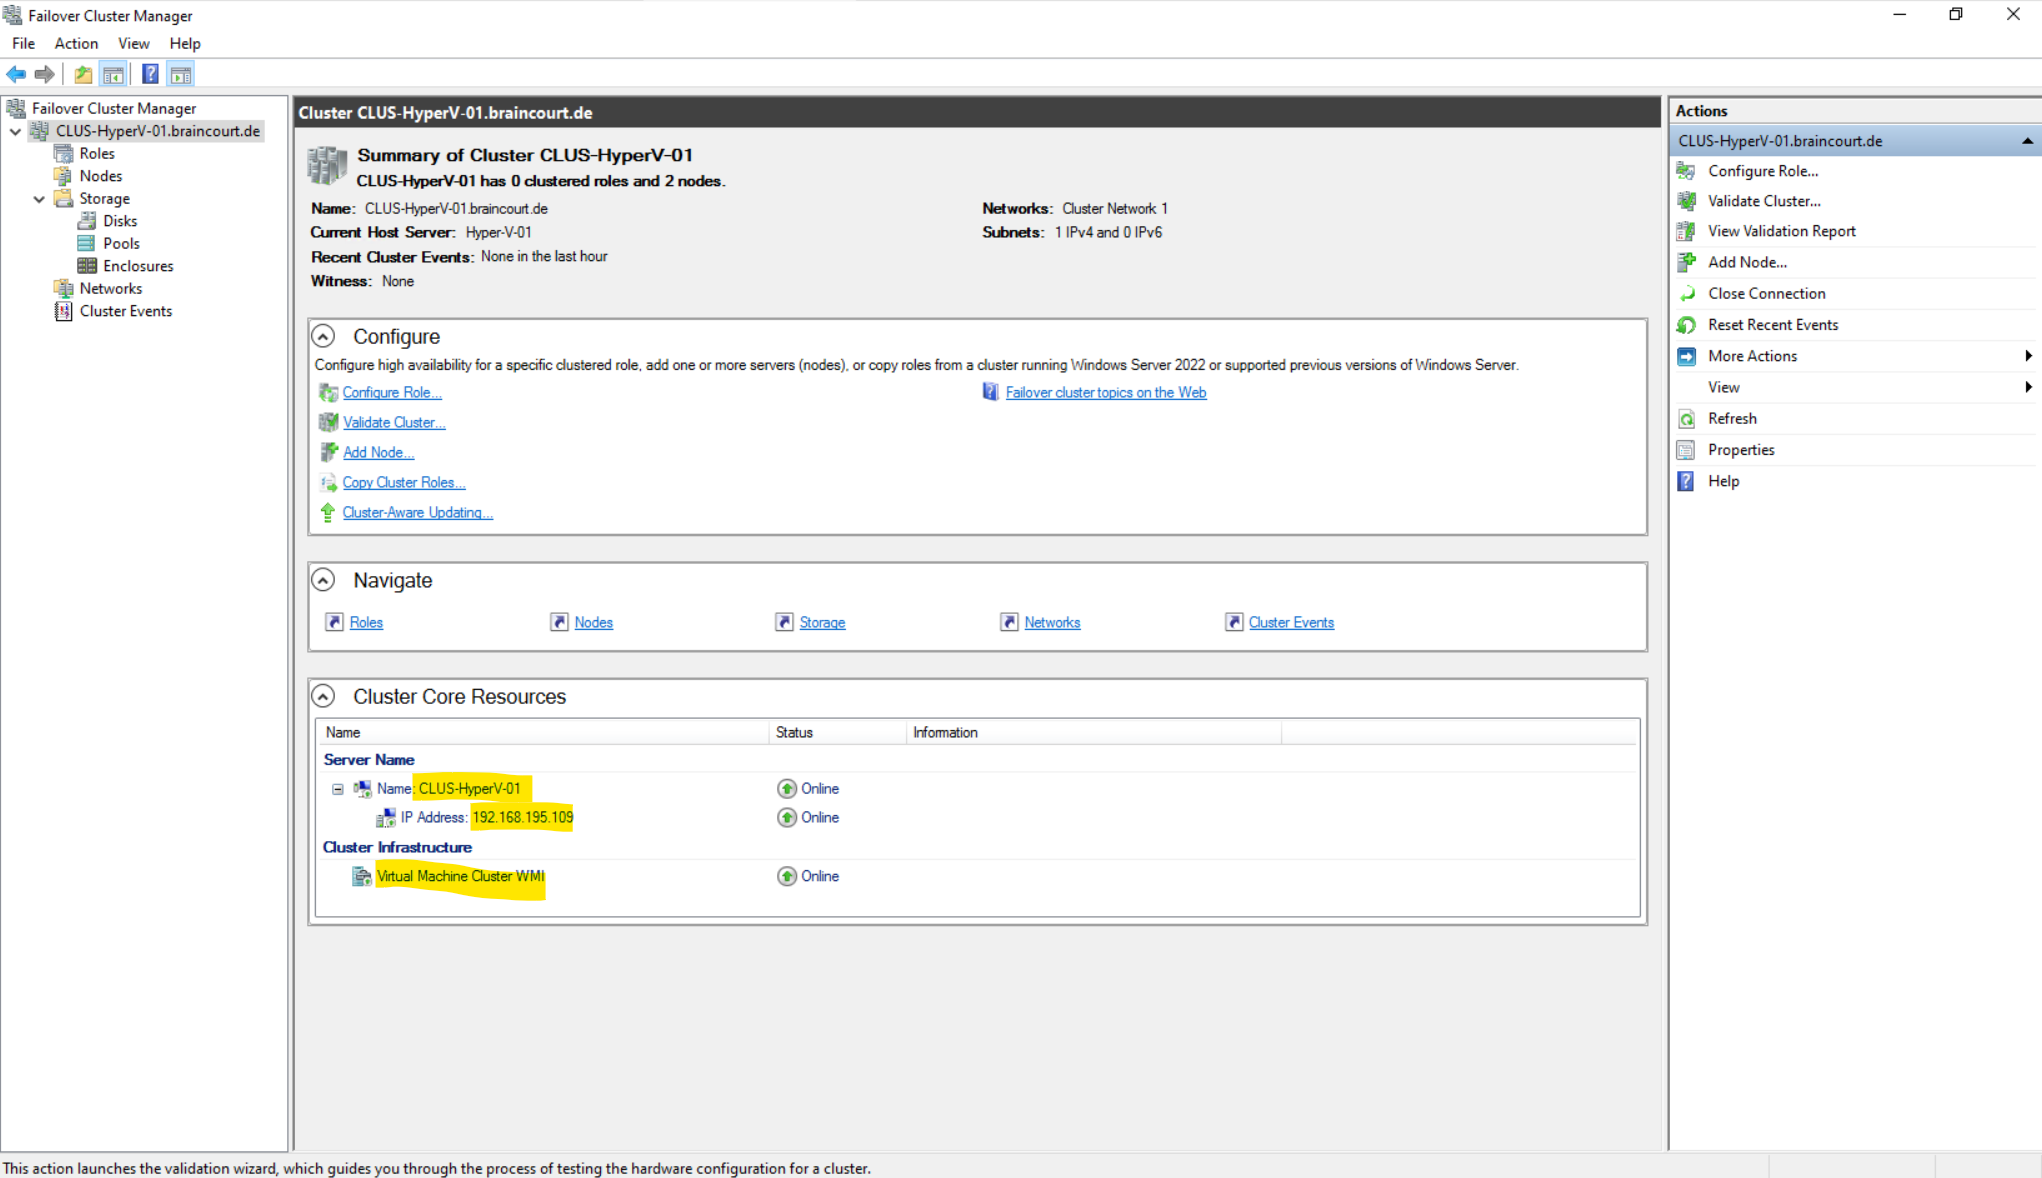
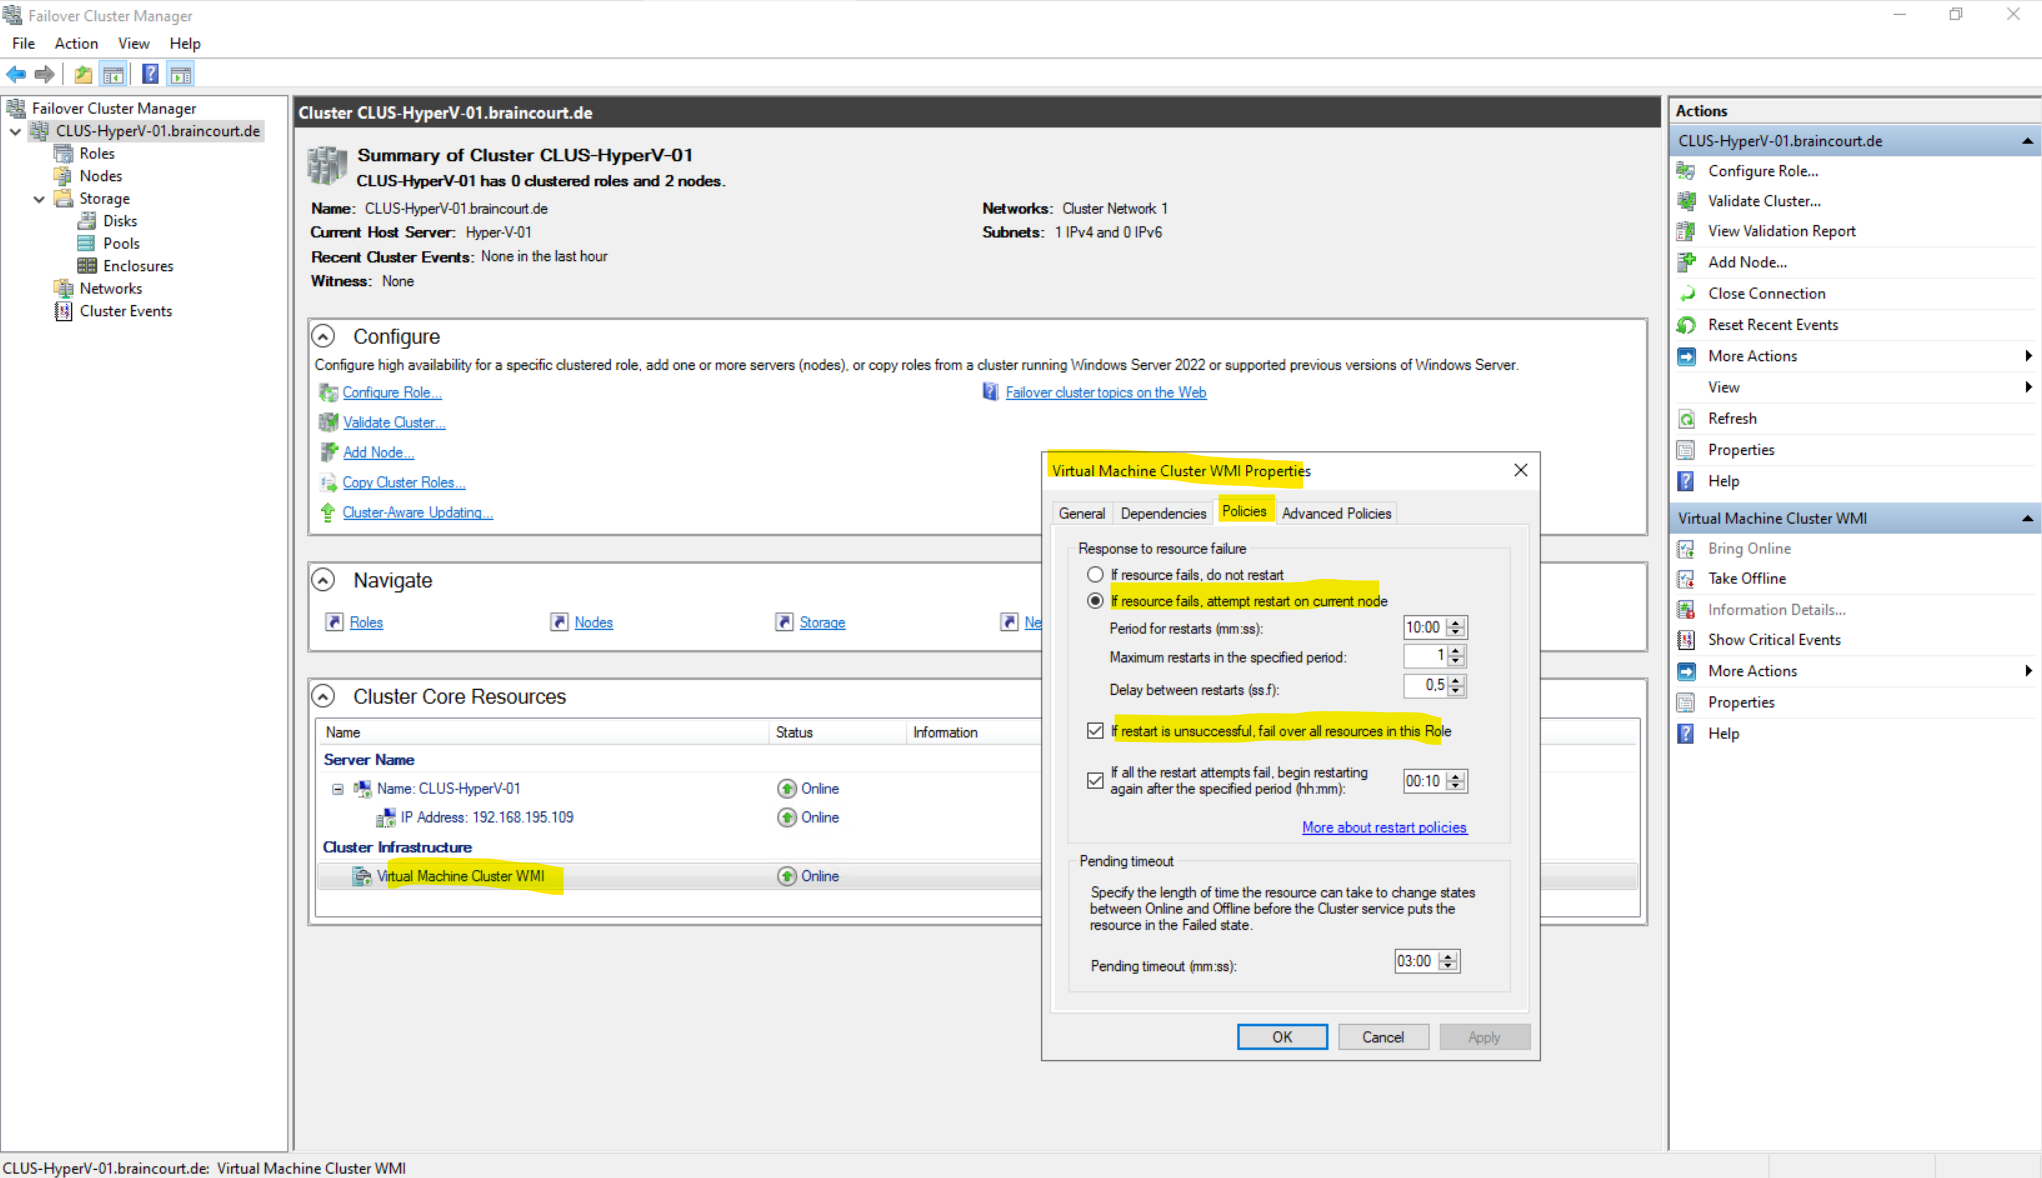
When clicking below on Virtual Machine Cluster WMI within the Cluster Infrastructure section, we can adjust the policies for failover of virtual machines.
Configure Cluster Shared Volumes for the Cluster
Cluster Shared Volumes (CSV) enable multiple nodes in a failover cluster to simultaneously have read-write access to the same LUN (disk) that is provisioned as an NTFS volume. (In Windows Server 2012 R2 and later, the disk can be provisioned as NTFS or Resilient File System (ReFS).) With CSV, clustered roles can fail over quickly from one node to another node without requiring a change in drive ownership, or dismounting and remounting a volume. CSV also help simplify the management of a potentially large number of LUNs in a failover cluster.
To provide high availability for our failover cluster, we also need a cluster shared volume where our virtual machines are finally stored.
By default the cluster manager added already under Storage > Disks my previously to the server connected iSCSI virtual disk as shown in my following post.
When iSCSI Target Server is enabled, a computer running the Windows Server operating system becomes a network-accessible block storage device. This is useful for testing applications prior to deployment in a storage area network (SAN).
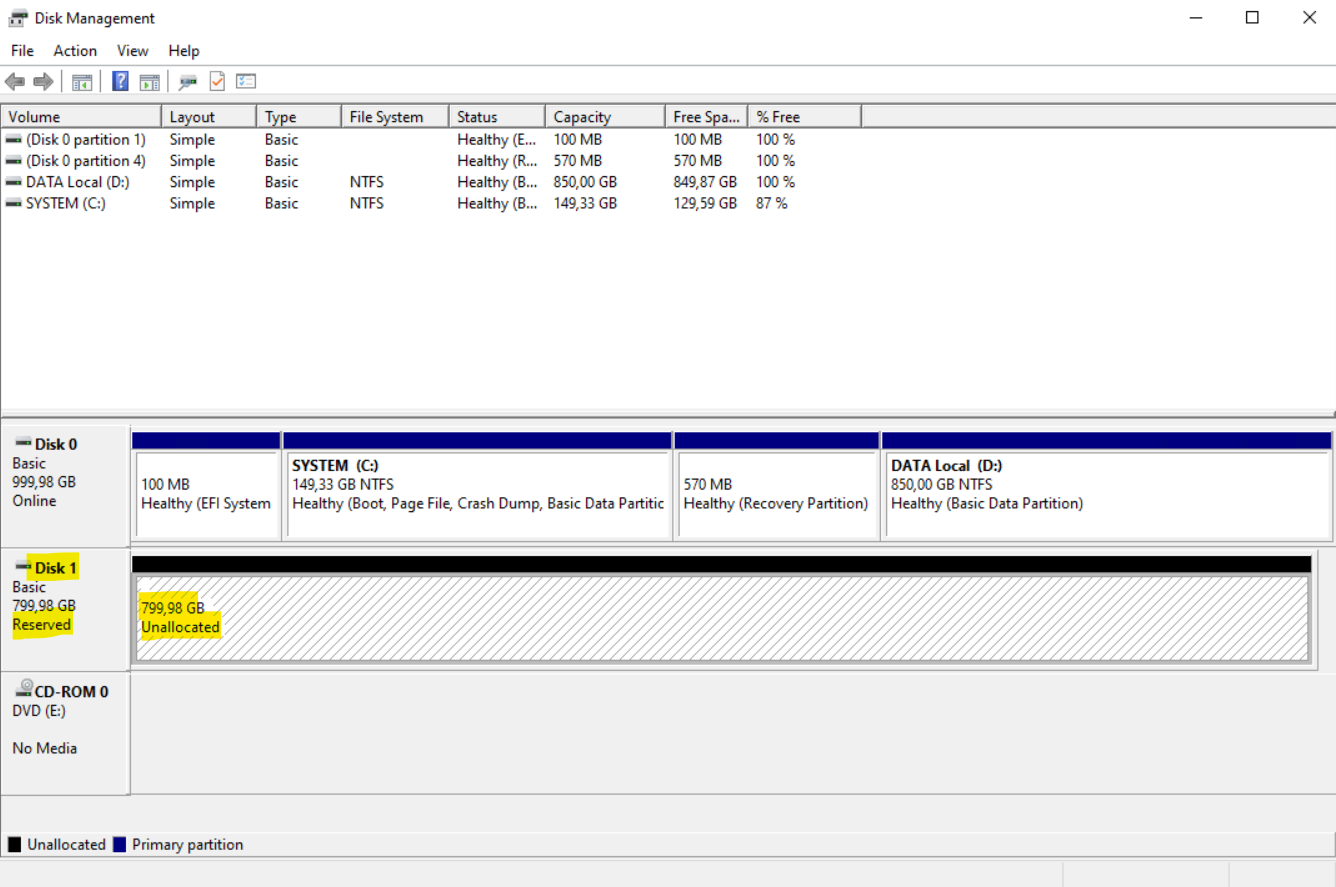
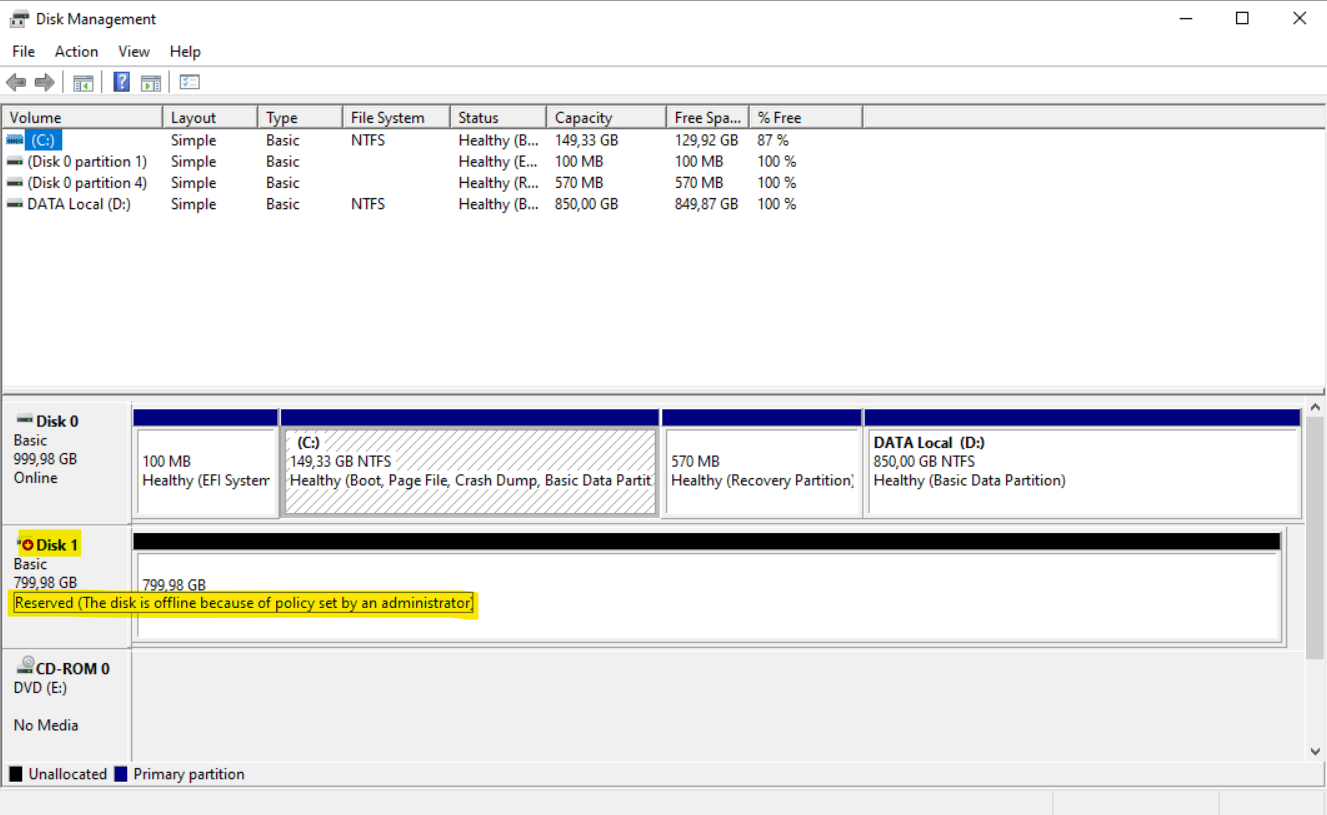
In the Disk Management Tool of the hyper-v-01.braincourt.de (my first Hyper-V server we used the Failover Cluster Manager to create the cluster) we can see this connected iSCSI virtual disk in state Reserved and Online.
The same on my second Hyper-V server hyper-v-02.braincourt.de looks like below.
The disk is also in state Reserved but here offline because of a policy set by an administrator. This behavior is by purpose as only one node (hyper-v-01 in my case so far) can have ownership of a Cluster Shared Volume and all other nodes will show the disk as Reserved like shown in the screenshot. The disks will get managed directly by the Failover Cluster Manager. So in case of a failover to another node, also the disk ownership will be switched to the failover node and done by the Failover Cluster Manager. This is by the way also the case when using an additional disk witness for quorum as shown later further down under Configure and manage quorum.
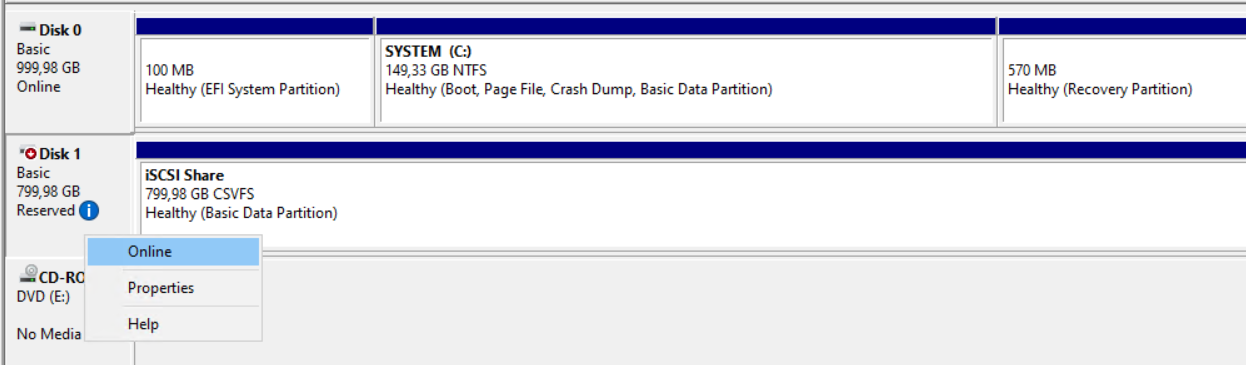
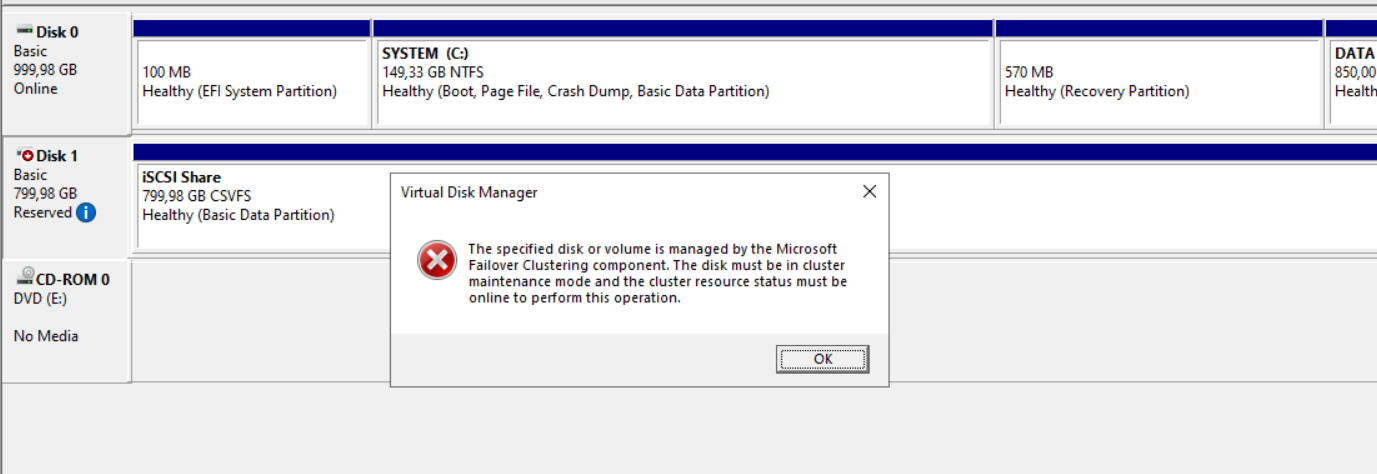
By nevertheless trying to bring this disk online, you will run into the following error message:
The specified disk or volume is manged by the Microsoft Failover Clustering component. The disk must be in cluster maintenance mode and the cluster resource status must be online to perform this operation.
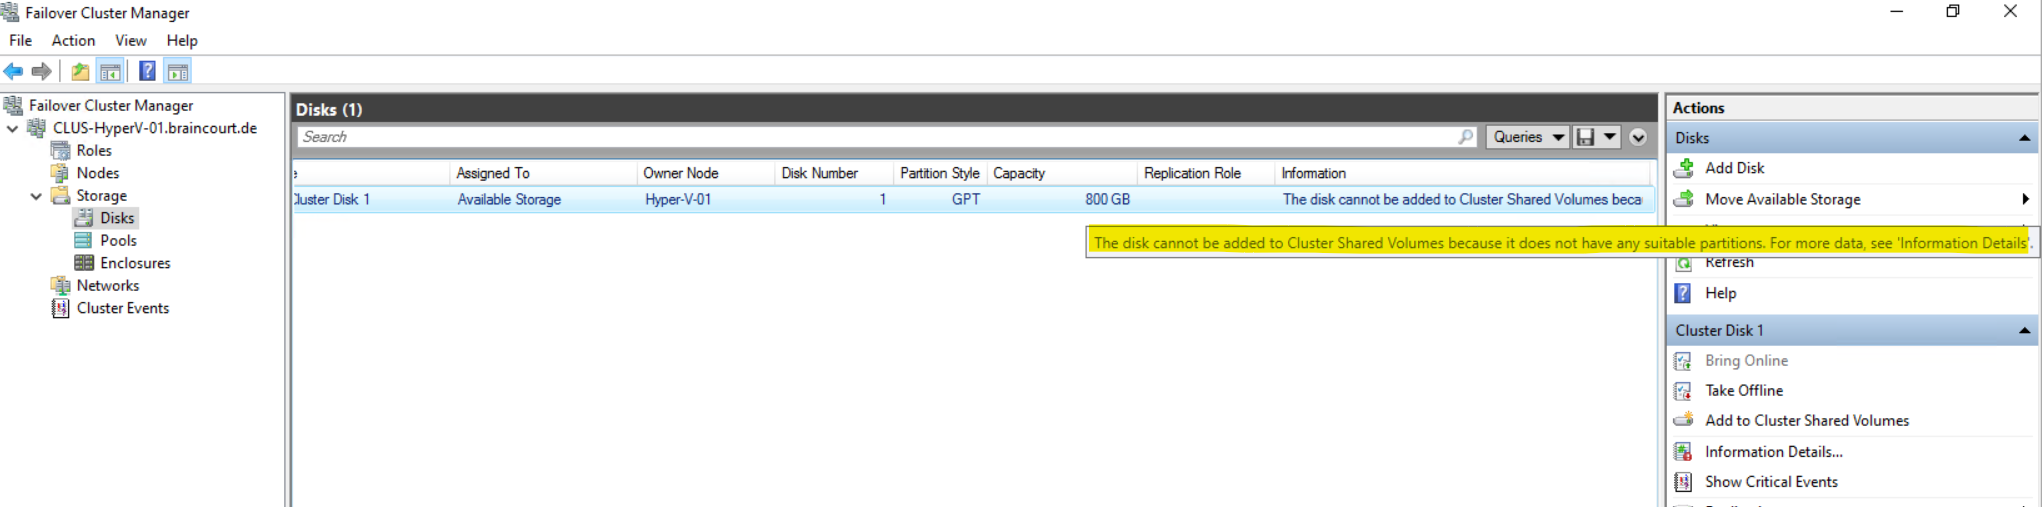
We can now add this iSCSI virtual disk as a Cluster Shared Volume within the Failover Cluster Manager as shown below.
I will run here first in the following error:
The disk is not configured in a way to be used with CSV. CSV disks must have at least one partition that is formatted with NTFS or REFS.
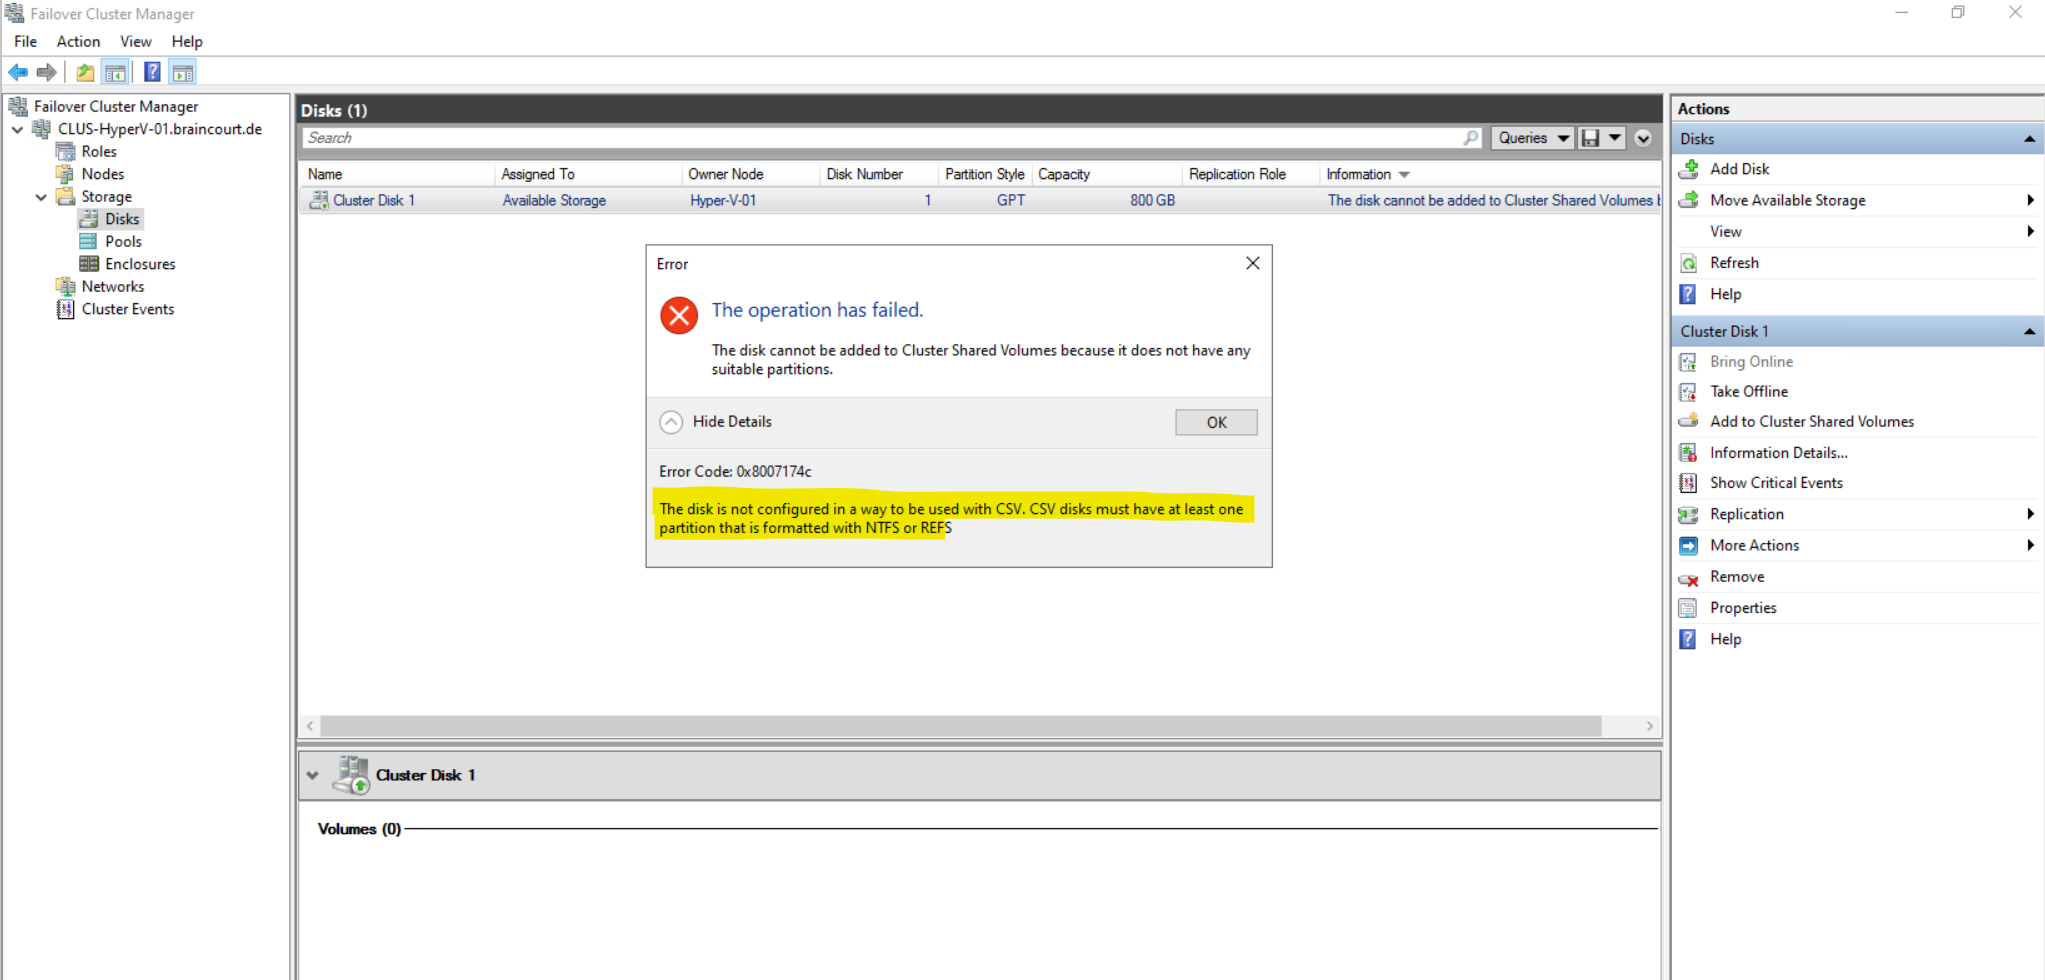
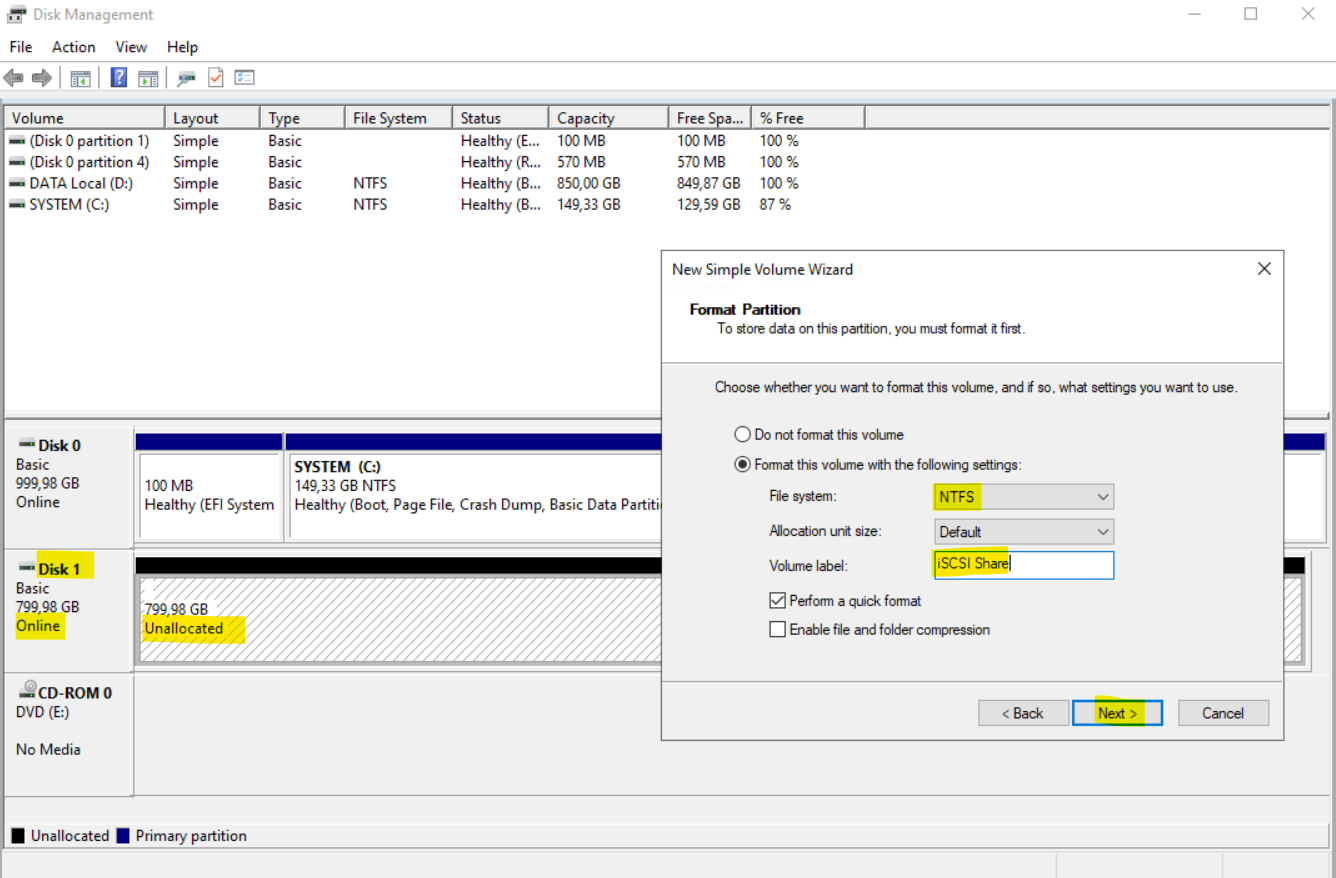
The error message is self-explaining, so I will first have to create a new NTFS volume on hyper-v-01.braincourt.de.
Both NTFS and ReFS have specific features which allow them to significantly improve performance of the file system.
They are both valid options for Hyper-V storage. NTFS has been out longer and does offer more features, while ReFS is still limited in some functionality. The main purpose of ReFS is to improve resilience and reliability to ensure data corruption is prevented.
In the CSV configuration, NTFS is the preferred file system. In contrast, with Storage Spaces Direct (S2D), ReFS is the preferred file system.
Meanwhile, ReFS supports both 4K and 64K cluster sizes. 4K is the recommended cluster size for most deployments, but 64K clusters are appropriate for large, sequential IO workloads.
Resilient File System (ReFS) overviewWindows Hyper-V NTFS vs ReFS: A Comparison
Source: https://learn.microsoft.com/en-us/answers/questions/494675/ntfs-vs-refs-for-hyper-v-volume-hosting
Add a disk to CSV on a Failover Cluster
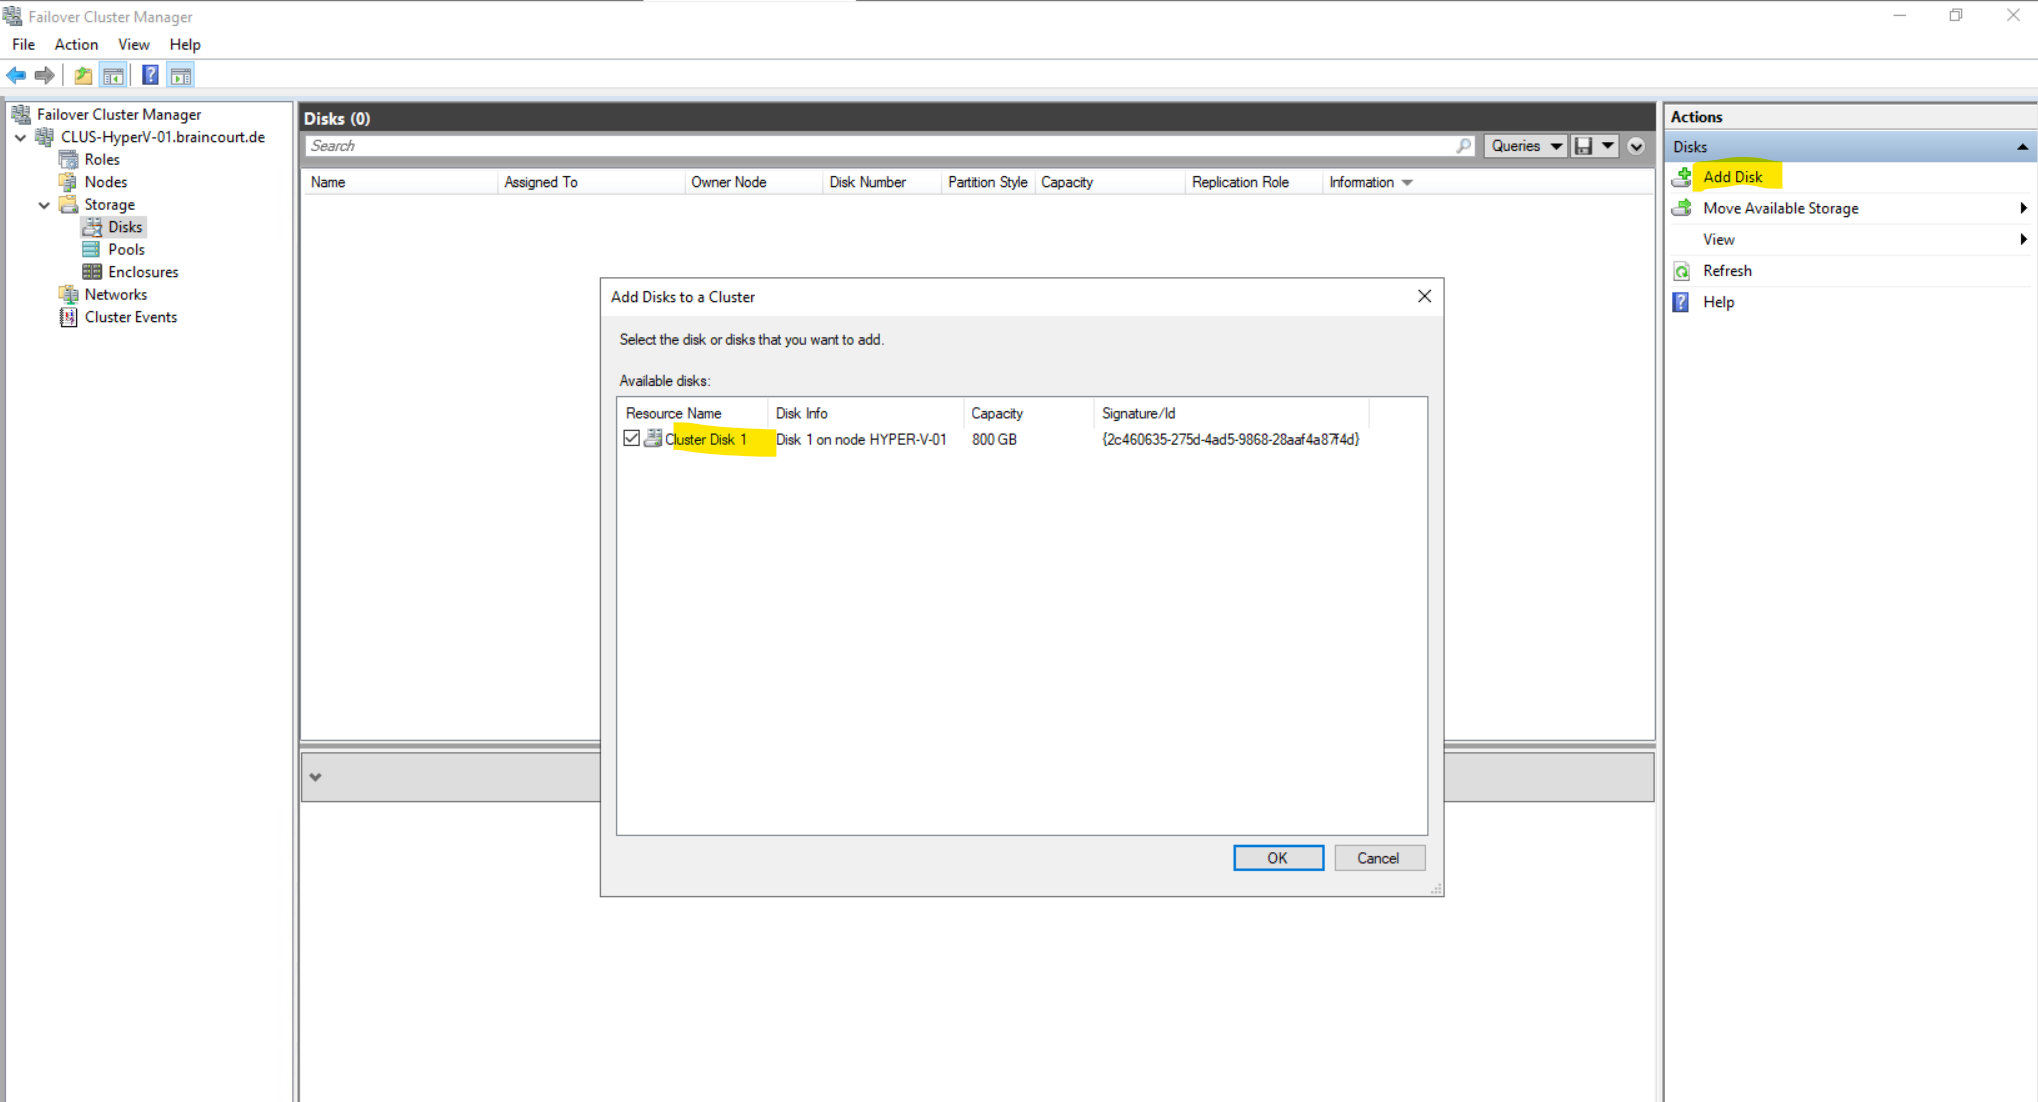
The CSV feature is enabled by default in Failover Clustering. To add a disk to CSV, you must add a disk to the Available Storage group of the cluster (if it is not already added), and then add the disk to CSV on the cluster. You can use Failover Cluster Manager or the Failover Clusters Windows PowerShell cmdlets to perform these procedures.
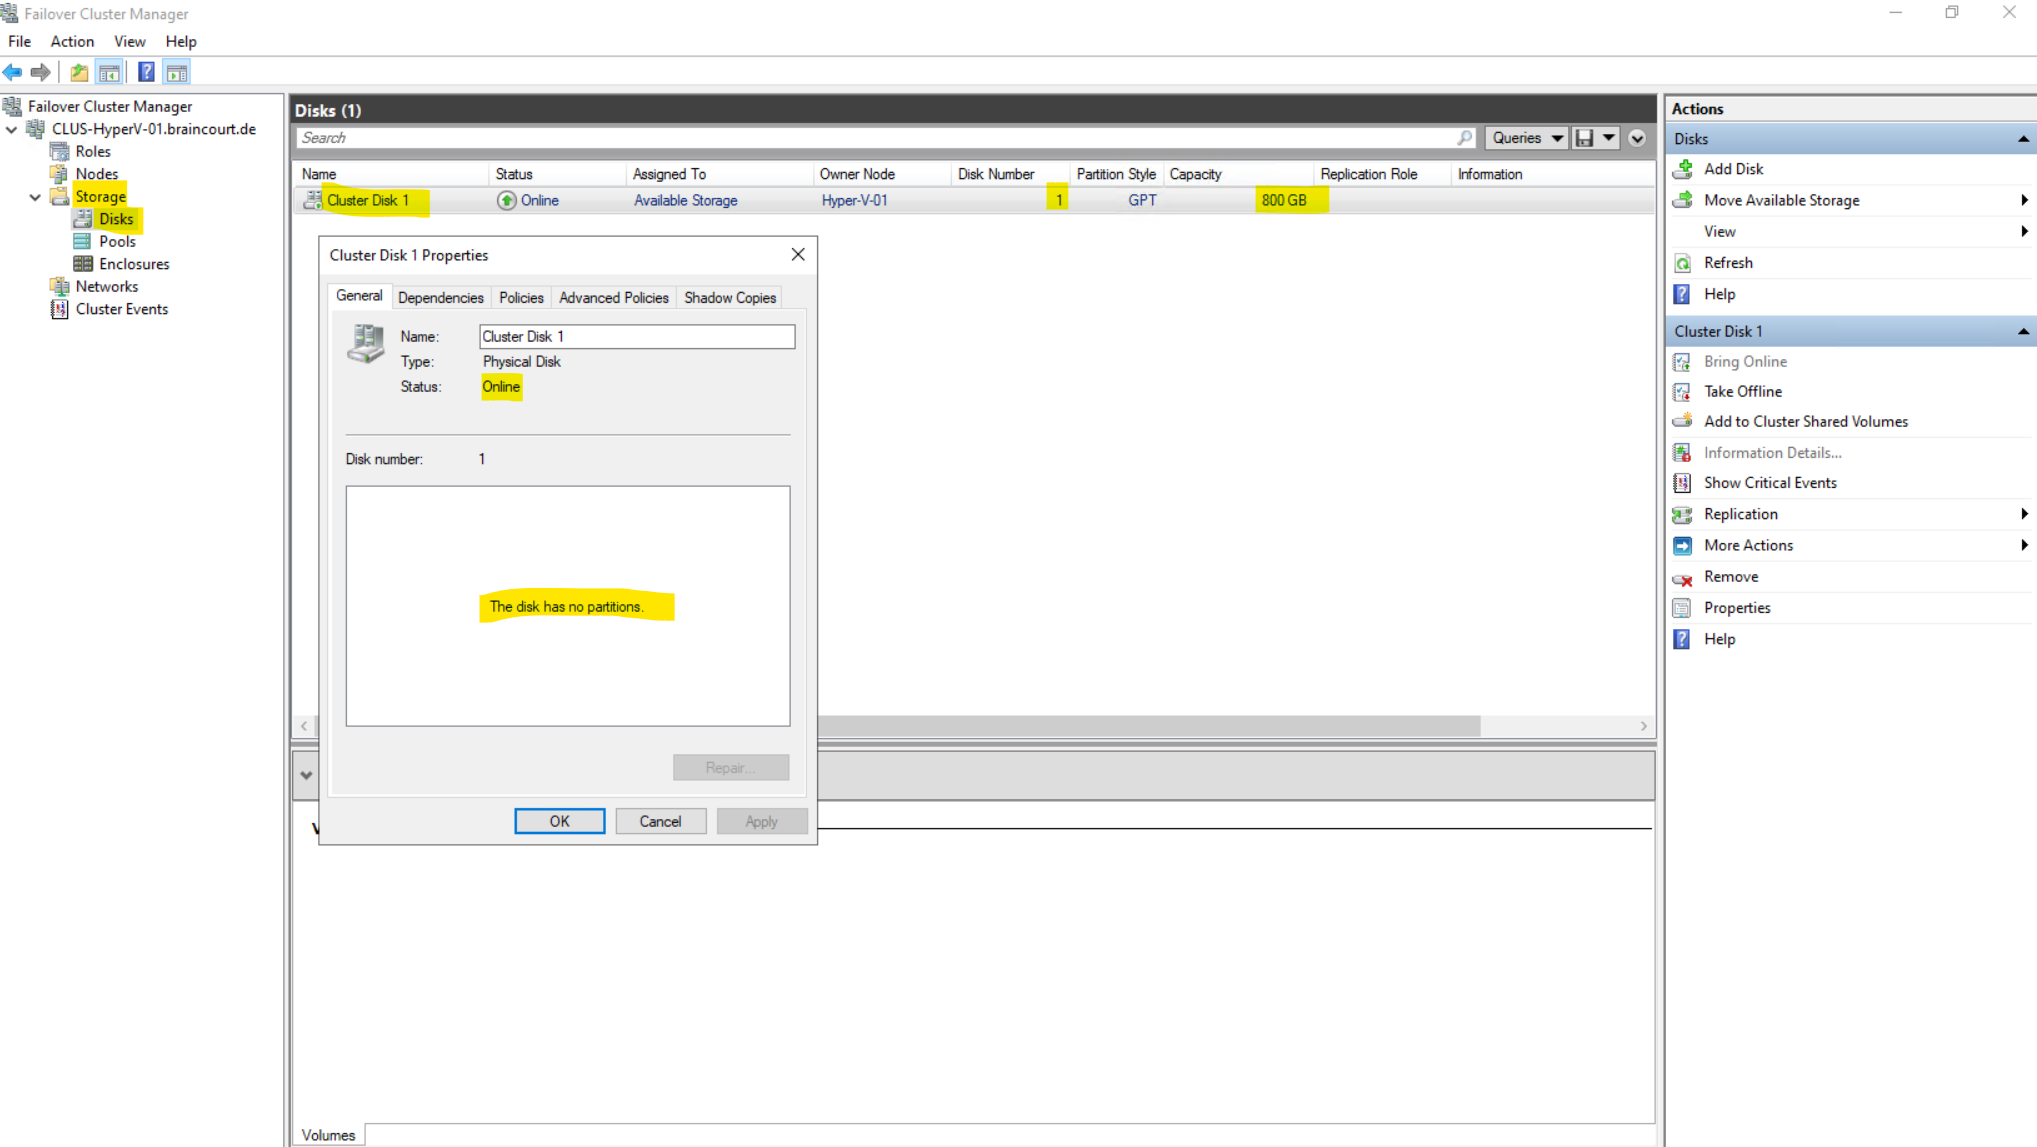
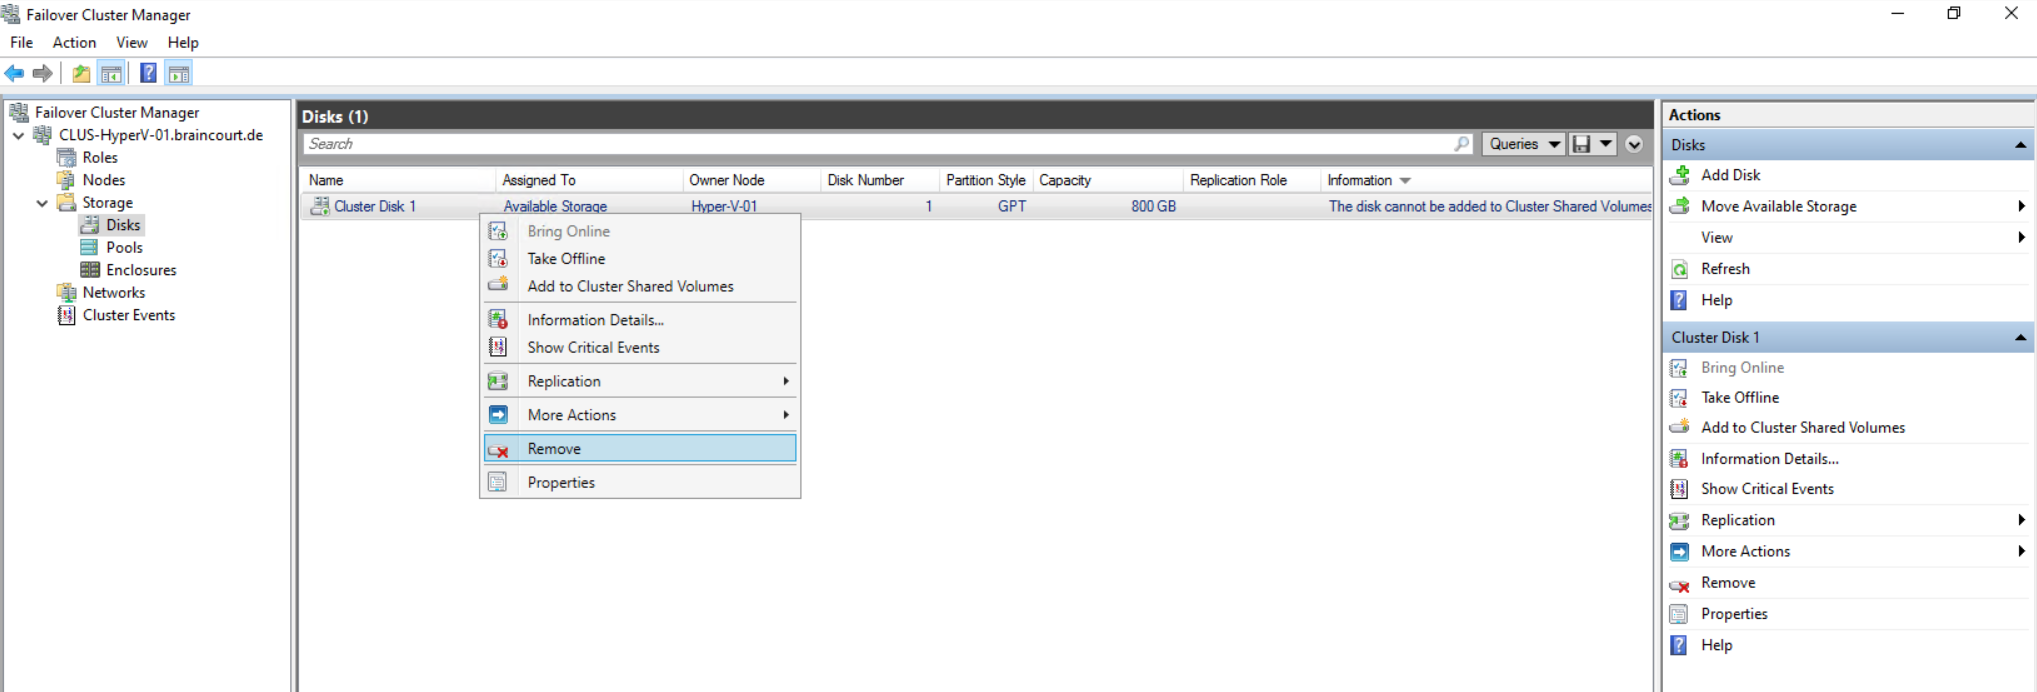
As shown previously, our connected iSCSI virtual disk is shown up already under Disks in the Failover Cluster Manager below. In order to add this disk as a Cluster Shared Volume, we first have to create a new NTFS volume (recommended or ReFS) on it. To be able to create a new volume on this disk, we first need to remove it from the Failover Cluster Manager to not be exclusively managed by anymore.
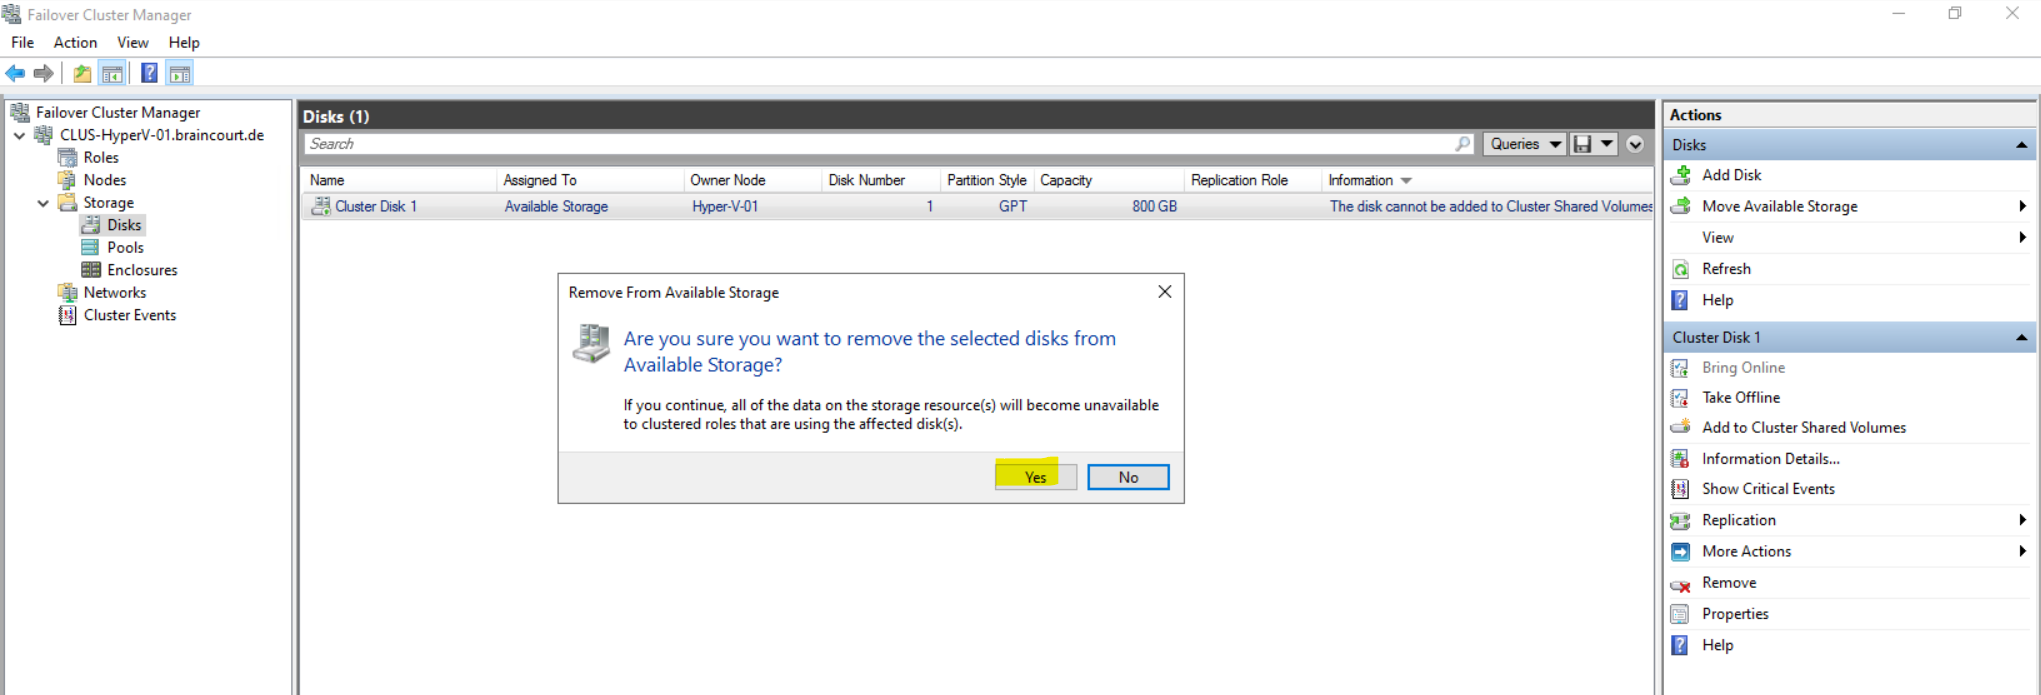
After removing the disk from the cluster, we can now first create a new NTFS volume on this disk before afterwards adding it again to our cluster and finally adding as a new Cluster Shared Volume.
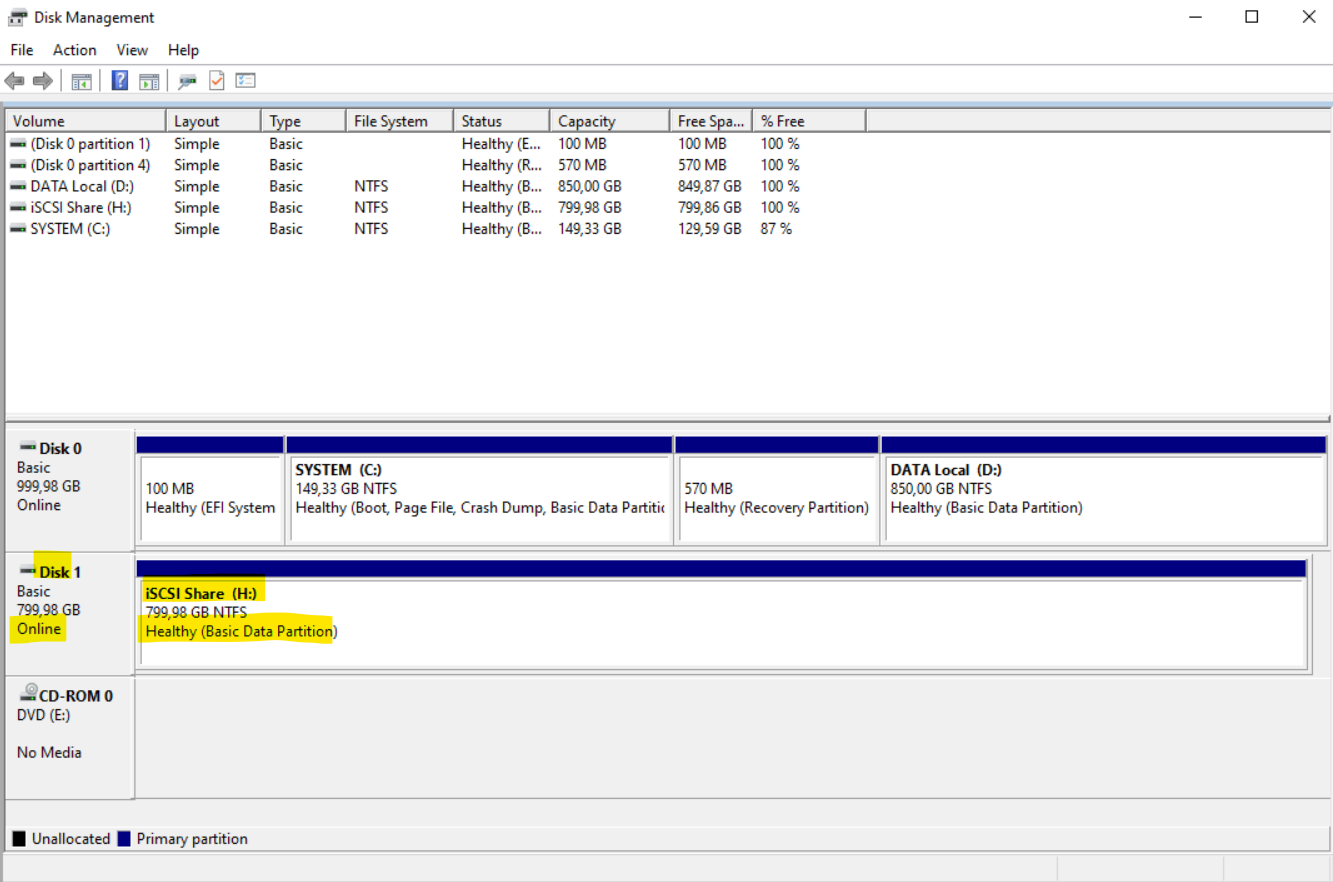
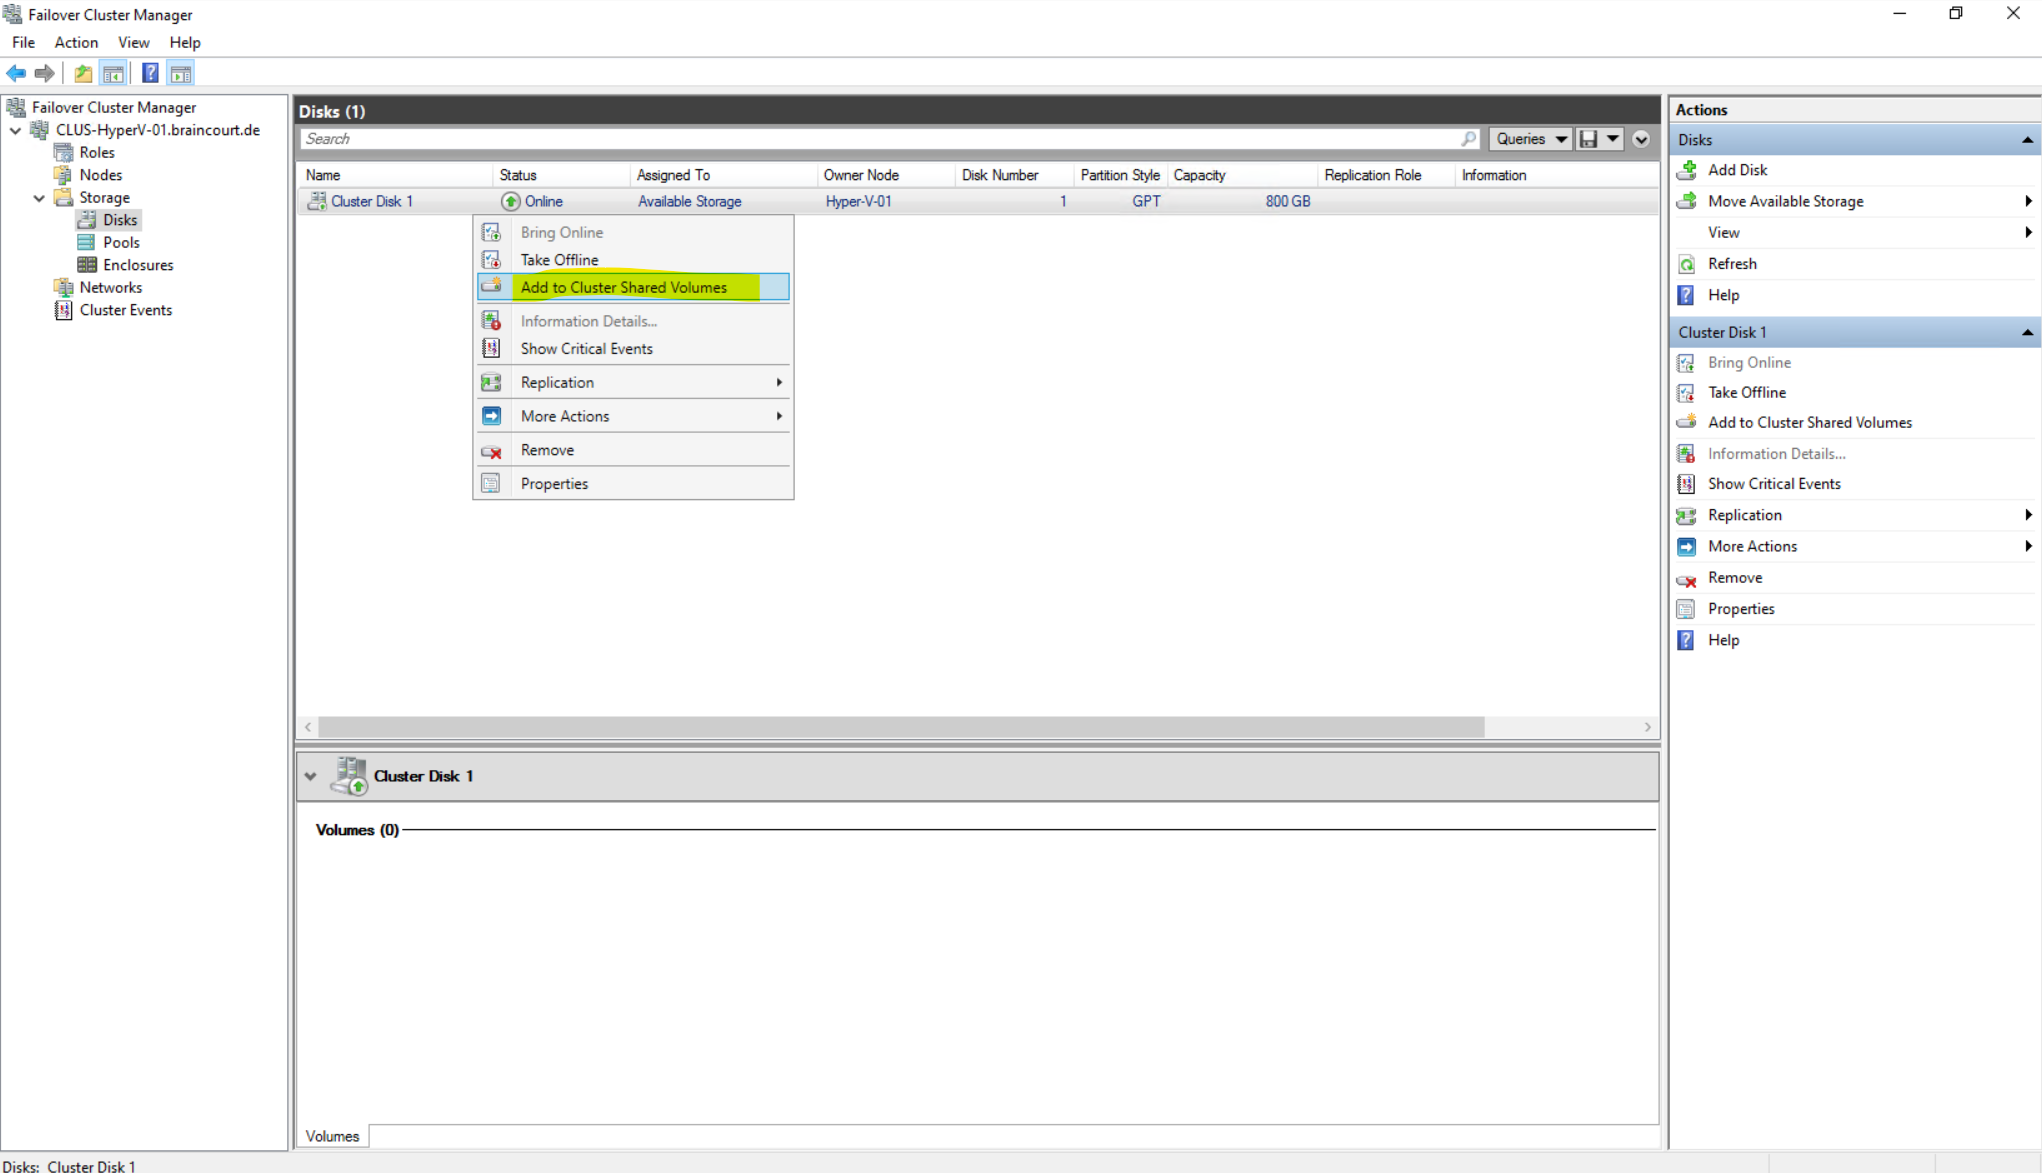
Now we can add the disk again to our cluster to finally add it to a Cluster Shared Volumes.
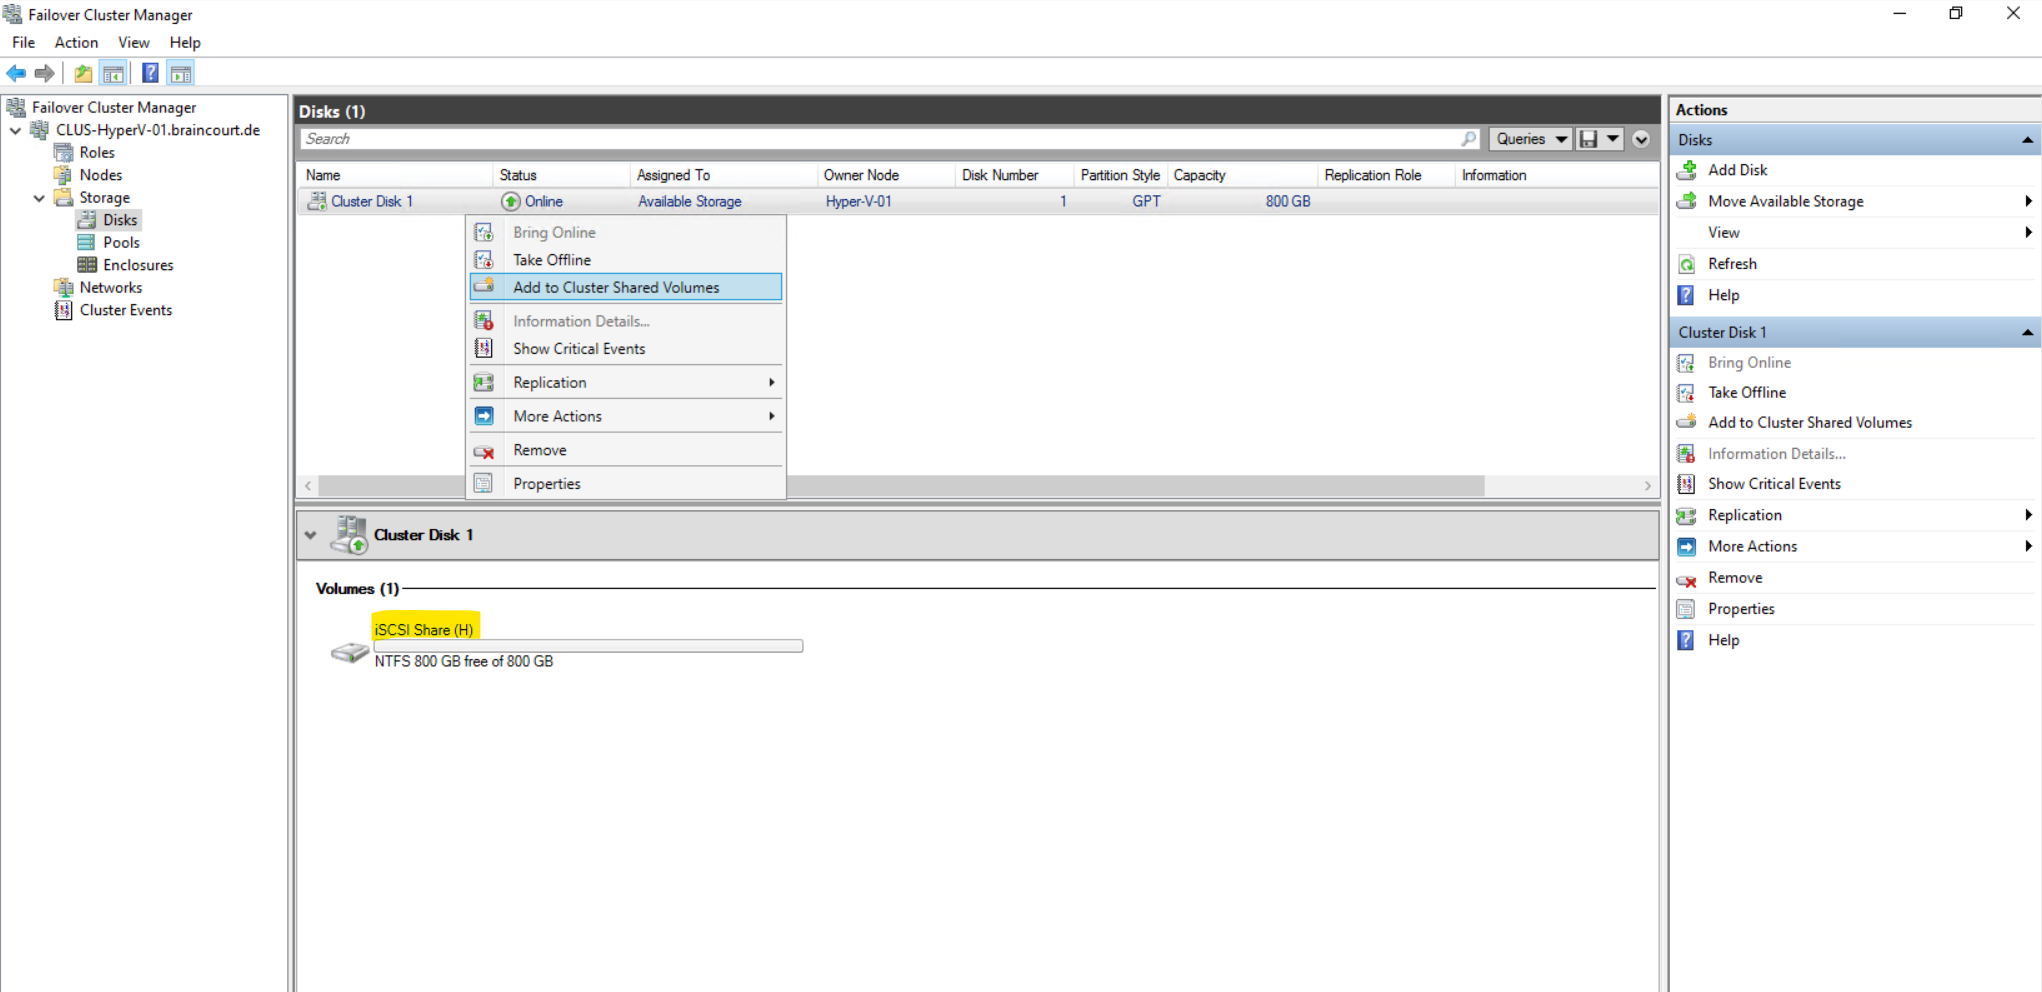
Right click on Cluster Disk 1 and select Add to Cluster Shared Volumes.
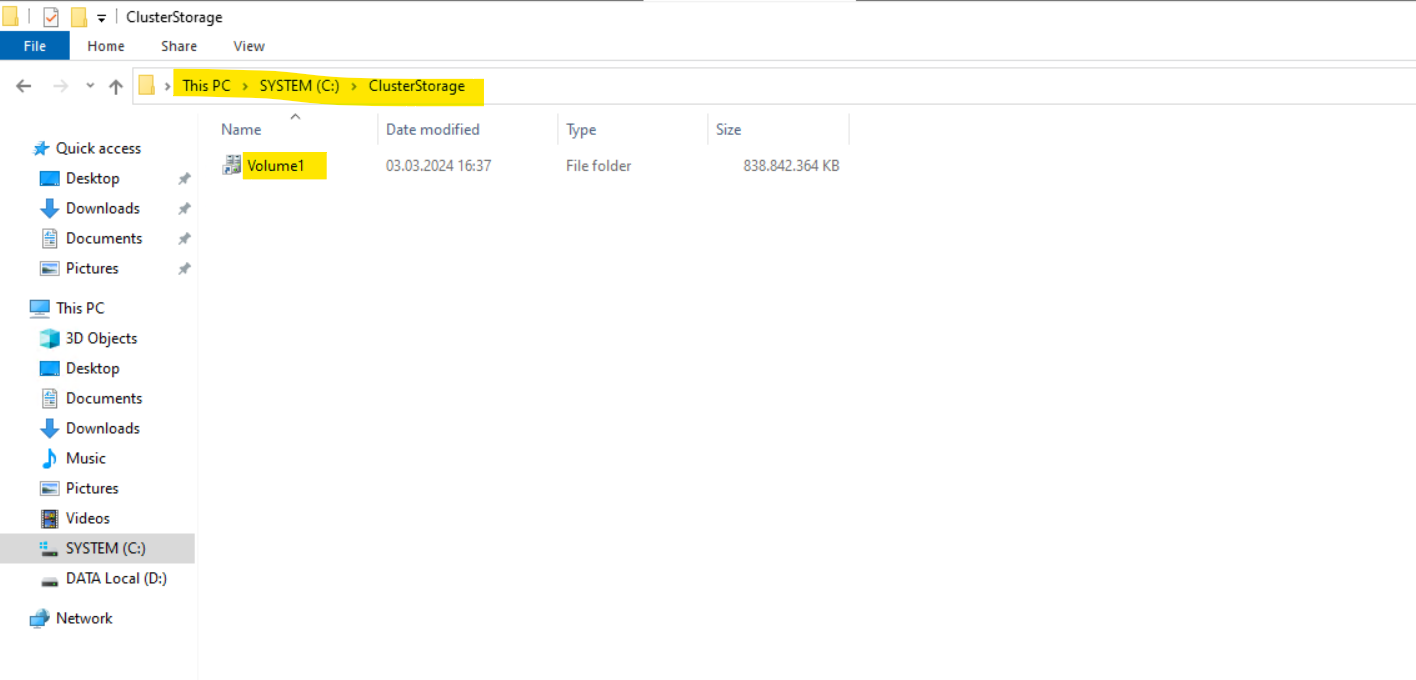
The disks are now assigned to the Cluster Shared Volume group in the cluster. The disks are exposed to each cluster node as numbered volumes (mount points) under the %SystemDisk%ClusterStorage folder. The volumes appear in the CSVFS file system.
The volumes appear in the CSVFS file system.
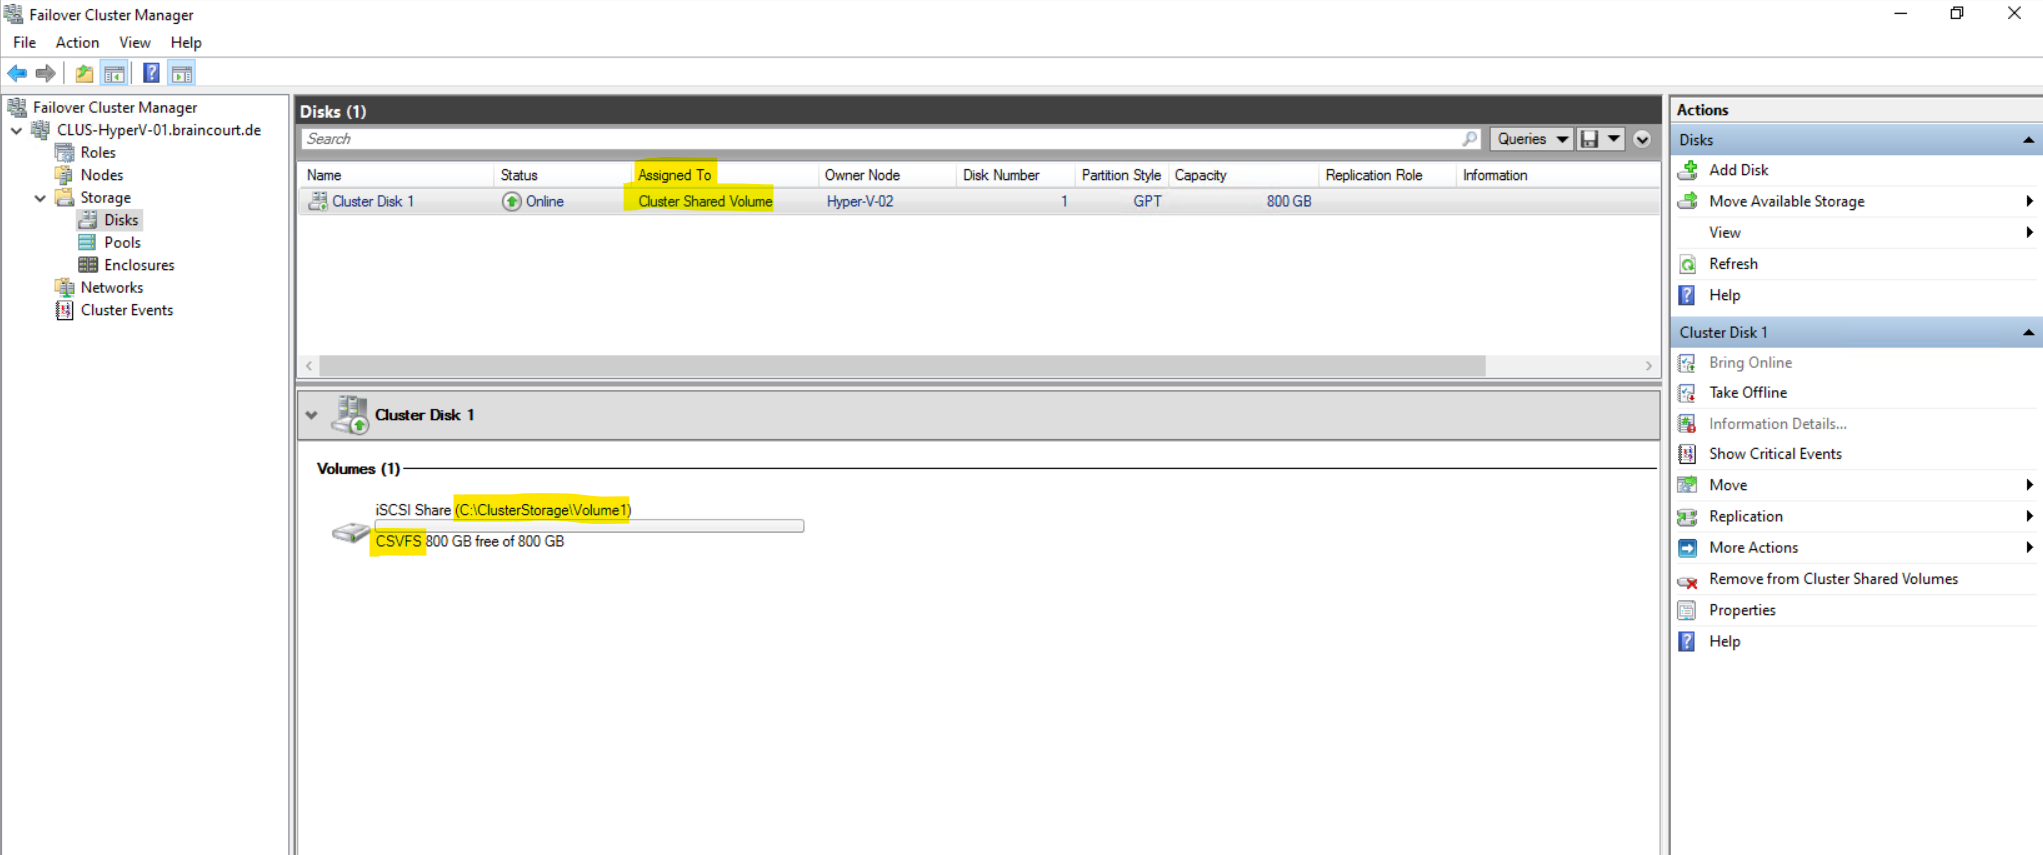
As mentioned the disks are exposed to each cluster node as numbered volumes (mount points) under the %SystemDisk%ClusterStorage folder.
Configure and manage quorum
Because I will use here a two-node cluster, I have to configure for the quorum configuration the Node and Disk Majority to increase the high availability of the cluster. Otherwise when one node is going down, the whole cluster will be down and lost quorum.
Node and Disk Majority means that the nodes and witness disk each contain copies of the cluster configuration. The cluster has quorum as long as at most of these copies are available.
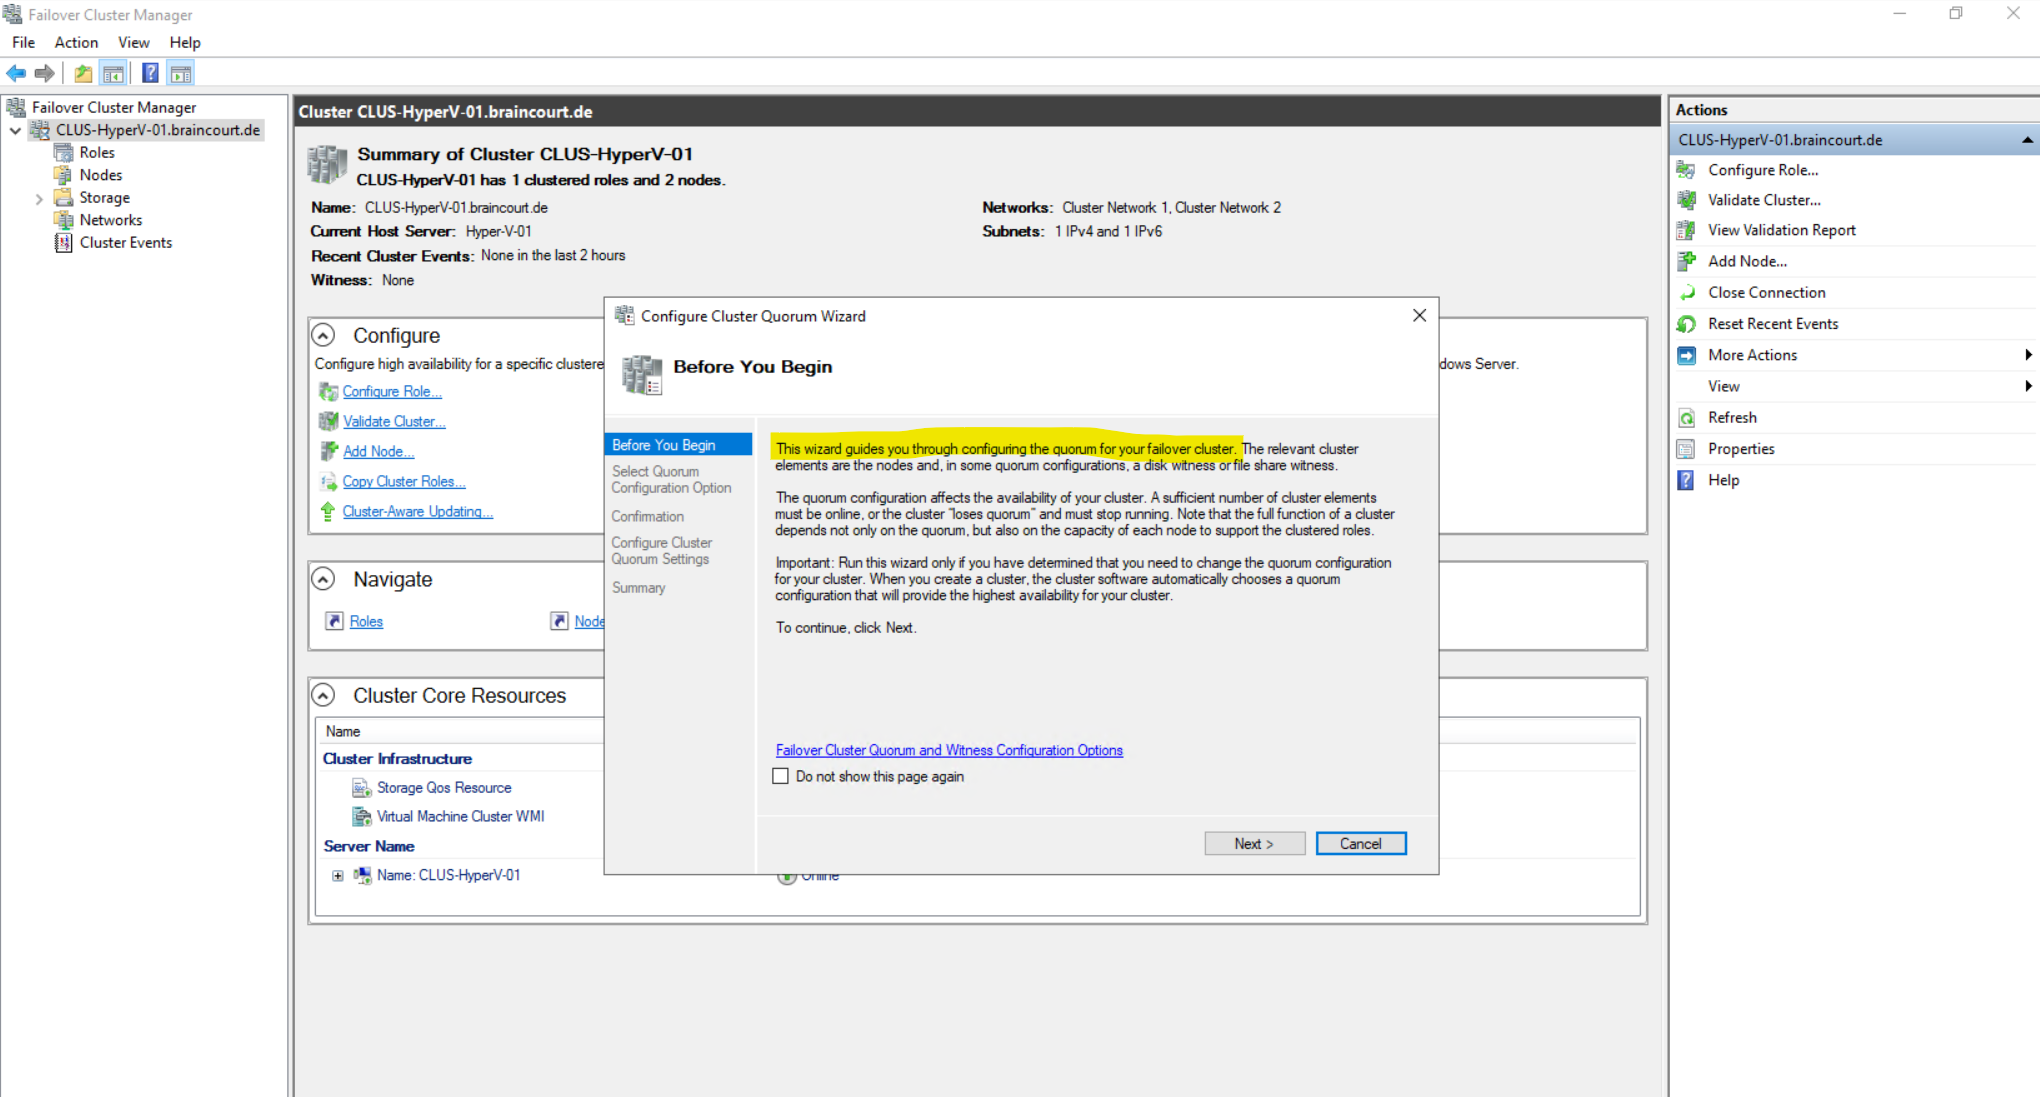
The quorum model in Windows Server is flexible. If you need to modify the quorum configuration for your cluster, you can use the Configure Cluster Quorum Wizard or the FailoverClusters Windows PowerShell cmdlets. For steps and considerations to configure the quorum, see Configure the cluster quorum later in this topic.
Source: https://learn.microsoft.com/en-us/windows-server/failover-clustering/manage-cluster-quorum
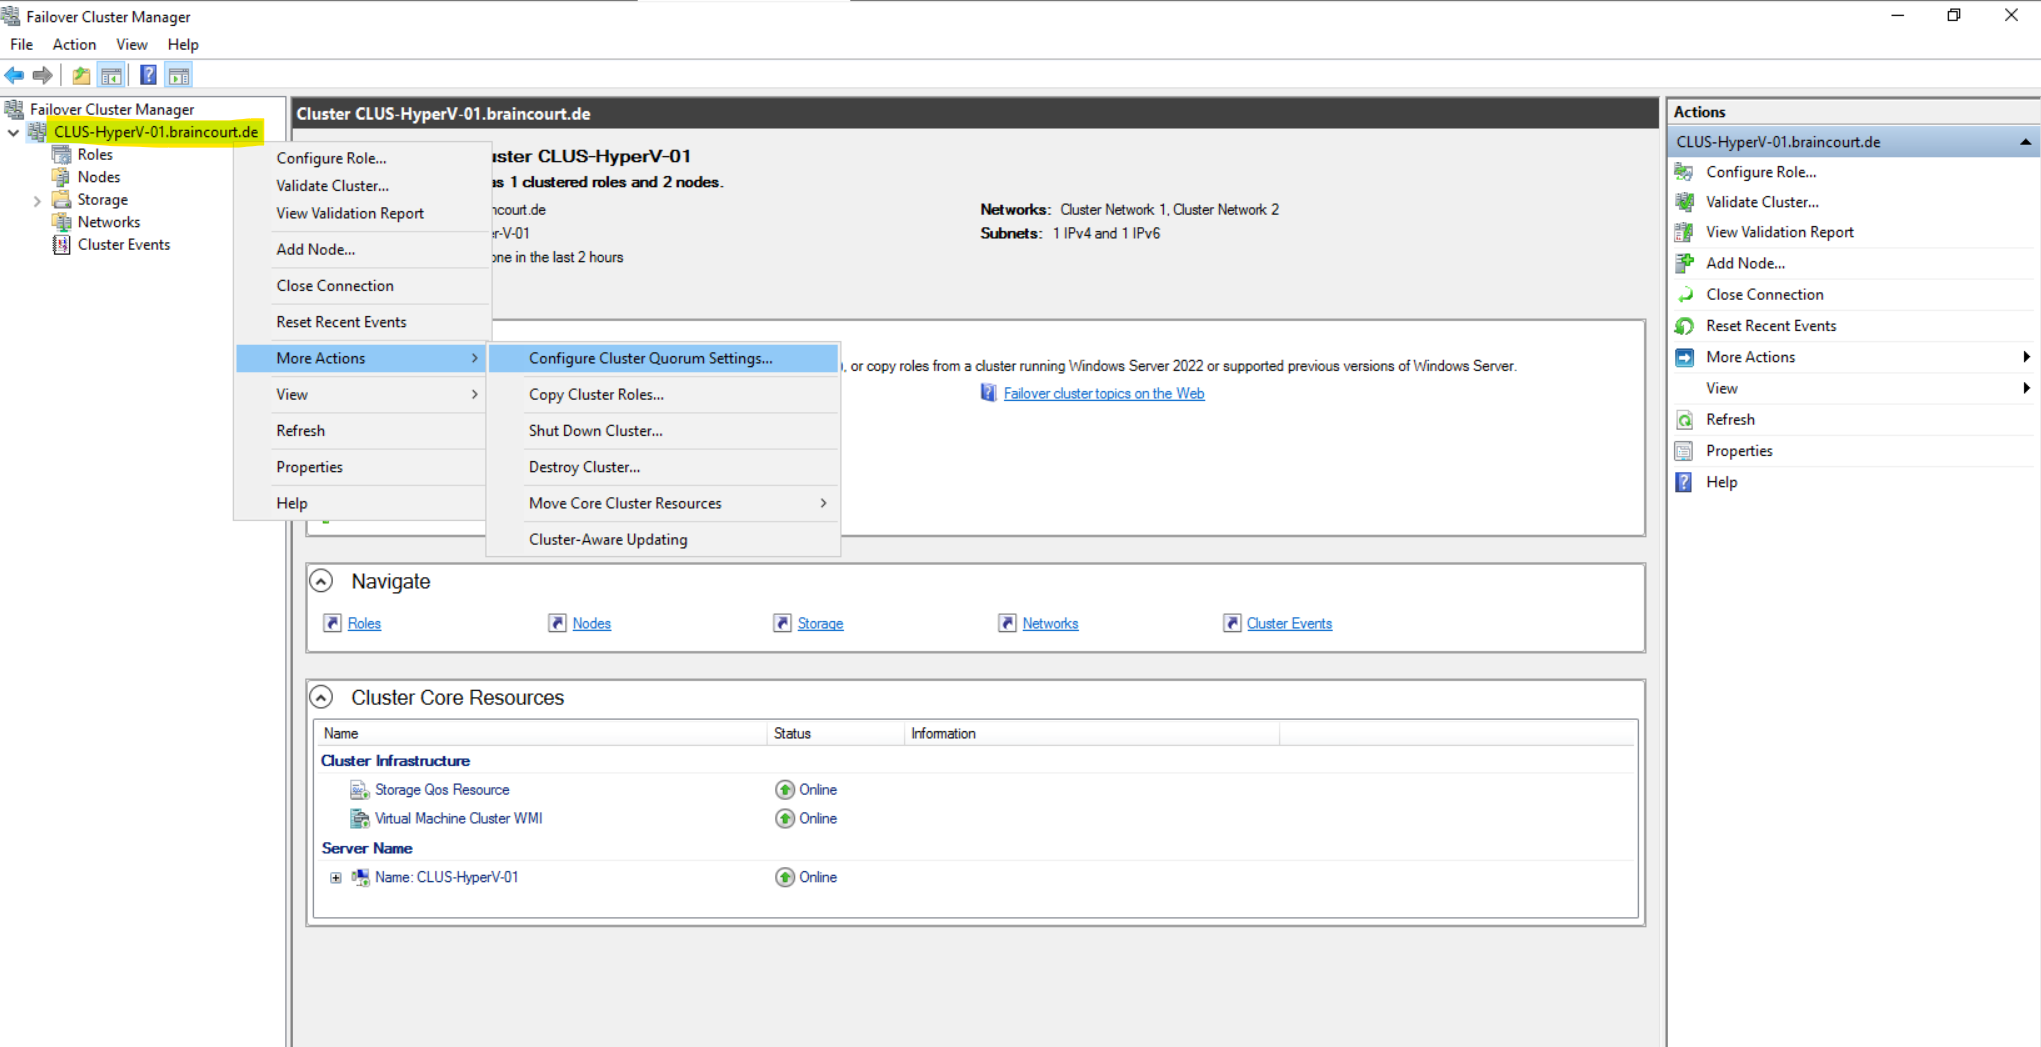
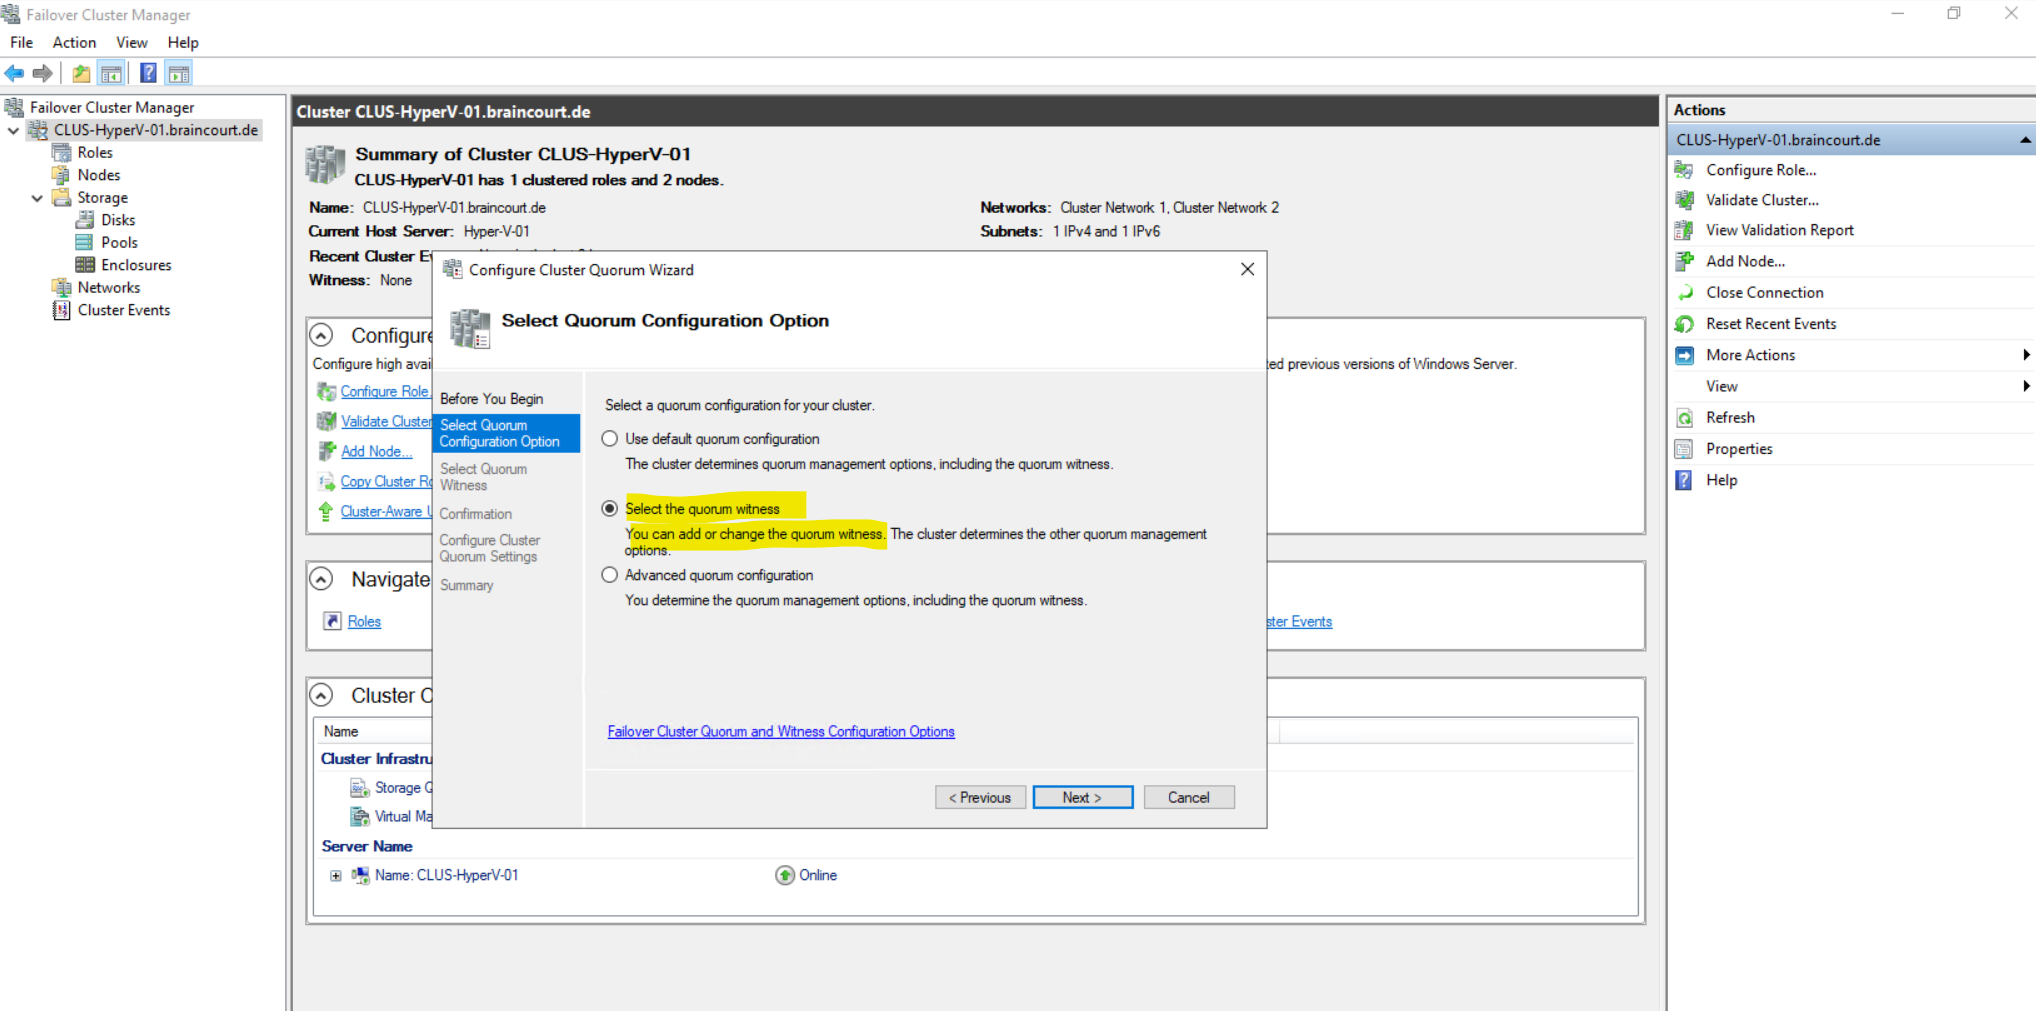
To configure the quorum settings, right click on the cluster root and select More Actions -> Configure Cluster Quorum Settings …
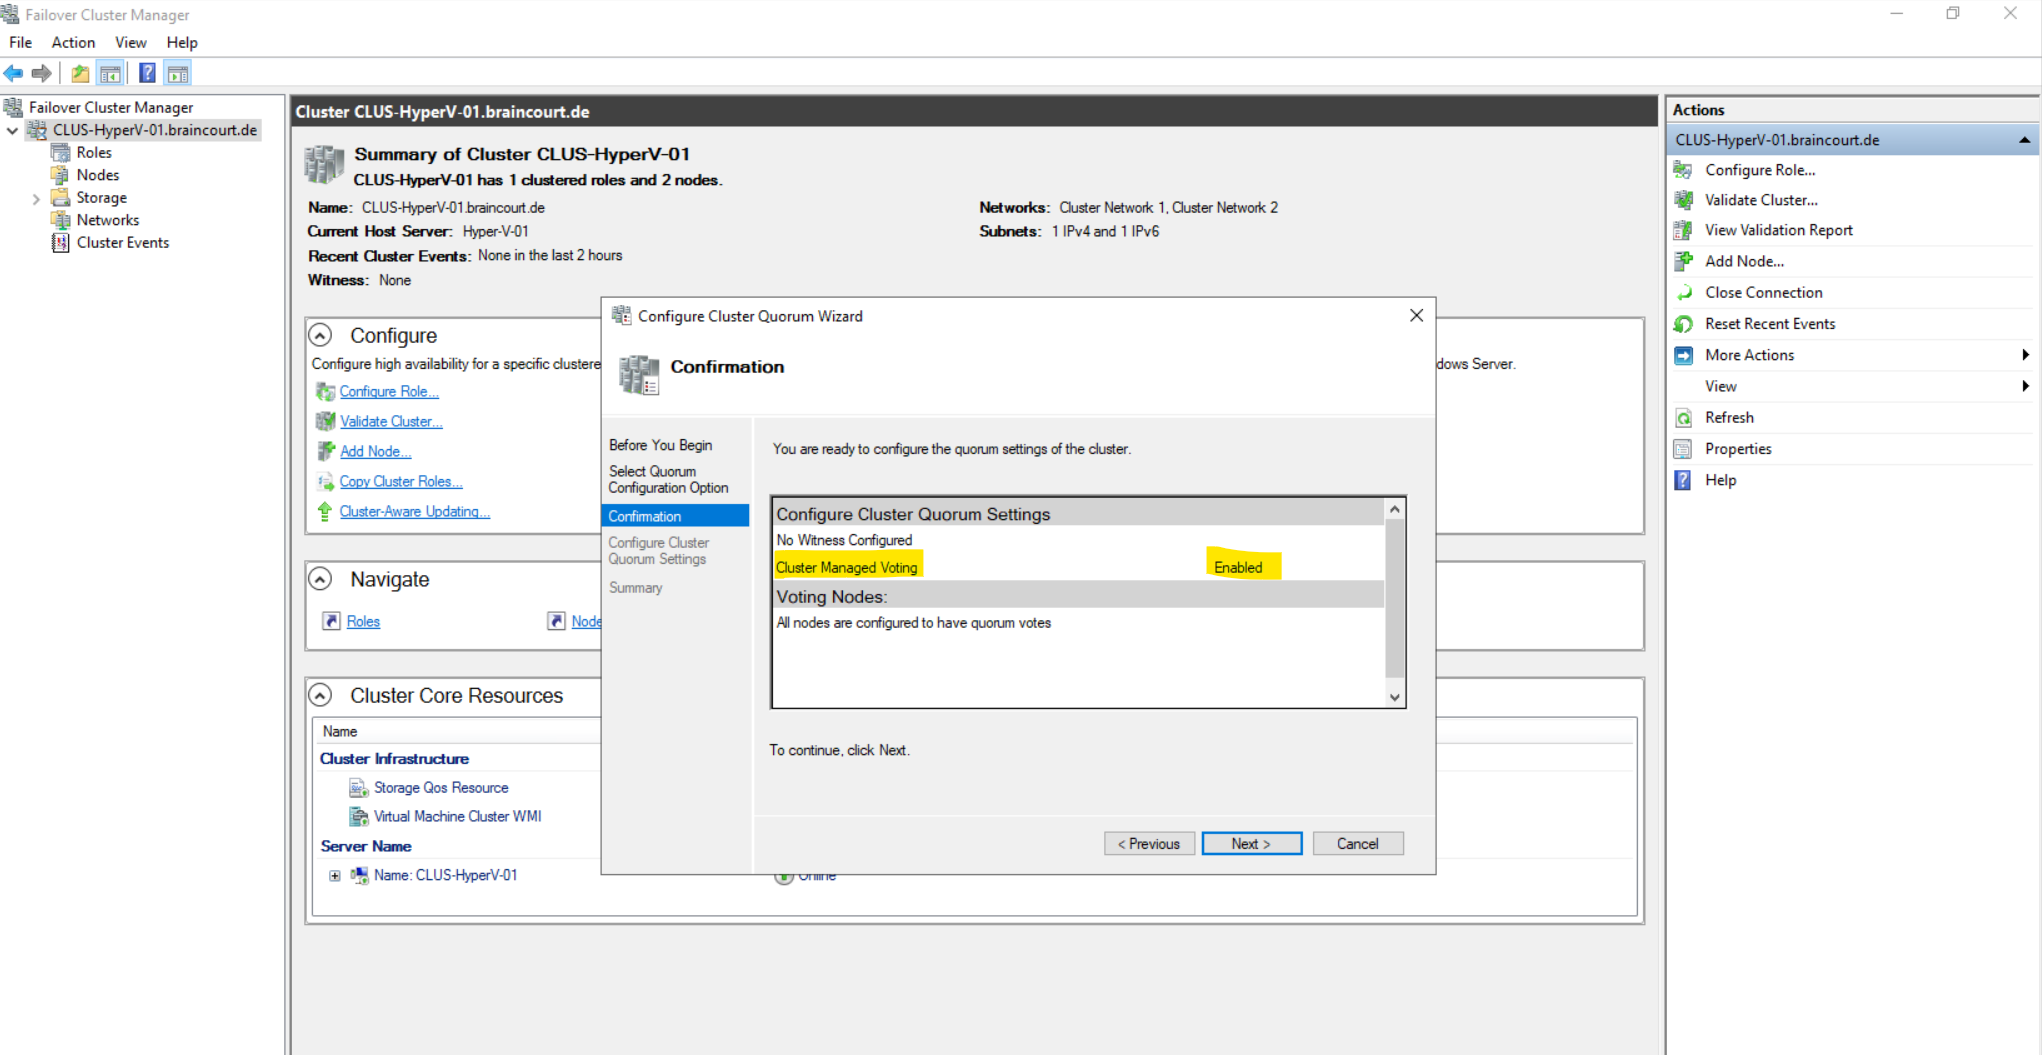
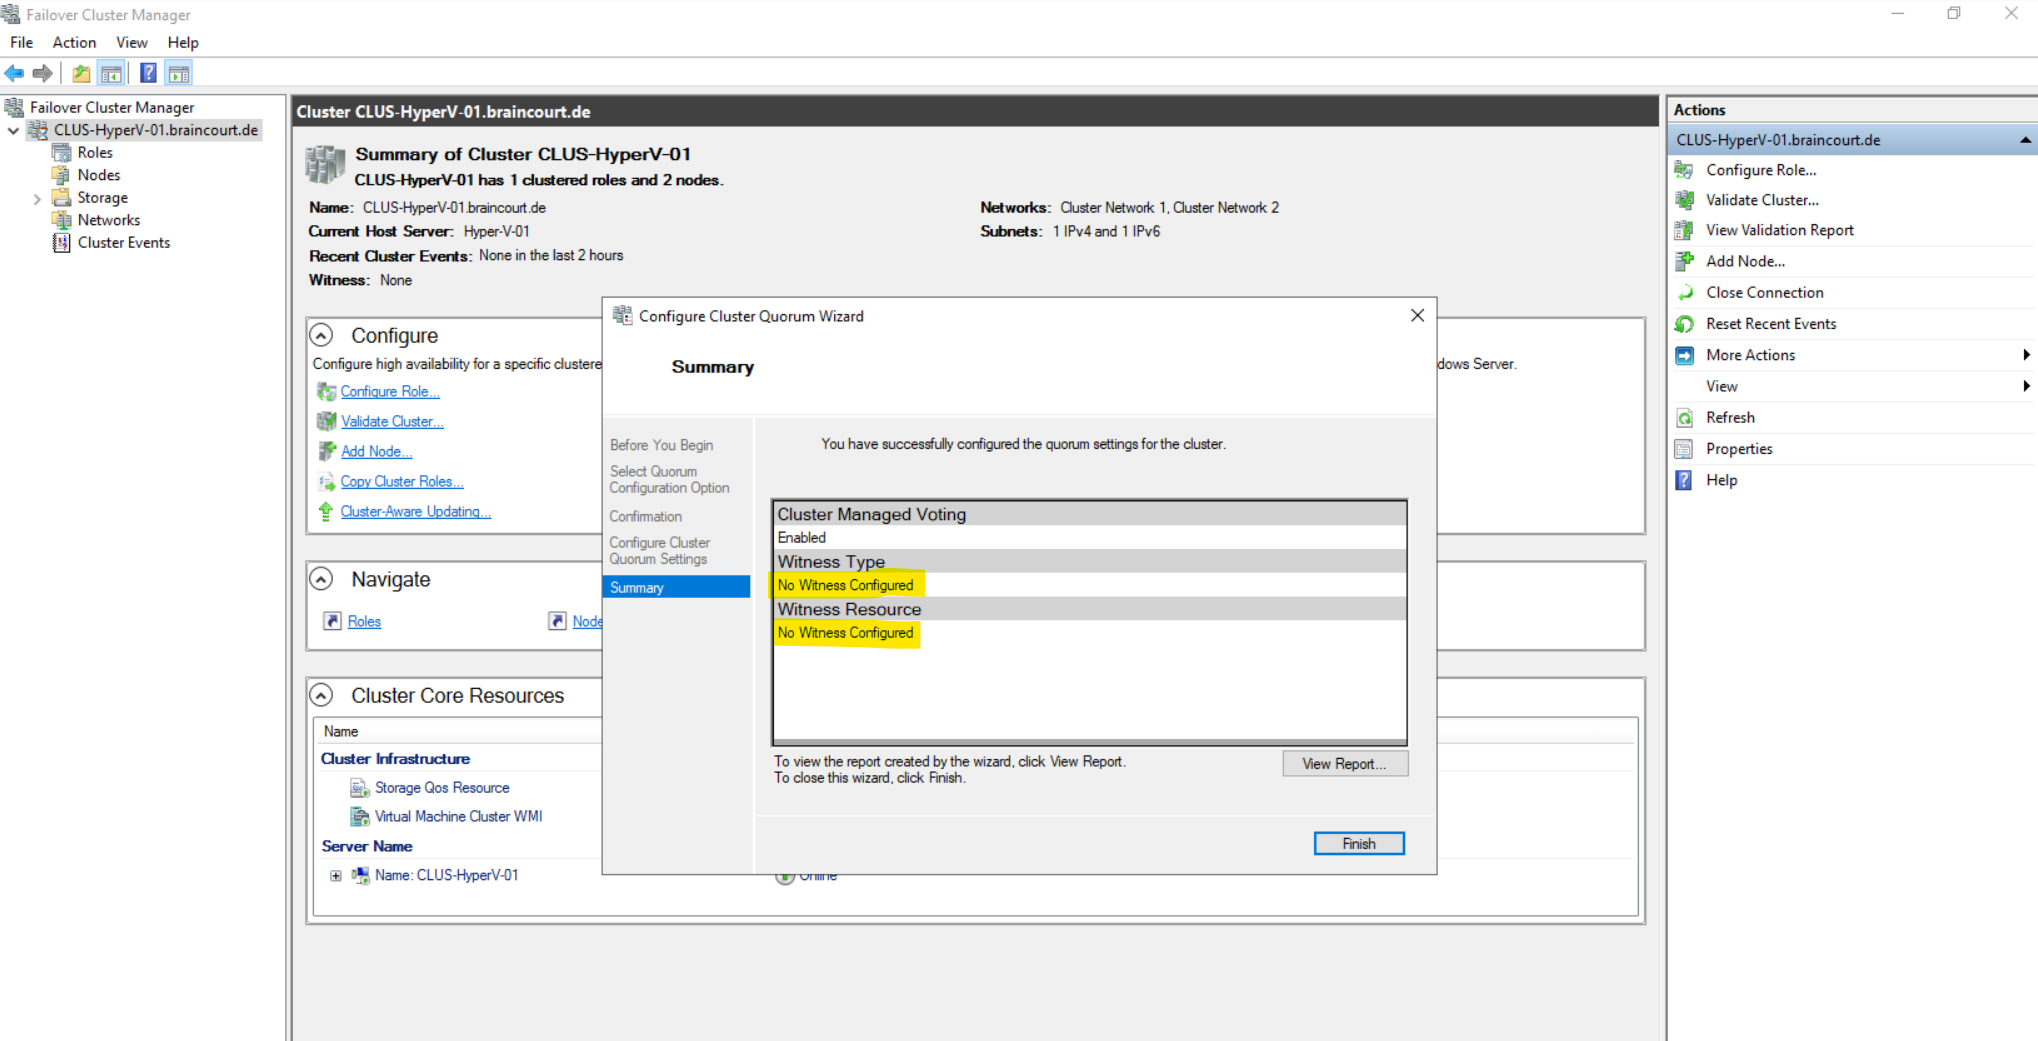
I will add below a quorom witness to the cluster. Therefore I have to select Select the quorum witness.
Add or change the quorum witness
You can add, change, or remove a witness resource. You can configure a file share or disk witness. The cluster automatically assigns a vote to each node and dynamically manages the node votes.
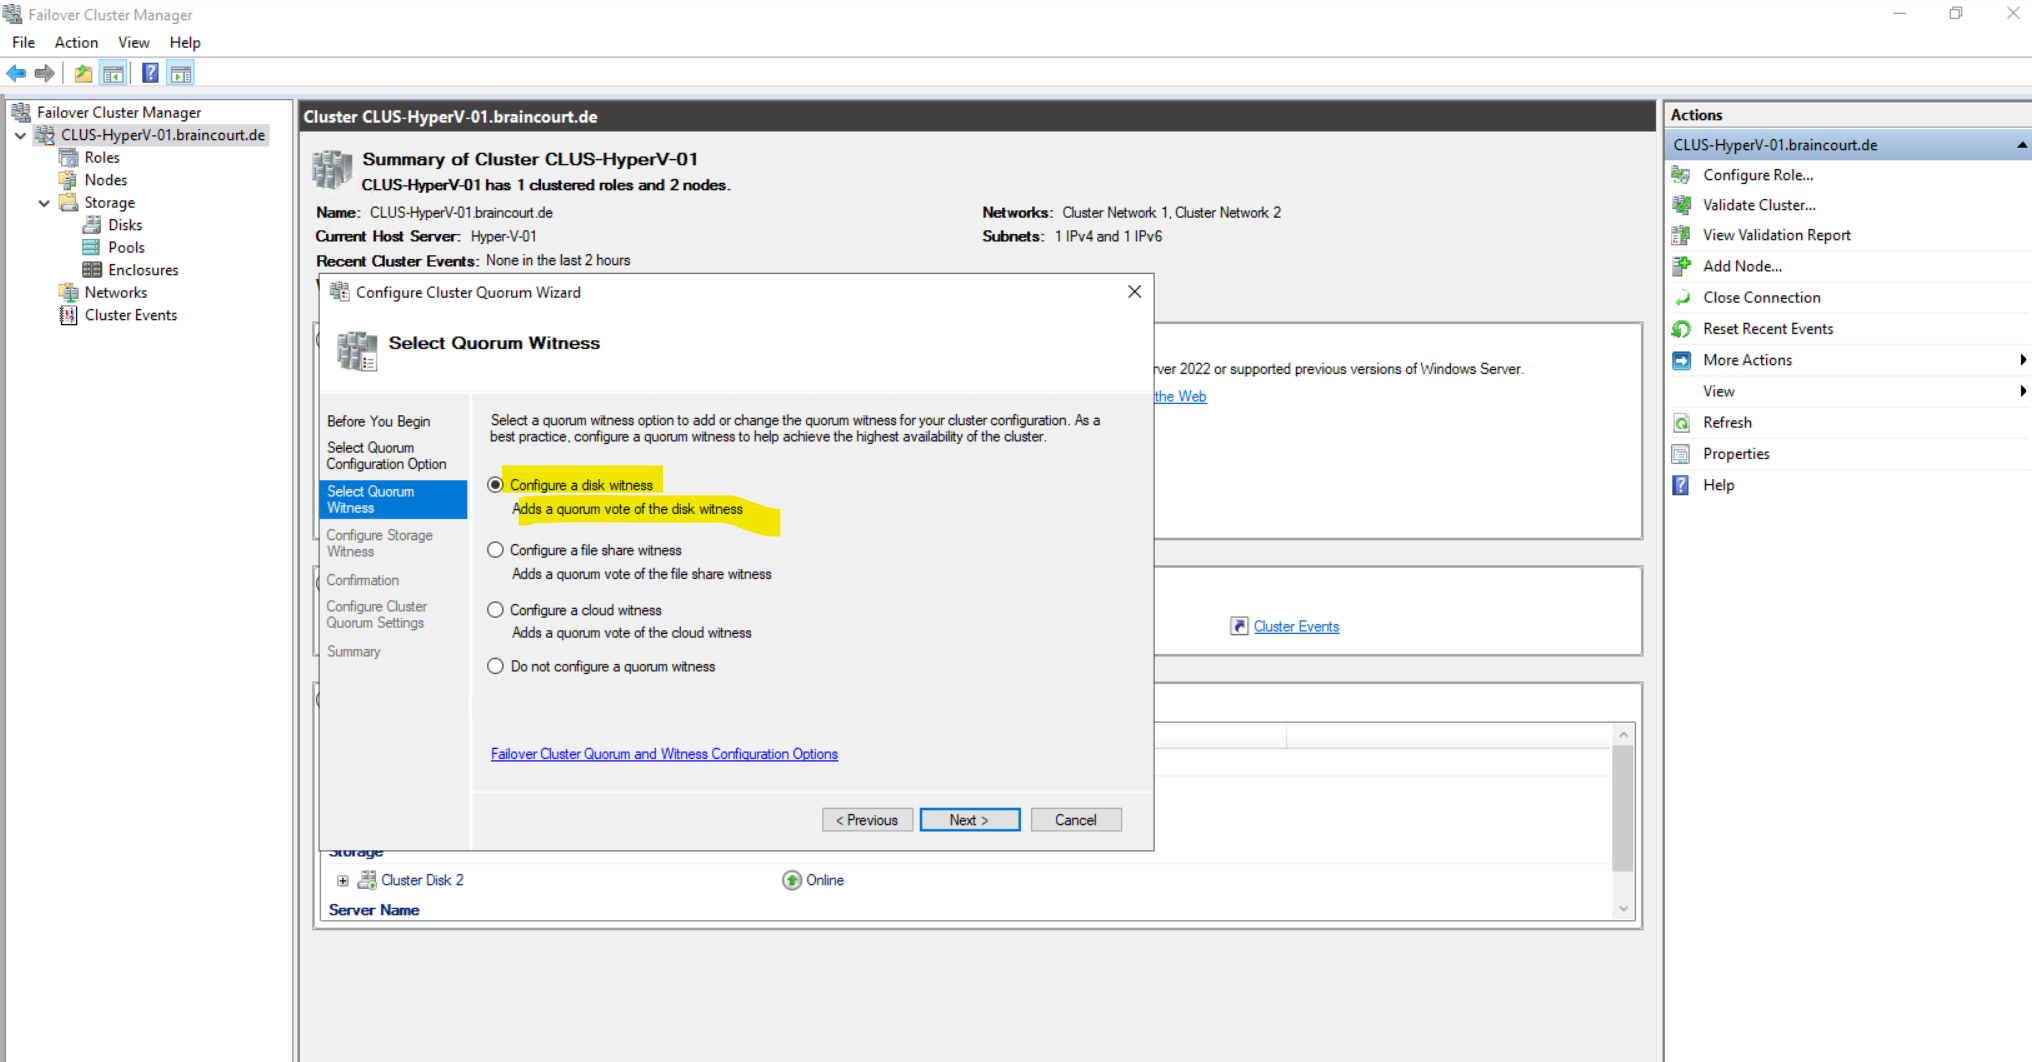
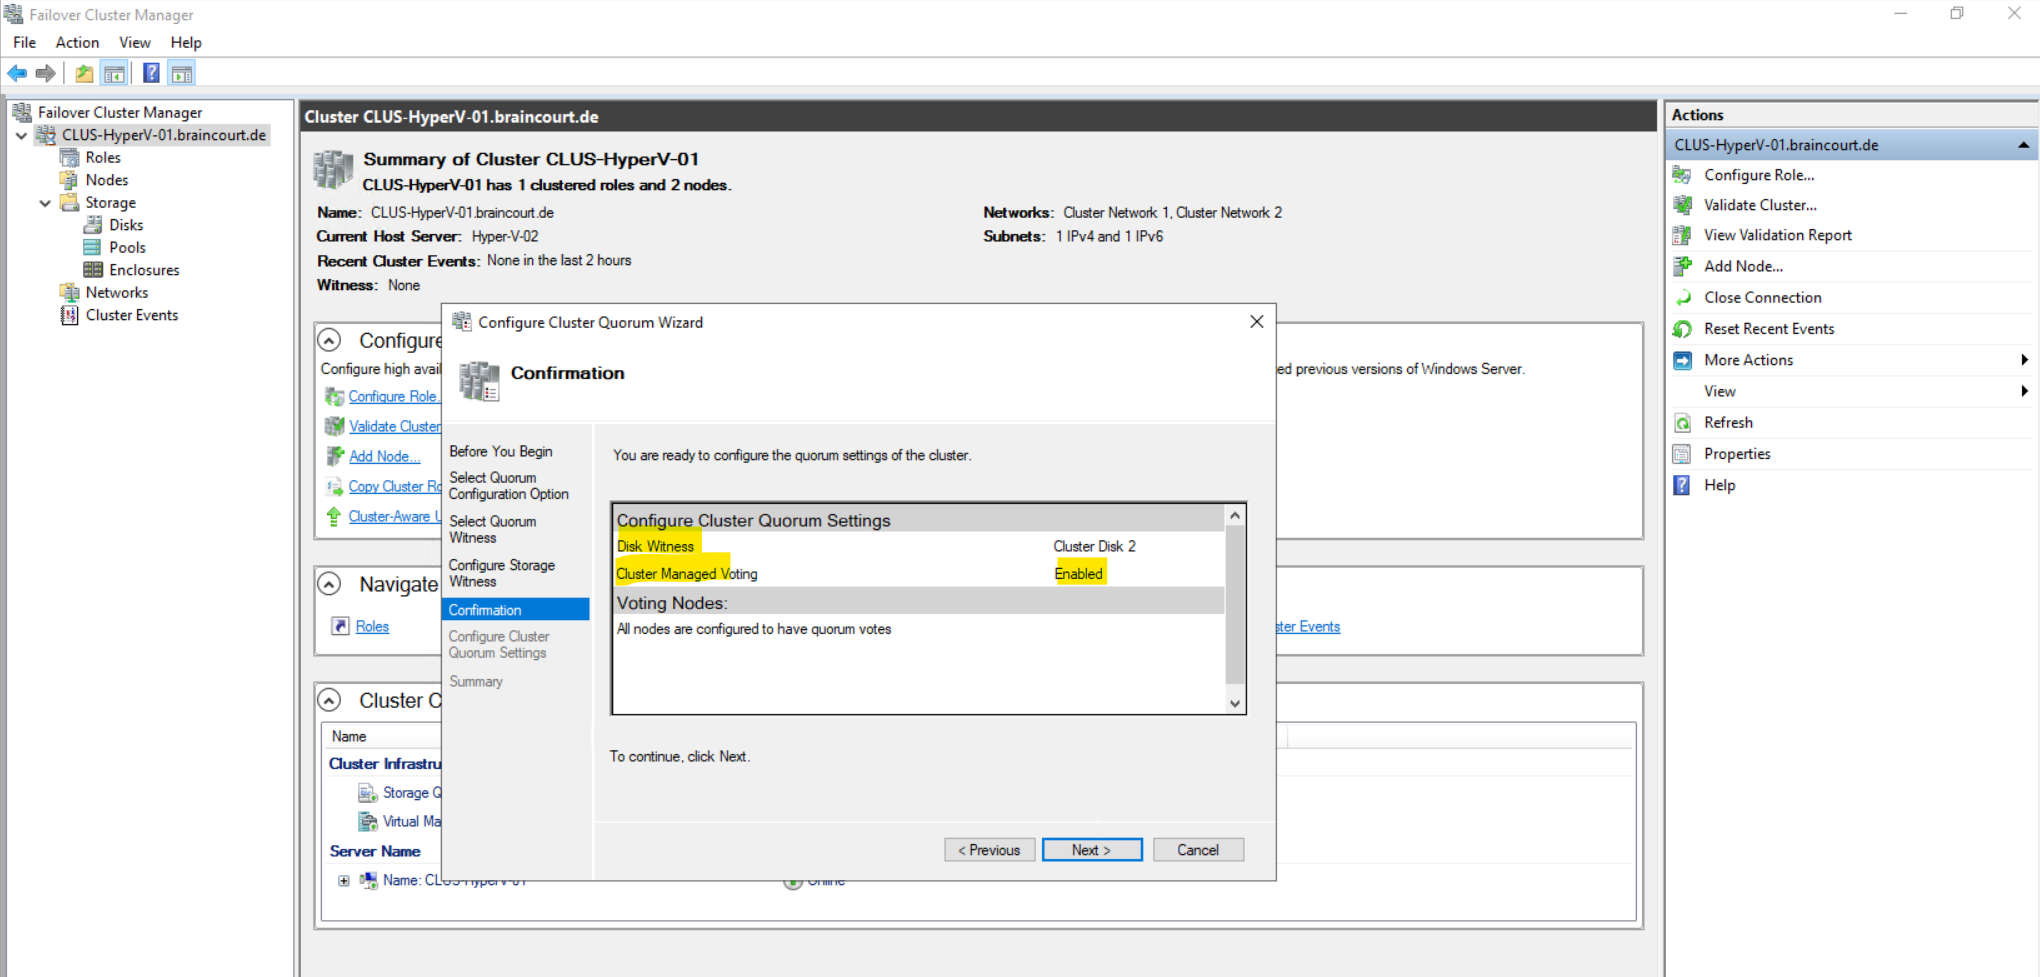
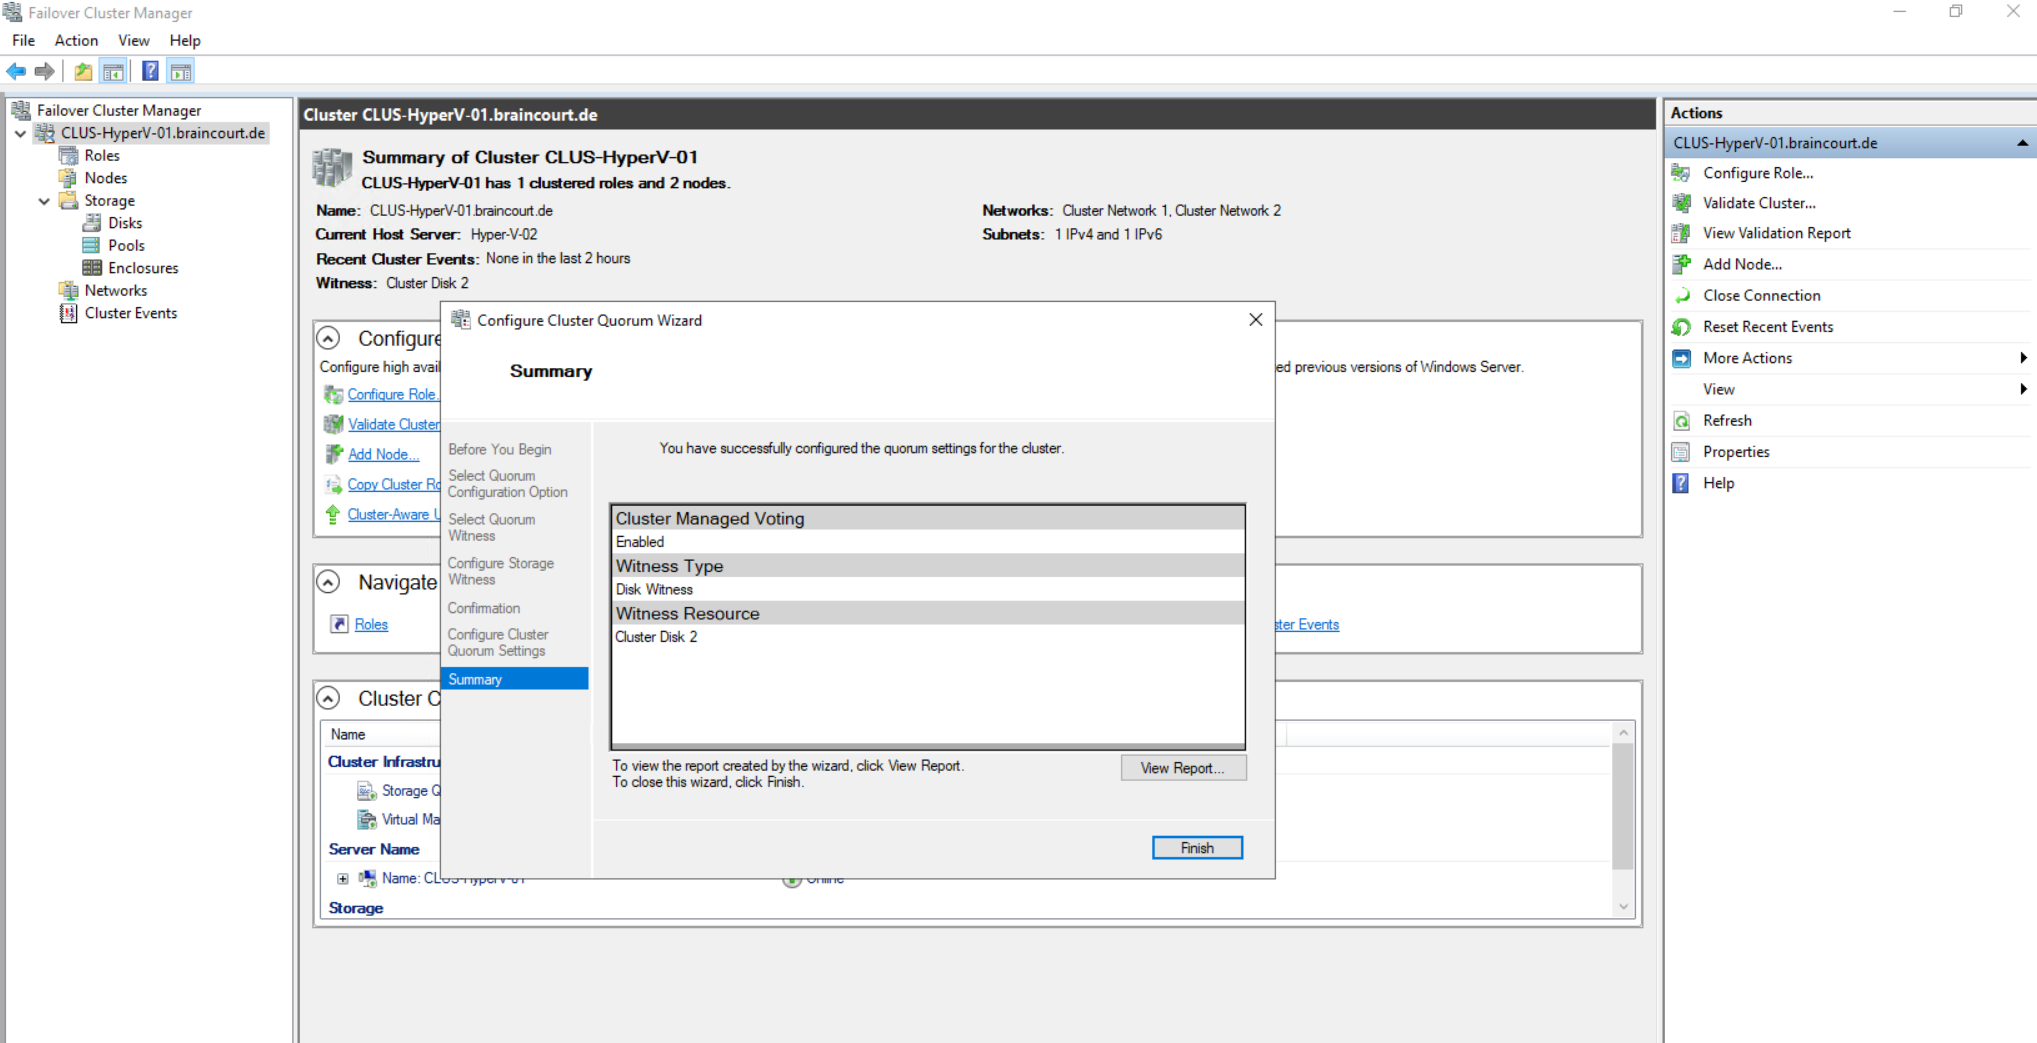
I will add a disk witness.
For the disk witness I was adding a further iSCSI virtual disk and connected it to both nodes. About how to add a further iSCSI virtual disk you can read my following post.
Below the requirements for the disk witness volume.
Disk witness requirements – Dedicated LUN that stores a copy of the cluster database
Size of LUN must be at least 512 MB
Must be dedicated to cluster use and not assigned to a clustered role
Must be included in clustered storage and pass storage validation tests
Cannot be a disk that is a Cluster Shared Volume (CSV)
Basic disk with a single volume
Can be formatted with NTFS or ReFS
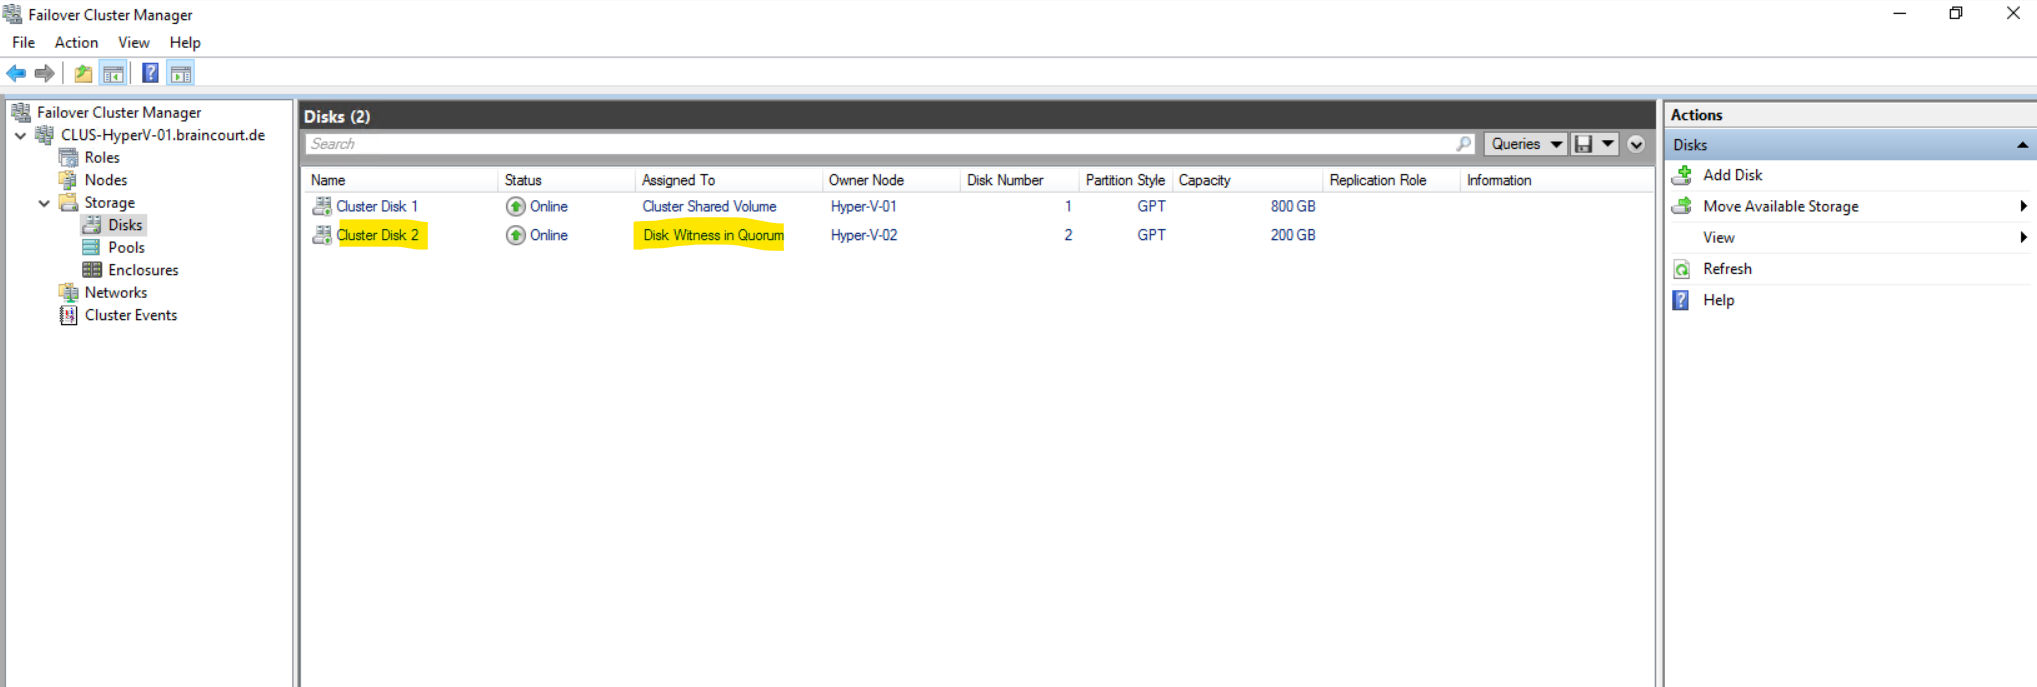
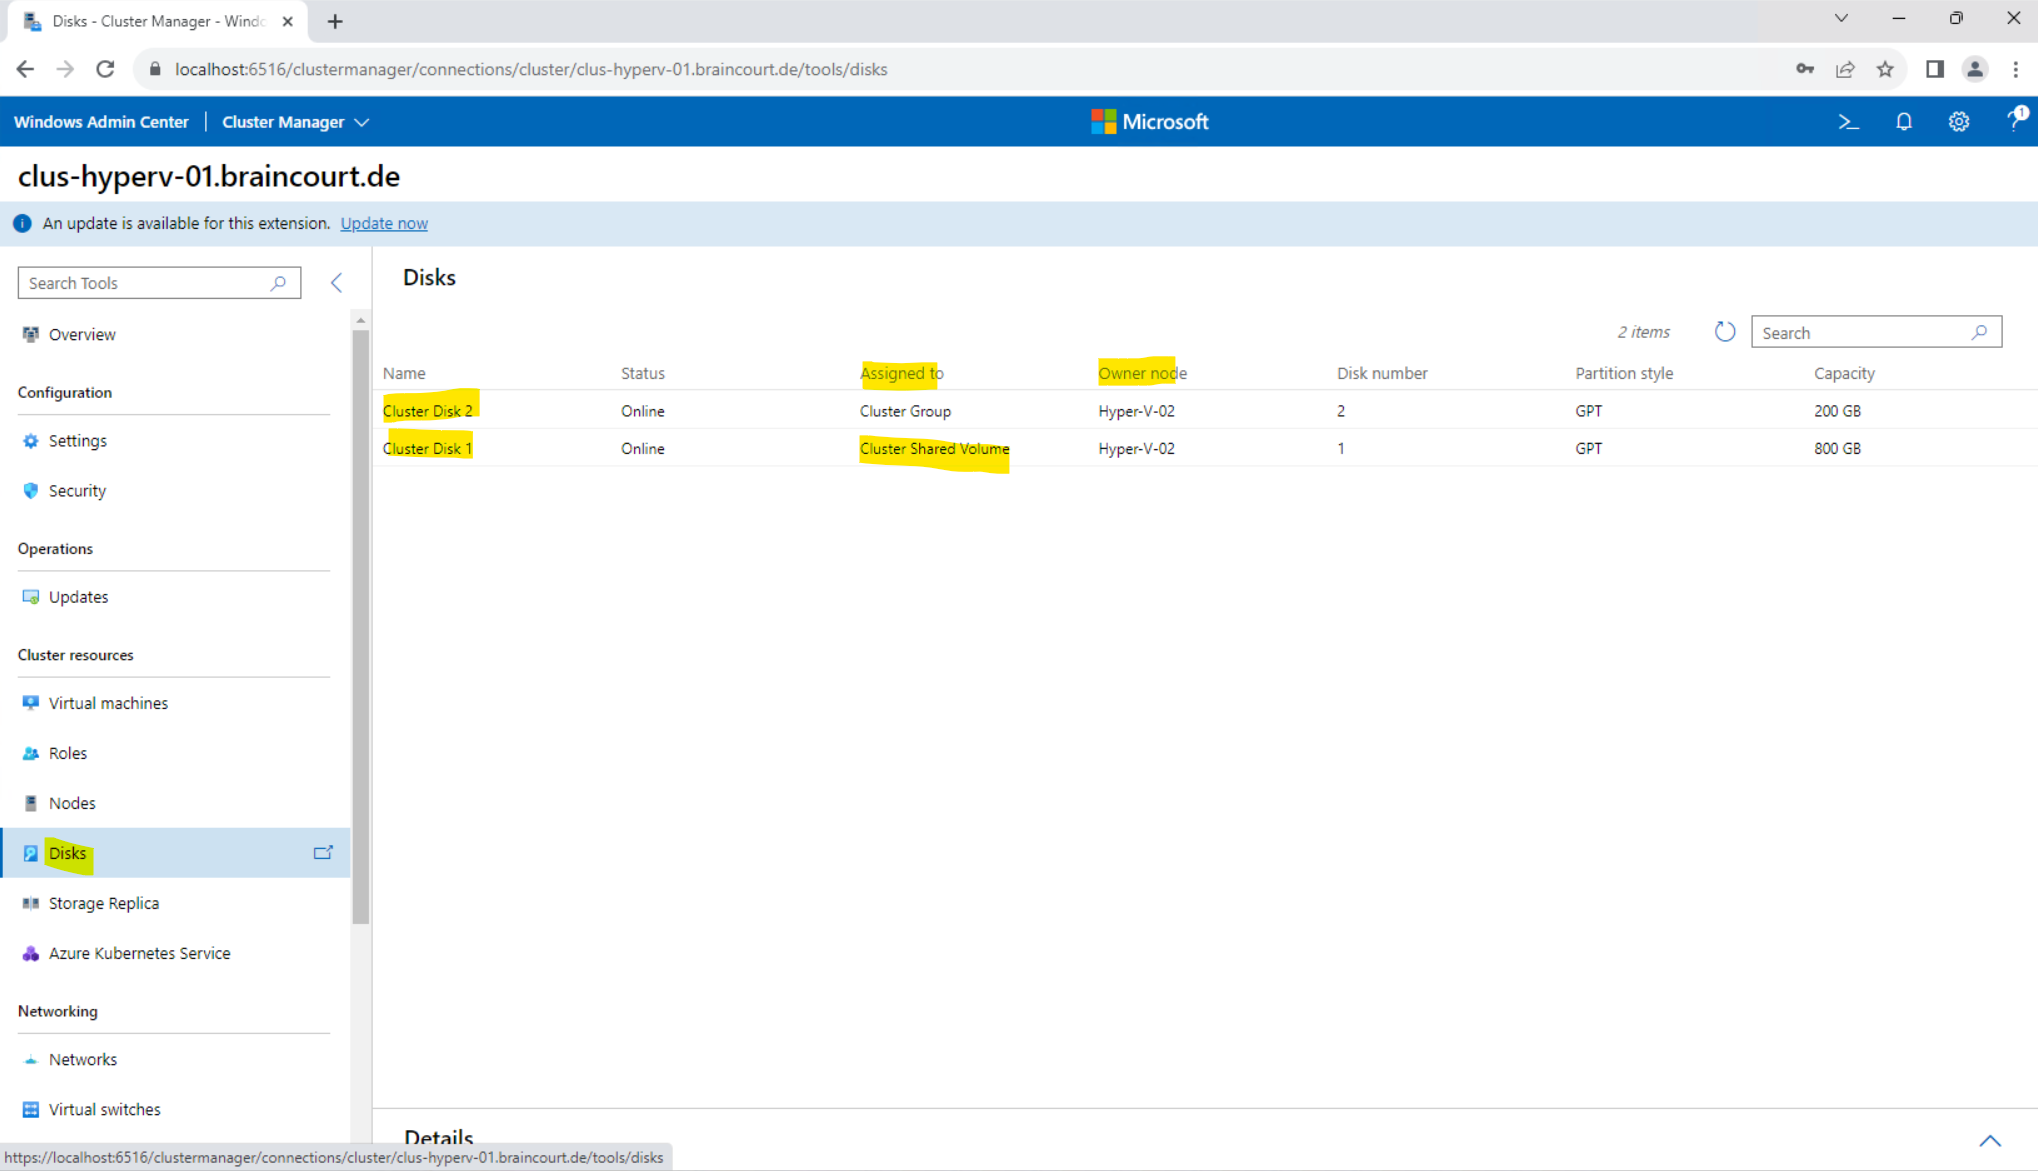
Cluster Disk 2 is the further iSCSI virtual disk I added to both nodes. As mentioned in the requirements, the disk cannot be added as Cluster Shared Volume (CSV).
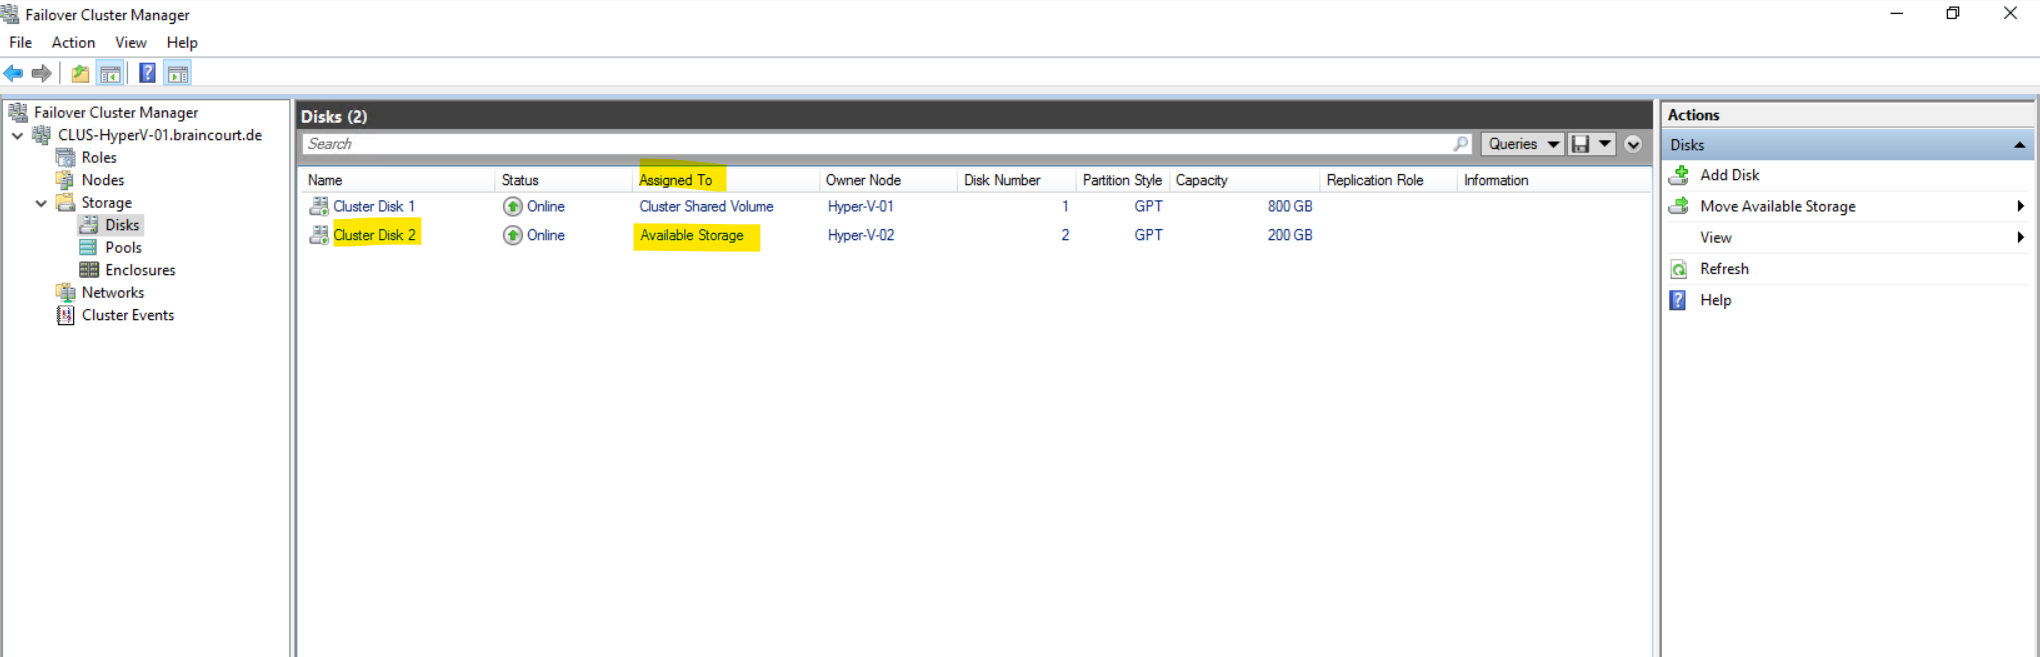
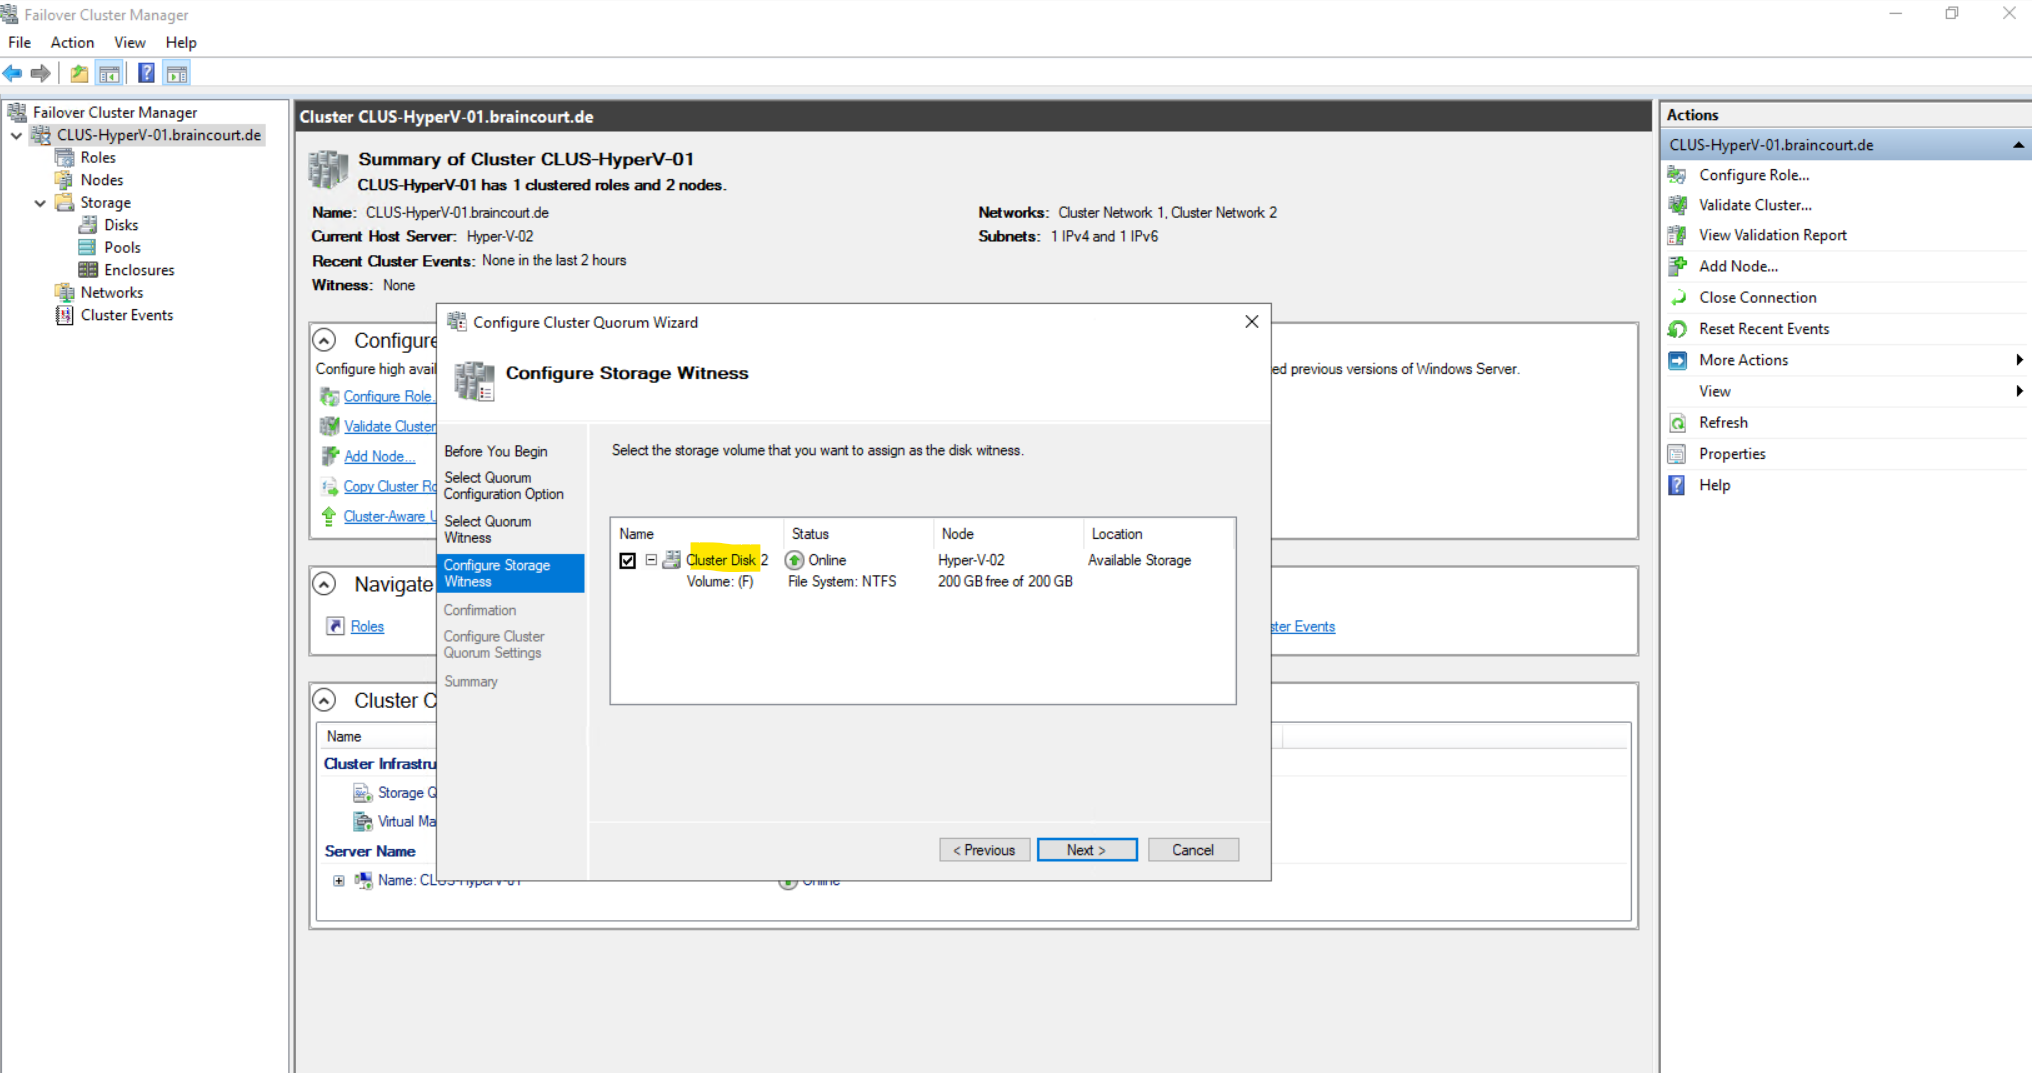
For the disk witness it is the same as for Cluster Shared Volumes, only one node can have ownership for a disk witness which is at them moment my node Hyper-V-02.
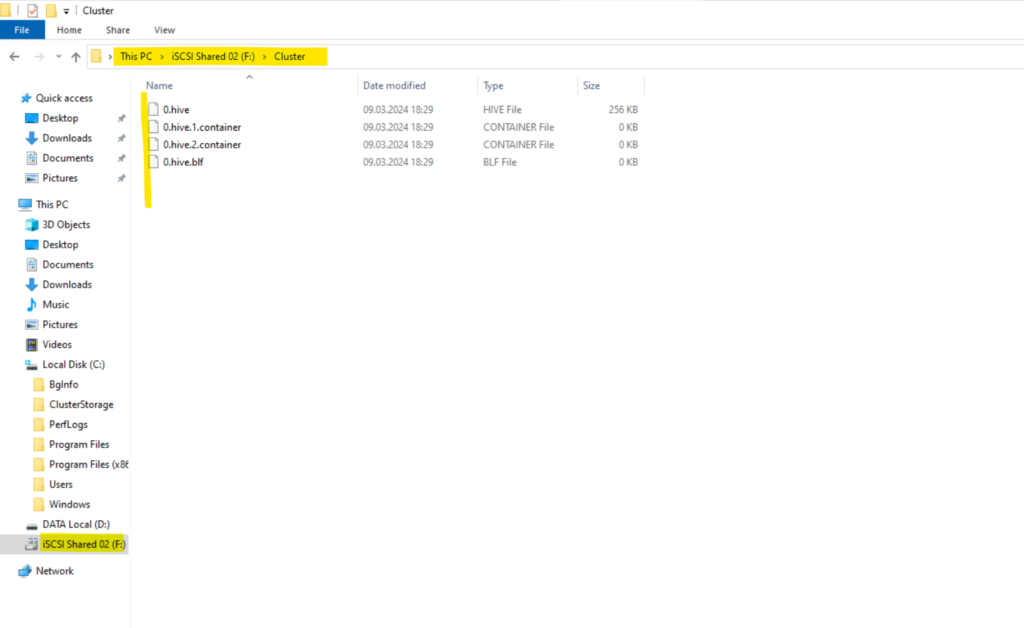
On the actual disk owner of the witness disk, in my case here the Hyper-V-02 host (node), you can see that a copy of the cluster database (on each node locally under C:WindowsClusterCLUSDB) is stored as o.hive. The other node have mounted the disk (witness) as reserved but in state offline.
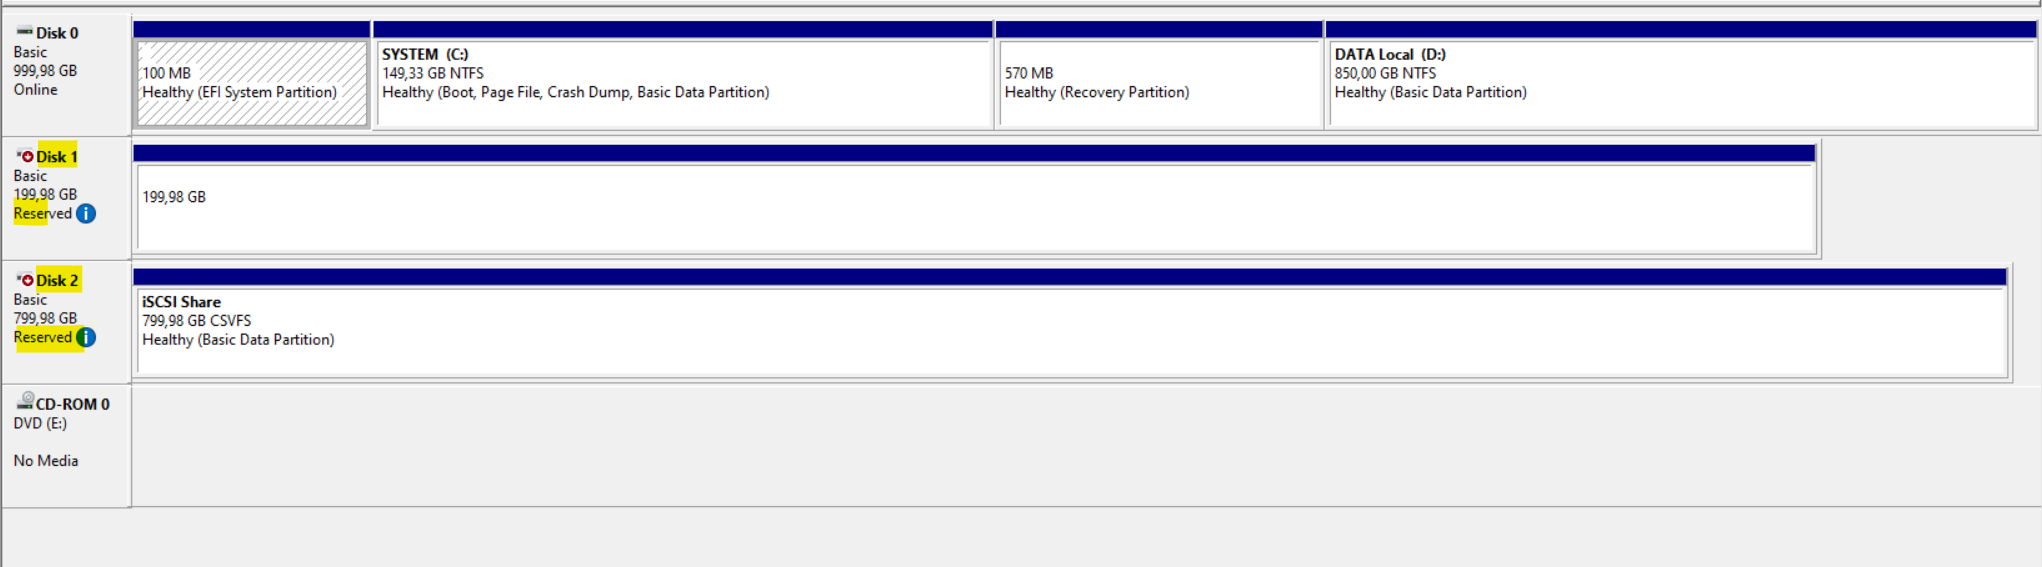
Here by the way how it looks on the node which isn’t the owner at the moment. Disk 1 is the Cluster Shared Volume and Disk 2 the Disk Witness where a copy of the cluster database is stored.
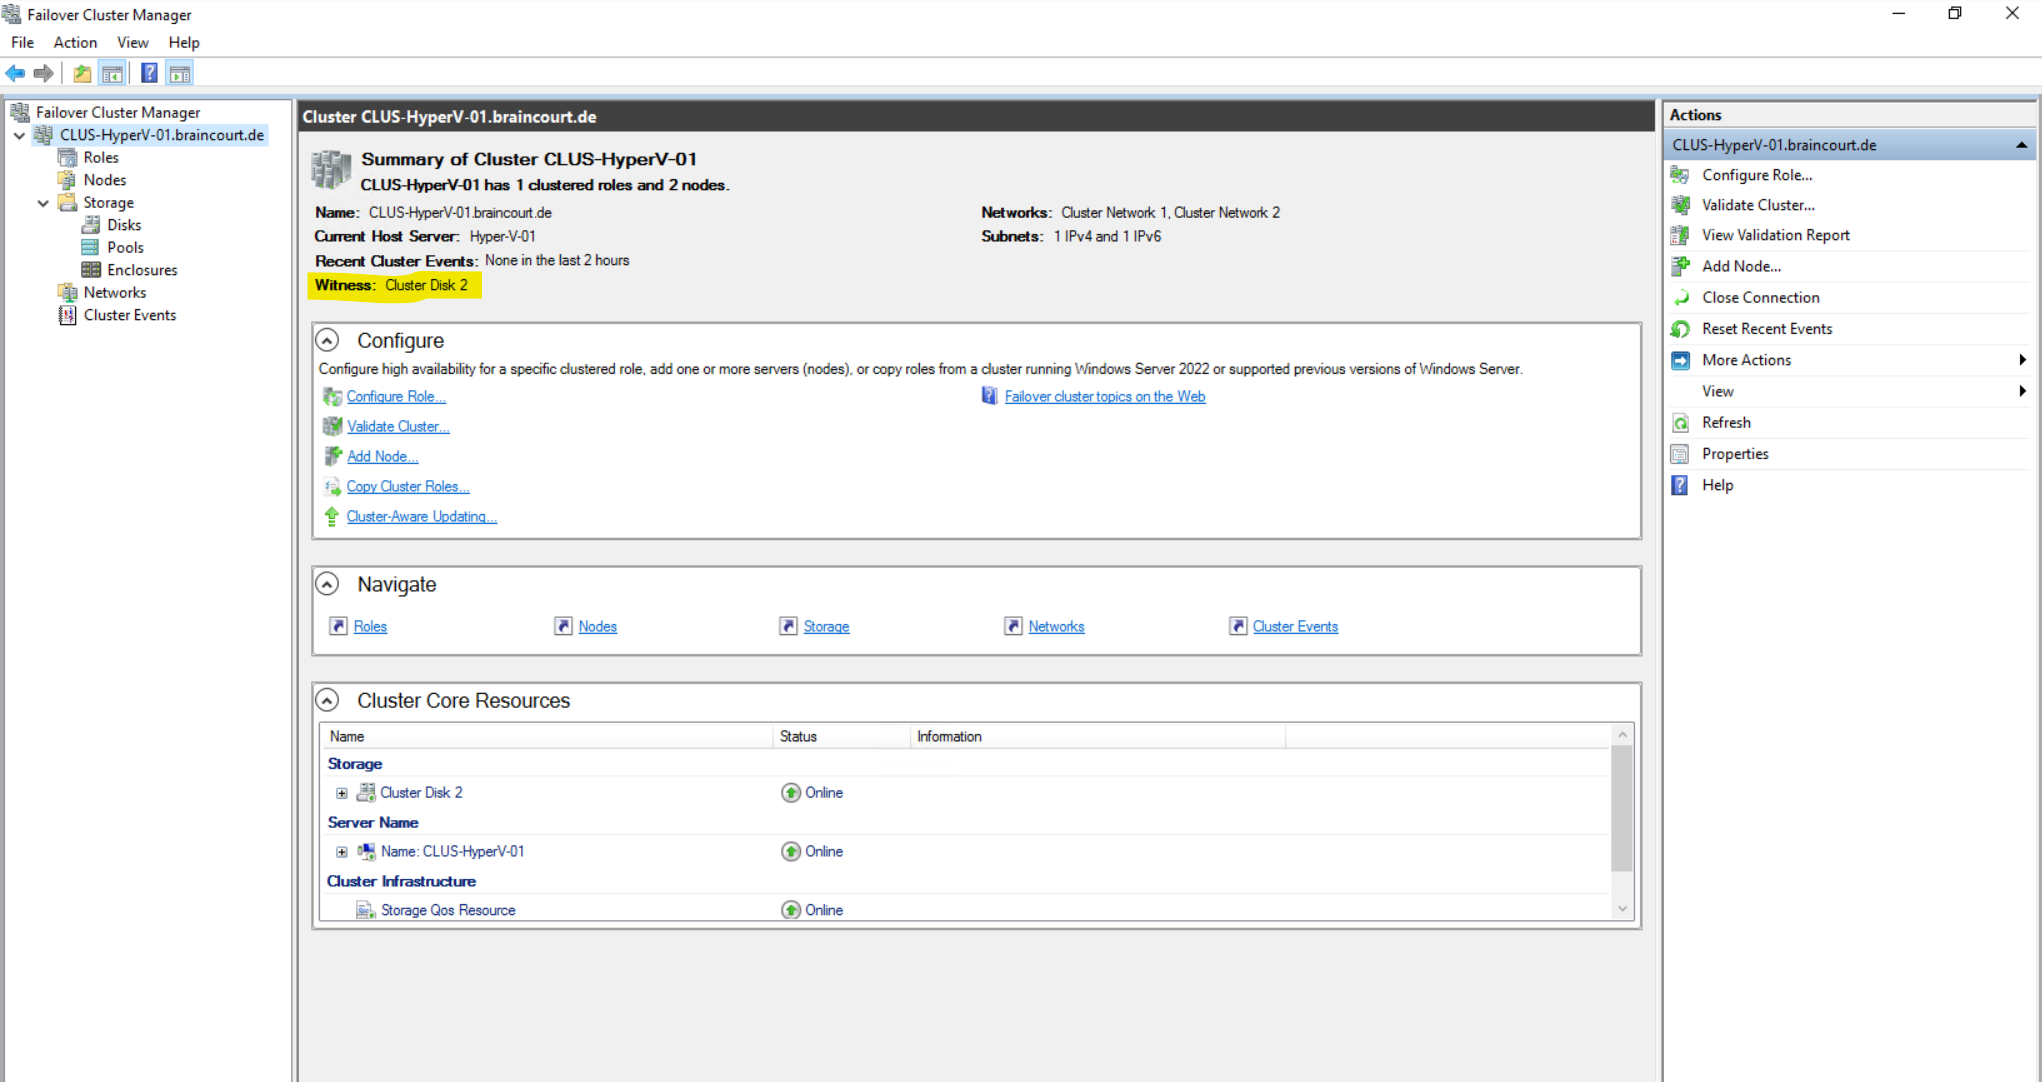
Finally we have configured our witness.
Testing Failover
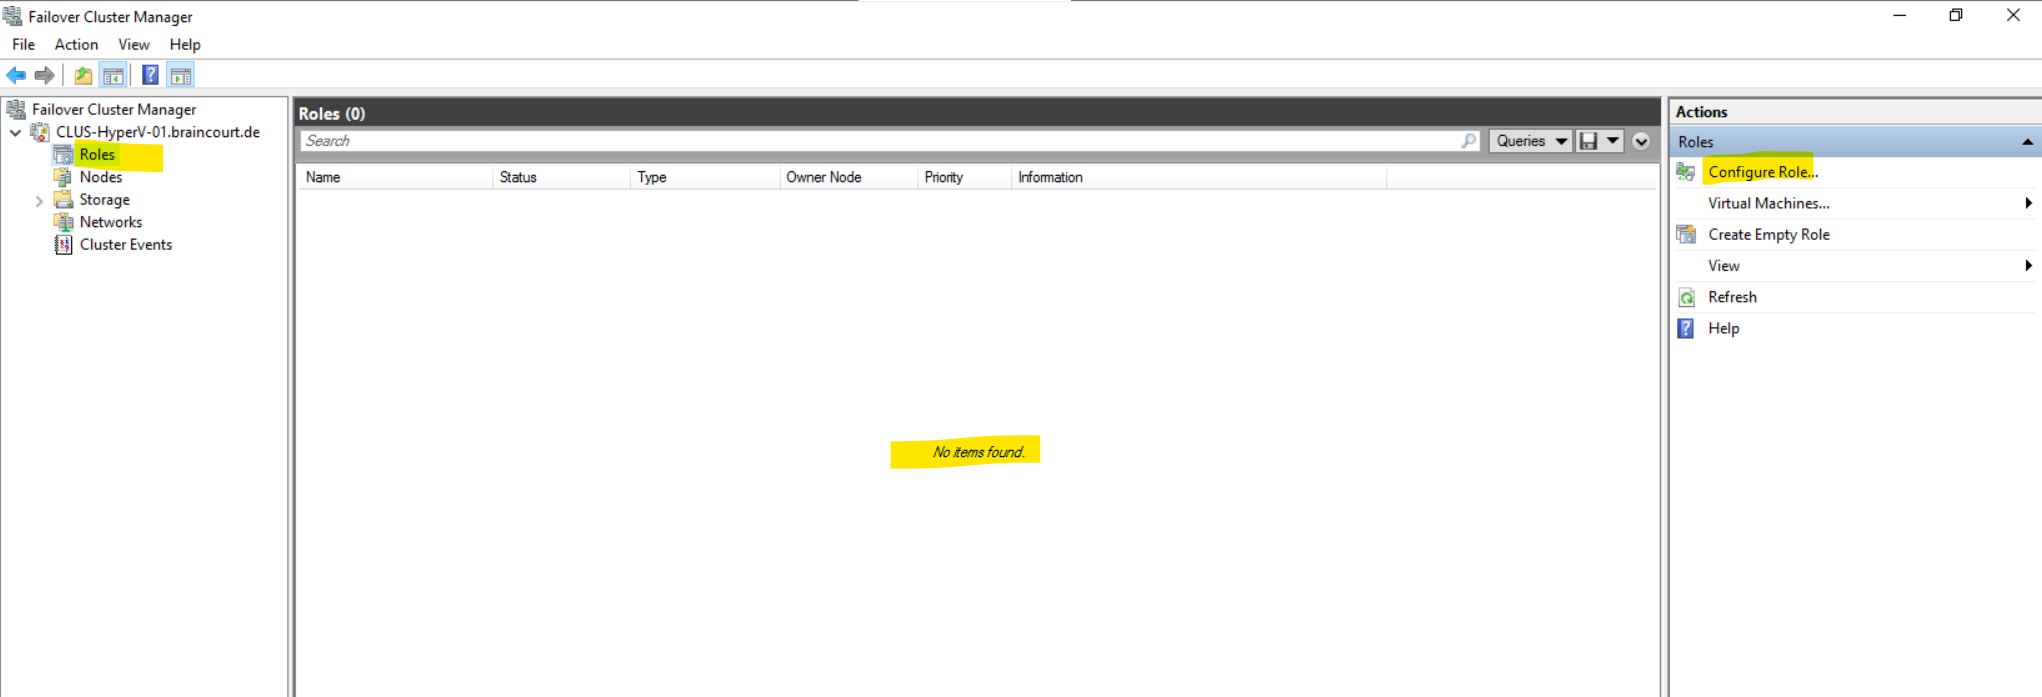
All virtual machines they need to be able to failover to another Hyper-V host, we either need to create directly within the Failover Cluster Manger within the Roles section, or when creating directly within the Hyper-V console on one of the nodes, afterwards we need to go to the Failover Cluster Manger -> Roles and click on Configure Role … to finally add the virtual machine also to the Failover Cluster.
Configured Roles and virtual machines within the Roles section will configure high availability for a role or virtual machine.
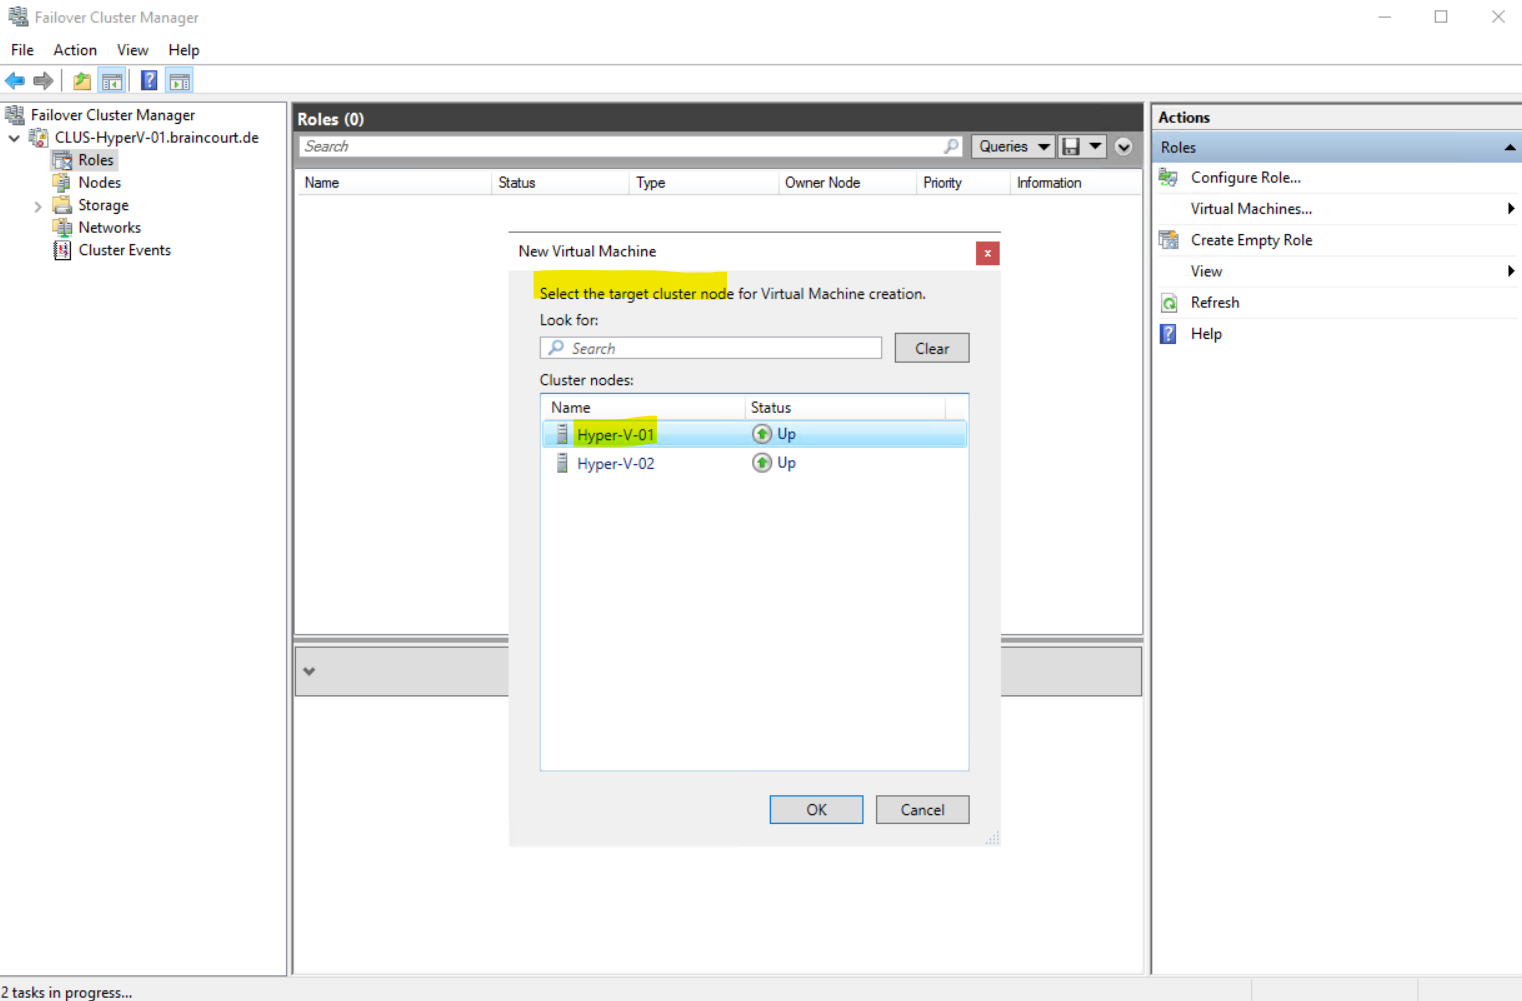
We need to select a target cluster node where our virtual machine will be created and running first and usually, I will create the new virtual machine on the Hyper-V-01 node.
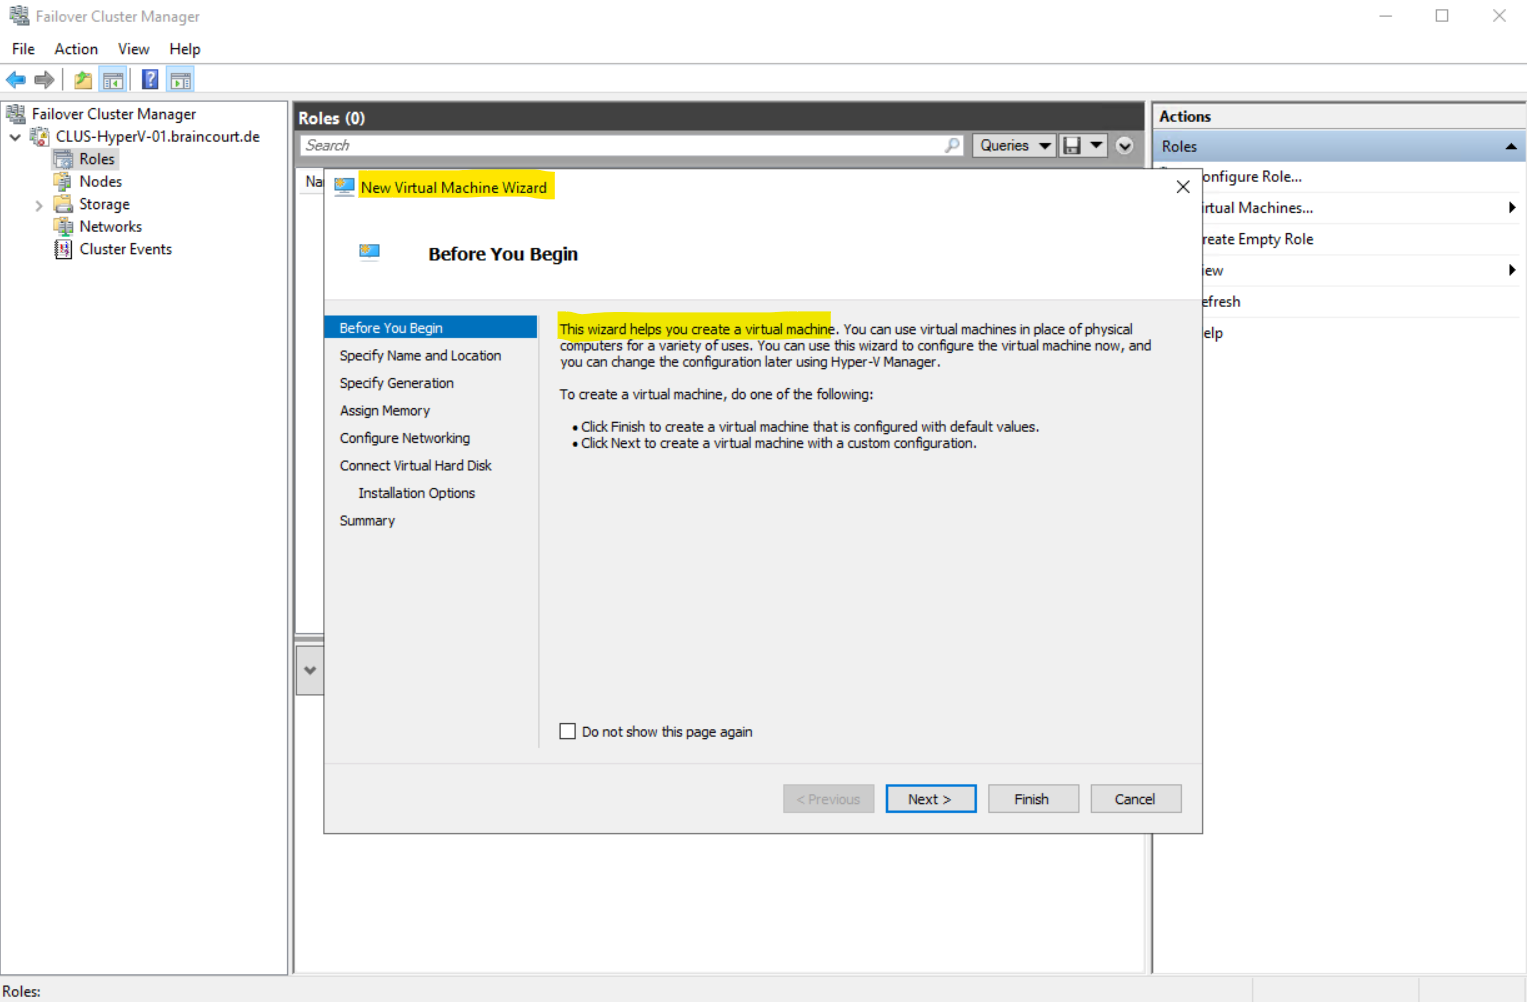
The New Virtual Machine Wizard is shown up.
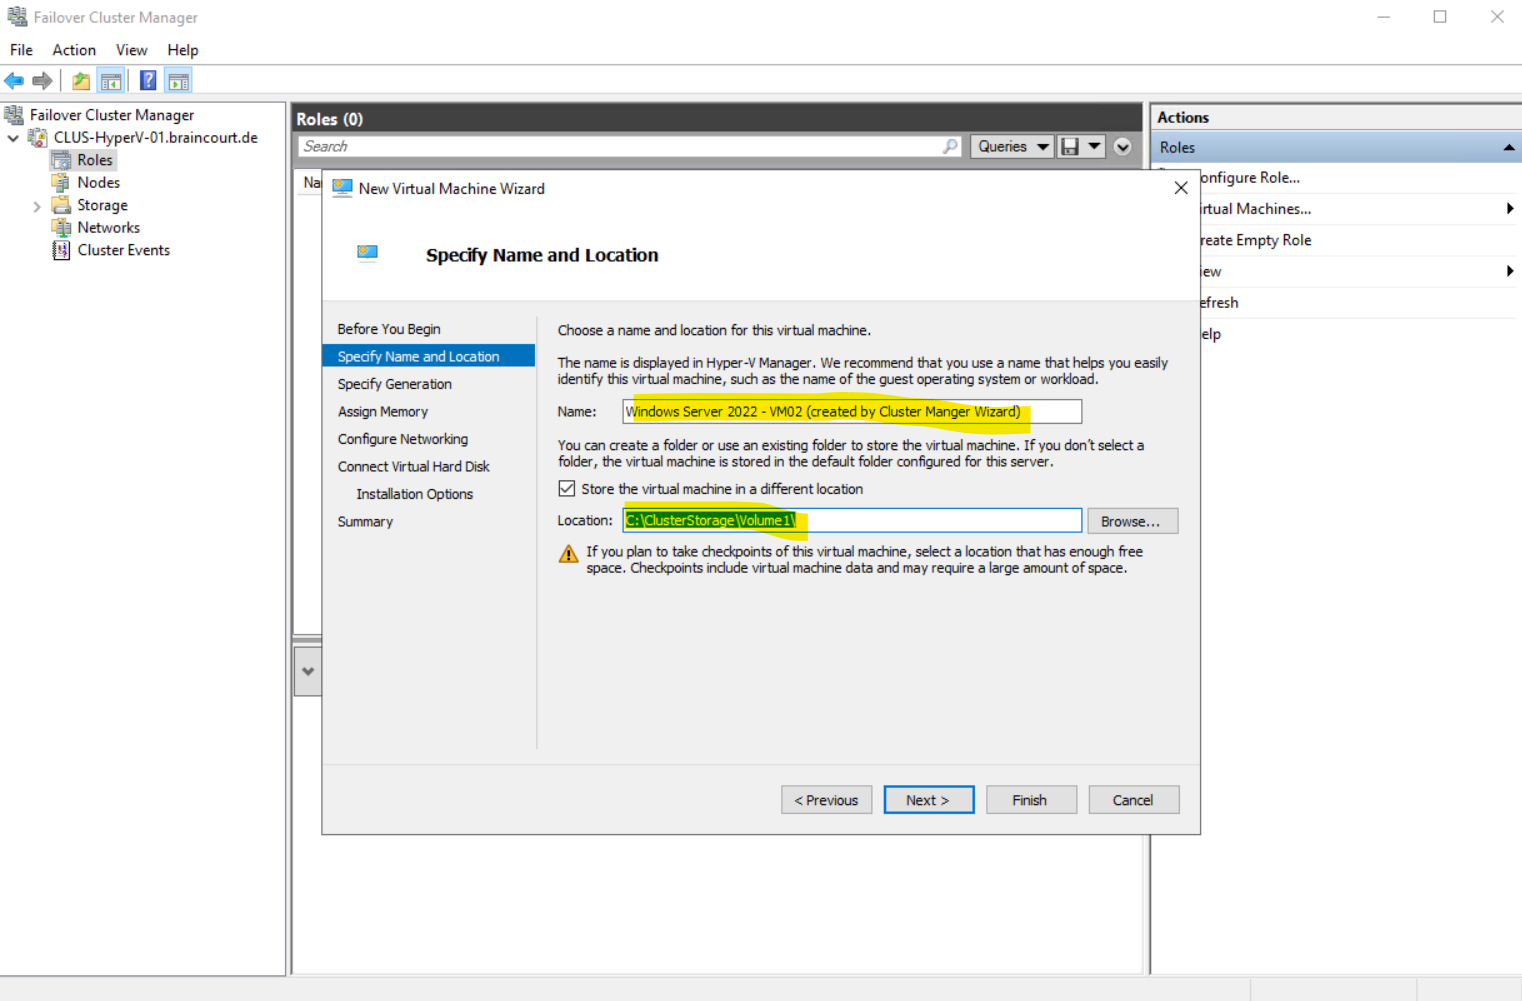
We need to select our previously added Cluster Shared Volume (CSV) to store the virtual machine. The rest as usual like using directly the Hyper-V console.
After that the wizard will configure by default high availability for the new virtual machine. Click finally on Finish.
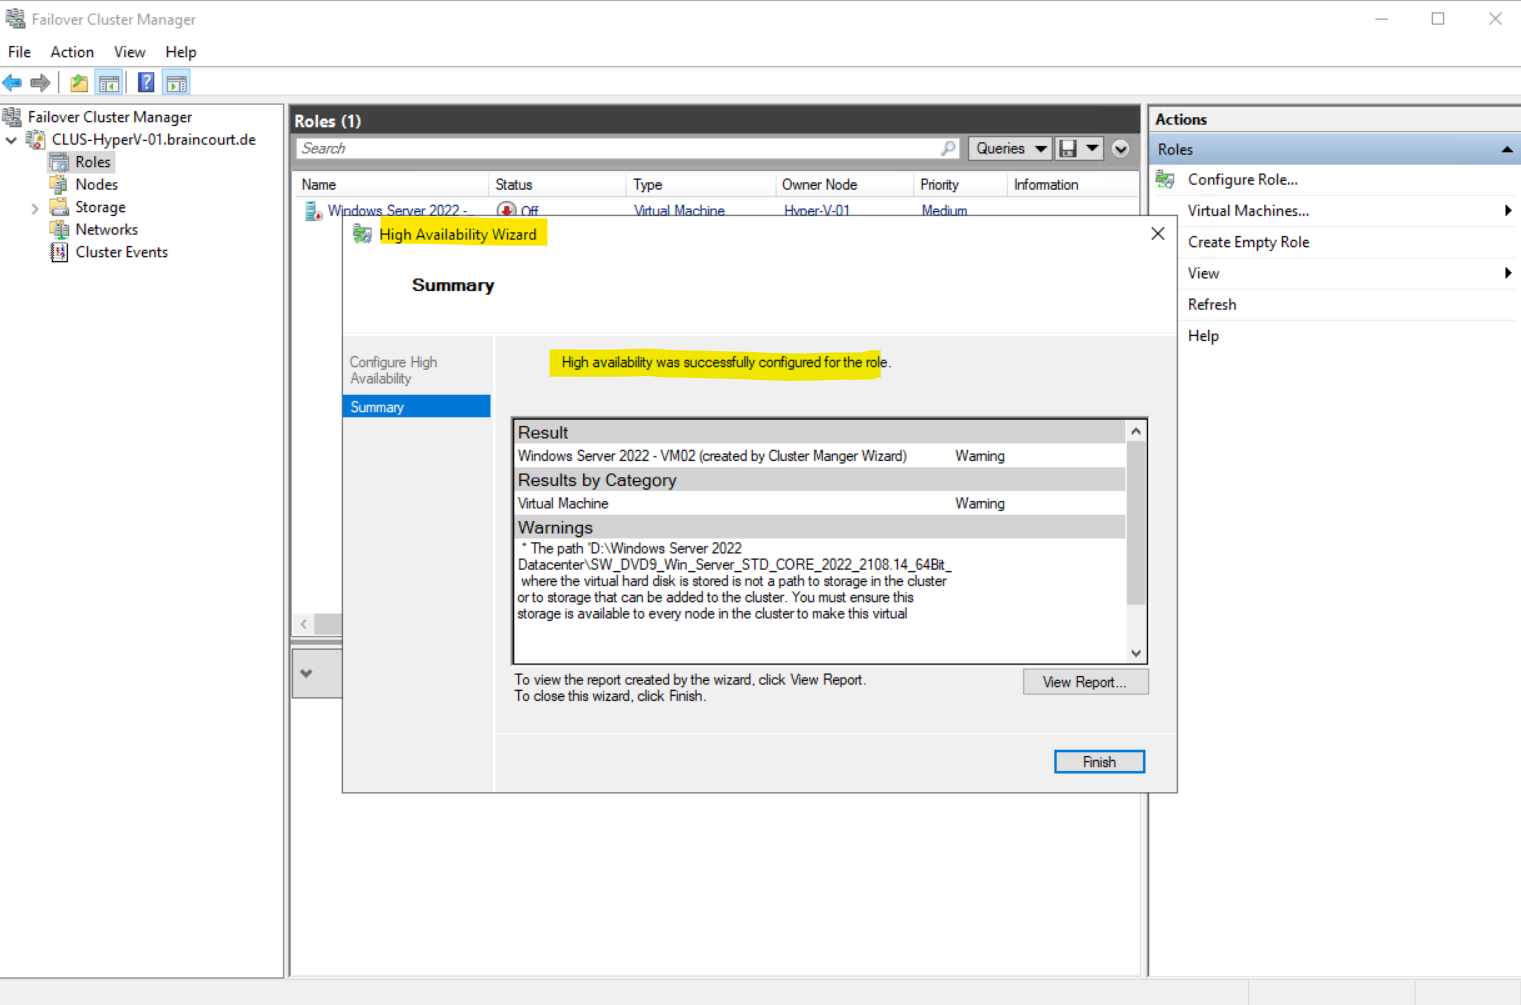
Now we can start to install the OS on our new virtual machine like used to by the Hyper-V console.
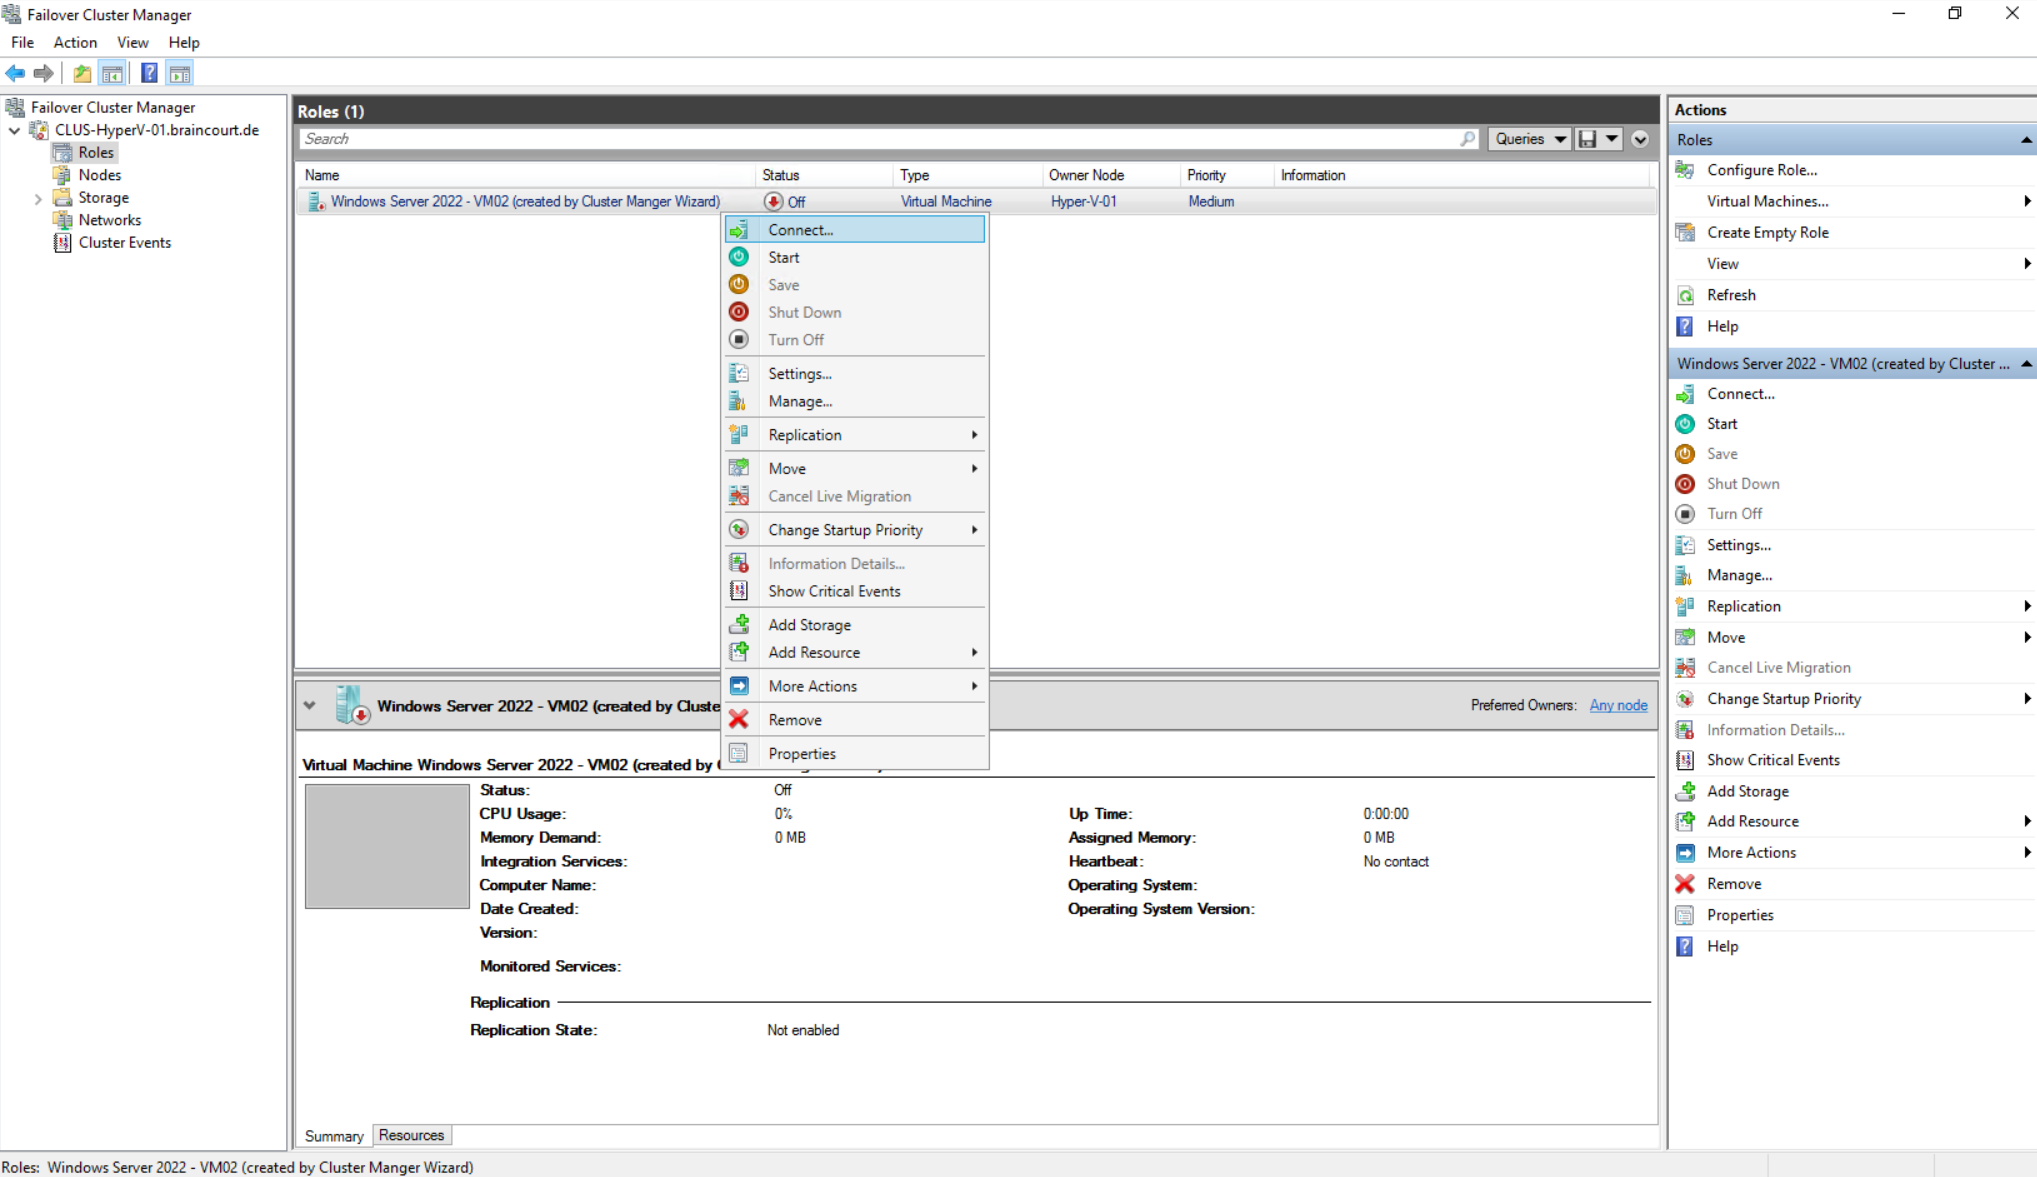
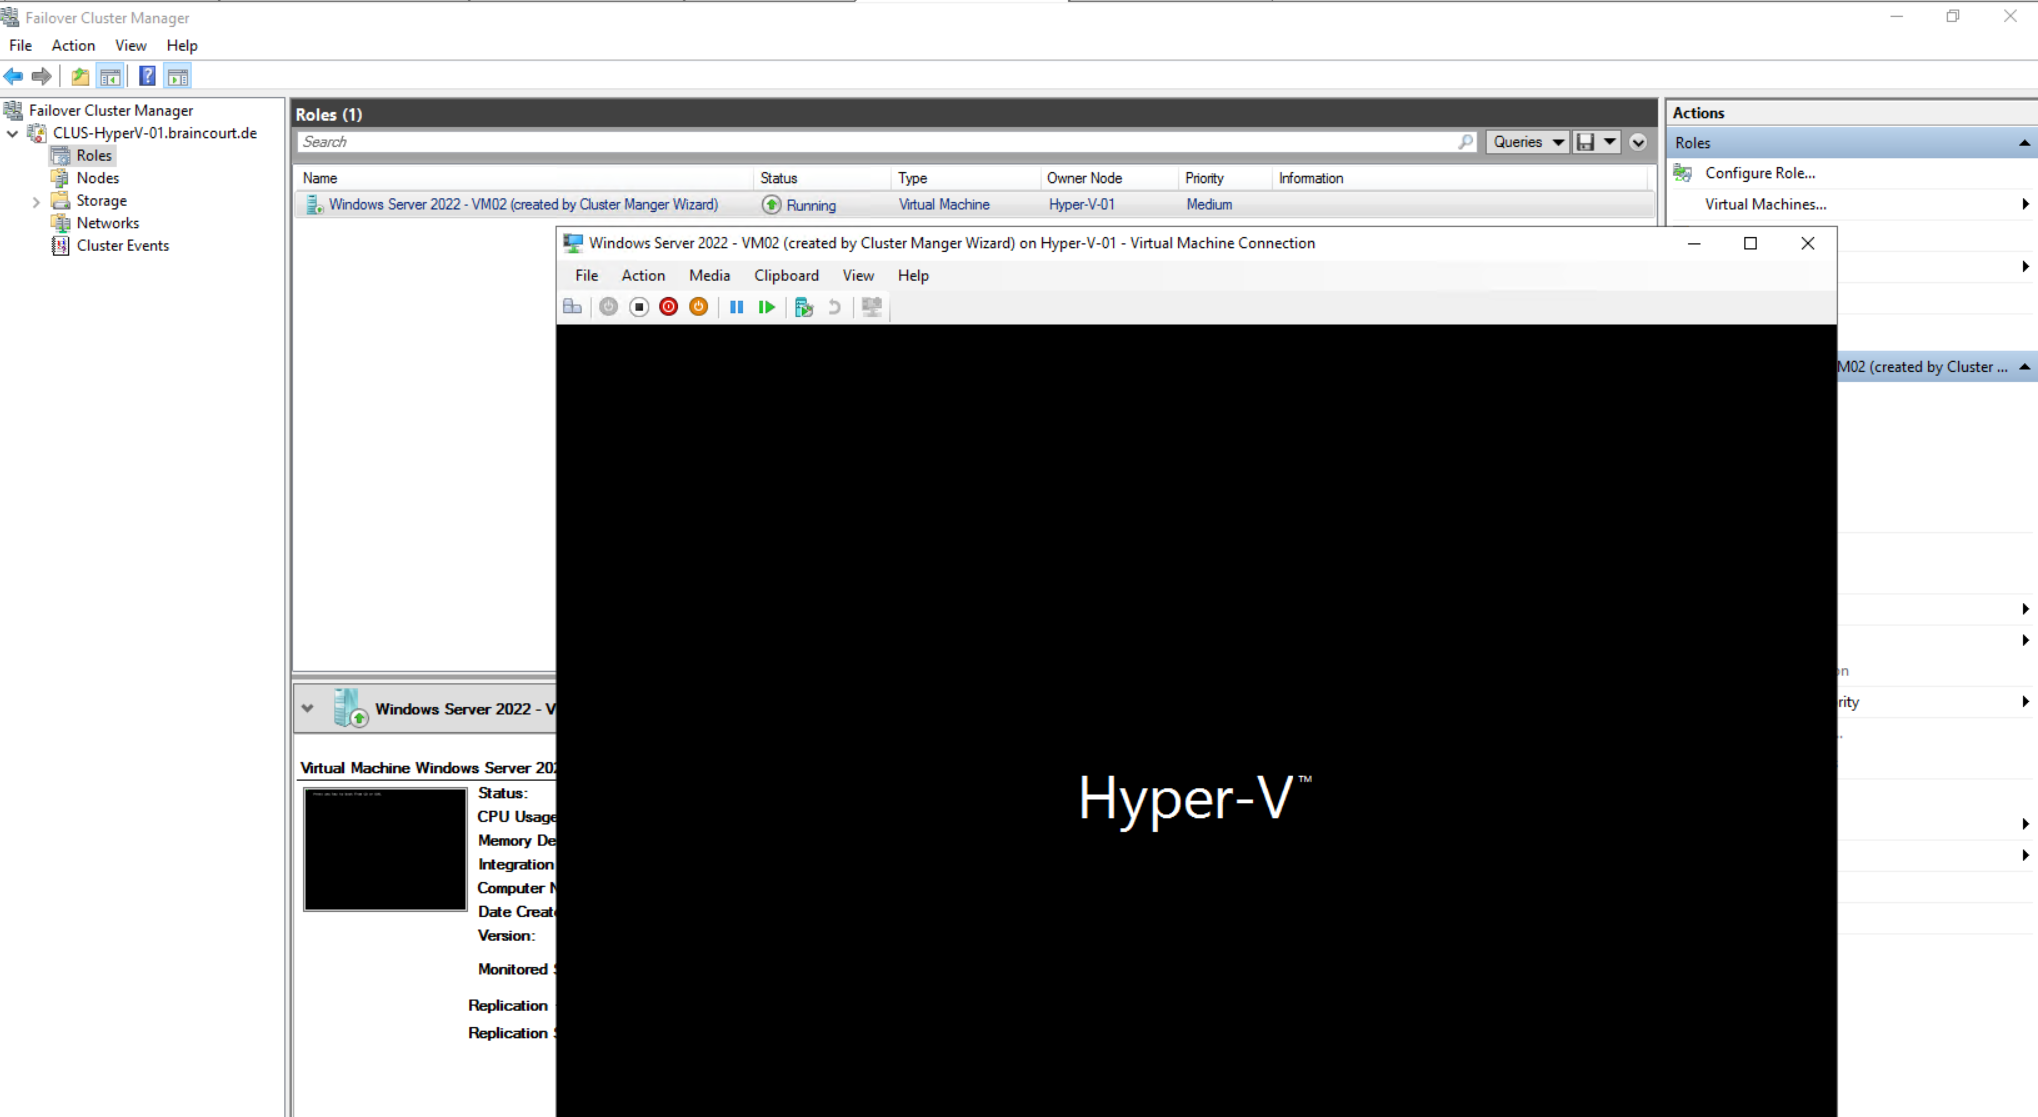
So now the virtual machine is running on the Hyper-V-01 node.

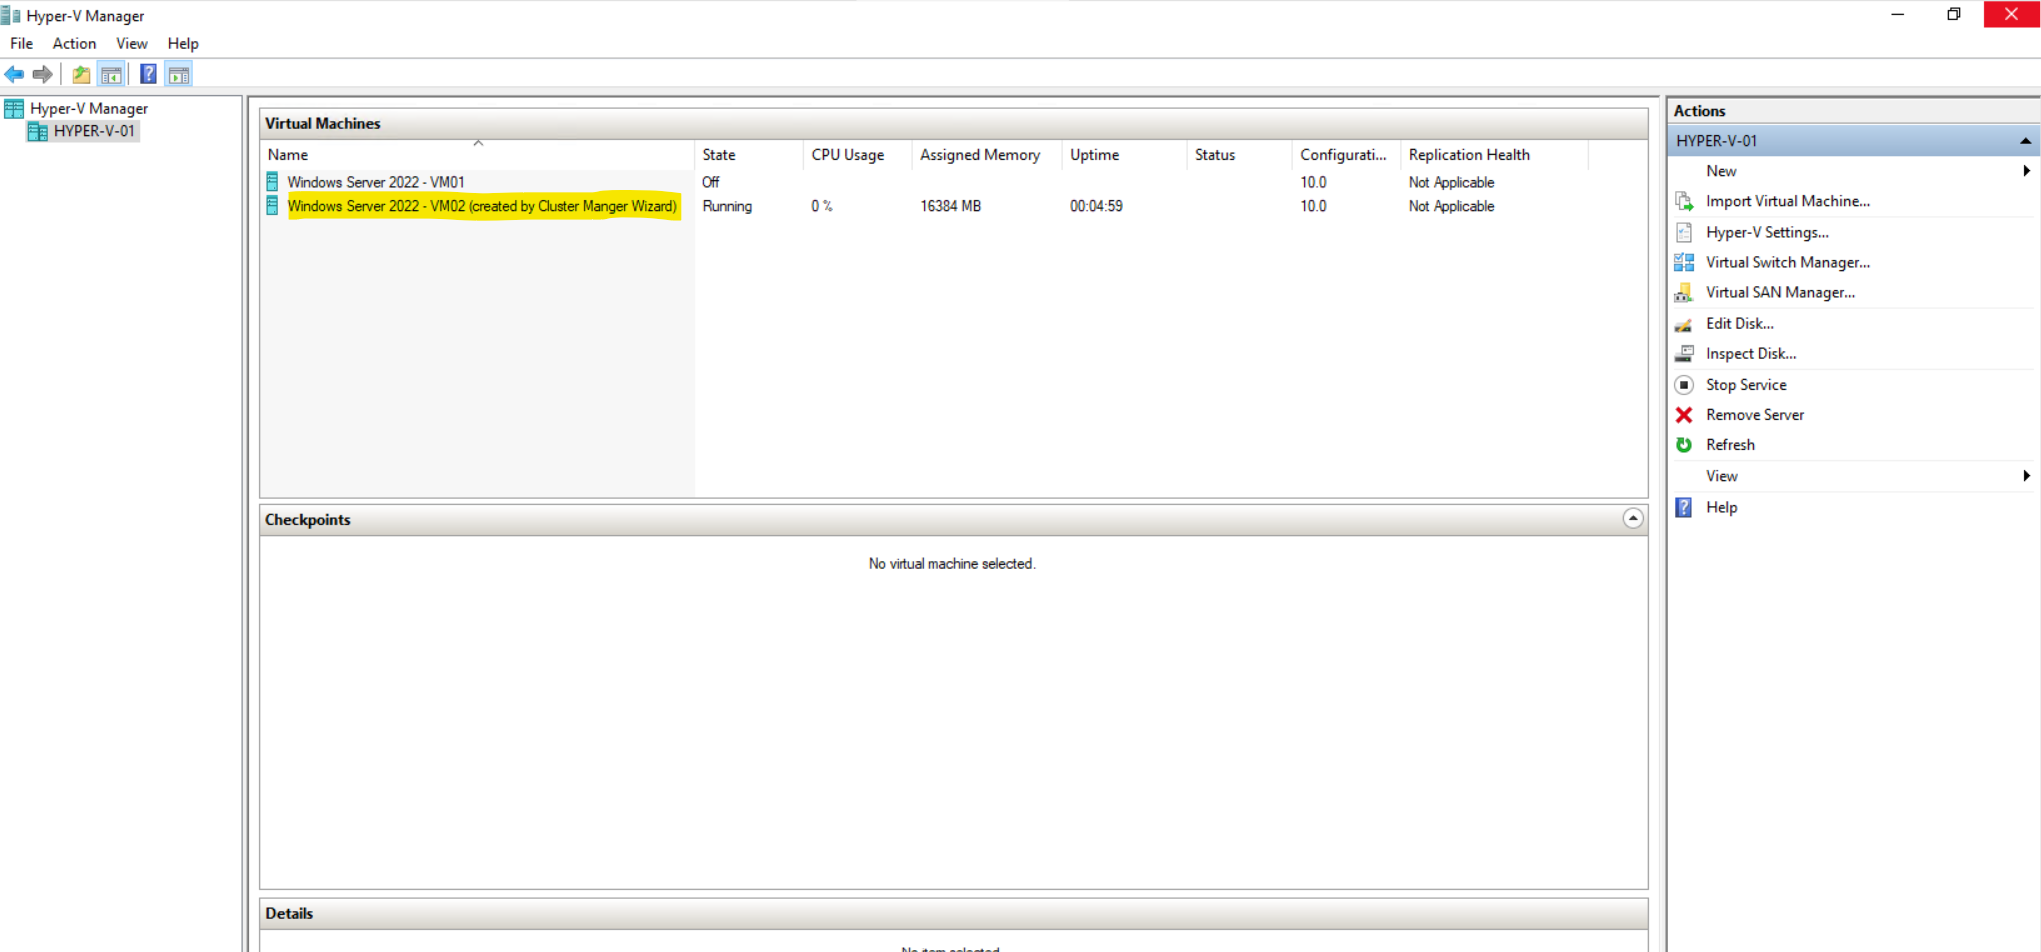
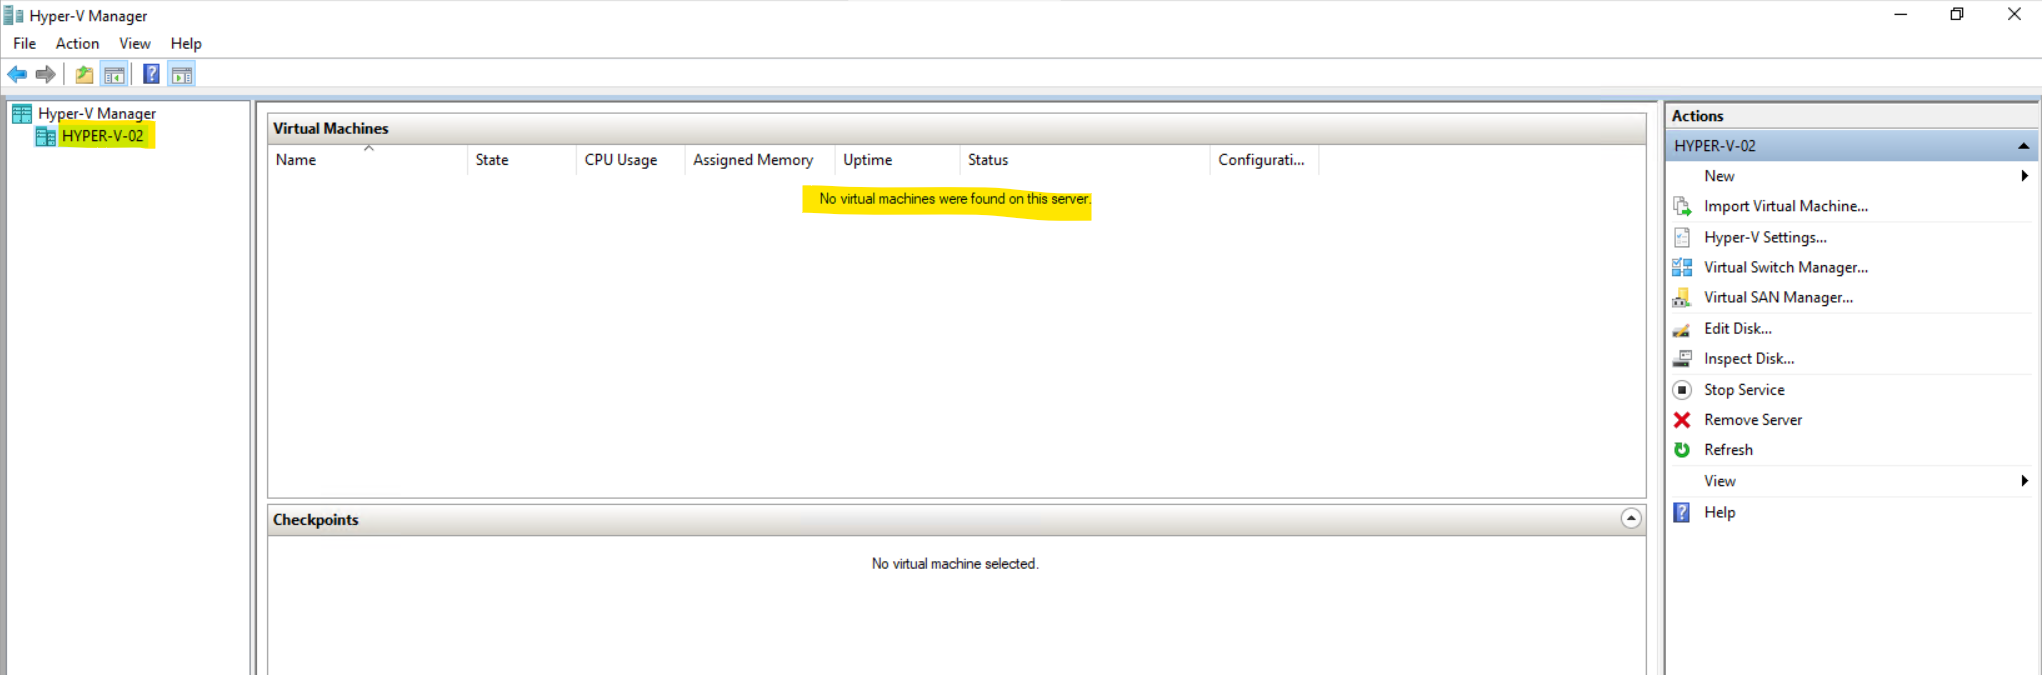
I will see the virtual machine also in the Hyper-V console of the Hyper-V-01 node. On the second node Hyper-V-02 I won’t see any virtual machine so far.
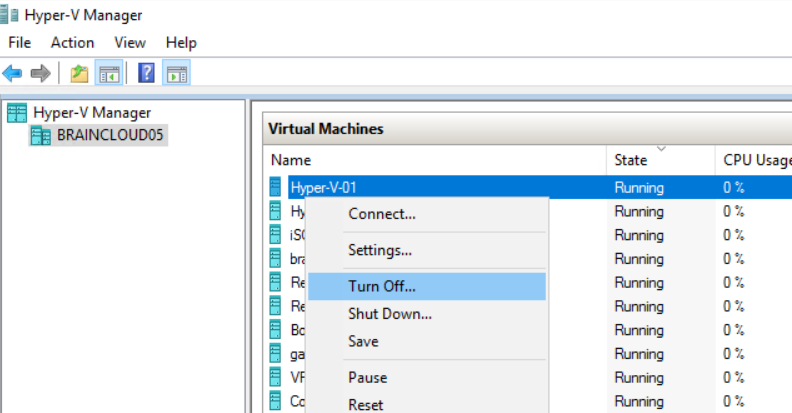
Because I will use for this post Microsoft Hyper-V Nested Virtualization, where both of my Hyper-V hosts (nodes) are also just virtual machines, I can simply simulate a crash of one of the hosts (nodes), by just turning off the active Hyper-V host node.
Now I will turning off the active Hyper-V-01 node where the virtual machine is running at the moment.
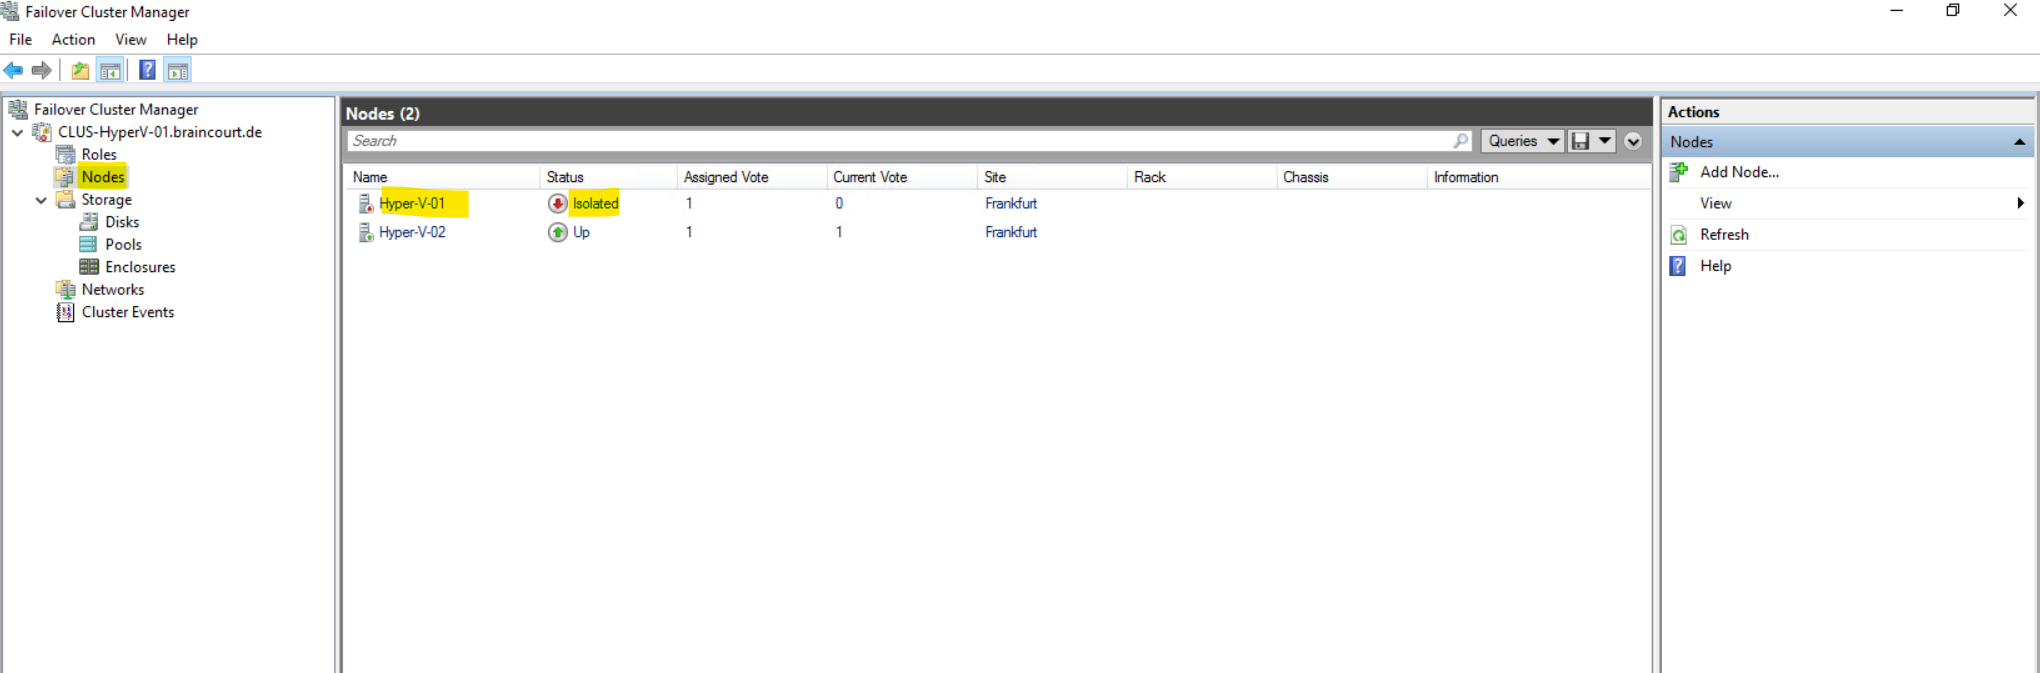
The node now appears in the Failover Cluster Manger as isolated.
Nodes in a failover cluster regularly communicate with each other and exchange status and availability information through a heartbeat. If a cluster node is no longer working reliably, cluster failover policies decide what to do with the resources (roles) hosted on that cluster node. Normally, a failover of cluster resources to another cluster node takes place.
In Windows Server 2016, Microsoft has introduced two new cluster modes. The first, cluster quarantine mode, checks the state of the cluster nodes. If irregularities in communication occur on one or more cluster nodes, or if the cluster node leaves the cluster, all virtual machines are moved to other cluster nodes by live migration, and the cluster node is removed from the cluster for two hours. A maximum of 20 percent of the cluster nodes can be switched to isolation mode.
In the second mode, cluster isolation, the cluster node is permanently removed from the cluster until the administrator adds the node back to the cluster. Machines running on the cluster node continue to run, but no cluster resources can be moved to the isolated node by any other cluster node. The cluster administrator can use PowerShell cmdlets to configure this.
Source: https://www.admin-magazine.com/Archive/2017/38/Highly-available-Hyper-V-in-Windows-Server-2016
And the role appears unmonitored.
The virtual machine is now no longer being monitored by the cluster service.

In the Hyper-V console of the second node (Hyper-V-02) no virtual machines are shown up so far.
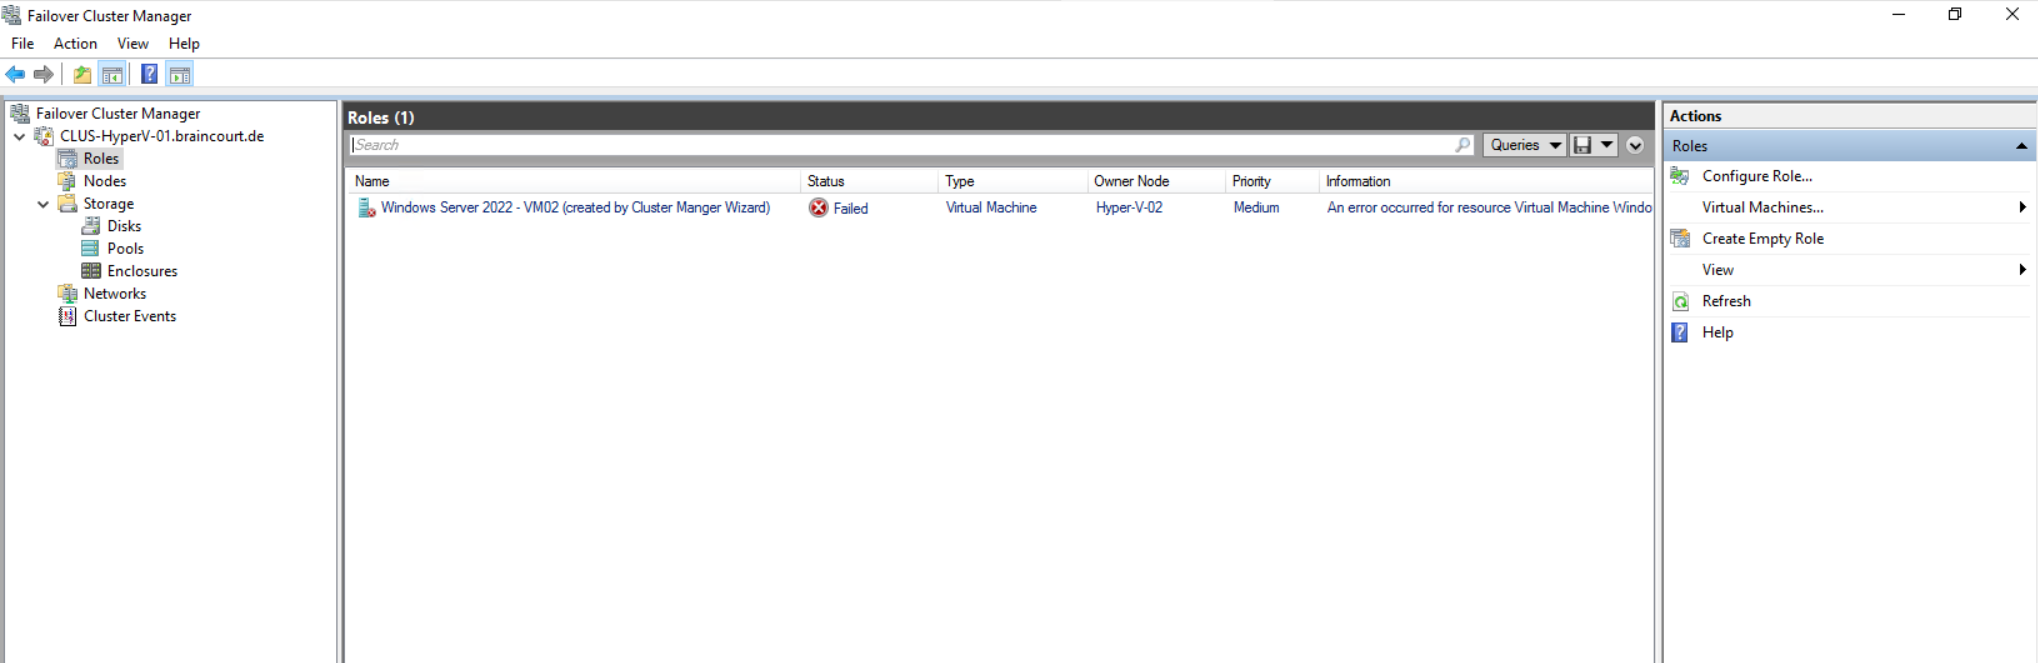
A few minutes later the virtual machine appears on the second node (Hyper-V-02) but in state off so far.

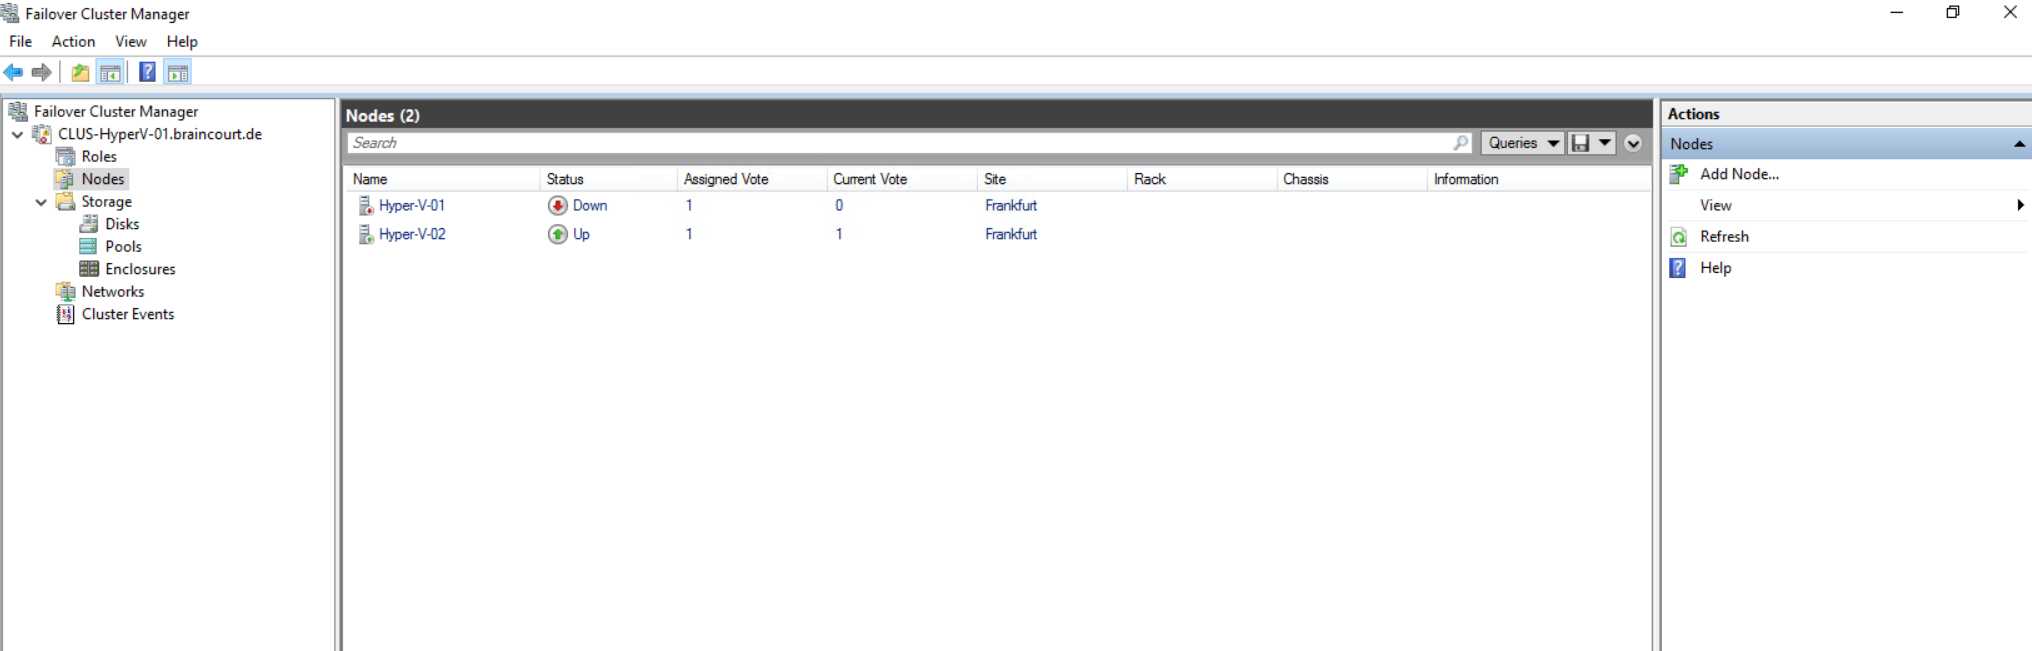
The node we turned off now is switched its state from Isolated to Down.
And the virtual machine is in state Failed.
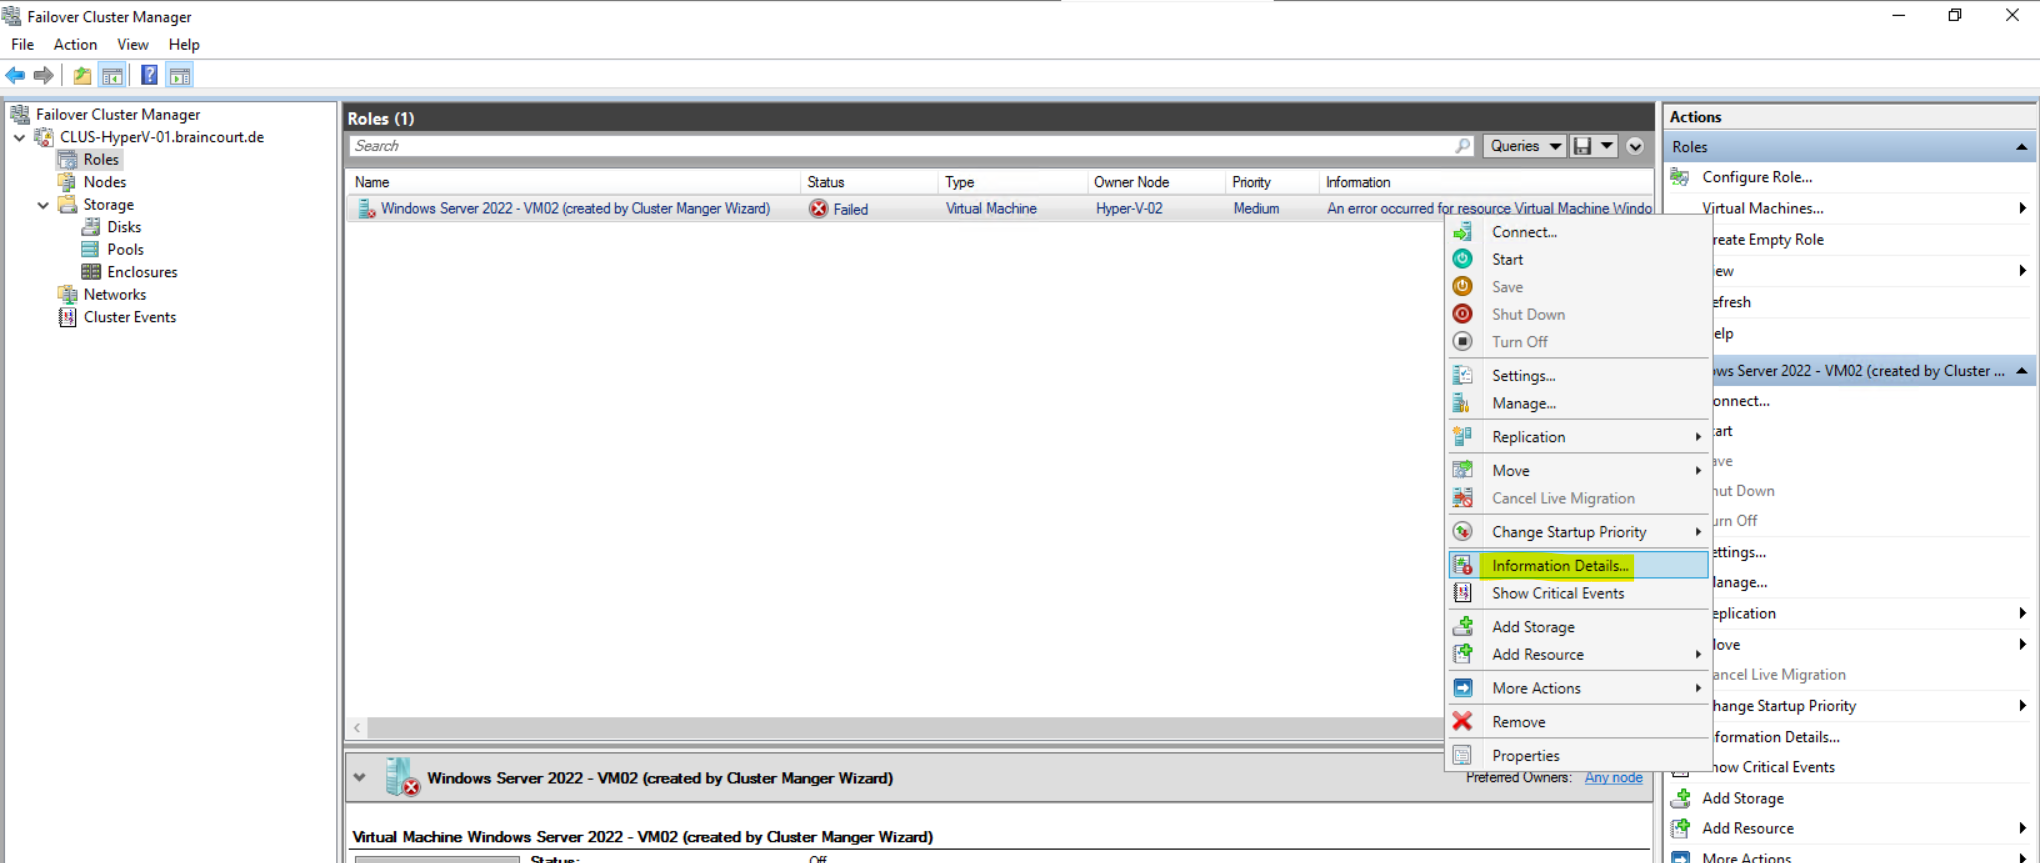
Right click on the Information column with the error and select Information Details … from the context menu.
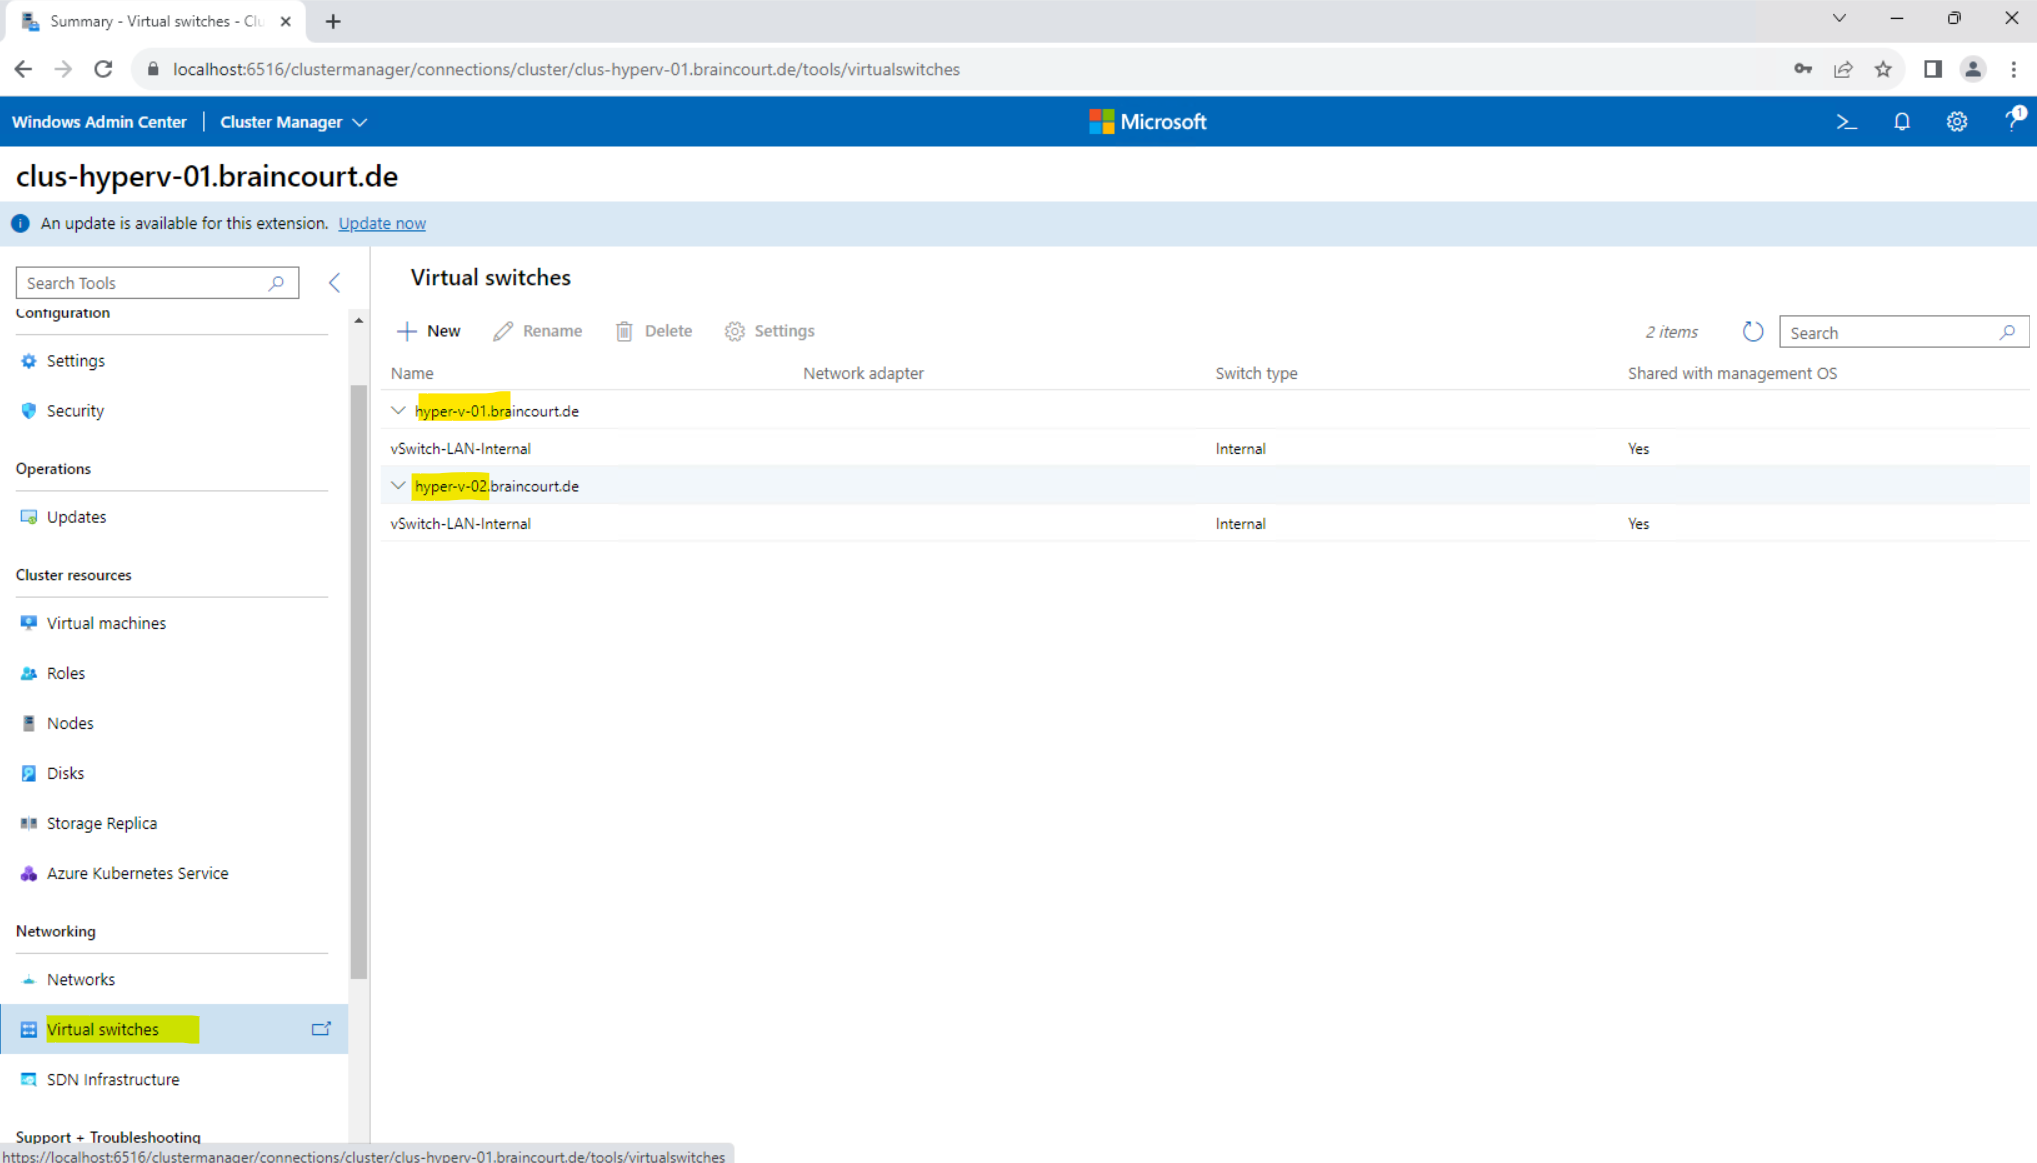
In my case here the virtual switch which the virtual machine is using on Hyper-V-01 host so far, is not configured on Hyper-V-02 and therefore cannot failover to.
Insufficient system resources exist to complete the requested service.
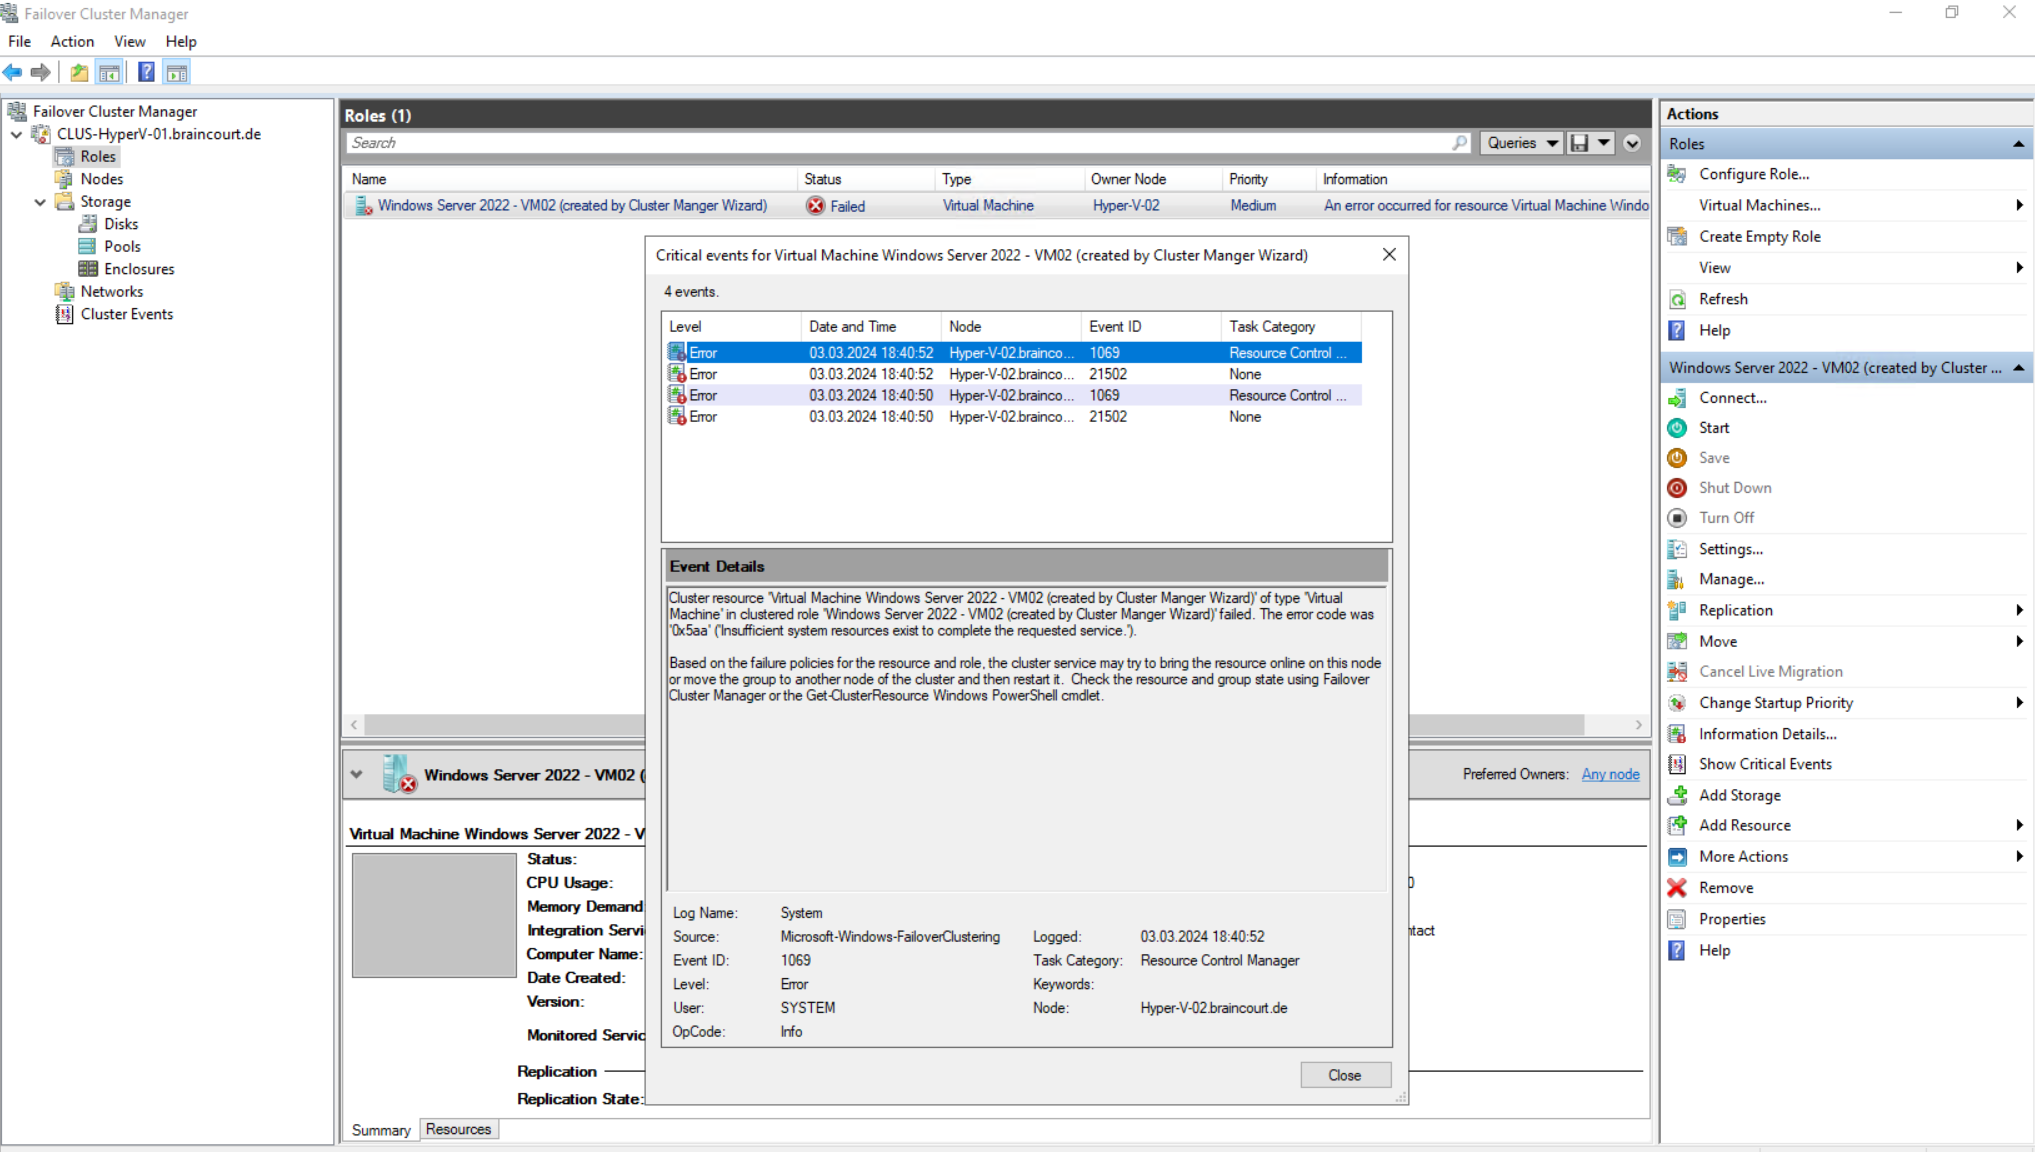
So I will first create the virtual switch which is using the virtual machine also on the second Hyper-V host (node).
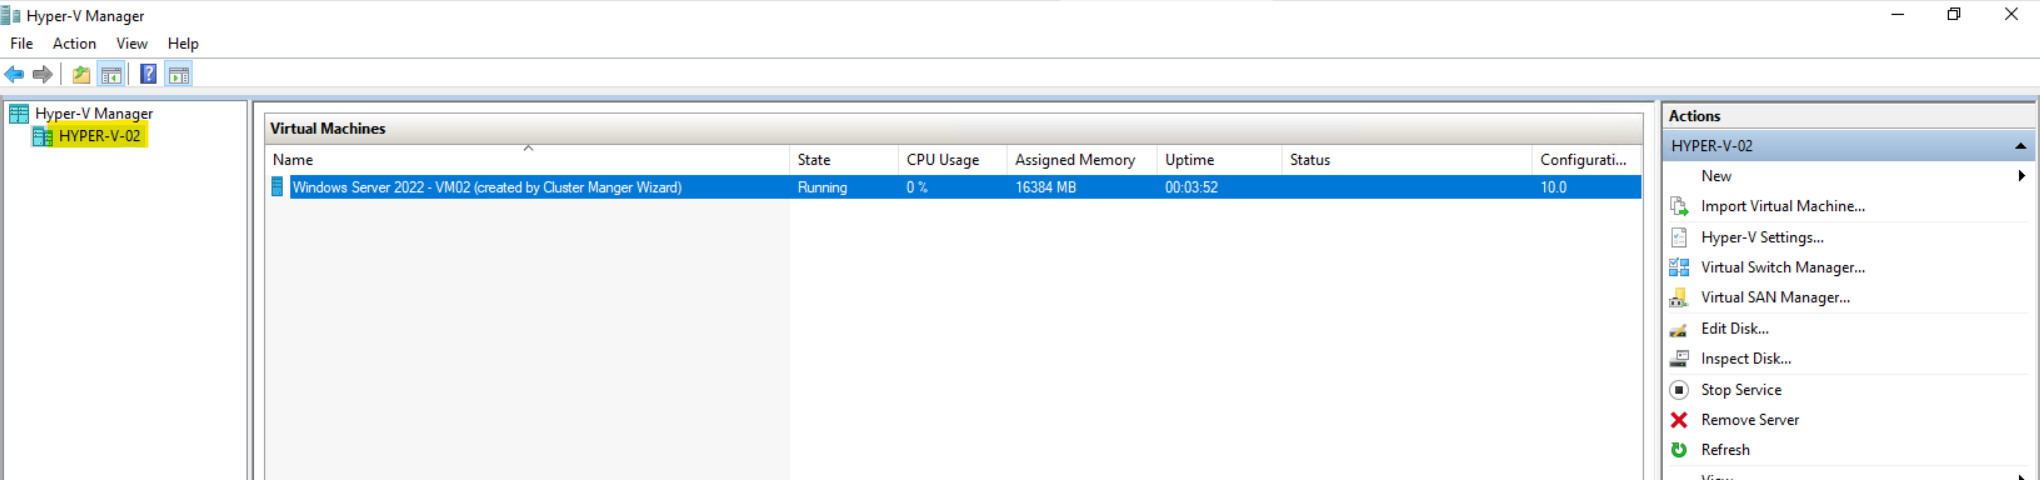
Now I will try the same as previously by turning off the Hyper-V-01 node where the virtual machine is running at the moment. The vSwitch the virtual machine is using is now created on both hosts.
Now it works and the virtual machine is started successfully a few minutes later after turning off the first node on the second node Hyper-V-02.
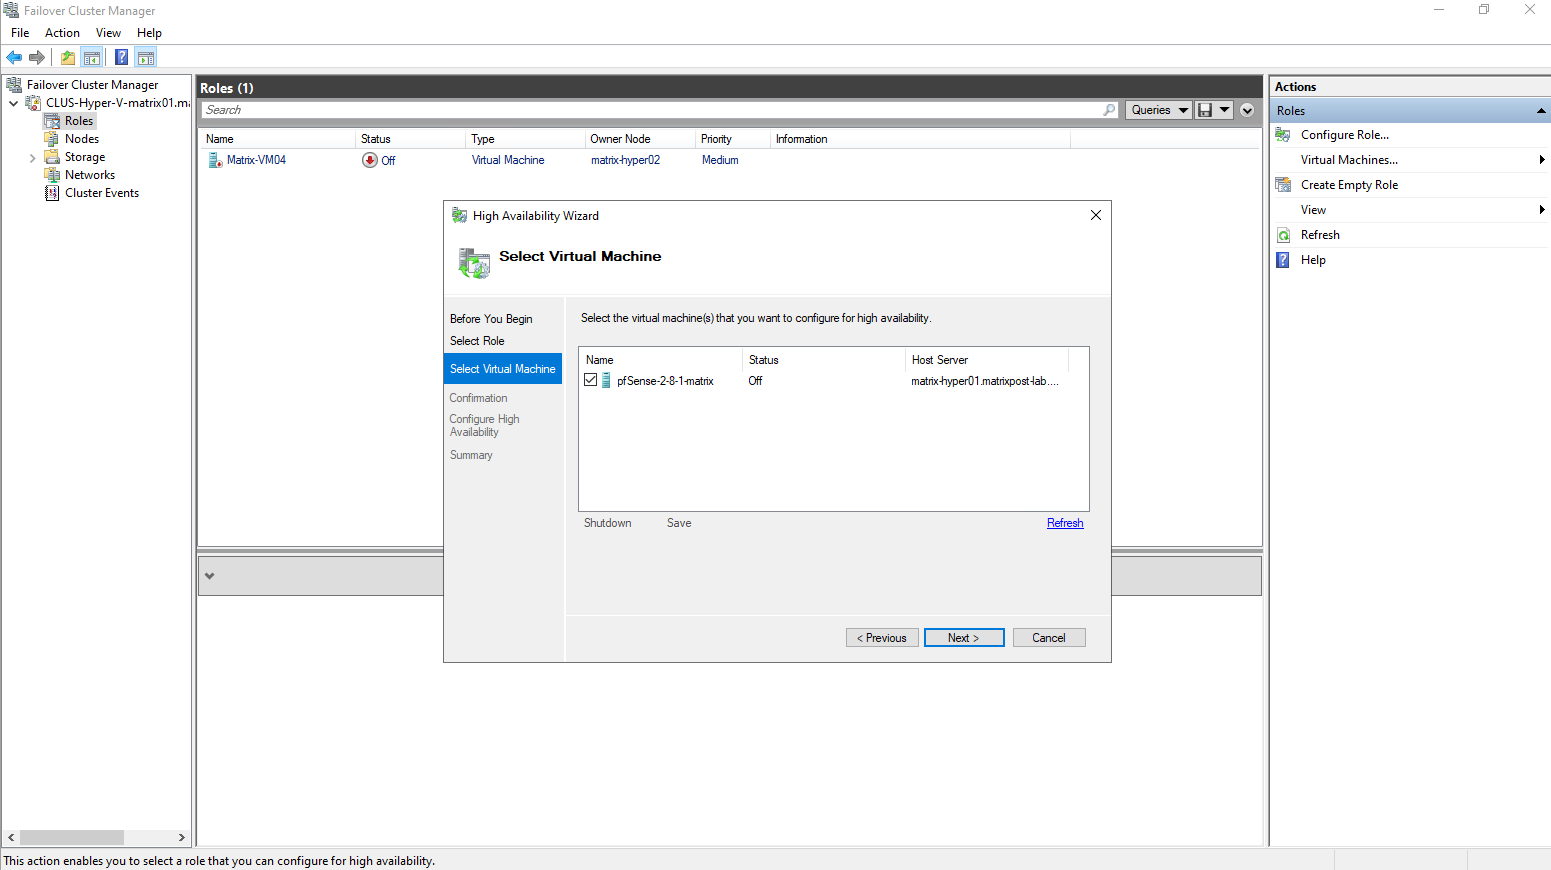
Or as mentioned we can add already created virtual machines outside the failover cluster manager adding as new role to configure for high availability.
On the Failover Cluster Manger click on Roles -> Configure Role … and select Virtual Machine as shown below.

In the next dialog just virtual machines for which we not already high availability have configured will appear to select.

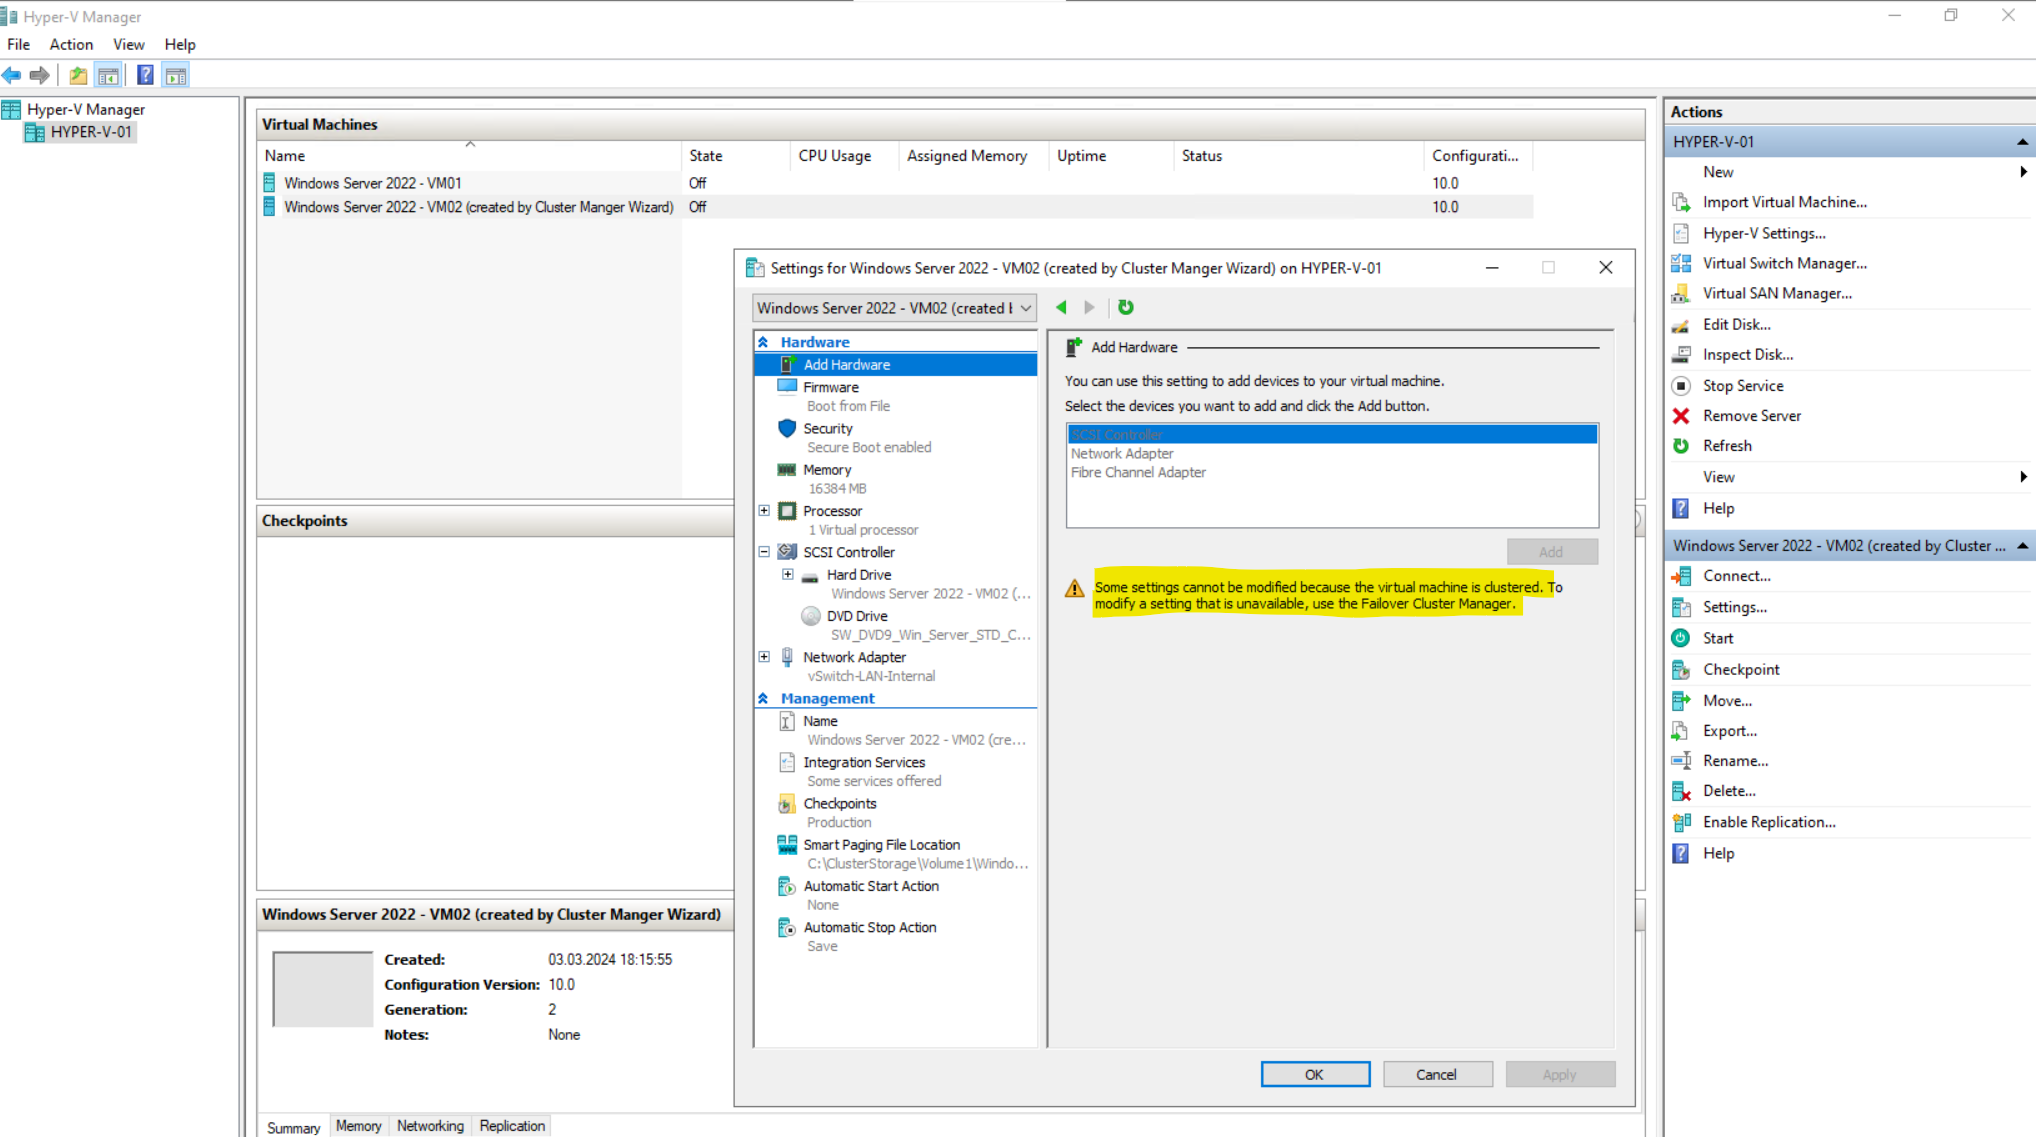
Modify Settings for a clustered Virtual Machine
To modify settings we need to use the Failover Cluster Manager for clustered virtual machines.
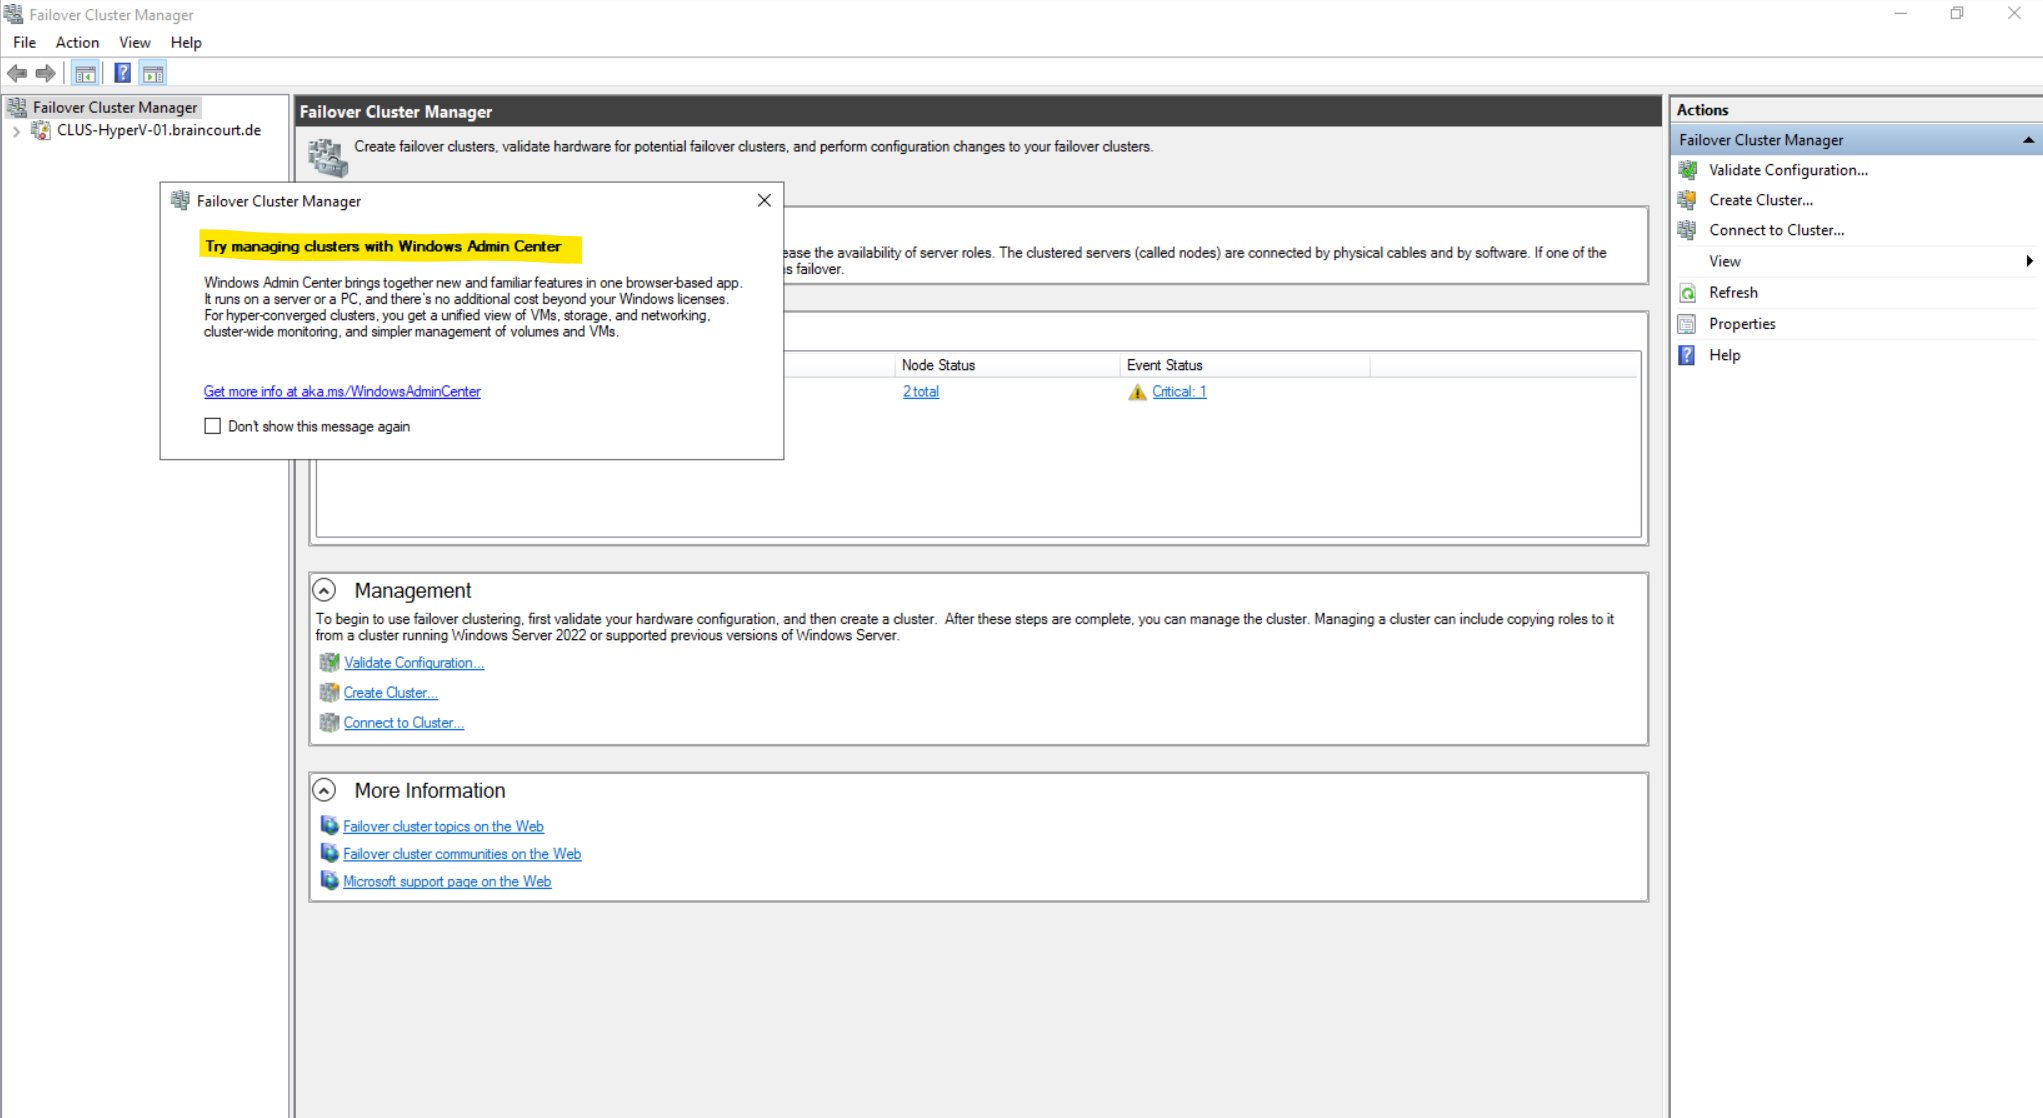
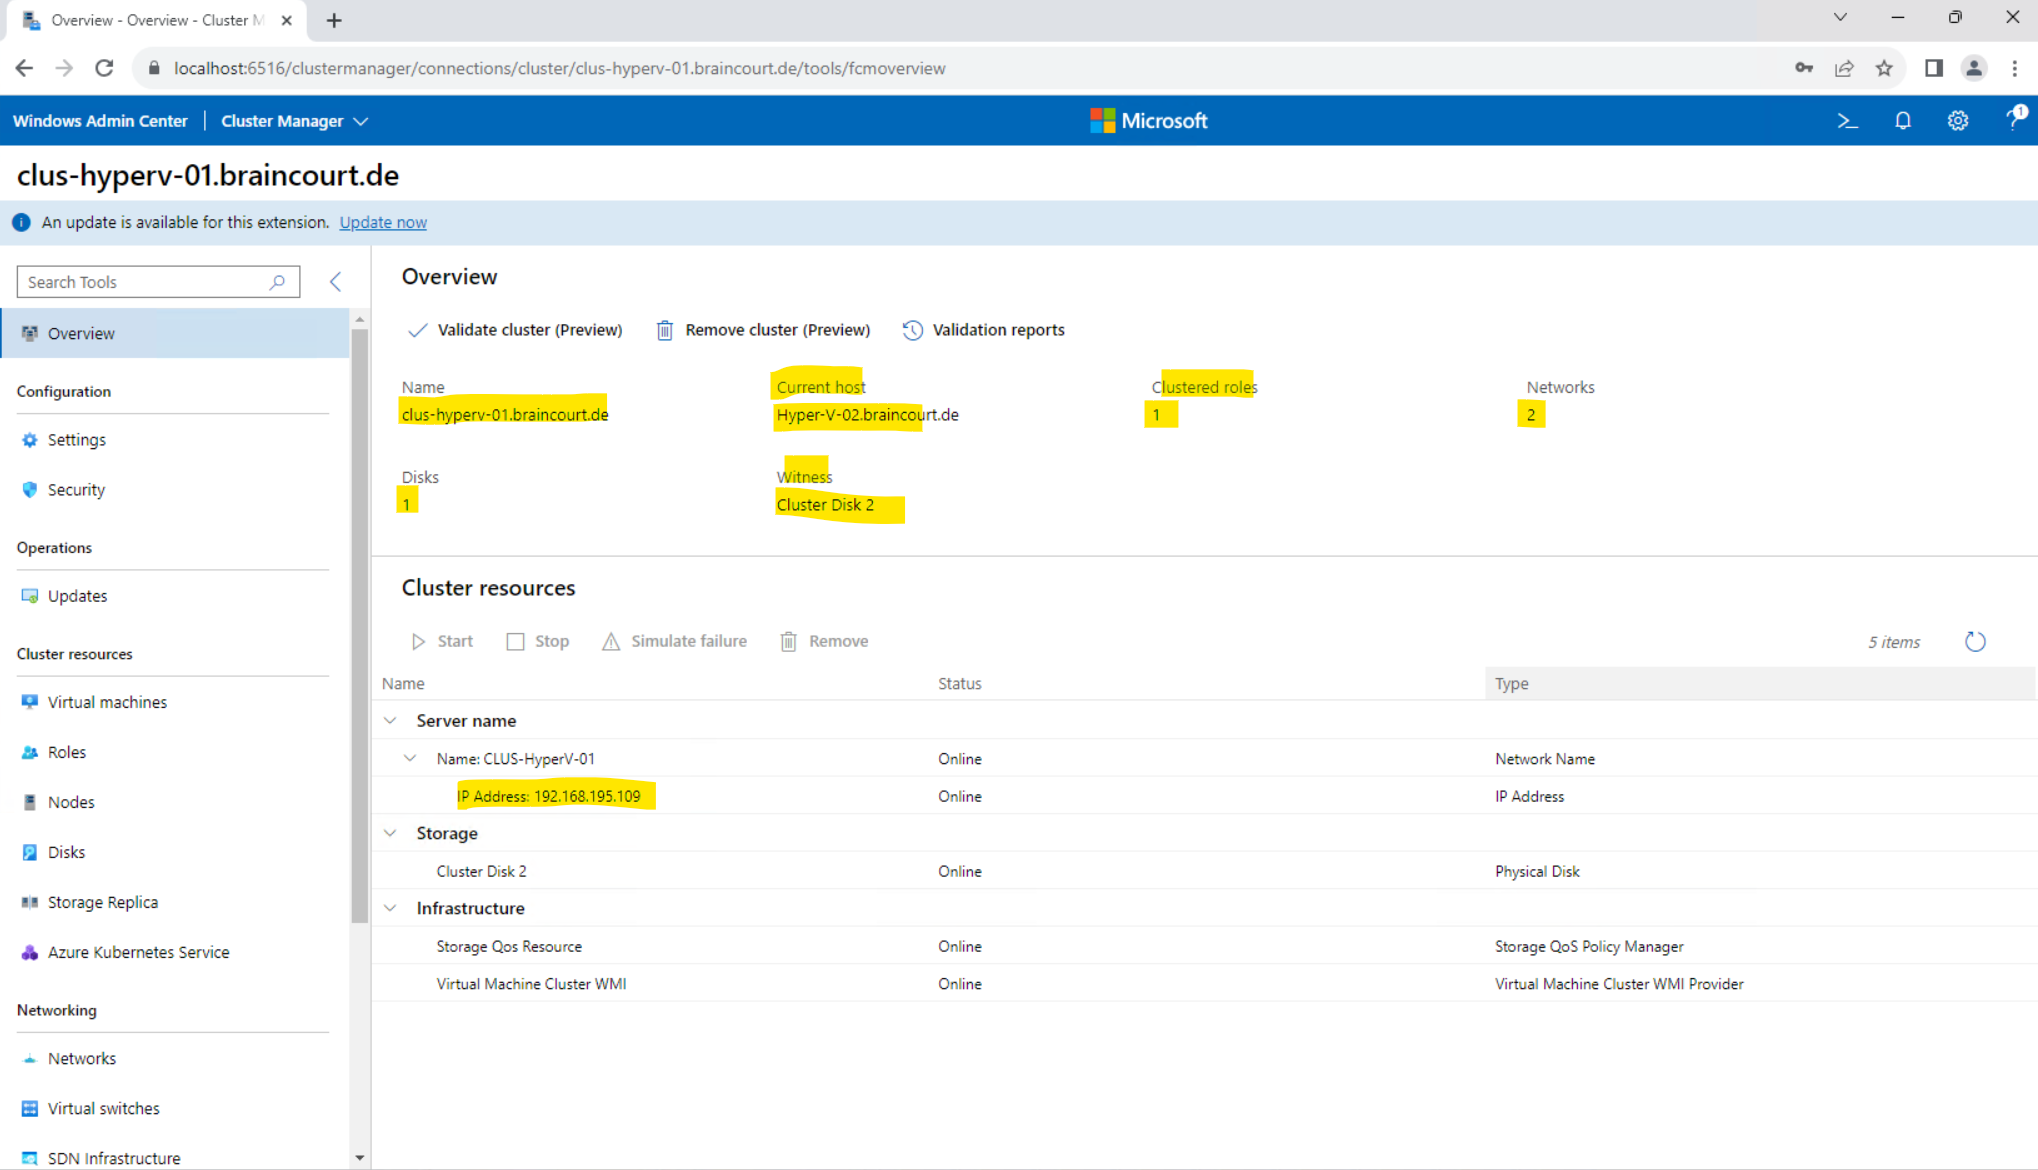
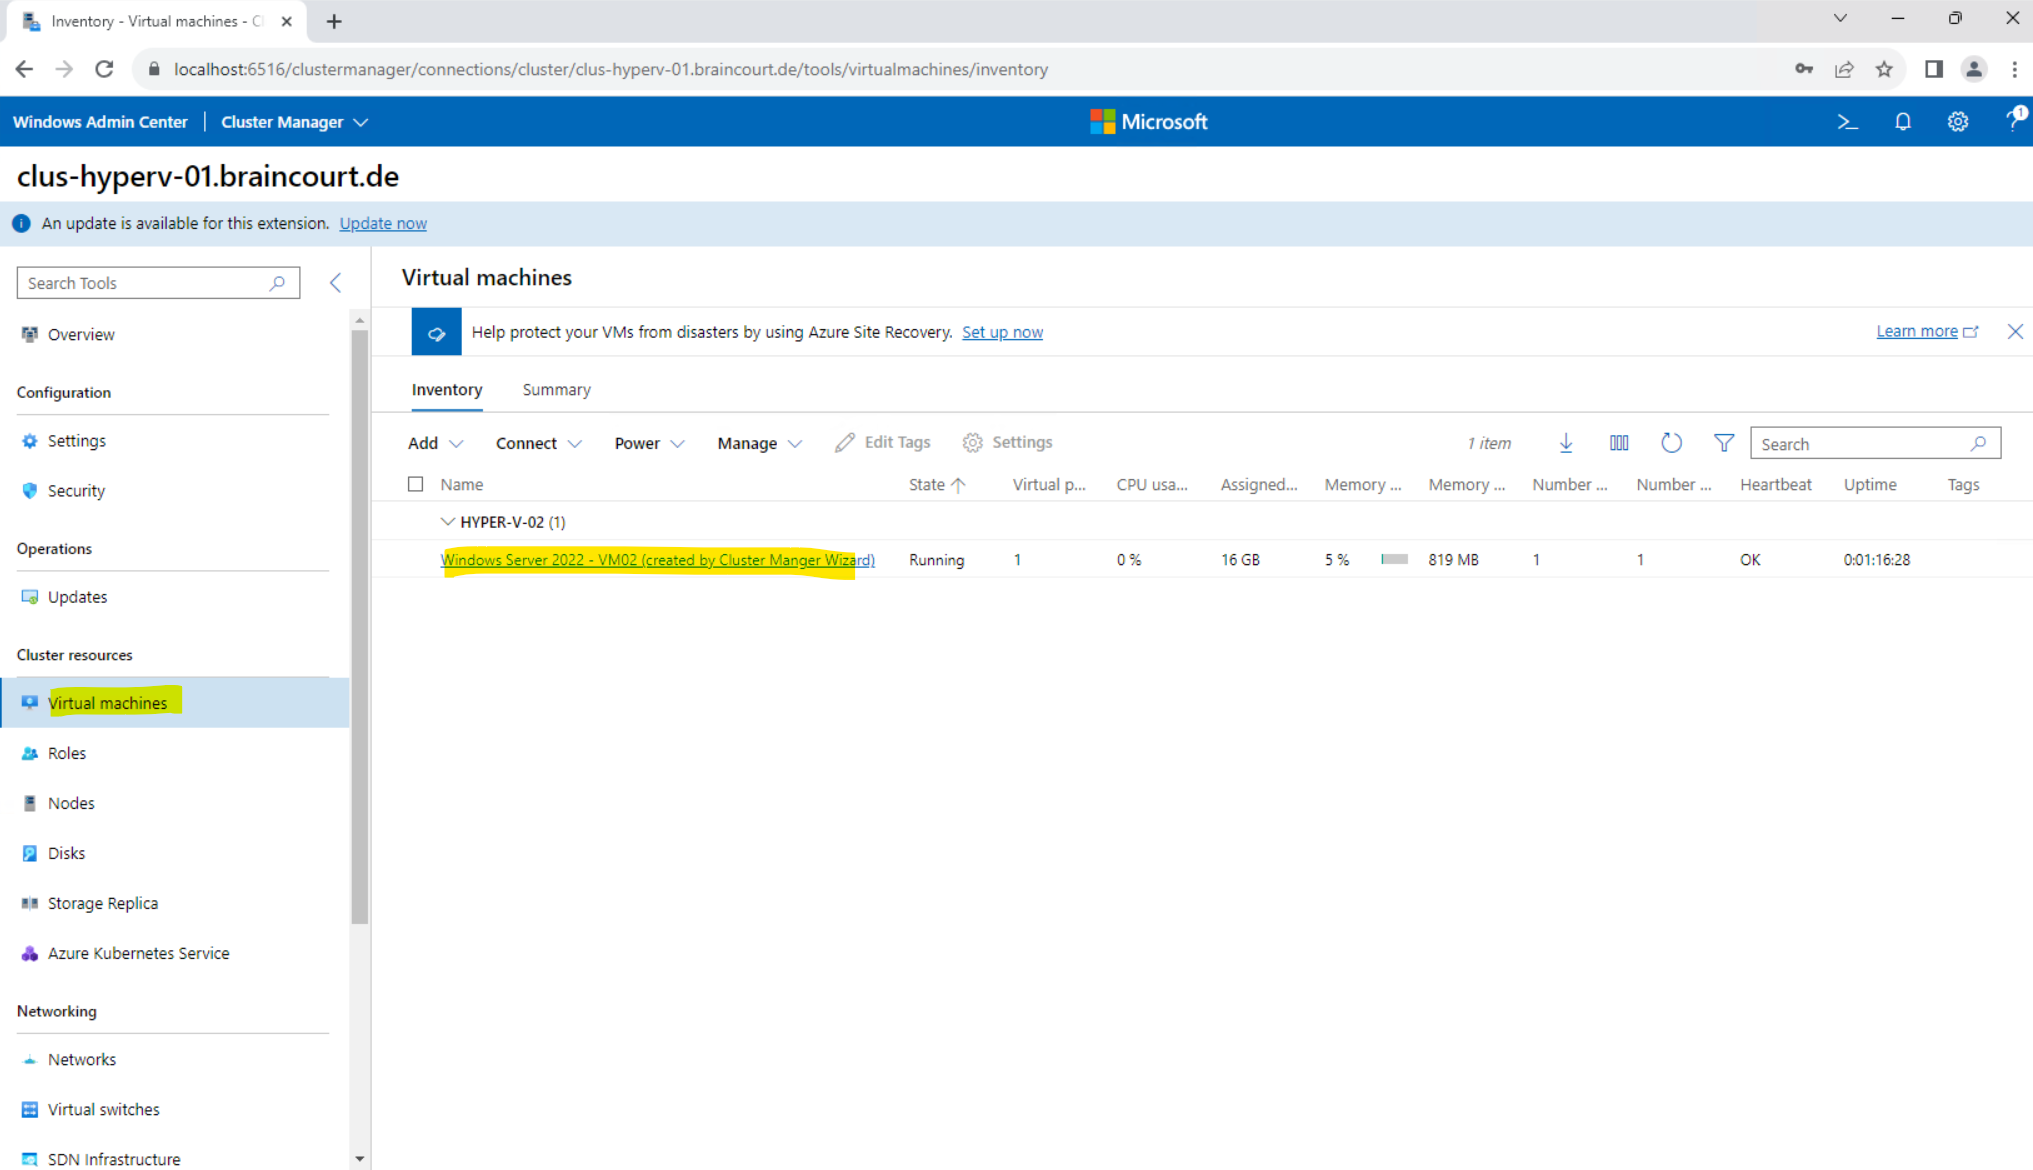
Using Windows Admin Center to managing Clusters
We can also use the Windows Admin Center to manage our Hyper-V cluster.
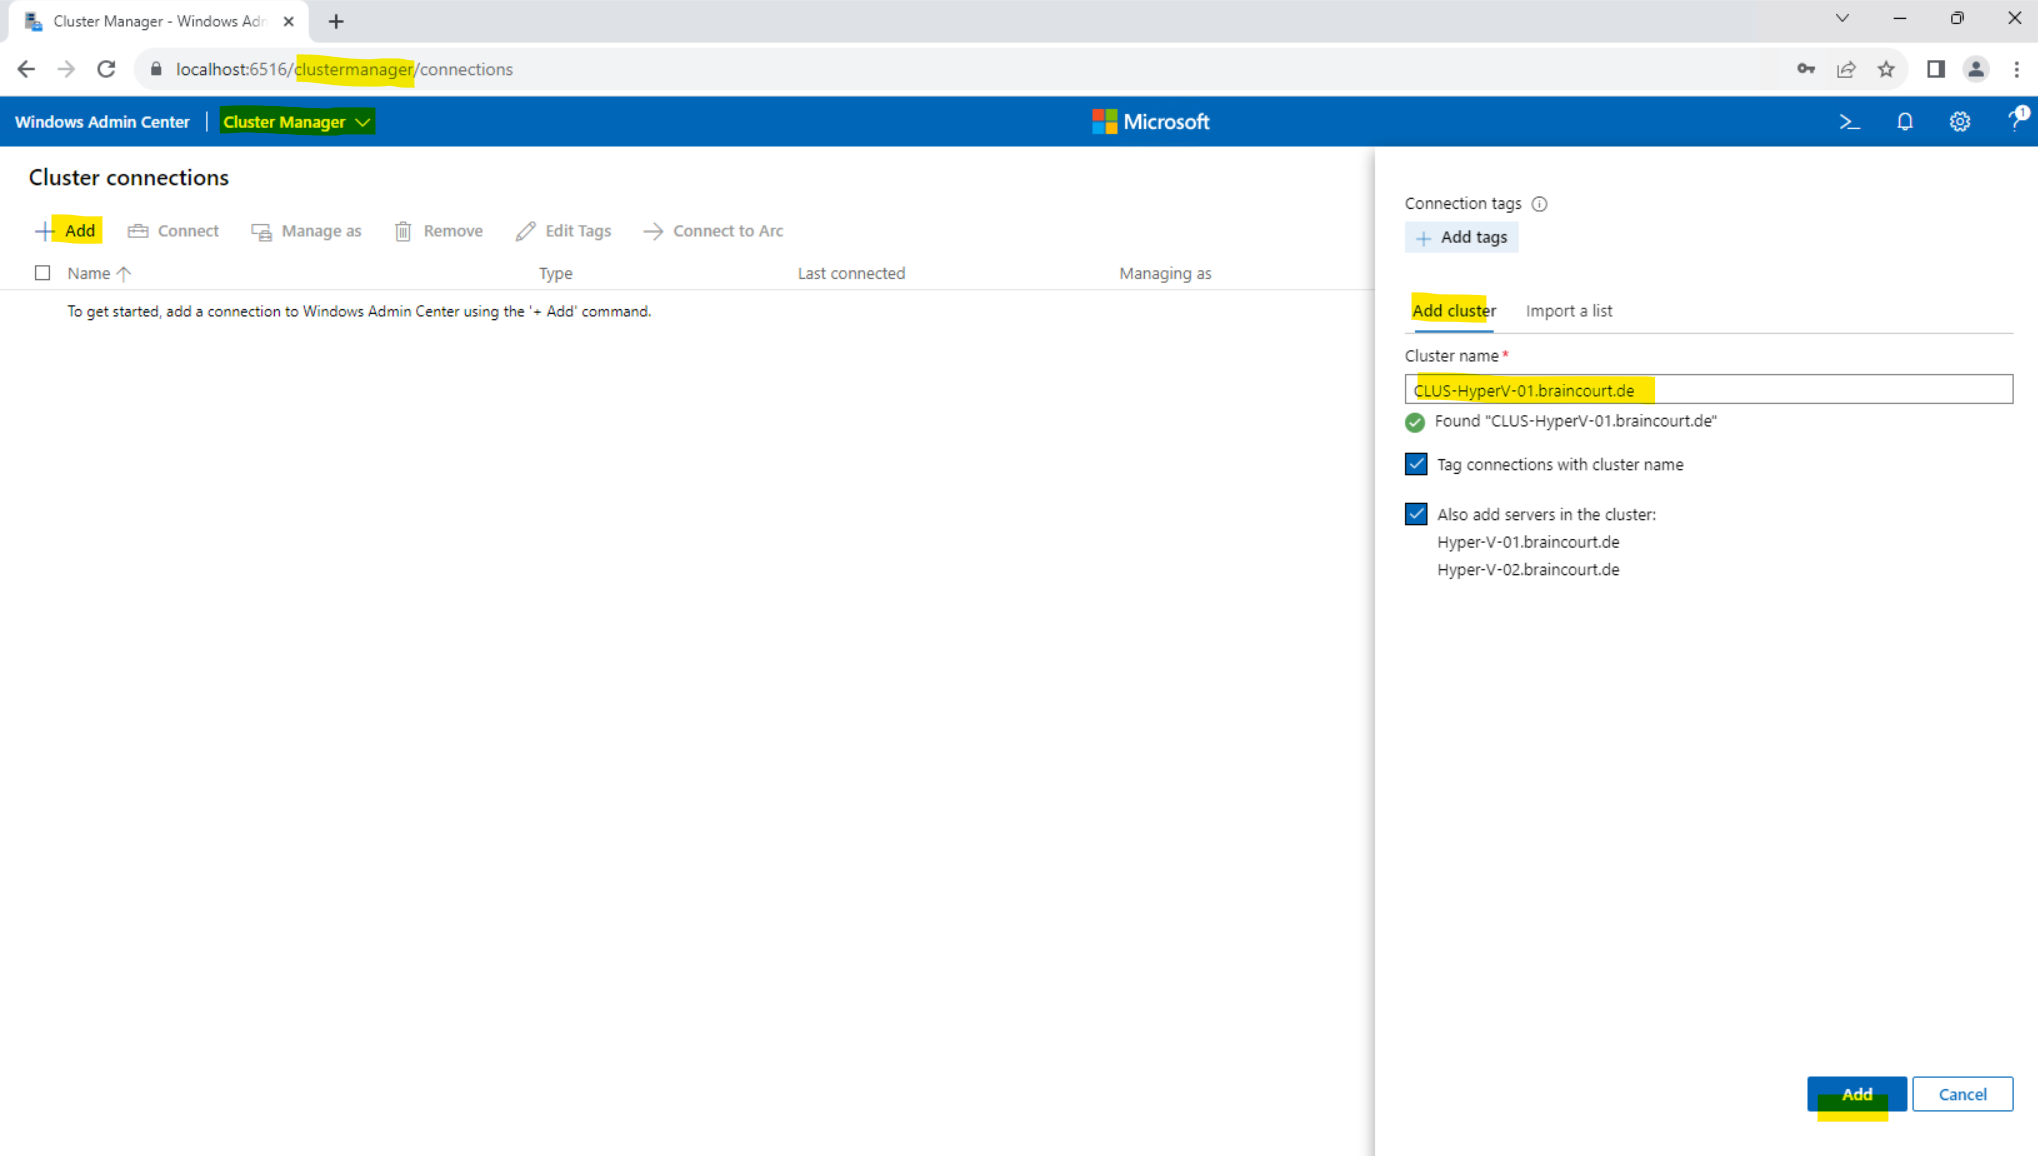
First we need to add our new cluster in the Windows Admin Center, therefore select the Cluster Manager in the selection on the left top and click on Add. For the cluster name we can use the hostname, FQDN or the IP address, I will use here the FQDN of my cluster.


Using PowerShell to managing Clusters
This reference provides cmdlet descriptions and syntax for all failover cluster-specific cmdlets. It lists the cmdlets in alphabetical order based on the verb at the beginning of the cmdlet. If these cmdlets aren’t available in your PowerShell session, you may need to add the Failover Cluster Module for Windows PowerShell Feature, using the following PowerShell cmd: Add-WindowsFeature RSAT-Clustering-PowerShell.
Source: https://learn.microsoft.com/en-us/powershell/module/failoverclusters
Show information about one or more failover clusters in a given domain
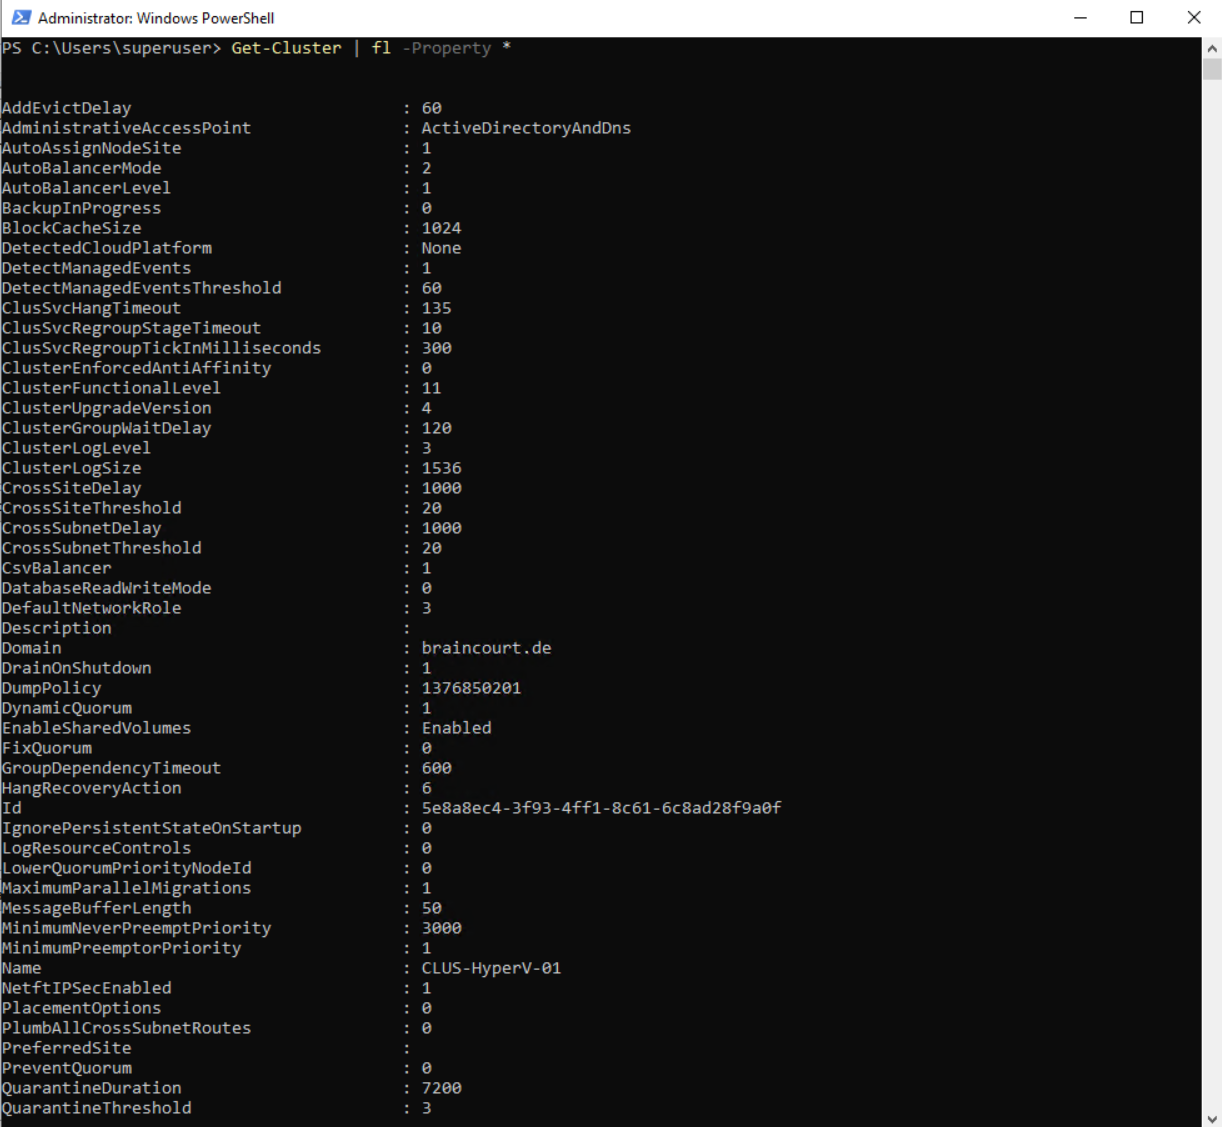
Get-Cluster | Format-List -Property *
This example displays state and property information for the local cluster in the form of a list.
Show information about the quorum configuration of a failover cluster
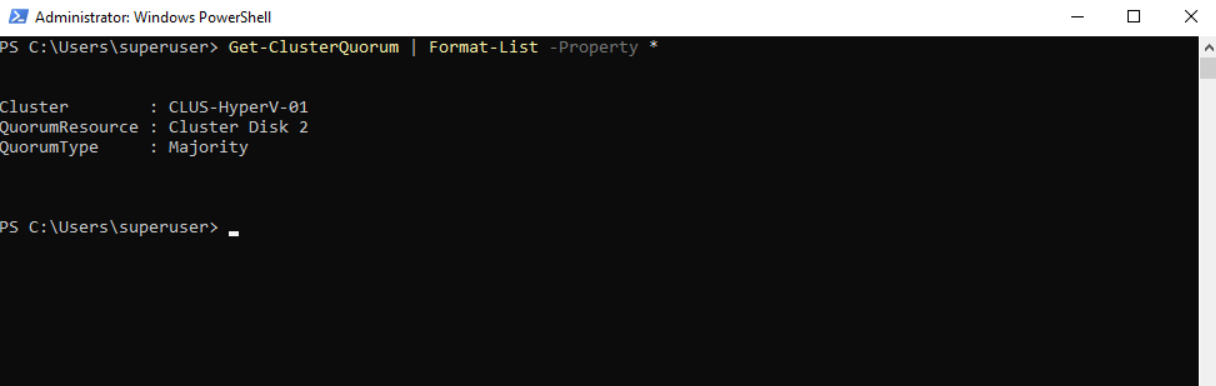
Get-ClusterQuorum | Format-List -Property *
This example displays the quorum configuration for the local cluster.
More cmdlets you will find in the following Microsoft article https://learn.microsoft.com/en-us/powershell/module/failoverclusters.
Troubleshooting
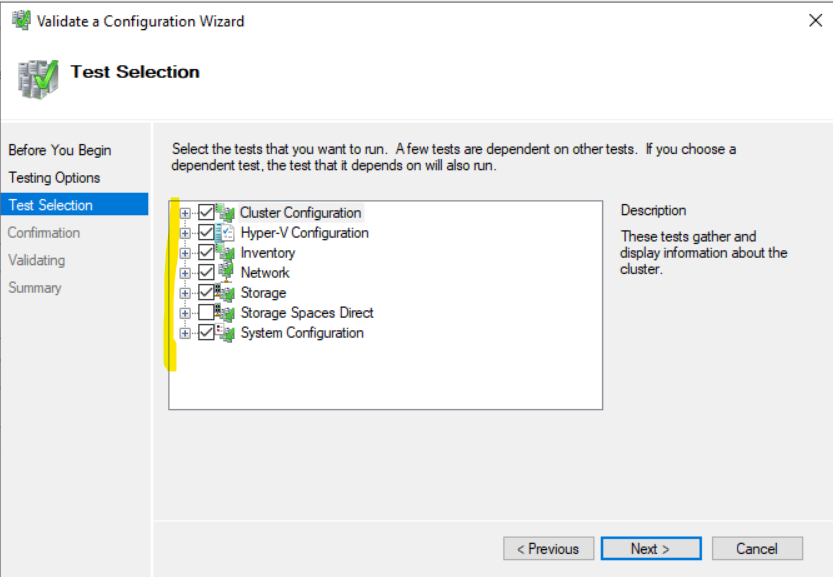
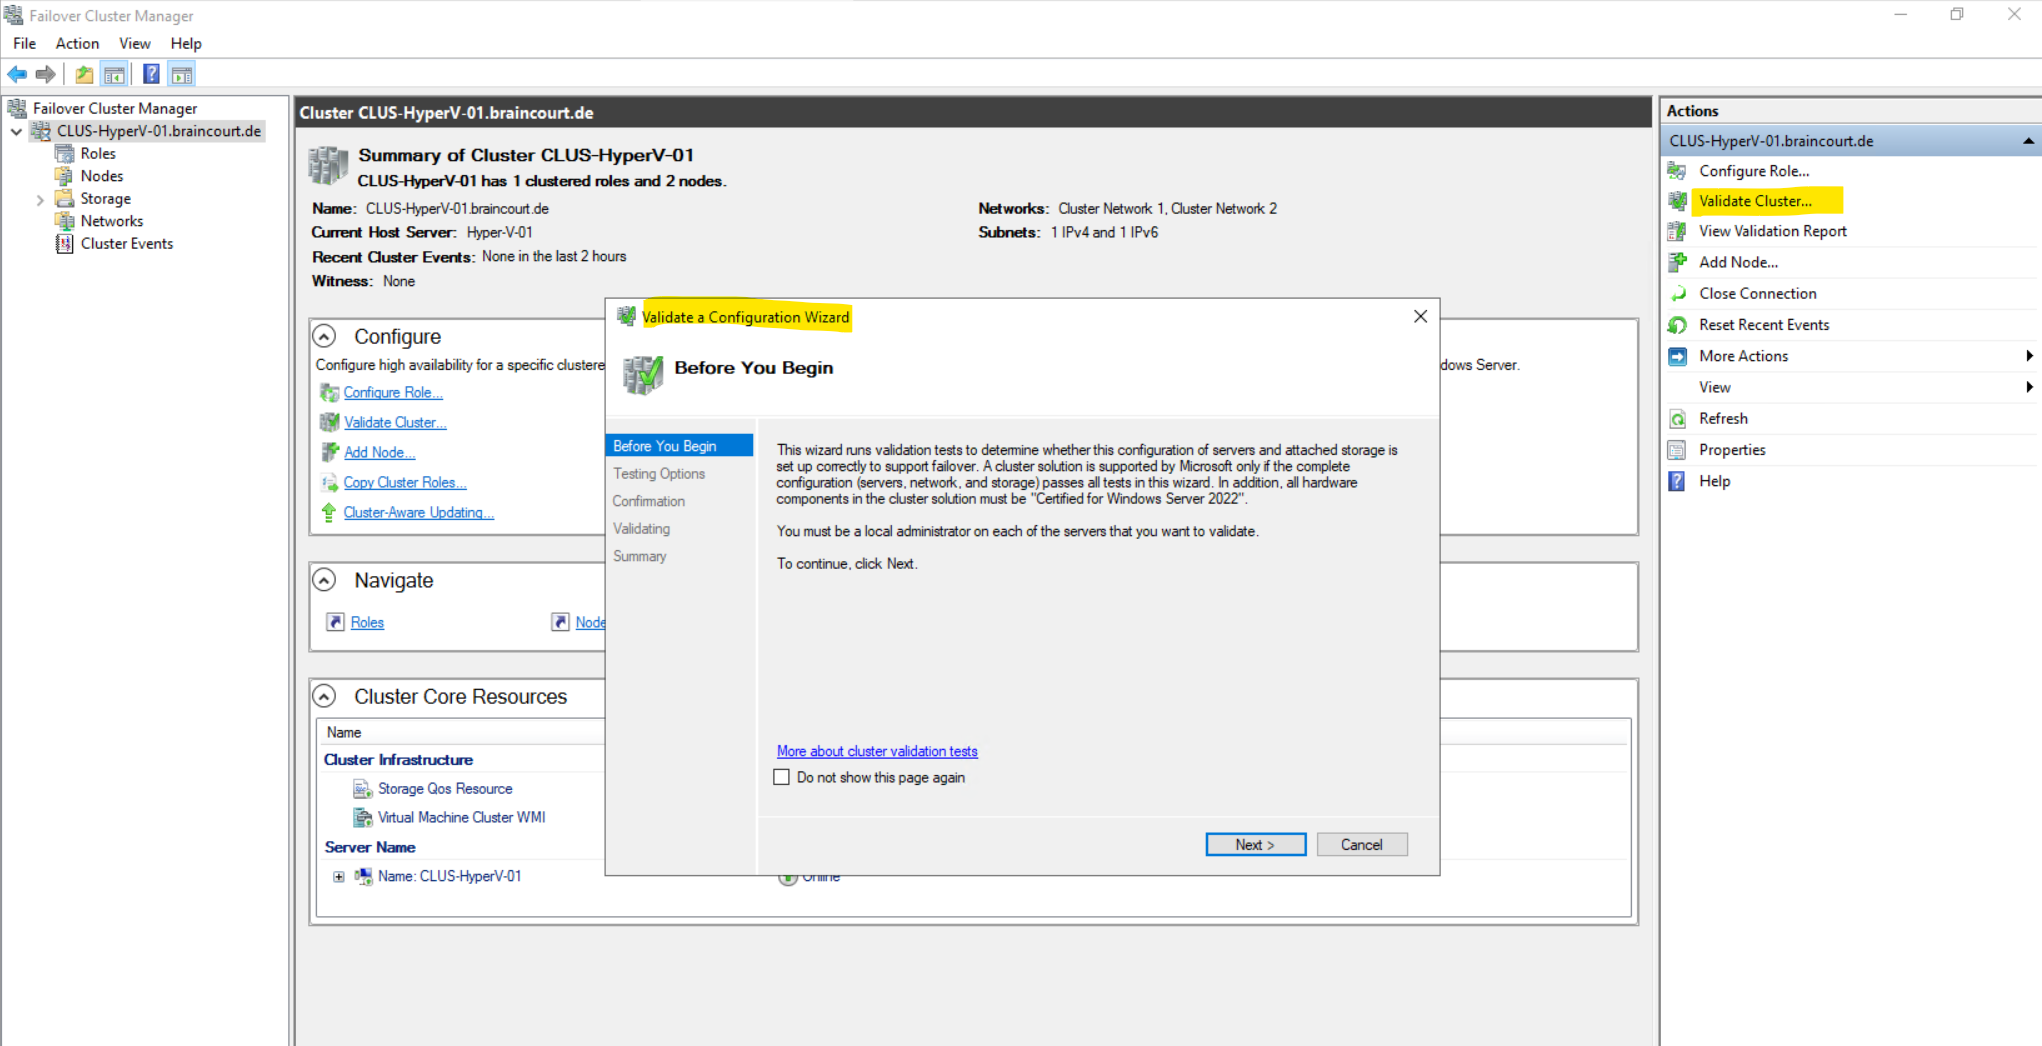
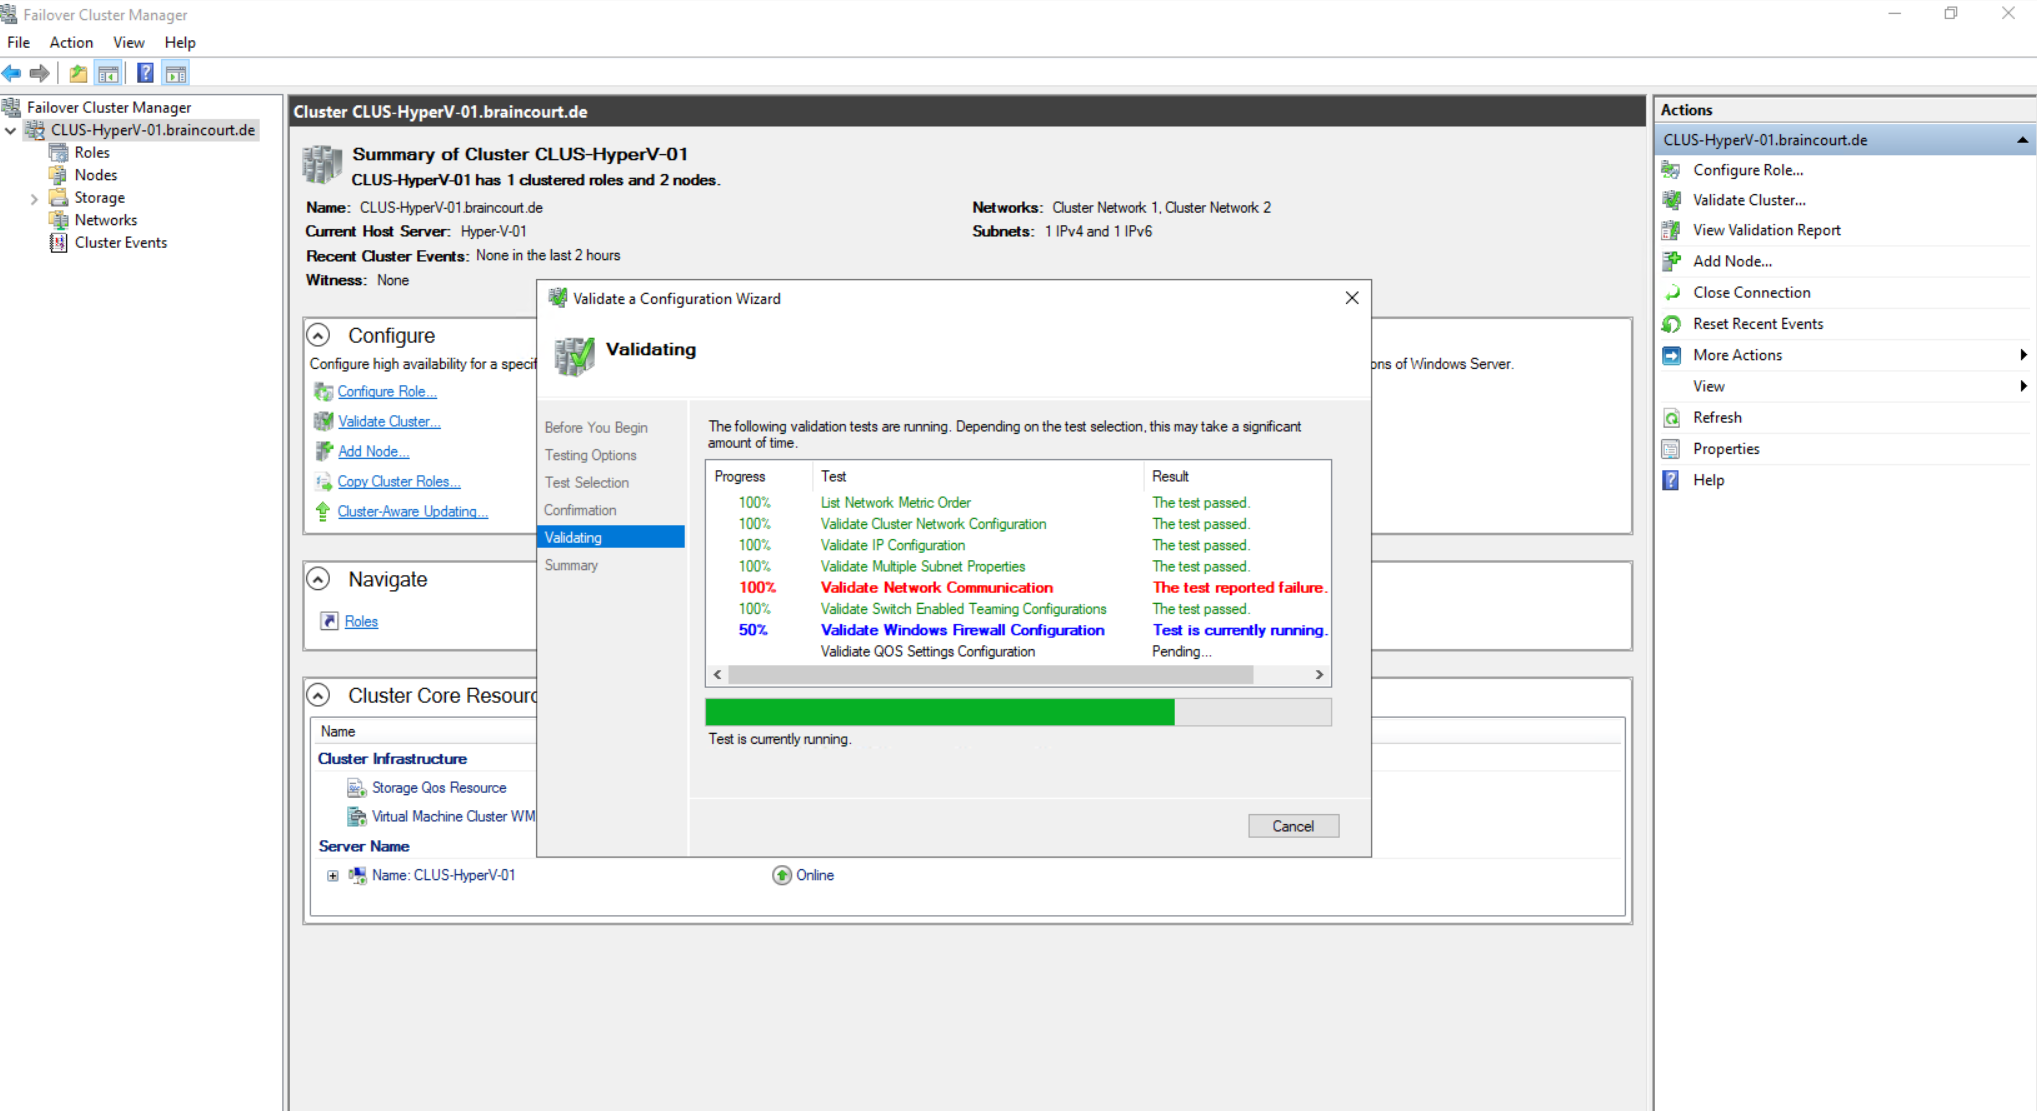
To troubleshoot in general you can use the Validate a Configuration wizard to check all components of the cluster.
Click on Validate Cluster … in order to run the Validate a Configuration wizard.

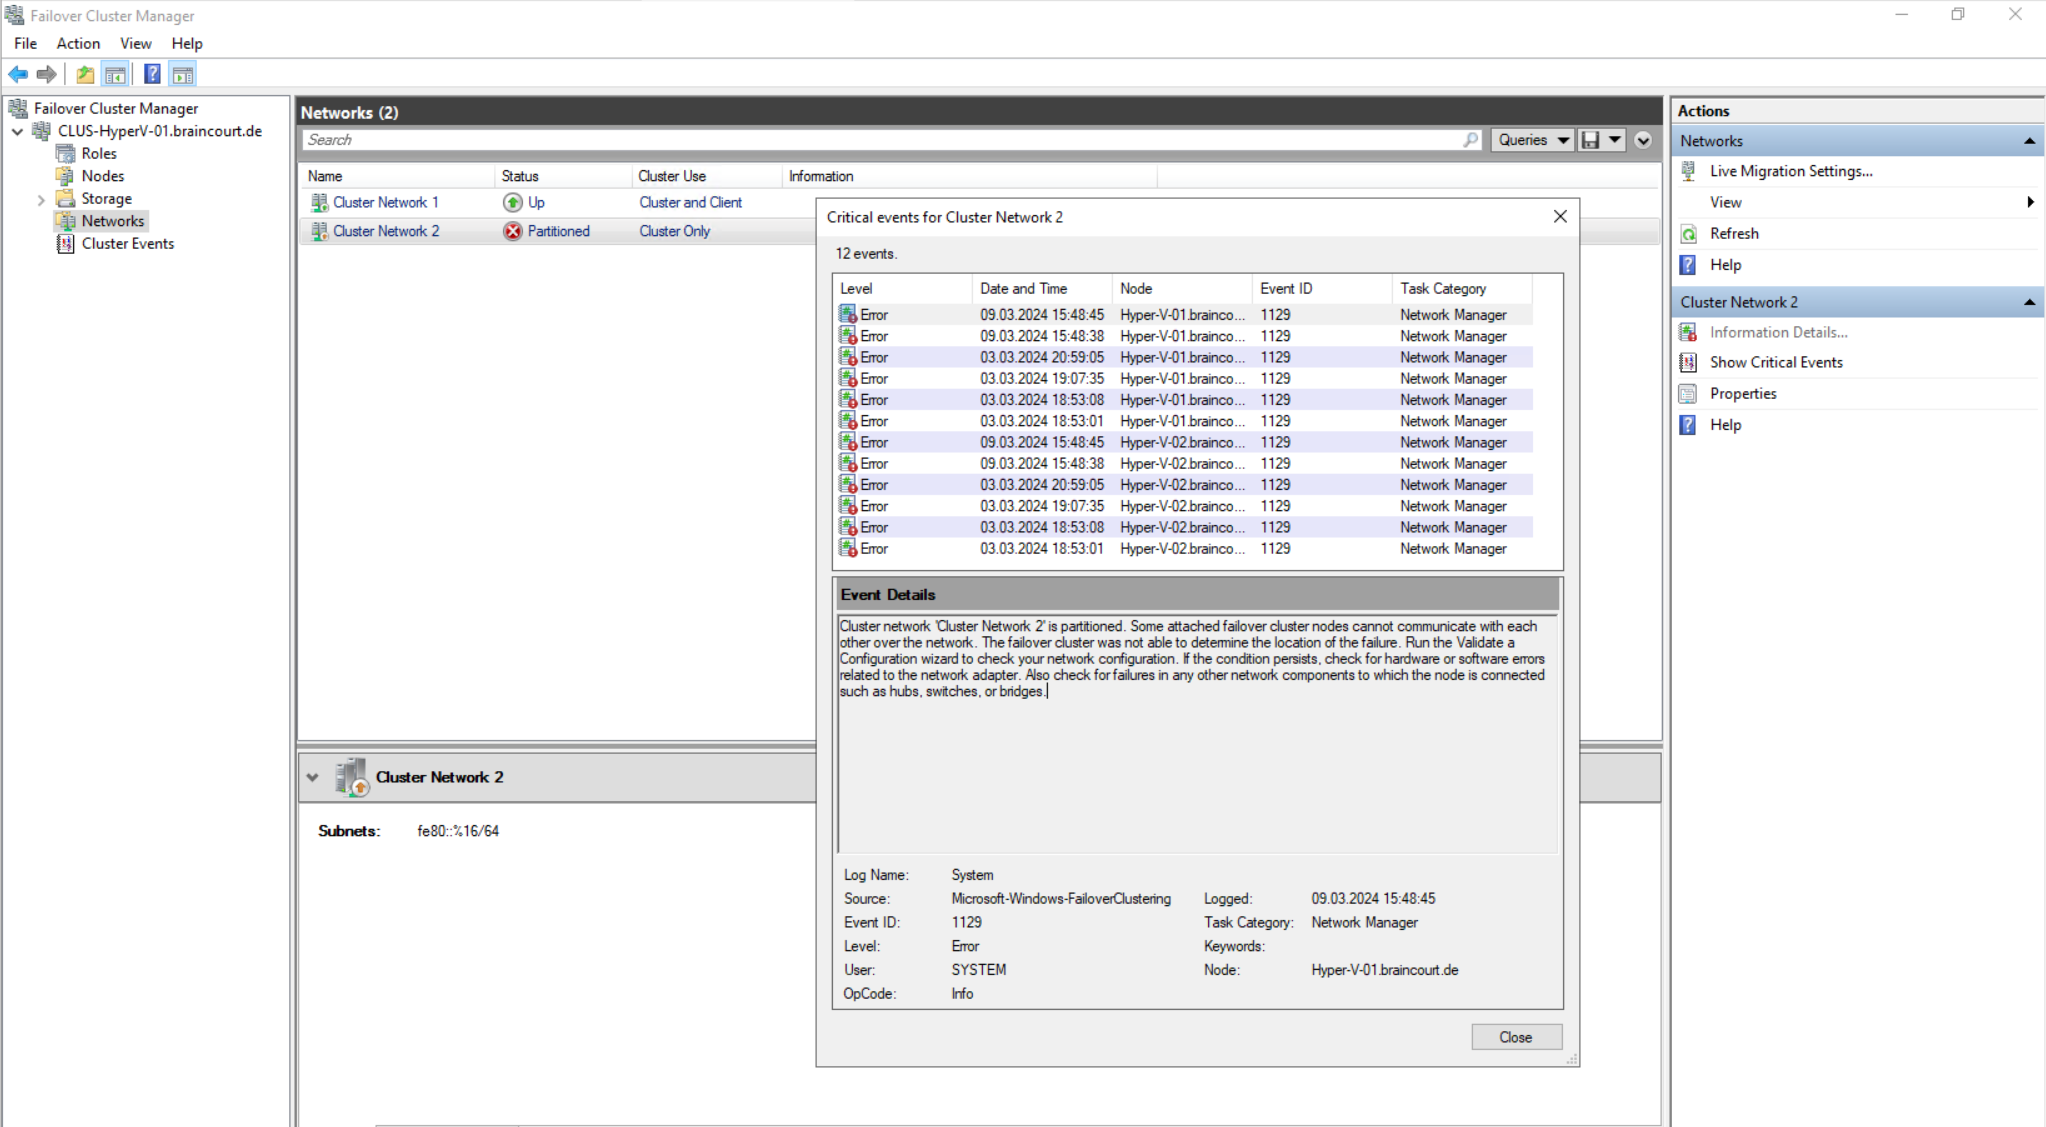
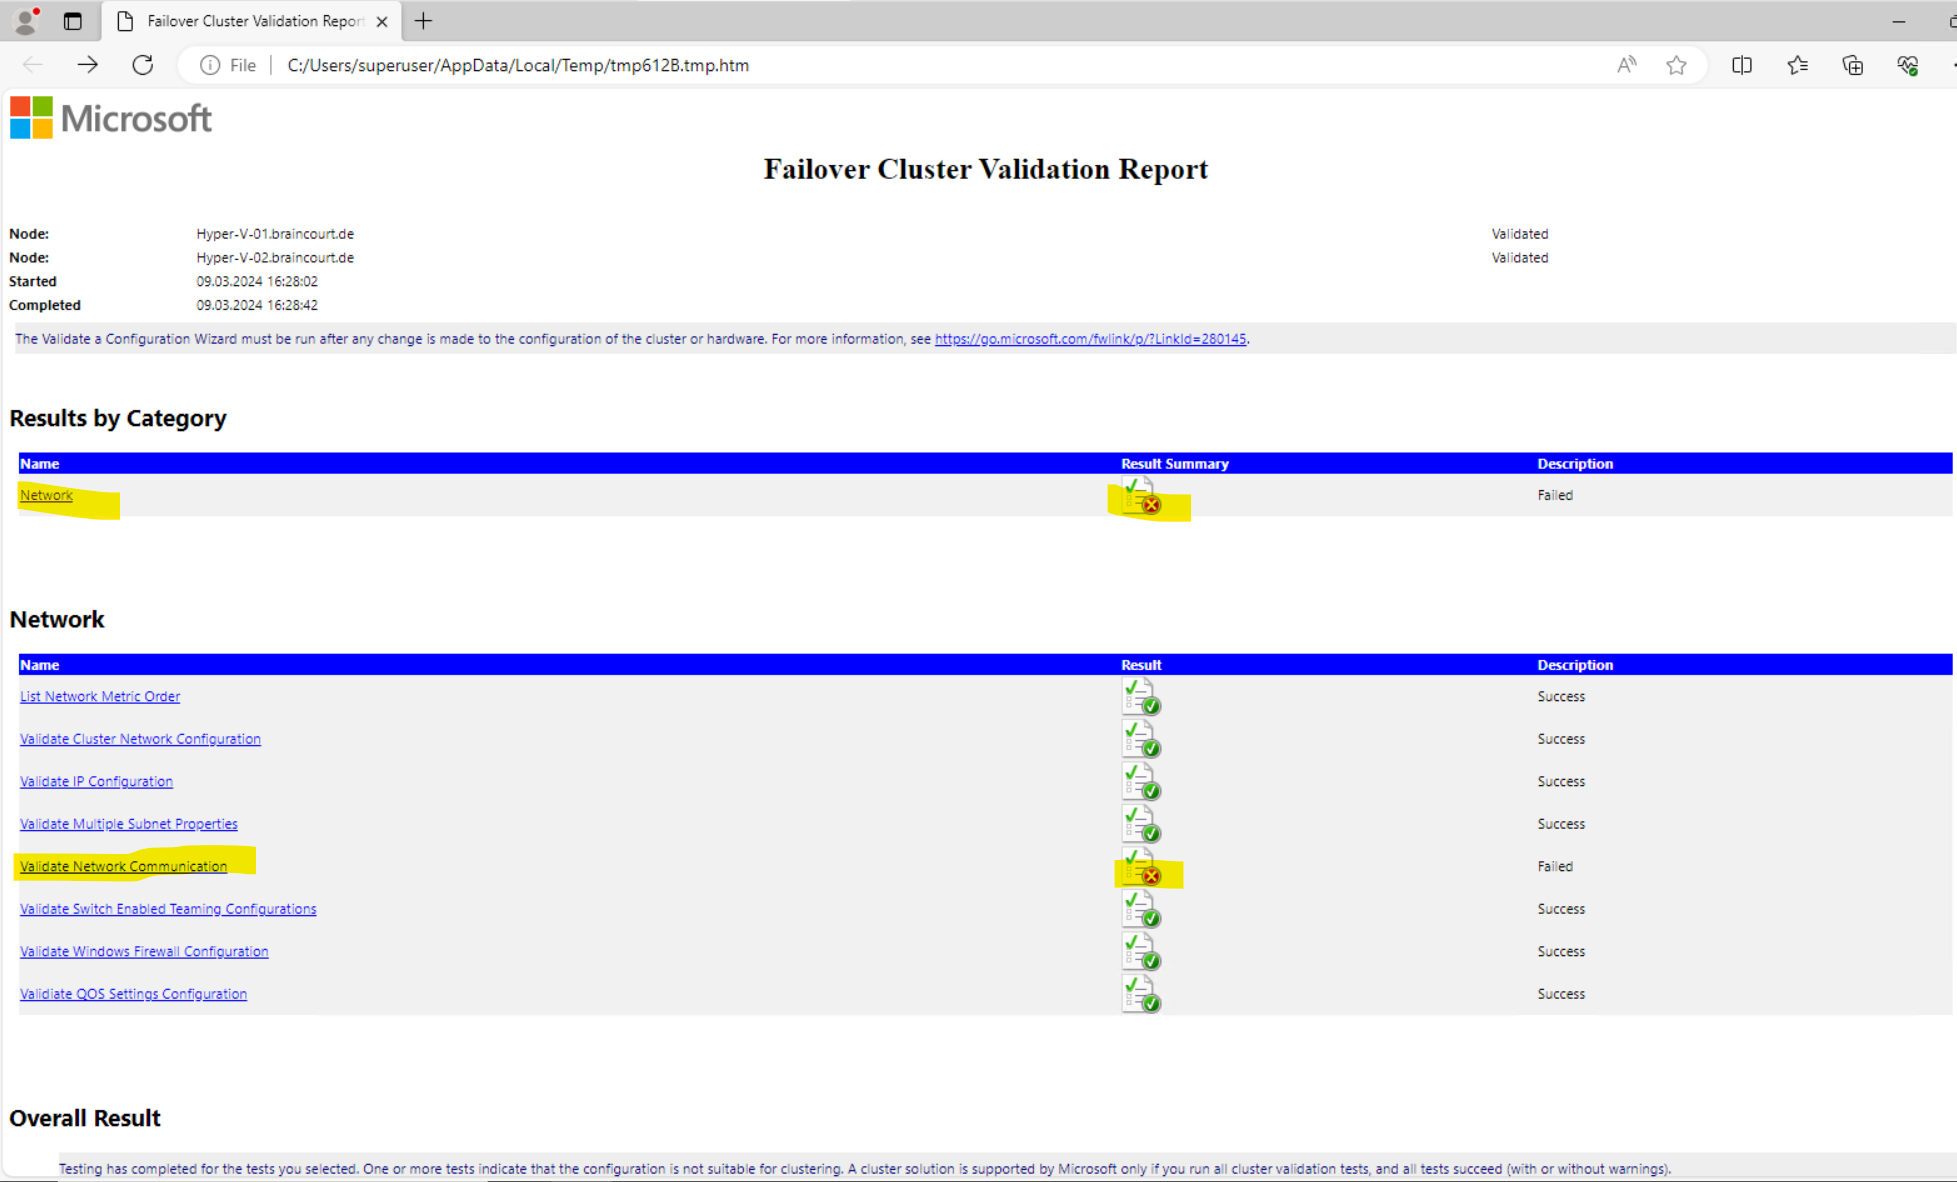
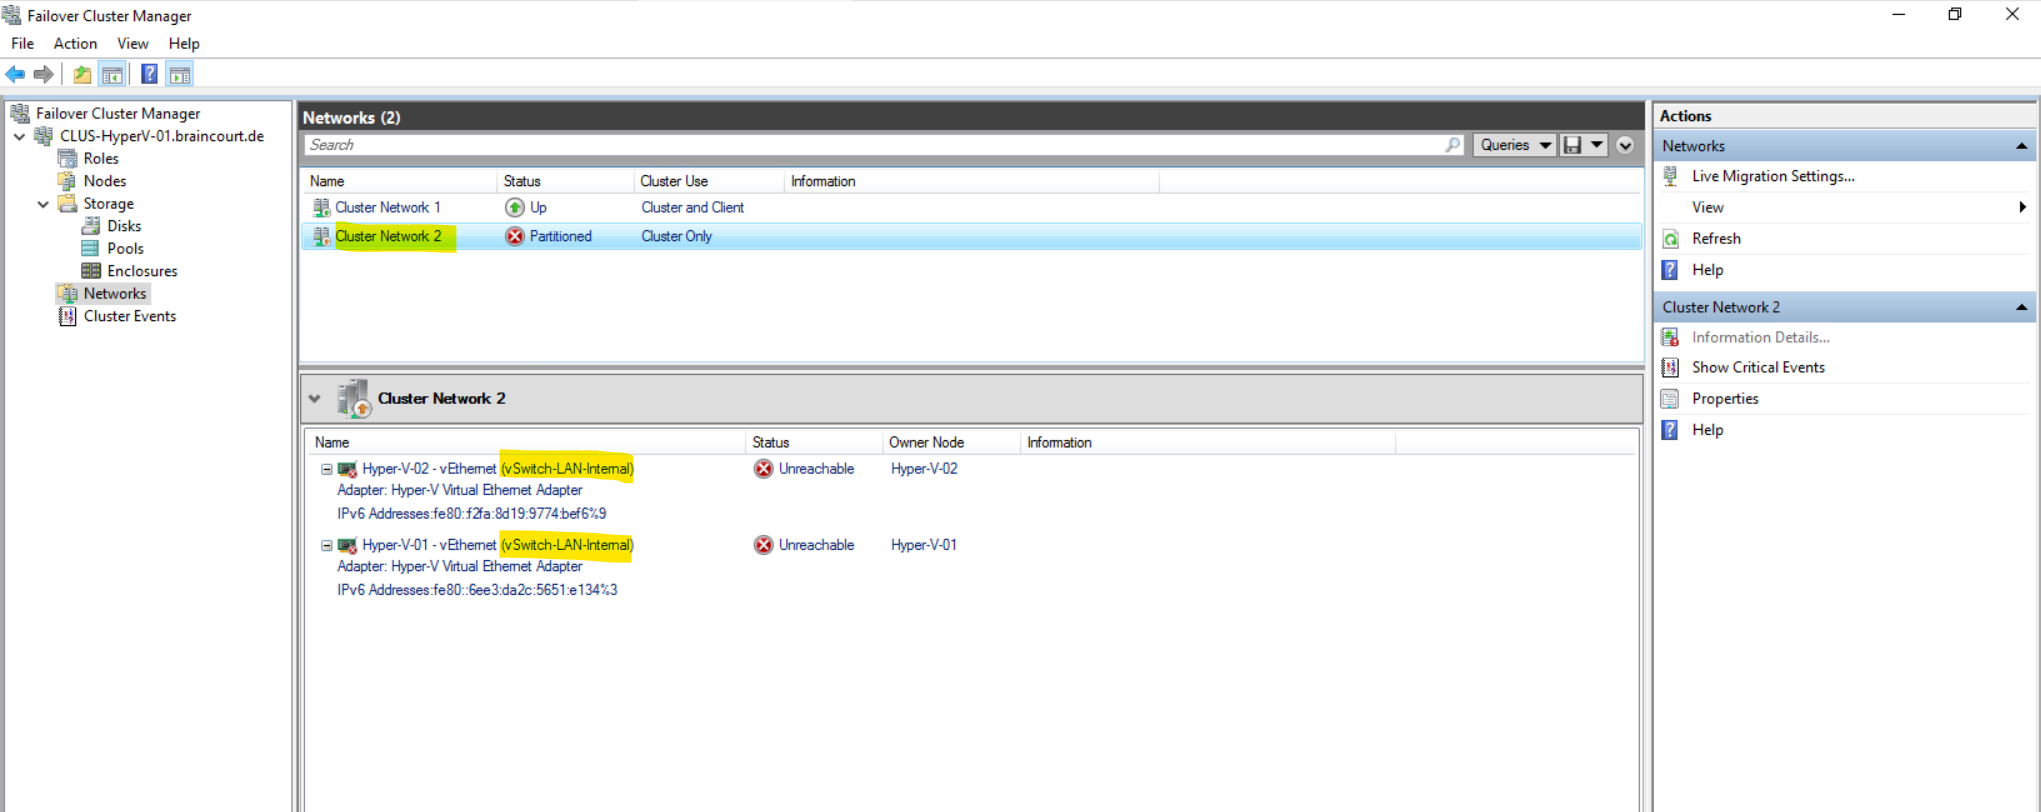
Cluster Network Partitioned
The cluster network “Partitioned” status usually caused by incorrect network configurations, and the heartbeat packet UDP 3343 unable to send between the two NICs.
Cluster network ‘Cluster Network 2’ is partitioned. Some attached failover cluster nodes cannot communicate with each other over the network. The failover cluster was not able to determine the location of the failure. Run the Validate a Configuration wizard to check your network configuration. If the condition persists, check for hardware or software errors related to the network adapter. Also check for failures in any other network components to which the node is connected such as hubs, switches, or bridges.
Click on Validate Cluster … in order to run the Validate a Configuration wizard and to check the network configuration of the cluster.
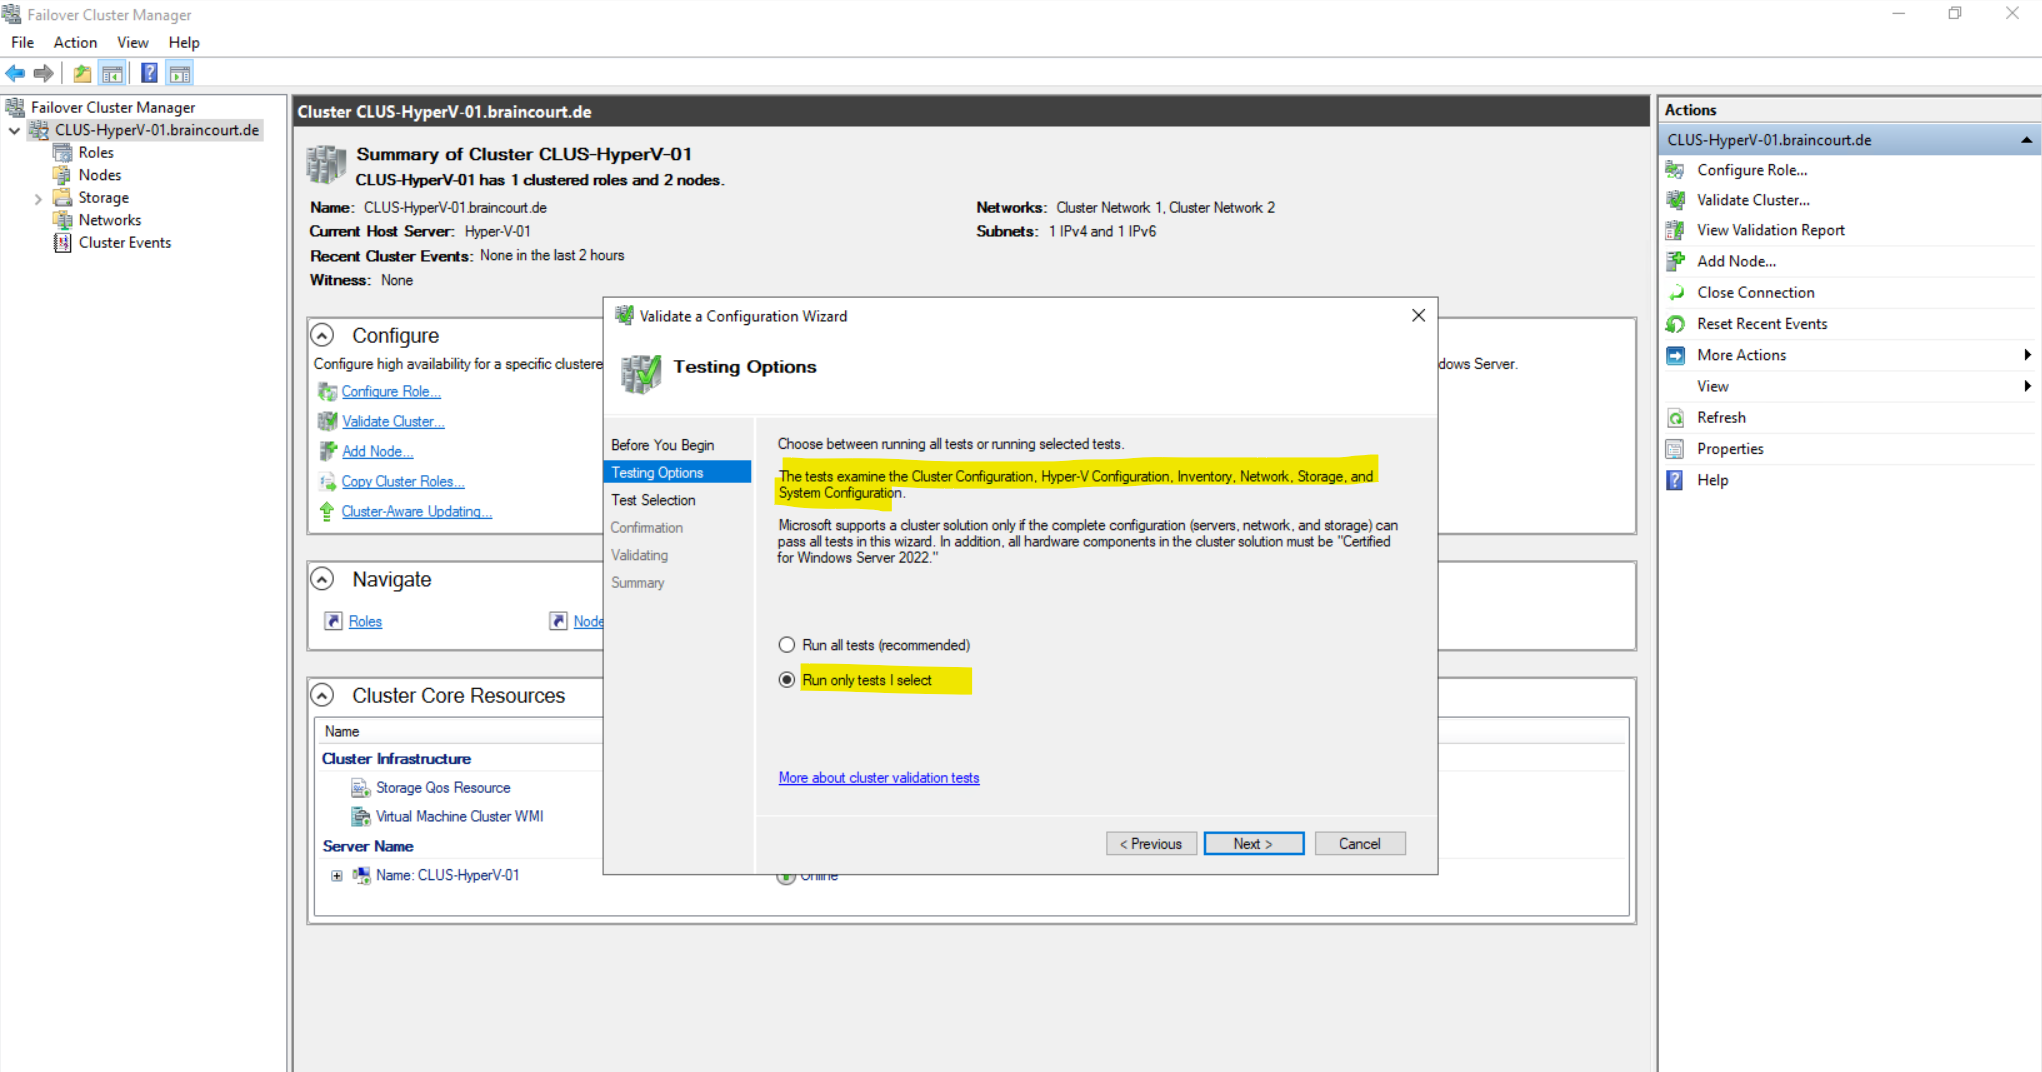
I just want to check the network configuration and therefore select Run only tests I select below.
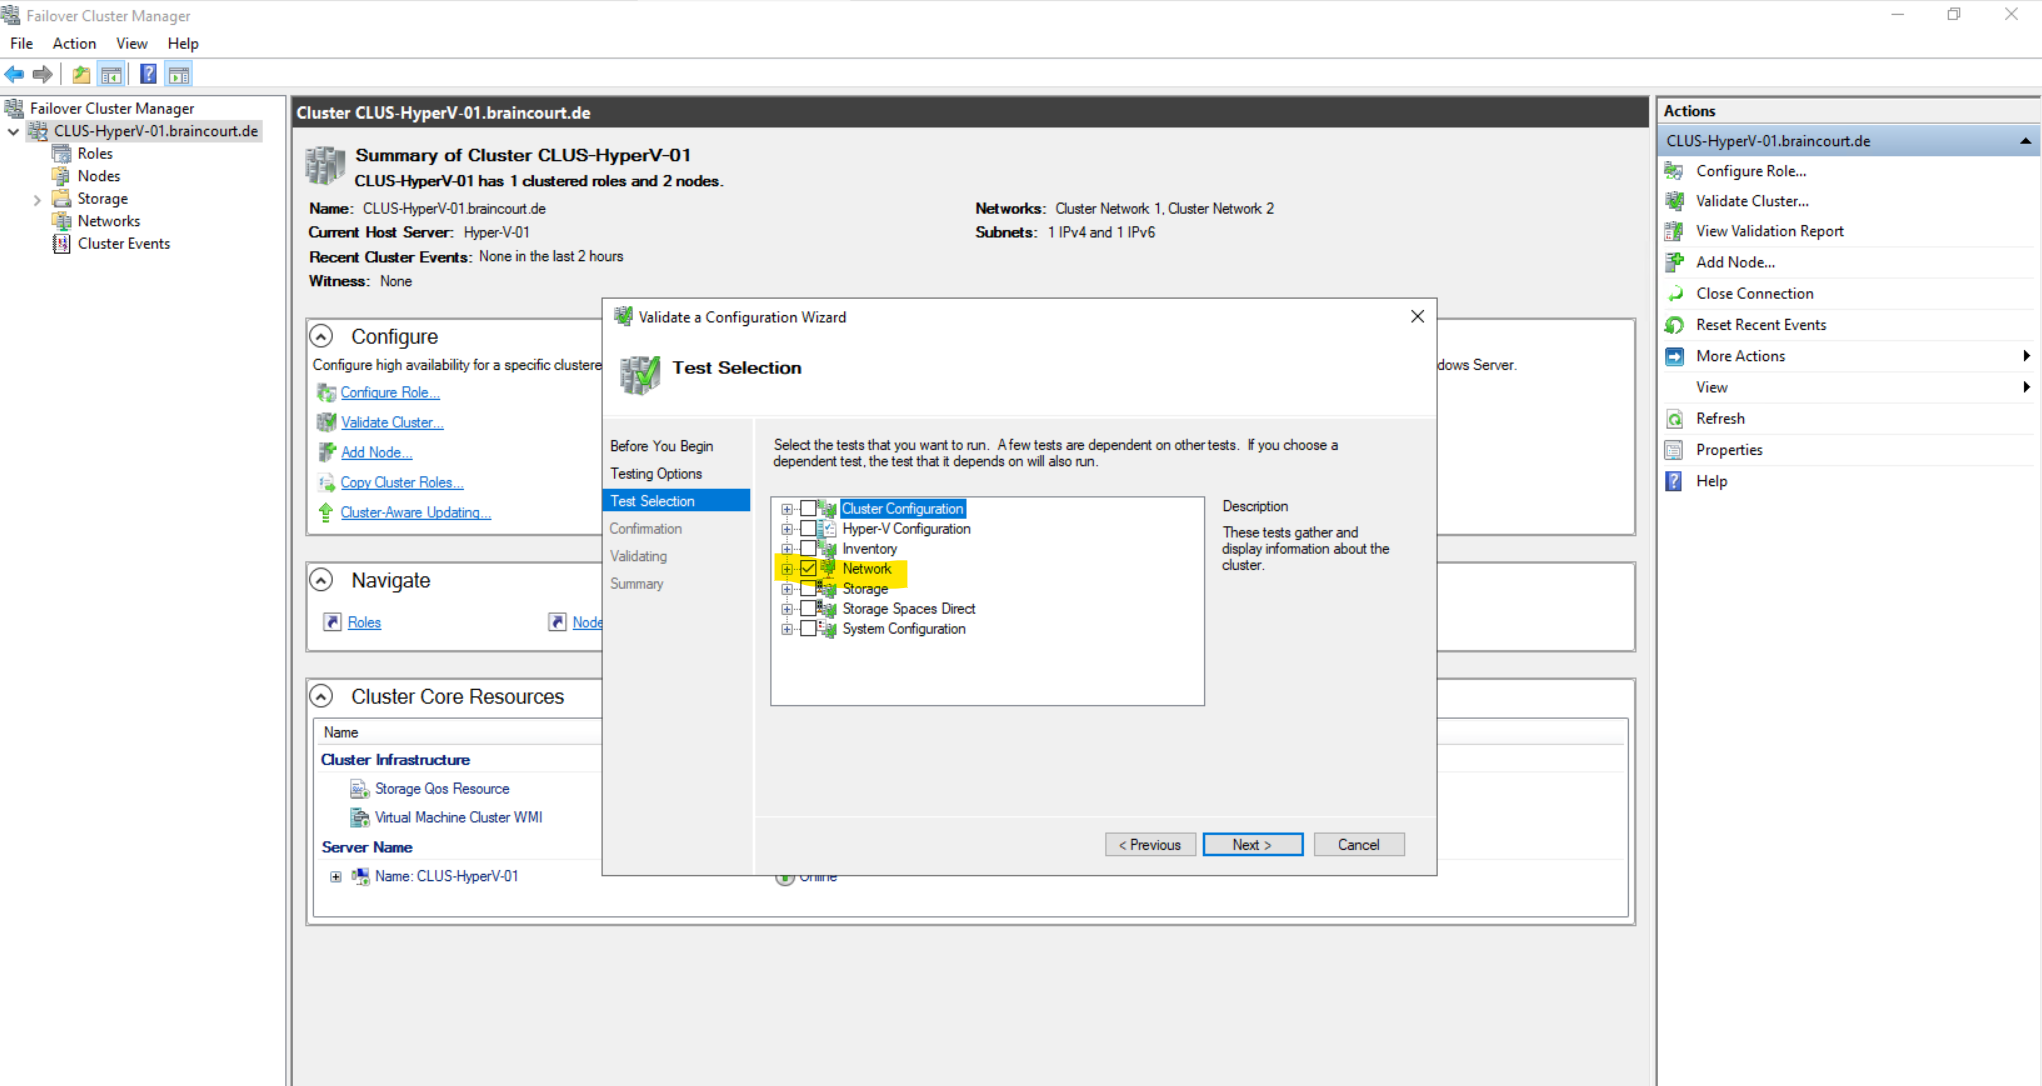
Below I will uncheck all tests besides Network.
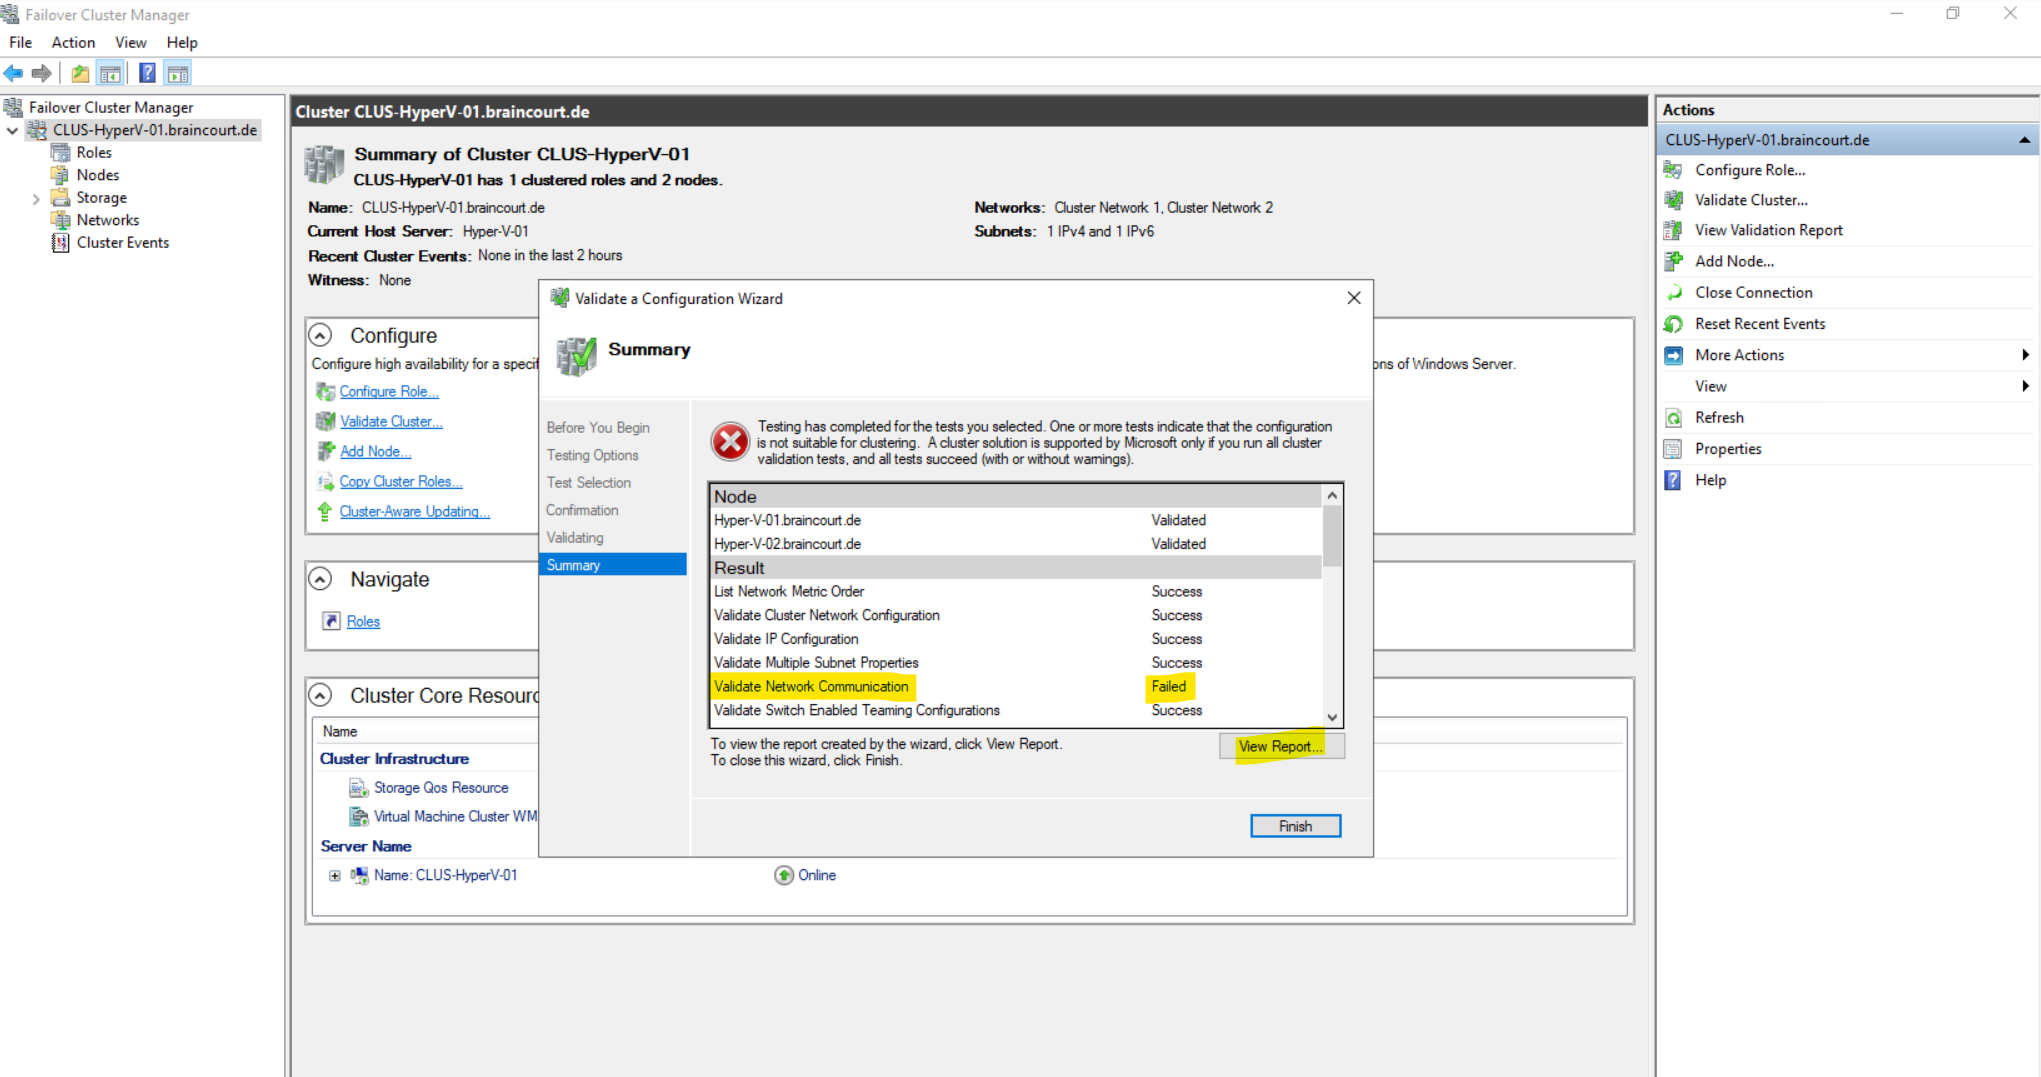
The nodes cannot communicate by using the Cluster Network 2.
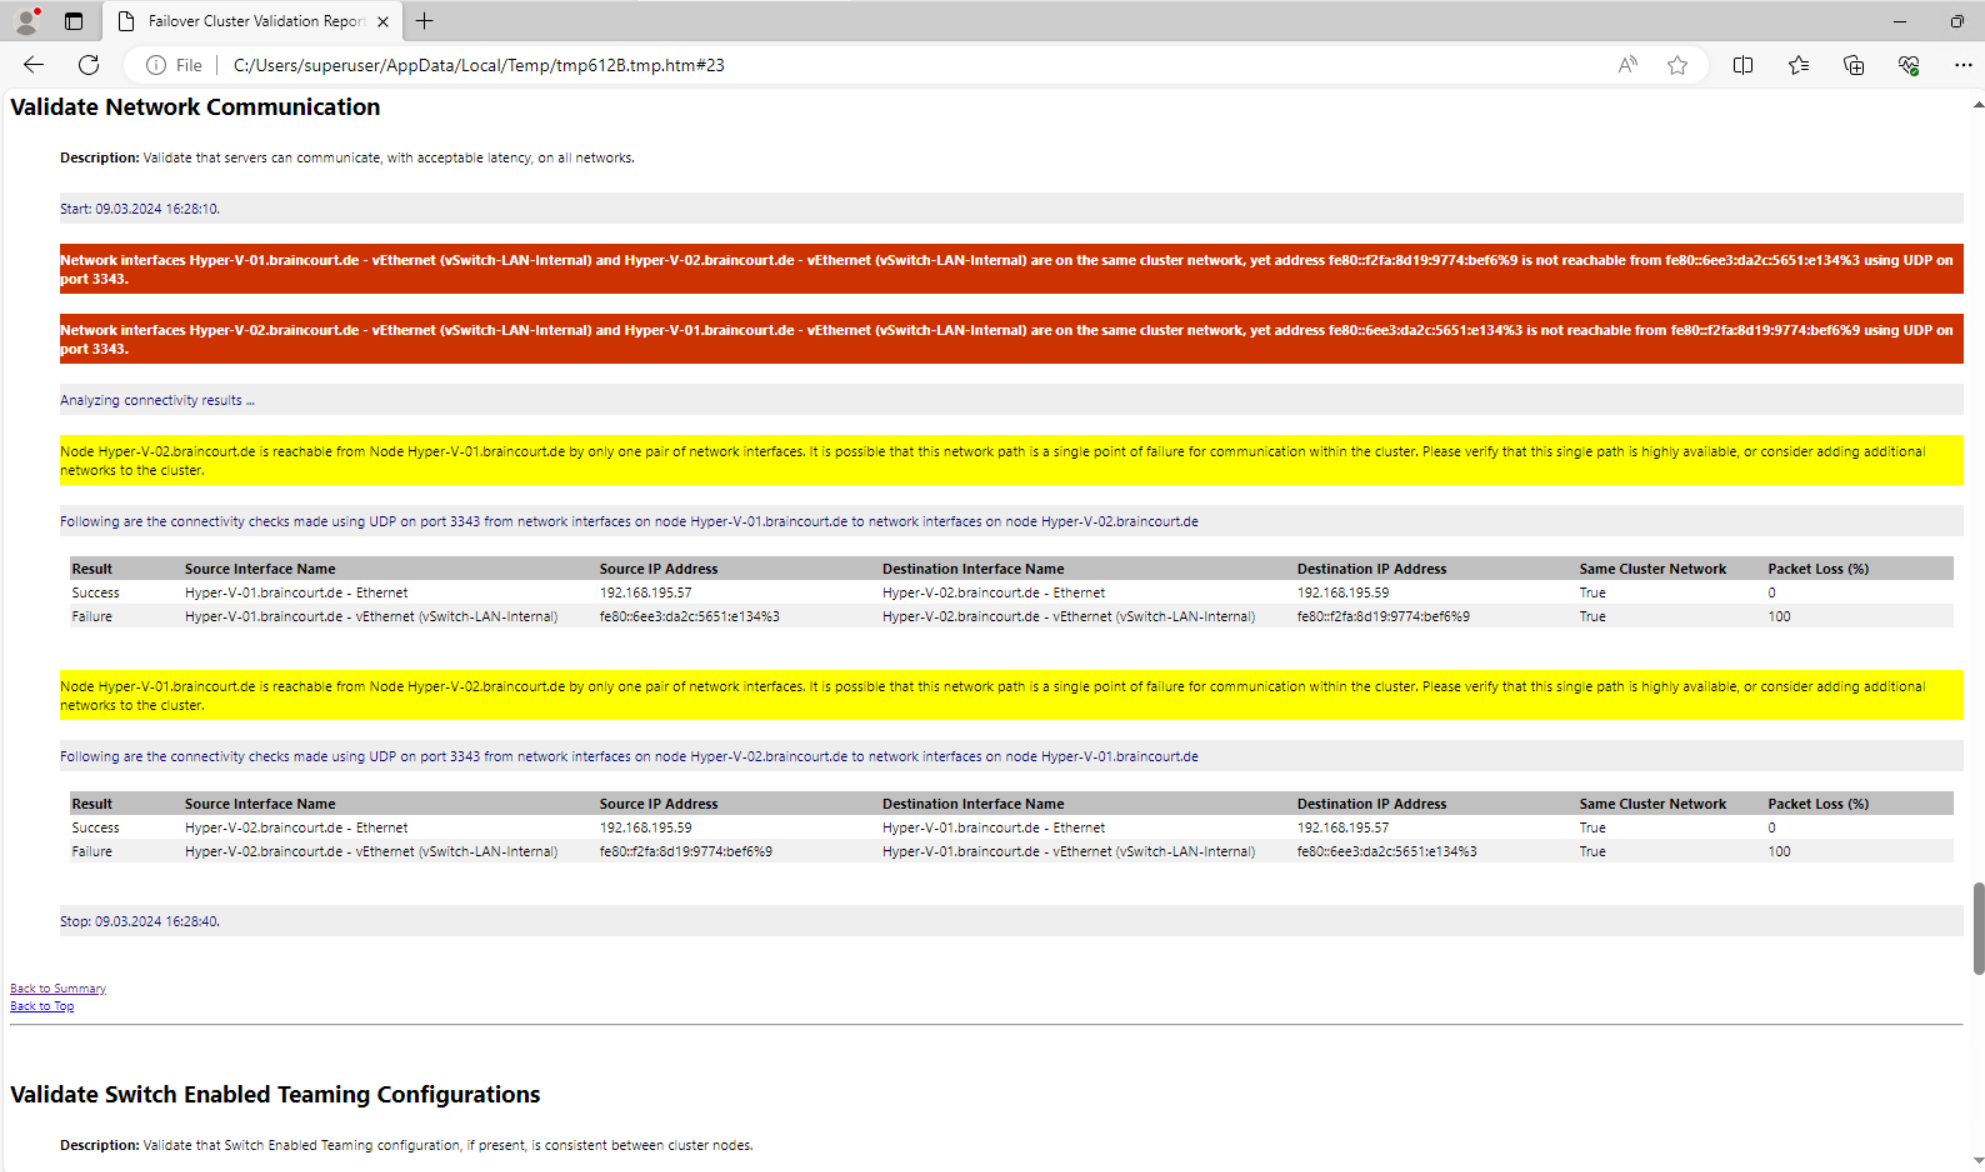

I have to remove here the Cluster Network 2 for the cluster network communication, this network is consisting of each internal virtual switch created on both Hyper-V hosts (nodes), which are just used for the virtual machines and not the nodes itself much less for the cluster network.
The internal switch just allows communication between virtual machines on the same host and the host itself. Traffic in general will and can’t leave the host.
The private switch in contrast enables communication just between virtual machines on the same host.
The external switch enables communication with the physical network and is the only one, which can also be used for the cluster network in case the option Allow management operating system to share this network adapter is checked within the Virtual Switch Manger of Hyper-V.
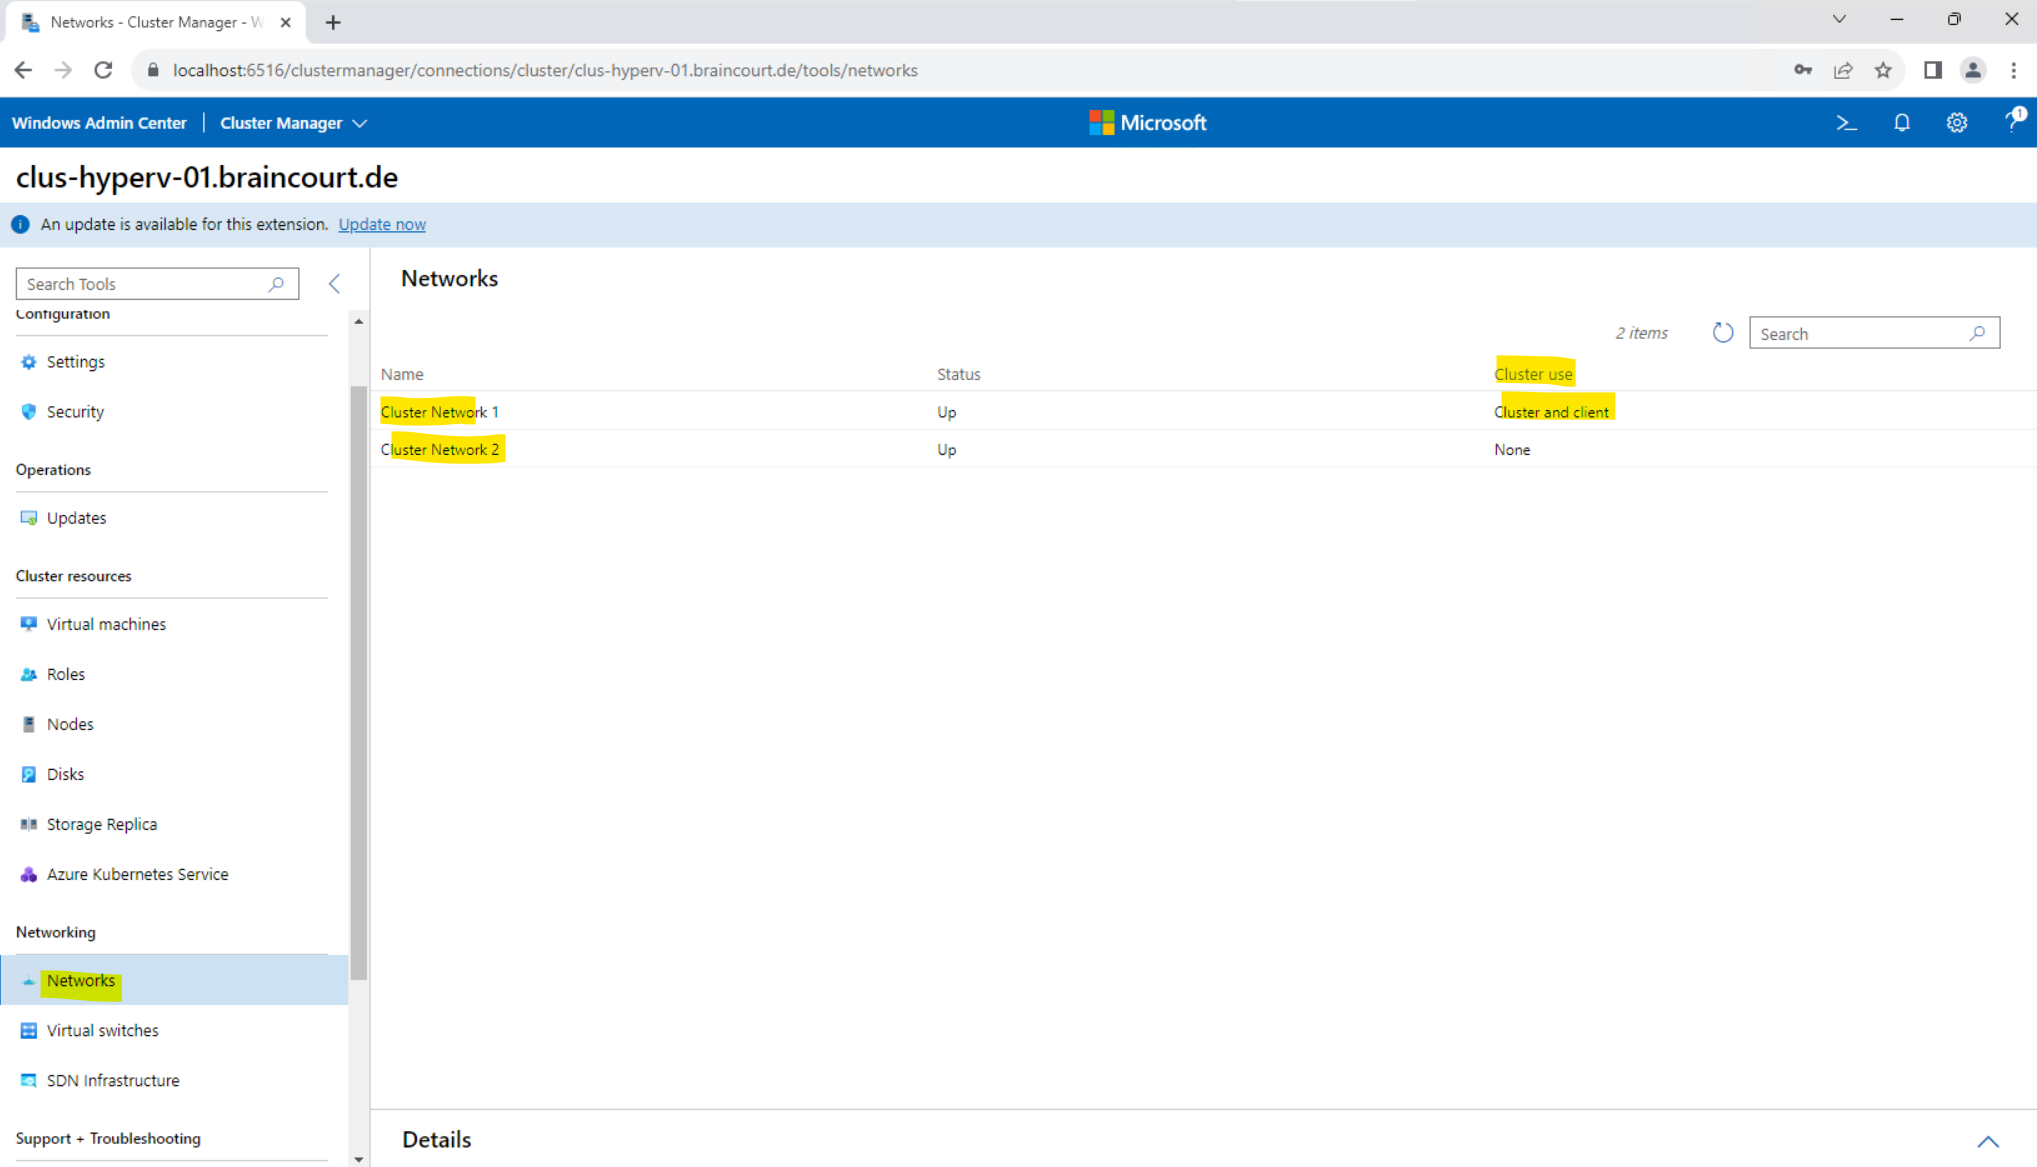
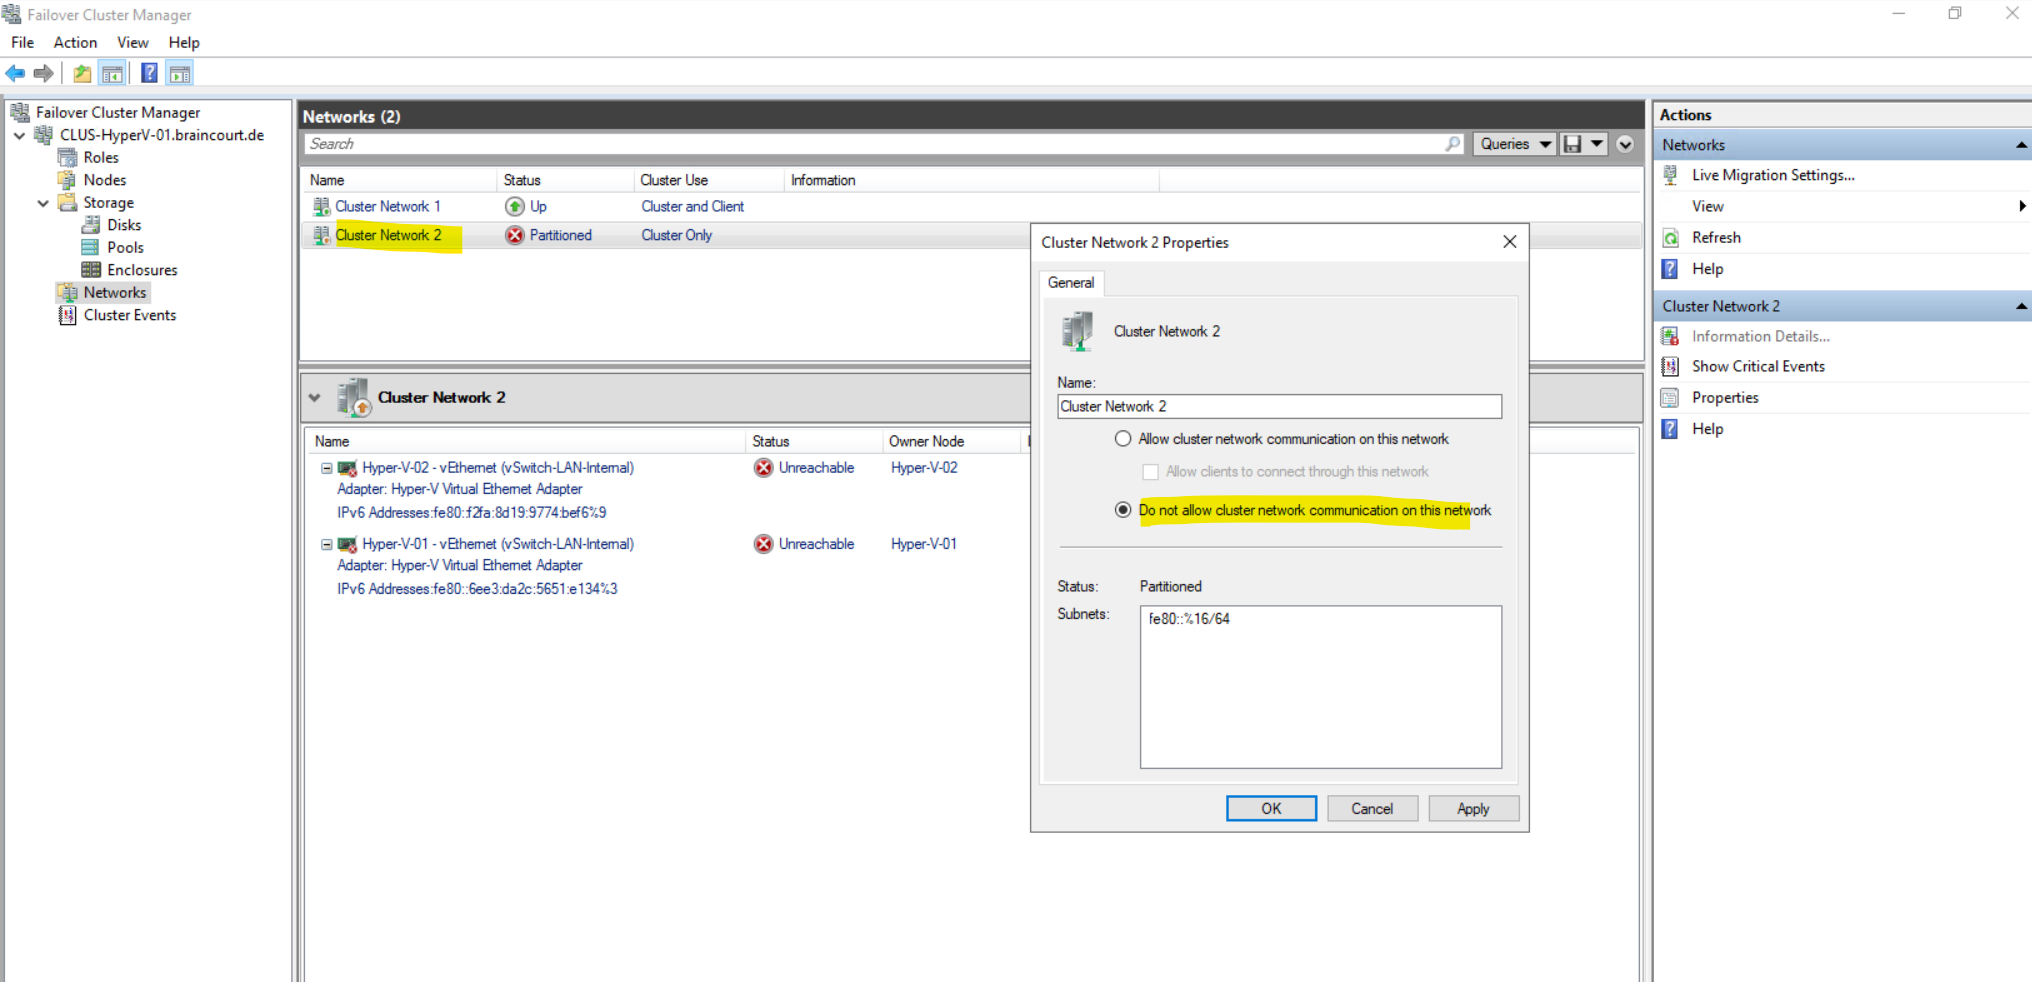
To finally solve this issue, I just need to switch within the affected Cluster Network 2 to Do not allow cluster network communication on this network as shown below.
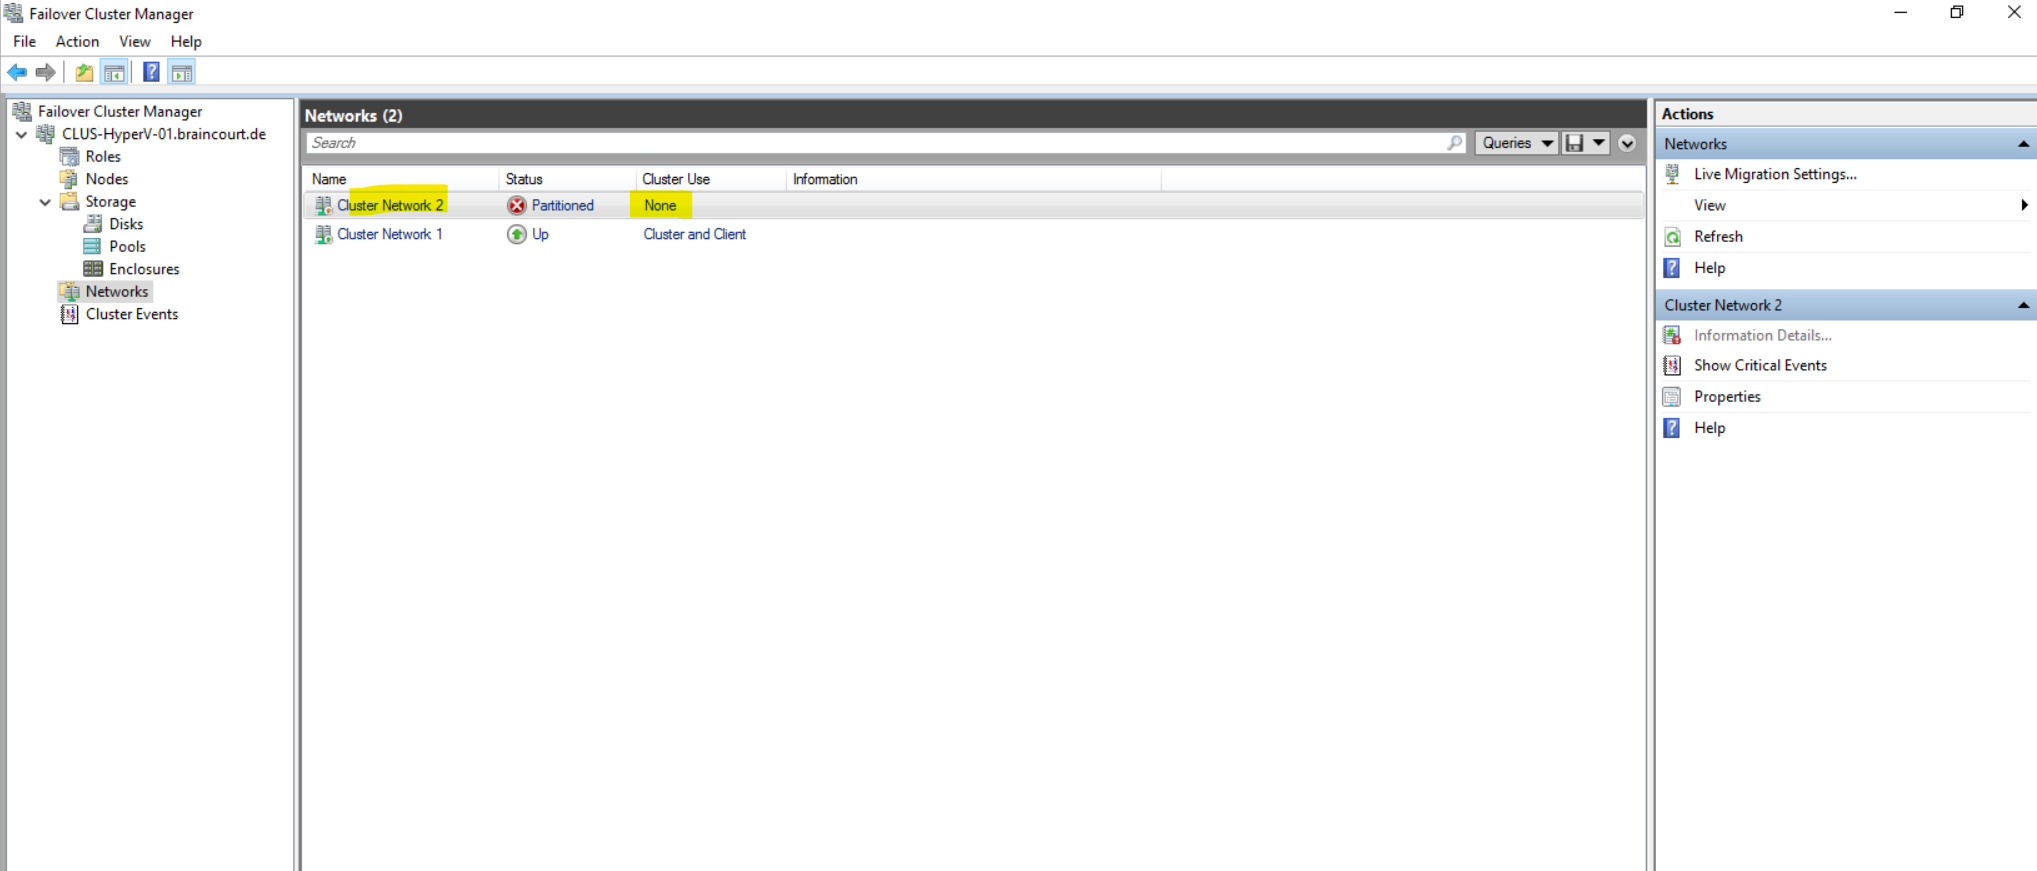
A few minutes later after removing this network from the cluster networks, the status switched from partitioned to Up.
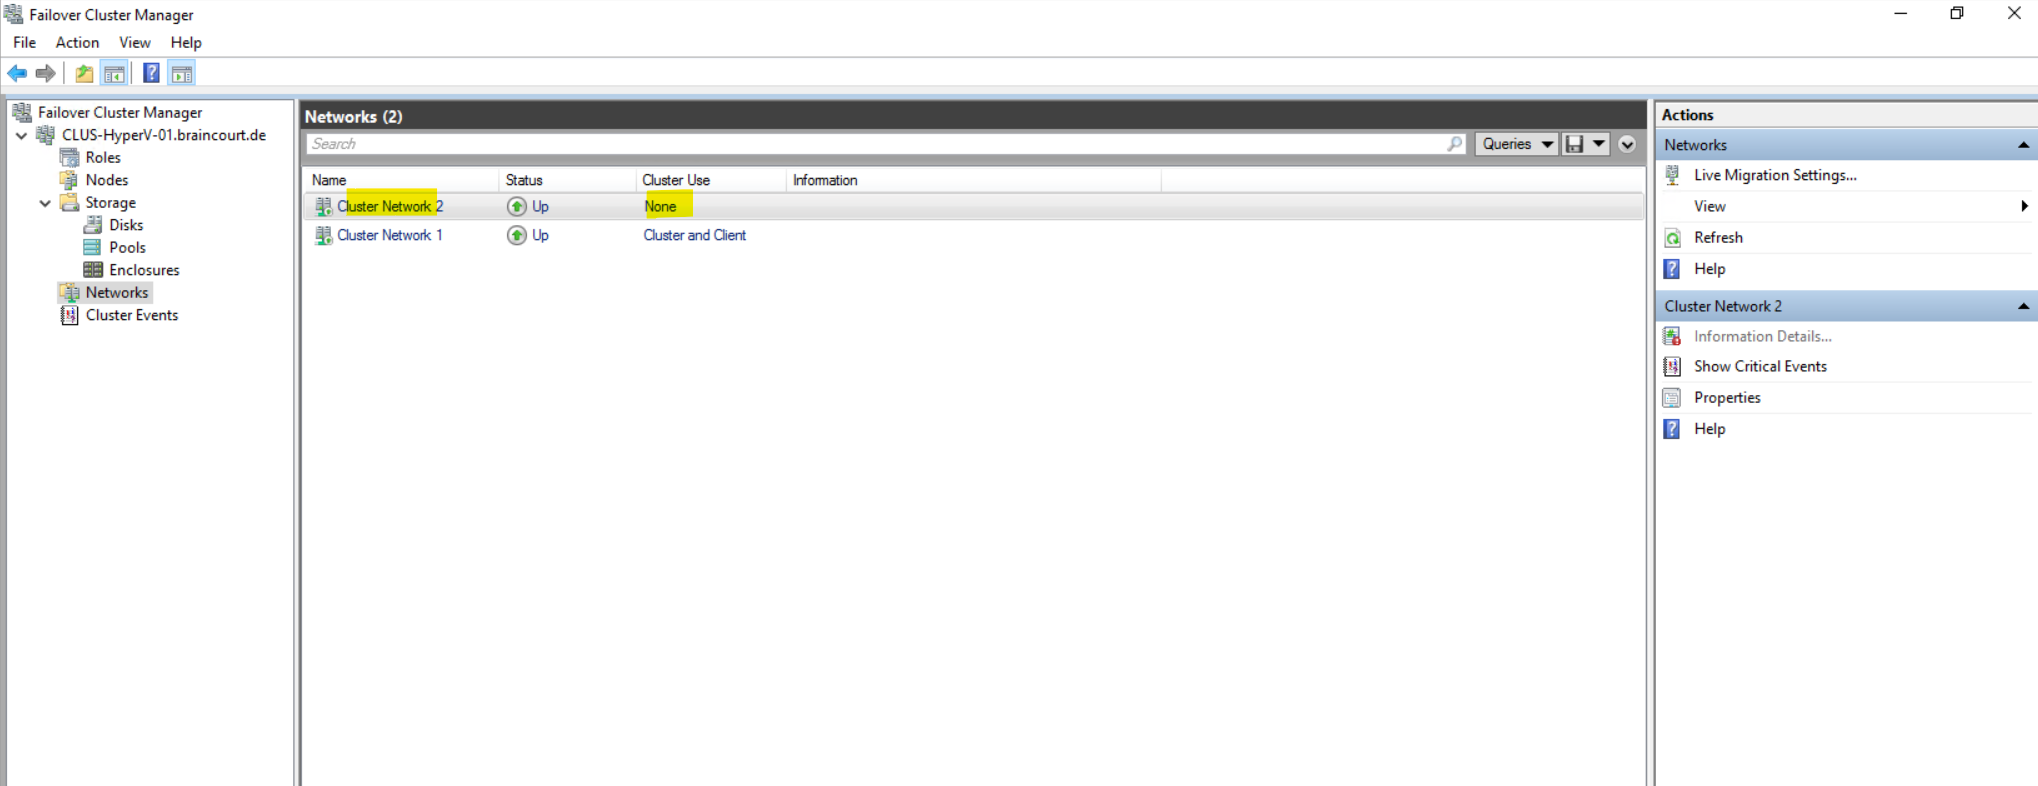
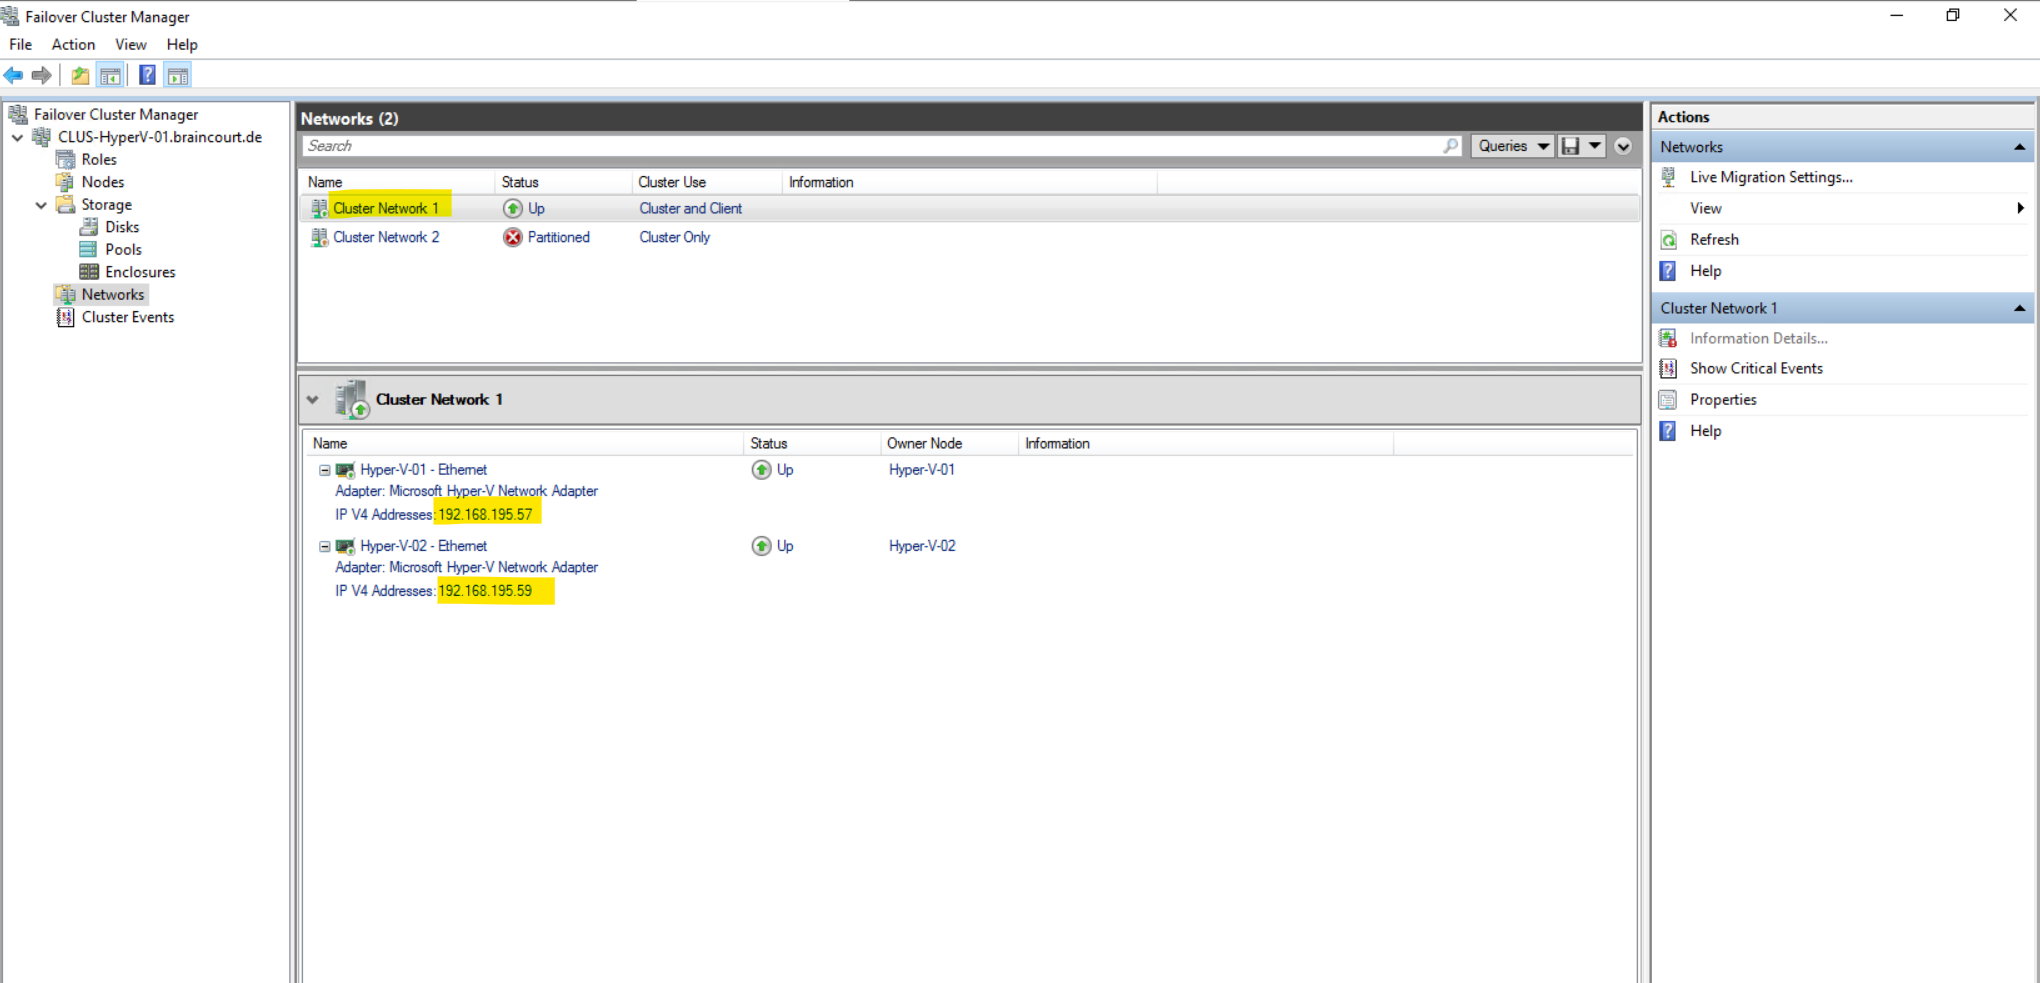
Here you can see my Cluster Network 1 which is existing by dedicated NICs connected to the physical network and just for the Hyper-V hosts (nodes) and not its hosted virtual machines.
Now I will run the Validate a Configuration wizard aginn to check the network configuration of the cluster and if the issue is now resolved.
This time just a warning message appears.

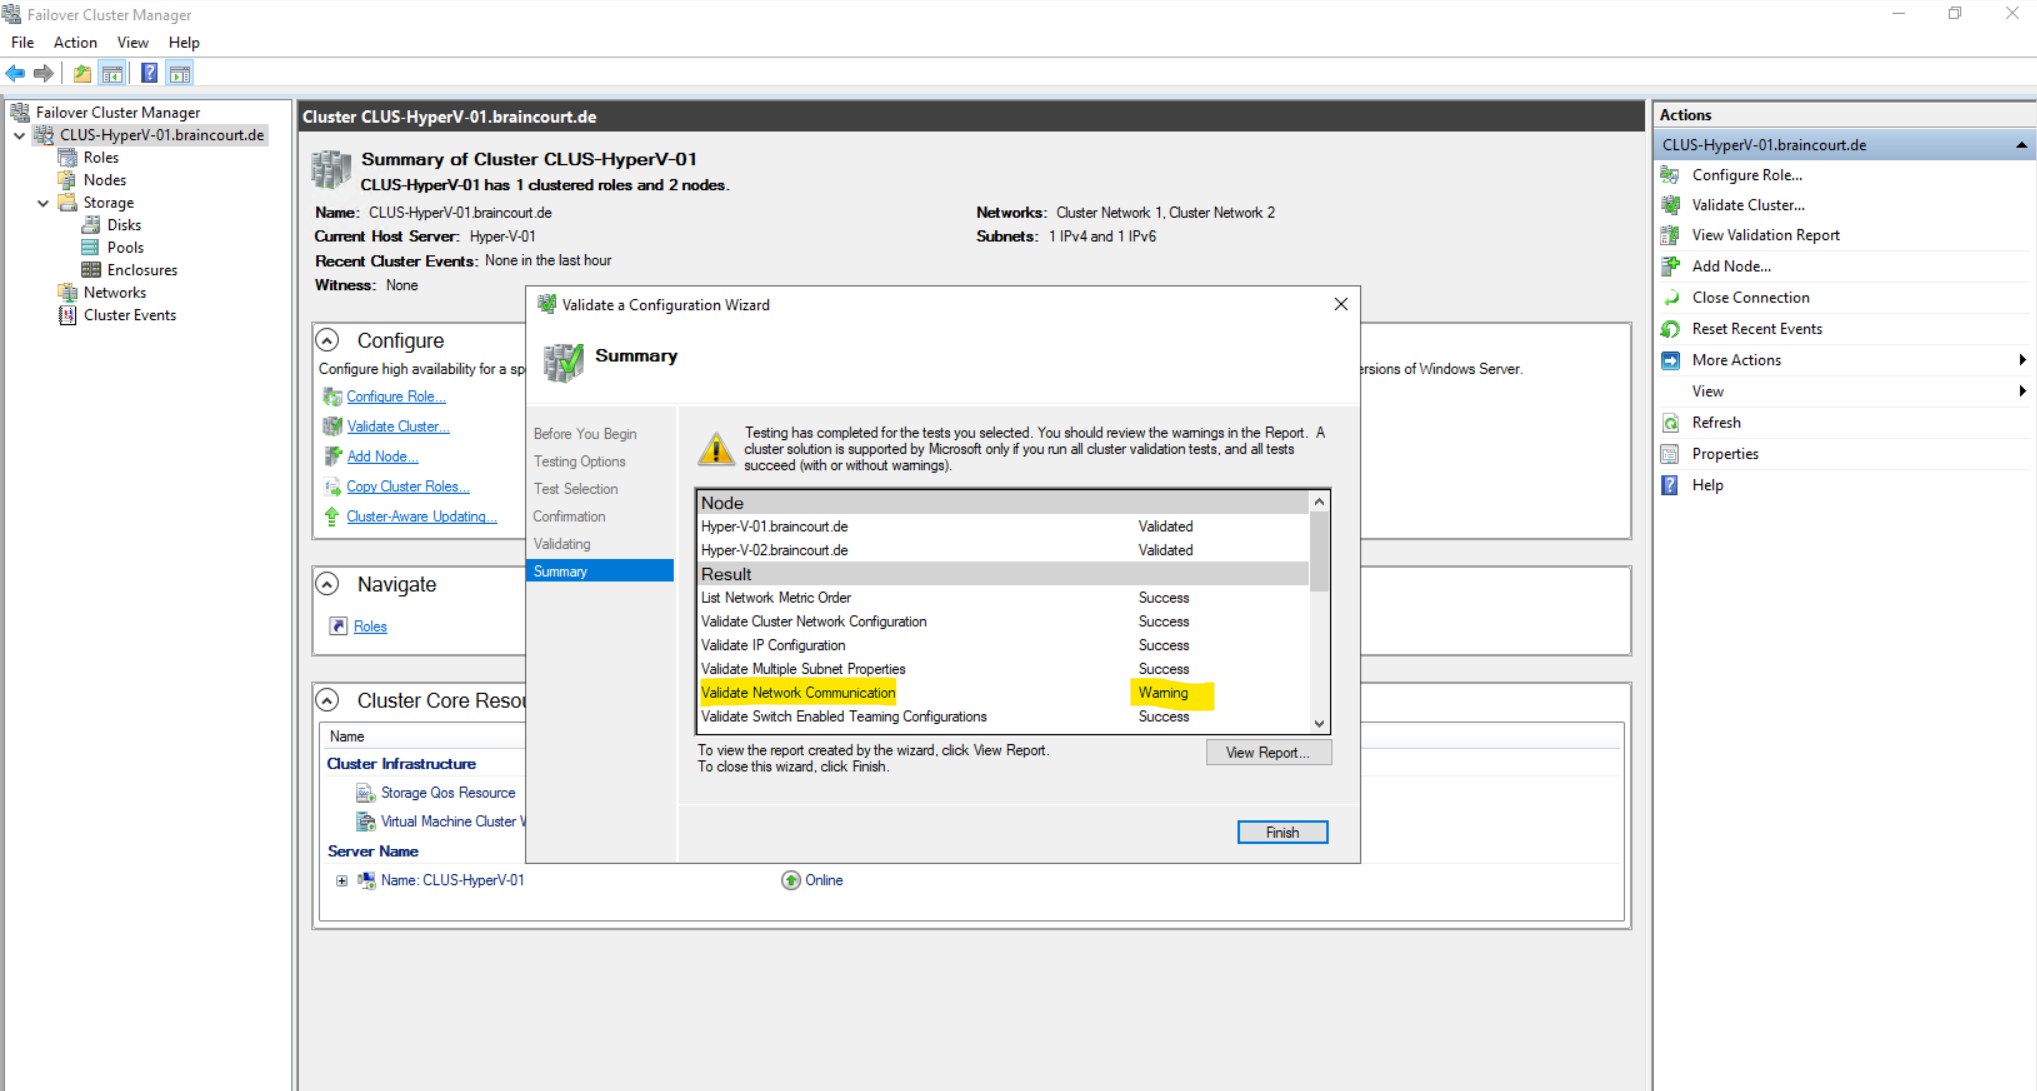
The reson for this warning is that both Hyper-V hosts (nodes) are just using a single network interface for the cluster communication and therefore is not highly available. As this cluster in my case is just for demonstration and testing purpose, this is not critical here.

Links
Deploy a Hyper-V Cluster
https://learn.microsoft.com/en-us/previous-versions/windows/it-pro/windows-server-2012-r2-and-2012/jj863389(v=ws.11)How to Create a Hyper-V Failover Cluster Step by Step?
https://www.vinchin.com/vm-tips/hyper-v-failover-cluster.htmlUse Cluster Shared Volumes in a failover cluster
https://learn.microsoft.com/en-us/windows-server/failover-clustering/failover-cluster-csvsCreate a failover cluster
https://learn.microsoft.com/en-us/windows-server/failover-clustering/create-failover-clusterHow to Deploy High Availability Hyper-V Cluster
https://www.ubackup.com/enterprise-backup/hyper-v-clustering.htmlDistributed Network Name
https://blogs.windows.com/windows-insider/2018/08/14/announcing-windows-server-2019-insider-preview-build-17733/#W0YAxO8BfwBRbkzG.97Highly available Hyper-V in Windows Server 2016
https://www.admin-magazine.com/Archive/2017/38/Highly-available-Hyper-V-in-Windows-Server-2016Configure and manage quorum
https://learn.microsoft.com/en-us/windows-server/failover-clustering/manage-cluster-quorumUnderstand Failover Cluster Quorum
https://www.starwindsoftware.com/blog/understand-failover-cluster-quorumDeploying a two-node clustered file server
https://learn.microsoft.com/en-us/windows-server/failover-clustering/deploy-two-node-clustered-file-server?tabs=server-manager
Tags In
Related Posts
Latest posts
Protecting NetApp ONTAP Workloads with Autonomous Ransomware Protection (ARP) – Part 2 – Simulating Ransomware Attacks on VMware VMFS Datastores
Follow me on LinkedIn