Install Skype for Business Server 2019 Step by Step
Install Skype for Business Prerequisites Front End Server
Add-WindowsFeature RSAT-ADDS, Web-Server, Web-Static-Content, Web-Default-Doc, Web-Http-Errors, Web-Asp-Net, Web-Net-Ext, Web-ISAPI-Ext, Web-ISAPI-Filter, Web-Http-Logging, Web-Log-Libraries, Web-Request-Monitor, Web-Http-Tracing, Web-Basic-Auth, Web-Windows-Auth, Web-Client-Auth, Web-Filtering, Web-Stat-Compression, Web-Dyn-Compression, NET-WCF-HTTP-Activation45, Web-Asp-Net45, Web-Mgmt-Tools, Web-Scripting-Tools, Web-Mgmt-Compat, Windows-Identity-Foundation, Server-Media-Foundation, Telnet-Client, BITS, ManagementOData, Web-Mgmt-Console, Web-Metabase, Web-Lgcy-Mgmt-Console, Web-Lgcy-Scripting, Web-WMI, Web-Scripting-Tools, Web-Mgmt-Service

Sources: https://docs.microsoft.com/en-us/skypeforbusiness/deploy/install/install-prerequisite
https://docs.microsoft.com/en-us/skypeforbusiness/plan/system-requirements
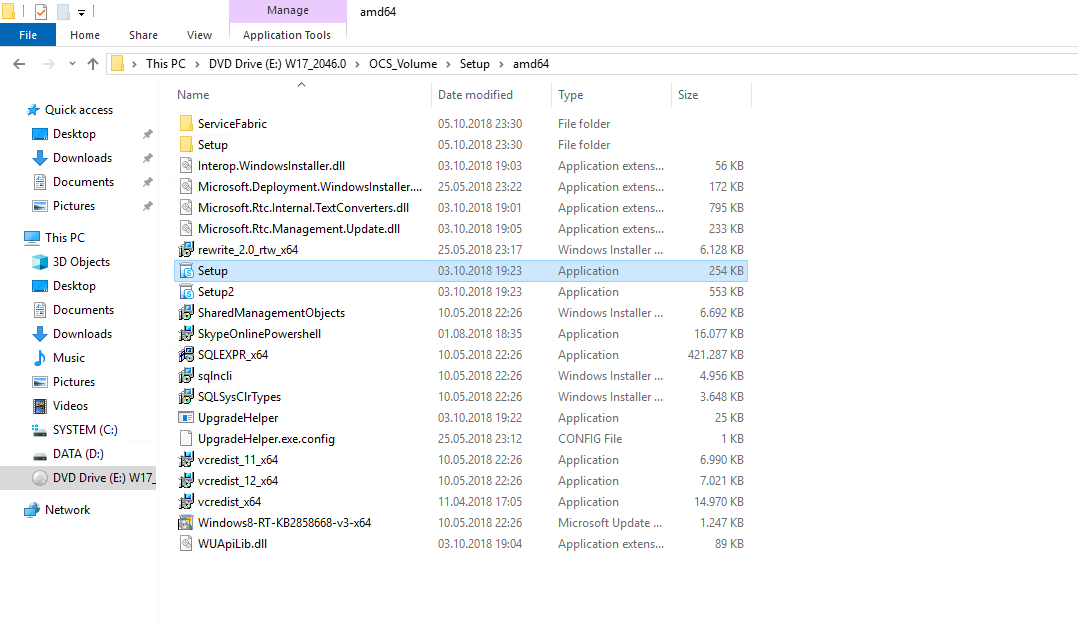
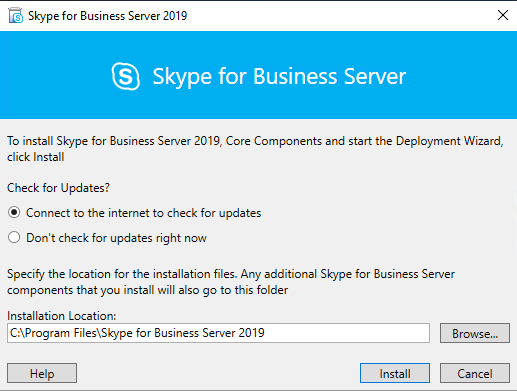
Run the Setup.exe on the Front End Server in your internal Network (Deployment Wizard)
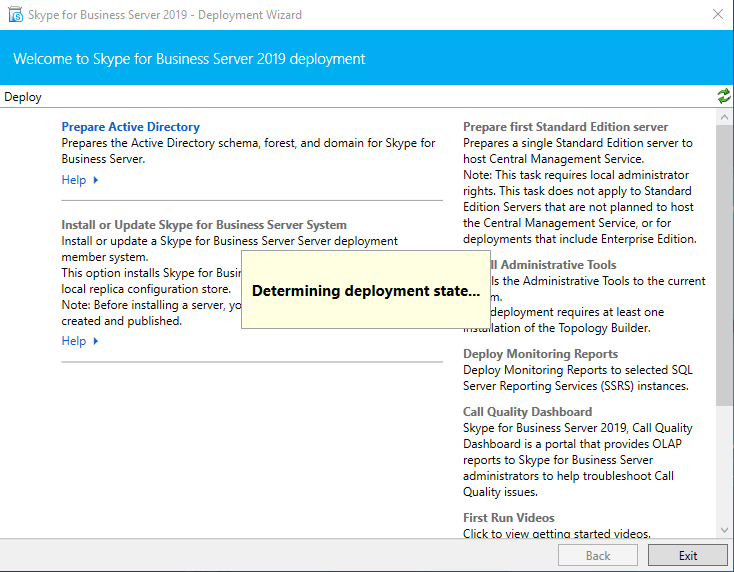
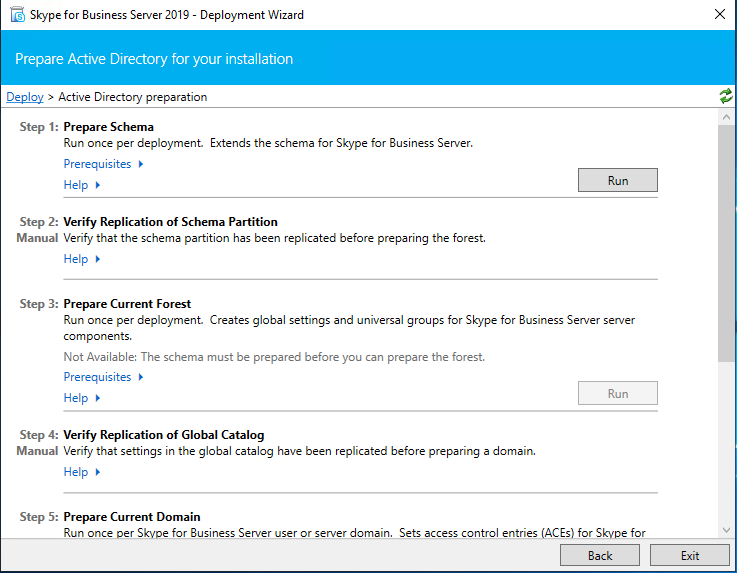
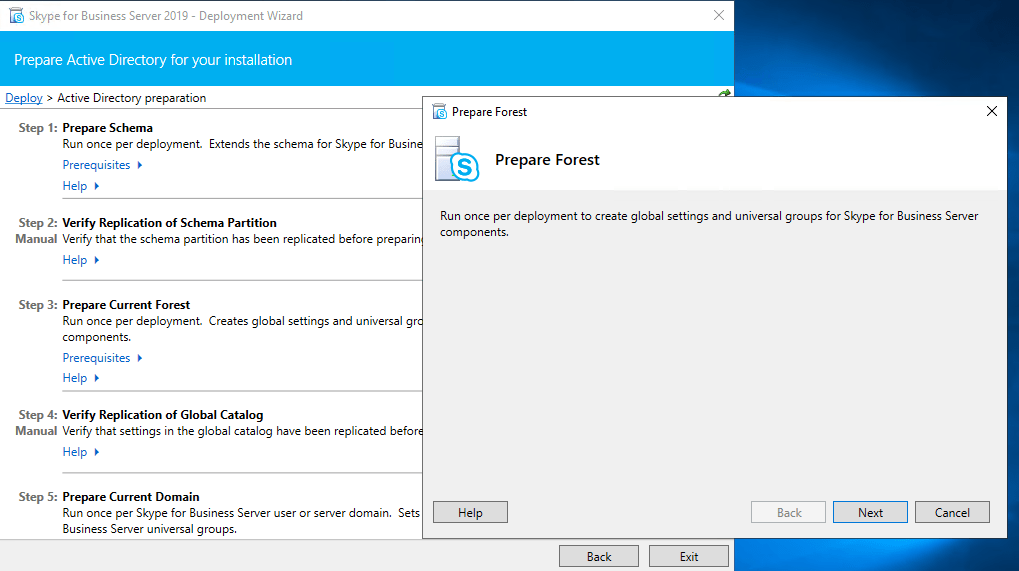
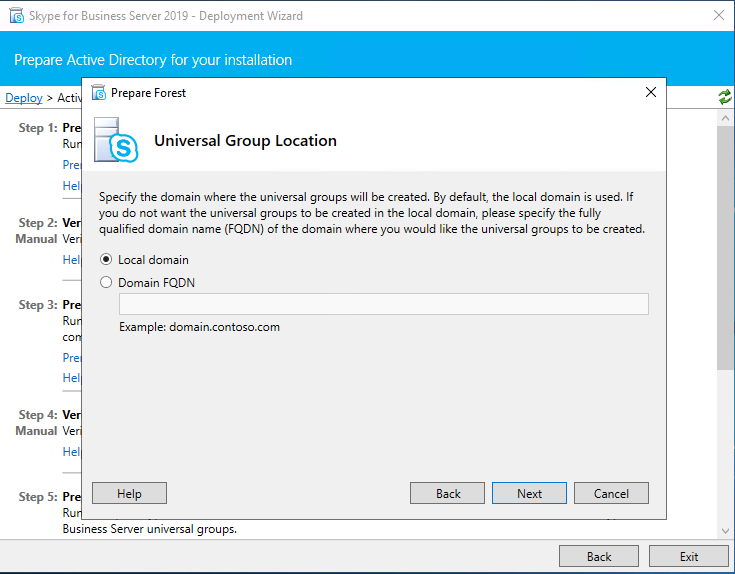
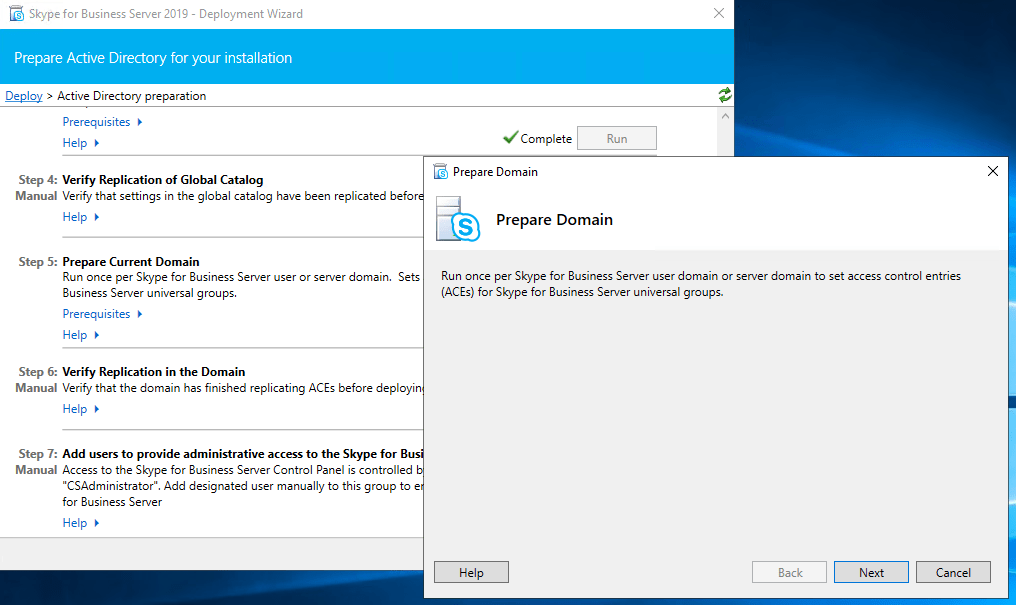
First I need to prepare the Active Directory as this is the first Skype for Business Server Setup in my Lab environment.
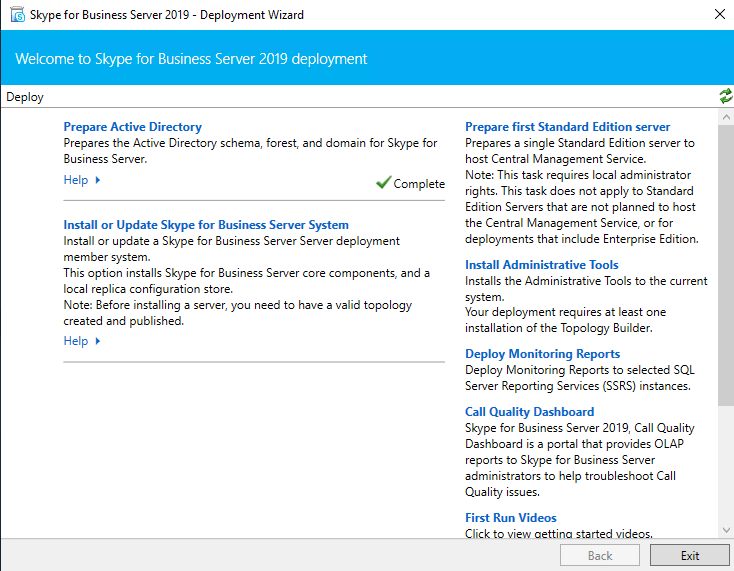
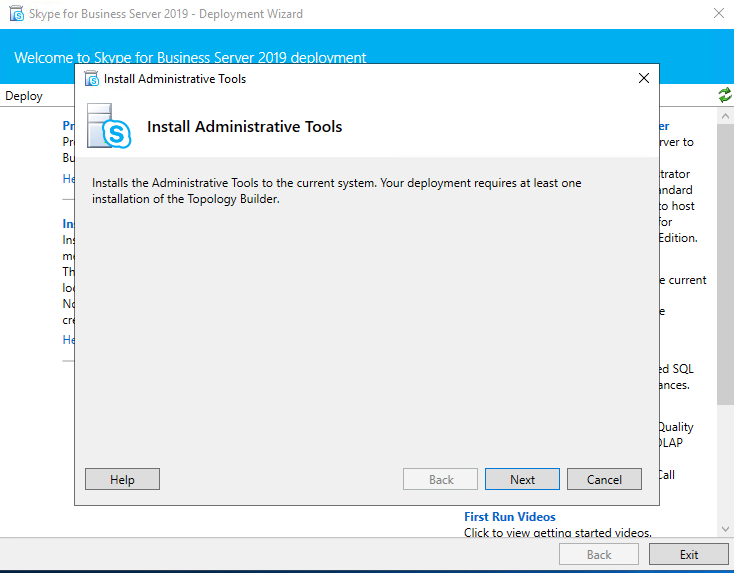
After we finished Prepare Active Directory next we install the Administrative Tools.
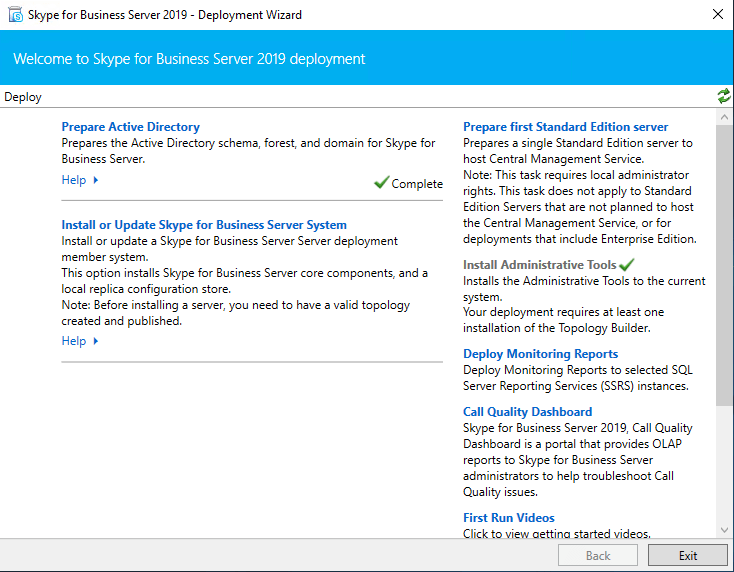
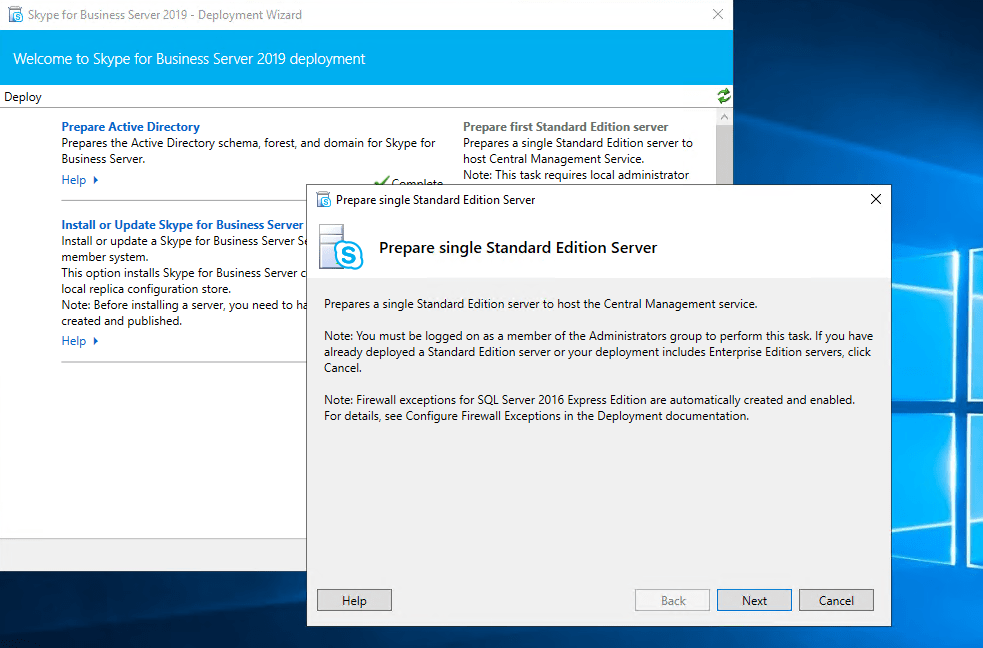
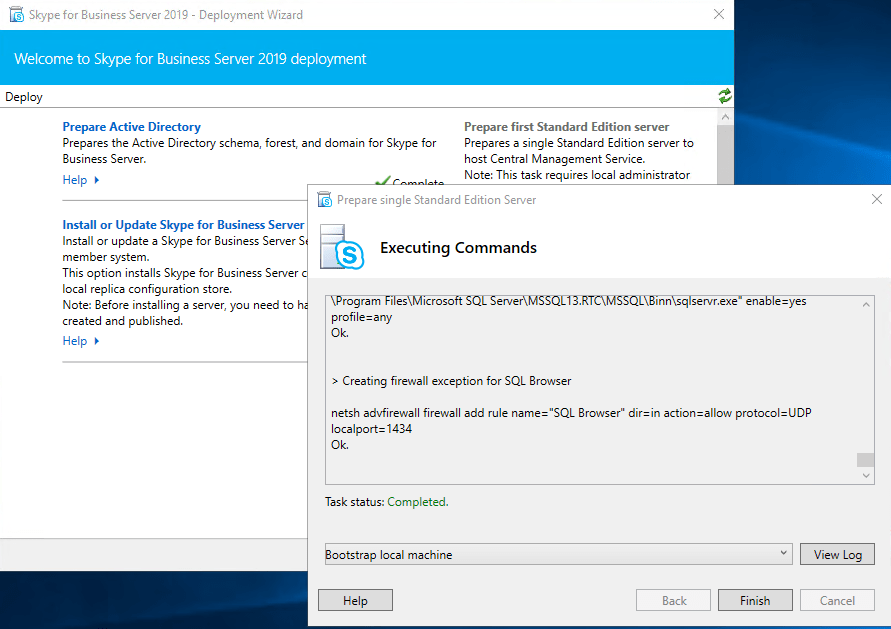
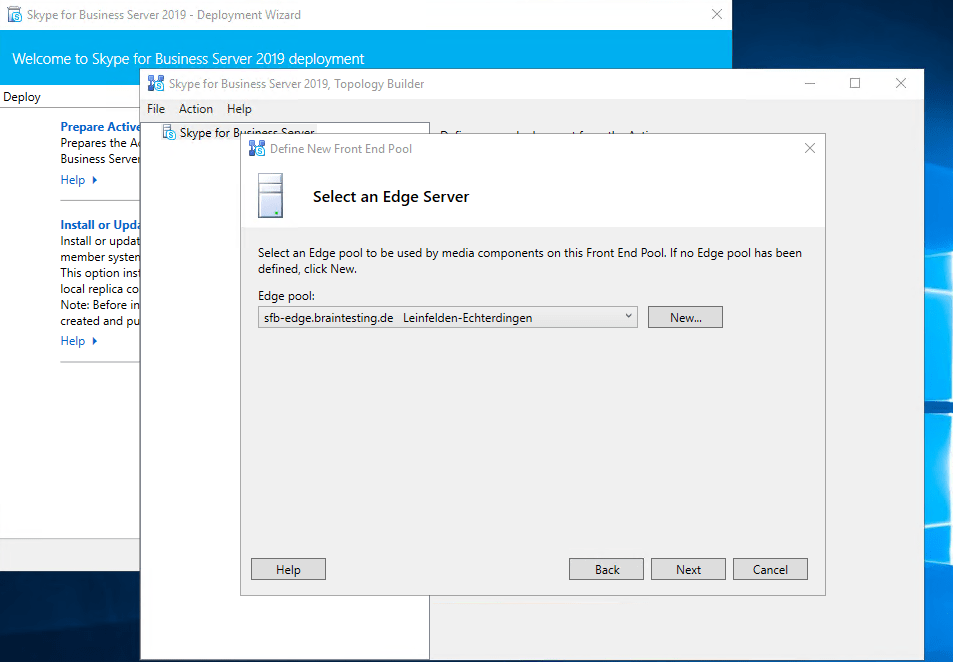
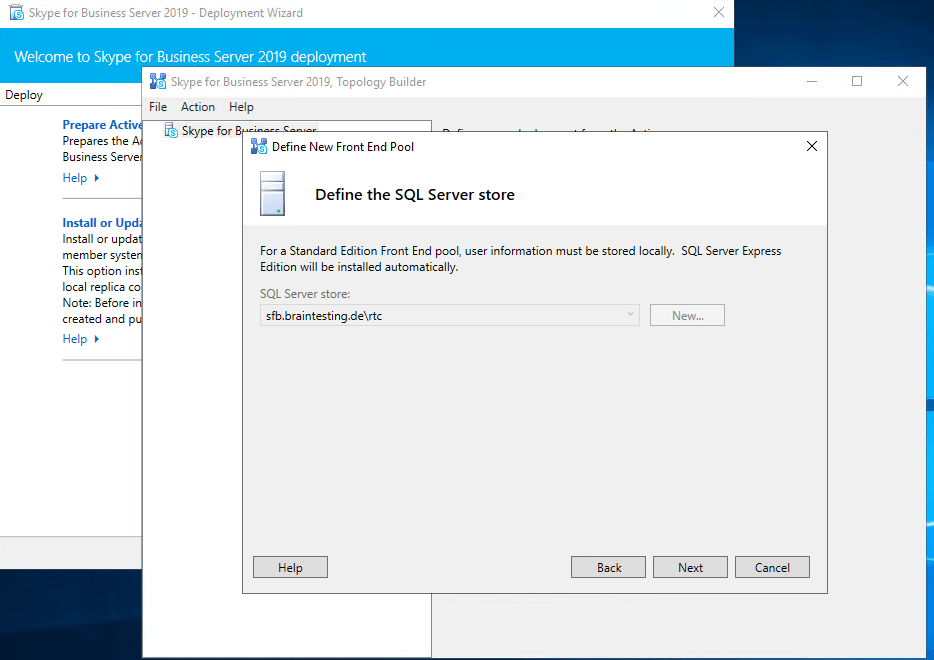
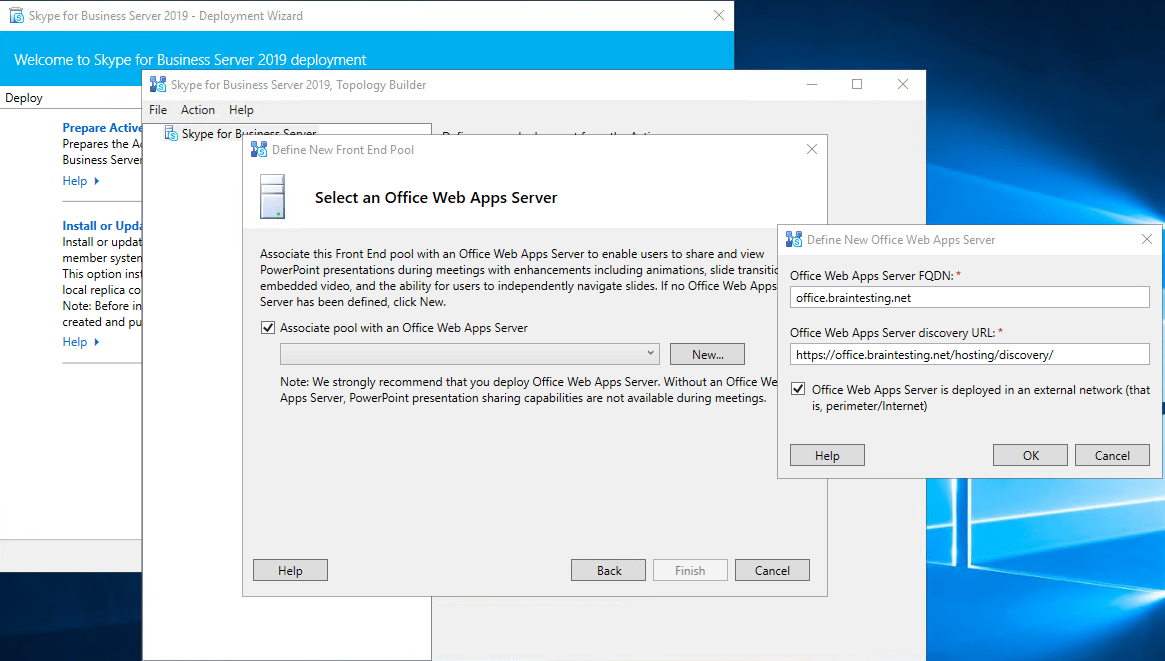
After installing the Administrative Tools we had to prepare the first Standard Edition Server.
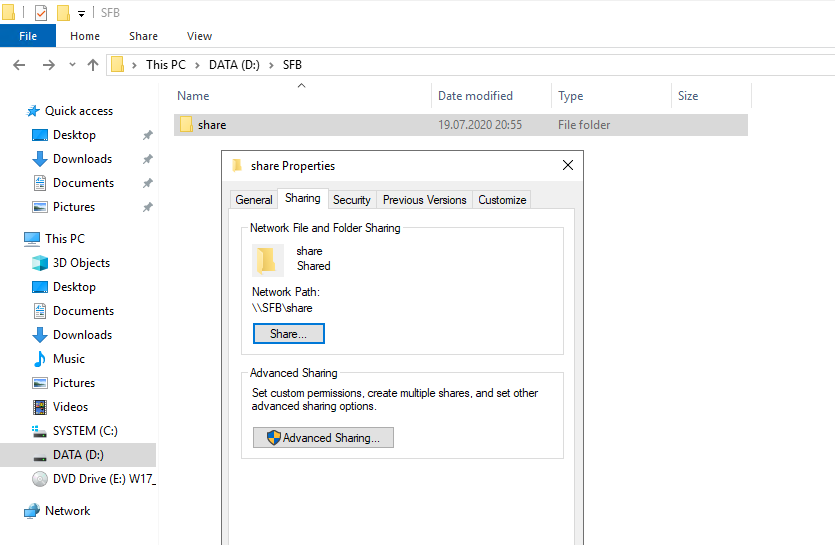
Create Network Share for Skype for Business
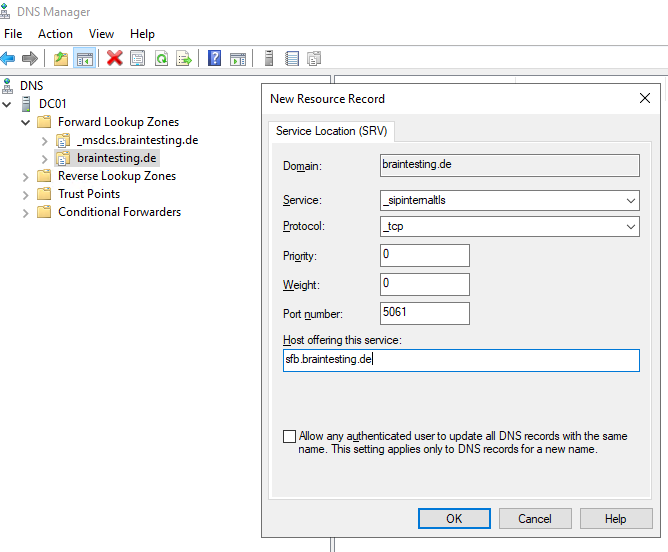
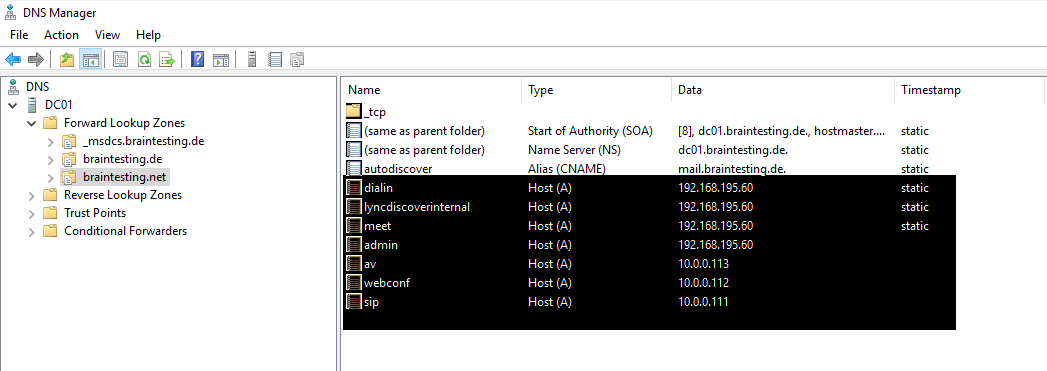
Configure DNS
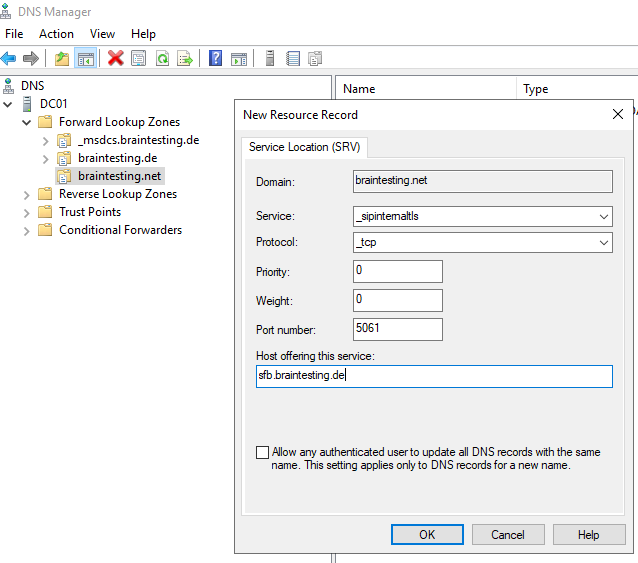
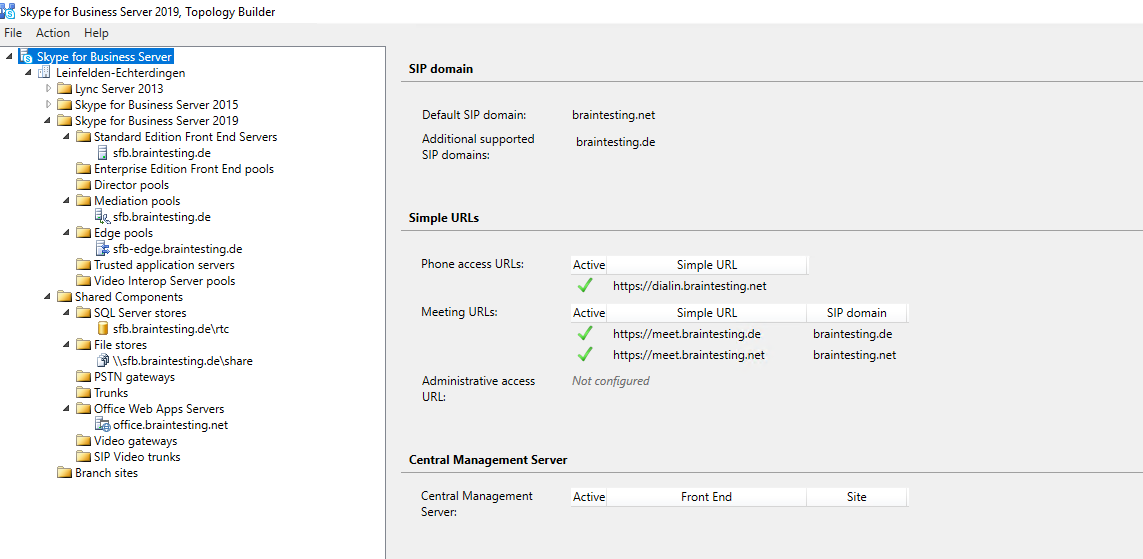
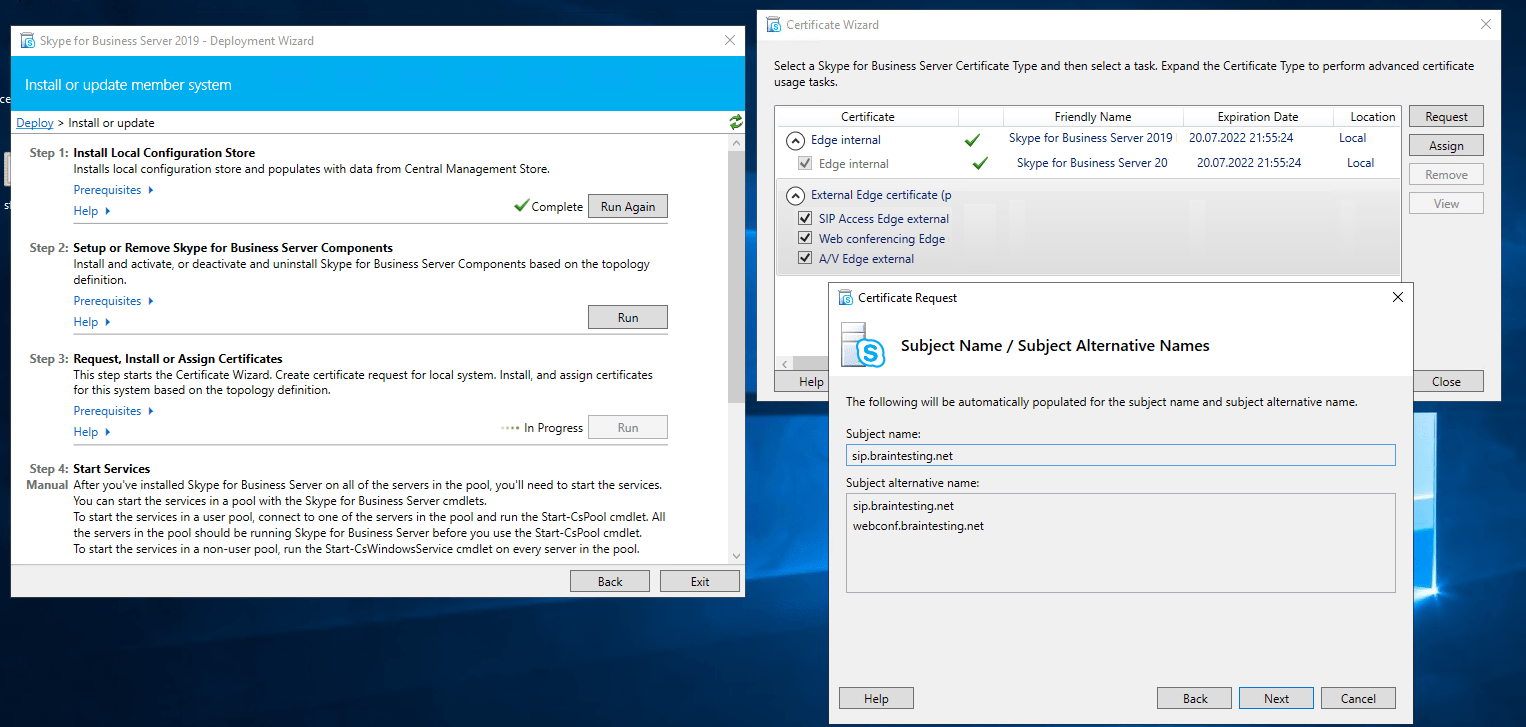
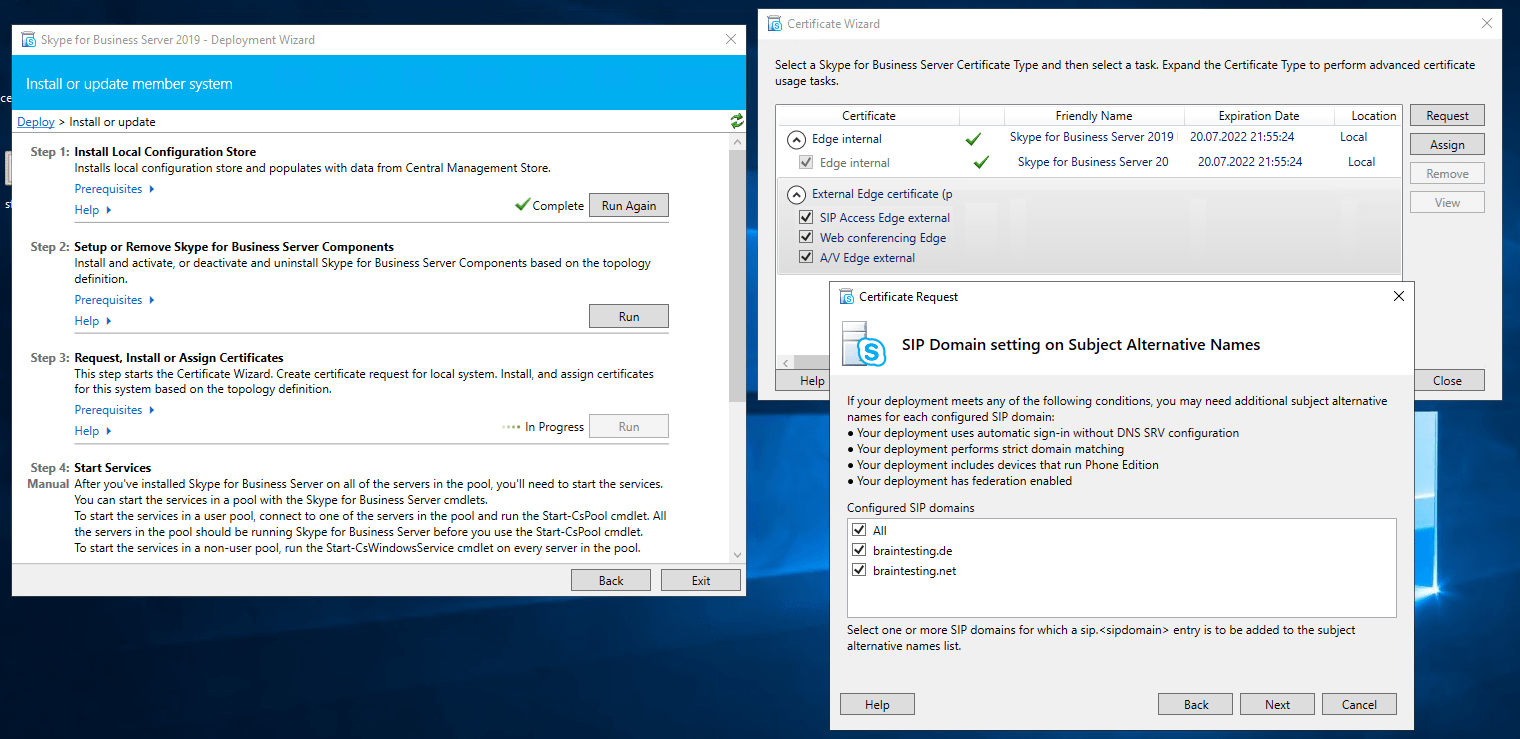
Create DNS Records for Skype for Business in the internal network. I want to use braintesting.net as primary domain and braintesting.de as the secondary domain.
https://docs.microsoft.com/en-us/skypeforbusiness/plan-your-deployment/network-requirements/dns
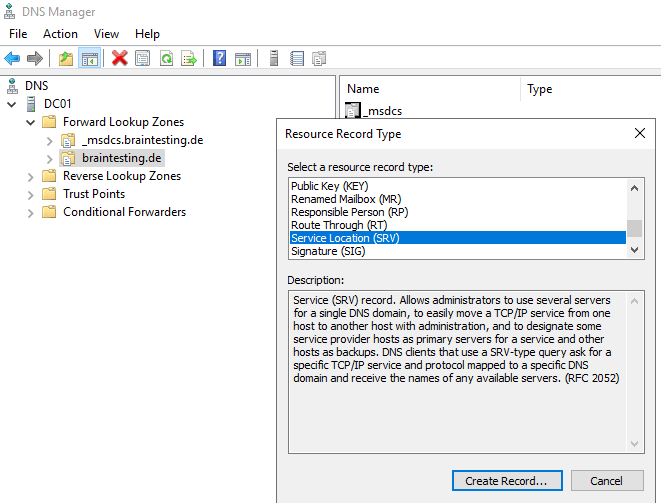
_sipinternaltls._tcp.<sipdomain>
Port 5061
Host offering this service: Front End pool FQDN
Enables Internal user automatic sign-in 1 to the Front End server/pool or
SE server/pool that authenticates and redirects client requests for sign-in.
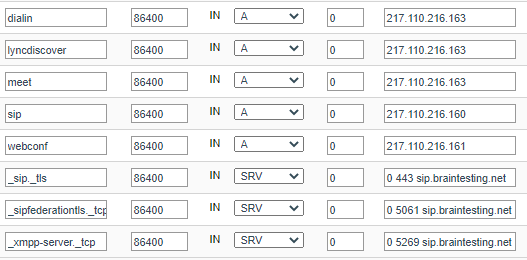
For external Access you need the following DNS Records published in the internet.
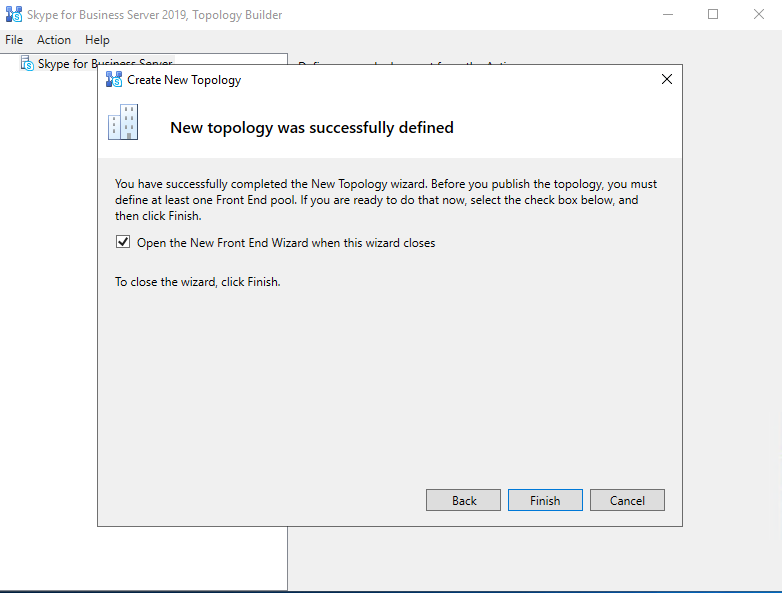
Launching the Topology Builder to create a new SFB Environment (Toplogy)
Now we can launch the Topology Builder and in my case, because it is the first Skype for Business Server in my LAB environment, I have to create a new Topology.
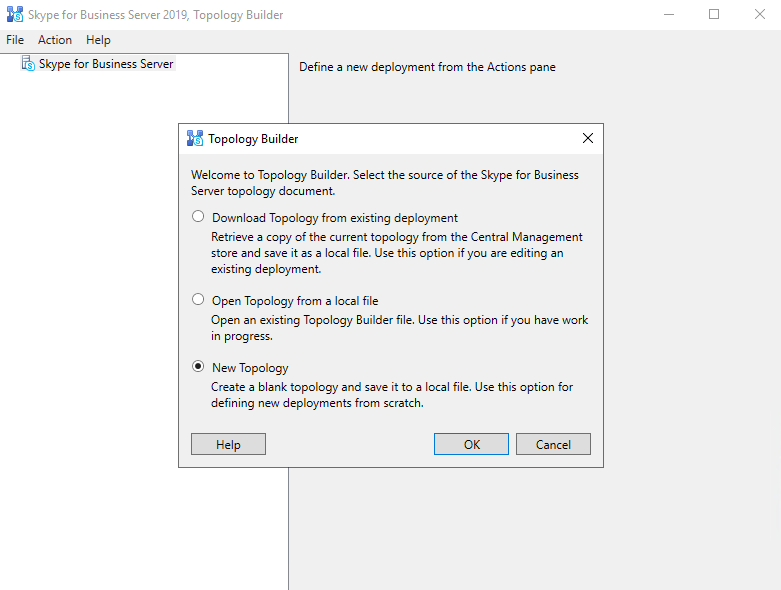
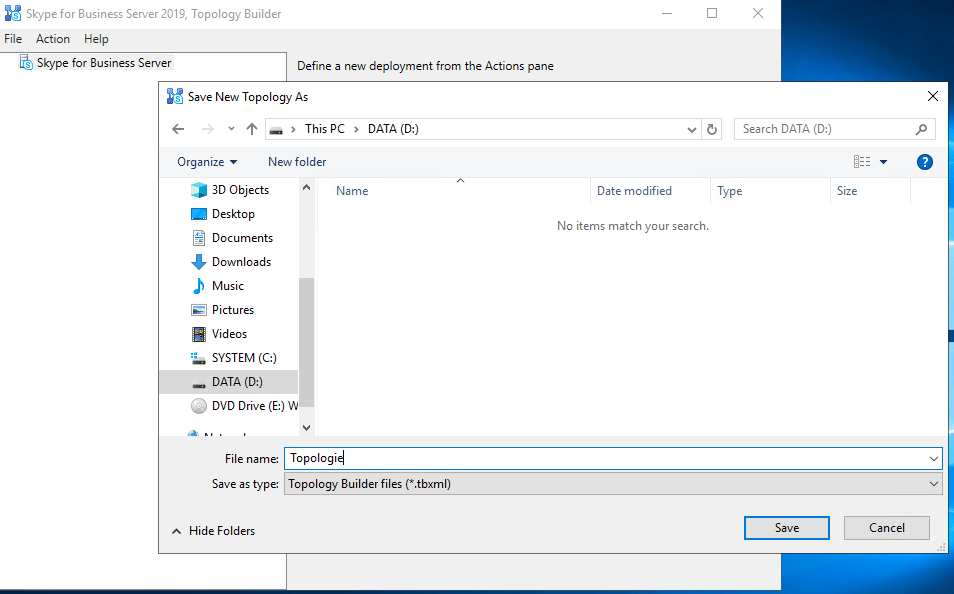
You need to save the Topologie into an xml file
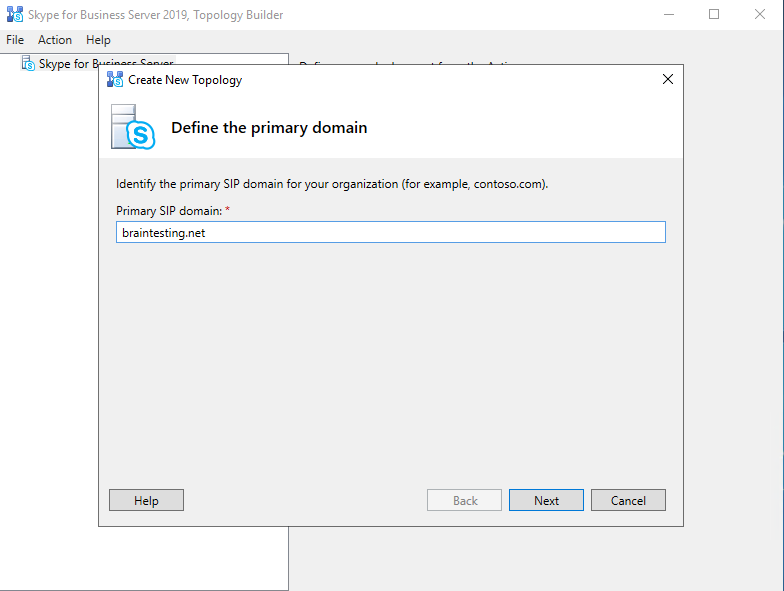
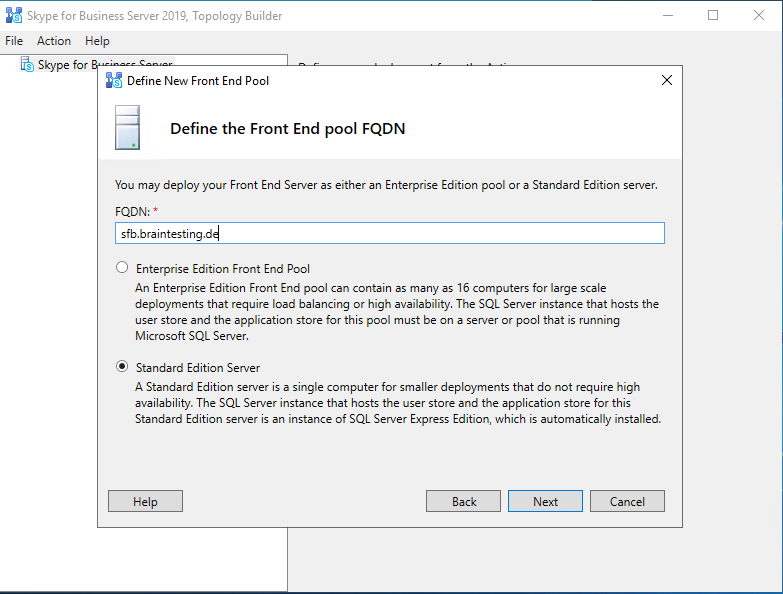
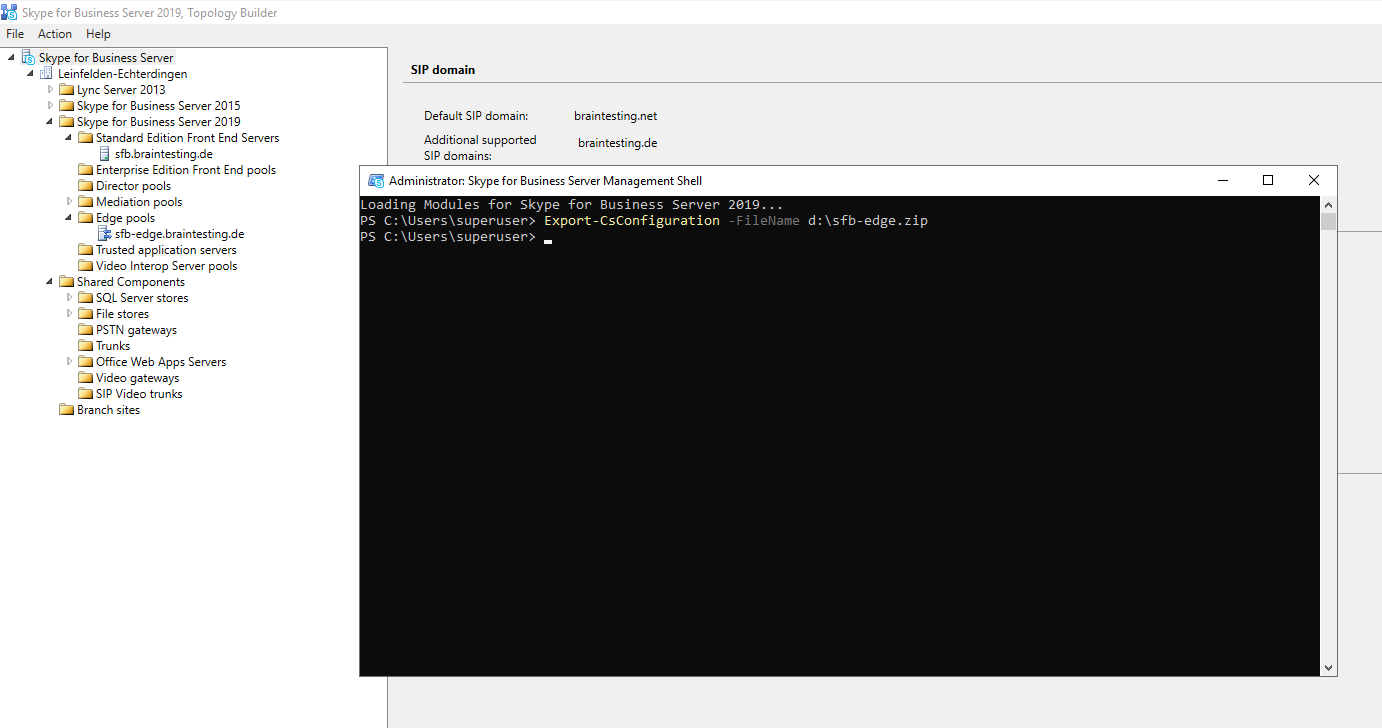
Enter the primary SIP domain for your deployment, in my case braintesting.net
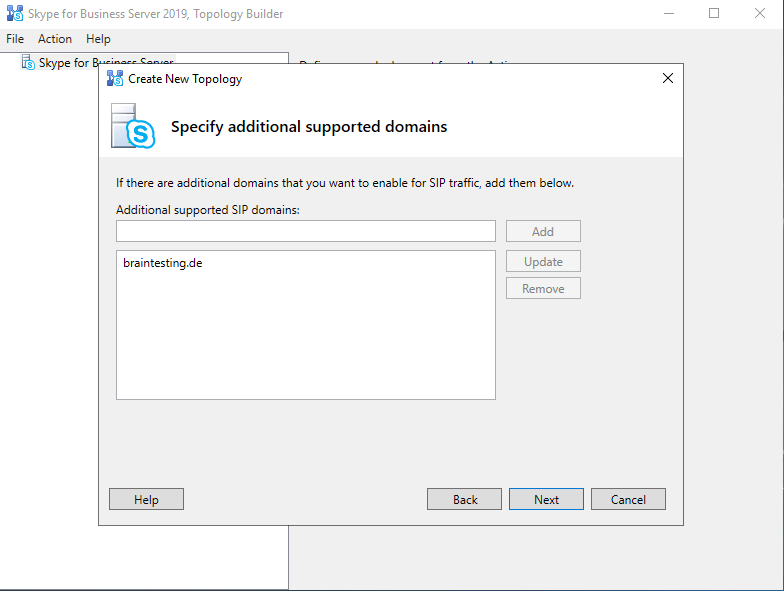
Further you can enable additional supported SIP domains, in my case I also want to use braintesting.de


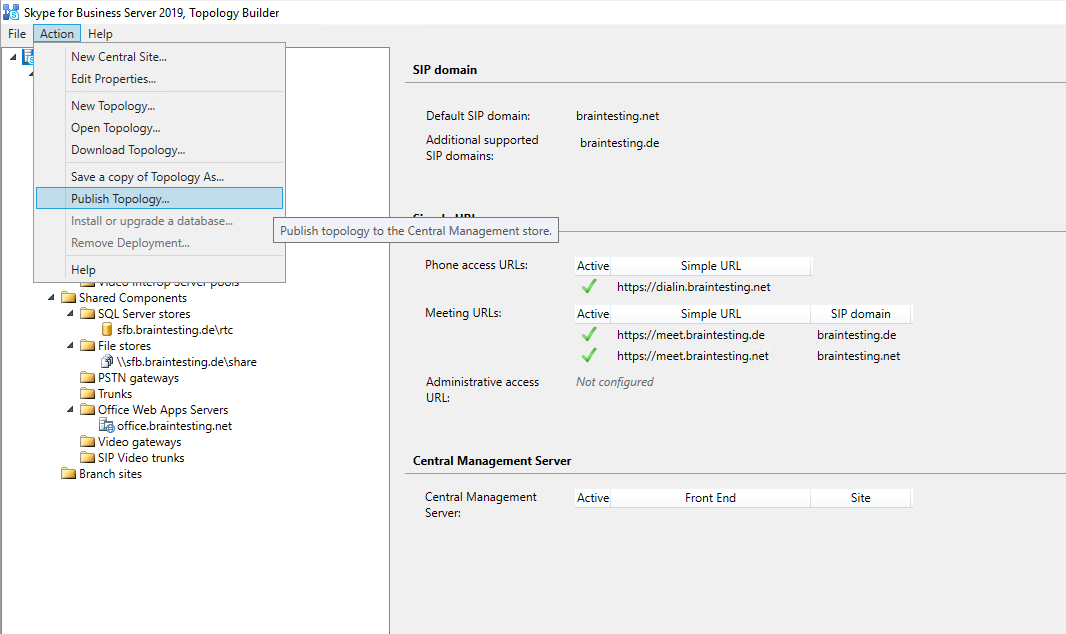
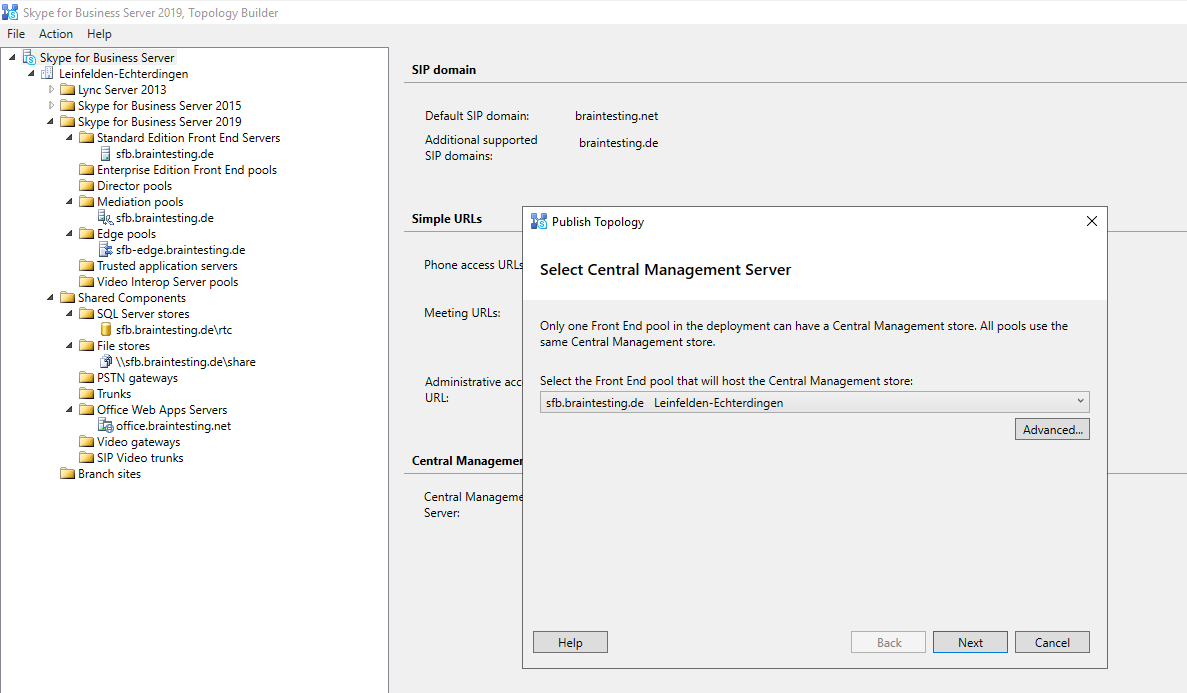
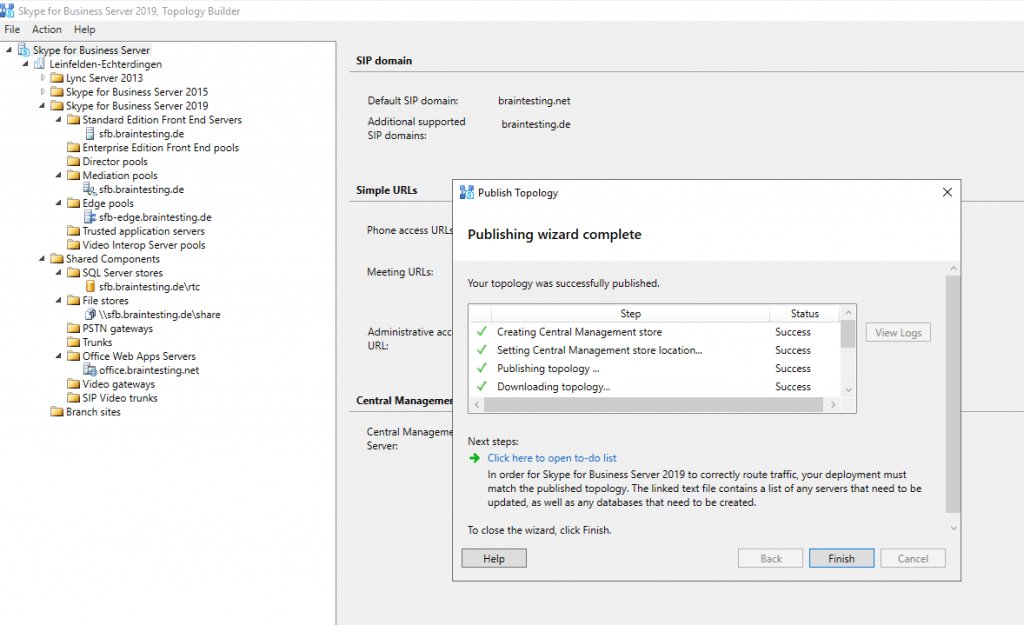
Publishing the Topology
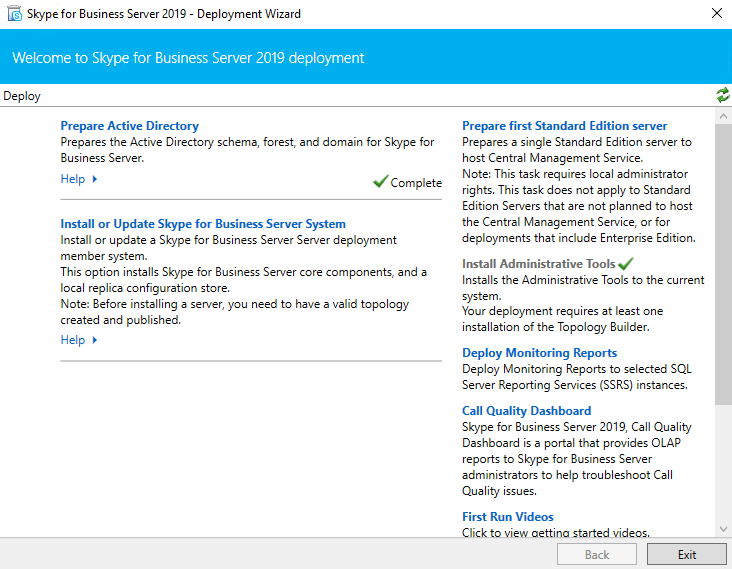
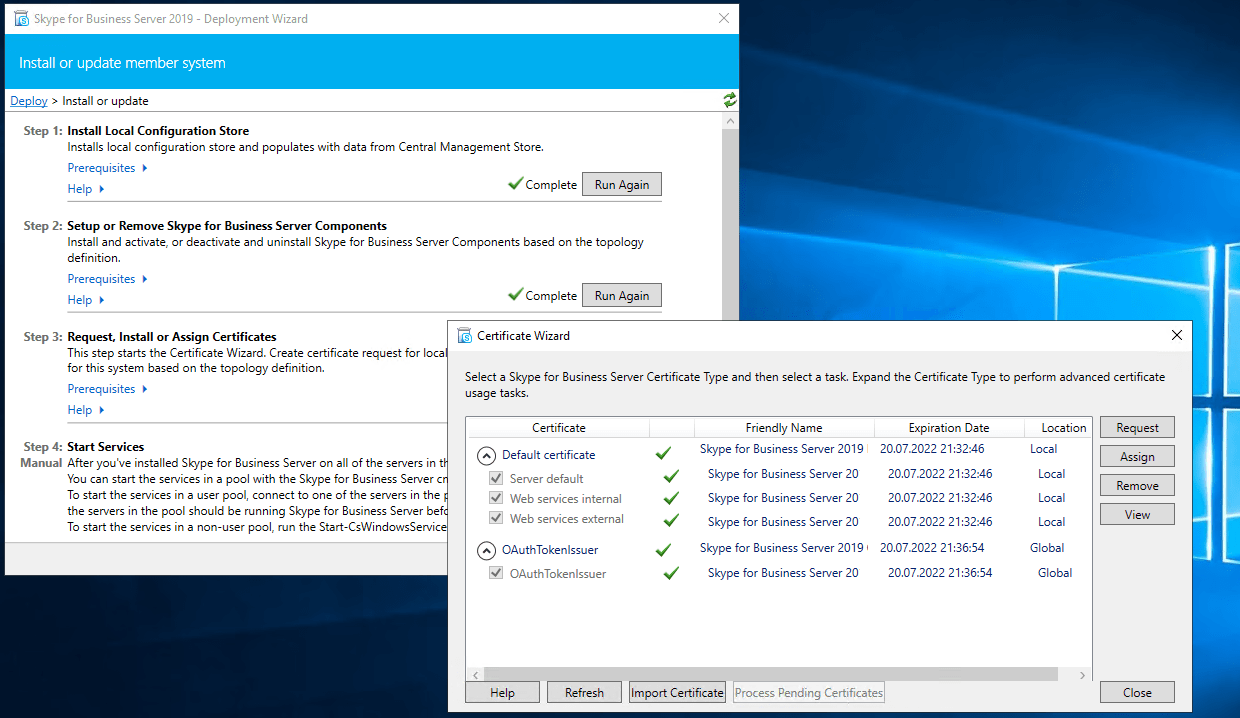
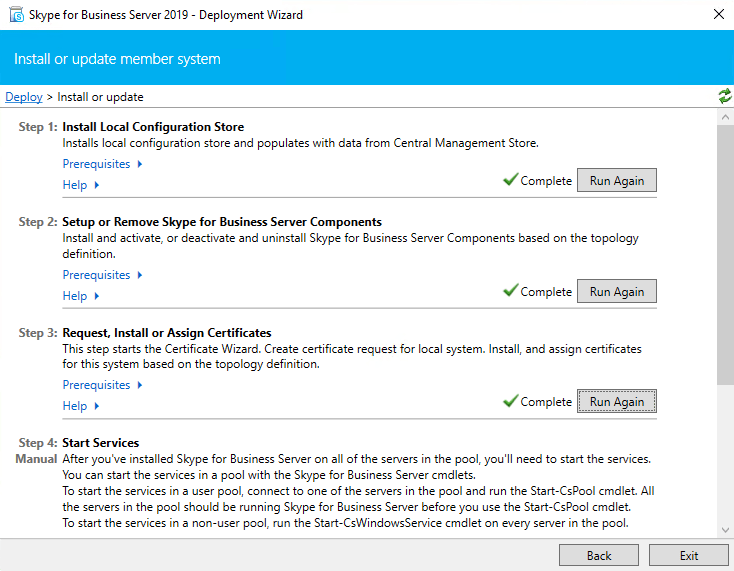
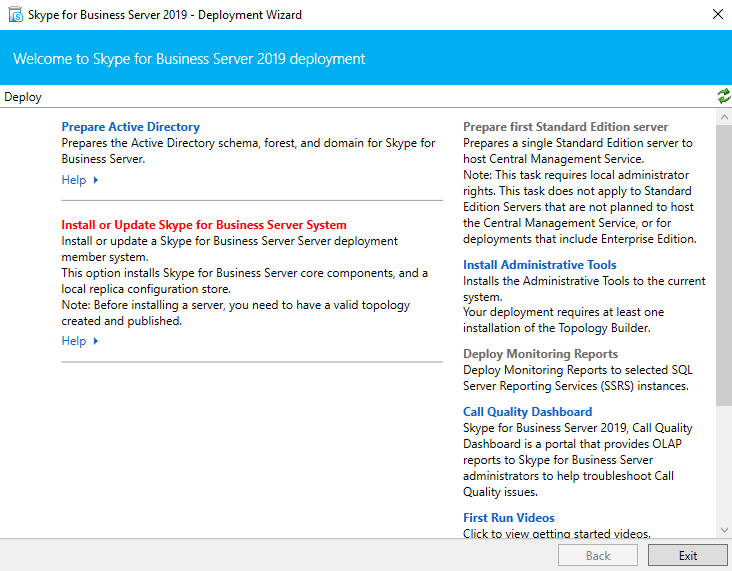
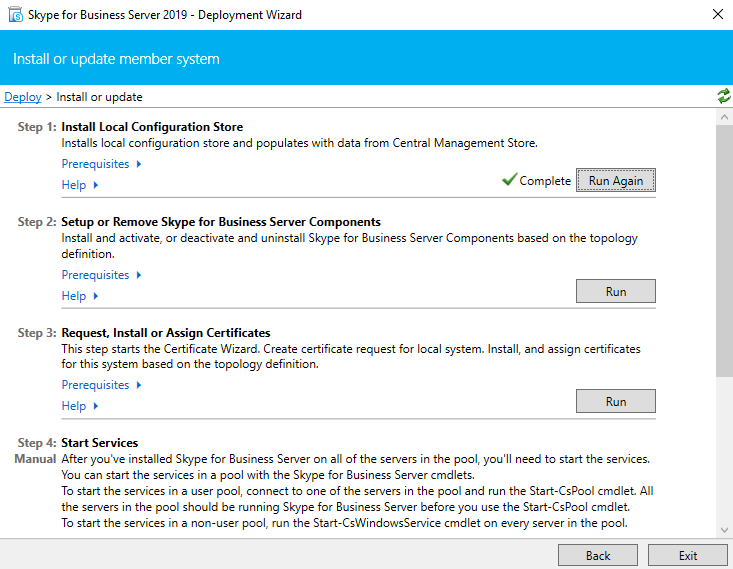
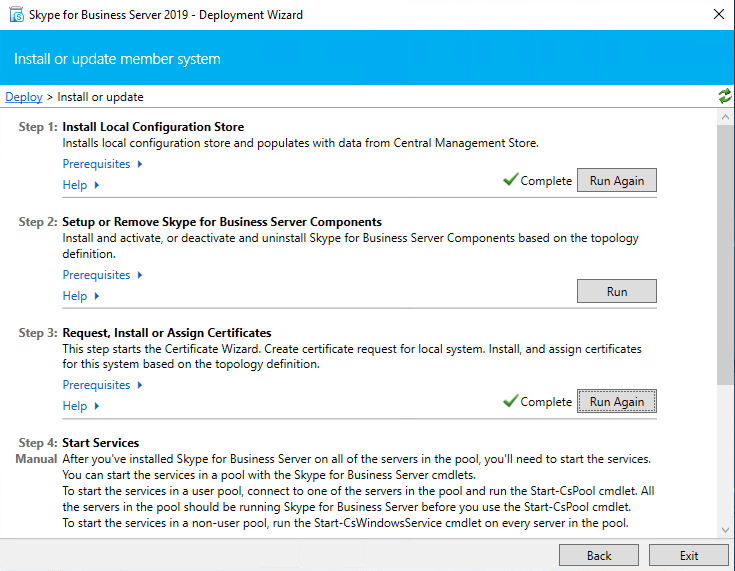
Install the Local Configuration Store and SFB Components
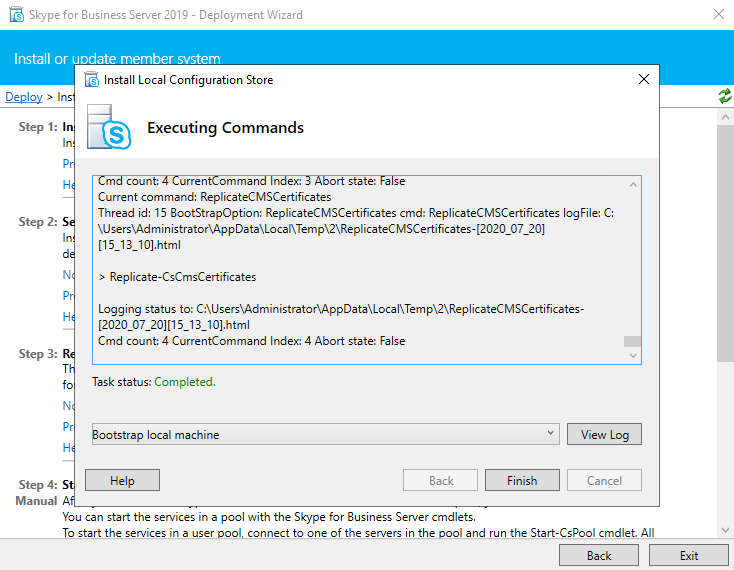
After publishing the Topology we need to run the Deployment Wizard. Click on Install or Update Skype for Business Server Systems and run the Install Local Configuration Store Wizard.
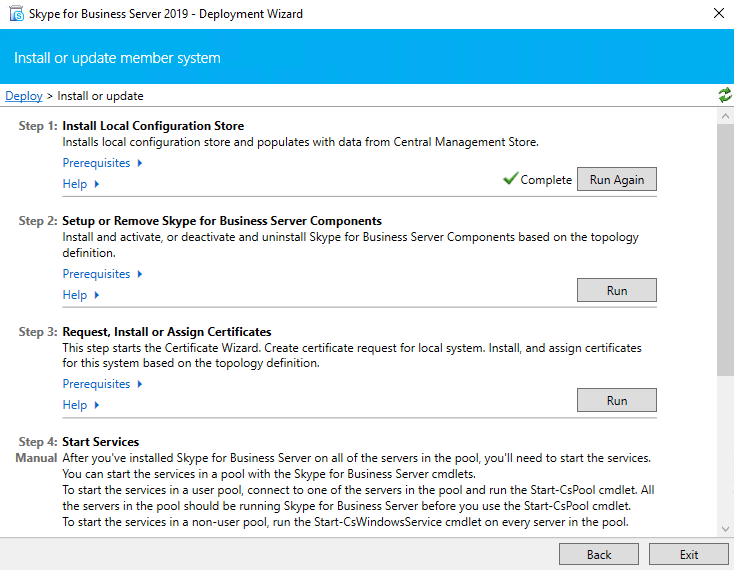
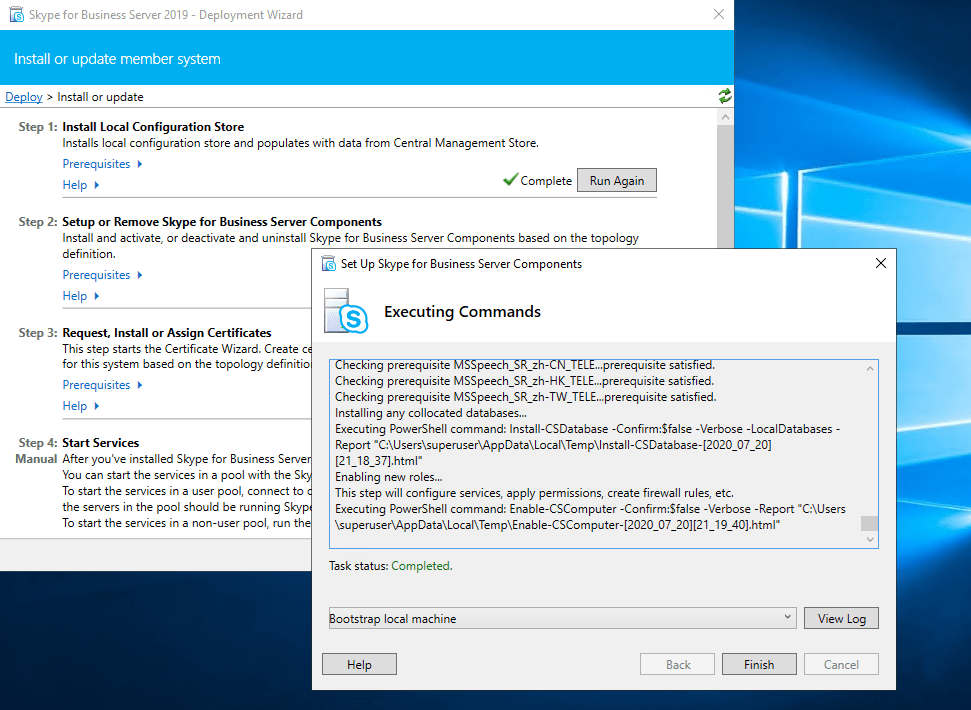
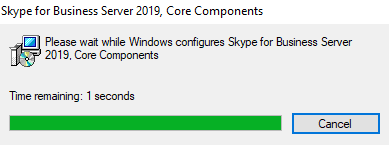
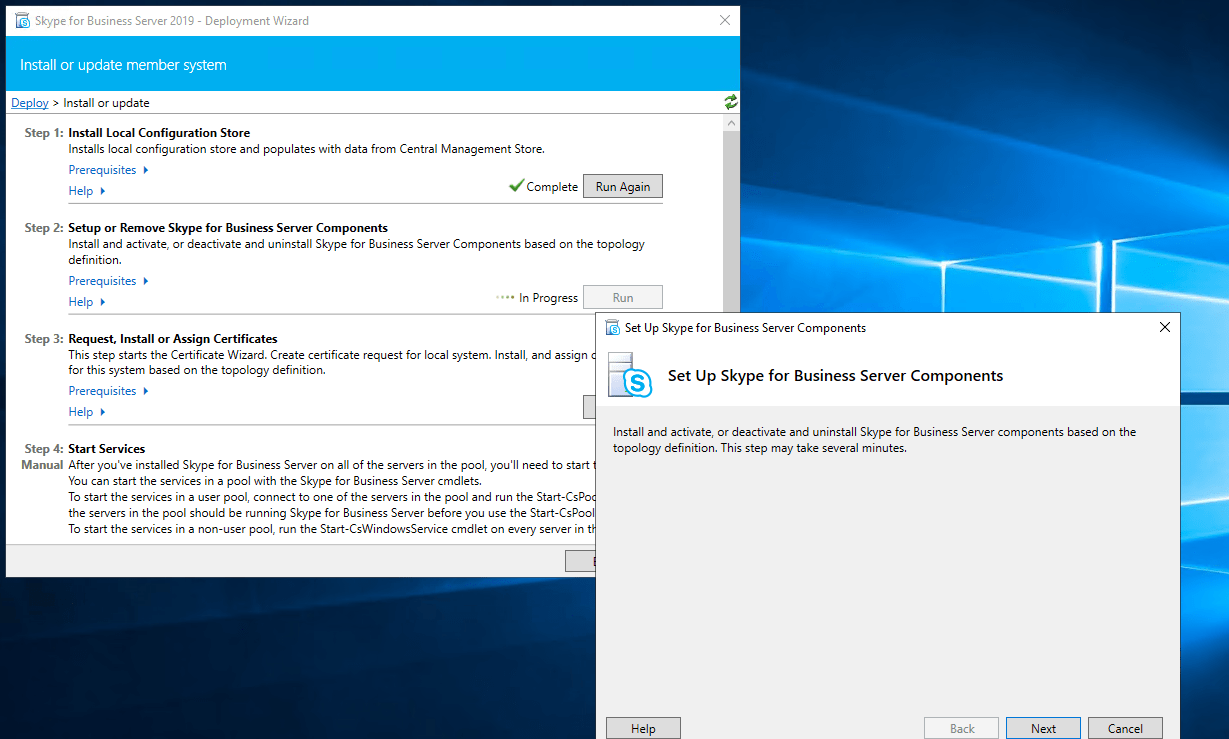
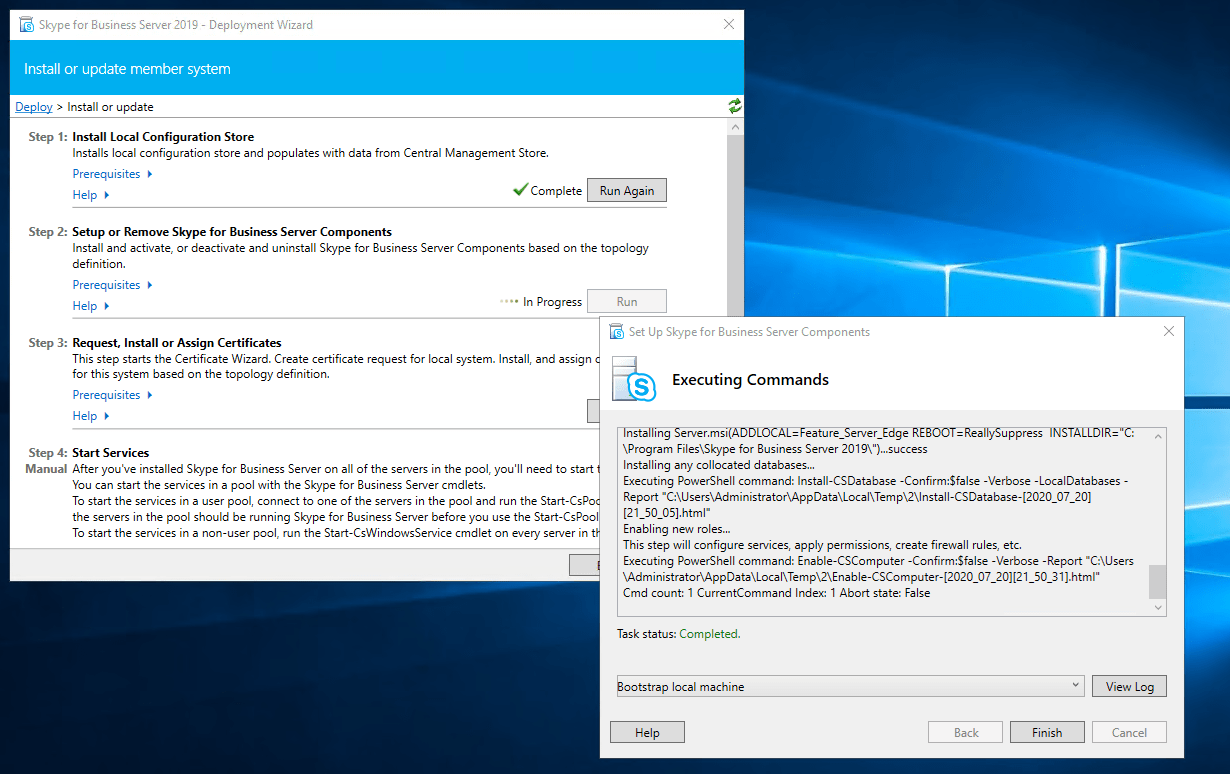
Now run Setup or Remove Skype for Business Server Components

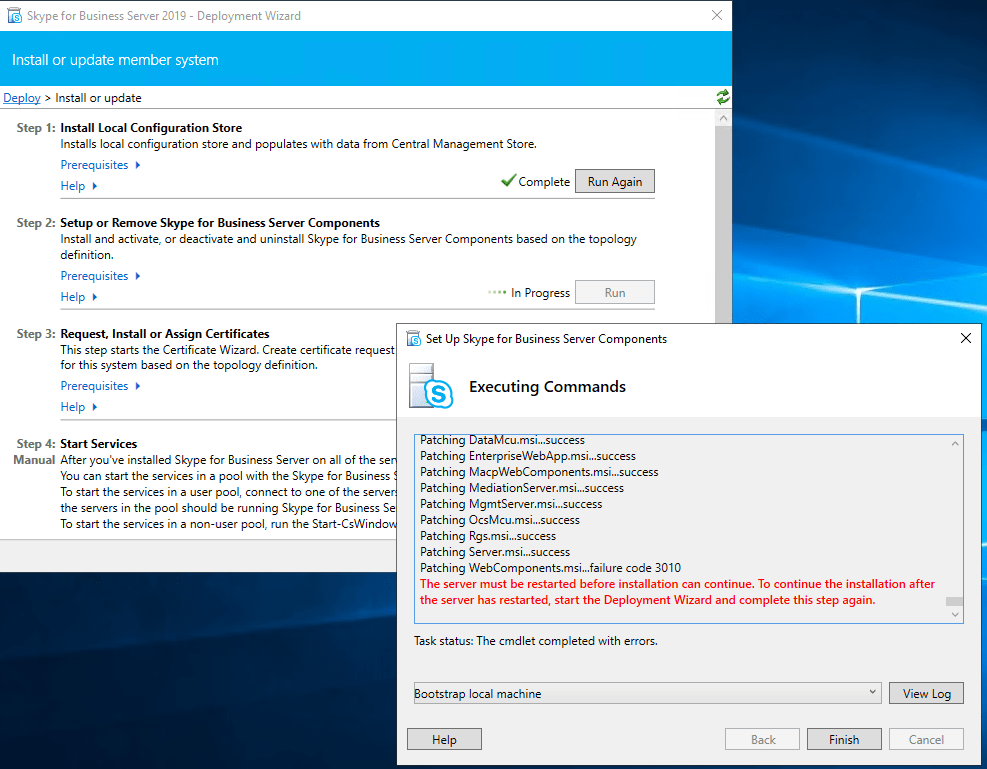
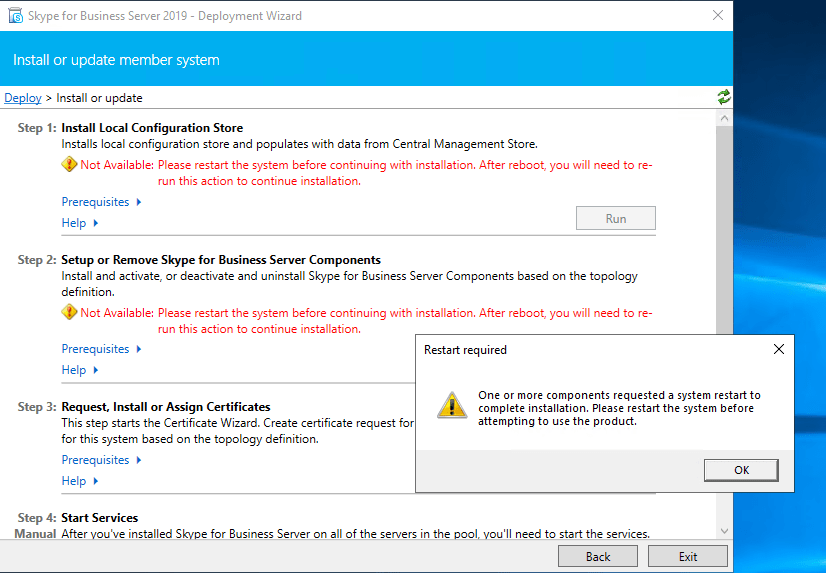
Run it after a reboot again
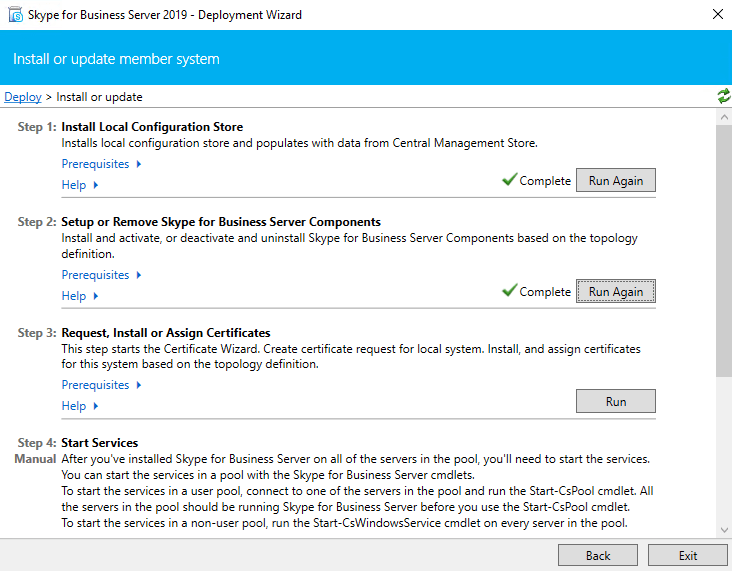
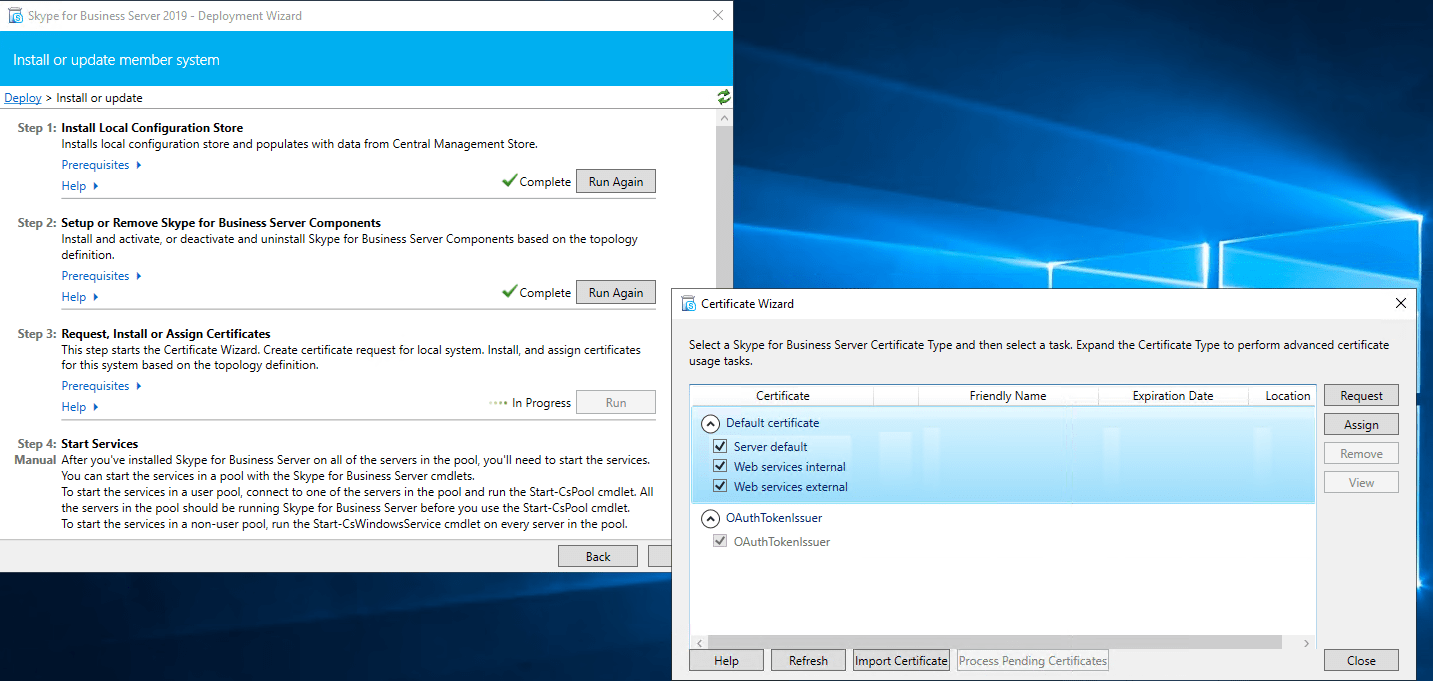
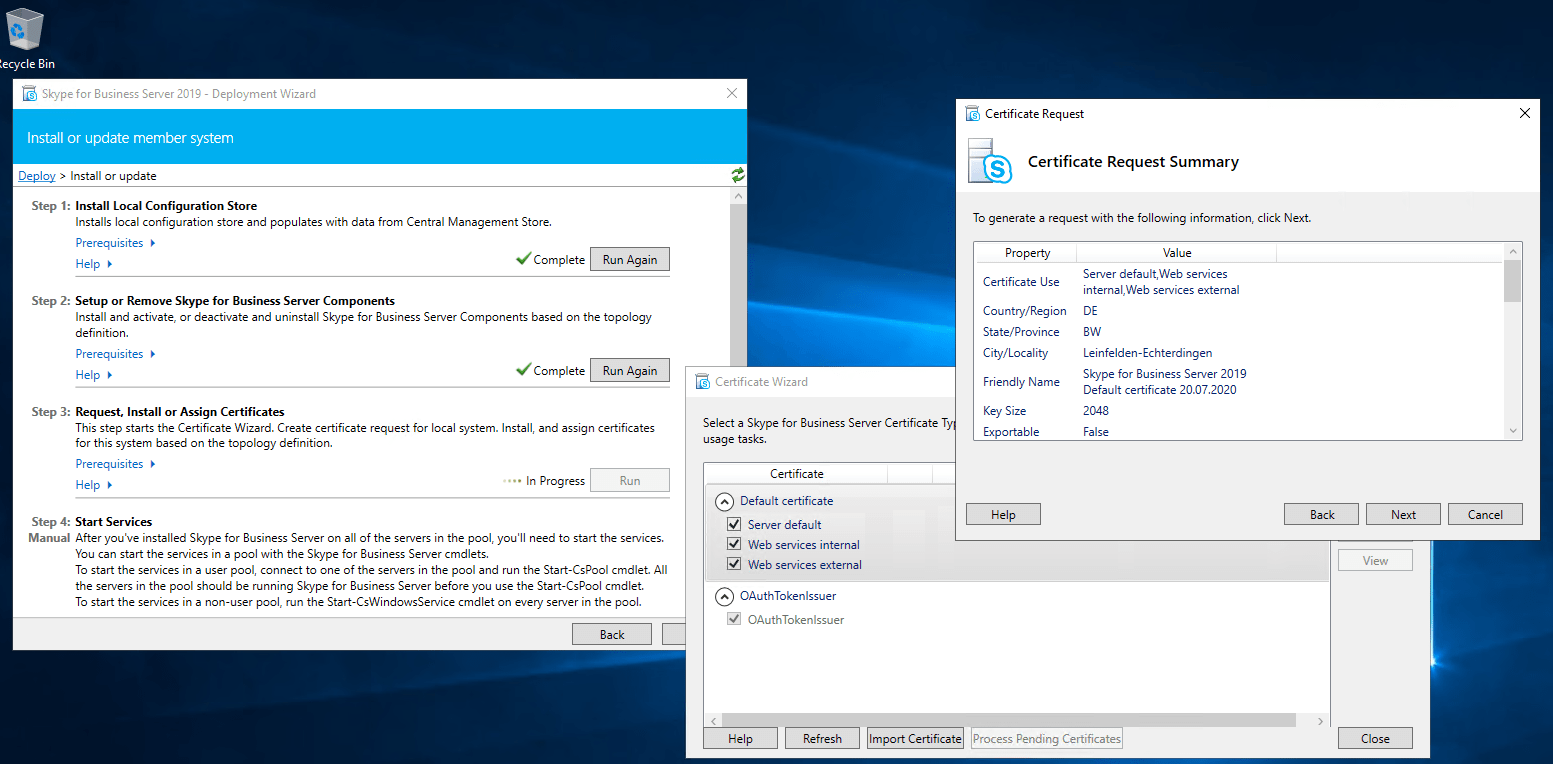
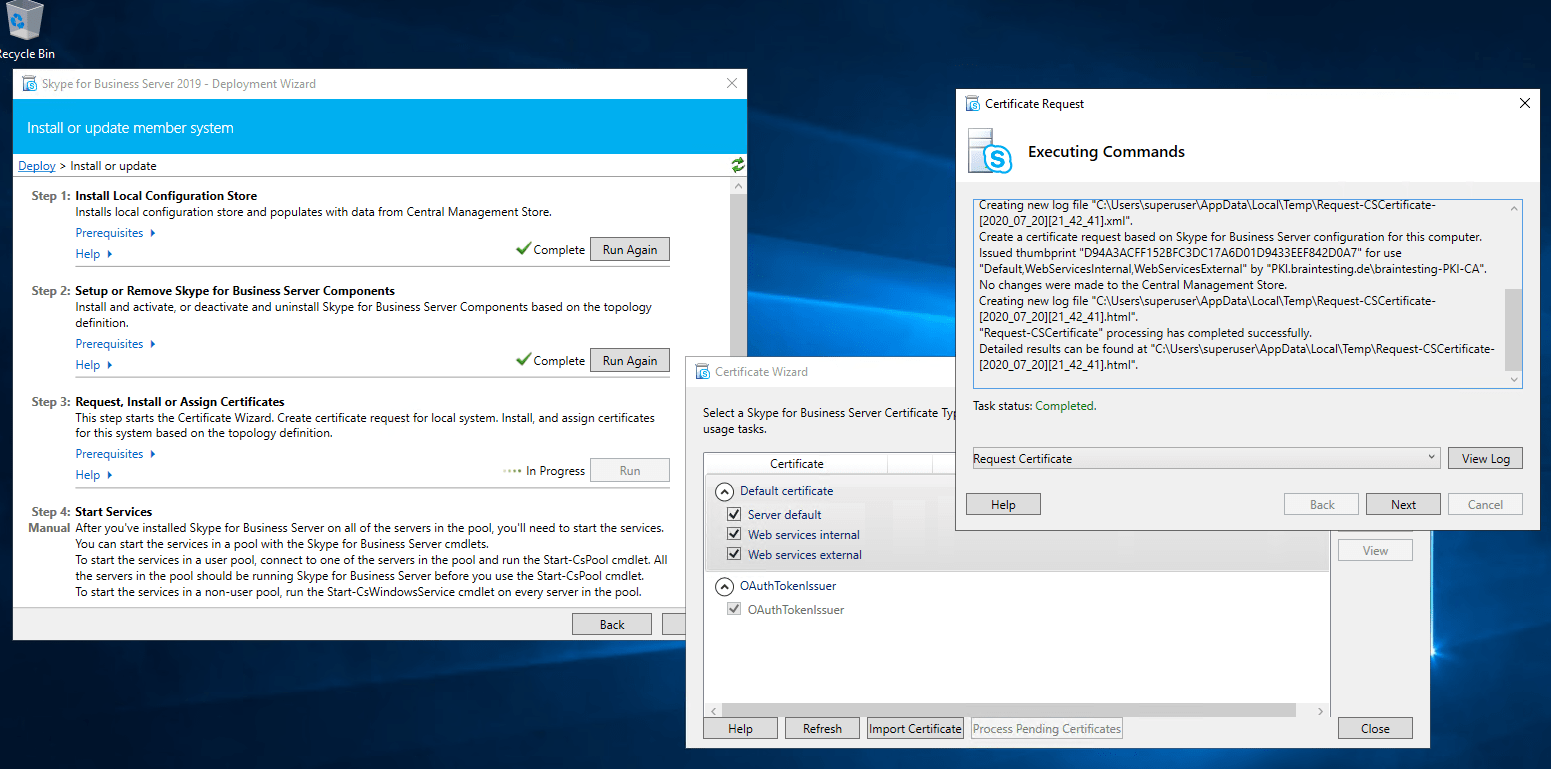
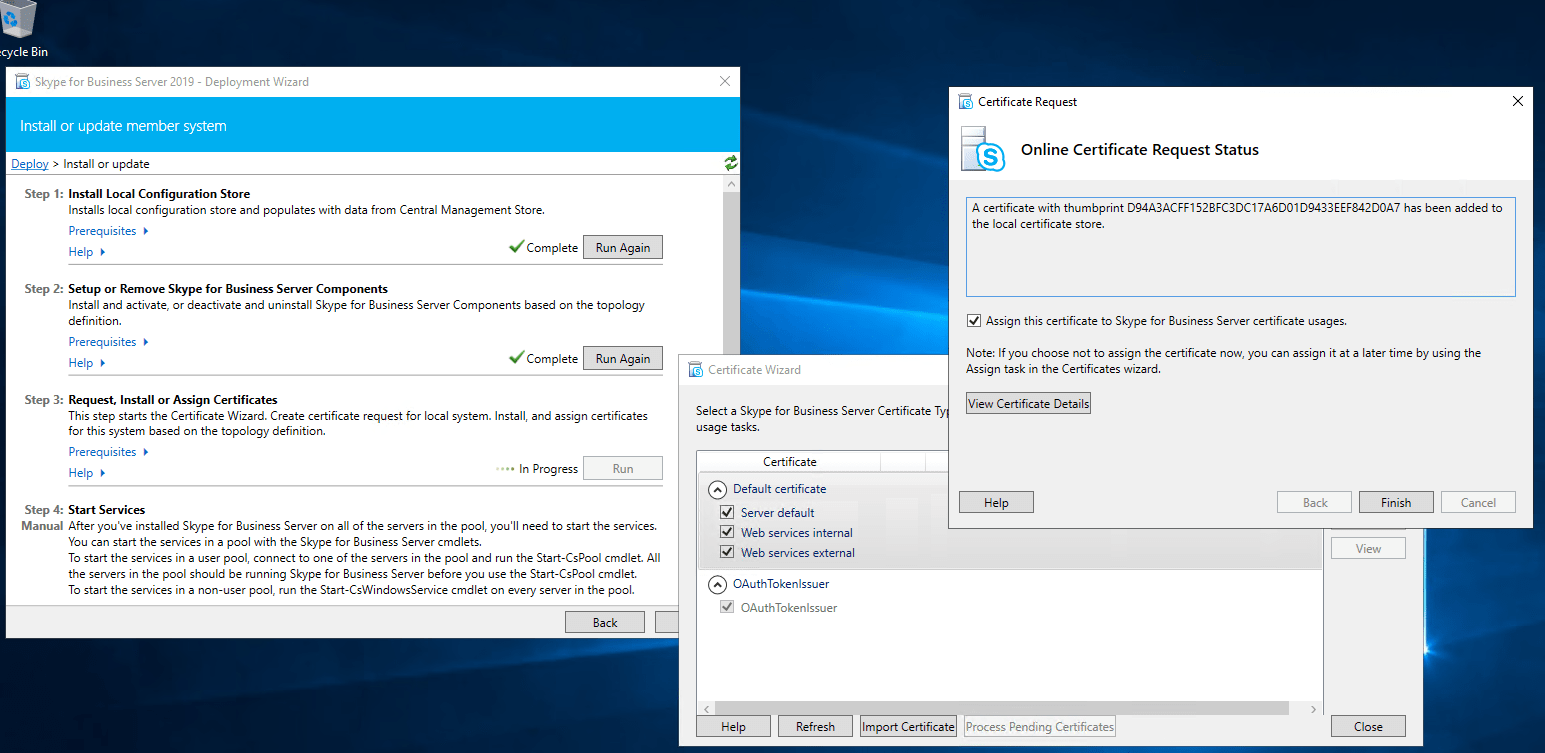
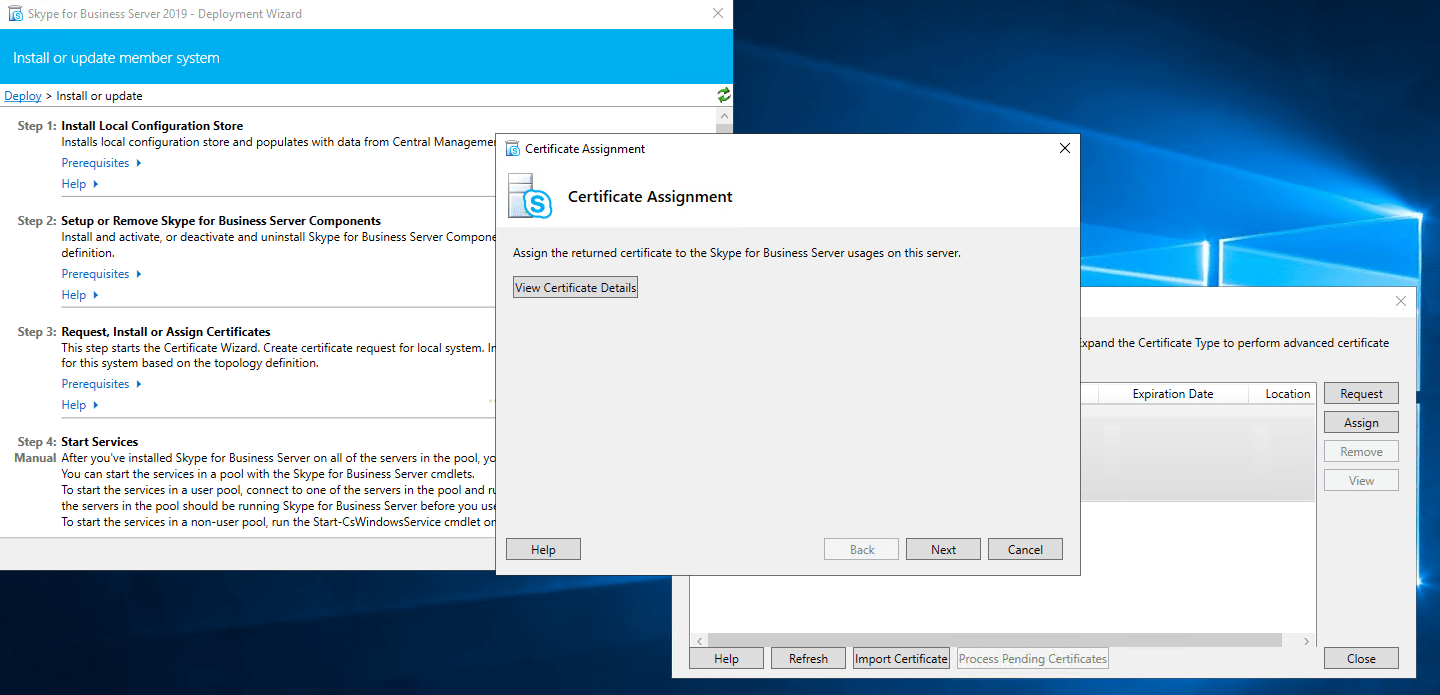
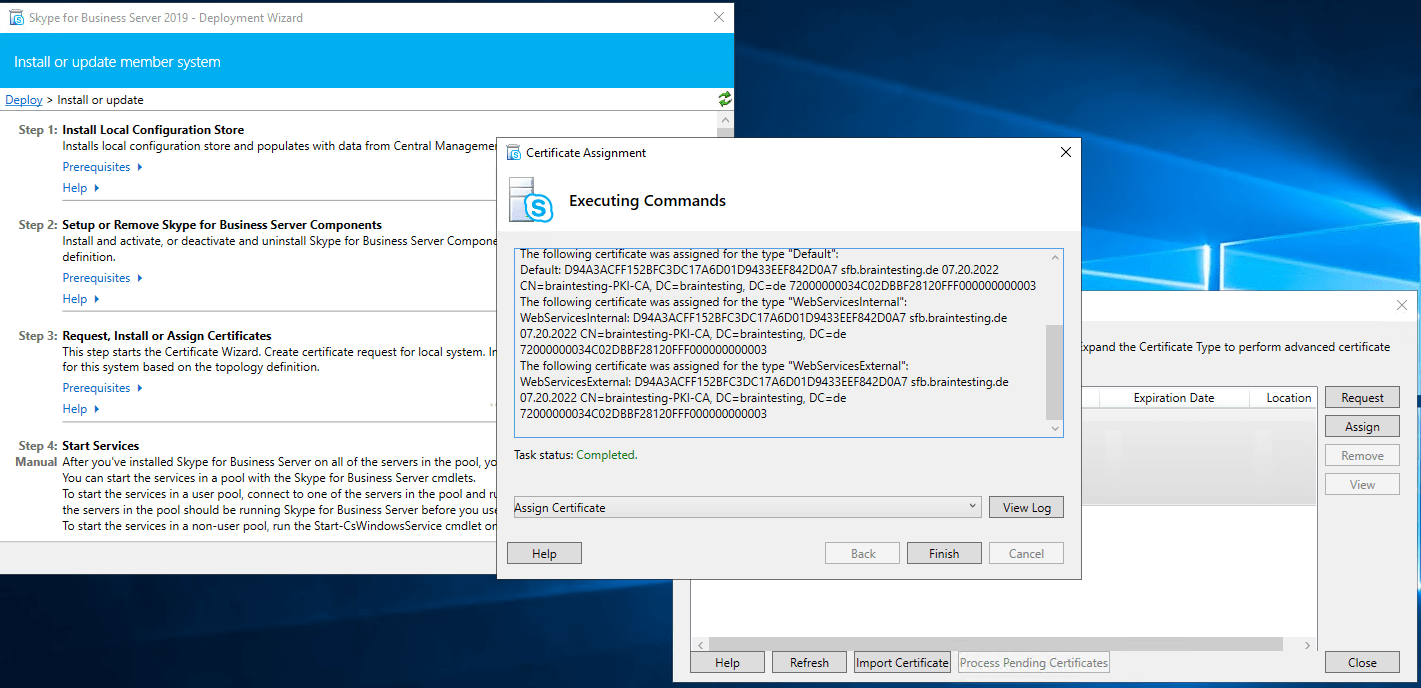
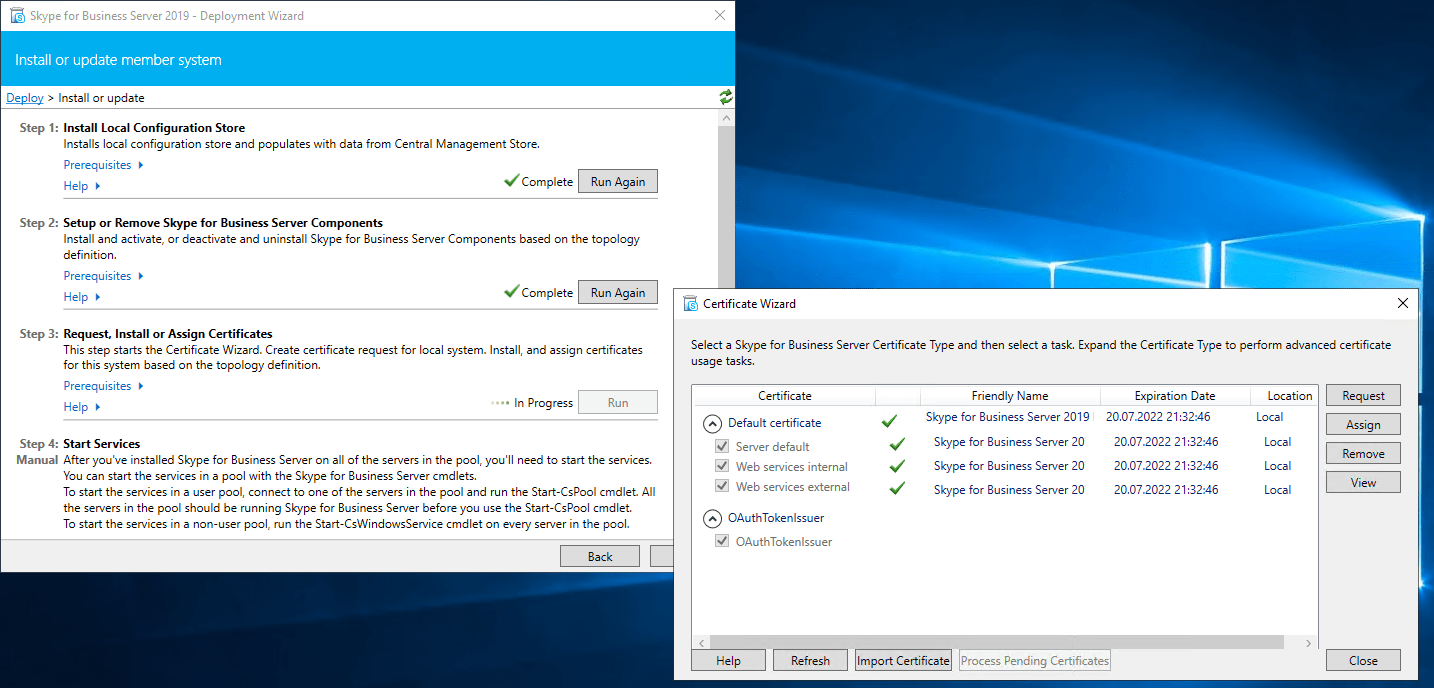
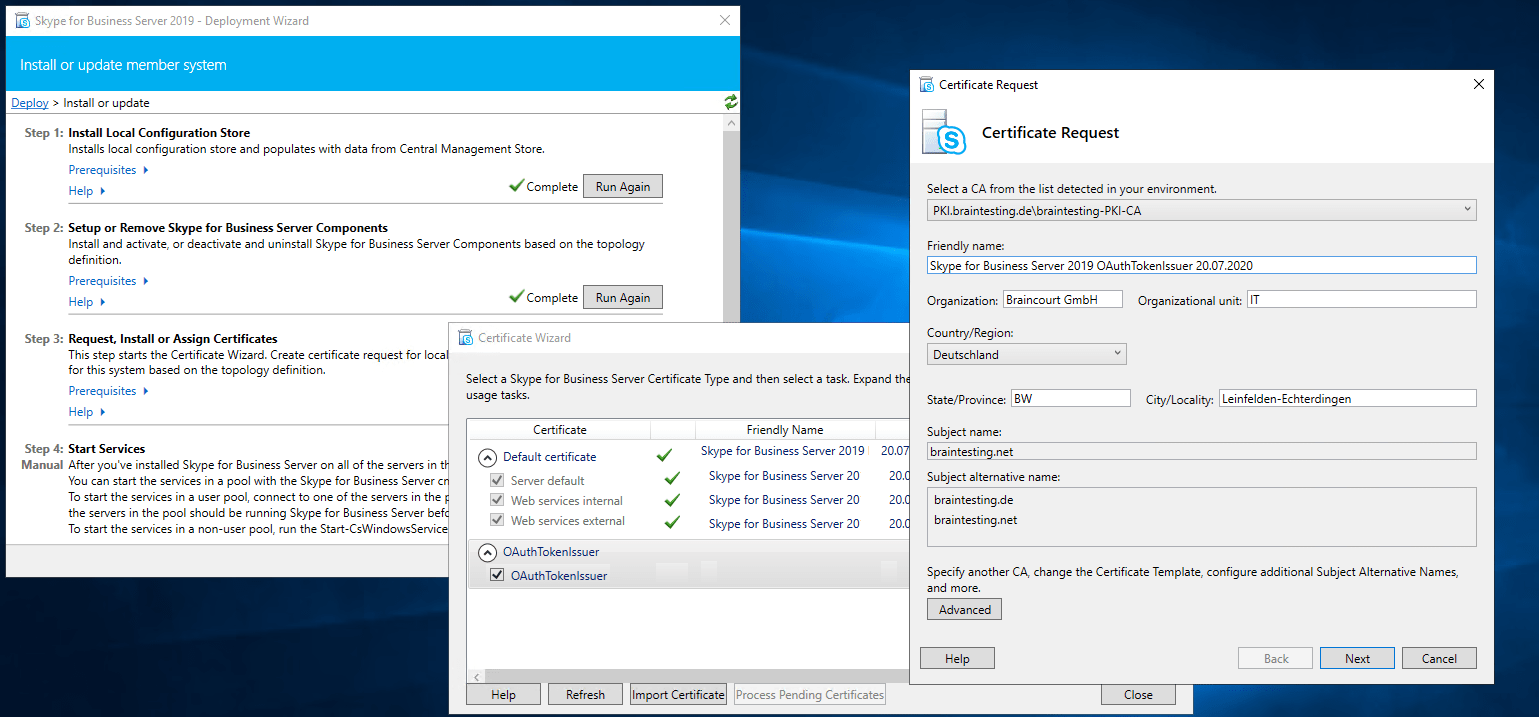
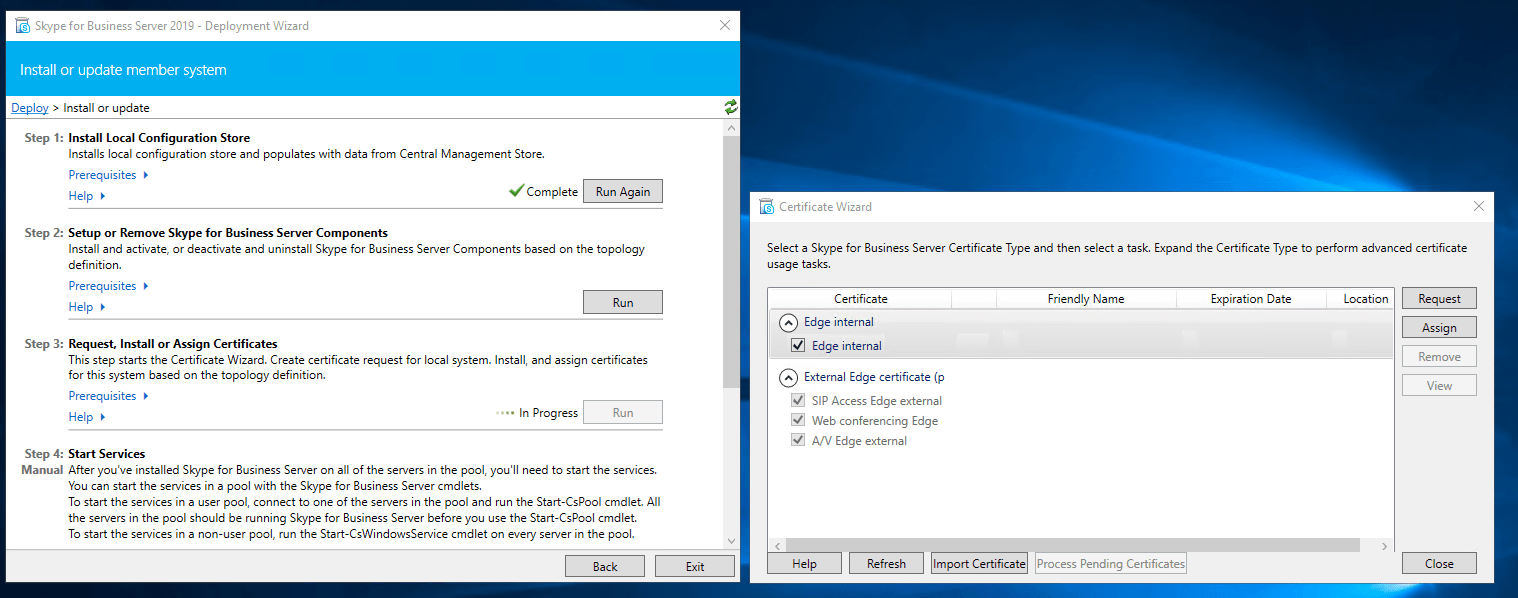
Assign a Certificate to the Front End Server
Next step is to request and assign a certificate for the front end server from our internal PKI.

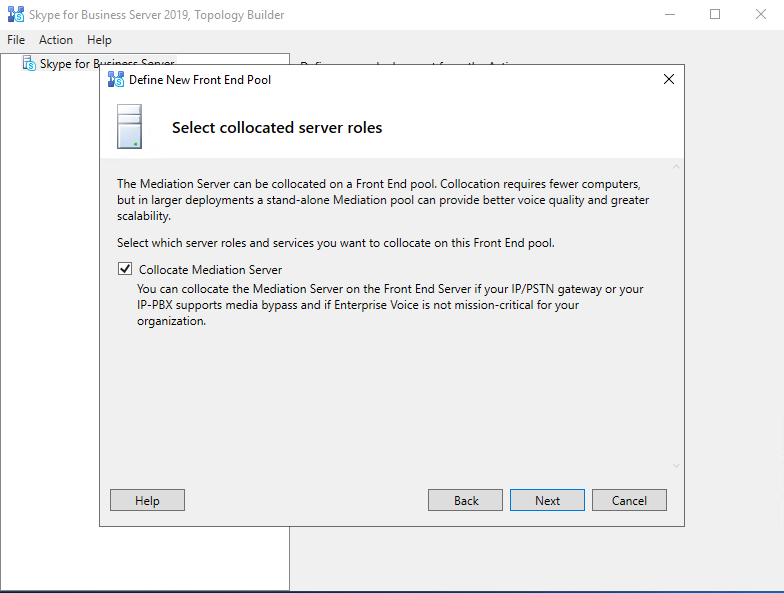
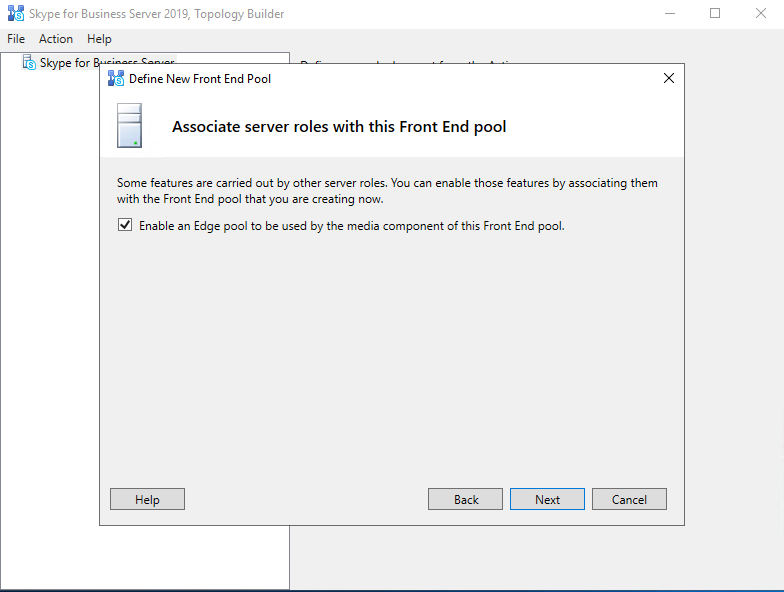
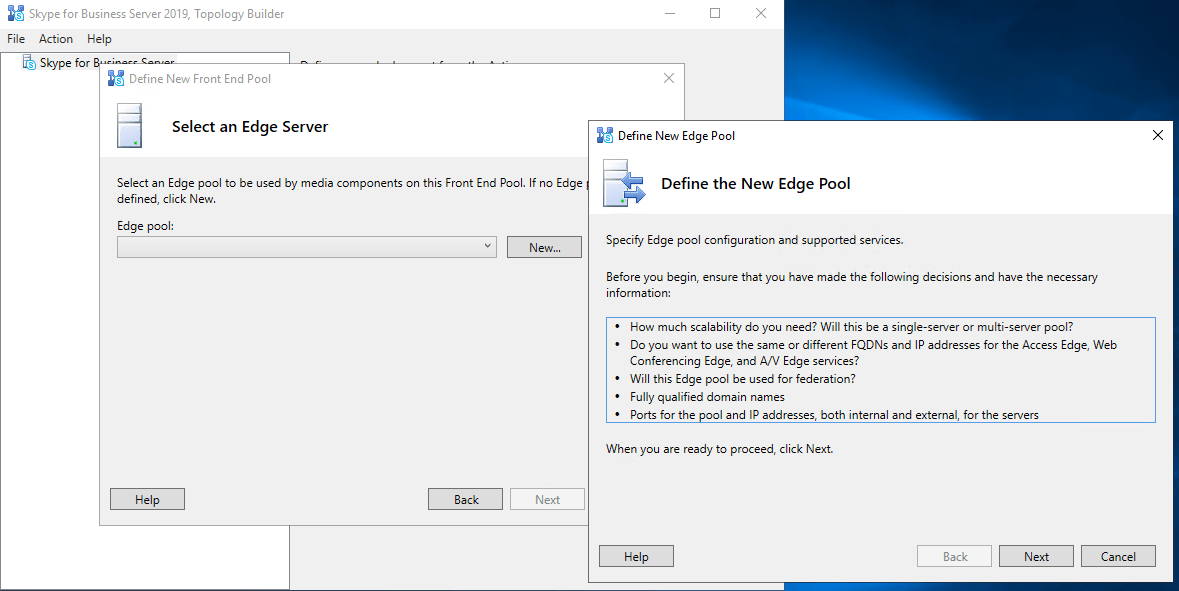
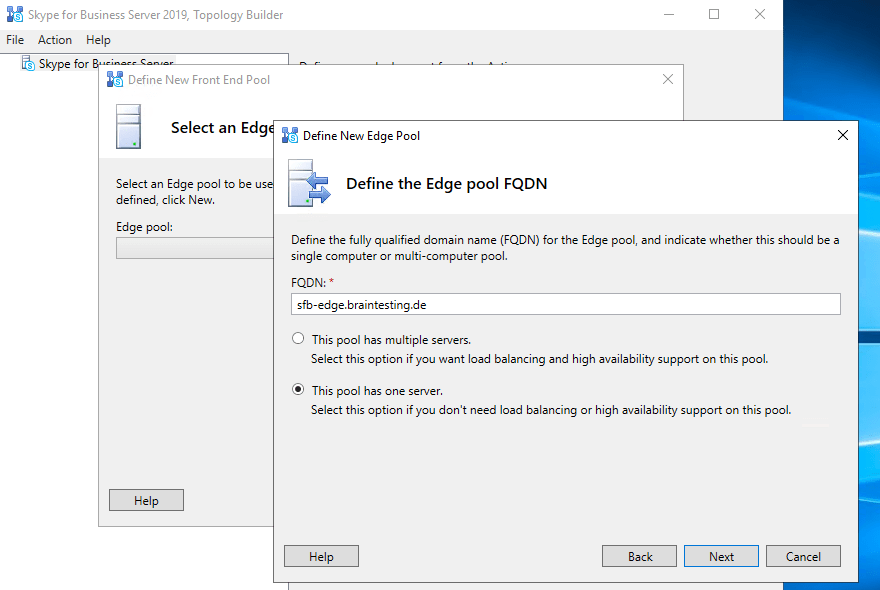
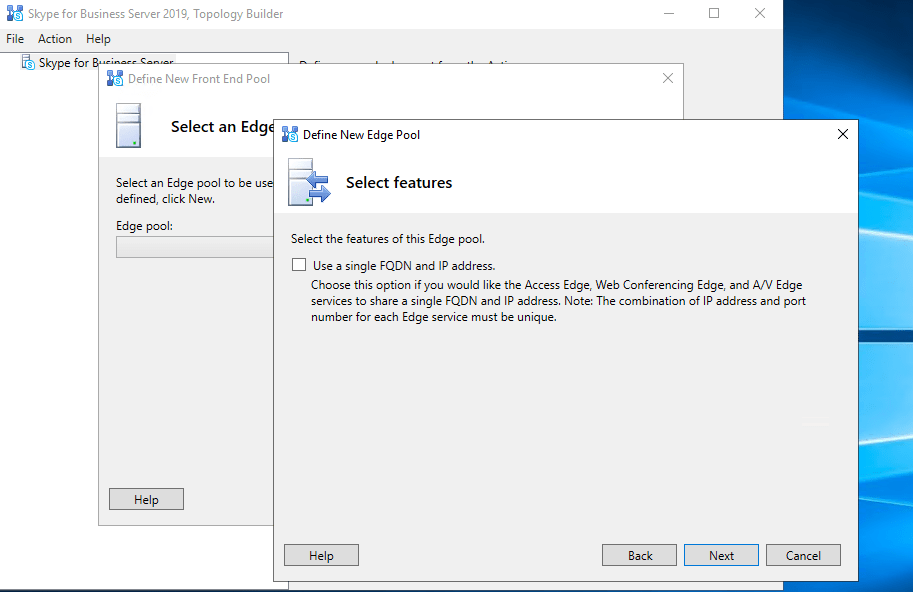
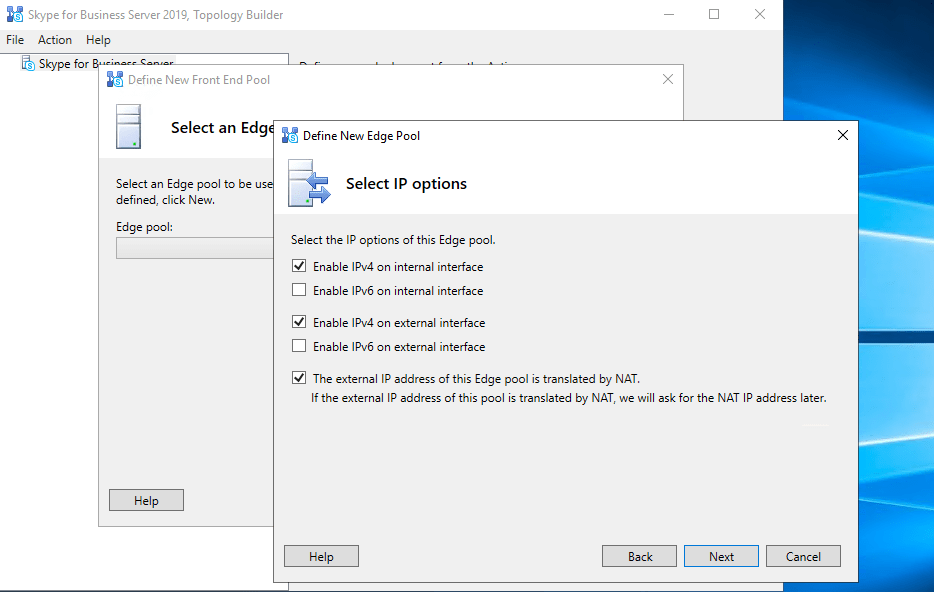
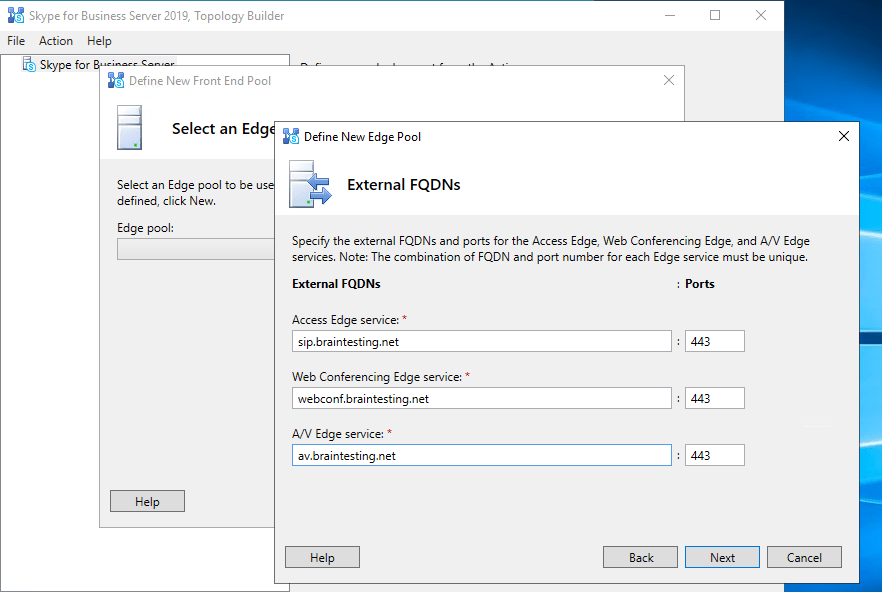
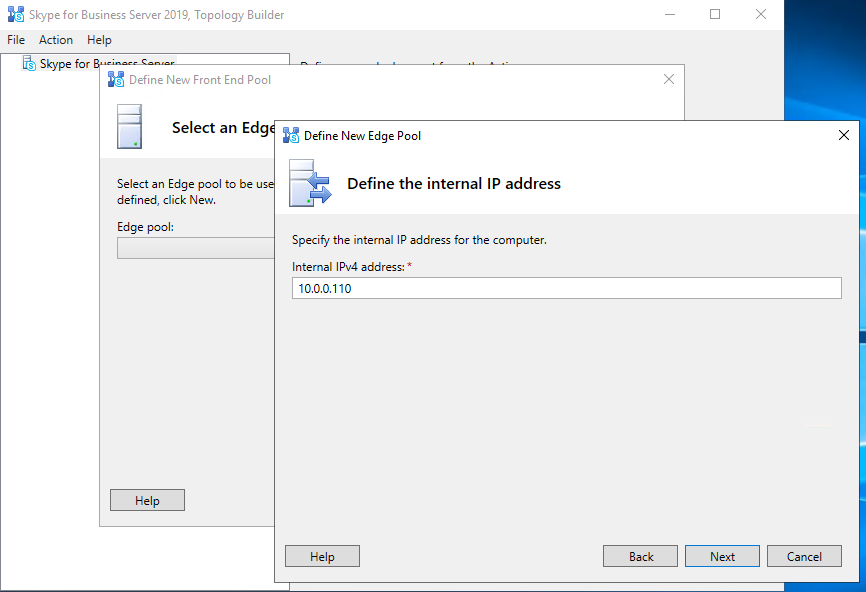
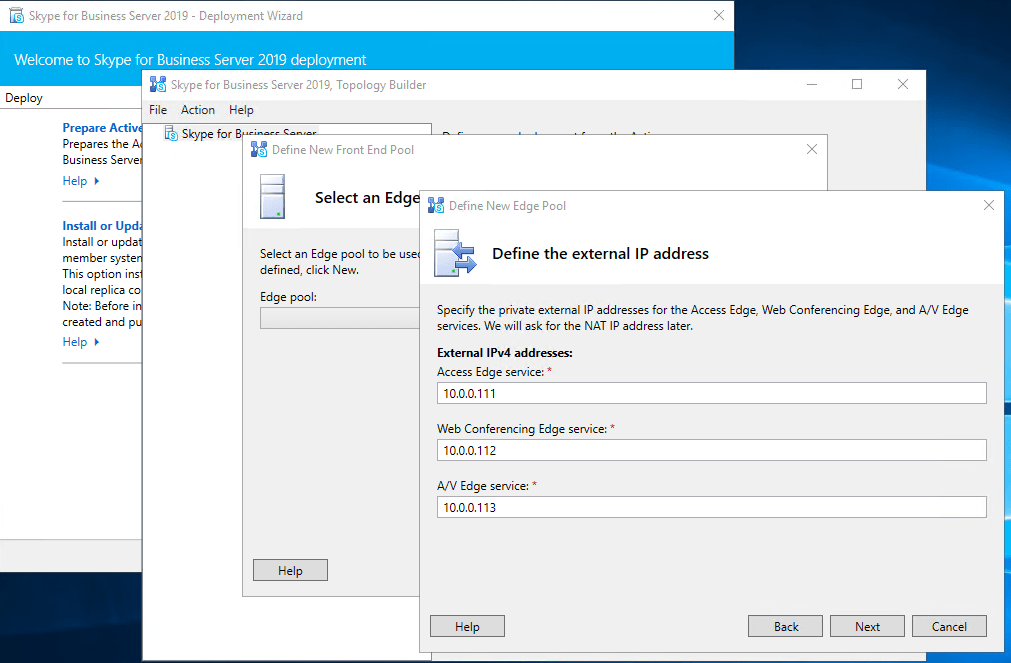
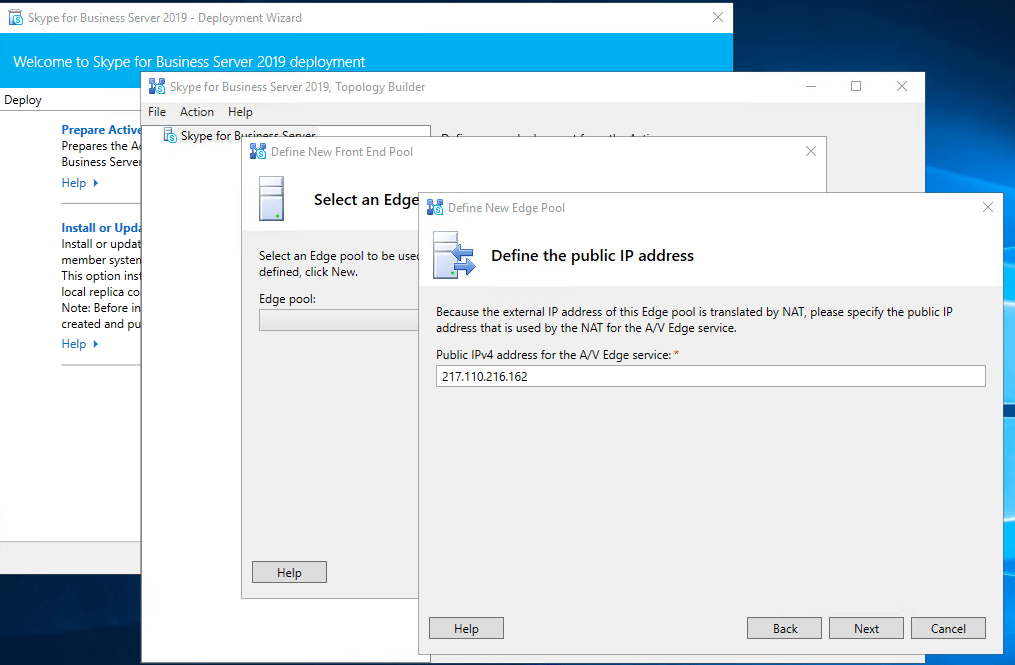
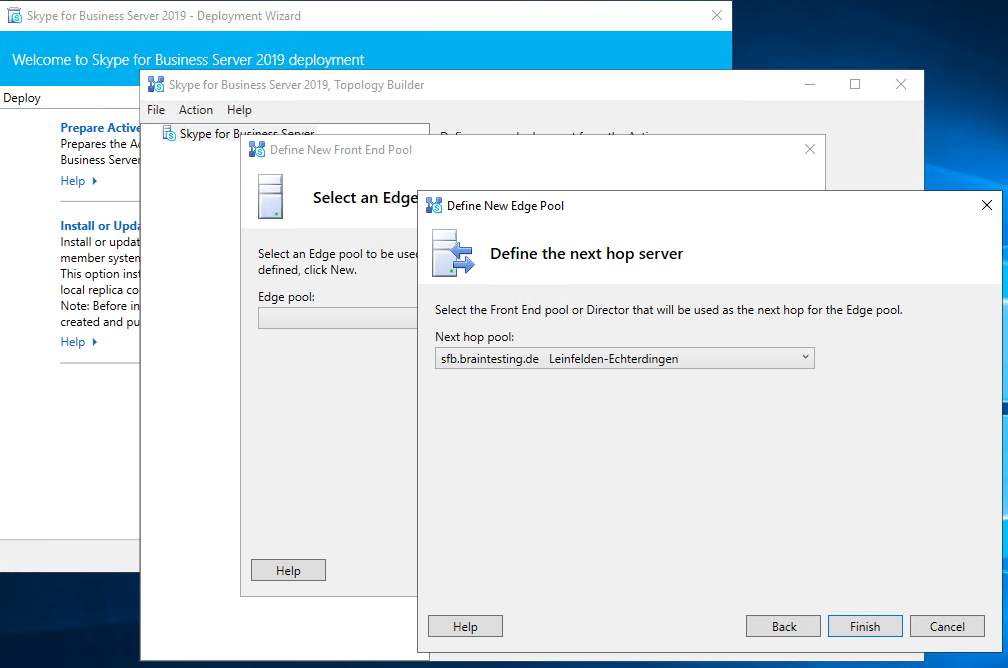
Deploying the Edge Server Role
Powershell script to install Skype for Business prerequisites on Edge Server:
Add-WindowsFeature RSAT-ADDS, NET-Framework-Core, NET-Framework-45-Core, NET-Framework-45-ASPNET, Web-Net-Ext45, NET-WCF-HTTP-Activation45, Windows-Identity-Foundation, Telnet-Client
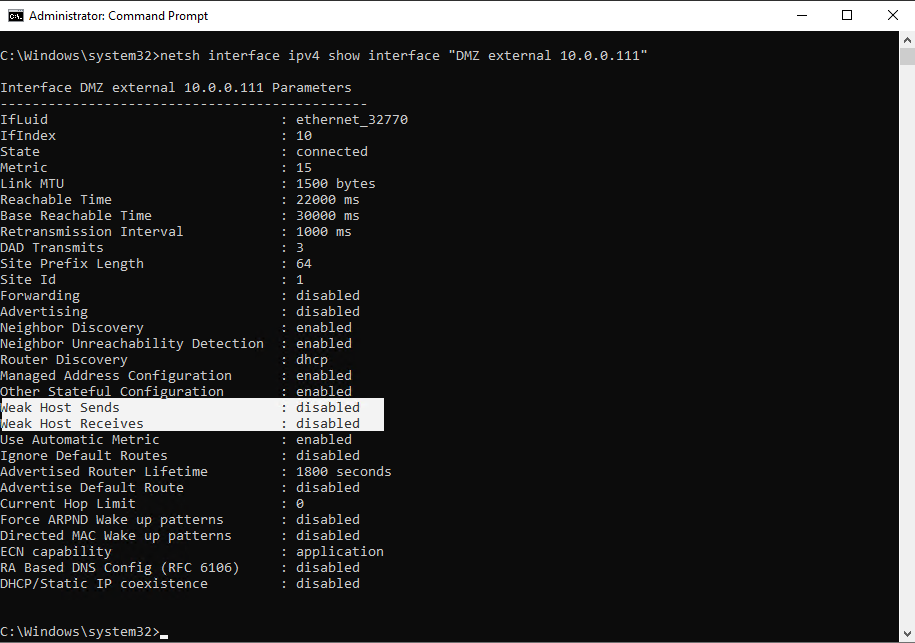
EDGE Server Network Configuration
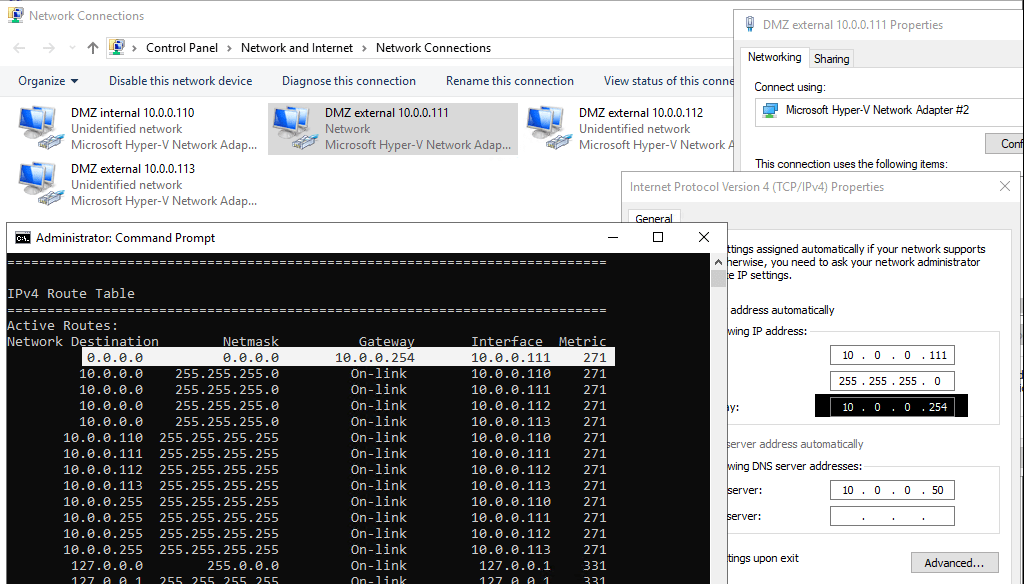
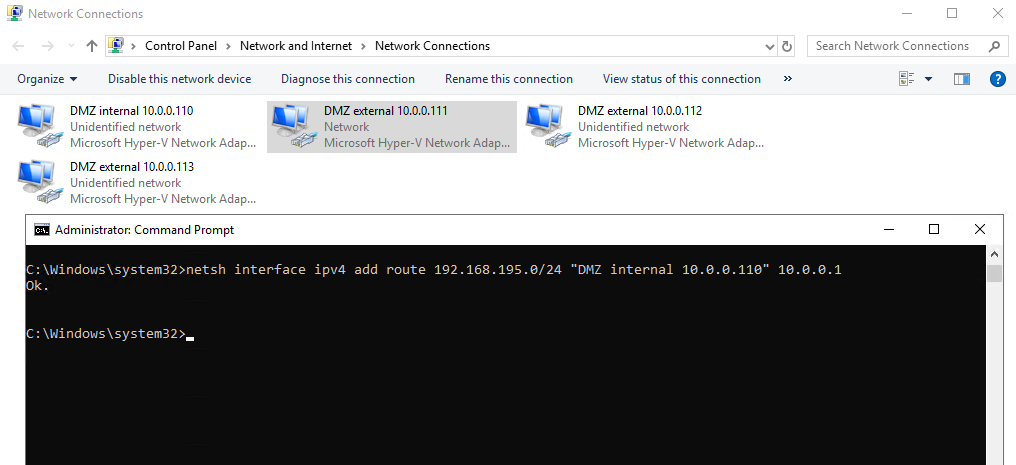
For the other both external adapters (webconferencing and a/v) set a static route to the internet with a metric which is higher than the federation adapter with the gateway, in my case higher than 271.
So you can be sure, that initiating internal outbound sip signalling traffic from the client, will flow through the Edge Servers access adapter for federation and sip traffic.
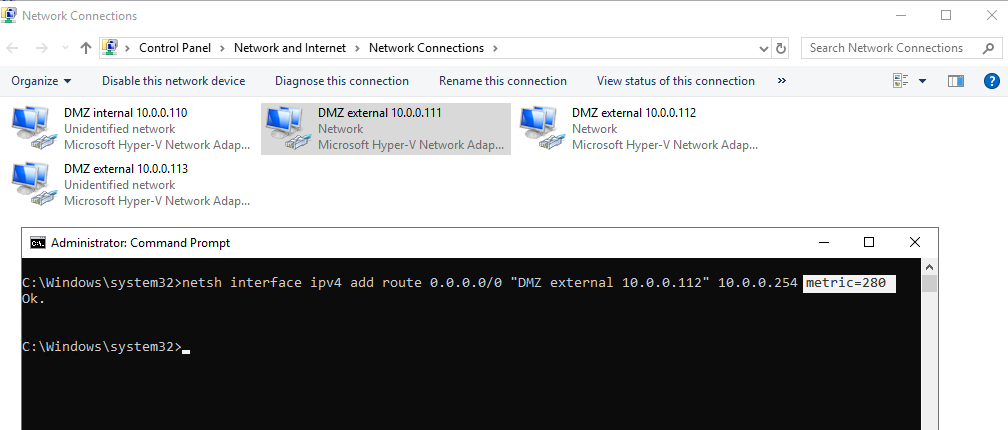
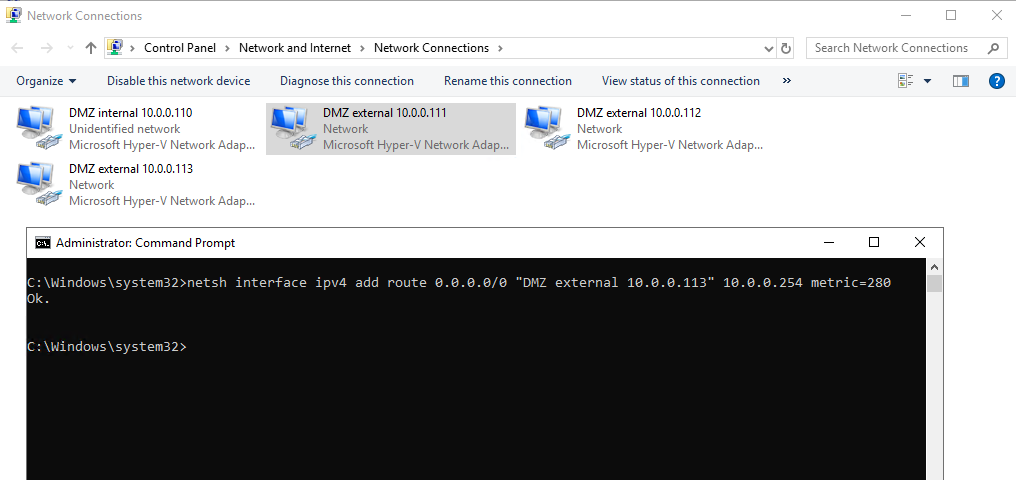
So you can see that traffic to the internet will flow through my access edge adapter with the lowest metric 271.
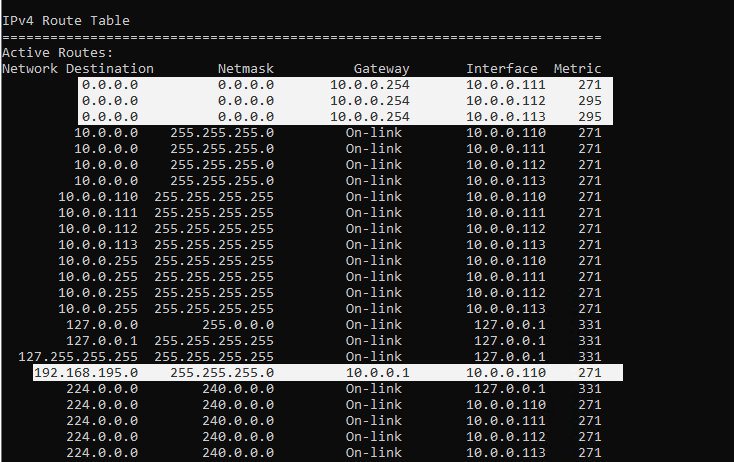
What’s behind this lowest metric for access edge adapter?
https://blogs.perficient.com/2009/09/17/ocs-edge-on-server-2008-the-strong-host-model/
The potential pitfalls with this solution is that any of the three interfaces could be used for initiating outbound communications. Checking the route table afterwards will show that all three defined routes have the same metric value. For responses to inbound traffic this is not a problem as the Strong Host model will dictate that the response leaves the interface it entered on and external firewalls will see the return traffic from the same IP and routing should be fine. But for initiating an outbound connection, as can happen when an internal users tries to start an IM conversation with a Federated or PIC user, needs to travel out of the Access Edge interface to match the traffic profile that firewalls would be configured for (TCP 5061 outbound). Typically this works usually since the Access Edge was the first configured external interface, but because the Strong Host Model does not officially assign a primary interface then it seems to be a little luck or black-magic.
A way to force the Access Edge interface to act as a primary default route interface would be to leave the Default Gateway set on the interface properties, and then perform a route print to identify the Metric value of that route. Then instead of adding the same Default Gateway value on the other two interfaces simply create a static route from the command line and assign a metric of higher value to each of the other interfaces. This will insure that the Access Edge interface is used for initial outbound connections but when Strong Host attempts to reply to traffic from any of the 3 interfaces there is a defined route on each interface.
Strong Host Model
http://en.wikipedia.org/wiki/Host_model
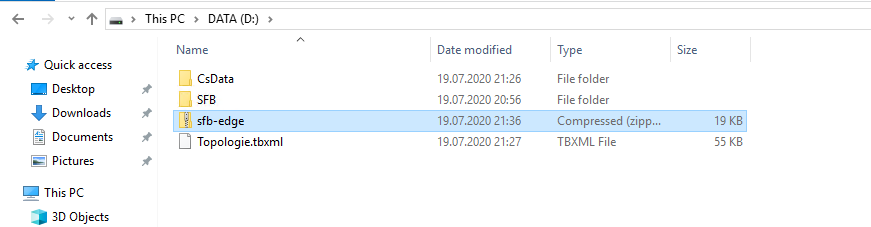
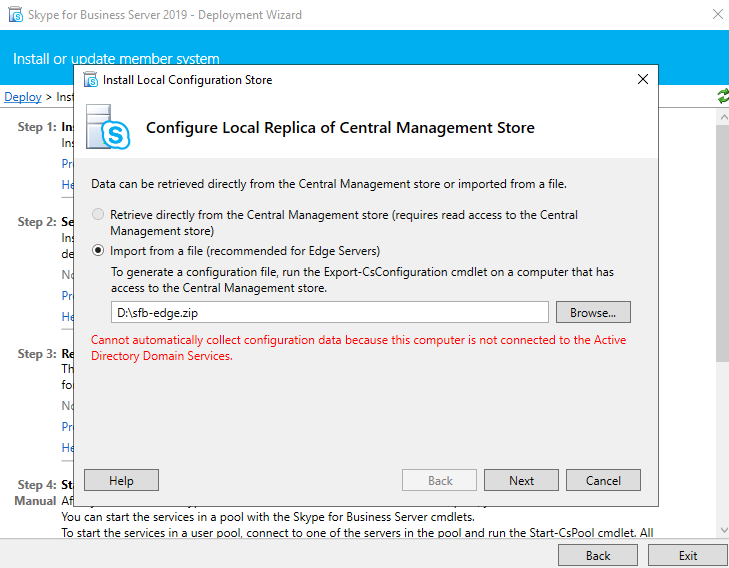
Export the Configuration
As we already created and published the Topology with the Edge Role, we can now export the configuration with the Skype for Business Server Management Shell on the Front End Server.
Export-CsConfiguration -FileName d:sfb-edge.zip
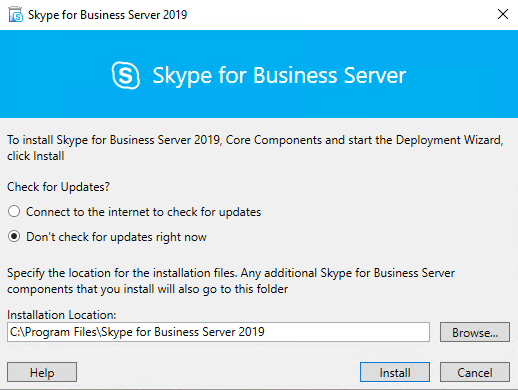
Running the Setup.exe on the Edge Server
Now we can go to our Edge Server and start the Setup.exe from the install media.
Click on Install or Update Skype for Business Server System
Click on Install Local Configuration Store

Select the option to import our previously exported ZIP file.
Now Setup or Remove Skype for Business Server Components
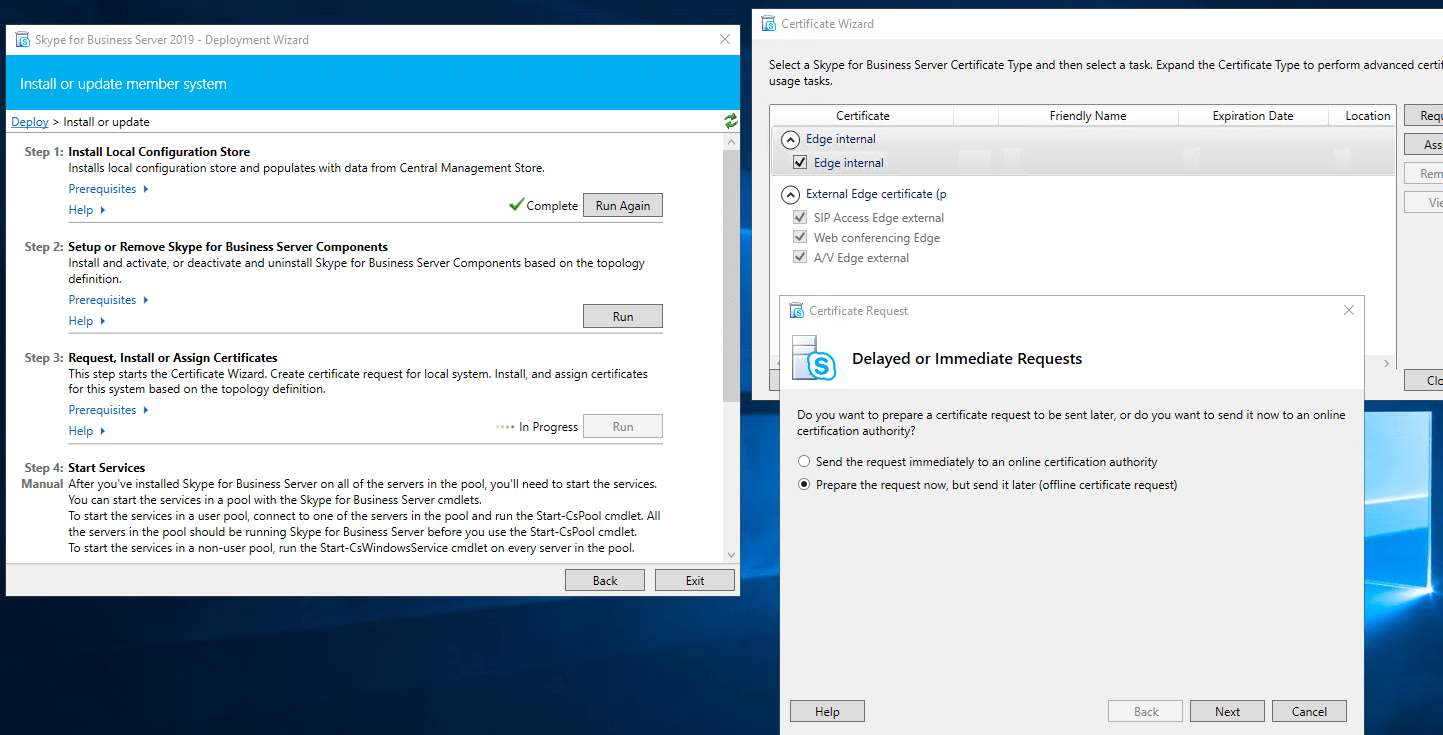
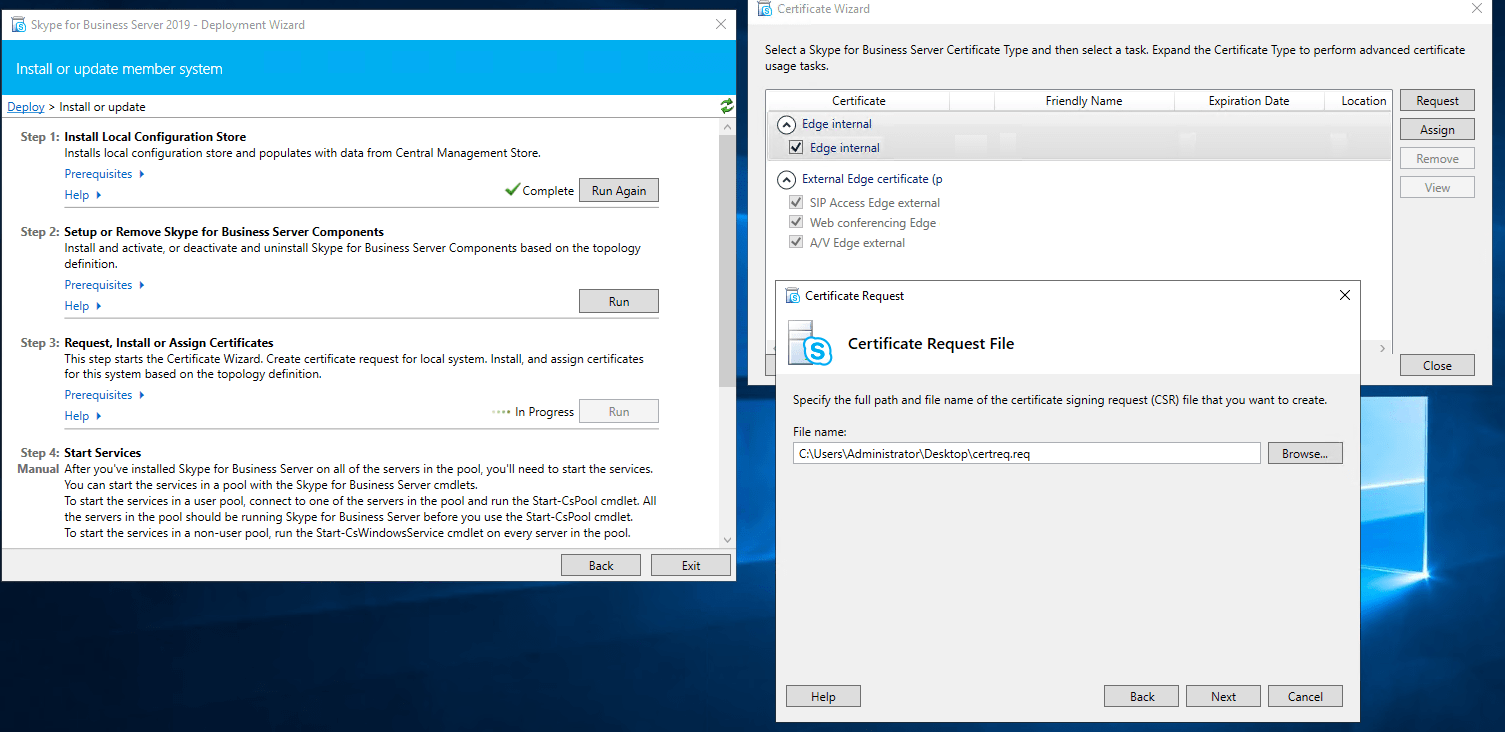
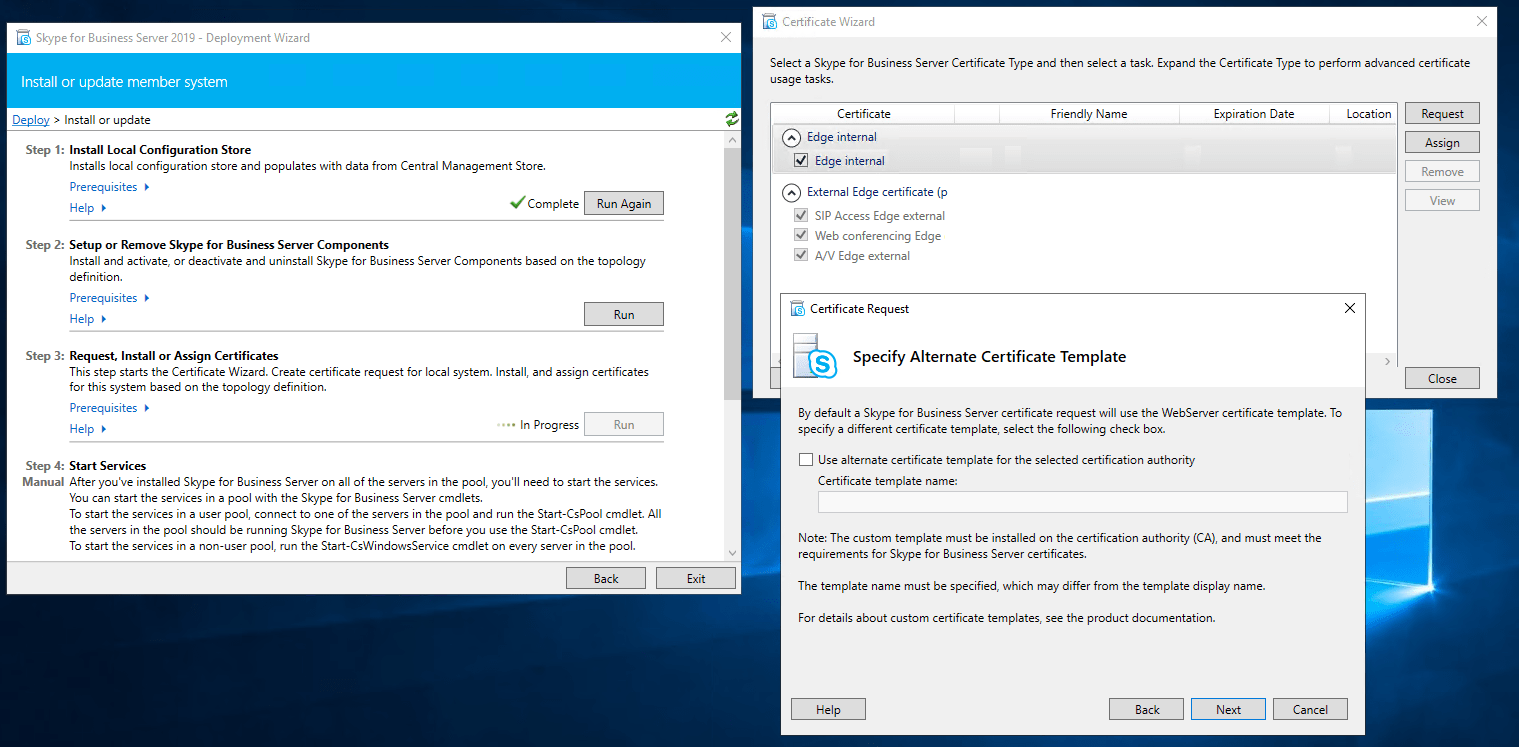
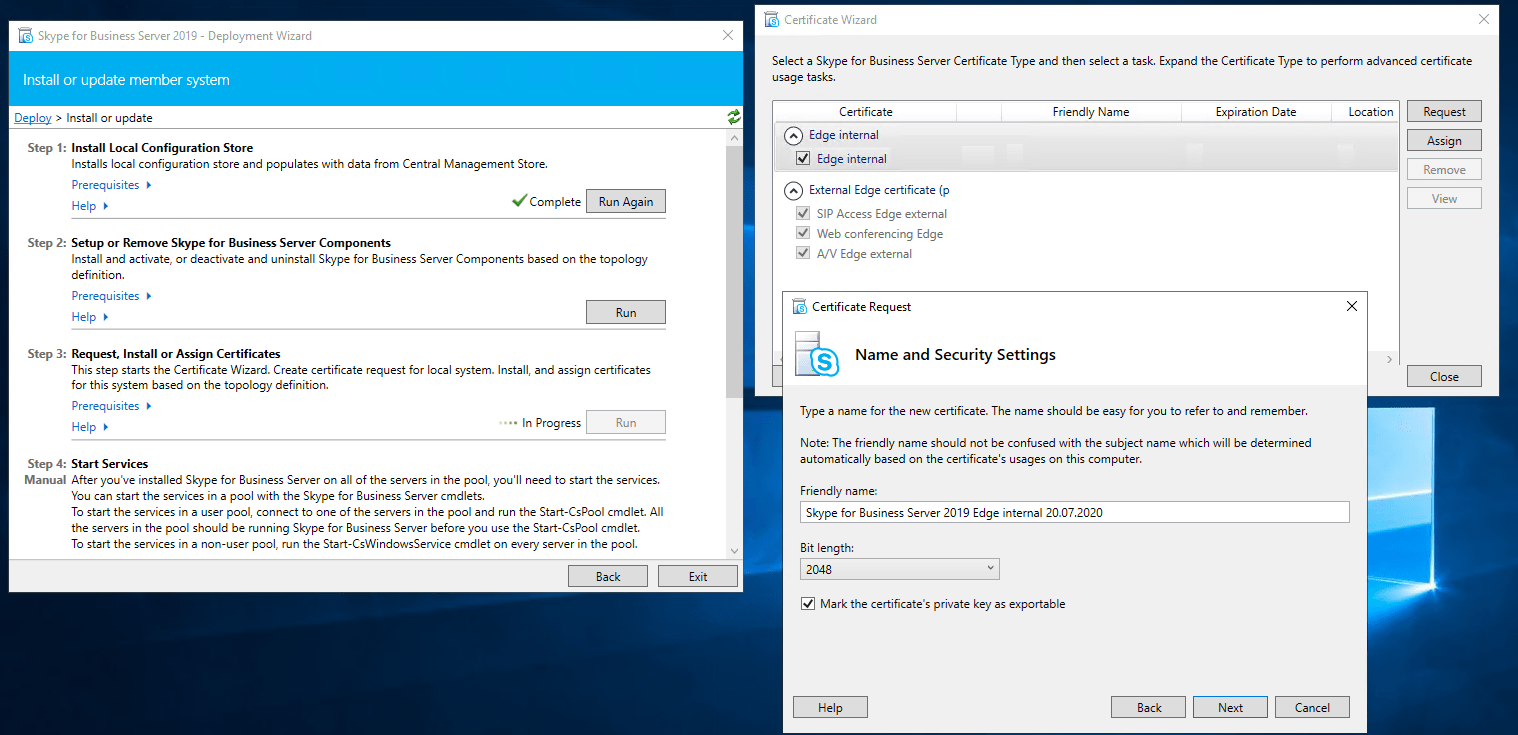
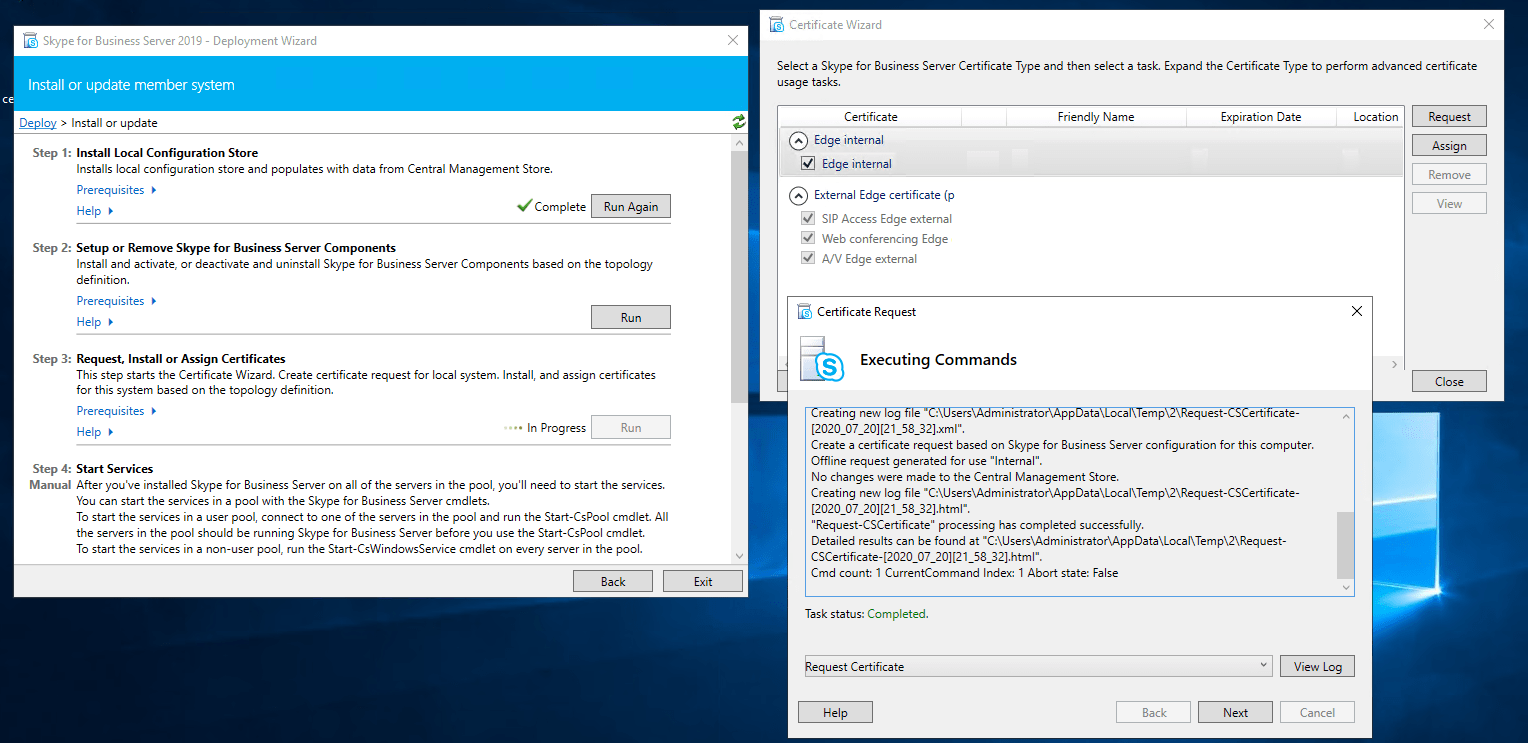
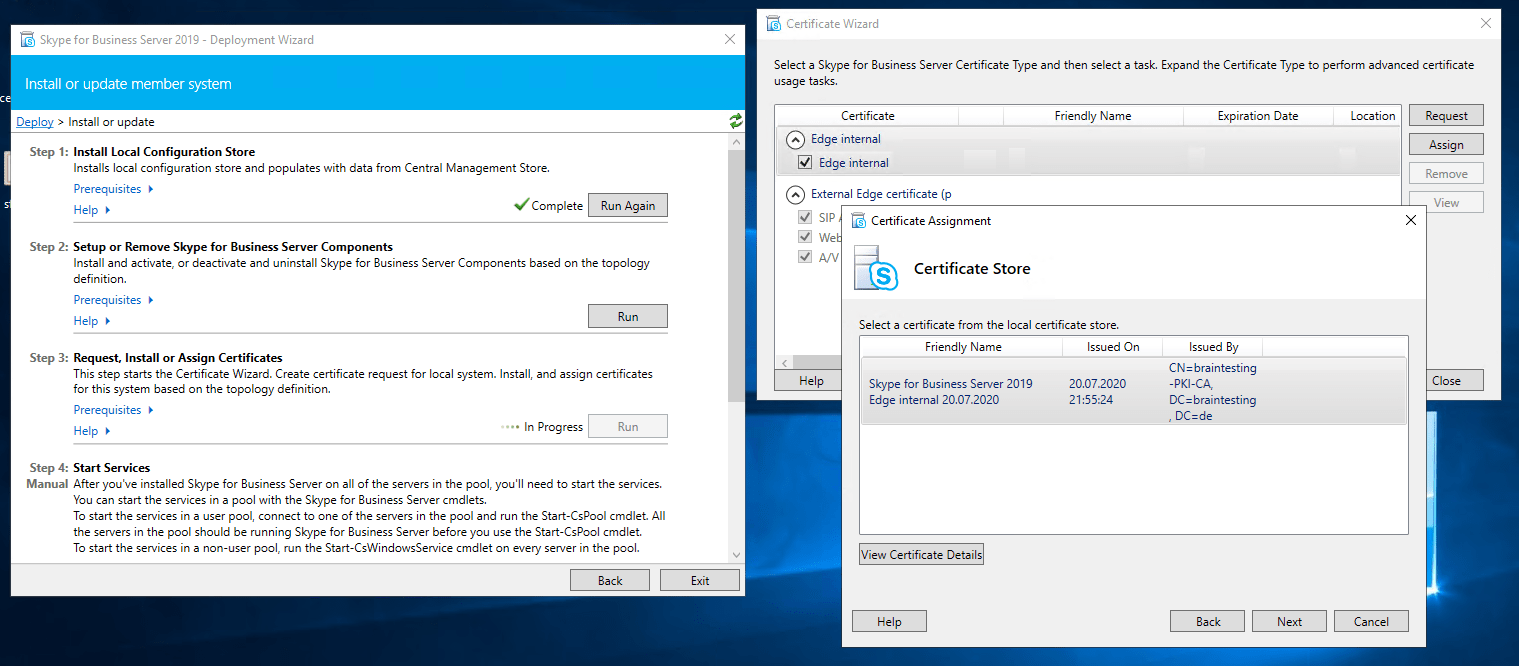
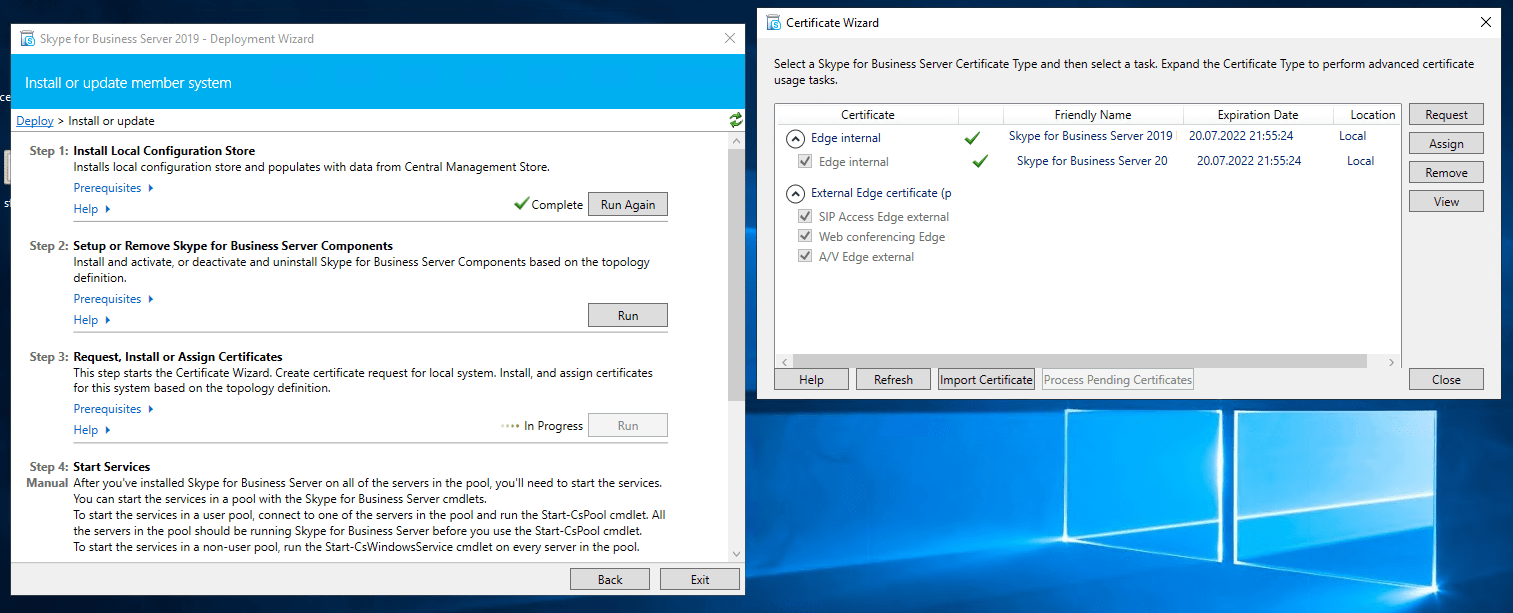
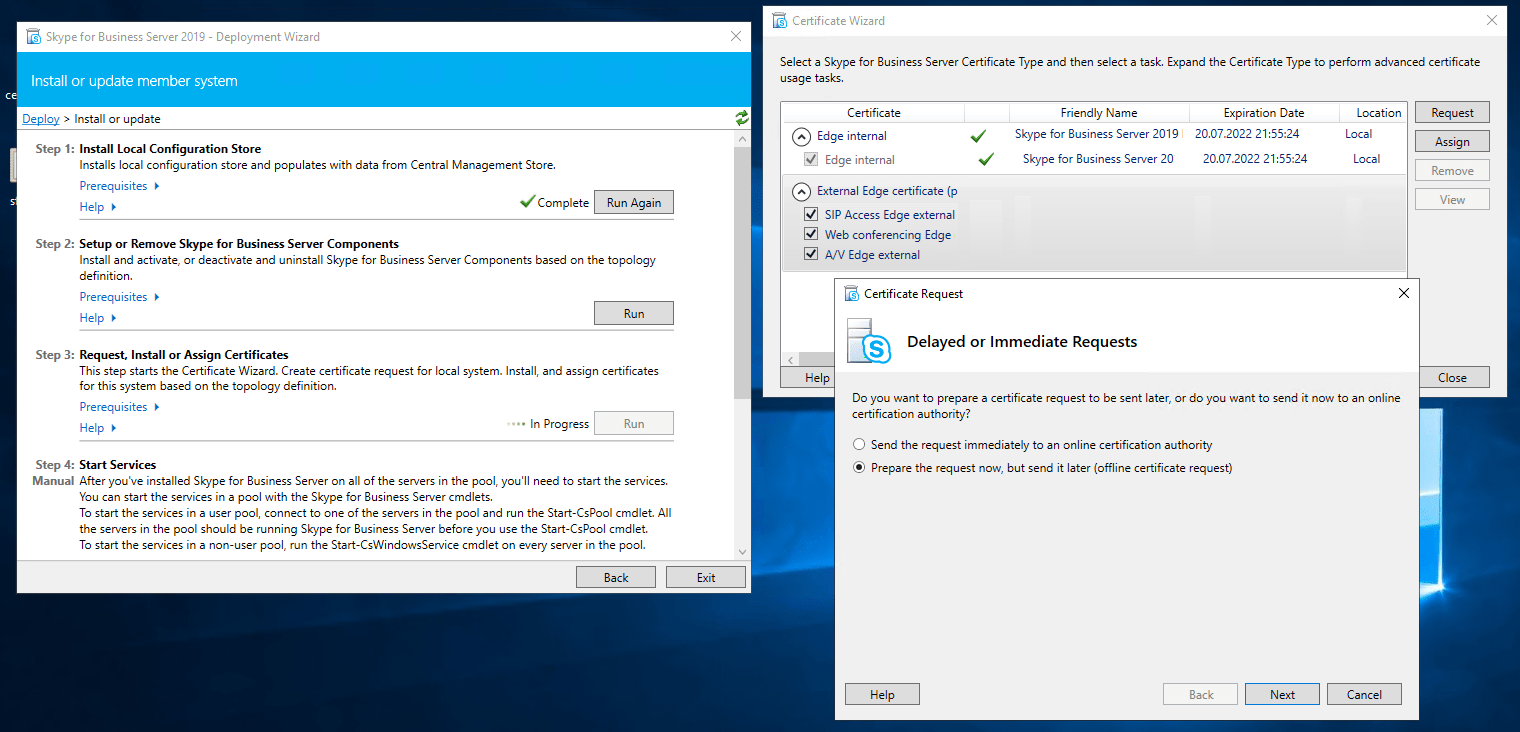
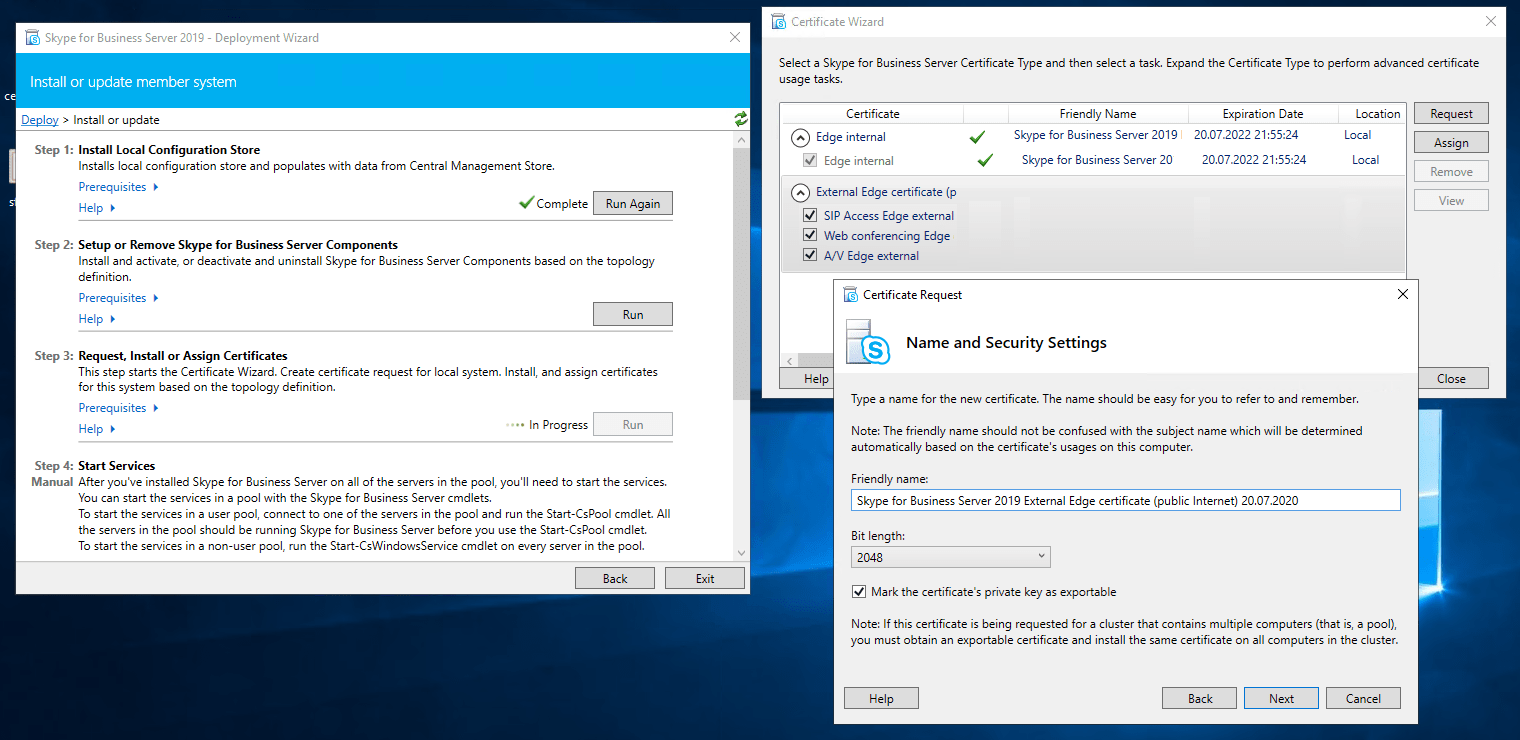
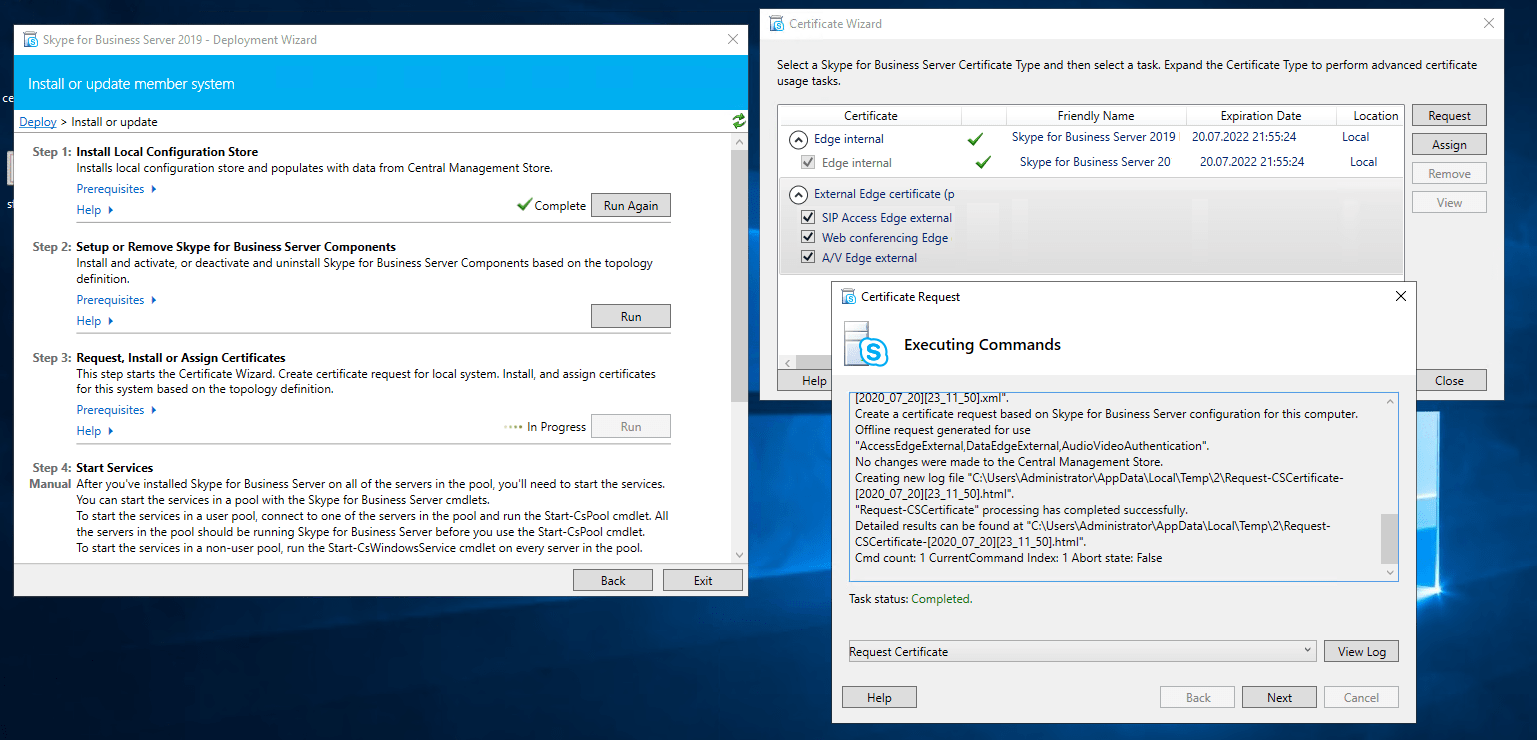
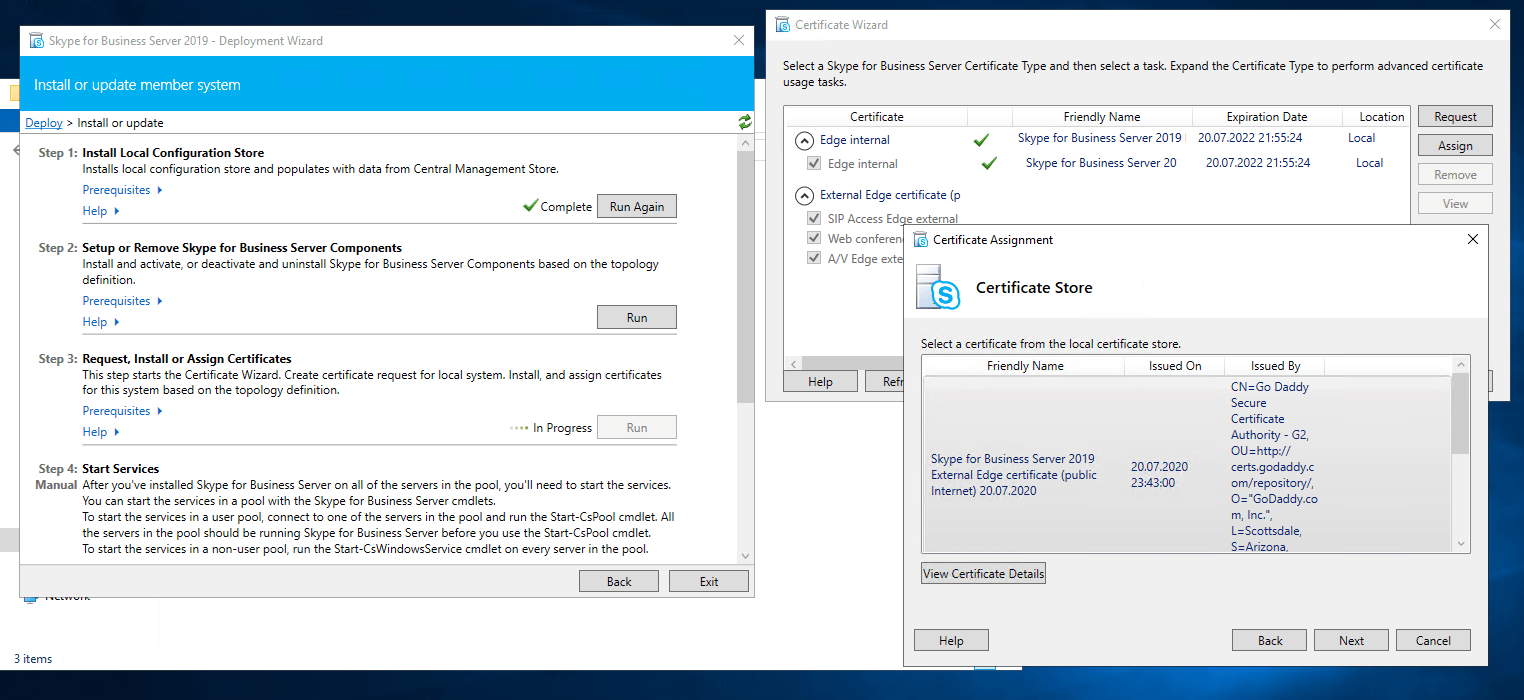
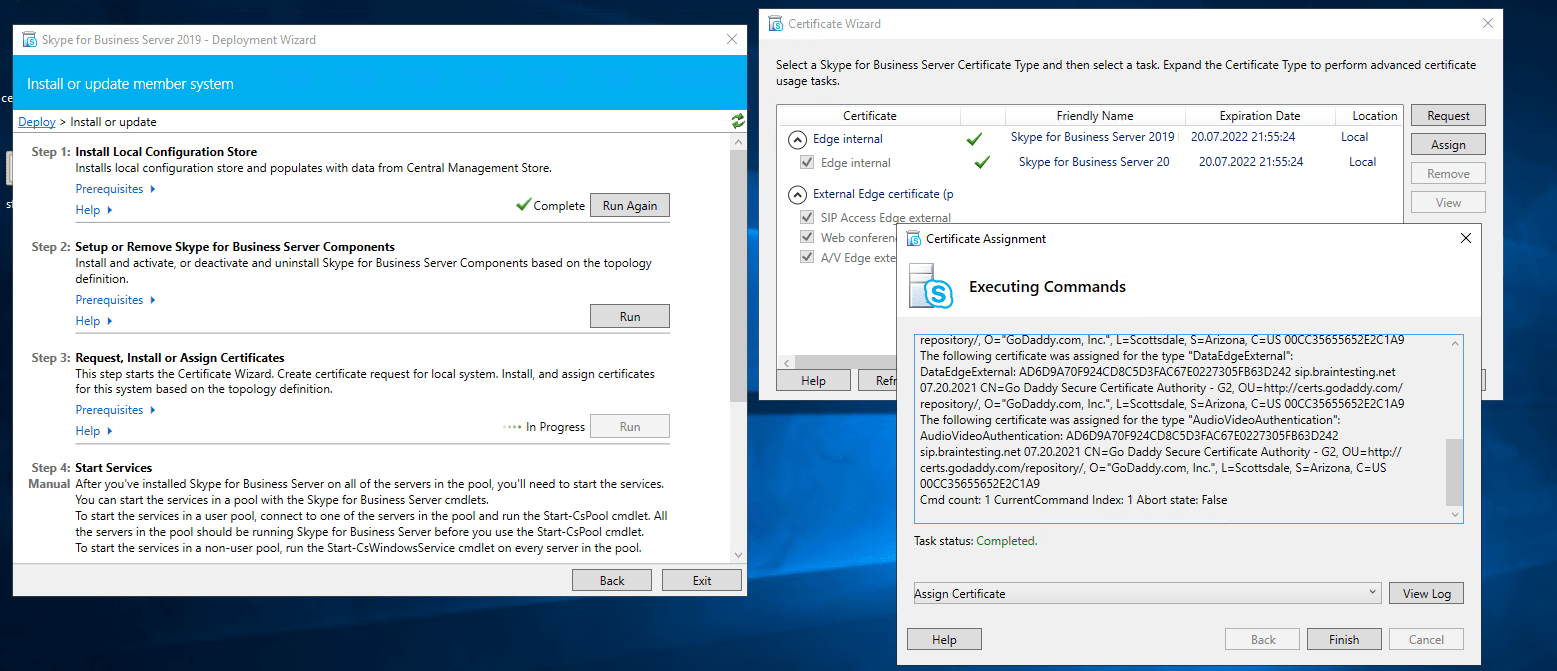
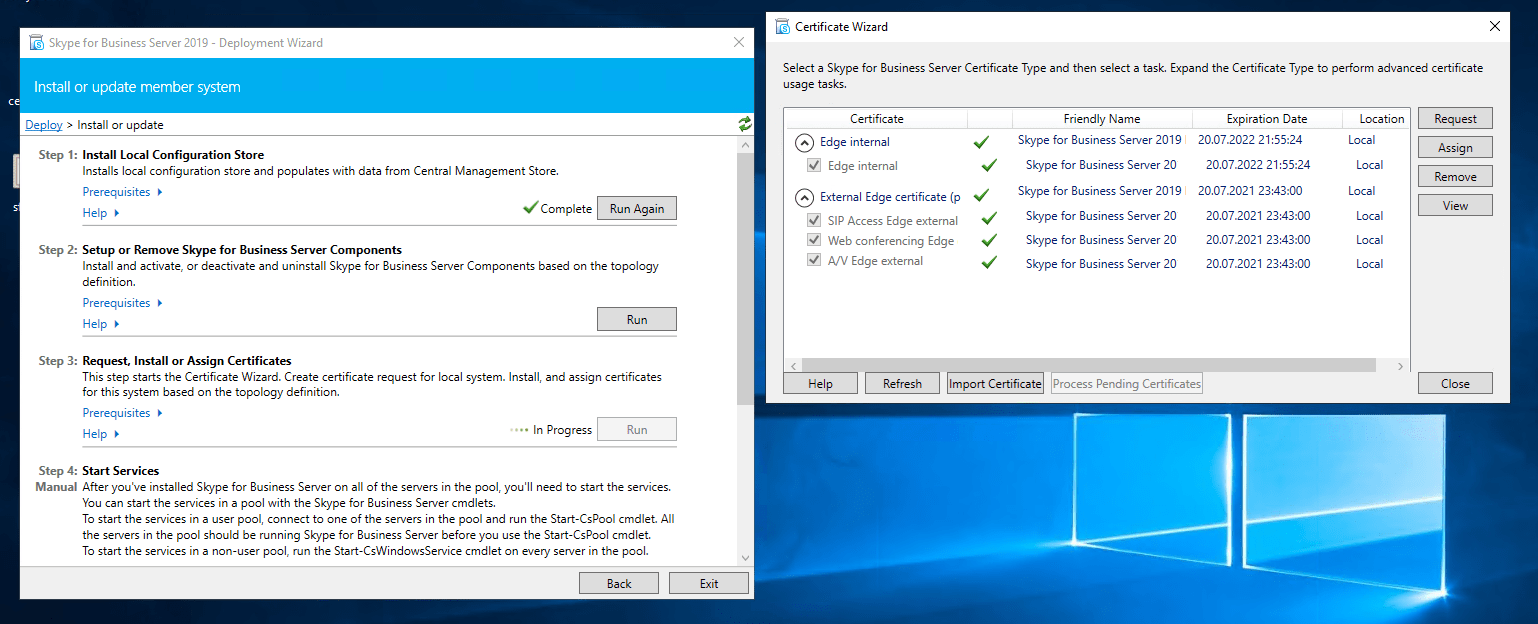
Assign a Certificate to the Edge Server
Now we can request and assign the certificates for the Edge Server. First for the internal Service we use a certificate from our internal PKI.


Now we request a public certificate for the external services from GoDaddy.

Final Configuration Steps within the SFB Control Panel
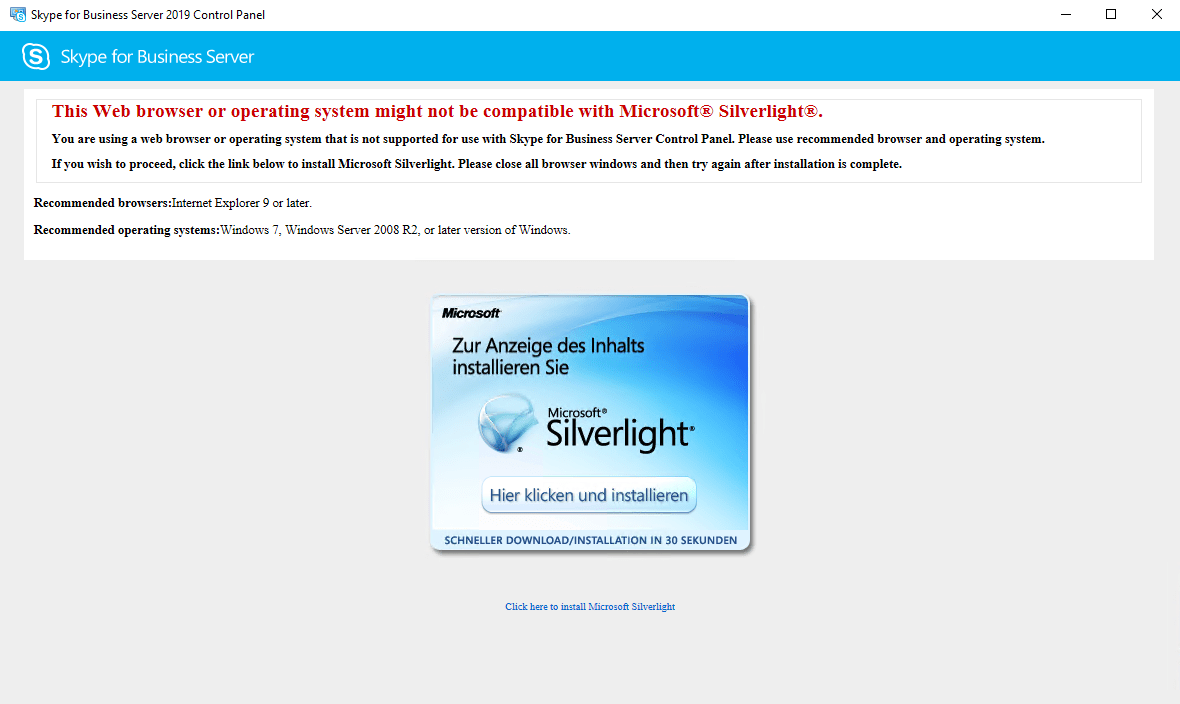
Now you can start the services on Front End and Edge or better do an restart for both machines! After reboot you can login to the Skype for Business Server 2019 Control Panel on the Front End Server. In my case I first need to install Silverlight for running the Control Panel.

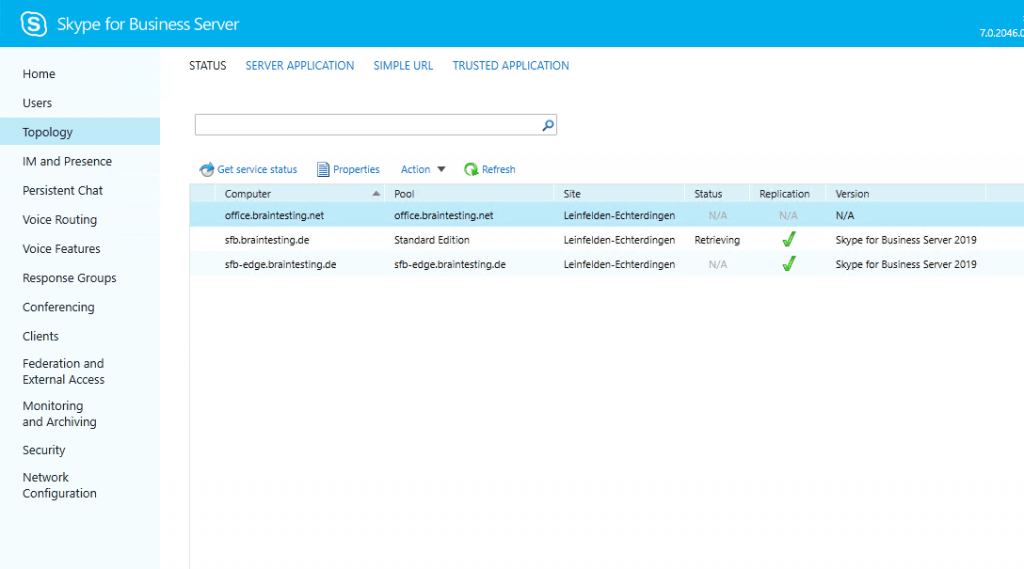
First thing to check is if the replication between the Front End and Edge Server is running.
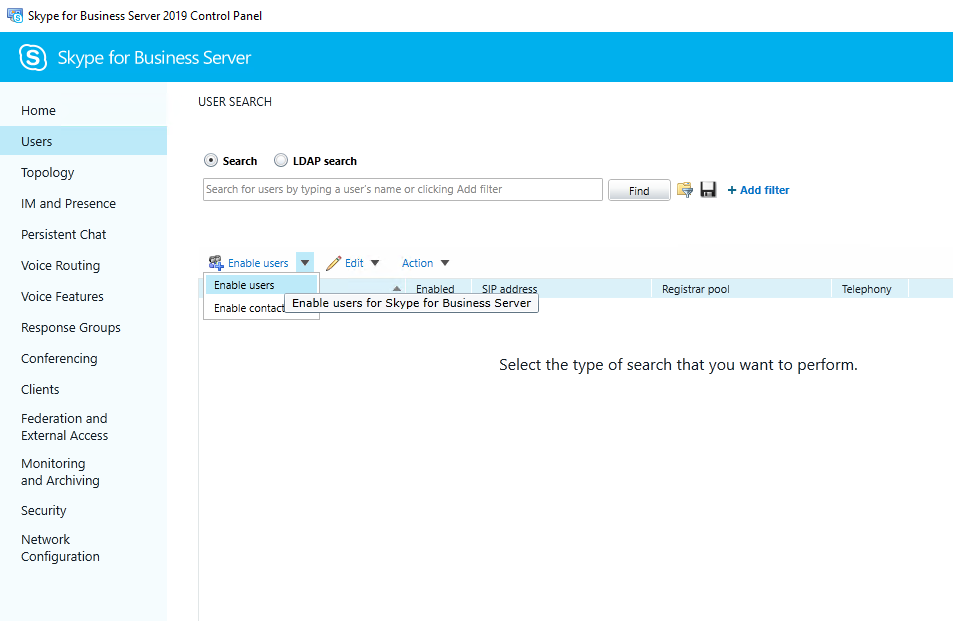
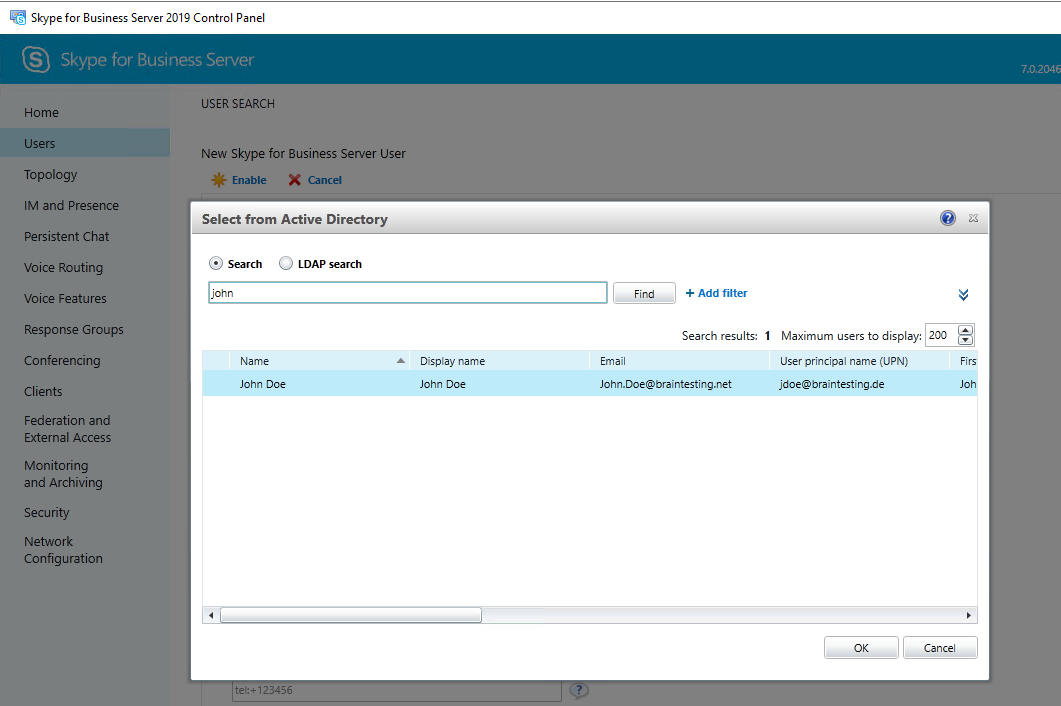
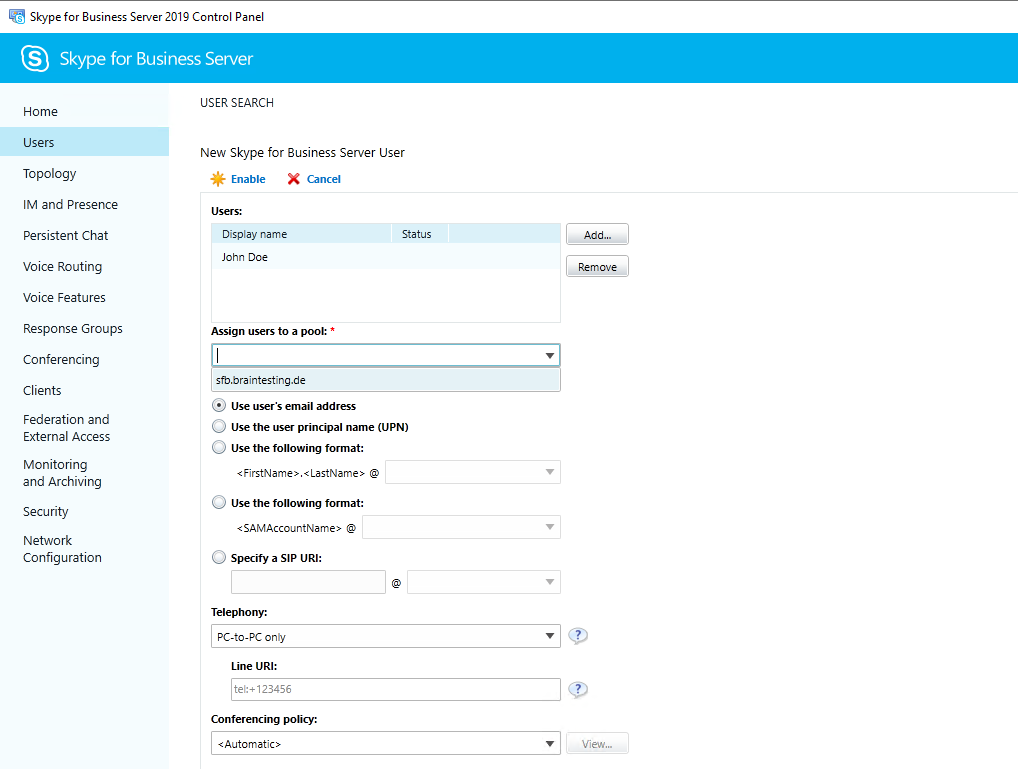
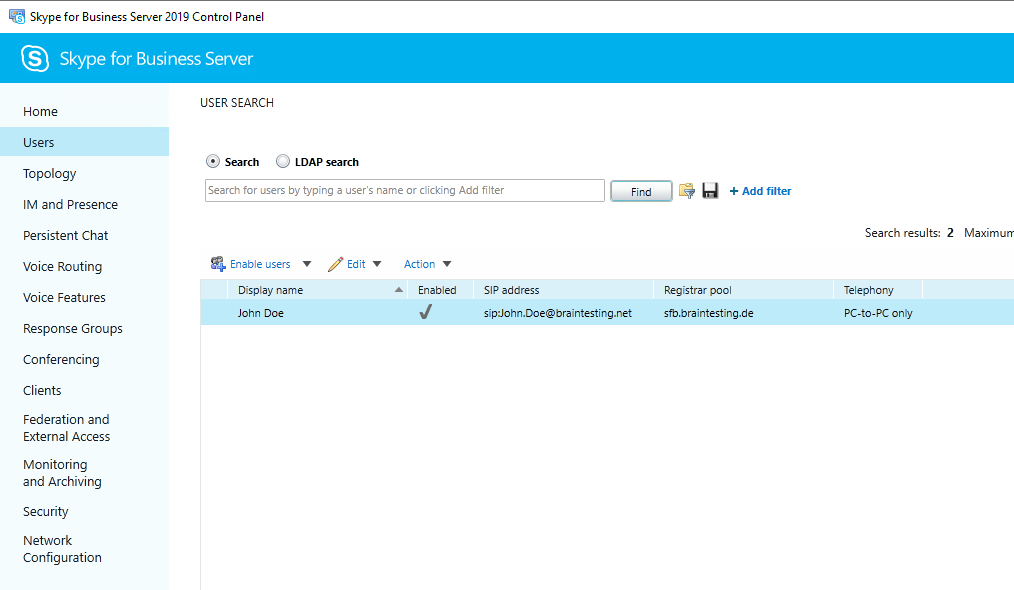
Enable Users
If everything is fine, you can enable users for Skype for Business
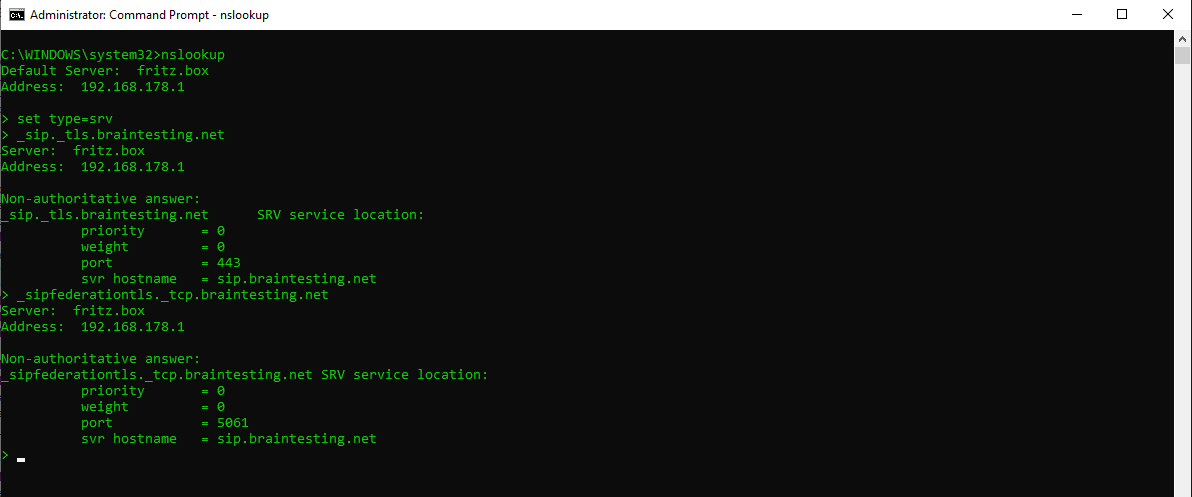
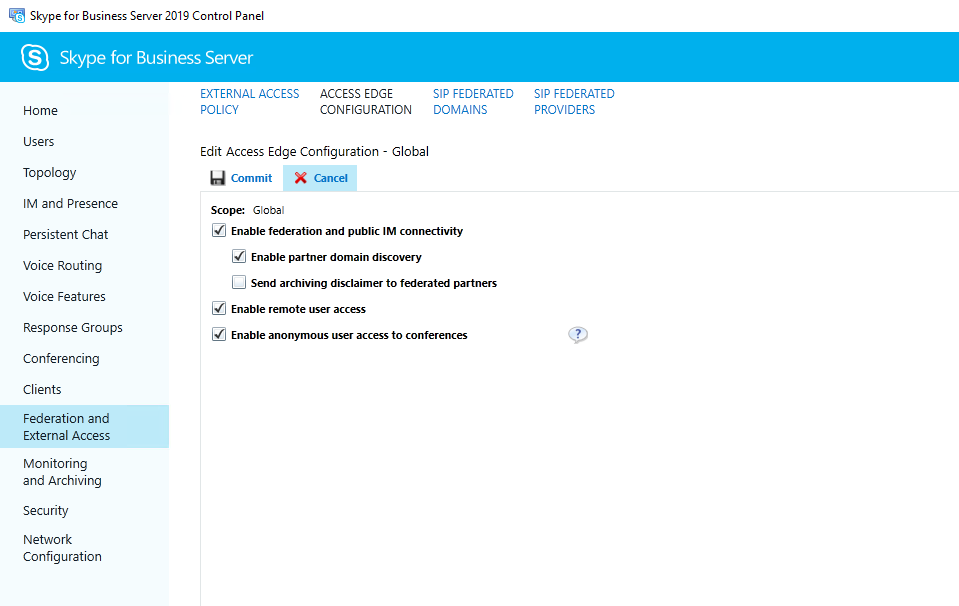
External Access
As we want to communicate with federated users from other companies with Skype for Business and want to allow communication with remote users and public users, first we check if the necessary external internet service dns records are set correctly.
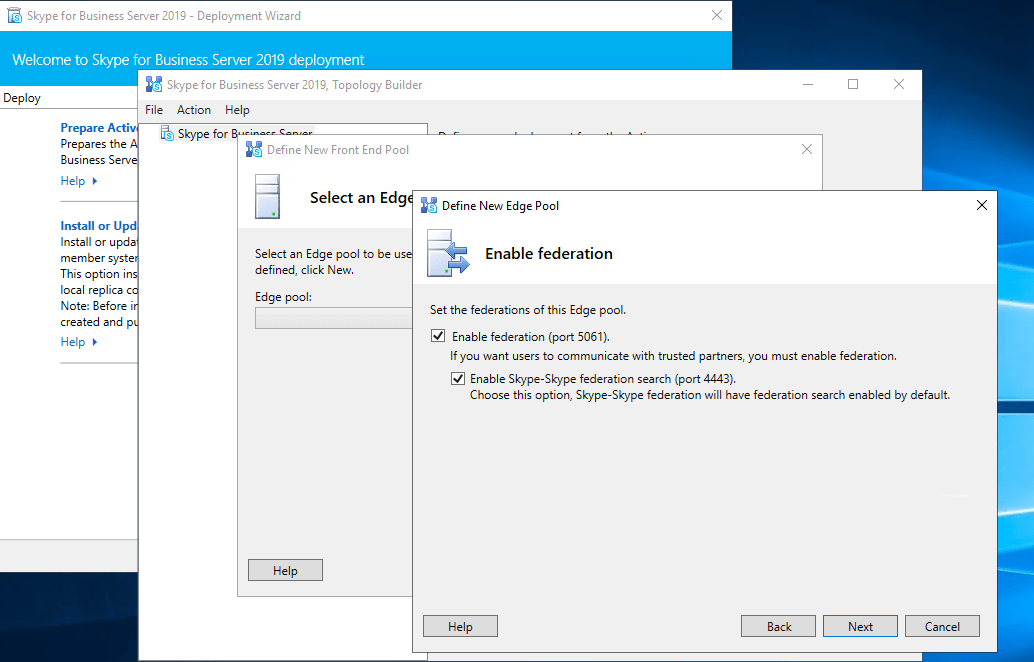
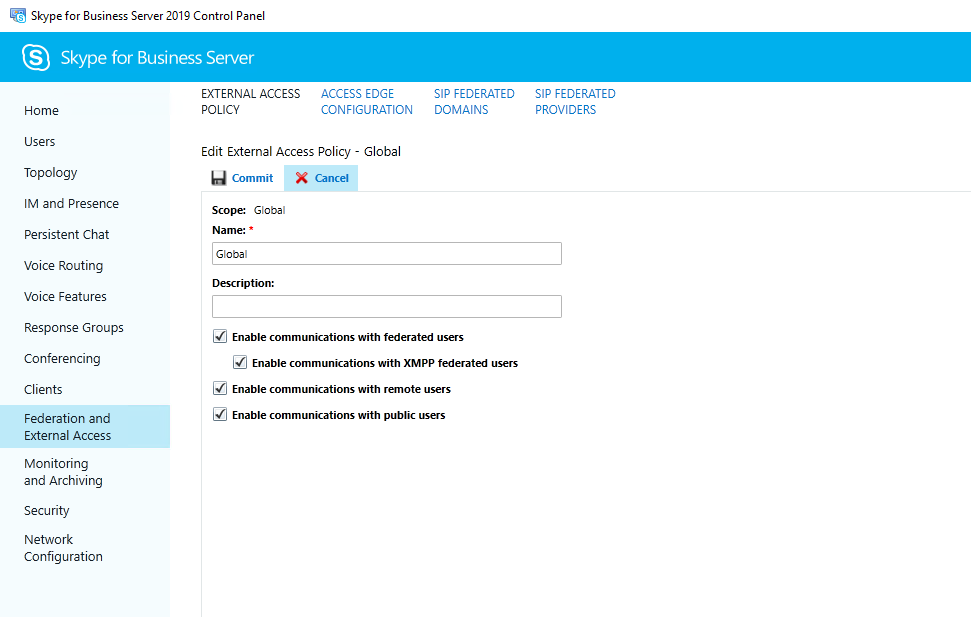
Second we must enable Federation and external access in the Control Panel under Federation and External Access and here under the External Access Policy and Access Edge Configuration.
To get the settings kick in, best is restart both servers, Front End and Edge Server!
Links
Install Skype for Business Server
https://docs.microsoft.com/en-us/skypeforbusiness/deploy/install/installSkype for Business 2015 Edge Server Deployment
http://blog.schertz.name/2016/03/skype-for-business-2015-edge-server-deployment/Lync Edge Role
https://www.msxfaq.de/skype_for_business/lyncedge.htm