

Azure VM Offline Recovery Using an Azure Repair VM
If an Azure VM no longer boots sufficiently to access it through SSH or the Azure Serial Console, the OS disk can be repaired offline using an Azure repair VM.
Azure can create a copy of the affected OS disk and attach it to a temporary Linux VM, where the filesystem can be mounted or accessed through chroot for troubleshooting and recovery.
While we could also attach the disk manually to another Linux VM, the major advantage of the Azure CLI VM Repair workflow is the automated restore process: once the repair is complete, Azure can automatically swap the repaired disk back in as the original VM’s OS disk, avoiding a manual disk detach and.
Without the VM Repair extension, the usual offline recovery process is:
Stop VM → snapshot/copy OS disk → attach copy to another Linux VM → mount/repair → detach disk → stop original VM → manually swap its OS disk → start VM → clean up.
Note: The Azure VM Repair workflow is also available for Windows VMs, using the same create–repair–restore concept while providing Windows-specific offline repair options.
The Azure CLI VM Repair Extension
The Azure CLI VM Repair extension provides commands for recovering non-bootable or otherwise inaccessible Azure VMs. It can create a temporary repair VM and attach a copy of the affected VM’s OS disk as a data disk for offline troubleshooting and recovery.
Creating the Azure Repair VM
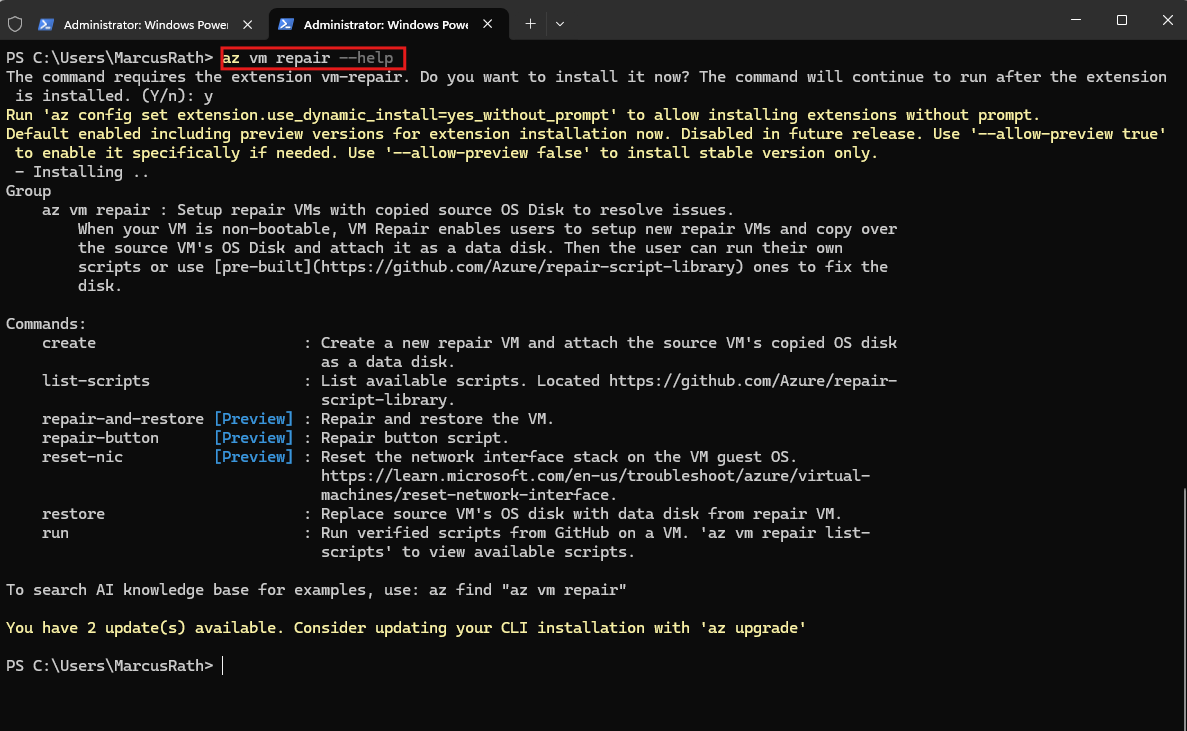
Before creating the repair VM, we can review the available parameters for the create command:
This command creates a temporary repair VM and attaches a copy of the source VM’s OS disk as a data disk, allowing us to inspect and repair it without modifying the original disk directly.
az vm repair --help
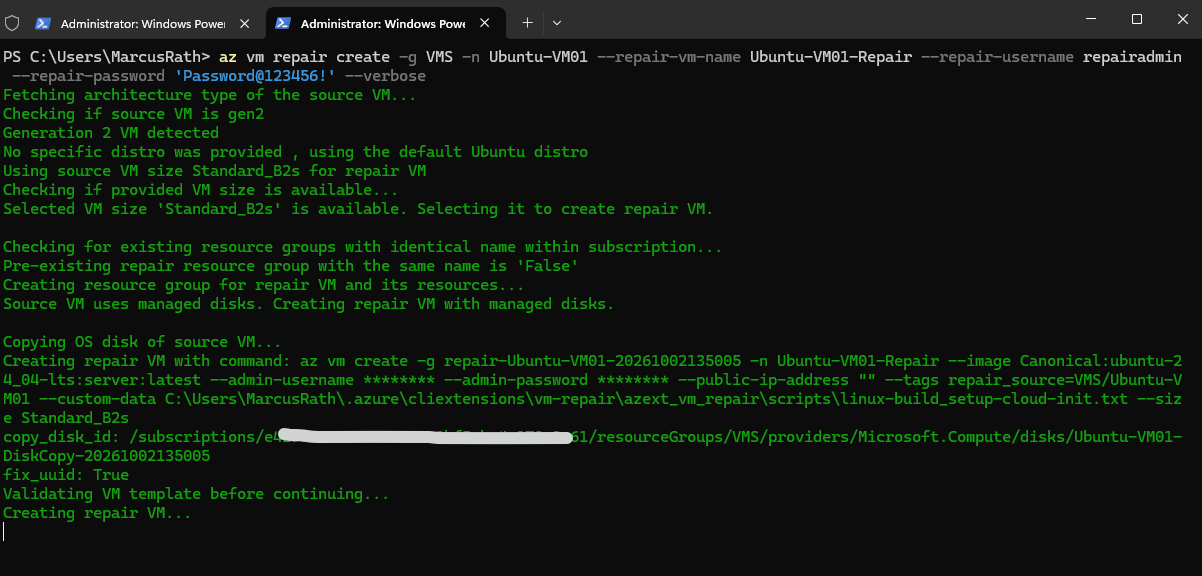
We now create a temporary Azure Repair VM for Ubuntu-VM01.
The repair process creates a copy of the source VM’s OS disk and attaches it to the repair VM as a data disk, allowing us to perform recovery operations without directly modifying the original OS disk.
Note: The password shown in this example is used only for demonstration purposes. In a real environment, always use a strong, unique and randomly generated password for the repair VM and never expose credentials in documentation, screenshots, scripts, or command.
az vm repair create -g VMS -n Ubuntu-VM01 --repair-vm-name Ubuntu-VM01-Repair --repair-username repairadmin --repair-password '<StrongPassword>' --verbose
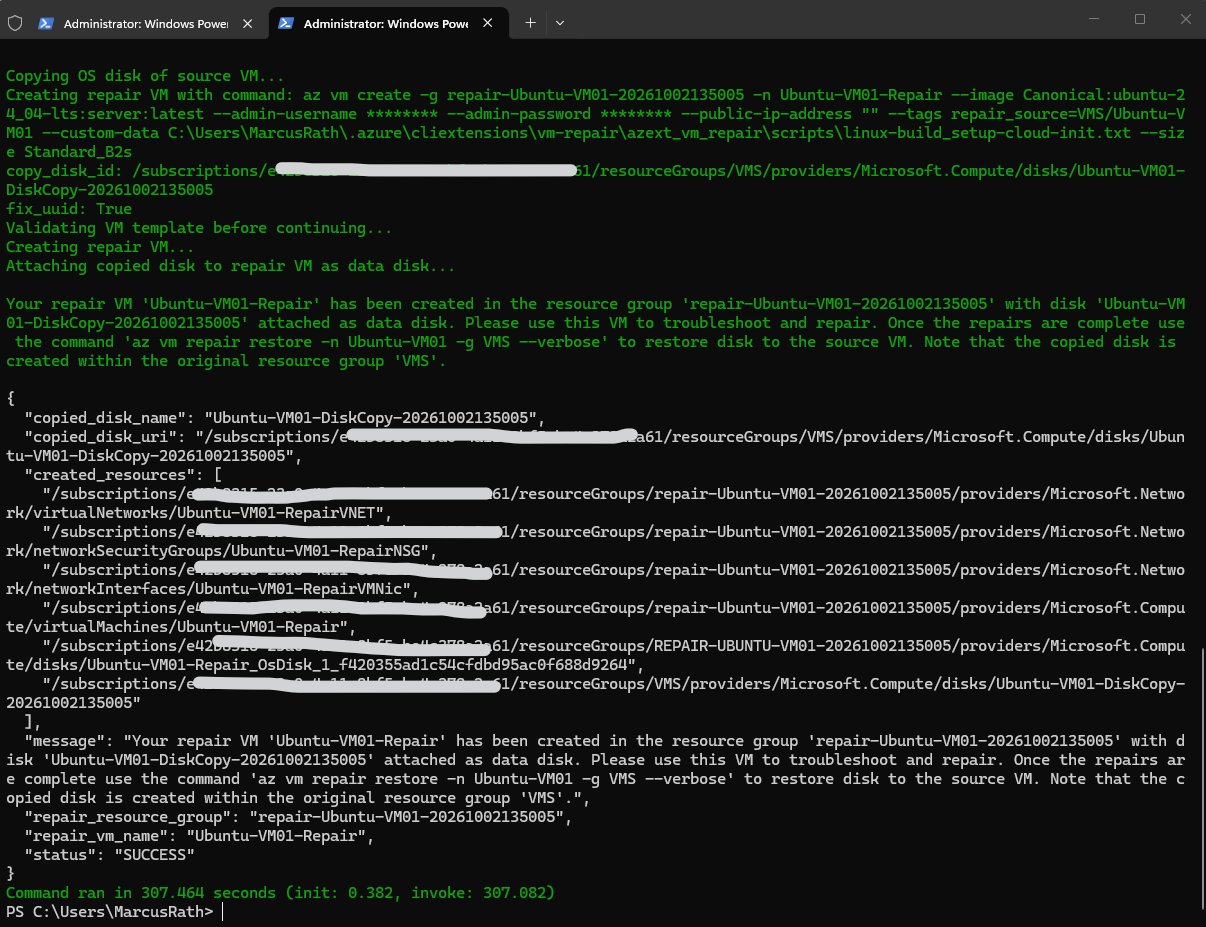
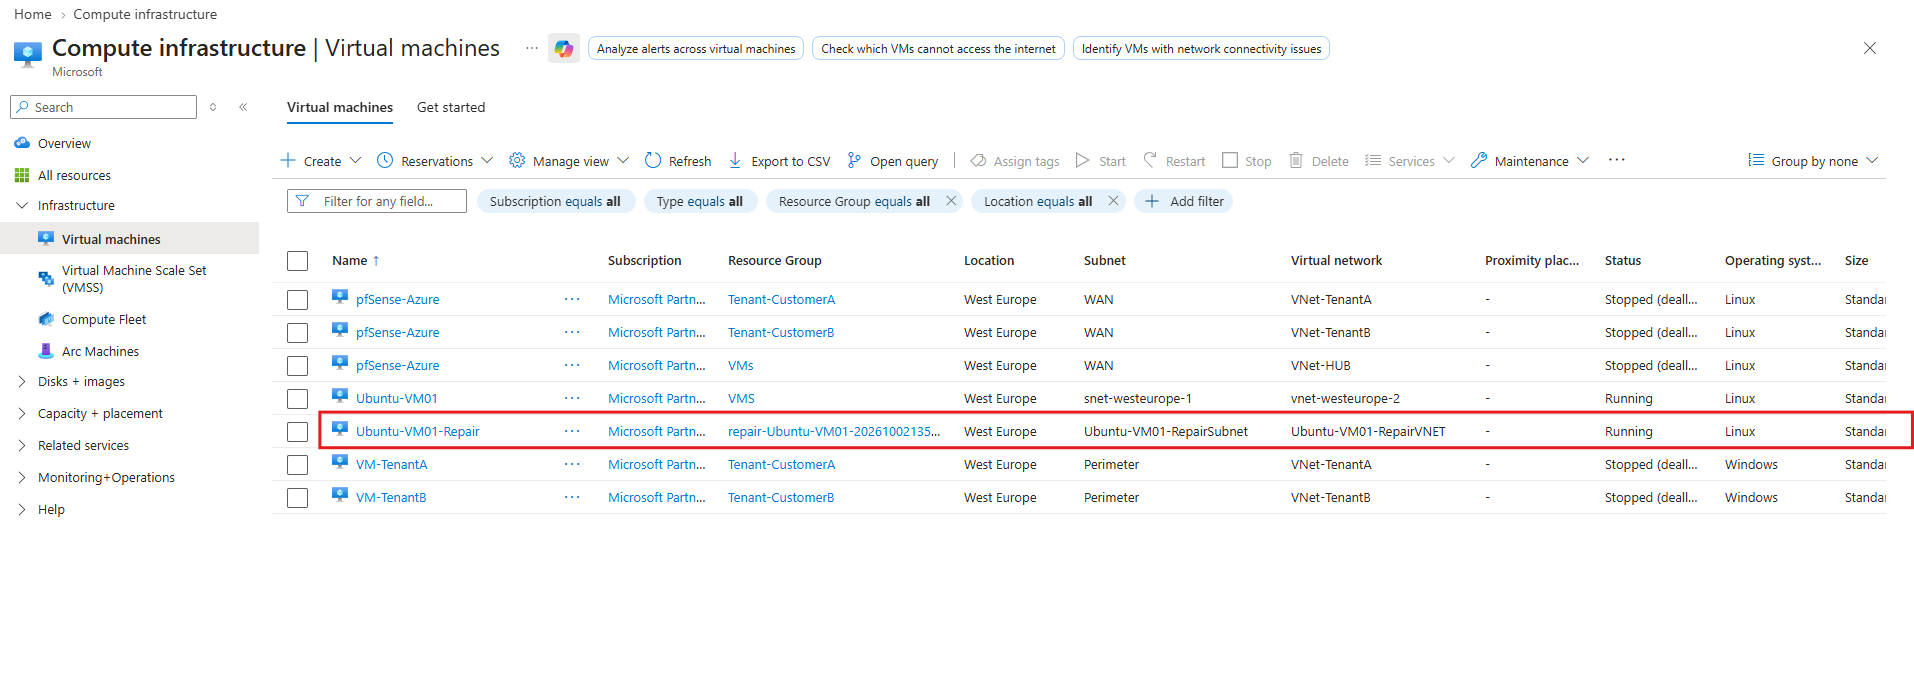
After a few minutes, Azure has created and started the temporary Ubuntu-VM01-Repair VM.
The repair VM is placed in a dedicated repair resource group together with its own virtual network and supporting resources, keeping the recovery environment separated from the source VM.
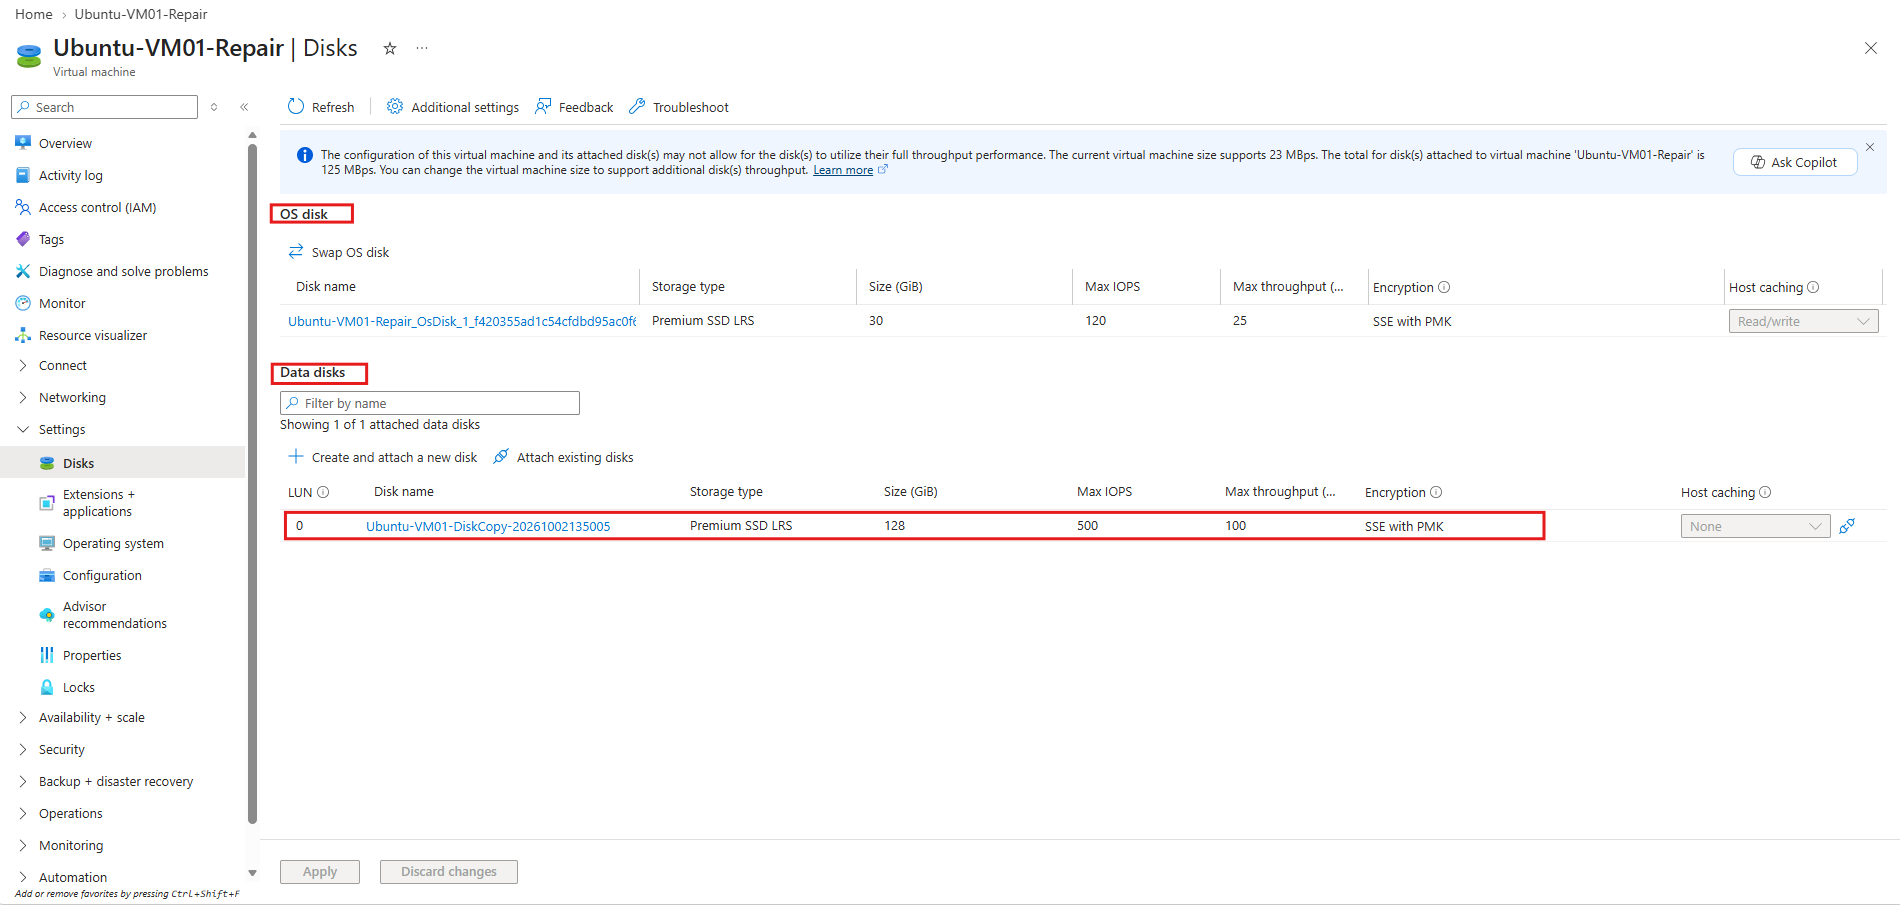
The repair VM uses its own 30 GiB OS disk, while the 128 GiB copy of the original Ubuntu-VM01 OS disk is attached separately as a data disk at LUN 0.
This allows us to mount and modify the copied filesystem from the healthy repair VM without booting from the affected operating system.
Connecting to the Azure Repair VM
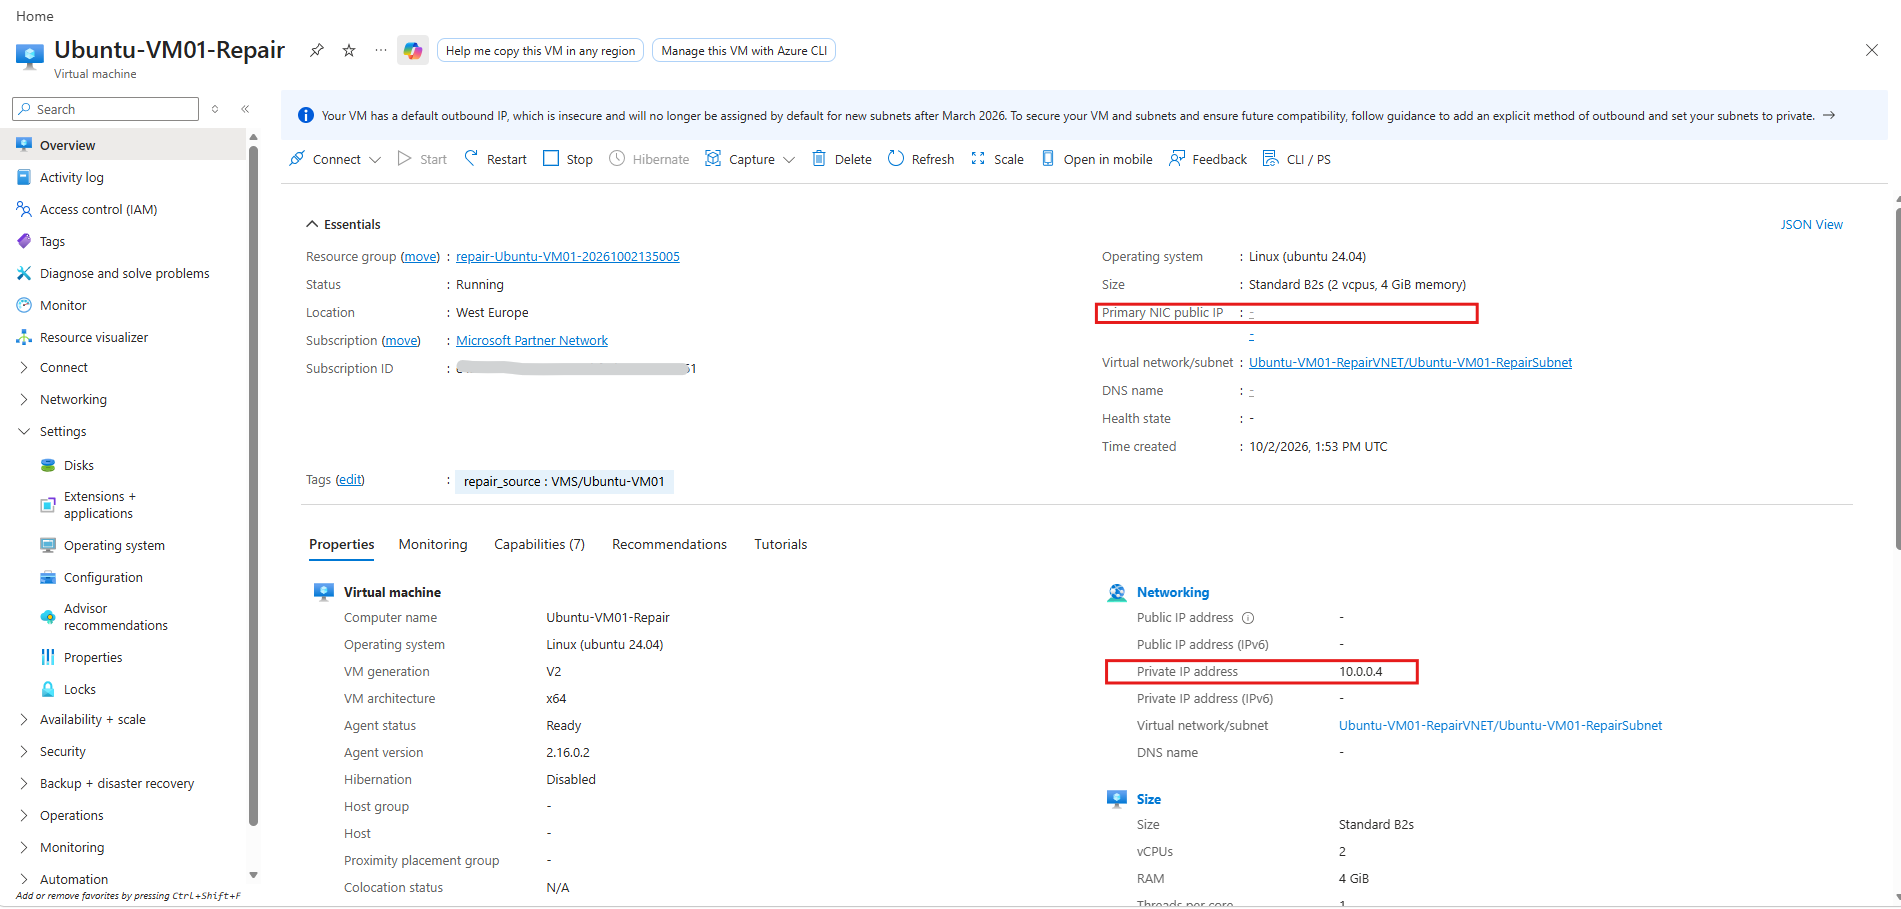
Before we can inspect and repair the copied OS disk, we first need to connect to the temporary repair VM. Since the repair VM was created without a public IP address, we will first examine its network configuration and available private IP address.
The automated
az vm repair createworkflow creates the repair VM with its own virtual network and subnet and does not provide parameters for selecting an existing VNet/subnet or assigning a public IP address during creation. Consequently, additional network configuration may be required before we can connect to the repair VM, depending on the environment.In my environment,
Ubuntu-VM01-Repairreceived the private IP address10.0.0.4on the automatically created repair virtual network.In my lab, I will simply assign a temporary public IP address to the repair VM and use SSH. In a production environment, private administrative connectivity would typically be preferable, for example through Azure Bastion, VNet peering, VPN, or ExpressRoute.
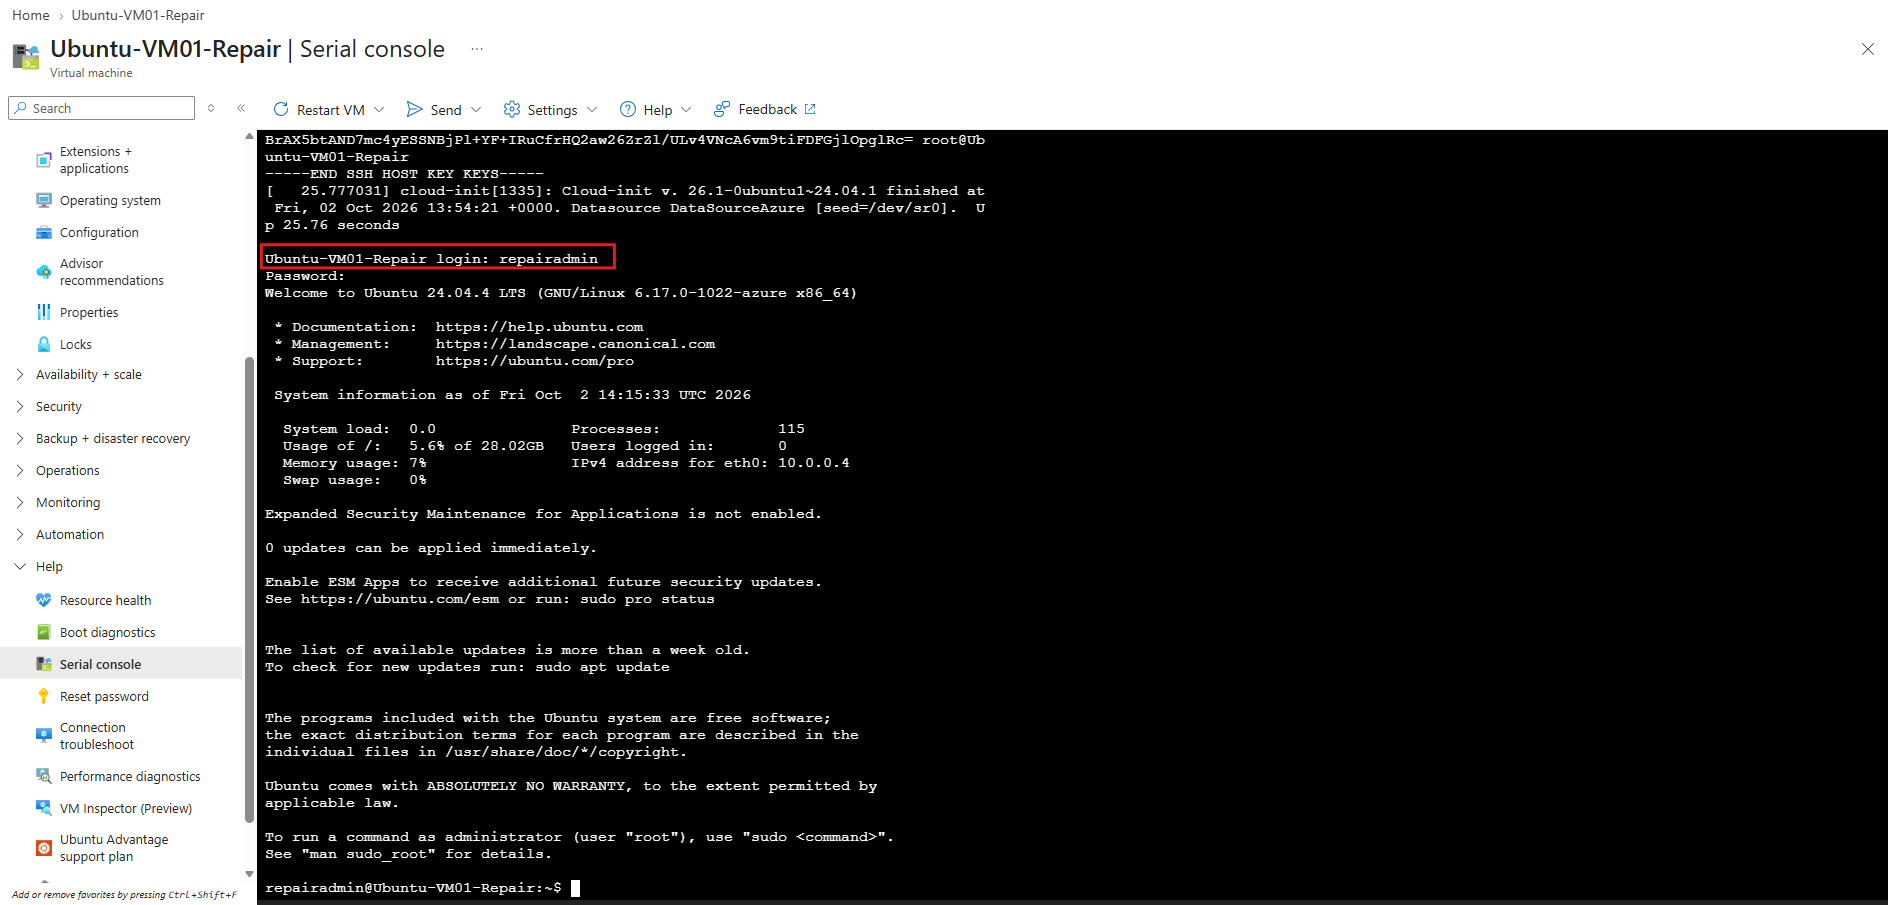
Alternatively, we can enable Boot diagnostics for the repair VM and use the Azure Serial Console to log in with the repairadmin account.
This provides direct console access without assigning a public IP address or requiring network connectivity to the repair VM.
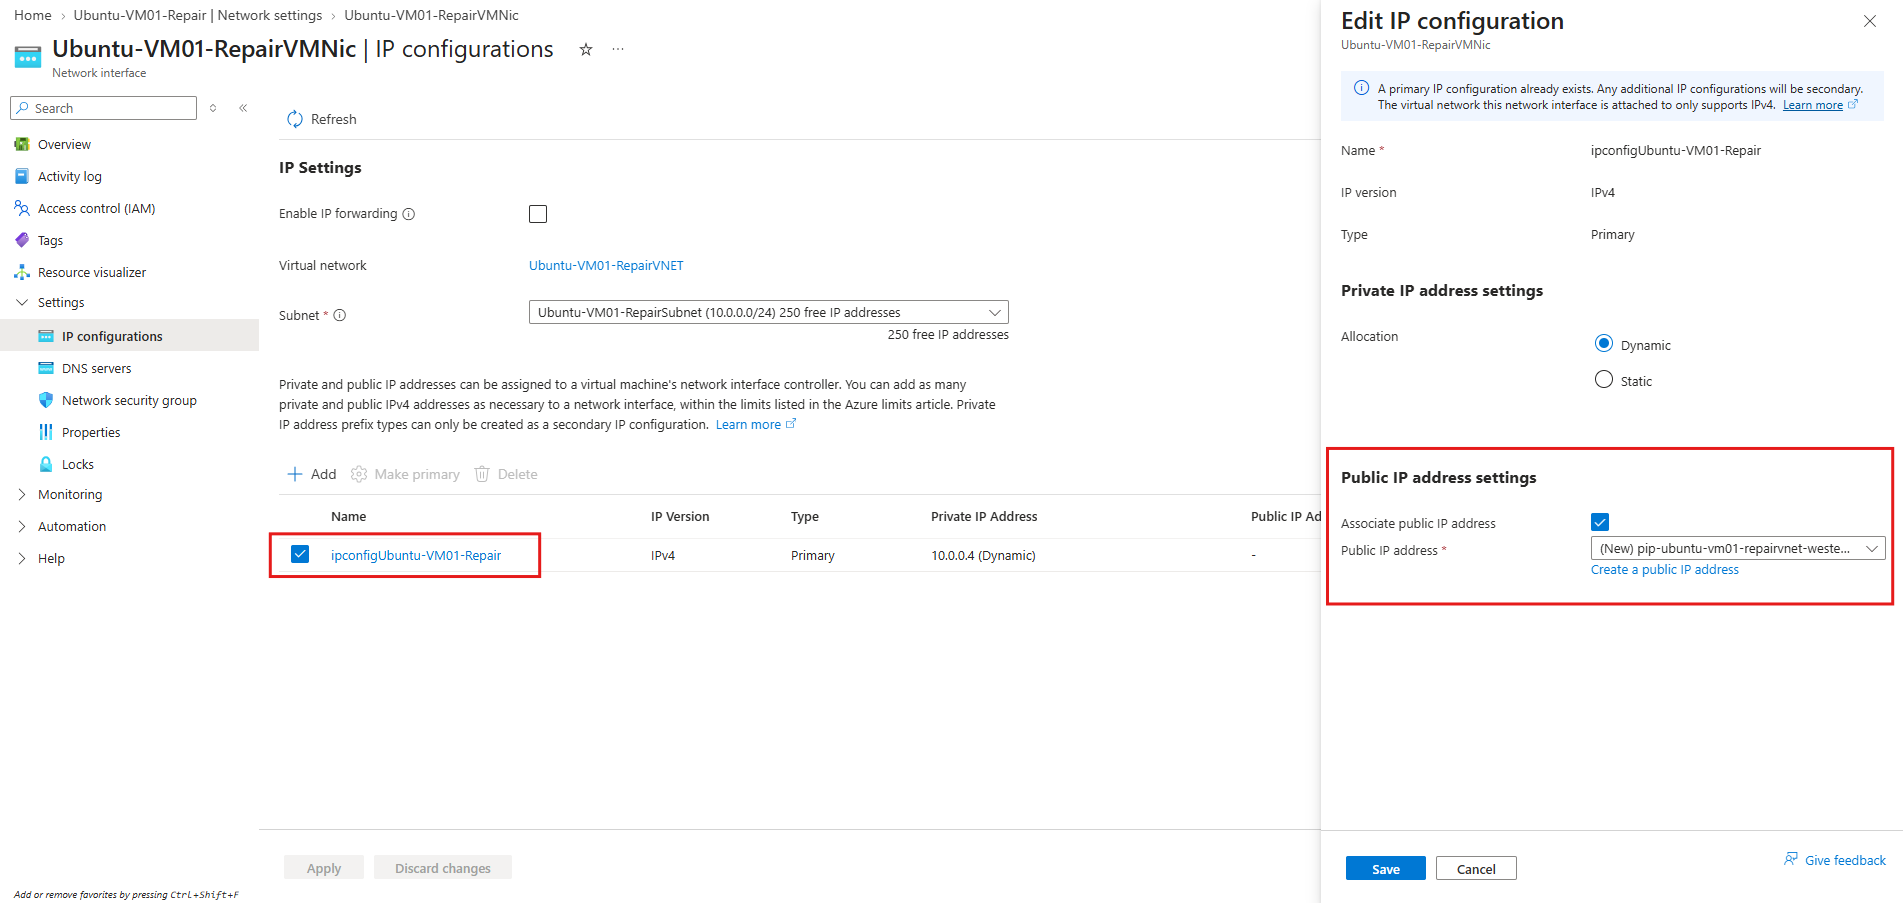
To enable direct SSH access for our lab, we can edit the repair VM’s primary NIC IP configuration and associate a newly created public IP address.
Since this access is required only temporarily for the recovery procedure, the public IP can be removed again afterward.
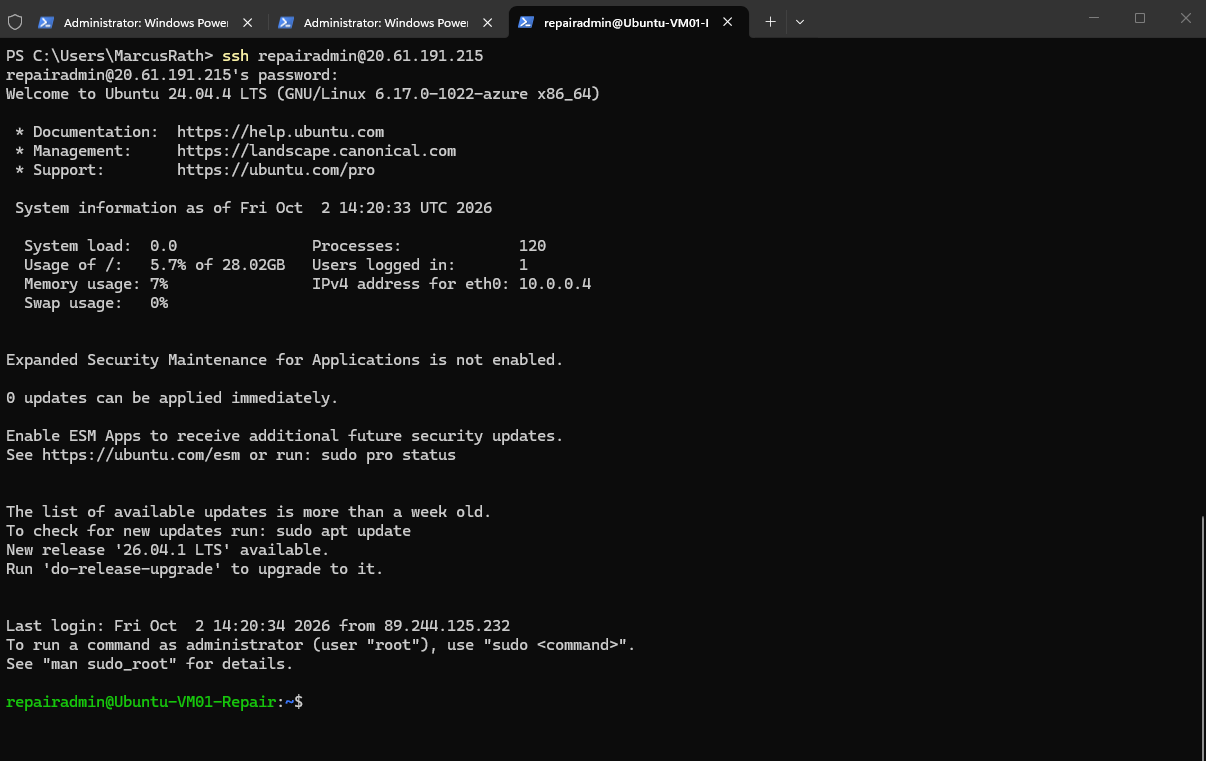
After associating the temporary public IP address, we can connect to the repair VM through SSH using the repairadmin account created earlier.
We now have a healthy Ubuntu environment from which we can inspect and repair the copied OS disk.
Inspecting and Mounting the Copied OS Disk
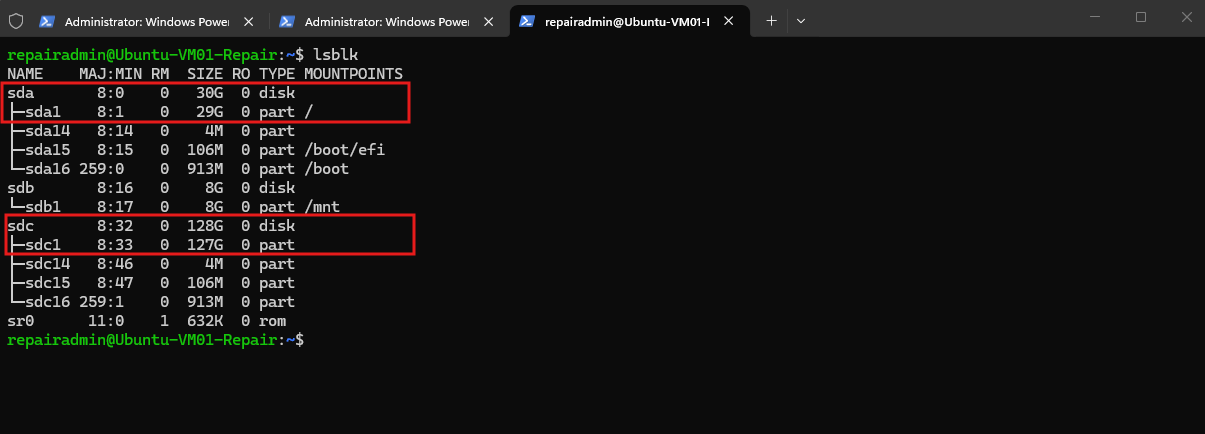
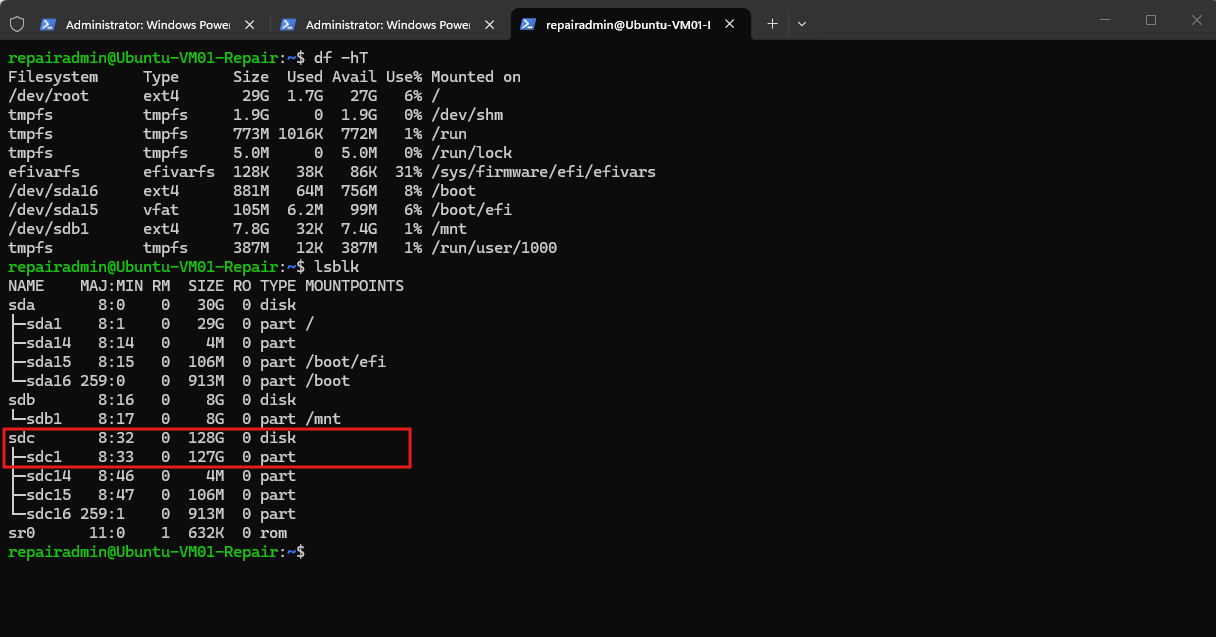
After connecting to the repair VM, we can use lsblk to identify the attached disks. The repair VM’s own OS disk is /dev/sda (30 GB), while /dev/sdc (128 GB) is the copied OS disk from Ubuntu-VM01, with /dev/sdc1 (127 GB) containing its root filesystem.
lsblk
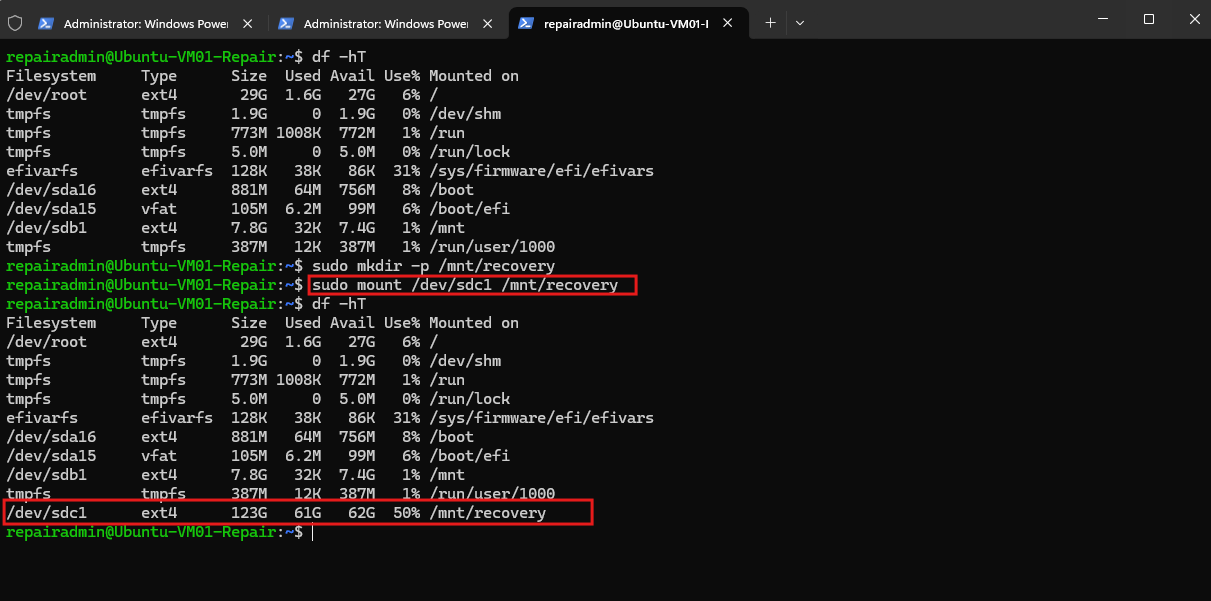
We can now create a temporary mount point and mount the copied root filesystem:
The copied root filesystem is now mounted at
/mnt/recoveryand can be accessed like any other filesystem from the healthy repair VM.
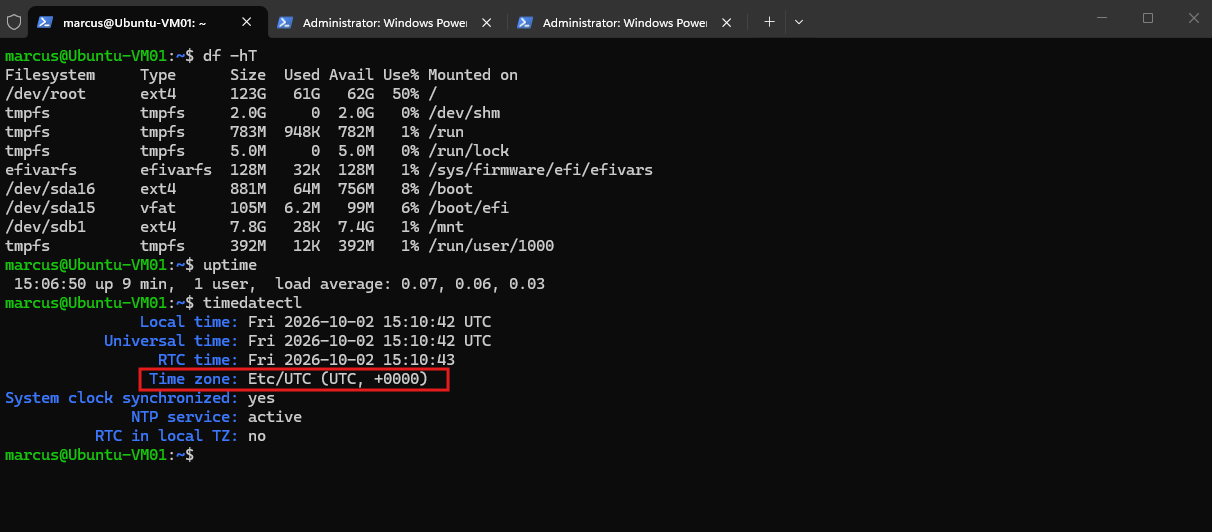
df -hTconfirms that/dev/sdc1is an ext4 filesystem with 123 GB capacity, containing the 61 GB of data from our original VM and approximately 62 GB of free space.
sudo mkdir -p /mnt/recovery
sudo mount /dev/sdc1 /mnt/recovery
Using chroot for Offline Recovery
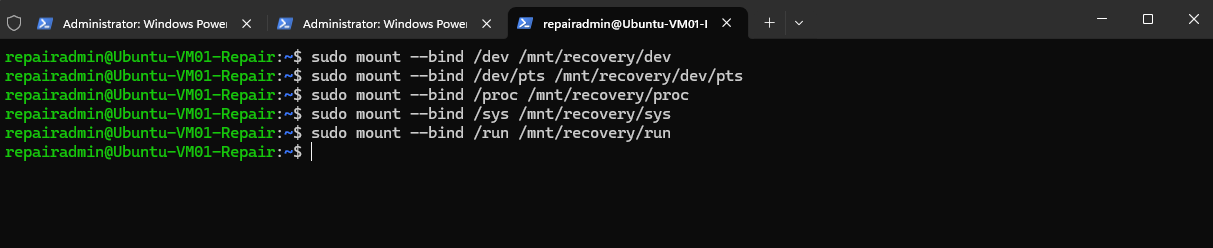
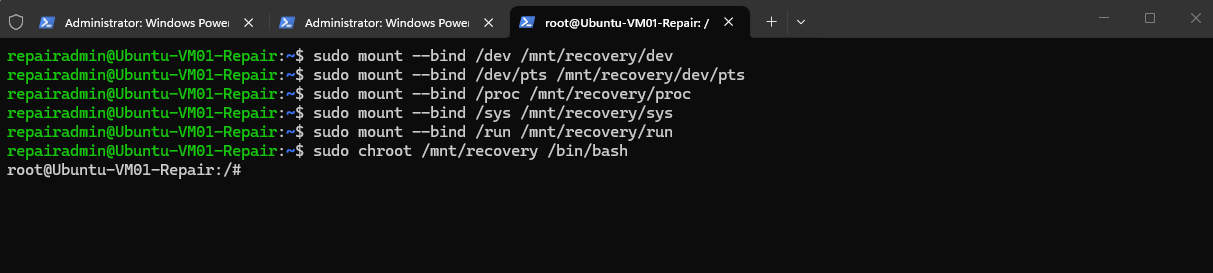
For more advanced repairs, we can use chroot to make the mounted copy of the affected Ubuntu installation temporarily behave like the root filesystem of our current shell. Before entering the environment, we bind-mount the required virtual filesystems:
The bind mounts make the repair VM’s virtual kernel filesystems such as
/dev,/proc,/sys, and/runavailable inside the mounted Ubuntu installation. This allows tools executed within thechrootenvironment to interact with devices, processes, and other kernel interfaces almost as if the copied system had been booted normally.For basic recovery operations like resetting the root user password also shown here, we can directly enter the mounted Ubuntu installation using
chroot. Additional virtual filesystems such as/dev,/proc,/sys, and/runonly need to be bind-mounted when recovery tools inside the chroot require access to these kernel and runtime interfaces.
sudo mount --bind /dev /mnt/recovery/dev
sudo mount --bind /dev/pts /mnt/recovery/dev/pts
sudo mount --bind /proc /mnt/recovery/proc
sudo mount --bind /sys /mnt/recovery/sys
sudo mount --bind /run /mnt/recovery/run
After preparing the required bind mounts, we enter the copied Ubuntu installation using chroot.
The shell now operates with
/mnt/recoveryas its apparent root filesystem, allowing us to execute administrative commands against the affected installation as if we were working directly within that system.
sudo chroot /mnt/recovery /bin/bash
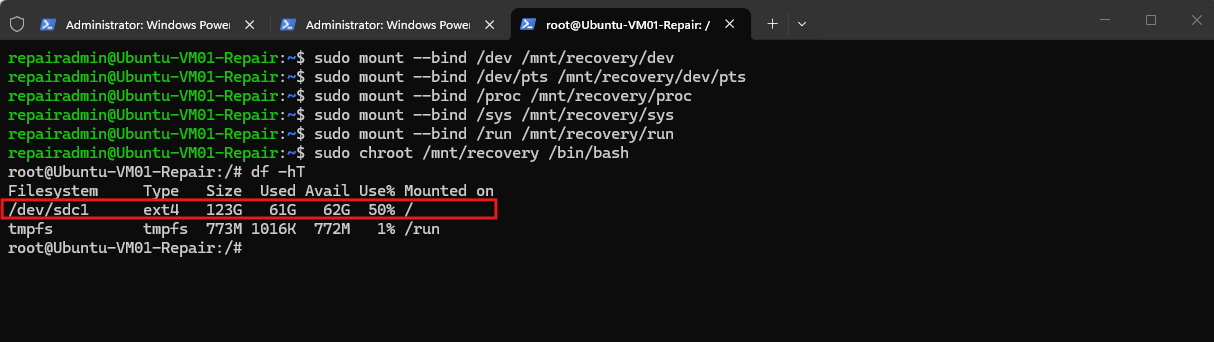
Inside the chroot environment, df -hT now reports the copied /dev/sdc1 filesystem as /.
This confirms that commands executed from this shell operate against the copied Ubuntu installation rather than the repair VM’s own root filesystem.
From within the chroot environment, we could also perform administrative recovery tasks such as resetting a user’s password, for example with passwd marcus.
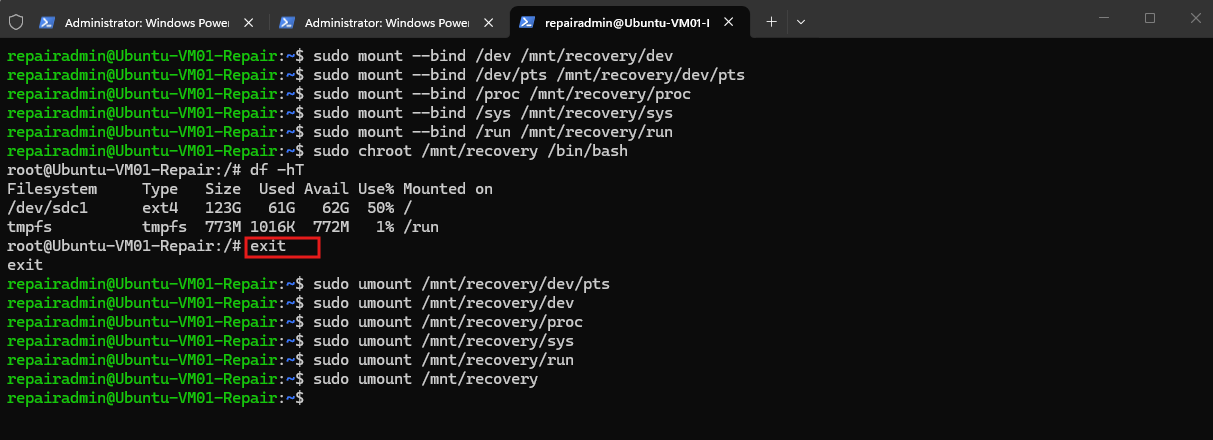
Once the required recovery tasks are complete, we leave the chroot environment by running exit.
Before detaching or performing further operations on the copied OS disk, we should also cleanly unmount the bind mounts and the root filesystem.
exit
sudo umount /mnt/recovery/dev/pts
sudo umount /mnt/recovery/dev
sudo umount /mnt/recovery/proc
sudo umount /mnt/recovery/sys
sudo umount /mnt/recovery/run
sudo umount /mnt/recovery
Extending the Root Partition and Filesystem Offline
If the affected VM cannot be repaired online, we can also extend its root partition and filesystem while the copied OS disk is attached to the repair VM.
A chroot environment is not required for this operation because we work directly with the attached block device.
In our example the copied disk is /dev/sdc, so the equivalent commands would be:
sudo growpart /dev/sdc 1
sudo resize2fs /dev/sdc1
For this demonstration, the copied OS disk already contains the previously extended partition and filesystem, so there is no additional space available to expand.
However, if the partition or filesystem had not been successfully extended on the original VM, we could perform the same operation offline from the repair VM.
Restoring the Repaired OS Disk to the Original VM
After completing the offline repairs and cleanly unmounting the copied filesystem, we use az vm repair restore. The command replaces the original VM’s OS disk with the repaired copy, starts the source VM, and cleans up the repair resources.
The
restorecommand automatically locates the associated repair VM, detaches the repaired data disk, and attaches it back toUbuntu-VM01as its new OS disk.It then offers to clean up the temporary repair VM, resource group, networking, and other resources created during the recovery process.
az vm repair restore -g VMS -n Ubuntu-VM01 --verbose
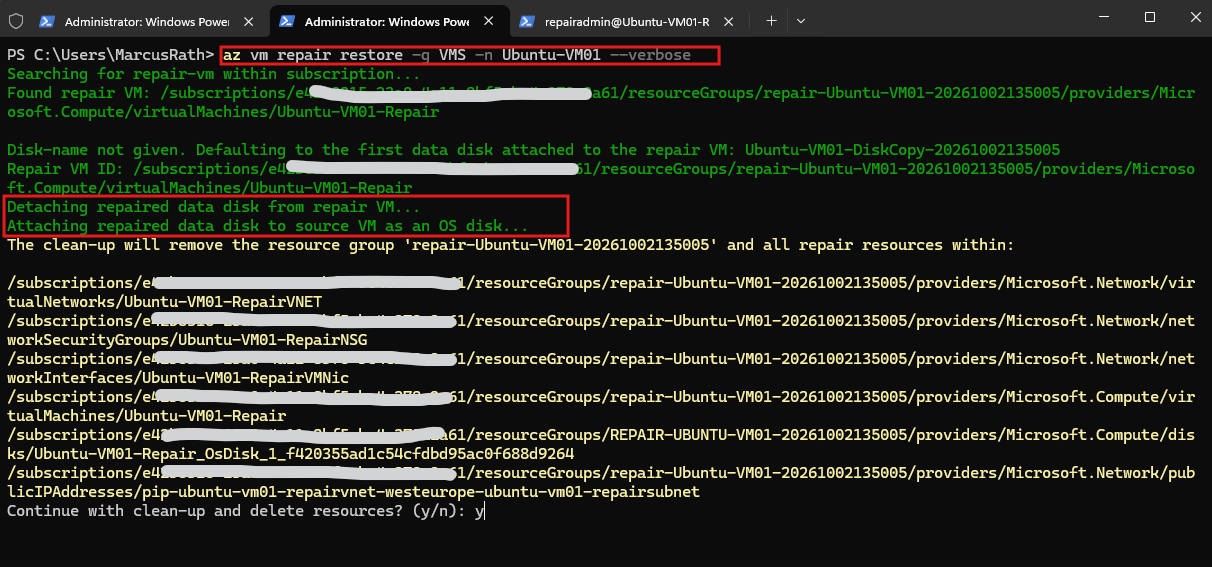
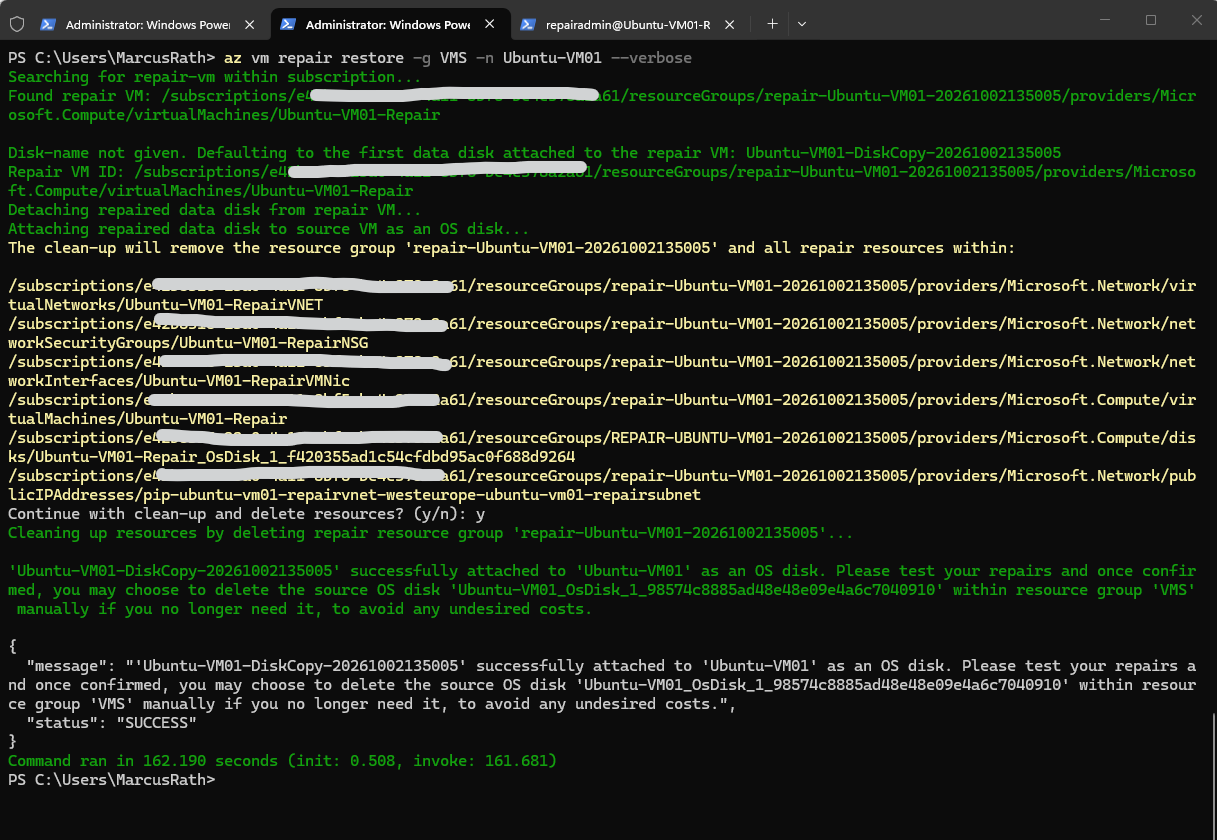
After confirming the cleanup, Azure removes the temporary repair resource group and its associated resources.
The repaired disk
Ubuntu-VM01-DiskCopy-20261002135005is successfully attached toUbuntu-VM01as its new OS disk, while the previous source OS disk is retained in theVMSresource group as a safety fallback.
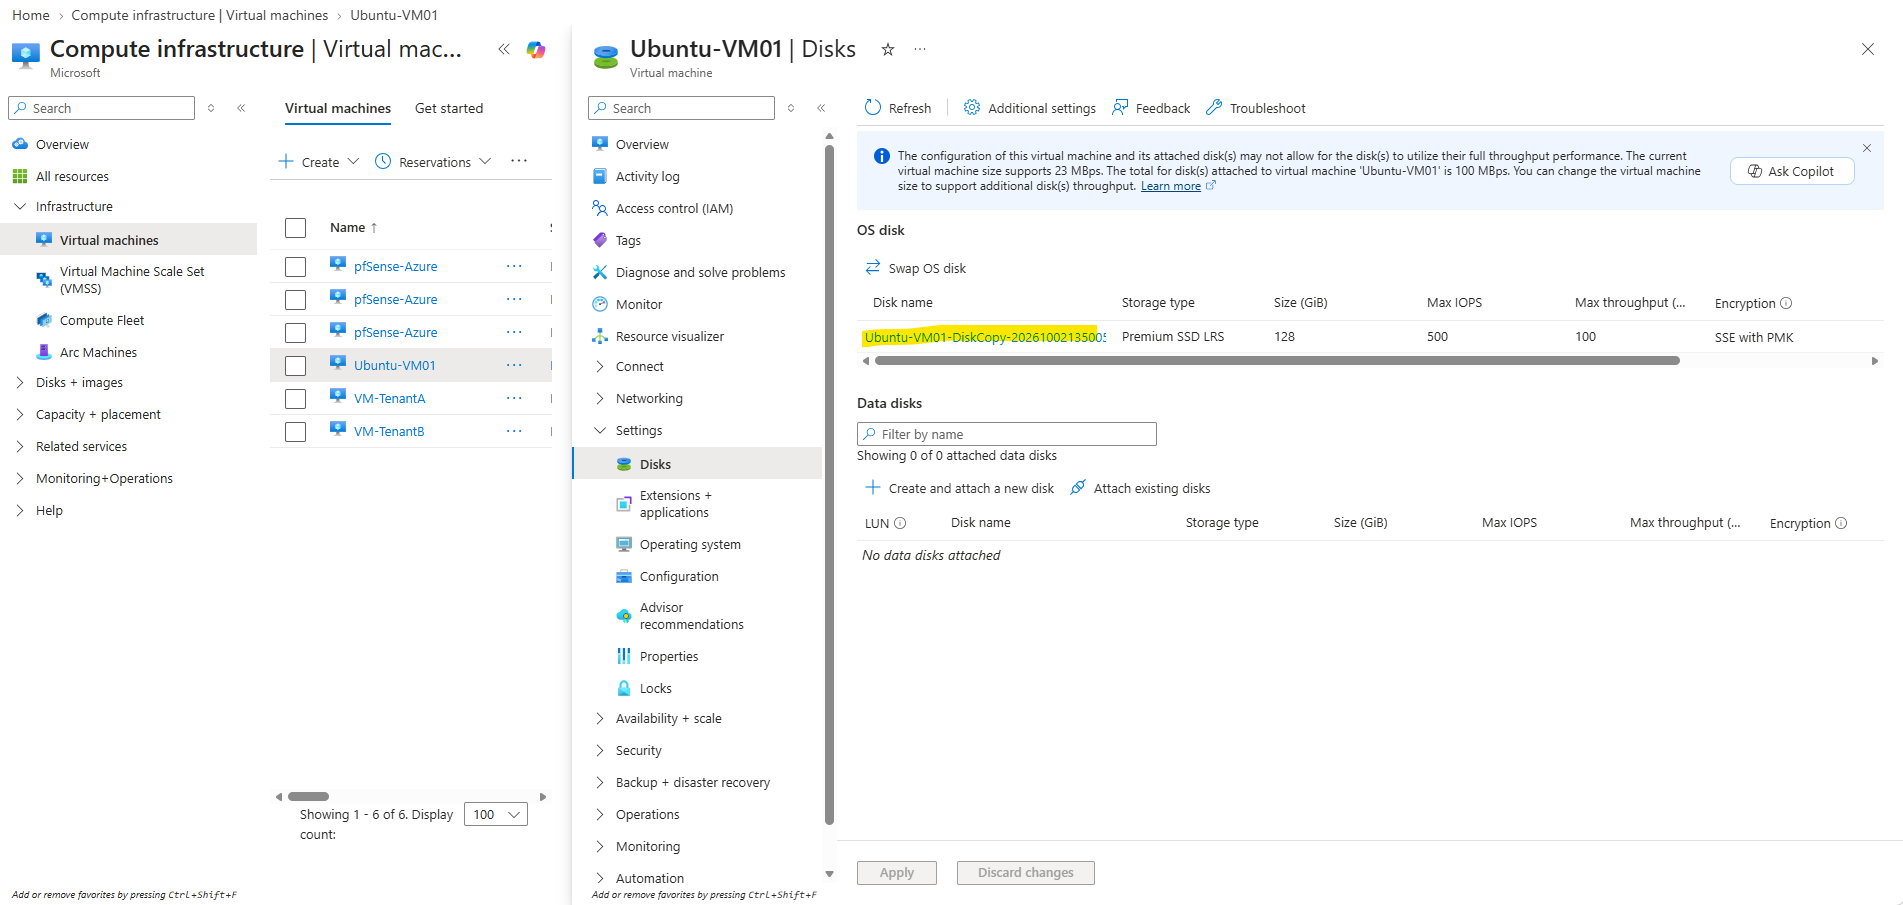
Back on the original Ubuntu-VM01, we can confirm that the repaired Ubuntu-VM01-DiskCopy-20261002135005 is now attached as the VM’s 128 GiB OS disk.
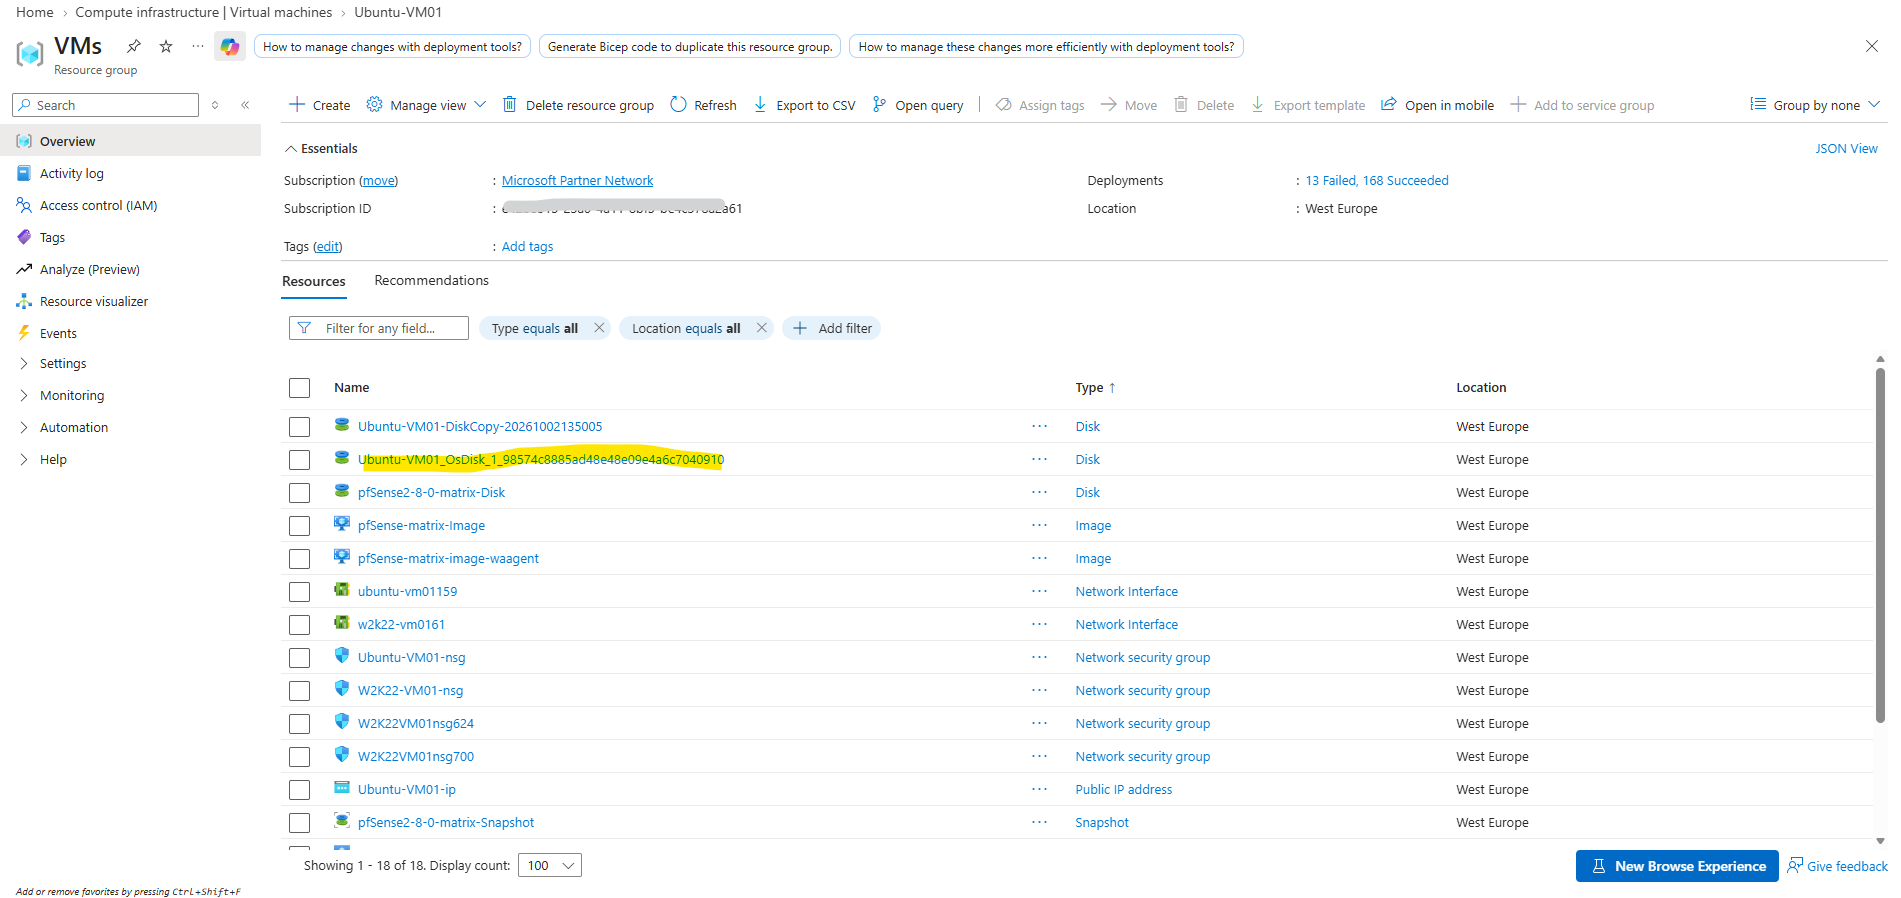
The previous OS disk remains available as an unattached managed disk, providing an additional rollback option until we have verified that the repaired VM operates correctly.
During the restore process, the original VM cannot remain running because its OS disk must be replaced. The VM Repair workflow handles this automatically: it swaps the repaired disk in as the new OS disk and subsequently starts the original VM again.
Creating the repair VM and copying the affected OS disk does not require the source VM to be stopped. Downtime is required only during the restore operation, when the repaired disk is swapped back in as the original VM’s OS disk.
Finally, we verify that the original VM is running normally again by checking its uptime. The short uptime confirms that the VM was restarted during the restore process when the repaired OS disk was swapped back in.
timedatectl
Copying an OS Disk Directly with Azure CLI
Using az disk create, we can create a new managed disk directly from an existing OS disk without first creating a snapshot.
The copied disk can then be attached to another Linux VM as a data disk for offline repair.
az disk create --resource-group <RepairResourceGroup> --name <RepairDiskName> --source <SourceOSDiskResourceID> --location <AzureRegion>
Replace <SourceOSDiskResourceID> with the full Azure resource ID of the original OS disk and use the same region as the source disk.
The source VM can remain running during the copy. However, shutting it down cleanly beforehand avoids ongoing writes and provides a more consistent starting point for the repair.
For further details, see Microsoft’s Azure CLI example for copying managed disks.
Links
Repair a Linux VM by using the Azure Virtual Machine repair commands
https://learn.microsoft.com/en-us/troubleshoot/azure/virtual-machines/linux/repair-linux-vm-using-azure-virtual-machine-repair-commandsTroubleshoot a Linux VM by attaching the OS disk to a recovery VM with the Azure CLI
https://learn.microsoft.com/en-us/troubleshoot/azure/virtual-machines/linux/troubleshoot-recovery-disks-linuxExpand virtual hard disks on a Linux VM
https://learn.microsoft.com/en-us/azure/virtual-machines/linux/expand-disksTroubleshoot Azure Linux virtual machine boot errors
https://learn.microsoft.com/en-us/troubleshoot/azure/virtual-machines/linux/boot-error-troubleshoot-linuxAzure Serial Console for Linux
https://learn.microsoft.com/en-us/troubleshoot/azure/virtual-machines/linux/serial-console-linuxCopy managed disks to same or different subscription with CLI
https://learn.microsoft.com/en-us/azure/virtual-machines/scripts/copy-managed-disks-to-same-or-different-subscription
