Set up DomainKeys Identified Mail (DKIM) for Exchange Online
Either you can set up DKIM by using the Microsoft 365 Defender portal or manually by using PowerShell.
First I will show how to set up DKIM in the Microsoft 365 Defender portal.
Microsoft 365 automatically sets up DKIM for onmicrosoft.com domains. No steps are needed to use DKIM for any initial domain names (like litware.onmicrosoft.com). For more information about domains, see Domains FAQ.
Source: https://learn.microsoft.com/en-us/microsoft-365/security/office-365-security/use-dkim-to-validate-outbound-email?view=o365-worldwide#steps-to-manually-upgrade-your-1024-bit-keys-to-2048-bit-dkim-encryption-keys
Enable DKIM by using the Microsoft 365 Defender portal
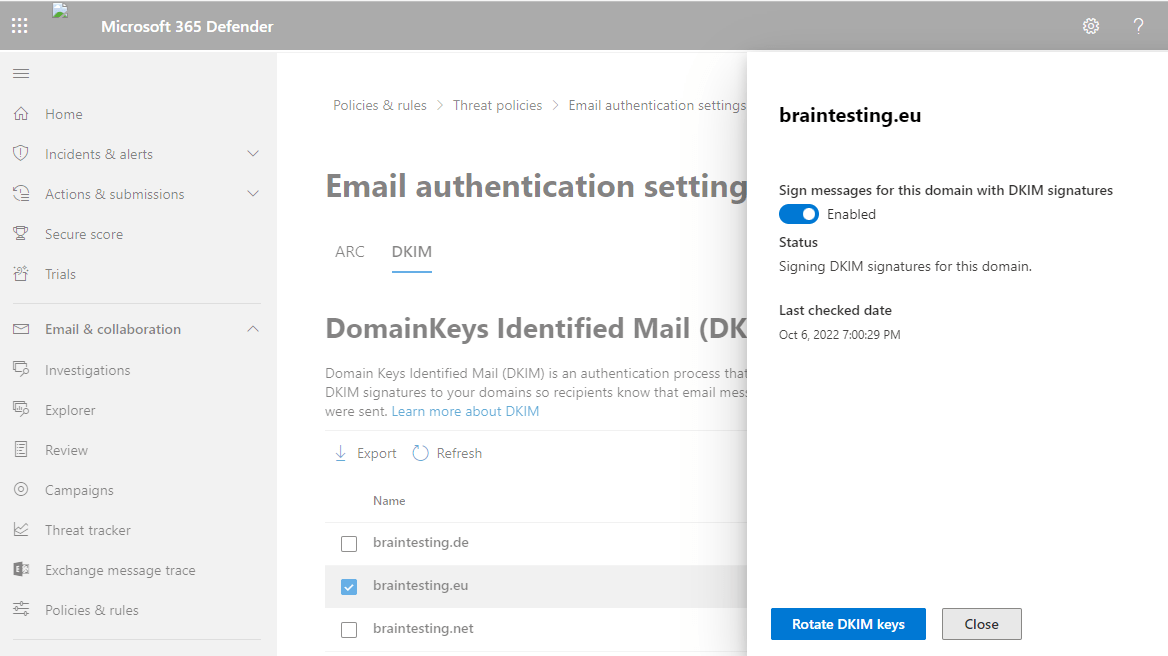
All the custom domains of your tenant will be shown in the Microsoft 365 Defender portal under the DKIM page.
https://security.microsoft.com/dkimv2
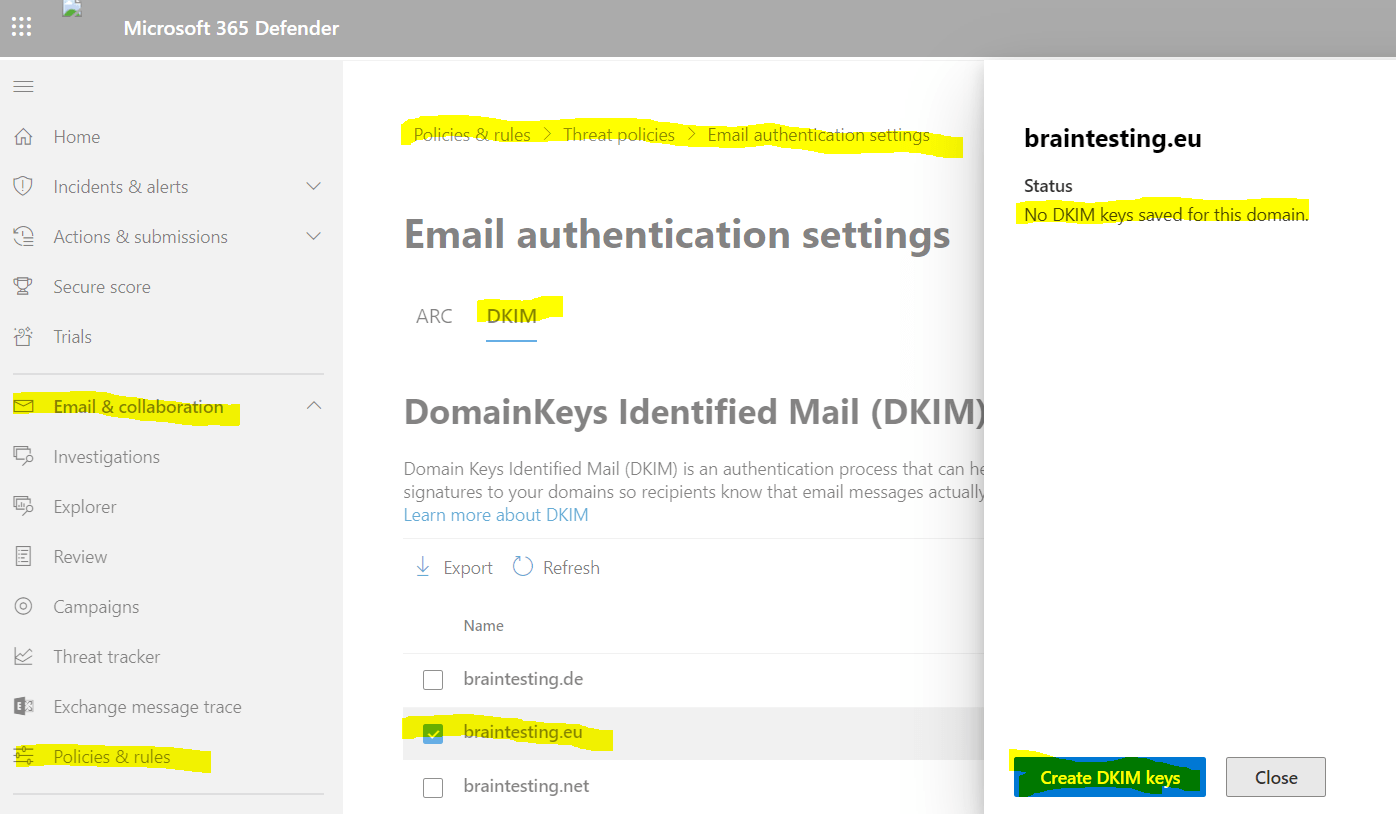
Microsoft 365 Defender portal –> Policies & rules –> Threat policies –> Email authentication settings –> DKIM
Here you can select your custom domain you want to set up for DKIM. When you click on Create DKIM keys a private and a public cryptographic key will be created for the domain.
The private key encrypts the E-Mail header in a domain’s outgoing email. The public key is published in the domain’s DNS records, and receiving servers can use that key to decode the signature. DKIM verification helps the receiving servers confirm the mail is really coming from your domain and not someone spoofing your domain.
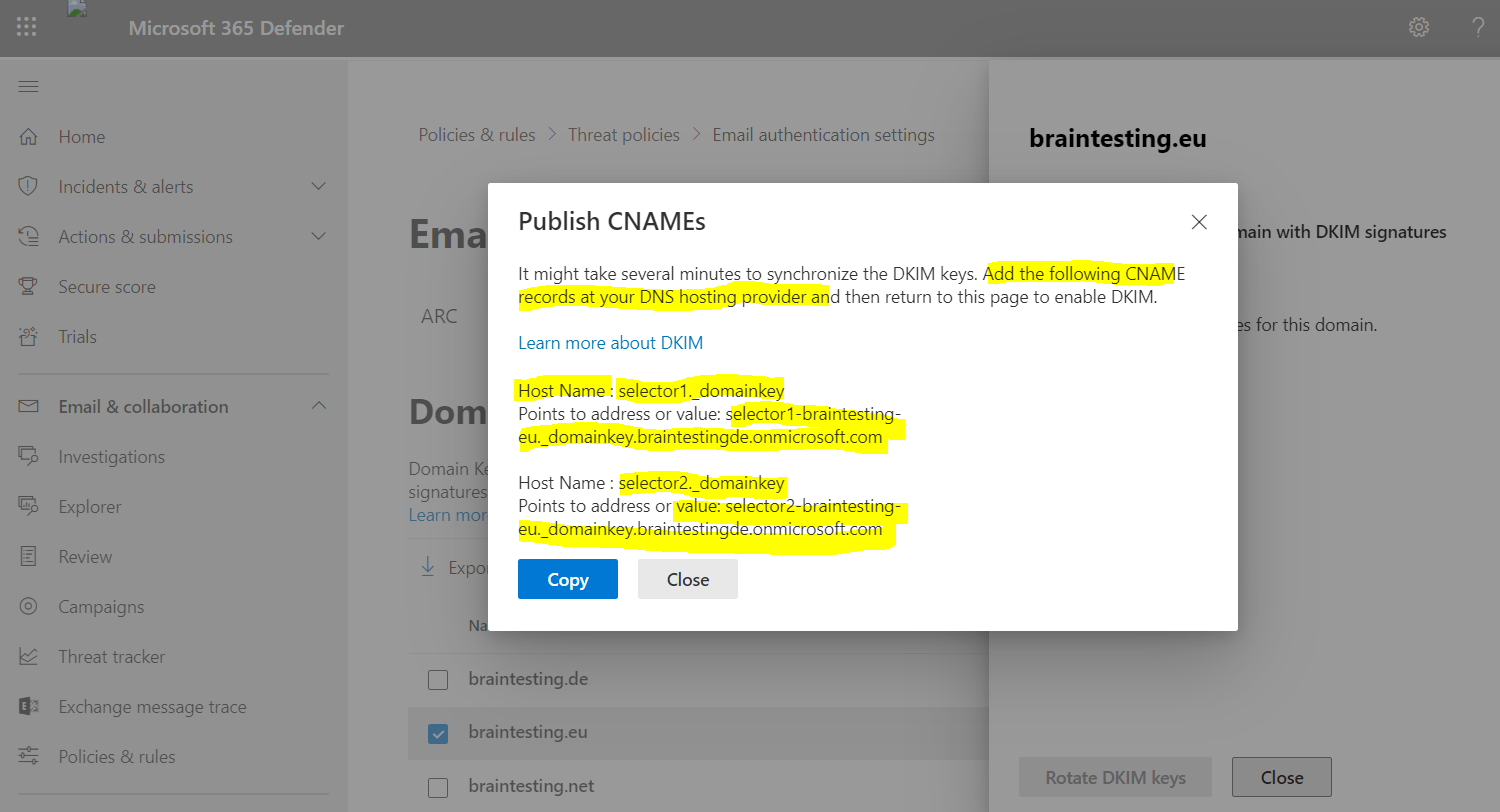
Below when I click on Create DKIM keys, I get the pop-up notification (second screenshot), that I also must set two CNAME DNS records for the domain.
So in order we can enable DKIM, we first need to publish the CNAME records shown in the pop-up above at our DNS provider.
Now we can try again to slide the toggle to Enable.
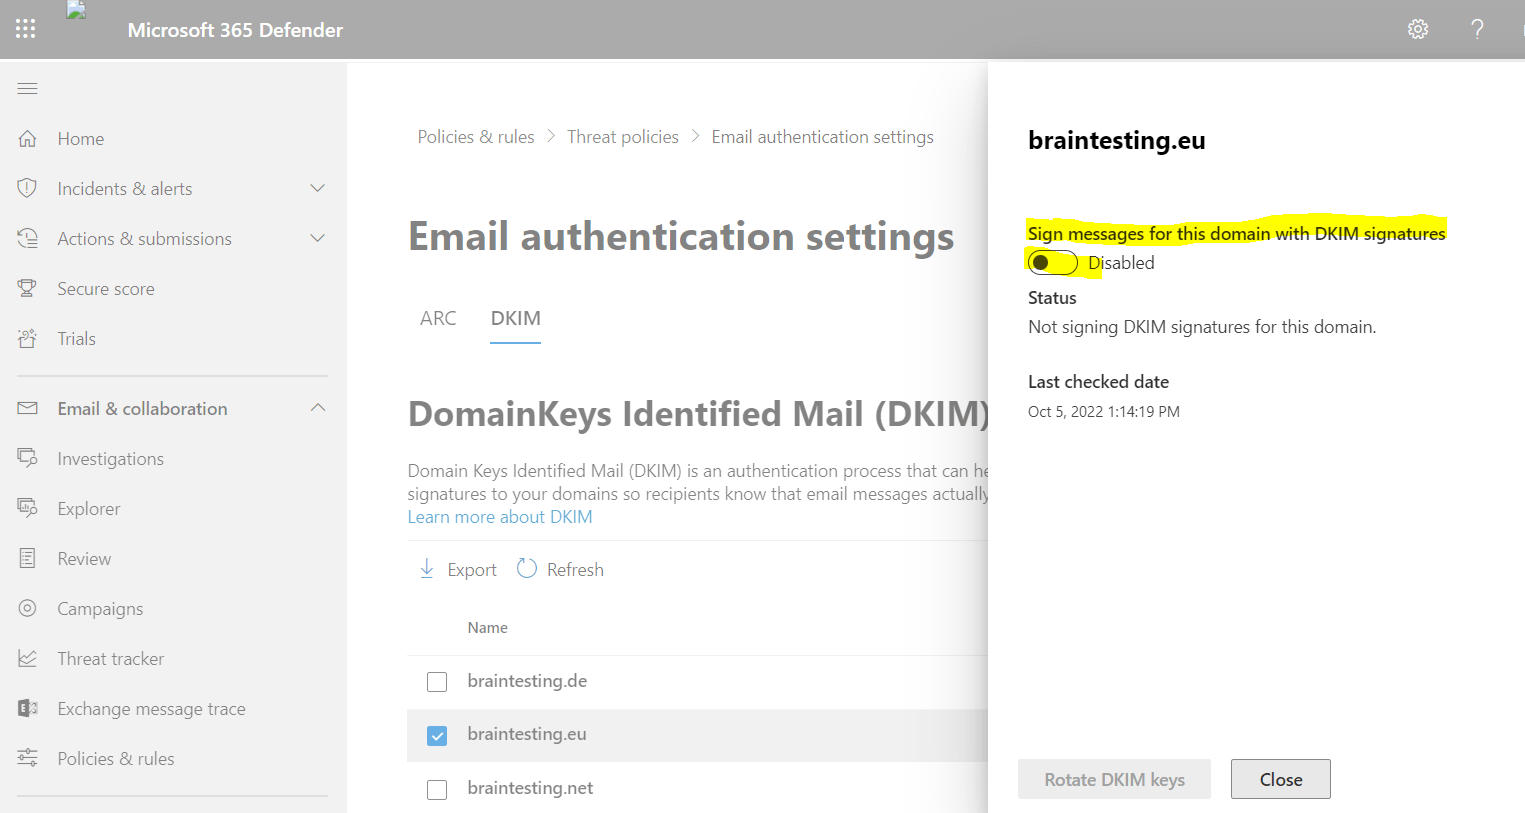
Due to synchronization delay with other DNS Servers, this can take a a few minutes till it works. So if you see the pop-up with the Client error and CNAME record does not exist again, just try it a few minutes later again.
In my case it lasts about 15 minutes till I could enable it after setting the CNAME record.

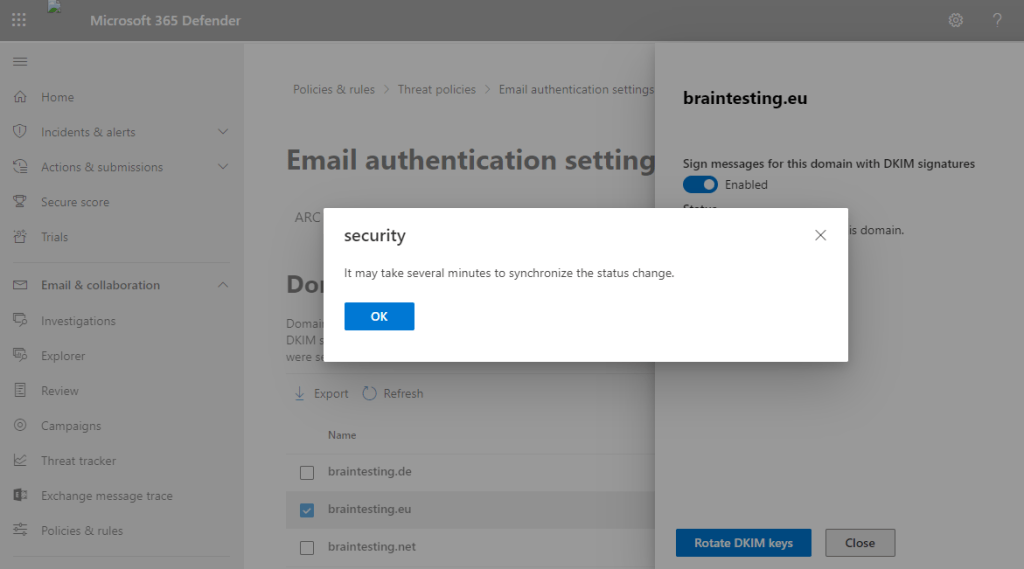
DKIM is now enabled for the domain. From now on, outgoing emails will be signed with the private key.
Enable DKIM by using PowerShell
As mentioned you can also use PowerShell to enable DKIM. Therefore we first need to connect to Exchange Online.
If not already installed, you first need to install the Exchange Online PowerShell V2 module.
https://www.powershellgallery.com/packages/ExchangeOnlineManagement/2.0.5
Install-Module -Name ExchangeOnlineManagement -RequiredVersion 2.0.5
Import-Module ExchangeOnlineManagement
$credential = Get-Credential
Connect-ExchangeOnline -Credential $credential -ShowProgress $true
As I already had set up the primary email domain from my lab environment for DKIM, I will use here another custom domain braintesting.de which is also an email alias.
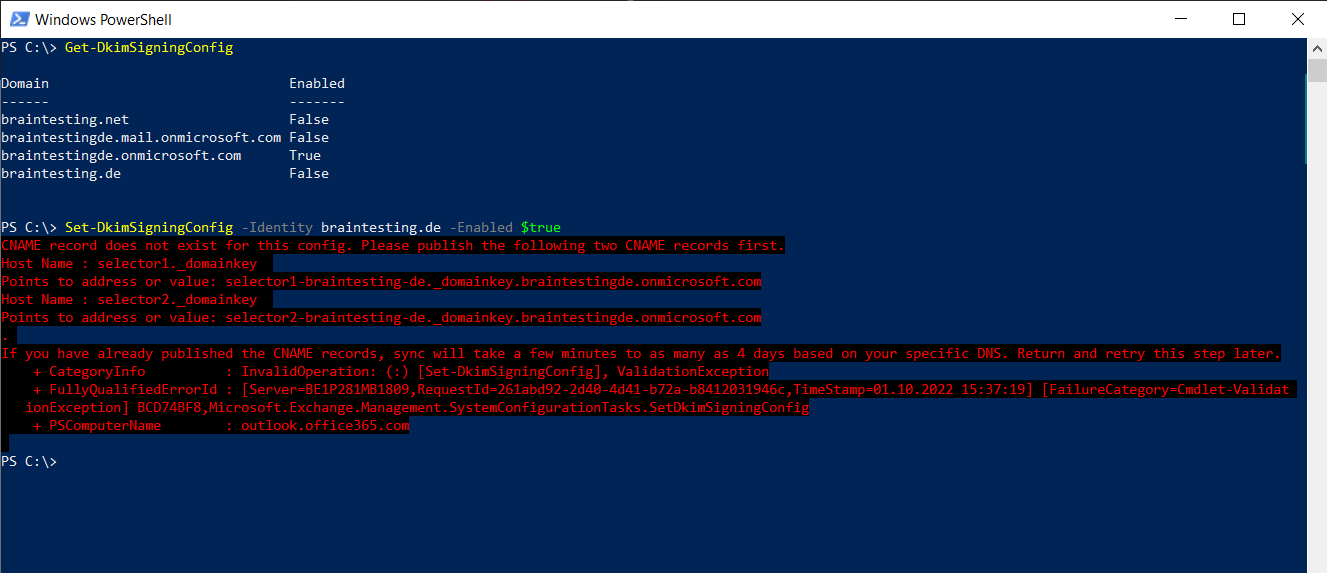
Set-DkimSigningConfig -Identity braintesting.de -Enabled $true
Here you can see the same as previously using the Microsoft 365 Defender portal, in order to enable DKIM I will first have to create the two new DNS CNAME records.
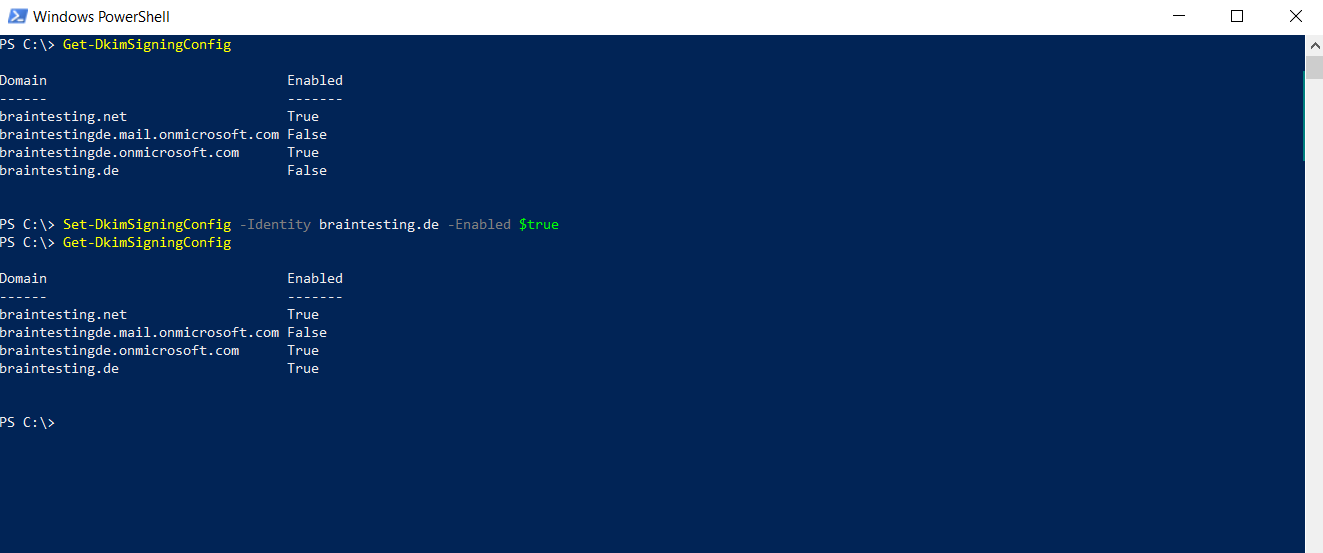
After adding the CNAME records, I also had to wait a few minutes till it works and the CNAME records for braintesting.de was synchronized with the other DNS servers.
Set up DMARC
Now after we enabled DKIM to sign message for our e-mail domain we can also configure finally DMARC which works with the Sender Policy Framework (SPF) and DomainKeys Identified Mail (DKIM) to authenticate mail senders.
About how to set up DMARC for your e-mail domain you can read my following post.
Links
Use DKIM to validate outbound email sent from your custom domain
https://learn.microsoft.com/en-us/microsoft-365/security/office-365-security/use-dkim-to-validate-outbound-email?view=o365-worldwide