How to change VMware Disk Provisioning (Thick/Thin) afterwards
In VMware vSphere, disk provisioning is a critical aspect of virtual machine storage management, impacting both performance and storage efficiency.
Two primary disk provisioning methods are available: Thick Provisioning and Thin Provisioning.
Thick provisioning allocates the entire disk space upfront, ensuring reserved capacity but potentially leading to underutilized storage.
Thin provisioning, on the other hand, allocates storage on-demand, optimizing space usage but requiring careful monitoring to avoid overcommitment.
Changing disk provisioning from thick to thin (or vice versa) is a common task in vSphere environments, often performed to balance performance requirements with storage efficiency. This process can be achieved using tools like Storage vMotion, cloning virtual machine disks or inflating the disk (thin to thick) when the virtual machine is offline.
Below we will see both methods step by step.
To change the vmdk from Thin to Thick provisioning
To change the provisioning of a virtual machine base disk from thin to thick, we can use the vSphere client as shown below.
Inflate the disk (by default will change from thin to thick provisioned eager zeroed)
First power off the virtual machine. In vSphere Client, right-click the virtual machine in the inventory.
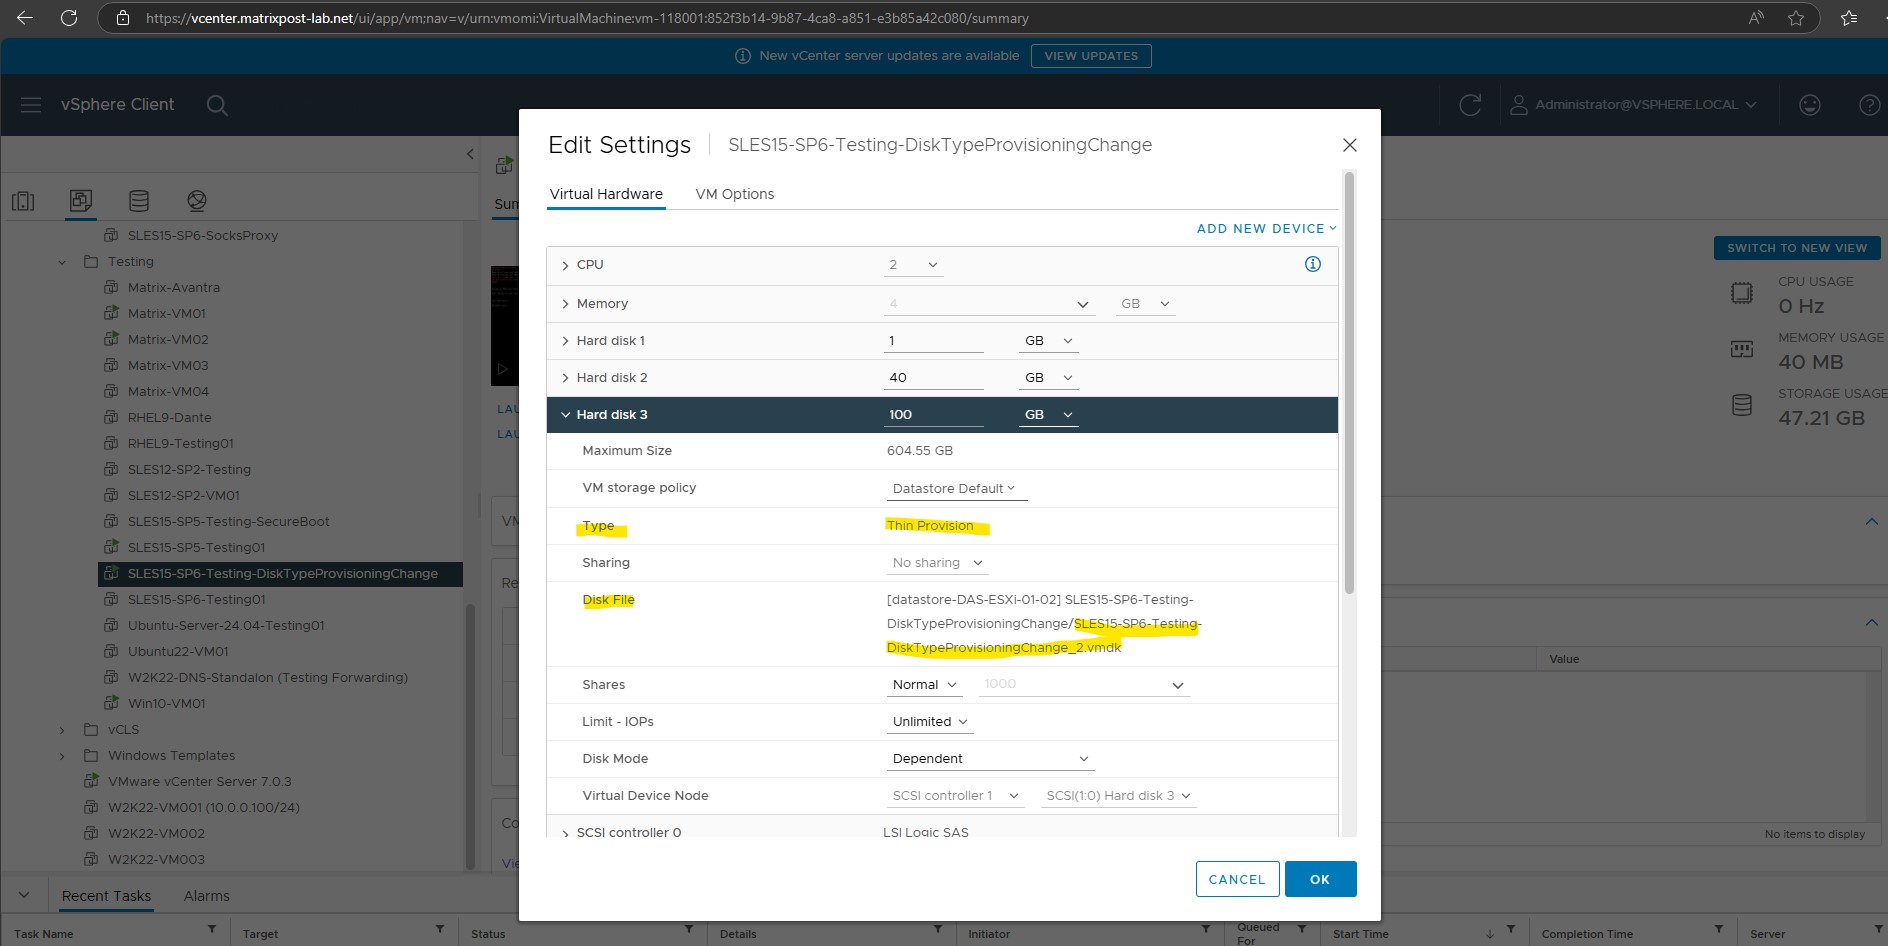
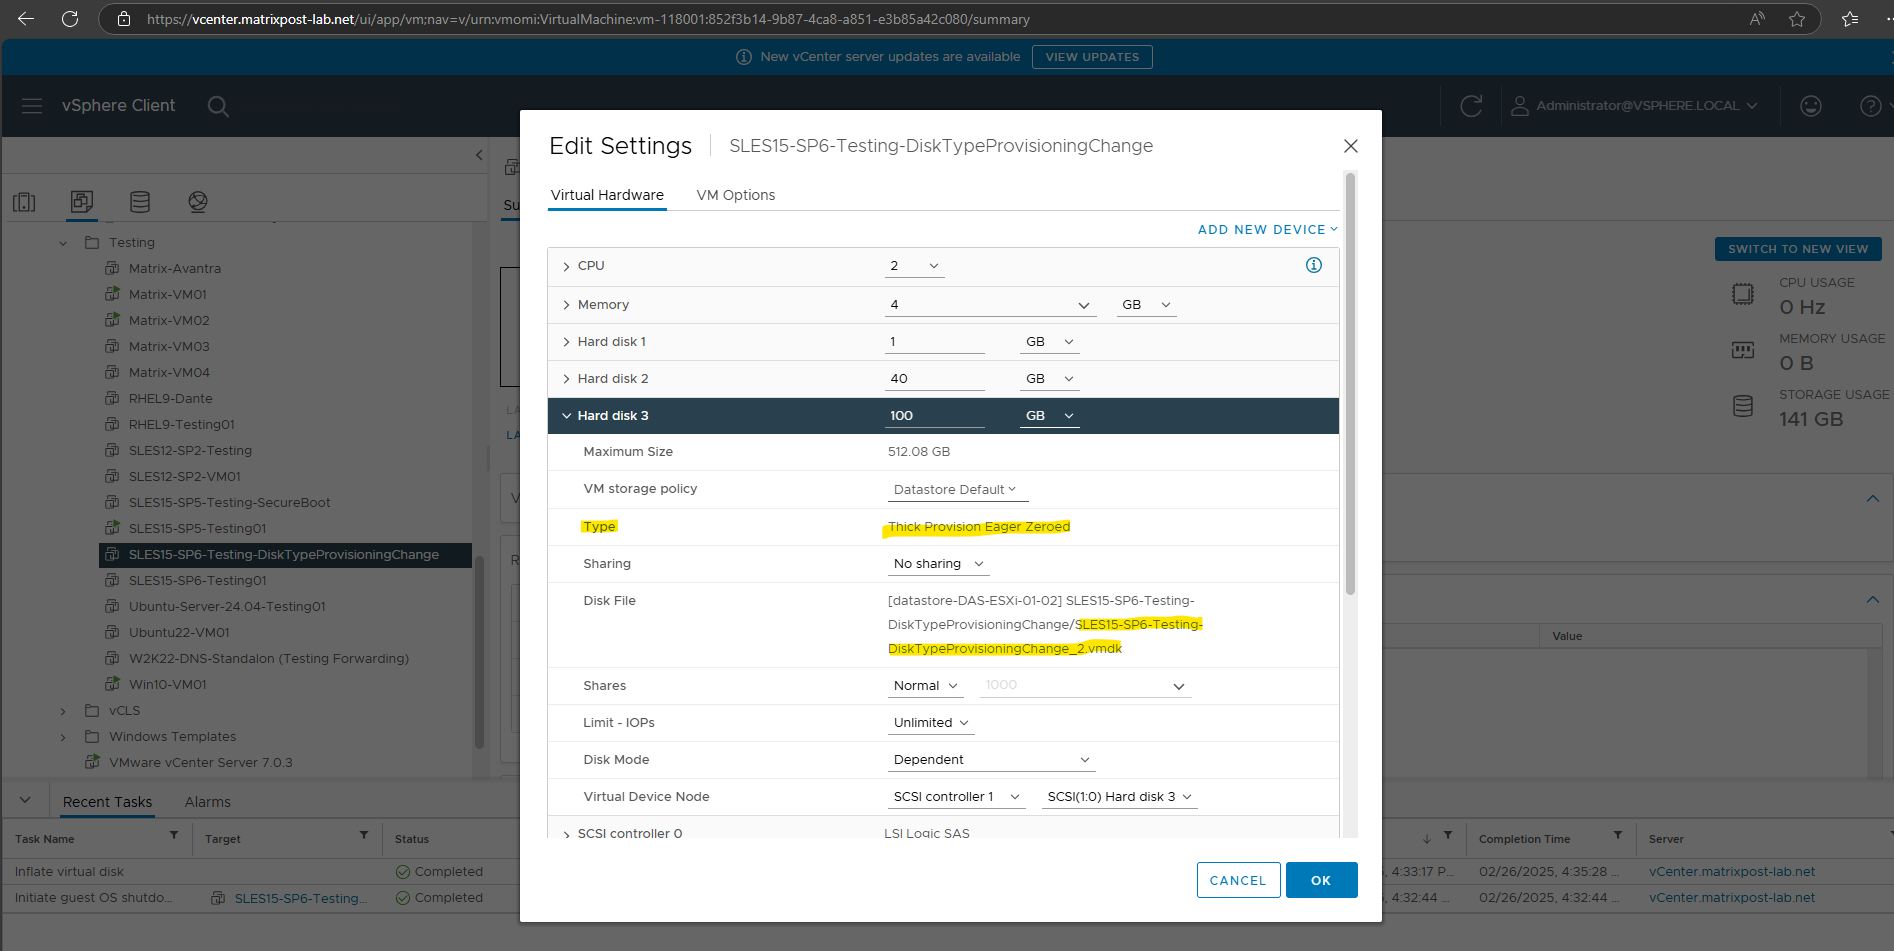
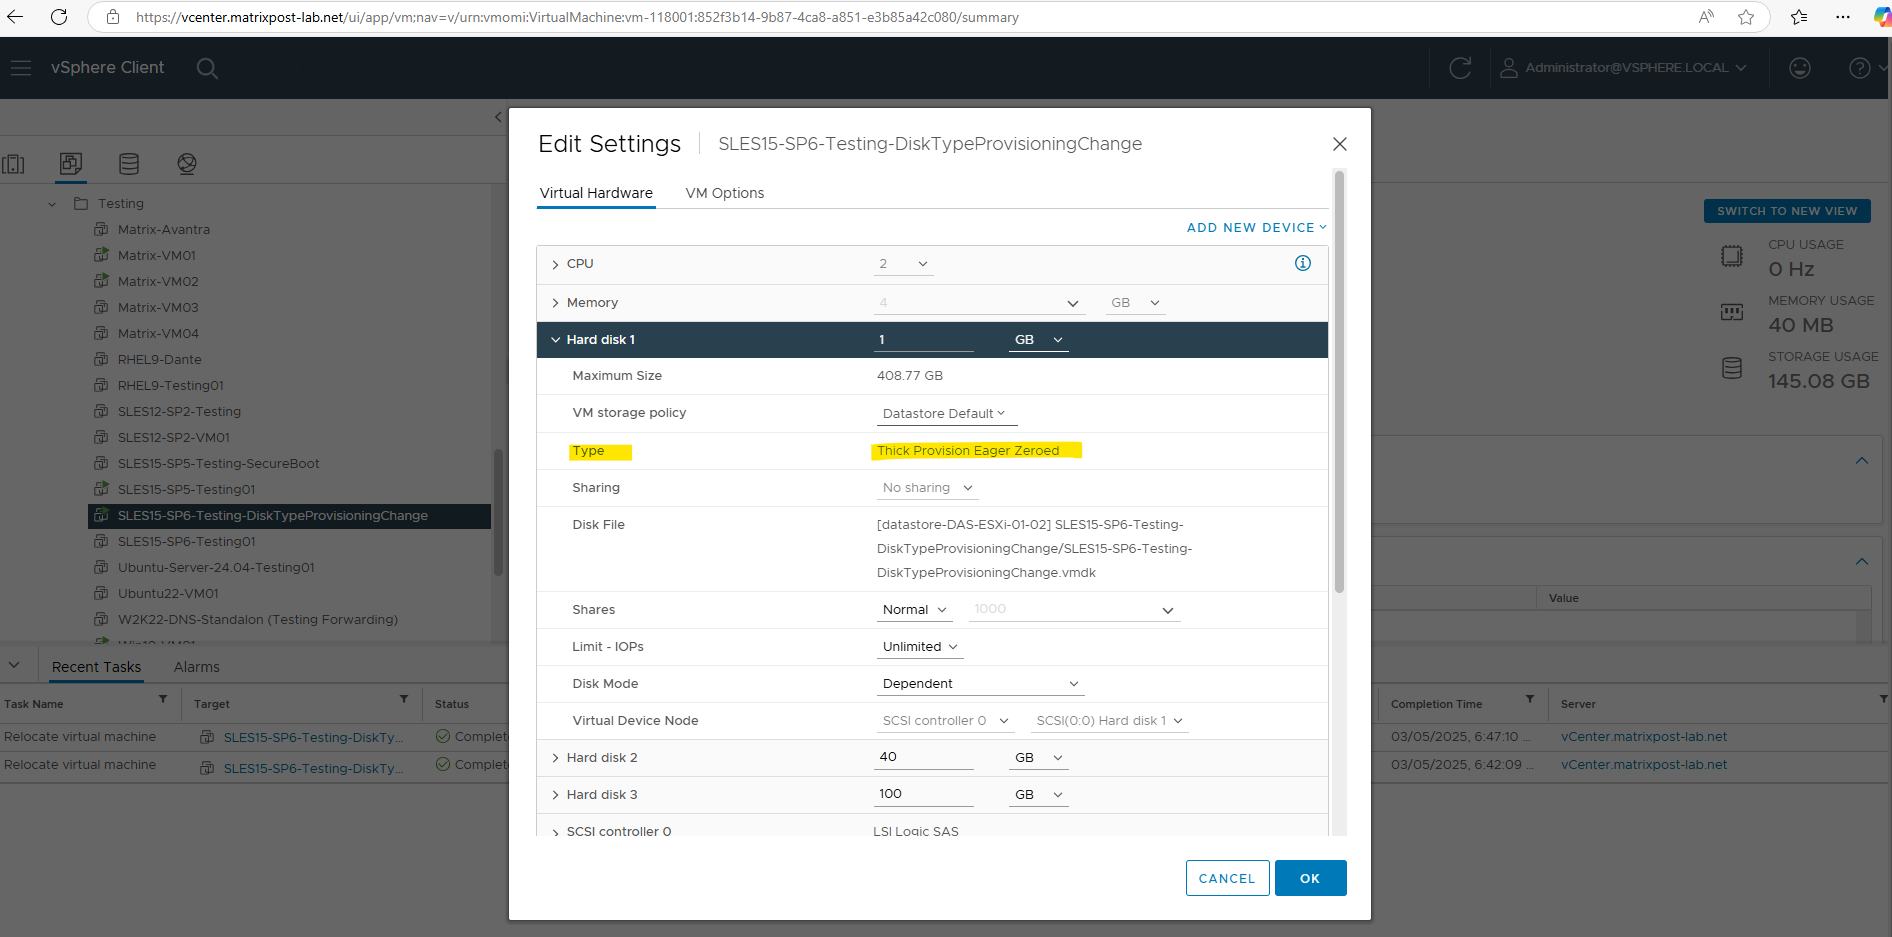
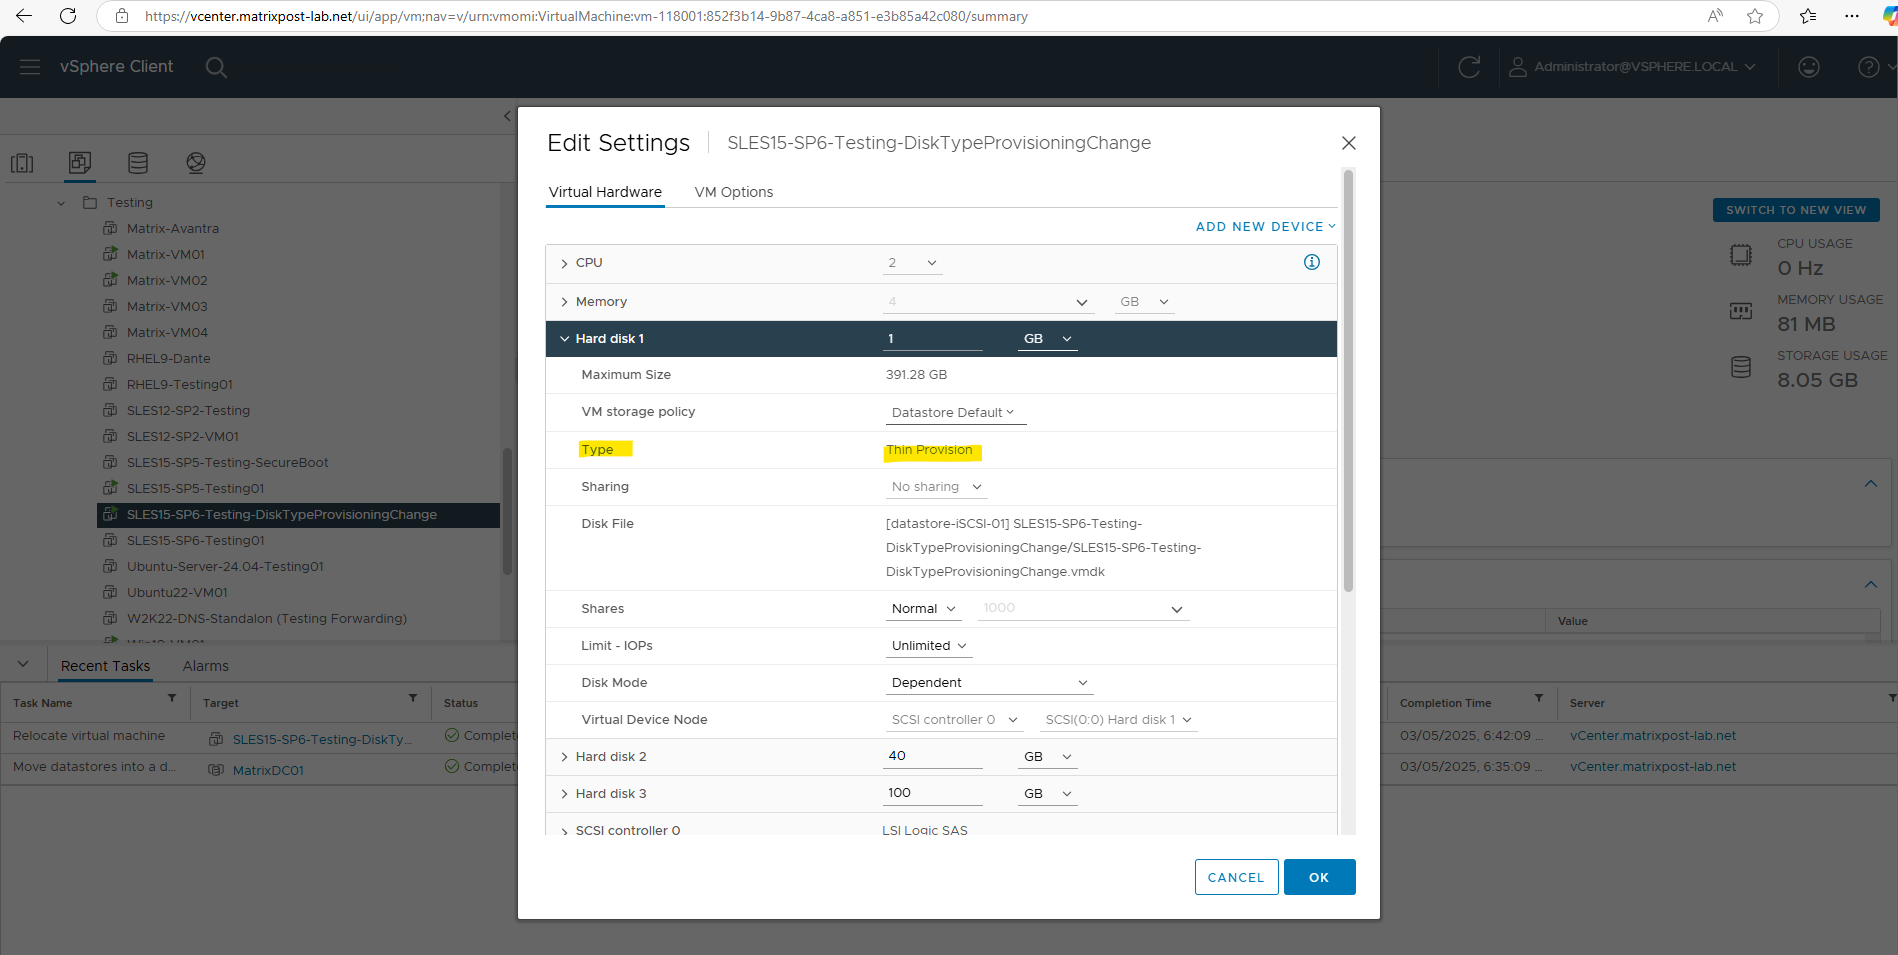
Click Edit Settings to display the Virtual Machine Properties dialog box. Select the appropriate hard disk in the Hardware list.
Note: The Disk Provisioning Type section on the right displays either Thin Provision or Thick Provision.
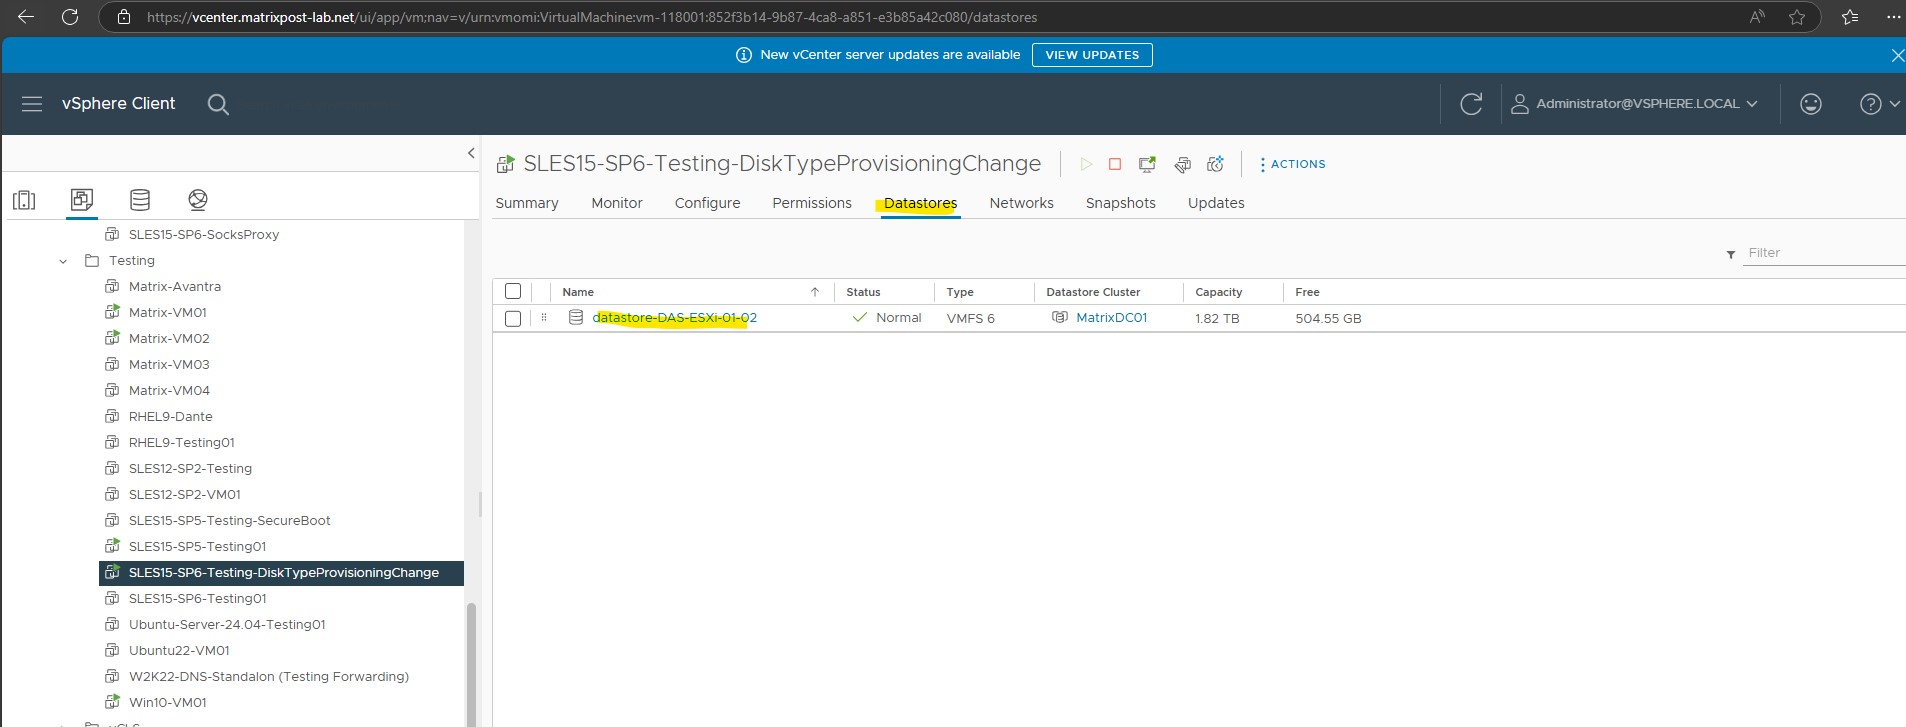
Click Cancel to exit from Virtual Machine Properties dialog box and navigate to the datastore where the VM disk resides that we identified above.
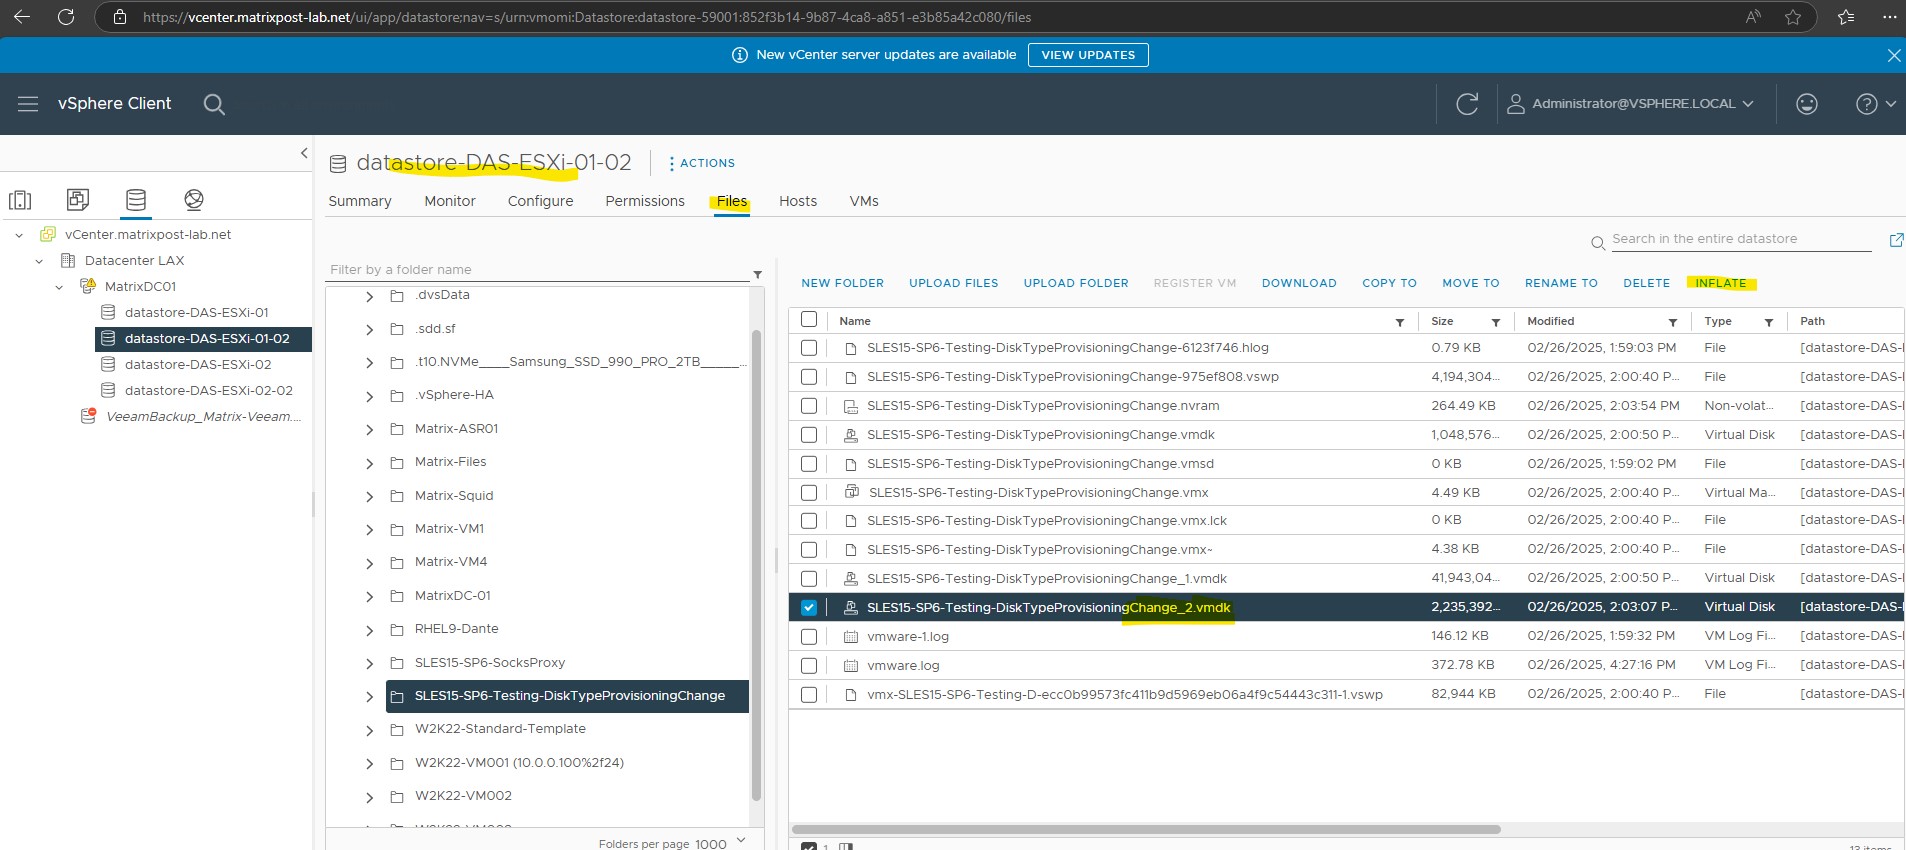
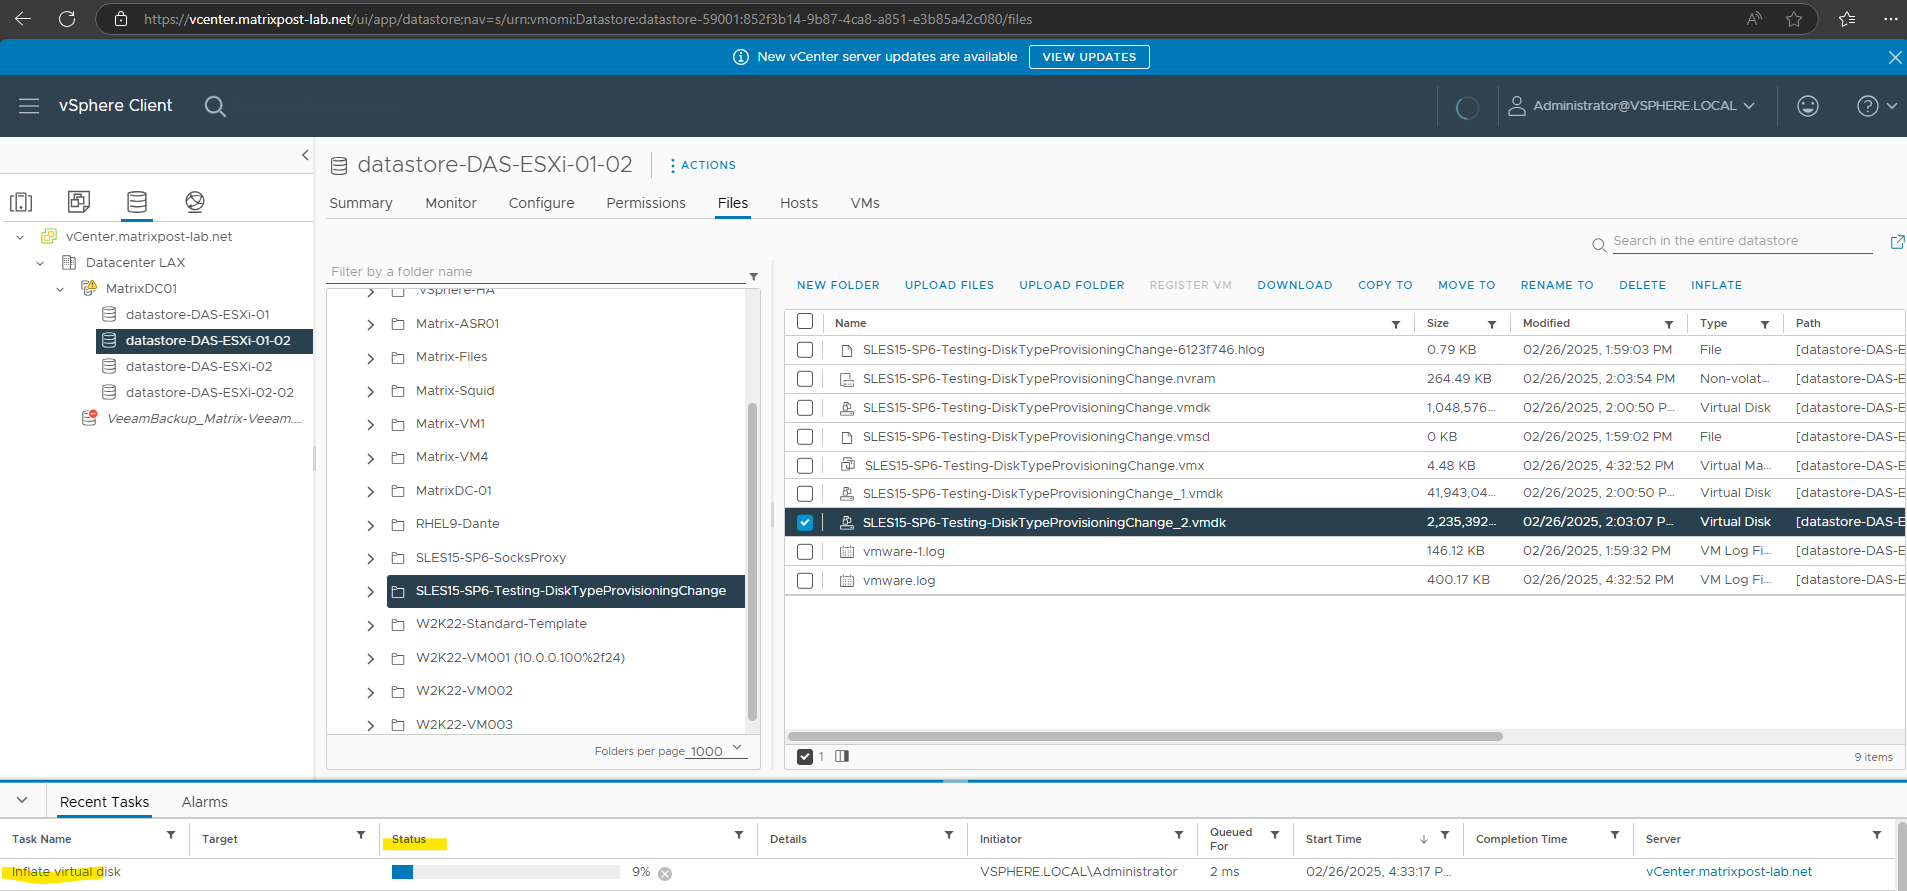
Select the disk in question, and in the status bar above, you should find the Inflate option.
The Inflate option converts the disk to thick provisioned eager zeroed.
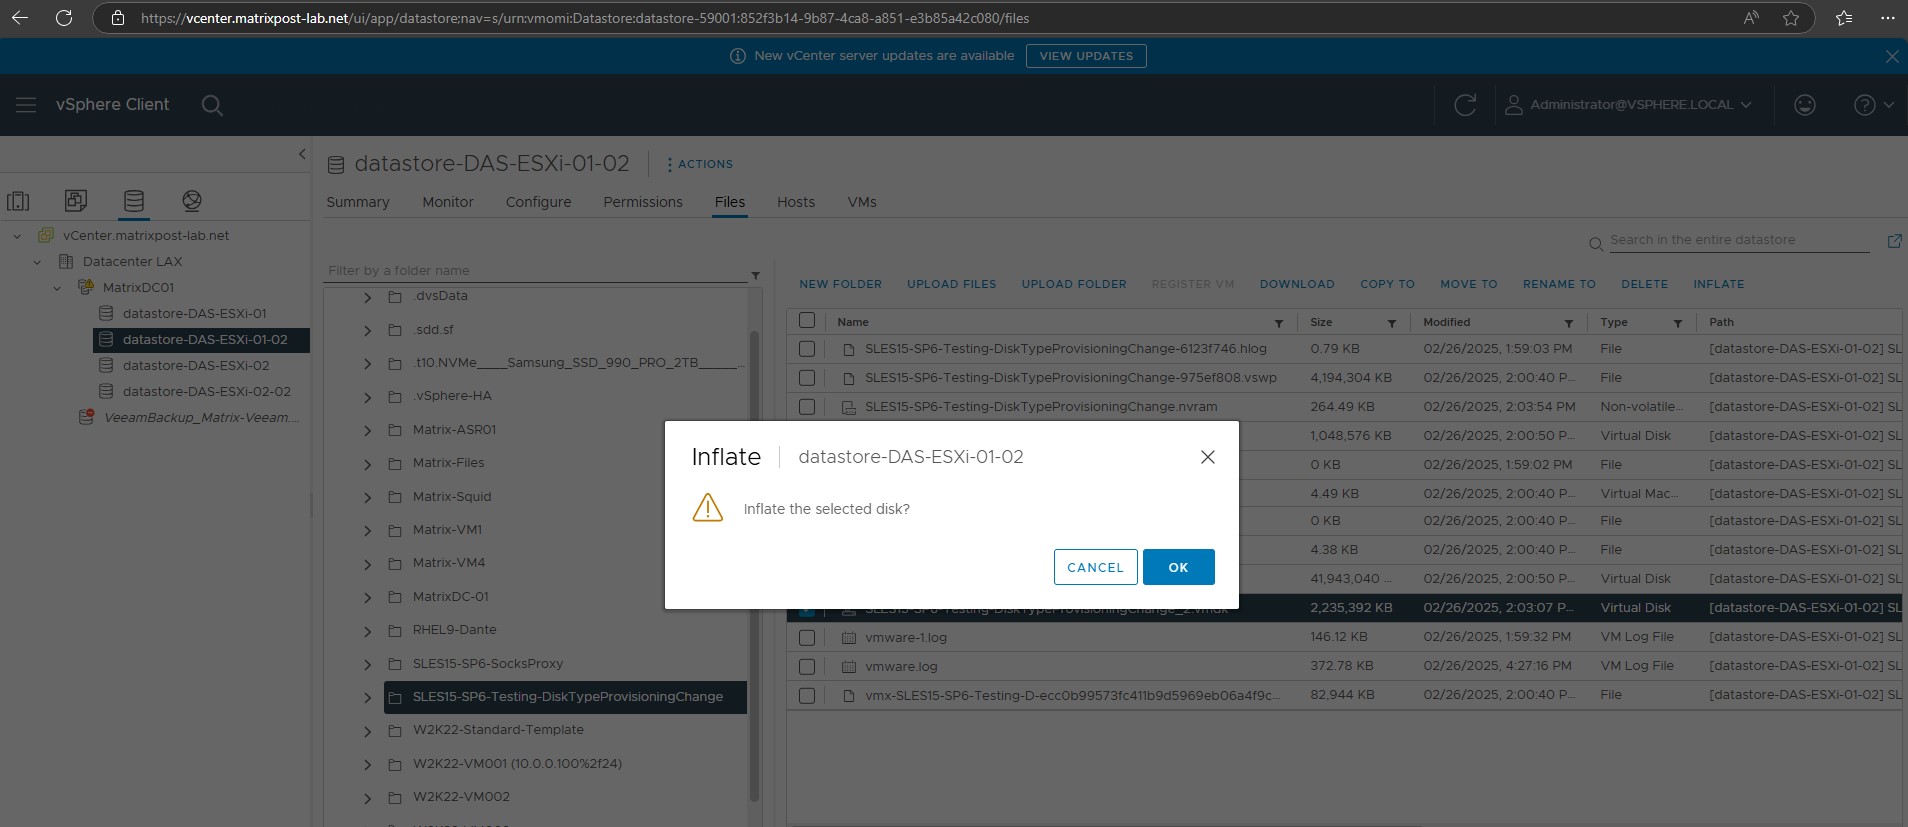
Confirm to inflate the disk.
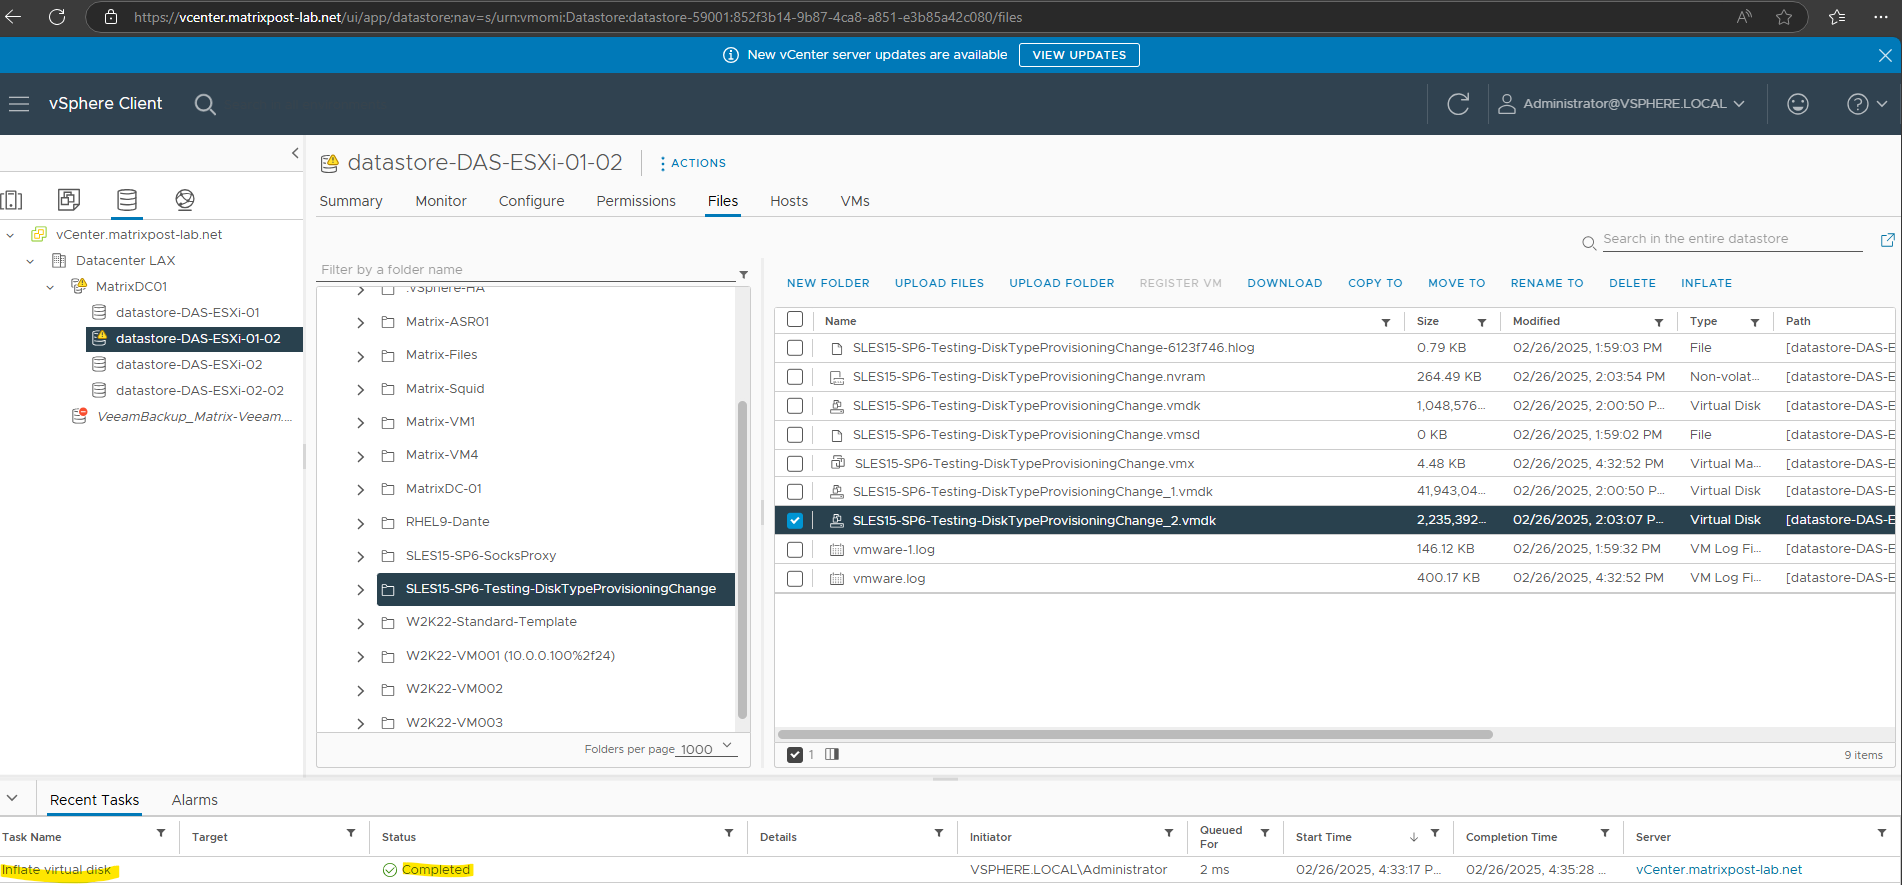
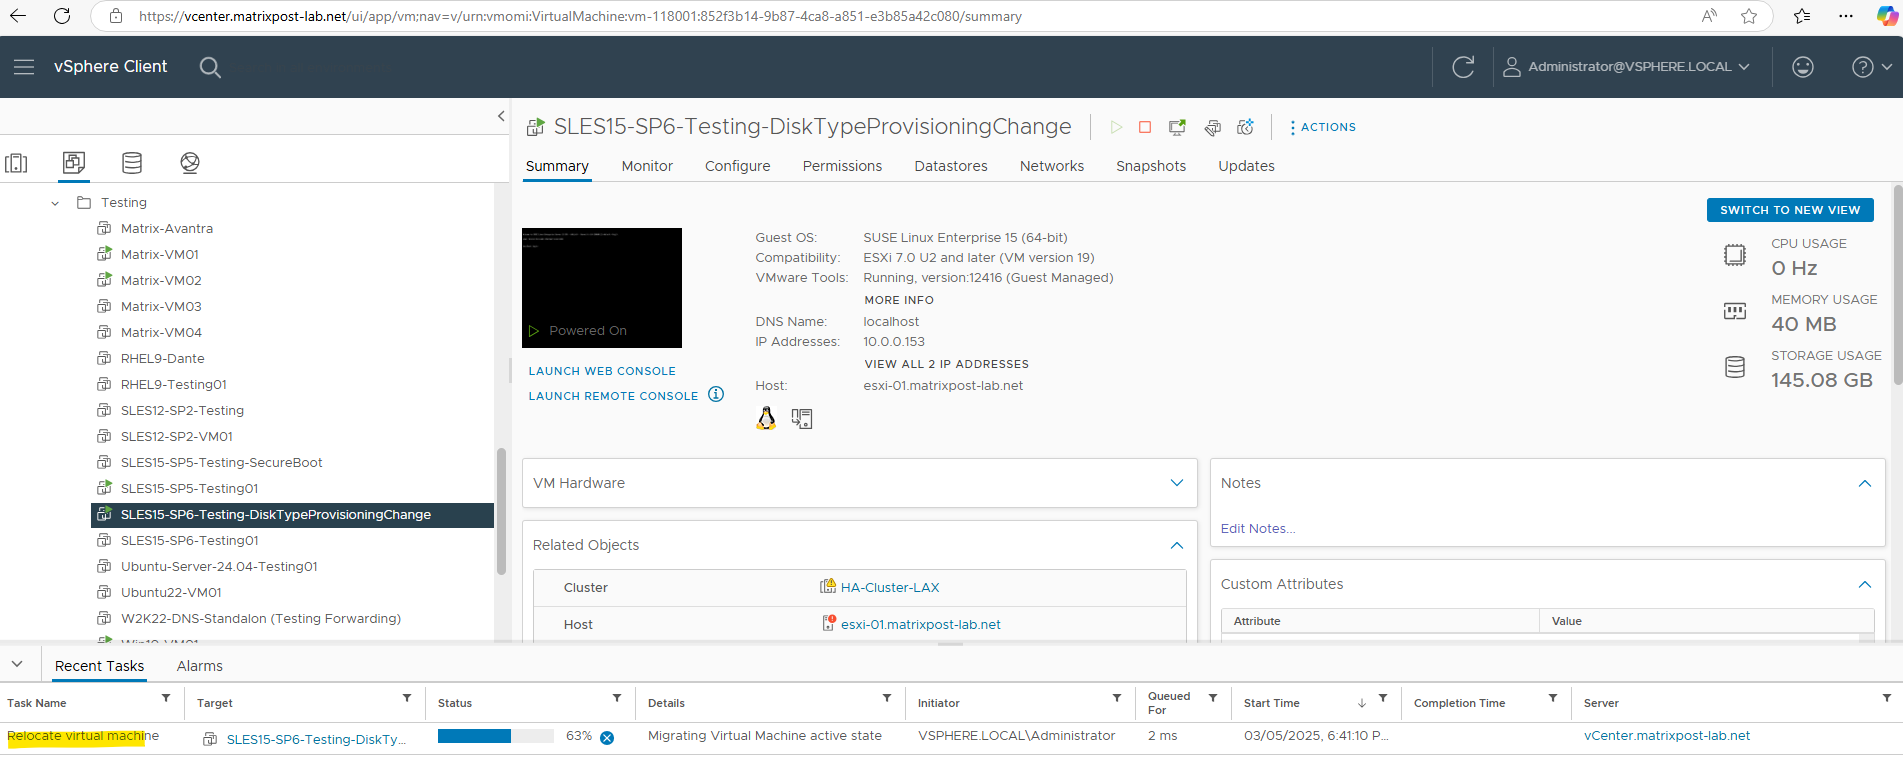
Once you’ve selected the inflate option, you should be seeing a task getting created for the vmdk inflation at the bottom in the Recent Tasks tab and shown below. This task usually takes sometime to complete depending on the performance of the array.
Finally the inflation task is completed successful.
A quick check by opening the Virtual Machine Properties again will show that we successfully changed the disk type from thin provisioning to thick provisioning.
Much easier and online we can use Storage vMotion like shown below. This will work finally from thick to thin and vice versa.
To change the vmdk from Thick to Thin provisioning
To change the disk type from thick to thin we can use Storage vMotion by migrating the virtual machines storage to another datastore as shown below.
By using the Storage vMotion we can finally migrate online from each disk type to another, from thick to thin and vice versa.
First I will check the actual disk type. Looks good as we want to change from thick to thin below.
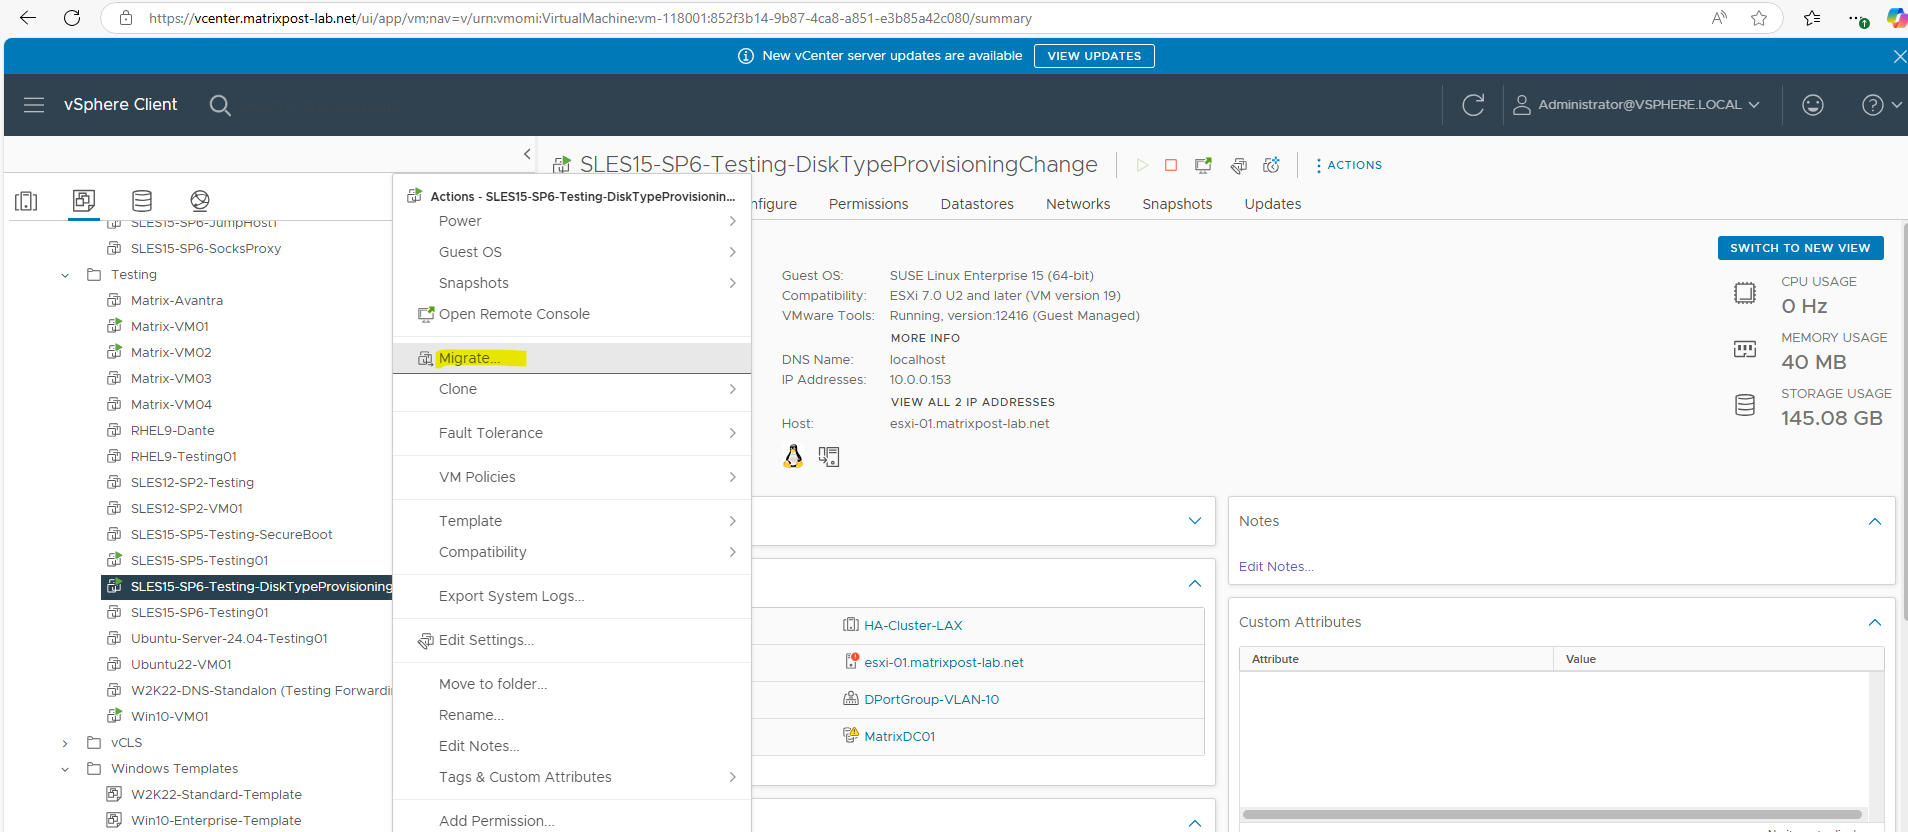
Right-click the virtual machine and select Migrate.
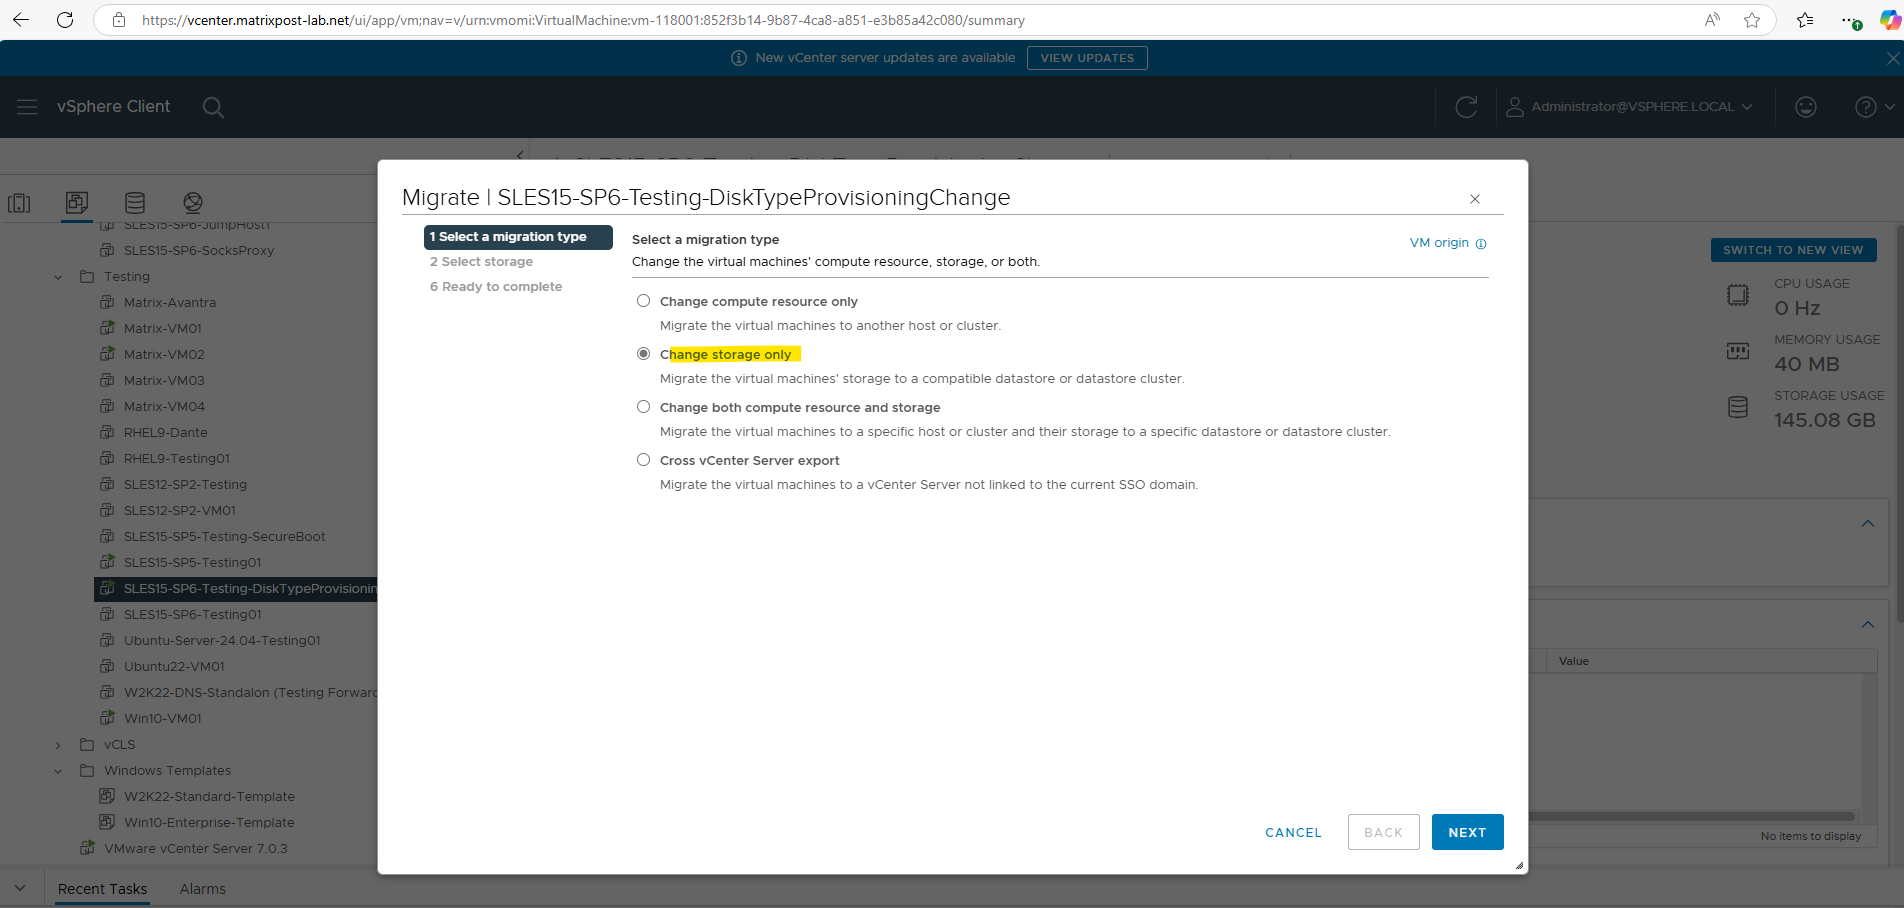
Select Change storage only and click Next.
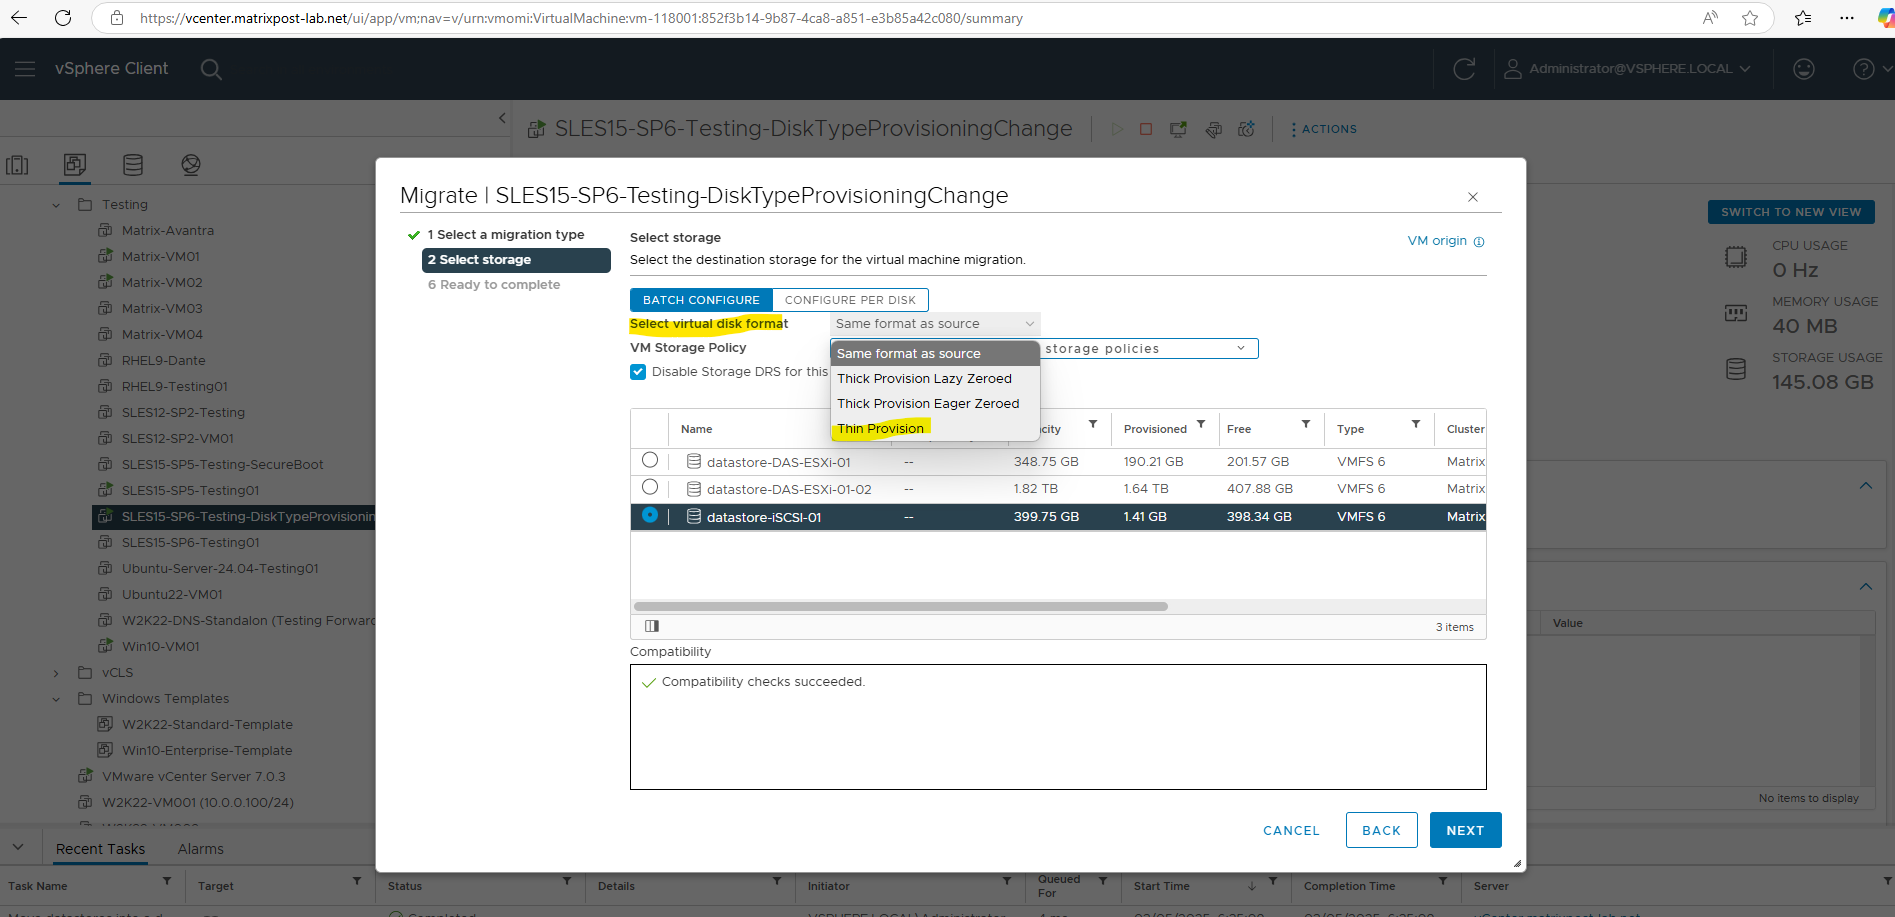
Select the destination datastore and for the virtual disk format select Thin Provision. Then click Next.
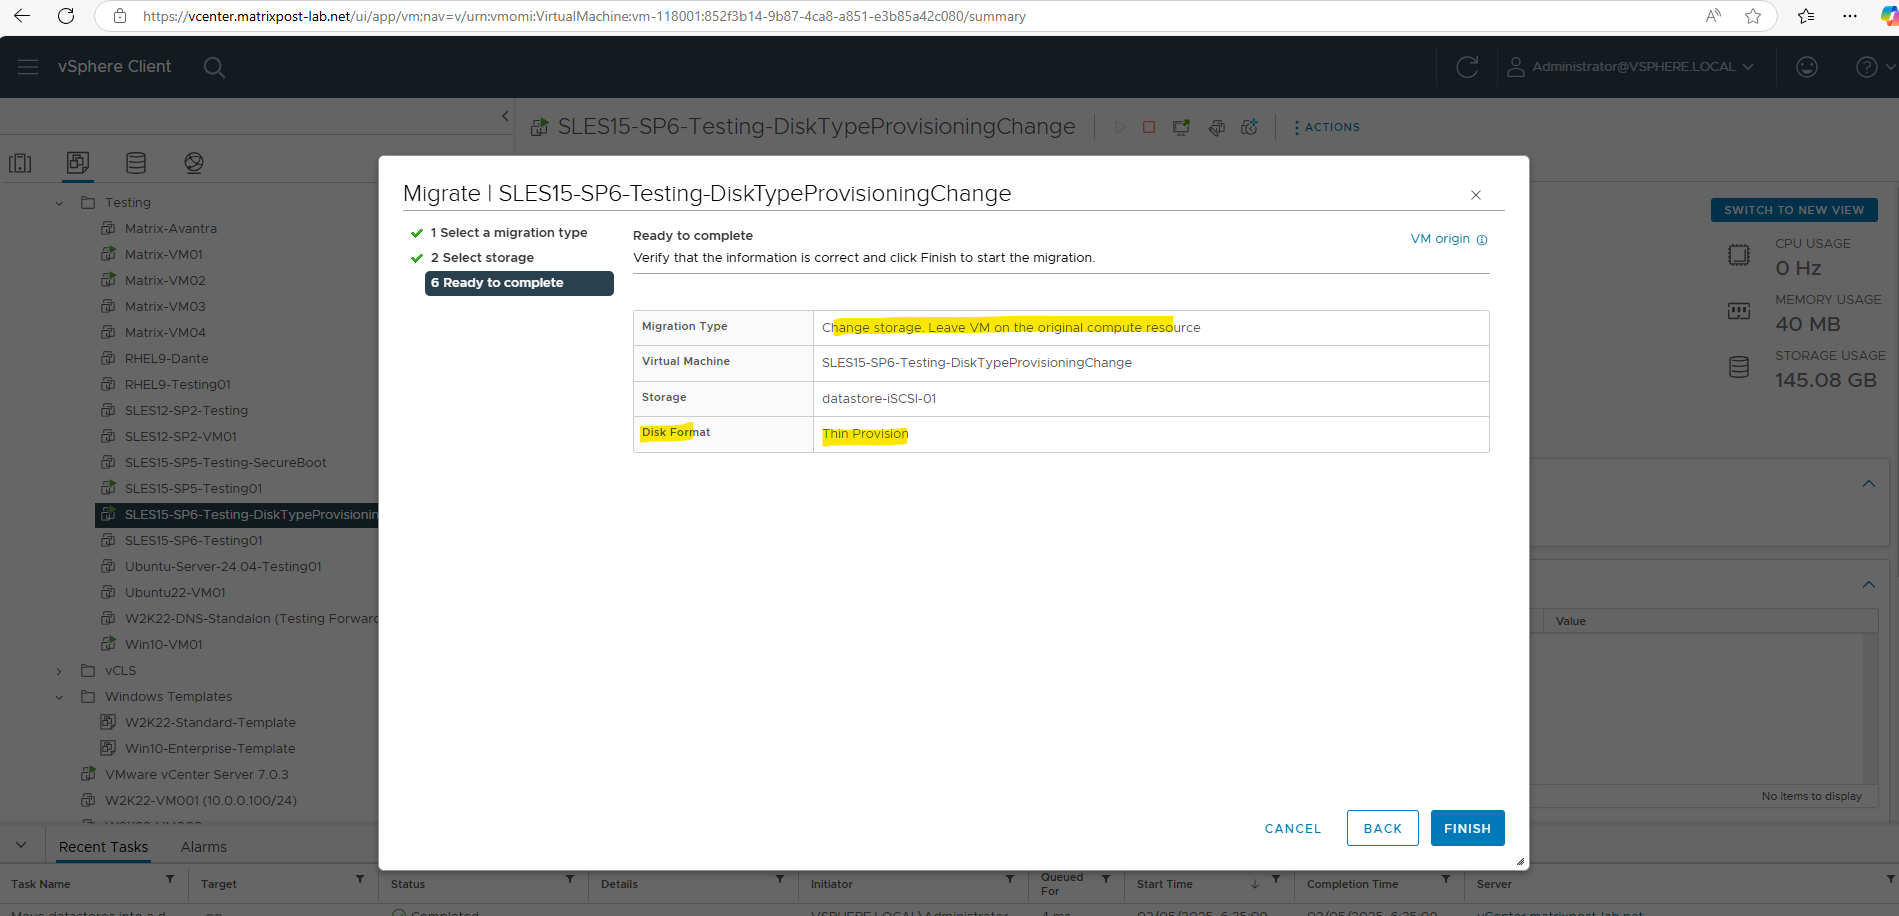
Finally click on Finish.
After migrating the disk successfully to another datastore, I will check the disk type again.
Looks good, the disk type is now changed to Thin Provision.
To change the vmdk Disk Type by cloning Virtual Machine Disks
The vmkfstools command offers the ability to clone virtual machine content and also convert from one virtual machine disk (.vmdk) format into another.
More about you will find here https://knowledge.broadcom.com/external/article?legacyId=1028042.
Troubleshooting
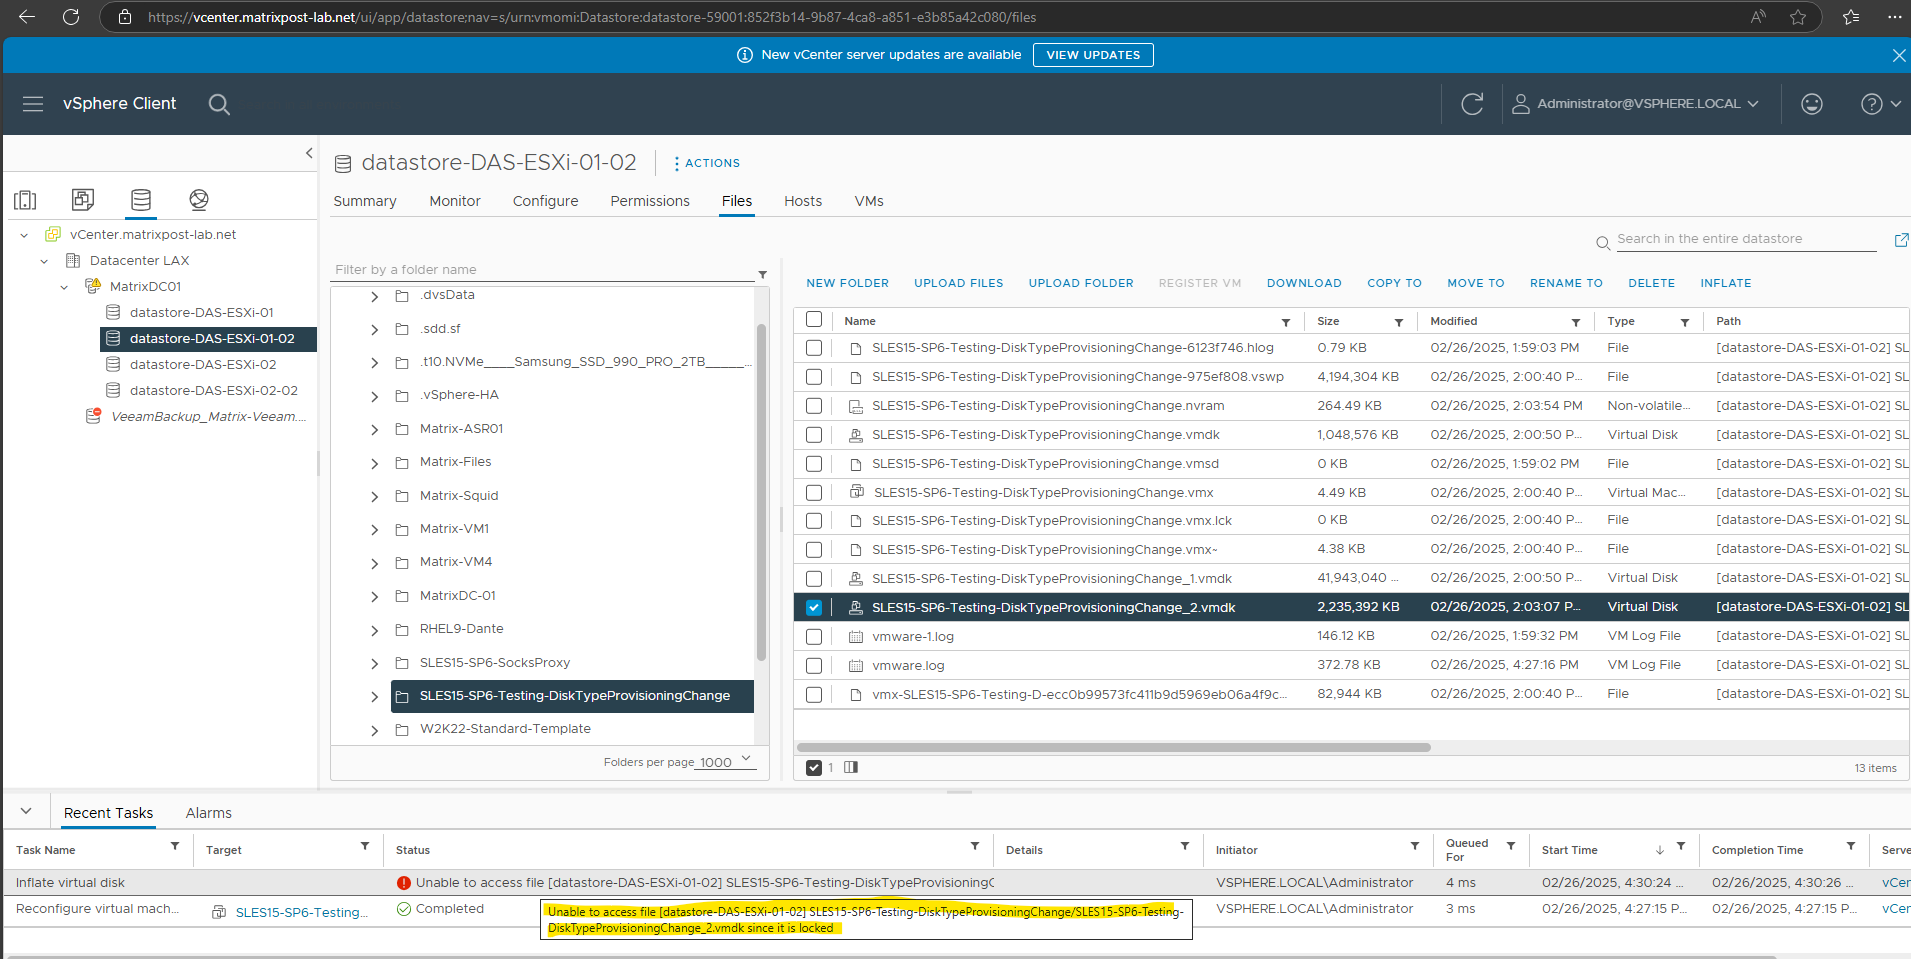
Unable to access file [datastore] disk.vmdk since it is locked
In case you try to inflate the disk and your virtual machine still running and not powered off, you will run into the following error.
Unable to access file [datastore] disk.vmdk since it is locked
VMware still reports Thin Provisioning after Inflate or Storage Migration
In some cases, the disk provisioning conversion itself completes successfully, but VMware vSphere still continues to display the virtual disk as Thin Provisioned in the VM settings.
This can happen after:
- Storage vMotion migrations
vmkfstools --inflateoperations- snapshot consolidations
- manual VMDK conversions
In my case, the underlying -flat.vmdk file was already fully inflated and consumed the complete provisioned capacity on the datastore, but the vSphere Client still reported the disk as thin provisioned.
To verify the actual allocation on the ESXi host, I connected through SSH and checked the flat VMDK file directly:
cd /vmfs/volumes/<datastore>/<virtual-machine-name>/
ls -lh
du -h diskname-flat.vmdk
The consumed space matched the provisioned disk size, which confirmed that the disk was already thick provisioned.
The issue was finally resolved by:
- Detaching the virtual disk from the VM (without deleting the files)
- Re-attaching the existing VMDK to the virtual machine
After re-attaching the disk, VMware refreshed the disk metadata and the vSphere Client immediately showed the correct provisioning type as Thick Provisioned.
This appears to be a UI or cached metadata issue within vSphere rather than a failed disk conversion.
Links
Changing the thick or thin provisioning of a virtual disk
https://knowledge.broadcom.com/external/article/323114/changing-the-thick-or-thin-provisioning.htmlCloning and converting virtual machine disks with vmkfstools
https://knowledge.broadcom.com/external/article?legacyId=1028042