How to mount SMB Shares on Linux
Linux systems can easily connect to Windows shared folders or other SMB (Server Message Block) network shares using the SMB/CIFS protocol. This allows seamless file sharing between Linux and Windows machines on a network.
In this post we will see how we can mount SMB shares on Linux.
Mount SMB Share on Linux
On SLES the cifs-utils are installed already which we can use to finally mount SMB shares.
The first version of the SMB network protocol, SMB1 or CIFS, is an old and insecure protocol, which has been deprecated by its originator, Microsoft.
For security reasons, the mount command on SUSE Linux Enterprise Server will only mount SMB shares using newer protocol versions by default, namely SMB 2.1, SMB 3.0, or SMB 3.02.
However, this change only affects mount and mounting via /etc/fstab. SMB1 is still available by explicitly requiring it. Use the following: The smbclient tool or the Samba server software shipped with SUSE Linux Enterprise Server.
Source: https://documentation.suse.com/sles/15-SP6/html/SLES-all/cha-samba.html#sec-samba-client-old-server
SLES15-SP5-Testing01:/ # zypper search-packages cifs
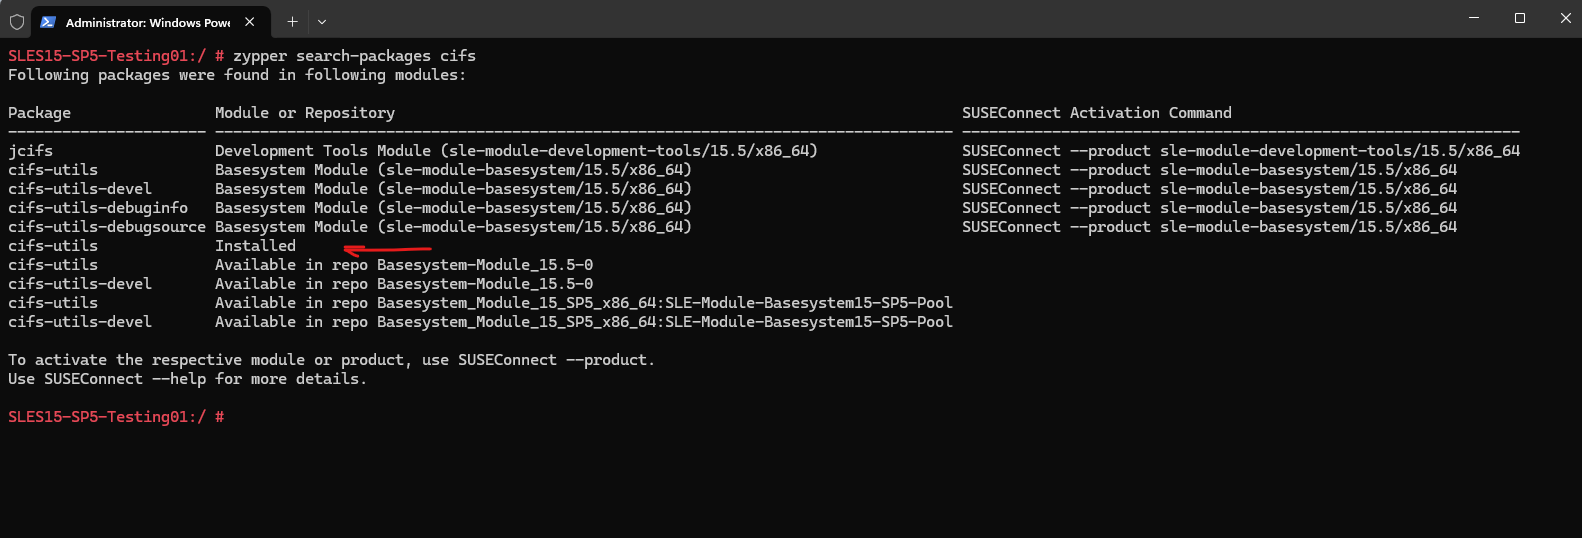
To see if the cifs-util is installed and check its version we can also use the following command besides the above zypper search-packages cifs command.
# rpm -q cifs-utils

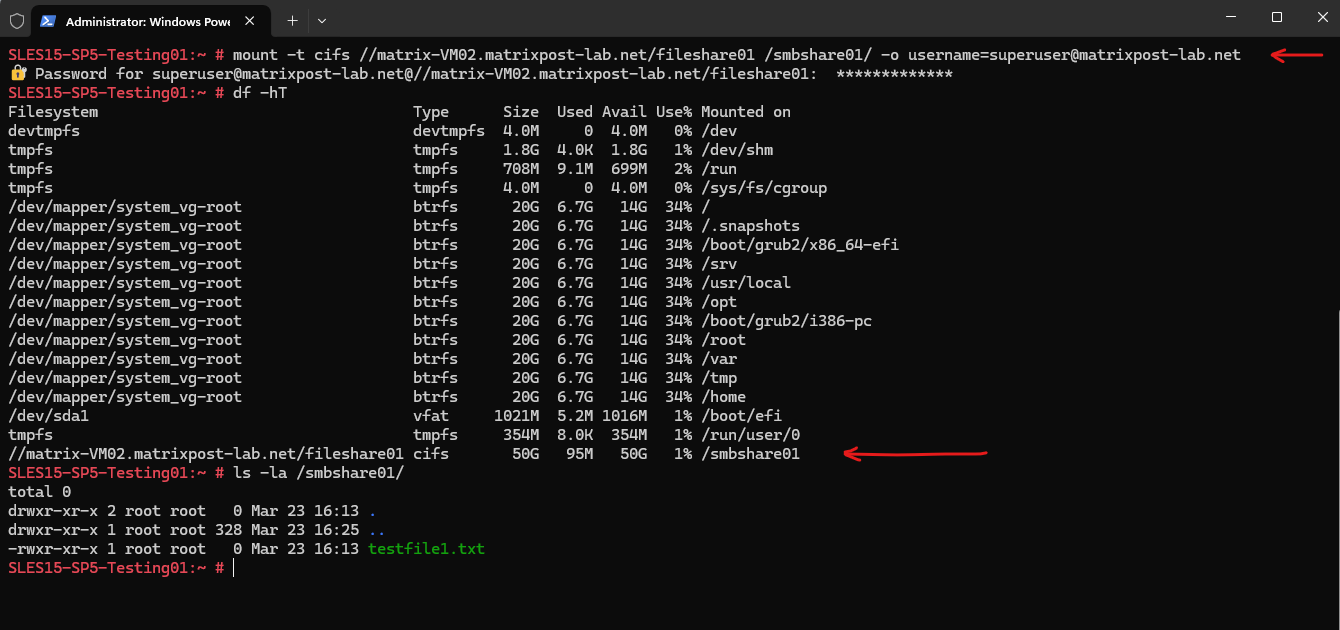
To mount SMB shares we can use the mount -t cifs command as show below. This will just mount the share temporary and we also need to enter the password.
SLES15-SP5-Testing01:~ # mount -t cifs //matrix-VM02.matrixpost-lab.net/fileshare01 /smbshare01/ -o username=superuser@matrixpost-lab.net
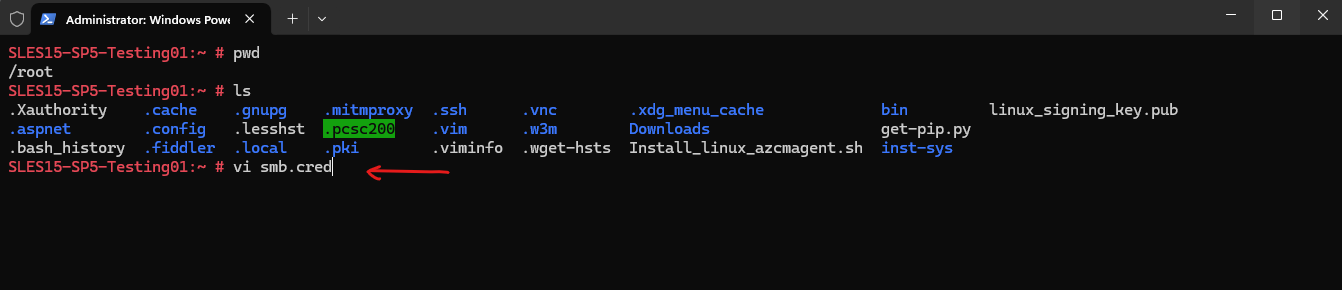
In order to mount a share without entering the user name and password, we can create a smb.cred file as shown below. I will store the file in the root users home directory.
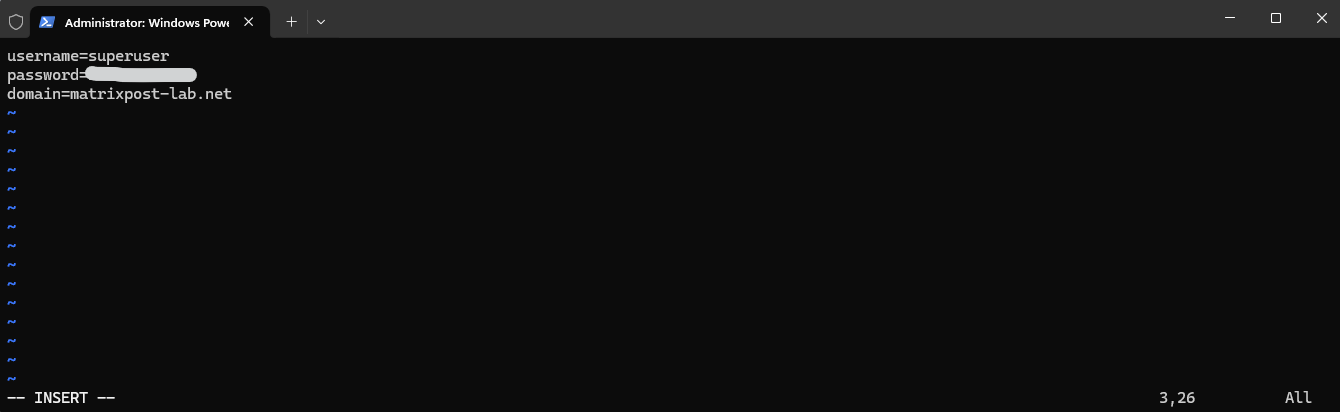
SLES15-SP5-Testing01:~ # vi smb.cred
username=<username>
password=<password>
domain=<domain>
Set the permissions to only allow the owner to access the file:
When mounted via
/etc/fstabduring boot as shown below, the CIFS share is mounted by root and then available system-wide at/smbshare01. Which Linux users can access it depends on the mount point permissions and CIFS mount options, for exampleuid,gid,file_mode,dir_mode.
chown user_name ~/smb.cred
chmod 600 ~/smb.cred
We can now pass the credentials=file_name mount option to the mount utility or use it in the /etc/fstab file to mount the share without being prompted for the user name and password.
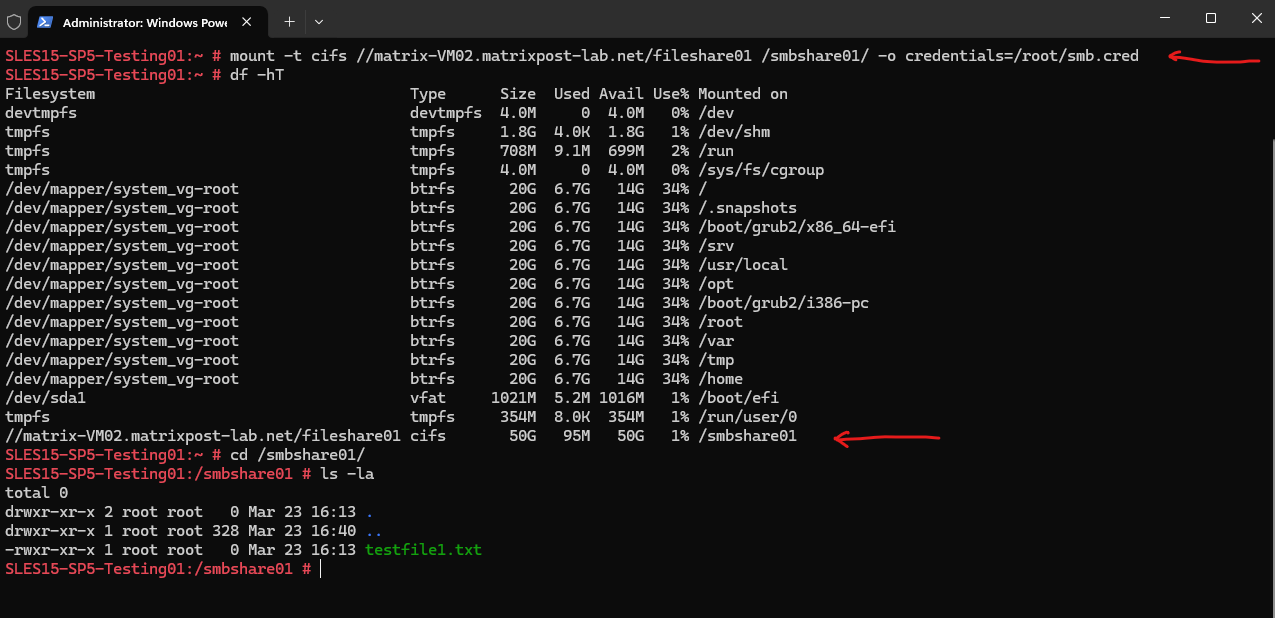
SLES15-SP5-Testing01:~ # mount -t cifs //matrix-VM02.matrixpost-lab.net/fileshare01 /smbshare01/ -o credentials=/root/smb.cred
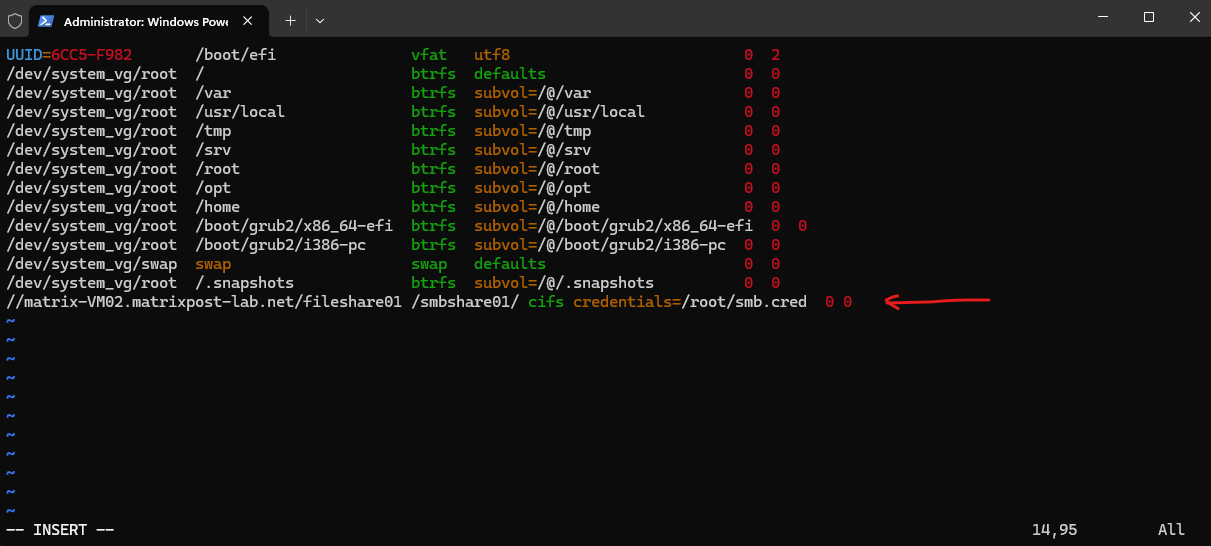
In order to mount the SMB share also permanently when the system boots we can add the following line to the /etc/fstab file.
//matrix-VM02.matrixpost-lab.net/fileshare01 /smbshare01/ cifs credentials=/root/smb.cred 0 0
To mount all filesystems mentioned in /etc/fstab we can run:
# mount -a | --all
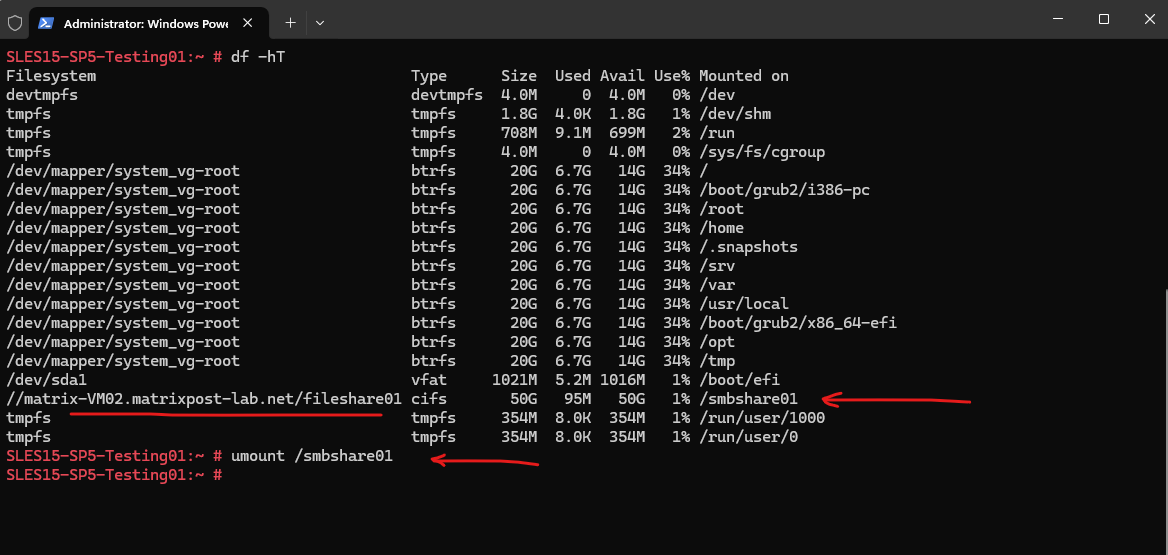
We can unmount the SMB share as usual by executing the umount command.
SLES15-SP5-Testing01:~ # umount /smbshare01
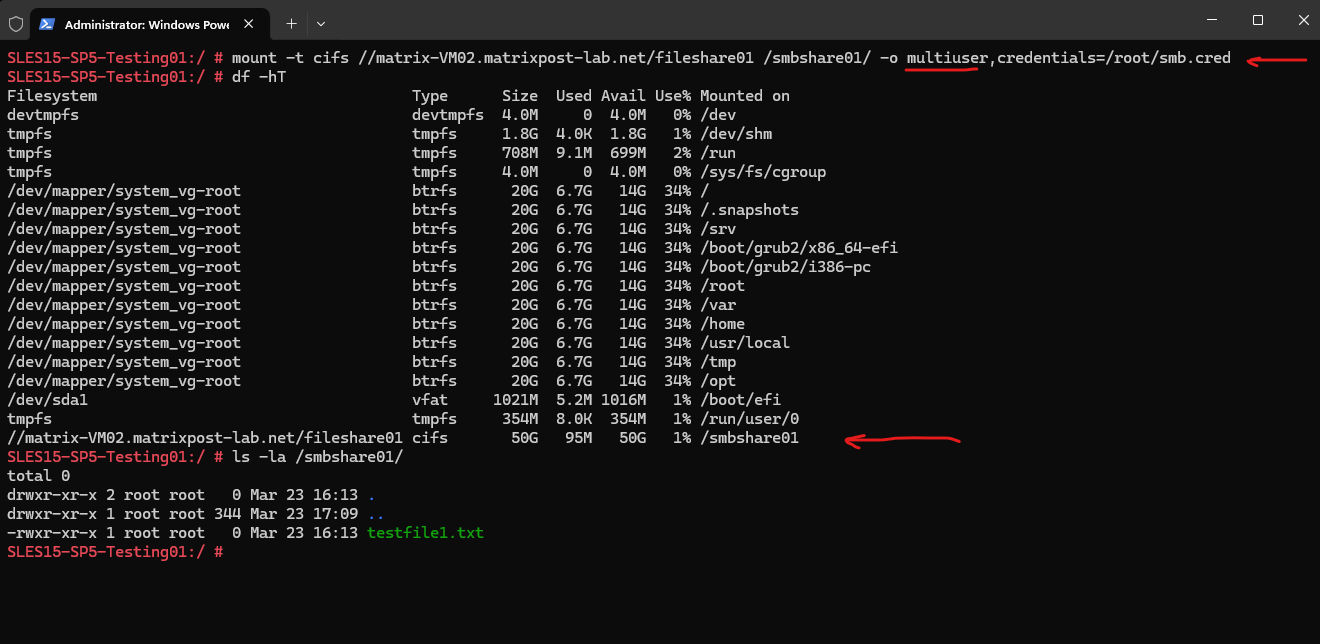
Mounting a Share with the multiuser Option
By mounting a SMB share with the multiuser option, regular users can provide their user name and password to the current session’s kernel keyring using the cifscreds utility.
If the user accesses the content of the mounted share, the kernel uses the credentials stored in the user’s kernel keyring instead of the credentials specified in the
/root/smb.credfile used during the initial mount.The root user does not need to provide additional credentials, as the credentials stored in the
/root/smb.credfile continue to be used for root’s access to the share.
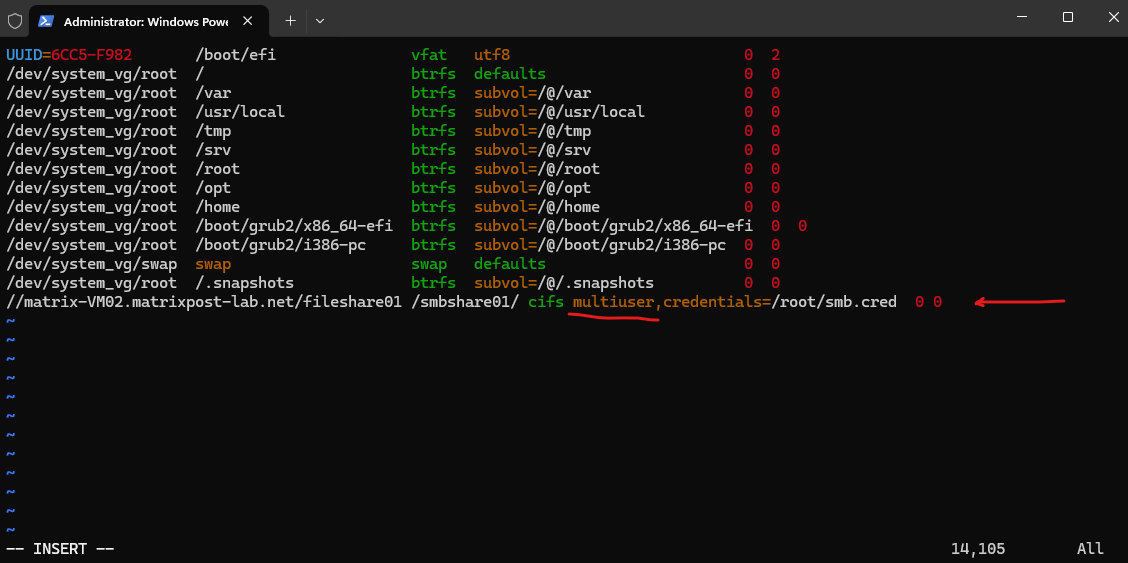
SLES15-SP5-Testing01:/ # mount -t cifs //matrix-VM02.matrixpost-lab.net/fileshare01 /smbshare01/ -o multiuser,credentials=/root/smb.cred
By adding it into the /etc/fstab.
//matrix-VM02.matrixpost-lab.net/fileshare01 /smbshare01/ cifs multiuser,credentials=/root/smb.cred 0 0
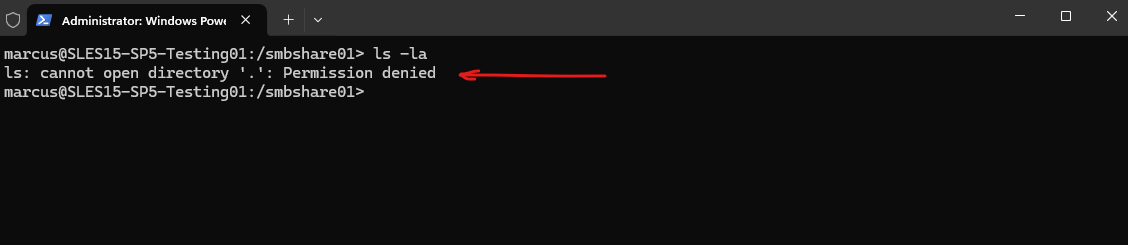
When I am now trying to access the SMB share with a different user than root, which have access to the smb.cred file, I will get a Permission denied as shown below.
The permissions for the SMB share are as shown below.
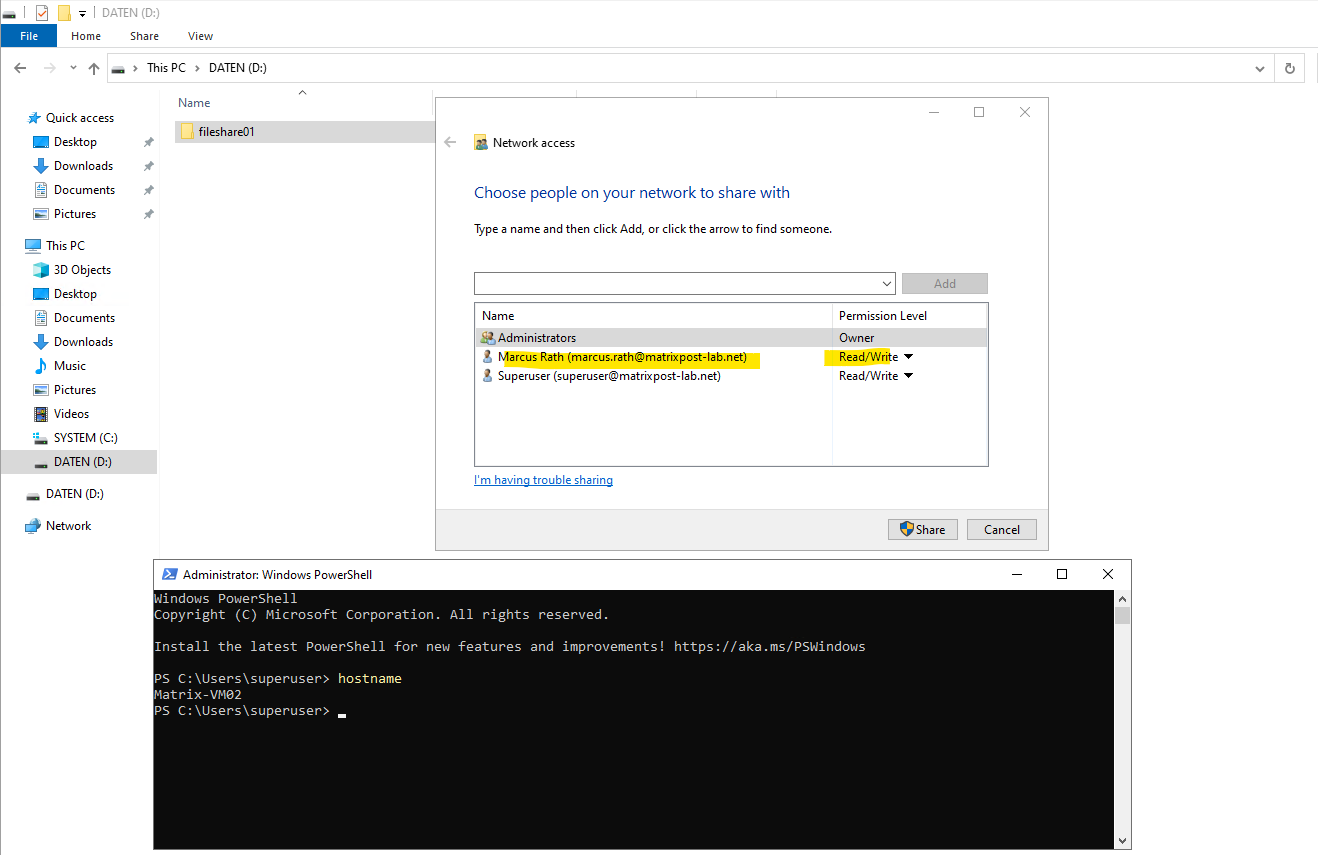
I will now use the cifscreds utility to provide the user name and password to the current session’s kernel keyring for the Windows (Active Directory) user marcus.rath@matrixpost-lab.net which had permissions assigned to access the SMB share.
# cifscreds add -u <username> -d <domain or hostname>
marcus@SLES15-SP5-Testing01:/smbshare01> cifscreds add -u marcus.rath -d matrixpost-lab.net
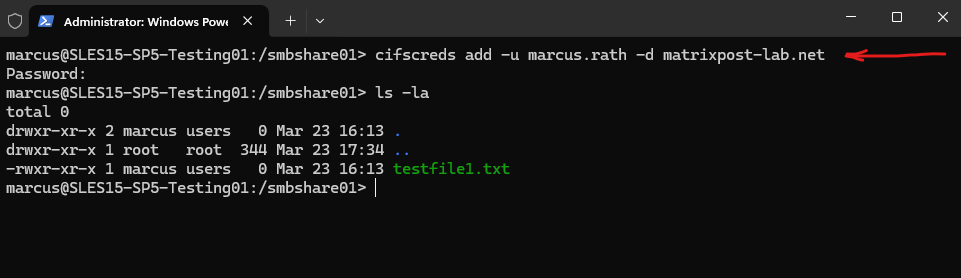
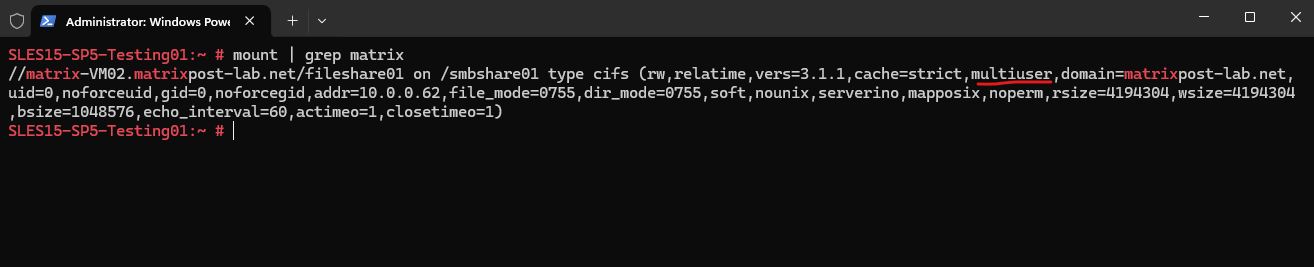
To verify if a share is mounted with the multiuser option we can just enter the mount command.
SLES15-SP5-Testing01:~ # mount
Mounting a Share for All Users
In some environments, it may be sufficient to mount an SMB share once using a shared service account and make it accessible to all local users on the Linux system.
In this case, users do not need to provide their own SMB credentials, and the multiuser mount option is not required.
The credentials used to access the SMB share can be stored in a protected credentials file that is only readable by the root user as already shown to the beginning.
SLES15-SP5-Testing01:~ # vi smb.cred
username=<username>
password=<password>
domain=<domain>
Set the permissions to only allow the owner to access the file:
When mounted via
/etc/fstabduring boot as shown below, the CIFS share is mounted by root and then available system-wide at/smbshare01. Which Linux users can access it depends on the mount point permissions and CIFS mount options, for exampleuid,gid,file_mode,dir_mode.
chown user_name ~/smb.cred
chmod 600 ~/smb.cred
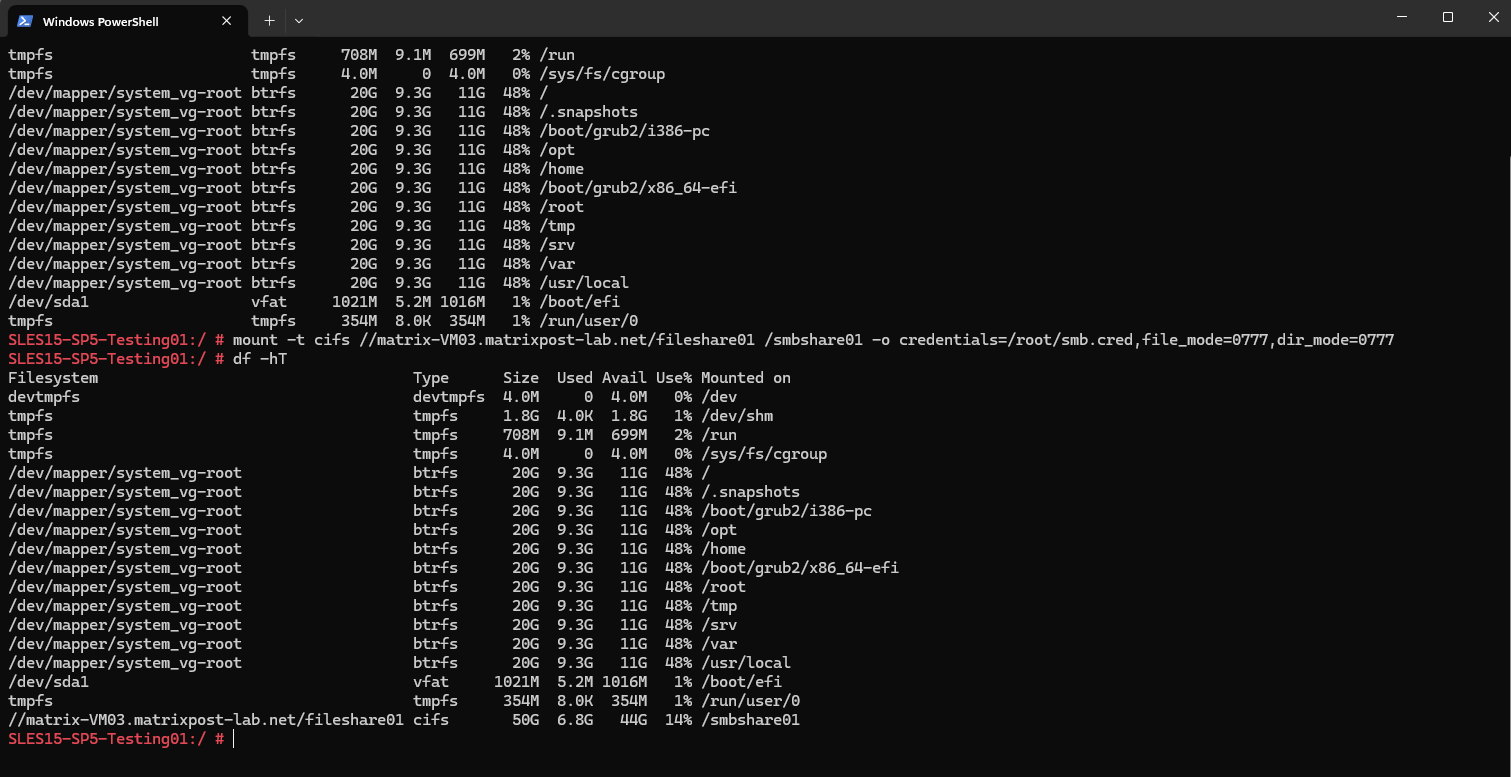
The share can then be mounted using the credentials file:
SLES15-SP5-Testing01:~ # mount -t cifs //matrix-VM03.matrixpost-lab.net/fileshare01 /smbshare01 -o credentials=/root/smb.cred,file_mode=0777,dir_mode=0777
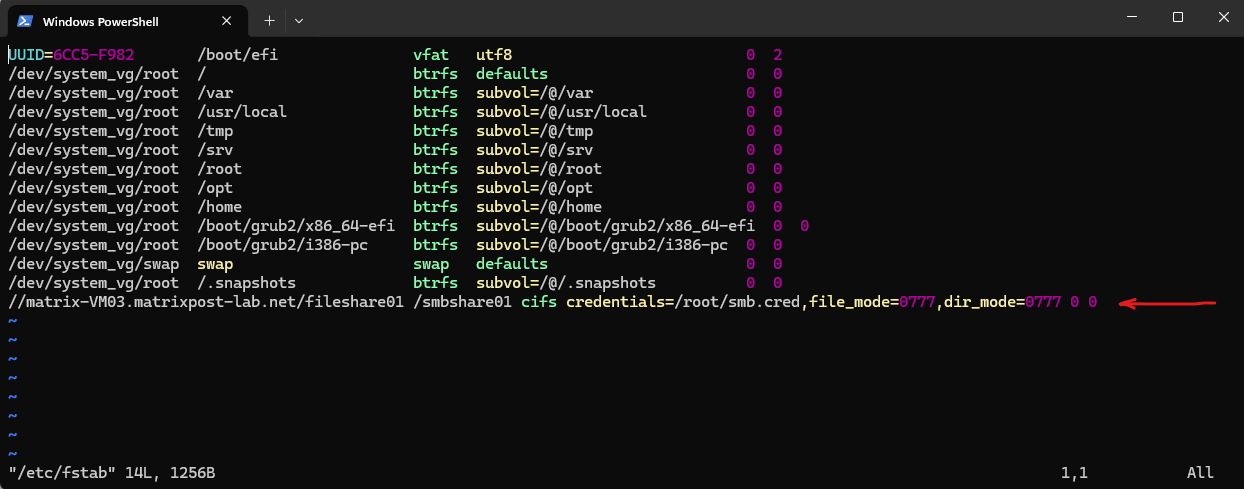
To mount the share automatically at boot, add the following entry to /etc/fstab:
//matrix-VM03.matrixpost-lab.net/fileshare01 /smbshare01 cifs credentials=/root/smb.cred,file_mode=0777,dir_mode=0777 0 0
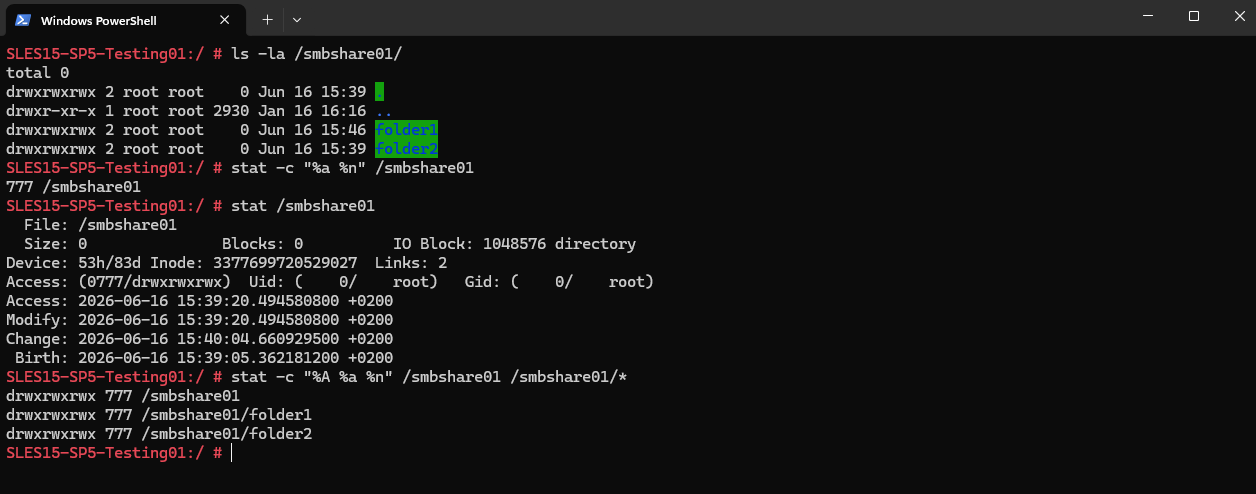
We can verify that the permissions specified for the mount above by the file_mode and dir_mode mount options were applied successfully by using the ls or stat commands.
In the example below, both the mount point and the directories within the SMB share have the expected
777permissions (drwxrwxrwx), allowing all local users to access the mounted share.
# ls -la /smbshare01/
# ls -la /smbshare01/
# stat /smbshare01
# stat -c "%A %a %n" /smbshare01 /smbshare01/*
To verify that the share is accessible to users other than root, switch to a regular user account and attempt to access the mounted share.
In the example below, the user
marcuscan successfully list the share contents and create a new file, confirming that the configured mount permissions allow access for all local users.
Mounting a Share for a Specific Group of Users
In some environments, it is desirable to allow access to a mounted SMB share for a specific set of local users without requiring each user to authenticate individually using their own SMB credentials.
In this scenario, Linux file permissions and group membership can be used to control access to the mounted share while all SMB operations continue to be performed using the account specified in the credentials file used during the mount.
First, create a dedicated Linux group that will be granted access to the mounted SMB share:
# groupadd smbusers

We can identify the regular (non-system) where the users UID ≥ 1000 on the Linux host together with their user IDs (UIDs) and primary group IDs (GIDs). This can be useful when selecting users that should be granted access to the mounted share.
Then add the users who should be able to access the share.
# awk -F: '$3 >= 1000 && $3 < 65534 {print $1}' /etc/passwd

To show the username together with the UID and primary GID, we can use:
# awk -F: '$3 >= 1000 && $3 < 65534 {printf "User: %-15s UID: %-5s GID: %-5s\n", $1, $3, $4}' /etc/passwd
Below I will add all three regular (non-system) user to my newly created group smbusers.
# usermod -aG smbusers marcus
# usermod -aG smbusers testuser1
# usermod -aG smbusers testuser2

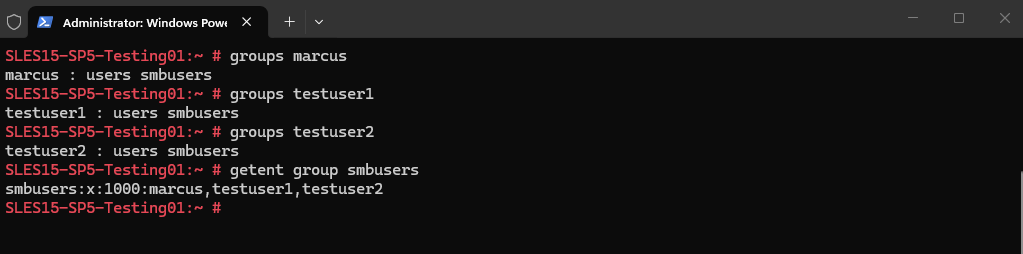
To determine in which groups a user is we can use the following command.
# groups marcus
# groups testuser1
# groups testuser2

To list all members of a specific group we can use:
# getent group smbusers
More about user management on Linux you will also find in my following post.
Now that the group smbusers exists and contains the users, mount the share by assigning the mounted files and directories to that group:
The
file_mode=0660option grants read and write permissions to the file owner and group, while denying access to all other users.Similarly,
dir_mode=0770grants full access (read, write, and execute) to the owner and group for directories, while preventing access by users outside the assigned group. For directories, the execute (x) permission allows users to enter and traverse the directory as well as access files and subdirectories by their names.As a best practice, regular files should typically be assigned
0660permissions, while directories should use0770. This grants users and group members the permissions required to work with files and traverse directories while avoiding unnecessary execute permissions on regular data files.
# mount -t cifs //matrix-VM03.matrixpost-lab.net/fileshare01 /smbshare01 -o credentials=/root/smb.cred,gid=smbusers,file_mode=0660,dir_mode=0770

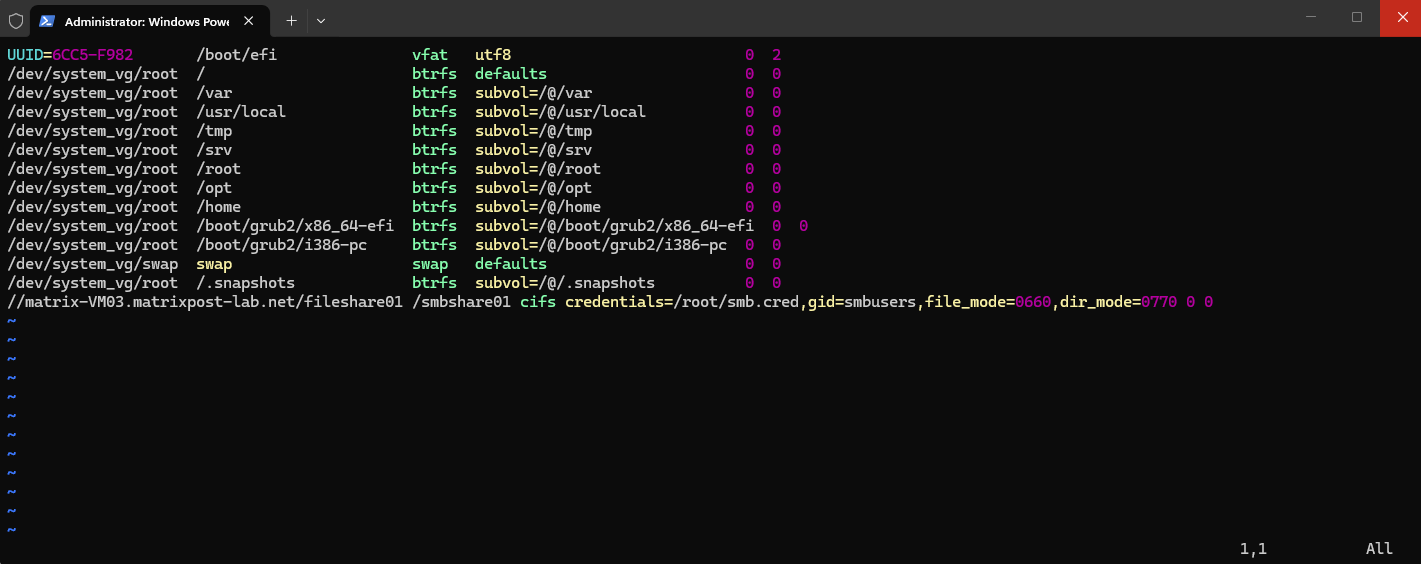
To make it persistent also after a reboot we also add it to the /etc/fstab file:
//matrix-VM03.matrixpost-lab.net/fileshare01 /smbshare01 cifs credentials=/root/smb.cred,gid=smbusers,file_mode=0660,dir_mode=0770 0 0
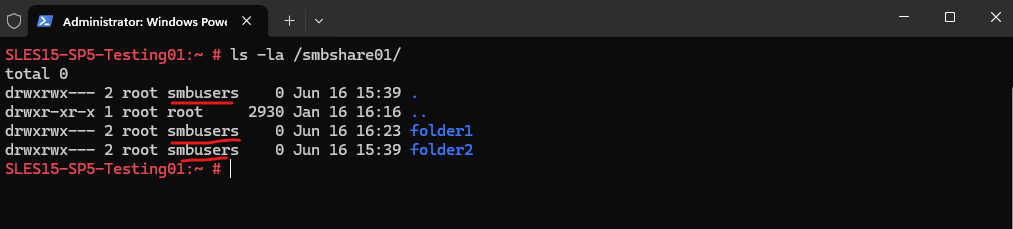
After mounting, verify the ownership and permissions:
# ls -la /smbshare01/
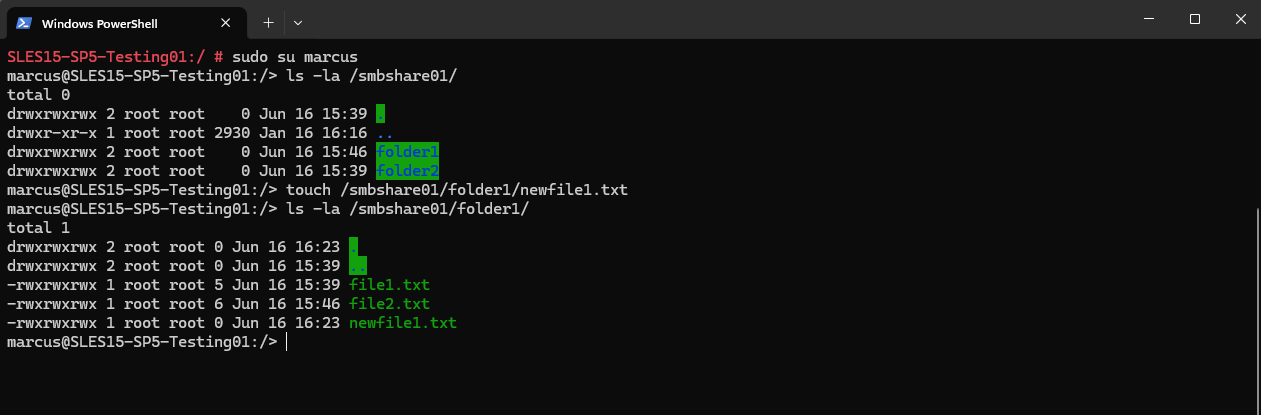
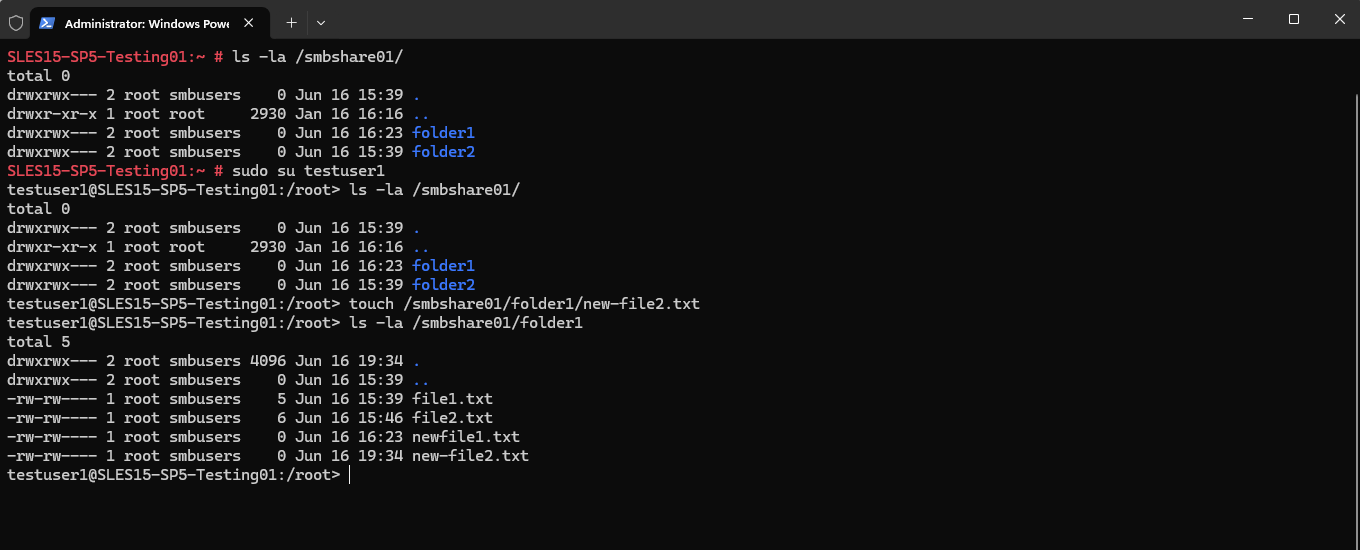
We can verify the configuration by switching to a user who is a member of the smbusers group and attempting to access the mounted share.
In the example below, the user
testuser1can successfully list the share contents and create a new file, confirming that group-based access to the SMB share is working as expected.
# sudo su testuser1
# ls -la /smbshare01/
# touch /smbshare01/folder1/new-file2.txt
Links
Mounting an SMB Share
https://docs.redhat.com/en/documentation/red_hat_enterprise_linux/7/html/storage_administration_guide/mounting_an_smb_shareMount an SMB Share in Linux
https://www.linode.com/docs/guides/linux-mount-smb-share/Configuring a Samba client with YaST
https://documentation.suse.com/sles/15-SP6/html/SLES-all/cha-samba.html#sec-samba-client-inst-yast