Run your App as Unix Daemon in Ubuntu
In this post we will see how we can run a custom app (executable) as daemon (service) on Ubuntu.
To manage these daemons, Ubuntu will using Systemd as init system since Ubuntu 15.04 beta. More about Systemd you will find in my following post.
For the app (command), I will use a little C# console app which will create a TCP/IP socket and waiting for incoming TCP/IP connections.
I was using this app already in my following post about Run a .NET Core C# Console App on Ubuntu.
Below you can see the source code of the C# console app. About how to publish the app for Ubuntu (Linux), you can read my post above.
For this post I will publish the app as framework-dependent which produces only the application itself and its dependencies. Therefore we have to separately install the .NET runtime on Ubuntu if not already installed. Details about publishing you will see as mentioned in my post above.
using System.Net.Sockets;
using System.Net;
using System;

// See https://aka.ms/new-console-template for more information
//Console.WriteLine("Hello, World!");


class Server
{
    public static void Main()
    {
        TcpListener server = new TcpListener(IPAddress.Parse("127.0.0.1"), 8080);

        server.Start();
        Console.WriteLine("Server has started on 127.0.0.1:8080.{0}Waiting for a connection…", Environment.NewLine);

        TcpClient client = server.AcceptTcpClient();

        Console.WriteLine("A client connected.");

    }
}
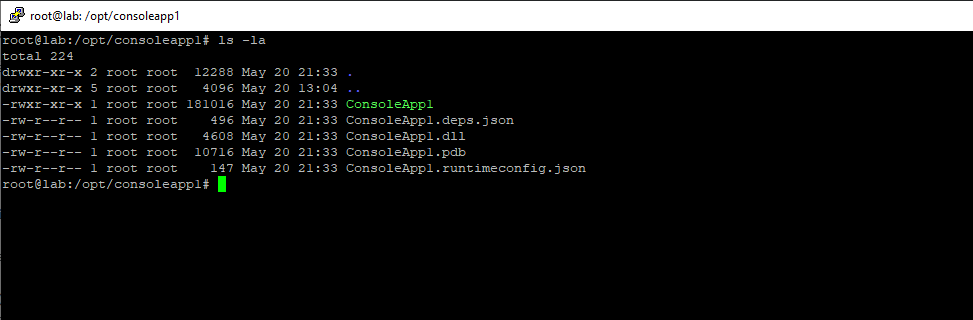
By publishing my C# console app, I was getting the following files which I was uploading to the /opt/consoleapp1 folder as shown below.
Further we need to add execution permissions to our executable file ConsoleApp1 by using the following command.
$ sudo chmod +x ConsoleApp1
This command will grant execution permissions for all users like chmod a+x. When using for example chmod u+x, you assign just for actual user execution permissions.
- u stands for user.
- g stands for group.
- o stands for others.
- a stands for all.
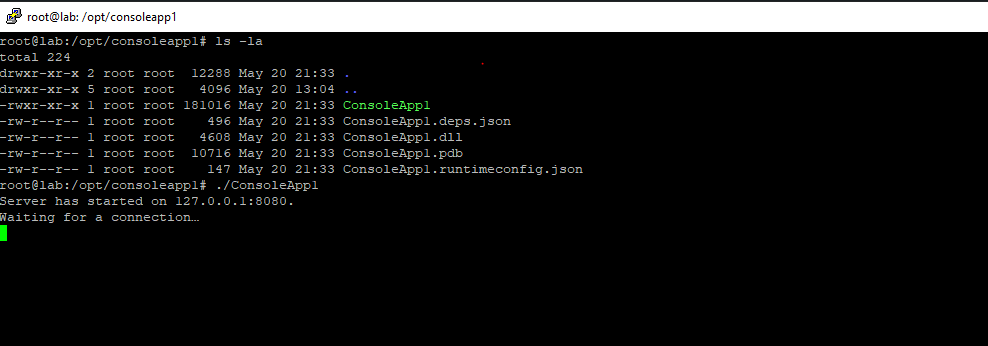
Before creating a daemon (service) for this app, I will first test if the app in general works by executing it directly from the console.
Looks good!
To create a daemon for this app, we first need to create a new so called unit file which will include among other settings, the path to our executable file ConsoleApp1, in order to start it as a daemon in the background.
We need to create here a new service unit file which has the extension .service. Below you can see that there exists several other unit file types.
A service, a socket, a device, a mount point, an automount point, a swap file or partition, a start-up target, a watched file system path, a timer controlled and supervised by systemd, a resource management slice or a group of externally created processes.
Source: https://manpages.ubuntu.com/manpages/bionic/man5/systemd.unit.5.html
Unit files typically consist of three sections:
- The [Unit] section — contains generic options that are not dependent on the type of the unit. These options provide unit description, specify the unit’s behavior, and set dependencies to other units. For a list of most frequently used [Unit] options, see Important [Unit] section options.
- The [Unit type] section — if a unit has type-specific directives, these are grouped under a section named after the unit type. For example, service unit files contain the [Service] section.
- The [Install] section — contains information about unit installation used by systemctl enable and disable commands. For a list of options for the [Install] section, see Important [Install] section options.
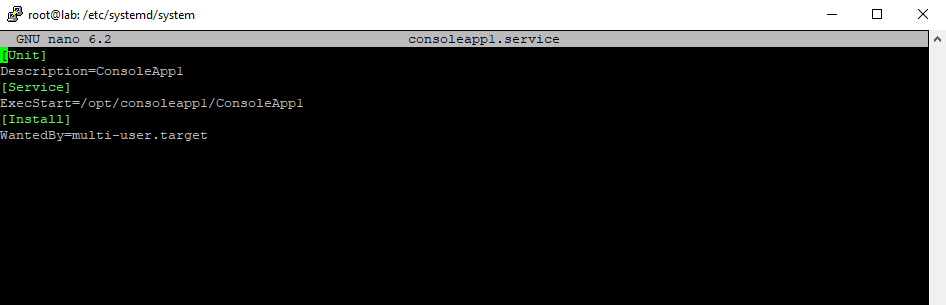
Here you will see a minimal unit file to create a daemon for my app. For the name I will use consoleapp1.service with the extension from type service. The path for unit files managed by Systemd is /etc/systemd/system/ for system wide units they were installed or edited by user’s.
[Unit]
Description=ConsoleApp1
[Service]
ExecStart=/opt/consoleapp1/ConsoleApp1
[Install]
WantedBy=multi-user.target
In the [Unit] section I will just set a description for the daemon. The [Unit type] section for my app is a [Service] section and will include the ExecStart directive with the path to the executable which will run as a daemon.
The ExecStart directive specifies the full path and the arguments of the app/command to be executed to start the process.
Finally the last section in a unit file is usually the [Install] section. This section is just mandatory for service units and is used to define the behavior for a unit if it is enabled.
The key-pair WantedBy will specify here when the service is started during boot up the system. The value multi-user.target is equivalent to the system state where all network services are started up and the system will accept logins, but a local GUI is not started. This is the typical default system state for server systems without an installed GUI. This system state was set in past by so called run levels.
Now our unit file is complete and we first need to reload the systemd manager configuration by executing the following command.
$ sudo systemctl daemon-reload
This will reload all config files from systemd. You need to run this command when editing existing unit files or creating new ones and using them directly without restarting the system.
Next we need to enable our new daemon by executing the following command.
$ sudo systemctl enable consoleapp1.service
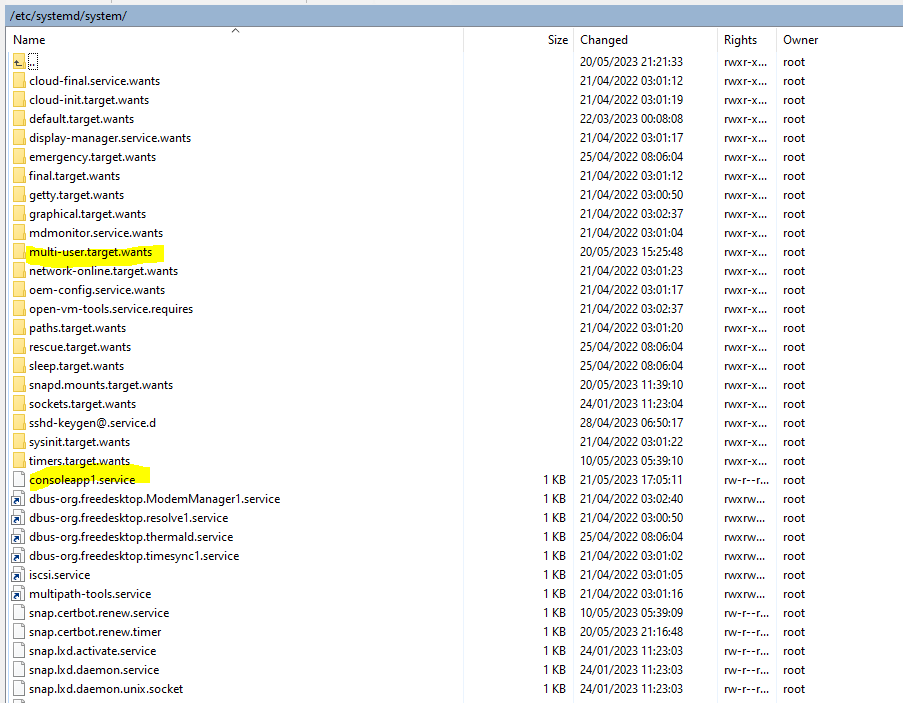
Here you can see that enabling the daemon will create a symlink in the multi-user.target.wants folder, which will point to our newly created unit file. The symlink will created in the multi-user.target.wants folder, because we set previously in the [Install] section the WantedBy directive with the value multi-user.target.
These target folders defines unit dependencies. Any unit may want or require one or more other units before it can run.
When a unit is enabled, symlinks will be created for those units and removed when the unit is disabled.
More about unit dependencies you will find in the following article https://fedoramagazine.org/systemd-unit-dependencies-and-order/.
Created symlink /etc/systemd/system/multi-user.target.wants/consoleapp1.service → /etc/systemd/system/consoleapp1.service.
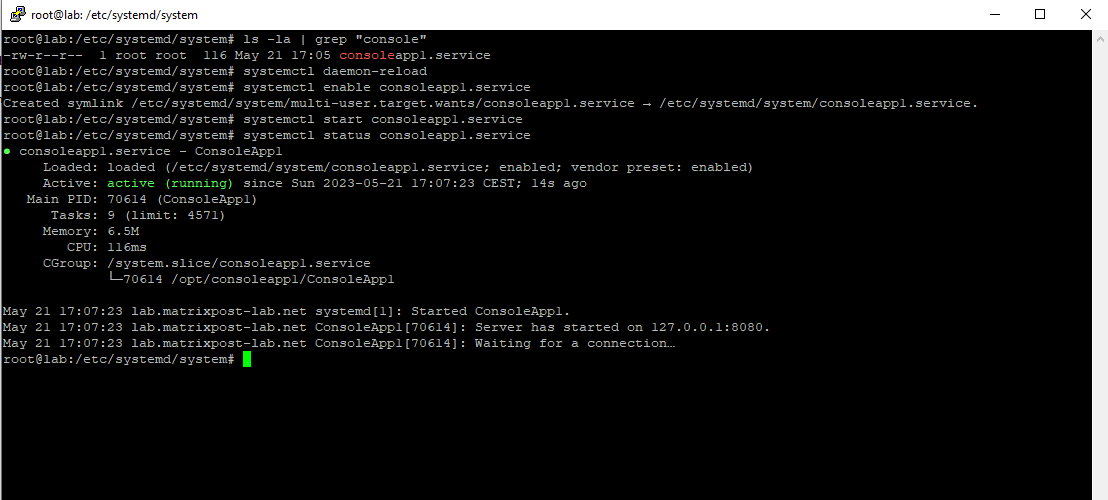
Finally we can start the daemon and showing its state if running or not by using the following commands.
$ sudo systemctl start consoleapp1.service
$ sudo systemctl status consoleapp1.service
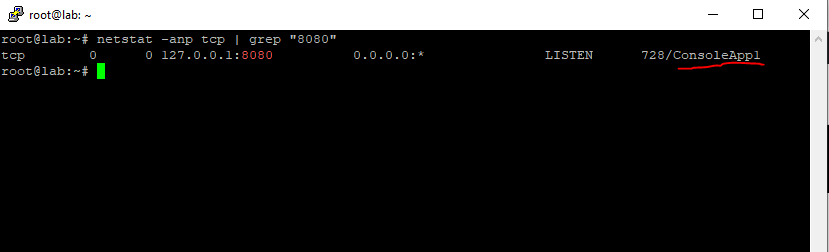
As our daemon will just create a TCP/IP socket and waiting for incoming TCP/IP connections, we can also quickly check by using the netstat command if the daemon is running fine.
netstat -anp tcp | grep "8080"
Looks also good!
Actually netstat is now considered as a deprecated command and has been replaced by the ss command, which offers more advanced features and better control over network connections, but I am still used to use the good old netstat command, which has done for me a real good job in past and still doing.
ss is used to dump socket statistics. It allows showing information similar to netstat. It
can display more TCP and state information than other tools.
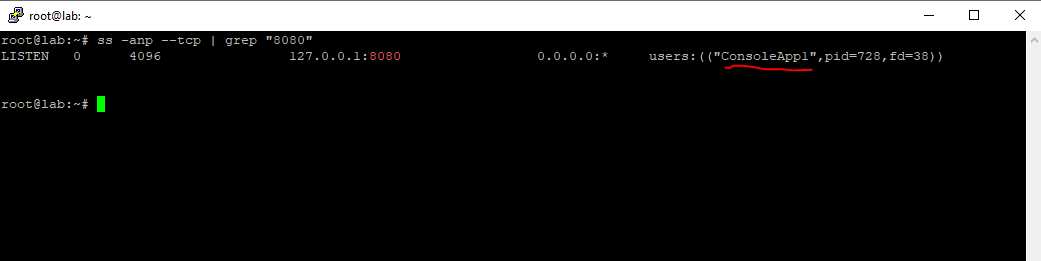
So the equivalent by using the new ss command is
ss -anp --tcp | grep "8080"
Links
Run a Program as a Unix Daemon
https://manpages.ubuntu.com/manpages/bionic/man1/daemonize.1.htmlWorking with systemd unit files
https://access.redhat.com/documentation/en-us/red_hat_enterprise_linux/8/html/configuring_basic_system_settings/assembly_working-with-systemd-unit-files_configuring-basic-system-settingsUnderstanding Systemd Units and Unit Files
https://www.digitalocean.com/community/tutorials/understanding-systemd-units-and-unit-filesThe systemd daemon
https://doc.opensuse.org/documentation/leap/reference/html/book-reference/cha-systemd.htmlsystemd: Unit dependencies and order
https://fedoramagazine.org/systemd-unit-dependencies-and-order/