Set up and Configure a VMware ESXi Host – Part 2
In part 1 we saw each of the separate steps to install ESXi on a bare metal server, in my case just for demonstration purpose on an old IBM x3650 M4 server.
In this part we will now see all necessary steps we have to configure to run this ESXi host.
- Configure ESXi
- Create a new VM on the ESXi Host
- Place the ESXi Host in Maintenance Mode
- ESXi / vCenter Certificates
- Join an ESXi Host to your Active Directory Domain
- Part 1 – Set up and Configure a VMware ESXi Host
- Set up a VMWare vSphere Environment
- Adding and Configuring a new ESXi Host in vSphere (vCenter server)
- Links
Configure ESXi
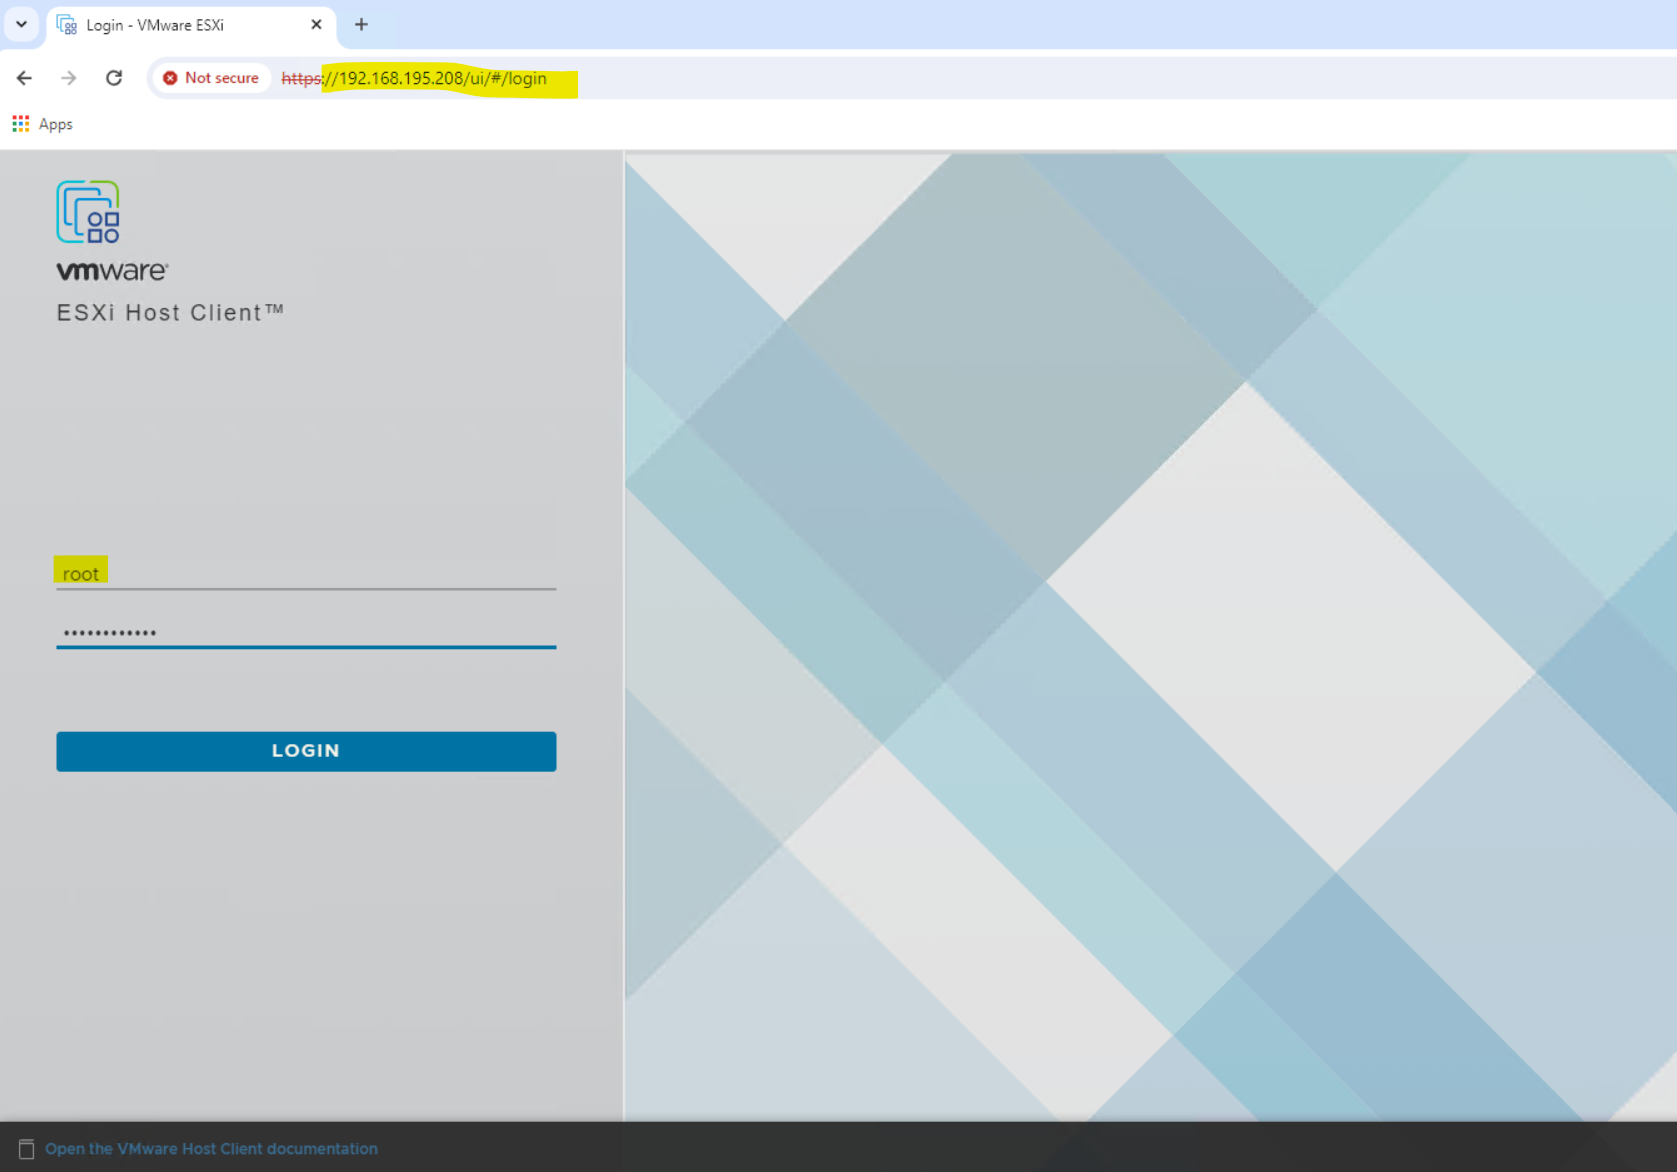
To sign in to the ESXi Host Client (ESXi Web UI) we need to use the root user and password we setup during the installation previously.
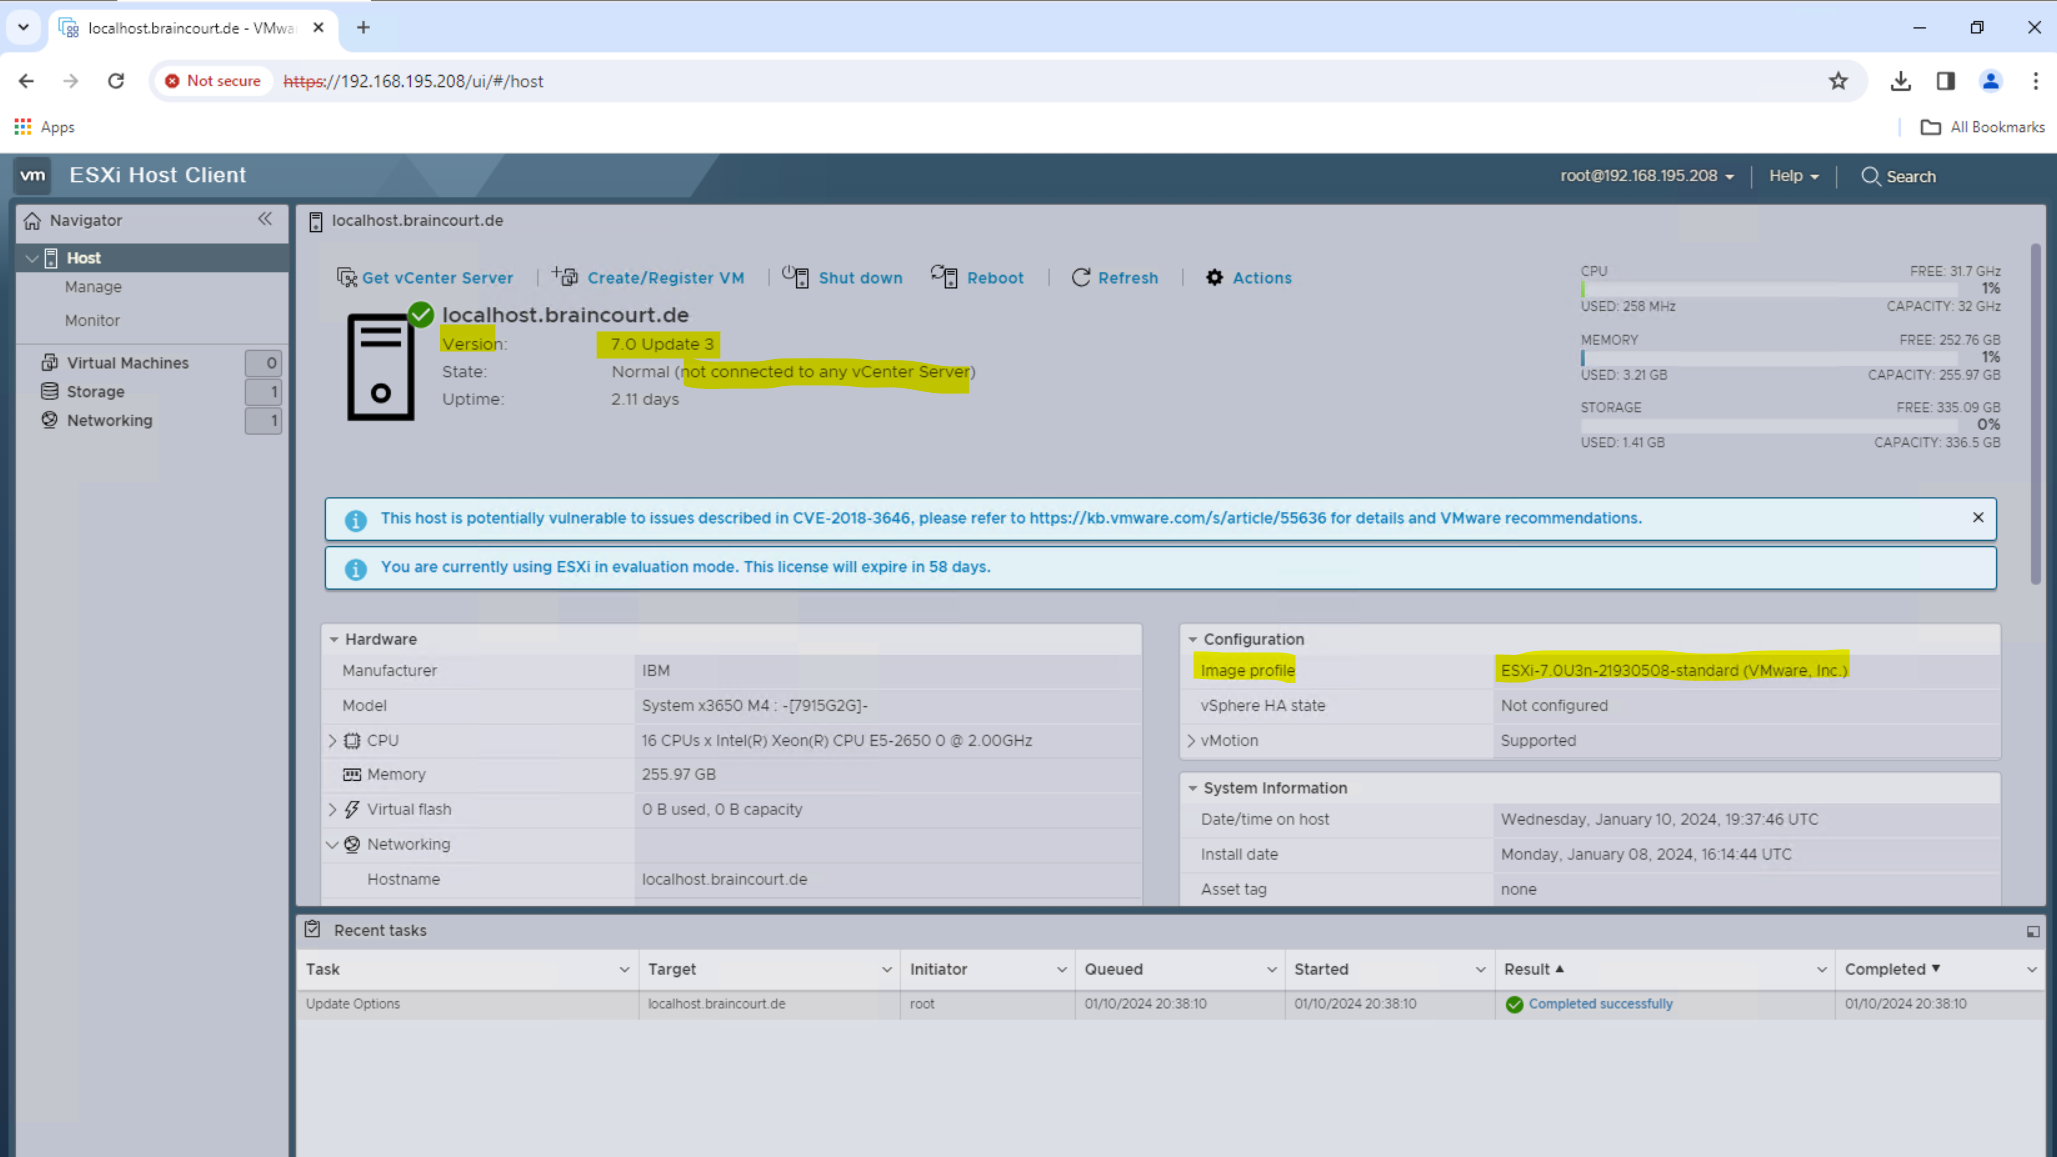
You will get directly forwarded to the dashboard of the ESXi host.
Configure Storage
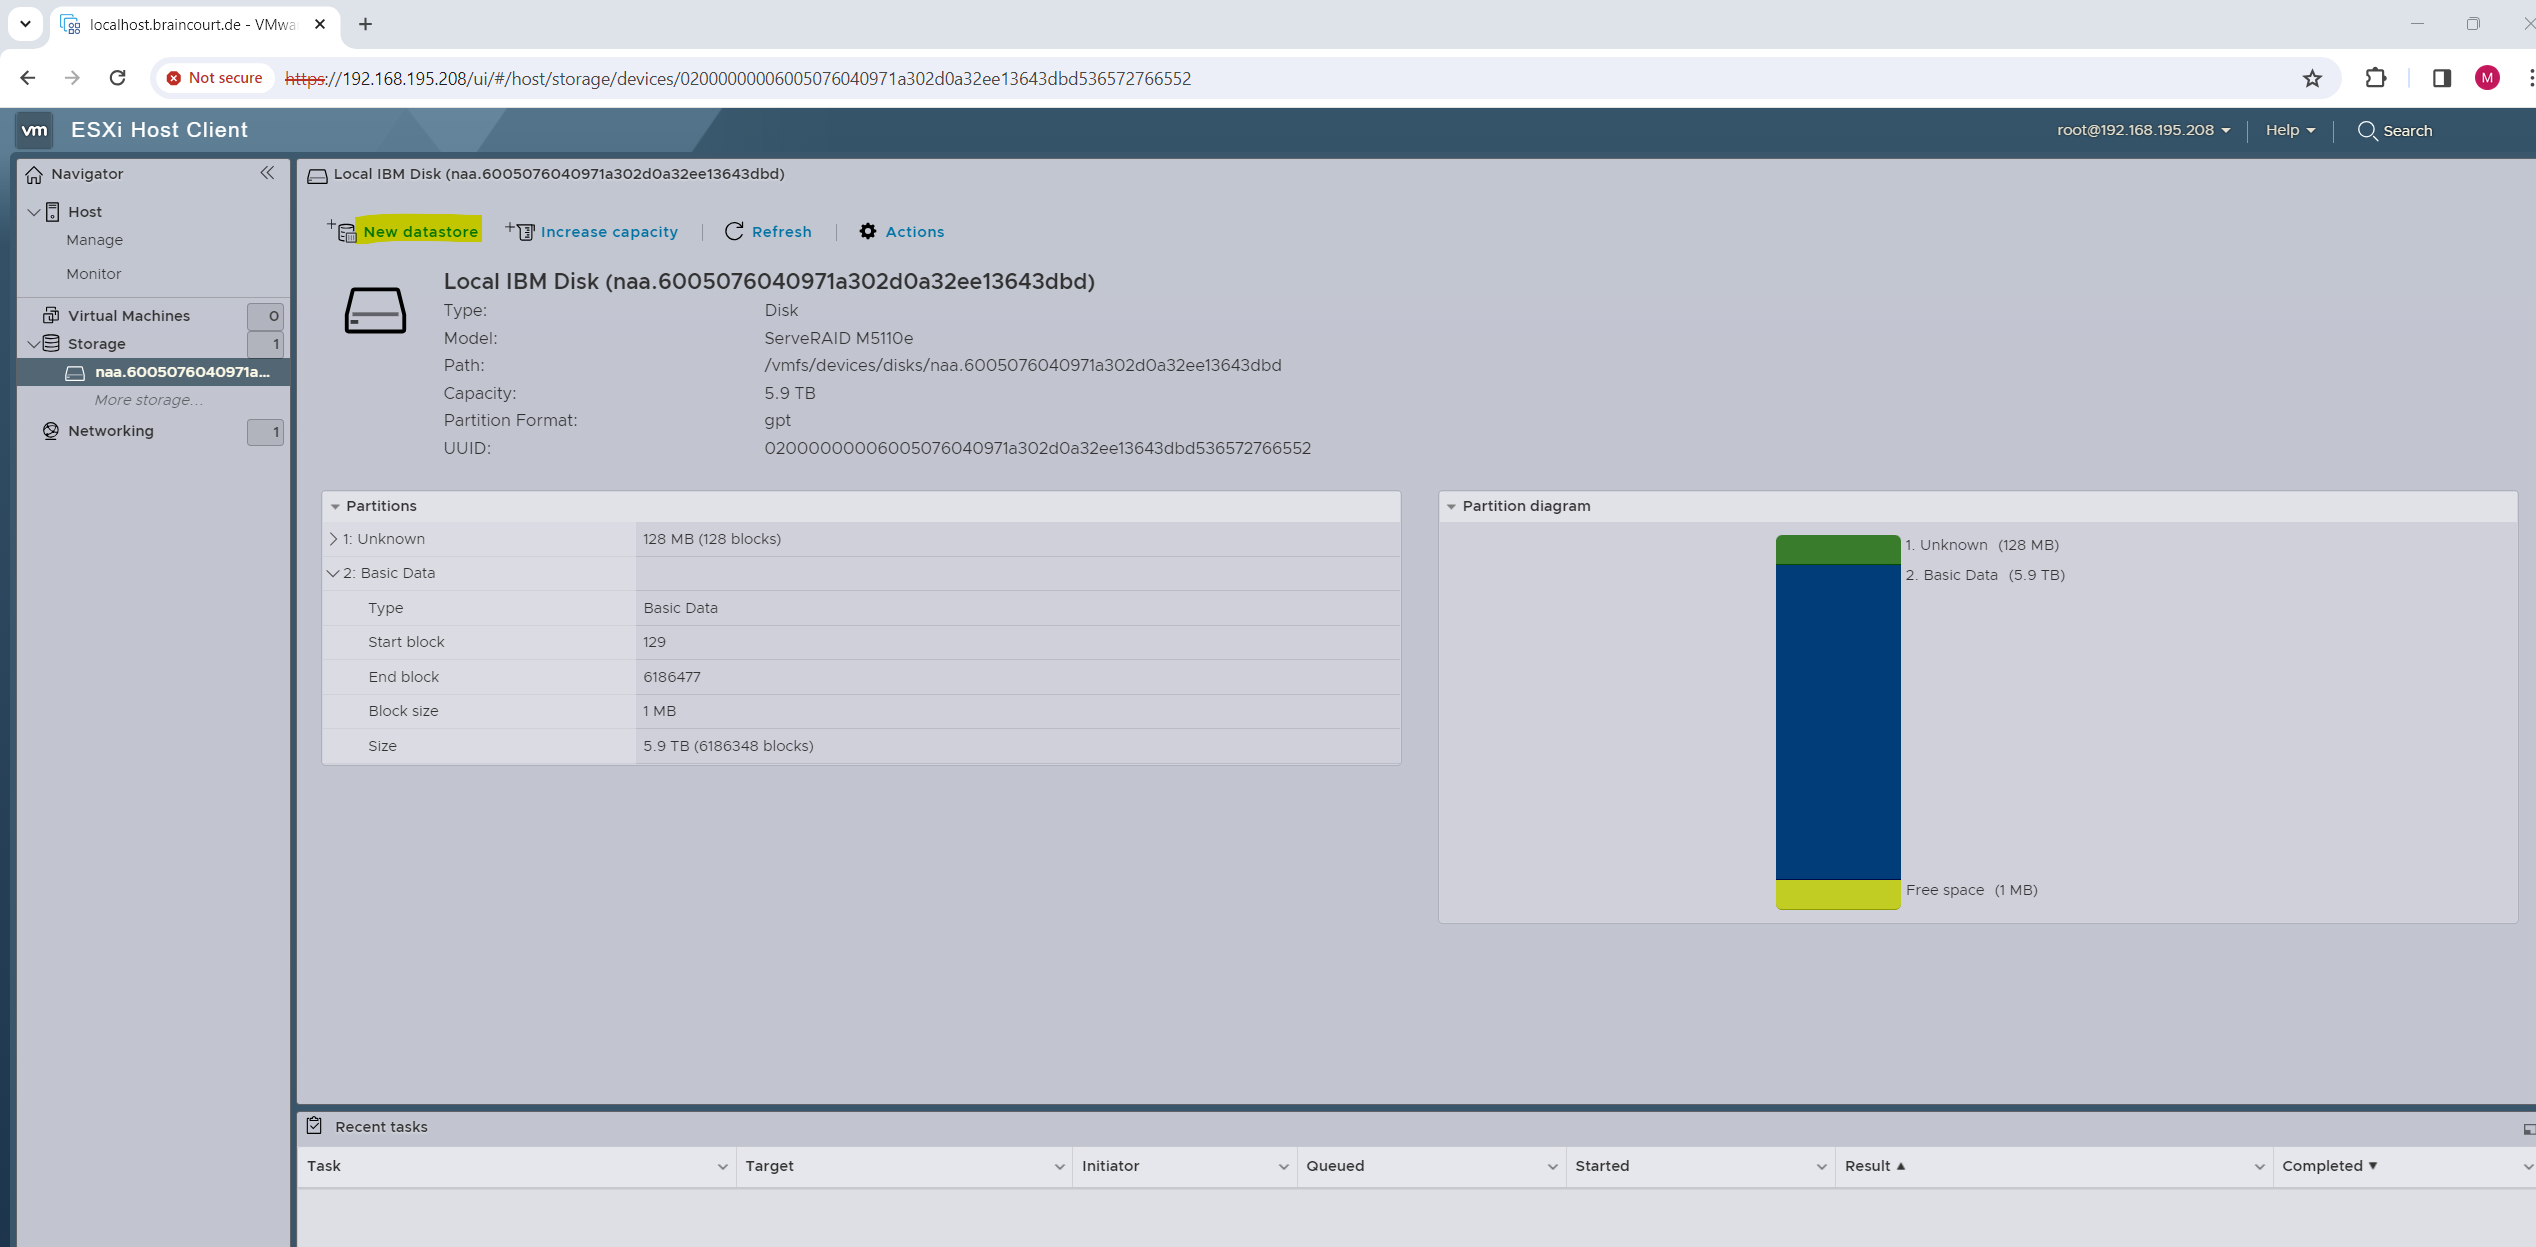
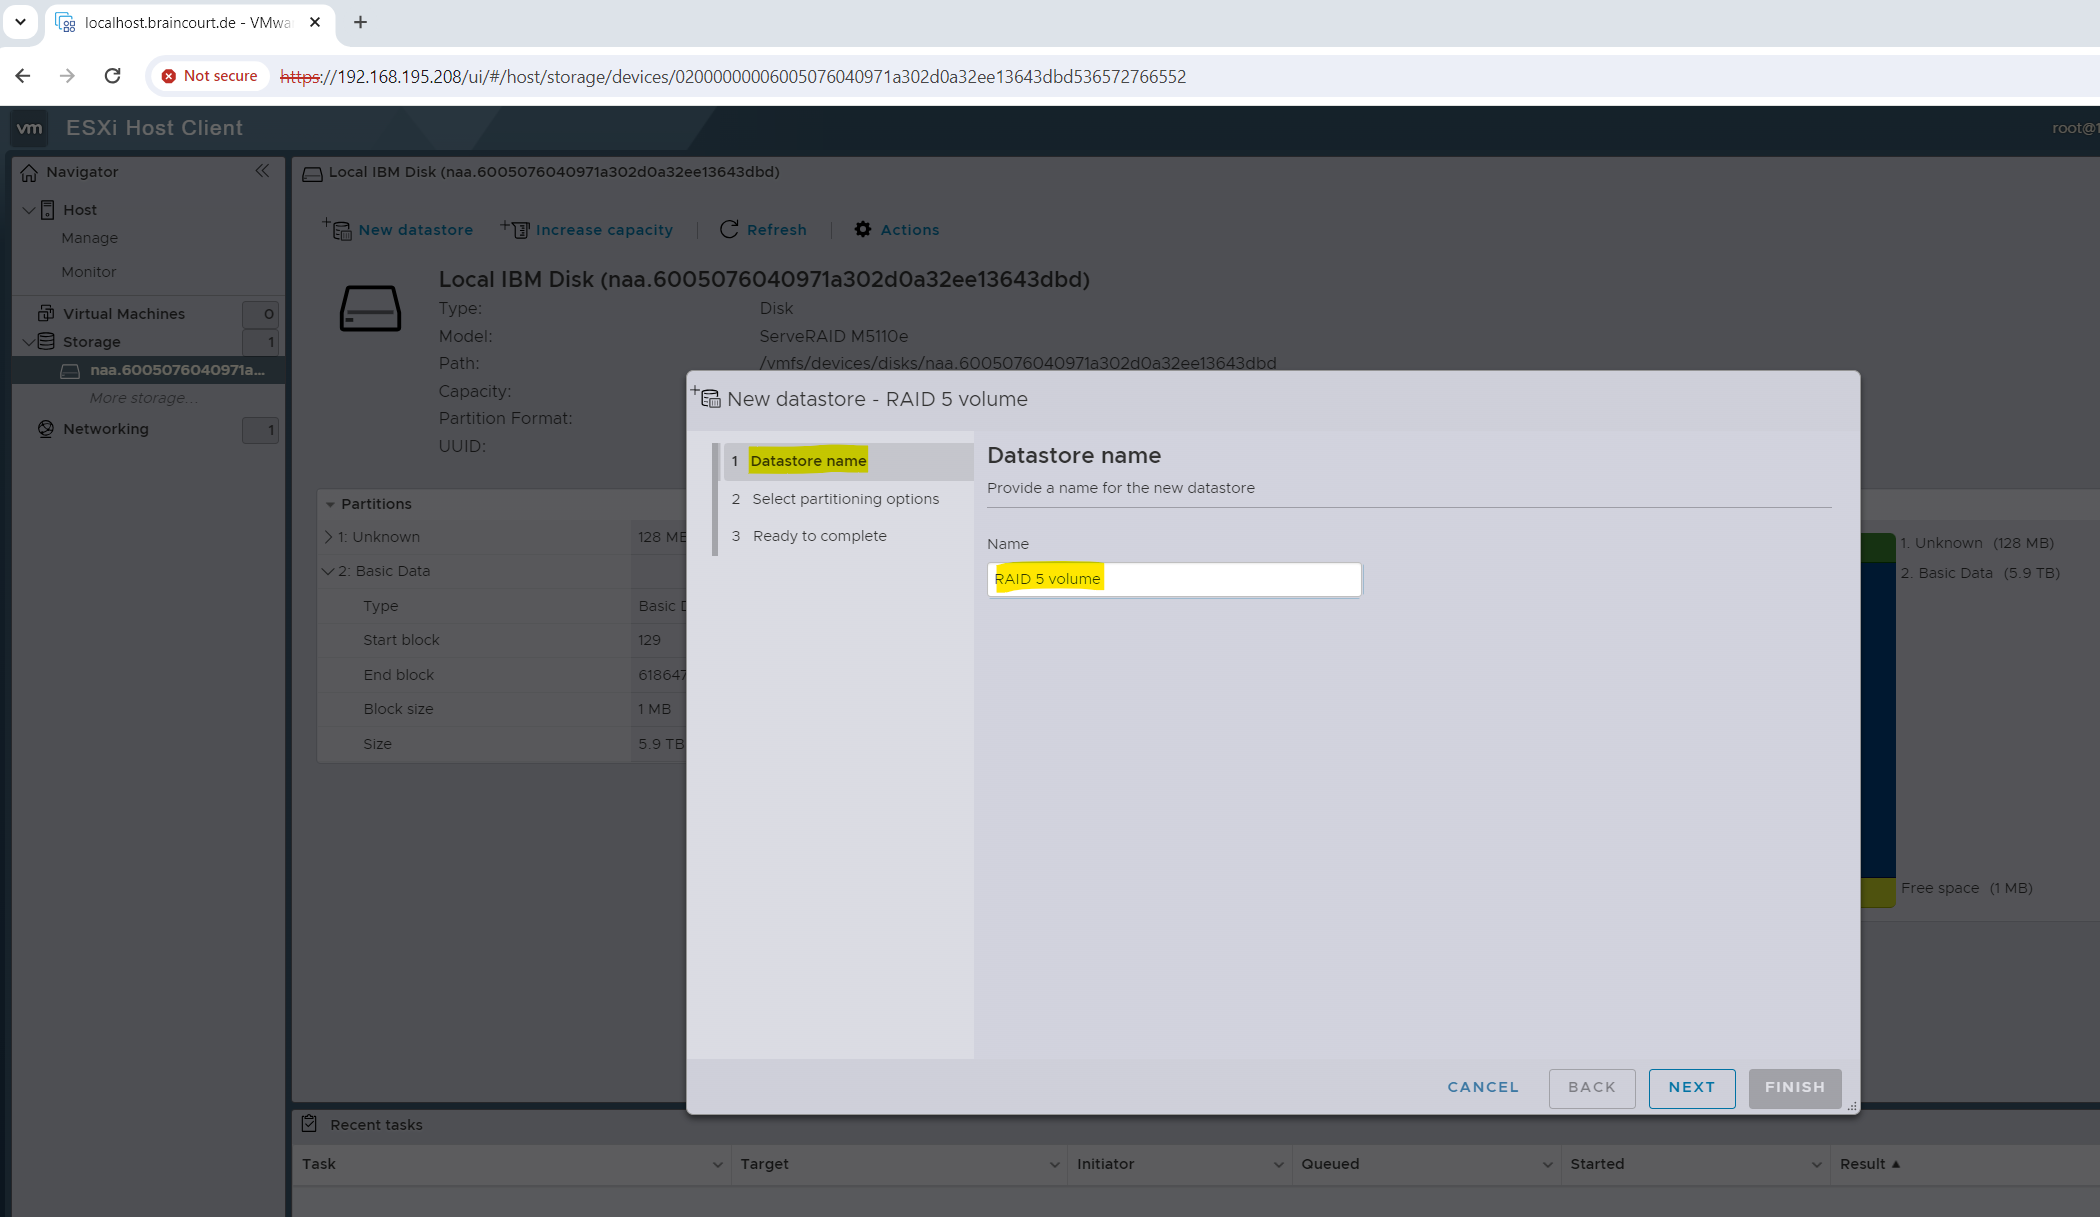
I will configure my RAID 5 volume, internal direct-attached storage (DAS) as new datastore in ESXi by using the new Virtual Machine File System (VMFS) 6.
To store virtual disks, ESXi uses datastores. The datastores are logical containers that hide specifics of physical storage from virtual machines and provide a uniform model for storing the virtual machine files.
vCenter Server and ESXi support the following types of datastores.
VMFS (version 5 and 6)
Datastores that you deploy on block storage devices use the vSphere Virtual Machine File System (VMFS) format. VMFS is a special high-performance file system format that is optimized for storing virtual machines. See Understanding VMFS Datastores.NFS (version 3 and 4.1)
An NFS client built into ESXi uses the Network File System (NFS) protocol over TCP/IP to access a designated NFS volume. The volume is located on a NAS server. The ESXi host mounts the volume as an NFS datastore, and uses it for storage needs. ESXi supports versions 3 and 4.1 of the NFS protocol. See Understanding Network File System DatastoresvSAN
vSAN aggregates all local capacity devices available on the hosts into a single datastore shared by all hosts in the vSAN cluster. See the Administering VMware vSAN documentation.vVol
Virtual Volumes datastore represents a storage container in vCenter Server and vSphere Client. See Working with VMware vSphere Virtual Volumes.
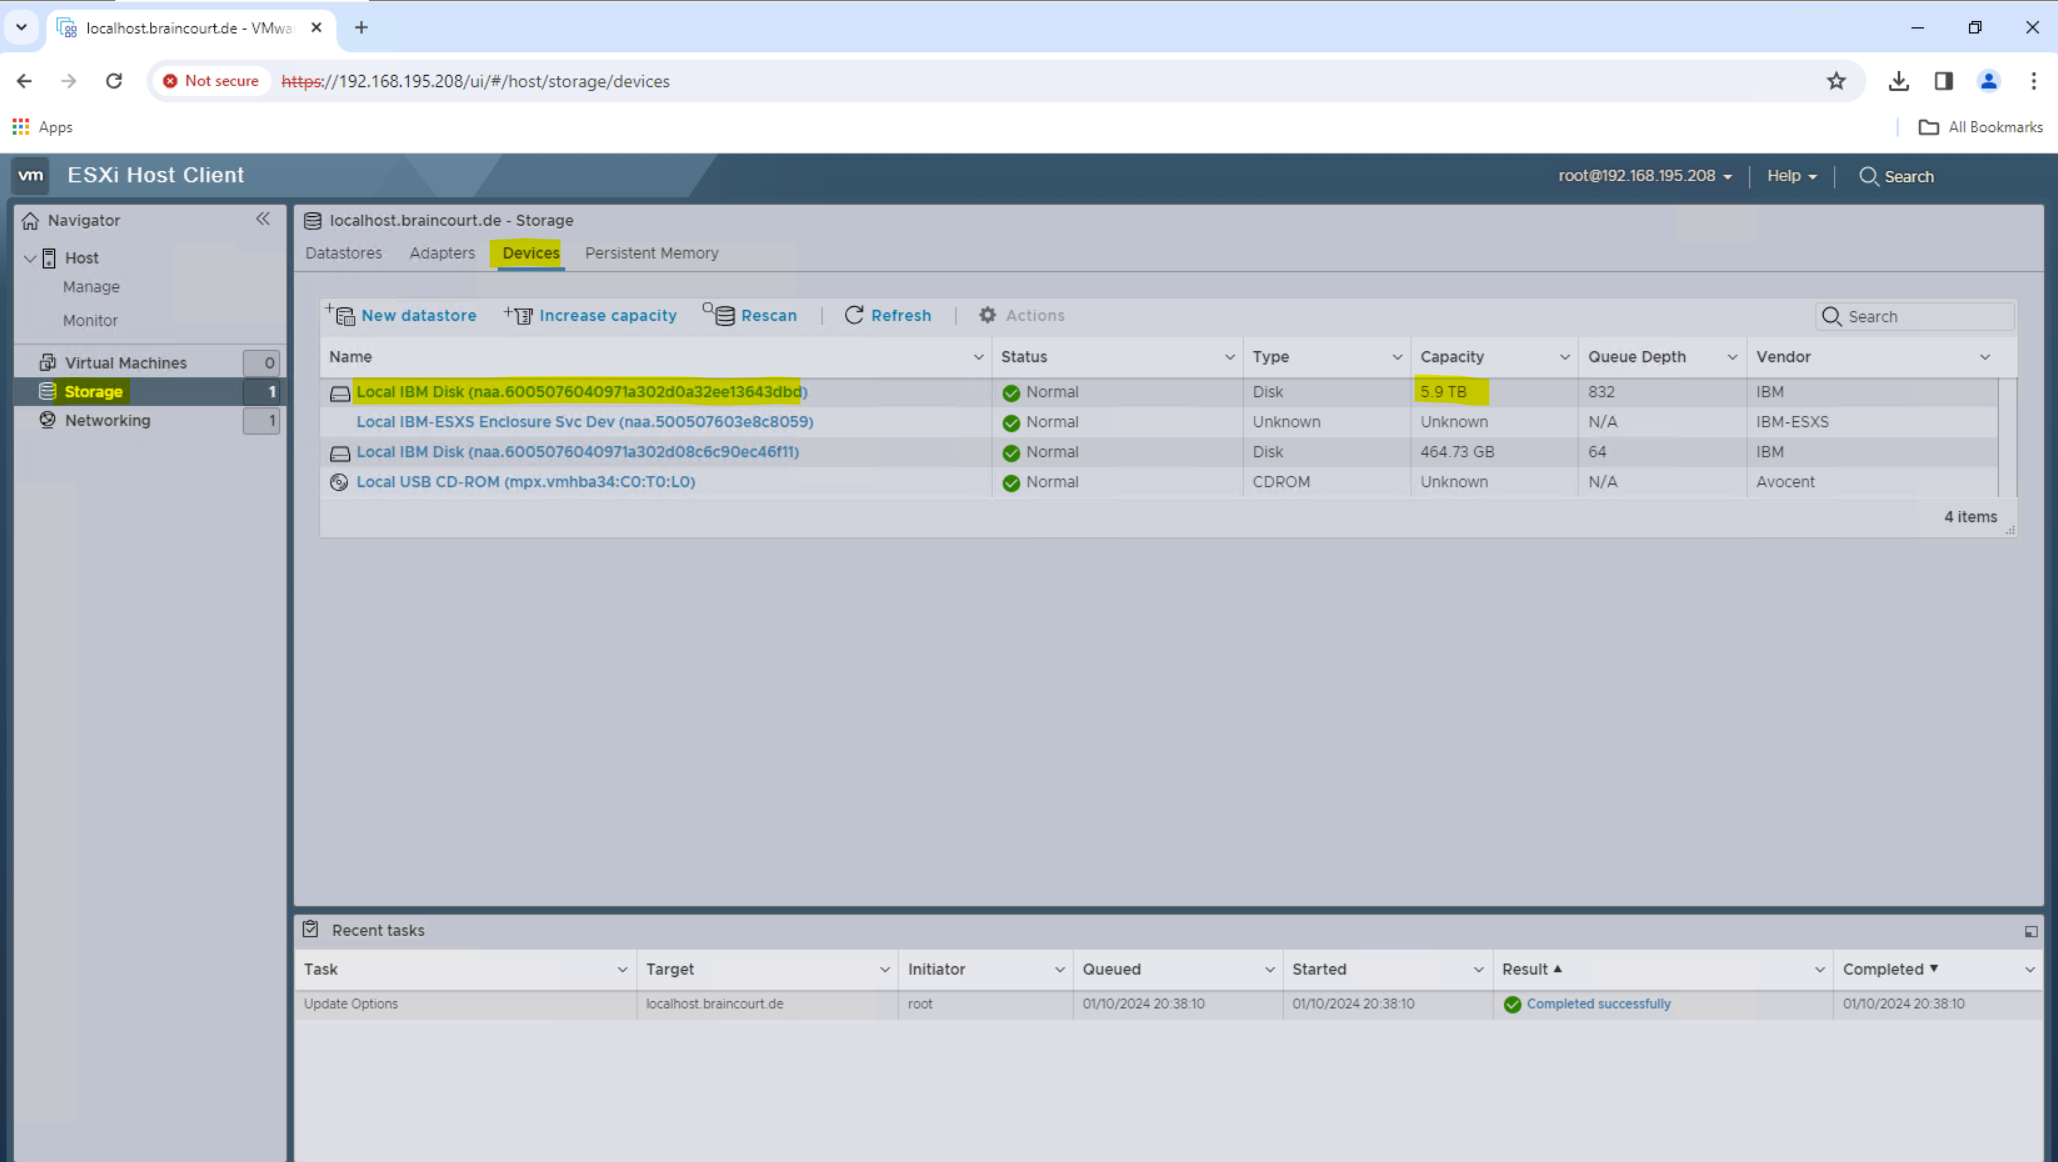
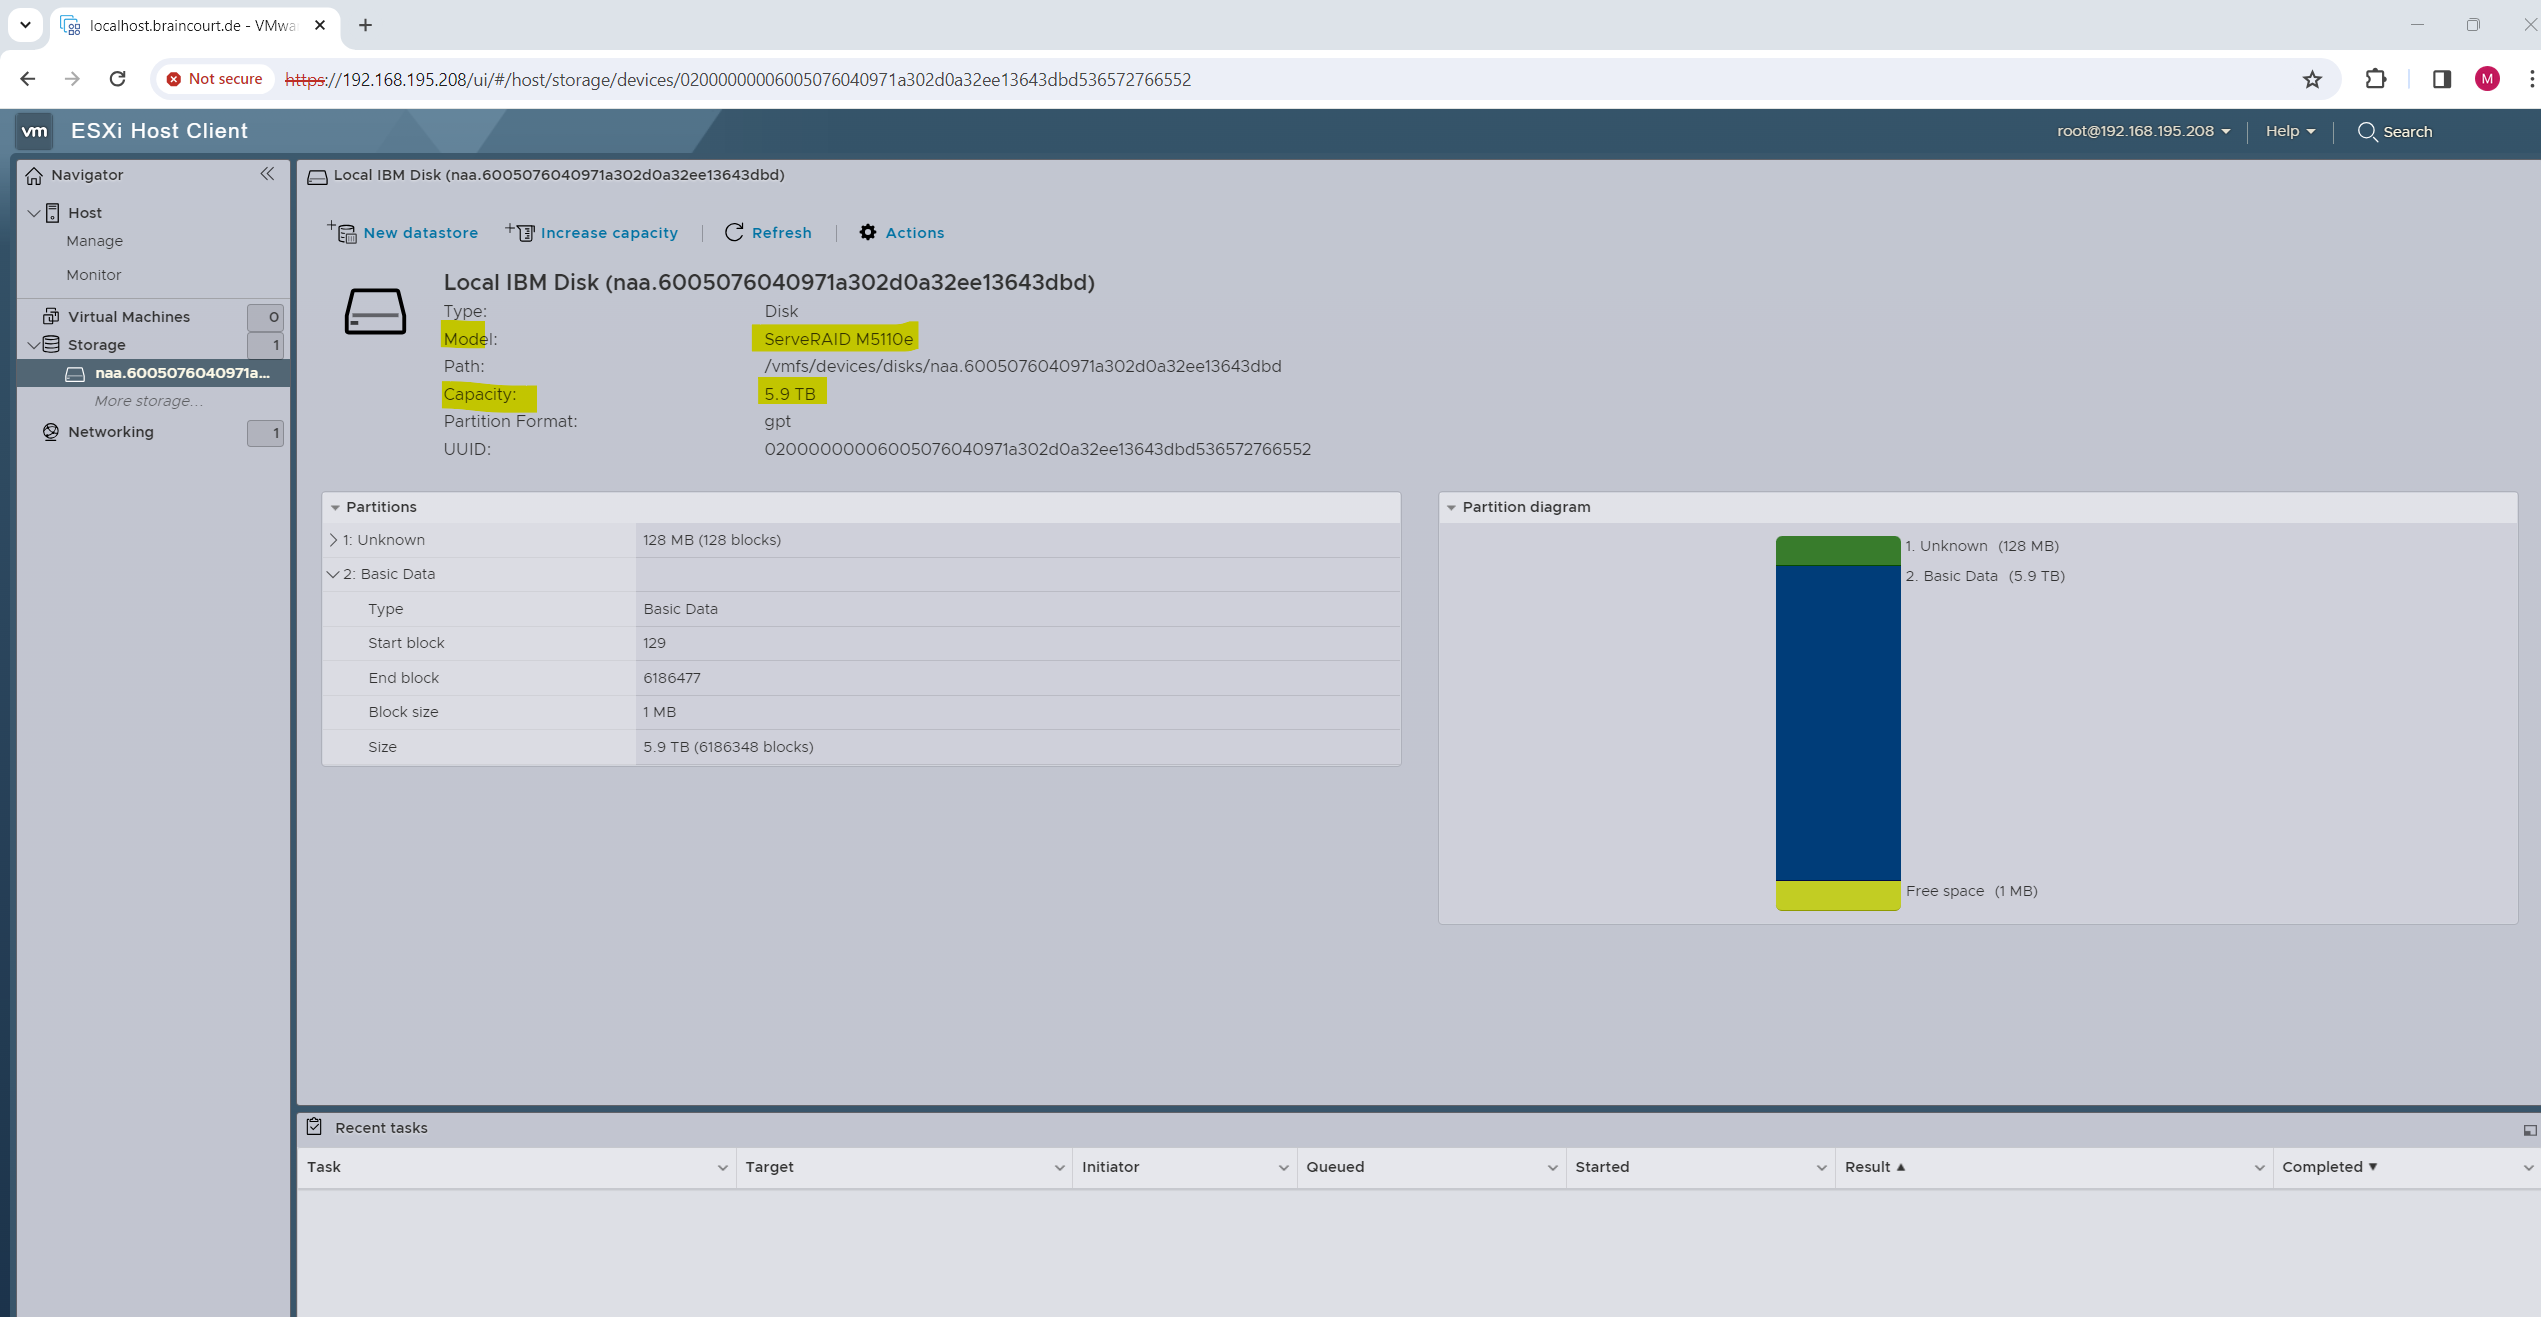
You can see here that this disk resp. my RAID 5 volume is provisioned by the ServeRAID M5110e raid controller.
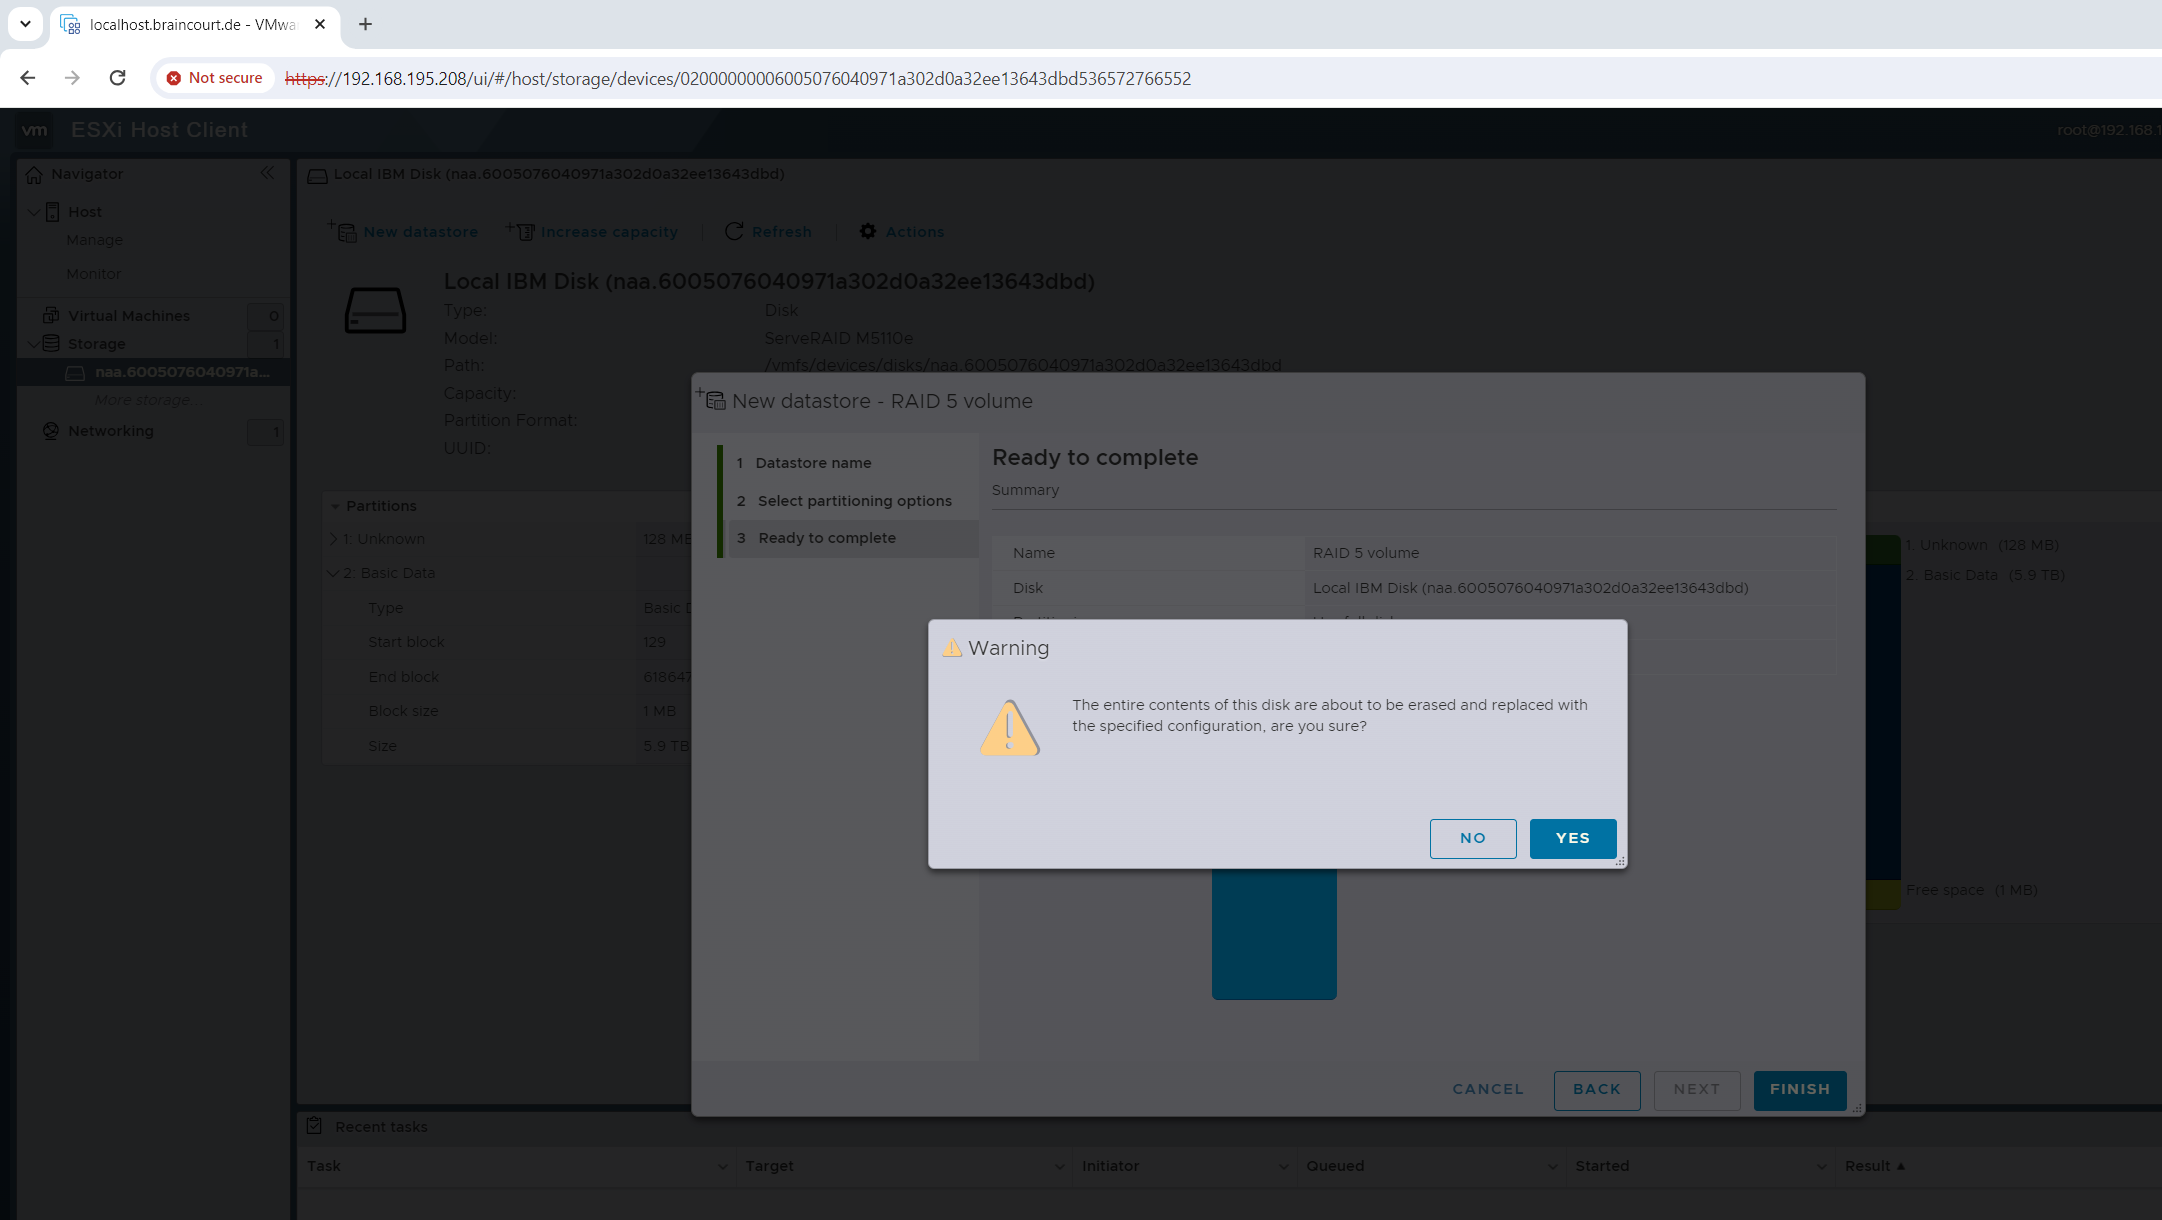
We can now create a new datastore by using this disk and clicking on the New datastore link.
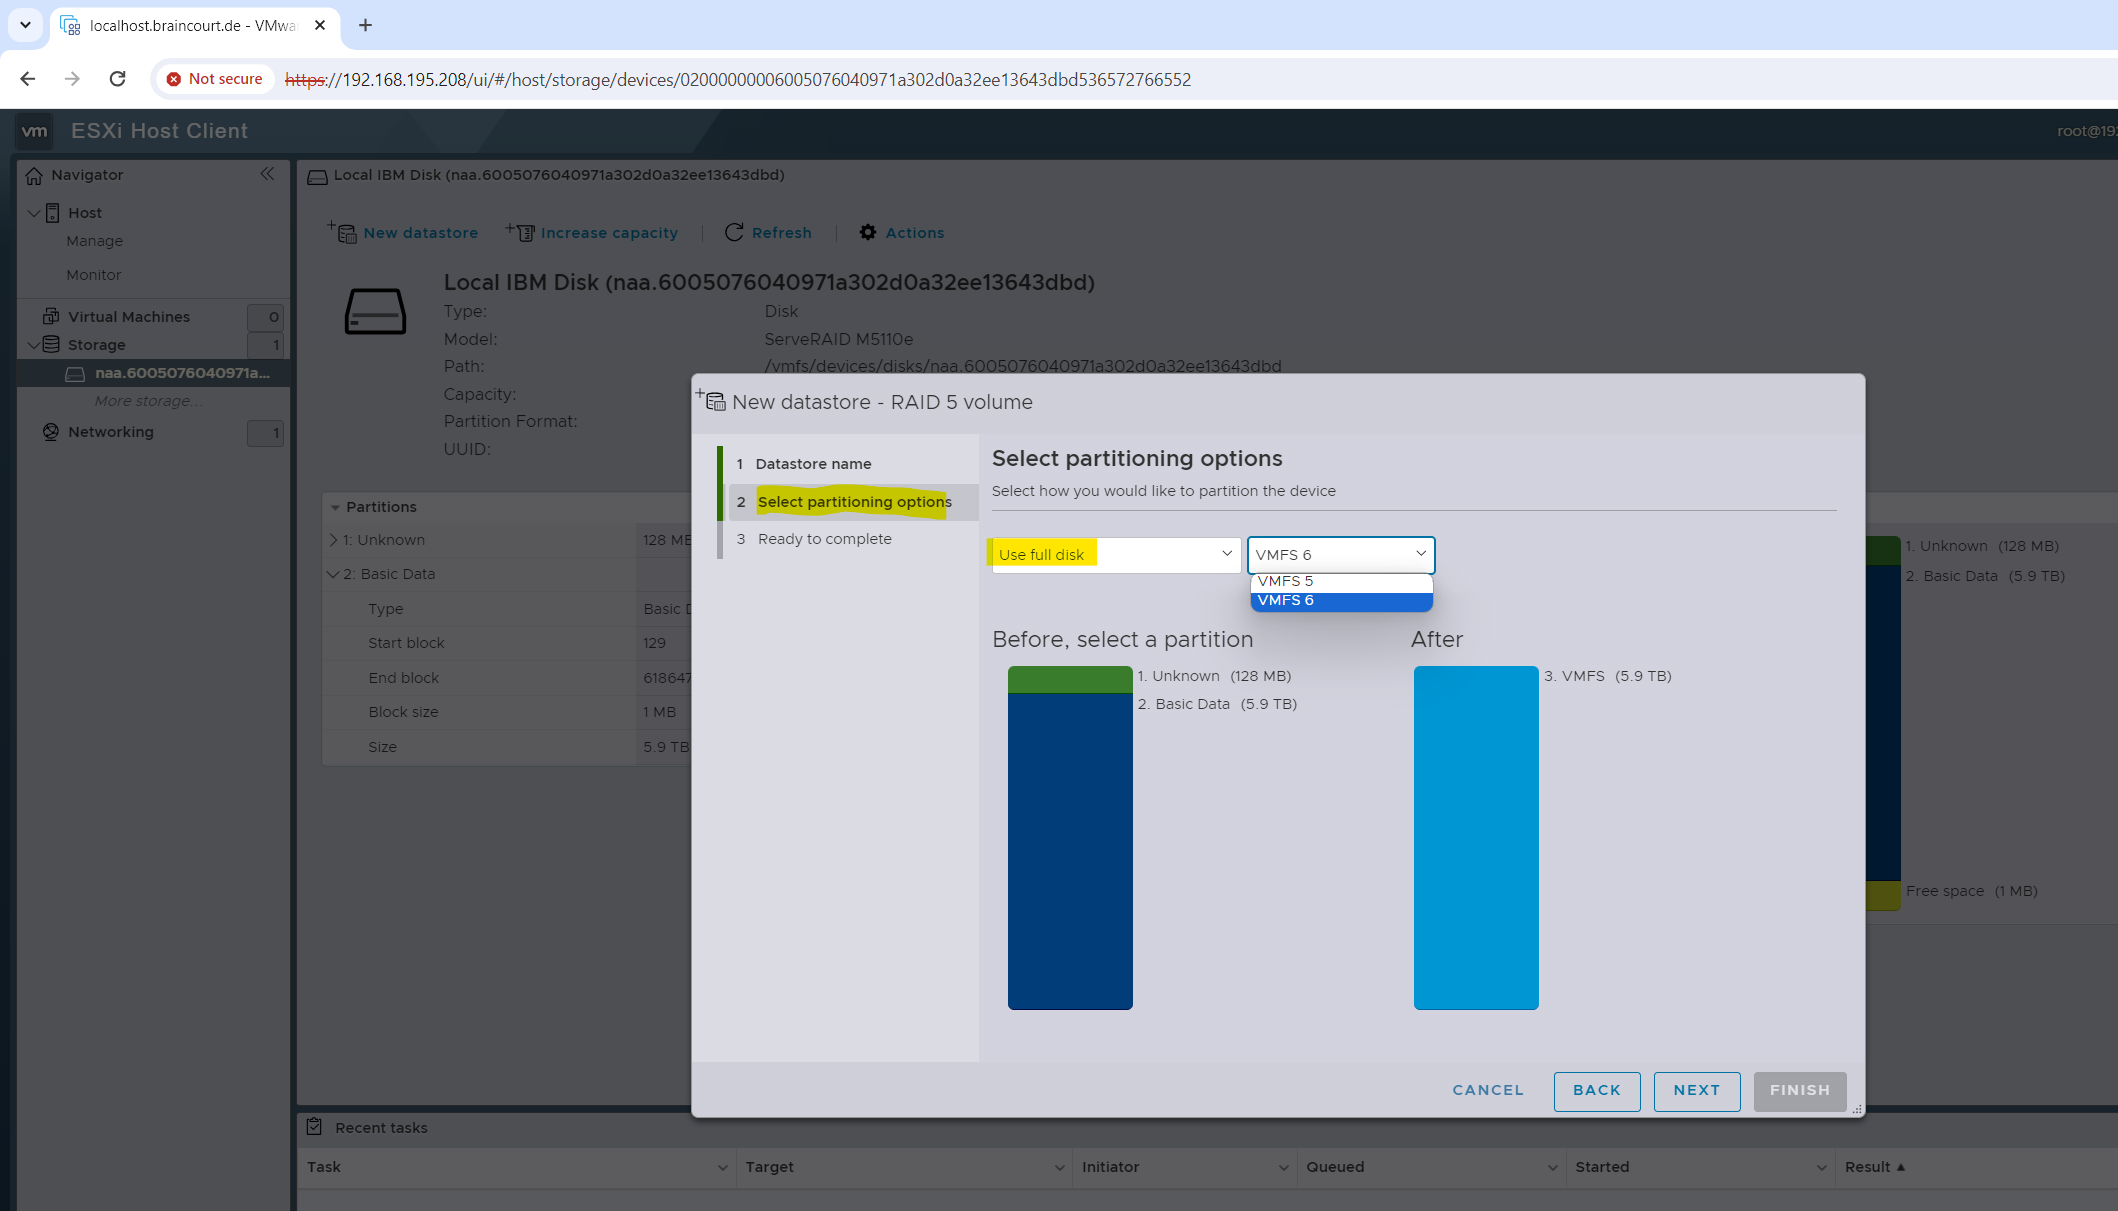
I will use below the full disk (my RAID 5 volume) and the new VMFS 6 file system to create the new datastore where the virtual machines will be stored and running from.
VMFS 6 is the new filesystem of vSphere 6.5. The new filesystem supports 512e advanced format drives and is 4098 sector (4K) aligned. It also supports automatic UNMAP, which asynchronously tracks freed blocks and sends UNMAPs to backend storage in background.
VMFS 5 and VMFS 6 can coexist. However, due to the changes done in VMFS 6 metadata structures to make it 4K aligned, you cannot inline/offline upgrade from VMFS5 to VMFS6.
You can leverage the new VMFS 6 capabilities by creating a new VMFS 6 datastore and provisioning new virtual machines to it or migrating the existing virtual machines from VMFS 5 datastore to VMFS 6 datastore.
Finally we can click on Finish to create the new datastore.
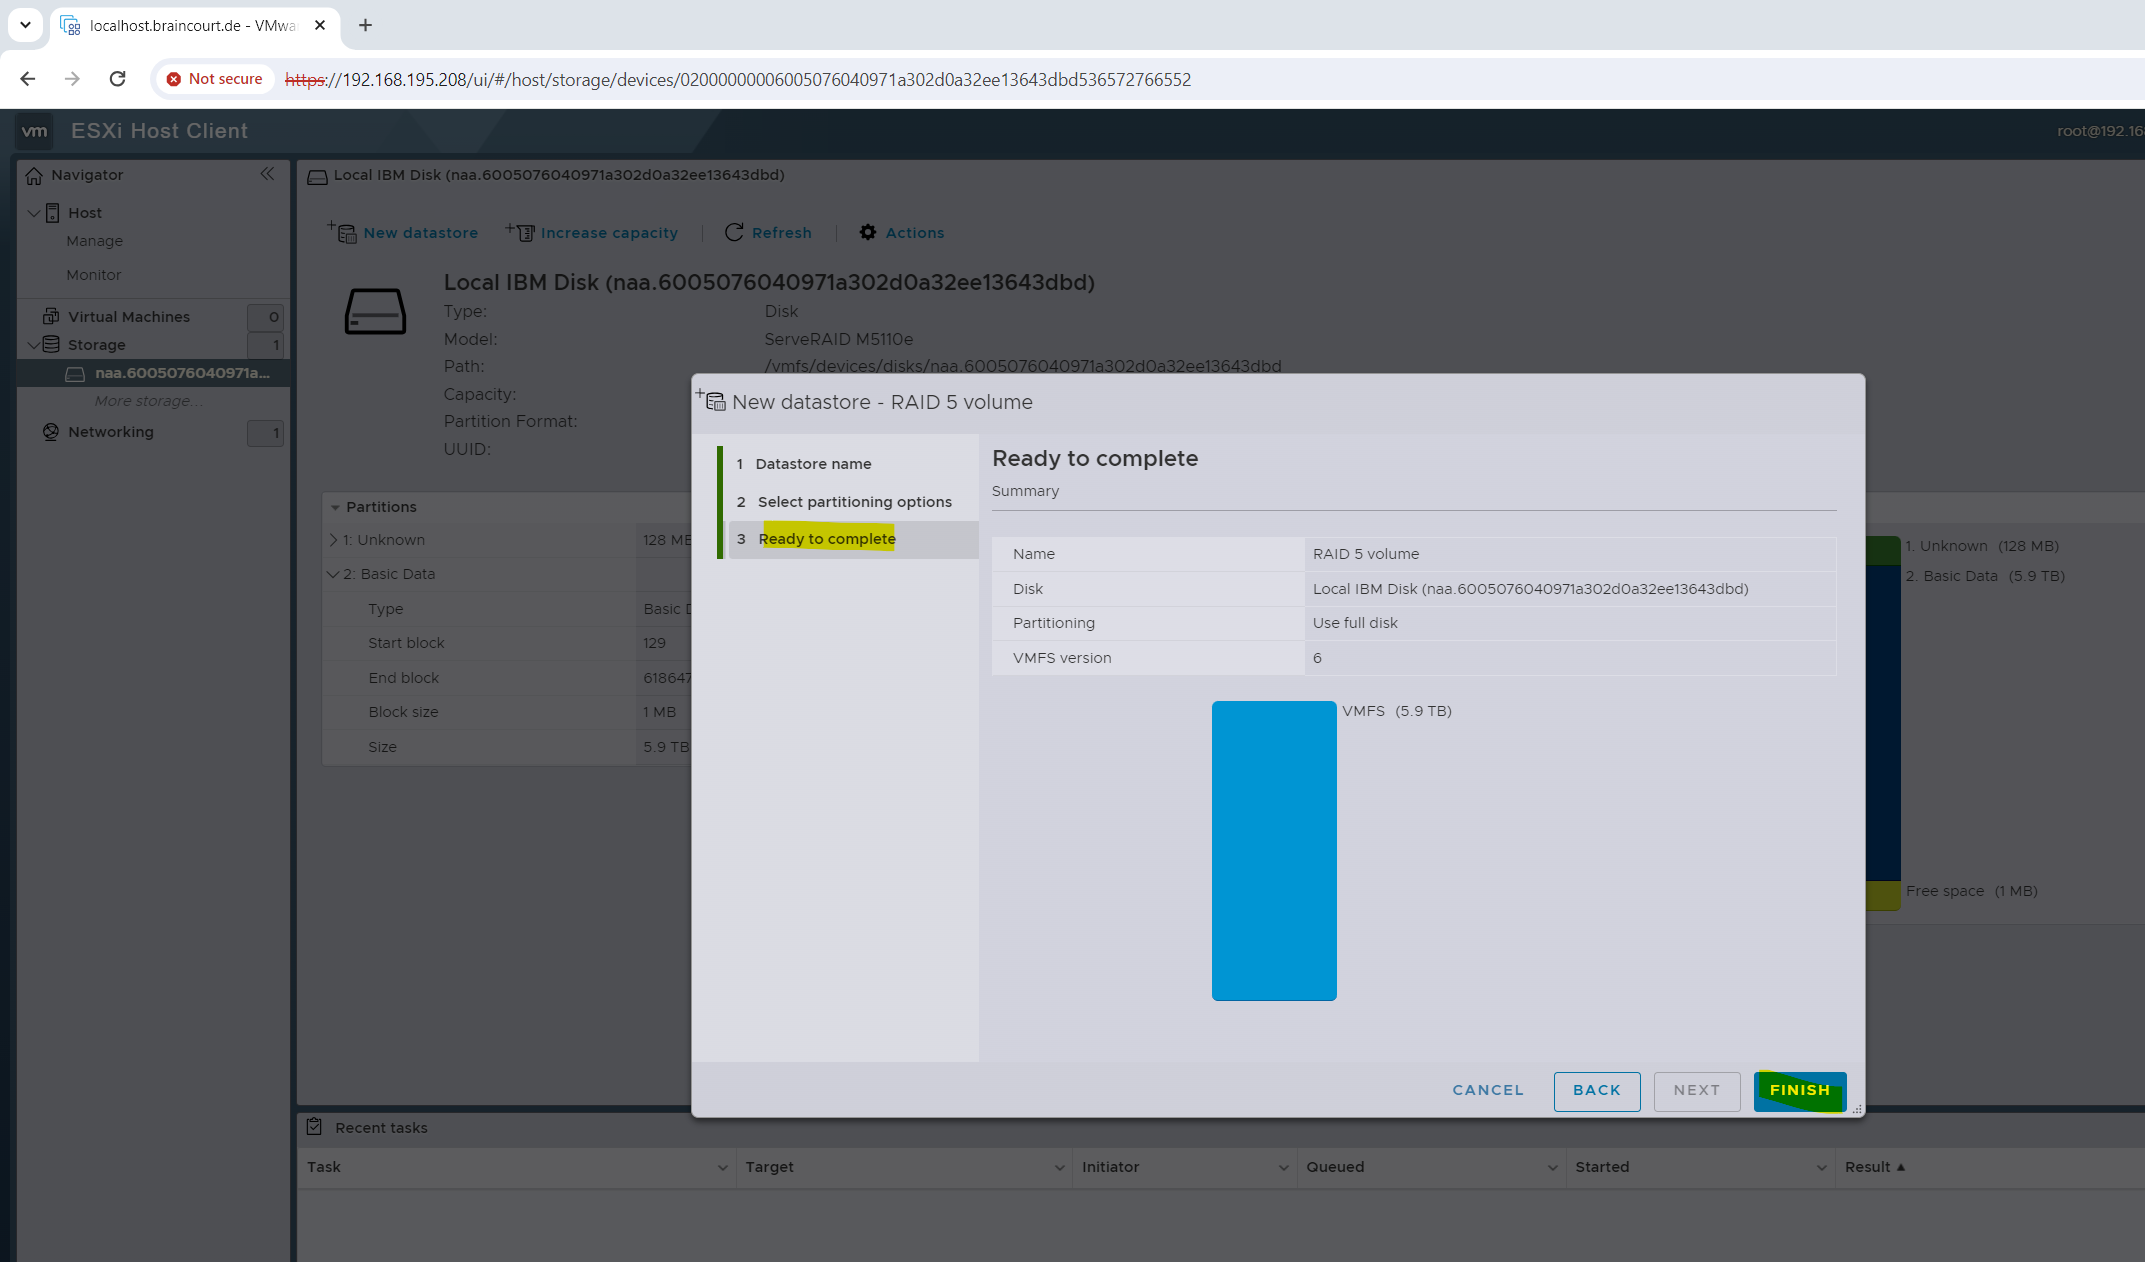
Confirm that the entire content on the disk will be erased in order to create a new datastore on.
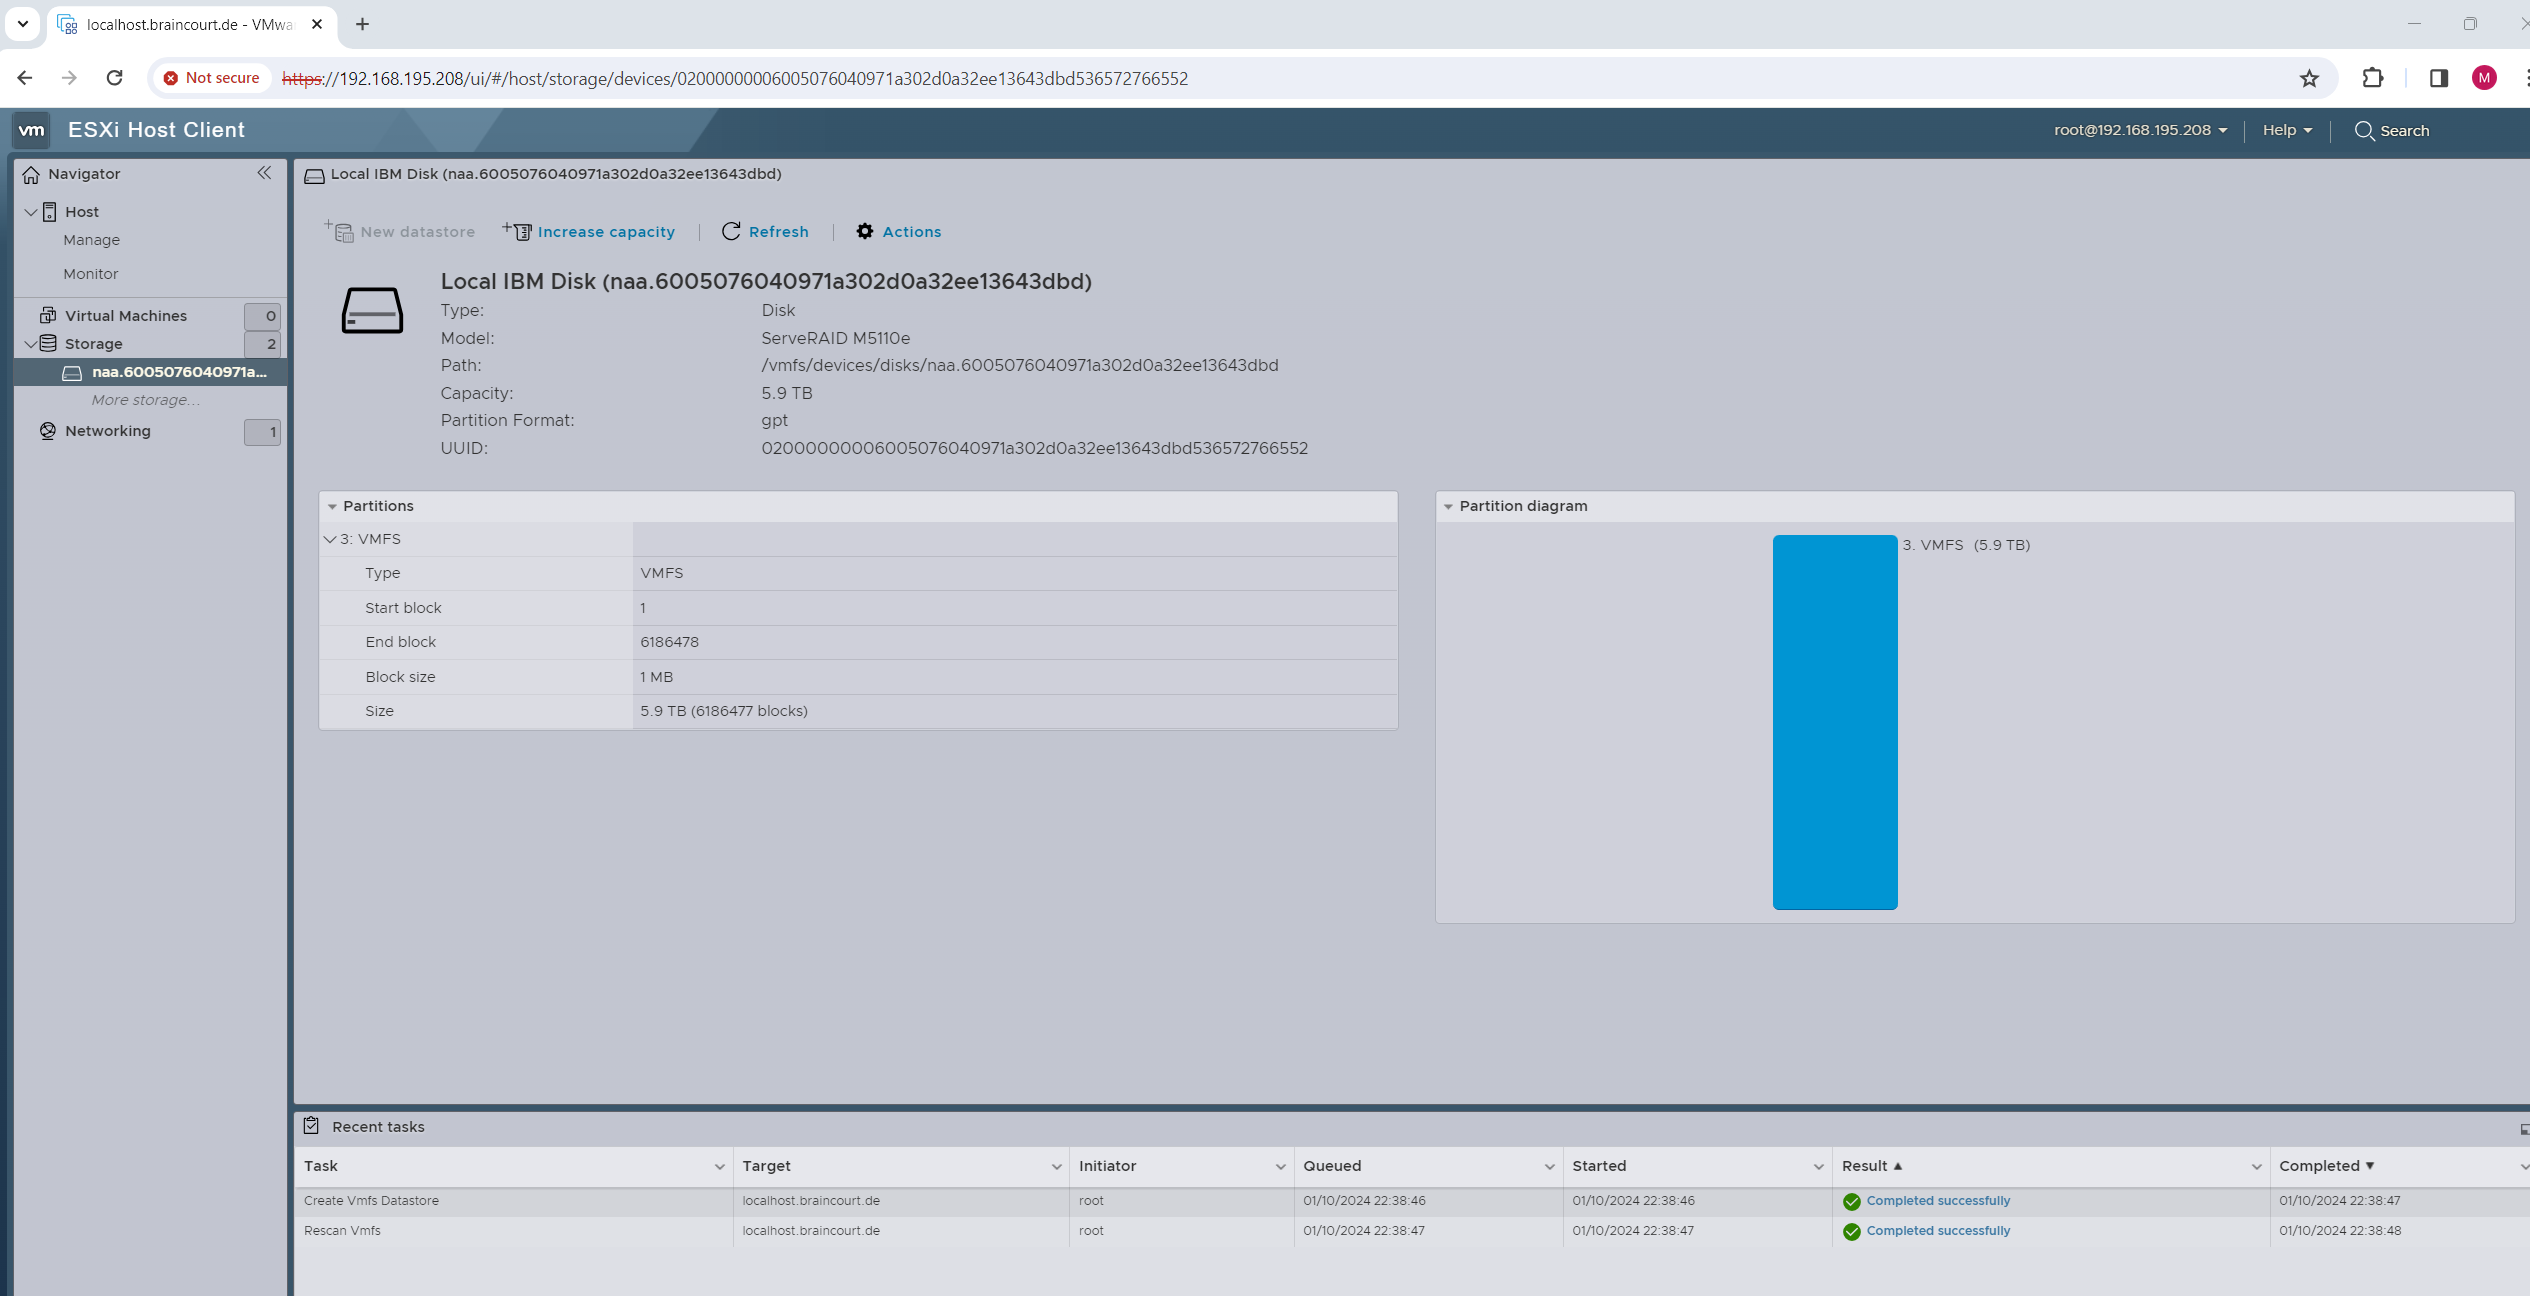
Finally we have a new datastore on the ESXi host.

Configure Network
We can configure the network of an ESXi host either by using the ESXi Host Client (ESXi Web UI) as shown below or the vSphere client running on the vCenter server if provisioned in your environment.
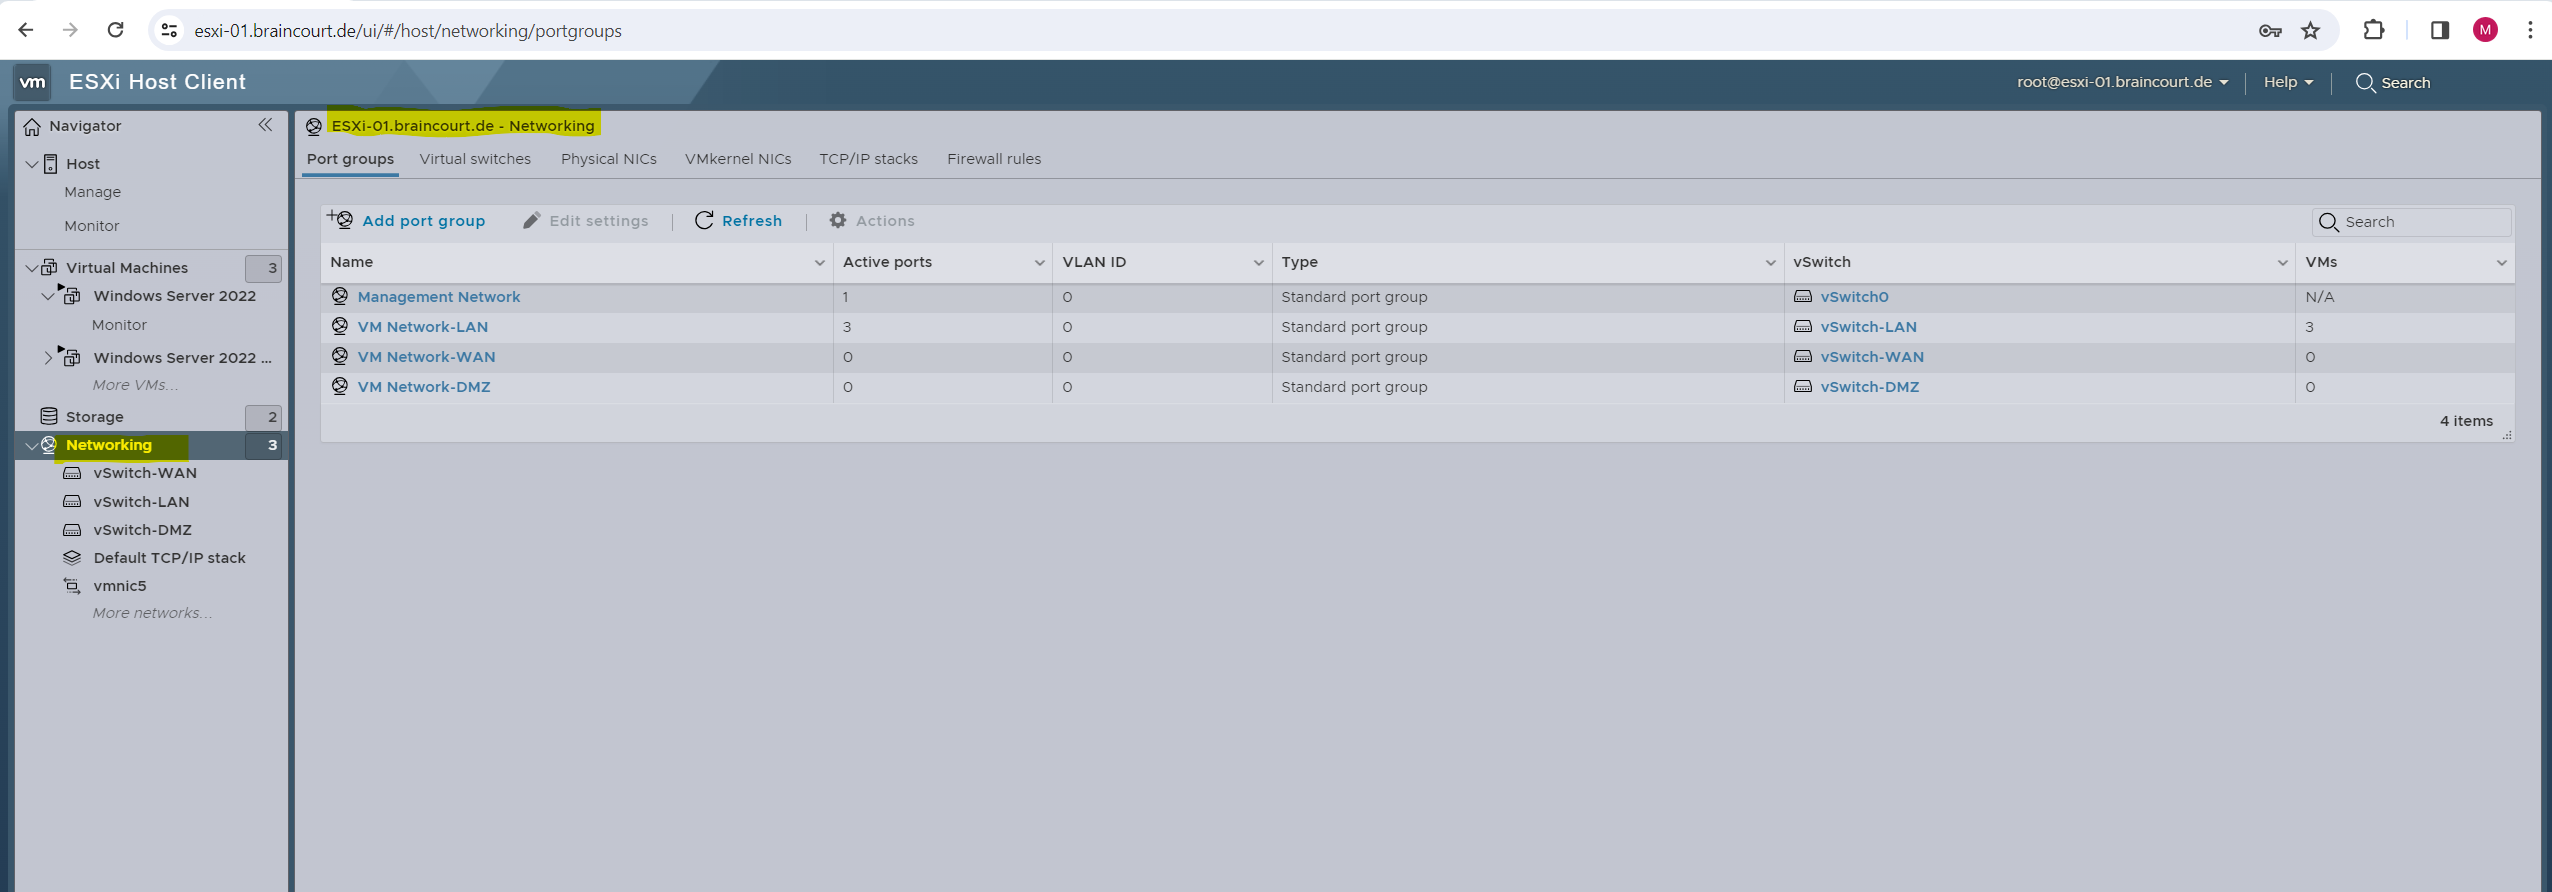
Below I will use the ESXi Web UI and here we have to navigate to the Networking menu as shown below. As you can see within the Networking menu we have several tabs to configure our network.
- Port groups
- Virtual switches
- Physical NICs
- VMkernel NICs
- TCP/IP stacks
- Firewall rules
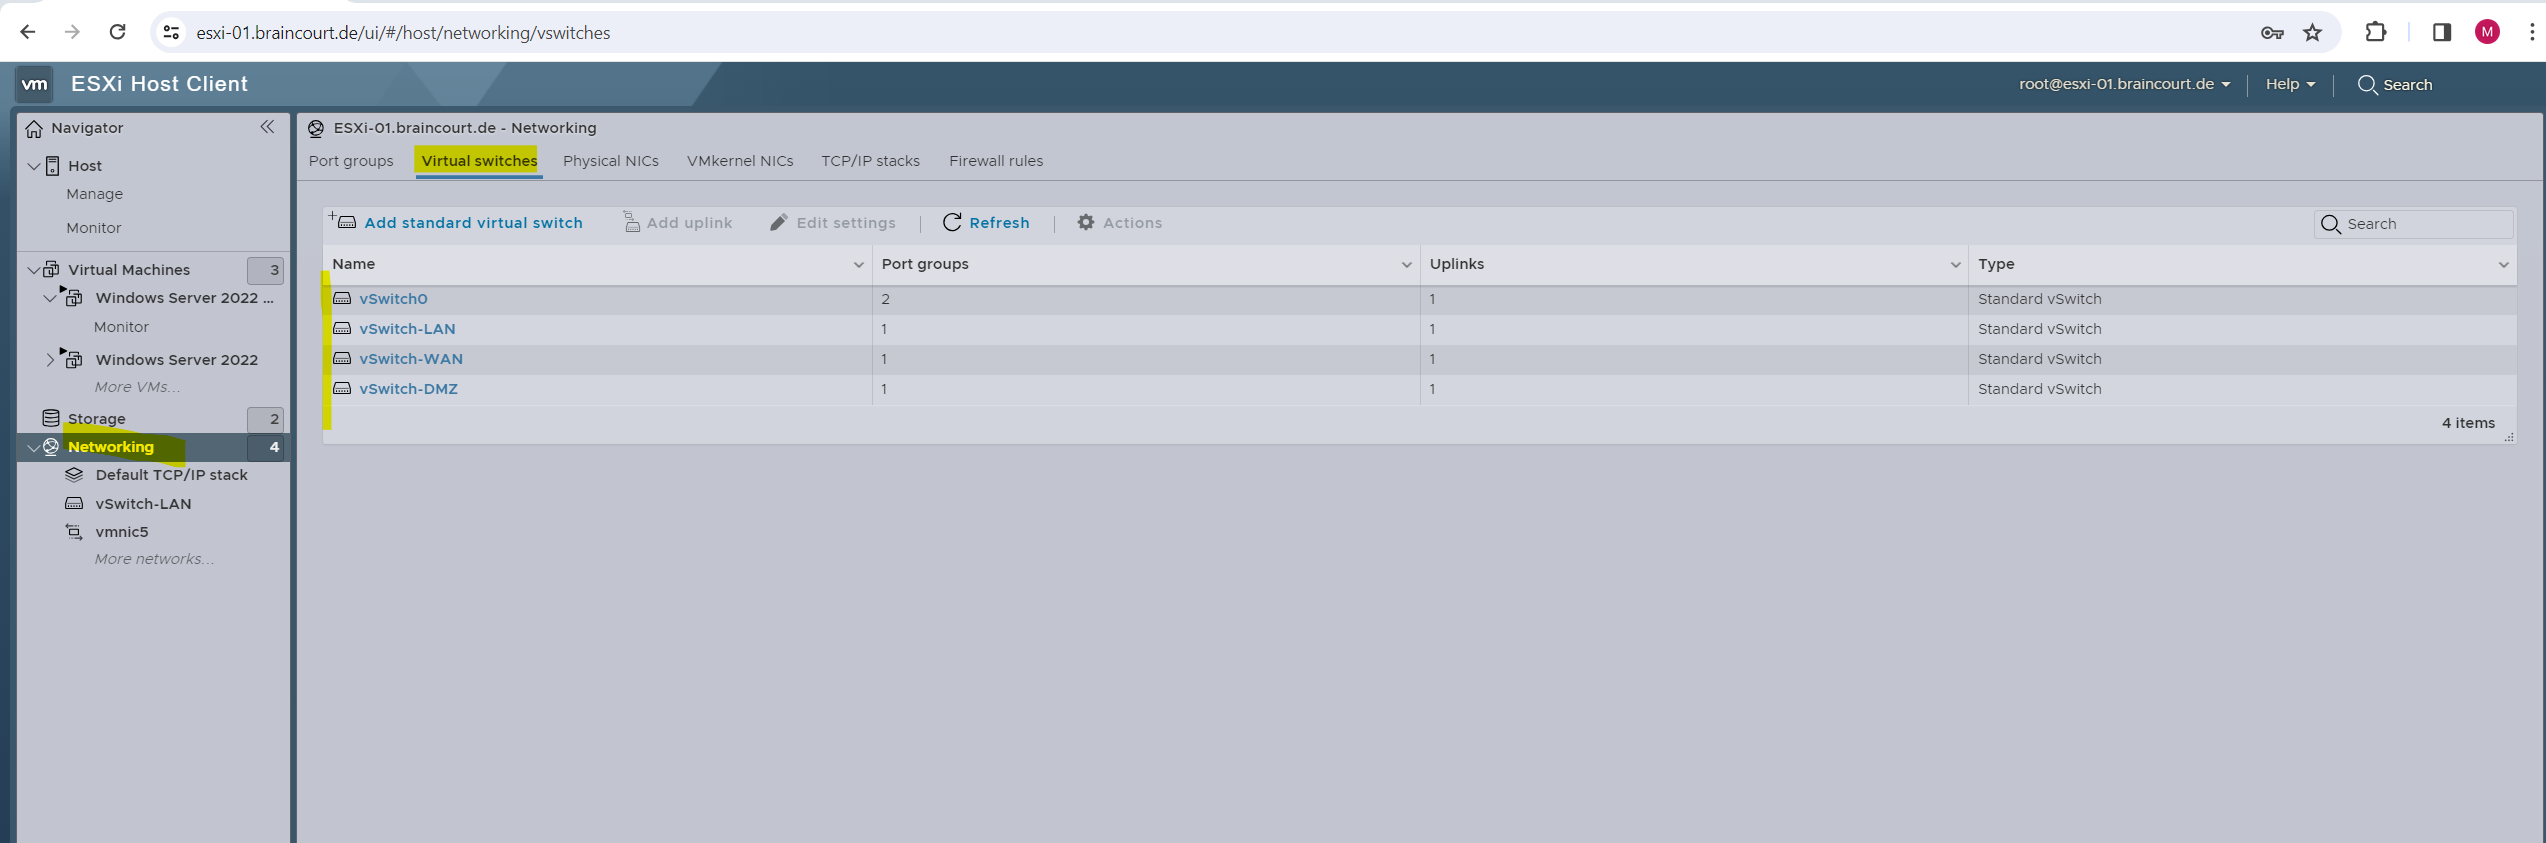
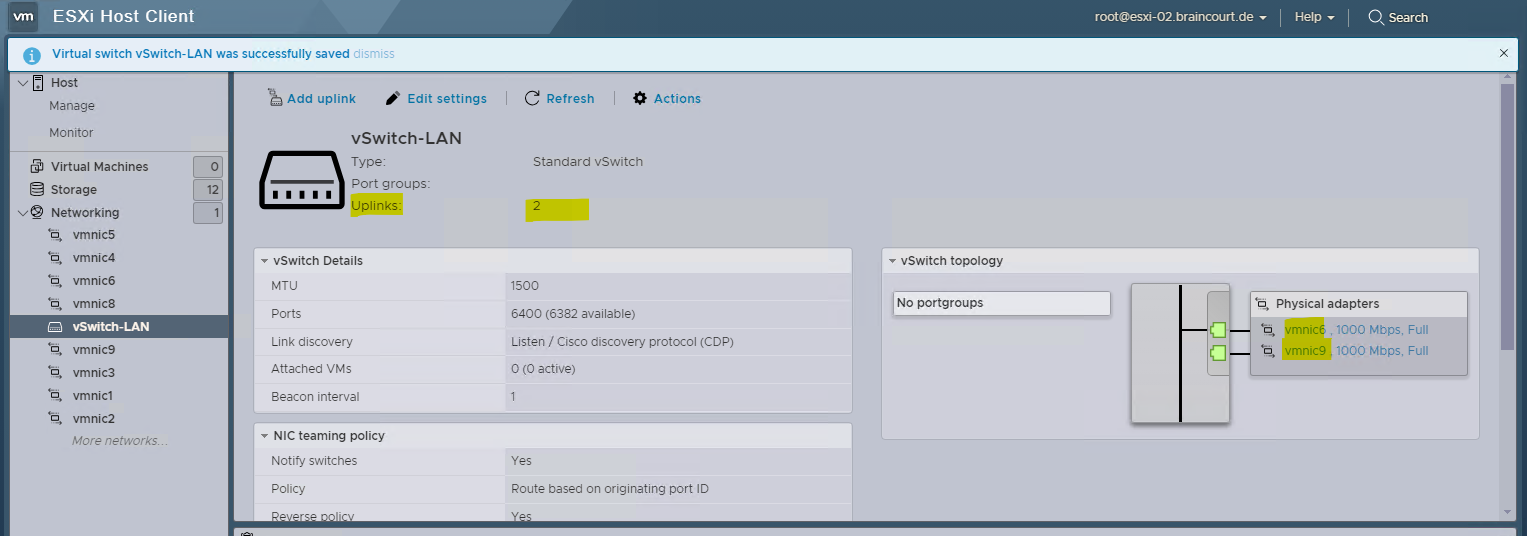
By default below after a new installation of an ESXi host, there is one virtual switch and two port groups named VM Network and Management Network. The port group named VM Network I was removing and therefore created three new port groups and vSwitches.
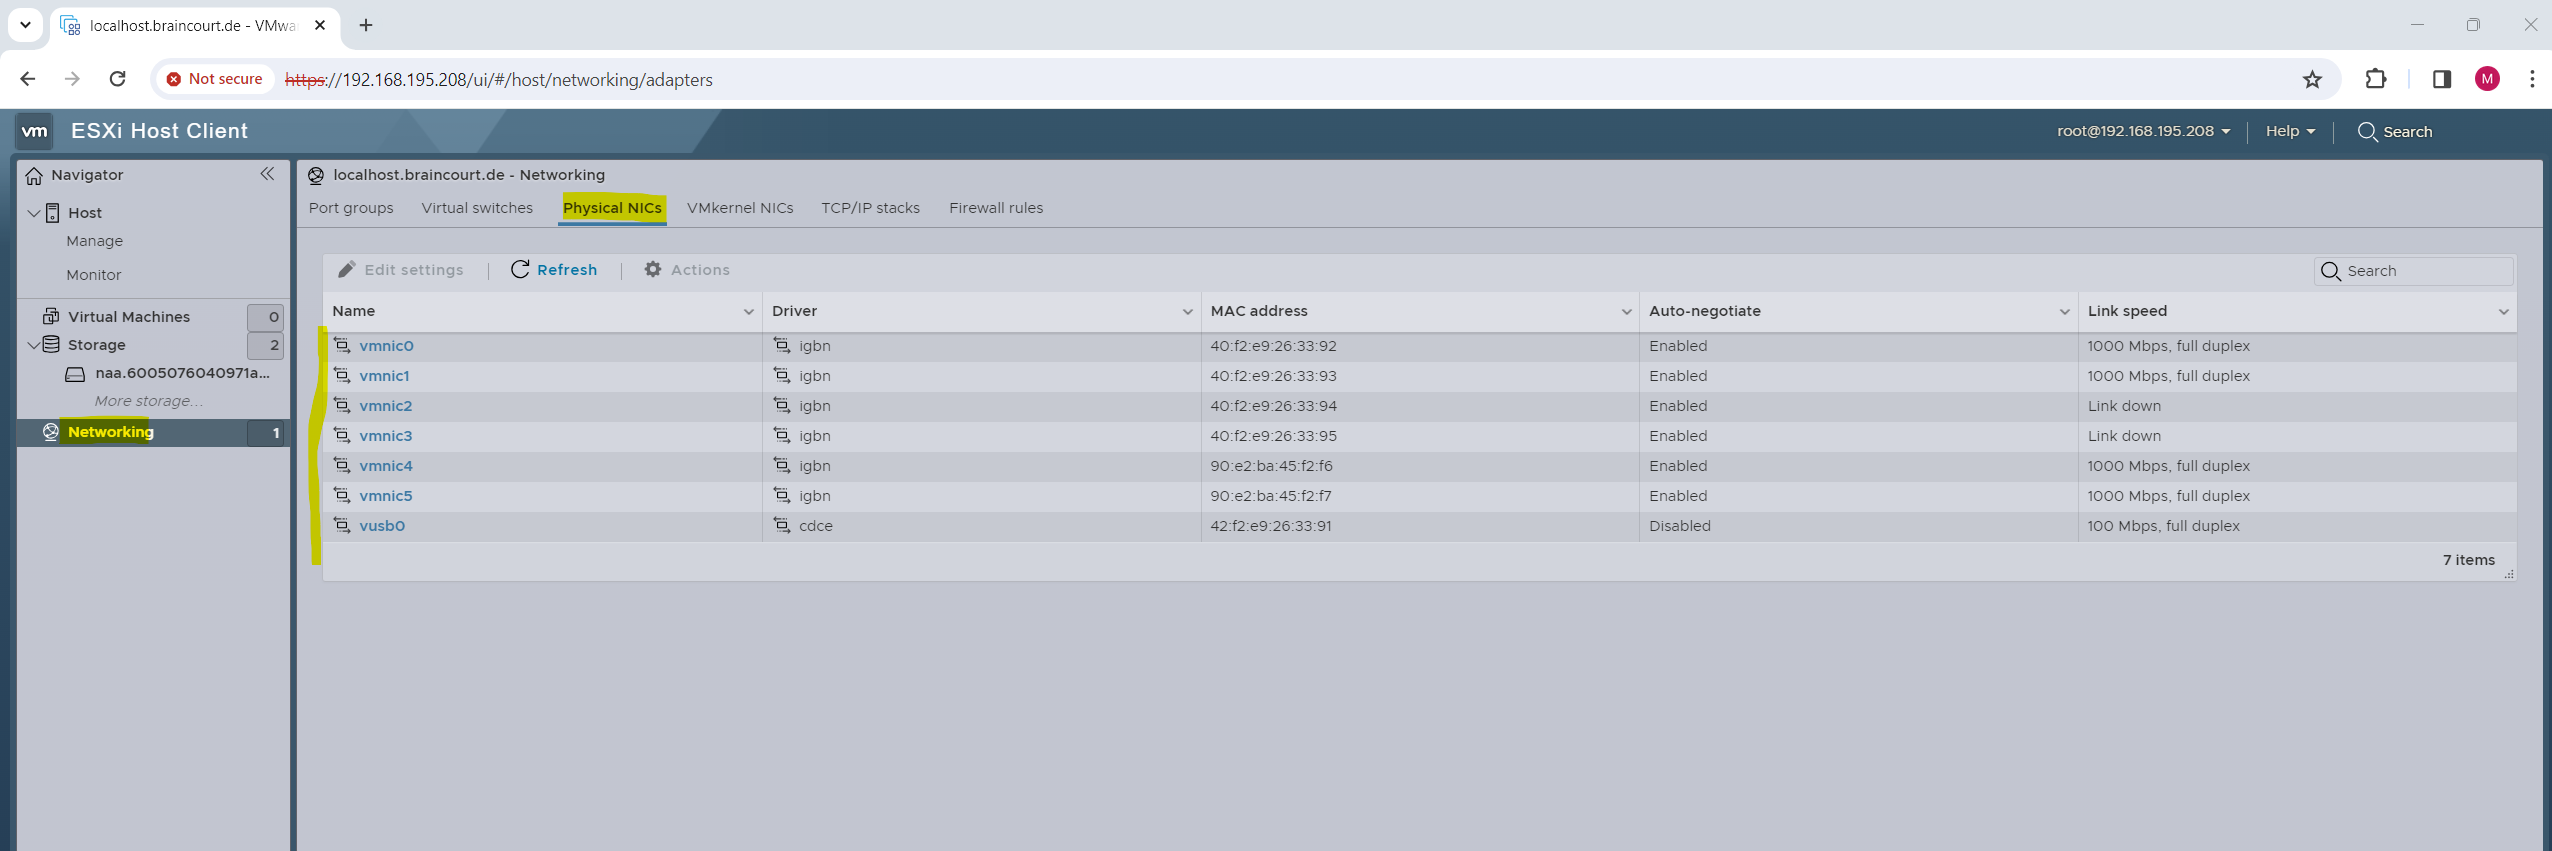
You will see all installed network interface cards (NICs) on the ESXi host by navigating to Networking -> Physical NICs. In my case two of the IBM x3650 M4 server’s NICs are not connected to a real physical switch and therefore listed below under Link speed showing the status Link down (vmnic2 & vmnic3).
vmnic -> Virtual-machine network interface card (physical network adapter (NIC) on a VMWare ESXi host)
vusb0 -> Ethernet over USB interface -> IMM remote management network card of the IBM x3650 M4 server.
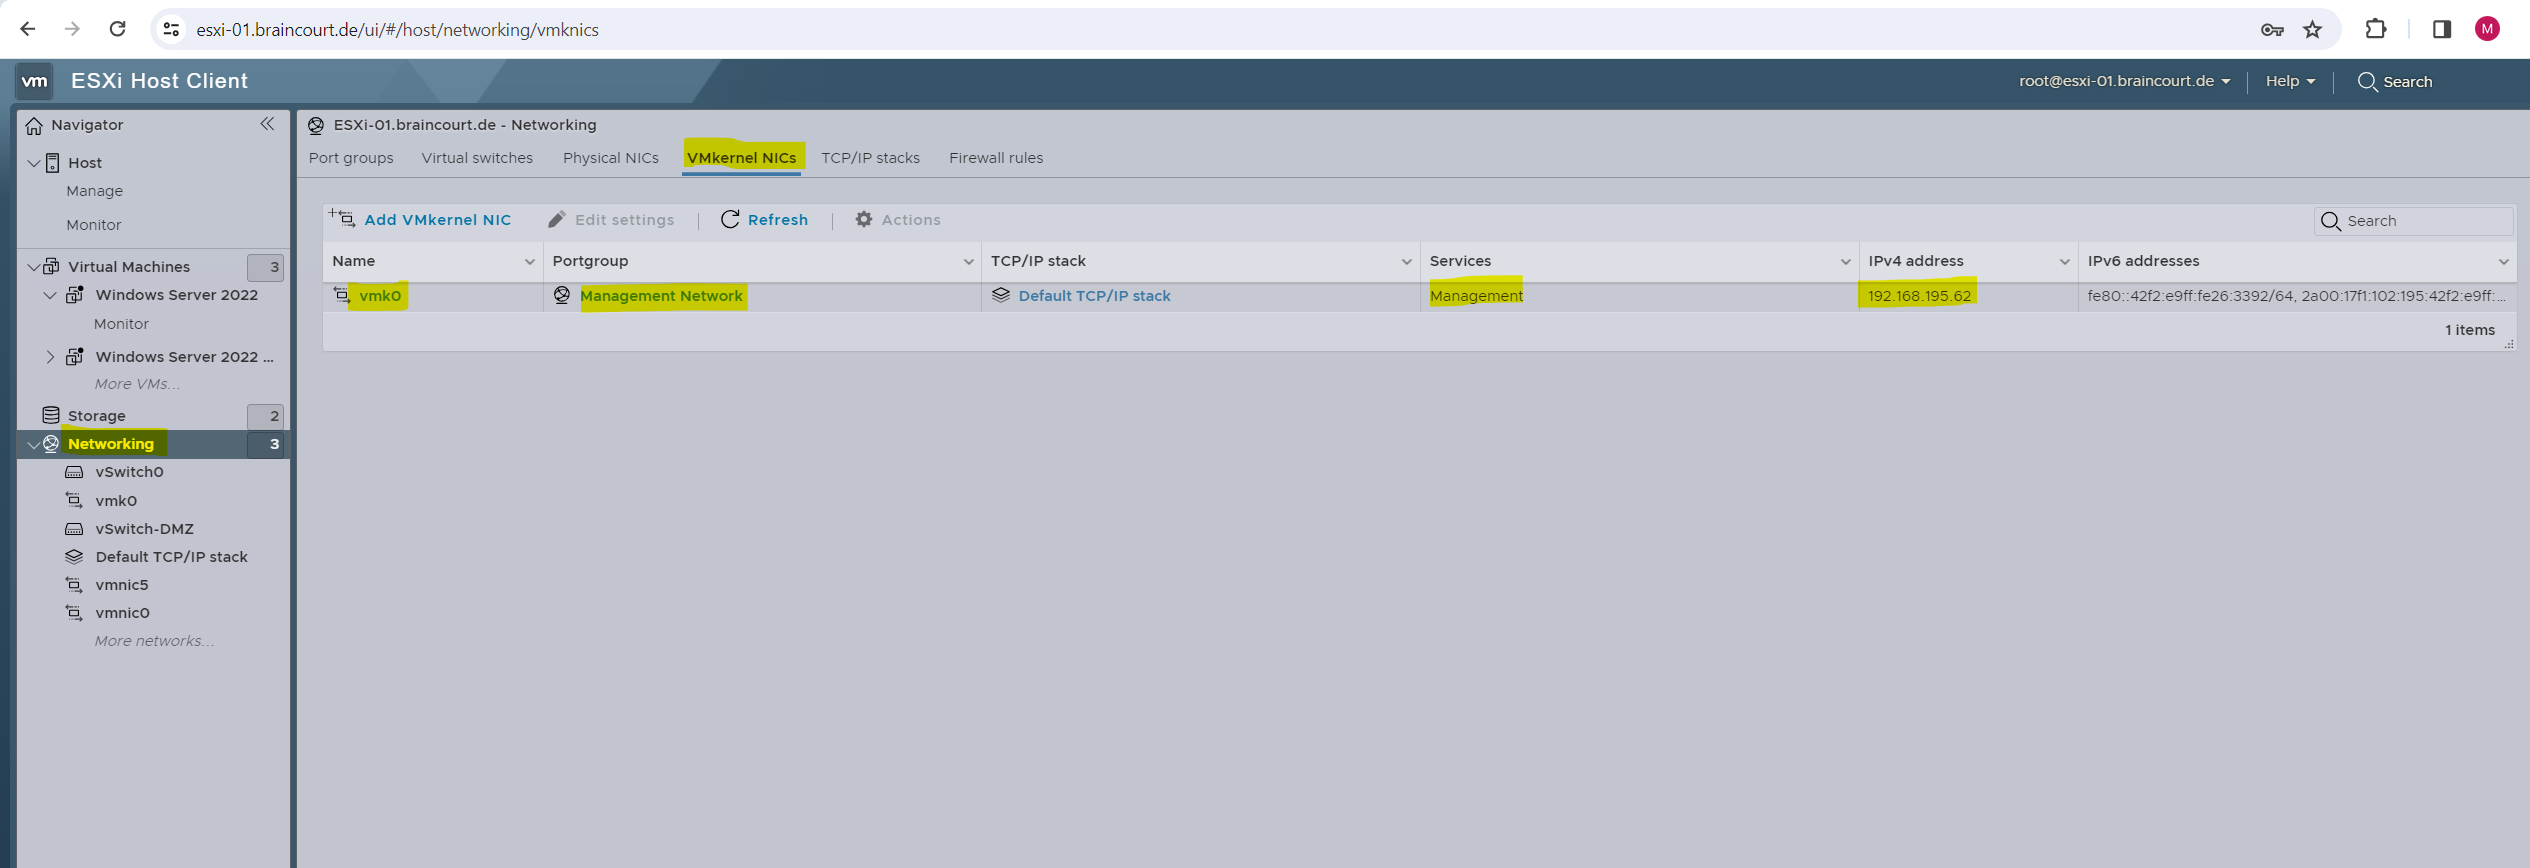
On the dashboard you will see that the first NIC, actually named vmnic0 under the Physical NICs menu above, is used by the ESXI host resp. its VMkernel (OS) itself and therefore now and here named vmk0.
Like virtual machines, also the ESXi host’s VMKernel operating system itself needs a dedicated interface to connect to the physical network for different purposes besides just to be able to manage the host remotely.
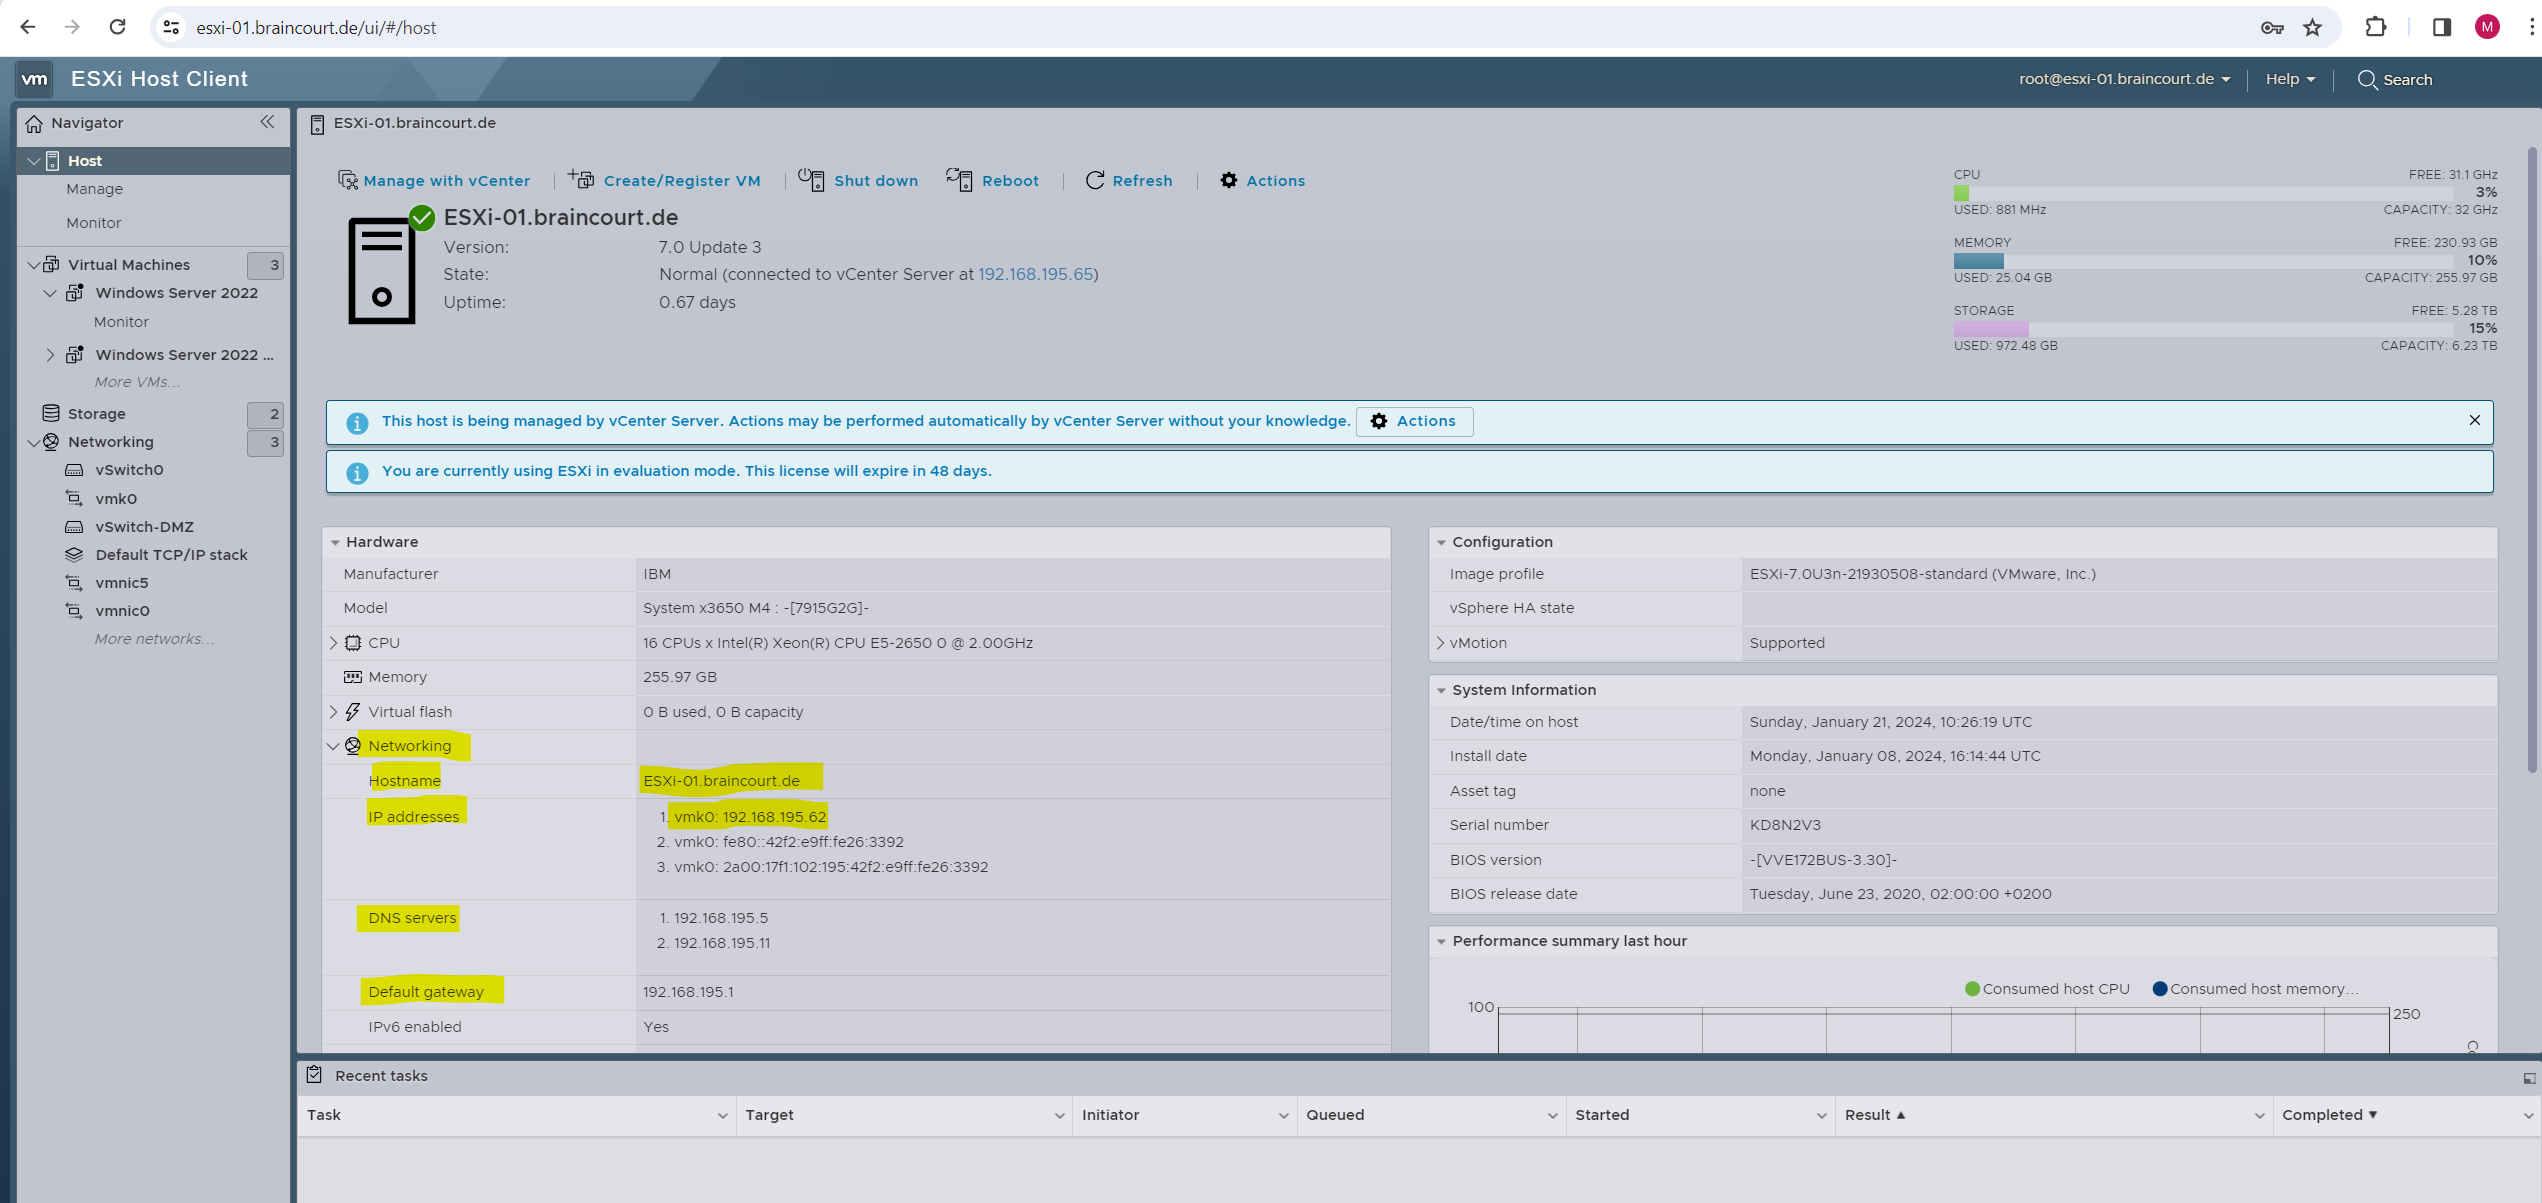
All dedicated NICs used for the management network you will see under Networking -> VMkernel NICs. You can also change here the NIC or add further NICs for the management network.
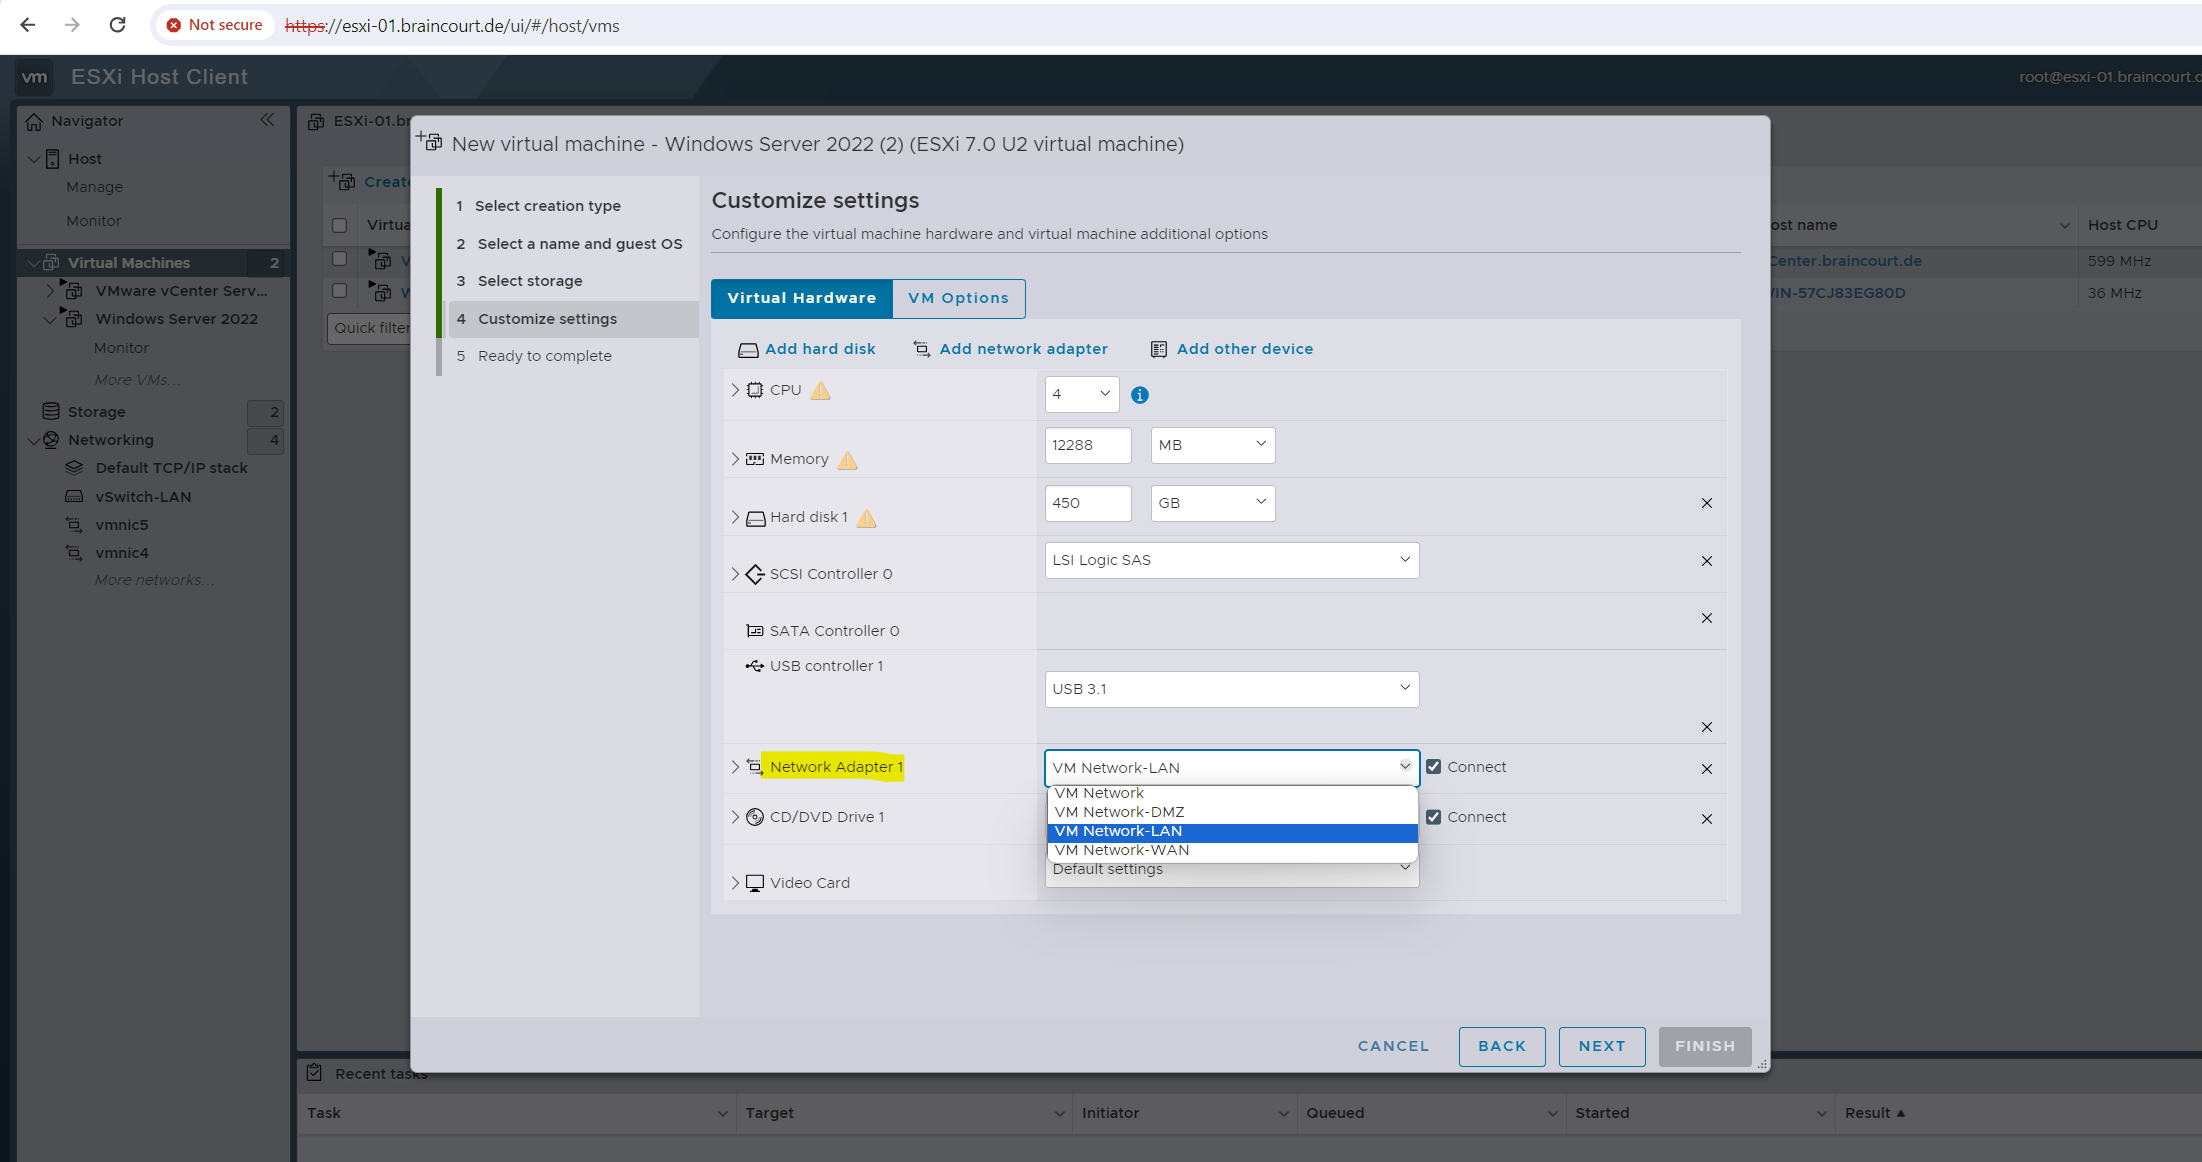
When we create a new virtual machine on the ESXi host, we also have to select a network adapter for the VM as shown on the figure below.
Virtual machines connect to a network similiar like physical real computers do. The difference is that virtual machines using instead of a real NIC a virtual network adapter which is connected to a virtual switch (vSwitch) instead of a real physical switch.
vSphere Standard Switch
It works much like a physical Ethernet switch. It detects which virtual machines are logically connected to each of its virtual ports and uses that information to forward traffic to the correct virtual machines. A vSphere standard switch can be connected to physical switches by using physical Ethernet adapters, also referred to as uplink adapters, to join virtual networks with physical networks. This type of connection is similar to connecting physical switches together to create a larger network. Even though a vSphere standard switch works much like a physical switch, it does not have some of the advanced functionality of a physical switch.
In contrast to Microsoft Hyper-V, the virtual network adapters of virtual machines on an ESXi host, are not connected directly to a virtual switch but instead to a so called port group.
A port group is another logical layer on top of a vSwitch which lets you define further network settings for the virtual ports on a vSwitch.
Finally the virtual network adapters from our virtual machines are connected to standard switches through these port groups.
Port groups define how a connection is made through the switch to the network. Typically, a single standard switch (vSwitch) is associated with one or more port groups. A port group specifies port configuration options such as bandwidth limitations and VLAN tagging policies for each member port.
Below the selection under Network Adapter 1 are not the vSwitches directly but instead the port groups where the vSwitches are associated to.

These virtual switches we can configure on the ESXi host under Networking -> Virtual Switches. When adding a new virtual switch, you also have to associate a physical NIC (vmnic) to by which the virtual switch is able to connect to your real physical network (hardware switches).
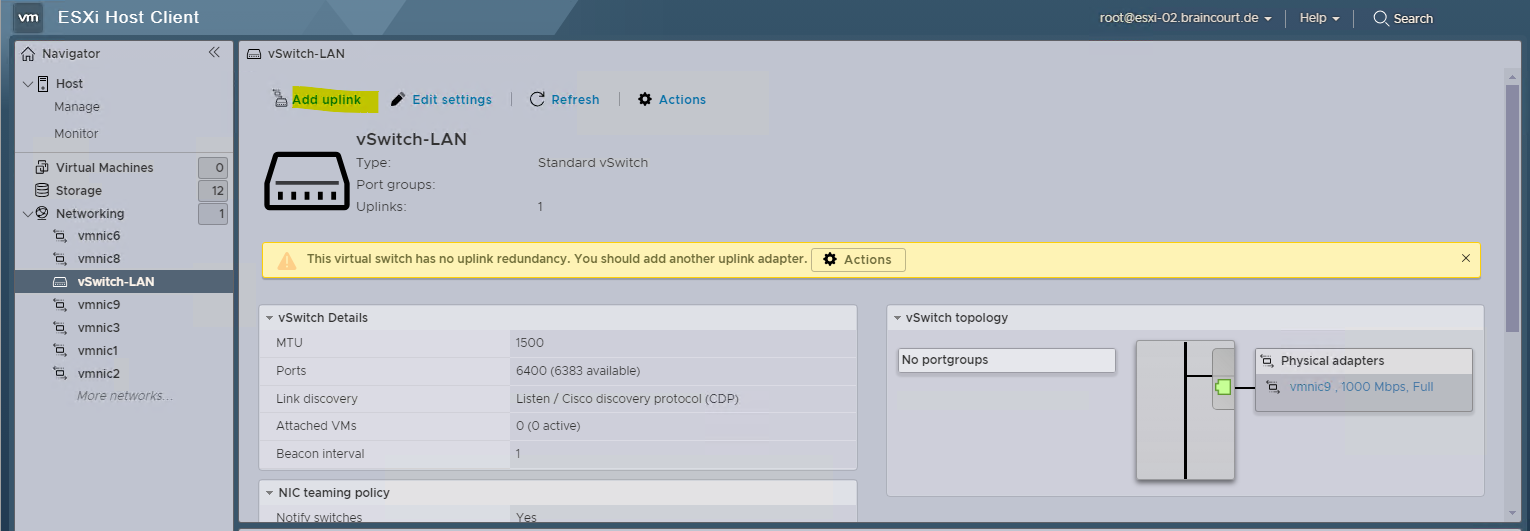
Virtual machines reach physical networks through uplink adapters. A vSphere Standard Switch (vSwitch) can transfer data to external networks only when one or more network adapters are attached to it. When two or more adapters are attached to a single standard switch (vSwitch), they are transparently teamed.
Best practices is to connect at least two NIC adapters to a single standard switch to provide NIC teaming and failover.


There is one more tab within Networking menu which is called TCP/IP stacks as shown below.
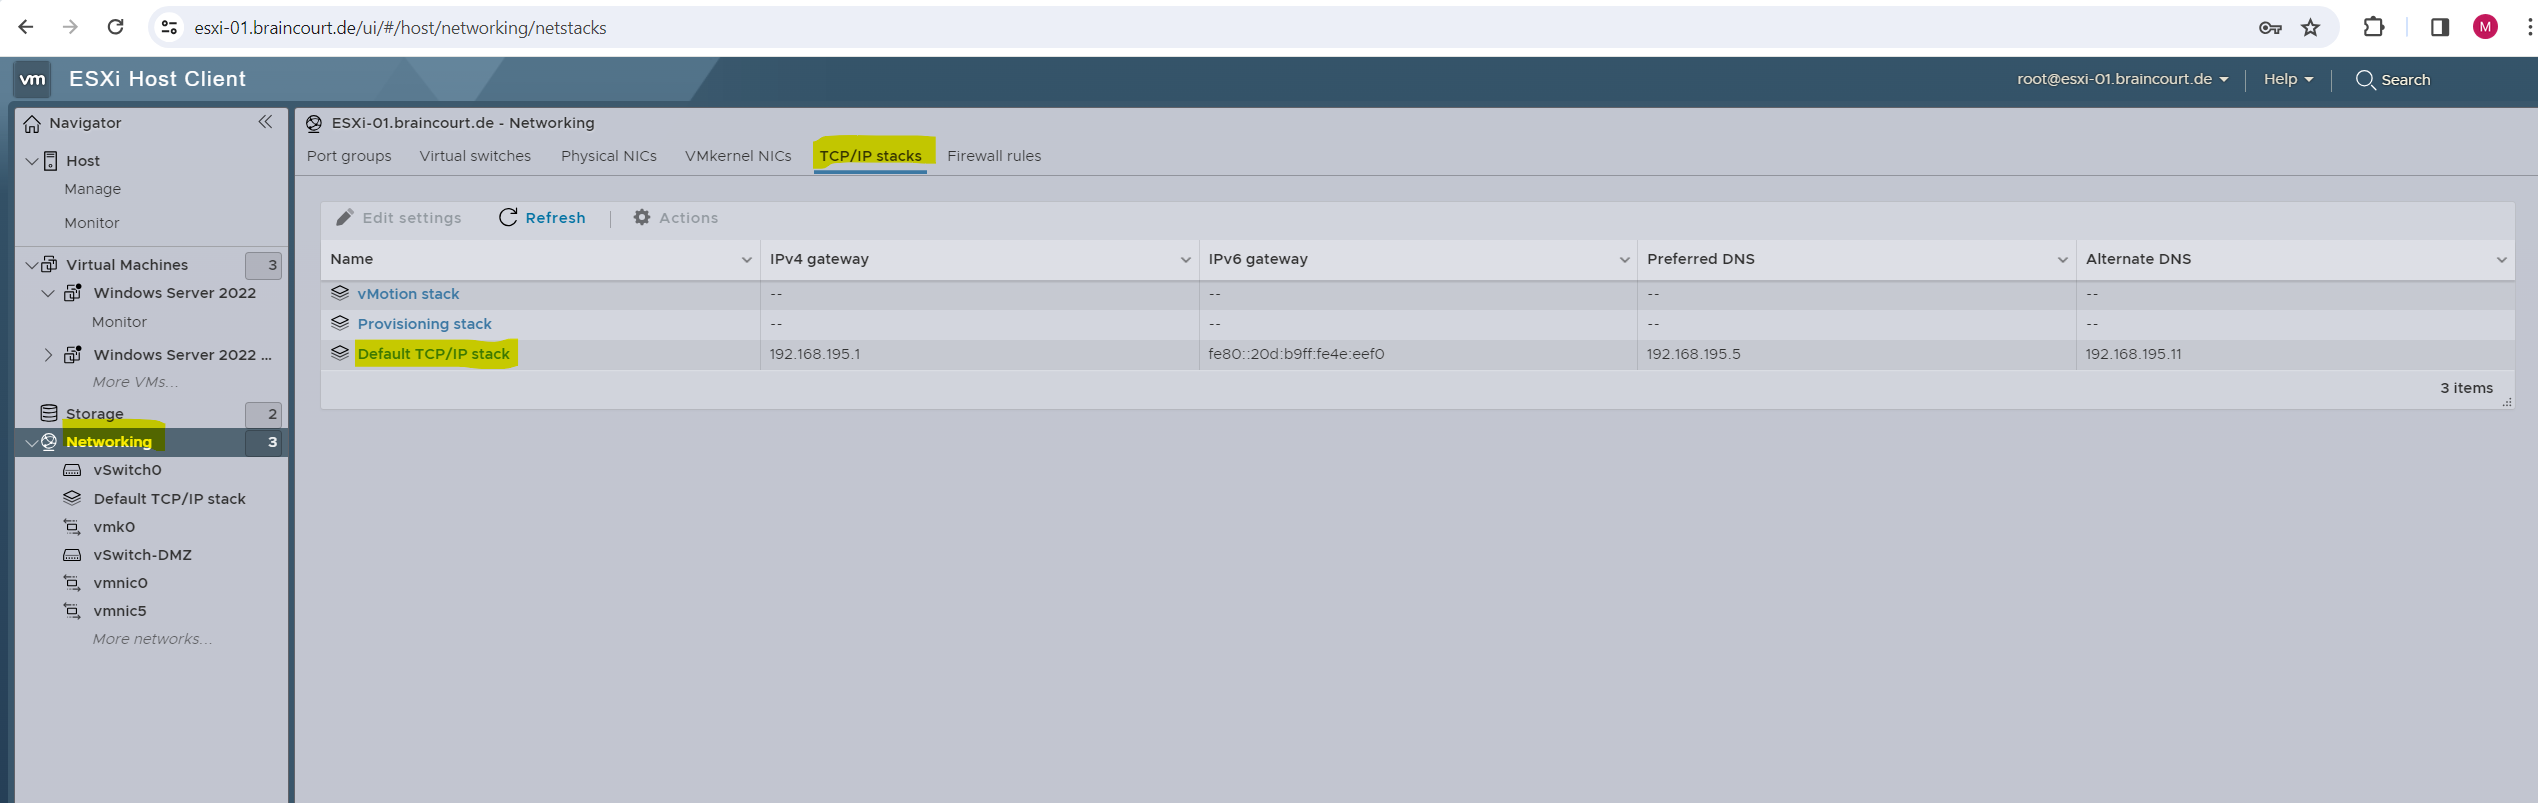
In a nuthshell, the TCP/IP stacks is the IP configuration of dedicated ESXi host network adpaters, which are exclusively used for management and backplane services of your vSphere environment, they are not used for network traffic of hosted virtual machines on the ESXi host.
vSphere 6.0 introduced a new TCP/IP stack architecture, which can use multiple TPC/IP stacks to manage different VMkernel network interfaces. With this architecture, you can configure traffic services such as vMotion, management, and fault tolerance on isolated TCP/IP stacks, which can use multiple default gateways.
For network traffic isolation and security requirements, deploy the different traffic services onto different network segments or VLANs. This prevents the different traffic services from traversing through the same default gateway.
Default TCP/IP Stack. Manage the host-related traffic services. This stack shares a single default gateway between all configured network services.
vMotion TCP/IP Stack. Isolates vMotion traffic onto its own stack. The use of this stack completely removes or deactivates vMotion traffic from the default TCP/IP stack.
Provisioning TCP/IP Stack. Isolates some virtual machine-related operations, such as cold migrations, cloning, snapshot, or NFC traffic.
More details about Networking you will find in the following PDF.
VMware Virtual Networking Concepts
https://www.vmware.com/content/dam/digitalmarketing/vmware/en/pdf/techpaper/virtual_networking_concepts.pdf
vSphere Standard Switch (vSS) vs. vSphere Distributed Switch (vDS)
There are two types of virtual switches in ESXi. The virtual Standard Switch (vSS) and the virtual Distributed Switch (vDS).
vNetwork Standard Switch (vSwitch, vSS)
The configuration of each standard switch resides on the specific ESXi/ESX host. The vSphere administrators have to manually maintain consistency of the vSwitch configuration across all ESXi/ESX hosts to ensure that they can perform operations such as vMotion.
vSwitches are configured on each ESXi/ESX host.
vNetwork Distributed Switch (dvSwitch, vDS)
The configuration of vDS is centralized to vCenter Server. The ESXi hosts that belong to a dvSwitch do not need further configuration to be compliant.
Distributed switches provide similar functionality to vSwitches. dvPortgroups is a set of dvPorts. The vDS equivalent of portgroups is a set of ports in a vSwitch. Configuration is inherited from dvSwitch to dvPortgroup, just as from vSwitch to Portgroup.
Virtual machines, Service Console interfaces (vswif), and VMKernel interfaces can be connected to dvPortgroups just as they could be connected to portgroups in vSwitches.
Administrative rights are required to create these virtual adapters on each ESXi/ESX host dvSwitch in vCenter Server:
- Service Console and VMKernel interfaces
- Physical NICs and their assignment to dvSwitch Uplink groups
Source: https://kb.vmware.com/s/article/1010555
More about the vSphere Distributed Switch Architecture you will find in the following article by VMWare.
vSphere Distributed Switch Architecture
https://docs.vmware.com/en/VMware-vSphere/7.0/com.vmware.vsphere.networking.doc/GUID-B15C6A13-797E-4BCB-B9D9-5CBC5A60C3A6.html
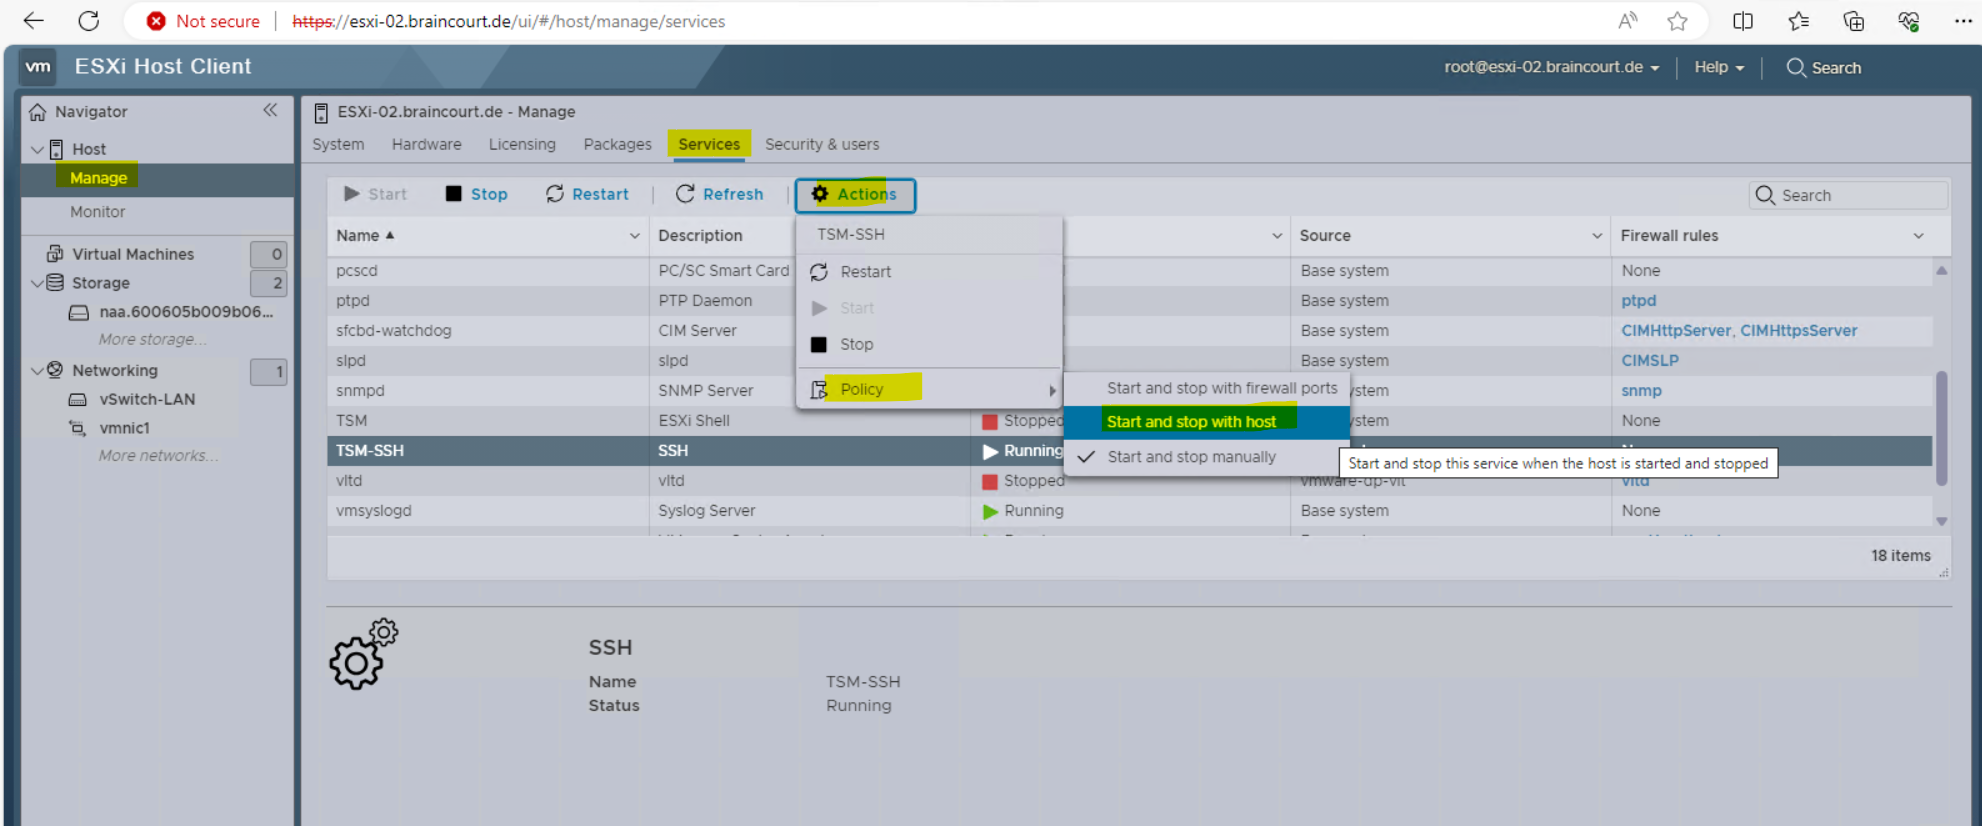
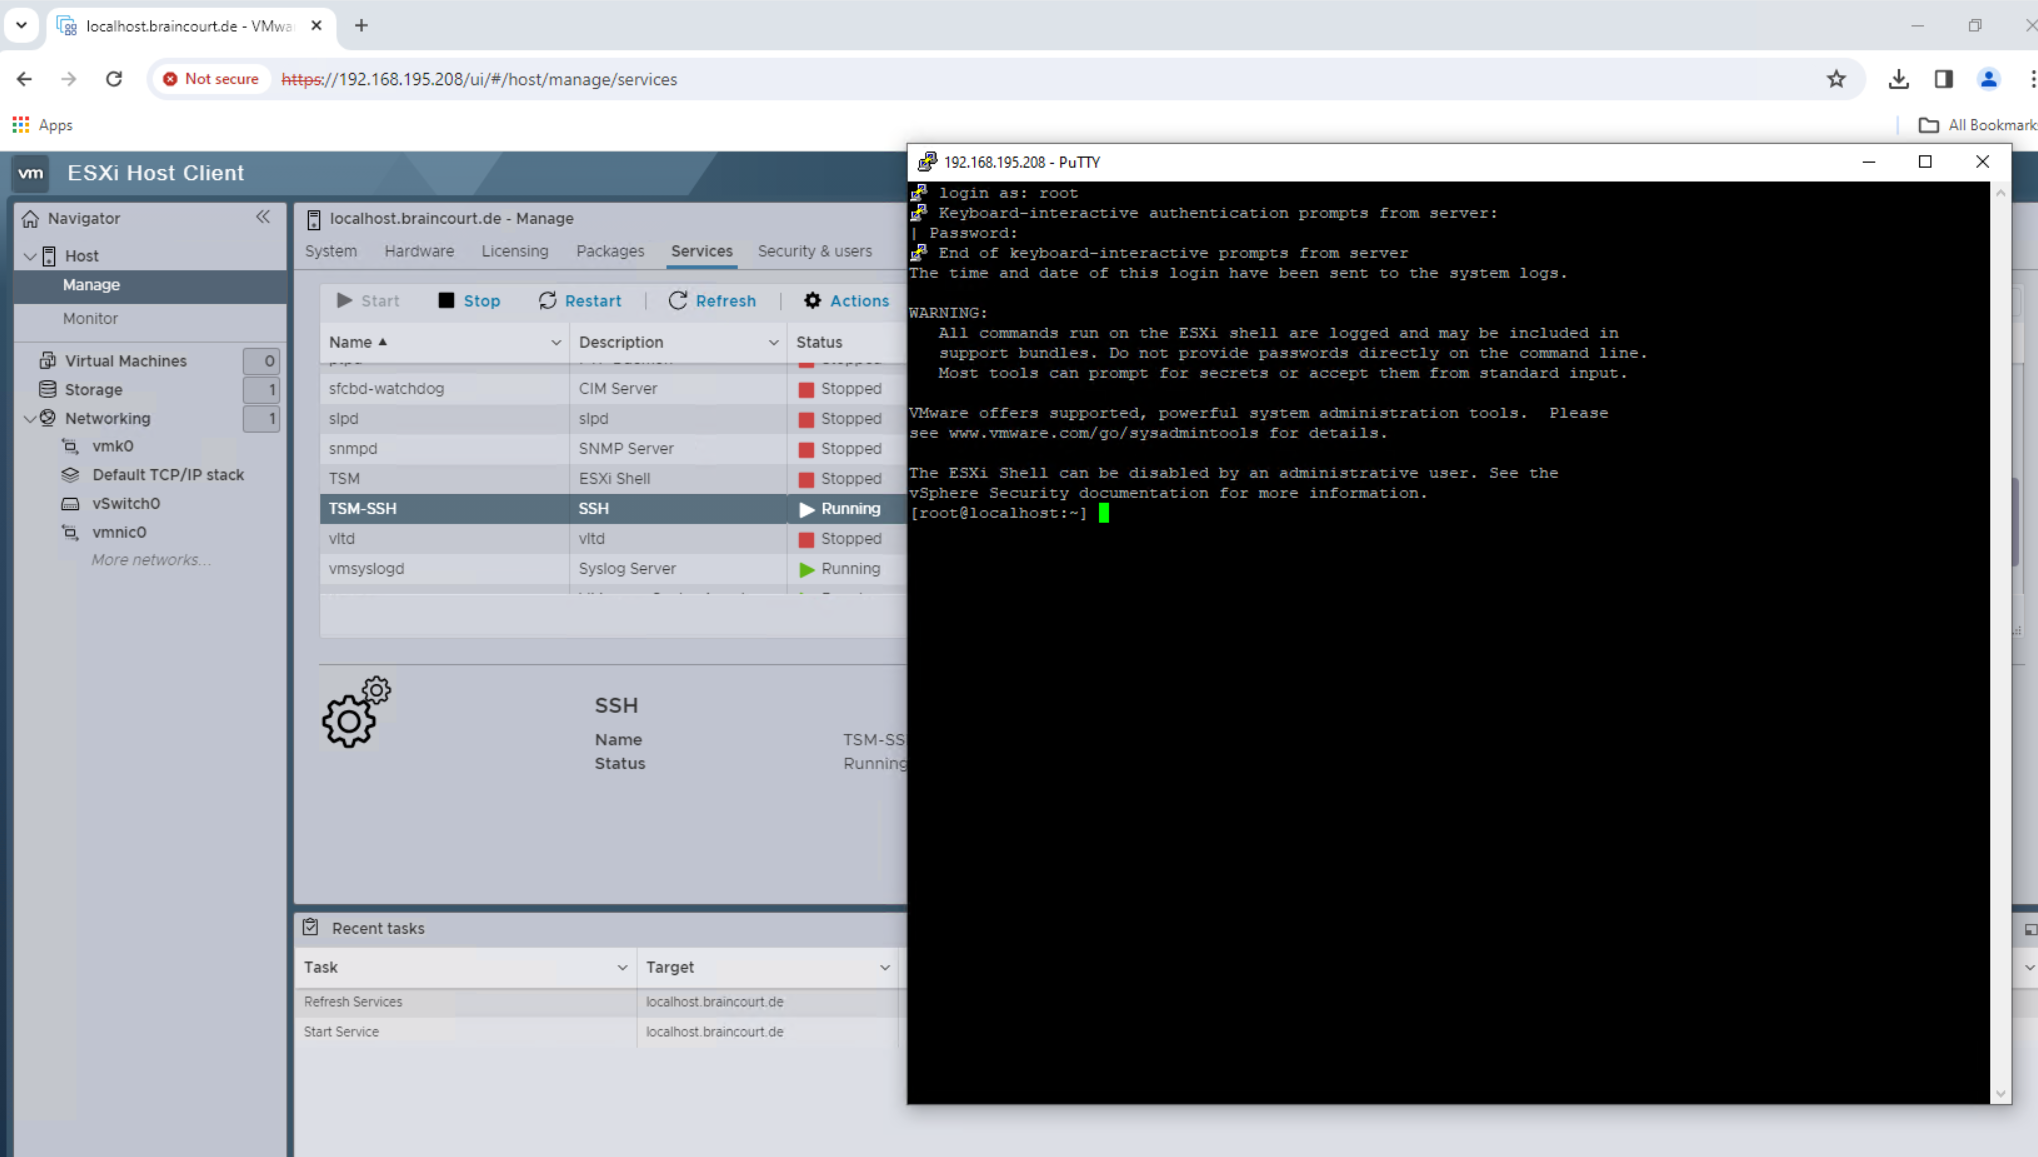
Enable SSH on the ESXi Host
Log into the ESXi Web UI and in the left menu click on Manage. Click the Services tab at the top. Locate the SSH service, listed as TSM-SSH under Services.
Right click, and click start as shown below. After completing these steps, SSH access should be enabled on the ESXi host, and you should be able to connect to it using an SSH client such as PuTTY.
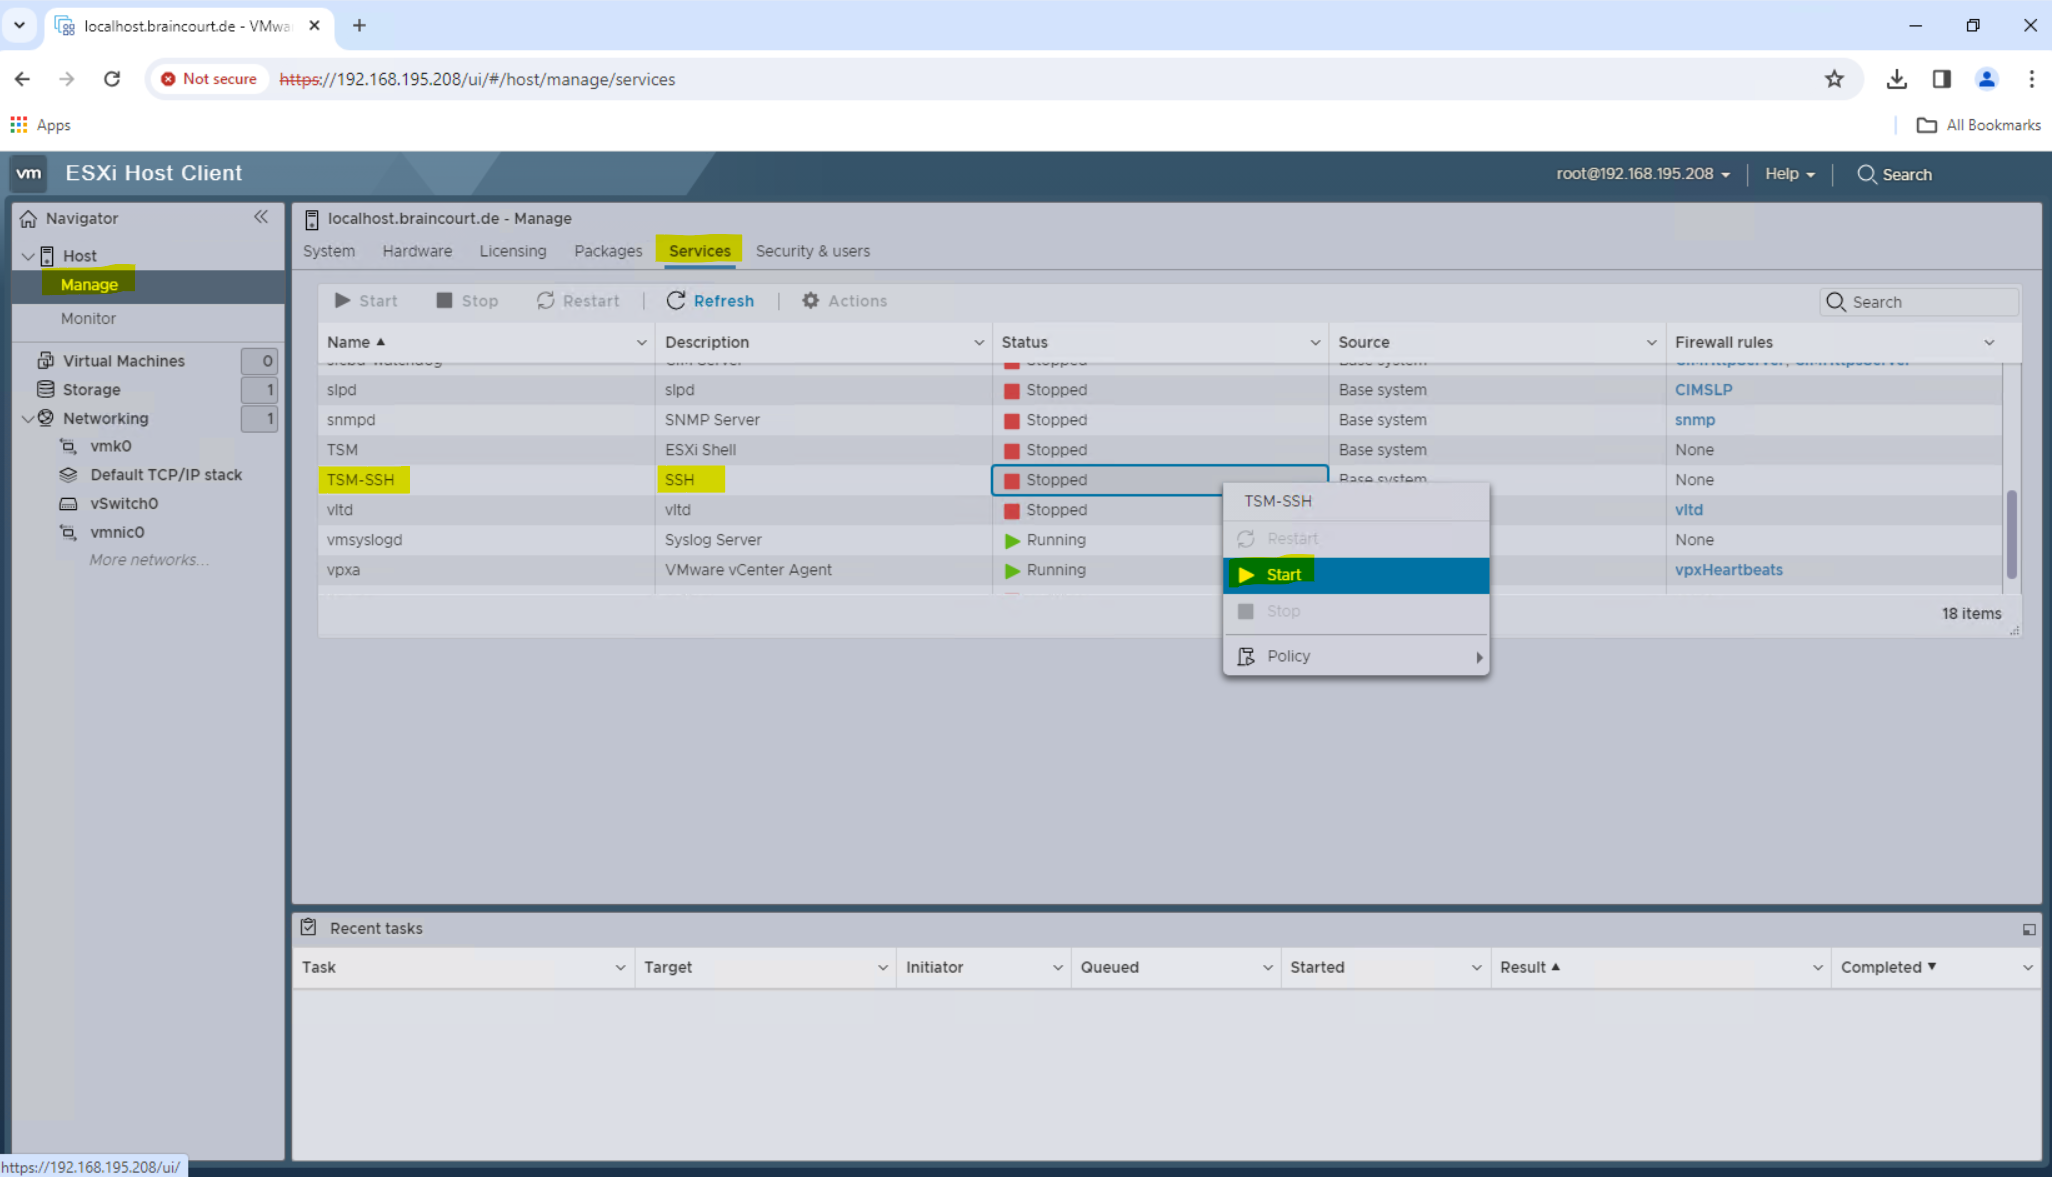
You can also adjust the policy to start the service automatically when the host is booting up the next time.
I am now able to connect to the ESXi host by using SSH.
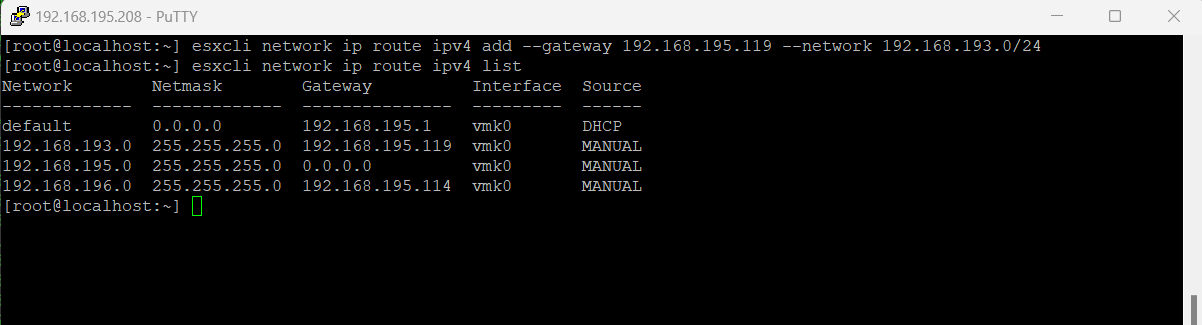
Adding static route on the ESXi host
In order to configure the ESXi host also from remote using a VPN connection, I will first have add a static route on the ESXi host for my remote VPN network.
We can use here the new ESXCLI tool to add a static route to the ESXi host.
To add a new static route e.g. to the 192.168.193.0 network with a /24 bit subnet mask (255.255.255.0) where the next hop (router) IP address is 192.168.193.119, run the following command:
esxcli network ip route ipv4 add --gateway 192.168.195.119 --network 192.168.193.0/24
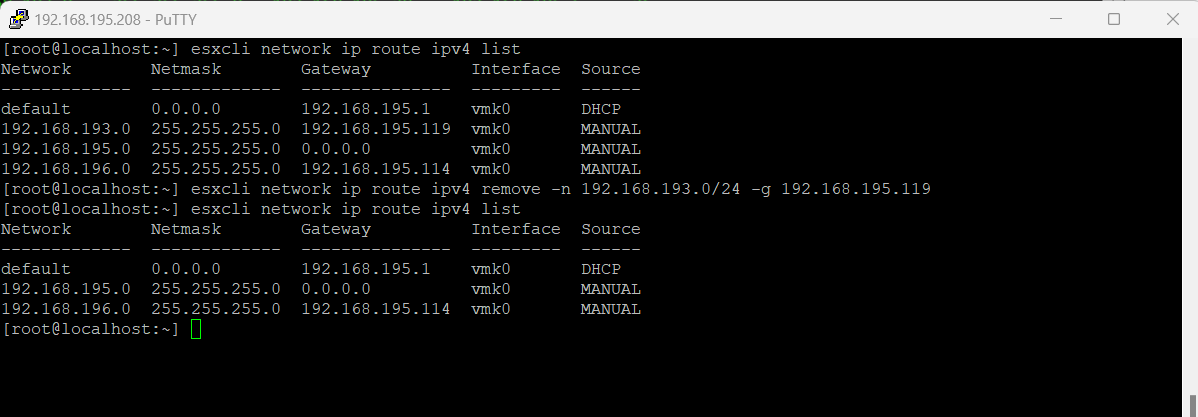
To list all routes on the ESXi host run the following command:
esxcli network ip route ipv4 list
To remove a static route, run the command: (Where 192.168.193.0/24 is the network and 192.168.195.119 the next hop (router)
esxcli network ip route ipv4 remove -n 192.168.193.0/24 -g 192.168.195.119
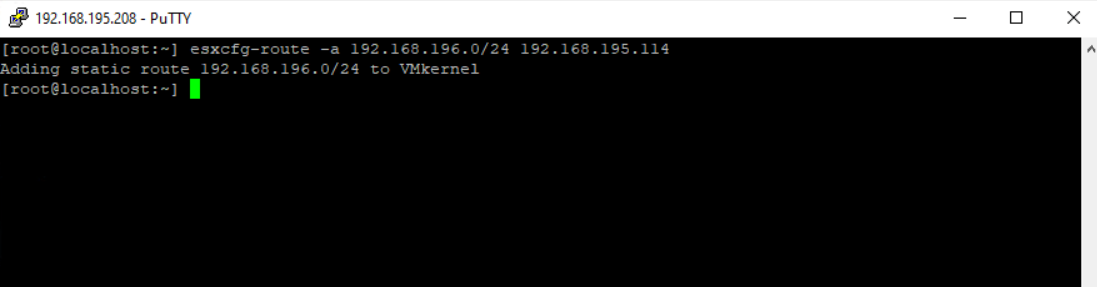
You can add a static route also by using the esxcfg-route or vicfg-route command as shown below. Please note that esxcfg- and vicfg- commands are deprecated and whenever possible you should migrate to and use ESXCLI commands.
esxcfg-route -a 192.168.196.0/24 192.168.195.114
vicfg-route -a 192.168.196.0/24 192.168.195.114-a parameter -> Add route to the VMkernel, requires network and gateway IP address
Rename a VMware ESXi Host by using the command line
If the ESXi host is part of a cluster, first enter the Maintenance mode to remove it from the cluster.
If the ESXi host is managed by vCenter Server, disconnect and remove the ESXi host from the vCenter Server.
esxcli system hostname set --host=hostname
esxcli system hostname set --fqdn=fqdn
Join the ESX host to vCenter Server and clusters again.
More about using the command line you will find in the following article.
Getting Started with vSphere Command-Line Interfaces
https://developer.vmware.com/docs/1092/cli_jumpstart.3.2.html
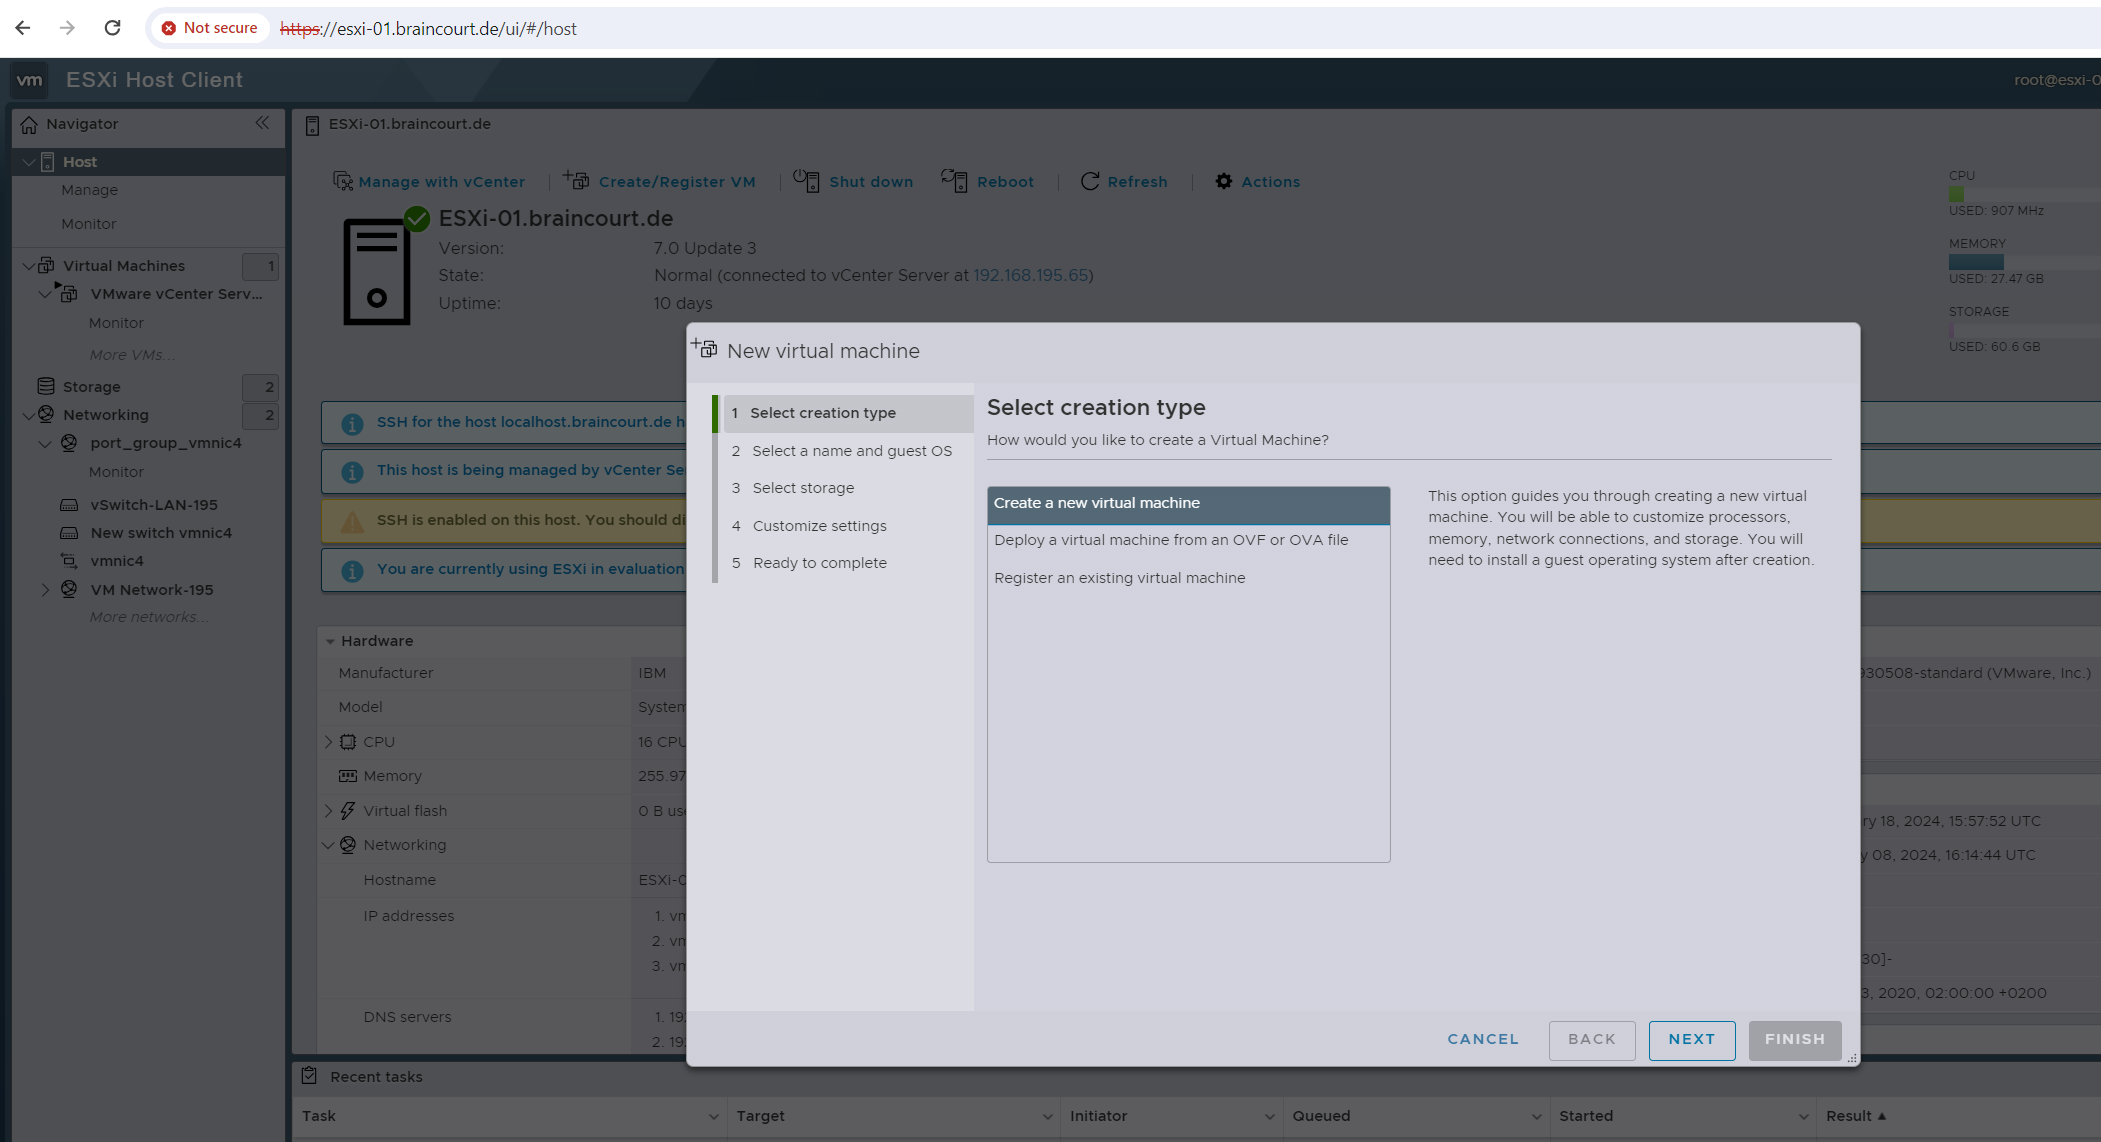
Create a new VM on the ESXi Host
Below I will go through each step to create a new virtual machine on our ESXi host.
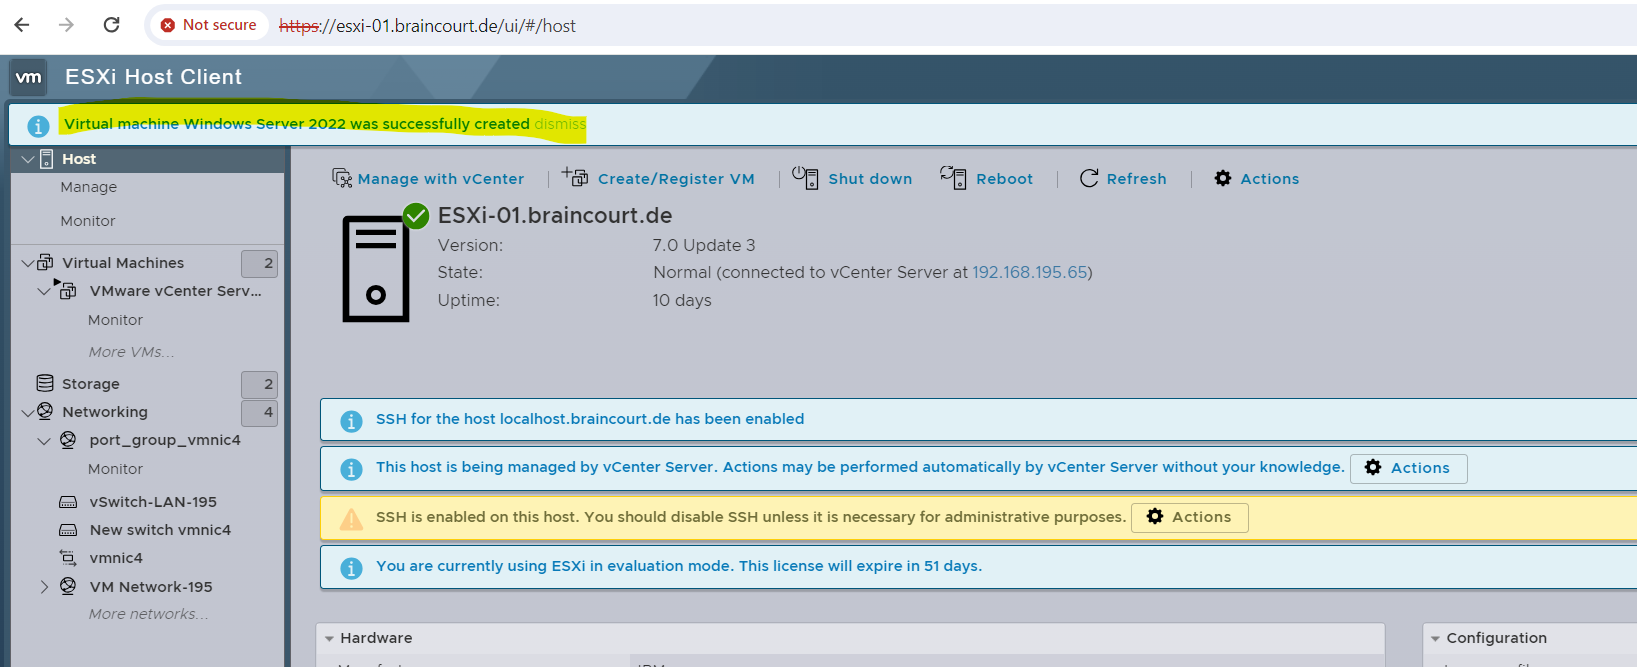
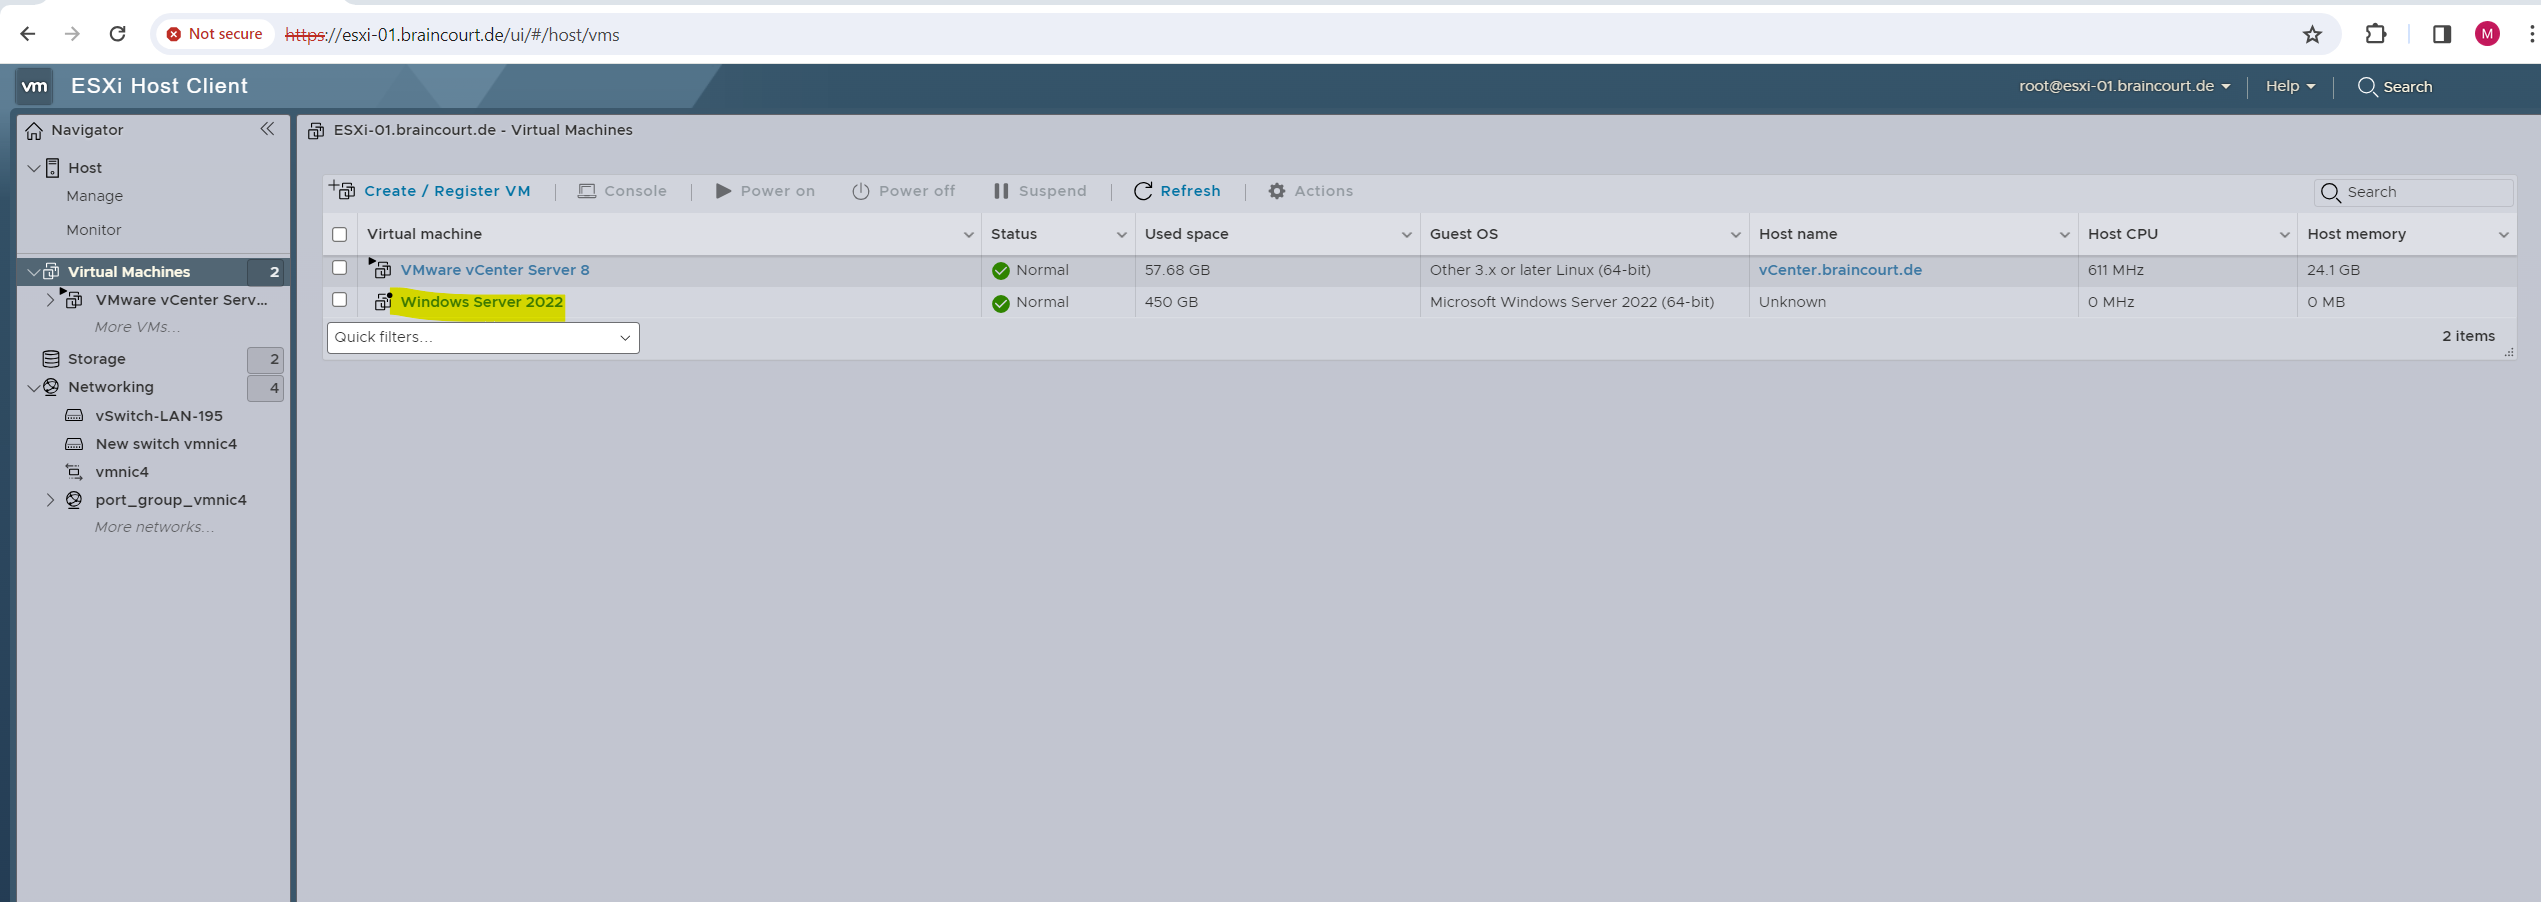
On the host’s dashboard or virtual machine menu we can click on Create/Register VM to create a new VM on this host.
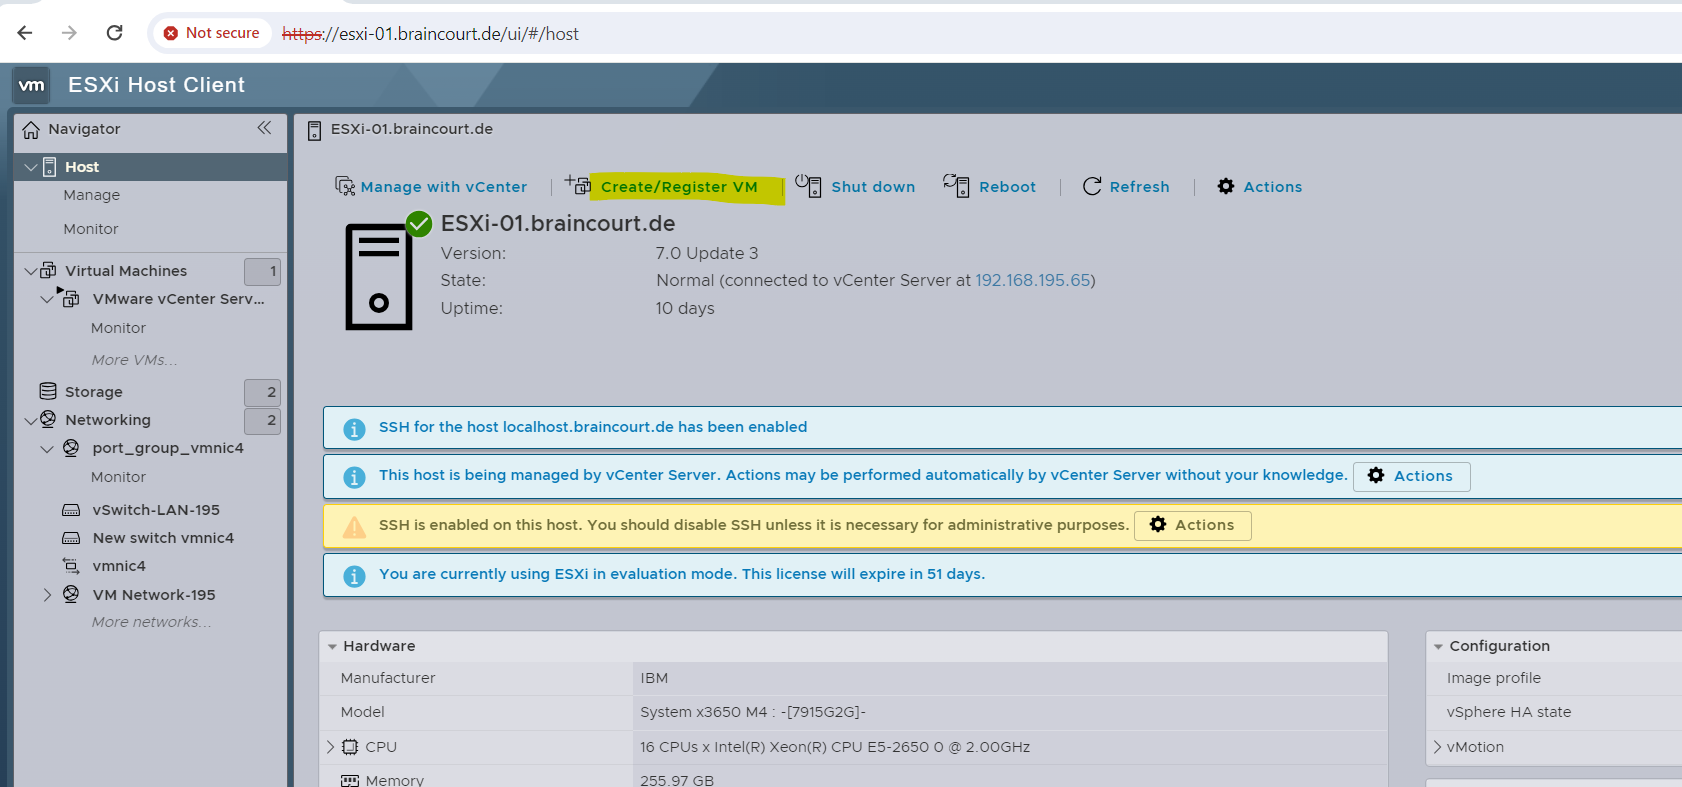
I want to create a new VM.
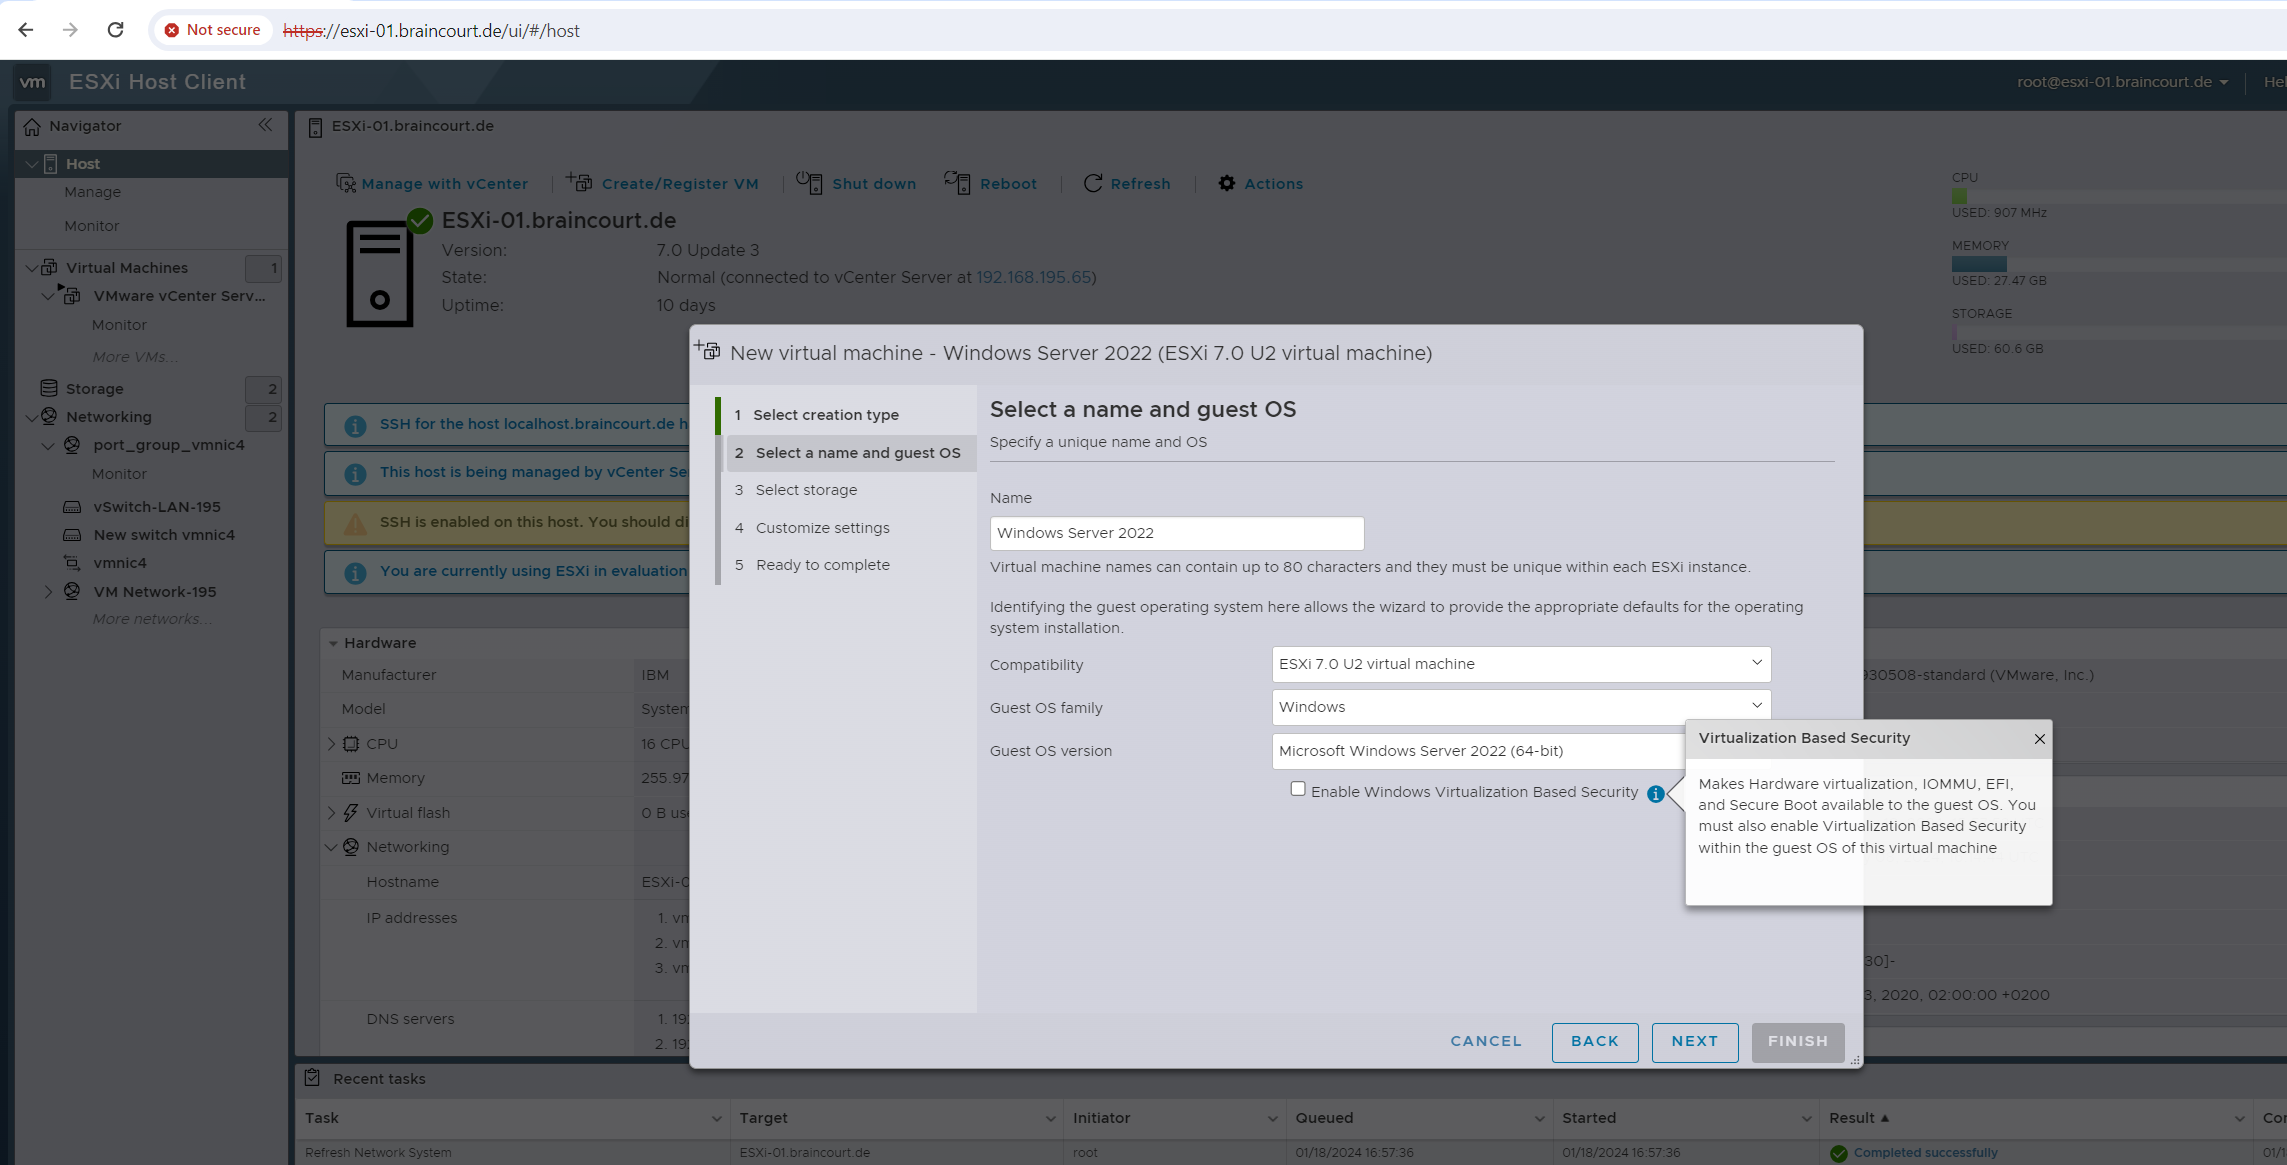
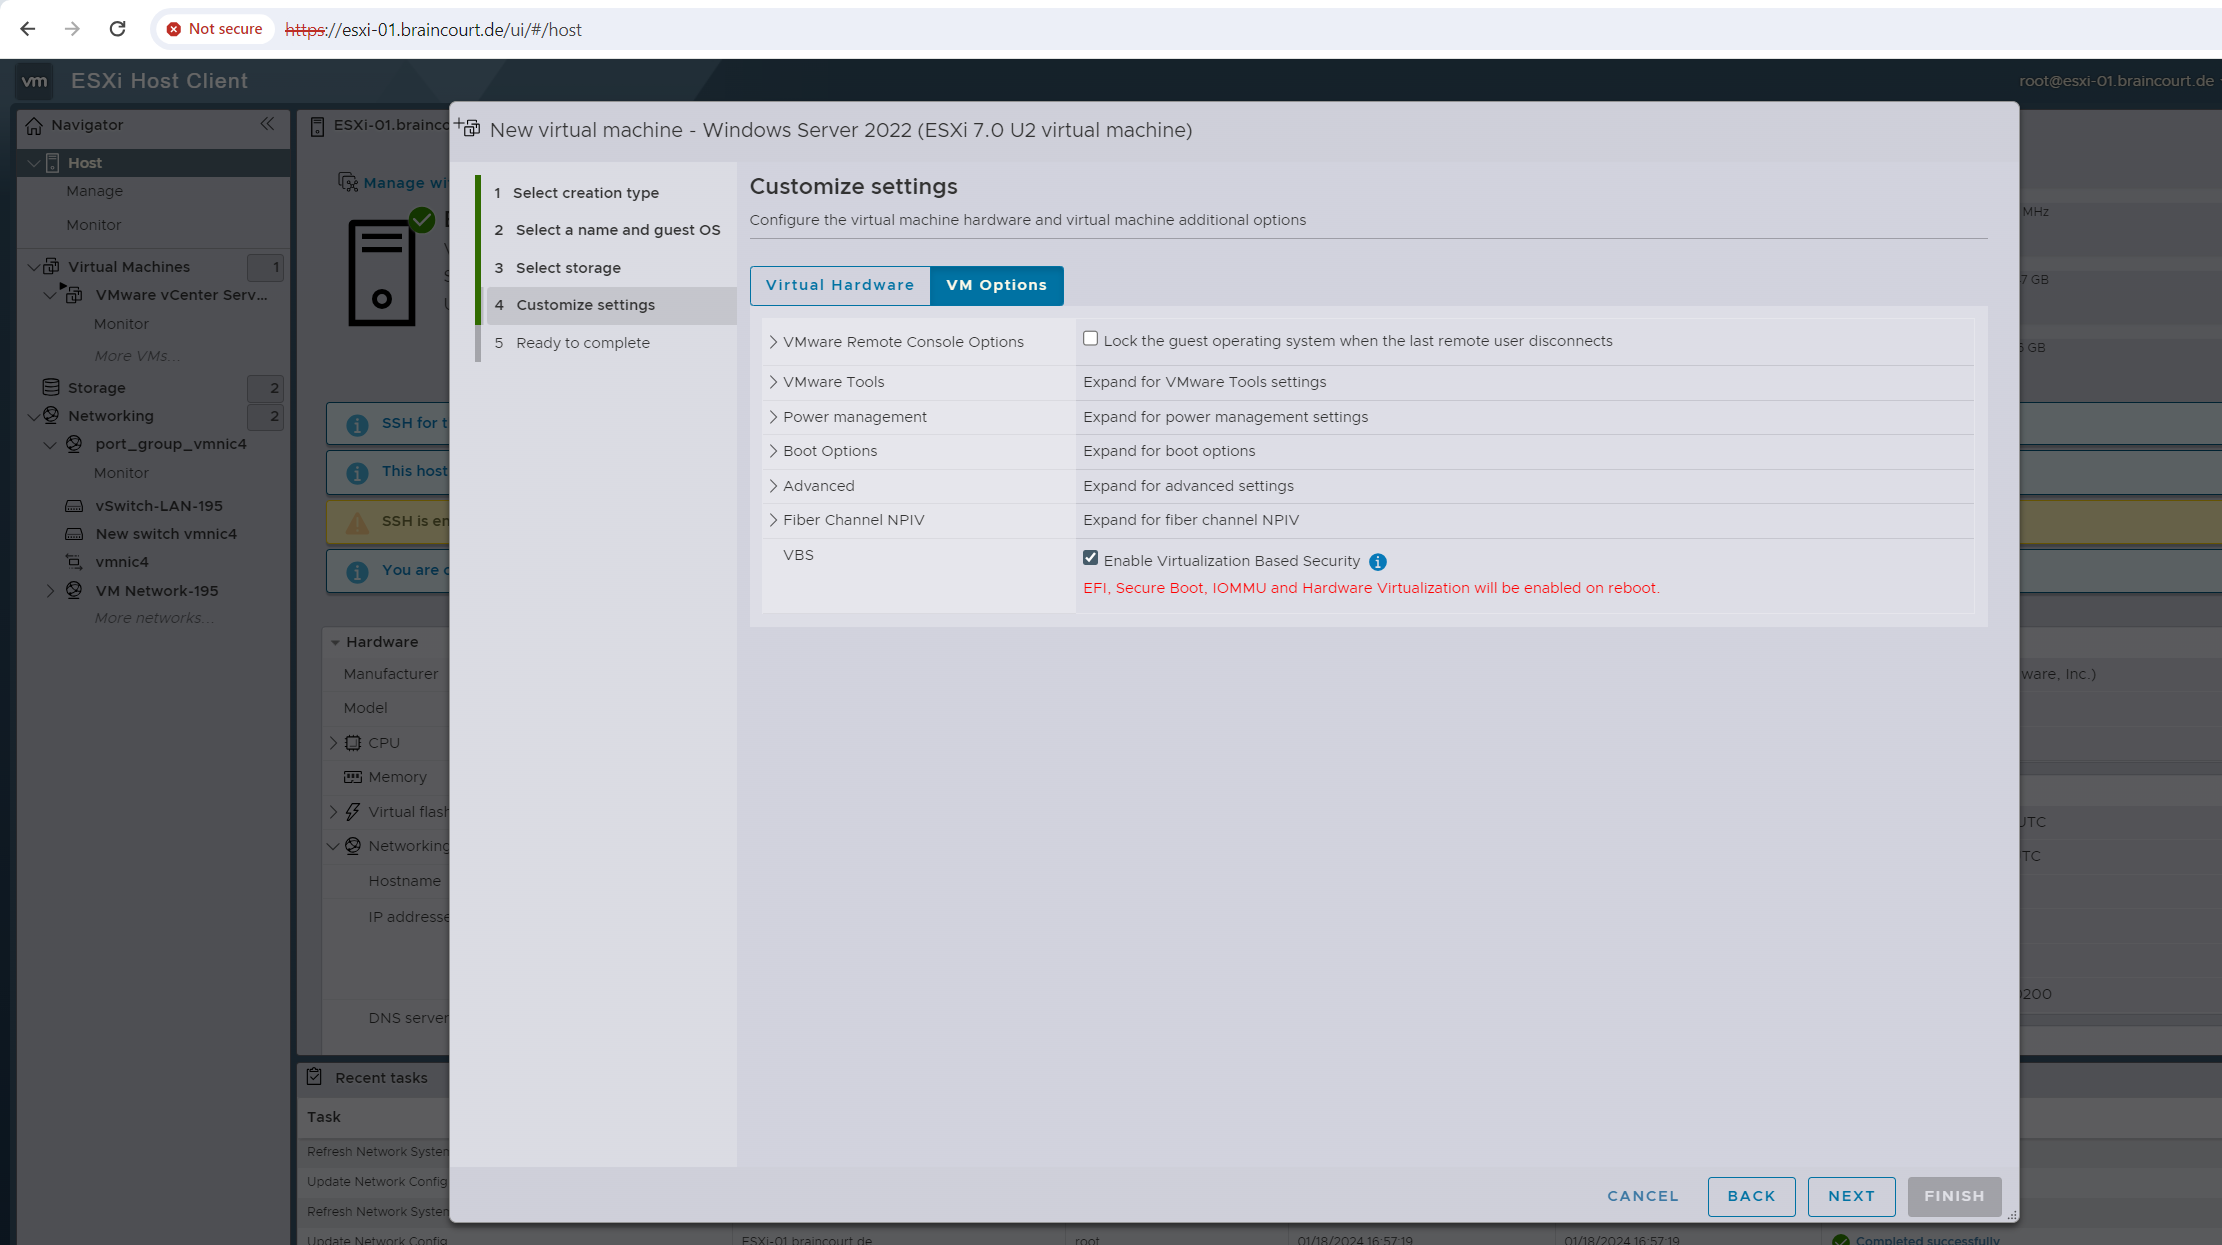
Starting with vSphere 6.7, you can enable Microsoft virtualization-based security (VBS) on supported Windows guest operating systems.
Microsoft VBS, a feature of Windows 10 and Windows Server 2016 operating systems, uses hardware and software virtualization to enhance system security by creating an isolated, hypervisor-restricted, specialized subsystem.
VBS permits you to use the following Windows security features to harden your system and isolate key system and user secrets from being compromised:
Credential Guard: Aims to isolate and harden key system and user secrets against compromise.
Device Guard: Provides a set of features designed to work together to prevent and eliminate malware from running on a Windows system.
Configurable Code Integrity: Ensures that only trusted code runs from the boot loader onwards.
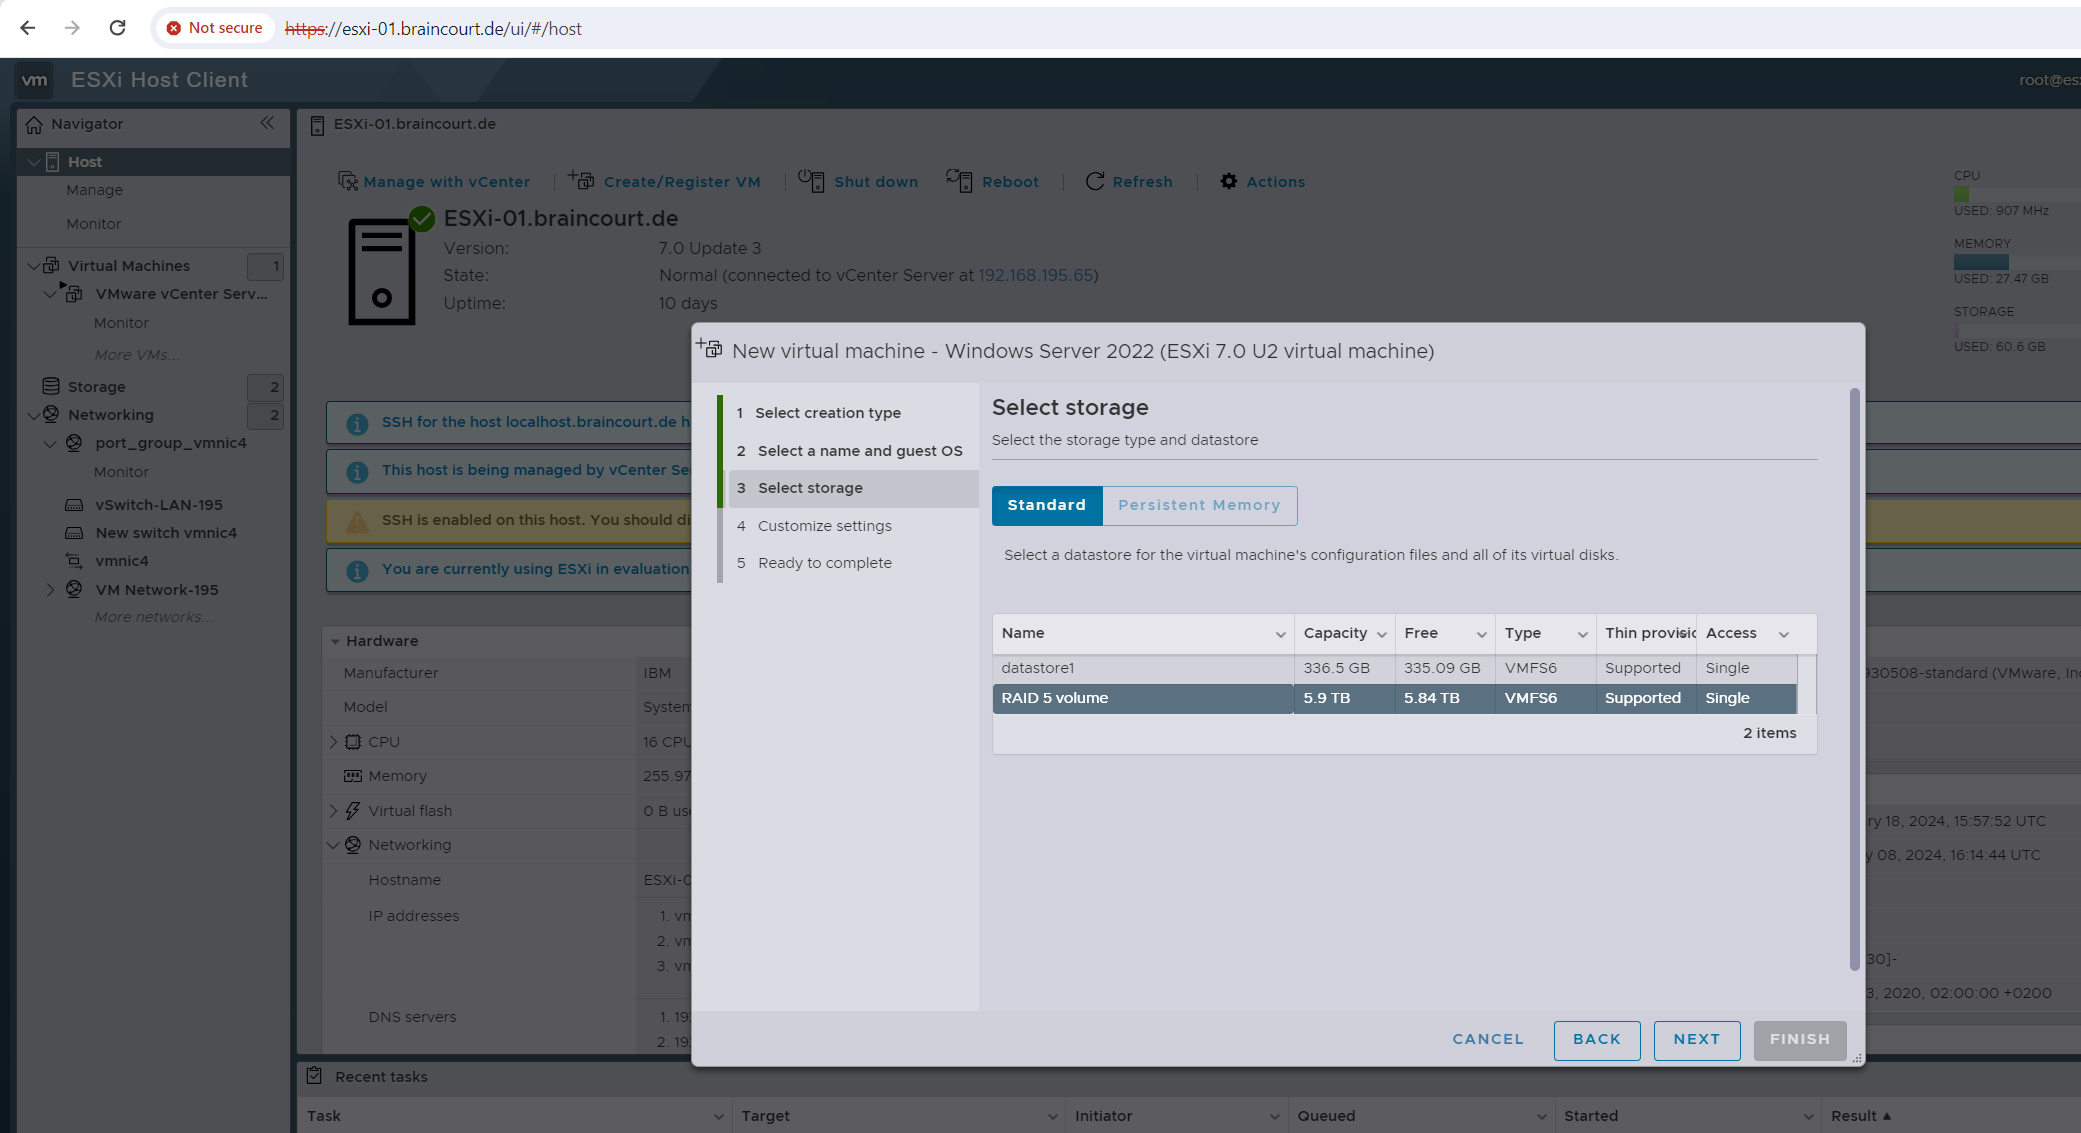
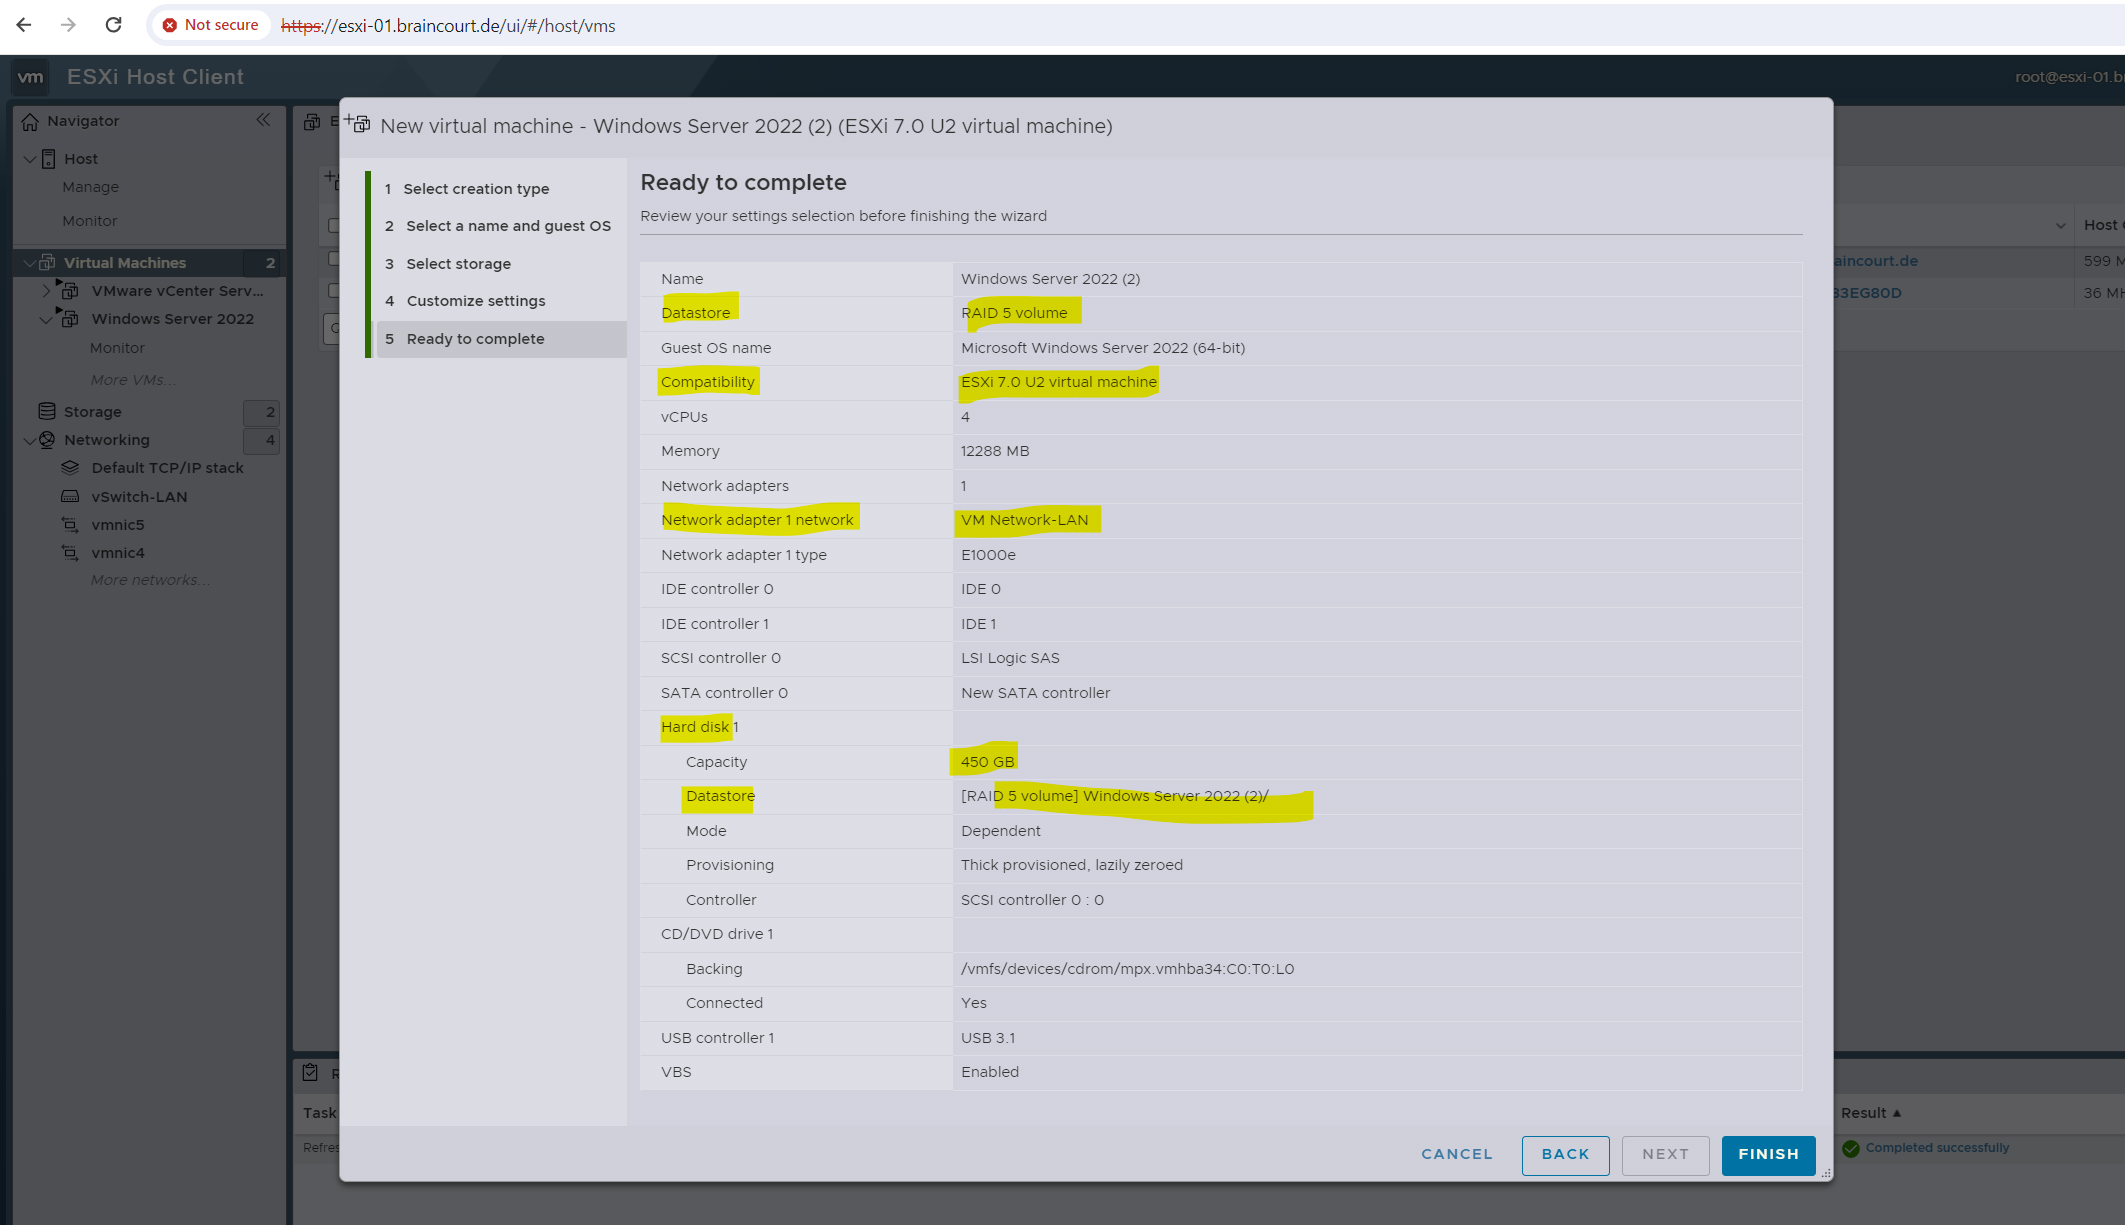
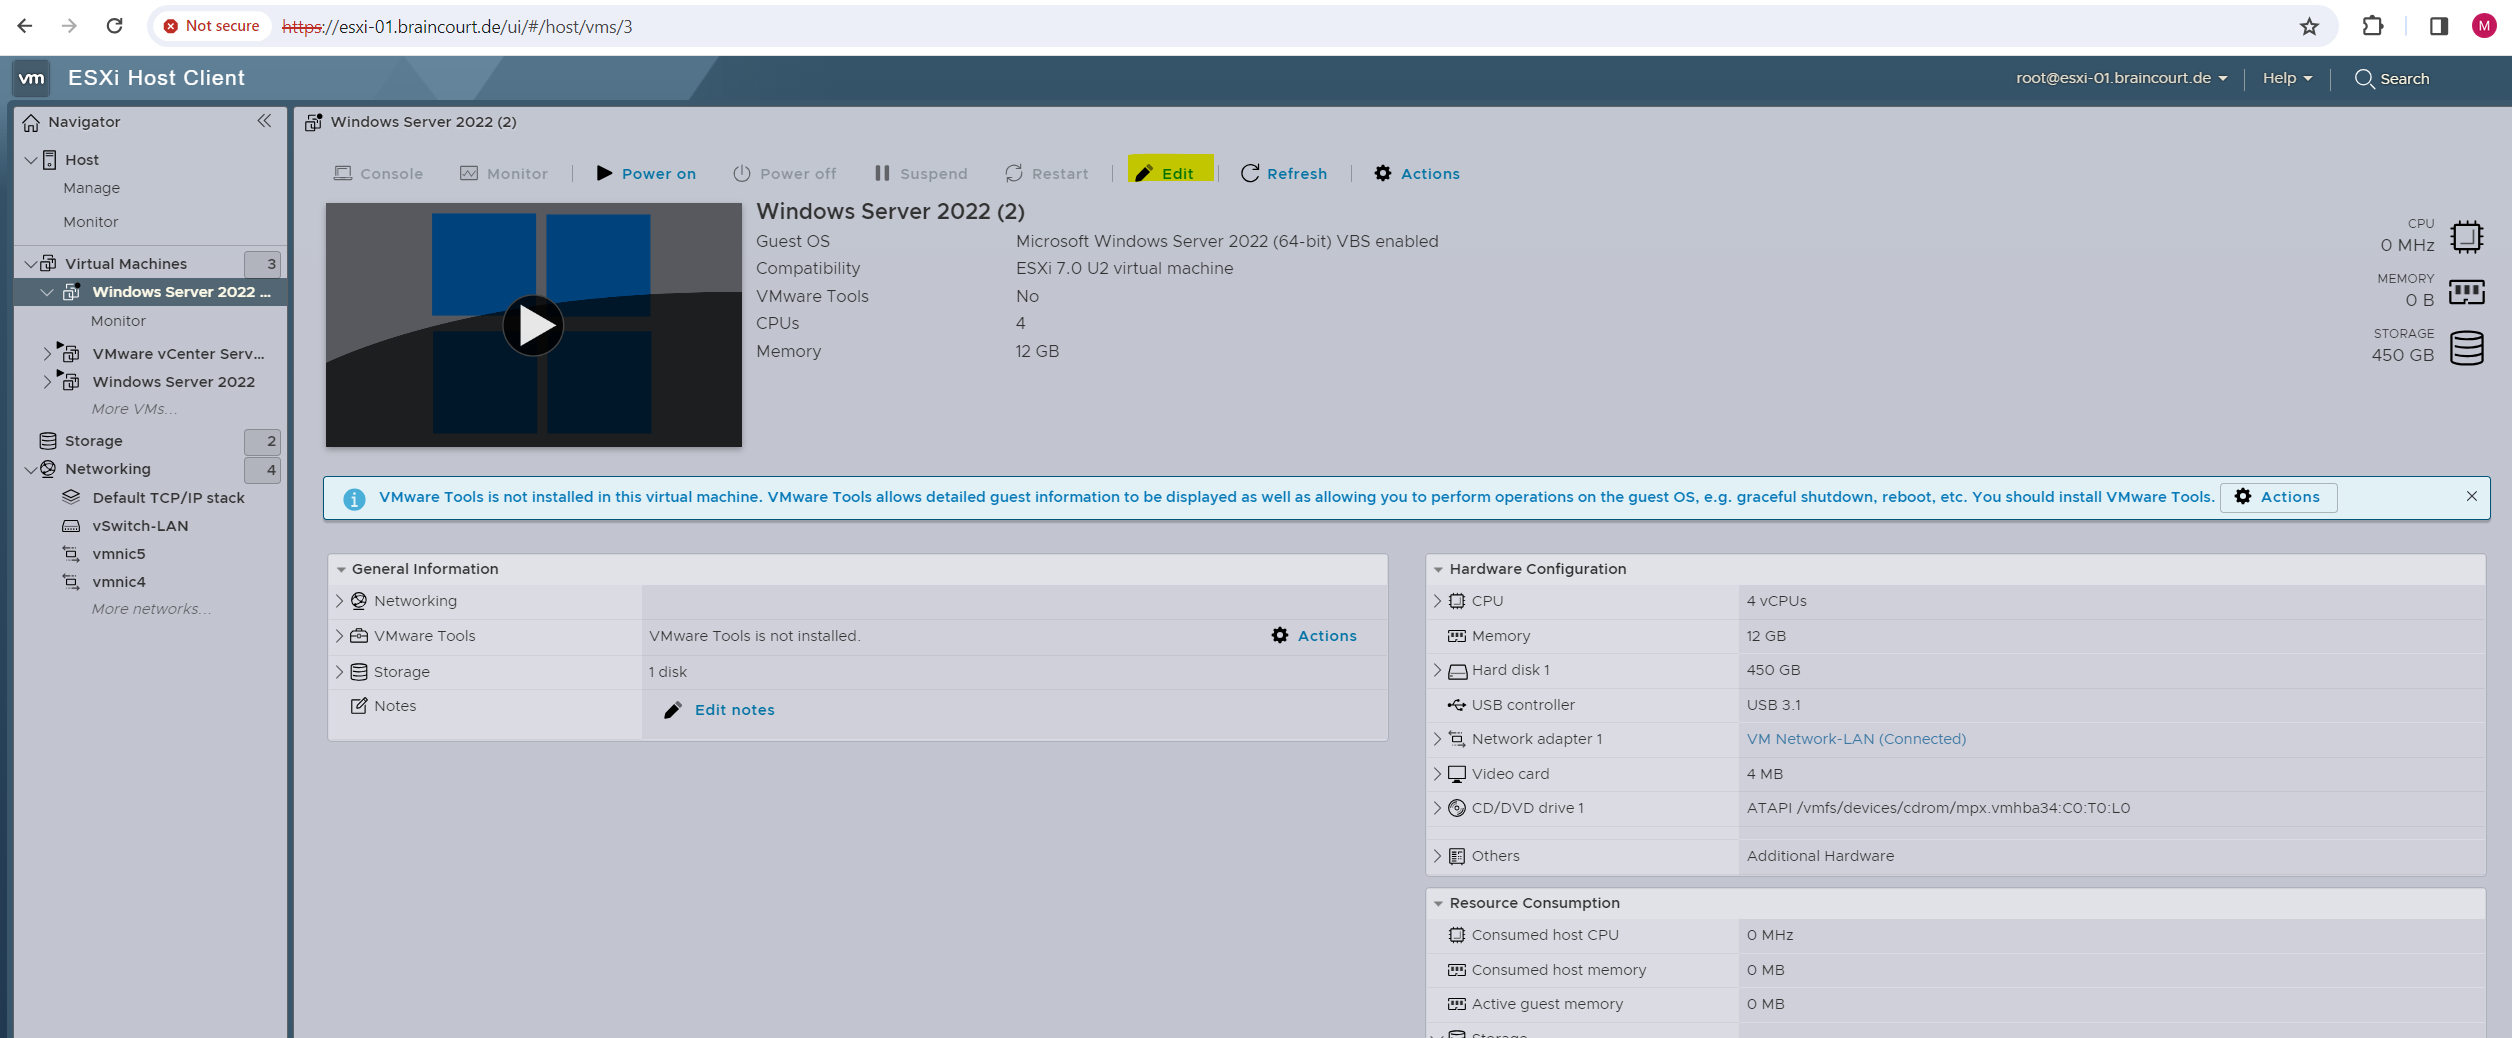
To store the virtual machines virtual hard disk and configuration files, I will select the datastore I created on my RAID 5 volume.
I will place this VM into my internal LAN network and therefore select the “VM Network-LAN” port group to which a virtual switch (named vSwitch-LAN) is associated to and its physical network apapter (NIC) connected to the internal LAN.
We can also mount here under CD/DVD Drive our Windows Server 2022 ISO file installation media. I will mount the ISO file later further down.
Finally we can create the VM by clicking on FINISH.
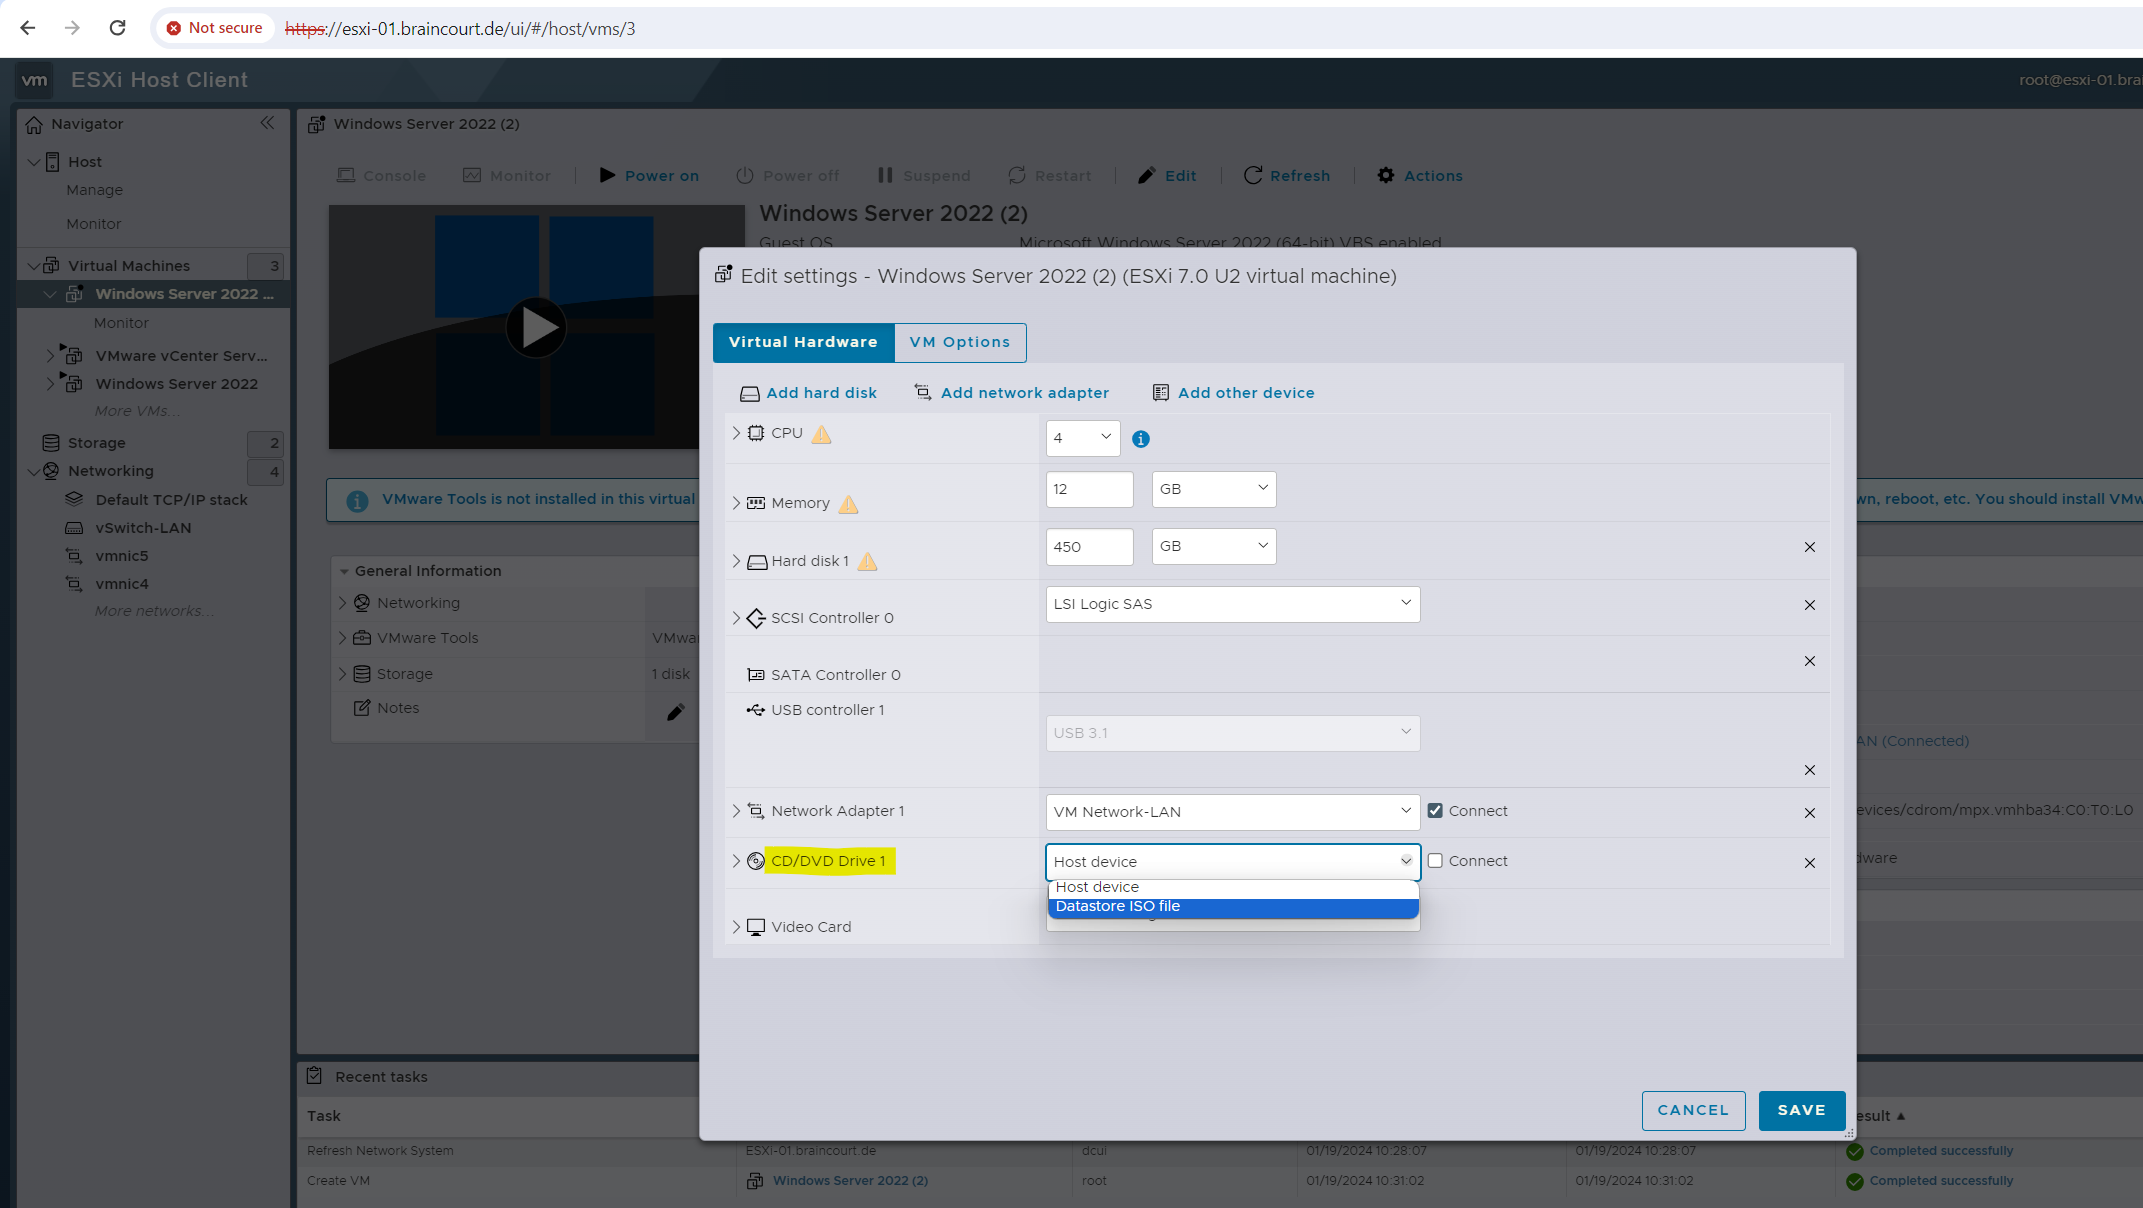
Mounting an ISO file on the VM
In order to install Windows Server 2022 on this VM, I will first have to mount the Windows Server 2022 ISO file installation media.
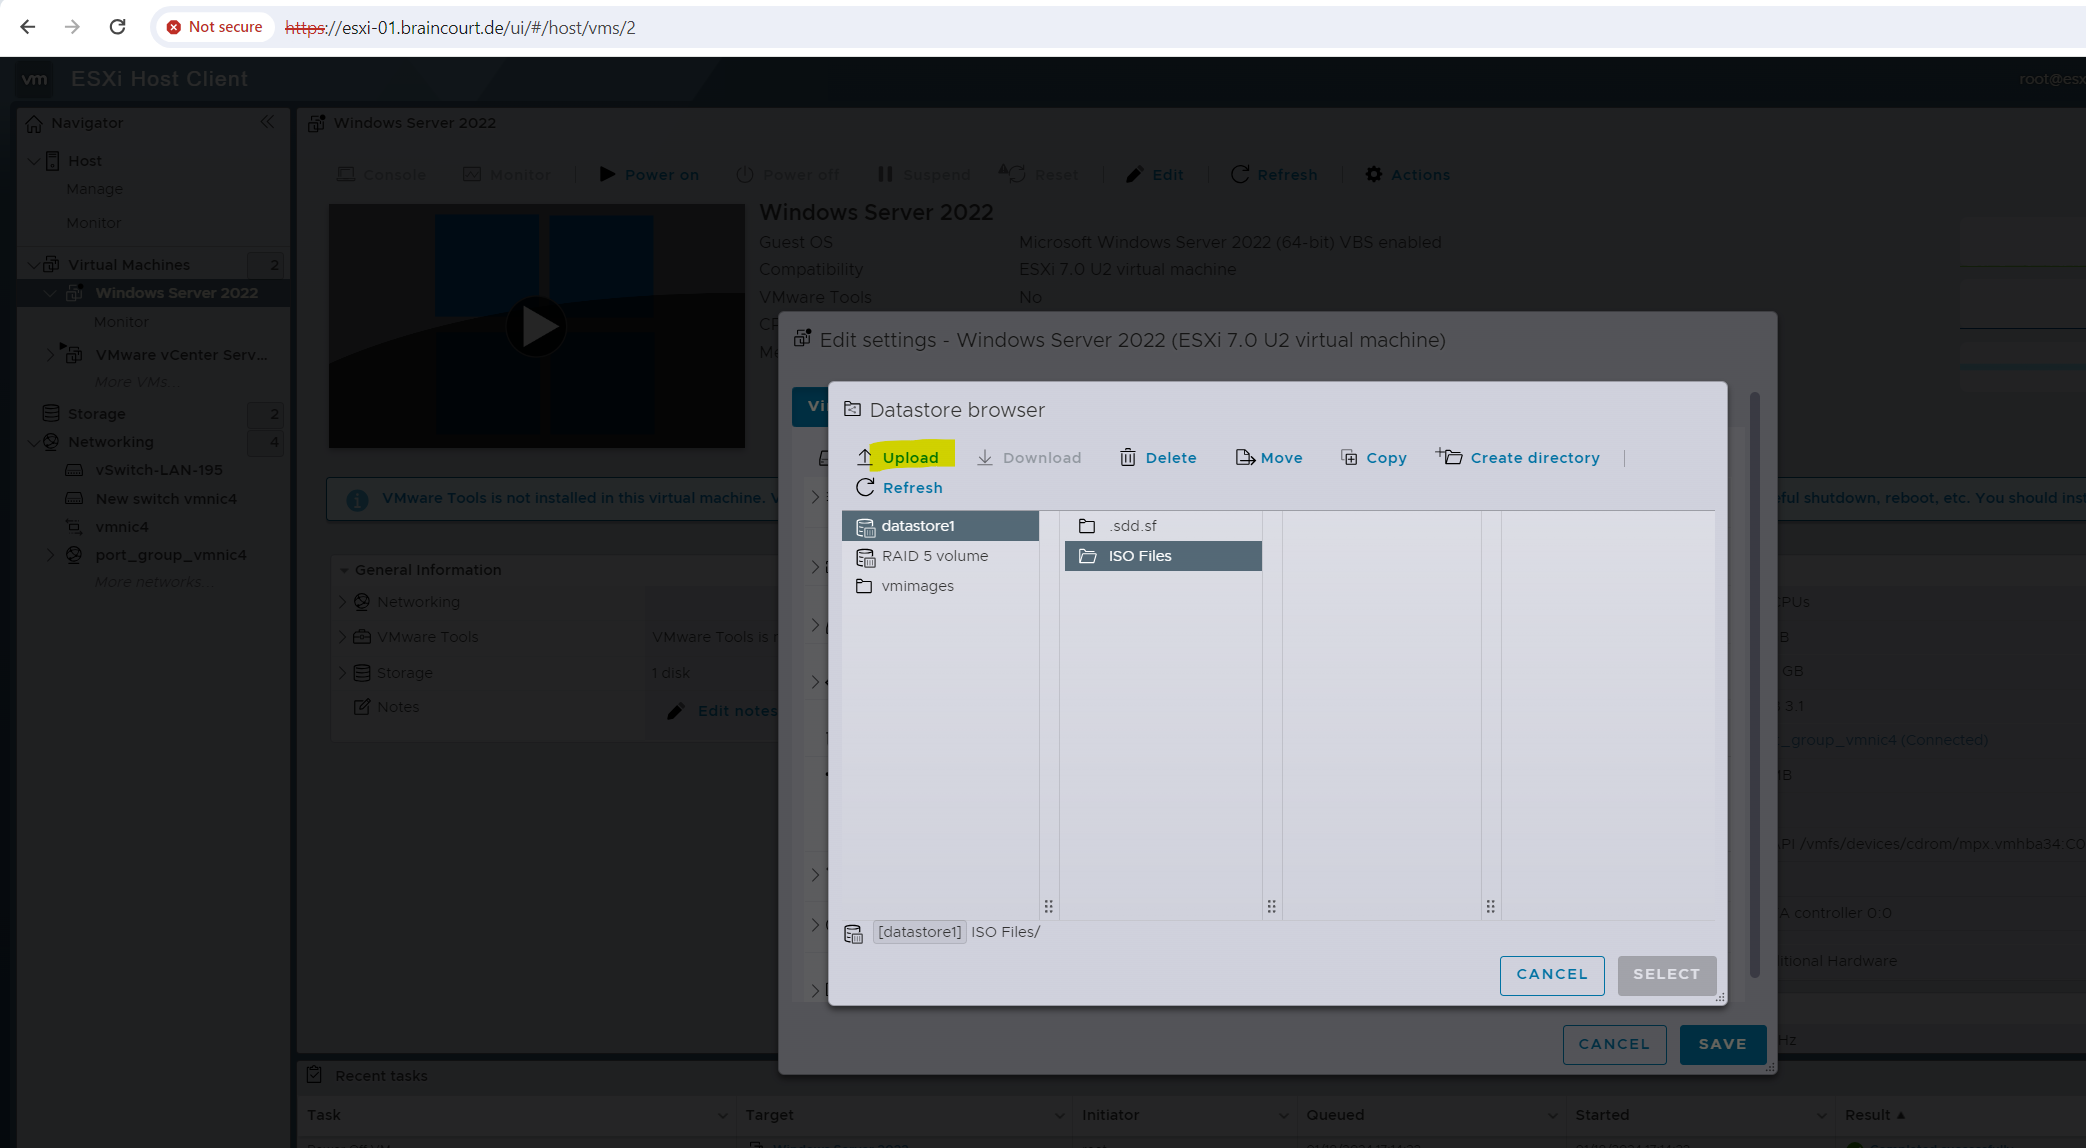
Select the VM and click on Edit.
We need to select here Datastore ISO file to pick up a file stored on the ESXi host.
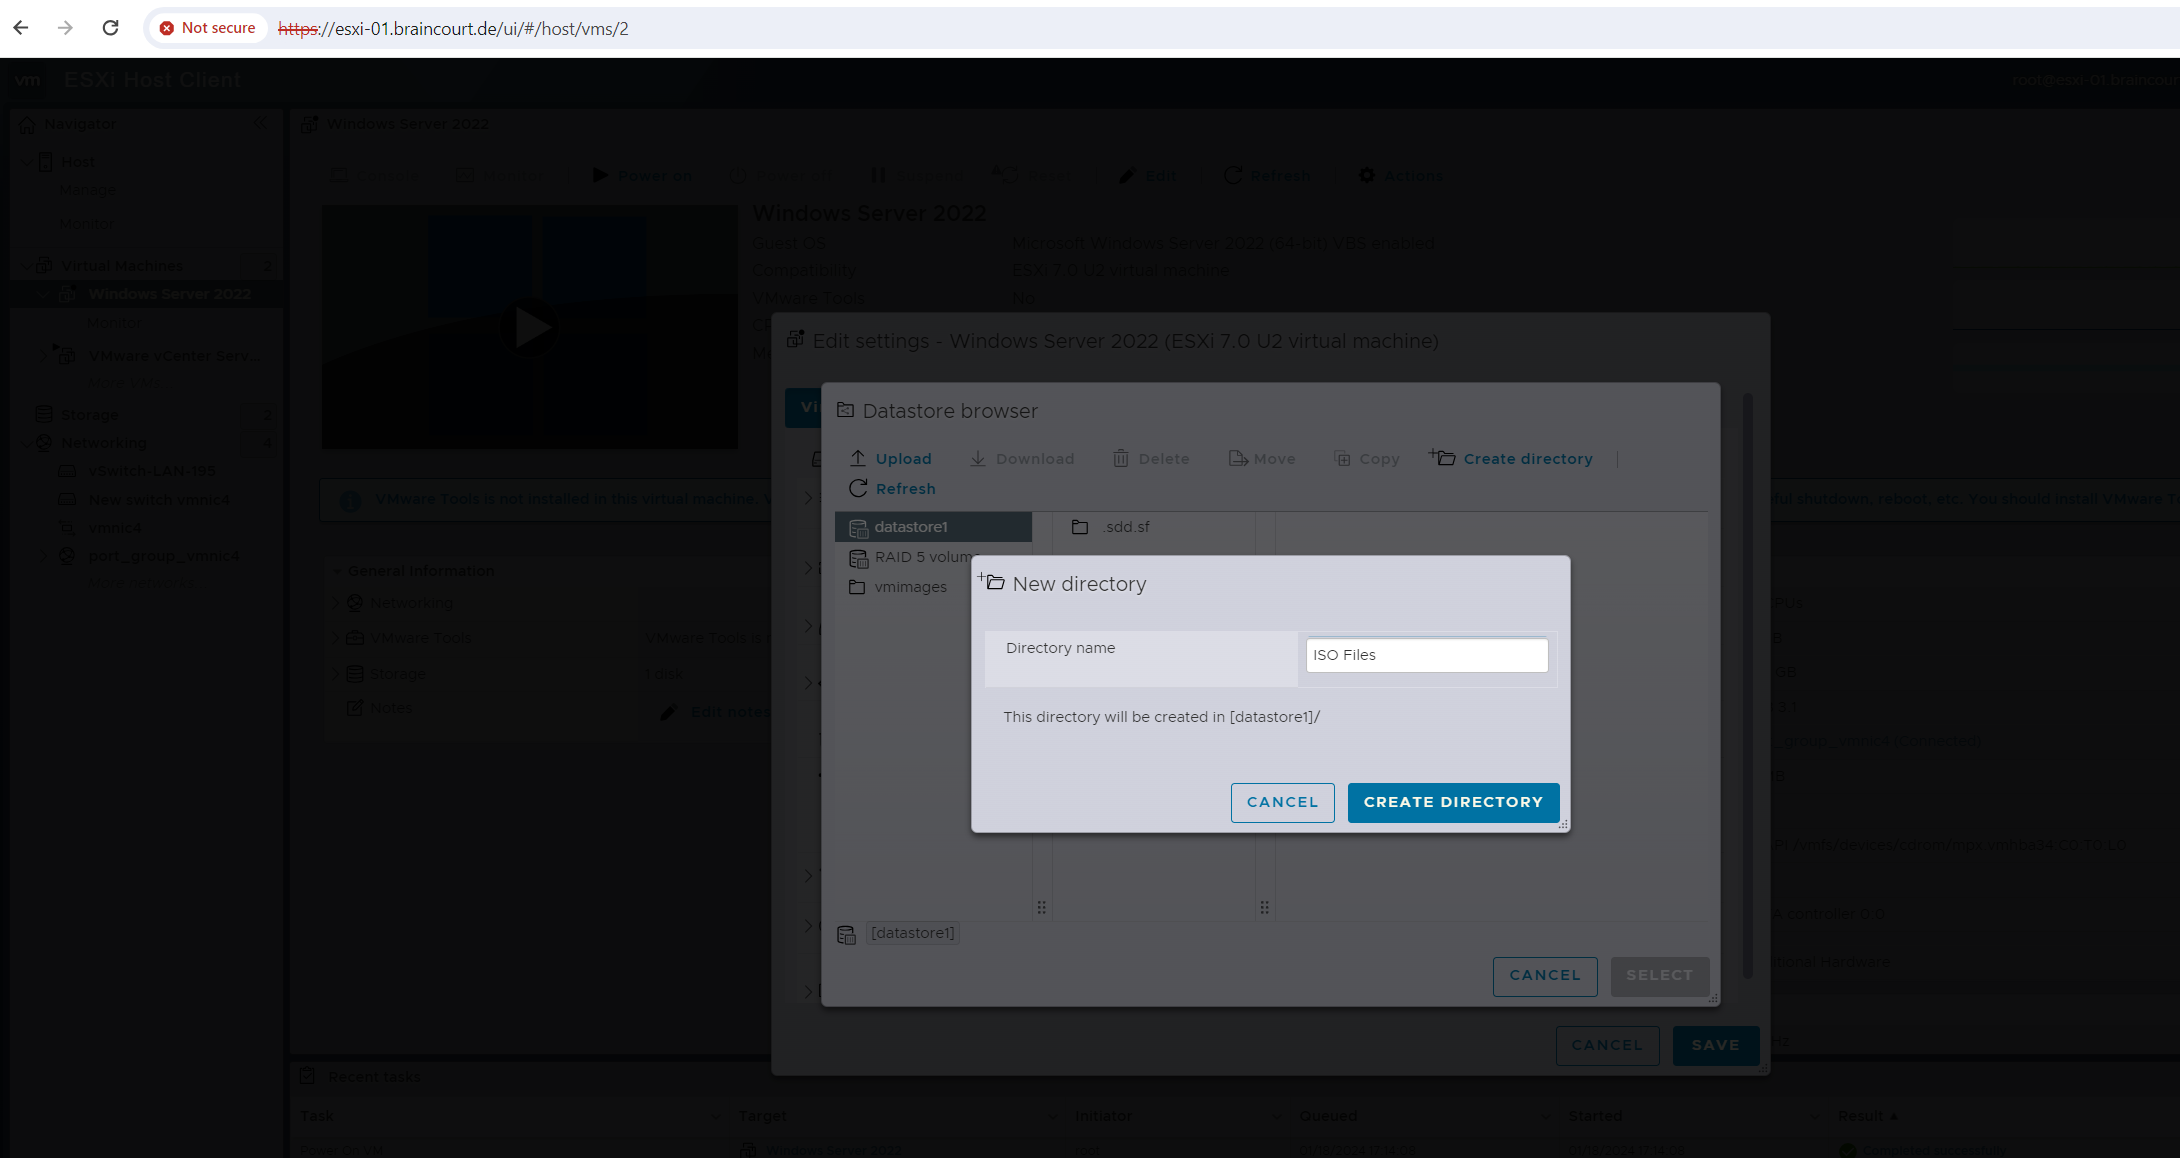
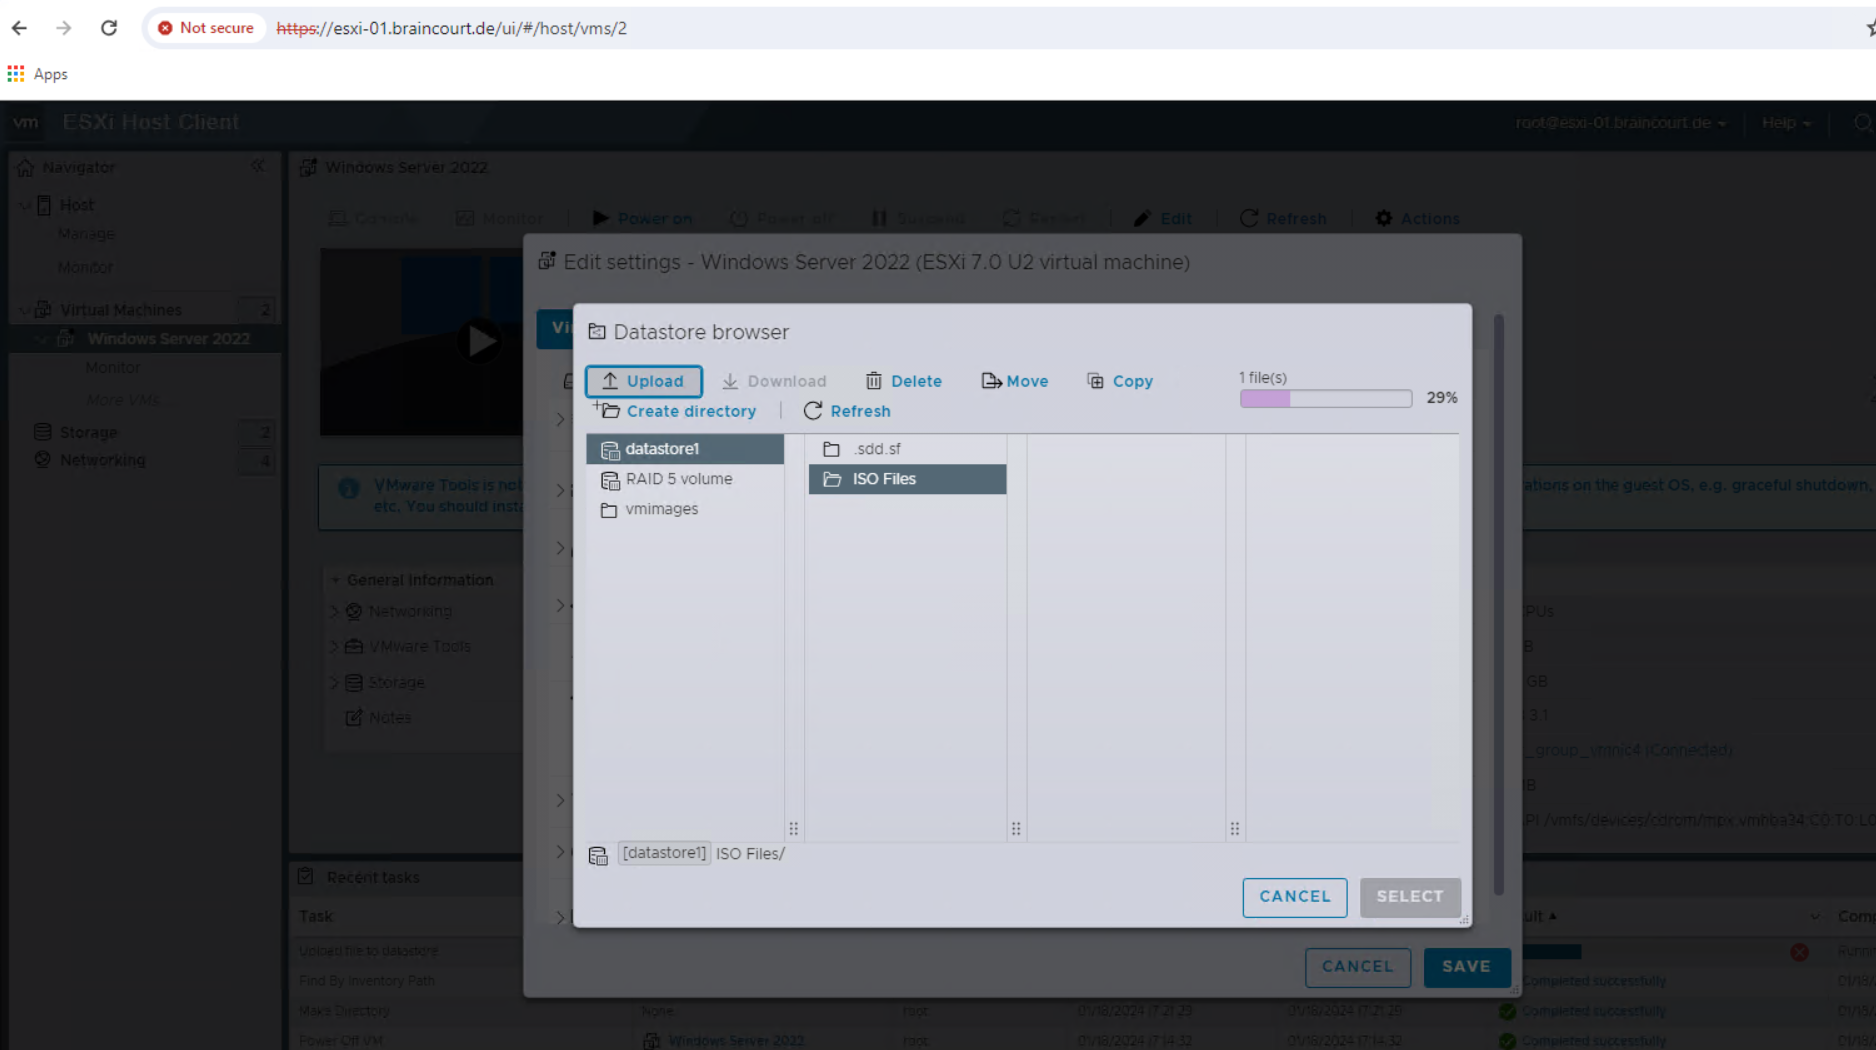
So far I neither created any folder nor uploaded any installation media to a datastores on the ESXi host, therefore I will create a new folder on datastore1 (in my case this is the ESXi OS partition) to upload and store ISO files.

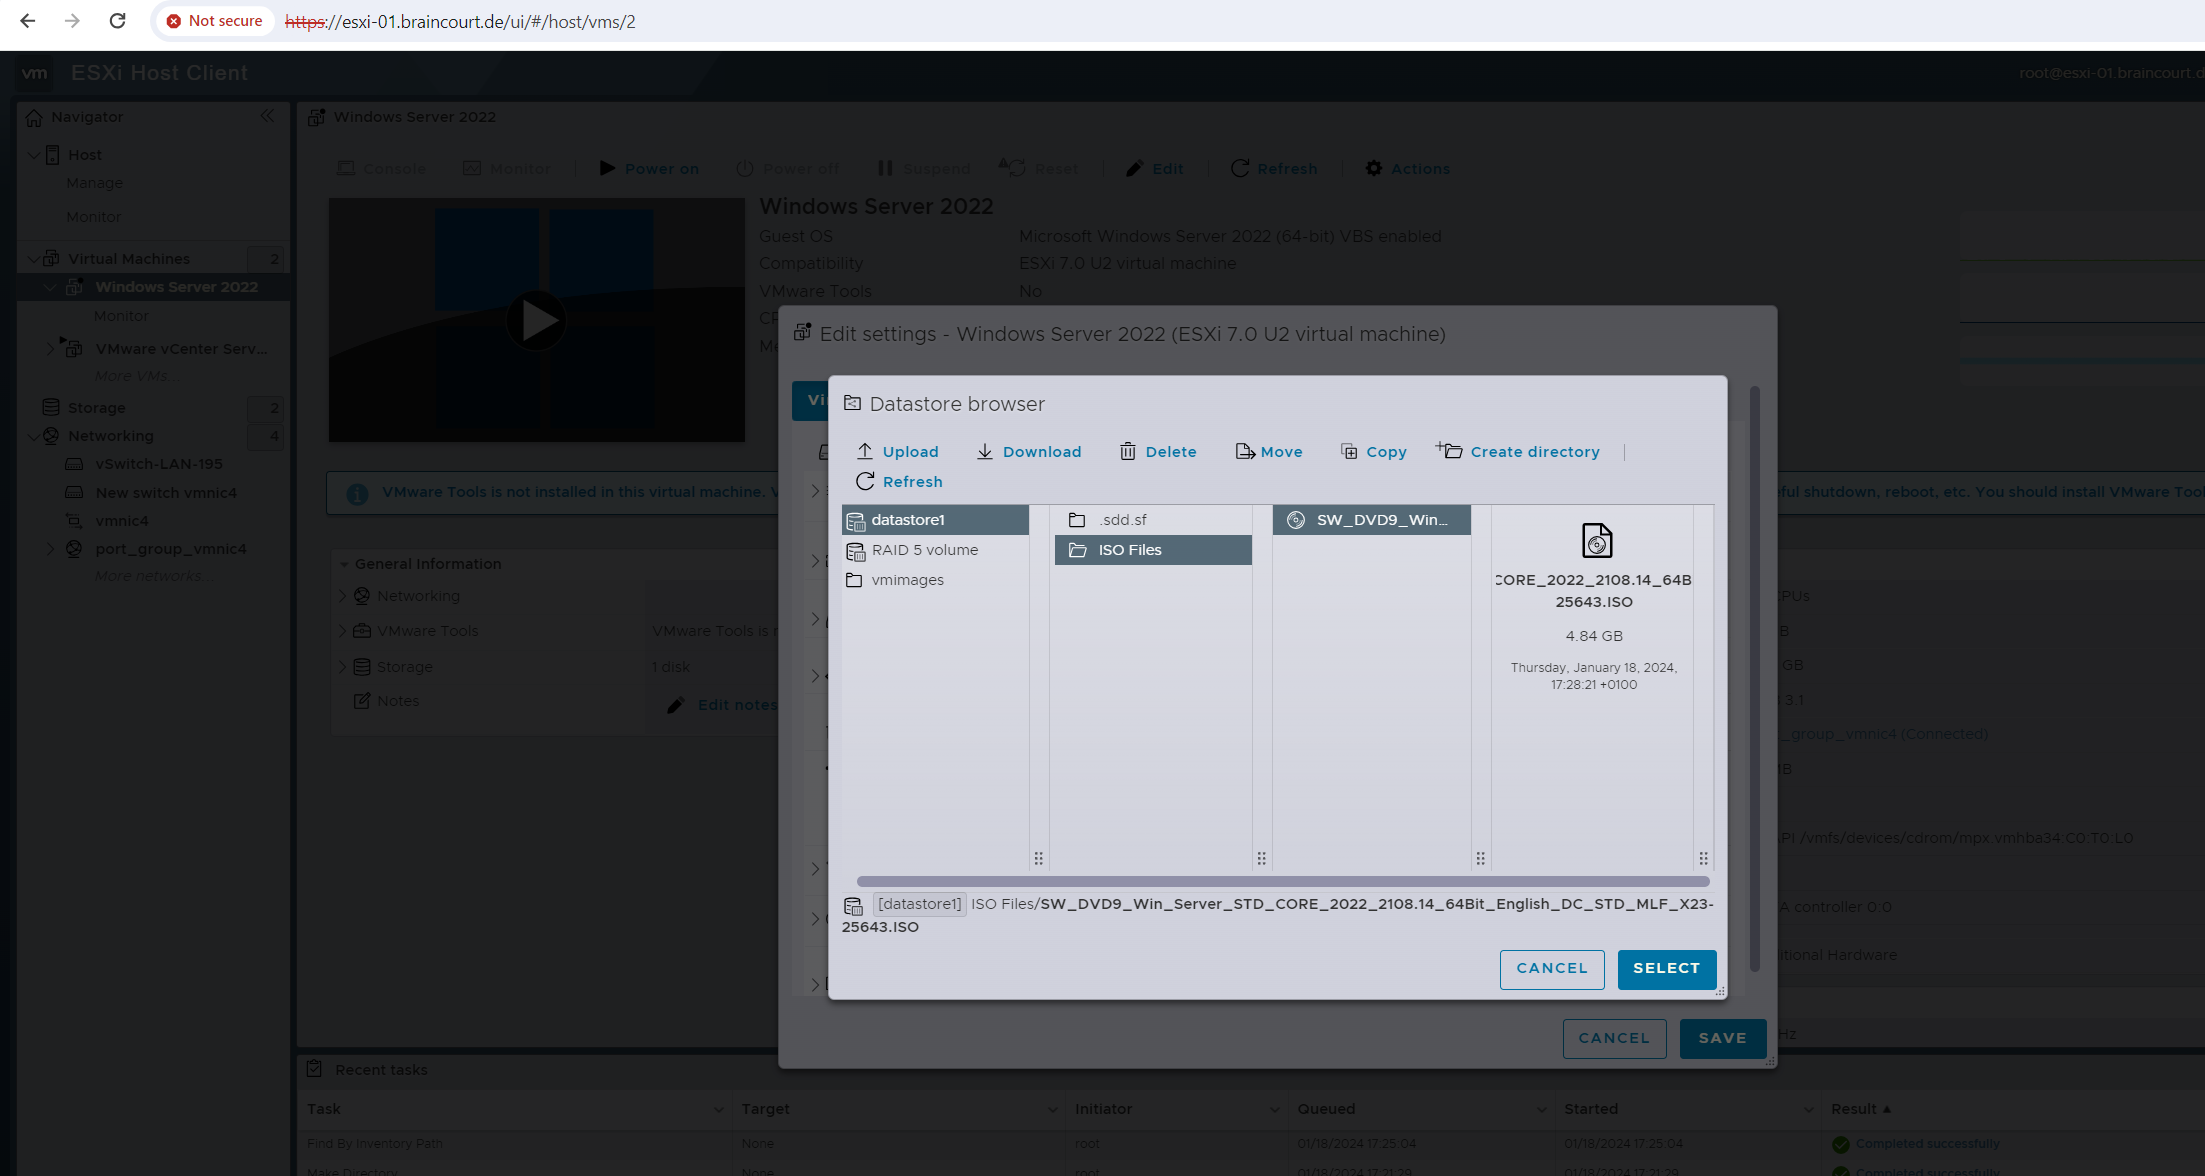
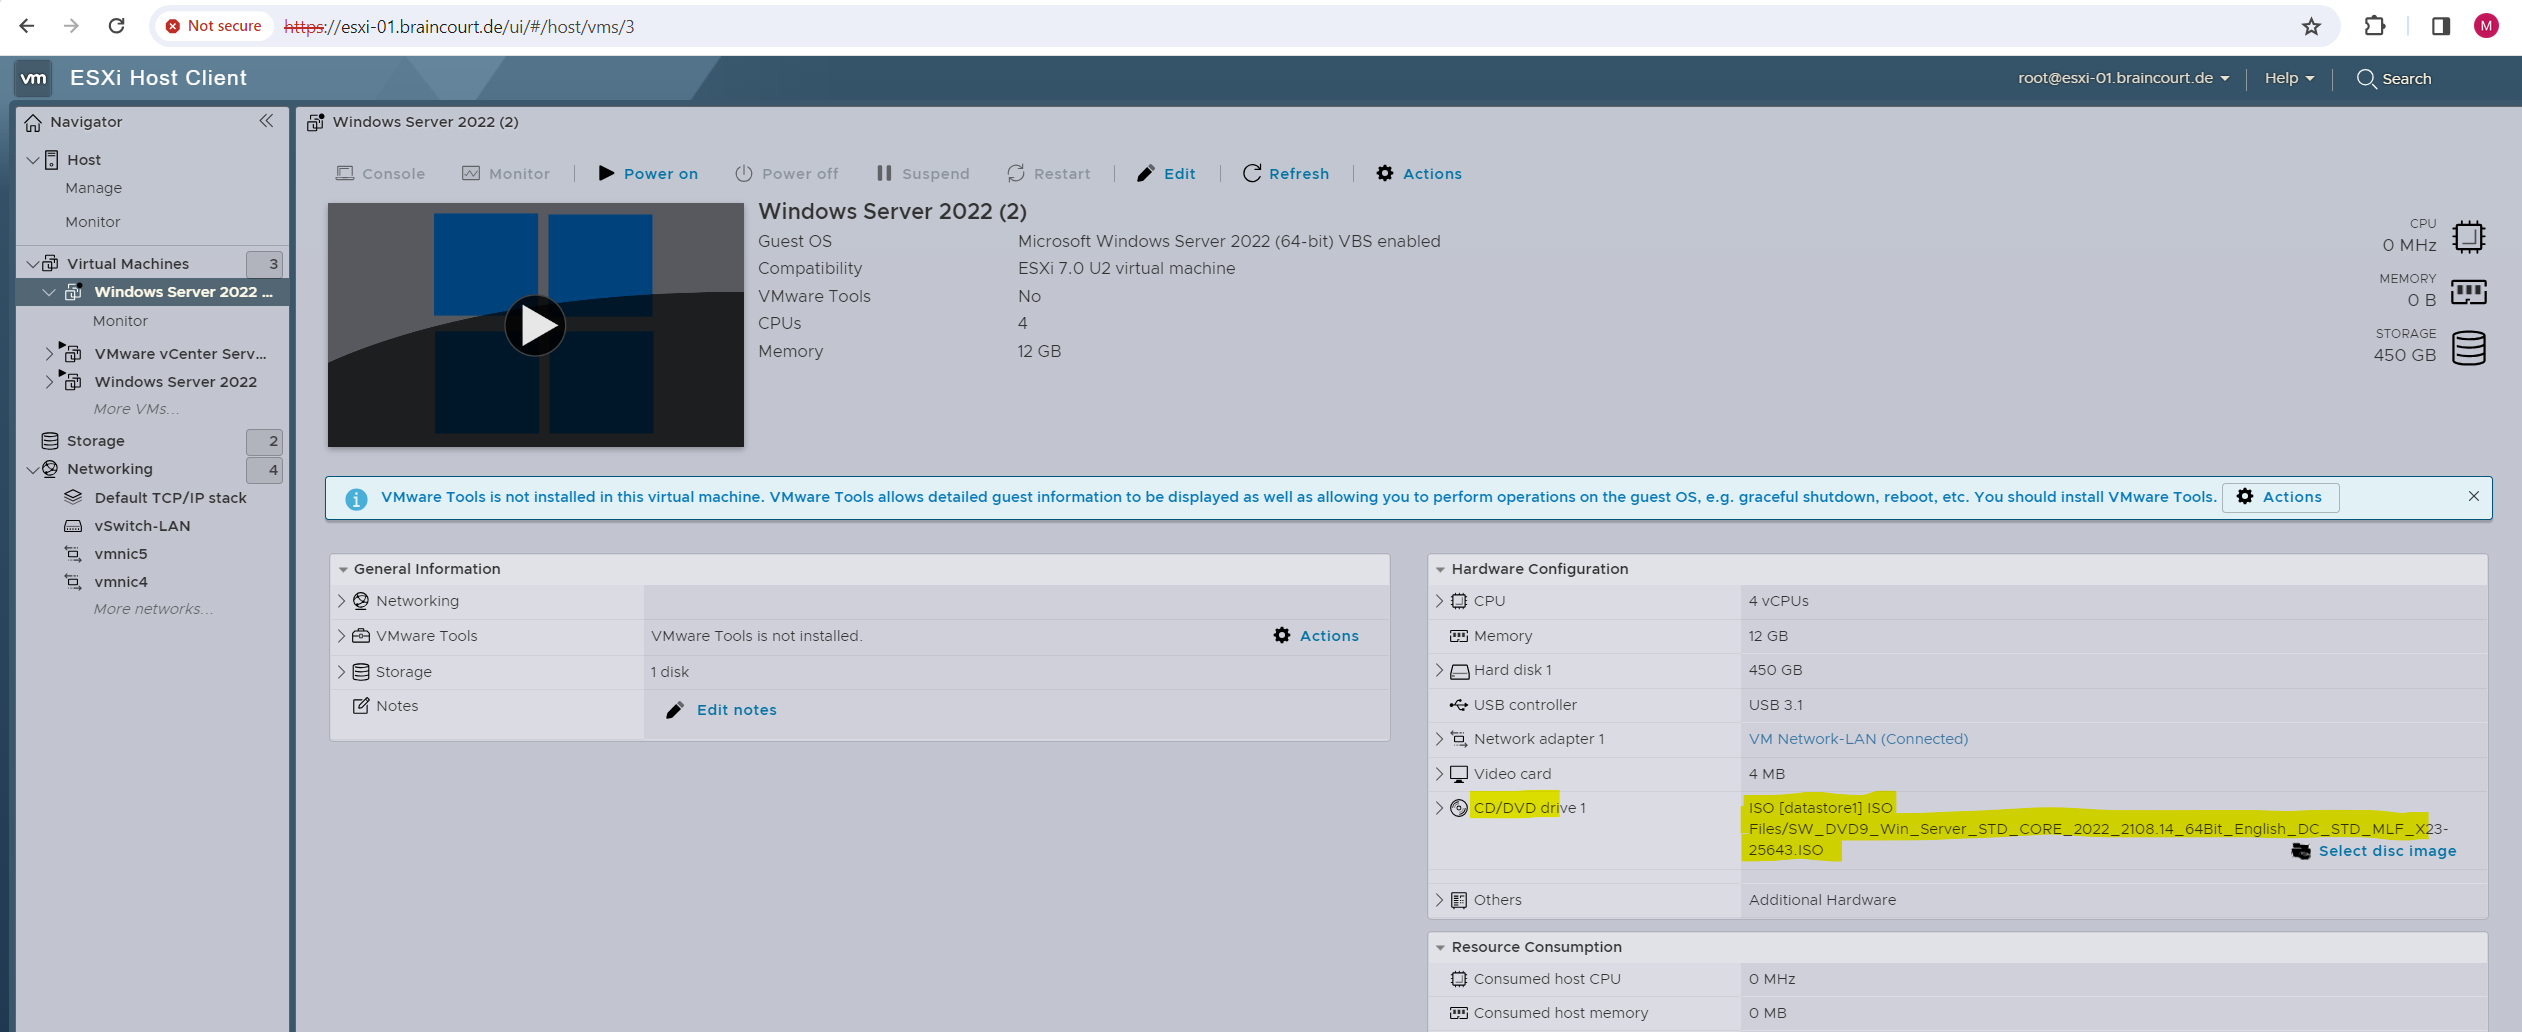
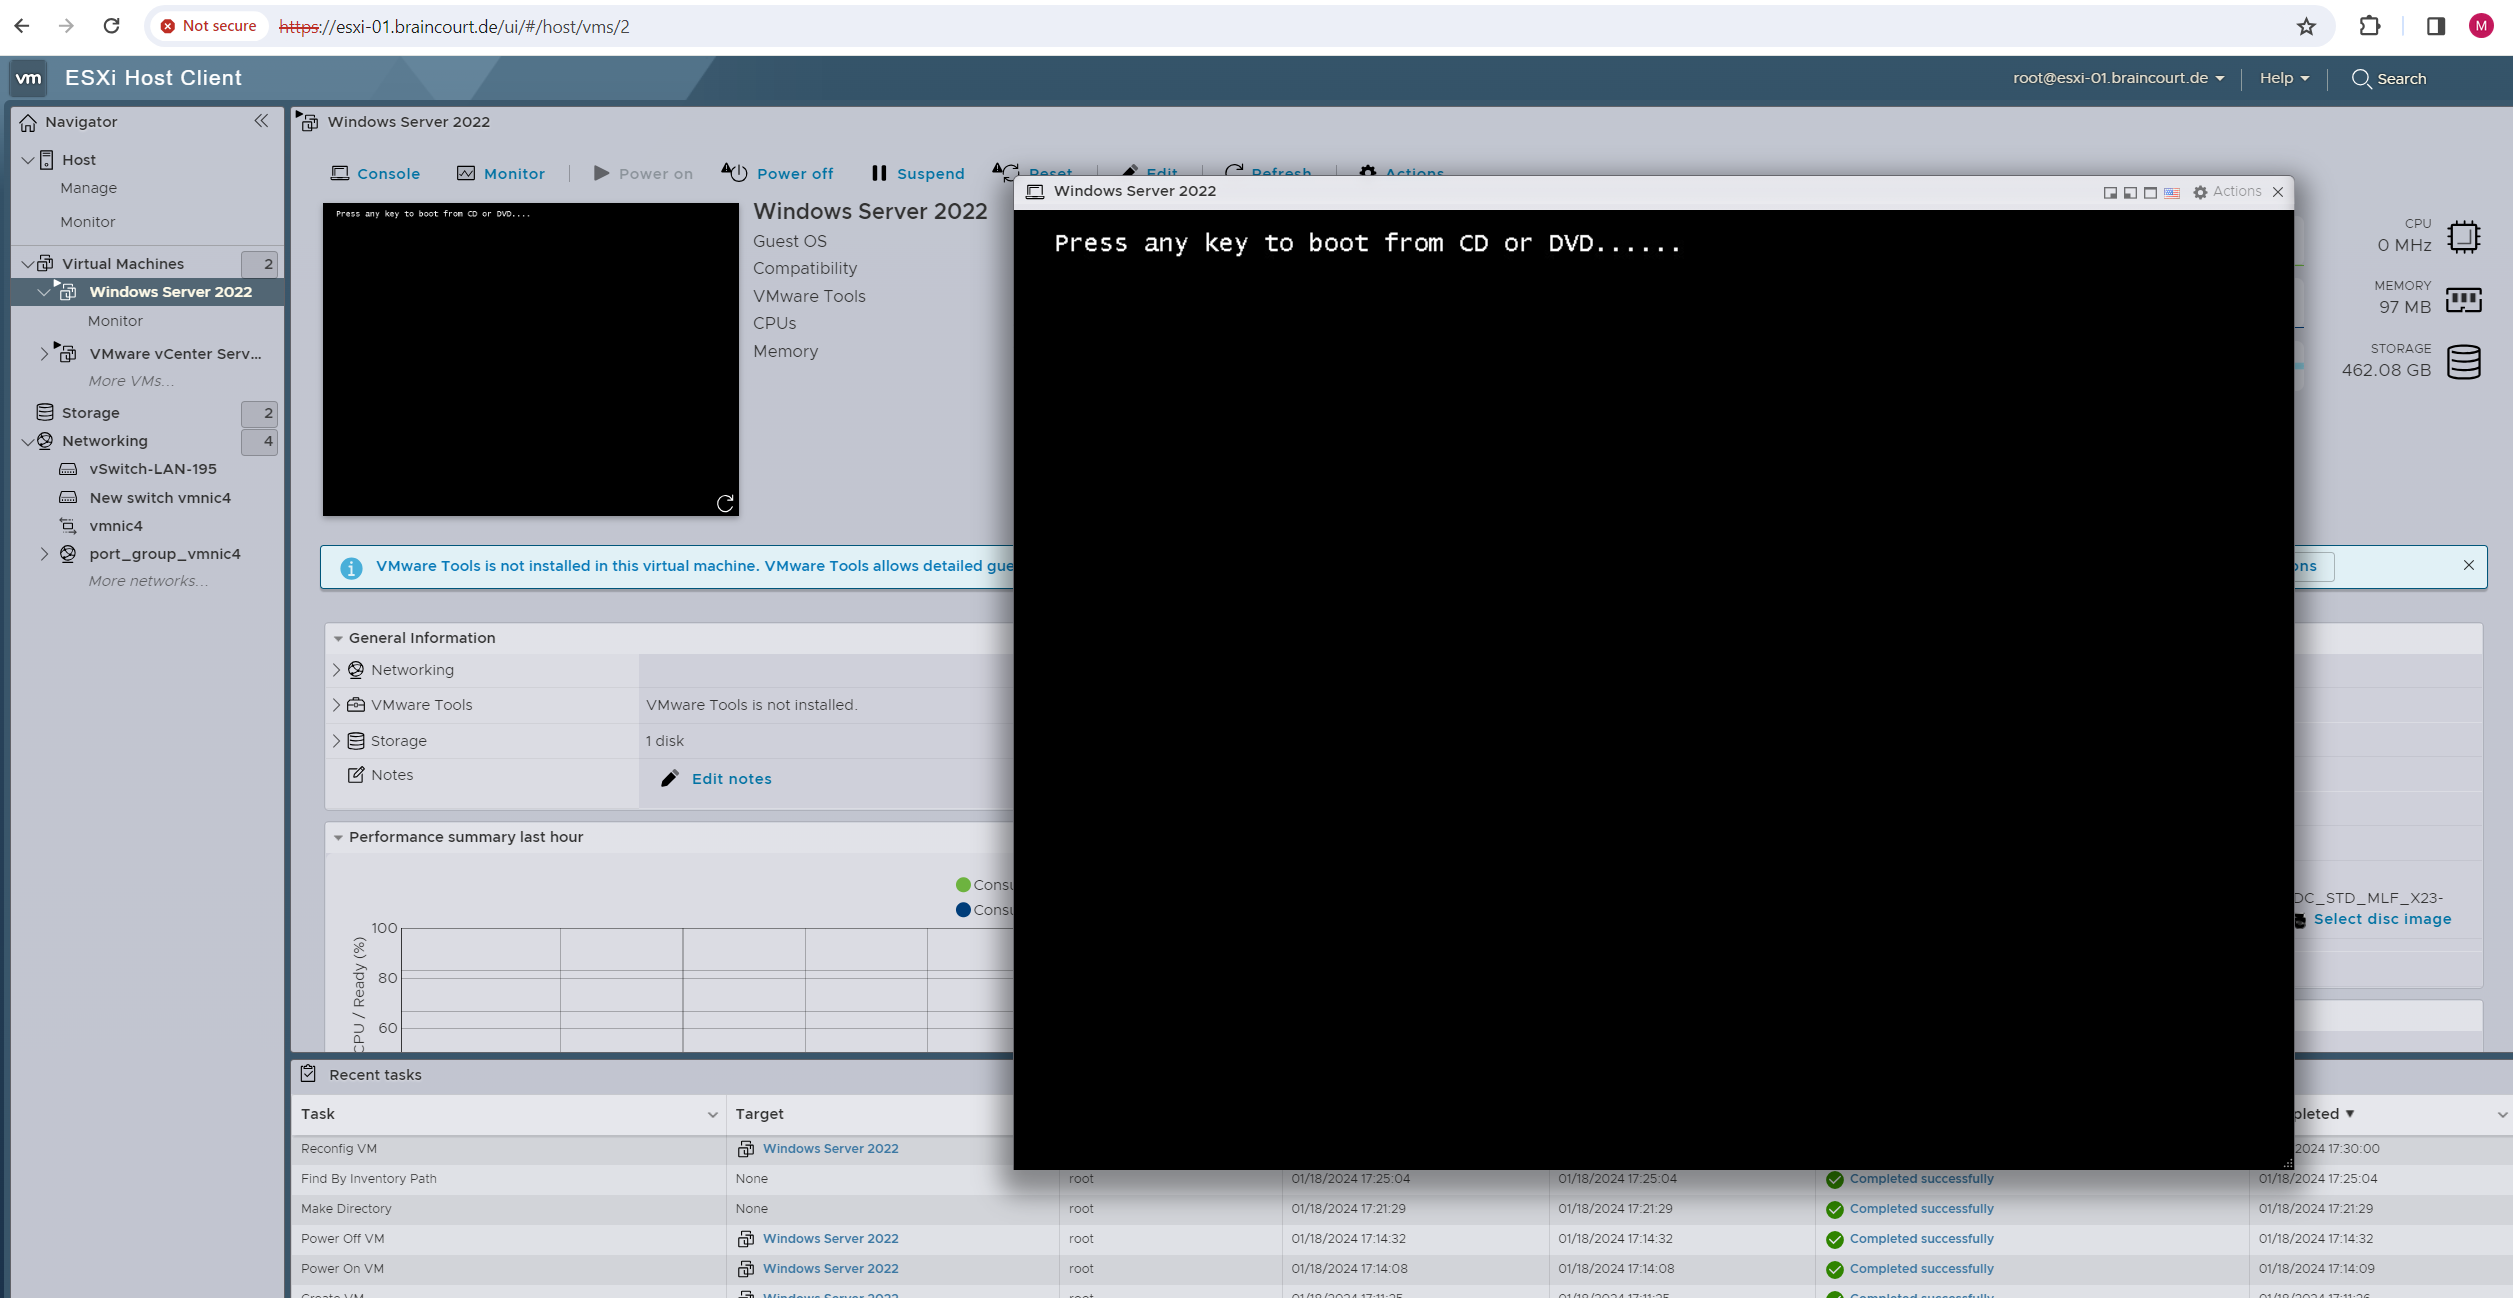
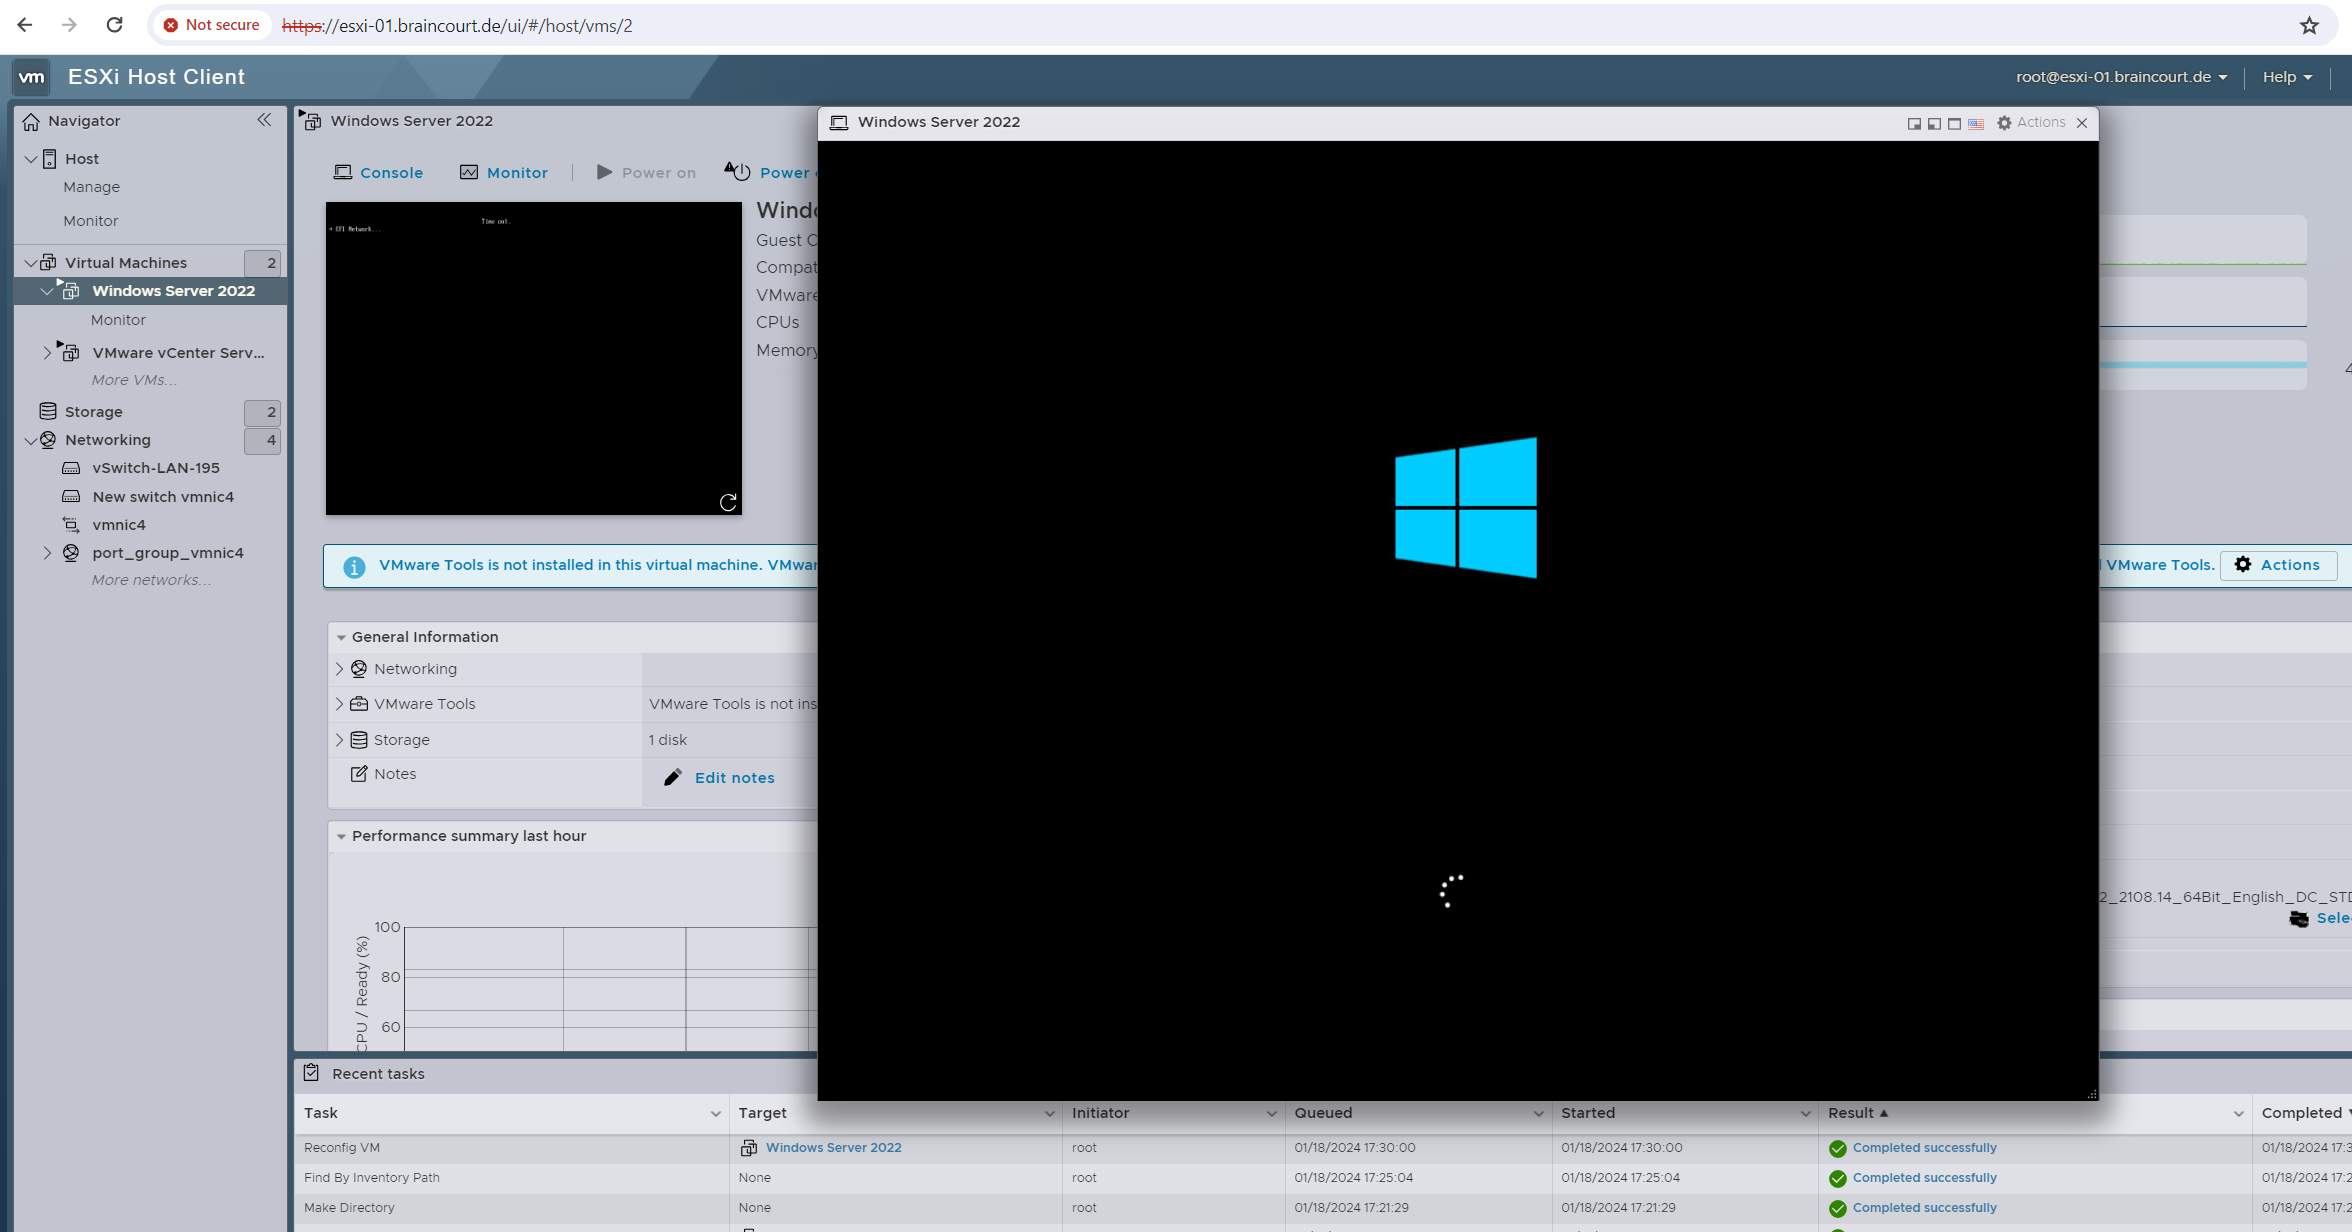
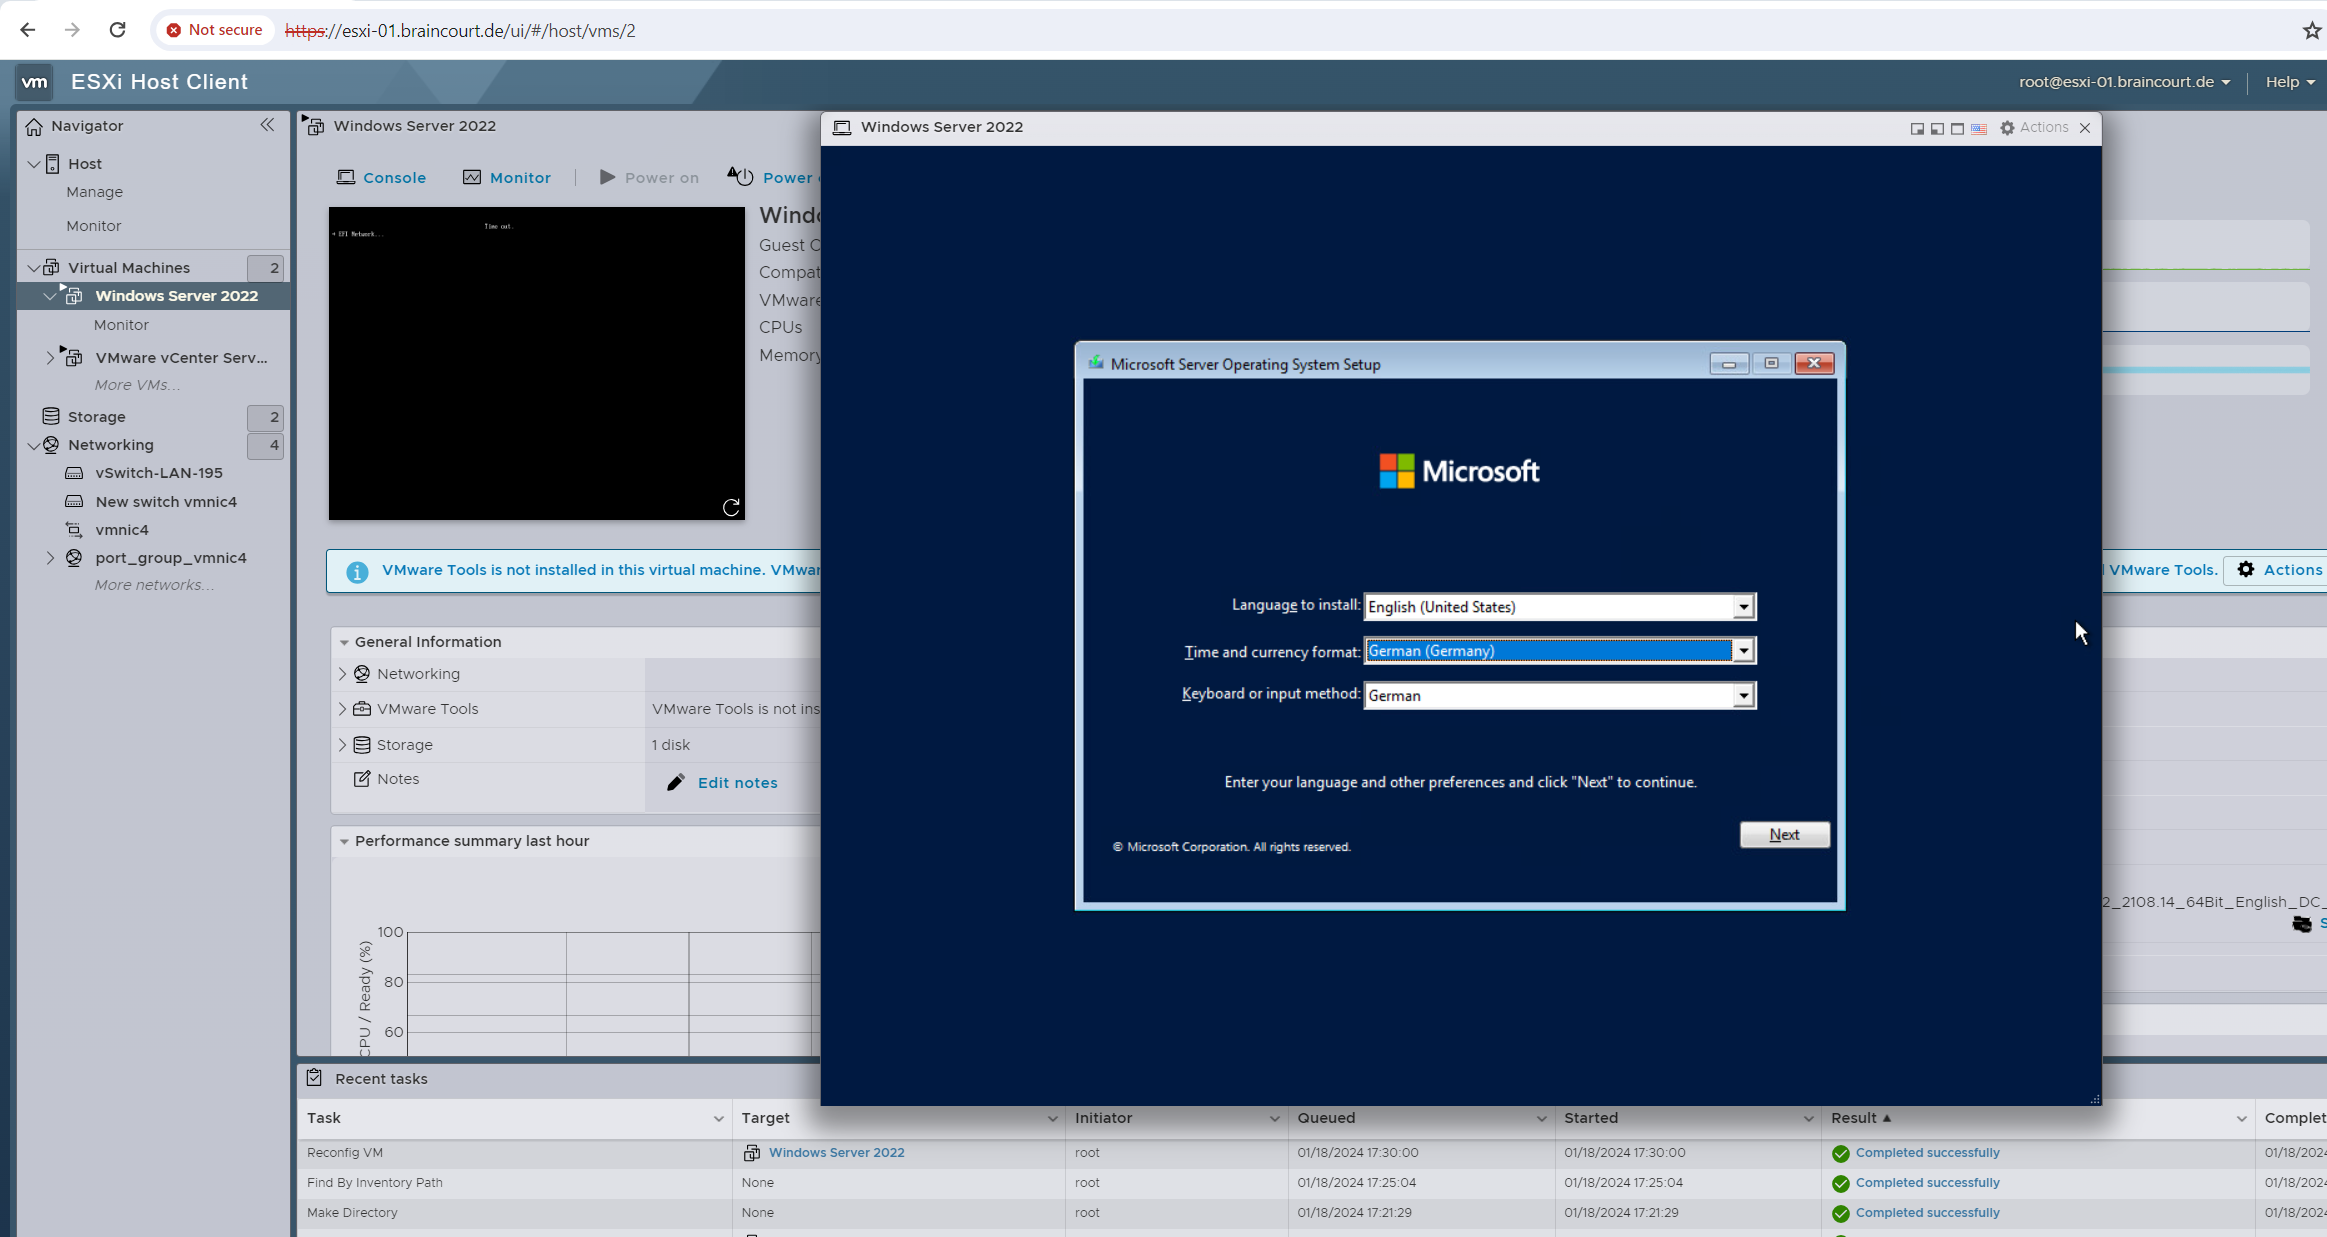
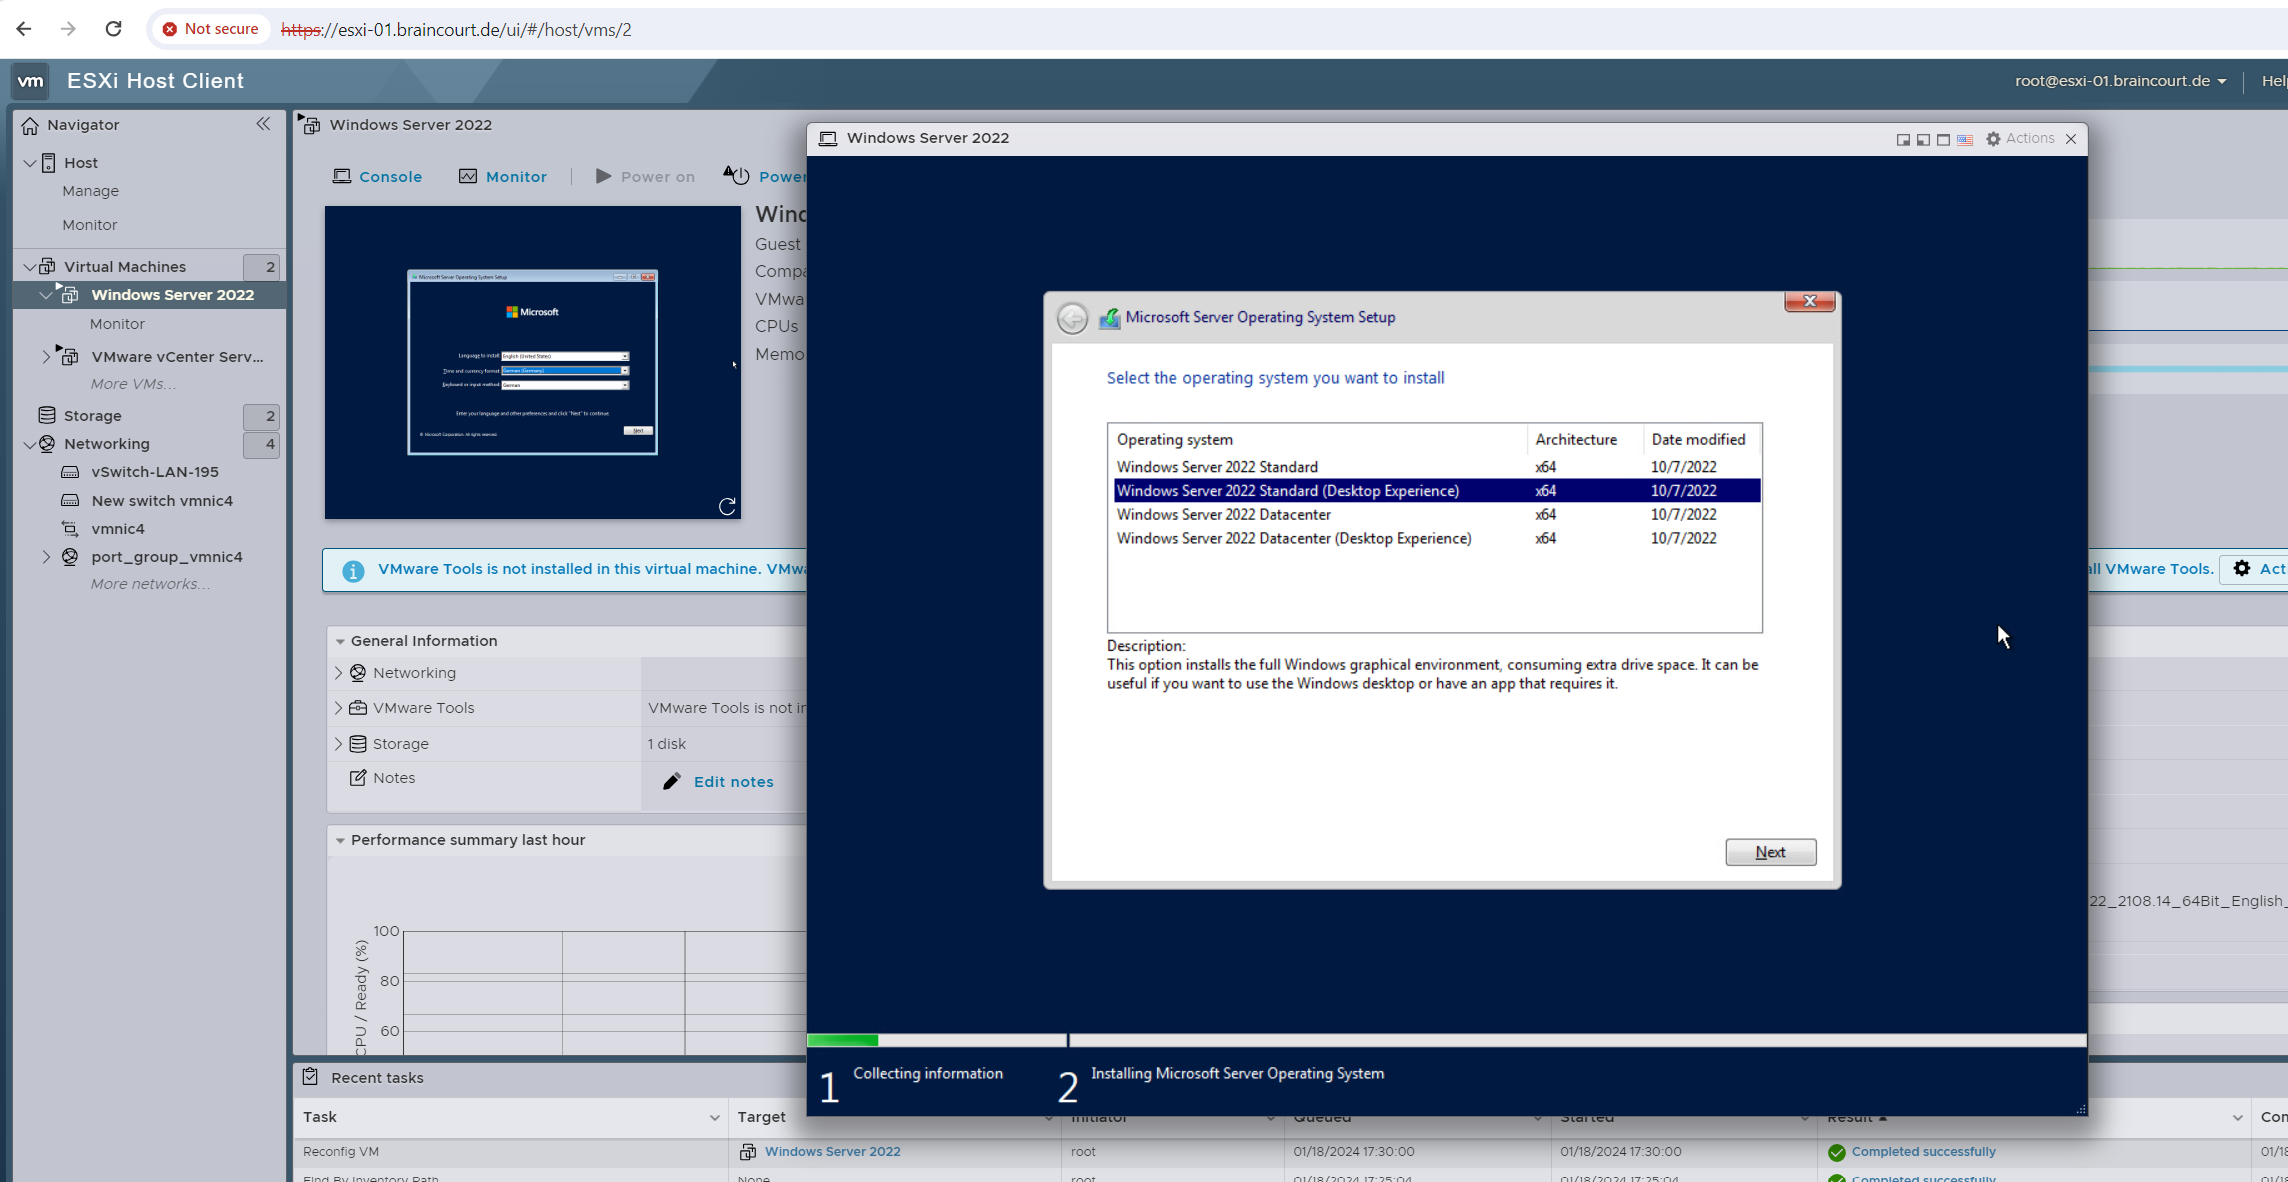
We can now power on the VM and boot from the ISO file to install Windows Server 2022 on.
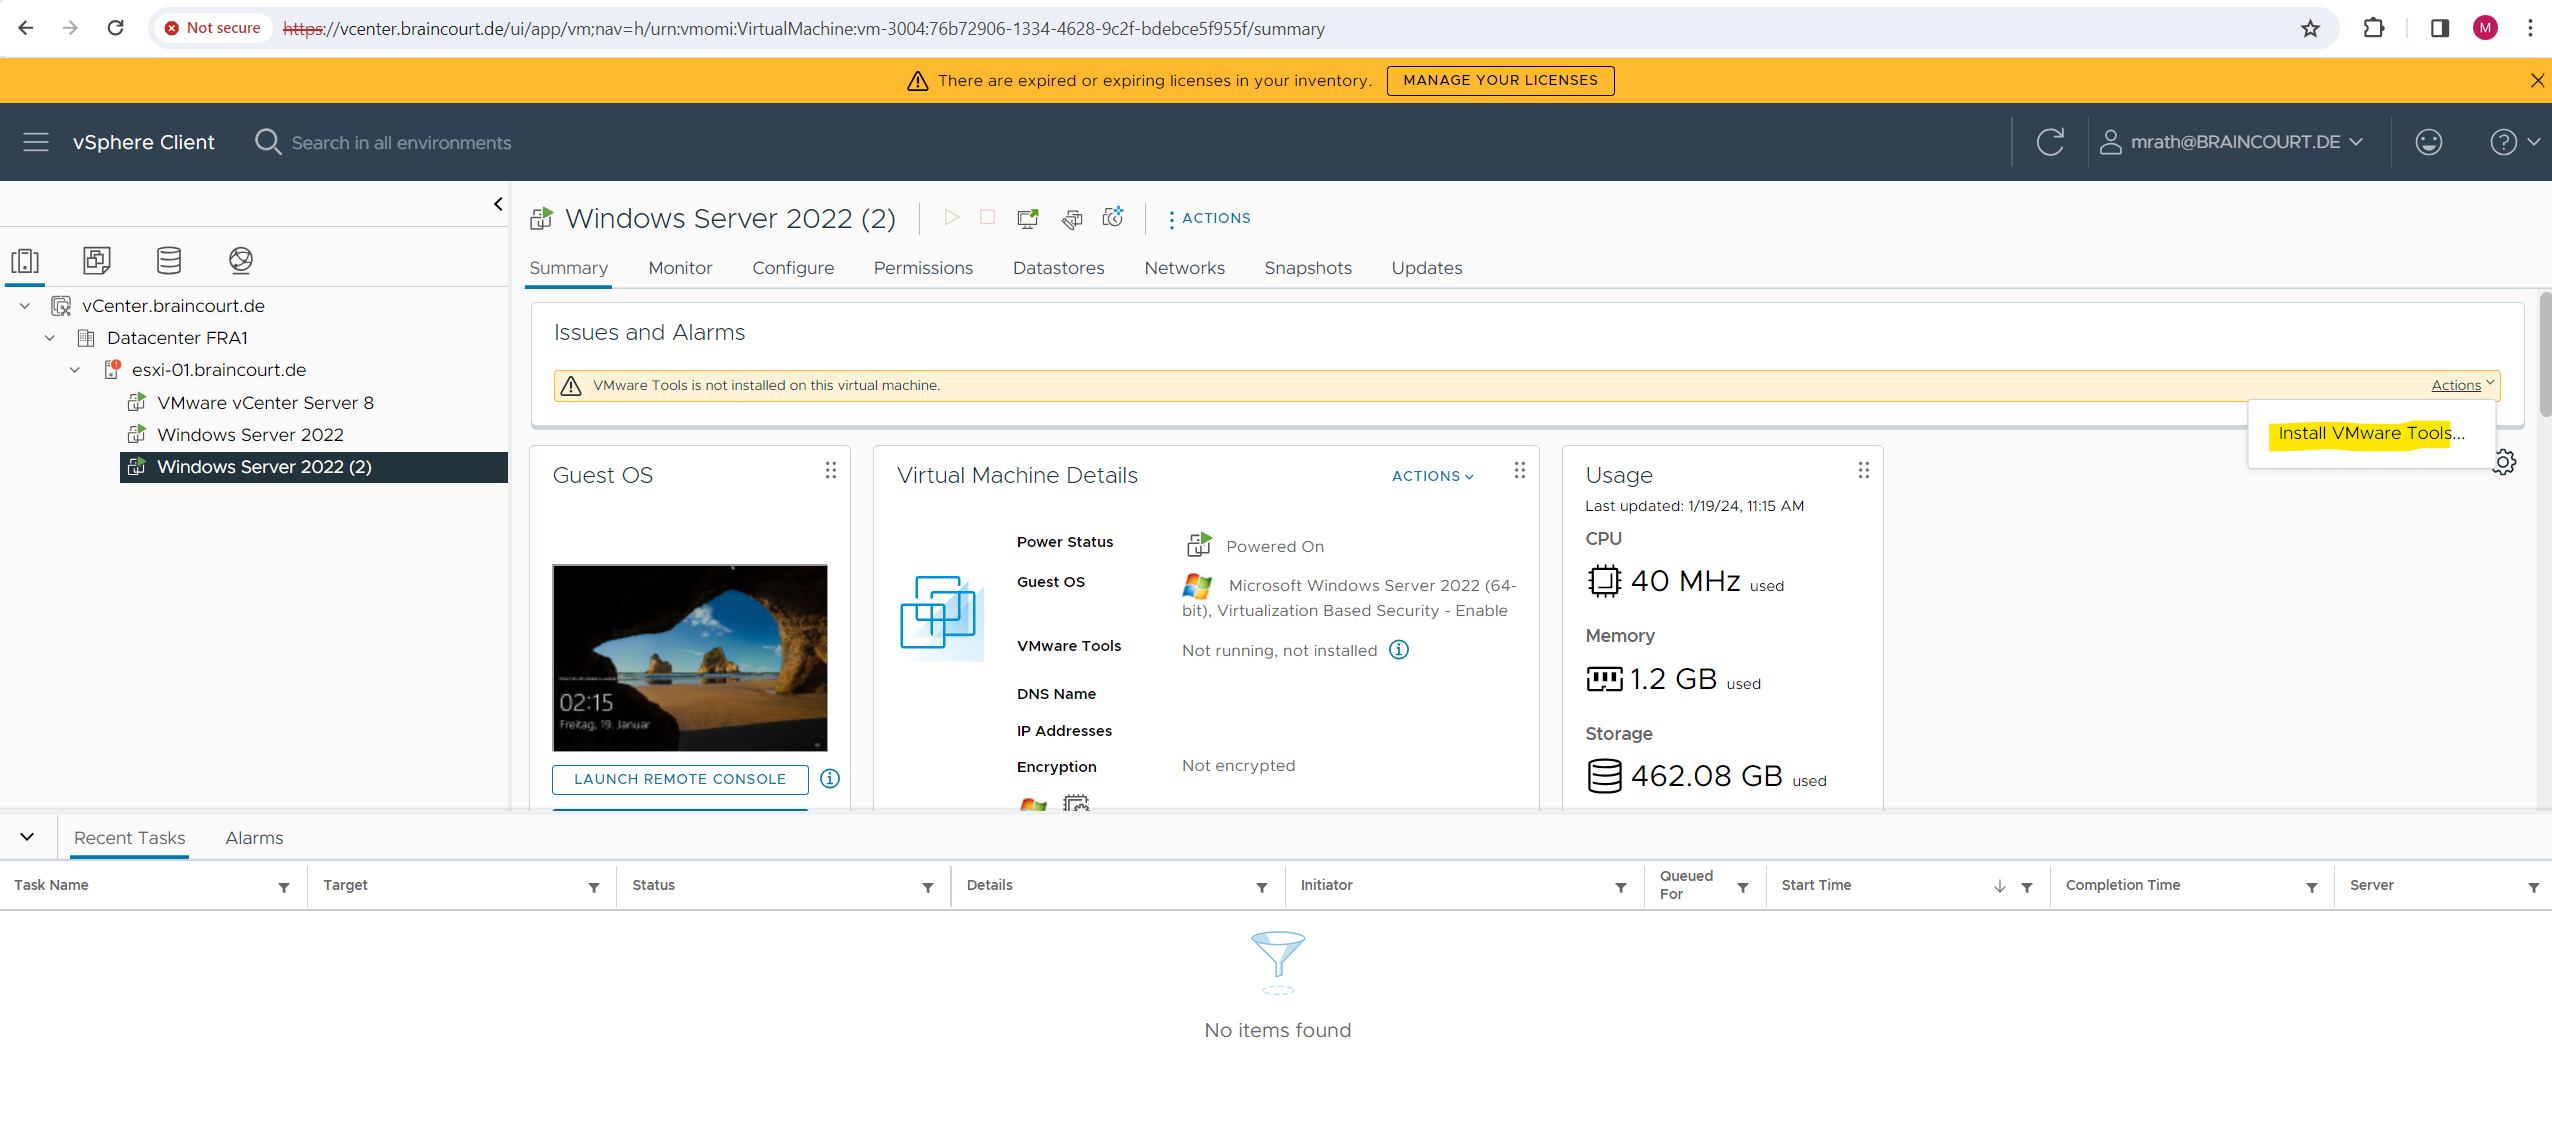
Install VMware Tools on the VM
The VMware Tools is the equivalent to Microsoft’s Hyper-V Integration Services (aka integration components). Both are used to improve guest OS performance and interoperability between the guest OS and hypervisor host (Hyper-V / ESXi).
Before Windows Server 2016 and Windows 10 Microsoft provided the integration services with the vmguest.iso file which you needed to install on the guest OS. This process was pain in the ass and it also needs a reboot after the installation.
Windows guests since Windows 10 and running on Windows Server 2016 or later will update its integration services by default if they are set up to get important updates from Windows Update.
Linux guests using current kernels contain integration services built in, but there may be optional updates available.
The image file Integration Services disk (vmguest.iso) isn’t included with Hyper-V starting with Windows Server 2016 and Windows 10 because it’s no longer needed.
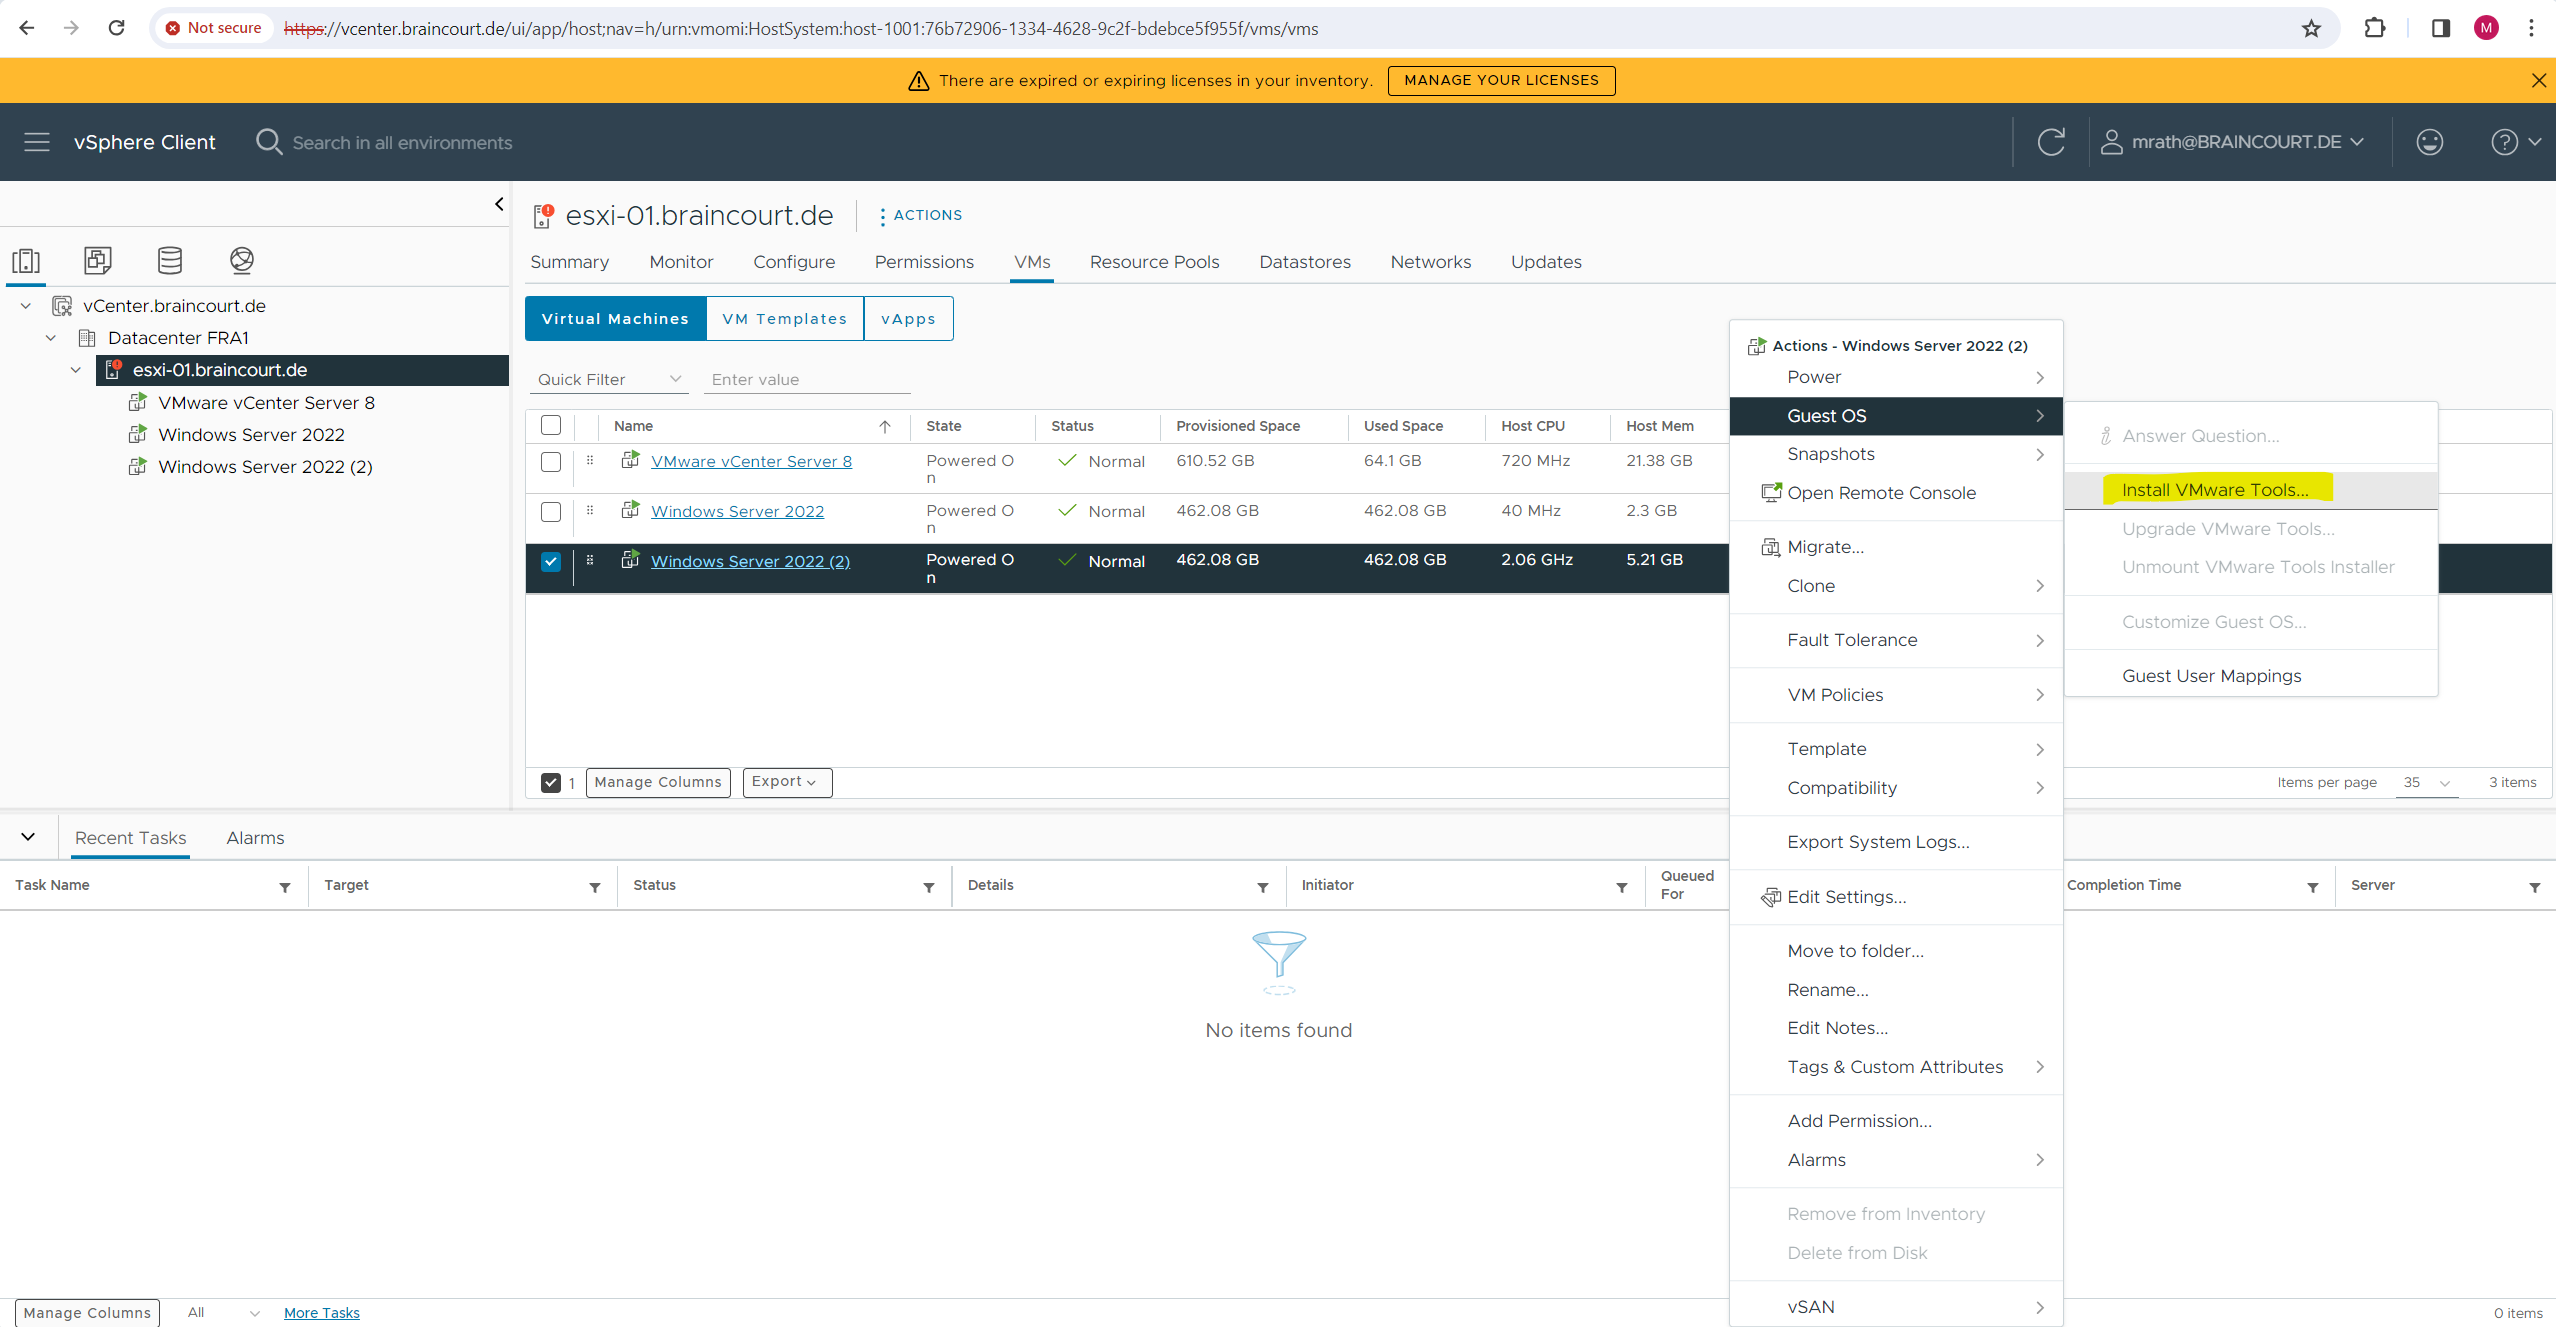
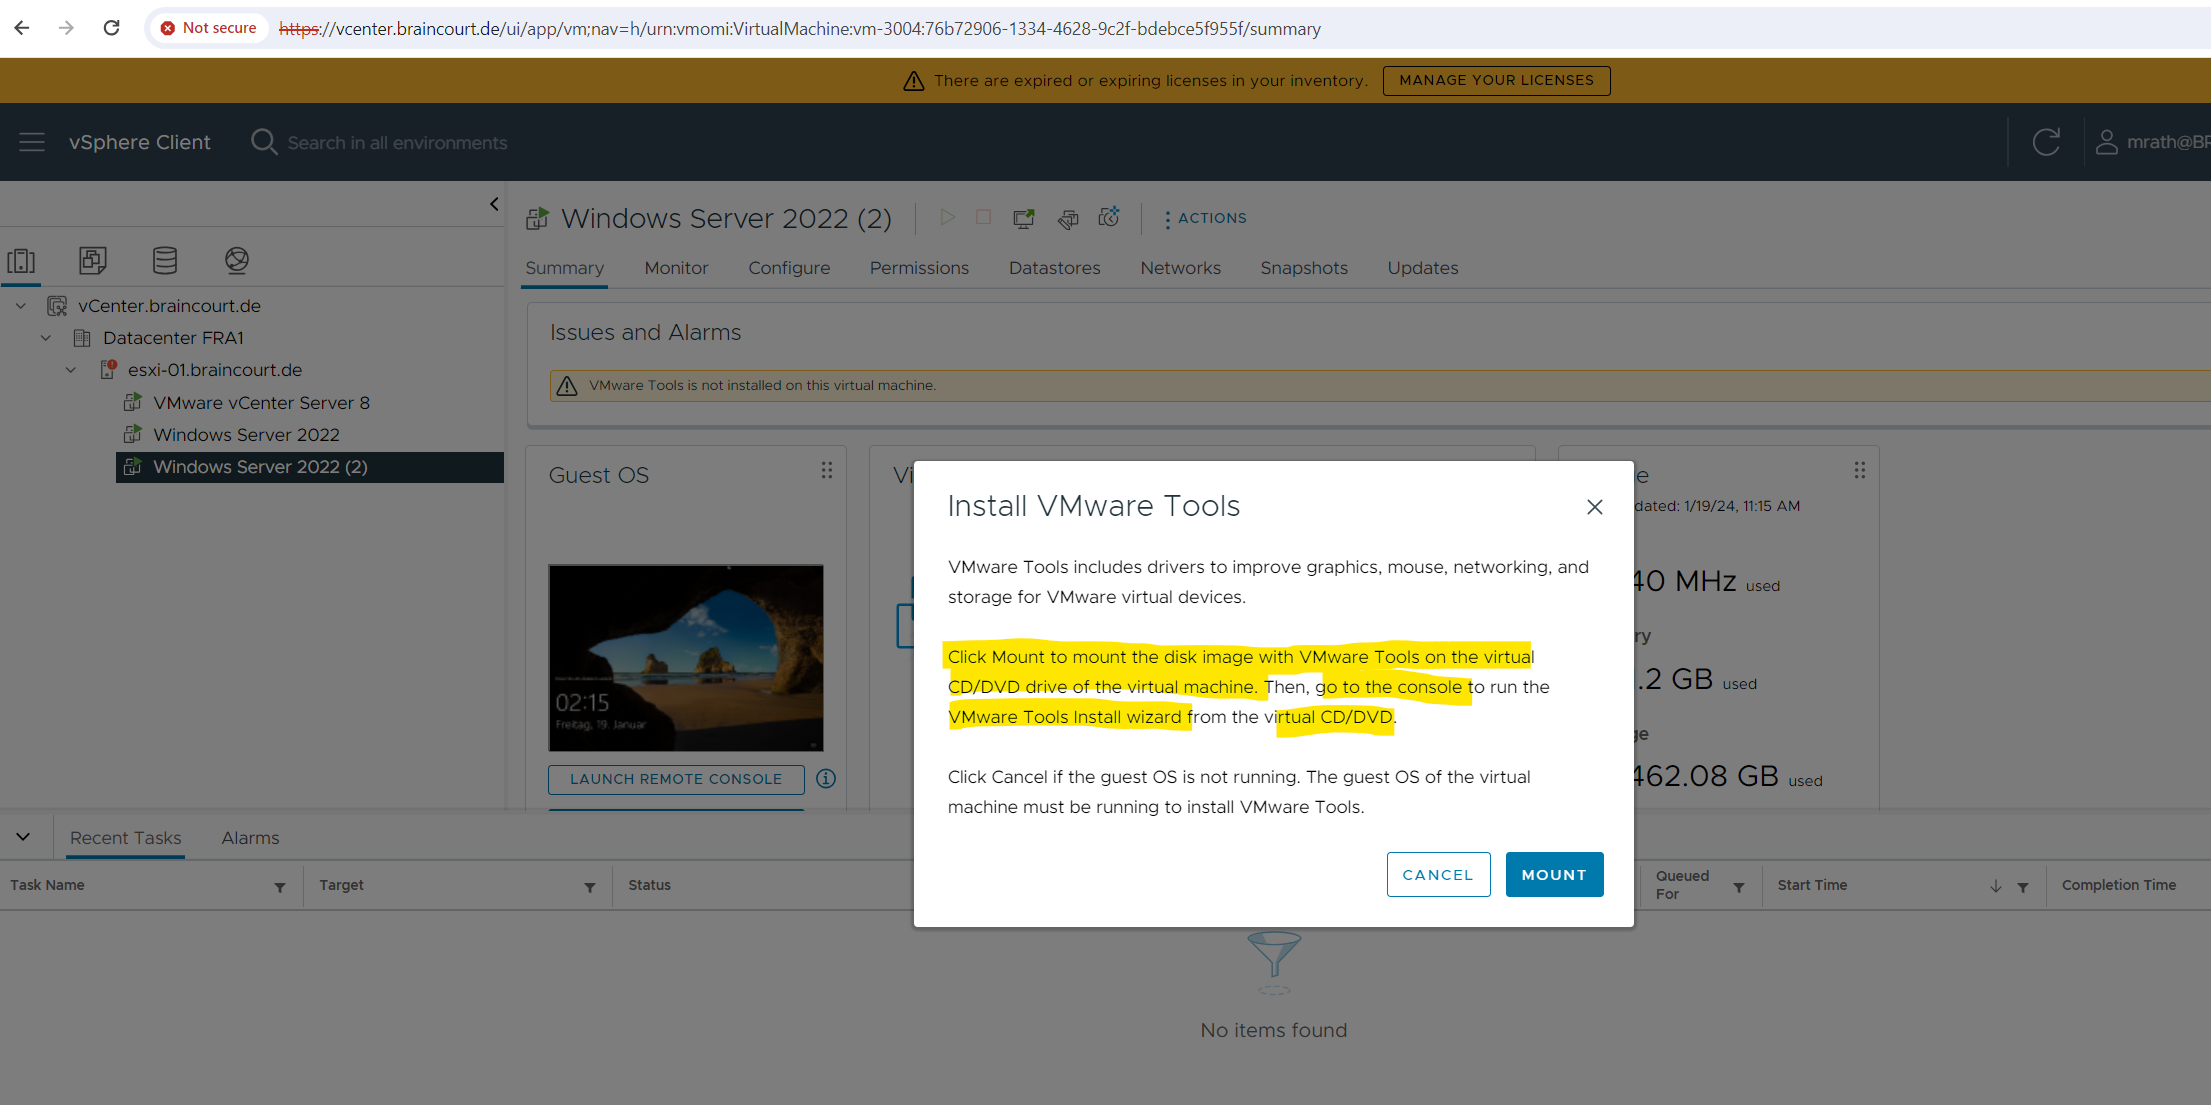
Click below on Actions and Install VMware Tools to mount the ISO file for the VM which includes all files needed to install the VMware Tools.

We can also use the vSphere client to mount the ISO file including the VMware Tools.
About how to set up a vSphere environment including the vCenter server I will show in my next post soon.
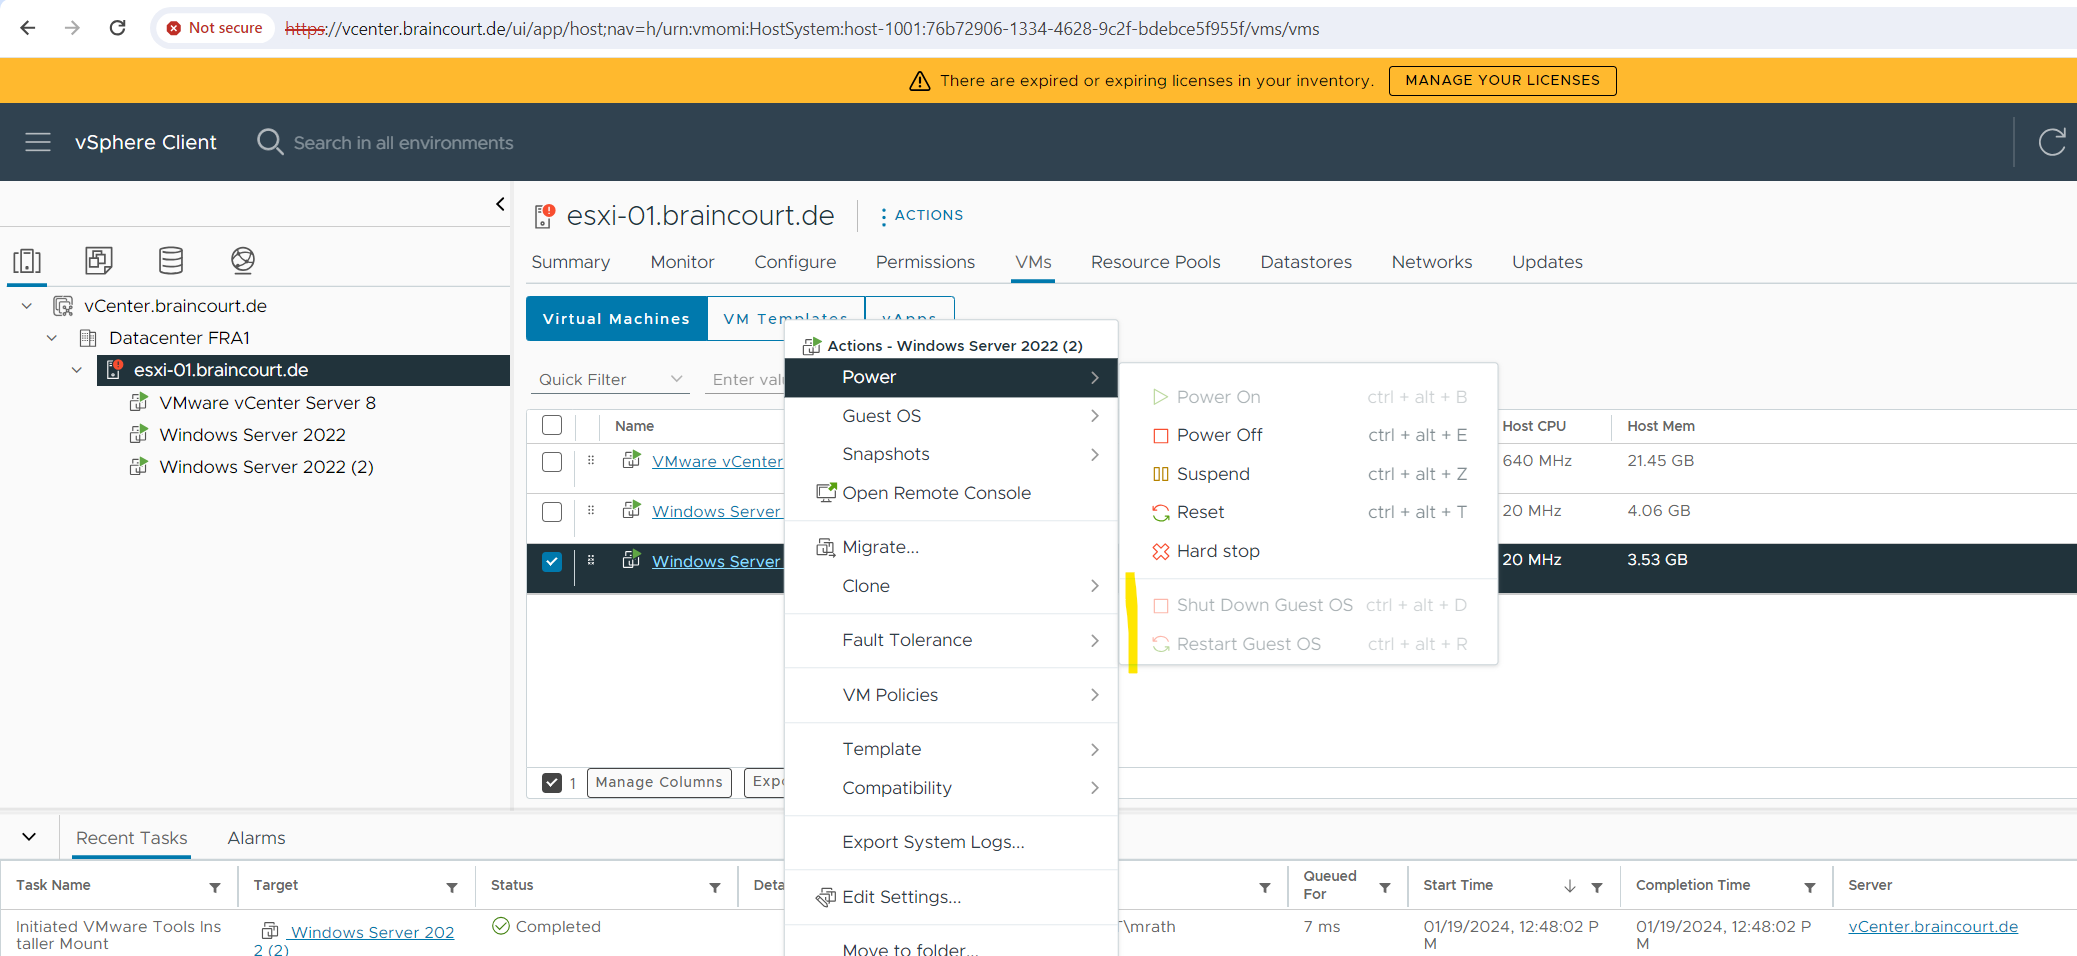
Either directly on the dashboard and its Actions notification of the virtual machine.
Or by using the context menue of the virtual machine.
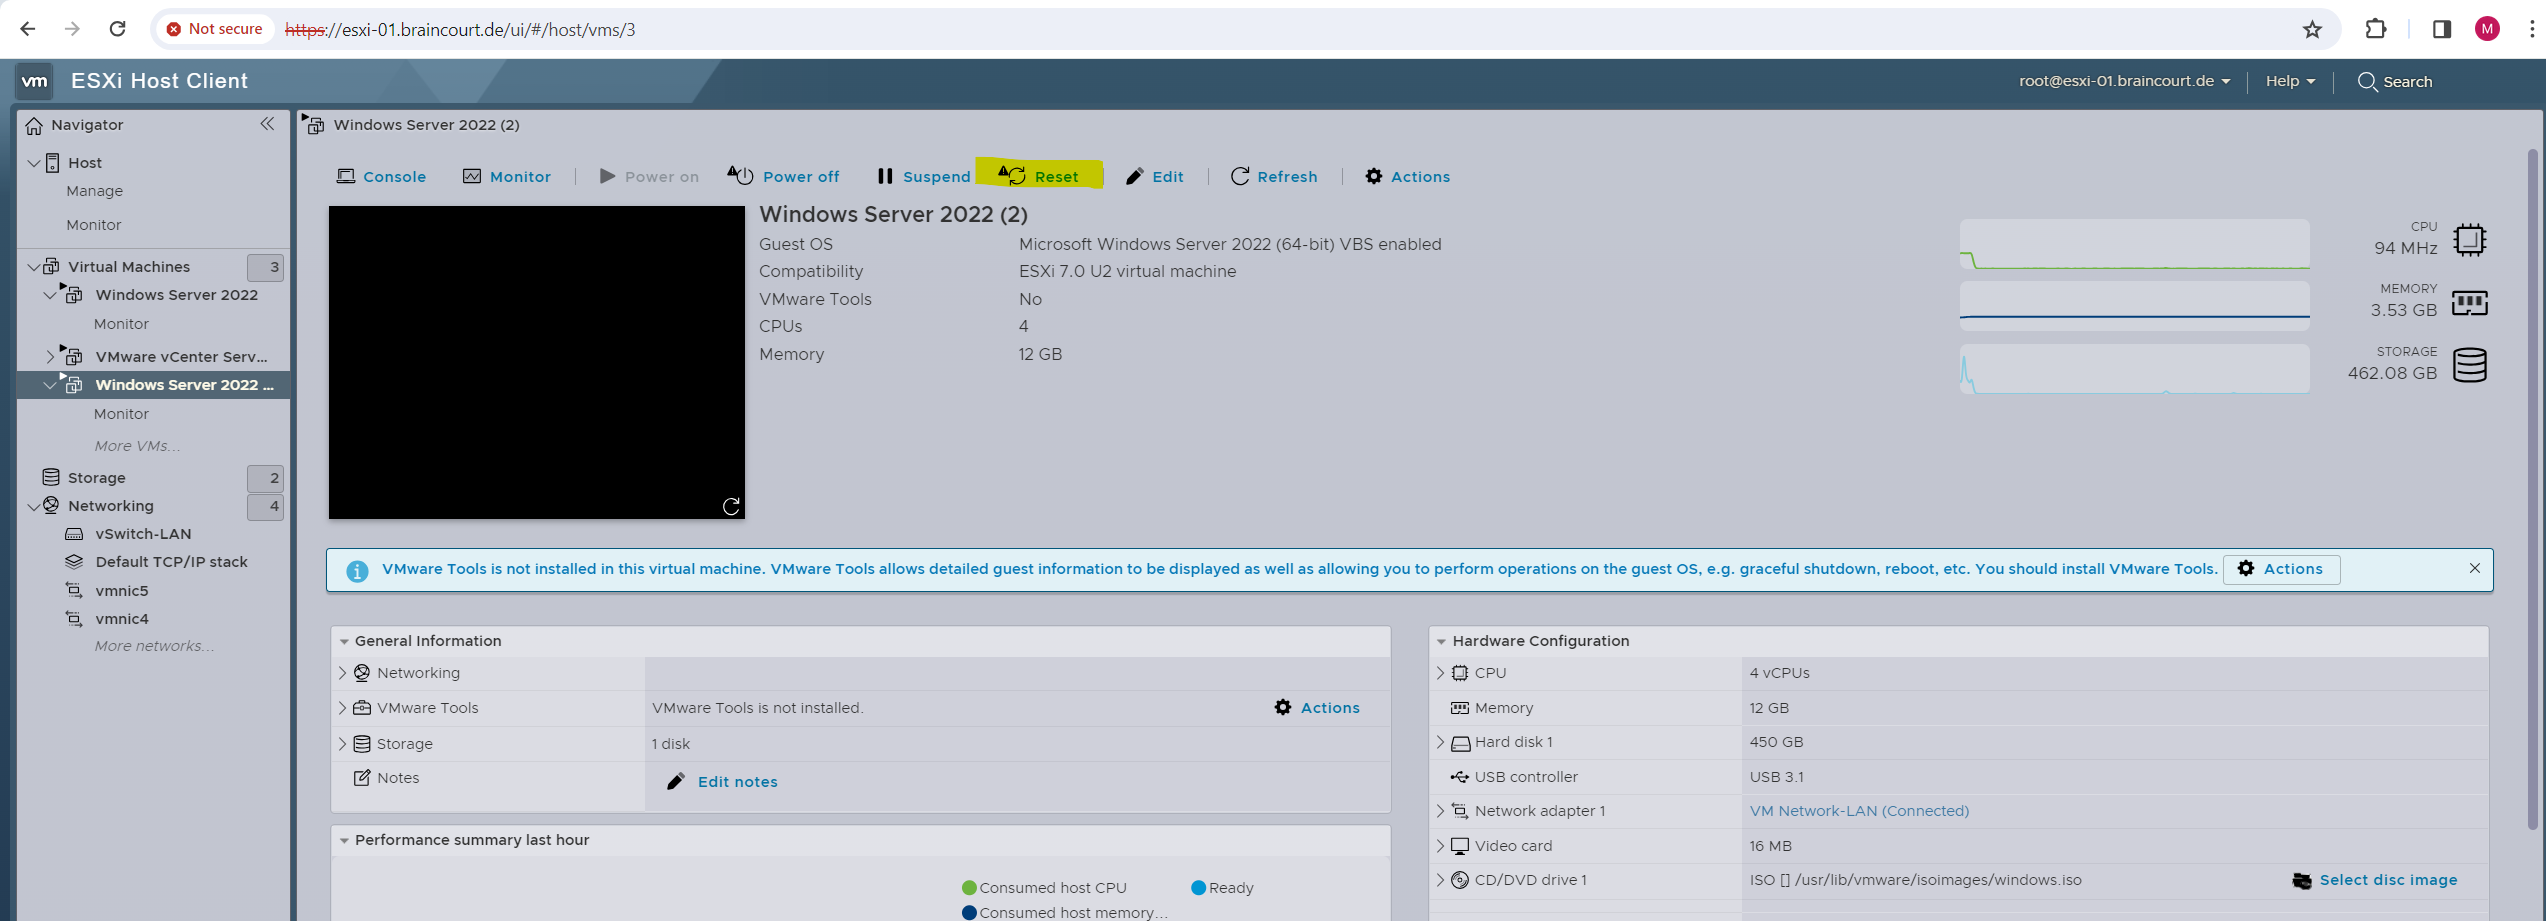
Without the VMware Tools installed on the VM you are also not able to trigger a reboot or shutdown from the ESXi Host client or vSphere client.
Within the ESXi Host client you are just able to trigger a reset (hard restart of the OS) or power off.
Within the vSphere client also the restart and shutdown option is greyed out without the VMware Tool installed on guests.
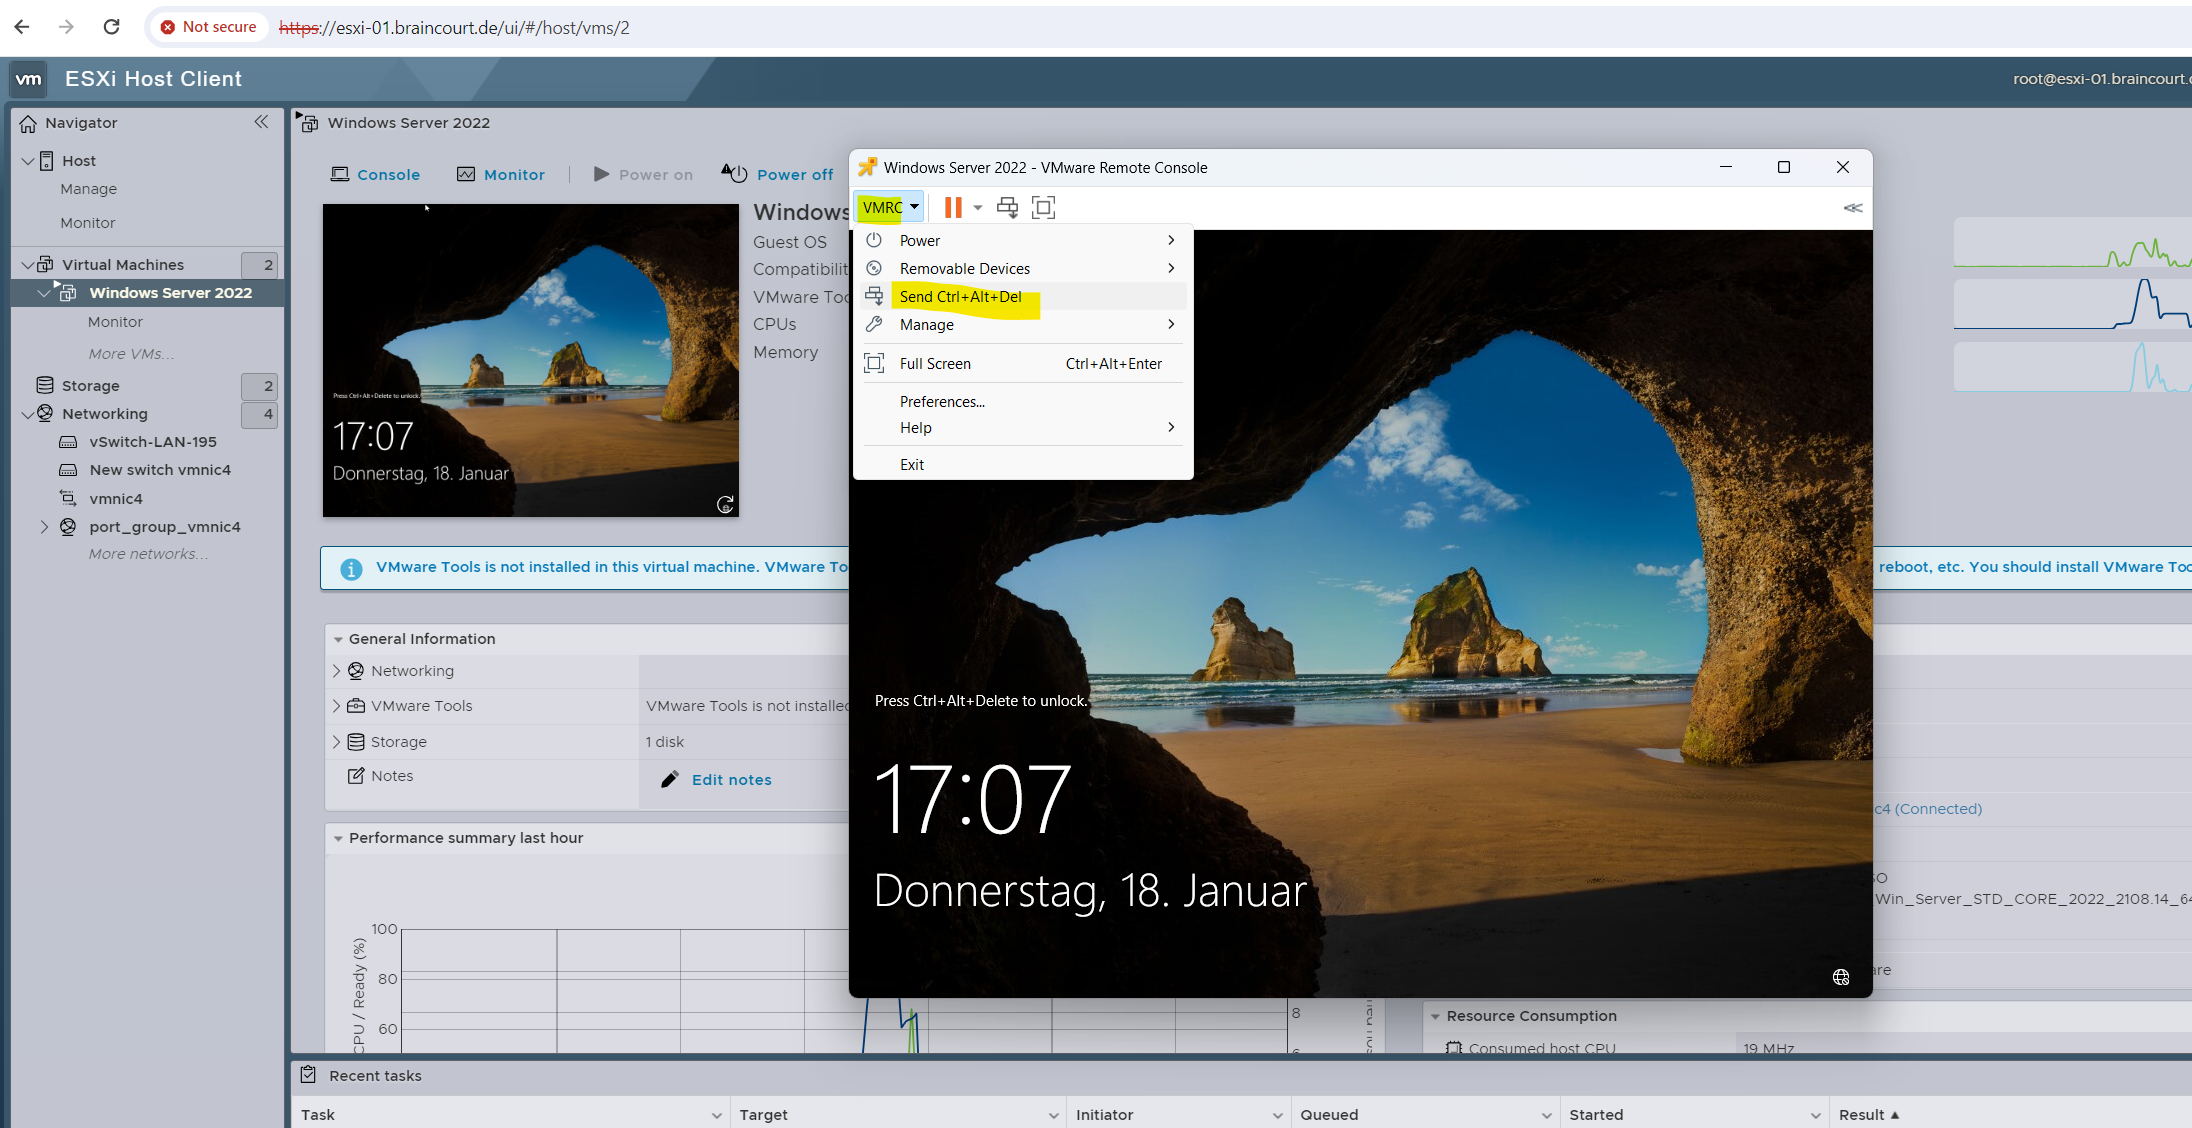
After a new installation we can’t use the first three consoles (highlighted below) to logon to our VM because we can’t unlock the sceen by using Send keys as shown below.
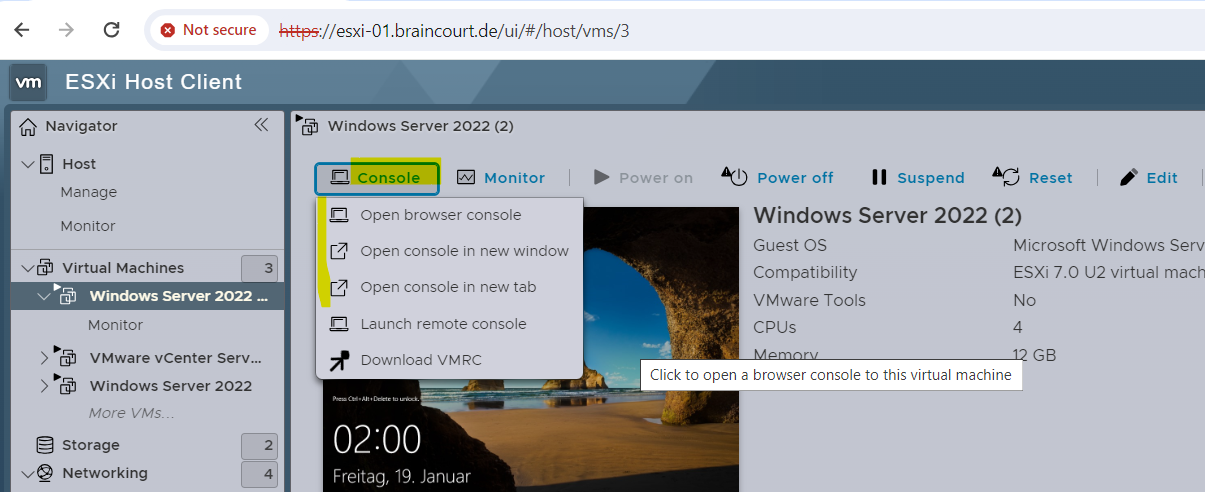
Nothing happens and the keys won’t be send to our VM.

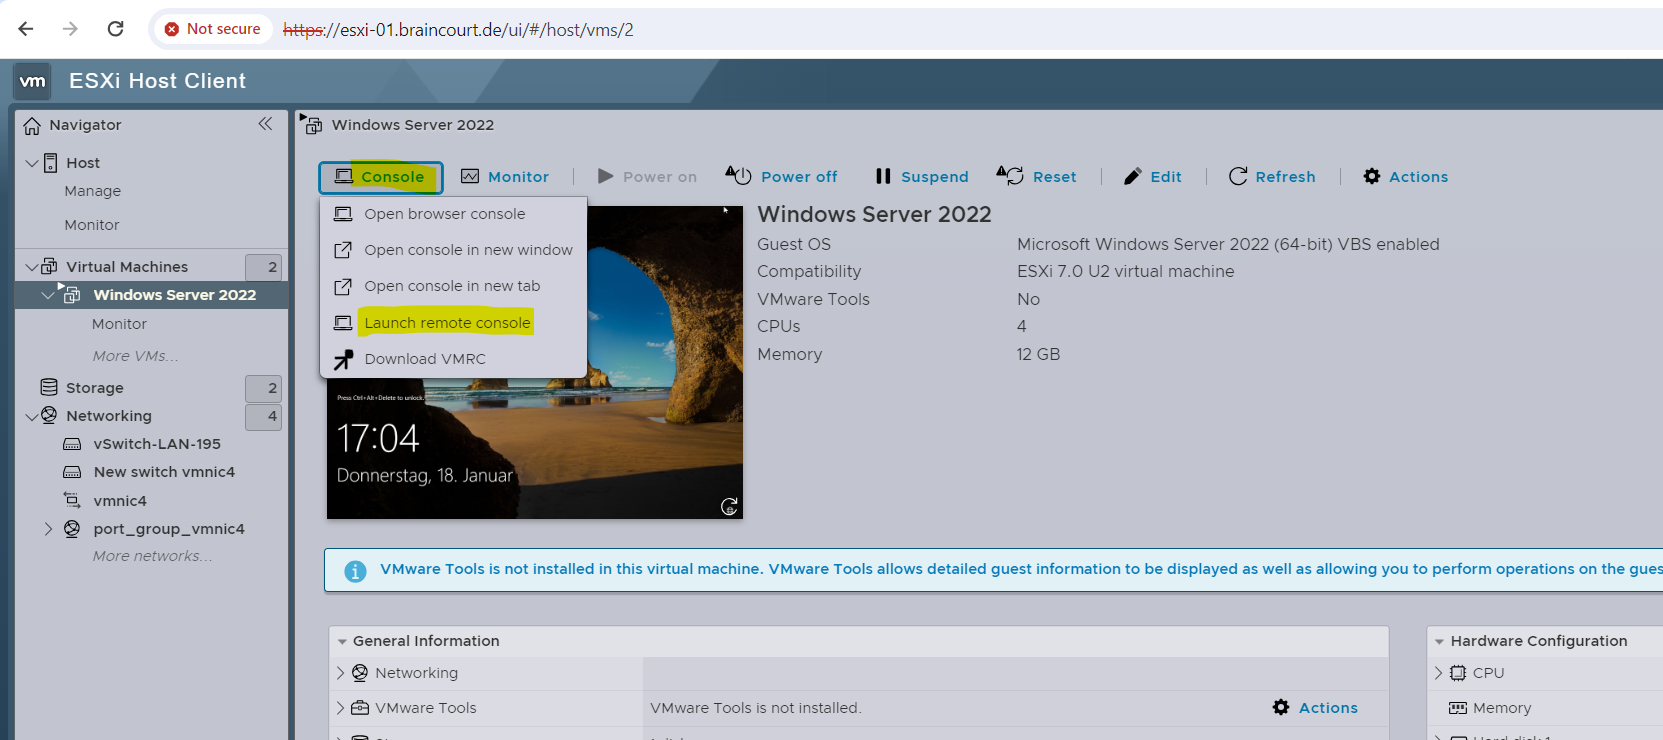
In order to also use the first three consoles we have to first install the VMware Tools on the VM. For the first logon we can use and launch the remote console if already installed on your local computer you will use to connect to the VM.
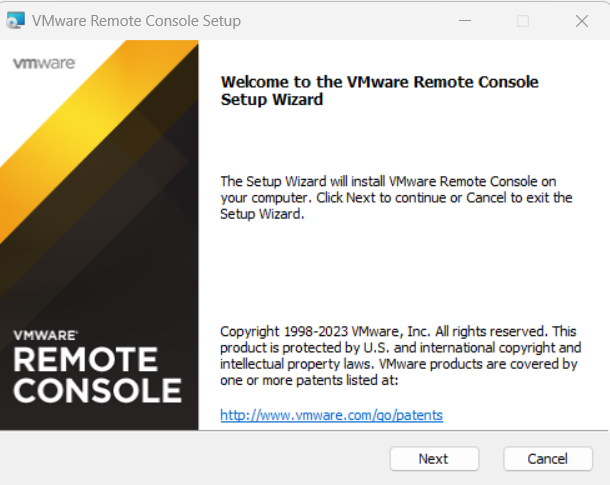
In my case I first need to install the VMRC and therefore I will click on Download VMRC as shown below.
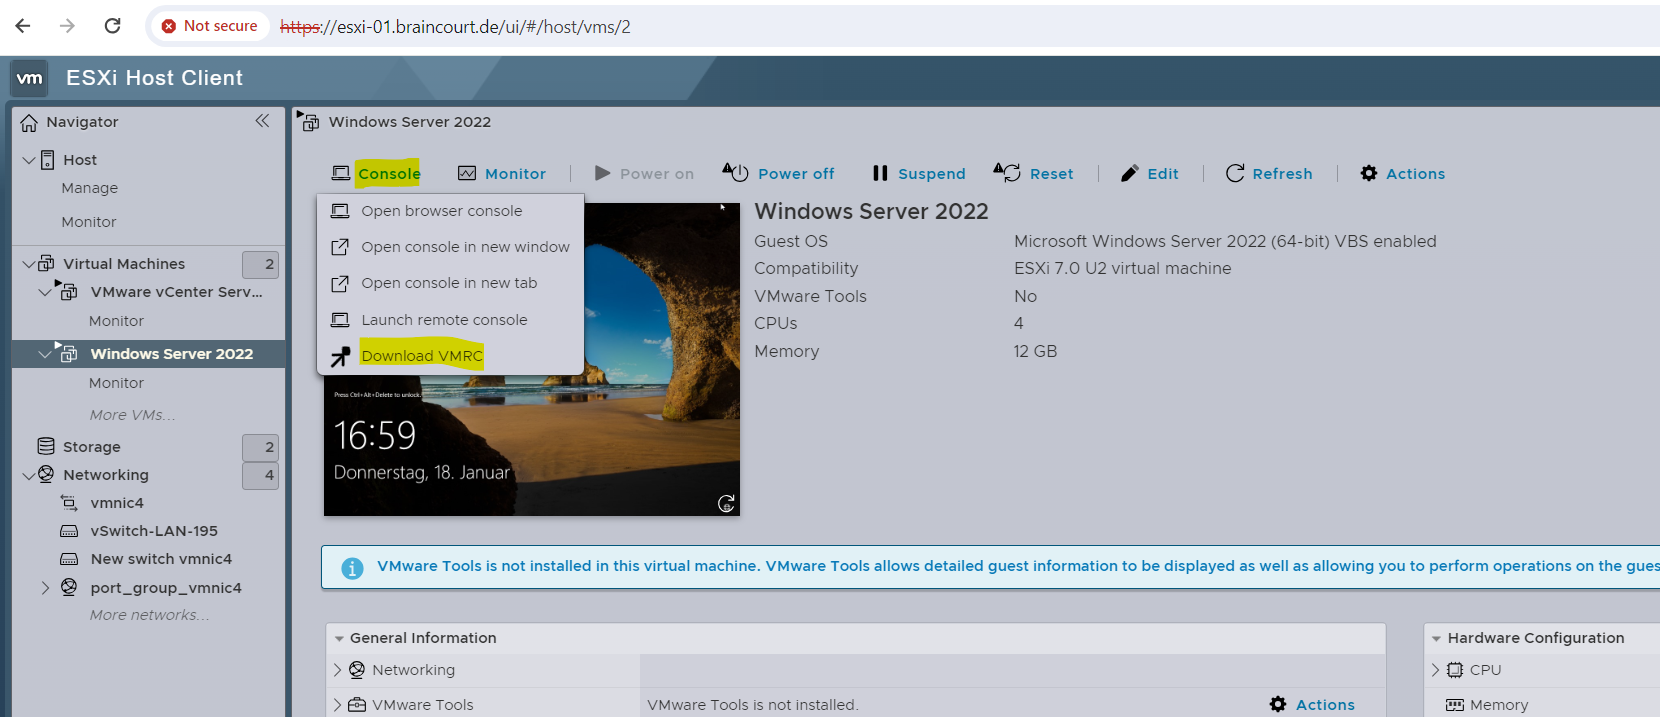
Download the remote console.
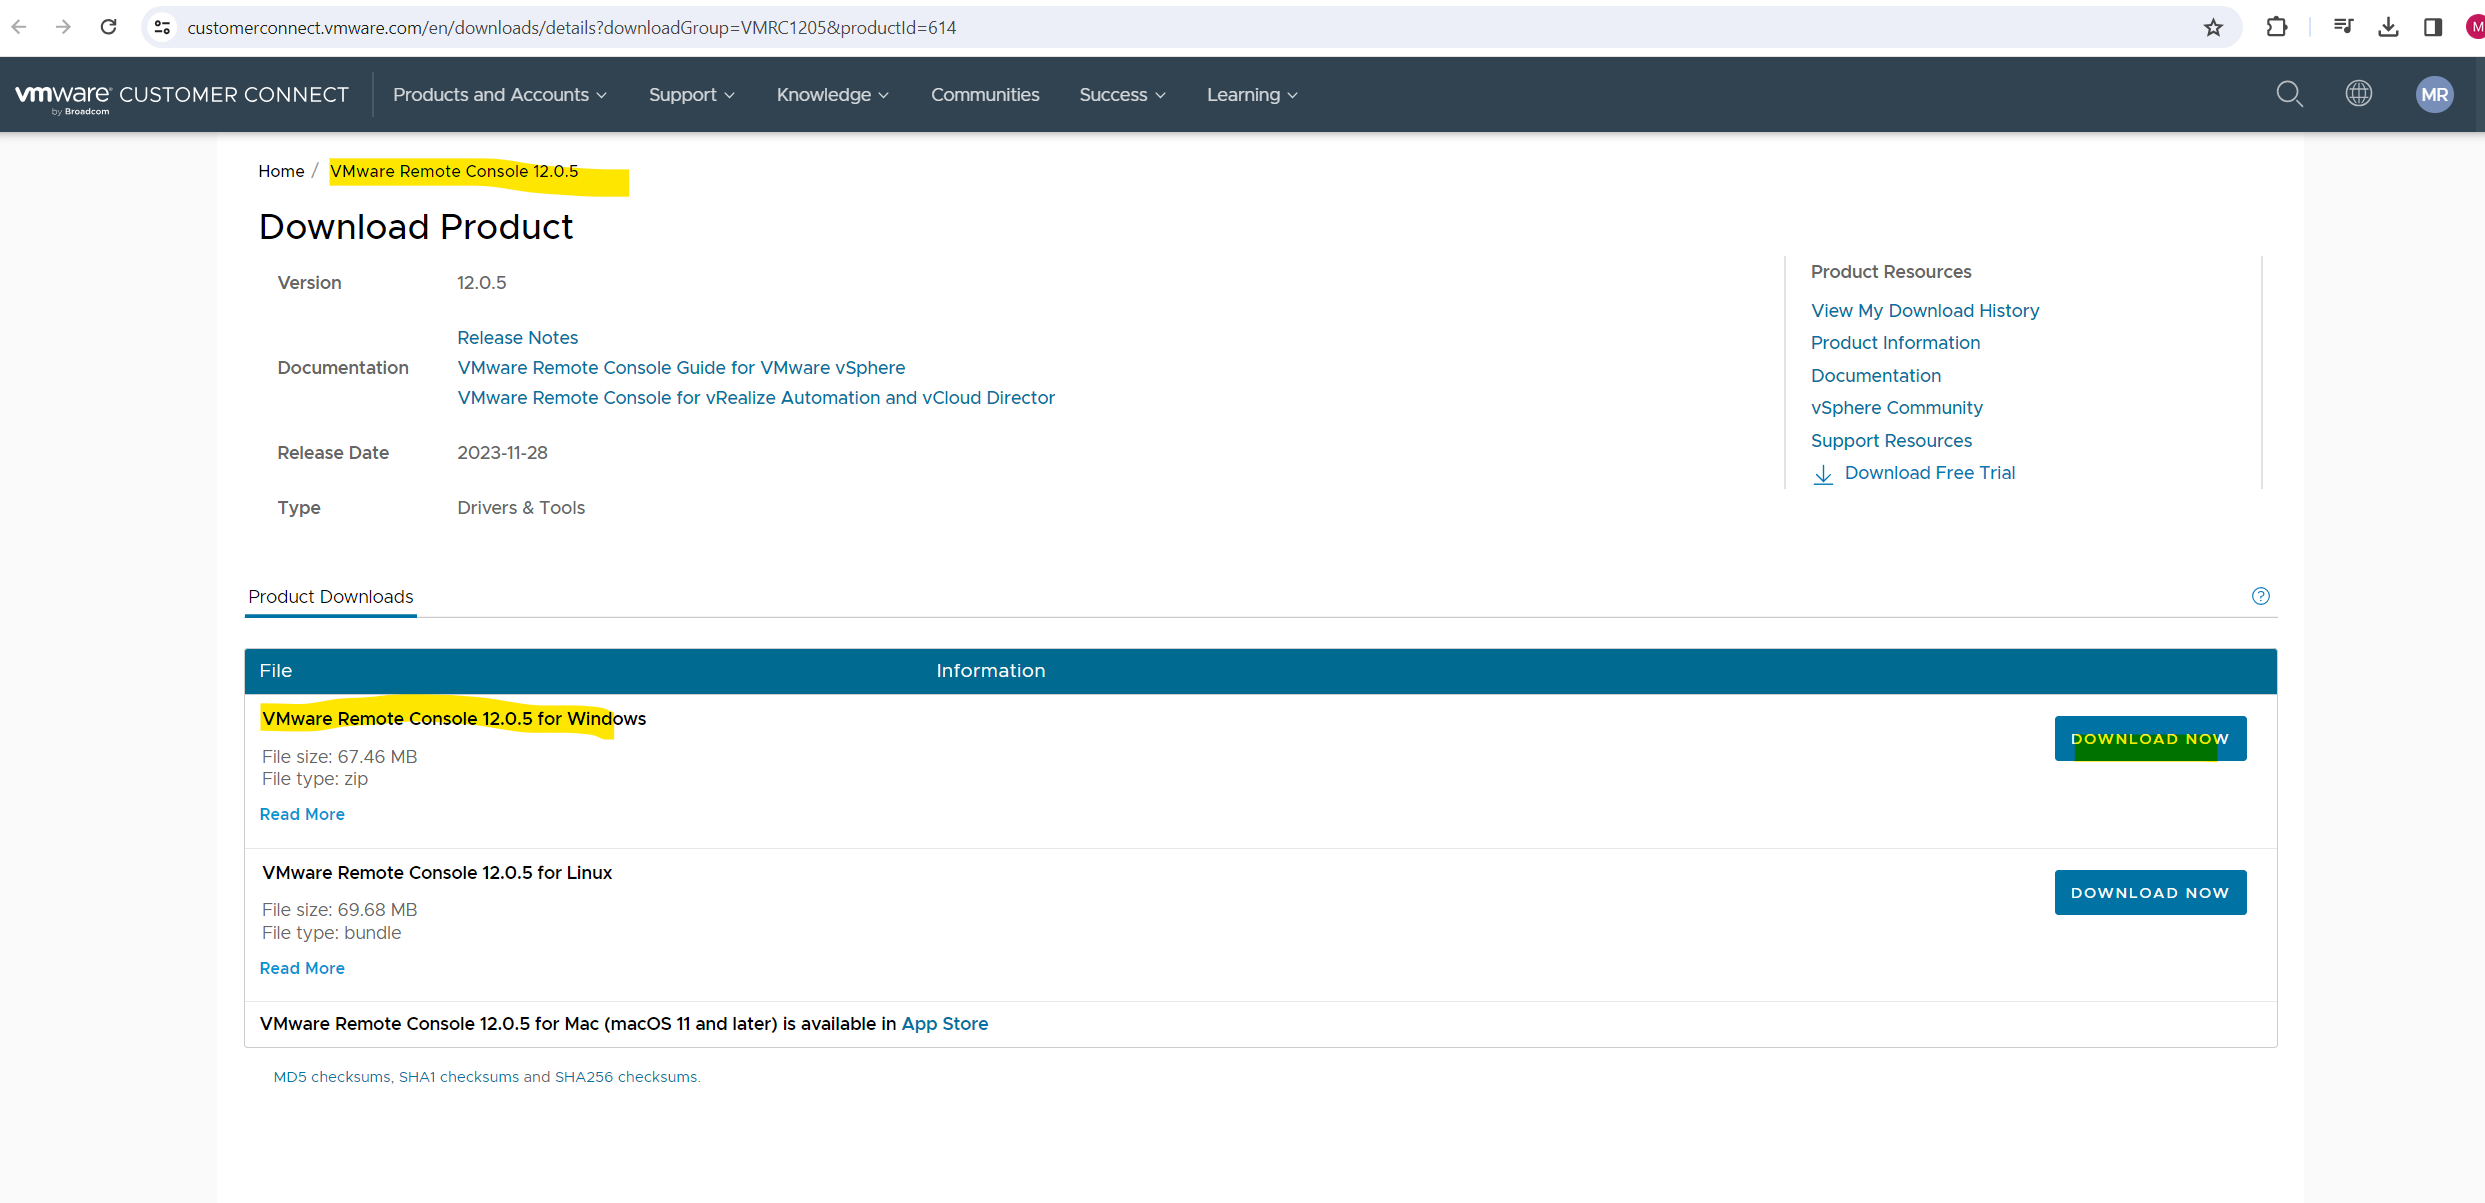
Install the remote console on your local computer.
After the installation of the VMRC on my local computer I can now launch it to connect to my VM and install the VMware Tools on.
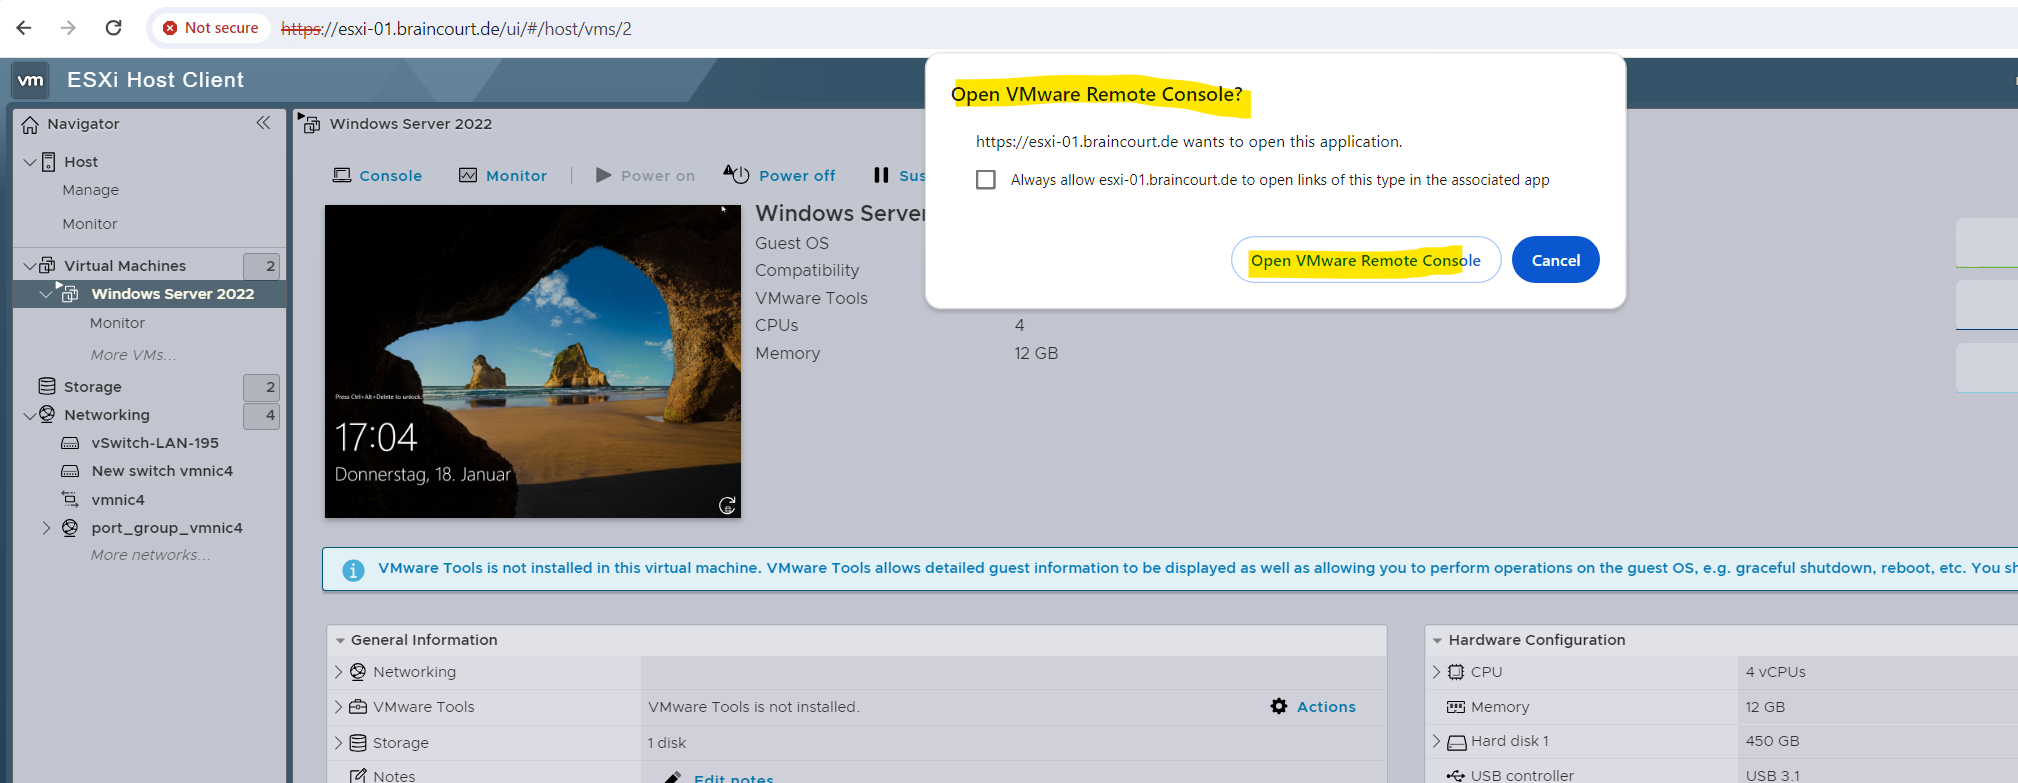
Click on open VMware Remote Console.
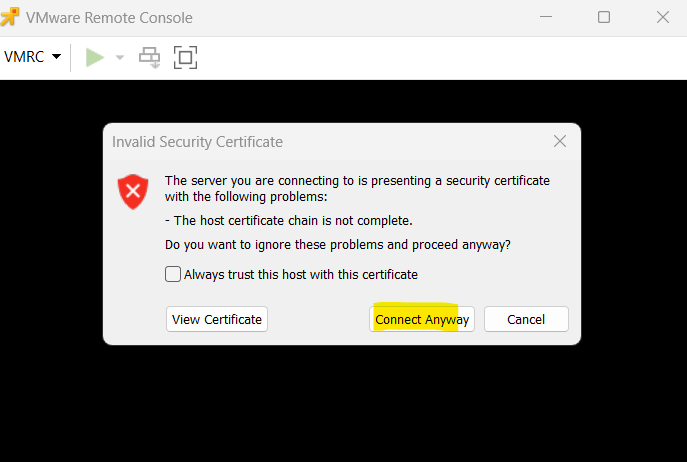
Click on Connect Anyway below and ignore the warning. Because the ESXi host is using a self-sigend certificate, your local computer can’t verify its issuer and therefore will not trust it. More about the certificates of the ESXi host and vSphere (vCenter server) you will see further down.
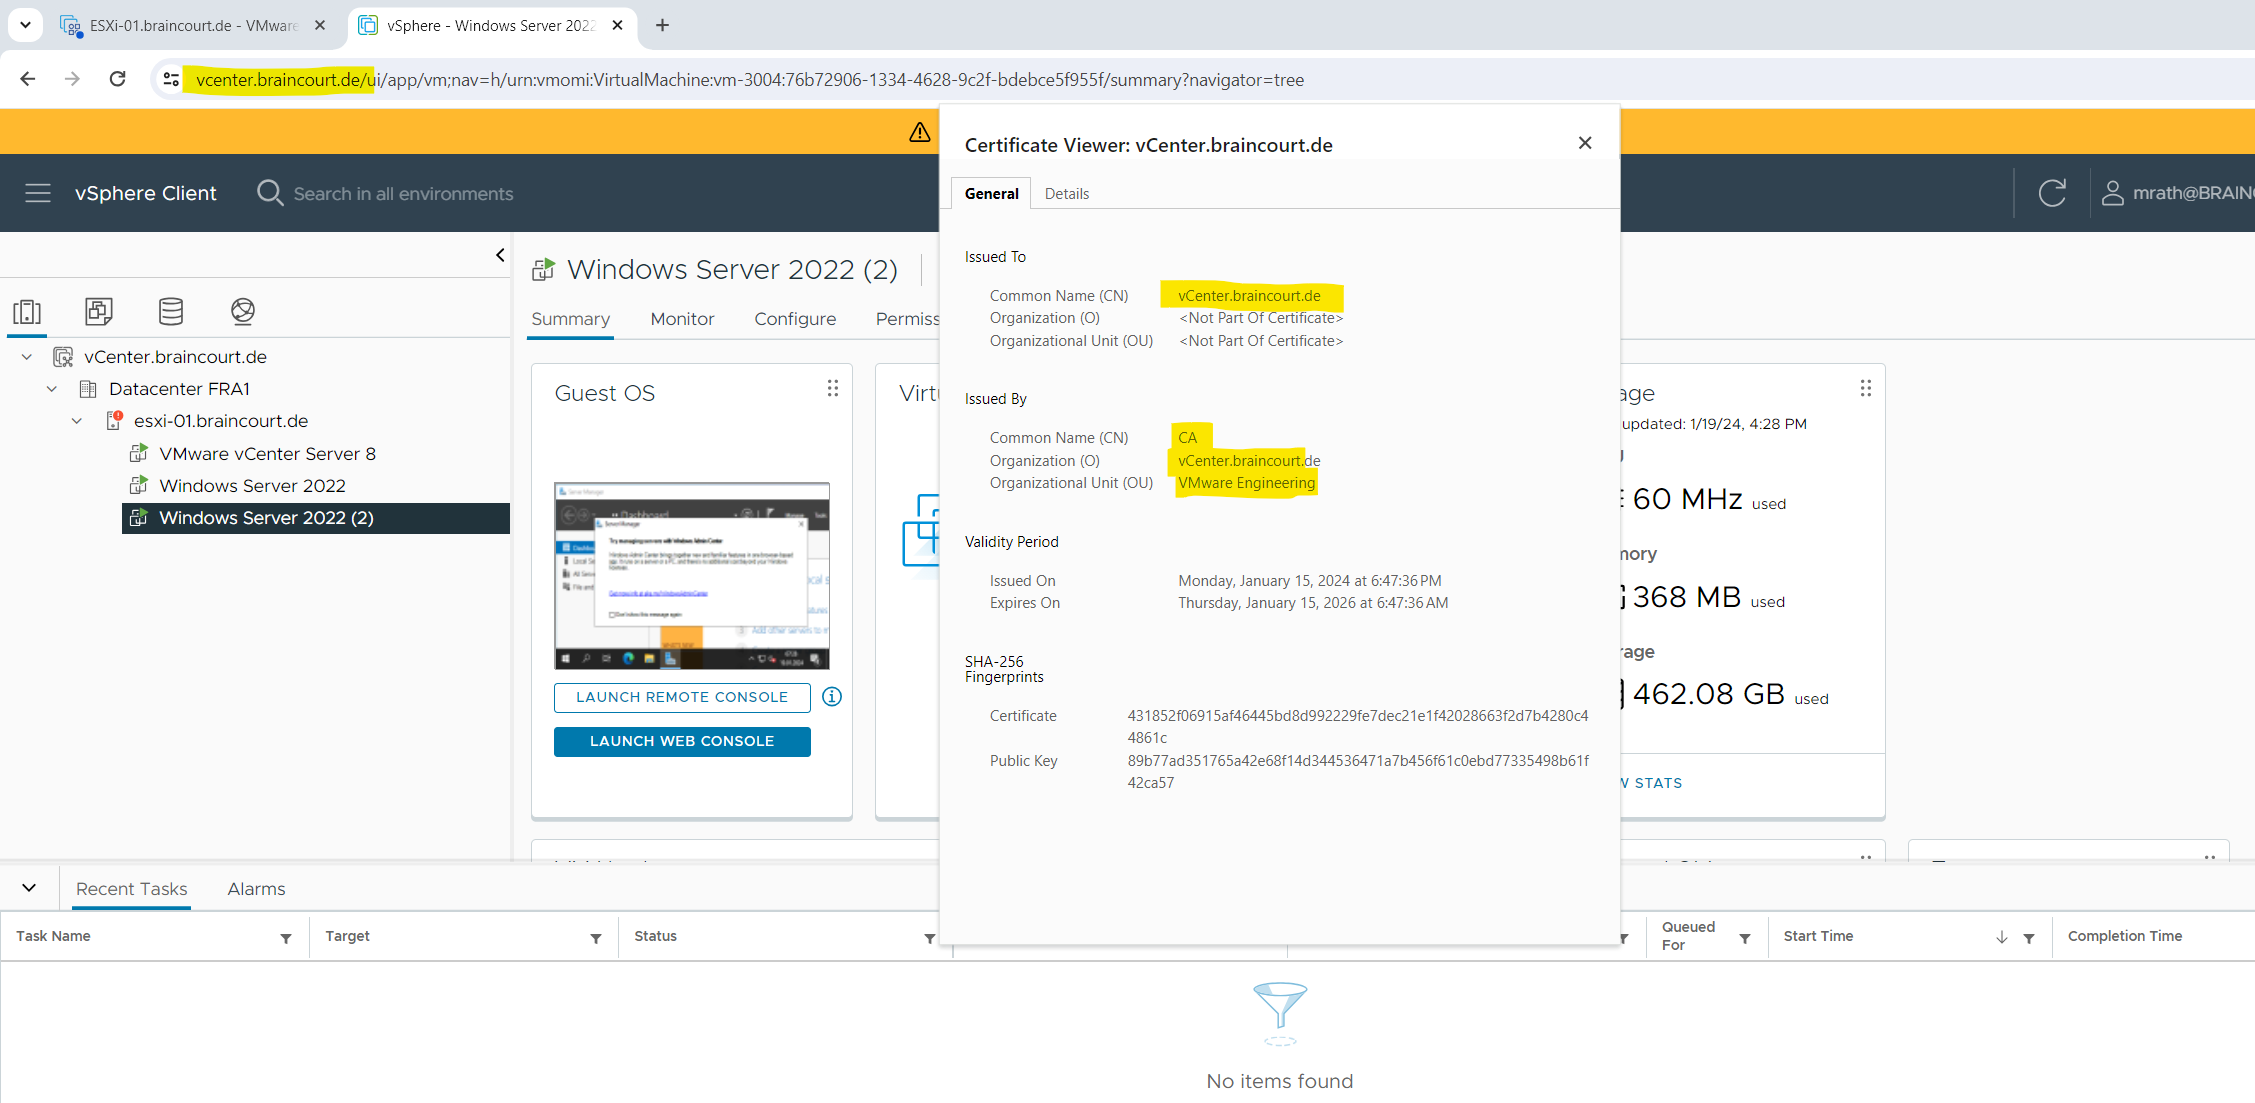
During the installation of ESXi, the installer generates a self-signed certificate for each ESXi host but the process is performed prior to the ESXi identity being configured. This means all ESXi hosts have a common name in their self-signed certificate of localhost.localdomain.
Further, by default, when the host is added to a vCenter Server system during bring-up of the management domain or other operations involving hosts (for example, host commissioning, VI workload domain creation, and so on), the autogenerated certificate is replaced with a certificate that is signed by the VMware Certificate Authority (VMCA).
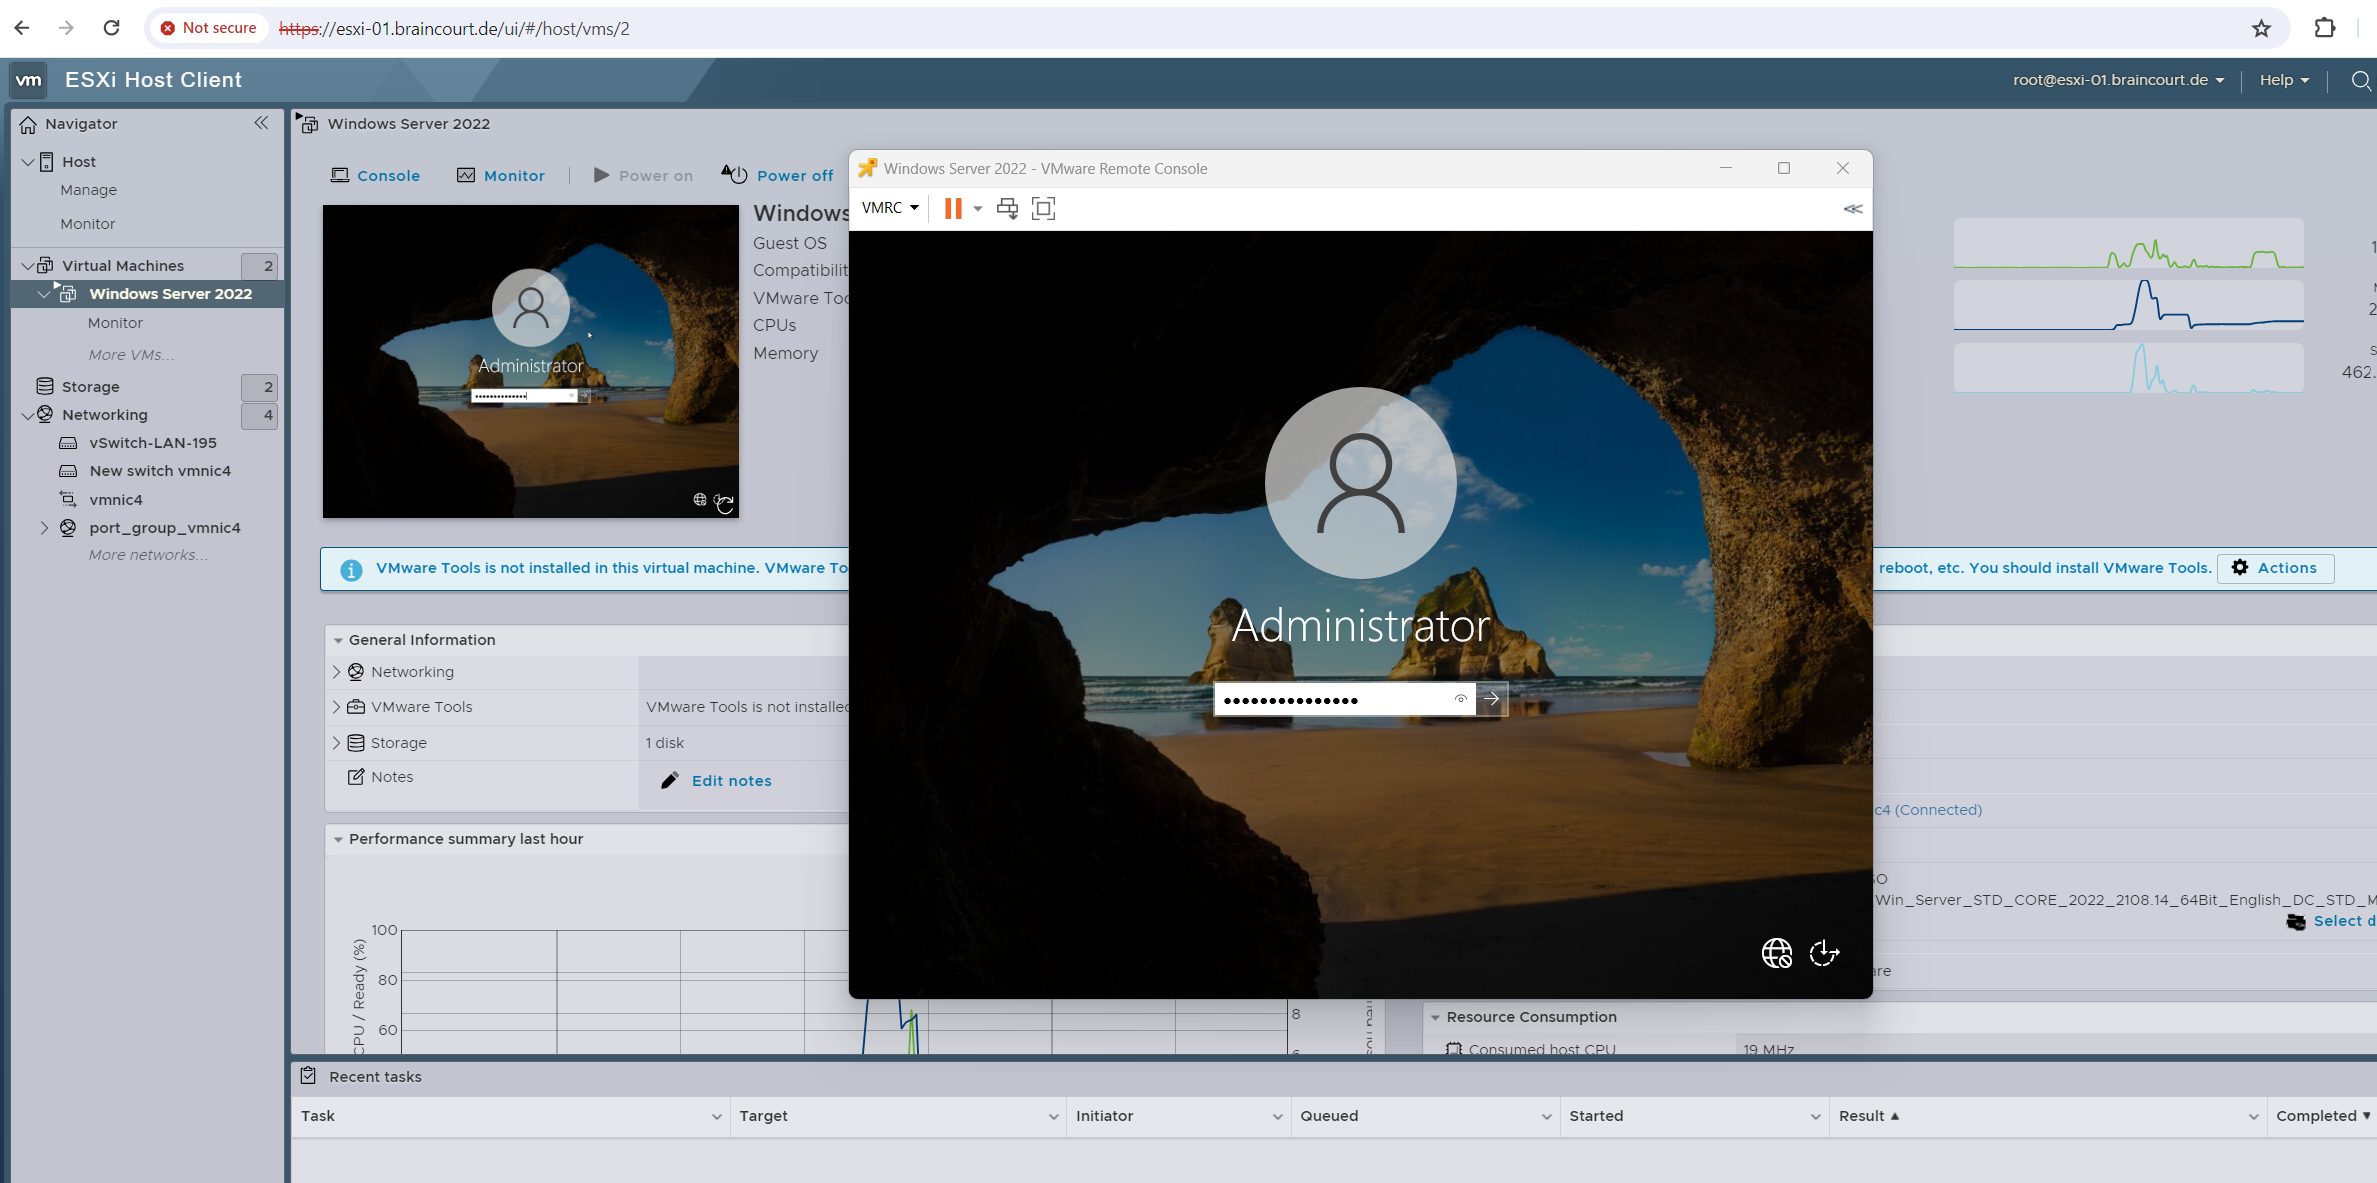
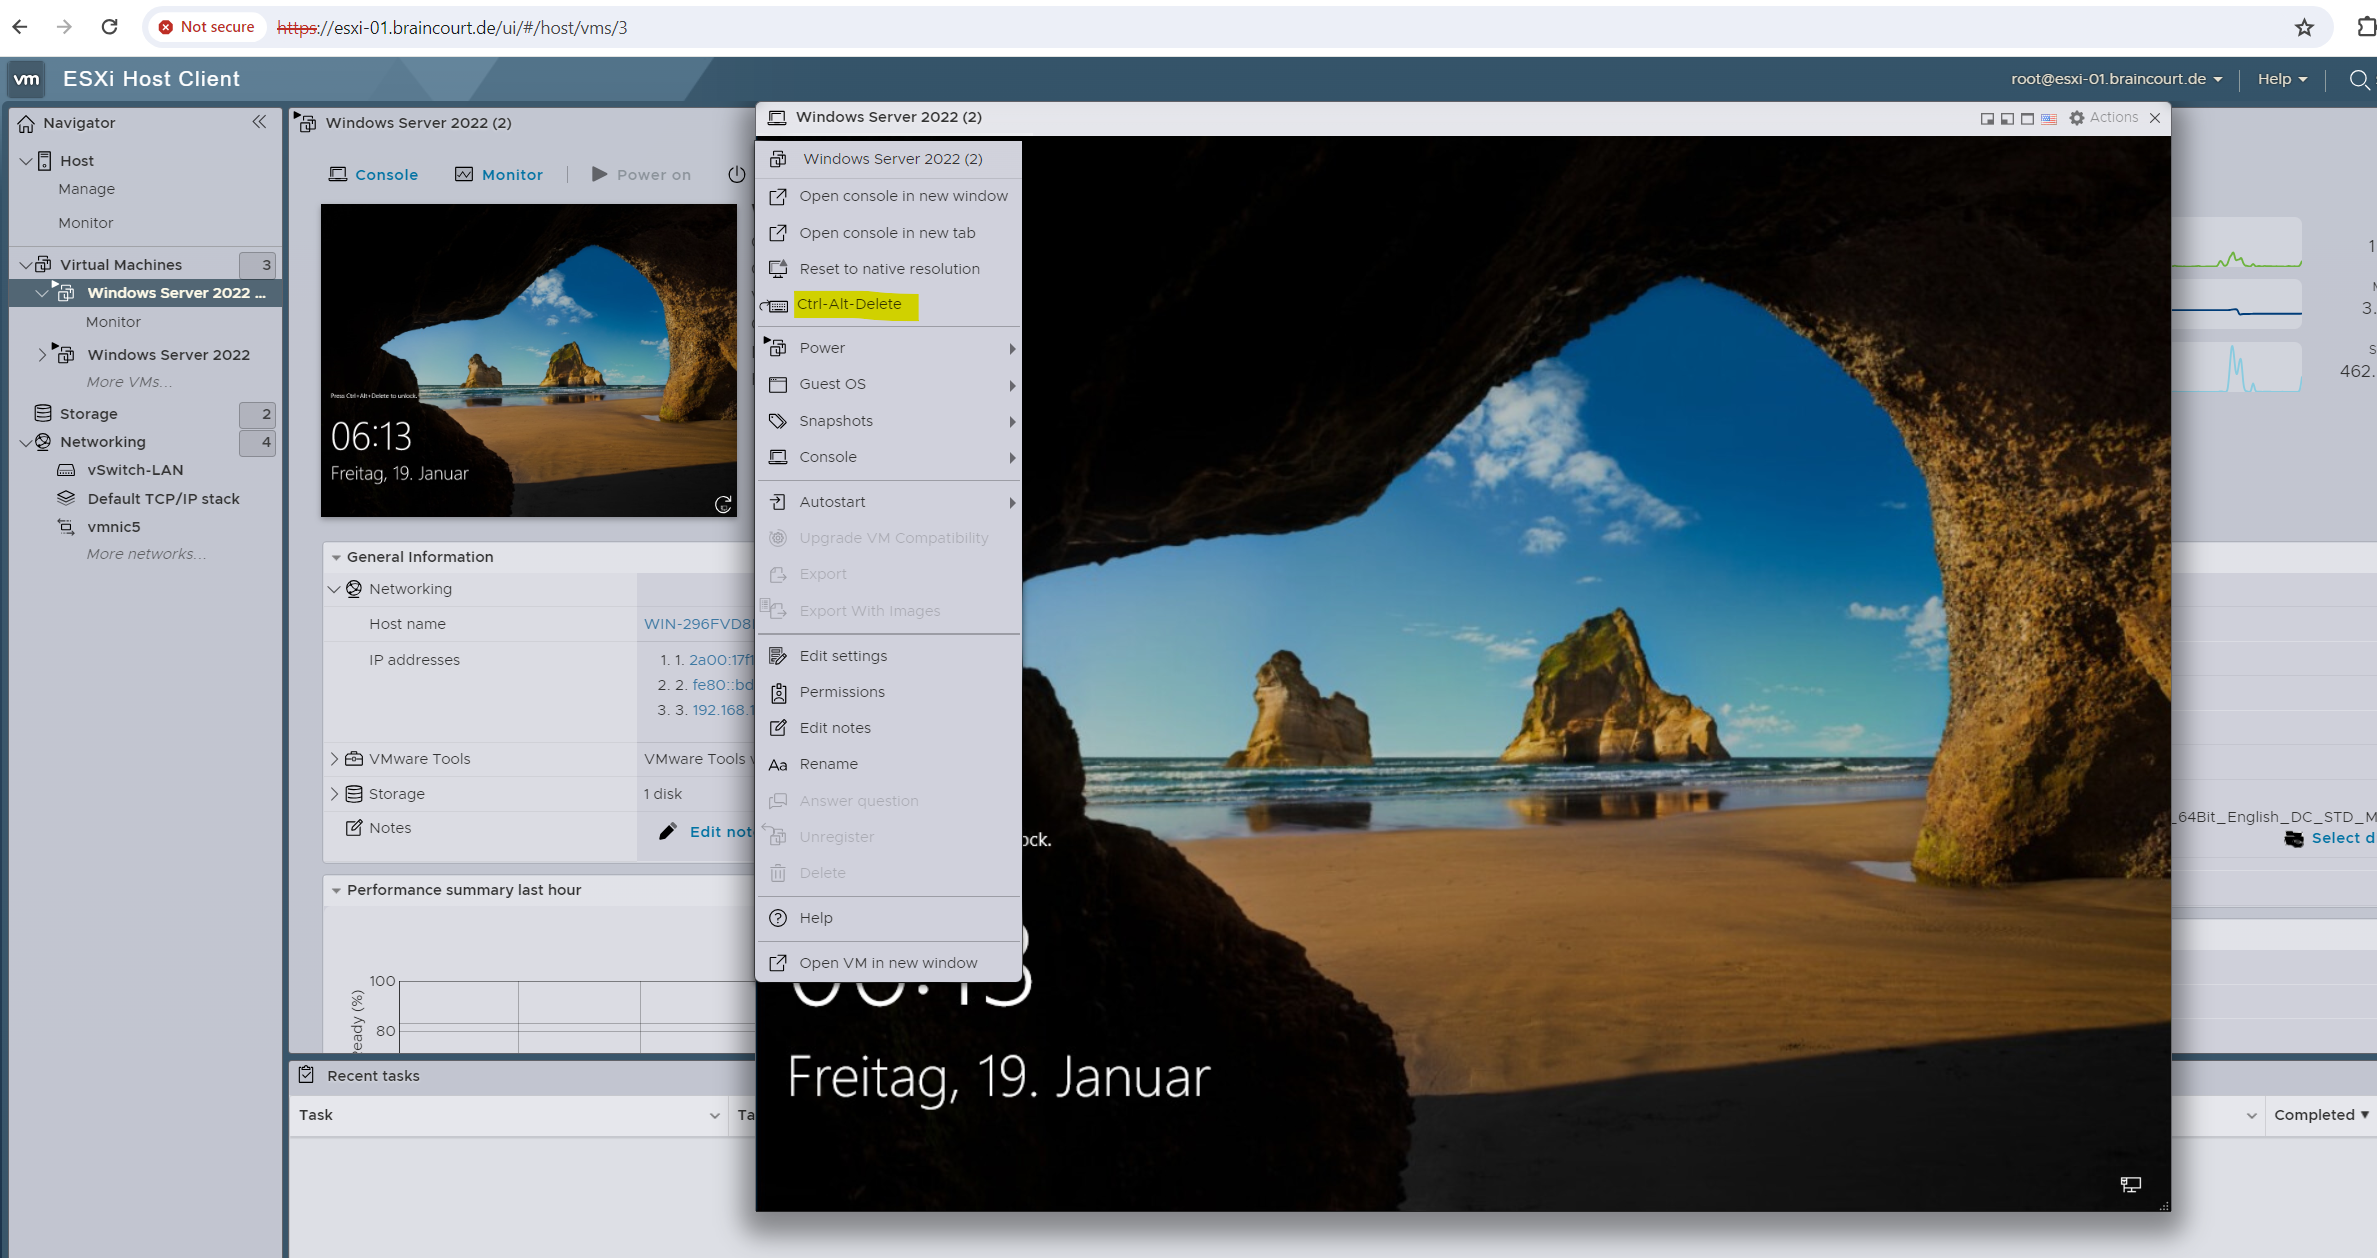
By using the remote console, we have here a dedicated option to send Ctrl + Alt + Del to our VM to unlock the screen.
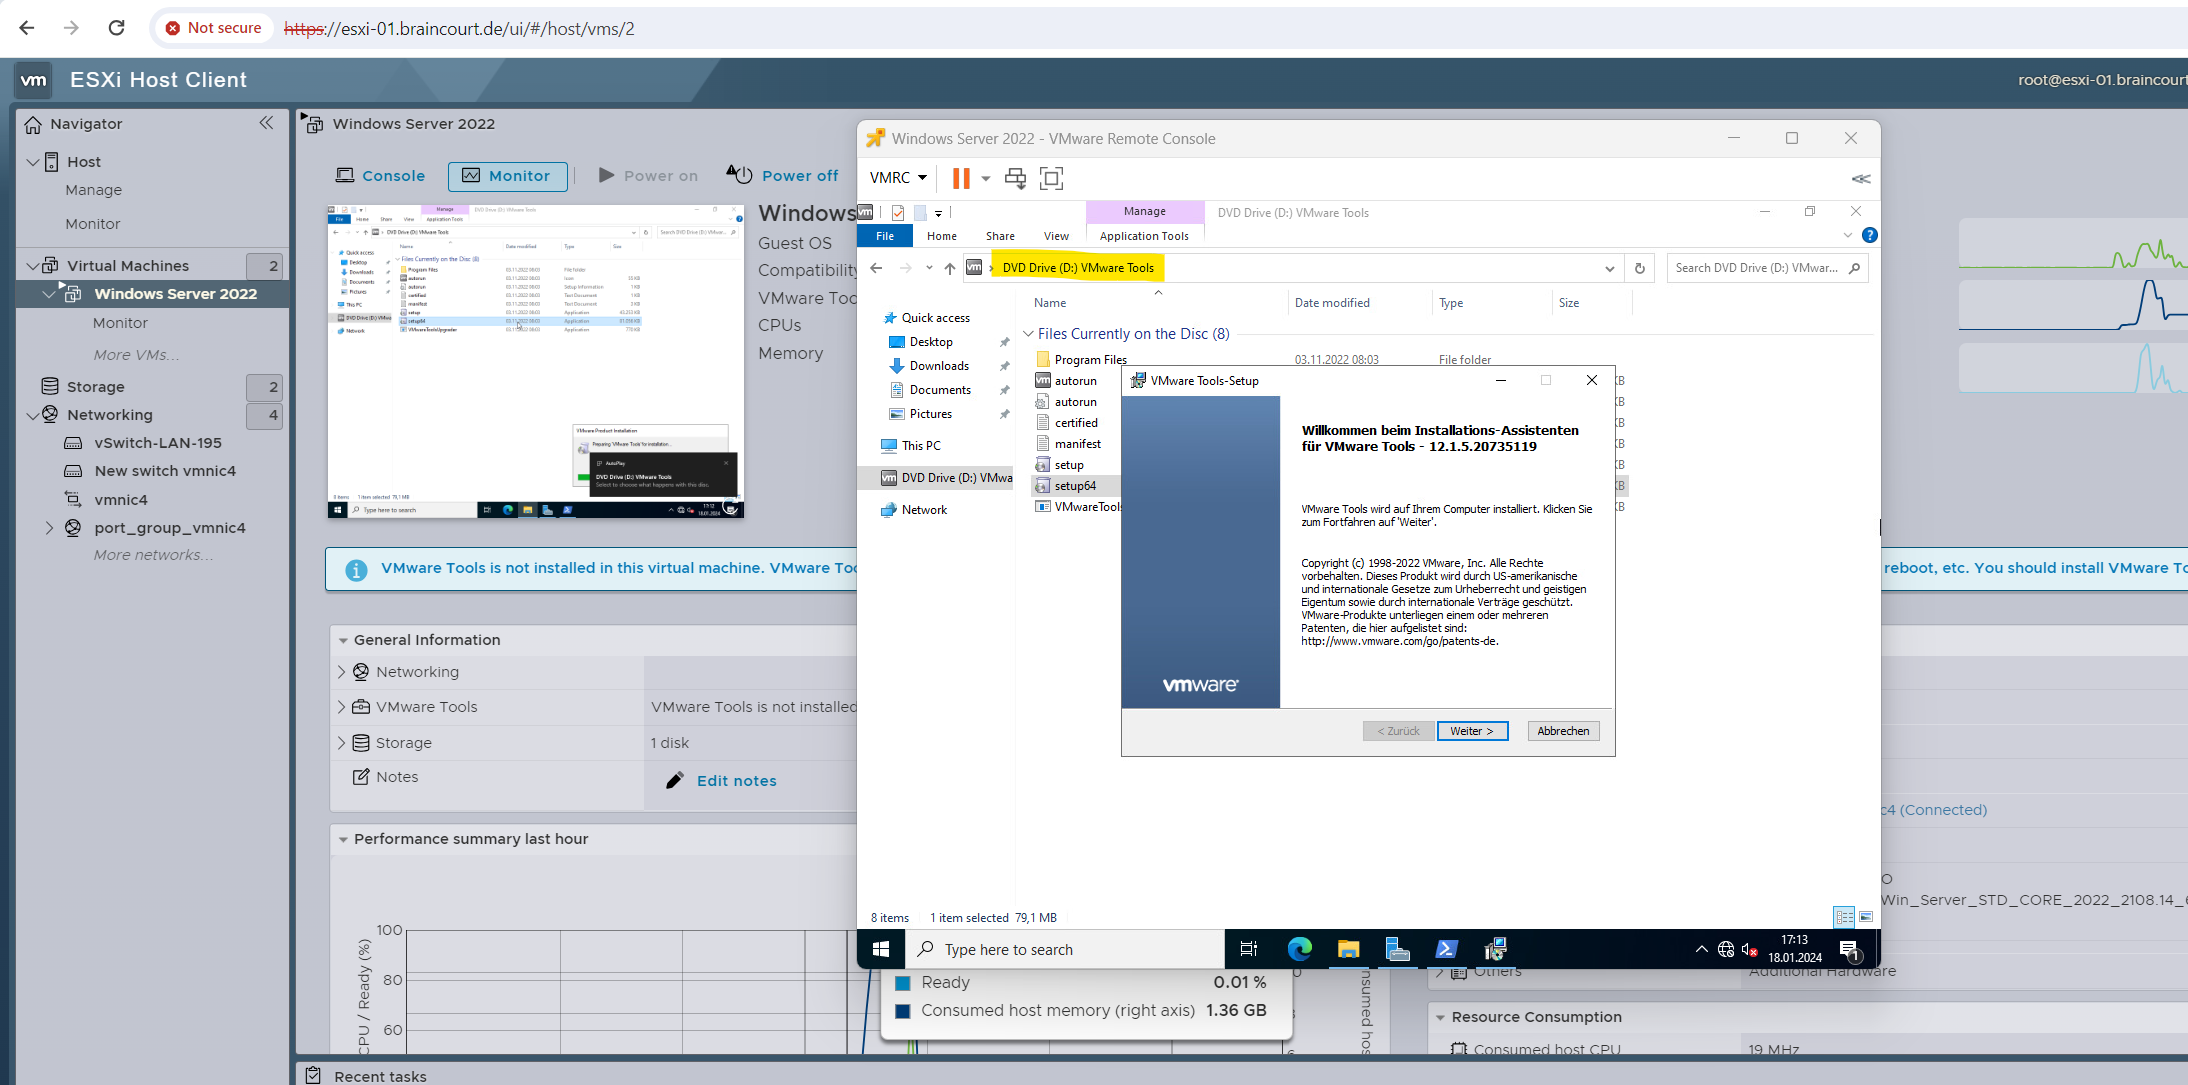
We can now install the VMware Tools from the previously mounted ISO file.
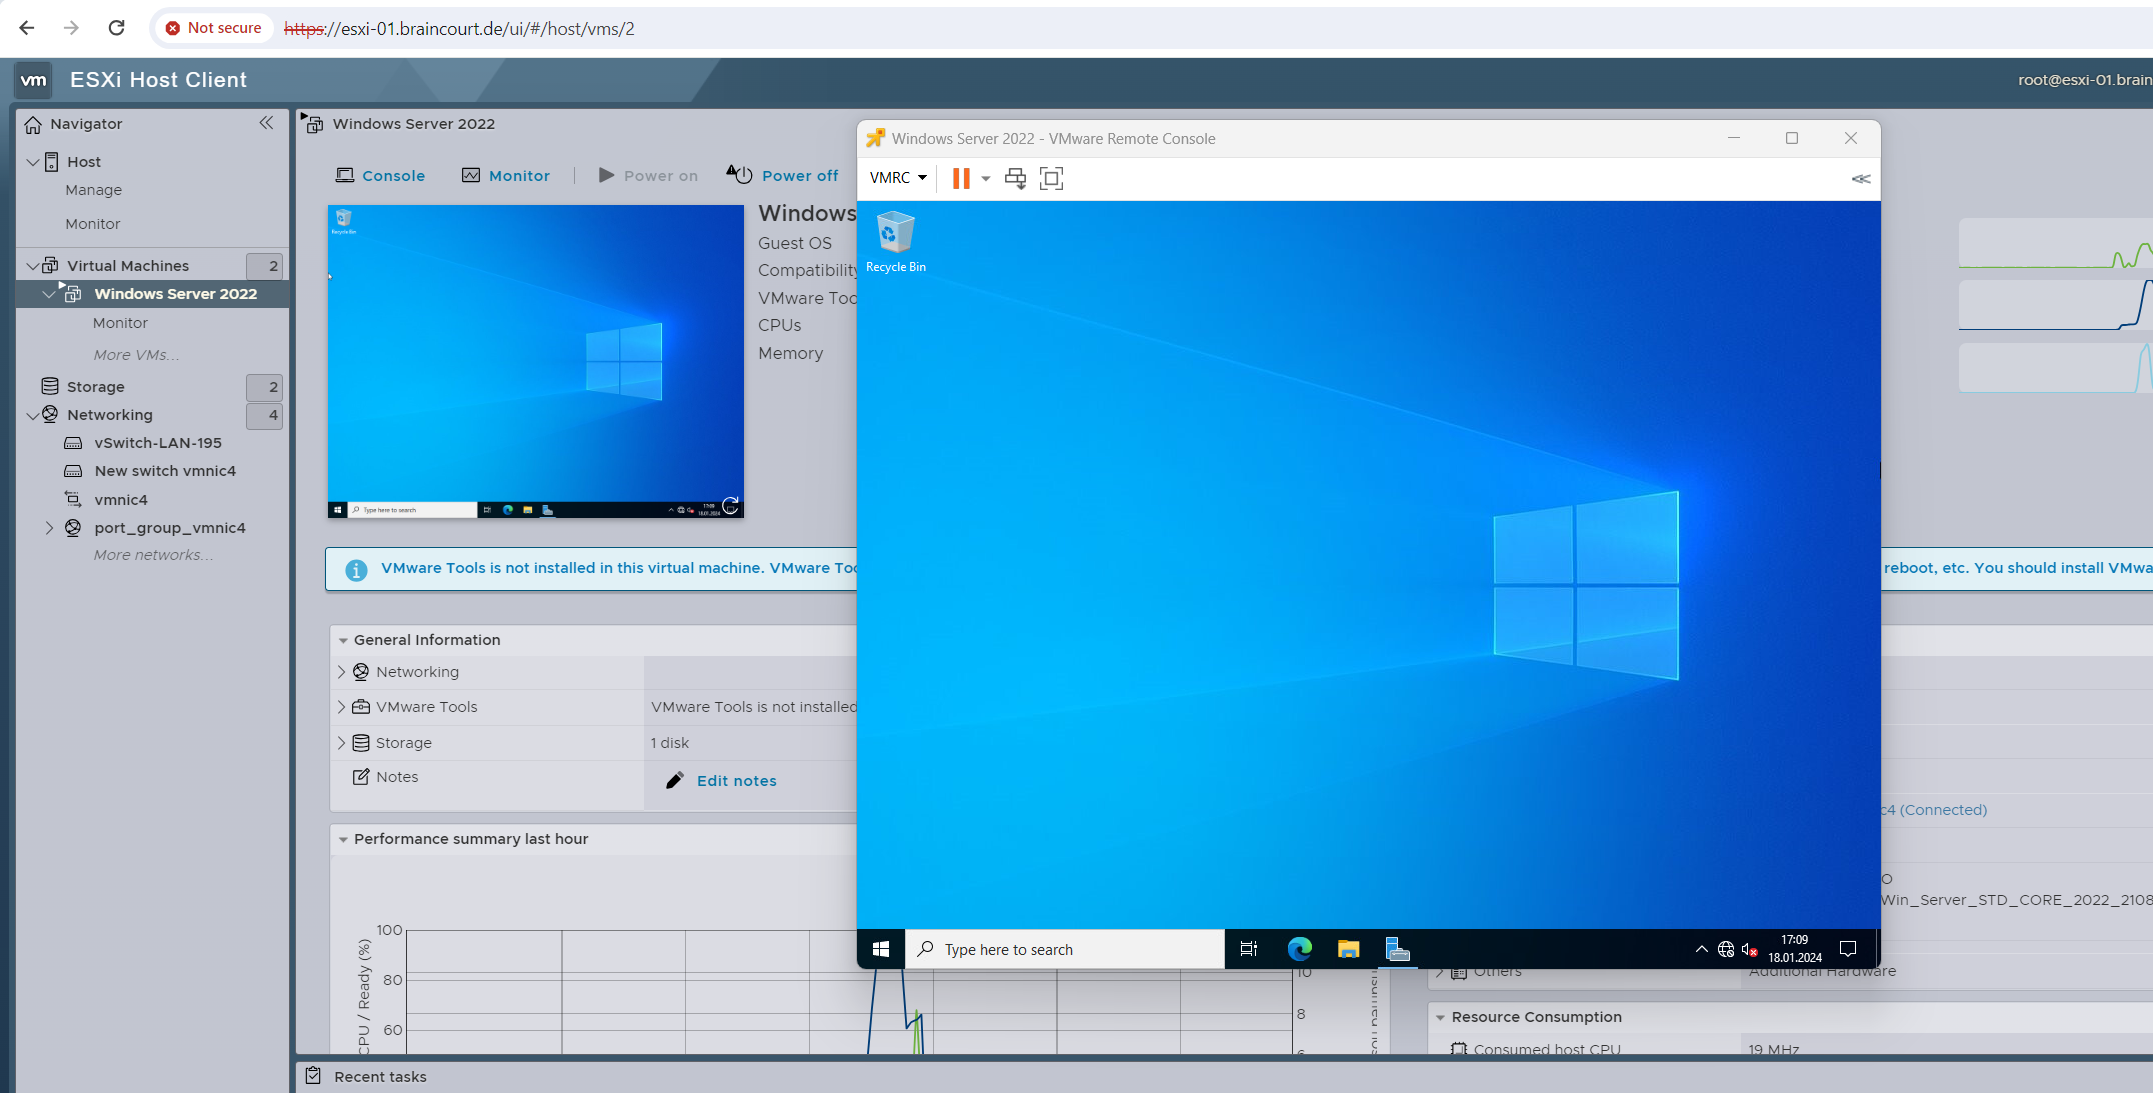
To finish the installation we also need to restart the VM. After a reboot we can now also use the other consoles to connect to the VM and will now have a dedicated Ctrl-Alt-Delete option in the context menu of the console which will work.
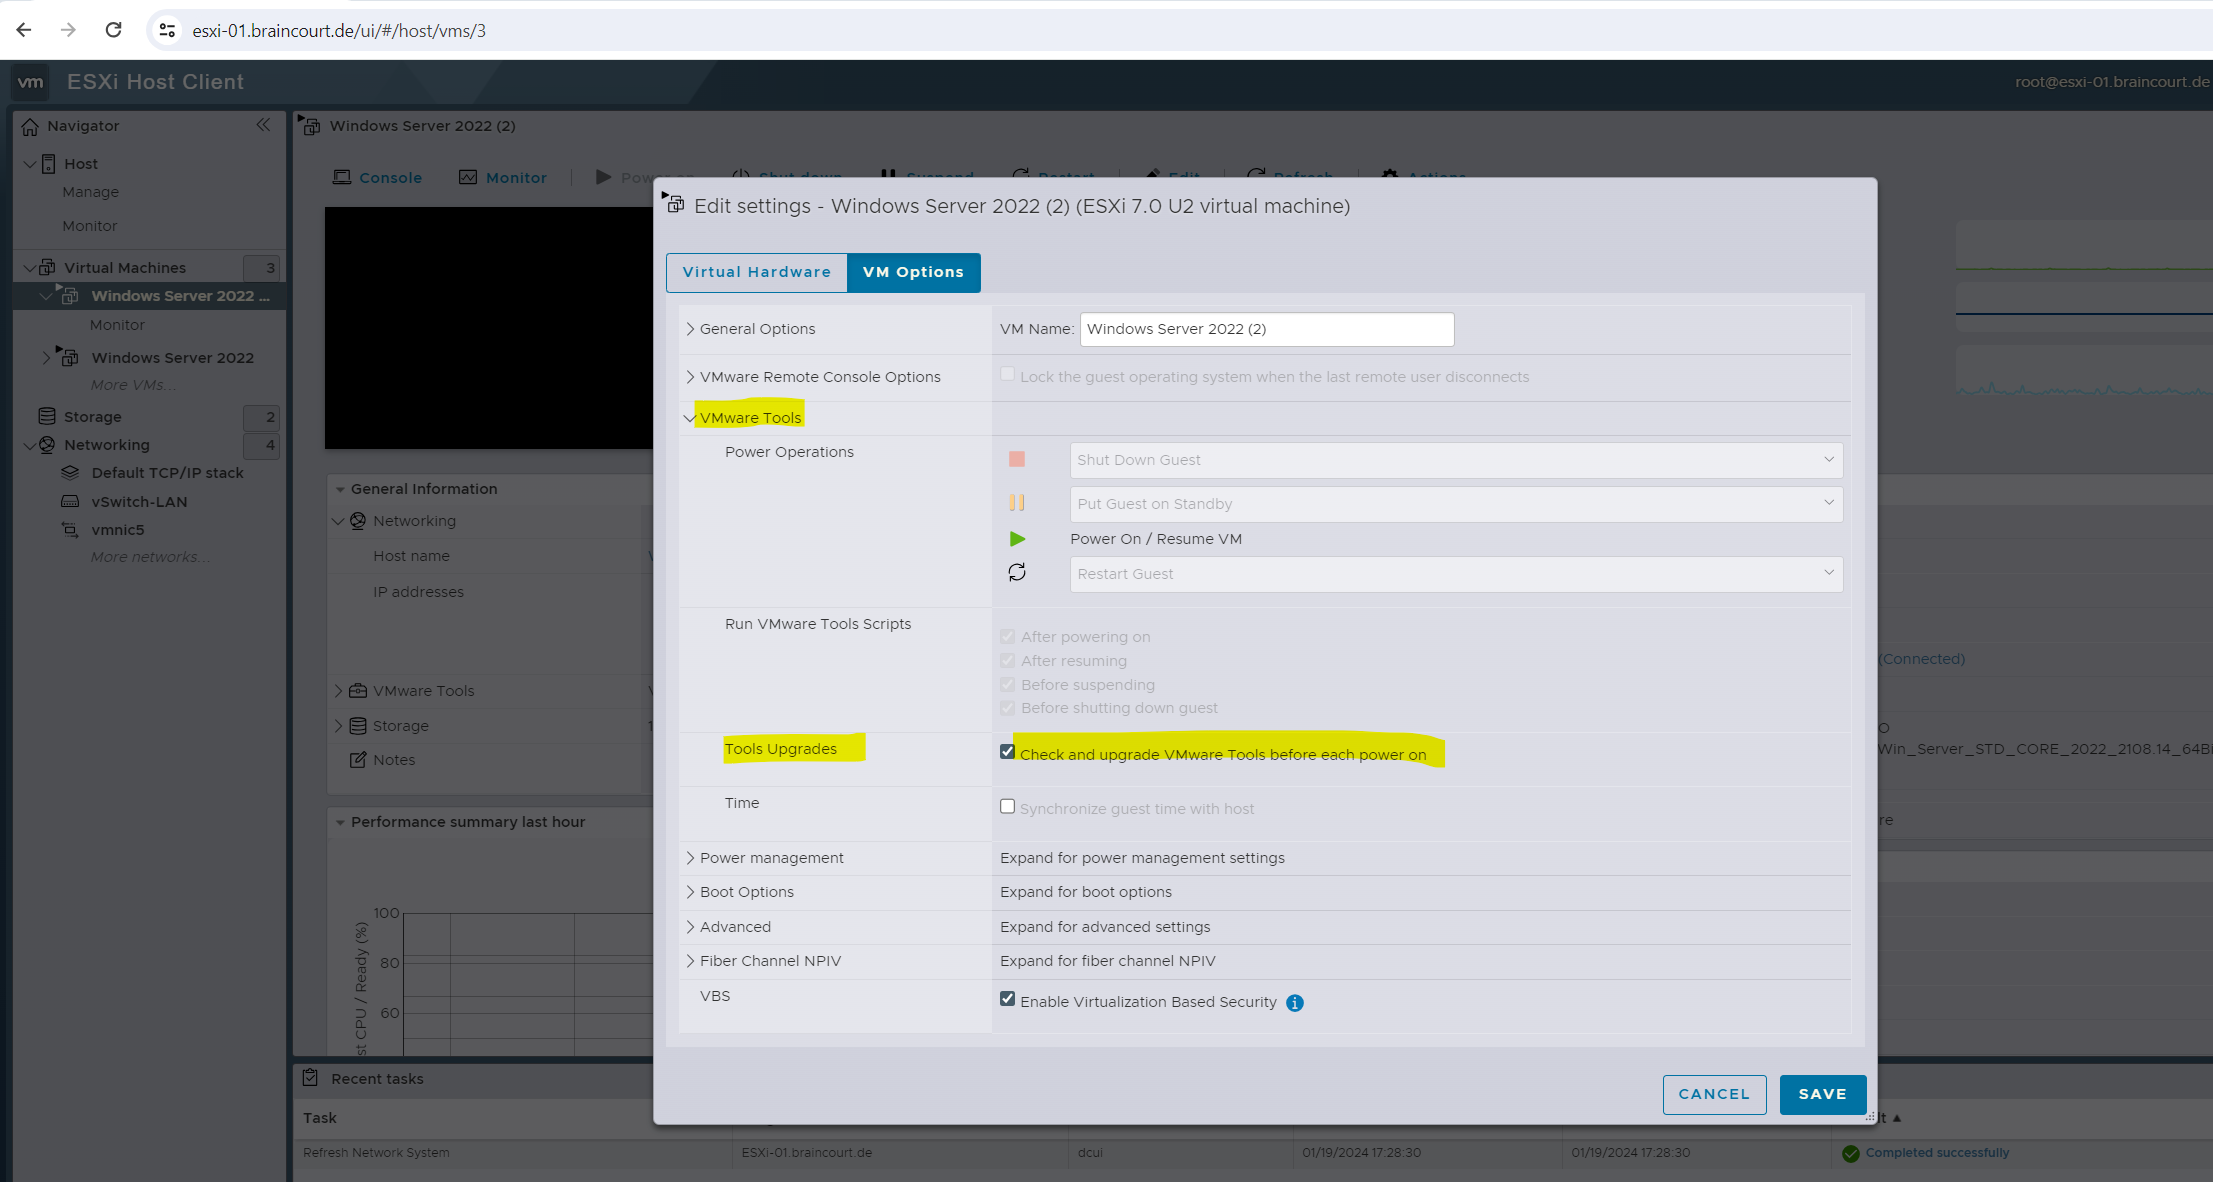
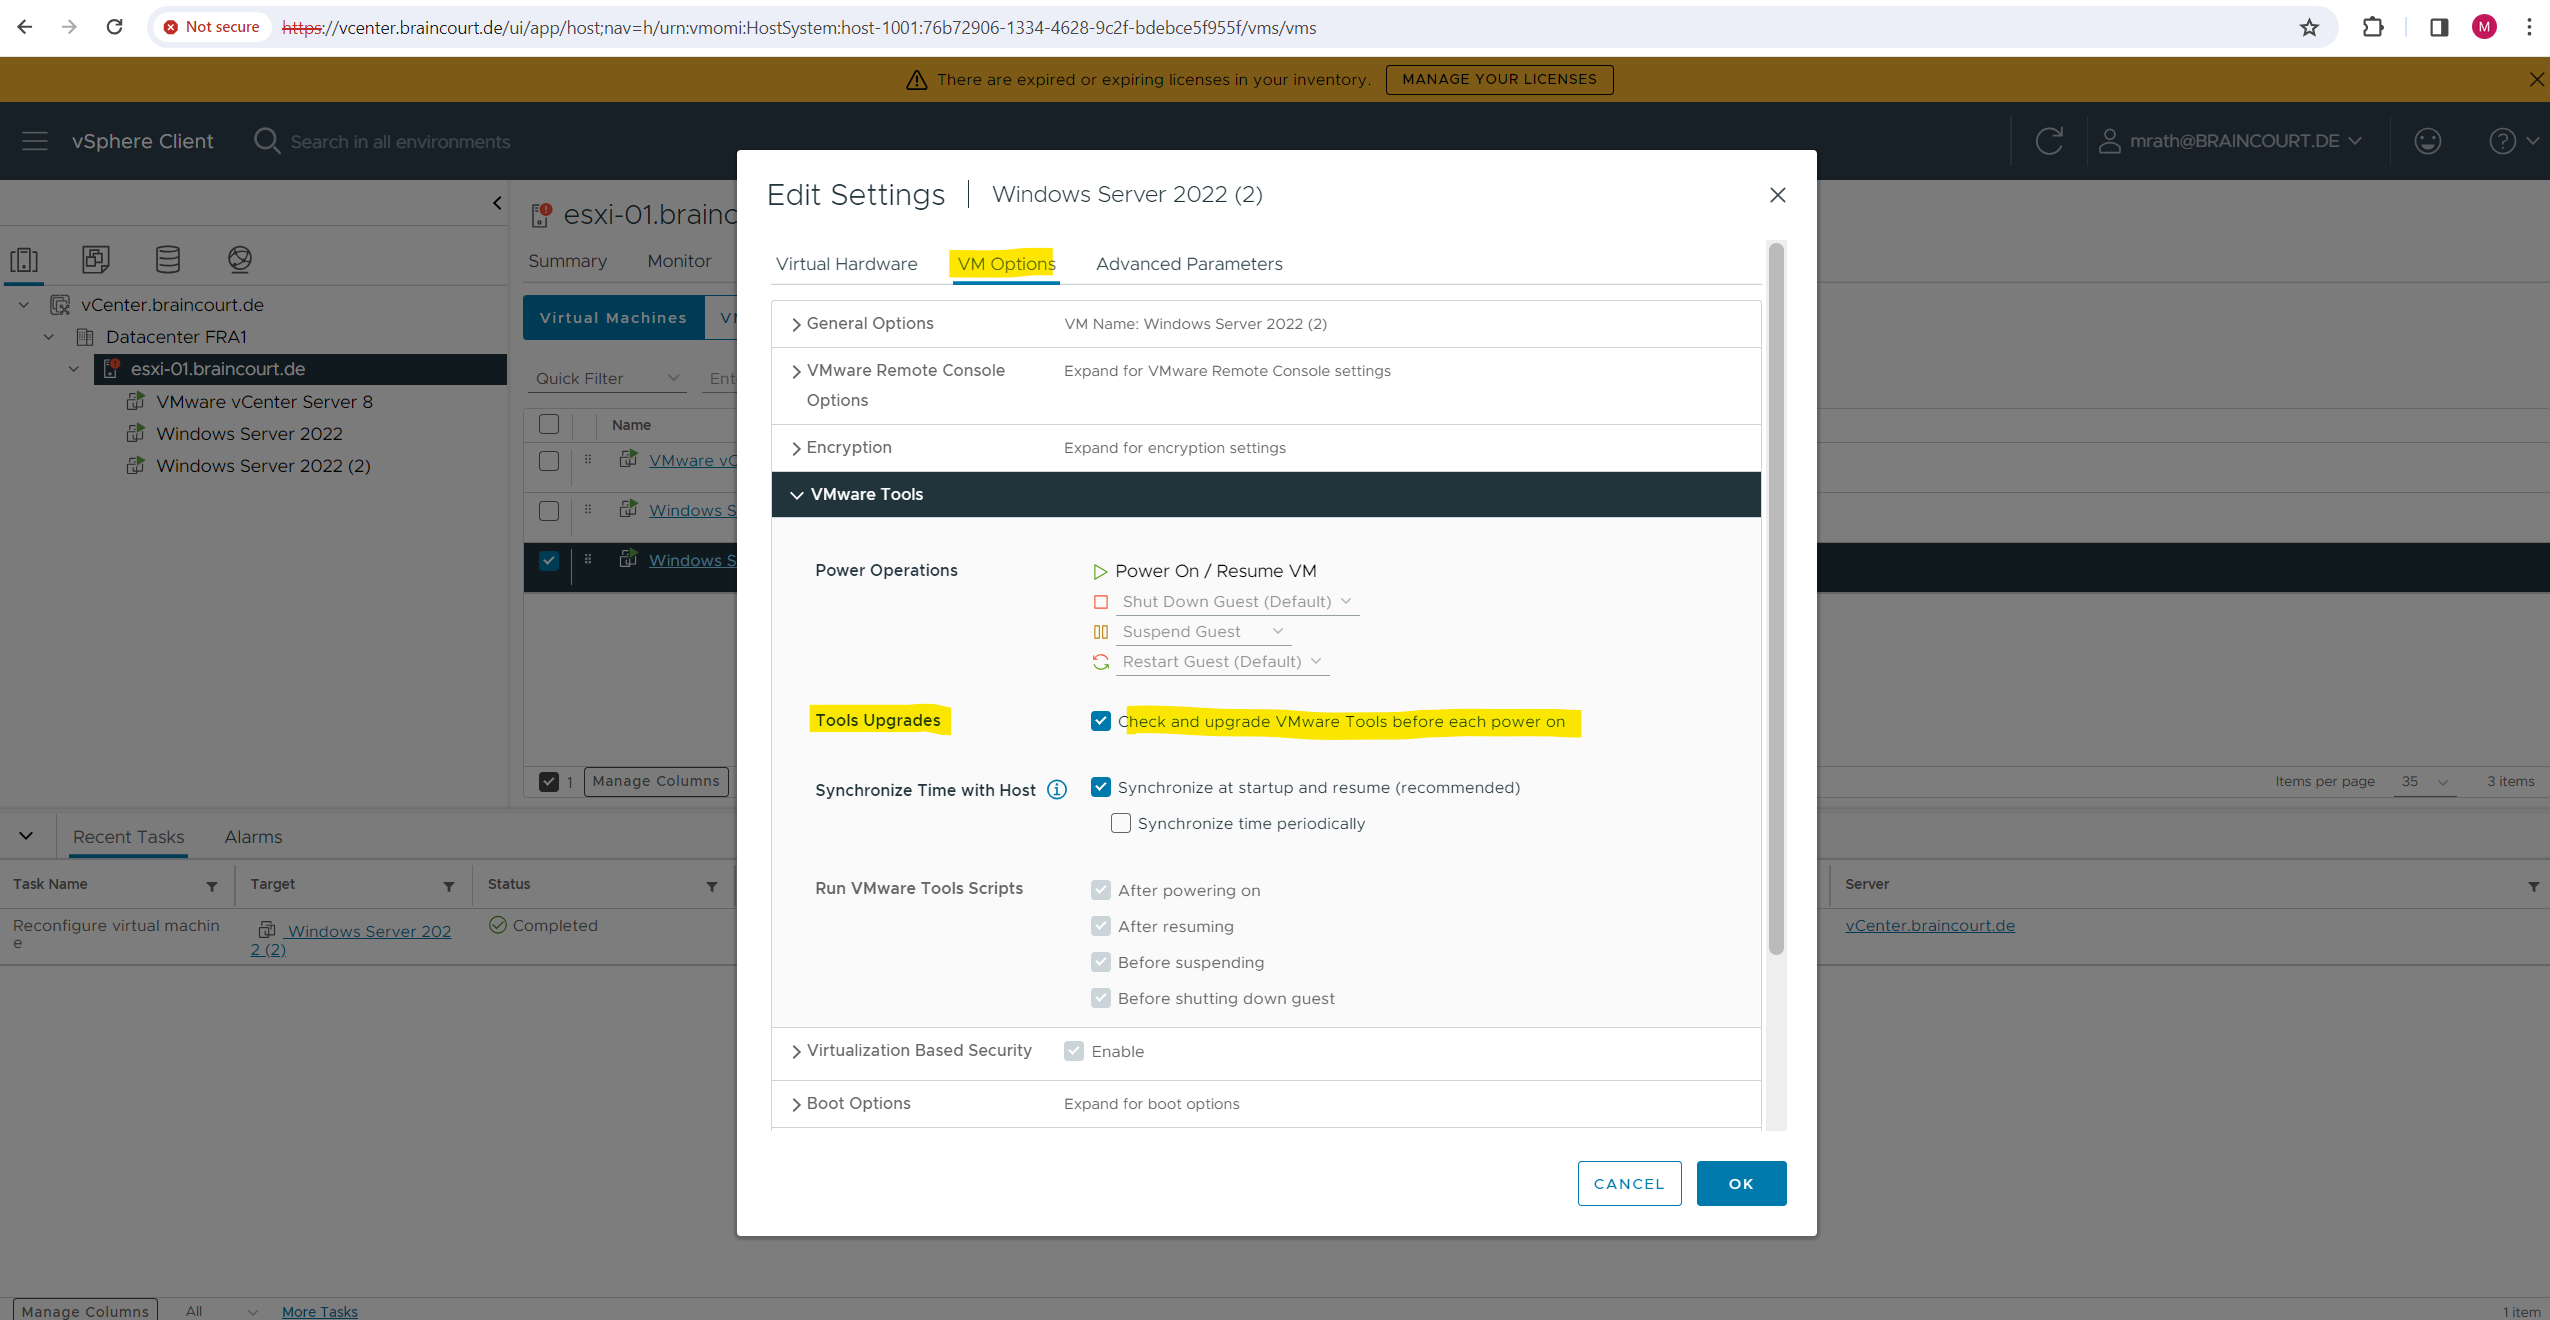
We can also configure the VM to automatically upgrade its VMware Tools the next time it is powered on.
The next time the virtual machine is powered on, it checks the ESX/ESXi host for a newer version of VMware Tools. If one is available, it is installed and the guest operating system is restarted (if required).
By using the ESXi Host client.
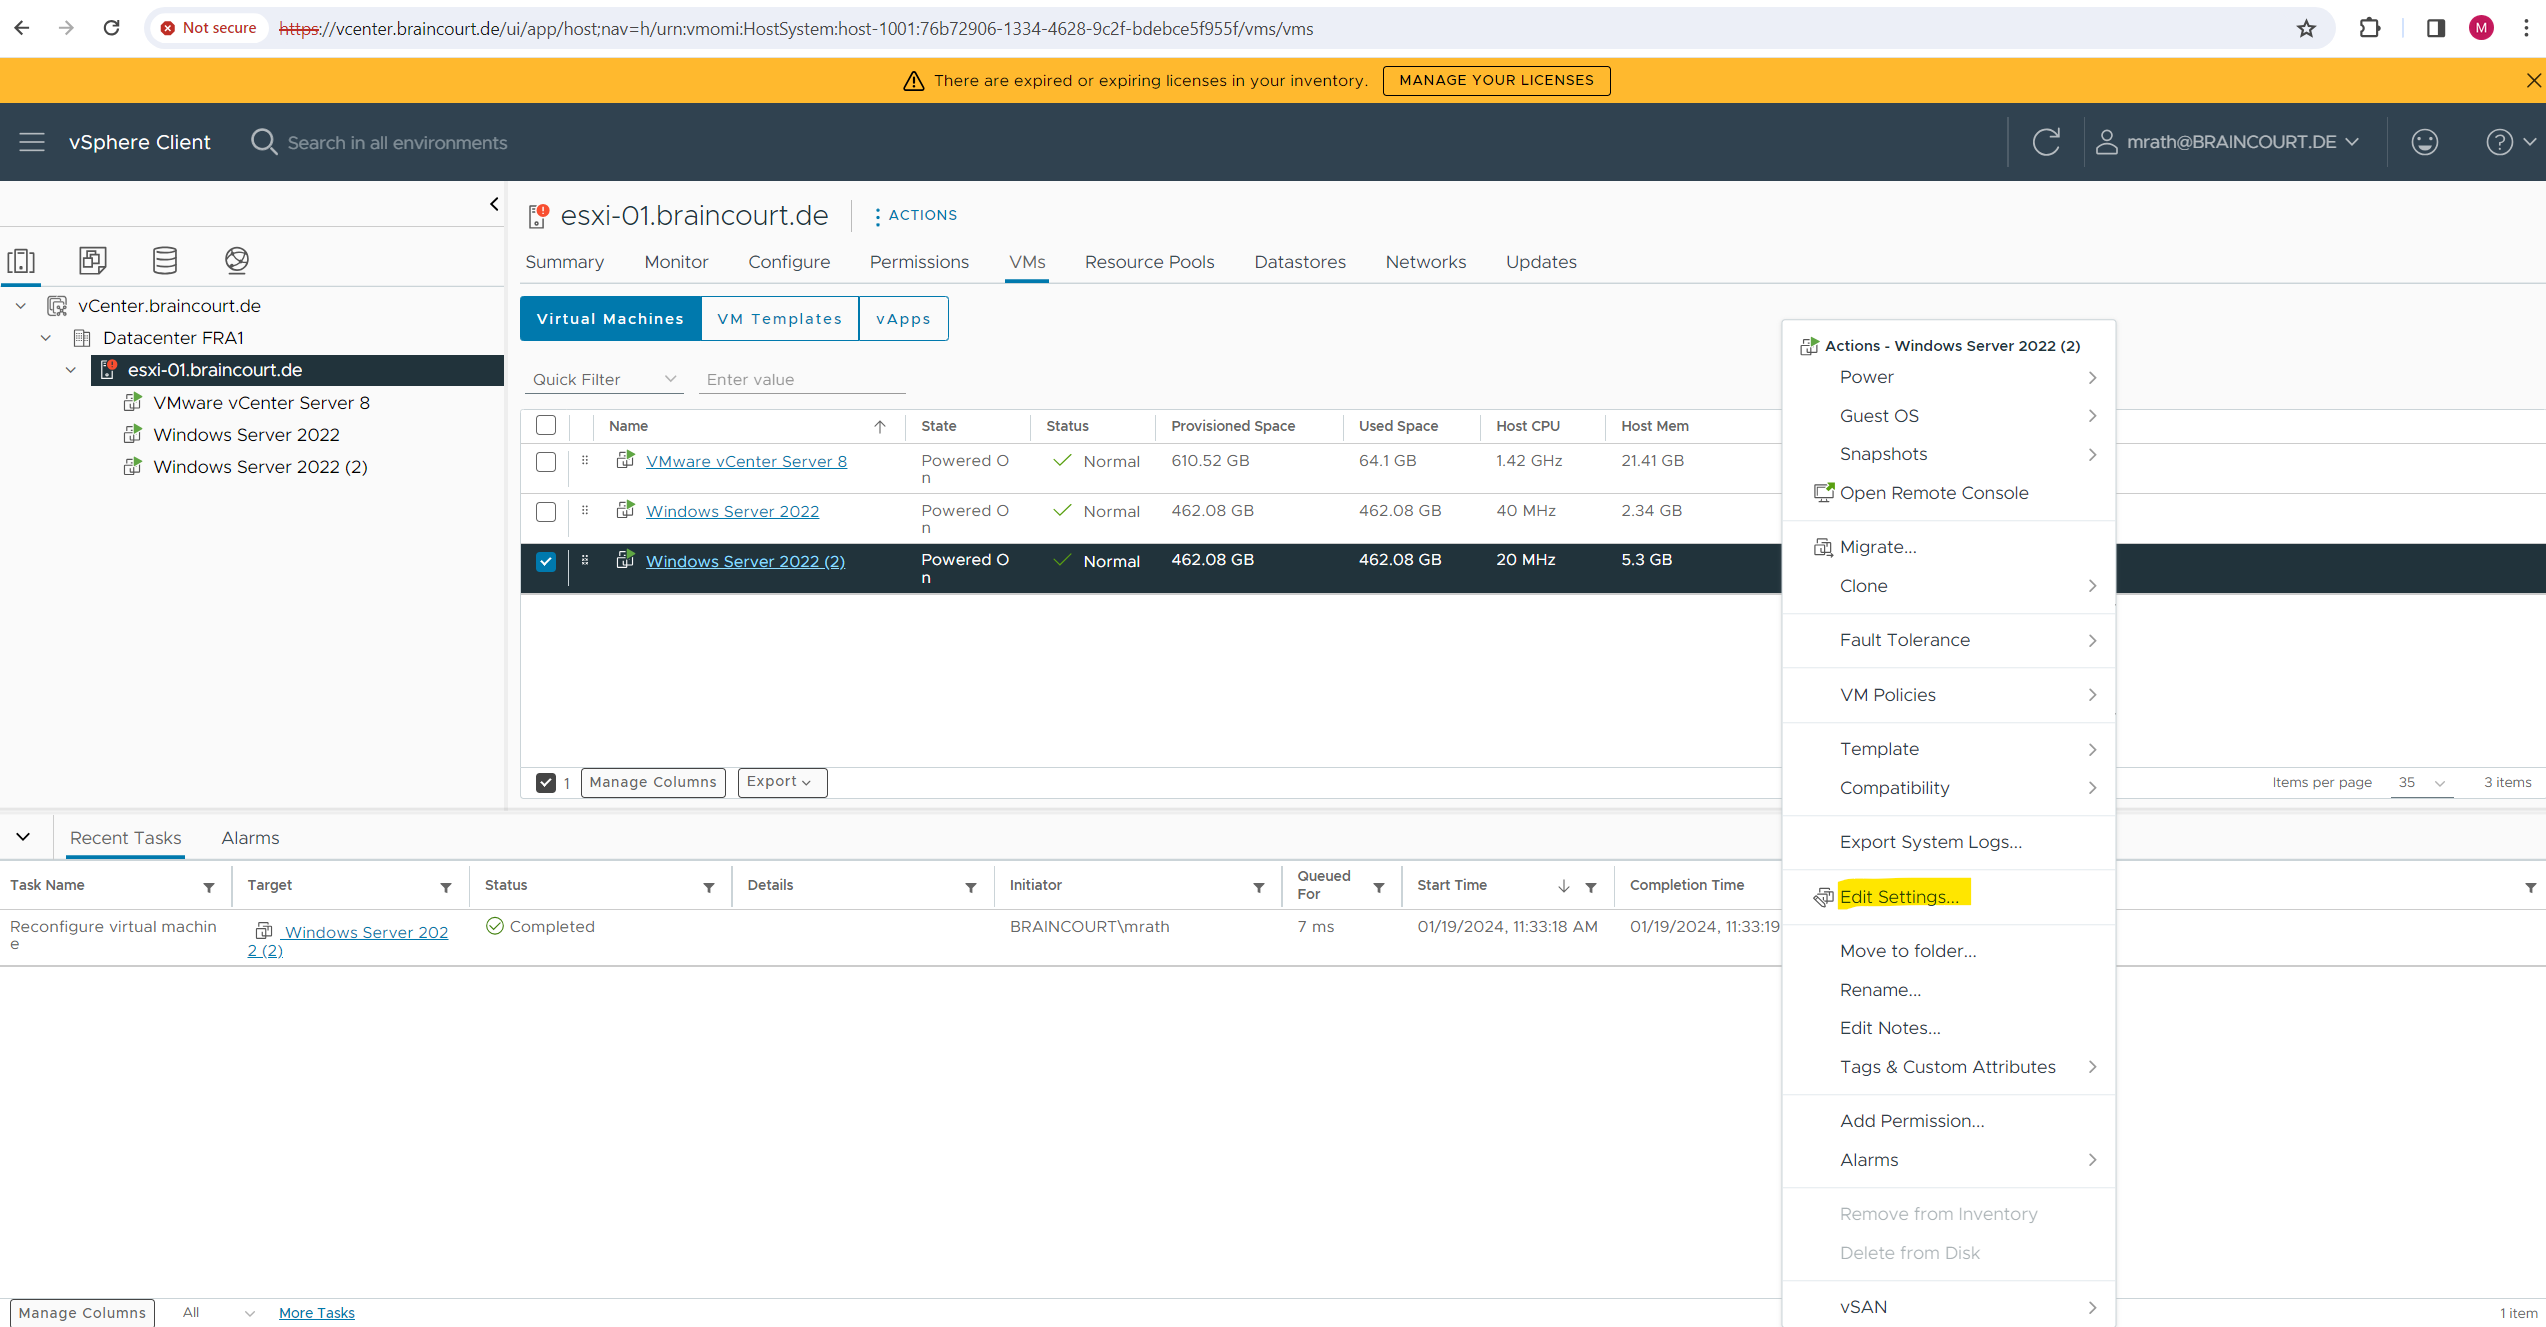
By using the vSphere client.
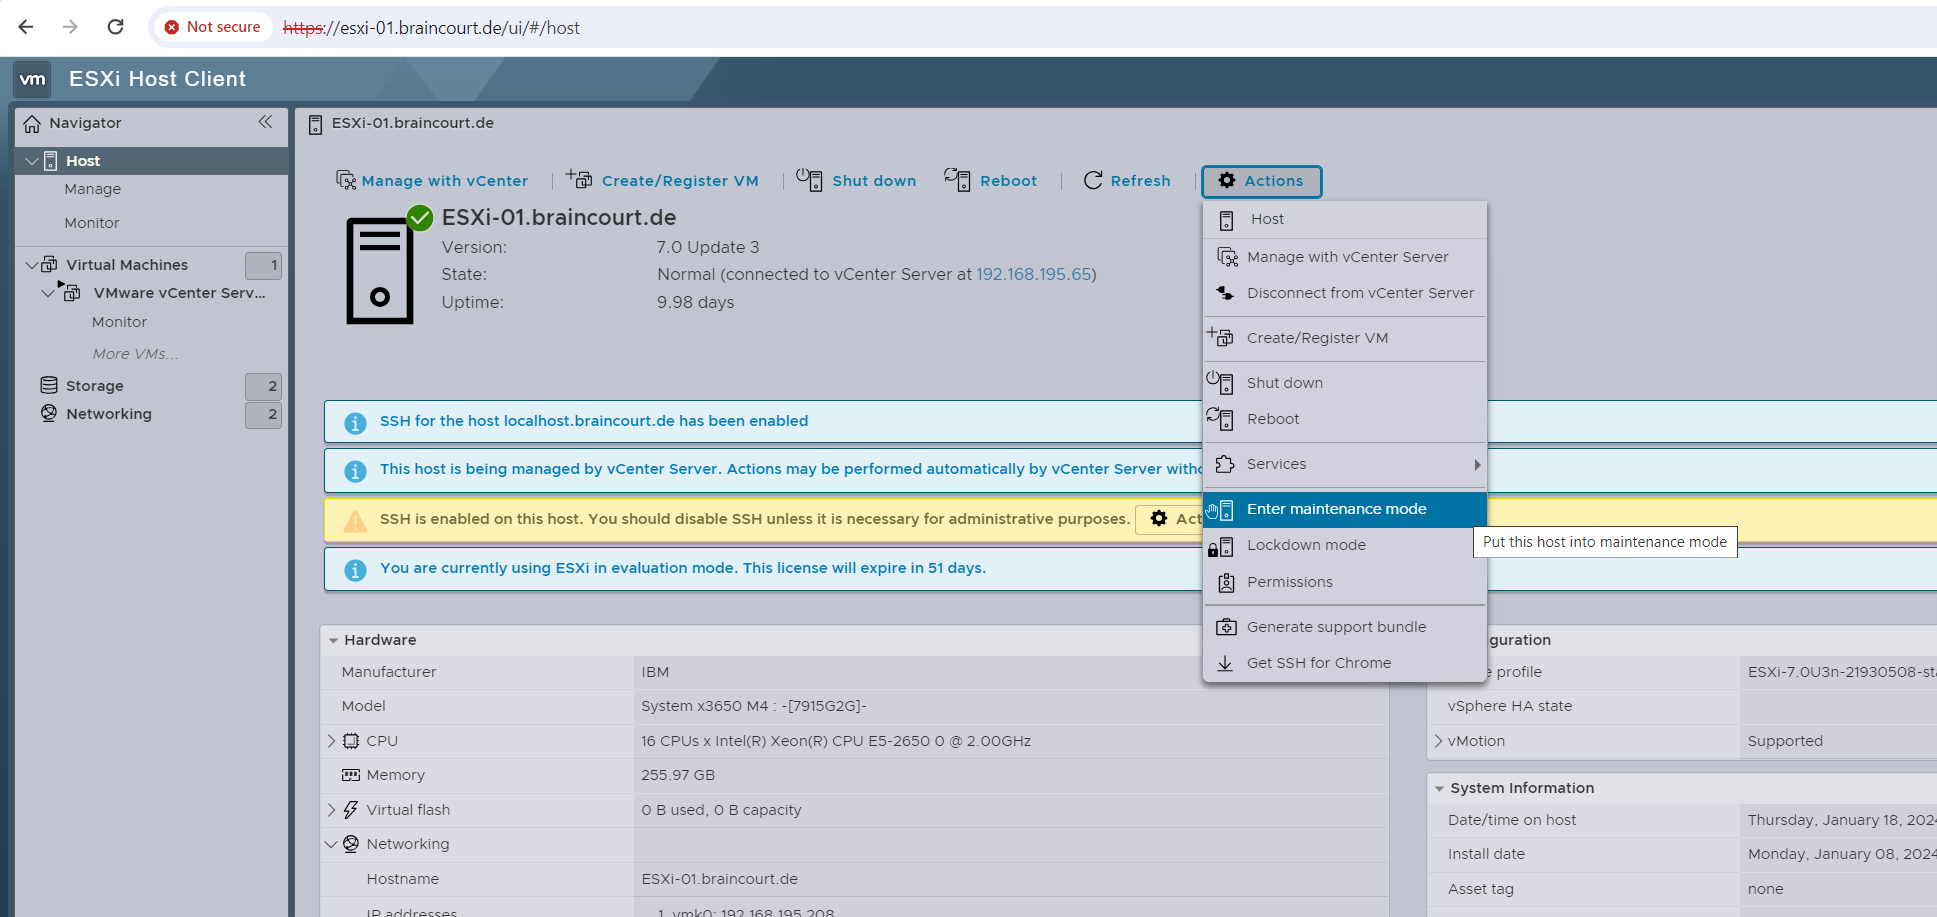
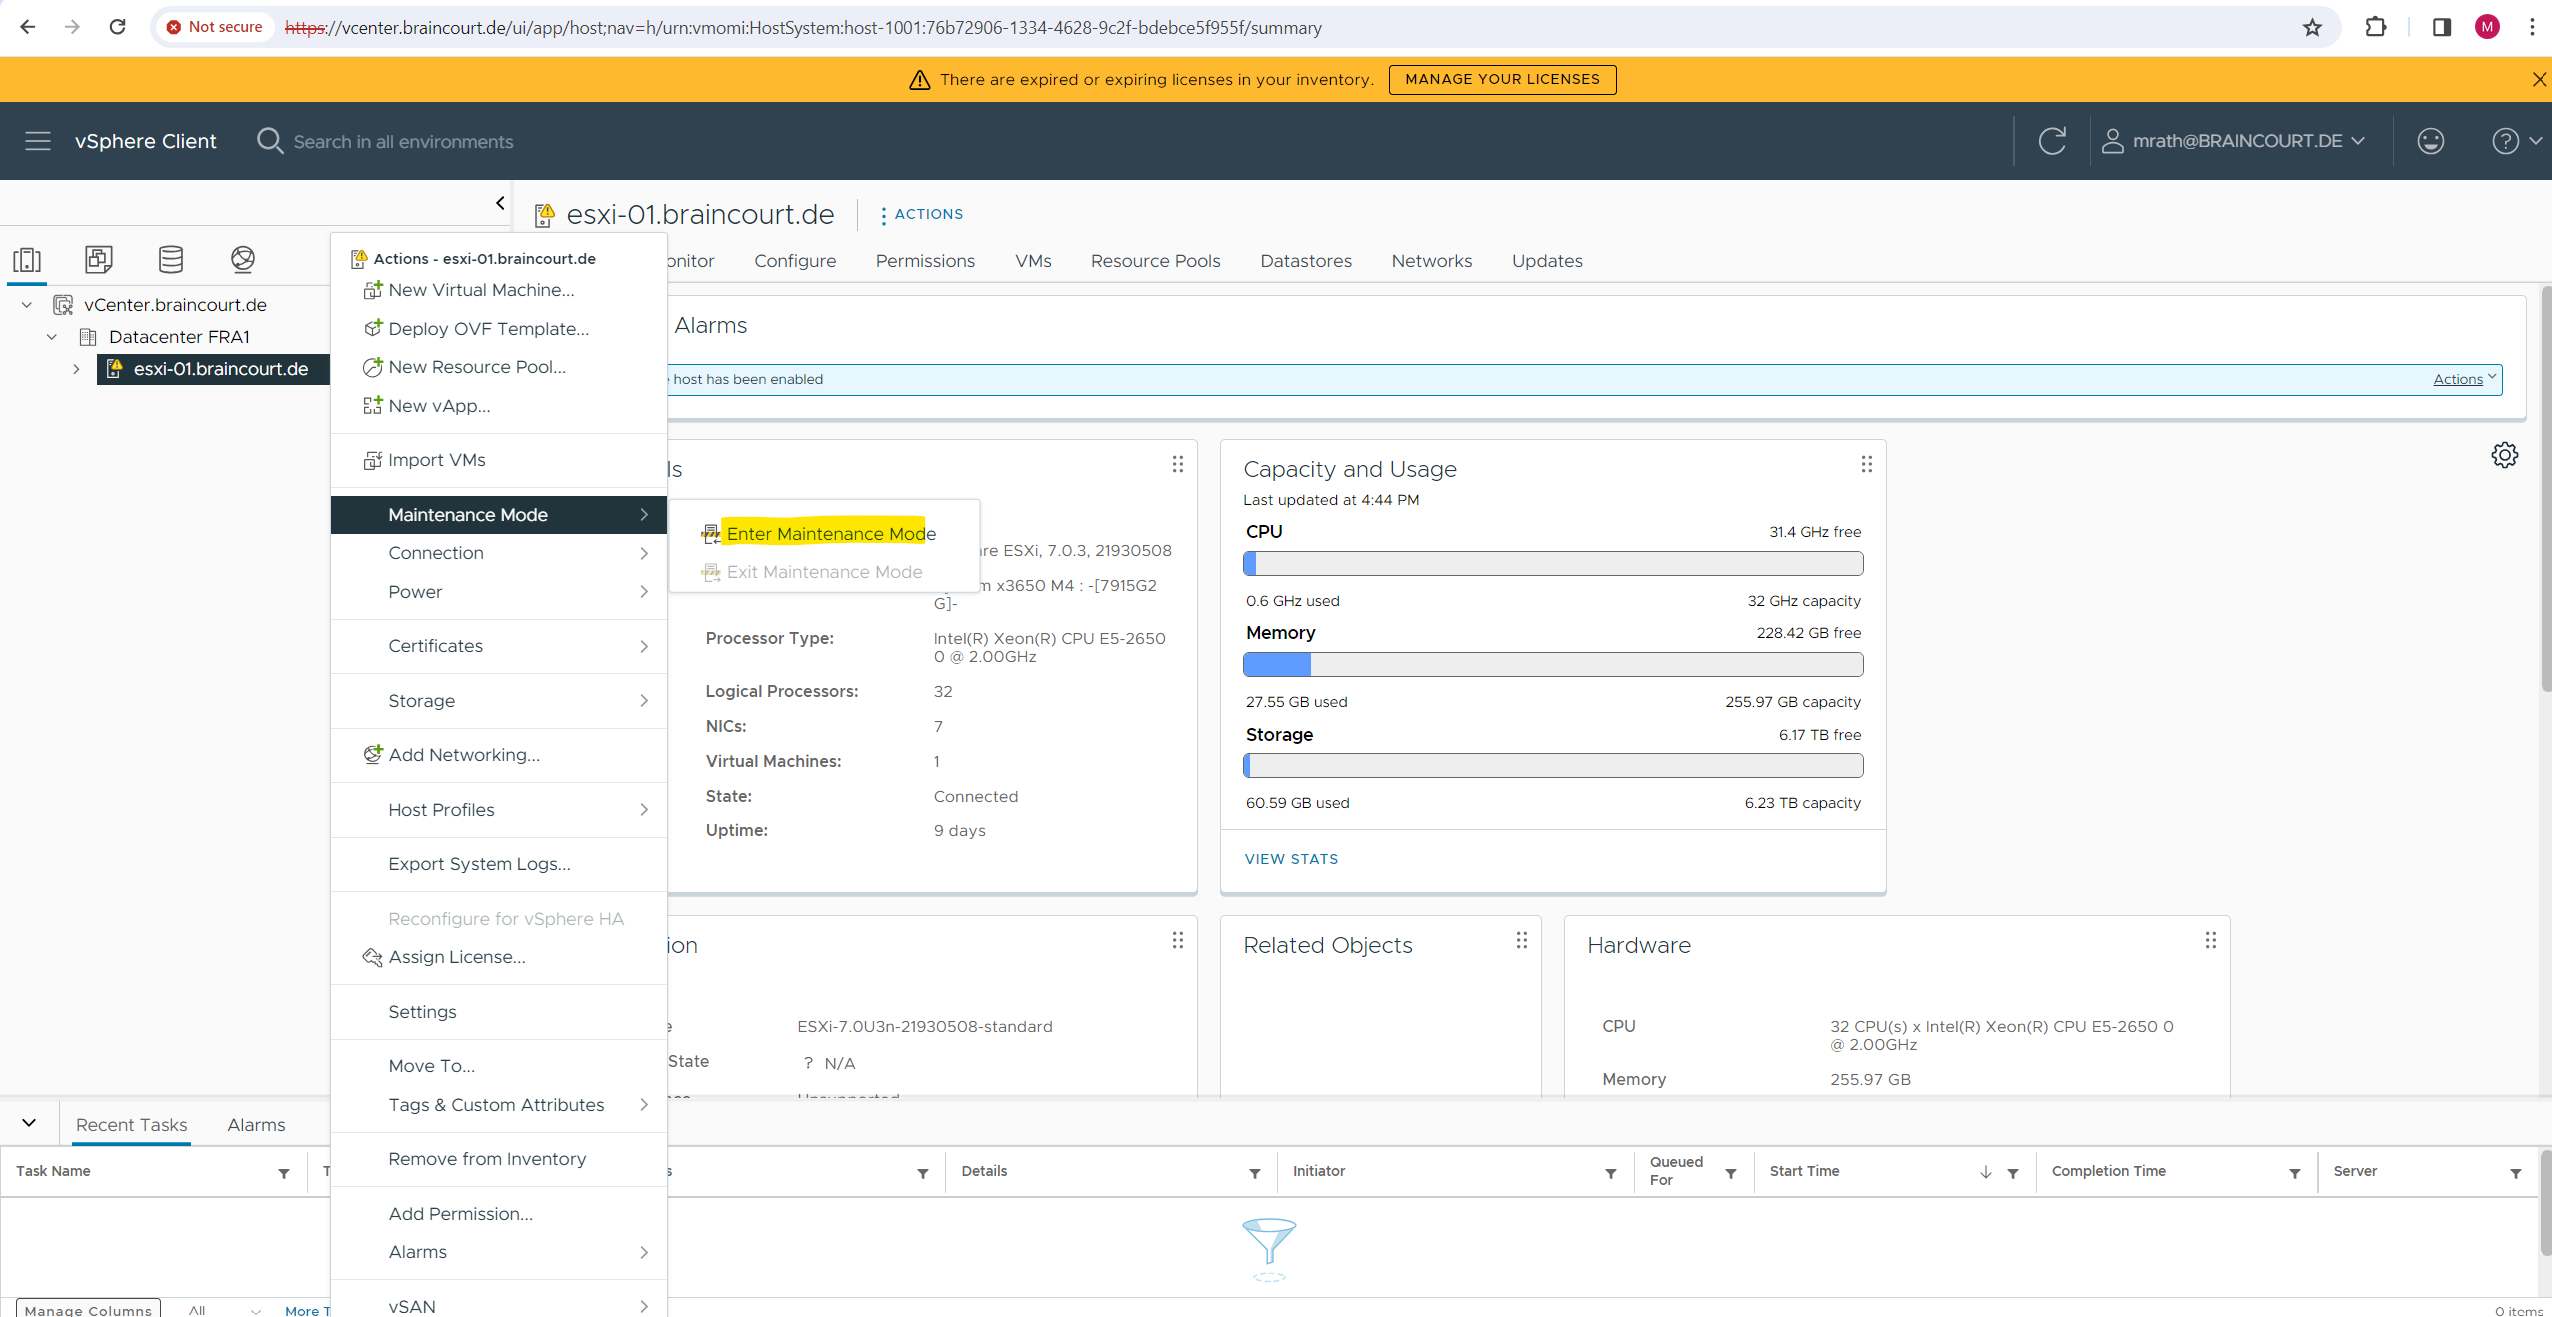
Place the ESXi Host in Maintenance Mode
You place a host in maintenance mode when you need to service it, for example, to install more memory.
Virtual machines that are running on a host entering maintenance mode need to be migrated to another host (either manually or automatically by DRS) or shut down. The host is in a state of Entering Maintenance Mode until all running virtual machines are powered down or migrated to different hosts. You cannot power on virtual machines or migrate virtual machines to a host entering maintenance mode.
When no more running virtual machines are on the host, the host’s icon changes to include under maintenance and the host’s Summary panel indicates the new state. While in maintenance mode, the host does not allow you to deploy or power on a virtual machine.
By using the ESXi Host Client.
By using the vSphere Client.
By using the ESXCLI.
To enter maintenance mode, run the following command.
esxcli <conn_options> system maintenanceMode set --enable true
To exit maintenance mode, run the following command.
esxcli system maintenanceMode set --enable false
ESXi / vCenter Certificates
When you use the ESXi Host client or vSphere Client to connect to a vCenter Server system or your ESXi ost, you will get a certificate warning in your browser.
To resolve this issue, you have to download the root certificates from the vCenter Server or ESXi host that you are targeting and install it on the machine on which you are running the browser.
How to download and install vCenter Server root certificates to avoid Web Browser certificate warnings (2108294)
https://kb.vmware.com/s/article/2108294
Unfortunately the browser will not trigger a download for the vCenter root certificate below and just displays an output because so far we cannot establish a trusted connection to the server. As workaround just right click on the output and select Save as … to finally download the cert file.
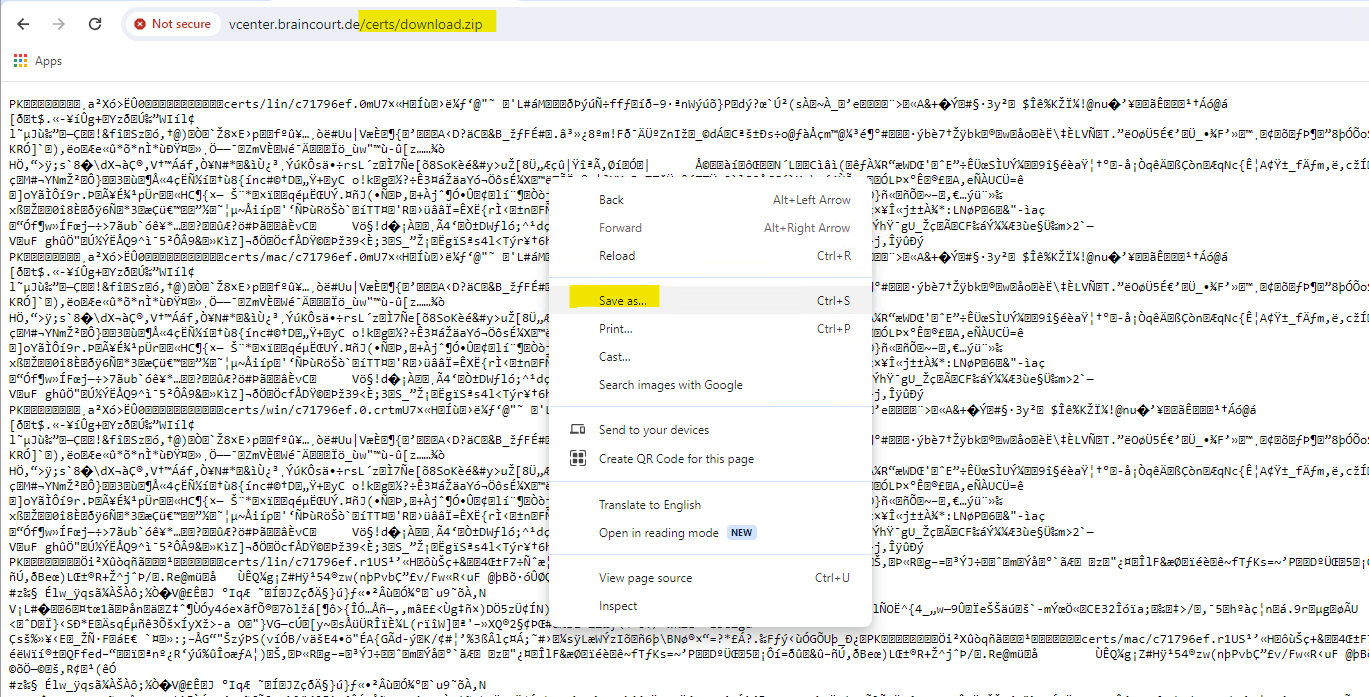
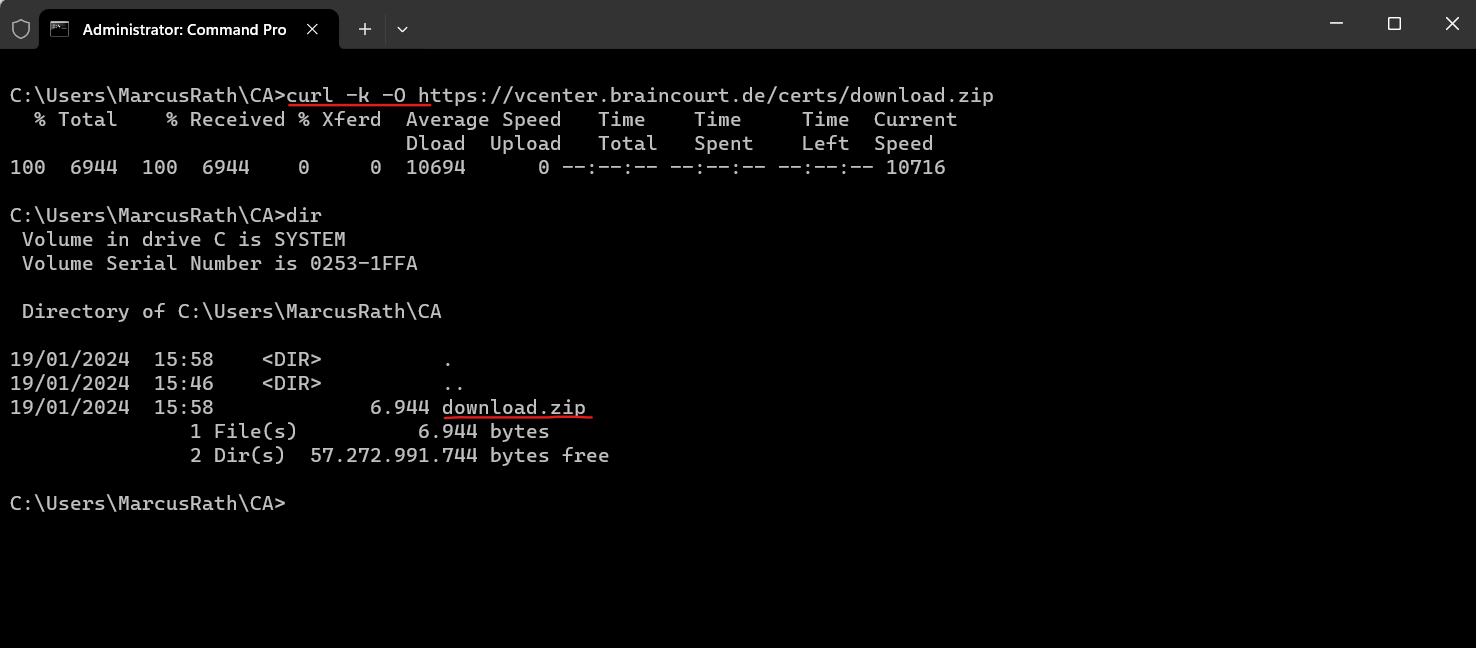
You can also use the curl command which is meanwhile also available by default on Windows, will include a switch to ignore untrusted SSL/TLS certificates and force downloading the file despite of not trusting the certificate.
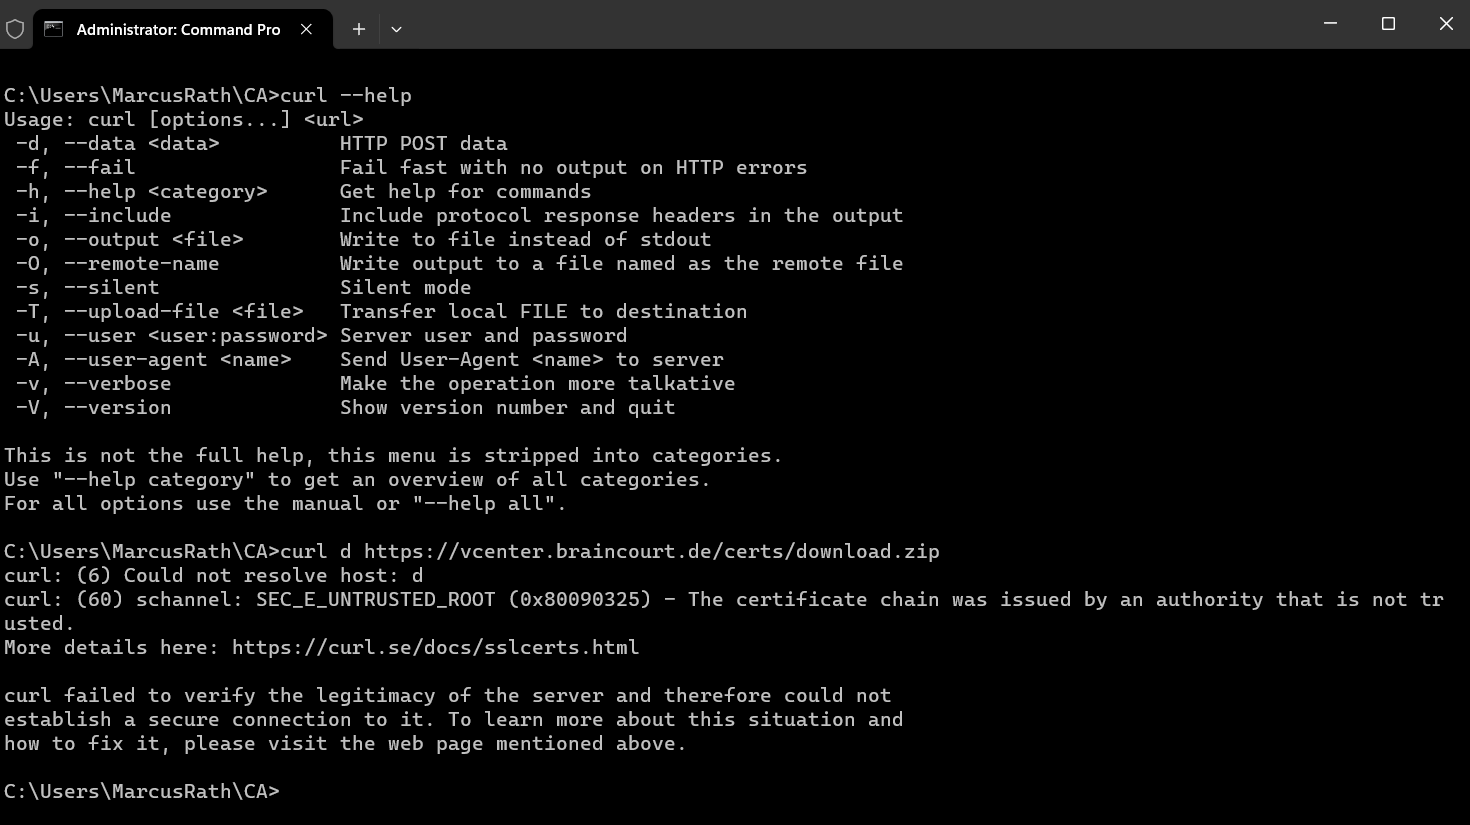
We can use either -k or --insecure to tell not to verify the peer.
curl -k -O https://vcenter.braincourt.de/certs/download.zip
curl SSL Certificate Verification
https://curl.se/docs/sslcerts.html
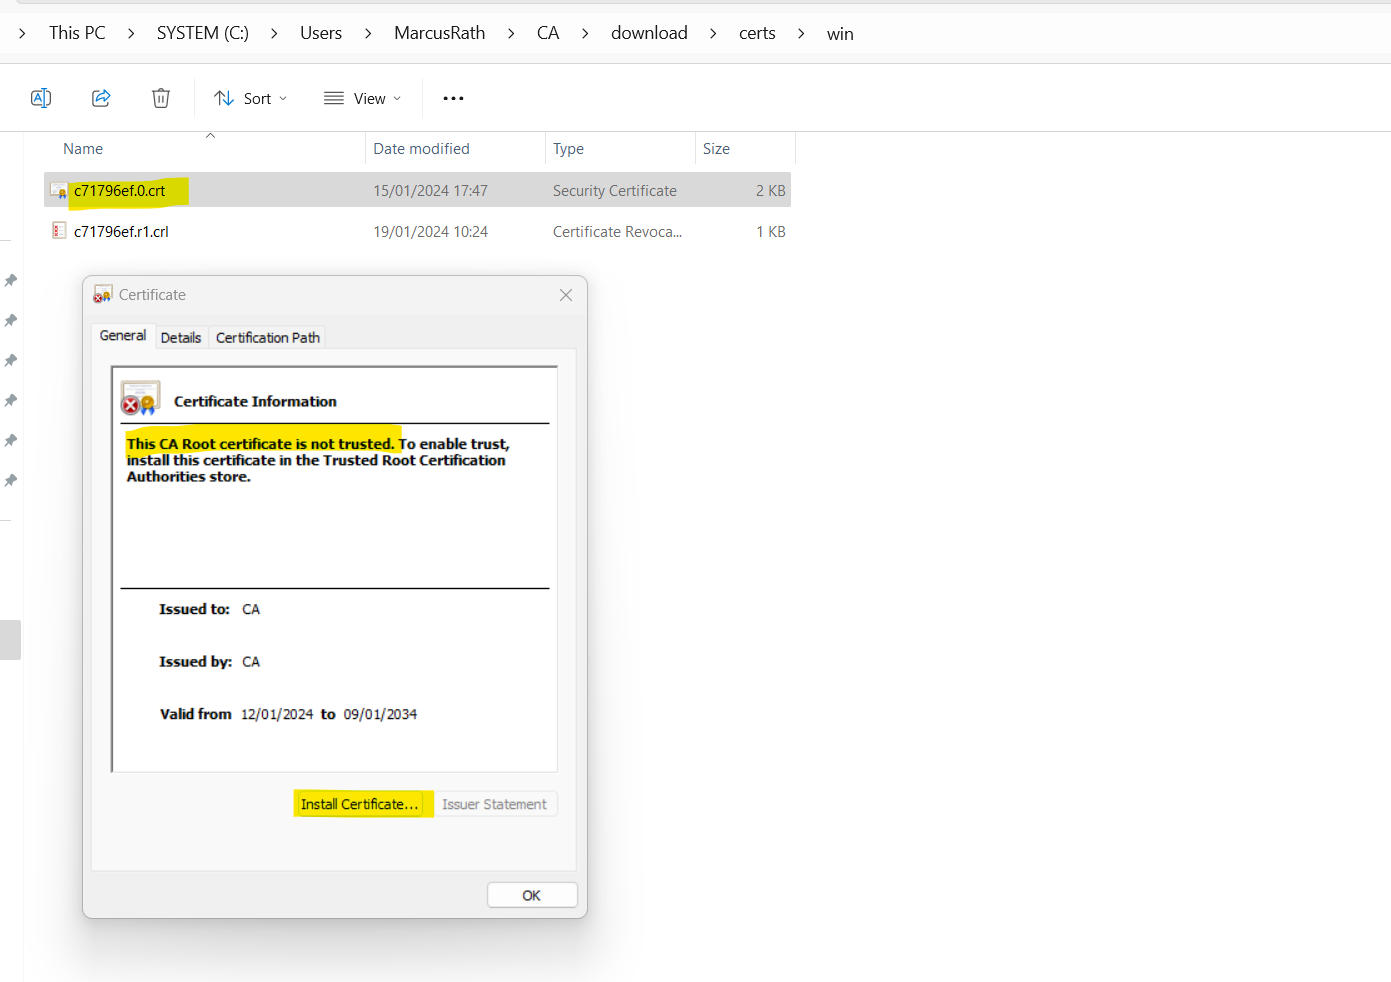
We can now extract the root CA and install it on our local computer into the trusted root CA store as usual.
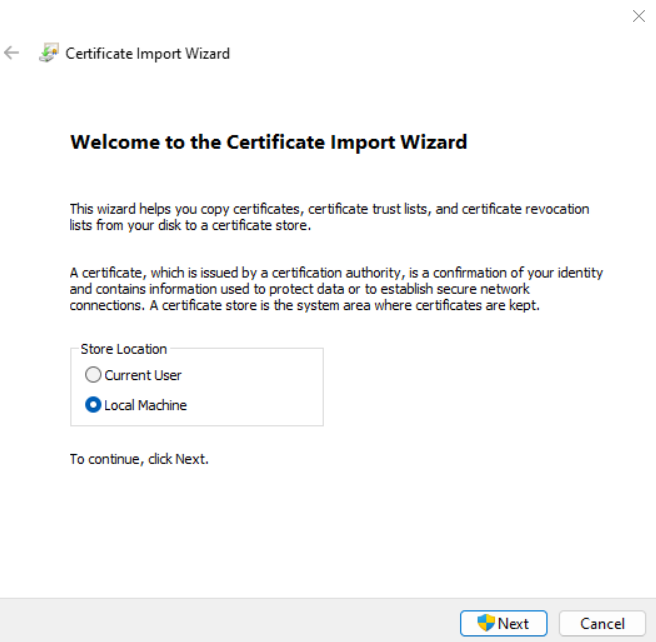
Either just for the current user logged on or for all users on your computer by selecting the Local Machine store.
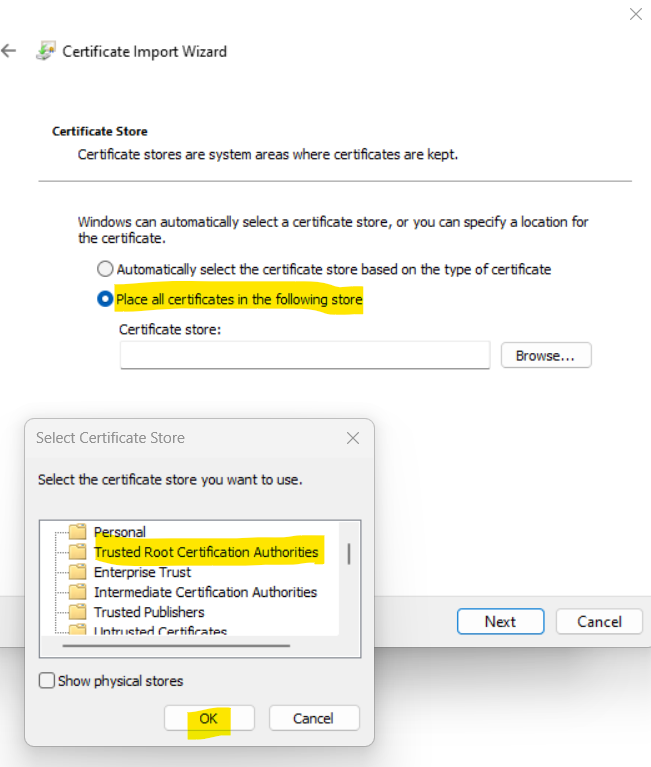
Select Place all certificates in the following store and then select the Trusted Root Certificate Authorities store. All certificates issued by root CAs they are stored here on your local computer, will trust your computer by default.
We now first need to close the browser and re-open it to establish a new https connection to the ESXi host and vSphere (vCenter server) to check if our computer now trusts each server certificate issued by VMware.
Looks good!
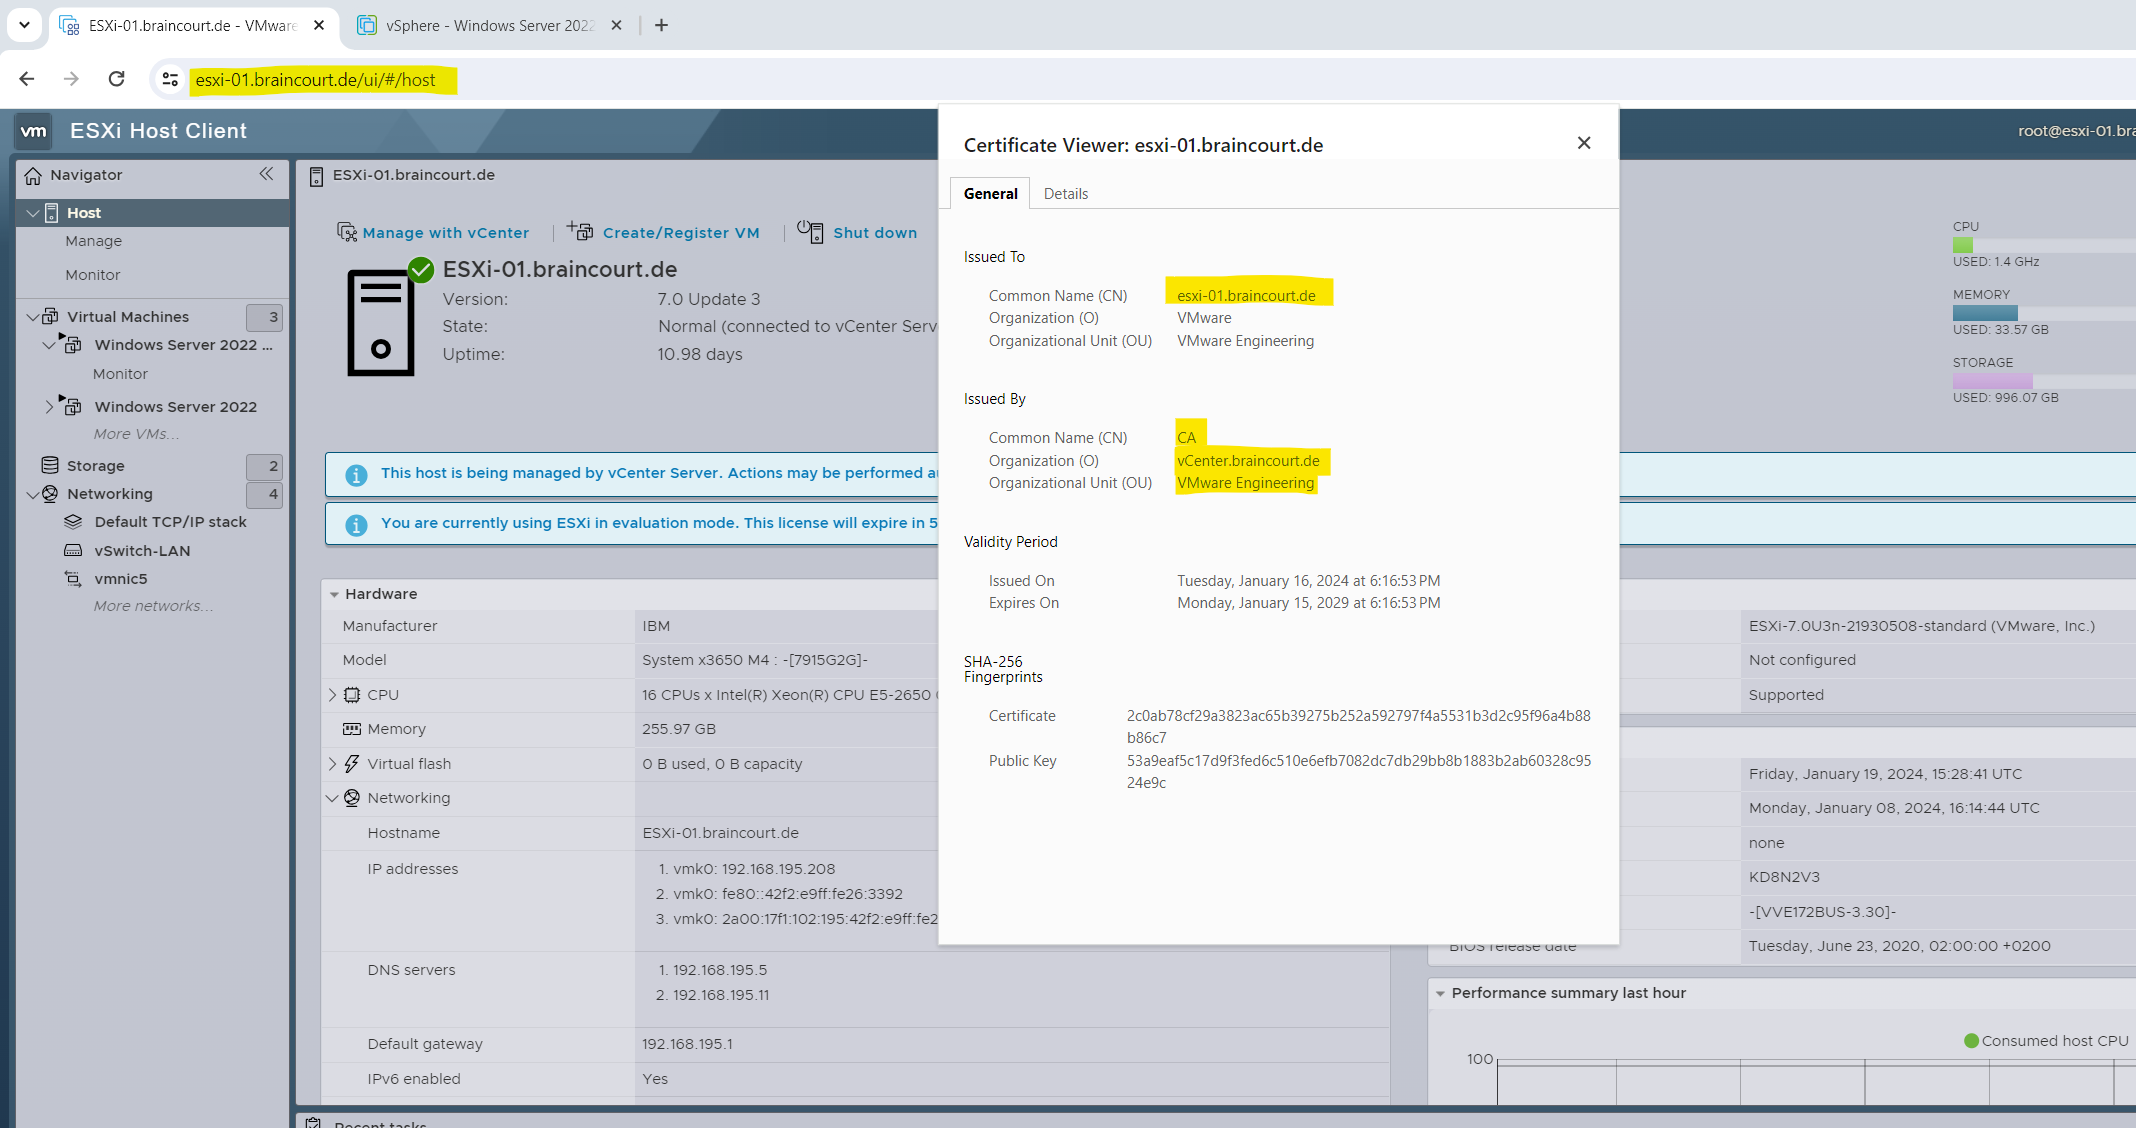
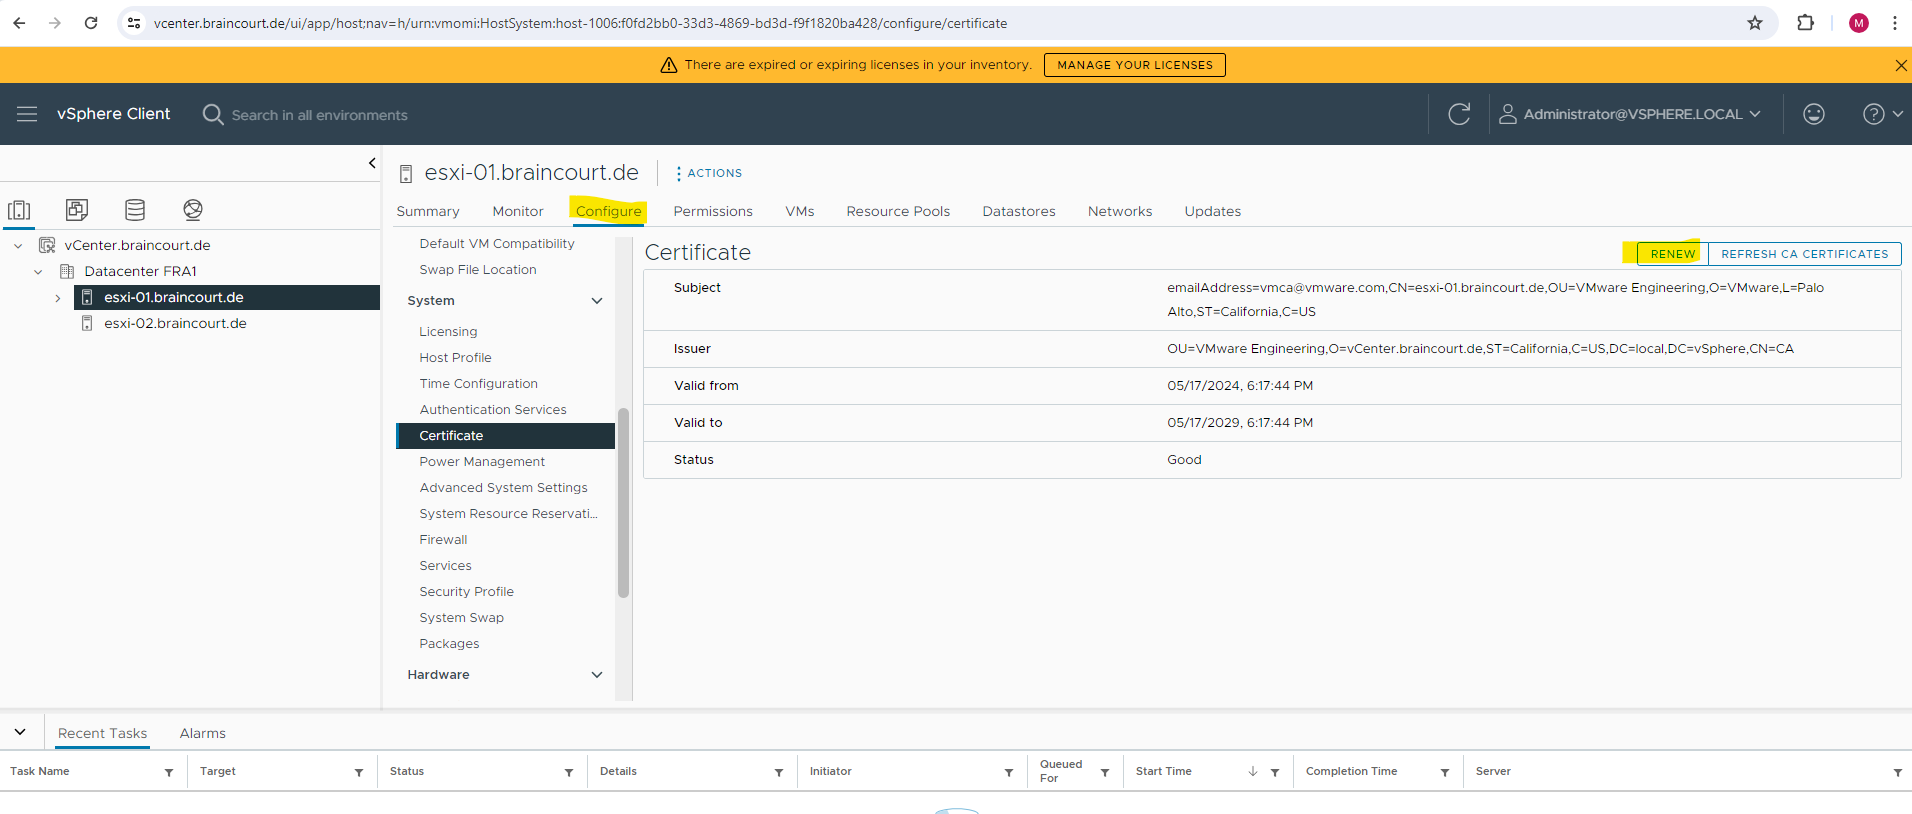
In case you have changed the hostname of your ESXi’s, you have to regenerate these certificates in order to include the correct and actual common name.
You can renew or regenerate these certificates either within the vSphere client or directly on the SSH console of the ESXi.
On the ESXi and its SSH console by executing:
# /sbin/generate-certificates
# /etc/init.d/hostd restart && /etc/init.d/vpxa restart
By using the vSphere client select the ESXi host and navigate to Configure -> Certificate.
Join an ESXi Host to your Active Directory Domain
Using Active Directory membership provides greater flexibility in granting access to ESXi hosts. Ensuring that users log in with a unique user account provides greater visibility for auditing.
Joining an ESXi host to an Active Directory domain with a read-only domain controller (RODC) is unsupported. You can join an ESXi host only to an Active Directory domain with a writable domain controller.
The supported method of joining an ESXi host to the domain is from the UI. To add an ESXi host to the Active Directory using vSphere Web Client:
About how to set up vSphere your can read my following post.
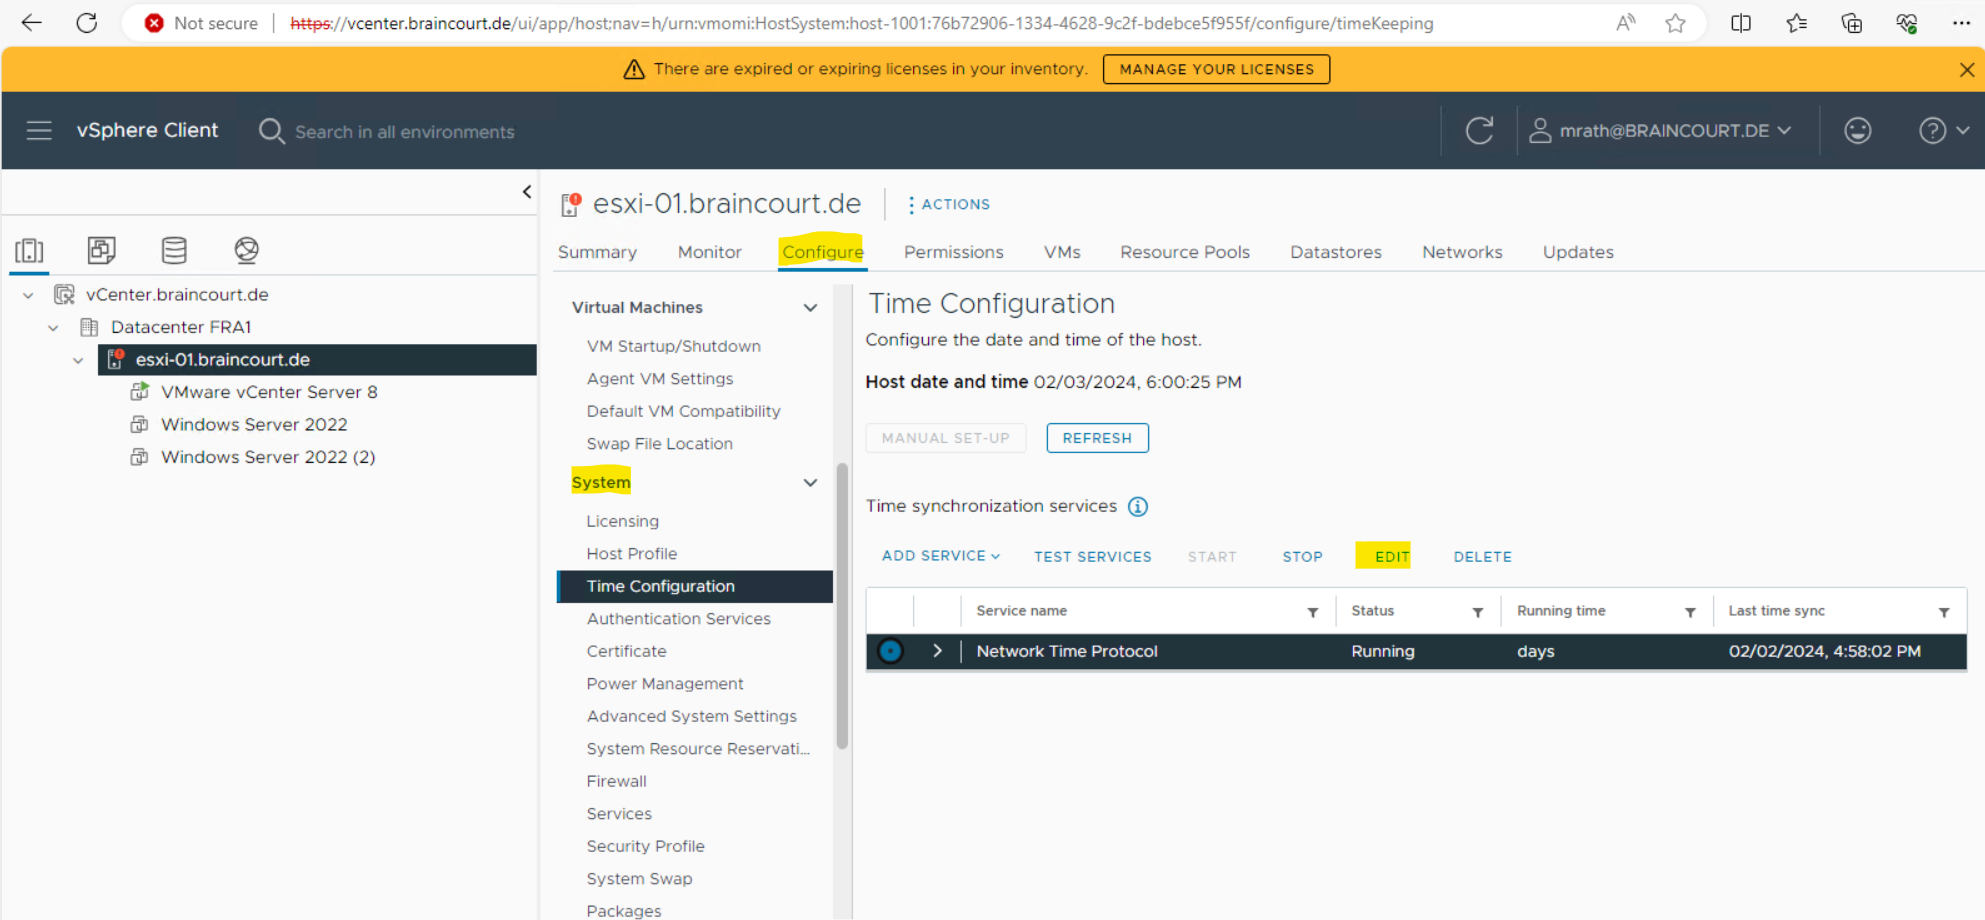
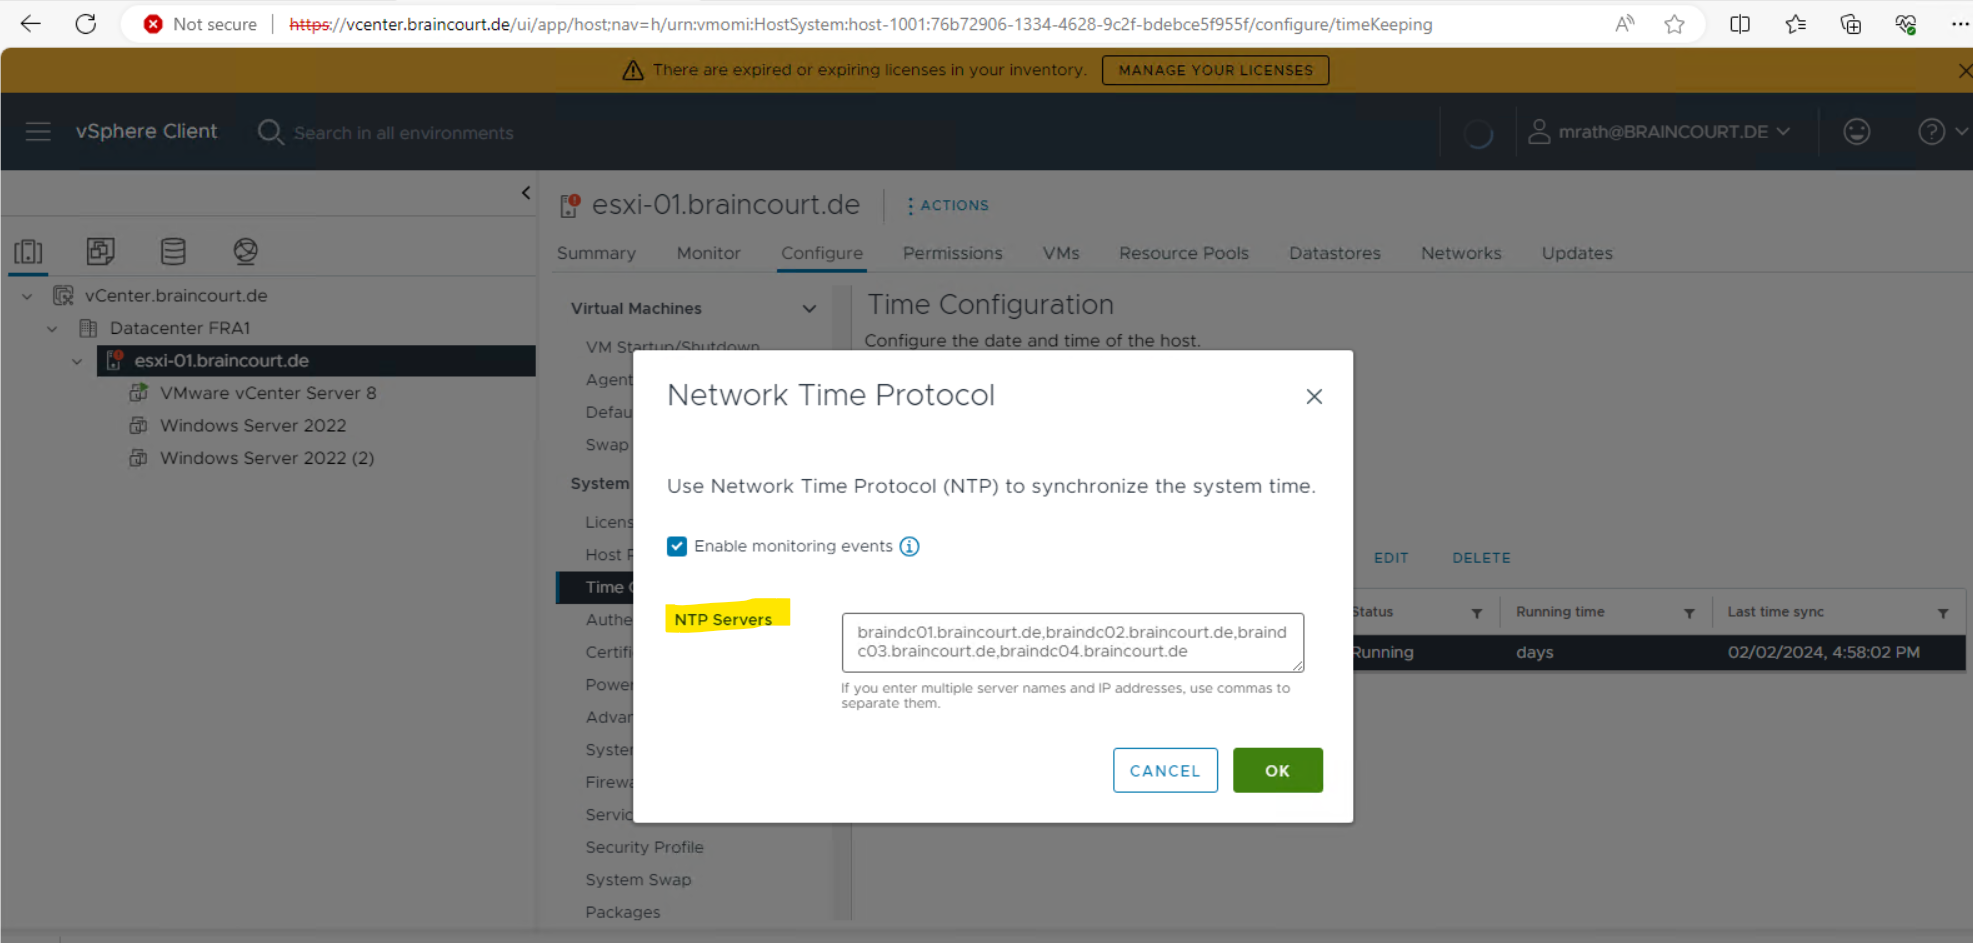
Confirm the ESXi host is synchronizing time with the Active Directory Domain controller.
You can use the vSphere Web Client to configure ESXI/ESX NTP.
Connect to the ESXi/ESX host or vCenter Server using the vSphere Client. Click on Hosts and Clusters.
Select the ESXi host from the list. Click Manage > Settings. Expand System and select Time Configurations.
Click on EDIT and specify the fully qualified domain name or IP address of the Windows server Domain Controller(s).
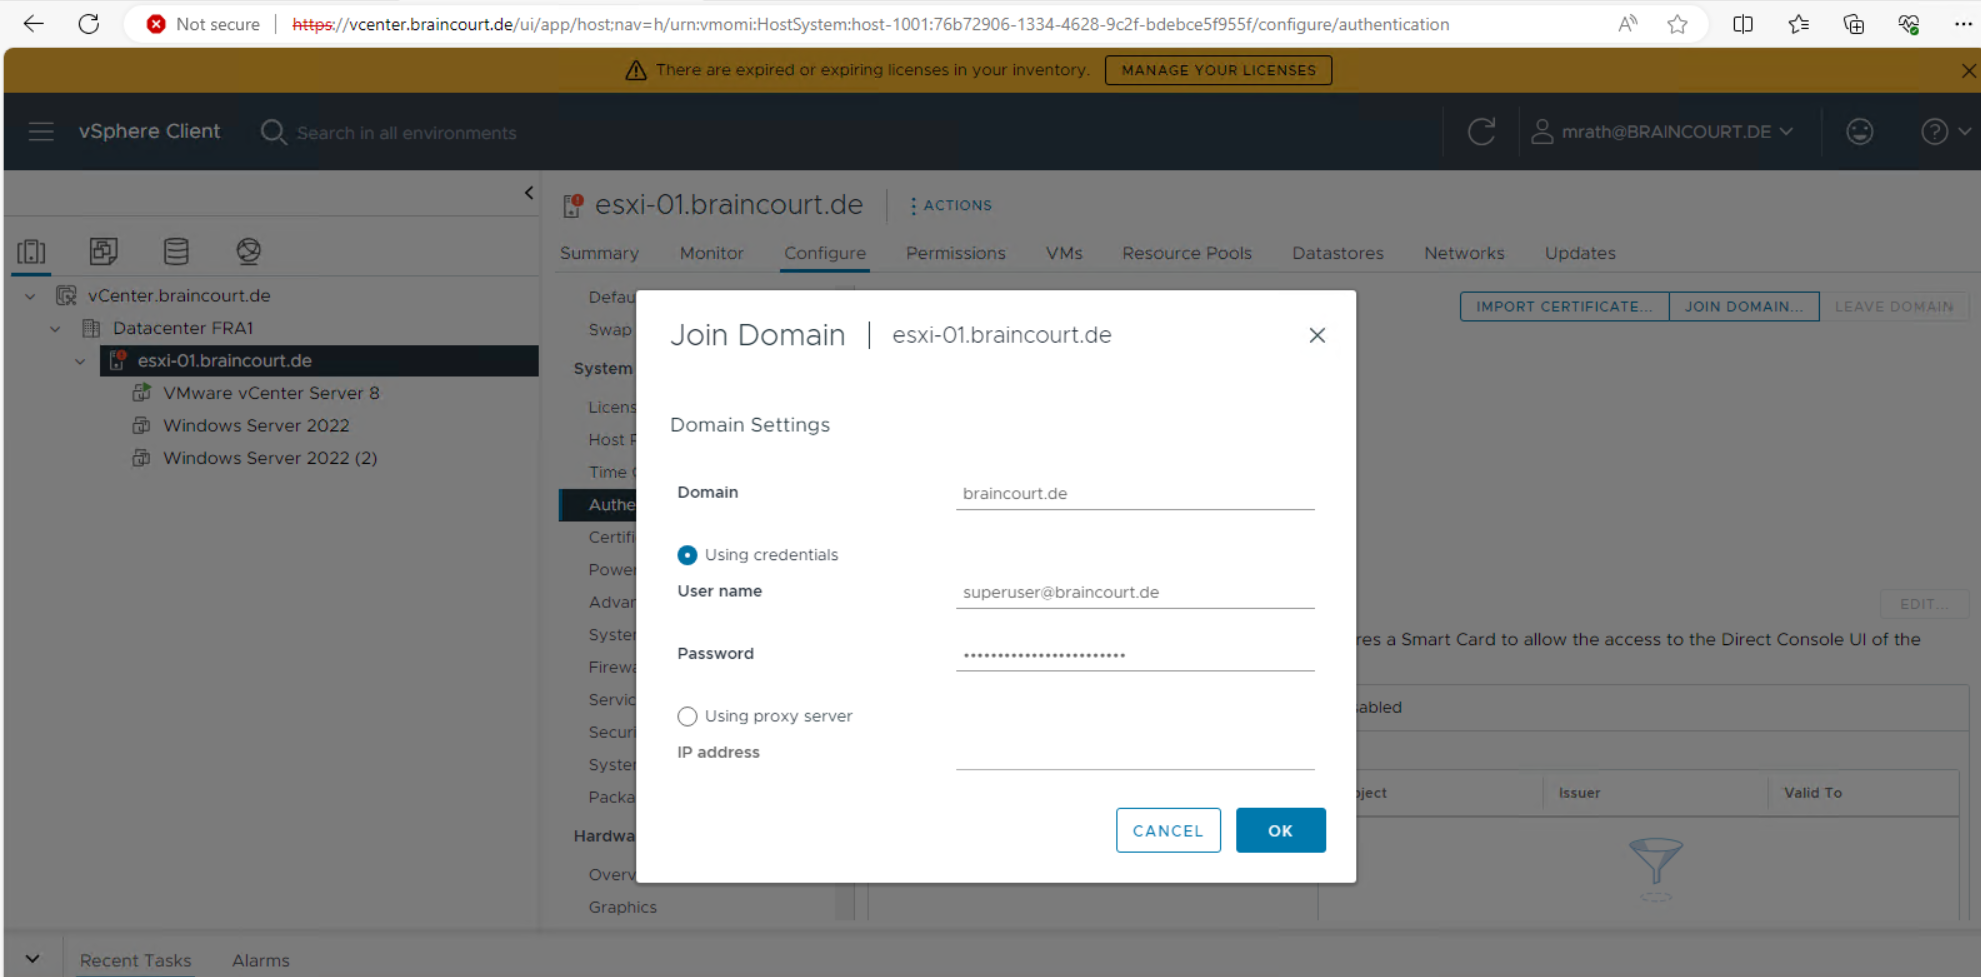
From the vCenter Server vSphere Client, select the host that you want to add to the Active Directory.
Click the Configure tab. Click the Authentication Services. Click the Join Domain… link at the top right pane.

In the Join Domain dialog, enter a domain. Use the form domain.com or domain.com/OU1/OU2.
Enter the user name (in user@domain.com format) and password of a directory service user account that has permission to join the host to the domain and click OK.
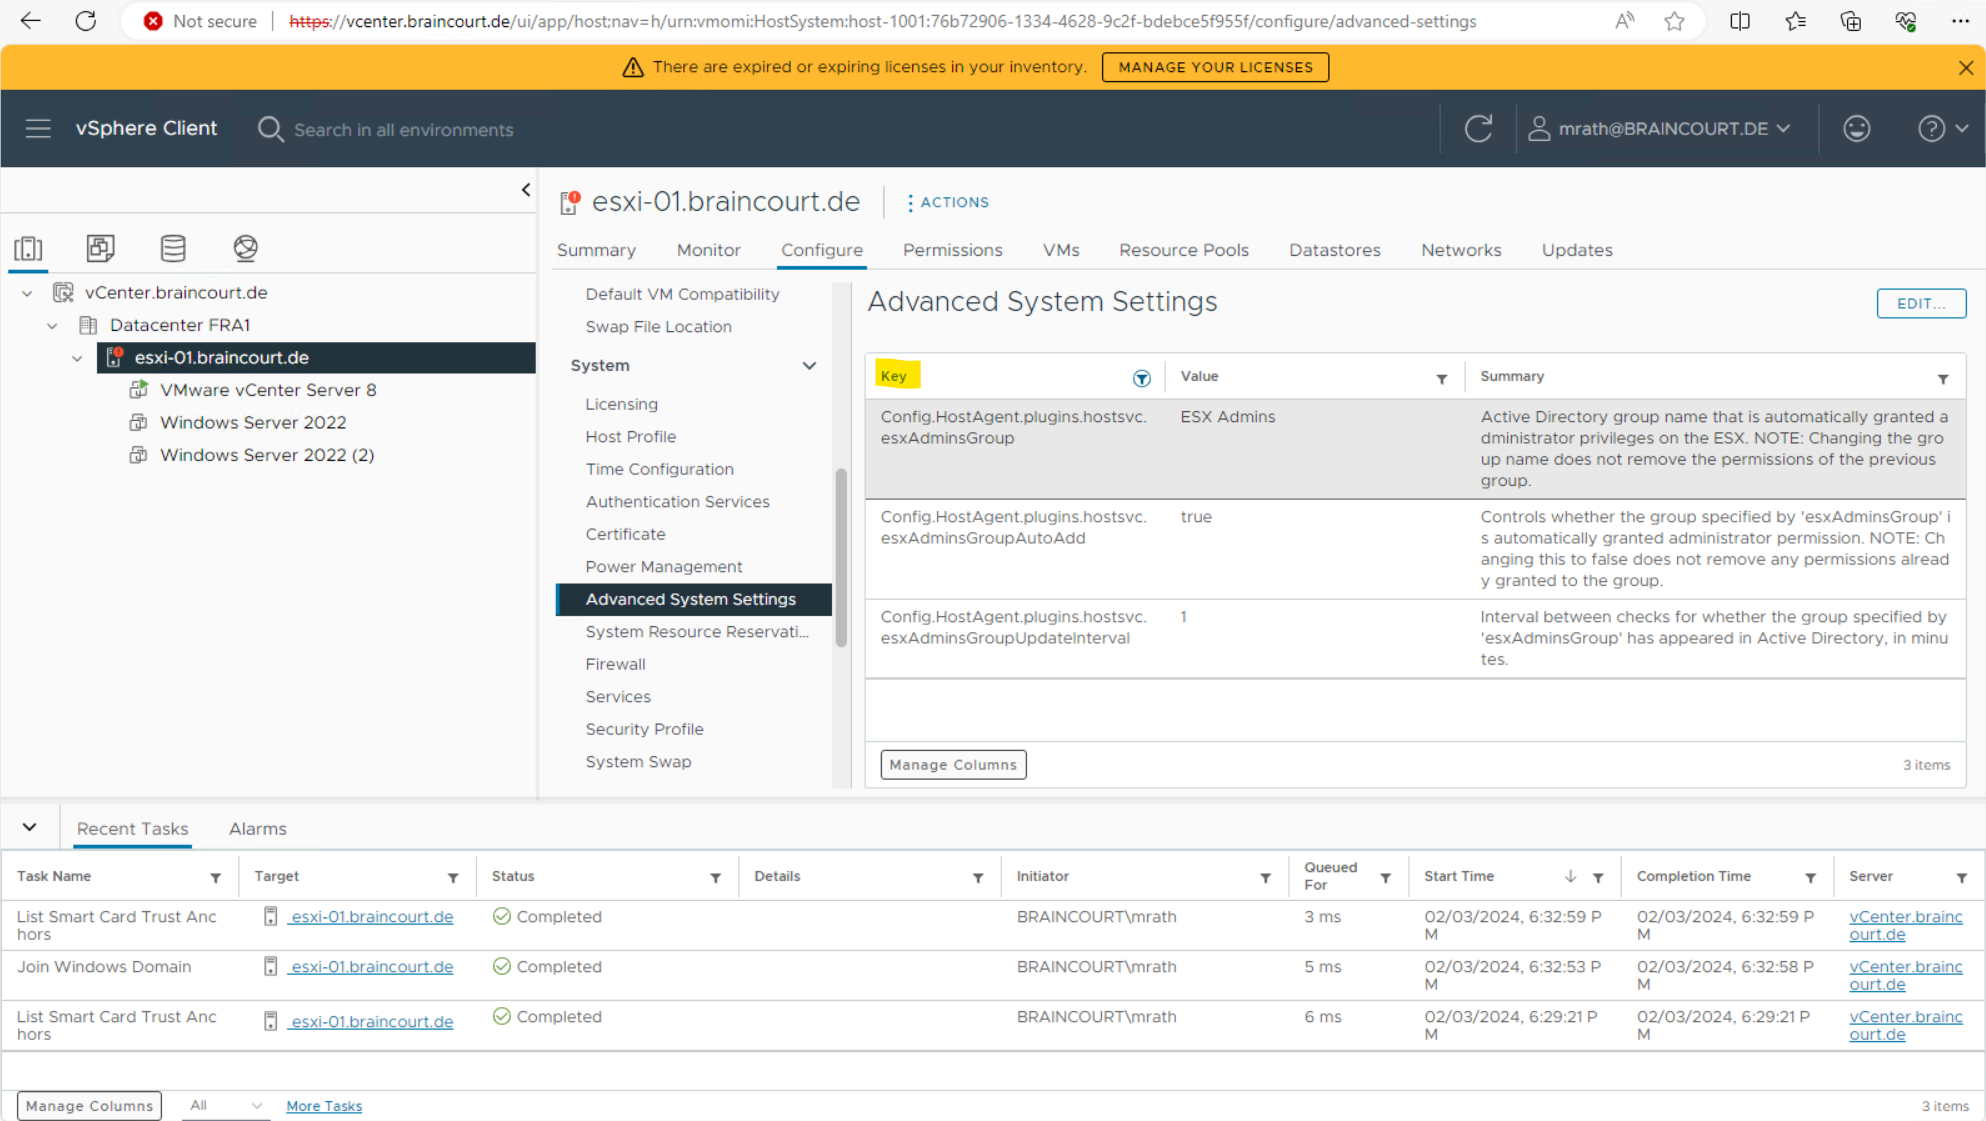
Click the Configure tab and click Advanced System Settings.
Under the Key column, click the filter icon and search for
Config.HostAgent.plugins.hostsvc.esxAdminsGroup
Confirm the Config.HostAgent.plugins.hostsvc.esxAdminsGroup setting matches the Administrator group that you want to use in the Active Directory. These settings take effect within a minute and no reboot is required. To edit, click the top right EDIT… link.

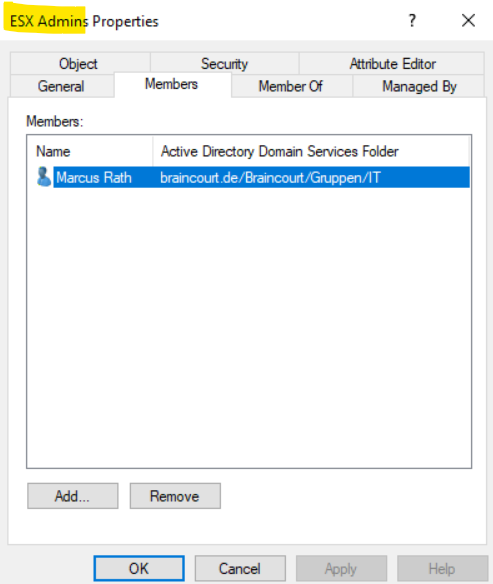
Either change the ESX Admin group above into an already existing group in your Active Directory or create this group in Active Directory and add all members they should have the Administrator role.
Both servers, the ESXI host and the vCenter server are now domain joined.
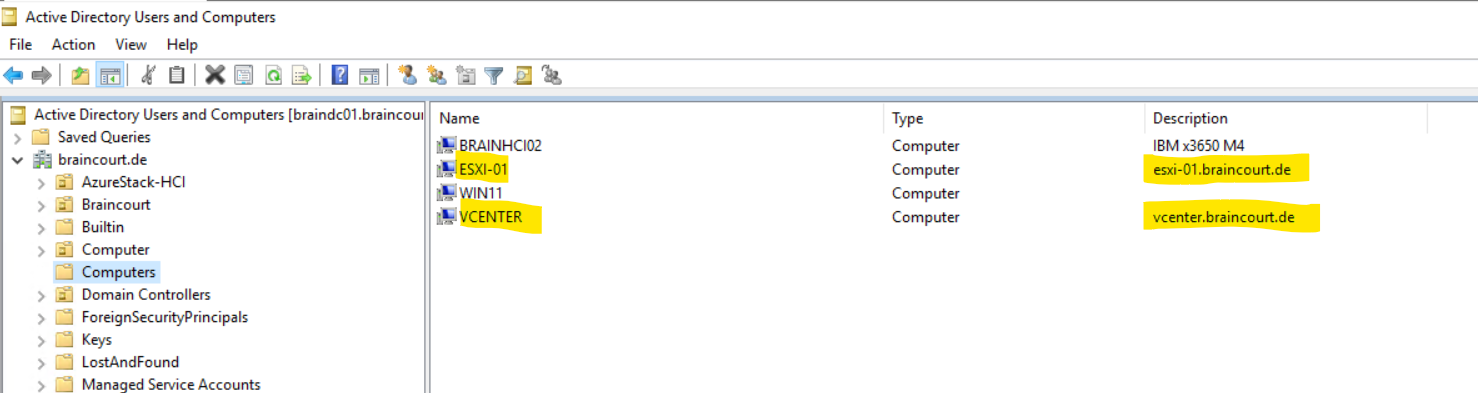
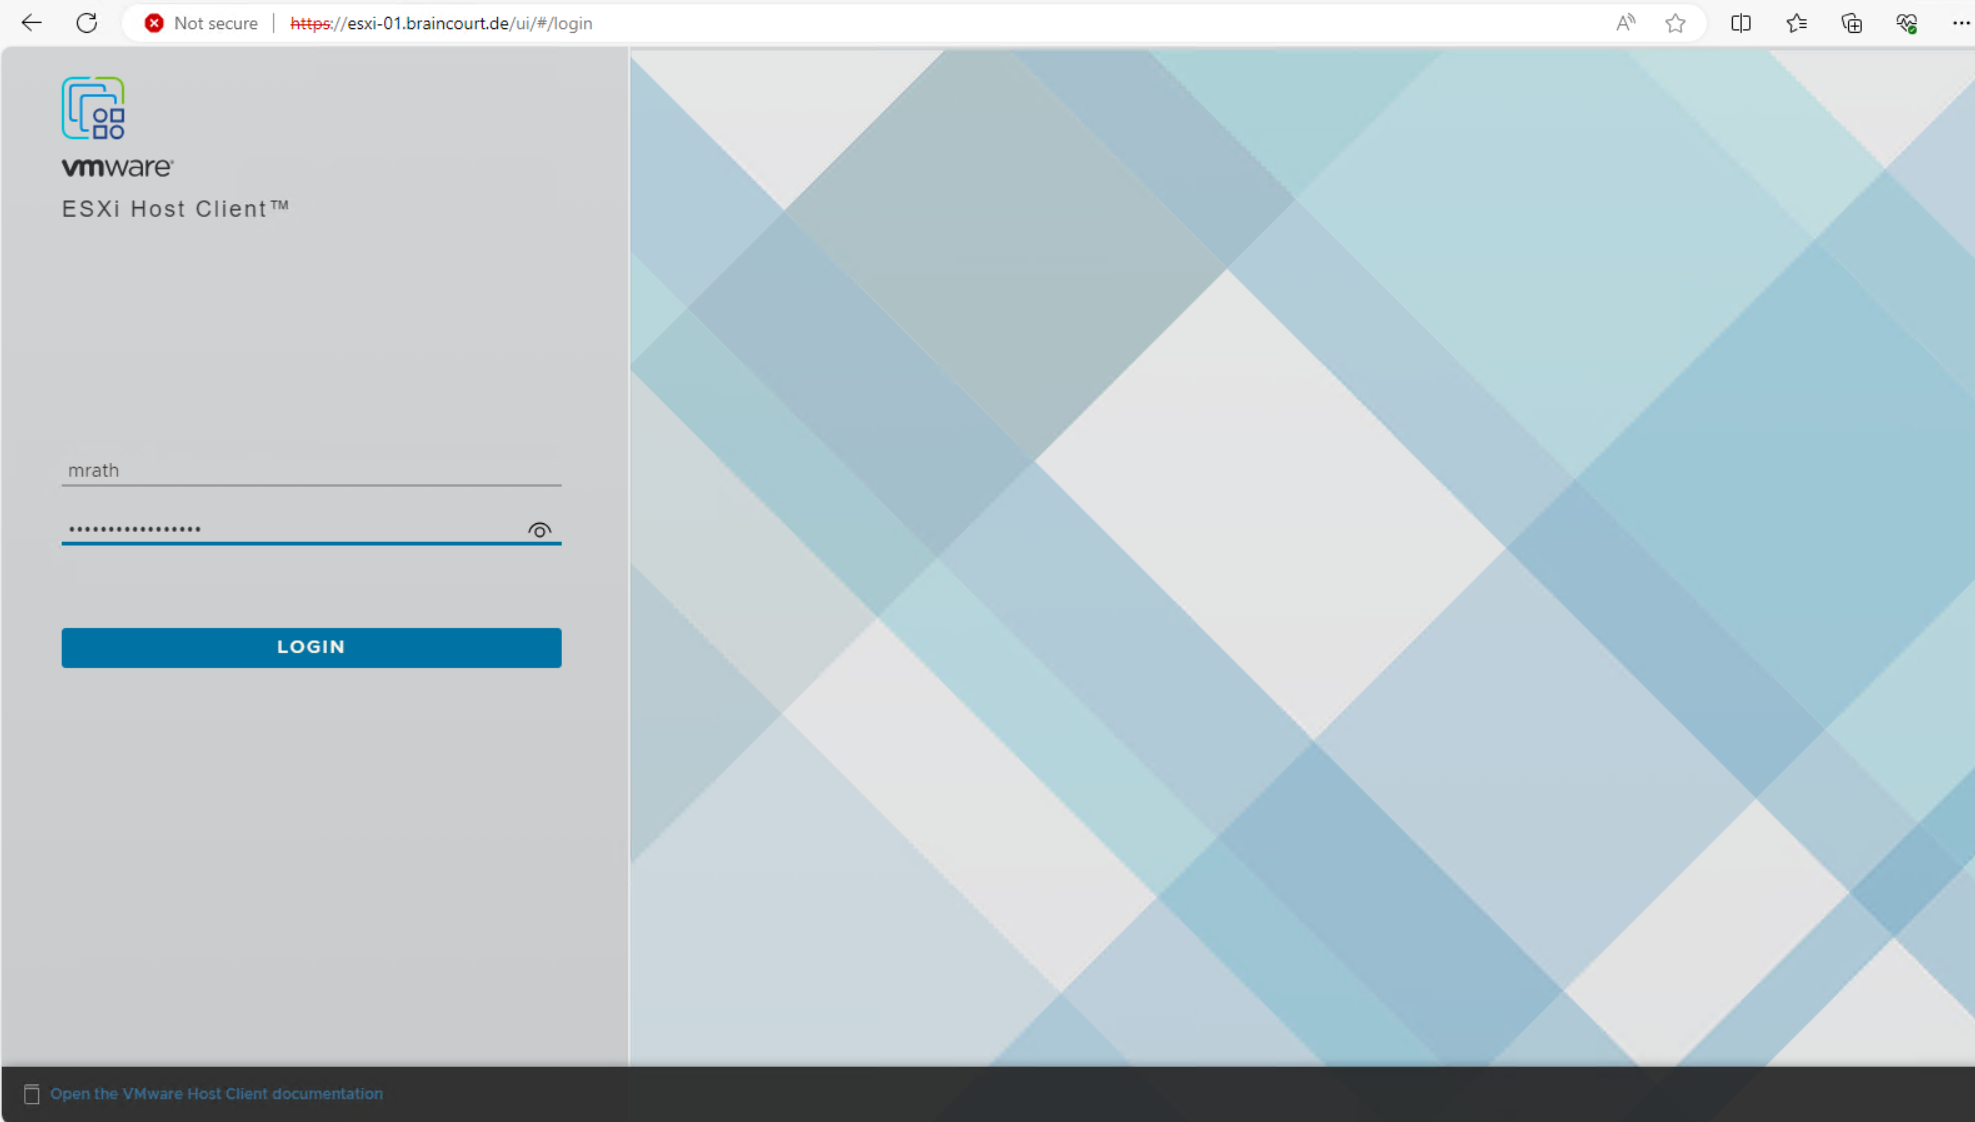
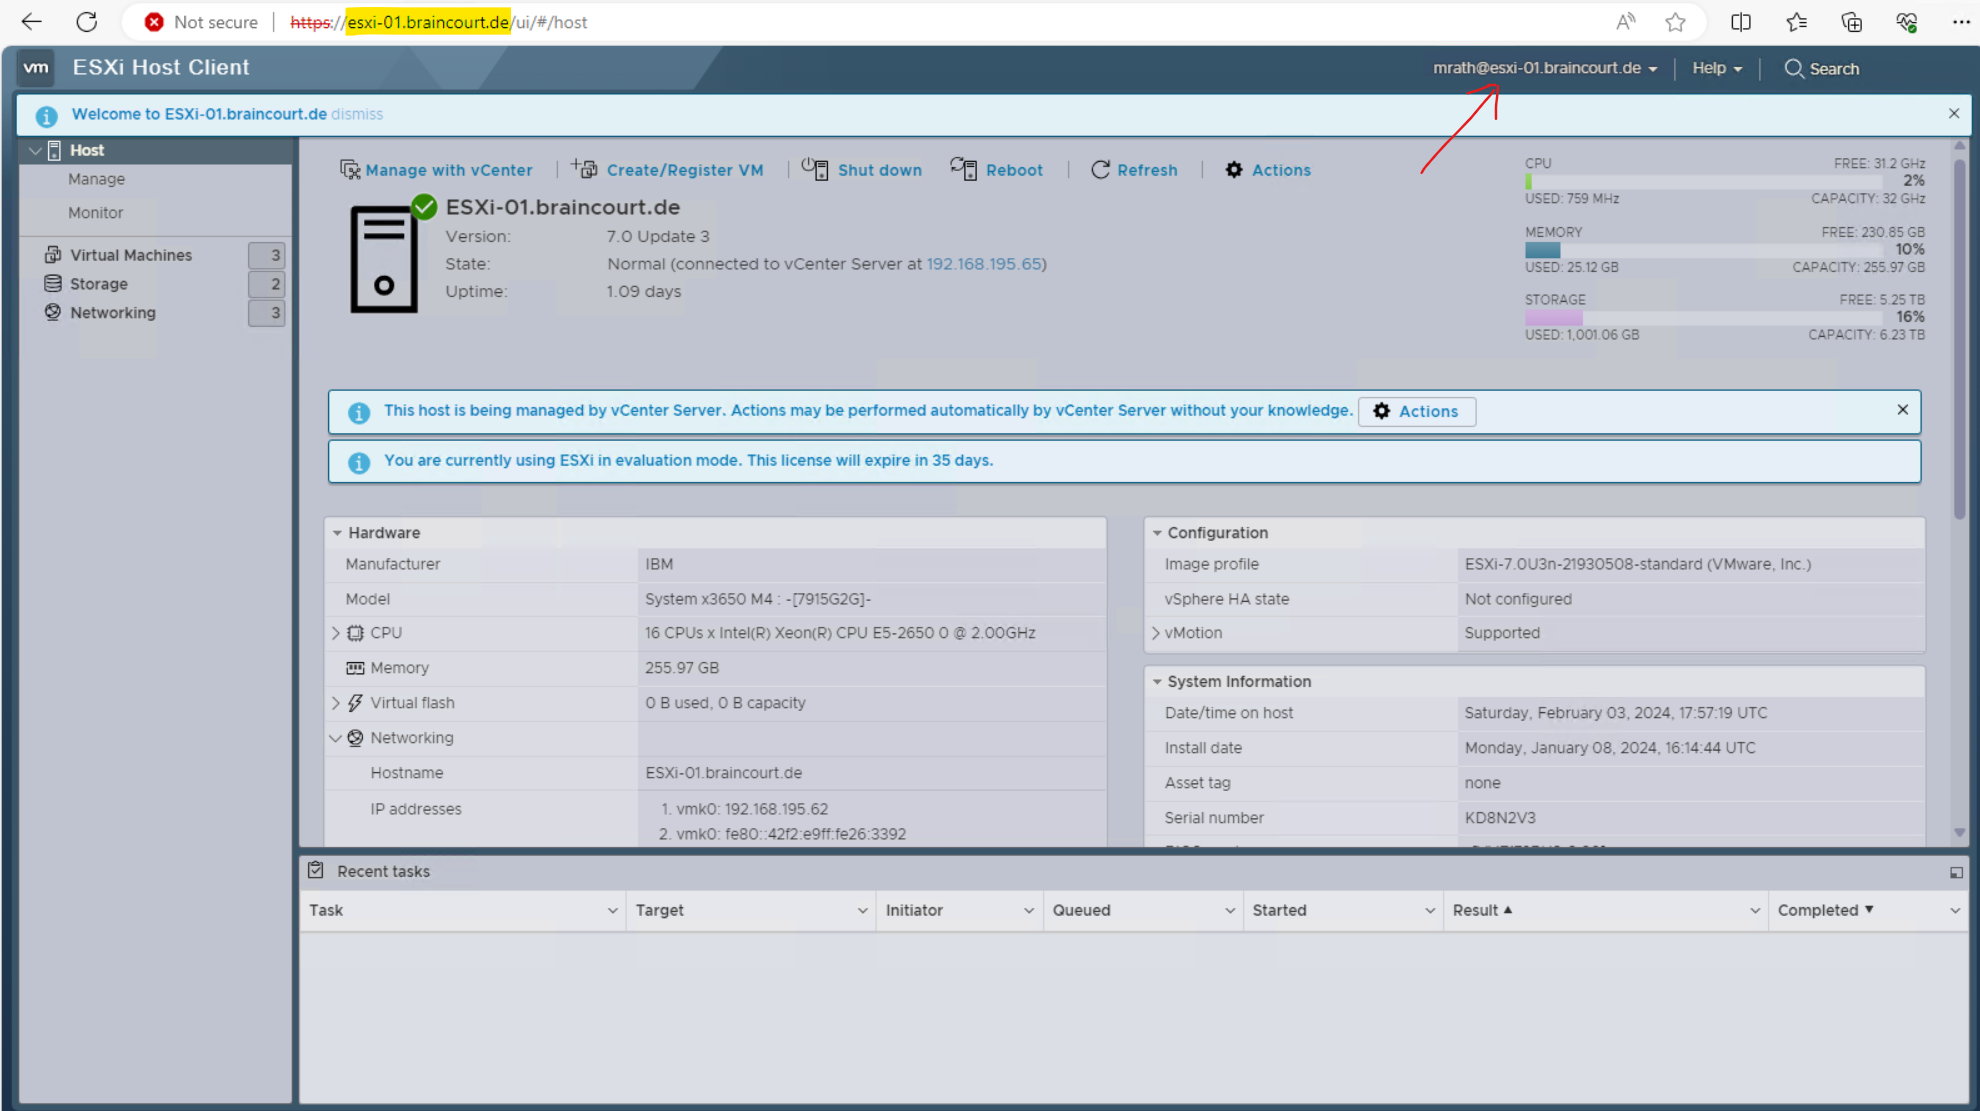
From now on I can also use my domain user account to login to the ESXi Host Client like shown below.
Enter the user name (either just the name as in the figure or including the domain like user@domain.com, aka user principle name (UPN), both will work)
You can also check directly on the ESXi Host Client if the host is joined to a domain under Host -> Manage -> Security & users -> Authentication like shown below.

In the vSphere client we previously joined the host. ESXi host -> Configure -> System -> Authentication Services.

Source: https://kb.vmware.com/s/article/2075361
Troubleshooting Domain Join
In case you will run into the following error when using the vSphere web client to join vCenter to your Active Directory domain, it means that that there is a general network connection issue.
Idm client exeption: Error trying to join AD, error code [31]

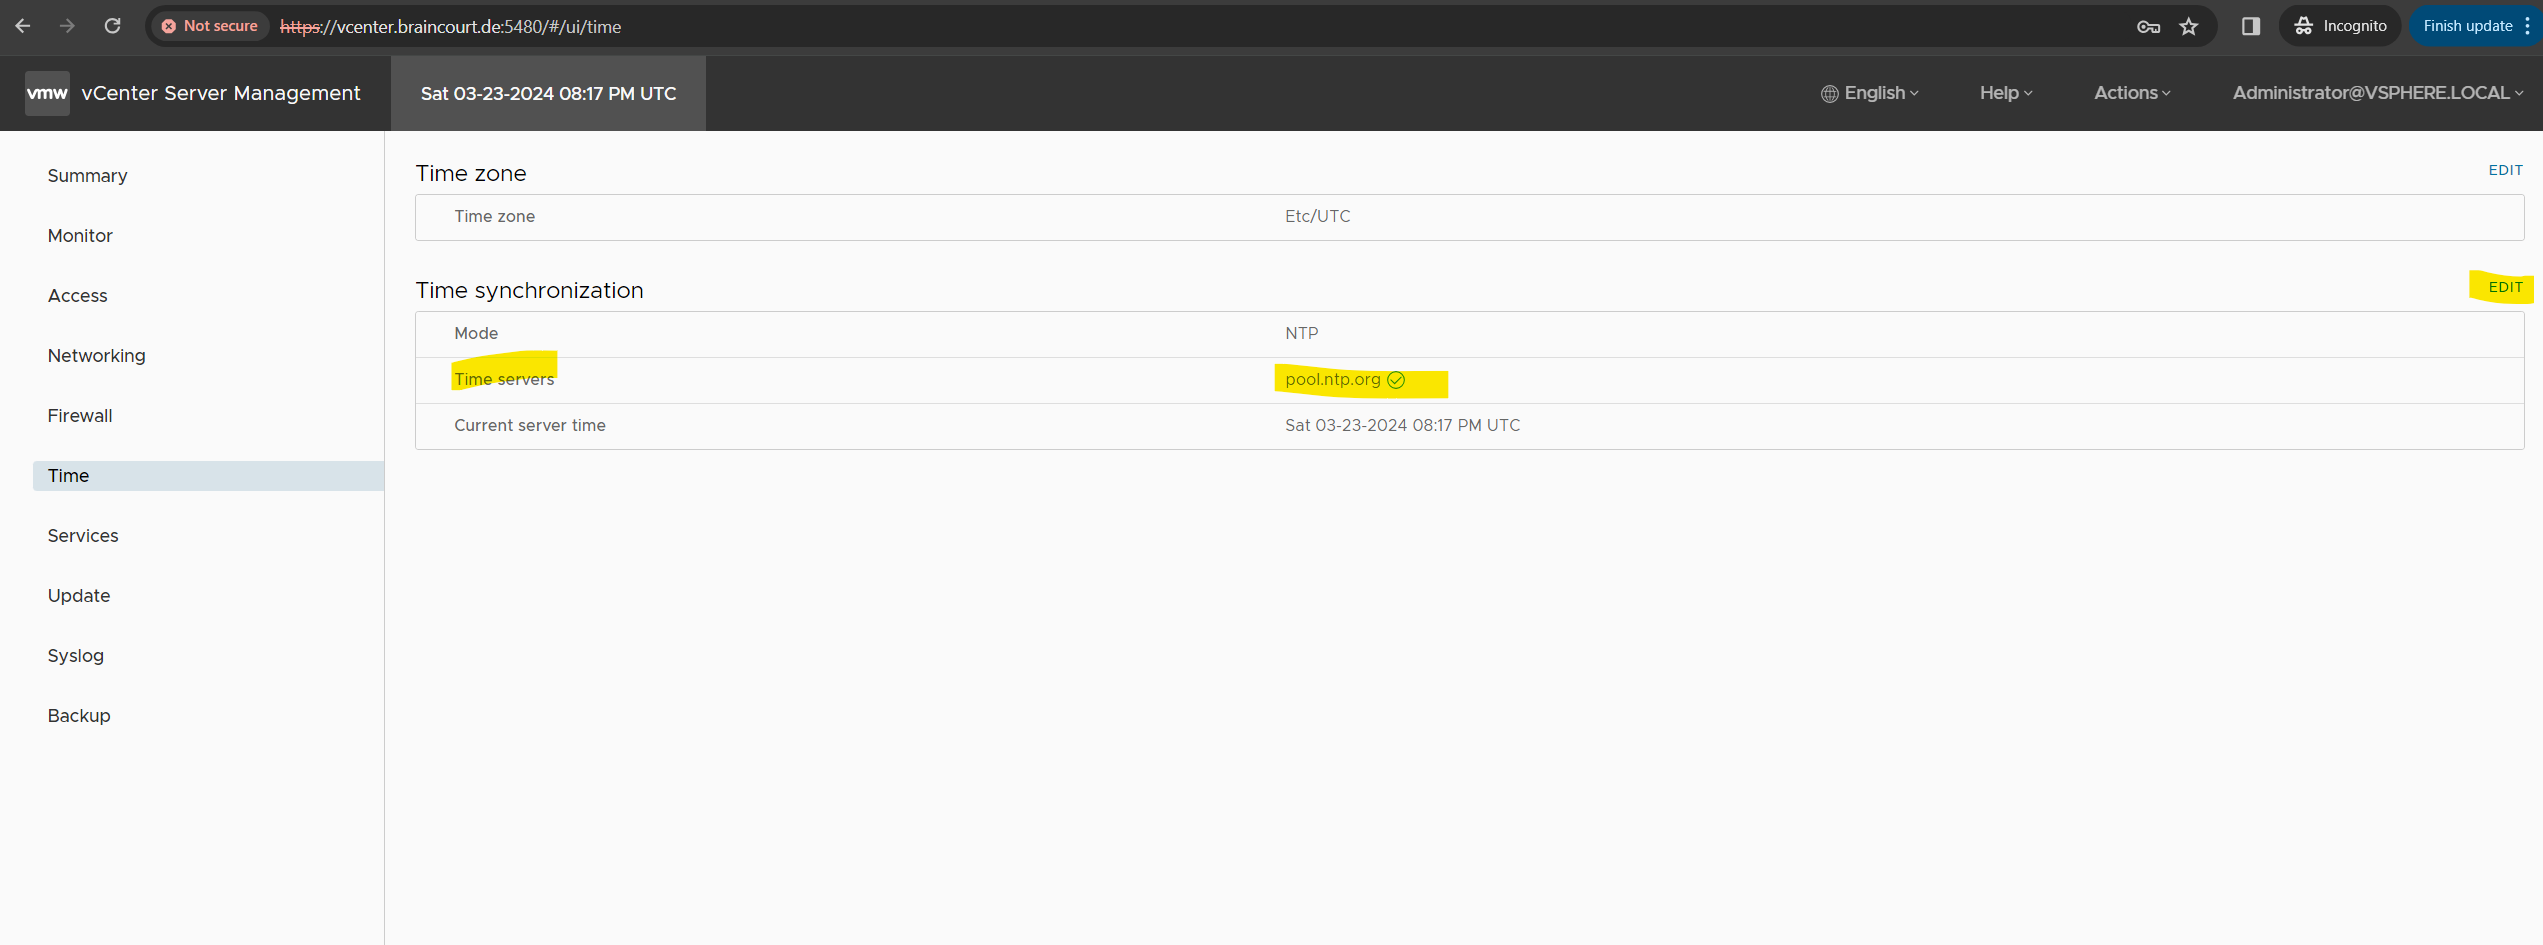
In my case the issue was that the vCenter server’s time was not correctly synchronized and 6 minutes behind the correct time. The default maximum allowed difference between the domain controllers and other domain members are 5 minutes.
So I could resolve the issue by adding a NTP server on the vCenter serve’s appliance management web interface on port 5480 like https://vcenter.braincourt.de:5480/.
In case you will use the command line to join the vCenter appliance to your domain, you encounter the following error for network connection problems.
/opt/likewise/bin # ./domainjoin-cli join <domain> <domain admin>
ERROR_GEN_FAILURE [code 0x0000001f]
Part 1 – Set up and Configure a VMware ESXi Host
See how to install and set up VMware’s ESXi hypervisor step by step on a bare metal server. We will see each of the separate steps to install ESXi on a bare metal server.
Set up a VMWare vSphere Environment
In the first part you will see how to deploy the vCenter server appliance (VCSA) on an ESXi host in your on-premise data center.
Adding and Configuring a new ESXi Host in vSphere (vCenter server)
In order to configure an ESXi host you can also use the vSphere client if you have provisioned vCenter server in your environment.
Links
Getting Started with vSphere Command-Line Interfaces
https://developer.vmware.com/docs/1092/cli_jumpstart.3.2.htmlHow to Install VMware Tools on Linux, Windows, MacOS, FreeBSD, and Solaris
https://www.nakivo.com/blog/how-to-install-vmware-tools-on-guest-os-overview/VMware Virtual Networking Concepts
https://www.vmware.com/content/dam/digitalmarketing/vmware/en/pdf/techpaper/virtual_networking_concepts.pdfESXCLI tool
https://developer.vmware.com/web/tool/8.0/esxcli/ESXCLI Concepts and Examples
https://vdc-repo.vmware.com/vmwb-repository/dcr-public/f1284e84-1a34-4727-aaca-af24fb4efb3d/47c628b9-c5f2-46e6-a7cb-68ce15377d78/vsphere-703-esxcli-concepts-examples-guide.pdfAnnouncing End of Life of vSphere CLI package in vSphere 7.0 (78473)
https://kb.vmware.com/s/article/78473What Is VMware vSwitch?
https://www.nakivo.com/blog/what-is-vmware-vswitch/VMware ESXi Networking Concepts
https://www.nakivo.com/blog/esxi-network-concepts/
Related Posts
Latest posts
Protecting NetApp ONTAP Workloads with Autonomous Ransomware Protection (ARP) – Part 2 – Simulating Ransomware Attacks on VMware VMFS Datastores
Follow me on LinkedIn