Set up a new WordPress Site at Kinsta
The main aim of this post is to give you a comprehensive guide and introduction about Kinsta’s WordPress hosting services.
In this post I will go through each separate steps to create and set up a new WordPress site at Kinsta.
First of all Kinsta’s entire infrastructure is built on the Google Cloud Platform which provides industry-leading performance for their hosted services.
Kinsta is powered exclusively by Google Cloud Platform and they utilize Google Cloud’s premium tier global network to ensure site loads even faster. Kinsta is recommended by Google Cloud as a fully-managed hosting solution.
Source: https://kinsta.com/knowledgebase/what-you-should-know/
Kinsta: Building a better hosting service with Google Cloud
https://cloud.google.com/customers/kinsta
Introduction
Founded in 2013, Kinsta makes running projects of all sizes quick and seamless with their Application Hosting, Database Hosting, and Managed WordPress Hosting. Their hosting spans all types of projects, and they serve 55,000+ users from 128 countries around the globe. By taking a customer-centric approach and providing access to the latest technology, Kinsta has become one of the fastest growing hosts in Europe and America.
Source: https://cloud.google.com/customers/kinsta
Kinsta customers can choose from 35 data centers from around the world, allowing them to choose the closest data center to their website visitors.
Source: https://kinsta.com/knowledgebase/what-you-should-know/
Set up a new WordPress Site
First we need to sign up for a new Managed WordPress Hosting plan.
Easy setup via MyKinsta dashboard
24/7/365 expert support
High-performance infrastructure – > Kinsta’s entire infrastructure is built on the Google Cloud Platform
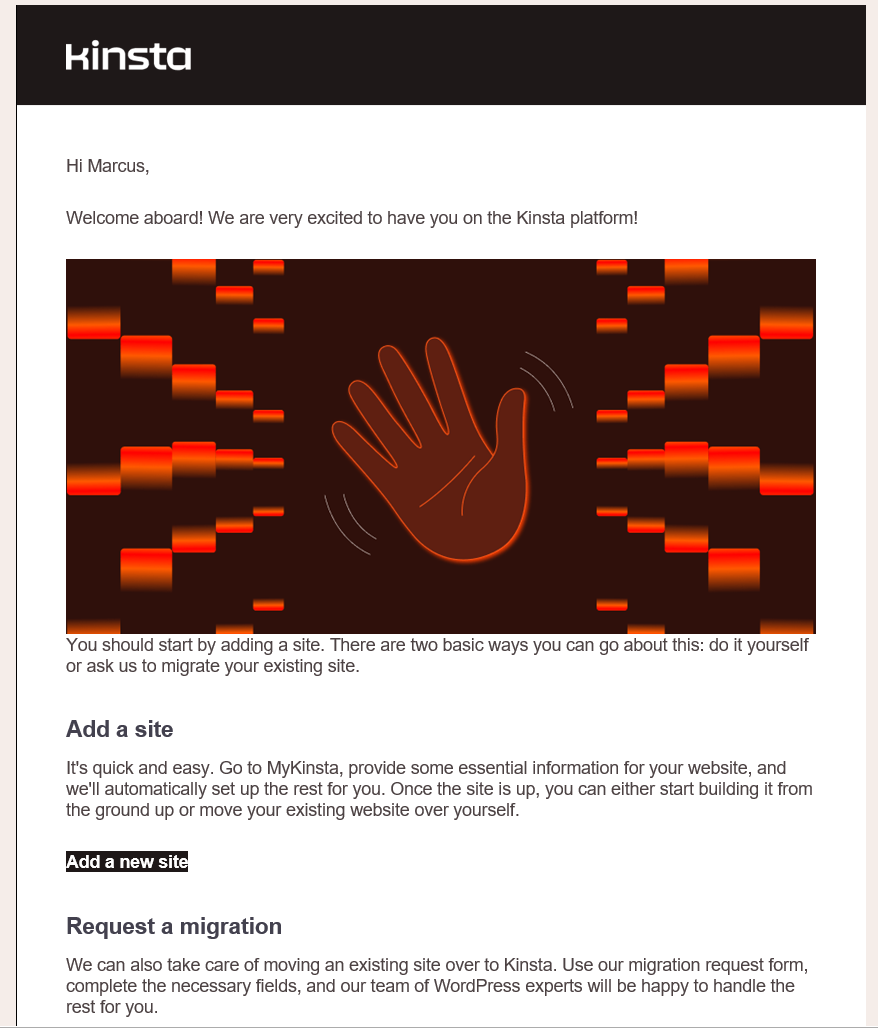
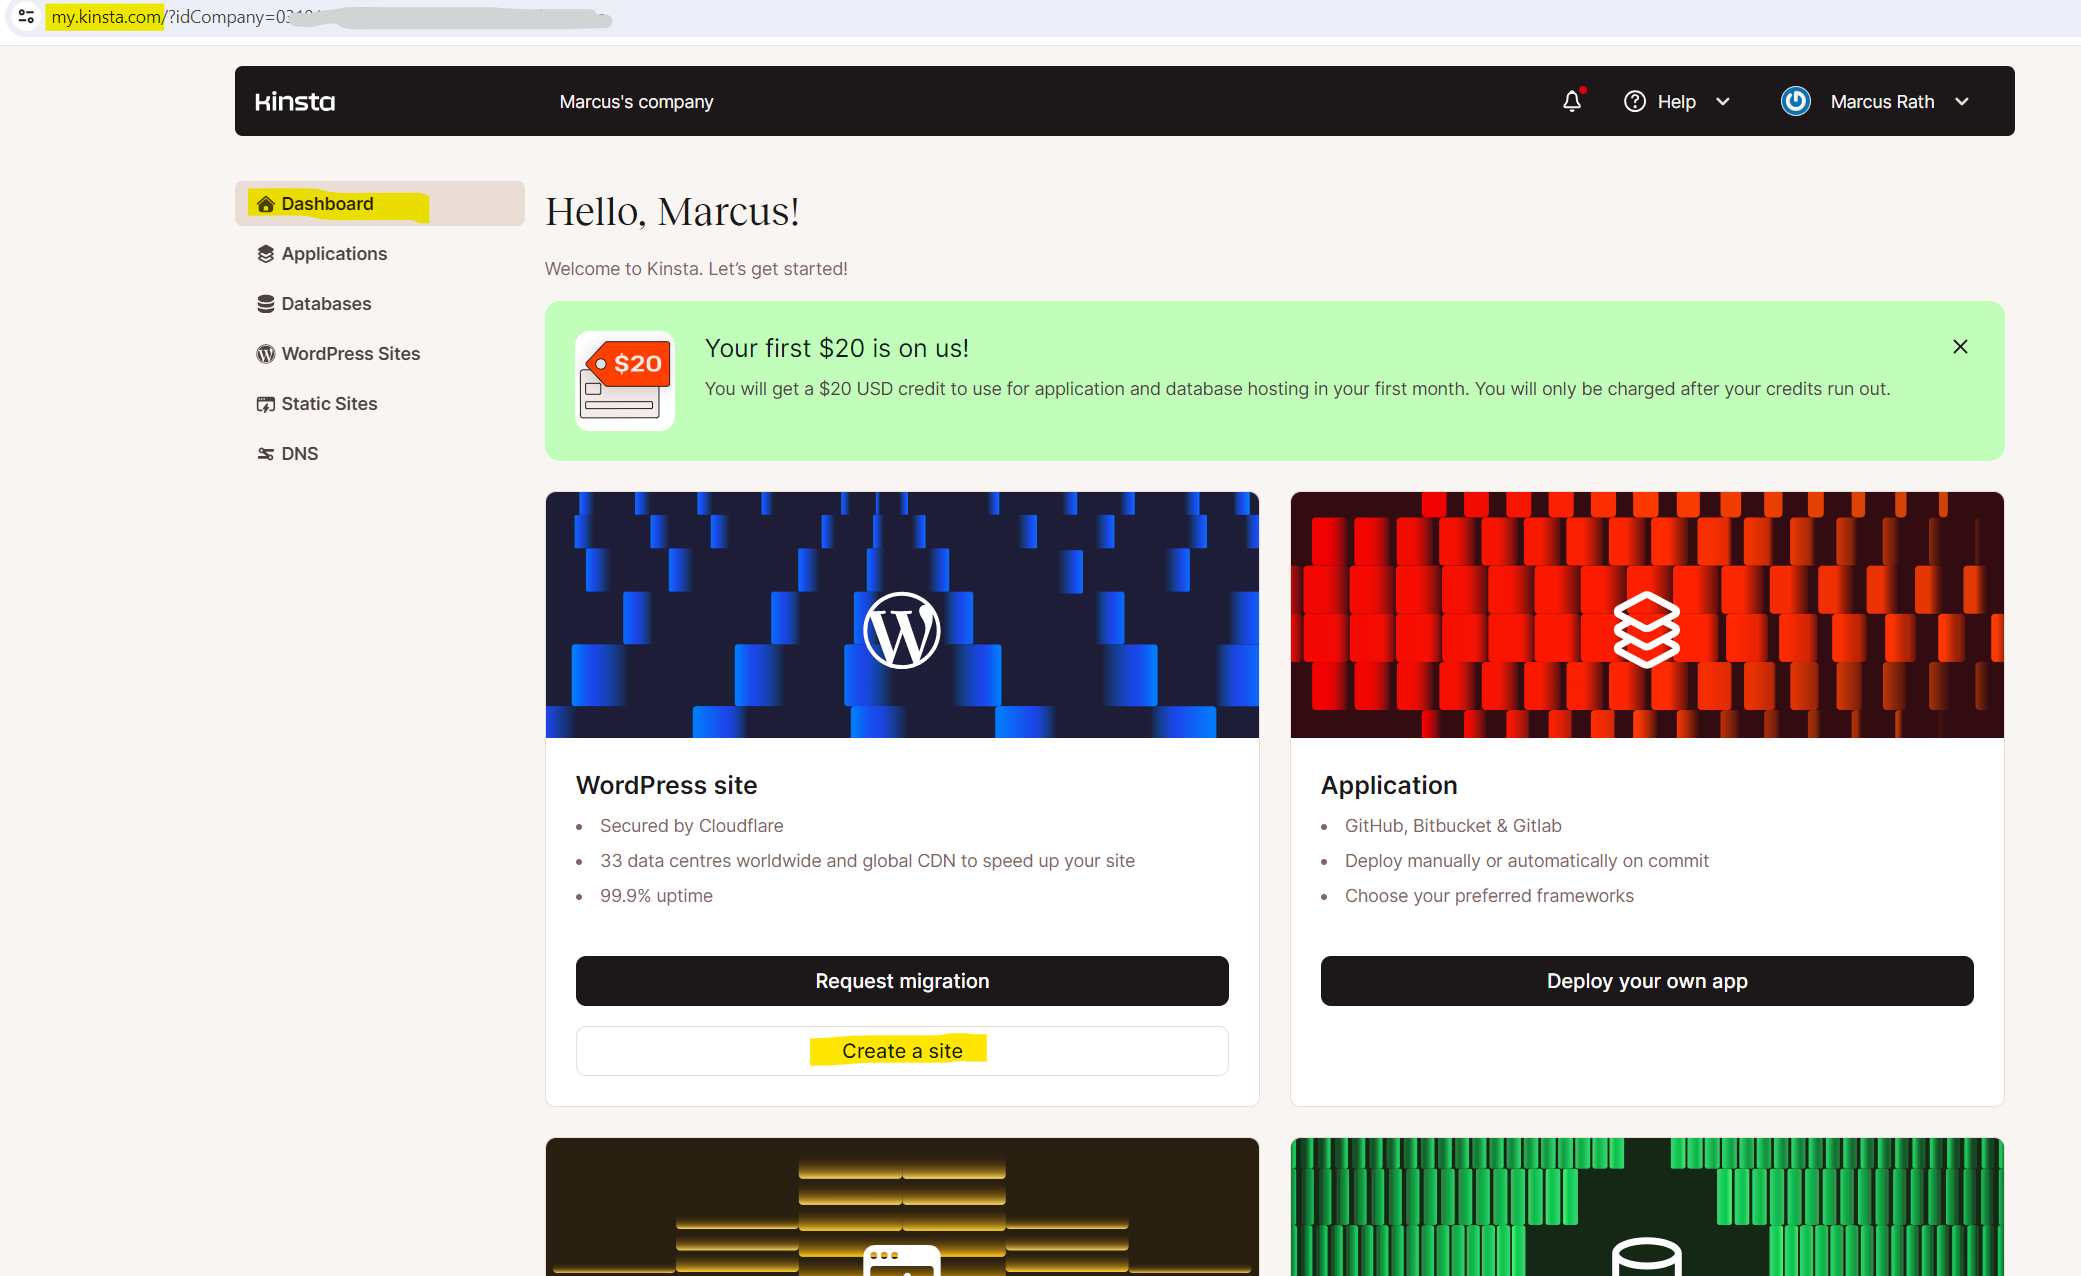
After signing up for a new Managed WordPress Hosting plan, you will get an invitation email with further instructions and a link to create a new WordPress site in your dashboard at Kinsta.
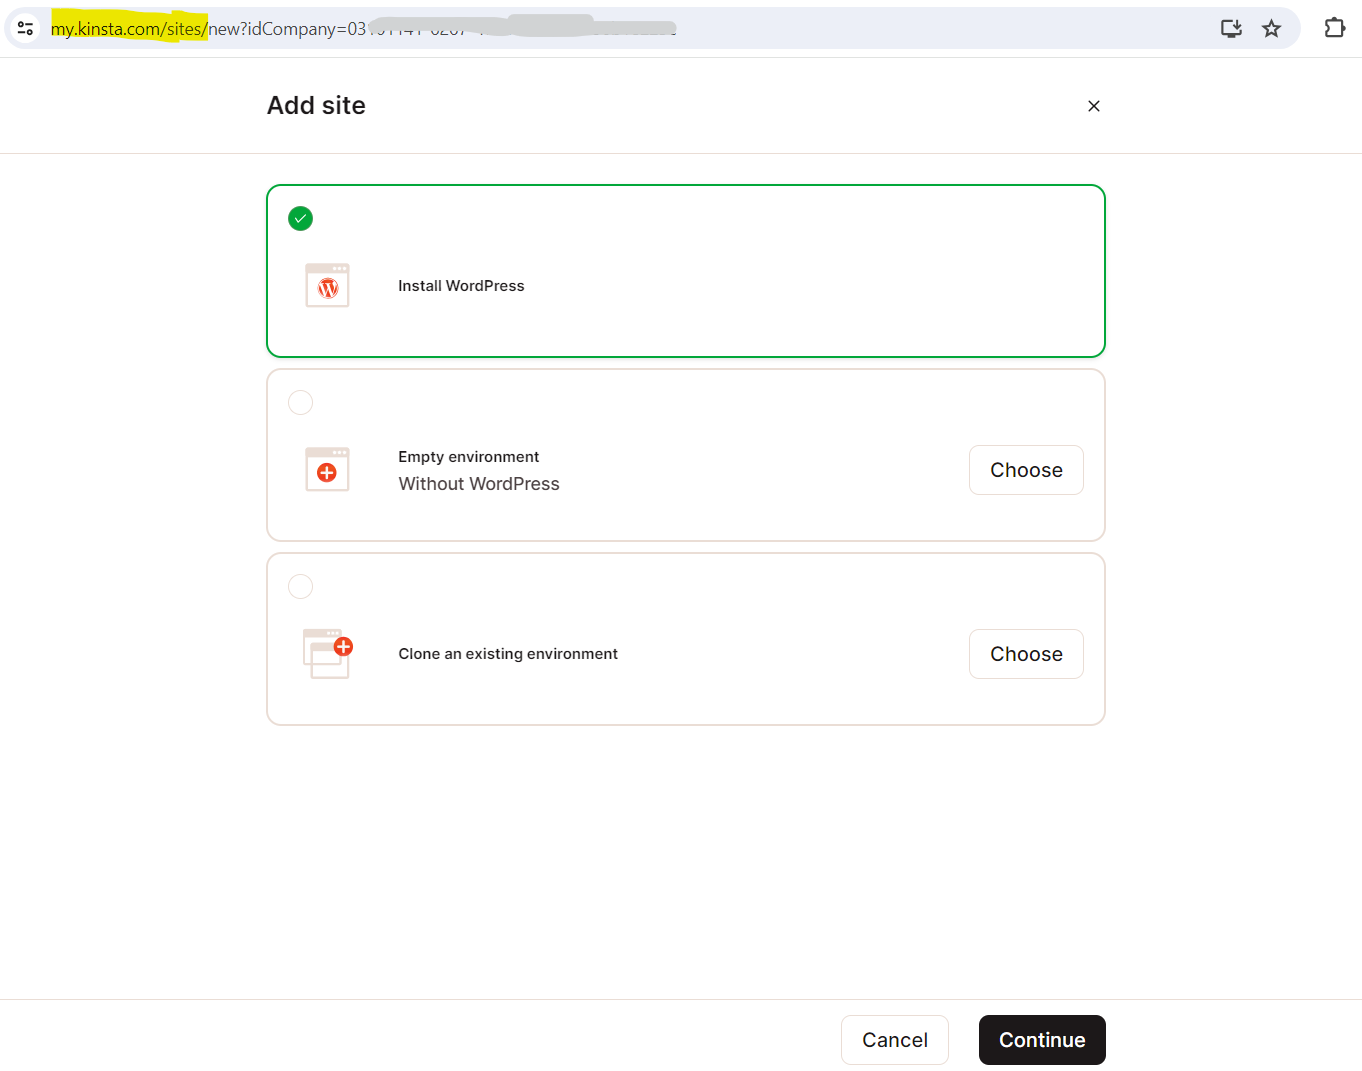
When you click on Create a site you will get navigated through a wizard to finally create the site as shown below.
- Install WordPress: This option installs a fully functional WordPress site that is ready for you to use immediately.
- Empty environment: This option installs all the necessary software to run a WordPress site (web server, PHP, MySQL, etc.) but does not install WordPress itself. This is a good option for users migrating to Kinsta with Duplicator or setting up a Bedrock/Trellis installation with a custom file structure.
- Clone an existing environment: This option allows you to clone an existing staging or live environment to the live environment of a new site.
I will select here Install WordPress.
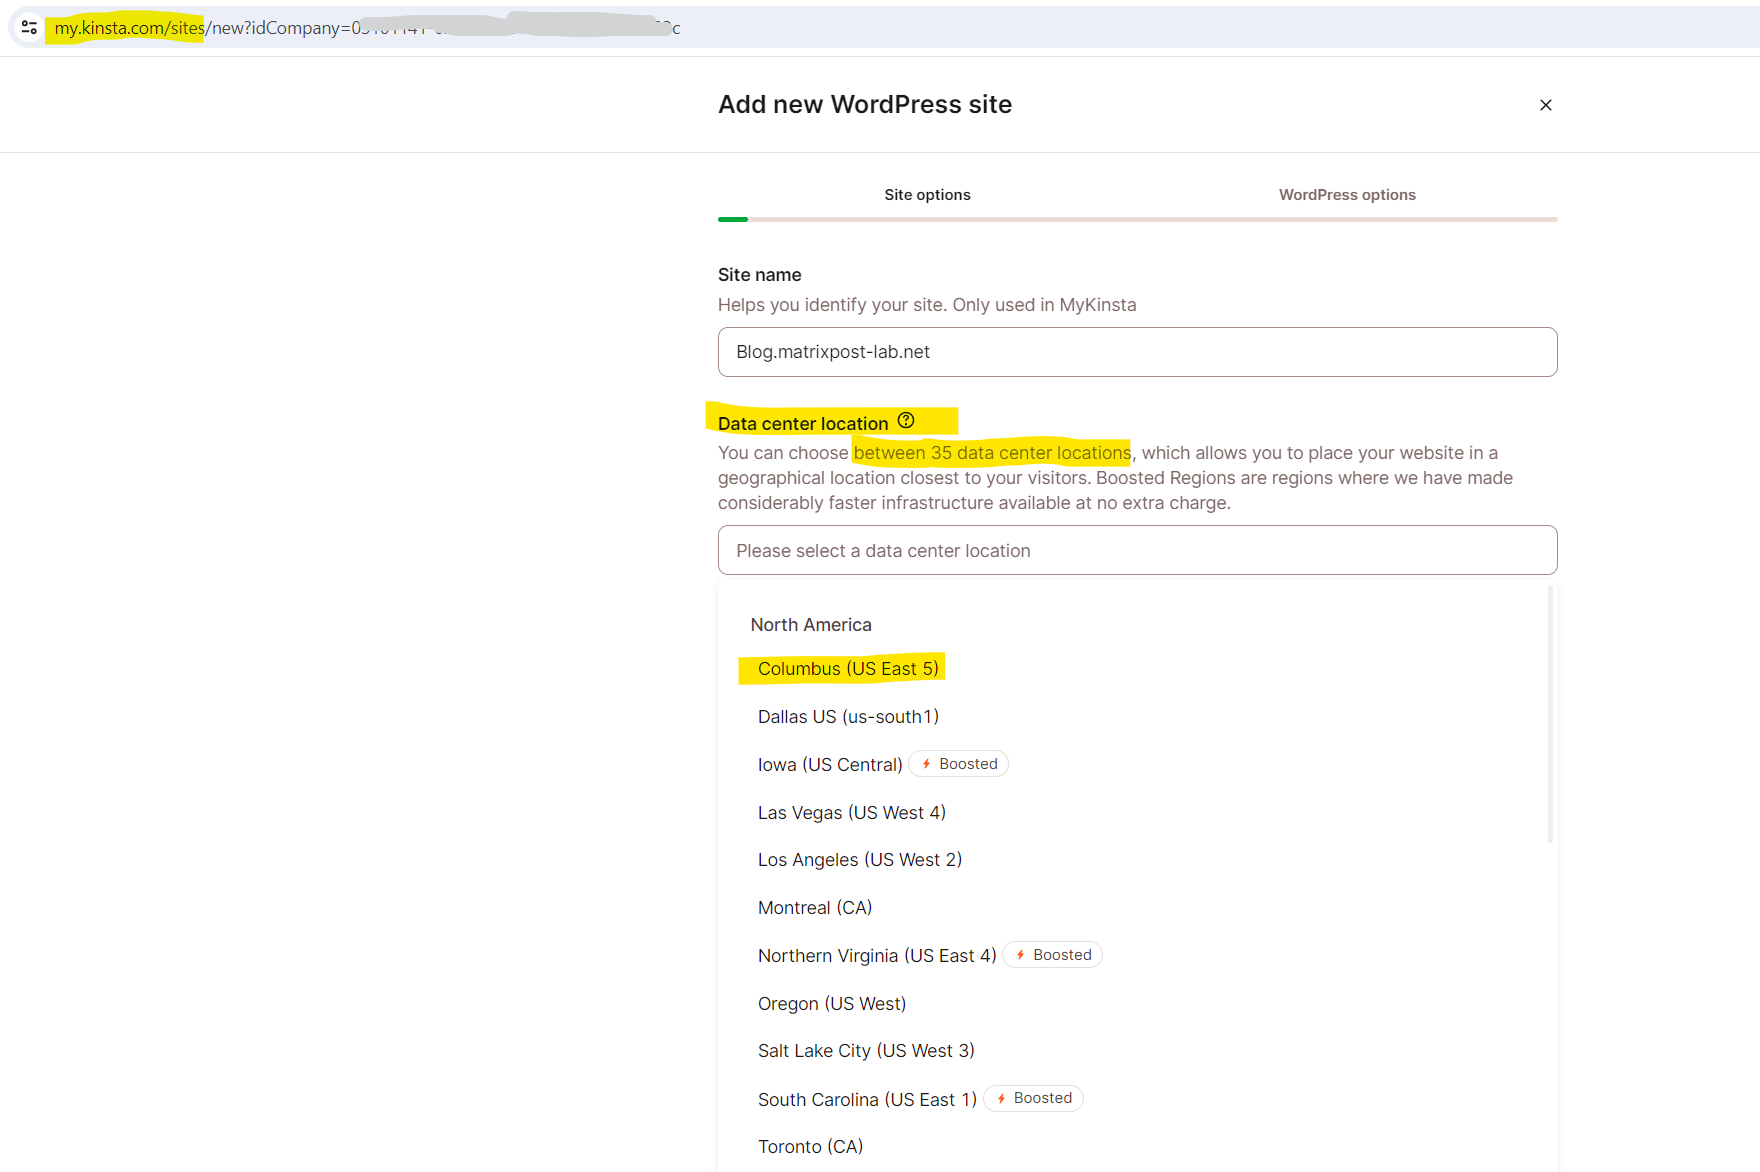
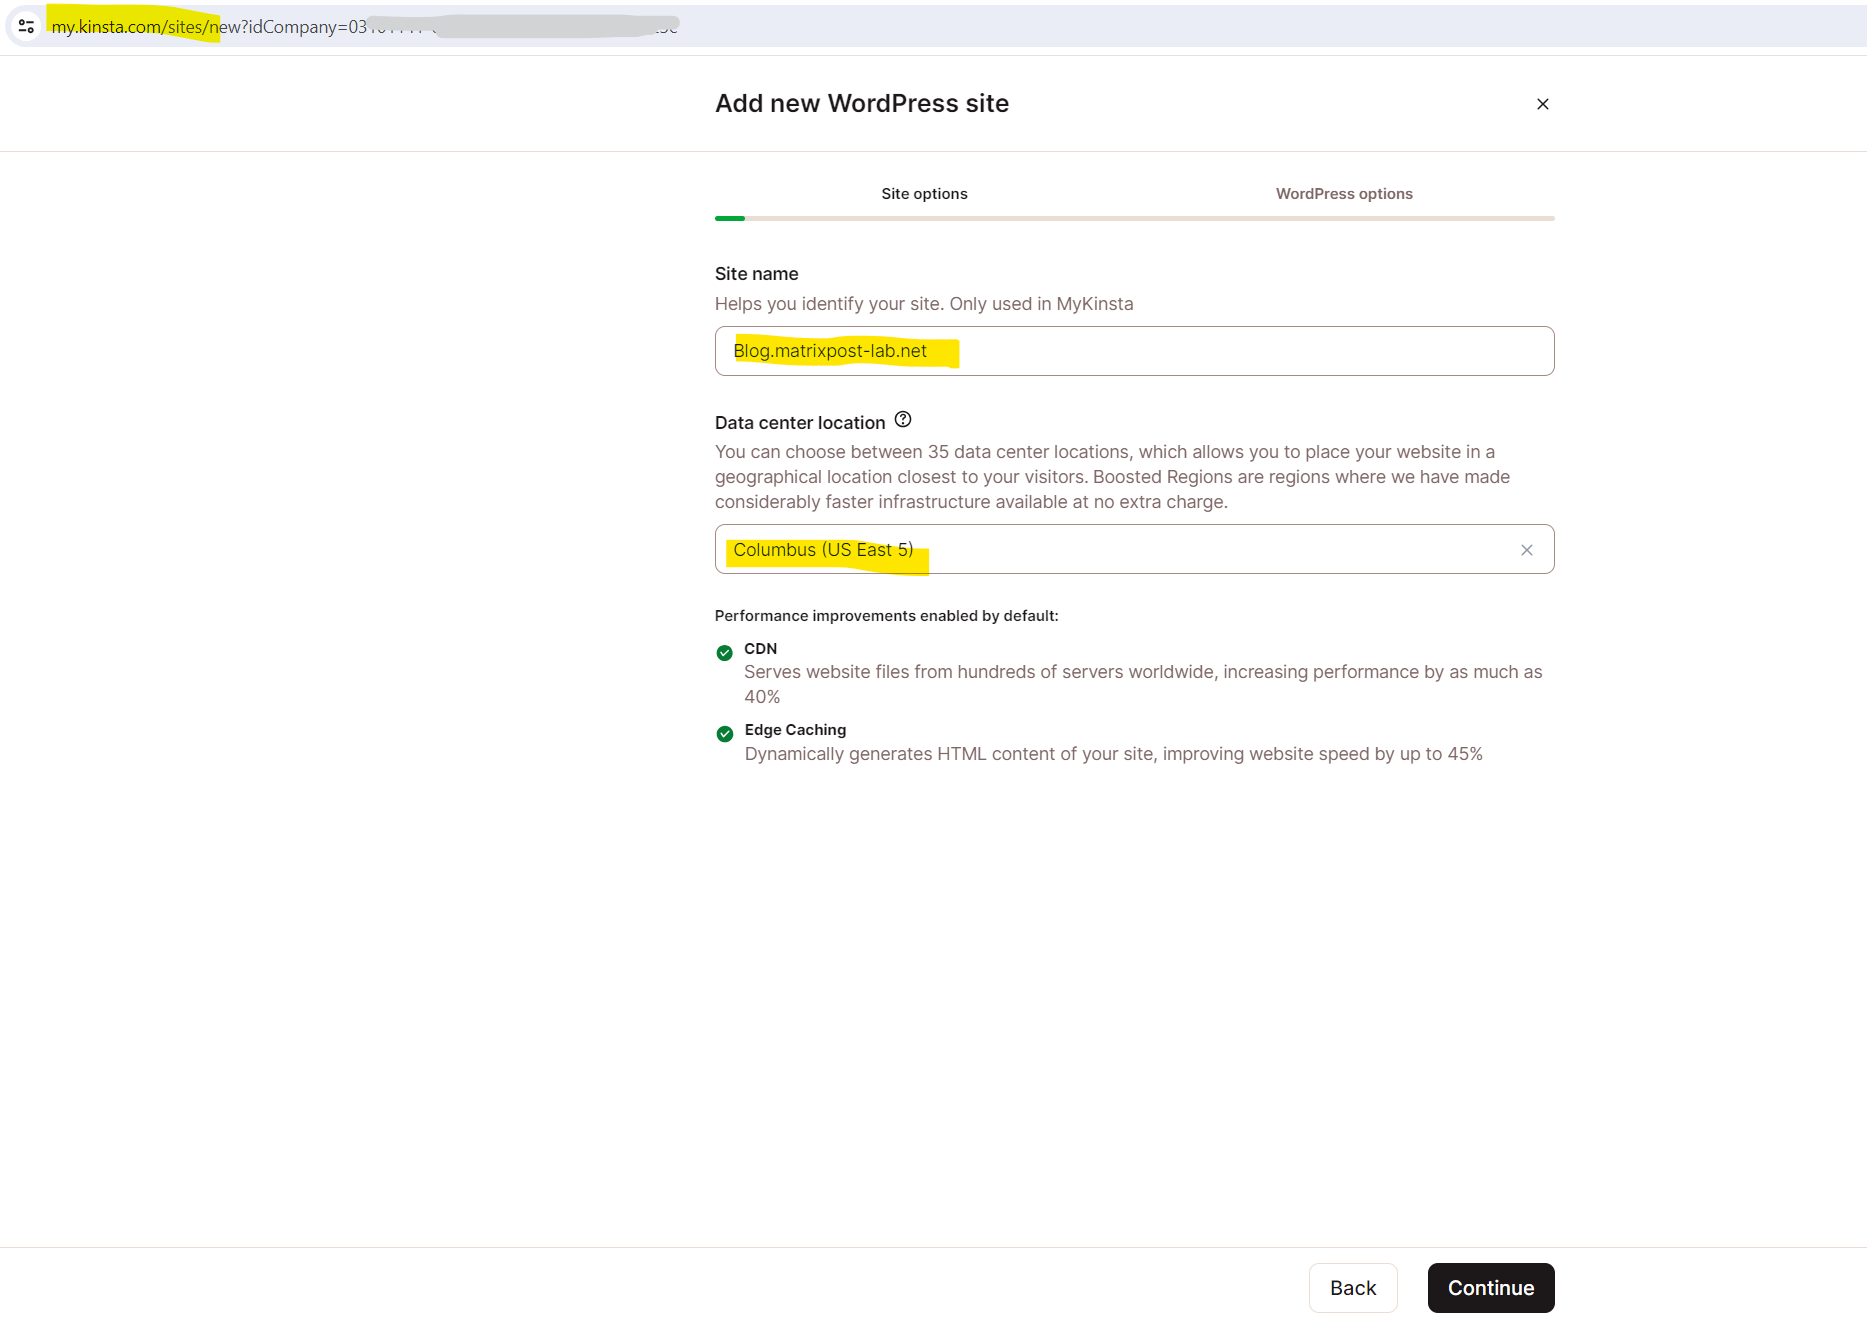
The name of the site will be shown in MyKinsta but won’t be visible to your site’s visitors. This will also be used for the first part of your site’s temporary domain (sitename.kinsta.cloud).
Every site created at Kinsta comes with a WordPress temporary URL so that it’s immediately accessible to you even before you point your custom domain to the site at Kinsta. These temporary domains use this format – https://sitename.kinsta.cloud.
You can select a data center for each of your sites. This is where your data is actually stored and served from. We support 35 locations and recommend choosing a location closest to your user base as this will decrease latency, TTFB, and load times.
Source: https://kinsta.com/docs/wordpress-hosting/wordpress-getting-started/new-site
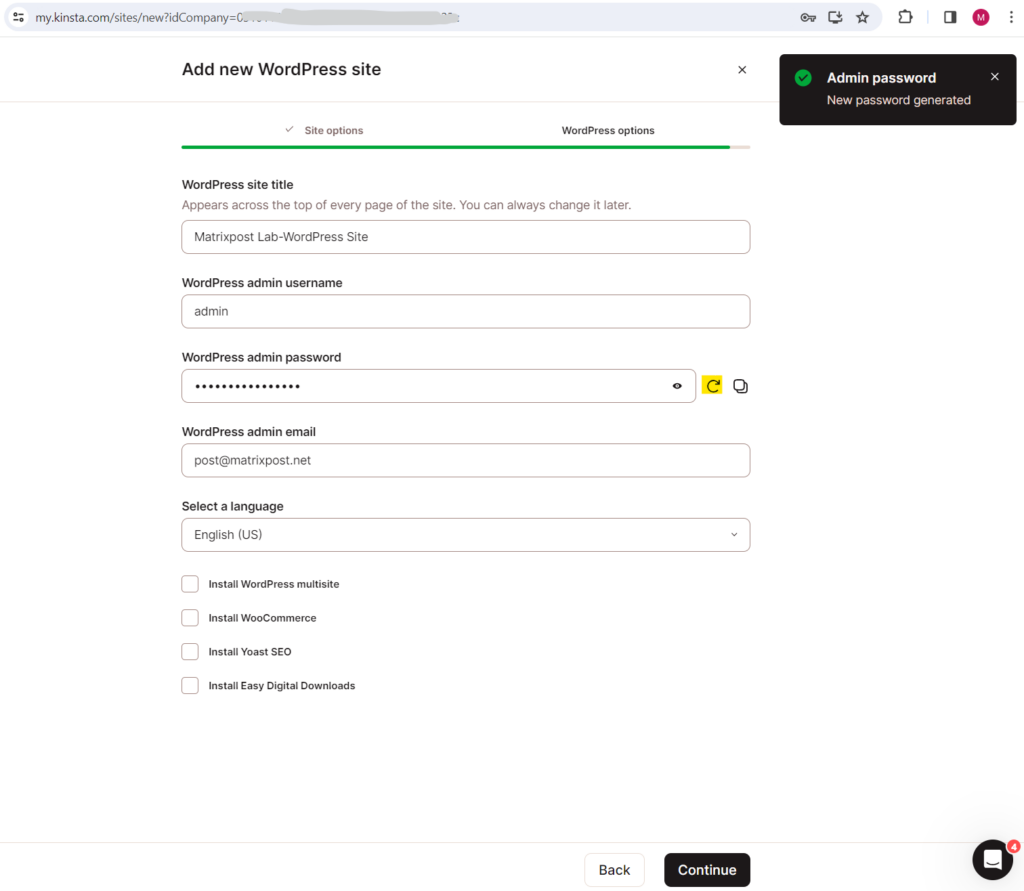
This allows you to set the site title for your WordPress site. Depending on your theme, it will be visible to your visitors in the browser tab and other places. You can change the site title in WordPress settings after site creation.
We automatically enforce strong passwords to protect users. You can use the generate new password option (reload icon) if you want a new one. Here’s how you can change your WordPress password later on.
Source: https://kinsta.com/docs/wordpress-hosting/wordpress-getting-started/new-site
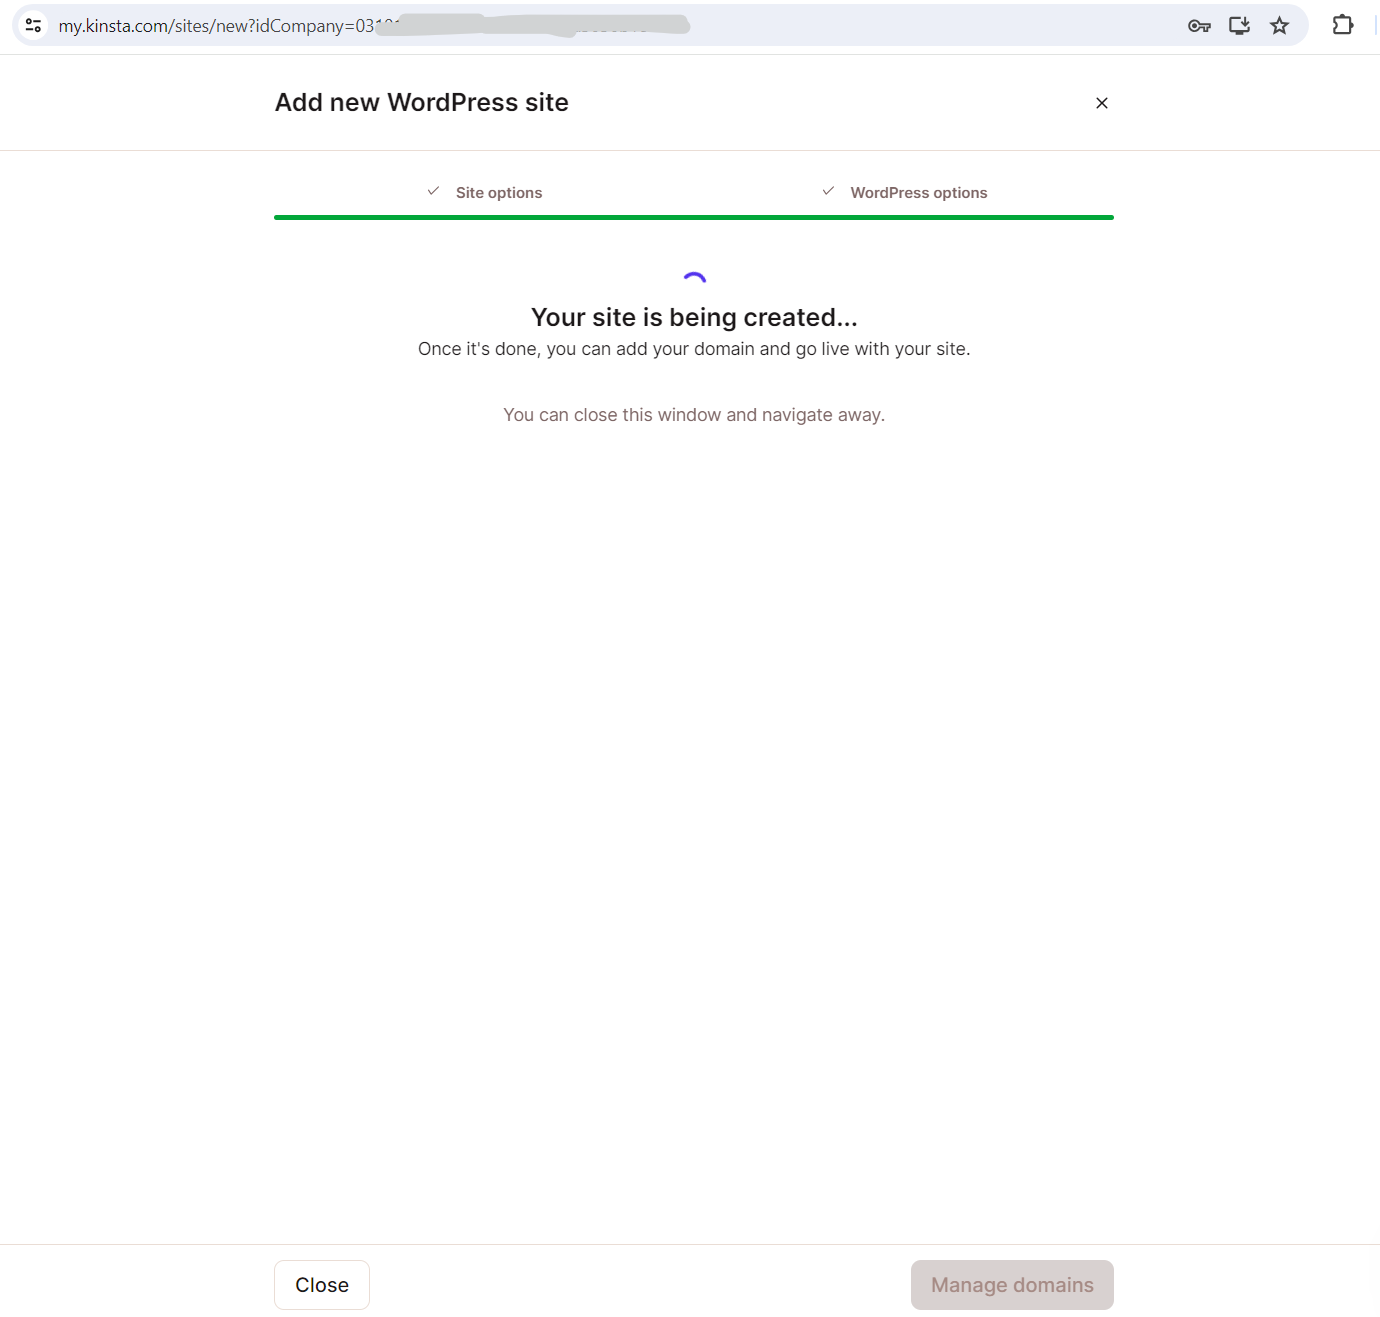
In my case the site creation process just took about 3-4 minutes.
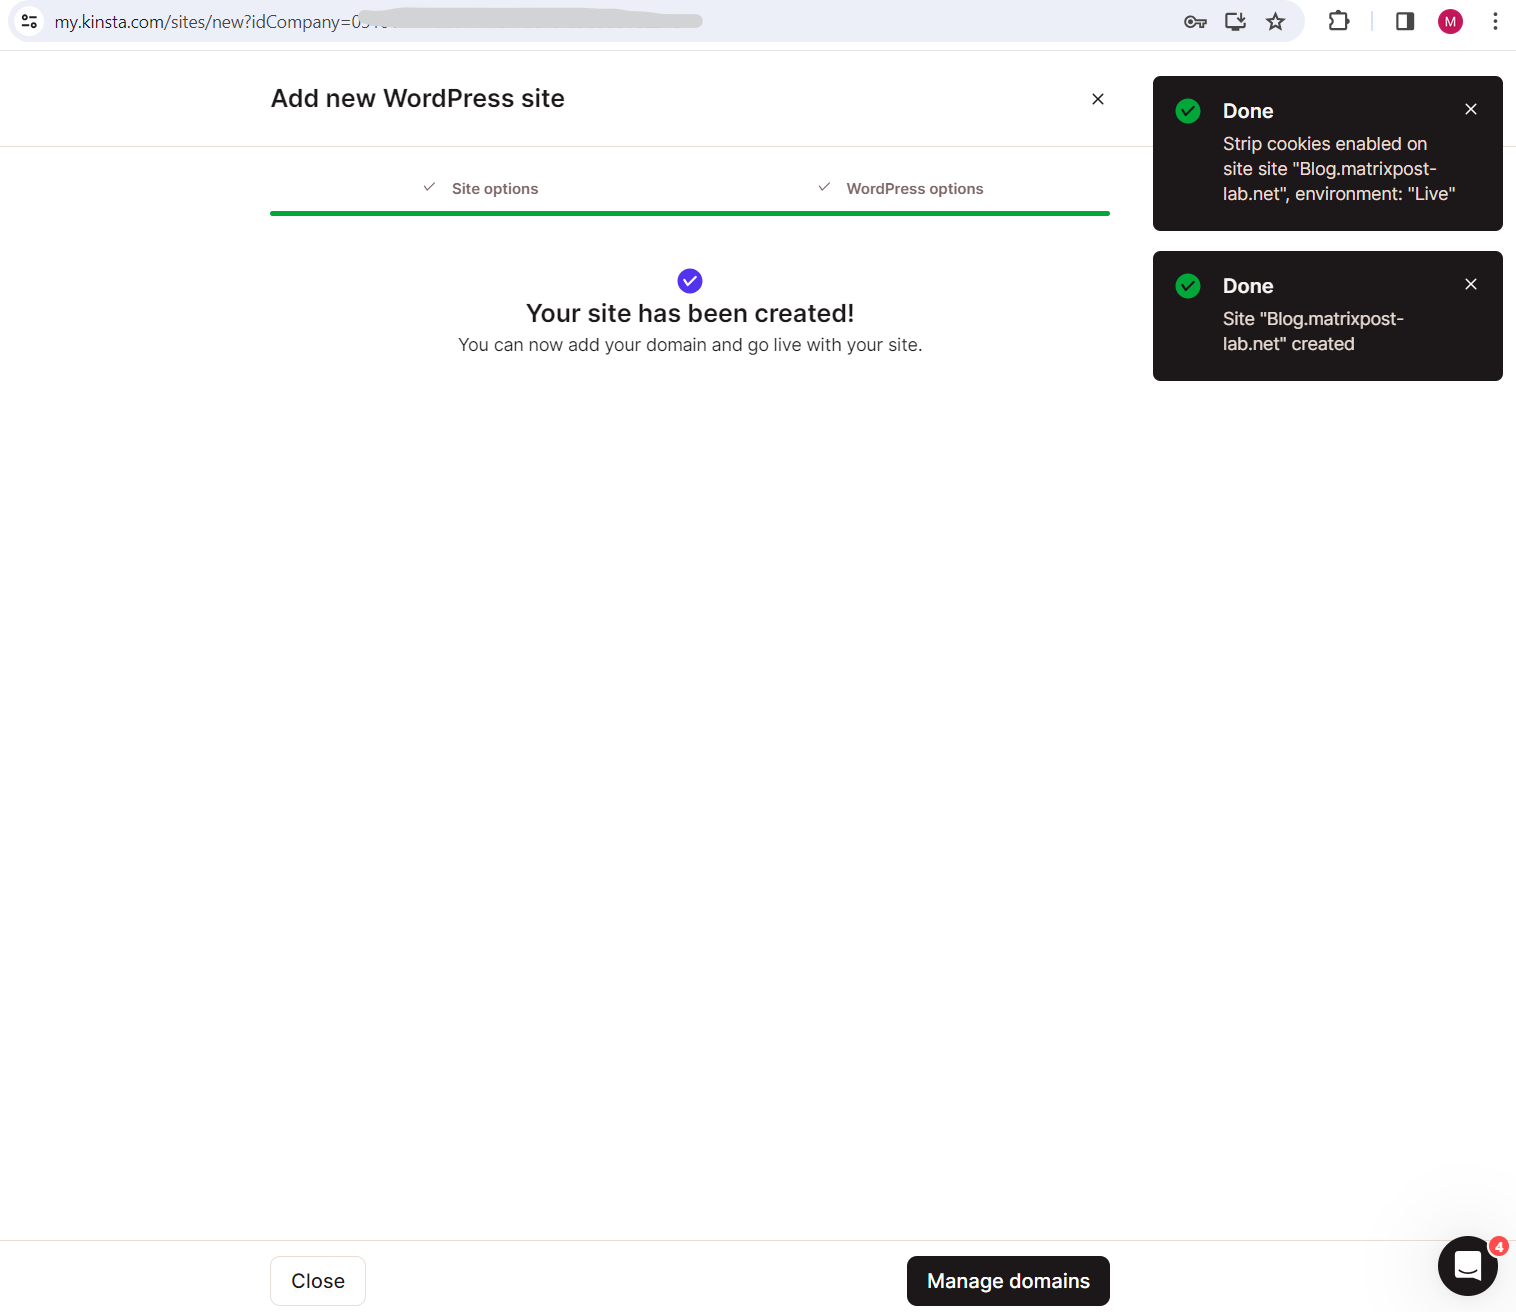
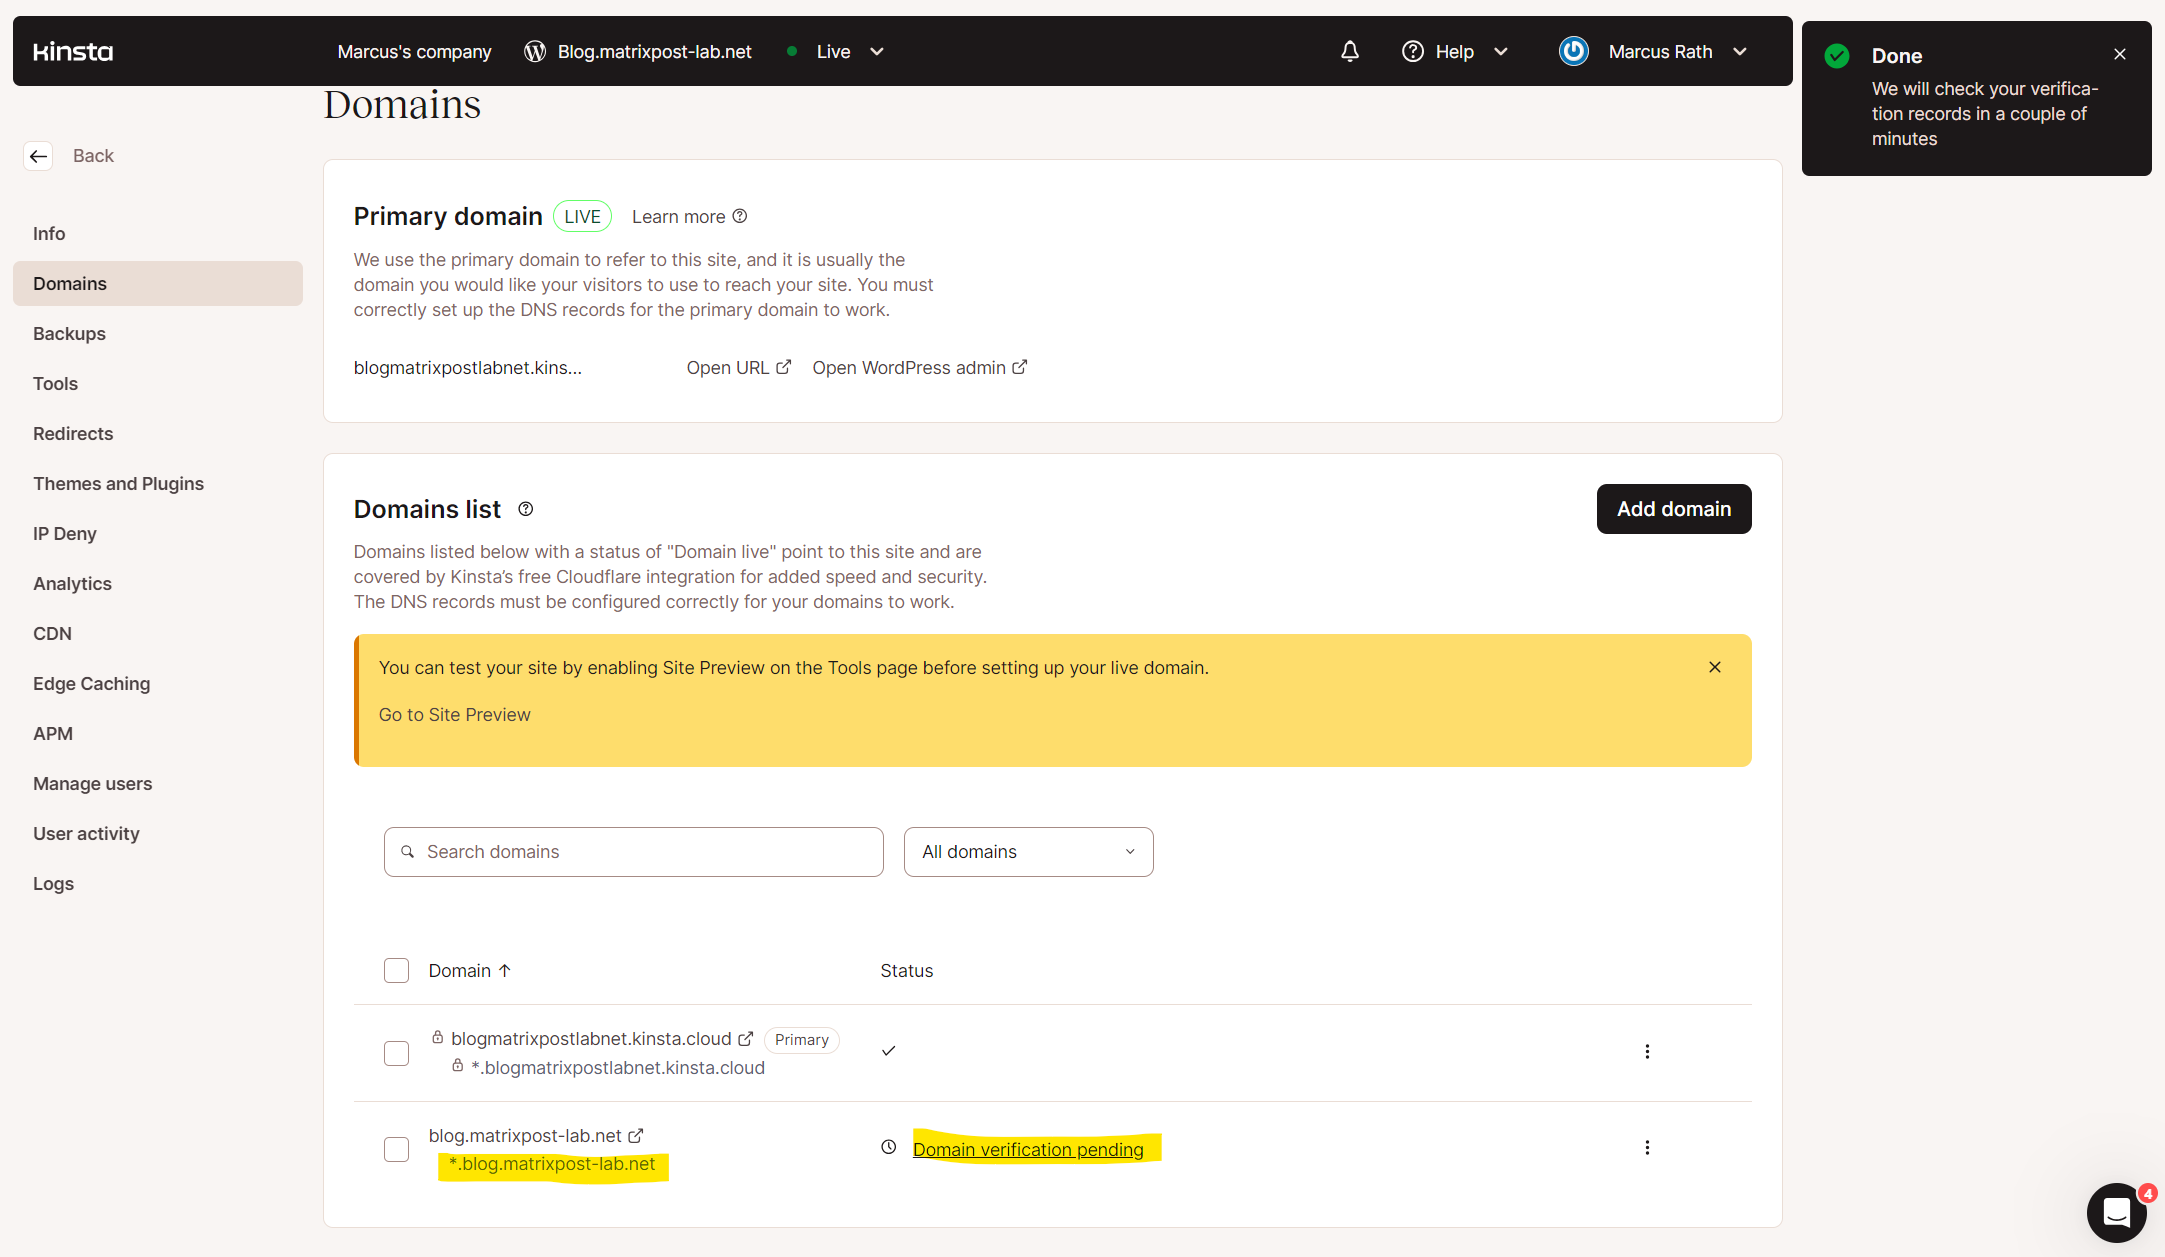
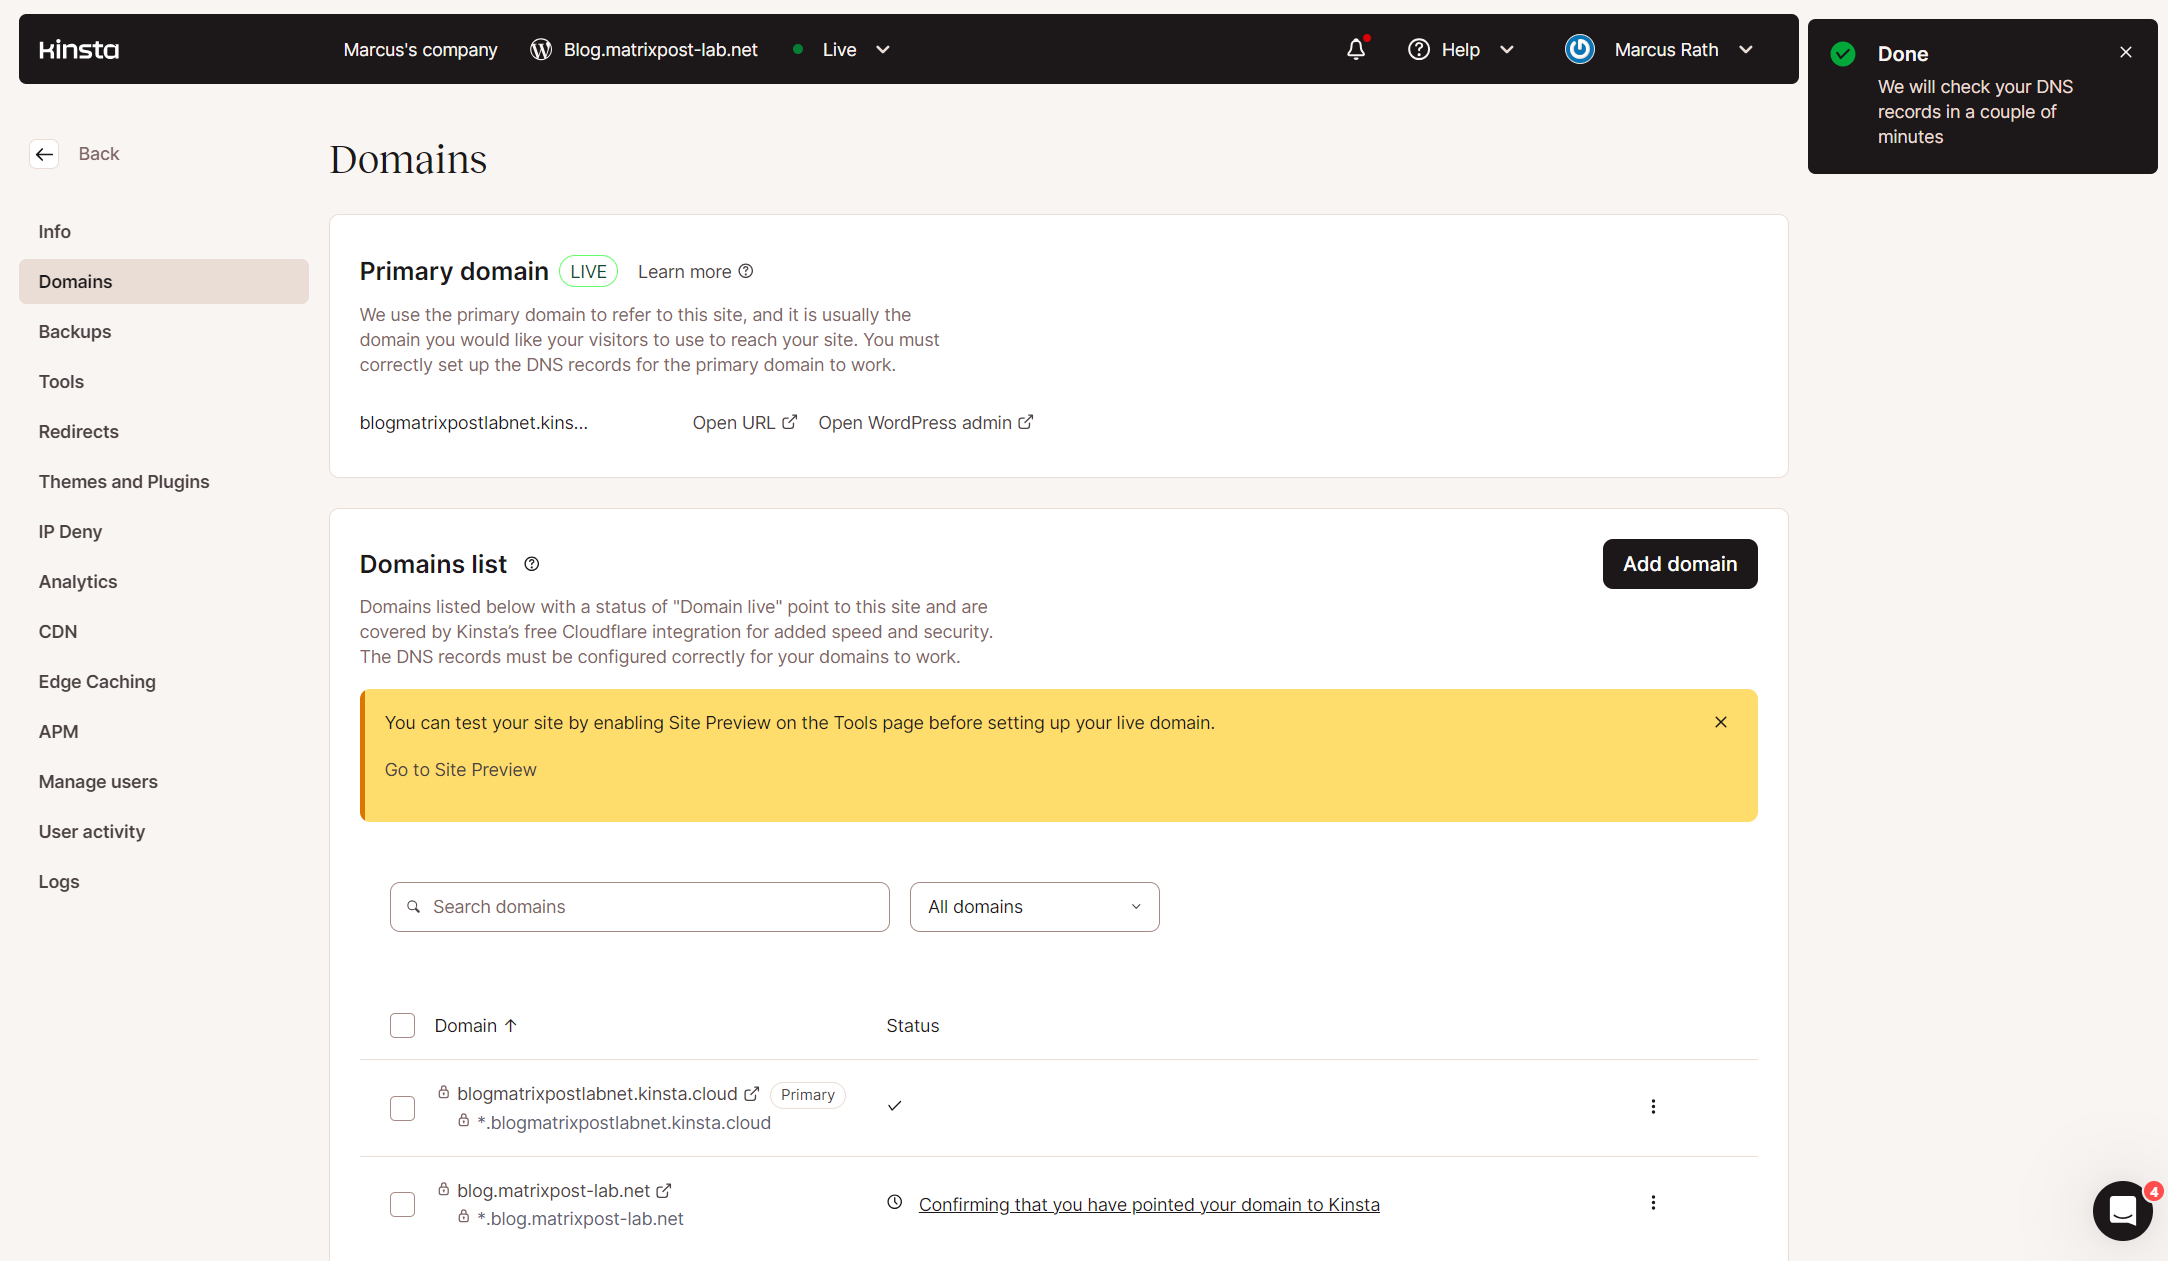
I will now click above on Manage domains and will get forwarded to the following page.
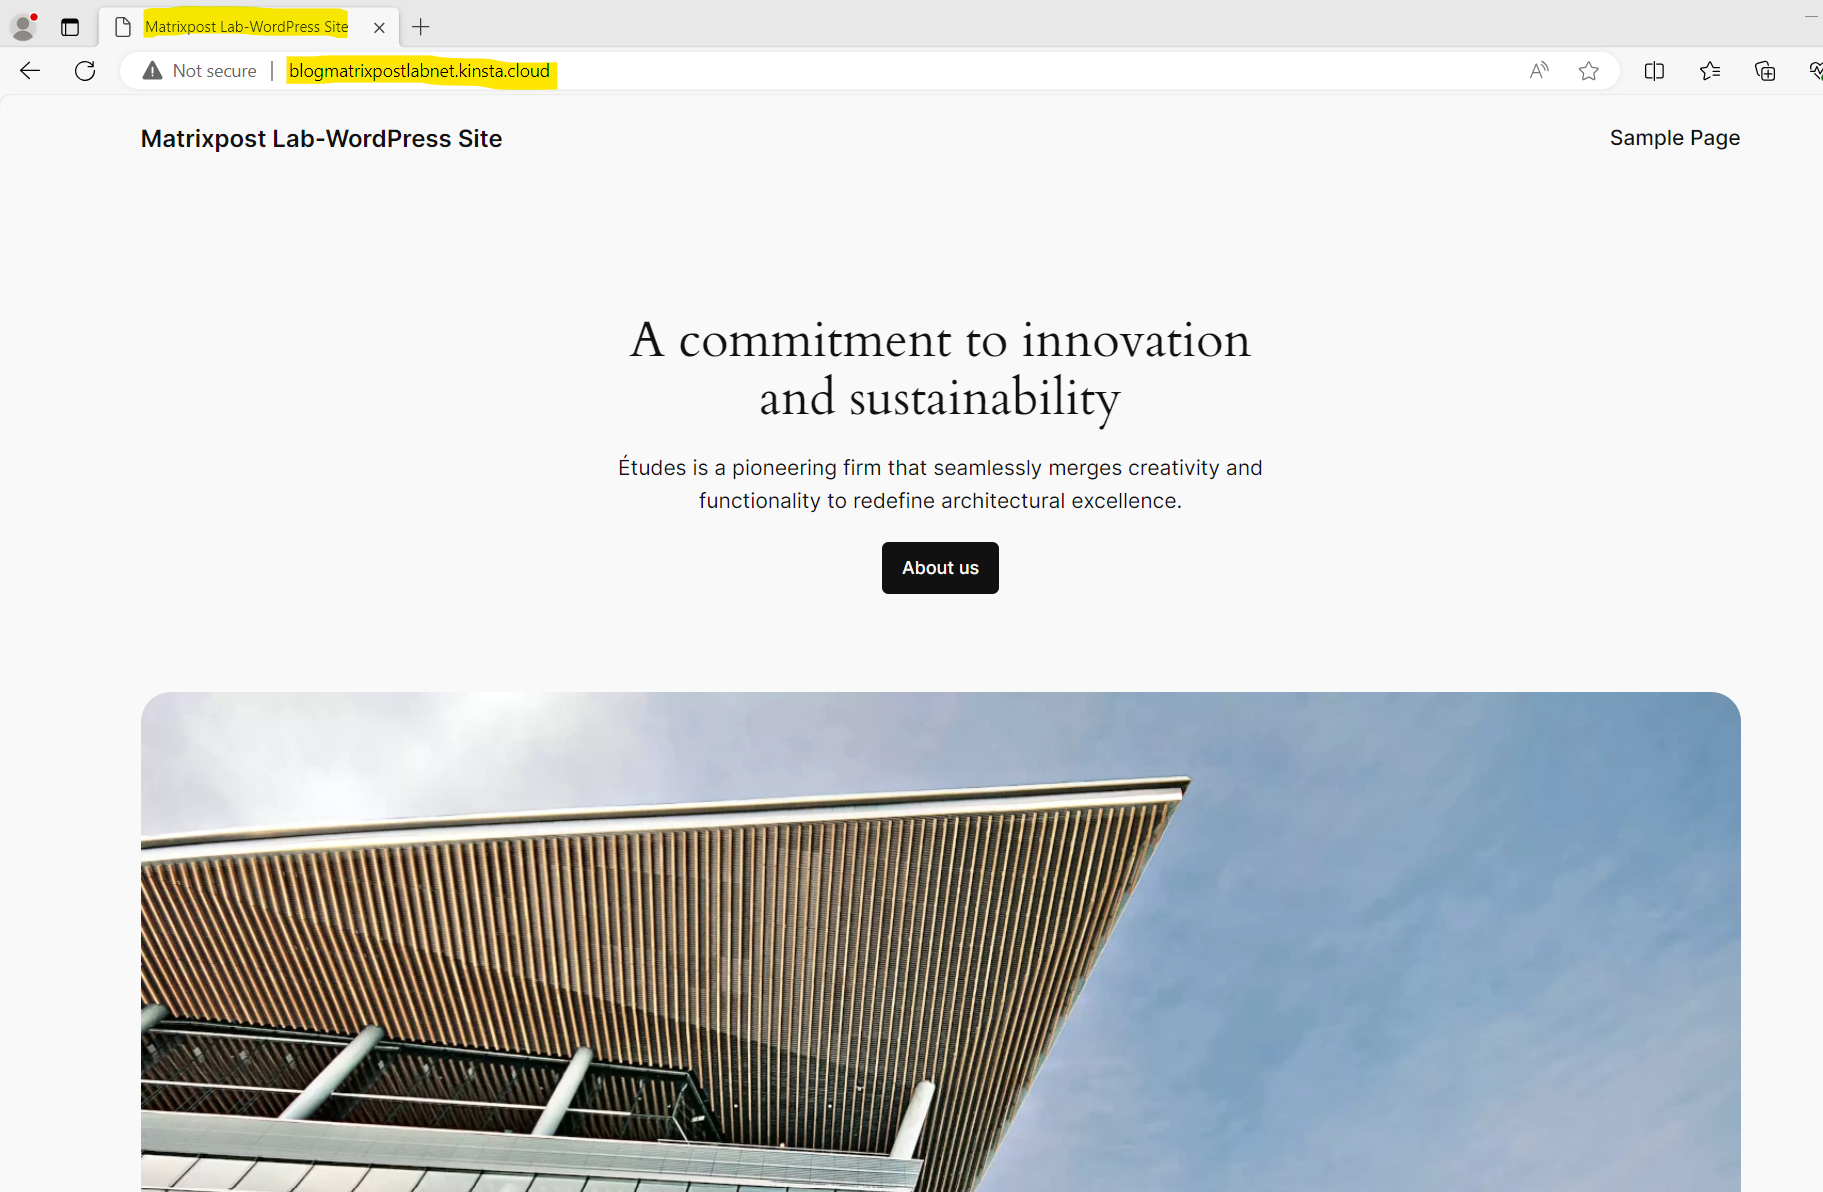
Here I can see that my new WordPress site is already accessible through its primary domain which is so far https://blogmatrixpostlabnet.kinsta.cloud/. This primary domain (aka FQDN) is by default built up by using the WordPress site title we previously entered as subdomain plus kinsta (domain) and cloud (top level domain).
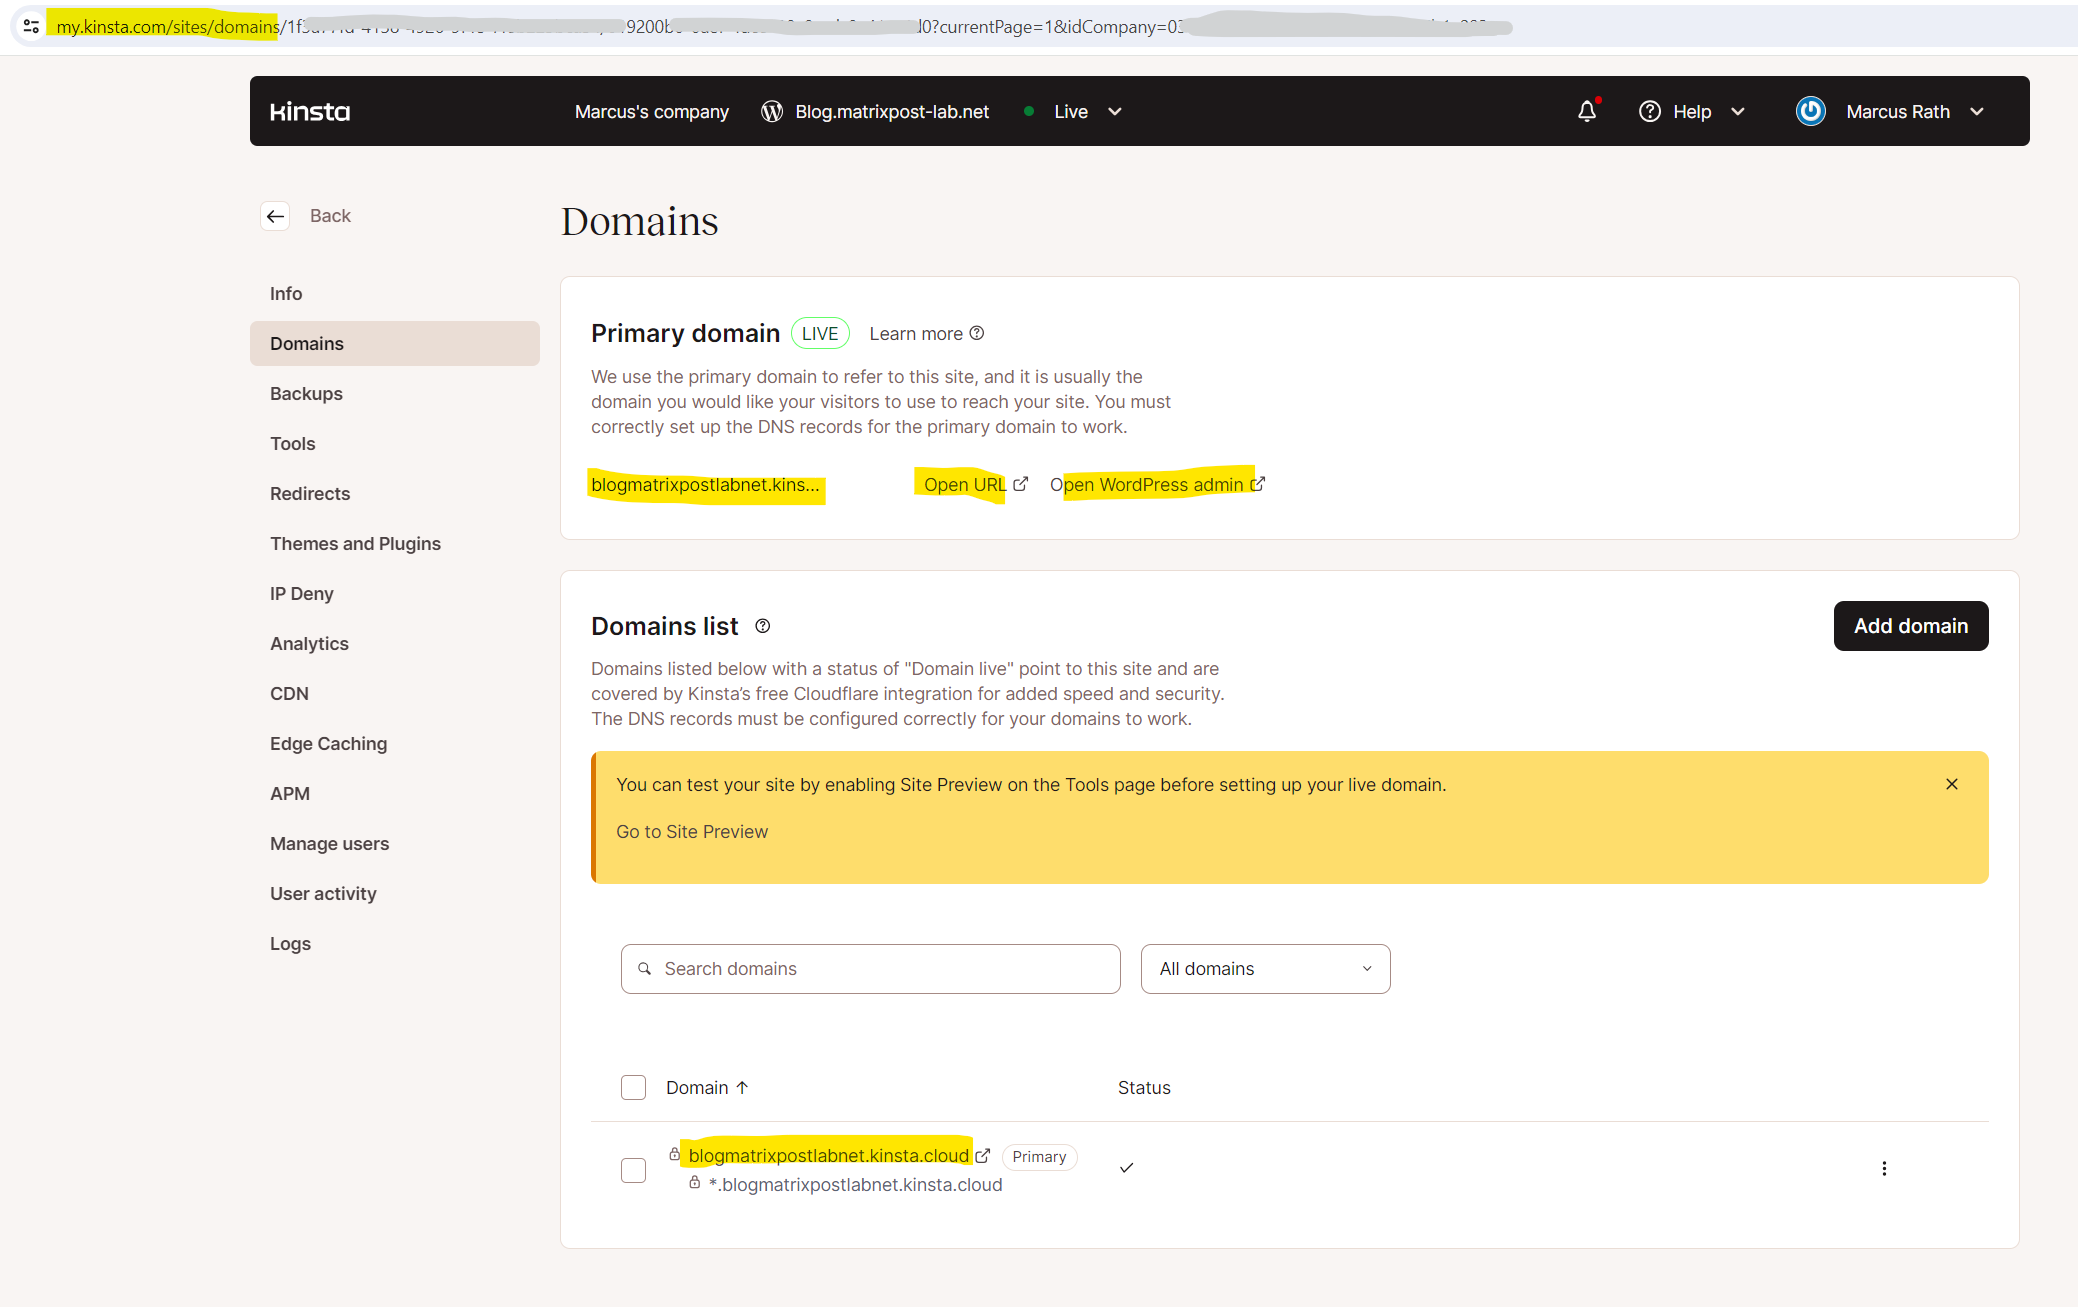
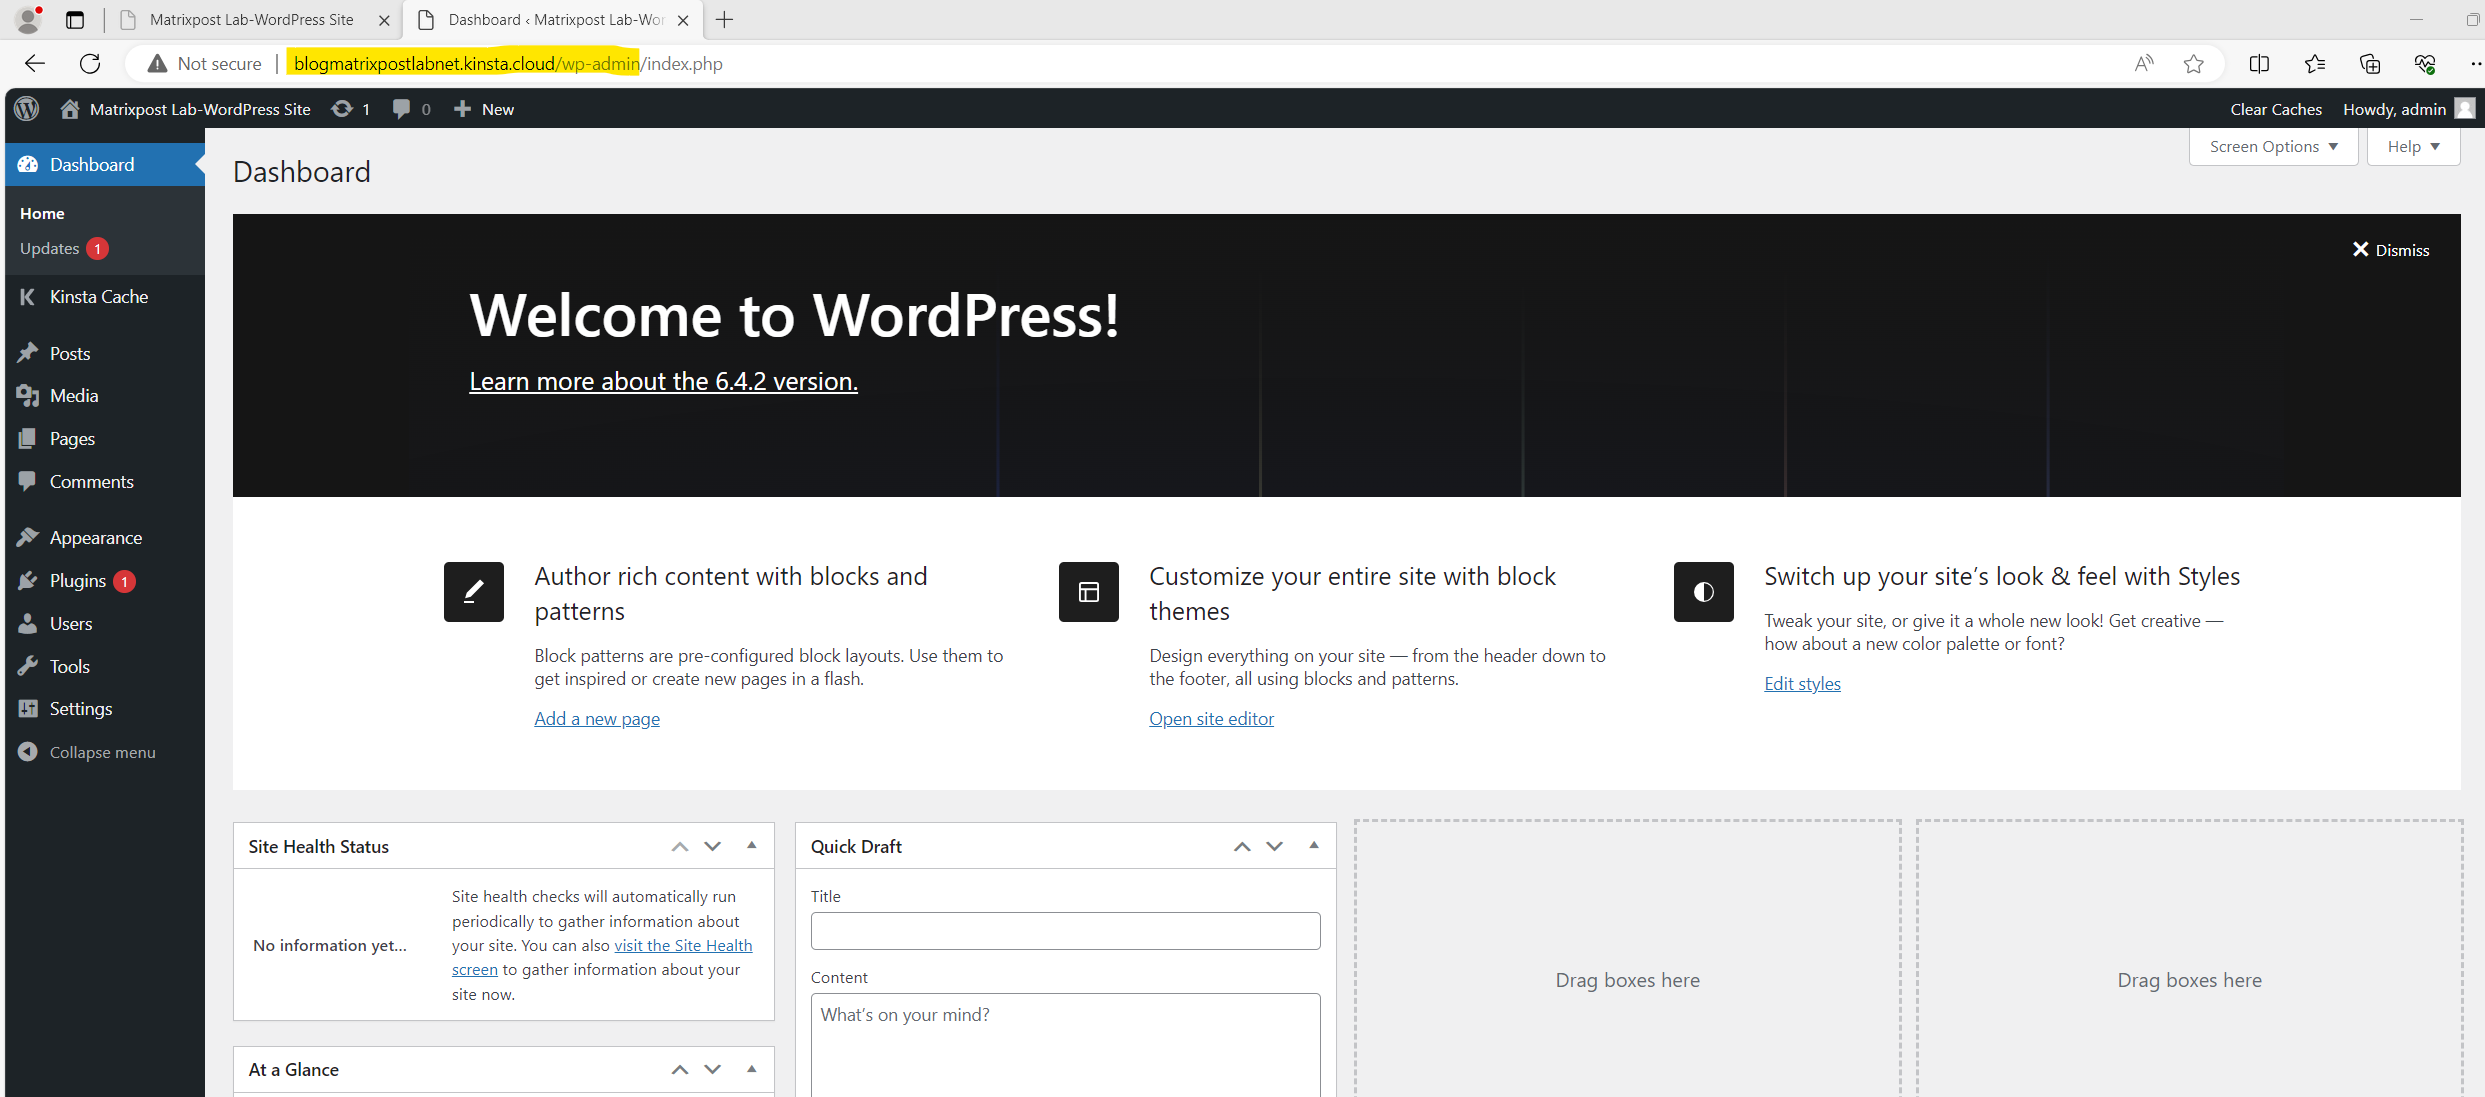
As usual we can now login to the WordPress admin dashboard by appending the /wp-admin/ directory to our primary domain and URL. In my my case this is:
http://blogmatrixpostlabnet.kinsta.cloud/wp-admin/
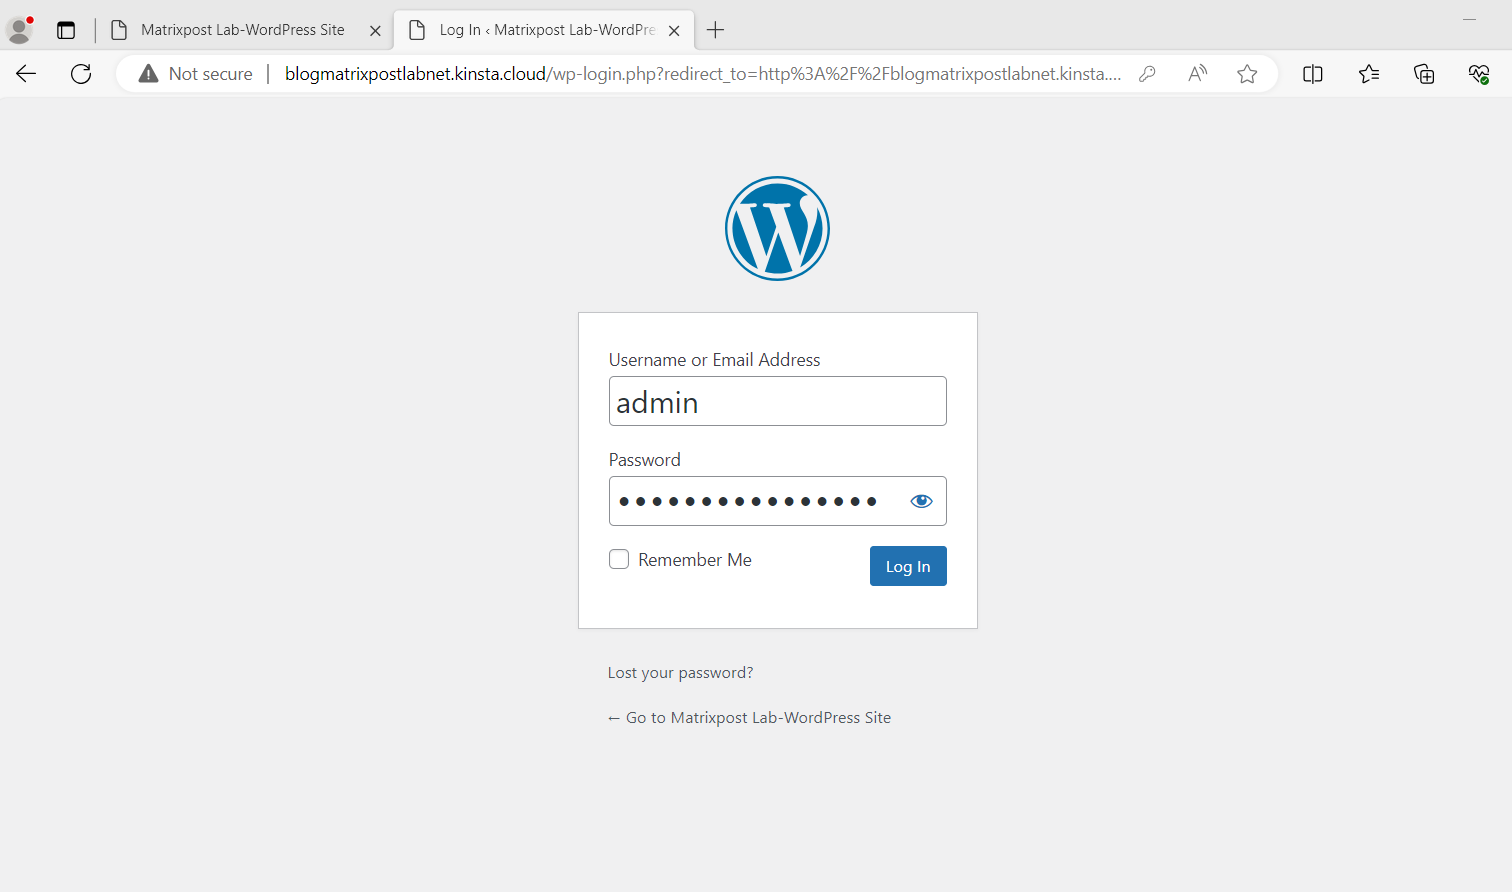
As of today there is already installed the newest WordPress version 6.4.2.
Adding a Custom Domain
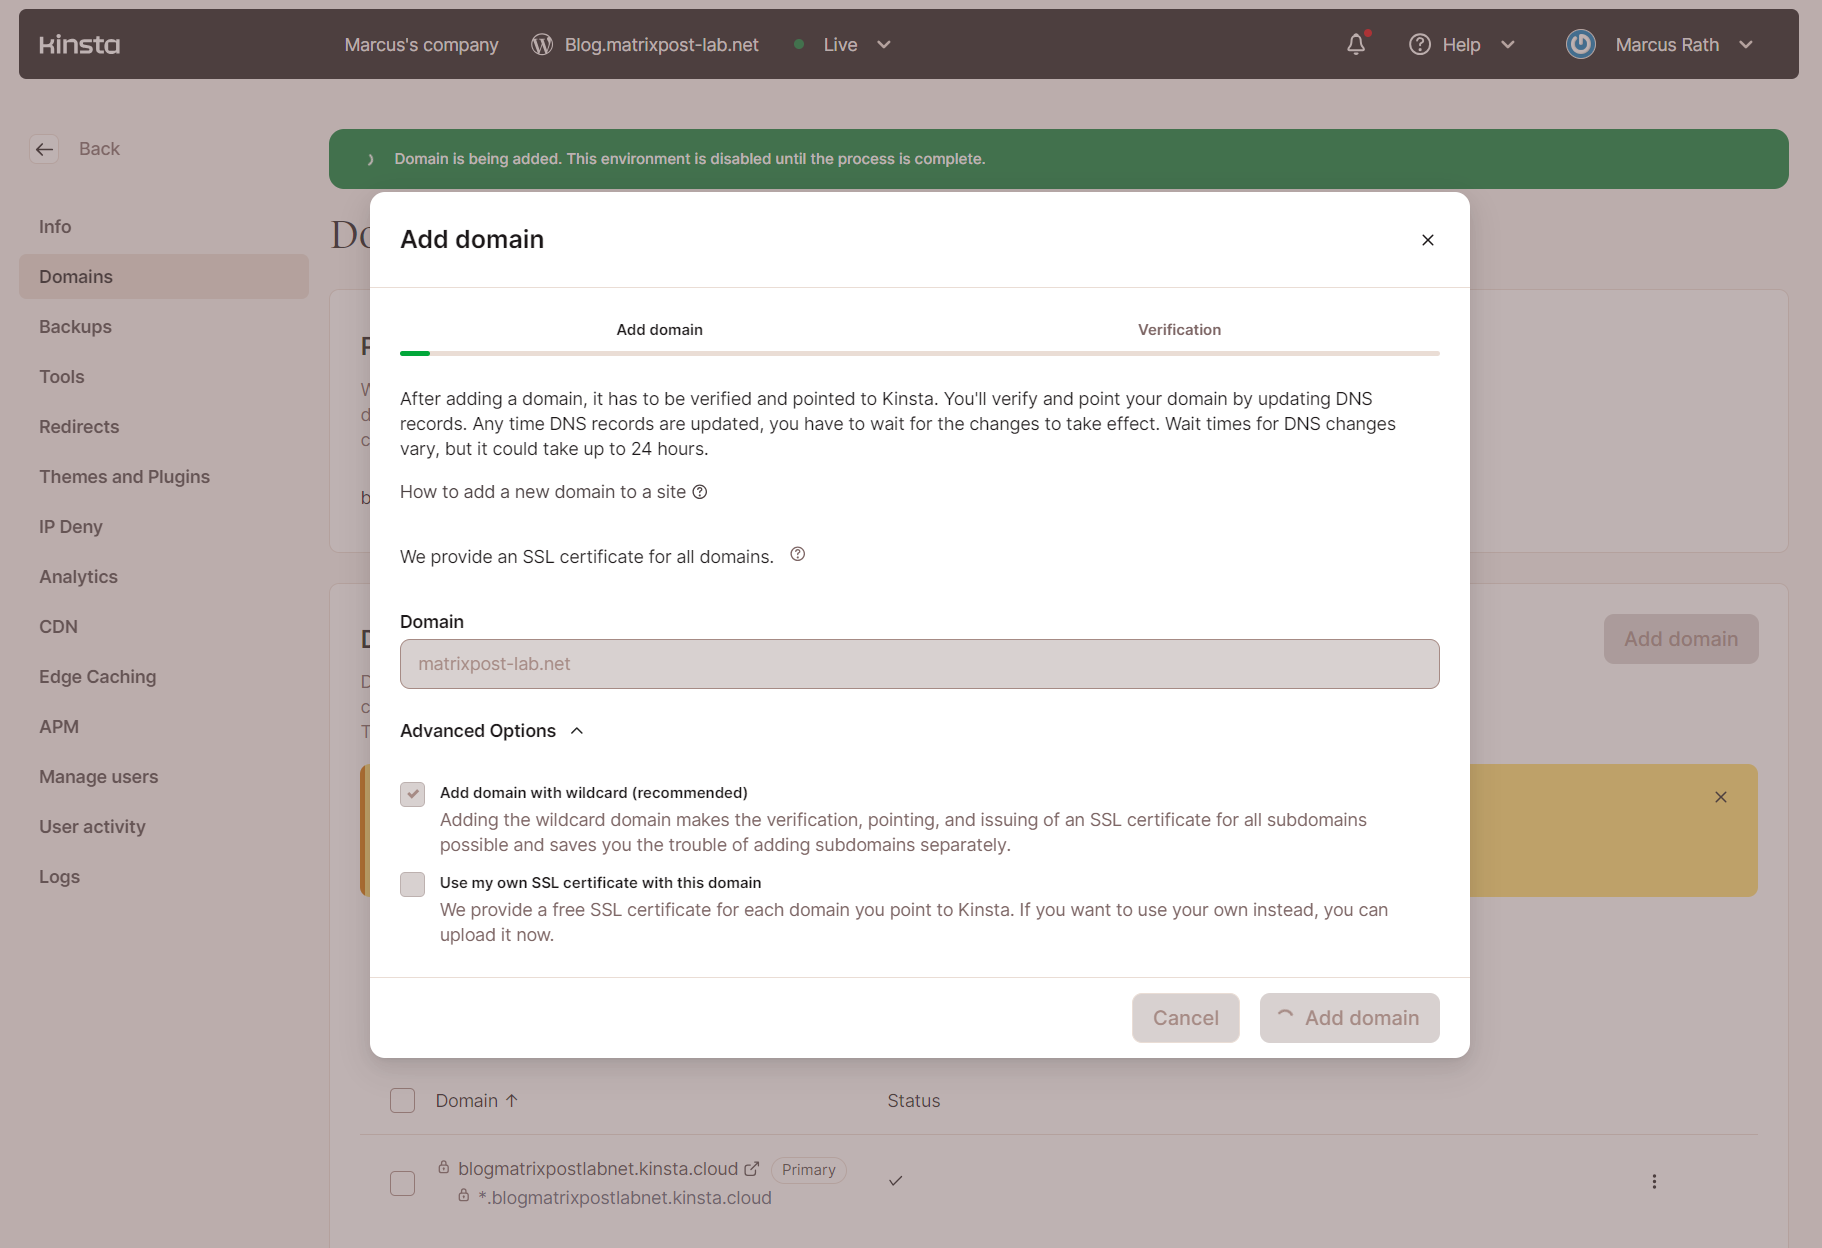
For demonstration purpose I will now add my own lab domain matrixpost-lab.net to the Domain list below, which I want to use later as primary domain for this new WordPress site.
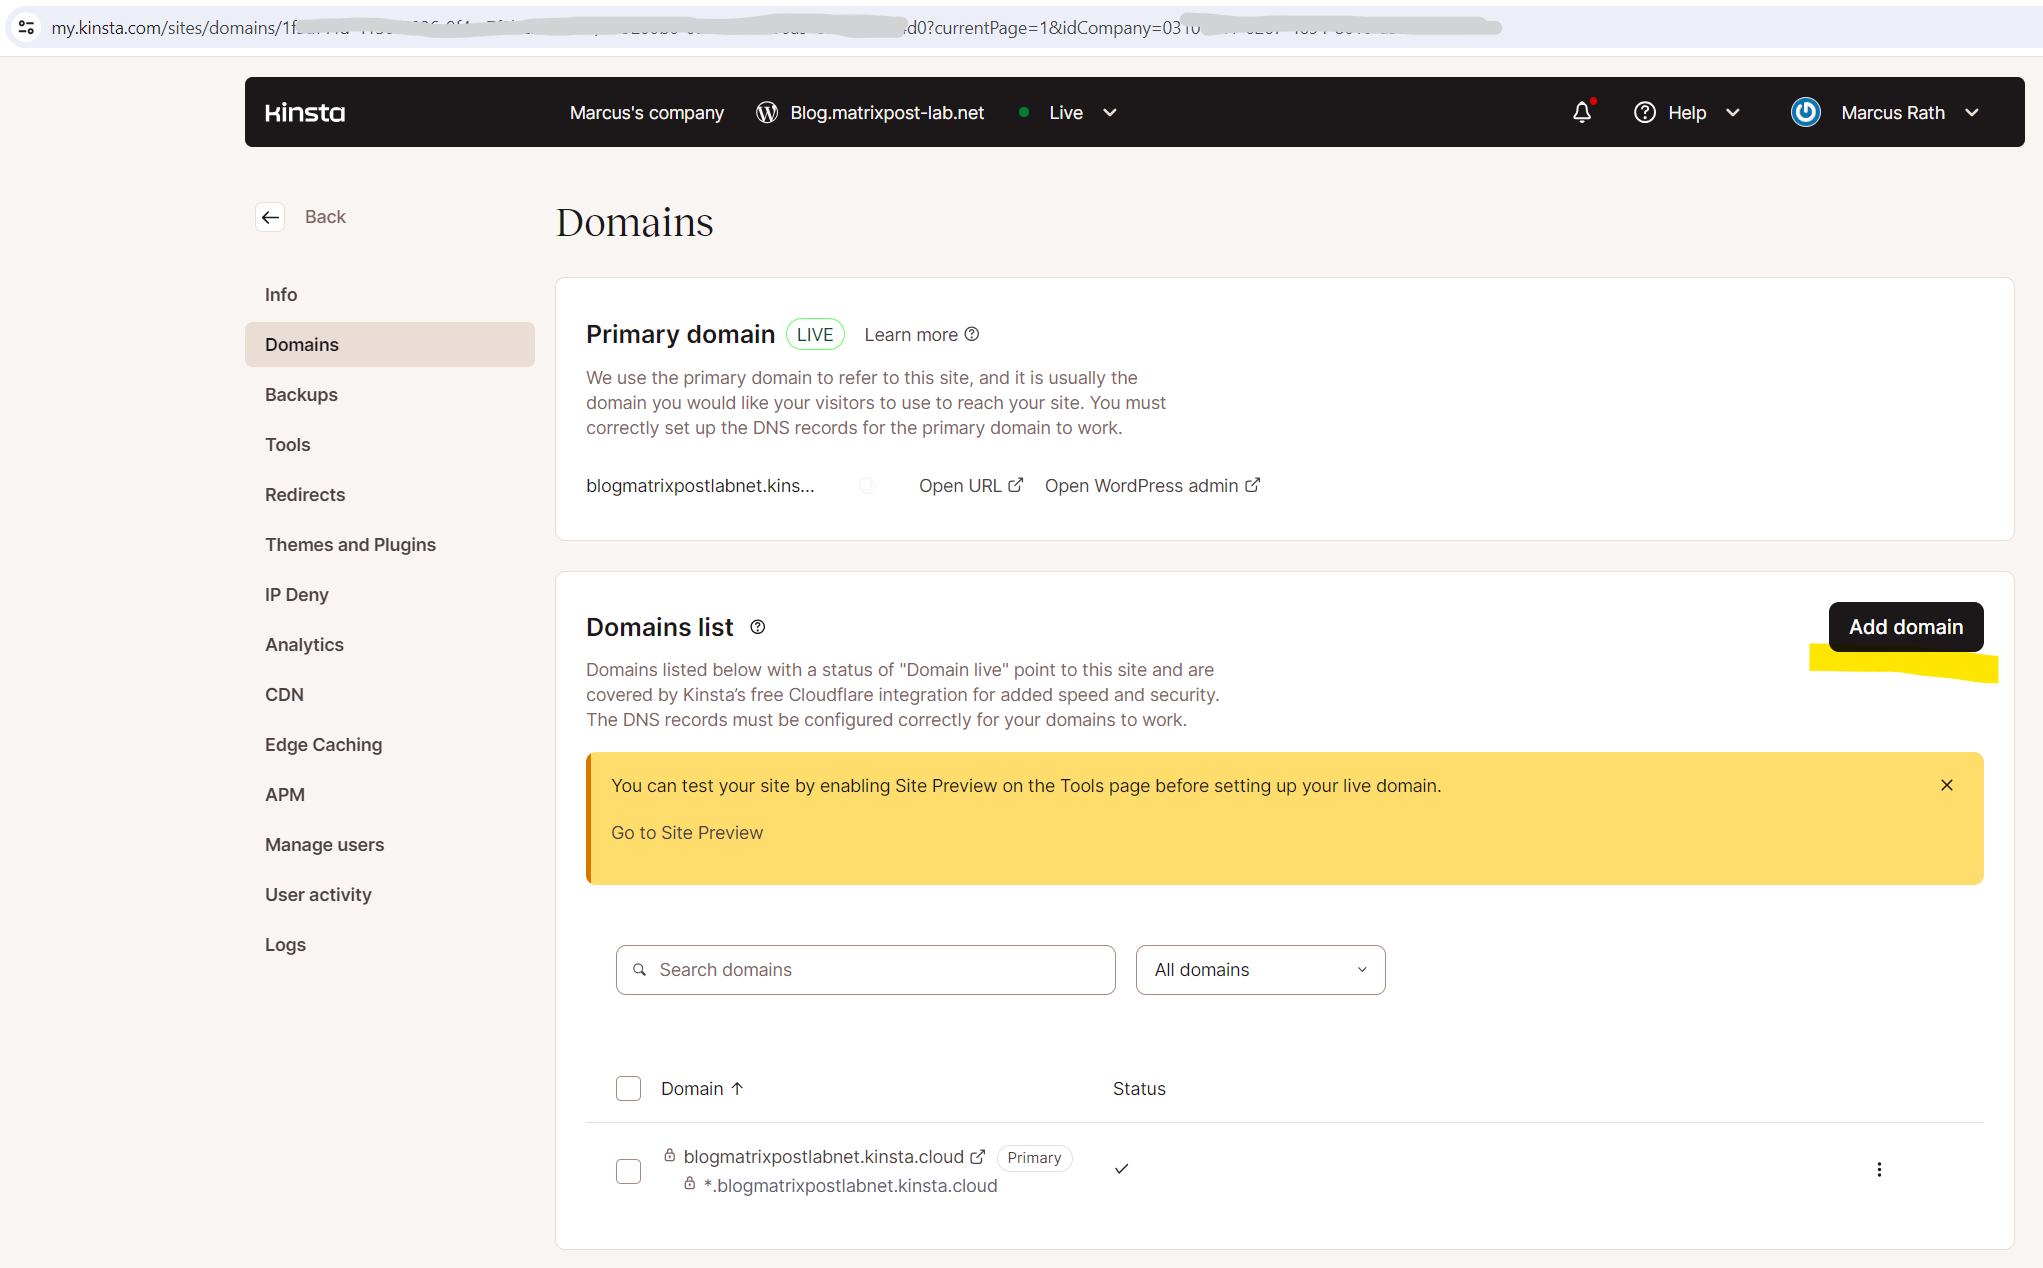
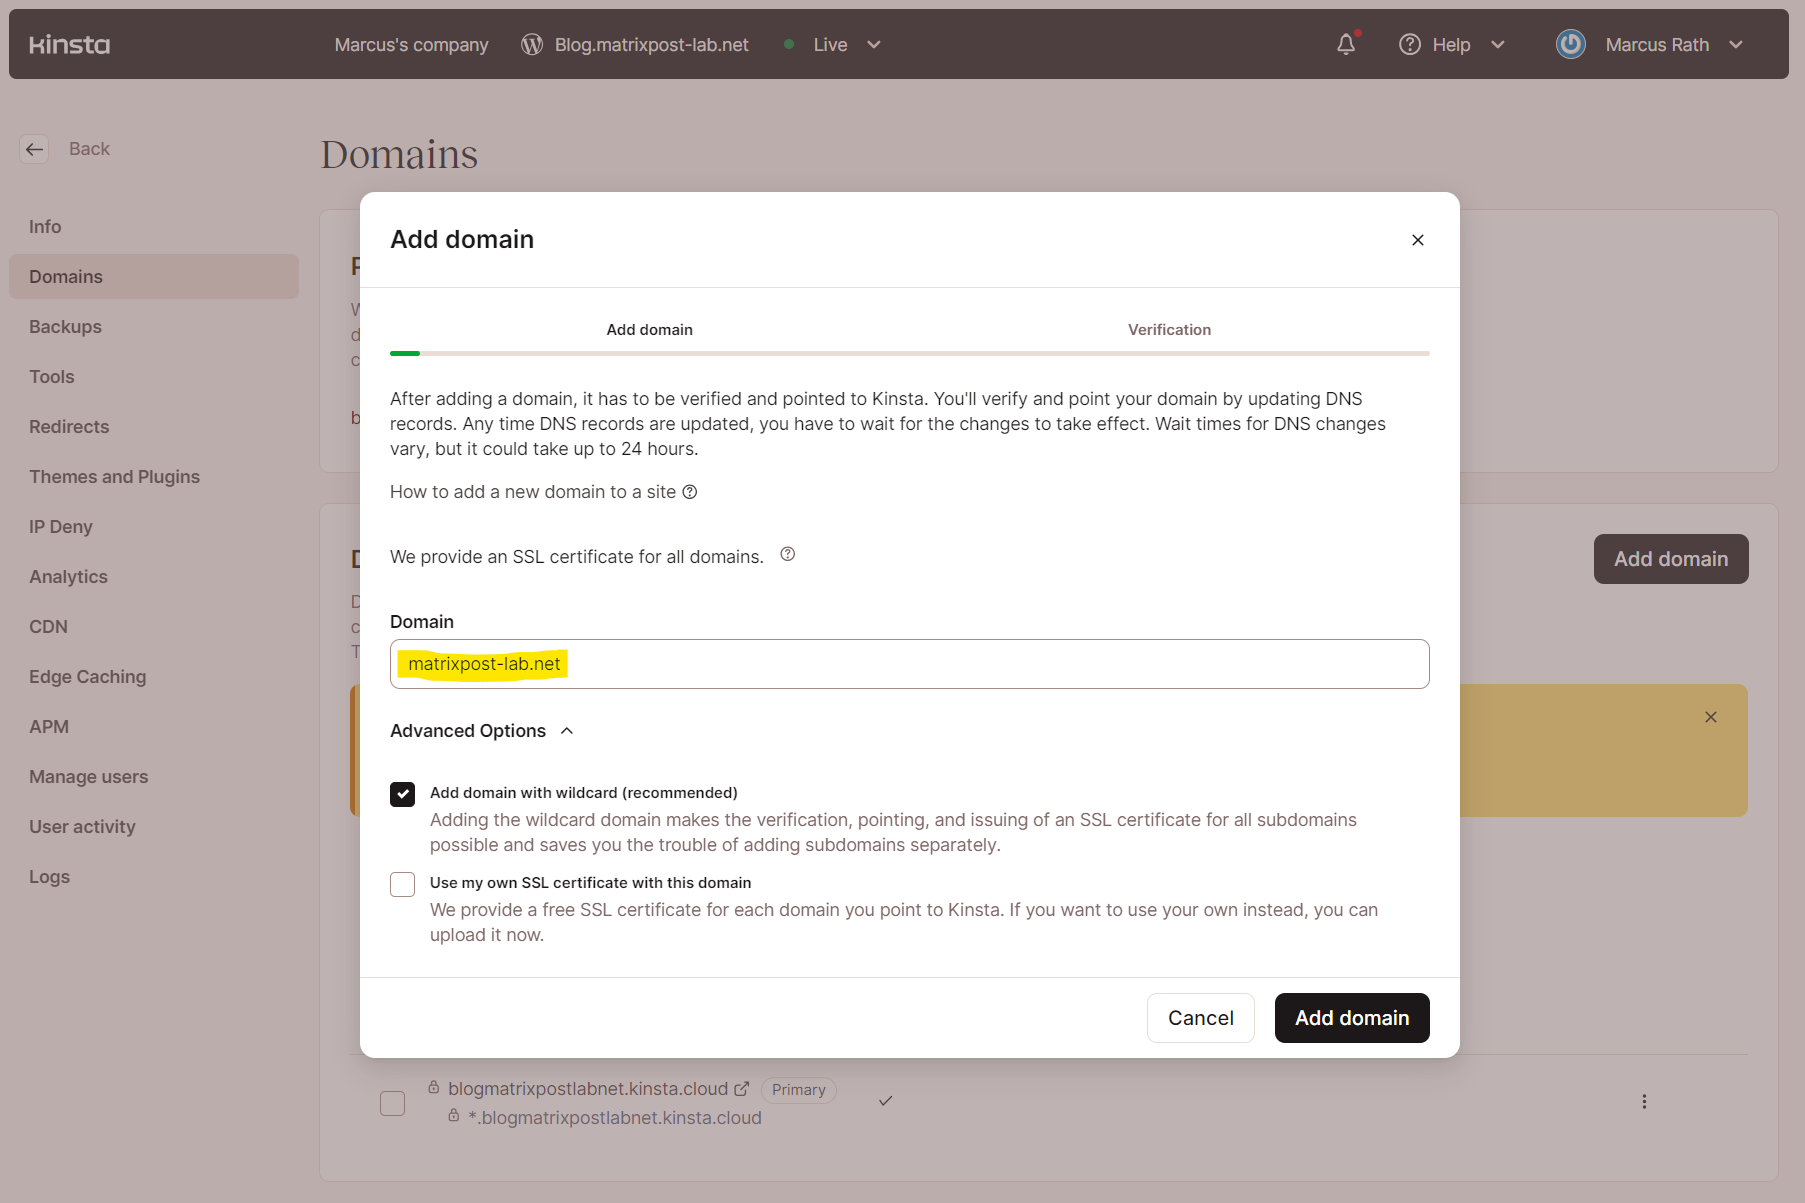
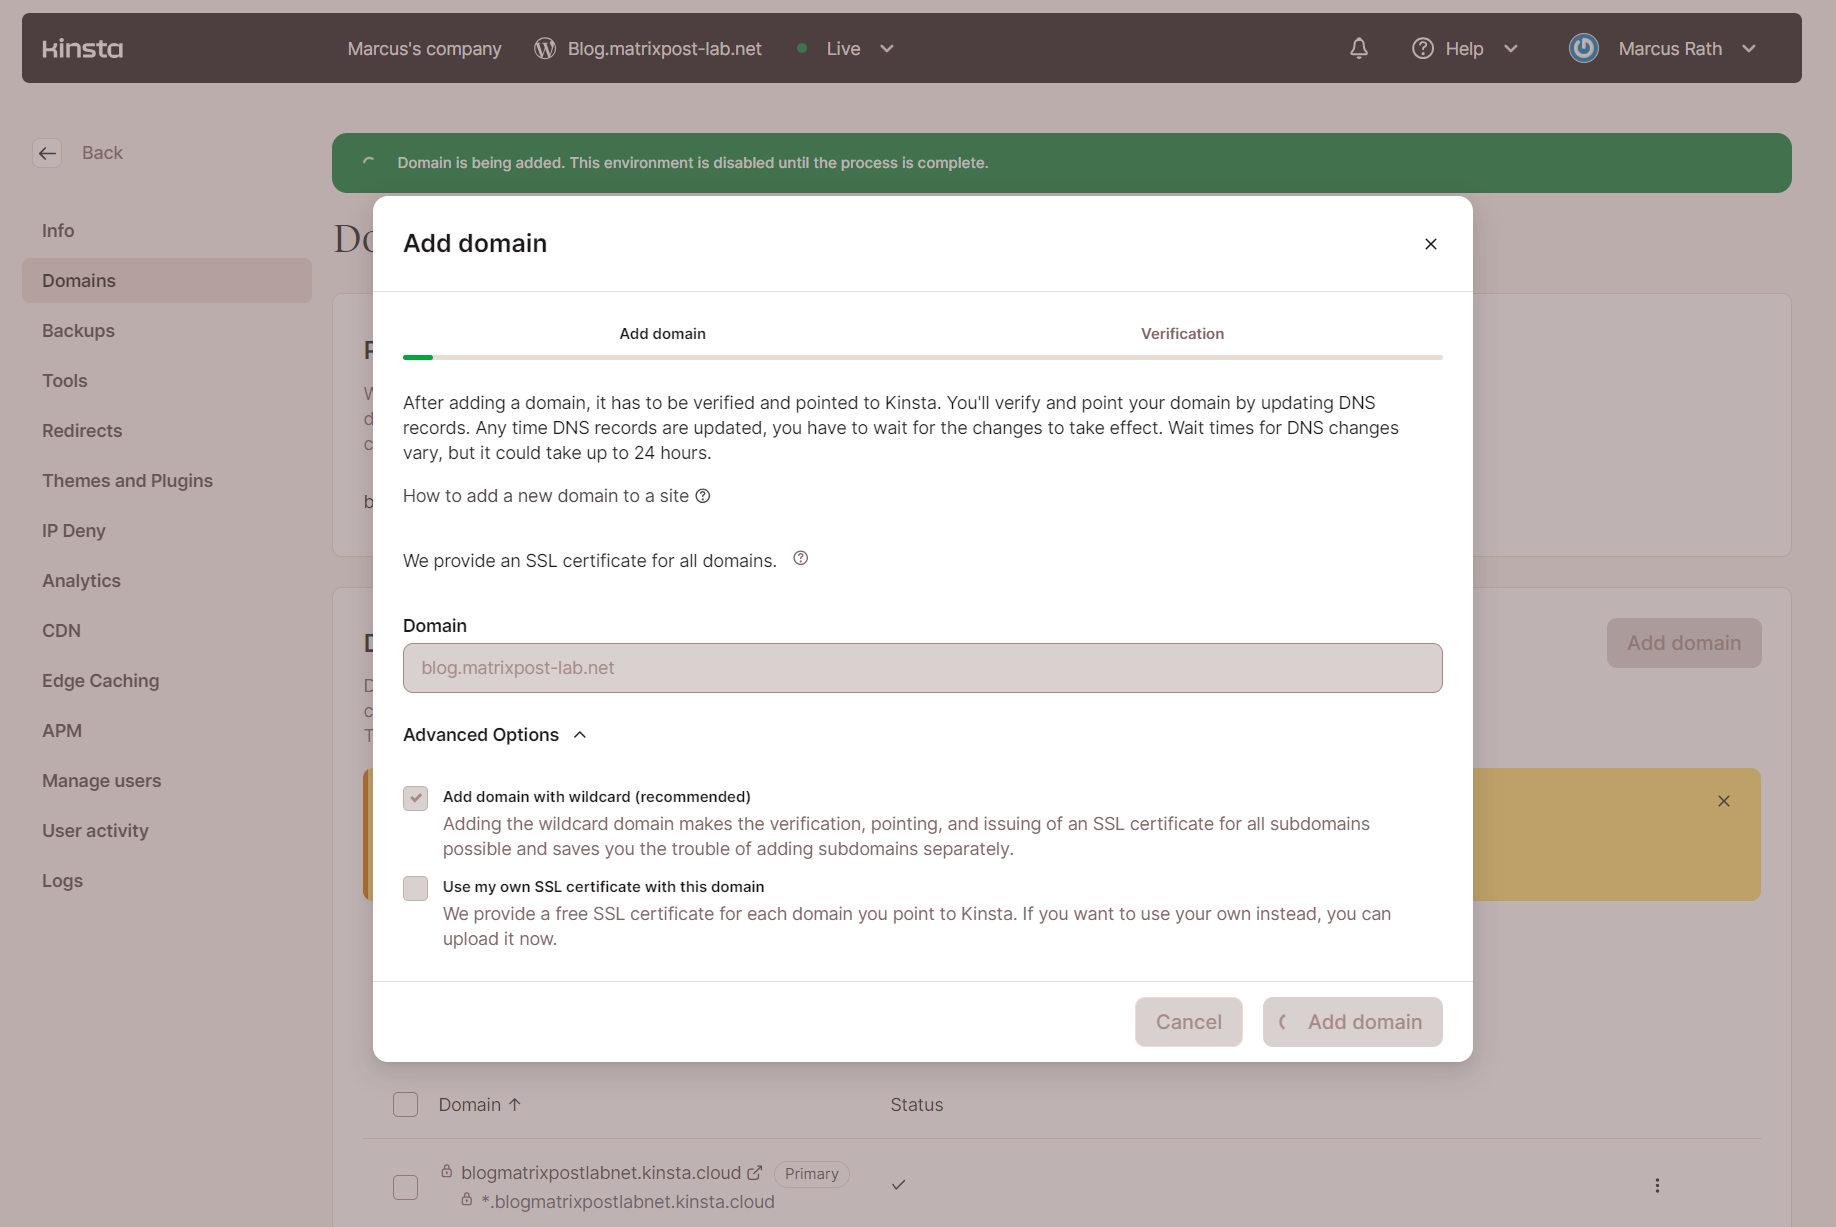
To add my own custom domain I will click above on Add domain and enter here below my own custom domain matrixpost-lab.net.
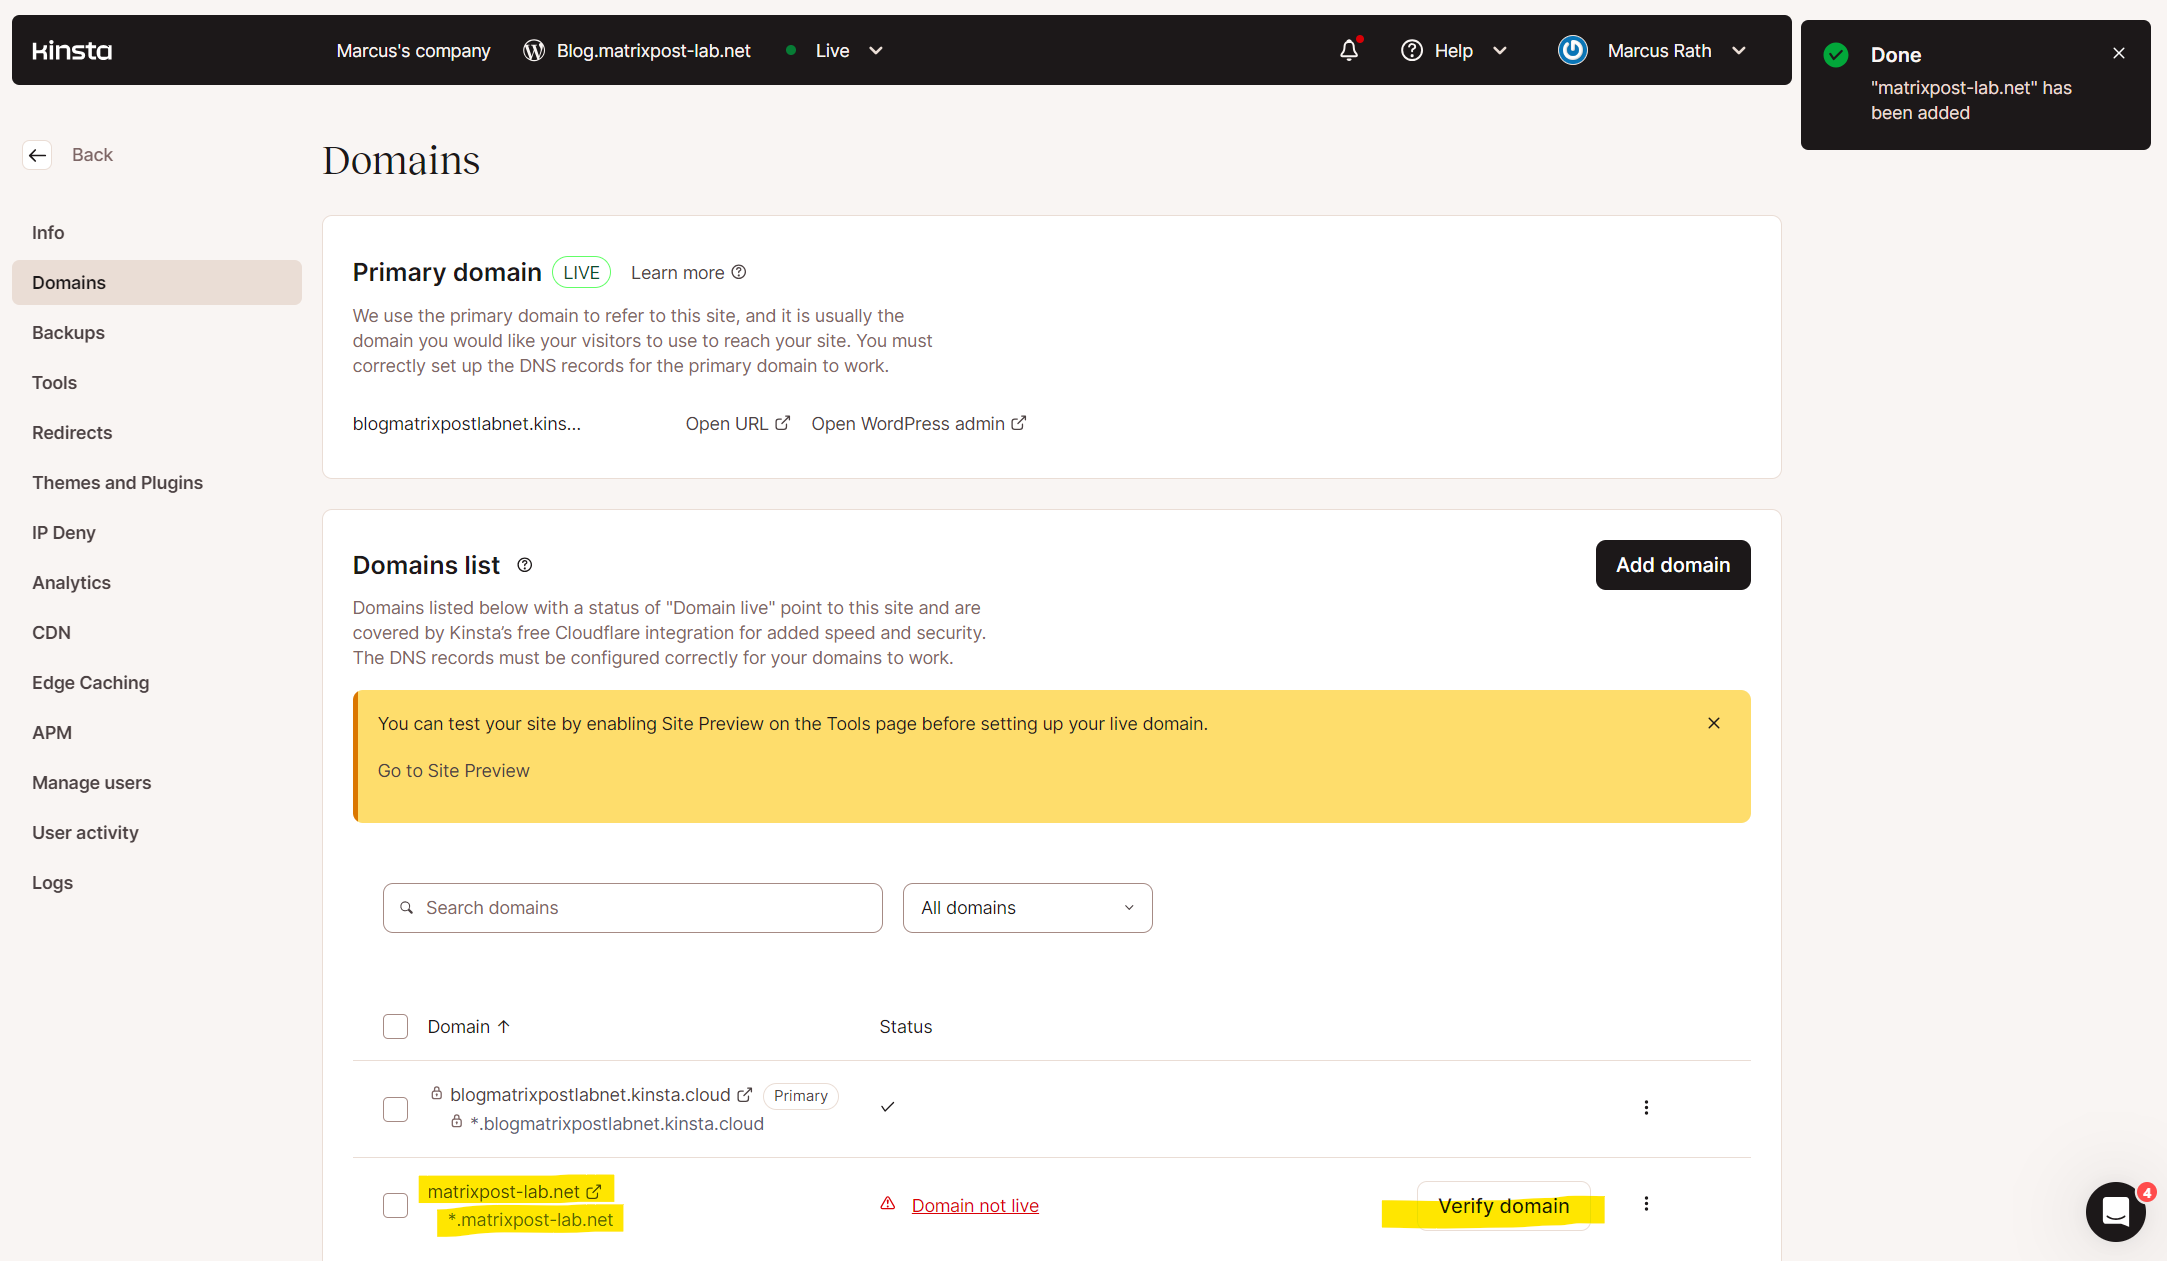
The next is now to verify the domain resp. to proof ownership for this domain. Therefore we can click on Verify domain below.
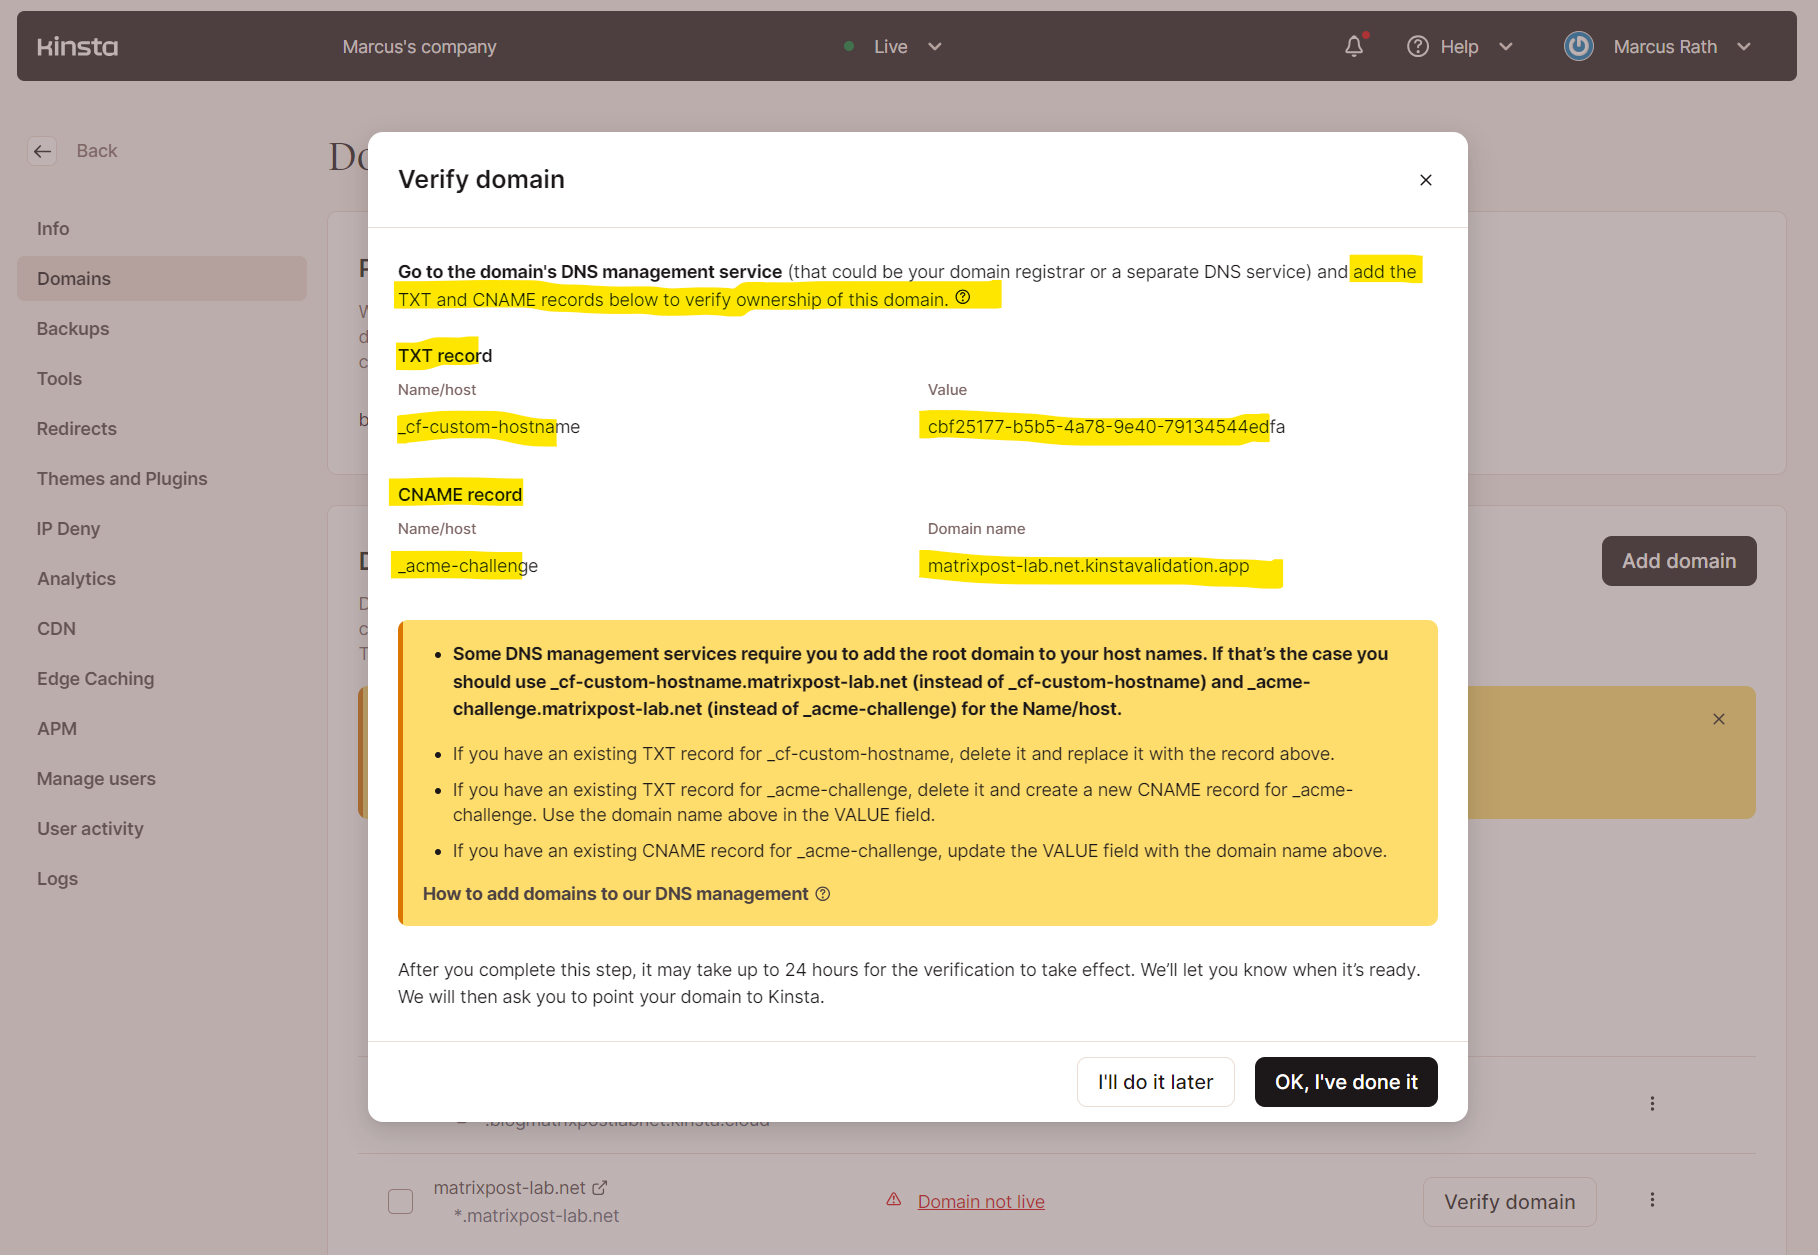
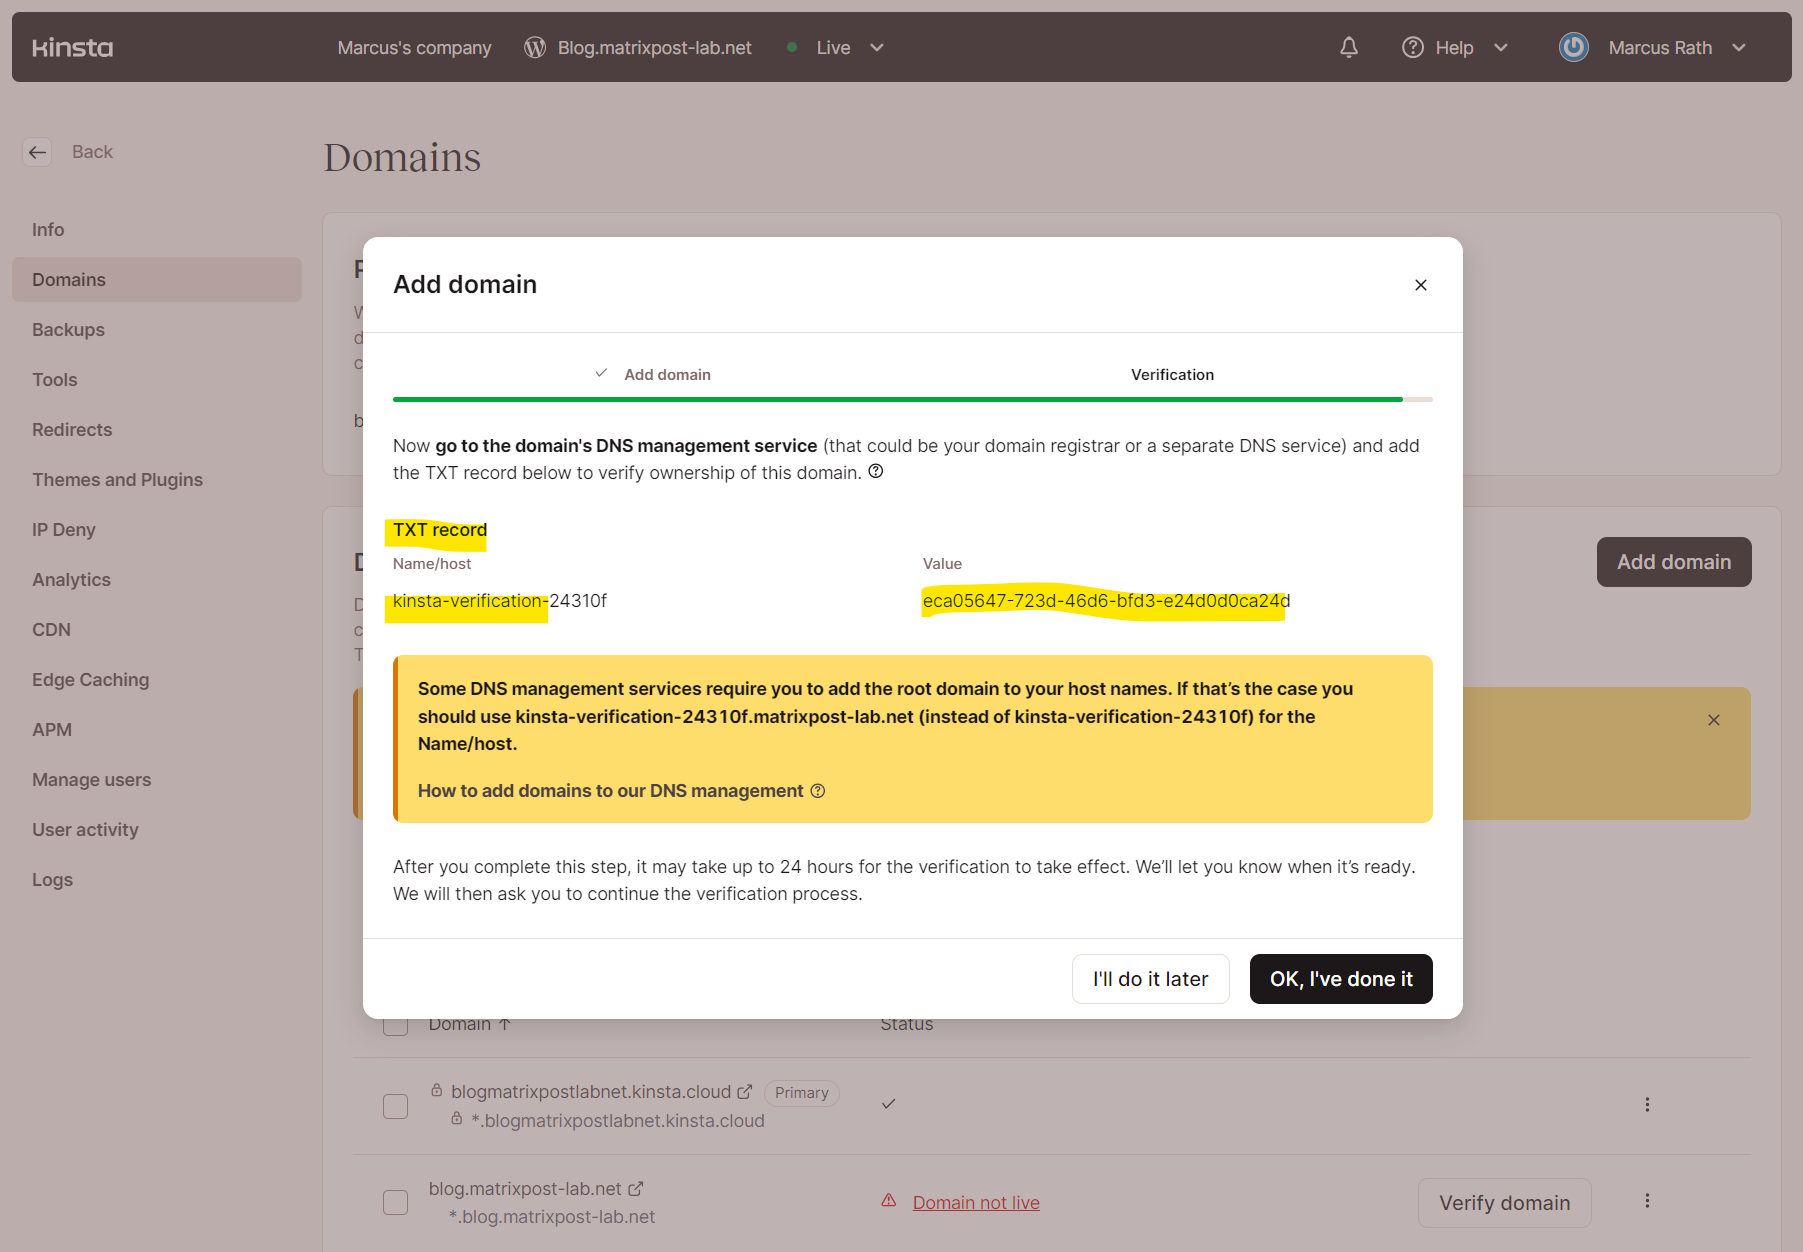
We will now see the requested DNS records (TXT and CNAME) we need to enter at our domain registrar’s portal.
Finally we can click on OK, I’ve done it to start the verification process on Kinsta.
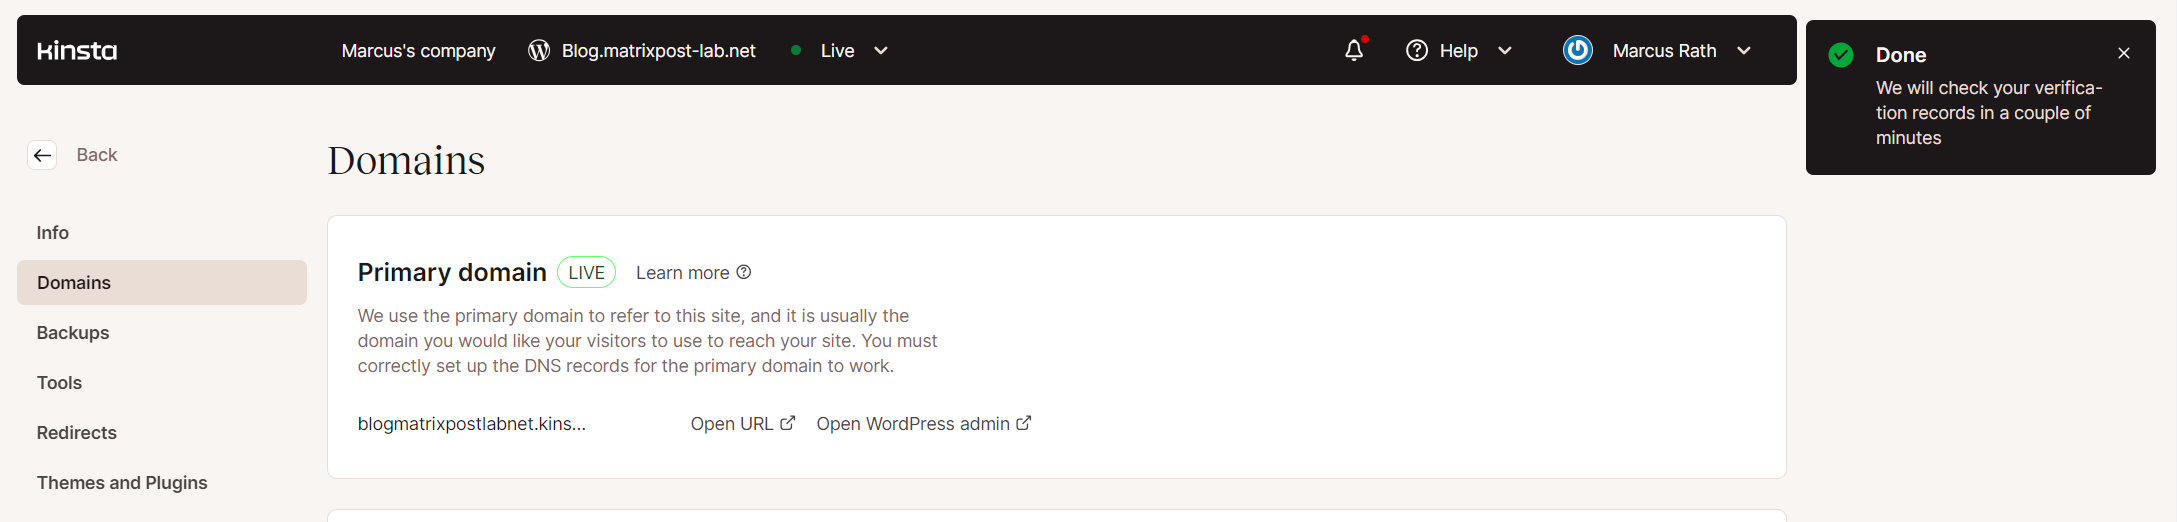
We will get notified that our verification records will get checked in a couple of minutes.
So far the Domain verification is in pending state. We can also display the requested verification records again by clicking on the Verify domain button below.

A few minutes later we get an email that our domain was successfully verified.
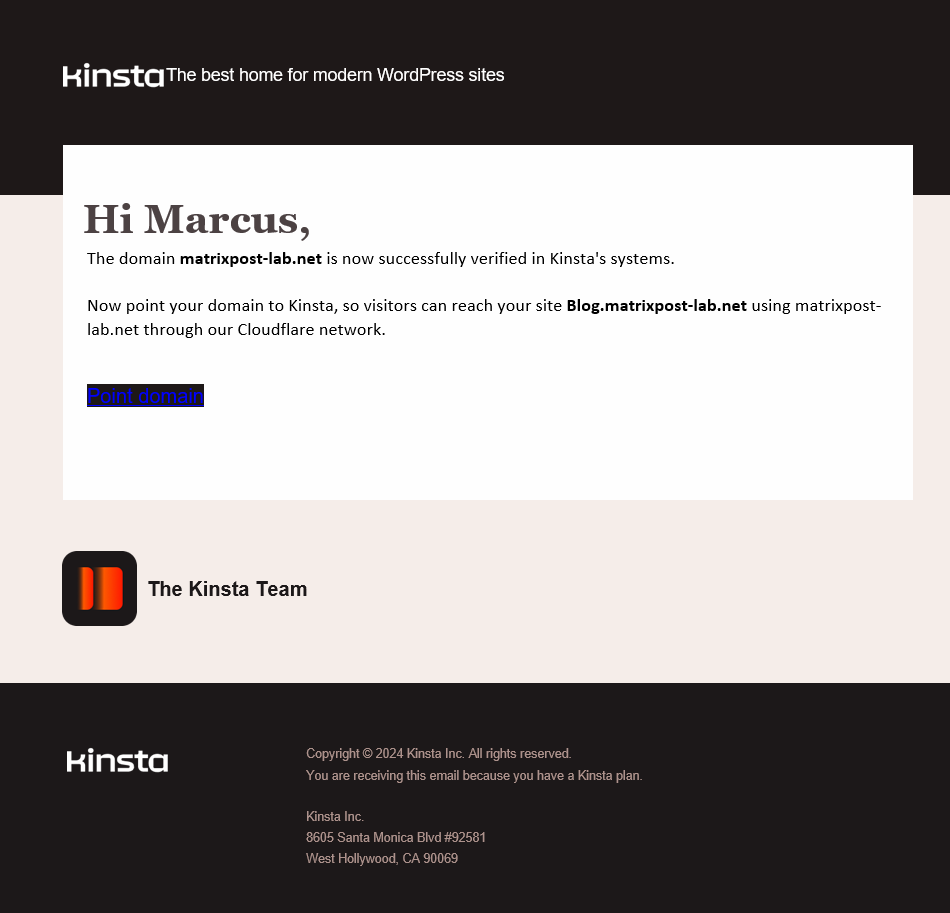
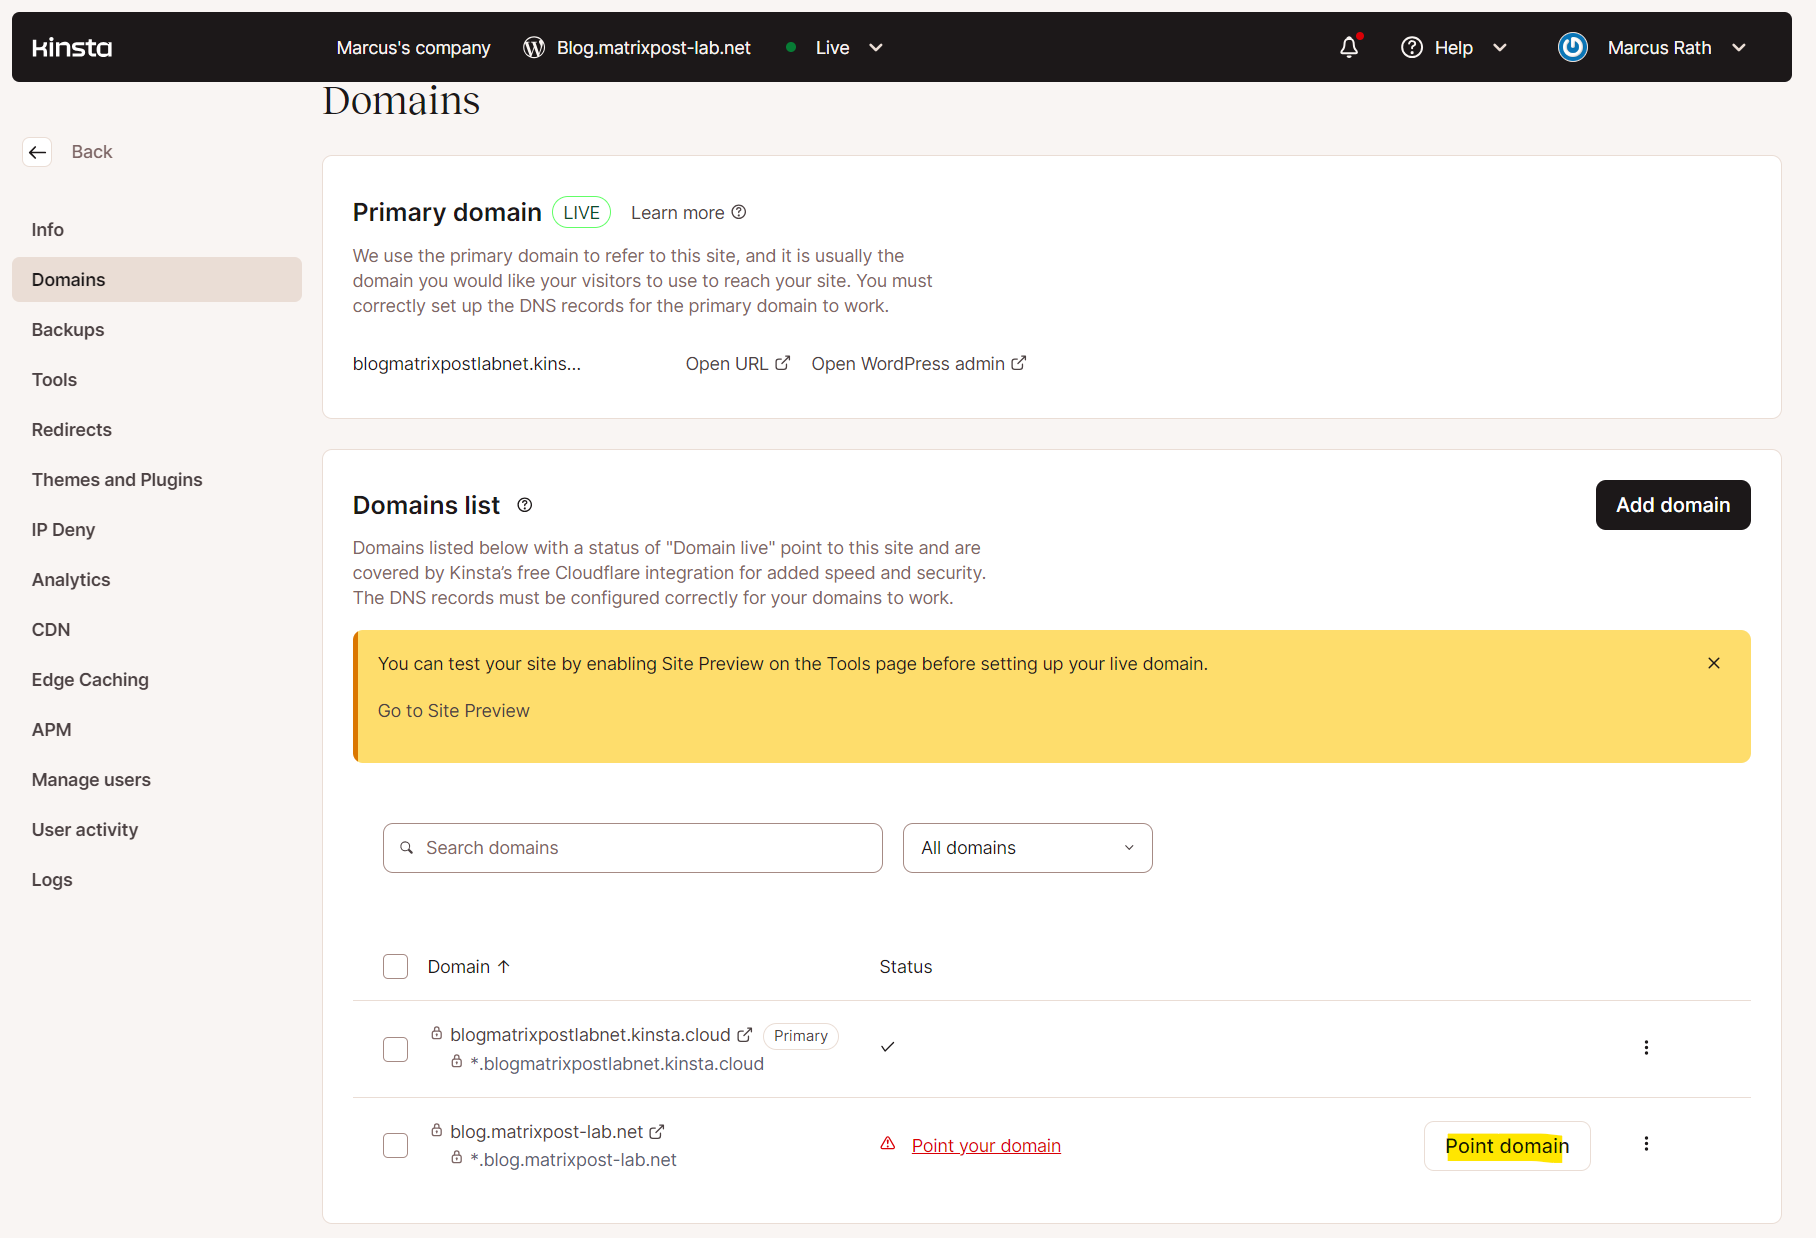
In the Kinsta portal we can now click on Point domain to assign the IP address on which our WordPress site is running to our custom domain.

We also this time get a straight forward dialog including all information to configure our DNS settings at our domain registrar.
In my case, I actually just want to point an A record to my subdomain blog.matrixpost-lab.net which I will use for the WordPress site for demonstration purpose.
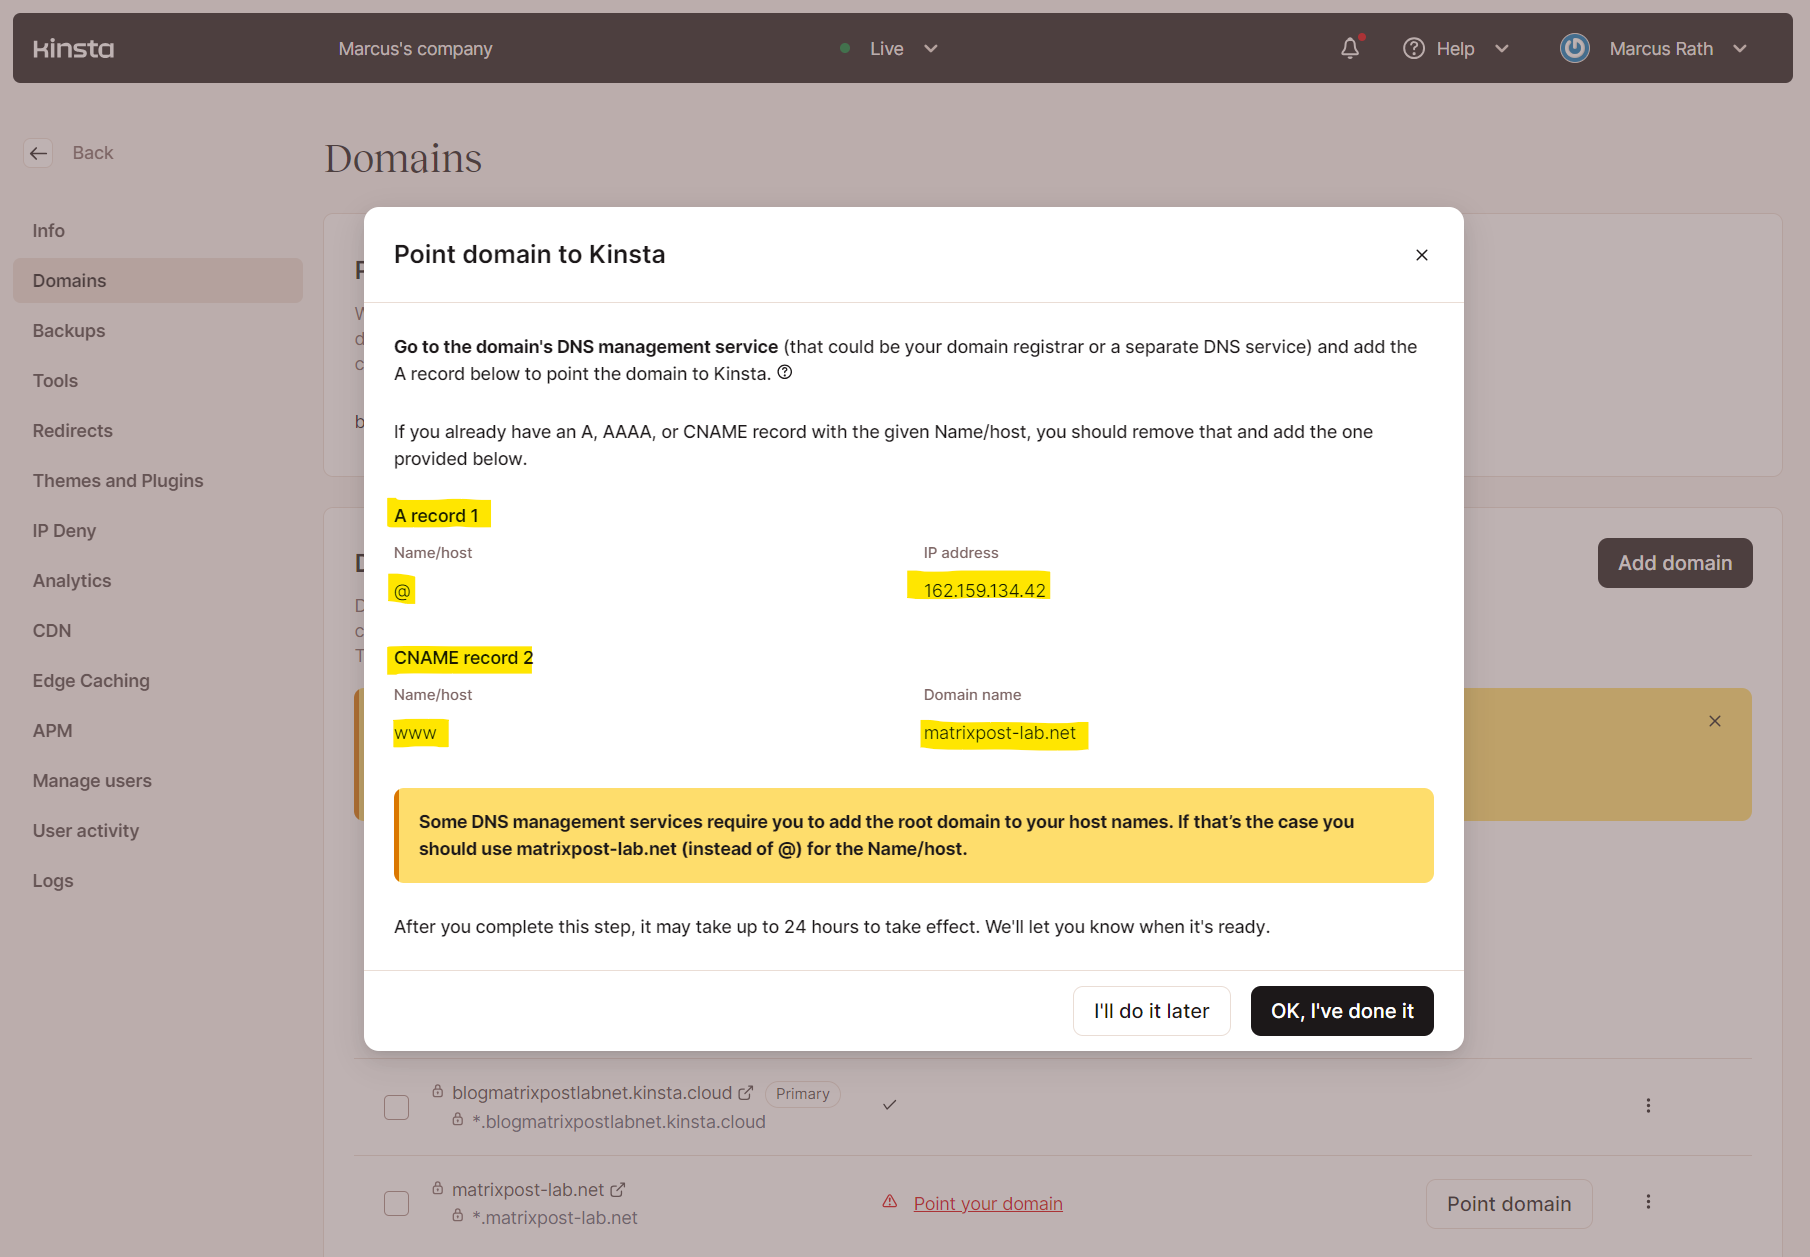
So you can use instead of a wildcard domain like *.matrixpost-lab.net also just a subdomain like blog.matrixpost-lab.net.
In my case I will use my lab domain matrixpost-lab.net also for other services which should be pointed to different IP addresses.
In order to just use a subdomain, I will now first remove the previously added wildcard domain from the Kinsta portal and then adding here just my subdomain. Therefore I need to start the verification process again, this time just for my subdomain.
Now I can point my subdomain to the desired IP addresses from Kinsta resp. Cloudflare Inc, more about Cloudflare further down.
At Kinsta, website performance and security are two of our core focuses. We are constantly on the lookout for new technologies that can have a positive impact on your website’s security and performance.
After our migration to Google Cloud Platform’s C2 VMs, our next big infrastructure enhancement will be integrating Cloudflare. That will enhance security and performance for all sites hosted on Kinsta.
Source: https://kinsta.com/knowledgebase/cloudflare-integration/
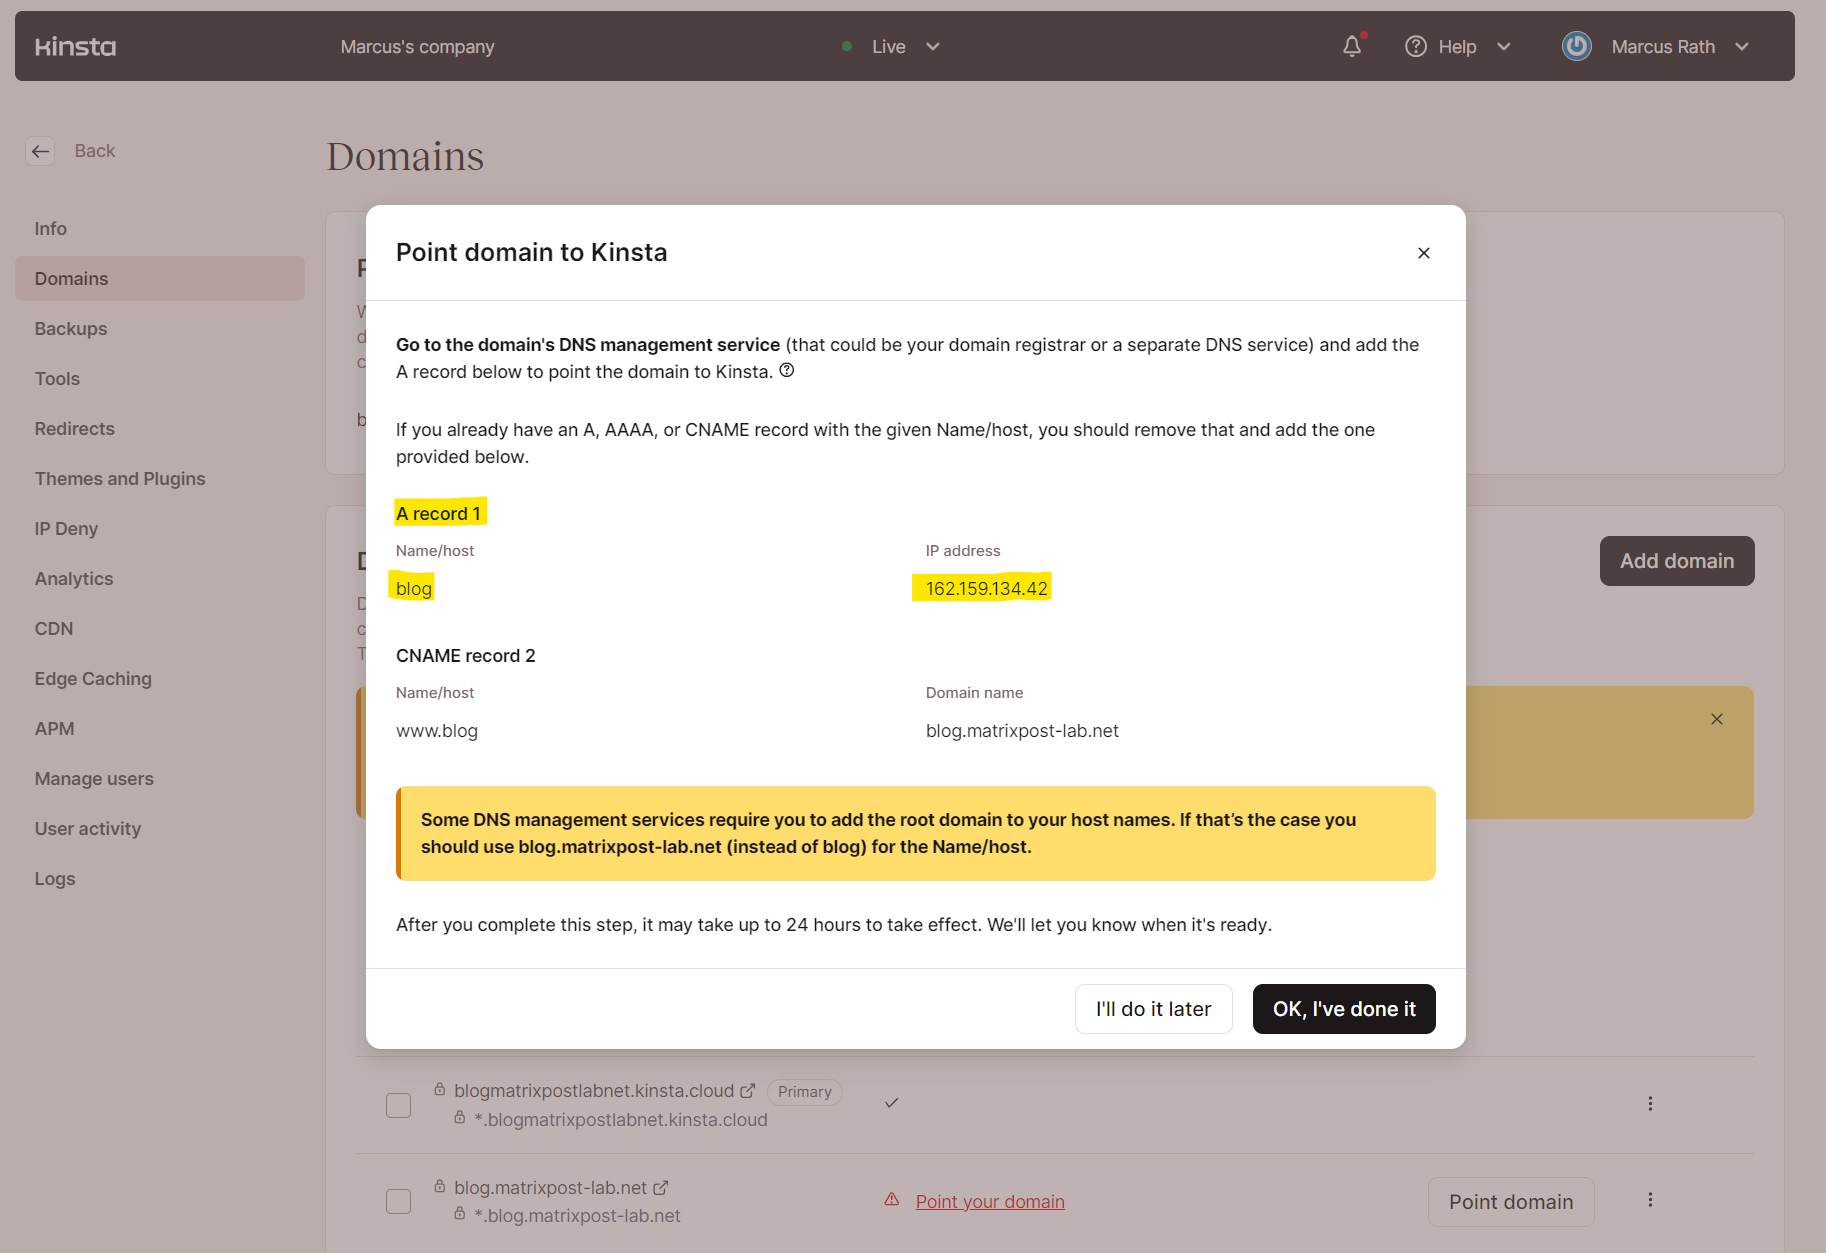
Here you can see that the above IP address 192.159.134.42 to which we should point our WordPress site belongs to Cloudflare.
So Kinsta is using Cloudflare as a proxy for its WordPress hosting services for the following reasons.
Cloudflare is an industry leader in security, web performance, and edge computing with data centers in over 200 cities around the world. For WordPress sites, Cloudflare’s product acts as a proxy that sits between the origin server and visitors. By acting as a proxy, Cloudflare can block malicious traffic, cache static files, optimize images, and more. According to data from W3Techs, 81.2% of all websites that use a CDN or reverse proxy rely on Cloudflare, allowing it to dominate market share.
Source: https://kinsta.com/knowledgebase/cloudflare-integration/
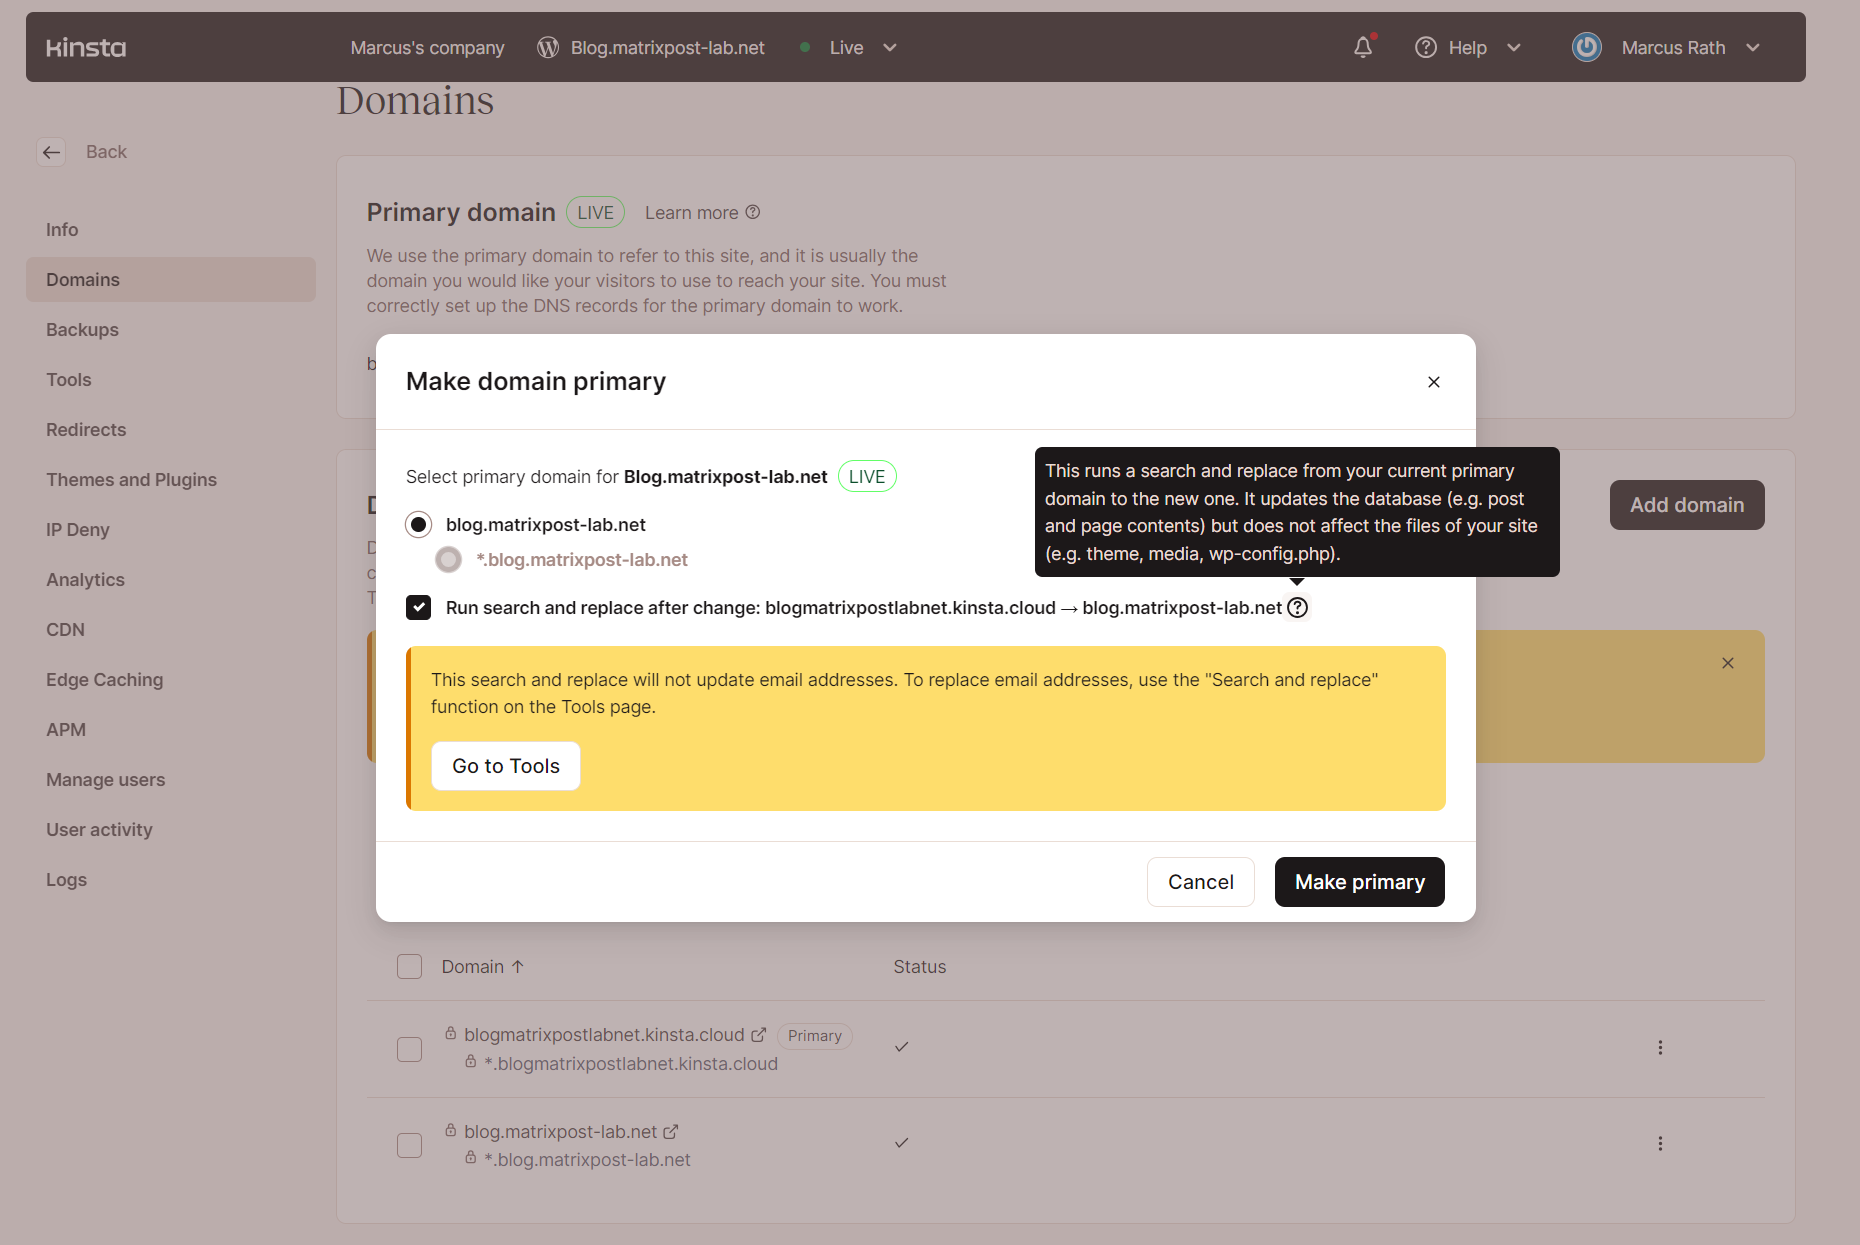
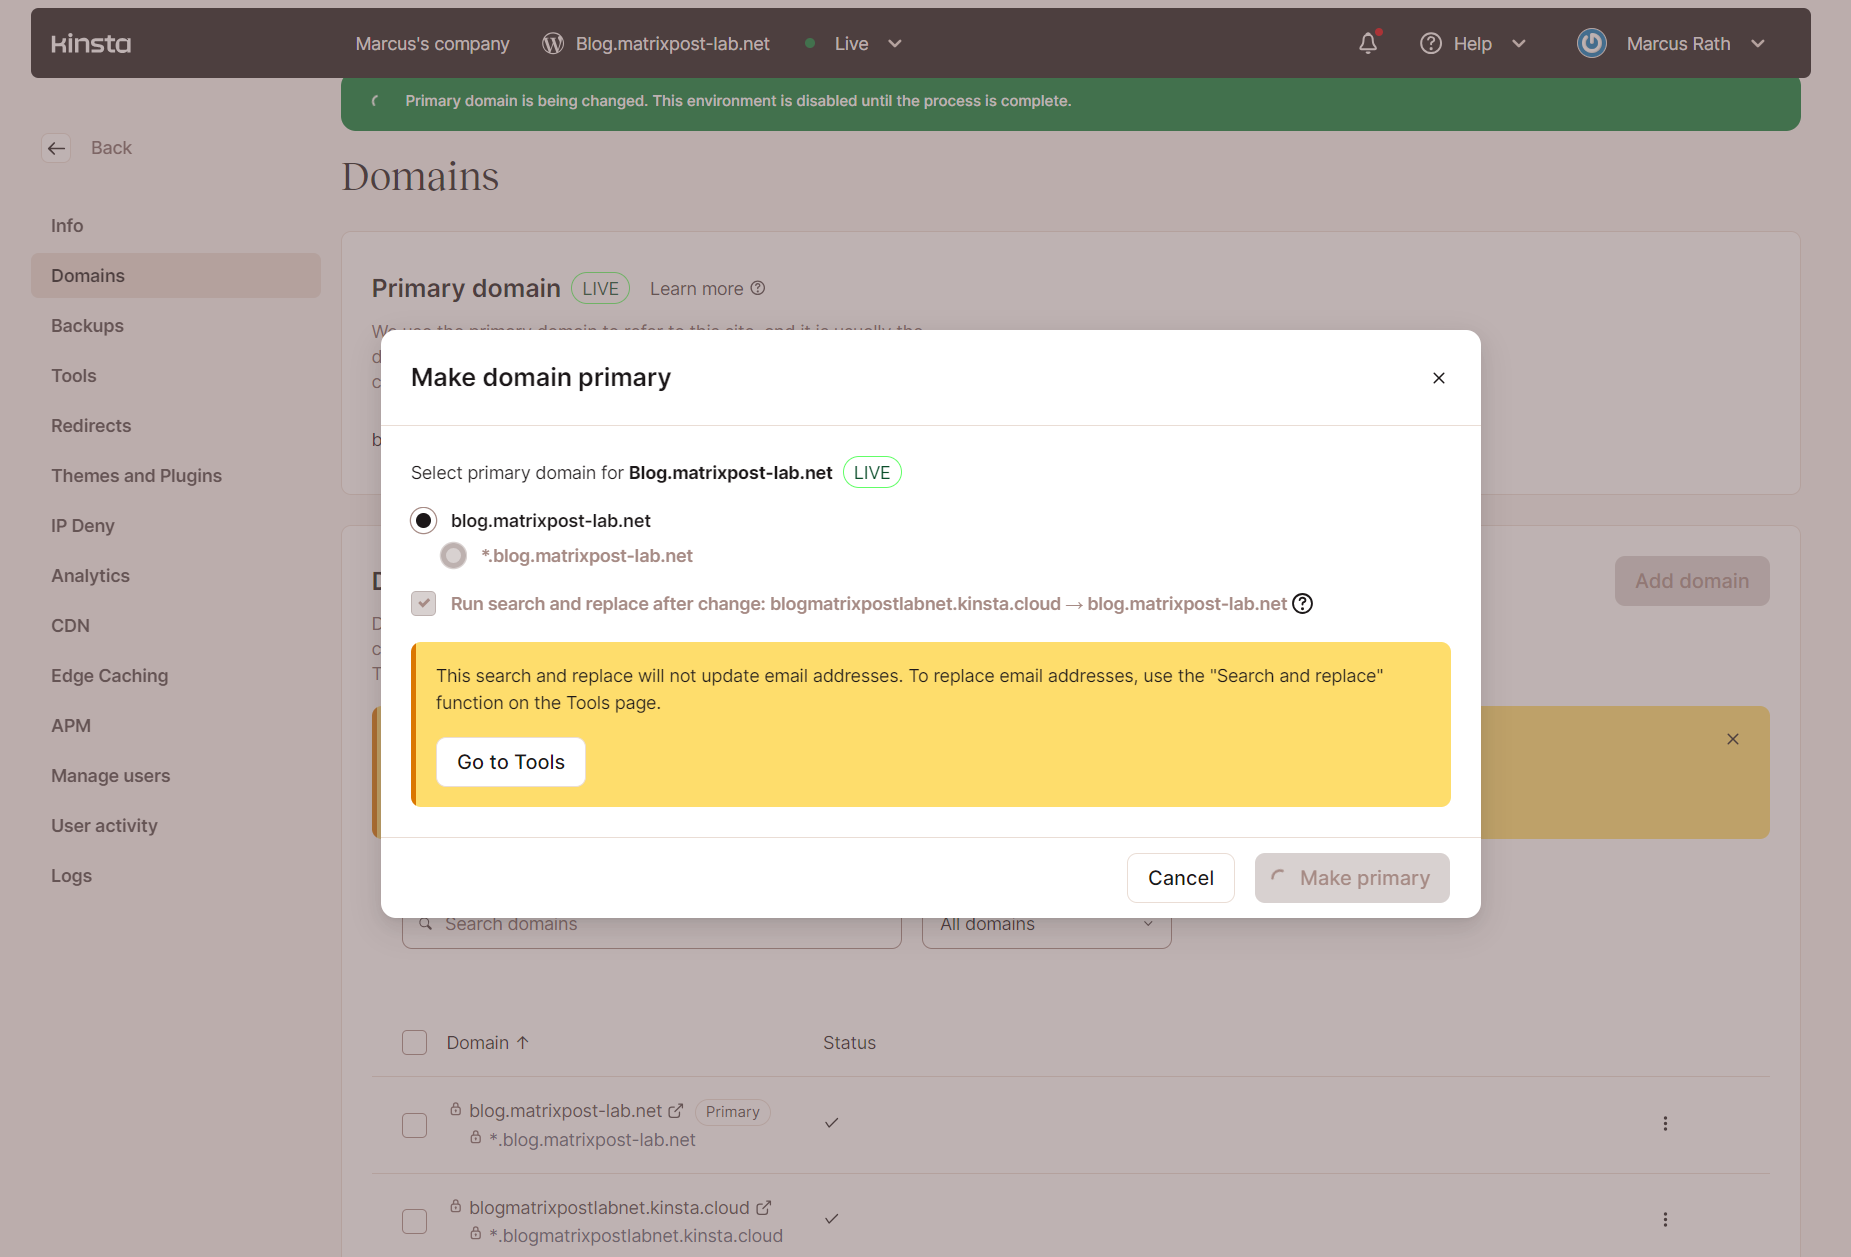
I will now change the primary domain to my own custom domain blog.matrixpost-lab.net.

You can run here commands to replace the old FQDN in the database with the new one. There are also more tools available within the Tools menu on the left sidebar.
Here for example you can open the Search and replace tool directly.
Tools -> Search and replace

The Search and replace tool was running successful.
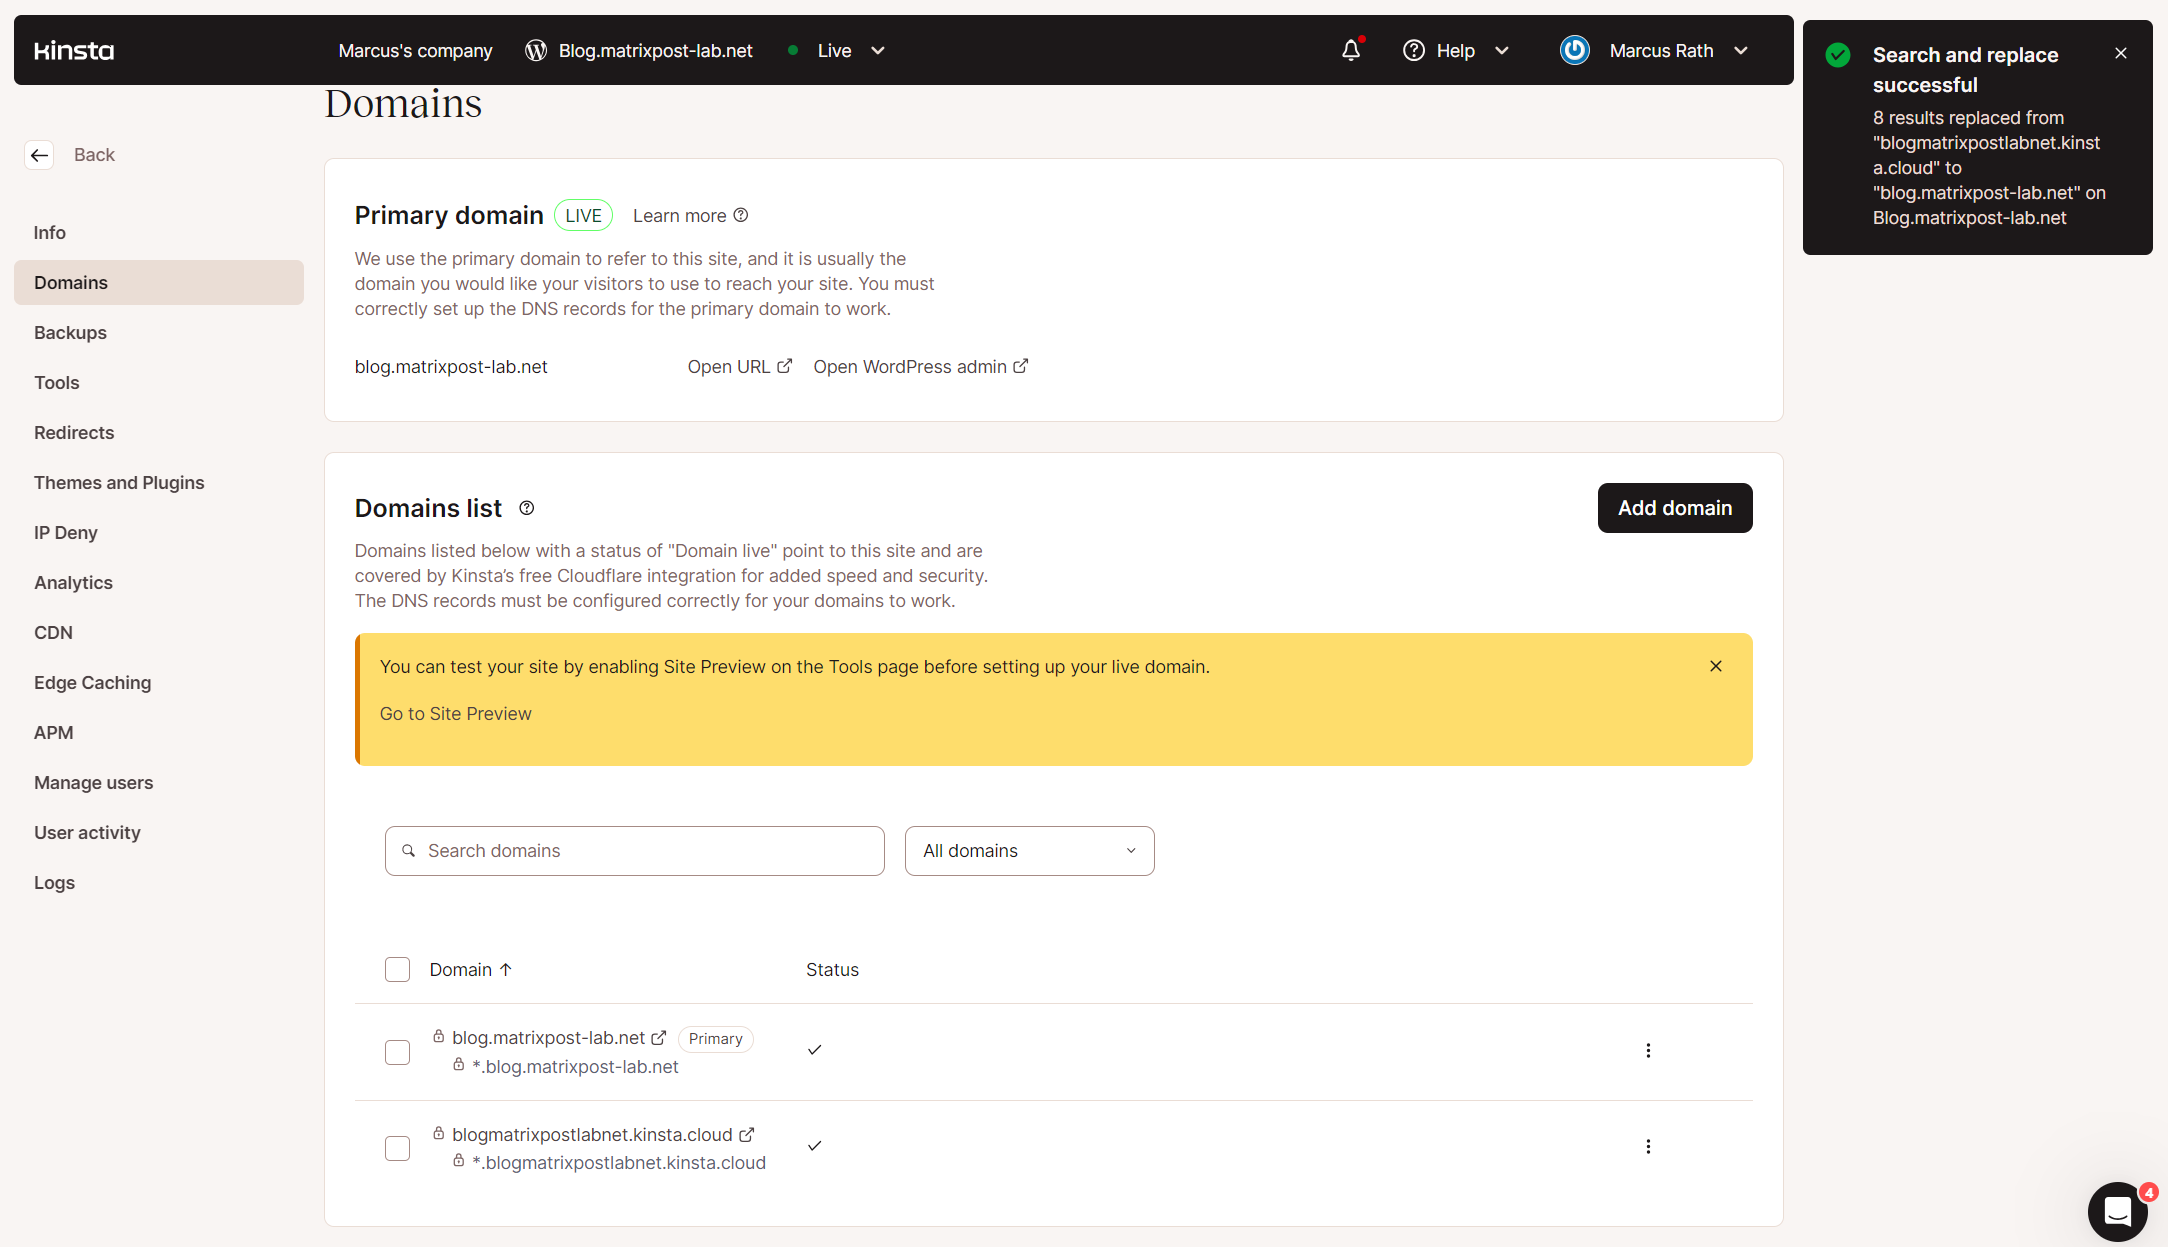
Finally the primary domain is changed to my own custom domain.
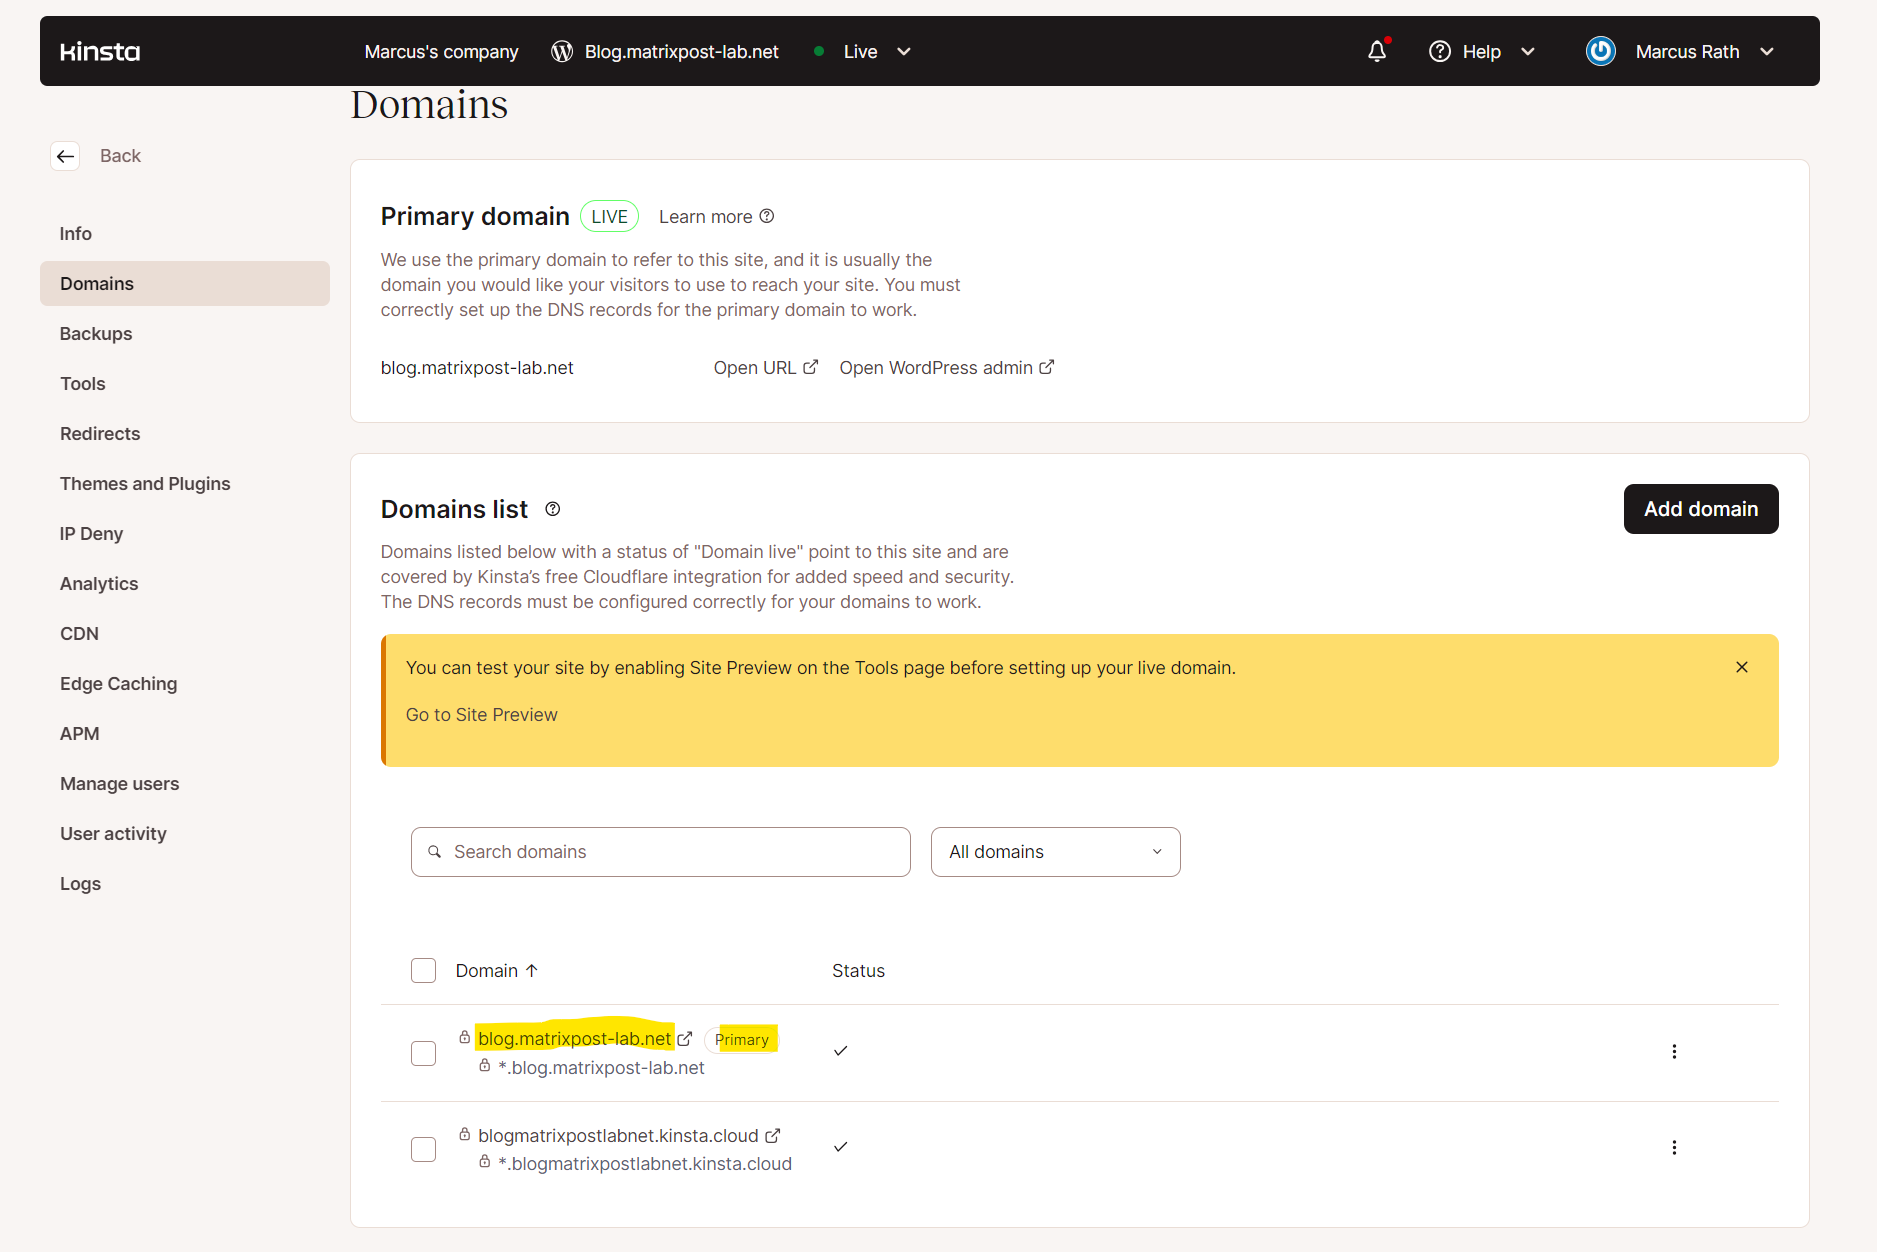
From now on the WordPress site is published and accessible under my own custom domain https://blog.matrixpost-lab.net.
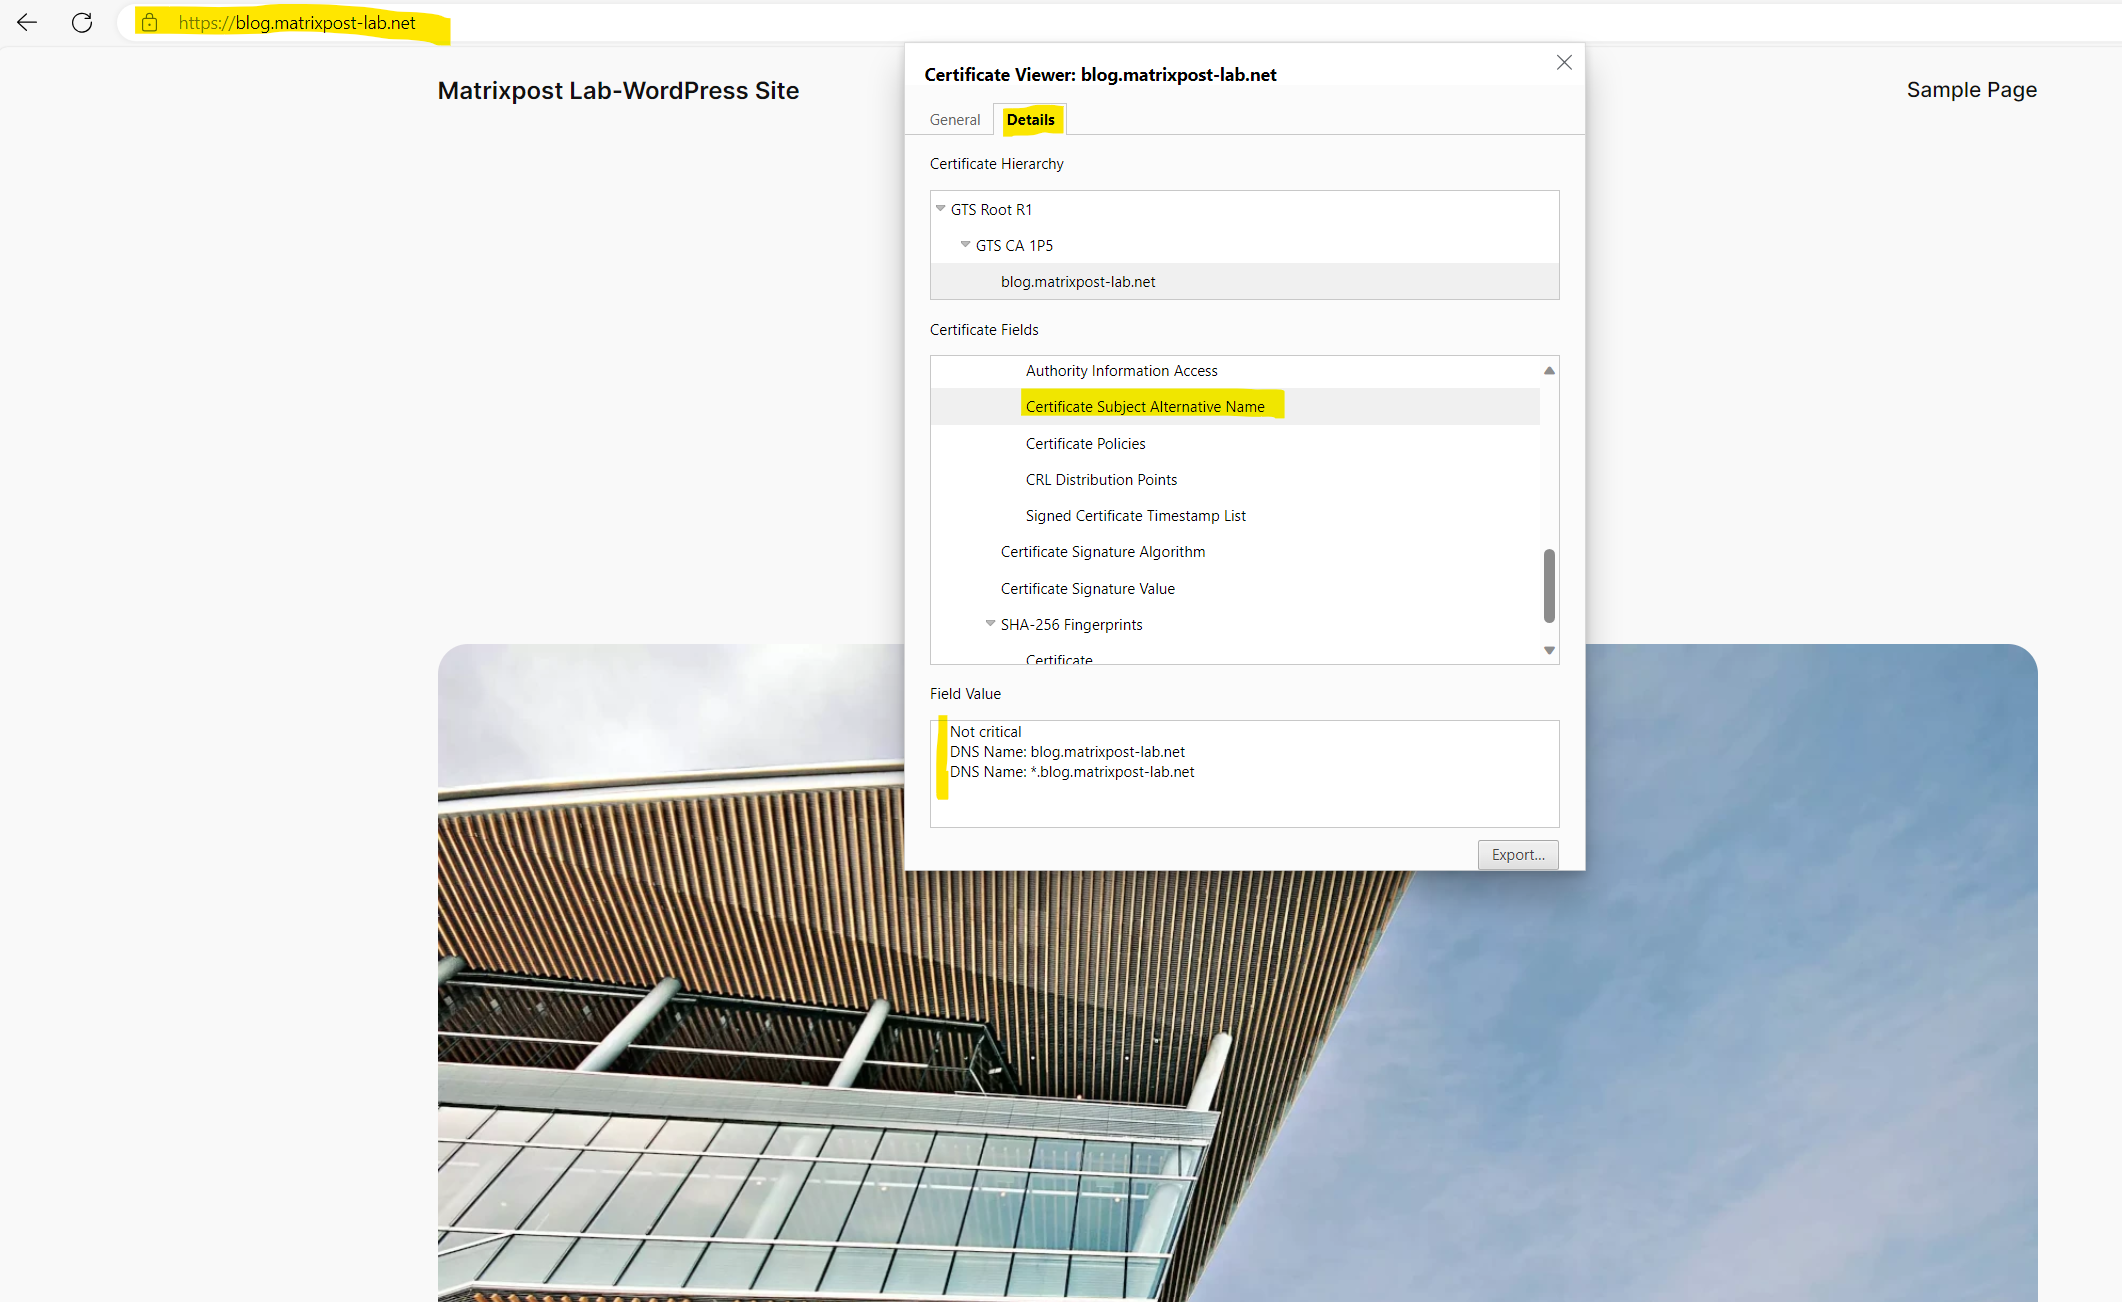
Kinsta resp. Google (because the site finally is running within the Google Cloud and its compute resources) will also assign by default a SSL/TLS certificate to your site and custom domain.

Performance Test by using Google’s PageSpeed Insights Tool
Because Kinsta claims its WordPress Hosting Services are the ultimate performance, I want to test if this is really true of course.
But just because of the fact, that Kinsta will using the Google Cloud Platform for their hosting services, I wouldn’t expect any different.
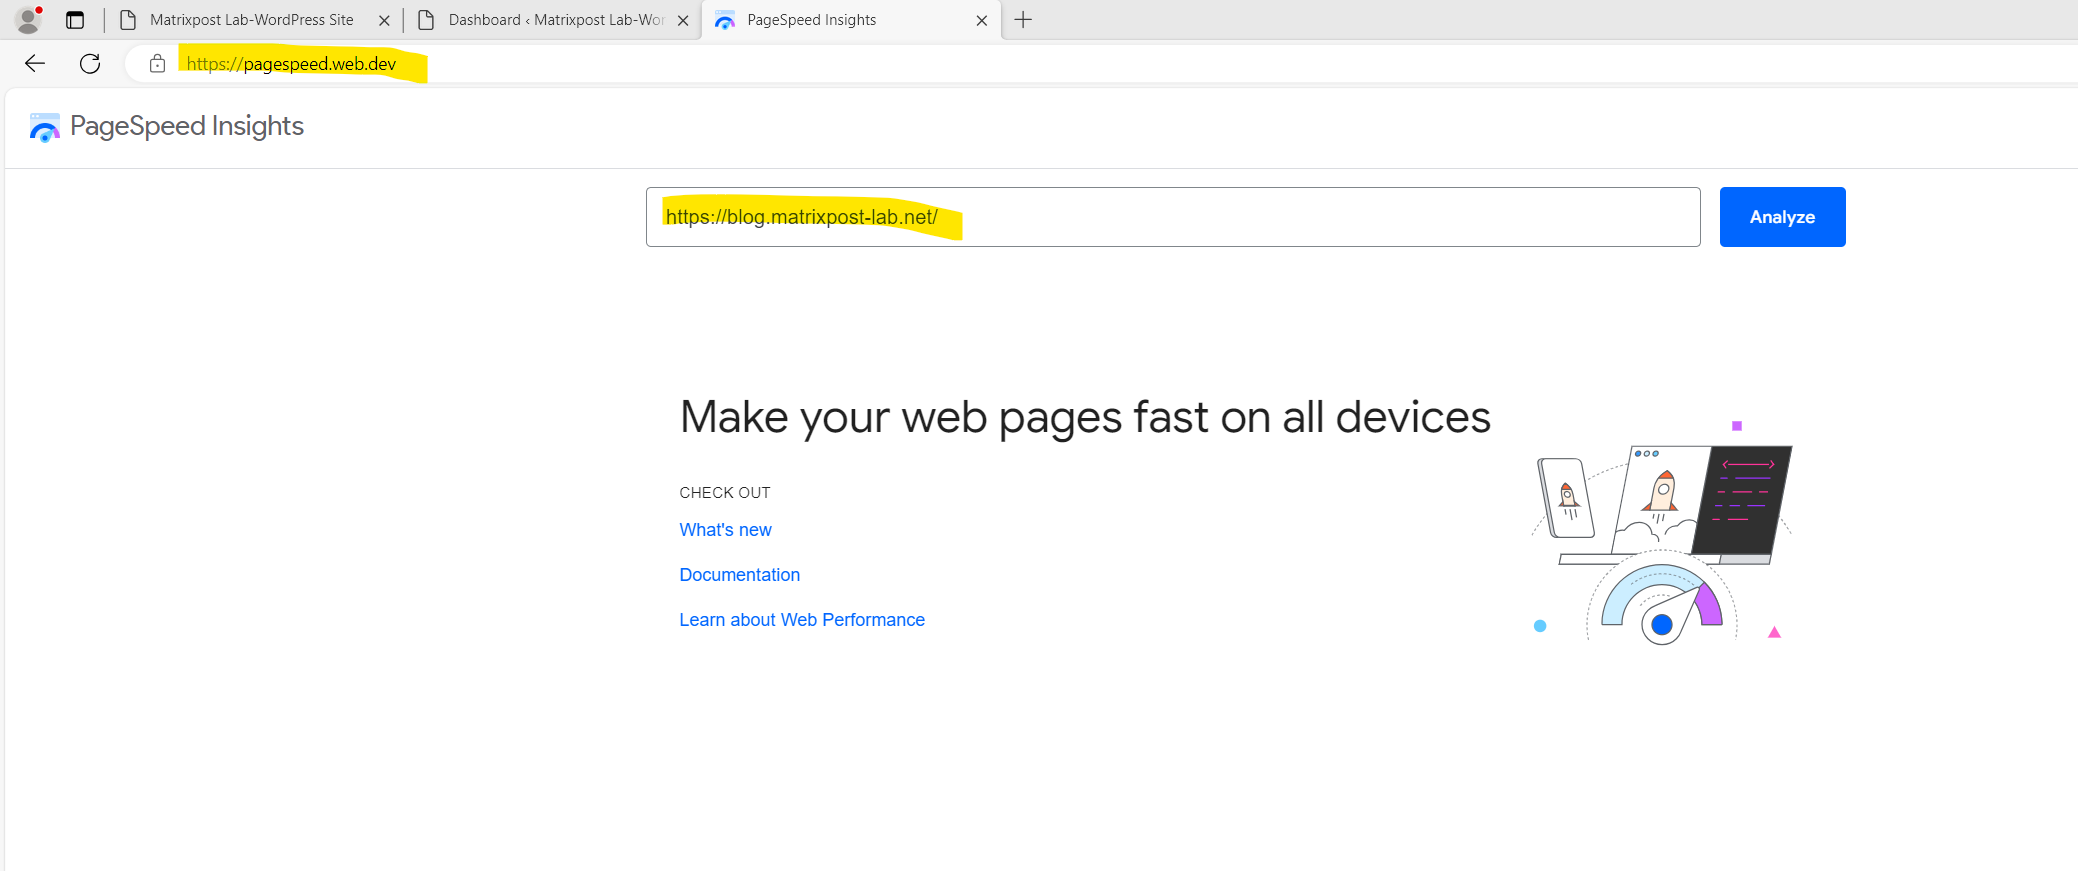
Just to be sure, I will run the test against my newly created WordPress site below.
Google PageSpeed Insights
https://pagespeed.web.dev/
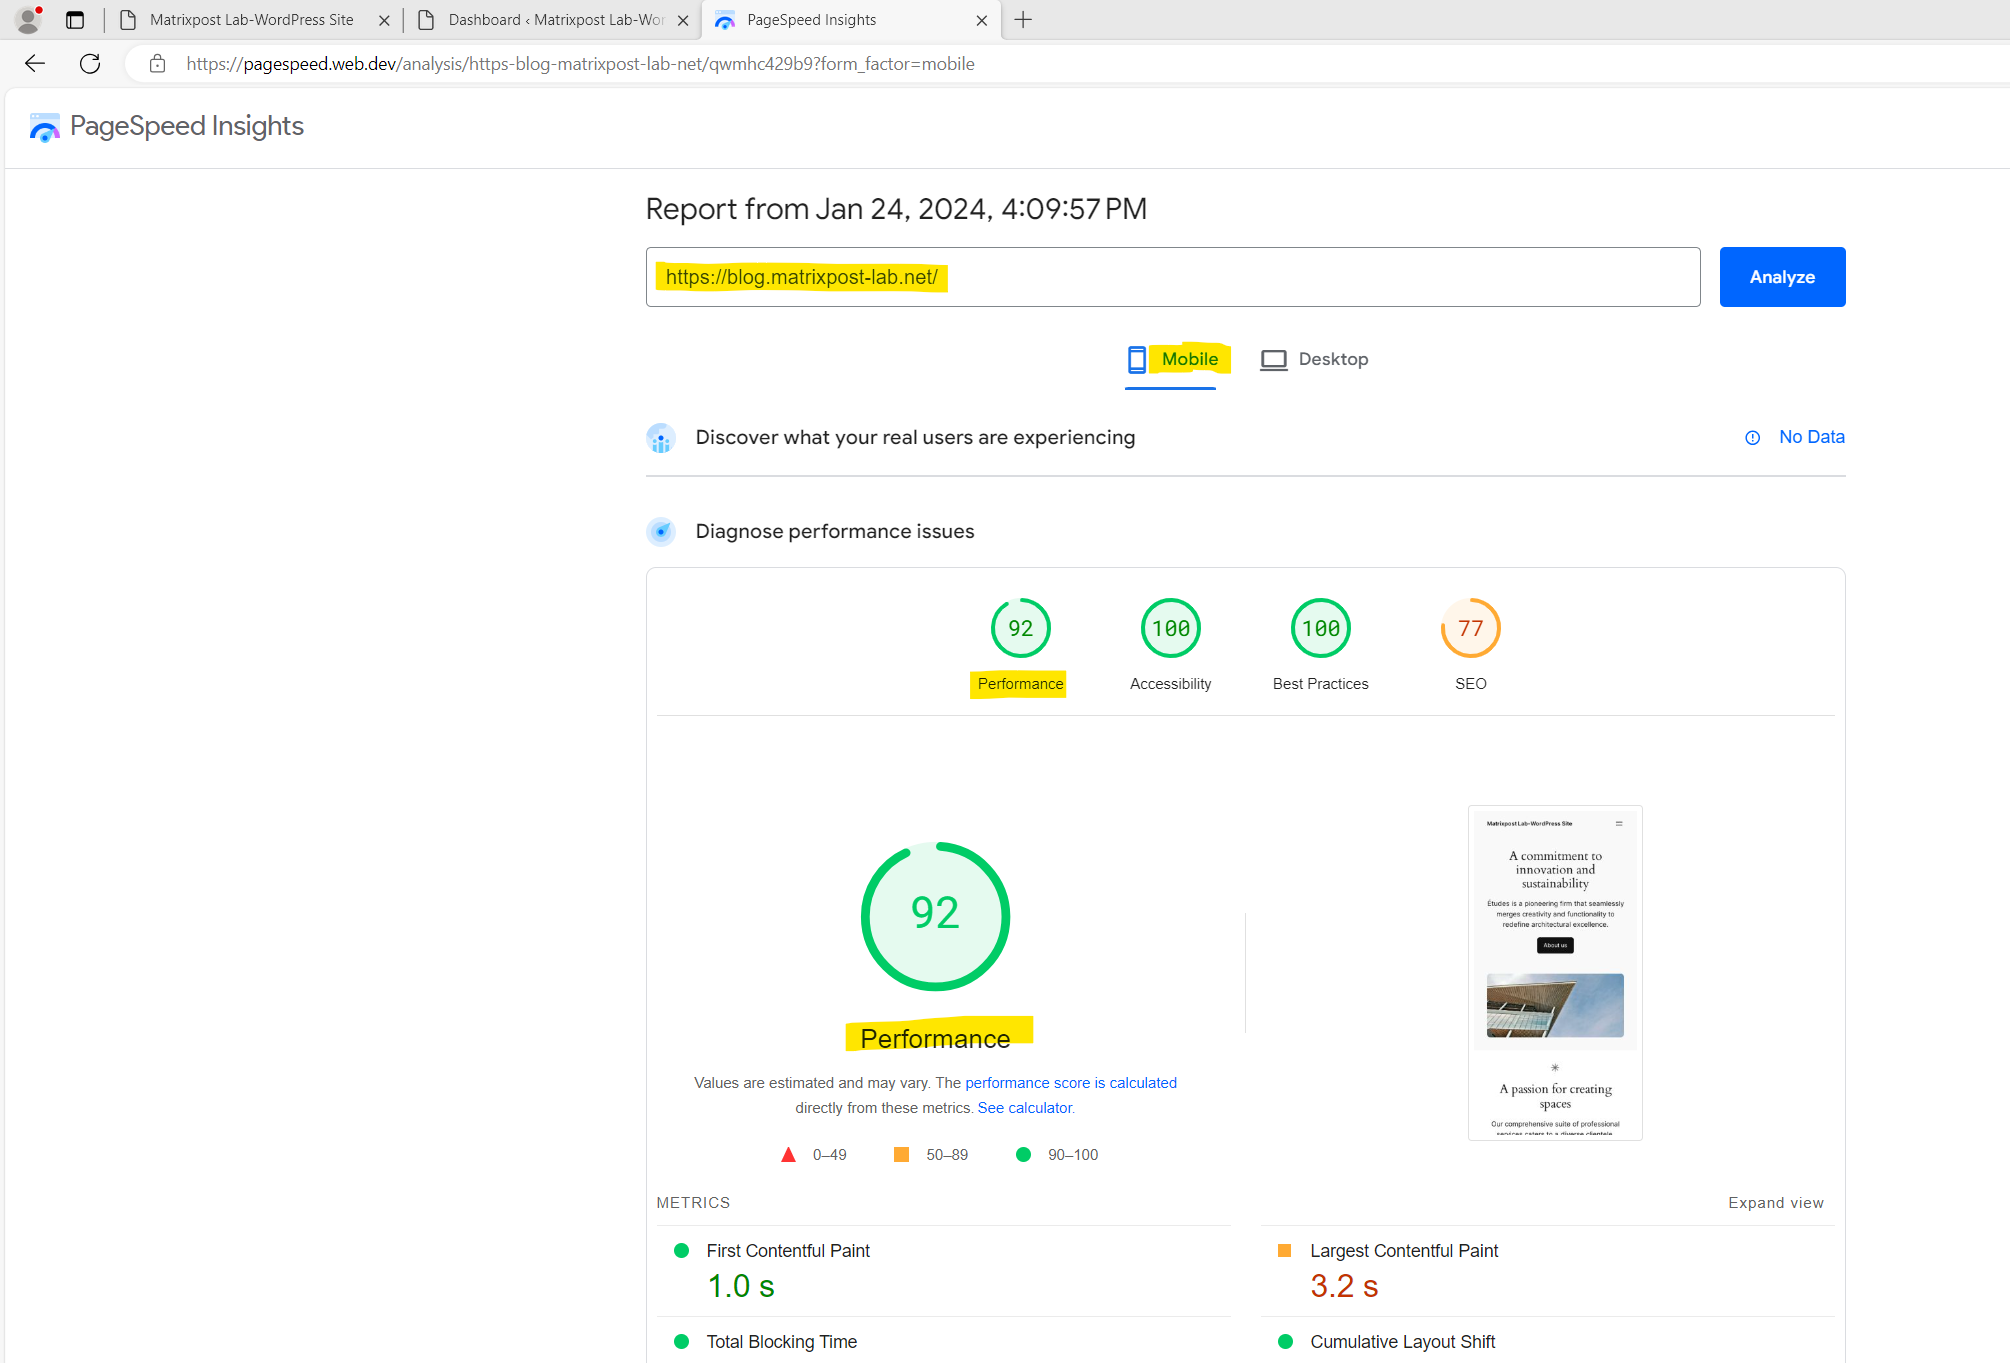
Performance on mobile devices.
Performance on Desktop
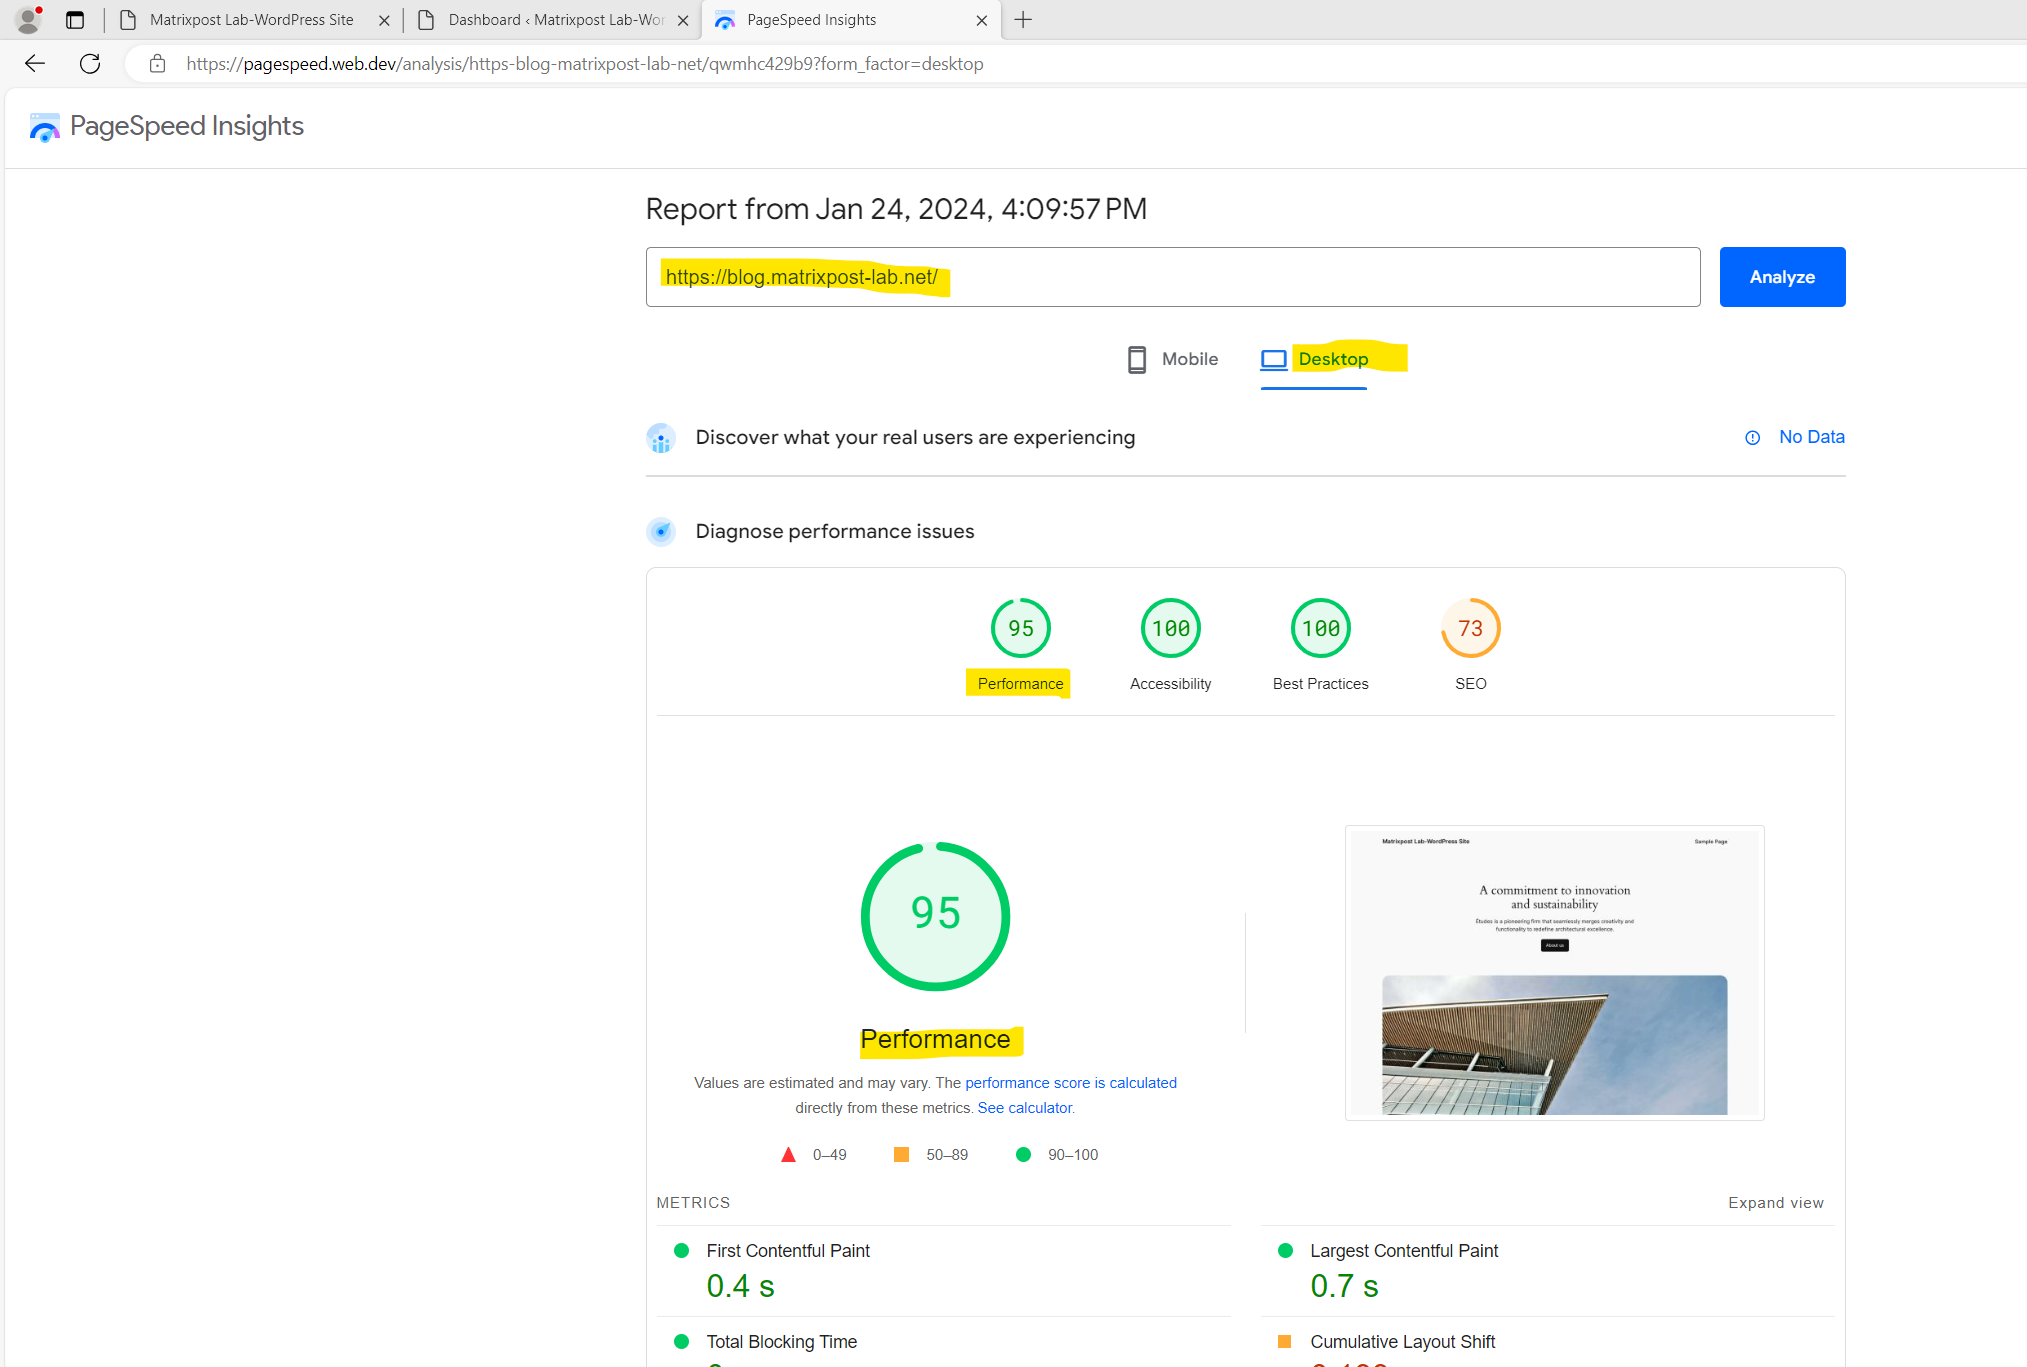
Looks really fine!
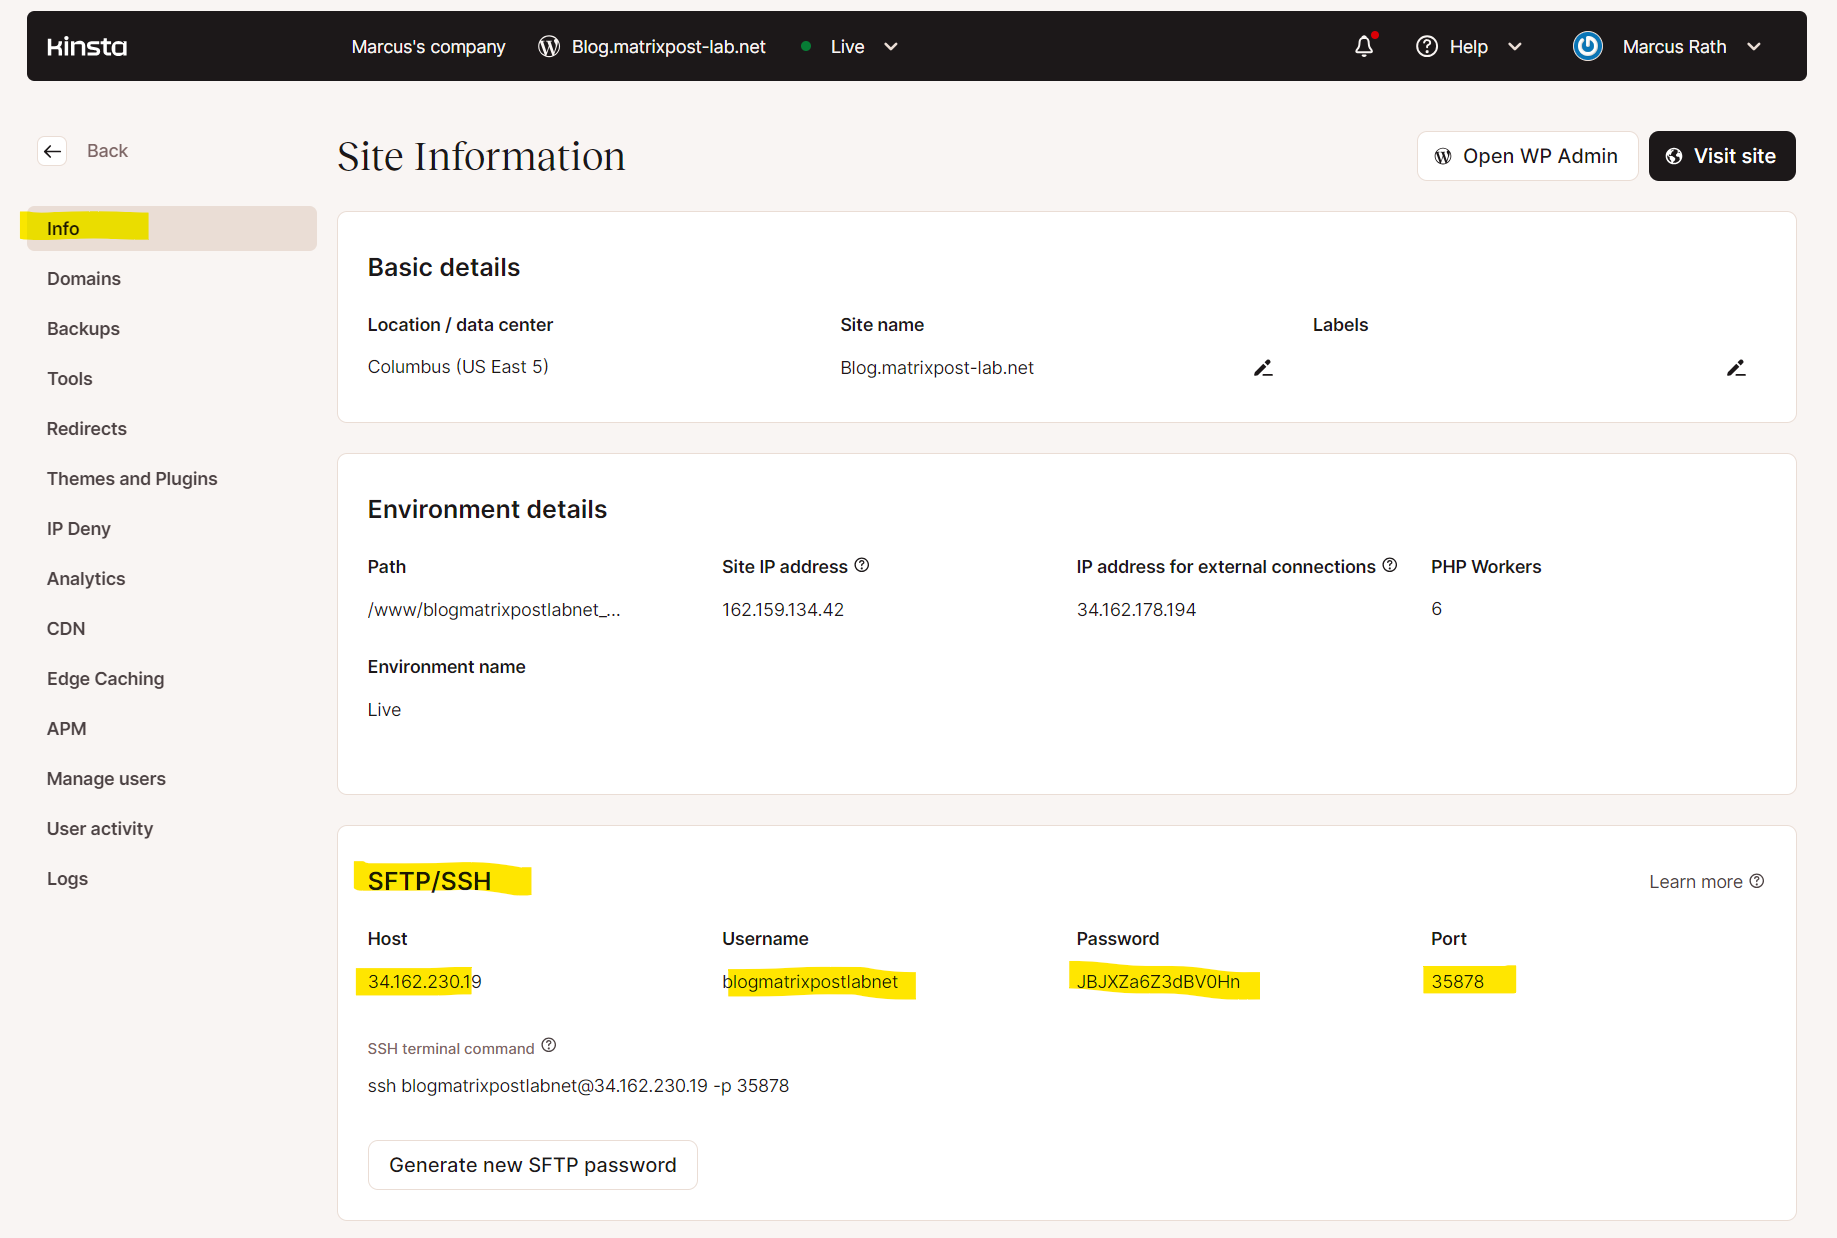
SFTP/SSH Access for your WordPress Site
Kinsta provides SSH access with all of their Managed WordPress Hosting plans.
SSH access allows you to log into a command prompt, perform common sysadmin tasks, and execute commands just as if you were sitting at the server itself. You can run additional tools such as Git, Composer, WP-CLI, etc. If you’re on an Enterprise plan, you can also use tools like npm. Follow the directions below on how to connect to SSH on your WordPress site.
Source: https://kinsta.com/docs/wordpress-hosting/connect-to-ssh
How to Use SFTP to Connect to Your WordPress Site
https://kinsta.com/knowledgebase/how-to-use-sftp/
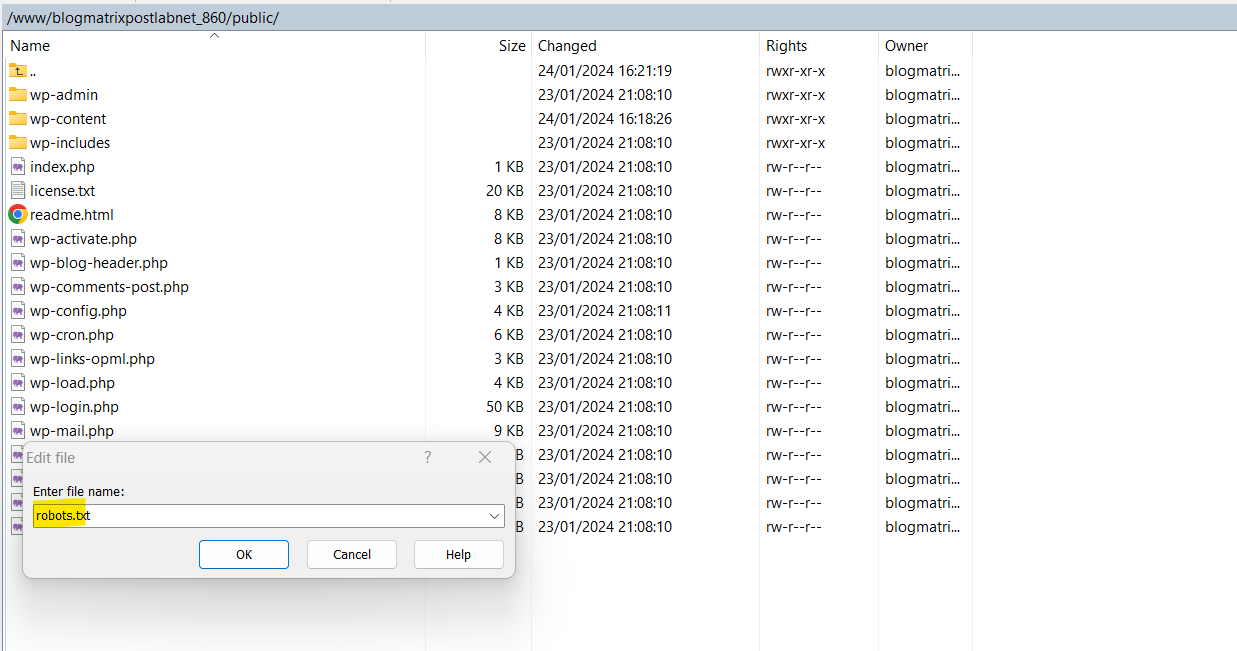
Creating a Robot.txt file
Below I will show how you can use the SSH access for example to create a new robots.txt file for your WordPress site. There are several WordPress plugins which can by the way also create a virtual robots.txt file.
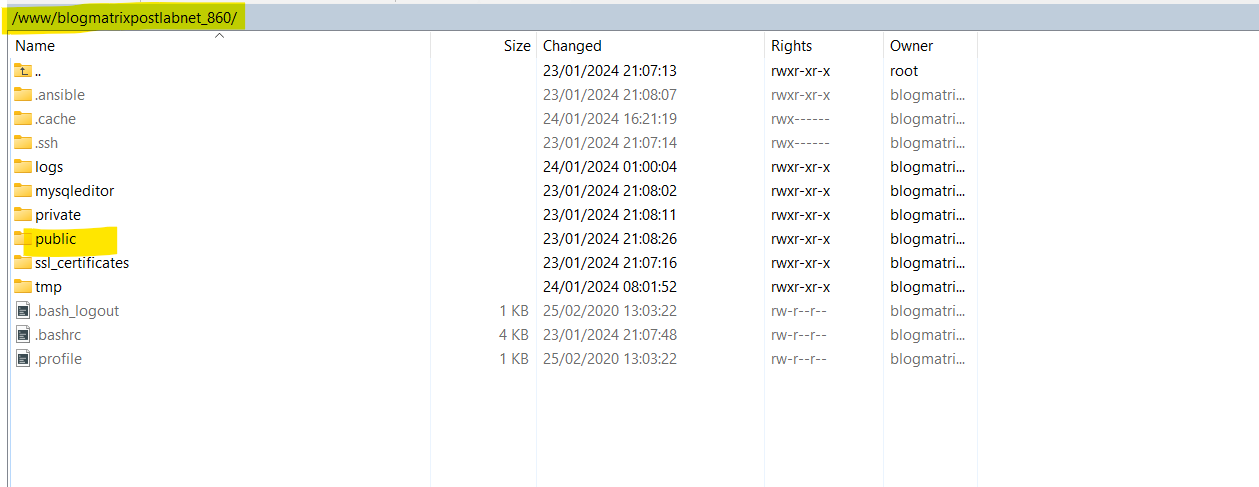
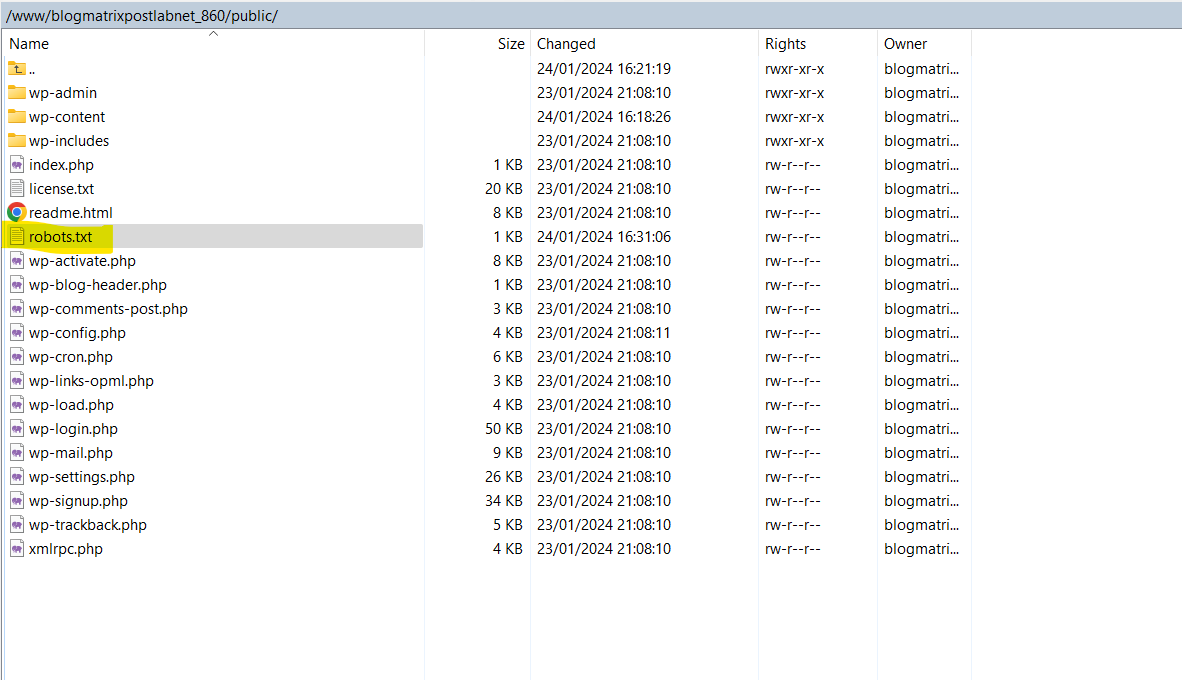
The web server document root path is /www/<your WordPress site title_*>
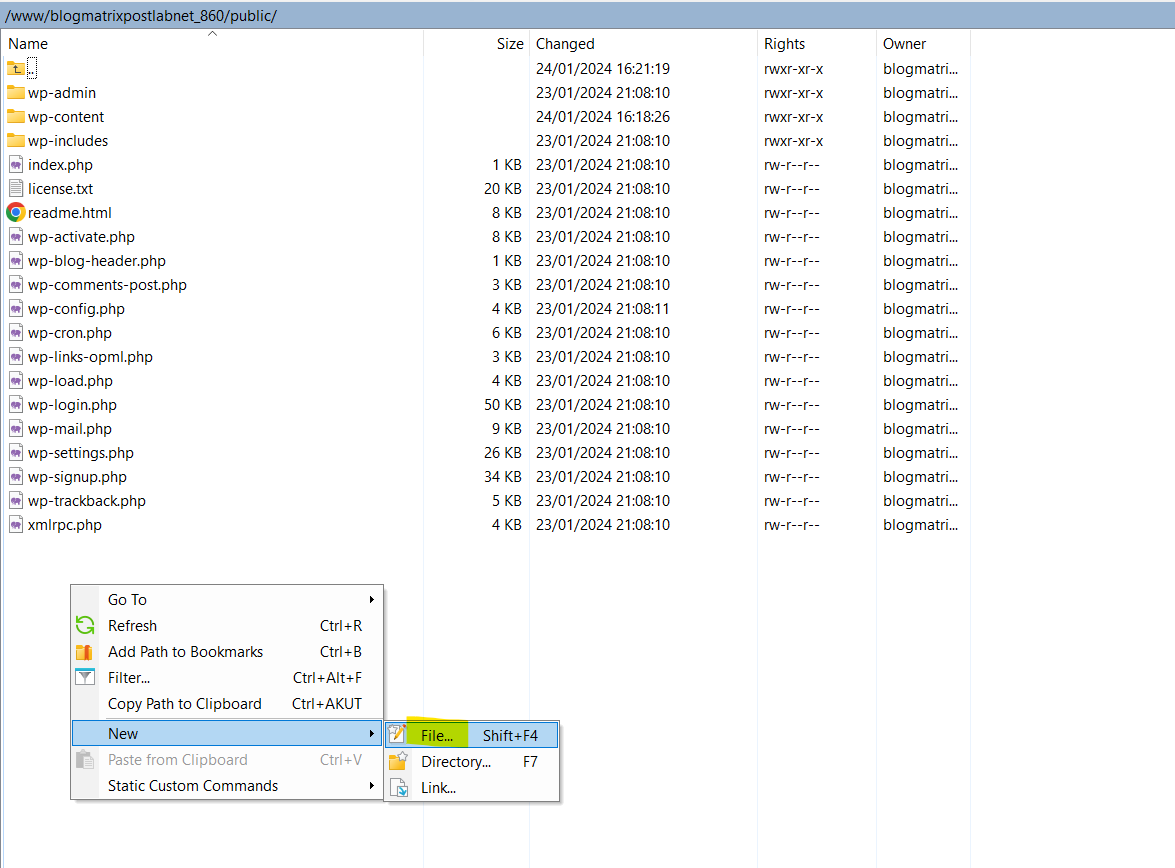
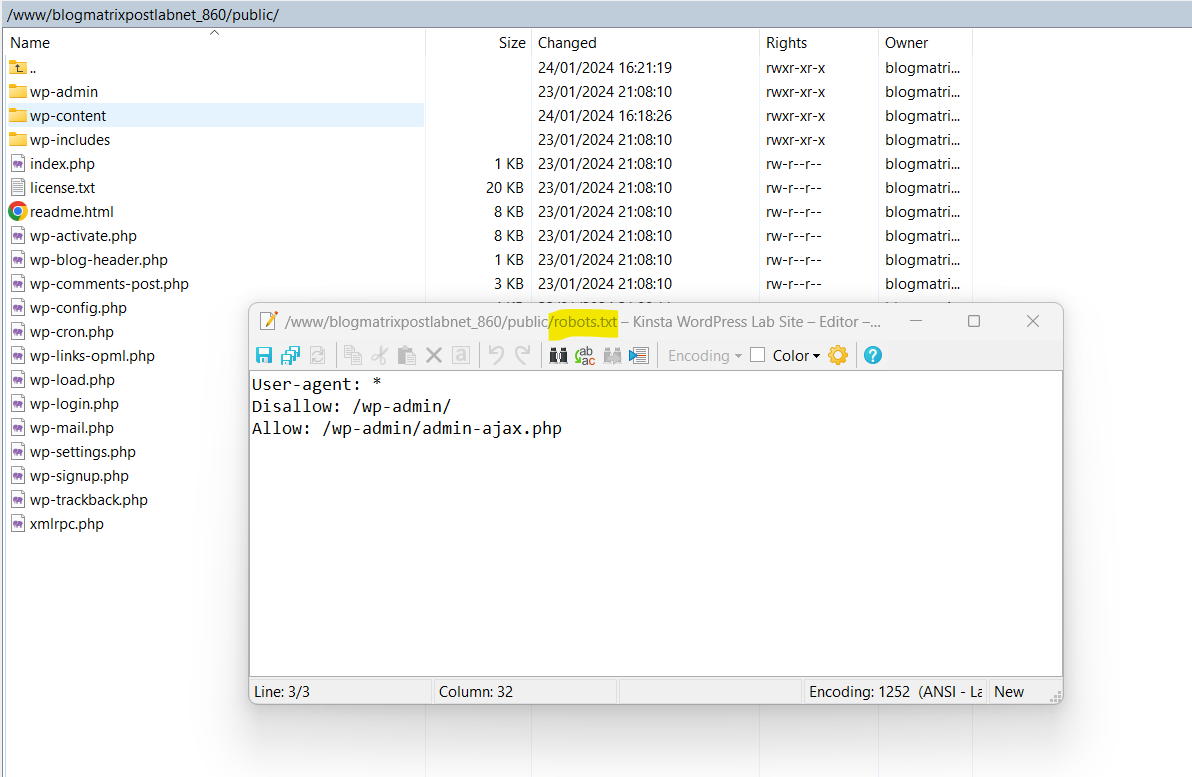
Usually your WordPress robots.txt file will looks similar to the following below in the figure where we disallow robots to crawl the wp-admin folder and just allow accessing the admin-ajax.php file within.
The admin-ajax.php file needs to be allowed in some configurations otherwise you might start seeing “The Page May Not Render Properly Due to Resources Blocked” popping up in Google Search Console. More about in the following article by Kinsta https://kinsta.com/blog/resources-blocked/.
How to Diagnose High Admin-Ajax Usage on Your WordPress Site
https://kinsta.com/blog/admin-ajax-php/
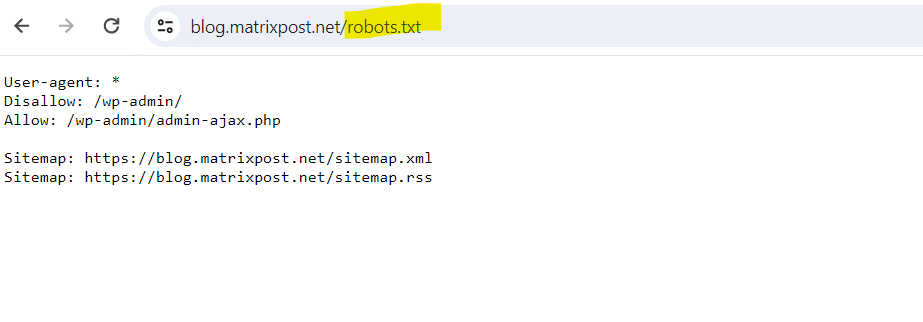
Below you will see the robots.txt file of my real blog which will also include the URLs of its sitemap.
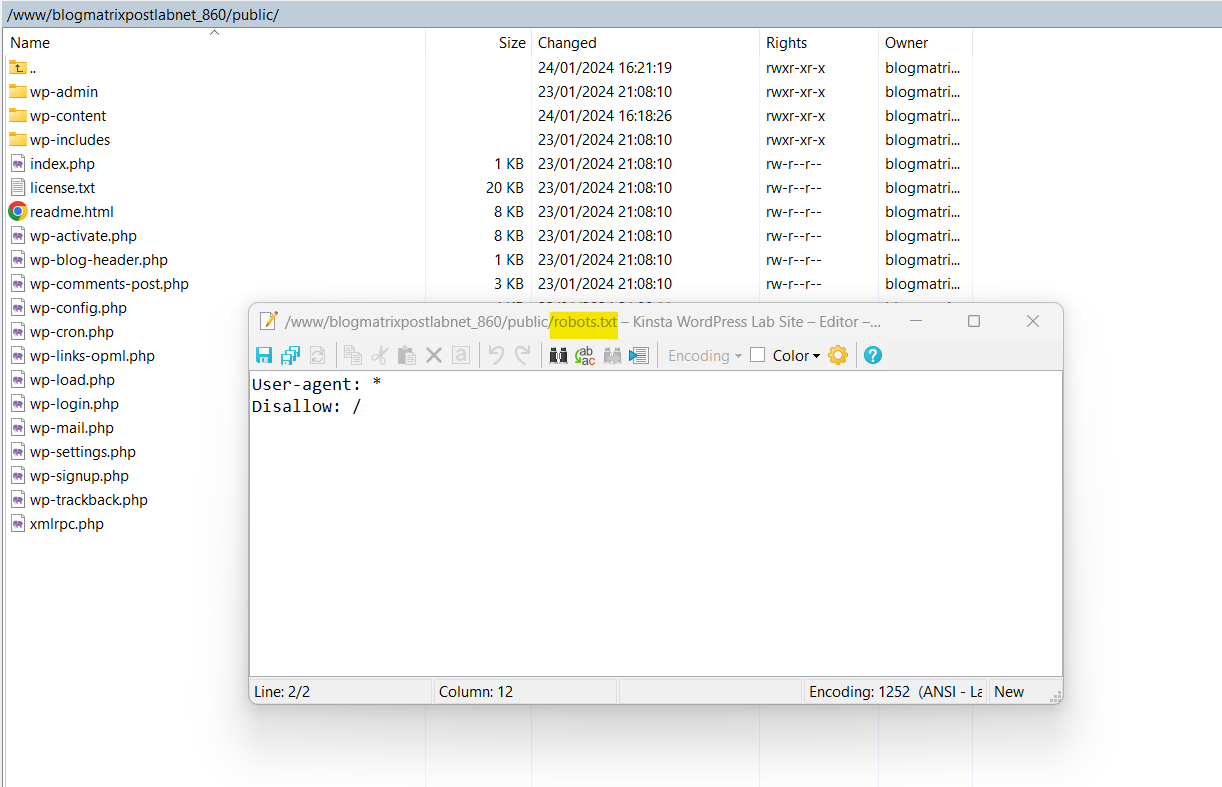
In my case because this is just a lab site for demonstration purpose, I don’t want this site be indexed by search engines and therefore telling the robots (crawler) to stay away from this site.
Links
The Most Important Things You Should Know About Kinsta
https://kinsta.com/knowledgebase/what-you-should-know/Kinsta: Building a better hosting service with Google Cloud
https://cloud.google.com/customers/kinstaHow to Use SFTP to Connect to Your WordPress Site
https://kinsta.com/knowledgebase/how-to-use-sftp/