Set up an NFS Server in Windows Server 2022
Introduction to the Network File System (NFS)
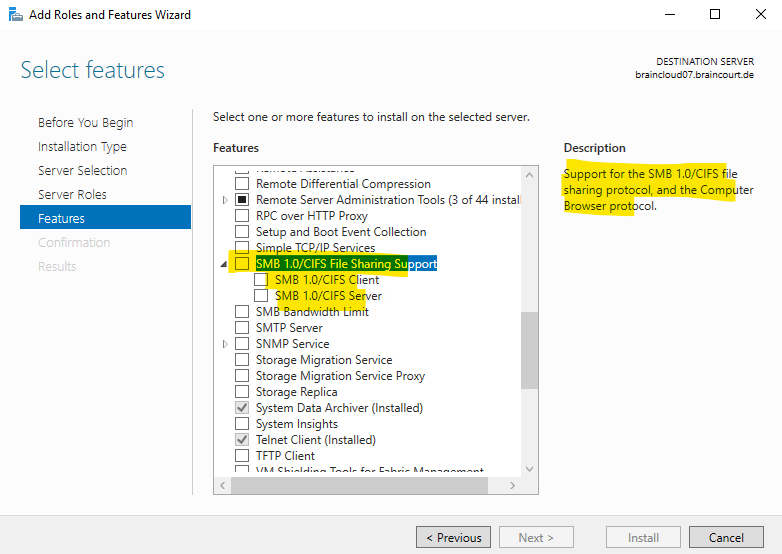
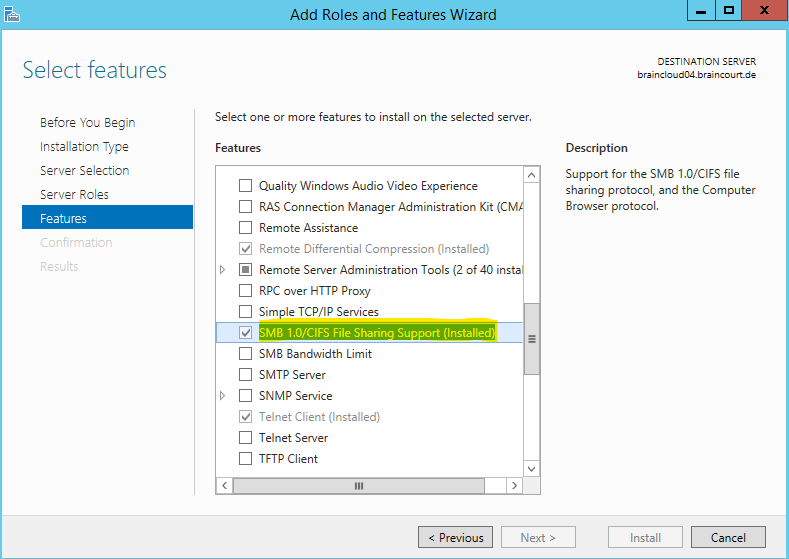
Introduction to CIFS (Common Internet File System) and SMB (Server Message Block)
Running NFS behind a Firwall
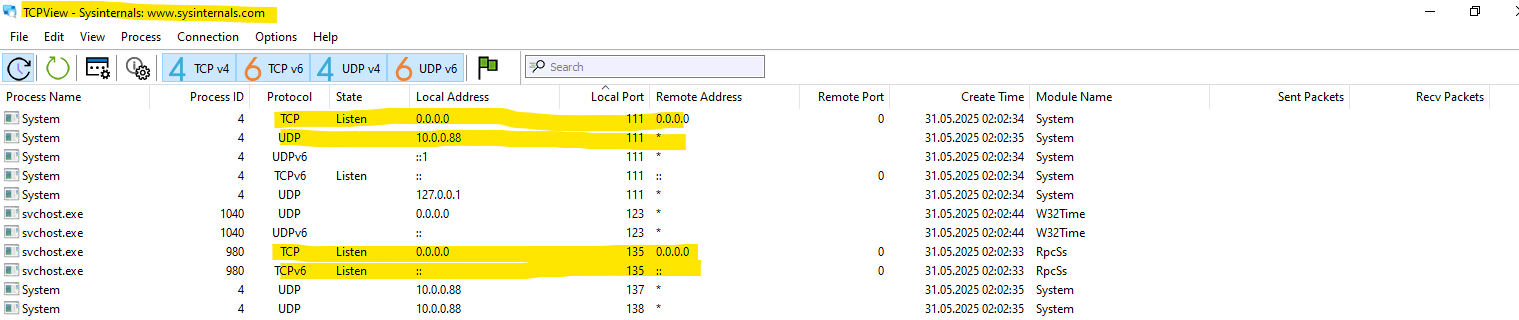
Windows RPC (DCOM, RPC services) primarily uses TCP 135 (Endpoint Mapper/Portmapper) for service registration and dynamic port allocation.
This is not NFS-specific but a general Windows RPC service.
When you install the Server for NFS role on Windows Server (e.g., via Services for NFS feature), it does add an NFS-specific RPC Portmapper running on the traditional TCP/UDP 111 port.
This is because the NFS server in Windows must mimic UNIX-style NFS behavior for clients to function properly.
Therefore Windows NFS Server will start a separate Portmapper on TCP/UDP 111, just like in Linux/UNIX.
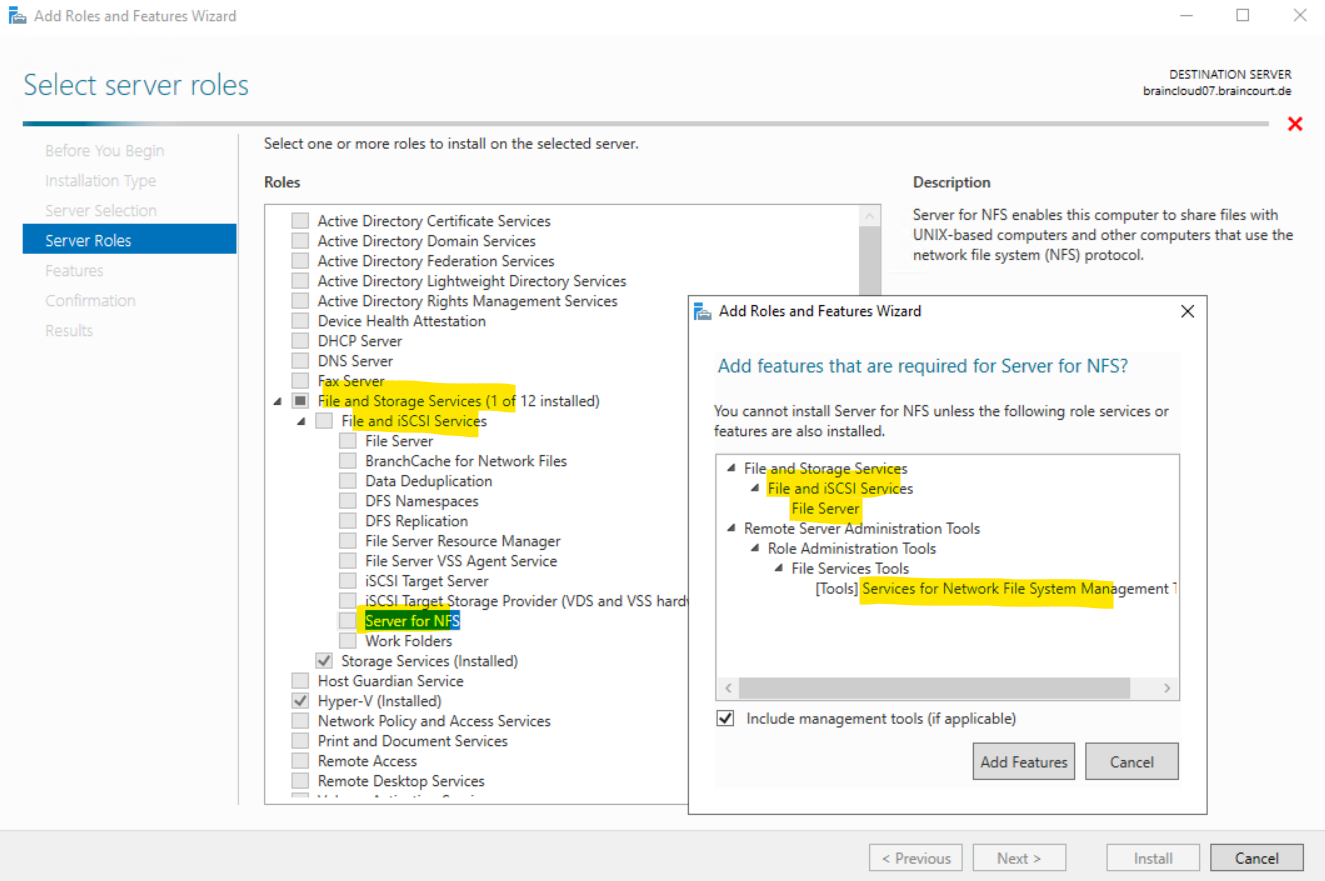
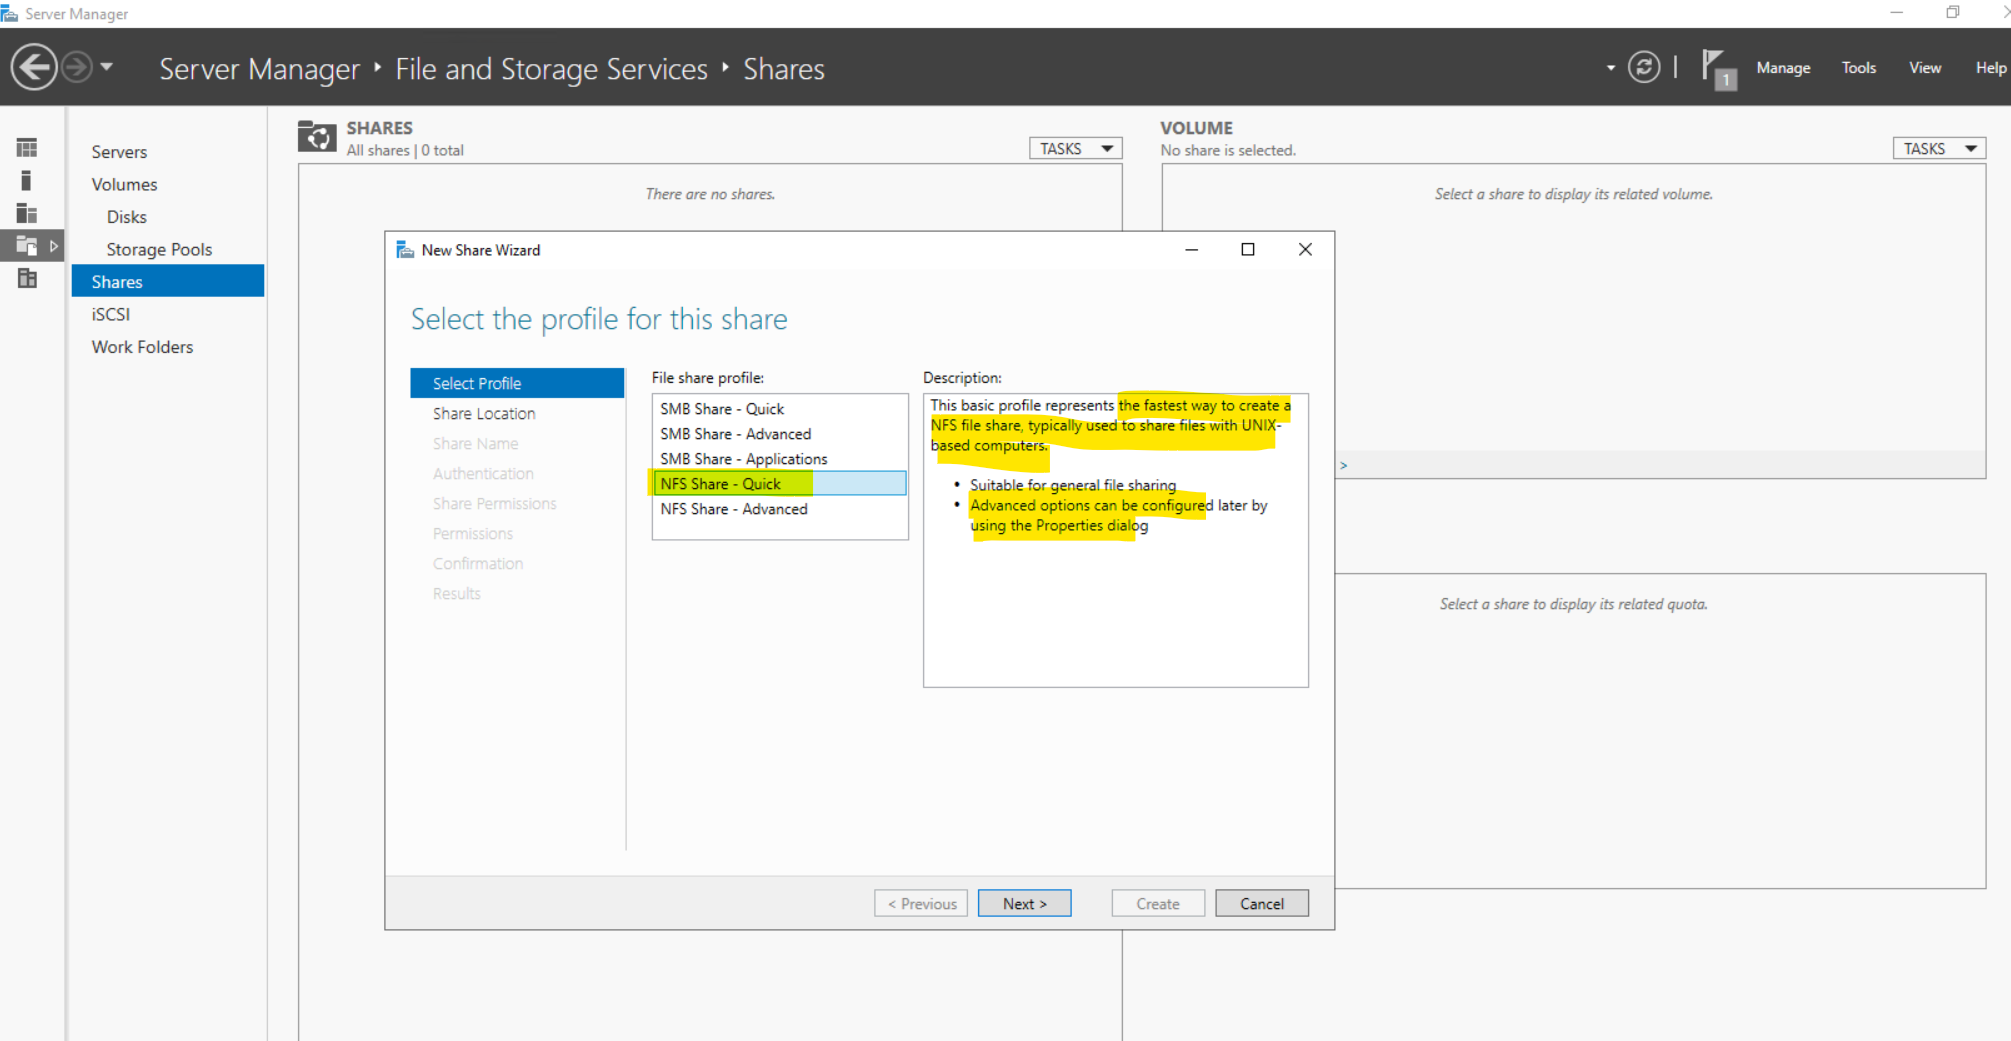
Install and set up Server for NFS
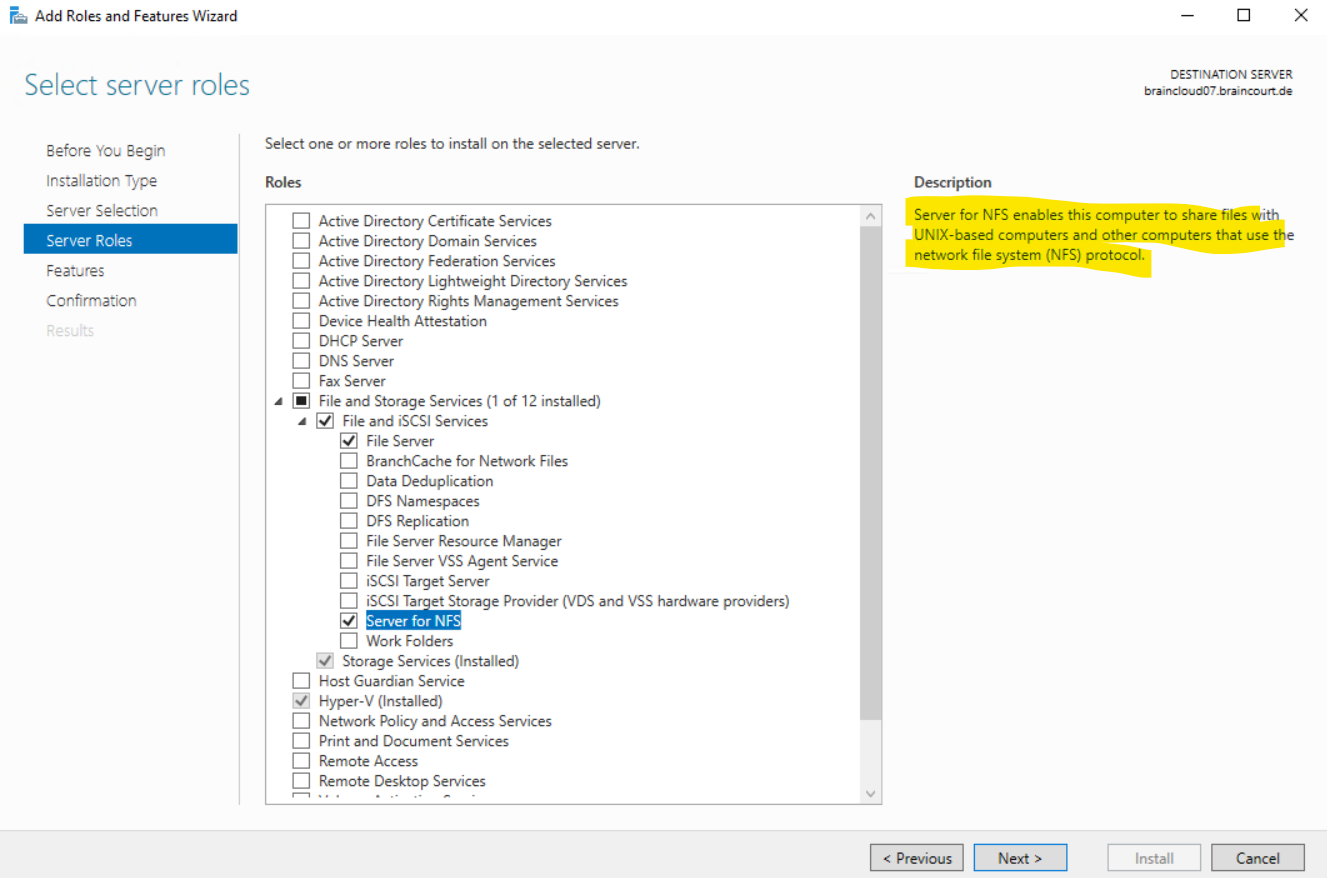
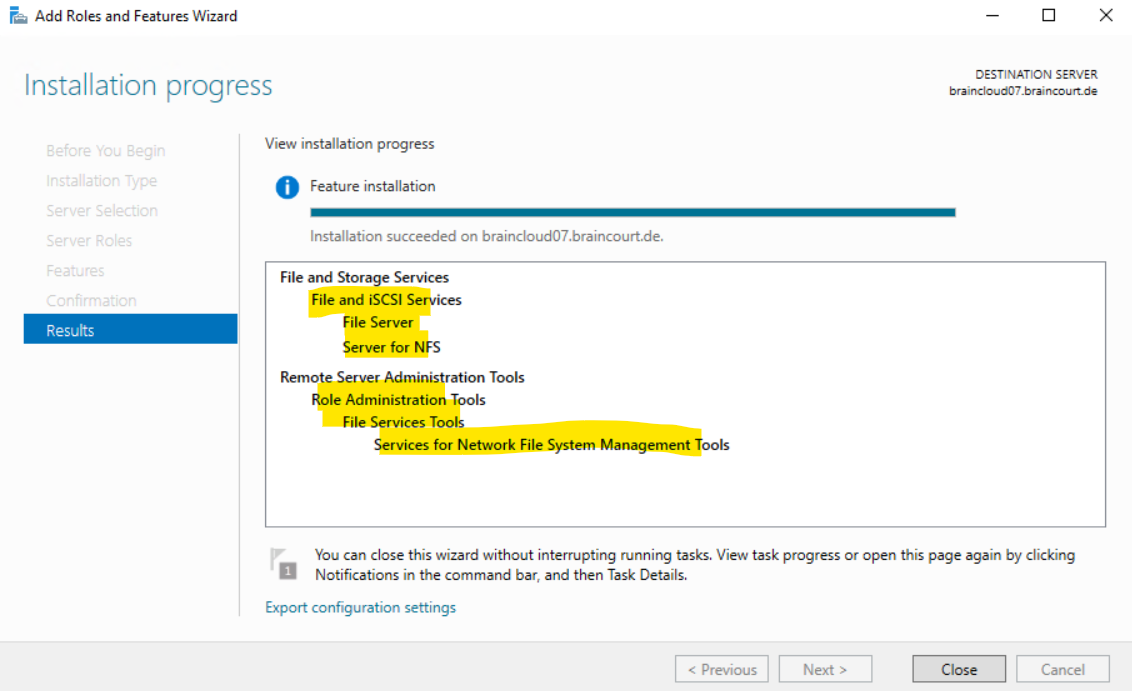
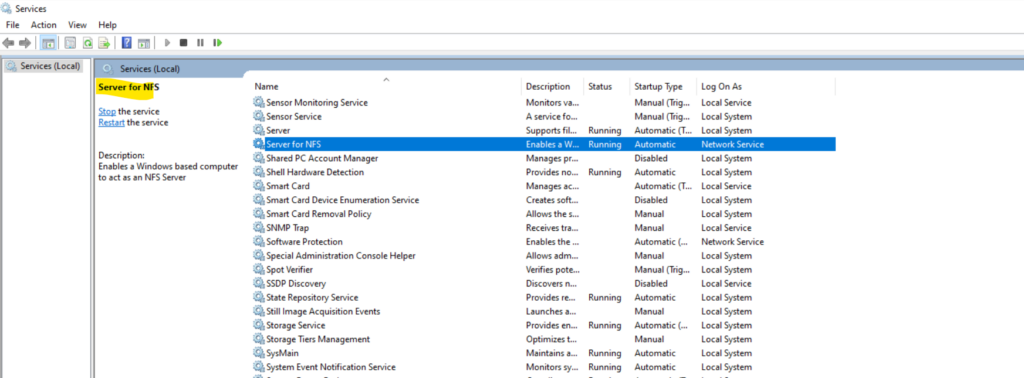
Using PowerShell to install Server for NFS
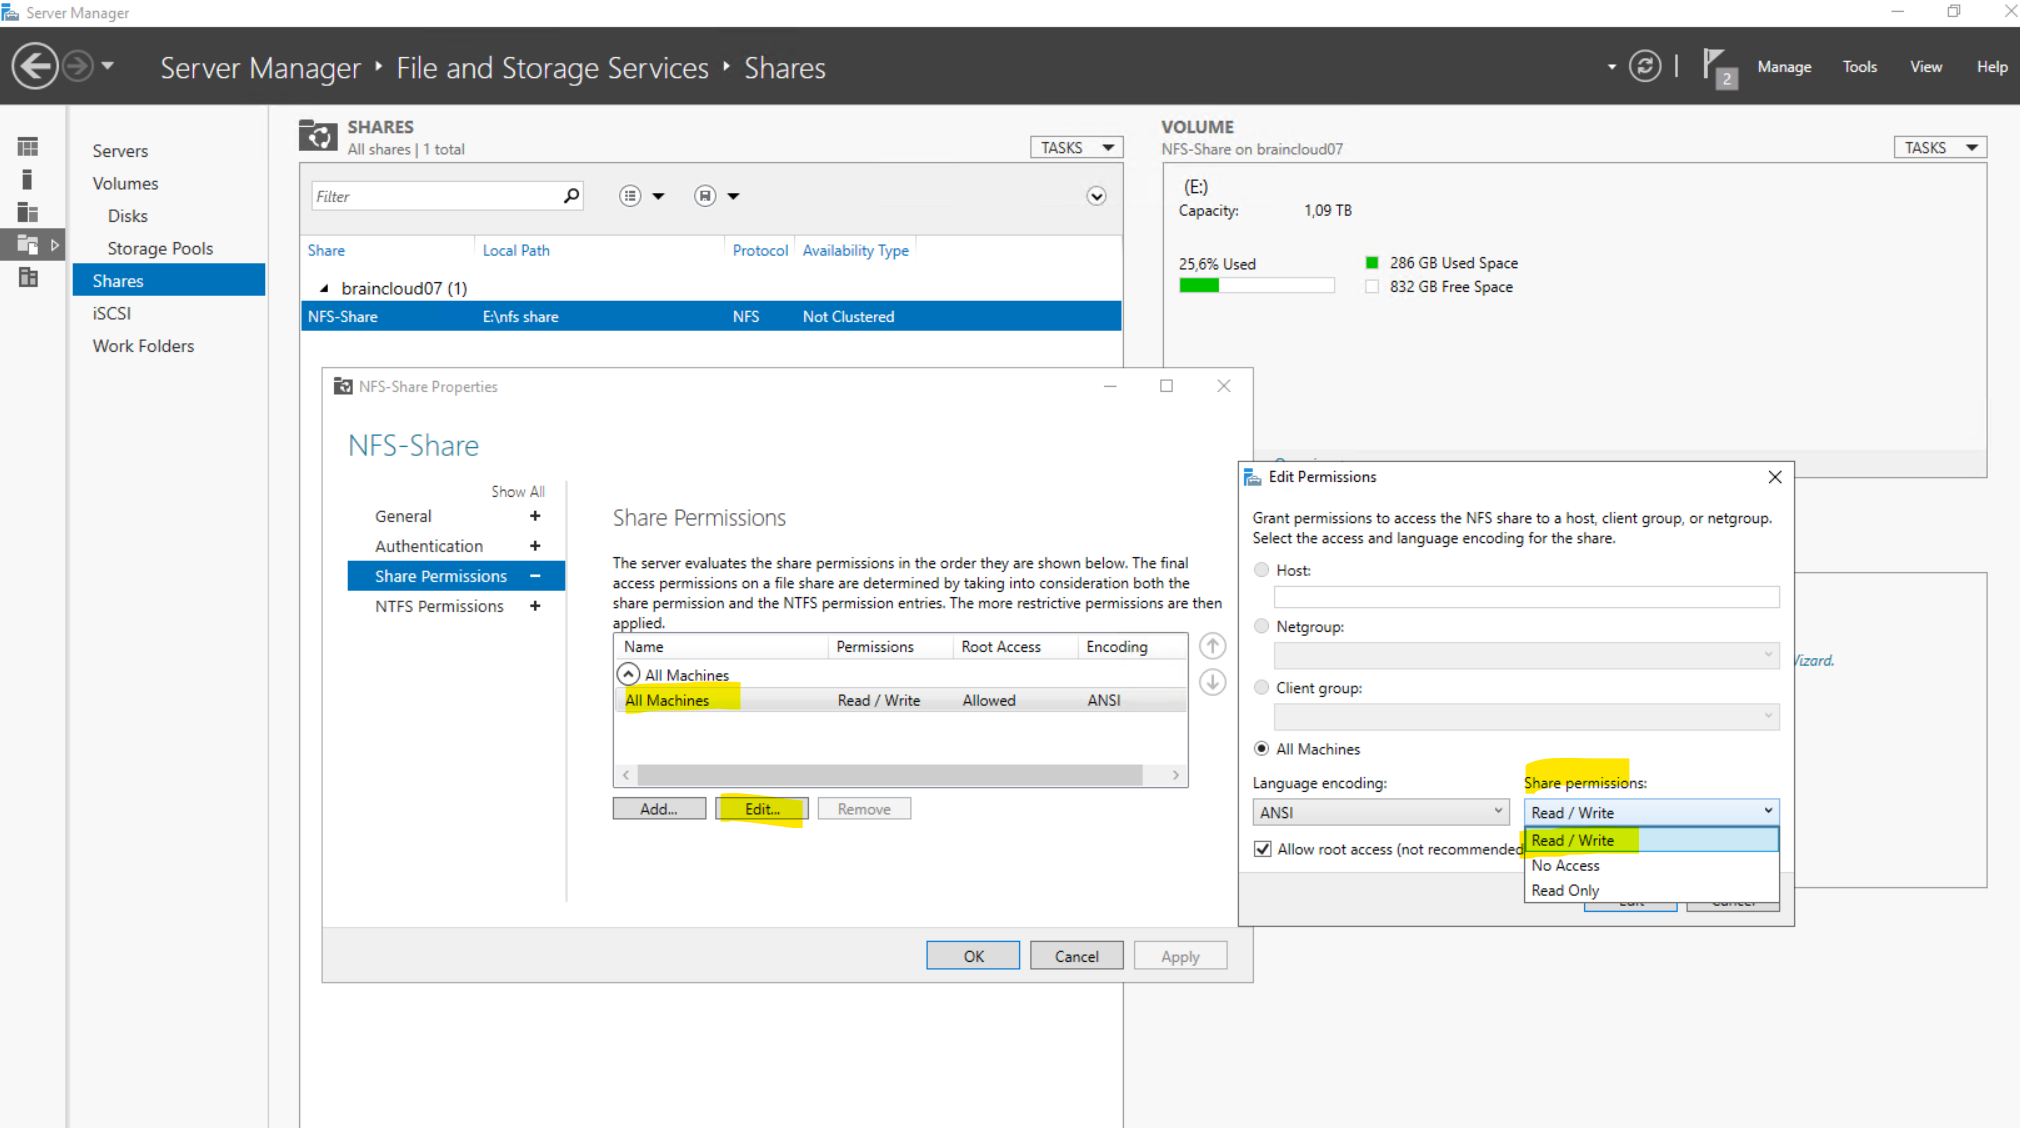
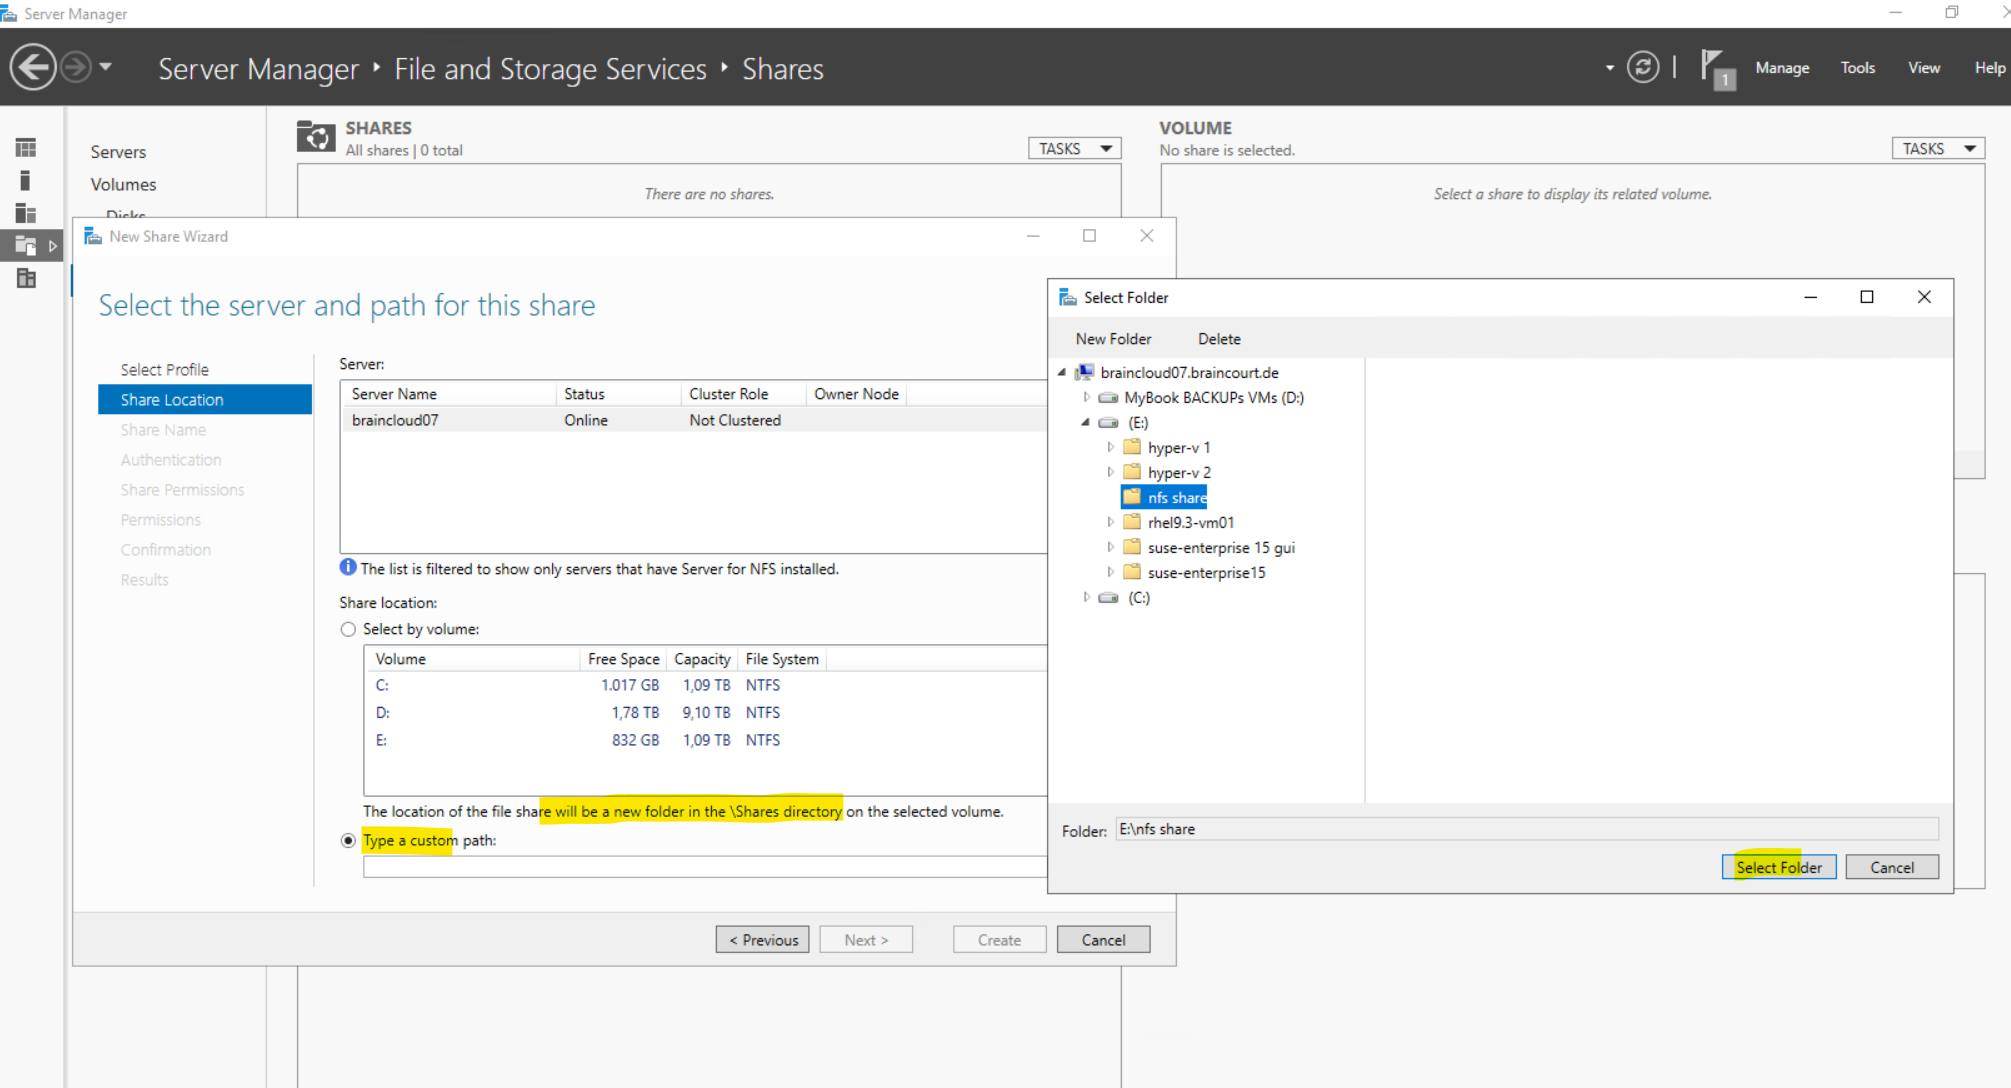
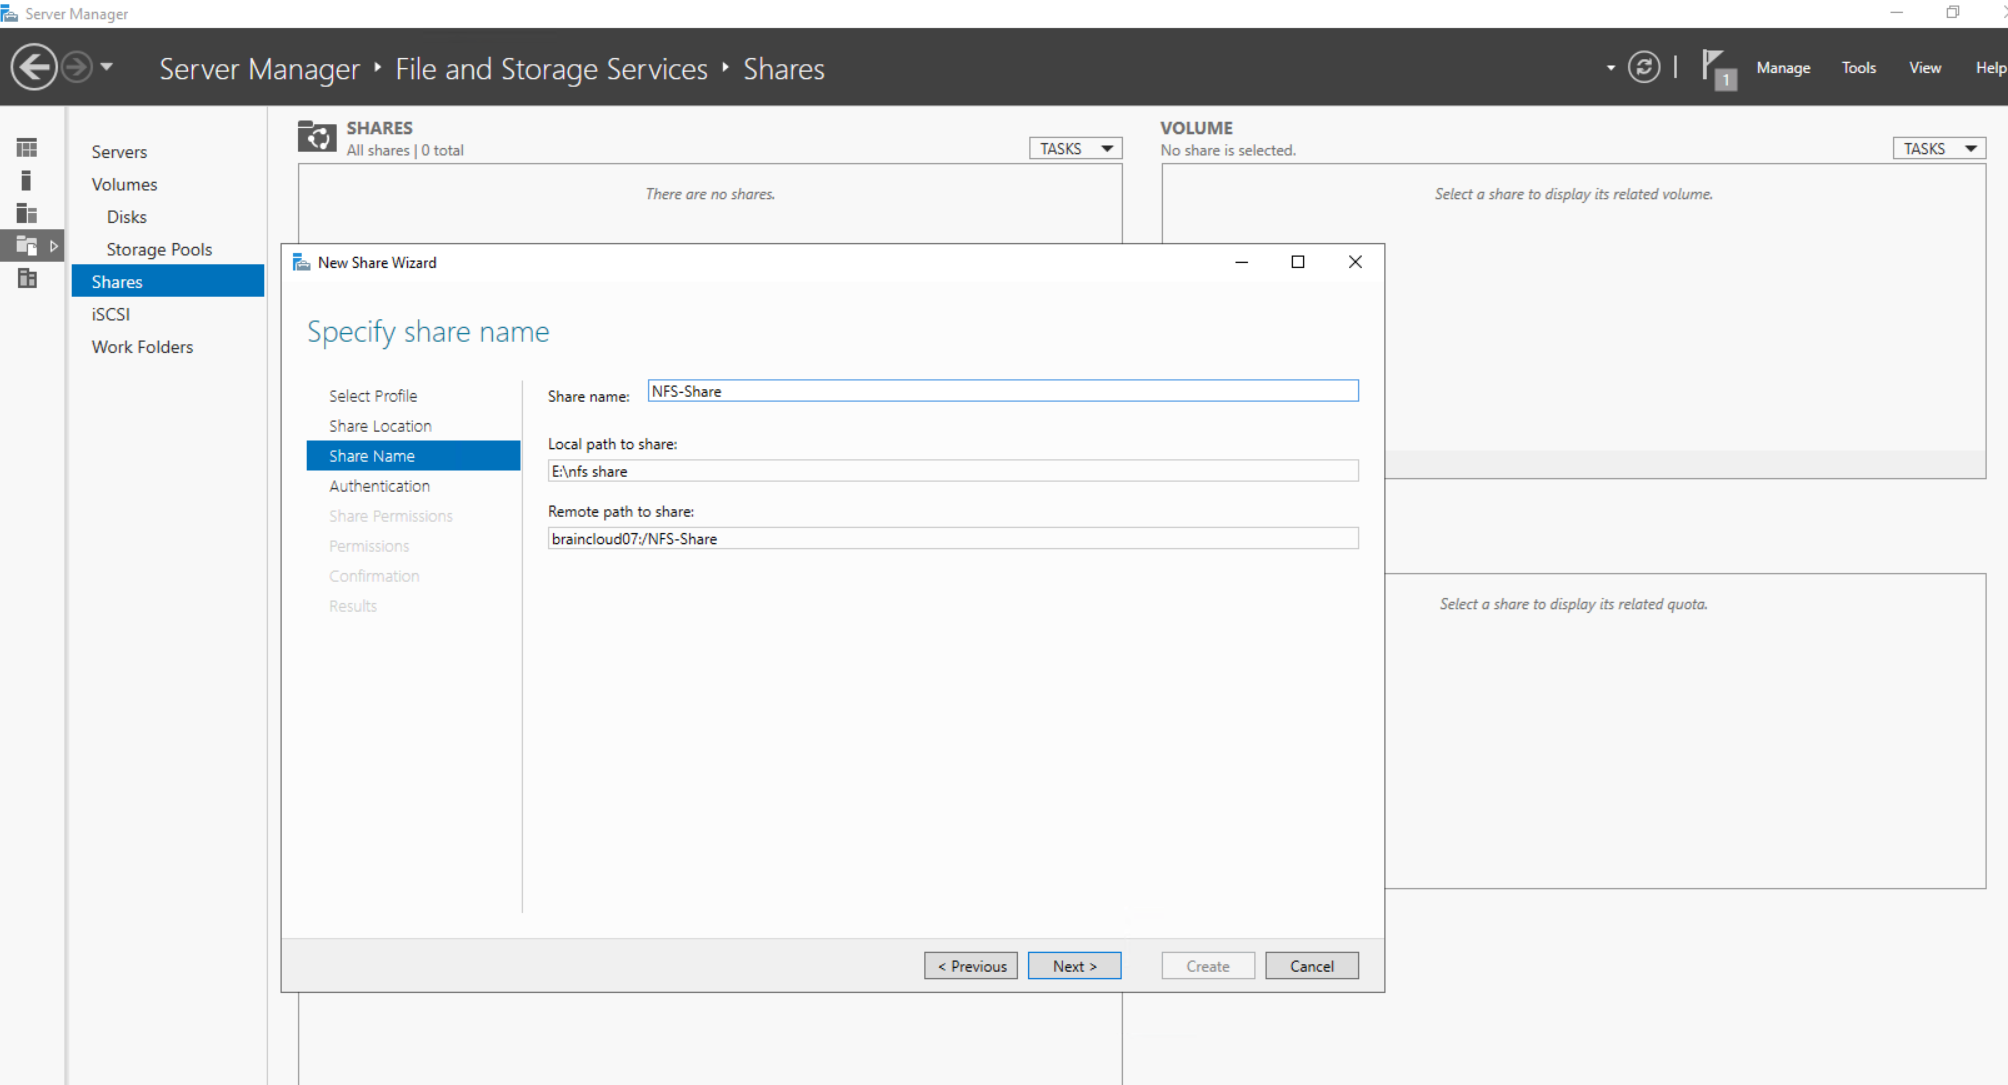
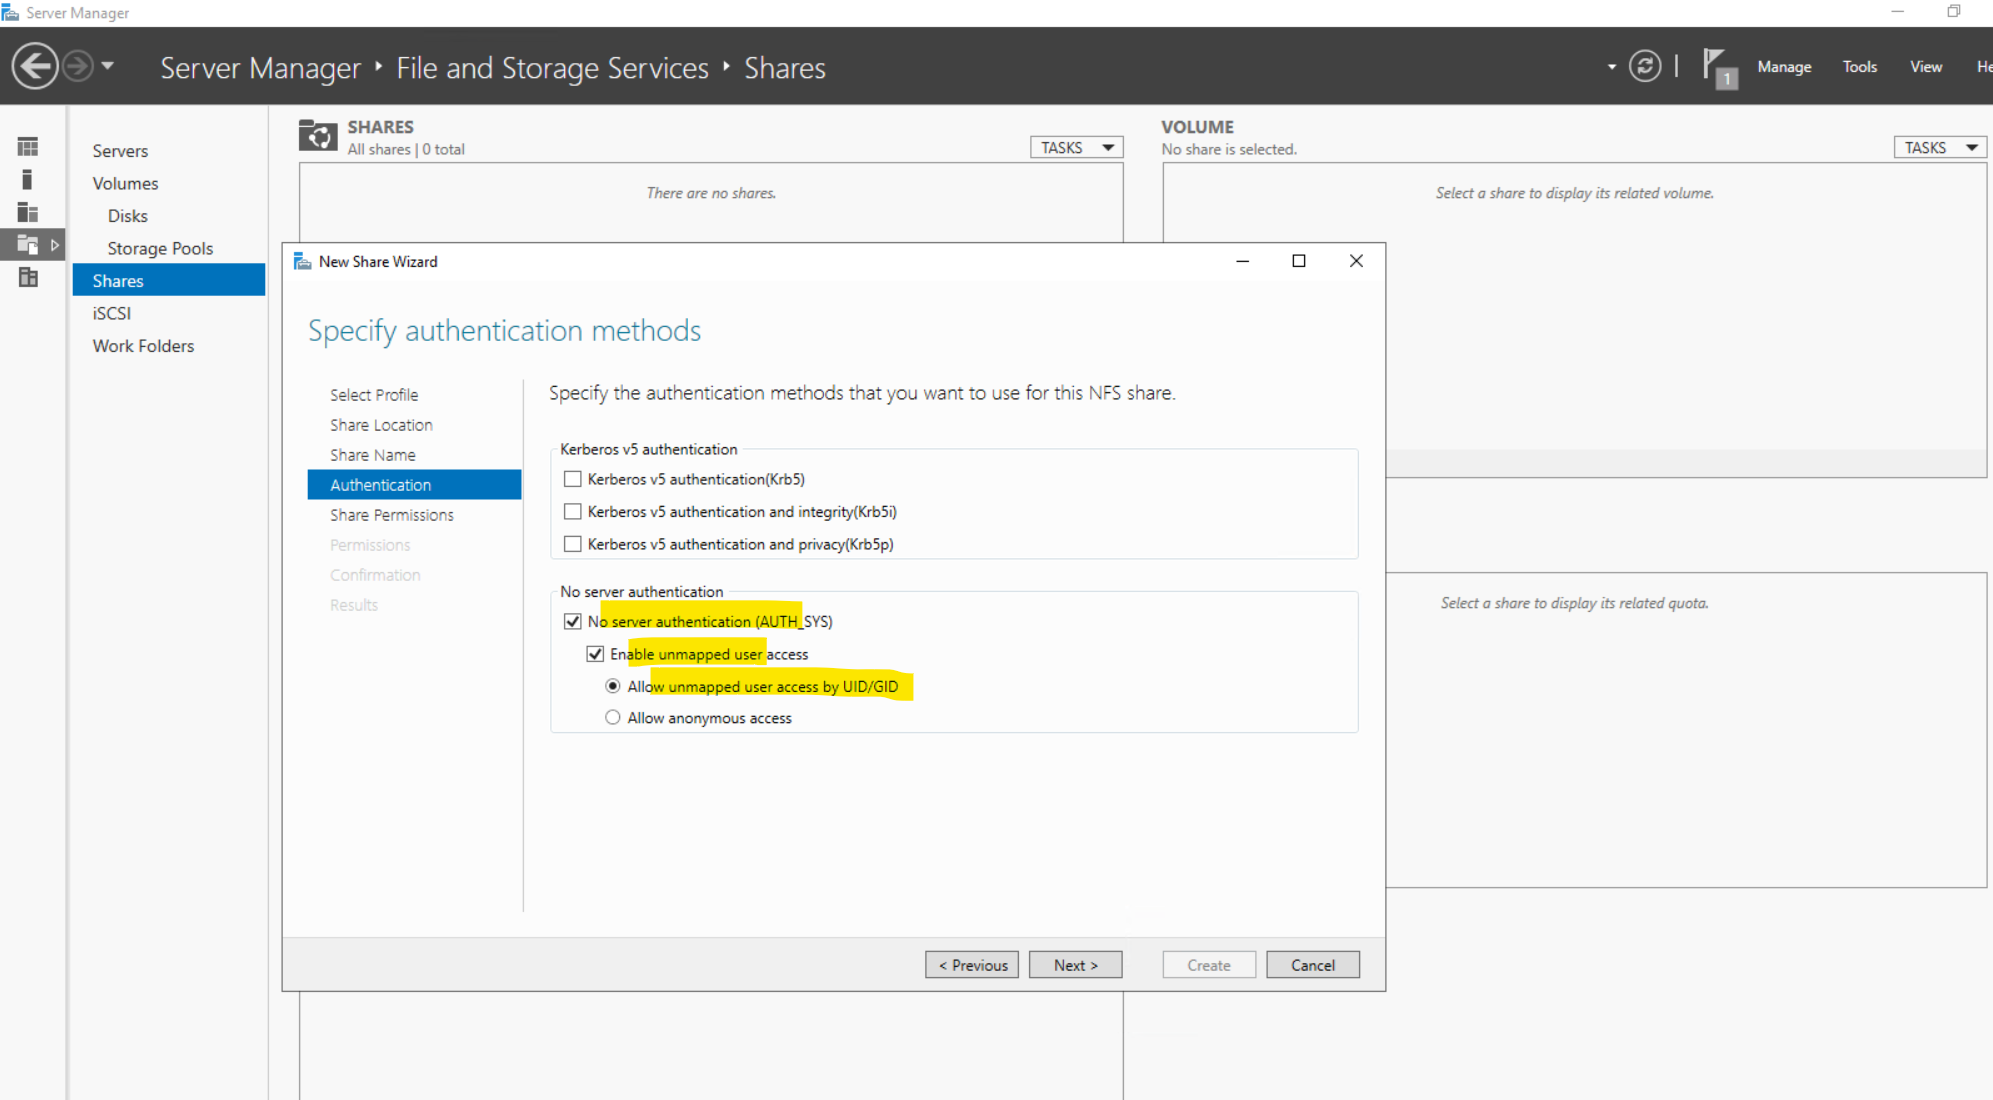
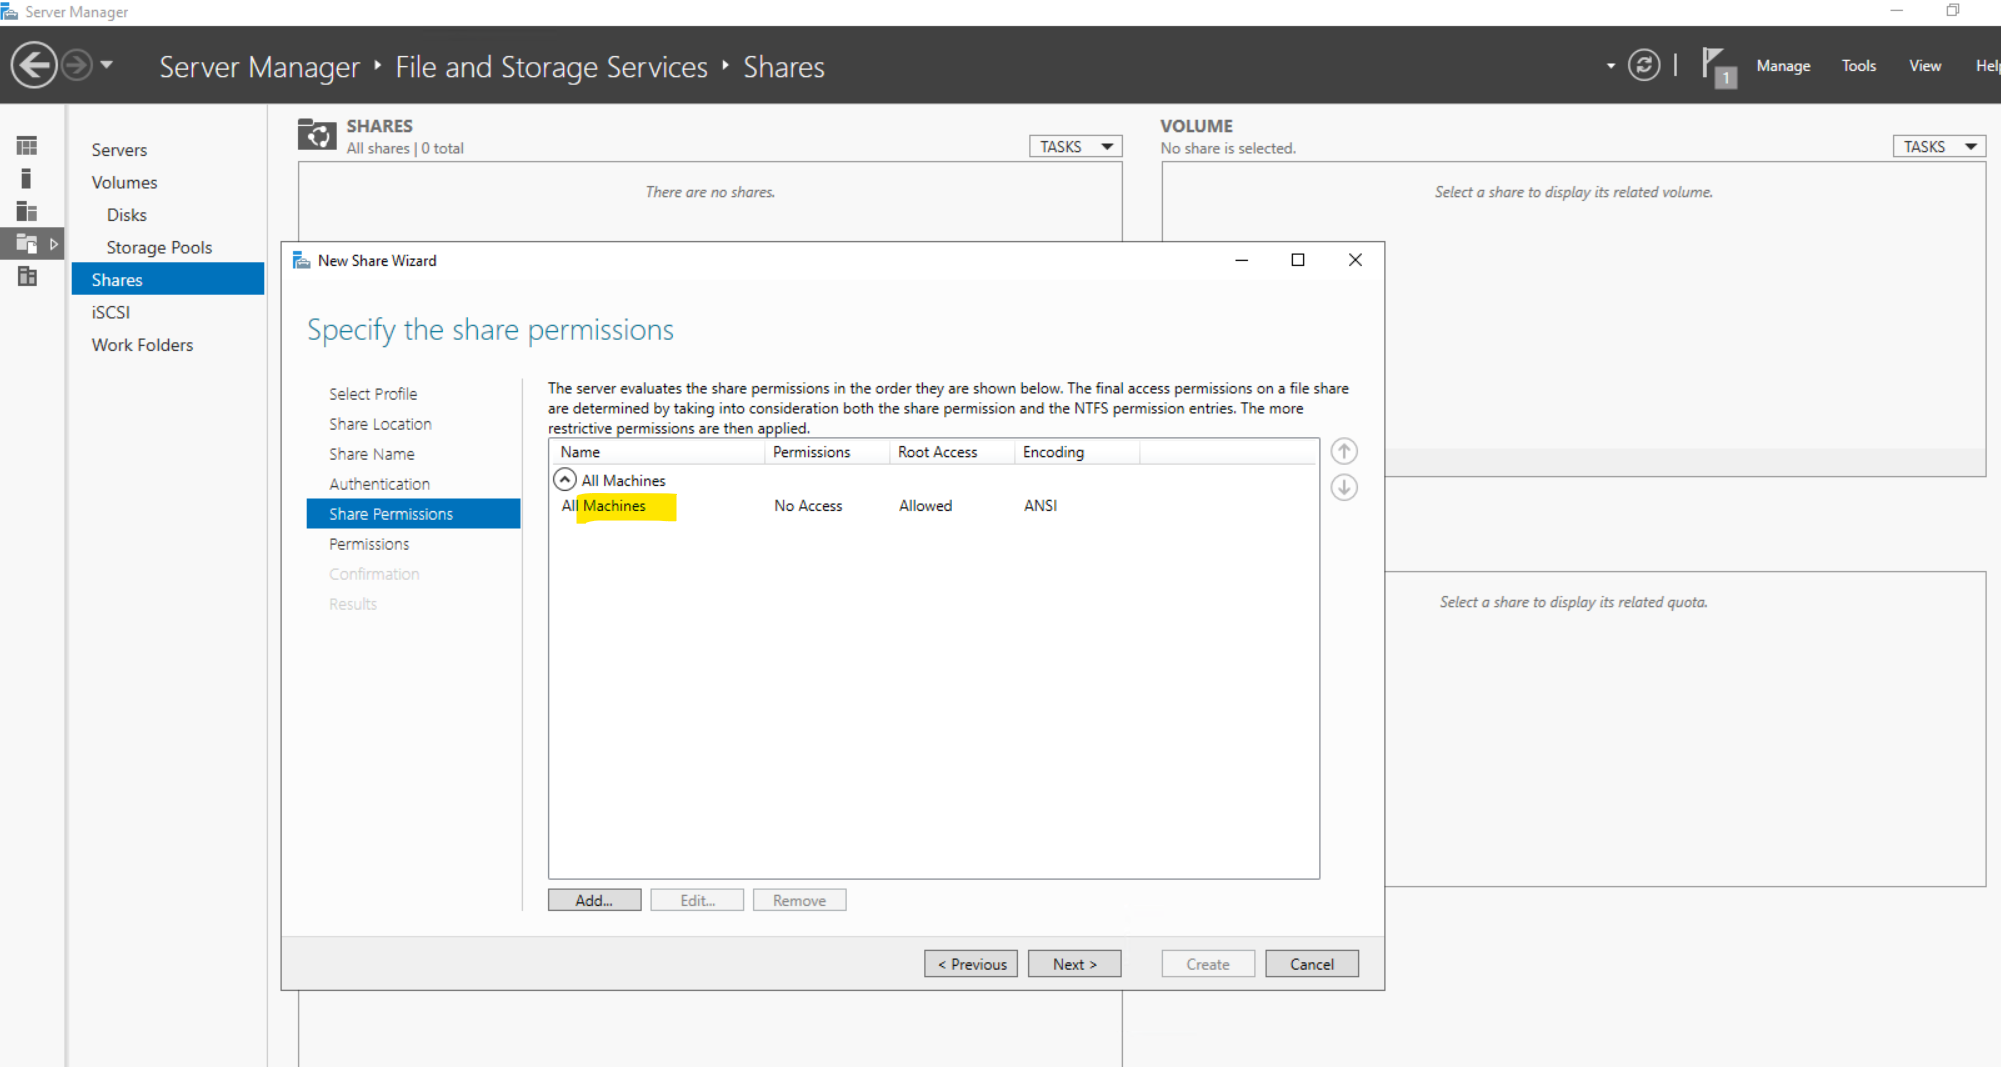
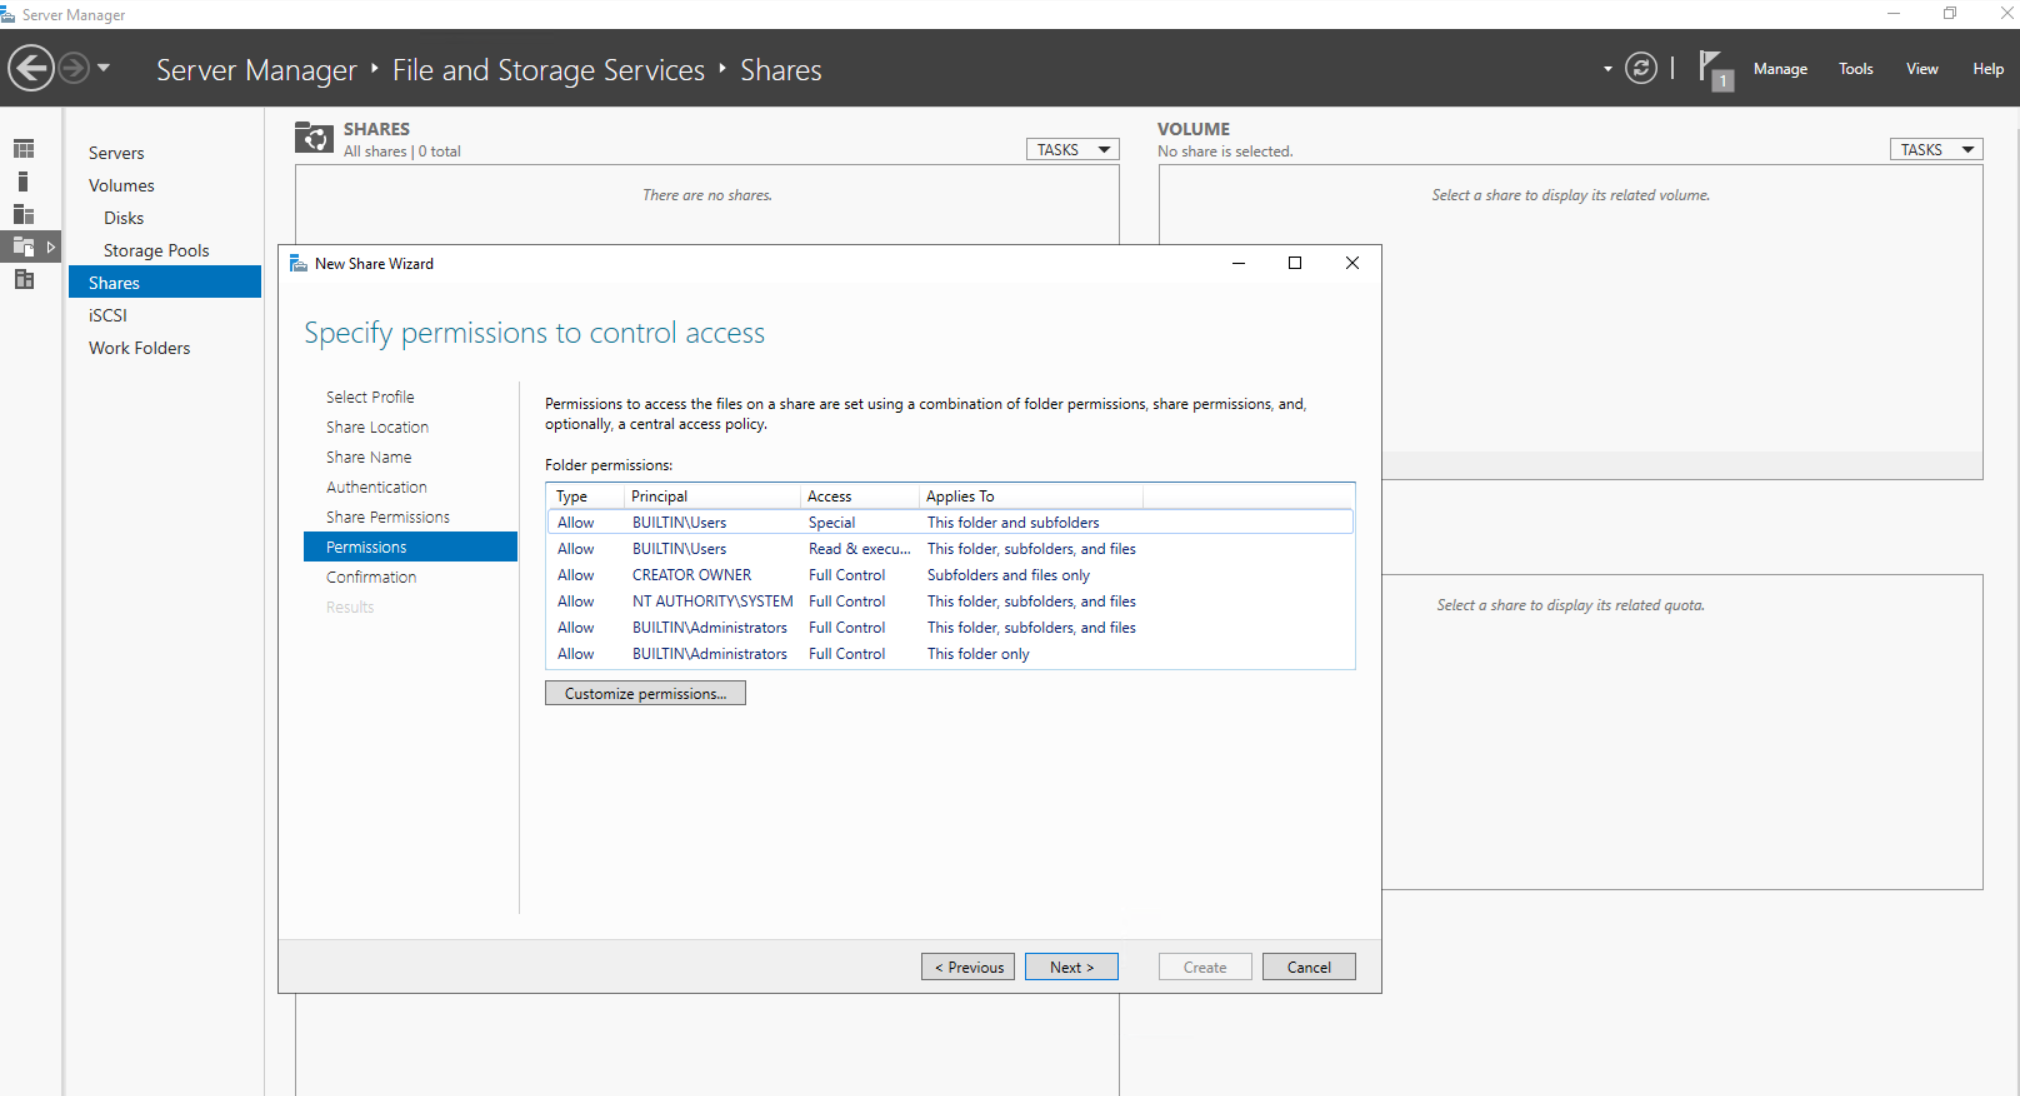
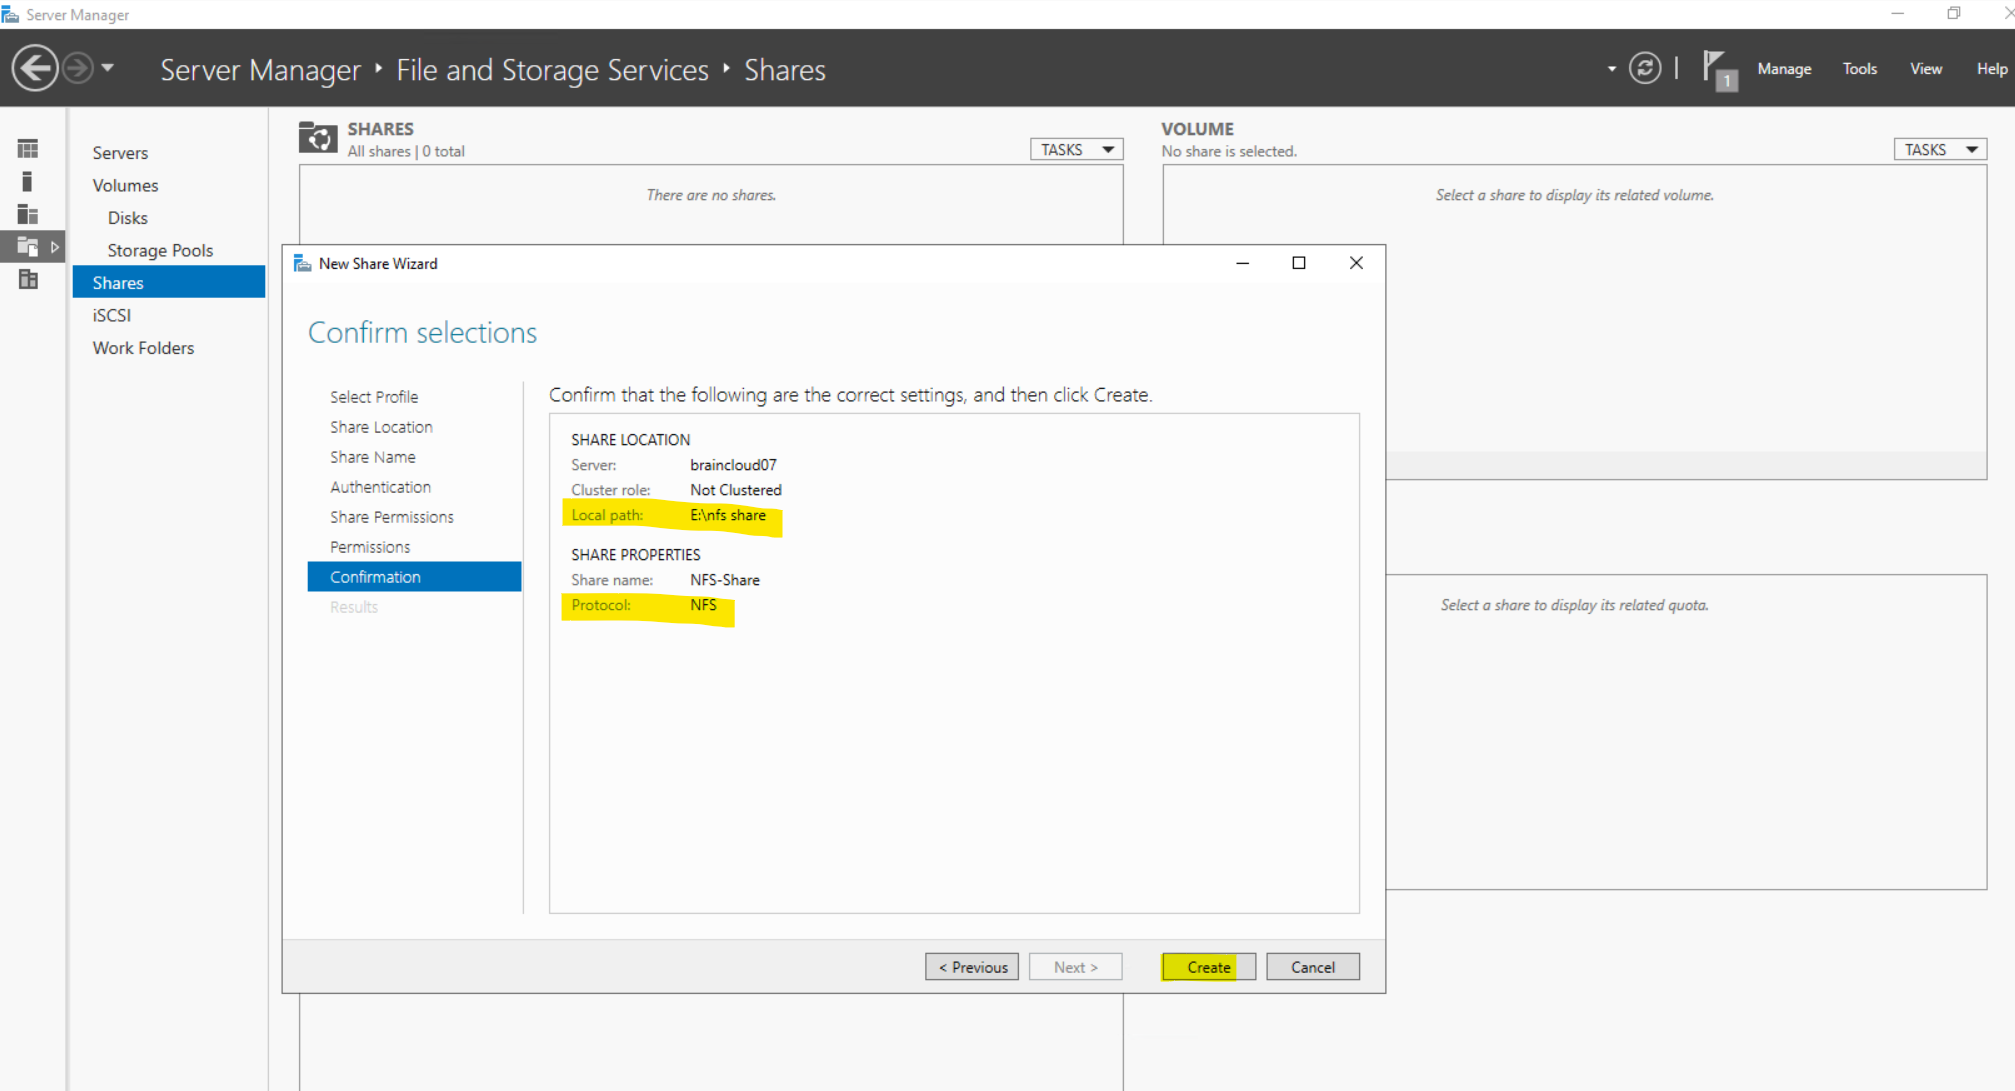
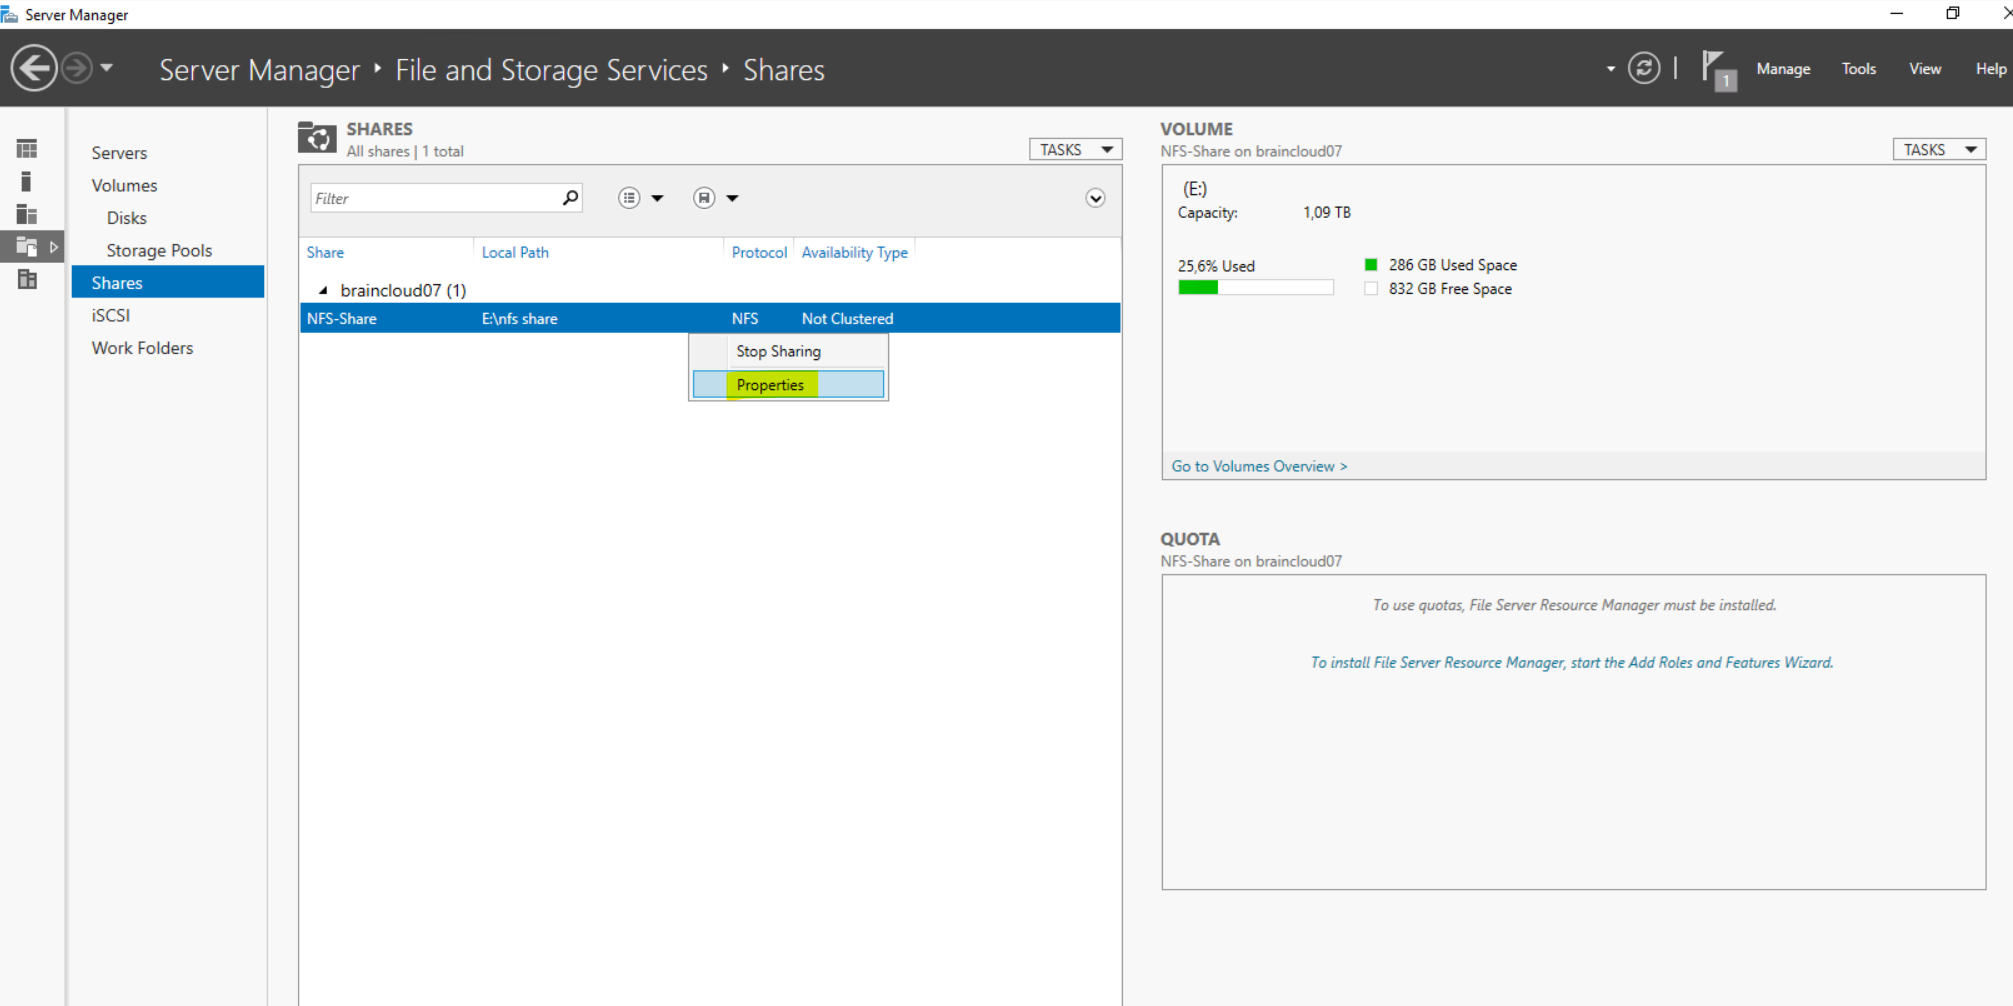
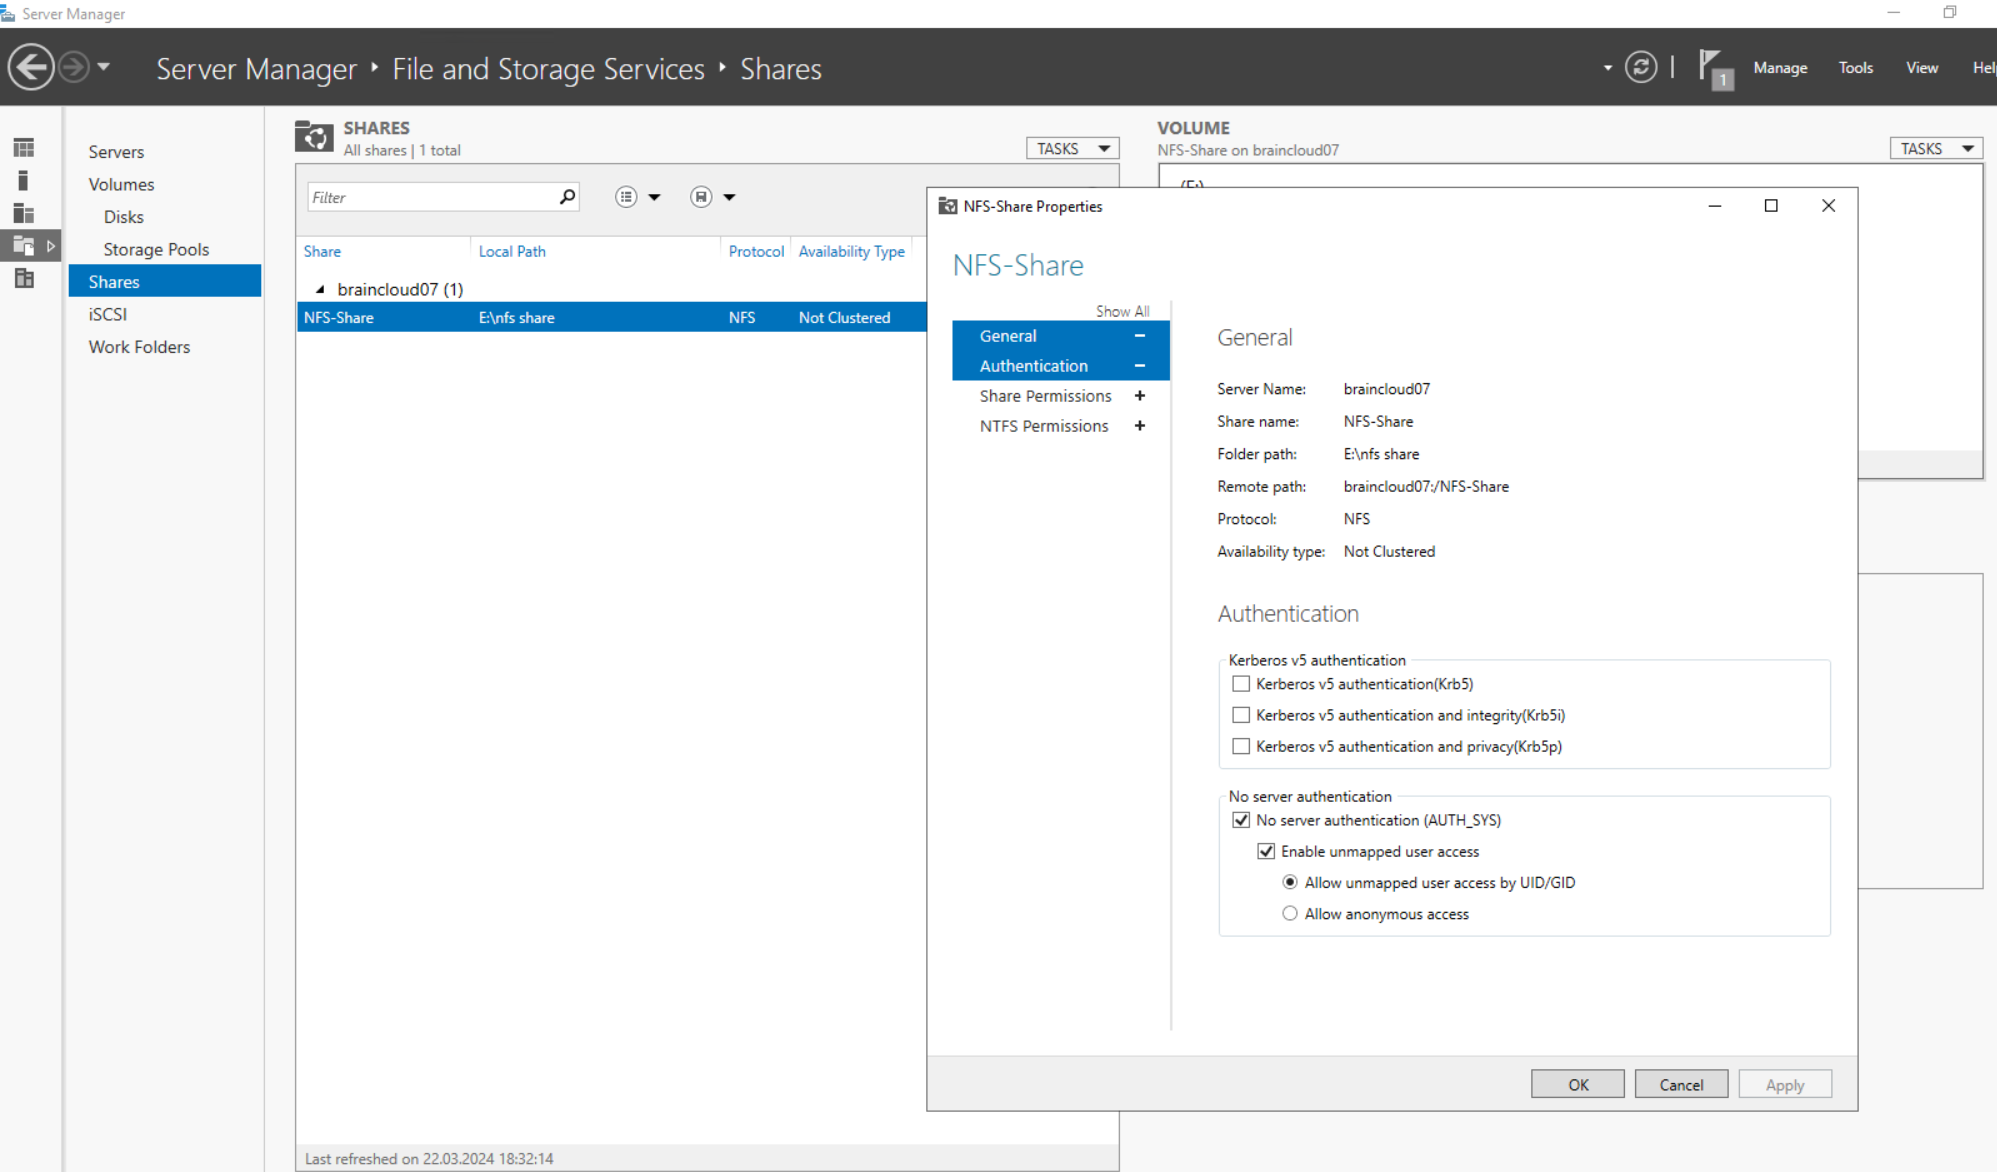
Add new Shares
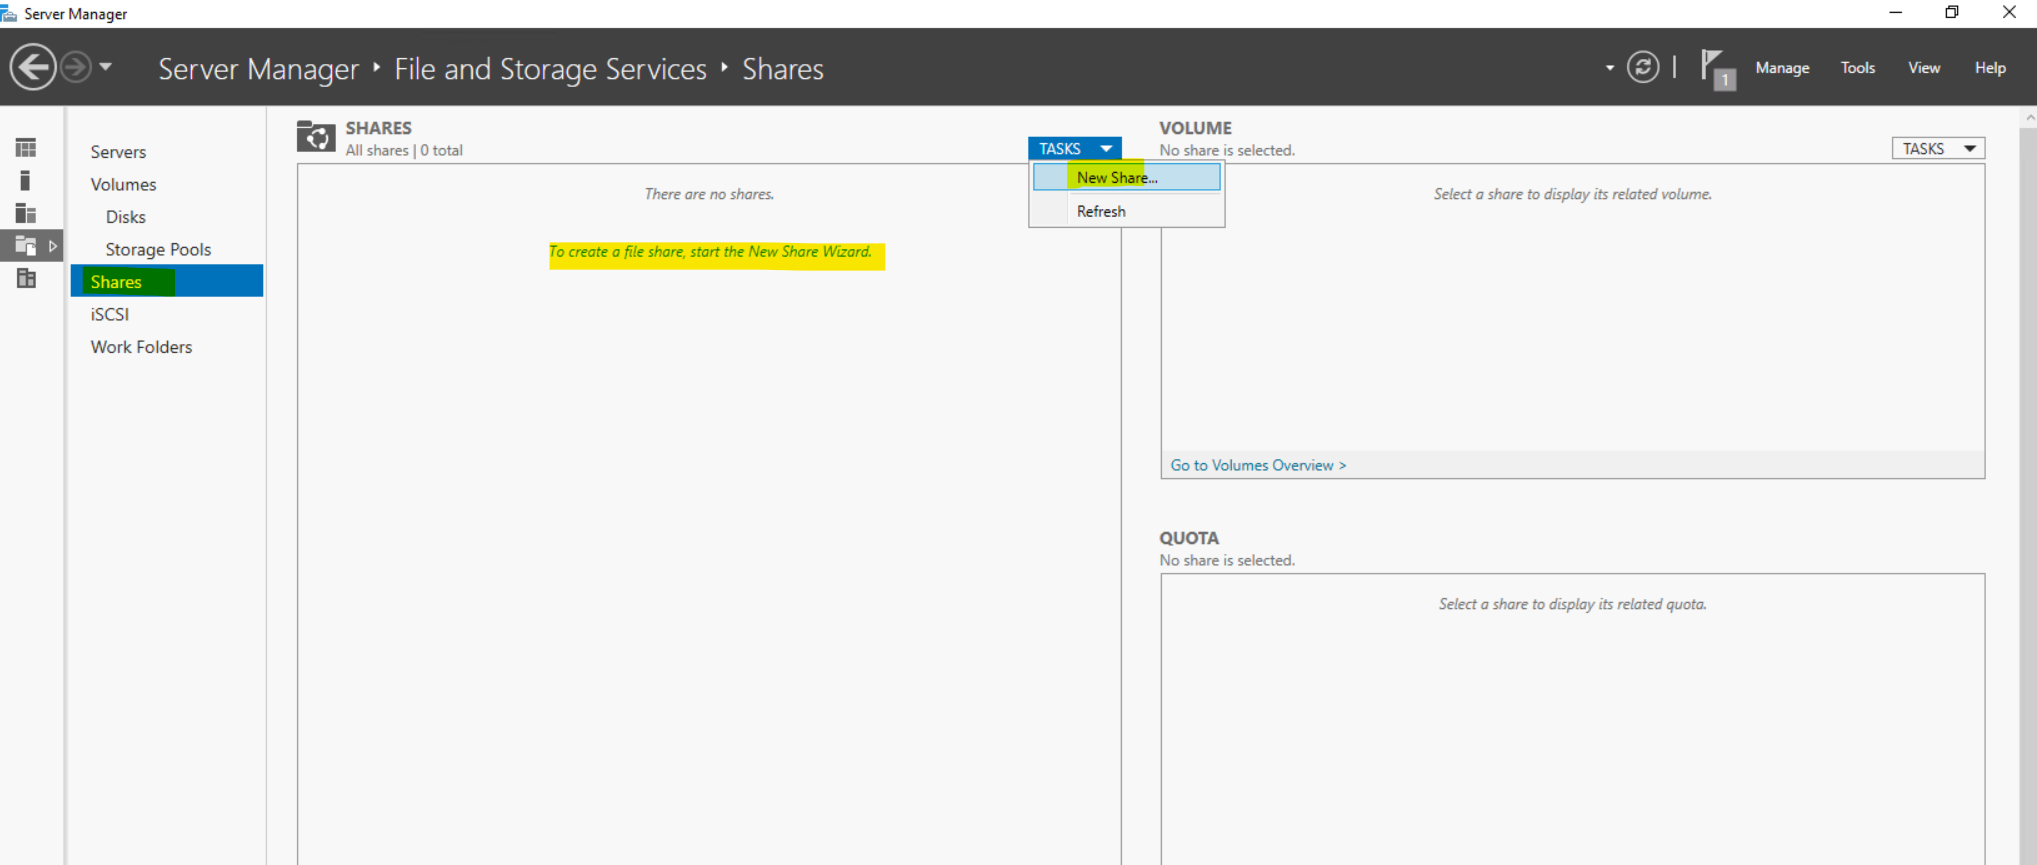

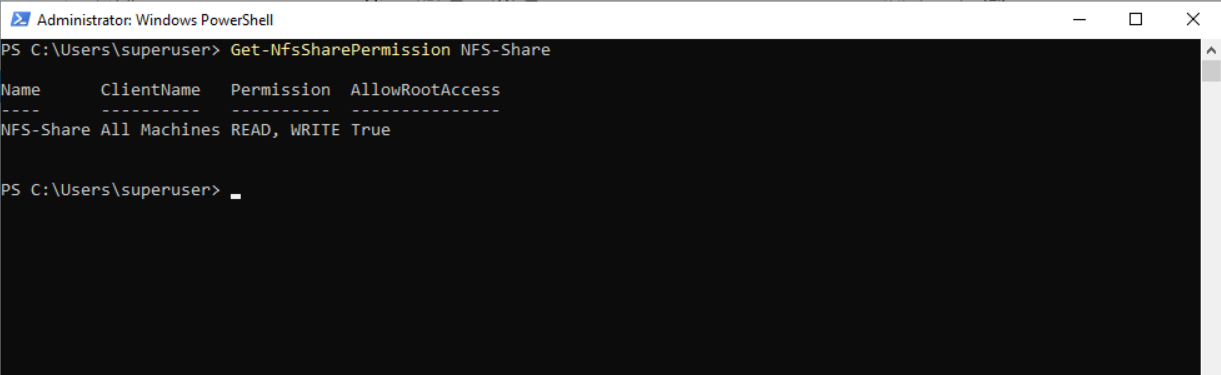
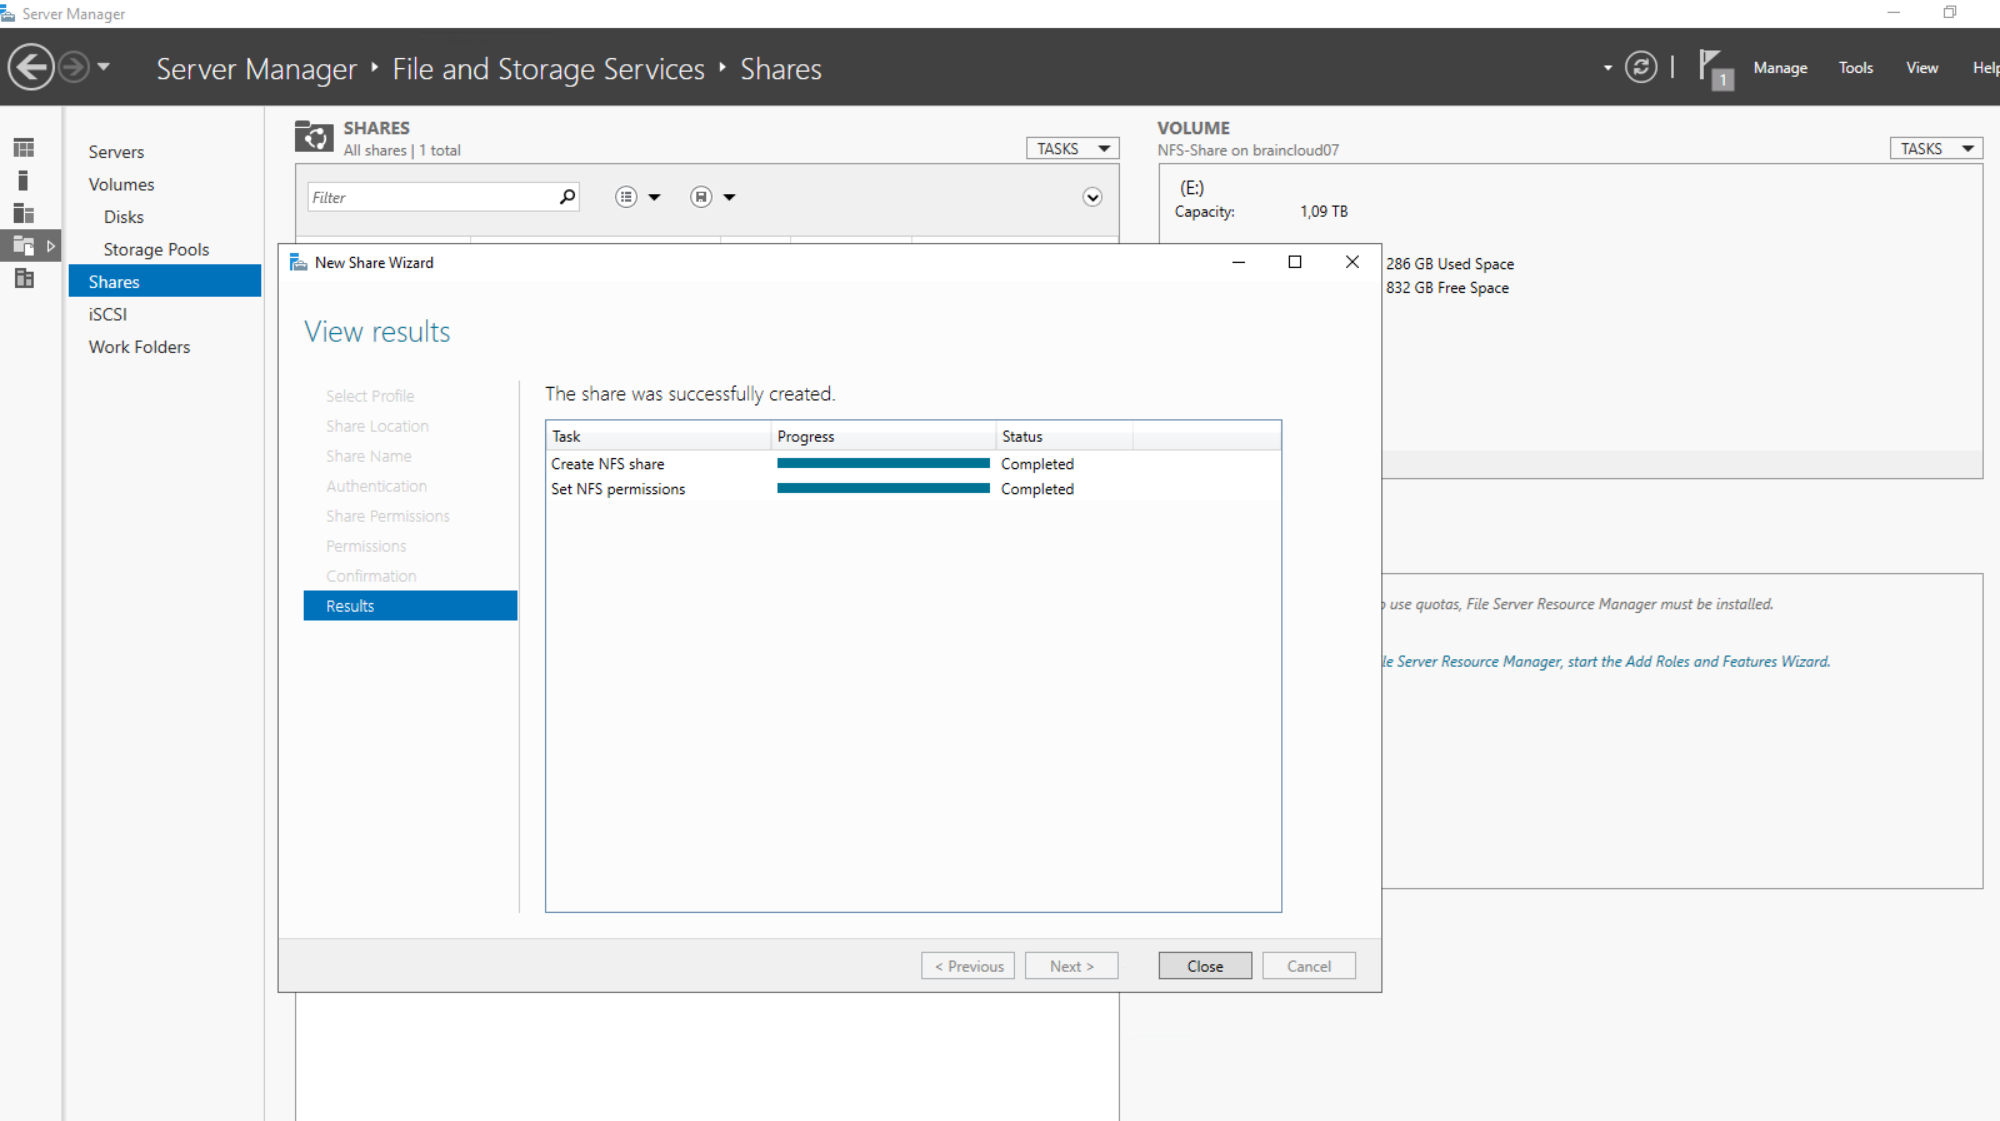

Using PowerShell to add new Shares
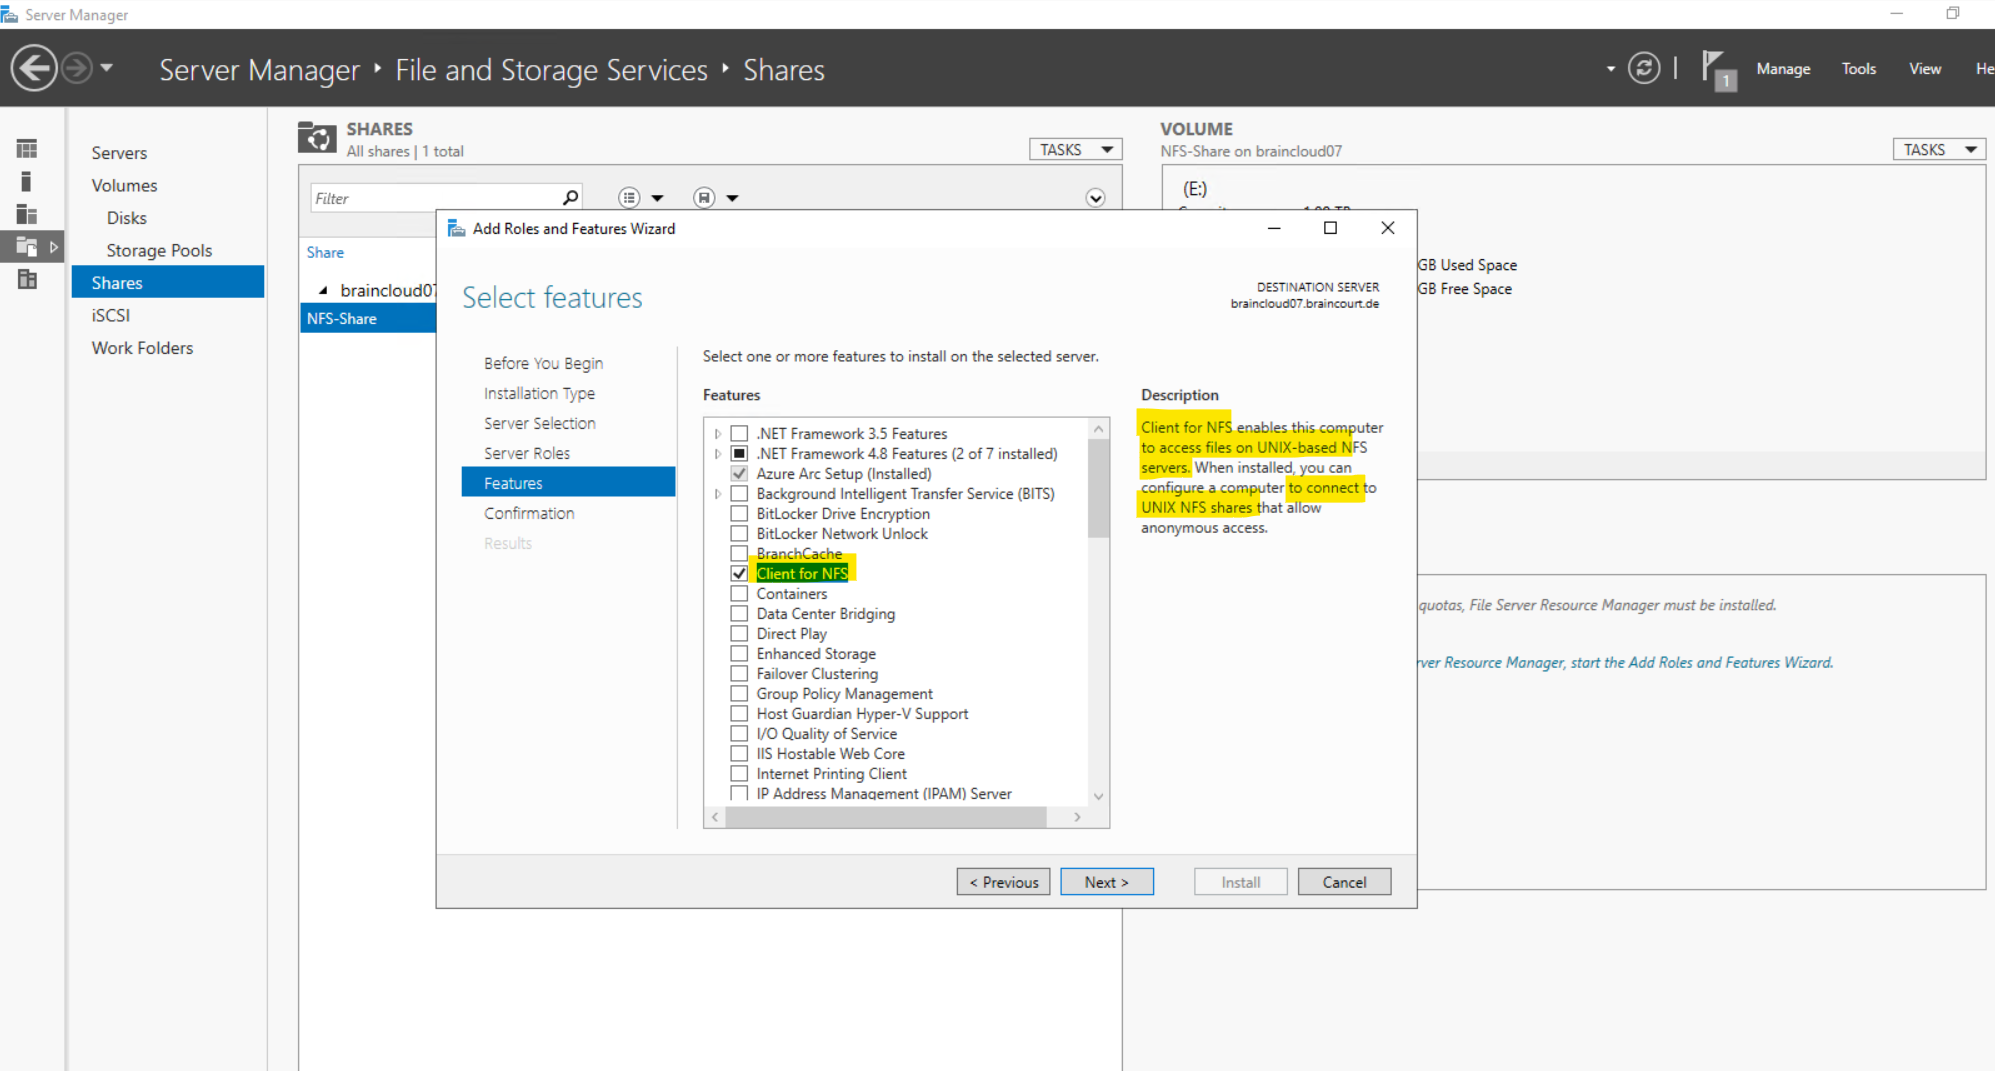
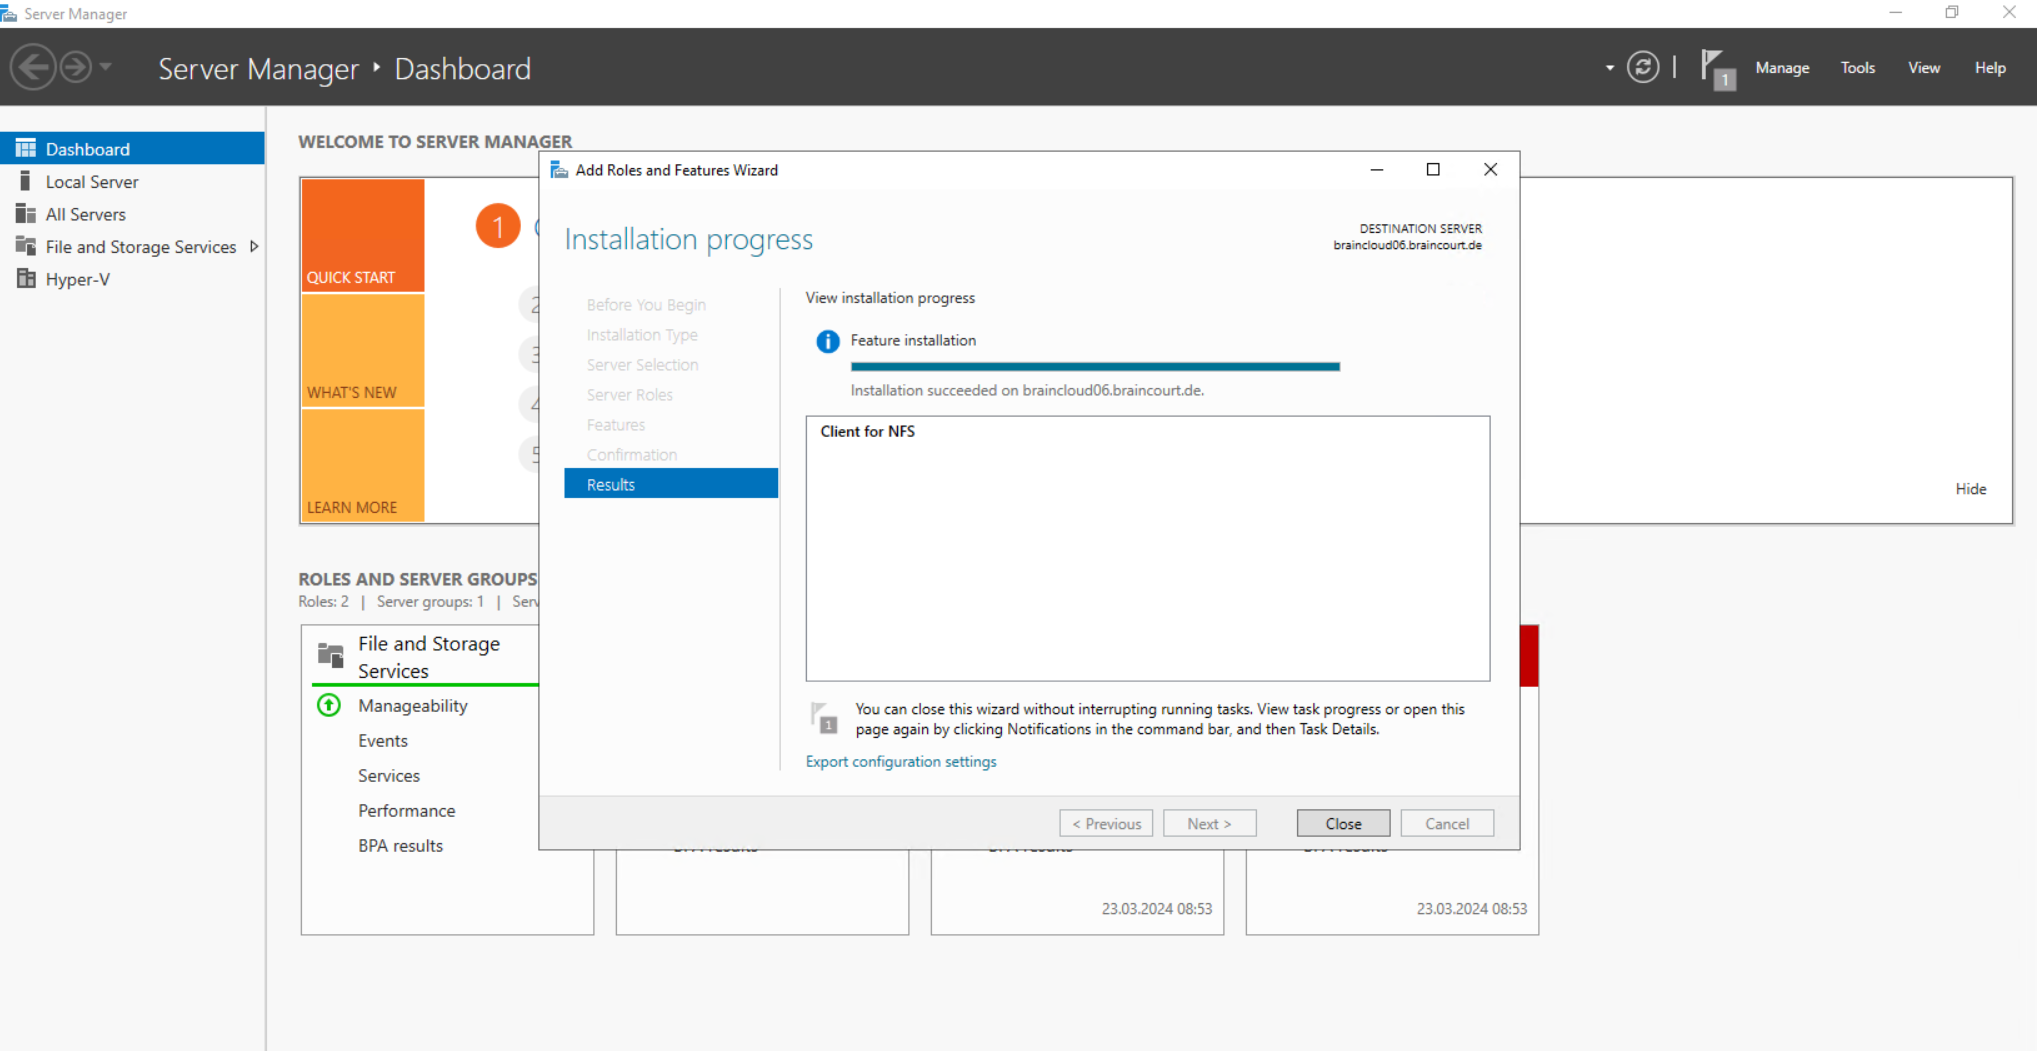
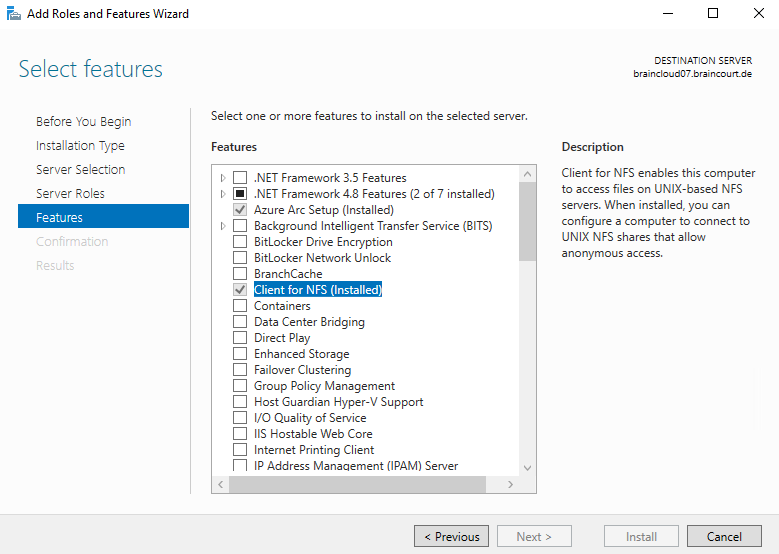
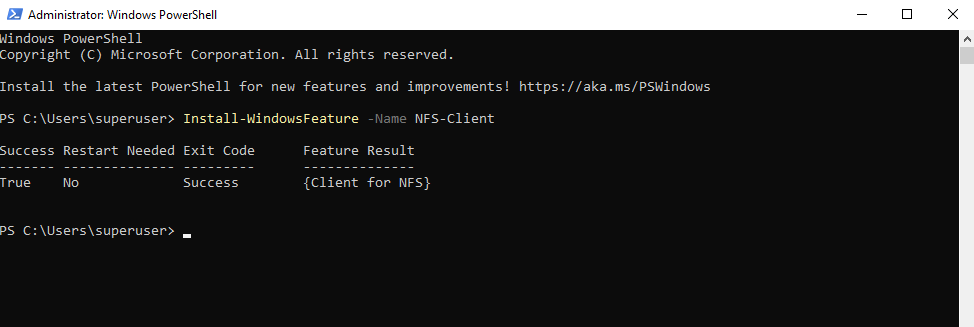
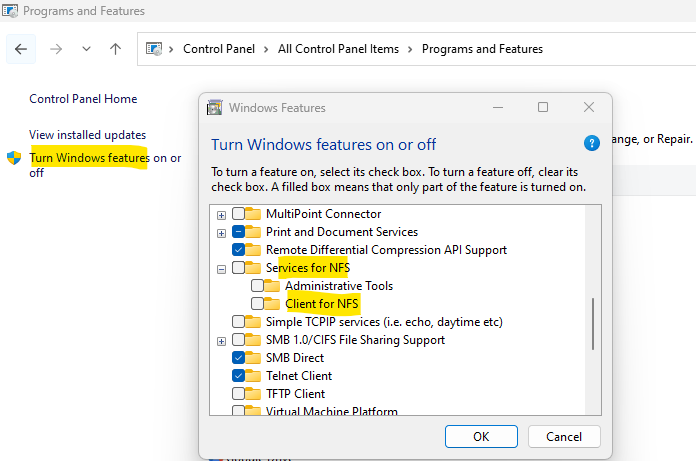
Install and set up Client for NFS
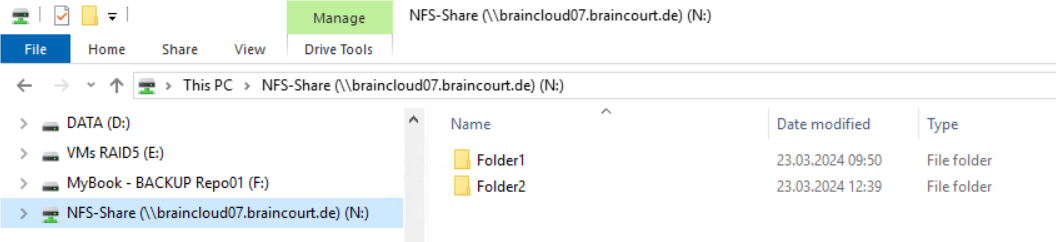
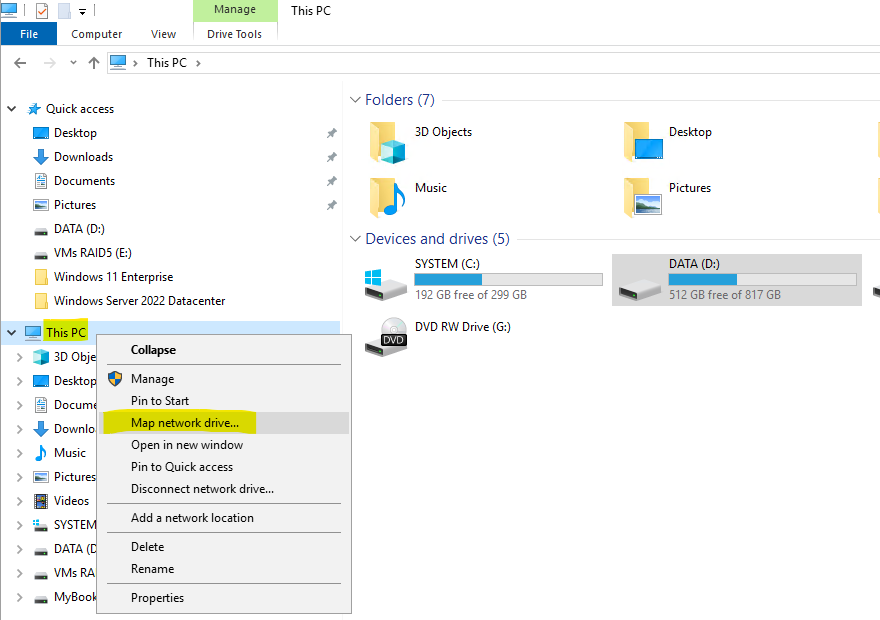
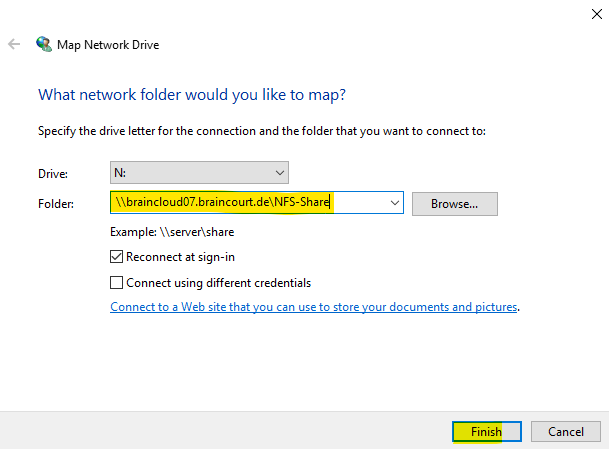
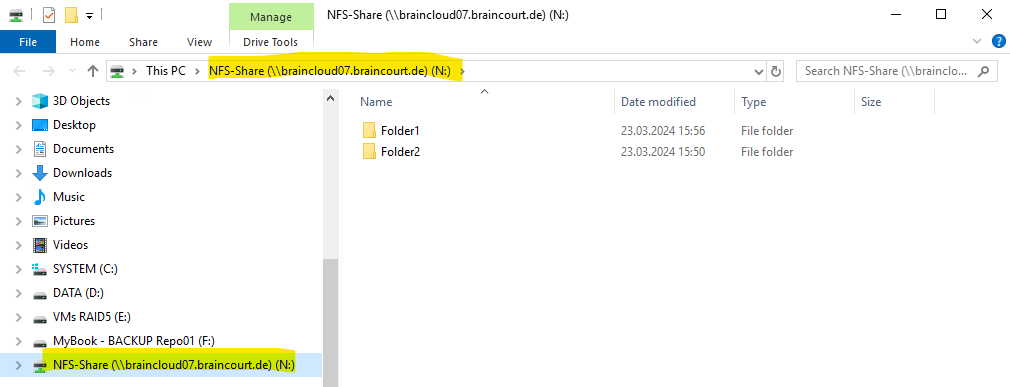
Mount NFS Network Shares on Windows
PS C:> Install-WindowsFeature -Name NFS-Client
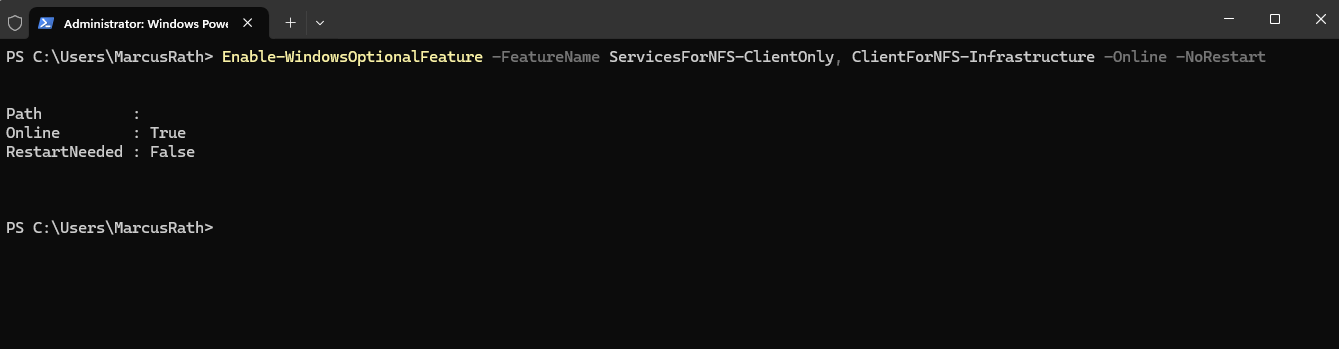
PS C:> Enable-WindowsOptionalFeature -FeatureName ServicesForNFS-ClientOnly, ClientForNFS-Infrastructure -Online -NoRestart
!!! Note !!!
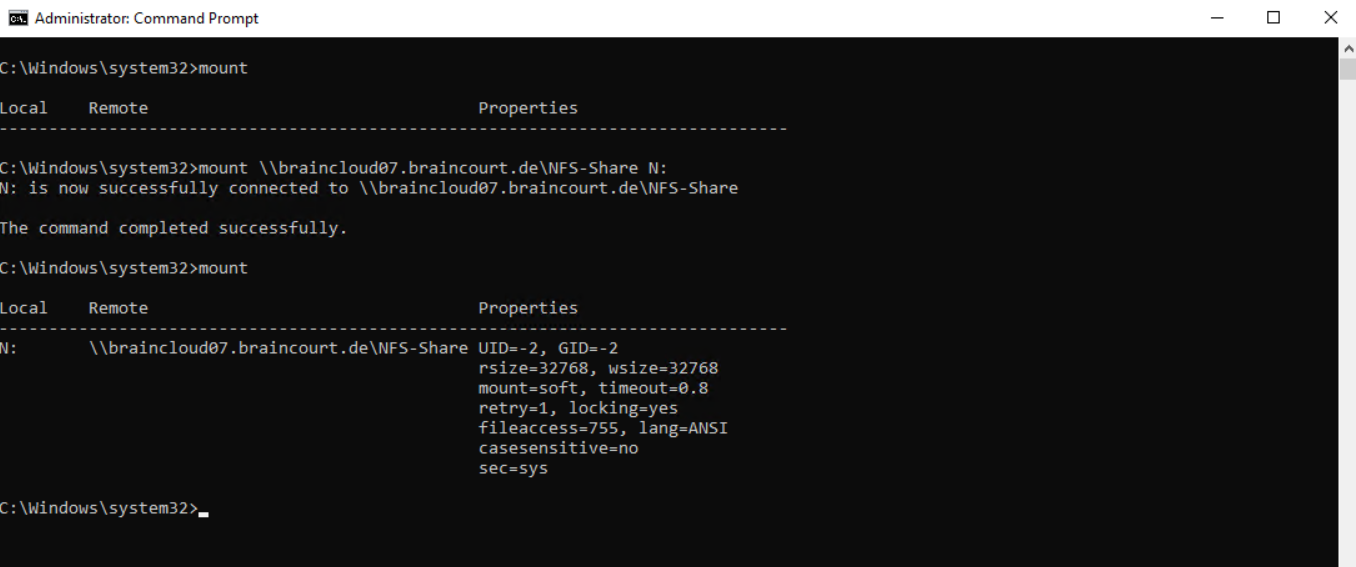
The mount command just works when using the Command Prompt, in PowerShell it doesn’t work!!!
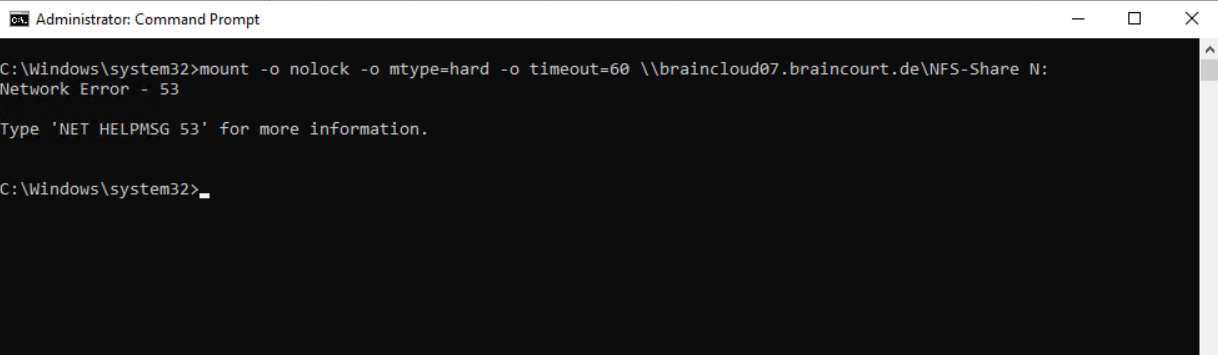
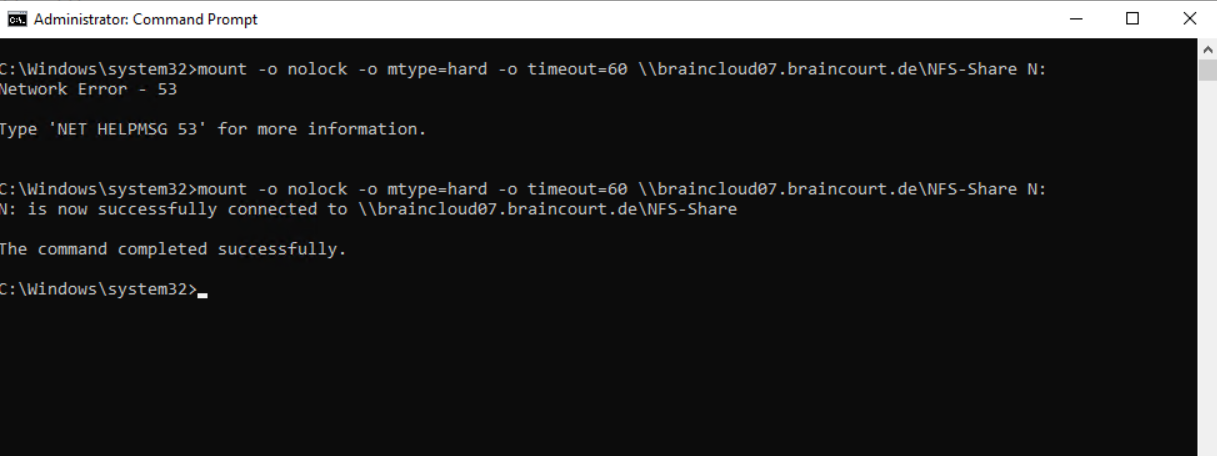
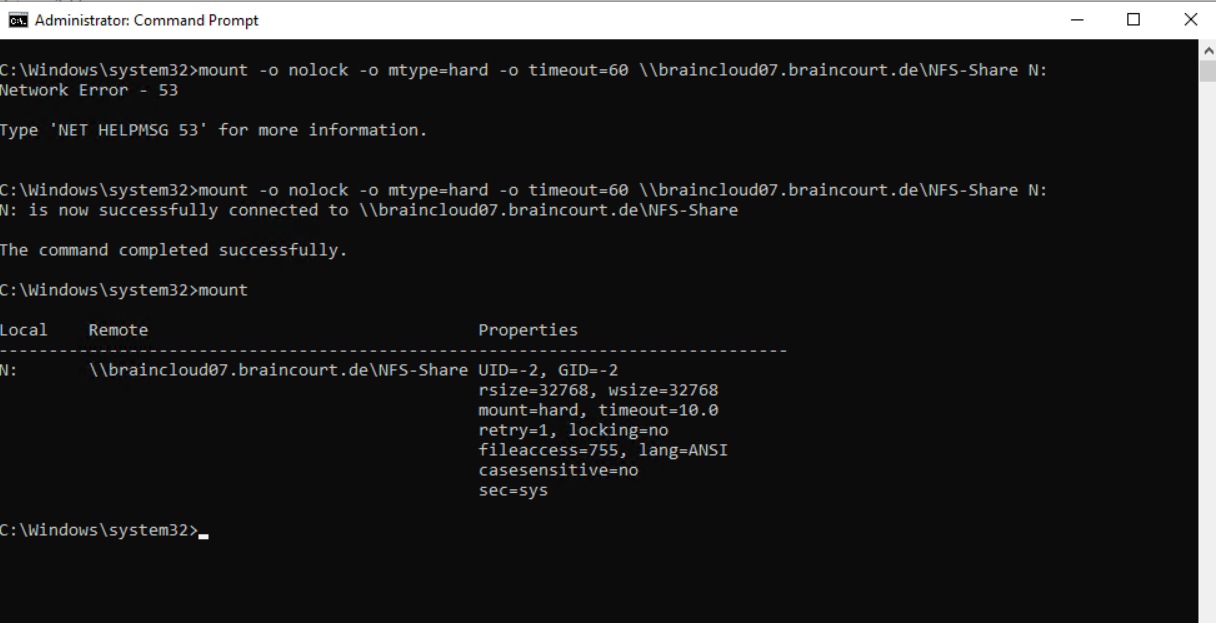
> mount \\ServerIP\ShareName Z:
> mount \\braincloud07.braincourt.de\NFS-Share N:
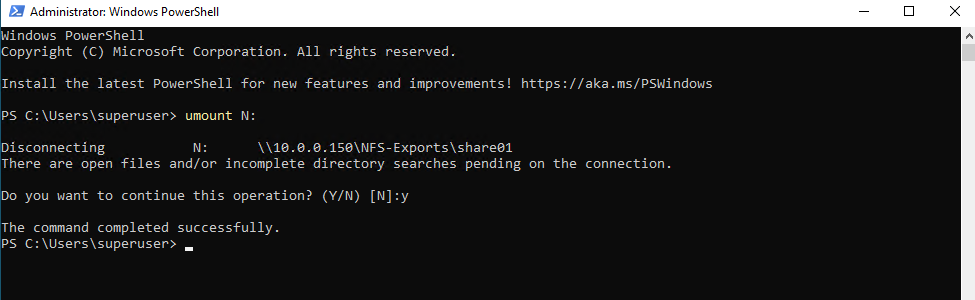
Unmount NFS Network Shares on Windows
To unmount NFS shares on Windows we can use the umount command like in Linux.
In contrast to the mount command, the umount command also works in PowerShell and not just in the Command Prompt.
> umount N:

By using PowerShell.
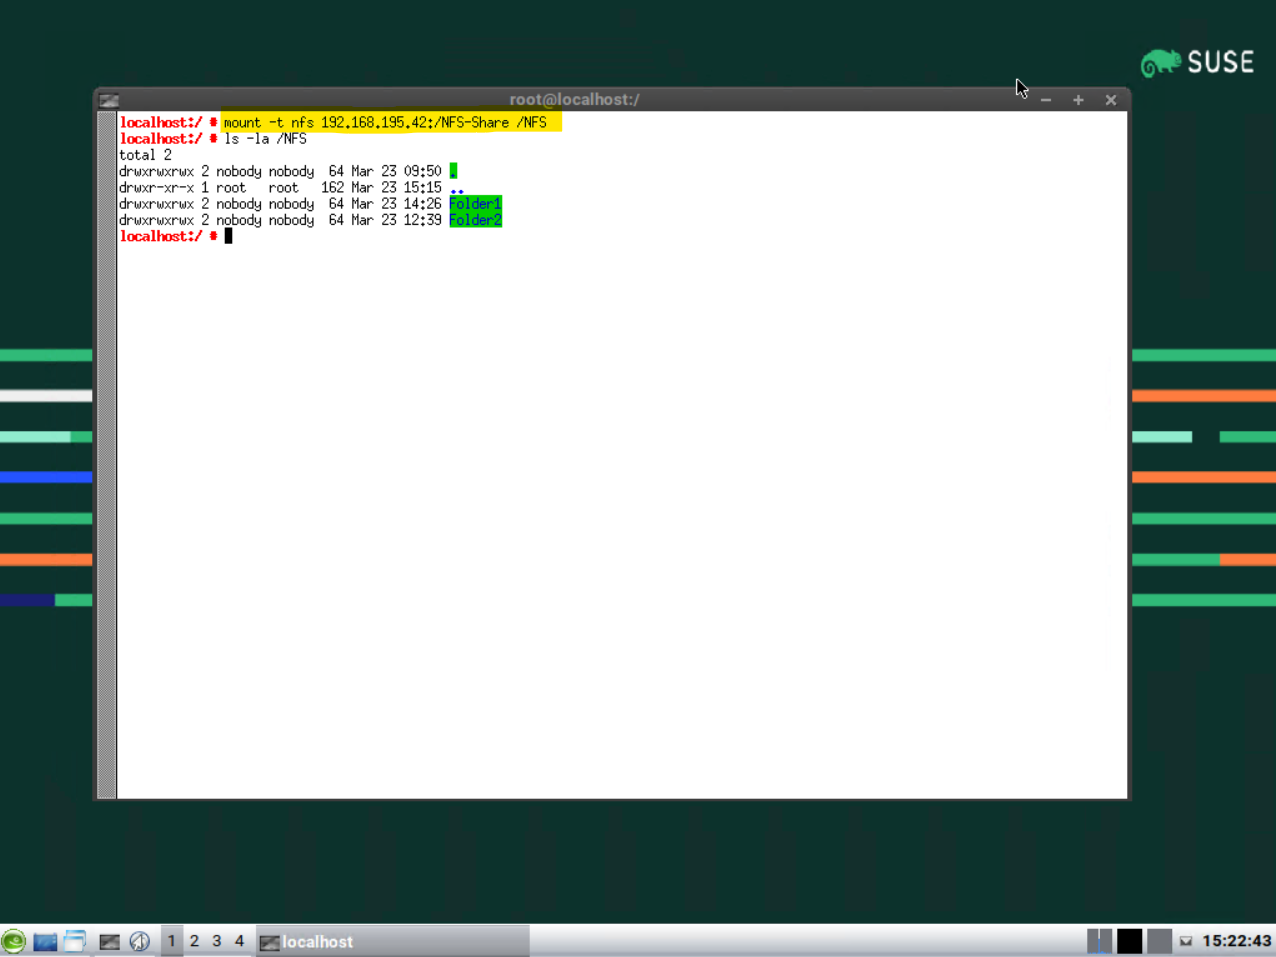
Mount NFS Network Shares on UNIX or Linux operating systems
Mount NFS Network Shares by default by using /etc/fstab
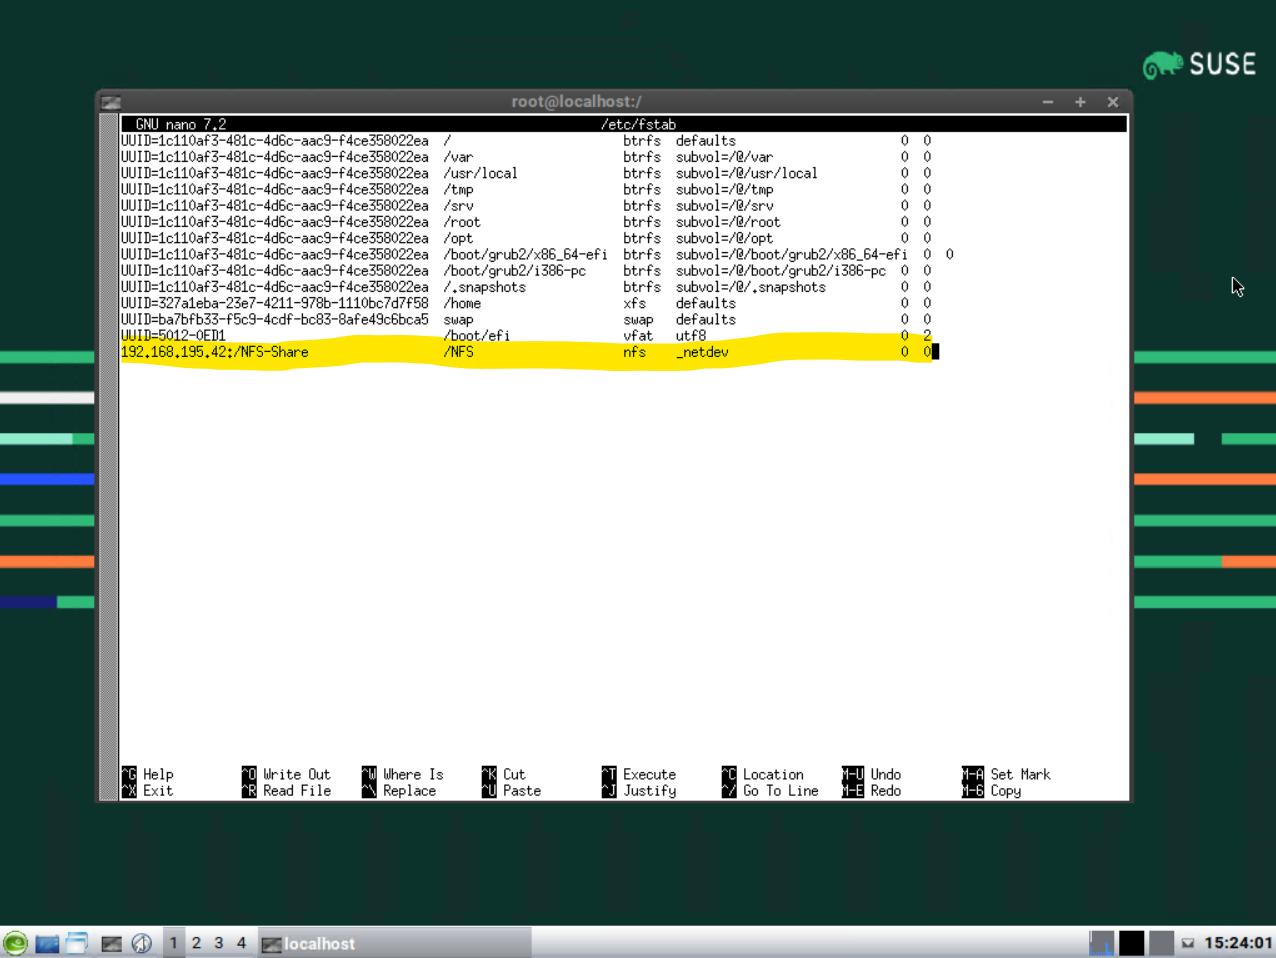
# sudo umount 192.168.195.42:/NFS-Share
Determine NFS Version
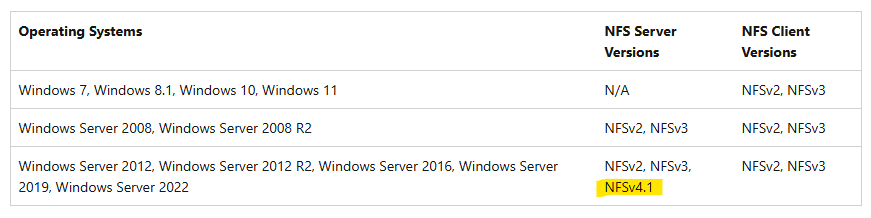
Windows supports multiple versions of the NFS client and server, depending on operating system version and family.
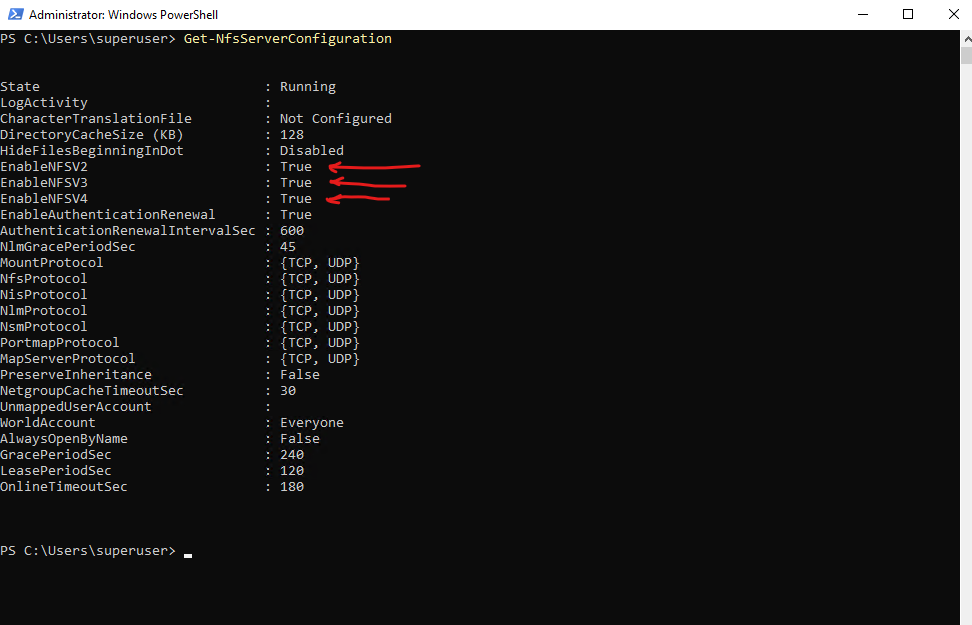
On the NFS Server
This command shows the configuration of the NFS Server including the enabled NFS versions.
PS> Get-NfsServerConfiguration
By using the Set-NfsServerConfiguration cmdlet we can control which versions are enabled or not.
PS> Set-NfsServerConfiguration -EnableNfsv2 $False -EnableNfsv4 $True -EnableNfsv3 $True
Source: https://learn.microsoft.com/en-us/powershell/module/nfs/set-nfsserverconfiguration
On the NFS Client
This command shows the configuration of the NFS client, when also UDP is available for the transport protocol it max NFS v3.
Windows NFS Clients only supports NFS v2 and v3 (not v4 natively). The Windows NFS Server down to W2K12 in contrast supports up to NFSv4.1.
NFS version 4 does not use UDP. If you mount a file system with the proto=udp option, then NFS version 3 is used instead of version 4.
PS> Get-NfsClientConfiguration

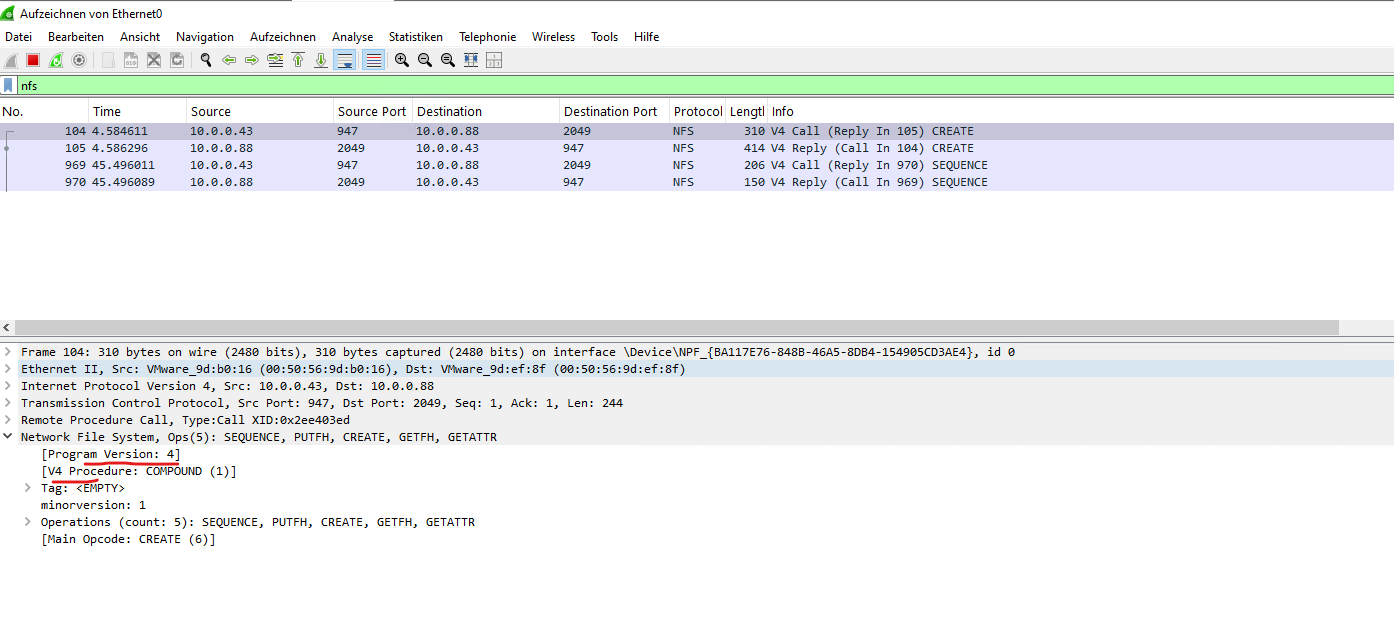
By using WireShark is always the best way to see whats really happen on the wire.
Below you will see a Windows Client (W2K22) connecting to a SUSE Linux Enterprise NFS server by using NFSv3.
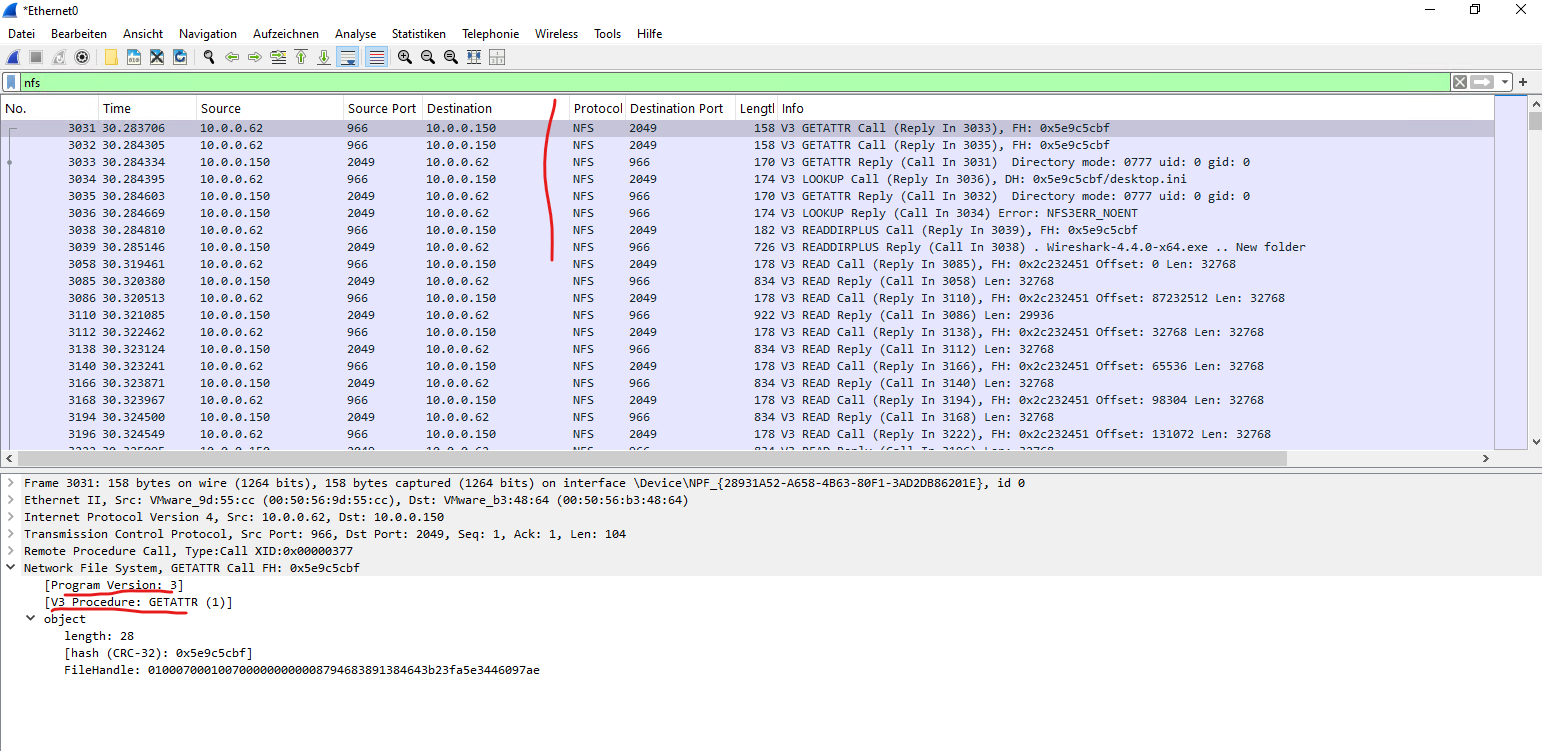
Here you will see the traffic on a W2K22 NFS Server, here a SUSE Linux Enterprise NFS Client is connecting to the W2K22 NFS Server by using NFSv4.
Troubleshooting
mount Network Error – 53