Set up an NFS Server on SUSE Linux Enterprise Server 15
Introduction
Terms
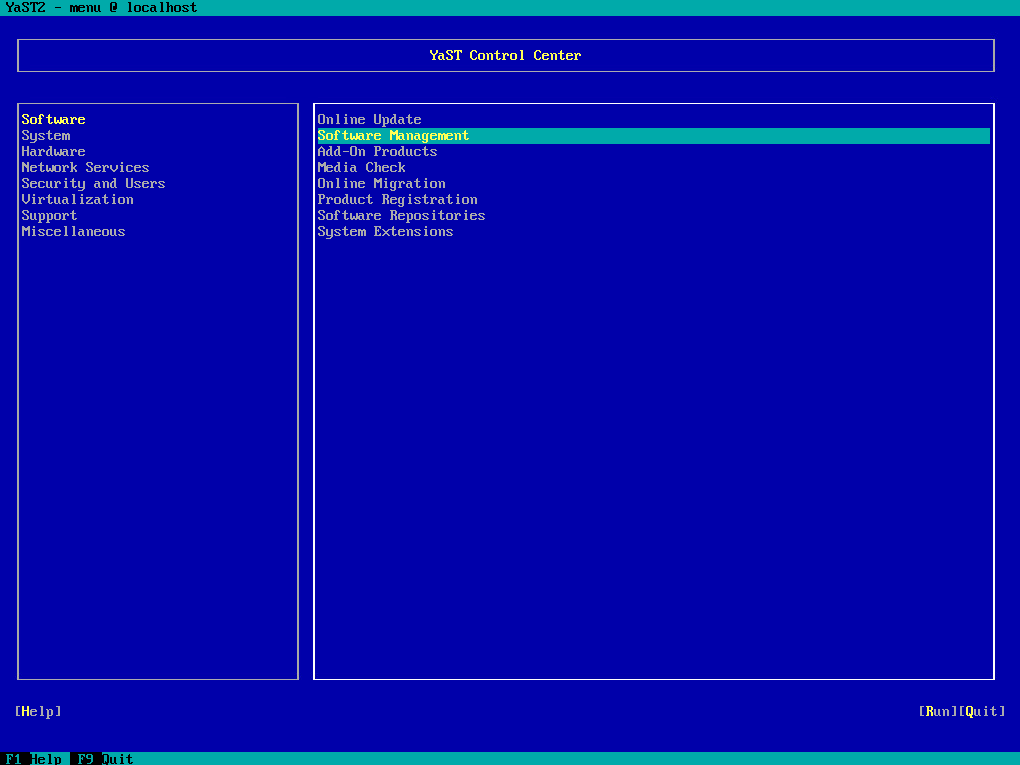
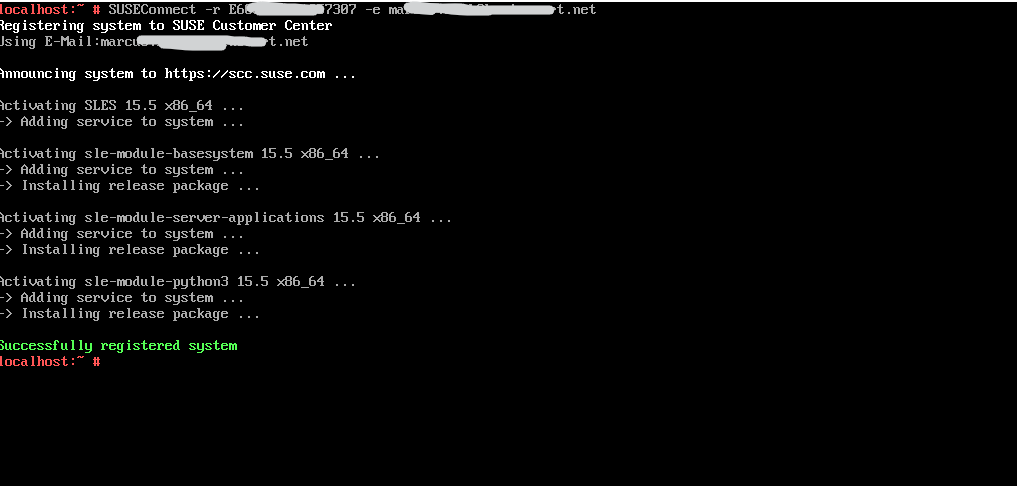
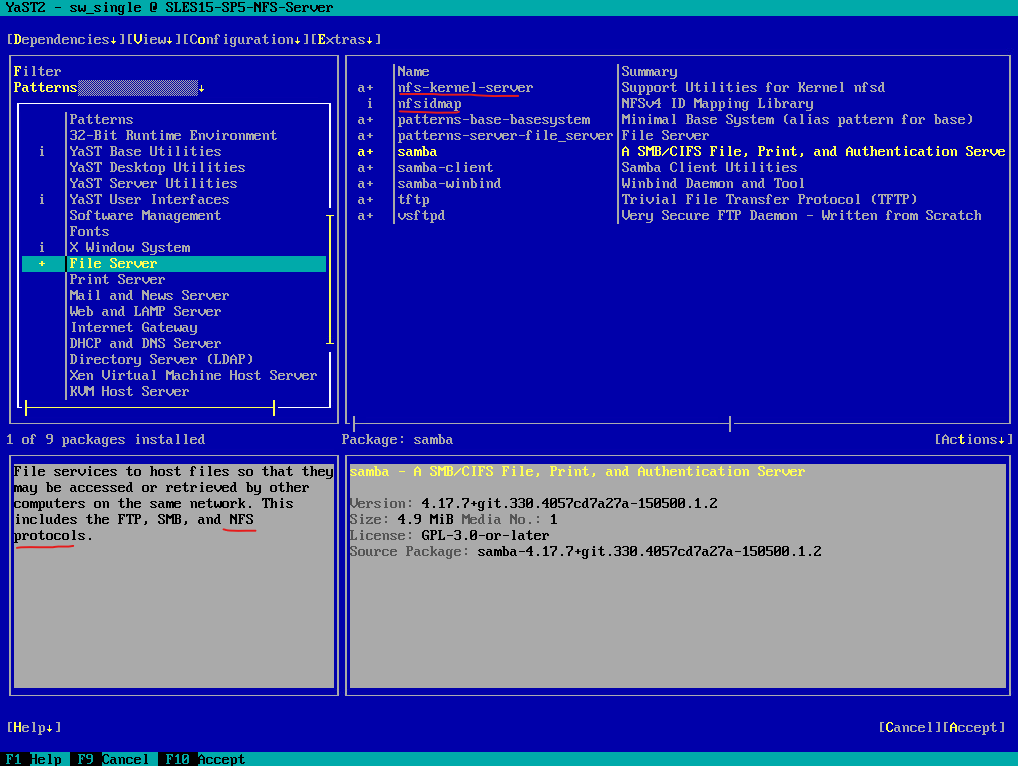
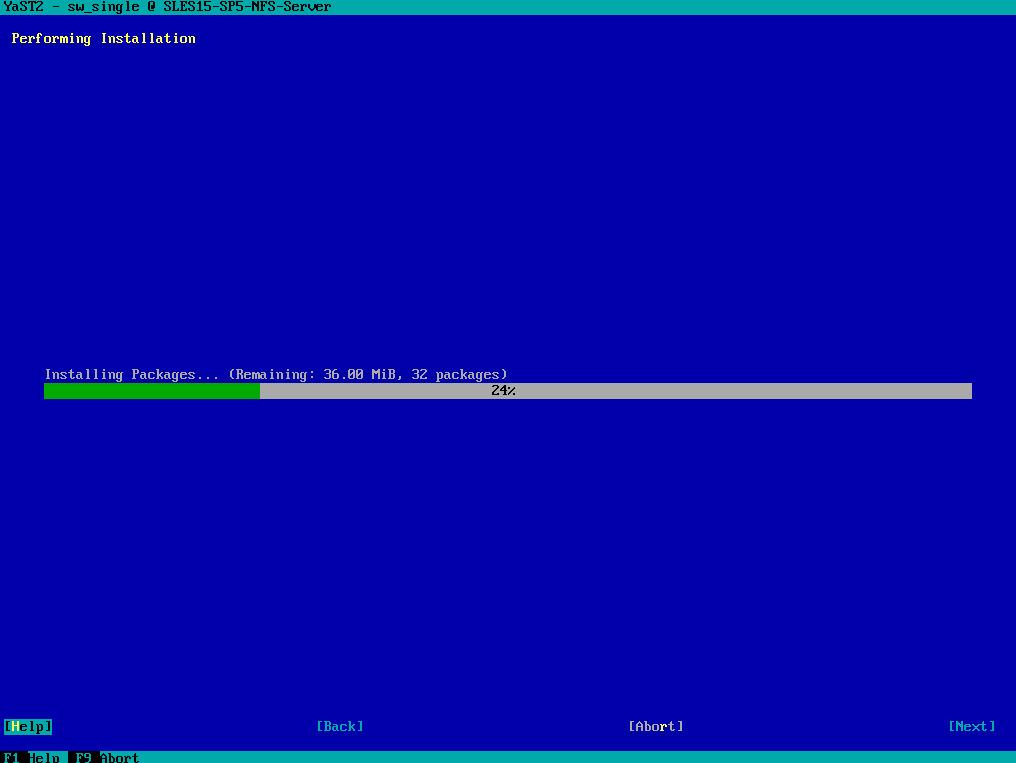
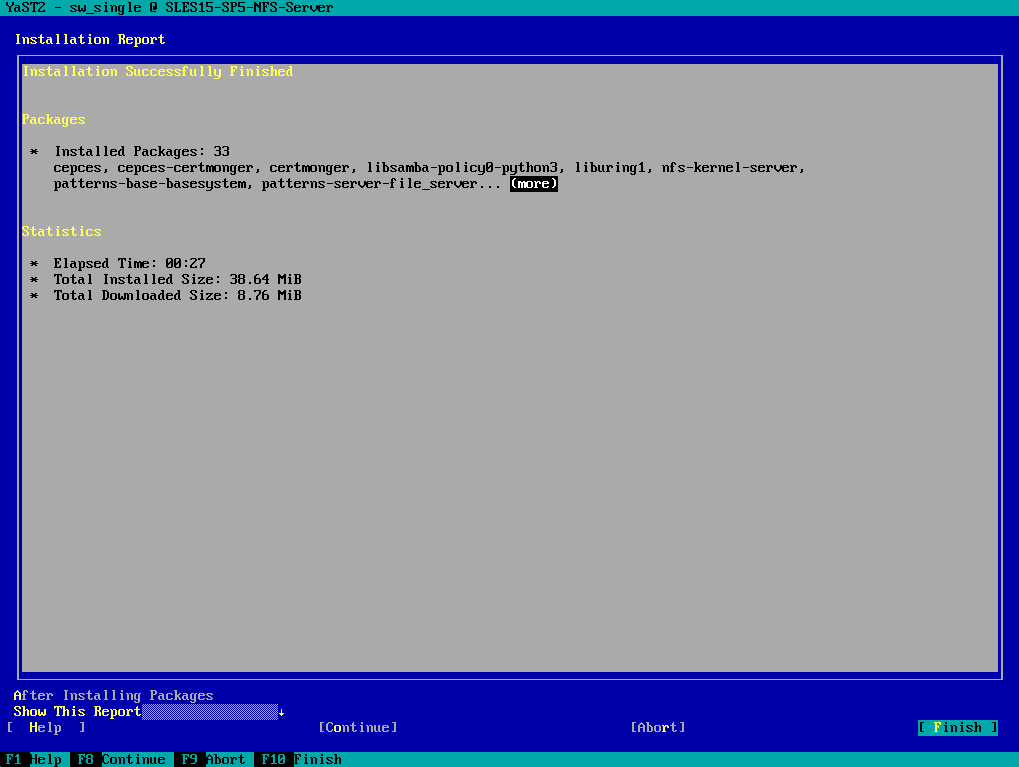
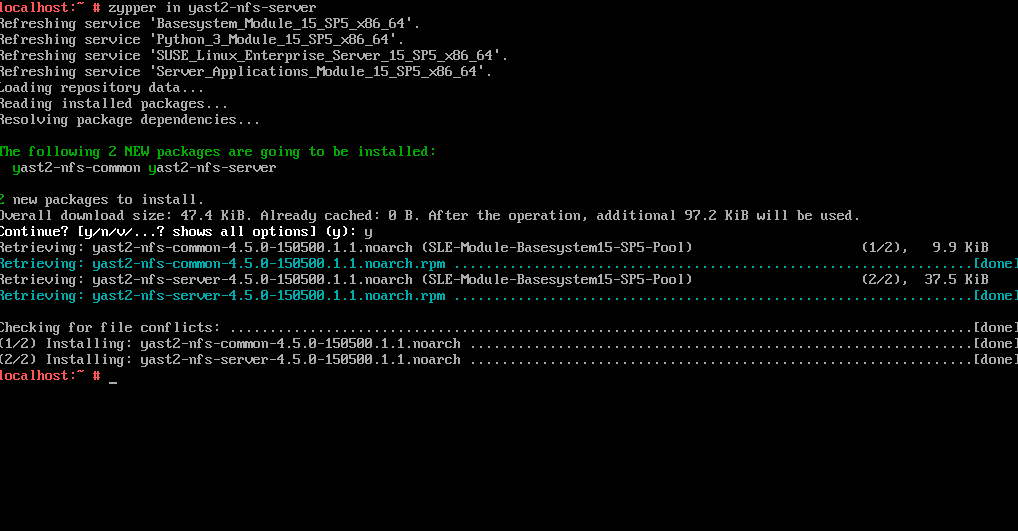
Install NFS Server
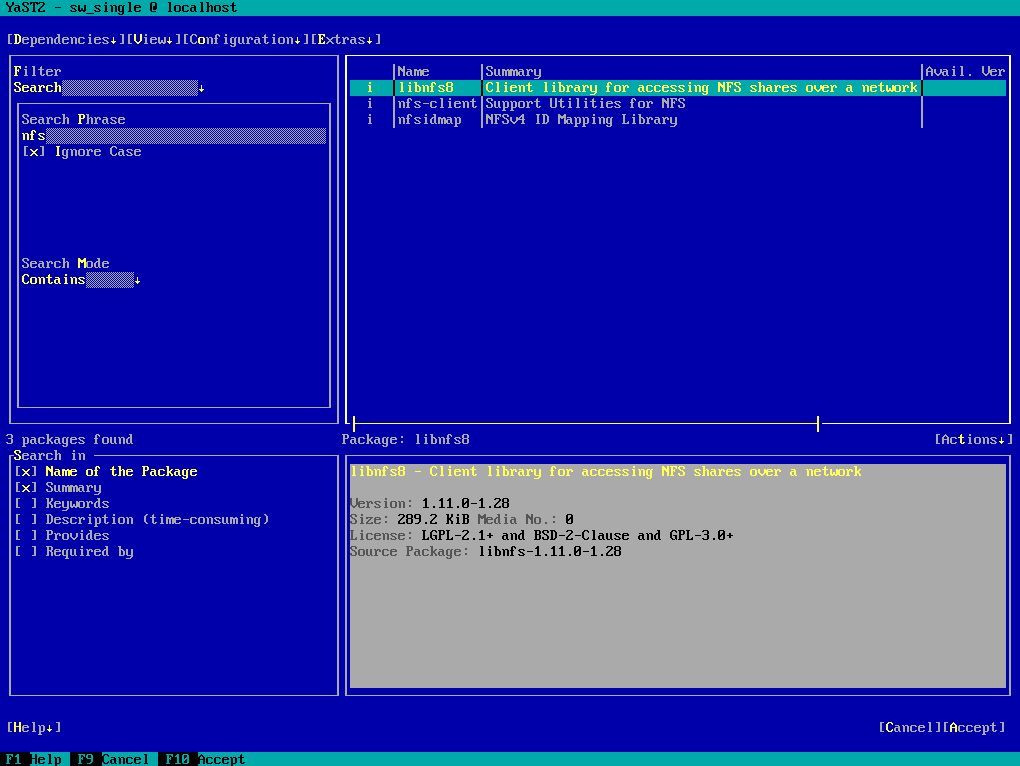
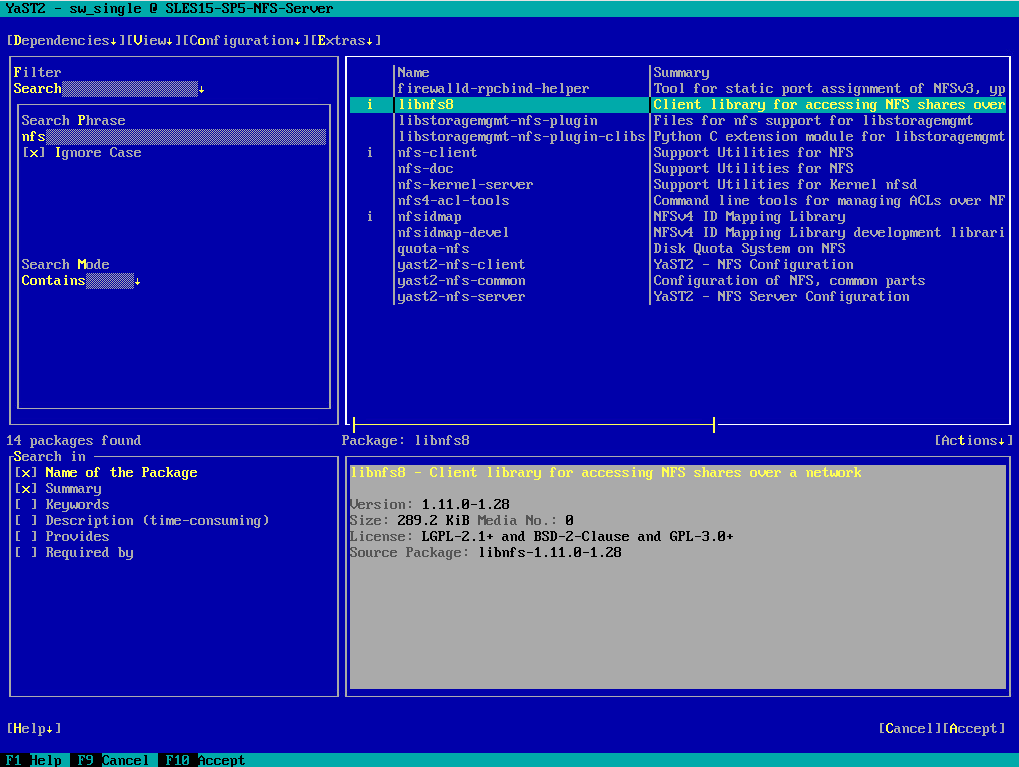
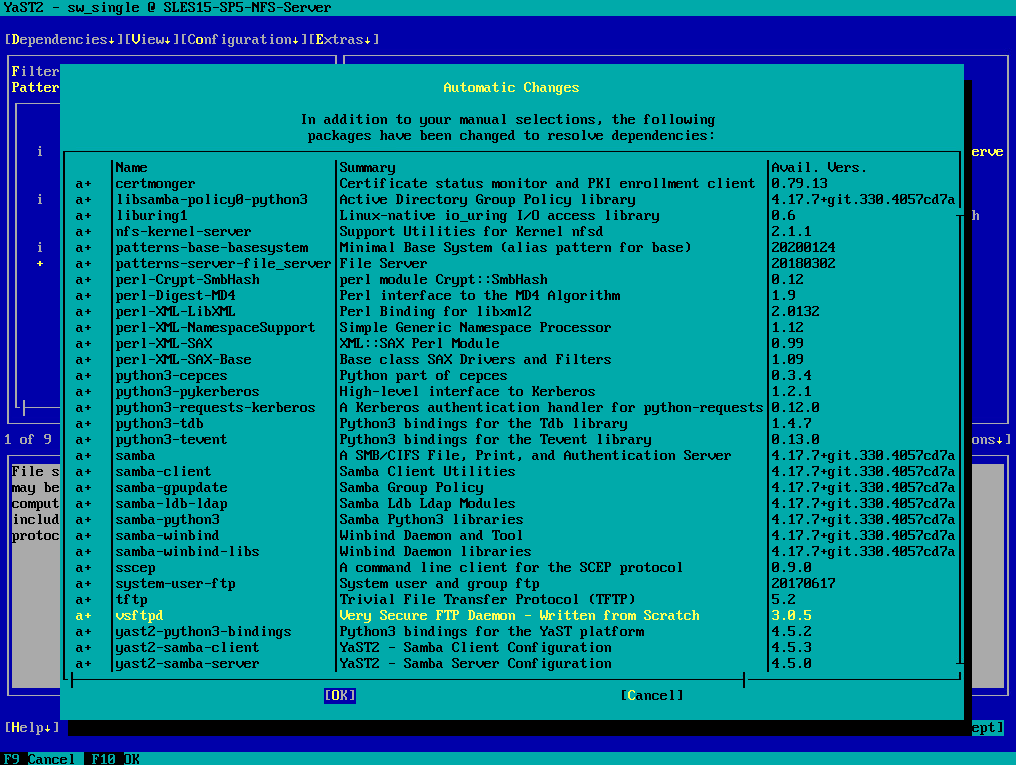

# zypper in yast2-nfs-server
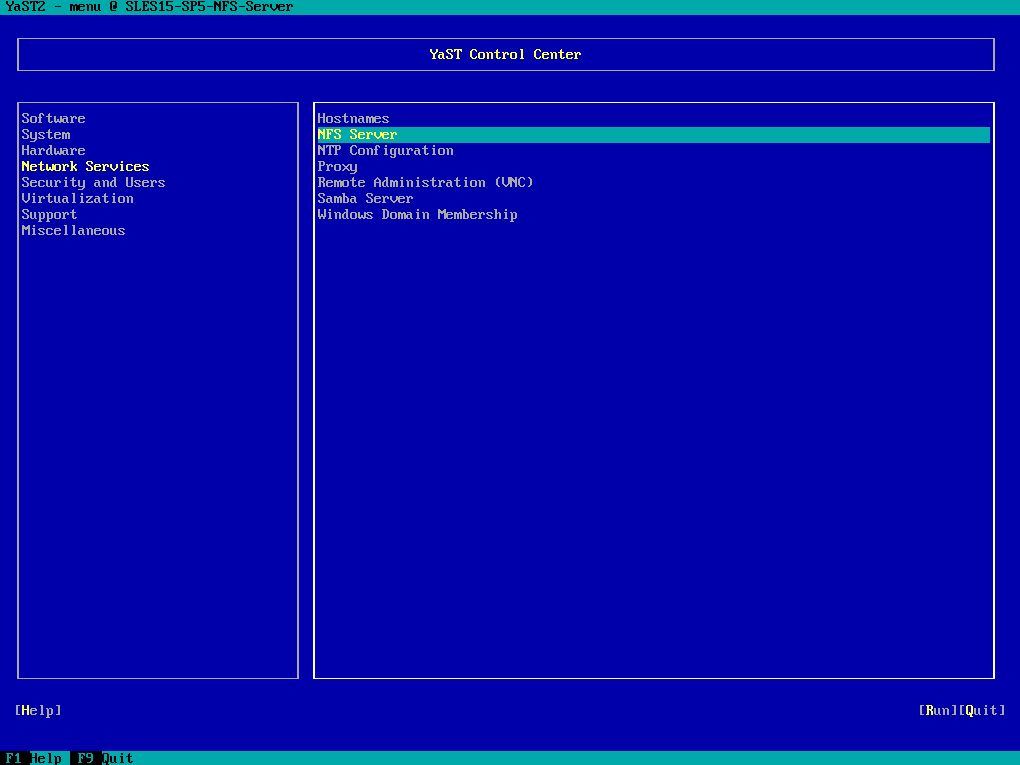
Configure NFS Server
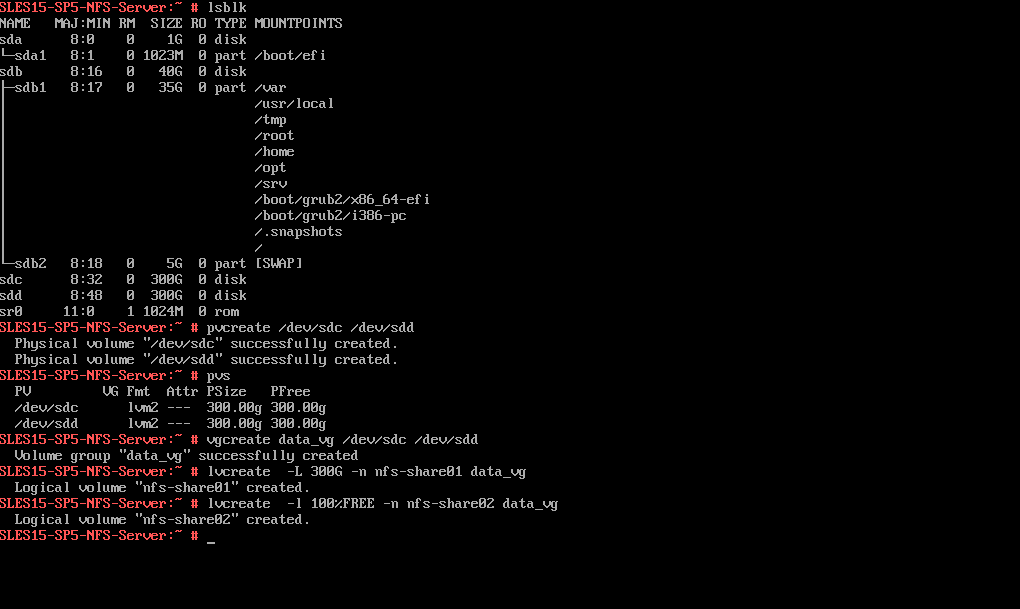
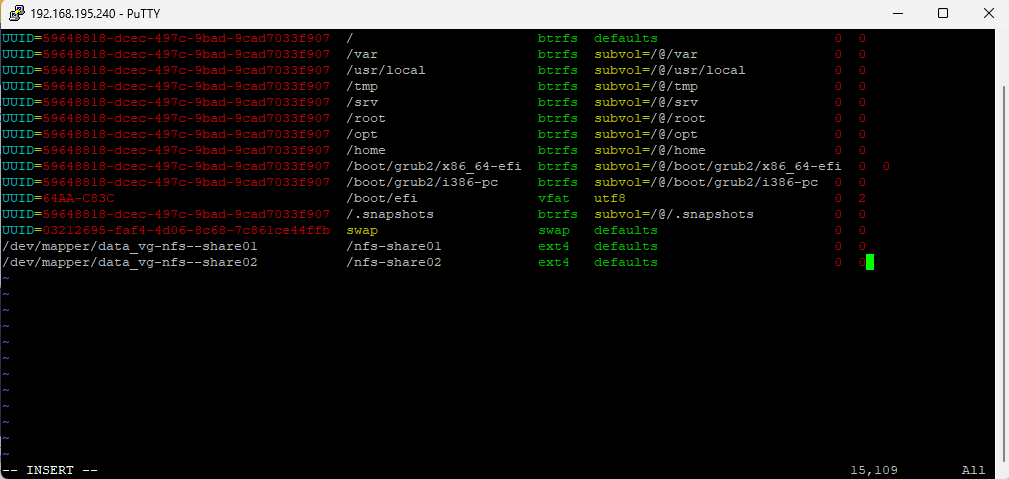
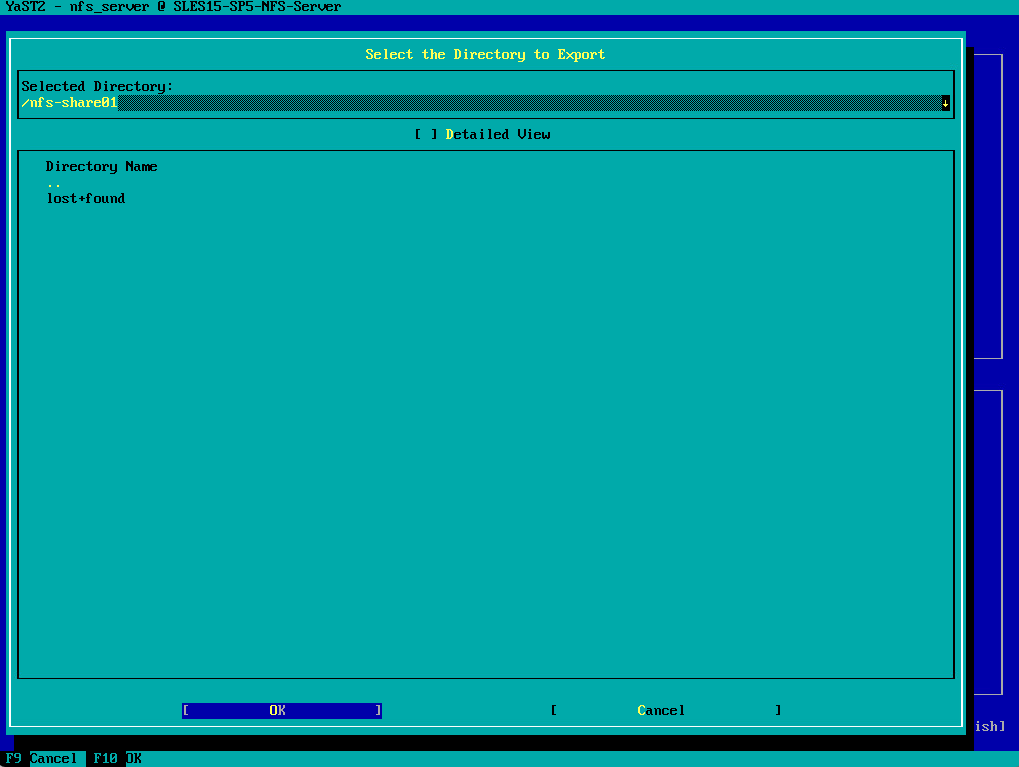
Create Partition/Directory for the Export


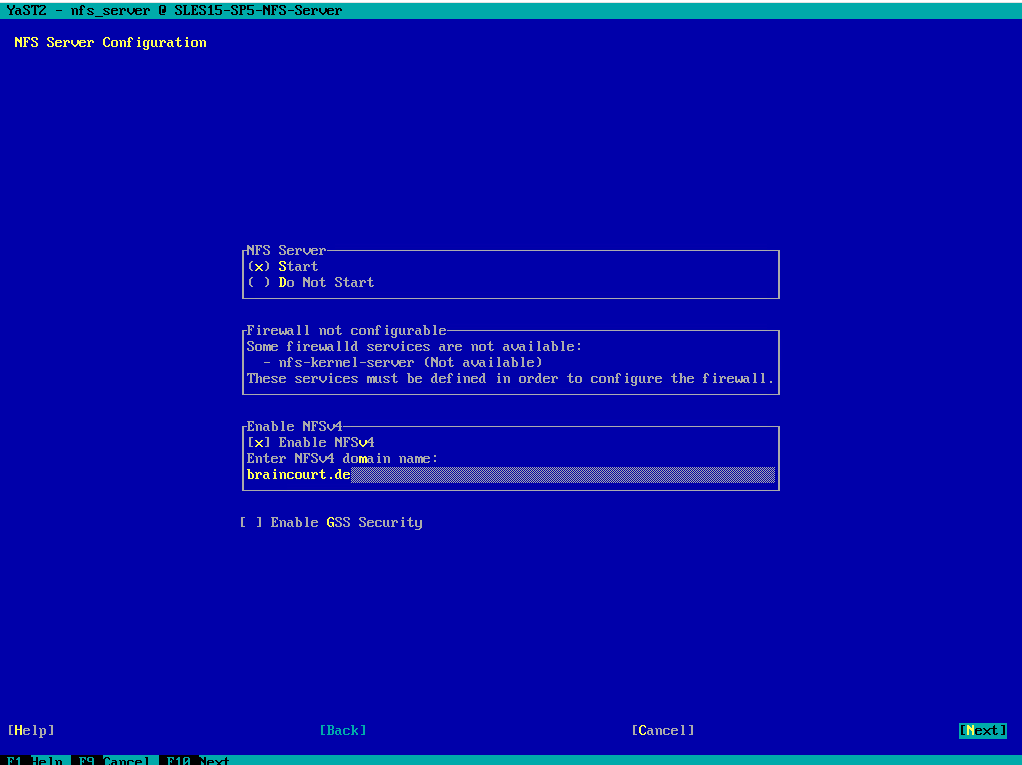
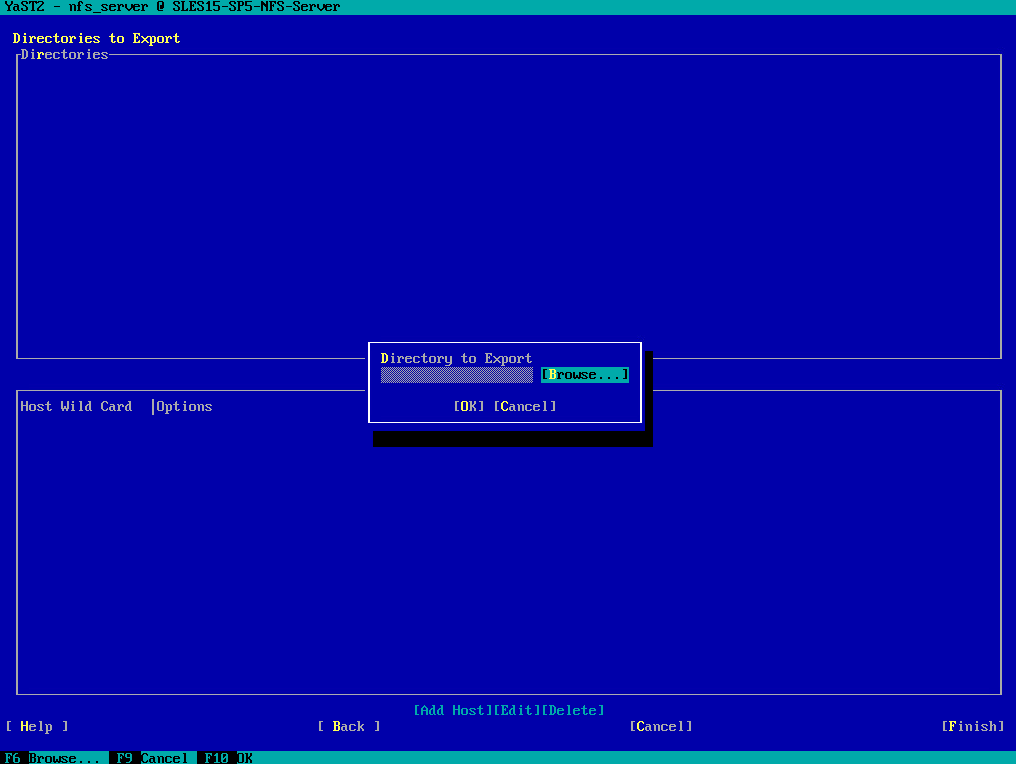
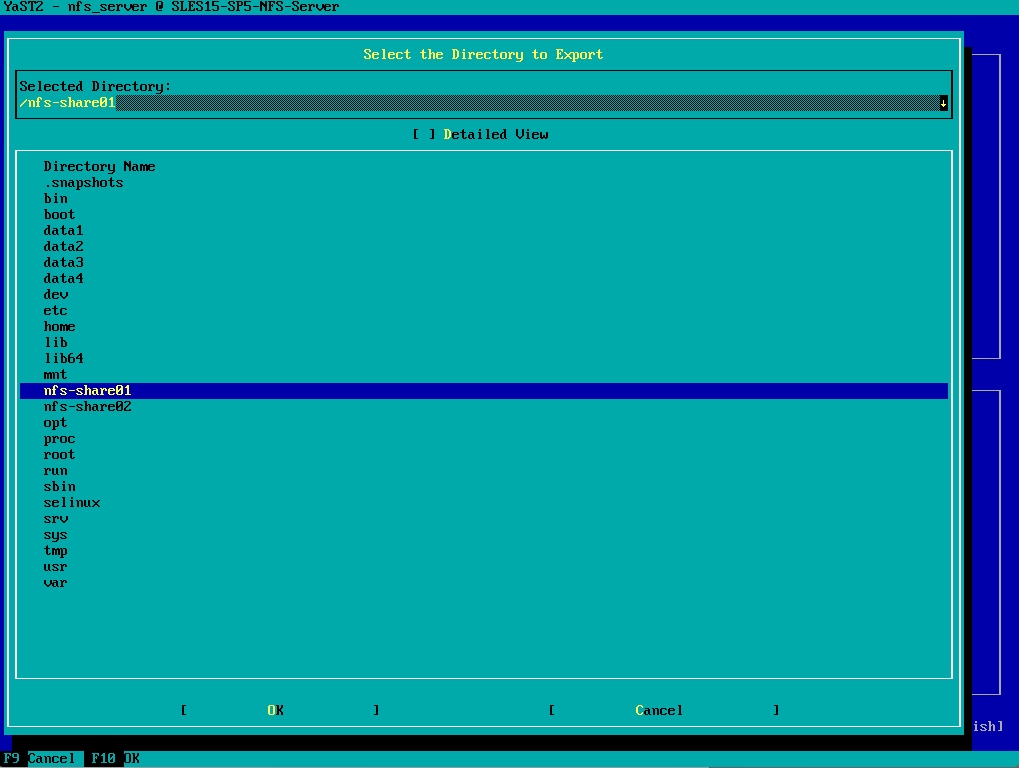
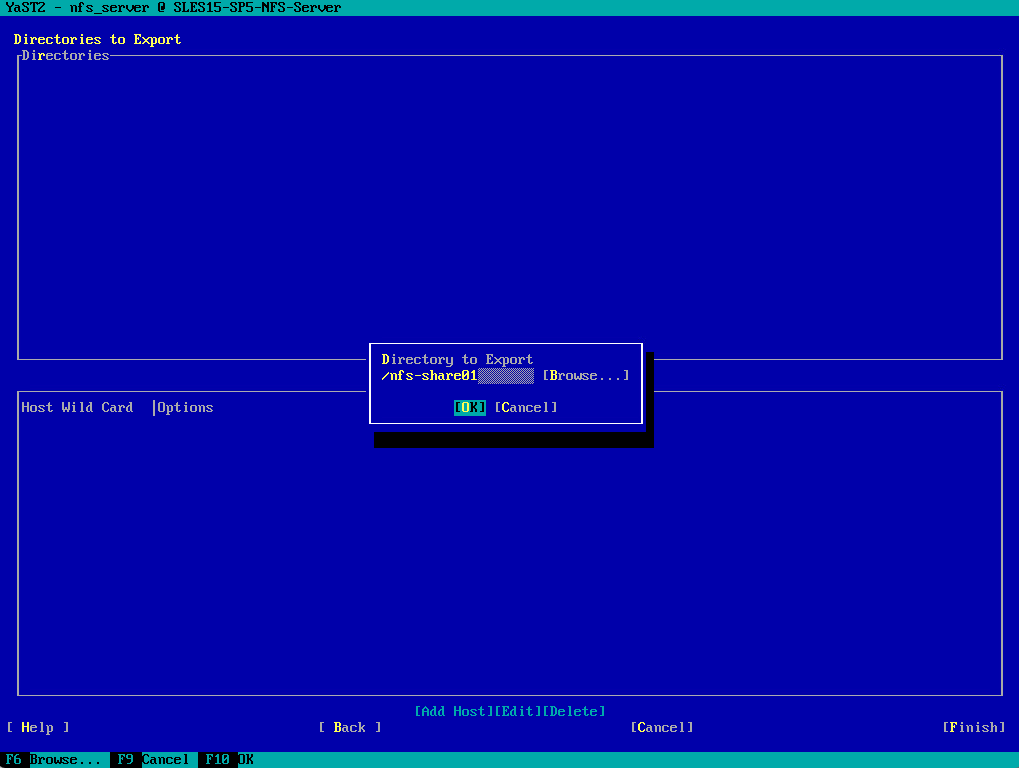
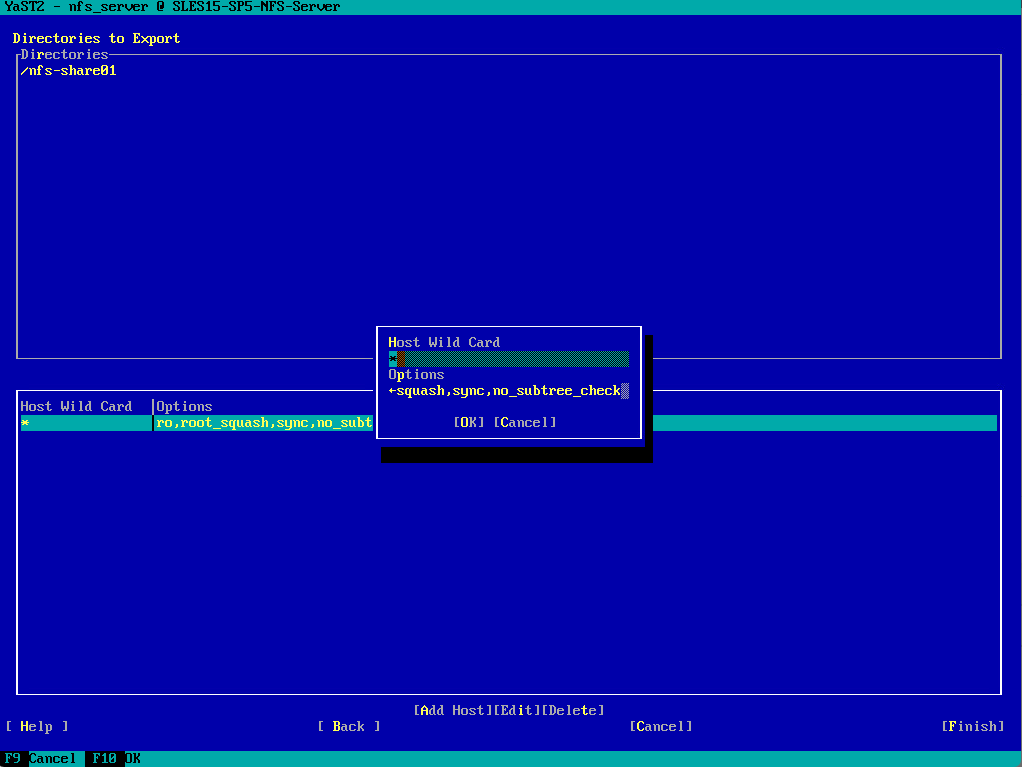
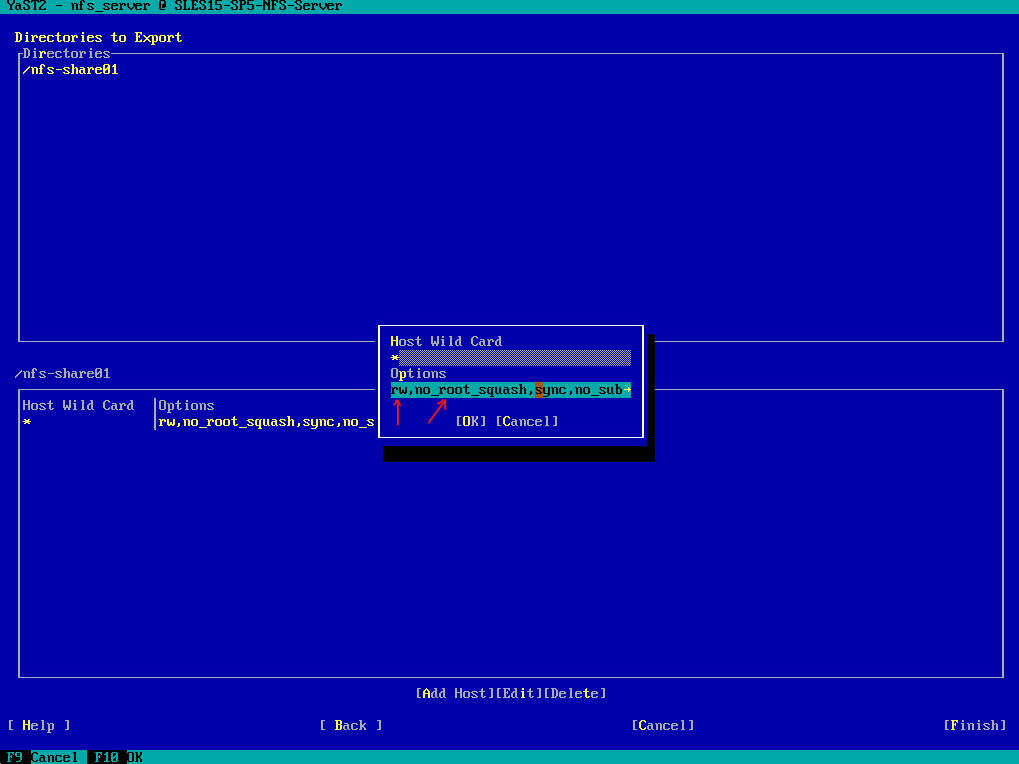
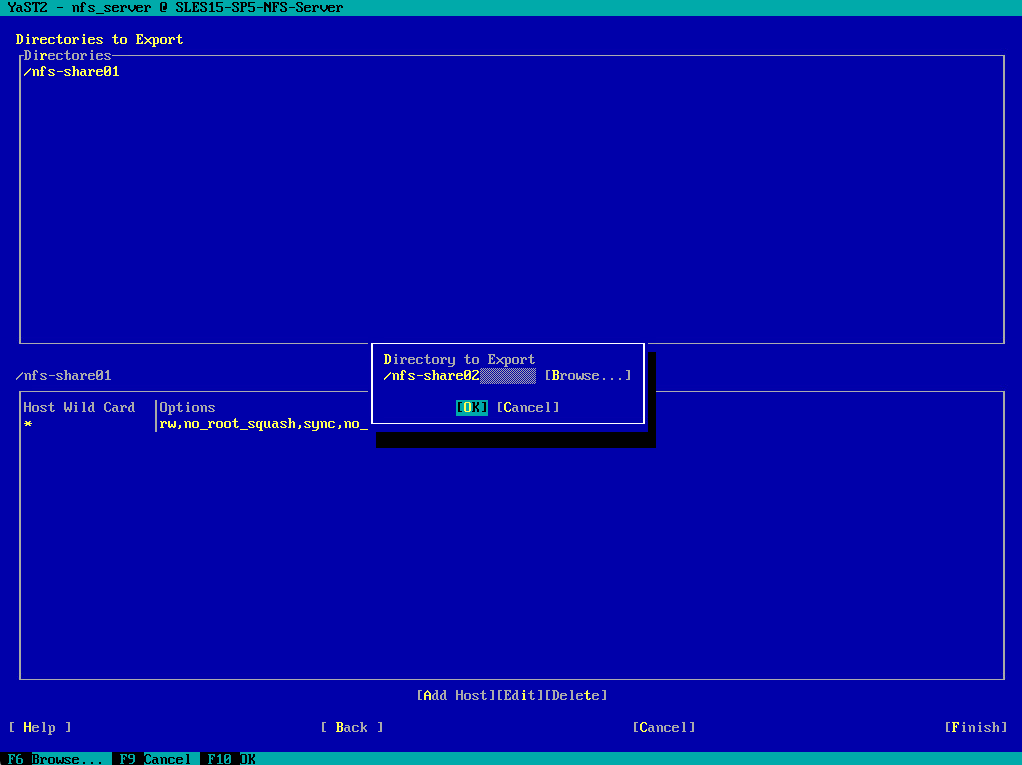
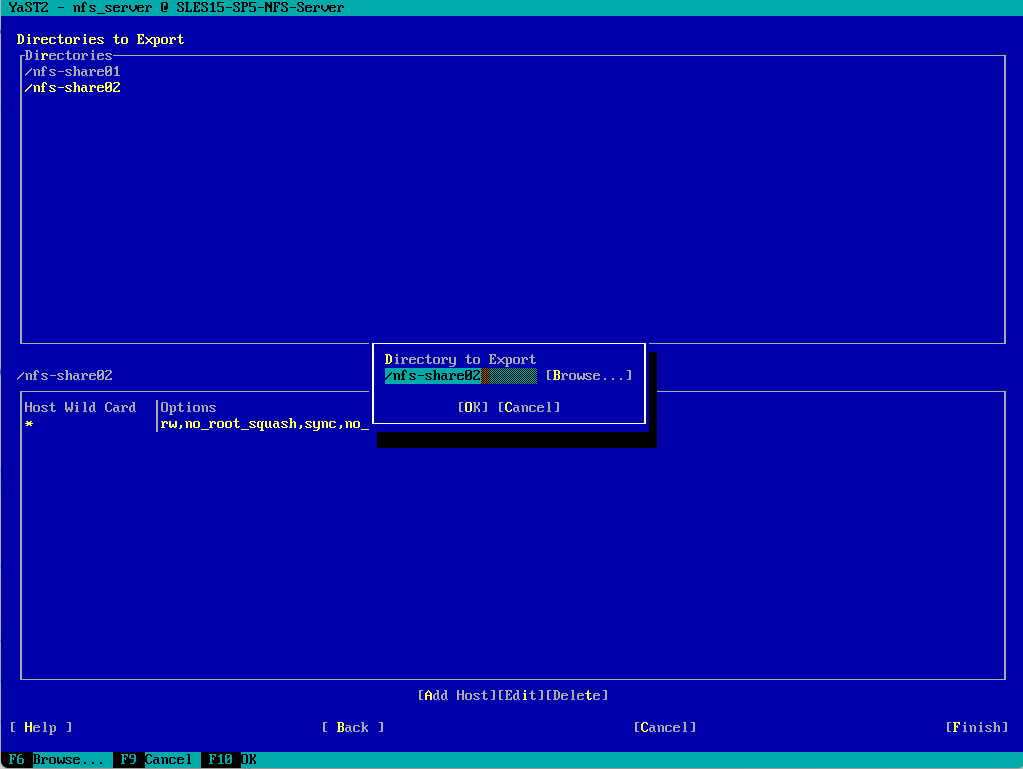
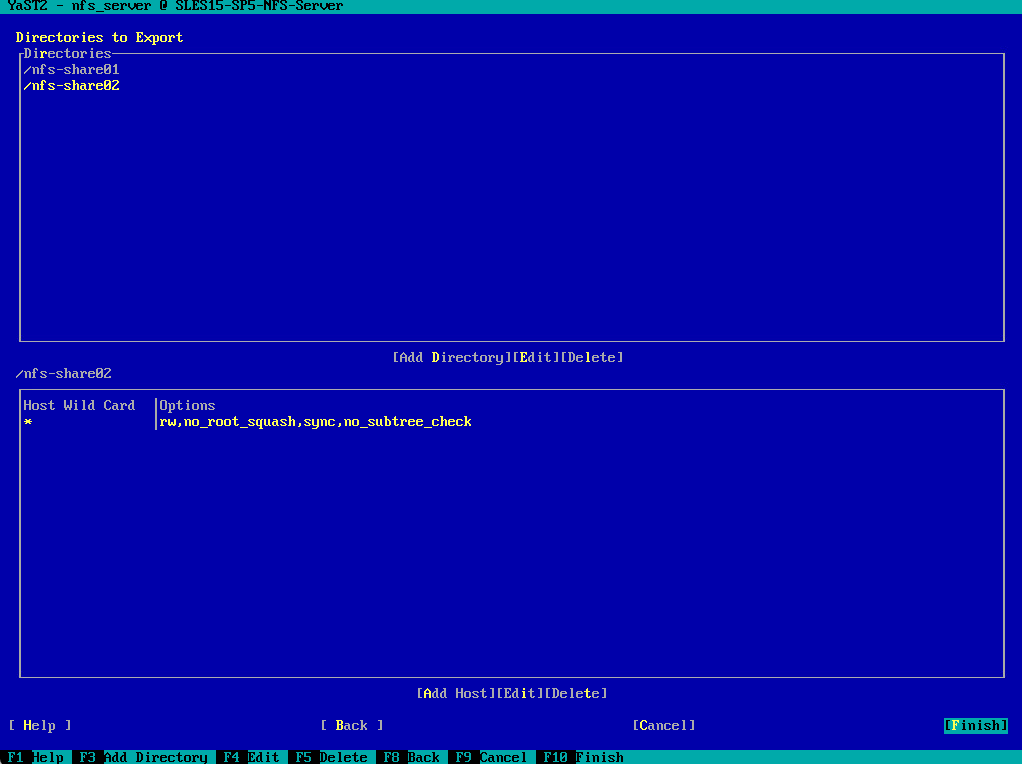
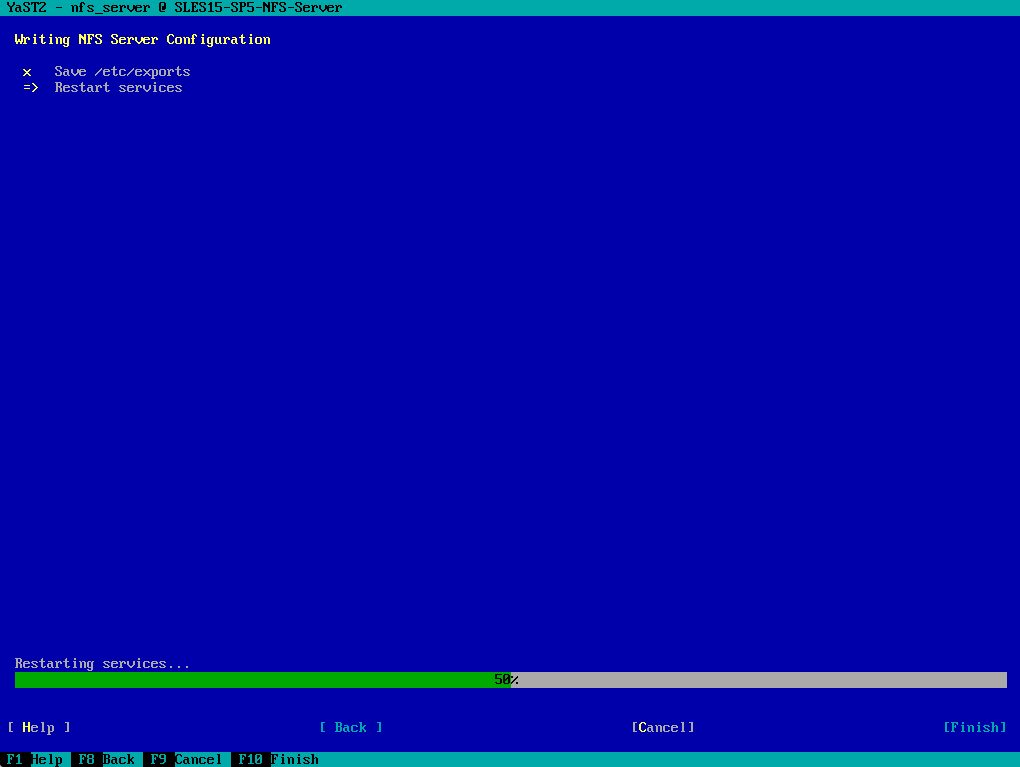
Export File System by using YaST
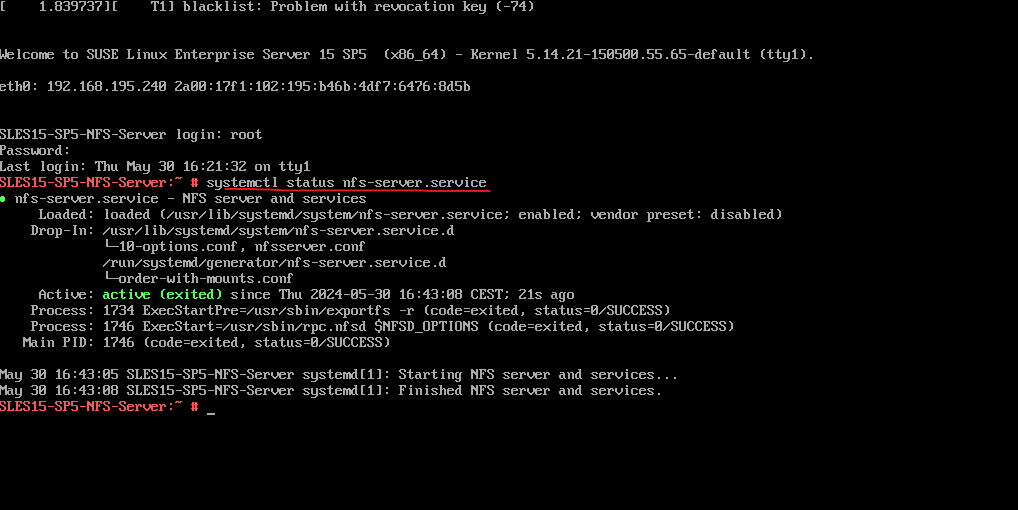
We can also enable the NFS server by using the systemctl command.
# systemctl enable nfs-server.service
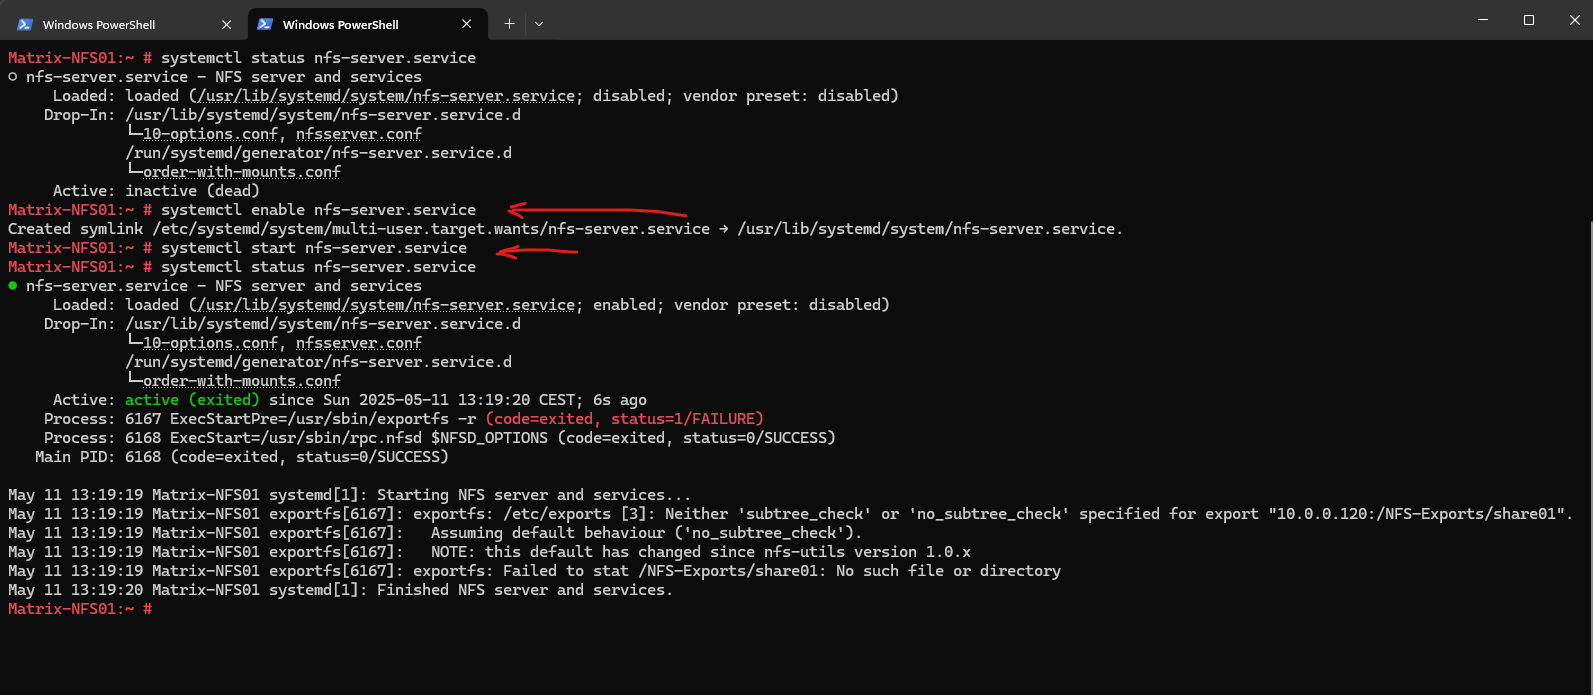
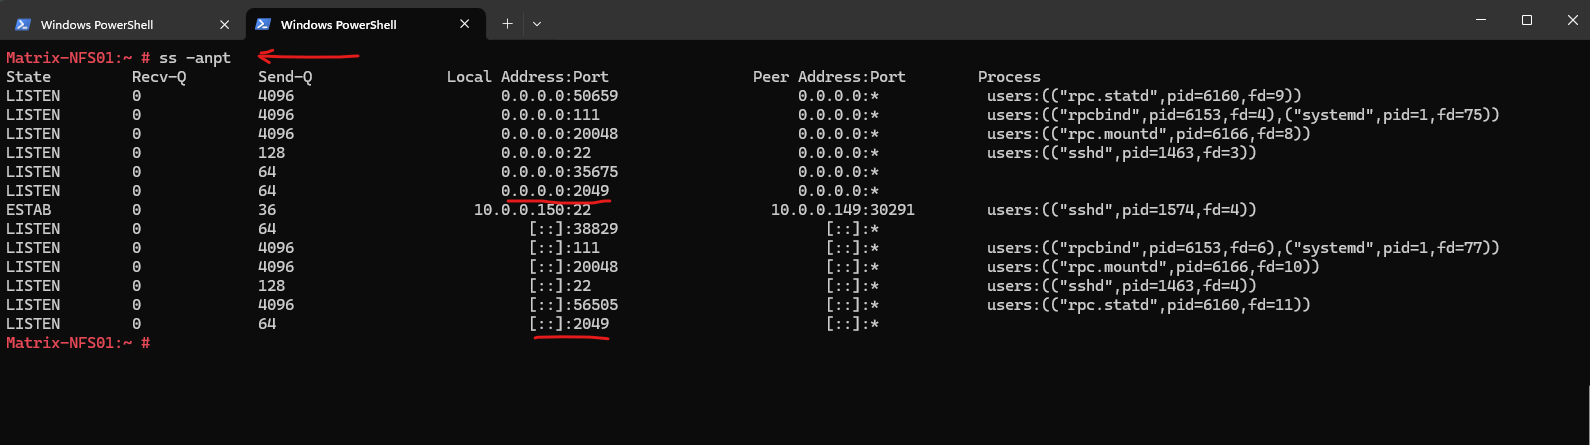
The NFS server finally should listen on TCP Port 2049 for incoming requests.


# systemctl status nfs-server.service
Export File System by editing /etc/exports
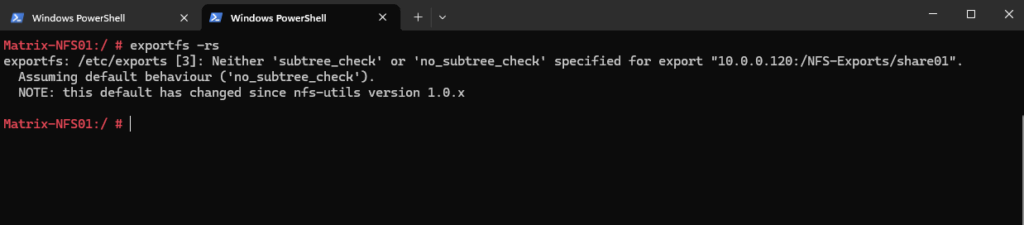
After editing/changing the /etc/exports we doesn’t need to restart the NFS service but executing the following command to make the changes finally effective.
exportfs -raThe command re-export all NFS shares, applying any changes made to the NFS configuration file (/etc/exports) without restarting the NFS service.

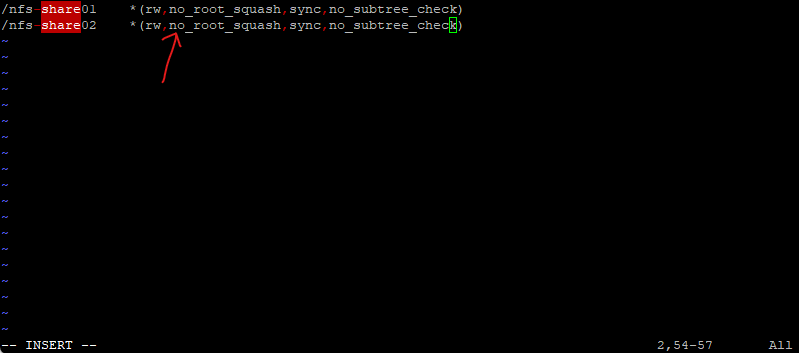
# vi /etc/exports
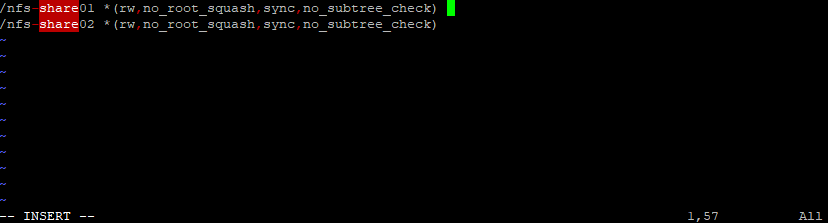
More samples:
/share 192.168.10.0/24(rw,no_root_squash,async) 192.168.20.0/24(rw,no_root_squash,async)
In the example above we can specify multiple IP ranges or IP addresses on a line, separated by spaces.
/exported/directory bob.example.com
In the example above, bob.example.com can mount /exported/directory/. Because no options are specified in this example, the following default NFS options take effect:
Each default for every exported file system must be explicitly overridden. For example, if the rw option is not specified, then the exported file system is shared as read-only. The following is a sample line from /etc/exports which overrides two default options:
/another/exported/directory 192.168.0.3(rw,sync)
In this example 192.168.0.3 can mount /another/exported/directory/ read/write and all transfers to disk are committed to the disk before the write request by the client is completed.
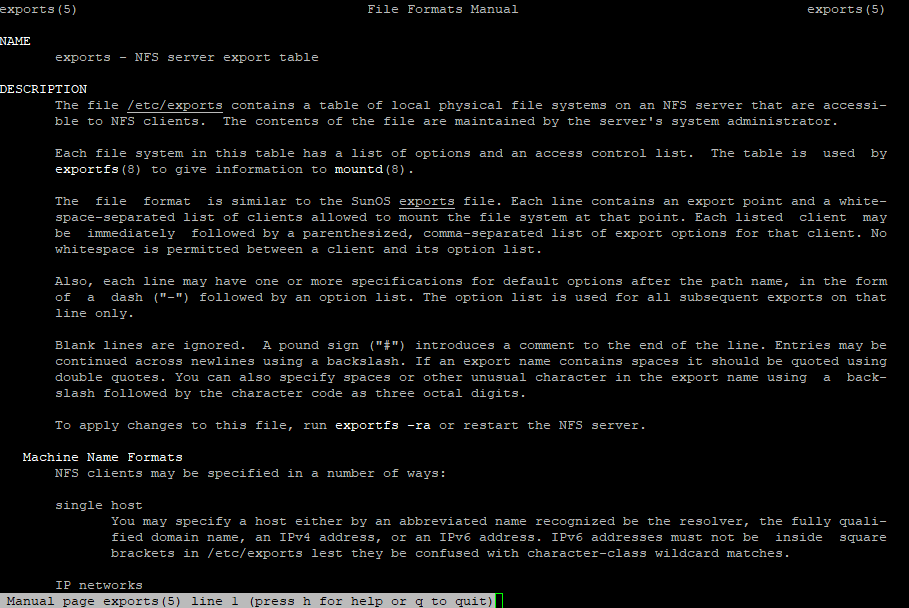
# man exports
As already mentioned, after editing/changing the NFS configuration file (/etc/exports), we need to run the following command to apply the changes and to take finally effect. Restarting the NFS service is not necessary.
exportfs -ra
The command re-export all NFS shares, applying any changes made to the NFS configuration file (/etc/exports) without restarting the NFS service.
Every file system being exported to remote users via NFS, as well as the access level for those file systems, are listed in the /etc/exports file. When the nfs service starts, the /usr/sbin/exportfs command launches and reads this file, passes control to rpc.mountd (if NFSv2 or NFSv3) for the actual mounting process, then to rpc.nfsd where the file systems are then available to remote users.
When issued manually, the /usr/sbin/exportfs command allows the root user to selectively export or unexport directories without restarting the NFS service.
-r — Causes all directories listed in /etc/exports to be exported by constructing a new export list in /etc/lib/nfs/xtab. This option effectively refreshes the export list with any changes that have been made to /etc/exports.
-a — Causes all directories to be exported or unexported, depending on what other options are passed to /usr/sbin/exportfs. If no other options are specified, /usr/sbin/exportfs exports all file systems specified in /etc/exports.
In case you will run into the following error and don’t find the package.
If ‘exportfs’ is not a typo you can use command-not-found to lookup the package that contains it.
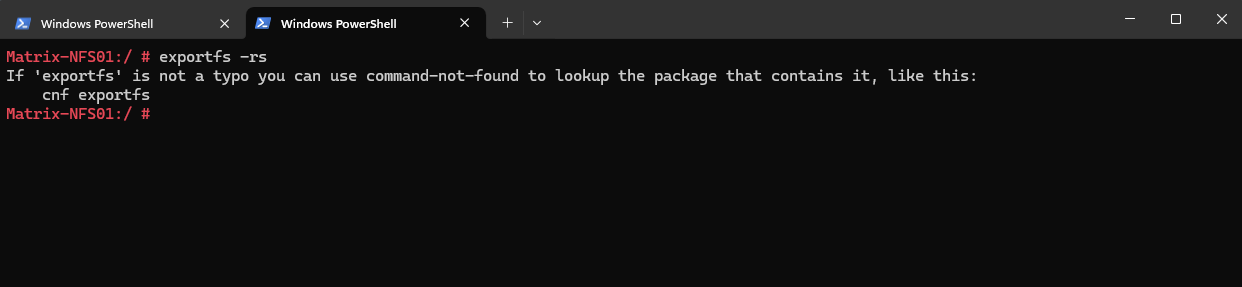
Make sure you have also installed the nfs-kernel-server package.
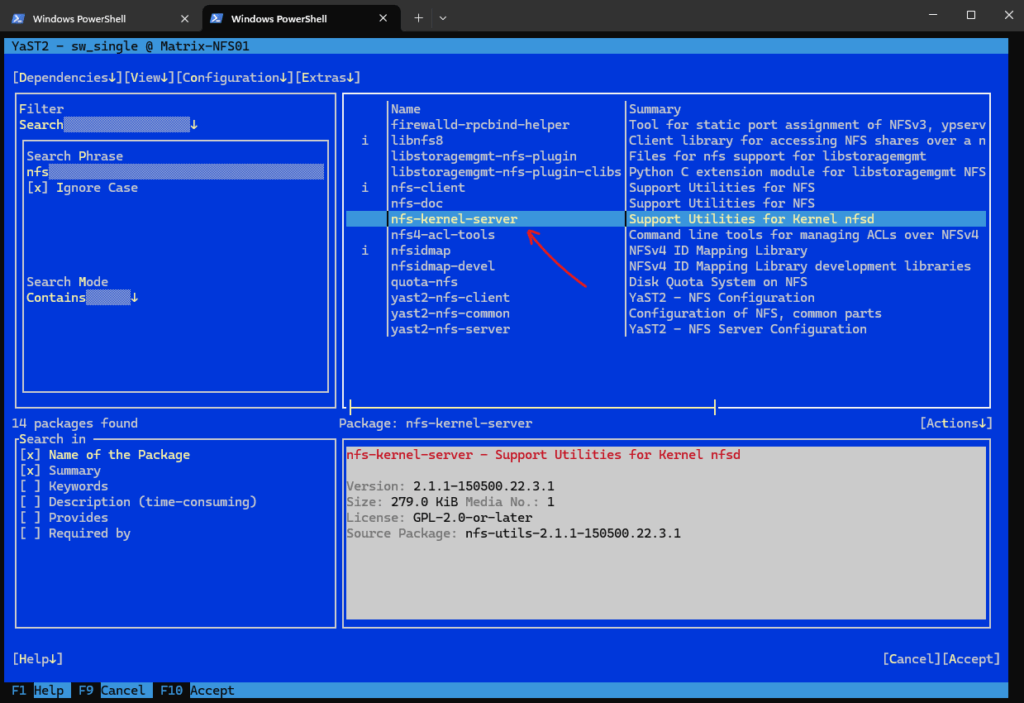
By using the command line.
# zypper install nfs-kernel-server
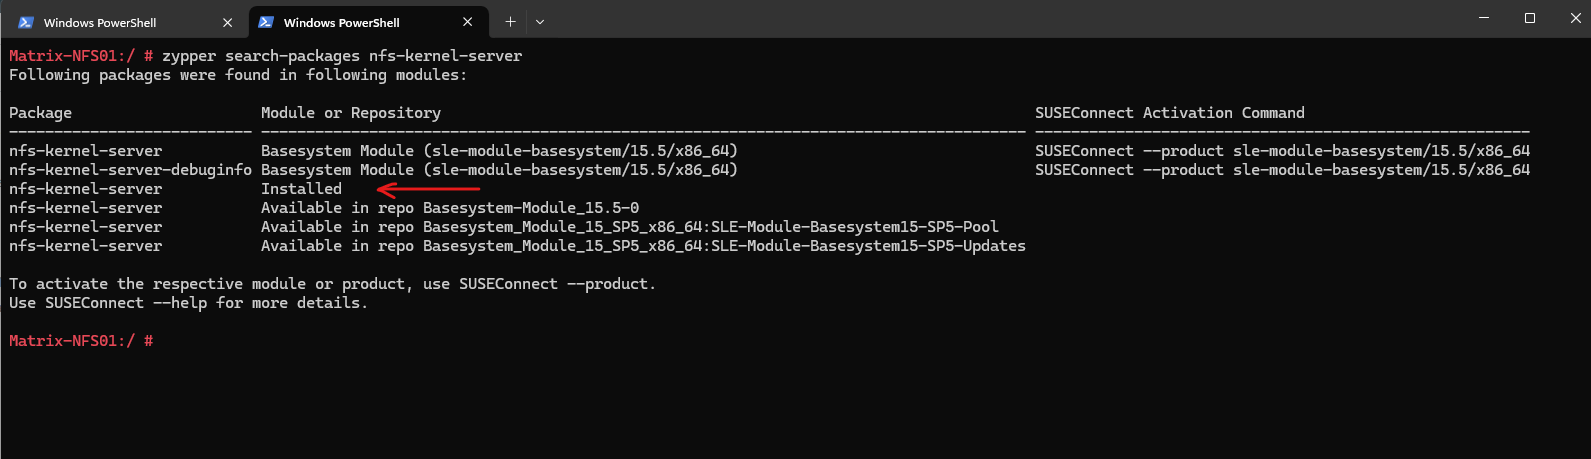
After installing the nfs-kernel-server package it works.
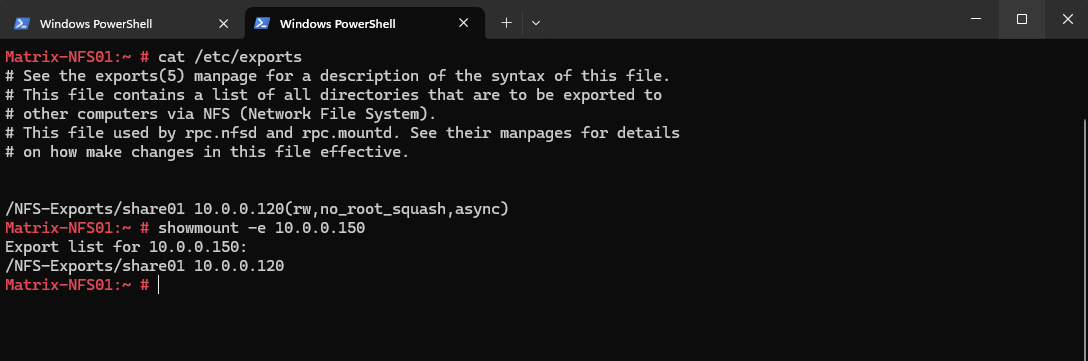
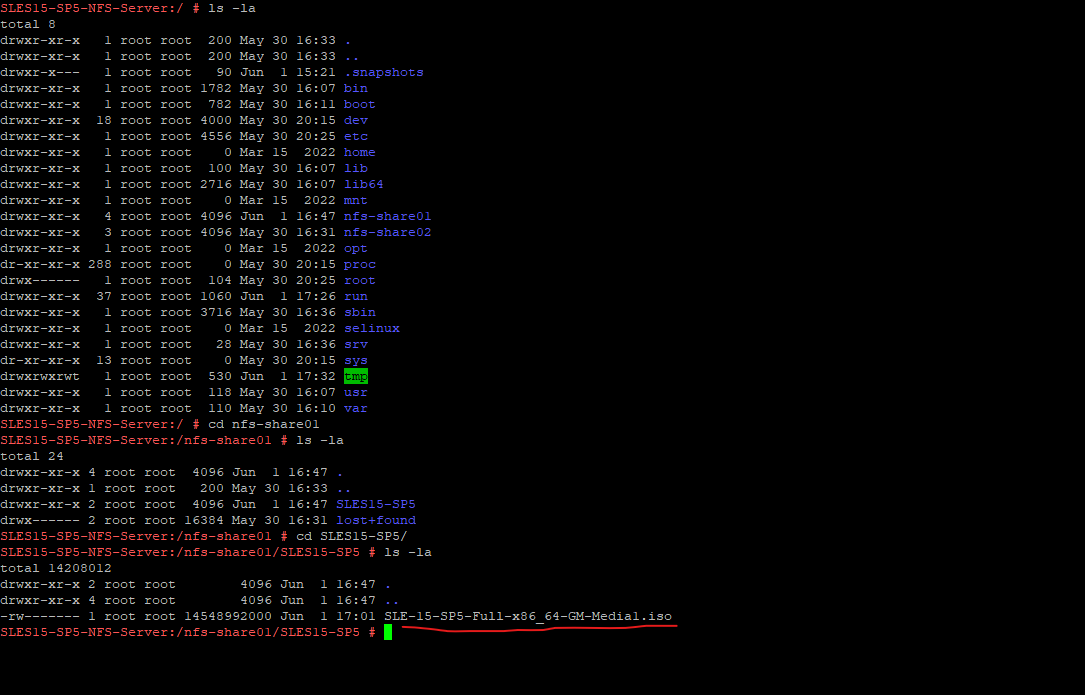
Determine exported File Systems
To check which file systems we have exported we can either check the /etc/exports file or running the showmount command.
# cat /etc/exports

# showmount -e <nfs-server-ip-or-hostname>
# showmount -e 10.0.0.150
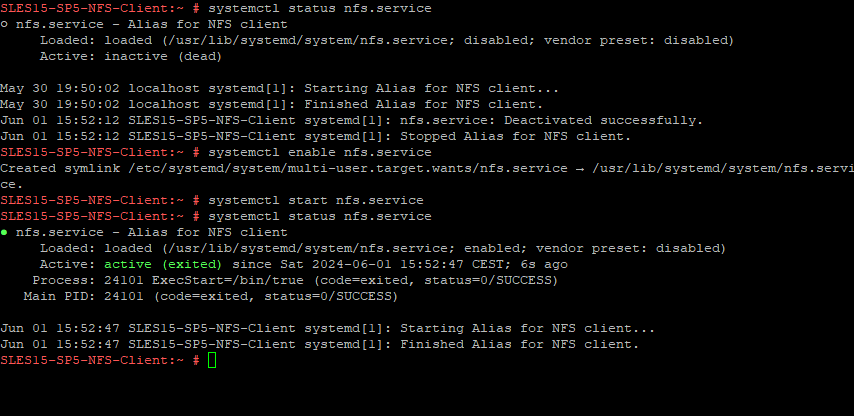
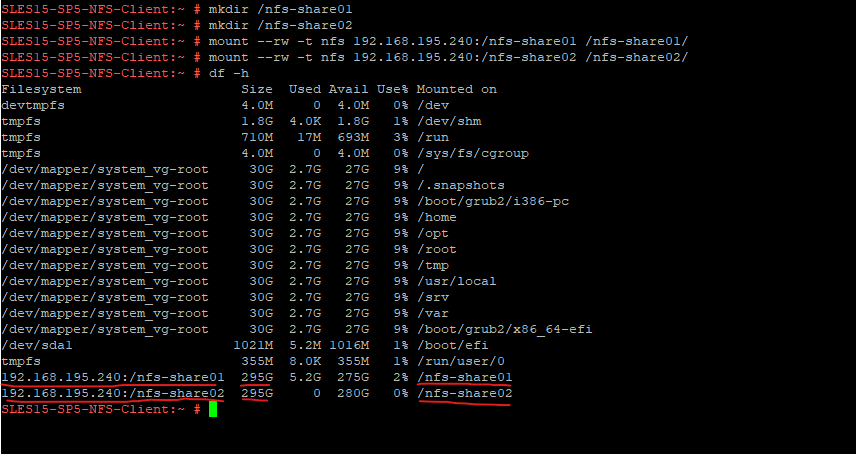
Importing File System on Linux
# systemctl enable nfs.service
# systemctl start nfs.service
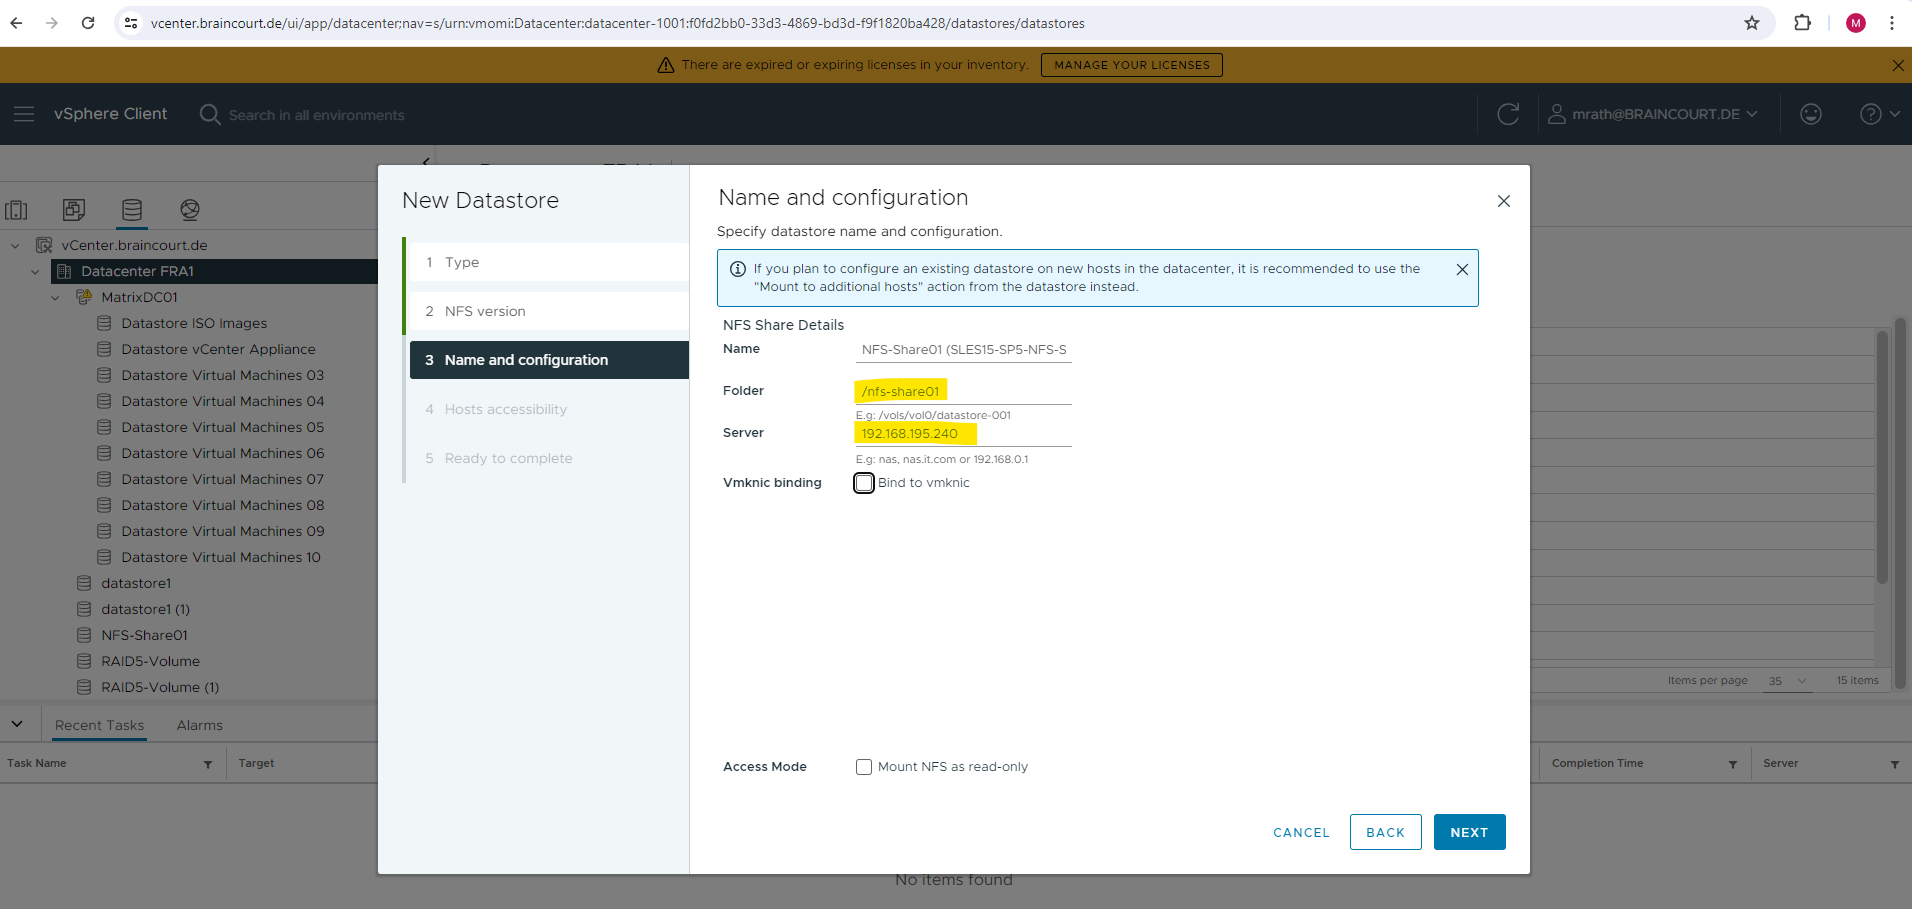
# mkdir /nfs-share01
# mkdir /nfs-share02

# mount -t nfs <FQDN or IP NFS Server>:/<exported directory> /<mount point>
# mount -t nfs 192.168.195.240:/nfs-share01 /nfs-share01
# mount -t nfs 192.168.195.240:/nfs-share02 /nfs-share02

-t flag -> Limit the set of filesystem types
-rw --read-write flag -> mount the file system read-write (by default without using this flag)
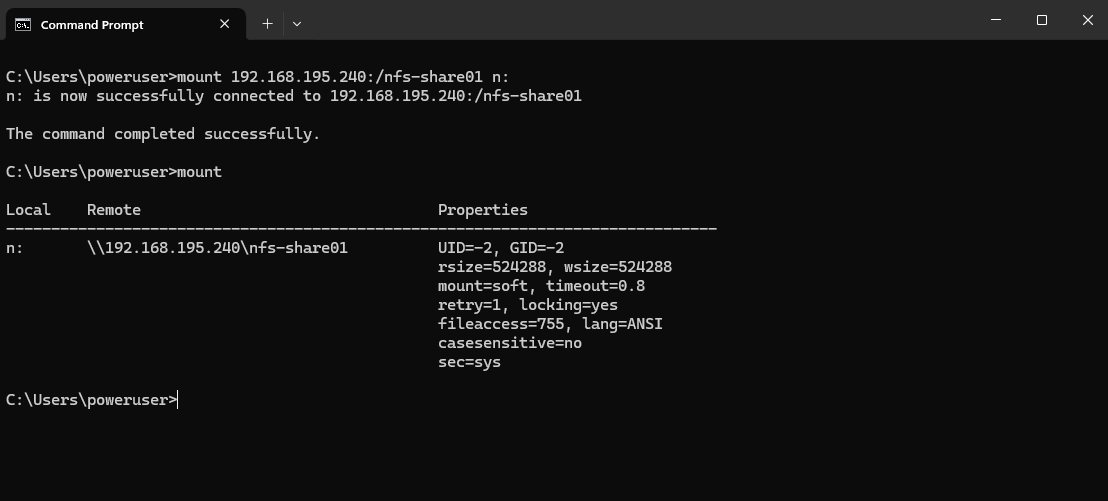
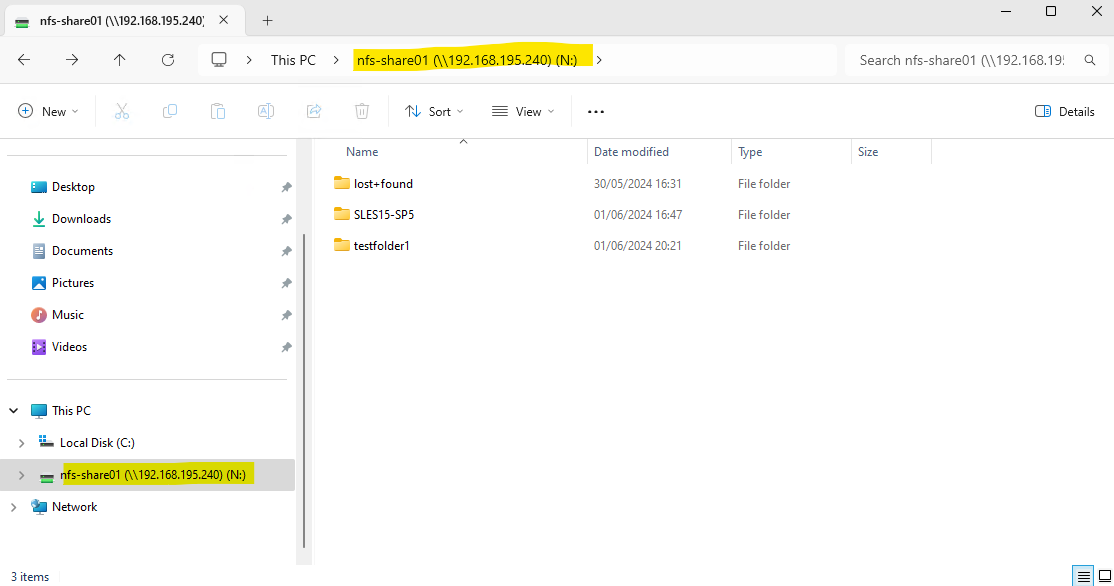
Importing File System on Windows
> mount <IP or FQDN NFS Server>:/<share> <drive>:
> mount 192.168.195.240:/nfs-share01 n:
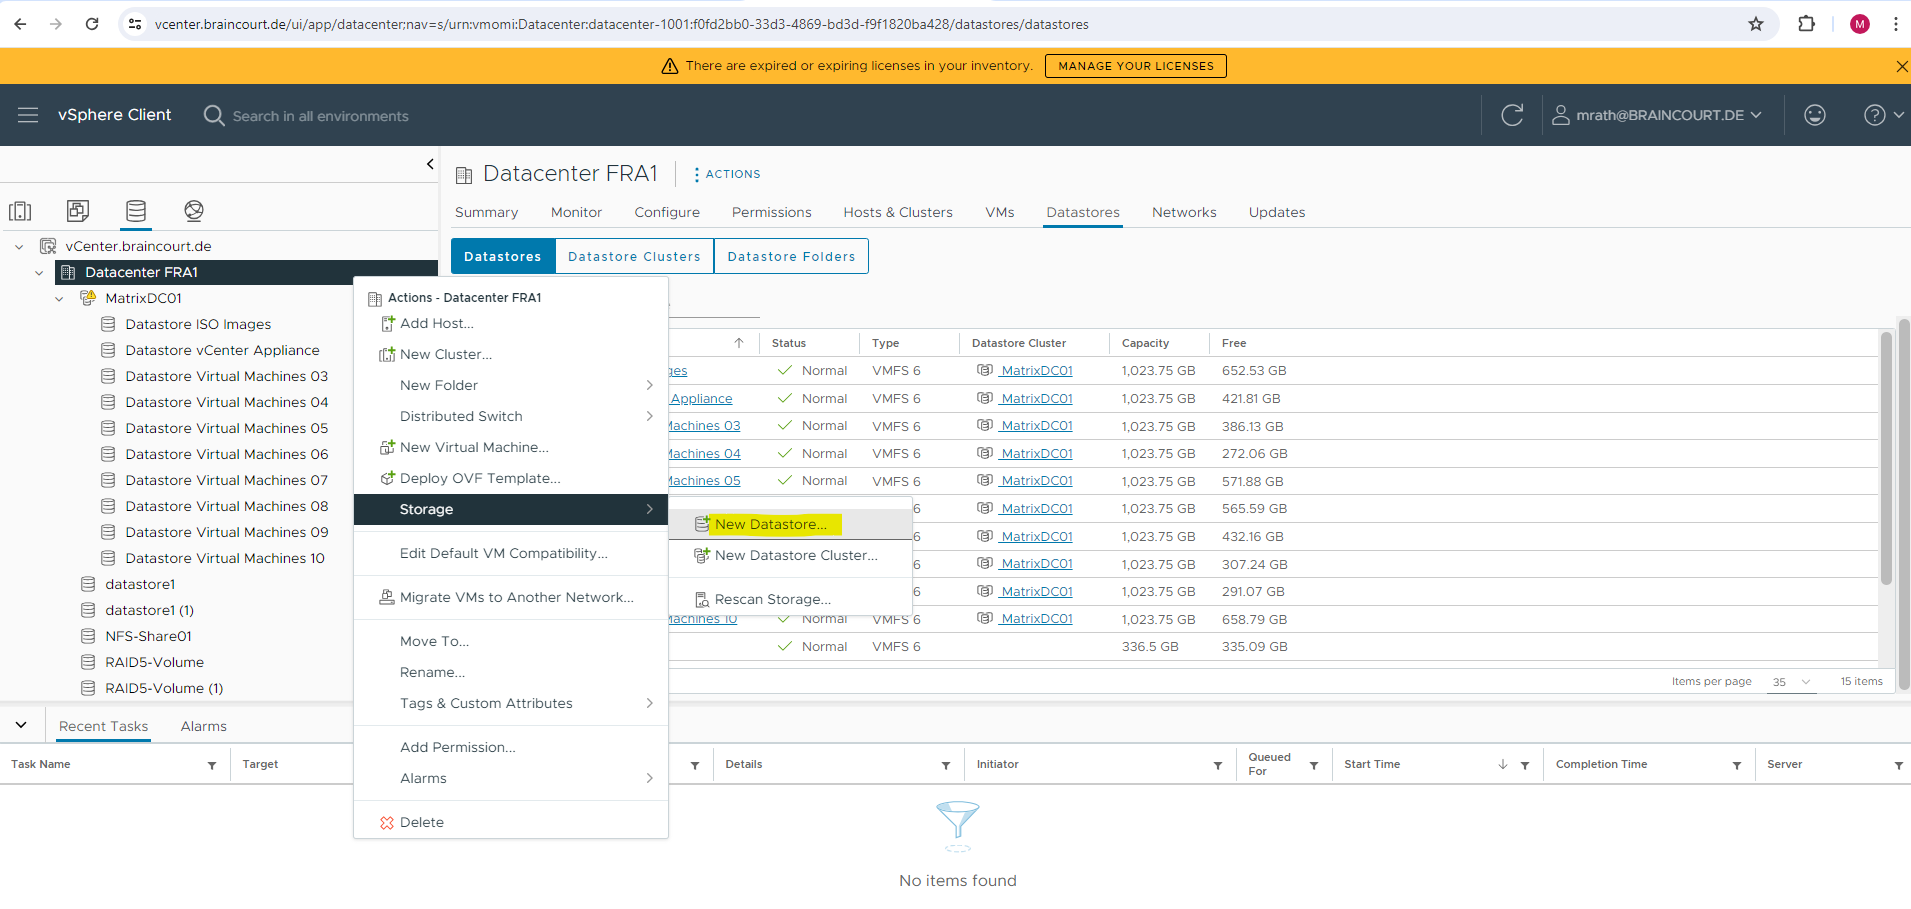
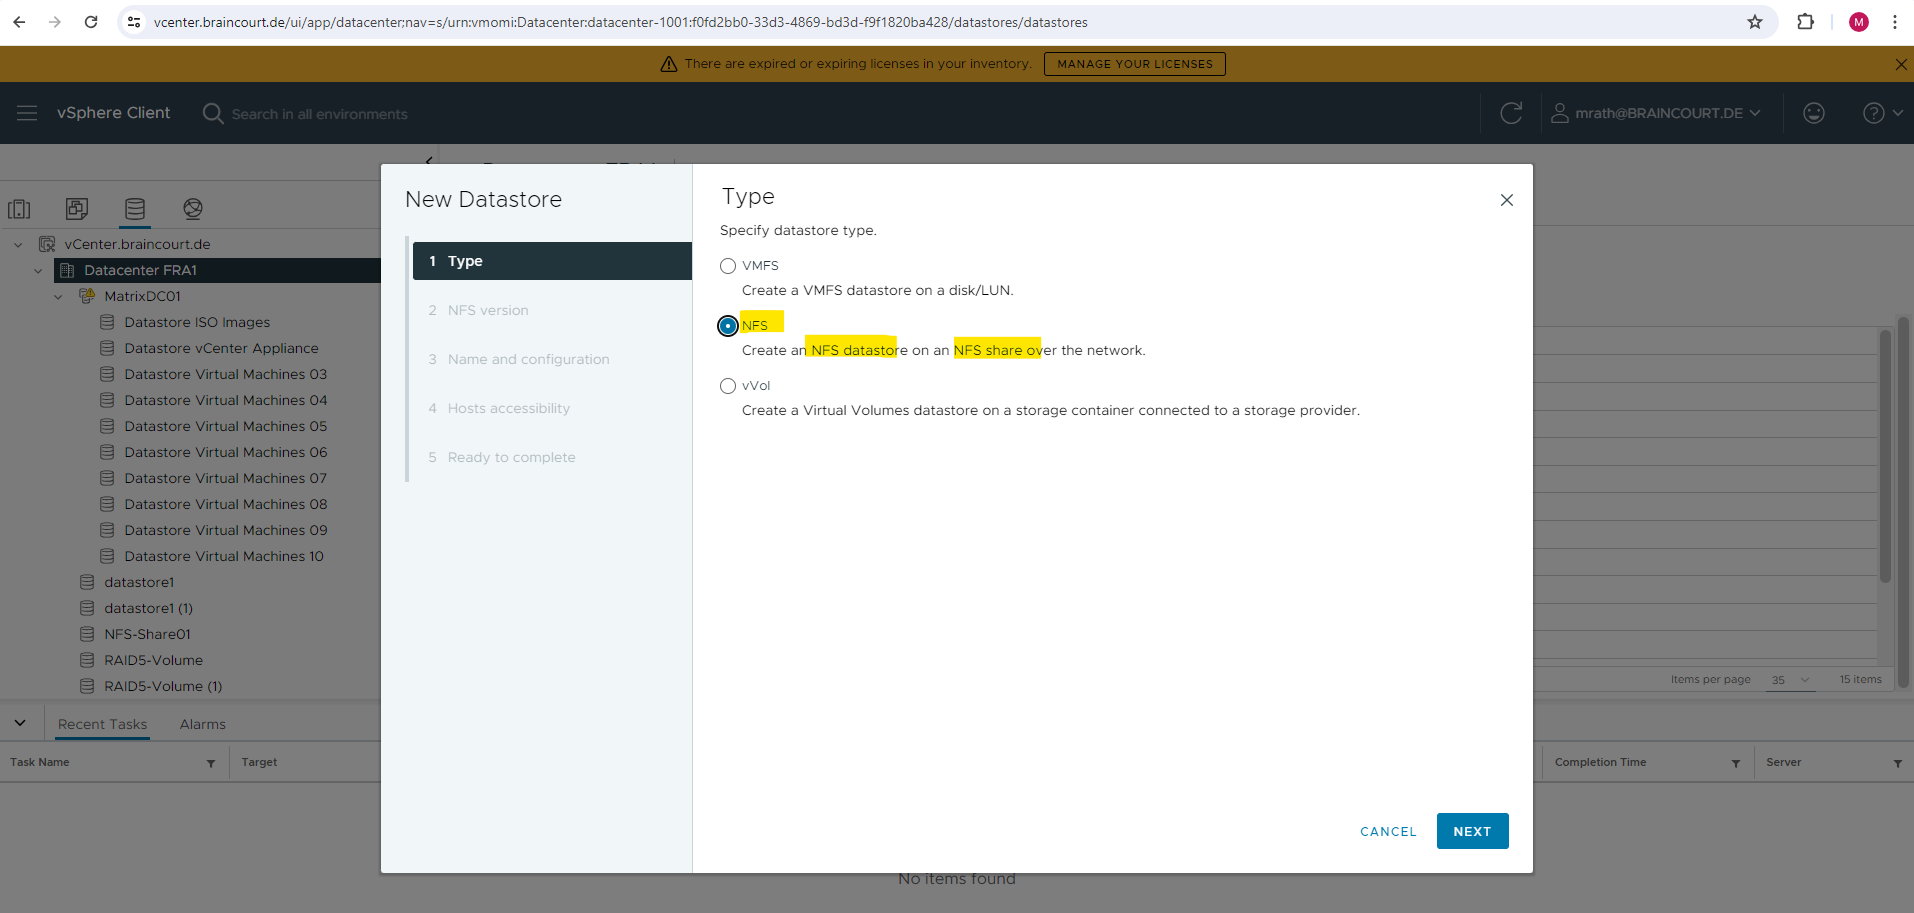
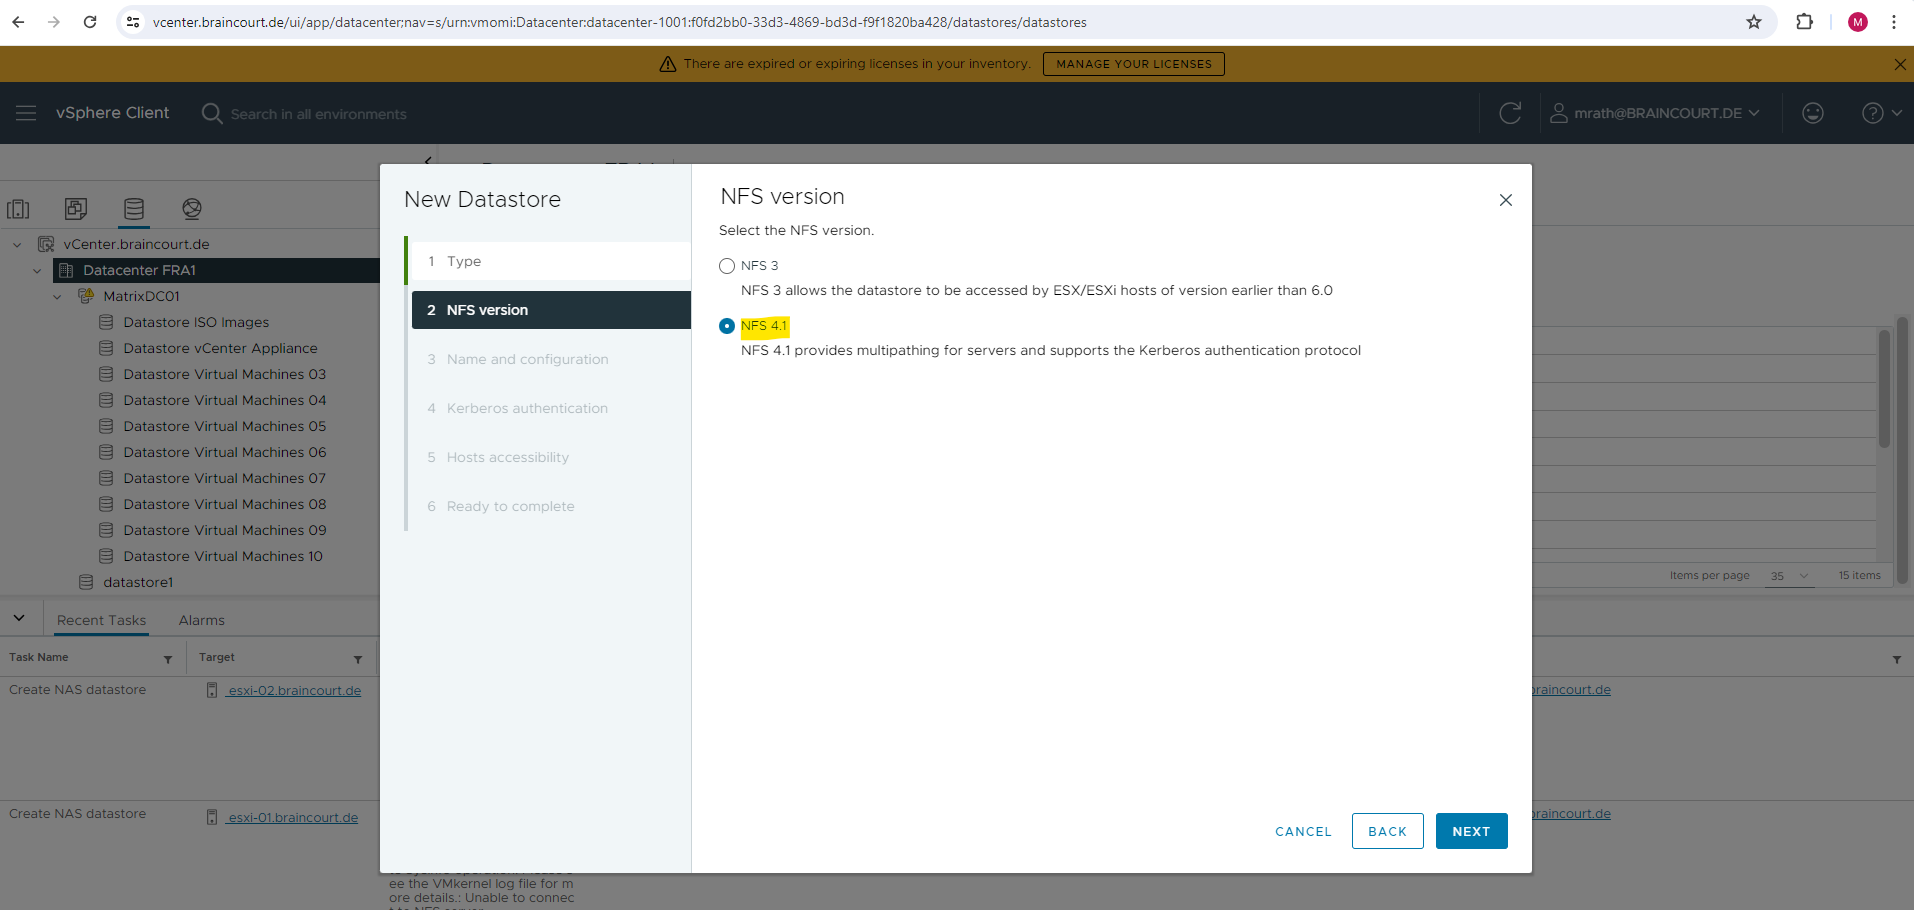
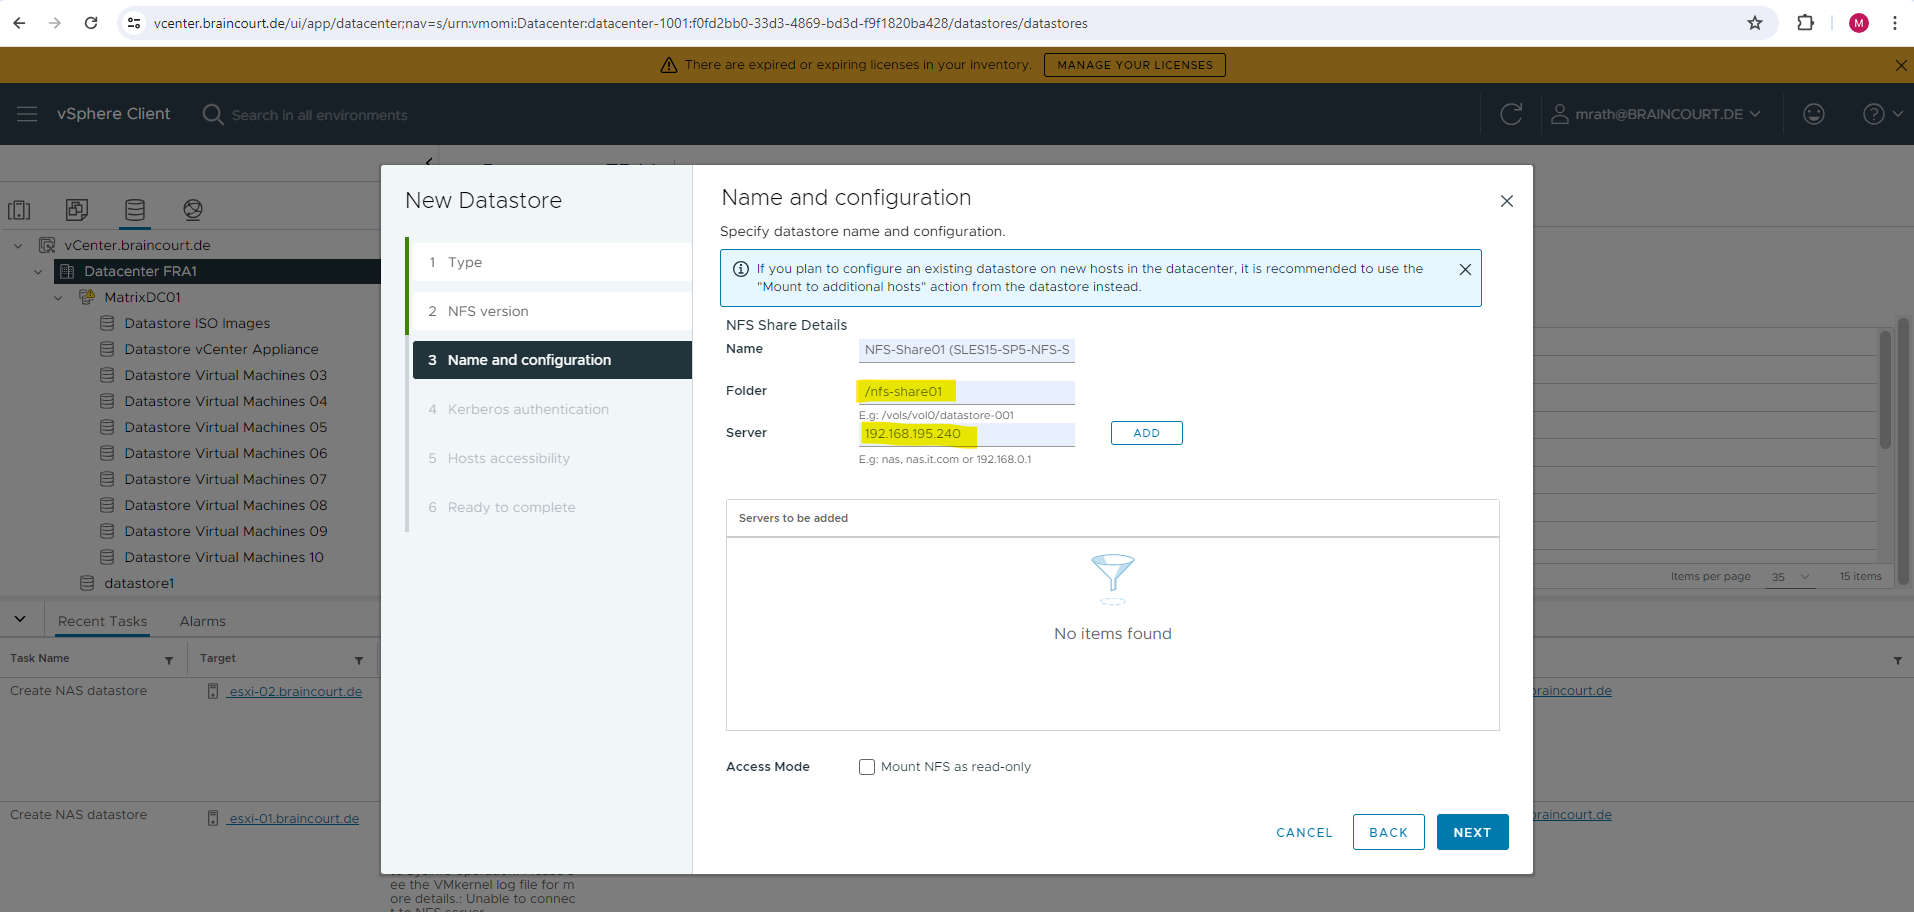
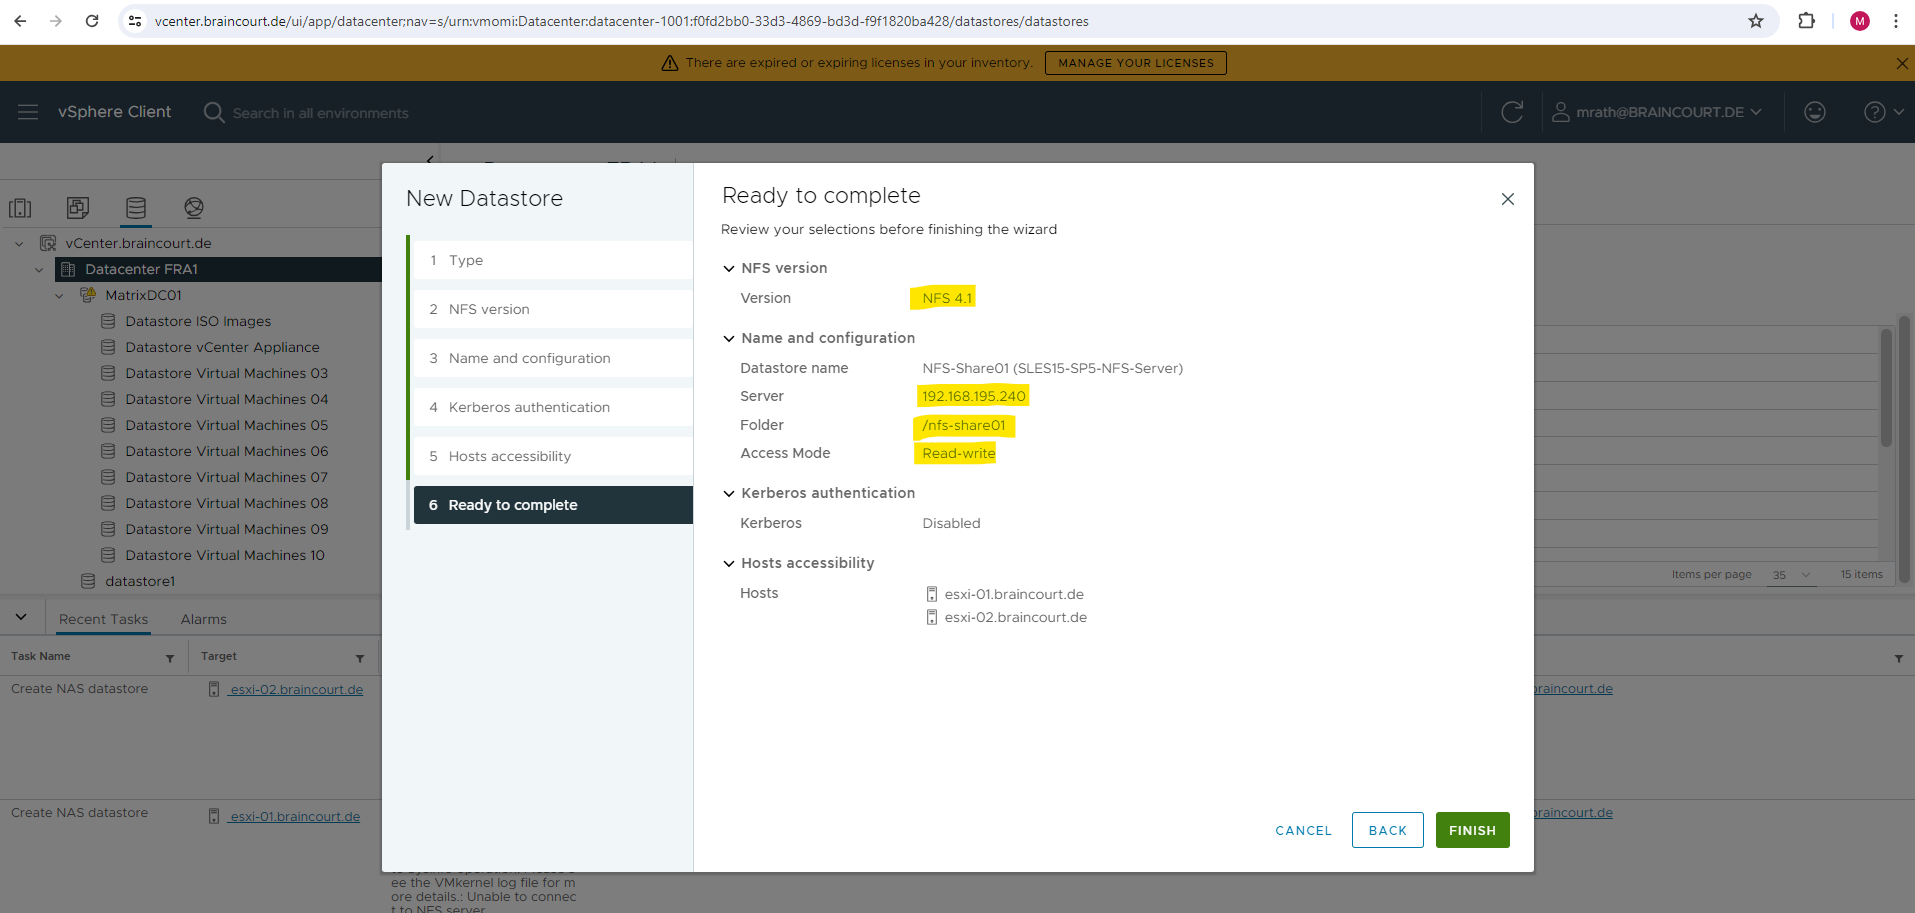
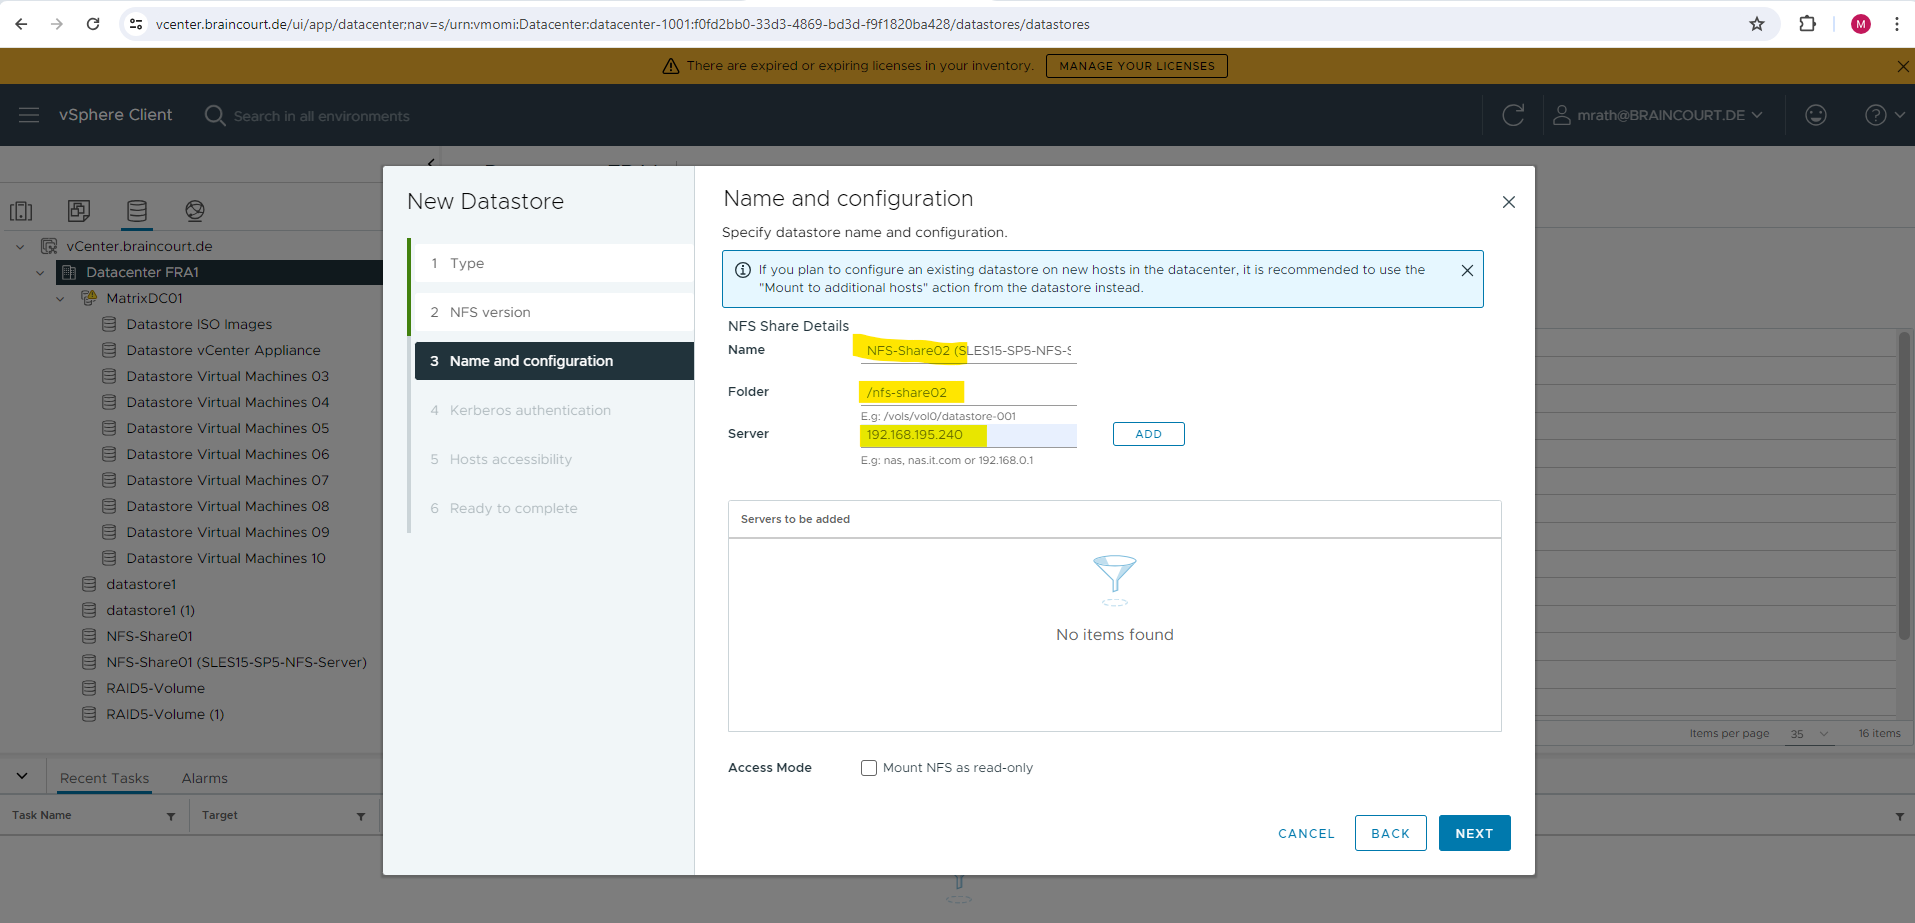
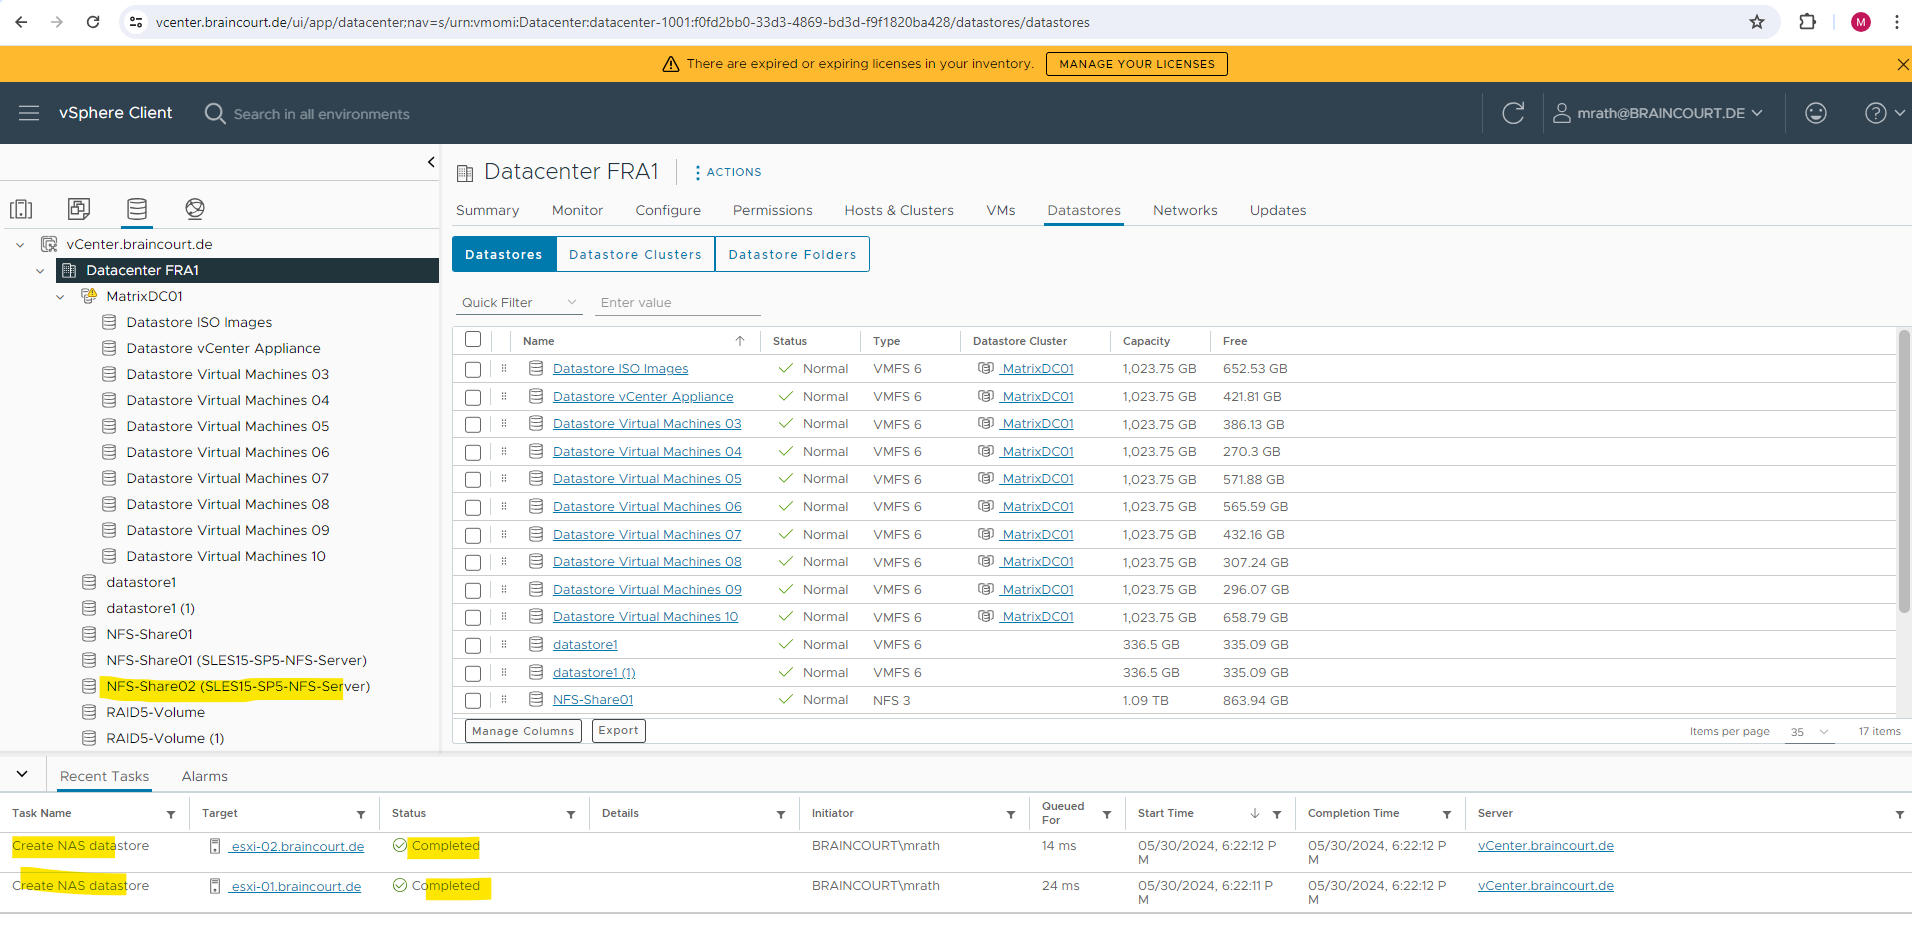
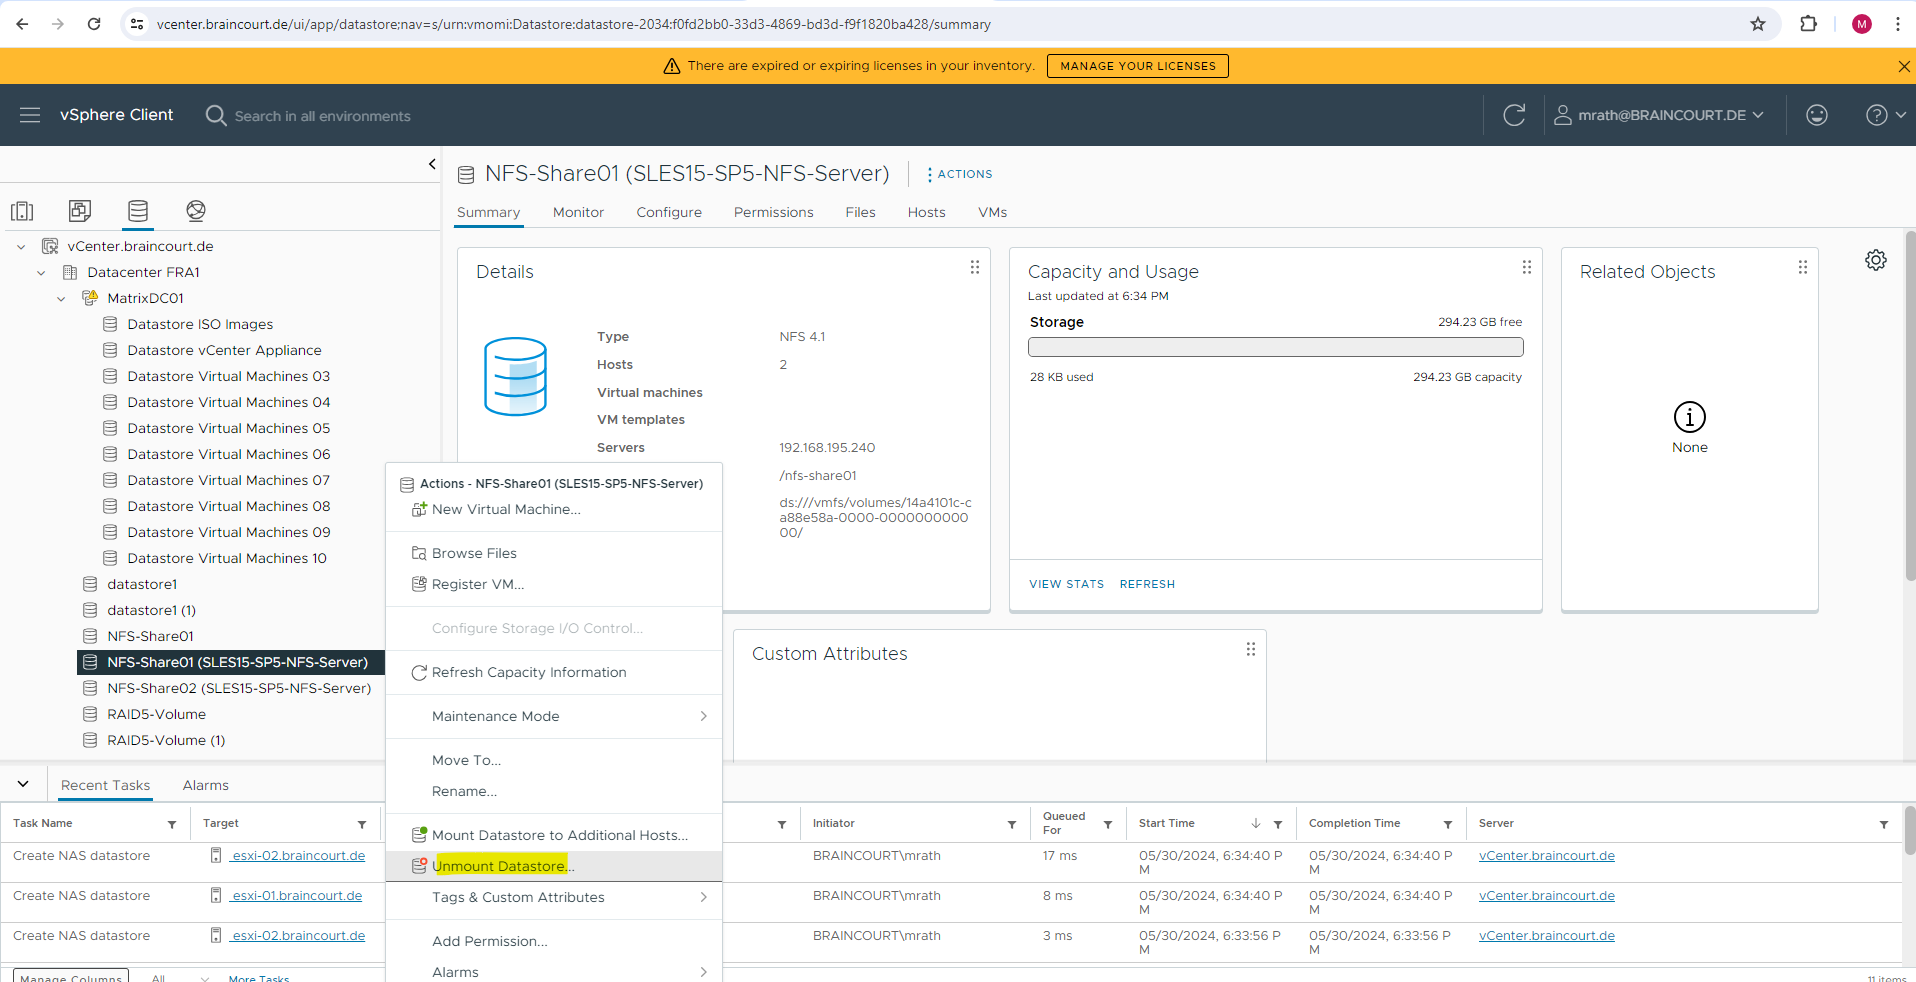
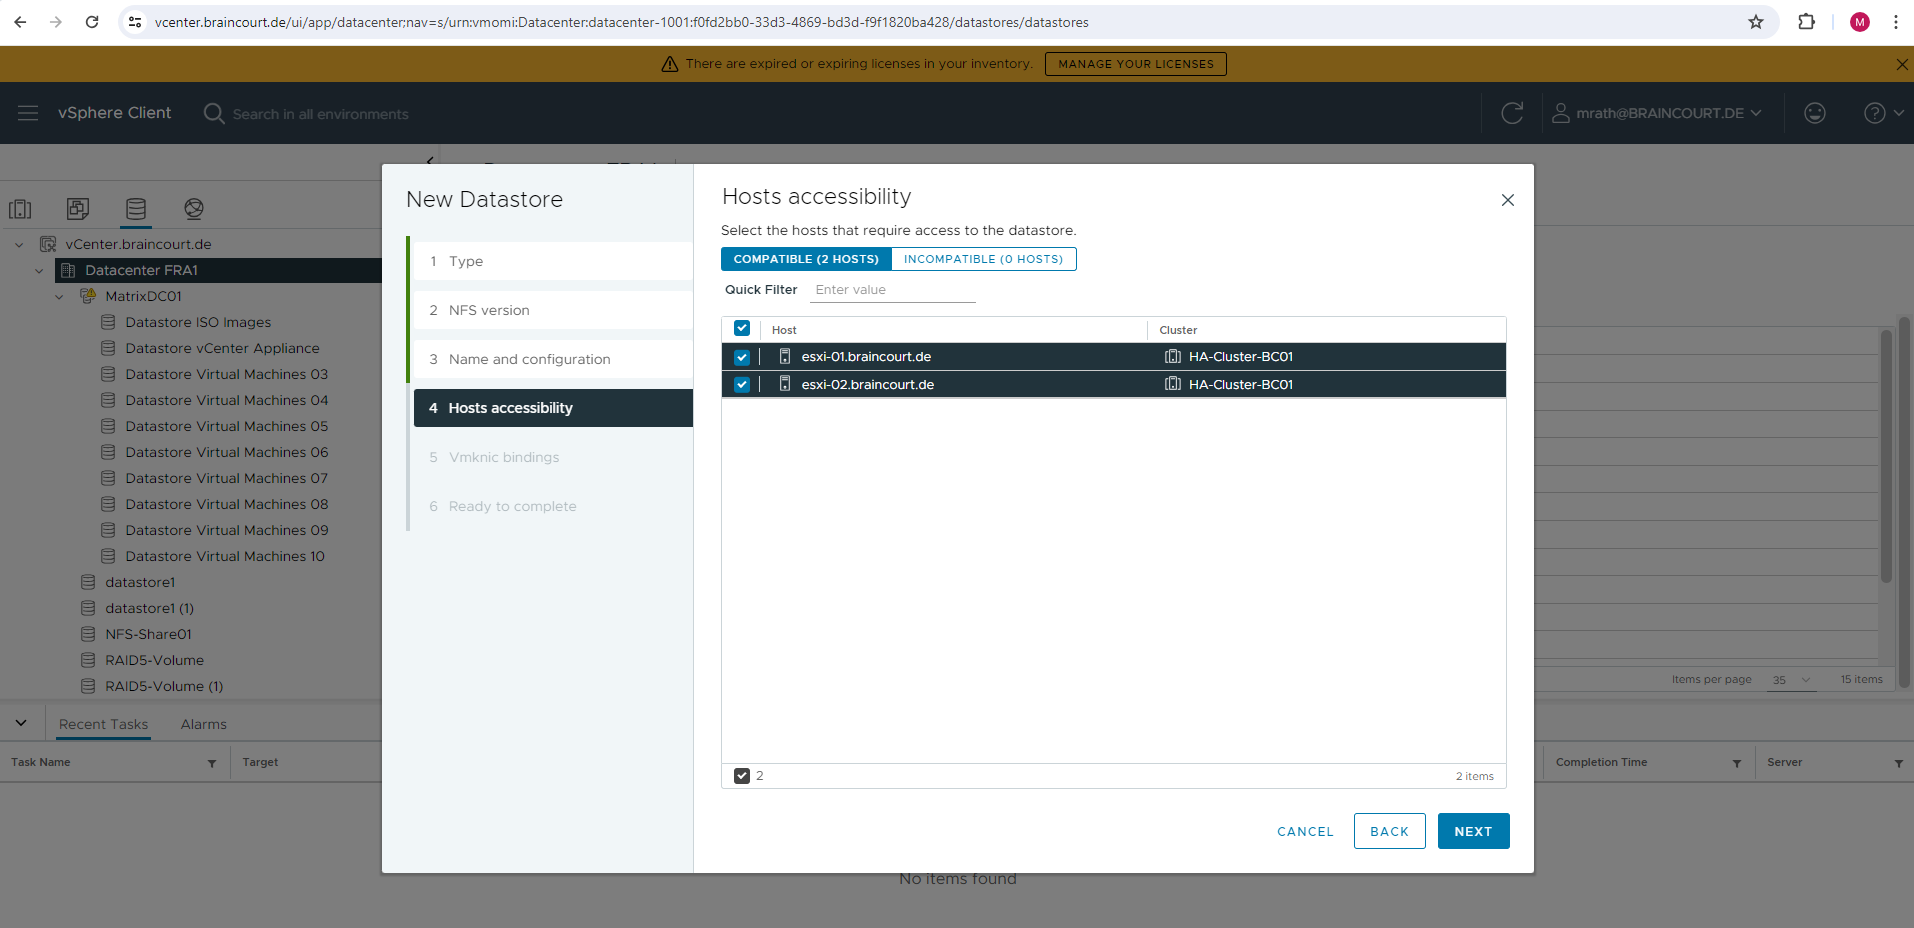
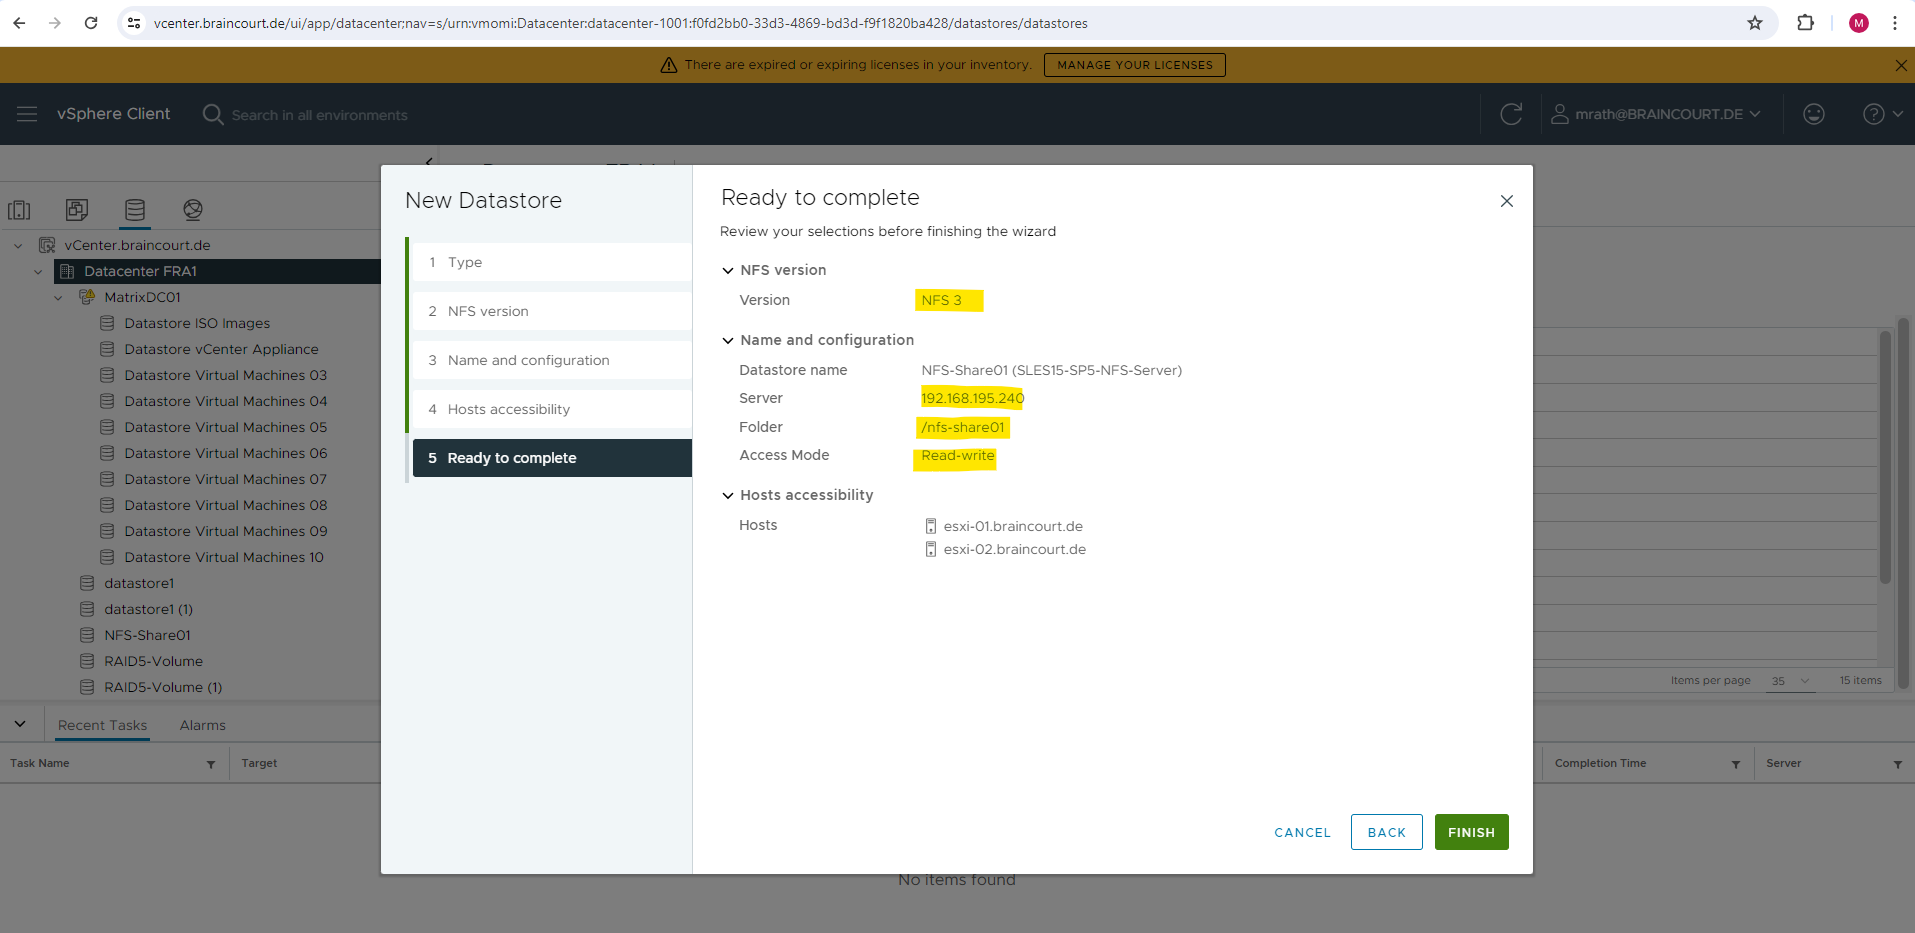
Importing File Systems on vSphere


Determine NFS Version
There are several ways to check which NFS version is active on both the server and client:
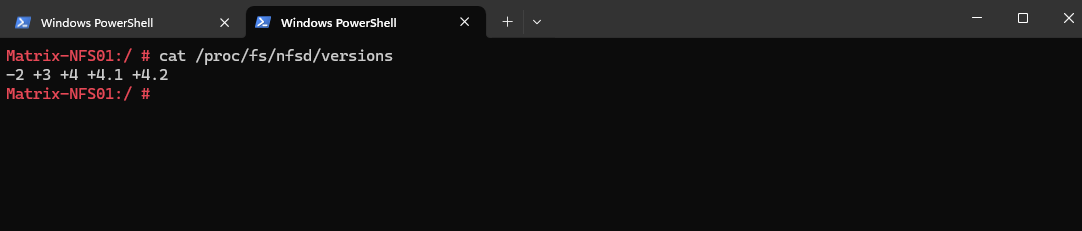
On the NFS Server
# cat /proc/fs/nfsd/versions
Output like +2 +3 +4 +4.1 +4.2 shows supported versions.
# cat /etc/sysconfig/nfs | grep NFS4
Look for lines like NFS4_SUPPORT=”yes” or NFS_VER=”4.2″

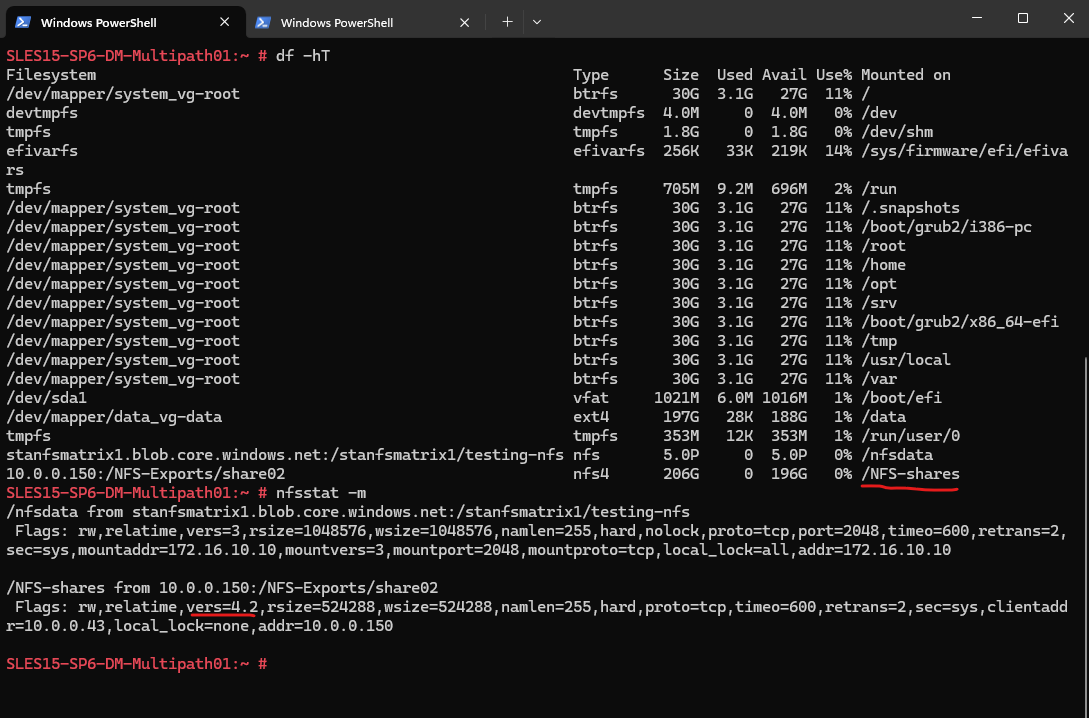
On the NFS Client
Check the mounted shares.
# nfsstat -m
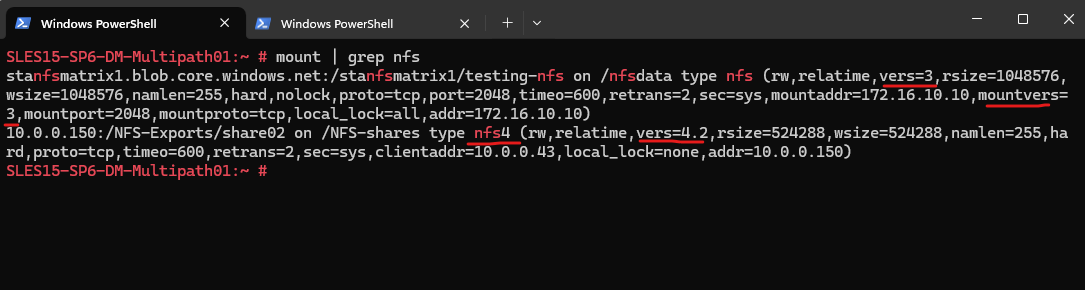
Look for version indicators in the output (e.g., “vers=4.2”). Below on the screenshot is a mounted share from an Azure storage account and blob storage as shown in my following post https://blog.matrixpost.net/set-up-an-azure-storage-account-and-blob-storage-for-nfs-access-by-using-a-private-endpoint/.
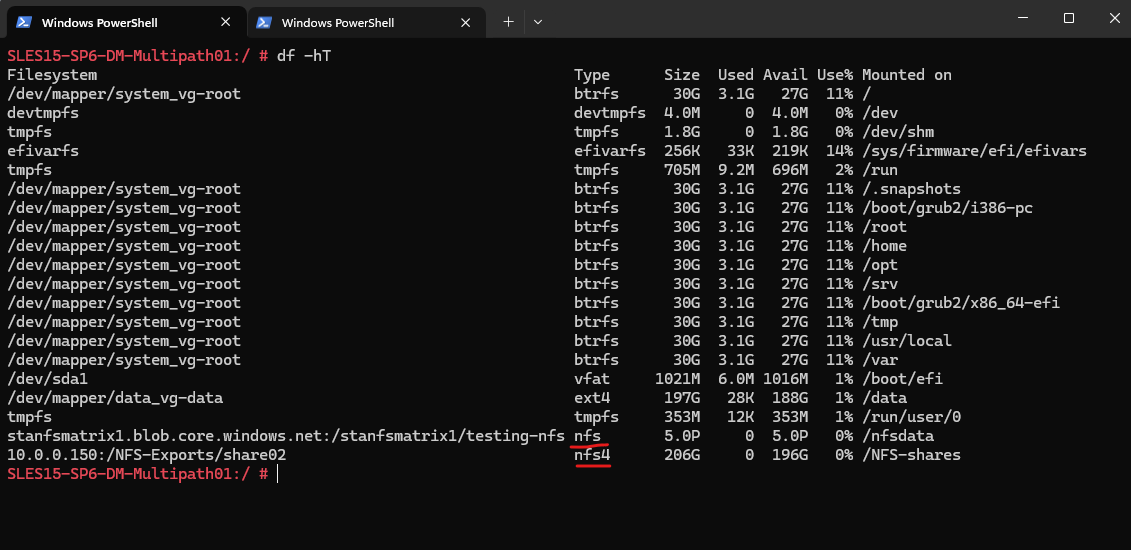
Azure Blob Storage now supports NFS 3.0.
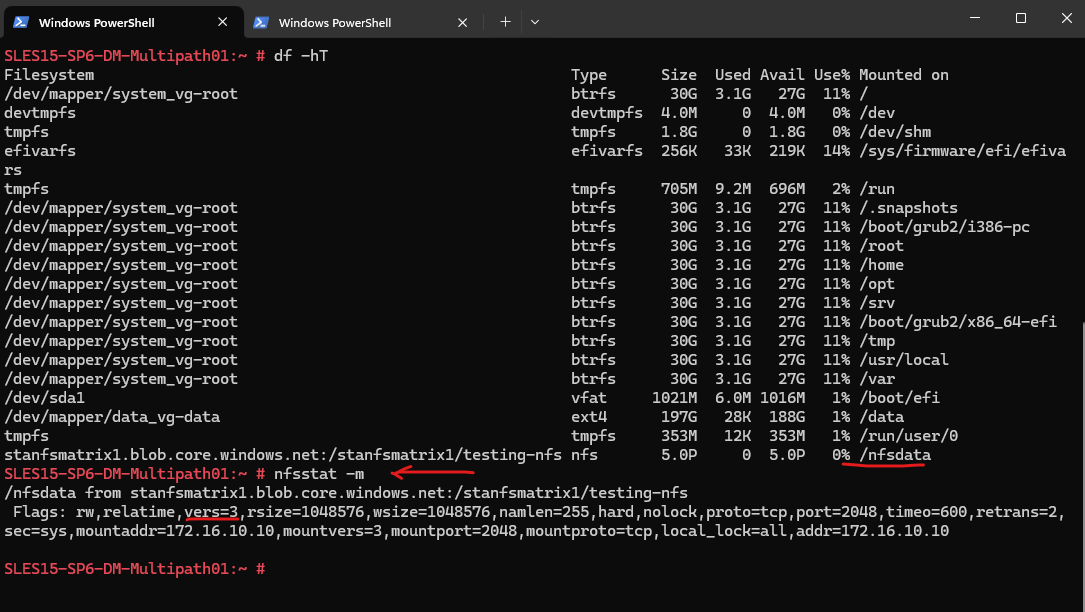
This share is exported by my internal SLES NFS server which supports NFS 4.2.
# mount | grep nfs
# df -hT
Common Version Indicators
- NFSv3: Uses TCP/UDP port 2049 + portmapper (rpcbind)
- NFSv4: Uses just TCP port 2049
- NFSv4.1: Adds session trunking
- NFSv4.2: Adds server-side copy, sparse files
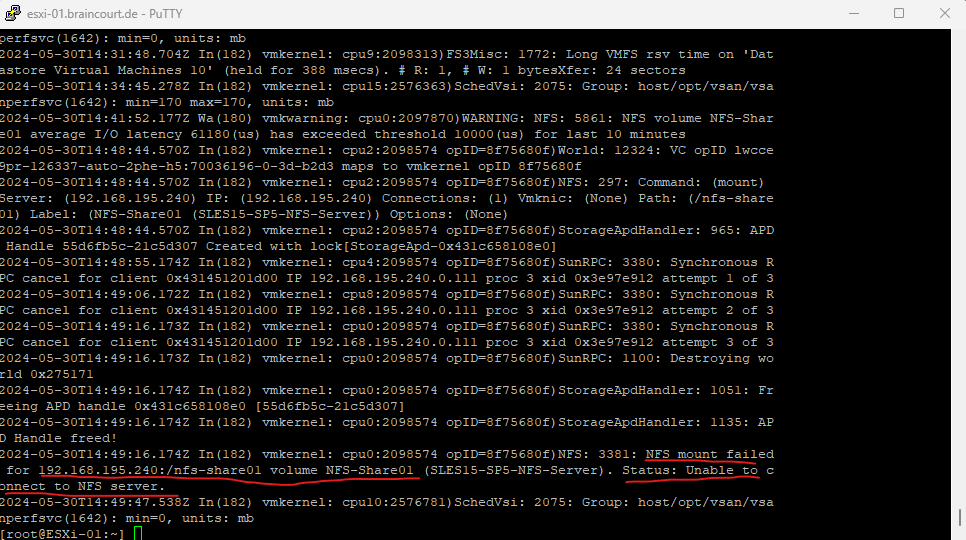
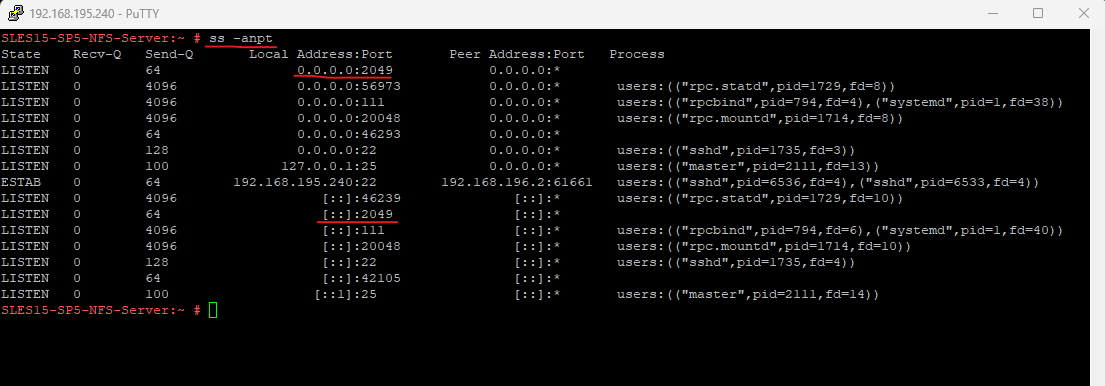
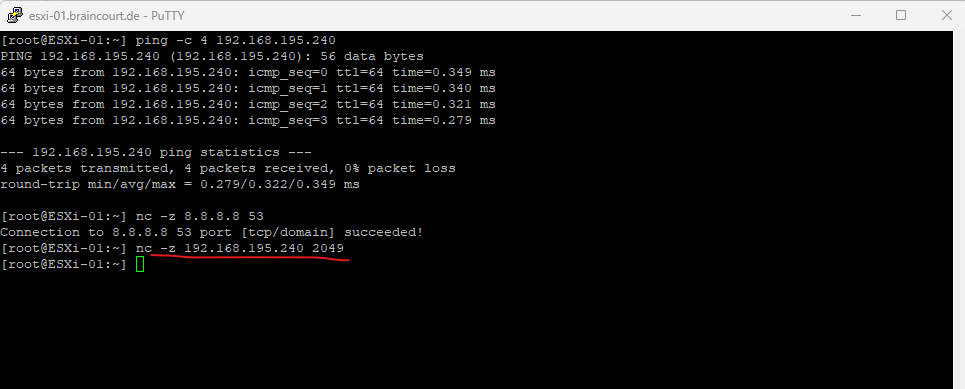
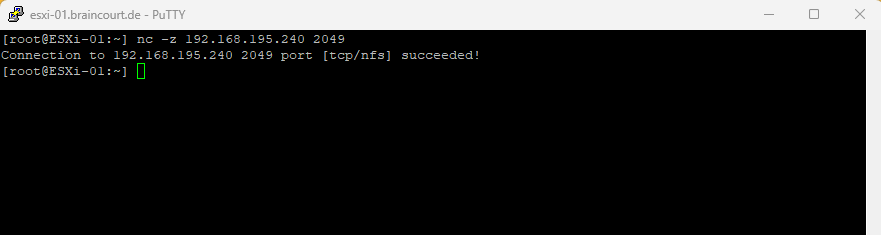
Troubleshooting
TCP Connectivity

# cat /var/log/vmkernel.log
More about the Netcat utility and its reimplementation Ncat, you will find in my following post https://blog.matrixpost.net/mastering-oracle-linux-updates-and-repos/#netcat.
On SLES 15 and below the netcat-openbsd version is installed by default.
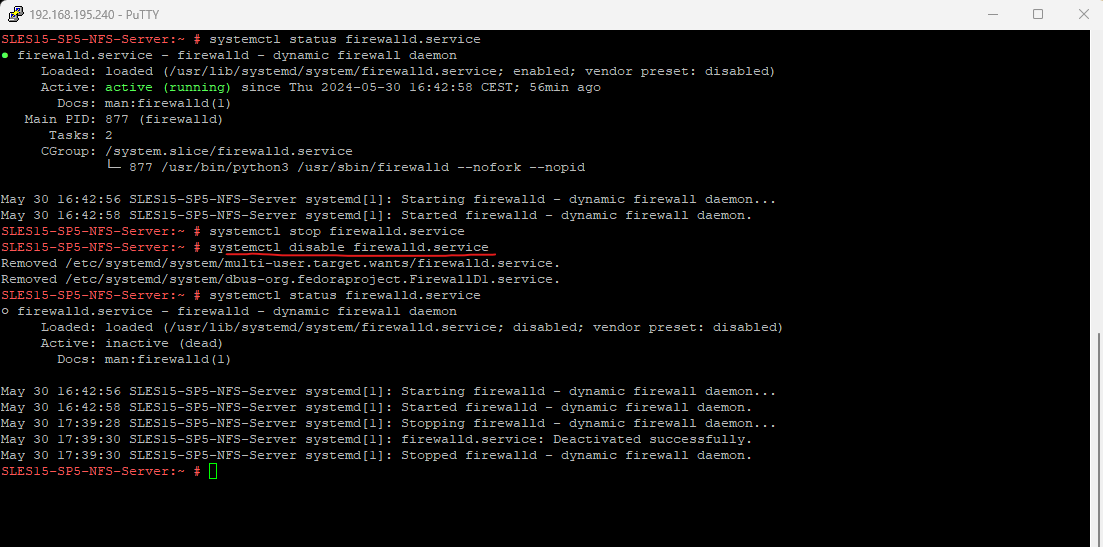
NFS Server is not enabled
We can enable the NFS server by using the systemctl command.
# systemctl enable nfs-server.service
The NFS server finally should listen on TCP Port 2049 for incoming requests.
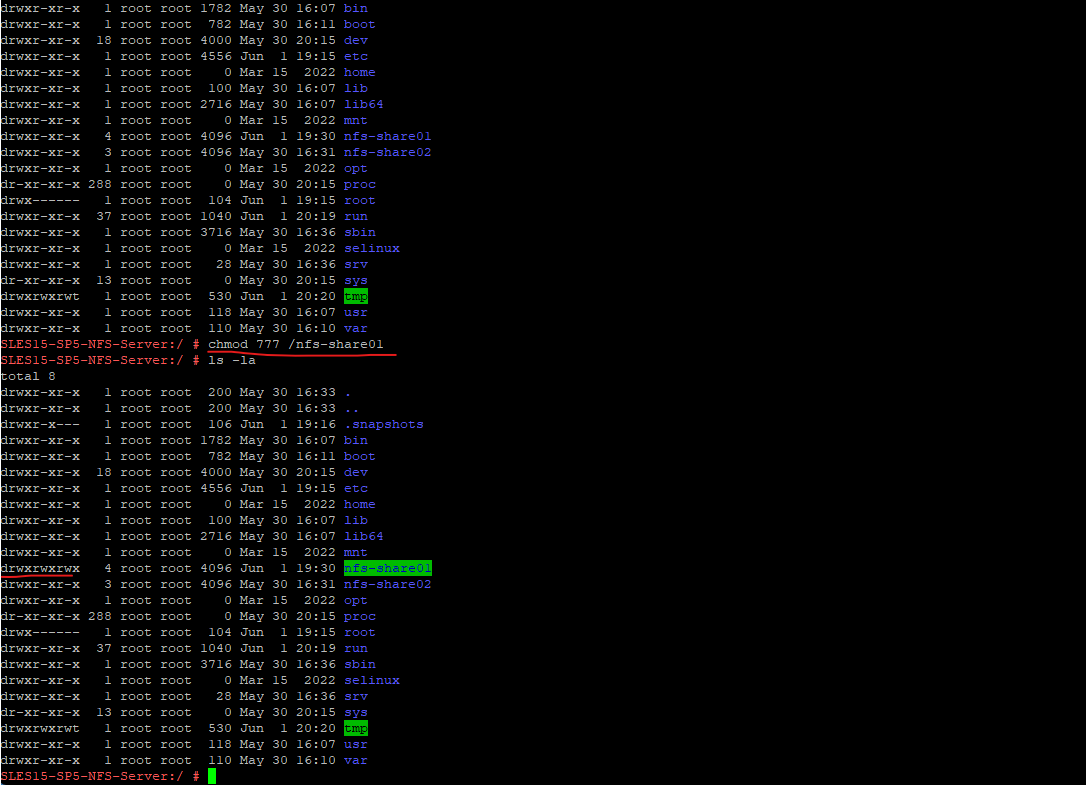
Read-only permissions on exported file system
ro,root_squash,sync,no_subtree_check
# systemctl restart nfs-server.service