Set up Windows Autopilot – Production Environment from external – Part 2
In this part I want to enroll a Windows 10 device (also VM) into the production environment as Hybrid Azure AD joined with pre-installed apps like Notepad++ and a configured VPN connection for onboarding the device outside the corporate network.
In Part 1 you will see the basics how you can enroll step by step windows 10 devices to Azure AD (Azure AD joined) using Windows Autopilot.
For this part I will also use the following article from Microsoft.
Demonstrate Autopilot deployment
https://docs.microsoft.com/en-us/windows/deployment/windows-autopilot/demonstrate-deployment-on-vm
- Register the device in Azure AD
- Create the Windows Autopilot deployment profile
- Create a configuration profile for domain join (on-premises)
- Configure Intune Connector for Active Directory to support autopilot-enrolled computers in the on-premises Active Directory domain
- Configure support for external devices outside the corporate network by configure VPN for Autopilot.
- Deploy your root certificate for VPN by creating a trusted certificate profile in Intune
- Create a VPN Configuration Profile
- Create a Autopilot Script (PowerShell) to activate Windows 10
- Deploy an App to the Autopilot Profile
- Add Office 365 to the Autopilot Profile
- See Windows Autopilot in action
- Links
Register the device in Azure AD
For registering the VM in Azure AD I will use Microsoft Intune as shown already in Part 1.
Therefore I will import the previously captured hardware ID using the PowerShell cmdlet from Part 1.
md c:HWID
Set-Location c:HWID
Set-ExecutionPolicy -Scope Process -ExecutionPolicy Unrestricted -Force
Install-Script -Name Get-WindowsAutopilotInfo -Force
$env:Path += ";C:Program FilesWindowsPowerShellScripts"
Get-WindowsAutopilotInfo.ps1 -OutputFile AutopilotHWID.csv
When you are prompted to install the NuGet package, choose Yes.
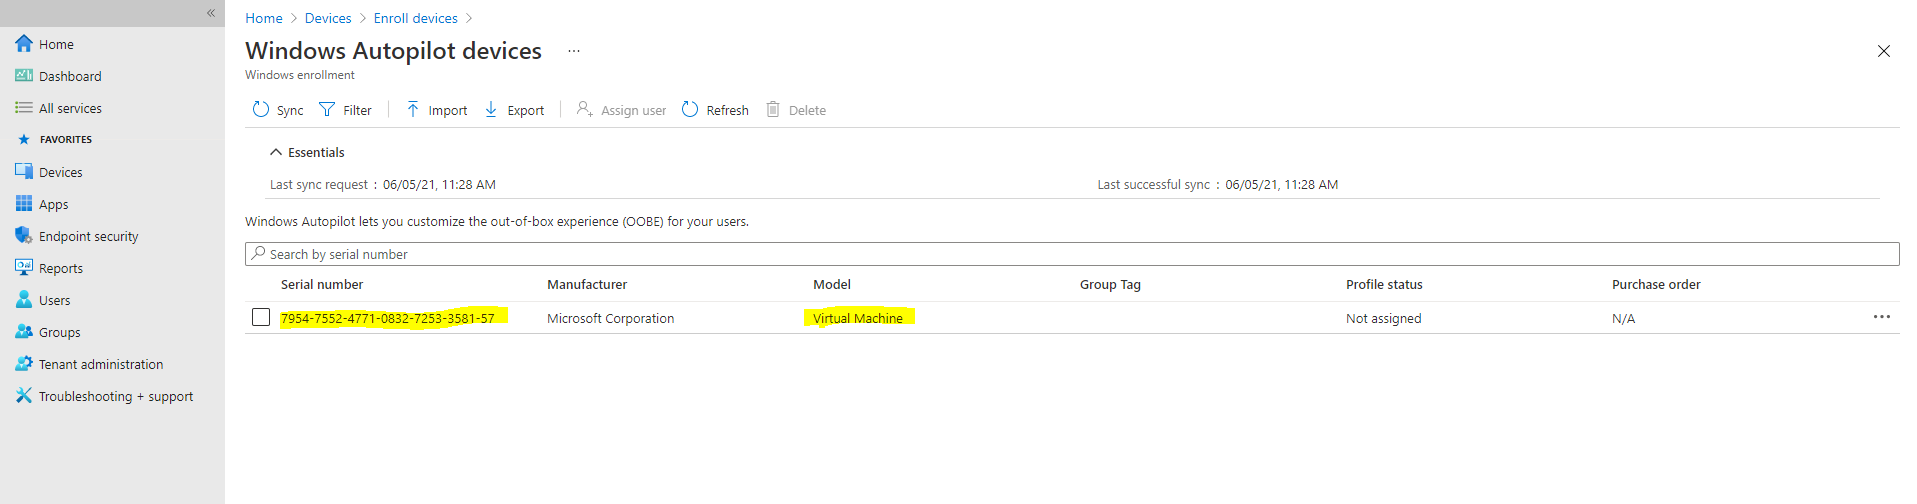
Microsoft Endpoint Manager admin center -> Devices -> Enroll devices -> Windows enrollment -> Devices
Choose Import to add the AutopilotHWID.csv file previously created on the VM.
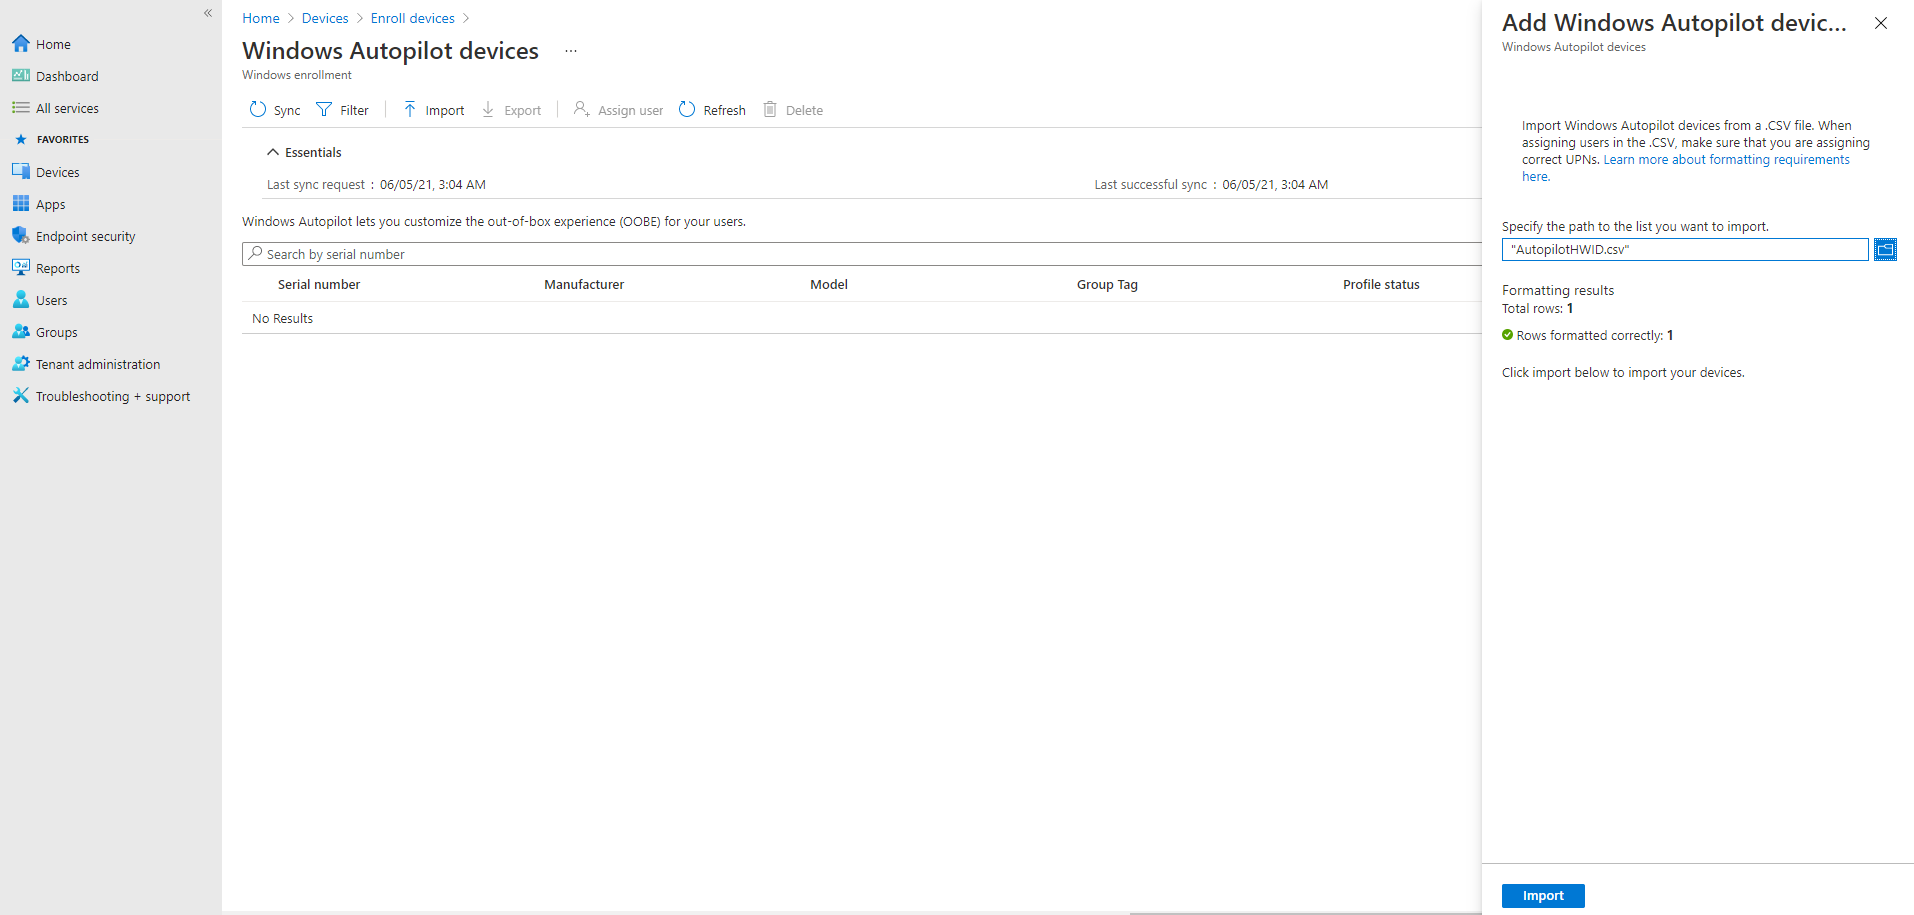
Click Import and wait until the import process completes. This can take up to 15 minutes.
So far nothing has changed to Part 1
The different part in the production environment in contrast to the previously shown set up for the lab environment, will be the deployment profile we will create for.
Create the Windows Autopilot deployment profile
I will use Microsoft Intune again to create the deployment profile, but as mentioned in Part 1 you can also use the Microsoft Store for Business (MSfB), recommended is to use Microsoft Intune.
I will only use Microsoft Intune again.
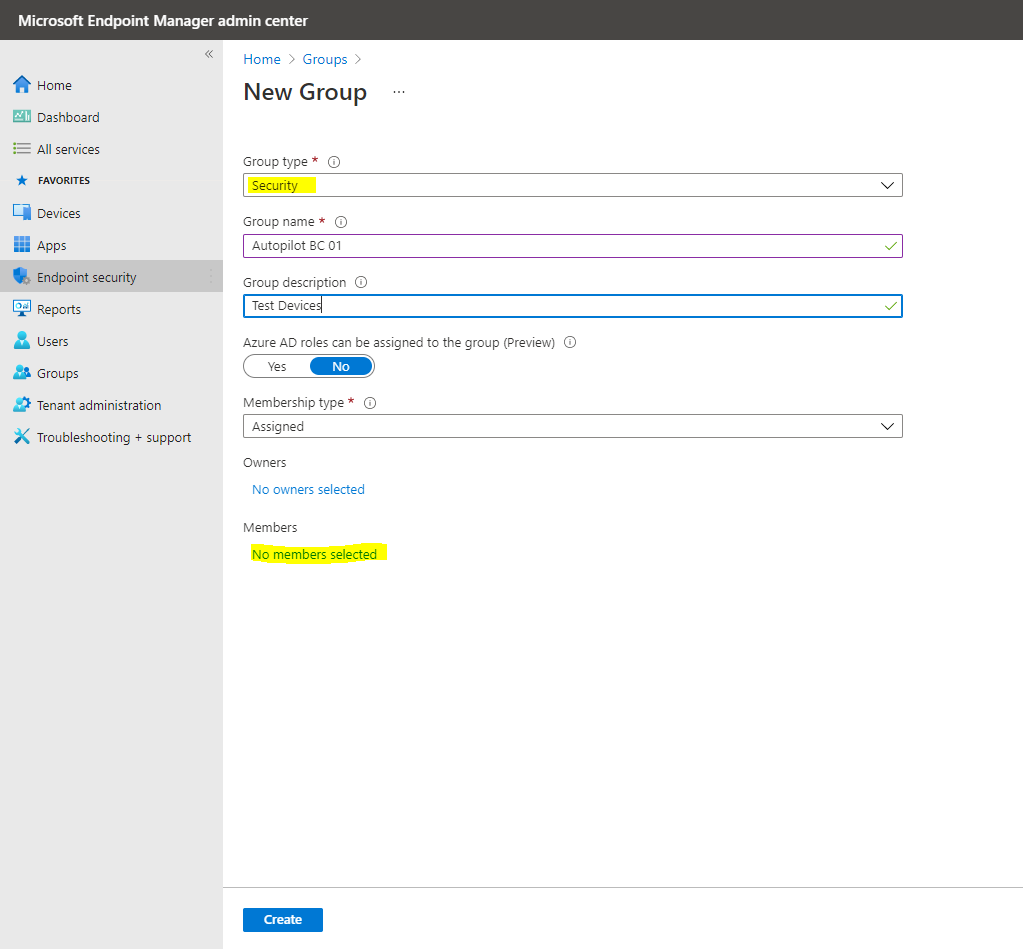
The Autopilot deployment profile wizard will ask for a device group, so we must create one first. To create a device group:
In the Group blade:
- For Group type, choose Security.
- Type a Group name and Group description.
- Azure AD roles can be assigned to the group: No
- For Membership type, choose Assigned.
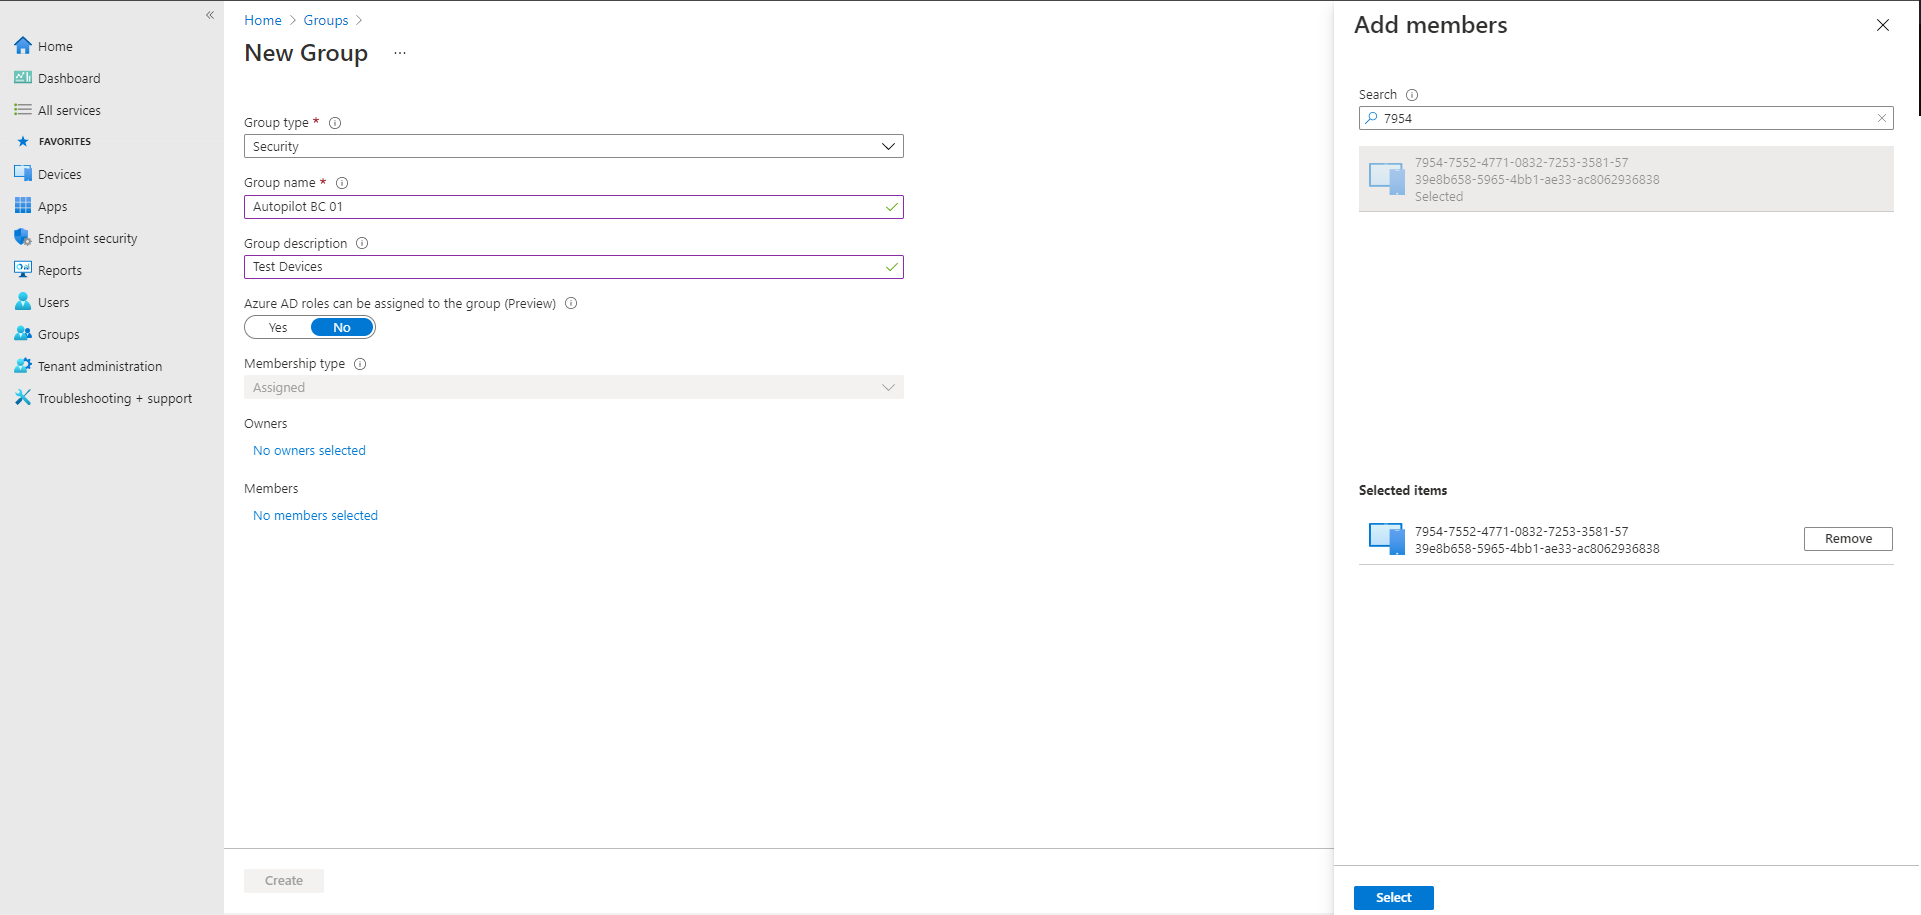
Click Members and add the Autopilot VM to the group. See the following example:
Click Create.
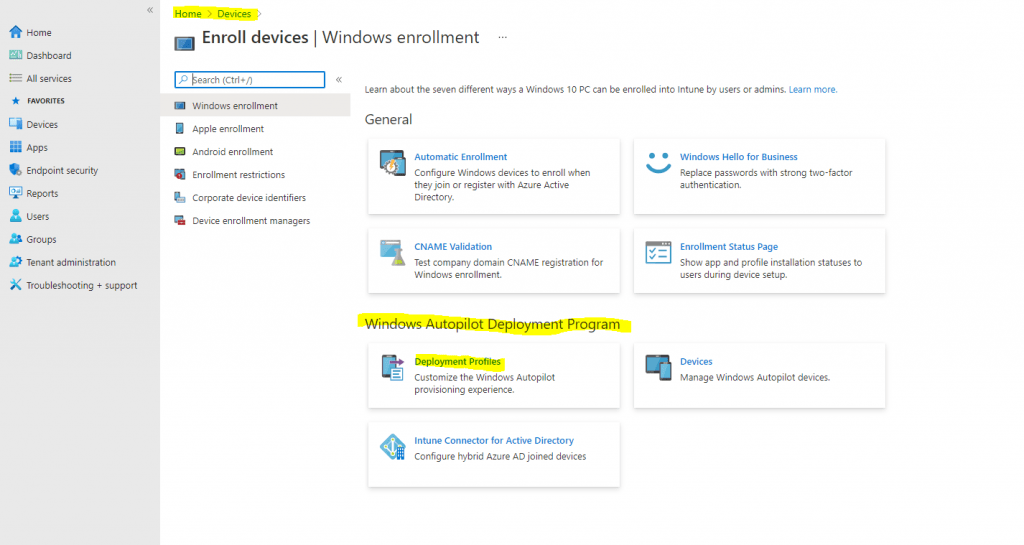
Now we can create a Windows Autopilot profile, scroll back to the left hand pane and click Devices, then under Enroll devices | Windows enrollment select Deployment Profiles.
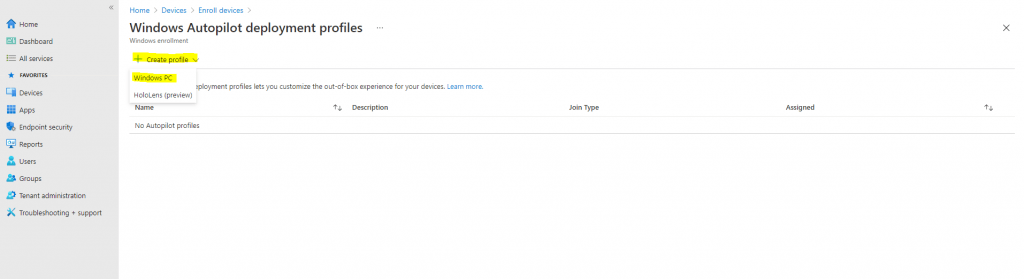
Click on Create profile and then select Windows PC.
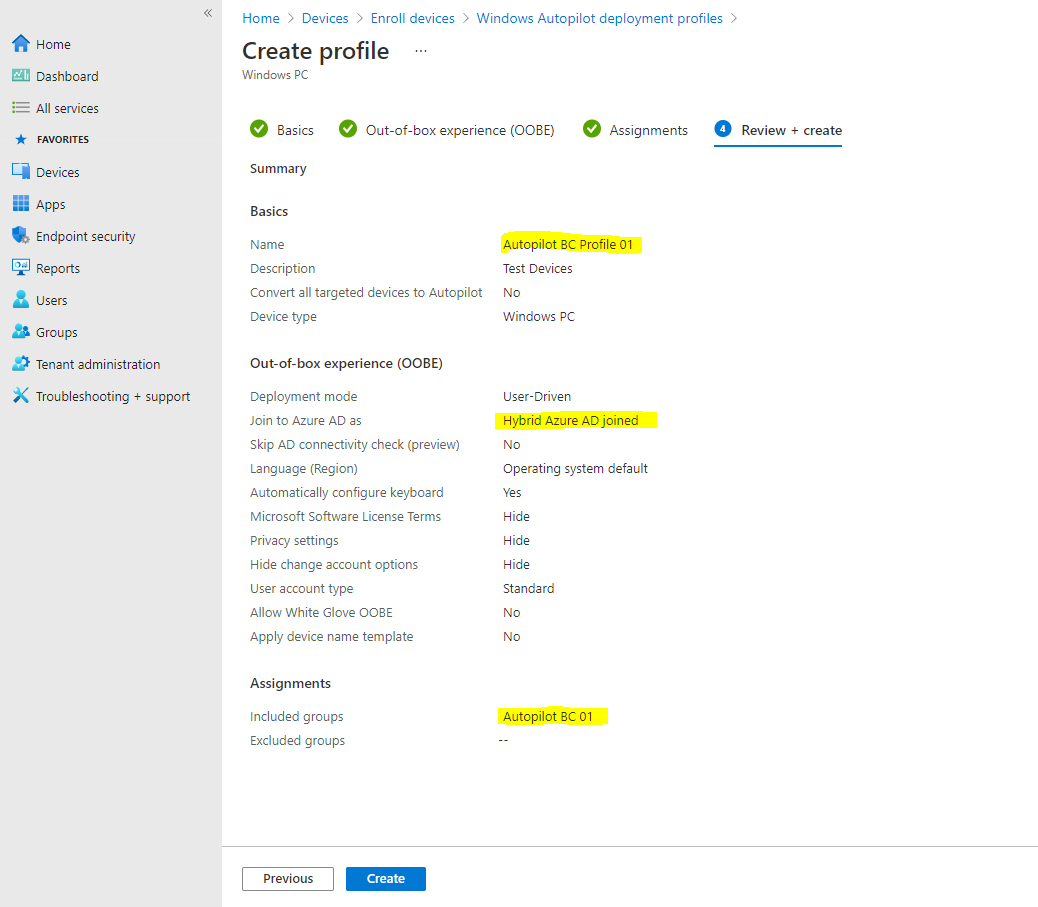
Name -> Autopilot BC Profile 01
Description -> Test Devices
Convert all targeted devices to Autopilot -> No
Click Next to continue with the Out-of-box experience (OOBE) settings:
Deployment mode -> User-driven
Join to Azure AD as -> Hybrid Azure AD joined (this is different to the lab environment where we configured Azure AD join
Microsoft Software Licence Terms -> Hide
Privacy Settings -> Hide
Hide change account option -> Hide
User account type -> Standard | Administrator (here you can also elevate the user who will perform the OOEB process Welcome Screen sign-in to be a local administrator on the device)
Allow White Gove OOBE -> No
Language (Region) -> Operating system default
Automatically configure keyboard -> yes
Apply device name template -> For Hybrid Azure AD joined type of Autopilot deployment profiles, devices are named using settings specified in Domain Join configuration.
Click Next to continue with the Assignments settings:
Assign to -> Selected groups
- Click Add groups under Included groups
- Click the Autopilot BC 01 group previously created, and then click Select.
- Click Next to continue and then click Create. See the following example:
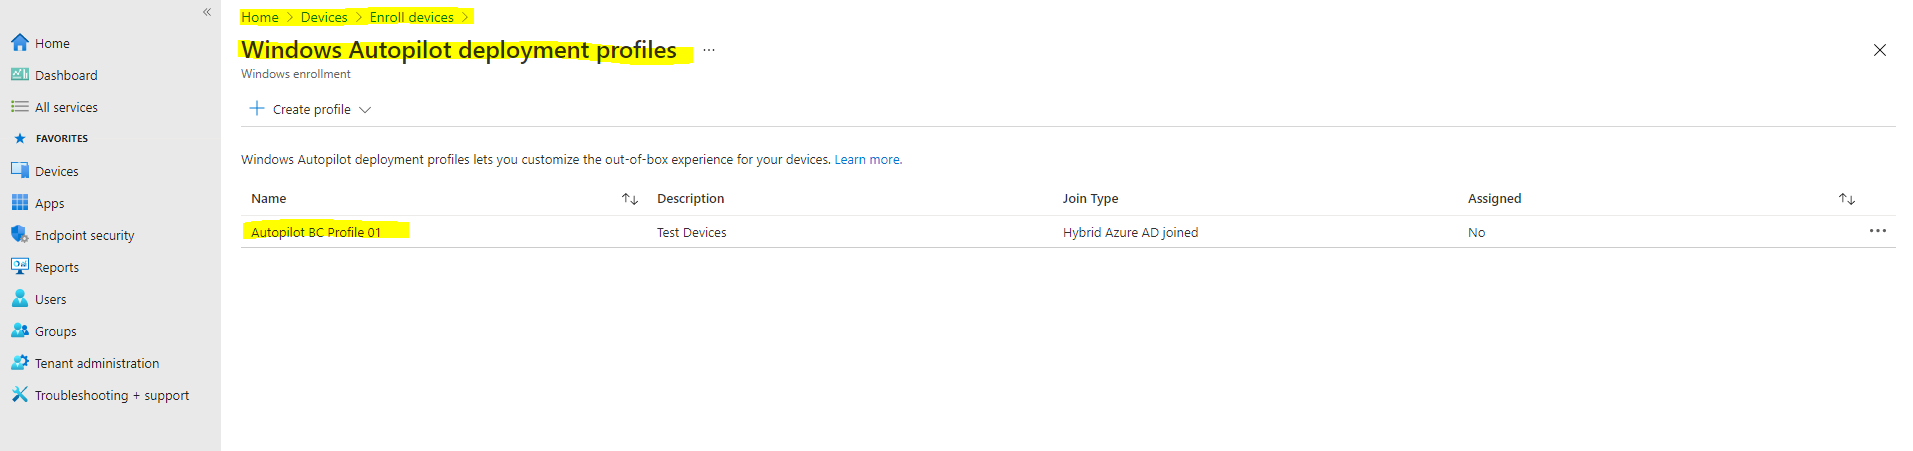
The new profile will only be applied if the device has not been started, and gone through OOBE. Settings from a different profile can’t be applied when another profile has been applied. Windows would need to be reinstalled on the device for the second profile to be applied to the device.
Create a configuration profile for domain join (on-premises)
Next we have to create a Configuration profile for domain join.
Configuration Domain Join settings for hybrid Azure AD joined devices in Microsoft Intune
https://docs.microsoft.com/en-us/mem/intune/configuration/domain-join-configure
Many environments use on-premises Active Directory (AD). When AD domain-joined devices are also joined to Azure AD, they’re called hybrid Azure AD joined devices. Using Windows Autopilot, you can enroll hybrid Azure AD joined devices in Intune. To enroll, you also need a Domain Join configuration profile.
A Domain Join configuration profile includes on-premises Active Directory domain information. When devices are provisioning (and typically offline), this profile deploys the AD domain details so devices know which on-premises domain to join. If you don’t create a domain join profile, these devices might fail to deploy.
This feature applies to:
- Windows 10 and newer
- Hybrid Azure AD joined devices
- Hybrid deployment with Autopilot + Intune
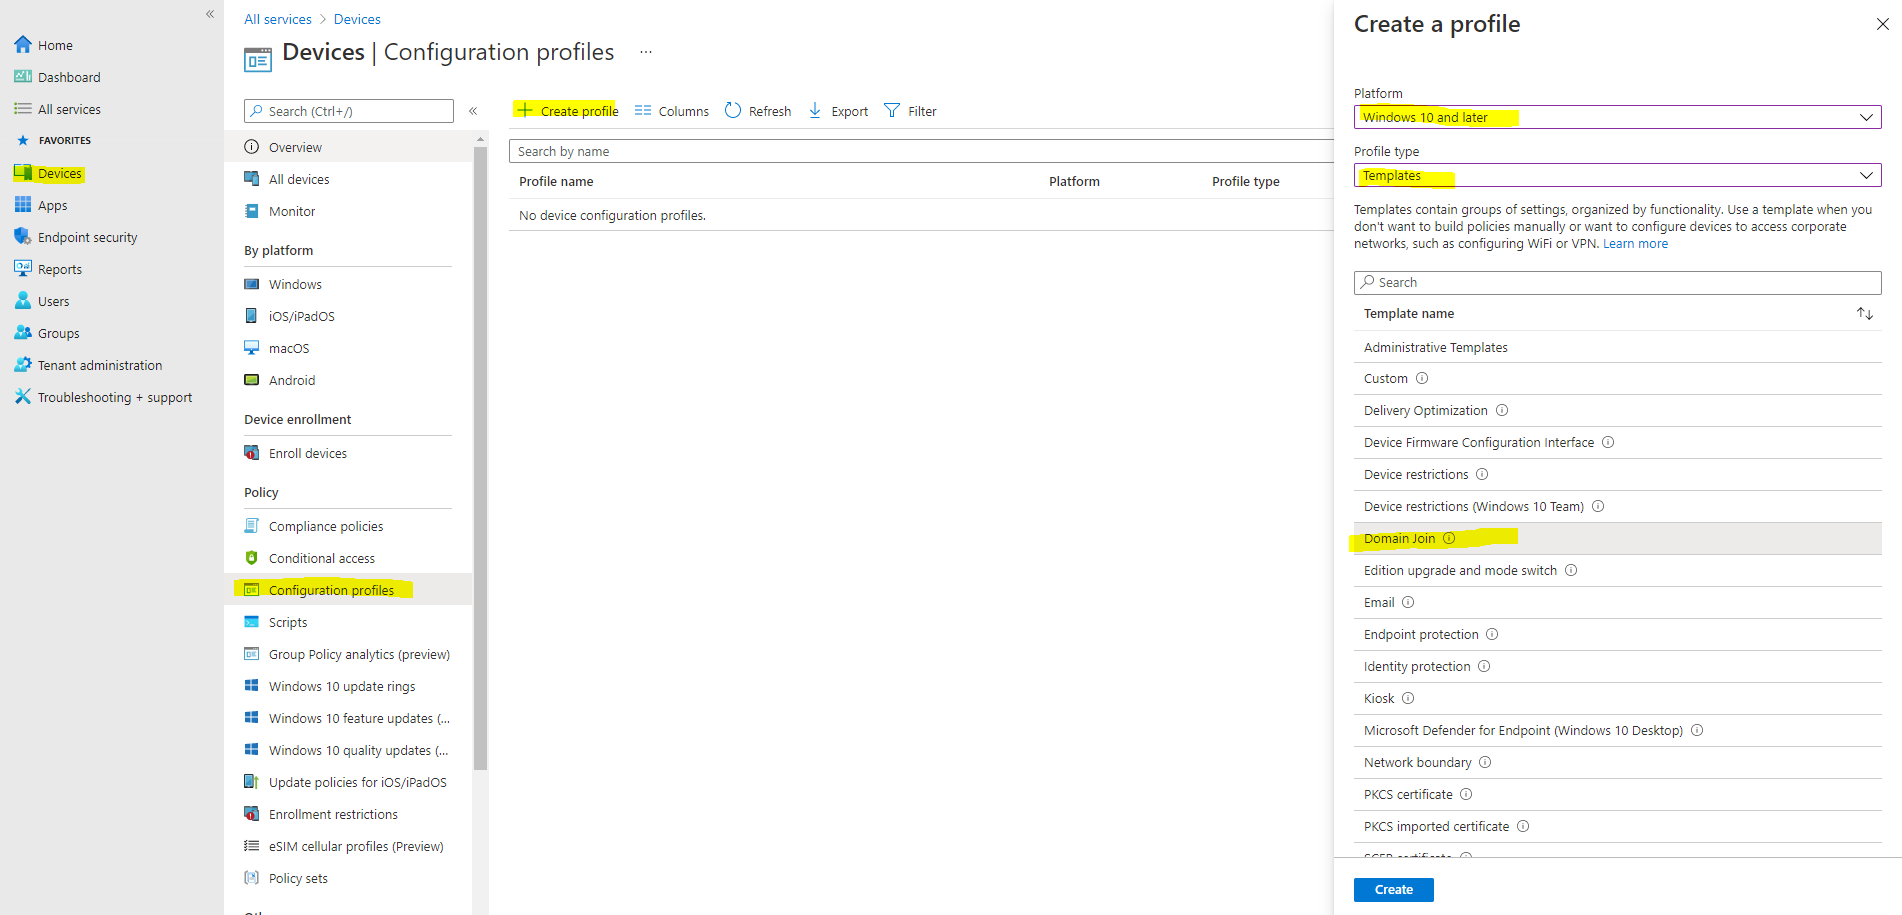
- Sign in to the Microsoft Endpoint Manager admin center.
- Select Devices > Configuration profiles > Create profile.
- Enter the following properties:
- Platform: Select Windows 10 and later.
- Profile: Select Templates > Domain Join.
Select Create.
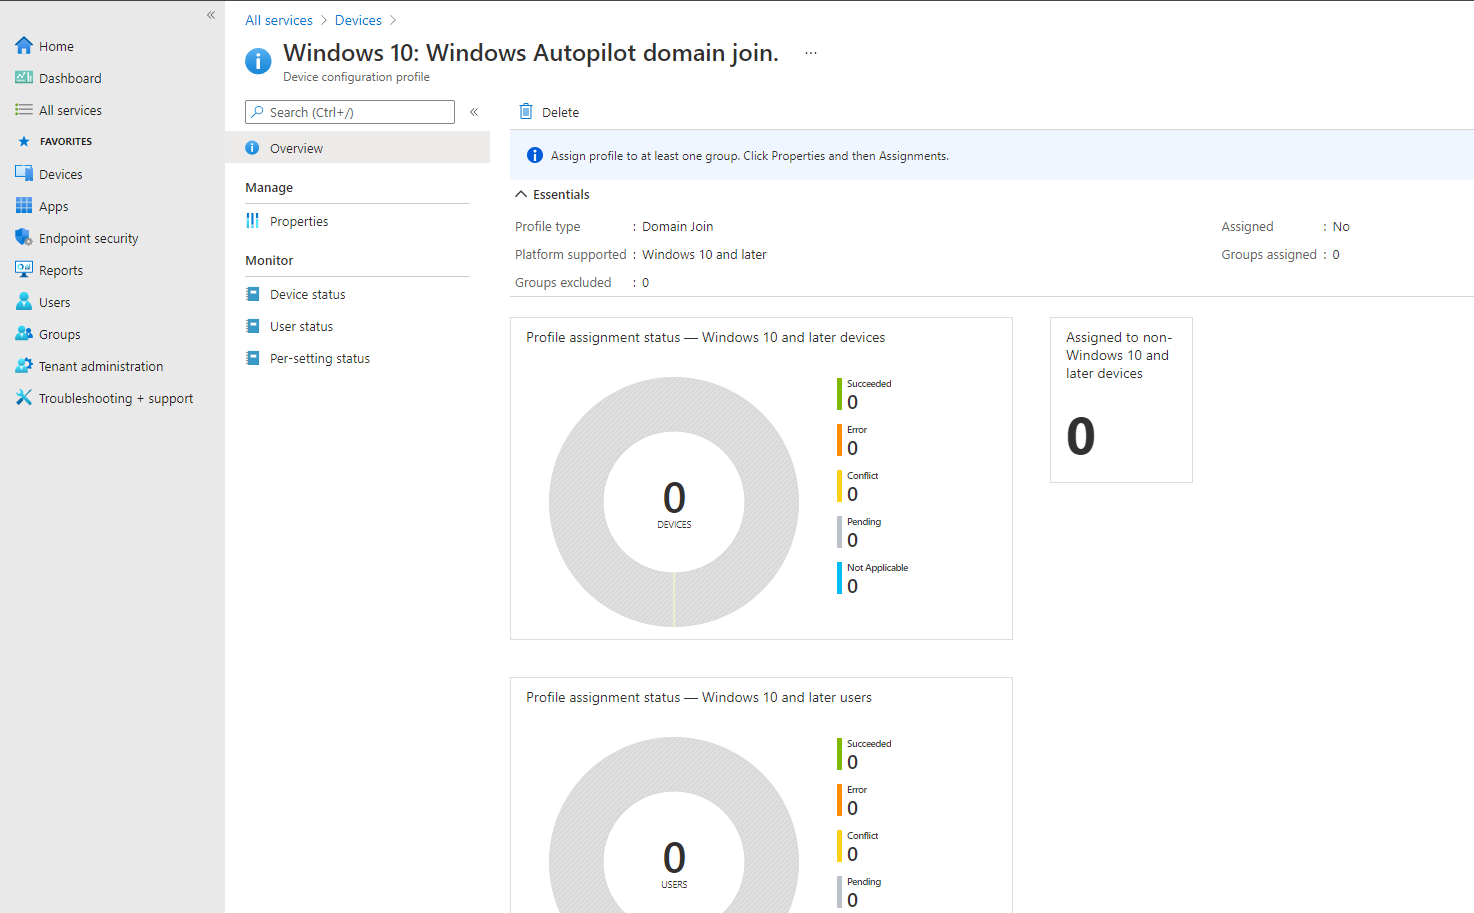
- In Basics, enter the following properties:
- Name: Enter a descriptive name for the policy. Name your policies so you can easily identify them later. For example, a good policy name is Windows 10: Windows Autopilot domain join.
- Description: Enter a description for the policy. This setting is optional, but recommended. For example, enter Windows 10: Domain join profile that includes on-premises domain information to enroll hybrid AD joined devices with Windows Autopilot.
- In Configuration settings, enter the following properties:
- Computer name prefix: Enter a prefix for the device name. Computer names are 15 characters long. After the prefix, the remaining 15 characters are randomly generated.
- Domain name: Enter the Fully Qualified Domain Name (FQDN) the devices are to join. For example, enter
americas.corp.contoso.com. - Organizational unit (optional): Enter the full path (distinguished name) to the organizational unit (OU) the computer accounts are to be created. For example, enter
OU=Mine,DC=Contoso,DC=com. Don’t enter quotation marks. To use the well-known computer object container (CN=Computers, DC=Contoso, DC=Com), leave this property blank.
For more information and advice on this setting, see Deploy hybrid Azure AD-joined devices.
Select Next.
In Assignments, select the device groups that will receive your profile. For more information about assigning profiles, see Assign user and device profiles.
I will use here my previously created Autopilot BC 01 group.
If you need to join devices to different domains or OUs, create different device groups.
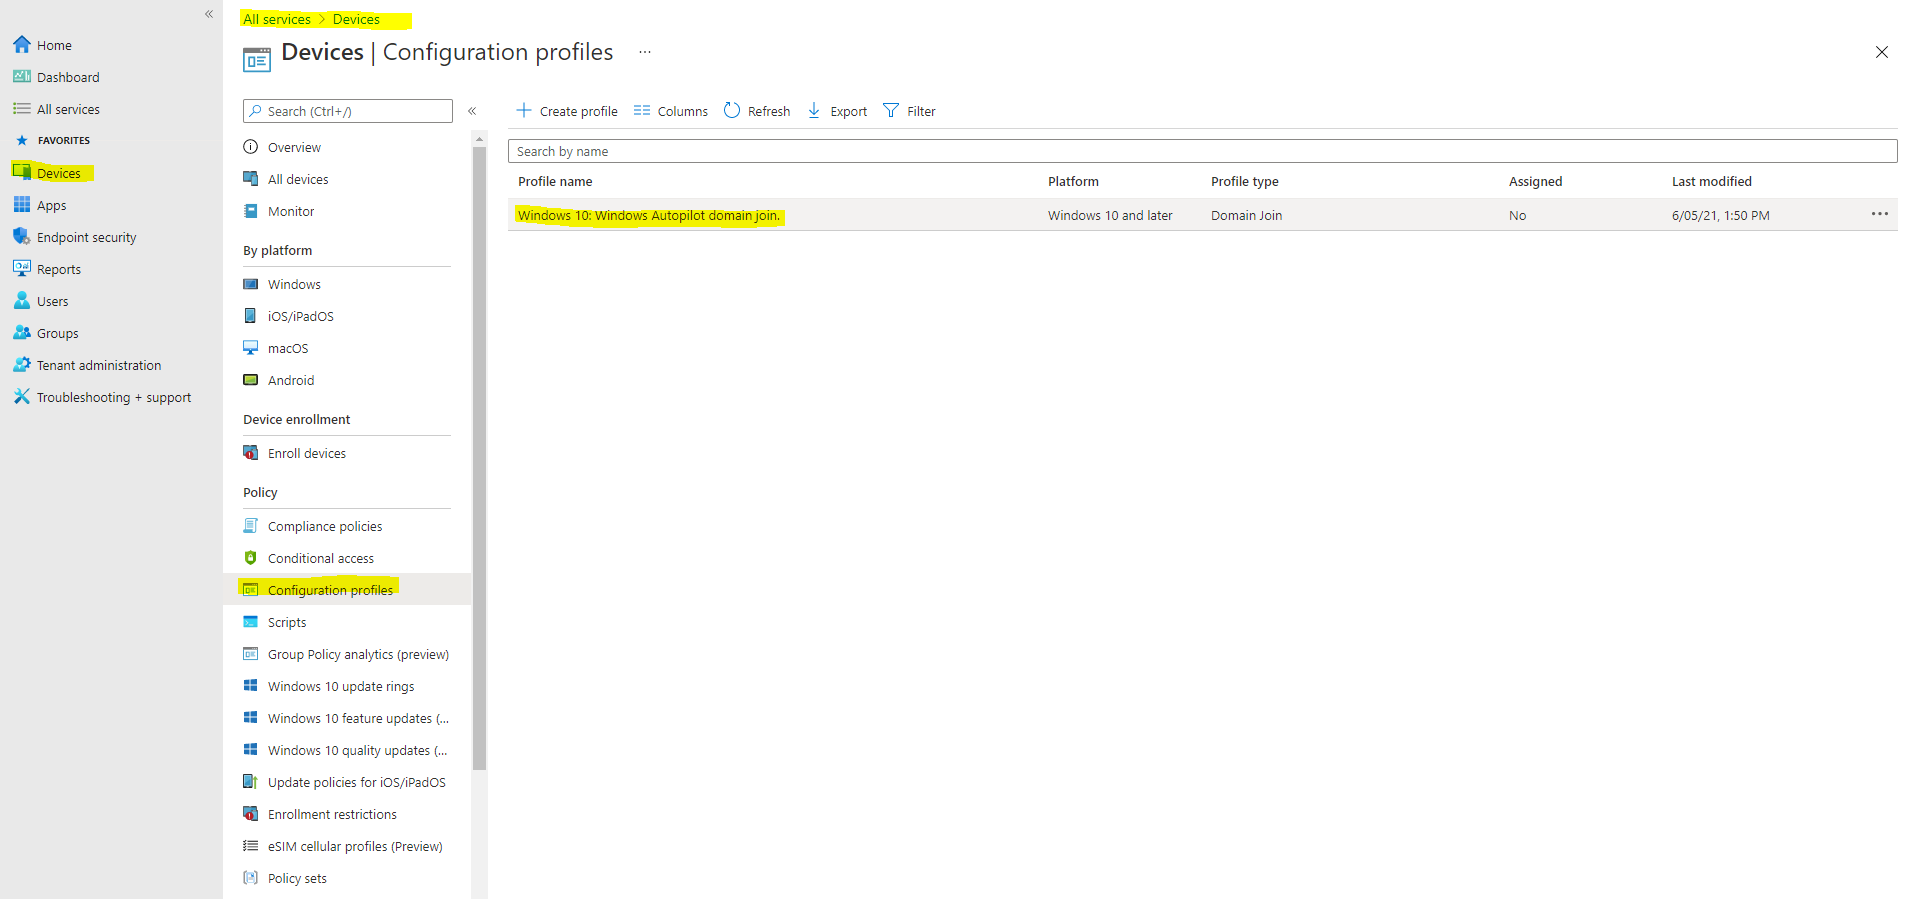
Select Next
In Review + create, review your settings. When you select Create, your changes are saved, and the profile is assigned. The policy is also shown in the profiles list.
Now we can deploy Hybrid Azure AD joined devices with Microsoft Intune as described and well documented in the following article from Microsoft .
Deploy hybrid Azure AD-joined devices by using Intune and Windows Autopilot
https://docs.microsoft.com/en-us/mem/autopilot/windows-autopilot-hybrid
I will assume you have still configured Hybrid Azure AD join in your environment, if not you can go to my following post about how.
Configure Intune Connector for Active Directory to support autopilot-enrolled computers in the on-premises Active Directory domain
We first have to increase the computer account limit in the Organizational Unit we previously configured in the configuration profile.
The Intune Connector for your Active Directory creates autopilot-enrolled computers in the on-premises Active Directory domain. The computer that hosts the Intune Connector must have the rights to create the computer objects within the domain.
In some domains, computers aren’t granted the rights to create computers. Additionally, domains have a built-in limit (default of 10) that applies to all users and computers that aren’t delegated rights to create computer objects. The rights must be delegated to computers that host the Intune Connector on the organizational unit where hybrid Azure AD-joined devices are created.
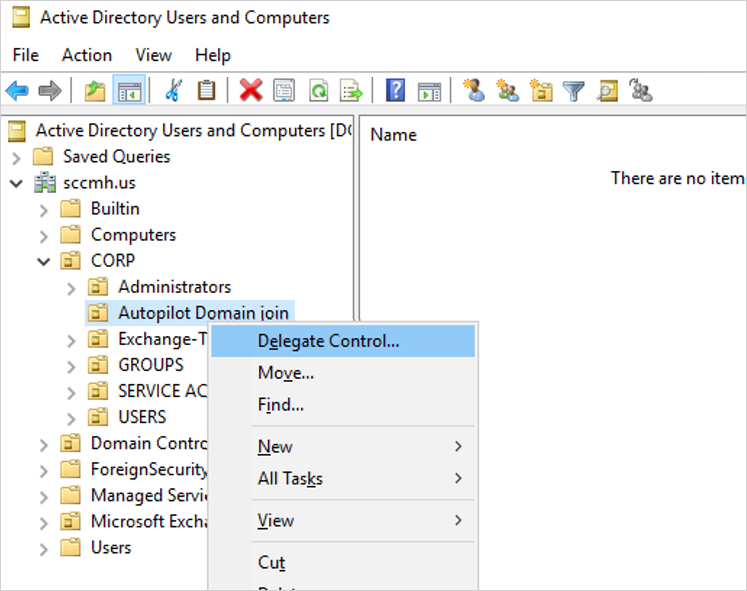
Open Active Directory Users and Computers (DSA.msc).
Right-click the organizational unit to use to create hybrid Azure AD-joined computers > Delegate Control.
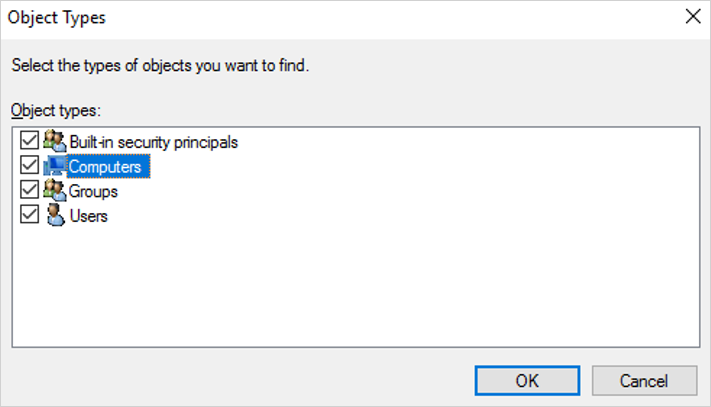
In the Delegation of Control wizard, select Next > Add > Object Types.
In the Object Types pane, select the Computers > OK.
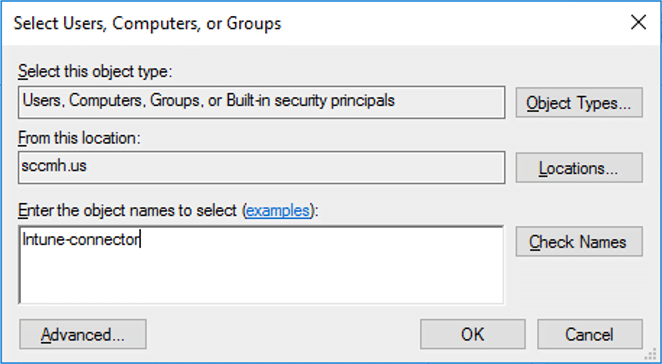
In the Select Users, Computers, or Groups pane, in the Enter the object names to select box, enter the name of the computer where the Connector is installed.
Further below you will see how to install the Intune Connector on this computer.
- Select Create a custom task to delegate > Next.
- Select Only the following objects in the folder > Computer objects.
- Select Create selected objects in this folder and Delete selected objects in this folder.
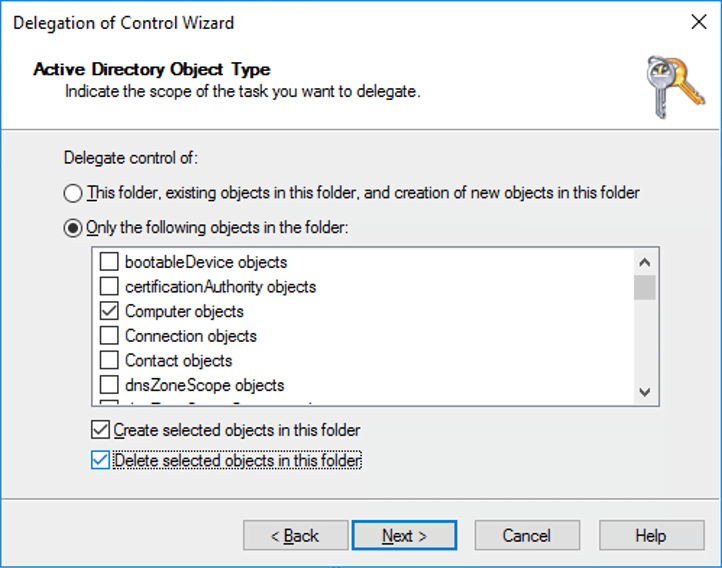
Select Next.
Under Permissions, select the Full Control check box. This action selects all the other options.
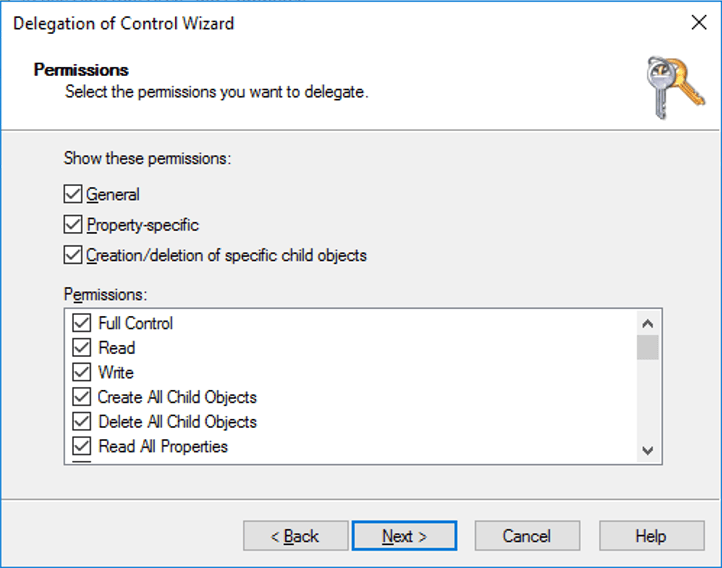
Select Next > Finish.
Now as mentioned we need to install the Intune Connector.
The Intune Connector for Active Directory must be installed on a computer that’s running Windows Server 2016 or later. The computer must also have access to the internet and your Active Directory. To increase scale and availability, you can install multiple connectors in your environment. We recommend installing the Connector on a server that’s not running any other Intune connectors. Each connector must be able to create computer objects in any domain that you want to support.
If your organization has multiple domains and you install multiple Intune Connectors, you must use a service account that’s able to create computer objects in all domains, even if you plan to implement hybrid Azure AD join only for a specific domain. If these are untrusted domains, you must uninstall the connectors from domains in which you don’t want to use Windows Autopilot. Otherwise, with multiple connectors across multiple domains, all connectors must be able to create computer objects in all domains.
The Intune Connector requires the same endpoints as Intune.
- Turn off IE Enhanced Security Configuration. By default Windows Server has Internet Explorer Enhanced Security Configuration turned on. If you’re unable to sign in to the Intune Connector for Active Directory, then turn off IE Enhanced Security Configuration for the Administrator. How To Turn Off Internet Explorer Enhanced Security Configuration.
- In the Microsoft Endpoint Manager admin center, select Devices > Windows > Windows enrollment > Intune Connector for Active Directory > Add.
- Follow the instructions to download the Connector.
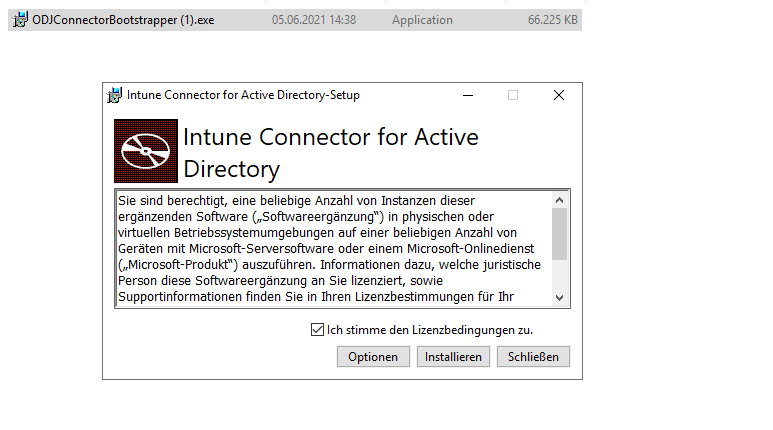
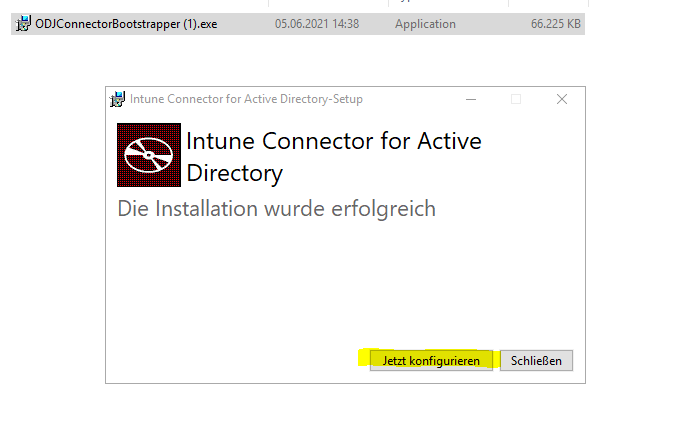
- Open the downloaded Connector setup file, ODJConnectorBootstrapper.exe, to install the Connector.
- At the end of the setup, select Configure.
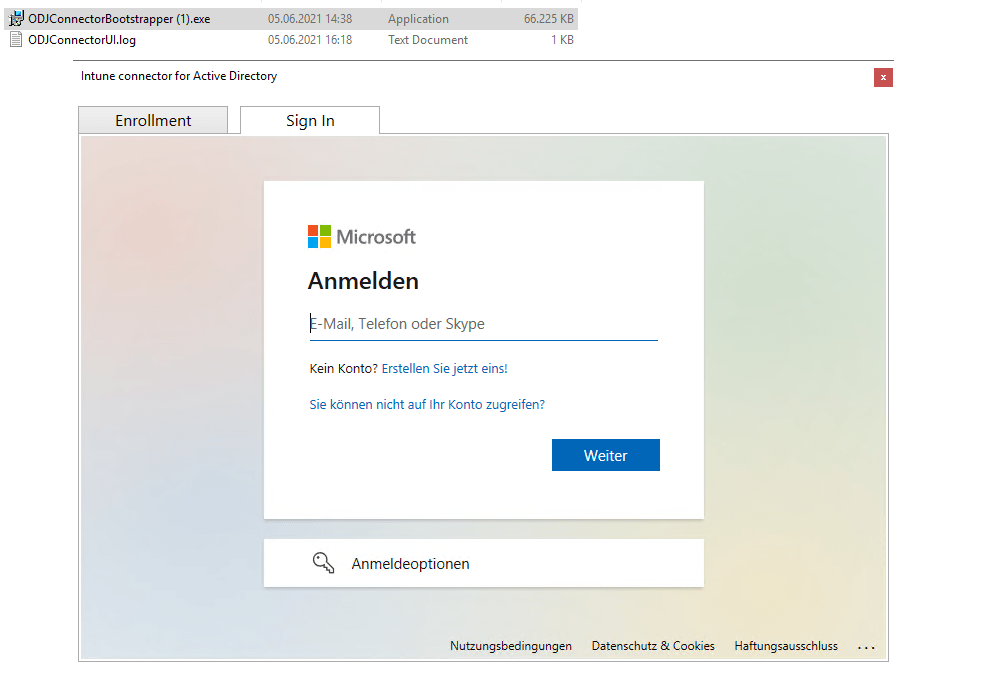
- Select Sign In.
- Enter the user Global Administrator or Intune Administrator role credentials. The user account must have an assigned Intune license.
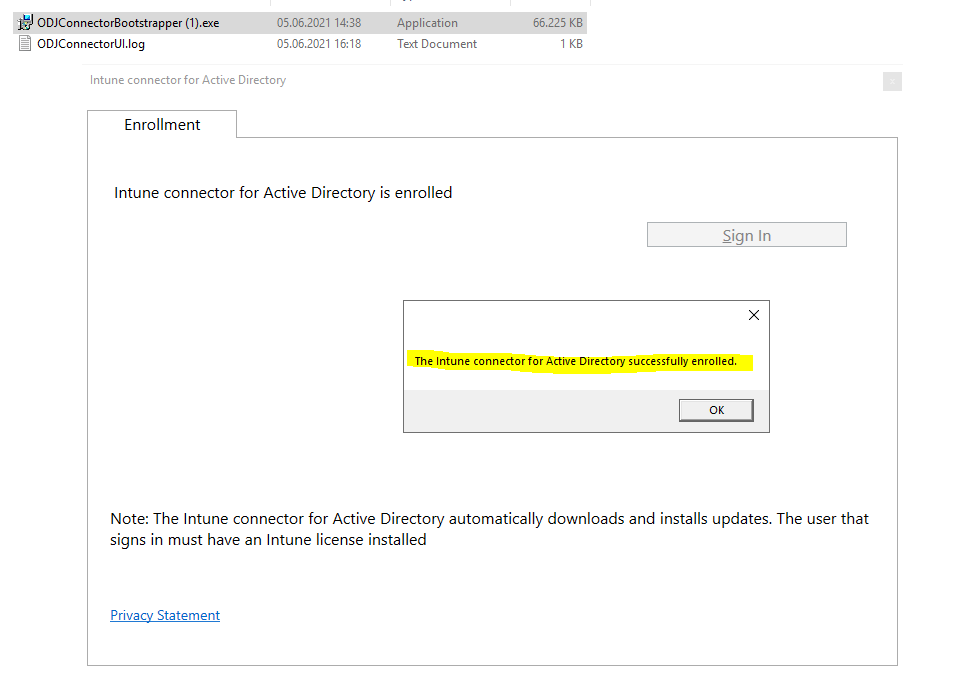
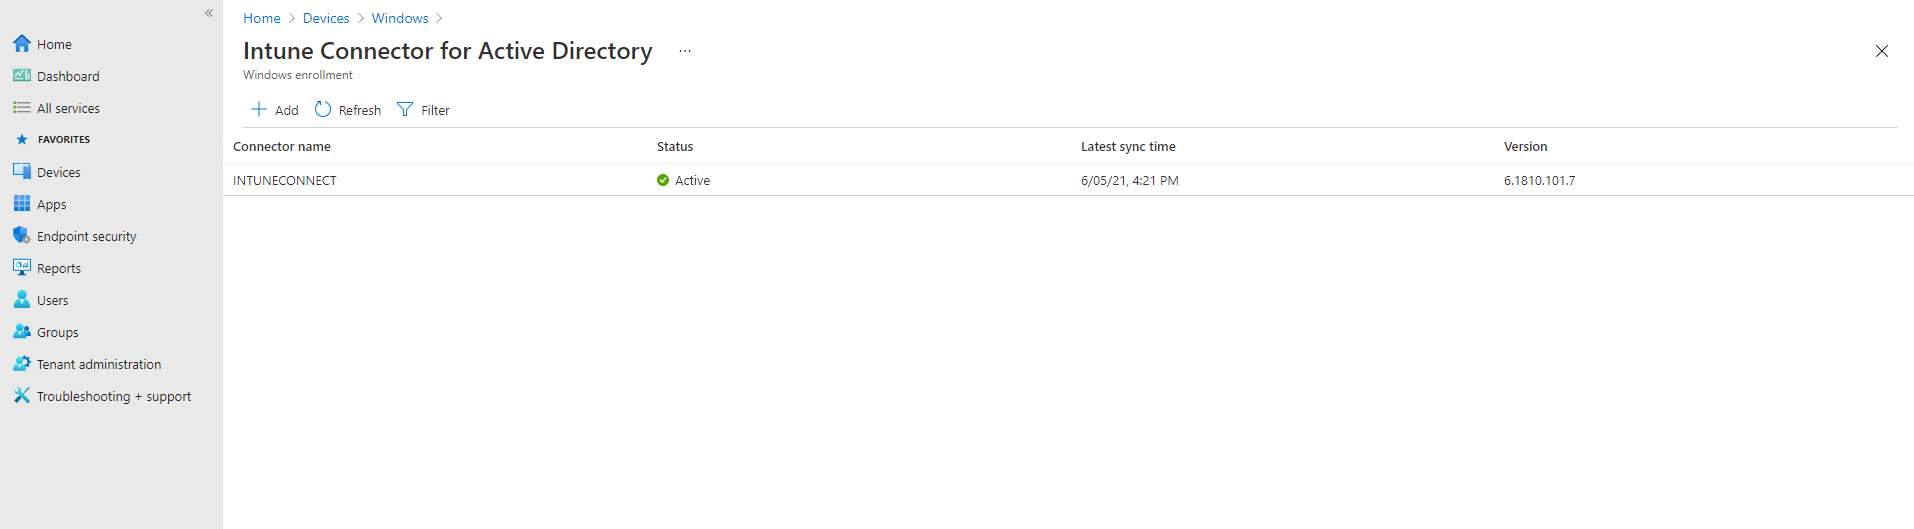
- Go to Devices > Windows > Windows enrollment > Intune Connector for Active Directory, and then confirm that the connection status is Active.
After you sign in to the Connector, it might take a couple of minutes to appear in the Microsoft Endpoint Manager admin center. It appears only if it can successfully communicate with the Intune service.
About registering your Autopilot devices please choose one of the following ways described in the article from Microsoft.
Register your Autopilot devices
https://docs.microsoft.com/en-us/mem/autopilot/windows-autopilot-hybrid#register-your-autopilot-devices
We have registered the device already previously above.
More about Offline Domain Join (ODJ) you will find in the following article from Microsoft
Offline domain join overview
https://docs.microsoft.com/en-us/windows-server/remote/remote-access/directaccess/directaccess-offline-domain-join#offline-domain-join-overview
Introduced in Windows Server 2008 R2, domain controllers include a feature called Offline Domain Join. A command line utility named Djoin.exe lets you join a computer to a domain without physically contacting a domain controller while completing the domain join operation.
Configure support for external devices outside the corporate network by configure VPN for Autopilot.
I have still registered my VM at the beginning and also created a deployment profile. As I also want to deploy devices from external which are not directly connected to the network and therefore over VPN, I have to change one setting afterwards in the deployment profile.
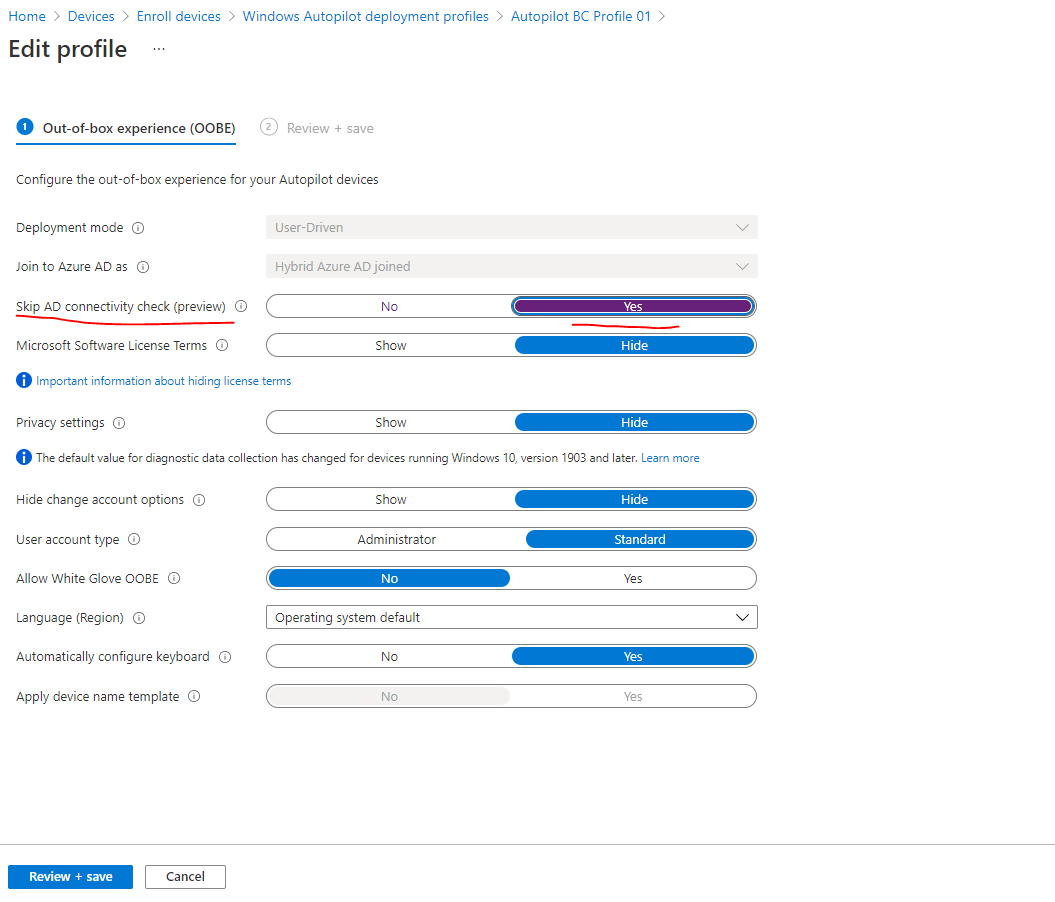
If you’re deploying devices off of the organization’s network using VPN support, set the Skip Domain Connectivity Check option to Yes. For more information, see User-driven mode for hybrid Azure Active Directory join with VPN support.
Therefore edit the previously created profile (Autopilot BC Profile 01 in my case) in Microsoft Endpoint Manager admin center under -> Devices -> Enroll Devices -> Deployment Profiles (Windows Autopilot Deployment Program section).
I will have to enable Skip AD connectivity check.
The Windows Autopilot user-driven Hybrid Azure AD Join process would validate that the device is able to contact an Active Directory domain controller by pinging that domain controller.
With the addition of VPN support for this scenario, you can configure the Hybrid Azure AD Join process to skip the connectivity check. This doesn’t eliminate the need for communicating with an Active Directory domain controller. Instead, to allow connection to the organization’s network, Intune delivers the needed VPN configuration before the user attempts to sign in to Windows.
When enabled, the device will go through the entire provisioning process, up to the point where the user needs to sign into Windows for the first time, without needing any corporate network connectivity.
To be clear, the entire domain join process will work without any direct connection to the on-premise network and domain controllers. The computer object is created on-premises through the Intune Connector for Active Directory triggered by the Windows Autopilot and Intune.Therefore only a working internet connection is needed in order the OOEB process can communicate with the Windows Autopilot and Intune.
After this process and for the first user login, the VPN connection created through the deployment profile below is of course still needed to authenticate and logon the user. At this step when the user logon to the domain using the VPN Connection also the assigned Group Policies from on-premises will be applied to the device.
Requirements for VPN support:
In addition to the core requirements for user driven hybrid Azure AD join mentioned above, the following additional requirements apply to a remote scenario of Hybrid Azure AD Join with VPN support:
- A supported version of Windows 10:
- Windows 10 1903 + December 10 Cumulative update (KB4530684, OS build 18362.535) or higher
- Windows 10 1909 + December 10 Cumulative update (KB4530684, OS build 18363.535) or higher
- Windows 10 2004 or later
- Enable the “Skip domain connectivity check” toggle in the Hybrid Azure AD Join Autopilot profile.
- A VPN configuration that:
- can be deployed with Intune and lets the user manually establish a VPN connection from the Windows logon screen, or
- one that automatically establishes a VPN connection as needed.
The specific VPN configuration required depends on the VPN software and authentication being used. For third-party (non-Microsoft) VPN solutions, this typically would involve deploying a Win32 app (containing the VPN client software itself and any specific connection information, for example: VPN endpoint host names) via Intune Management Extensions. Consult your VPN provider’s documentation for configuration details specific to that provider.
In cases where certificate authentication is required by the VPN software, the needed machine certificate should also be deployed via Intune. This deployment can be done using the Intune certificate enrollment capabilities, targeting the certificate profiles to the device.
User certificates aren’t supported because they can’t be deployed until the user logs in. Also, because they aren’t installed until after the user signs in, non-Microsoft UWP VPN plug-ins delivered from the Windows Store aren’t supported.
Deploy your root certificate for VPN by creating a trusted certificate profile in Intune
In my case I will use the native Windows VPN with SSTP and IKEv2. For both the device needs to trust the certificate from the Windows VPN Server (Routing & RAS services).
Therefore I have to deploy the root certificate to the devices using a trusted certificate profile in Intune as follow.
To create a trusted certificate profile
https://docs.microsoft.com/en-us/mem/intune/protect/certificates-trusted-root#to-create-a-trusted-certificate-profile
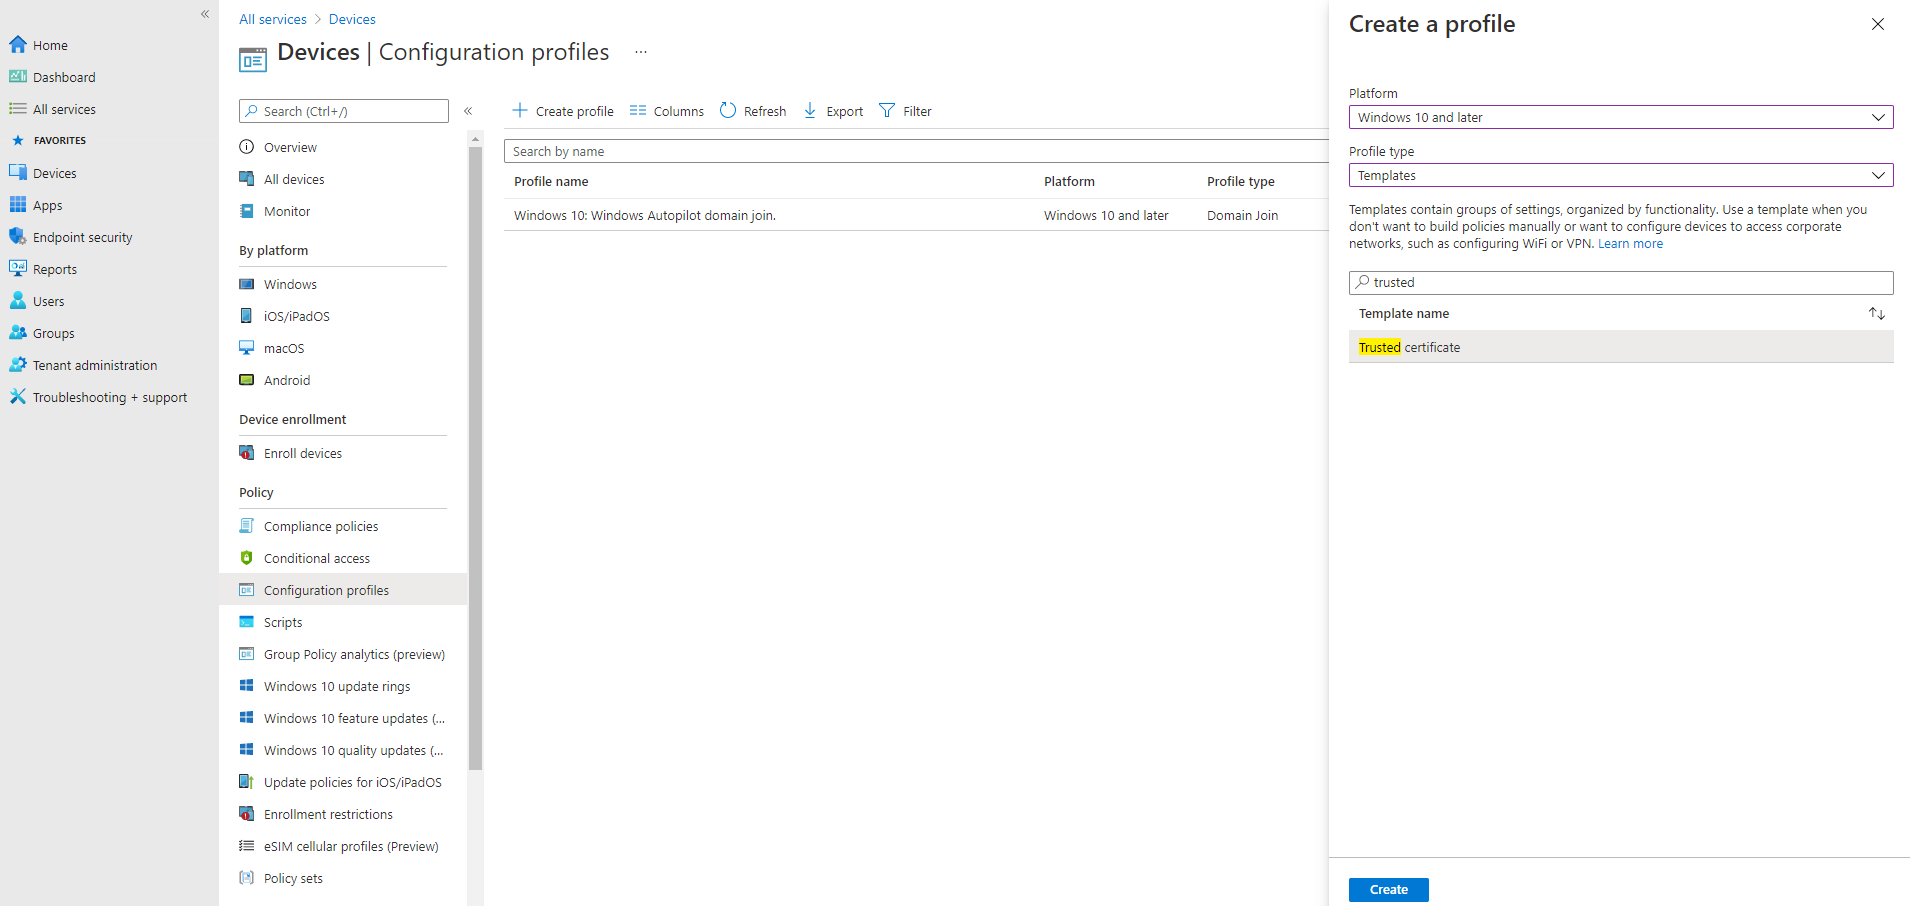
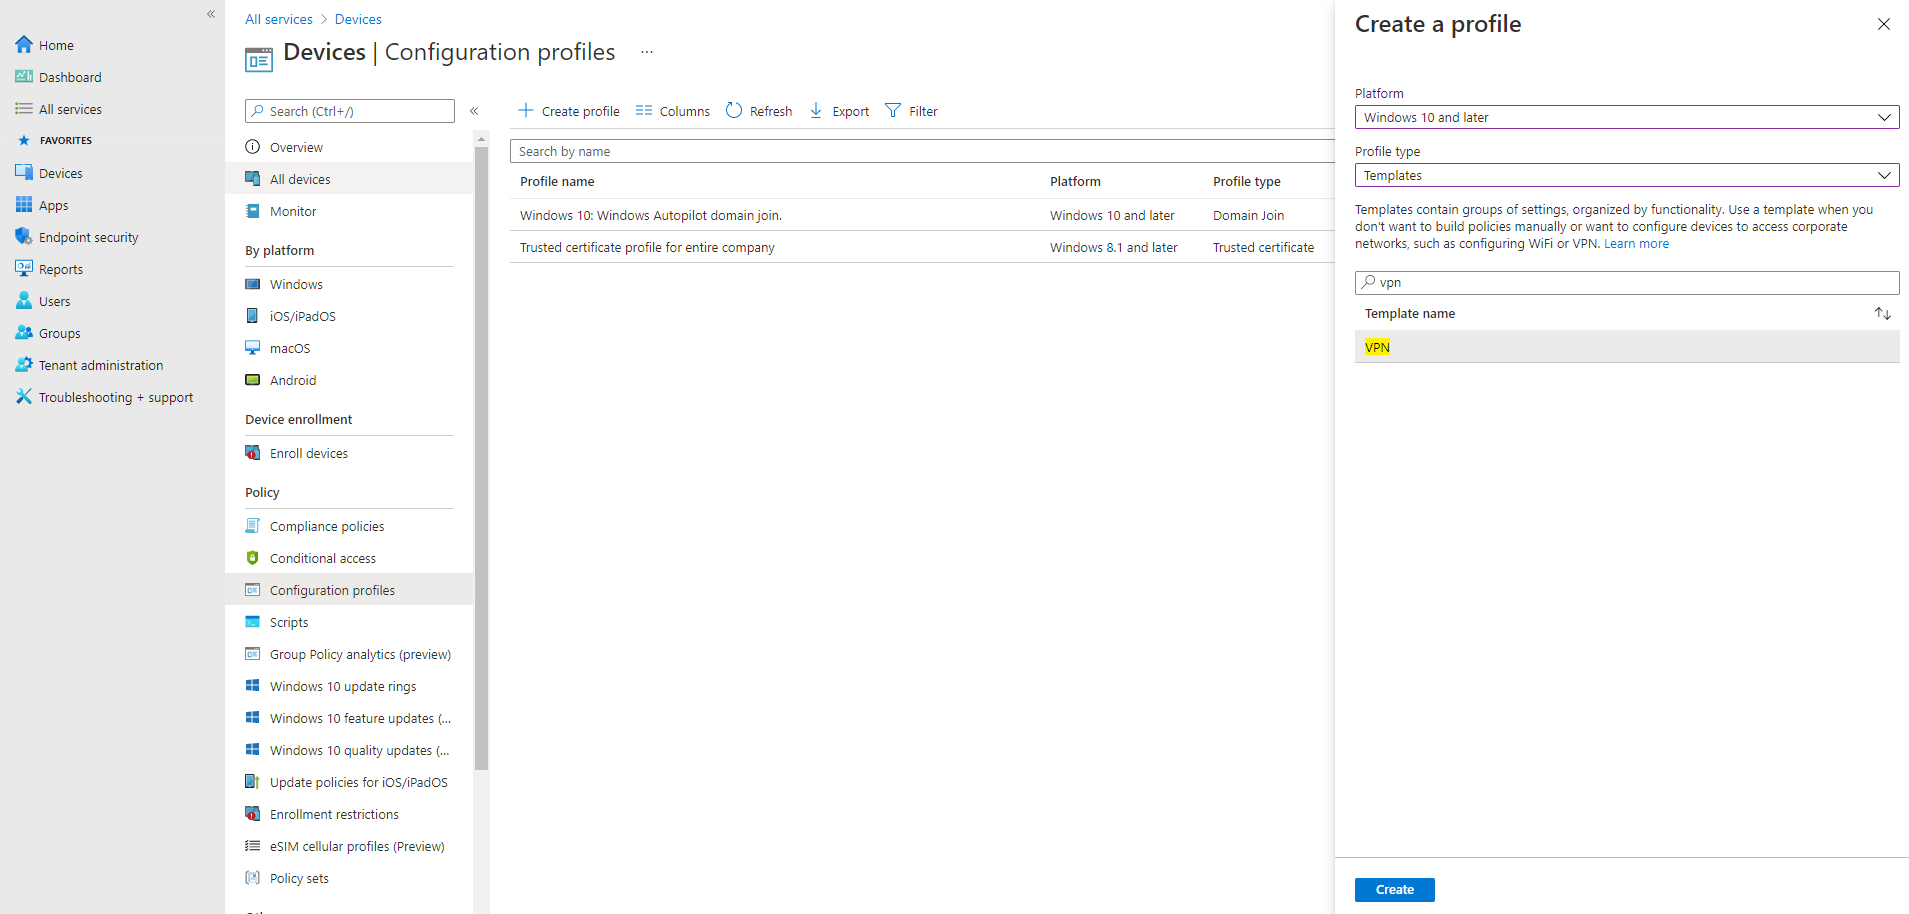
Select and go to Devices > Configuration profiles > Create profile.
- Enter the following properties:
- Platform: Choose the platform of the devices that will receive this profile.
- Profile: Select Trusted certificate. Or, select Templates > Trusted certificate.
- Select Create.
- In Basics, enter the following properties:
- Name: Enter a descriptive name for the profile. Name your profiles so you can easily identify them later. For example, a good profile name is Trusted certificate profile for entire company.
- Description: Enter a description for the profile. This setting is optional, but recommended.
- Select Next.
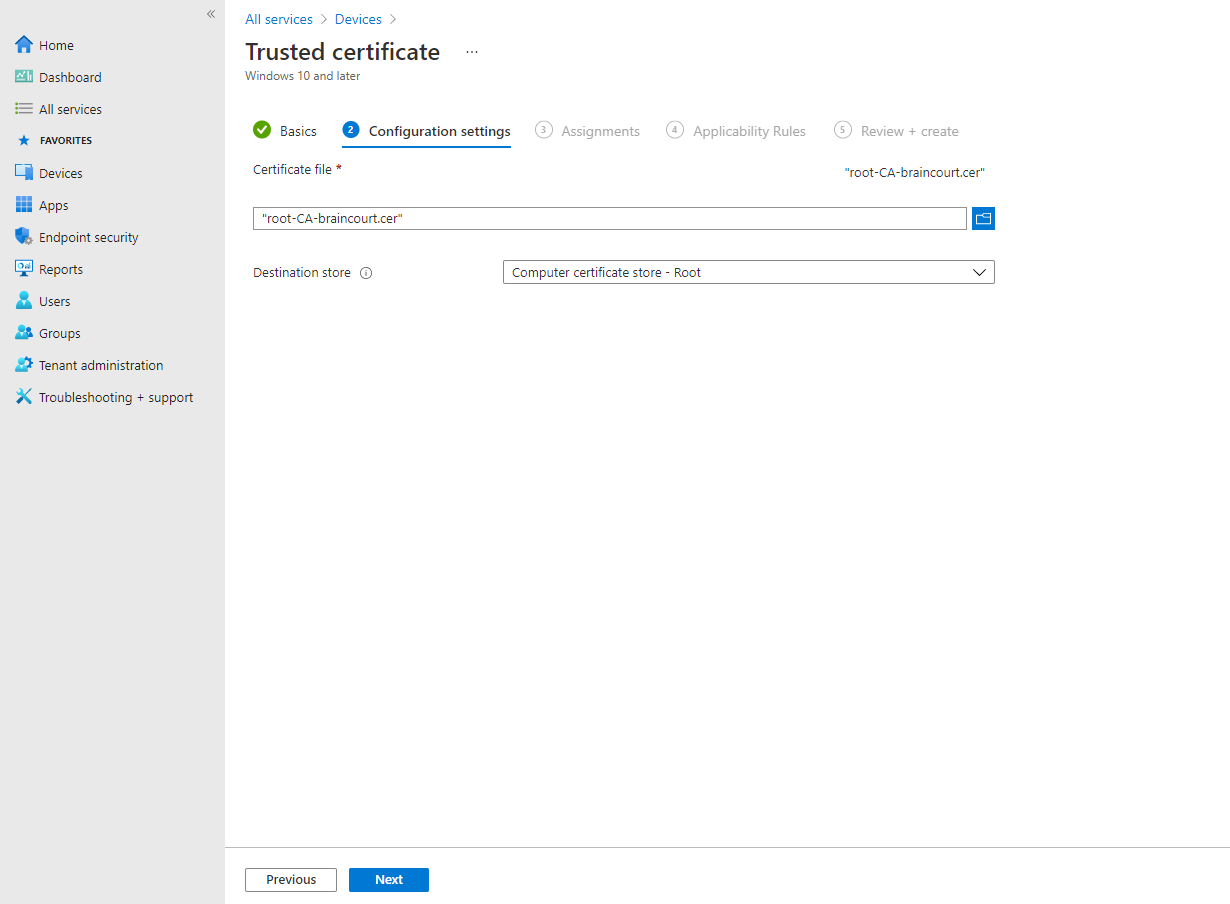
- In Configuration settings, specify the .cer file for the trusted Root CA Certificate you previously exported.For Windows 8.1 and Windows 10 devices only, select the Destination Store for the trusted certificate from:
- Computer certificate store – Root
- Computer certificate store – Intermediate
- User certificate store – Intermediate
- Select Next.
- In Assignments, select the user or groups that will receive your profile.
- Select Next.
I will also assign this profile also to my Autopilot BC 01 group.
(Applies to Windows 10 only) In Applicability Rules, specify applicability rules to refine the assignment of this profile. You can choose to assign or not assign the profile based on the OS edition or version of a device.
For more information, see Applicability rules in Create a device profile in Microsoft Intune.
In Review + create, review your settings. When you select Create, your changes are saved, and the profile is assigned. The policy is also shown in the profiles list.

Create a VPN Configuration Profile
Finally we need to create a VPN Configuration Profile.
Windows 10 and Windows Holographic device settings to add VPN connections using Intune
https://docs.microsoft.com/en-us/mem/intune/configuration/vpn-settings-windows-10
Create VPN profiles to connect to VPN servers in Intune
https://docs.microsoft.com/en-us/mem/intune/configuration/vpn-settings-configure
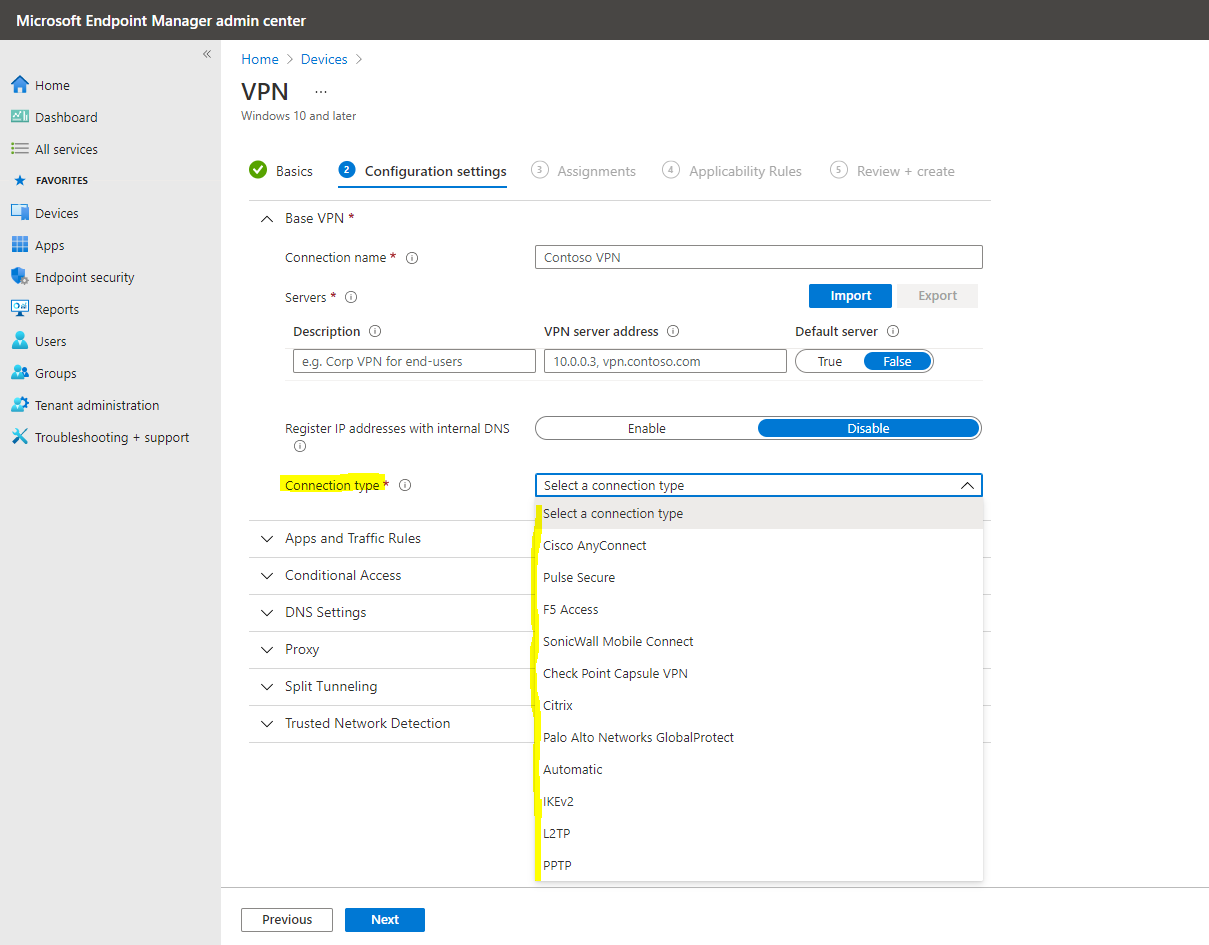
Create the VPN Profile
https://docs.microsoft.com/en-us/mem/intune/configuration/vpn-settings-configure#create-the-profile
As you can see you can choose between different vpn solutions.
You can also configure VPN to authenticate using device or user certificates. Therefore please read the following articles about the Simple Certificate Enrollment Protocol (SCEP) and Intune.
Use certificates for authentication in Microsoft Intune
https://docs.microsoft.com/en-us/mem/intune/protect/certificates-configure
Configure infrastructure to support SCEP with Intune
https://docs.microsoft.com/en-us/mem/intune/protect/certificates-scep-configure
Create and assign SCEP certificate profiles in Intune
https://docs.microsoft.com/en-us/mem/intune/protect/certificates-profile-scep
Using a Autopilot Script (PowerShell) for native Windows VPN instead a VPN Configuration Profile
As mentioned I will use the native Windows VPN with IKEv2 and SSTP and the Routing & RAS services on a Windows Server, therefore I can skip the VPN Configuration Profile and instead using a simple PowerShell Script to create the VPN Connection with Intune.
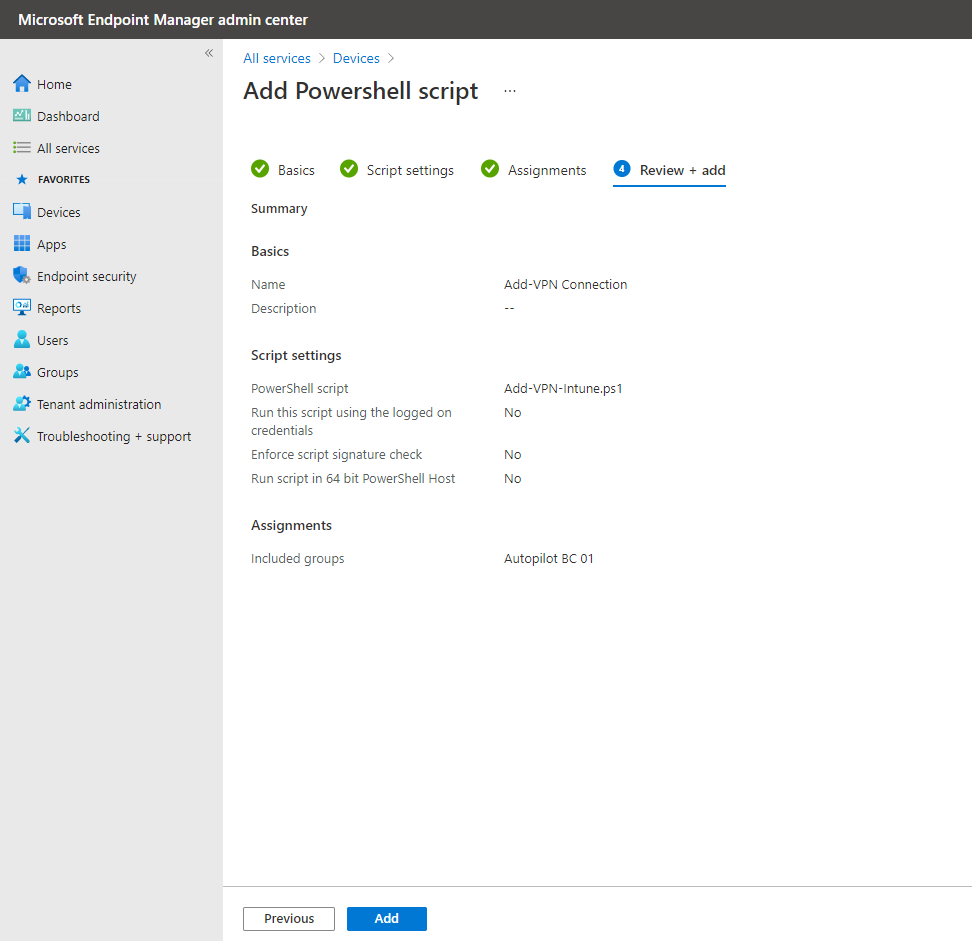
# PowerShell Script to create a VPN Connection which will appear at the logon screen using the -AllUserConnection parameter
Add-VpnConnection -Name "Corp VPN BC Intune" -ServerAddress <FQDN VPN Server> -AllUserConnection -SplitTunneling -AuthenticationMethod MSChapv2 -TunnelType Automatic -EncryptionLevel Required -PassThru
Microsoft Endpoint Manager admin center -> Devices -> Scripts
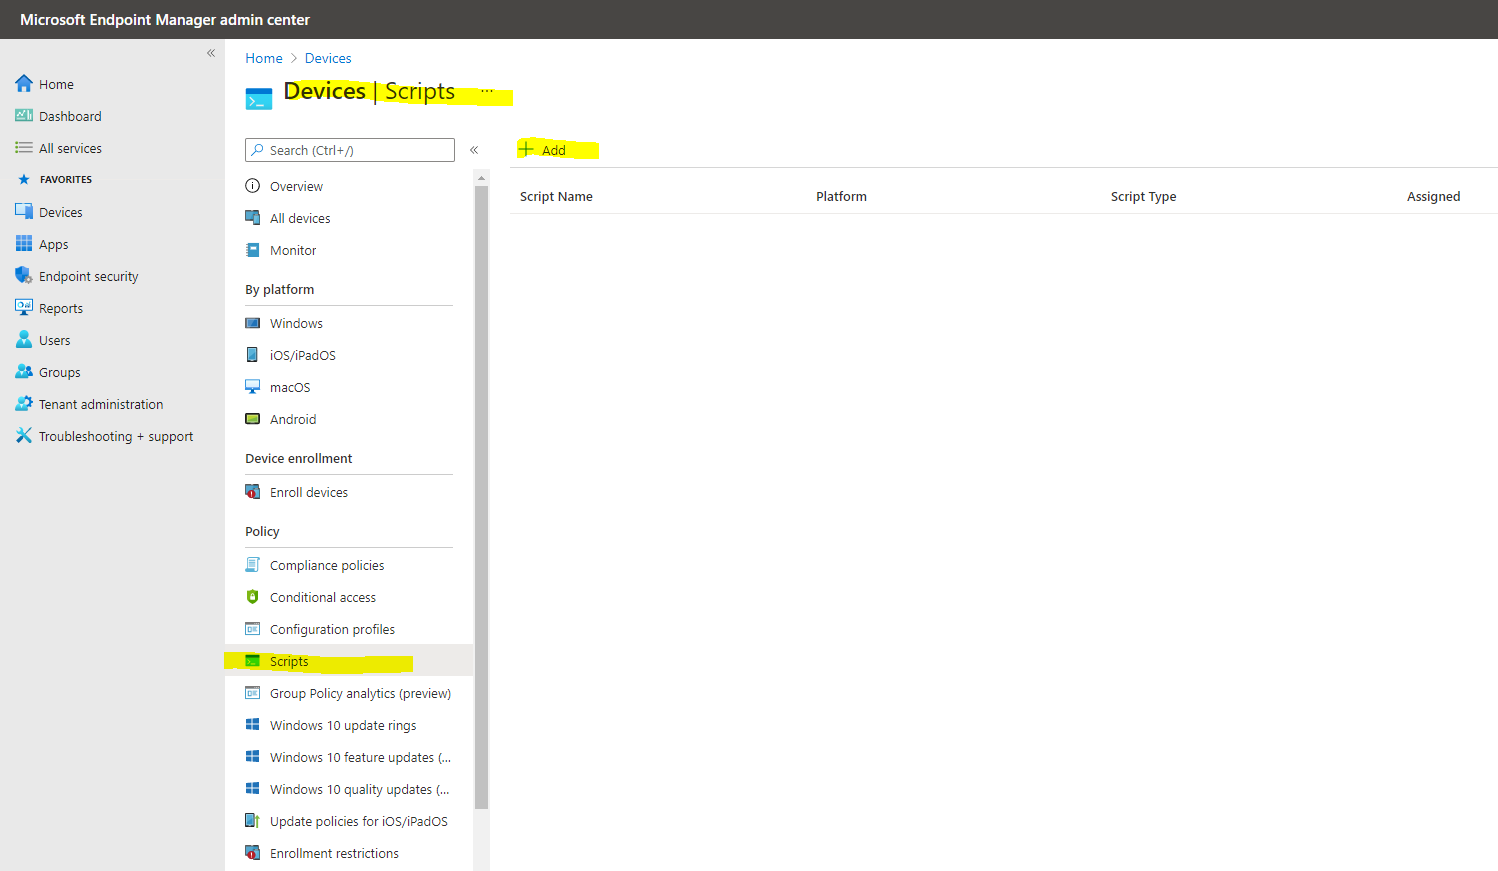
Upload the PowerShell script from above.
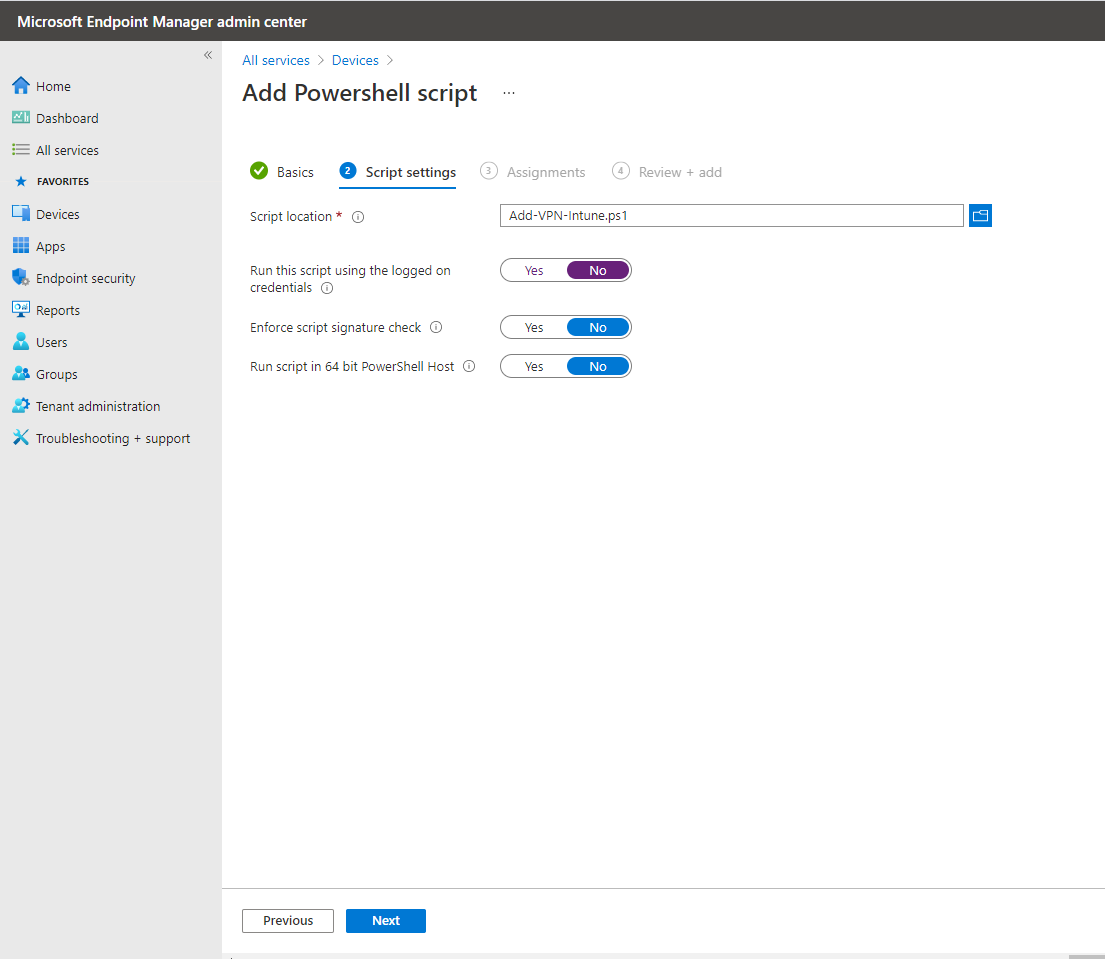
Assign it to your previously created group, in my case the Autopilot BC 01 group.
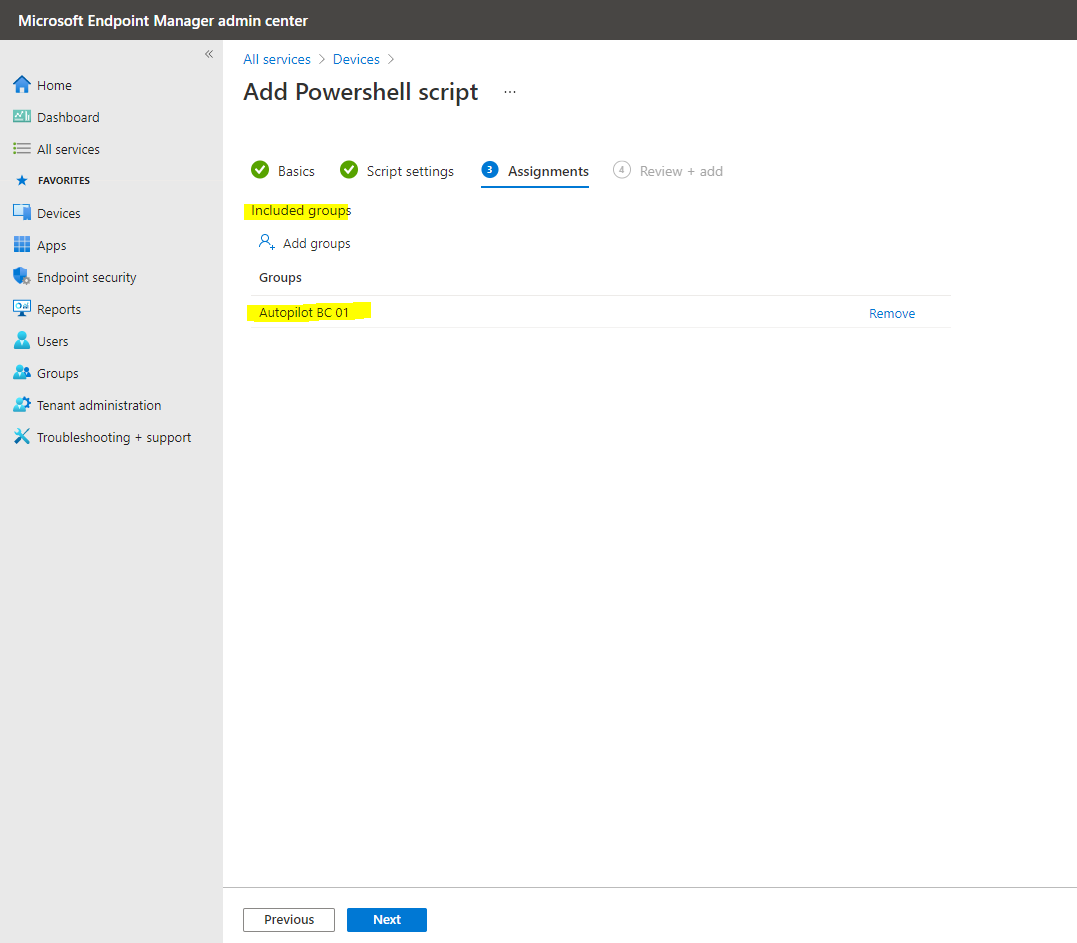
Click on Add.
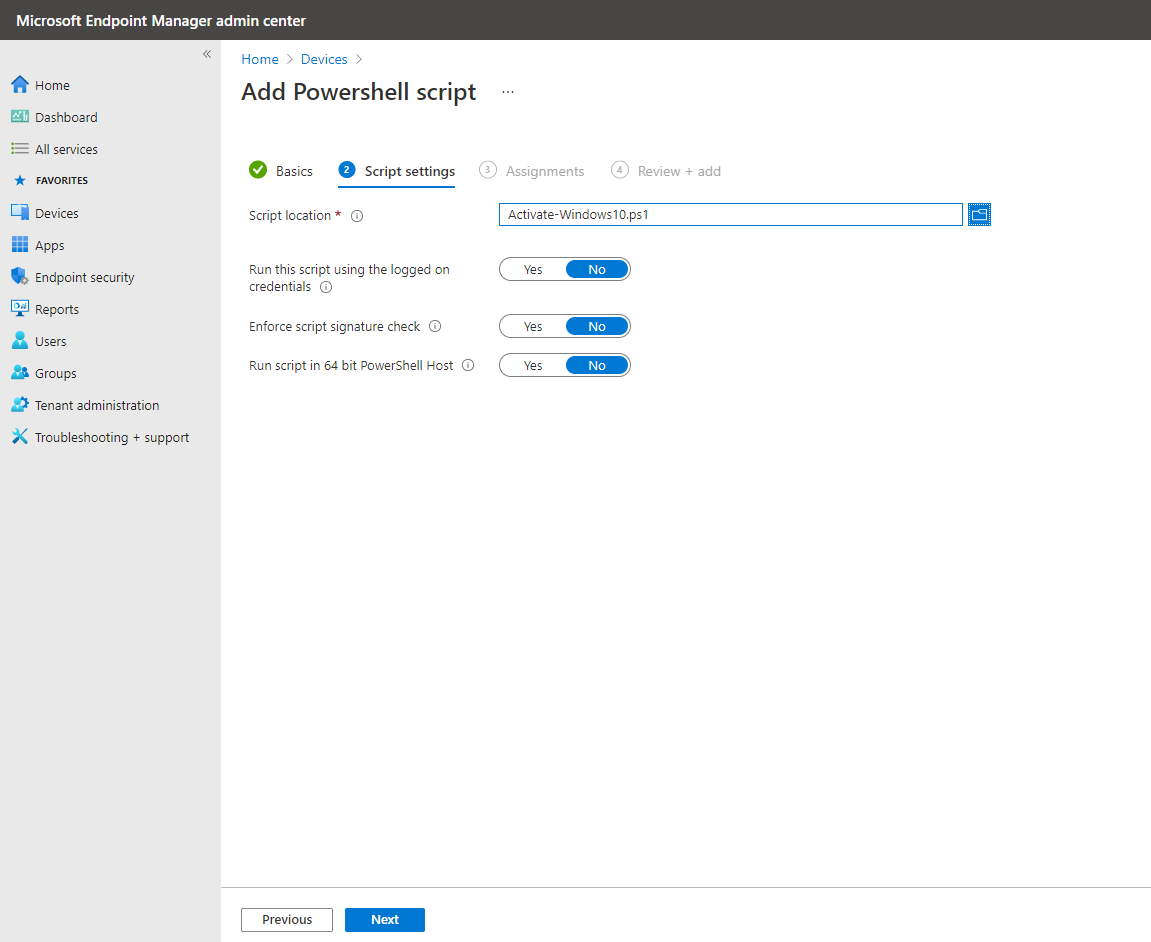
Create a Autopilot Script (PowerShell) to activate Windows 10
I will also create a Script to activate Windows 10 with a volume lincense.
slmgr.vbs -ipk <your windows key>

Deploy an App to the Autopilot Profile
Finally I also want to deploy an app to the Autopilot profile.
Appendix B: Adding apps to your profile
https://docs.microsoft.com/en-us/windows/deployment/windows-autopilot/demonstrate-deployment-on-vm#appendix-b-adding-apps-to-your-profile
Before we can pull an application into Intune to make it part of our AP profile, we need to “package” the application for delivery using the IntuneWinAppUtil.exe command-line tool. After downloading the tool, gather the following three bits of information to use the tool:
- The source folder for your application
- The name of the setup executable file
- The output folder for the new file
For the purposes of this lab, we’ll use the Notepad++ tool as our Win32 app.
Download the Notepad++ msi package here and then copy the file to a known location, such as C:Notepad++msi.
Run the IntuneWinAppUtil tool, supplying answers to the three questions, for example:


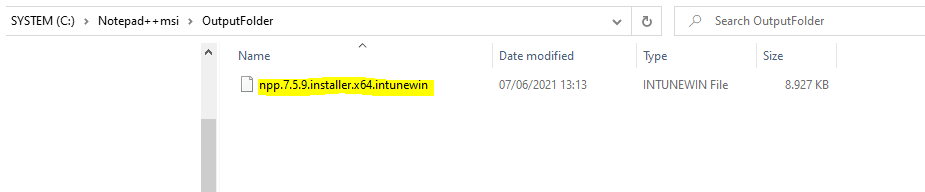
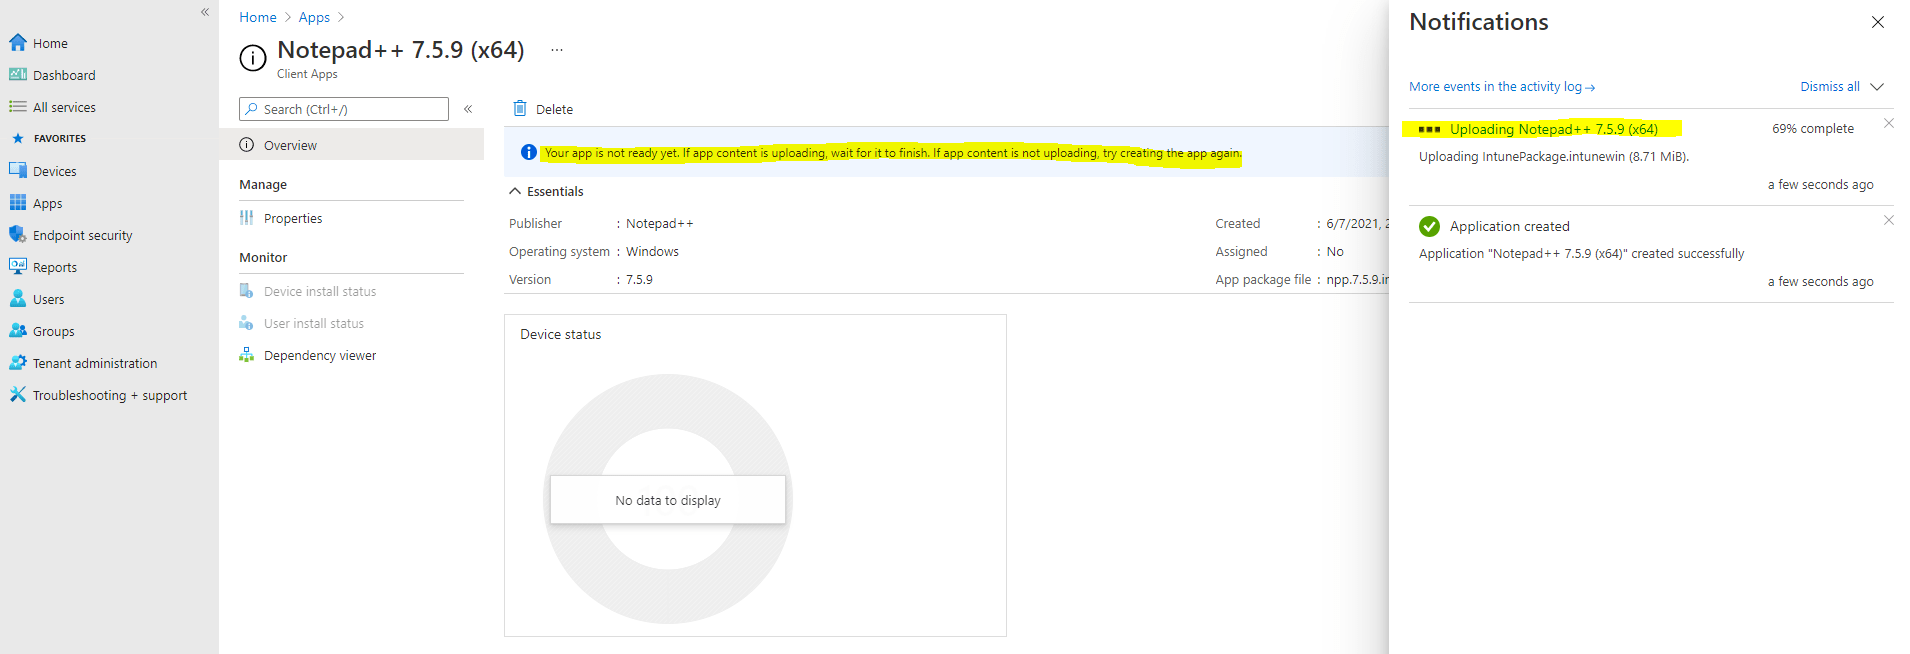
After the tool finishes running, you should have an .intunewin file in the Output folder, which you can now upload into Intune using the following steps.
Create app in Intune
Log into the Microsoft Endpoint Manager admin center
https://endpoint.microsoft.com/
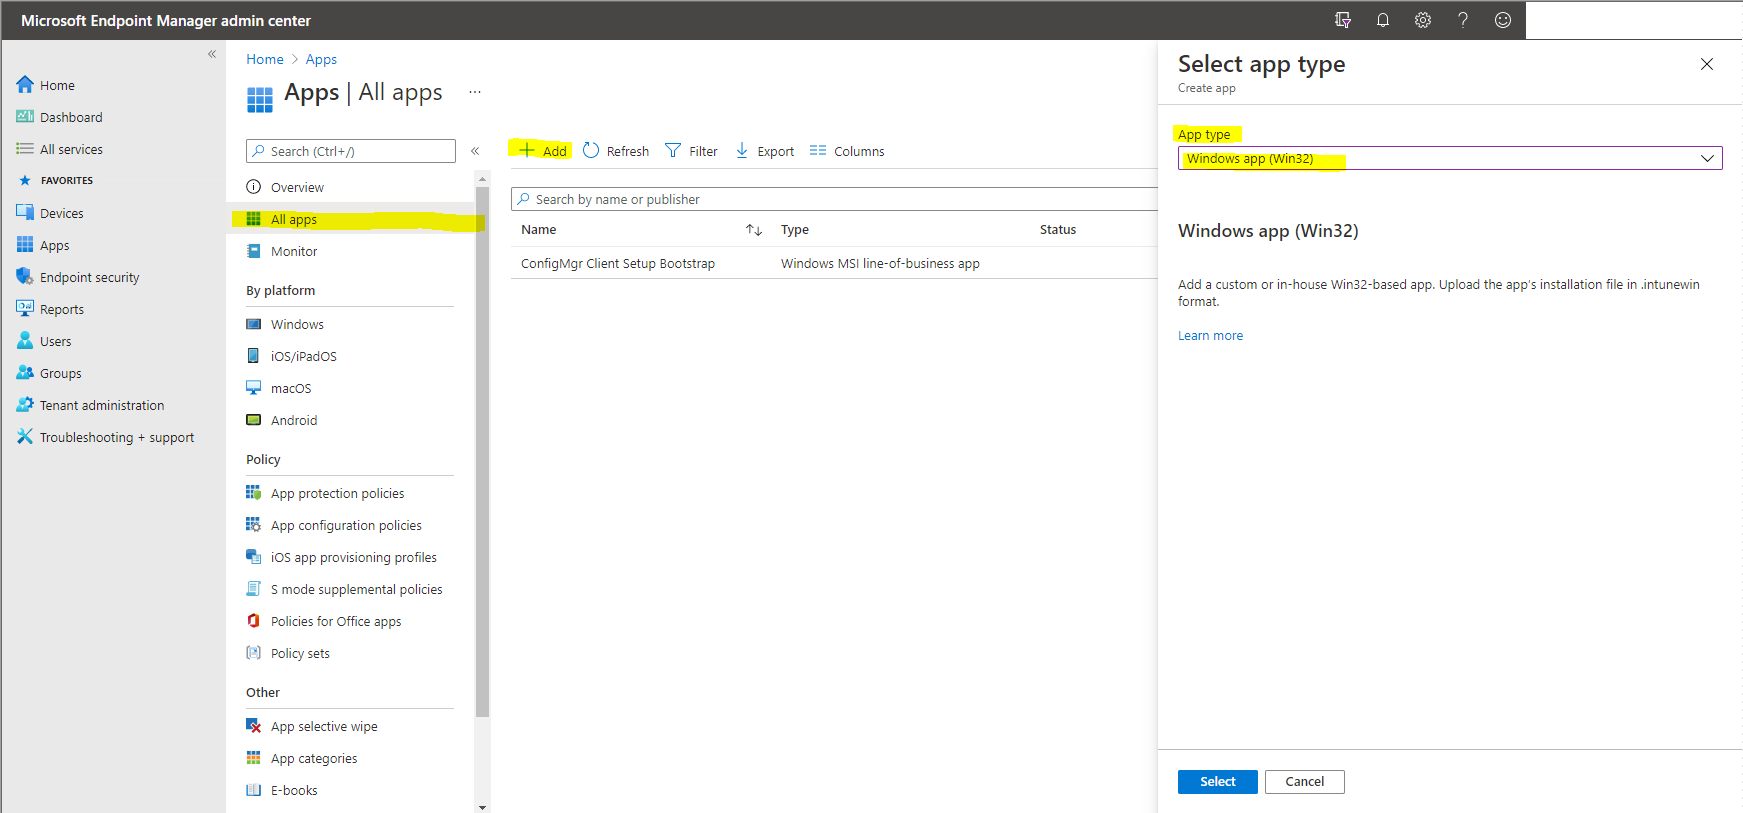
Navigate to Apps -> All apps, and then click the Add button to create a new app package.
Under App Type, select Windows app (Win32):
On the App package file blade, browse to the *.intunewin file in your output folder, open it, then click OK:

In the App Information Configure section, provide a friendly name, description, and publisher, such as:

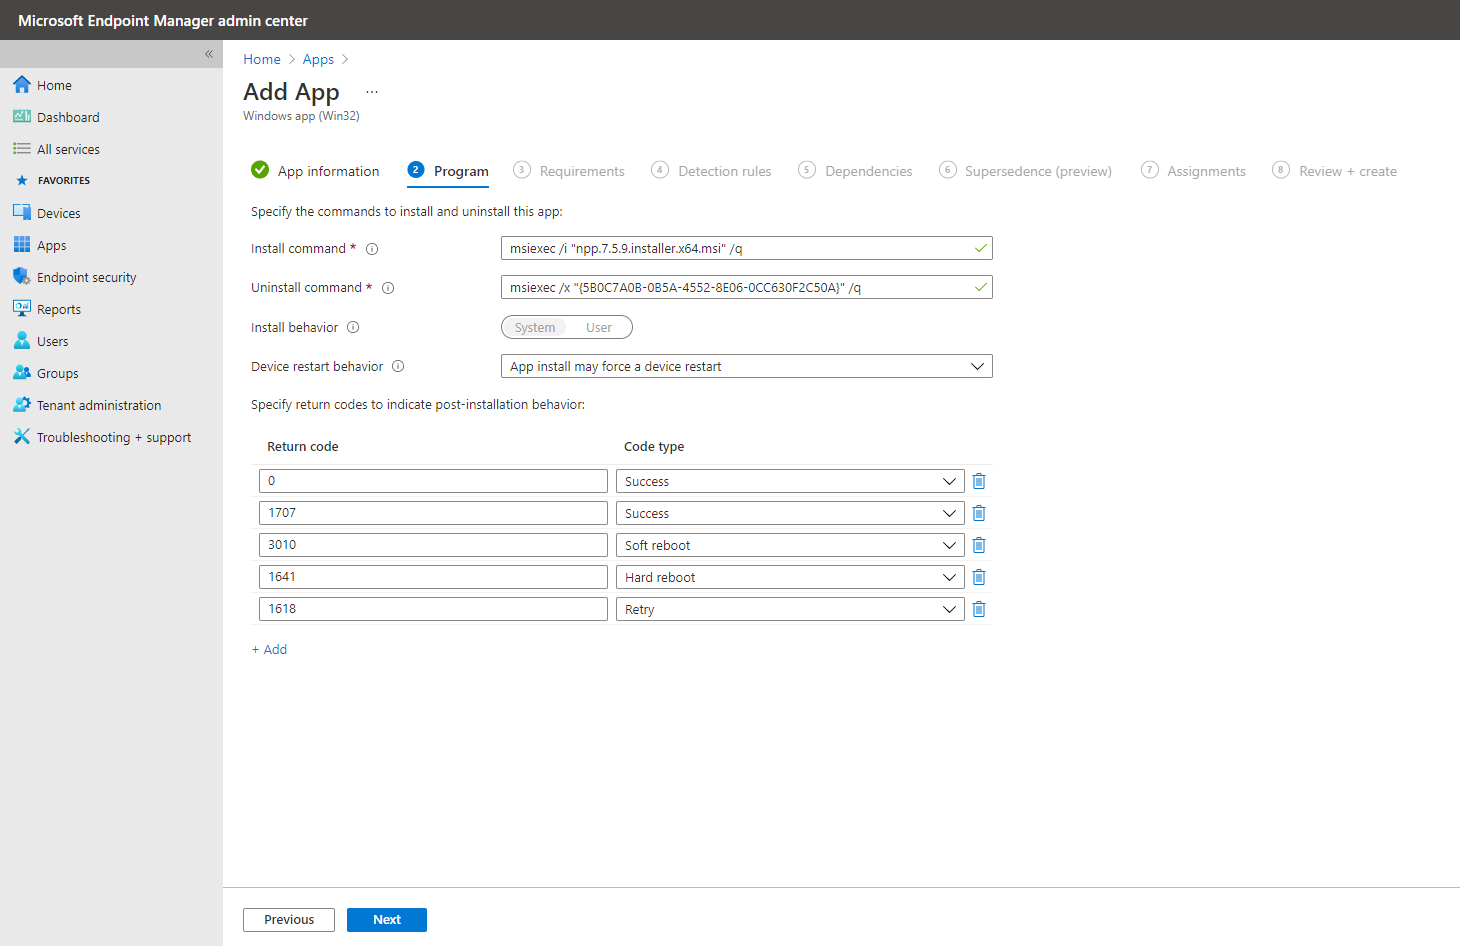
In the Program Configuration section, supply the install and uninstall commands:
Install: msiexec /i “npp.7.5.9.installer.x64.msi” /q
Uninstall: msiexec /x “{5B0C7A0B-0B5A-4552-8E06-0CC630F2C50A}” /q
Likely, you do not have to write the install and uninstall commands yourself because the IntuneWinAppUtil.exe command-line tool automatically generated them when it converted the .msi file into a .intunewin file.
Simply using an install command like “notepad++.exe /S” will not actually install Notepad++; it will only launch the app. To actually install the program, we need to use the .msi file instead. Notepad++ doesn’t actually have an .msi version of their program, but we got an .msi version from a third party provider.
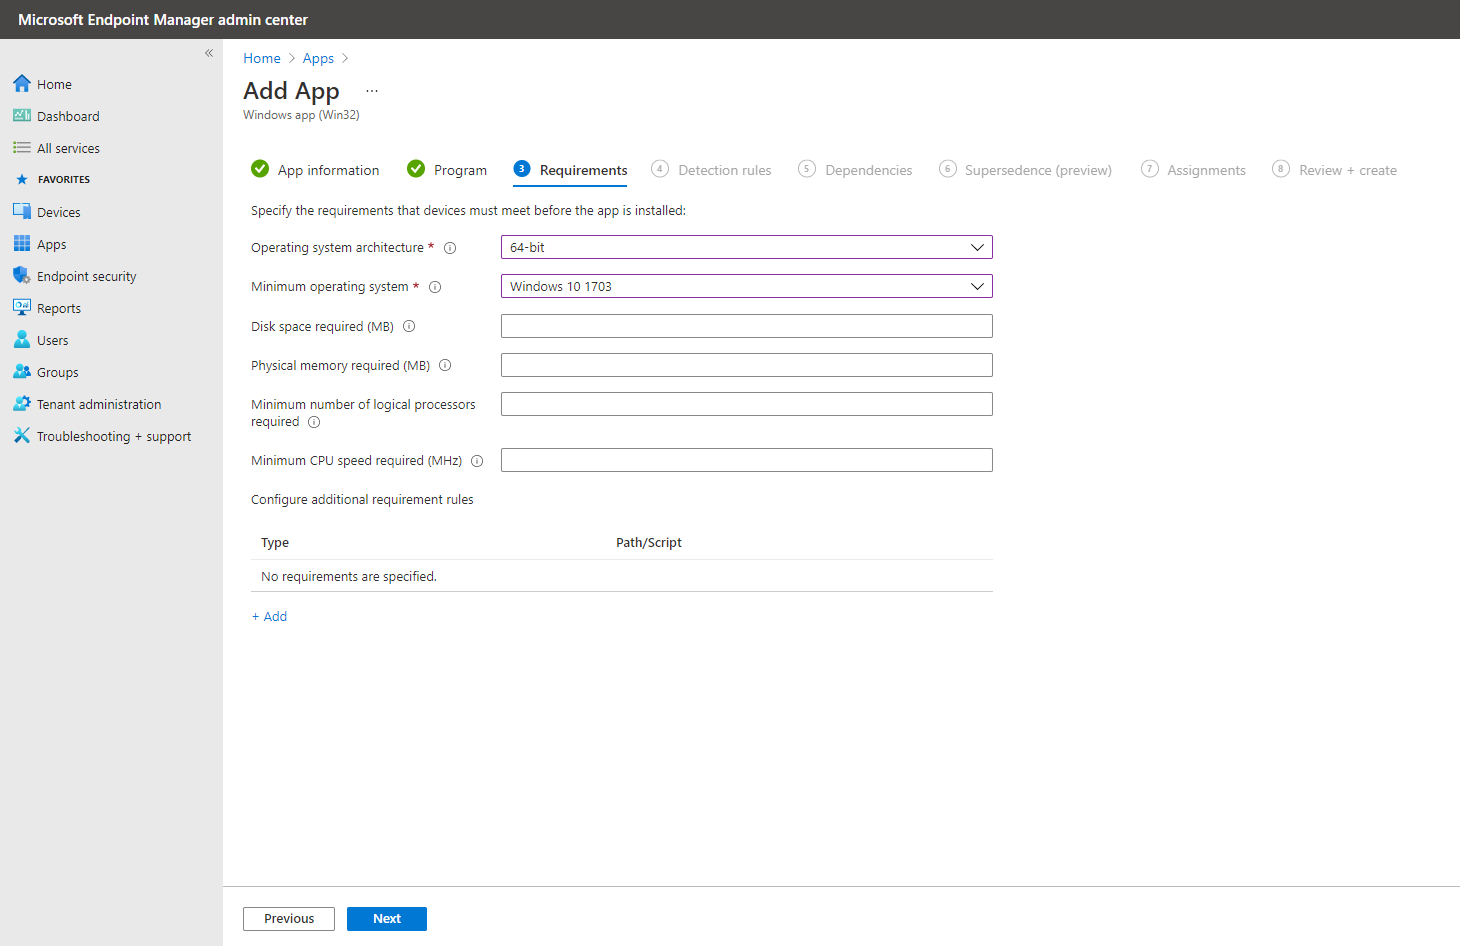
On the Requirements Configuration section, specify the OS architecture and the Minimum OS version:
Next, configure the Detection rules. For our purposes, we will select manual format:
Click Add to define the rule properties. For Rule type, select MSI, which will automatically import the right MSI product code into the rule:

Next the Dependencies and Supersedence section we can skip so click Next twice.
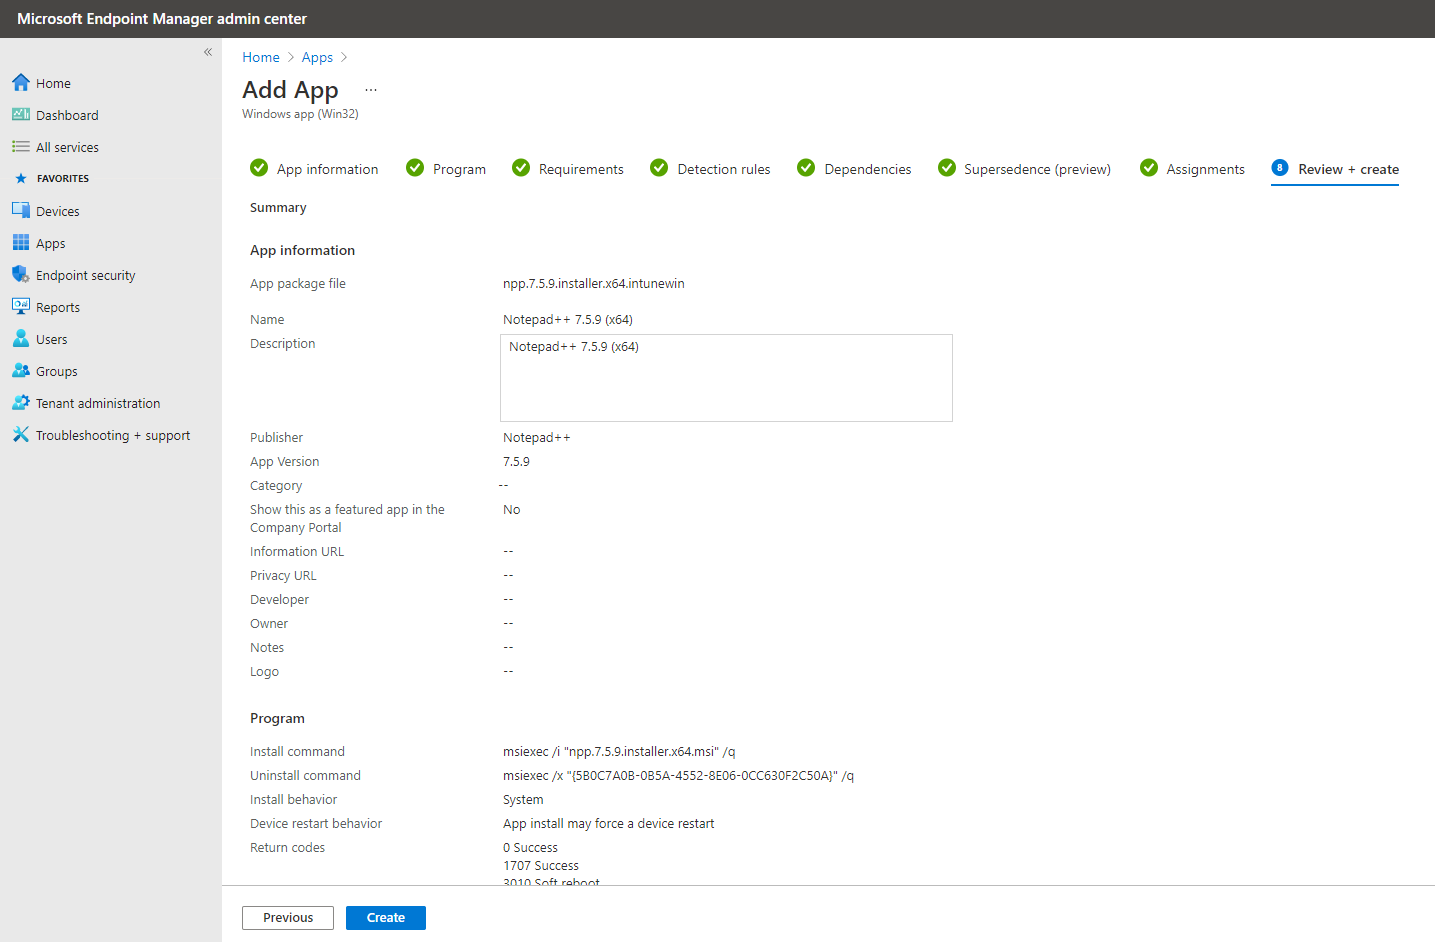
In the last Assignments section I will assign the app to my Autopilot BC 01 group.

Click on Create finally.
Add Office 365 to the Autopilot Profile
Therefore please go to the original article from Microsoft
Add Office 365
https://docs.microsoft.com/en-us/windows/deployment/windows-autopilot/demonstrate-deployment-on-vm#add-office-365
See Windows Autopilot in action
As mentioned in Part 1, you can also use a physical device like a notebook, the PowerShell script to export the device ID and Hash will also works here.
There will be no differences like using a virtual machine.
Now we can test if it works.


I also tested the whole process with an external Dell XPS 15 notebook, at this point I first have to choose my language and keyboard layout. You can pre-configure these settings in the deployment profile.
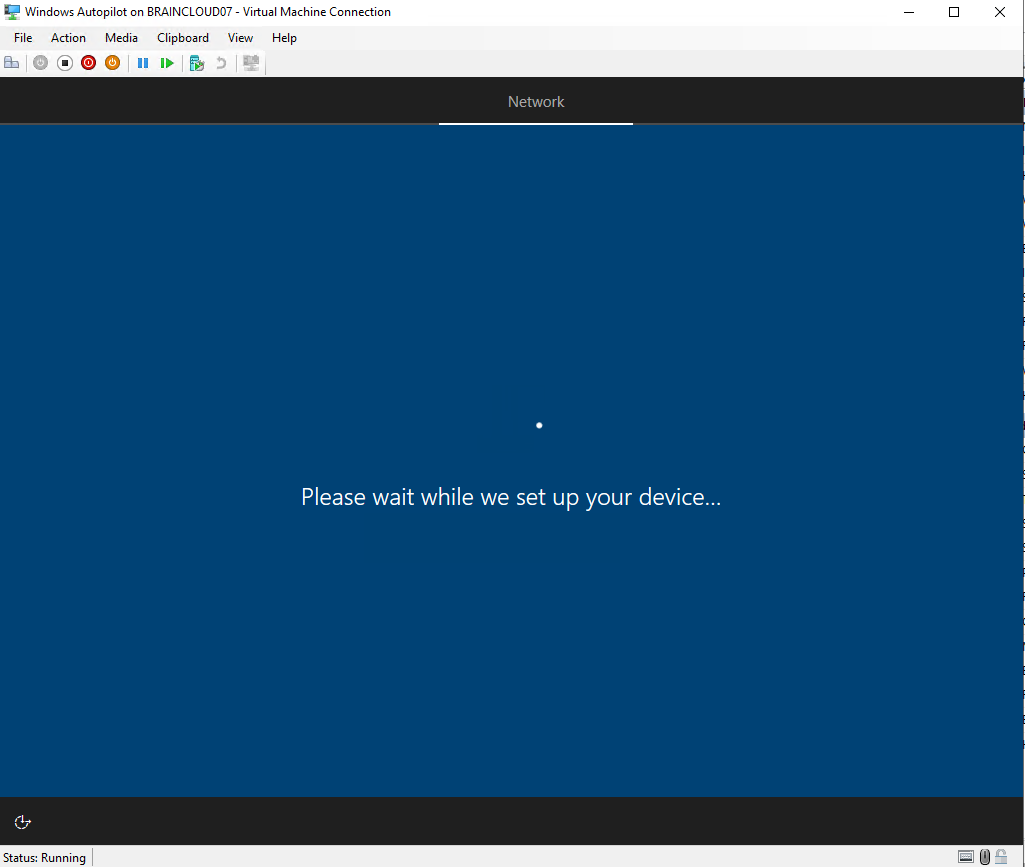
After that I was asked to connect to a WLAN network, so I entered the password of my wlan hot spot and I was getting the message:
Now we have some important setup to do
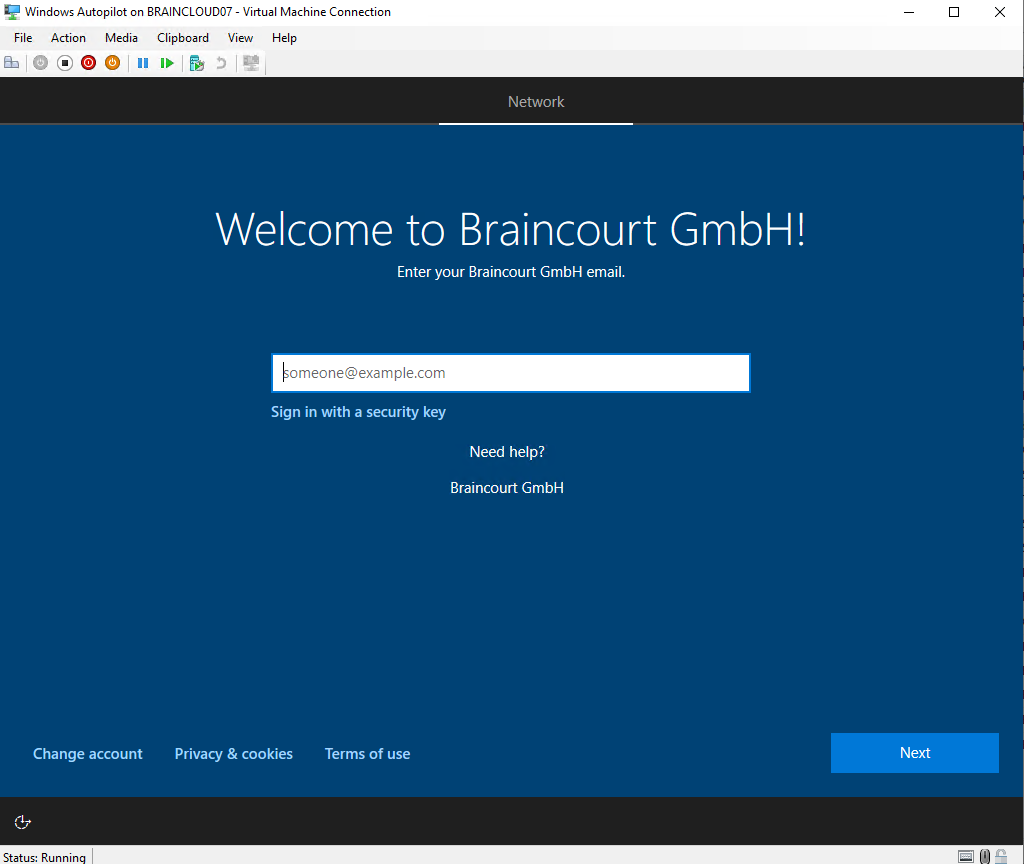
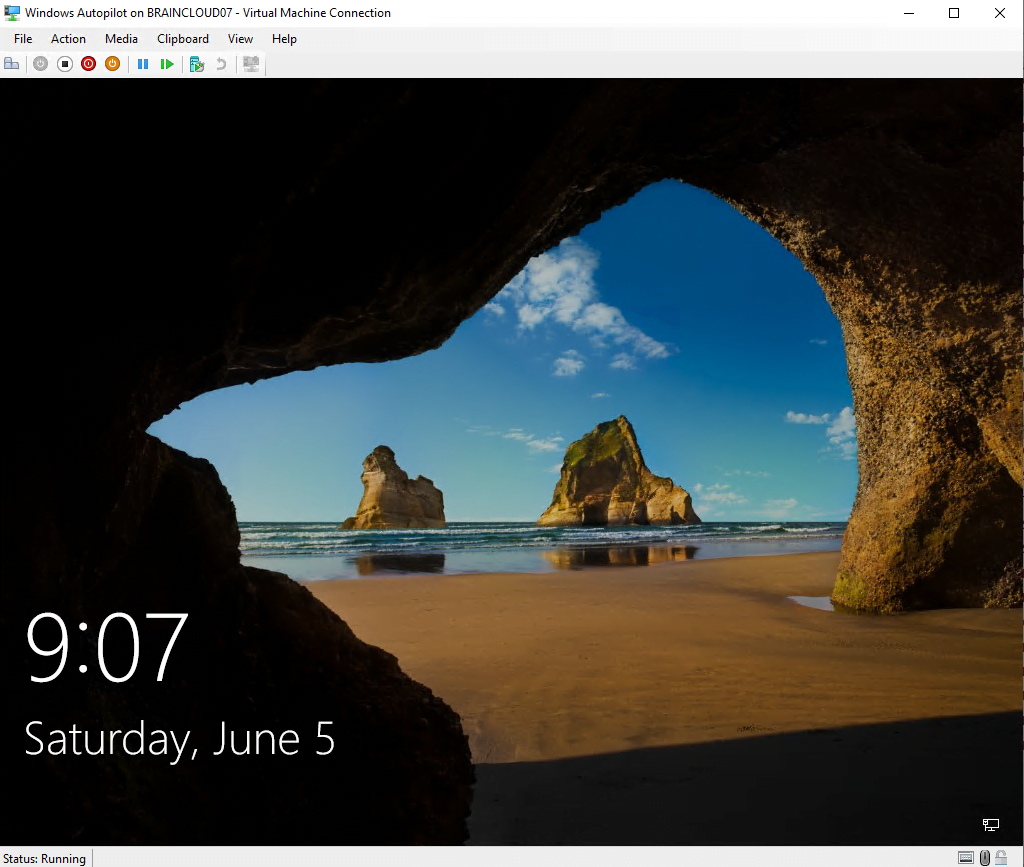
A few seconds later, I get displayed the below Welcome to Braincourt GmbH screen.
Looks good, the device is recognized from Intune.
At this point the Intune Connector for Active Directory still created the computer object in your Active Directory and the configured OU.
All this without establishing ever a vpn connection to the on-premises network.
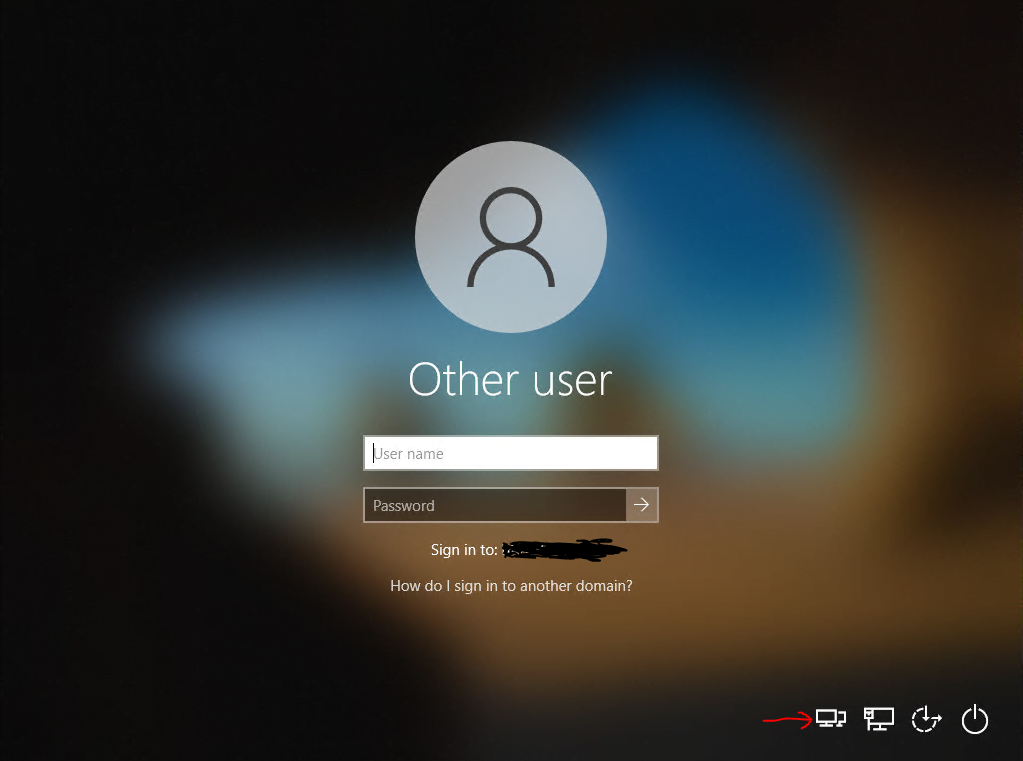
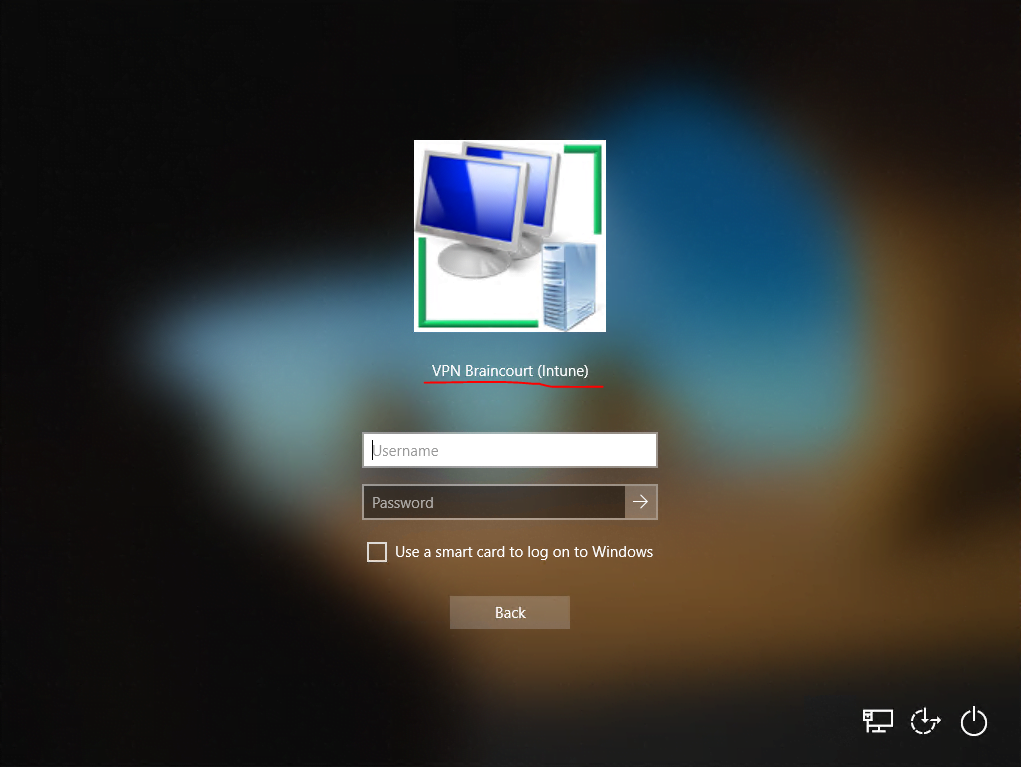
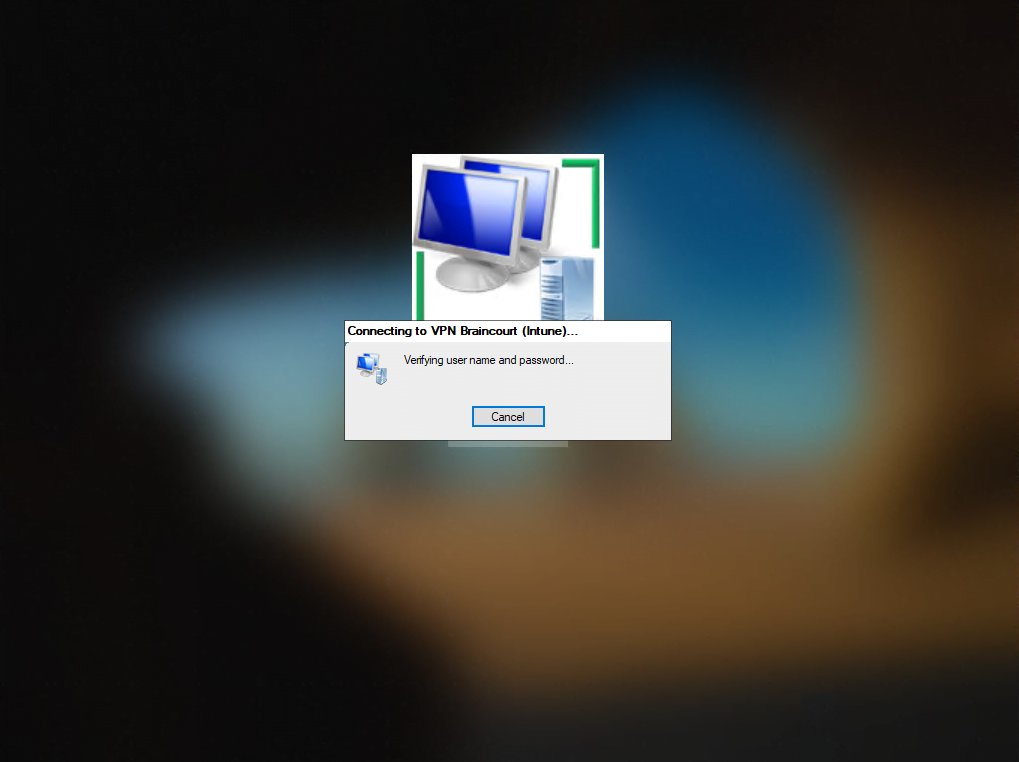
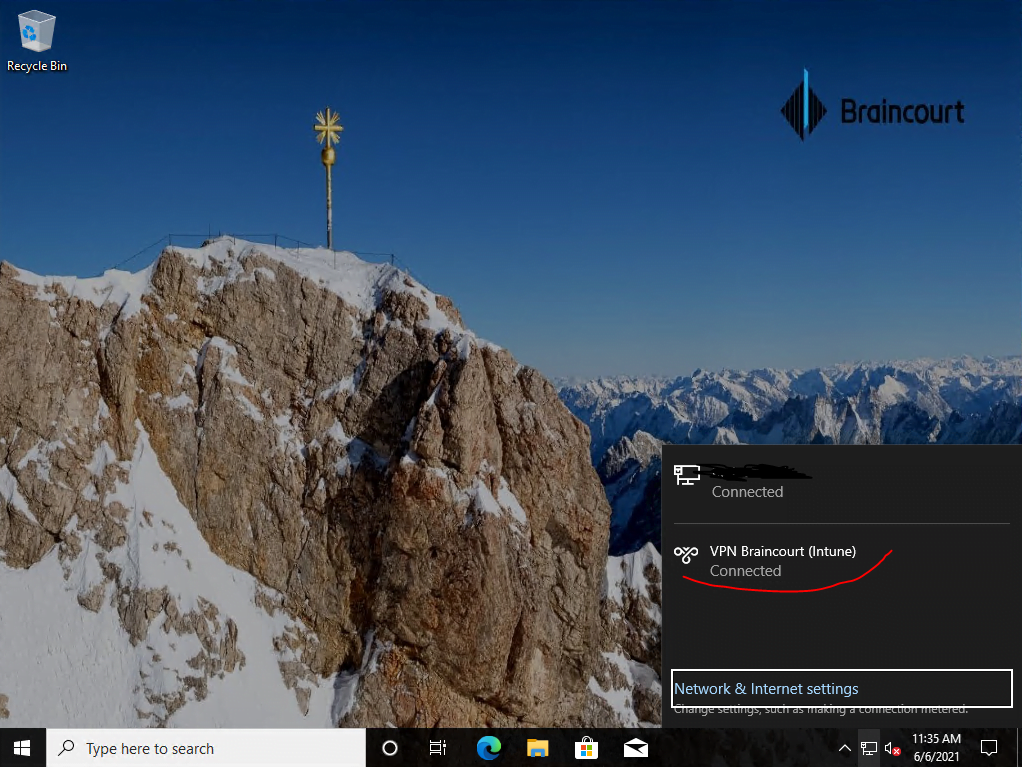
As mentioned the device is located external and have no direct connection to the internal network. So in this case I will have to establish a network logon through the from Intune created VPN connection using the PowerShell script.
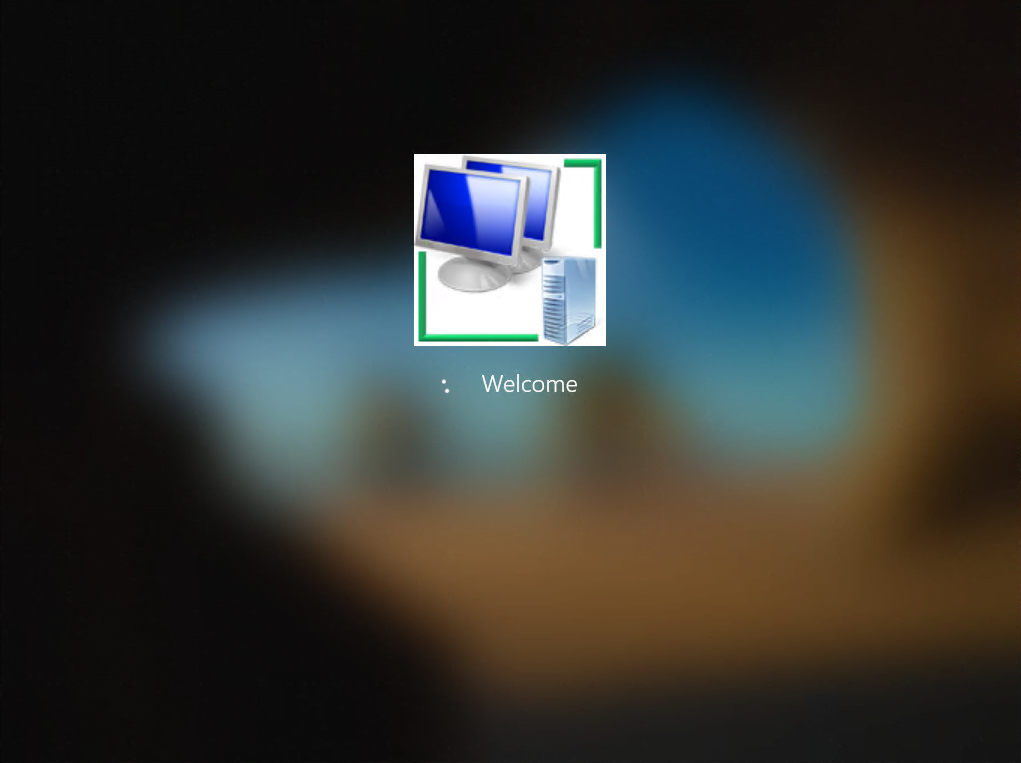
I have to click on the icon with the two monitors to establish a network logon using the VPN connection from the logon screen.
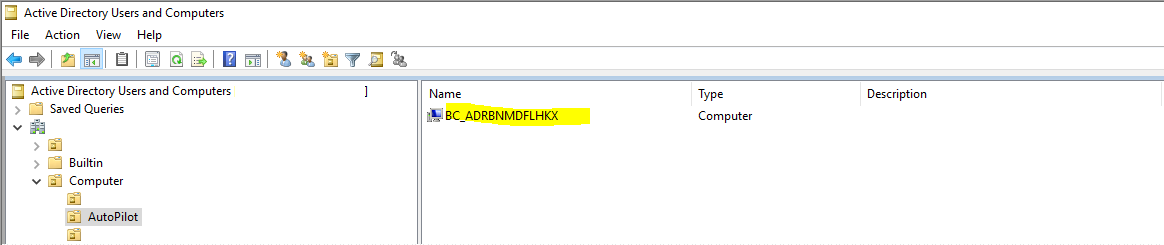
Btw. you can also see from the logon screen, that the device (VM) was successfully added to the internal domain from Intune and the server with the Intune Connector for Active Directory as we where prompted to sign-in to the internal Domain. Further we can check with the Active Directory Users and Computers console that the computer object was also successfully create in our Organizational unit (OU) we set previously in the Device configuration profile.


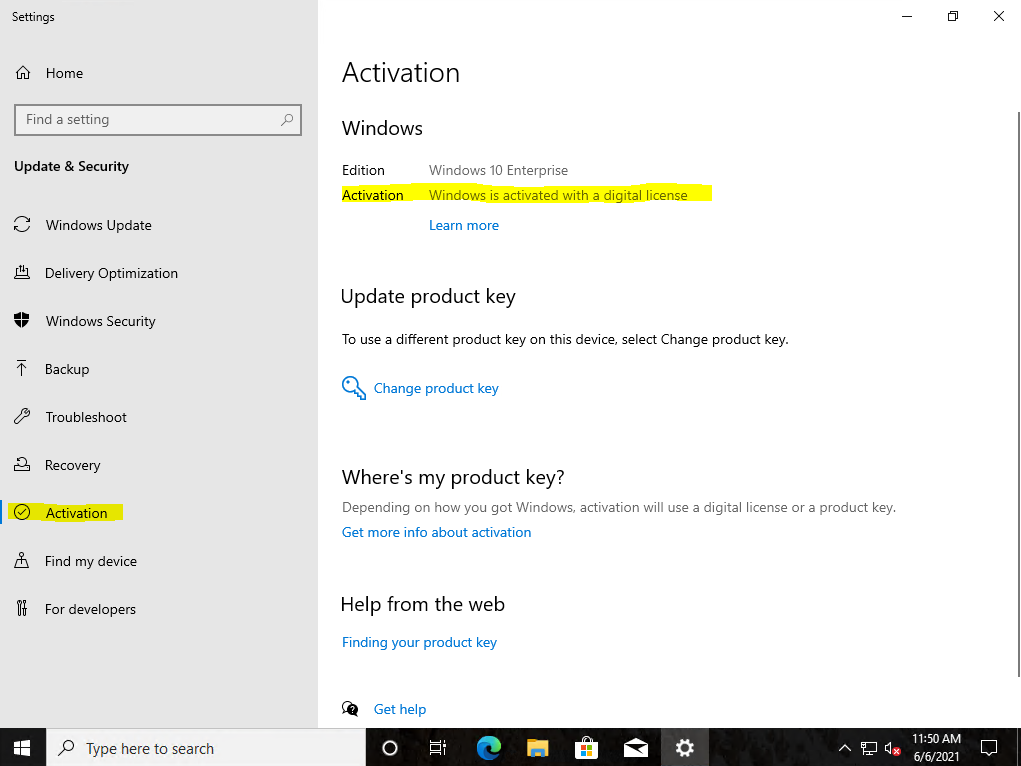
Product Key activation using also the PowerShell script with Intune also works.
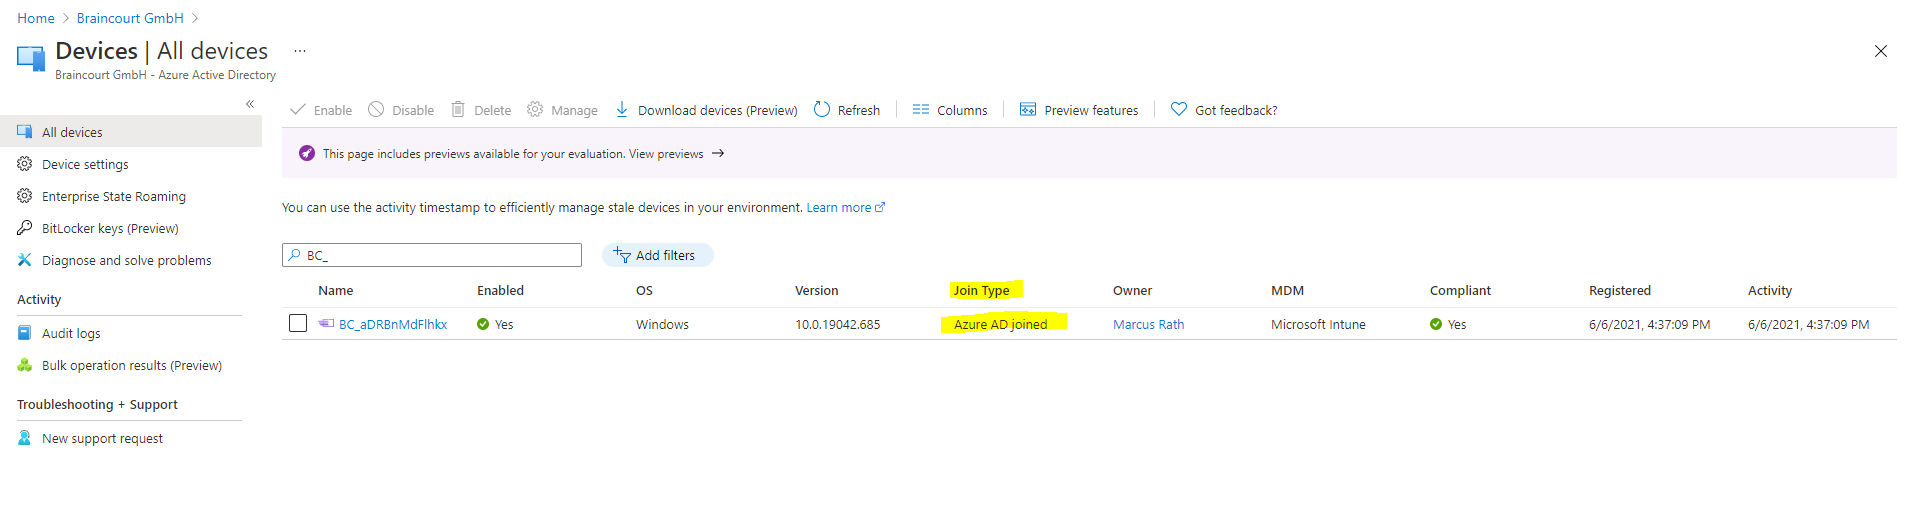
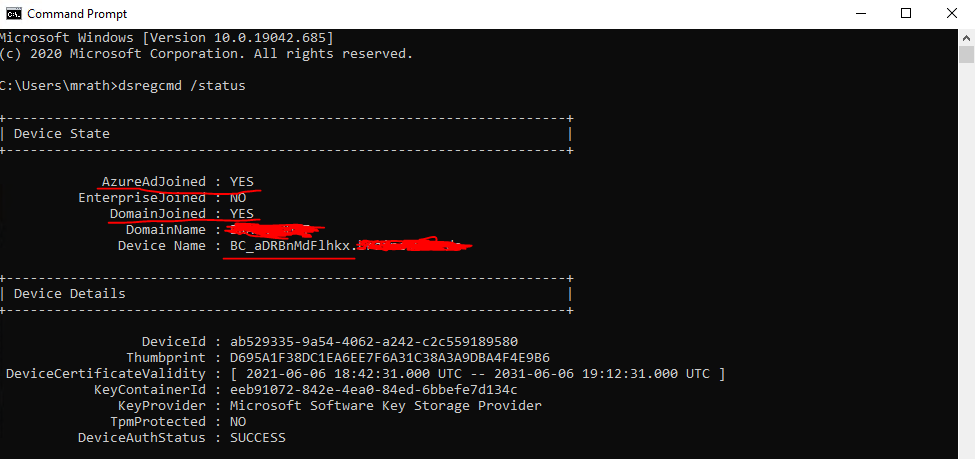
The device at this moment is shown up only as Azure AD joined instead of Hybrid Azure AD joined in Azure as follows.
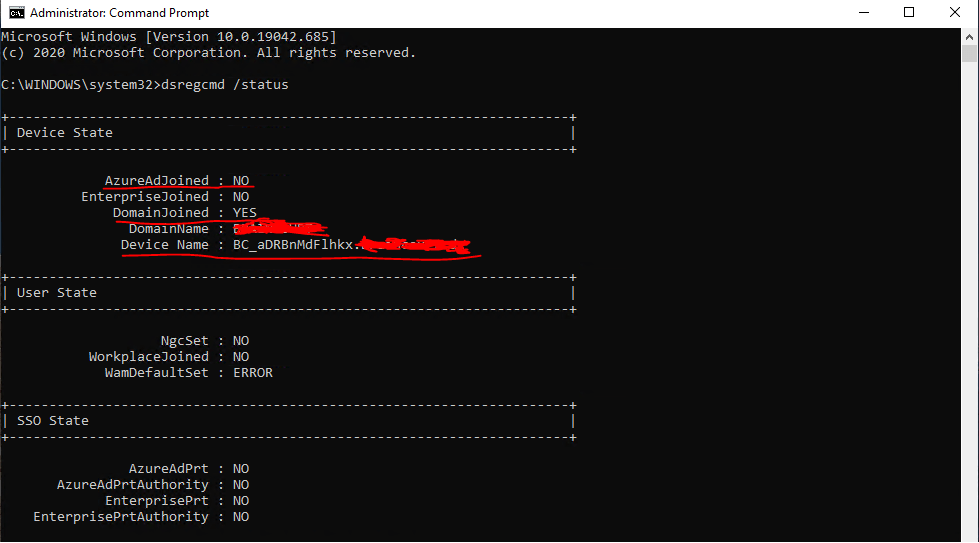
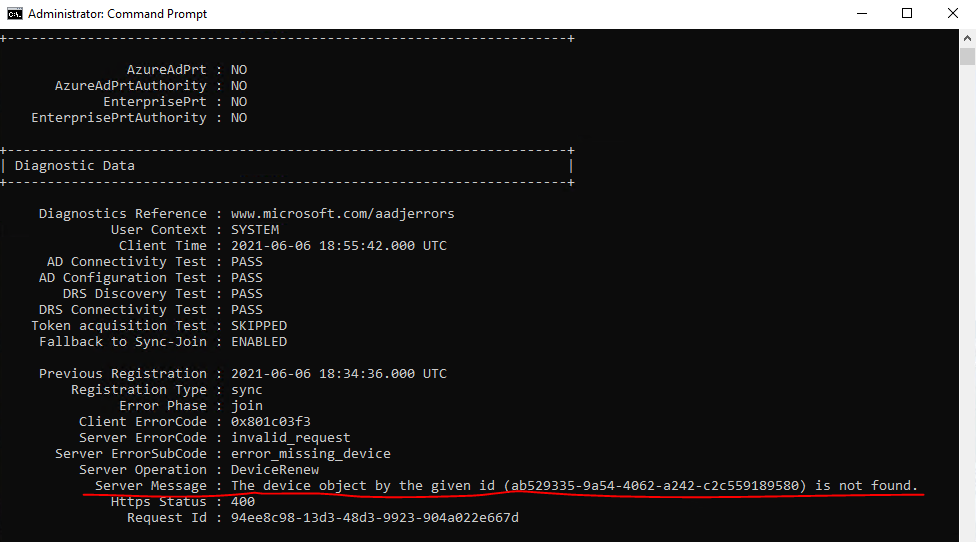
Checking the status of the device with dsregcmd /status, will show me that the device is not found in Azure AD.
The reason for is that the computer object in the Autopilot OU from on-premises so far wasn’t synced to Azure AD. Keep in mind to also include this OU in Azure AD Connect to synchronize to Azure AD.
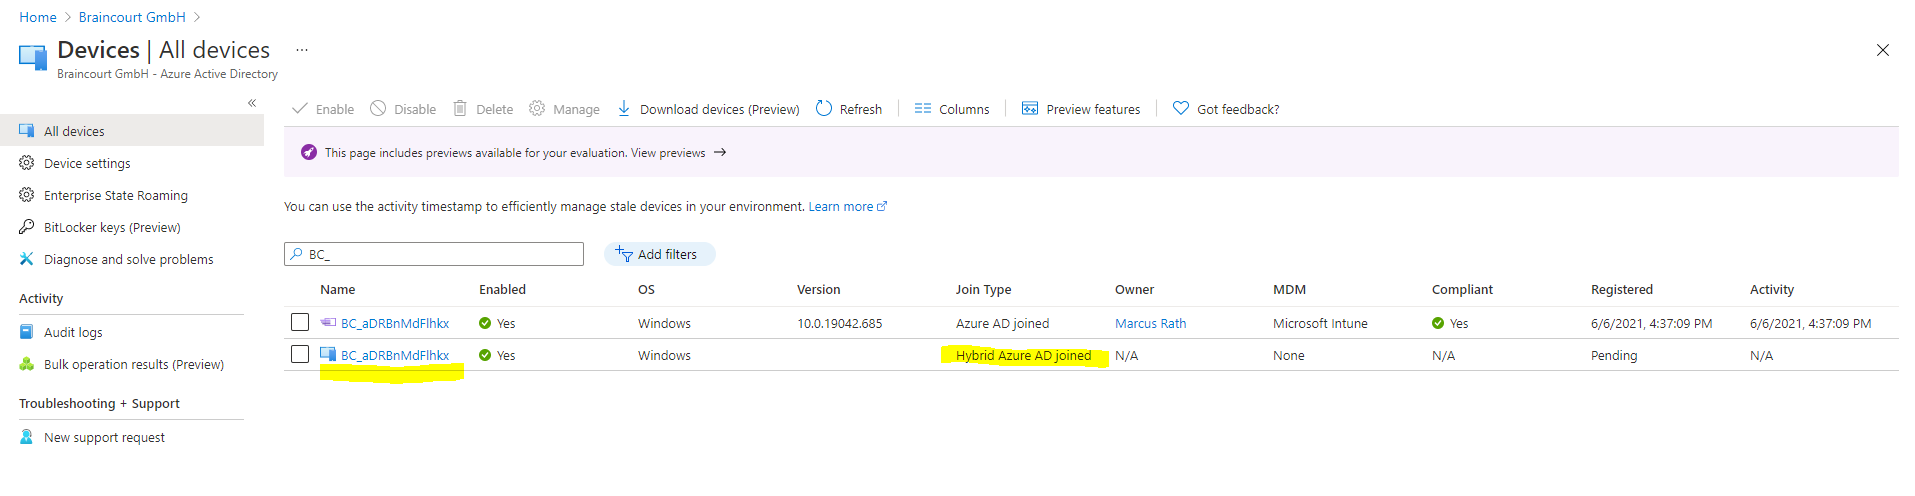
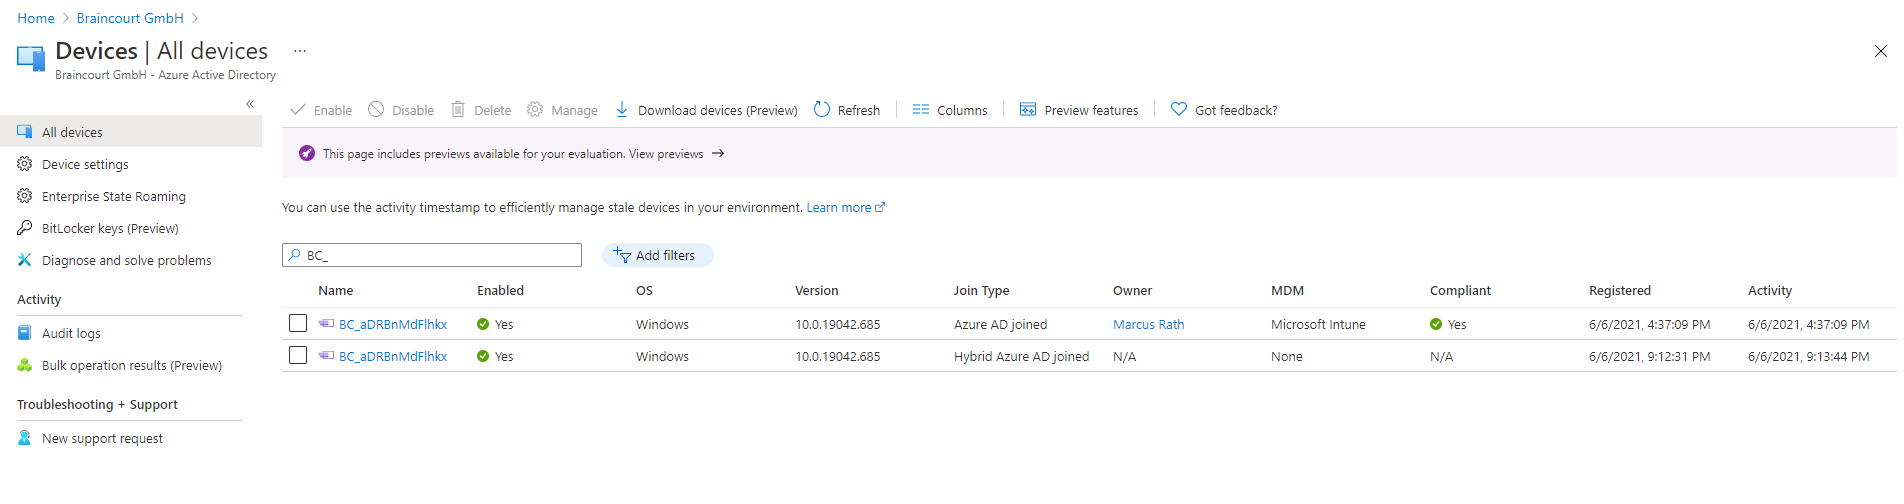
After triggering the sync using the following PowerShell cmdlet, the device appears twice in Azure AD, once with Azure AD joined and once with Hybrid Azure AD joined. Also the Hybrid Azure AD joined device appears not as Autopilot device with the purple icon in front.
The status of device itself when using the dsregcmd /status command will show me no change and I will get the same status as above. The reason is that the task domain join is only executed on system start and each hour.
About the task domain join you can read my post about how to configure Hybrid Azure AD join for managed domain.
Start-ADSyncSyncCycle -PolicyType Delta
After the sync the on-premises computer object is shown up in Azure AD.
After a restart where the task domain join is executed again. Both now determined as Autopilot device shown with the purple icon in front of the device name.
That the device is registered twice in Azure AD, once first as Azure AD joined and secondly once as Hybrid Azure AD joined was wondering me to say the least.
After a web search I found a lot people complaining about the same issue and obviously this will be by design and an expected behavior in Hybrid Autopilot. Below a few conversations about this topic.
I suppose this will be changed in future.
https://social.msdn.microsoft.com/Forums/en-US/5eac366c-b5a4-47c4-8acb-58ab15dbcda7/duplicate-devices-azure-ad-join-and-hybrid-joined-while-performing-autopilot?forum=WindowsAzureAD
https://techcommunity.microsoft.com/t5/microsoft-intune/hybrid-joined-device-are-getting-registered-twice-in-aad/m-p/1600212
This is by design. Reason why is that Azure is unable to match the registered device from Intune and the device from AD on prem. Both devices have the same name but not the same object ID.
https://social.technet.microsoft.com/Forums/en-US/64a2c8c7-5723-46fa-a63b-31a722710b42/hybrid-autopilot-double-aad-objects?forum=microsoftintuneprod
After confirming with Microsoft, this is the expected behavior in Hybrid Autopilot.
Also the device state with dsregcmd /status look fine now.

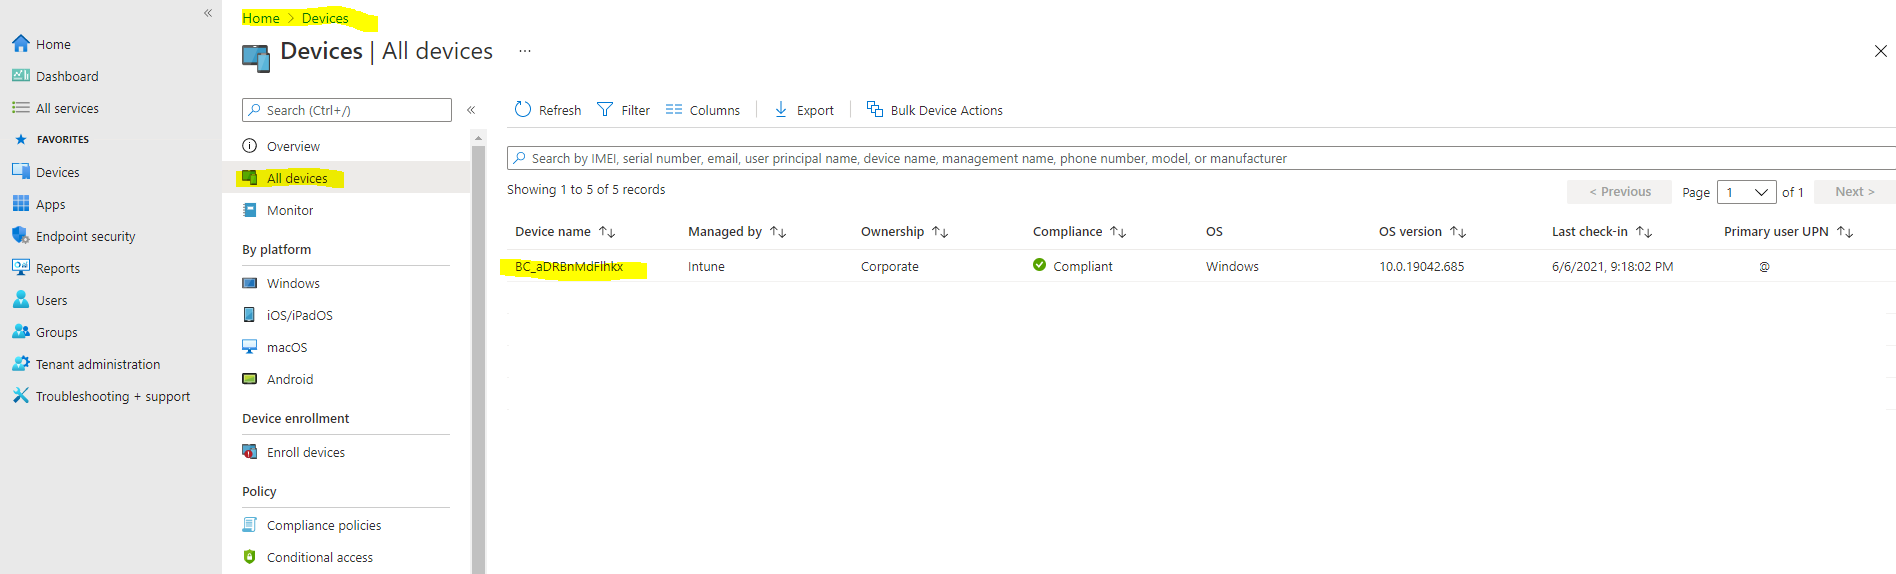
Also within the Microsoft Endpoint Manager admin center everything looks fine for the device.
Links
Demonstrate Autopilot deployment
https://docs.microsoft.com/en-us/windows/deployment/windows-autopilot/demonstrate-deployment-on-vm
Configuration Domain Join settings for hybrid Azure AD joined devices in Microsoft Intune
https://docs.microsoft.com/en-us/mem/intune/configuration/domain-join-configure
Deploy hybrid Azure AD-joined devices by using Intune and Windows Autopilot
https://docs.microsoft.com/en-us/mem/autopilot/windows-autopilot-hybrid
User-driven mode for hybrid Azure Active Directory join with VPN support (Preview)
https://docs.microsoft.com/en-us/mem/autopilot/user-driven#user-driven-mode-for-hybrid-azure-active-directory-join-with-vpn-support-preview
To create a trusted certificate profile
https://docs.microsoft.com/en-us/mem/intune/protect/certificates-trusted-root#to-create-a-trusted-certificate-profile
Windows 10 and Windows Holographic device settings to add VPN connections using Intune
https://docs.microsoft.com/en-us/mem/intune/configuration/vpn-settings-windows-10
Create VPN profiles to connect to VPN servers in Intune
https://docs.microsoft.com/en-us/mem/intune/configuration/vpn-settings-configure
Create the VPN Profile
https://docs.microsoft.com/en-us/mem/intune/configuration/vpn-settings-configure#create-the-profile
Appendix B: Adding apps to your profile
https://docs.microsoft.com/en-us/windows/deployment/windows-autopilot/demonstrate-deployment-on-vm#appendix-b-adding-apps-to-your-profile
IntuneWinAppUtil
https://github.com/Microsoft/Microsoft-Win32-Content-Prep-Tool
Add Office 365
https://docs.microsoft.com/en-us/windows/deployment/windows-autopilot/demonstrate-deployment-on-vm#add-office-365