Setup Postfix Mailserver with Dovecot and MySQL on Ubuntu 18.04.4 LTS Step by Step
Because of changing my hosting provider for my virtual machine and domains, I had to setup my postfix mailserver on a new Ubuntu 18.04.4 LTS virtual machine.
So I thought, I could document the the whole setup process in a step by step guide.
Installing and configuring Postfix
First we need to install postfix which is an Mail Transfer Agent (MTA).
His job is to submit mails over the smtp protocol to other smtp mailservers (MTAs in particular).
Clients like Thunderbird or Outlook send their outgoing mails over SMTP and postfix. For the incoming mails they use in my case dovecot, which is an Mail Delivery Agent (MDA) and imap server.
$ sudo apt install postfix
$ sudo apt install libsasl2-modules
libsasl2-modules implements in Ubuntu the Simple Authentication and Security Layer (SASL) framework for authentication and data security. Postfix and Dovecot use SASL to authenticate the clients. If this is not present you will see authentication erros like SASL authentication failed; no mechanism available in the logs.
Simple Authentication and Security Layer (SASL)
https://en.wikipedia.org/wiki/Simple_Authentication_and_Security_LayerPostfix SASL Howto
http://www.postfix.org/SASL_README.html
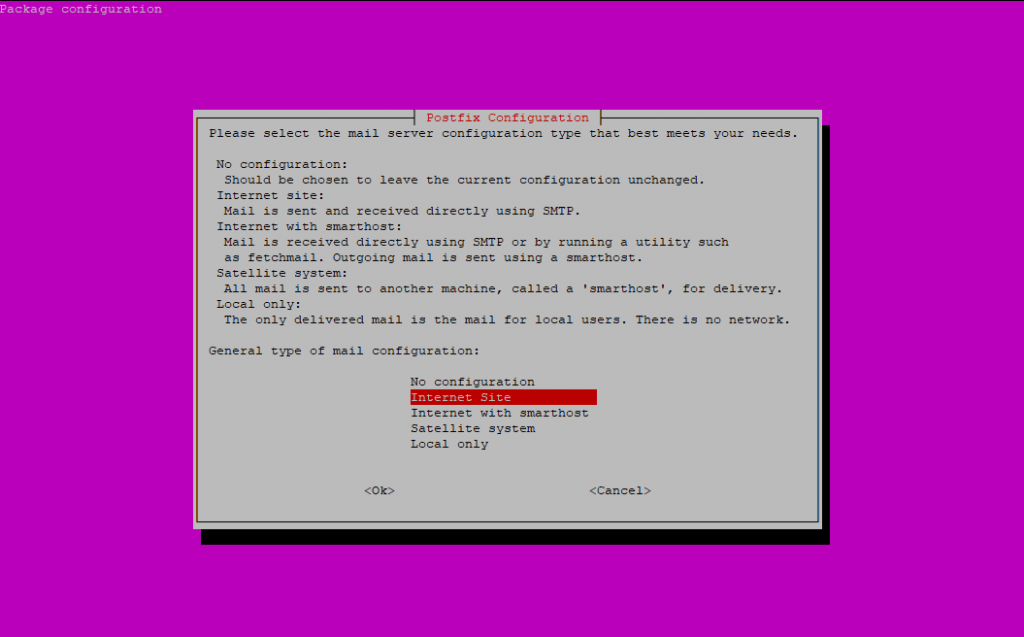
I will setup a Internet Site deployment so that postfix can receive and send mails directly from and to the internet.
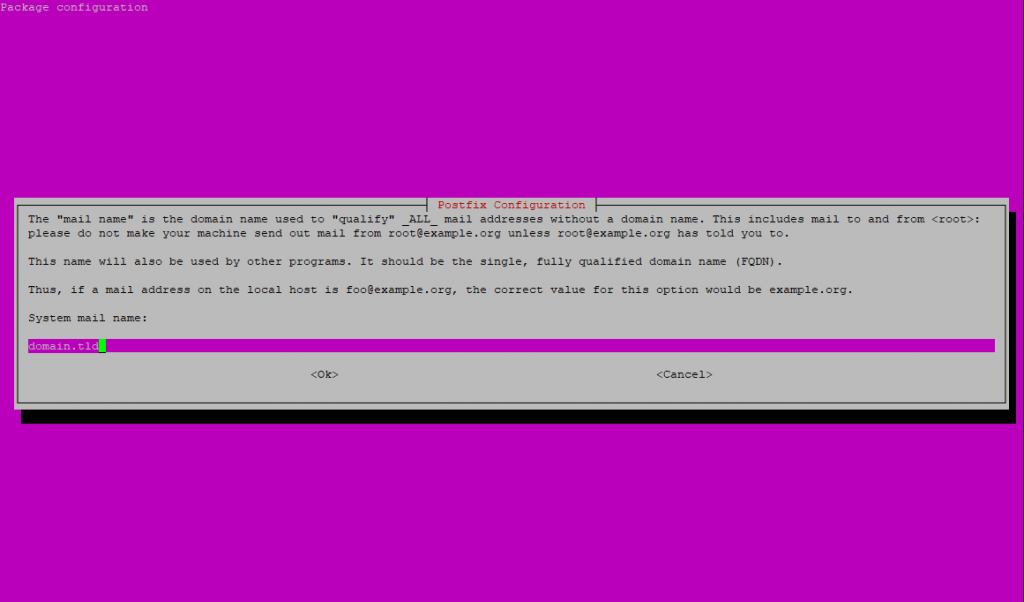
Enter your domain name as FQDN which should be used for mails without a domain name.
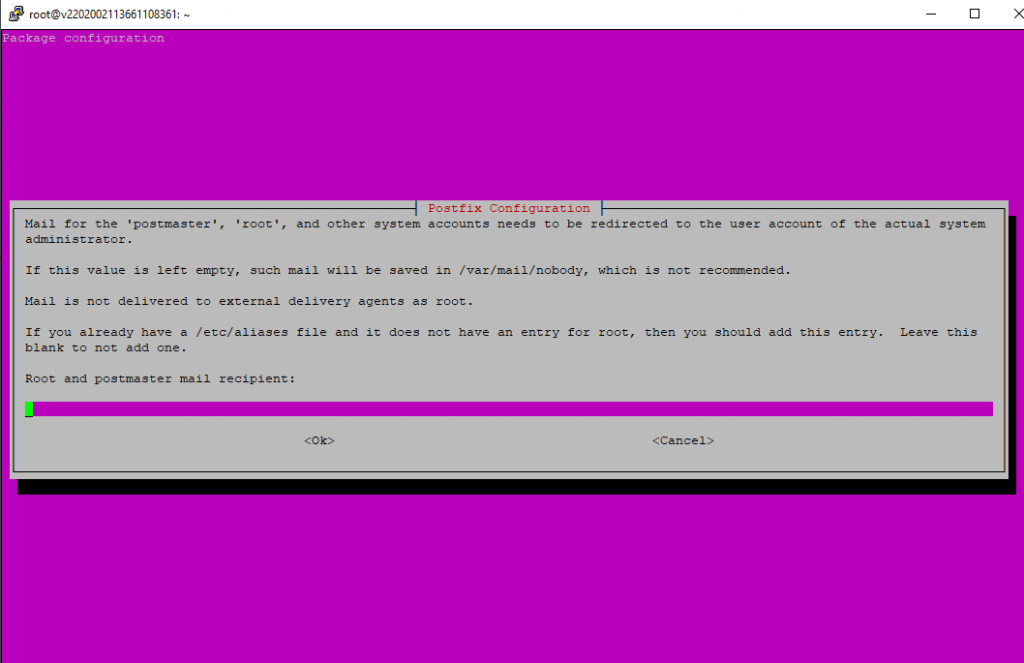
The next I leave blank as I am not interested in getting mails for the local system accounts.
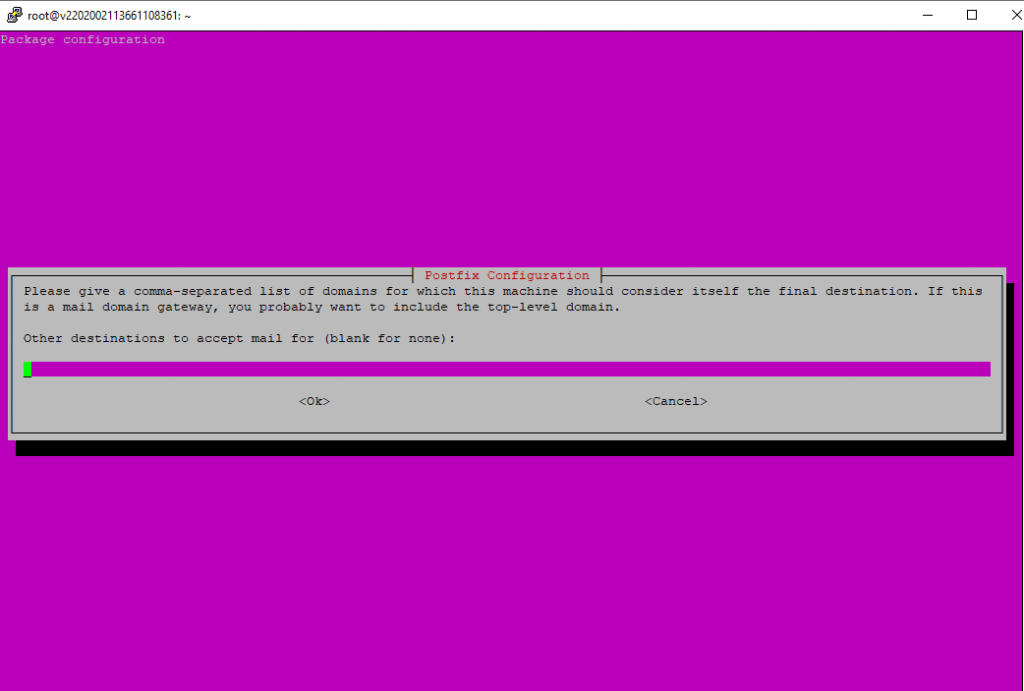
Leave the accepted domains blank as we configure them later in a MySQL database.
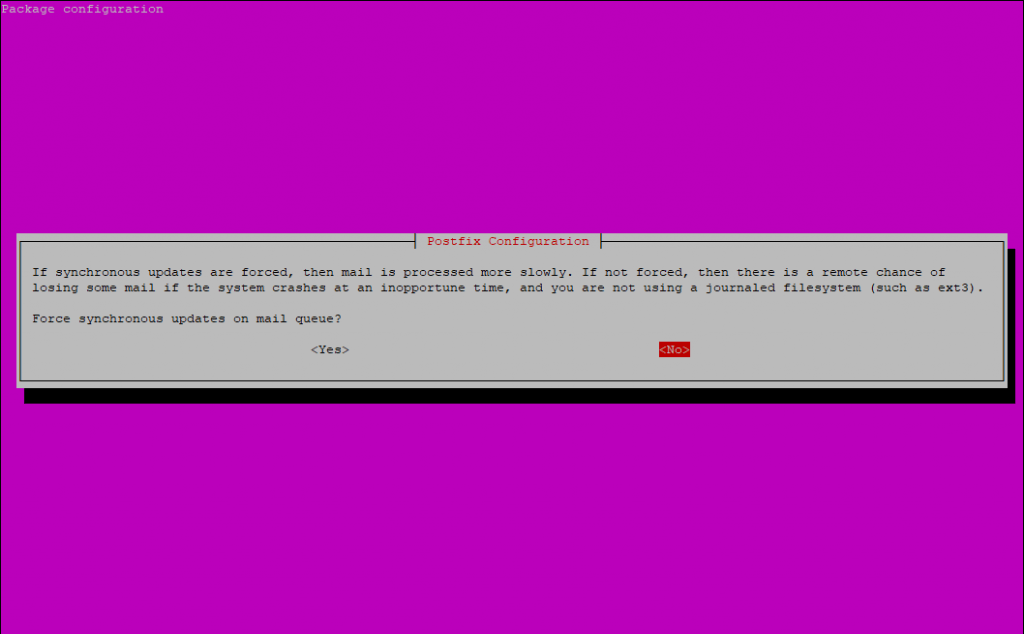
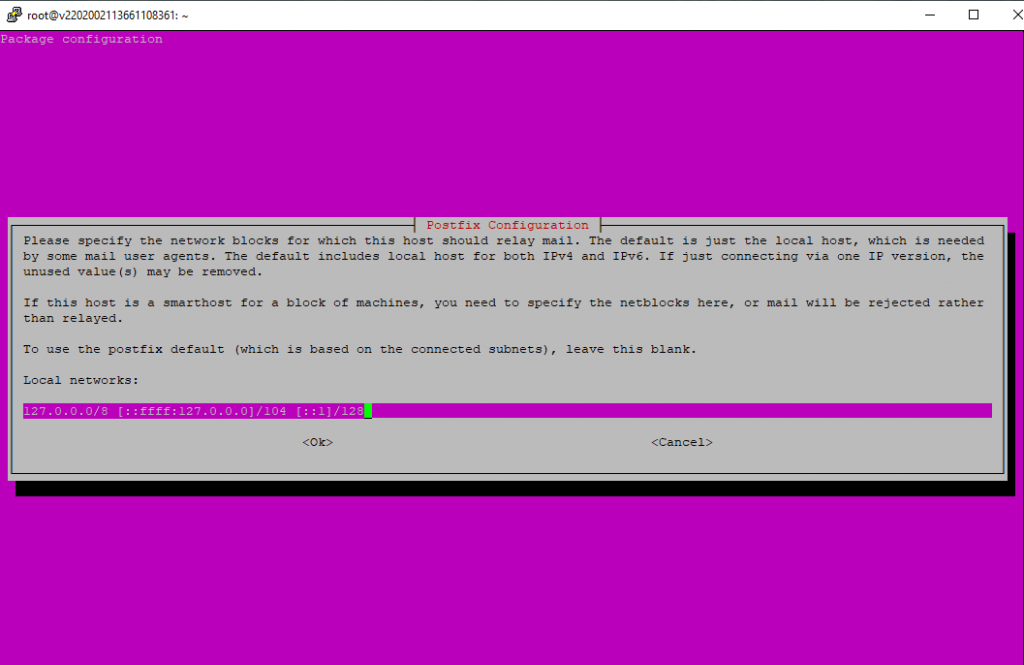
I don’t want to limit the size of the mailboxes, so I leave it to zero.
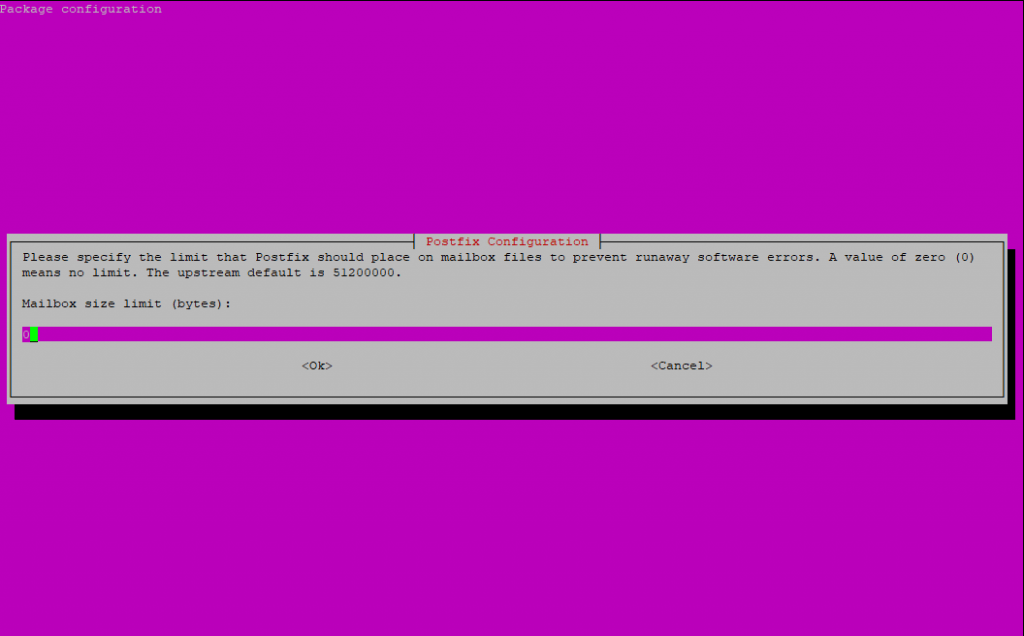
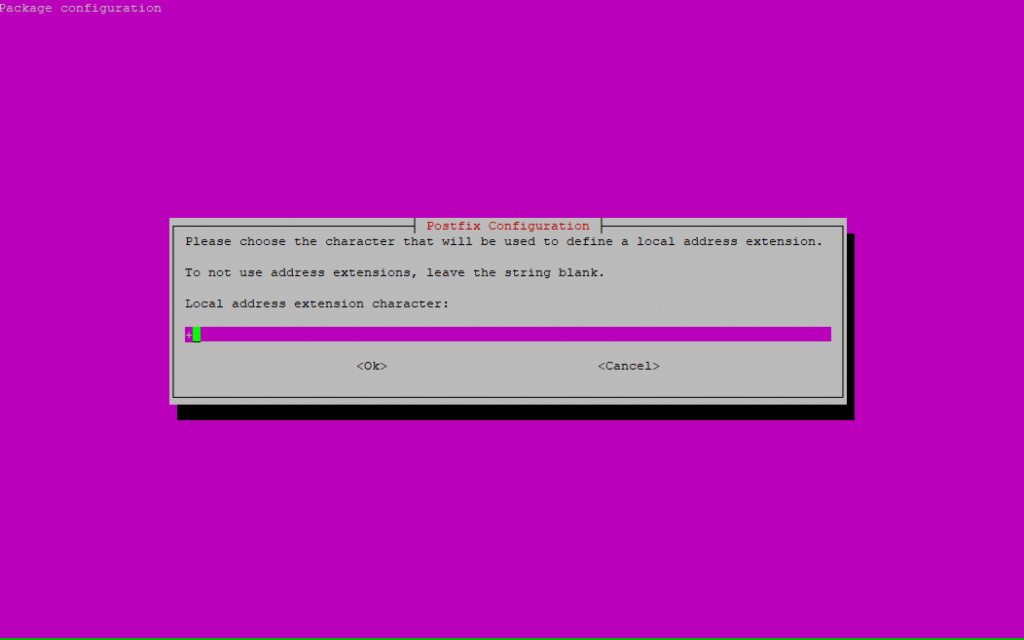
As I only had an IPv4 Adress on the server, I will restrict the protocols to IPv4.
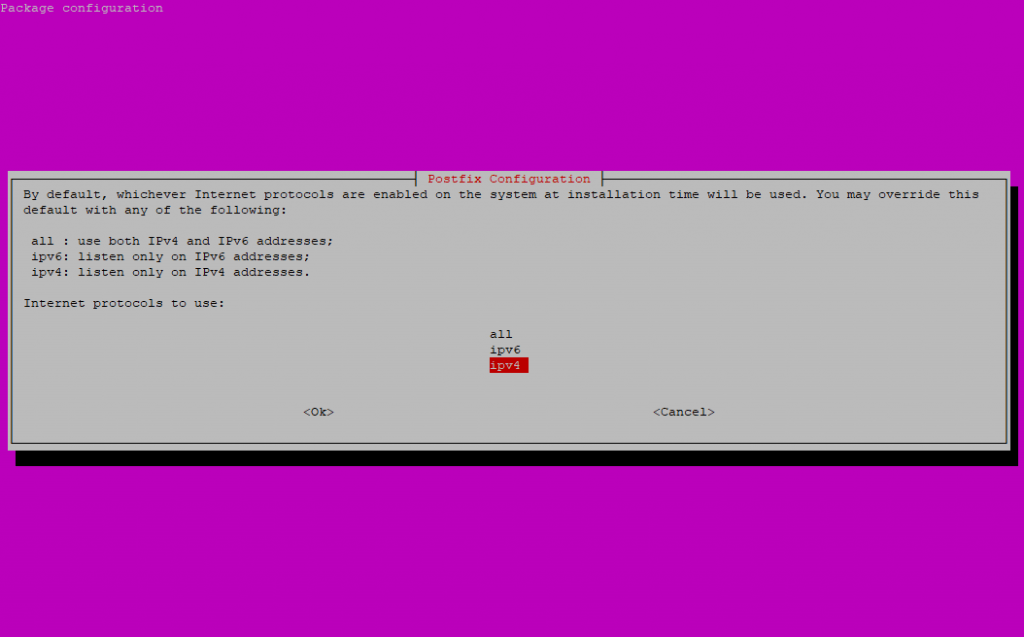
You can repeat the assistent with the following command:
$ sudo dpkg-reconfigure postfix
Also you can change the configuration directly in the main config file:
/etc/postfix/main.c
Installing and configuring MySQL
Now as we want to use virtual accounts for the mailserver instead of real user accounts on ubuntu, and we want to store these accounts in MySQL, we need to install and configure MySQL on the virtual machine.
Creating and placing these virtual accounts in a MySSQL database is much more comfortable as creating native user accounts on the system. You can easy scale and manage these virtual accounts in your database. Postfix and Dovecot will then use the database as source for the users, aliase and domains.
If not already installed on your machine, install the following packages
$ sudo apt install mysql-server postfix-mysql
First you must create a new database and three tables, one for the user accounts, one for the accepted domains on postfix and one for the aliase.
mysql> CREATE DATABASE vmail;
mysql> use vmail;
# Create Table for user account
mysql> CREATE TABLE users (id INT UNSIGNED AUTO_INCREMENT NOT NULL, username VARCHAR(128) NOT NULL, domain VARCHAR(128) NOT NULL, password VARCHAR(128) NOT NULL, UNIQUE (id), PRIMARY KEY (username, domain) );# Create Table for domains
mysql> CREATE TABLE domains (id INT UNSIGNED AUTO_INCREMENT NOT NULL, domain VARCHAR(128) NOT NULL, UNIQUE (id), PRIMARY KEY (domain));# Create Table for Aliase
mysql> CREATE TABLE aliases (id INT UNSIGNED AUTO_INCREMENT NOT NULL, source VARCHAR(128) NOT NULL, destination VARCHAR(128) NOT NULL, UNIQUE (id), PRIMARY KEY (source, destination) );
# Finally we create a new database user vmail with an password and grant him full access on the vmail database. This account later will use Postfix and Dovecot to access the database.
CREATE USER ‘vmail’@’localhost’ IDENTIFIED BY ‘password’;
GRANT ALL PRIVILEGES ON vmail.* TO ‘vmail’@’localhost’;
Installing and configuring Dovecot
We do not want that our mailboxes resist in the default /var/mail folder, we want to place them in /var/vmail.
Within this folder Dovecot will build automatically a maildir folder structure like
/var/vmail/domain/username
In this username folder where placed the folders for Inbox, Drafts, Sent Messages, etc.
So we create the new vmail folder
$ sudo mkdir /var/vmail
The folder structure within this folder will be created by Dovecot later automatically as mentioned.
Now we must create a new user named vmail which we have to grant full access on this folder. This user the mailserver will be use to access the folder.
$sudo useradd vmail
Make him owner of the vmail folder
$ sudo chown -R vmail:vmail /var/vmail
$ sudo chmod -R 770 /var/vmail
At this point we will install Dovecot, which is a Mail Delivery Agent (MDA).
His job is to route the incoming mails to the correct mailboxes.
Further Dovecot is also an IMAP Server so that clients can access their mailboxes.
$ sudo apt install dovecot-sieve dovecot-managesieved dovecot-imapd
$ sudo apt install dovecot-mysql dovecot-lmtpd
After the installation we must do some config in the 10-mail-conf file which you will find in the dovecot config folder
/etc/dovecot
and here in
/etc/dovecot/conf.d
Make the following settings and uncomment #
mail_home = /var/vmail/%d/%n
mail_location = maildir:~/mail:LAYOUT=fs
mail_uid = vmail
mail_gid = vmail
mail_privileged_group = vmail
This will tell Dovecot the pattern to create the mailboxes and what user will be taken to access them.
Further we must configure the authentication over the MySQL database in the dovecot-sql.conf.ext file. So paste the following lines after the #driver parameter.
/etc/dovecot/dovecot-sql.conf.ext
driver = mysql
# Connection string in one line!
connect = host=127.0.0.1 dbname=vmail user=vmail password=<your vmail password>
default_pass_scheme = SHA512-CRYPTpassword_query =
SELECT username, domain, password
FROM users WHERE username = ‘%n’ AND domain = ‘%d’iterate_query = SELECT username, domain FROM users
The first part of the above configuration will set the access informations for the vmail database and the second will tell the mailserver the sql commands to execute for getting user account informations.
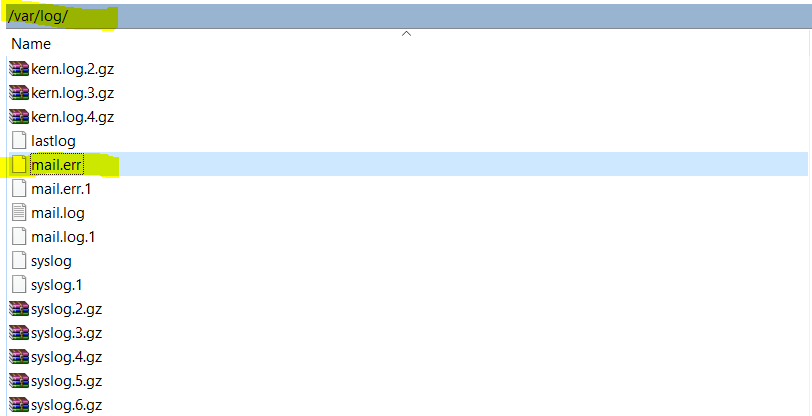
The iterate_query is in some cases not needed and will result in warning logs. So if you find these warnings with iterate_query in your mail logs, under /var/log/mail.err , you can uncomment this.
To secure the logon to the mailserver we need some more configuration to do. You need to configure the 10-auth.conf file in the conf.d directory from Dovecot.
/etc/dovecot/conf.d/10-auth.conf
disable_plaintext_auth = yes
auth_mechanisms = plain login
First part will allow transmit plaintext passwords to the server only over a encrypted connection. The second part we add the login parameter. This is needed by Windows Mail and Outlook. If using other mail clients you can leave the login paramter.
Don’t forget to comment the following line at the end of the 10-auth.conf file
#!include auth-system.conf.ext
This line will include another file with settings for PAM Authentification if using normal user accounts on ubuntu. Because we use virtual accounts in MySQL, we do not need them.
Next we change the /etc/dovecot/dovecot.conf file and replace it with the following configuration.
# Enable installed protocols
!include_try /usr/share/dovecot/protocols.d/*.protocollisten = *, ::
base_dir = /var/run/dovecot/
# Greeting message for clients.
login_greeting = Dovecot ready.!include conf.d/*.conf
!include_try local.conf# Passdb SQL
passdb {
driver = sql
args = /etc/dovecot/dovecot-sql.conf.ext
}
This includes basic configuration of Dovecot. It will set enabled protocols, used network interfaces and an welcome message for the mail clients. With the !include directives all configuration files from the conf.d files will be imported. The Passdb section will tell Dovecot to use the SQL Queries in the dovecot-sql.conf.ext file to authenticate a user. (SASL Authentication)
Because Postfix will ask Dovecot, if a specific user is authorized to send mails, Dovecot must provide Postfix a socket for such SASL requests. Therefore we must configure the Auth-Socket in the /etc/dovecot/conf.d/10-master.conf file.
Modify the service-auth section like
service auth {
unix_listener auth-userdb {
mode = 0600
user = vmail
group = vmail
}# Postfix smtp-auth
unix_listener /var/spool/postfix/private/auth {
mode = 0660
user = postfix
group = postfix
}
}
Besides the SASL socket we also change the LMTP socket in this file. The LMTP protocol is used to send mails which was received from the MTA Agent (Postfix) to the MDA Agent (Dovecot) and therefore to the mailboxes.
service lmtp {
unix_listener /var/spool/postfix/private/dovecot-lmtp {
mode = 0660
group = postfix
user = postfix
}
user = vmail
}
The LMTP protocol also uses settings from the Local Delivery Agent (LDA) which will reside in the /etc/dovecot/conf.d/15-lda.conf file. Therefore we need to adjust the postmaster_address settings.
postmaster_address =
You need to set a valid e-mail address, to this address all undeliverable notifications will be sent.
To secure the access from your mail clients to your mailserver, we must enable SSL/TLS access for Dovecot. Therefore open the /etc/dovecot/conf.d/10-ssl.conf file and be sure the following settings are enabled. New versions are per default SSL/TLS enabled.
ssl = required
ssl_cert = </etc/dovecot/dovecot.pem
ssl_key = </etc/dovecot/private/dovecot.pem
The default certificates works but you will get some warnings regarding not trusted because these are self signed certificates and your computer won’t trust them.
If you want to use a public certificate which is secured with password, you can set this with the ssl_key_password parameter.
To enhance the security you can change the ssl_cipher_list parameter as following from https://bettercrypto.org/#_dovecot
ssl_cipher_list = EDH+CAMELLIA:EDH+aRSA:EECDH+aRSA+AESGCM:EECDH+aRSA+SHA256:EECDH:+CAMELLIA128:+AES128:+SSLv3:!aNULL:!eNULL:!LOW:!3DES:!MD5:!EXP:!PSK:!DSS:!RC4:!SEED:!IDEA:!ECDSA:kEDH:CAMELLIA128-SHA:AES128-SHA
# SSL protocols to use, disable SSL, use TLS only
ssl_protocols = !SSLv3 !SSLv2
We need a second time to change the postfix configuration to include our Dovecot. So go to /etc/postfix/main.cf
This part will tell postfix to use the Auth Socket from Dovecot we created above, to determine the authorization for the users.
###### SASL Auth ######
smtpd_sasl_type = dovecot
smtpd_sasl_path = private/auth
smtpd_sasl_auth_enable = yes
This part will enable LMTP and use the LMTP Socket we also creates above.
###### Use Dovecot LMTP Service to deliver Mails to Dovecot ######
virtual_transport = lmtp:unix:private/dovecot-lmtp
This part will tell postfix how to deal with mail relay and what is allowed
##### Only allow mail transport if client is authenticated or in own network (PHP Scripts, …) ######
smtpd_relay_restrictions = permit_mynetworks, permit_sasl_authenticated, reject_unauth_destination
The last part will configure postfix to use the MySQL Database for the user accounts, domains and aliase.
###### MySQL Connection ######
virtual_alias_maps = mysql:/etc/postfix/virtual/mysql-aliases.cf
virtual_mailbox_maps = mysql:/etc/postfix/virtual/mysql-maps.cf
virtual_mailbox_domains = mysql:/etc/postfix/virtual/mysql-domains.cf
local_recipient_maps = $virtual_mailbox_maps
Per default the accepted domains will be configured in the main.cf file, but we use instead the MySQL Database. Therefore to add an accepted domain, we just need to add a new record in the database and here in the domains table. The above MySQL settings will refer to three SQL files which we now must create.
Therefore create a new folder /etc/postfix/virtual
$ sudo mkdir /etc/postfix/virtual
$ sudo chmod 660 /etc/postfix/virtual/
$ cd /etc/postfix/virtual
The first file in this folder we need to create is the mysql-aliases.cf with the following content
user = vmail
password = vmailpassword
hosts = 127.0.0.1
dbname = vmail
query = SELECT destination FROM aliases WHERE source=’%s’
The second file in this folder is the mysql-maps.cf
user = vmail
password = vmailpassword
hosts = 127.0.0.1
dbname = vmail
query = SELECT * FROM users WHERE username=’%u’ AND domain=’%d’
And the last file in this folder is the mysql-domains.cf
user = vmail
password = vmailpassword
hosts = 127.0.0.1
dbname = vmail
query = SELECT * FROM domains WHERE domain=’%s’
So at this point the configuration is complete, now we just had to fill the database and our three tables (aliases, domains and users) with data.
So connect to your MySQL vmail database
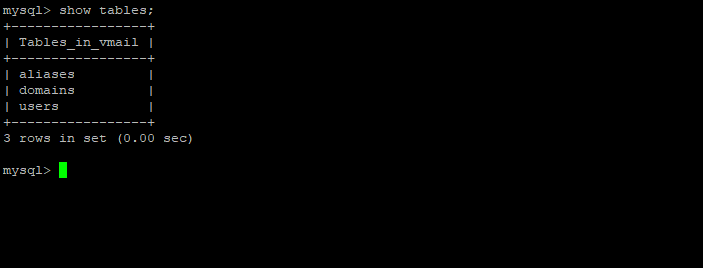
Add all domains which postfix should accept
insert into domains (domain) values (‘domain.tld’);
Add an user account/mail address for postfix
Dovecot needs an strong SHA-512 Hash as password. You can create this Hash with the command line in ubuntu
$ doveadm pw -s SHA512-CRYPT
In this example I use “password” as password
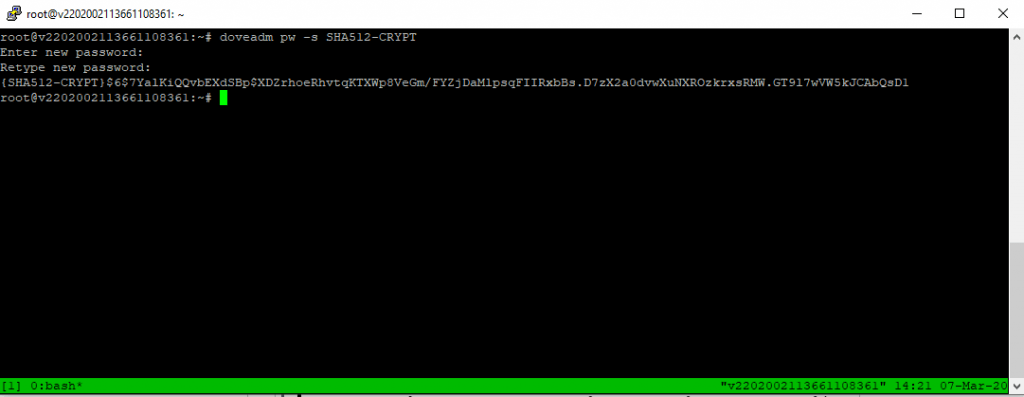
The prefix {SHA-512-CRYPT} you can delete from the Hash and is only used for identifying the Hash schema as we only use SHA512-CRYPT in Dovecot.
insert into users (username, domain, password) values (‘username’, ‘domain.tld’, ‘$6$7YalKiQQvbEXdSBp$XDZrhoeRhvtqKTXWp8VeGm/FYZjDaMlpsqFIIRxbBs.D7zX2a0dvwXuNXROzkrxsRMW.GT9l7wVW5kJCAbQsD1’);
If you want any aliases for your mail address you can add them here. Source is the new alias address and destination is the origin/native mail address.
insert into aliases (source, destination) values (‘aliasuser@domain.ltd’, ‘user@domain.ltd’);
If you want to configure a Catch-All aliase, you can create as source an aliase “@domain.ltd” and for the destination one of your native accounts “user@domain.ltd”.
To enable all the settings restart dovecot and postfix
systemctl restart dovecot
systemctl restart postfix
Troubleshooting
Undelivered Mail Returned to Sender
Error:
Mails will not accepted and the sender get an Undelivered Mail Returned to Sender message with
<user@domain.ltd>: unknown user: “user”
In the logs of postfix /var/log/mail.log you will see logs like
postfix/trivial-rewrite[1650]: warning: do not list domain <domain.tld> in BOTH mydestination and virtual_mailbox_domains
status=bounced (unknown user: “user”)Solution:
delete mydestination= entries in /etc/postfix/main.c
If something went wrong, the first place to check are the log files under /var/log and here the mail.err file.
More about Postfix
Please also read my following posts about Postfix.
Links
The Postfix Home Page
https://www.postfix.org/
DOVECOT – The Secure IMAP server
https://www.dovecot.org/
Latest posts
Deploying NetApp Cloud Volumes ONTAP (CVO) in Azure using NetApp Console (formerly BlueXP) – Part 4 – Antivirus VSCAN Configuration
Follow me on LinkedIn


