Set up SUSE Linux Enterprise Server 15
In this post I will go through the separate steps to set up a SUSE Linux Enterprise Server 15, SLES 15 was published on 13th December 2023.
I want to show some basic configurations for Linux operating systems and how they will differ in SUSE Linux Enterprise Server.
SUSE Linux Enterprise (SLE) is a Linux-based operating system developed by SUSE. It is available in two editions, suffixed with Server (SLES) for servers and mainframes, and Desktop (SLED) for workstations and desktop computers.
SUSE Linux Enterprise products receive more intense testing than the upstream openSUSE community product, with the intention that only mature, stable versions of the included components will make it through to the released enterprise product. It is developed from a common code base with other SUSE Linux Enterprise products.
IBM’s Watson was built on IBM’s POWER7 systems using SLES. Hewlett Packard Enterprise’s Frontier, world’s first and fastest exascalesupercomputer runs on SUSE’s SLES 15 (HPE Cray OS).
SUSE Linux Enterprise Server 15 (SLES 15) beta 1 was released on October 18, 2017, and the final version was released on July 16, 2018. SLES 15 SP2, which updates the kernel, PostgreSQL, Samba, Salt and many other parts of the operating system, was released on July 21, 2020.
- First download a Trial version and request a Trial Code to registering with SUSEConnect
- Installation
- Set up and Configure some Basics
- How to Customize the Bash Prompt
- Mount an .ISO File mapped as CD/DVD Drive in Hyper-V for a Linux Virtual Machine
- Managing software with command line tools (Zypper and RPM)
- Mastering Network Configuration in SUSE Linux Enterprise Server
- Installing Software by using Snaps
- Registering with SUSEConnect
- Install Apache Web Server on SUSE Linux Enterprise Server
- Manage Services on SUSE Linux Enterprise Server
- Firewall on SUSE Linux Enterprise Server
- Create a new User on the System
- How to add SLES repository on SLES server
- How to determine and change the Runlevel
- Troubleshooting
- Links
First download a Trial version and request a Trial Code to registering with SUSEConnect
You can download SUSE Linux Enterprise Server versions under the following link.
SUSE Linux Enterprise Server
https://www.suse.com/download/sles/
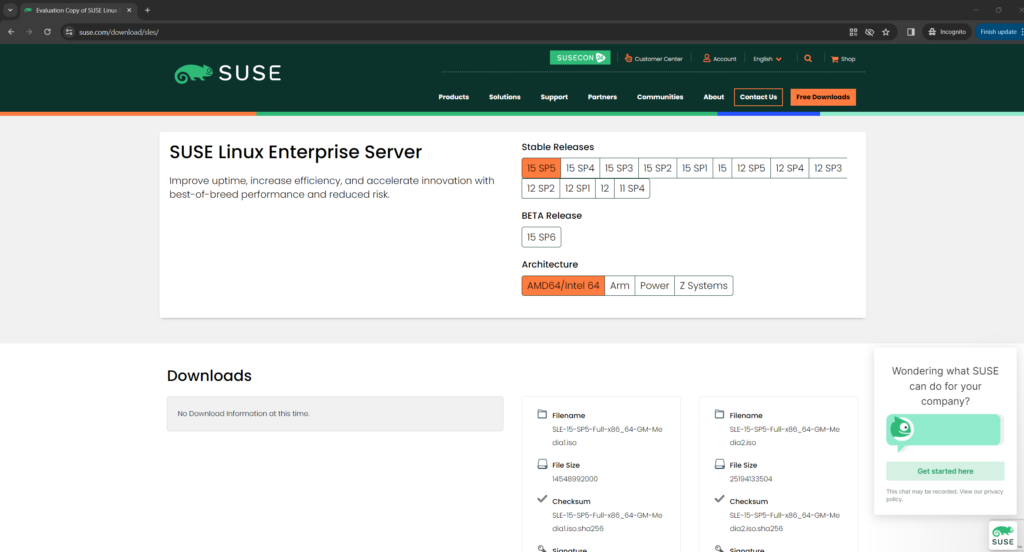
To be able to receive updates and getting immediate access to the update repository, you further need to register (or activating) a system with the SUSE Customer Center (SCC).
The SUSE Customer Center (SCC) is an online tool designed to make it easy for you to manage your business and technical interactions with SUSE. SUSE Customer Center brings together customer information to provide an overview of subscriptions, entitlements, systems, and organizations. As a result, you can better manage your subscriptions and stay informed about your account.
Source: https://scc.suse.com/docs/help
Further in order to install software and tools directly from the SCC, you also need to register a system to SCC.
Alternatively you can also install software and tools by using Snaps or the openSUSE Leap repositories as shown further down.
Package repositories
https://en.opensuse.org/Package_repositories
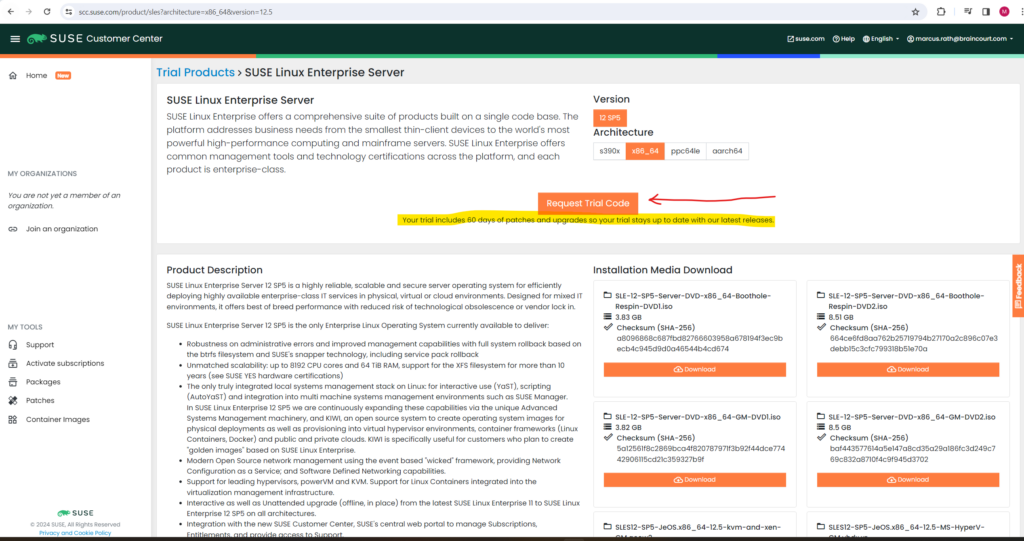
In order to request a free trial code you first need to create an account under the following link https://www.suse.com/account/create/ and then within your account click on SUSE Customer Center.
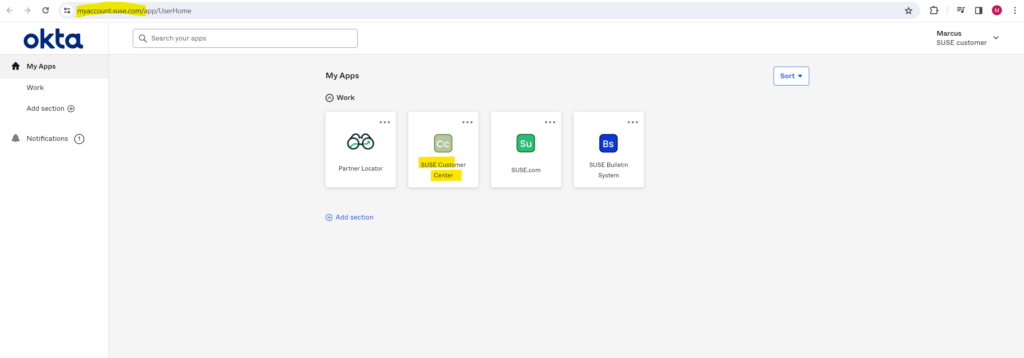
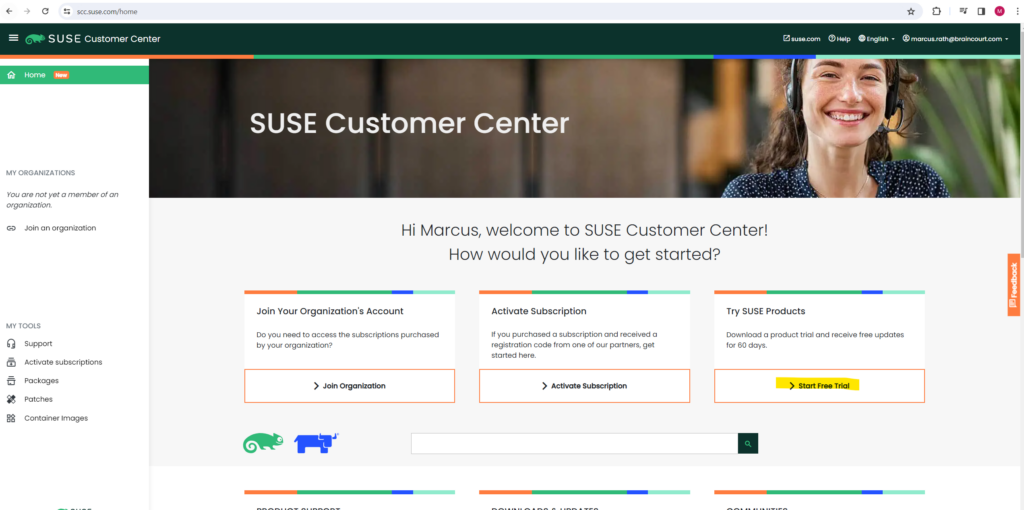
Here you can request a free 60 days trial.
Select SUSE Linux Enterprise Server.
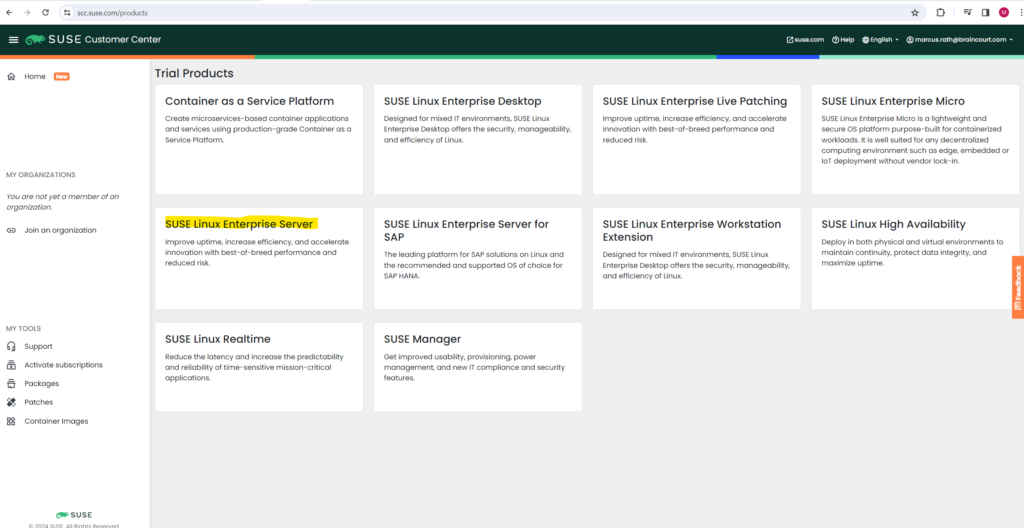
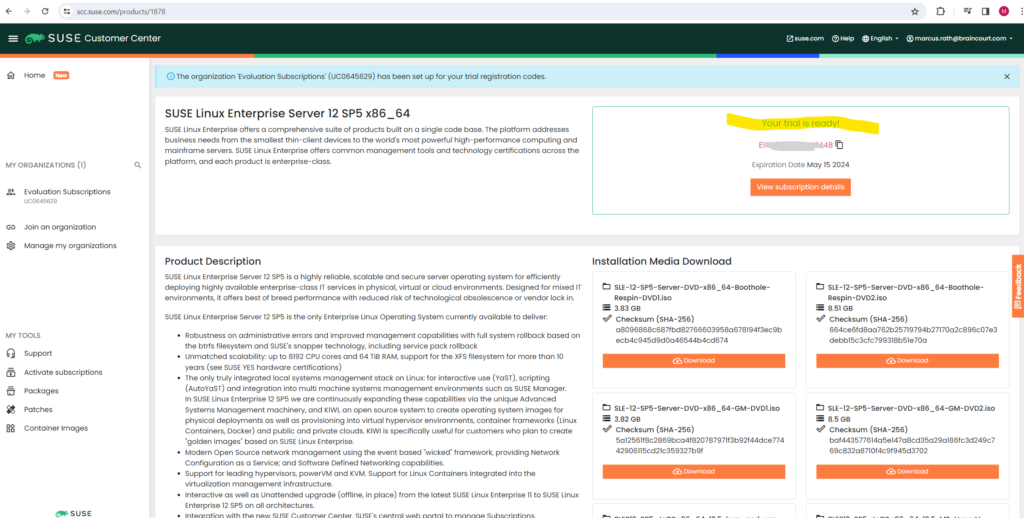
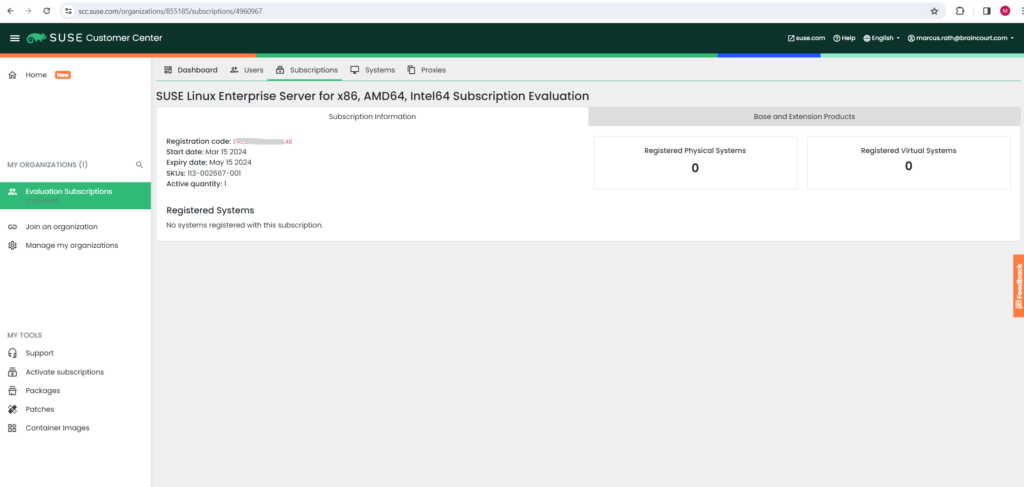
Finally request your trial code, we need this code later during or after the installation of SLES 15.
Installation
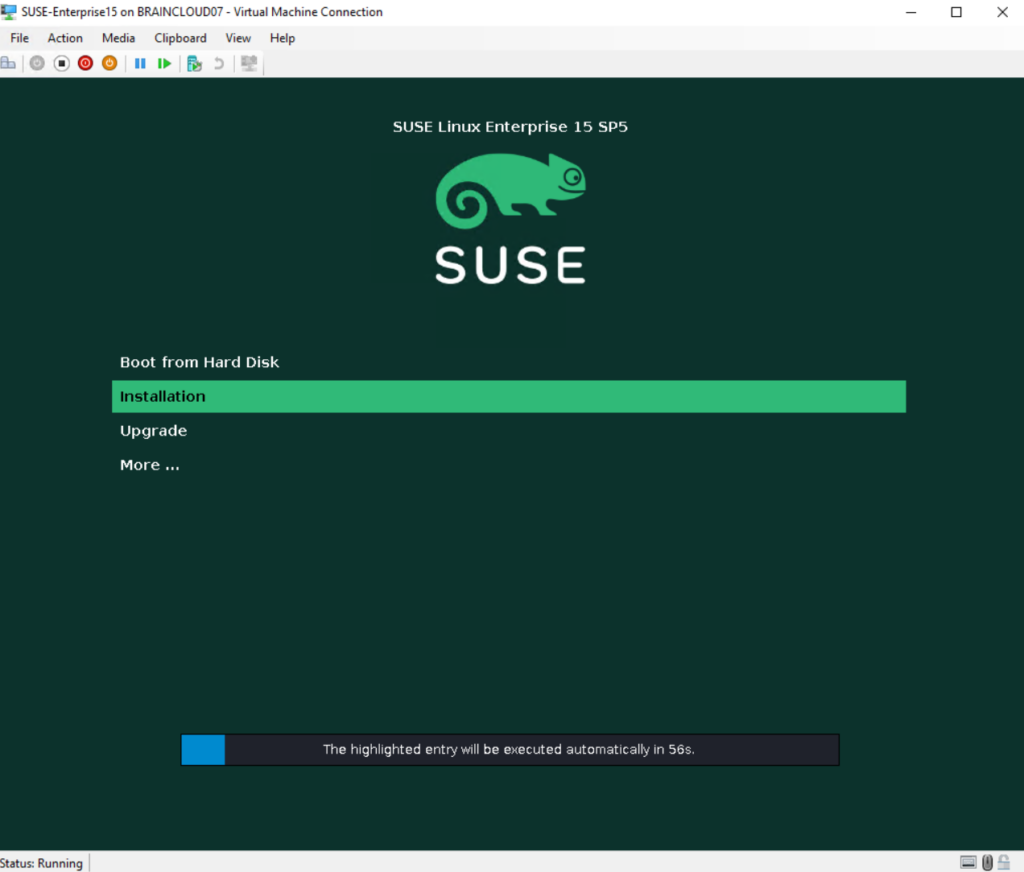
I will install SLES 15 on a Hyper-V virtual machine and therefore map the SLES15 ISO file in Hyper-V to boot from.
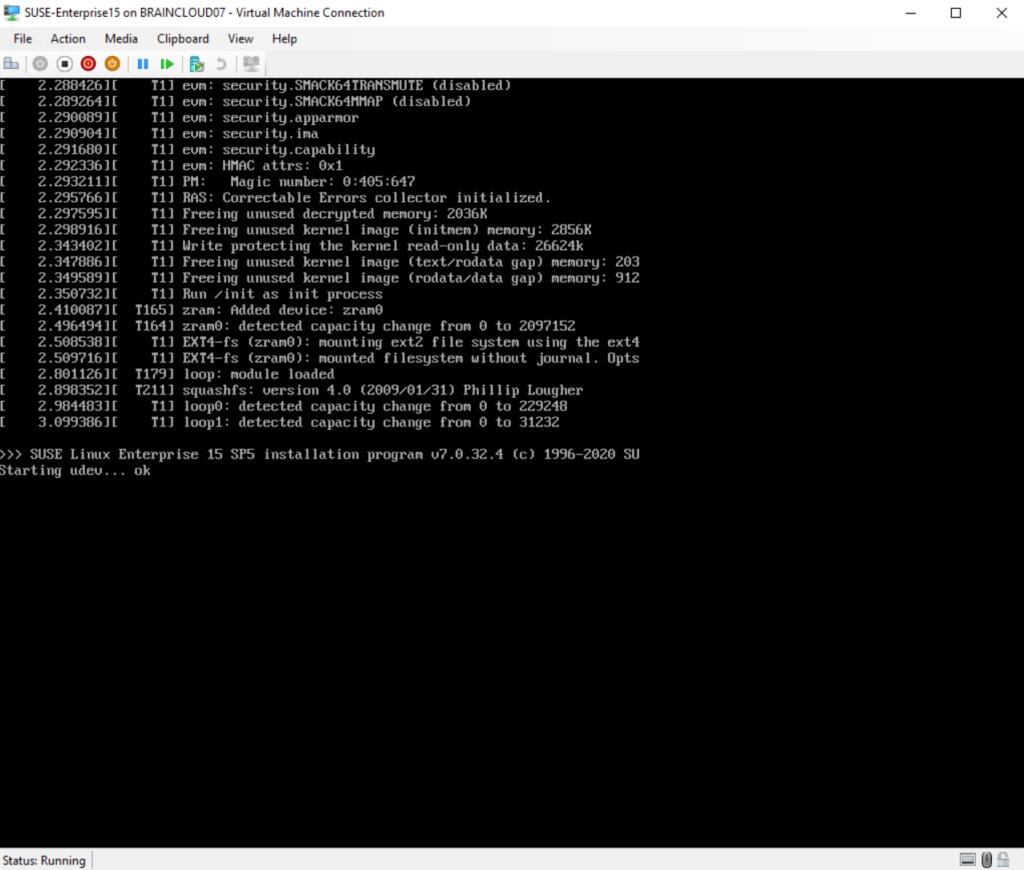
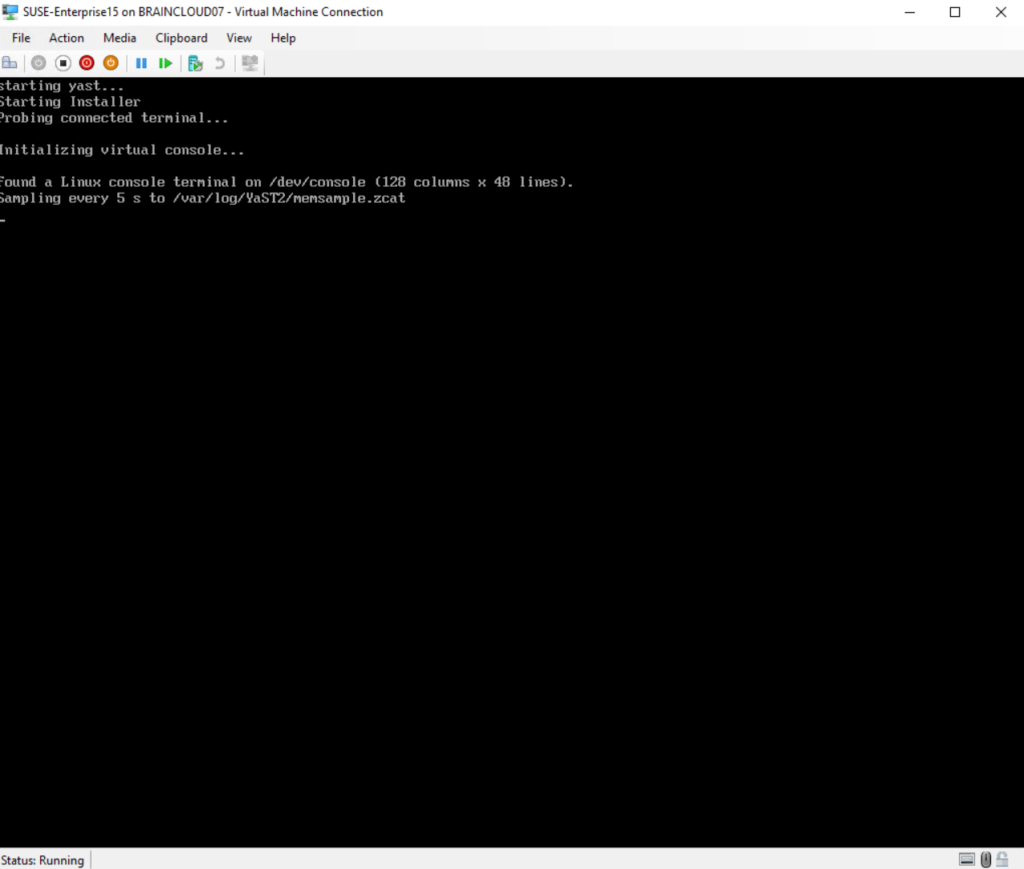
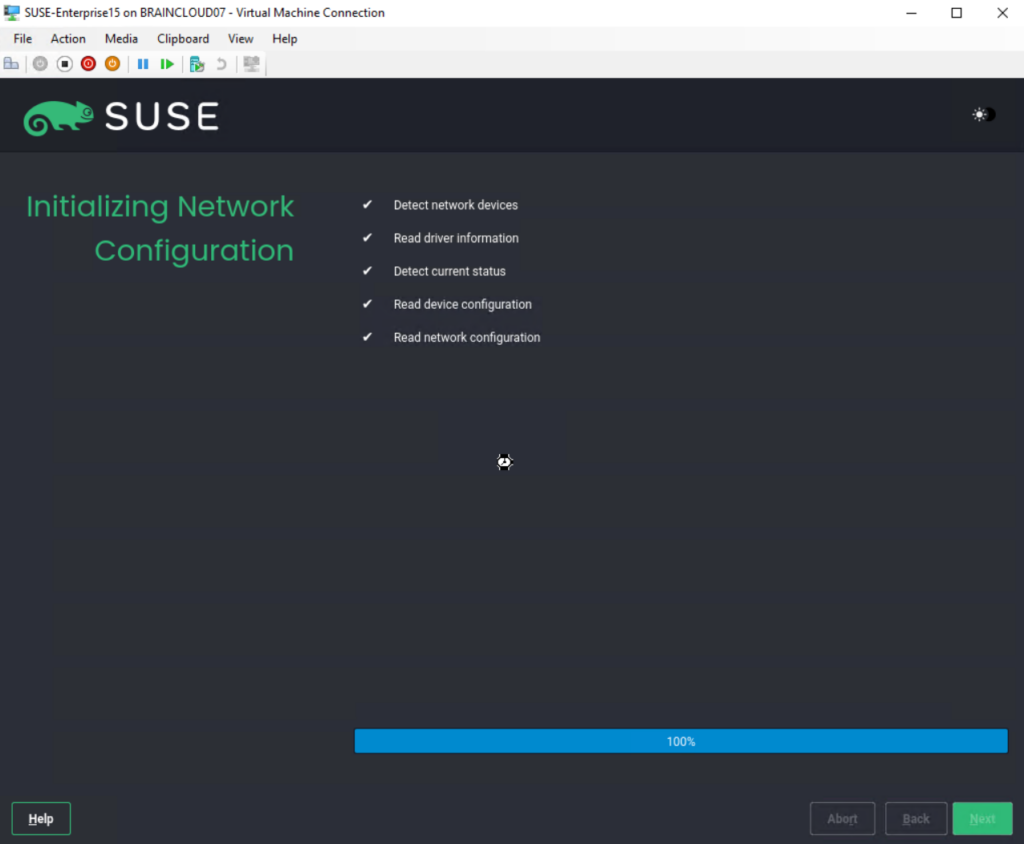
Language, Keyboard and Product Selection
I will have a trial registration code (more about further down) just for the SUSE Linux Enterprise Server 15 and therefore will select it below.
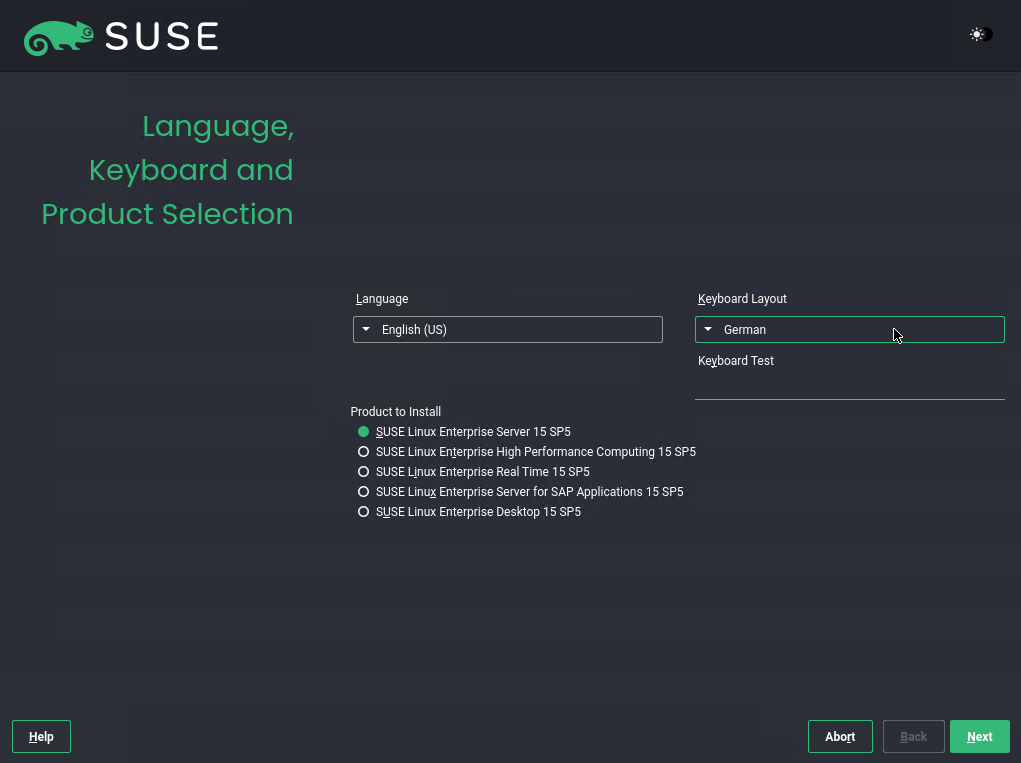
With the Unified Installer you can install all SUSE Linux Enterprise base products:
- SUSE Linux Enterprise Server 15 SP2 (I will install here)
- SUSE Linux Enterprise Desktop 15 SP2 (for installation instructions, refer to https://documentation.suse.com/sled/)
- SUSE Linux Enterprise High Performance Computing 15 SP2
- SUSE Linux Enterprise Real Time 15 SP2 (for installation instructions, refer to https://documentation.suse.com/sle-rt/)
- SUSE Linux Enterprise Server for SAP Applications 15 SP2 (for installation instructions, refer to https://documentation.suse.com/sles-sap)
- SUSE Manager Server 4.1 (for installation instructions, refer to https://documentation.suse.com/suma/)
- SUSE Manager Proxy 4.1 (for installation instructions, refer to https://documentation.suse.com/suma/)
- SUSE Manager Retail Branch Server 4.1 (for installation instructions, refer to https://documentation.suse.com/suma-retail)
Source: https://documentation.suse.com/sles/15-SP2/html/SLES-all/cha-install.html
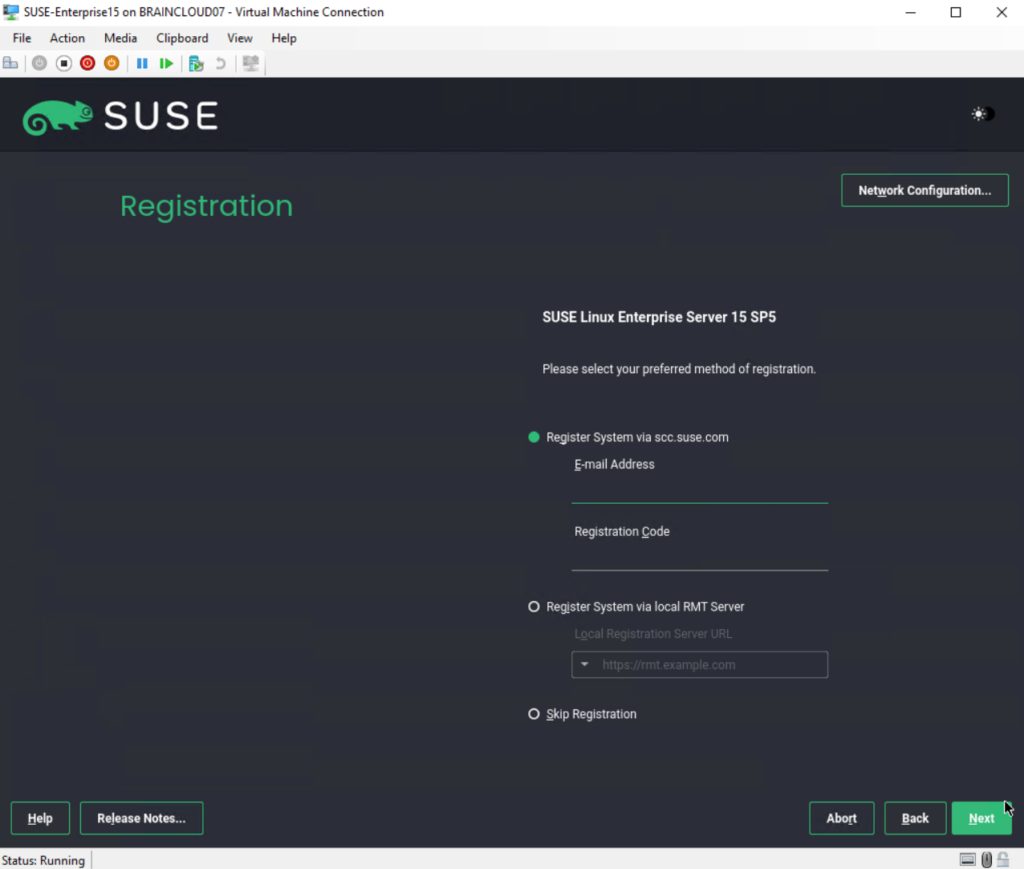
Click on Network Configuration on the right top to configure the network settings.
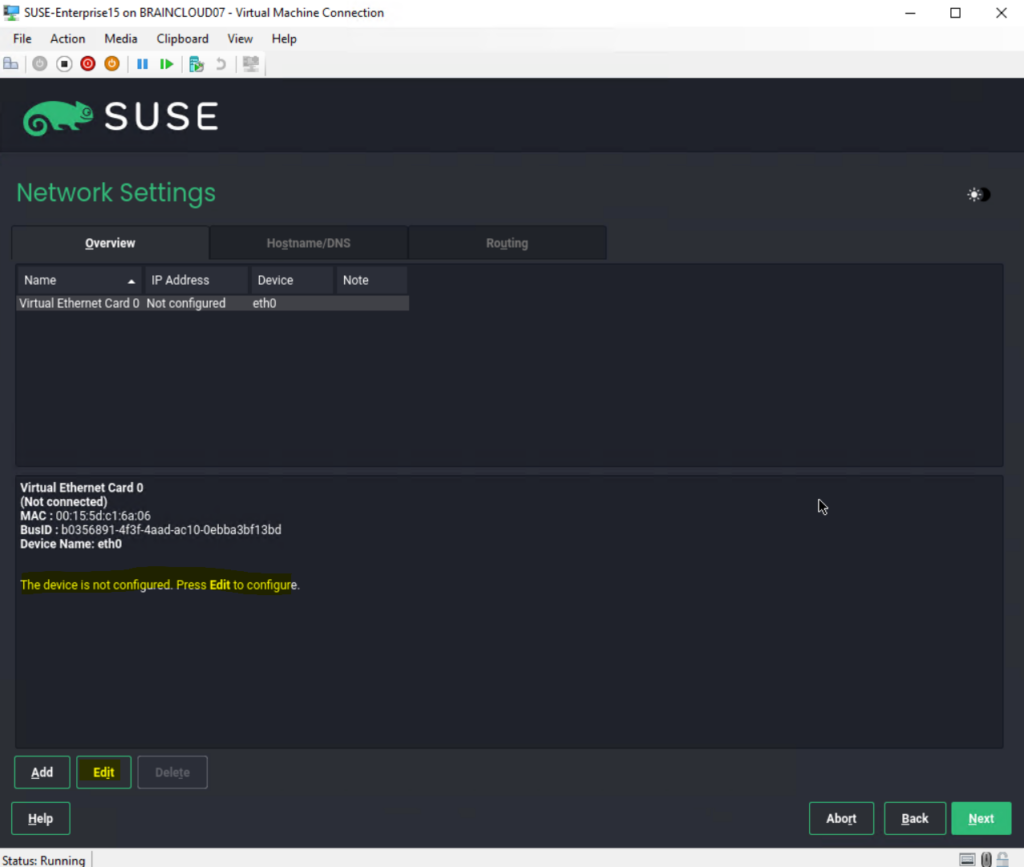
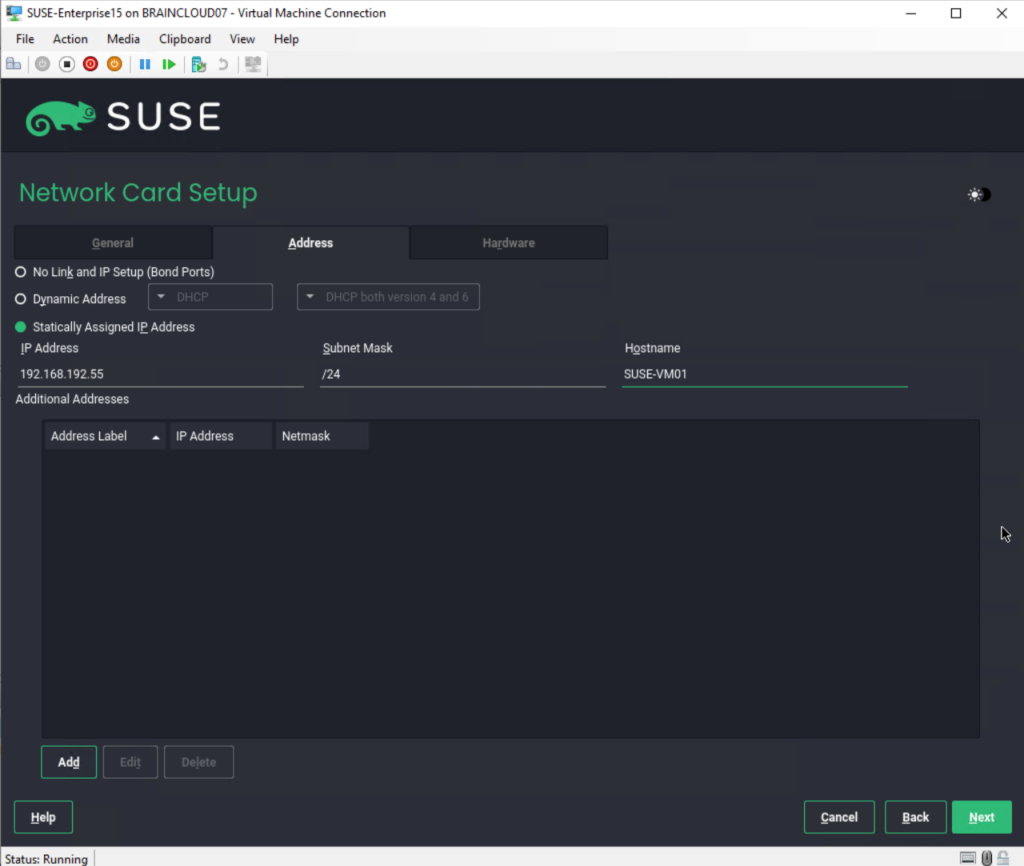
Click on Edit to configure the network settings.
By default Statically Assigned IP_Address is pre-selected which I will also configure here.
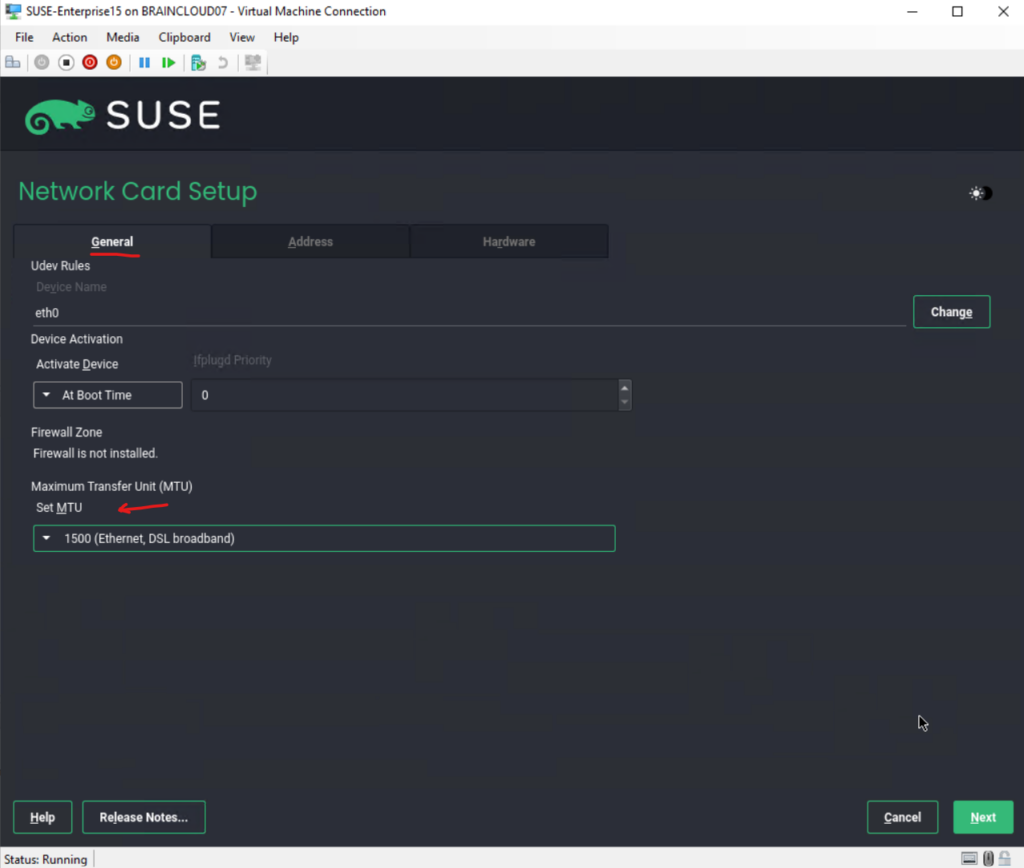
On the General tab you can set the Maximum Transfer Unit (MTU) for this connection and when to activate the network device.
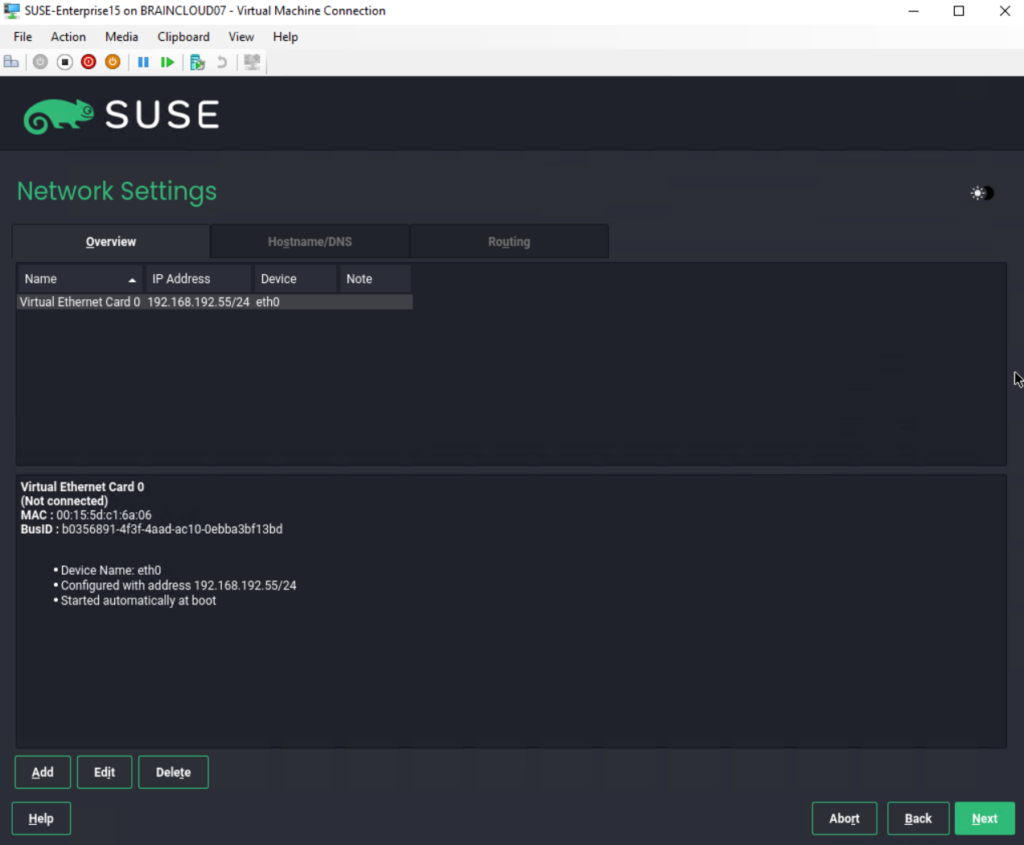
On the next page we have also have the Hostname/DNS and Routing tab to configure more network settings.
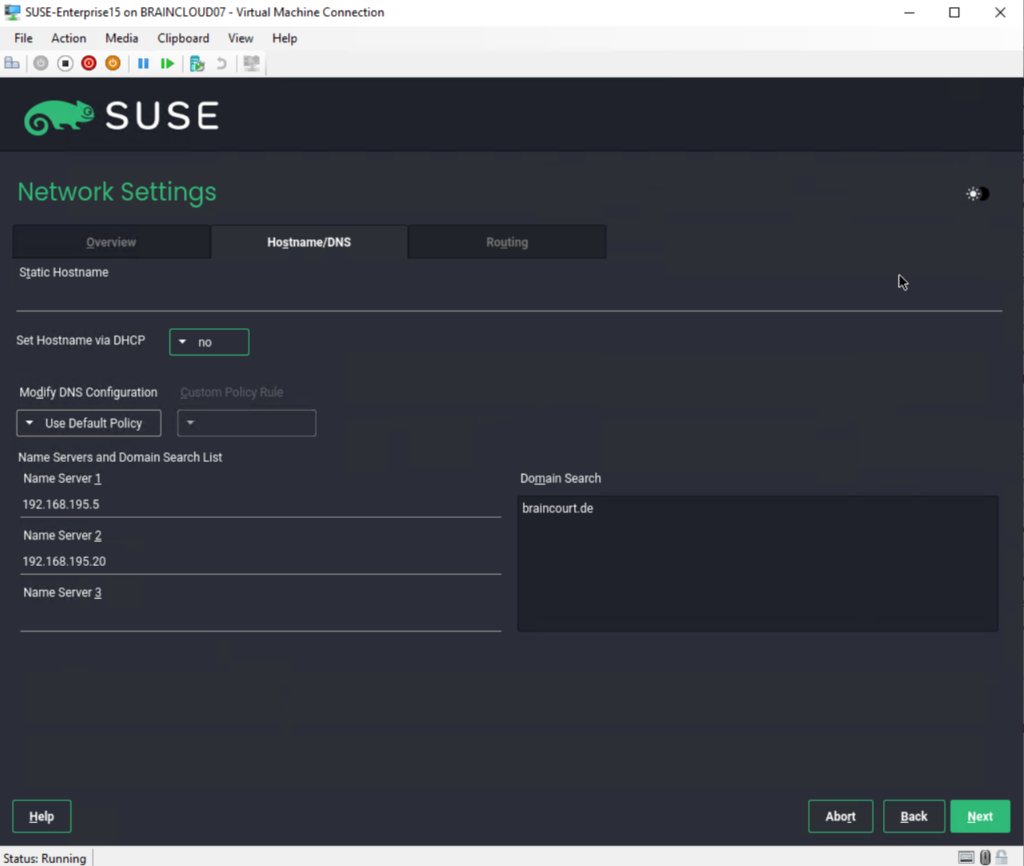
I will add here two of my internal Active Directory DNS servers and the search domain.
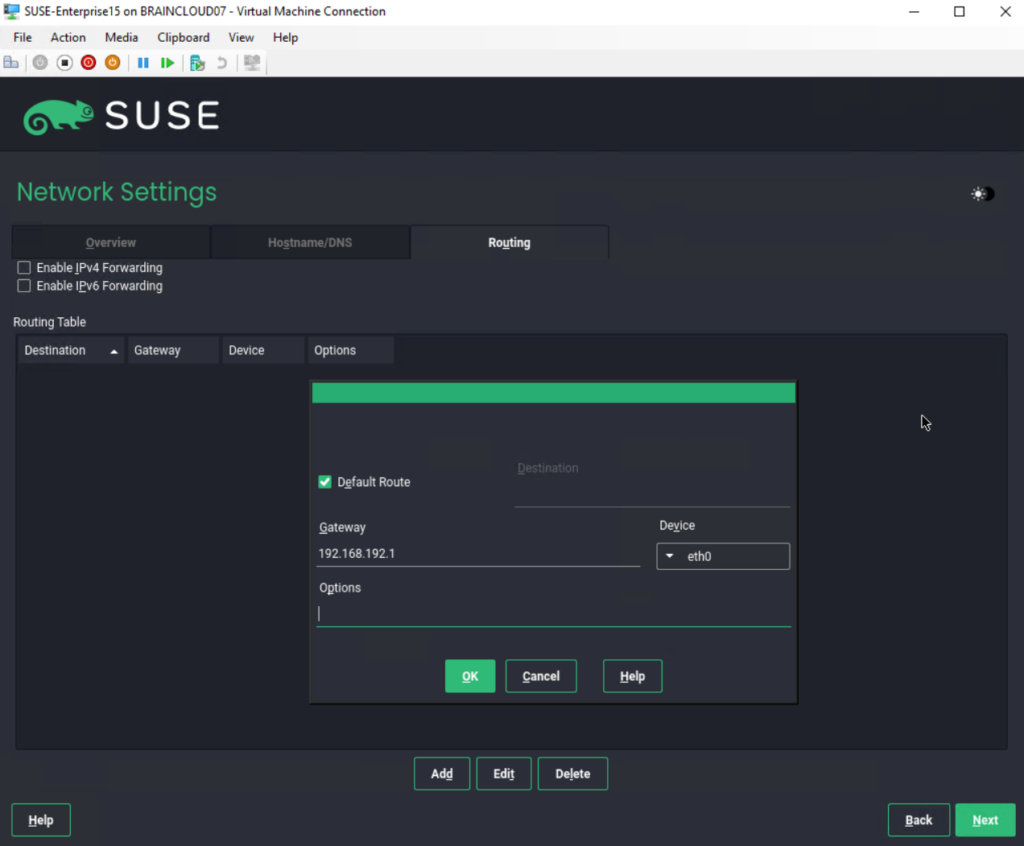
On the Routing tab we can also add static routes and in case this server will be used as a router to forward traffic, we can also enable here IPv4 or IPv6 Forwarding.
I will just add here the default route/gateway and select the network device for. This gateway is an internal router and are able to route traffic to all internal subnets and to the internet in my case.
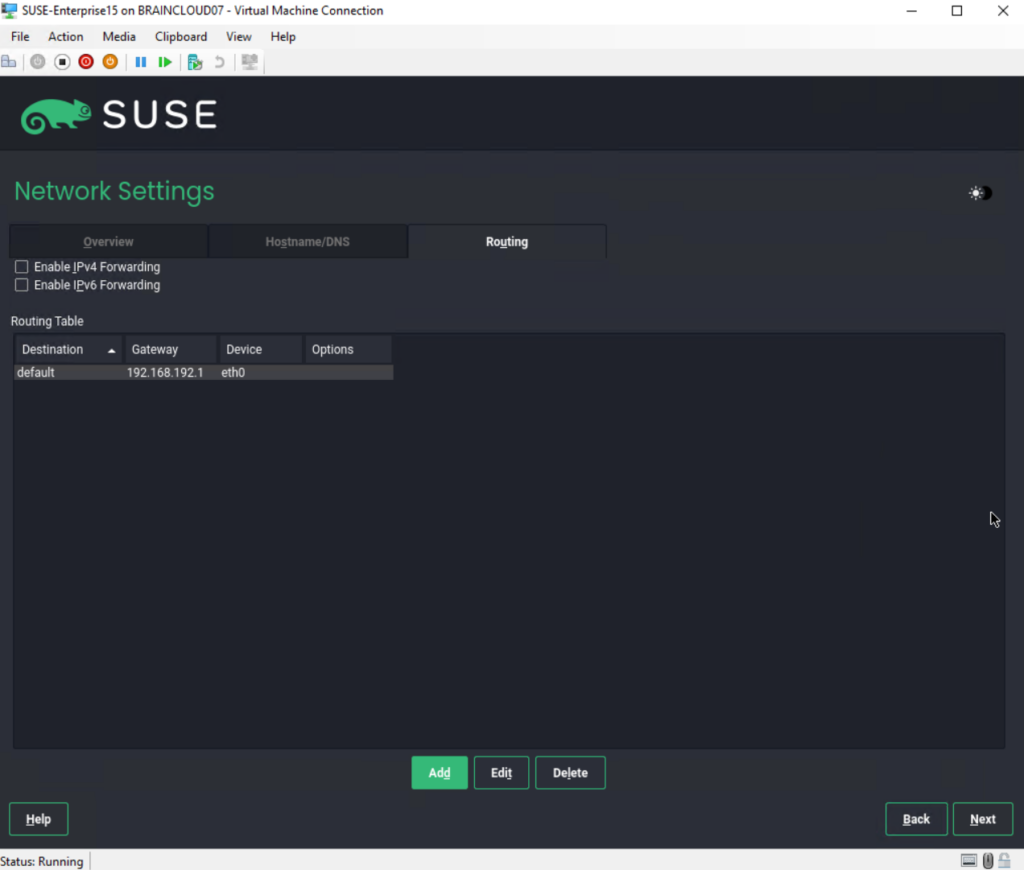
So I can click on Next to save the network configuration.
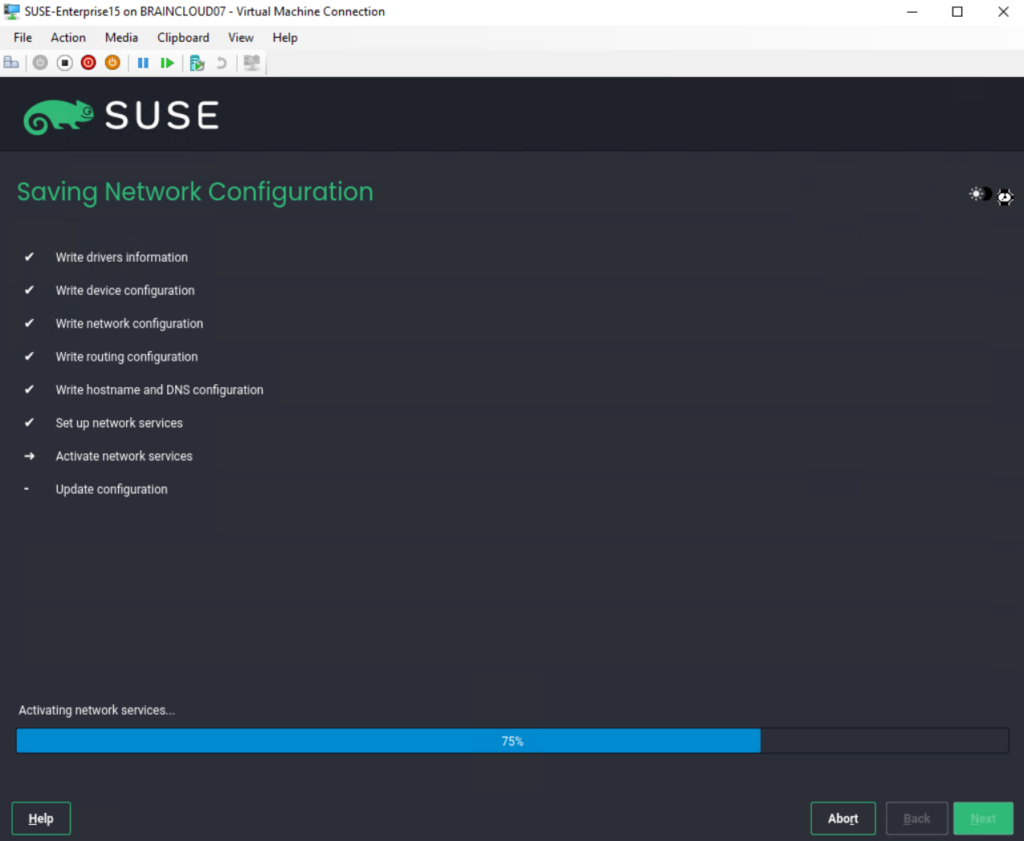
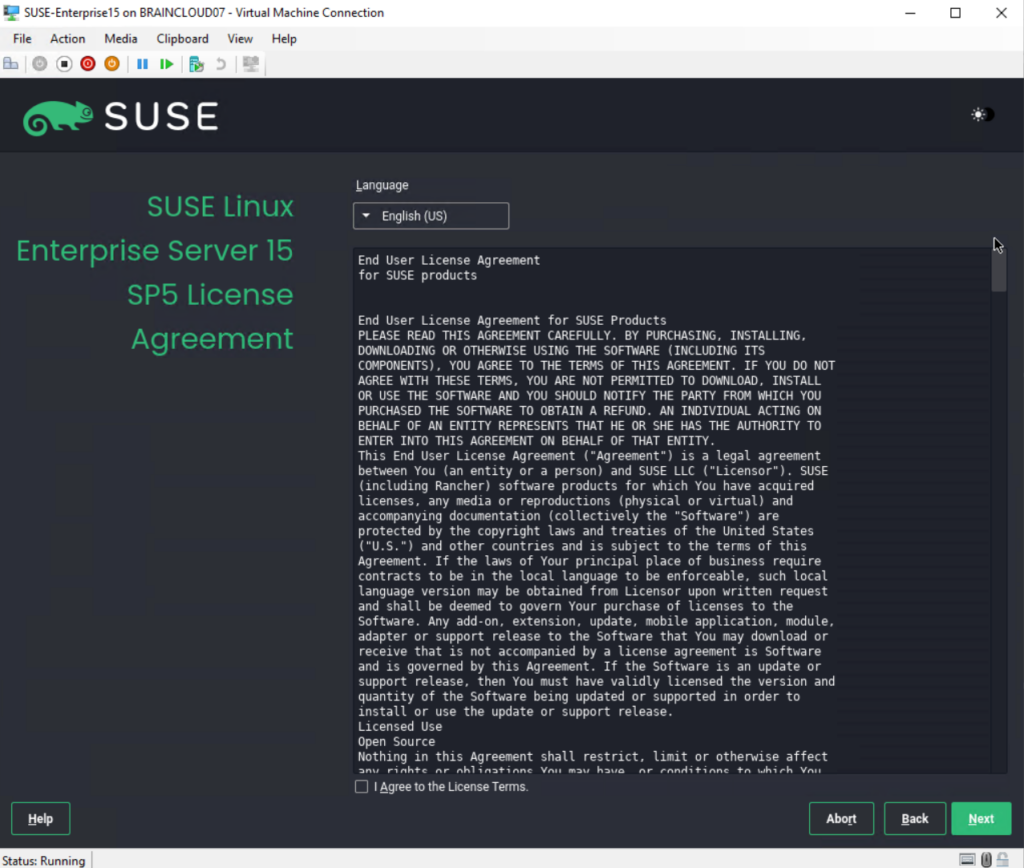
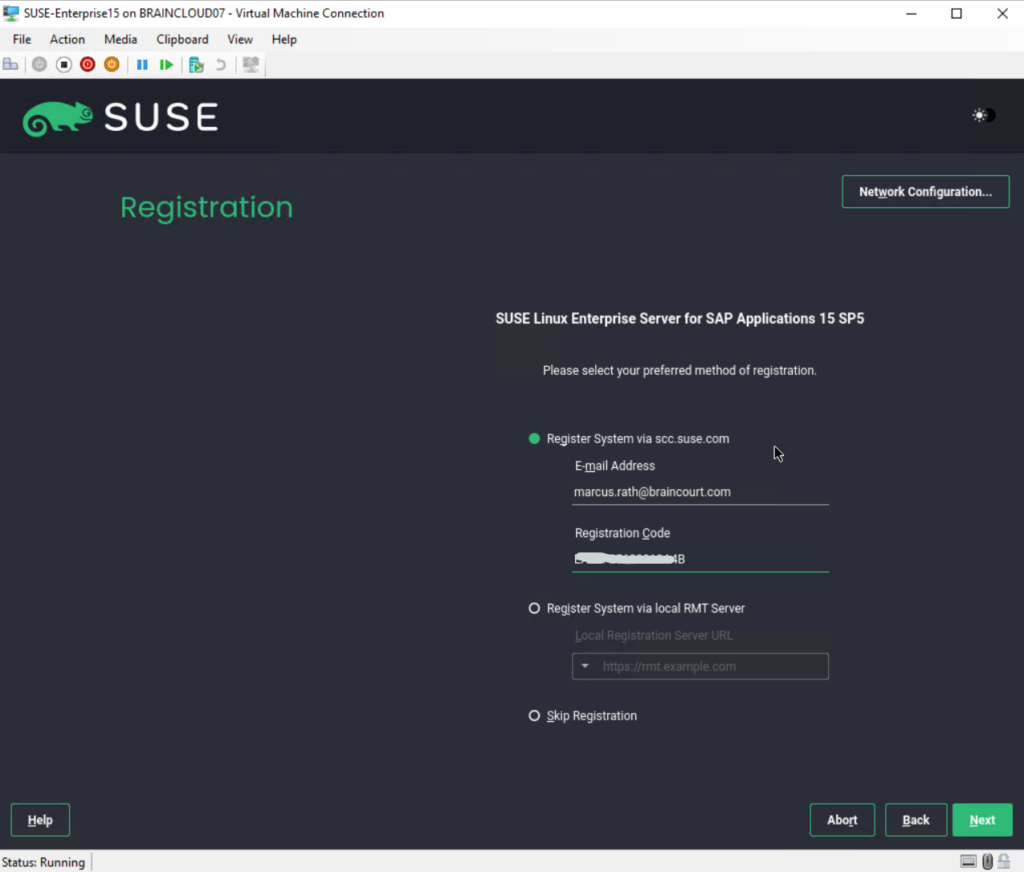
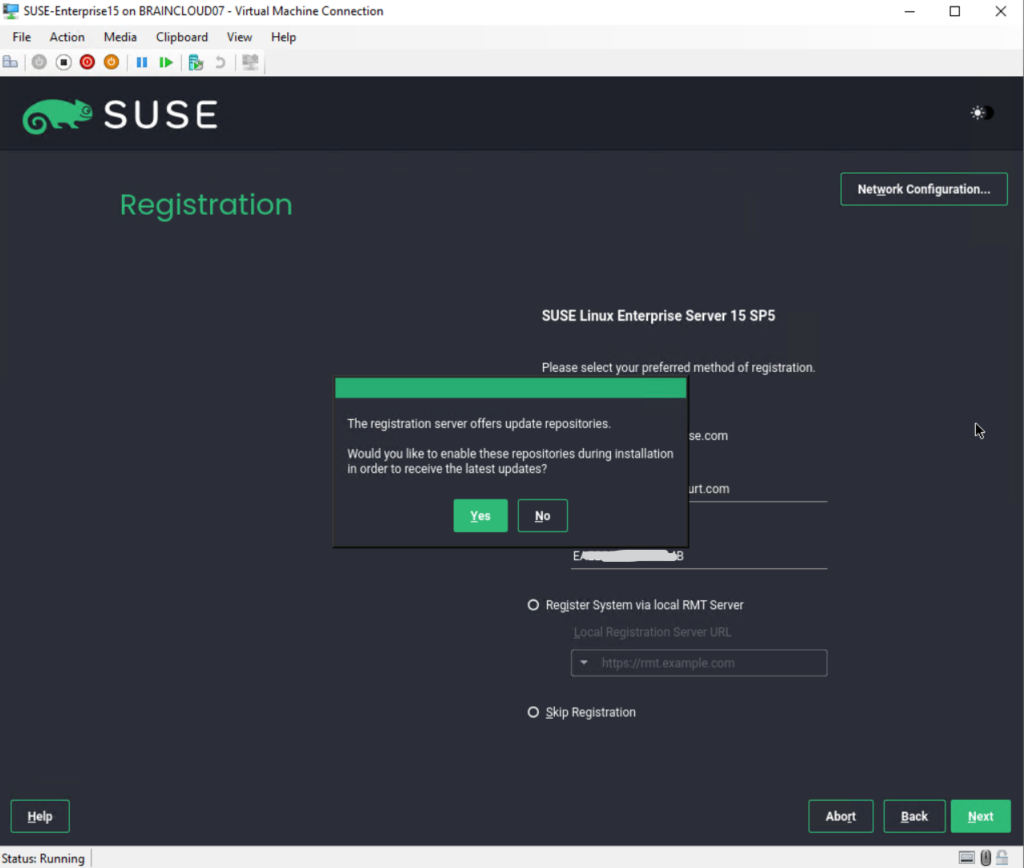
You can also first skip registration, I will show further down how you can connect later after the installation is finished to the SUSE Customer Center (SCC).
To get technical support and product updates, you need to register and activate SUSE Linux Enterprise Server with the SUSE Customer Center or a local registration server. Registering your product at this stage also grants you immediate access to the update repository. This enables you to install the system with the latest updates and patches available.
Source: https://documentation.suse.com/sles/15-SP2/html/SLES-all/cha-install.html
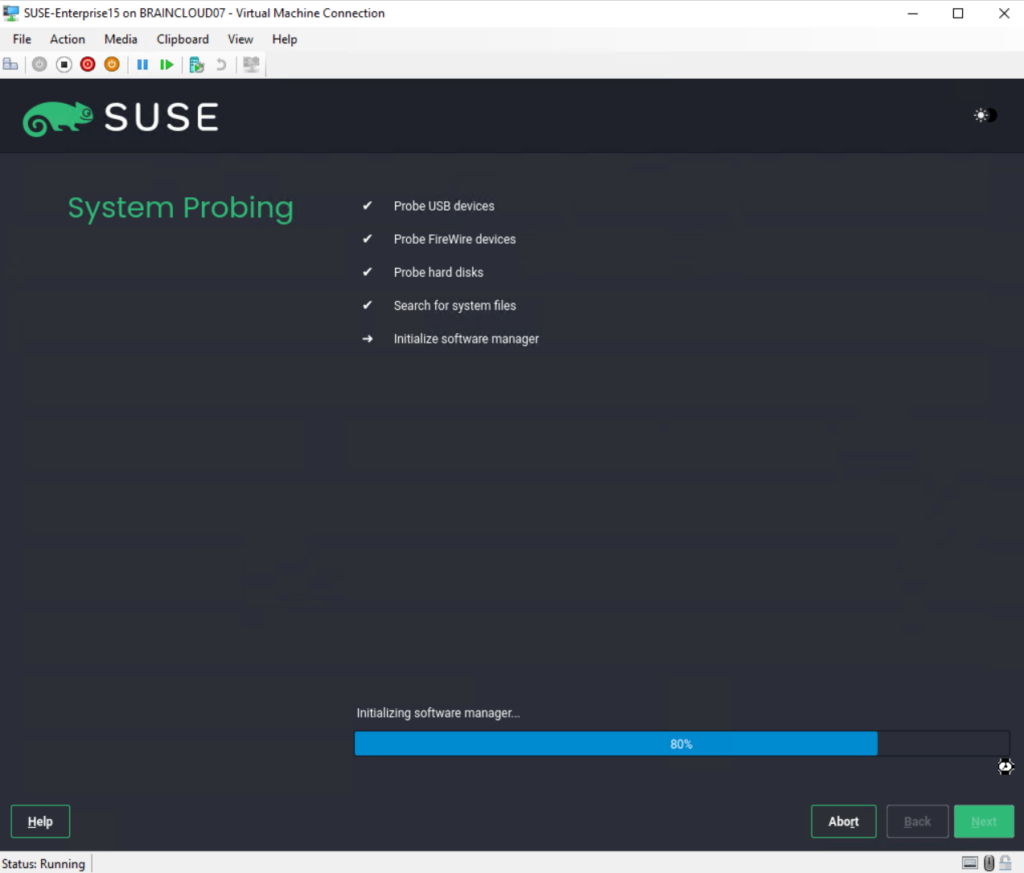
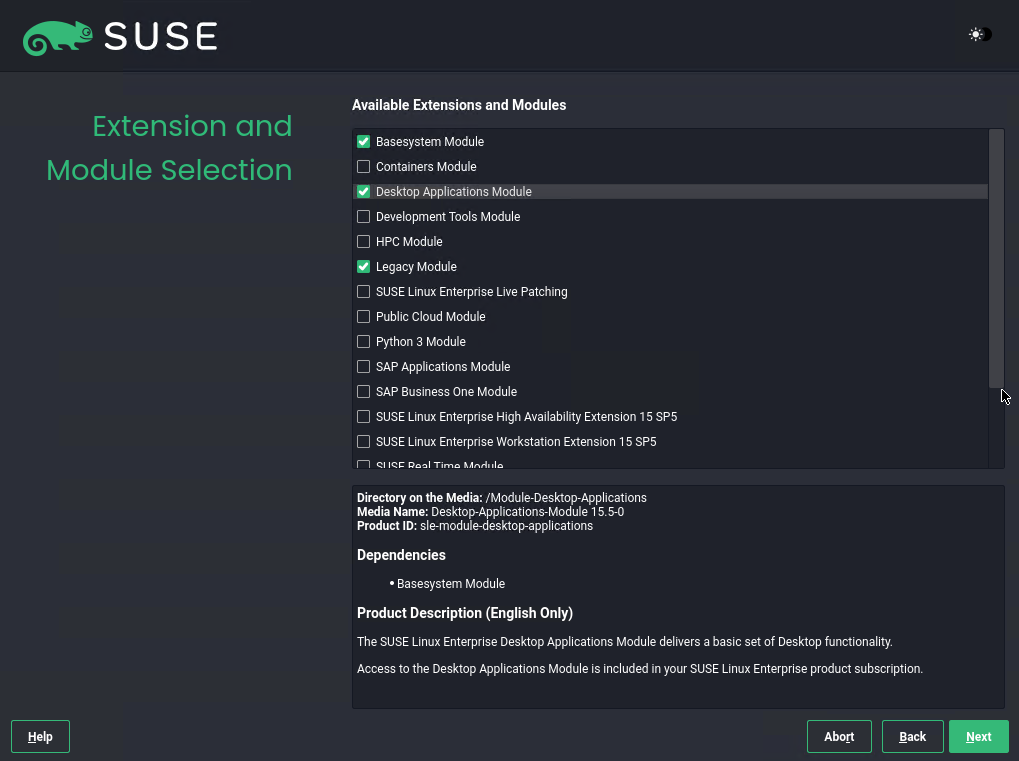
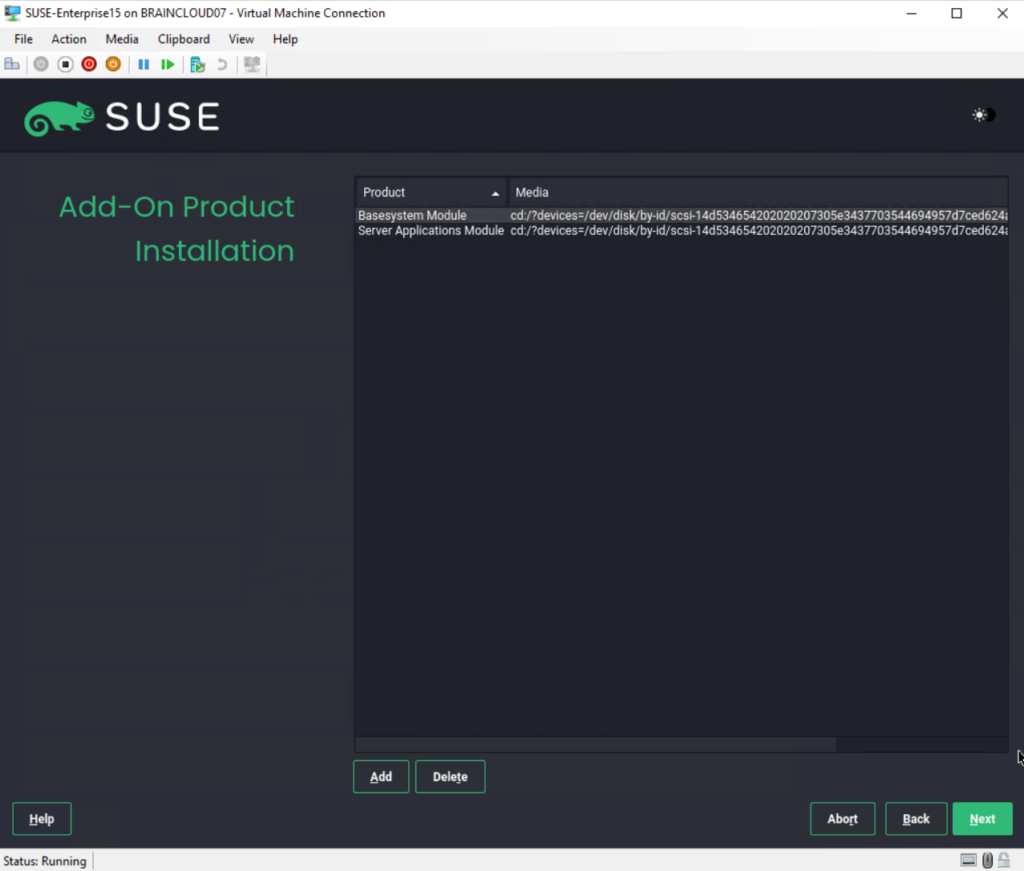
On the Extension and Module Selection page I will just use the by default pre-selected Basesystem Module and Server Applications Module.
In this dialog the installer lists modules and extensions that are available for SUSE Linux Enterprise Server. Modules are components which allow you to shape the product according to your needs. They are free of charge. Extensions add functionality to your product. They are offered as subscriptions and require a registration key that is liable for costs.
The availability of certain modules or extensions depends on the product you chose in the first step of this installation. For a description of the modules and their life cycles, select a module to see the accompanying text. More detailed information is available in the Release Notes.
The selection of modules indirectly affects the scope of the installation, because it defines which software sources (repositories) are available for installation and in the running system.
Source: https://documentation.suse.com/sles/15-SP2/html/SLES-all/cha-install.html
In case you want to install a GUI you also have to check the Desktop Applications Module. This module delivers a basic set of Desktop functionality.
More about the extensions and modules you will find in the following article from SUSE:
Modules and Extensions QUICK Start
https://documentation.suse.com/sles/15-SP4/html/SLES-all/article-modules.html
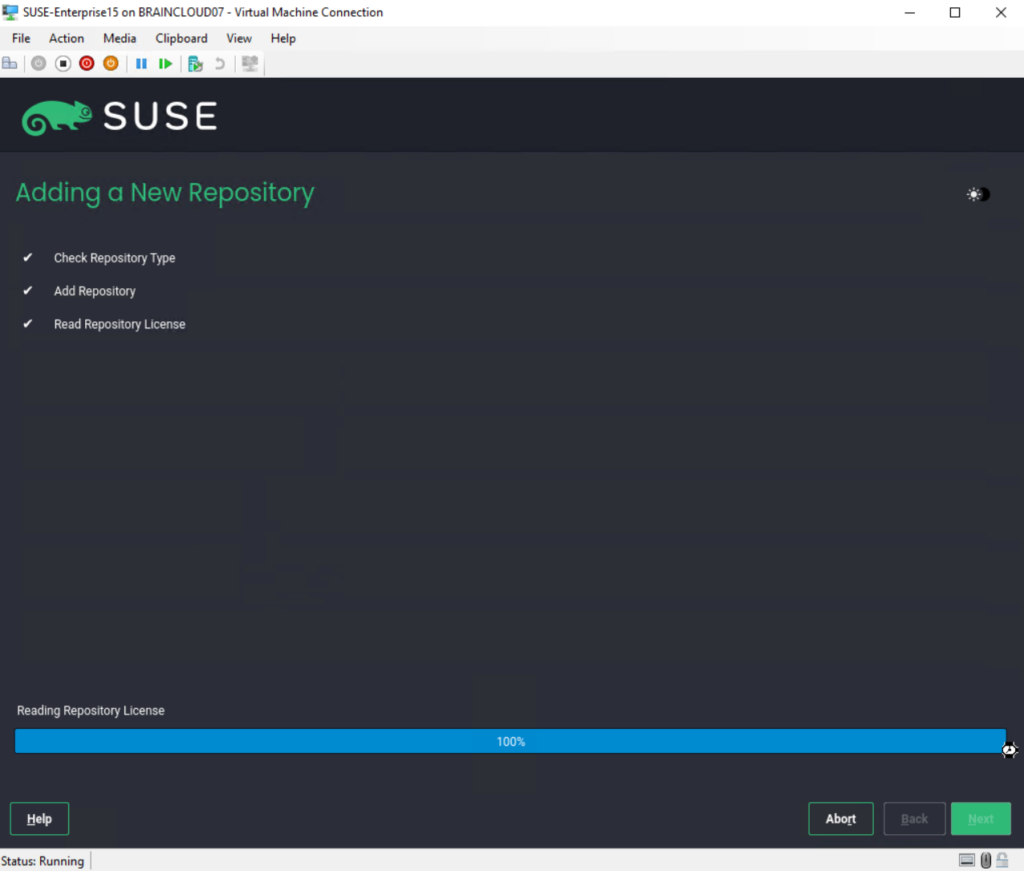
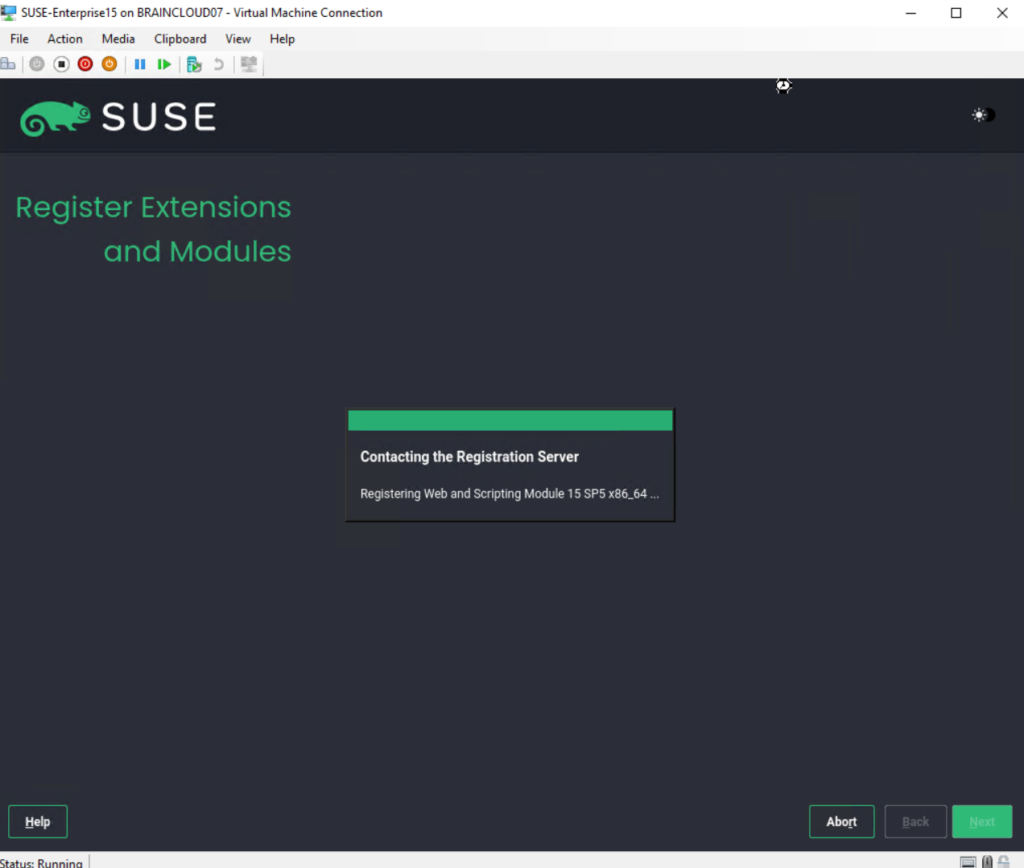
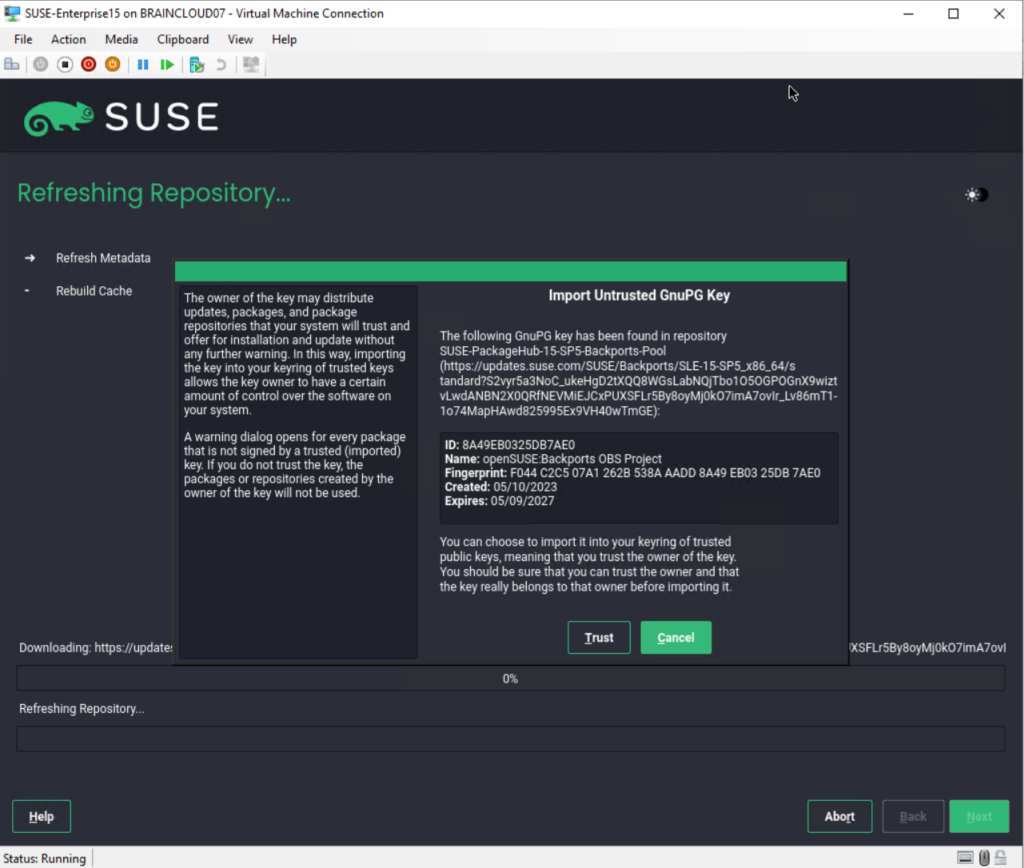
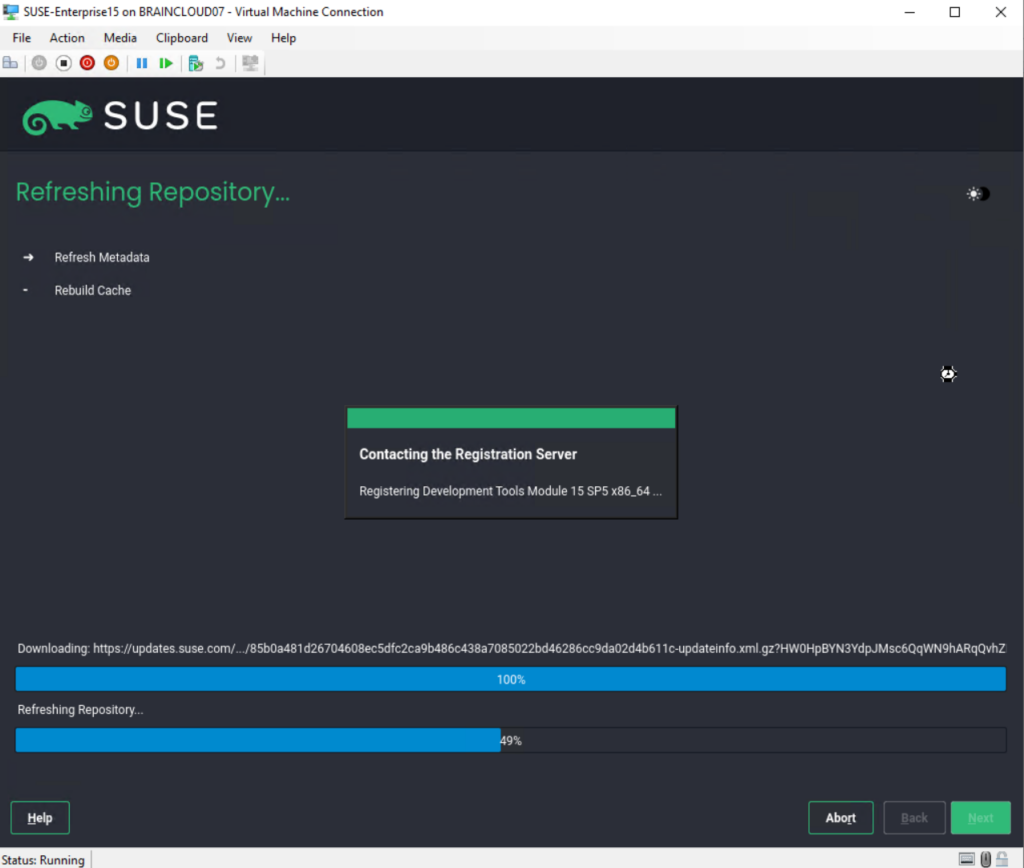
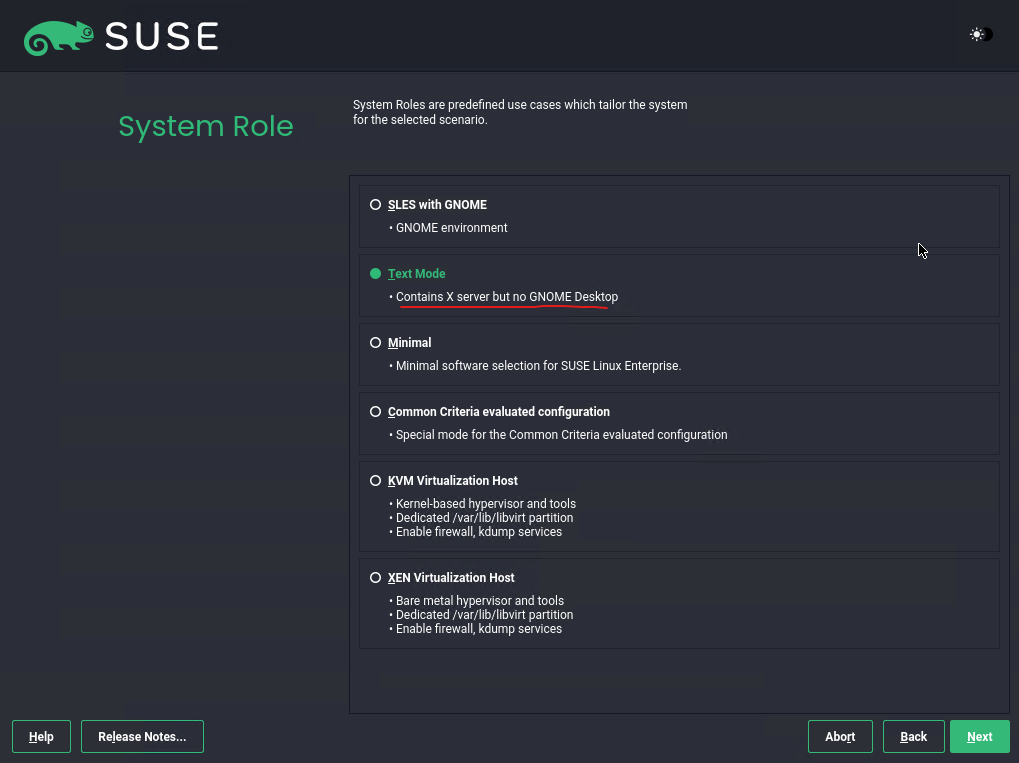
I will install the Text Mode system role which contains a X server but no GNOME Desktop as shown below. Nevertheless we can add some more software and packages on the summary page of all installation settings later before the installation is finally triggered as shown further down.
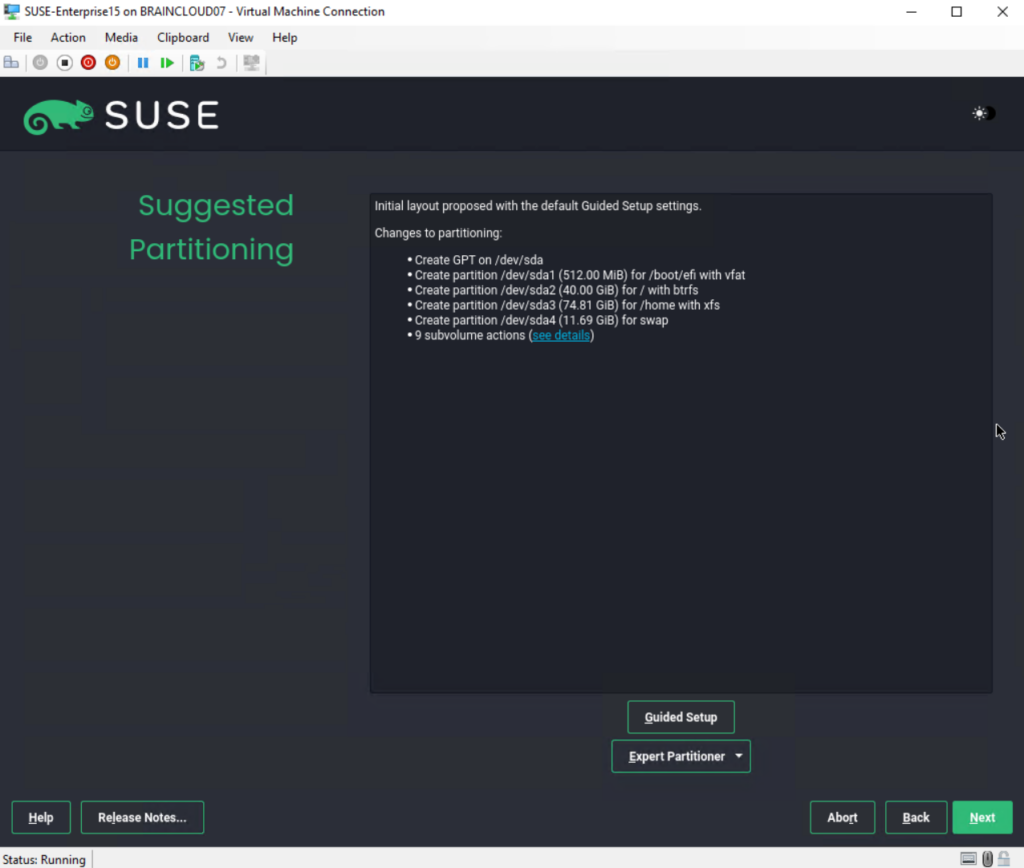
For the partitioning I will use the by default proposed setup and click on Next here.
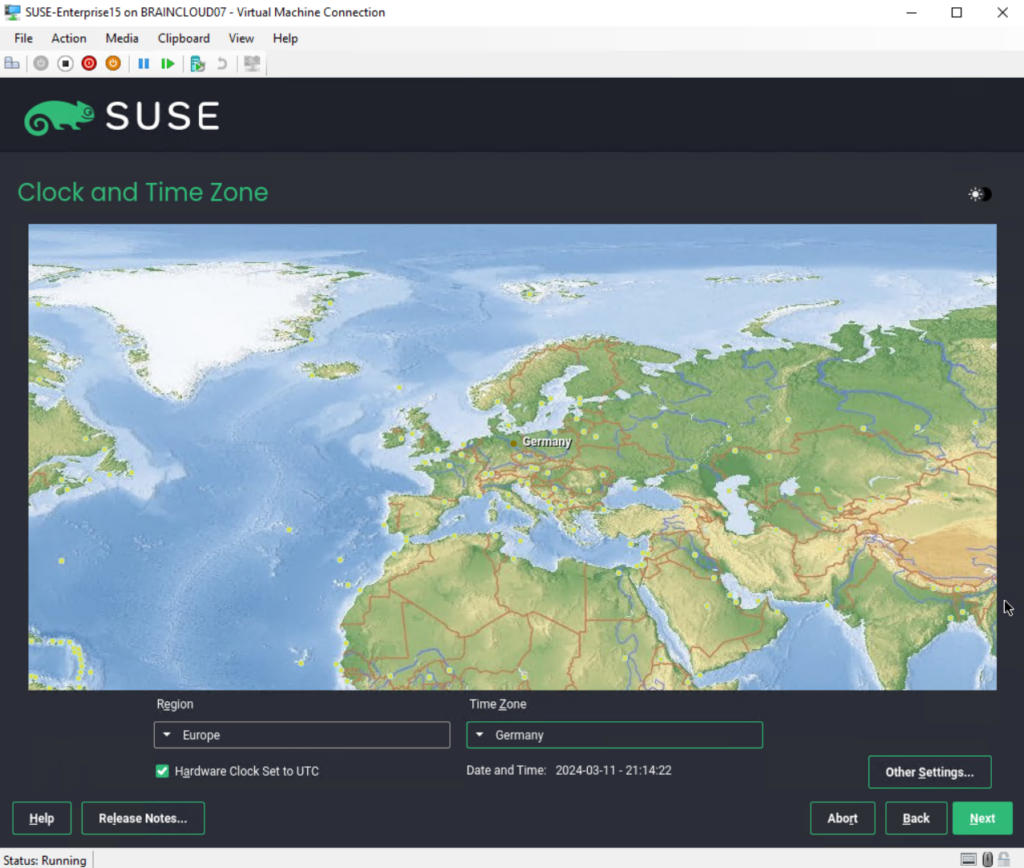
Select your clock and time zone below.
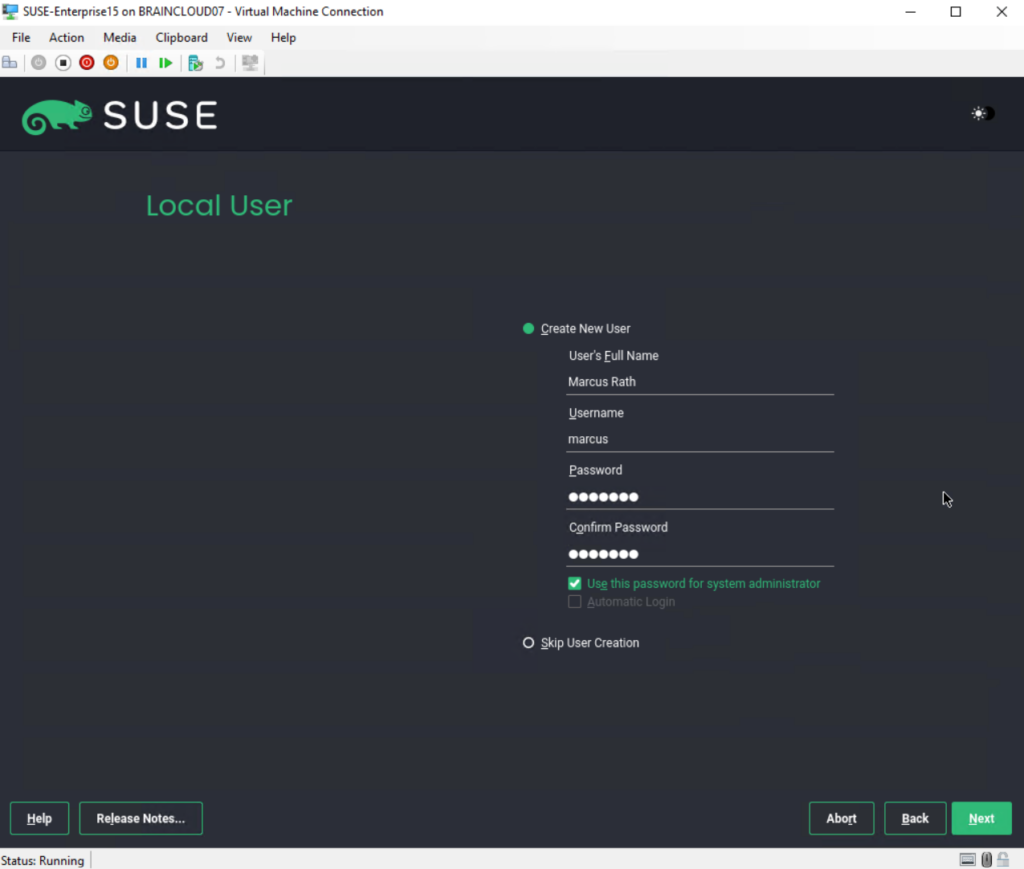
I will create below also a new user and the password should also be used for the root account.
Before we can start the installation we first get a summary of all installation settings. We can also enable or disable here some settings.
SSH is enabled by default as shown below.
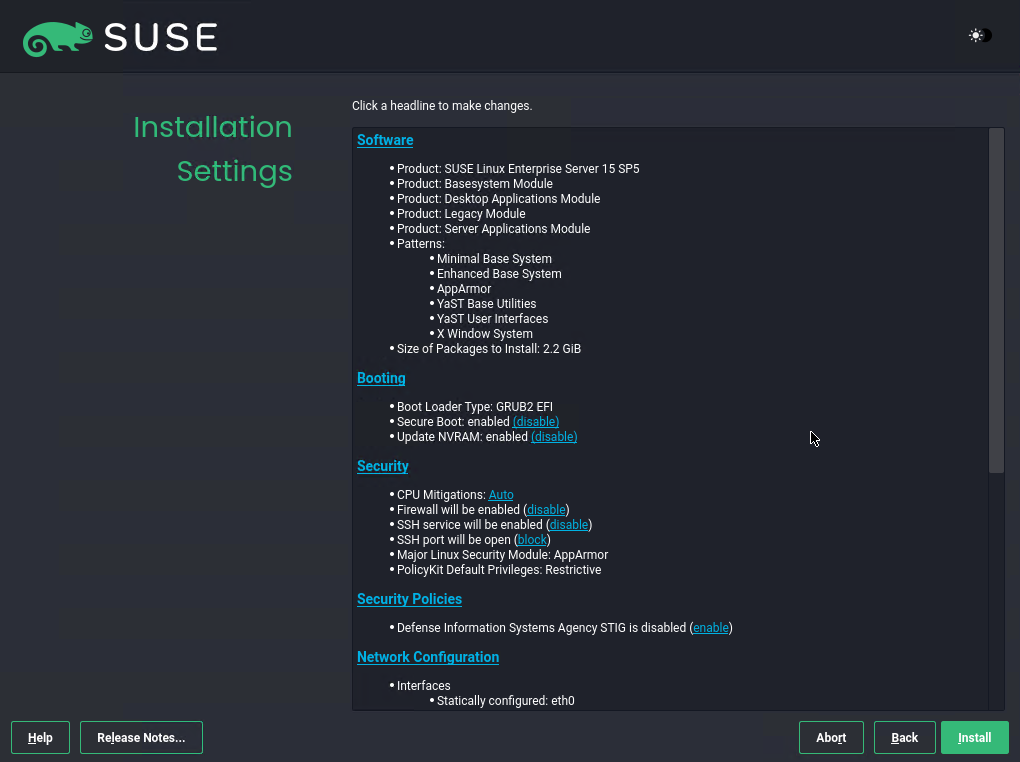
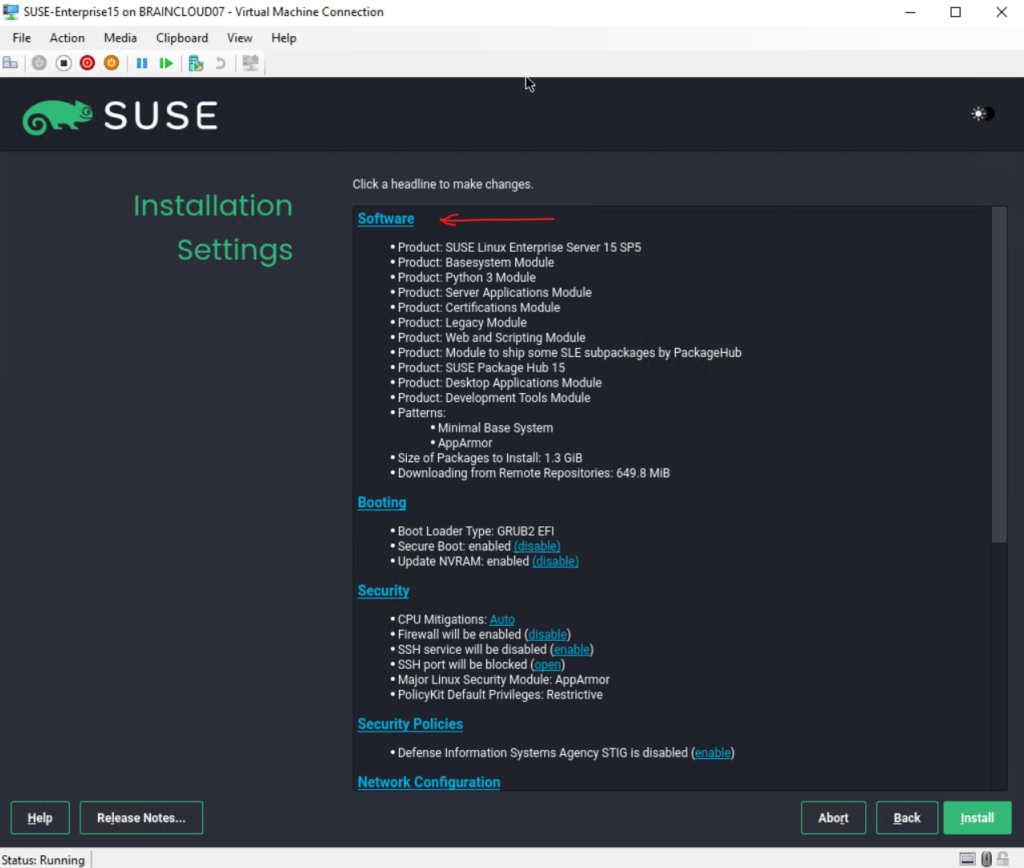
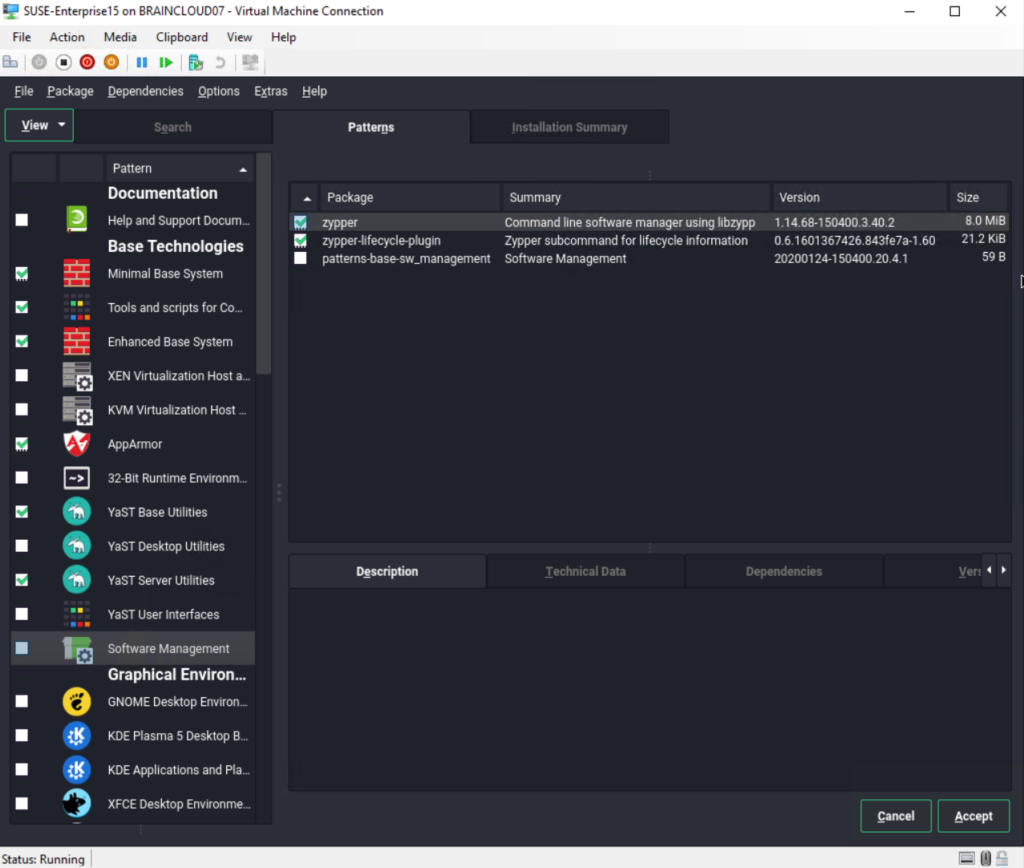
I will also add some more software to the system as already mentioned previously by clicking below on Software in the summary page.
Finally we can click on Install.
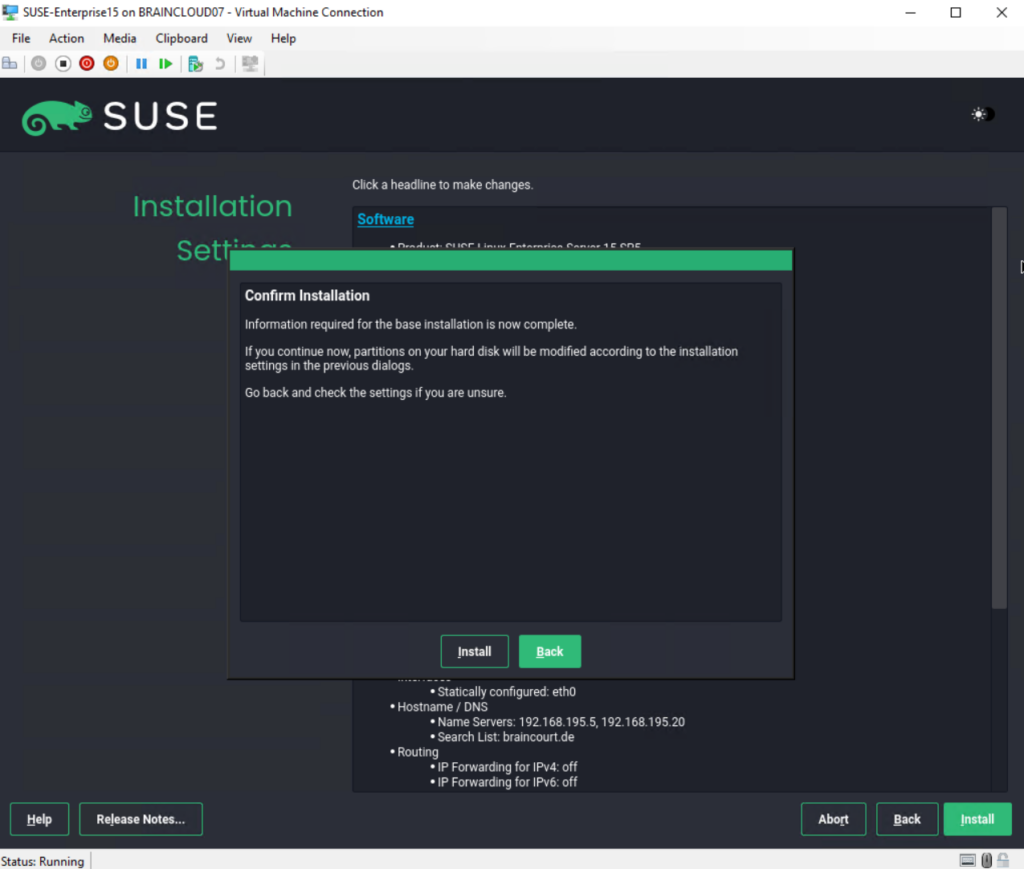
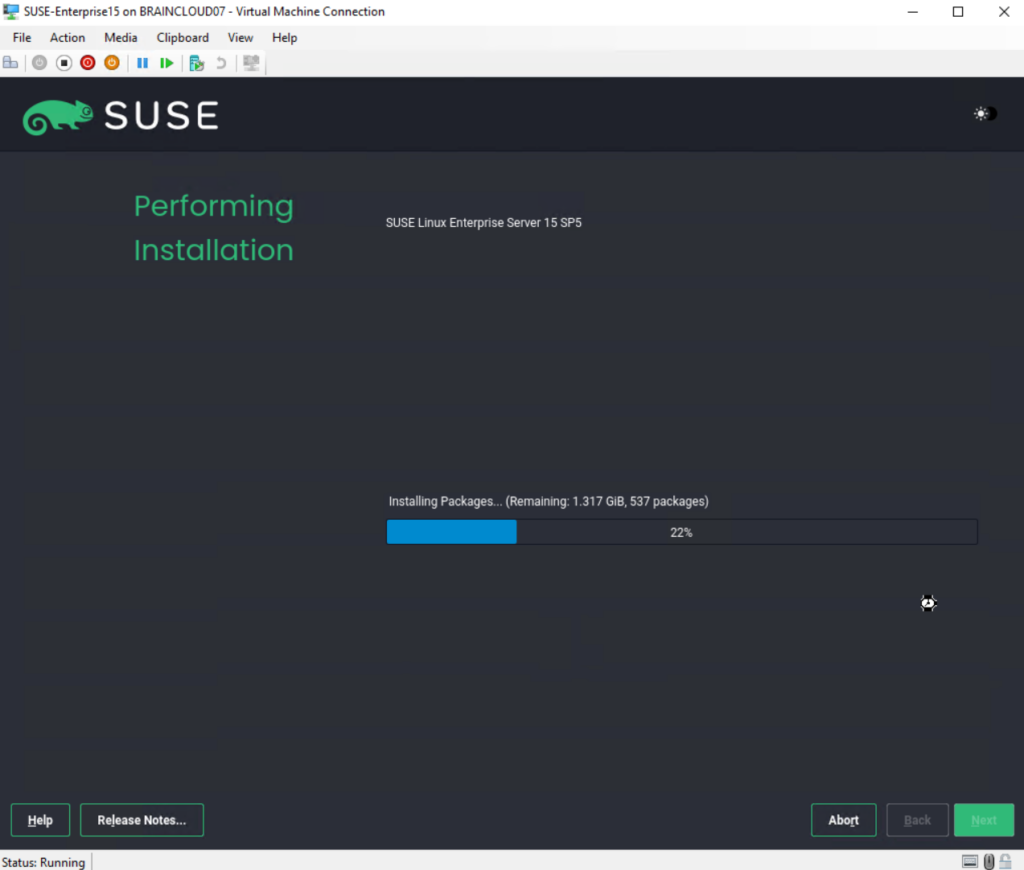
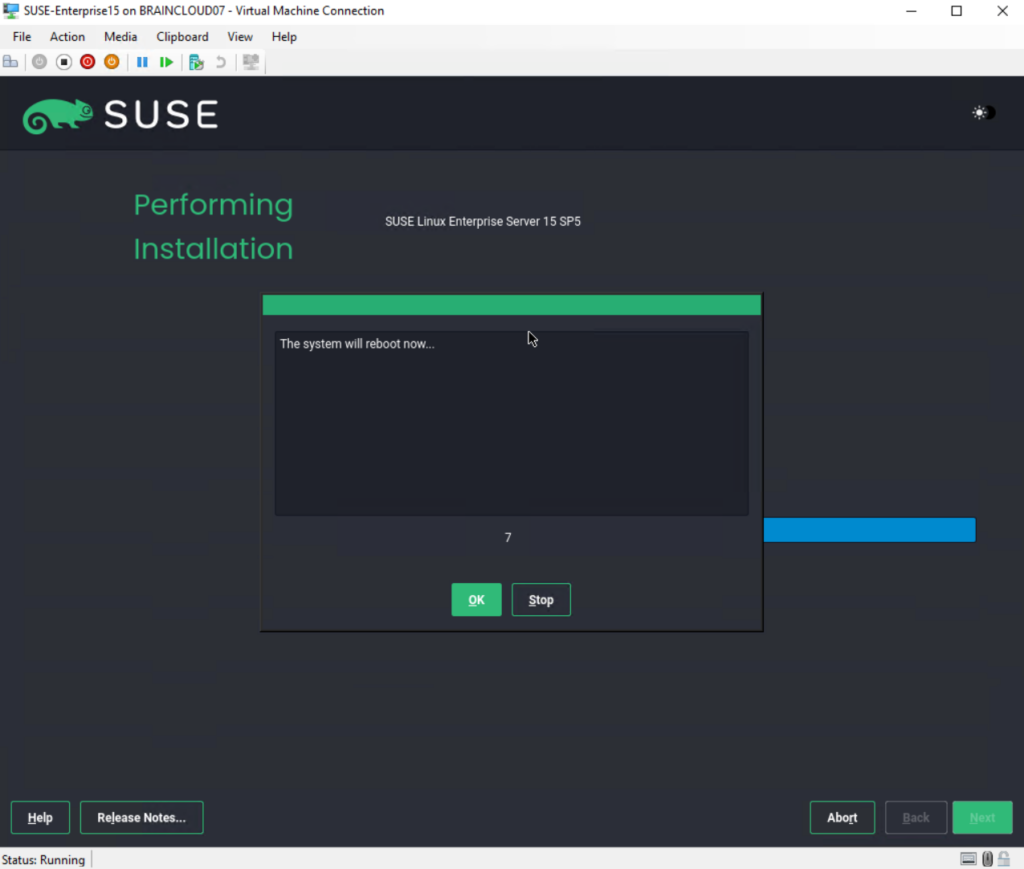
To finish the installation the system needs to be rebooted.
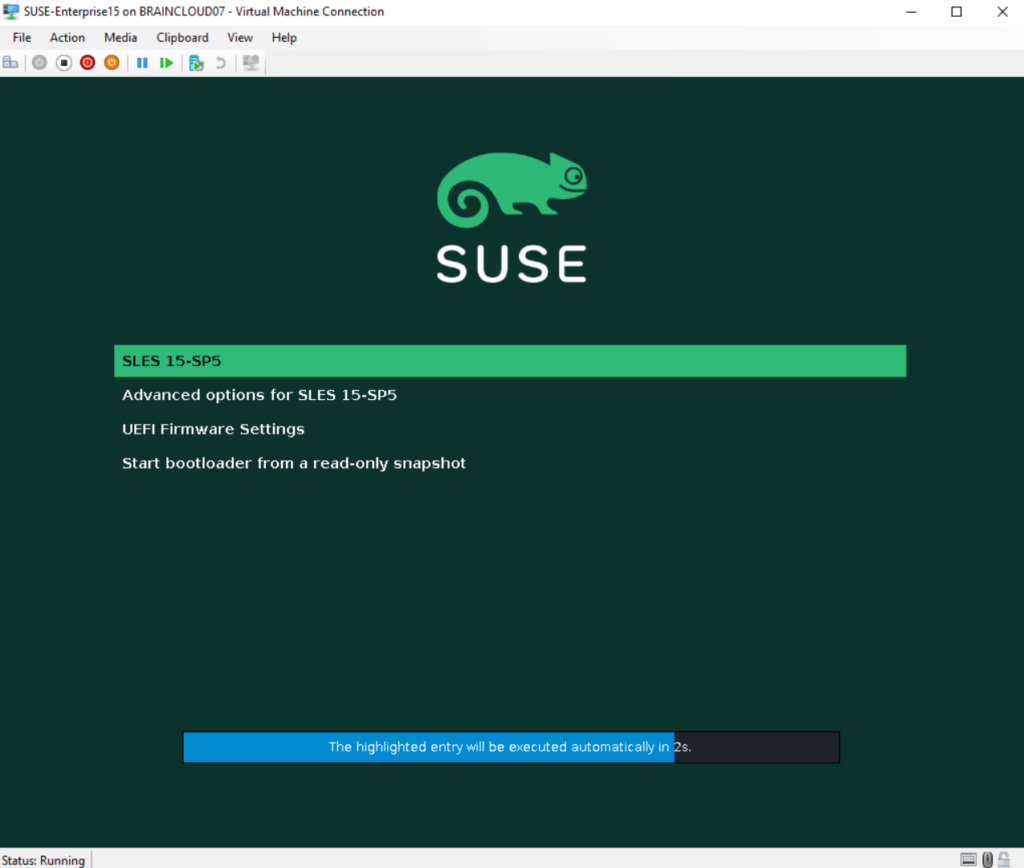
The system boots up now.
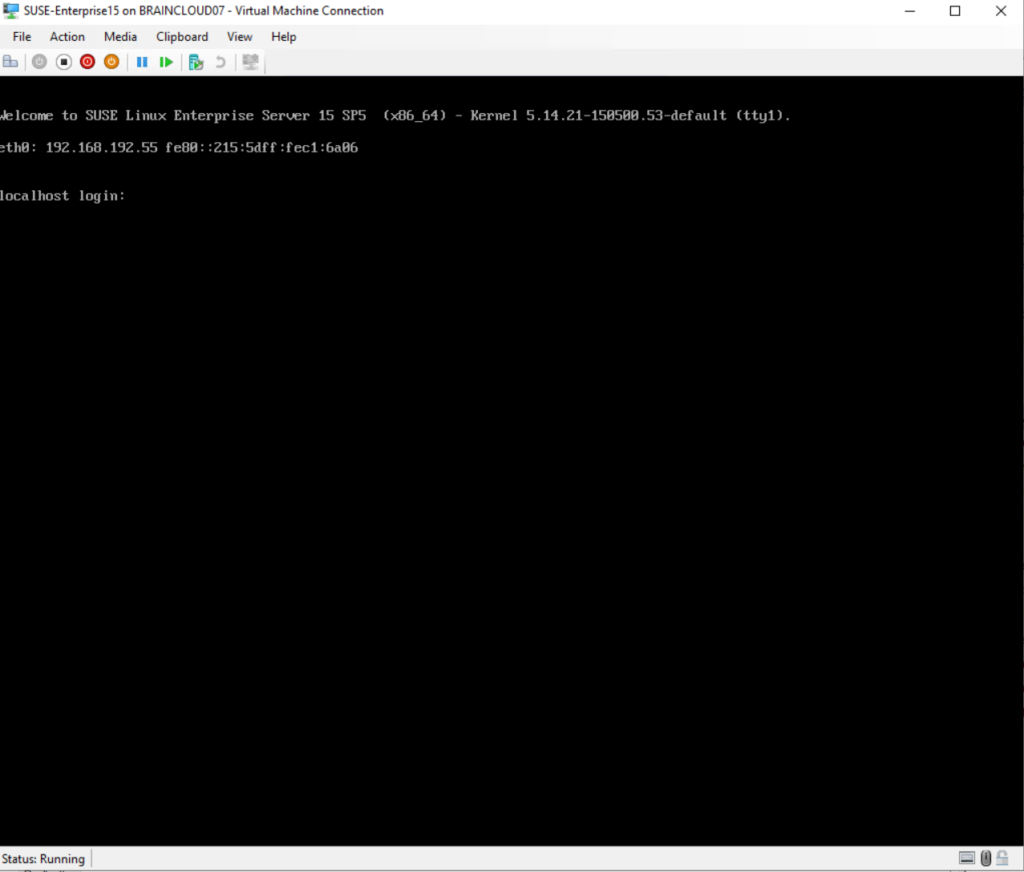
Finally we can login to the system.
Set up and Configure some Basics
Change Hostname
To first show the actual hostname we can use one of the following two commands.
> hostname

> hostnamectl
To change the hostname we need to edit the /etc/hostname file as usual in Linux. Open the file and add or change the hostname.
> sudo nano /etc/hostname
Next edit the /etc/hosts file and replace any appearing old hostname with the new.
> sudo nano /etc/hosts
Finally reboot the computer to take effect.
Update SUSE Linux Enterprise Server
To update/refresh the added SUSE repositories on the system we can use:
> sudo zypper refresh

Like <apt update> in Ubuntu.
To first list all available updates you can run:
> sudo zypper list-updates --all

Like <apt list --upgradable> in Ubuntu.
To finally update the system use:
> sudo zypper update

Like <apt install> in Ubuntu.
Some useful Commands
Show SUSE Version
> cat /etc/os-release

or by using the lsb-release tool
> lsb_release -a

the lsb-release tool we can install with the following commmand:
> sudo zypper install lsb-release

Shutdown the OS immediately (brings the system down in a secure way)
> sudo shutdown -h now
or
> sudo poweroff
or
> sudo systemctl poweroff

Display current used shell (Bash, Zsh, Fish, Ksh, Tcsh, Dash, Ash, ...)
> ps -p $$

Bash, short for Bourne-Again SHell, is most commonly used shell in Linux. It is default shell in most Linux distributions and is also most powerful. Bash provides a range of features, including command history, tab completion, and scripting. It is also highly customizable and can be configured to suit individual n


Show gateway
> route -n
or
> netstat -r -n

Both tools are now deprecated but still can be installed with <zypper install net-tools-deprecated>


Check which desktop environment you are using - This command doesn't give you much information besides the used desktop environment.
> echo $XDG_CURRENT_DESKTOP

or

> ls -l /usr/share/xsessions

To get more information including the version number of the desktop environment you can use screenfetch.
To install screenfetch in SUSE you can use:
> zypper install screenfetch (to determine the package to install, you can first use <zypper search-packages screenfetch>

To run the tool just type in the name of the command:
> screenfetch
How to Customize the Bash Prompt
On SUSE Linux Enterprise Server the Bash prompt for the root user looks as follows: (On Debian/Ubuntu it is also the # character but in white and not red color btw.)

For non root users it looks as follows: (On Debian/Ubuntu it looks like user@host:~$ with the $ character.)
The ~ tilde character represents the home directory of the user.

How the Bash prompt will finally looks like, is defined in the $PS1 environment variable on Linux.
Bash reads its configuration file to determine its behavior. This file named ~/.bashrc is stored in the users home directory like shown below.
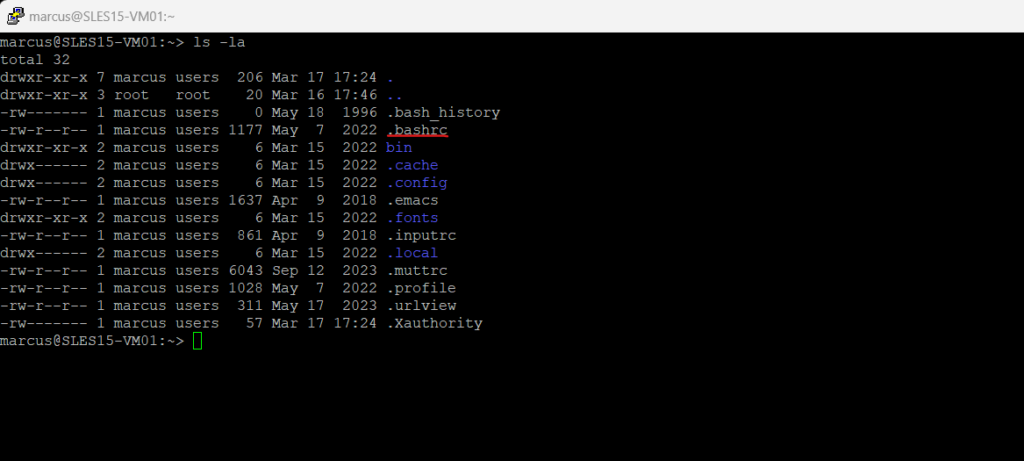
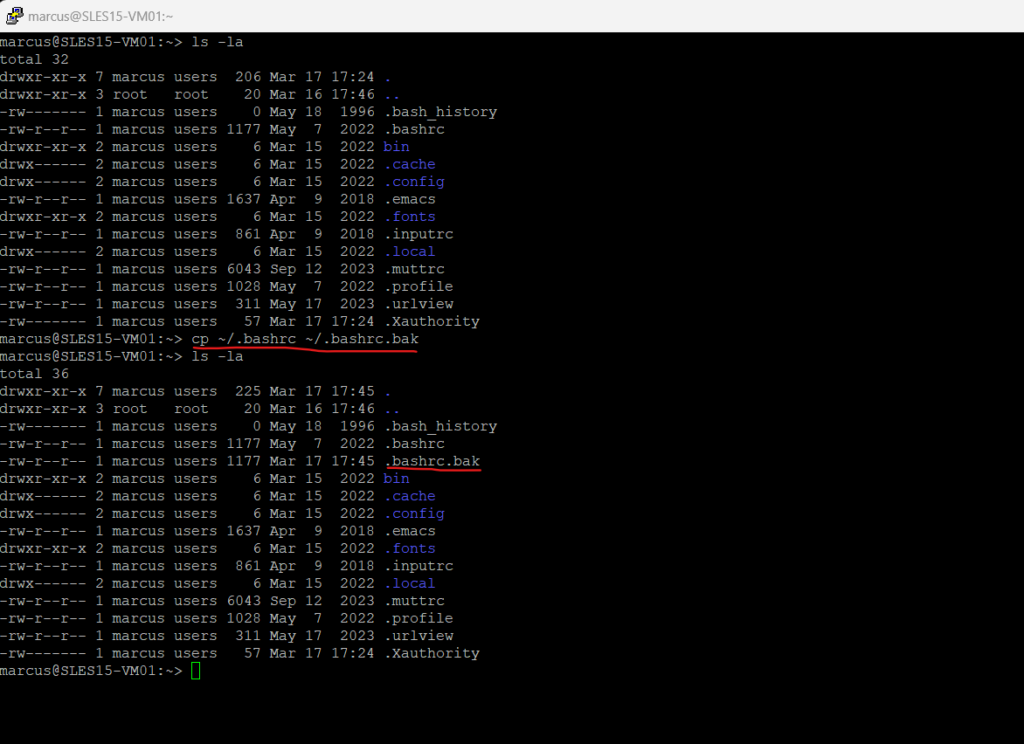
Before we make any changes we first create a copy of by executing the following command:
> cp ~/.bashrc ~/.bashrc.bak
Open the Bash configuration file to adjust the prompt.
> nano ~/.bashrc
Enter at the end of the file the following or whatever you want to appear new prompt:
PS1="MyNewPrompt> "
The $PS1 environment variable on Linux operating systems will store how the console prompt will looks like.
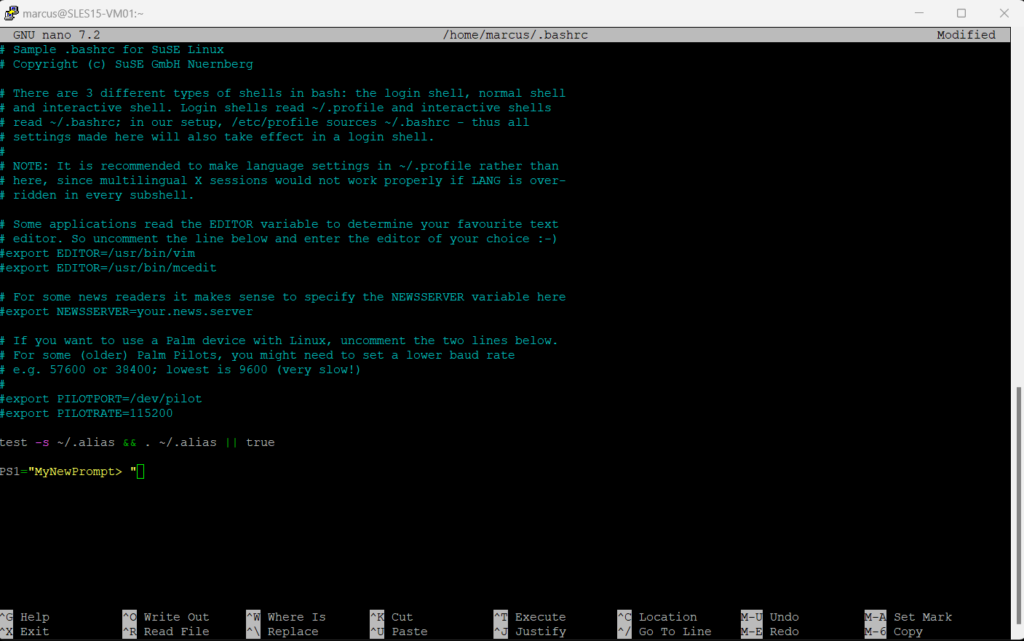
Finally save and exit the file.
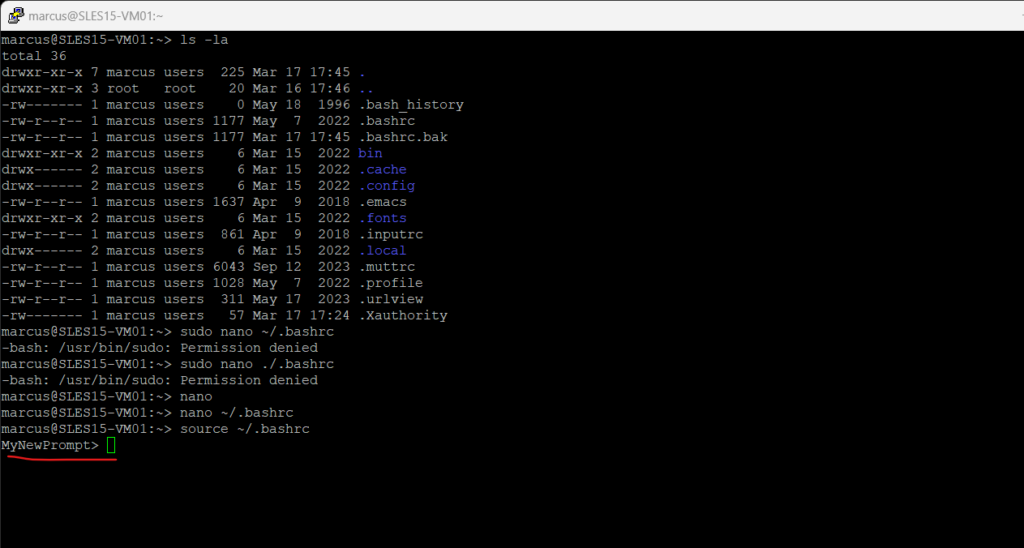
Refresh the BASH service to apply your changes.
> source ~/.bashrc
The Bash prompt will immediately change to the new one.
To just change temporary the Bash prompt you can use the export command as shown below, the change will effect immediately:
> export PS1="u@h:w$"
This is also how Debian/Ubuntu will show the Bash prompt by the way.

More about you will find in the following great article about how to customize the Bash prompt in Linux https://phoenixnap.com/kb/change-bash-prompt-linux.
Mount an .ISO File mapped as CD/DVD Drive in Hyper-V for a Linux Virtual Machine
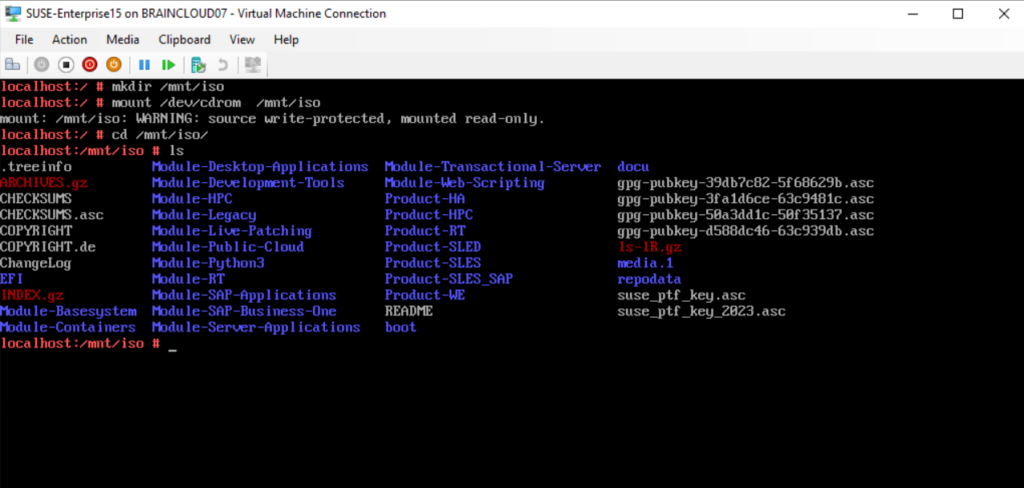
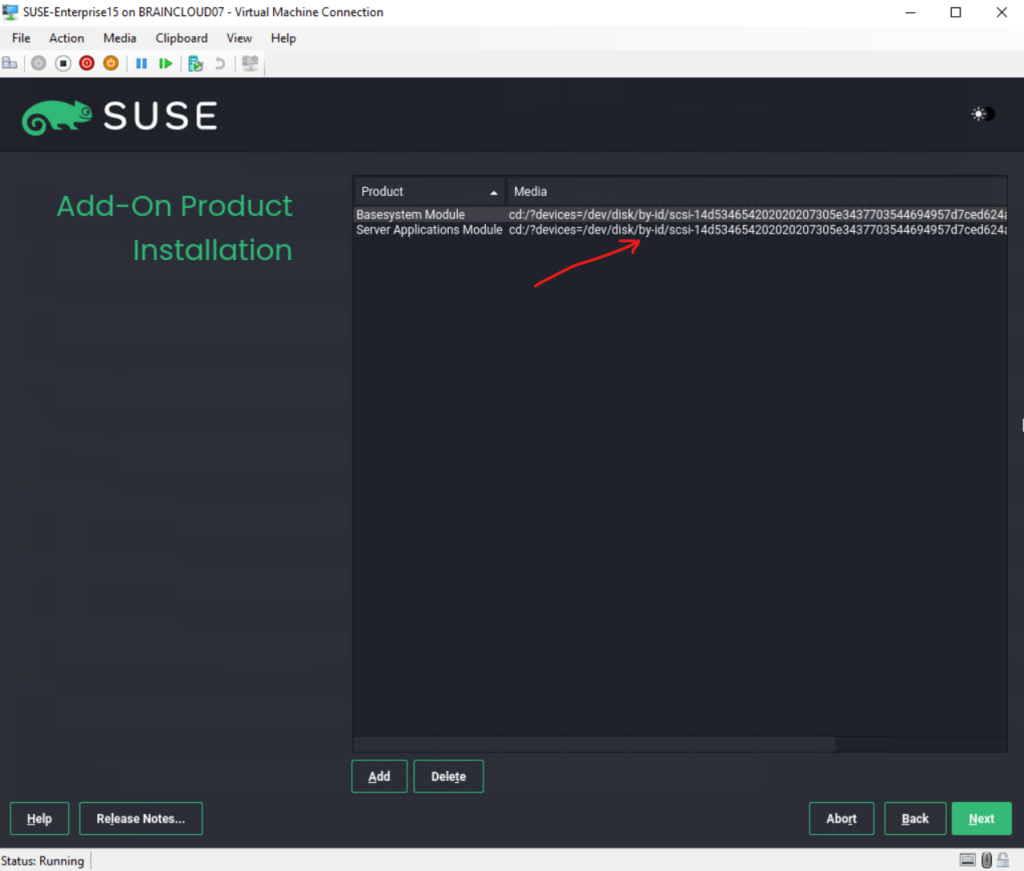
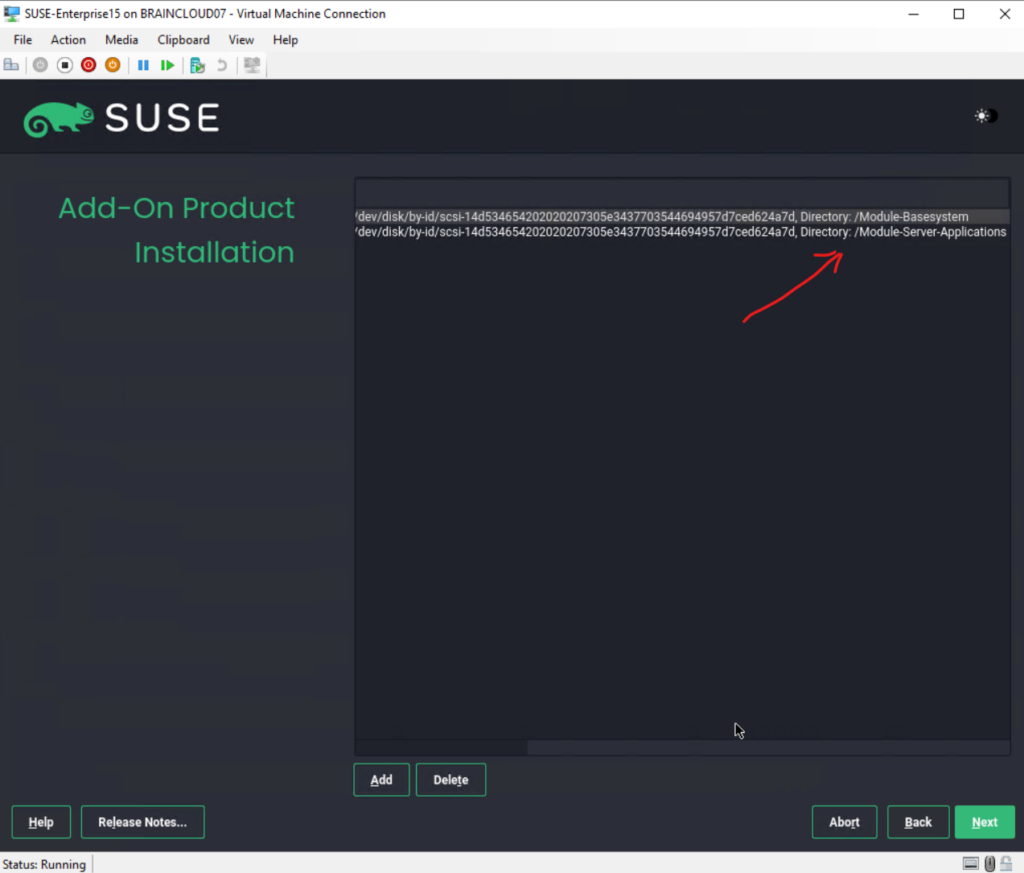
In order to mount a .ISO file we added in Hyper-V for a Linux virtual machine, we usually first create a folder to mount the file to. Then we mount the virtual CD/DVD-ROM to our newly created mount folder like shown below.
The .ISO file is of course write-protected and we just can mount it in read-only mode.
> mkdir /mnt/iso
> mount /dev/cdrom /mnt/iso
Managing software with command line tools (Zypper and RPM)
https://documentation.suse.com/sles/15-SP3/html/SLES-all/cha-sw-cl.html
Installing and removing software with Zypper reference
https://documentation.suse.com/smart/systems-management/html/reference-zypper-install/index.html
Zypper is the command line interface of ZYpp package manager for installing, removing and updating SUSE.
ZYpp is the package management engine that powers both Zypper and YaST.
Determine configured repositories on SUSE Linux Enterprise Server (SLES)
How to determine configured repositories on SUSE Linux Enterprise Server (SLES) you will find in my following post.
https://blog.matrixpost.net/mastering-azure-update-manager-part-3/#determine_repositories
zypper Commands
Search for Packages
You can search for packages to see what repositories will provide them.
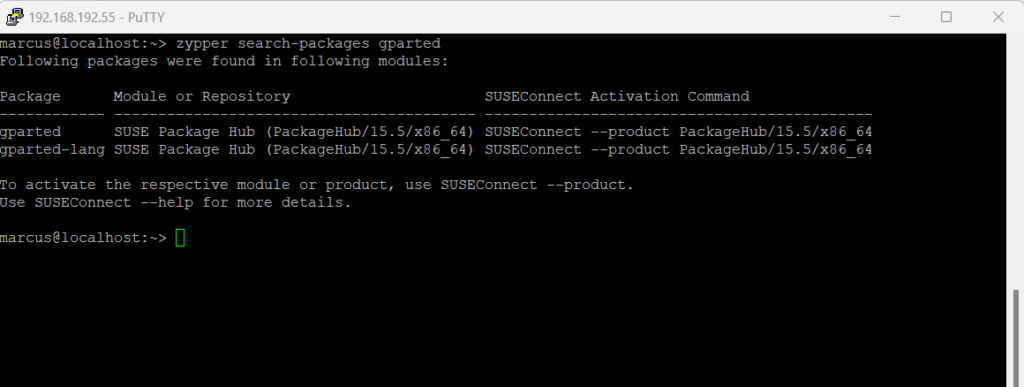
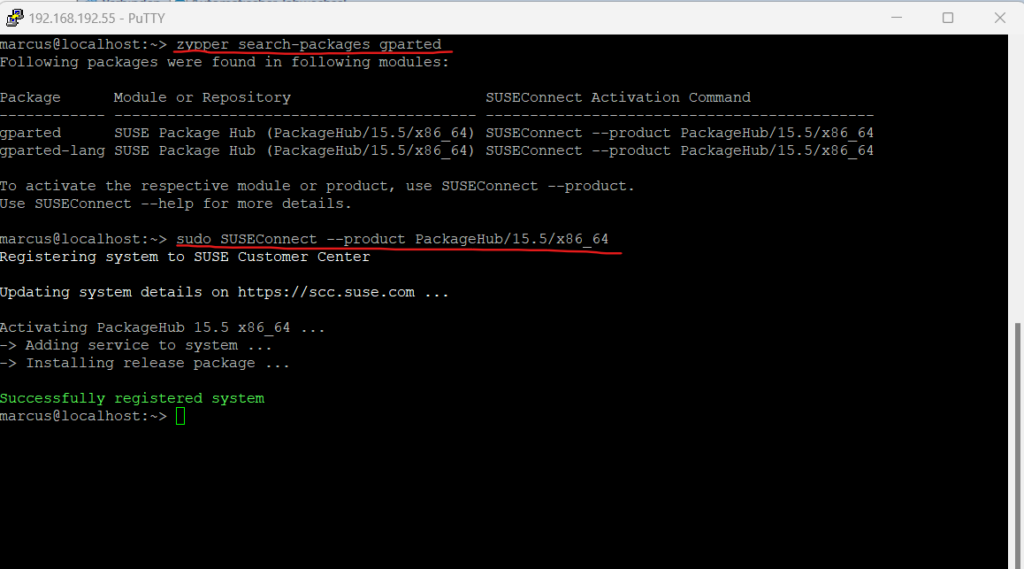
Since SLES 15, zypper search-packages is available for searching packages in both activated and non-activated SLES modules by contacting the SUSE Customer Center (SCC).
zypper search-packages requires access to the SCC, but for RMT/SMT clients, the SCC practically doesn’t exist – the /etc/SUSEConnect file on such systems points to the local RMT/SMT server instead of https://scc.suse.com
> zypper search-packages <package>
> zypper search-packages gparted

or

> zypper se <tool name>
> zypper se nano
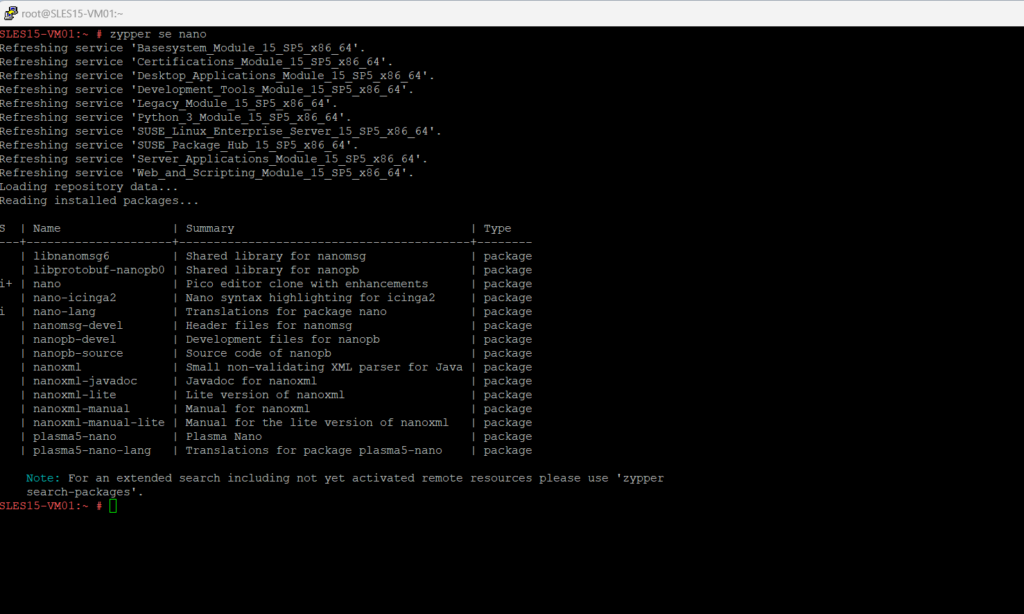
You can also use the cnf (Command Not Found) utility therefore.
A utility to quickly find and install the package for a command that’s not installed yet.
Just enter cnf <tool name> to determine the corresponding package.
In Ubuntu this is an executable python script which can be found in /usr/lib/command-not-found.
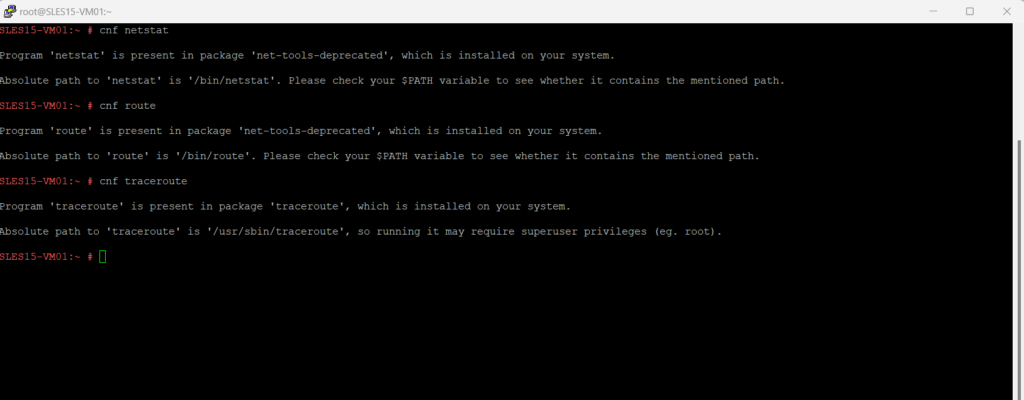
The cnf (Command Not Found) utility itself is available by the scout-command-not-found package.

List Repositories
List repository priority and list by priority.
zypper lr -P
or
zypper repos
zypper lr
Use the commands zypper refresh or zypper ref to refresh zypper repositories.
zypper refresh
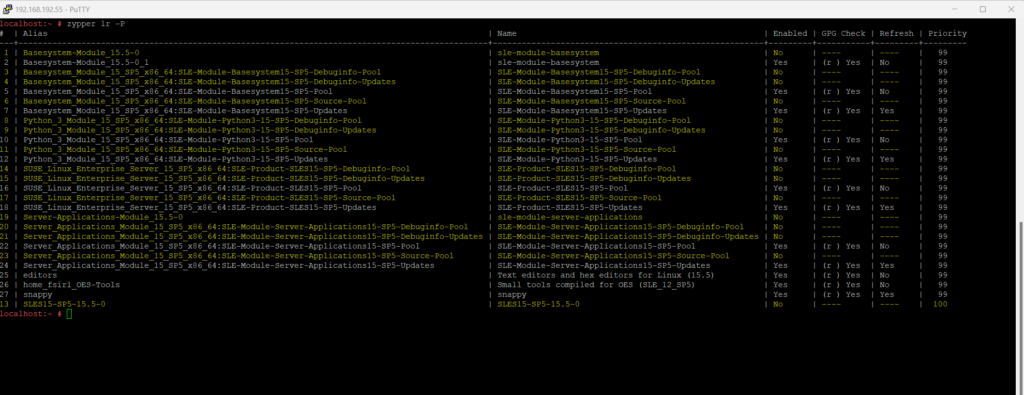
Disable Repositories
Before disabling repository, you must know that in Zypper, every repository has its own unique number, that is used to disable or enable a repository.
To list all repositories and its unique numbers and Enabled state, you can use the following command:
zypper lr
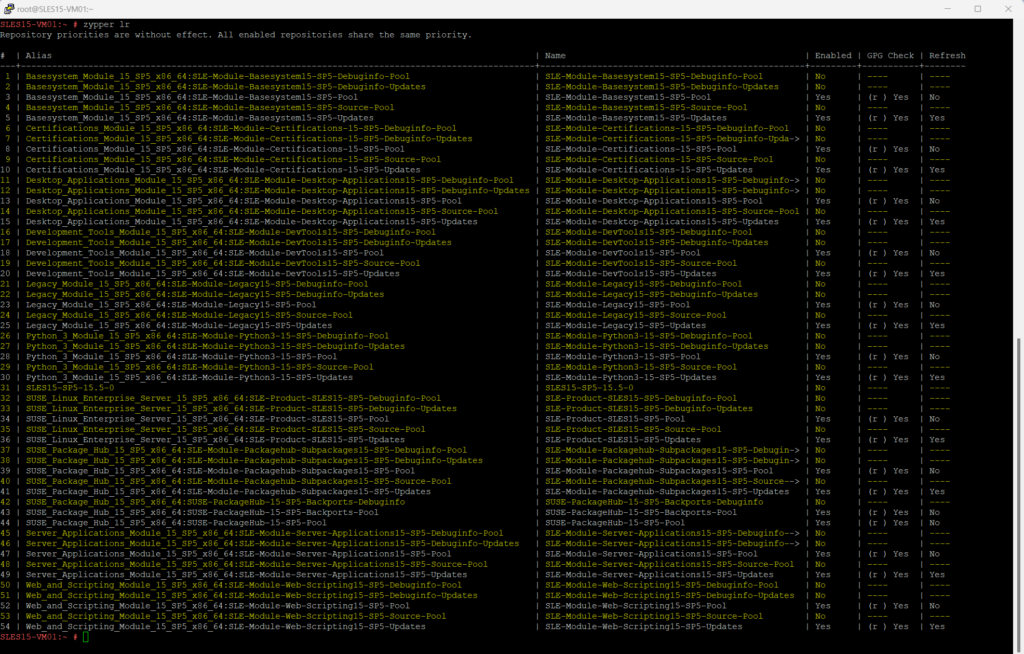
To disable now for example the Basesystem_Module_15_SP5_x86_64:SLE-Module-Basesystem15-SP5-Updates repository which have the unique number or ID 5, we can execute the following command:
zypper mr -d 5

To enable the repository again we can use:
zypper mr -e 5

Install iputils
sudo zypper install iputils
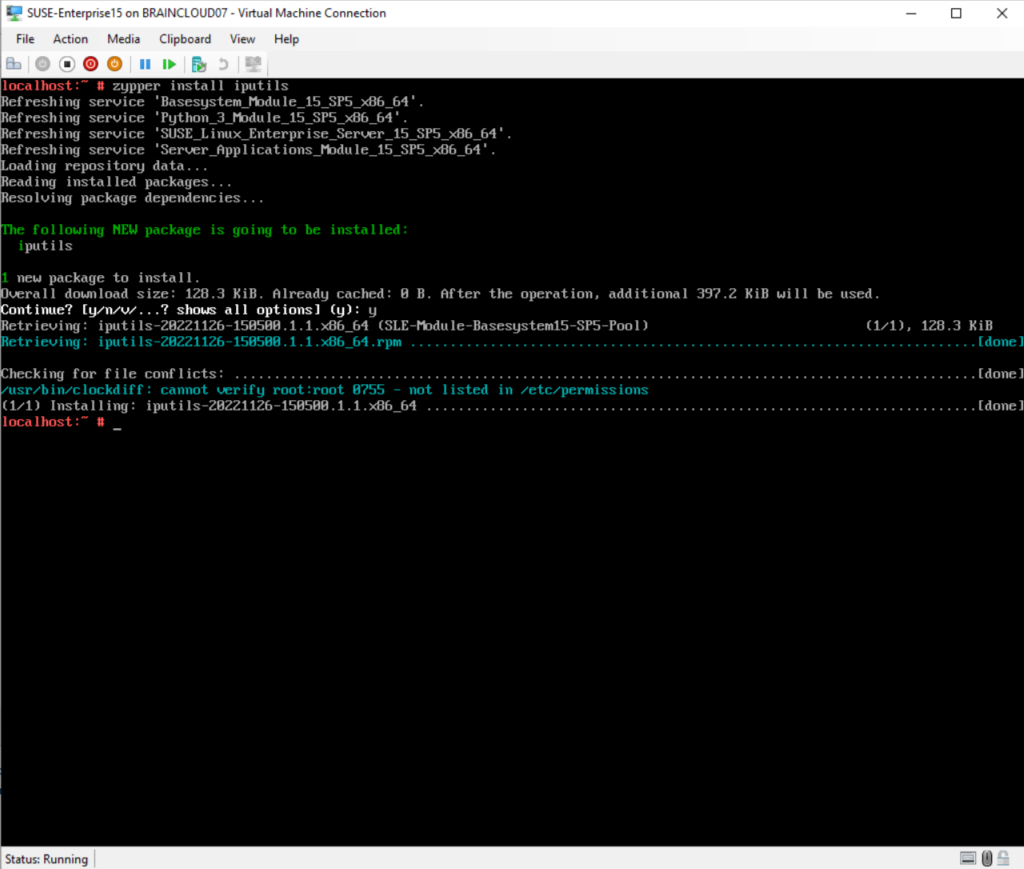
Install vi Editor
sudo zypper install vi
Mastering Network Configuration in SUSE Linux Enterprise Server
More about in my following post.
Installing Software by using Snaps
The first time I was using Snaps was for the new Certbot tool from Let’s Encrypt as shown in my following post.
Snaps are applications packaged with all their dependencies to run on all popular Linux distributions from a single build. They update automatically and roll back gracefully.
Snaps are discoverable and installable from the Snap Store, an app store with an audience of millions.
Snap can also be installed from the command line on Linux Enterprise Server 15.
Below I will show how you can use Snaps to install the nano text editor from.
You first need to add the snappy repository from the terminal. Leap 15.5 users, for example, can do this with the following command:
The latest up to date repositroy URLs you will find here https://en.opensuse.org/Snap
> sudo zypper addrepo --refresh https://download.opensuse.org/repositories/system:/snappy/openSUSE_Leap_15.5 snappy

To remove a repository you can use
>  zypper removerepo https://download.opensuse.org/repositories/system:/snappy/openSUSE_Leap_15.5 snappy

With the repository added, import its GPG key:
> sudo zypper --gpg-auto-import-keys refresh


Finally, upgrade the package cache to include the new snappy repository:
> sudo zypper dup --from snappy

Snap can now be installed with the following:
> sudo zypper install snapd

You then need to either reboot, logout/login or source /etc/profile to have /snap/bin added to PATH. Additionally, enable and start both the snapd and the snapd.apparmor services with the following commands:
> sudo systemctl enable --now snapd
> sudo systemctl enable --now snapd.apparmor

Install GNU nano (UNOFFICIAL)
To install GNU nano (UNOFFICIAL), simply use the following command:
> sudo snap install nano --classic
Note!
Not all packages from the repos of openSUSE will work with the SLES.
The nano editor above will work on my SLES 15 installation.openSUSE It is offered in two main variations: Tumbleweed, an upstream rolling release distribution, and Leap, a stable release distribution which is sourced from SUSE Linux Enterprise.
Update repository with updates from SUSE Linux Enterprise 15.
Version: Leap 15.5 http://download.opensuse.org/update/leap/15.5/sle/
Source: https://snapcraft.io/install/nano/opensuse
Registering with SUSEConnect
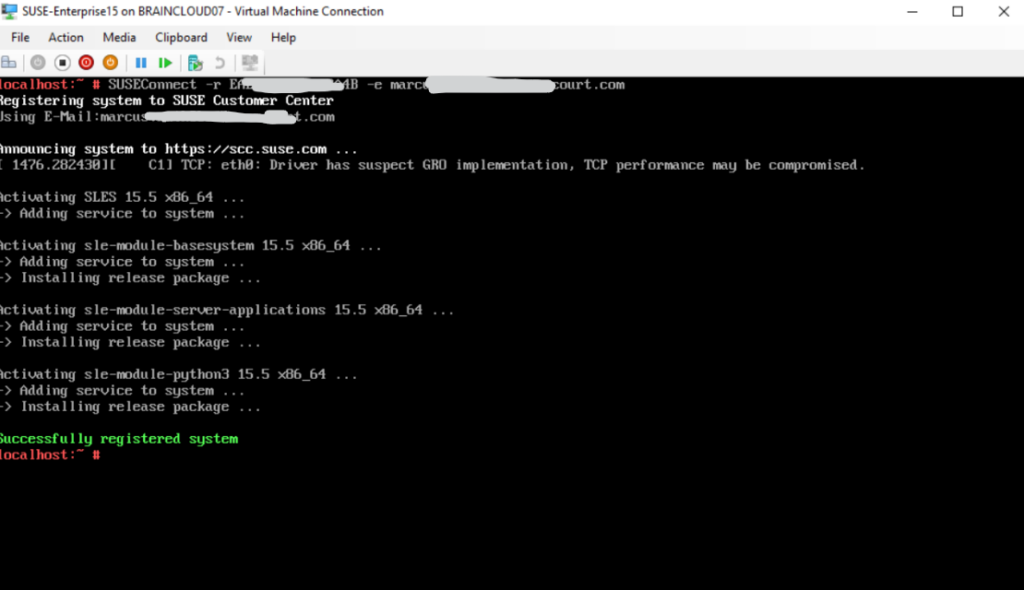
Registering (or activating) a system with the SUSE Customer Center (SCC) is necessary to be on a supported state and to be able to receive updates.
To register from the command line after you have already installed the OS, you can use the following command:
sudo SUSEConnect -r REGISTRATION_CODE -e EMAIL_ADDRESS
Replace REGISTRATION_CODE with the registration code you received with your copy of SUSE Linux Enterprise Server. Replace EMAIL_ADDRESS with the e-mail address associated with the SUSE account you or your organization uses to manage subscriptions.
For example to install gparted I can first search for the package to see which repository will include it. After that I can connect to that repository and finally install it by using zypper install gparted.
Install Apache Web Server on SUSE Linux Enterprise Server
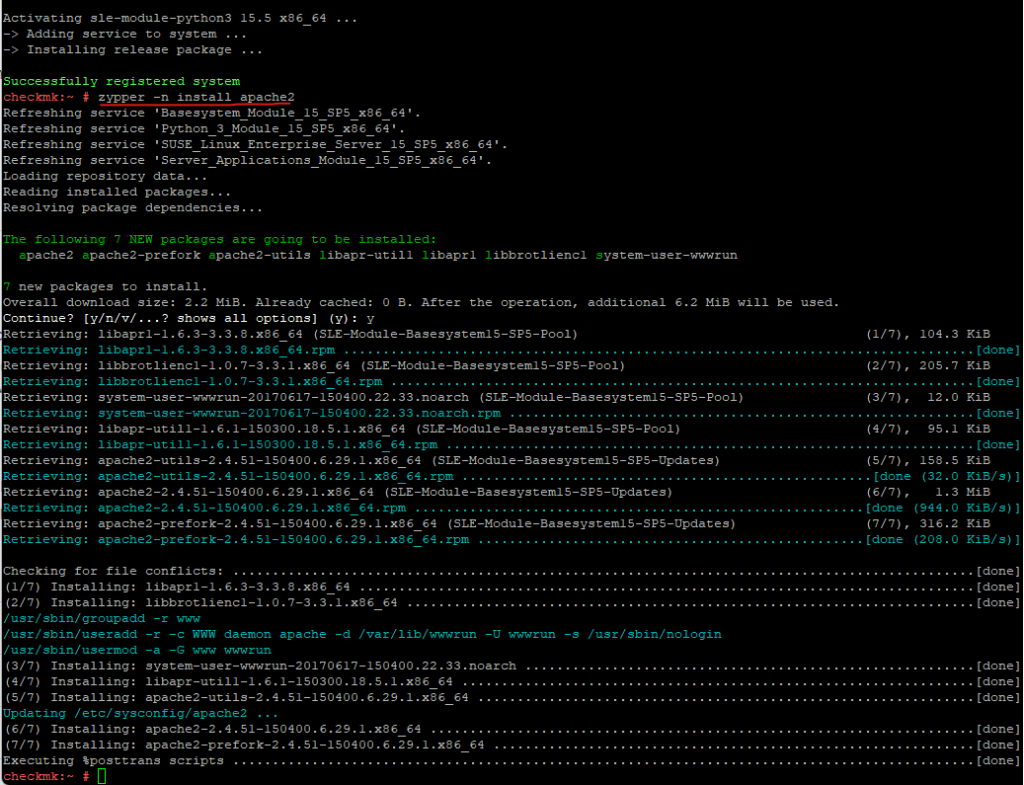
To install the apache web server we can use either Yast or the following command.
# zypper -n install apache2

 --non-interactive, -n   Do not ask anything, use default answers automatically. Default: false
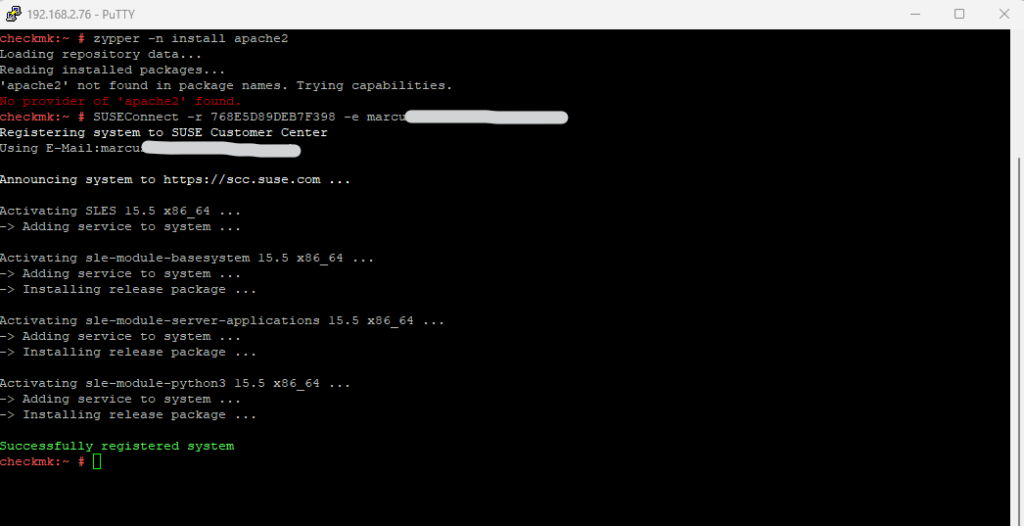
I will first need to register the system with the SUSE Customer Center (SCC) in order to access the repositories for the apache packages.
# SUSEConnect -r REGISTRATION_CODE -e EMAIL_ADDRESS
Manage Services on SUSE Linux Enterprise Server
SUSE Linux Enterprise Server 15 is also using Systemd as init system like most Linux operating systems these days.
About how to manage services (aka daemons) by using Systemd, you can read my following post.
Firewall on SUSE Linux Enterprise Server
Whenever Linux is used in a network environment, you can use the kernel functions that allow the manipulation of network packets to maintain a separation between internal and external network areas. The Linux netfilter framework provides the means to establish an effective firewall that keeps different networks apart. Using iptables—a generic table structure for the definition of rule sets—precisely controls the packets allowed to pass a network interface.
Such a packet filter can be set up using firewalld and its graphical interface firewall-config.
firewalld is finally just like Ufw under Ubuntu a frontend for iptables and nftables which makes it much easier to configure these rules.
As of SLES 15 SP3, the default backend for firewalld has changed from iptables to nftables.More about iptables and nftables you can read in my following post:
https://blog.matrixpost.net/set-up-ubuntus-built-in-firewall/
SUSE Linux Enterprise Server 15 GA introduces firewalld as the new default software firewall, replacing SuSEfirewall2. This chapter provides guidance for configuring firewalld, and migrating from SuSEfirewall2 for users who have upgraded from older SUSE Linux Enterprise Server releases.
Source: https://documentation.suse.com/sles/15-SP4/html/SLES-all/cha-security-firewall.html
The firewalld packet filtering model allows any outgoing connections to pass. Outgoing connections are connections that are actively established by the local host. Incoming connections that are established by remote hosts are blocked if the respective service is not allowed in the zone in question. Therefore, each of the interfaces with incoming traffic must be placed in a suitable zone to allow for the desired services to be accessible. For each of the zones, define the services or protocols you need.
firewalld implements different security zones. Several predefined zones like internal and public exist. The administrator can define additional custom zones if desired. Each zone contains its own set of iptables rules. Each network interface is a member of exactly one zone. Individual connections can also be assigned to a zone based on the source addresses.
Source: https://documentation.suse.com/sles/15-SP4/html/SLES-all/cha-security-firewall.html
You can list all network interfaces currently assigned to a zone like this:
firewall-cmd is the command line client of the firewalld daemon. It provides an interface to manage the runtime and permanent configurations.
List all network interfaces on the system
> ip link show

> sudo firewall-cmd --zone=public --list-interface

To assign an interface to a zone, you can use the following commands.
The variant using --add-interface will only work if eth0 is not already assigned to another zone.
> sudo firewall-cmd --zone=internal --add-interface=eth0


The variant using --change-interface will always work, removing eth0 from its current zone if necessary:
> sudo firewall-cmd --zone=internal --change-interface=eth0

Any operations without an explicit --zone argument will implicitly operate on the default zone. This pair of commands can be used for getting and setting the default zone assignment:

> sudo firewall-cmd --get-default-zone
dmz

firewall-cmd --set-default-zone=public
Any network interfaces not explicitly assigned to a zone will be automatically part of the default zone. Changing the default zone will reassign all those network interfaces immediately for the permanent and runtime configurations. You should never use a trusted zone like internal as the default zone, to avoid unexpected exposure to threats. For example hotplugged network interfaces like USB Ethernet interfaces would automatically become part of the trusted zone in such cases.
Source: https://documentation.suse.com/sles/15-SP4/html/SLES-all/cha-security-firewall.html
By default all firewall-cmd commands operate on the runtime configuration. You can apply most operations to the permanent configuration only by adding the --permanent parameter. When doing so the change will only affect the permanent configuration and will not be effective immediately in the runtime configuration. There is currently no way to add a rule to both runtime and permanent configurations in a single invocation. To achieve this you can apply all necessary changes to the runtime configuration and when all is working as expected issue the following command:
> sudo firewall-cmd --runtime-to-permanent
This will write all current runtime rules into the permanent configuration. Any temporary modifications you or other programs may have made to the firewall in other contexts are made permanent this way. If you are unsure about this, you can also take the opposite approach to be on the safe side: Add new rules to the permanent configuration and reload firewalld to make them active.
> sudo firewall-cmd --reload

or

> sudo systemctl reload firewalld
To add new rules you can either use the service name or the port number. To see all the available pre-defined services (names) you can enter:
> sudo firewall-cmd --get-services
Allowing or Denying a Port/Protocol
> sudo firewall-cmd --zone=public --add-port=22/tcp --permanent

> sudo firewall-cmd --zone=public --remove-port=22/tcp --permanent
Allowing or Denying a service (name)
> sudo firewall-cmd --zone=public --add-service=http --permanent

> sudo firewall-cmd --zone=public --remove-service=http --permanent
Reload firewalld to make the new permanent rules kick in immediately.
> sudo firewall-cmd --reload
To get enabled configurations/rules:
> sudo firewall-cmd --list-all
To get all configurations for all zones:
> sudo firewall-cmd --list-all-zones
To get all configurations for a specific zone:
> sudo firewall-cmd --zone=public --list-all
Source: https://firewalld.org/documentation/man-pages/firewall-cmd.html
Enable/Disable the Firewall
As mentioned SUSE Linux Enterprise Server 15 GA introduces firewalld as the new default software firewall and replacing the SuSEfirewall2.
To disable firewalld you first need to stop the firewalld daemon and then disable it by executing the following commands:
# systemctl stop firewalld.service
# systemctl disable firewalld.service
To enable the firewalld enter the following commands:
# systemctl enable firewalld.service
# systemctl start firewalld.service
Create a new User on the System
To create a new user you can use as usual on Linux operating systems the useradd command.
# sudo useradd <USERNAME>

# sudo useradd john

The command adds an entry to the /etc/passwd, /etc/shadow, /etc/group, and /etc/gshadow files.

Verify that the new user was created
# sudo id john

Set a password for the new user
# sudo passwd john


Use the -m (--create-home) option to create the user home directory as /home/<username>
# sudo useradd -m john
About how to elevate normal user accounts in SUSE Linux Enterprise with sudo rights you can read my following post.
How to add SLES repository on SLES server
Repositories are added to SLES automatically when a system is registered to the SUSE Customer Center (SCC), SUSE Manager, or SMT/RMT. If you need to manually add a repository or iso as a repository:
Please make sure to have the SLES ISO or DVD to add as a repository to the server.
- Launch YaST | Software | Software Repositories
- Select Add
- Select Media Type and press Next
- Browse to the ISO or insert the DVD and press Next
- Finish adding the repository, and close YaST
Source: https://www.suse.com/support/kb/doc/?id=000018261
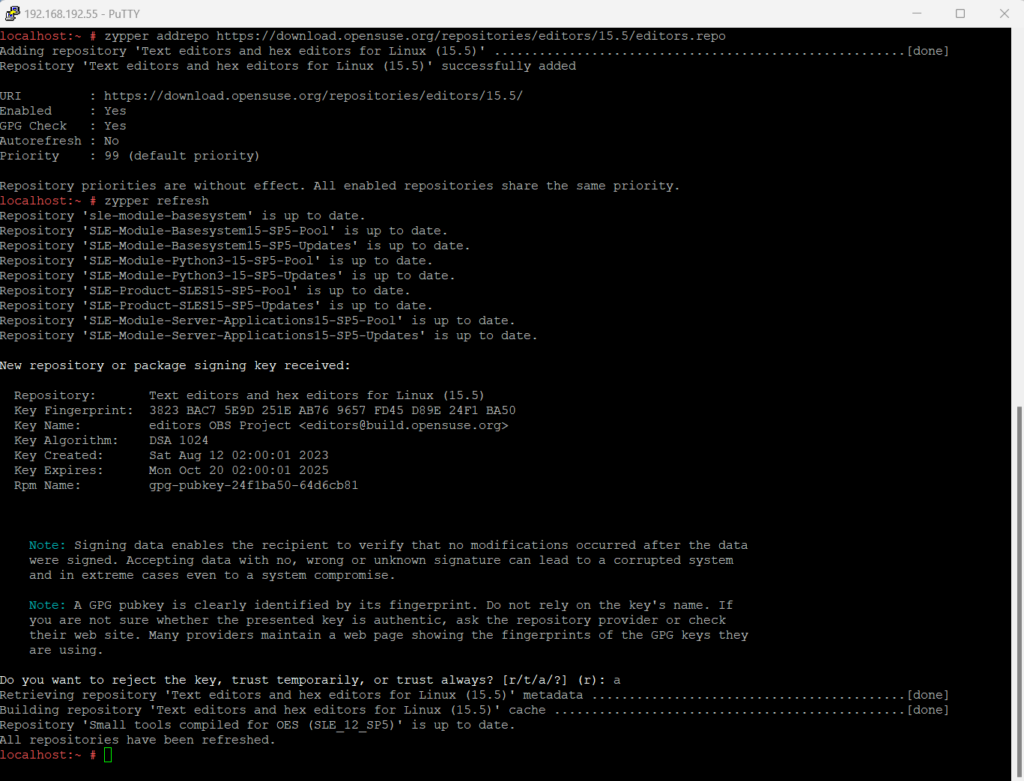
Or by using the addrepo command.
zypper addrepo https://download.opensuse.org/repositories/editors/15.5/editors.repo
zypper refresh
zypper install nano
How to determine and change the Runlevel
In Linux, a runlevel is a specific operating state that determines which services and processes are running on the system. Historically, runlevels were used to define different states of system operation, such as single-user mode, multi-user mode, or reboot mode.
Traditionally, Linux systems used seven runlevels, numbered from 0 to 6, with each runlevel representing a different configuration of services and processes:
- Runlevel 0: Halt – System shutdown
- Runlevel 1: Single User Mode – Maintenance mode, typically used for system administration tasks without any networking services.
- Runlevel 2: Multi-User Mode without Networking – Similar to multi-user mode, but without network services.
- Runlevel 3: Multi-User Mode with Networking – Full multi-user mode with networking services.
- Runlevel 4: Not standardized, often unused. It’s available for the system administrator to define as needed.
- Runlevel 5: GUI Mode – Multi-user mode with graphical user interface (GUI).
- Runlevel 6: Reboot – System reboot.
The exact configuration and behavior of each runlevel can vary between different Linux distributions. However, with the adoption of systemd, which is a system and service manager for Linux operating systems, traditional runlevels have been largely replaced by systemd targets, which provide more flexibility and control over system states and services.
List of all targets under SUSE are described under the following link https://documentation.suse.com/smart/systems-management/html/reference-managing-systemd-targets-systemctl/index.html.
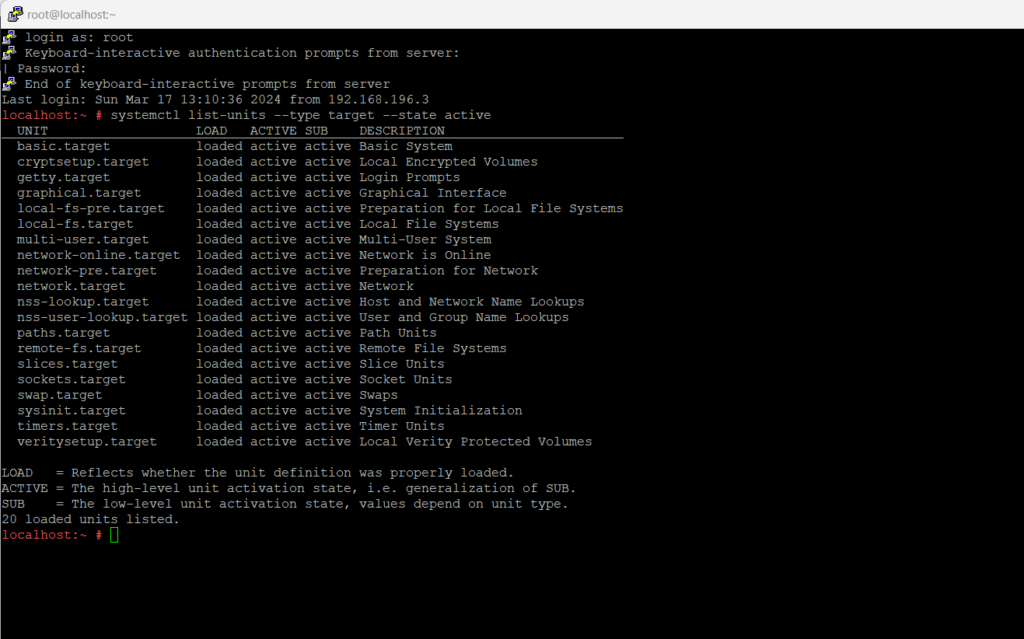
To inspect the list of all currently active targets:
systemctl list-units --type target --state active
To determine the default runlevel (target):
systemctl get-default
To change the default runlevel (target) enter:
Equal to runlevel 3.
systemctl set-default multi-user.targetEqual to runlevel 5 (GUI Mode – Multiuser)
systemctl set-default graphical.target
default.target
The target that is booted by default. This is a symbolic link to another target, like graphical.target.

Troubleshooting
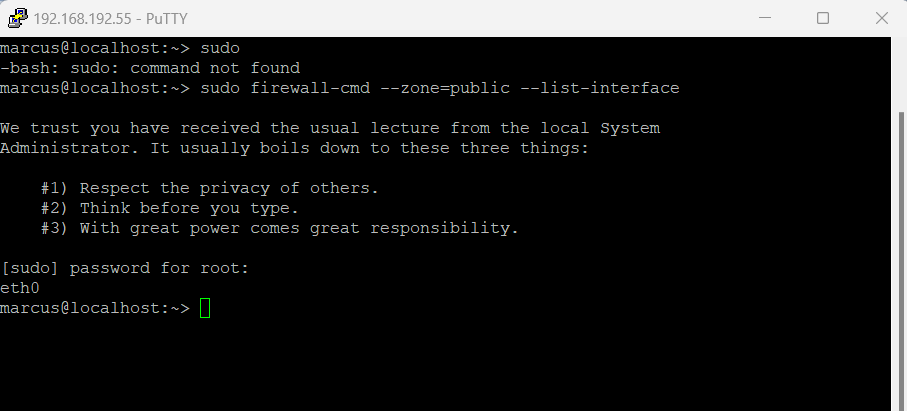
sudo: command not found
The sudo command is short for superuser do and allows a user who is part of the sudo group to execute a command as if they were the root user.
Finally it grants the user root powers and permissions as long as they use sudo and authenticate by their own password.
Because the sudo command is finally also just a package installed on the system, it can happen that this package is so far not installed on your Linux system. Mostly this package is by default installed on most systems.

On SUSE Linux Enterprise Server we can install the sudo package as usually.
zypper install sudo
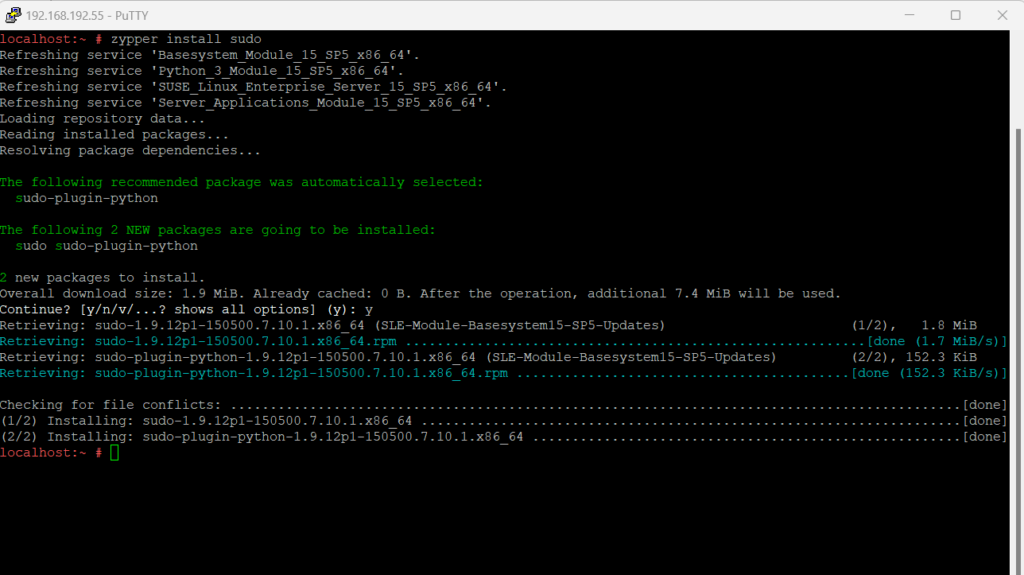
From now on I can use the sudo command for non root users.
This notification you get on SUSE Linux Enterprise 15 Server just once thankfully.
Links
SUSE Linux Enterprise Server Download
https://www.suse.com/download/sles/Firewalling
https://documentation.suse.com/sles-sap/15-SP2/html/SLES-SAP-guide/cha-access.htmlConfiguring HANA-Firewall
https://documentation.suse.com/sles-sap/15-SP2/html/SLES-SAP-guide/cha-access.html#sec-configure-firewall-hanafirewall-cmd
https://firewalld.org/documentation/man-pages/firewall-cmd.html
Tags In
Latest posts
Deploying NetApp Cloud Volumes ONTAP (CVO) in Azure using NetApp Console (formerly BlueXP) – Part 4 – Antivirus VSCAN Configuration
Follow me on LinkedIn


