What is Microsoft Entra Global Secure Access (Private Access)?
In my last post I was introducing Global Secure Access in general and how to setup Microsoft Entra Internet Access to secure access to Microsoft 365, SaaS, and public internet apps.
This post will show how you can setup Microsoft Entra Private Access to secure access to your private corporate resources whether from a corporate office or from remote.
Introduction
Microsoft Entra Private Access provides a secure, zero-trust access solution for accessing internal resources without requiring a VPN.
Private Access provides two ways to configure the private resources that you want to tunnel through the service. You can configure Quick Access, which is the primary group of FQDNs and IP addresses that you want to secure. You can also configure a Global Secure Access app for per-app access, which allows you to specify a subset of private resources that you want to secure. The Global Secure Access app provides a granular approach to securing your private resources.
The features of Microsoft Entra Private Access provide a quick and easy way to replace your VPN to allow secure access to your internal resources with an easy-one time configuration, using the secure capabilities of Conditional Access.
Source: https://learn.microsoft.com/en-us/entra/global-secure-access/concept-private-access
Get started with Microsoft Entra Private Access
Below we will see both ways (Quick Access and Per-app Access) we can use to configure private access.
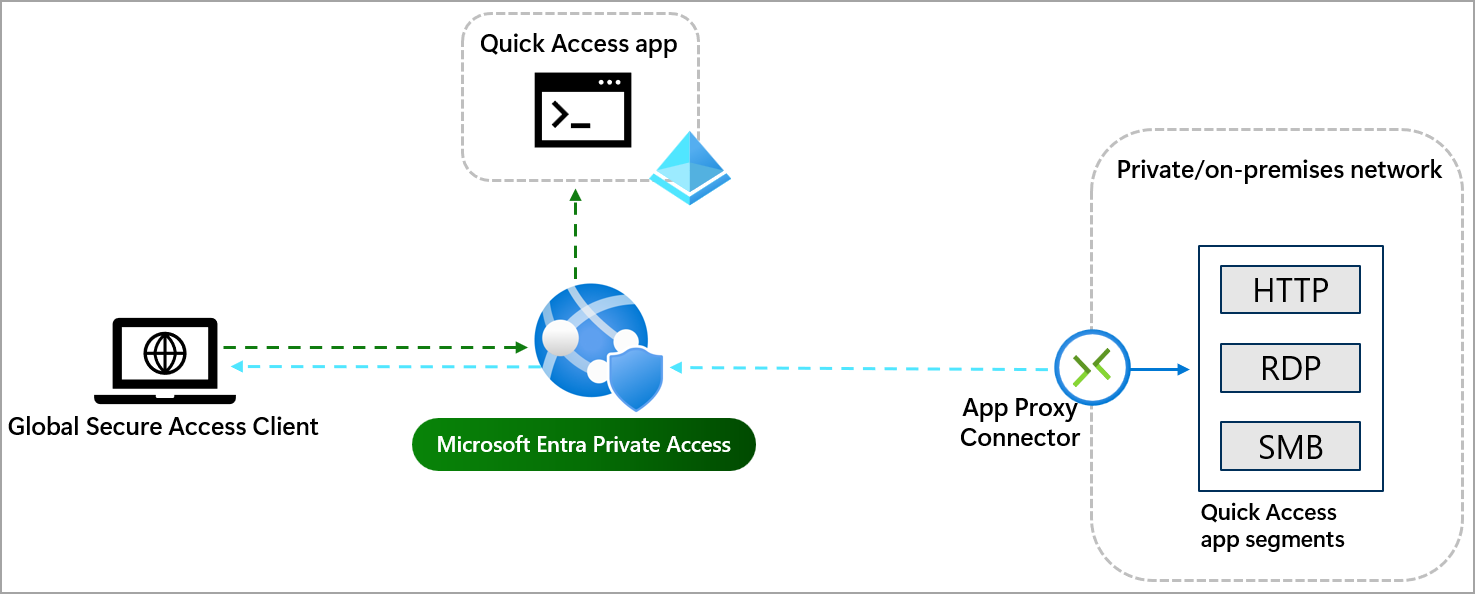
Quick Access
Configure Quick Access and enable the Private access traffic forwarding profile to specify the sites and apps you want routed through Microsoft Entra Private Access. At this time, the Global Secure Access Client must be installed on end-user devices to use Microsoft Entra Private Access. About how to install the client you can read my post about Internet Access.
!!! Note !!!
Tunneling traffic to Private Access destinations by IP address is supported only for IP ranges outside of the end-user device local subnet.At this time, Private access traffic can only be acquired with the Global Secure Access Client. Remote networks can’t be assigned to the Private access traffic forwarding profile.
When you configure Quick Access for the first time, Private Access creates a new enterprise application. The properties of this new app are automatically configured to work with Private Access.
To configure Quick Access, you need to have a connector group with at least one active Microsoft Entra application proxy connector. The connector group handles the traffic to this new application. Once you have Quick Access and an App proxy connector group configured, you need to grant access to the app.
Install and register a connector
To use Private Access, install a connector on each Windows server you’re using for Microsoft Entra Private Access. The connector is an agent that manages the outbound connection from the on-premises application servers to Global Secure Access. You can install a connector on servers that also have other authentication agents installed such as Microsoft Entra Connect.
More about connectors and connector groups you will find in the following article.
Understand Microsoft Entra application proxy connectors
https://learn.microsoft.com/en-us/entra/identity/app-proxy/application-proxy-connectors
To install the connector, first sign-in to the Microsoft Entra admin center as a Global Administrator of the directory that uses Application Proxy.
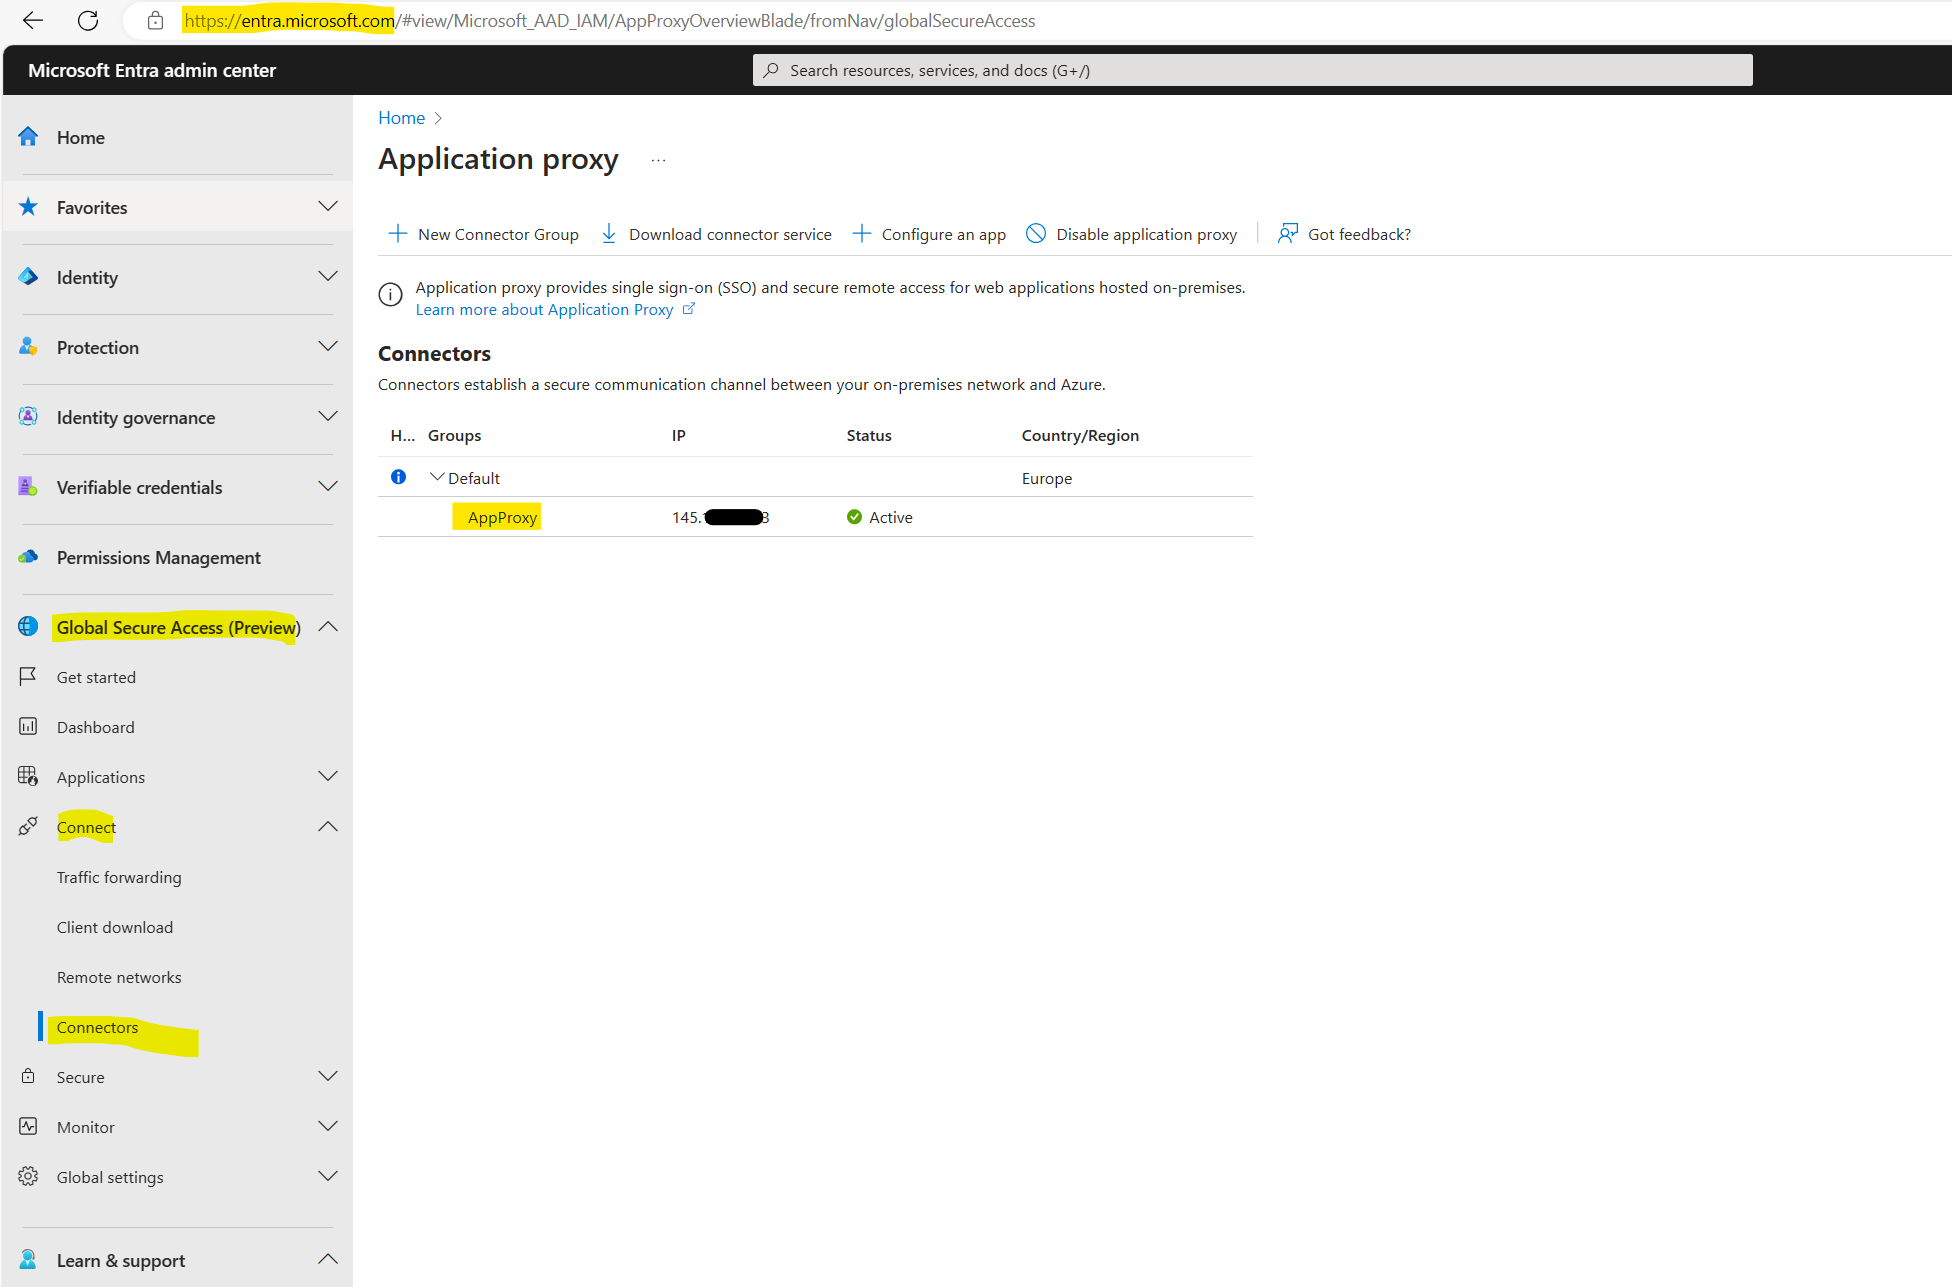
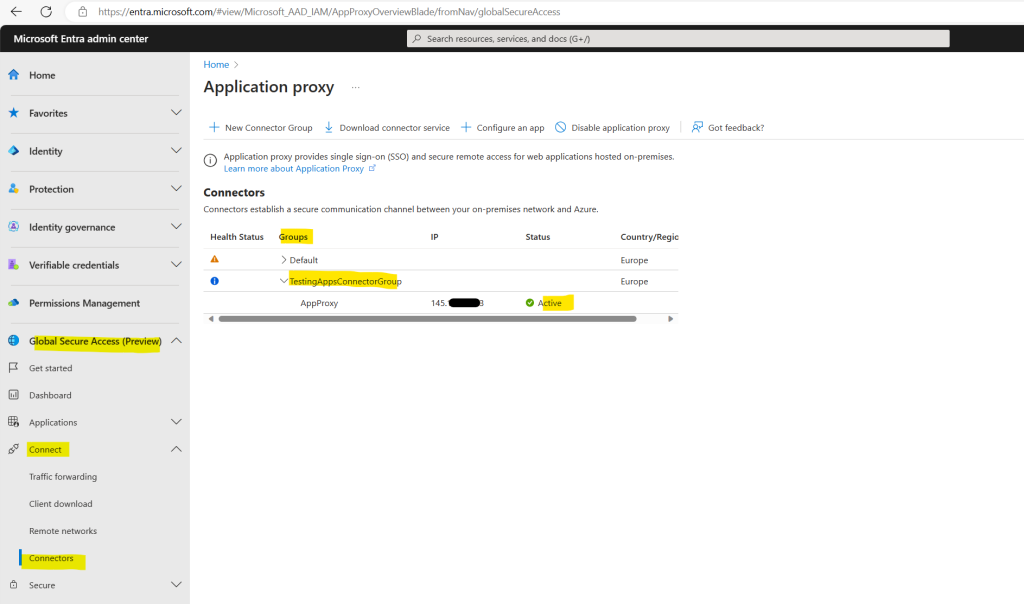
Browse to Global Secure Access (preview) > Connect > Connectors.
Application Proxy will enable automatically when we install the connector.
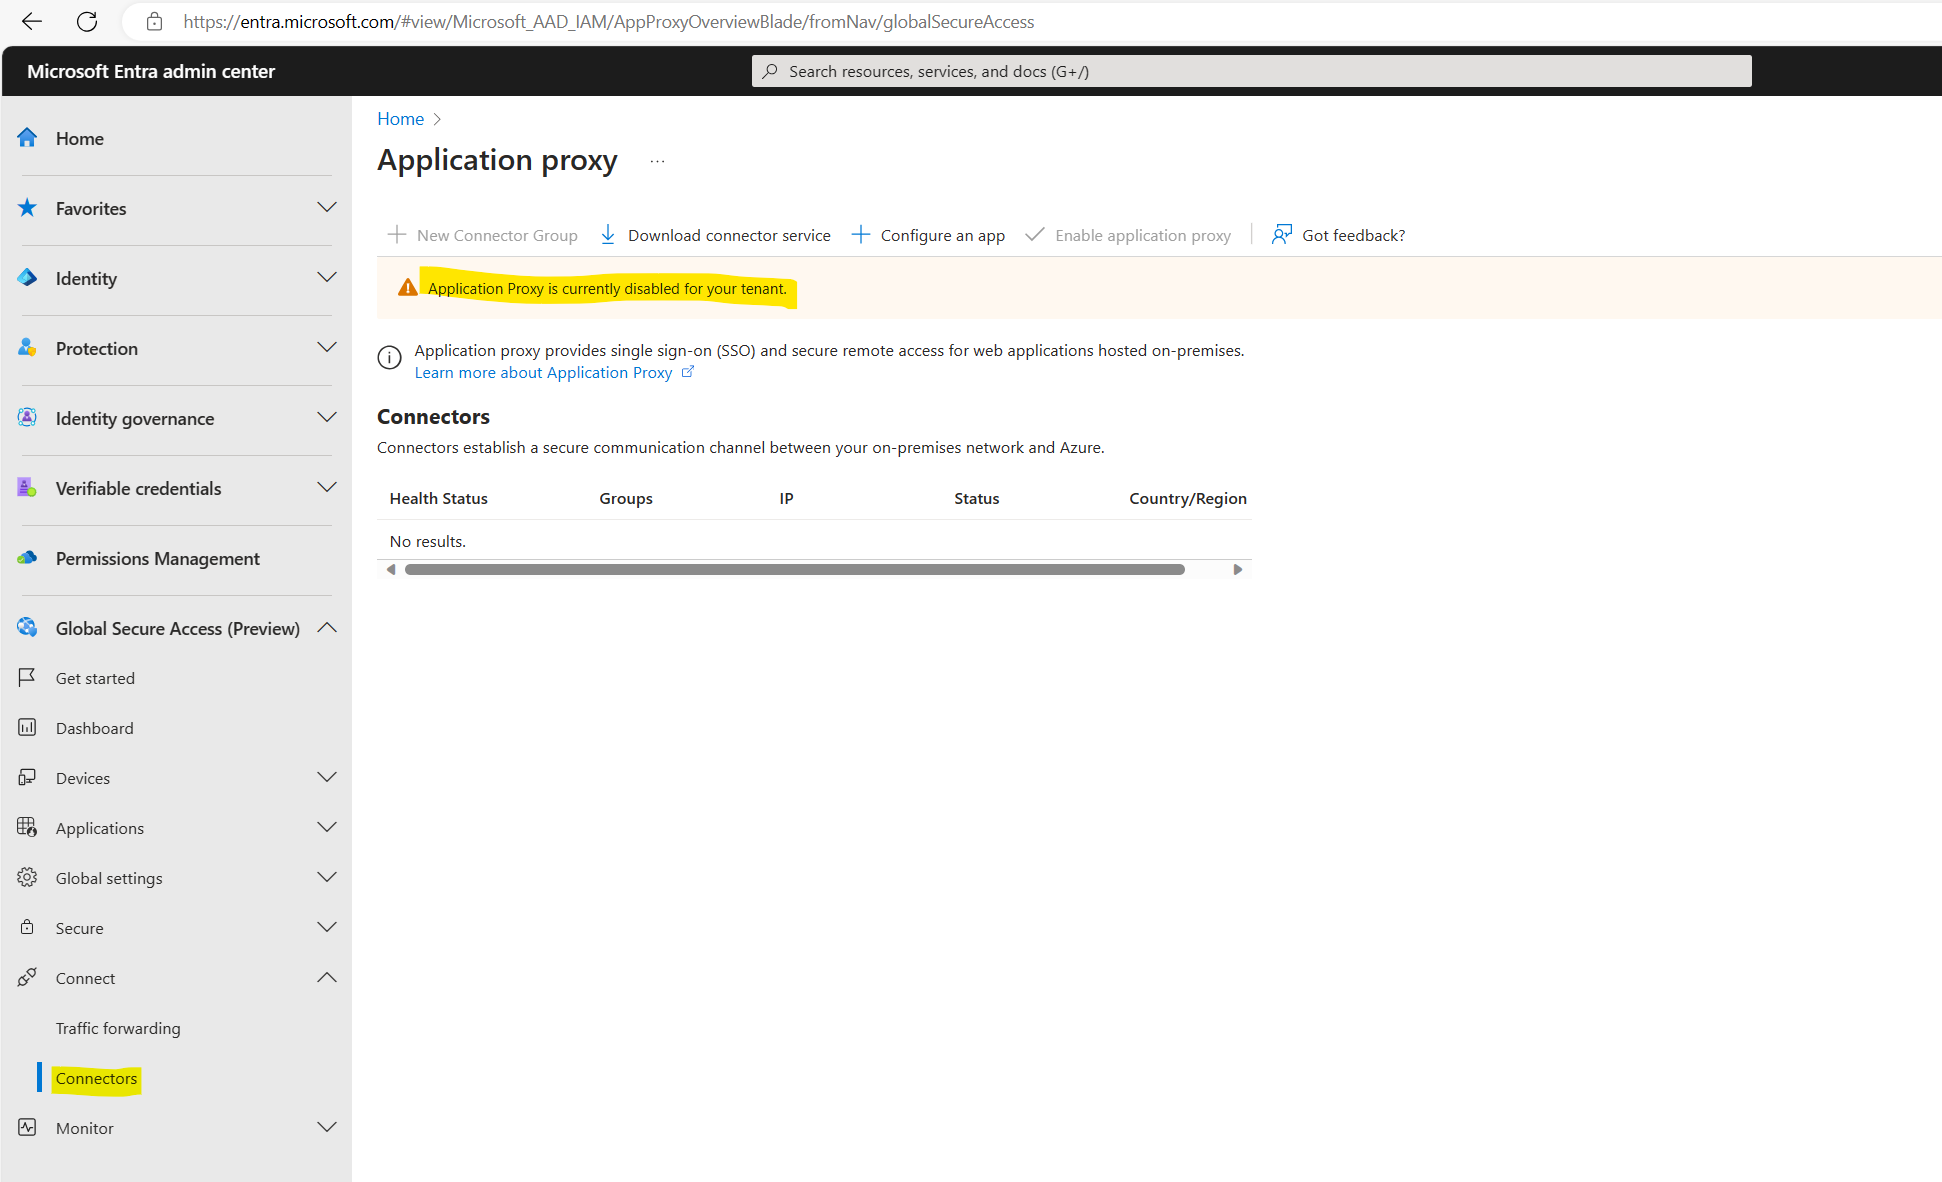
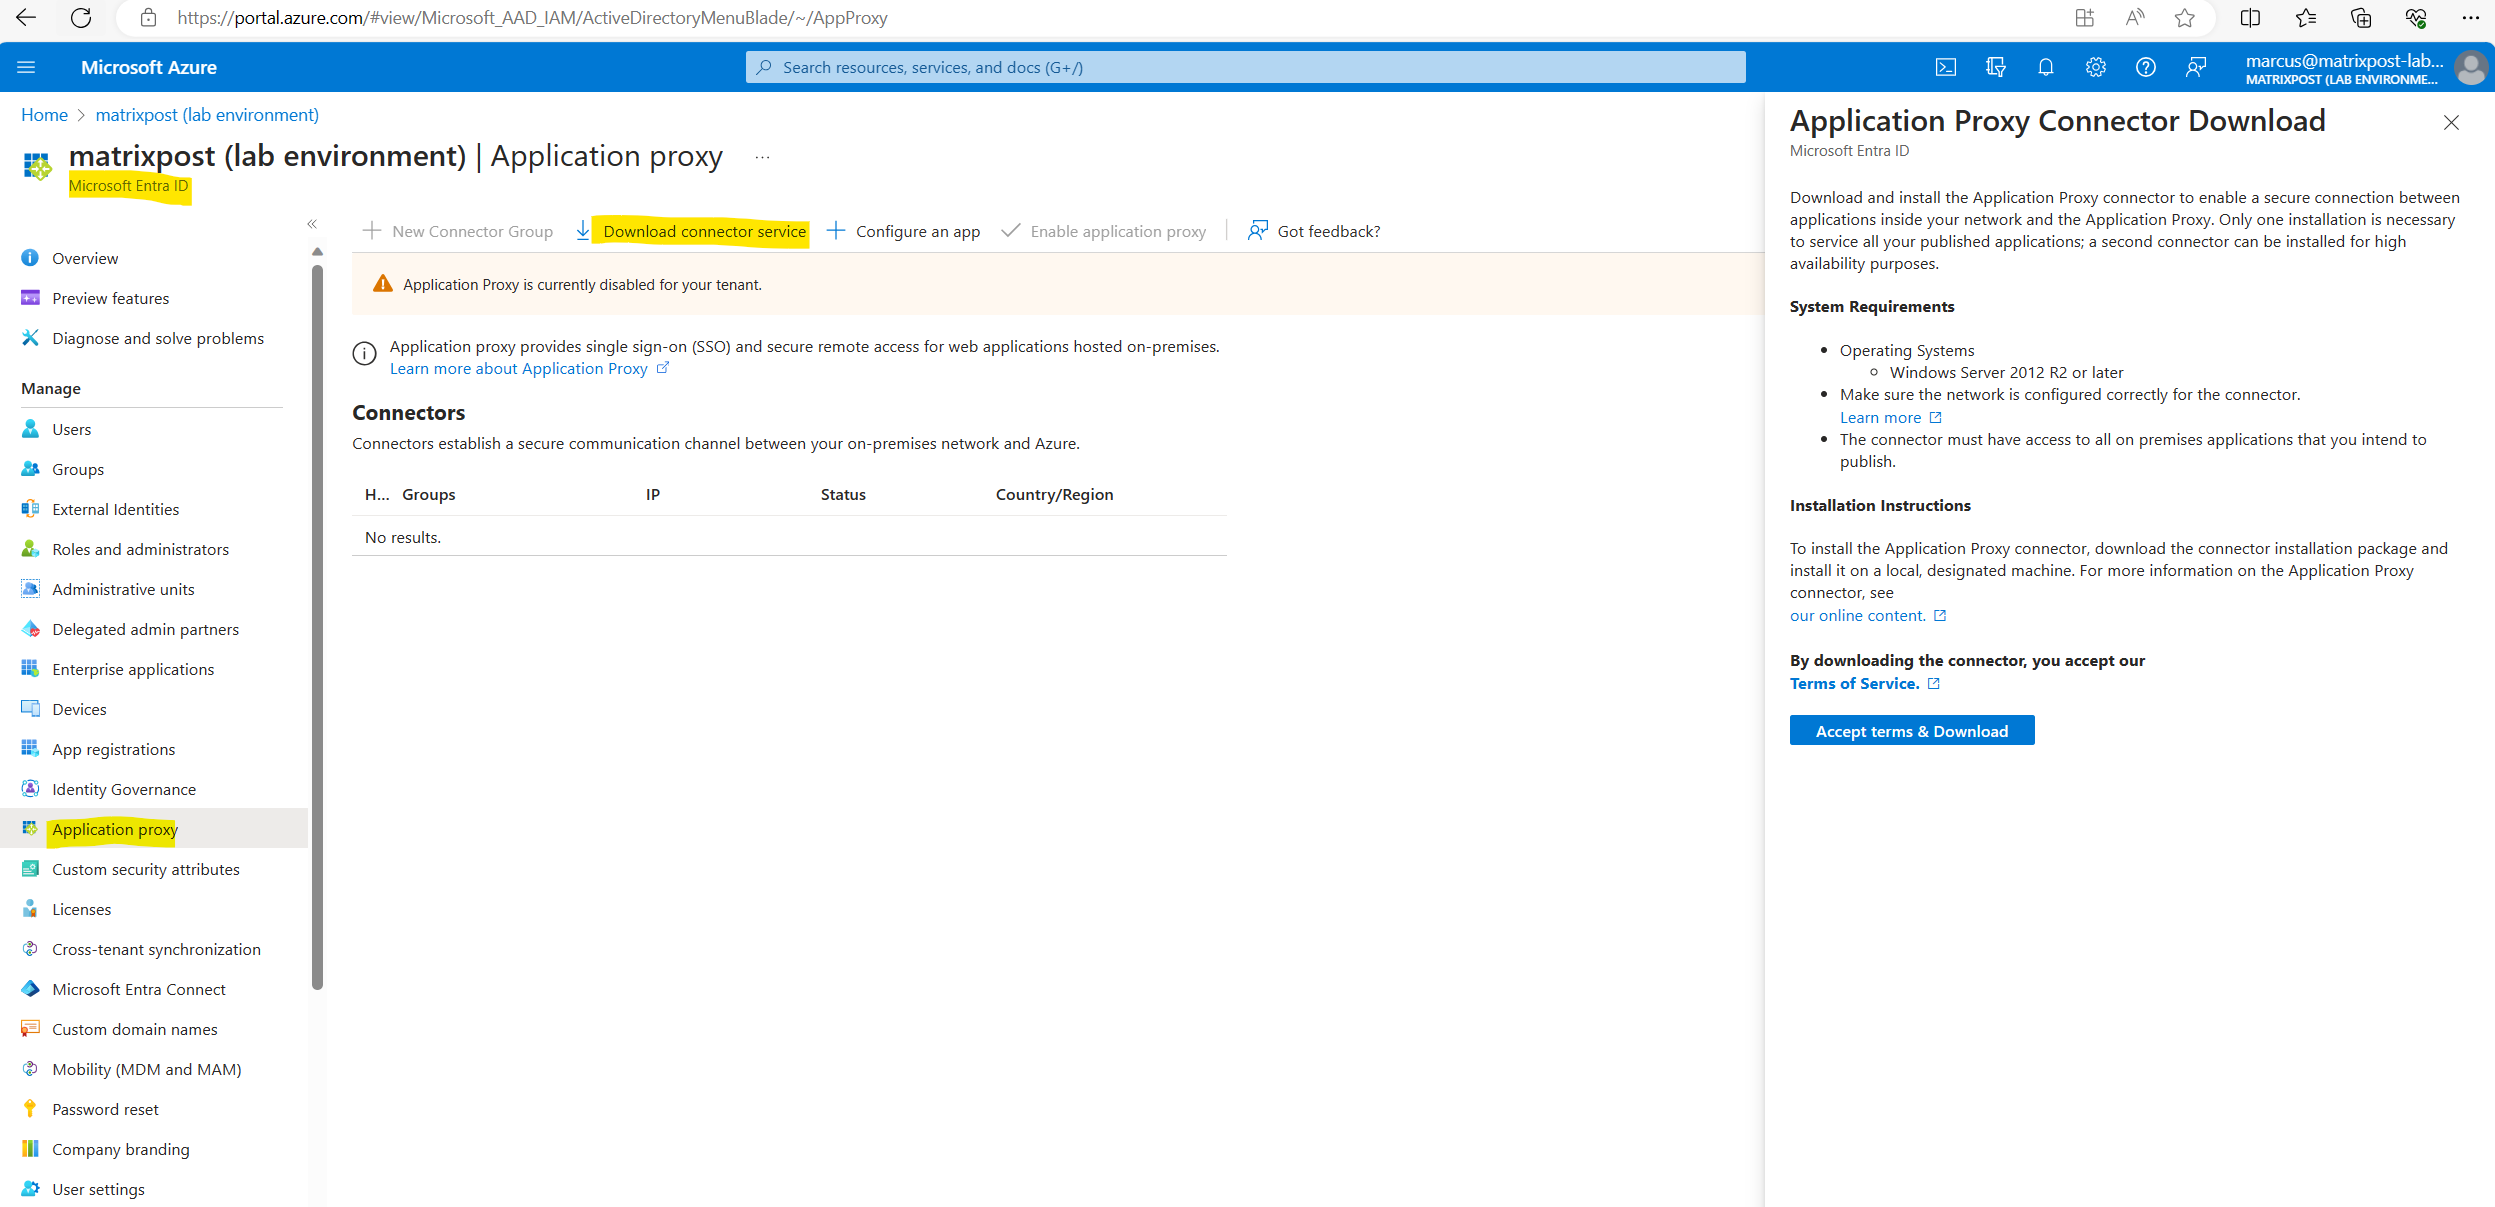
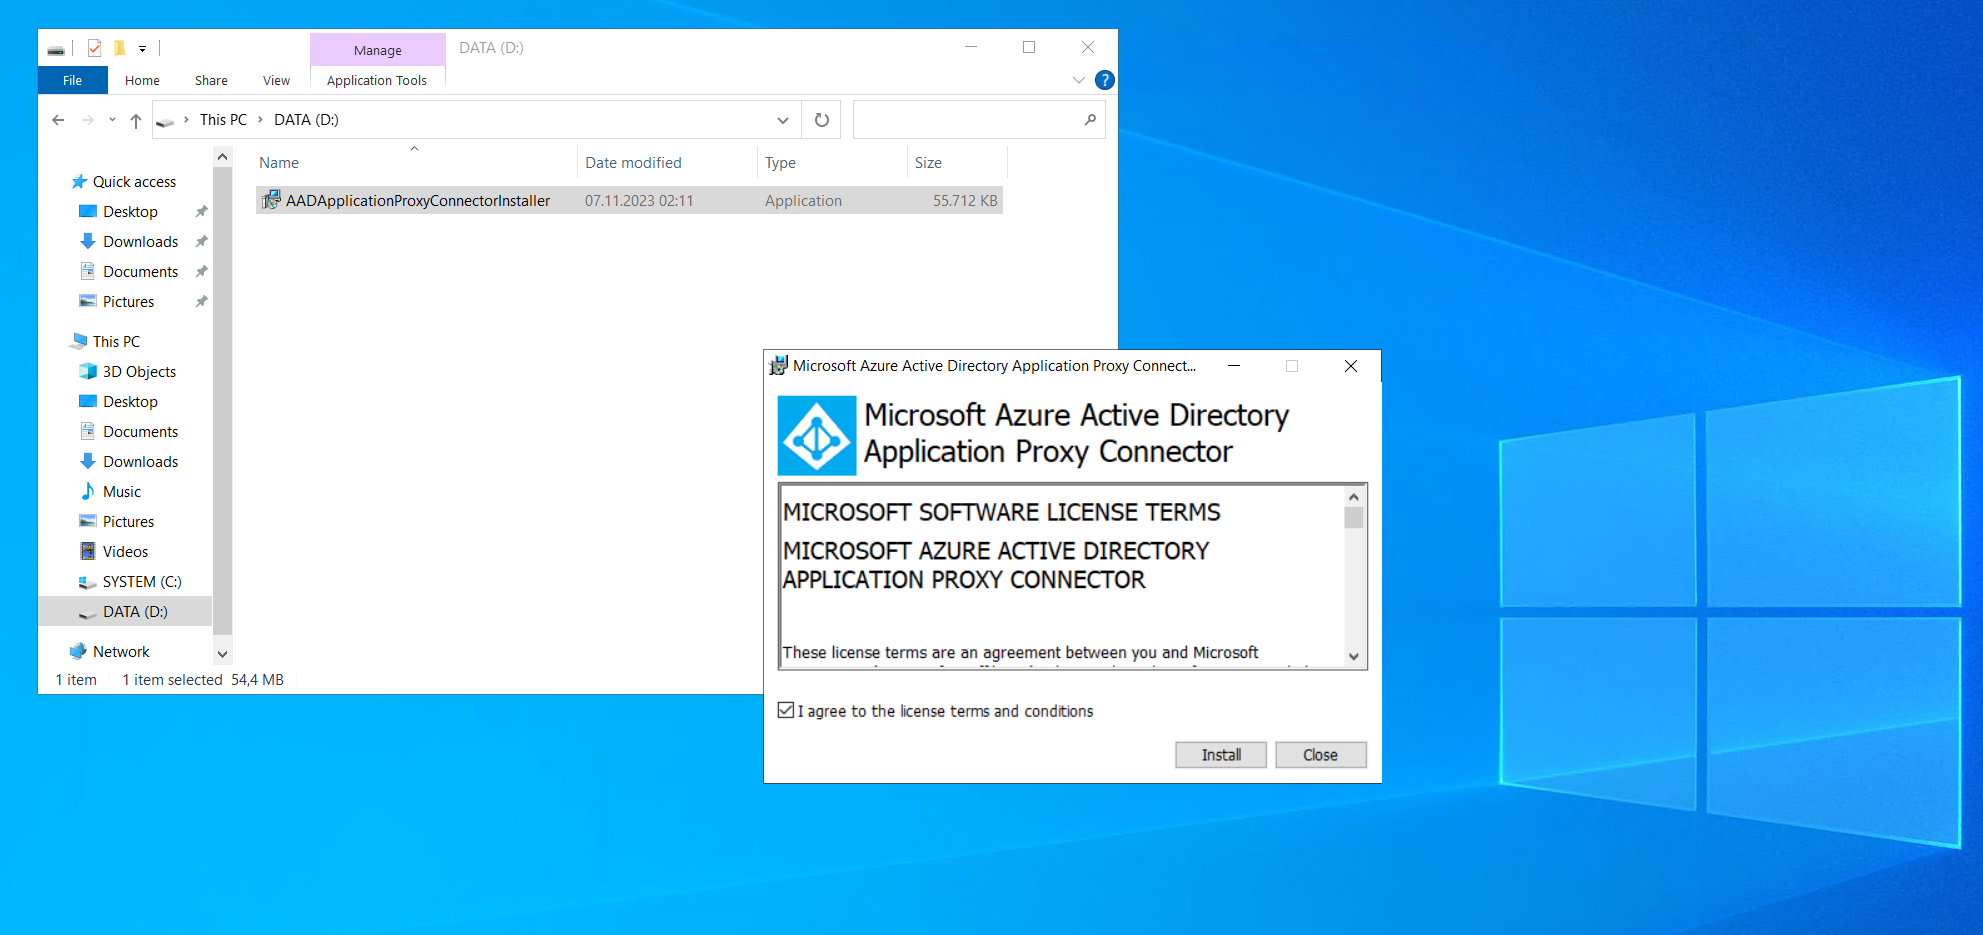
So first I will download the Application Proxy Connector Installer and install it on a local designated machine in my on-premise data center.
Only one installation is necessary to service all your published applications; a second connector can be installed for high availability purposes.
For Internet Explorer (IE): If IE Enhanced Security Configuration is set to On, you may not see the registration screen. To get access, follow the instructions in the error message. Make sure that Internet Explorer Enhanced Security Configuration is set to Off.
When you’re prompted to register the connector with the Application Proxy for your Microsoft Entra tenant, provide your Global Administrator credentials.
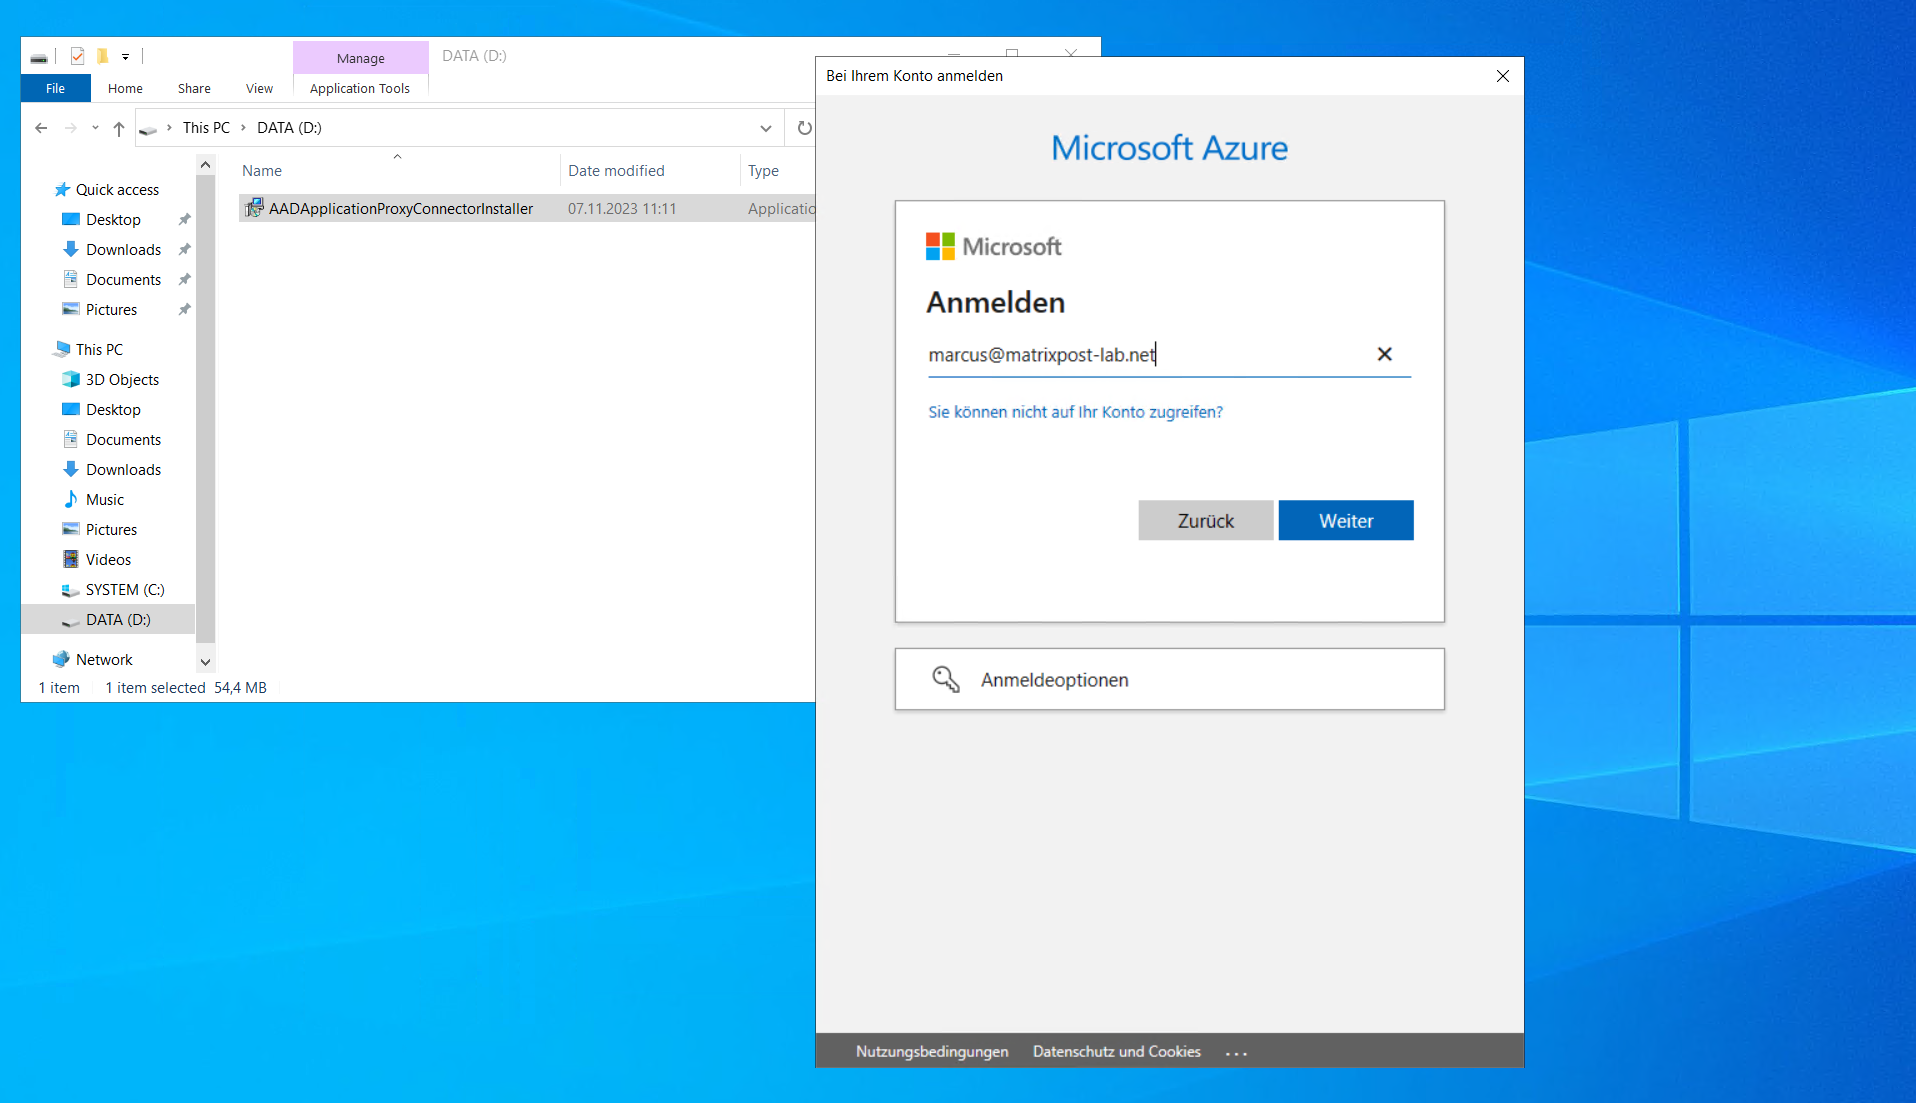
In my case I will use a default gateway for outbound internet access and therefore don’t need to configure the connector to use a proxy.
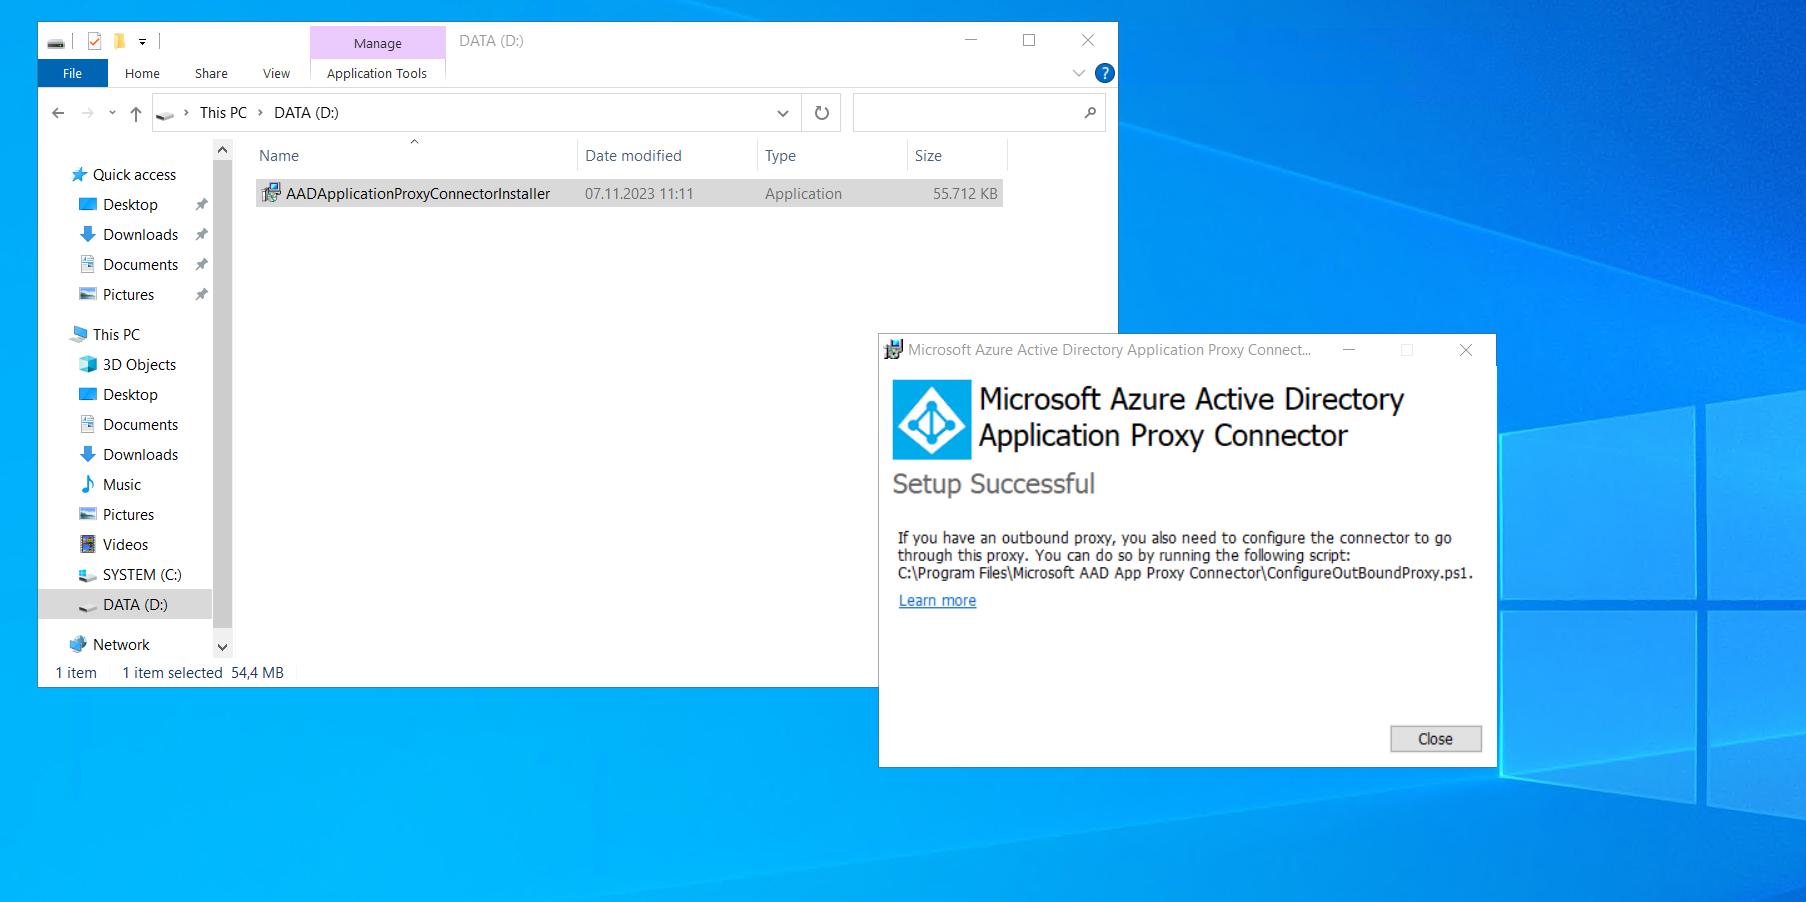
After installing the Application Proxy Connector on a dedicated local machine in my on-premise data center, I will refresh the Microsoft Entra admin center page again and will see that my new connector was installed successfully.
The previous message Application Proxy is currently disabled for your tenant disappeared after installing the connector.
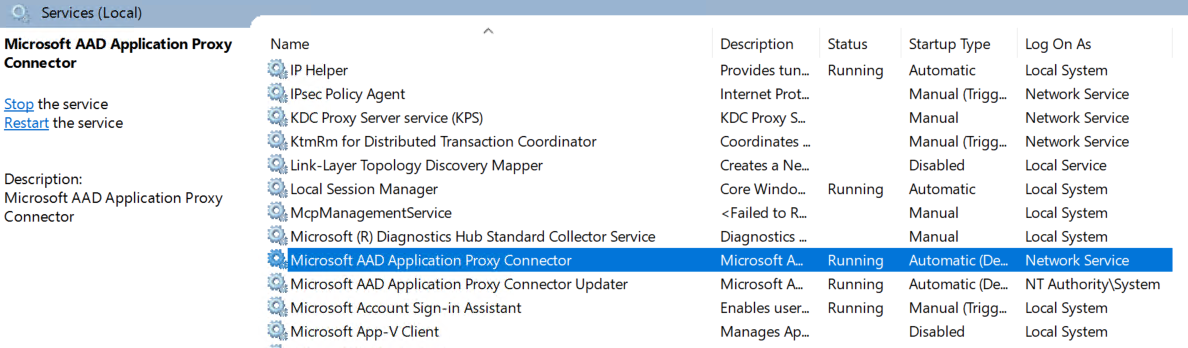
The Application Proxy Connector will be installed as Windows service.
Source: https://learn.microsoft.com/en-us/entra/global-secure-access/how-to-configure-connectors
Create connector groups
To create as many connector groups as you want:
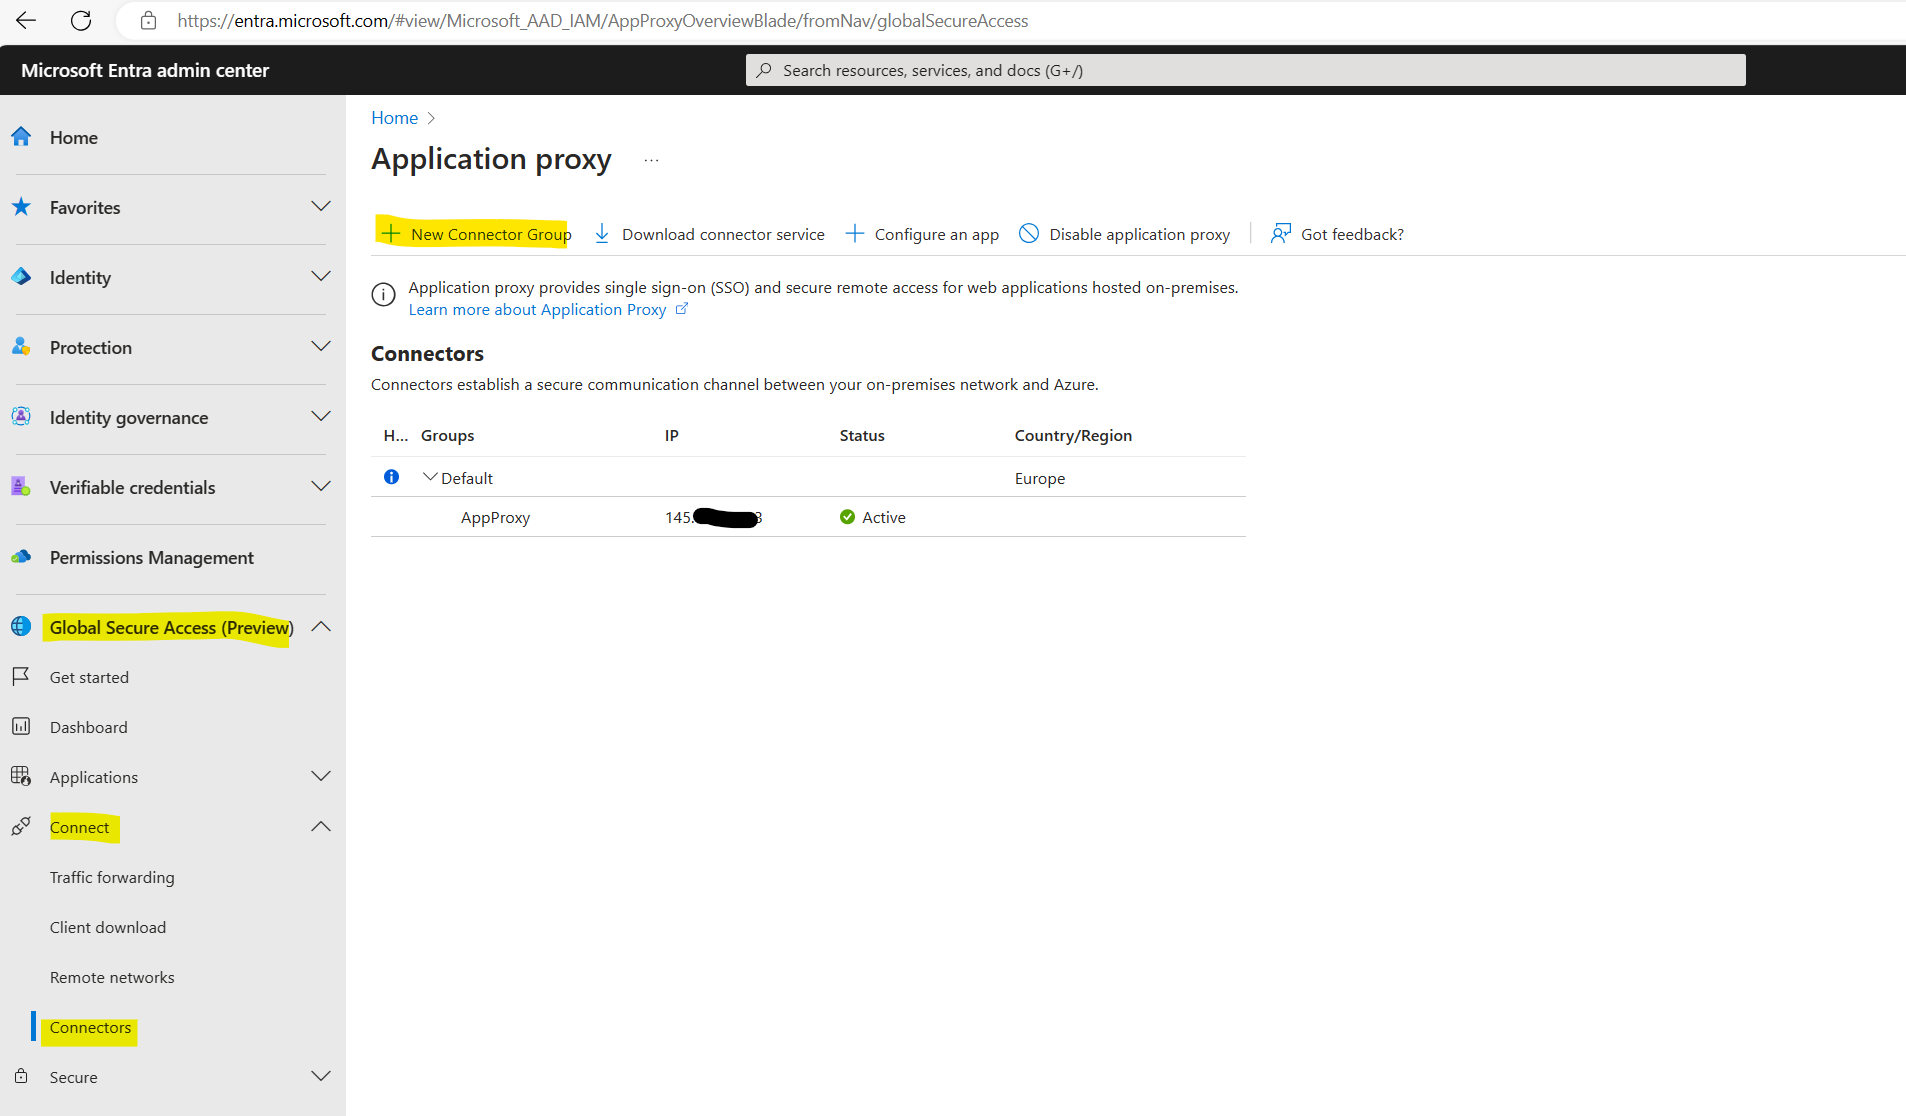
Browse to Global Secure Access (preview) > Connect > Connectors.
Select New connector group.
Each Application Proxy connector is assigned to a connector group. All the connectors that belong to the same connector group act as a separate unit for high-availability and load balancing. All connectors belong to a connector group. If you don’t create groups, then all your connectors are in a default group. Your admin can create new groups and assign connectors to them in the Microsoft Entra admin center.
Source: https://learn.microsoft.com/en-us/entra/identity/app-proxy/application-proxy-connector-groups
Give your new connector group a name, then use the dropdown menu to select which connectors belong in this group.
Click on Create.

Now that we have created an App Proxy and connector group, we can finally configure Quick Access.
Configure Quick Access
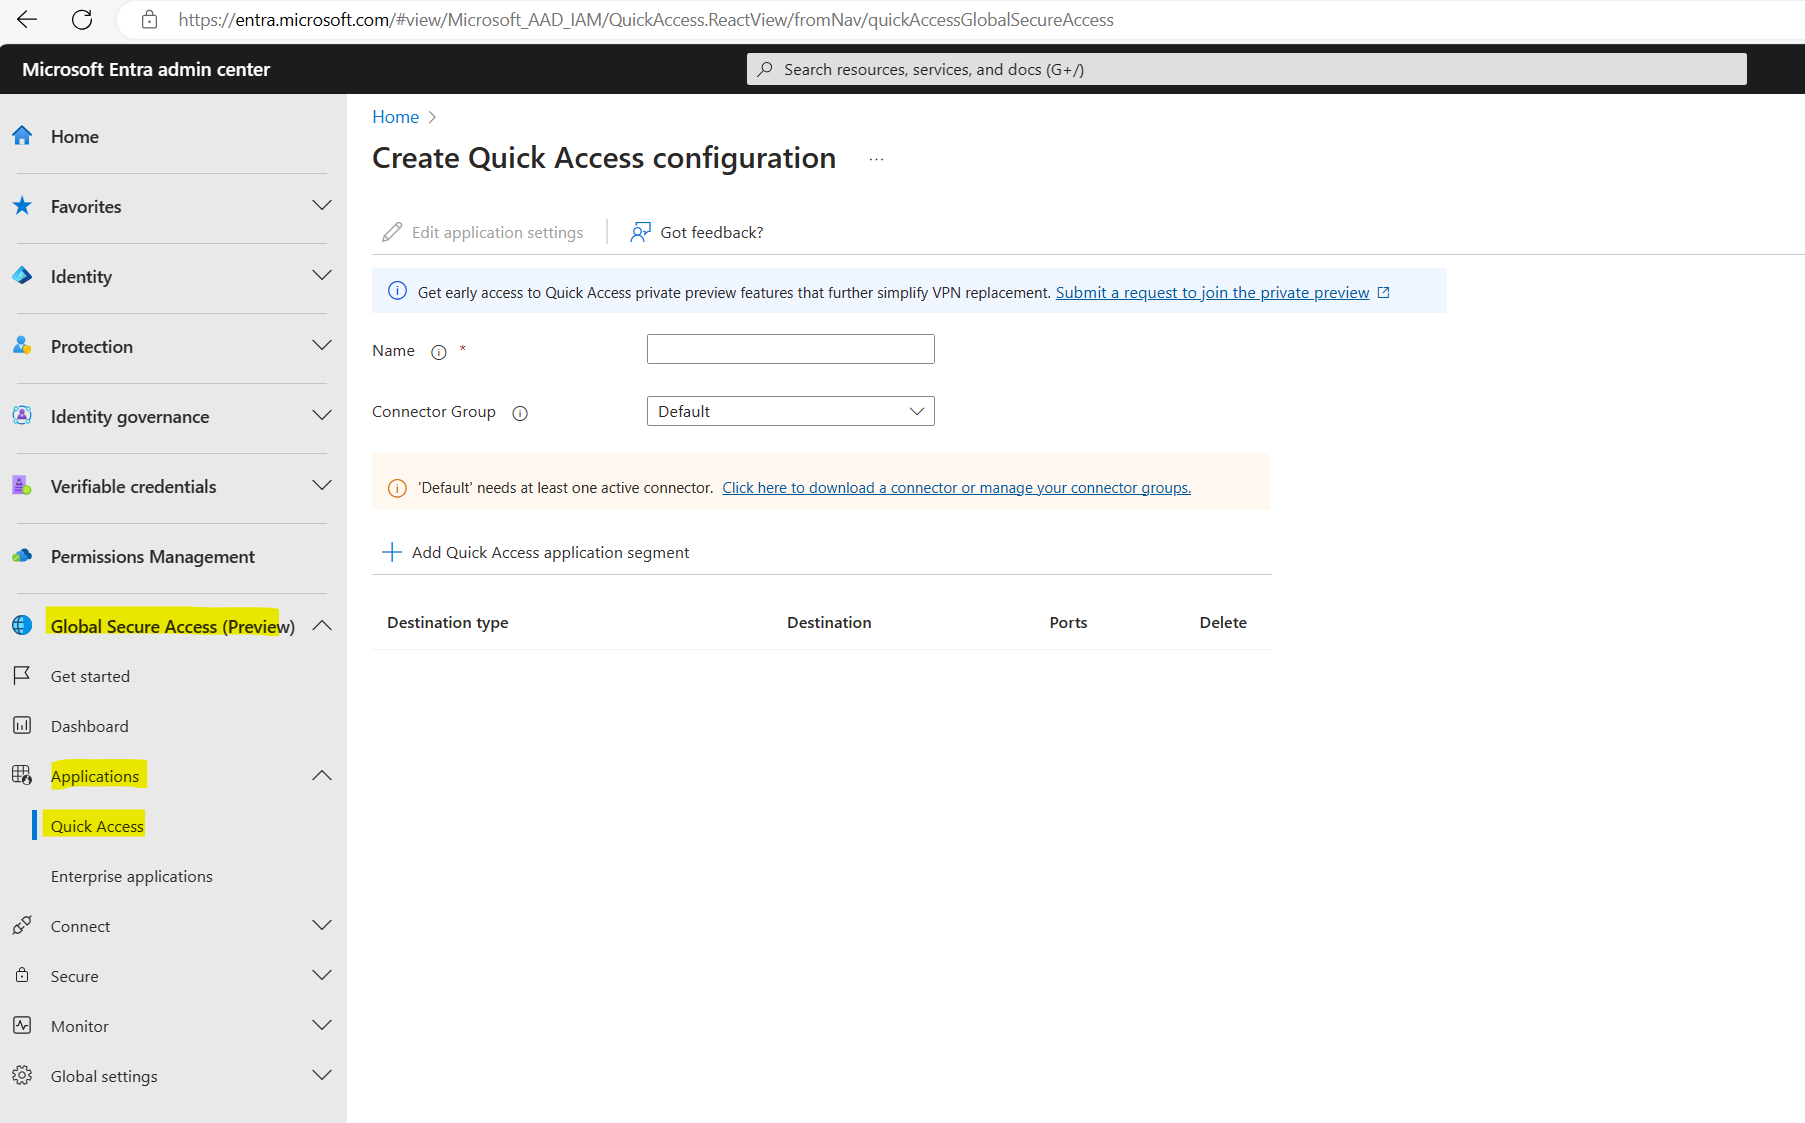
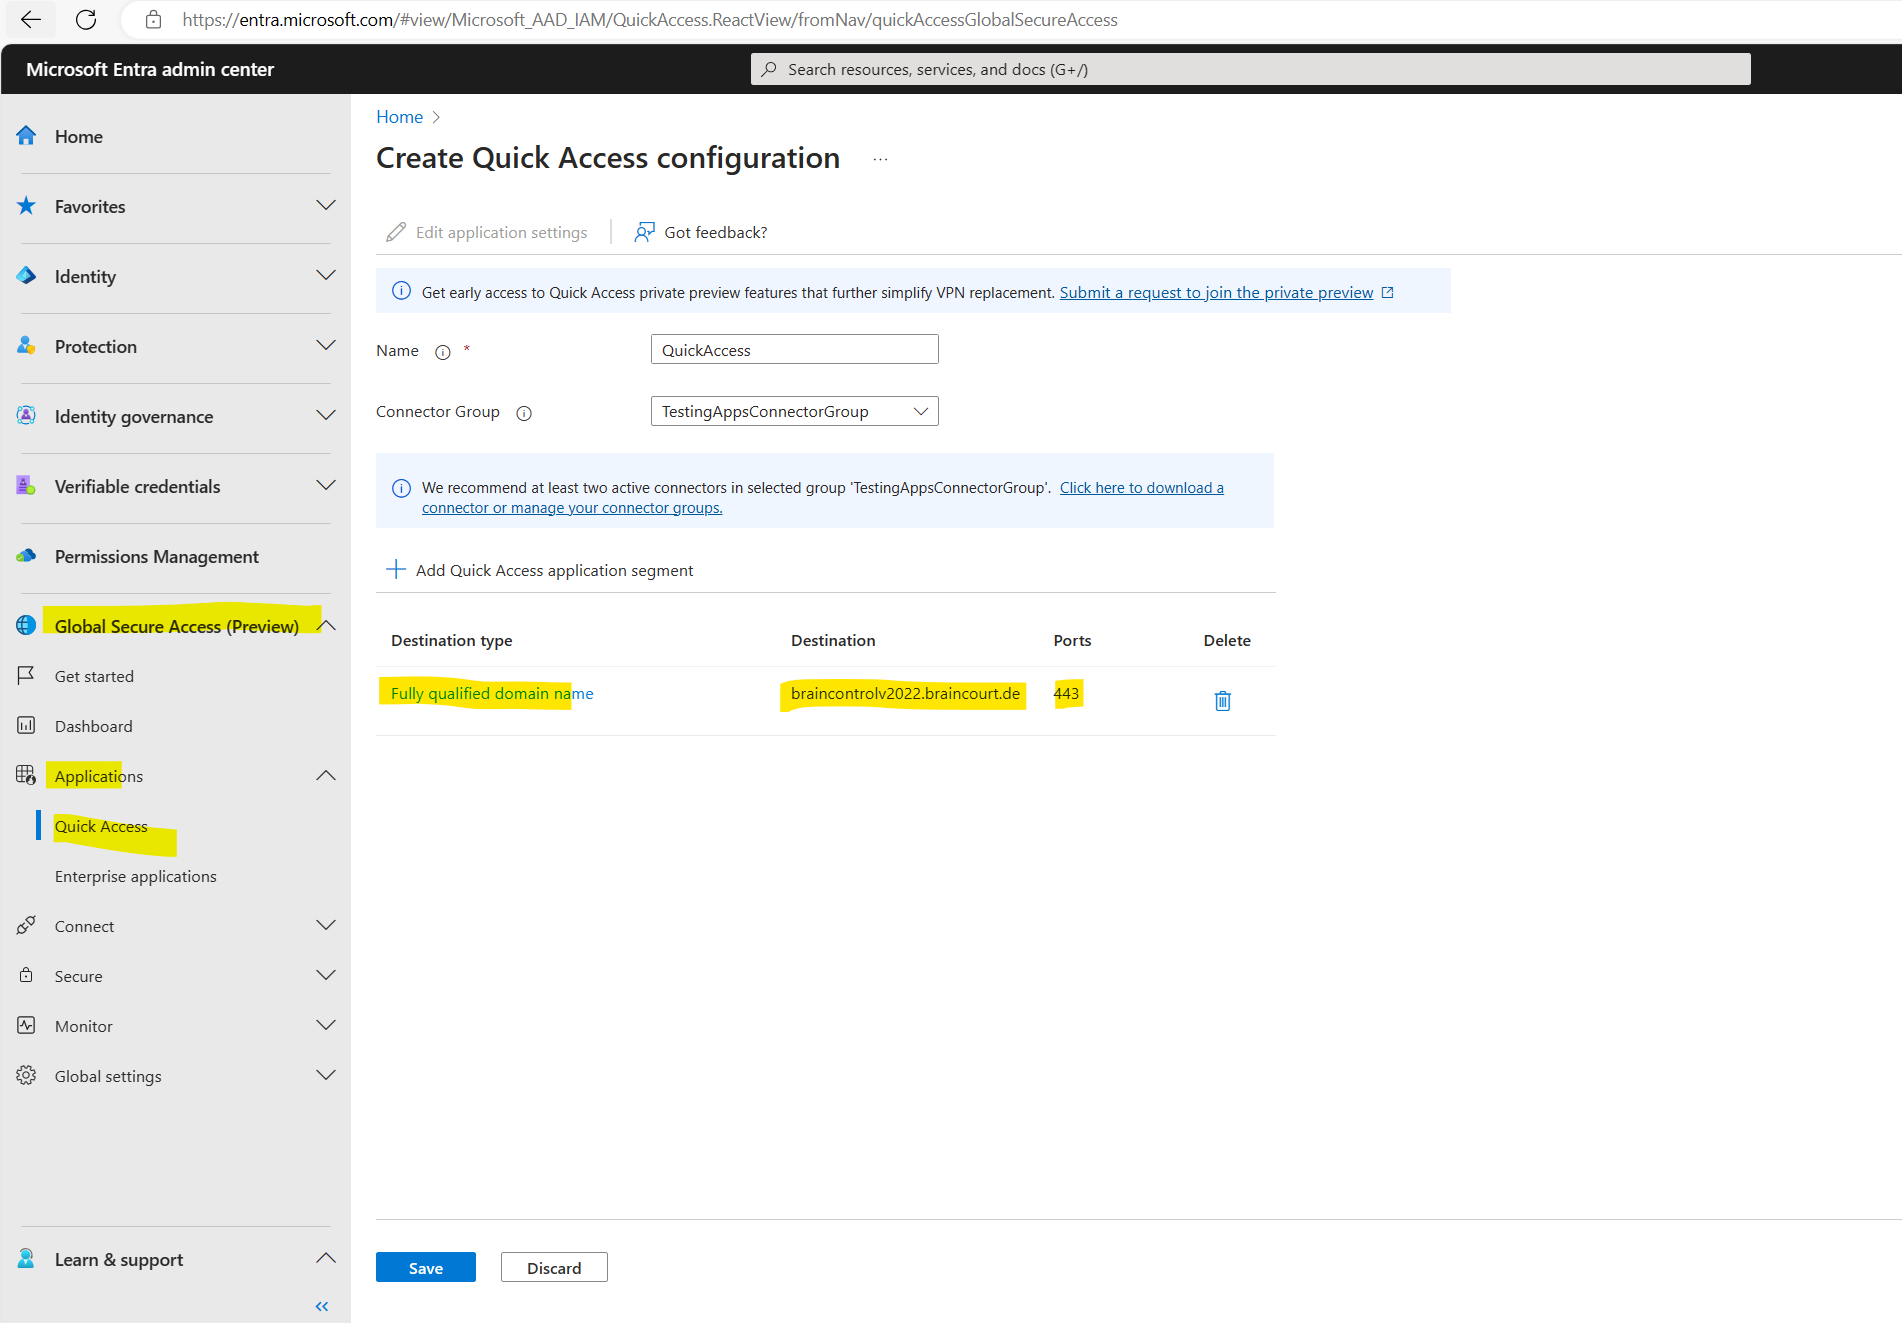
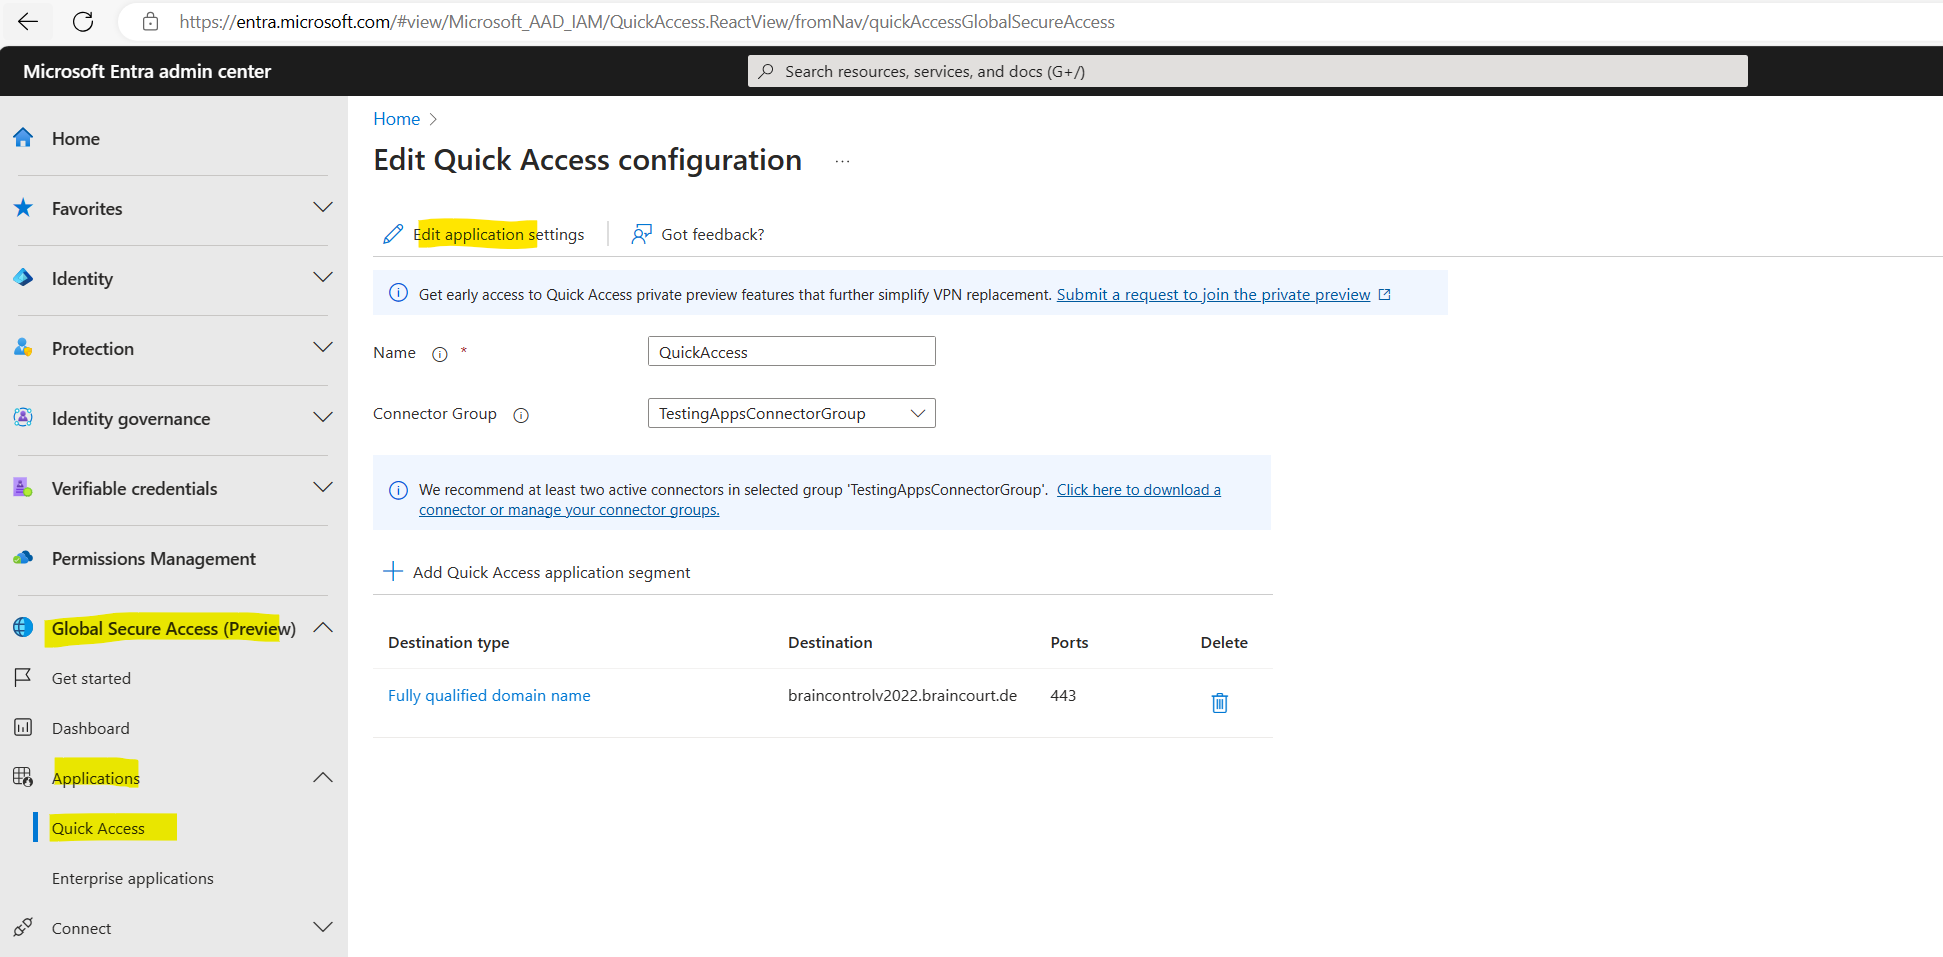
On the Quick Access page, you provide a name for the Quick Access app, select a connector group, and add application segments, which include FQDNs and IP addresses. You can complete all three steps at the same time, or you can add the application segments after the initial setup is complete.
Browse to Global Secure Access (preview) > Applications > Quick access.
In order to demonstrate Private Access, I will use my internal blazor server web app which is a time tracking and vacation planning app.
More about blazor server you will find in my blog under the following URL https://blog.matrixpost.net/?category=blazor-server.
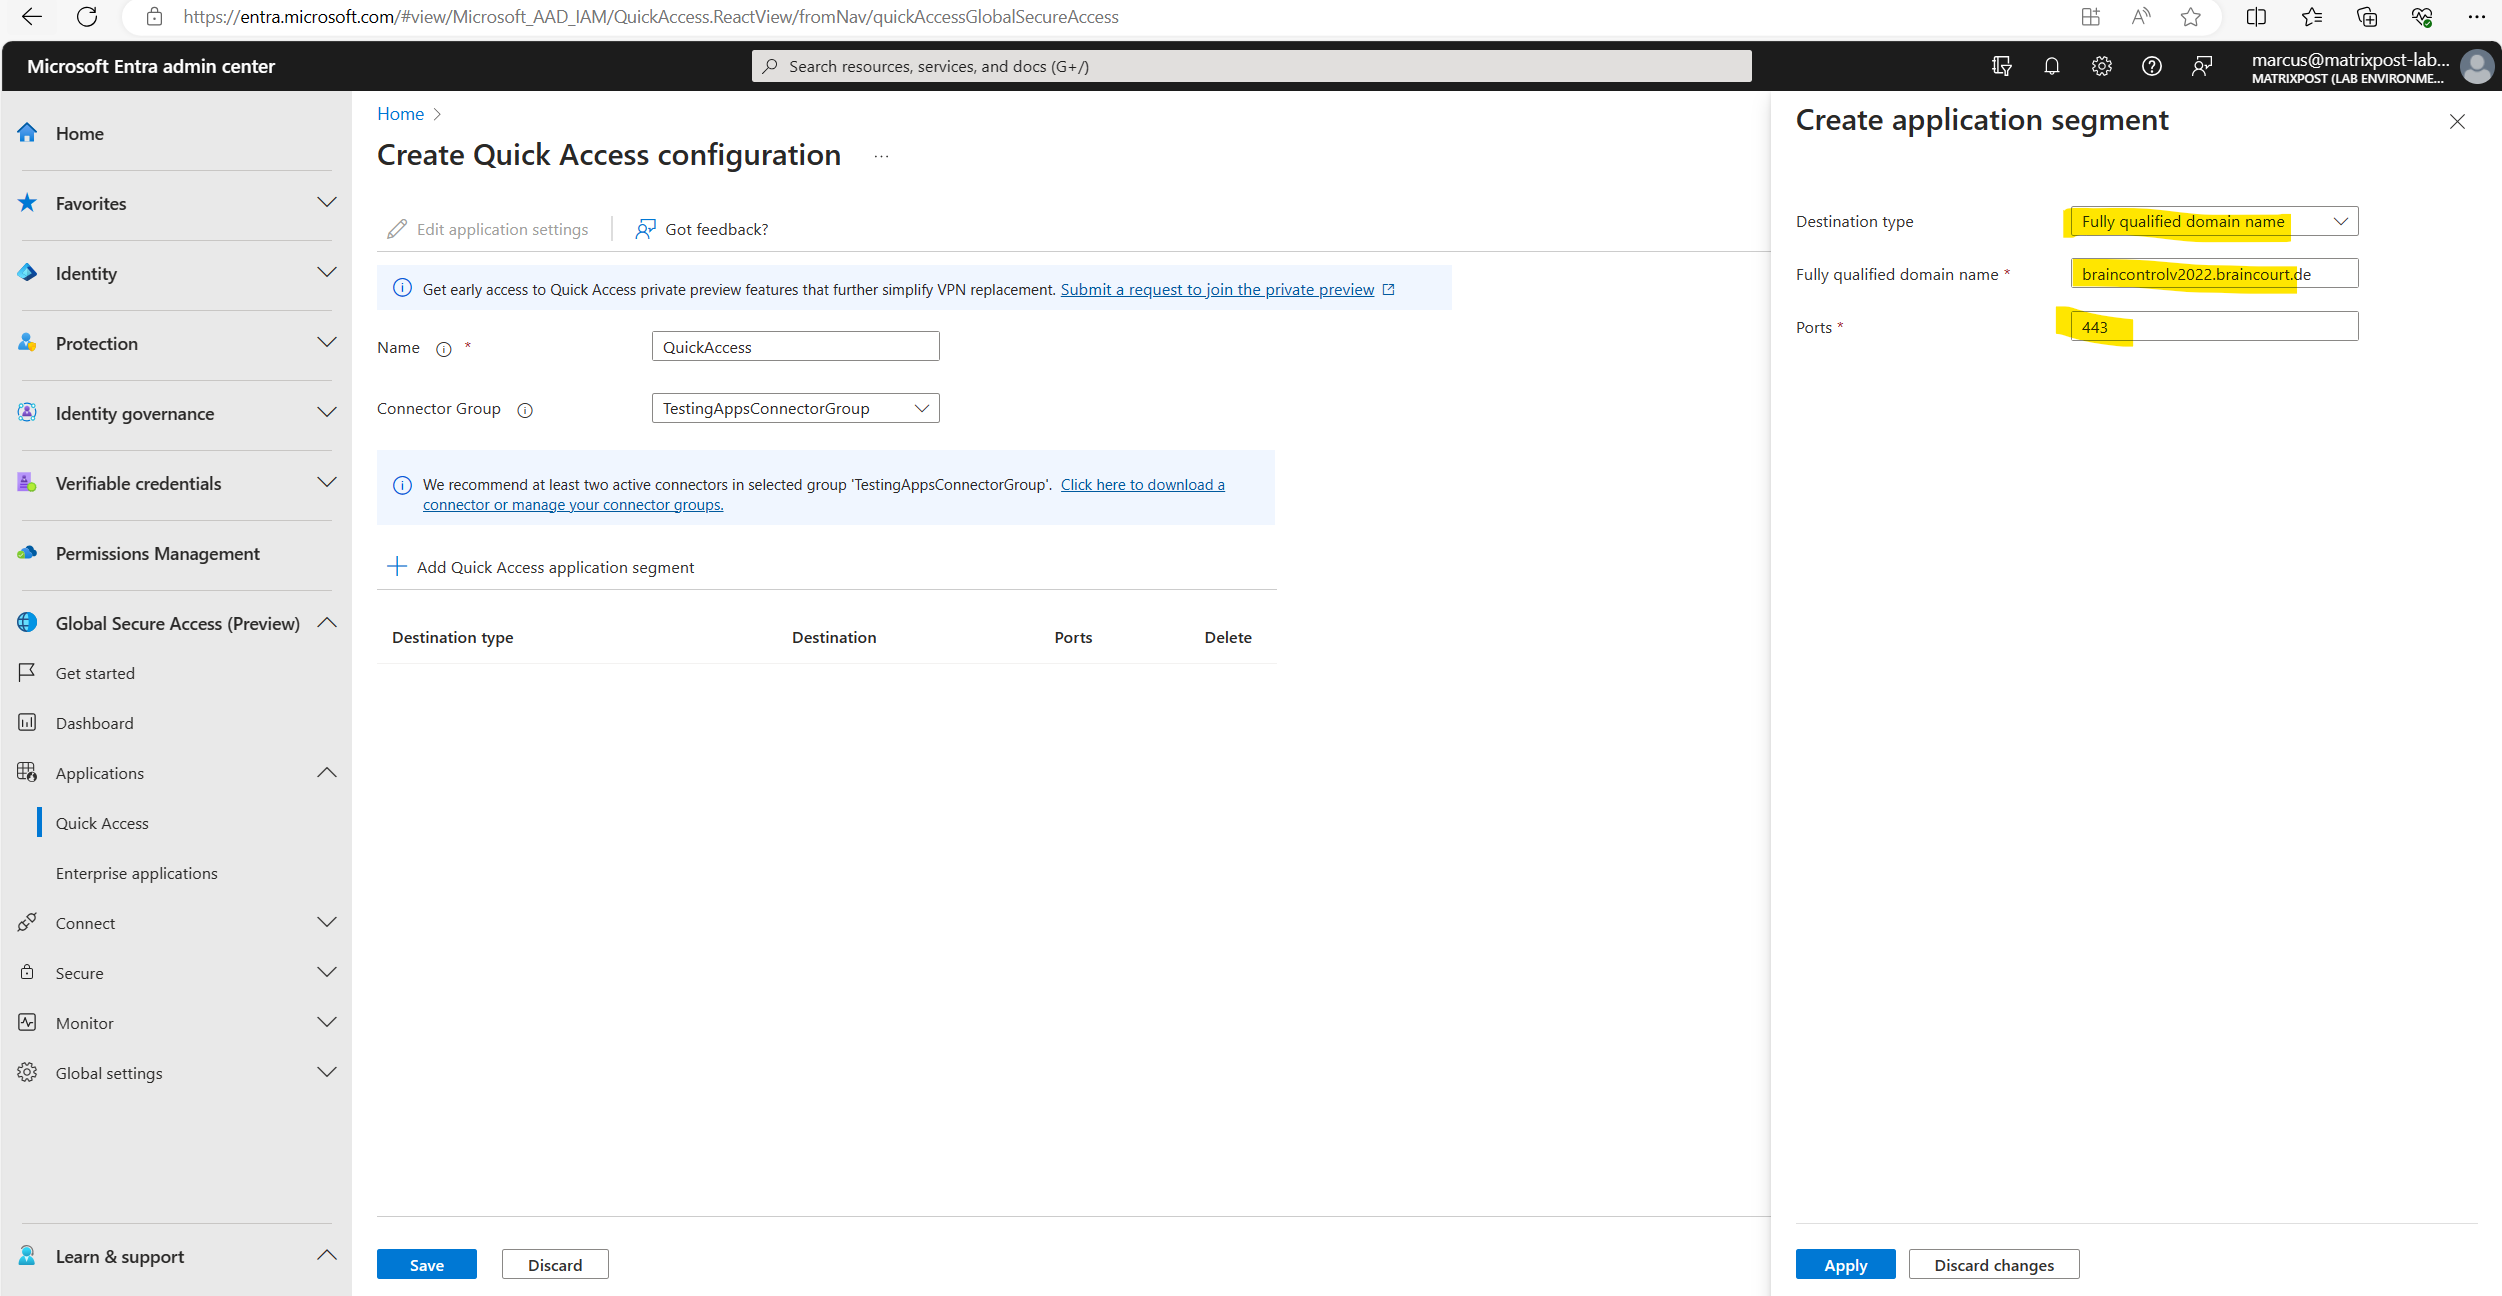
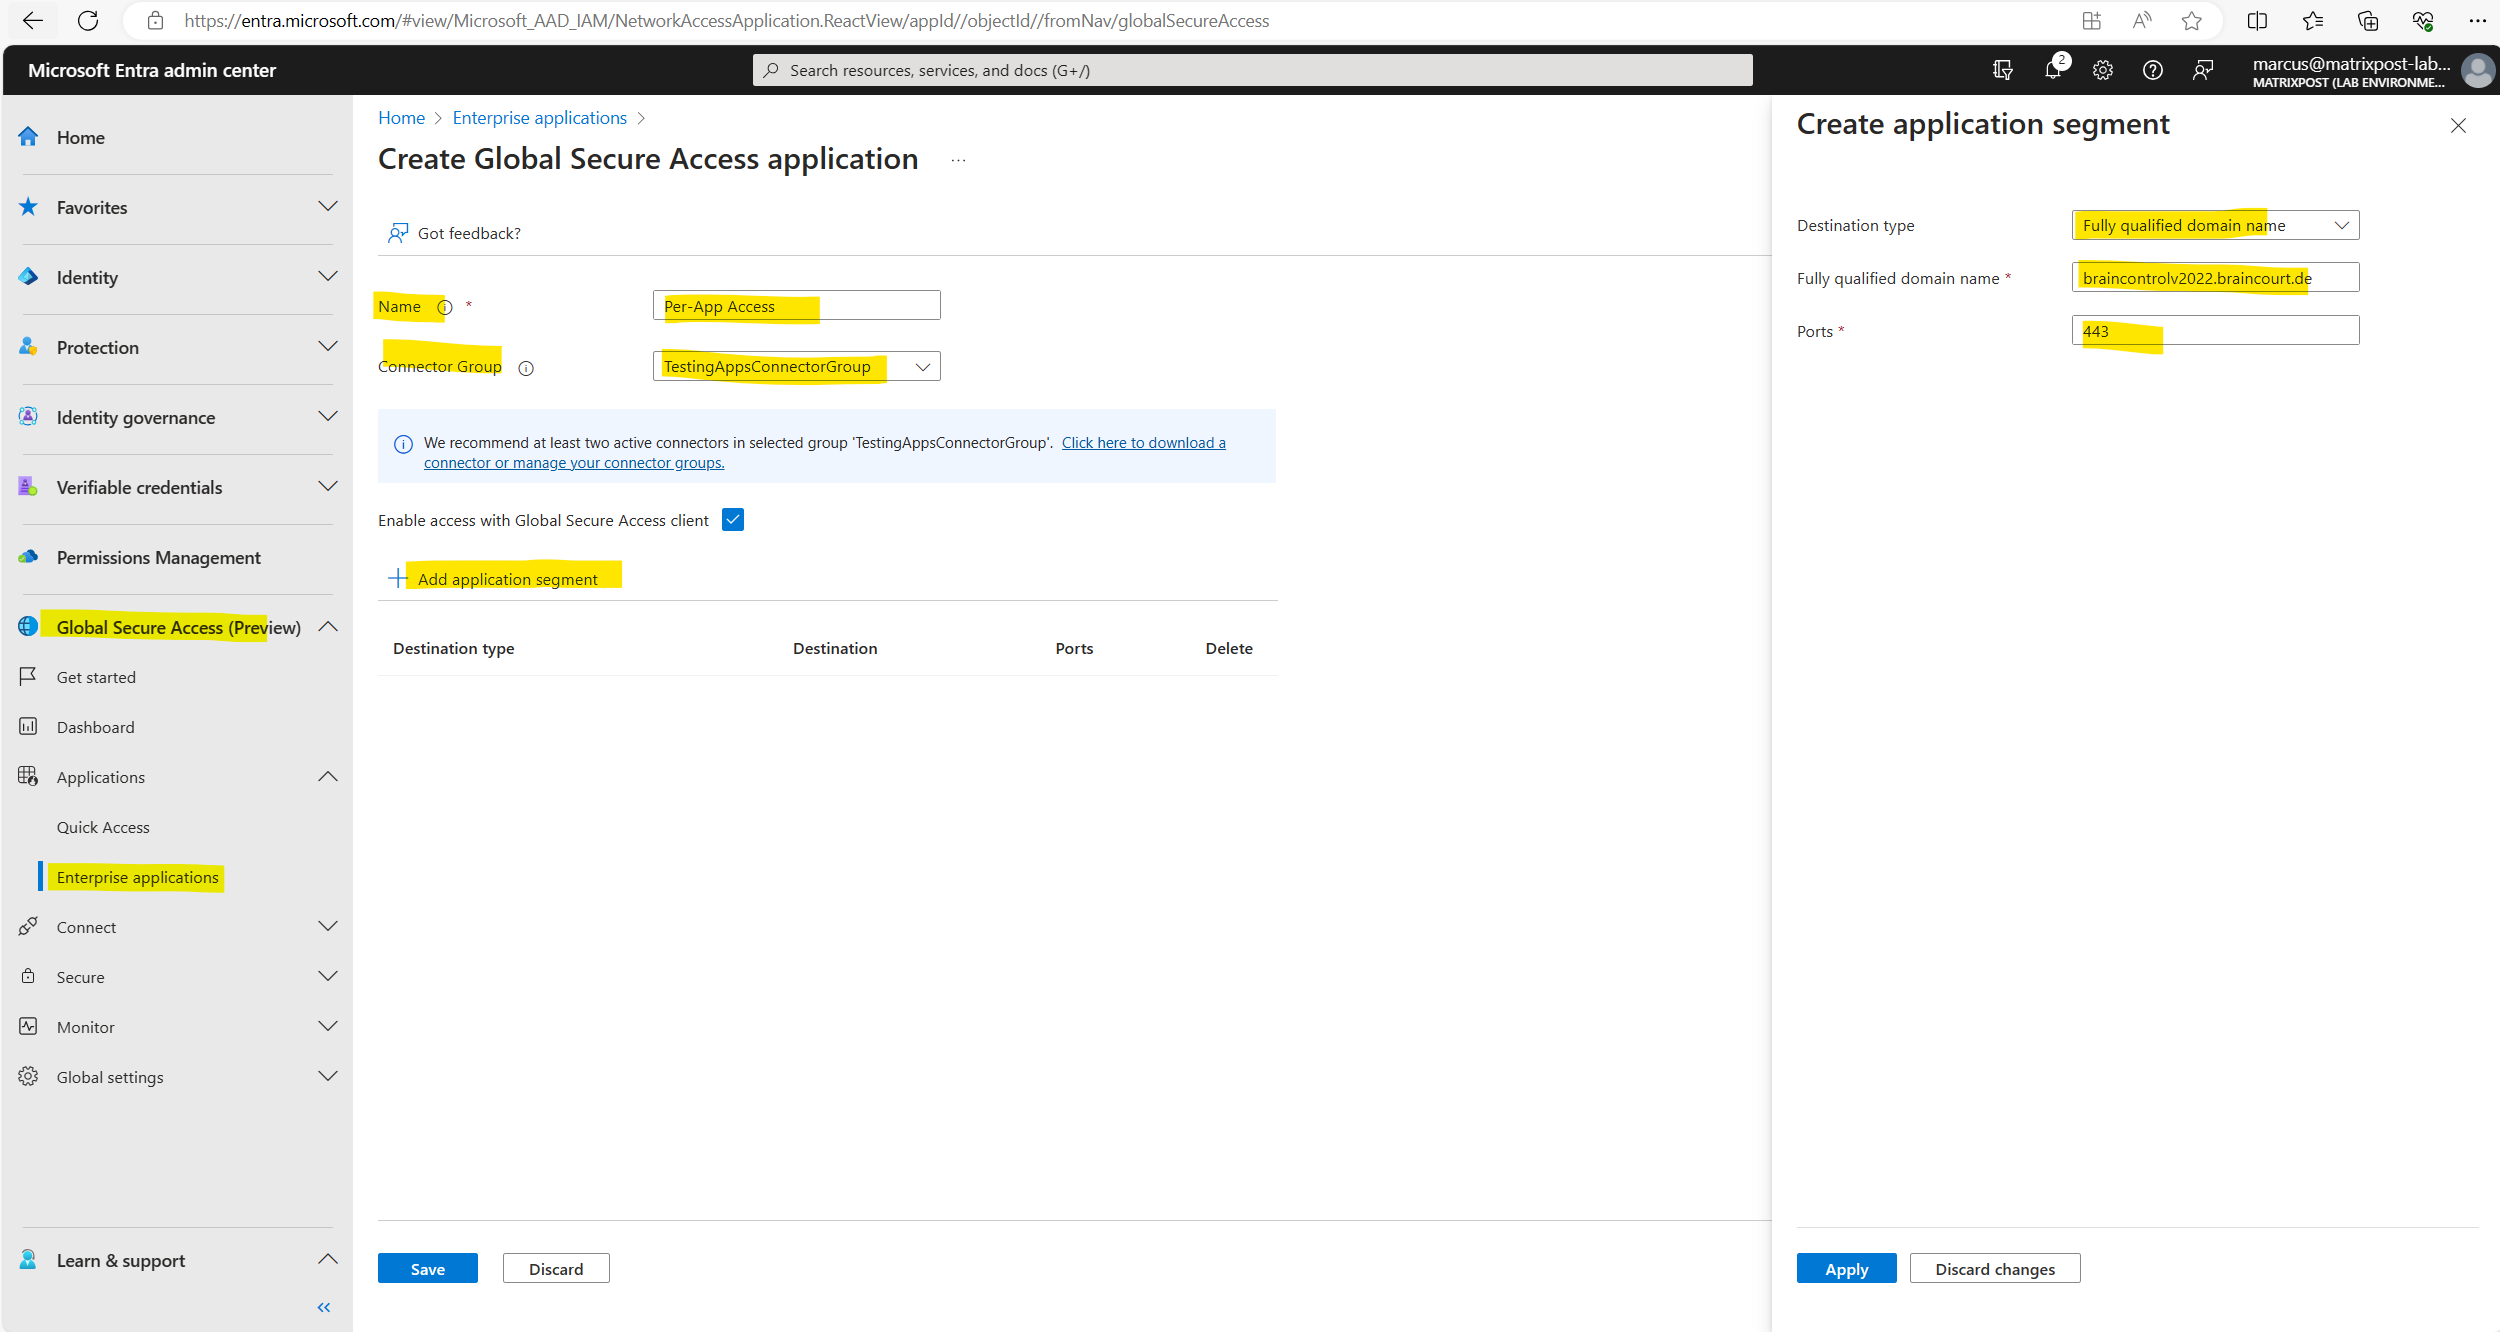
For the destination type I will use here FQDN.
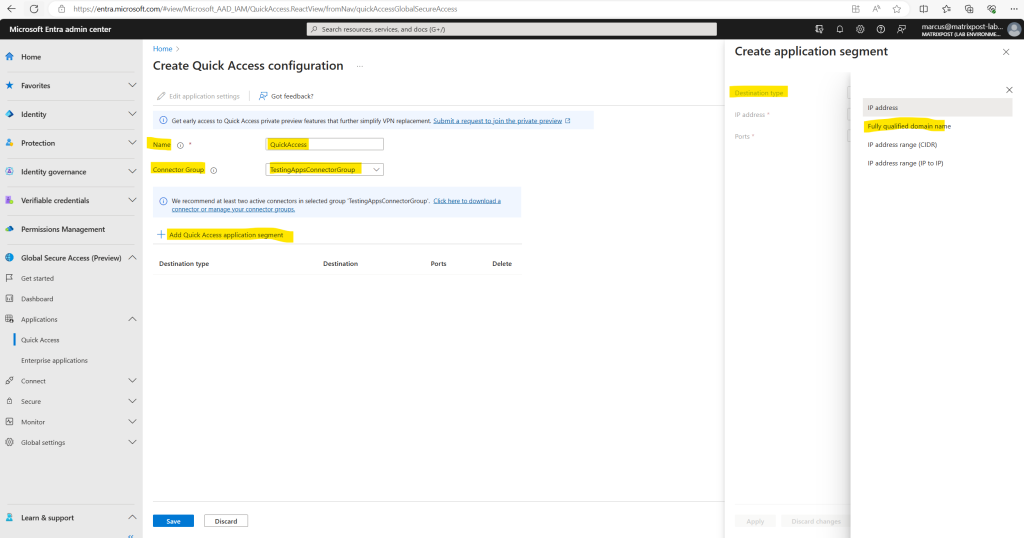
Here I will enter the FQDN from the internal blazor server web app and the port number.
You can add up to 500 application segments to your Quick Access app.
Do not overlap FQDNs, IP addresses, and IP ranges between your Quick Access app and any Private Access apps.
Finally I will click on Save.
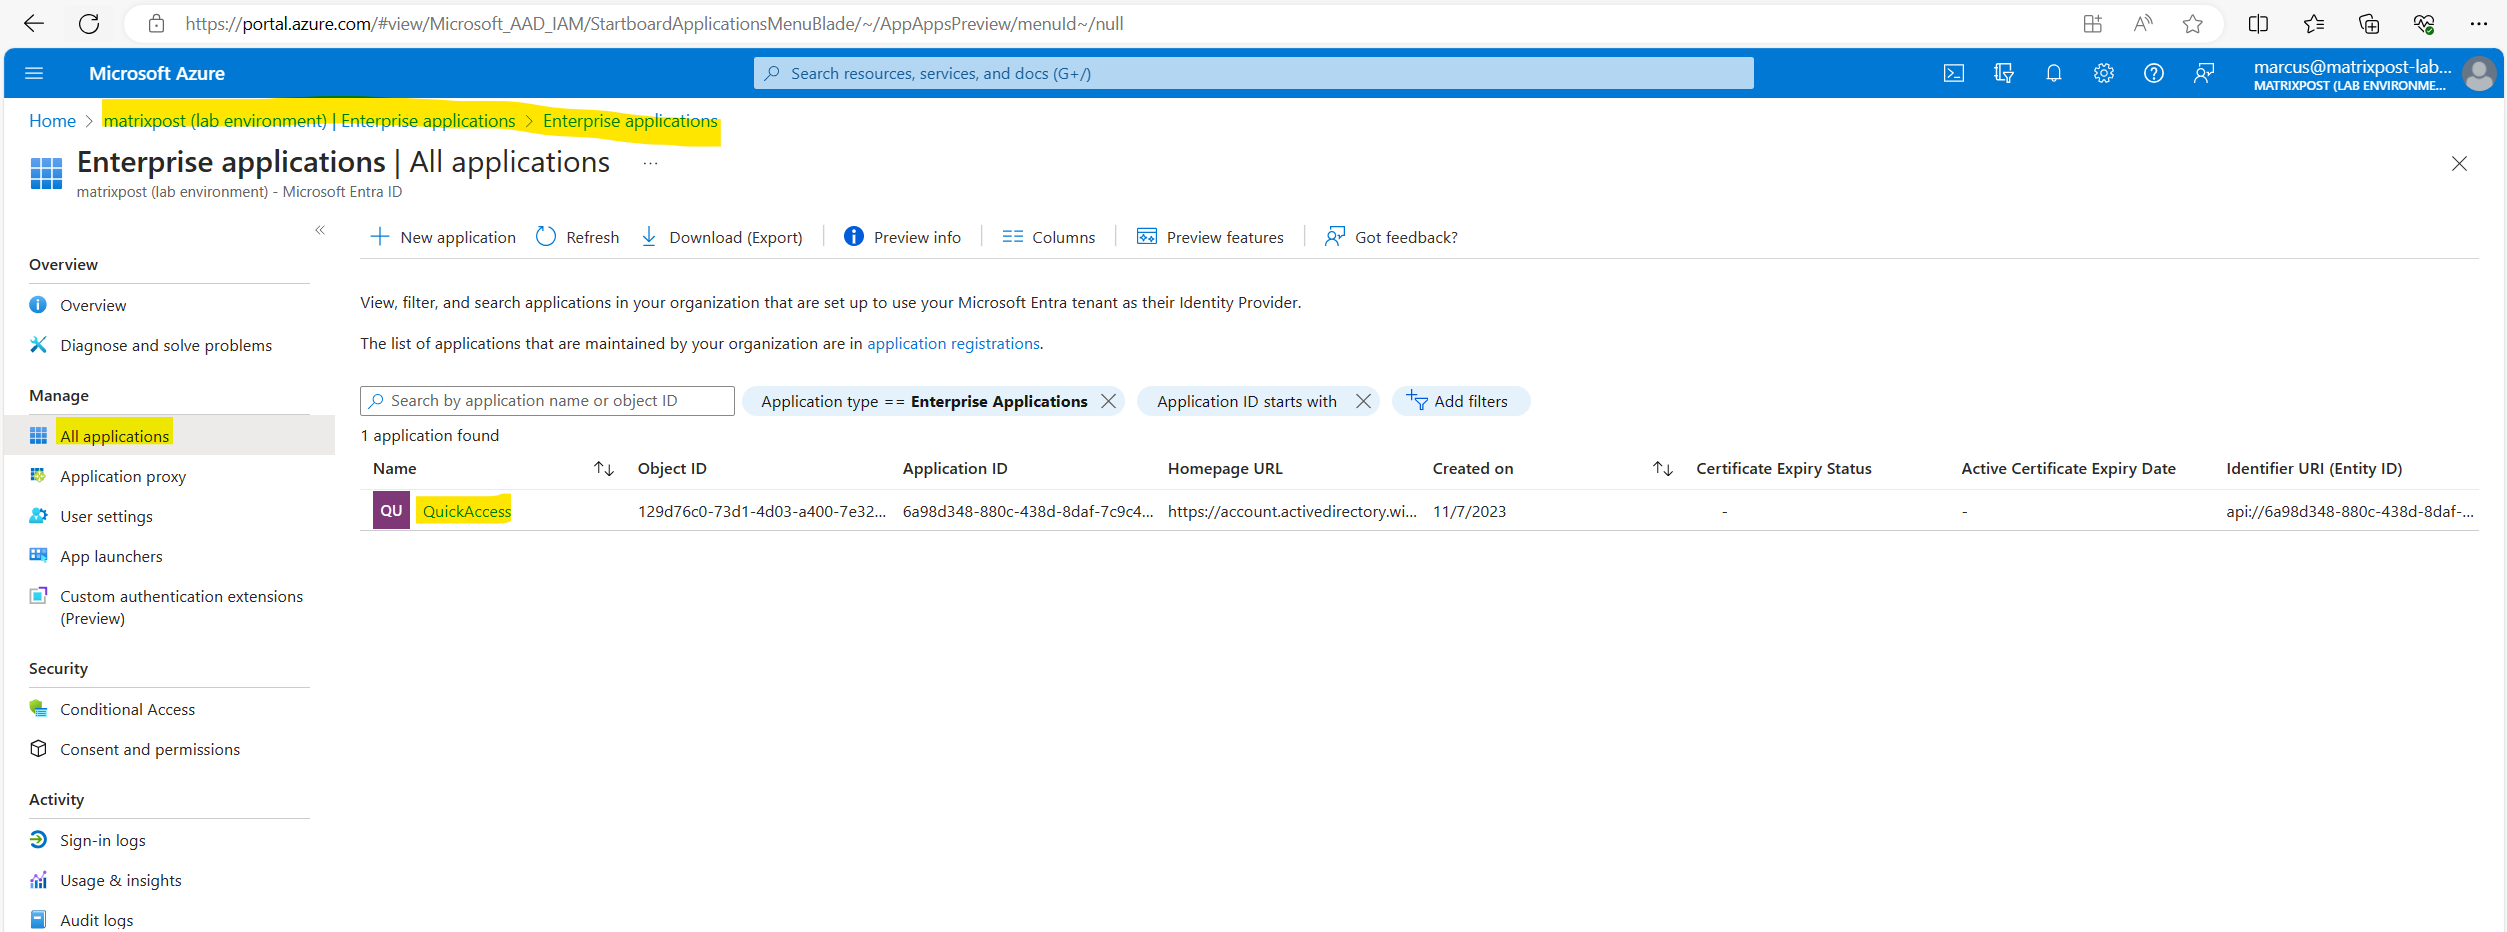
When you configure Quick Access, a new enterprise app is created on your behalf.
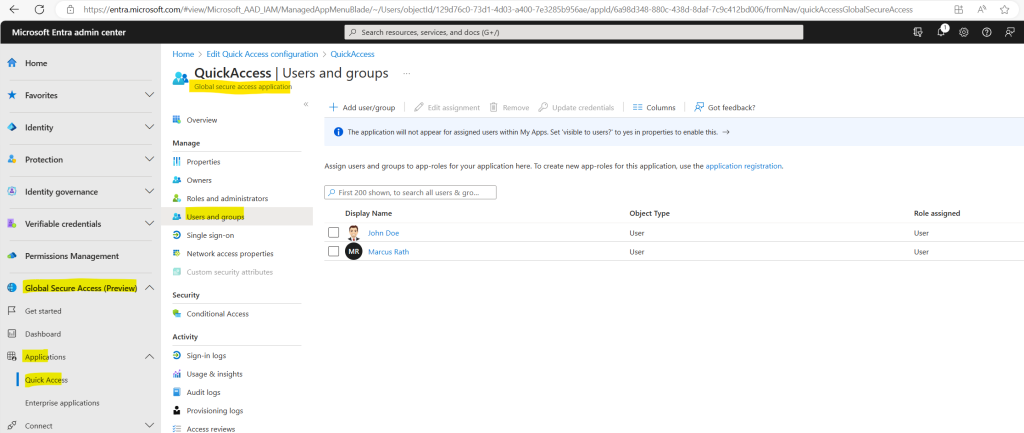
You need to grant access to the Quick Access app you created by assigning users and/or groups to the app.
Select the Edit application settings button from Quick Access.
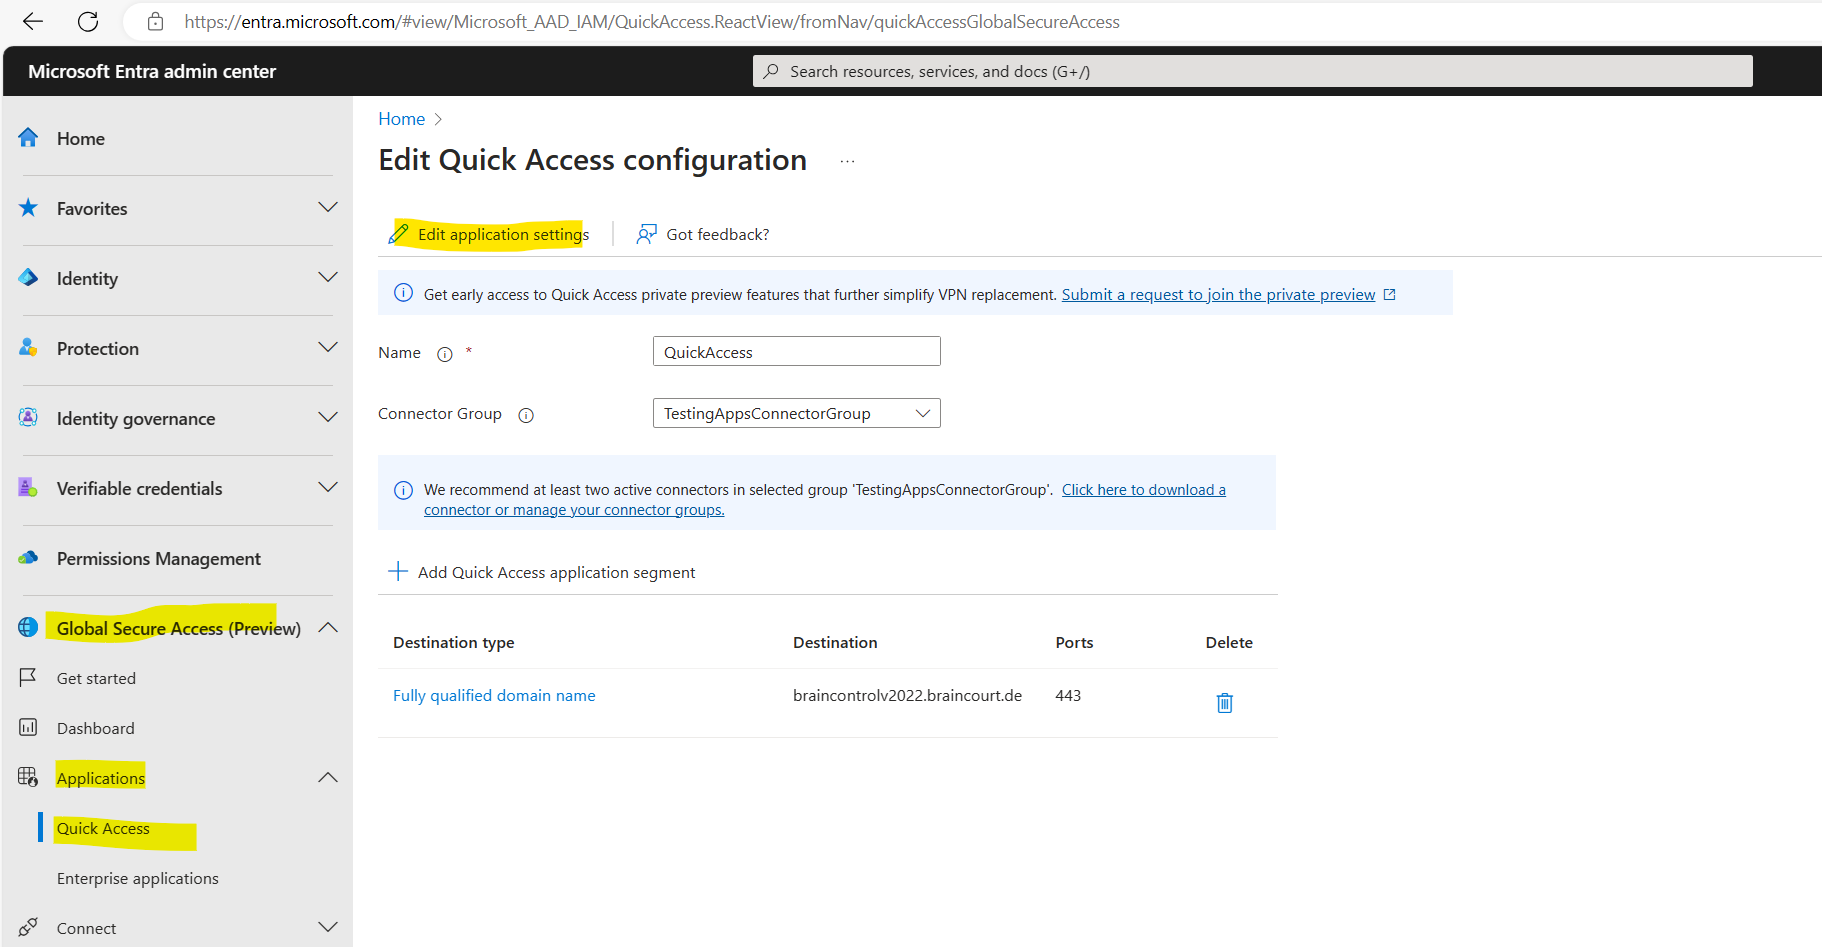
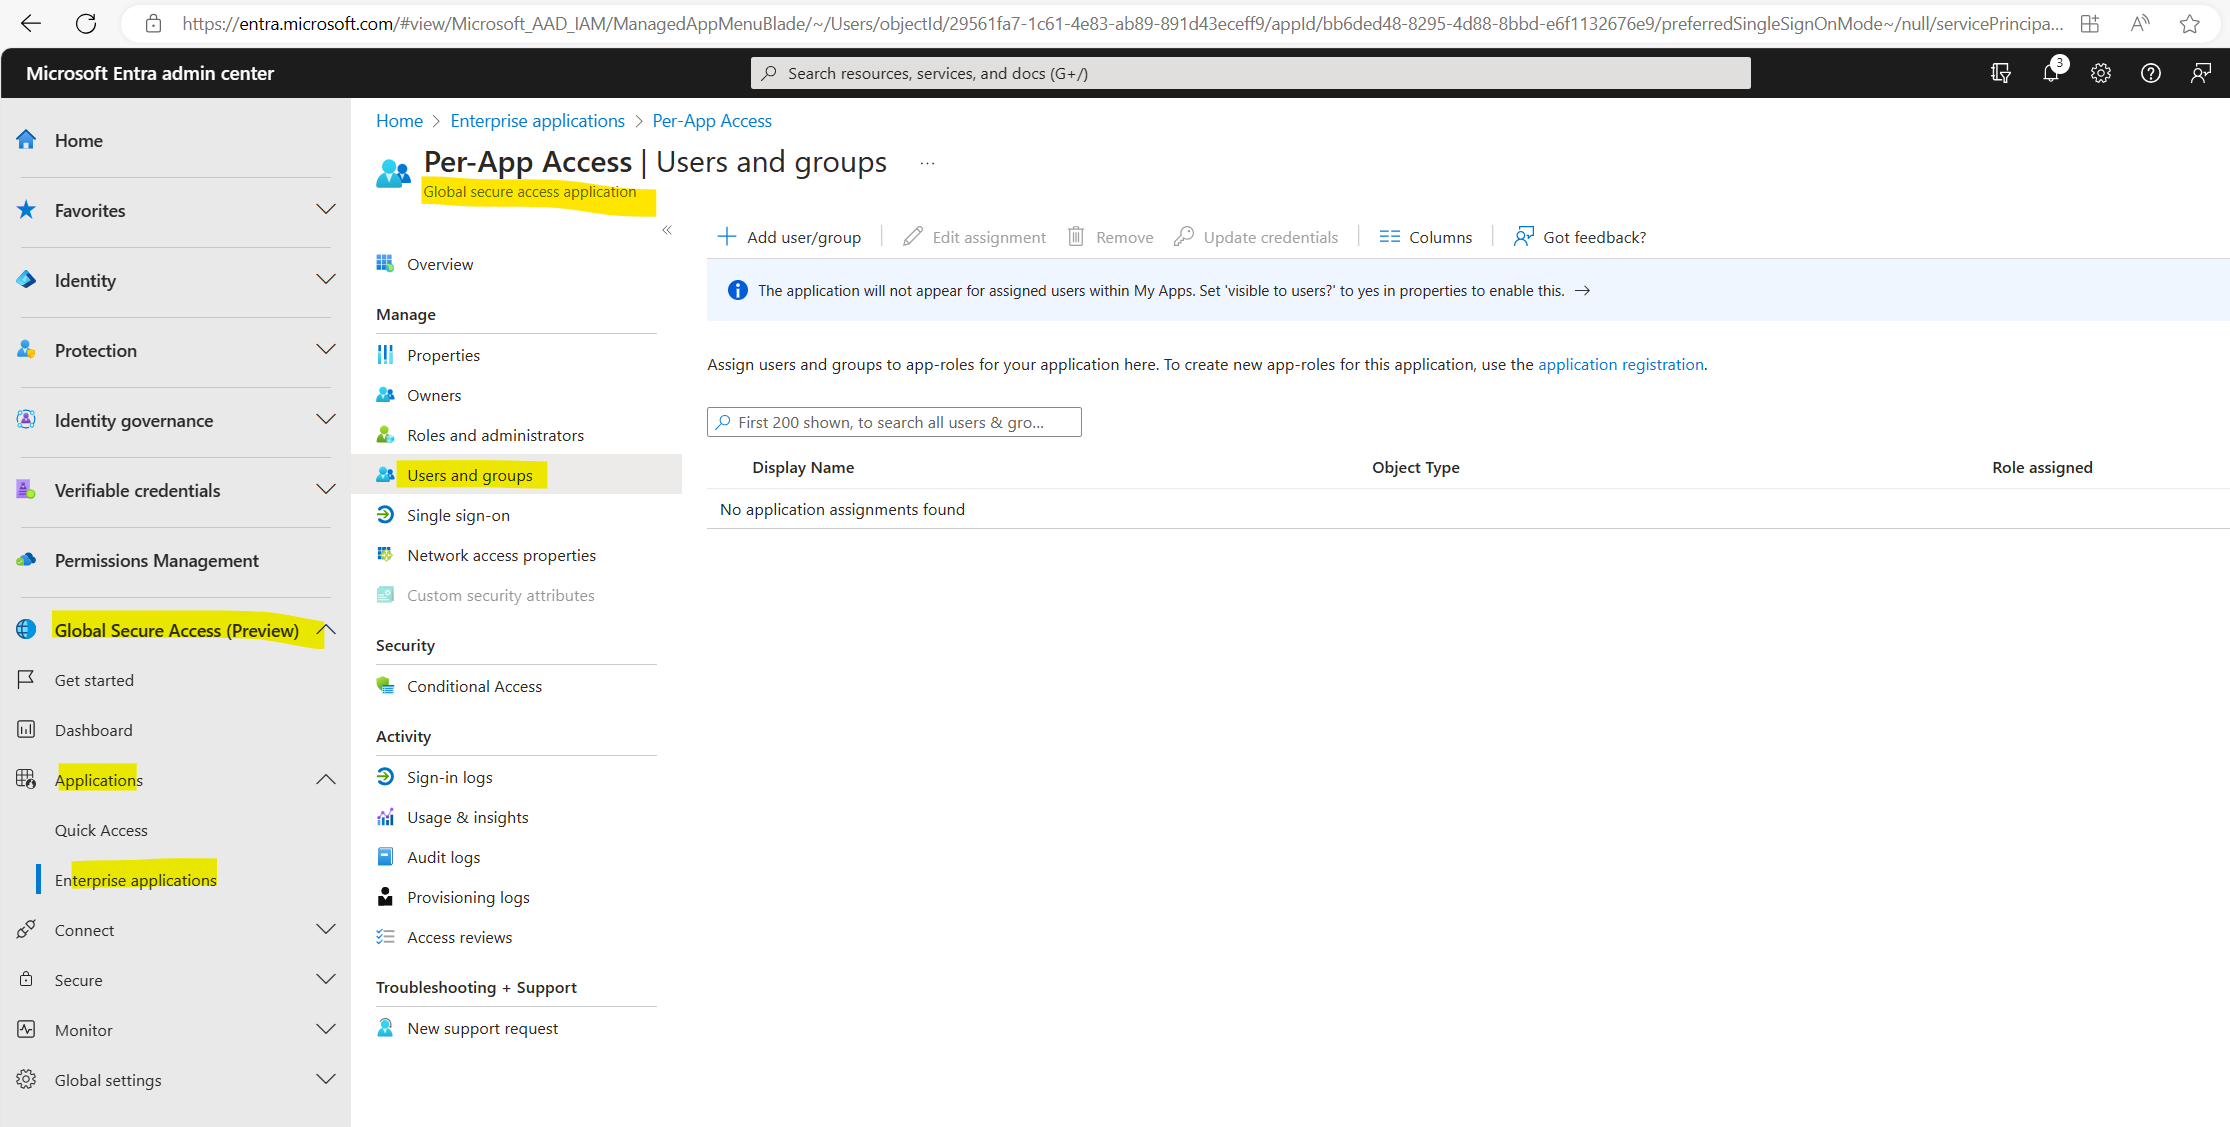
Select Users and groups from the side menu.
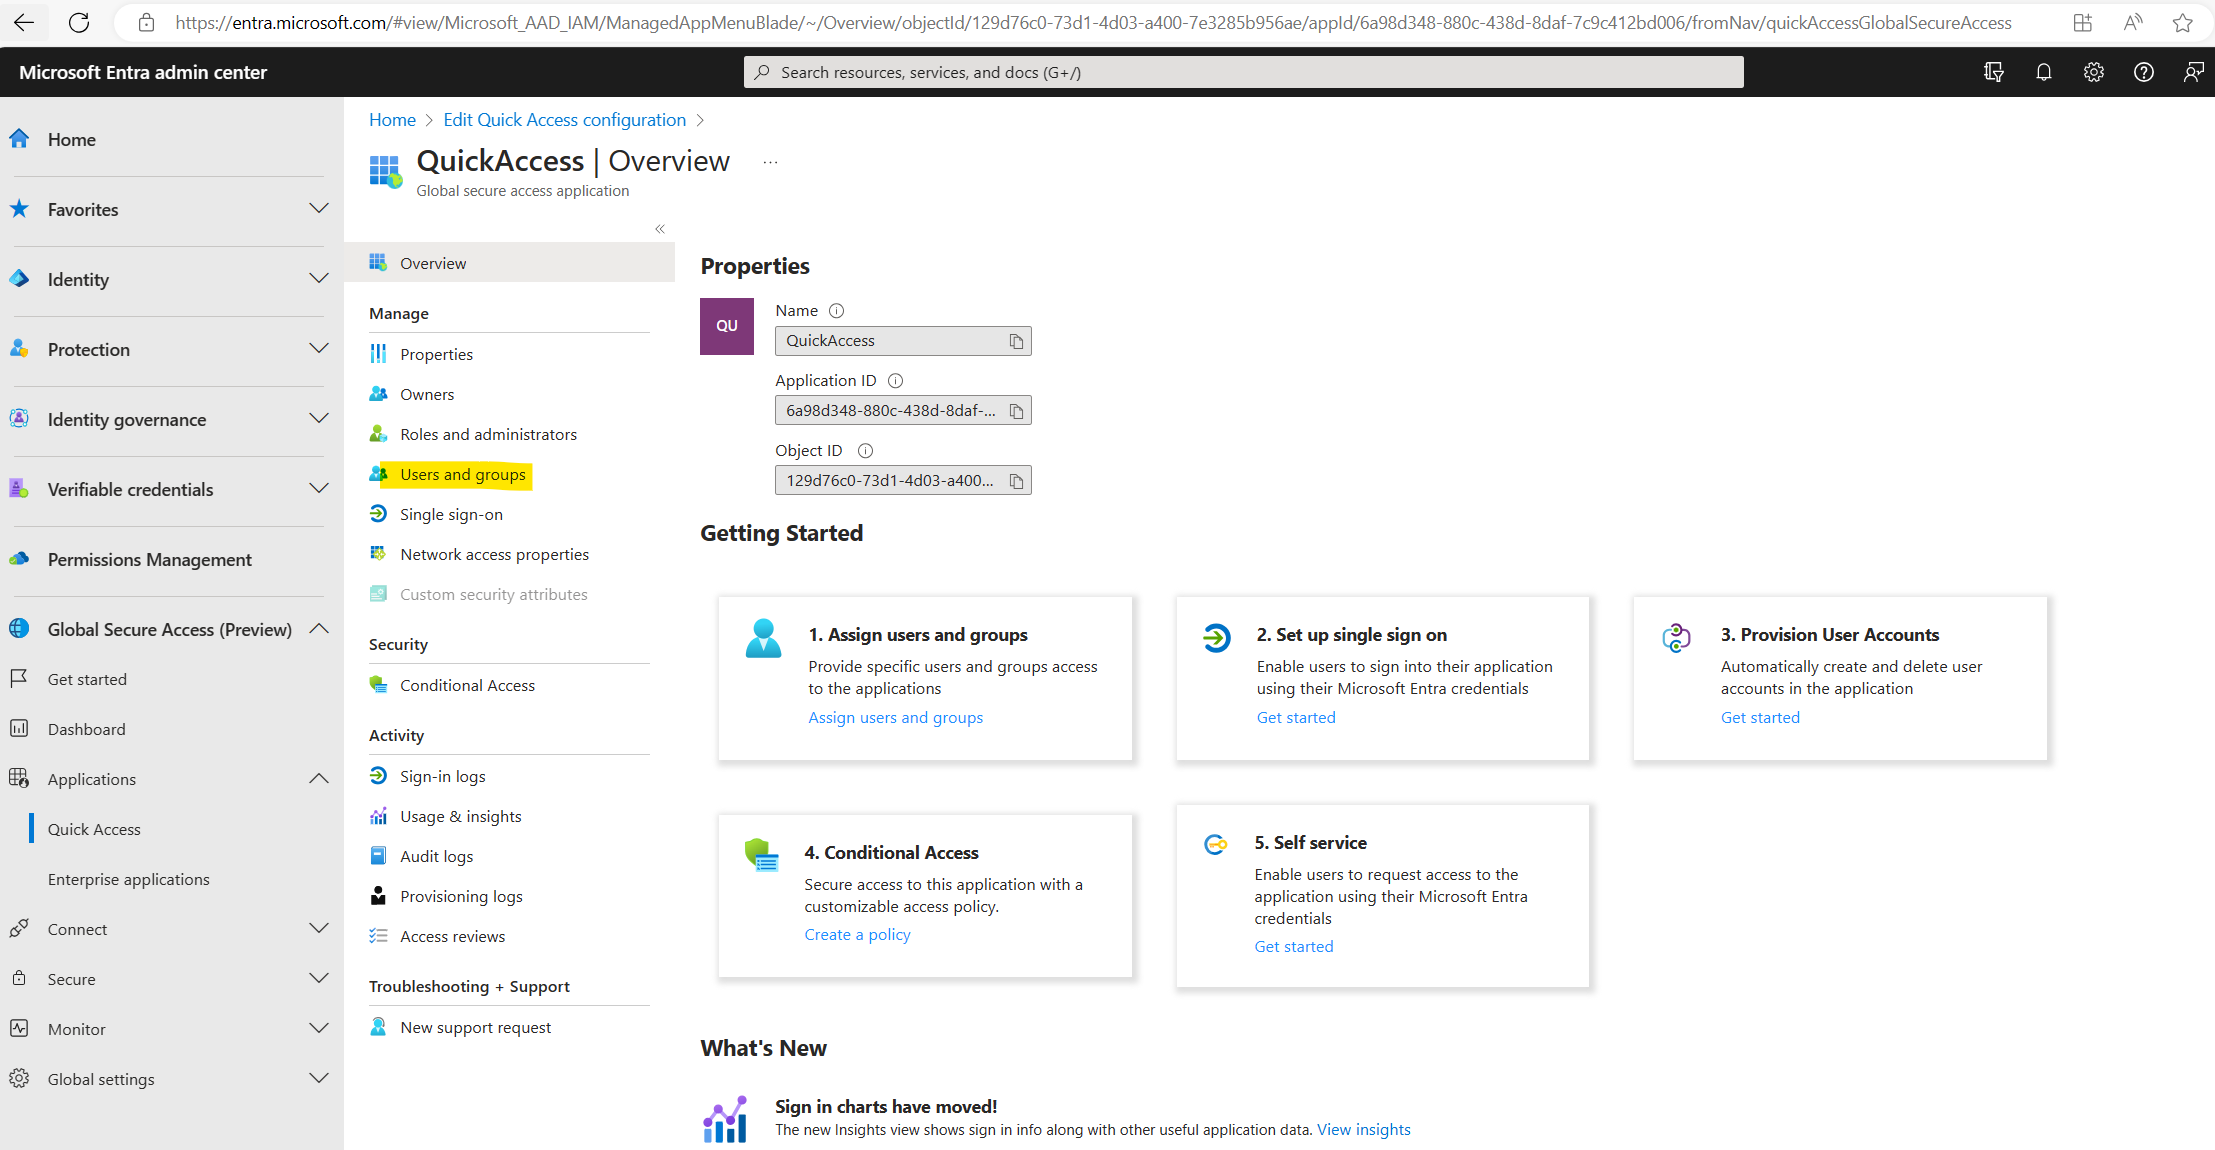
Add users and groups as needed.
For more information, see Assign users and groups to an application.
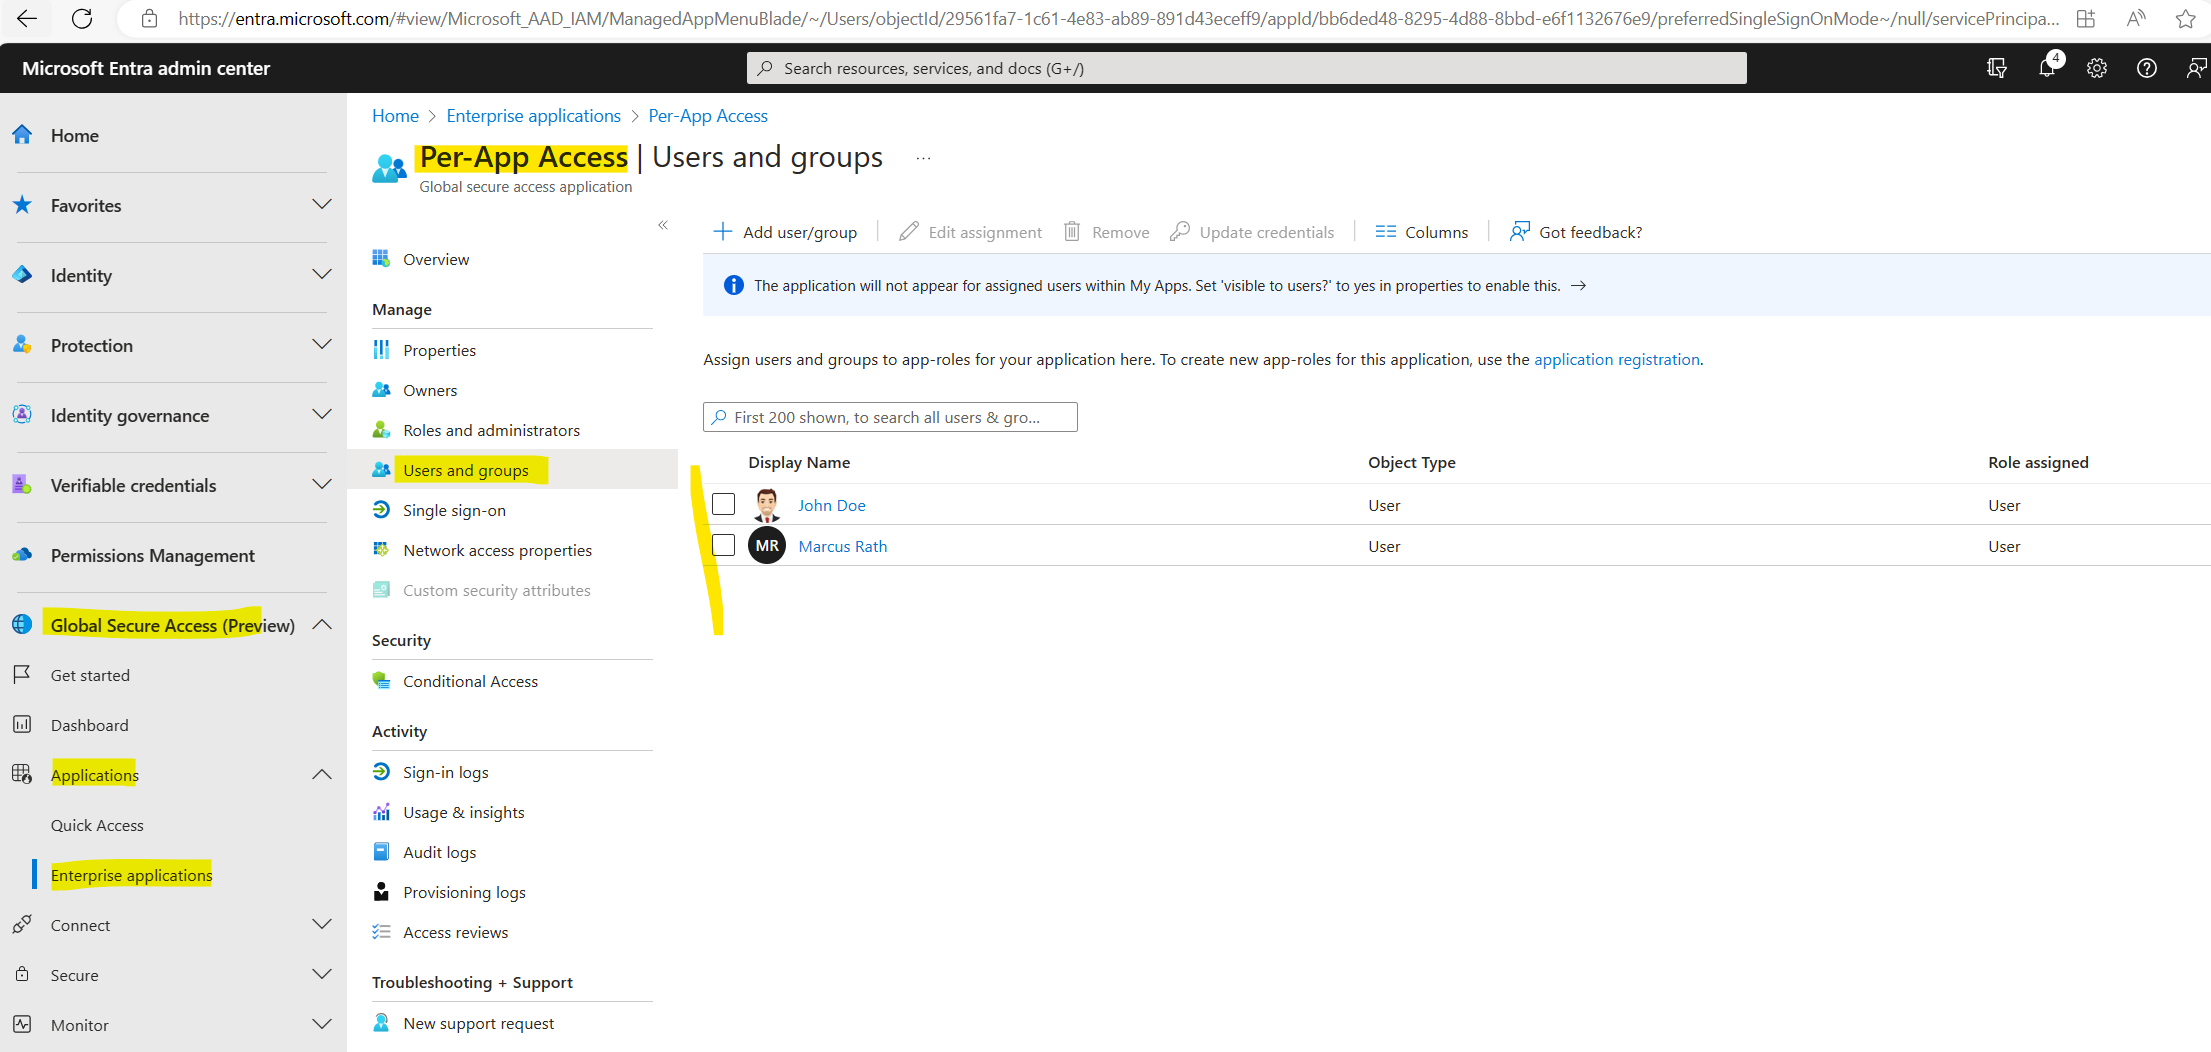
I will add here myself and John Doe.
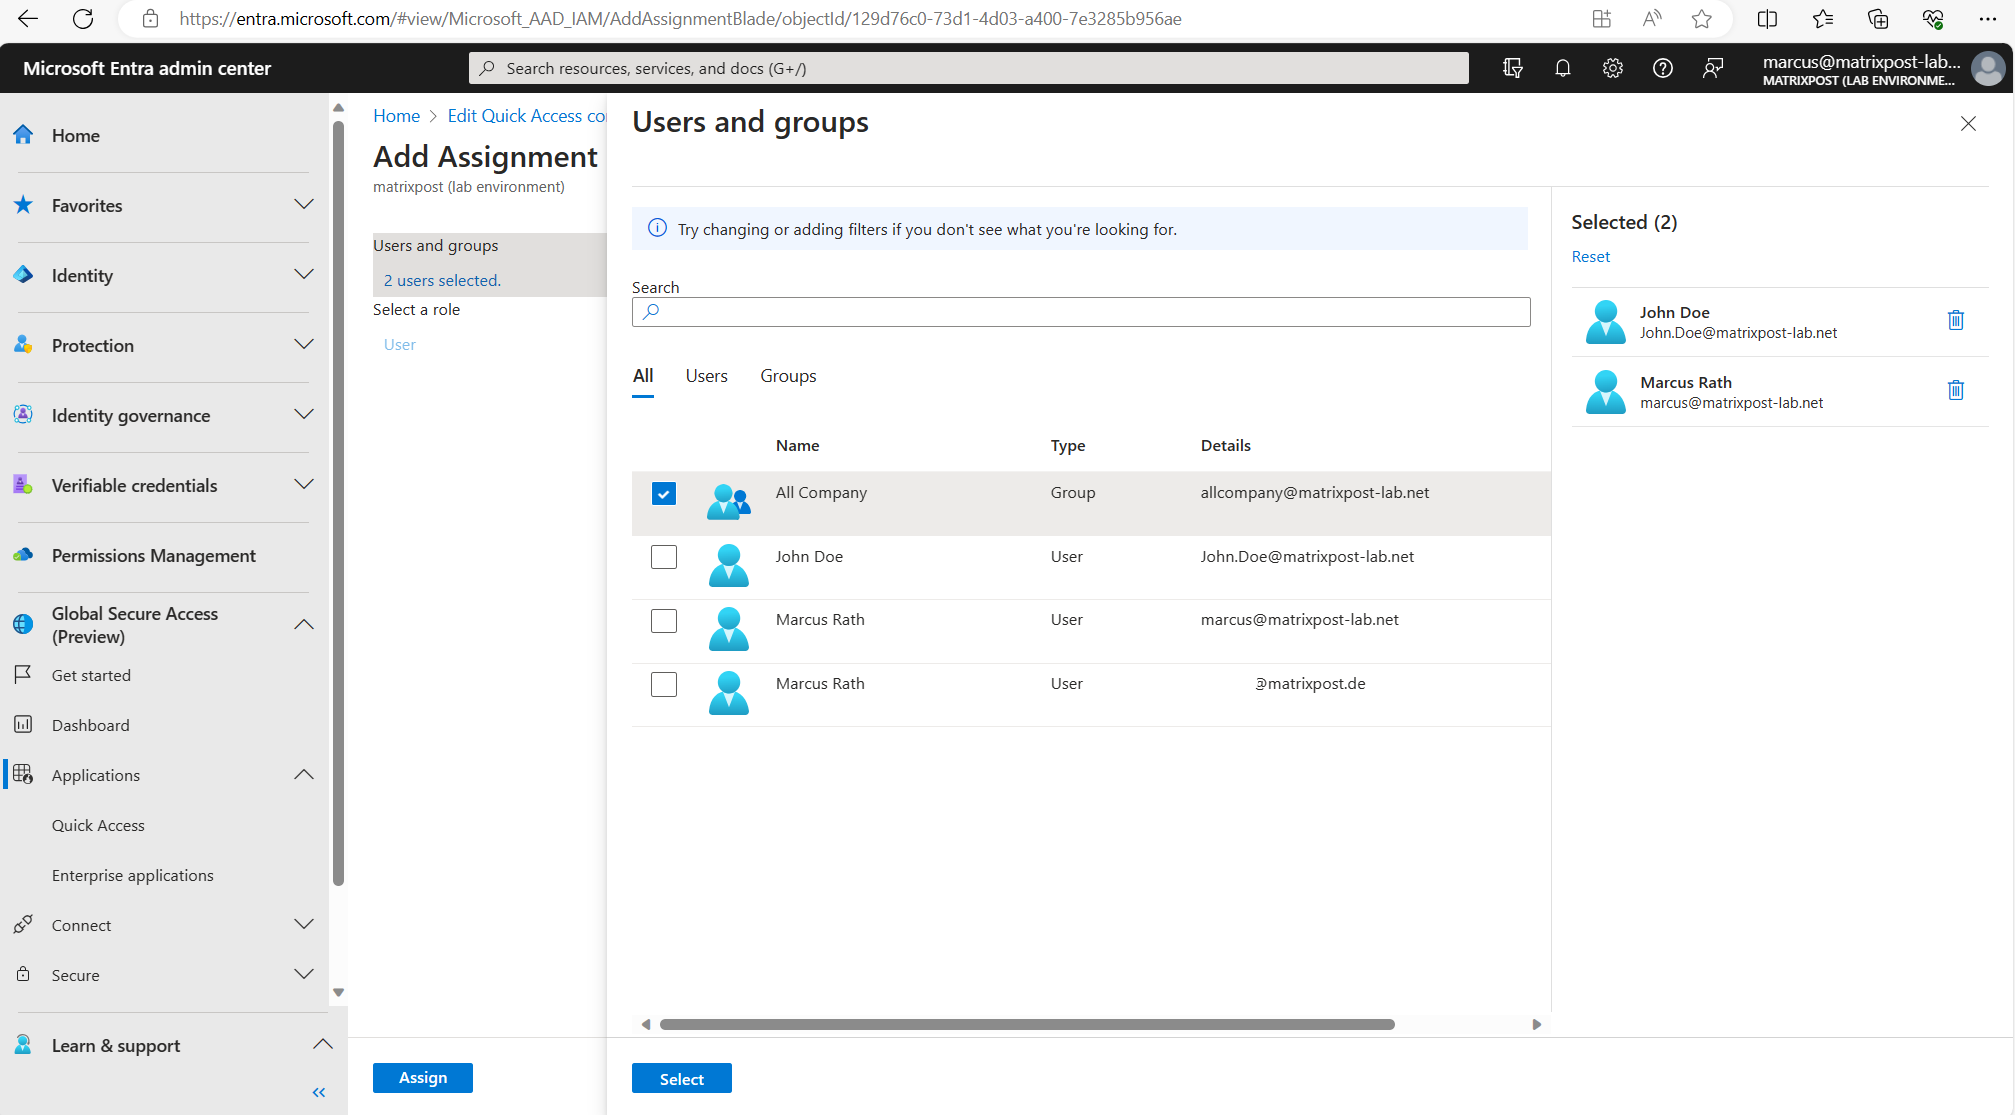
Users must be directly assigned to the app or to the group assigned to the app. Nested groups are not supported.
Conditional Access policies can be applied to your Quick Access app. Applying Conditional Access policies provides more options for managing access to applications, sites, and services.
Creating a Conditional Access policy is covered in detail in How to create a Conditional Access policy for Private Access apps.
Enable Microsoft Entra Private Access
Once you have your Quick Access app configured, your private resources added, users assigned to the app, you can enable the Private access profile from the Traffic forwarding area of Global Secure Access.
You can enable the profile before configuring Quick Access, but without the app and profile configured, there’s no traffic to forward.
Browse to Global Secure Access (preview) > Connect > Traffic forwarding.
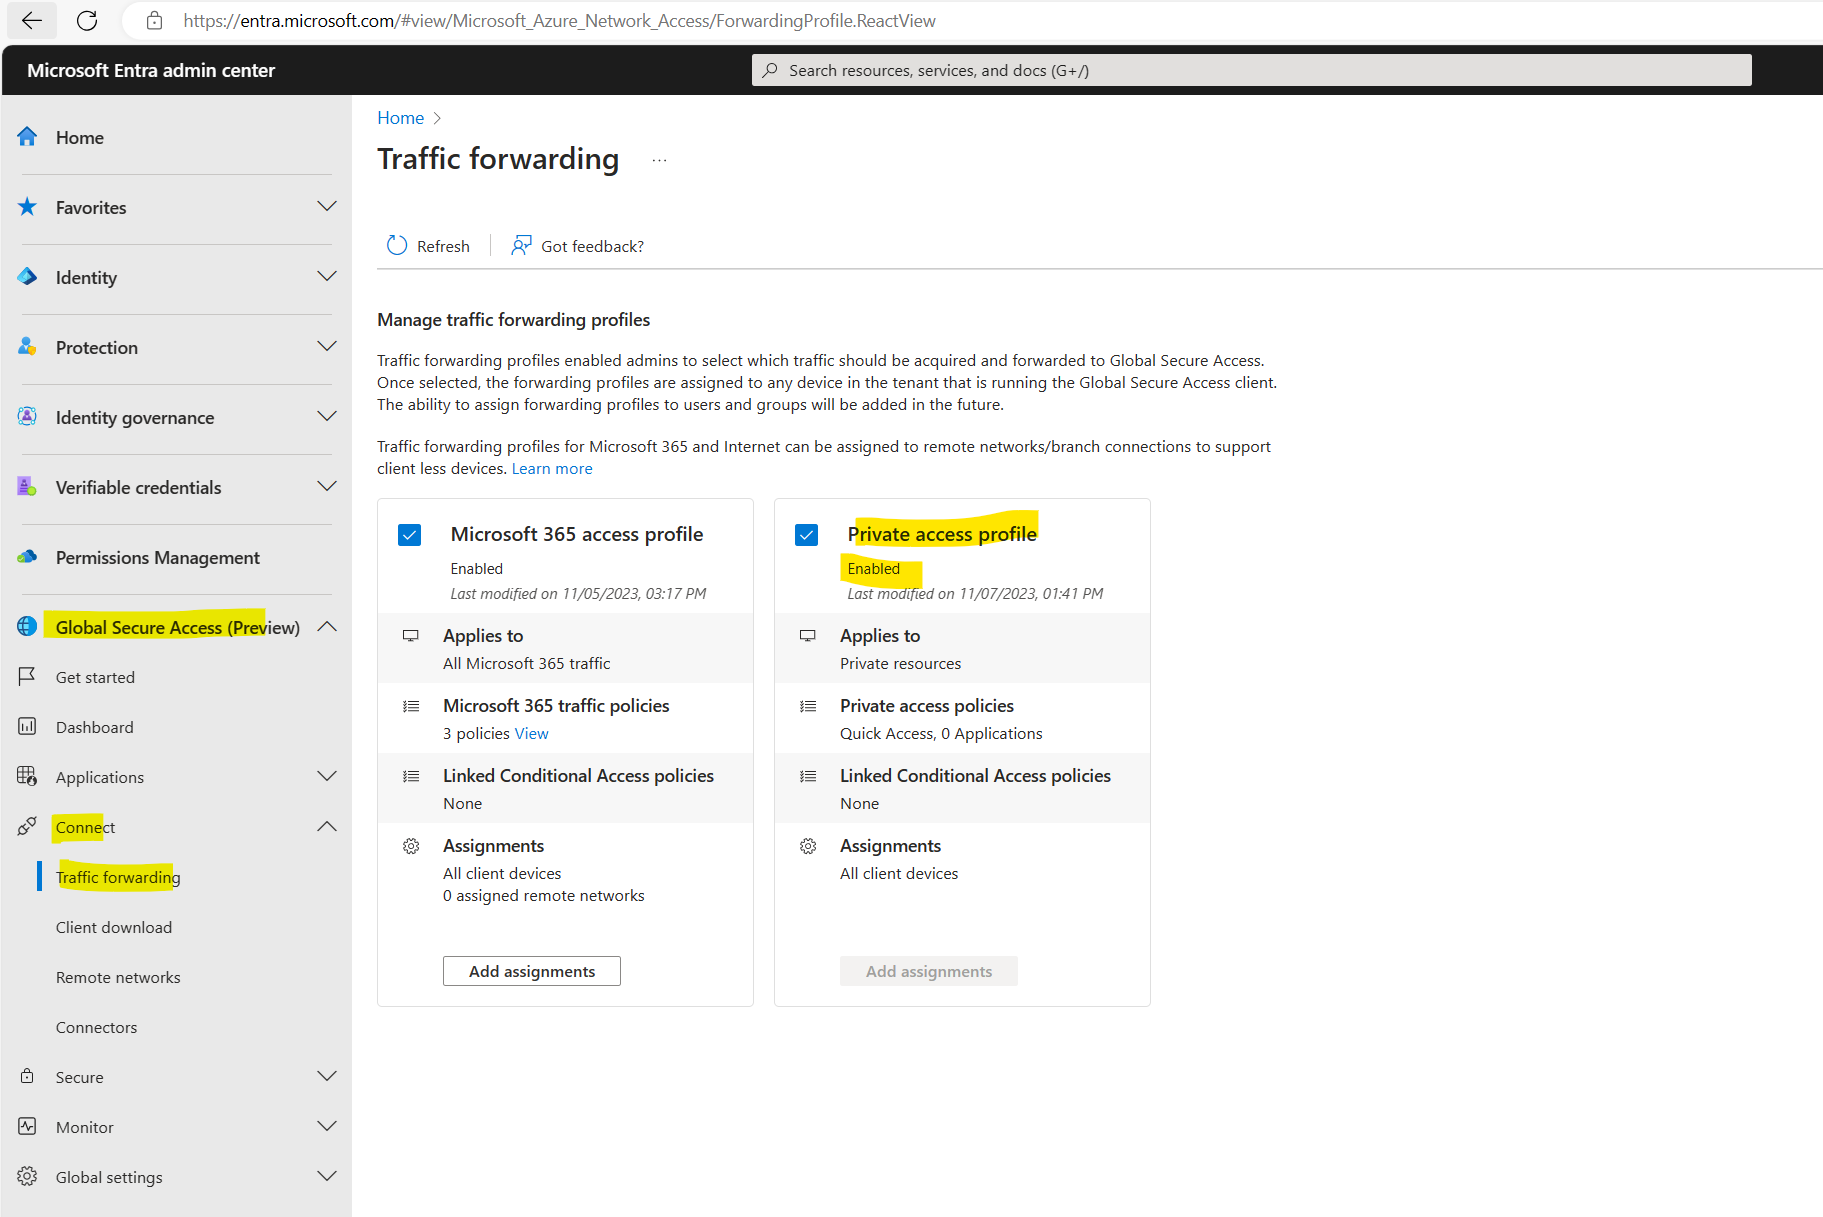
Select the checkbox for Private access profile.
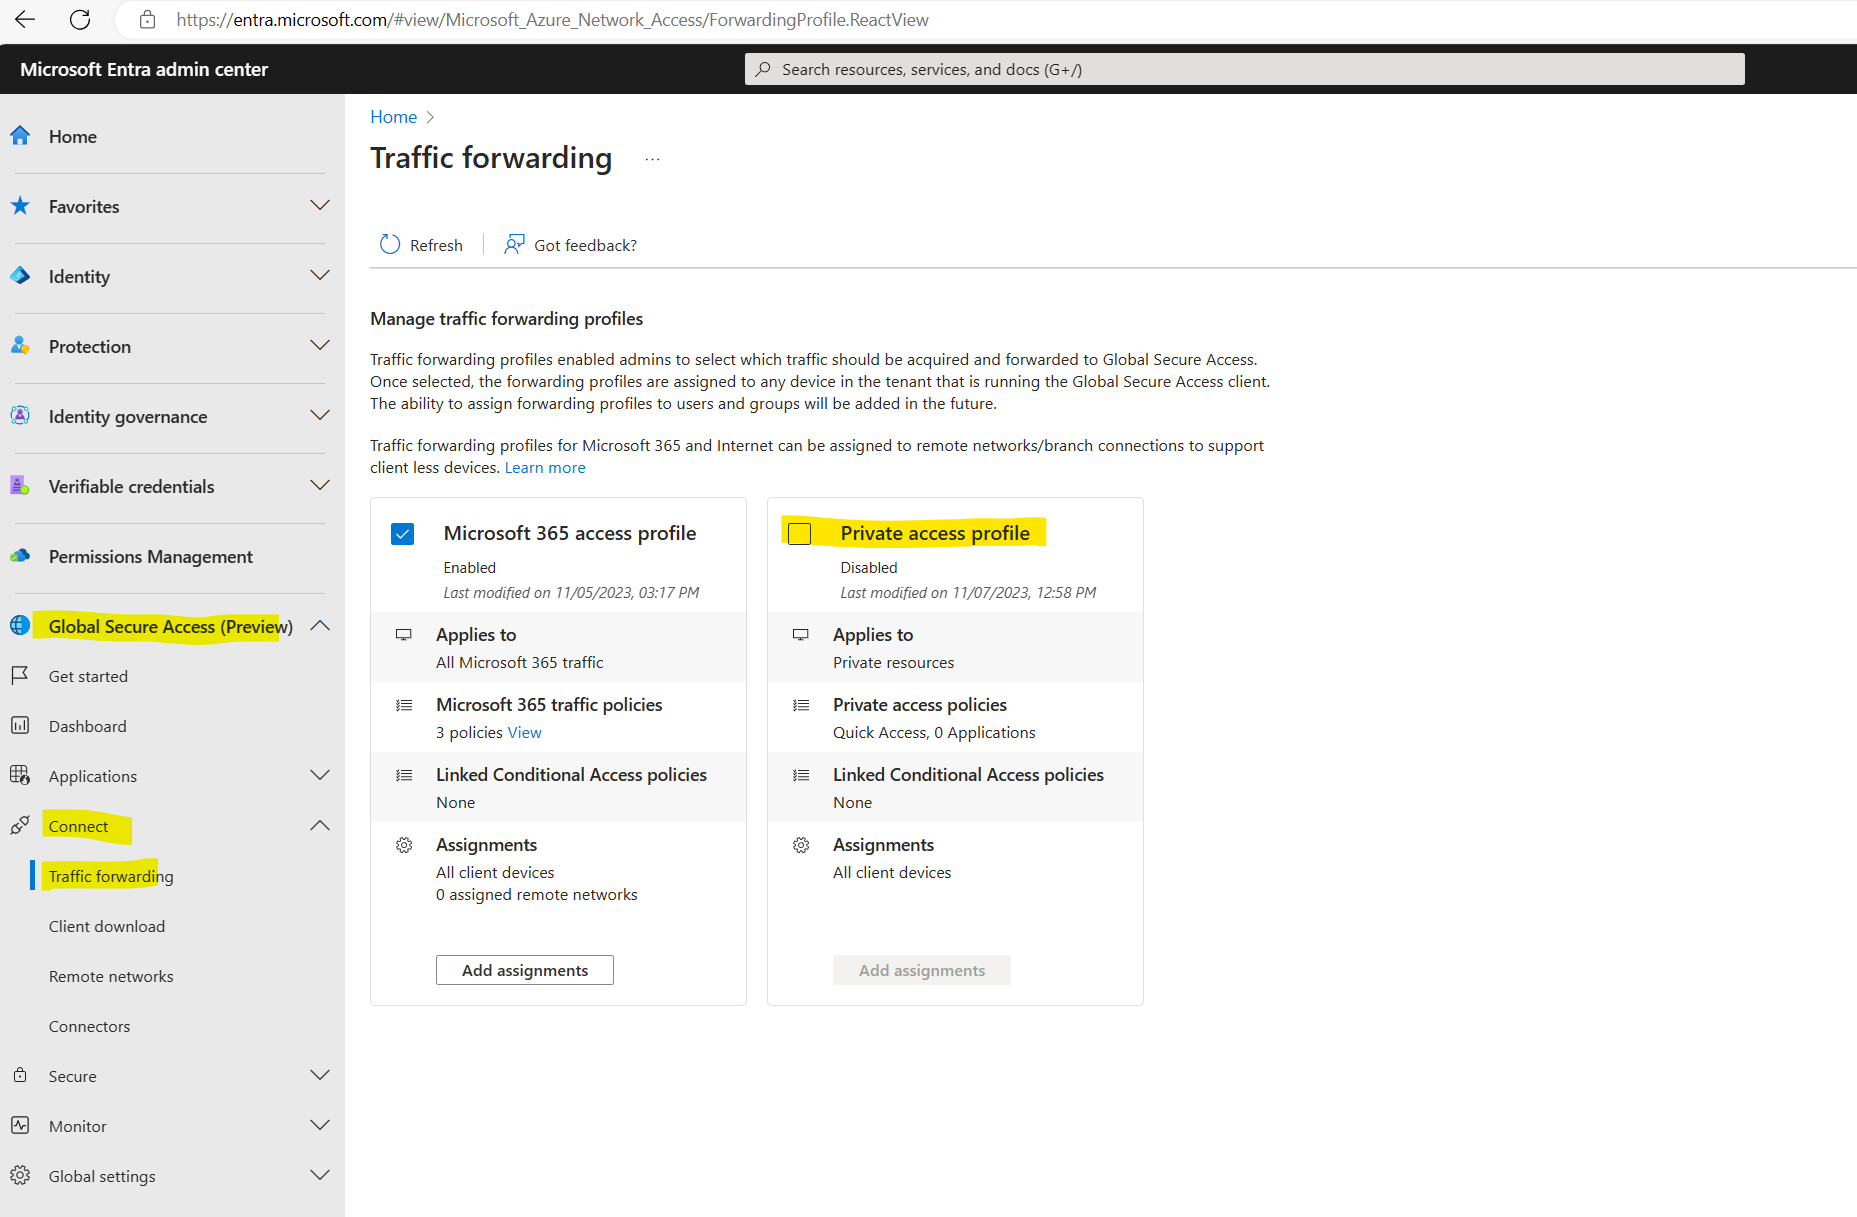
As mentioned previously remote networks can’t be assigned to the Private access traffic forwarding profile, therefore the Add assignments button is greyed our.
Now I will perform a quick final check if Private Access really works from now on. Therefore I will sign-in with John Doe’s user account and on its computer where the Global Secure Access client is installed.
Looks good! The FQDN braincontrolv2022.braincourt.de isn’t neither registered in public DNS nor on the local machine but will be resolved in an IP address used by Global Secure Access.
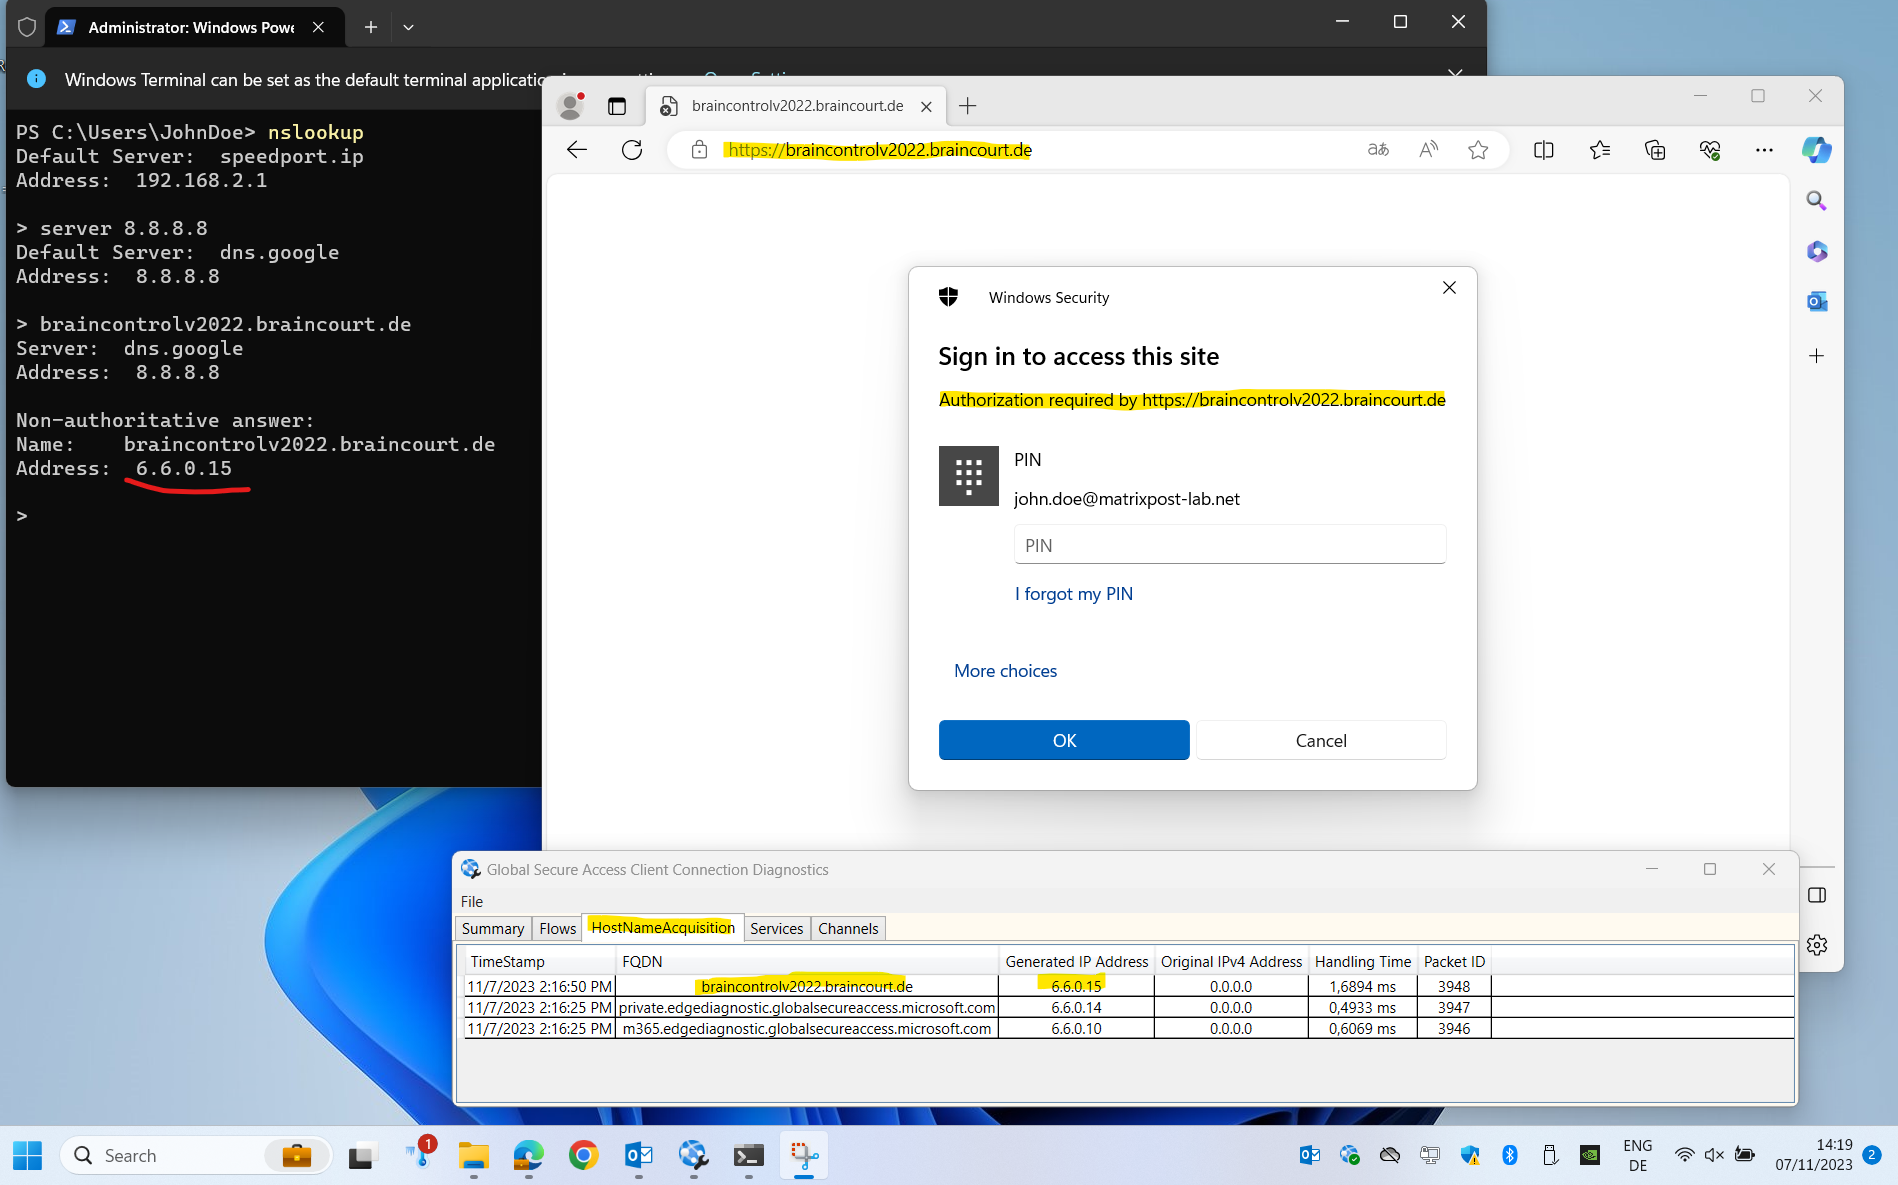
Please not that the web app I will access here from remote is not running on the local designated machine where the Application Proxy Connector is installed.
So only one installation in your on-premise network is necessary to service all your published applications; a second connector can be installed for high availability purposes.
Quick Access is the primary group of FQDNs and IP addresses that you want to secure. As you’re planning your Global Secure Access deployment, review your list of private resources and determine which resources you always want to tunnel through the service. This primary group of FQDNs, IP addresses, and IP ranges is what you add to Quick Access.
Source: https://learn.microsoft.com/en-us/entra/global-secure-access/concept-private-access#quick-access-app
Source: https://learn.microsoft.com/en-us/entra/global-secure-access/how-to-configure-quick-access
Per-app Access
As mentioned Private Access provides two ways to configure the private resources. The Quick Access app we already saw previously in action. Now let’s take a look at the Global Secure Access app.
A Global Secure Access app could be configured if any of the following scenarios sound familiar:
- I need to apply a different set of Conditional Access policies to a subset of users.
- I have a few private resources that I want to secure, but they should have a different set of access policies.
- I have a subset of private resources that I only want to secure for a specific time frame.
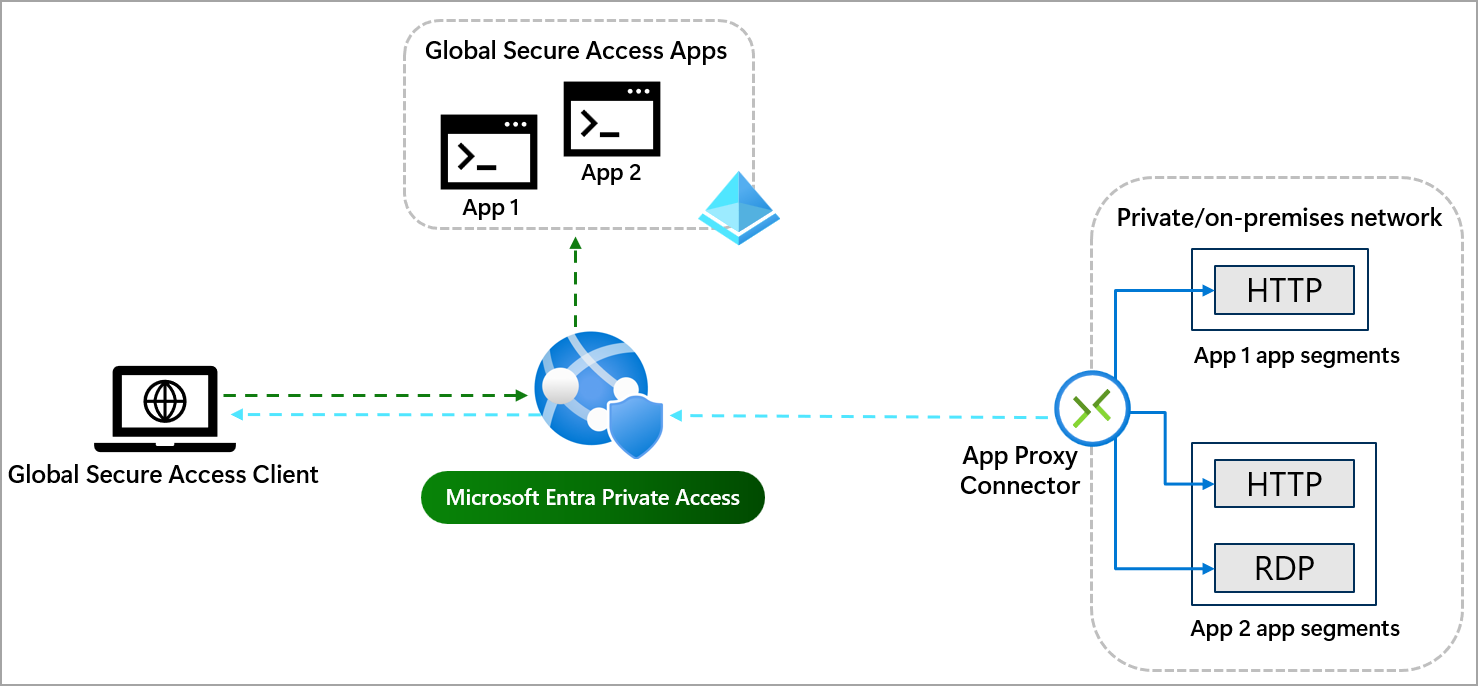
The Global Secure Access app takes a more detailed approach to securing your private resources. You can create multiple per-app access apps to secure different private resources. Paired with Conditional Access policies, you have a powerful yet fine-grained way to secure your private resources.
Configure Per-app Access
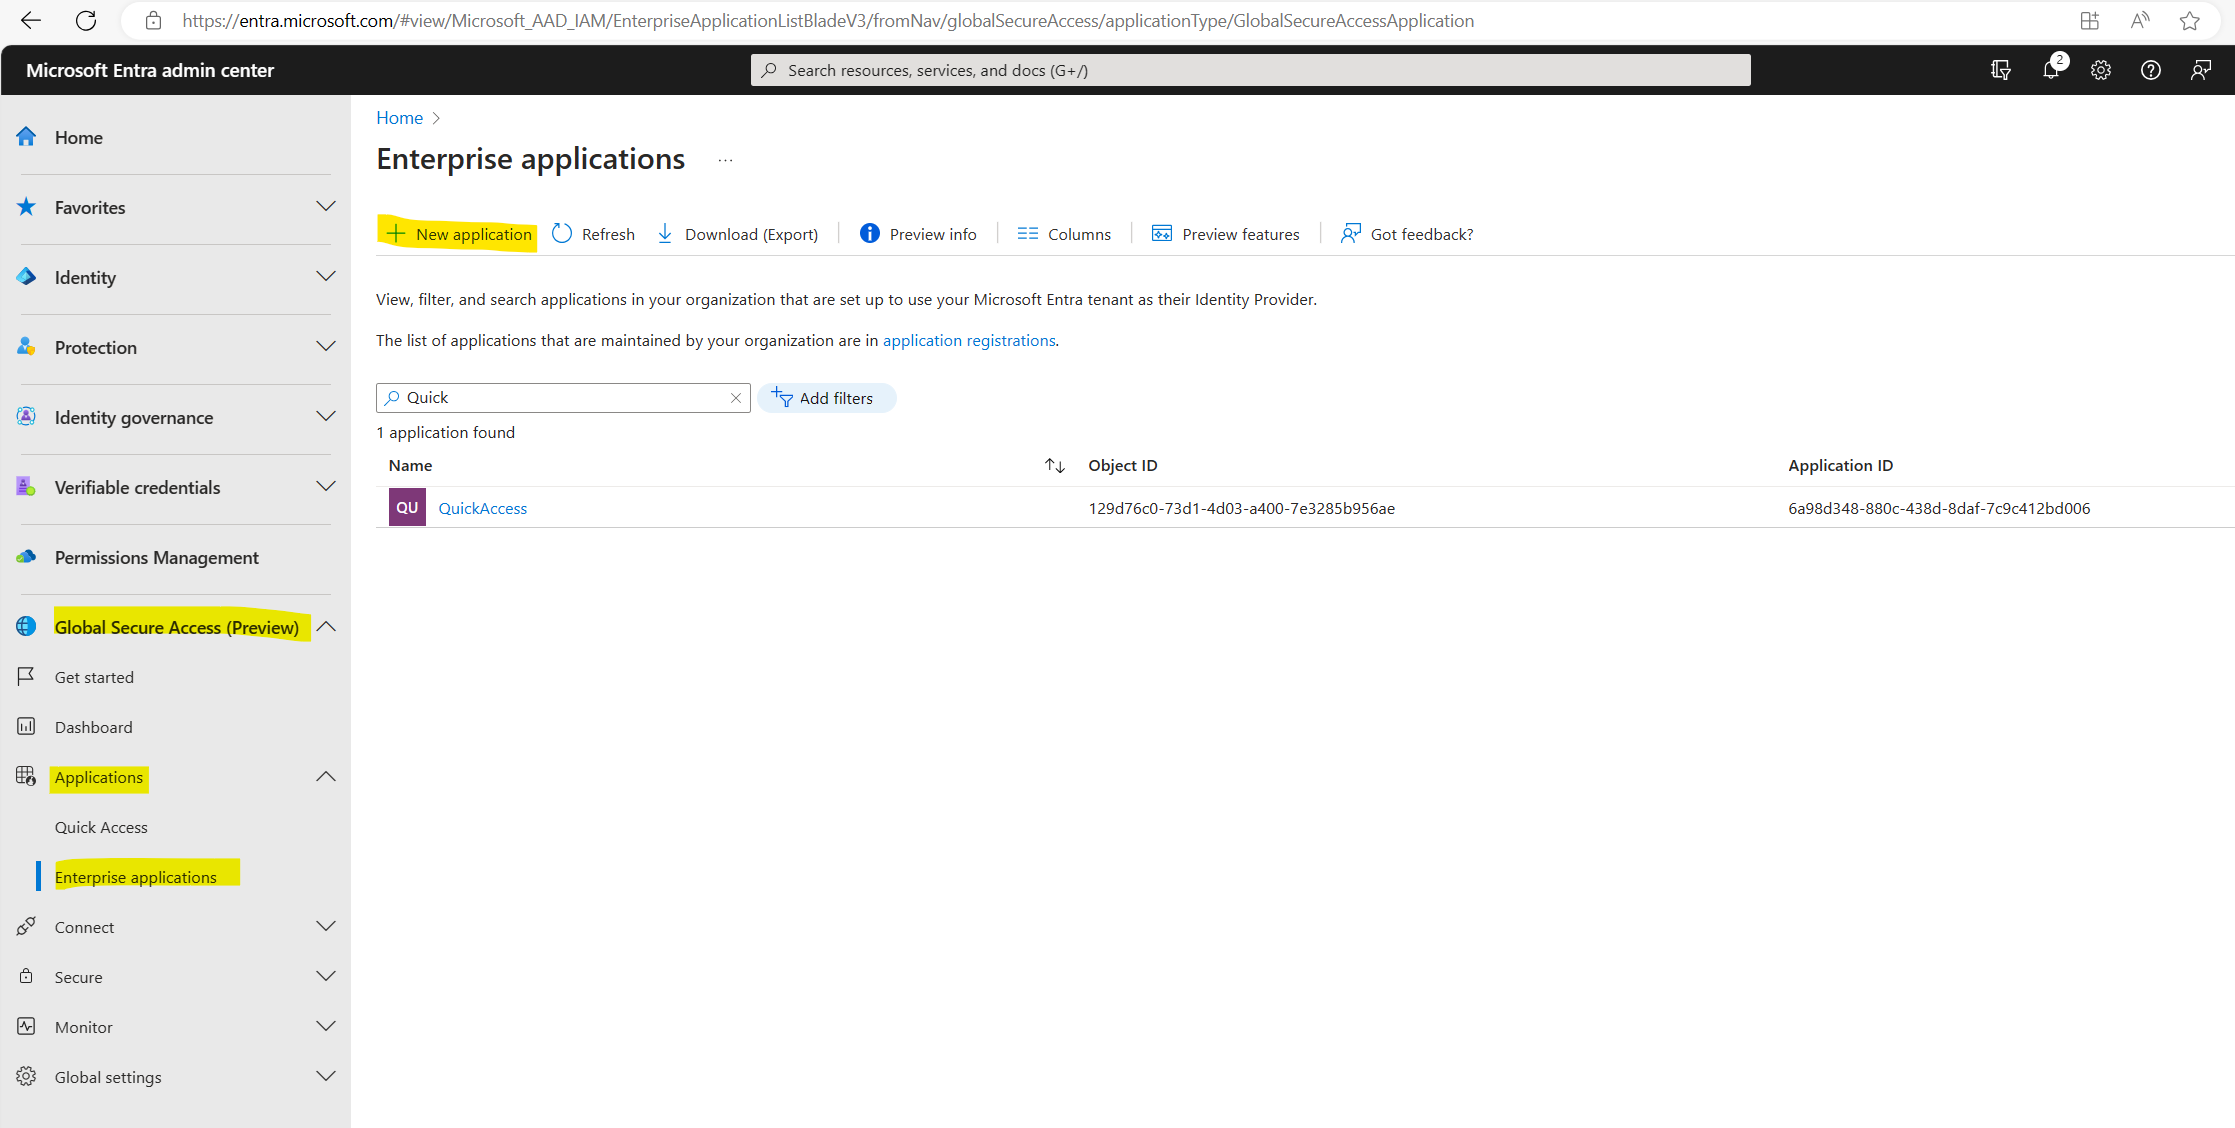
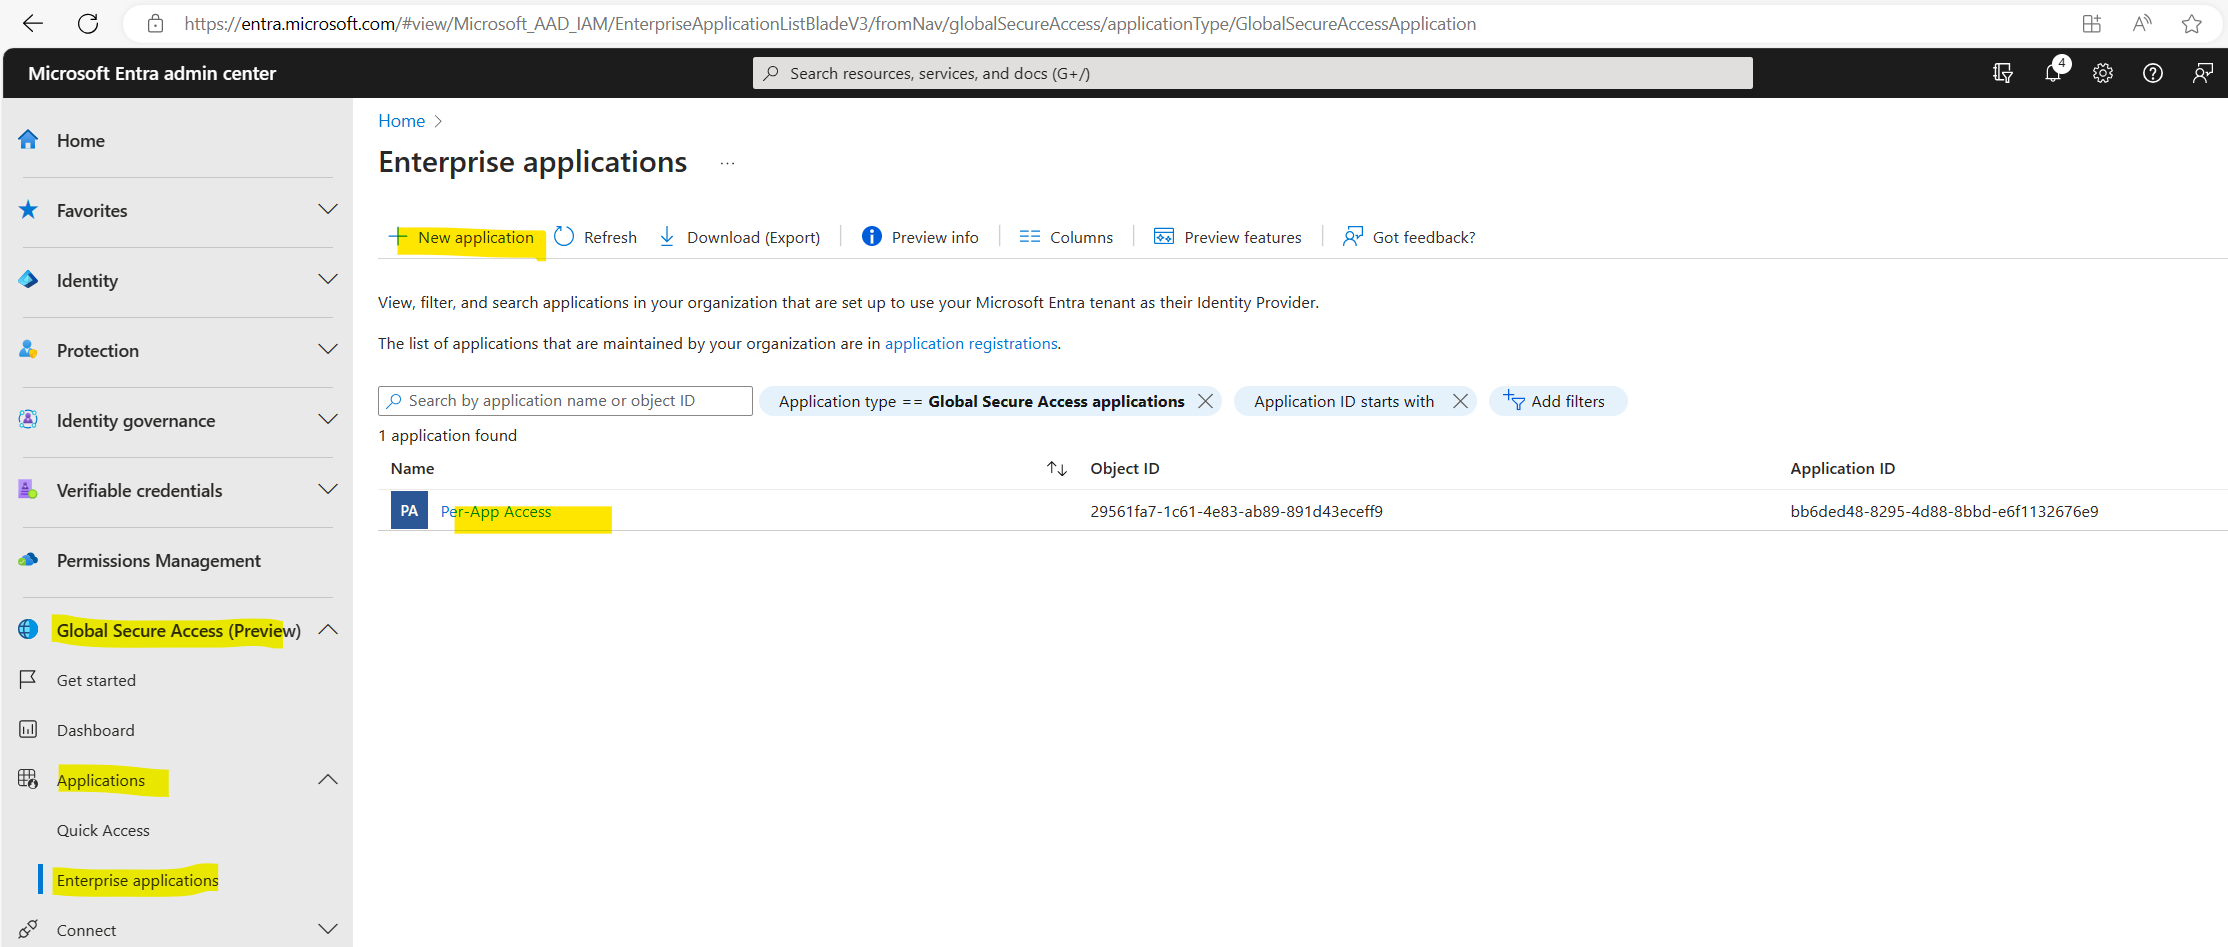
To configure Per-app Access we first need to create a new application.
Global Secure Access (preview) > Applications > Enterprise applications.
To demonstrate the Per-app Access option I will use here also my internal blazor server web app as previously for the Quick Access option.
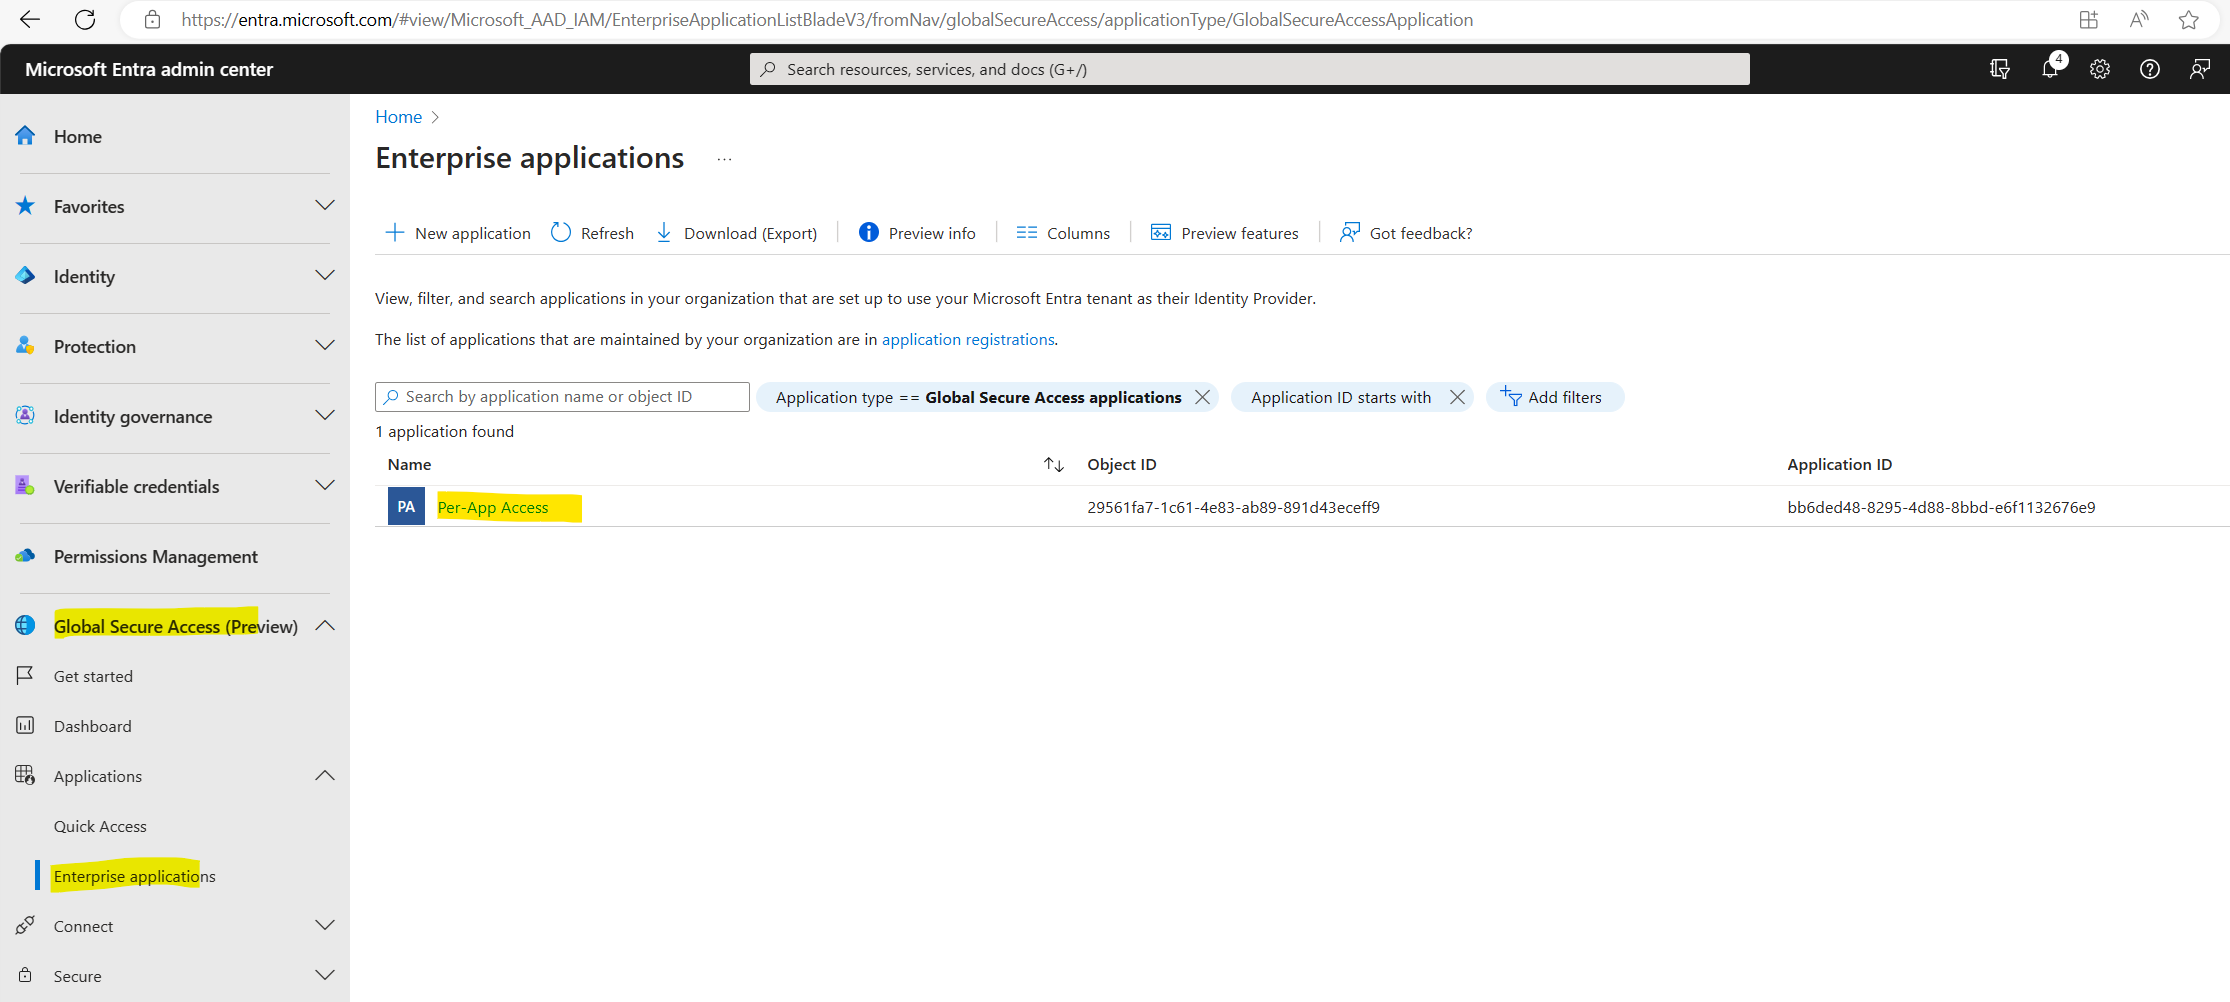
So now I have two enterprise applications for Private Access.
As previously I will also assign myself and John Doe to the new application to grant access to.
In order to update application segments browse to Global Secure Access (preview) > Applications > Enterprise applications.
Search for and select your application and select Network access properties from the side menu.
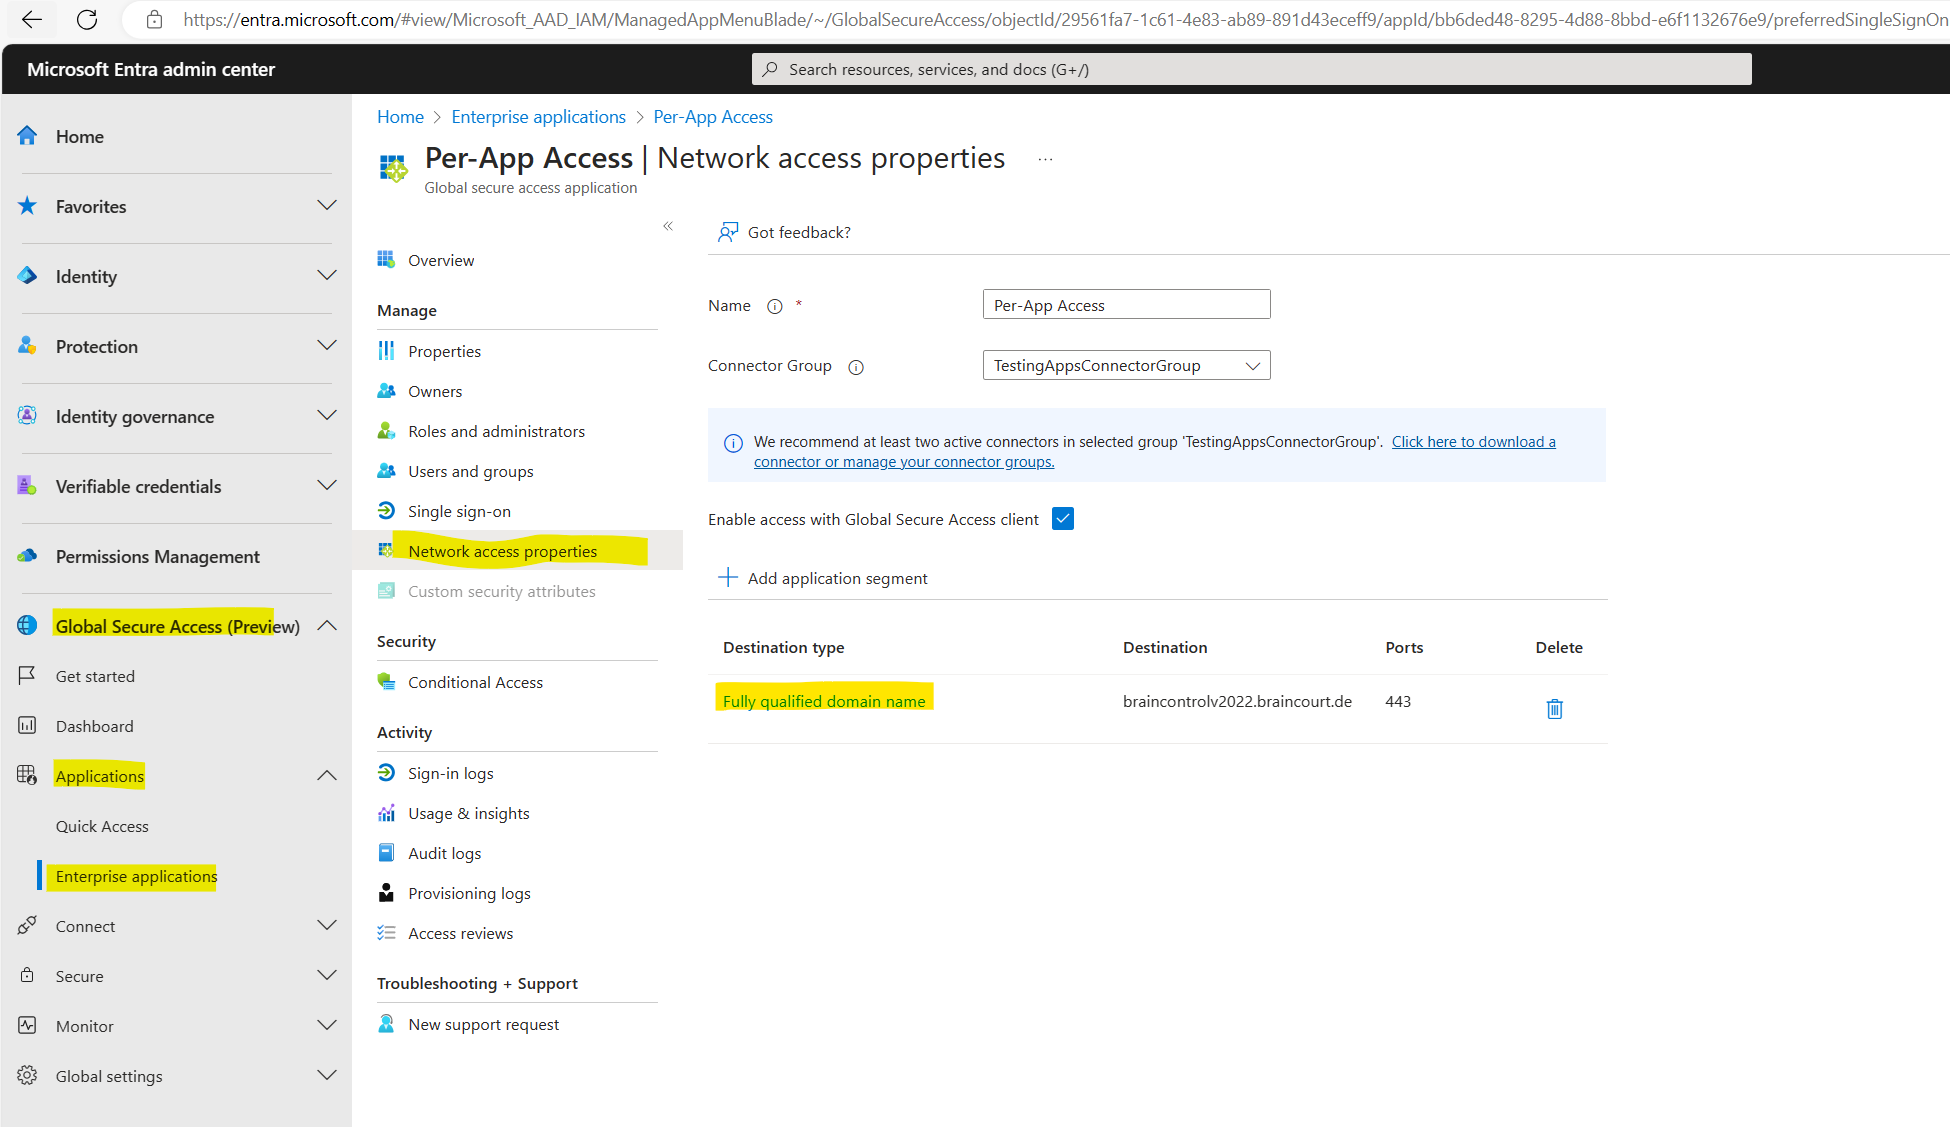
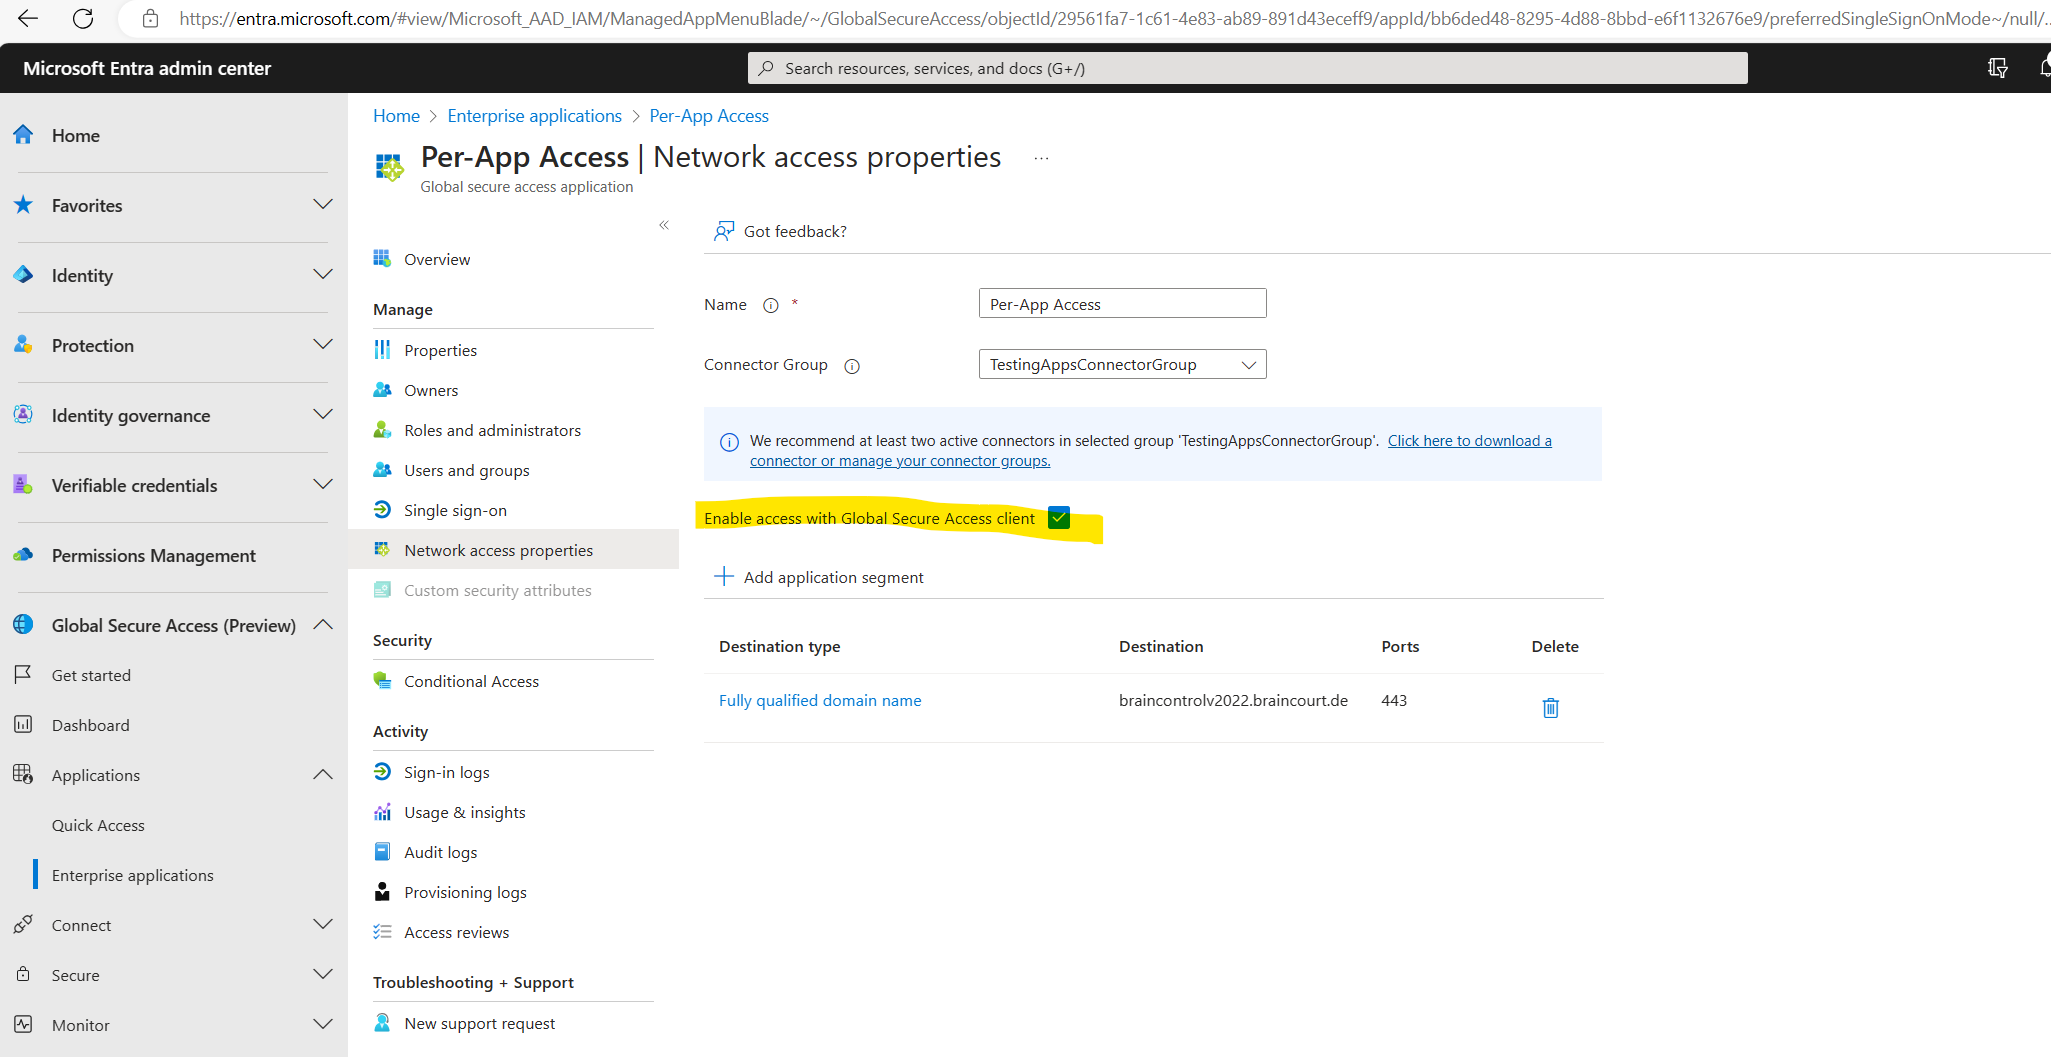
You can also enable or disable here access to the Global Secure Access app using the Global Secure Access Client.
This option is selected by default, but can be disabled, so the FQDNs and IP addresses included in the app segments aren’t tunneled through the service.
Source: https://learn.microsoft.com/en-us/entra/global-secure-access/how-to-configure-per-app-access
Quick Access vs. Per-app Access
The Global Secure Access app takes a more detailed approach to securing your private resources. You can create multiple per-app access apps to secure different private resources. Paired with Conditional Access policies, you have a powerful yet fine-grained way to secure your private resources.
Below you can see that you can create multiple per-app access apps.
Here for example I have created a second per-app.
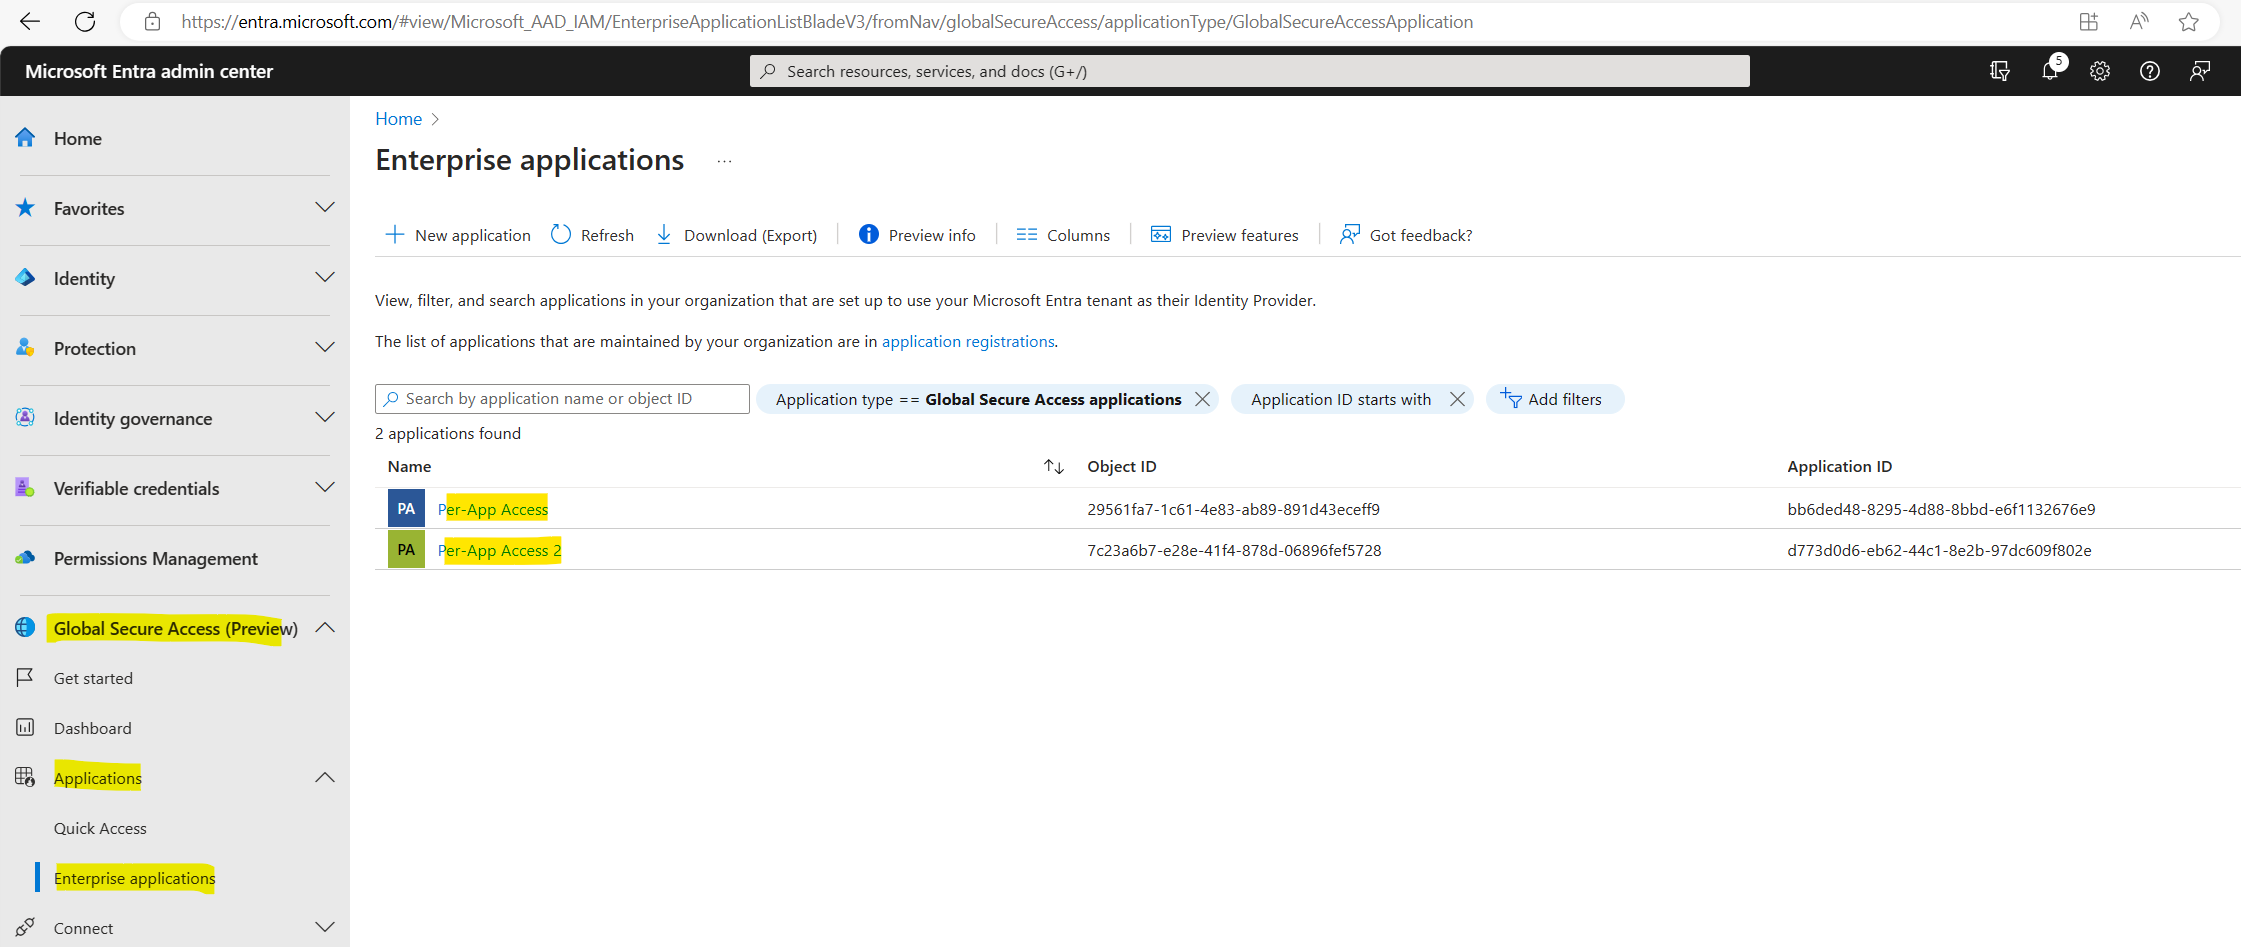
For the second app I can for example assign a different conditional access policy than to the first app.
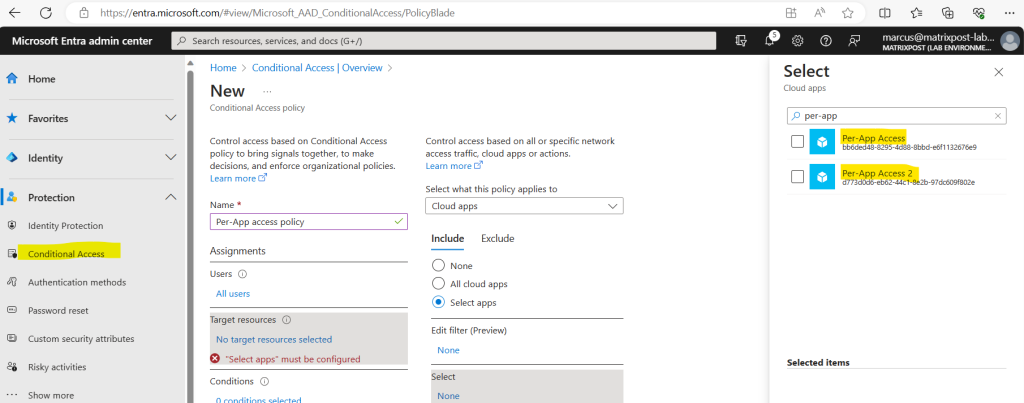
In contrast you can have just one Quick Access app.
What is Microsoft Entra?
To see all products included in the unifying brand named Microsoft Entra please take a look at my following post.
Links
Get started with Global Secure Access
https://learn.microsoft.com/en-us/entra/global-secure-access/how-to-get-started-with-global-secure-accessLearn about Microsoft Entra Private Access
https://learn.microsoft.com/en-us/entra/global-secure-access/concept-private-accessHow to configure Quick Access for Global Secure Access
https://learn.microsoft.com/en-us/entra/global-secure-access/how-to-configure-quick-accessHow to configure Quick Access for Global Secure Access
https://learn.microsoft.com/en-us/entra/global-secure-access/how-to-manage-private-access-profileHow to configure Per-app Access using Global Secure Access applications
https://learn.microsoft.com/en-us/entra/global-secure-access/how-to-configure-per-app-access