Set up Active Directory Federation Services (AD FS 5.0) – Create an ASP.NET Core Web Application (MVC) using WS-FED – Part 5
In this post I want to show you, how you can create a claim aware ASP.NET Core Web Application (MVC) with C# in Visual Studio, in order to authenticate users through an AD FS server and WS-FED.
This post is split into multiple parts
Part 1 … will cover the installation from the internal ADFS ServerPart 2 … will cover the installation from the ADFS Reverse Proxy Server in the perimeter network
Part 3 … will cover all about certificates for an ADFS environmentPart 4 … we will create an ASP.NET Web Application (.NET Framework -Web Forms) and configure it to be claim aware using WS-FED.
Part 5 … we will create an ASP.NET Core Web Application (MVCs) and configure it to be claim aware using WS-FED.
Part 6 … we will create an ASP.NET Web Application (.NET Framework – MVC) and configure it to be claim aware by using OAuth 2.0 and OpenID Connect.
Part 7 … we will create an ASP.NET Core Web Application (MVC) and configure it to be claim aware by using OAuth 2.0 and OpenID Connect.
Part 8 … will explain and list all identity protocols, AD FS supports.
I used the following documentation from Microsoft regarding WS-Federation Authentication for ASP.NET Core Web Applications using the MVC template.
Authenticate users with WS-Federation in ASP.NET Core
https://docs.microsoft.com/en-us/aspnet/core/security/authentication/ws-federation
Facebook, Google, and external provider authentication in ASP.NET Core
https://docs.microsoft.com/en-us/aspnet/core/security/authentication/social/
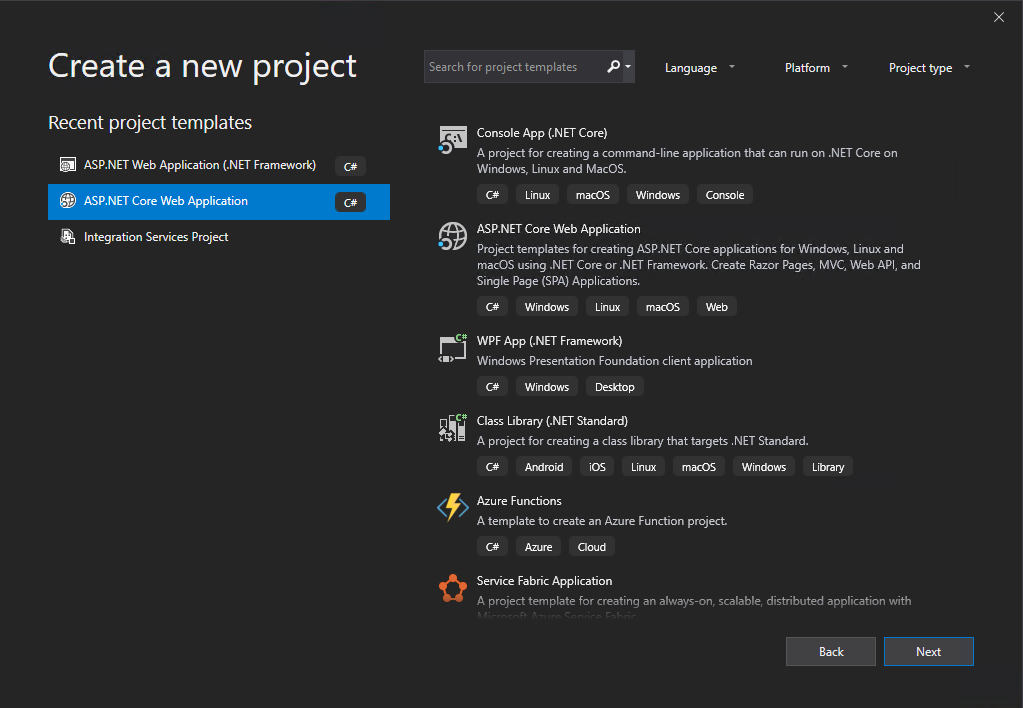
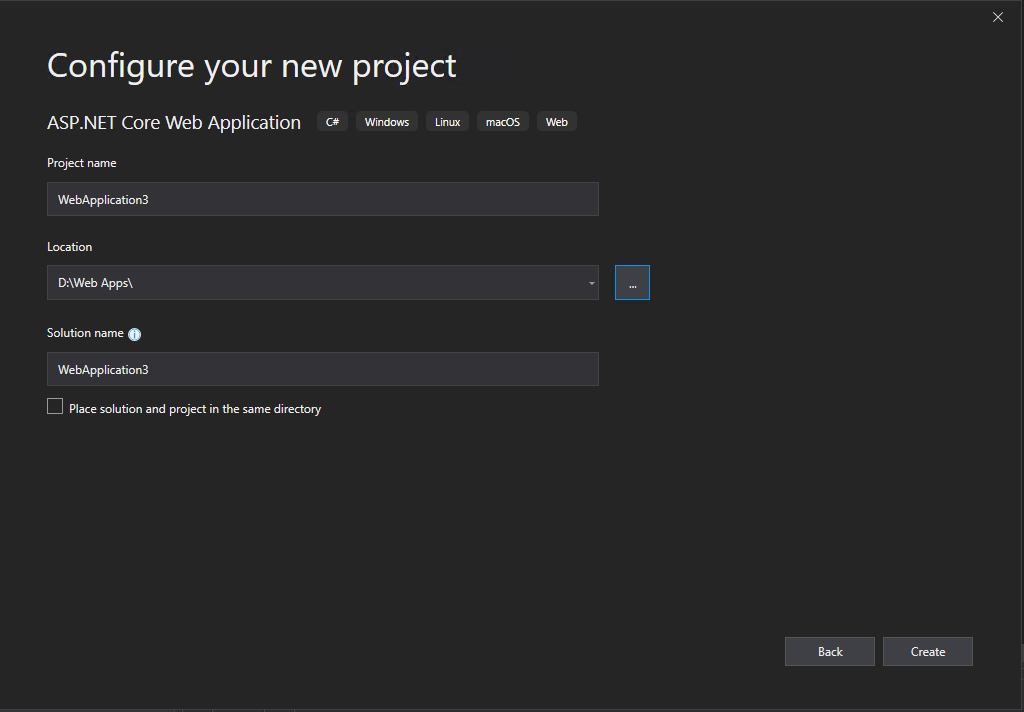
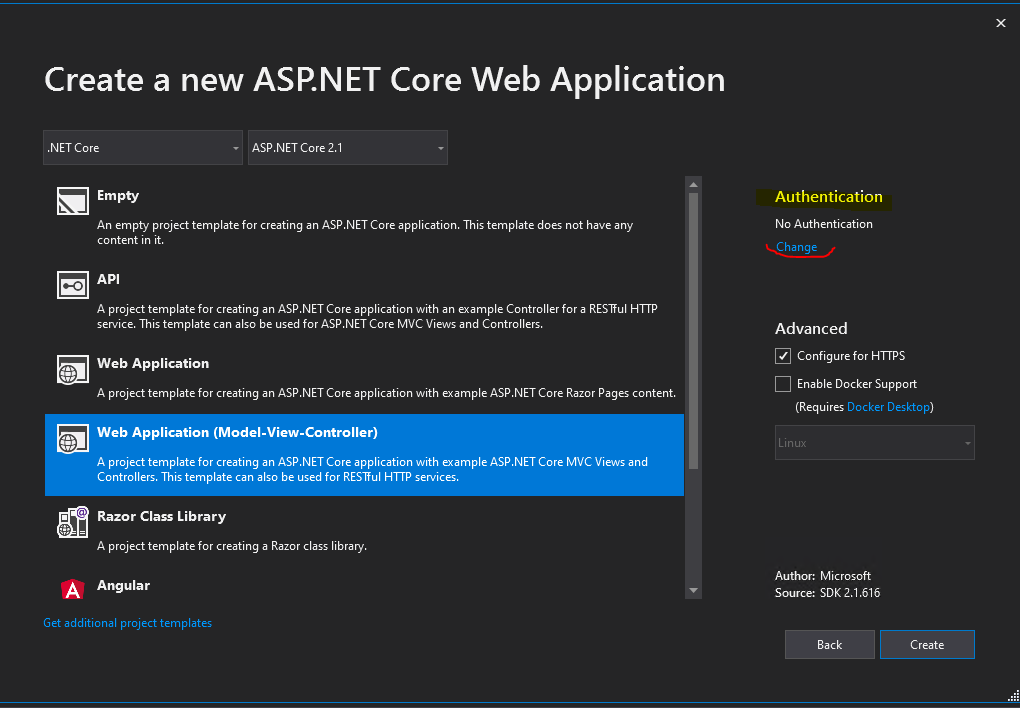
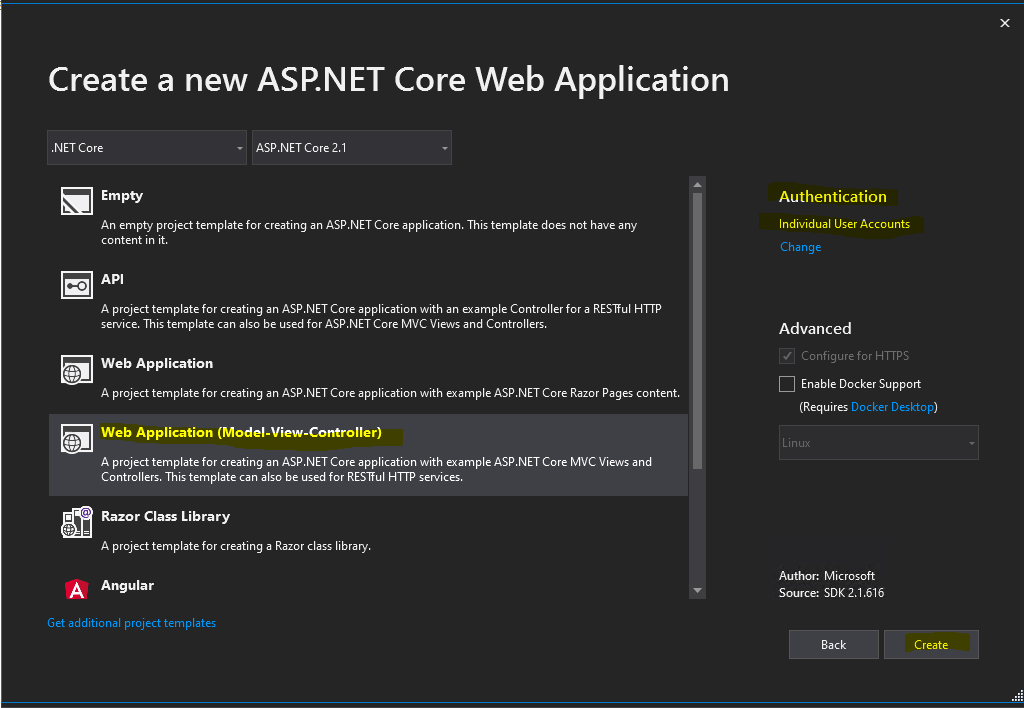
Here I will use the Web Application (Model-View-Controller) template.
ASP.NET MVC
https://en.wikipedia.org/wiki/ASP.NET_MVC
Click on Change under Authentication
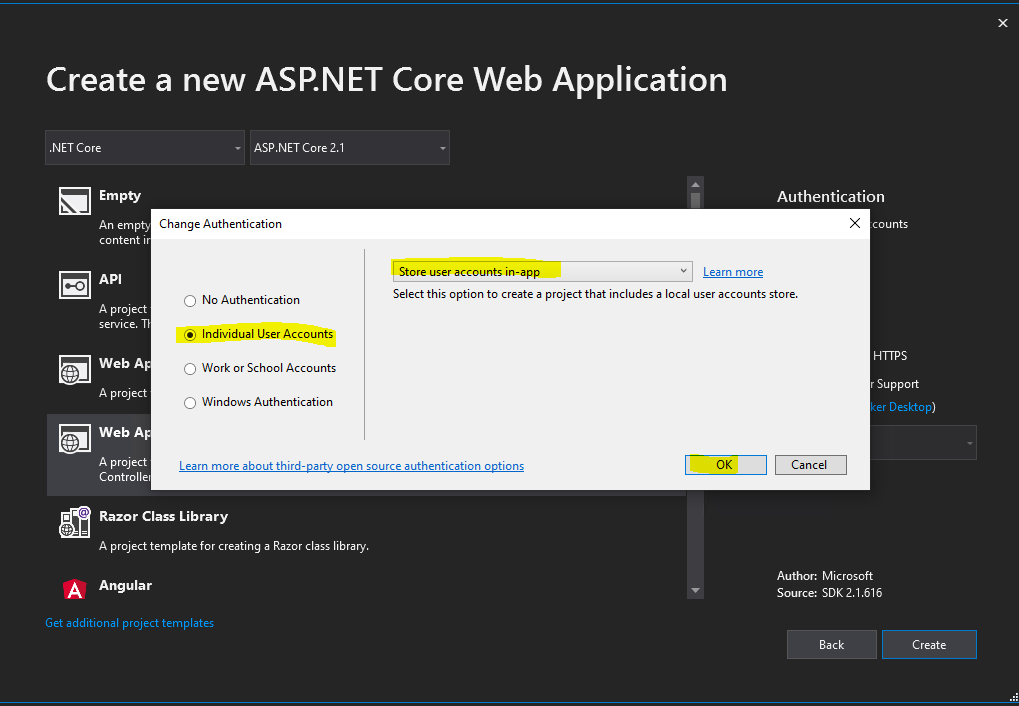
Click on Individual User Accounts and leave Store user accounts in-app.
Click on Create
In the project, open the Startup.cs file and add the following Code inside the public void ConfigureServices() method and before the line
services.AddMvc().SetCompatibilityVersion(CompatibilityVersion.Version_2_1);
# This last line we only need in case we authenticate against Azure AD.
options.Wtrealm = “api://bbd35166-7c13-49f3-8041-9551f2847b69”;
 // WS-Federation Code
            services.AddAuthentication()
            .AddWsFederation(options =>
            {
            // MetadataAddress represents the Active Directory instance used to authenticate users.
            options.MetadataAddress = "https://<ADFS FQDN or AAD tenant>/FederationMetadata/2007-06/FederationMetadata.xml";

            // Wtrealm is the app's identifier in the Active Directory instance.
            // For ADFS, use the relying party's identifier, its WS-Federation Passive protocol URL:
            options.Wtrealm = "https://localhost:44307/";

            // For AAD, use the Application ID URI from the app registration's Overview blade:
            options.Wtrealm = "api://bbd35166-7c13-49f3-8041-9551f2847b69";
            });
            // End WS-Federation Code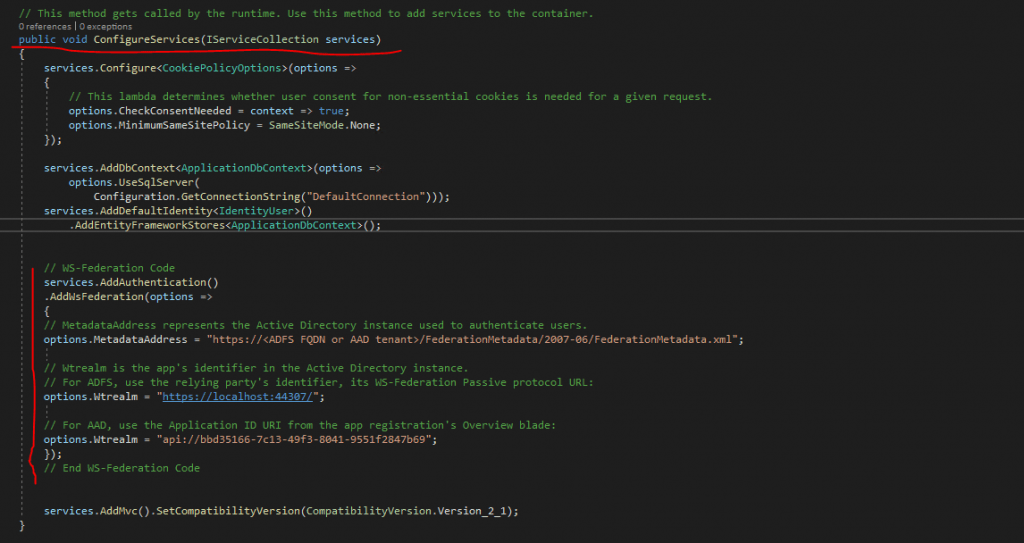
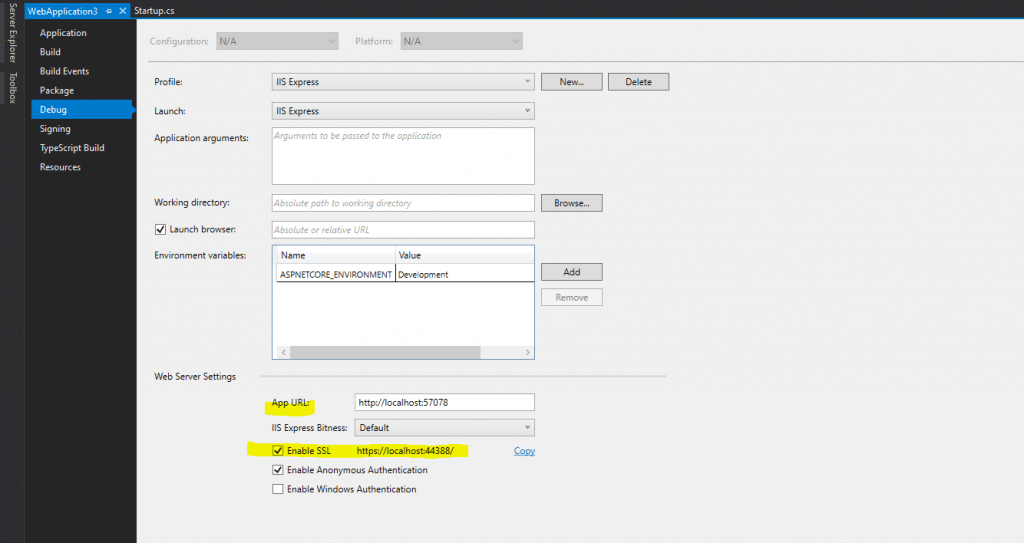
Adjust the MetadataAddress and Wtrealm to your environment.
The URL you can determine in the properties of your web application, here the SSL URL.
Further you need to enter the Federation Metadata URL from your federation server.

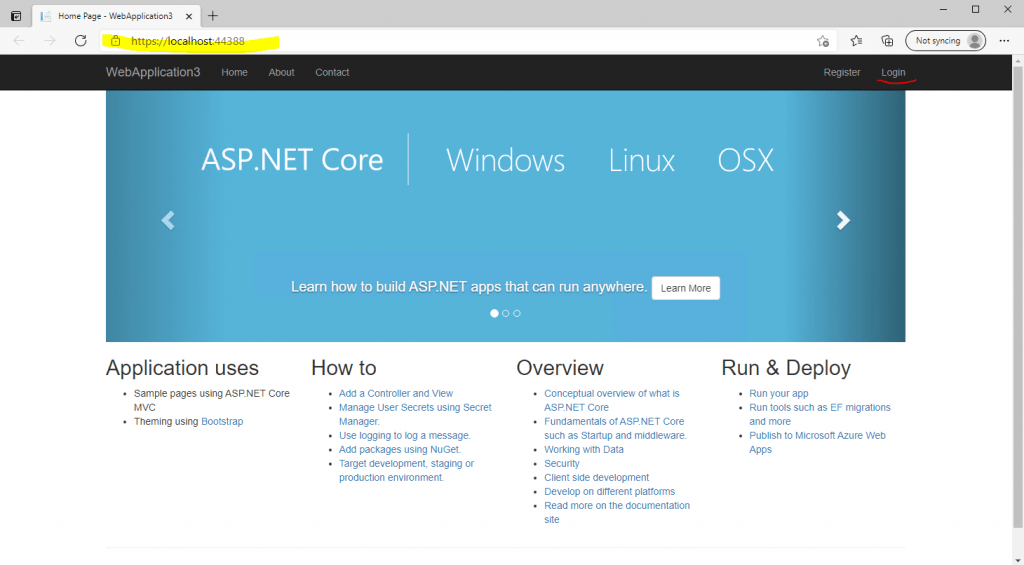
Now we will run the application with F5 for Start Debugging as usual in Visual Studio.
Click on the Login link on the top right
Here we have to click on WsFederation to login through our federation server and getting the claim token to authenticate against the web application.
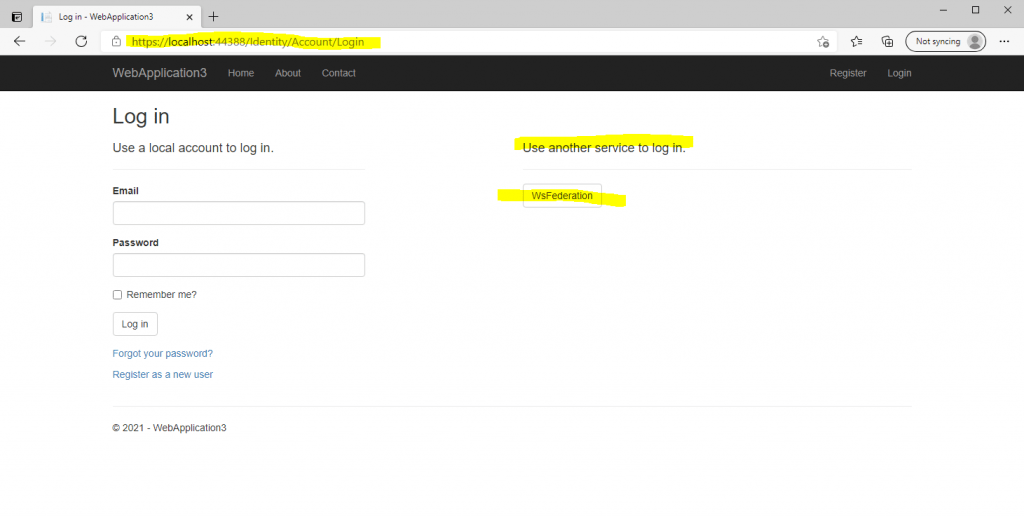
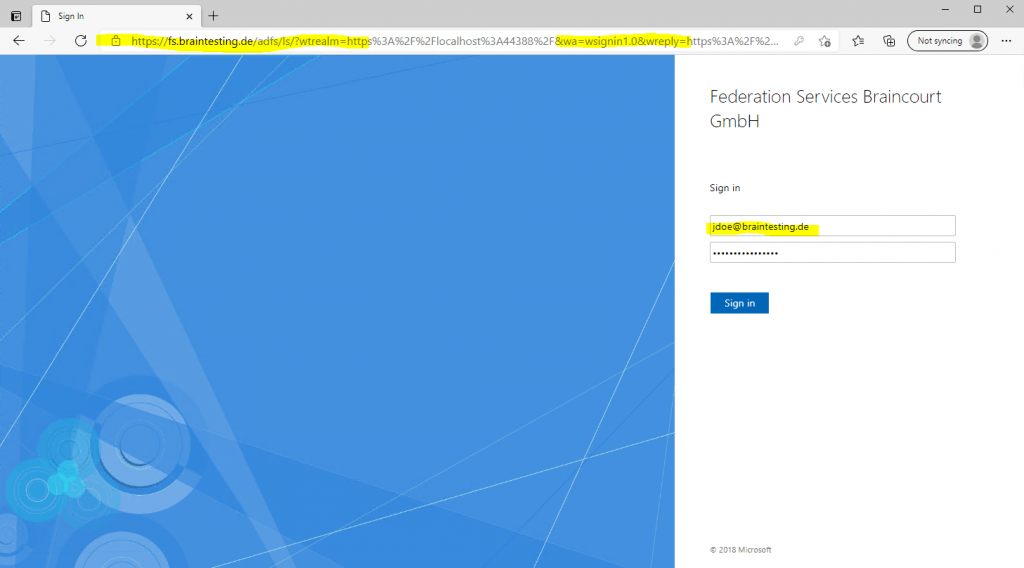
We will get redirected to the sign-in page from the federation server.
Enter your username and password from your on-premise AD account. The parameter in the link from the federation server will tell us, that we using WS-Federation.
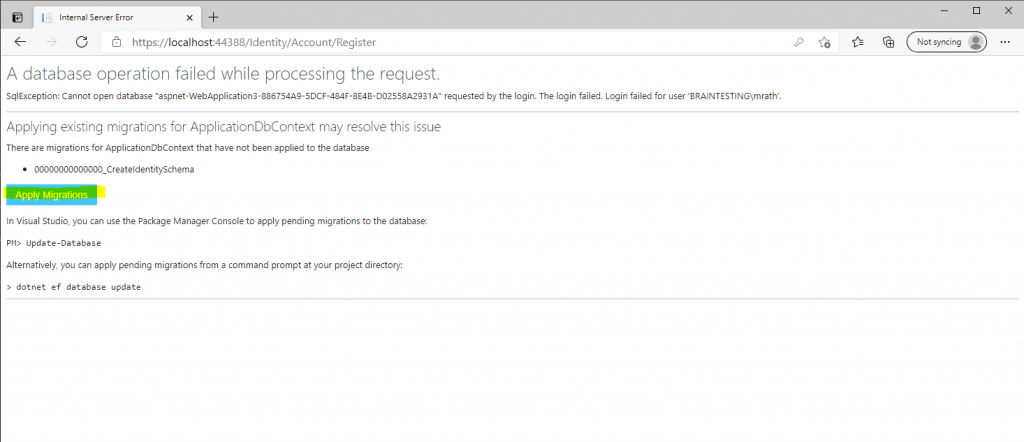
Click on Apply Migrations below and follow the instructions. Finally you had to refresh the page after the migration is applied.
Behind the scenes our web application will create a Microsoft SQL Server LocalDB database to store the users in. So this process and page below will only appear for the first user registration.
The user is created in the database table dbo.AspNetUsers, after you click the register button below. In this table the email will be used also as username. During the process also your on-premises user principal name from the issued claim token and your AD FS server is written to the database and the table dbo.AspNetUserLogins.
More about the Microsoft SQL Server LocalDB you can read in my following post https://blog.matrixpost.net/microsoft-sql-server-localdb/
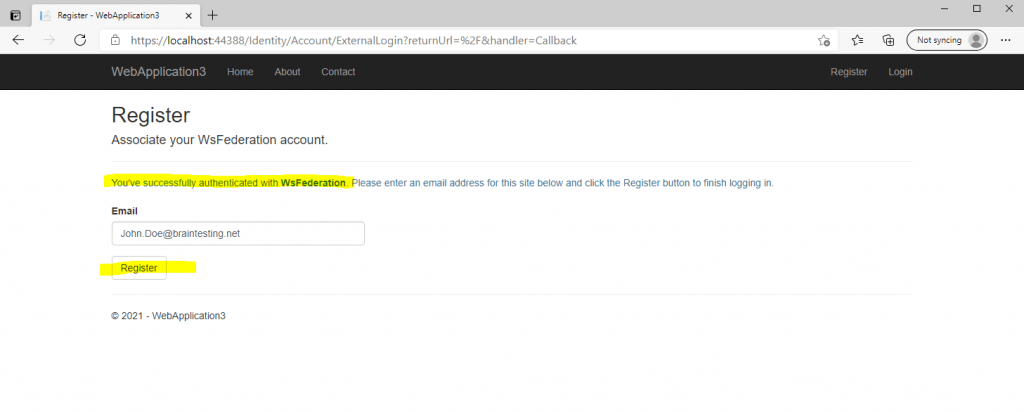
We will successfully authenticated with WsFederation. To finish we finally need to register this account in the web application.
If you configured the Claim Issuance Policy on your AD FS server to issue also the E-Mail Address claim, the Email field below is prepopulated and you only need to click on Register to finalize the registration.
If not you can enter manually your Email address.
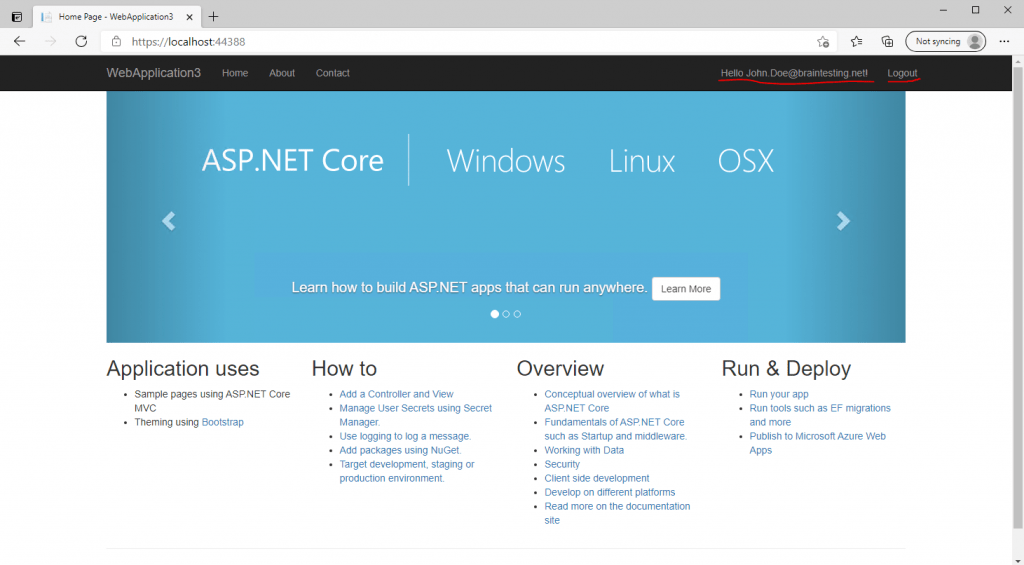
Finally I get logged in to the web application with my on-premises AD account.
As mentioned above, if you provide the E-Mail Address claim, the Email field above at registration is prepopulated and you only need to click on Register to finalize the registration.
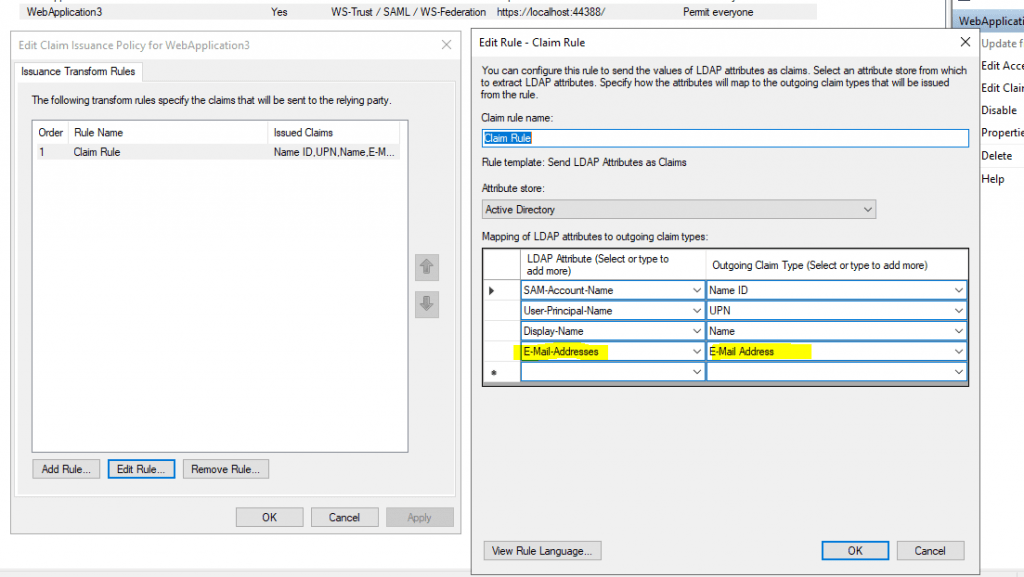
I will not describe all steps to create the relying part trust for this web application in AD FS, it is the same as for the first Web Forms application at the beginning of this post.
Only the Claim Issuance Policy I configured you will see here. The application needs mandatory the SAM-Account-Name -> Name ID claim.
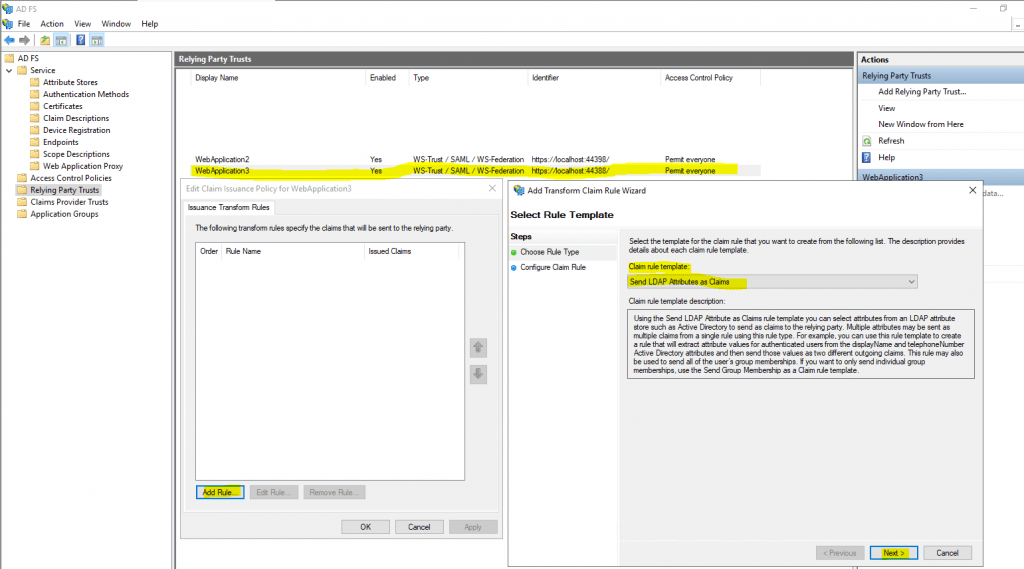
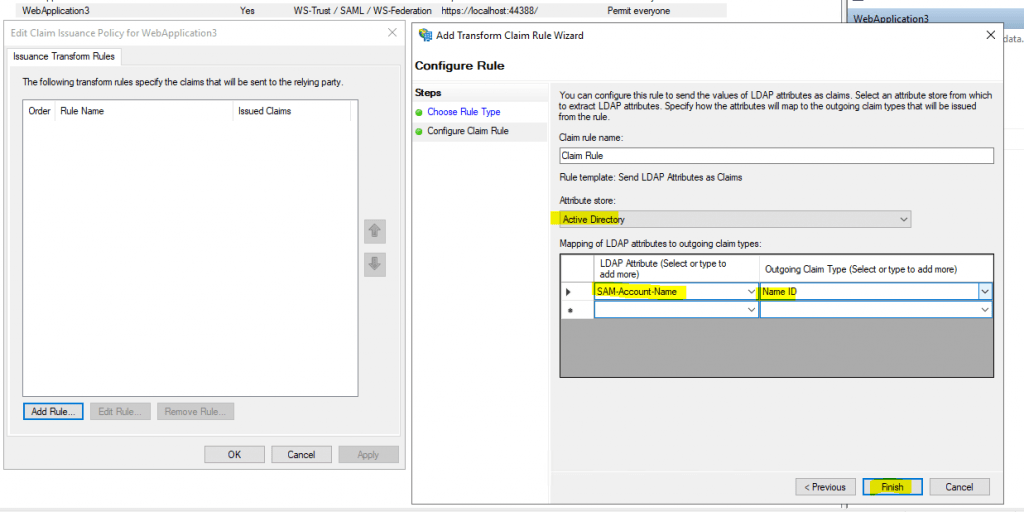
Btw. the username (email) which is displayed in the web application at the top right with Hello …. is coded in the _LoginPartial.cshtml under Views – Shared.

Links
Authenticate users with WS-Federation in ASP.NET Core
https://docs.microsoft.com/en-us/aspnet/core/security/authentication/ws-federation
Claims-based authorization in ASP.NET Core
https://docs.microsoft.com/en-us/aspnet/core/security/authorization/claims
Facebook, Google, and external provider authentication in ASP.NET Core
https://docs.microsoft.com/en-us/aspnet/core/security/authentication/social/
Introduction to Identity on ASP.NET Core
https://docs.microsoft.com/en-us/aspnet/core/security/authentication/identity
Related Posts
Latest posts
Deploying NetApp Cloud Volumes ONTAP (CVO) in Azure using NetApp Console (formerly BlueXP) – Part 5 – Backup and Recovery
Follow me on LinkedIn


