Set up and deploy BgInfo from Sysinternals by using Microsoft Intune
In this post we will see how we can set up and deploy BgInfo from Sysinternals on Windows devices by using Microsoft Intune.
BgInfo runs on Windows client system Windows 8.1 and higher and on Windows server system Windows Server 2012 and higher.
About how to deploy BgInfo in on-premise Active Directory networks by using a group policy, you can read my following post.
BgInfo runs on Windows client system Windows 8.1 and higher and on Windows server system Windows Server 2012 and higher.
BGInfo automatically displays relevant information about a Windows computer on the desktop’s background, such as the computer name, IP address, service pack version, and more. You can edit any field as well as the font and background colors, and can place it in your startup folder so that it runs every boot, or even configure it to display as the background for the logon screen.
Because BGInfo simply writes a new desktop bitmap and exits, you don’t have to worry about it consuming system resources or interfering with other applications.
Source: https://learn.microsoft.com/en-us/sysinternals/downloads/bginfo
- Enroll Windows Computer into Microsoft Intune
- Set up and configure BgInfo
- Creating a Windows App in Microsoft Intune to deploy the BgInfo Files on the Device
- Microsoft Intune Policy refresh intervals
- Using the Company Portal App to manage corporate apps provided by Microsoft Intune
- Troubleshooting
- Using the New-Object PowerShell Cmdlet to determine the Common Startup Folder
- Links
Enroll Windows Computer into Microsoft Intune
In order to deploy BgInfo by using Microsoft Intune, the machines we want to deploy BgInfo needs to be of course first enrolled into Microsoft Intune.
About how to enroll Windows Computer into Microsoft Intune you can read my following post.
Set up and configure BgInfo
First we need to download the latest version of BGInfo from the following page.
BgInfo
https://learn.microsoft.com/en-us/sysinternals/downloads/bginfo
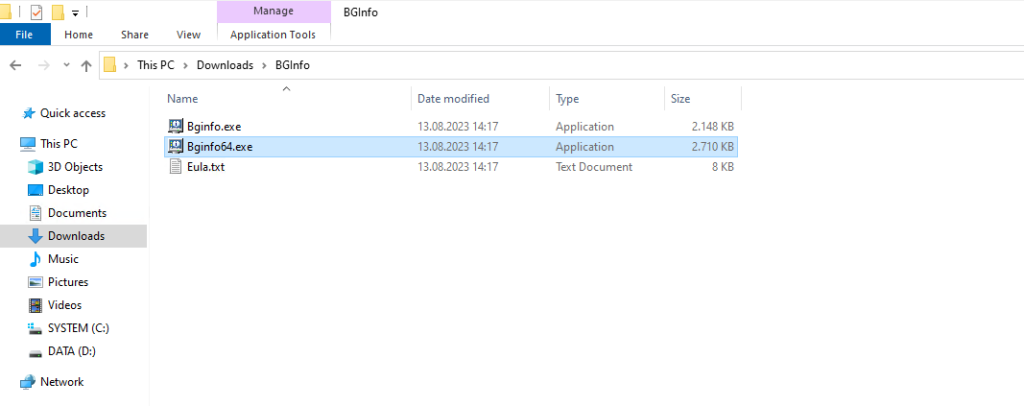
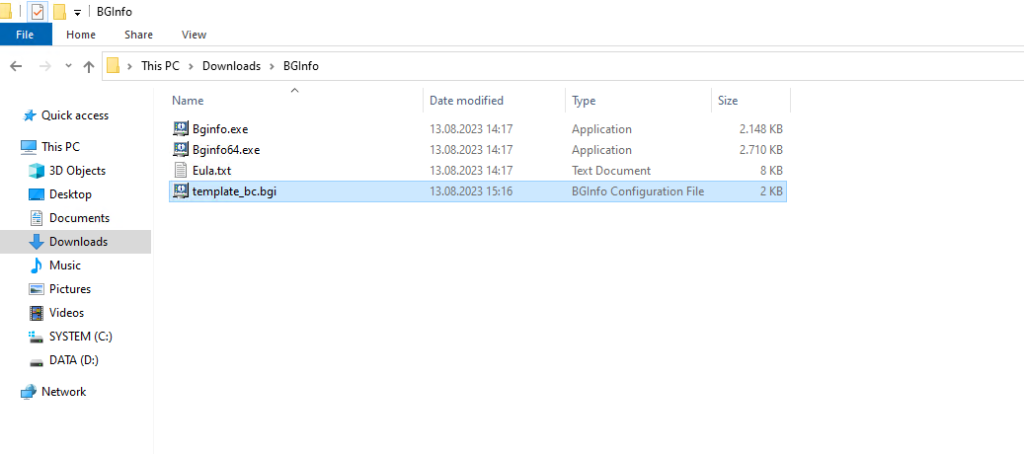
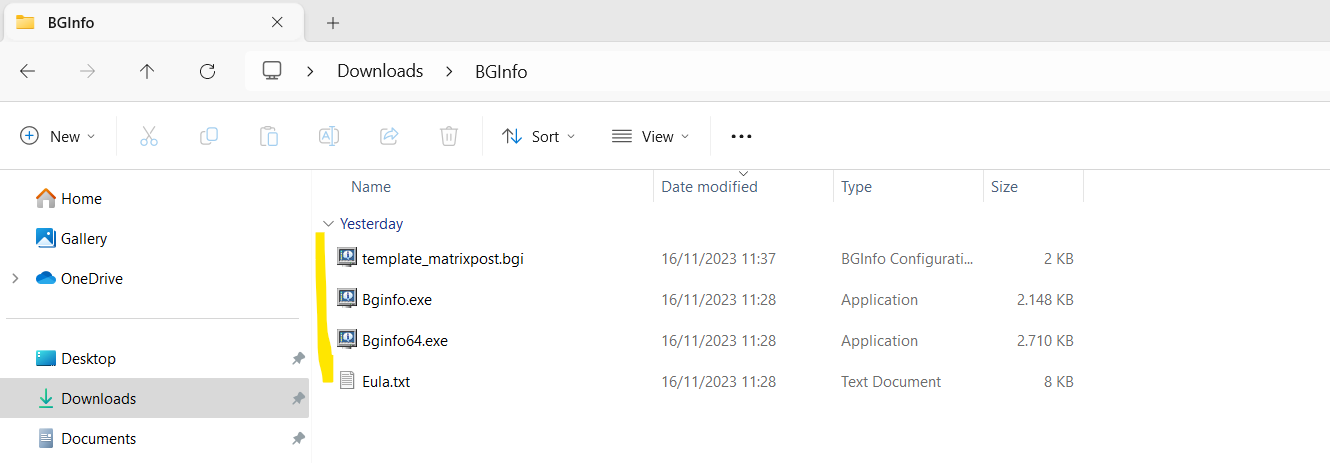
When unzipping the file you will get a 32-bit and 64-bit version of BgInfo.
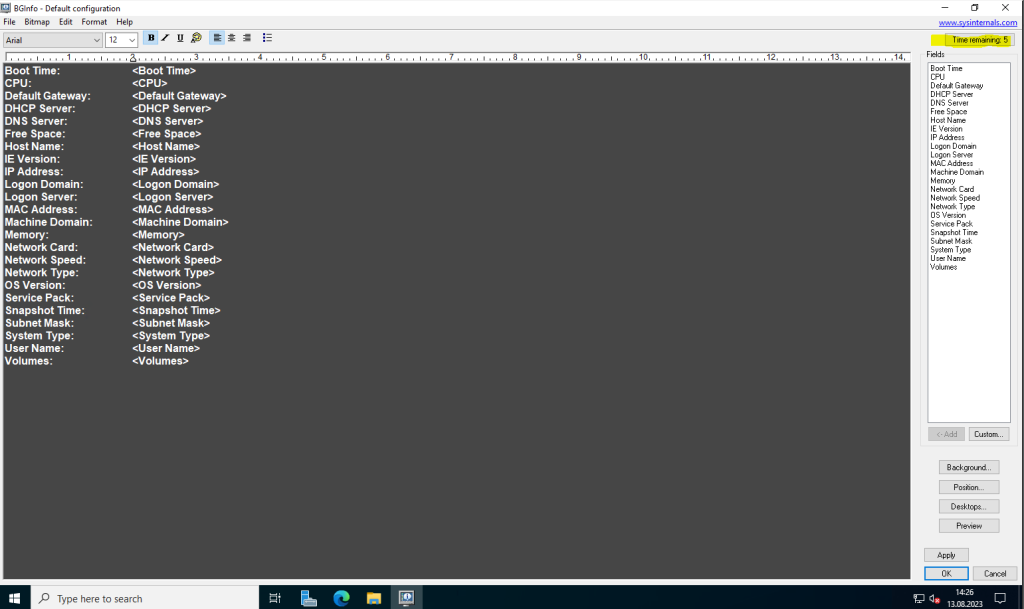
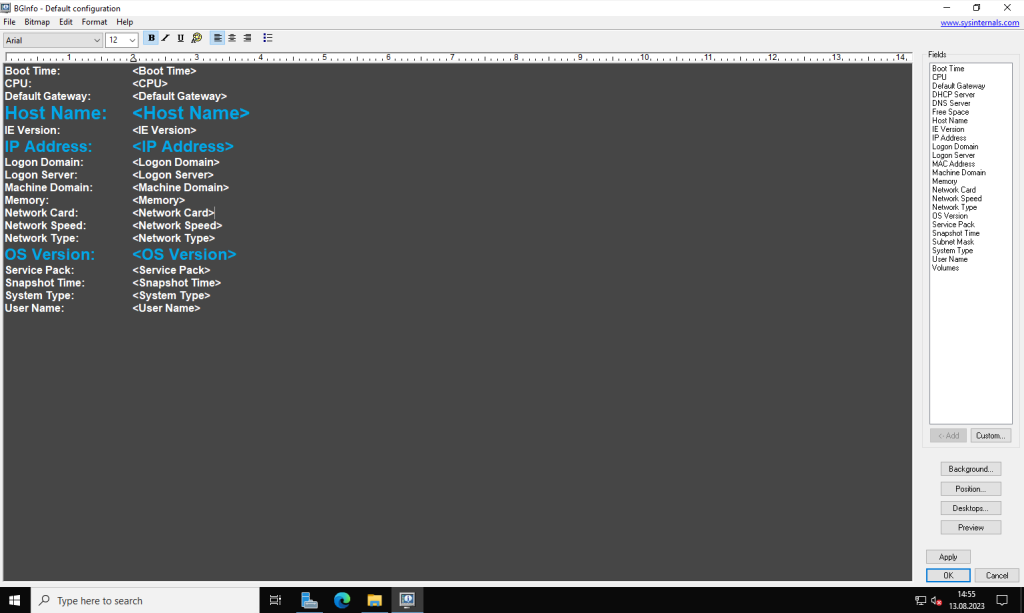
When we double click on one of them, it will open the default configuration of BgInfo like shown below.
The default configuration will also automatically applied to the desktop background on the computer you run BgInfo. If left untouched it will automatically apply these settings and exit after its 10 second count-down timer expires.
Selecting any button or menu item will disable the timer, allowing you to customize the layout and content of the background information.
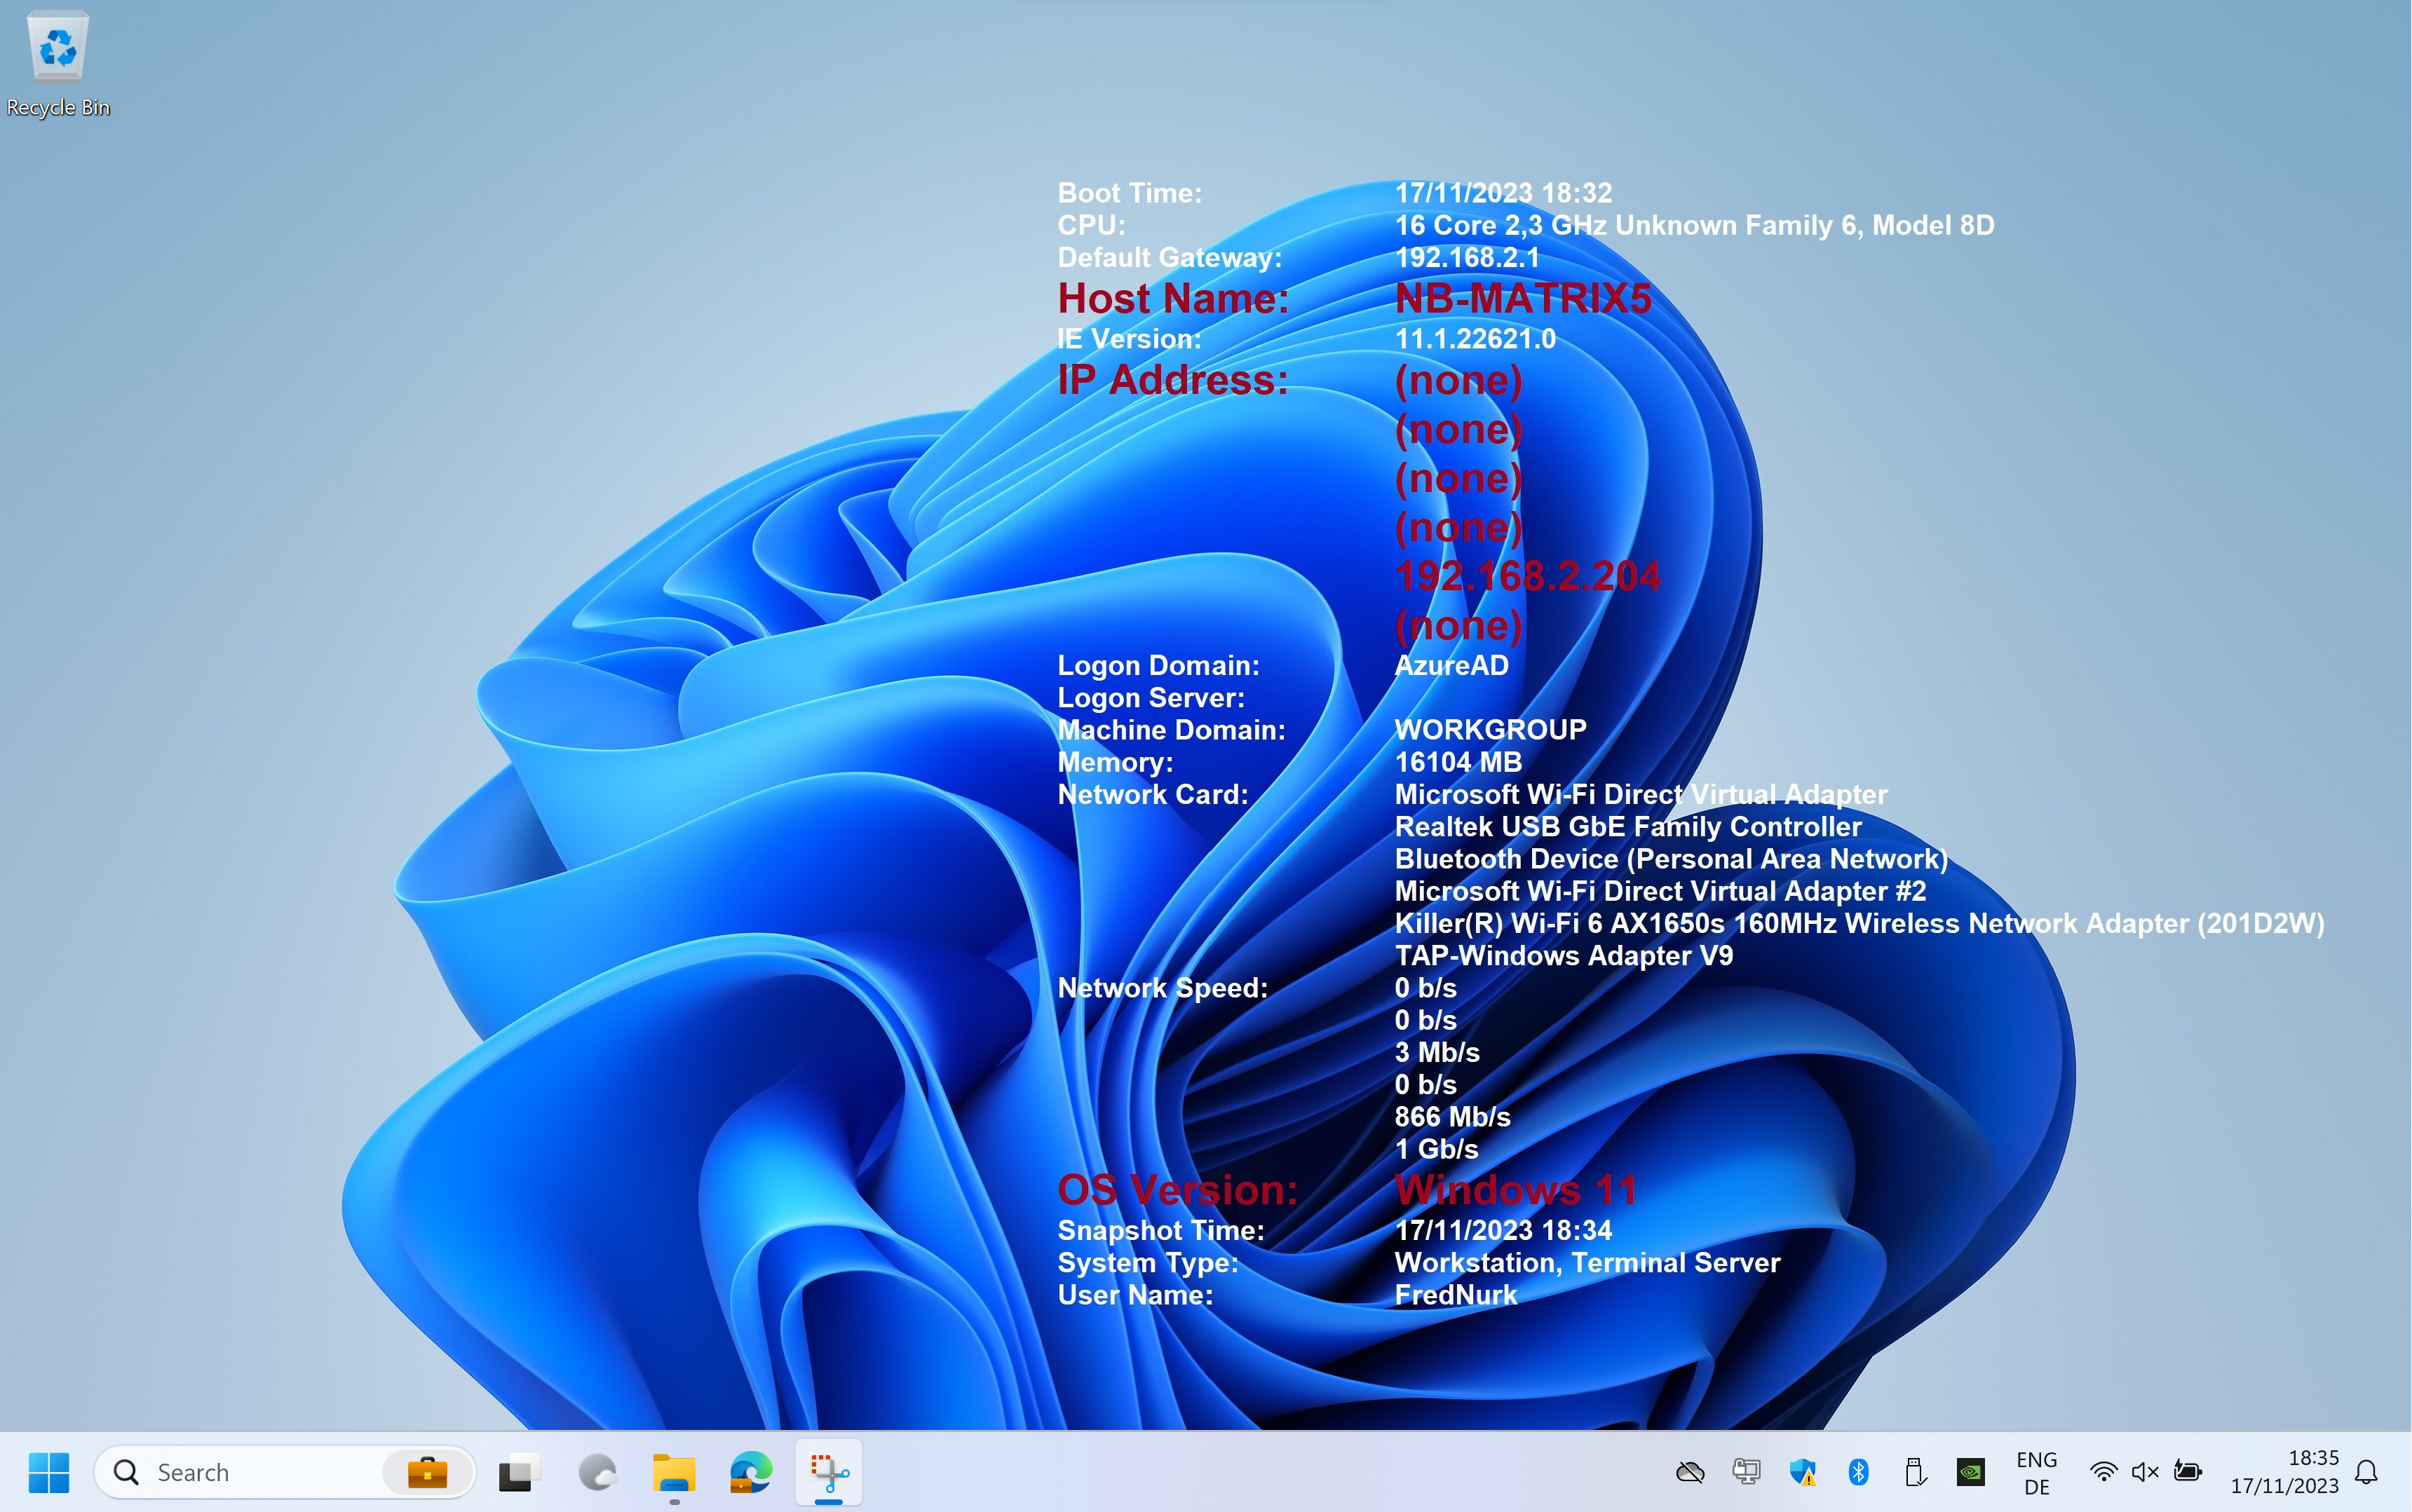
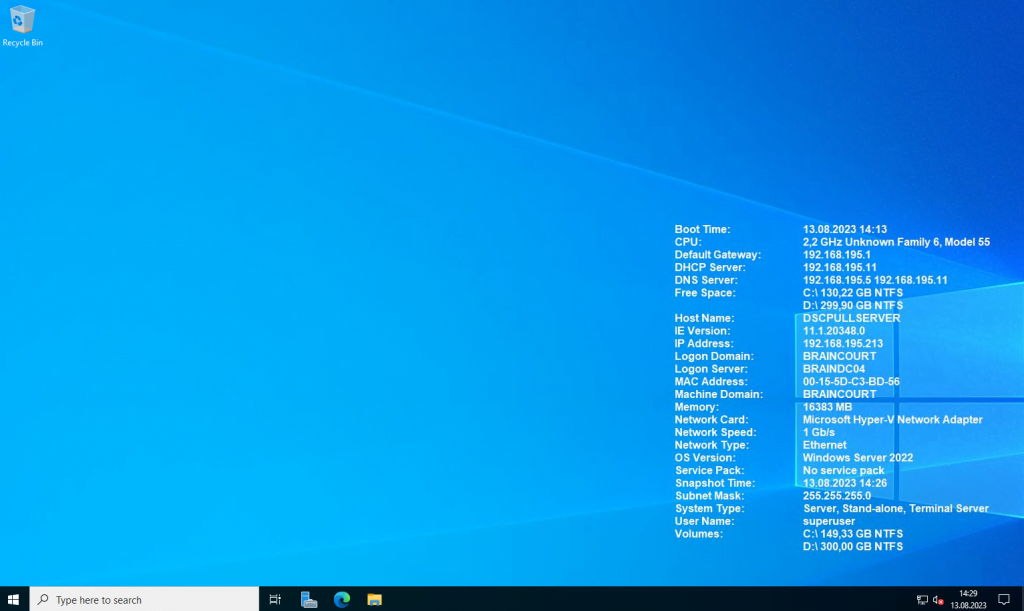
Here you can see the applied default configuration on the computer BgInfo was executed.
You can easily remove fields from the default configuration by just editing the display area. Adding is also simple by first position the cursor in the display area and then clicking on the desired field and the Add button.
The display area is like a classic text editor where you can also adjust the font and colors.
Below I removed some fields I doesn’t need or want to display and changed the font style including colors from some fields.
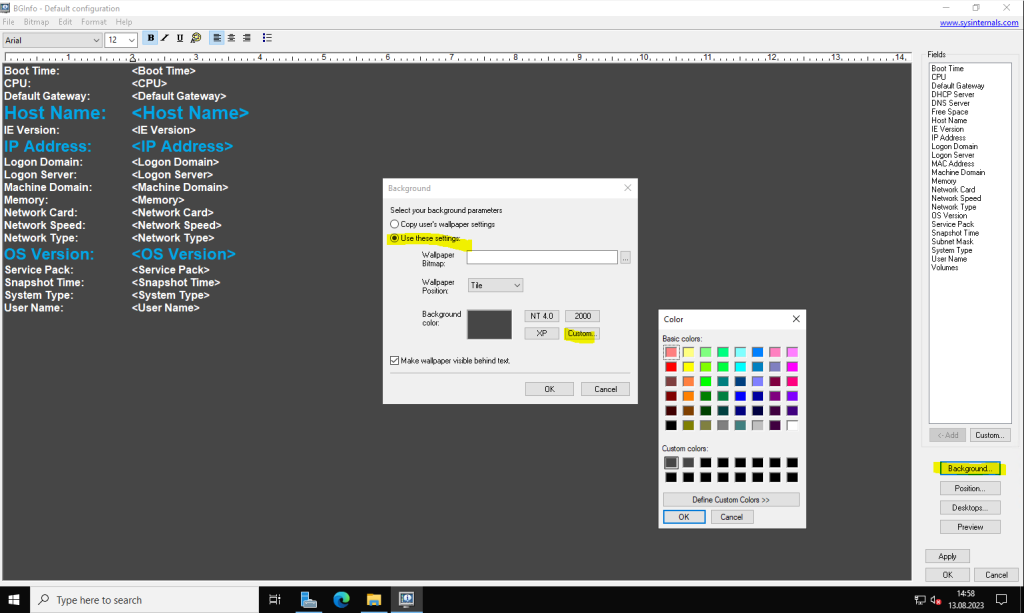
By clicking on the Background button on the right we can also change the background color or adding a wallpaper. In my case I will just use the default background color like shown below.
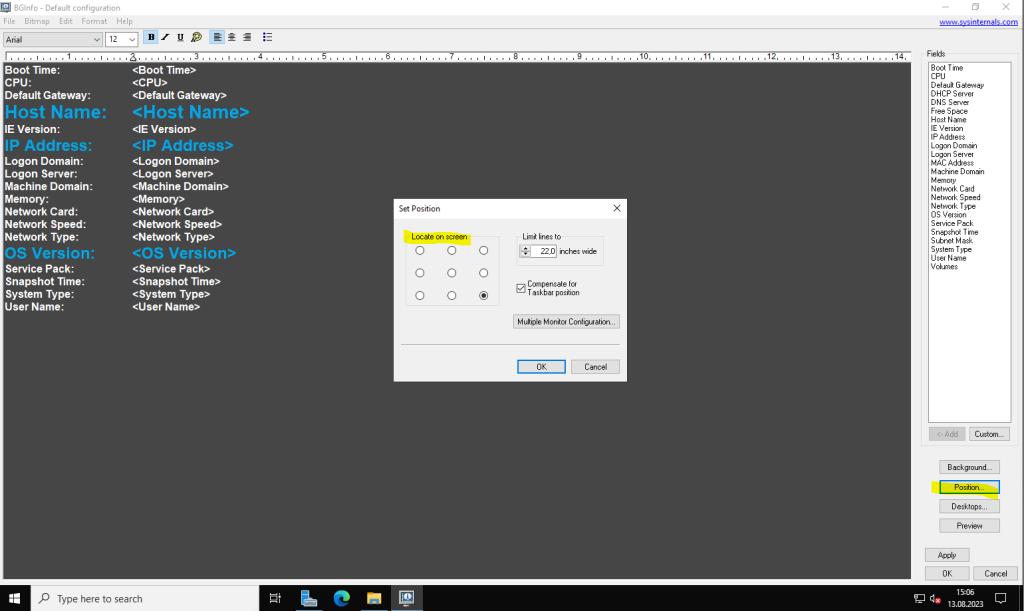
You can also adjust the position where the information block will be displayed on the desktop background by clicking on the Position button as shown below.
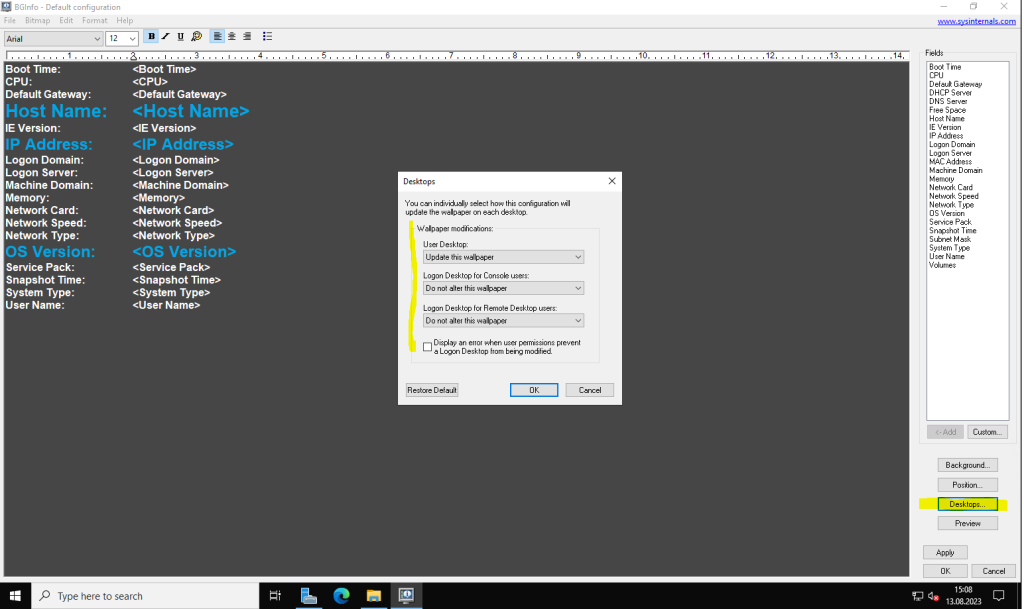
By clicking on the Desktops button as shown below, you can also define where the information block will everywhere displayed like default on the user desktop or also if wanted on the logon desktop.
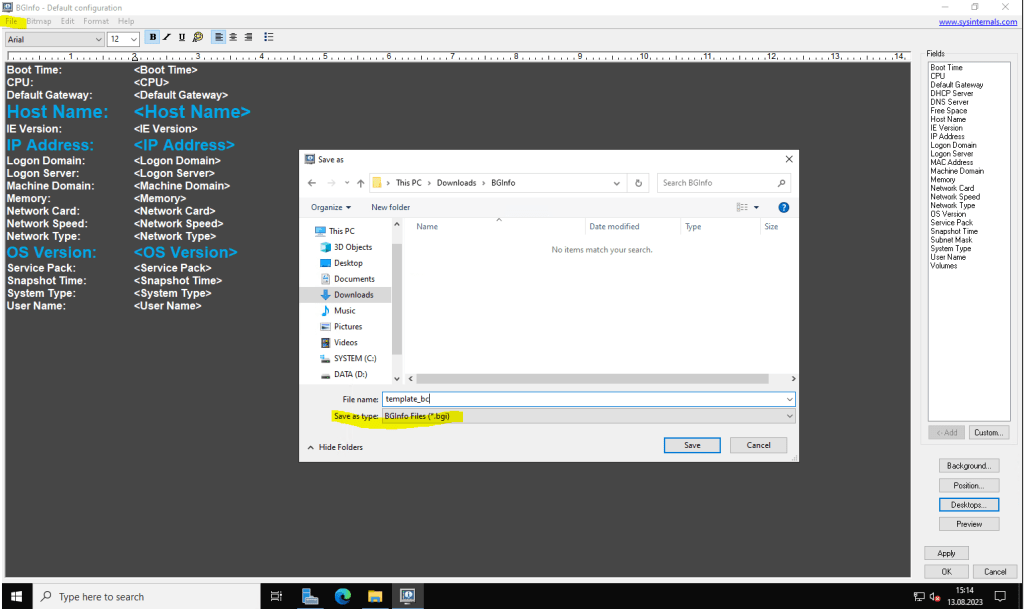
Now after modifying the default configuration we need to save the new custom configuration as a template we want to use for deploying within our network.
Therefore finally click on File – Save As … and enter a name for the new configuration. This will create a new custom BgInfo configuration file we will use to deploy on our servers in the network.
Creating a Windows App in Microsoft Intune to deploy the BgInfo Files on the Device
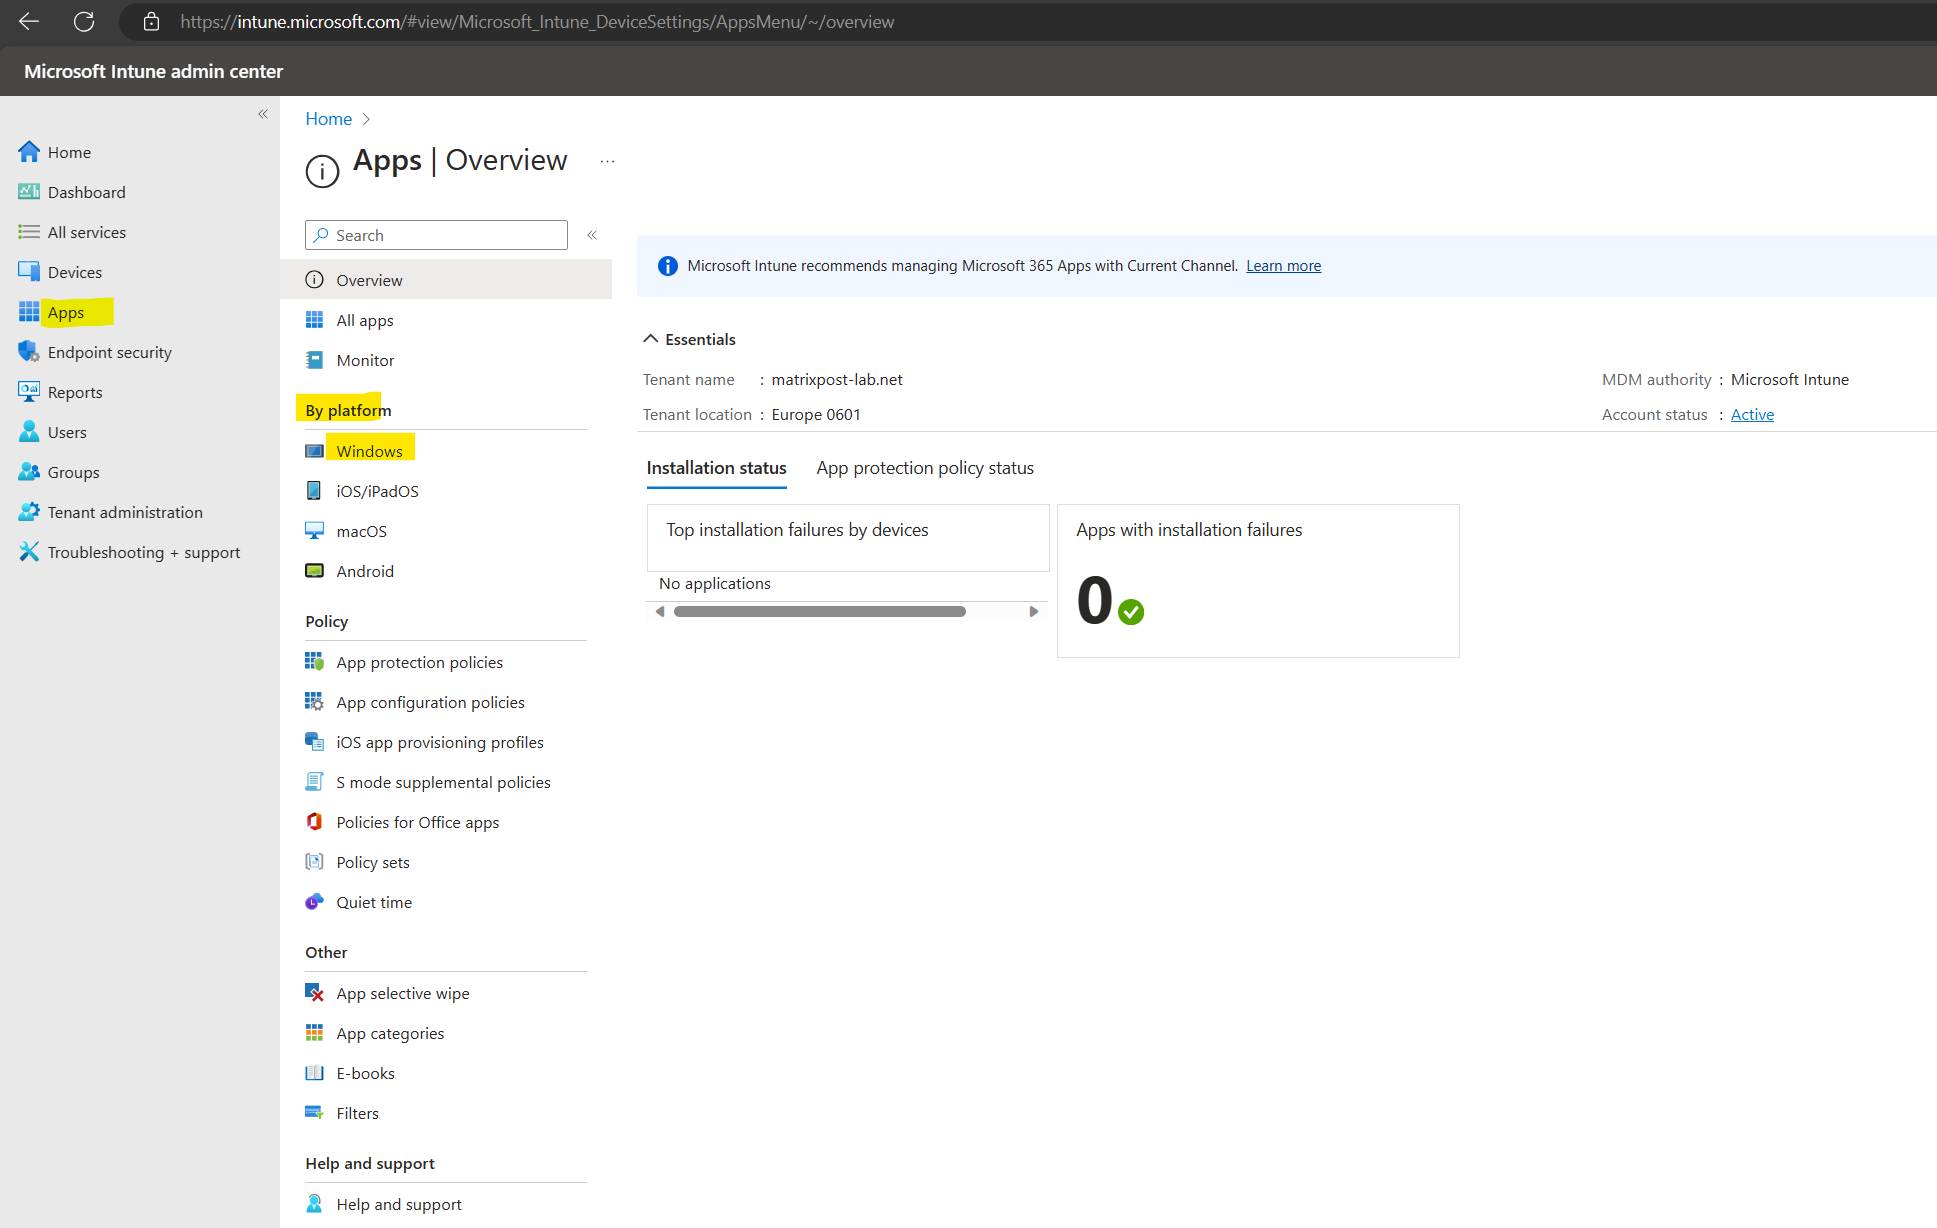
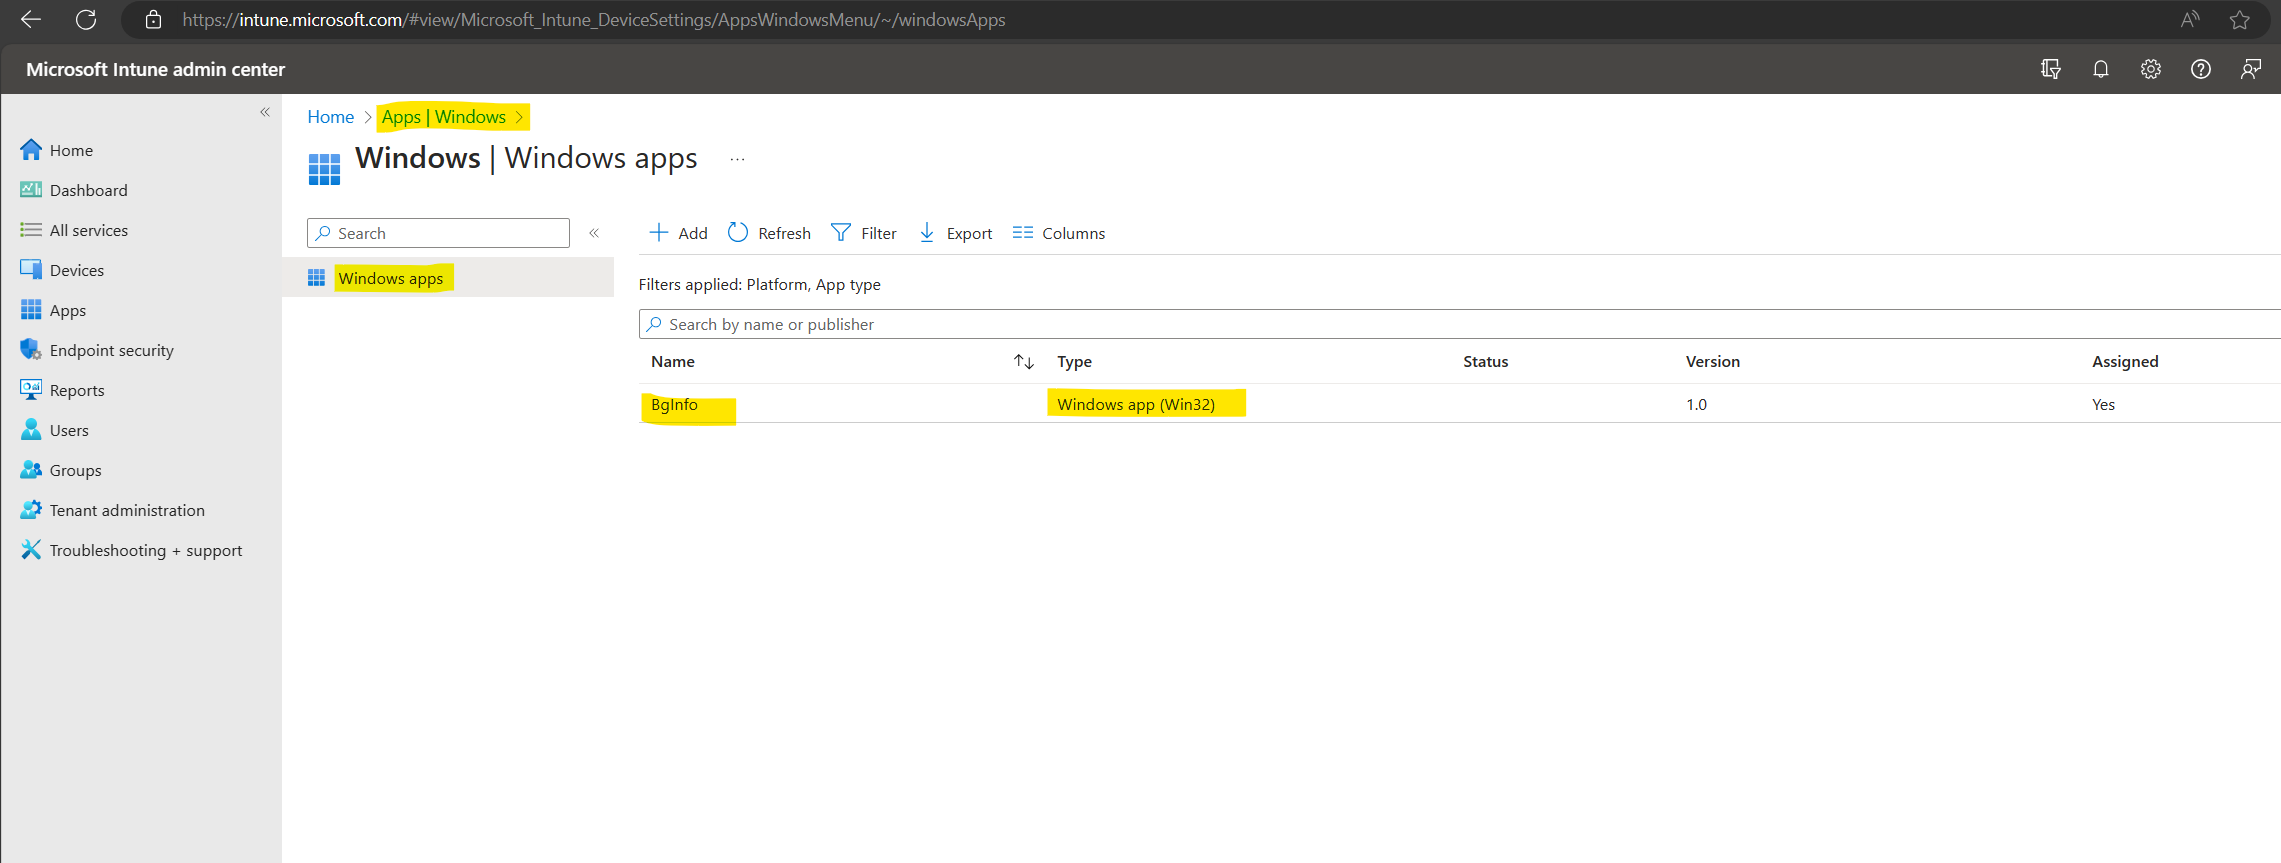
In order to deploy the BgInfo files on the destination devices we need to create a new Windows app in Microsoft Intune.
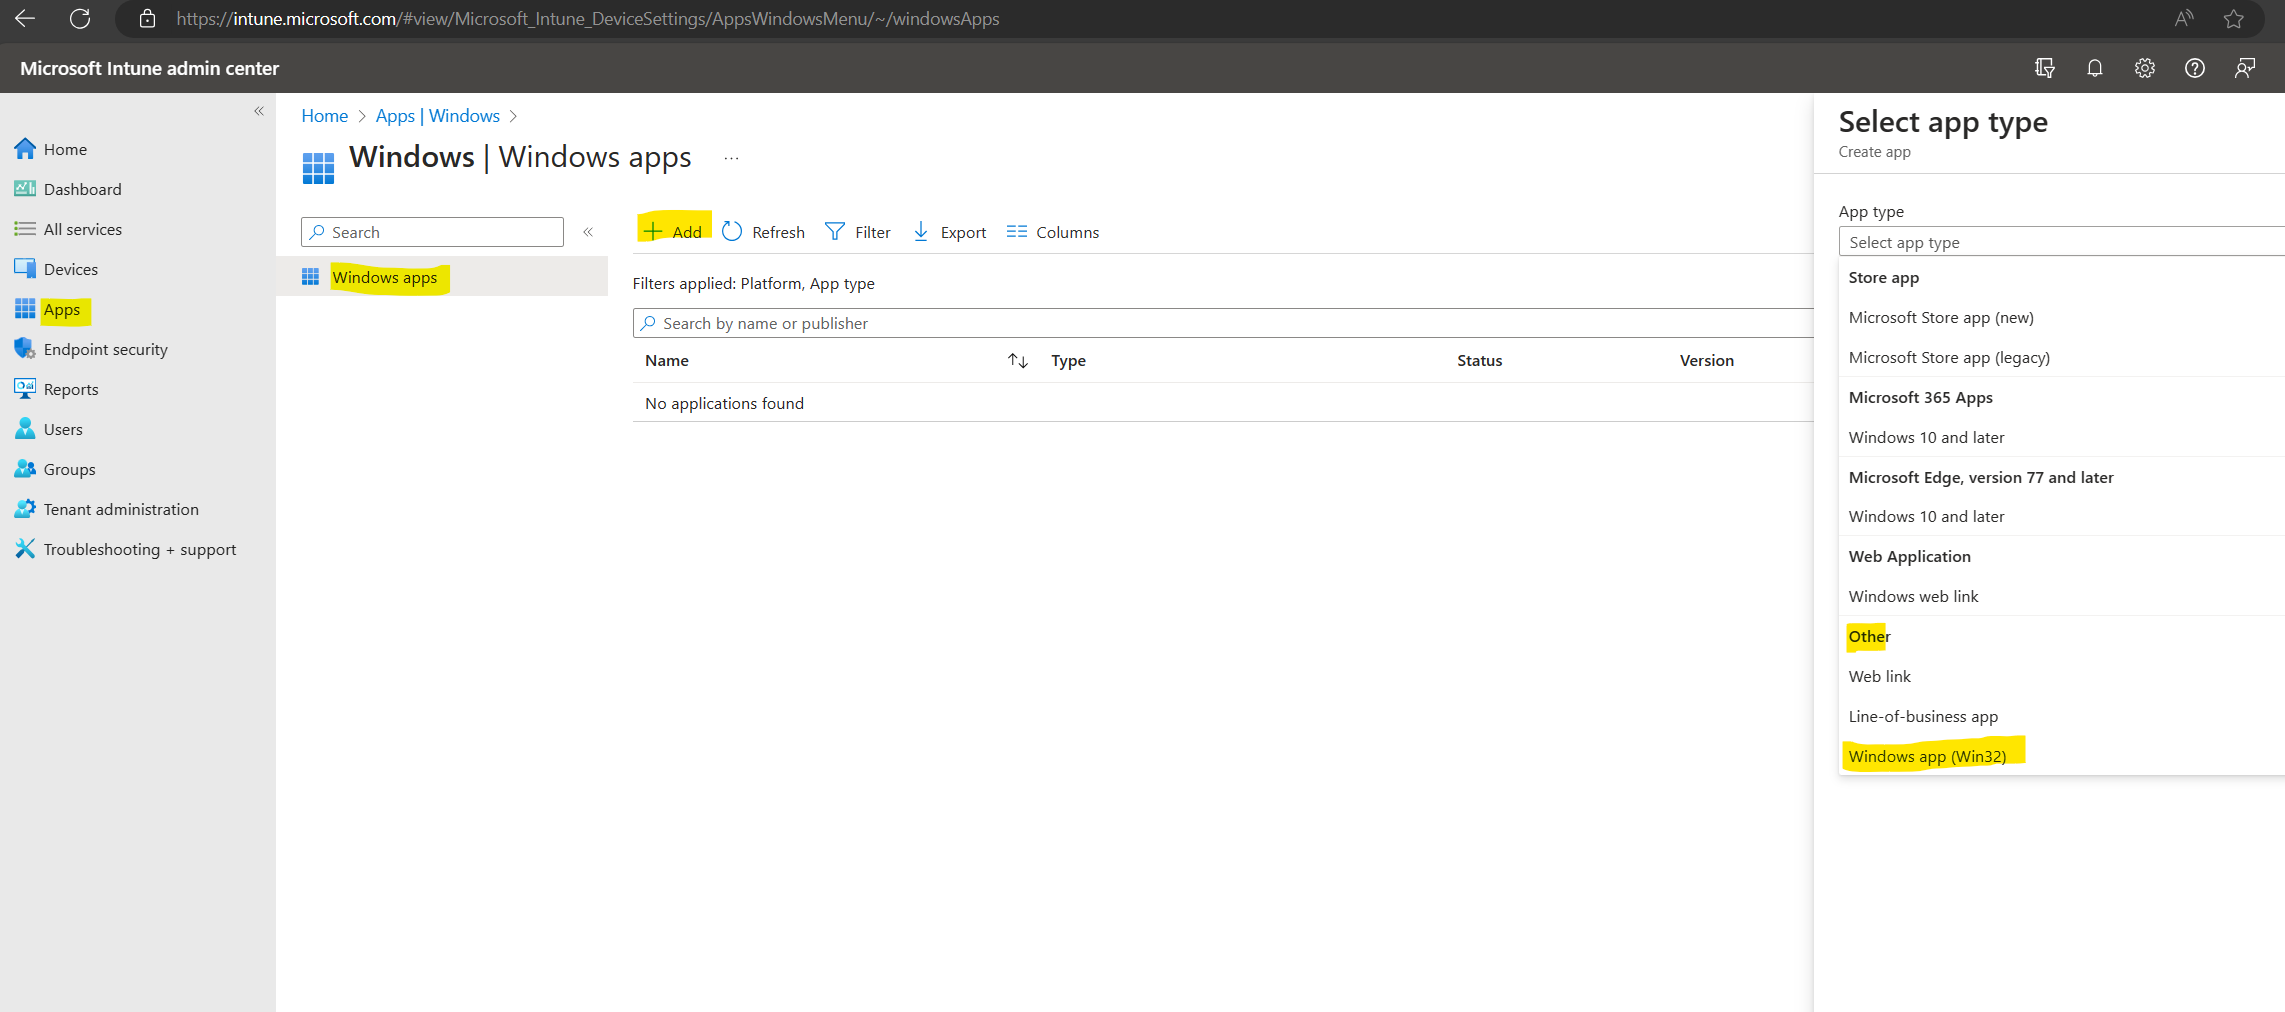
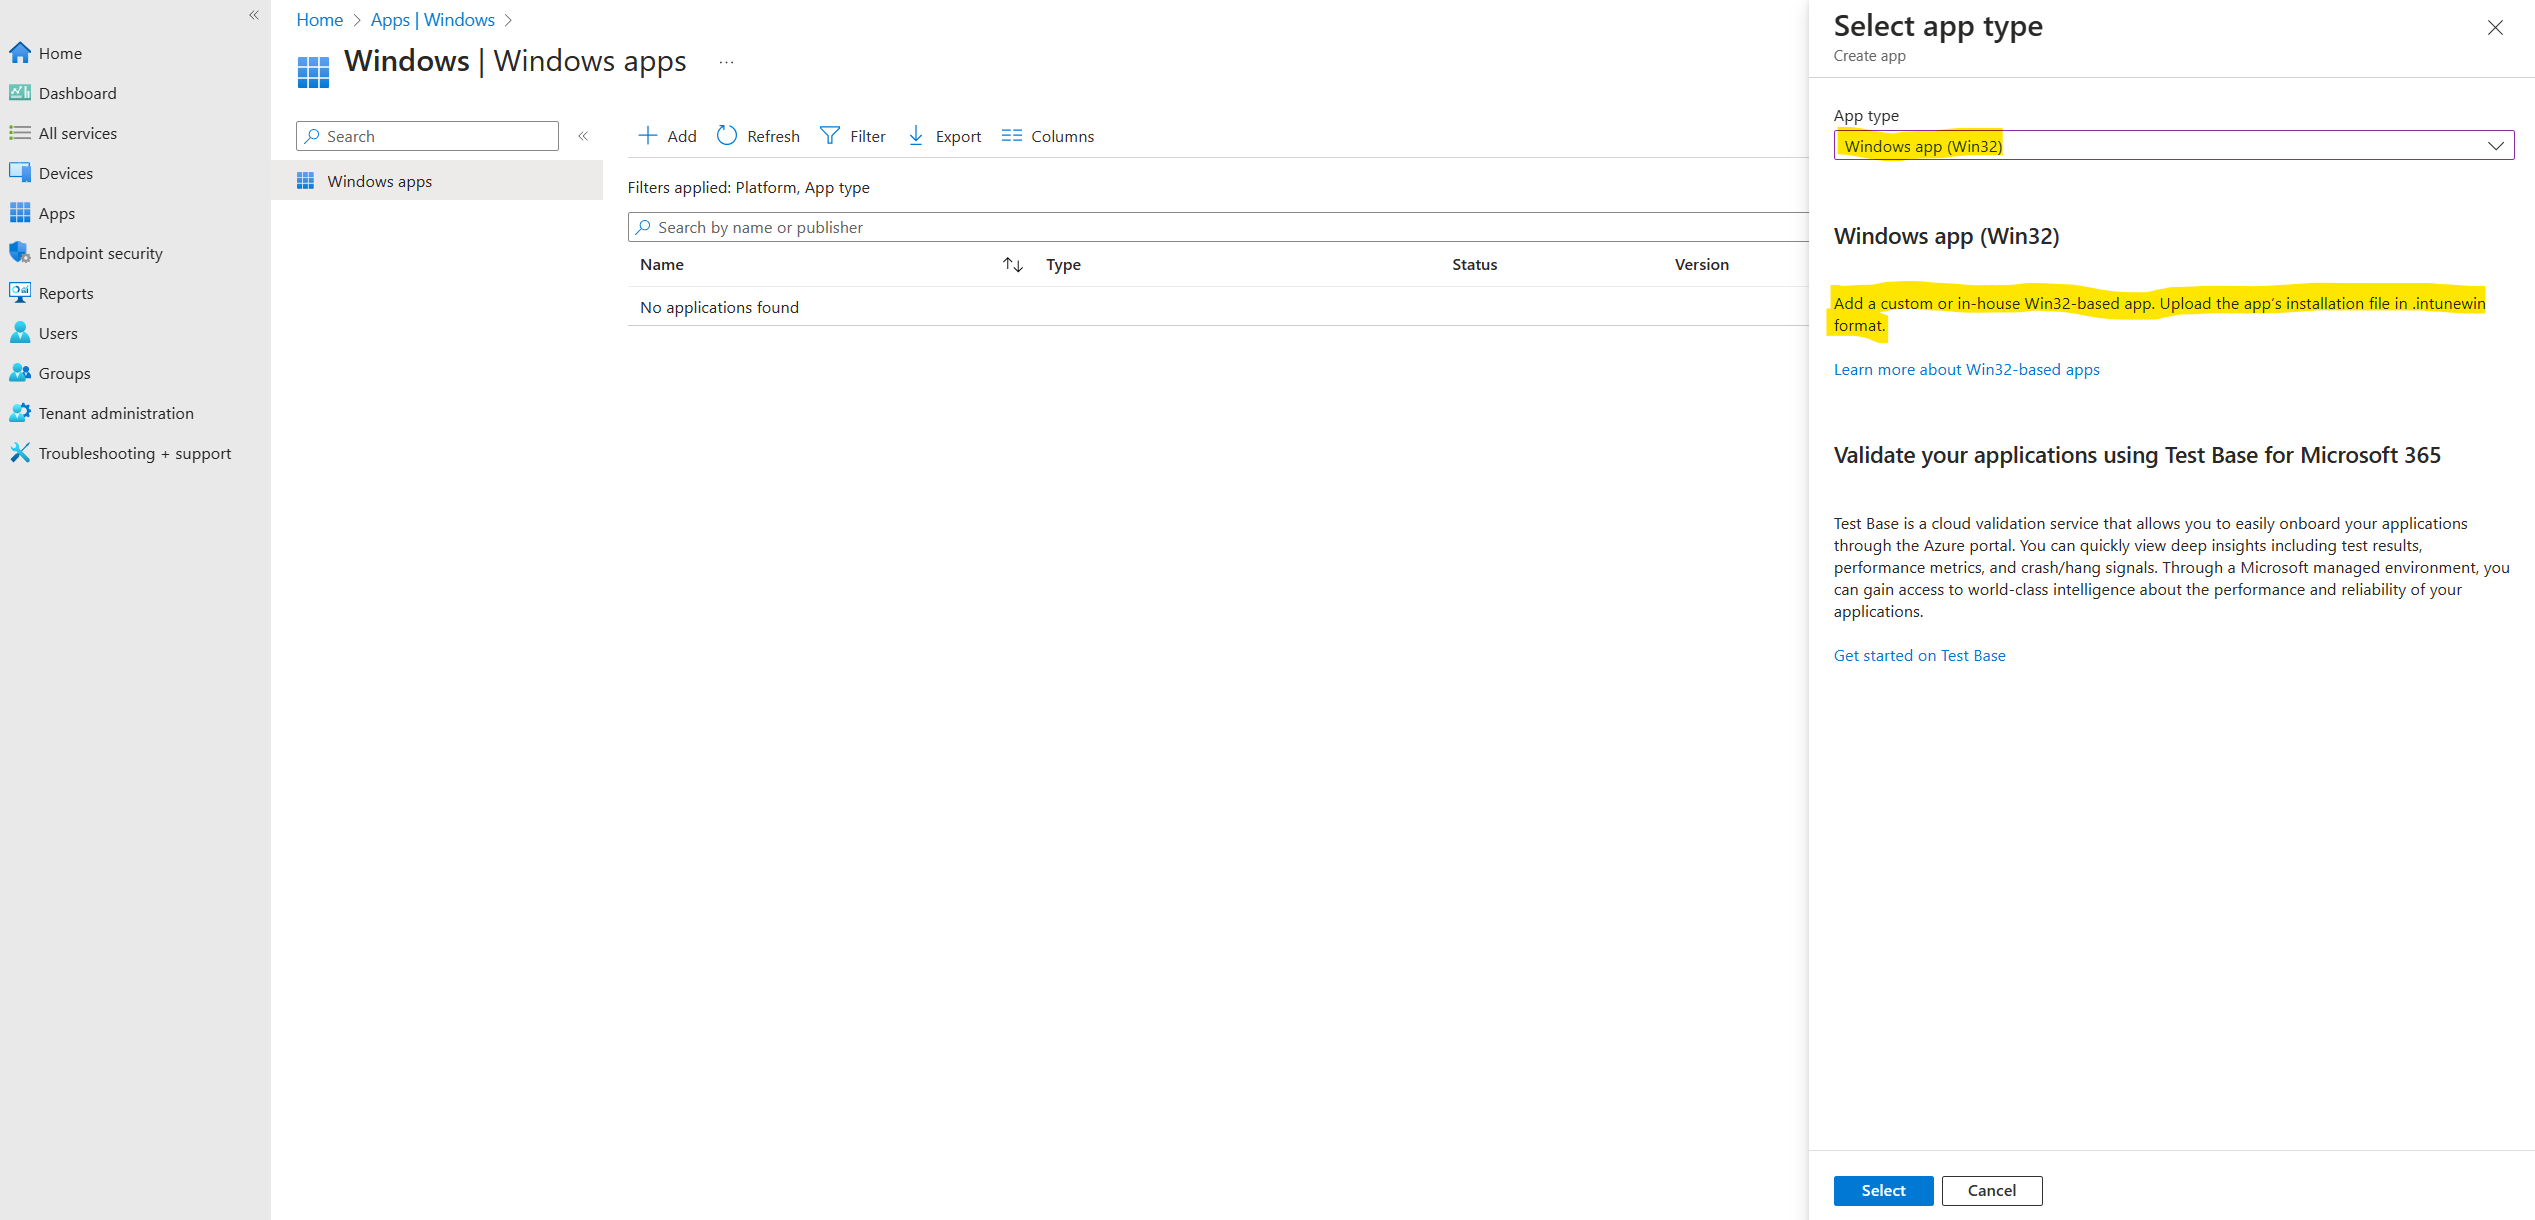
Click on Apps -> By platform -> Windows
Click on Add -> Windows app (Win32)
Before we can add a Win32 app to Microsoft Intune, we first need to prepare the app by using the Microsoft Win32 Content Prep Tool The tool converts application installation files into the .intunewin format.
More about you will find in the following Microsoft article https://learn.microsoft.com/en-us/mem/intune/apps/apps-win32-app-management.
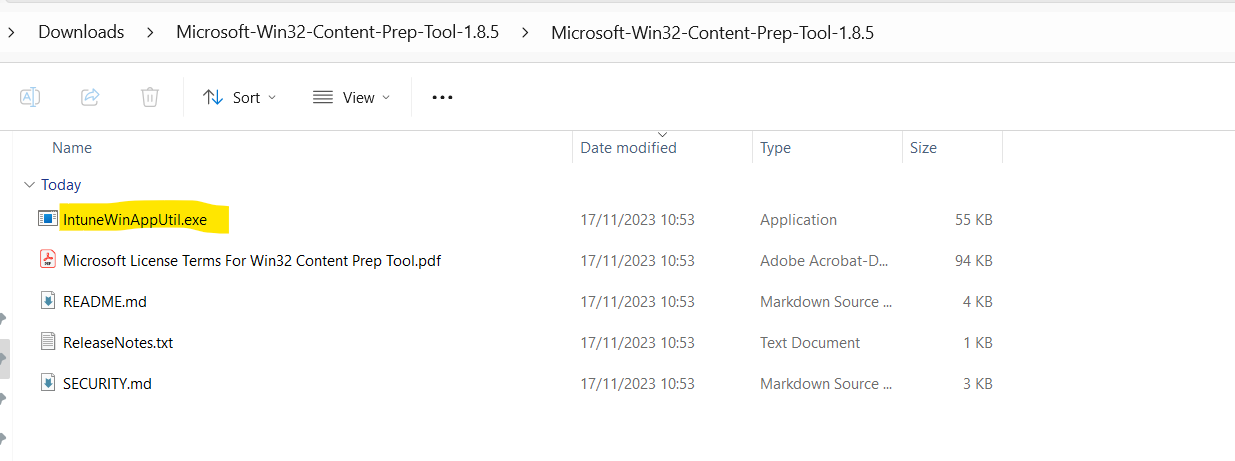
The Microsoft Win32 Content Prep Too can be downloaded from here. When you extract the ZIP file you will get the IntuneWinAppUtil.exe file.
The Microsoft Win32 Content Prep Tool (IntuneWinAppUtil.exe) zips all files and subfolders when it creates the .intunewin file. Be sure to keep the Microsoft Win32 Content Prep Tool separate from the installer files and folders, so that you don’t include the tool or other unnecessary files and folders in your .intunewin file.
Source: https://learn.microsoft.com/en-us/mem/intune/apps/apps-win32-prepare#convert-the-win32-app-content
If you run IntuneWinAppUtil.exe from the command window without parameters, the tool will guide you to enter the required parameters step by step. Or, you can add the parameters to the command based on the following available command-line parameters.
Below I will run the IntuneWinAppUtil.exe from the command window without parameters so that I will get guided by the tool.
Remember the files that we need to include in the package are stored so far in the following path/folder.
C:UsersMarcusRathDownloadsBGInfo
When we now generating an .intunewin file, we need to put any files we need to reference into a subfolder of the setup folder (from where the IntuneWinAppUtil.exe will be executed). Then we need to use a relative path to reference the specific files we need.
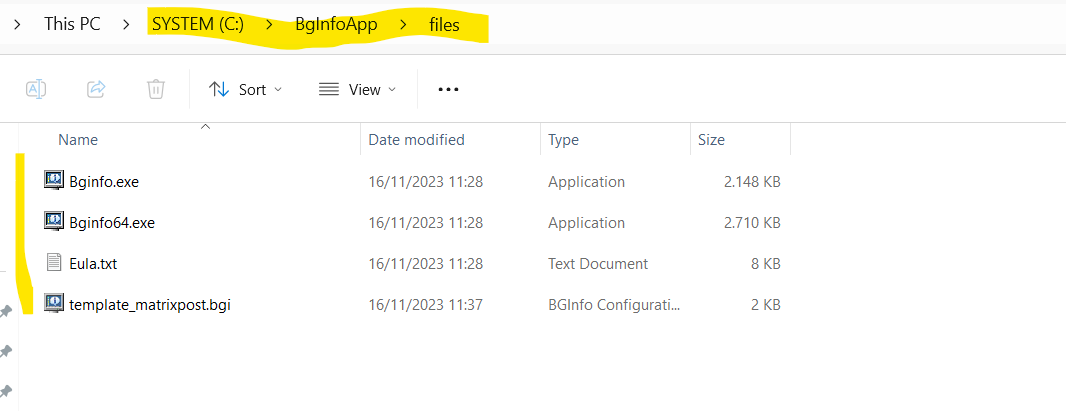
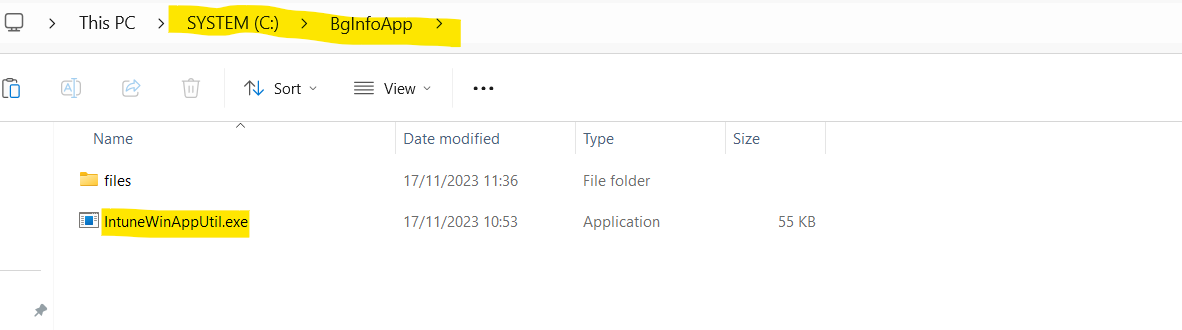
So in my case I will first create a new setup folder directly on the C drive: C:BgInfoApp.
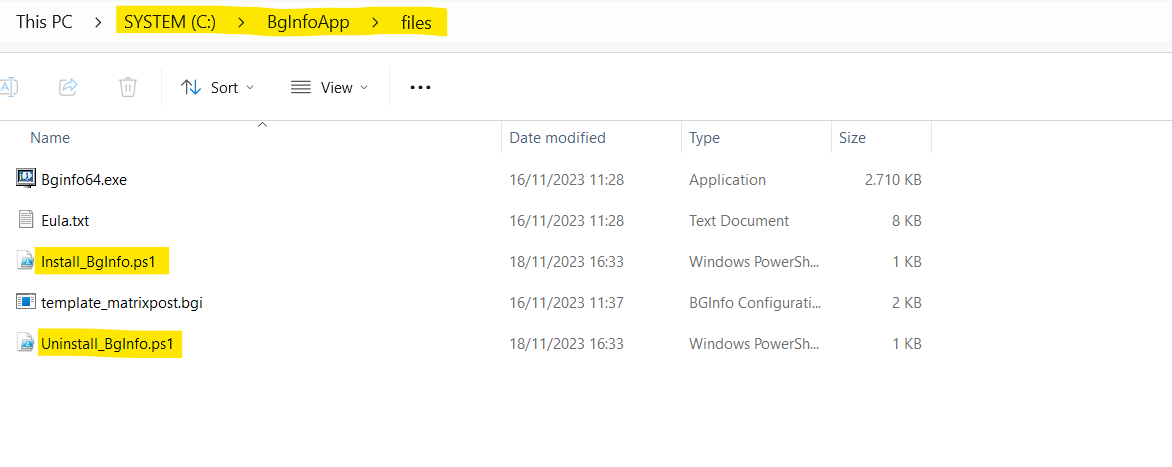
Within this folder I will create a subfolder named files: C:BgInfoAppfiles and copied the BGInfo files into like shown below.
Then in order to reference for example to the Bginfo64.exe file, I just need to refer to filesBginfo64.exe.
To these referenced files we need to add two more files (PowerShell scripts), one of them will finally install BgInfo, actually it just needs to create on the destination devices the C:BgInfo folder, copying the BgFiles into and finally creating a shortcut in the common startup folder. The second file will uninstall the app when the user is clicking on Uninstall in the Company Portal.
Save the first file in your files folder under the setup folder, in my case C:BgInfoAppfilesInstall_BgInfo.ps1.
# Create Directory
New-Item -Path "C:" -Name "BgInfo" -ItemType "directory" -Force

# Copy files into the BgInfo folder on the destination devices
Copy-Item Bginfo64.exe -Destination "C:BgInfo" -Force
Copy-Item template_matrixpost.bgi -Destination "C:BgInfo" -Force

$WshShell = New-Object -comObject WScript.Shell
$strCommonStartup = $WshShell.SpecialFolders("AllUsersStartup")
$Shortcut = $WshShell.CreateShortcut($strCommonStartup + "BgInfo.lnk")
$Shortcut.TargetPath = "C:BgInfoBginfo64.exe"
$Shortcut.Arguments = "C:BgInfotemplate_matrixpost.bgi /SILENT /TIMER:0 /NOLICPROMPT"
$Shortcut.Save()

# Return optional a status code if installation was successfully
# Determine if BgInfo is successfully installed
$BgInfoIsInstalled = Test-Path -Path "C:BgInfoBginfo64.exe"

if($BgInfoIsInstalled)
 {
	write-output "BgInfo successfully installed"
	exit 0
 }
   else
 {
	write-output "Some issues occured when installing BgInfo"
	exit 1
 }
In order to create a shortcut in the common startup folder which is pointing to the Bginfo64.exe file, I will use here the Windows Script Host (WSH) which also supports to add arguments for the link we need to use for BgInfo to include the template file and additional settings including to suppress the license agreement prompt.
In case you didn’t need to use additional arguments/parameters for your shortcut (symbolic link), you can also use the native PowerShell cmdlet New-Item -ItemType SymbolicLink.
The WshShell object’s SpecialFolders property returns the WshSpecialFolders object, which is a collection of special folders. It supports the following folders by default:
AllUsersDesktop AllUsersStartMenu AllUsersPrograms AllUsersStartup Desktop Favorites Fonts MyDocuments NetHood PrintHood Programs Recent SendTo StartMenu Startup TemplatesSo when using the Windows Script Host (WSH) we will have a convenient way to not just pass arguments to a shortcut (symbolic link) but also to determine the common startup folder of the device.
In order to determine the common startup folder we can also use natively PowerShell and the New-Object –com Shell.Application cmdlet, but to say it right away, this is not as much convenient as using therefore the Windows Script Host (WSH). I will show this also at the end of this post.
Save the second file also in your files folder under the setup folder, in my case C:BgInfoAppfilesUninstall_BgInfo.ps1.
# Remove Directory along with Files
Remove-Item -LiteralPath "C:BgInfo" -Force -Recurse

# Determine Shortcut (symbolic link) path using Windows Script Host (WSH)
$WshShell = New-Object -comObject WScript.Shell
$strCommonStartup = $WshShell.SpecialFolders("AllUsersStartup")
$strShortcut = $strCommonStartup + "BgInfo.lnk"

# Remove Shortcut using PowerShell's Remove-Item cmdlet
Remove-Item -Path $strShortcut -Force


# Return optional a status code if uninstalling was successfully
# Determine if BgInfo is still installed
$BgInfoIsInstalled = Test-Path -Path "C:BgInfoBginfo64.exe"

if($BgInfoIsInstalled)
 {
	write-output "BgInfo not successfully uninstalled"
	exit 1
 }
   else
 {
	write-output "BgInfo successfully uninstalled"
	exit 0
 }
I was also deleting the BgInfo.exe file from the source folder because I will just deploy the 64bit version of BgInfo to the destination devices.
The IntuneWinAppUtil.exe tool I will finally copy to my setup folder C:BgInfoAppIntuneWinAppUtil.exe and run it from the command window like shown below.
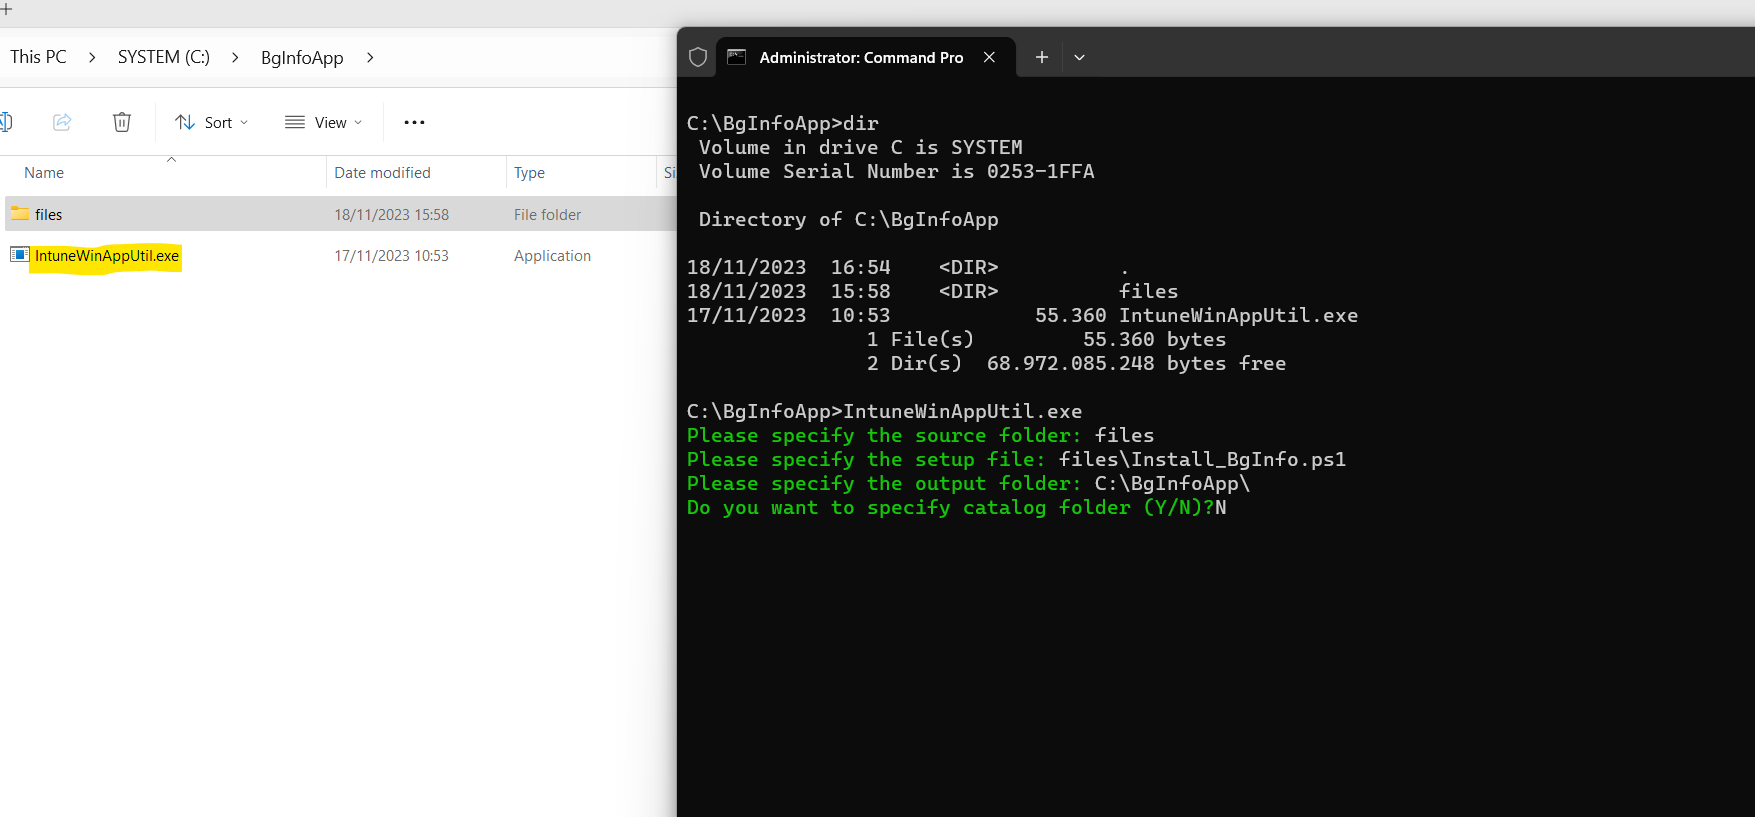
For the source folder I will just need to refer to the relative path which is the files folder. The setup file is our PowerShell script Install_BgInfo.ps1 which includes the commands to create the folder, copying the files into and creating finally a shortcut.
For the output folder I have to enter the absolute path from our setup folder: C:BgInfoApp.
I will not specify a catalog folder.
Here you can see the created app package file .intunewin file which is named like the setup file with Install_BgInfo.intunewin.
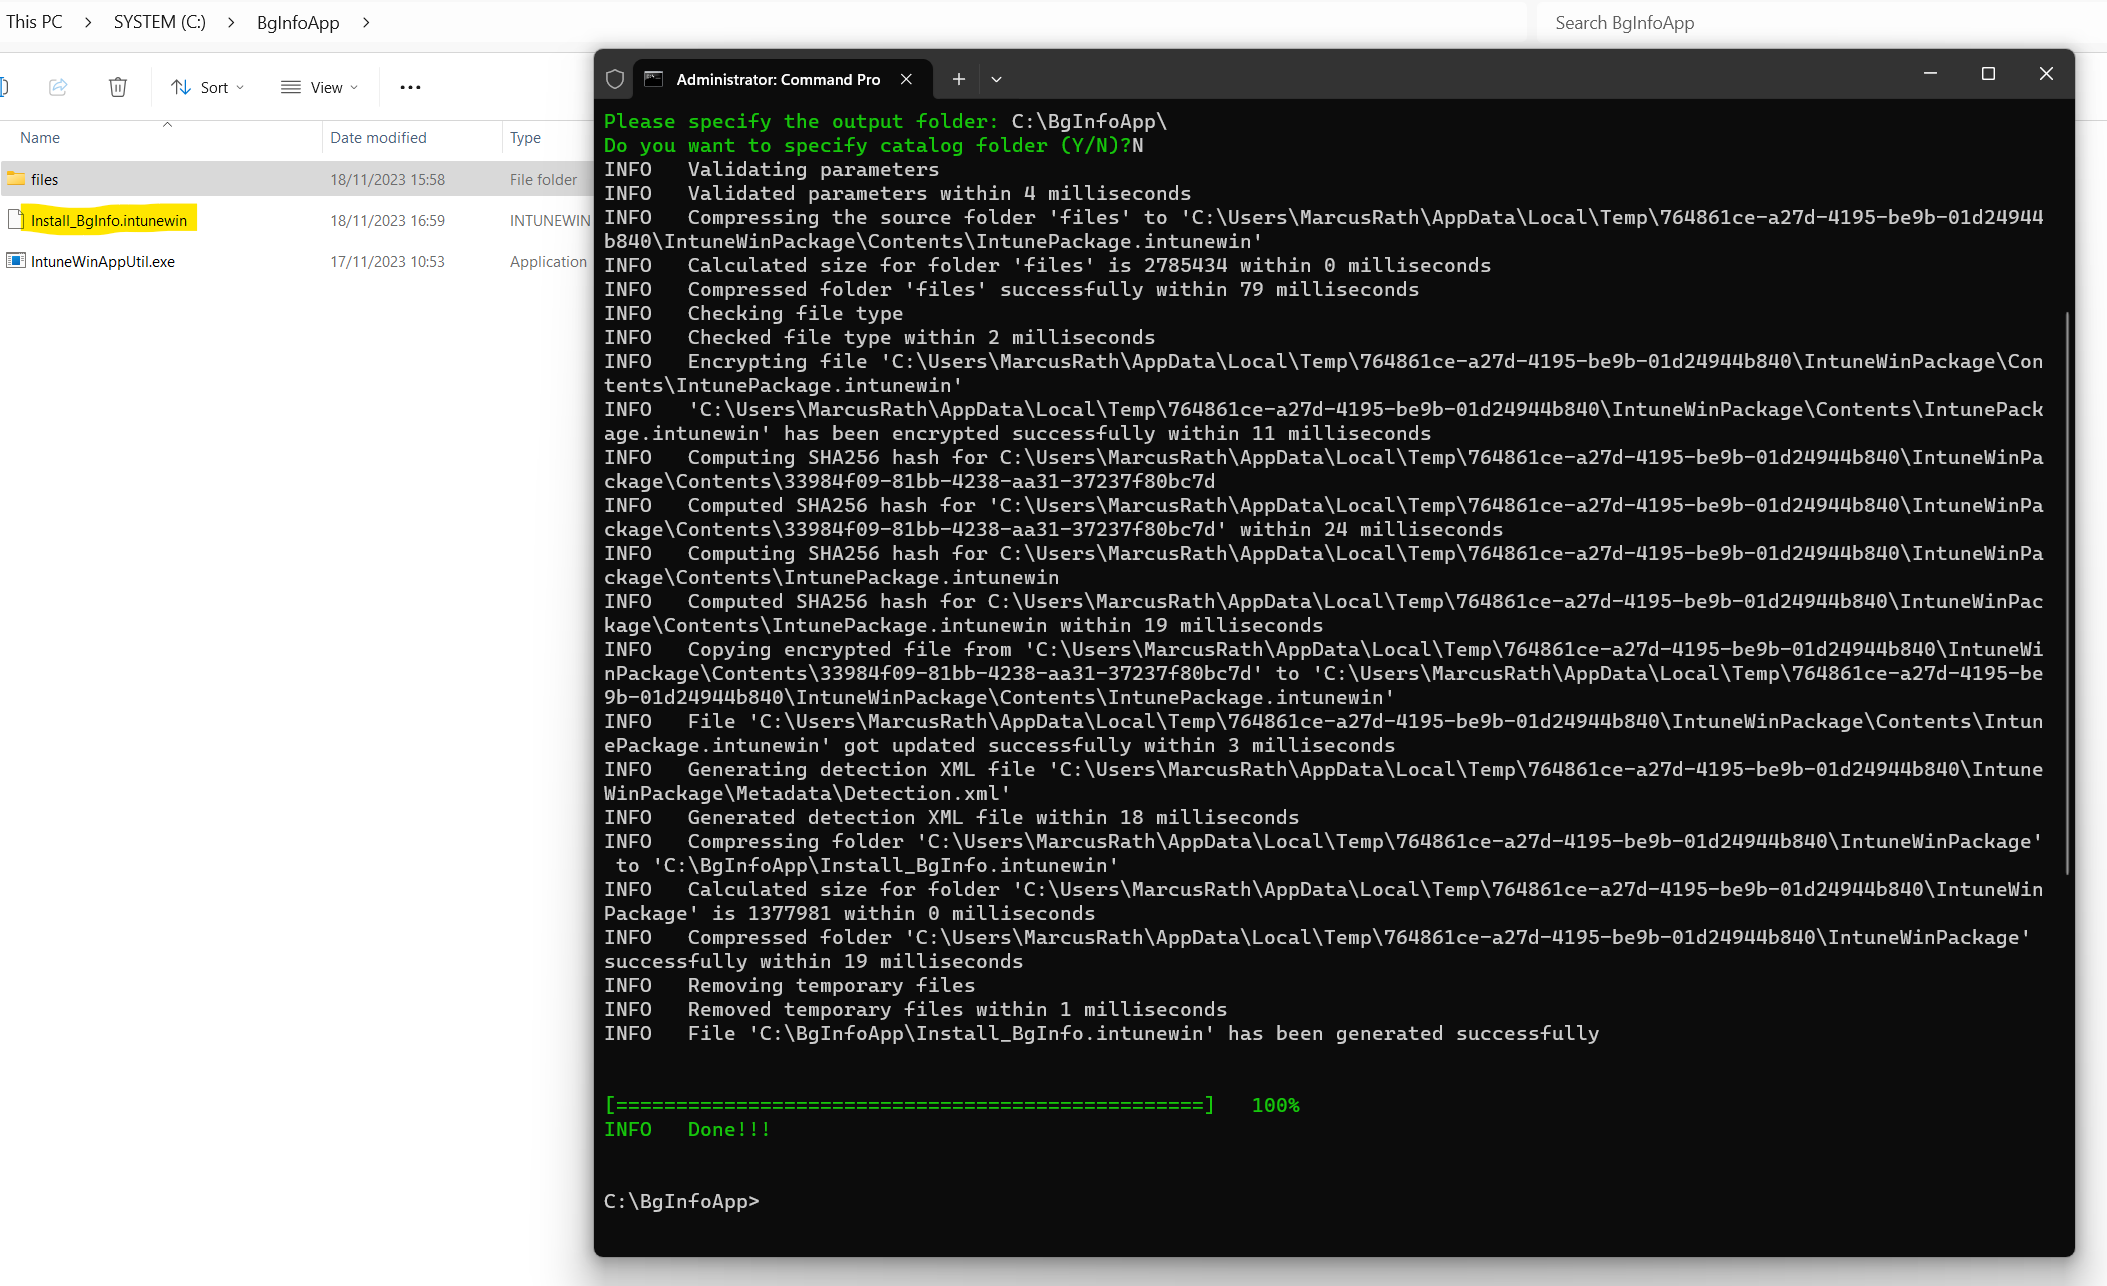
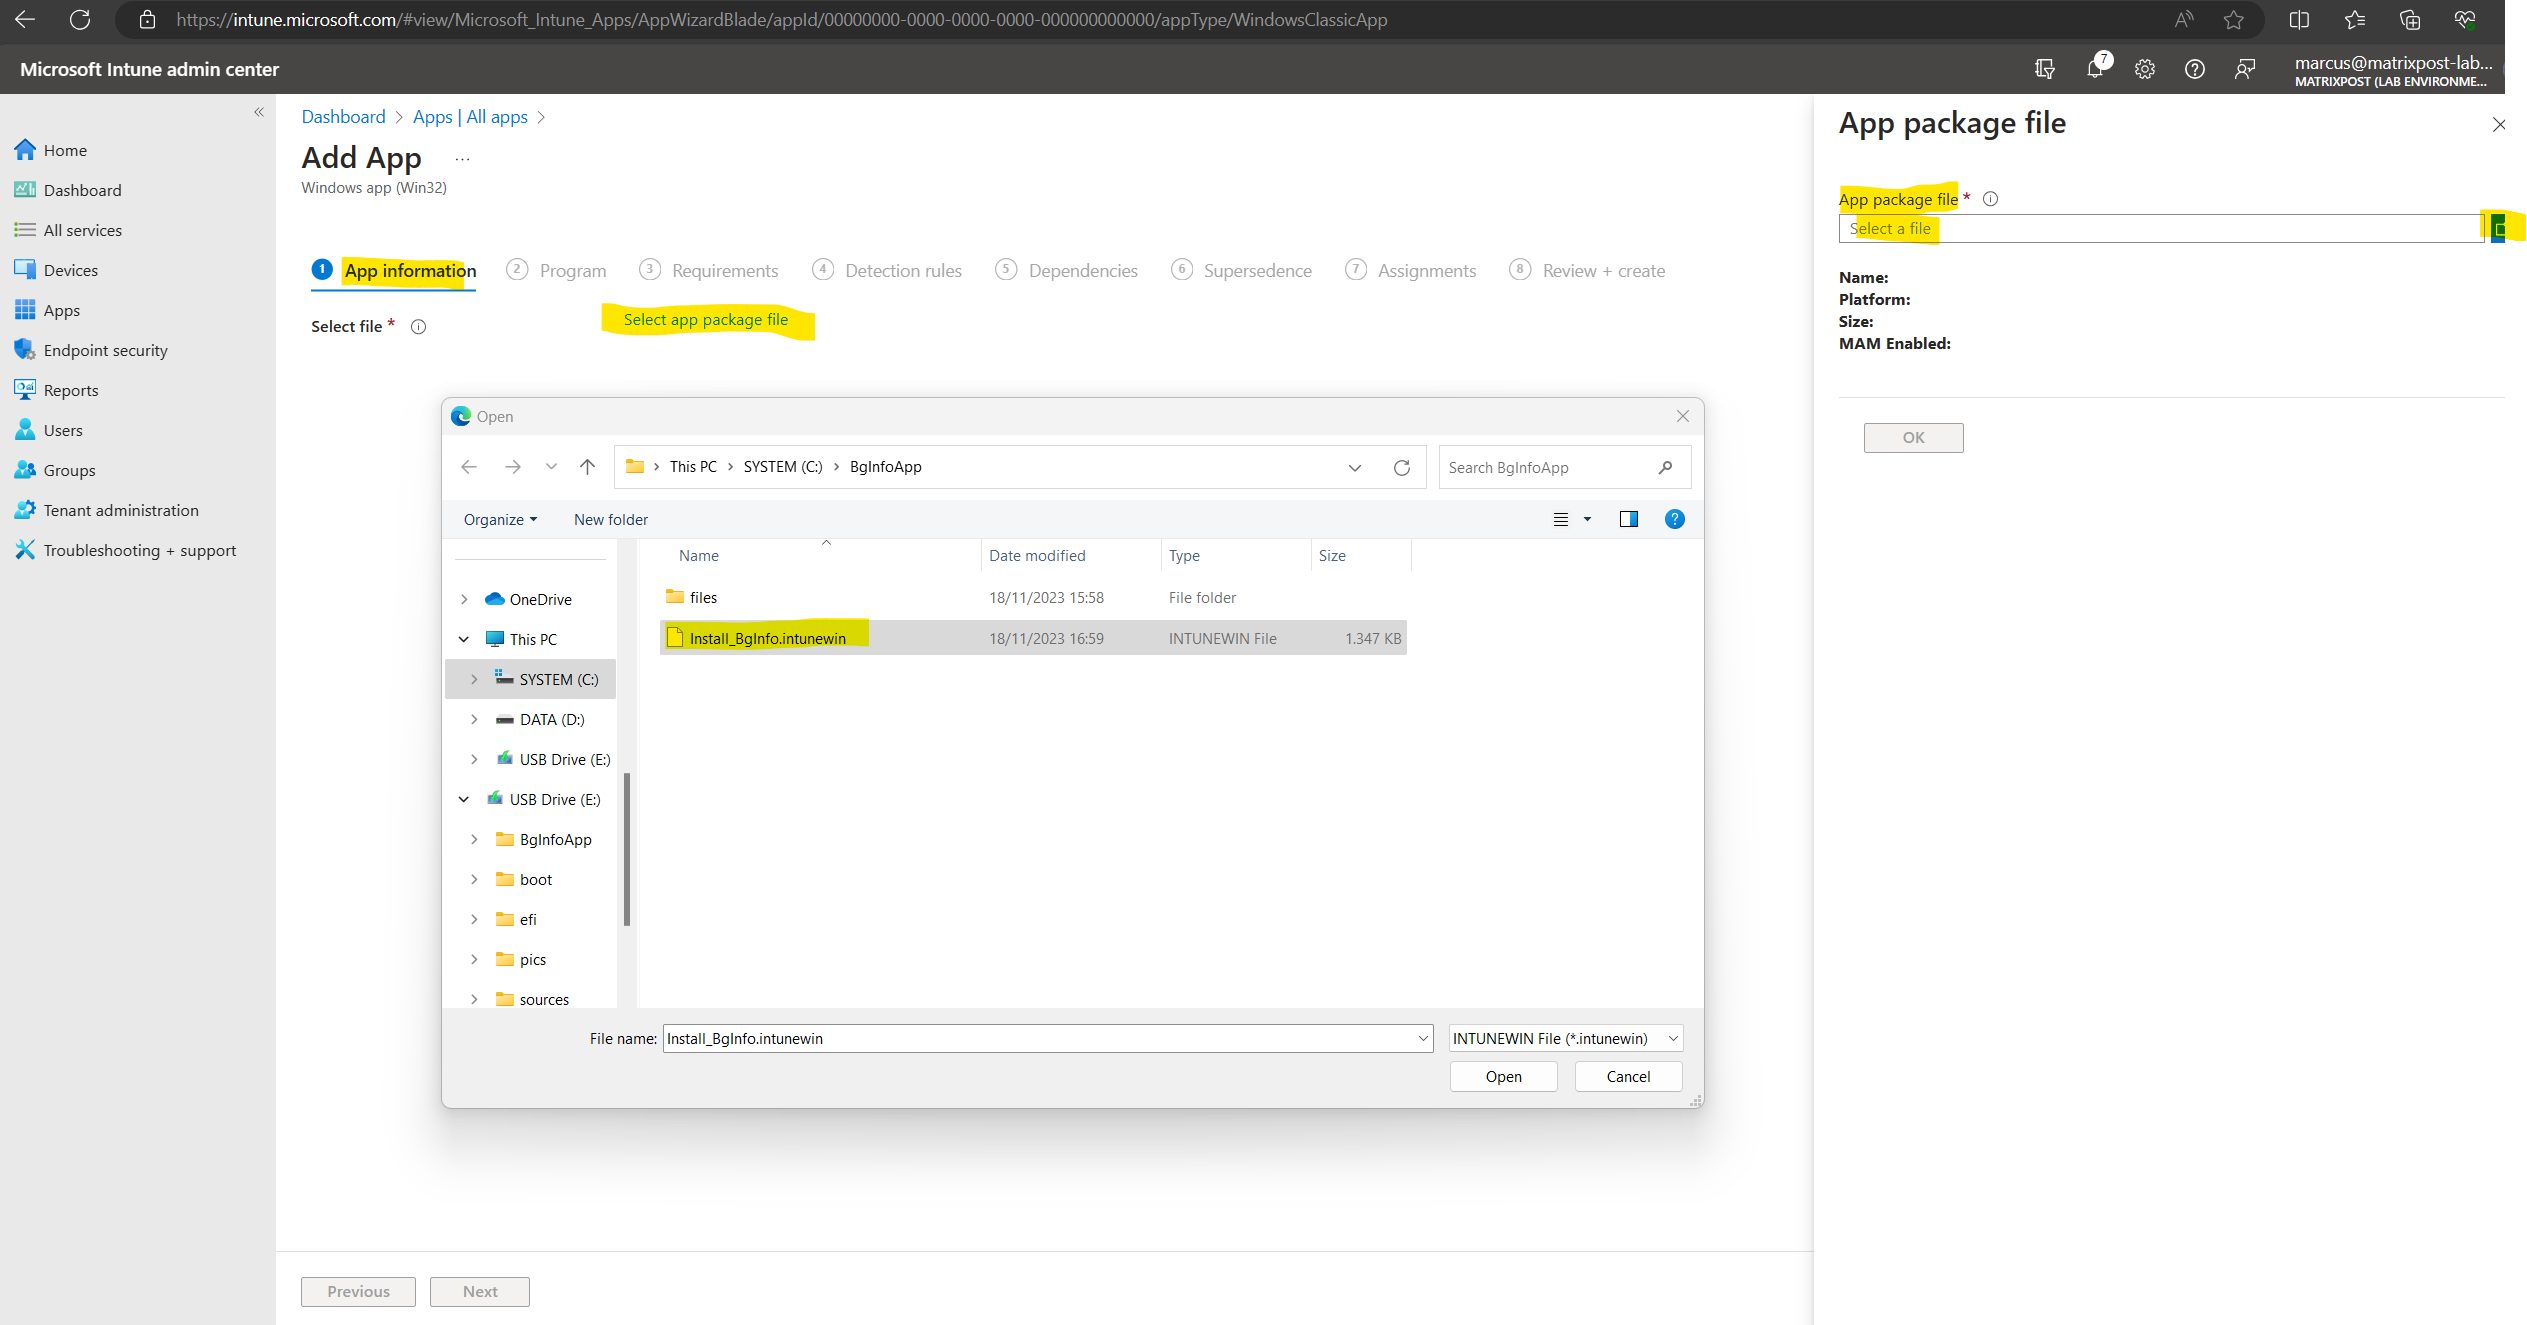
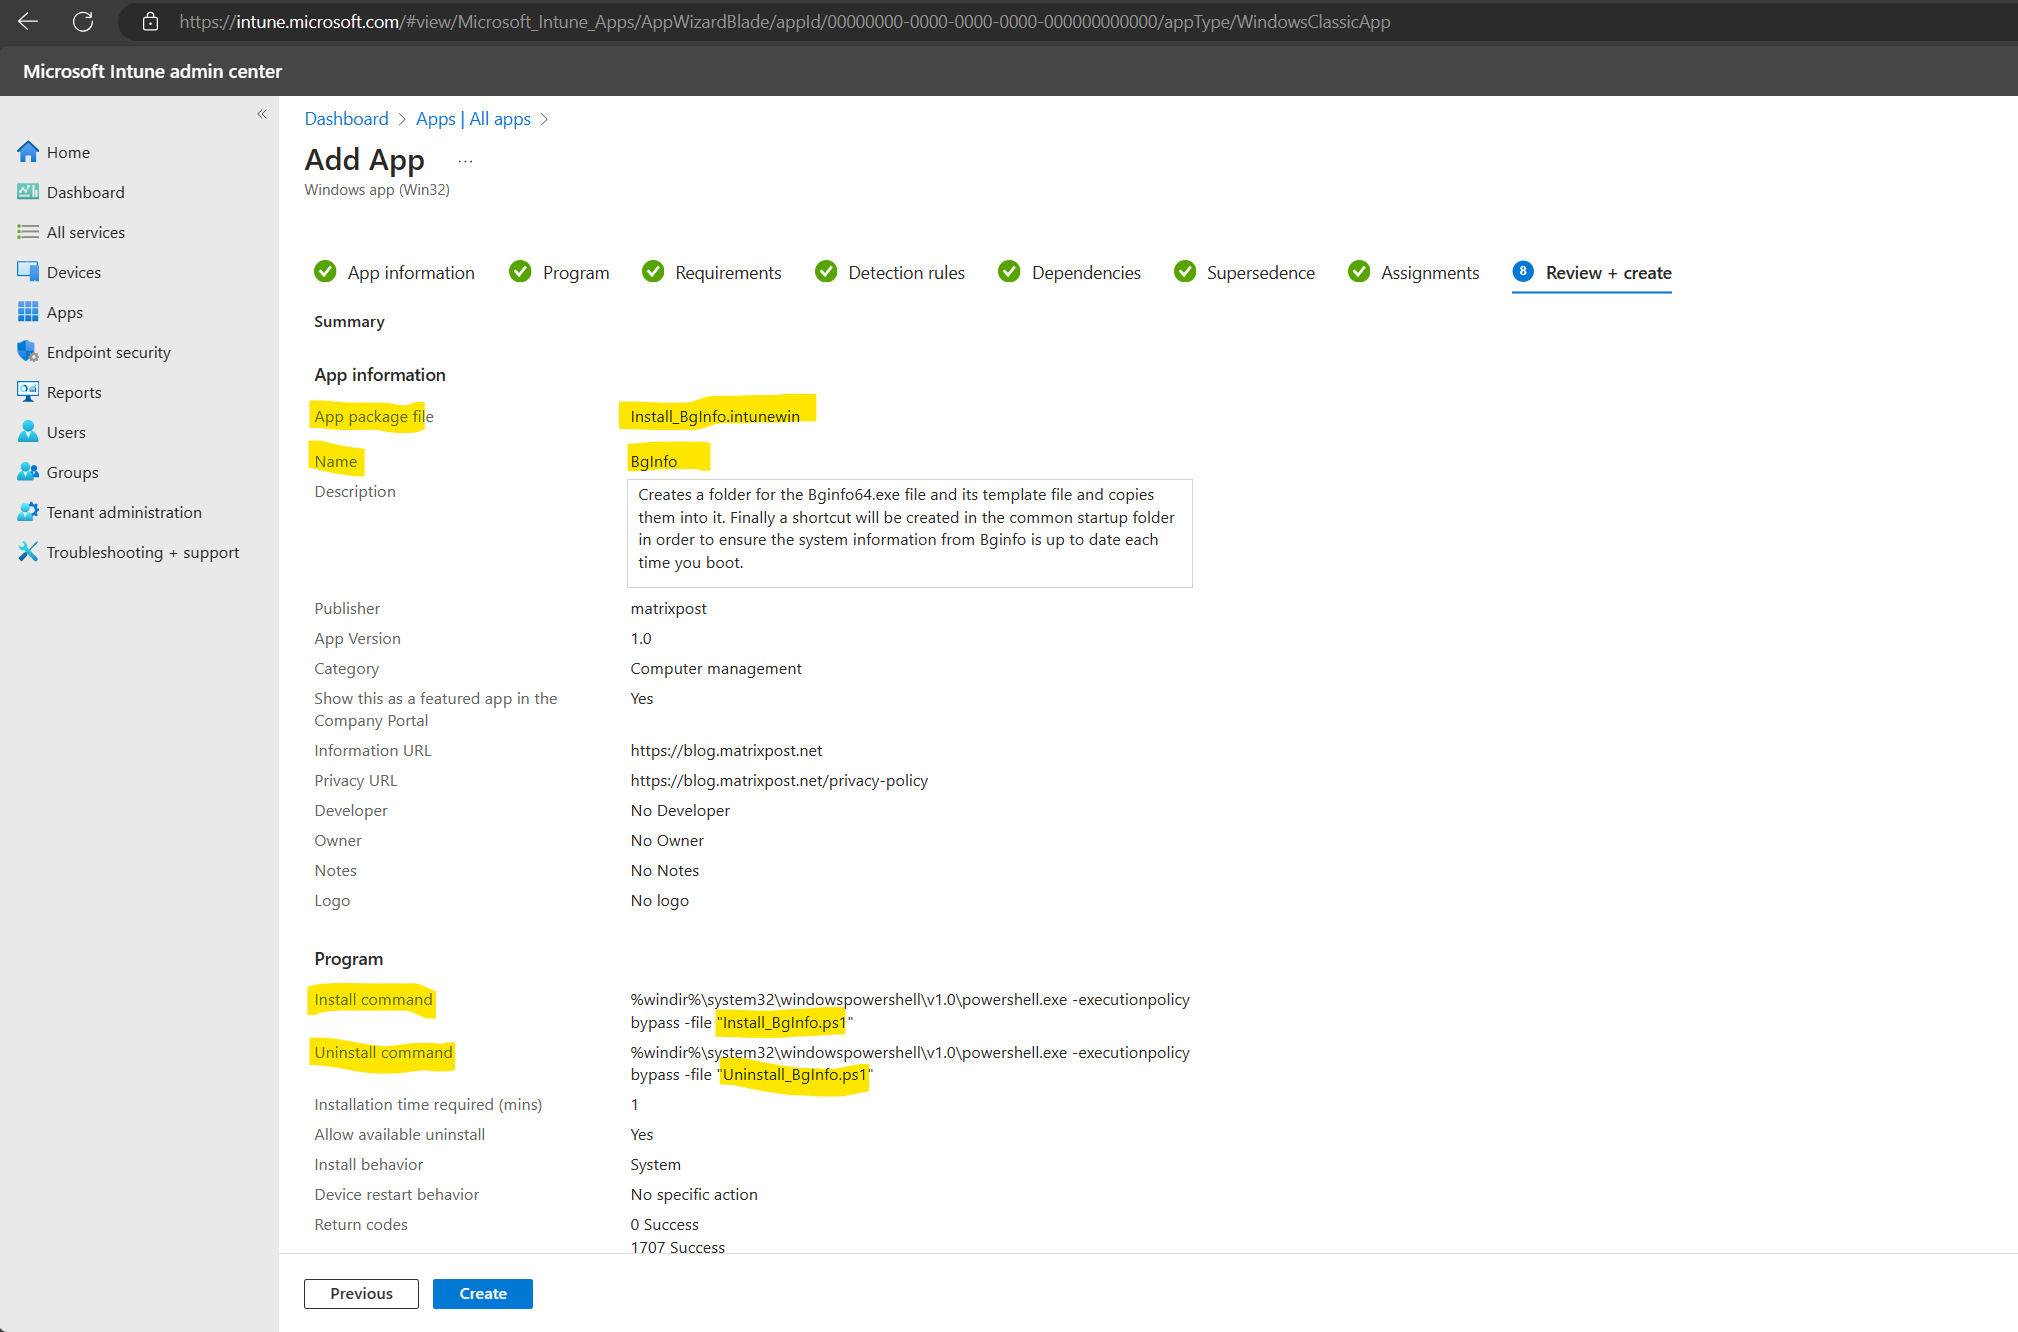
From now on we can resume creating the Windows app by uploading our Install_BgInfo.intunewin (App package file) to Microsoft Intune.
First we need to enter a name for the App. This name will be visible in the Intune apps list and to users in the Company Portal.
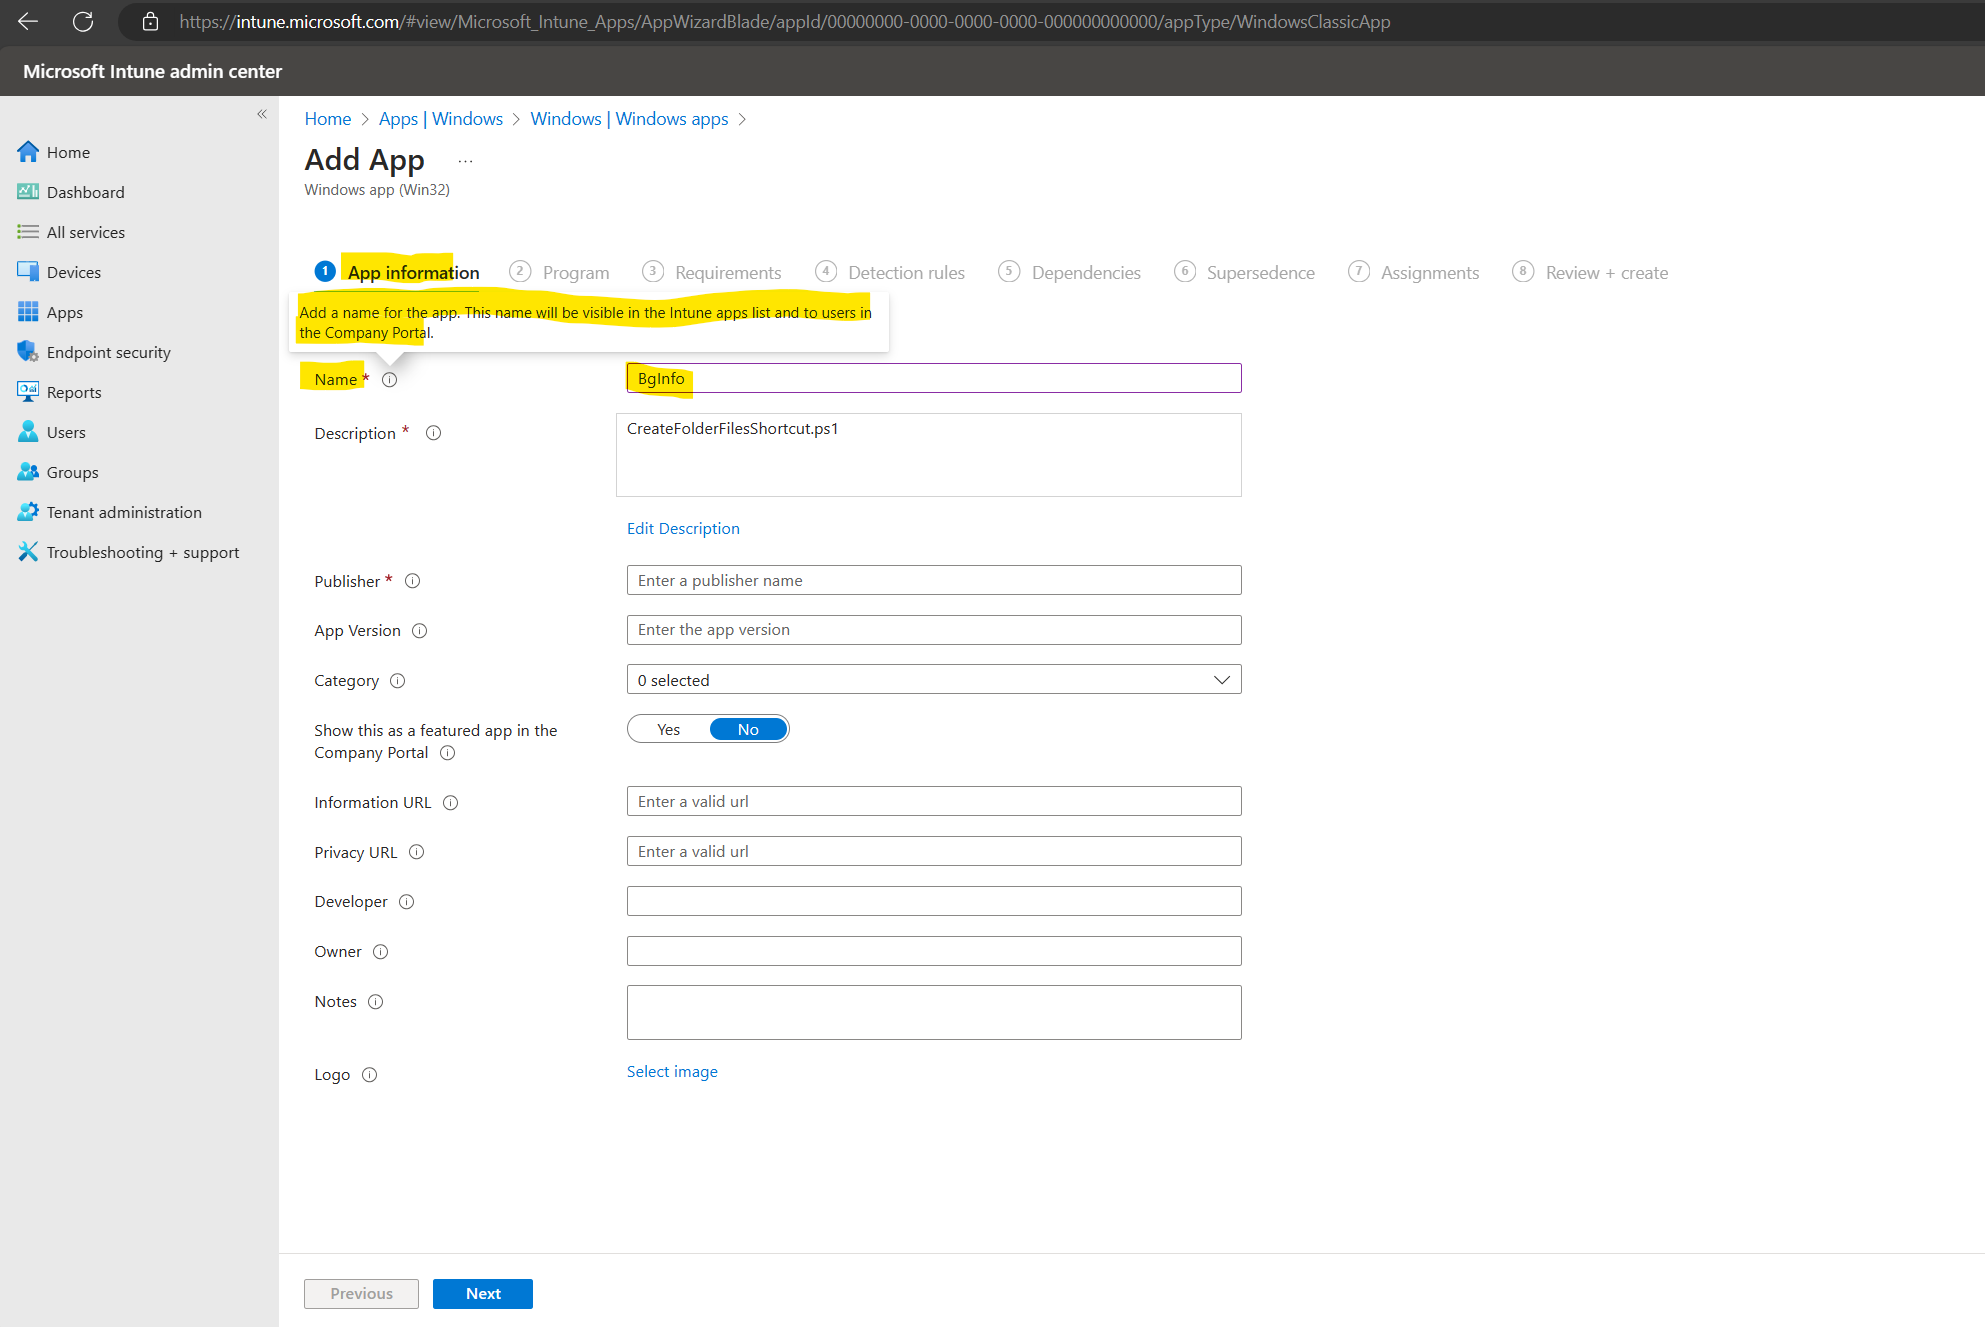
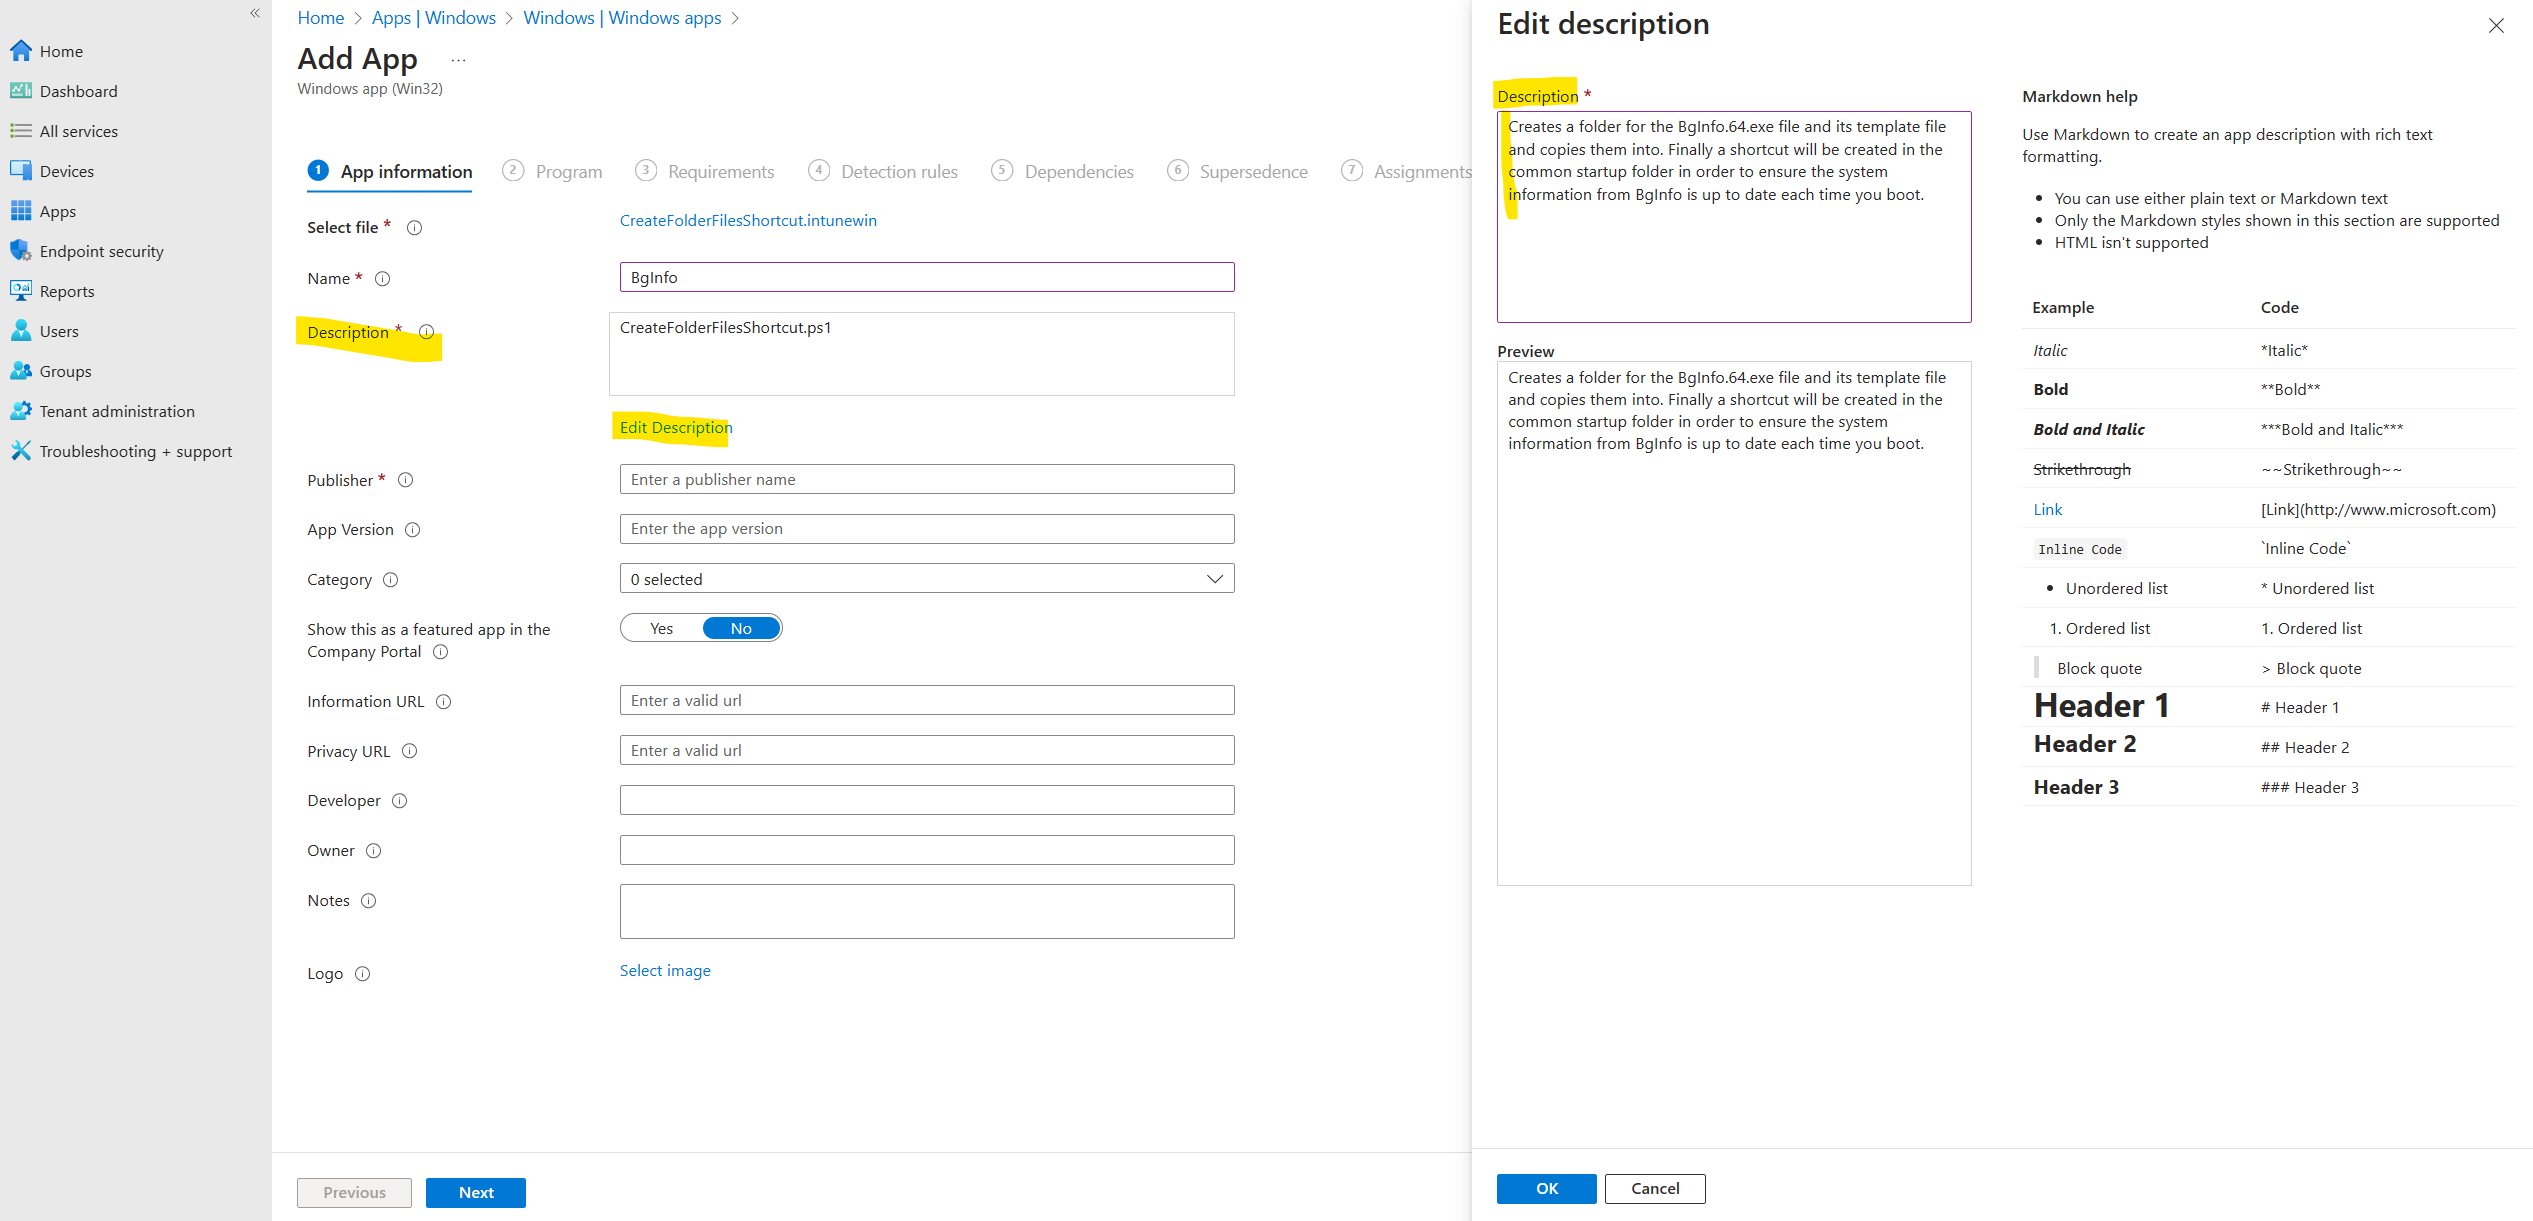
We can also adjust the description for the app.
Creates a folder for the Bginfo64.exe file and its template file and copies them into it. Finally a shortcut will be created in the common startup folder in order to ensure the system information from Bginfo is up to date each time you boot.
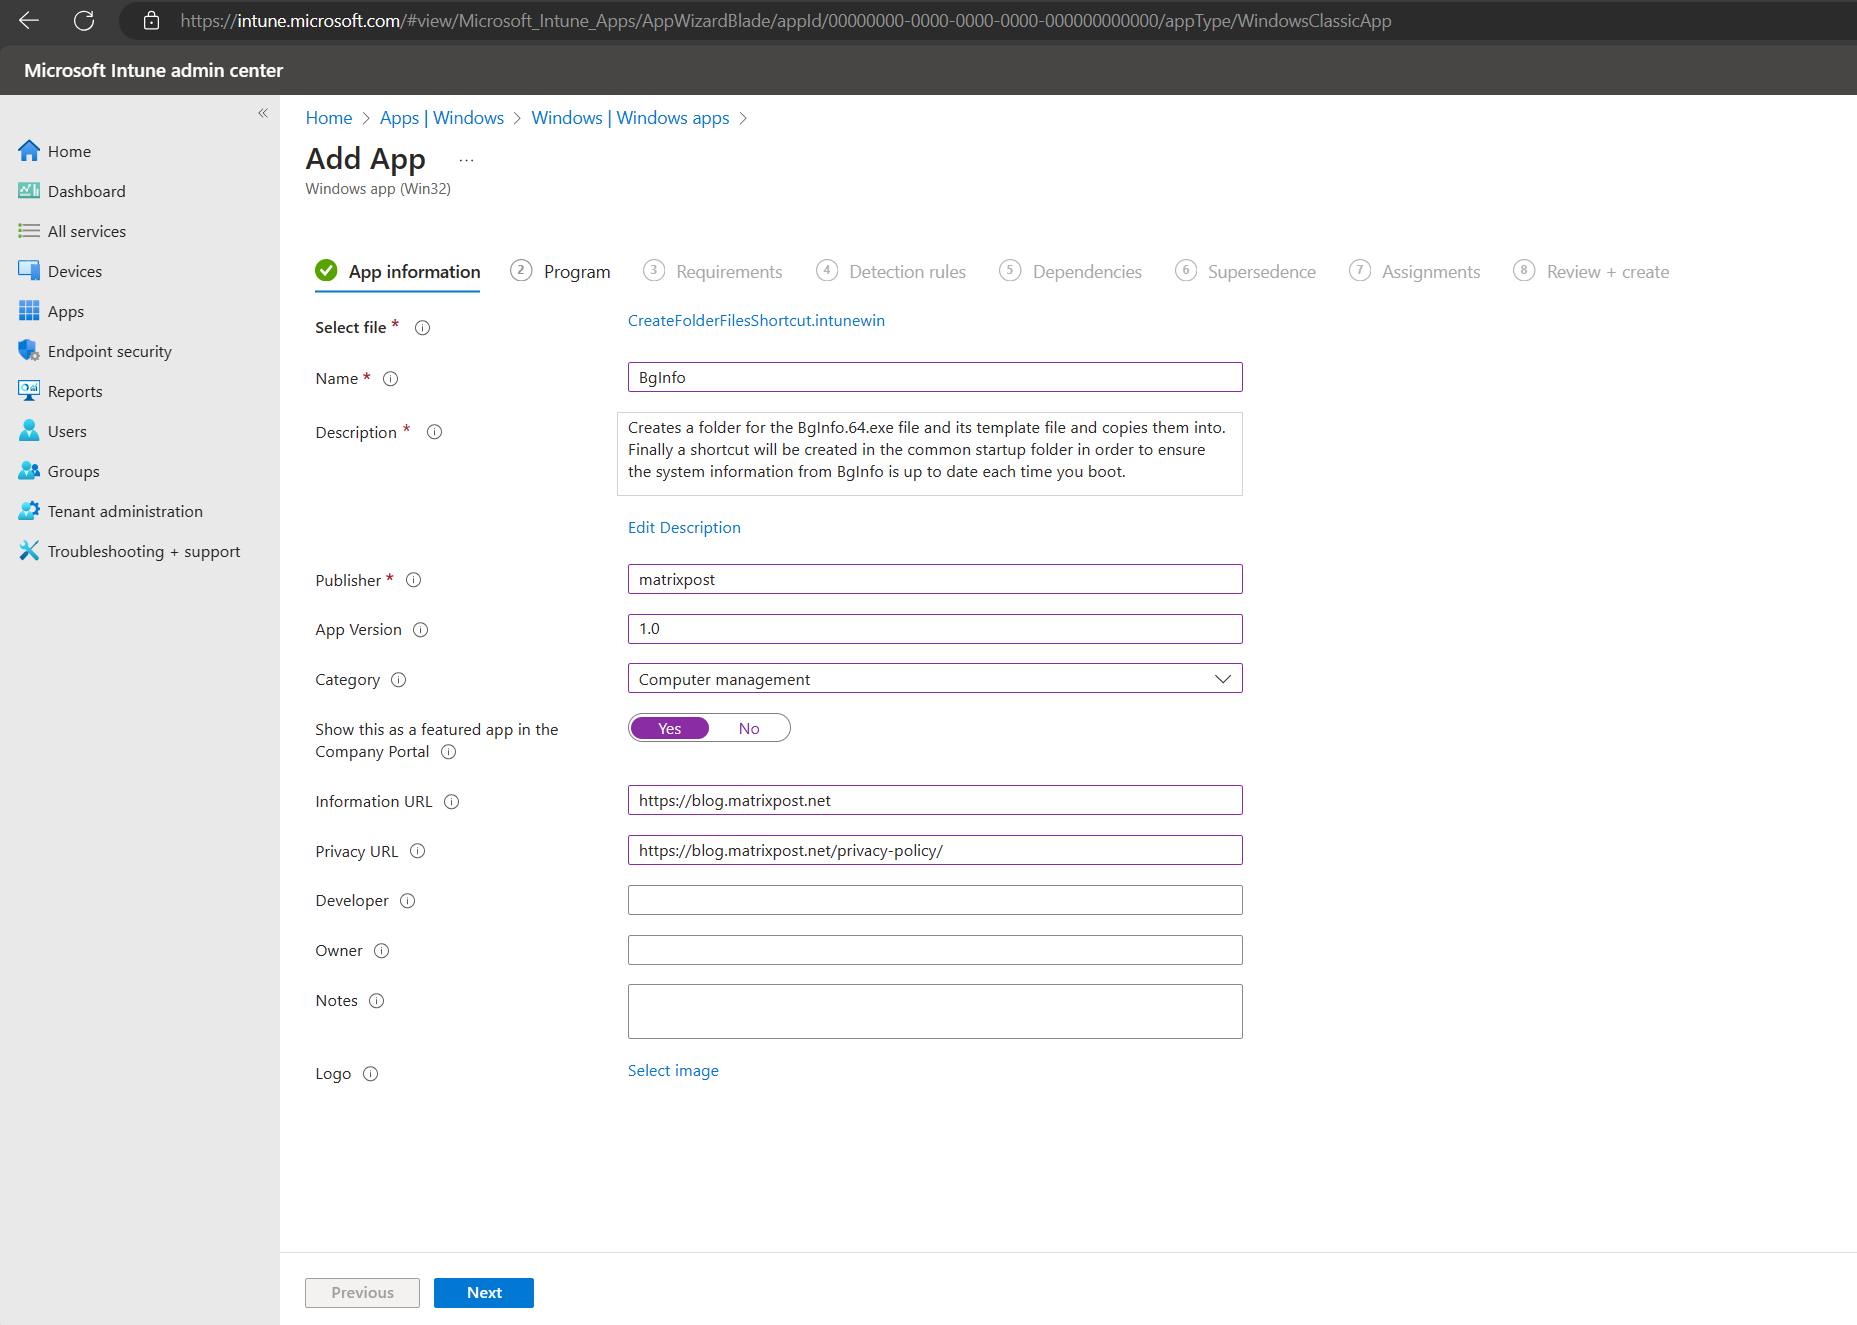
We can also adding some additional information to the app.
Featured apps are prominently placed in Company Portal so that users can quickly get to them.
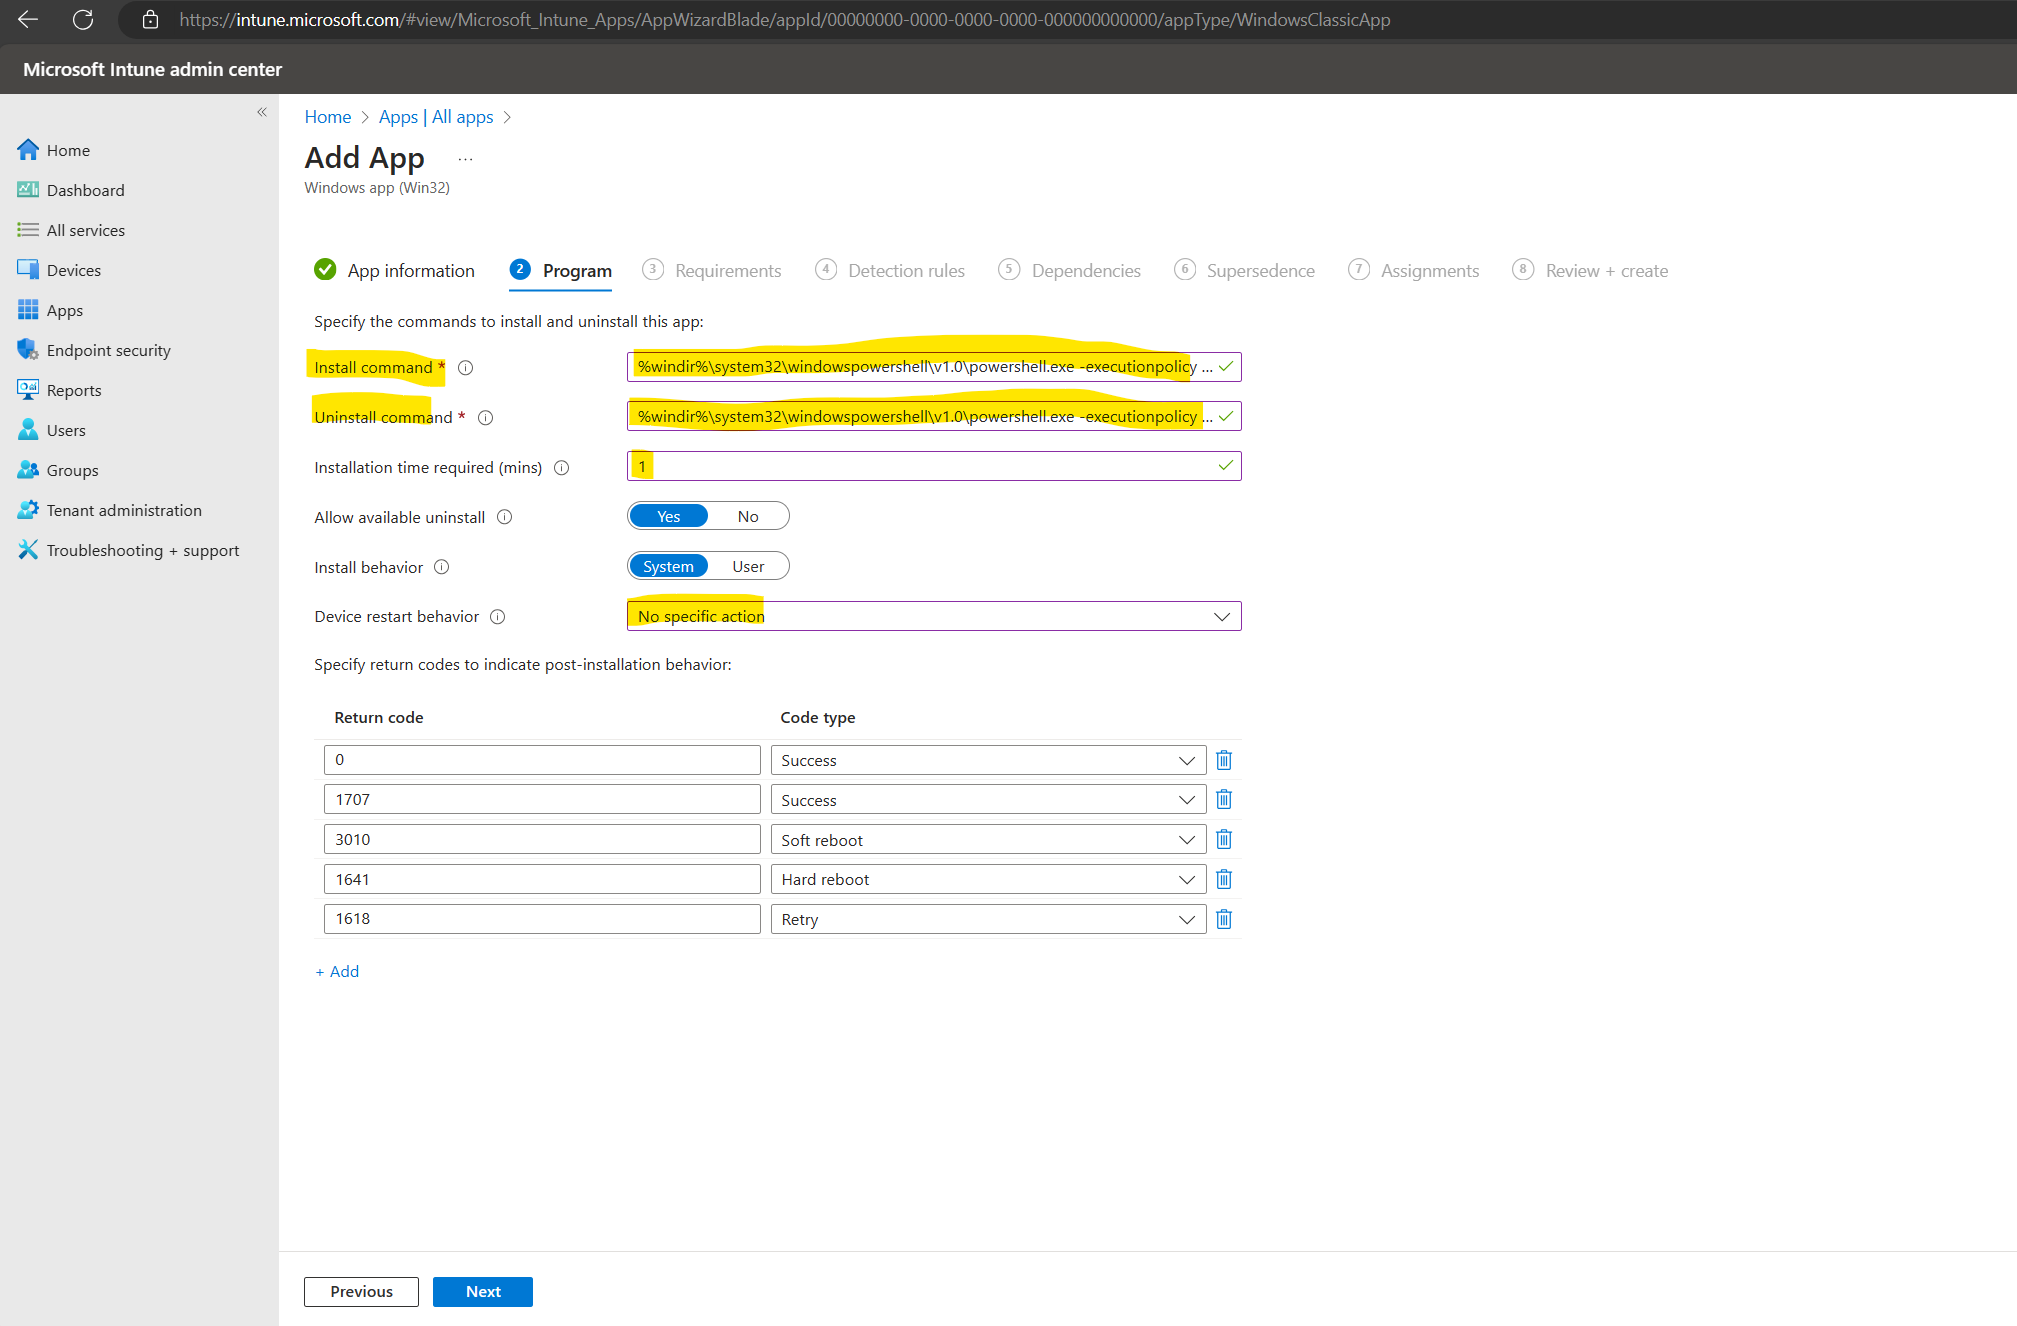
In the Program tab we first need to enter the install and uninstall command. We need to enter here our both PowerShell scripts (Install_BgInfo.ps1 & Uninstall_BgInfo.ps1). Because we will using here a PowerShell script we also need to enter for both scripts the absolute path to the powershell.exe binary as shown below.
Install command:
%windir%system32windowspowershellv1.0powershell.exe -executionpolicy bypass -file "Install_BgInfo.ps1"
Uninstall command:
%windir%system32windowspowershellv1.0powershell.exe -executionpolicy bypass -file "Uninstall_BgInfo.ps1"
The required installation time should be done in a few seconds, therefore I will enter here the minimum for 1 minute.
The device needs no restart for the installation, however in order BgInfo will initial apply the system information to the desktop, it first needs to be executed which will happen during boot because of the created shortcut (symbolic link) to the common startup folder (C:ProgramDataMicrosoftWindowsStart MenuProgramsStartup).
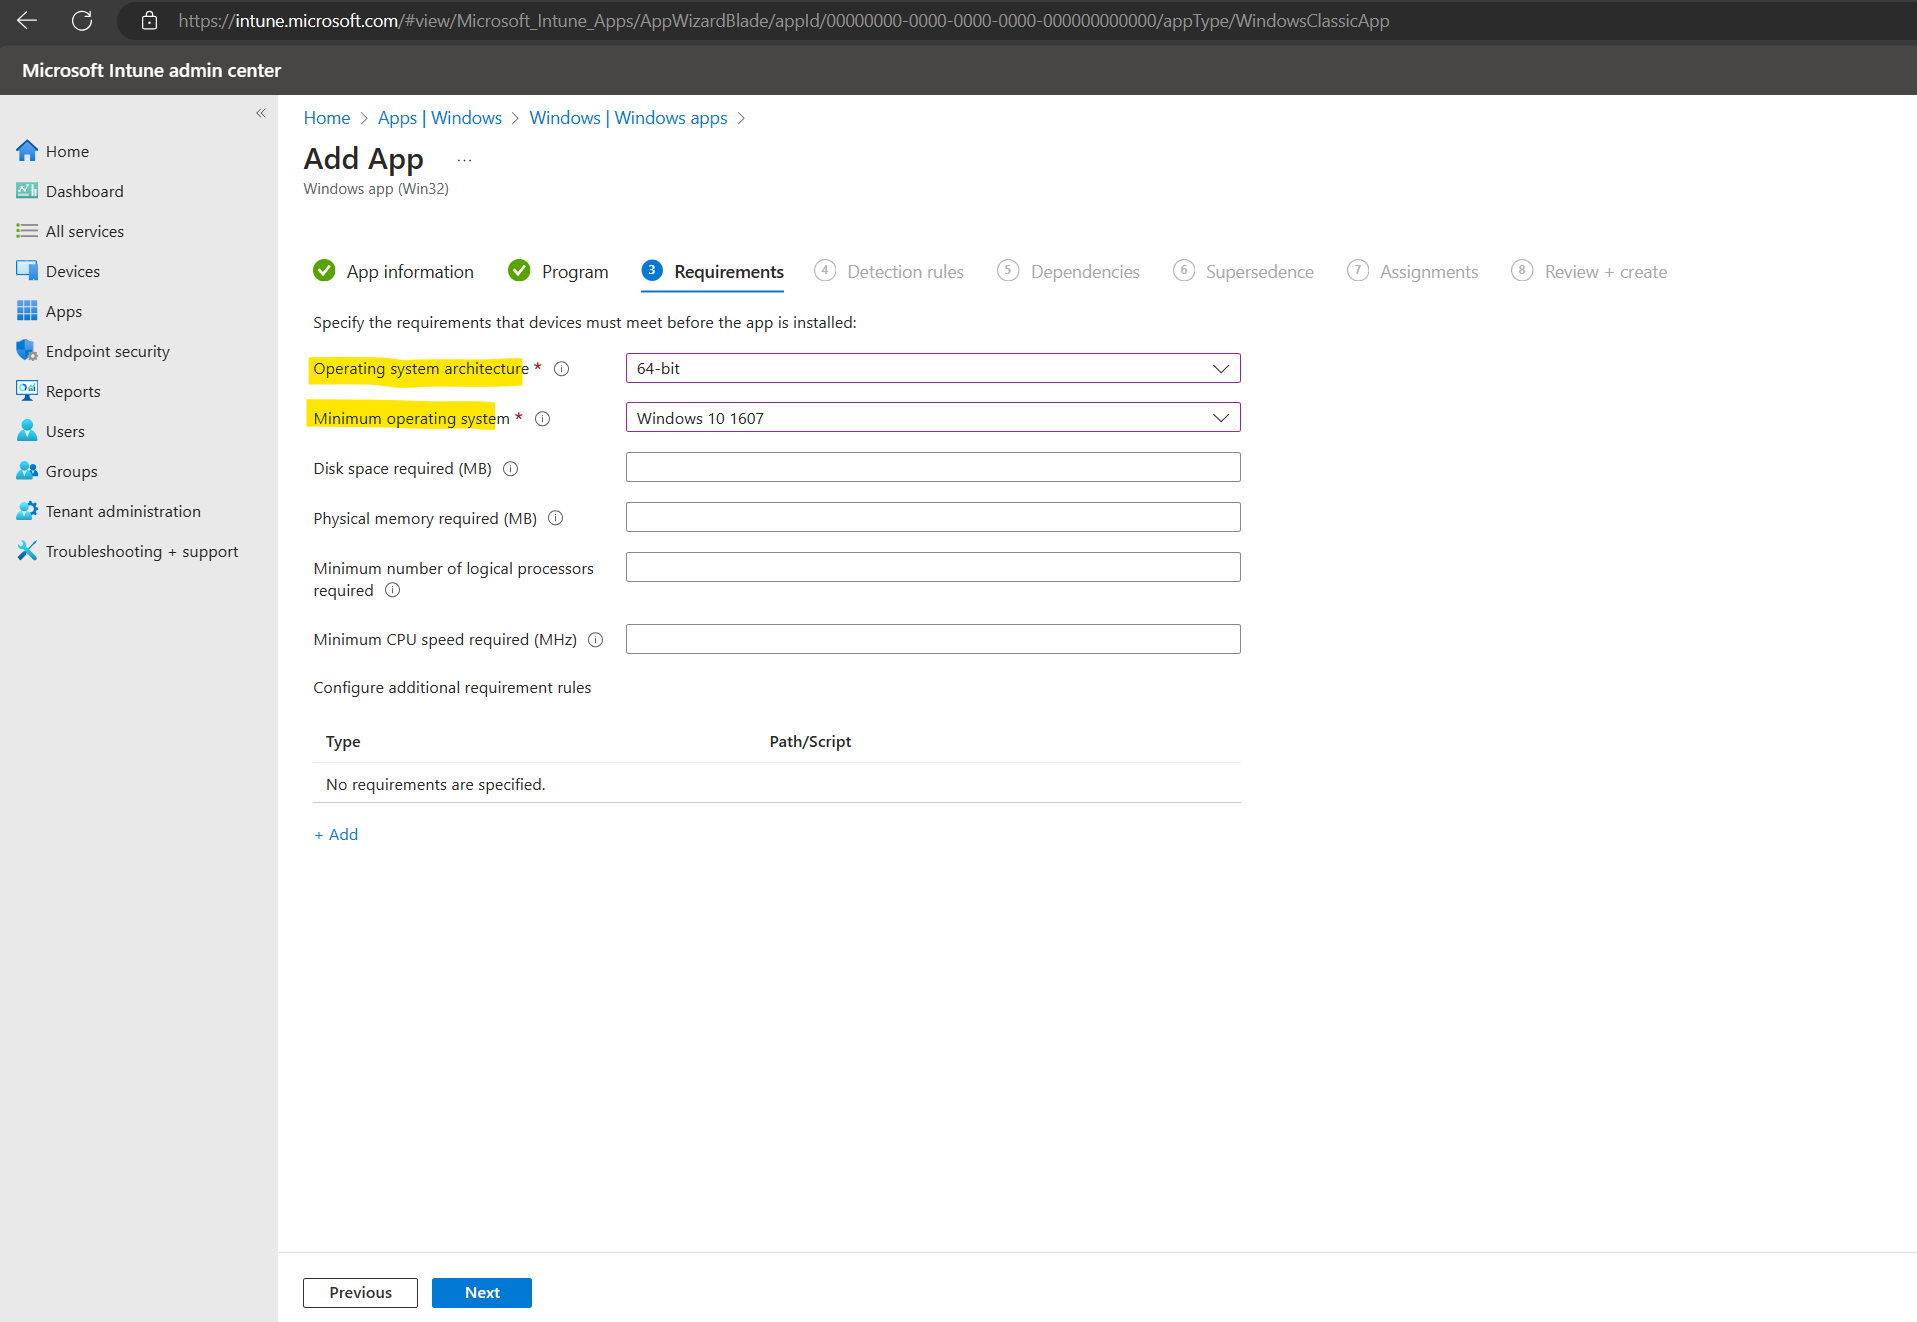
We just need to select the operating system architecture with 64-bit (depends on the BgInfo version you used for the app package) and a minimum operating system version which can be the oldest Windows 10 version we can select.
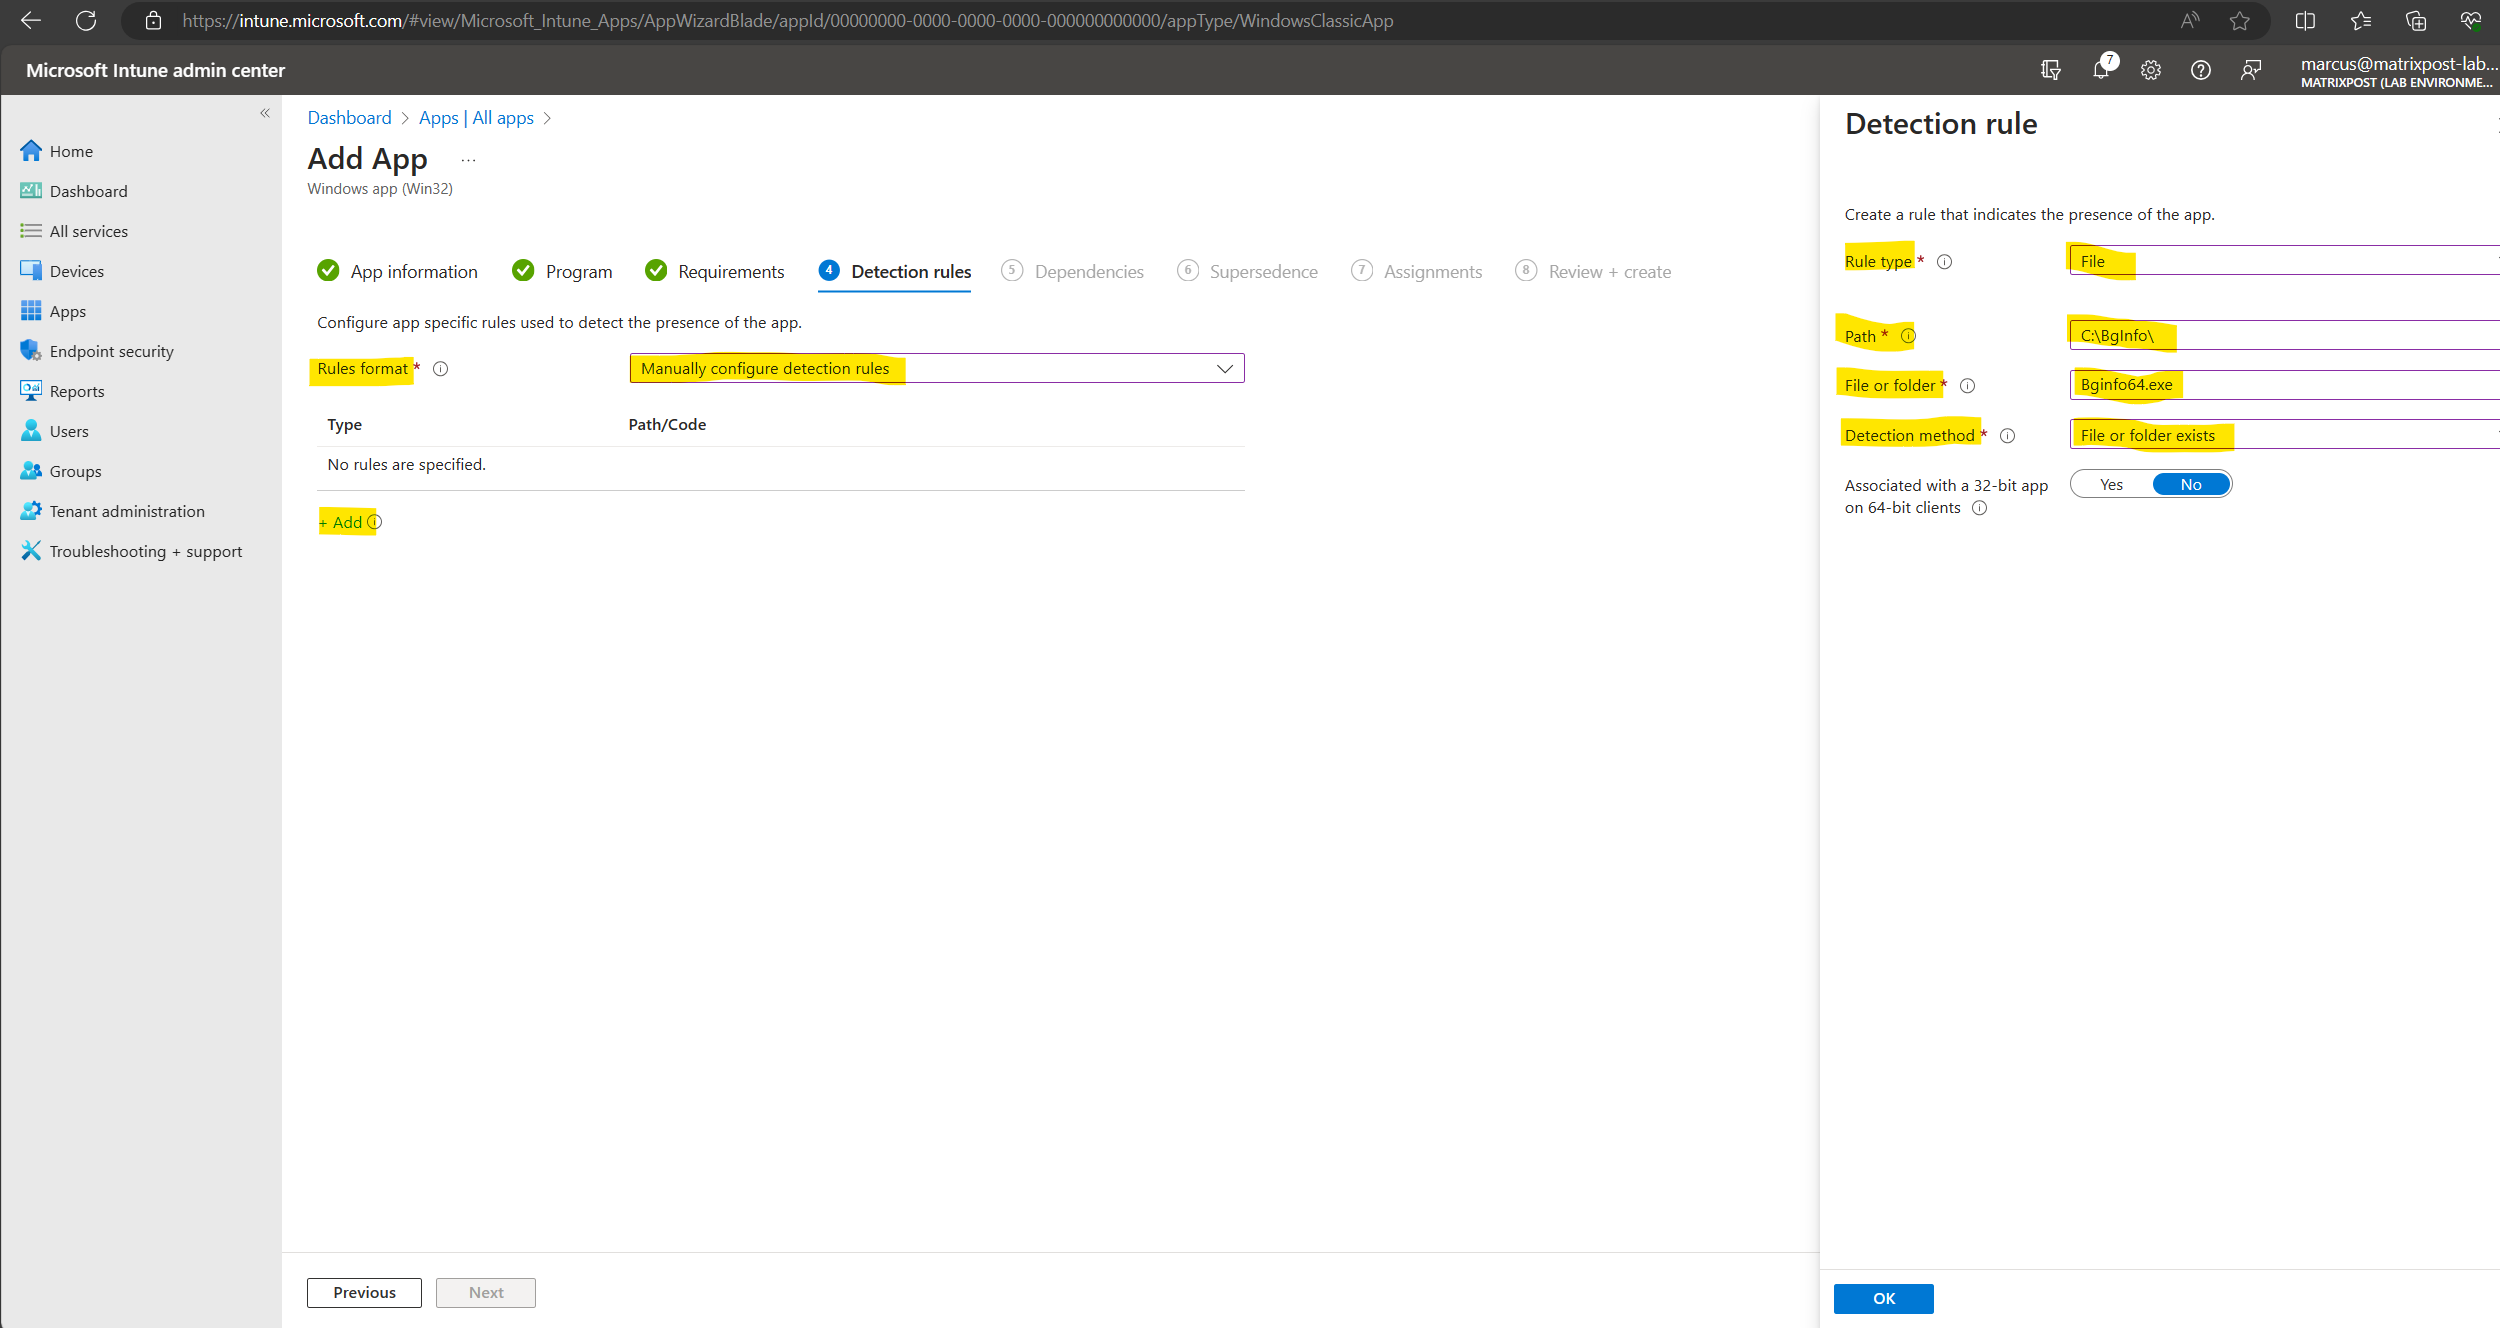
For the detection rules we select Manually configure detection rules and adding a File rule type as shown below.
Dependencies and Supersedence we can skip and go directly to the Assignments tab.
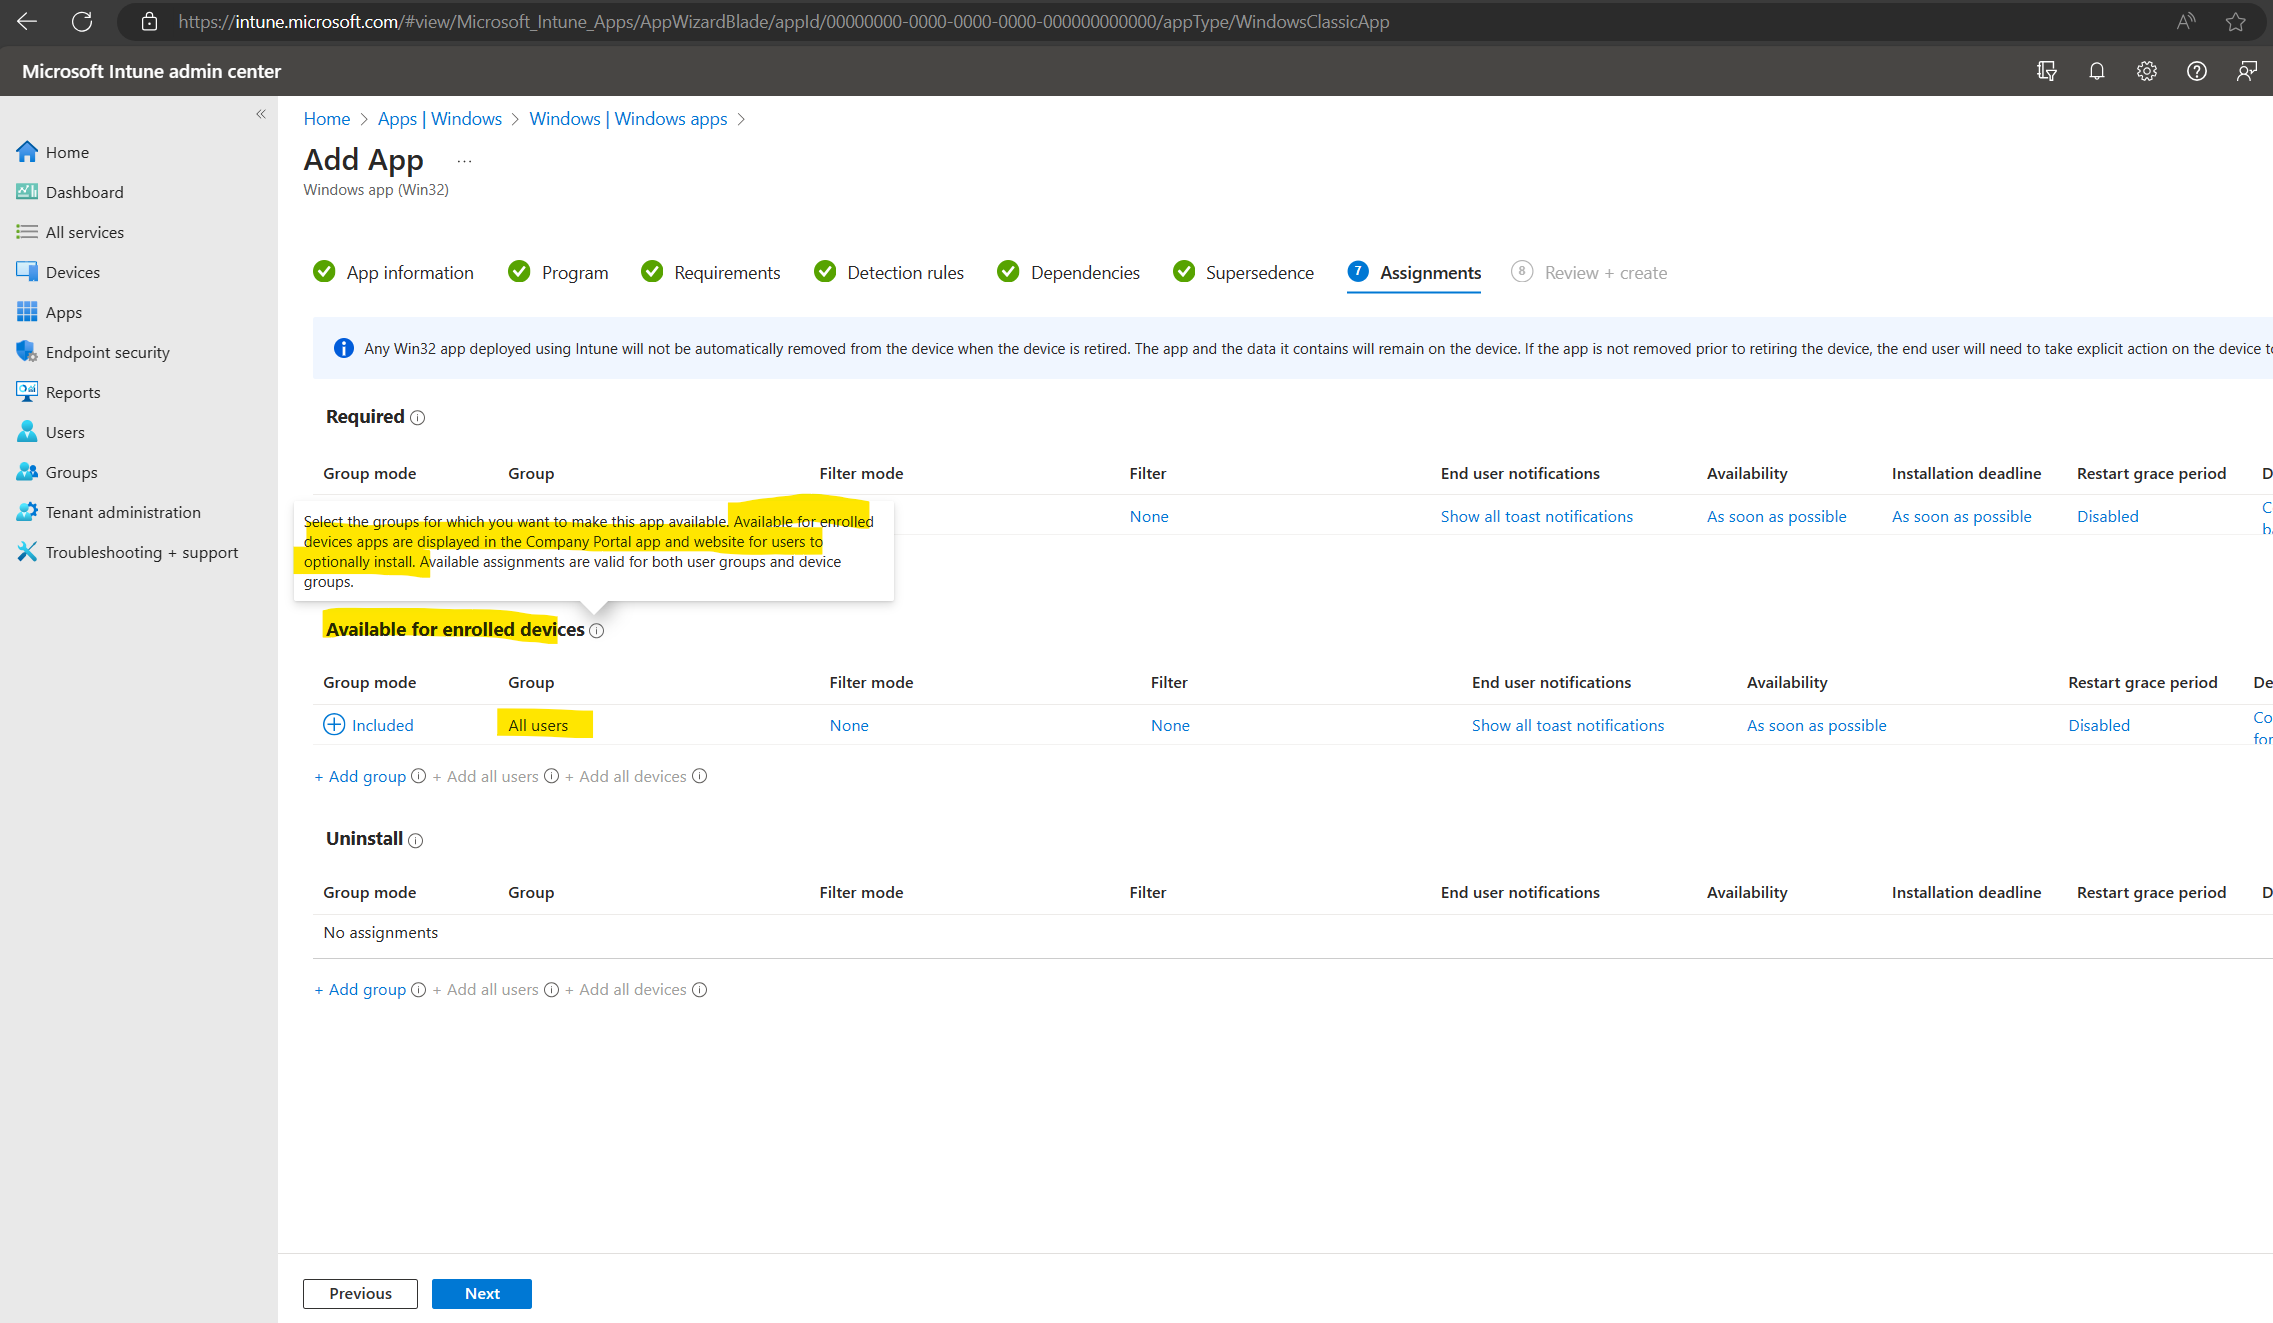
Here we can choose to deploy the app automatically by adding users or devices in the Required section.
Available for enrolled devices apps are displayed in the Company Portal app and website for users to install these apps on demand.
!!! Note !!!
If you want to allow users to be able to uninstall the app by using the Company Portal app, don’t add these users or devices to the required section, if you add them here the users will encounter issues when they trying to uninstall the app!Also under the Program tab previously you need to select Yes for Allow available uninstall of course.

Adding users in the Available for enrolled device section.
Finally we will create the app.
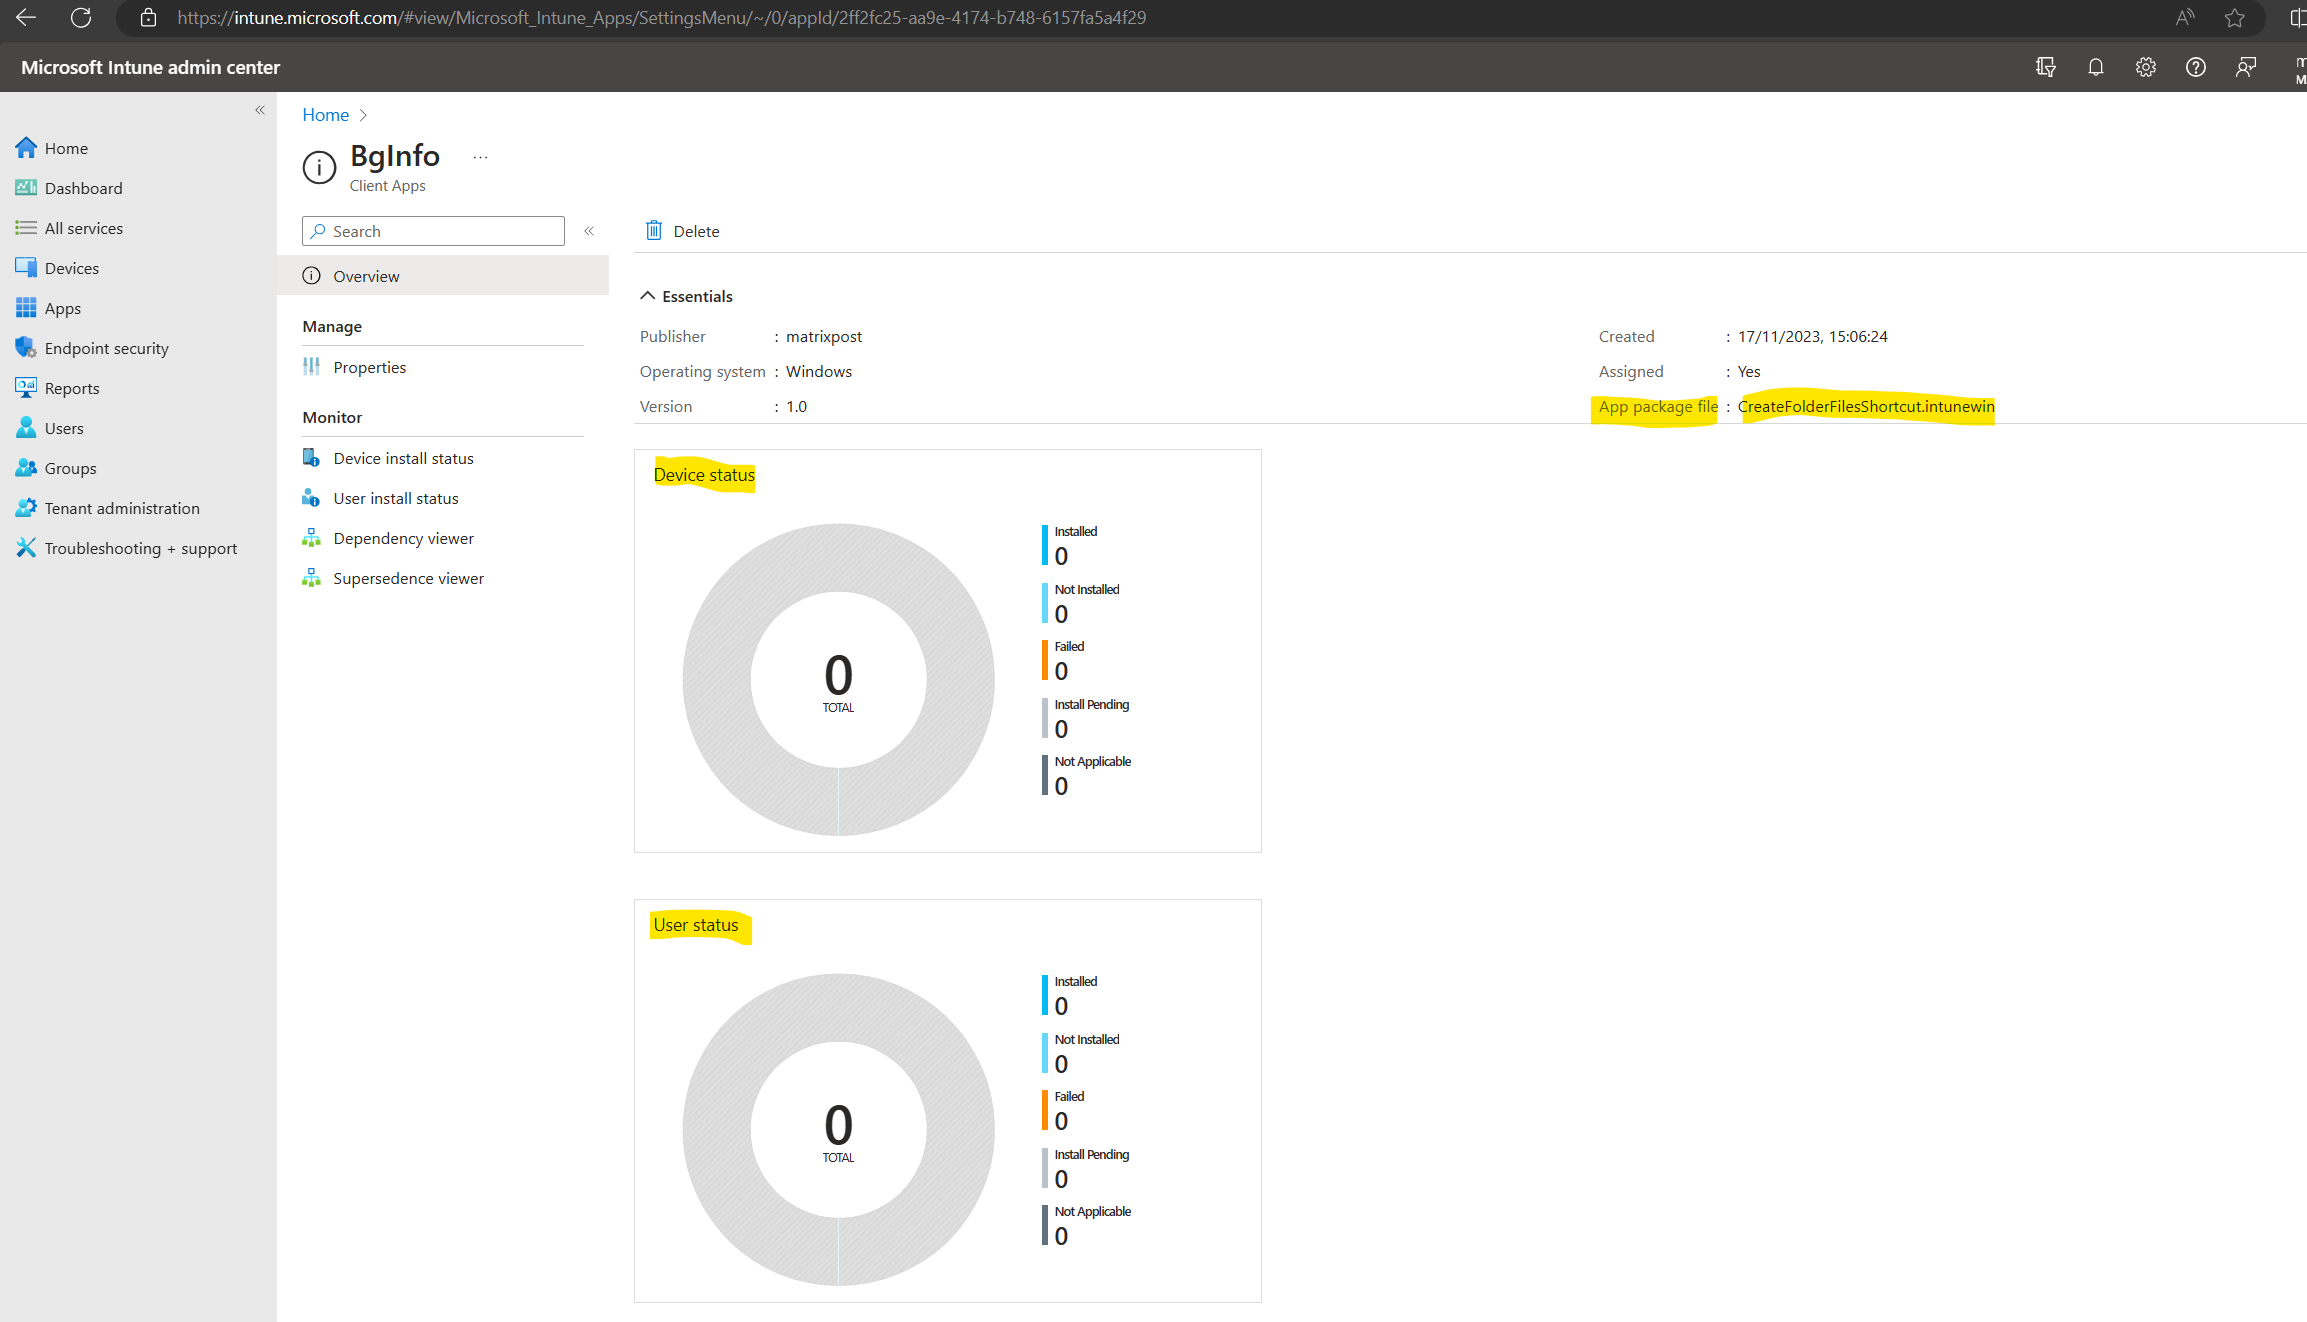
So far the app isn’t deployed/installed on any device in my lab environment.

Microsoft Intune Policy refresh intervals
Intune notifies the device to check in with the Intune service. The notification times vary, including immediately up to a few hours. These notification times also vary between platforms.
If a device doesn’t check in to get the policy or profile after the first notification, Intune makes three more attempts. An offline device, such as turned off, or not connected to a network, may not receive the notifications. In this case, the device gets the policy or profile on its next scheduled check-in with the Intune service. The same applies to checks for non-compliance, including devices that move from a compliant to a non-compliant state.
Estimated frequencies:
| Platform | Refresh cycle |
|---|---|
| Android | About every 8 hours |
| iOS/iPadOS | About every 8 hours |
| macOS | About every 8 hours |
| Windows 10/11 PCs enrolled as devices | About every 8 hours |
| Windows 8.1 | About every 8 hours |
If devices recently enroll, then the compliance, non-compliance, and configuration check-in runs more frequently. The check-ins are estimated at:
| Platform | Frequency |
|---|---|
| Android | Every 3 minutes for 15 minutes, then every 15 minutes for 2 hours, and then around every 8 hours |
| iOS/iPadOS | Every 15 minutes for 1 hour, and then around every 8 hours |
| macOS | Every 15 minutes for 1 hour, and then around every 8 hours |
| Windows 10/11 PCs enrolled as devices | Every 3 minutes for 15 minutes, then every 15 minutes for 2 hours, and then around every 8 hours |
| Windows 8.1 | Every 5 minutes for 15 minutes, then every 15 minutes for 2 hours, and then around every 8 hours |
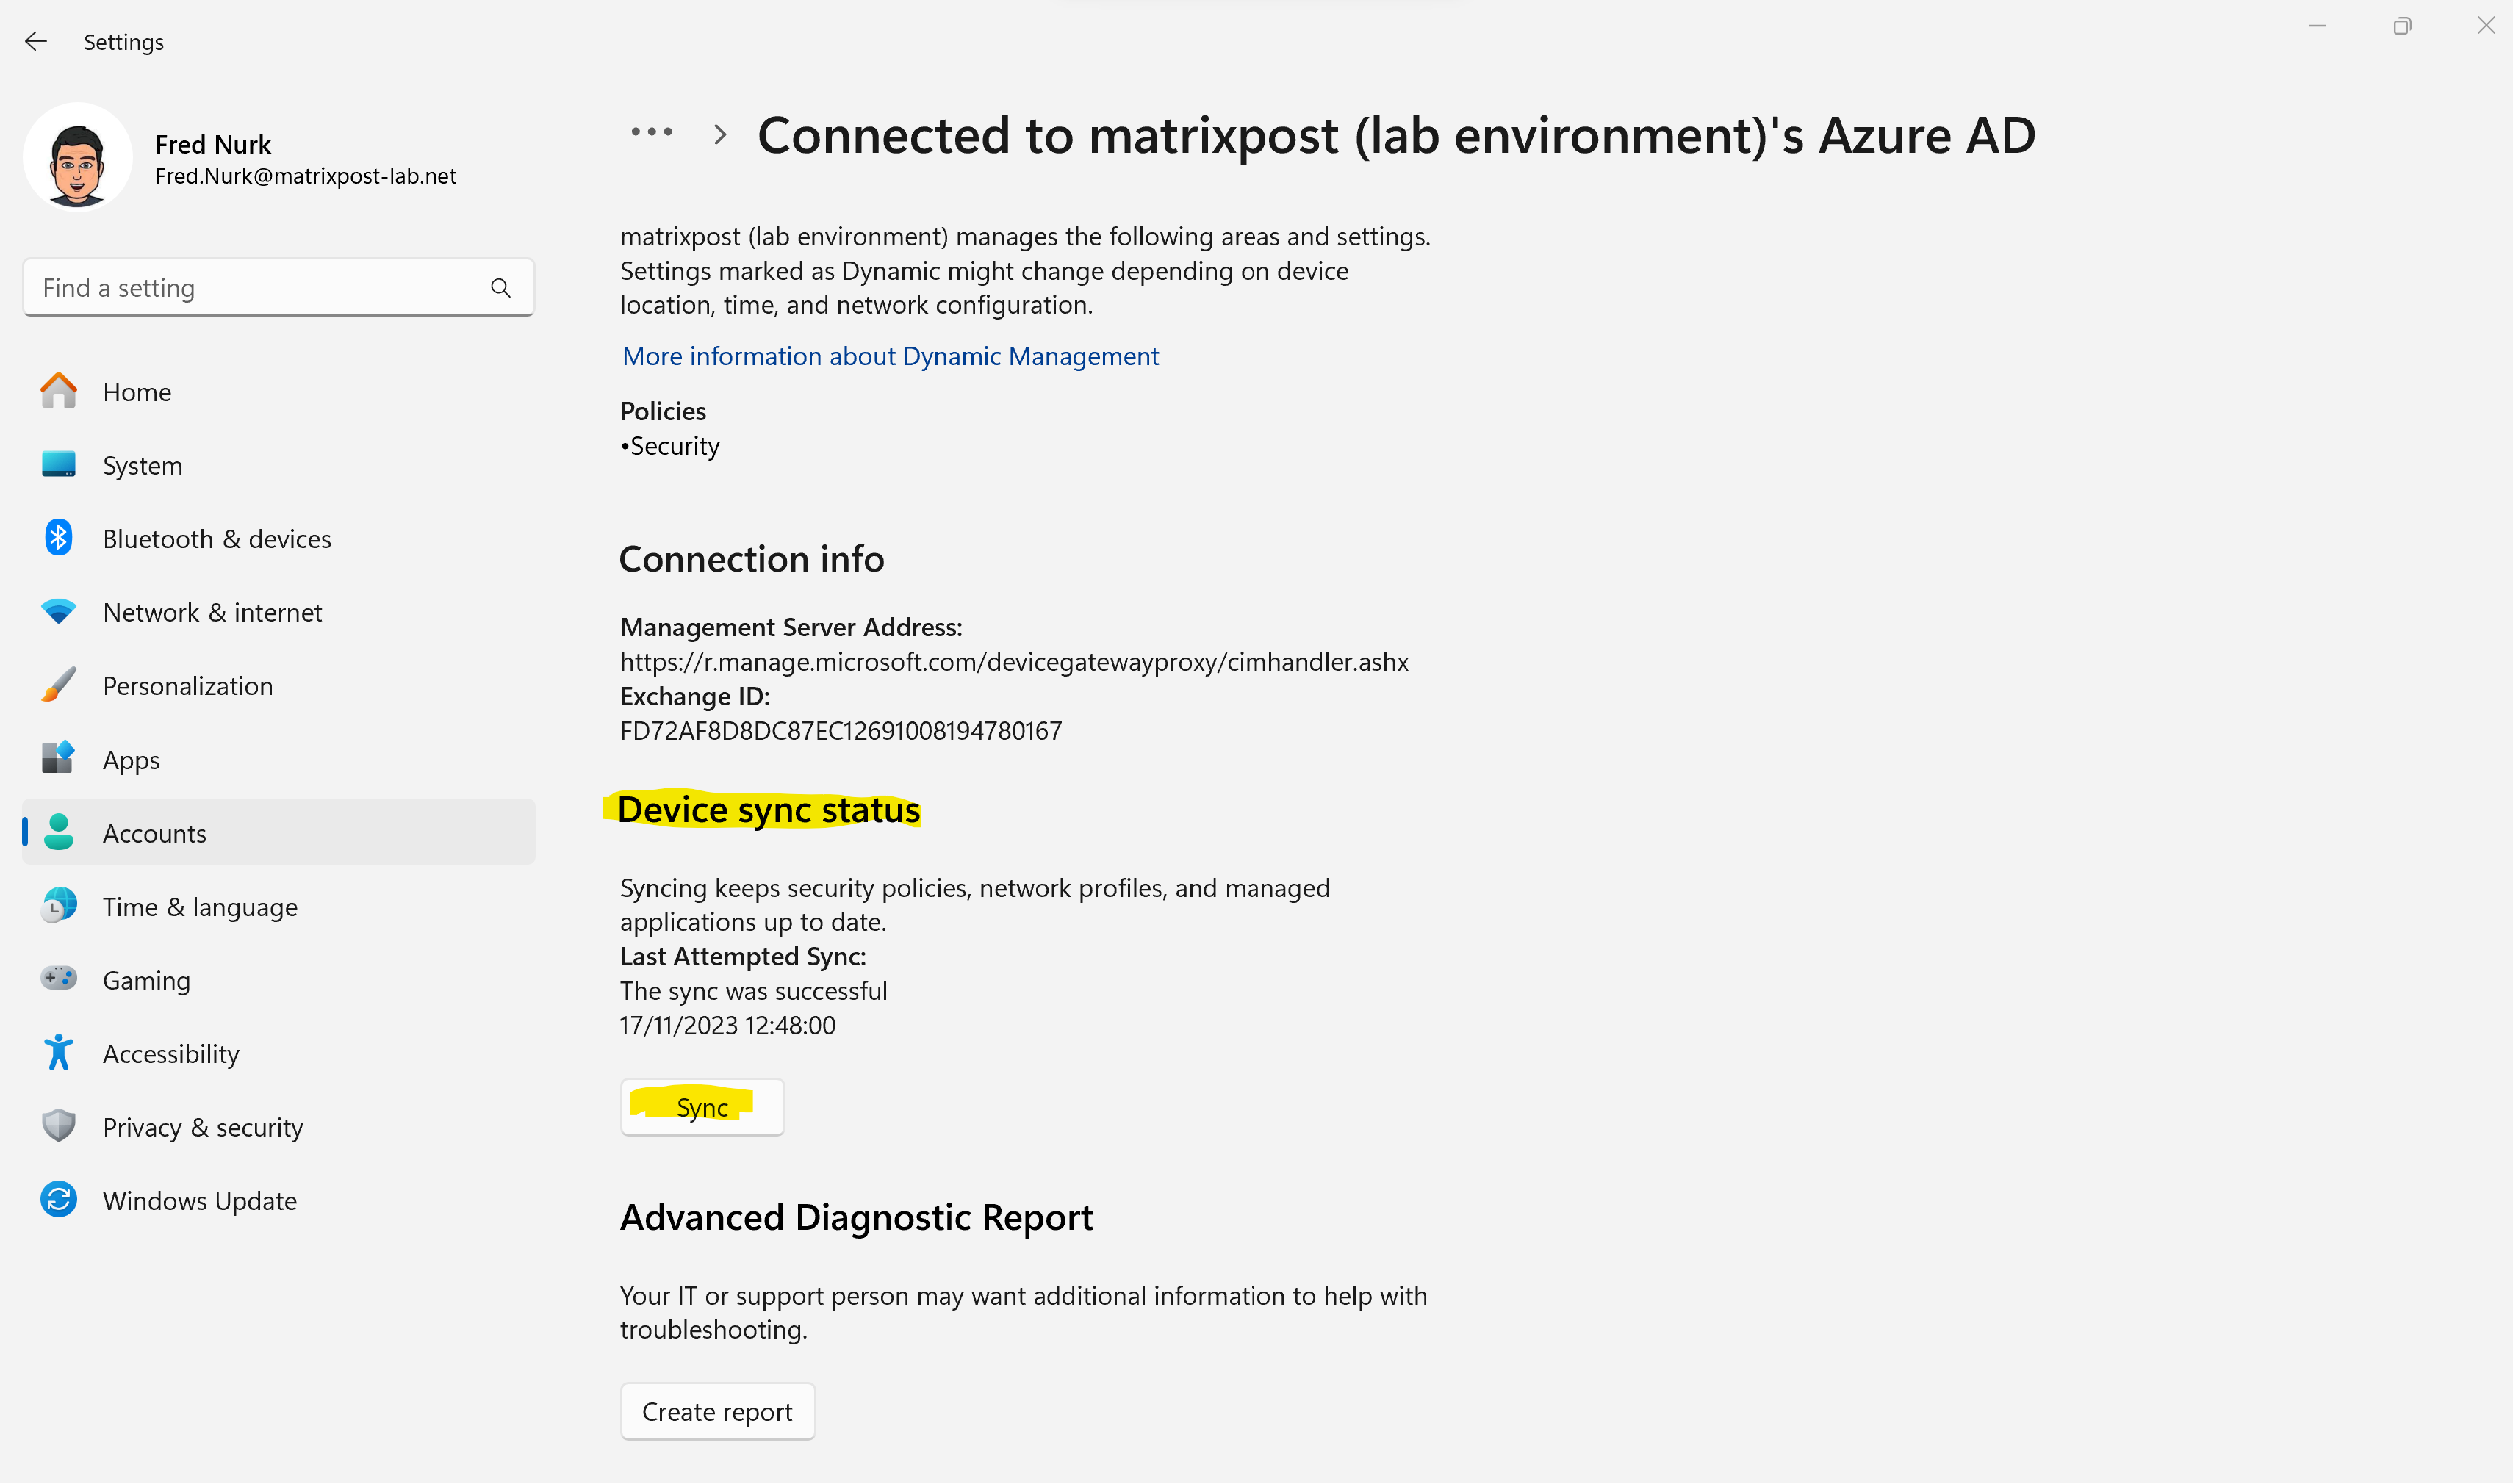
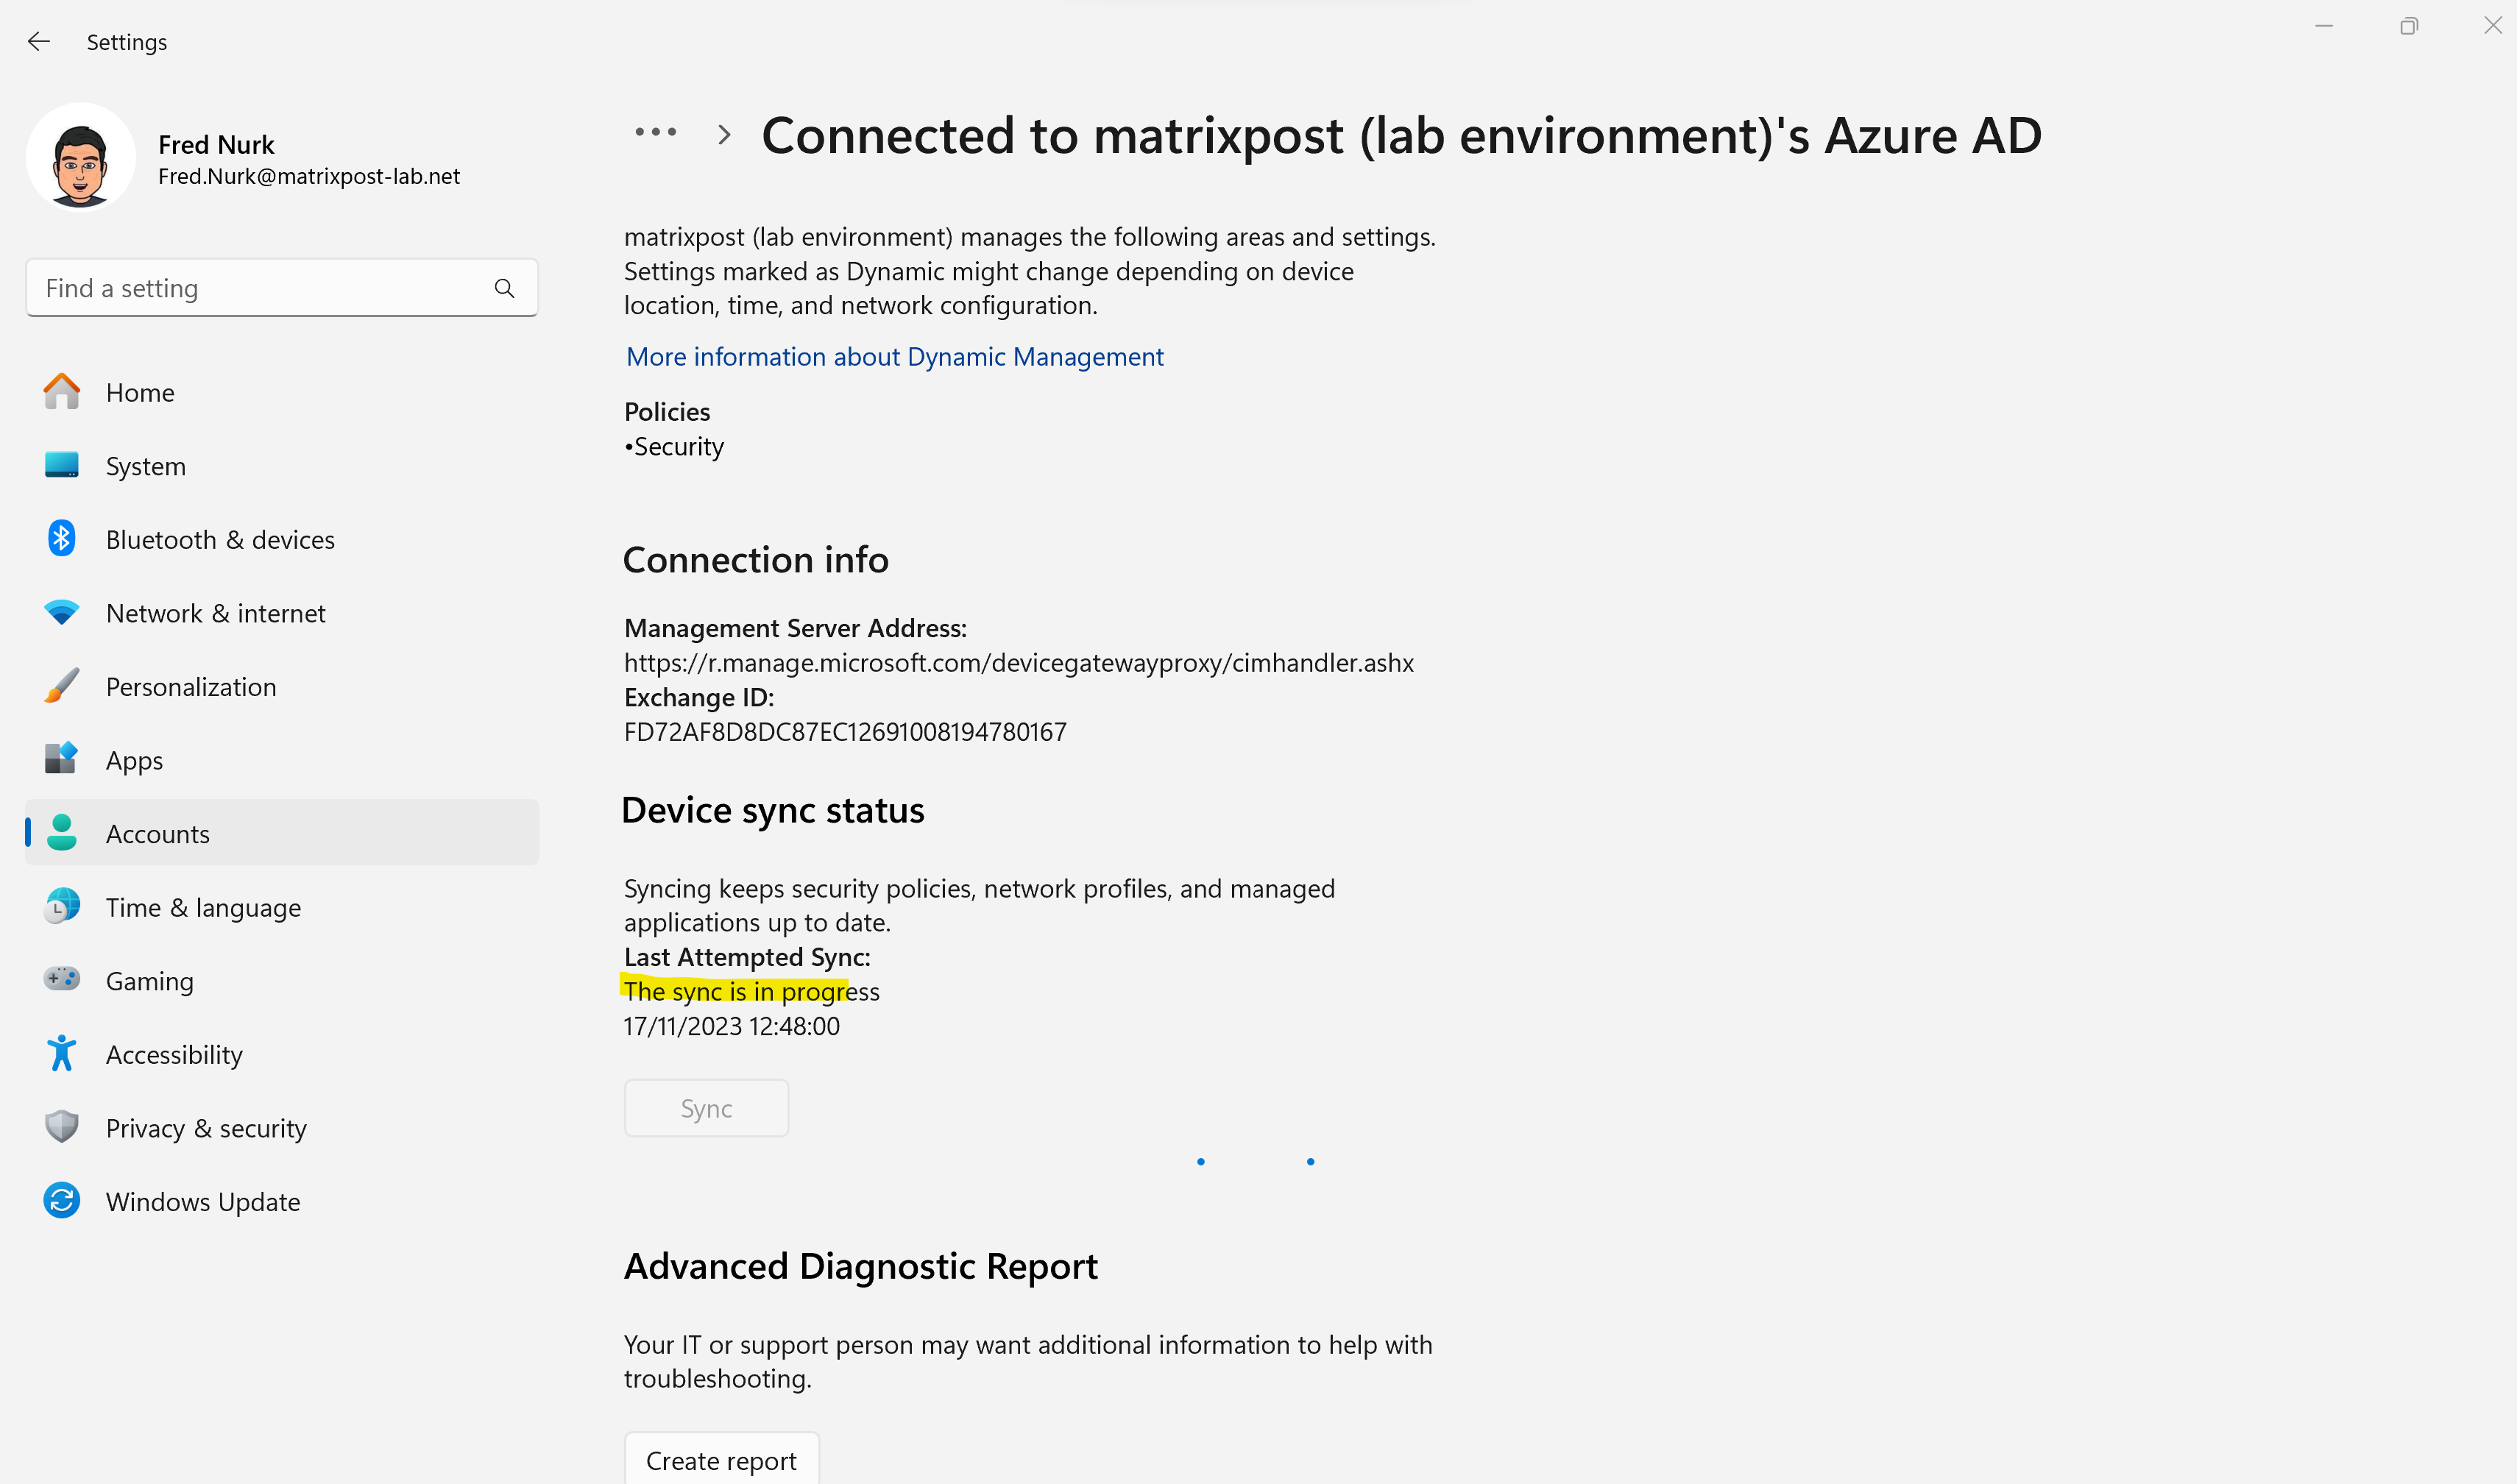
At any time, users can open the Company Portal app, Devices > Check Status or Settings > Sync to immediately check for policy or profile updates.
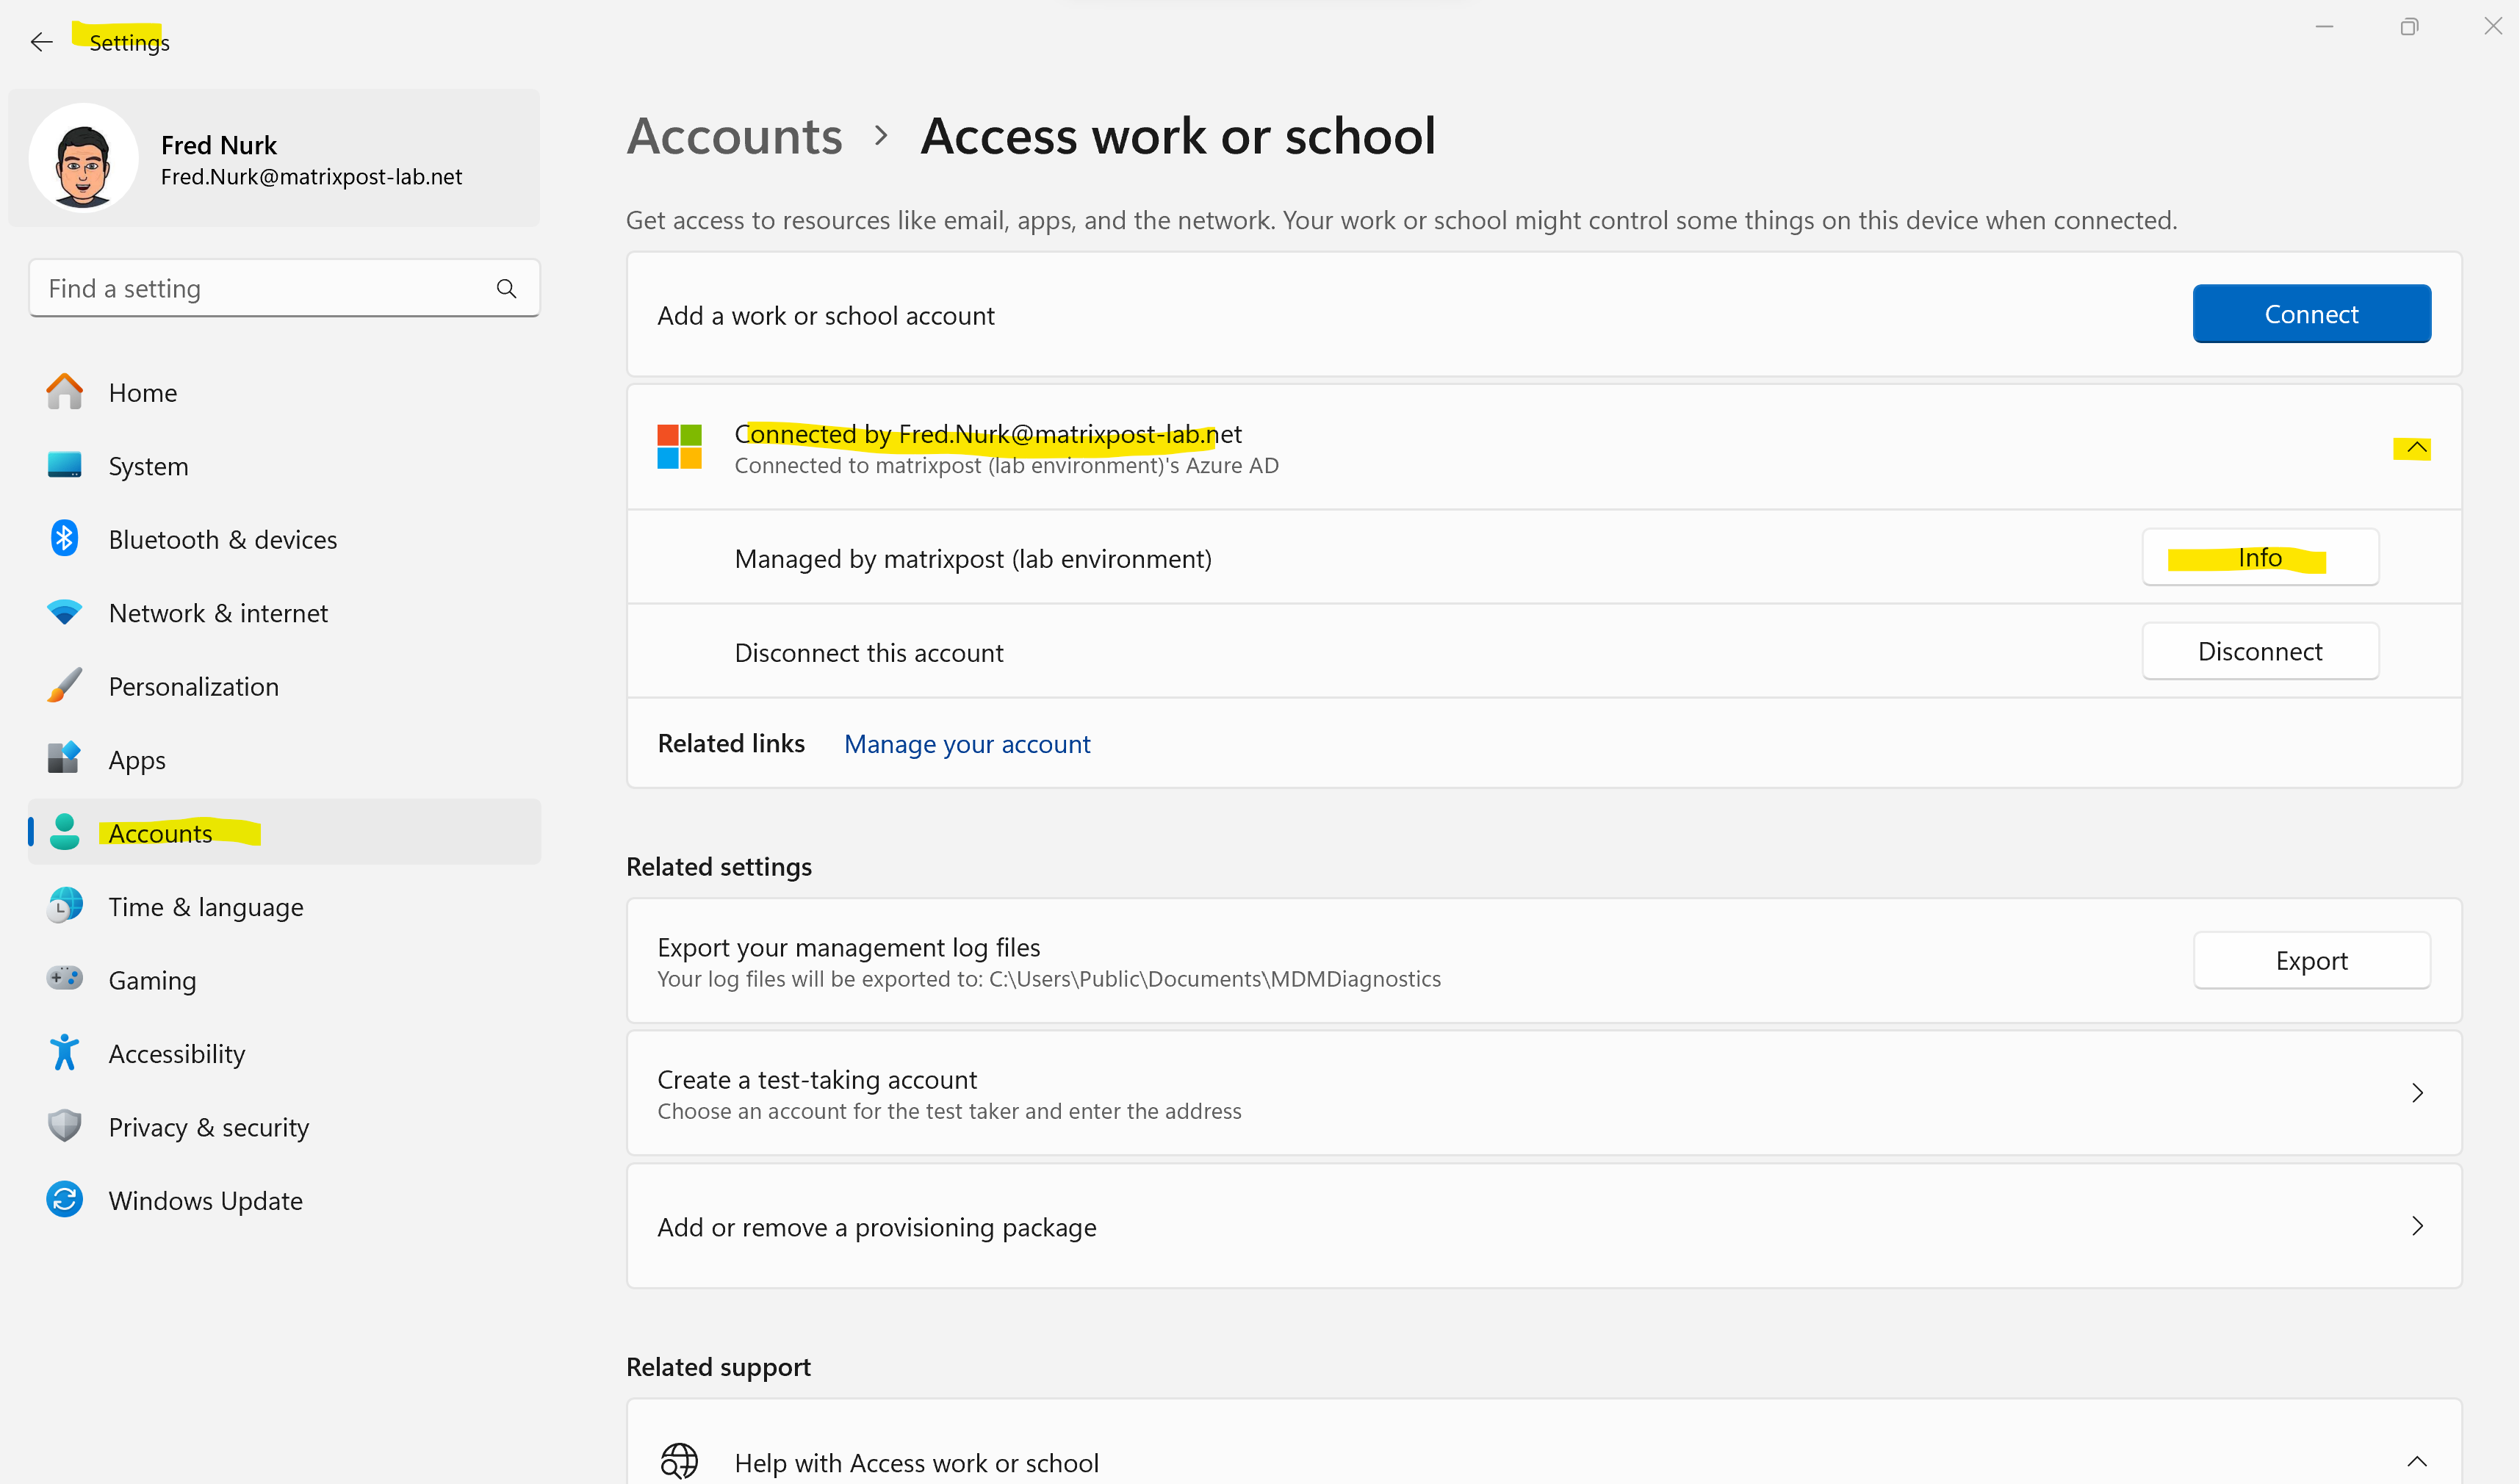
In order to speed up the deployment we can also force a sync directly from the account settings on the client as shown below.
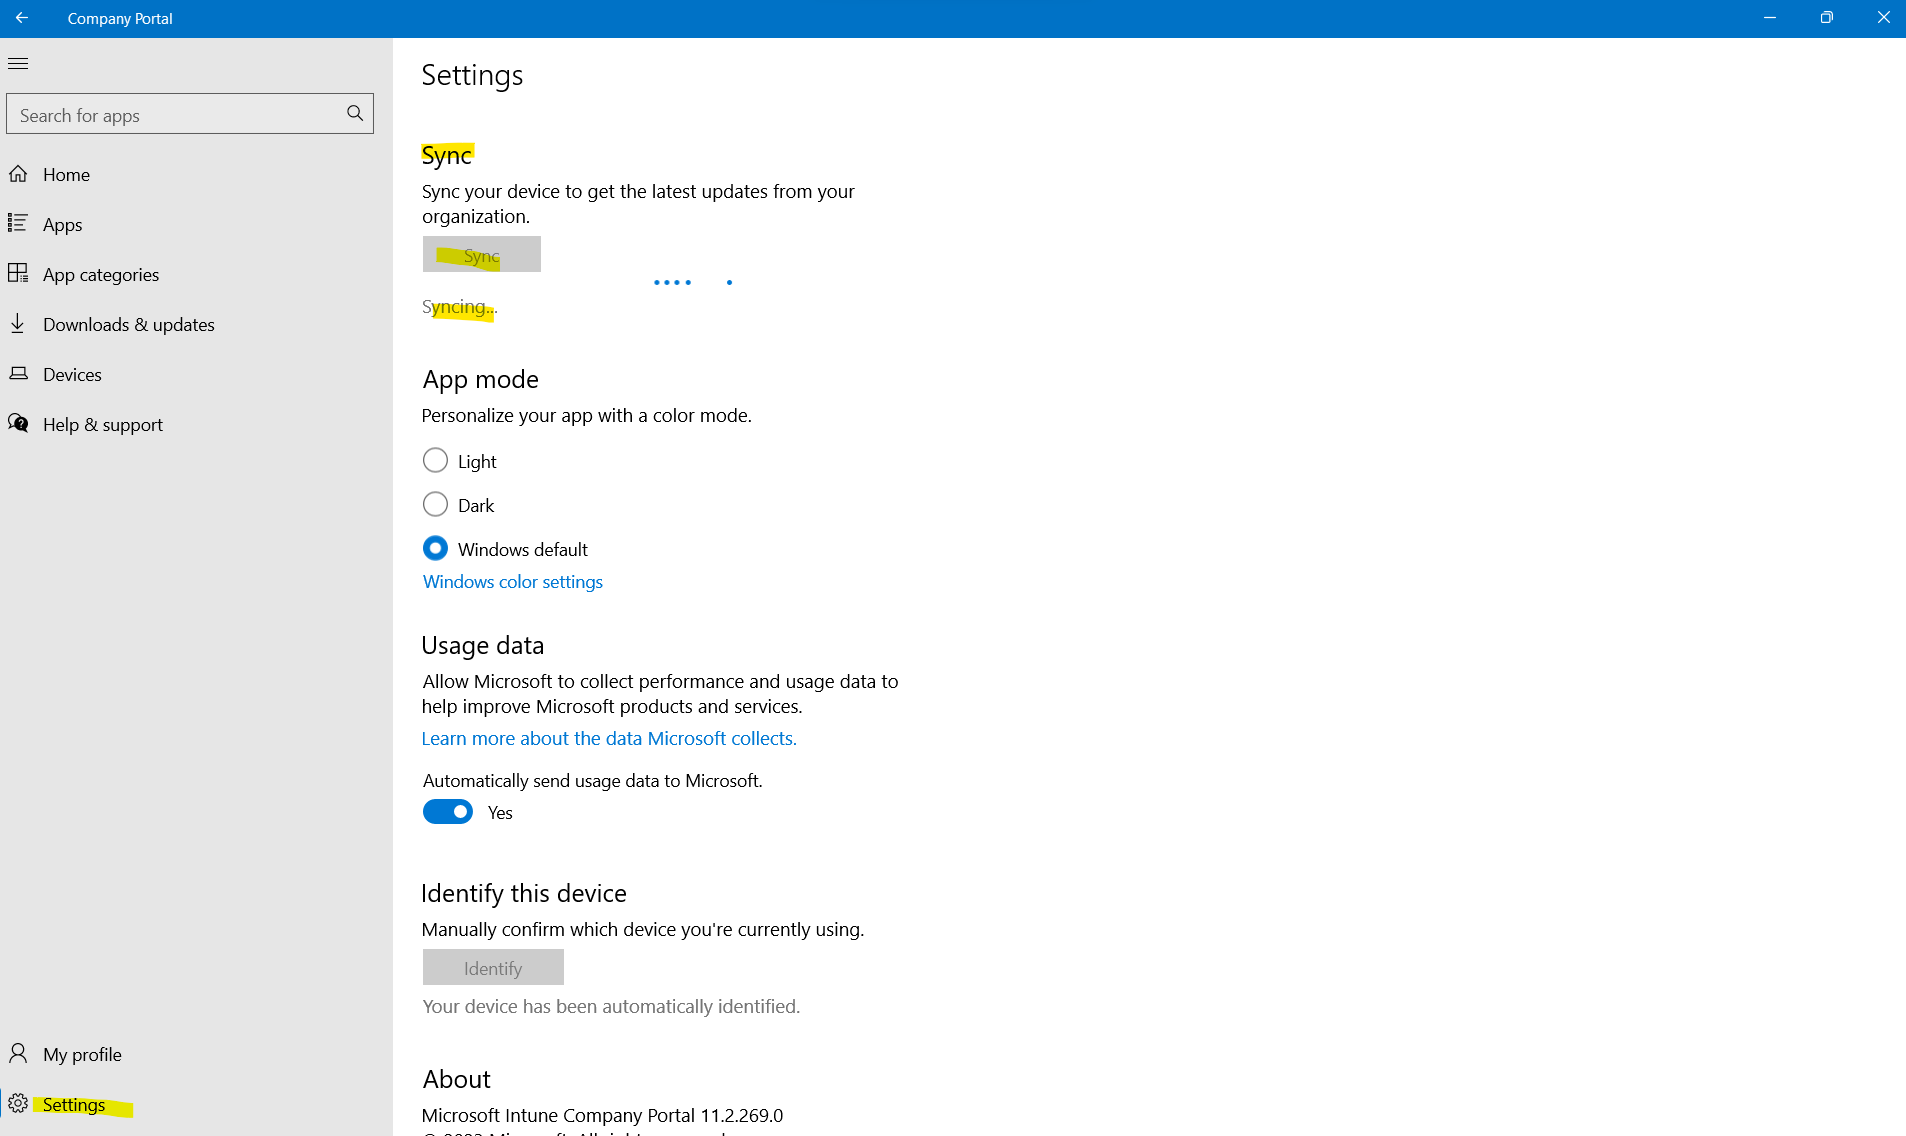
Or within the Company Portal app under Setting -> Sync.
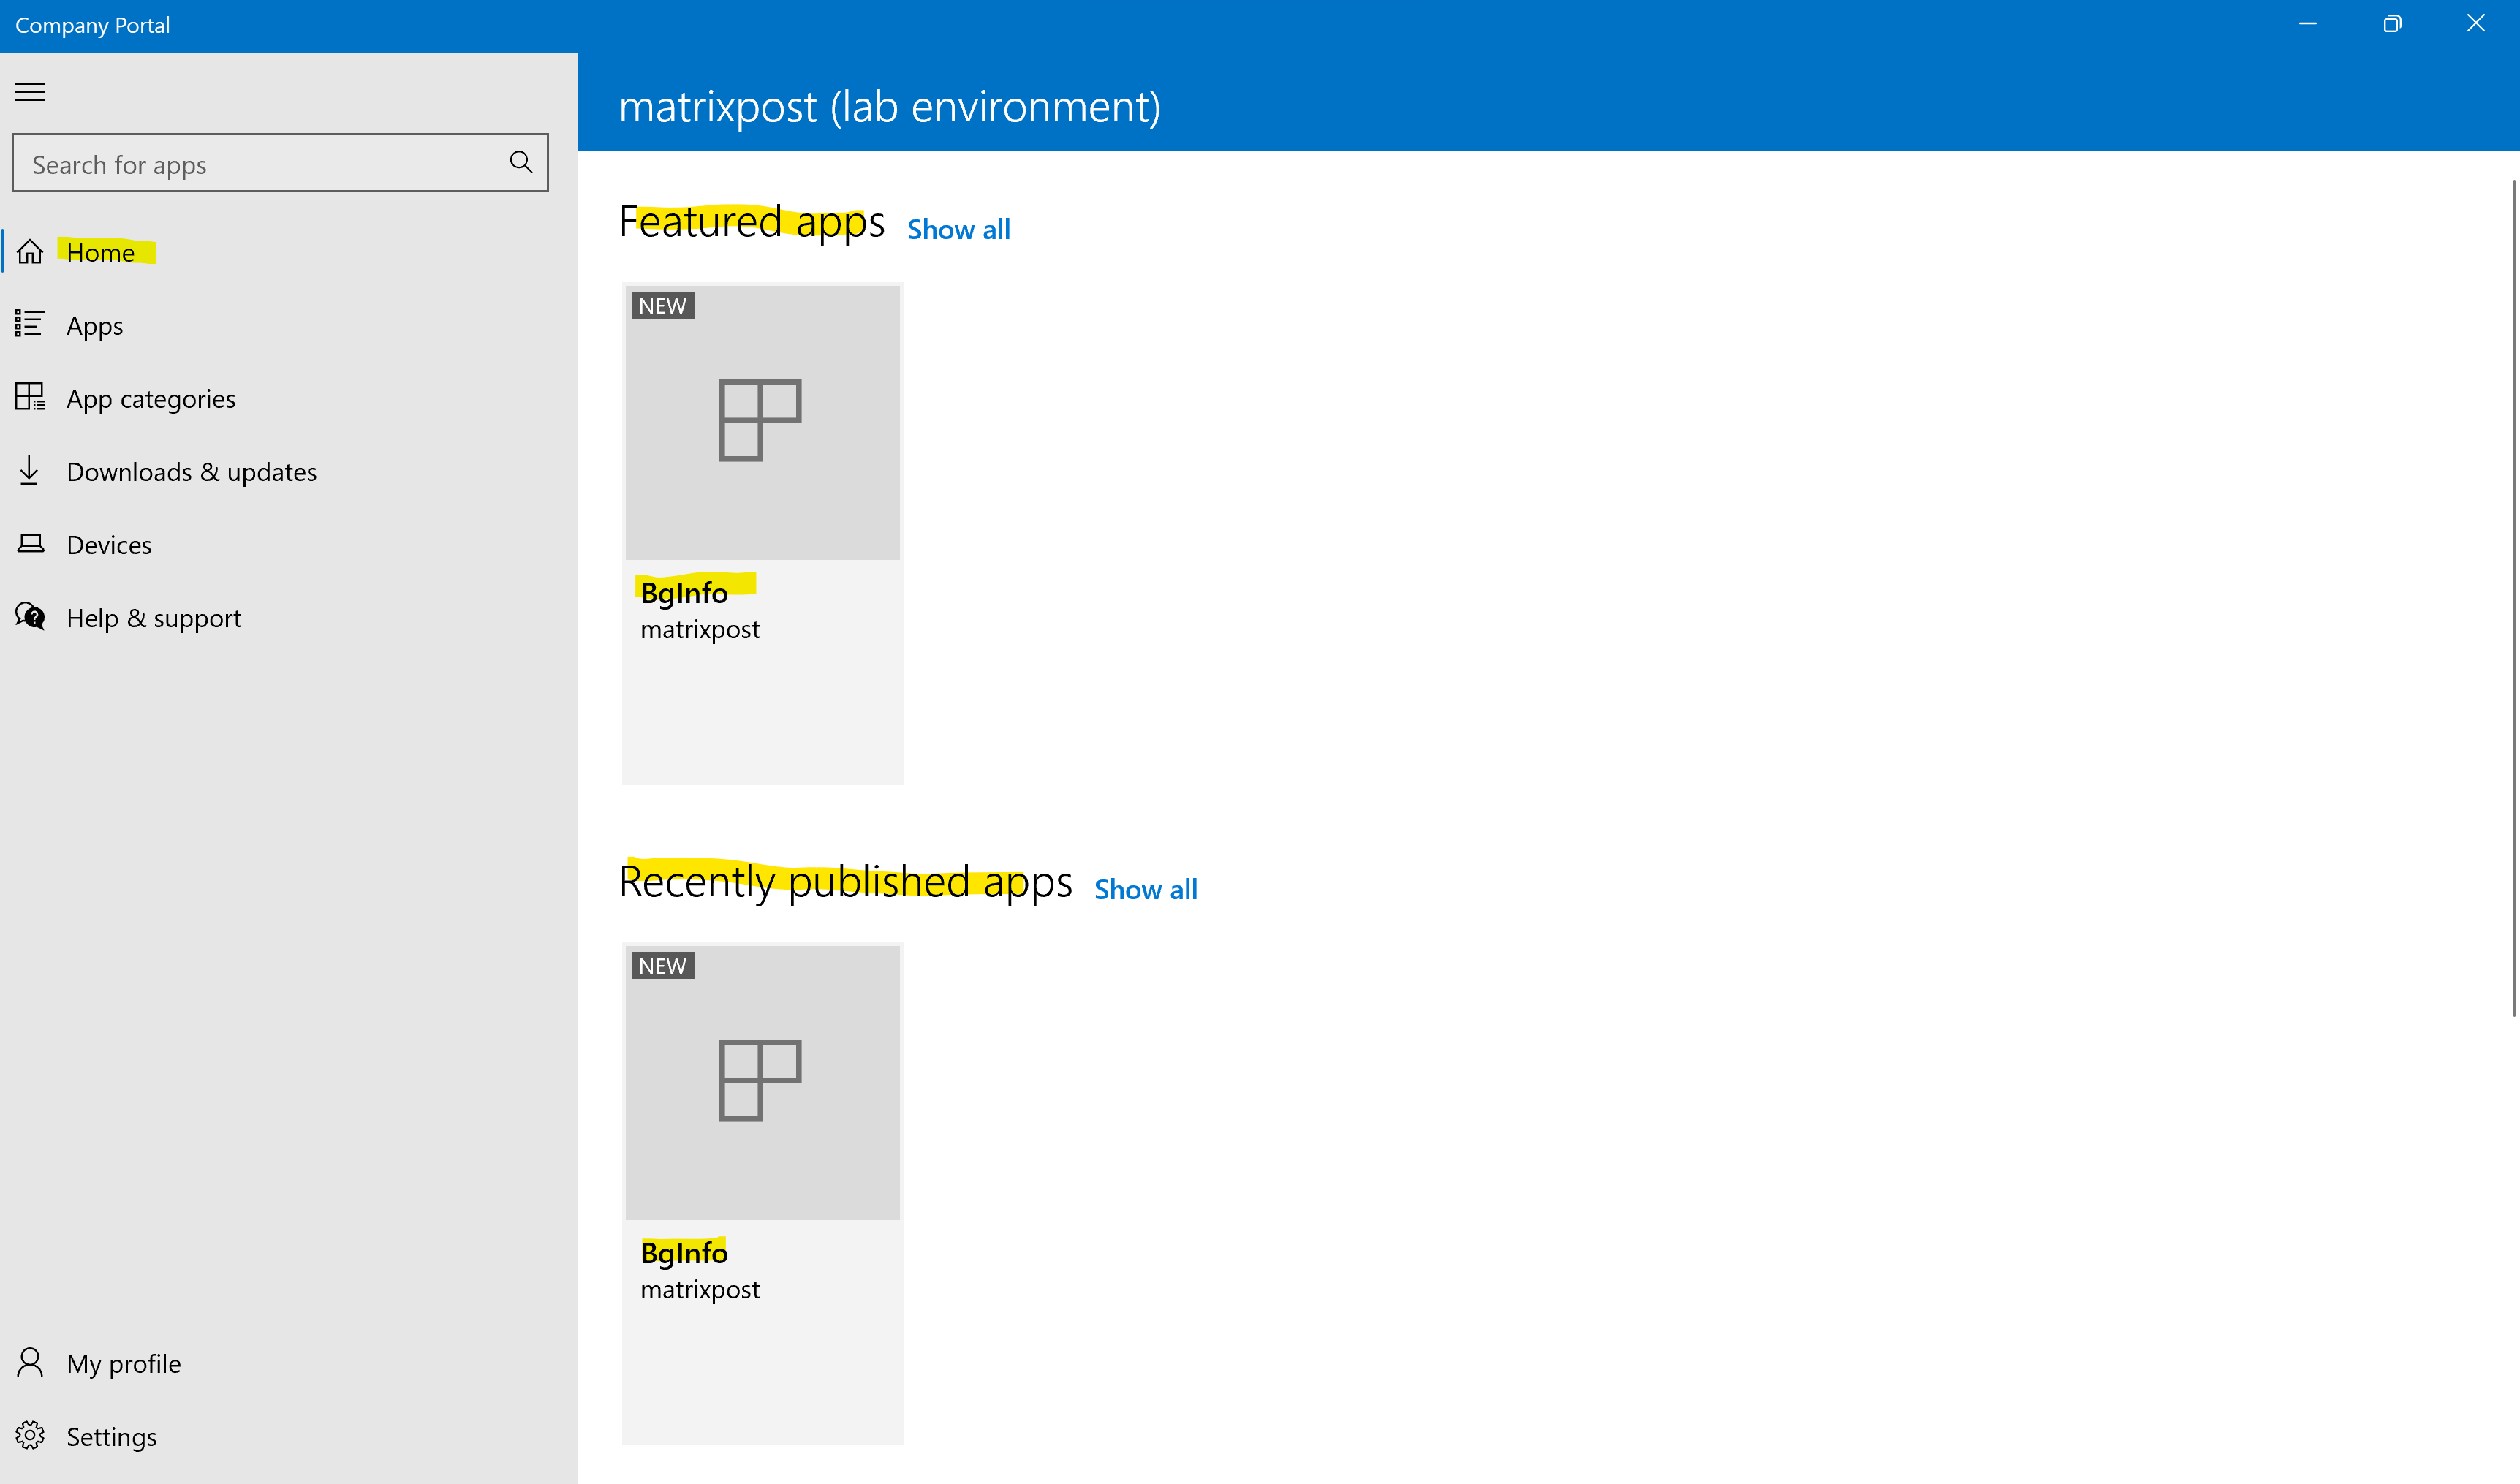
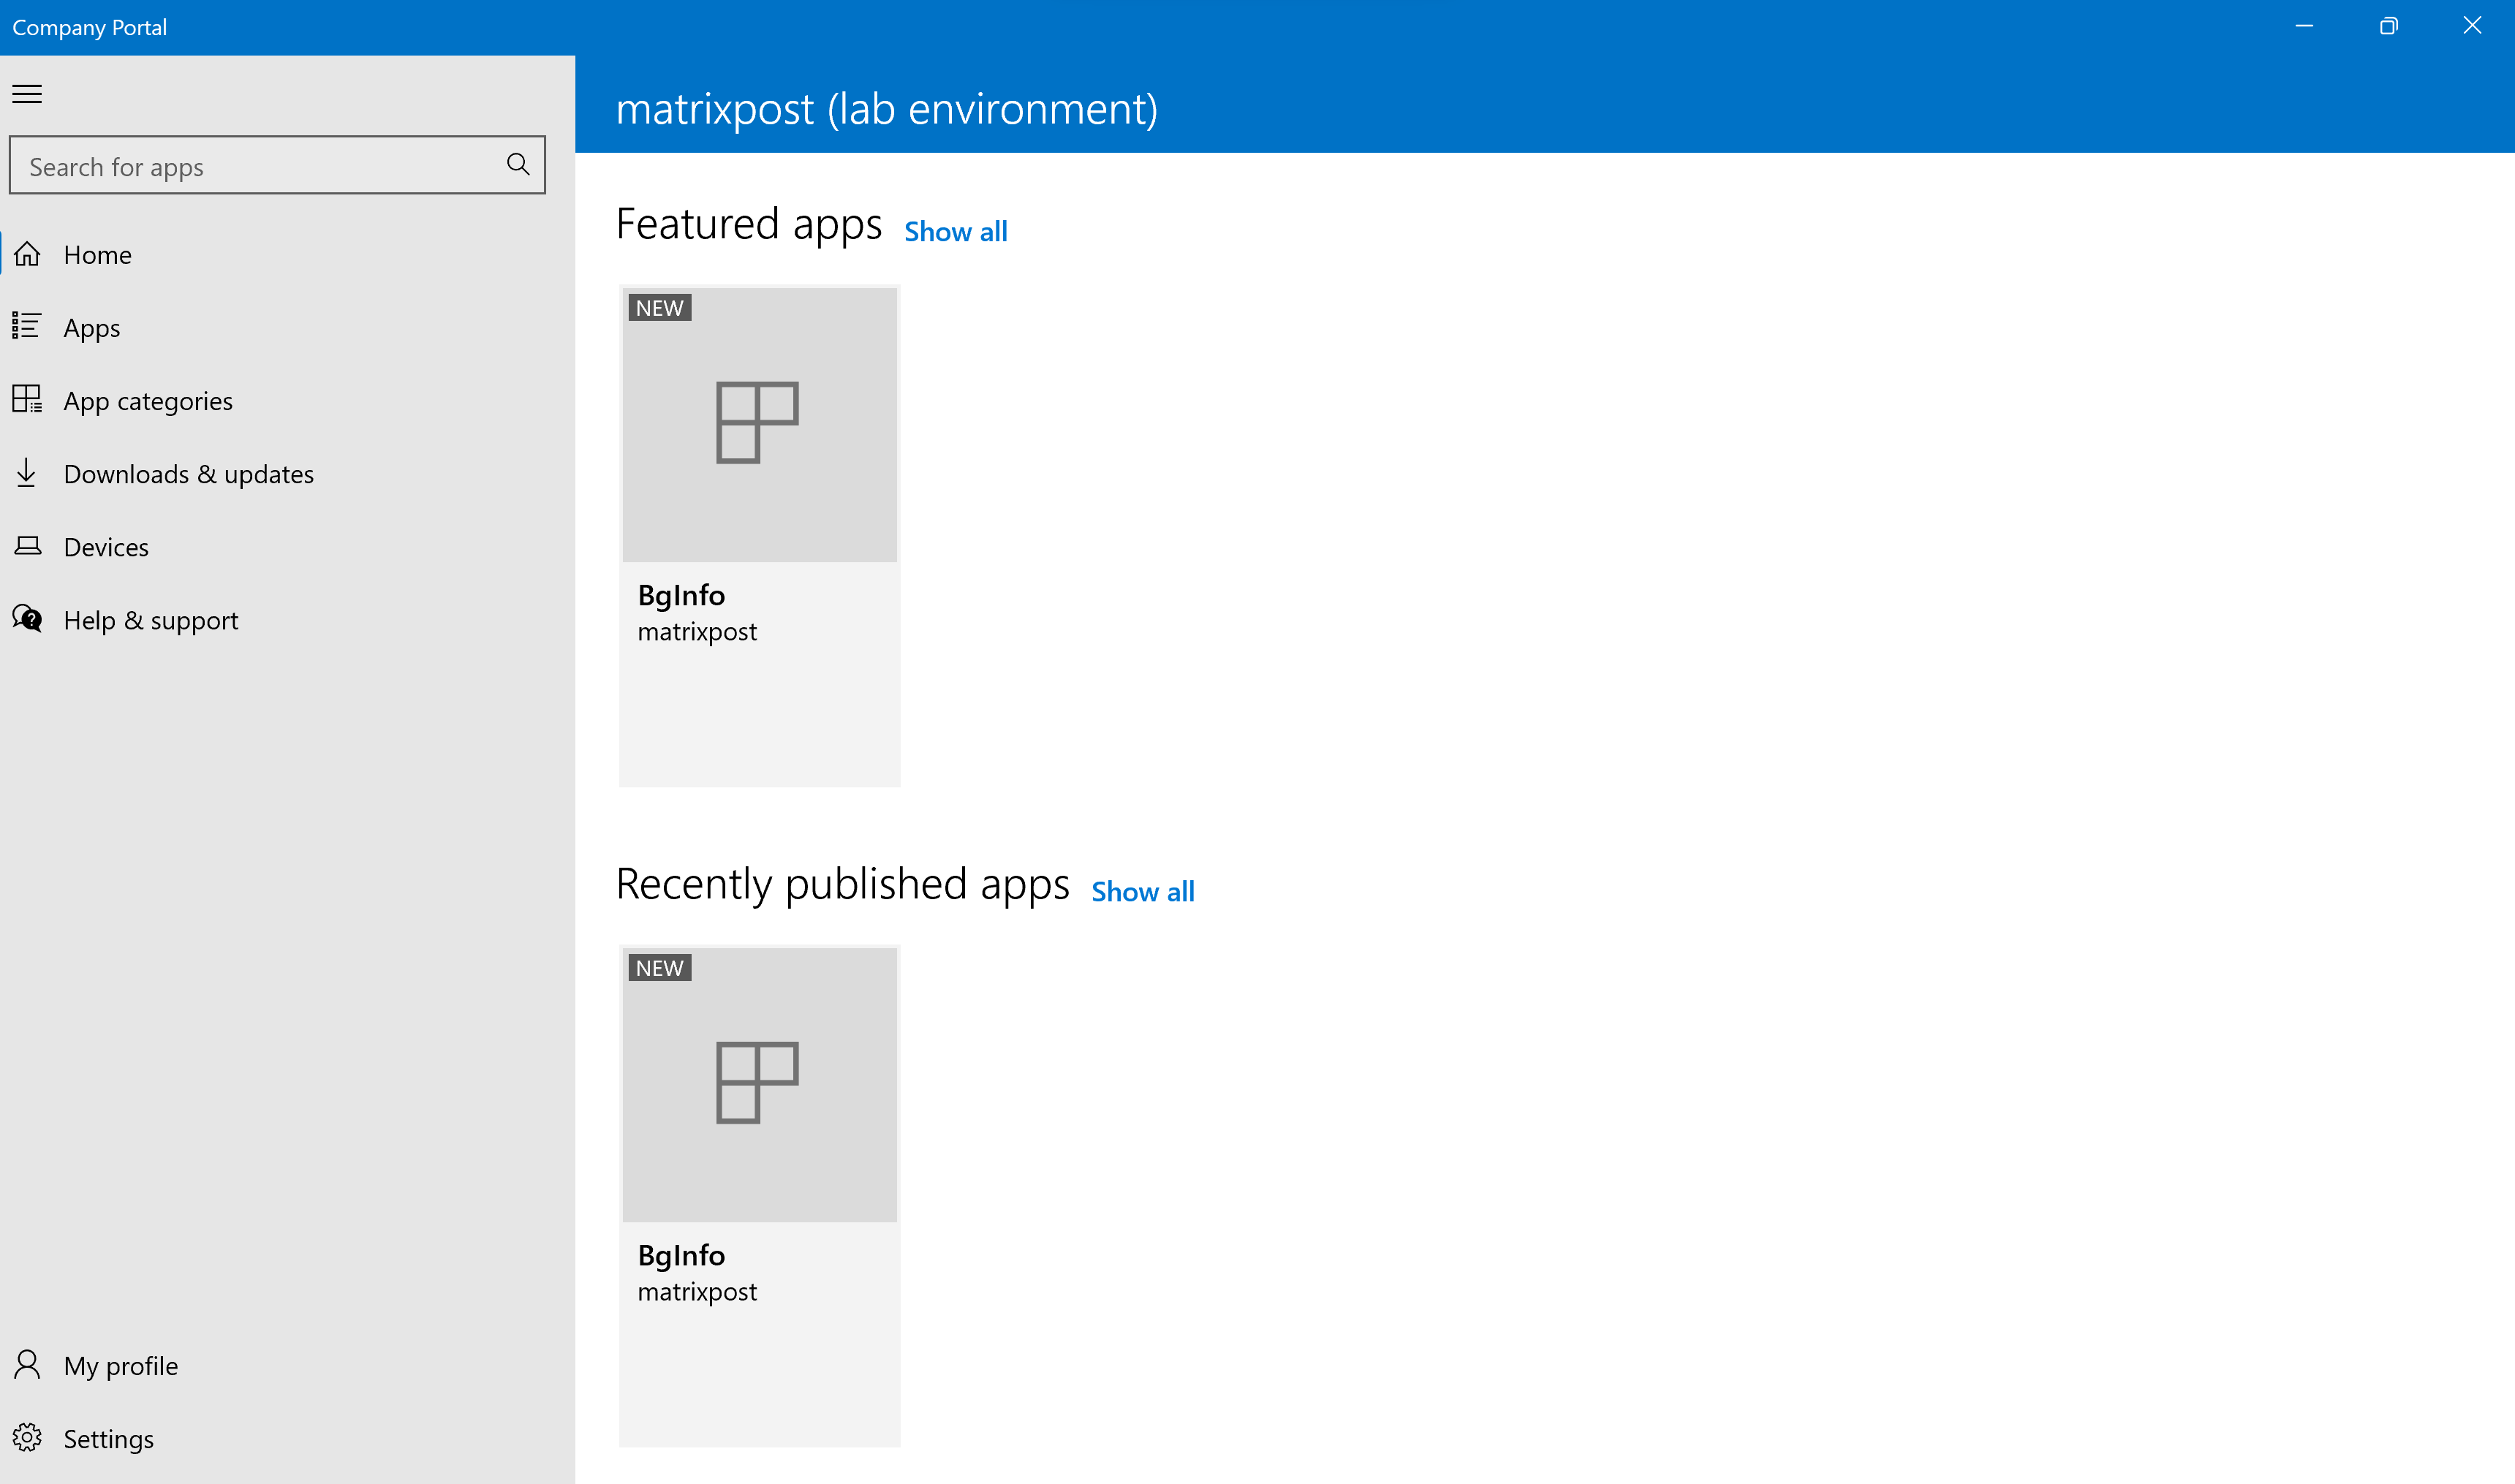
After syncing the device with Microsoft Intune you will see the app listed in the Company Portal.
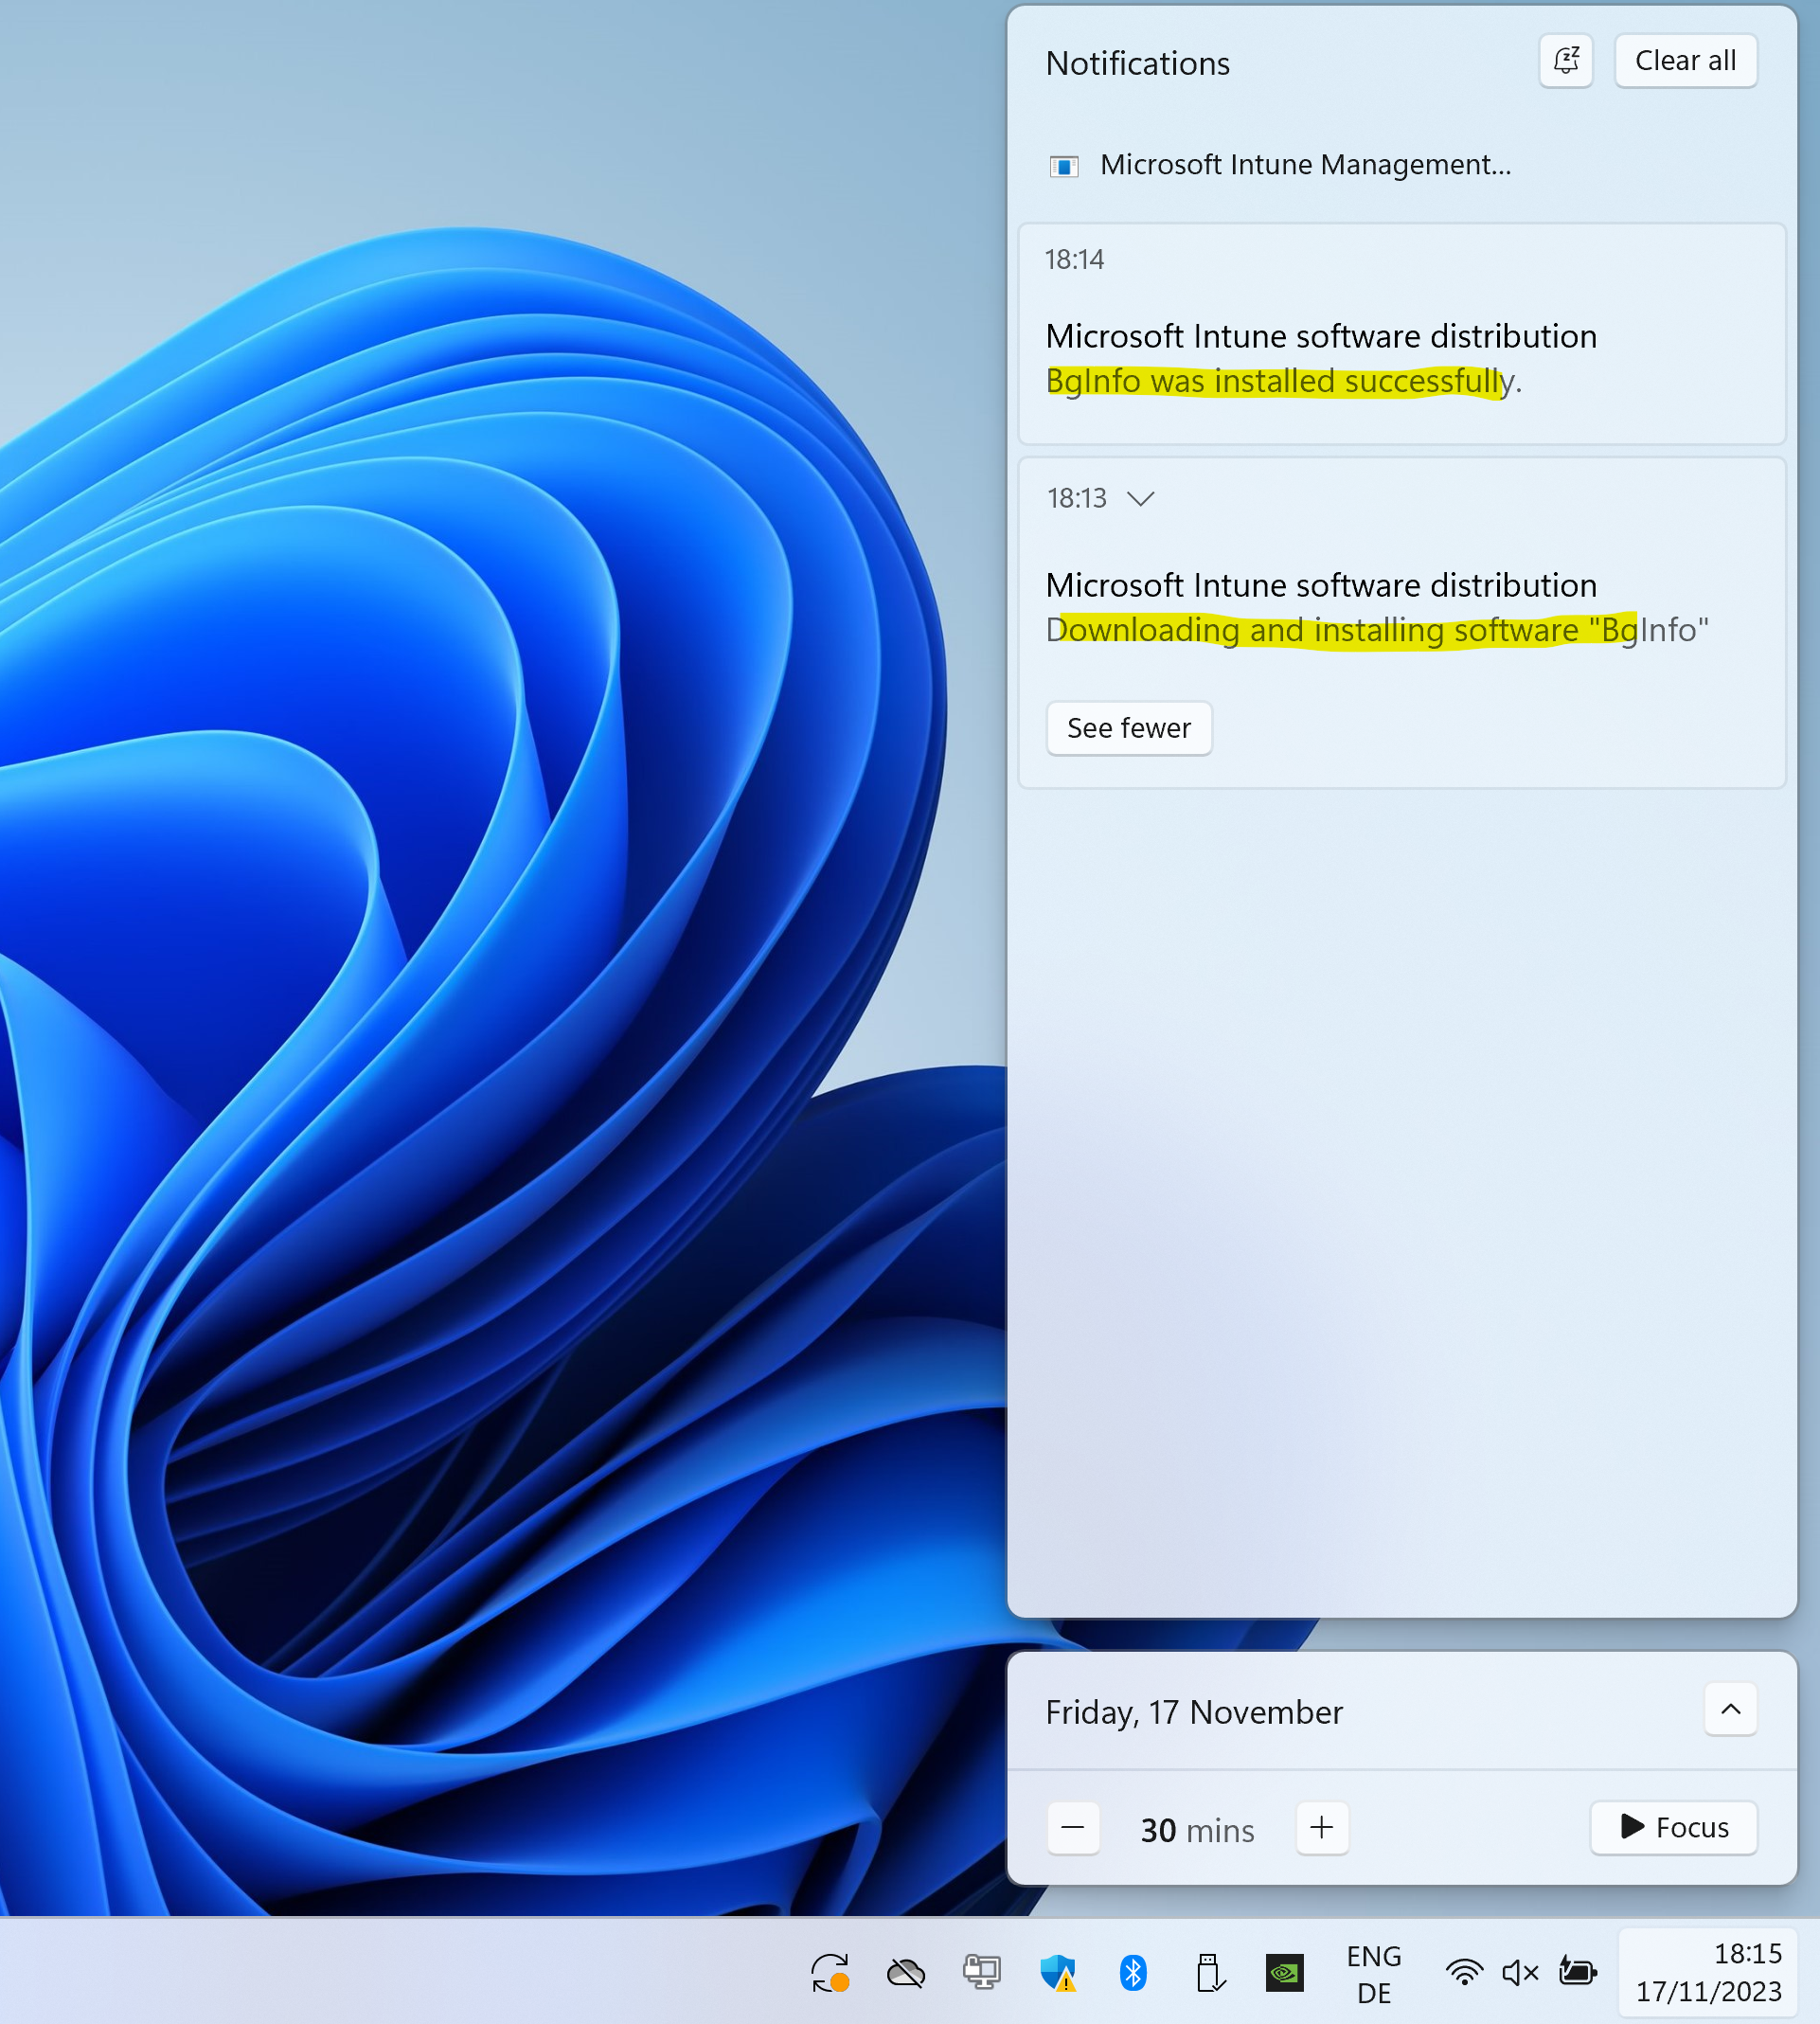
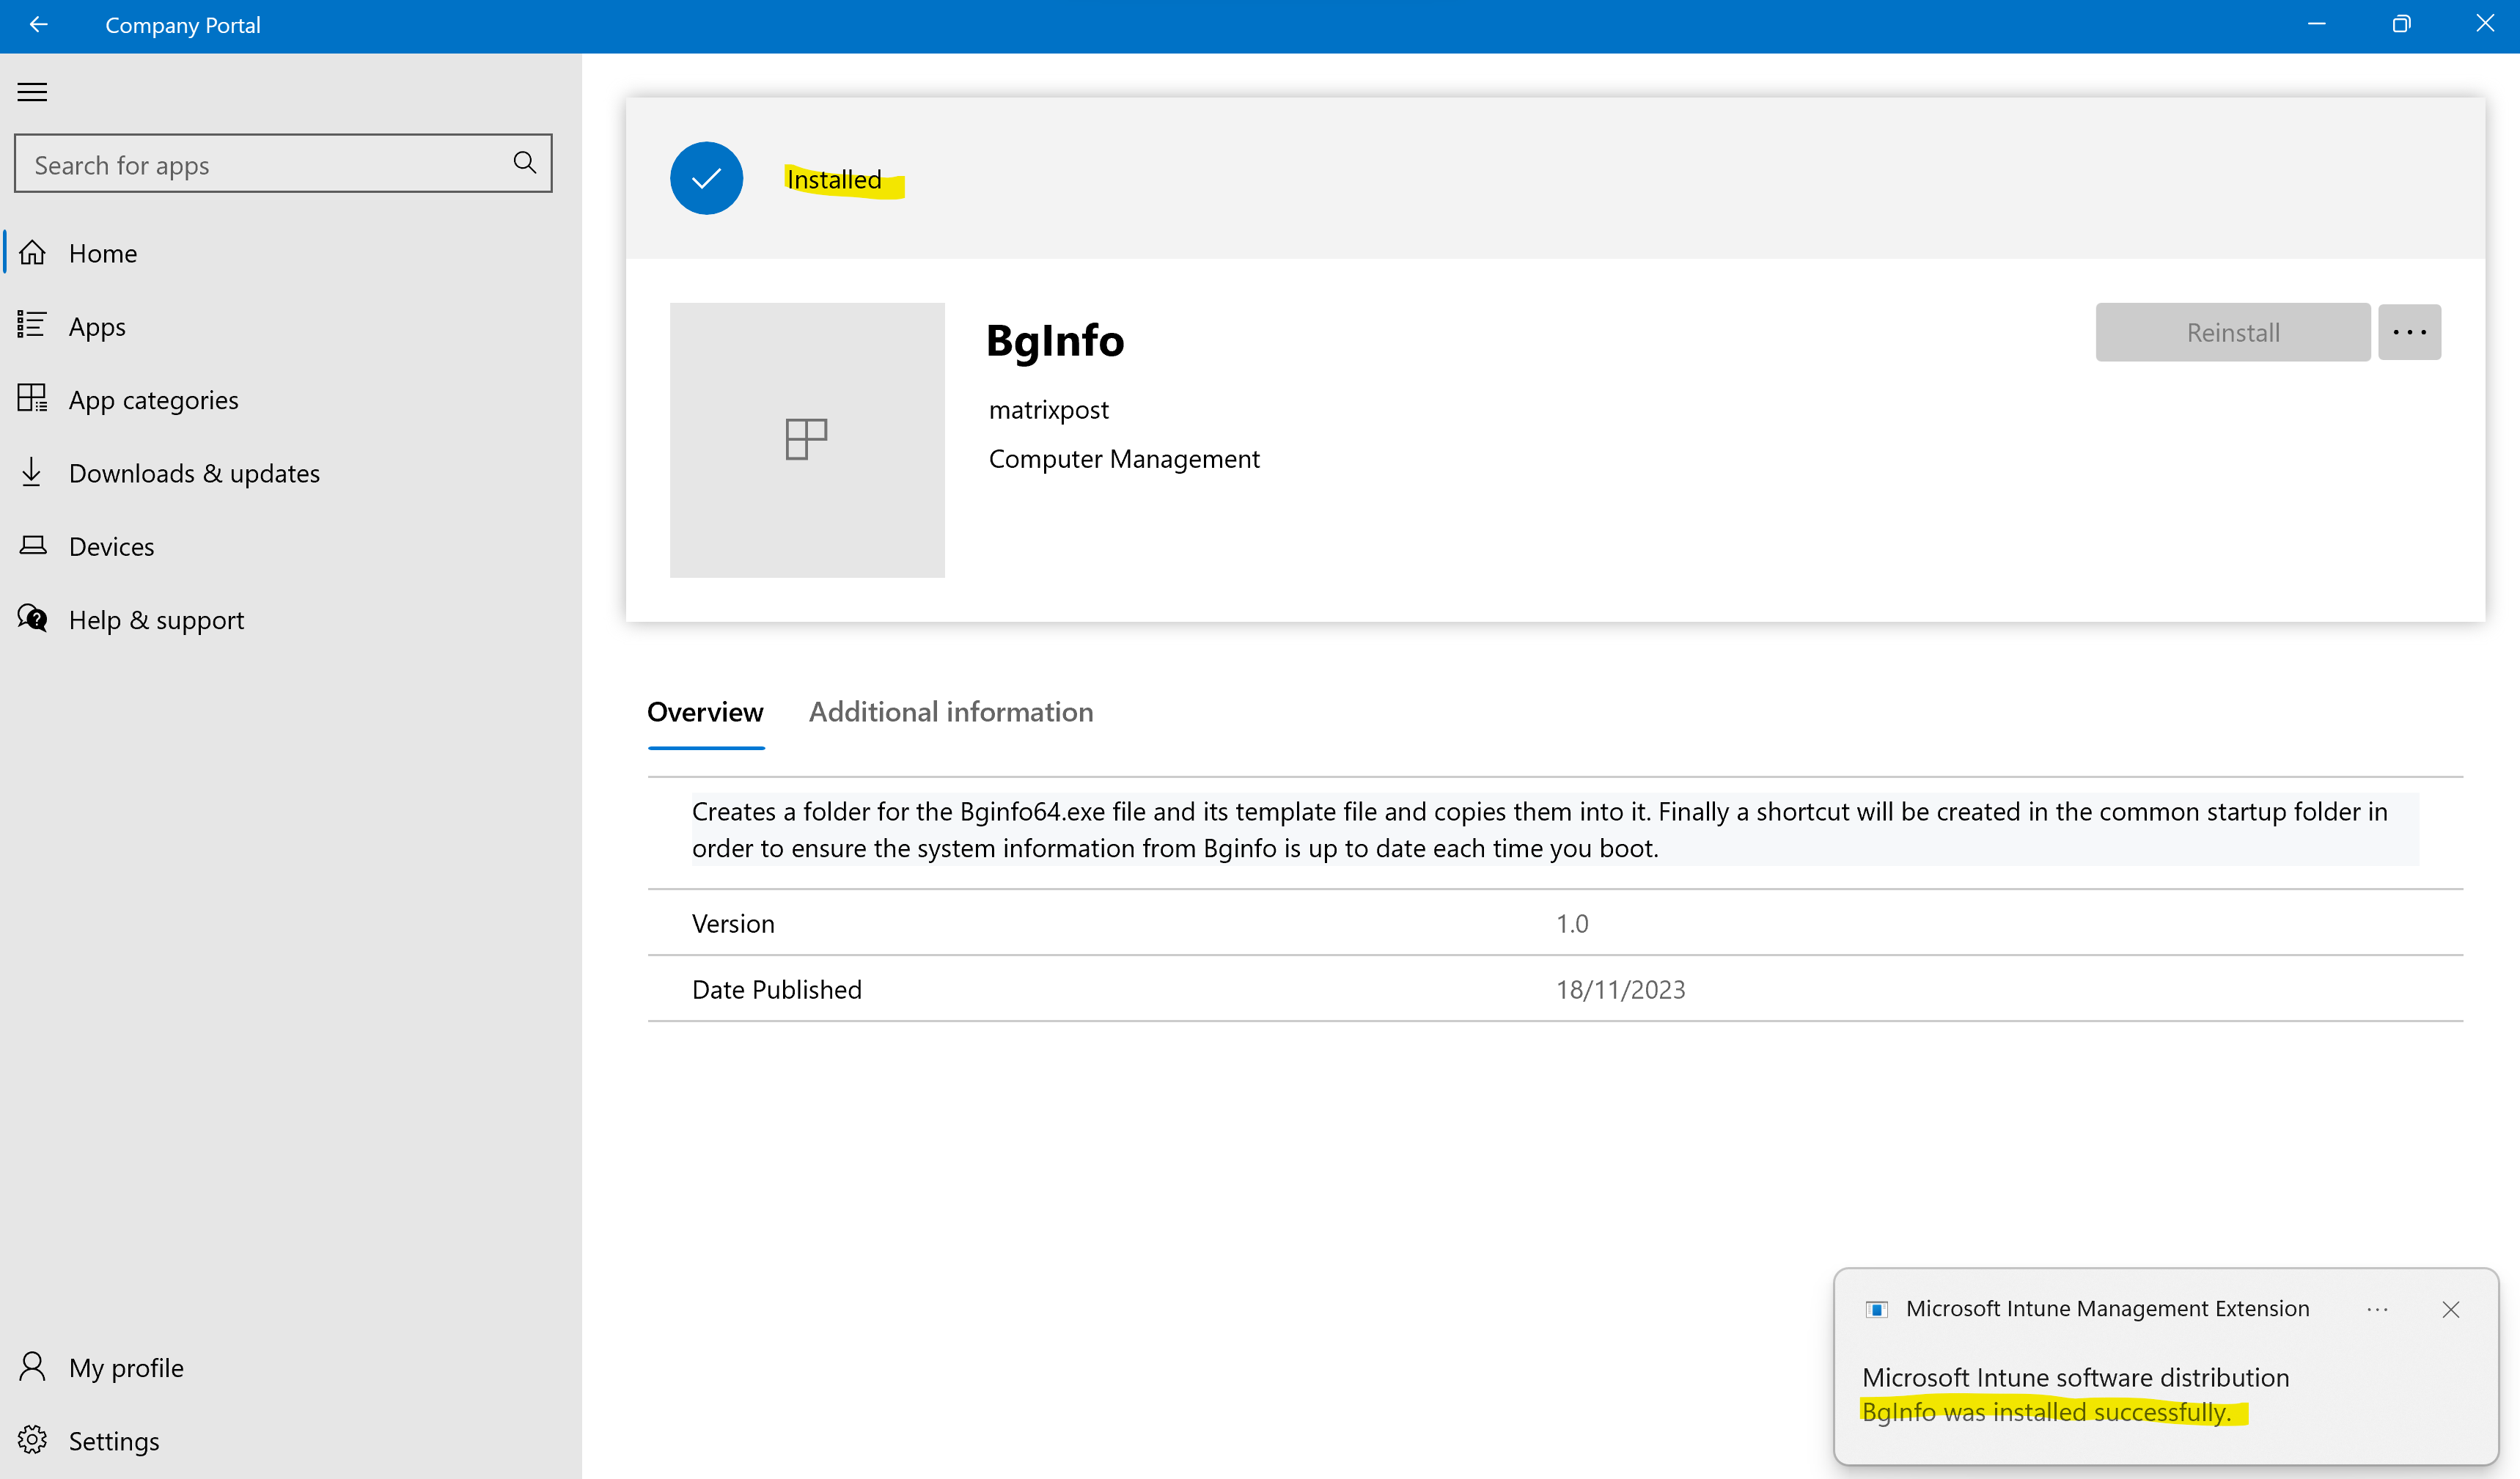
For devices they were added in the required section under Assignments for the app in Microsoft Intune, a few minutes later the app was installed automatically on the device as shown below.
After a reboot from the device, BgInfo updated the system information on the desktop as shown below.
Using the Company Portal App to manage corporate apps provided by Microsoft Intune
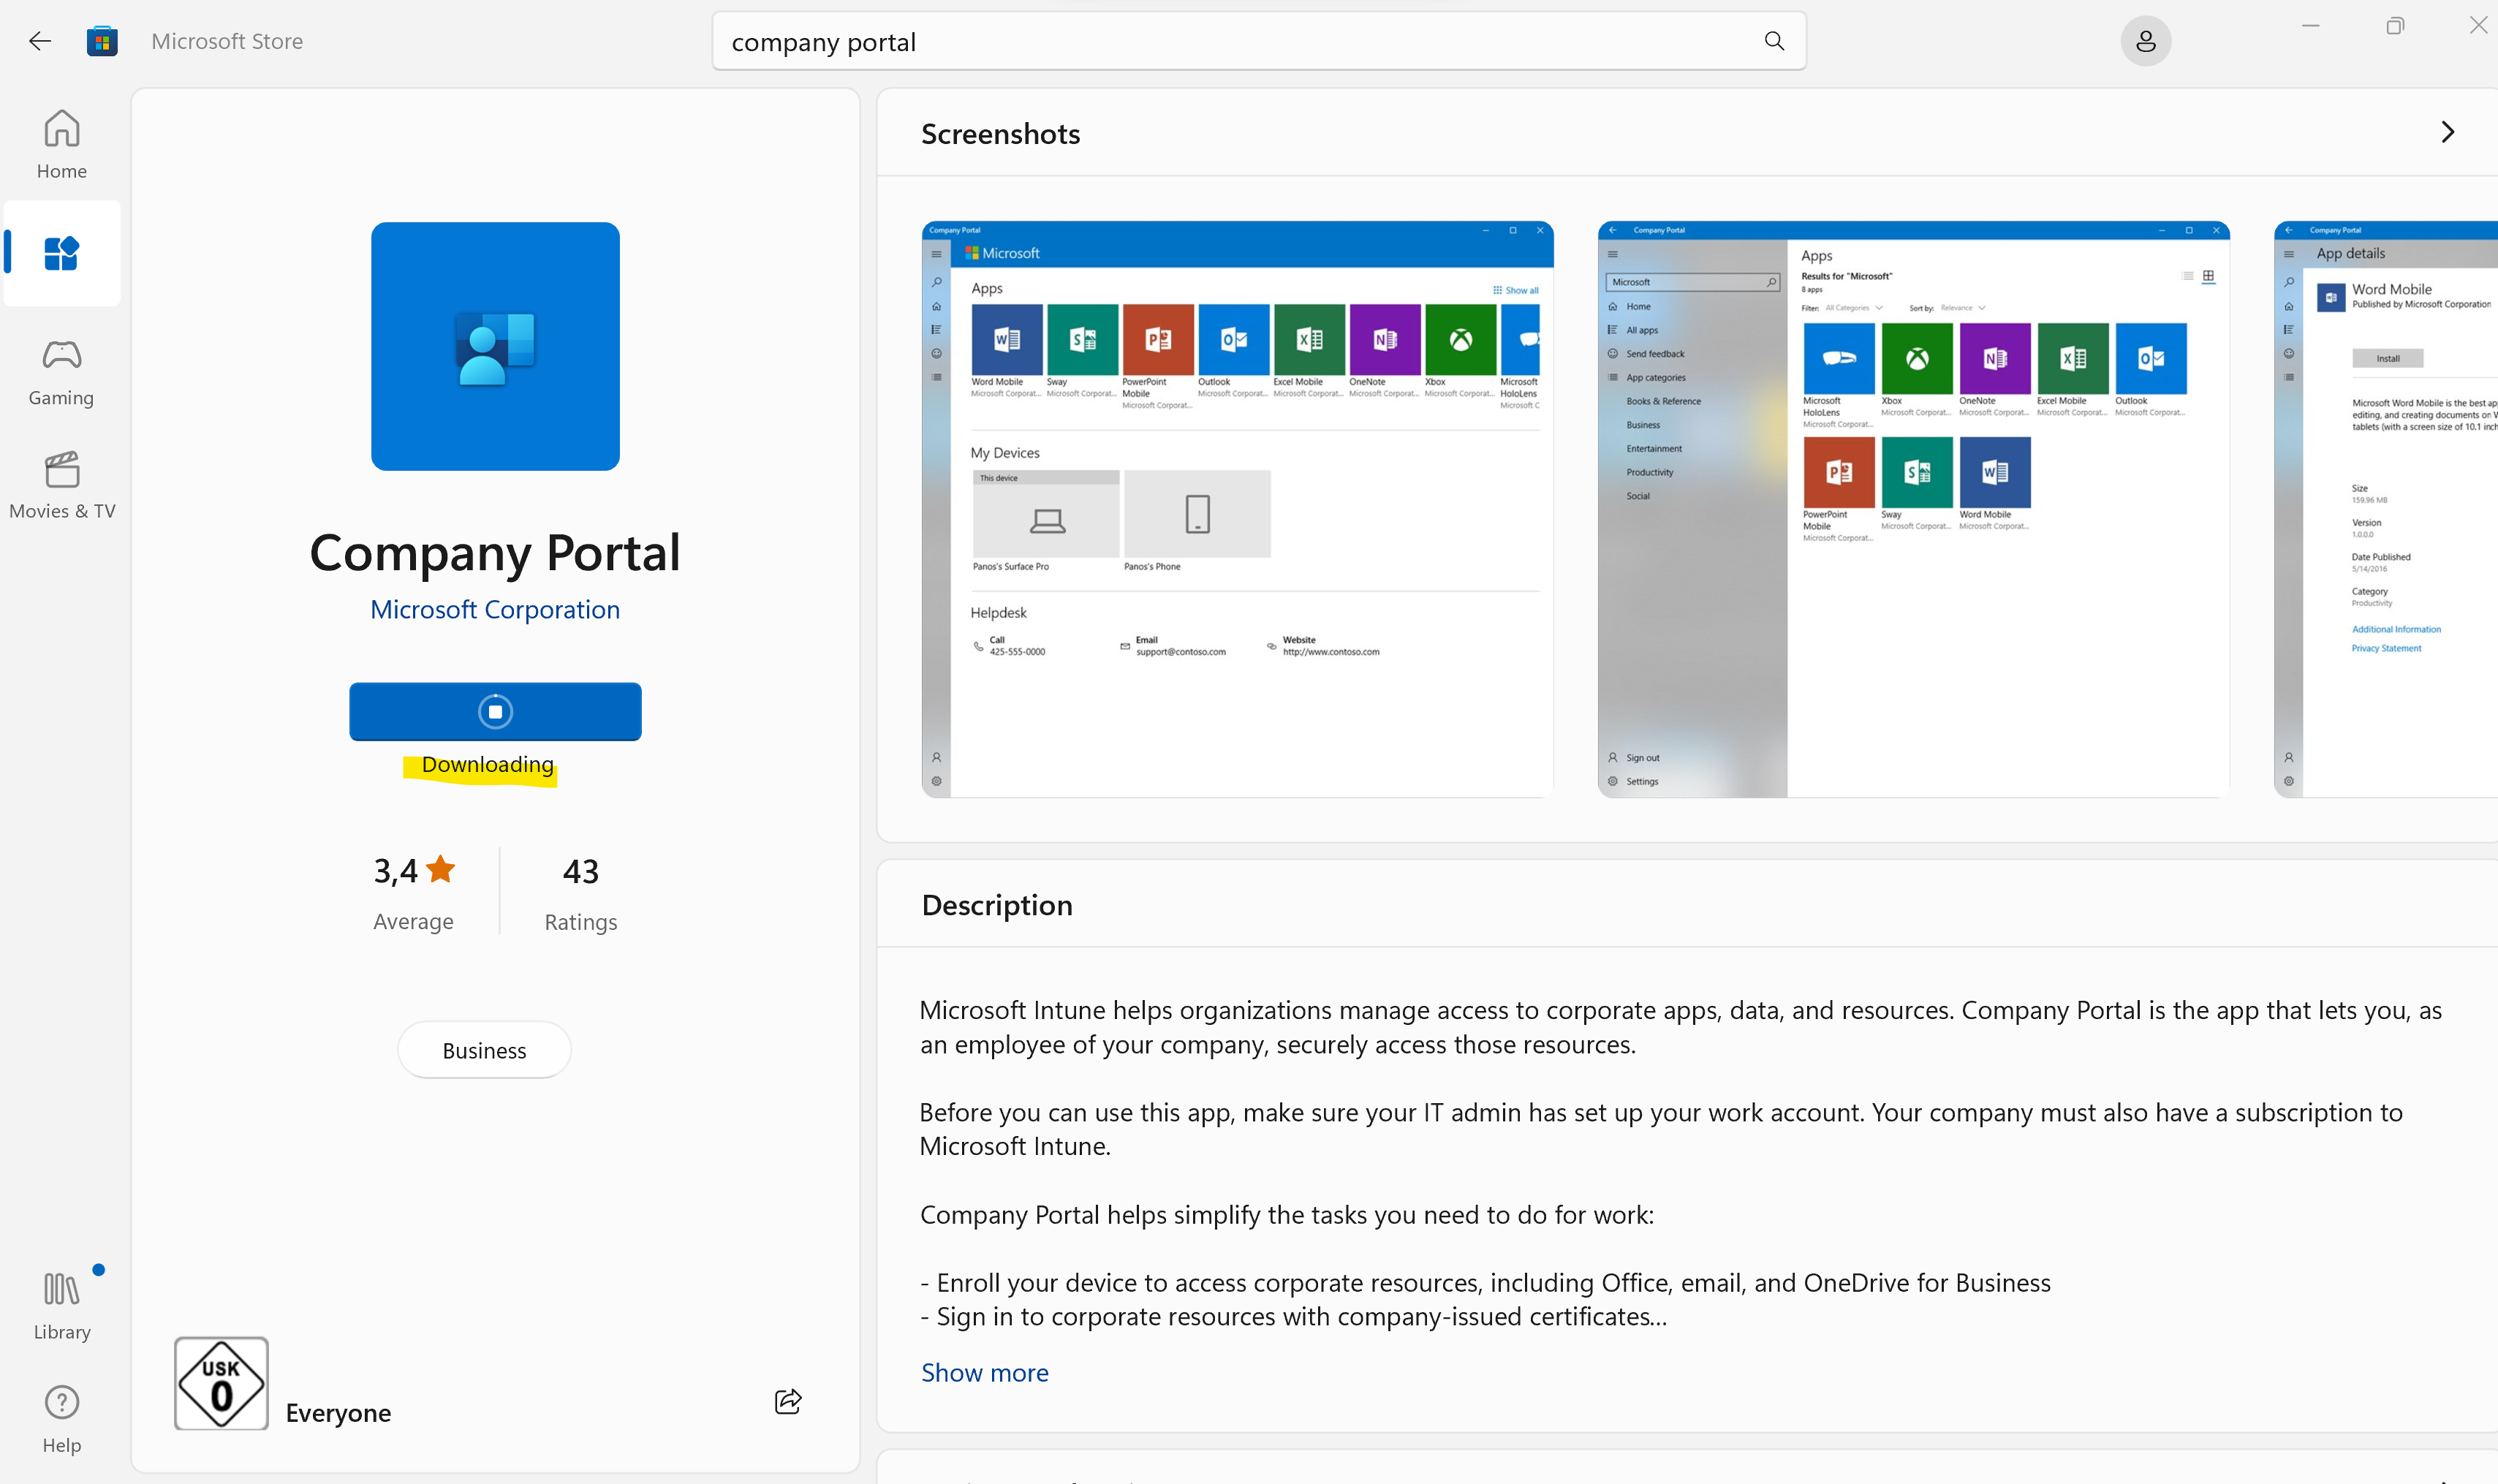
If not already deployed in your network, you can also download the Company Portal app by using the Microsoft Store app.
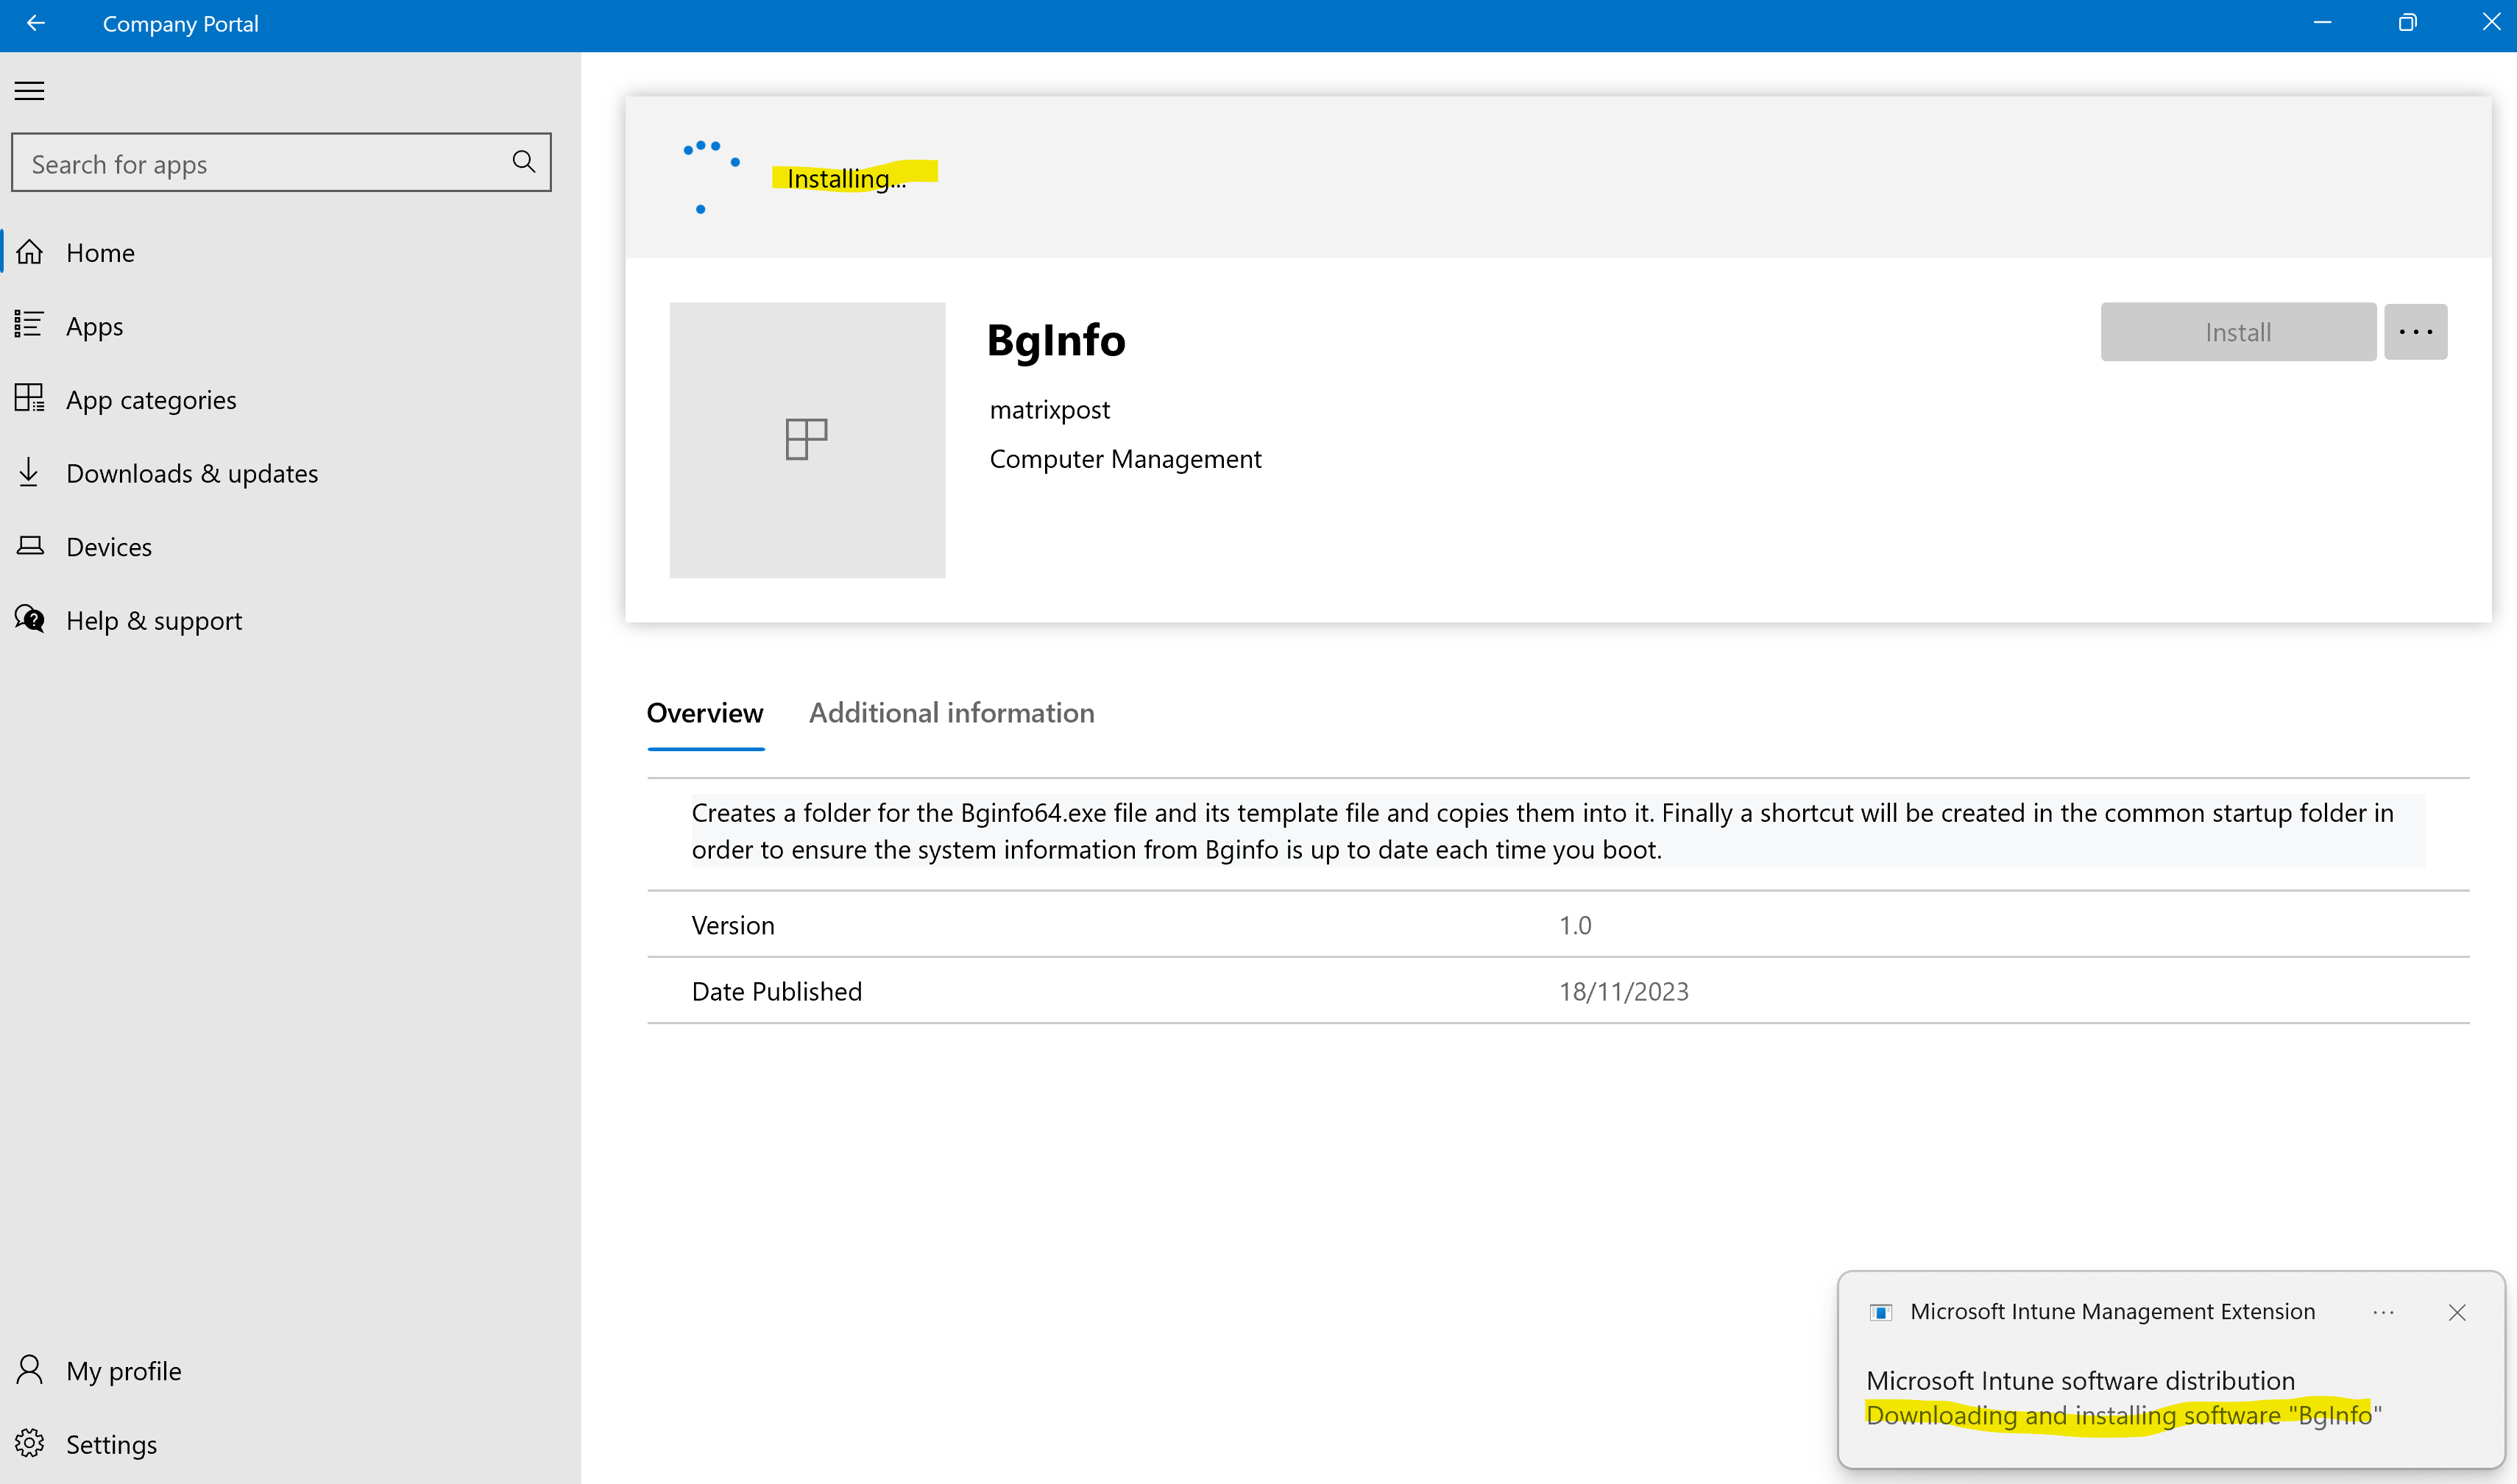
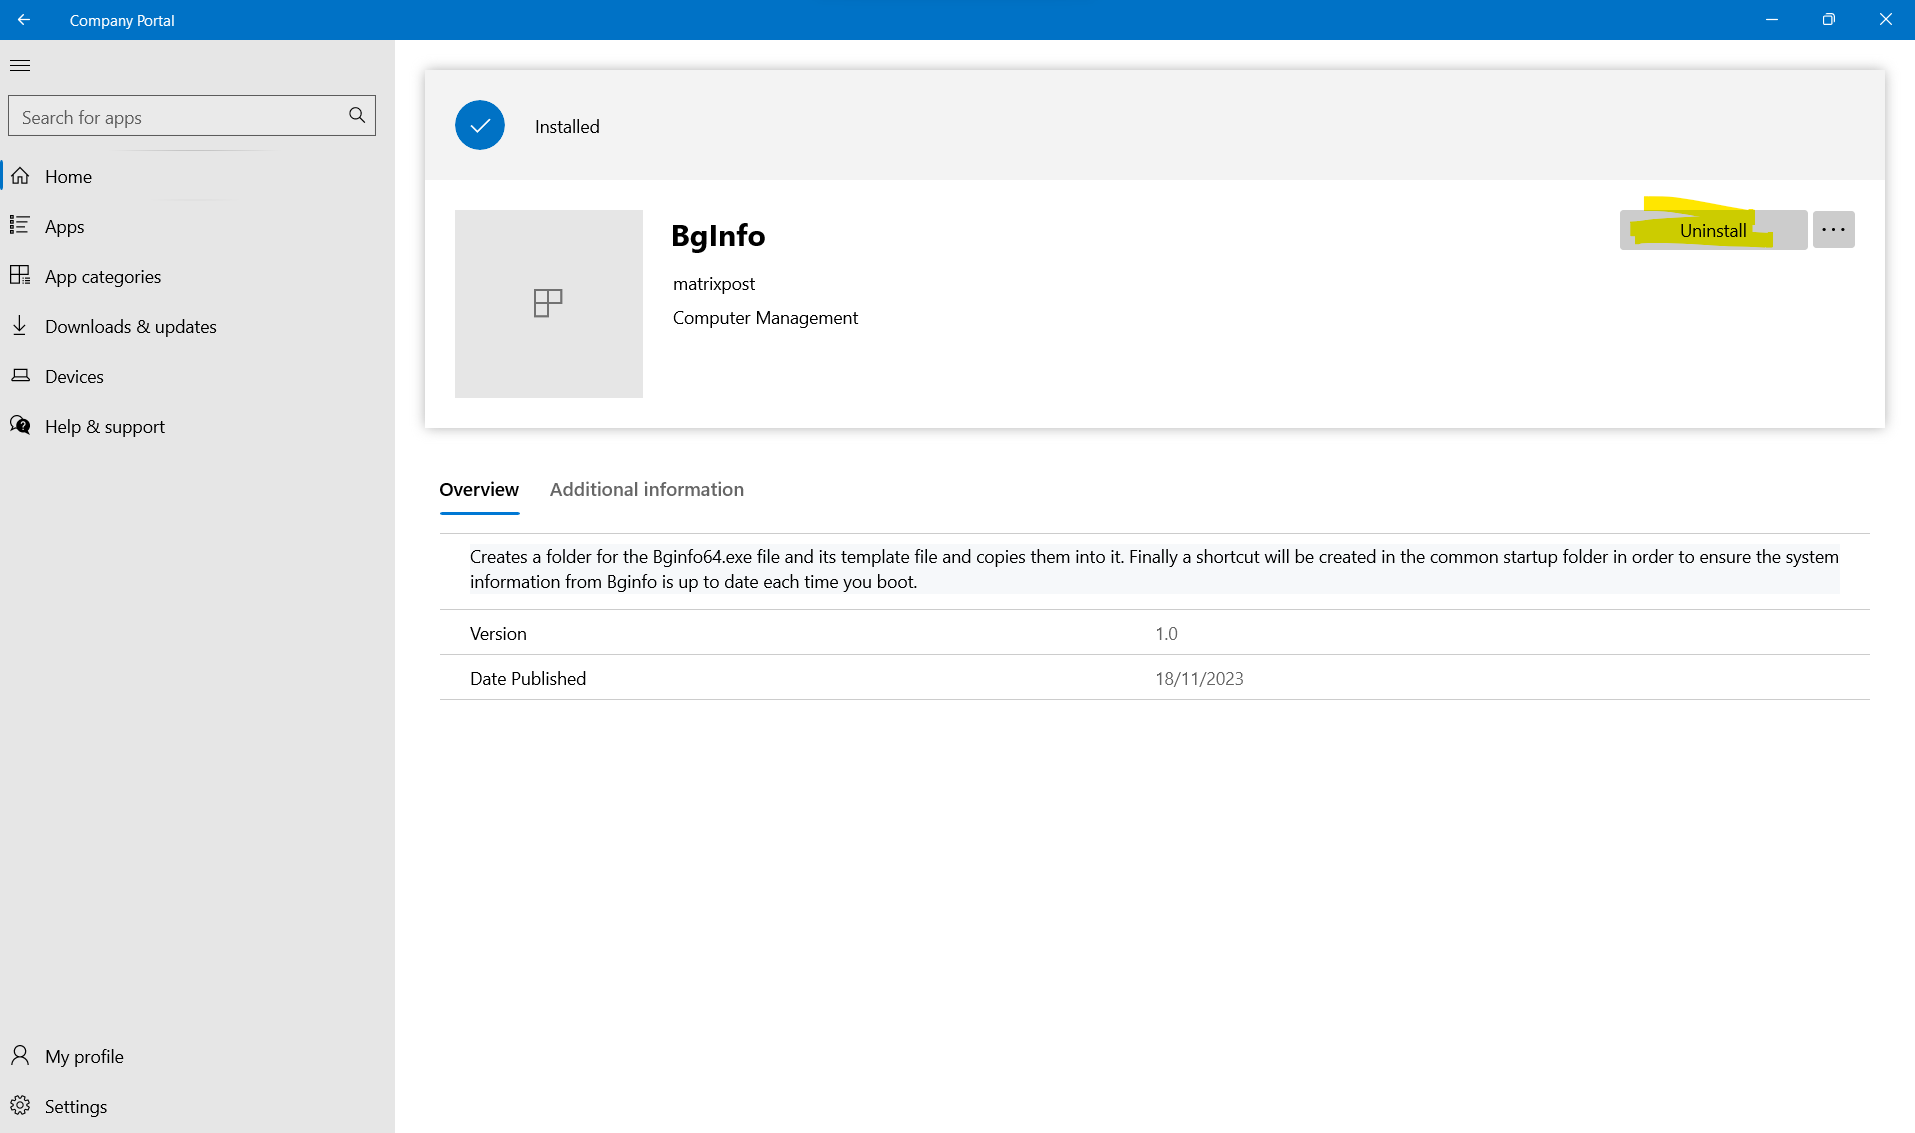
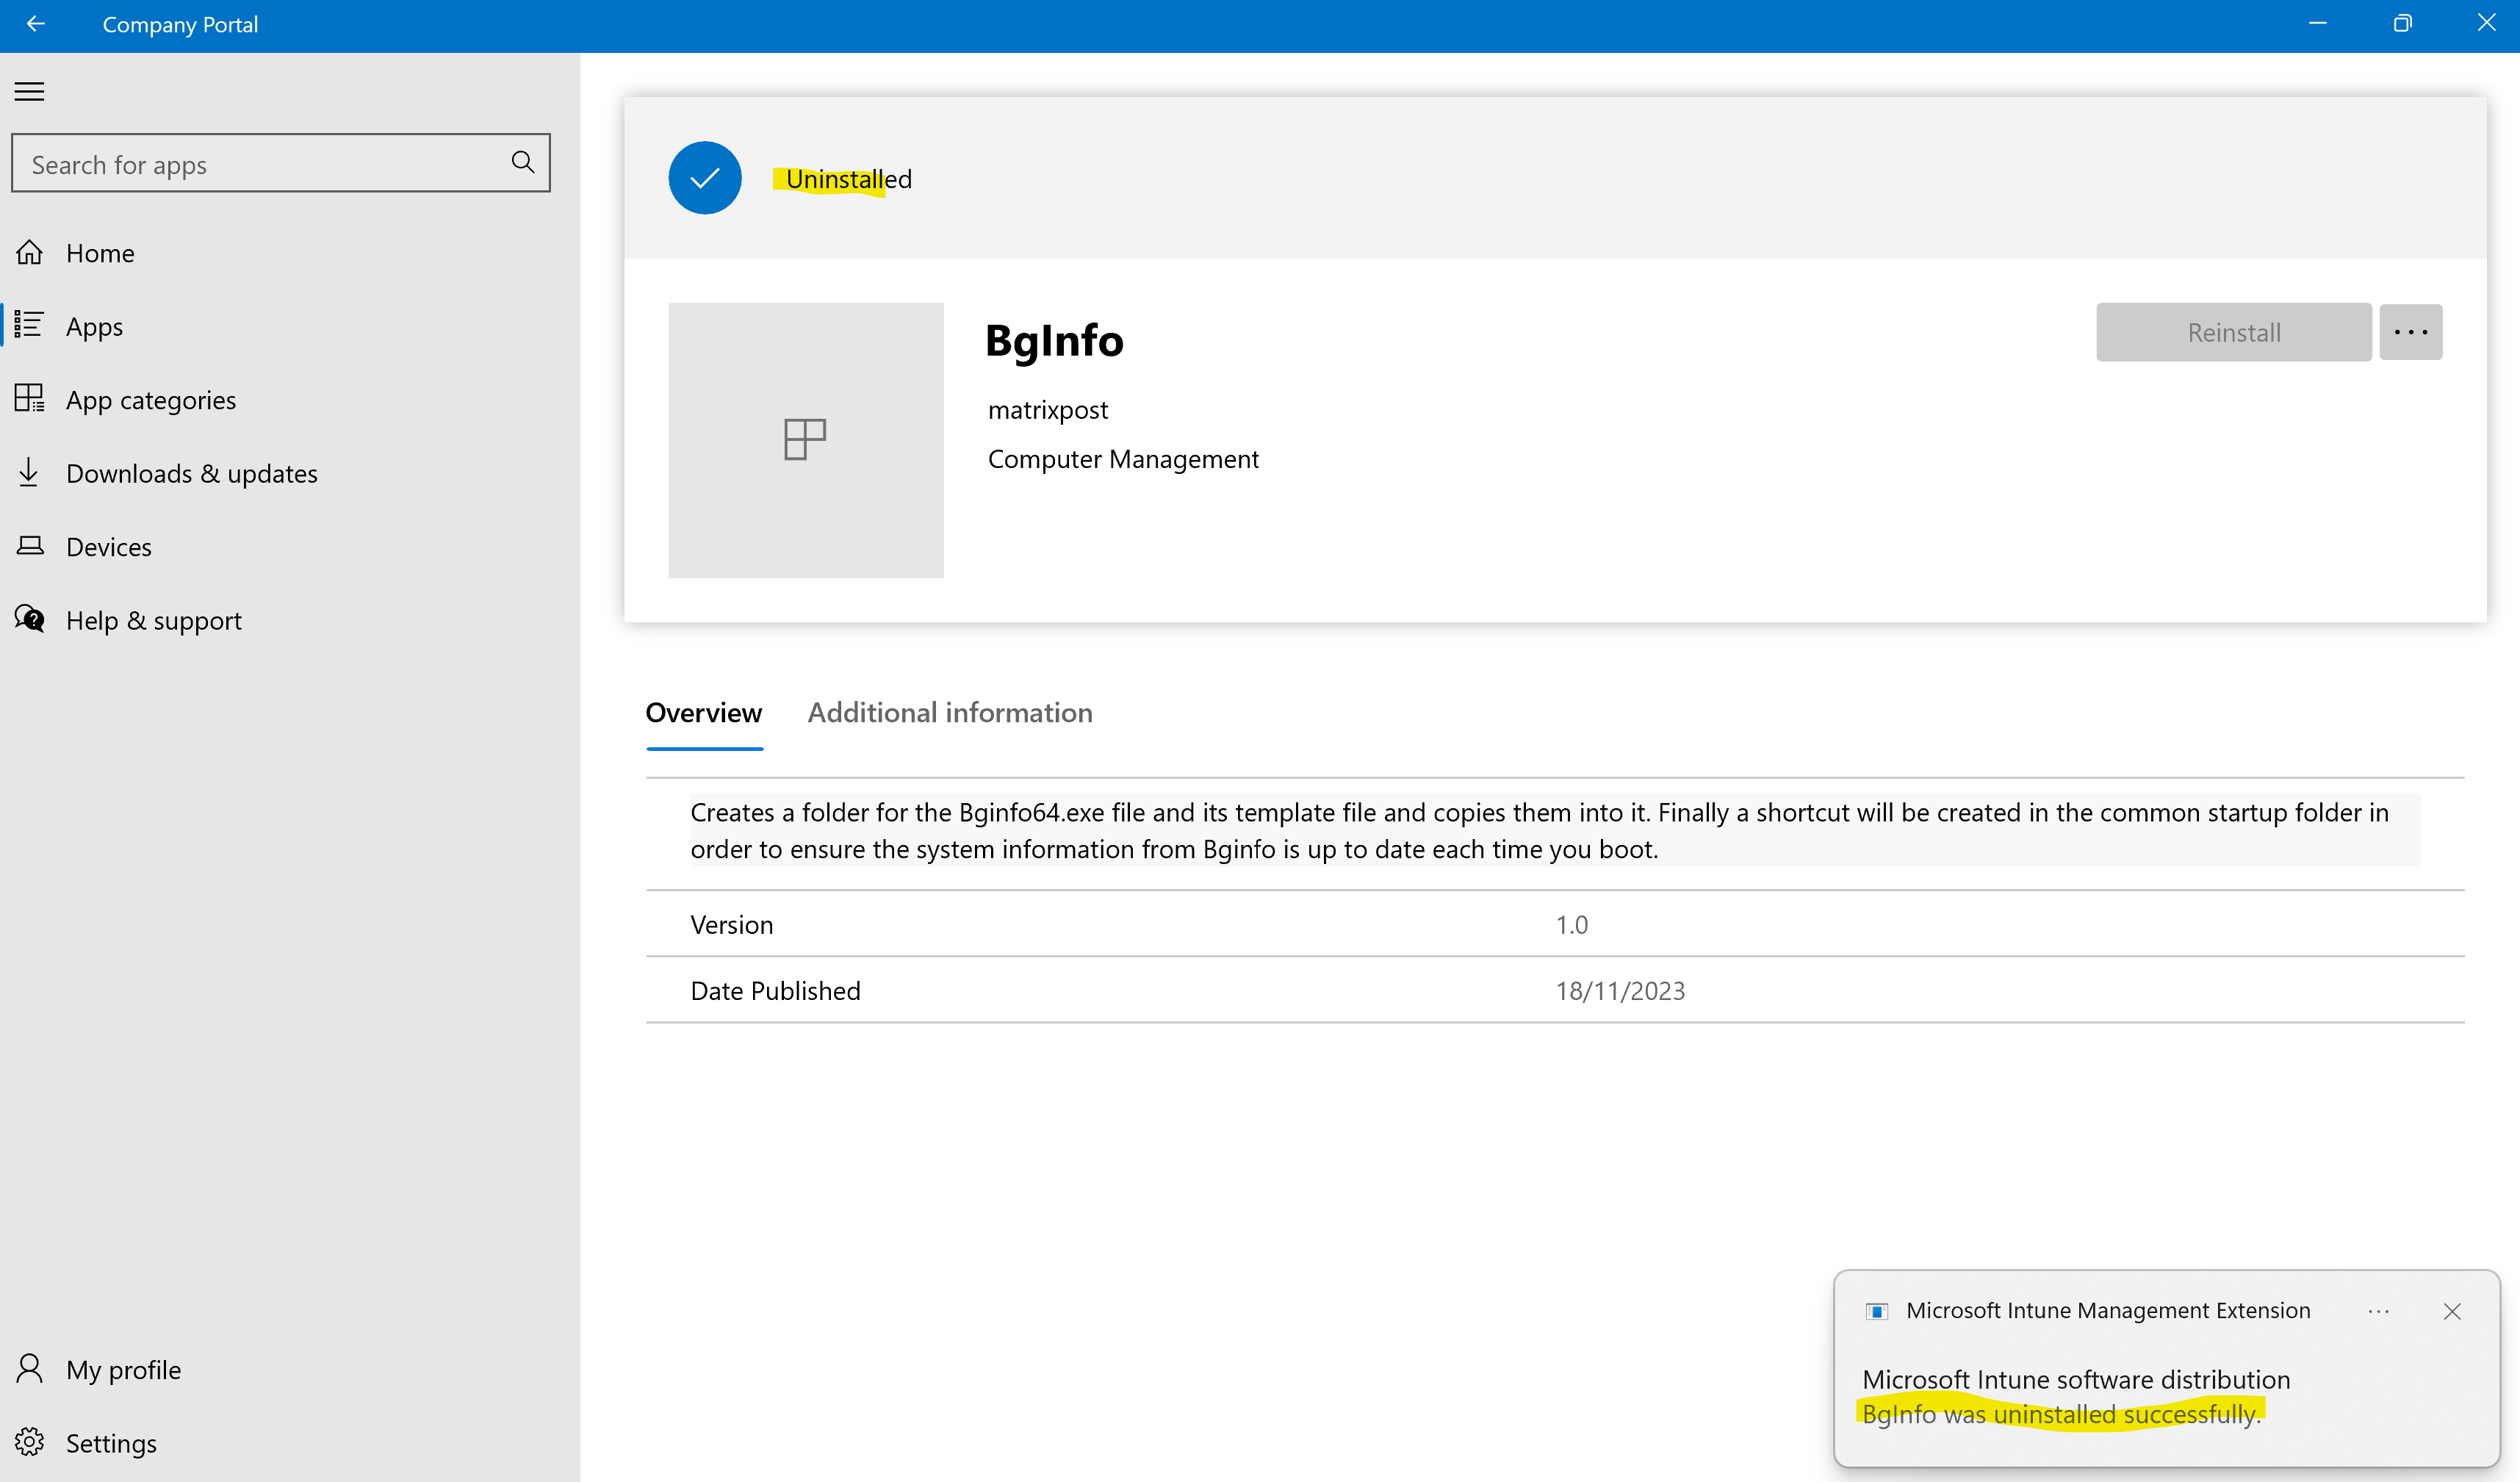
As already mentioned if you adding users or devices to the Available for enrolled devices section under Assignments for the app in Microsoft Intune, users can manage these apps by using the Company Portal app as shown below for the previously created BgInfo app.
Installing available apps

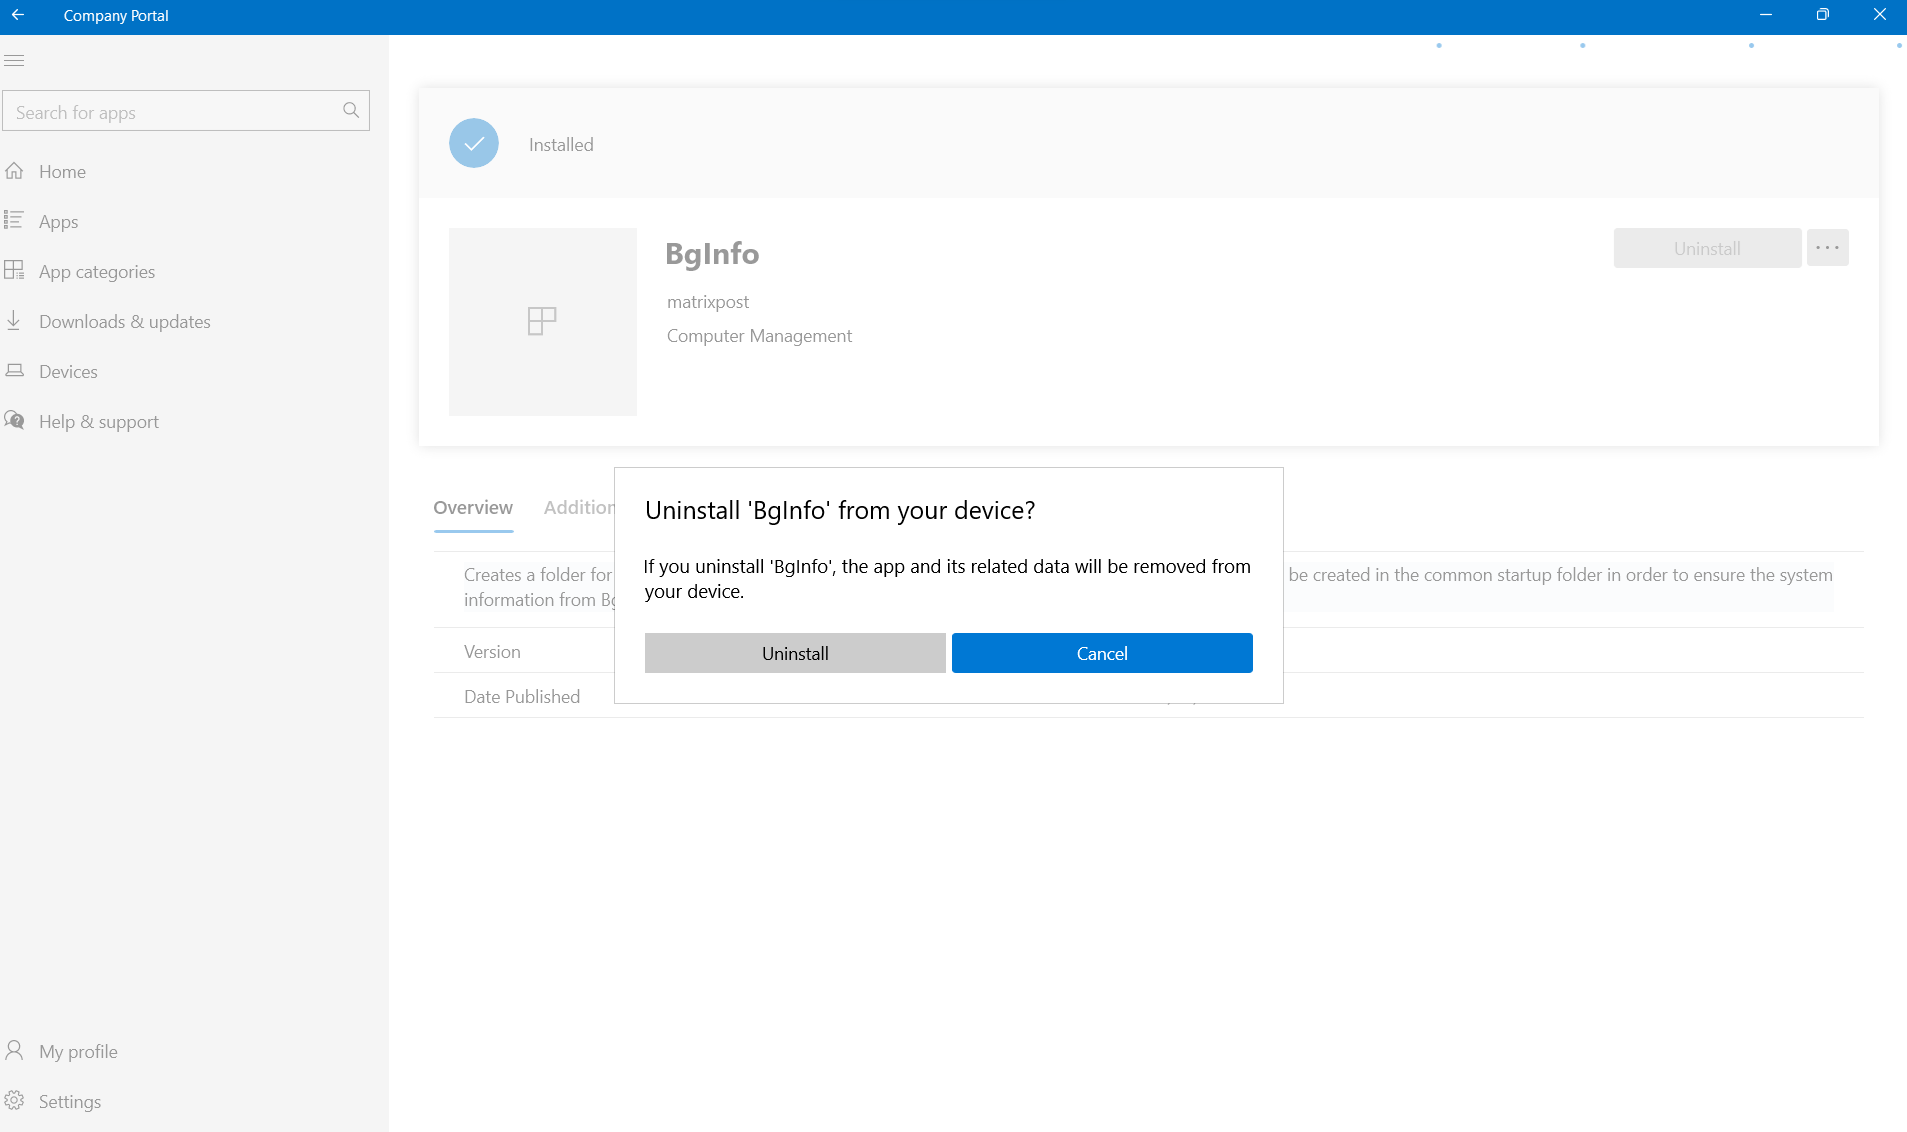
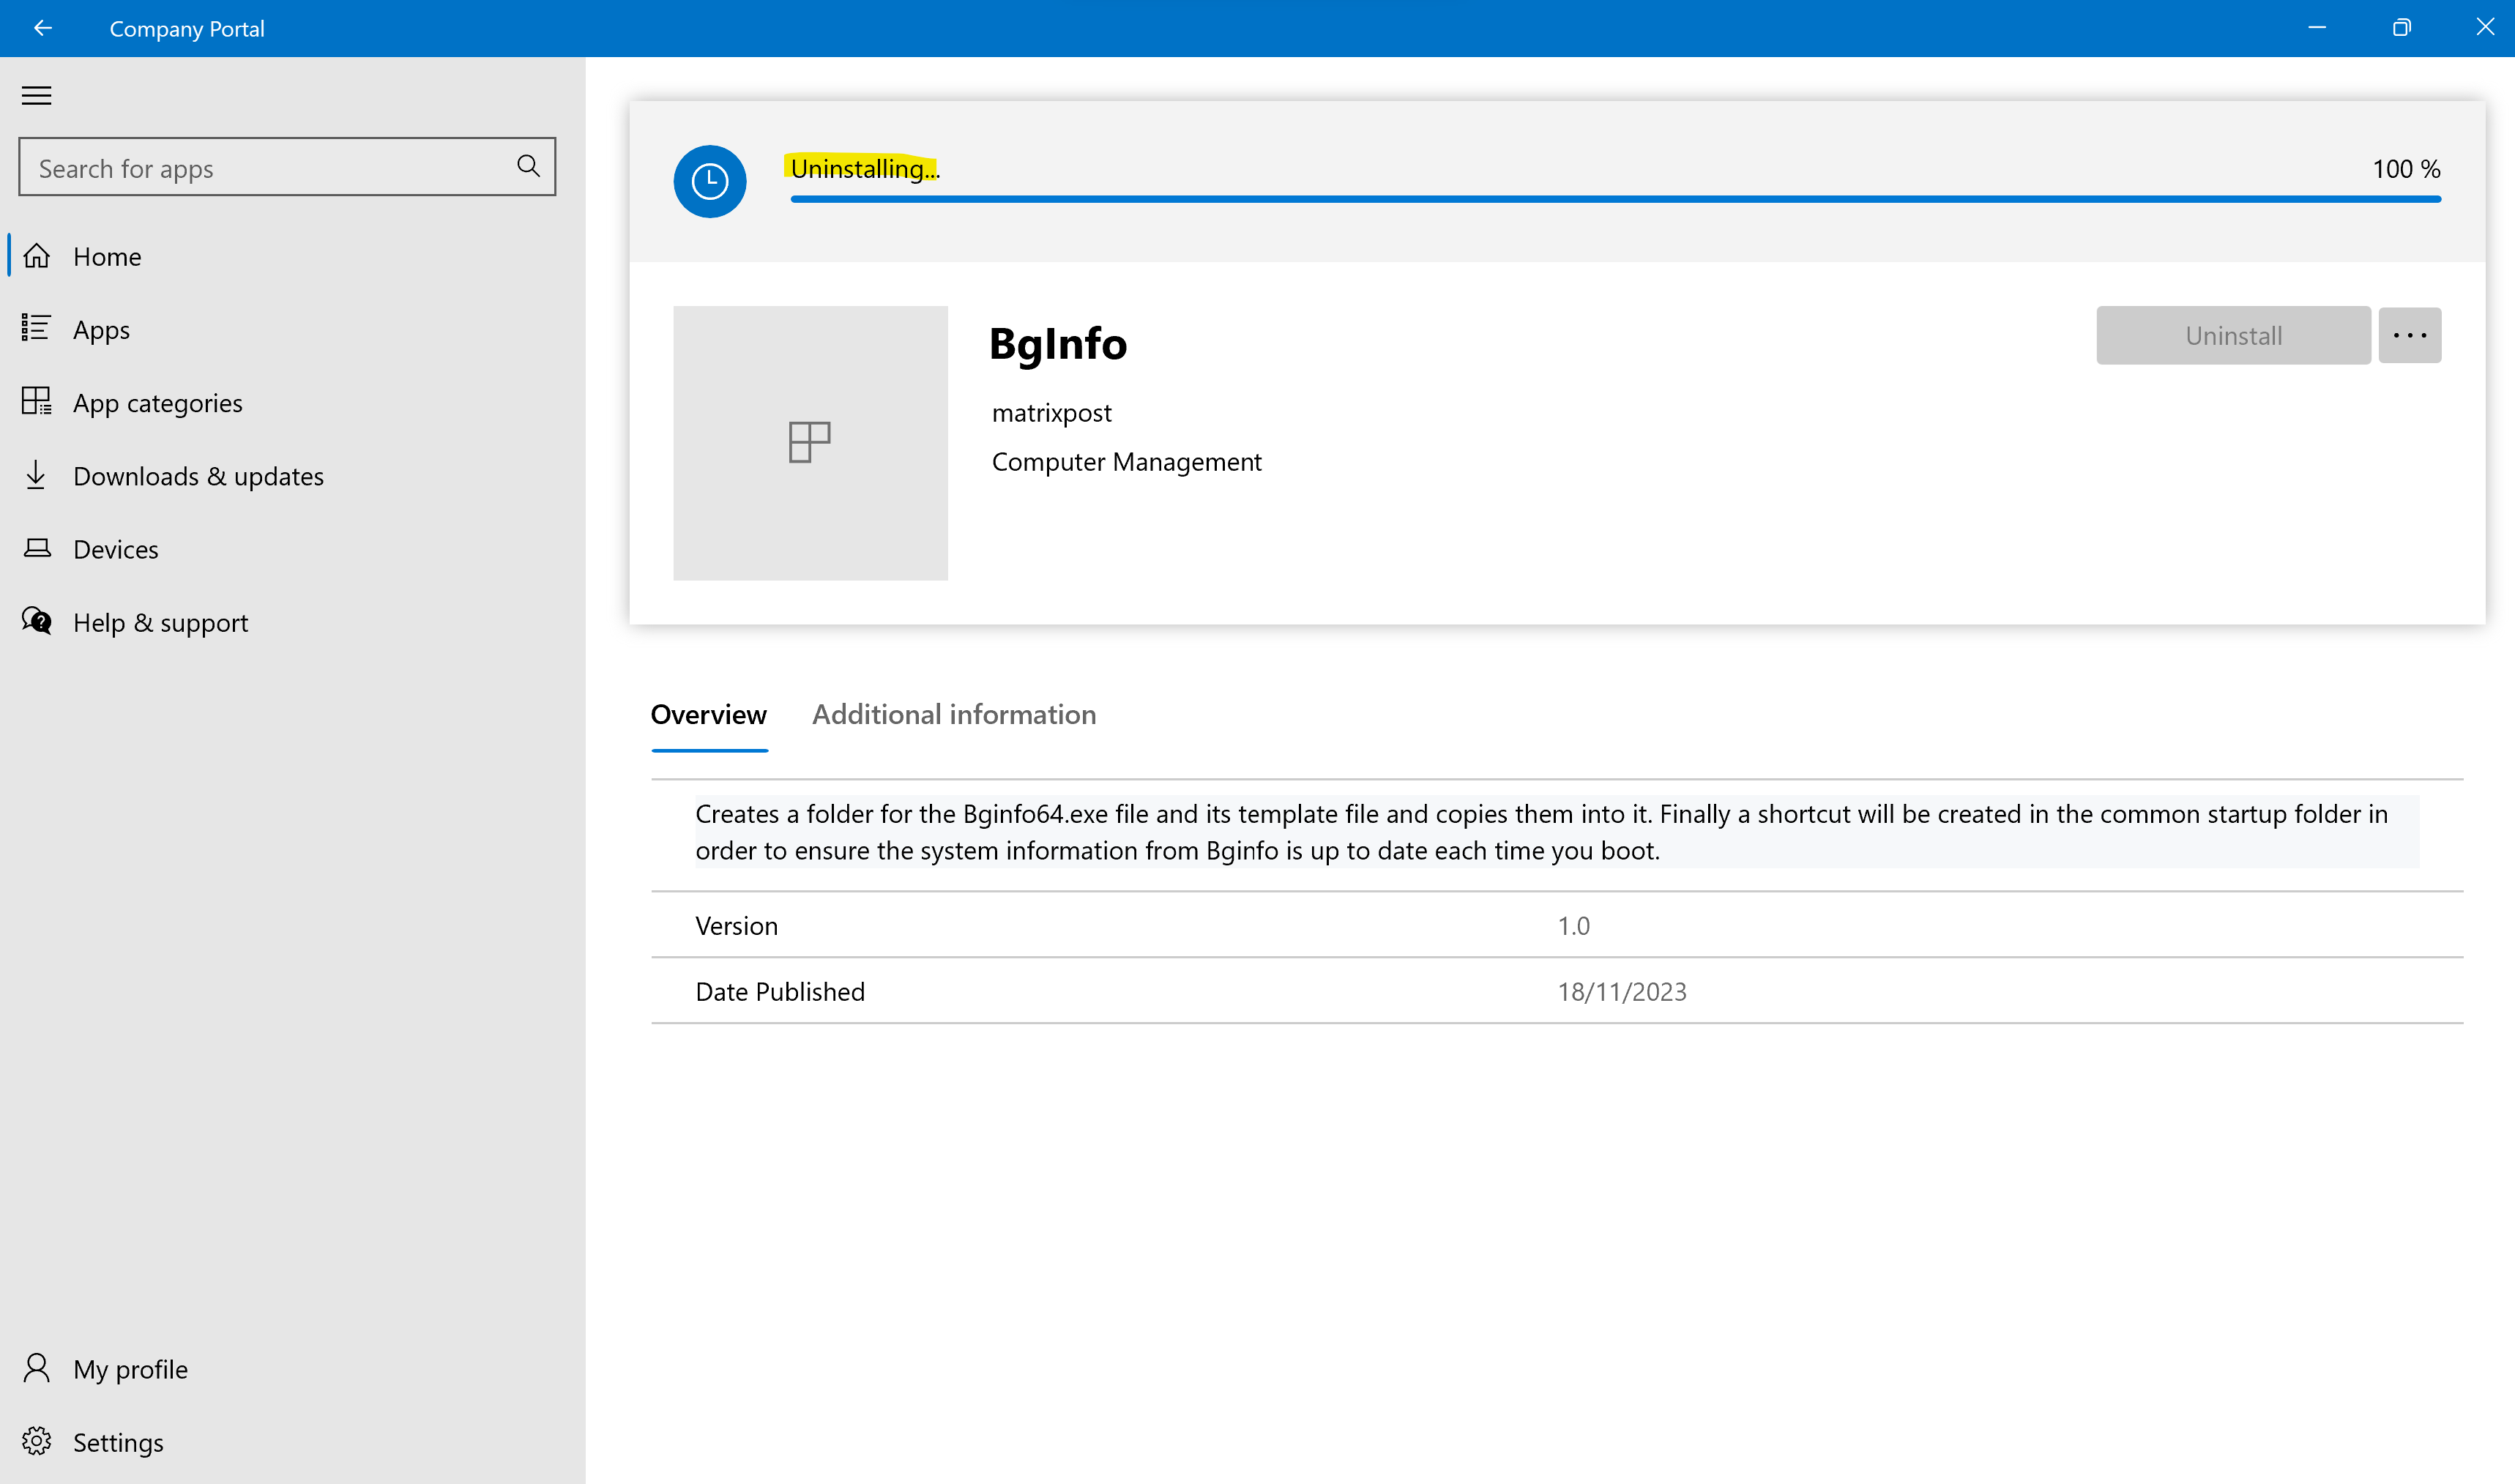
Uninstalling available apps
Troubleshooting
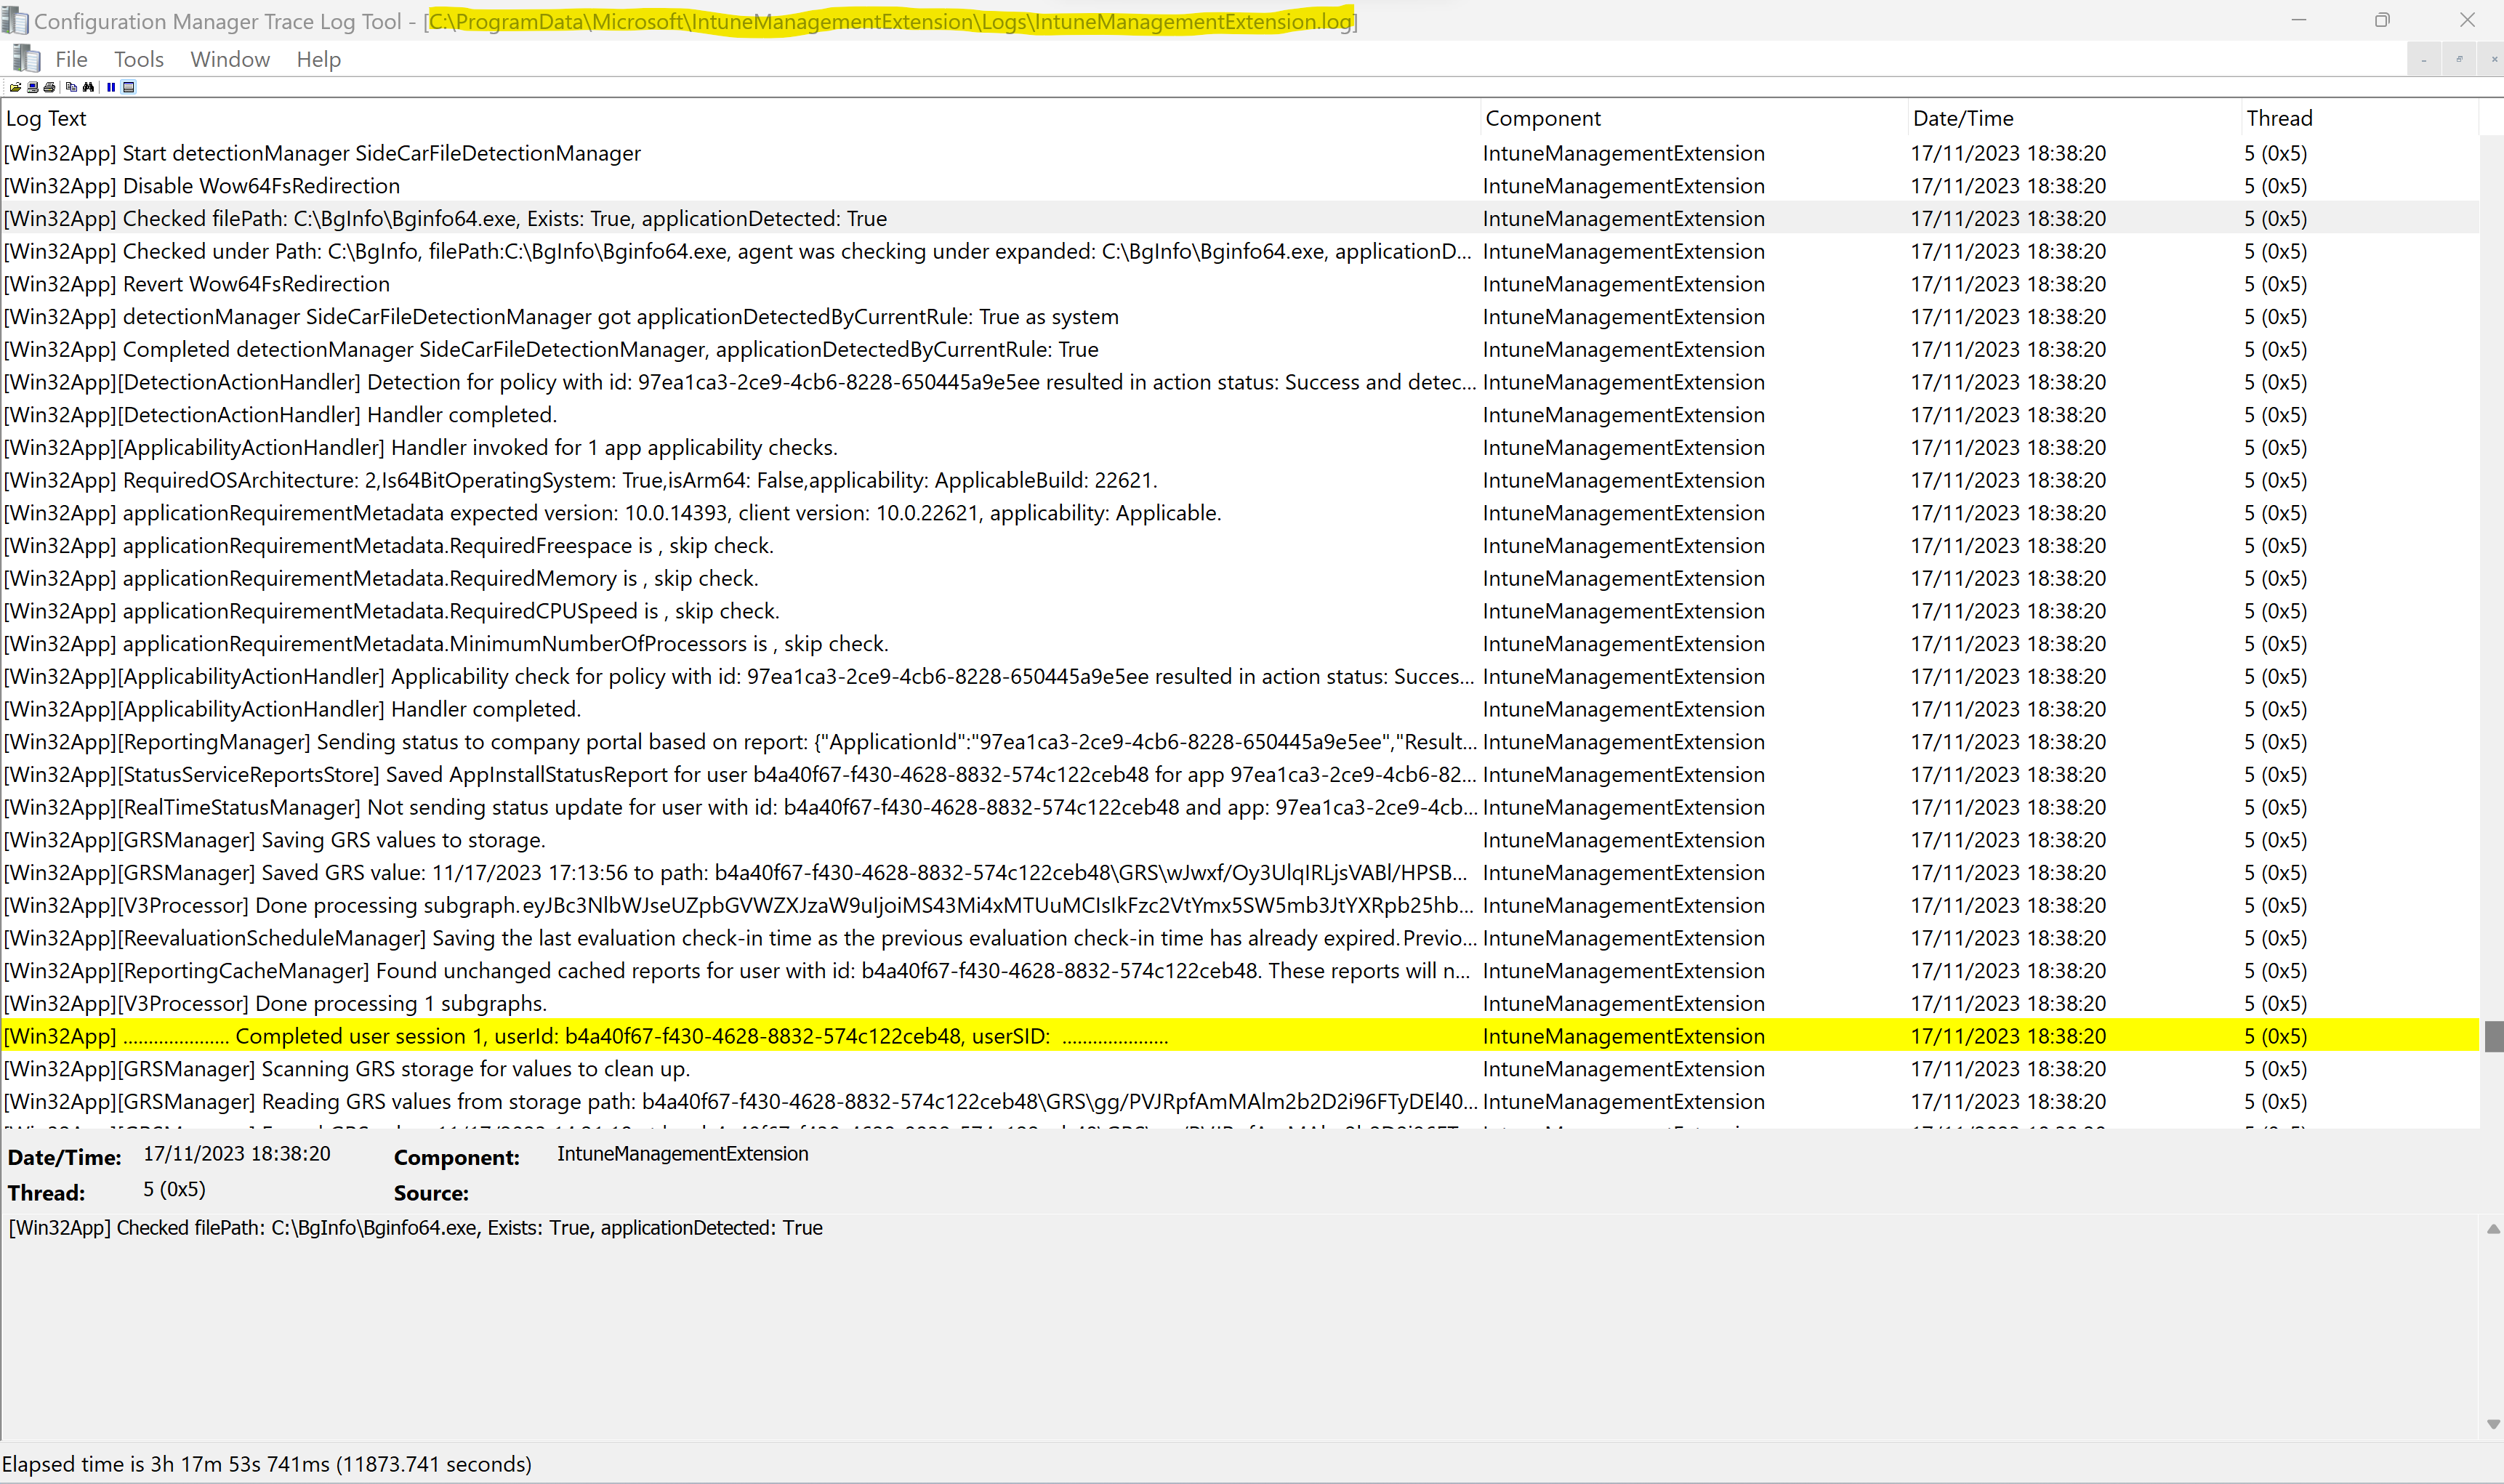
In case the installation of the app will fail, you can either analyze logs directly on the device by checking the IntuneManagementExtension.log file under the path C:ProgramDataMicrosoftIntuneManagementExtensionLogs as shown below or you can use the Microsoft Intune admin center and the Troubleshooting + support section.
Analyzing logs directly on the device.
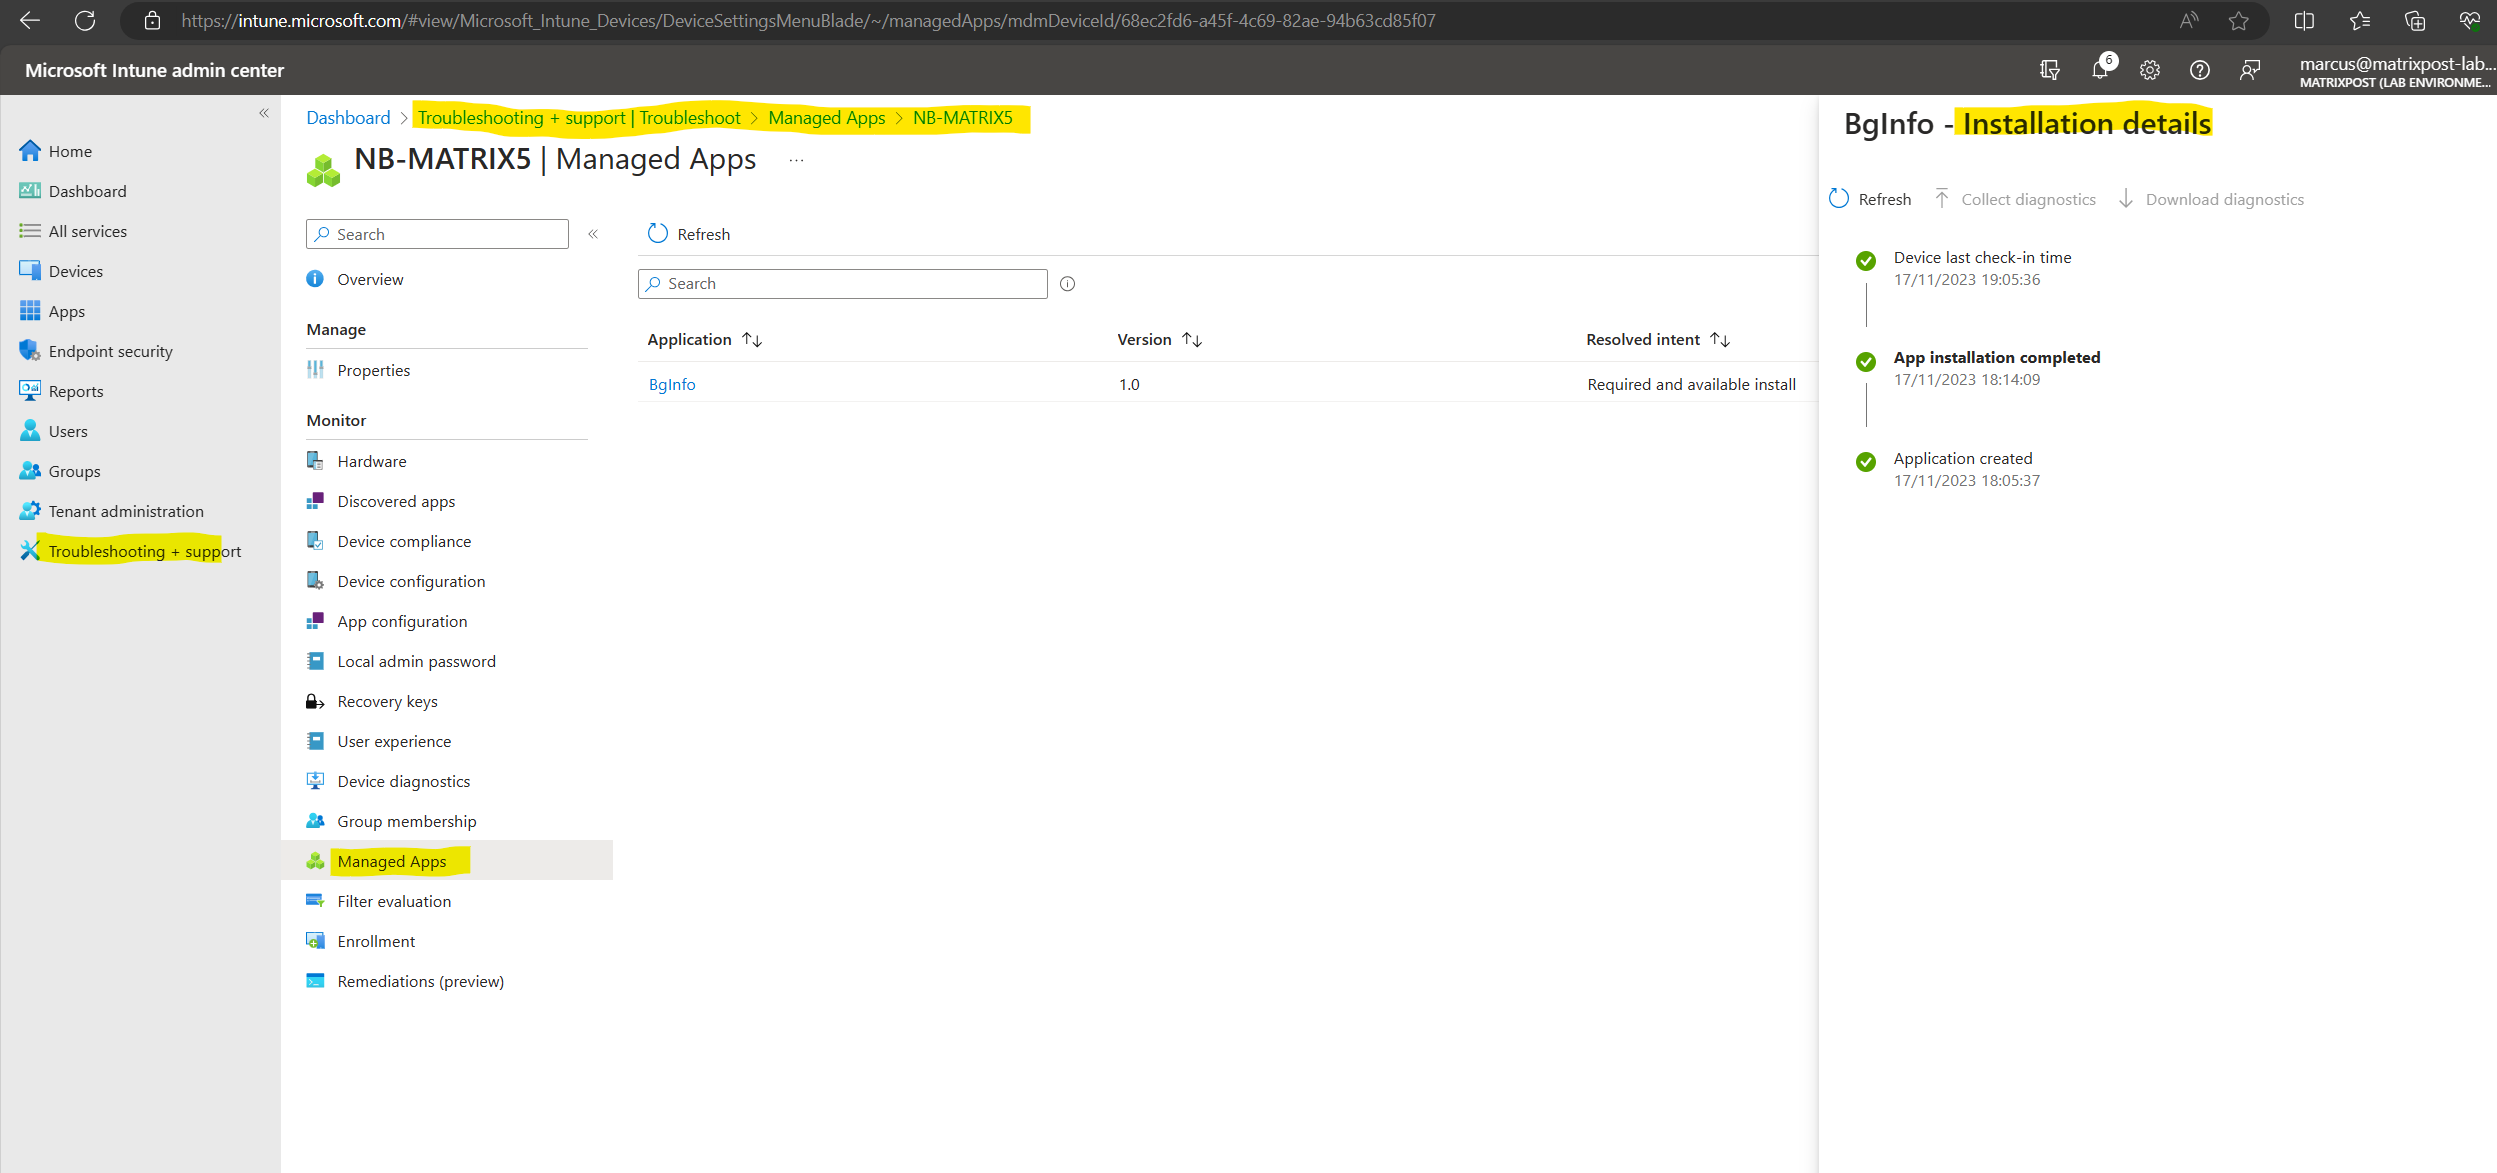
Analyzing the installation within the Microsoft Intune admin center.
Using the New-Object PowerShell Cmdlet to determine the Common Startup Folder
As mentioned further above, instead of using the Windows Script Host (WSH) to determine the common startup folder (AllUsersStartup), we can also use natively PowerShell and the New-Object –com Shell.Application cmdlet.
You remember, we can use the following code in Windows Script Host (WSH) to determine common startup folder (AllUsersStartup).
# Determine Shortcut (symbolic link) path using Windows Script Host (WSH)
$WshShell = New-Object -comObject WScript.Shell
$strCommonStartup = $WshShell.SpecialFolders("AllUsersStartup")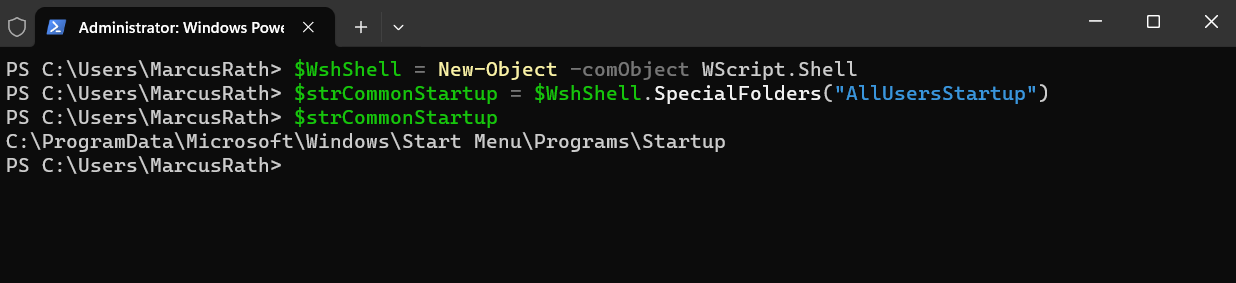
The WshSpecialFolders object also supports the following folders by default.
AllUsersDesktop AllUsersStartMenu AllUsersPrograms AllUsersStartup Desktop Favorites Fonts MyDocuments NetHood PrintHood Programs Recent SendTo StartMenu Startup Templates
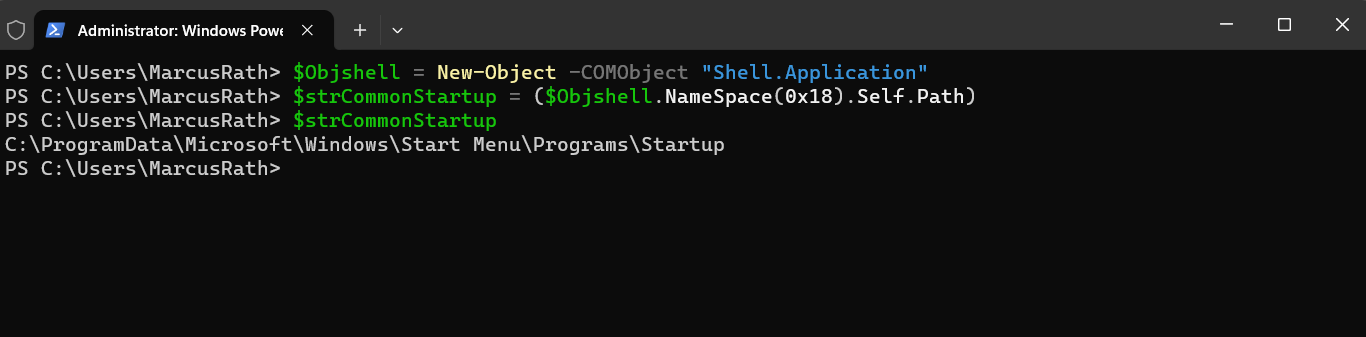
The same we can also achieve by using natively PowerShell and the New-Object -COMObject Shell.Application cmdlet as shown below.
$Objshell = New-Object -COMObject "Shell.Application"
$strCommonStartup = ($Objshell.NameSpace(0x18).Self.Path)
$strCommonStartup
The New-Object cmdlet creates an instance of a Microsoft .NET Framework or COM object.
You can specify either the type of a .NET Framework class or a ProgID of a COM object. By default, you type the fully qualified name of a .NET Framework class and the cmdlet returns a reference to an instance of that class. To create an instance of a COM object, use the ComObject parameter and specify the ProgID of the object as its value.
Source: https://learn.microsoft.com/en-us/powershell/module/microsoft.powershell.utility/new-object
The hex value 0x18 for the folder NameSpace returns the ssfCOMMONSTARTUP folder (path).
0x18 (decimal 24). File system directory that contains the programs that appear in the Startup folder for all users. A typical path is C:Documents and SettingsAll UsersMicrosoftWindowsStart MenuProgramsStartUp. Valid only for Windows NT systems.
A list of all available special folders and its hex values you will find in the following Microsoft article.
ShellSpecialFolderConstants enumeration
https://learn.microsoft.com/en-us/windows/win32/api/shldisp/ne-shldisp-shellspecialfolderconstants
Links
BgInfo
https://learn.microsoft.com/en-us/sysinternals/downloads/bginfoMark’s Windows IT Pro Magazine Power Tools article
https://web.archive.org/web/20170806013538/https://windowsitpro.com/systems-management/bginfo