Blazor Server – Basics Part 5 – Authentication and Authorization
In this part I want to show how you can implement authentication and authorization in your Blazor Server app.
In Part 6 I will show how you can query your on-premise Active Directory by using the user identity determined by the authentication below.
Introduction to Authentication in Blazor Server
ASP.NET Core Identity is designed to work in the context of HTTP request and response communication, which generally isn’t the Blazor app client-server communication model.
Blazor uses the existing ASP.NET Core authentication mechanisms to establish the user’s identity. The exact mechanism depends on how the Blazor app is hosted, Blazor Server or Blazor WebAssembly.
Blazor Server authentication
Blazor Server operates over a SignalR connection with the client. Authentication in SignalR-based apps is handled when the connection is established. Authentication can be based on a cookie or some other bearer token, but authentication is managed via the SignalR hub and entirely within the circuit.
The built-in AuthenticationStateProvider service for Blazor Server apps obtains authentication state data from ASP.NET Core’s HttpContext.User. This is how authentication state integrates with existing ASP.NET Core authentication mechanisms.
Don’t use IHttpContextAccessor/HttpContext directly or indirectly in the Razor components of Blazor Server apps. Blazor apps run outside of the ASP.NET Core pipeline context. The HttpContext isn’t guaranteed to be available within the IHttpContextAccessor, and HttpContext isn’t guaranteed to hold the context that started the Blazor app.
AuthenticationStateProvider service
AuthenticationStateProvider is the underlying service used by the AuthorizeView component and CascadingAuthenticationState component to obtain the authentication state for a user.
You don’t typically use AuthenticationStateProvider directly. Use the AuthorizeView component or Task<AuthenticationState> approach as described later in this article. The main drawback to using AuthenticationStateProvider directly is that the component isn’t notified automatically if the underlying authentication state data changes.
Adding Authentication to your Blazor Server web app
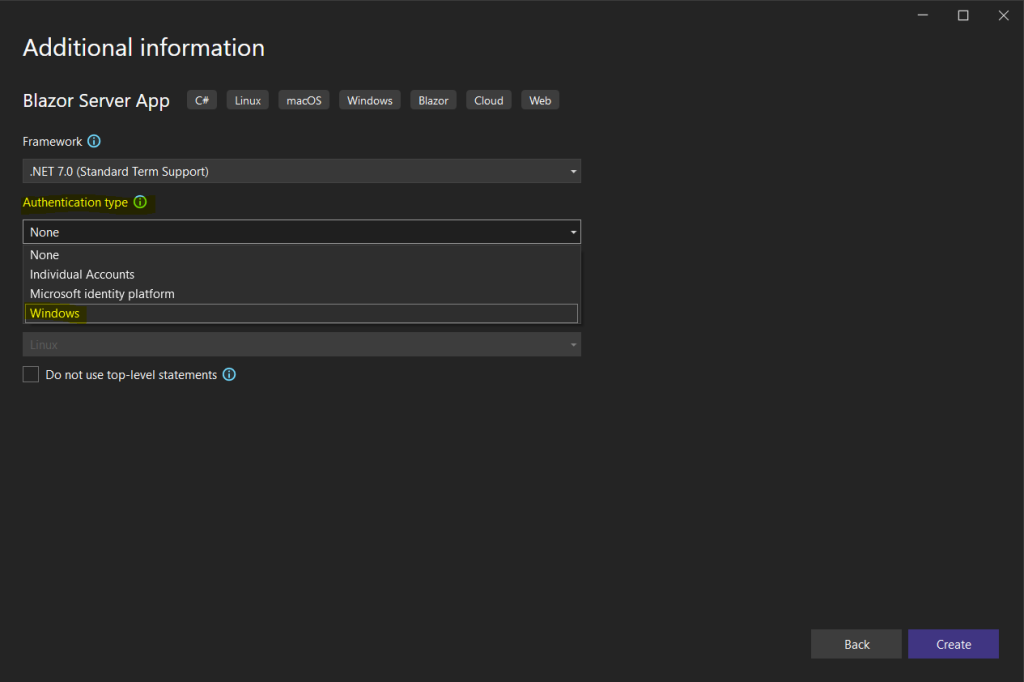
As already shown in Part 2 below, you can add an authentication type to your web app when creating it with the wizard and using a project template.
As I want to authenticate users in my web app by using the on-premise Active Directory, I will select here Windows, for Azure AD you can select Microsoft identity platform.
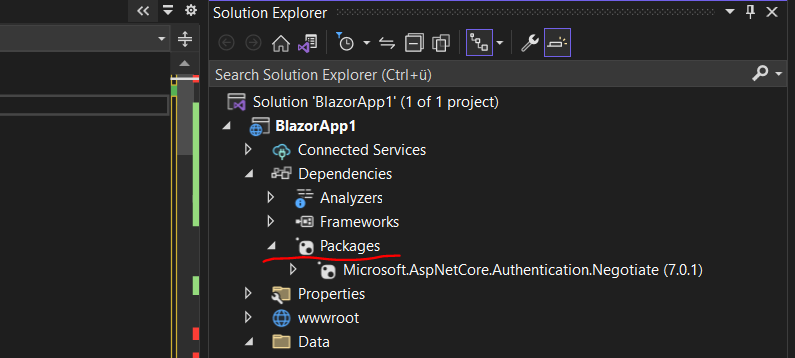
This will add the following red marked code and NuGet Package to your Program.cs file.
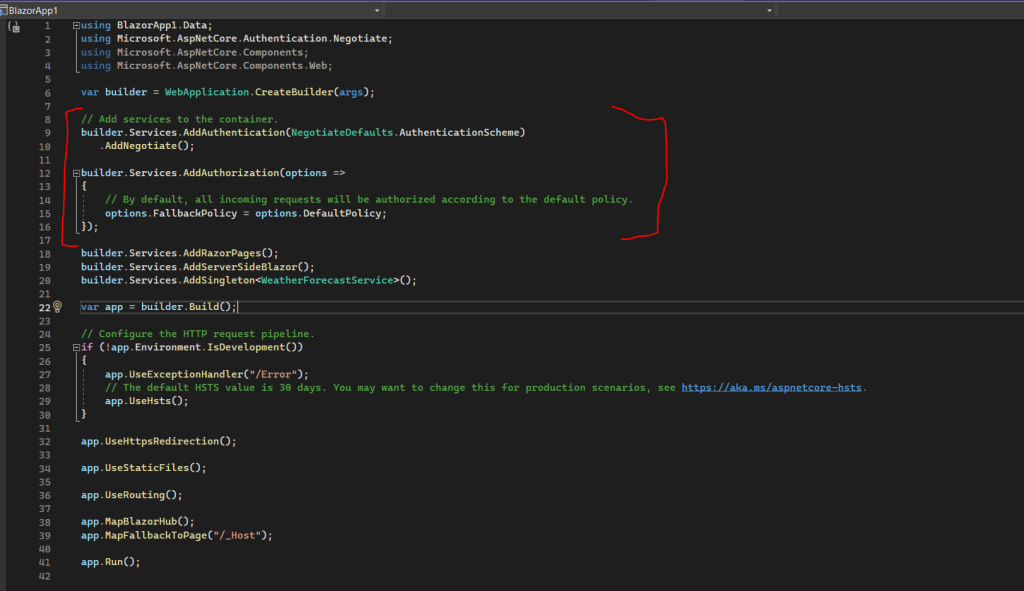
Microsoft.AspNetCore.Authentication.Negotiate package.
Further a LoginDisplay.razor component will be added to your web app.
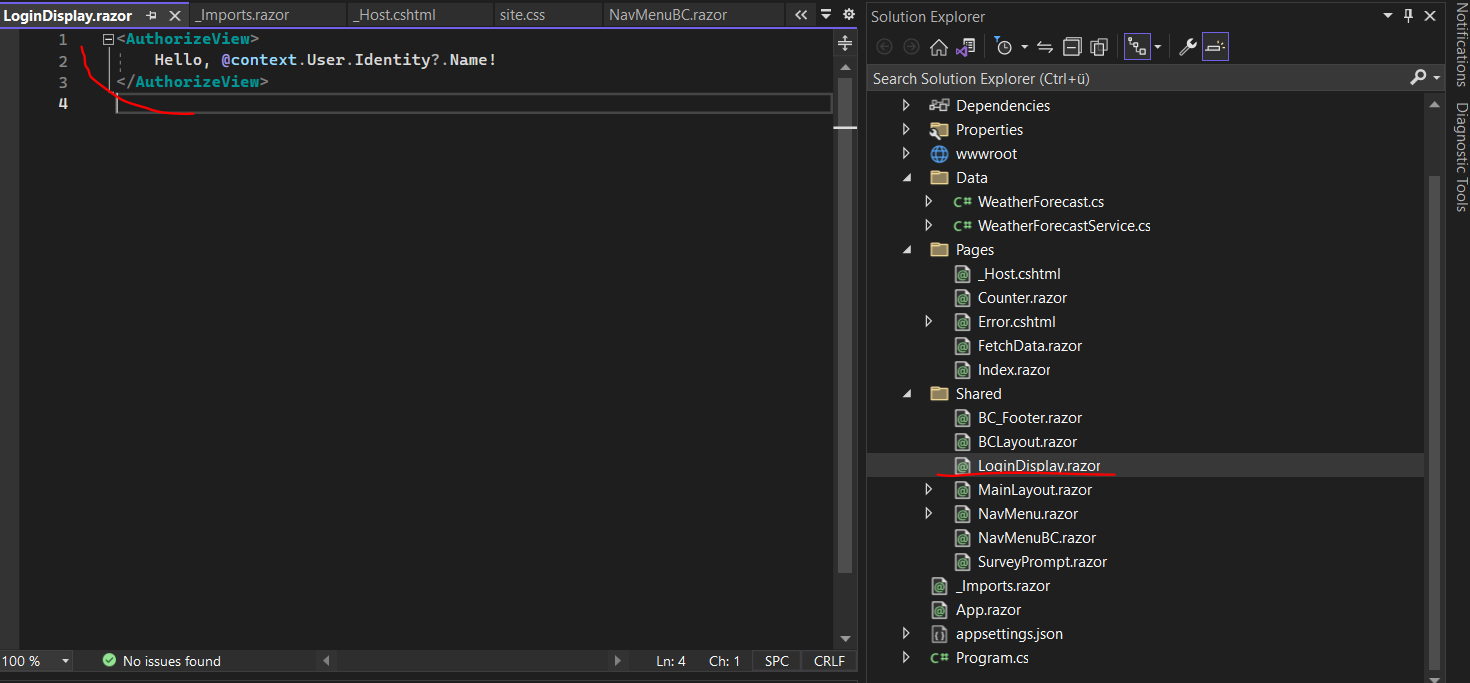
The AuthorizationView component exposes a context variable of type AuthenticationState
@context.User.Identity?.Name!
Source: https://learn.microsoft.com/en-us/aspnet/core/blazor/security/?view=aspnetcore-7.0#authorizeview-component
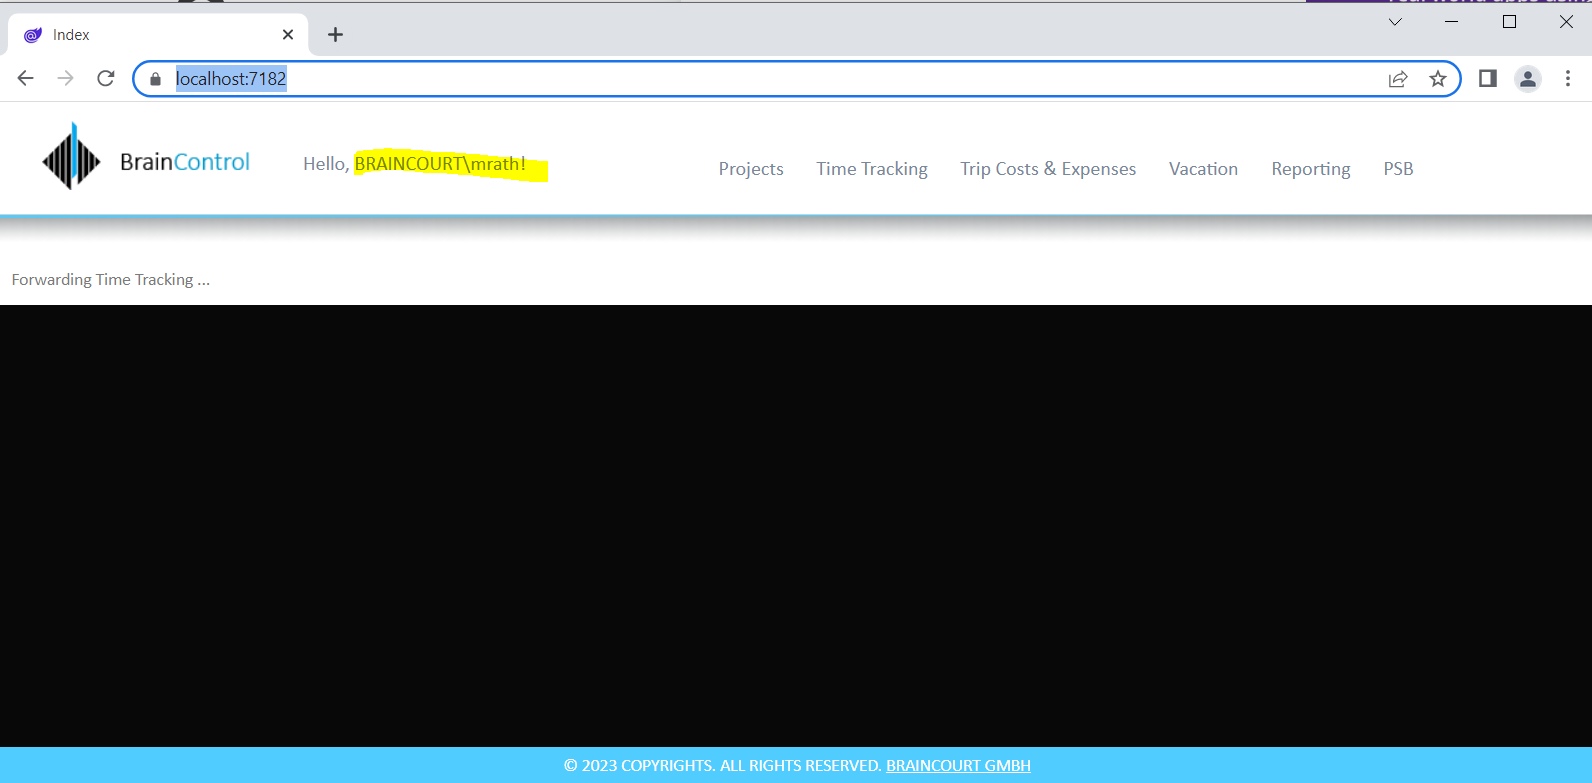
which will show here the signed-in Windows user account.
When you create a Blazor app from one of the Blazor project templates with authentication enabled, the App component includes the AuthorizeRouteView and CascadingAuthenticationState components shown in the following example. A Blazor WebAssembly app includes the required service registrations as well. Additional information is presented in the Customize unauthorized content with the Router component section.
App.razor file
<CascadingAuthenticationState>
    <Router ...>
        <Found ...>
            <AuthorizeRouteView RouteData="@routeData"
                DefaultLayout="@typeof(MainLayout)" />
            ...
        </Found>
        <NotFound>
            ...
        </NotFound>
    </Router>
</CascadingAuthenticationState>
Authentication by using cascading parameter of type Task<AuthenticationState>
If the app is required to check authorization rules as part of procedural logic, use a cascaded parameter of type Task<AuthenticationState> to obtain the user’s ClaimsPrincipal. Task<AuthenticationState> can be combined with other services, such as IAuthorizationService, to evaluate policies.
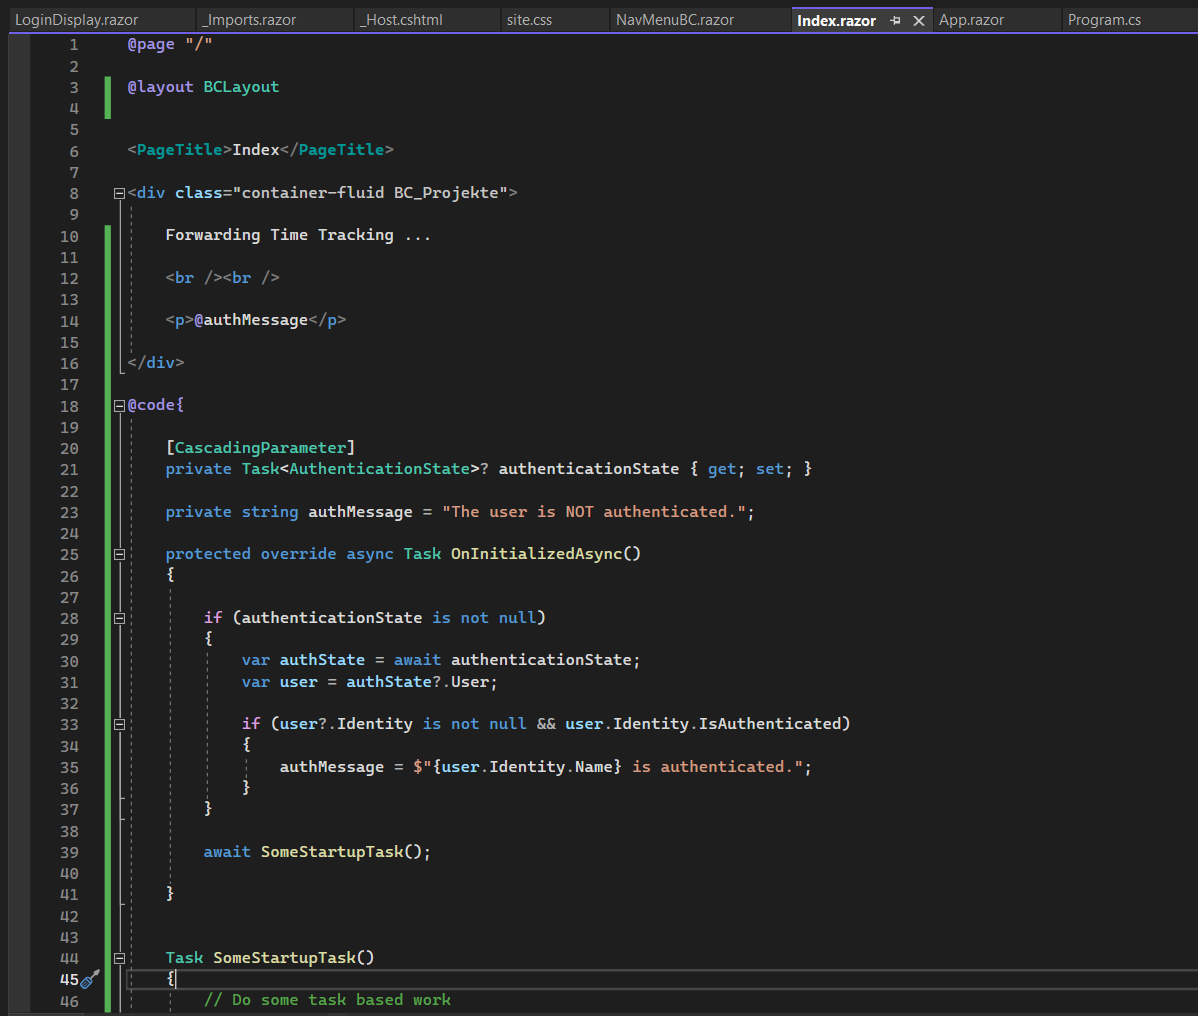
To obtain the authentication state by defining a cascading parameter of type Task<AuthenticationState> you can use the following code.
@page "/cascade-auth-state"

<h1>Cascade Auth State</h1>

<p>@authMessage</p>

@code {
    private string authMessage = "The user is NOT authenticated.";

    [CascadingParameter]
    private Task<AuthenticationState>? authenticationState { get; set; }

    protected override async Task OnInitializedAsync()
    {
        if (authenticationState is not null)
        {
            var authState = await authenticationState;
            var user = authState?.User;

            if (user?.Identity is not null && user.Identity.IsAuthenticated)
            {
                authMessage = $"{user.Identity.Name} is authenticated.";
            }
        }
    }
}
The claims can be enumerated and membership in roles evaluated. Evaluating the roles we need further down for authorize the user depending on its groupmembership.
Source: https://learn.microsoft.com/en-us/aspnet/core/blazor/security/?view=aspnetcore-7.0#procedural-logic
For my new time tracking and vacation planning system this will looks like this below when I am using the example above for my index page.

Authorization by using cascading parameter ot type Task<AuthenticationState>
The user claims principal object from the authentication above we can use to determine the users group memberships.
ClaimsPrincipal Class
https://learn.microsoft.com/en-us/dotnet/api/system.security.claims.claimsprincipal?view=net-7.0
We can use the IsInRole method as shown below to check if the user is a member in a specific security group or not. Depending on the membership we can authorize the user or not.
Here I will check if the user is a member in the security group named braincontrol2011 from the BRAINCOURT domain.
if (authenticationState is not null)
{
var authState = await authenticationState;
var user = authState?.User;
if (user?.Identity is not null && user.Identity.IsAuthenticated)
{
authMessage = $"{user.Identity.Name} is authenticated.";
}
if (user.IsInRole("BRAINCOURT\braincontrol2011"))
{
// authorized code
authorizedMessage = $"{user.Identity.Name} is authorized.";
}
else
{
// not authorized code
authorizedMessage = $"{user.Identity.Name} is NOT authorized.";
}
principal = user;
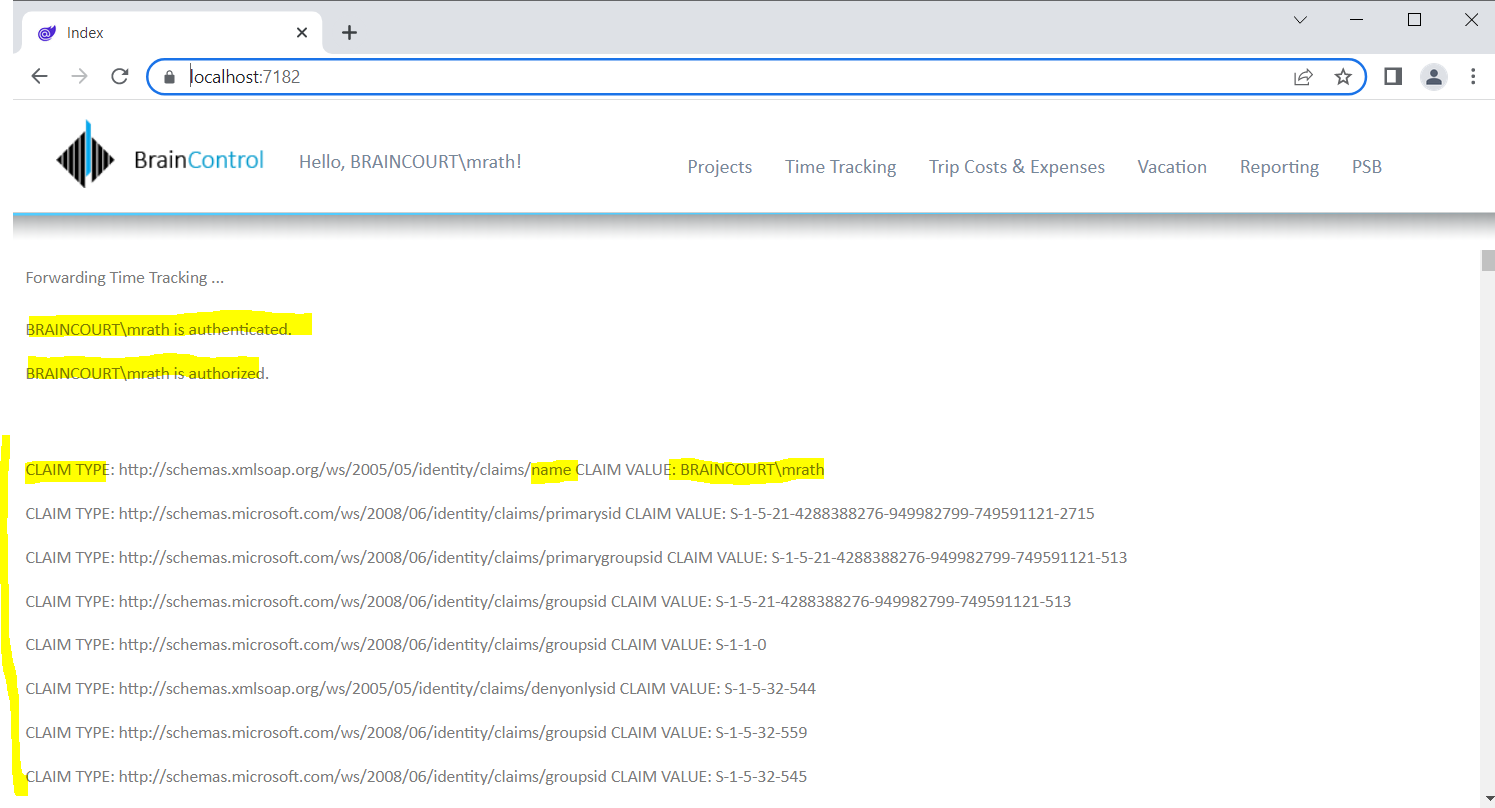
}The complete code for my index page is shown below. For testing purpose I was adding a ClaimsPrincipal object named principal which I will enumerate to list all group memberships for the user identity which is signed-in.
@page "/"

@layout BCLayout

@using System.Security.Claims


<PageTitle>Index</PageTitle>

<div class="container-fluid BC_Projekte">

    Forwarding Time Tracking ...

    <br /><br />

    <p>@authMessage</p>

    <p>@authorizedMessage</p>

    <br /><br />

    @foreach (Claim claim in principal.Claims)
    {
        <p>CLAIM TYPE: @claim.Type CLAIM VALUE: @claim.Value</p>

    }


</div>

@code{


    private string authMessage = "The user is NOT authenticated.";
    private string authorizedMessage = "The user is NOT authorized.";

    [CascadingParameter]
    private Task<AuthenticationState>? authenticationState { get; set; }

    ClaimsPrincipal principal;


    protected override async Task OnInitializedAsync()
    {

        if (authenticationState is not null)
        {
            var authState = await authenticationState;
            var user = authState?.User;
            if (user?.Identity is not null && user.Identity.IsAuthenticated)
            {
                authMessage = $"{user.Identity.Name} is authenticated.";
            }

            if (user.IsInRole("BRAINCOURT\braincontrol2011"))
            {
                // authorized code
                authorizedMessage = $"{user.Identity.Name} is authorized.";
            }
            else
            {
                // not authorized code
                authorizedMessage = $"{user.Identity.Name} is NOT authorized.";
            }

            principal = user;

        }

    }

}
As menioned to the beginning, in Part 6 I will show how you can query your on-premise Active Directory by using the user identity determined by the authentication here in this post.
Blazor Server Series
Blazor Server – Basics Part 1
https://blog.matrixpost.net/blazor-server-basics-part-i/Blazor Server – Basics Part 2
https://blog.matrixpost.net/blazor-server-basics-part-ii/Blazor Server – Basics Part 3 – Custom Layout
https://blog.matrixpost.net/blazor-server-basics-part-iii-custom-layout/Blazor Server – Basics Part 4 – Program.cs File
https://blog.matrixpost.net/blazor-server-basics-part-iv-program-cs-file/Blazor Server – Basics Part 5 – Authentication and Authorization
https://blog.matrixpost.net/blazor-server-basics-part-v-authentication-and-authorization/Blazor Server – Basics Part 6 – Query the on-premise Active Directory
https://blog.matrixpost.net/blazor-server-basics-part-vi-query-the-on-premise-active-directory/Blazor Server – Basics Part 7 – C# Events, Delegates and the EventCallback Class
https://blog.matrixpost.net/blazor-server-basics-part-vii-c-events-and-delegates/Blazor Server – Basics Part 8 – JavaScript interoperability (JS interop)
https://blog.matrixpost.net/blazor-server-basics-part-viii-javascript-interoperability-js-interop/Blazor Server – Basics Part 9 – Responsive Tags and Chips
https://blog.matrixpost.net/blazor-server-basics-part-ix-responsive-tags-and-chips/Blazor Server – Basics Part 10 – MS SQL Server Access and Data Binding
https://blog.matrixpost.net/blazor-server-basics-part-10-ms-sql-server-access-and-data-binding/Blazor Server – Basics Part 11 – Create a Native Blazor UI Toggle Switch Component
https://blog.matrixpost.net/blazor-server-basics-part-11-native-blazor-toggle-switch-by-using-the-eventcallback-class-and-css/Blazor Server – Basics Part 12 – Create a Native Blazor UI Toggle Button Component
https://blog.matrixpost.net/blazor-server-basics-part-12-create-a-native-blazor-ui-toggle-button-component/
Links
ASP.NET Core Blazor authentication and authorization
https://learn.microsoft.com/en-us/aspnet/core/blazor/security/?view=aspnetcore-7.0Authentication and authorization in ASP.NET Core SignalR
https://learn.microsoft.com/en-us/aspnet/core/signalr/authn-and-authz?view=aspnetcore-7.0