Blazor Server – Basics Part 3 – Custom Layout
In this part from my blazor server series, I want to show how you can apply a custom layout to your blazor server web app.
So far we just set up the default blazor server web app with the default main layout from the MainLayout.razor template.
I won’t explain how to design a new layout using HTML and CSS, I will just explain the separate steps to apply a custom layout to your Blazor server app.
Create a new Razor Layout Template
The first step is to create a new razor template which becomes the new layout template and will replace the default MainLayout.razor, in my case I will name it BCLayout.razor.
We will create the new template in the Shared folder where also the default MainLayout.razor is.

For layout templates you need to inherit from the LayoutComponentBase by using the @inherits directive as shown below.
@inherits LayoutComponentBase
The content from your razor pages homed in the Pages folder, will be rendered in the layout markup with the @Body razor syntax as shown below in the BC_Content div tag.
So if a user for example entered the following URL https://<FQDN web app>/testsite in the addressbar from its browser, the content from the testsite.razor will be rendered within the BC_Content div tag below.
Provided the testsite.razor page uses the @page “/testsite” directive of course and had imported the new layout template by using the @layout BCLayout directive.
In order the web server will render a razor component when you enter a specific URL site, the @page directive need to be included with the URL path.
@inherits LayoutComponentBase
<header />
<div class="container-fluid fixed-top BC_Header_top">
<div class="row align-items-start">
<div class="col-md-2">
<a href="/"><img src="images/LogoBC_BrainControl.png" /></a>
</div>
<div class="col-md-3 BC_LoginDisplay">
<LoginDisplay />
</div>
<div class="col-md-7">
<NavMenuBC />
</div>
</div>
</div>
<div class="container-fluid BC_Header_2nd">
</div>
<div class="BC_Content">
@Body
</div>
<BC_Footer />
<div class="BC_Copyright">
<div class="container">
<p>© 2023 Copyrights. All rights reserved. <a class="text-primary" href="https://www.braincourt.com" target="_blank">Braincourt GmbH</a></p>
</div>
</div>
@code {
}
Using the new Layout for your routable Razor Components (Pages)
In order to use the new template for your routable razor components, you need to add the @layout directive to them.
@layout BCLayout
Below for example I will add the @layout directive to the index.razor page which will be rendered by default for the root URL on the web server.
@page “/” directive to render the razor page for the root URL.
@page "/"
@layout BCLayout
<PageTitle>Index</PageTitle>
<div class="container-fluid BC_Projekte">
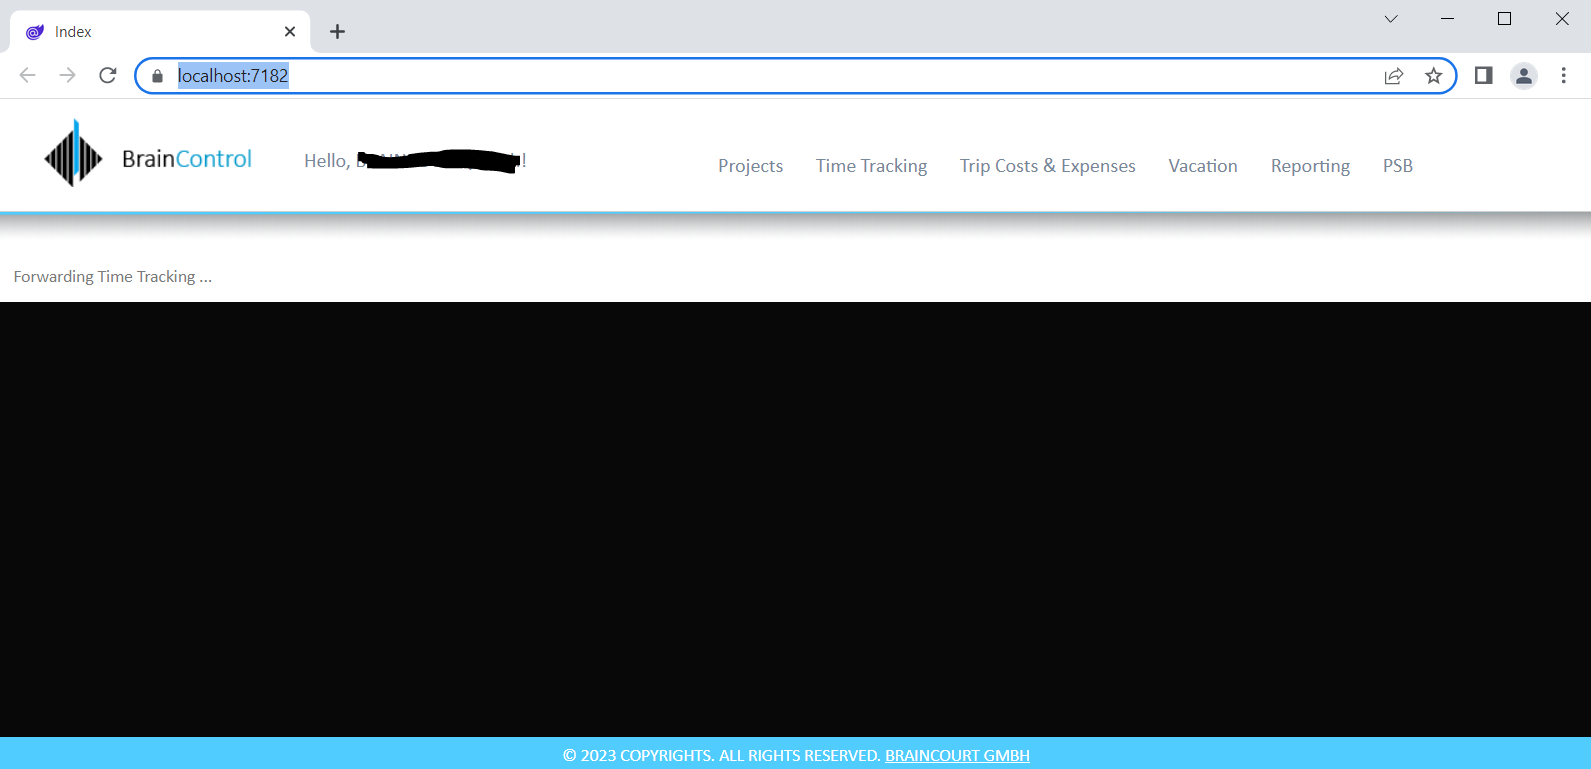
Forwarding Time Tracking ...
</div>Now we can see that the index.razor page is rendered by using the custom BCLayout.razor template.
As you can see, the index page should redirect you to the time tracking page. The redirect with Blazor I will show in another post.
To specify a default app layout for all routable razor components in your web app, you can also change the default layout in the App.razor file.
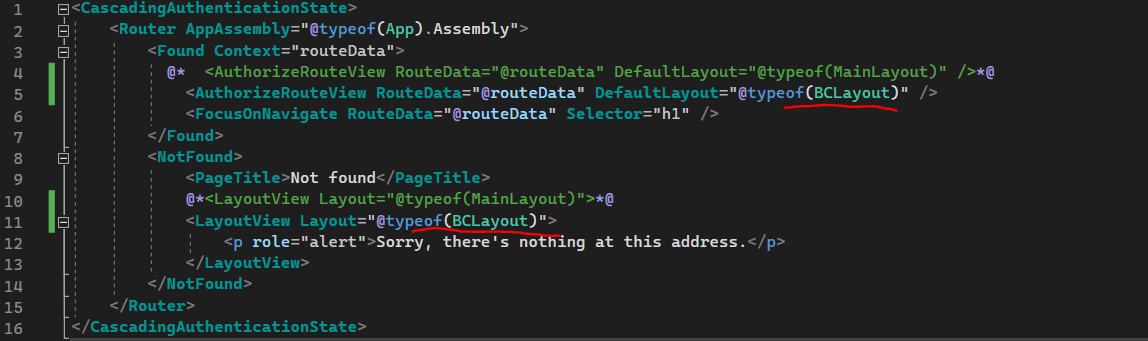
This will apply my custom BCLayout.razor template as default layout to all routable razor components and you do not have to use the @layout directive on each of them separate.
You can also create for each folder a dedicated _Imports.razor file and add the @layout directive to set a default layout for all routable razor components within that folder.
Do not add a Razor @layout directive to the root _Imports.razor file, which results in an infinite loop of layouts.
Above in my web app you can also see the Hello username message and the navigation menu. Both are further razor components and included in the BCLayout.razor template.
The Hello username component is included by the <LoginDisplay /> HTML tag which includes the LoginDisplay.razor component and the navigation menu is included by the <NavMenuBC /> HTML tag which includes the NavMenuBC.razor component.
The NavMenuBC.razor component is a simple unordered list using the <ul> tag and formatted by using CSS Bootstrap.
<!-- A transparent horizontal navbar that becomes vertical on small screens -->
<nav class="navbar navbar-expand-sm bg-transparent">

    <!-- Links -->
    <ul class="navbar-nav navbar">
        <li class="nav-item">
            <NavLink class="nav-link" href="projects">Projects</NavLink>
        </li>
        <li class="nav-item">
            <NavLink class="nav-link" href="time_tracking">Time Tracking</NavLink>
        </li>
        <li class="nav-item">
            <NavLink class="nav-link" href="trip_costs_expenses">Trip Costs & Expenses</NavLink>
        </li>
        <li class="nav-item">
            <NavLink class="nav-link" href="vacation">Vacation</NavLink>
        </li>
        <li class="nav-item">
            <NavLink class="nav-link" href="reporting">Reporting</NavLink>
        </li>
        <li class="nav-item">
            <NavLink class="nav-link" href="psb">PSB</NavLink>
        </li>
    </ul>

</nav>
The LoginDisplay.razor component are just the following 3 lines, more about using Windows Authentication in Blazor I will show in another post.
<AuthorizeView>
    Hello, @context.User.Identity?.Name!
</AuthorizeView>
In order the new Blazor website with the custom layout template will looks like this, you also need a bunch of CSS code and images which all will be placed in the wwwroot folder.
I was modifying the existing site.css file which is referenced by default in the _Host.cshtml file which is the root page of the app.
When any page of the app is initially requested like for example the index.razor, this page is rendered and returned in the response.
So all CSS and JavaScript files will be referenced in the _Host.cshtml file in .NET 7, in .NET 6 you will use the _Layout.cshtml file which however is referenced in the _Host.cshtml.
Place the JavaScript (JS) tags (<script>…</script>) just before the the closing </body> tag rather than in the <head> section.
When the browser loads a website, it loads besides the HTML code also linked files like images, CSS and JavaScript files. Modern browsers could download multiple files at once, but when the browser detects a <script> object it starts immediately to process the code by using the JavaScript interpreter.
This will result in pausing the parsing and downloading of all other files and HTML code which will interrupt the page loading.
Further in case your JavaScript code wants to access specific HTML elements from the Document Object Model (DOM), they not loaded so far, you will run into an access error.
Also the blazor.server.js file is referenced in the _Host.cshtml as explained in Part 1.

_Host.cshtml file

Blazor Server Series
Blazor Server – Basics Part 1
https://blog.matrixpost.net/blazor-server-basics-part-i/Blazor Server – Basics Part 2
https://blog.matrixpost.net/blazor-server-basics-part-ii/Blazor Server – Basics Part 3 – Custom Layout
https://blog.matrixpost.net/blazor-server-basics-part-iii-custom-layout/Blazor Server – Basics Part 4 – Program.cs File
https://blog.matrixpost.net/blazor-server-basics-part-iv-program-cs-file/Blazor Server – Basics Part 5 – Authentication and Authorization
https://blog.matrixpost.net/blazor-server-basics-part-v-authentication-and-authorization/Blazor Server – Basics Part 6 – Query the on-premise Active Directory
https://blog.matrixpost.net/blazor-server-basics-part-vi-query-the-on-premise-active-directory/Blazor Server – Basics Part 7 – C# Events, Delegates and the EventCallback Class
https://blog.matrixpost.net/blazor-server-basics-part-vii-c-events-and-delegates/Blazor Server – Basics Part 8 – JavaScript interoperability (JS interop)
https://blog.matrixpost.net/blazor-server-basics-part-viii-javascript-interoperability-js-interop/Blazor Server – Basics Part 9 – Responsive Tags and Chips
https://blog.matrixpost.net/blazor-server-basics-part-ix-responsive-tags-and-chips/Blazor Server – Basics Part 10 – MS SQL Server Access and Data Binding
https://blog.matrixpost.net/blazor-server-basics-part-10-ms-sql-server-access-and-data-binding/Blazor Server – Basics Part 11 – Create a Native Blazor UI Toggle Switch Component
https://blog.matrixpost.net/blazor-server-basics-part-11-native-blazor-toggle-switch-by-using-the-eventcallback-class-and-css/Blazor Server – Basics Part 12 – Create a Native Blazor UI Toggle Button Component
https://blog.matrixpost.net/blazor-server-basics-part-12-create-a-native-blazor-ui-toggle-button-component/
Links
ASP.NET Core Blazor layouts
https://learn.microsoft.com/en-us/aspnet/core/blazor/components/layouts?view=aspnetcore-7.0Layouts Blazor University
https://blazor-university.com/layouts/Bootstrap
https://getbootstrap.com/