What is Microsoft Entra External ID (Azure AD External Identities)?
Microsoft Entra External ID (for customers) is Microsoft’s new customer identity and access management (CIAM) solution.
Customer (or consumer) identity and access management (CIAM) is a subset of the larger concept of identity access management (IAM) that focuses on managing and controlling external parties access to a business applications, web portals and digital services.
Source: https://en.wikipedia.org/wiki/Customer_identity_access_management
- Introduction
- Creating a distinct new Customer Tenant
- Register an App in the Customer Tenant
- Create a sign-up and sign-in user flow for customers
- Add your application to the user flow
- Enable self-service password reset
- Testing User Flow Sign-in to our Application
- Microsoft Entra External ID vs. Azure AD B2C
- What is Microsoft Entra?
- Links
Introduction
For organizations and businesses that want to make their public-facing applications available to consumers, Microsoft Entra ID makes it easy to add CIAM features like self-service registration, personalized sign-in experiences, and customer account management. Because these CIAM capabilities are built into Microsoft Entra ID, you also benefit from platform features like enhanced security, compliance, and scalability.
Microsoft Entra External ID is currently in preview. See the Universal License Terms for Online Services for legal terms that apply to Azure features and services that are in beta, preview, or otherwise not generally available.

When getting started with Microsoft Entra ID for customers, you first create a new dedicated customer tenant that will contain your customer-facing apps, resources, and directory of customer accounts.
This customer tenant follows the standard Microsoft Entra tenant model but is configured for customer scenarios.
More about this distinct tenant for customers you will find in the following article from Microsoft https://learn.microsoft.com/en-us/azure/active-directory/external-identities/customers/overview-customers-ciam#create-a-dedicated-tenant-for-your-customer-scenarios
Creating a distinct new Customer Tenant
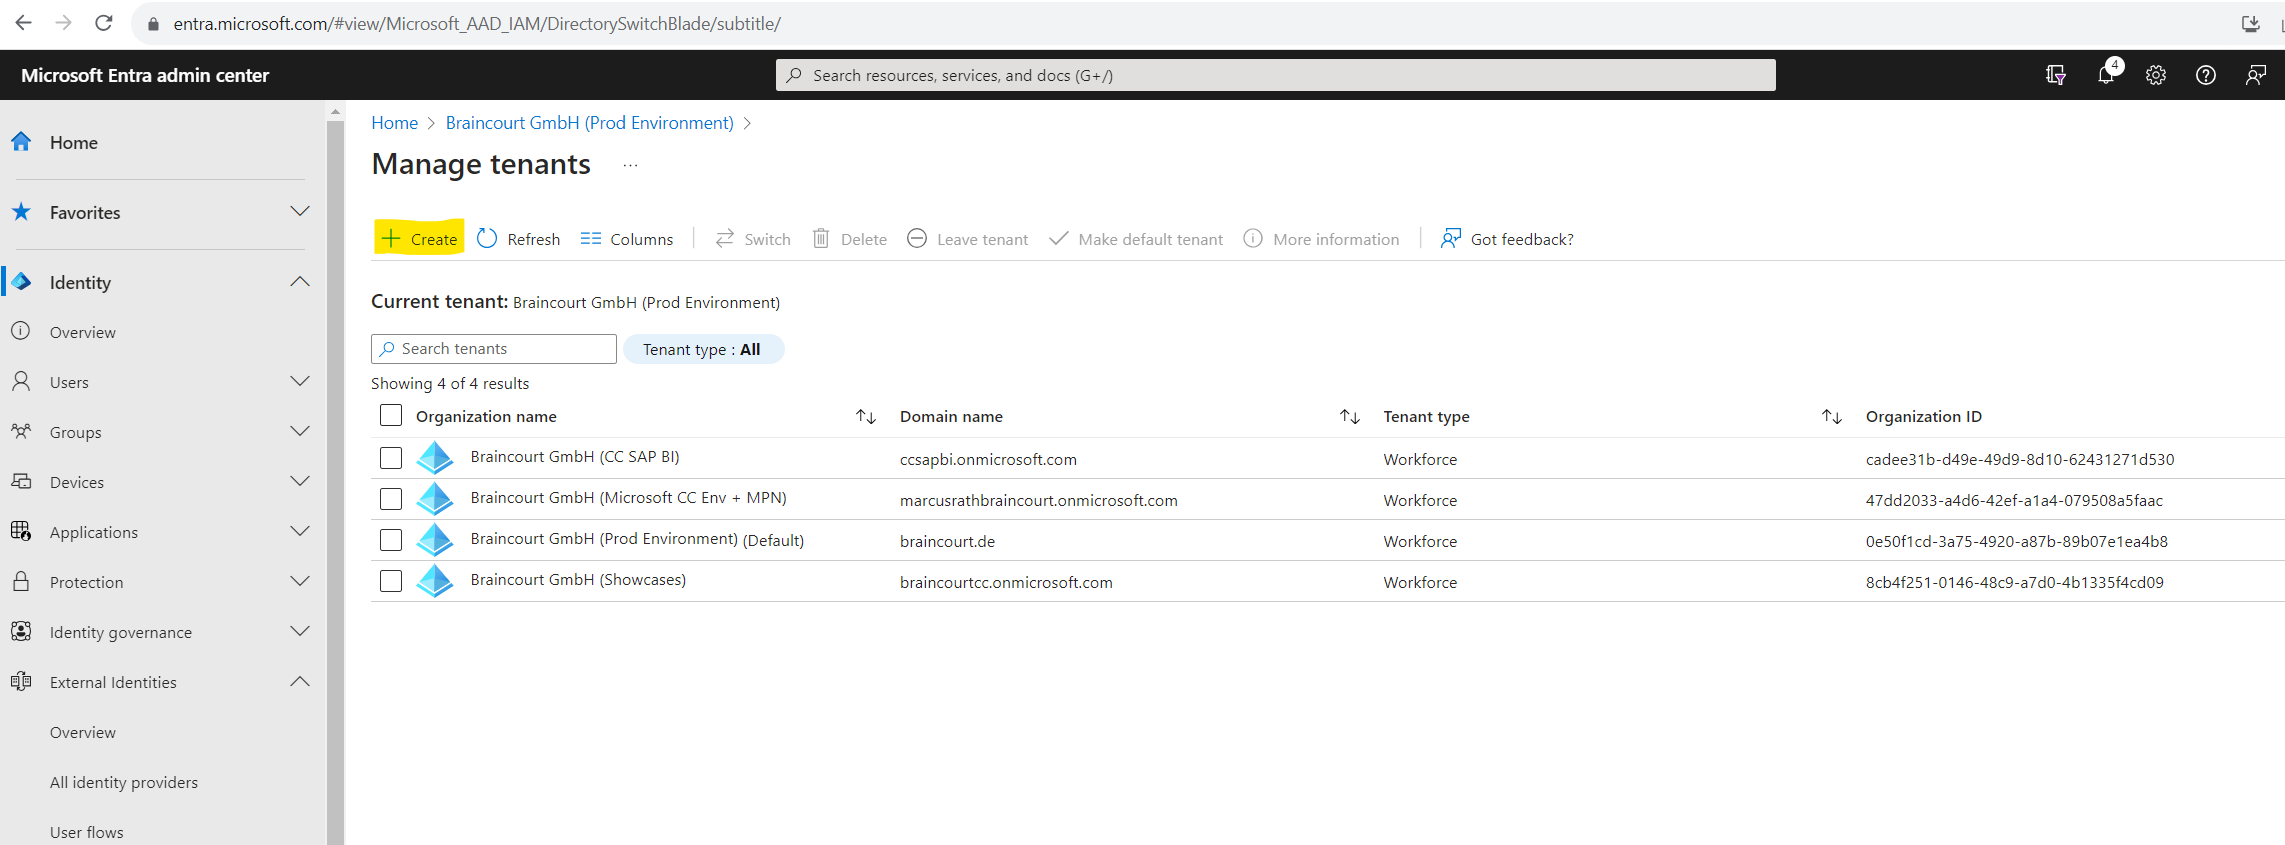
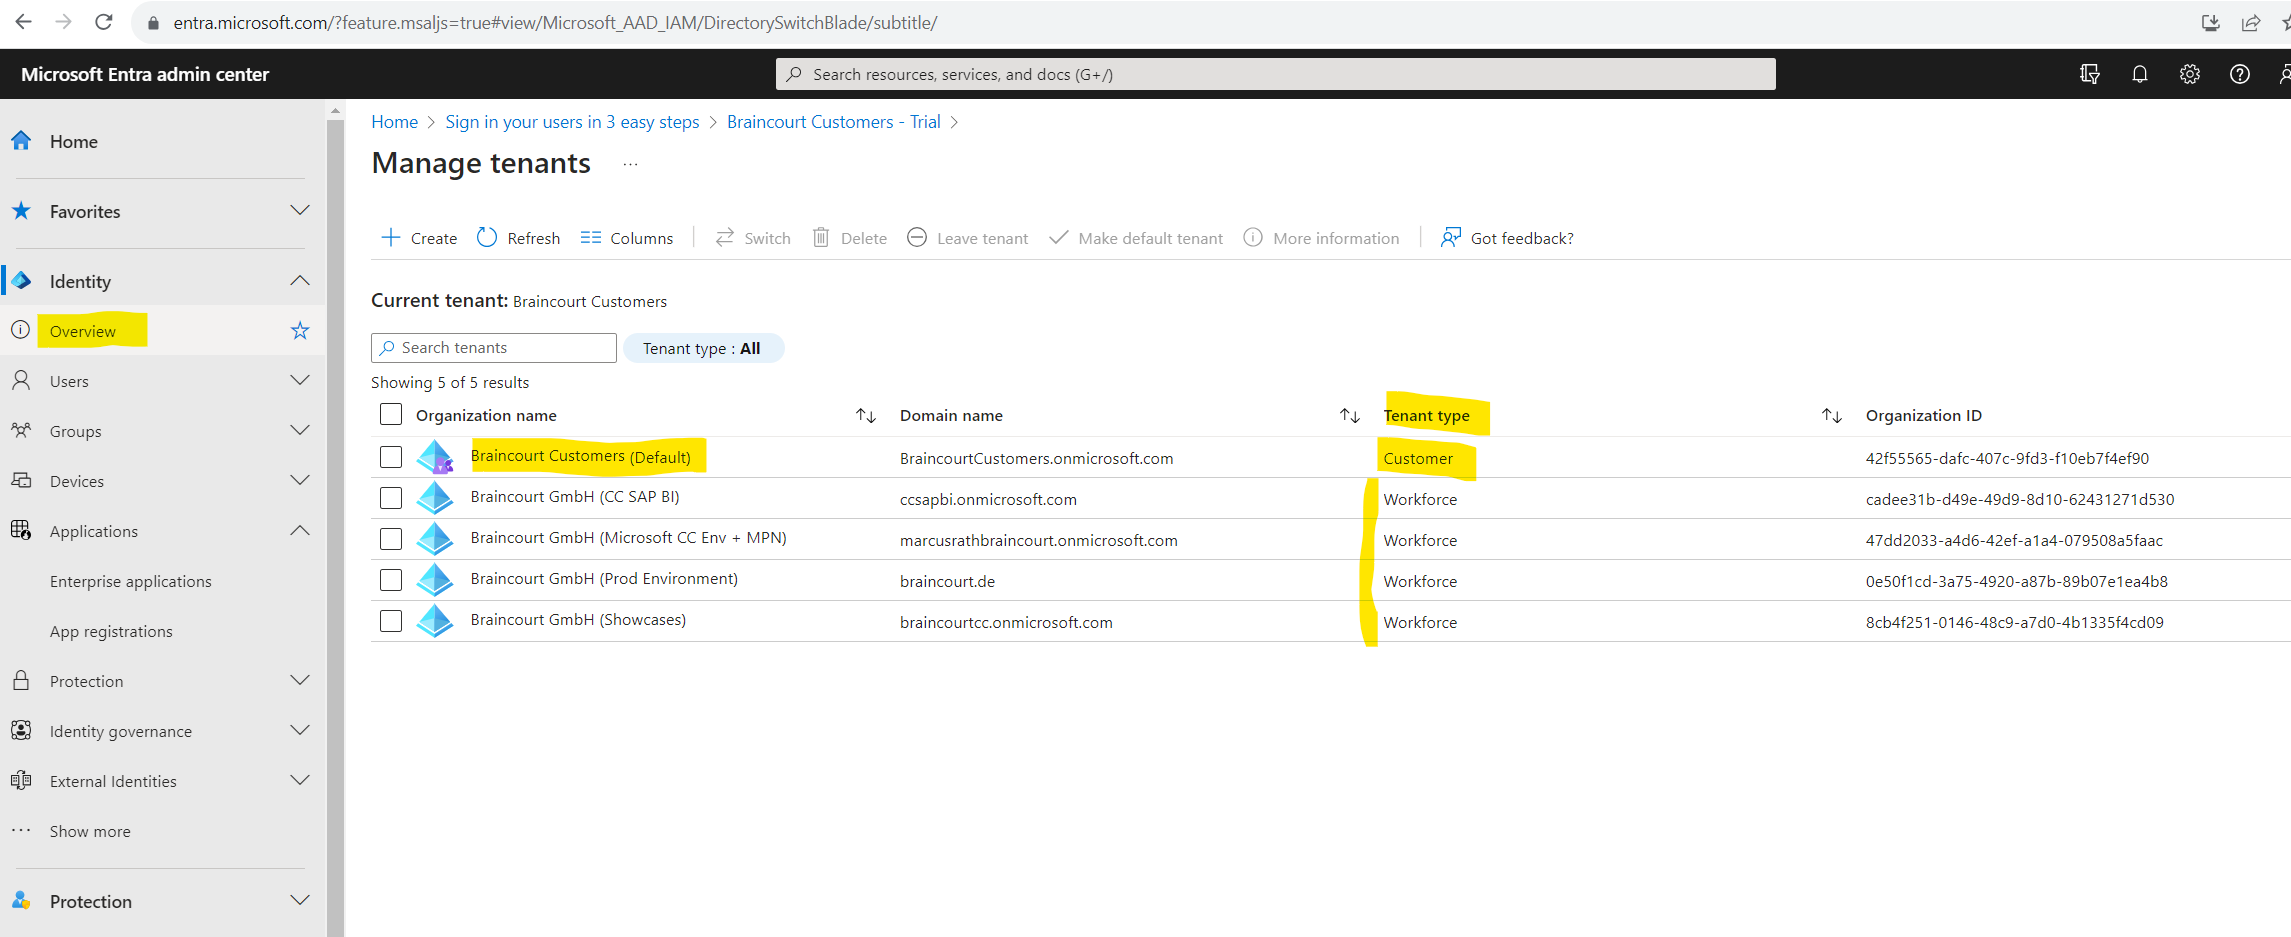
To create a new customer tenant we need to sign-in to the Microsoft Entra admin center at least as Contributor and click on Manage tenants under
Identity > Overview > Manage tenants

Select Create.
Select Customer, and then Continue.
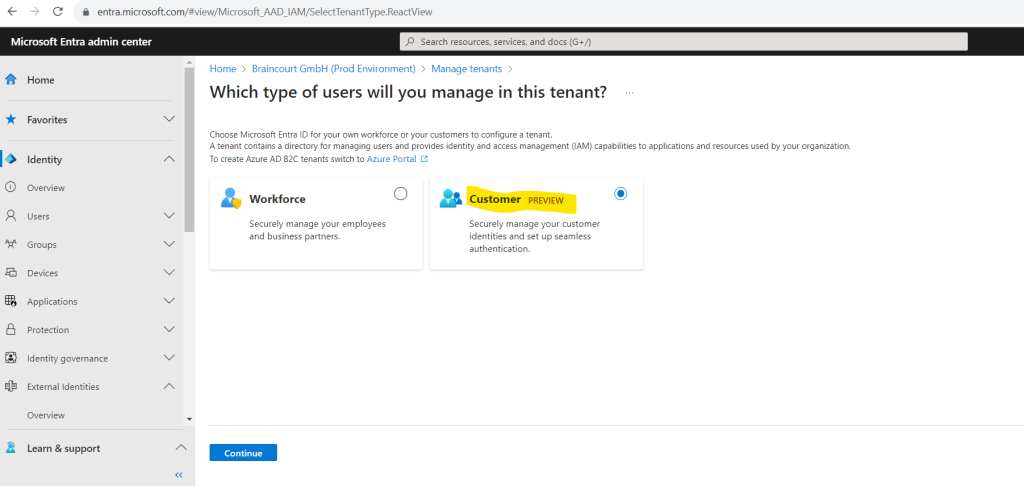
If you’re creating a customer tenant for the first time, you have the option to create a trial tenant that doesn’t require an Azure subscription. Otherwise, use the Azure Subscription option to continue to the next step.
I will use here the free trial to demonstrate Microsoft Entra ID for customers.

- Type your desired Tenant Name (for example Contoso Customers).
- Type your desired Domain Name (for example Contosocustomers).
- Select your desired Location. This selection can’t be changed later.

Finally click on the Continue button to create the tenant.
The tenant creation process can take up to 30 minutes. You can monitor the progress of the tenant creation process in the Notifications pane. Once the customer tenant is created, you can access it in both the Microsoft Entra admin center and the Azure portal.
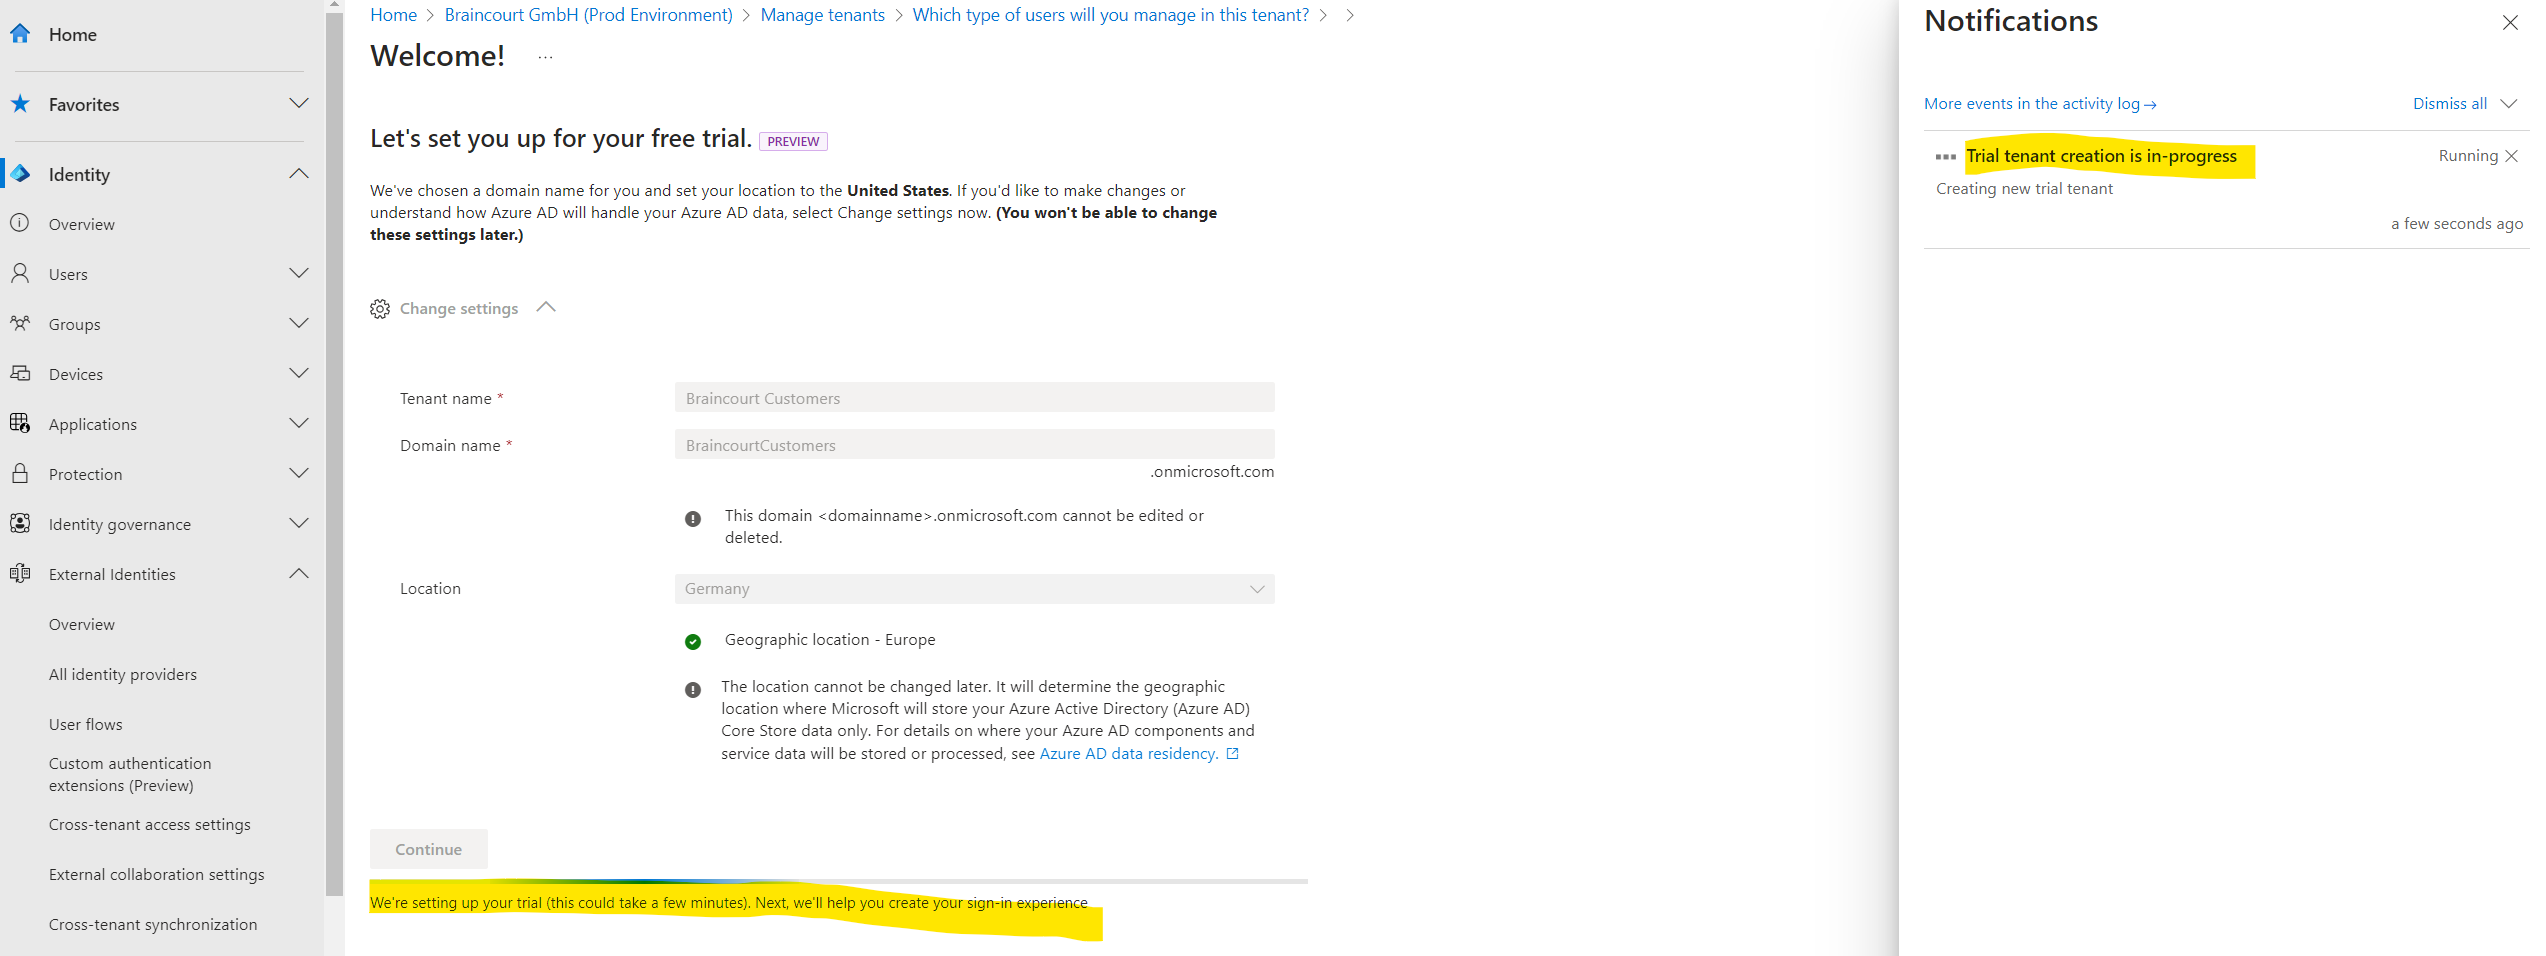
Creating the trial tenant was completed in my case just within 2 minutes.
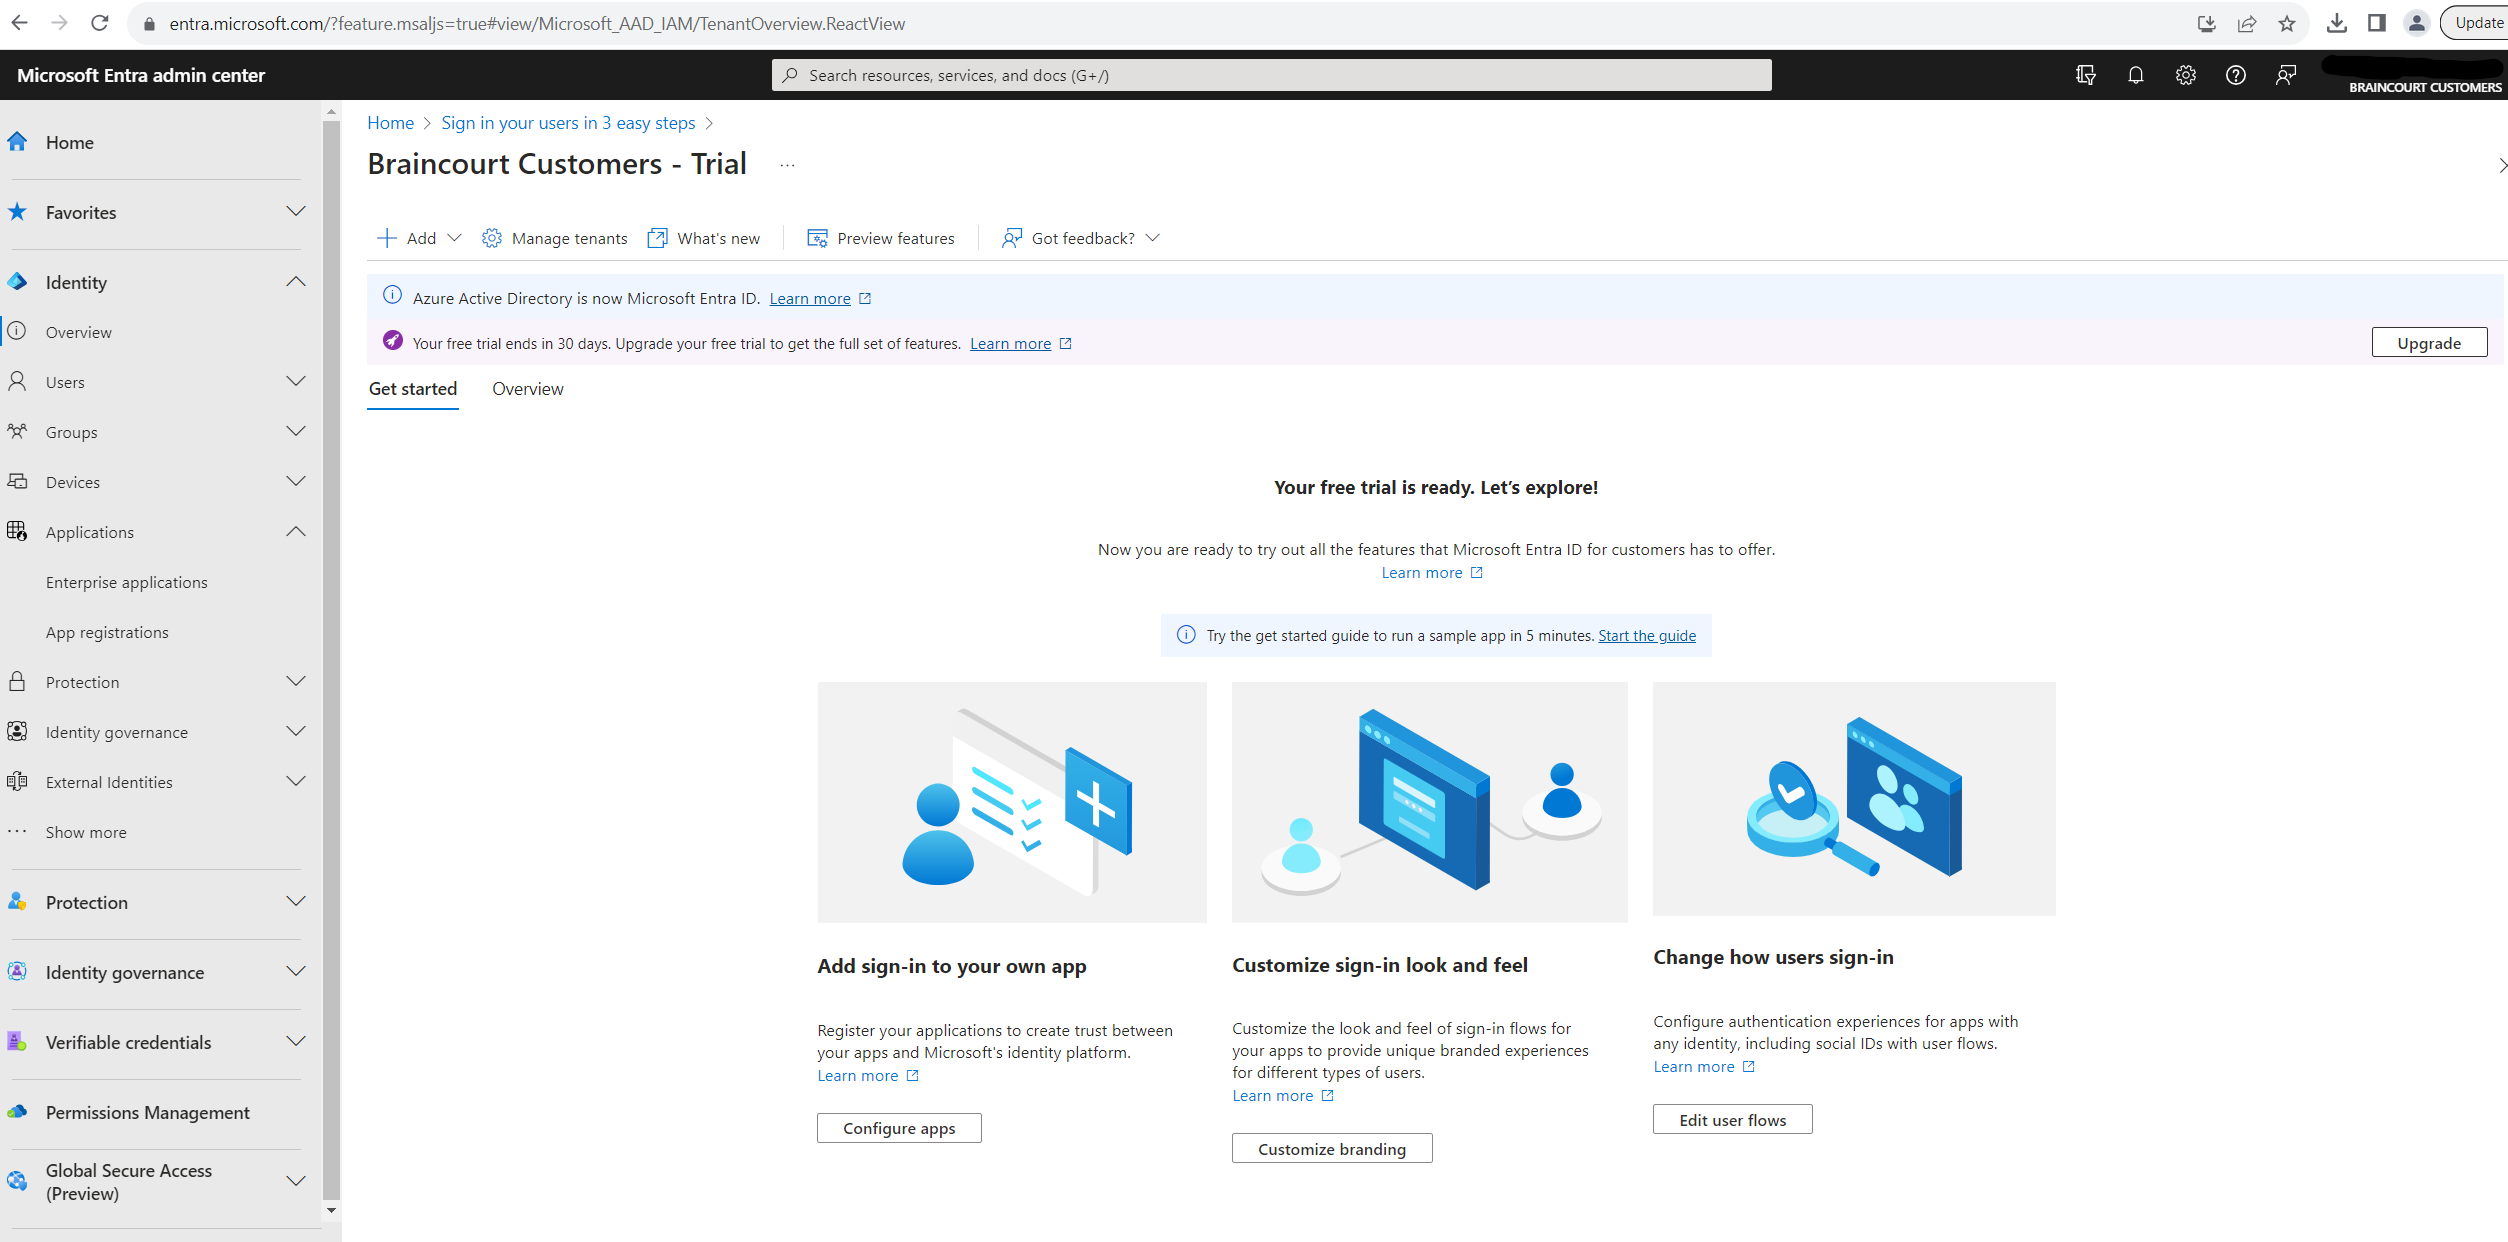
After the creation of the tenant the following page will be shown to configure the sign-in experience for the customers.

Sign-experience is setting up.

We can first try out the sign-in experience for customers by clicking on Run it now as shown below.
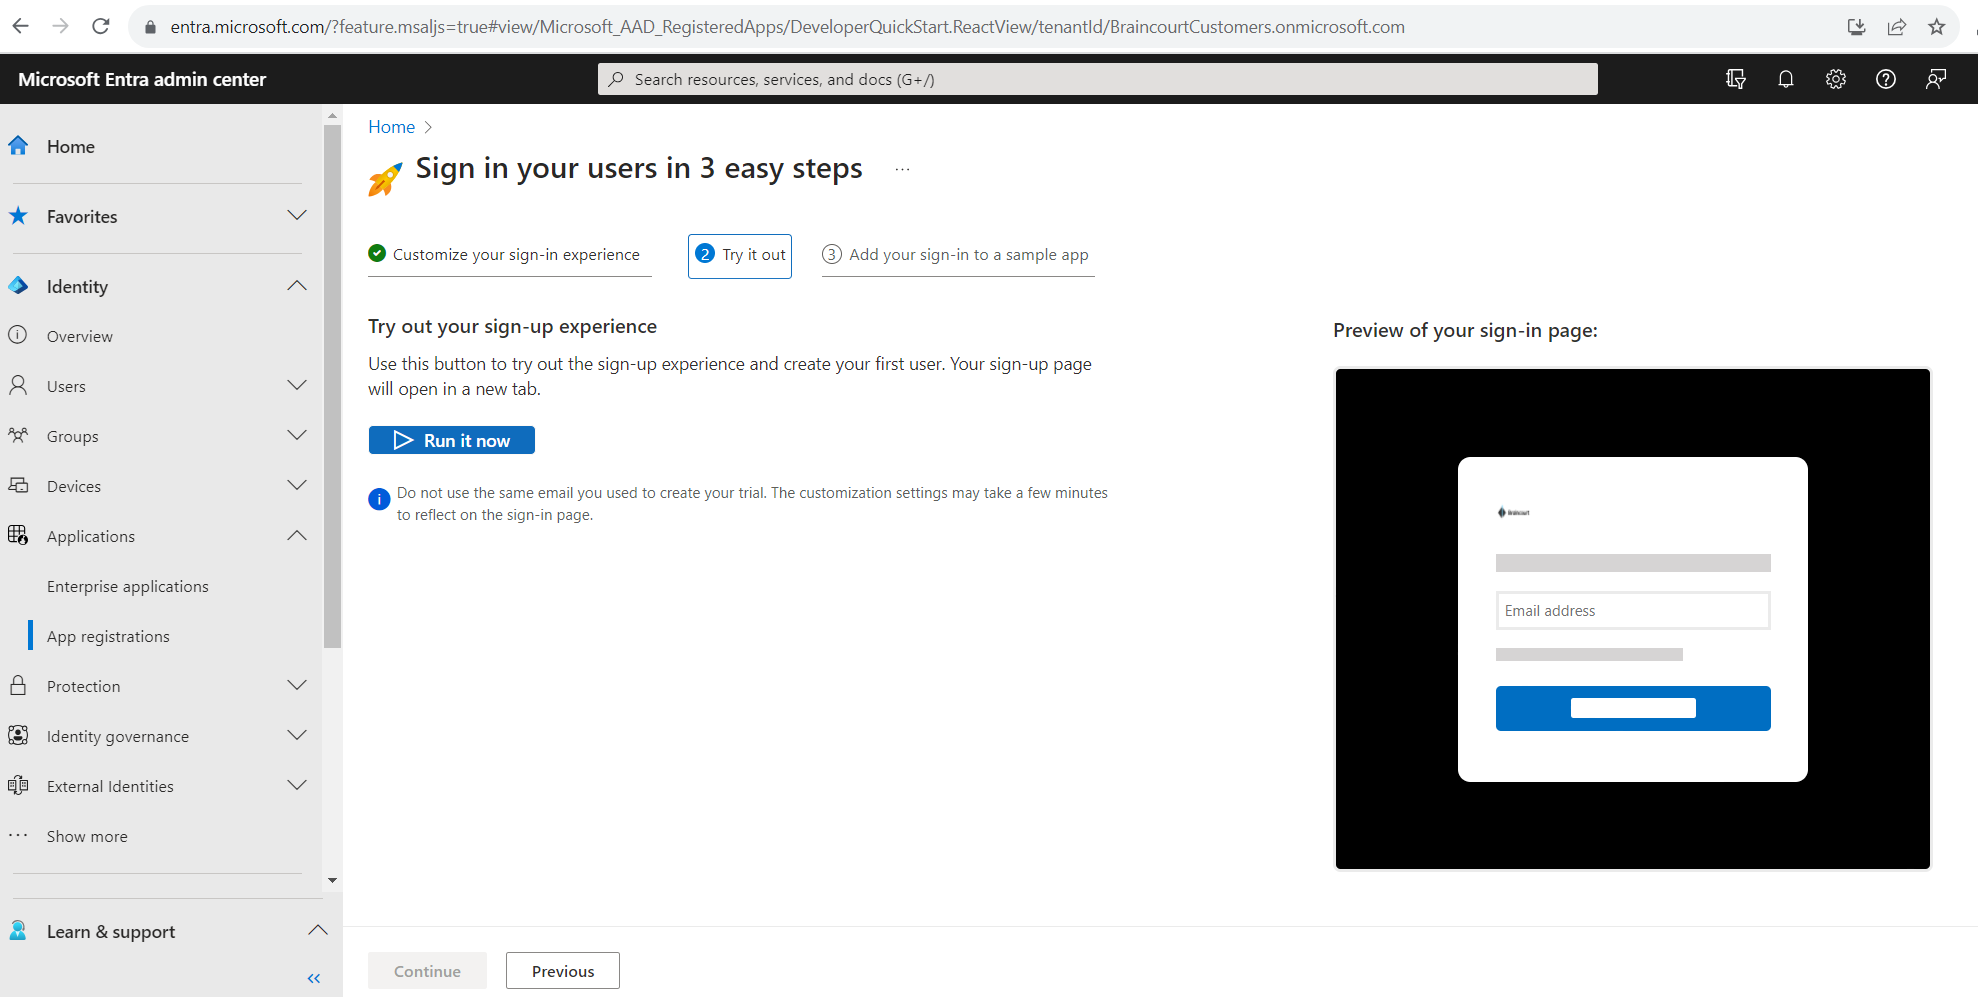
Your sign-up page will open in a new tab.

I will exit here the guide.

When we no go back to the Manage tenants page we can see that our new customer tenant is also listed here.
The next step is to register an app in this newly created customer tenant to which our customers later should have access to. We will see this in the next section below.
Register an App in the Customer Tenant
To enable your application to sign in with External ID for customers, you need to register your app with External ID for customers. The app registration establishes a trust relationship between the app and External ID for customers. During app registration, you specify the redirect URI. The redirect URI is the endpoint to which users are redirected by External ID for customers after they authenticate. The app registration process generates an application ID, also known as the client ID, that uniquely identifies your app.
External ID for customers supports authentication for various modern application architectures, for example web app or single-page app. The interaction of each application type with the customer tenant is different, therefore, you must specify the type of application you want to register.
To demonstrate Microsoft Entra External ID I will use and register a web app below.
Sign in to the Microsoft Entra admin center as at least an Application Developer.
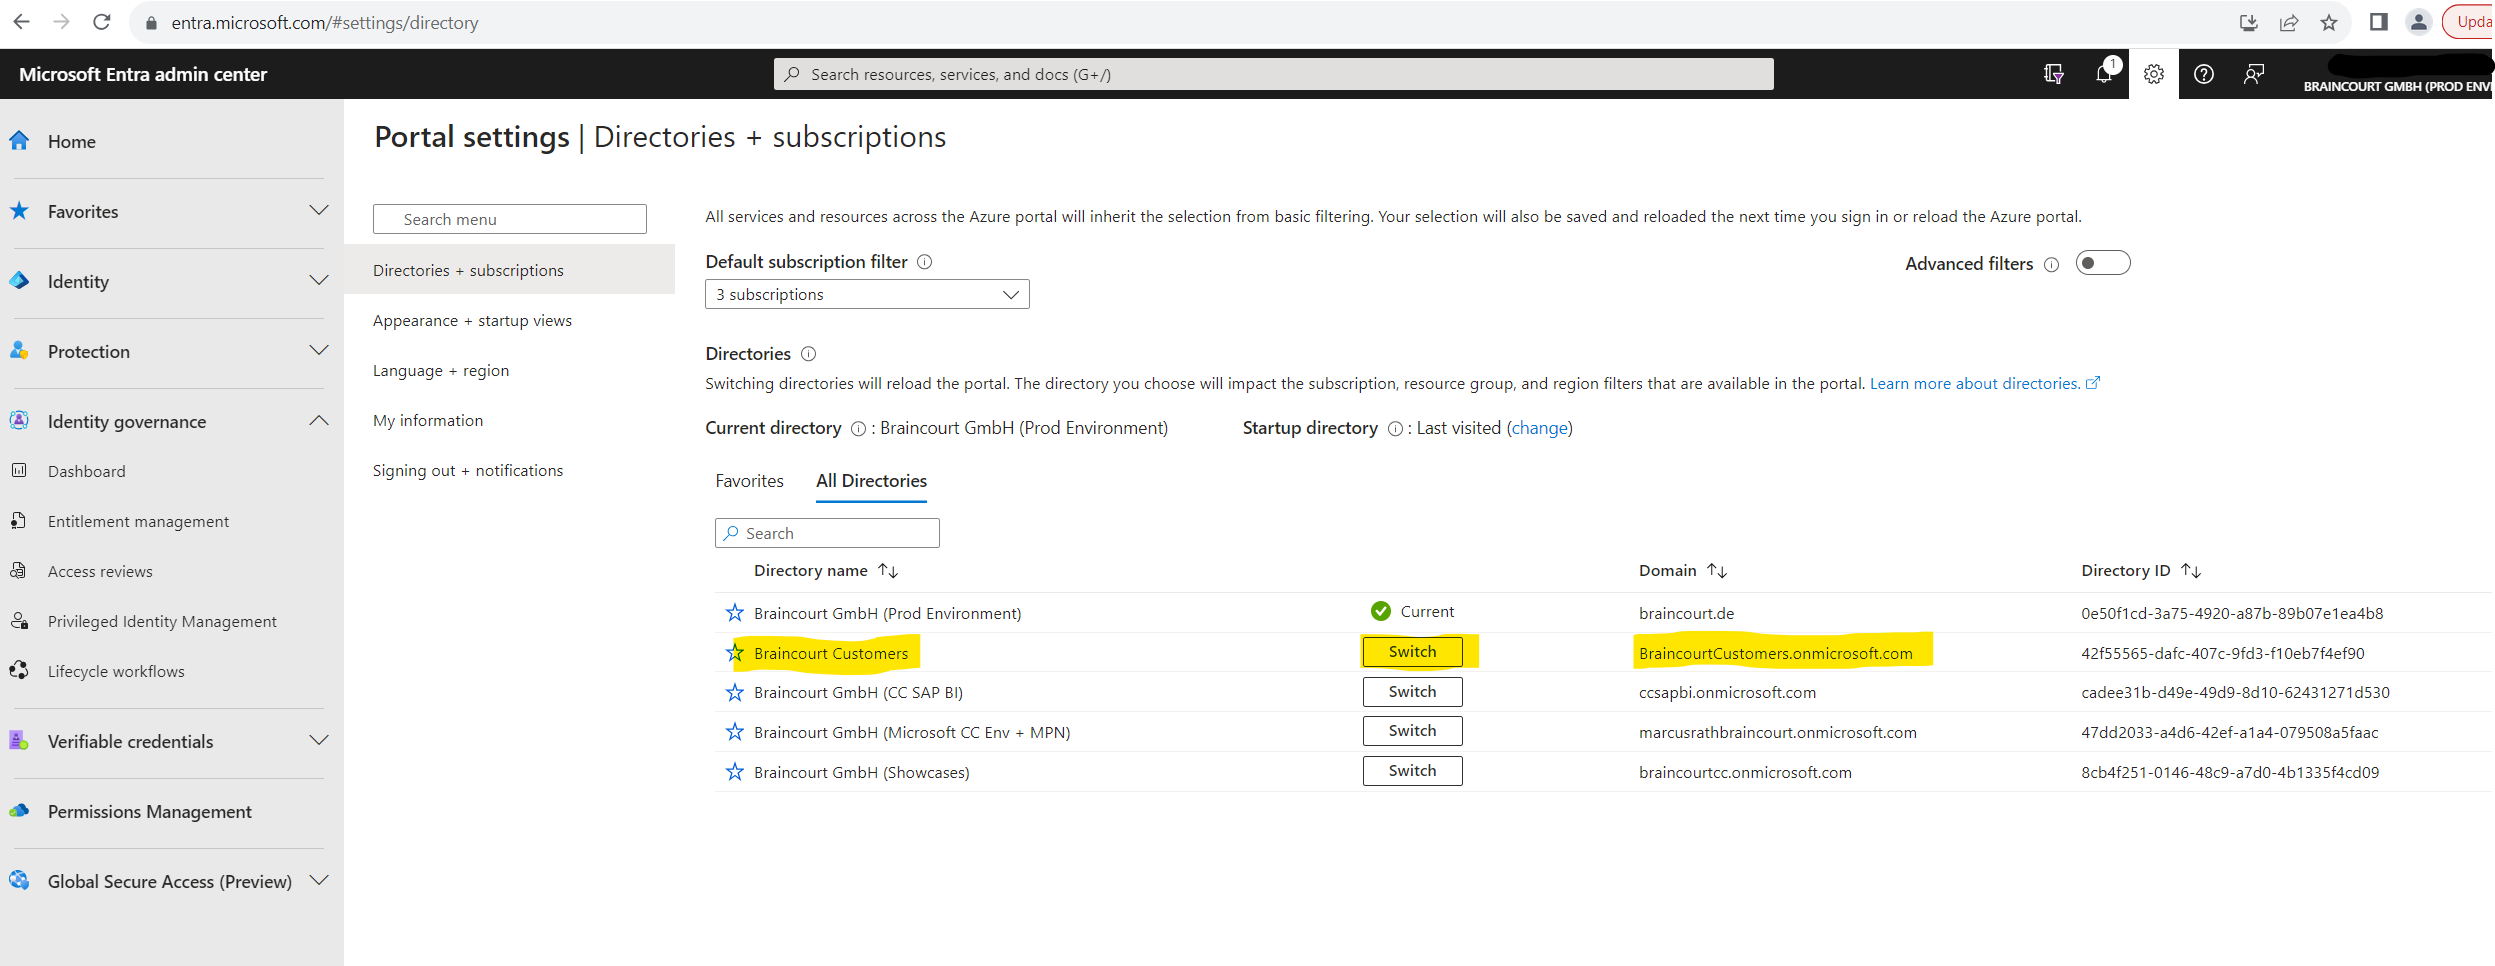
If you have access to multiple tenants, use the Switch directory link in the top menu to switch to your customer tenant.
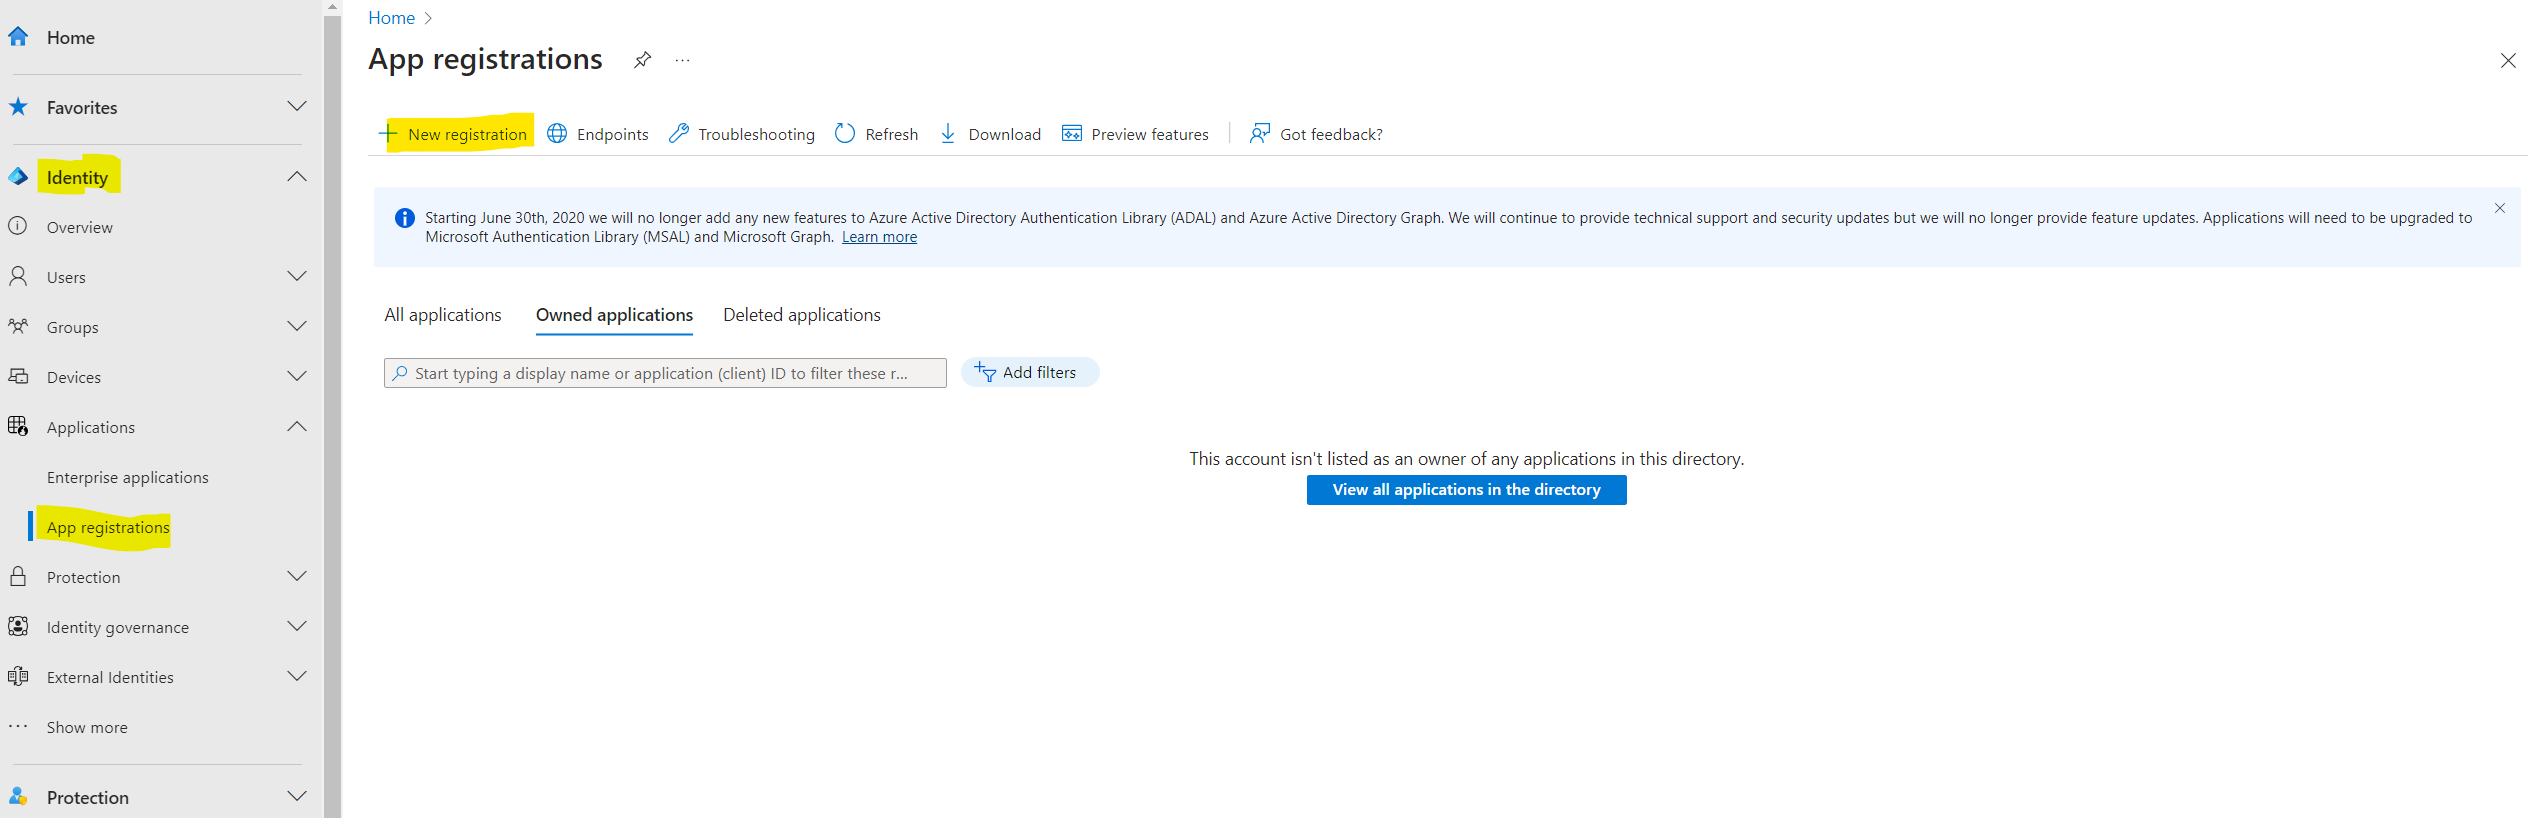
Browse to Identity > Applications > App registrations.

Select + New registration.
In the Register an application page that appears, enter your application’s registration information:
Under Supported account types, select Accounts in this organizational directory only.
Finally click on Register.

The redirect URI is the endpoint where the user is sent to by the authorization server (in this case, Microsoft Entra ID) after completing its interaction with the user, and to which an access token or authorization code is sent to upon successful authorization.
The External ID for customers authentication is just like most Azure and Microsoft 365 authentications based on OAuth and OpenID Connect. This is also called modern authentication which is a combination of authentication and authorization. Some examples of modern authentication protocols are SAML, WS-Federation, and OAuth.
More about so called modern authentication you will find in my following posts.
But now let’s get back to our app registration after this little excursion about modern authentication.
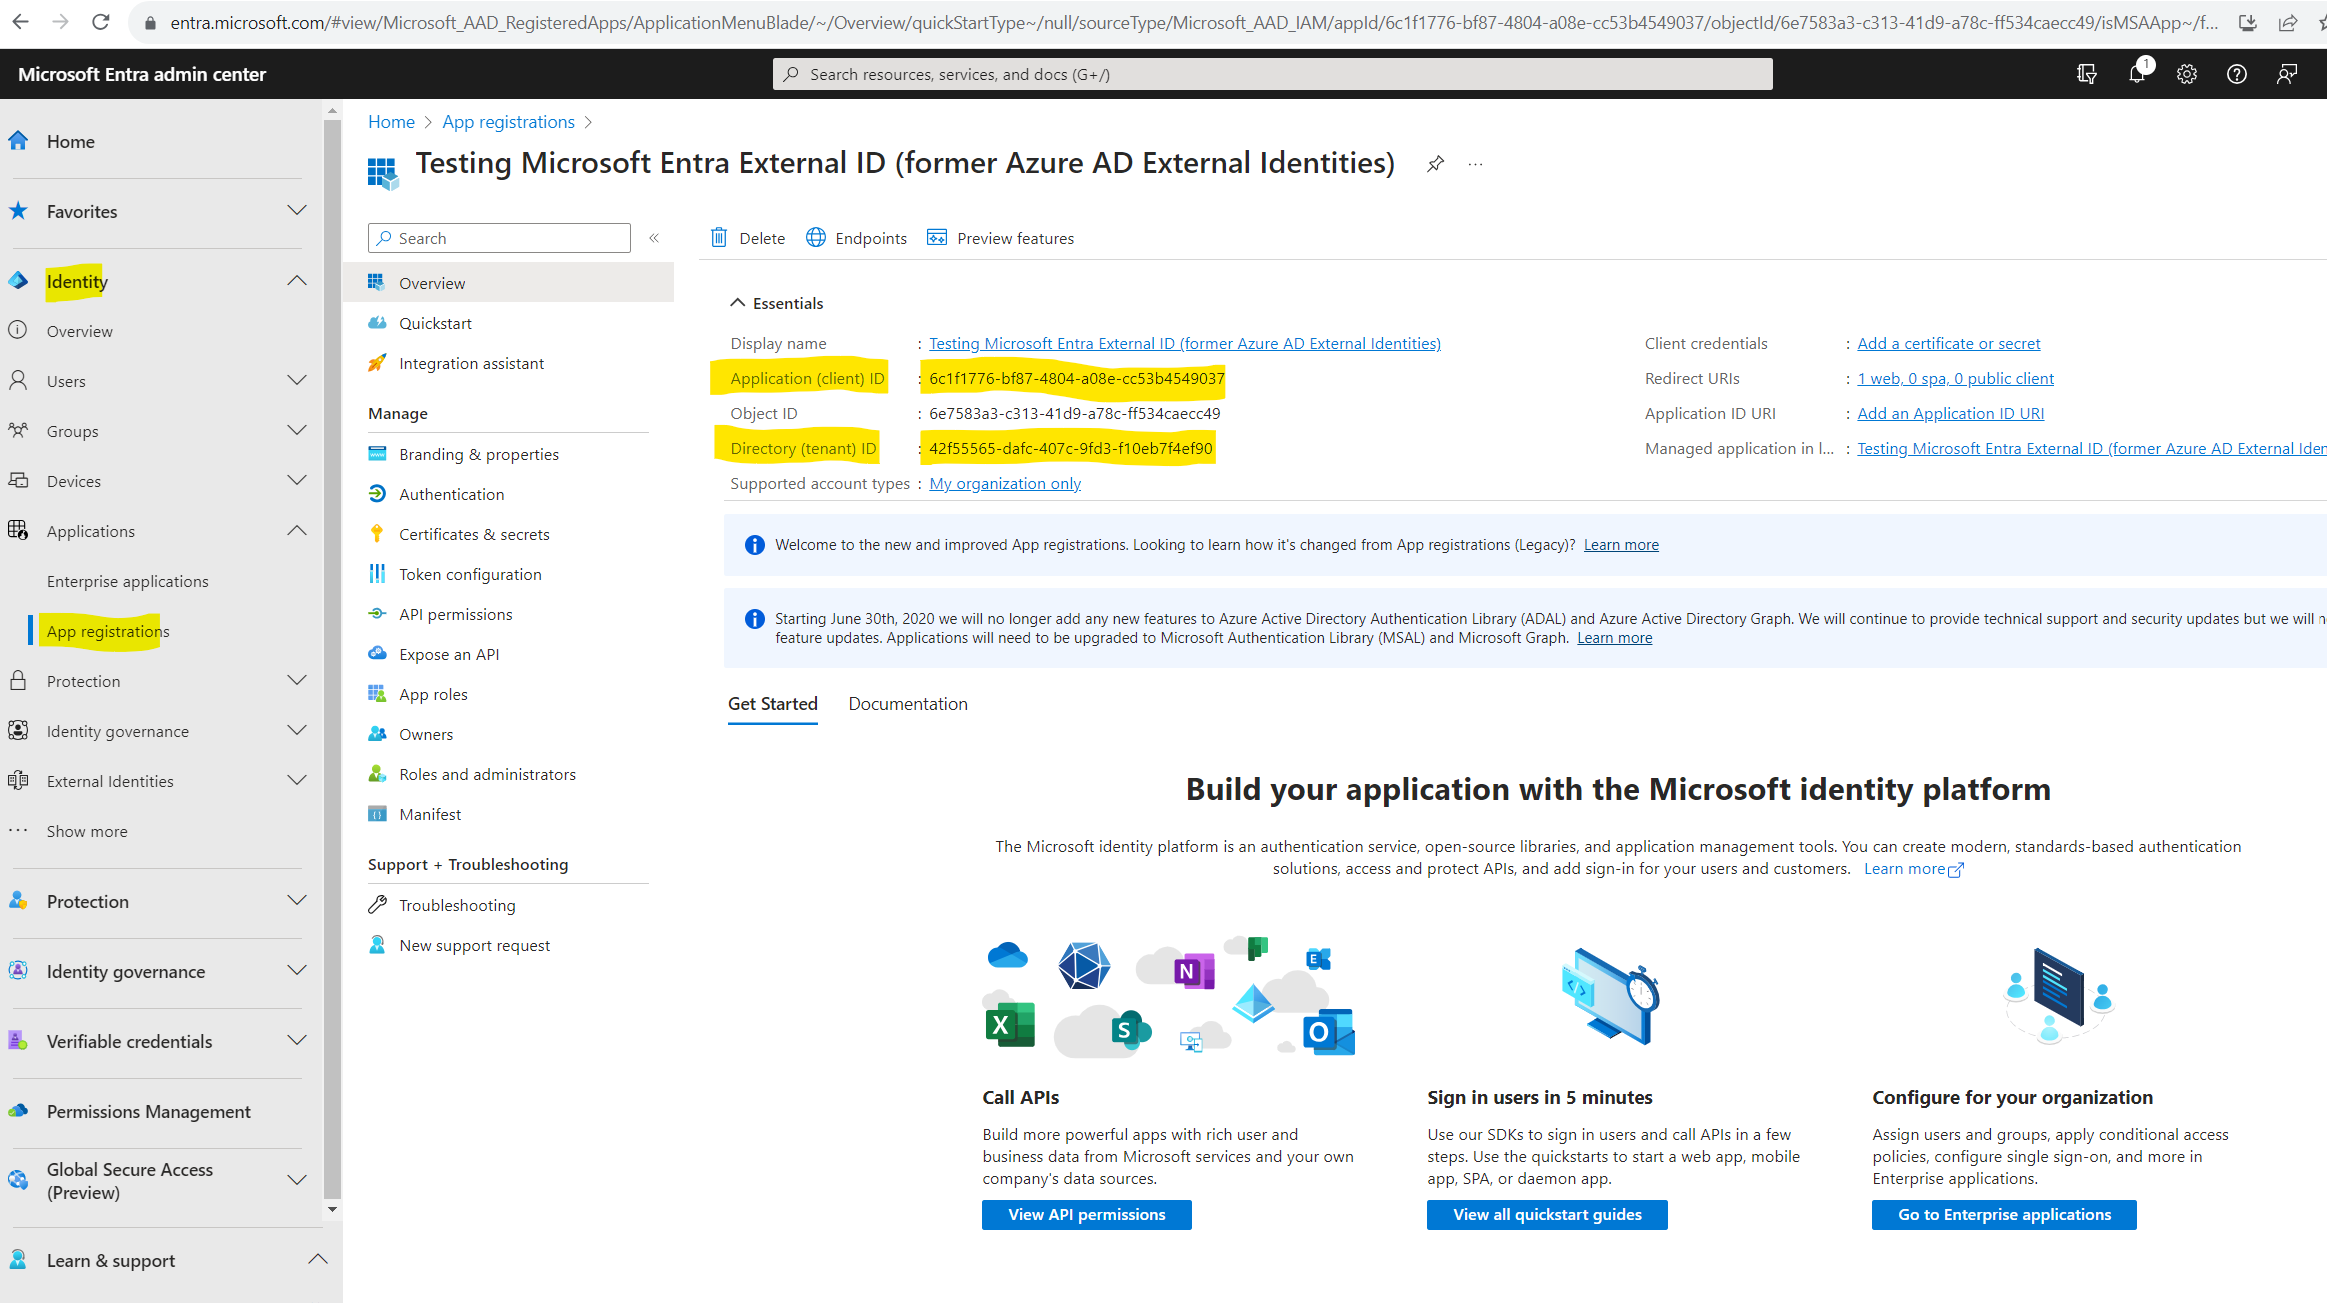
The application’s Overview pane is displayed when registration is complete. Record the Directory (tenant) ID and the Application (client) ID to be used in your application source code.
In a production application, it’s typically a publicly accessible endpoint where your app is running, like https://contoso.com/auth-response.
About creating a web app and register it to Microsoft Entra ID (formerly Azure AD), you can also read my following post.
During app development, you might add the endpoint where your application listens locally, like http://localhost:3000. You can add and modify redirect URIs in your registered applications at any time.
The following restrictions apply to redirect URIs:
- The reply URL must begin with the scheme https, unless you use a localhost redirect URL.
- The reply URL is case-sensitive. Its case must match the case of the URL path of your running application. For example, if your application includes as part of its path …/abc/response-oidc, do not specify …/ABC/response-oidc in the reply URL. Because the web browser treats paths as case-sensitive, cookies associated with …/abc/response-oidc may be excluded if redirected to the case-mismatched …/ABC/response-oidc URL.
- The reply URL should include or exclude the trailing forward slash as your application expects it. For example, https://contoso.com/auth-response and https://contoso.com/auth-response/ might be treated as non-matching URLs in your application.
This app signs in users. You can add delegated permissions to it, by following the steps below:
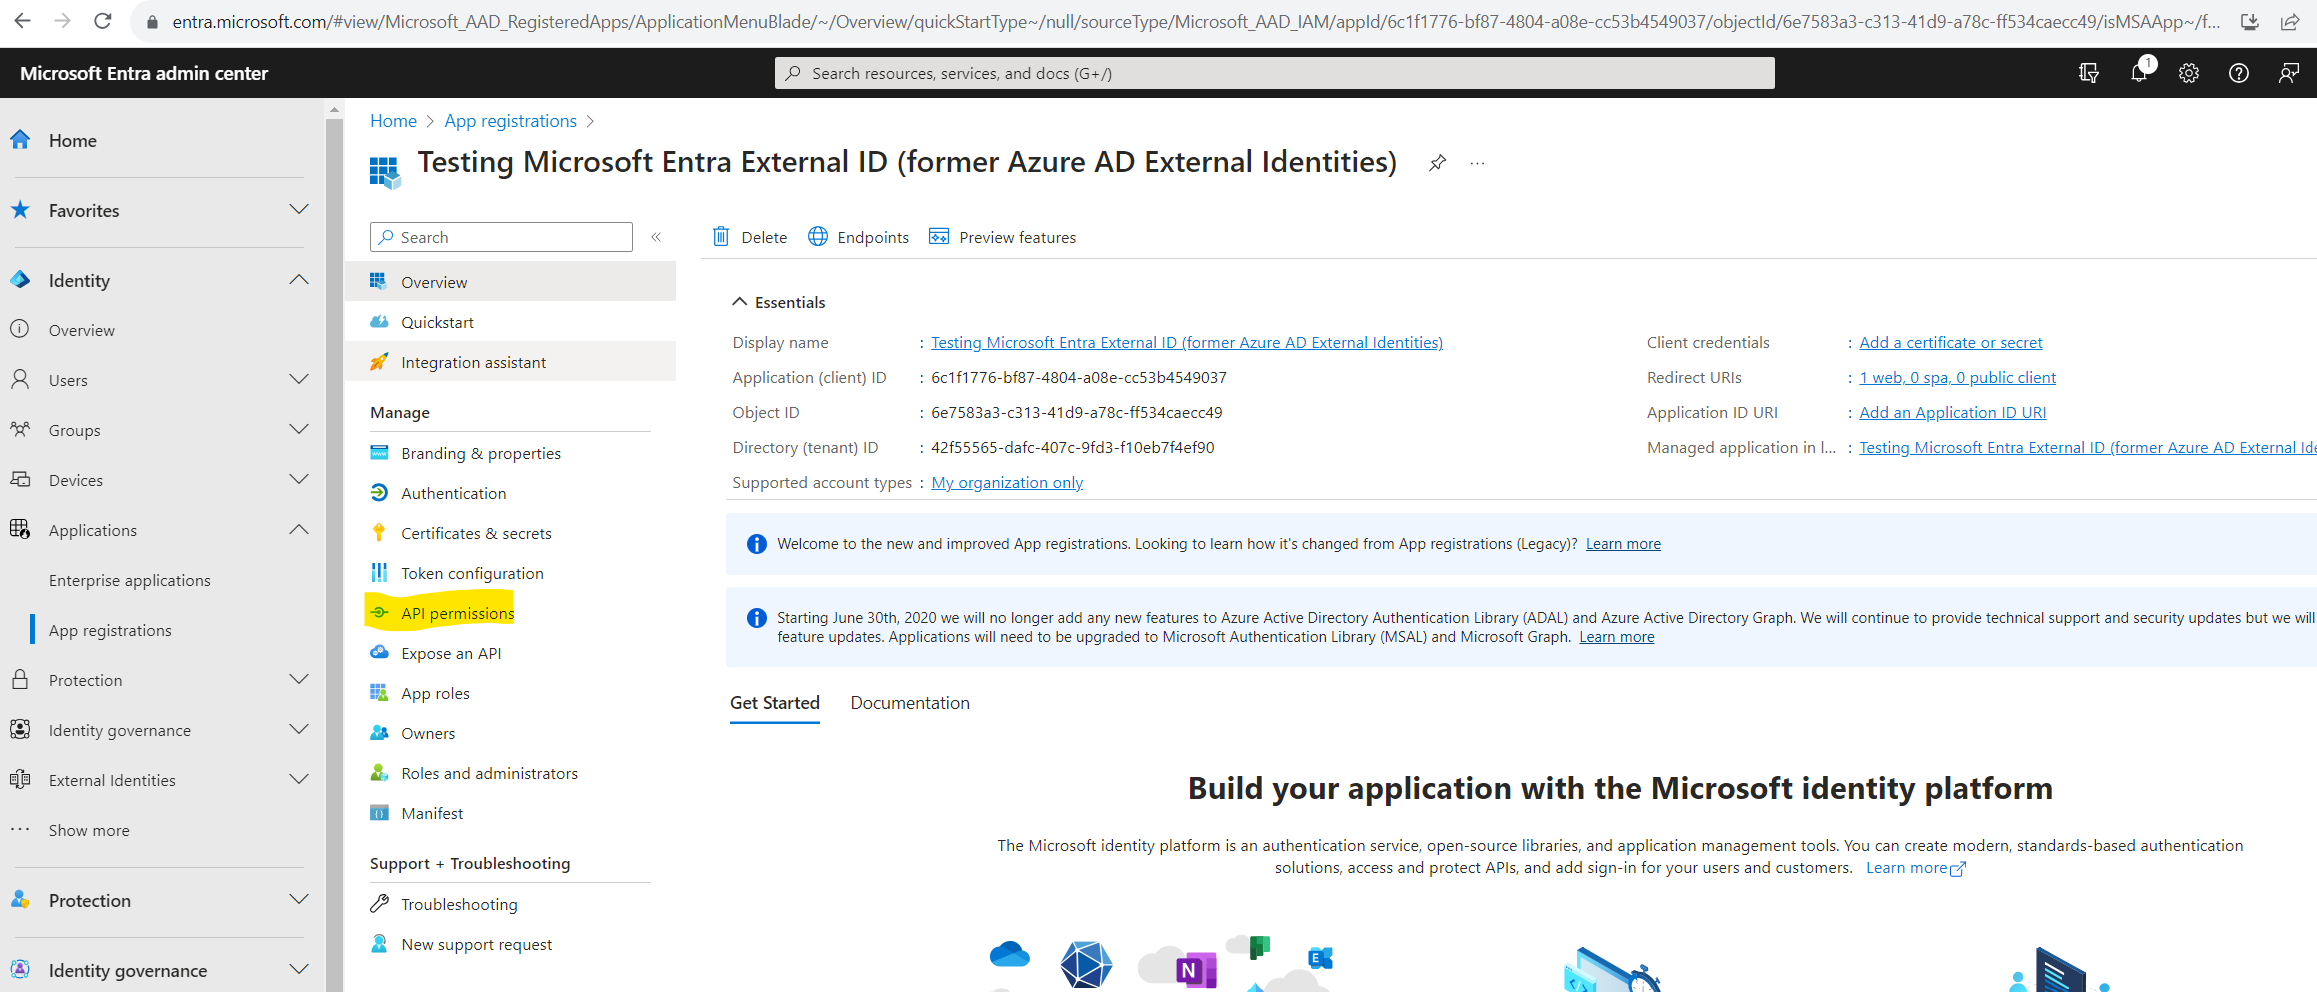
From the App registrations page, select the application that you created to open its Overview page.
Under Manage, select API permissions.
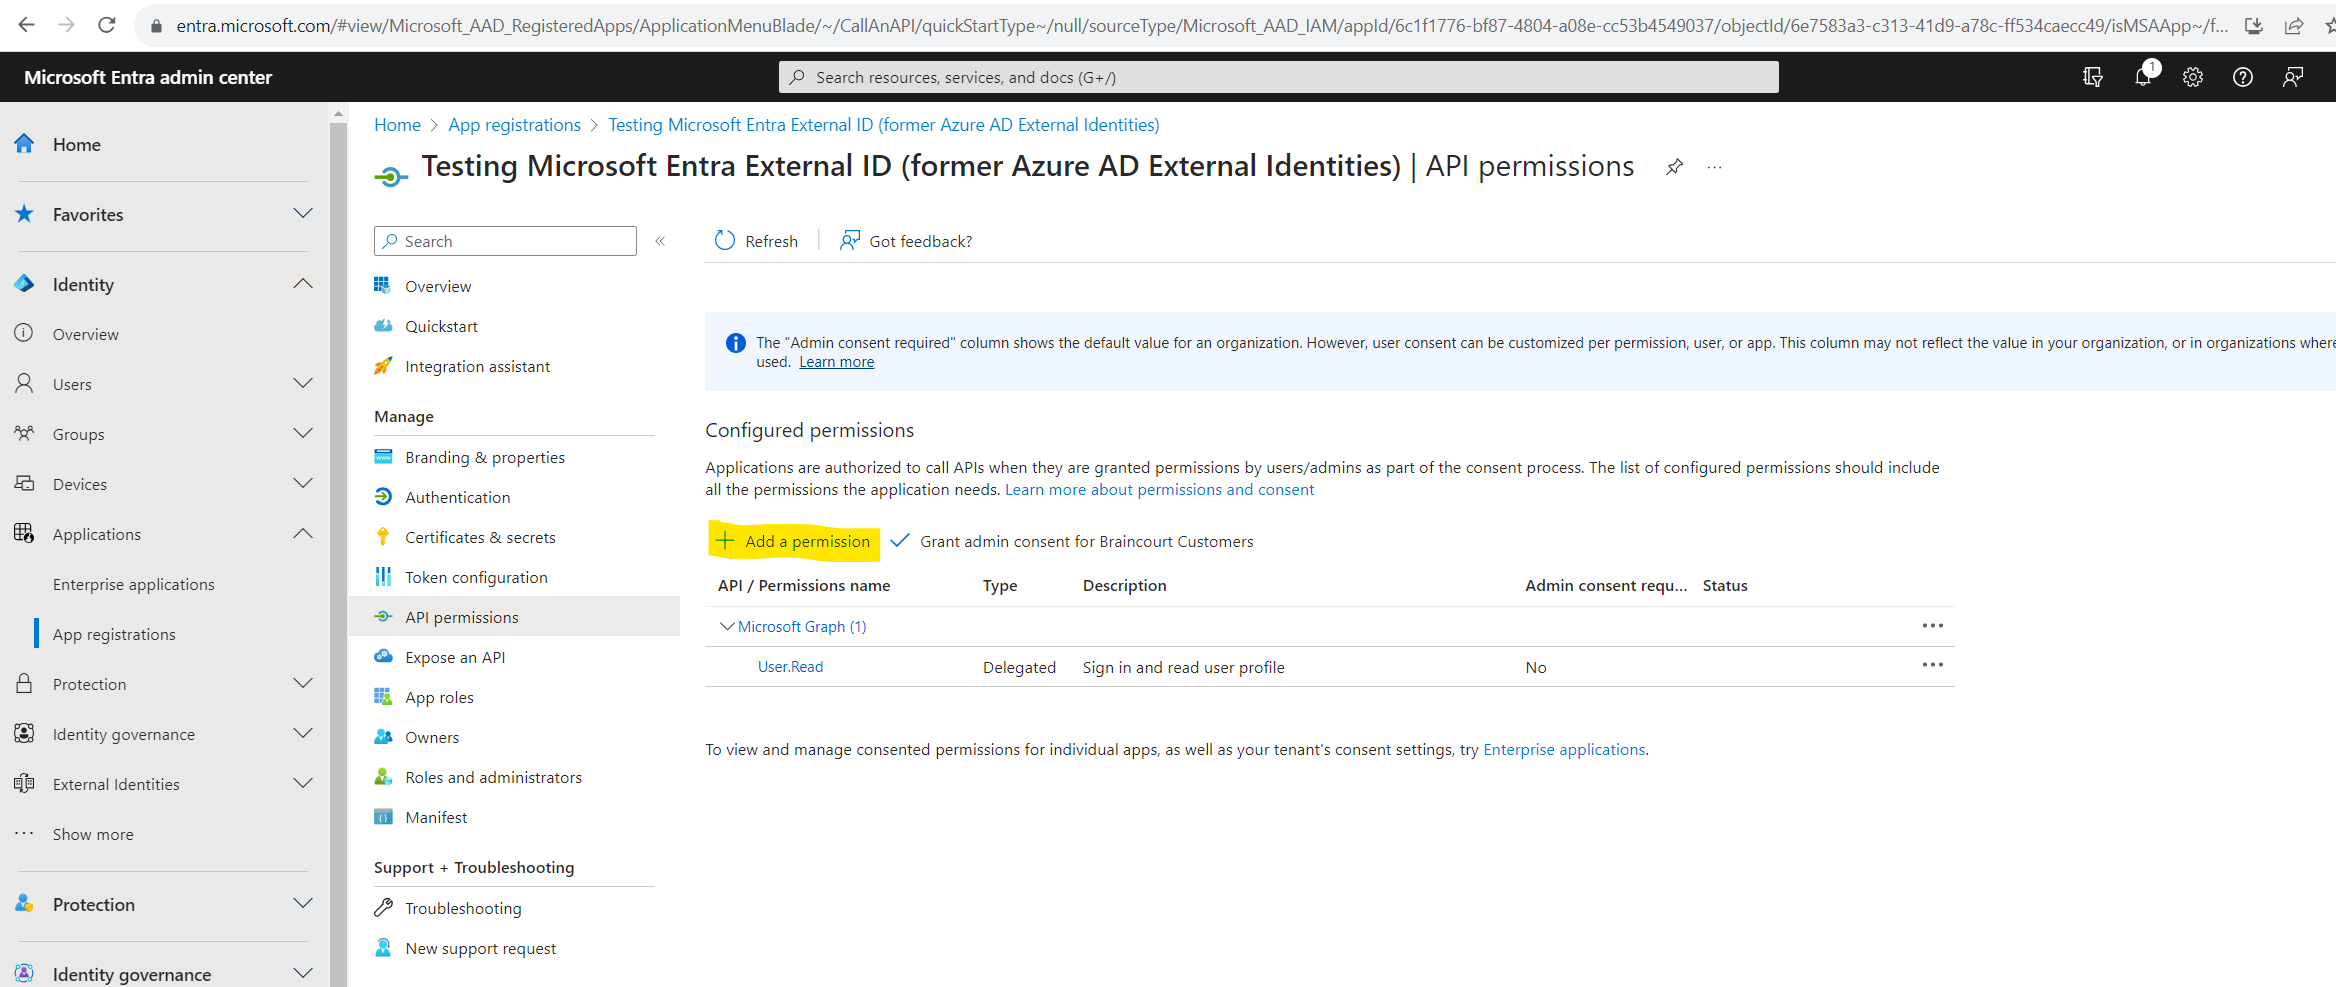
Under Configured permissions, select Add a permission.
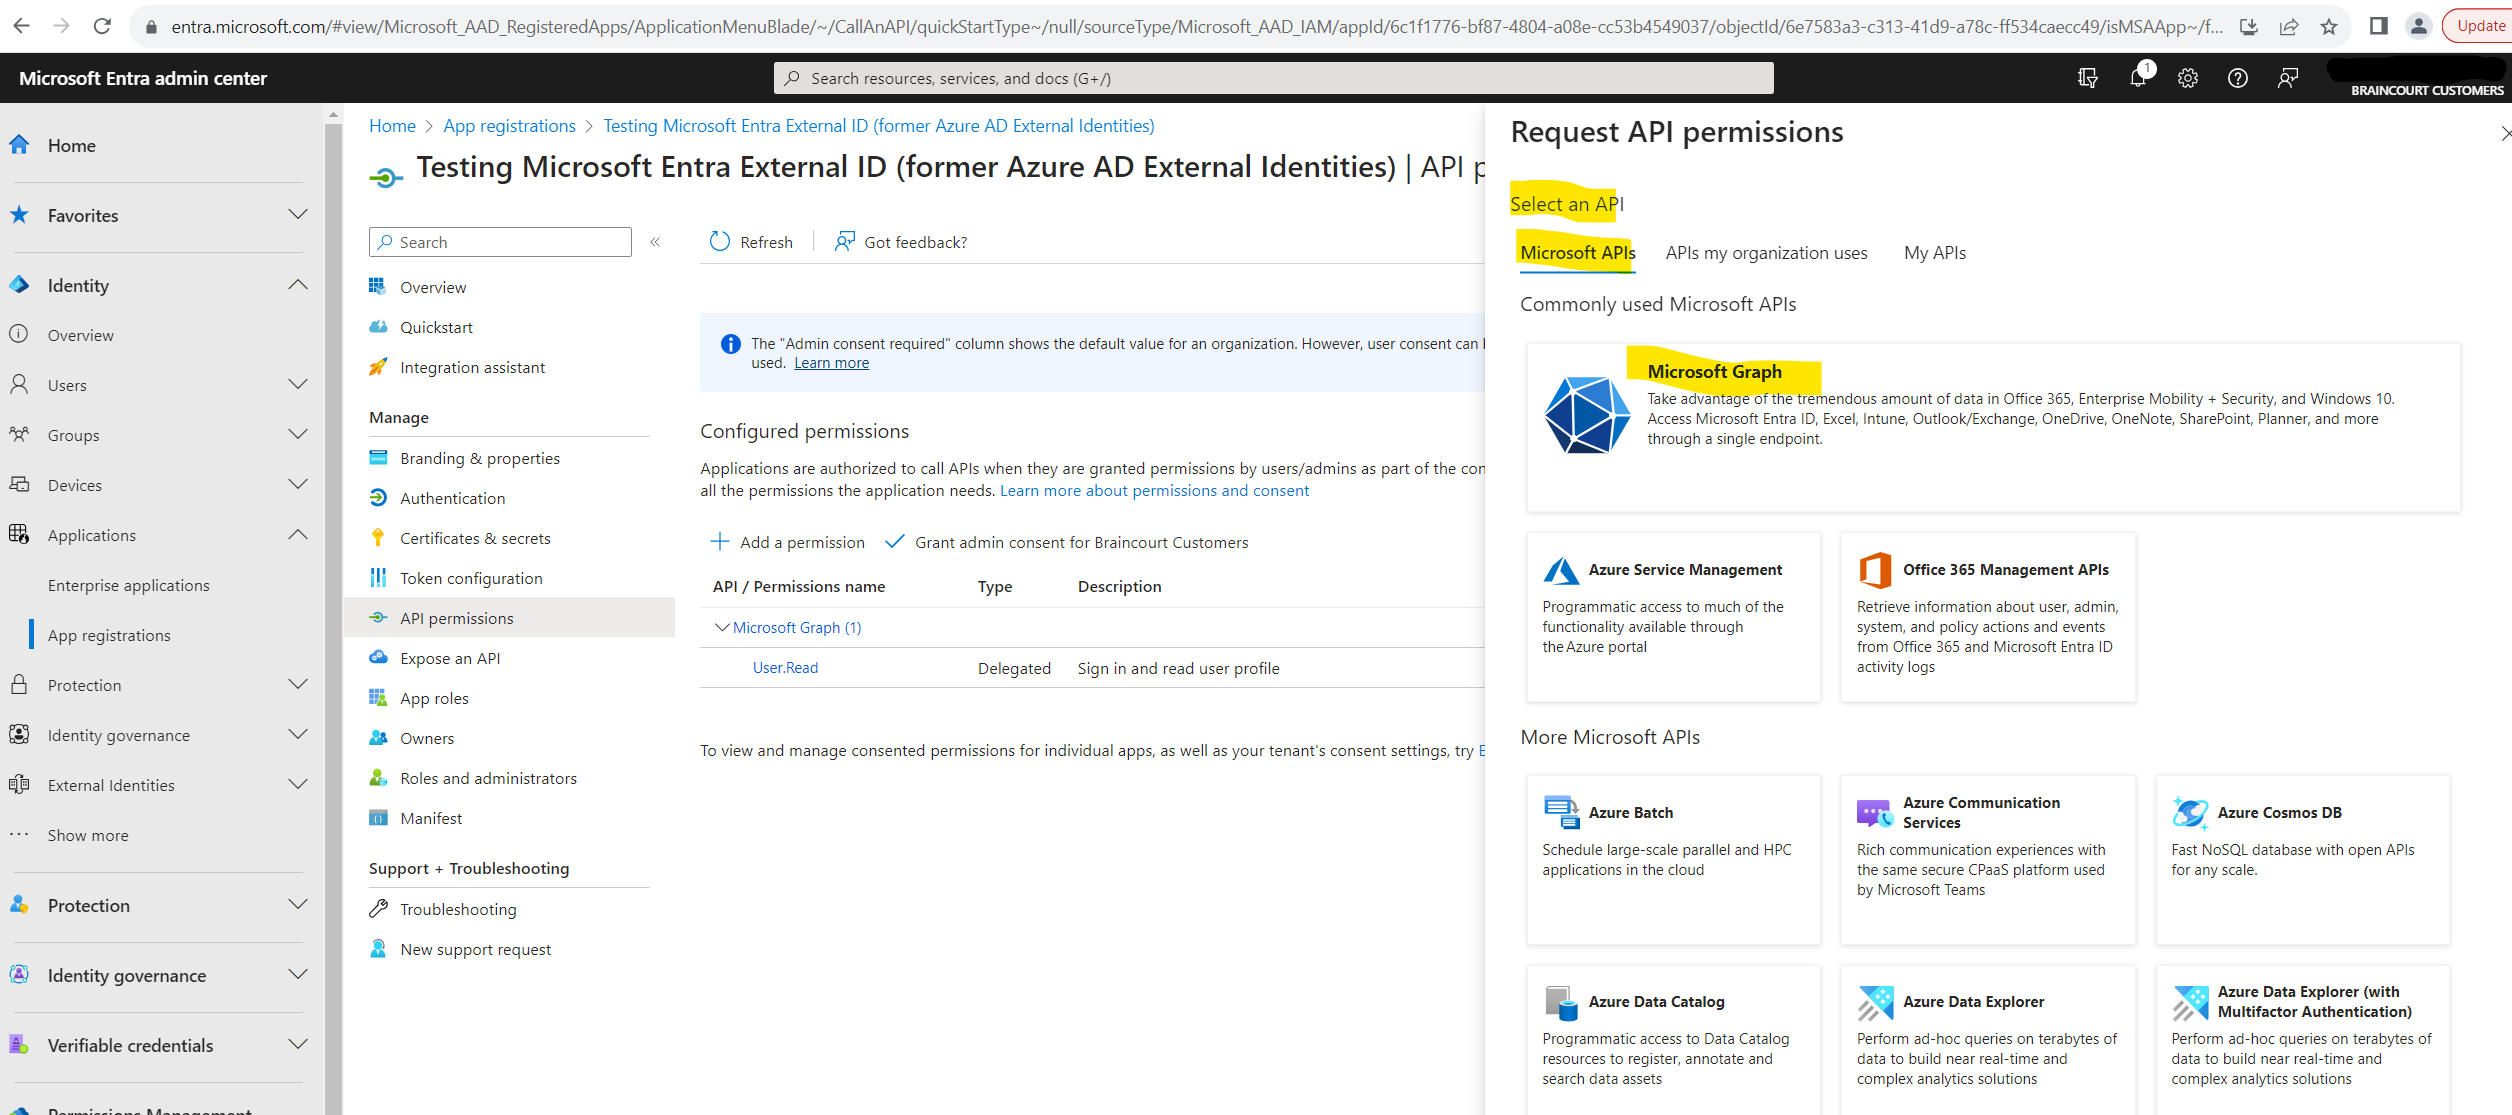
Select Microsoft APIs tab. Under Commonly used Microsoft APIs section, select Microsoft Graph.
Select Delegated permissions option.
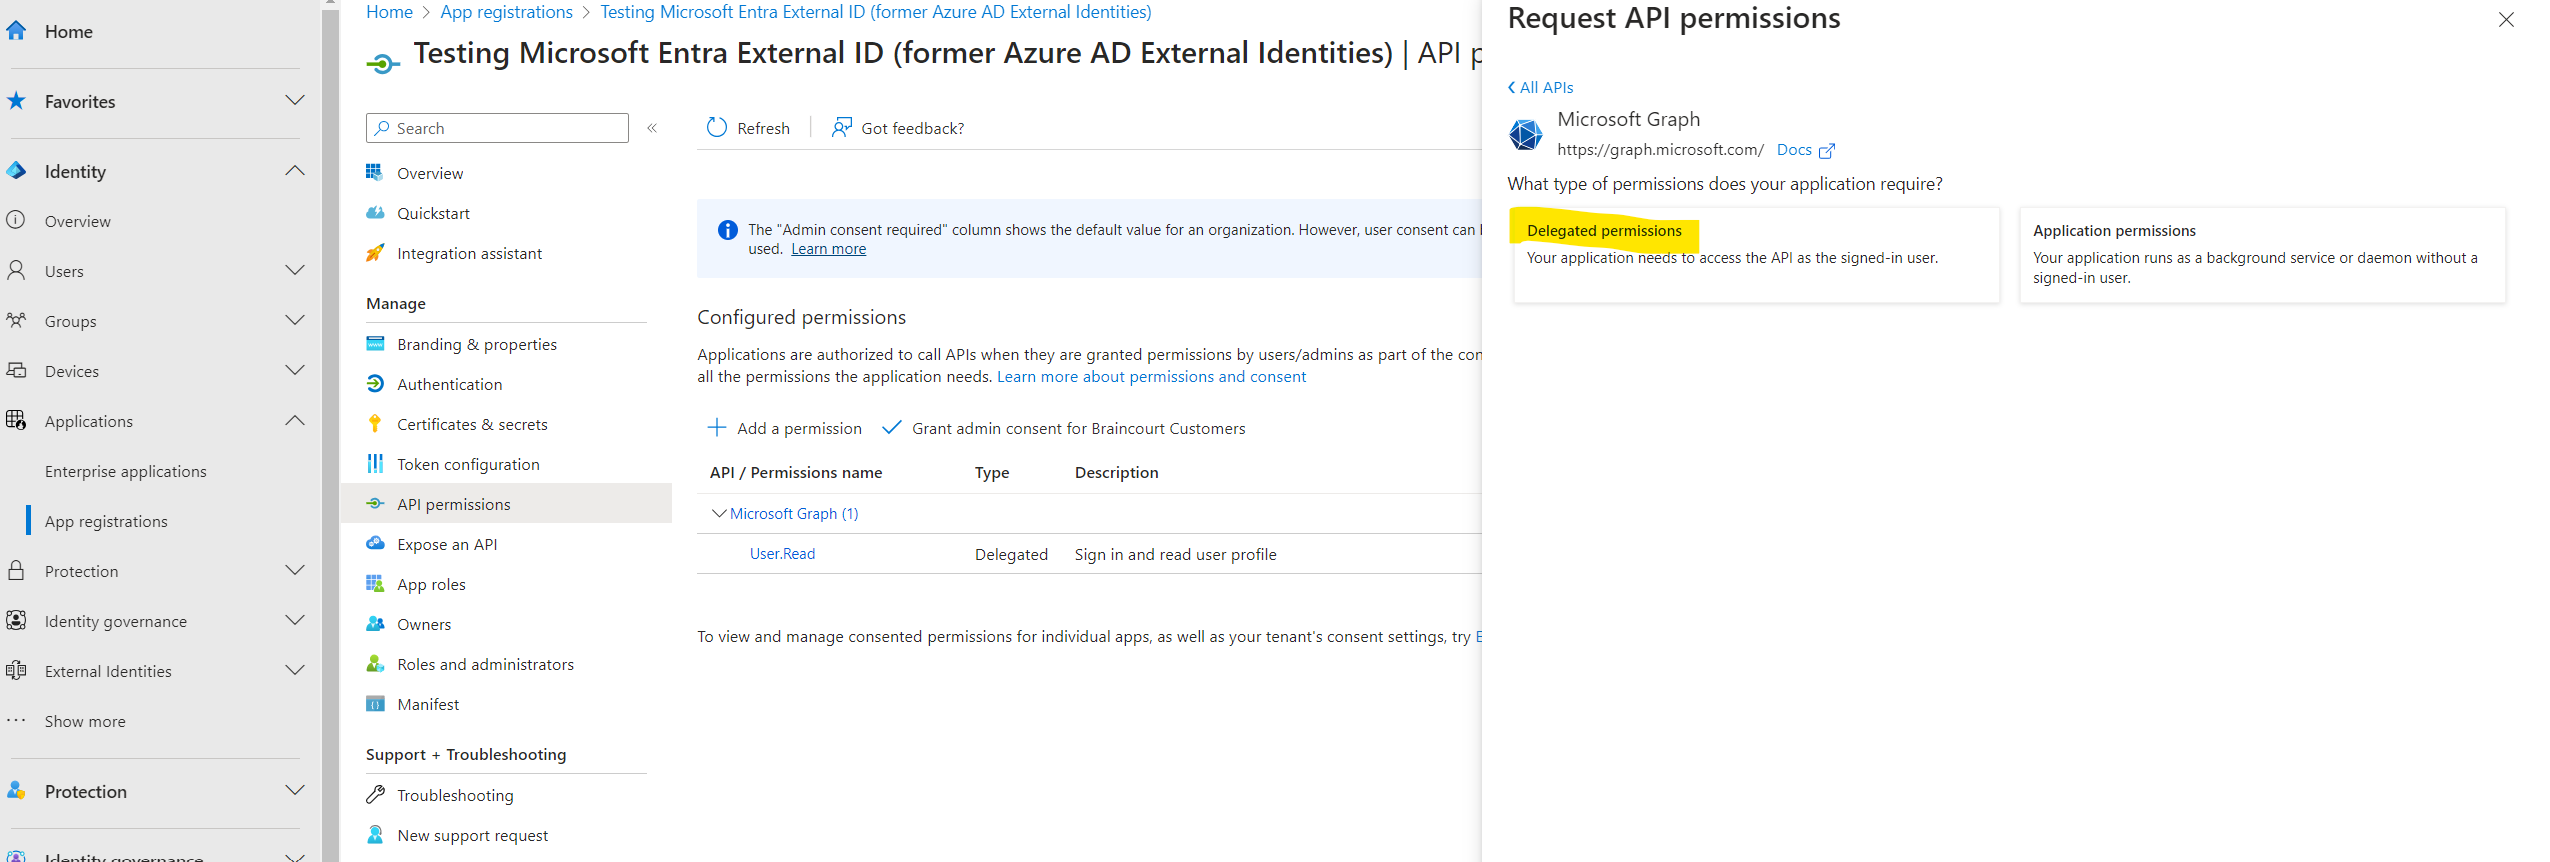
Under Select permissions section, search for and select both openid and offline_access permissions.


Finally we should have added both of them.
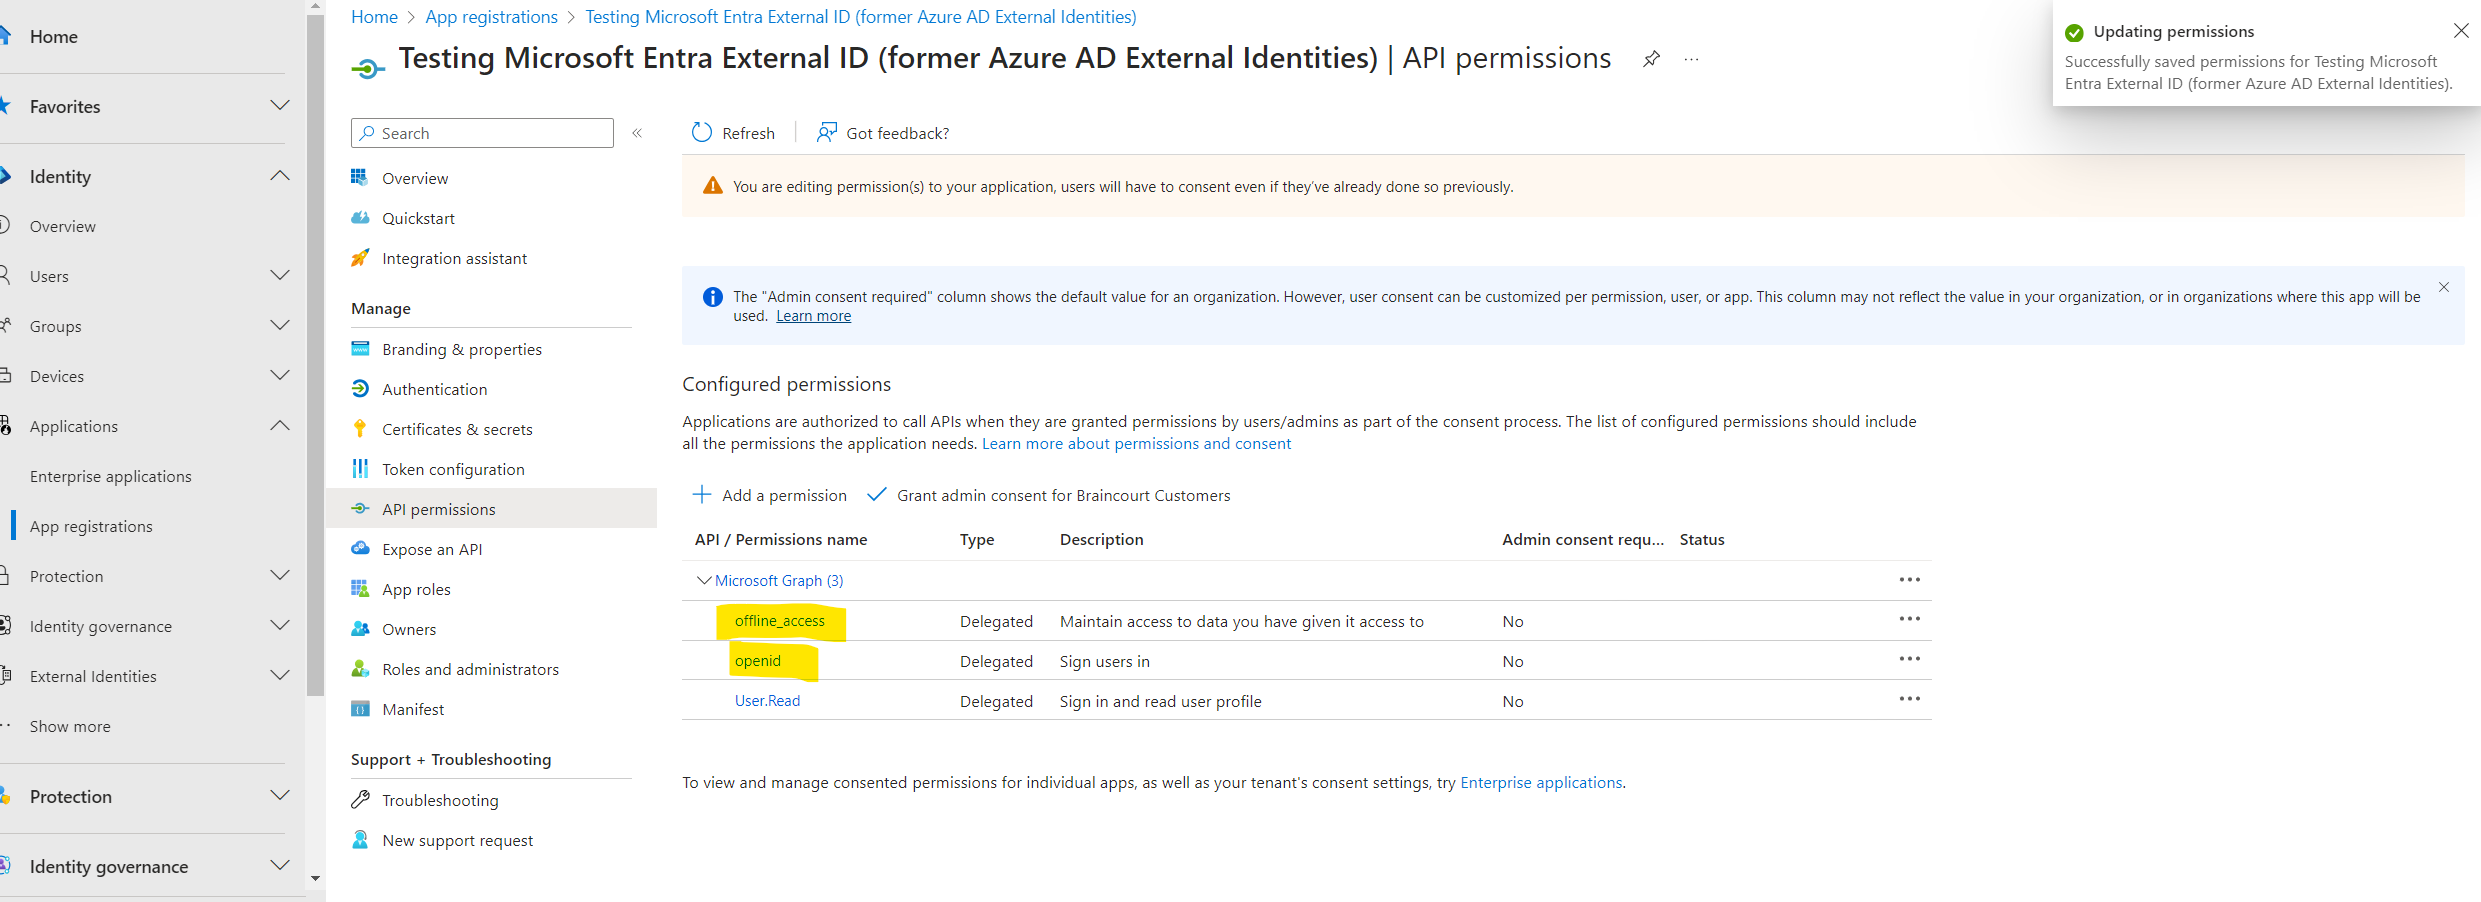
At this point, you’ve assigned the permissions correctly. However, since the tenant is a customer’s tenant, the consumer users themselves can’t consent to these permissions. You as the admin must consent to these permissions on behalf of all the users in the tenant:
- Select Grant admin consent for <your tenant name>, then select Yes.
- Select Refresh, then verify that Granted for <your tenant name> appears under Status for both scopes.


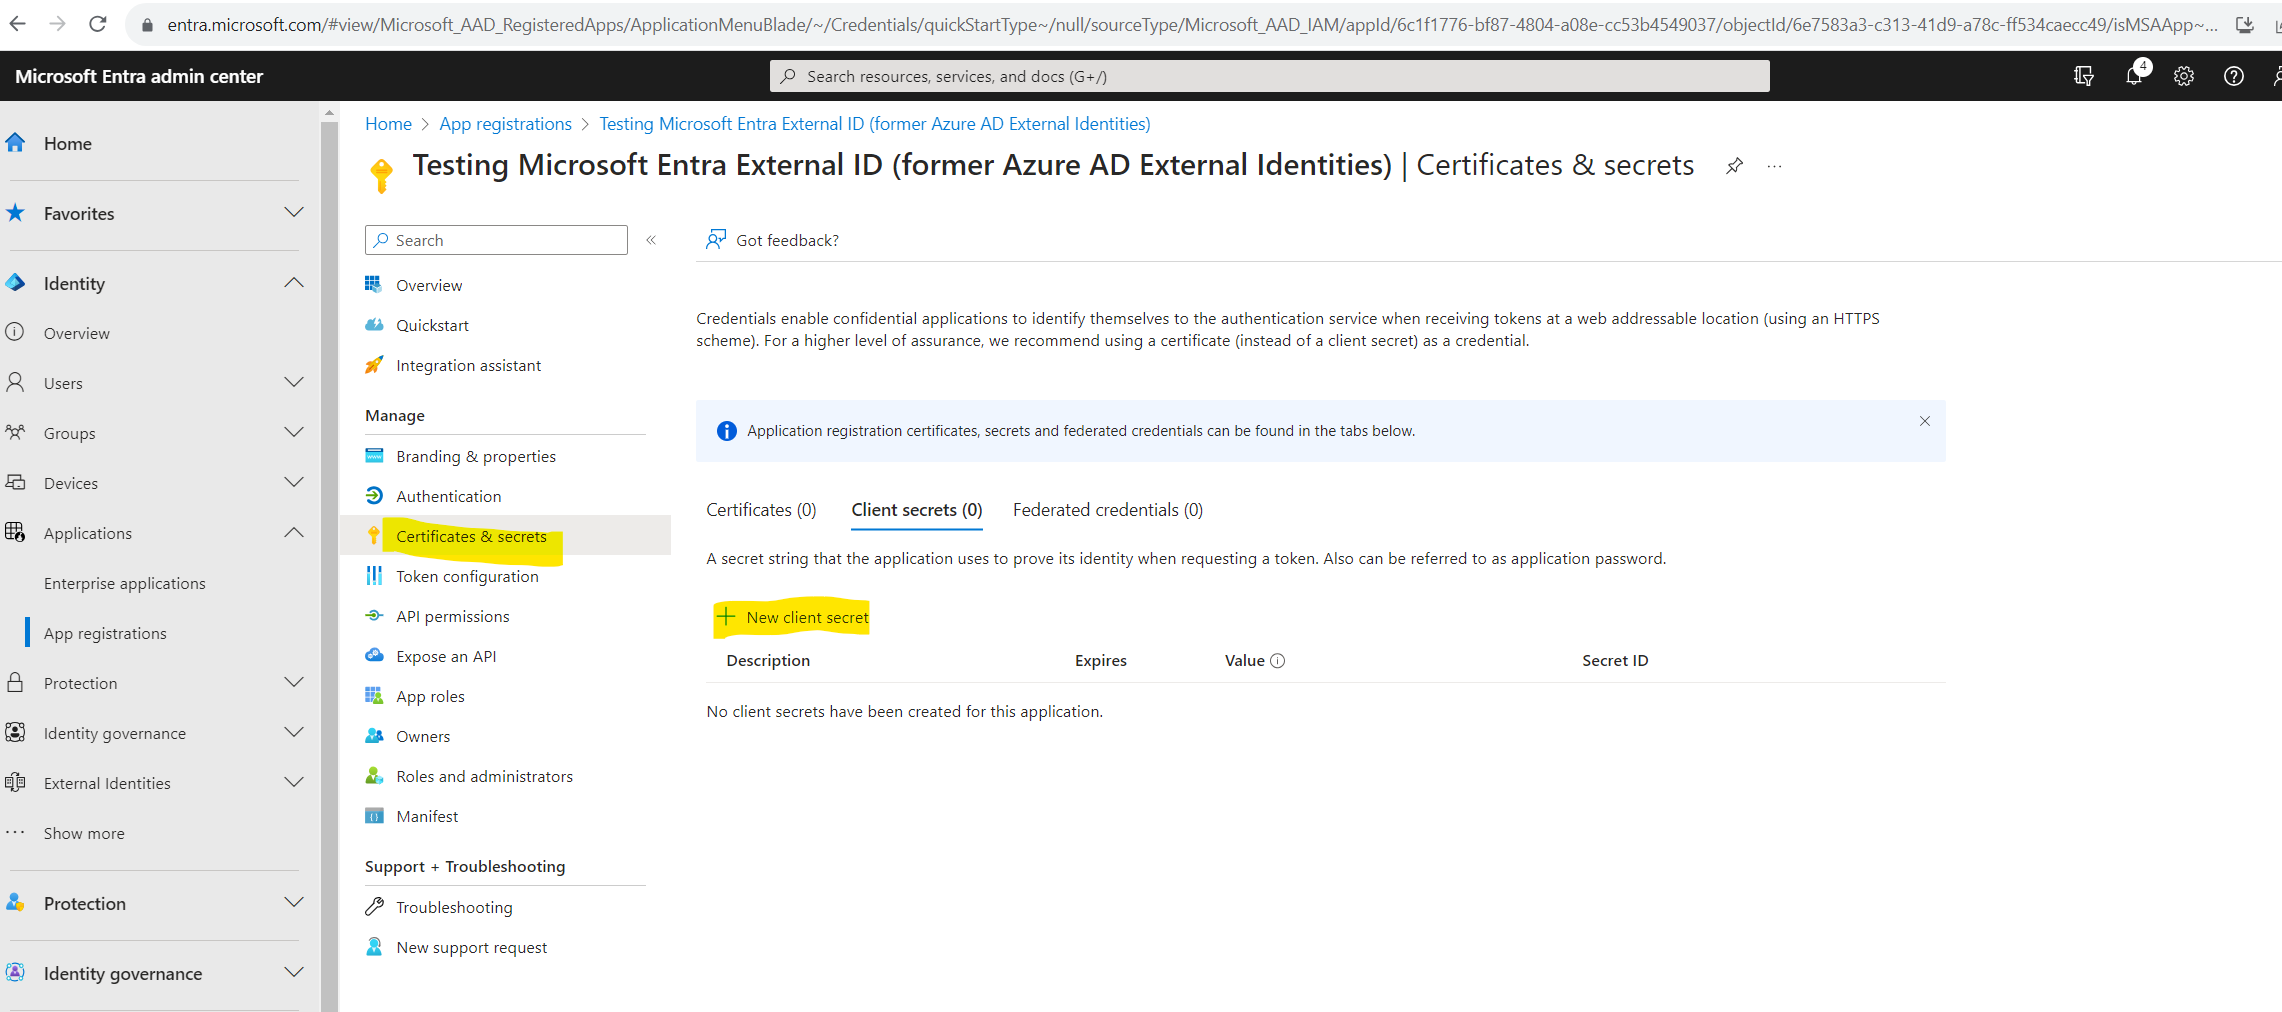
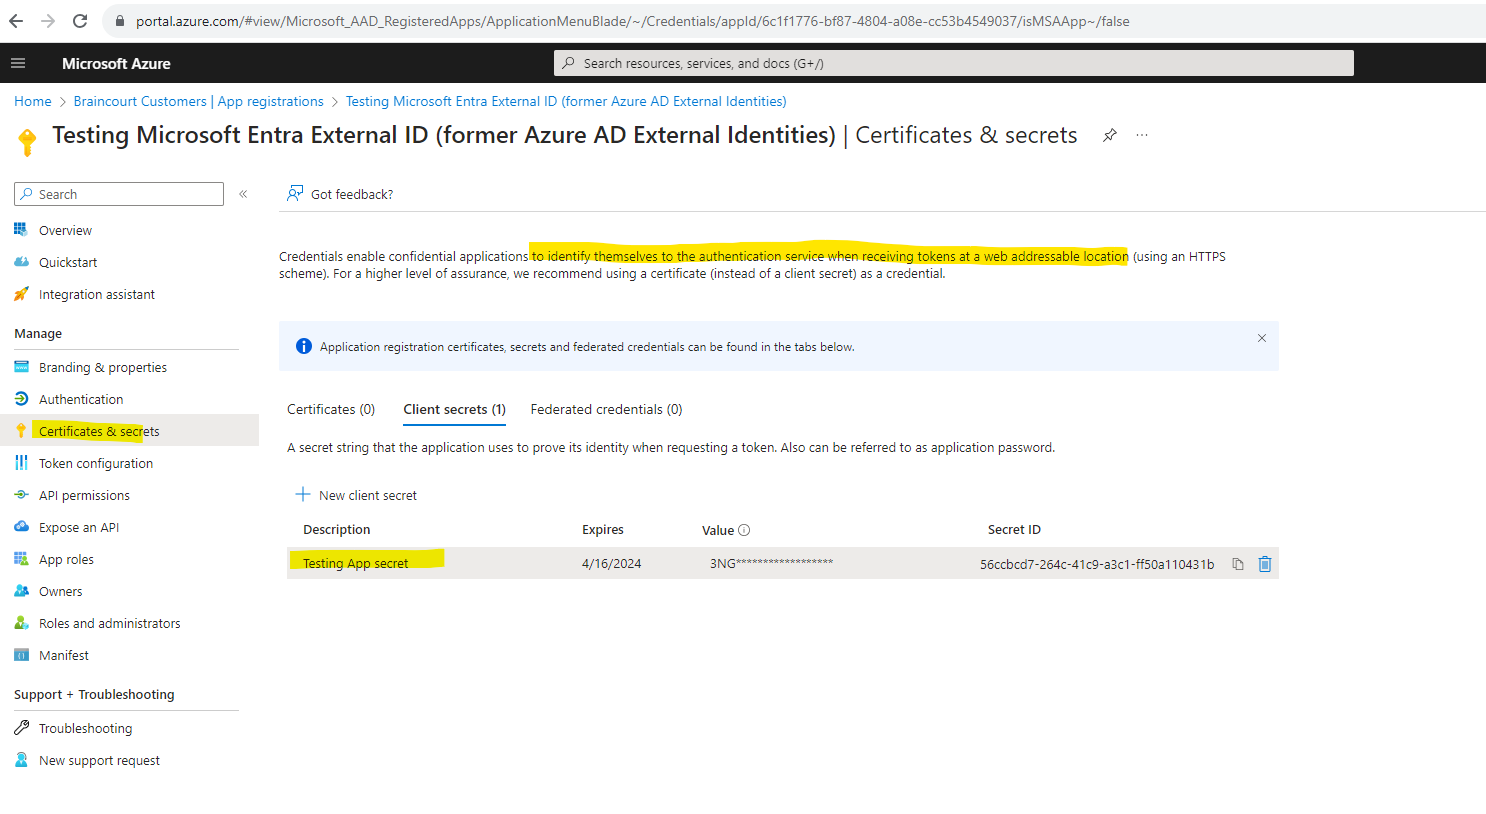
Next we need to create a client secret for the registered application. The application uses the client secret to prove its identity when it requests for tokens.
Under Manage, select Certificates & secrets. Select New client secret.
In the Description box, enter a description for the client secret (for example, ciam app client secret). Under Expires, select a duration for which the secret is valid (per your organizations security rules), and then select Add.
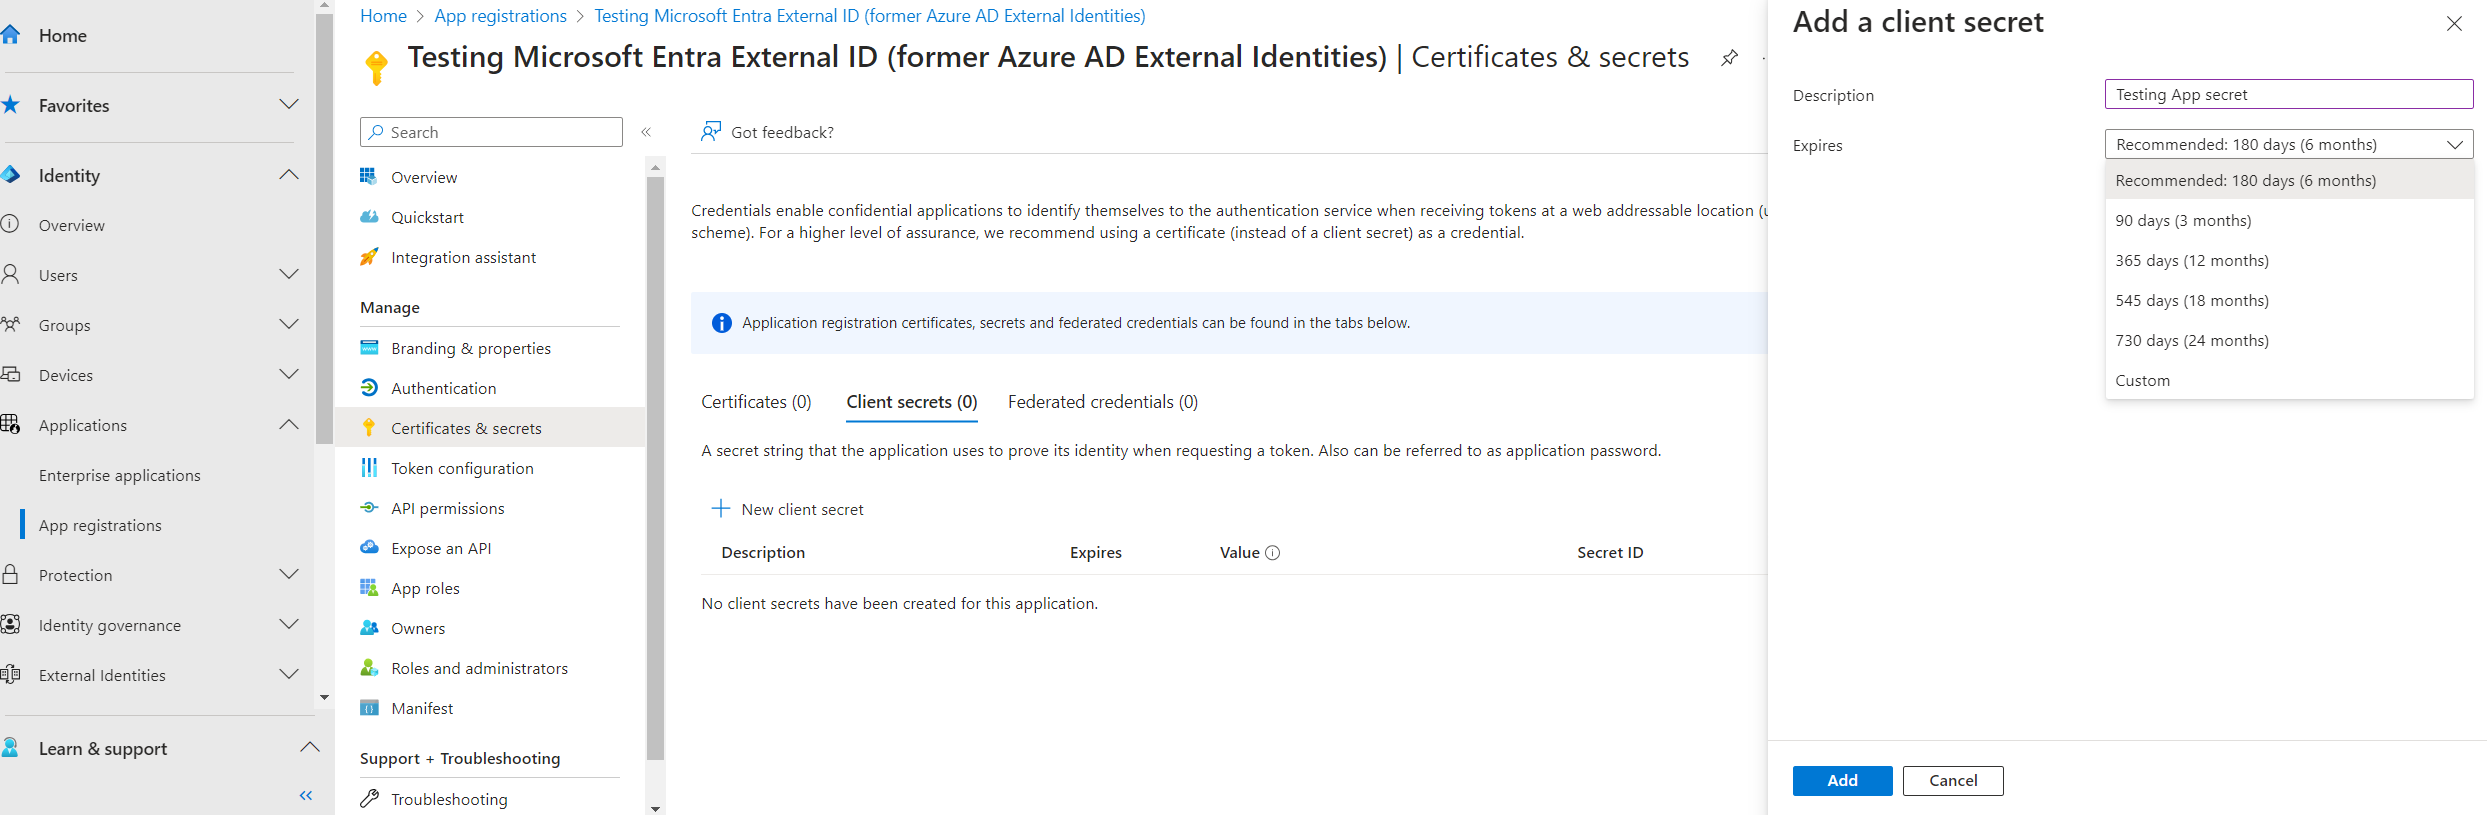
Record the secret’s Value. You’ll use this value for configuration in a later step.
The secret value won’t be displayed again, and is not retrievable by any means, after you navigate away from the Certificates and secrets page, so make sure you record it.
For enhanced security, consider using certificates instead of client secrets.

If your web app needs to call an API, you must grant your web app API permissions so it can call the API. You must also register the web API that you need to call.
My web app won’t need further APIs so I can skip this step, more about you will find here https://learn.microsoft.com/en-us/azure/active-directory/external-identities/customers/how-to-register-ciam-app?tabs=webapp#grant-api-permissions-optional-1
The next step is to create a sign-up and sign-in user flow which we will see in the next section.
Create a sign-up and sign-in user flow for customers
You can create a simple sign-up and sign-in experience for your customers by adding a user flow to your application. The user flow defines the series of sign-up steps customers follow and the sign-in methods they can use (such as email and password, one-time passcodes, or social accounts from Google or Facebook). You can also collect information from customers during sign-up by selecting from a series of built-in user attributes or adding your own custom attributes.
You can create multiple user flows if you have multiple applications that you want to offer to customers. Or, you can use the same user flow for many applications. However, an application can have only one user flow.
Follow these steps to create a user flow a customer can use to sign in or sign up for an application. These steps describe how to add a new user flow, select the attributes you want to collect, and change the order of the attributes on the sign-up page.
Sign in to the Microsoft Entra admin center.
As usual if you have access to multiple tenants, use the Switch directory link in the top menu to switch to your customer tenant.
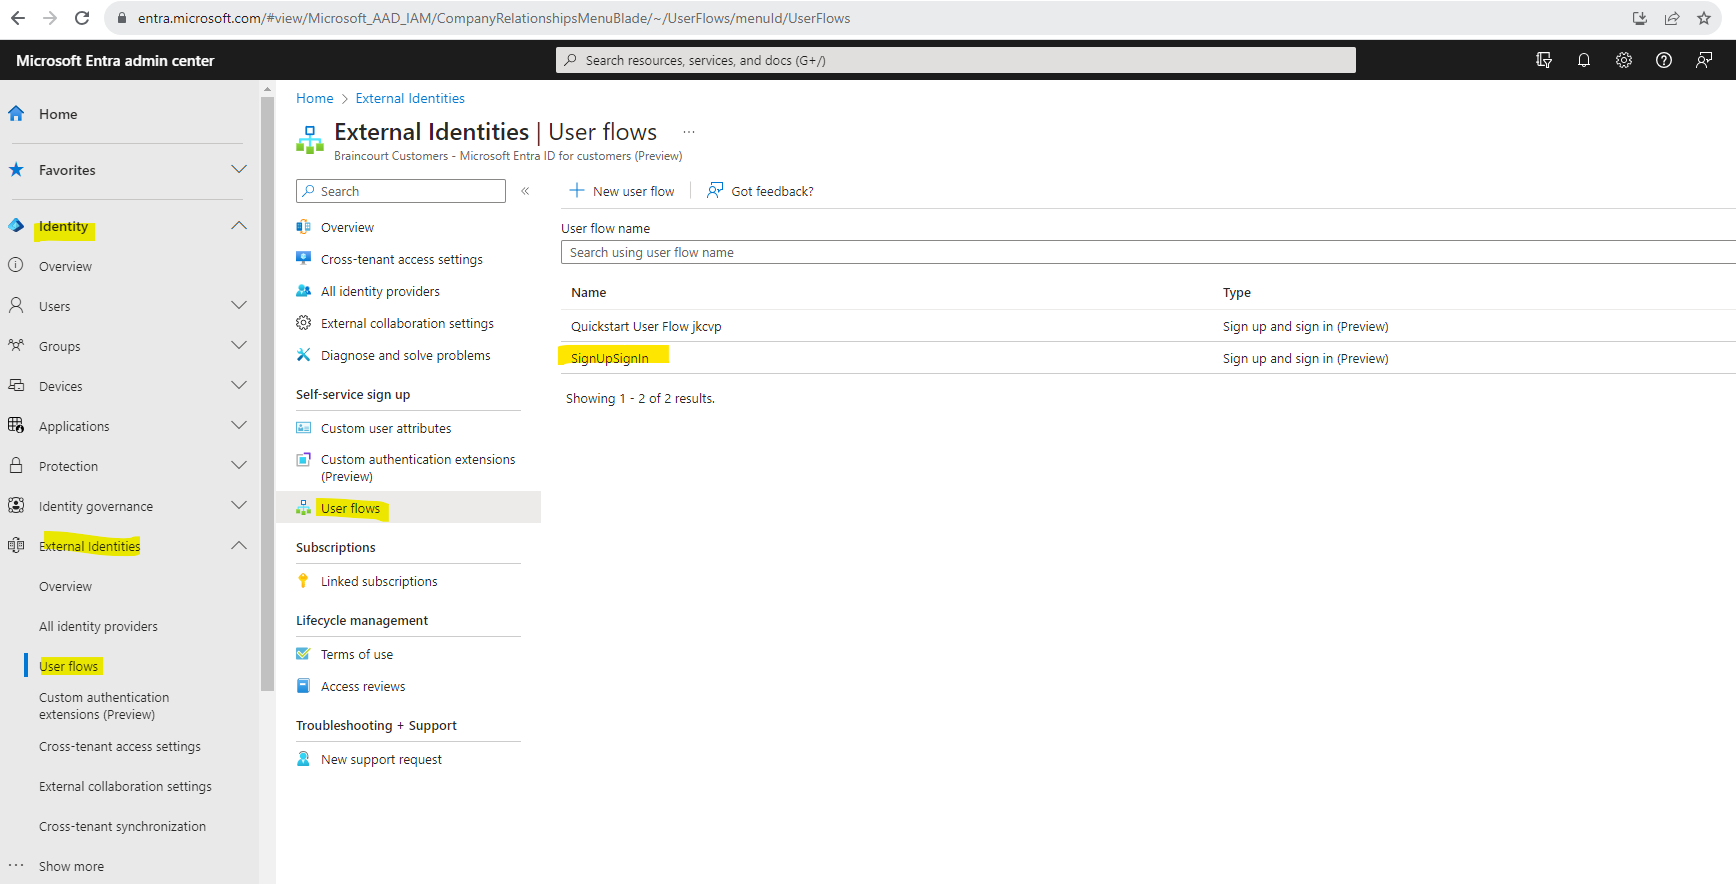
Browse to Identity > External Identities > User flows. Select New user flow.
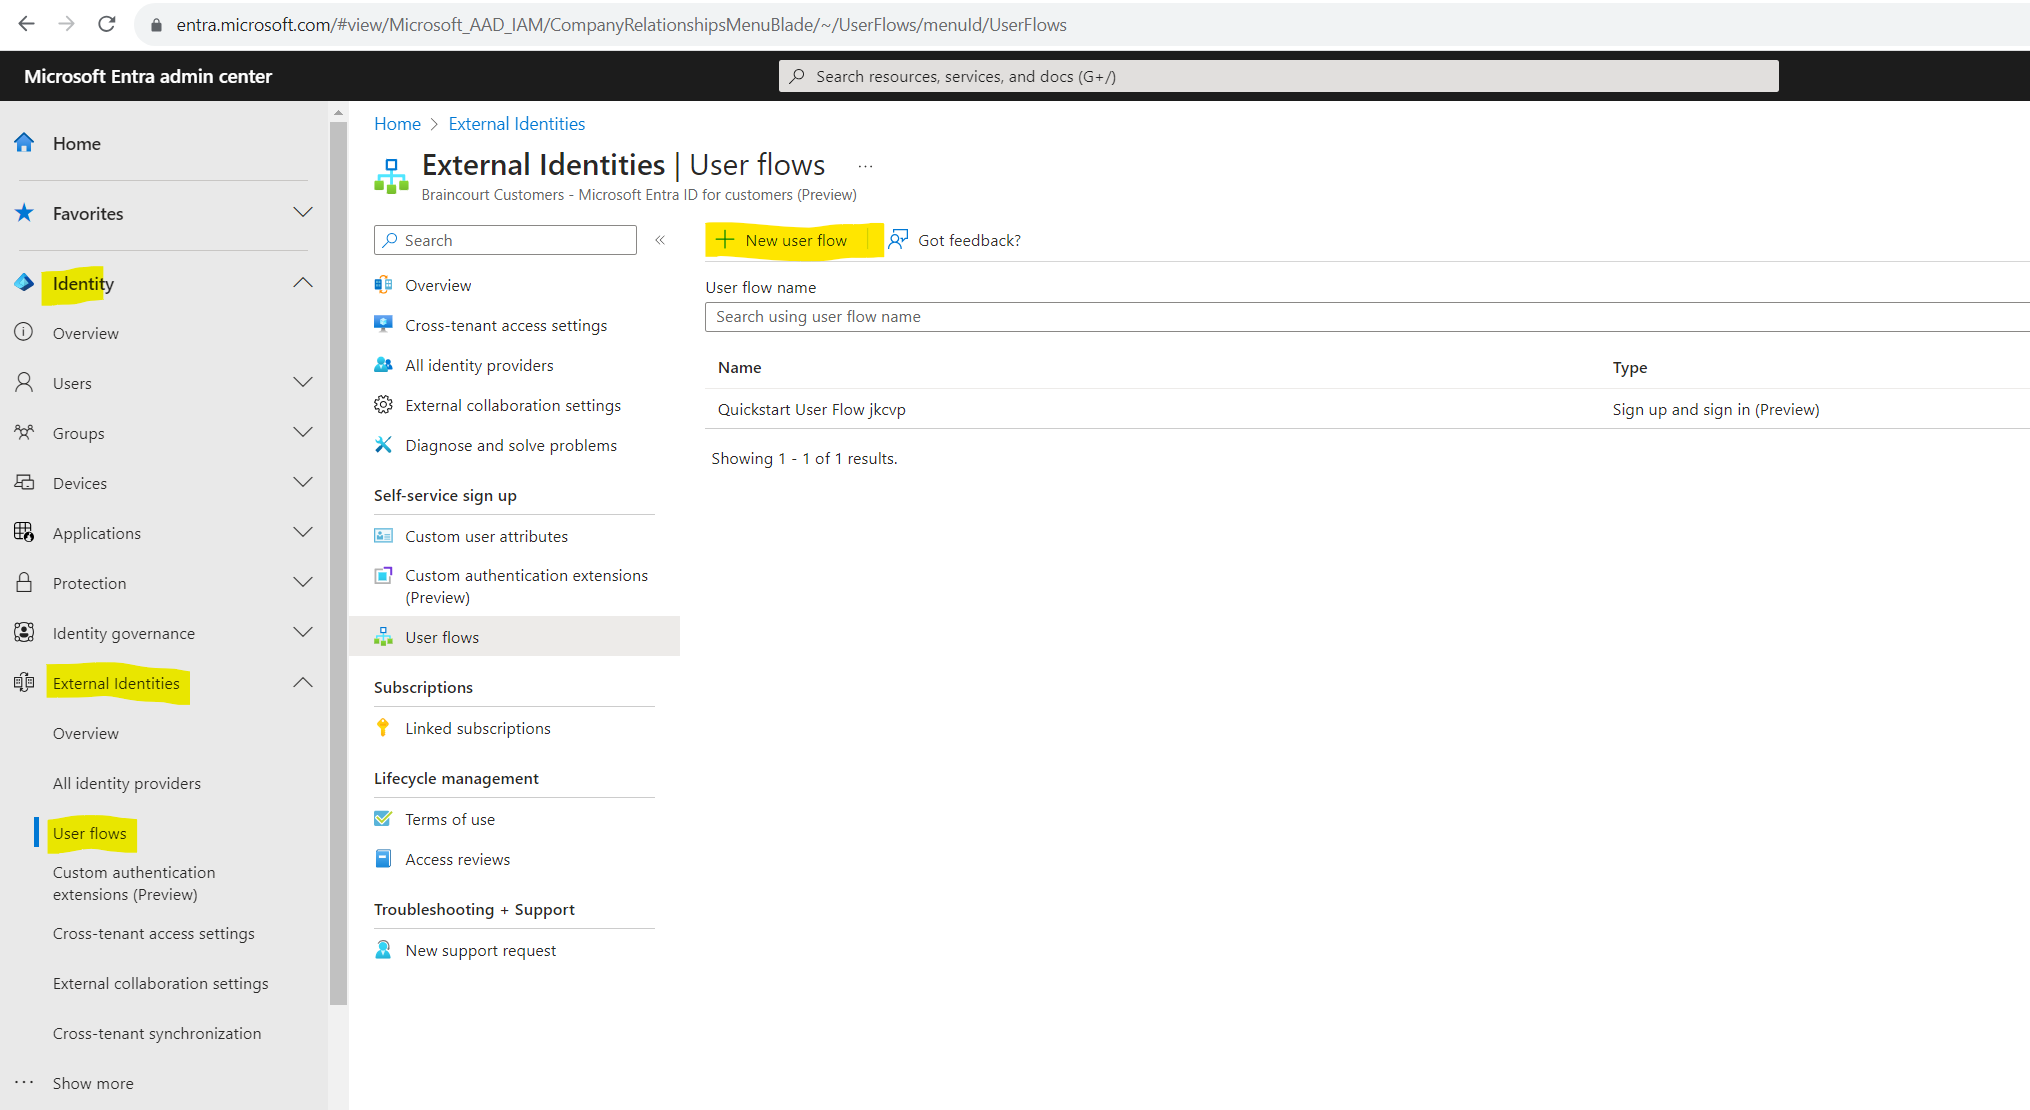
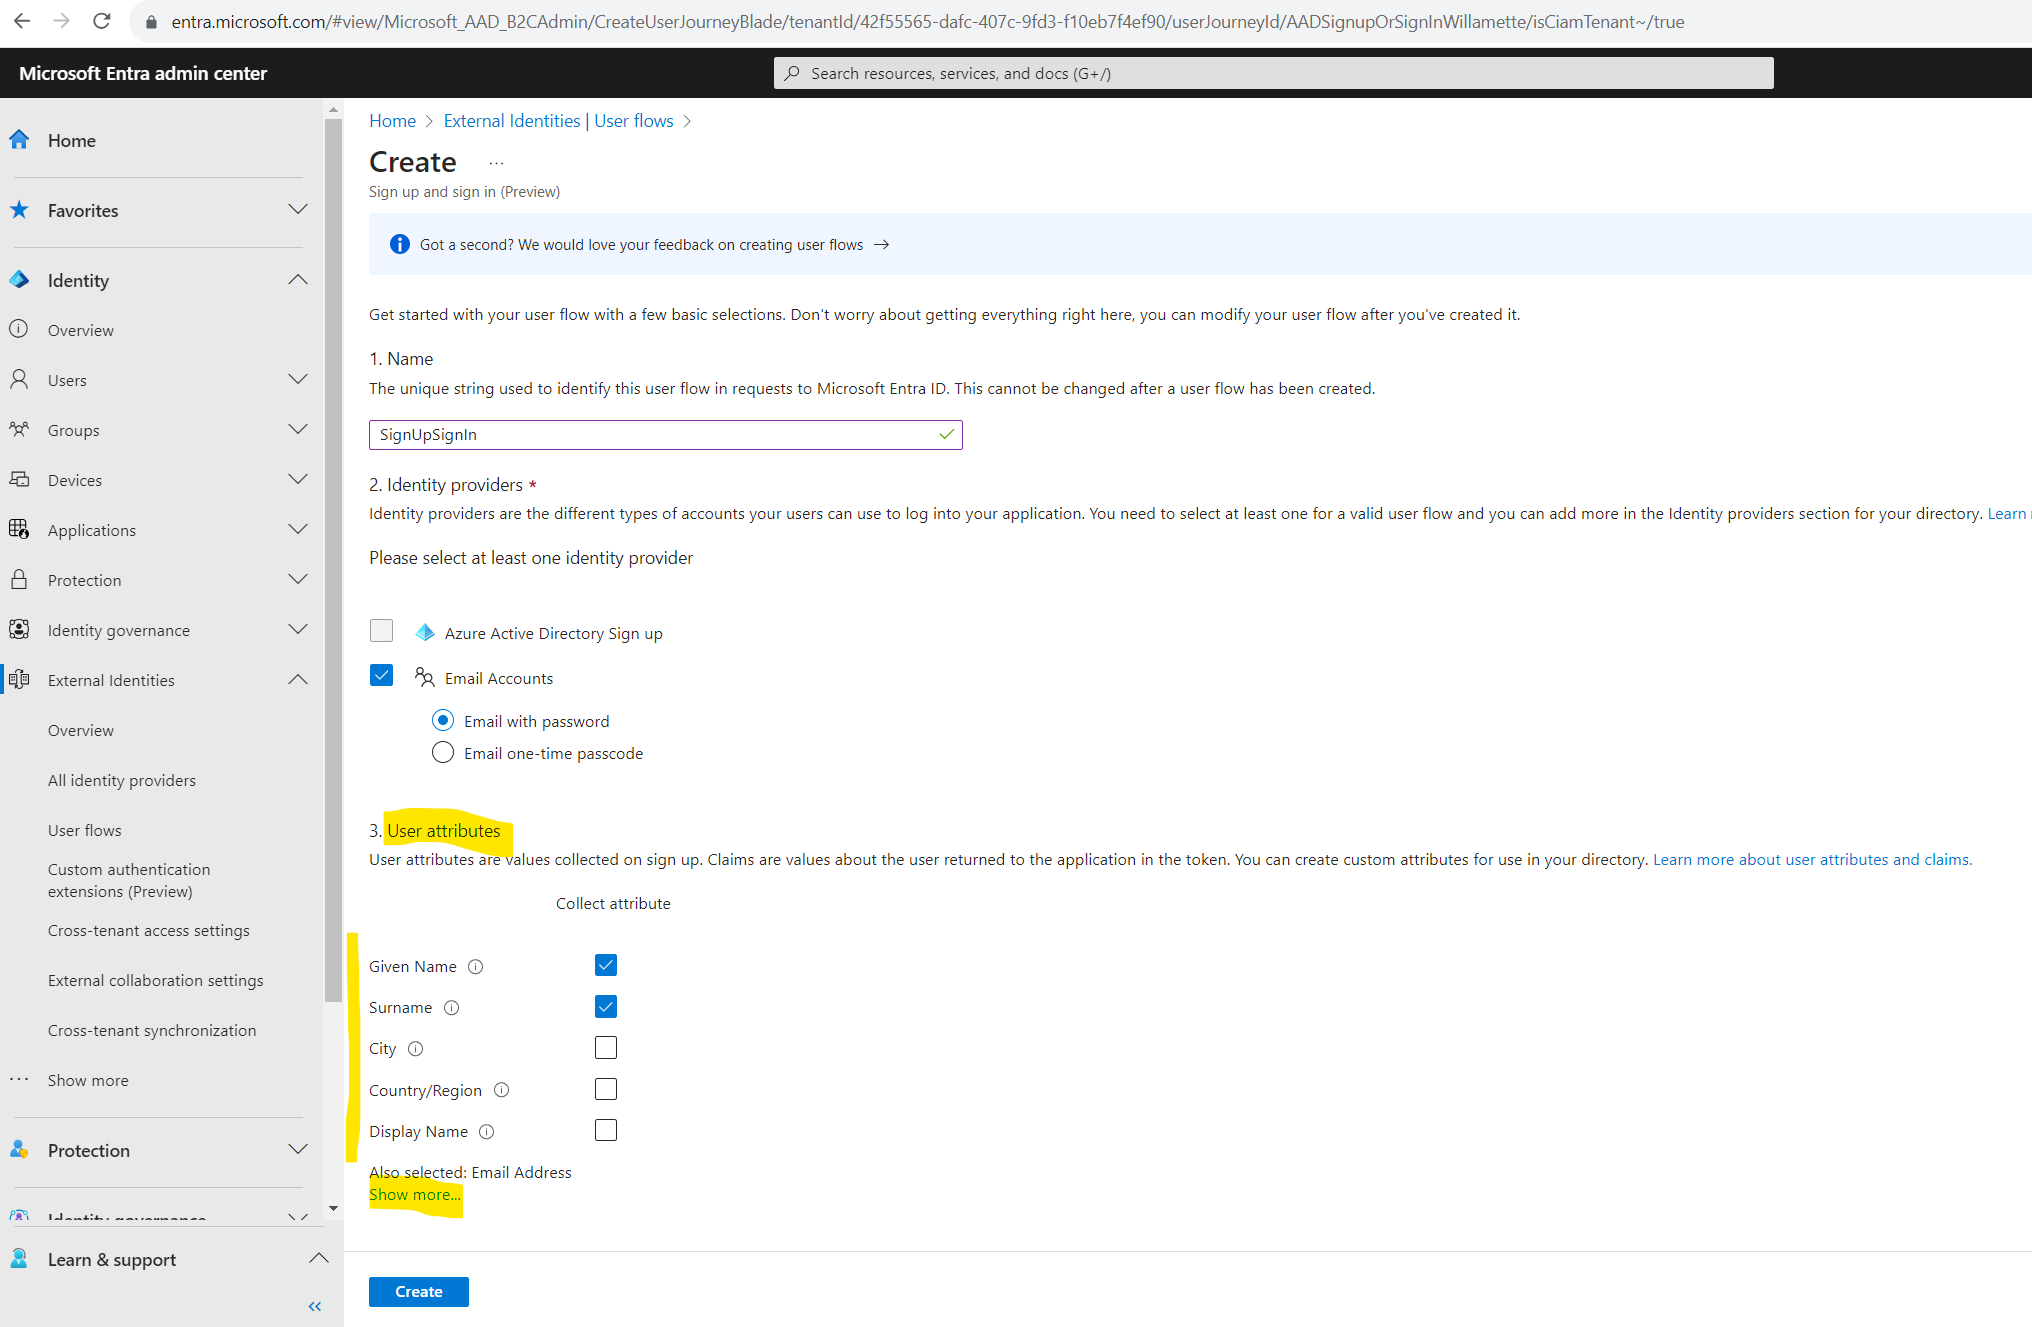
On the Create page, enter a Name for the user flow (for example, “SignUpSignIn”).
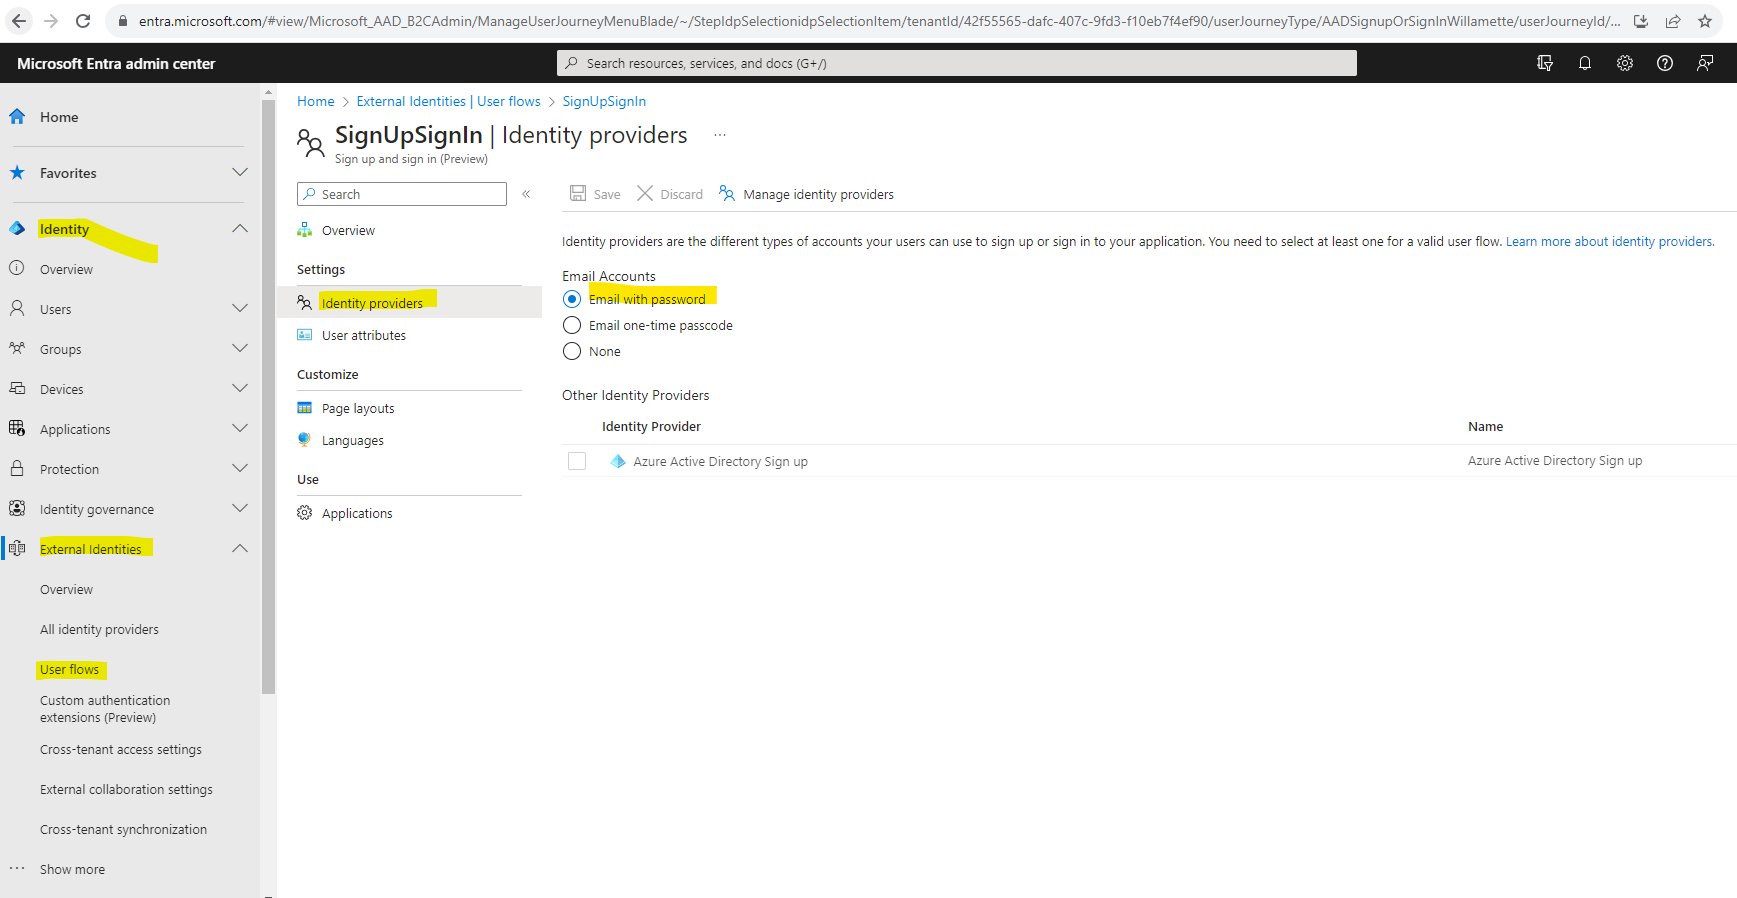
Under Identity providers, select the Email Accounts check box, and then select one of these options:
- Email with password: Allows new users to sign up and sign in using an email address as the sign-in name and a password as their first-factor authentication method. You can also configure options for showing, hiding, or customizing the self-service password reset link on the sign-in page (learn more).
- Email one-time passcode: Allows new users to sign up and sign in using an email address as the sign-in name and email one-time passcode as their first-factor authentication method.
The Microsoft Entra ID Sign up (formerly Azure Active Directory Sign up) option is unavailable because although customers can sign up for a local account using an email from another Microsoft Entra organization, Microsoft Entra federation isn’t used to authenticate them. Google and Facebook become available only after you set up federation with them. Learn more about authentication methods and identity providers.

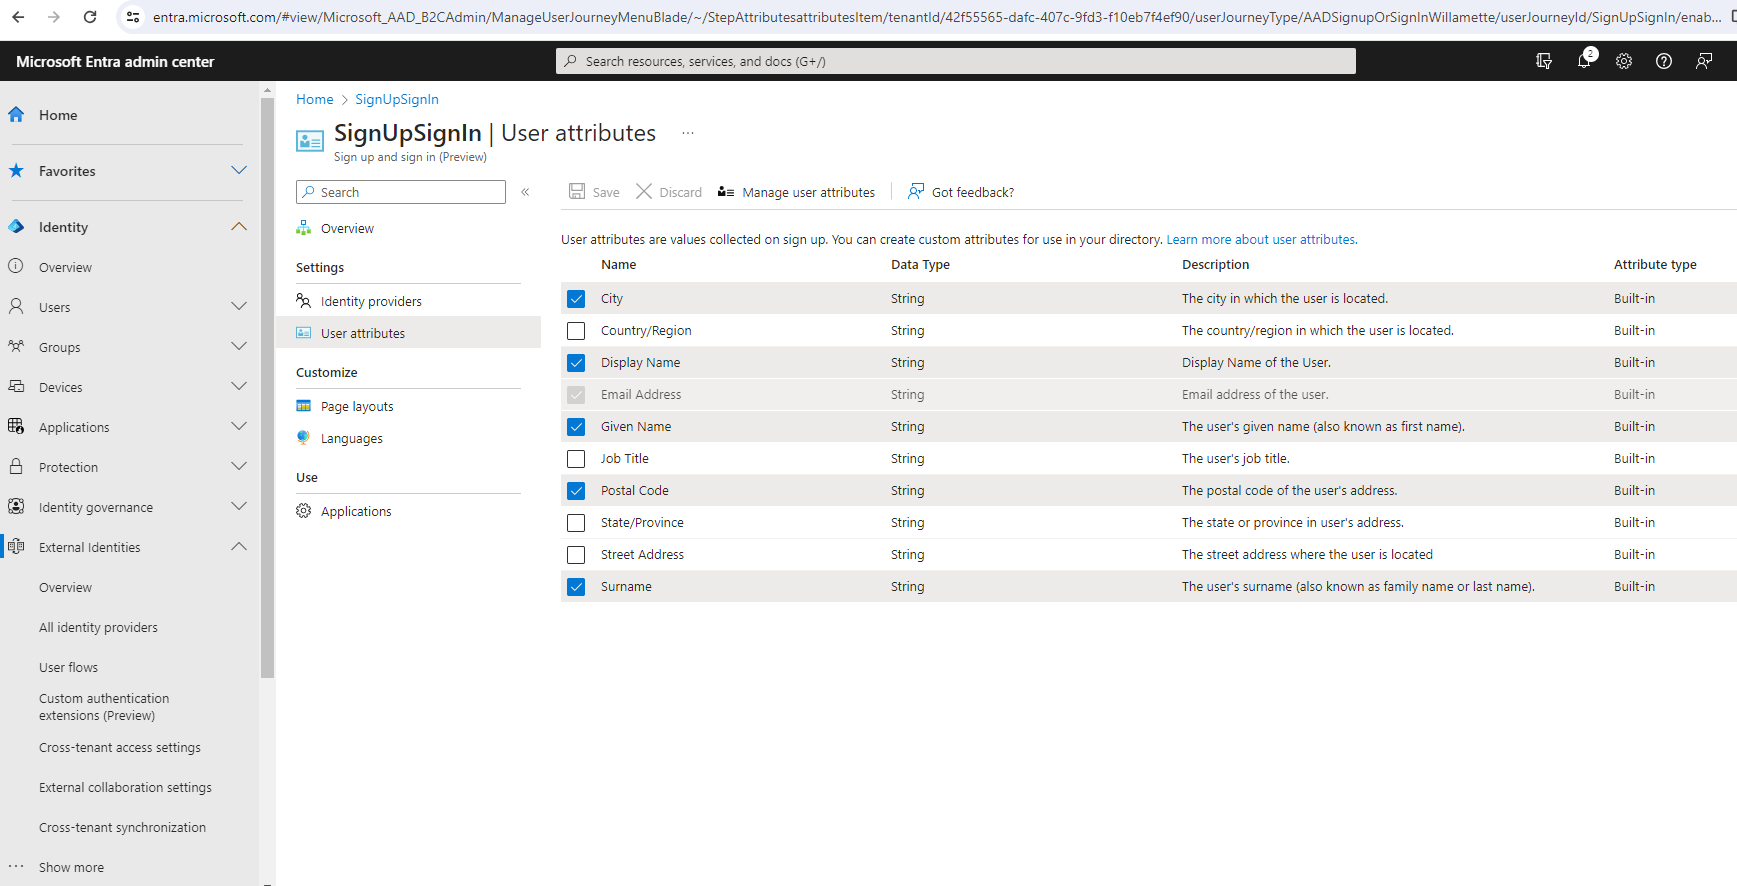
Under User attributes, choose the attributes you want to collect from the user during sign-up. Select Show more to choose from the full list of attributes, including Job Title, Display Name, and Postal Code.
Email Address is mandatory and selected by default.
Select Create to create the user flow.
Disable sign-up in a sign-up and sign-in user flow
If you want your customer users to only sign in and not sign up, you can disable sign-up experience in your user flow by using Microsoft Graph API. You need to know the ID of the user flow that you want whose sign-up you want to disable. You can’t read the user flow ID from the Microsoft Entra Admin center, but you can retrieve it via Microsoft Graph API if you know the app associated with it.
Read the application ID associated with the user flow:
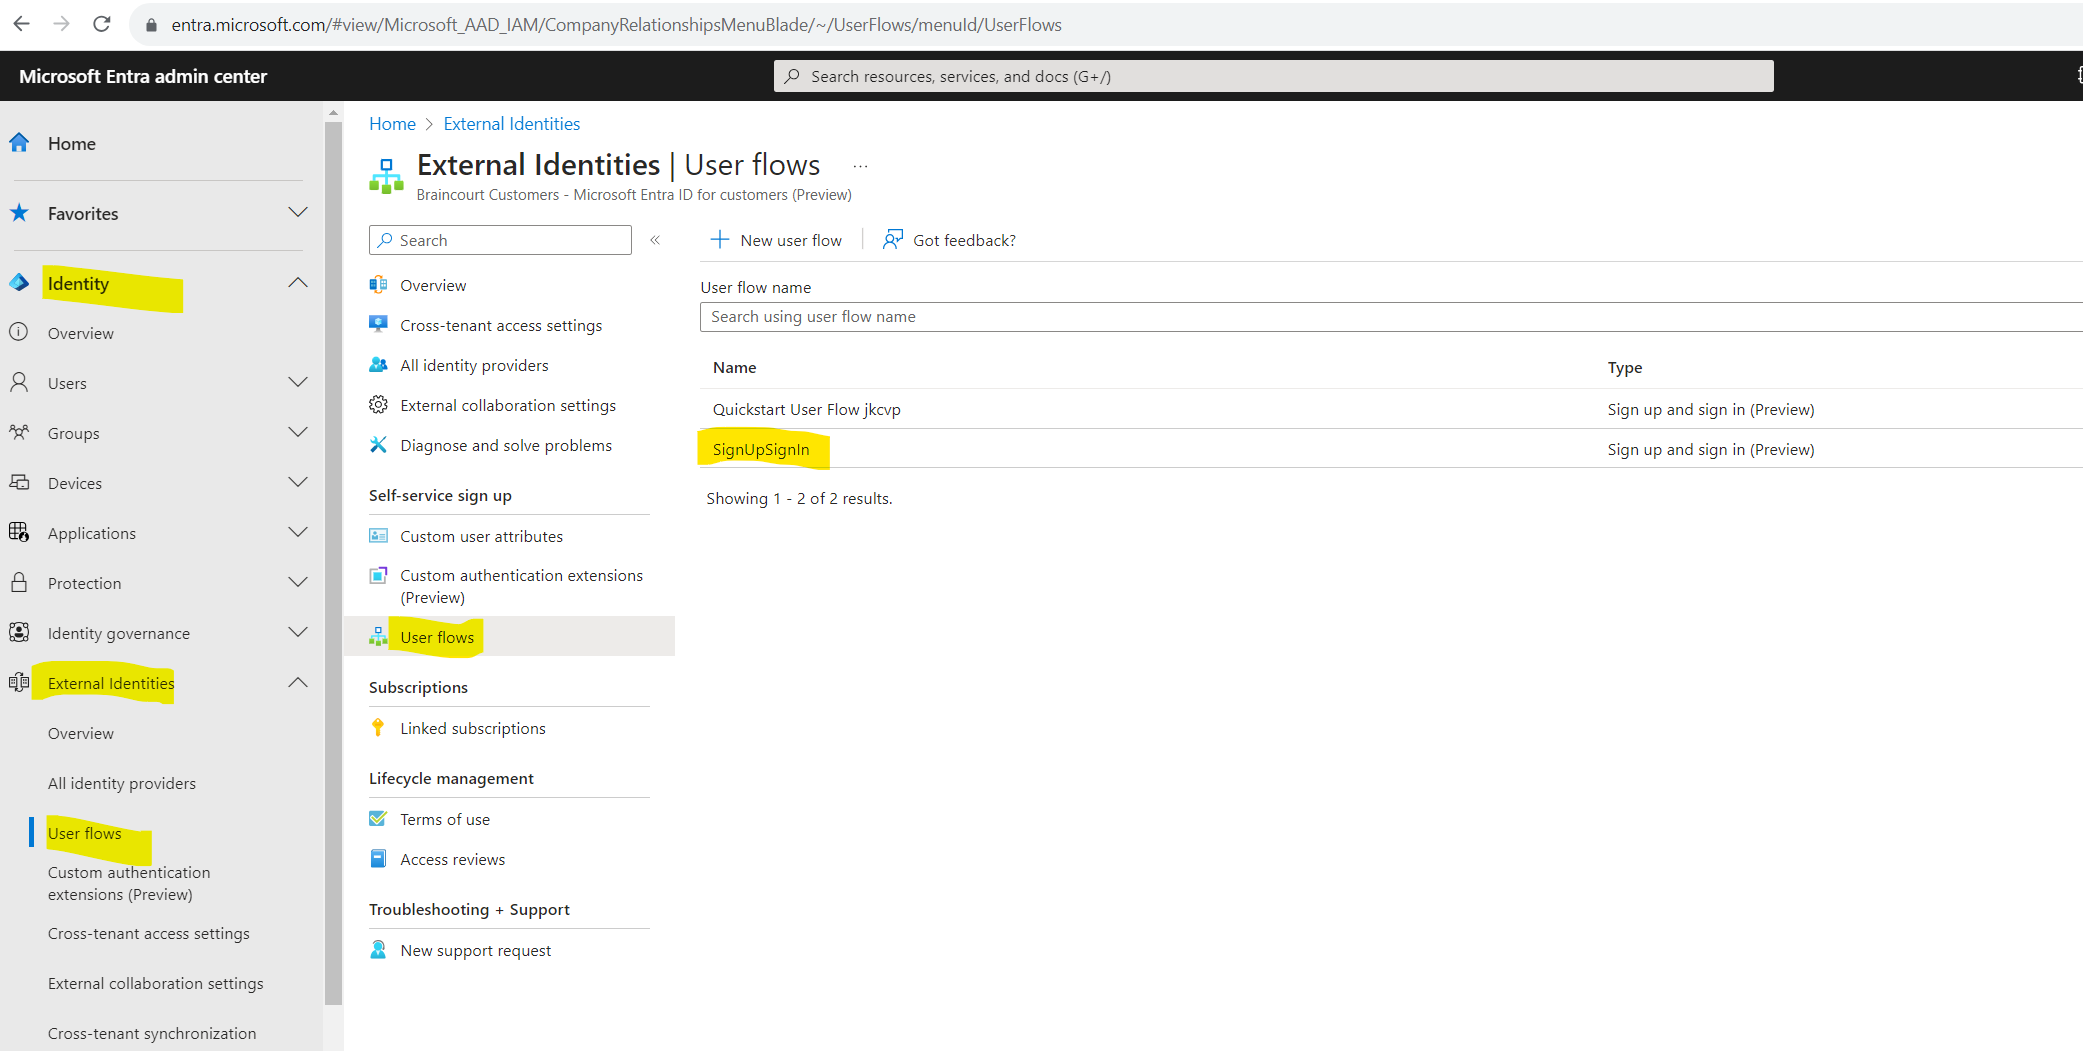
Browse to Identity > External Identities > User flows
From the list, select your user flow
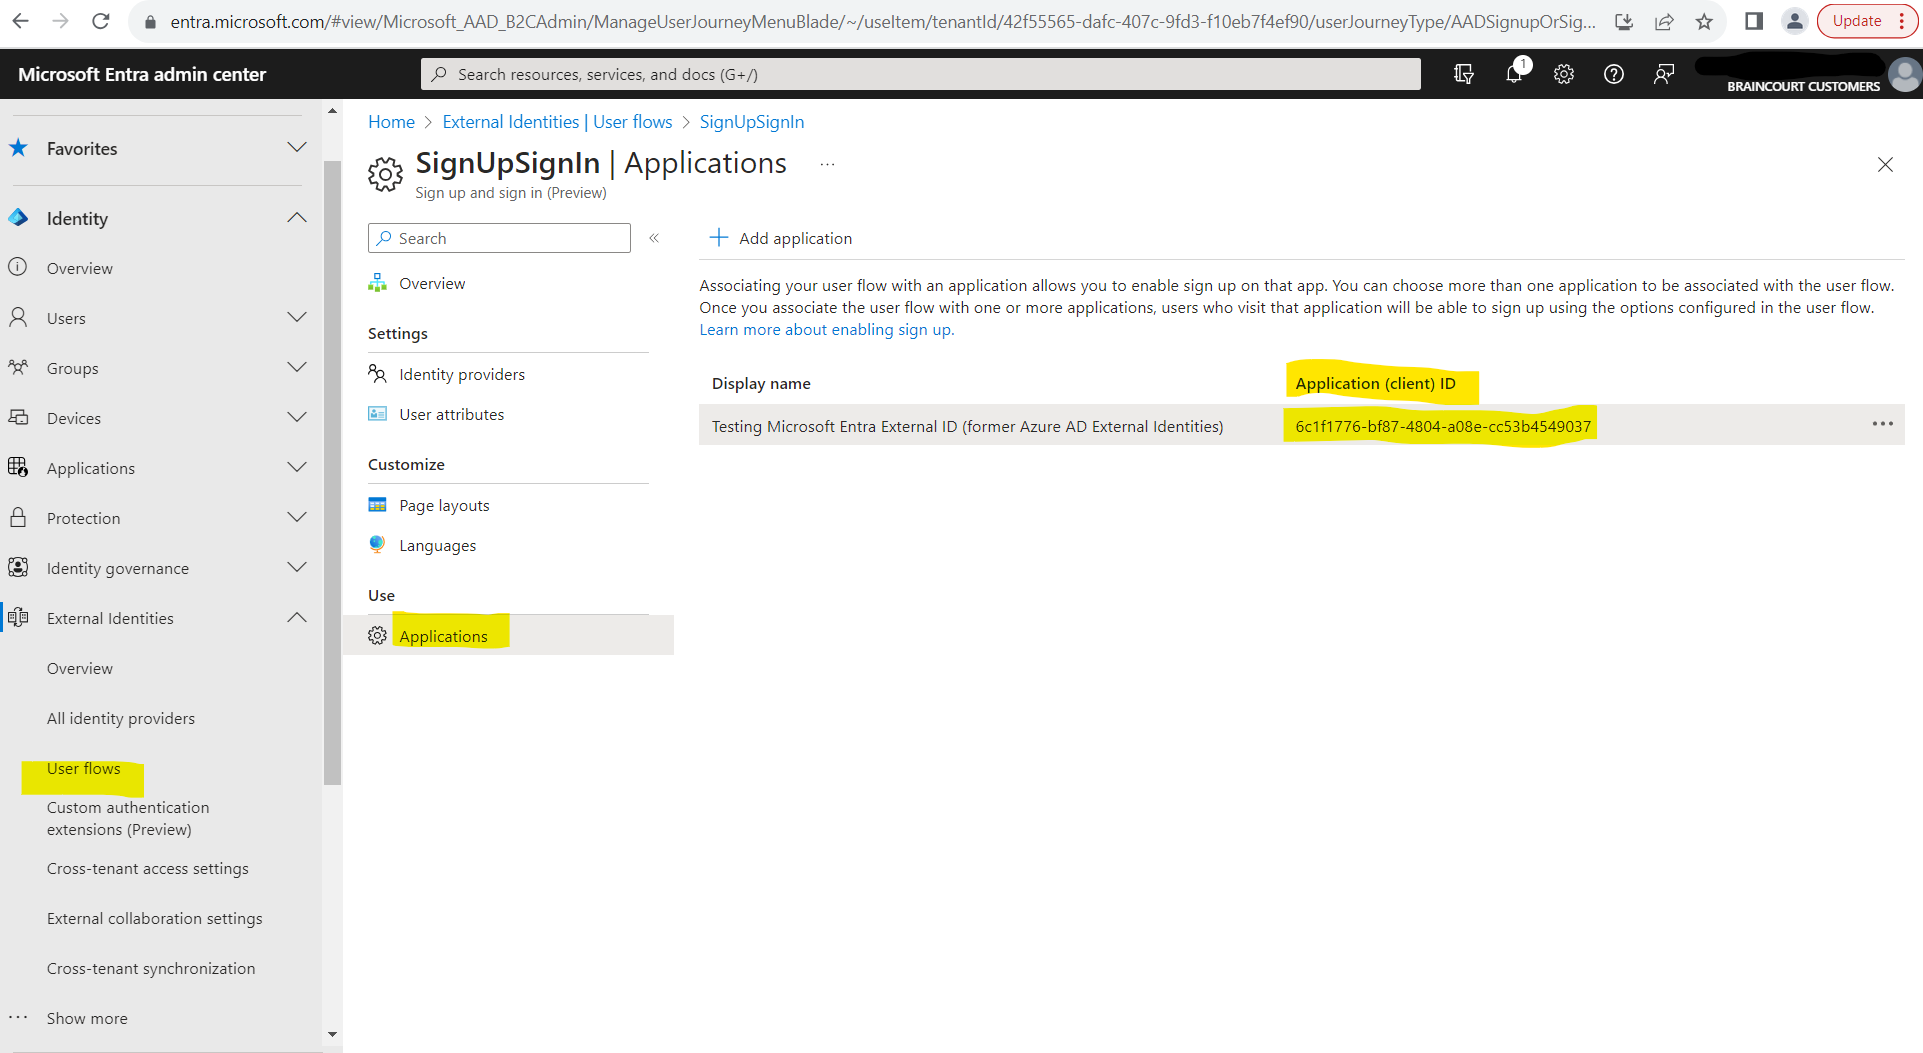
In the left menu, under Use, select Applications
From the list, under Application (client) ID column, copy the Application (client) ID.
Identify the ID of the user flow whose sign-up you want to disable.
To do so, List the user flow associated with the specific application.
Using the Microsoft Graph Explorer
Unfortunately so far you can’t switch tenants within the Microsoft Graph Explorer, to sign-in to a specific tenant you can pass the tenant name in the URL as shown below.
<a href="https://developer.microsoft.com/en-us/graph/graph-explorer?tenant=” target=”_blank” rel=”noreferrer noopener”>https://developer.microsoft.com/en-us/graph/graph-explorer?tenant=<tenant name>
In my case I will use the following URL
To list all user flows you can use the following HTTP GET request message
https://graph.microsoft.com/beta/identity/authenticationEventsFlows
Because this is is my new customer tenant I first have to add some permissions for the Microsoft Graph Explorer.
The application does not have any of the required delegated permissions (Policy.ReadWrite.AuthenticationFlows, EventListener.Read.All, EventListener.ReadWrite.All, Application.Read.All, Application.ReadWrite.All) to access the resource.
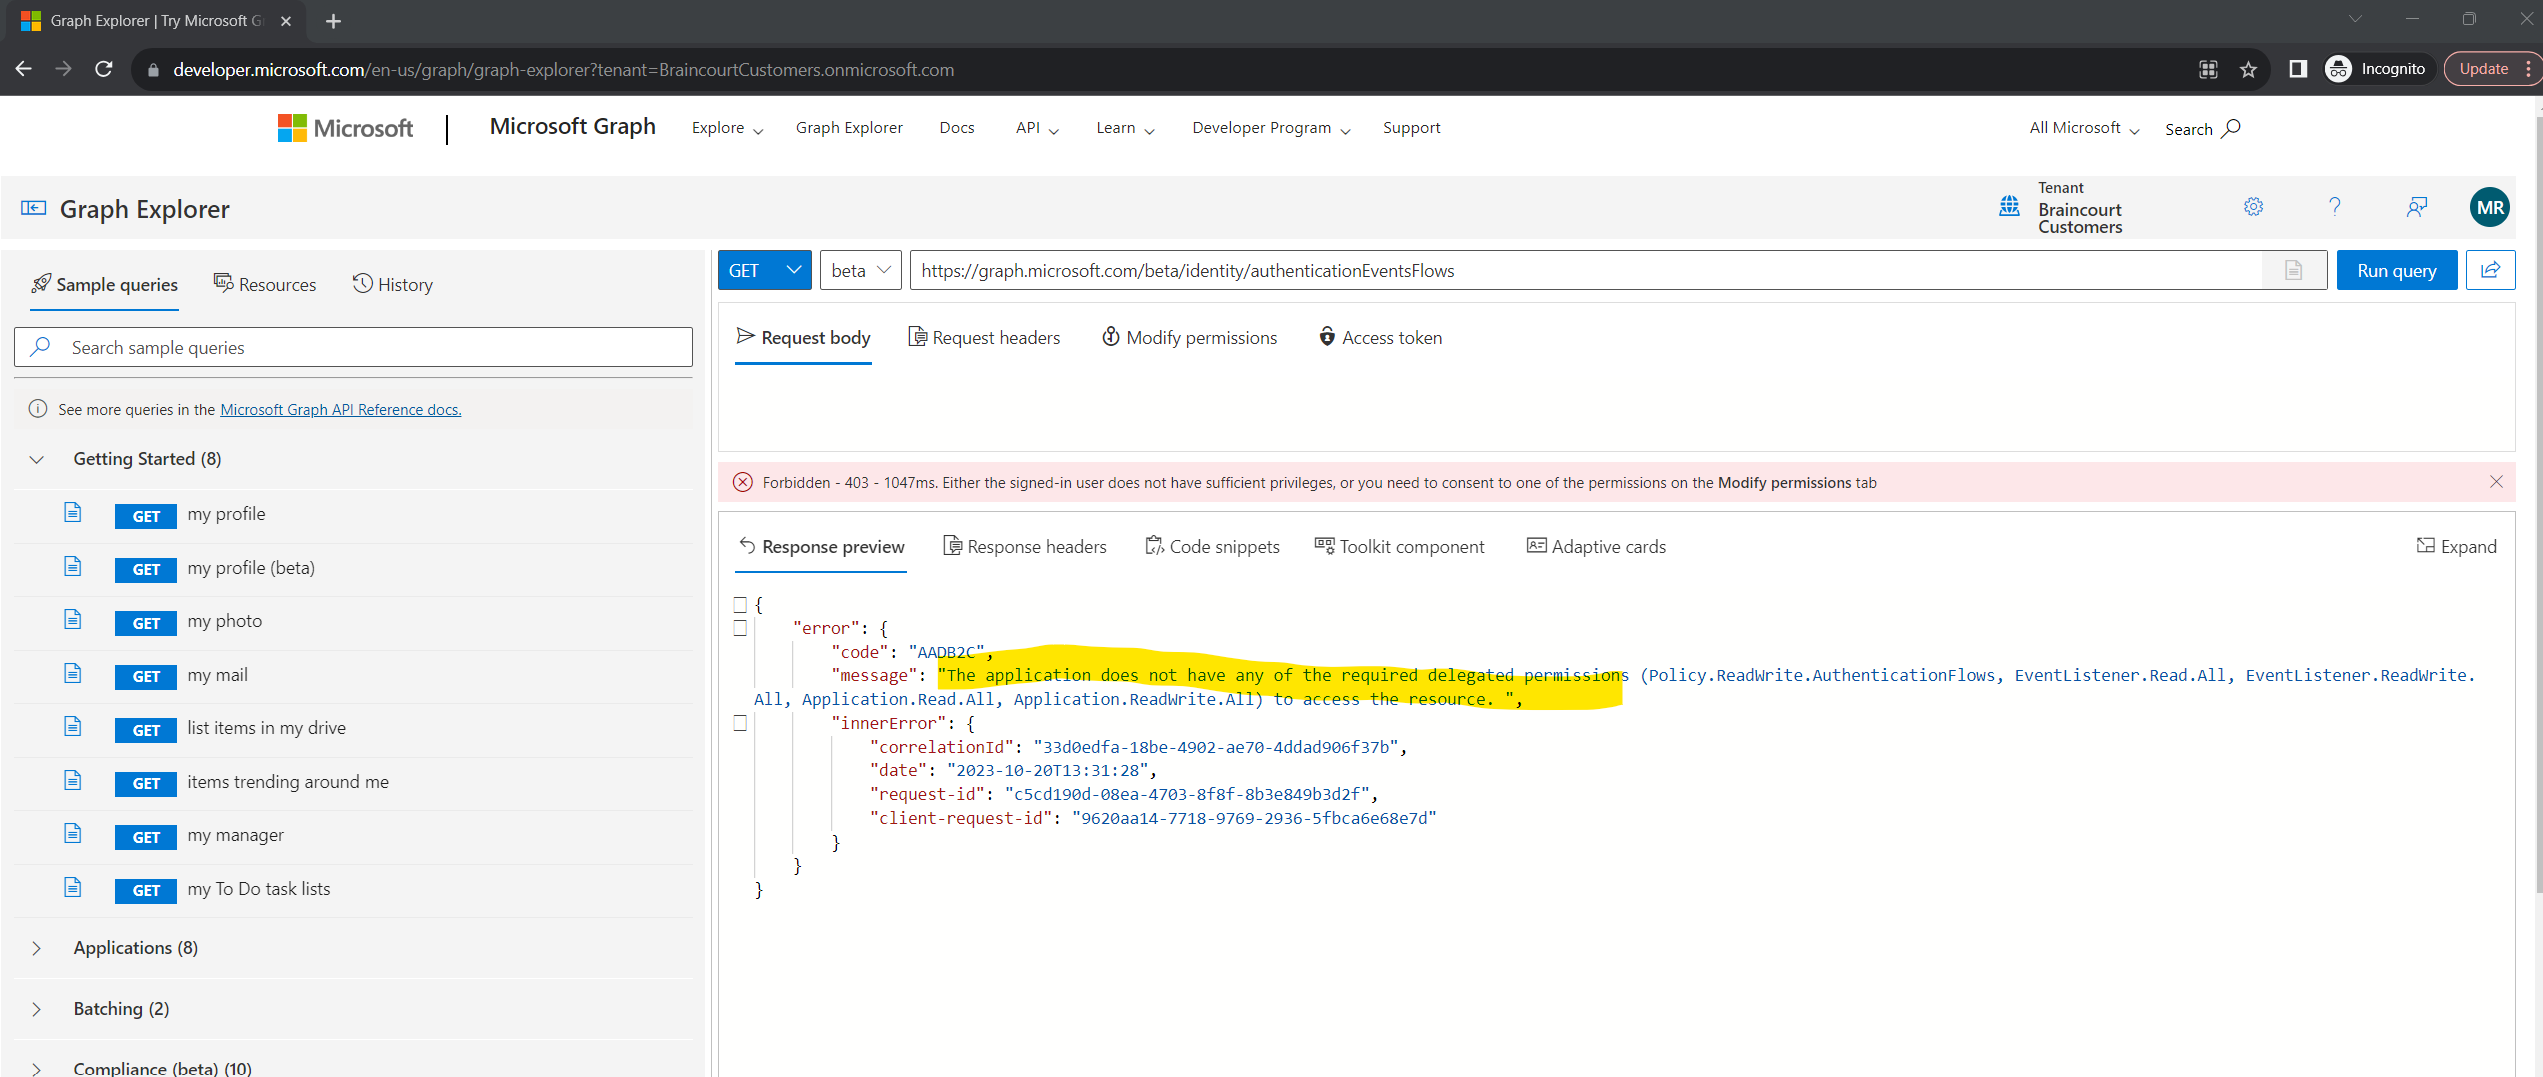
You can add these permissions within the Microsoft Graph Explorer as shown below.
The Consent to permissions option in the profile avatar contains the list of all available permissions. Click the profile avatar and choose the Consent to permissions option. This option contains the list of all available permissions.

From the list of all the permissions, consent to the ones you want.
Here I will search for all permissions I got previously back in the ‘The application does not have any of the required delegated permissions‘ response and then will consent to.
More about working with the Graph Explorer and consent to permissions you will find in the following Microsoft article.
https://learn.microsoft.com/en-us/graph/graph-explorer/graph-explorer-features


This I will repeat for all requested permissions to get a list of all user flows.
- Policy.ReadWrite.AuthenticationFlows
- EventListener.Read.All
- EventListener.ReadWrite.All
- Application.Read.All
- Application.ReadWrite.All
After consenting to these permissions, I was able to request a list of all user flows by using the following HTTP GET request message.
https://graph.microsoft.com/beta/identity/authenticationEventsFlows
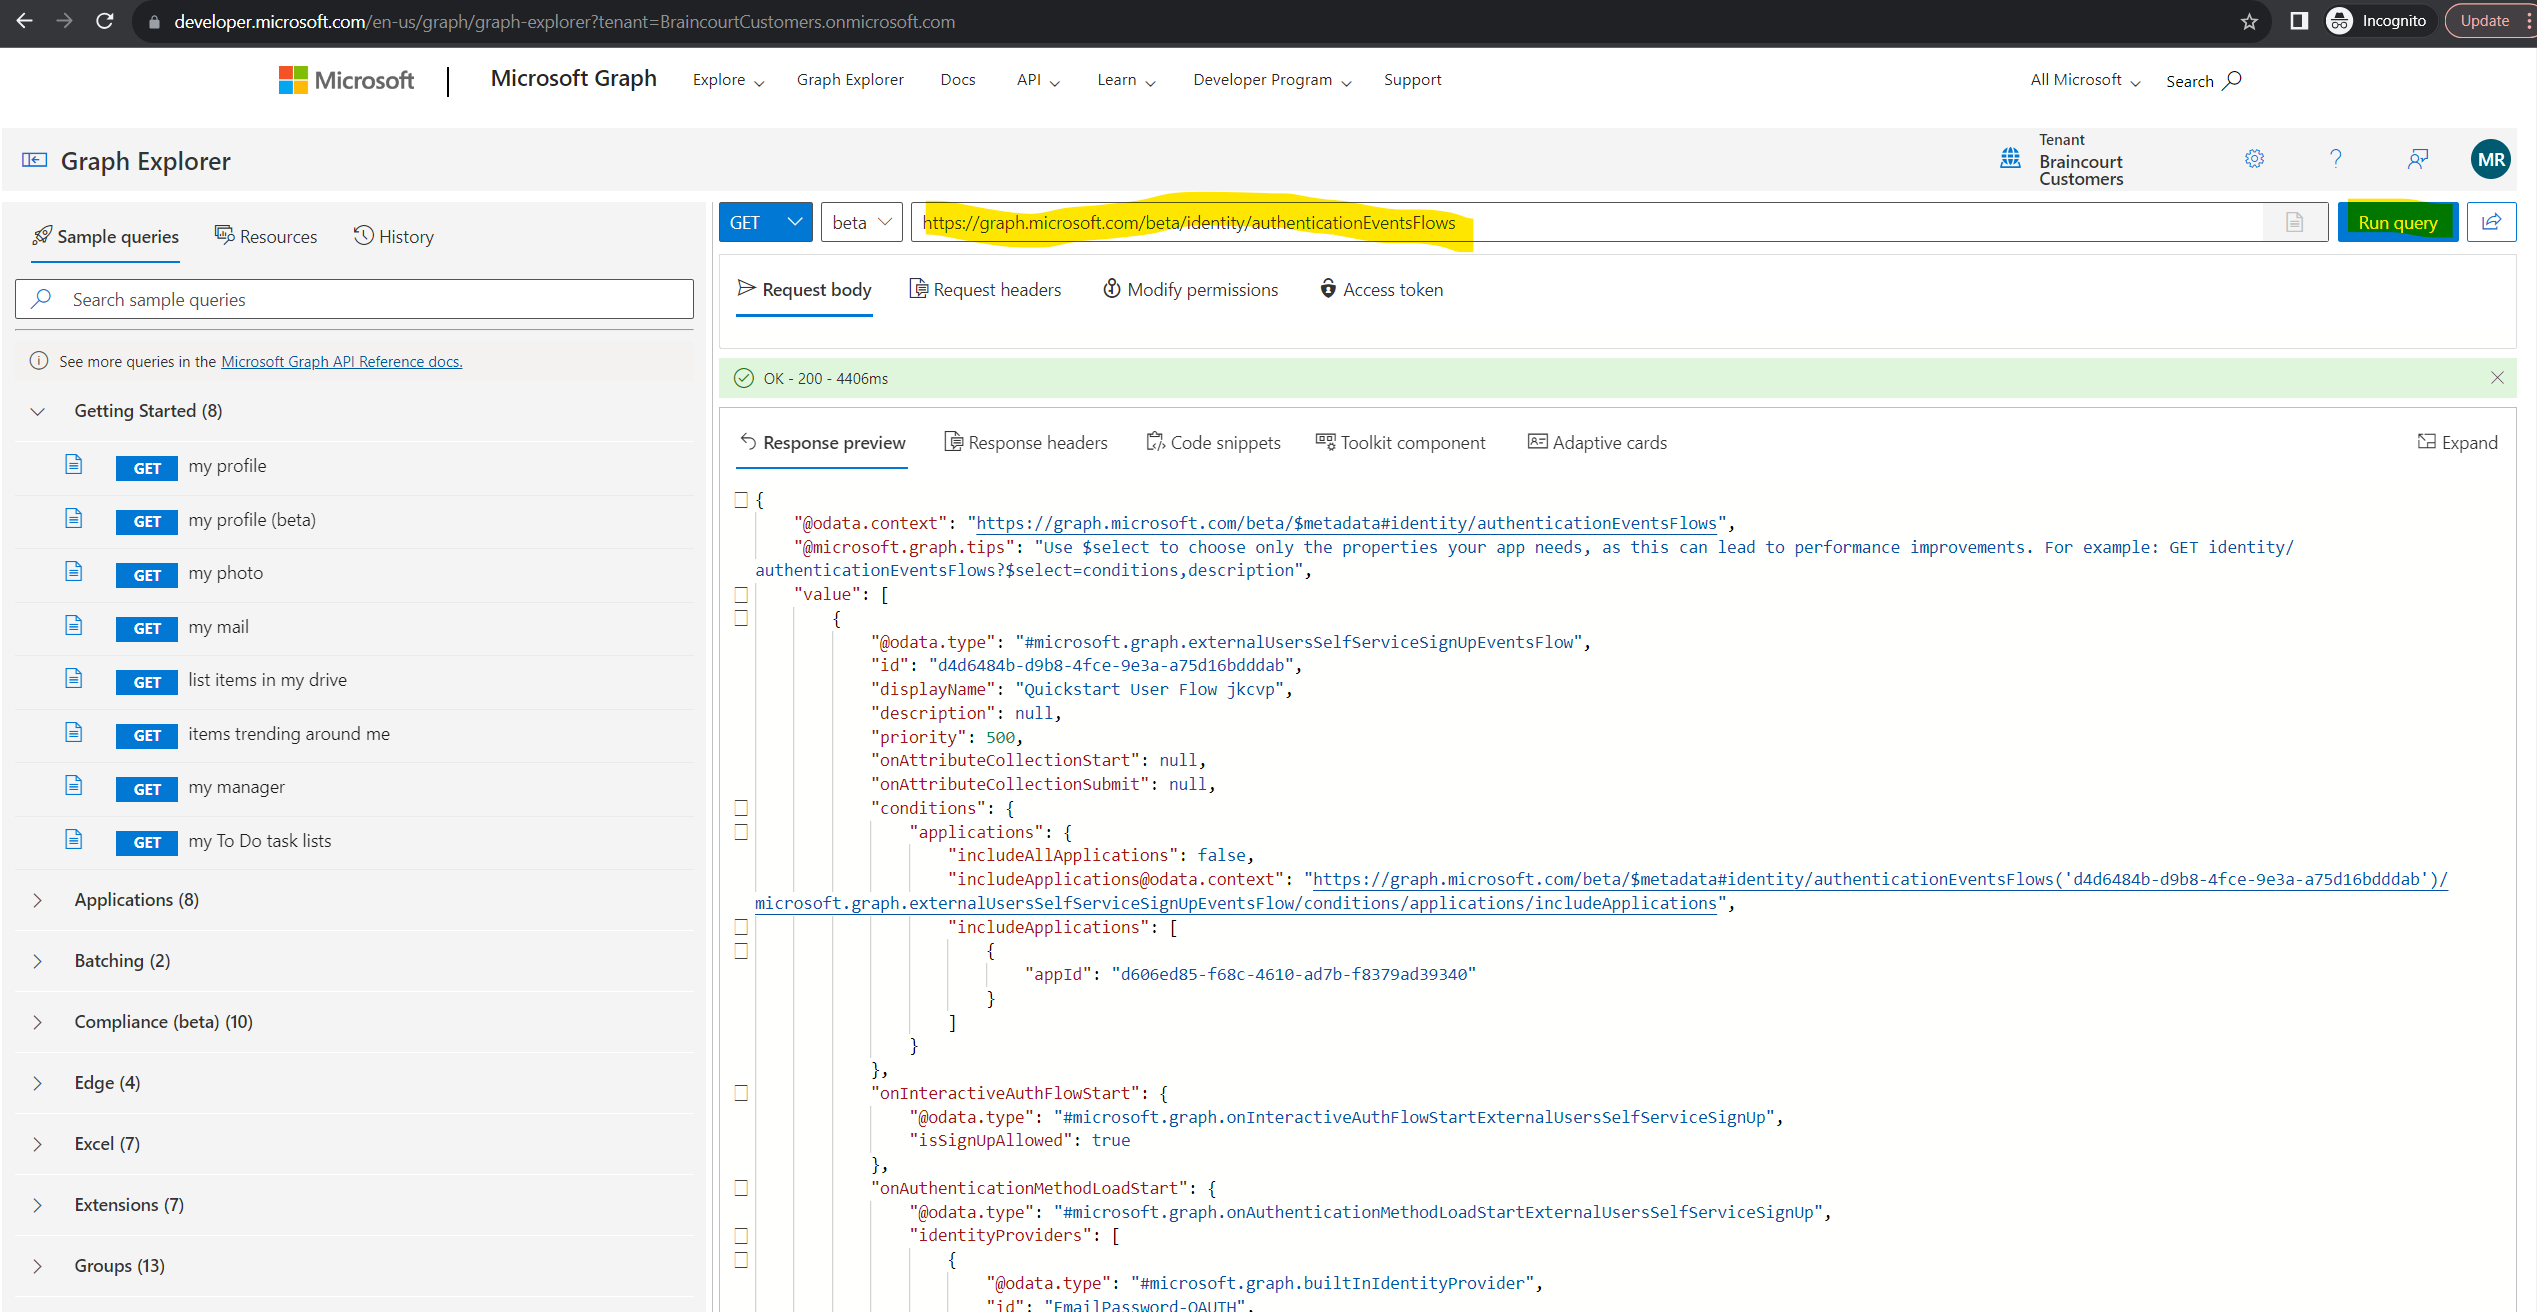
In the response we can search for the displayName of the user flow or our previously determined application ID.
Here will then find the ID from our user flow where we want to disable the sign-up for. In my case this is the red marked ID with 7fa51eef-076c-40a8-a461-c87730f9736f.

Now we can finally update our user flow to disable sign-up.
PATCH https://graph.microsoft.com/beta/identity/authenticationEventsFlows/{user-flow-id}
{
    "@odata.type": "#microsoft.graph.externalUsersSelfServiceSignUpEventsFlow",
    "onInteractiveAuthFlowStart": {
        "@odata.type": "#microsoft.graph.onInteractiveAuthFlowStartExternalUsersSelfServiceSignUp",
        "isSignUpAllowed": "false"
  }
}
Replace {user-flow-id} with the user flow ID that you obtained in the previous step. In my case 7fa51eef-076c-40a8-a461-c87730f9736f.
Notice the isSignUpAllowed parameter is set to false. To re-enable sign-up, make a call to the Microsoft Graph API endpoint, but set the isSignUpAllowed parameter to true.
Add your application to the user flow
A user flow defines the authentication methods a customer can use to sign in to your application and the information they need to provide during sign-up. After you create a user flow, you can associate it with one or more of the applications registered in your customer tenant.
Because you might want the same sign-in experience for all of your customer-facing apps, you can add multiple apps to the same user flow. But only one sign-in experience is needed for an application, so you can add each application to just one user flow.
If you already registered your application in your customer tenant, you can add it to the new user flow. This step activates the sign-up and sign-in experience for users who visit your application. An application can have only one user flow, but a user flow can be used by multiple applications.
Sign in to the Microsoft Entra admin center.
Browse to Identity > External Identities > User flows
From the list, select your user flow
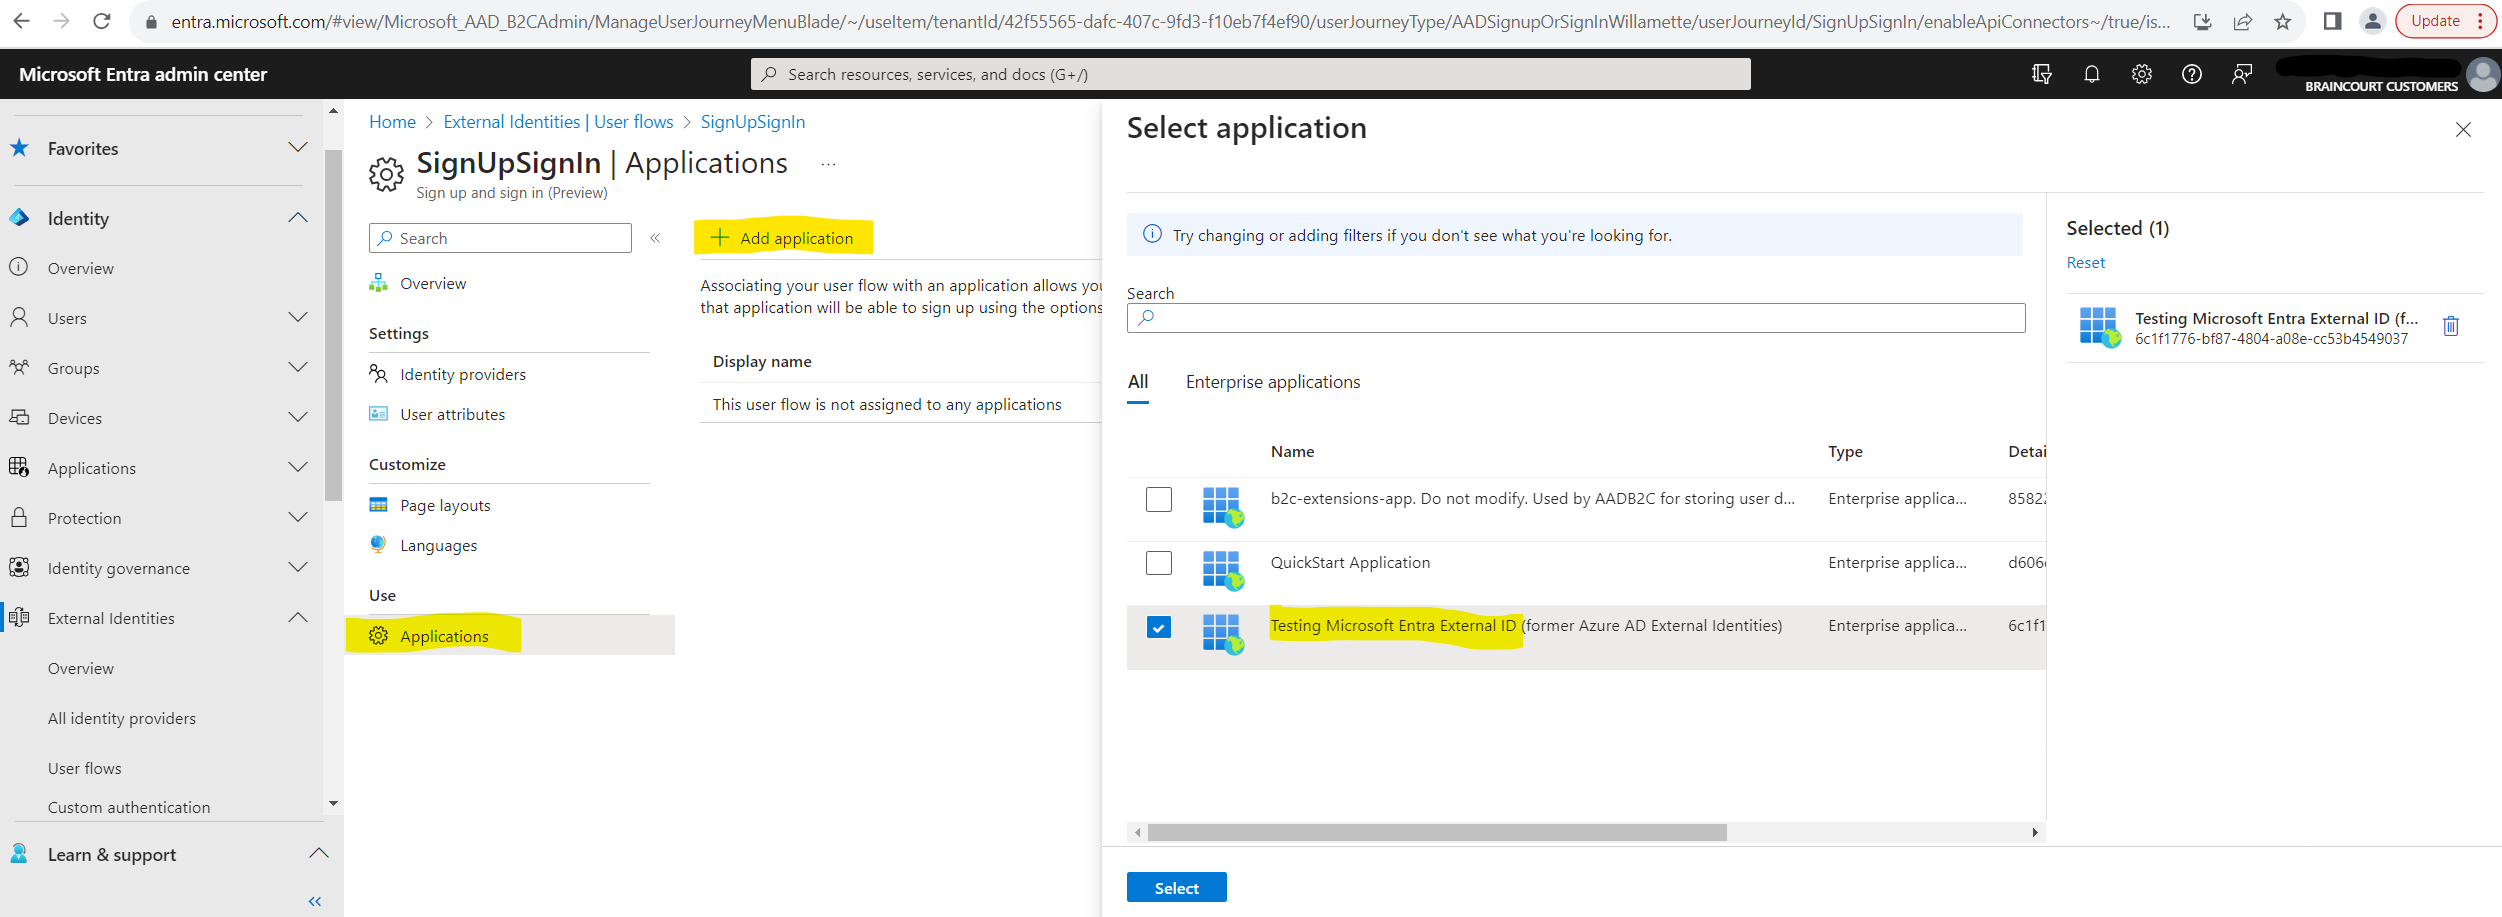
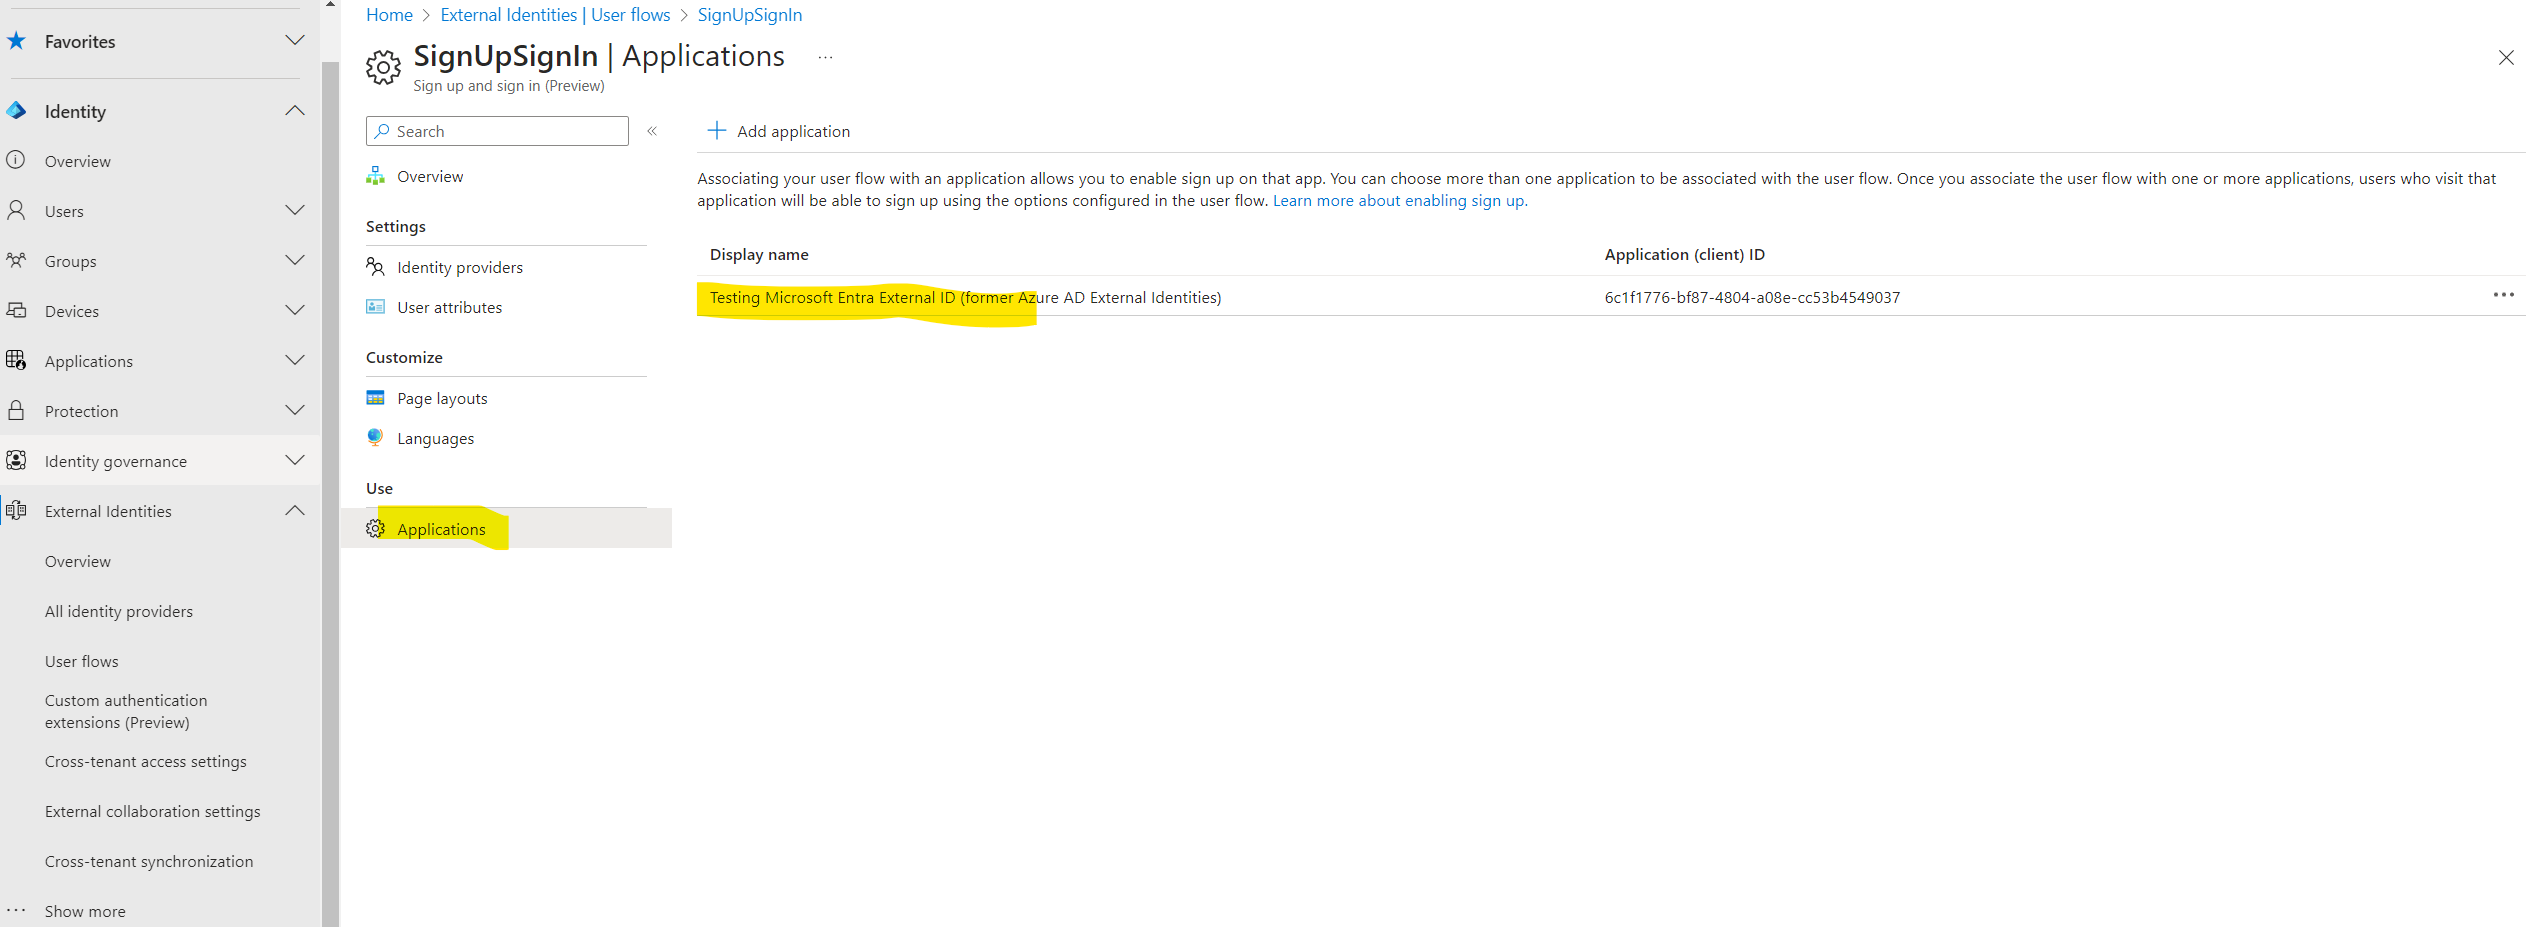
In the left menu, under Use, select Applications
In the left menu, under Use, select Applications
Select the application from the list. Or use the search box to find the application, and then select it.
You might find an app named b2c-extensions-app in the application list.
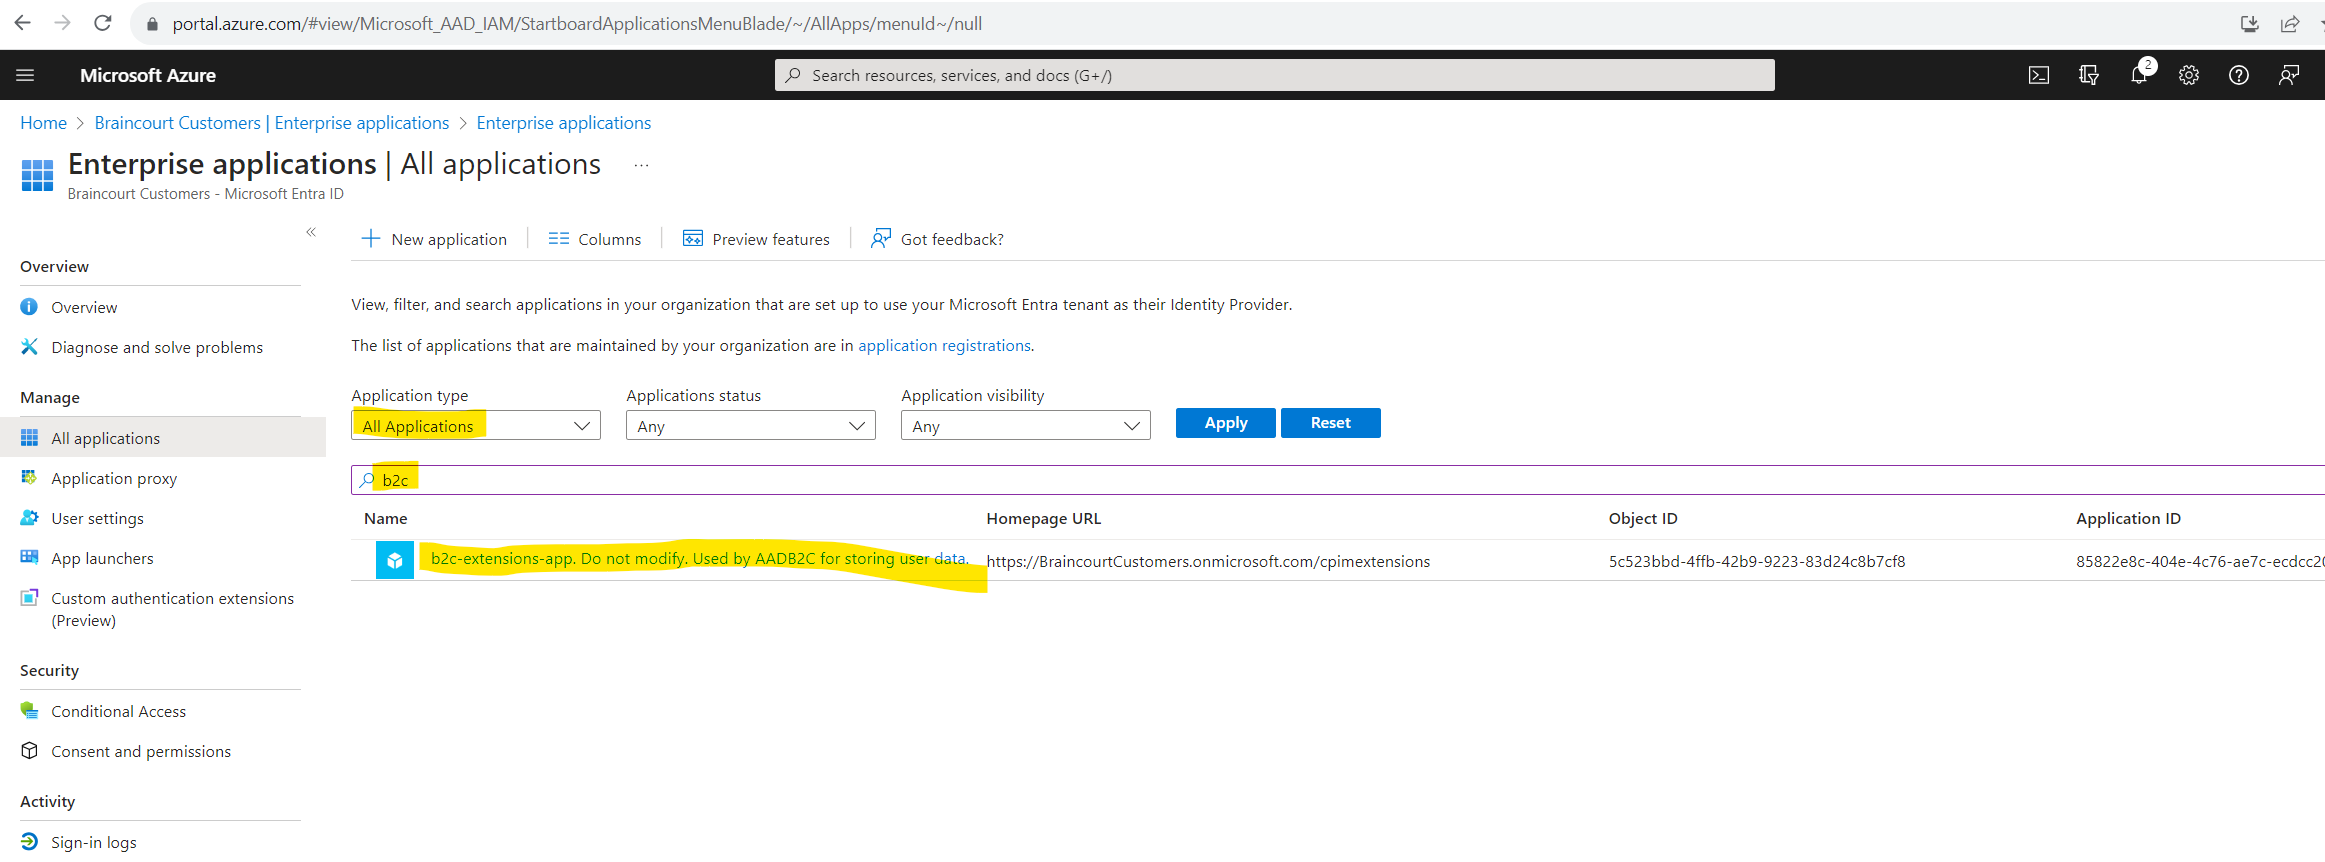
This app is created automatically inside the new directory, and it contains all extension attributes for your customer tenant. If you want to collect information beyond the built-in attributes, you can create custom user attributes and add them to your sign-up user flow. Custom attributes are also known as directory extension attributes, as they extend the user profile information stored in your customer directory. All extension attributes for your customer tenant are stored in the b2c-extensions-app. Do not delete this app. You can learn more about this app here.
Because I selected previously email with password sign-in, I also need to enable password reset which is shown in the next section.
Enable self-service password reset
Self-service password reset (SSPR) in Microsoft Entra ID for customers gives customers the ability to change or reset their password, with no administrator or help desk involvement. If a customer’s account is locked or they forget their password, they can follow prompts to unblock themselves and get back to work.
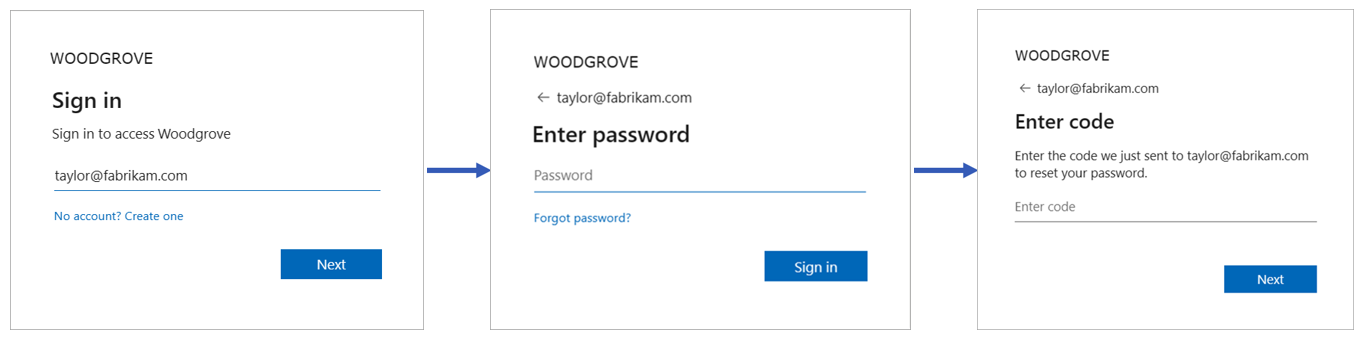
The self-service password uses the email one-time passcode (Email OTP) authentication. When enabled, customer users who forgot their passwords use Email OTP authentication. With one-time passcode authentication, users verify their identity by entering the one-time passcode sent to their email address, and are then prompted to change their password.
The following screenshots show the self-service password rest flow. From the app, the customer chooses to sign-in. On the sign-in page, the user types their email and selects Next. If users forgot their password, they choose the Forgot password? option. Microsoft Entra ID sends the passcode to email address provided on the first page. The customer needs to type the passcode to continue.
To enable self-service password reset for customers sign to the Microsoft Entra admin center.
In my case both, self-service password reset for customers and email one-time passcode (Email OTP) was already enabled by default. To be sure check them as described below.
As usually if you have access to multiple tenants, use the Switch directory link in the top menu again to switch to your customer tenant.
Browse to Identity > External Identities > User flows
From the list of User flows, select the user flow you want to enable SSPR.
Make sure that the sign-up user flow registers Email with password as an authentication method under Identity providers.
To enable self-service password reset, you need to enable the email one-time passcode (Email OTP) authentication method for all users in your tenant. To ensure that the Email OTP feature is enabled follow the steps below:
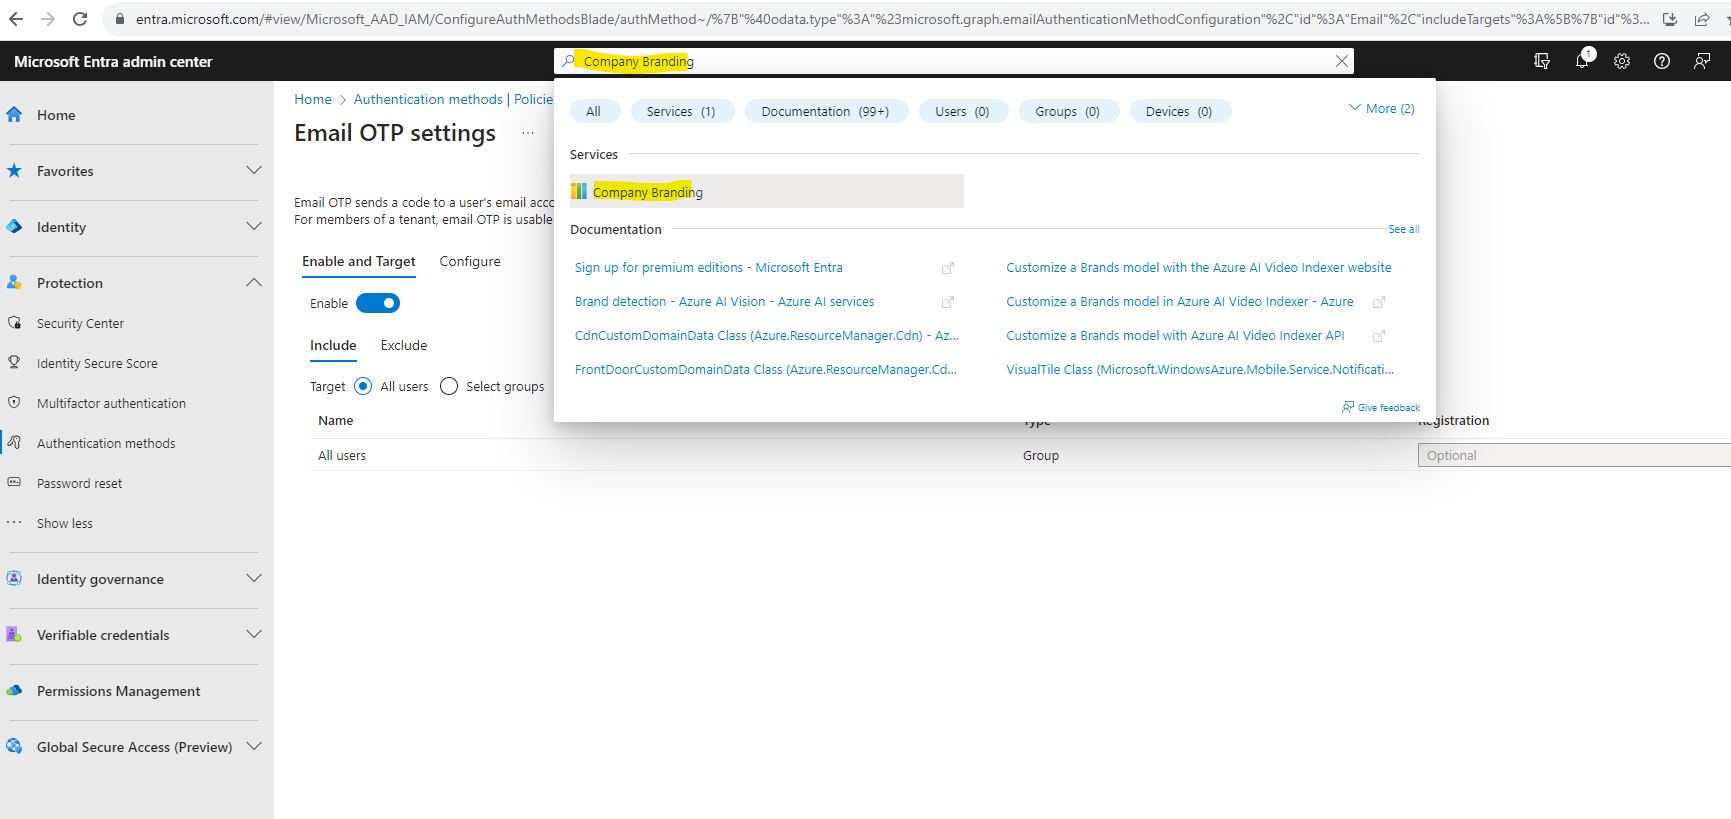
Browse to Identity > Protection > Authentication methods
Under Policies > Method select Email OTP (preview)

Under Enable and Target enable Email OTP and select All users under Include and select Save.

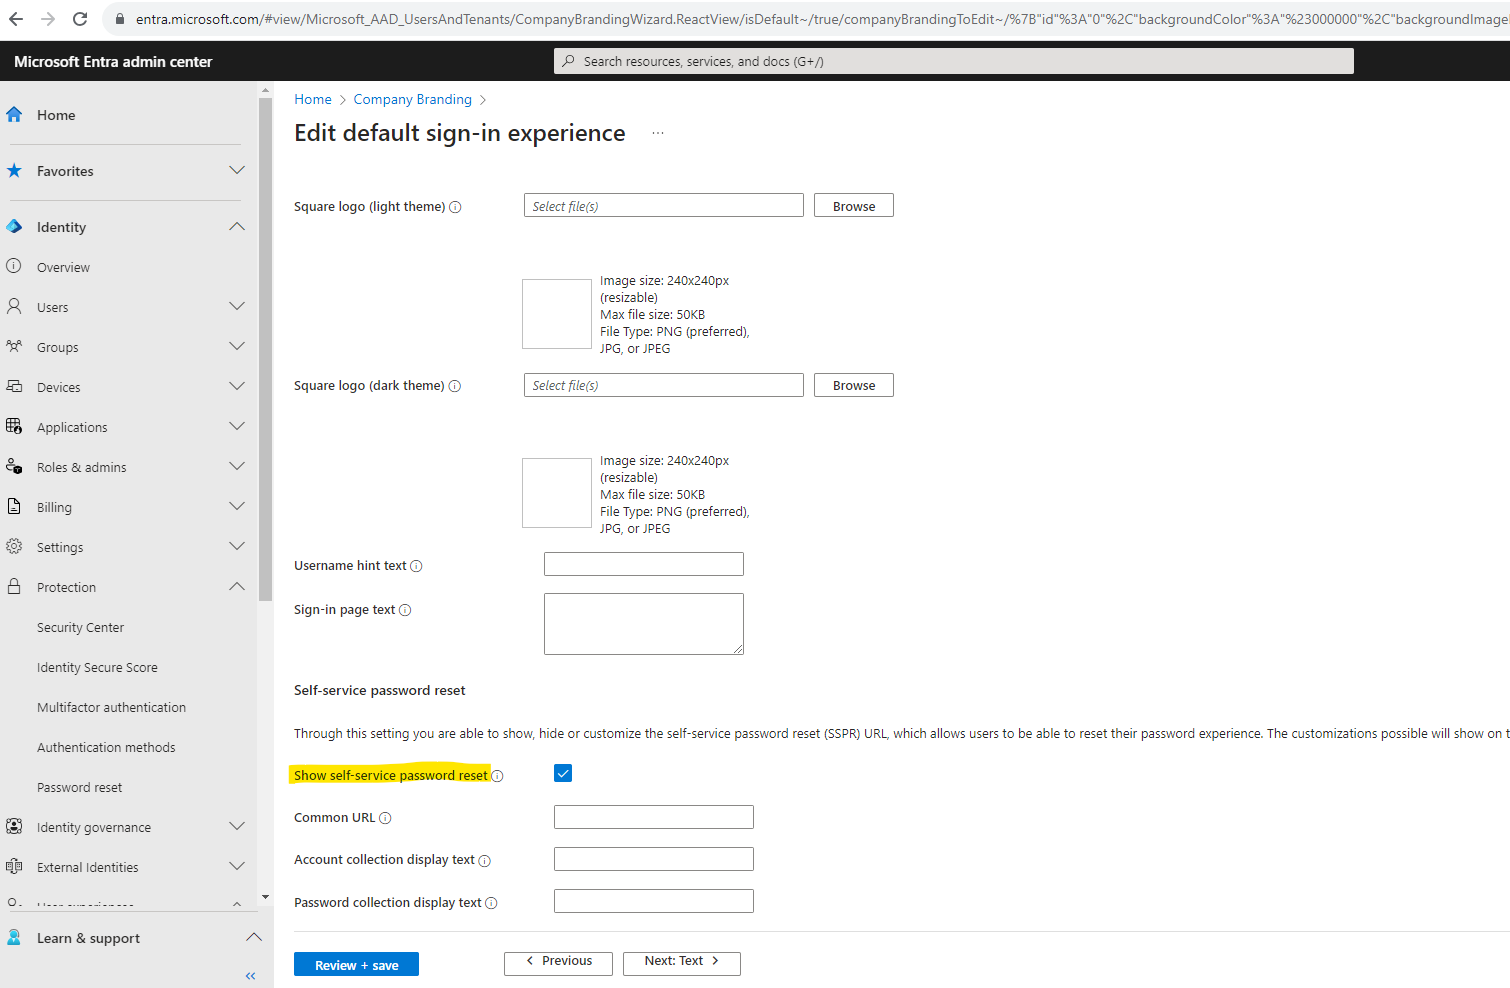
Finally we need to enable the password reset link.
In the search bar, type and select Company Branding
Under Default sign-in select Edit
On the Sign-in form tab, scroll to the Self-service password reset section and select Show self-service password reset.
Select Review + save and Save on the Review tab.
For more details, check out the Customize the neutral branding in your customer tenant article.
Testing User Flow Sign-in to our Application
Now finally we can test the user flow sign-in to our application. As you remember for demonstration purpose I was using for the redirect URI http://localhost:3000.
During app development, you might add the endpoint where your application listens locally, like http://localhost:3000. You can add and modify redirect URIs in your registered applications at any time.
The redirect URI is the destination when returning authentication responses (tokens) after successfully authenticating or signing out users. The redirect URI will be send in the request to the login server (authorization server in context of OAuth).
More about OAuth and OpenID Connect you will find in my following post https://blog.matrixpost.net/oauth-2-0-and-openid-connect-deep-dive/
Remember the following restrictions apply to redirect URIs:
- The reply URL must begin with the scheme https, unless you use a localhost redirect URL.
- The reply URL is case-sensitive. Its case must match the case of the URL path of your running application. For example, if your application includes as part of its path …/abc/response-oidc, do not specify …/ABC/response-oidc in the reply URL. Because the web browser treats paths as case-sensitive, cookies associated with …/abc/response-oidc may be excluded if redirected to the case-mismatched …/ABC/response-oidc URL.
- The reply URL should include or exclude the trailing forward slash as your application expects it. For example, https://contoso.com/auth-response and https://contoso.com/auth-response/ might be treated as non-matching URLs in your application.
To add or modify redirect URIs after you already registered the application, please go to Microsoft Entra ID -> App registrations -> select your app
Note! Ensure that you switched already to your customers tenant.
Click on the Redirect URIs link or in left menu under Manage on Authentication to change the redirect URI.

Here you can modify or delete your existing URI or you can add a new one.

As mentioned to the beginning, about how to create a web app and register it to Microsoft Entra ID (formerly Azure AD), you can also read my following post.
To demonstrate the user flow sign-in for external customers (Microsoft Entra External ID) I will also use here such a custom ASP.NET Core Web App.
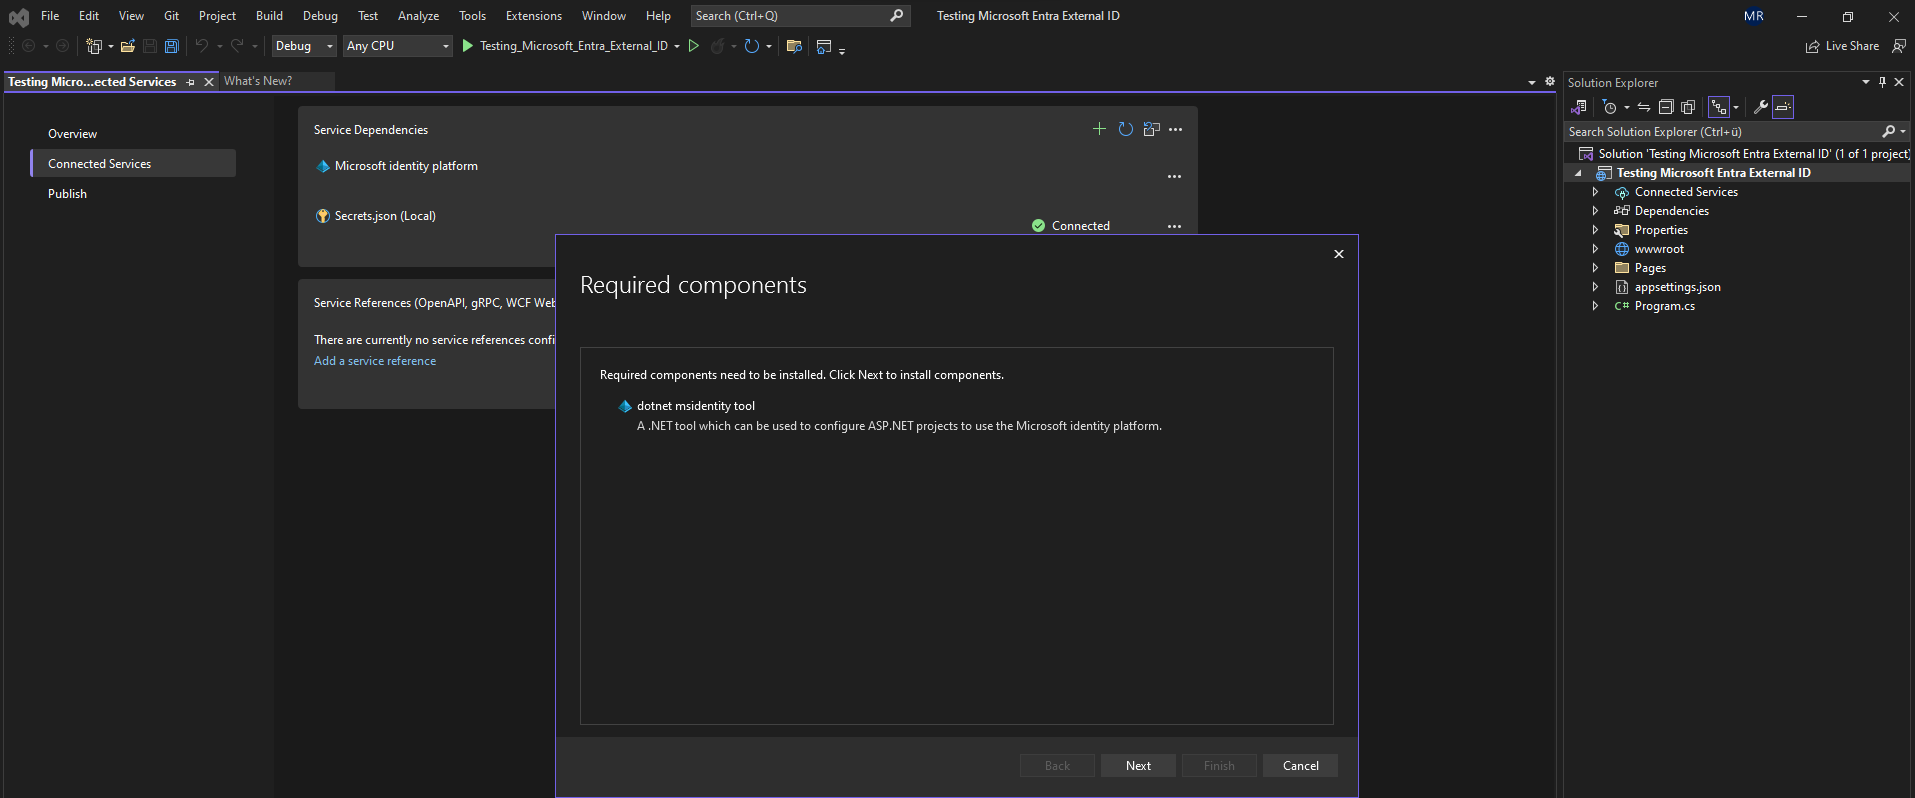
Visual Studio offers us here an authentication type with Microsoft identity platform which I will choose for the app.
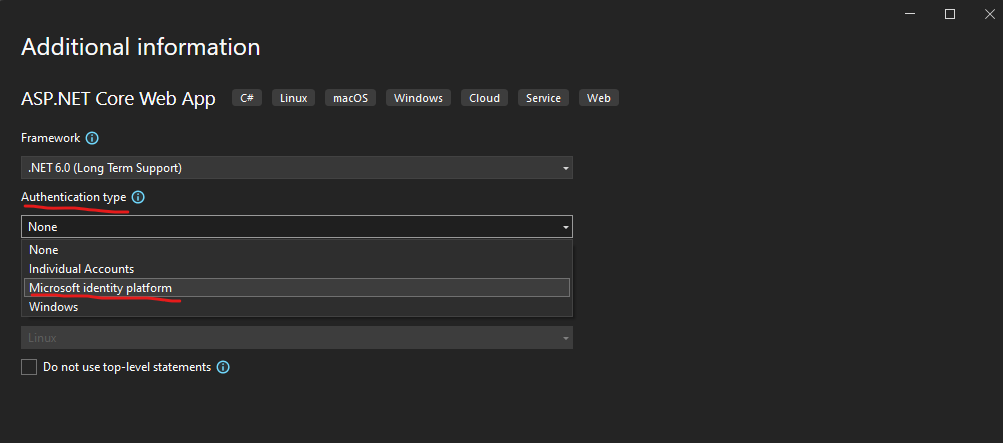
This will also install a component named msidentity tool which makes it easy for us to configure this app to use the Microsoft Identity platform.
By the way this is new and wasn’t available at the time I wrote the post above about how to create a web app and register it to Microsoft Entra ID (formerly Azure AD).
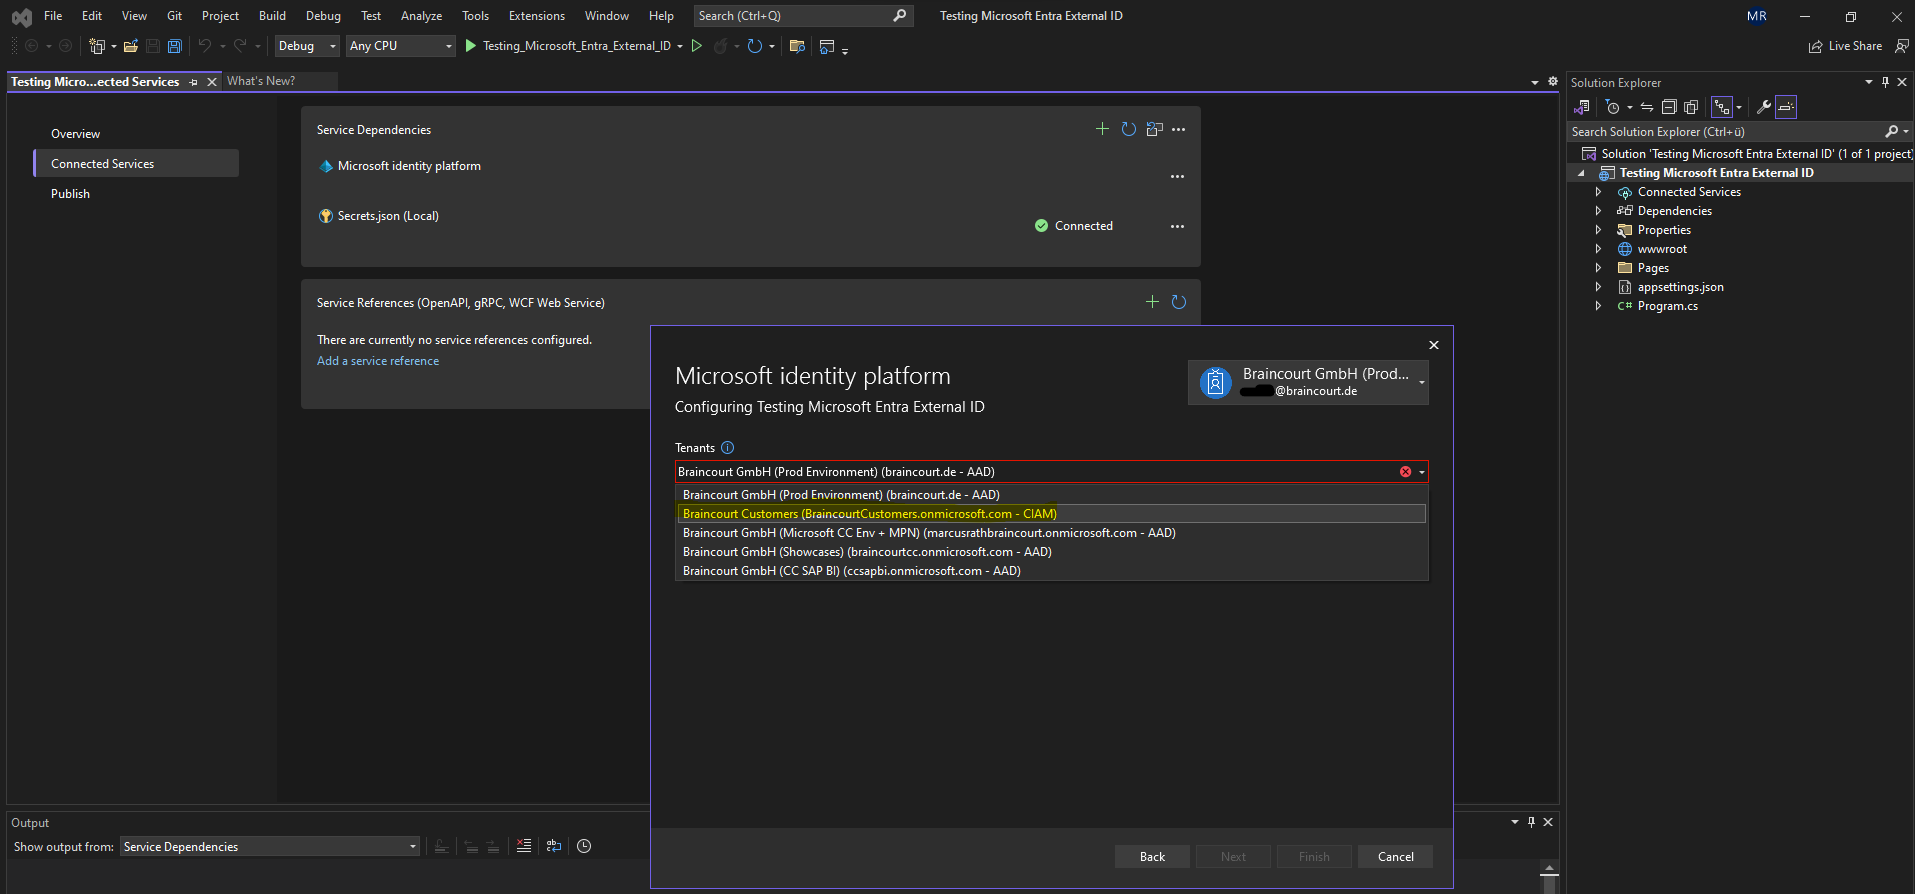
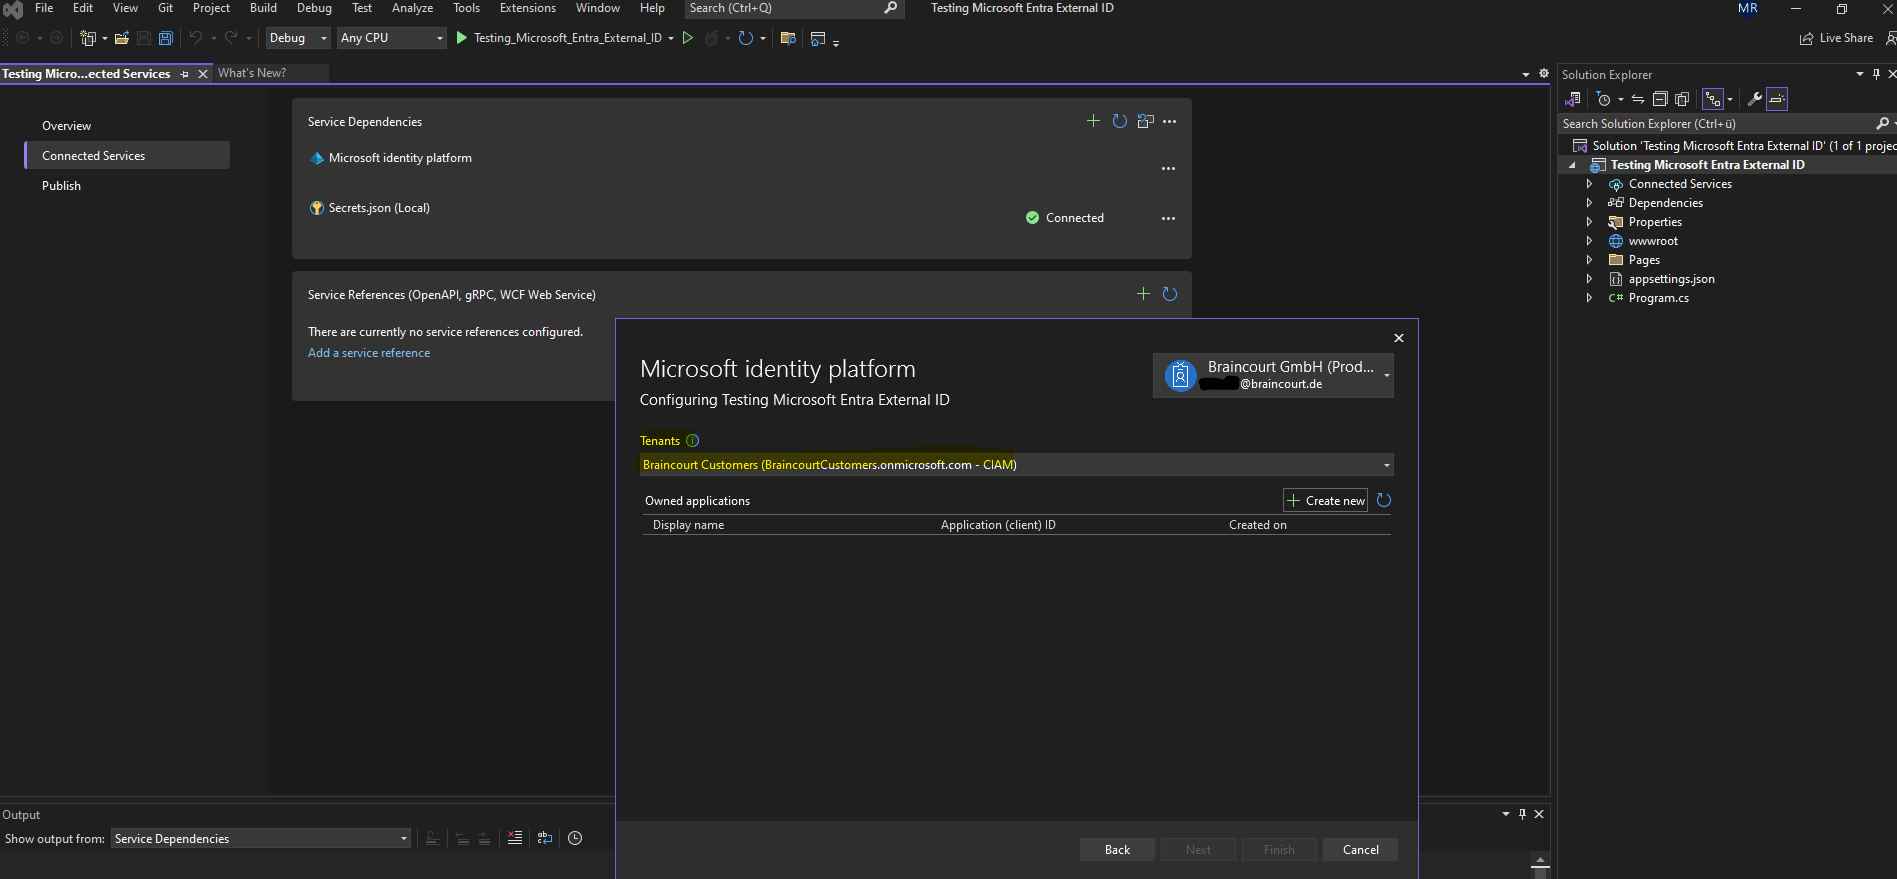
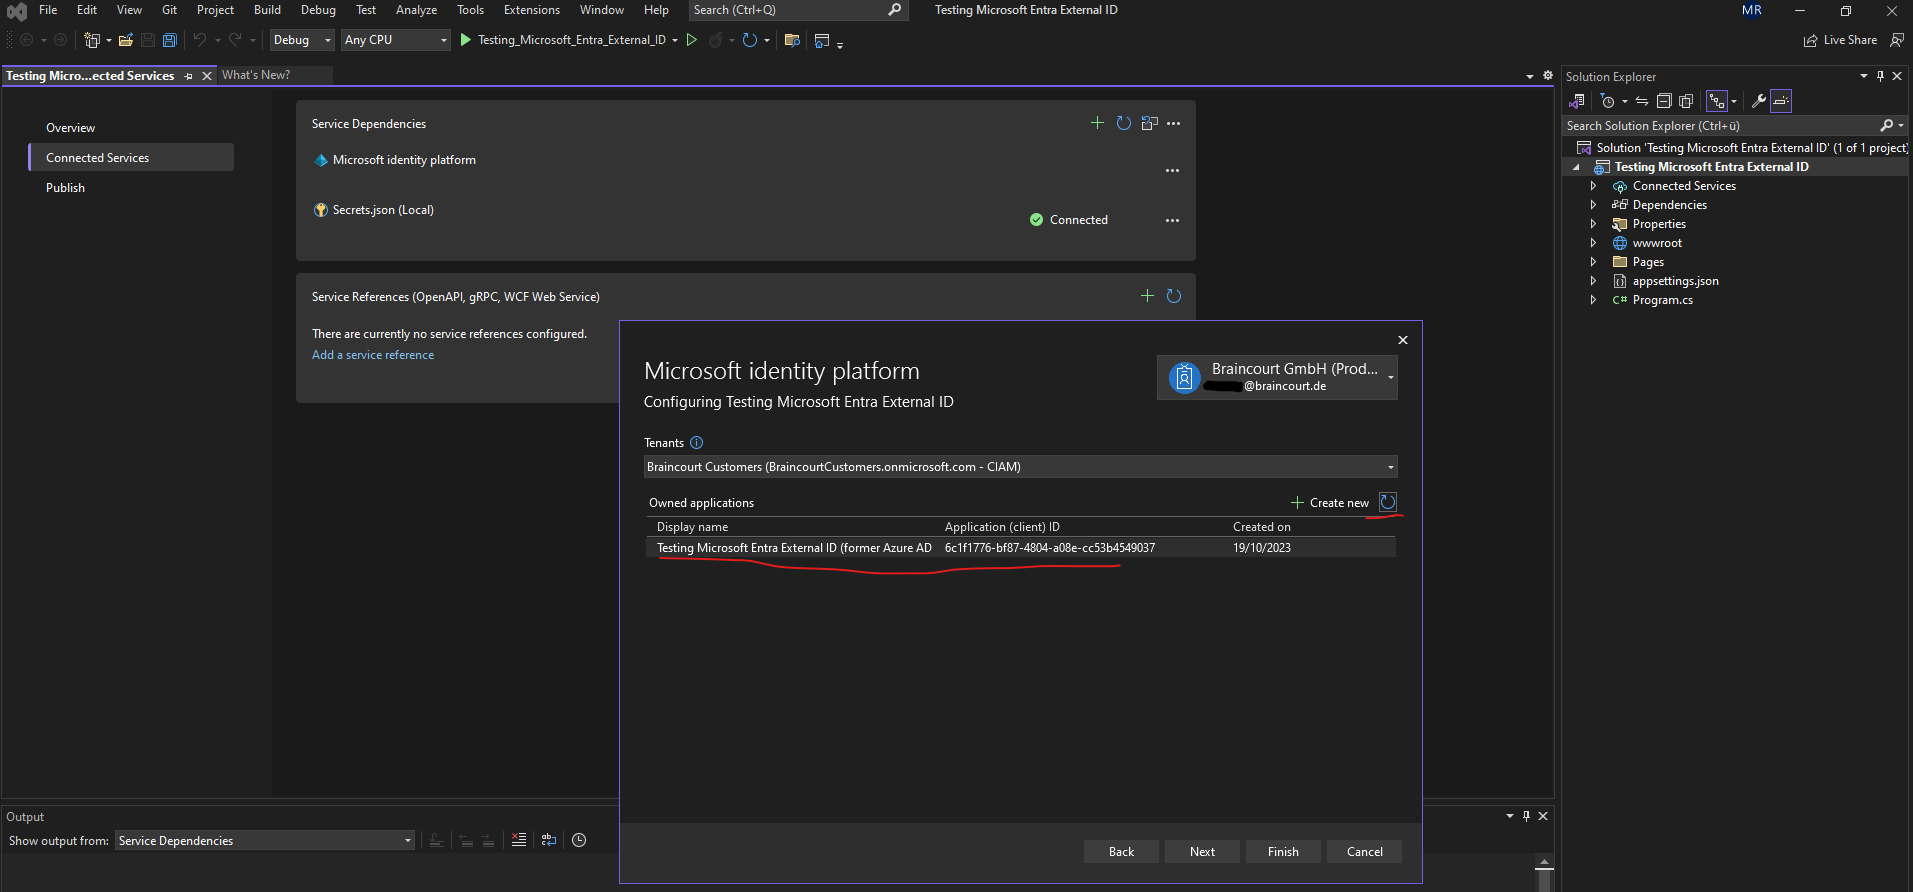
Within this tool I first need to switch to my customers tenant in order to determine all my owned applications.
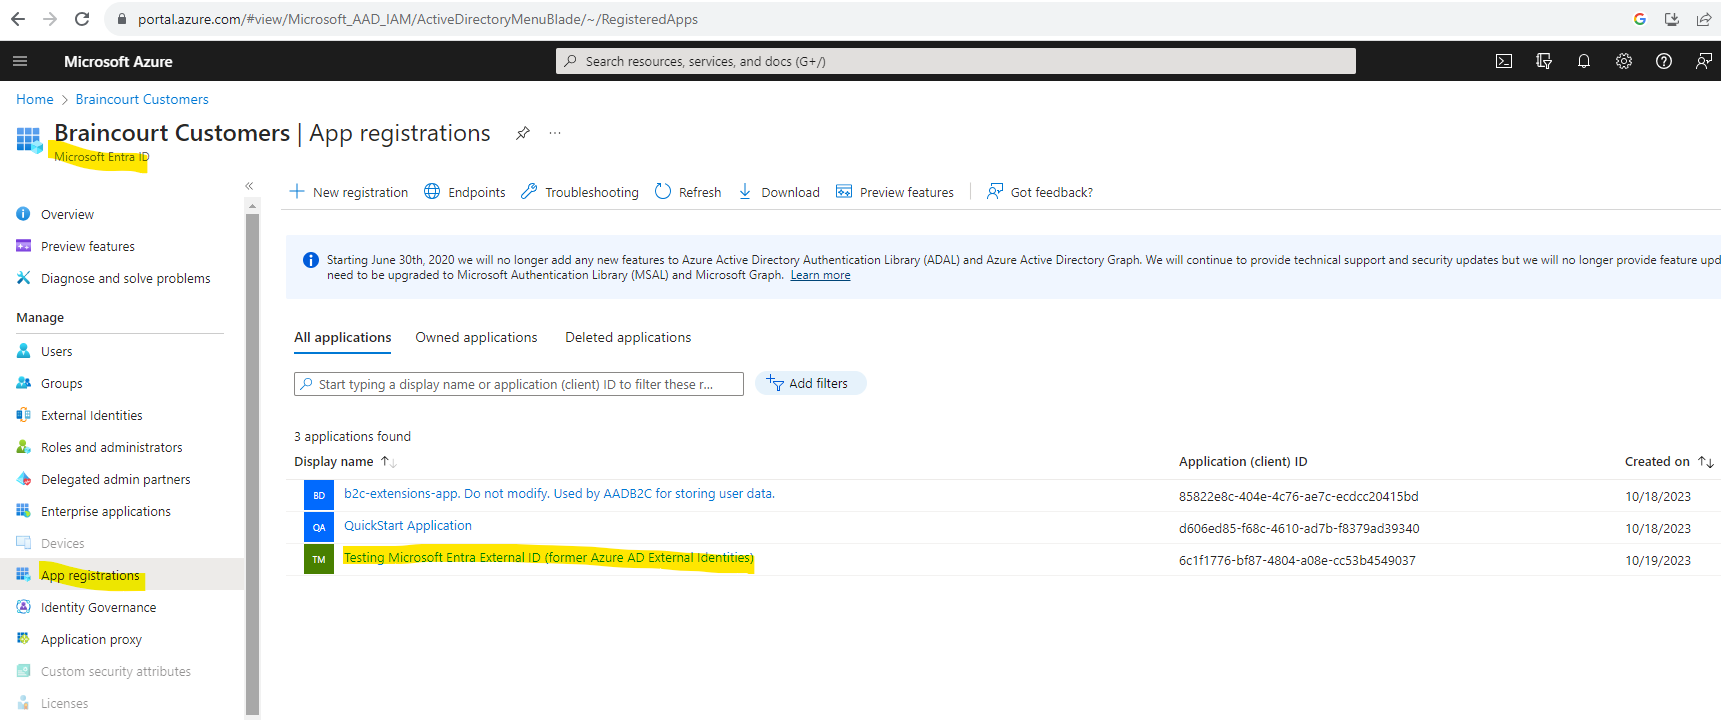
Ok, seems that my account doesn’t own any applications in my customers tenant, I couldn’t find here my application we created previously and named Testing Microsoft Entra External ID (former Azure AD External Identities).
Also in Microsoft Entra ID -> App registrations -> Owned applications I couldn’t find my previously created application.
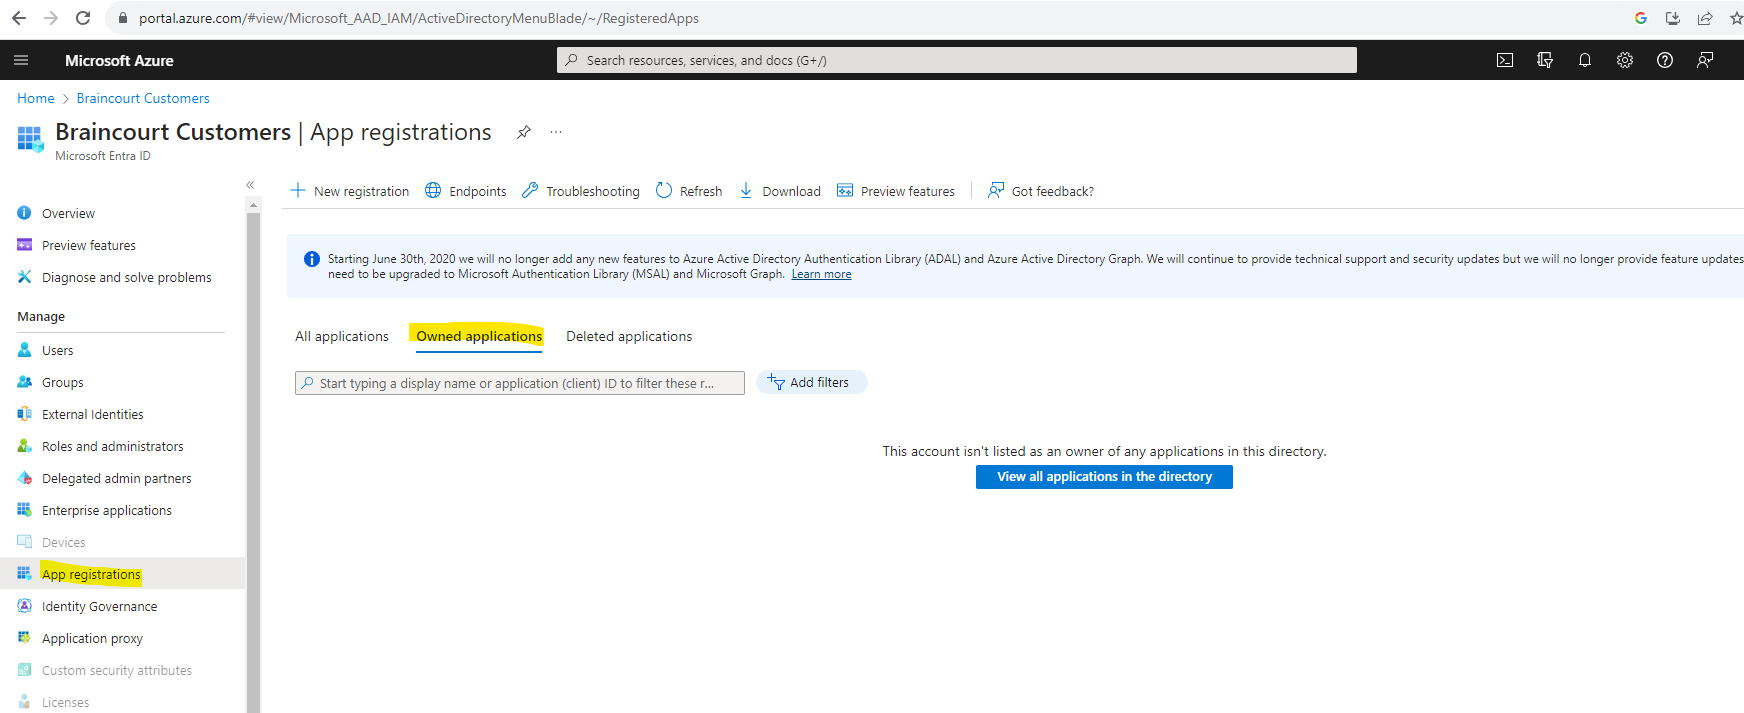
So far the app is just listed under All applications.

To check the owners for the app we can click above on the app and here below we click on Owners in the left menu.

Seems that even I created this app with my own account, this will not add the user by default as owner for the app.

So I will explicit add my user account as owner by clicking on Add owners.

Now I will check if the app is now listed under Owned applications in the App registration blade. Looks good!

So now the app should also be detected by the msidentity tool in Visual Studio. Let’s see. After clicking on the refresh button my application appears also here.
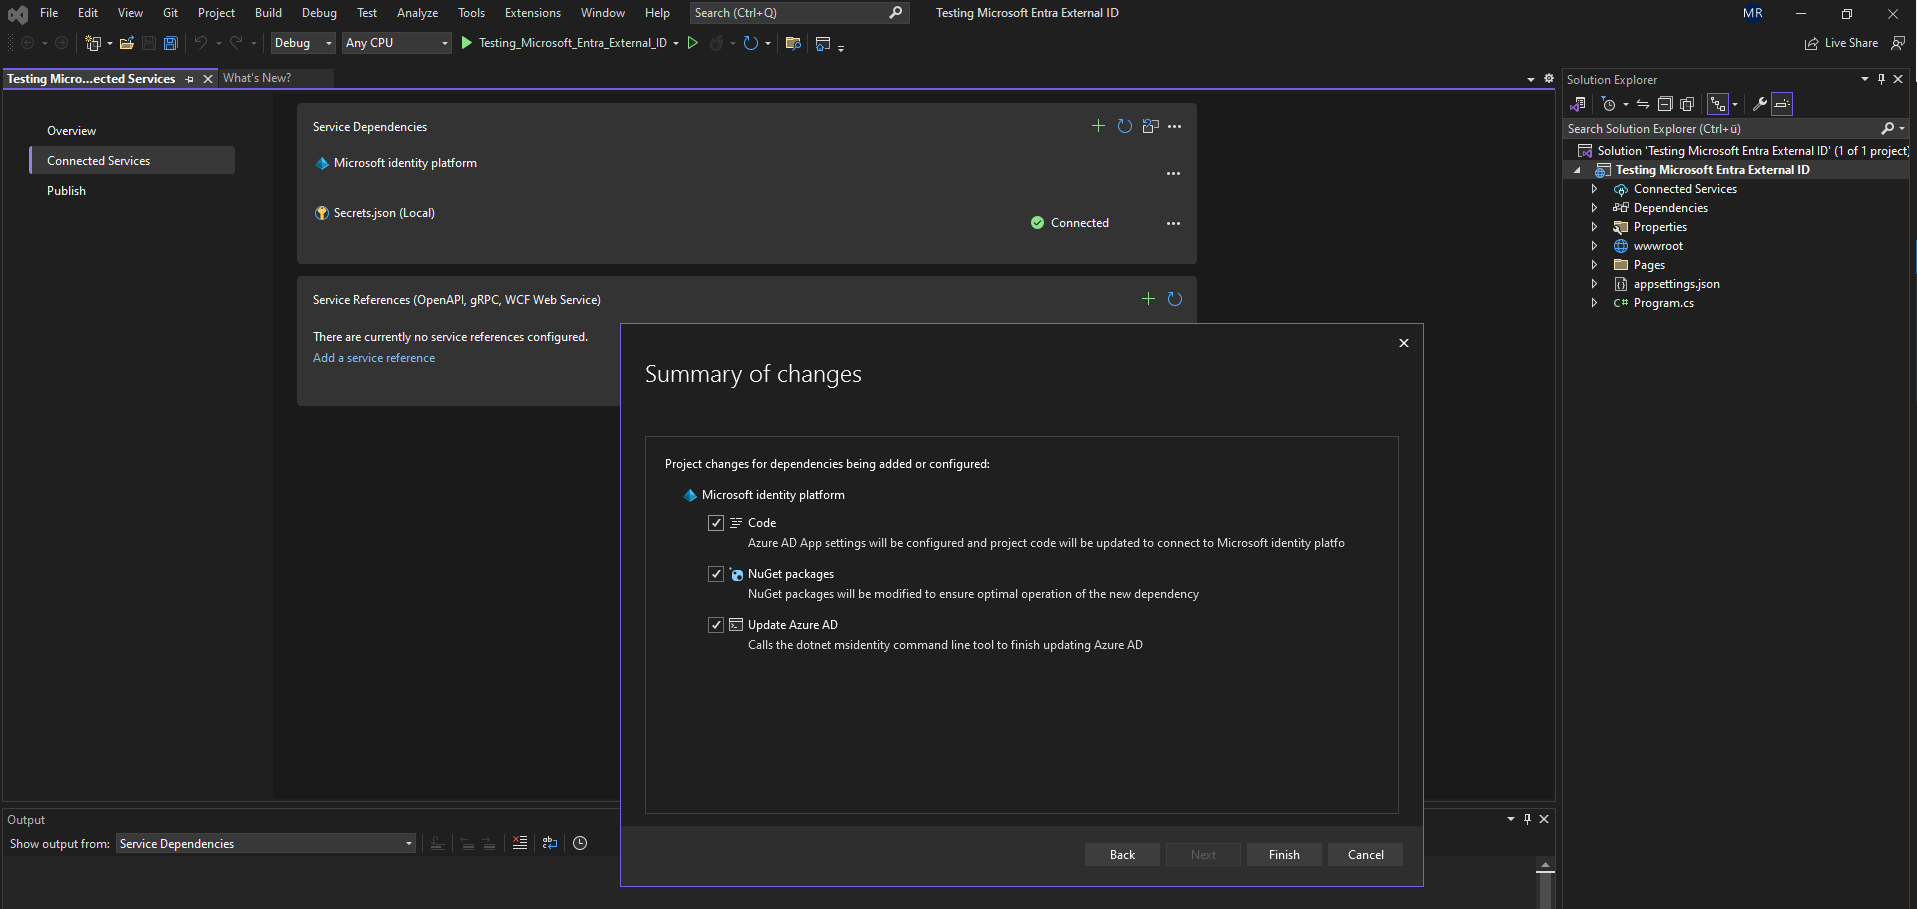
The tool will also add some dependencies in order our app can use the Microsoft Identity platform.

When we now open the appsettings.json file, we can see that the tool already added our AppID as ClientId here. The Client Secret value we previously hopefully recorded it during app registration because we need to enter it here by hand and it is not retrievable anymore.

In case you didn’t record the secret value during app registration, you can delete the secret here and create a new one.
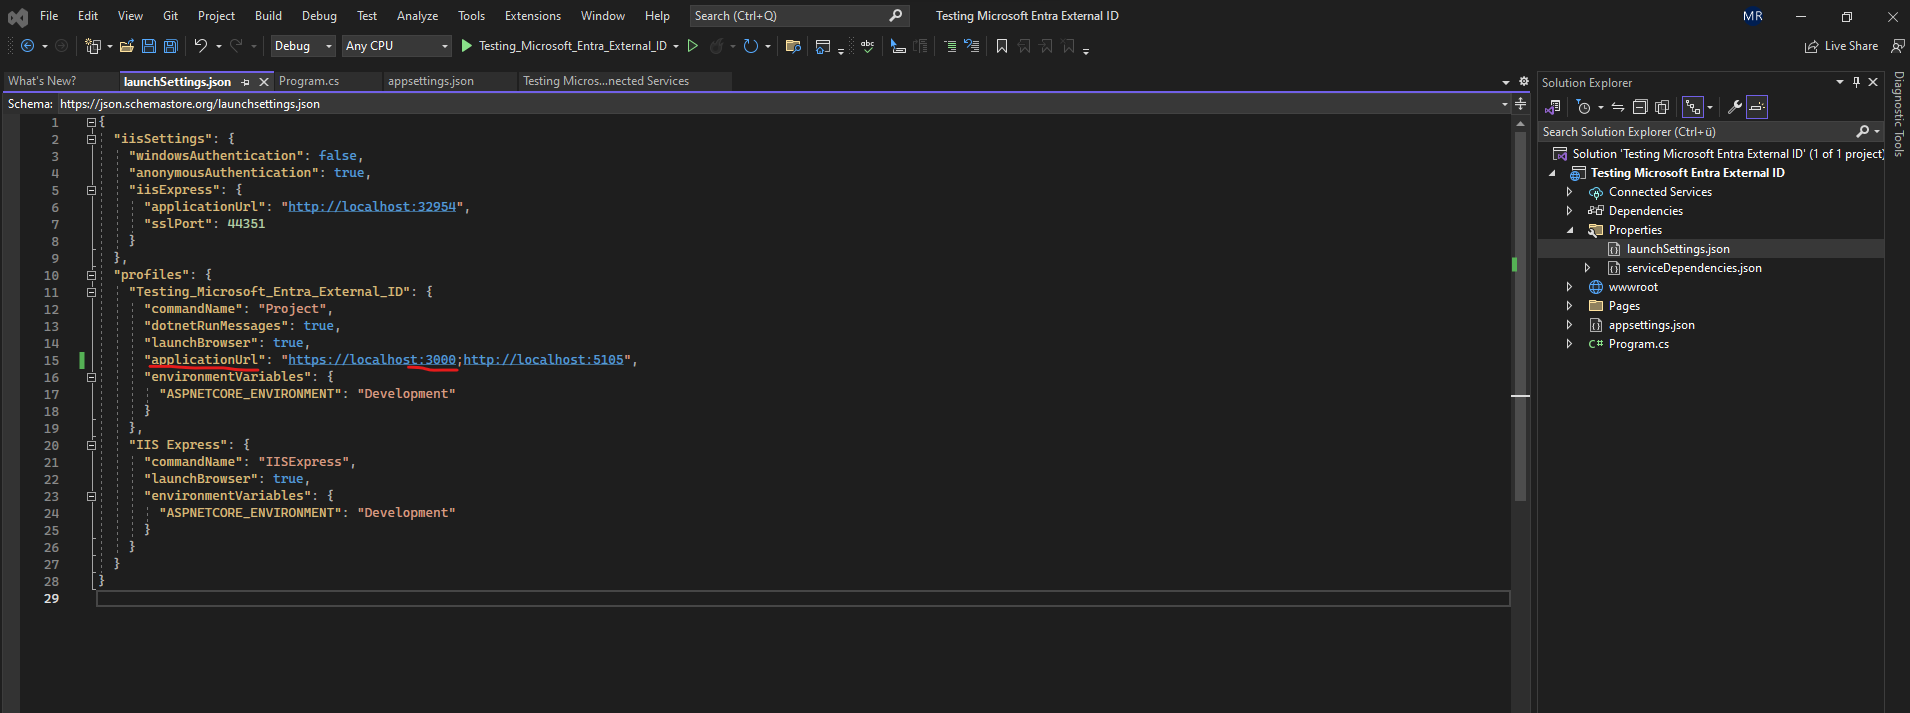
Before starting my app to testing the sign-in experience for customers, I first need to adjust the port to 3000 as set in the app registration for the redirect URI.
I will just adjust the https URI.
Now I will launch my app by starting debugging pressing F5 in Visual Studio. I will use the chrome browser for testing which will not allow invalid certificates here.

When using the google chrome browser just enter the following into the URL field to enable invalid certificates for resources loaded from localhost.
chrome://flags/#allow-insecure-localhost

Now it should work, so I will debug the app again by pressing F5 in Visual Studio.
Looks good, the app will redirect me directly to the OAuth authorization server for the customers tenant.
The URI for the authorization server is listed in the appsettings.json file and was added by default from the msidentity tool component previously.
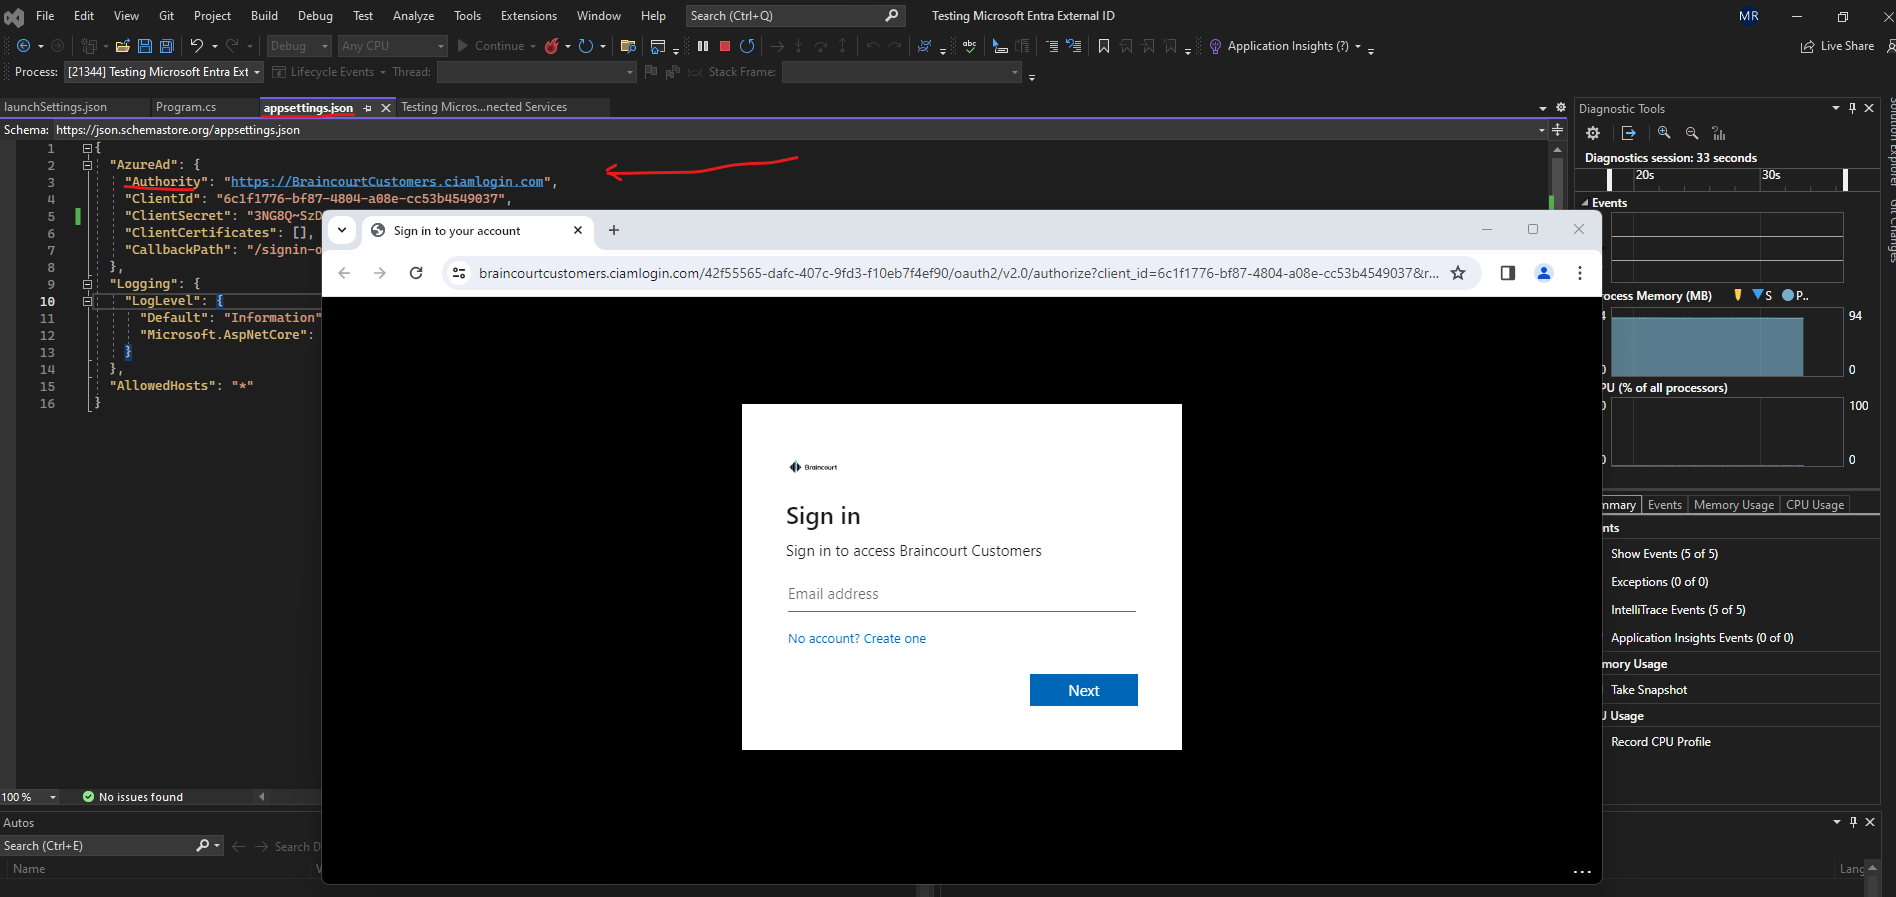
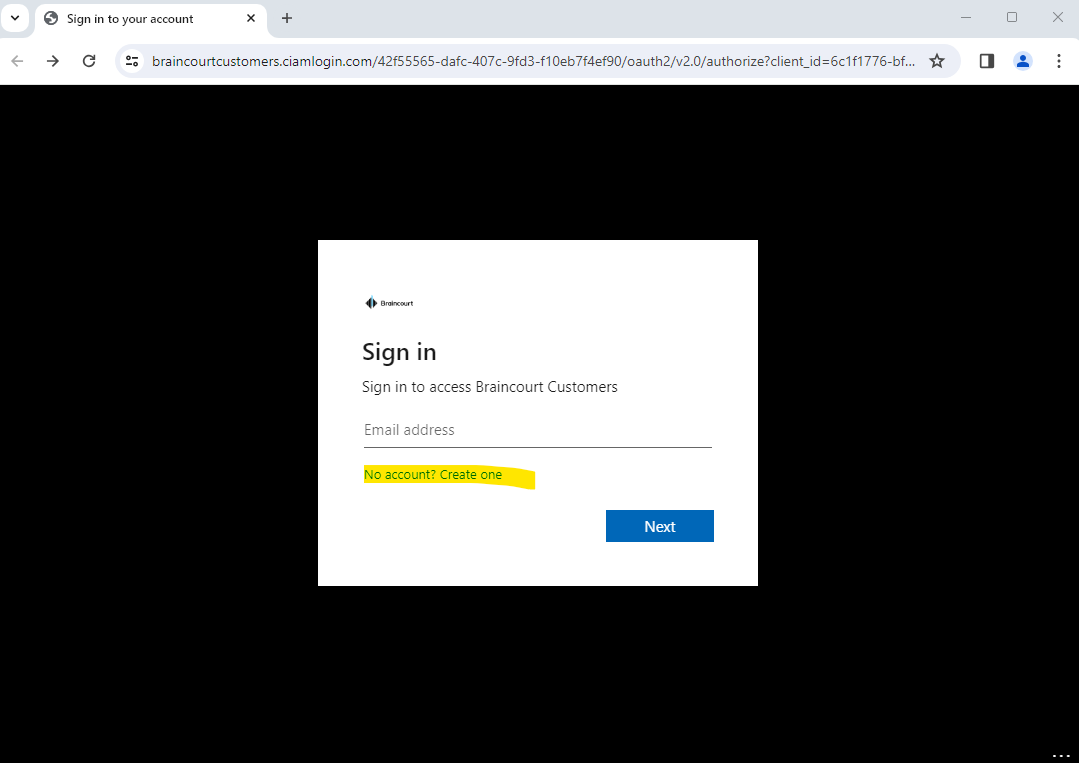
In my case I didn’t previously disabled sign-up for the user flow in Microsoft Entra External ID, so I will click here on No account? Create one.
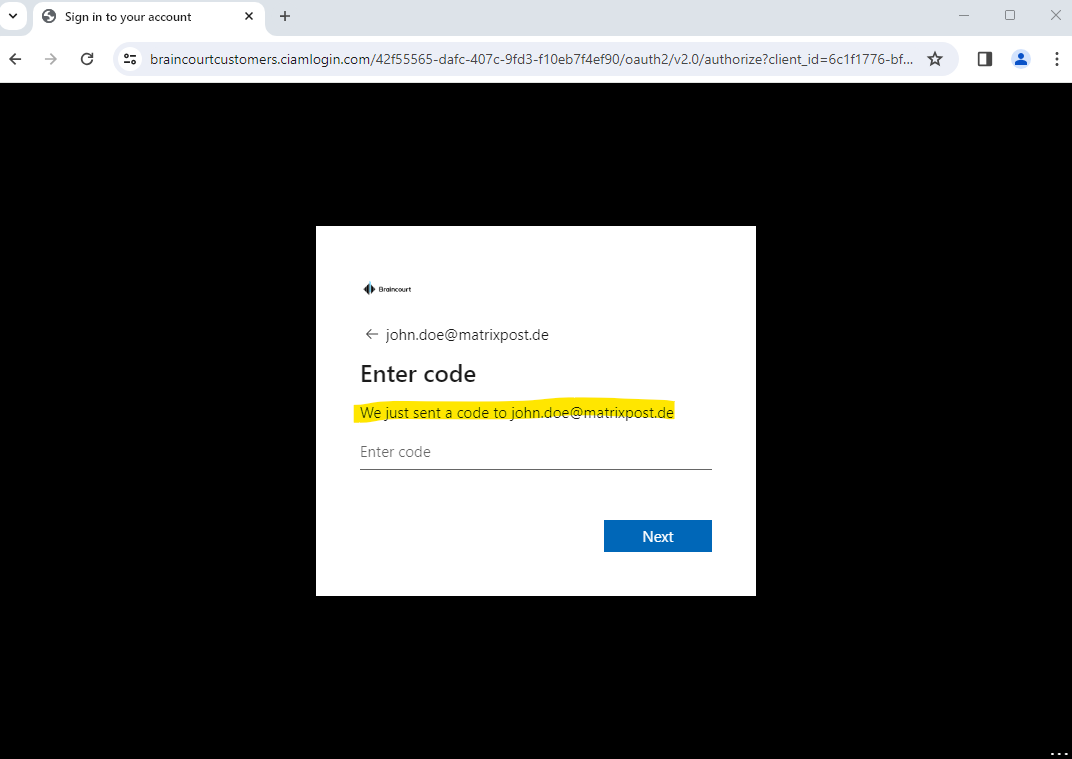
For testing purpose, I will user here a lab user from my private Azure tenant which email address is john.doe@matrixpost.de.


Ok, something went wrong here.
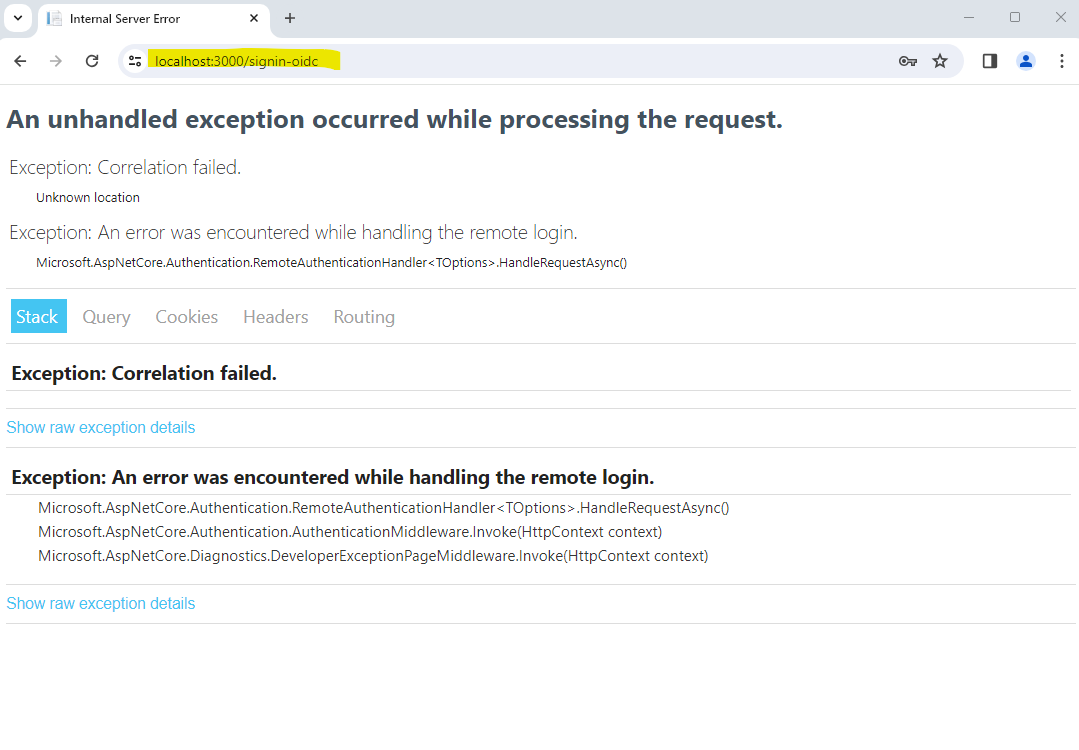
So I will first check my redirect URIs for the app. Actually I just added http://localhost:3000 during my app registration previously.
So as you can see the nice extension from Visual Studio, named msidentity tool component, also added the URLs including callback path from the launchSettings.json and appsettings.json file.

Because I changed the applicationUrl in the launchSettings.json file after the extension modified these URIs in Azure, my adjusted URI https://localhost:3000 was not added in Azure. So I will add this URI by hand to see if it now works.
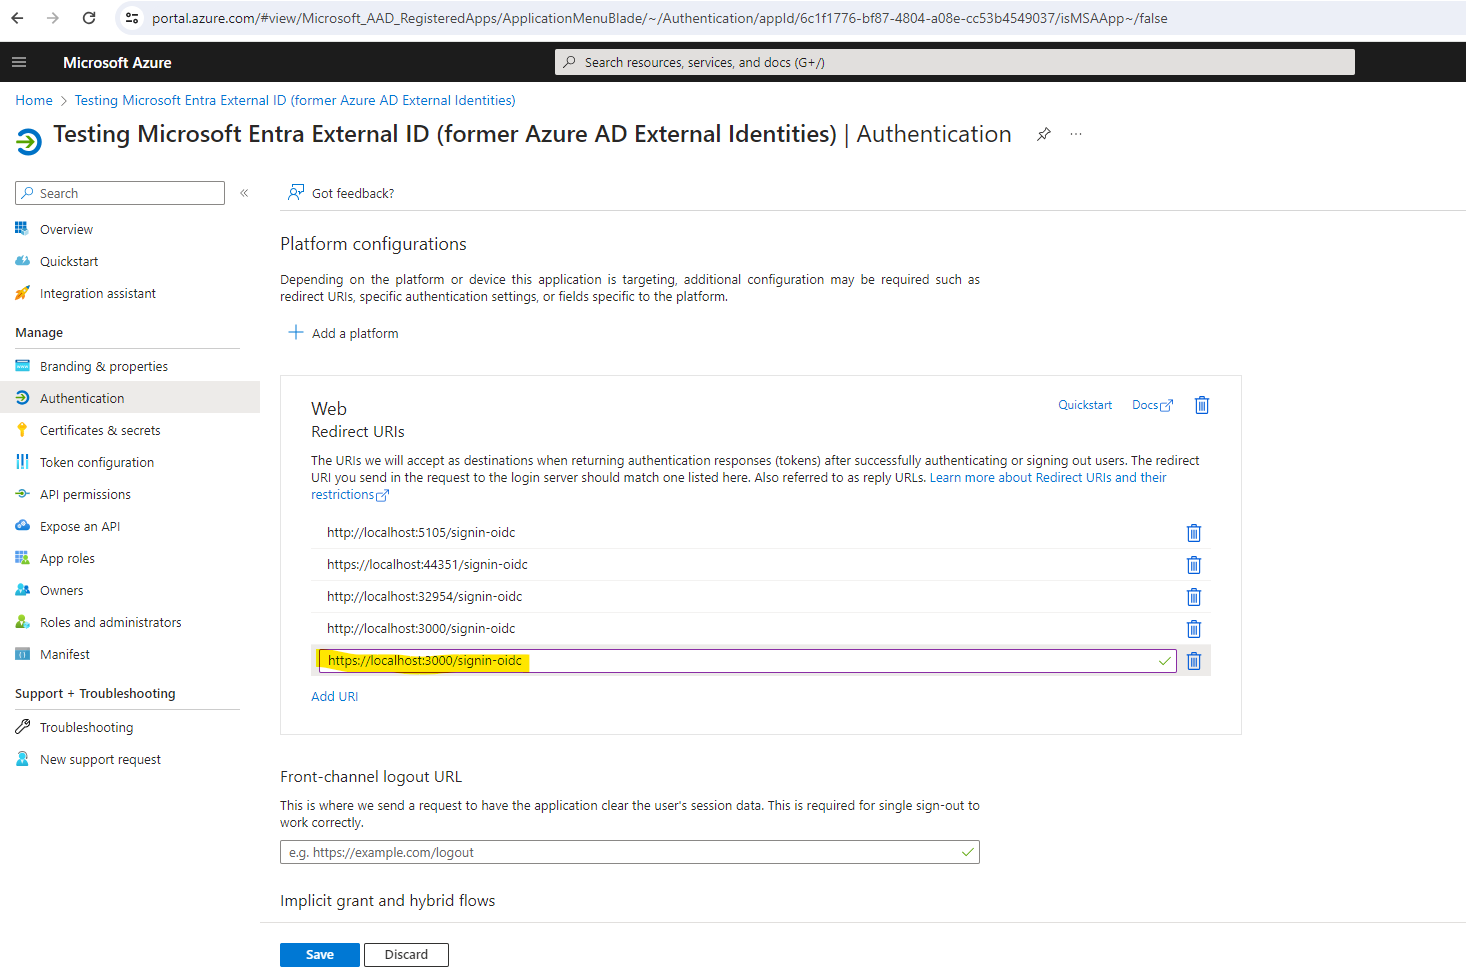
Let’s try again. And ….. Et voilà.

So but now I am curious about what happened in my customers tenant regarding the self created account by this external user John Doe from my private Azure tenant. So first I will check the Microsoft Entra ID from the customers tenant for new created customer users.
Here I can see a new user which display name is unknown but created natively in this tenant.
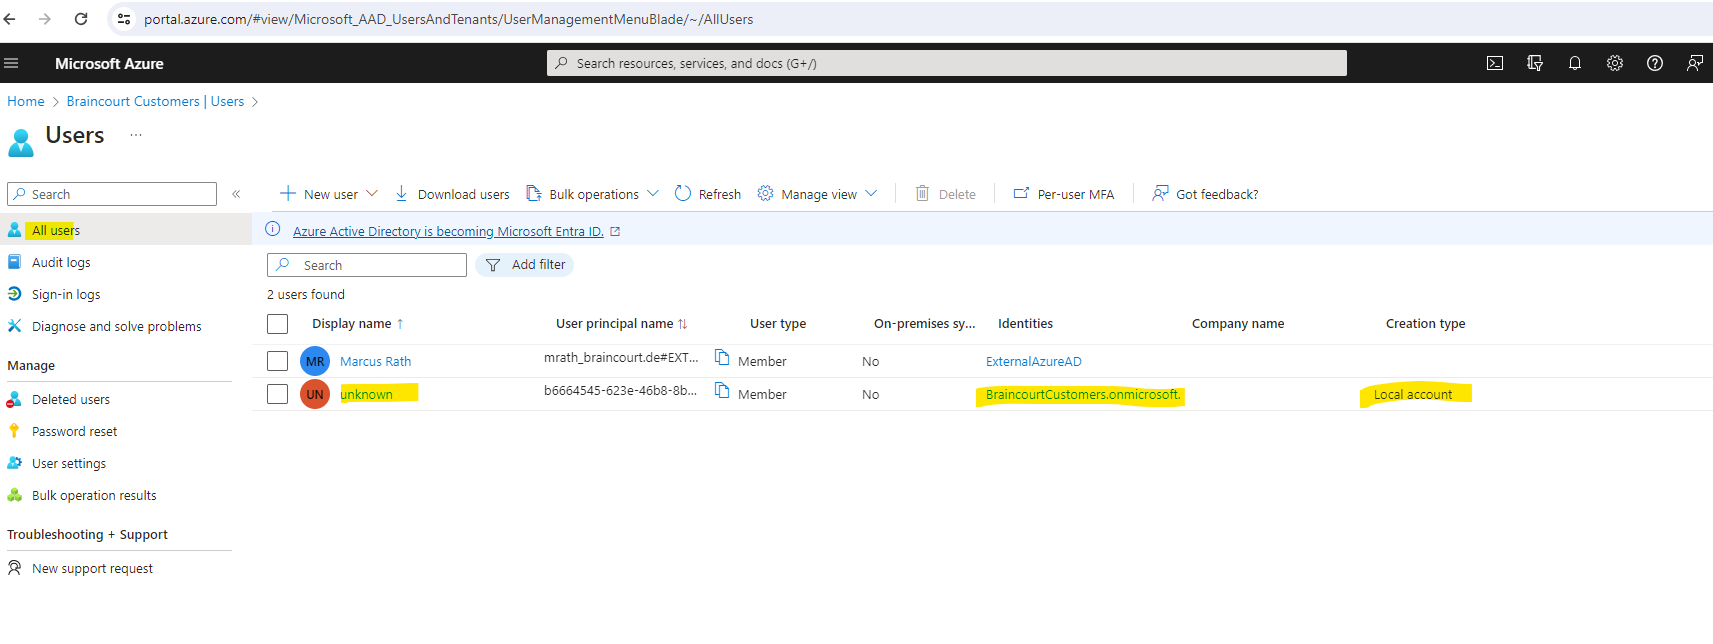
When I click on this unknown user I can see that it’s my external lab user John Doe which was sign-up previously for my web app.

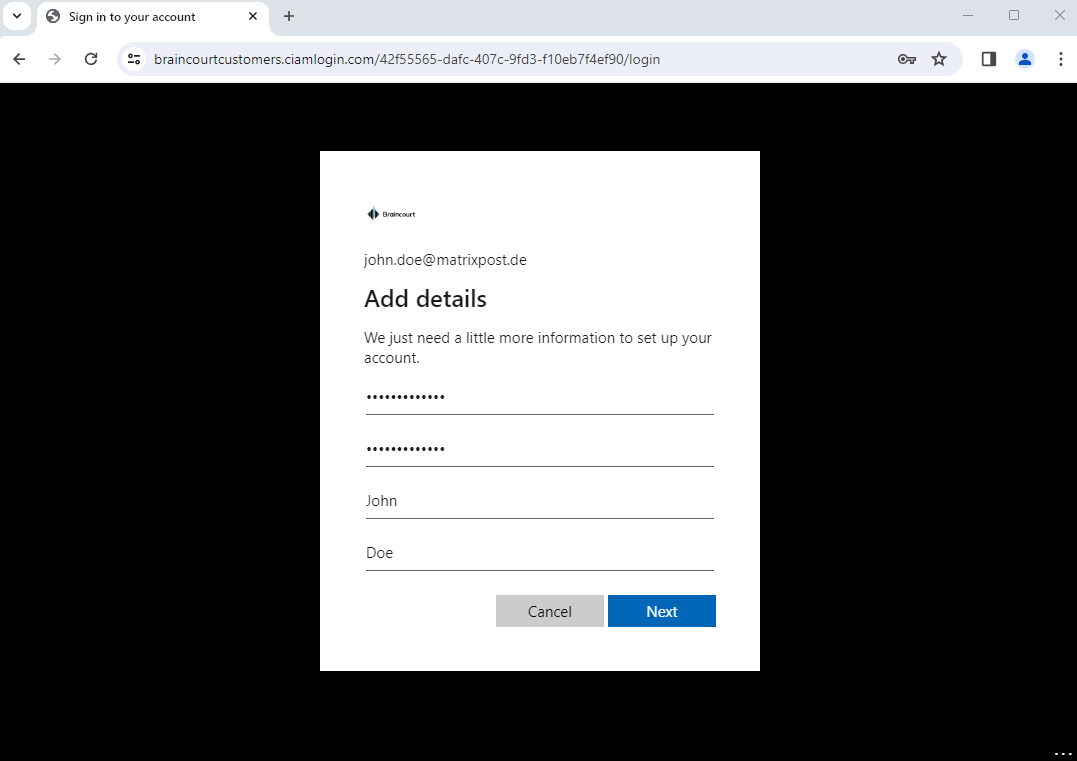
The reason for why the display name was not created in my customers tenant, is that I previously for the user flow didn’t checked the Display Name attribute to be collected during sign-up to my application.
In order to avoid further sign-up’s will also be created as unknown, I will check this attribute immediately for the user flow.
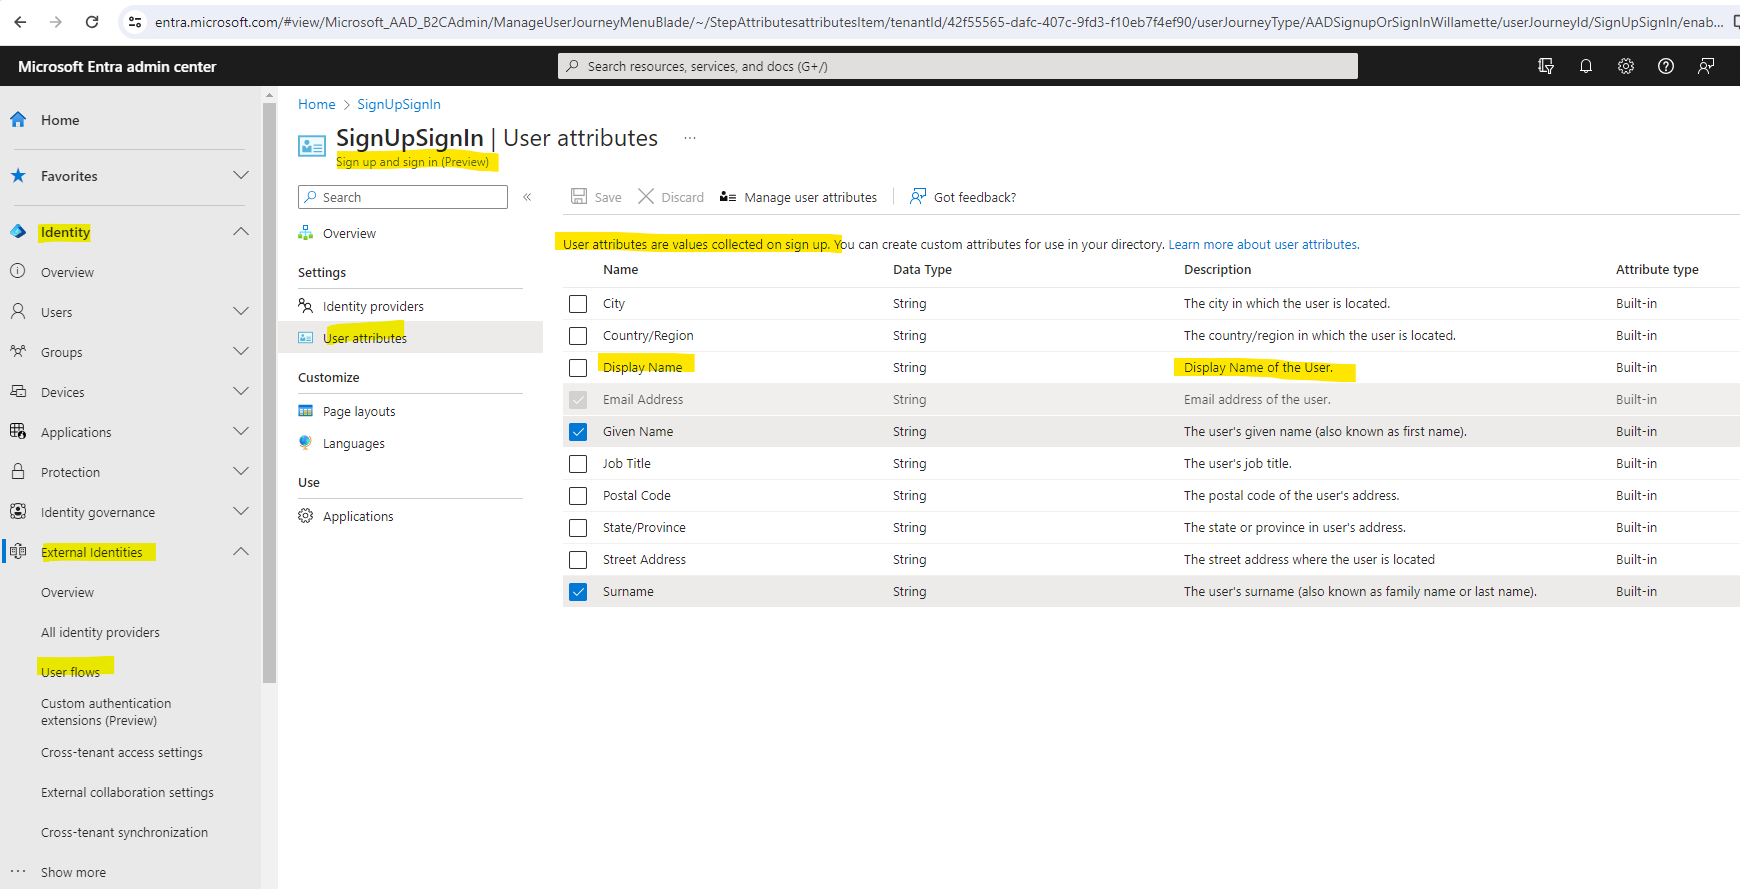
Further I will also check City, Country/Region and Postal Code to check how the sign-up form the next time as user sign-up will now looks like.
I will first delete the account from John Doe in order to re-sign-up to my application.
I will debug the app again by pressing F5 in Visual Studio.
So this time all the checked attributes from the user flow will be requested to sign-up to the application.
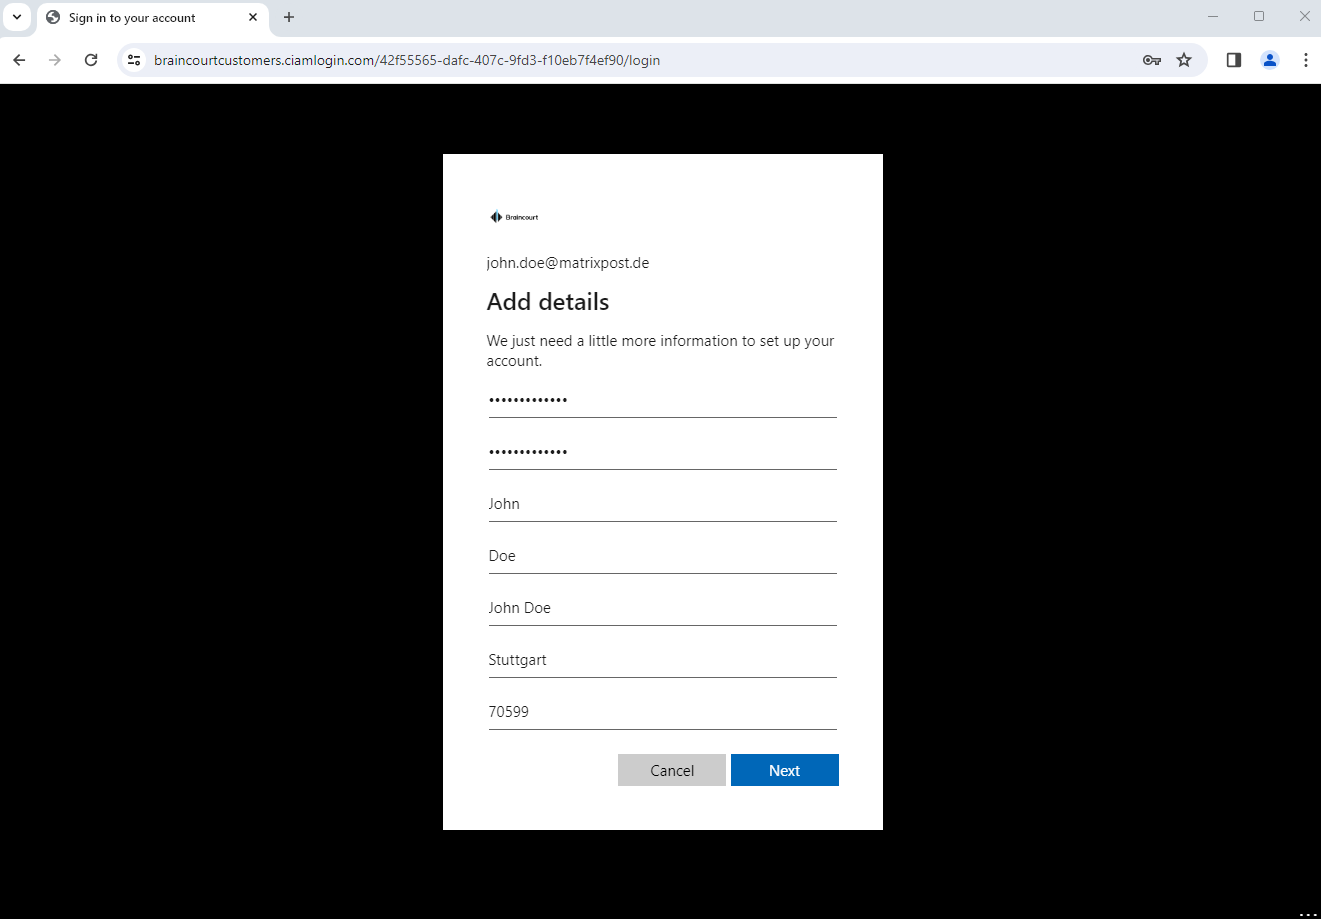
The attributes where also stored successfully in Microsoft Entra ID (formerly Azure AD).

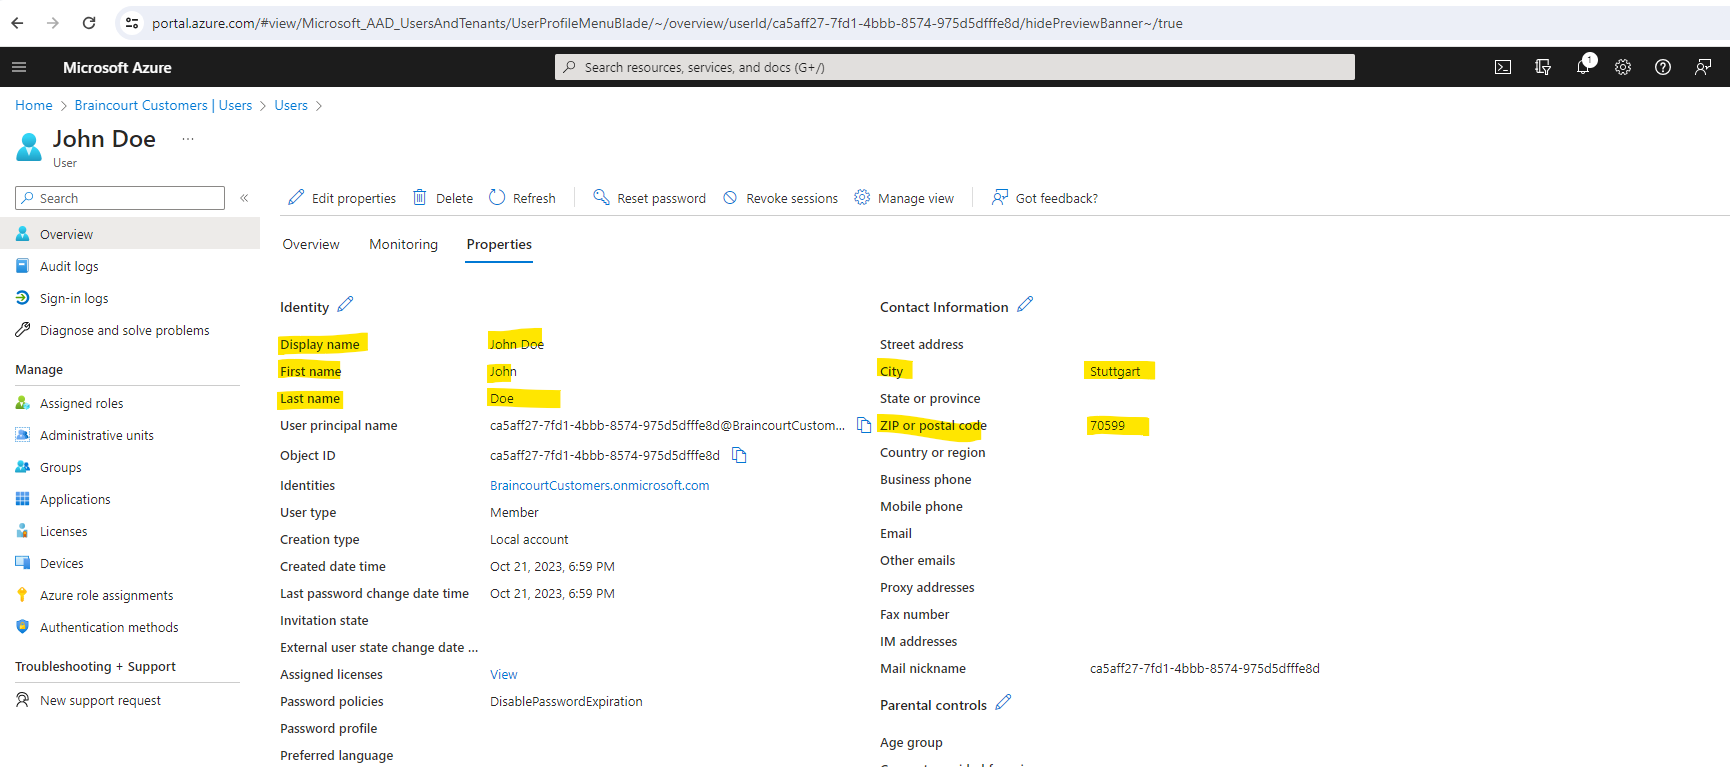
There might be scenarios in which you want to manually create customer accounts in your Microsoft Entra customer tenant. Although customer accounts are most commonly created when users sign up to use one of your applications, you can create them programmatically and by using the Microsoft Entra admin center.
More about adding and manage customer accounts (preview) you will find in the following article from Microsoft https://learn.microsoft.com/en-us/azure/active-directory/external-identities/customers/how-to-manage-customer-accounts.
Microsoft Entra External ID vs. Azure AD B2C
If you’re a new customer, you might be wondering which solution is a better fit, Azure AD B2C or Microsoft Entra External ID (preview). Opt for the current Azure AD B2C product if:
- You have an immediate need to deploy a production ready build for customer-facing apps.
Opt for the next generation Microsoft Entra External ID platform if:
- You’re starting fresh building identities into apps or you’re in the early stages of product discovery.
- The benefits of rapid innovation, new features and capabilities are a priority.
Note!
Keep in mind that the next generation Microsoft Entra External ID platform represents the future of CIAM for Microsoft, and rapid innovation, new features and capabilities will be focused on this platform. By choosing the next generation platform from the start, you will receive the benefits of rapid innovation and a future-proof architecture.
What is Azure Active Directory B2C?
https://learn.microsoft.com/en-us/azure/active-directory-b2c/overview
https://learn.microsoft.com/en-us/azure/active-directory-b2c/
What is Microsoft Entra?
To see all products included in the unifying brand named Microsoft Entra please take a look at my following post.
Links
Microsoft Entra ID for customers documentation
https://learn.microsoft.com/en-us/azure/active-directory/external-identities/customers/What is Microsoft Entra ID for customers?
https://learn.microsoft.com/en-us/azure/active-directory/external-identities/customers/overview-customers-ciam