Blazor Server – Basics Part 9 – Responsive Tags and Chips
In this part of my Blazor Server series, I want to show how you can easily create tags and chips for your web app.
Chips (also sometimes called pills) and tags represent small blocks of information which are often used to filter data. One of the main reasons to use them, is to provide the users an intuitive and easy way of controlling the web app.
Actually when spoken about them, they both mean the same but to be exact, tags are the information itself which will be displayed as a small block in a rectangle named chips or pills.
Chips or pills can further have an icon or image, also they can have an “x” icon to delete themselves and can act like a button where some action is executed when clicked on them.
Below I will show how I will create and use them for the project page in my time tracking and vacation planning web app.
The chip itself is nothing else then a <div> tag which is styled like a rectangle by using CSS. Within the <div> tag there is also a <span> tag which is displaying the information and an <i> tag which is displaying if needed the mentioned “x” icon to delete the chip itself.
Here you will see the general html code to define a chip. We need to assign a CSS class to the <div> and <i> tag.
<div class="tag-active">
     <span>Information Block displayed</span>
     <i class="fa fa-close" @onclick="C# method/task to delete the chip itself" title="Some information about deleting the chip"></i>
</div>
The CSS class from the <i> tag will show an “x” icon. I will use here the fa fa-close class from fontawesome.com.
In order to use the icons from fontawesome, you first need to register your email address in order to get a free starter kit which is your own custom version and unique ID as shown below.
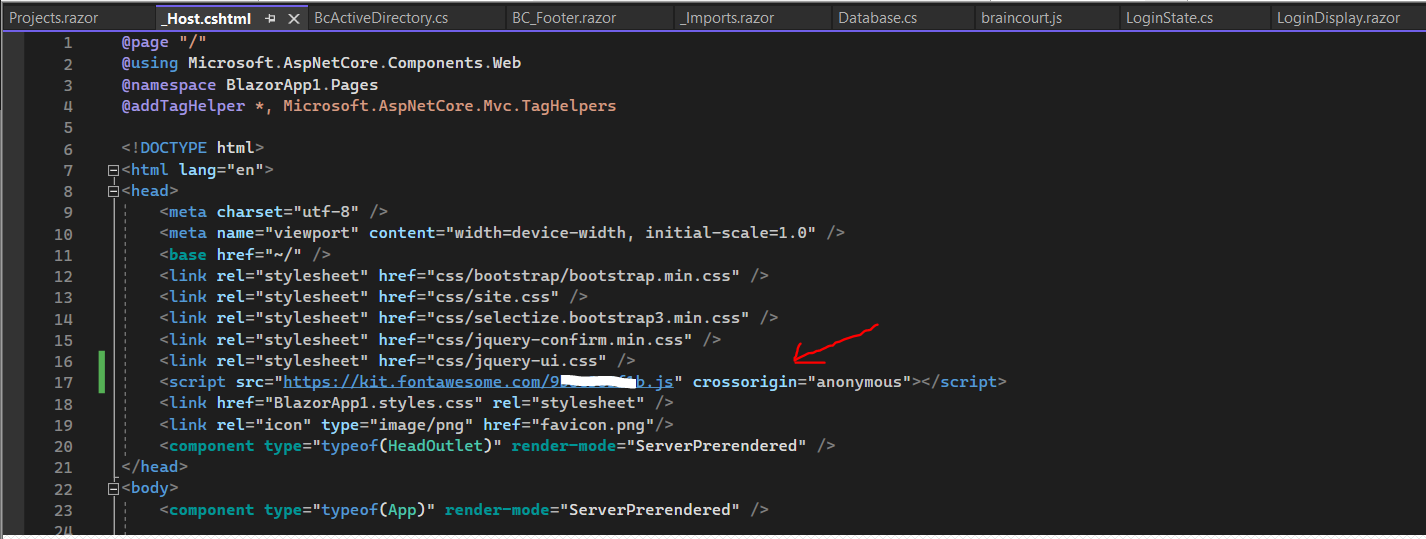
After registering you will get your own JavaScript file which you have to insert as external resource in your HTML file like the following.
<script src="https://kit.fontawesome.com/a62???????84.js" crossorigin="anonymous"></script>For Blazor Server we have to insert the code in the _Host.cshtml file in order the “x” icon is displayed in the <i> tag. More about you will find under the following link https://fontawesome.com/
How To Add Icons
https://fontawesome.com/docs/web/add-icons/how-to
Here you can see the CSS classes for the <div> and <i> tags which represents the chip itself.
/* BC Tags (Chips) */

.tag-active {
    height: 33px;
    padding: 5px;
    border: 1px solid #51CCFF;
    border-radius: 3px;
    background: transparent;
    display: flex;
    align-items: center;
    color: #51CCFF;
    box-shadow: 0 0 4px rgba(0, 0, 0, 0.2), inset 0 1px 1px #fff;
    cursor: default;
}

.tag-inactive {
    height: 33px;
    padding: 5px;
    border: 1px solid #808080;
    border-radius: 3px;
    background: transparent;
    display: flex;
    align-items: center;
    color: #808080;
    box-shadow: 0 0 4px rgba(0, 0, 0, 0.2), inset 0 1px 1px #fff;
    cursor: default;
}

.tag-active i {
    font-size: 16px;
    color: #51CCFF;
    margin-left: 5px !important;
}

.tag-inactive i {
    font-size: 16px;
    color: #808080;
    margin-left: 5px !important;
}
Below you can see the html code for the chips which I will use to display all assigned users for the selected project. By clicking on the “x” icon here, the assigned user will be disabled for the project and the chip will be displayed like inactive plus the “x” icon will get replaced with an “+” icon to be able to enable the user again for the project.
<div class="tag-active">
     <span>@row["BRAIN_NAME"]</span>
     <i class="fa fa-close" @onclick="() => SetBrainProjektStatus(Username, true, ProjektID)" title="Disable Brain for project."></i>
</div>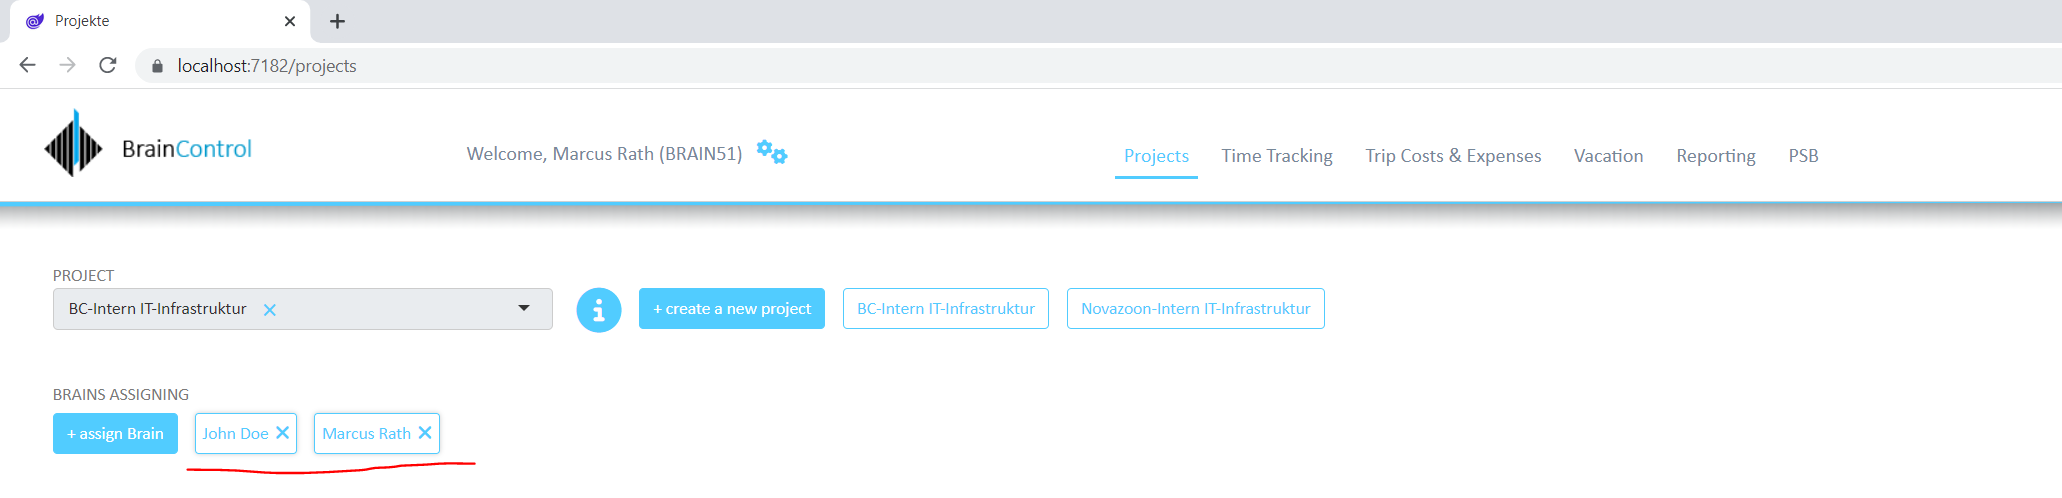
Here you can see the inactive chip from John Doe after clicking above on the “x” icon to disable the user for the project.
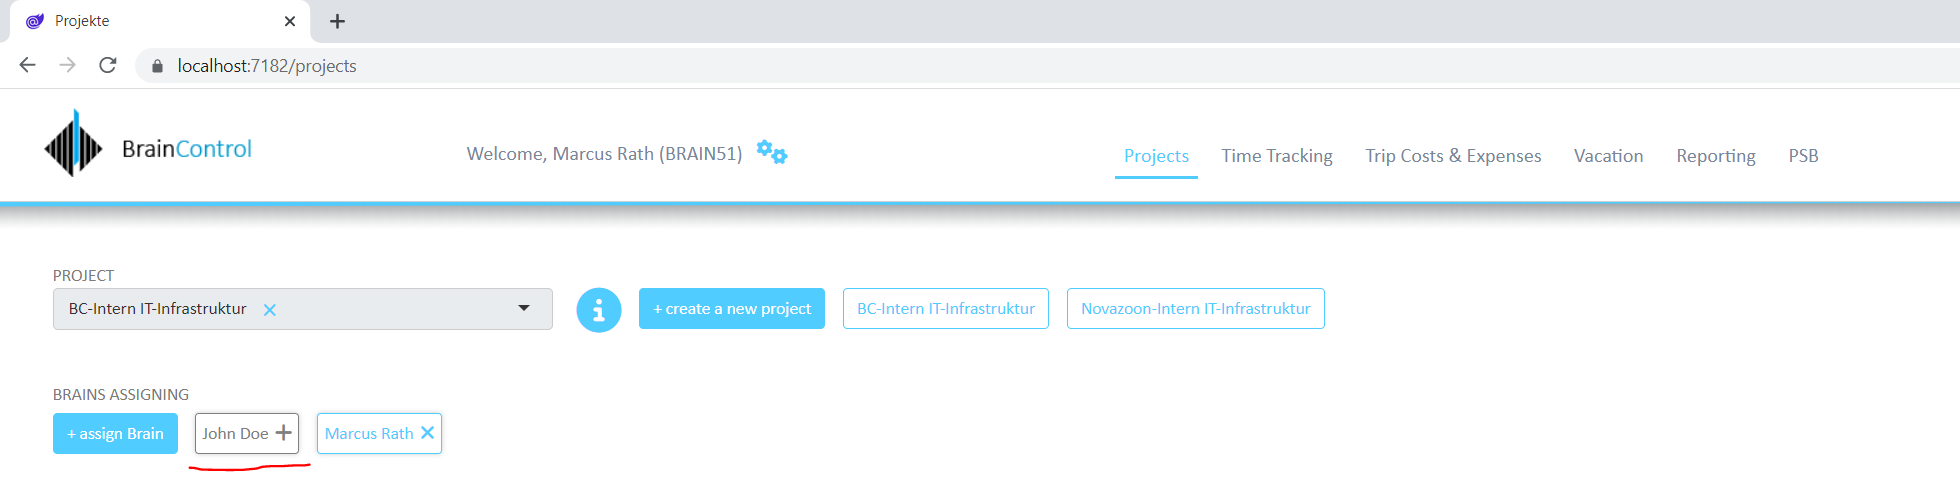
As you can see the CSS class for the <div> tag and <i> tag have changed in order to show the inactive chip. The C# method which is executed for the @onclick event is the same but this time we passed a false argument with it, which means the state of the chip is at the moment inactive.
<div class="tag-inactive">
     <span>@row["BRAIN_NAME"]</span>
     <i class="fa fa-plus" @onclick="() => SetBrainProjektStatus(Username, false, ProjektID)" title="Enable Brain for project."></i>
</div>
By the way, the above C# method SetBrainProjektStatus() for the @onclick event is using here a lambda expression in order to pass additional arguments to the method (event handler).
Normally you would specify the following event handler. This is the standard way of calling an event handler, but here you can’t pass additional arguments.
<button @onclick="SetBrainProjektStatus">+</button>
More about event handler and using lambda expressions for, I will show in another post coming soon.
So far we just saw how to create those chips by using html and CSS, but how will they created after the user is selecting a project on the page?
I will use here a DataTable which gets populated through a SQL Server stored procedure by requesting all users assigned to the selected project, enabled or disabled. This DataTable I will iterate by using a foreach loop as shown below. Then depending on the state of the user, enabled or disabled, I will create the <div> tags and associated CSS class for inactive or active.
<chip-tags> @*CSS class assigned in order the chips will all try to fit onto one line.*@
            @foreach(DataRow row in dtBrainsProjekt.Rows)
                {
                    // Check if Brains are enabled or not for the project and depending on display the chips as inactive or active
                    bool Status = Convert.ToBoolean(row["STATUS_AKTIV"]);
                    string? Username = Convert.ToString(row["BRAIN_LOGIN"]);
                    string? ProjektID = Convert.ToString(row["PROJEKT_NUMMER"]);

                    if (Status == true)
                        {
                            <div class="p-2">
                                <div class="tag-active">
                                    <span>@row["BRAIN_NAME"]</span>
                                    <i class="fa fa-close" @onclick="() => SetBrainProjektStatus(Username, true, ProjektID)" title="Disable Brain for project."></i>
                                </div>
                            </div>
                        }
                        else
                        {
                            <div class="p-2">
                                <div class="tag-inactive">
                                    <span>@row["BRAIN_NAME"]</span>
                                    <i class="fa fa-plus" @onclick="() => SetBrainProjektStatus(Username, false, ProjektID)" title="Enable Brain for project."></i>
                                </div>
                            </div>
                        }
                }
</chip-tags>
By the way as you can see in the code above, I will nest the foreach loop block in a html5 custom element named <chip-tags>. The reason for is, that by default browsers always place a line break before and after the <div> element.
In my case I want to position the chips all in a line till the end of it before a line break will occur. Therefore I will assign a CSS class to the custom element which is using a flexbox layout as shown below.
display: flex; /* defines a flex container */
By default, flex items will all try to fit onto one line. You can change that and allow the items to wrap as needed with this property.
flex-wrap: nowrap | wrap | wrap-reverse;More about flexbox you will find in the following article.
A Complete Guide to Flexbox
https://css-tricks.com/snippets/css/a-guide-to-flexbox/
chip-tags {
    display: flex;
    flex-wrap: wrap;
}
Here you can see the content of the populated DataTable for the selected project.

More about using a MS SQL Server database for your web app, I will show in one of my next posts soon.
Below you can see that I will further use chips for expenses and operations assigend to the selected project, in order to easily enable or disable it by just clicking on them. So you can see you can use chips not just for filtering purpose.
Blazor Server Series
Blazor Server – Basics Part 1
https://blog.matrixpost.net/blazor-server-basics-part-i/Blazor Server – Basics Part 2
https://blog.matrixpost.net/blazor-server-basics-part-ii/Blazor Server – Basics Part 3 – Custom Layout
https://blog.matrixpost.net/blazor-server-basics-part-iii-custom-layout/Blazor Server – Basics Part 4 – Program.cs File
https://blog.matrixpost.net/blazor-server-basics-part-iv-program-cs-file/Blazor Server – Basics Part 5 – Authentication and Authorization
https://blog.matrixpost.net/blazor-server-basics-part-v-authentication-and-authorization/Blazor Server – Basics Part 6 – Query the on-premise Active Directory
https://blog.matrixpost.net/blazor-server-basics-part-vi-query-the-on-premise-active-directory/Blazor Server – Basics Part 7 – C# Events, Delegates and the EventCallback Class
https://blog.matrixpost.net/blazor-server-basics-part-vii-c-events-and-delegates/Blazor Server – Basics Part 8 – JavaScript interoperability (JS interop)
https://blog.matrixpost.net/blazor-server-basics-part-viii-javascript-interoperability-js-interop/Blazor Server – Basics Part 9 – Responsive Tags and Chips
https://blog.matrixpost.net/blazor-server-basics-part-ix-responsive-tags-and-chips/Blazor Server – Basics Part 10 – MS SQL Server Access and Data Binding
https://blog.matrixpost.net/blazor-server-basics-part-10-ms-sql-server-access-and-data-binding/Blazor Server – Basics Part 11 – Create a Native Blazor UI Toggle Switch Component
https://blog.matrixpost.net/blazor-server-basics-part-11-native-blazor-toggle-switch-by-using-the-eventcallback-class-and-css/Blazor Server – Basics Part 12 – Create a Native Blazor UI Toggle Button Component
https://blog.matrixpost.net/blazor-server-basics-part-12-create-a-native-blazor-ui-toggle-button-component/
Links
Chips
https://mdbootstrap.com/docs/standard/components/chips/Tags & Chips
https://mdbootstrap.com/docs/b4/jquery/javascript/tags/A Complete Guide to Flexbox
https://css-tricks.com/snippets/css/a-guide-to-flexbox/